If you’re craving a project that’s equal parts messy, meditative, and wildly customizable, paper mache masks are the sweet spot. I love how you can start with a humble mask form and end up with something totally you—ready for paint, texture, and all the little details that make a face come alive.
Custom-Fit Blank Mask Base
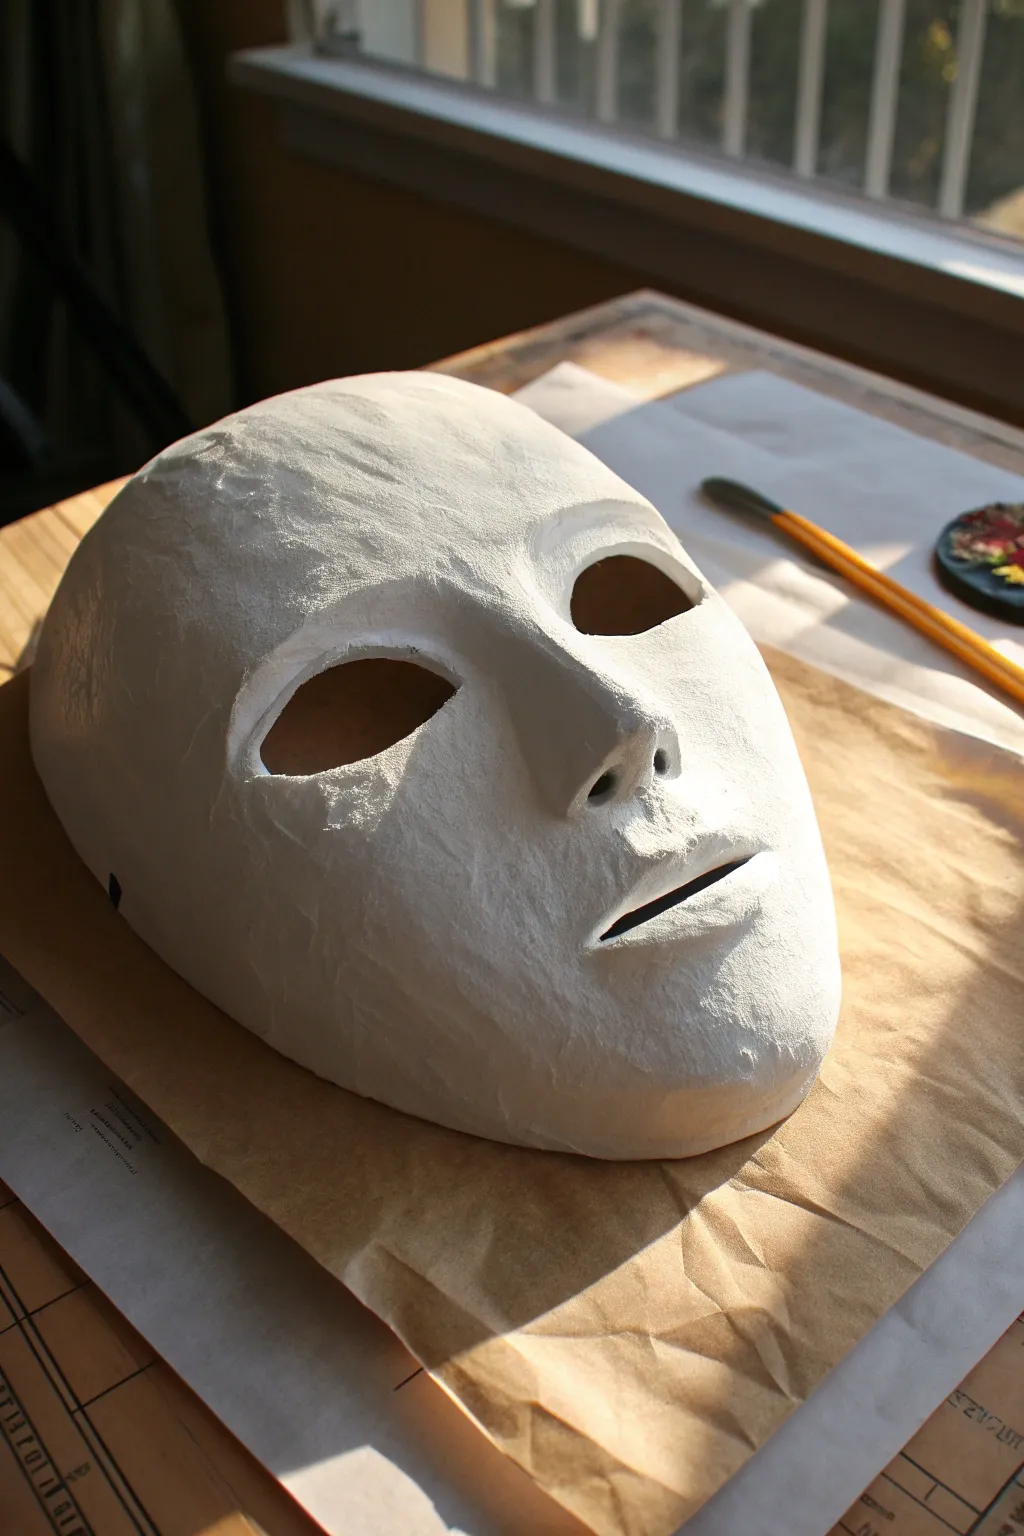
This fundamental project teaches you how to construct a durable, custom-fitted mask base that serves as a perfect blank canvas for any costume or art piece. The result is a stark white, textured foundation with a slight handmade grain, ready for painting or decorating.
Step-by-Step
Materials
- Plastic face form or balloon (for the base shape)
- Petroleum jelly or plastic wrap
- Newspaper stripes
- White printer paper (torn into strips)
- White flour
- Water
- Salt (optional, to prevent mold)
- Sandpaper (medium and fine grit)
- White gesso or acrylic primer
- Bowl for mixing paste
- Scissors or craft knife
Step 1: Preparation and Base Layer
-
Prepare the paste:
Mix one part flour with one part warm water in a bowl. Whisk until you achieve a consistency similar to pancake batter. I like to add a pinch of salt here to help preserve the mask over time. -
Prepare the form:
If using a plastic face mask form, coat it lightly with petroleum jelly to ensure easy release later. Alternatively, you can cover it tightly with plastic wrap. -
Tear the paper:
Tear your newspaper into strips approximately 1 inch wide and 4 inches long. Tearing creates soft, fibrous edges that blend smoother than cut edges. -
Apply the first layer:
Dip a newspaper strip into the paste, squeegee off the excess with your fingers, and lay it across the forehead of the form. Smooth it down completely so there are no air bubbles. -
Cover the surface:
Continue applying paste-soaked newspaper strips, overlapping them slightly, until the entire face form is covered. Change the direction of the strips (horizontal, vertical, diagonal) to build strength. -
define the features:
Use smaller bits of paper around the nose and eye sockets to ensure the paper contours tightly to the mold’s details. -
Let it dry:
Allow this initial newspaper layer to dry completely. This creates a rigid shell that won’t warp when you add more moisture later.
Wrinkly Paper?
If your paper strips are wrinkling as you lay them down, use less paste and tear your strips into smaller, narrower pieces to navigate the curves better.
Step 2: Building Strength and Smoothness
-
Add bulk layers:
Apply 3-4 more layers of newspaper strips, allowing for some drying time in between layers if the mask feels too soggy. -
Switch to white paper:
For the final two layers, use strips of plain white printer paper. This covers the newsprint text and provides a brighter base for priming. -
Create the final texture:
On the very last layer, be extra meticulous about smoothing down edges with wet fingers to minimize ridges. -
Full cure:
Place the mask in a warm, dry spot and let it cure fully for at least 24 hours. Ideally, wait until it feels light and room temperature to the touch. -
Release the mask:
Gently pry the edges of the paper mache away from the mold. It should pop off cleanly due to the petroleum jelly release layer.
Smooth as Porcelain
For a glass-like finish, apply a thin layer of wood filler or joint compound over the dried paper mache, let dry, and sand it completely smooth before priming.
Step 3: Refining and Priming
-
Trim the edges:
Use sturdy scissors or a craft knife to trim the outer perimeter of the mask for a clean silhouette. -
Cut the eyes:
Carefully trim out the paper covering the eye holes. Start with a small puncture in the center and spiral outward to the edge of the socket. -
Sand surfaces:
Sand the entire surface with medium-grit sandpaper to knock down high spots. Clean off the dust with a tack cloth. -
Fine finish sanding:
Switch to fine-grit sandpaper to smooth out the paper fibers, focusing on the nose and chin areas. -
Prime the mask:
Apply a coat of white gesso or acrylic primer. This seals the porous paper and creates that uniform, bright white finish shown in the photo. -
Final touch-up:
Once the primer is dry, you can do a very light sanding and add a second coat for a porcelain-like appearance.
Your mask is now a strong, blank canvas waiting for your creative vision

Classic Cat Mask With Pointy Ears
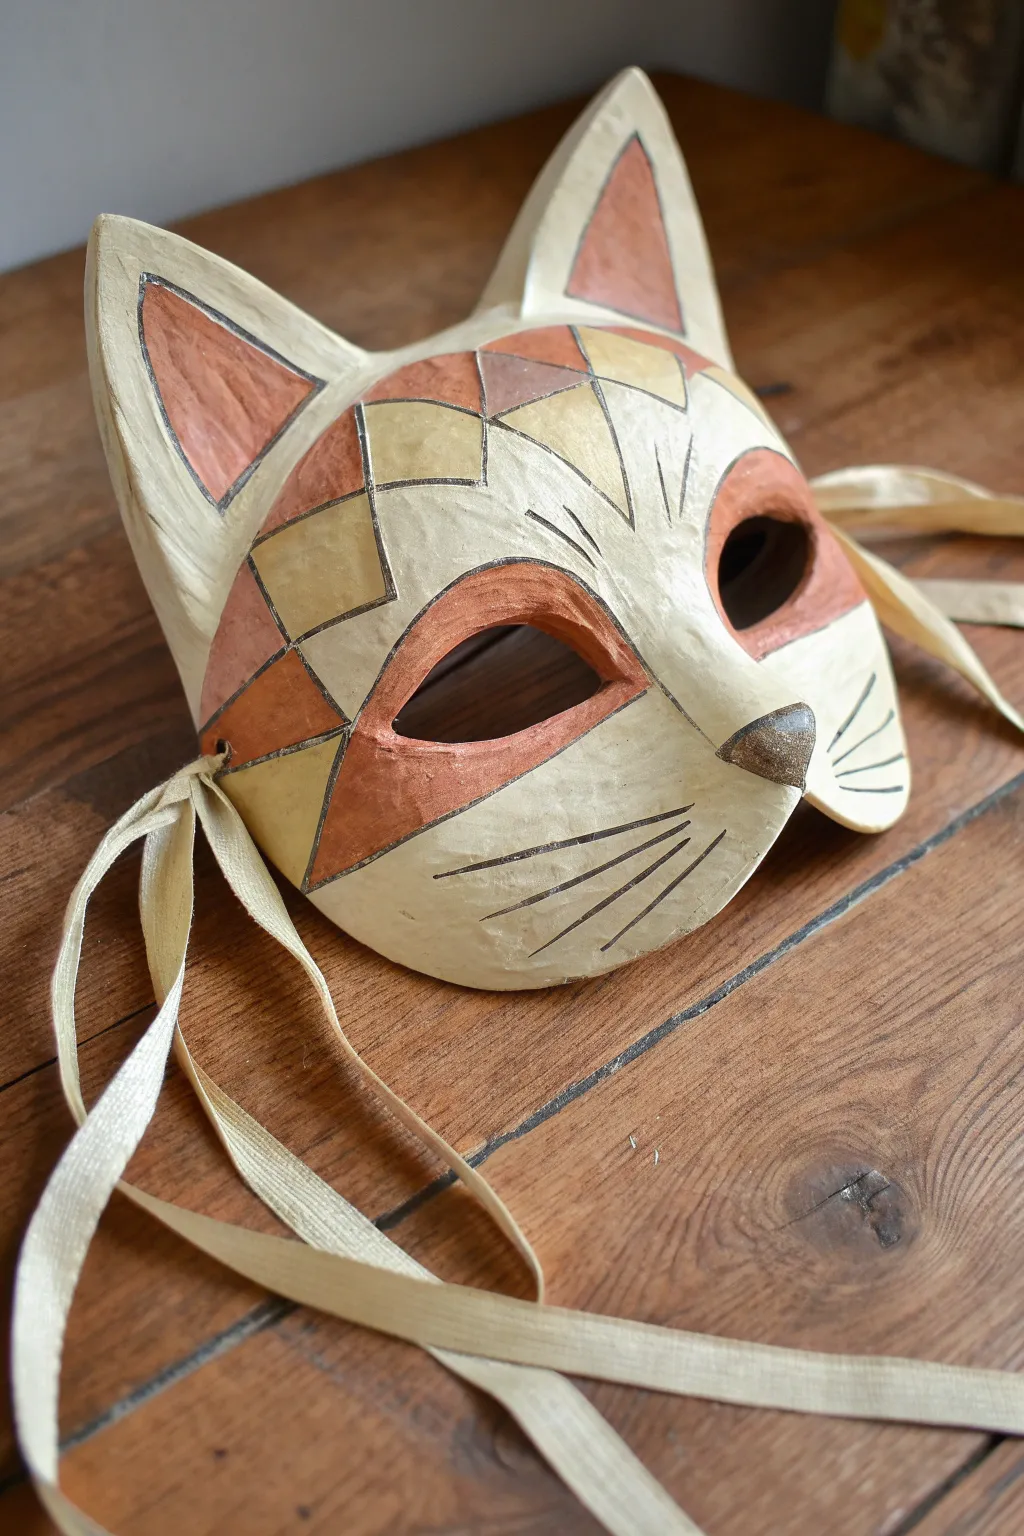
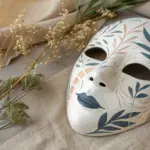
This elegant cat mask combines the rustic texture of paper mache with a sophisticated geometric paint job in warm, earthy tones. The harlequin diamond pattern across the forehead gives it a classic Venetian carnival feel while maintaining a playful feline charm.
Detailed Instructions
Materials
- Rigid mask form (plastic cat mask base or clay sculpt)
- Newspaper strips
- PVA glue (white school glue)
- Water
- Paper clay or smooth mache pulp (optional for refining)
- Fine grit sandpaper (220-300 grit)
- Acrylic paints: Cream/Off-white, Terracotta/Rust, Golden Yellow/Ochre, Dark Brown
- Fine detail paintbrush (round size 1 or 2)
- Flat shader brush
- Pencil
- Matte varnish or sealant
- Cream or beige satin ribbon
Step 1: Building the Base
-
Prepare the adhesive:
Mix your PVA glue with a small amount of water until it has the consistency of heavy cream. This ensures it soaks thoroughly into the paper. -
Apply the first layer:
Tear newspaper into thin strips about a half-inch wide and dip them into the glue mixture. Lay them over your mask form, overlapping slightly to create a strong bond. -
Build up thickness:
Continue adding layers of paper strips until you have a sturdy base. For a durable mask like this one, aim for at least 4-5 layers, letting them dry completely between every couple of layers. -
Refine the surface:
Once the final layer of strips is bone dry, you can smooth out the texture. Sand the surface gently, or apply a thin layer of paper clay or joint compound if you want that ultra-smooth, porcelain-like finish shown in the photo. -
Drill ribbon holes:
Use a small drill bit or an awl to carefully poke holes on the sides of the mask near the temples for the ribbon attachments.
Step 2: Mapping the Design
-
Base coat application:
Paint the entire mask with a cream or off-white acrylic paint. This provides a neutral canvas and helps the subsequent colors pop. You may need two coats for full opacity. -
Sketch the symmetry line:
Use a pencil to lightly draw a vertical line down the center of the mask. This guide is crucial for keeping your geometric patterns symmetrical. -
Draw the diamond grid:
Sketch the harlequin pattern across the forehead. Start with a central diamond shape and work outwards toward the ears, ensuring the lines curve slightly to follow the contour of the mask. -
Outline the features:
Lightly sketch the distinct markings: the triangles inside the ears, the curved patches under the eyes, and the nose triangle.
Clean Lines Hack
If you struggle painting straight lines on a curved surface, use thin automotive masking tape (pinstriping tape) to mask off the diamond shapes before painting.
Step 3: Painting the Details
-
Paint the terracotta sections:
Using your flat shader brush, fill in the inner ears, the patches under the eyes, and specific diamonds on the forehead with the terracotta or rust-colored paint. -
Apply the gold accents:
Process next to the yellow ochre or gold paint, filling in the alternating diamonds to complete the harlequin check pattern. -
Define the nose:
Paint the triangular nose tip. For the texture seen here, I like to stipple a mix of dark brown and grey rather than painting a solid block of color. -
Create the outlines:
This step requires a steady hand. Use your finest detail brush and thinned dark brown paint to carefully outline every geometric shape, the ears, and the eye holes. -
Add the whiskers:
Paint three sweeping lines on each cheek for whiskers, and three smaller dashes near the outer corners of the eyes for extra character. -
Distress the finish:
To achieve that aged, vintage look, you can do a very light dry-brushing with a tiny amount of brown paint over the cream areas, focusing on the edges.
Antiquing Glaze
Mix a drop of brown paint with glazing medium or water. Wipe it over the dried mask and immediately wipe it off with a rag to leave color only in the crevices.
Step 4: Finishing Touches
-
Seal the artwork:
Apply a coat of matte varnish over the entire mask. This protects the paint from chipping and unifies the sheen of the different colors. -
Attach the ribbons:
Thread your warm cream satin ribbons through the holes you made earlier. Tie a knot on the inside of the mask to secure them in place. -
Final smooth check:
Check the inside of the mask for any rough paper edges that might scratch your face and sand them down if necessary.
Your sophisticated feline mask is now ready to add a touch of mystery to your wall or your next costume event


Friendly Fox Mask With Sculpted Snout
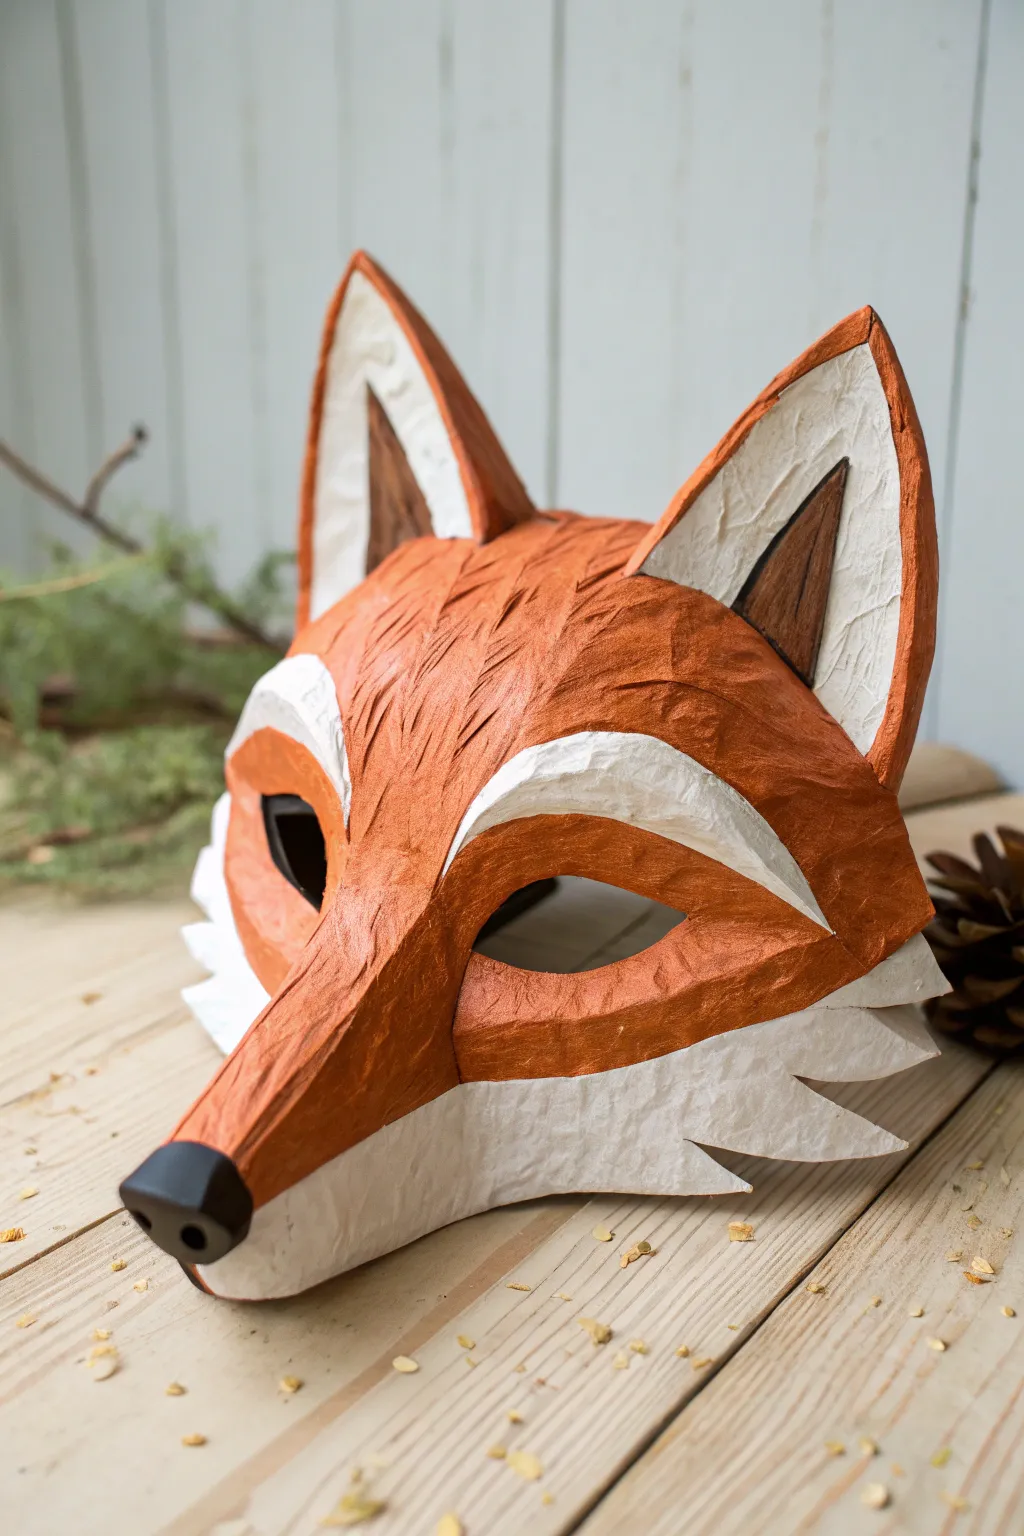
Capture the clever spirit of a woodland fox with this textured, semi-geometric mask. The distinctively sculpted snout and fluffy cheek ruffs make it a standout piece perfect for costumes or wall decor.
Step-by-Step
Materials
- Cardboard (thin for details, thick for base)
- Masking tape
- Aluminum foil
- Newspaper strips
- PVA glue (white school glue)
- Water
- Acrylic paints (burnt orange, white, black, dark brown)
- Paintbrushes (flat shader and fine tip)
- Scissors and craft knife
- Elastic cord (optional)
Step 1: Building the Armature
-
Cut the base plate:
Cut a basic eye mask shape from thin cardboard to serve as your foundation, ensuring the eye holes align comfortably with your own face. -
Form the snout:
Crumple a large piece of aluminum foil into a cone shape to create the fox’s long snout. Tape this securely to the center of the cardboard mask base, right between the eyes. -
Shape the ears:
Cut two large, pointed triangular shapes from cardboard for the ears. Tape them to the top corners of the mask, angling them slightly outward for alertness. -
Add dimension to the forehead:
Using more foil or folded cardboard, build up the forehead area so it transitions smoothly into the snout, creating a continuous slope rather than a sharp angle. -
Create cheek structure:
Cut jaggy, fur-like shapes from thin cardboard and tape them to the outer edges of the cheeks to exaggerate the width of the face. -
Define the brows:
Roll thin tubes of foil and tape them above the eye holes to create pronounced, expressive eyebrows that frame the face.
Fur Texture Trick
Mix a little tissue paper pulp into your glue for the final layer. This creates a rougher surface that looks incredibly like fur once painted.
Step 2: Applying Paper Mache
-
Prepare the paste:
Mix a solution of one part PVA glue to one part water until smooth. -
Apply the first layer:
Dip newspaper strips into the paste and lay them over the entire armature. Smooth them down firmly to ensure they adhere to the cardboard and foil shapes underneath. -
Build texture:
For the second layer, I like to wrinkle the wet paper slightly as I apply it. This purposeful creasing mimics the texture of fur. -
Reinforce edges:
Pay special attention to the tips of the ears and the jagged cheek fur, wrapping small strips around the edges to prevent fraying later. -
Dry completely:
Allow the mask to dry for at least 24 hours. It should feel hard and room temperature to the touch, not cool or damp.
Sagging Snout?
If the foil snout feels too heavy and pulls the mask down, stuff the inside hollow of the foil cone with scrunched dry newspaper to reduce weight.
Step 3: Painting and Detailing
-
Base coat:
Paint the entire mask with a solid coat of white acrylic paint. This primes the surface and ensures the orange color pops. -
Map color zones:
Lightly pencil in the separation lines where the orange fur meets the white fur on the snout, cheeks, and inner ears. -
Apply orange fur:
Paint the top of the head, outer ears, and the bridge of the nose with a warm burnt orange. Use a somewhat dry brush to drag paint over the textured paper, highlighting the ‘fur’ ridges. -
Define the white areas:
Repaint the cheeks, inner ear rims, and the patches above the eyes with fresh white paint to create a crisp contrast. -
Darken the inner ears:
Paint the deep recessed triangle inside the ears with dark brown to add depth. -
Sculpt the nose:
Paint the very tip of the snout black for the nose. You can also paint a simple black rim around the eye holes to make the eyes stand out. -
Final touches:
Once dry, you can attach an elastic cord to the sides if you plan to wear the mask.
Now your cunning fox is ready to prowl the forest or brighten up your wall


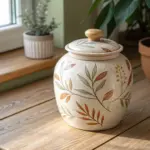

Bear Mask With Rounded Muzzle
This charming bear mask features a gentle, rounded muzzle and deep, warm brown tones that give it a classic storybook feel. The textured paint job mimics fur without needing complex sculpting, making it a perfect project for learning how to layer acrylics on paper mache.
How-To Guide
Materials
- Plastic face mask form (as a base)
- Newsprint or newspaper strips
- Paper mache paste (flour/water or glue/water)
- Cardboard or cardstock
- Masking tape
- Aluminum foil
- Jesso or white primer
- Acrylic paints (Dark brown, medium warm brown, black, deeply dark grey)
- Satin or matte varnish
- Sponge applicators and small detail brushes
- Scissors and craft knife
Step 1: Building the Form
-
Prepare the base:
Start with a basic plastic mask form. If the eye holes are small, carefully widen them with a craft knife to match the larger, almond-shaped openings seen in the bear mask. -
Sculpt the muzzle:
Crumple a ball of aluminum foil into a protruding snout shape. It should be wide at the base and taper slightly to a rounded end. Tape this securely to the nose and mouth area of the mask form. -
Create the ears:
Cut two semi-circles from sturdy cardboard for the ears. Use masking tape to attach them to the top corners of the forehead, angling them slightly forward for an alert expression. -
Refine the shape:
Use additional masking tape or small wads of foil to build up the bridge of the nose so it transitions smoothly from the forehead into the muzzle. You want a continuous slope rather than a sharp angle. -
Add ear dimension:
To give the ears that cupped look, tape a small ridge of rolled foil along the outer back edge of the cardboard ears. This creates a realistic thickness and distinct inner ear area.
Step 2: Paper Mache Application
-
Apply the first layer:
Dip strips of newsprint into your paste, removing excess with your fingers. Apply them over the entire mask, overlapping edges. I find tearing the paper rather than cutting creates smoother seams. -
Reinforce features:
Use smaller, thinner strips around the eye holes, the base of the ears, and the connection point of the muzzle to ensure these complex curves are strong and defined. -
Build thickness:
Apply 3 to 4 layers of paper mache in total, allowing the mask to dry completely between layers. This ensures the mask is durable and won’t warp. -
Create the nose texture:
For the nose tip, use a slightly thicker pulp or layer several small, wet strips together to create a smooth, slightly raised button shape at the end of the muzzle. -
Final smoothing:
Once the final paper layer is dry, lightly sand any rough edges or sharp points with fine-grit sandpaper, wiping away the dust with a damp cloth.
Wrinkled Paper?
If your paper strips are wrinkling on the round muzzle, use narrower strips (1/2 wide) and fan them out. Smoothing with a damp finger immediately after placing helps bond layers tight.
Step 3: Painting and Detailing
-
Prime the surface:
Coat the entire mask with gesso or white primer. This seals the paper and ensures your brown paint tones will appear rich and true. -
Base coat application:
Paint the entire mask with a medium, warm brown acrylic paint. Let this base layer dry completely. -
Create fur texture:
Using a dry brush or a sponge with very little paint, drag a darker brown color vertically down the mask. This streaky application mimics the direction of fur growth. -
Highlight the form:
Mix a little yellow or light ochre into your base brown. Lightly dry-brush this lighter shade over the high points: the bridge of the nose, the tops of the ears, and the forehead. -
Paint the nose:
Paint the nose tip with a very dark grey (almost black). Use pure black to paint the two nostril holes. -
Define the mouth:
Paint a thin, dark line extending down from the nose and curving slightly upward on either side to create the gentle mouth line. -
Add raised eyebrows:
Using a small detail brush and dark brown paint, carefully paint two curved eyebrow shapes above the eye holes to give the bear a thoughtful expression. -
Seal the work:
Finish by applying a coat of satin varnish. This protects the paint and gives the mask a slight sheen similar to polished wood or sleek fur.
Fuzzy Texture
Mix a small amount of sawdust or sand into your base coat of brown paint. When dry, this creates a tactile, slightly rough texture that feels more organic than smooth paint.
Your finished bear mask is now ready for a woodland costume party or simply to hang as rustic wall art
BRUSH GUIDE
The Right Brush for Every Stroke
From clean lines to bold texture — master brush choice, stroke control, and essential techniques.
Explore the Full Guide
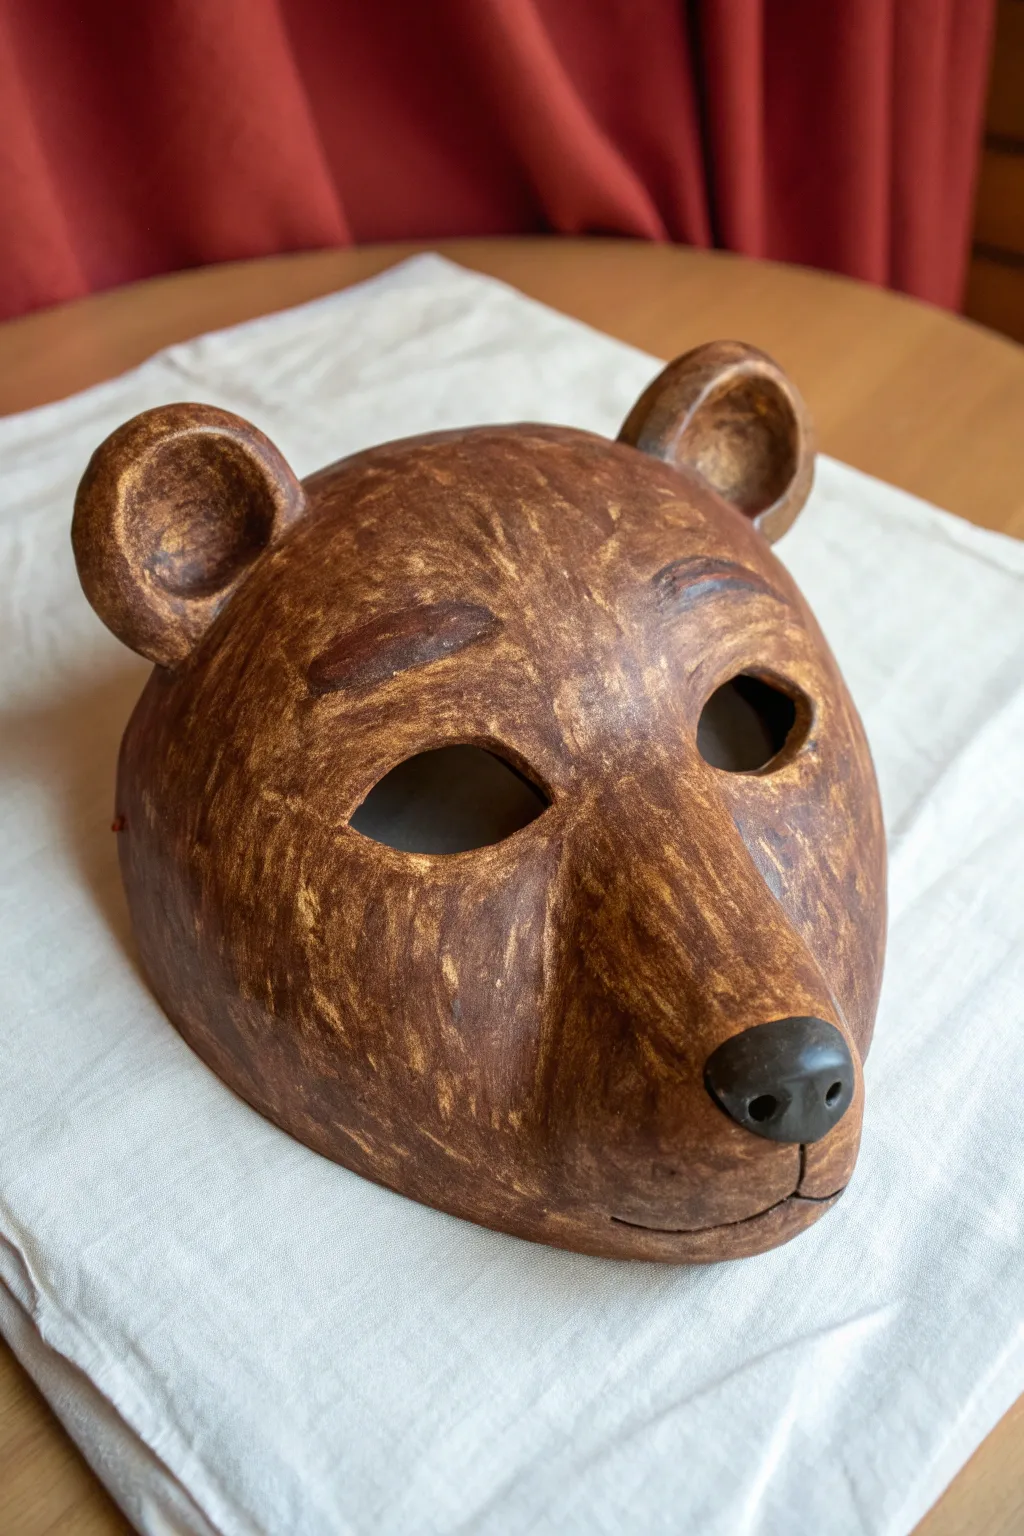
Owl Mask With Big Eye Rings
This charming paper mache owl mask captures a playful spirit with its exaggerated eyes and delicate feather tufts. The textured white finish contrasts beautifully with bold black rings and gold geometric accents, making it perfect for a costume party or wall display.
Step-by-Step Guide
Materials
- Balloon or plastic mask form (base)
- Newspaper stripes
- Paper mache paste (flour/water or glue/water)
- White tissue paper or paper towels
- Cardboard (for beak)
- Acrylic paints: white, black, metallic gold, amber/brown
- Two large brown feathers (real or stiff paper)
- Craft glue or hot glue gun
- Scissors and craft knife
- Fine liner brush and medium flat brush
- Matte sealant spray (optional)
Step 1: Building the Base
-
Prepare the form:
Inflate a balloon to the approximate size of a face, or use a plastic mask form covered in plastic wrap for an easier release. This will be the foundation for your owl’s face. -
Apply the first layers:
Dip newspaper strips into your prepared paper mache paste and apply them to the form. Smooth them down carefully to avoid air pockets. Aim for about 3-4 layers for structural integrity. -
Shape the beak:
While the base is drying slightly, cut a triangular beak shape from thin cardboard. Fold it down the center to give it a 3D ridge. -
Attach the beak:
Secure the cardboard beak to the center of the mask using masking tape or additional paper mache strips, blending the edges smoothly into the face curve. -
Create the final texture:
For the final layer, switch to white tissue paper or paper towels. Scrunch the paper slightly as you apply it with the paste to create that lovely, crinkled feather-like texture seen in the photo. -
Dry completely:
Let the mask dry thoroughly—this is crucial. Depending on humidity, this might take 24 to 48 hours. It should feel hard and hollow when tapped.
Clean Lines Pro-Tip
Painting gold over black can be tricky. Paint the gold triangles first, let them dry, and then carefully paint the black background around them for sharper edges.
Step 2: Sculpting the Eyes
-
Remove the form:
If you used a balloon, pop it. If you used a plastic mold, gently pry the paper shell loose. Trim the outer edges with scissors to get a clean, rounded owl face shape. -
Cut the eye holes:
Using a pencil, draw two large circles for the eyes. Use a craft knife to carefully cut out the inner circles so the wearer can see. -
Base coat painting:
Paint the entire mask—including the beak—with a coat of white acrylic paint. This unifies the texture and covers any newsprint that might be showing through the tissue layer.
Step 3: Detailed Painting
-
Draft the designs:
Lightly sketch the large rings around the eye holes and the triangular patterns on the beak with a pencil. Symmetry helps here, but handmade imperfections add character. -
Paint the eye rings:
Using black acrylic paint and a steady hand (or a medium flat brush), fill in the thick rings around the eyes. Ensure the lines are crisp against the white background. -
Add the inner rings:
Paint a smaller, solid black ring immediately surrounding the cut-out eye holes to give depth to the gaze. -
Paint the beak:
Mix a warm amber or brown shade and paint the beak. I find adding a tiny touch of gold to this mix gives it a nice subtle sheen. -
Apply gold geometry:
Once the black paint is bone dry, use a fine liner brush and metallic gold paint to add the small triangles inside the black eye rings. Orient the points outward for a sunburst effect. -
Detailing the white face:
Using a very dry brush with a tiny amount of grey or black paint, gently dry-brush faint lines radiating from the eyes across the white face to suggest fine feathers.
Level Up: 3D Eyes
Instead of painting the outer rings flat, cut rings from thin cereal box cardboard, glue them on before the gesso stage, and paint them to add physical depth.
Step 4: Finishing Touches
-
Attach the feather ears:
Select two stiff brown feathers. If they are natural, trim them to match. Glue them firmly to the top corners of the mask, angled slightly outward. -
Secure the base of the feathers:
To hide the glue point and add fluff, glue small tufts of softer, downy feathers (marabou works well) right at the base where the long feathers meet the mask. -
Seal (Optional):
Spray the mask with a matte sealant to protect your paint job and ensure the paper remains stiff over time.
Once the glue sets, your wise old owl is ready to be worn or hung as a striking piece of wall art
Tiger Mask With Bold Painted Stripes
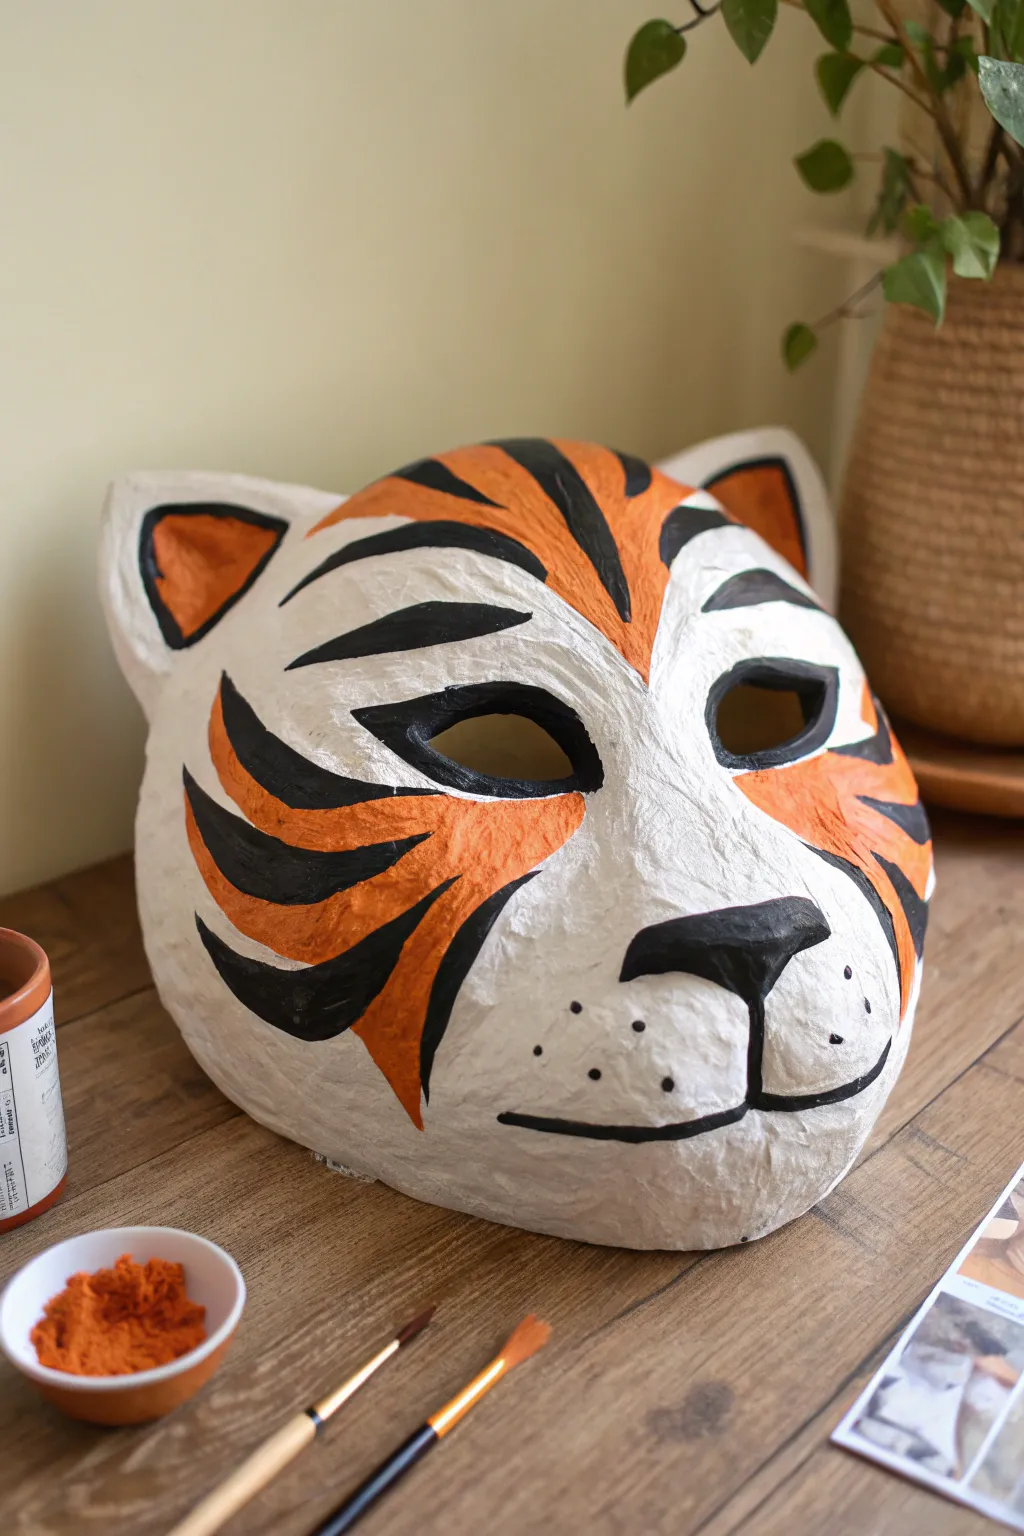
Bring the wild into your home with this striking tiger mask, featuring deep orange accents and bold black stripes against a crisp white background. The textured paper mache surface gives this piece an authentic, handcrafted feel that looks great on a wall or as part of a costume.
Step-by-Step Tutorial
Materials
- Cardboard (for base structure)
- Masking tape
- Newspaper strips
- PVA glue or flour/water paste
- Paper clay or fine paper pulp
- White acrylic paint (gesso inspired)
- Bright orange acrylic paint
- Black acrylic paint
- Small and medium round paintbrushes
- Fine-grit sandpaper
- Scissors or craft knife
Step 1: Sculpting the Foundation
-
Build the armature:
Begin by creating a basic face shape using cardboard. Cut out an oval slightly larger than a human face, and mark where the eye holes will be, cutting them out carefully. -
Form the snout:
Crumple newspaper into a distinct muzzle shape—make it wide and slightly protruding. Tape this firmly onto the lower center of your cardboard base using masking tape. -
Add dimension to the brow:
Roll smaller tubes of newspaper to create raised ridges above the eye holes. Tape these in place to give the tiger its intense, furrowed expression. -
Create the ears:
Cut two triangular shapes from cardboard for the ears. Attach them to the top corners of the mask, curving them slightly forward to mimic a tiger’s alert posture. -
Refine the nose bridge:
Build up the bridge of the nose between the eyes using layered tape or small wads of paper, ensuring a smooth transition from the forehead to the muzzle.
Smooth Operator
Before painting the white base, lightly sand the dried paper pulp with fine-grit sandpaper. It won’t remove the texture entirely but will make painting sharp stripes much easier.
Step 2: Applying the Paper Mache
-
Apply the first layer:
Dip strips of newspaper into your paste and lay them over the entire structure. Smooth them down with your fingers to remove air bubbles. -
Add structural strength:
Apply 3-4 layers of newspaper strips, letting the mask dry partially between layers. This ensures the mask is rigid enough to hold the final clay layer. -
Apply paper clay for texture:
Once the strip layers are fully dry, cover the entire surface with a thin layer of paper clay or thick paper pulp. This creates that wonderful, stony texture visible in the photo. -
Sculpt the nose details:
While the clay is wet, define the triangular nose shape and slightly indent the philtrum (the groove above the lip) to give the mouth character. -
Dry thoroughly:
Let the mask dry completely. This can take 24-48 hours depending on humidity. I like to let this dry near a sunny window to speed things up safely.
Step 3: Painting the Tiger
-
Base coat in white:
Cover the entire mask with bright white acrylic paint. You may need two coats to hide the grey color of the pulp completely. -
Draft the pattern:
Lightly sketch the design with a pencil. Mark out the areas for the orange patches on the cheeks, forehead, and bridge of the nose. -
Apply the orange patches:
Paint the designated areas with bright orange. Use feathery strokes at the edges where the orange meets the white to simulate fur texture rather than hard lines. -
Paint the inner ears:
Fill the sunken sections of the ears with the same orange hue, leaving a thick white border around the rims. -
Add the black nose:
Using a smaller brush, paint the sculptural nose tip black. Extend a thin line down the center and curve it outwards to create the mouth line. -
Paint facial stripes:
Using a steady hand and black paint, carefully add the stripes over the orange and white areas. Taper the ends of the stripes to sharp points. -
Add the whisker spots:
Dot several small black points on the white muzzle area to represent whisker follicles. -
Define the eyes:
Paint a thick black rim around the eye holes. Add a slight “winged” tip at the outer corners to enhance the cat-eye shape.
Make It Glossy
Once the paint is fully dry, seal the mask with a satin or gloss varnish. This deepens the black contrast and makes the orange pop while protecting your work from dust.
Hang your fierce new creation on the wall for a stunning piece of handmade decor

PENCIL GUIDE
Understanding Pencil Grades from H to B
From first sketch to finished drawing — learn pencil grades, line control, and shading techniques.
Explore the Full Guide
Bird Beak Mask for Parade Vibes
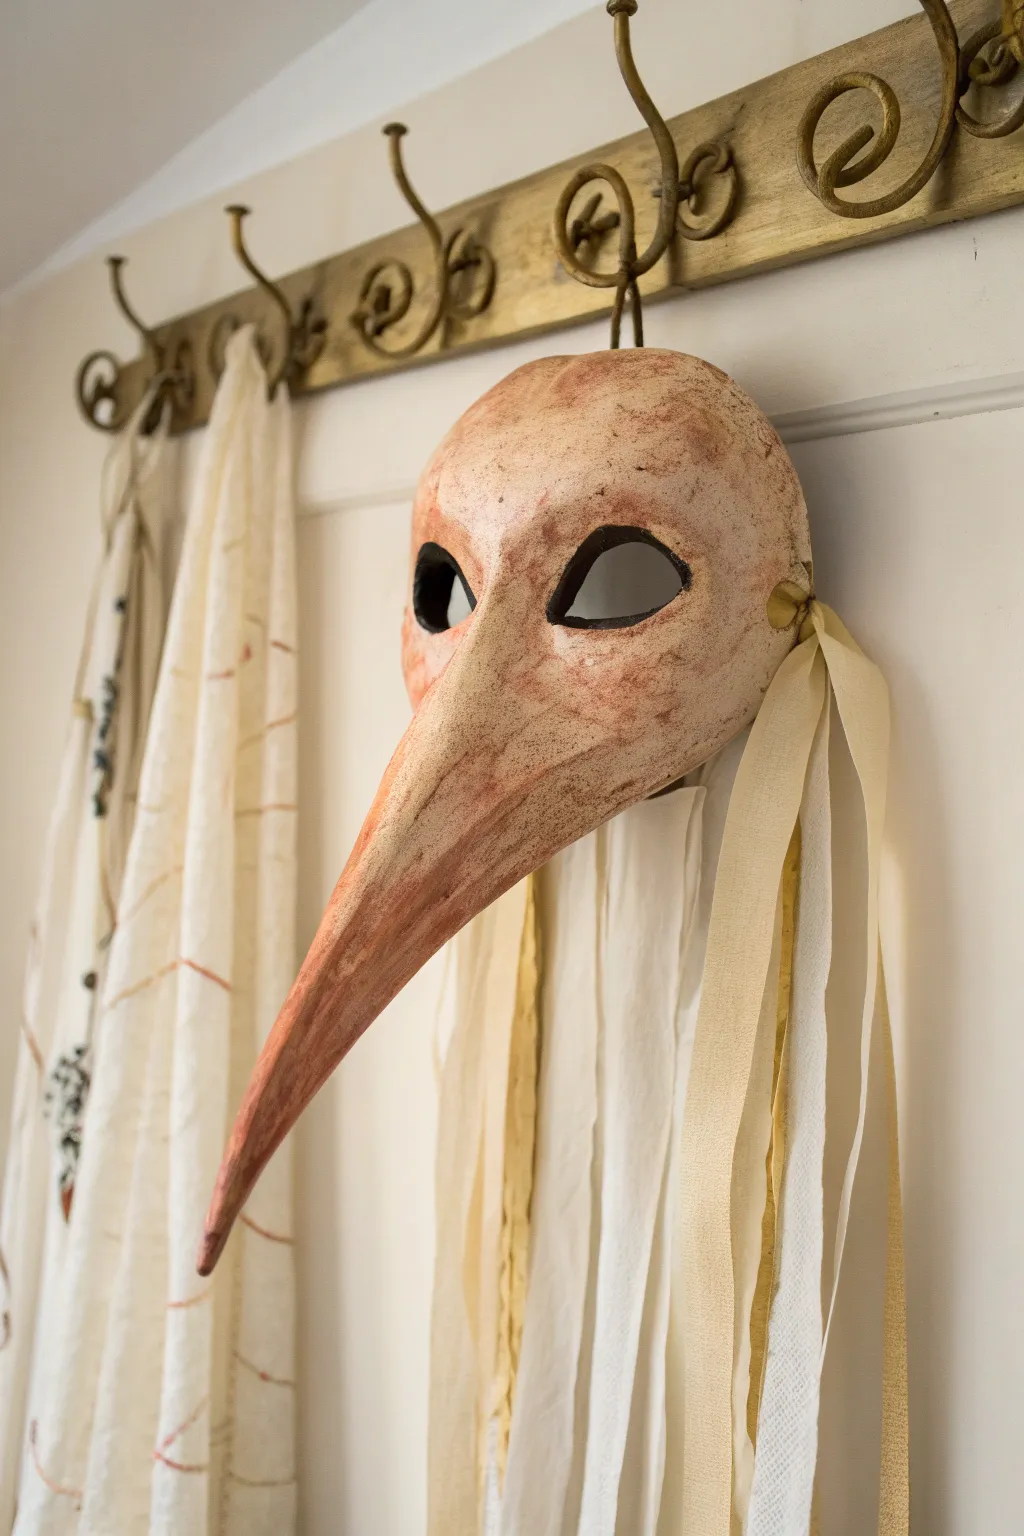
Channel the mysterious allure of Venetian carnivals or vintage plague doctor costumes with this striking bird mask. The project features a distinctively long beak and a textured, bone-like finish created with careful paper mache layering and staining techniques.
How-To Guide
Materials
- Plastic face mask form (for base)
- Cardboard (cereal box thickness)
- Masking tape
- Aluminum foil
- Newspaper stripes
- Flour and water paste (or PVA glue)
- White acrylic paint or gesso
- Burnt umber and raw sienna acrylic paints
- Sponge or rag for antiquing
- Matte varnish
- Cream or off-white ribbon (various widths)
- Gold ribbon (accent)
- Hot glue gun
- Scissors
Step 1: Sculpting the Form
-
Prepare the base:
Start with a basic plastic craft mask. Cut off the nose area if needed to allow flush attachment, or simply plan to build over it. Cover the plastic mask with a layer of foil or cling wrap if you plan to remove the paper mache shell later, though leaving it inside adds stability. -
Cardboard armature:
Cut a long triangle from thin cardboard for the beak. It should be roughly 8-10 inches long. Curve it gently so it has volume, not just flat. -
Attach the beak:
Tape the cardboard beak securely to the nose area of the mask using masking tape. Ensure the transition from the forehead to the beak is relatively smooth, but don’t worry about perfection yet. -
Shape with foil:
Crumple aluminum foil and tape it over the cardboard beak to create a rounded, organic conical shape. Bulwark the brow area slightly with foil to give the eyes a deep-set look. -
Tape wrap:
Cover the entire foil structure with masking tape. This secures the shape and provides a better surface for the paper mache to adhere to than slick foil.
Soggy Paper Syndrome?
If your mask feels spongy, you used too much paste. Place it in front of a fan or in a sunny spot immediately. Don’t add more layers until it is rock hard.
Step 2: Paper Mache Application
-
Mix your paste:
Create a smooth paste using a 1:1 ratio of flour and warm water, or water down some white PVA glue. -
First layer:
Dip strips of torn newspaper into the paste, squeegeeing off excess with your fingers. Apply them over the entire mask, smoothing them down to remove air bubbles. Let this layer dry completely. -
Build strength:
Apply 3-4 more layers of paper mache. Alternating direction with each layer helps build structural integrity. I find it helpful to let the mask dry overnight between every two layers to prevent mold. -
Smooth the texture:
For the final layer, use plain white paper or paper towels soaked in paste. Paper towels create a slightly wrinkled, skin-like texture that works perfectly for this antique organic look.
Pro Tip: Better Texture
For the final layer, use brown kraft paper (like from a grocery bag) torn into small bits. It creates a leather-like texture that looks incredible when stained.
Step 3: Painting and Antiquing
-
Base coat:
Once bone dry, paint the entire mask with an off-white or cream acrylic paint. Two coats may be necessary for full coverage. -
Mixing the wash:
Dilute burnt umber and raw sienna paint with water until it’s very runny, like ink. -
Apply the wash:
Brush the watery brown mix over the mask, focusing heavily on the recesses around the eyes, the sides of the beak, and the edges of the mask. -
Wipe back:
Immediately use a damp sponge or rag to wipe away most of the brown paint. The dark color will stay in the tiny crevices of the paper texture, creating that aged, weathered bone effect. -
Add blotching:
Dab a cheesecloth or rough sponge into the reddish-brown paint and lightly stipple random spots on the forehead and cheeks to mimic organic discoloration. -
Darken the eyes:
Paint the inside rim of the eye holes black to give them depth and a finished look. -
Seal:
Protect your paint job with a coat of matte varnish. This removes any unnatural shine and seals the paper.
Step 4: Finishing Touches
-
Prepare ribbons:
Cut several long strips of cream ribbon, fabric scraps, and thin metallic gold ribbon. Vary the lengths for a cascading effect. -
Attach streamers:
Hot glue the ribbons to the inside temples of the mask, letting them hang down freely. -
Final secure:
Add a sturdy elastic band or ribbon tie horiztonally across the back if you intend to wear it.
Hang your finished masterpiece on the wall or wear it to make a mysterious entrance at your next costume event
Sugar Skull-Inspired Floral Mask
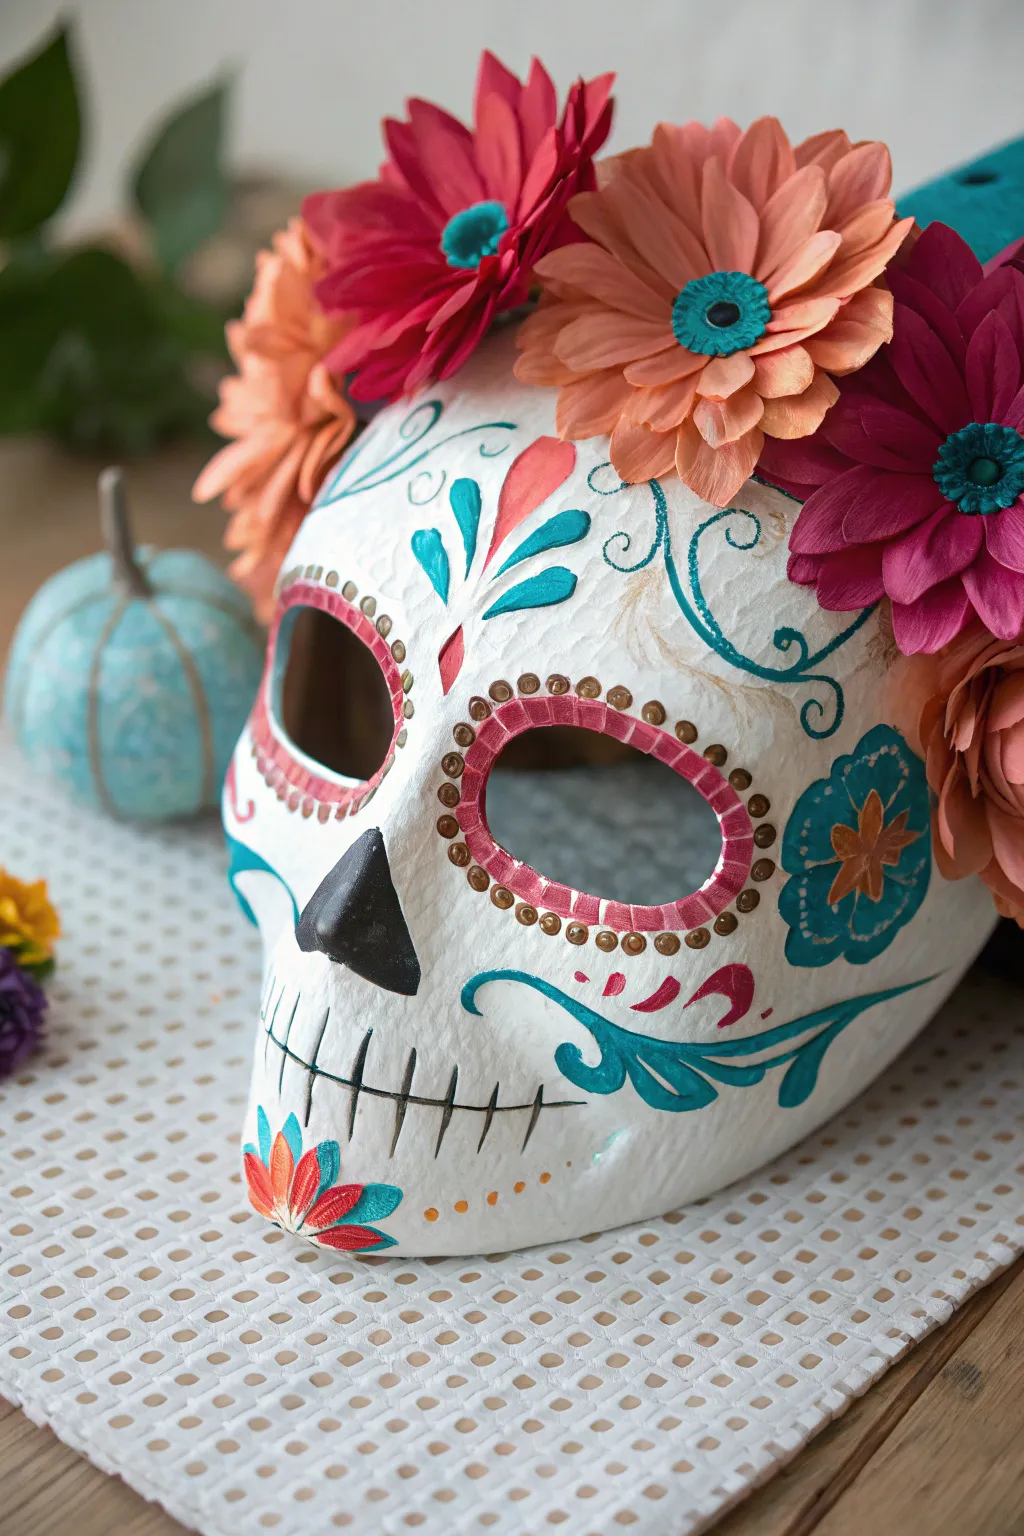
Embrace the vibrant spirit of Día de los Muertos with this stunning papier-mâché mask, featuring bold floral embellishments and intricate hand-painted details. The contrast between the stark white base and the rich teal, pink, and orange accents creates a captivating piece perfect for display or costume.
Step-by-Step Tutorial
Materials
- Plastic skull mask form (base)
- Newsprint or paper strips
- Flour and water paste (or white glue)
- White gesso or acrylic primer
- Fine-grit sandpaper
- Acrylic paints: Teal, Coral/Salmon, Magenta, Gold, Black
- Small round paintbrush (sz 2-4)
- Detail liner brush (sz 0-1)
- Faux flowers (Gerbera daisies in coral, pink, deep magenta)
- Hot glue gun and glue sticks
- Matte or satin sealant spray
Step 1: Building the Foundation
-
Prepare the Form:
Start with a plastic skull mask form. If you want the final mask to be removable from the form, cover the plastic base tightly with cling wrap; otherwise, you can build directly onto it for a sturdier, permanent structure. -
Apply First Layer:
Dip torn strips of newsprint into your paper mache paste, squeegeeing off the excess with your fingers. Apply them smoothly over the mask form, overlapping edges slightly to ensure a strong bond. -
Build Thickness:
Continue adding layers of paper strips. I usually aim for about 3-4 distinct layers, letting each layer dry completely before starting the next to prevent mold and ensure rigidity. -
Refine the Surface:
Once the final paper layer is bone dry, use fine-grit sandpaper to gently smooth out any rough wrinkles or sharp ridges, creating a more uniform surface for painting. -
Prime the Skull:
Apply two coats of white gesso or a high-quality white acrylic primer. This seals the newsprint and creates that bright, clean bone-white background essential for the sugar skull look.
Smooth Operator
To get that ultra-smooth texture seen in the photo, apply a thin layer of drywall joint compound over the dried paper mache, sand it silky smooth, then prime.
Step 2: Painting the Details
-
Sketch the Design:
Lightly sketch your symmetrical designs using a pencil. Mark out the eye sockets, the nose cavity, the cheek flourishes, and the floral elements on the forehead and chin. -
Darken the Features:
Paint the inside of the nose cavity entirely black. Do the same for the inner edges of the eye sockets if you want deep depth, or leave them open if wearing the mask. -
Paint Eye Borders:
Using a small round brush, paint a thick ring around each eye socket in magenta. Allow this base ring to dry completely. -
Add Eye Details:
Over the magenta ring, use a detail brush and gold or light brown paint to add small dots or a scalloped edge pattern, giving it that traditional decorative look. -
Create Forehead Flourishes:
Mix a vibrant teal paint. Paint the teardrop shapes and leaf-like swirls on the center of the forehead, radiating upward from the brow line. -
Accent the Forehead:
Add a central coral-colored teardrop shape between the teal flourishes to balance the warm and cool tones. -
Paint Cheek Designs:
Using the teal paint again, create large, sweeping scrollwork that starts near the ear area and curves down toward the jawline. -
Add Floral Cheek Accents:
Paint a large, stylized flower on the cheekbone using teal for the petals and adding a small orange/gold starburst in the center. -
Detail the Mouth:
Use a liner brush with black paint to draw the vertical teeth lines across the mouth area. Keep the lines thin and slightly tapered at the ends for a realistic fissure look. -
Decorate the Chin:
Paint a small, fan-like flower on the chin using coral for the petals and teal for the leaves, mirroring the colors used on the forehead. -
Final Flourishes:
Add tiny dots of gold or orange paint along the teal scrollwork and around the chin flower to add texture and intricacy.
Make it Sparkle
Add self-adhesive rhinestones or flat-back crystals to the centers of the painted flowers or along the eye circles for extra glamour.
Step 3: Finishing Touches
-
Seal the Paint:
Once all paint is thoroughly dry, spray the entire mask with a clear matte or satin sealant to protect your work from moisture and fading. -
Prepare Flowers:
Pop the heads off your faux Gerbera daisies (or cut the stems very short). You’ll want a mix of coral, pink, and deep magenta blooms. -
Paint Flower Centers:
For a custom touch, paint the plastic centers of the flowers teal to match your painted designs, tying the whole color palette together. -
Attach the Crown:
Using hot glue, attach the flowers in a dense row across the top of the skull. Start with the largest blooms in the center and work outward with slightly smaller ones.
Now your beautiful, culturally-inspired masterpiece is ready to be admired.


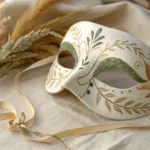
Simple Masquerade Half Mask With Scrollwork

This project transforms a simple base into a sophisticated masquerade accessory using raised relief techniques. The result is a stunning ivory and gold piece featuring dimensional swirls and a refined diamond centerpiece.
How-To Guide
Materials
- Plastic or paper mache half-mask base
- Paper clay or lightweight air-dry clay
- PVA glue (white school glue)
- Water
- Fine-grit sandpaper
- Acrylic gesso or primer
- Cream or ivory acrylic paint
- Metallic antique gold acrylic paint
- Small round brushes (size 0 and 2)
- Small flat brush
- Satin varnish
- Ribbons for ties
- Hot glue gun
Step 1: Preparation and Base Coat
-
Prepare the surface:
Begin by lightly sanding your mask blank if it has any rough edges or manufacturing seams. Wipe it clean with a damp cloth to remove any dust. -
Prime the mask:
Apply a coat of gesso or primer to the entire mask. This gives the clay and paint a better surface to grip onto than bare plastic or paper. -
Sketch the design:
Once the primer is dry, lightly sketch your scrollwork pattern directly onto the mask with a pencil. Mark out the large swirls around the cheeks, the diamond on the bridge of the nose, and the borders around the eyes.
Fixing Clay Cracks
If your clay scrolls crack while drying, mix a tiny bit of fresh clay with water to make a paste. Paint this slurry into the cracks and smooth with a finger.
Step 2: Sculpting the Relief Details
-
Roll clay coils:
Take small pinches of your paper clay and roll them into very thin, even snakes or coils on a flat surface. These should be roughly the thickness of a piece of yarn. -
Apply the glue lines:
Working in small sections so the glue doesn’t dry, paint a thin line of PVA glue over your pencil marks where the first scroll needs to go. -
Lay the main scrolls:
Gently press your clay coils onto the glue lines. Focus on the large C-curves on the cheeks and the S-curves above the eyes. Use a damp brush to smooth any joins where pieces of clay meet. -
Form the central diamond:
For the diamond shape on the bridge of the nose, flatten a small ball of clay slightly and then cut it into a diamond shape, or build it up with thicker coils for a raised border. Glue this securely in the center. -
Add the upper crest:
Create the fan-like shape at the top of the forehead using teardrop-shaped pieces of clay. Flatten them slightly against the mask to create that radiating leaf effect. -
Detail the eye borders:
Roll a slightly thicker coil to define the bottom edge of the mask and the upper ridge of the eye openings. Press this firmly into place to create a defined rim. -
Create the texture dots:
Roll tiny spheres of clay—no bigger than a seed beads—and glue them along the outer perimeter of the mask and along the upper brow line for that delicate, beaded look.
Antiquing Effect
After the gold paint dries, apply a very watered-down brown paint wash over the whole mask and immediately wipe it off. It will settle in the crevices for an aged look.
Step 3: Painting and Finishing
-
Dry completely:
Let the clay work dry fully. This can take overnight depending on humidity. I find it’s best to be patient here to avoid denting the soft clay. -
Apply the base color:
Paint the entire mask, including the raised clay details, with two coats of cream or ivory acrylic paint. Let the first coat dry before applying the second. -
Highlight the scrolls:
Using a small round brush and metallic antique gold paint, carefully paint just the tops of the raised clay scrolls. Use a steady hand to keep the gold on the raised surfaces. -
Detail the dots:
Dab a tiny spot of gold paint onto each of the crushed clay spheres you applied to the borders. -
Accent the diamond:
Fill the center of the forehead diamond with a wash of gold paint. You can wipe it back slightly with a paper towel to make it look aged. -
Seal the work:
Protect your paint job with a layer of satin varnish. This gives the mask a finished, professional sheen similar to porcelain or polished leather. -
Attach the ties:
Finally, use hot glue to attach ribbons to the inside edges of the mask so it can be worn.
Now you have a refined, handcrafted mask ready for your next event
Comedy and Tragedy Theater Mask Pair

Capture the essence of the stage with this timeless pair of theater masks representing the dual nature of drama. These paper mache creations feature a textured, antique finish that mimics carved wood or aged plaster, perfect for wall decor.
Step-by-Step Guide
Materials
- Plastic face mask forms (male and female or two generic)
- Newspaper stripes
- Paper mache paste (flour/water or glue/water)
- Paper clay or cellulose clay
- Fine grit sandpaper
- Acrylic paints: Cream, White, Burnt Sienna, Black
- Matte sealant spray
- Jute twine for hanging
- Sculpting tools
- Paintbrushes
- Water container
Step 1: Building the Foundation
-
Prepare the Forms:
Start by greasing your plastic mask bases lightly with petroleum jelly or covering them with plastic wrap so the paper mache releases easily later. -
Layer the Strips:
Dip strips of torn newspaper into your paste and apply them to the mask forms. Overlap them in different directions to create a strong shell. -
Build Thickness:
Continue adding layers until you have about 4-5 solid layers of newspaper. Let this base dry completely, usually overnight, until it is hard to the touch. -
Release the Masks:
Once fully dry, carefully pop the paper shells off the plastic forms. If the edges are ragged, trim them with scissors for a neat outline.
Smoother Clay Work
Keep a small bowl of water nearby while sculpting. Dipping your fingers or tools aids in smoothing the clay and blending added features seamlessly.
Step 2: Sculpting the Features
-
Apply Paper Clay:
Cover the front of the newspaper shell with a thin, even layer of paper clay. This material allows for much finer detail than newspaper strips. -
Shape the Comedy Brows:
For the smiling mask, add snakes of clay above the eyes to create high, arched eyebrows. Blend the edges of the clay into the mask with a little water. -
Sculpt the Smile:
Build up the cheekbones into round, lifted shapes. Add clay around the mouth area to create wide laugh lines and an open, upturned grin. -
Form the Tragedy Brows:
On the second mask, add clay eyebrows that slant upwards towards the center of the forehead to create a look of distress. -
Create the Frown:
Elongate the face slightly by adding clay to the chin. Sculpt a downturned mouth with deep creases running from the nose to the corners of the lips. -
Enhance Textures:
While the clay is still wet, use a sculpting tool to carve deep wrinkle lines in the forehead and cheeks. I find adding slight indentations mimics the look of carved wood. -
Dry and Sand:
Allow the clay layer to dry thoroughly (this may take 24-48 hours depending on thickness). Lightly sand any overly rough spots, but keep the texture visible.
Fixing Cracks
If hairline cracks appear as the paper clay dries, don’t panic. Simply mix a tiny amount of fresh clay with water to make a paste and fill the gaps.
Step 3: Painting and Antiquing
-
Base Coat:
Paint both masks entirely with a mixture of Cream and a touch of White acrylic paint. You may need two coats for full coverage. -
Comedy Accents:
Using Burnt Sienna, paint the stylized eyebrows, the laugh lines, and outline the smiling mouth. Use a dry-brush technique to drag some of this color lightly over the cheeks for an aged look. -
Tragedy Accents:
Switch to Black paint for the sad mask. Paint the distressed eyebrows and the downturned mouth, and add a small triangular ‘beard’ patch on the chin. -
Antiquing Wash:
Mix a very watery wash of light brown paint. Brush it over the entire surface of both masks and immediately wipe it back with a rag. The color will settle into the carved wrinkles and textures. -
Final Details:
Paint the inside of the eye sockets and the open mouth areas a solid dark color (dark brown or black) to create depth. -
Seal and Hang:
Spray the masks with a matte sealant to protect the paint. Drill small holes near the temples and thread knotted jute twine through for a rustic hanging loop.
Hang your dramatic duo together to bring a touch of theatrical history to your walls
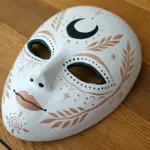
Spooky Cracked Porcelain Doll Mask
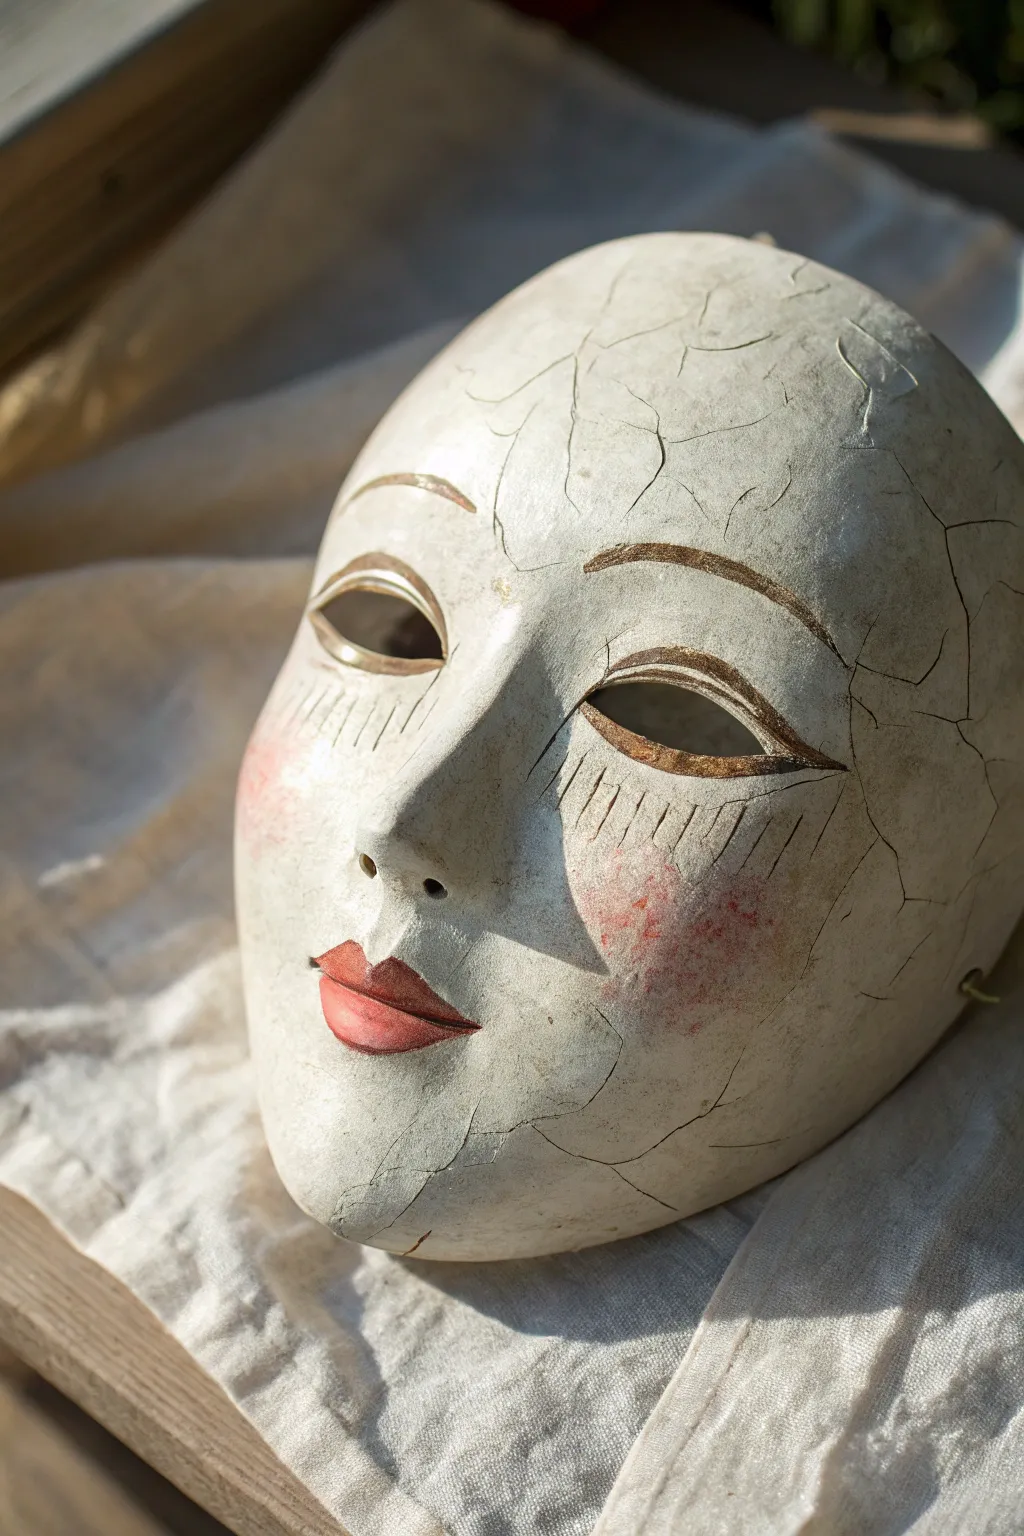
Transform a basic paper mache base into an eerie relic that looks like a shattered antique doll. The delicate gold details and realistic crackle finish create a hauntingly beautiful effect perfect for display or costume.
How-To Guide
Materials
- Paper mache mask base (pre-made or homemade)
- White acrylic gesso or matte white acrylic paint
- Light ivory or porcelain-tone acrylic paint
- Crackle medium (clear or white)
- Gold metallic acrylic paint
- Red lipstick shade acrylic paint
- Soft pink blush or pastel chalk
- Fine detail paintbrush (size 0 or 1)
- Flat shader brush
- Pencil
- Matte sealant spray
Step 1: Base Preparation
-
Smooth the foundation:
Begin with your dry paper mache mask base. Sand down any rough ridges or bumps with fine-grit sandpaper to mimic the smoothness of porcelain. Wipe away all dust with a slightly damp cloth. -
Prime the surface:
Apply a coat of white gesso to seal the paper mache. This ensures your paint colors will stand out and the texture remains consistent. Let this layer dry completely. -
Apply the skin tone:
Mix a very pale ivory or off-white acrylic paint. Paint the entire mask with an even coat. You want a solid, opaque finish, so adding a second coat after the first dries is usually necessary for that flawless ceramic look.
Crackle Trouble?
If the medium isn’t cracking, you may have let it dry too long before the top coat. It needs to be tacky. Try applying heat with a hair dryer immediately after painting.
Step 2: Creating the Cracks
-
Apply crackle medium:
This is the crucial step for the texture. Apply a generous layer of clear crackle medium over the painted face. The thickness of your application determines the size of the cracks—thicker application yields larger cracks. -
Layer top coat:
Once the medium is tacky but not dry, gently brush a thin layer of your off-white top coat over it. Do not over-brush or go back over wet areas, as this will ruin the crackle effect. Let it dry undisturbed. -
Mock cracks (optional):
If the crackle medium didn’t crack enough for your taste, or if you are skipping the medium, use a very fine brush and watered-down grey or brown paint to manually paint jagged, spiderweb-like lines across the forehead and cheeks.
A Gentle Blush
For the softest, most realistic cheek tint, use real powdered makeup blush or scraped pastel chalk instead of wet paint. Apply it with your finger for control.
Step 3: Painting the Features
-
Sketch the features:
Lightly sketch the outline of the eyebrows, eye sockets, and lips with a pencil. Keep the eyebrows relatively high and arched to give that classic, slightly surprised doll expression. -
Paint the eye sockets:
Using your gold metallic paint and a small flat brush, outline the eye holes. Create a thick, almond-shaped border that mimics heavy metal eyeliner or gold leaf detailing. -
Add the eyebrows:
Paint thin, arched eyebrows using the same metallic gold paint or a soft brown. Use short, fine strokes to suggest hair texture, or a single smooth line for a stylized look. -
Create lower lashes:
Beneath the eye opening, paint vertical, slightly curved lines using a diluted brown or grey paint to represent the painted-on lower lashes often seen on antique dolls. -
Paint the lips:
Fill in the lips with a deep red or rose-colored acrylic paint. Create a defined ‘cupid’s bow’ shape on the upper lip. Keep the paint opaque and smooth.
Step 4: Finishing Details
-
Add rosy cheeks:
Dip a dry, fluffy brush into a tiny amount of pink paint and wipe most of it off on a paper towel. Gently buff this ‘dry brush’ onto the cheeks in a circular motion. Alternatively, real cosmetic blush works beautifully here. -
Define the nostrils:
Use a small dot of diluted dark brown or black paint inside the nostril indentations to add depth and make the nose appear more three-dimensional. -
Antique the cracks:
To make the cracks pop, mix a watery wash of brown paint. Brush it over the cracked areas and immediately wipe the surface with a rag. The dark paint will stay stuck in the crevices. -
Seal the artwork:
Once you are happy with the shading and all paint is bone dry, spray the entire mask with a matte sealant. This protects the finish without adding an unrealistic plastic shine.
Now you have a hauntingly lovely mask that captures the fragile beauty of a forgotten toy
Monster Mask With Exaggerated Features
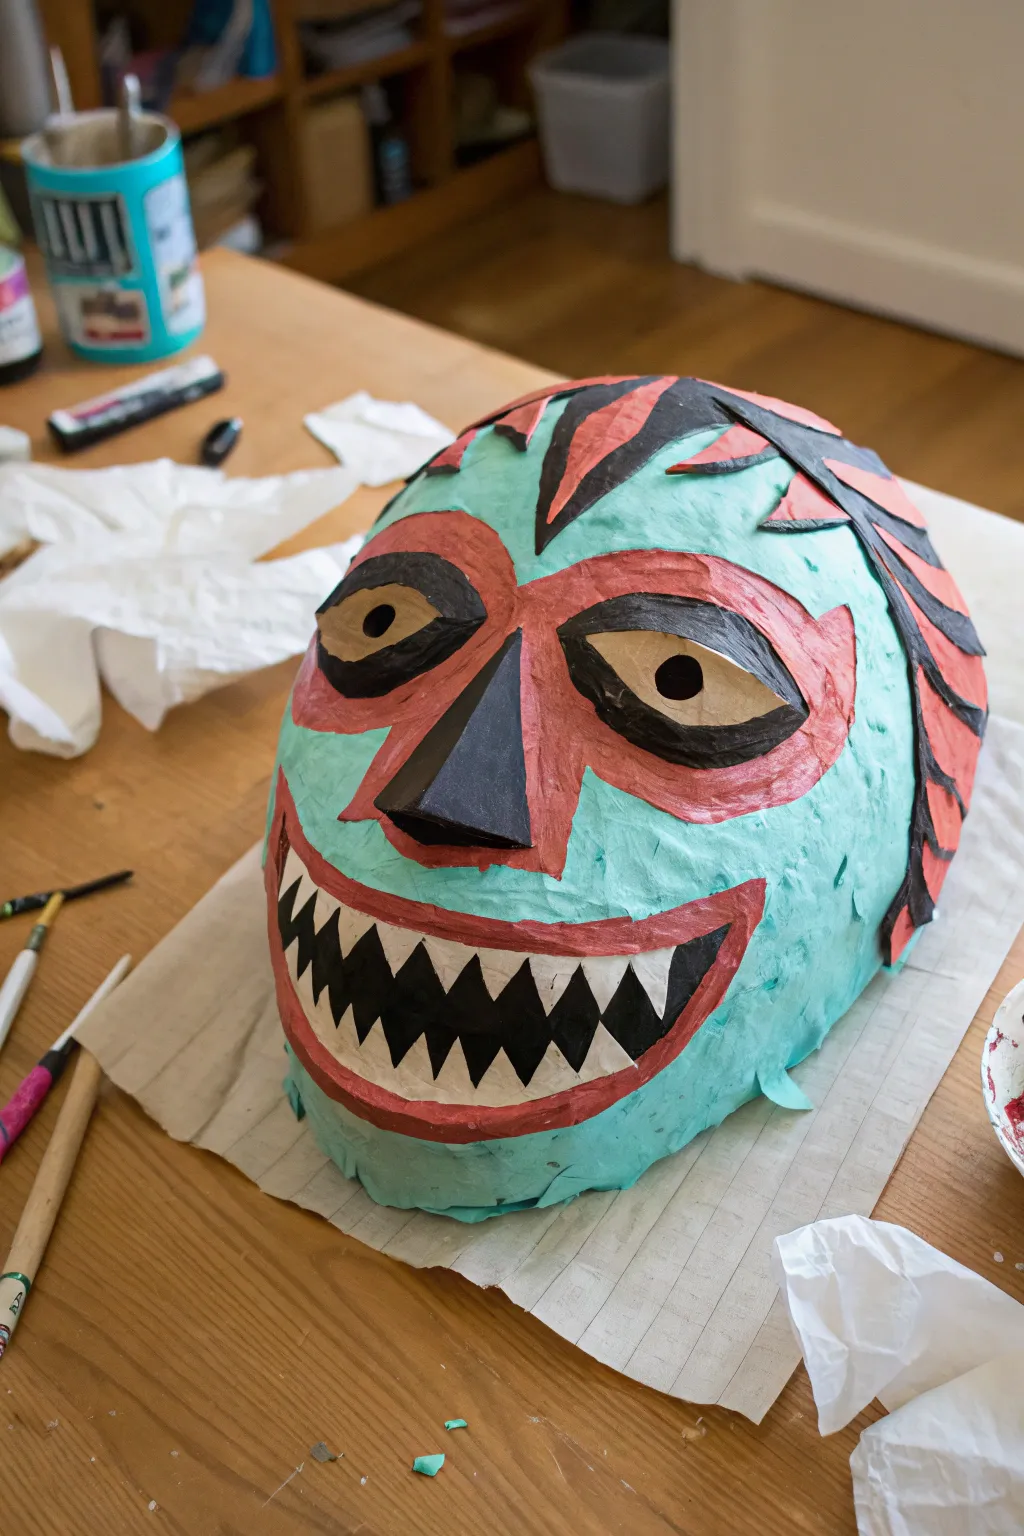
Bring a wild character to life with this vibrant paper mache creation featuring bold, graphic shapes and striking contrasts. This project combines structural sculpting with careful layering to achieve a smooth, professional finish that really pops.
Step-by-Step Tutorial
Materials
- Balloon (large round)
- Newsprint or scrap paper
- Paper mache paste (flour/water or glue/water)
- Cardboard (thin, like cereal boxes)
- Masking tape
- Tissue paper (colored: teal, red, black, beige/white)
- White glue (PVA) or decoupage medium
- Paintbrushes (flat shader and detail)
- Scissors
- Black marker or paint (optional for details)
Step 1: Building the Base Structure
-
Inflate the Form:
Blow up a large balloon to roughly the size of a human head. This provides the primary round shape for your mask. -
Initial Layering:
Tear newsprint into 1-inch strips. Dip them into your paper mache paste, removing excess liquid with your fingers, and cover the front half of the balloon. Apply 3-4 layers, letting them dry slightly between applications. -
Sculpt the Nose:
Cut a triangular pyramid shape from thin cardboard to create the pointed nose. Tape this securely onto the dried face form using masking tape, ensuring the edges are flush. -
Add Brow and Cheek Volume:
Scrunched-up newspaper can be taped around the eyes and cheekbones to build up those exaggerated, cartoonish ridges before the final skin layer. -
Smoothing Layer:
Apply 2-3 final layers of newsprint over the entire form, including the new cardboard nose and built-up areas. Focus on smoothing out the transitions so the nose looks integrated, not just stuck on. Let this dry completely until rigid—usually overnight.
Wrinkled Tissue?
Don’t panic if the tissue wrinkles while wet; this texture actually helps the mask look more organic. Just gently pat it down with a damp brush.
Step 2: Applying the Color Skin
-
Teal Base Coat:
Instead of paint, tear small pieces of teal tissue paper. Apply a thin layer of white glue or decoupage medium to the mask, place the tissue, and brush more glue over the top. Cover the entire surface to create a textured, colorful ‘skin’. -
Design the Eyes:
Cut two large almond shapes from beige or off-white tissue paper. Glue these onto the eye area. Create the pupils and heavy eyelids using black tissue paper layered carefully over the beige and teal. -
The Red Accent Mask:
Tear or cut red tissue paper to create the ‘mask within a mask’ shape. Outline the eyes and create a bridge over the nose, carefully gluing it down so the teal shows through underneath only where intended. -
Defining the Nose:
Cover the cardboard nose tip with solid black tissue paper to make it stand out against the teal and red background.
Step 3: Teeth and Final Details
-
Create the Mouth Shape:
Use red tissue paper to form a wide, grinning mouth outline. Ensure the curve is symmetrical and sits low on the mask face. -
Add the Teeth:
Cut a strip of white or beige paper with jagged triangles (sawtooth pattern) for the teeth. Glue this inside the red mouth outline. -
Darken the Mouth Interior:
Fill the negative space between the teeth with black tissue paper or black paint to give the mouth depth. -
Tiger Stripes:
Cut curved, claw-like shapes from black tissue paper. Apply these to the forehead and sides of the mask to simulate tiger stripes or tribal markings. -
Side Patterns:
Add corresponding red stripes alongside the black ones on the sides of the mask to balance the color palette. -
Final Seal:
Brush a final coat of decoupage medium or diluted white glue over the entire mask. This seals all the tissue edges and gives the mask a consistent, slight sheen. -
Remove the Balloon:
Once the mask is 100% dry and hard, pop the balloon from the back and carefully peel it away from the interior of the mask.
Make it Wearable
Punch small holes on the sides and reinforce them with duct tape on the inside before tying on an elastic cord to wear it securely.
Now you have a striking, durable mask ready for display or a costume party
Textured Stone or Weathered Metal Finish Mask
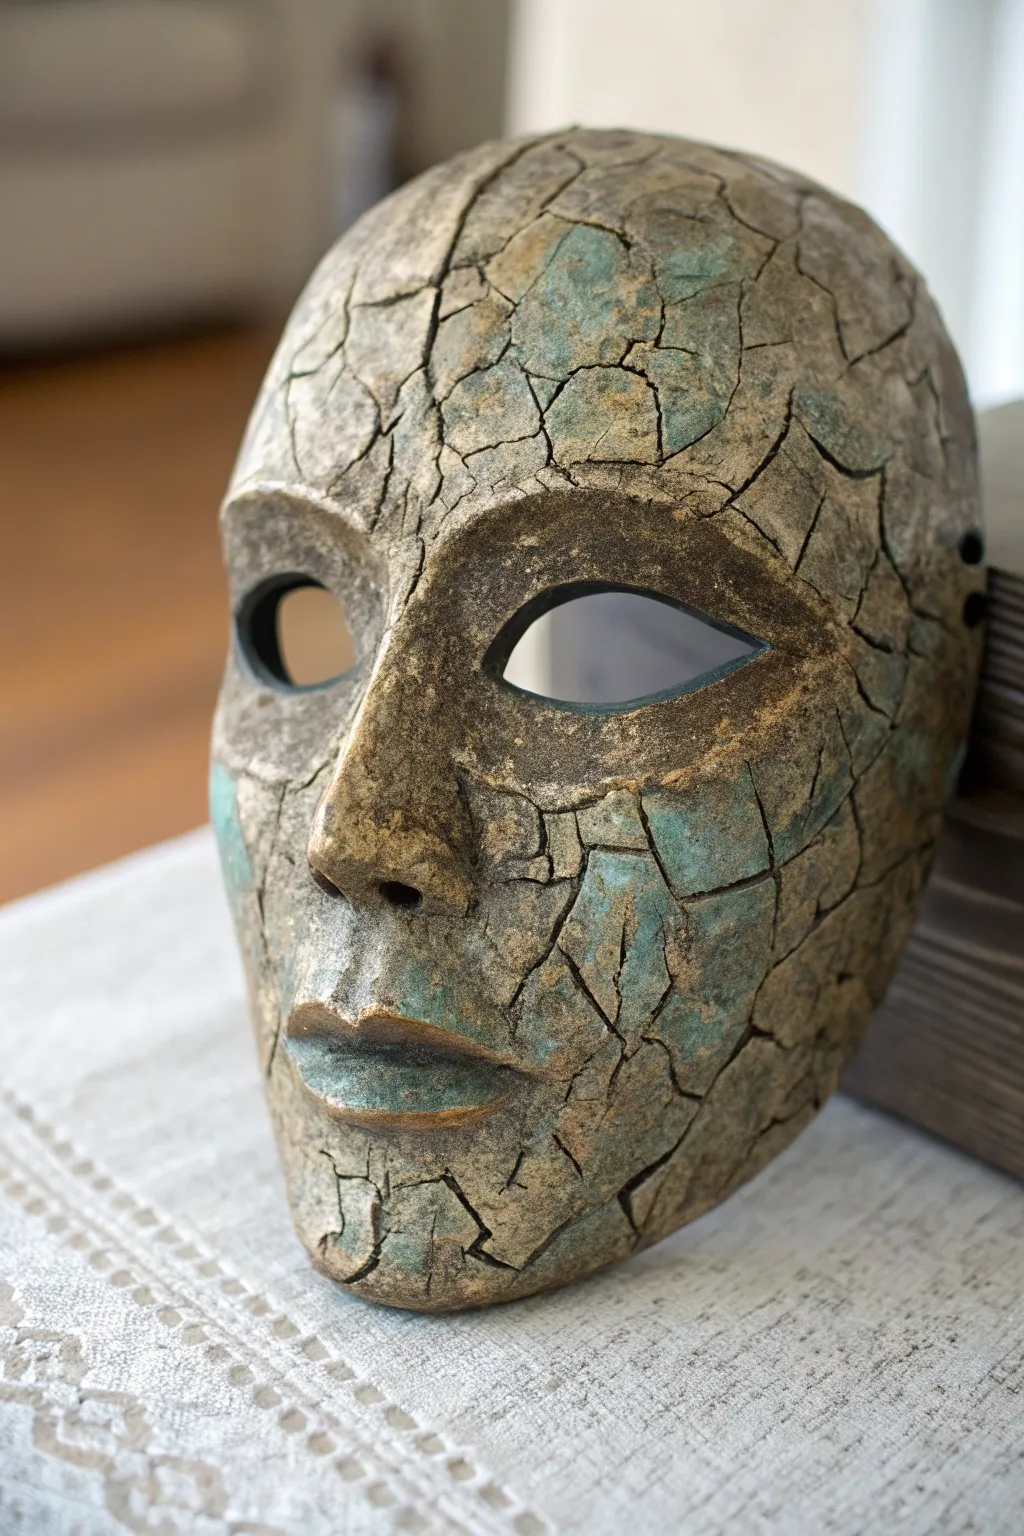
Transform a simple paper mache base into an artifact that looks centuries old with this specialized texturing technique. By combining crackle mediums and careful dry-brushing, you’ll achieve a hauntingly beautiful surface that mimics weathered stone or oxidized bronze.
How-To Guide
Materials
- Basic paper mache mask form (store-bought or handmade)
- Rigid wrap or plaster cloth (optional, for extra strength)
- Gesso or white acrylic primer
- Acrylic modeling paste or heavy body gel
- Crackle paste or crackle medium
- Acrylic paints: Burnt Umber, Black, Raw Sienna, Turquoise/Teal, Metallic Bronze
- Palette knife or plastic scraper
- Assorted paintbrushes (stiff bristle for dry brushing)
- Matte spray varnish
- Sandpaper (fine grit)
Step 1: Preparation and Base Texturing
-
Prepare the surface:
Begin by ensuring your paper mache mask form is clean and dry. If the surface is too smooth, lightly scuff it with fine-grit sandpaper to give the subsequent layers something to grip. -
Prime the mask:
Apply an even coat of white Gesso or acrylic primer over the entire mask, front and back. This seals the paper and prevents it from bowing or warping when wet textures are added later. -
Add structural volume (optional):
block out facial features like the brow ridge or nose with a little extra modeling paste if your base mask feels too flat. Smooth the edges down with a wet finger so they blend seamlessly. -
Apply the crackle medium:
Using a palette knife, spread a generous layer of crackle paste over the entire front surface. The thickness of application determines the crack size—thicker areas will yield deep, wide fissures, while thin areas create spiderweb cracks. -
Let the cracks form:
Allow the crackle paste to dry completely undisturbed. This can take anywhere from 12 to 24 hours depending on humidity; resist the urge to touch it or speed it up too aggressively with heat, as natural drying often produces the most organic patterns.
Cracks Not Appearing?
If your paste dries without cracking, the layer was likely too thin or the room too humid. Apply a second, thicker layer on top, or gently use a hairdryer on low heat to encourage separation.
Step 2: Painting the Depths
-
Base coat application:
Once the texture is fully hard, paint the entire mask in a dark, murky color. A mix of Black and Burnt Umber works well here to establish the deepest shadows found inside the cracks. -
Work into crevices:
Use a stiff brush and a little water to really push that dark paint into every single crack and fissure you created. It’s crucial that no white primer shows through the cracks. -
Wipe back:
While the paint is still slightly tacky, gently wipe the raised surfaces with a damp cloth or sponge. You want the raised ‘islands’ of texture to be cleaner, leaving the darkness permanently settled in the ‘rivers’ or cracks. -
Add the oxidation layer:
Mix a watery wash of Turquoise or Teal acrylic paint. Brush this sporadically over the mask, focusing on areas where distinct patches of oxidized copper might naturally occur. -
Blot the oxidation:
Immediately blot the teal wash with a dry paper towel. The goal is to leave a faint blue-green tint in the texture of the ‘stone’ without covering the dark cracks.
Step 3: Dry Brushing and Finishing
-
First dry brush pass:
Load a clean, dry flat brush with a mixture of Raw Sienna and a touch of Bronze metallic paint. Wipe almost all the paint off on a paper towel until nothing comes off. -
Highlight the texture:
In the same direction (e.g., top to bottom), lightly drag the brush over the raised surfaces. This catches the high points of the fractured earth texture and instantly creates dimension. -
Deepen the earth tones:
Repeat the dry brushing process with pure Burnt Umber in select areas to add variation, making the surface look dirty and worn rather than uniform. -
Add metallic sheen:
I particularly like to add a tiny amount of pure Metallic Bronze or antique gold to the highest ridges—like the nose bridge and brow bone—to suggest worn metal beneath the stone. -
Refine the eyes:
Use a small detail brush with black paint to neatly outline the eye sockets. A clean, dark edge here makes the mask look finished and draws focus to the empty eyes. -
Final assessment:
Step back and look at the mask. If the teal oxidation looks too bright, knock it back with a very light dry brush of beige or grey. -
Seal the artifact:
Finish by spraying the mask with a matte varnish. This unifies the sheen of the different paints and protects your textured masterpiece from dust.
Ancient Gaze
Glue black sheer fabric (like chiffon) behind the eye holes. This hides the wearer’s eyes completely while still allowing vision, giving the mask a truly hollow, possessed appearance.
This rugged, ancient-looking mask is now ready to display as a mysterious archaeological find or wear as a striking costume piece.
Under-the-Sea Creature Mask With Scales
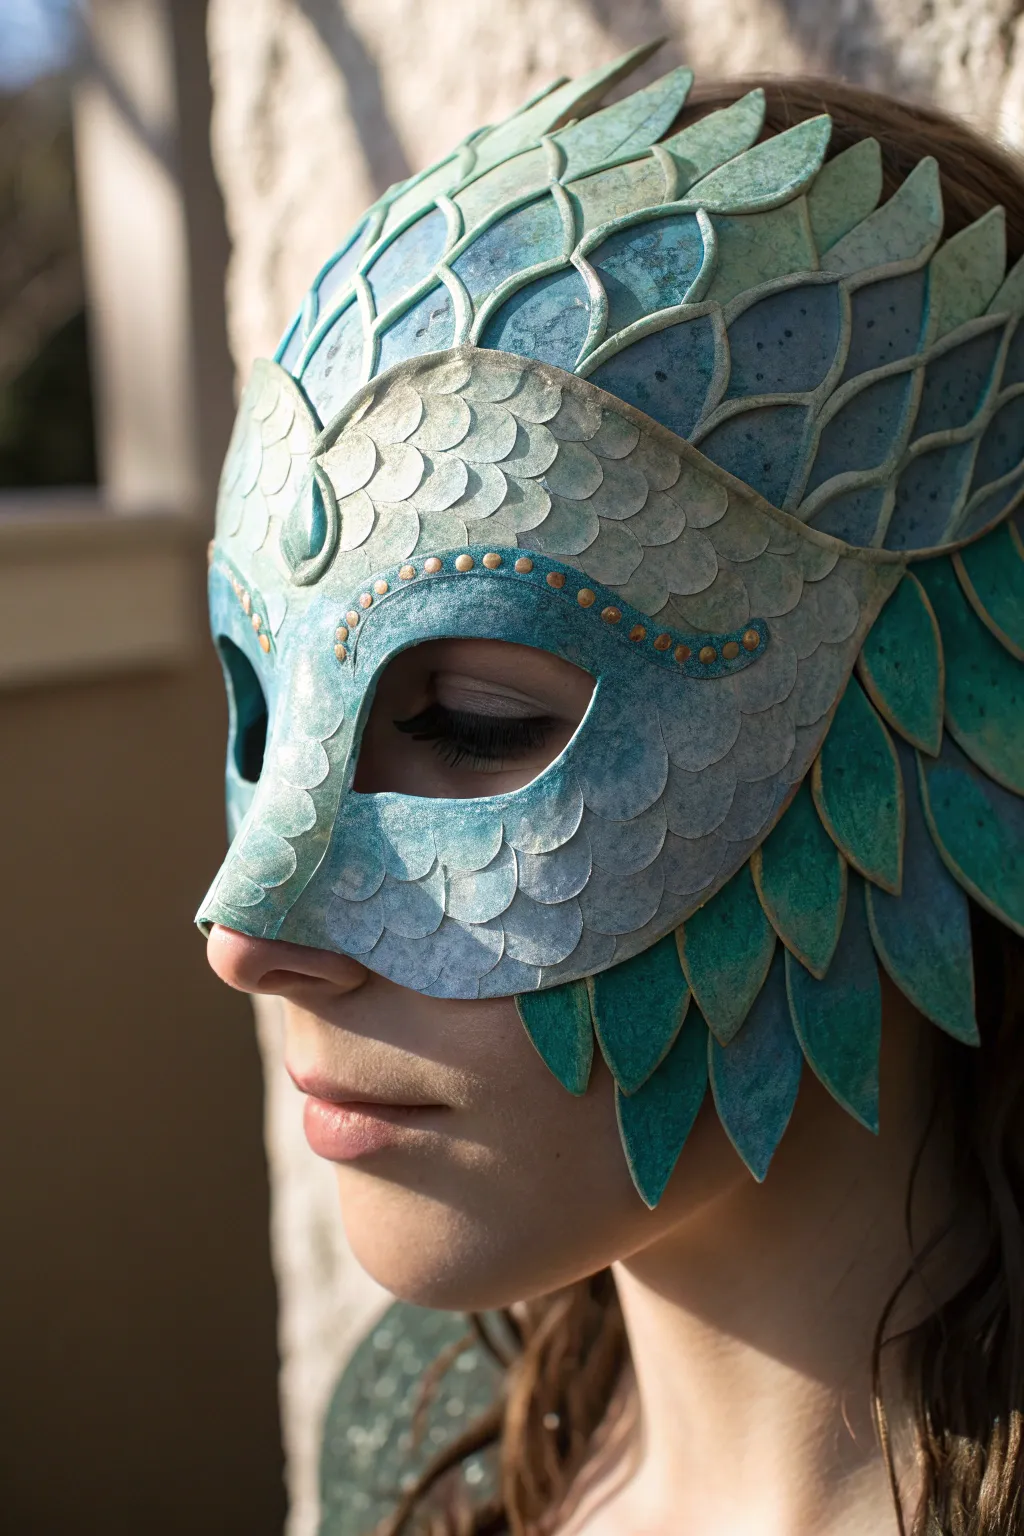
Transform into an oceanic myth with this stunning, scale-covered half-mask that captures the shimmering look of the deep sea. By layering individual paper scales over a sturdy base, you’ll create a textured, armor-like finish that looks far more complex than it actually is.
Step-by-Step Tutorial
Materials
- Plastic half-mask base (or homemade cardboard base)
- Newsprint or lightweight paper strips
- Paper mache paste (flour/water or glue/water)
- Heavy cardstock or watercolor paper (for scales)
- Scrap paper (for pattern making)
- Pencil and scissors
- Acrylic paints: Teal/Turquoise, Deep Blue, White, Metallic Gold
- Small sponges or sponge brushes
- Small detail paintbrush
- High-gloss varnish or sealant
- Elastic cord or ribbon
Step 1: Base Construction
-
Prepare the Form:
Start with a basic plastic craft mask as your armature. If you want a custom fit, you can build a rudimentary shape using aluminum foil over a mannequin head, pressing it firmly to define the nose and brow ridges. -
Initial Mache Layer:
Dip small strips of newsprint into your paste, wiping off the excess with your fingers. Apply 2-3 layers over your mask base to create a hard, unified shell. Focus on keeping the eye holes smooth and comfortable. -
Sculpt the Brow:
To get that distinct, slightly raised brow line seen in the image, roll thin tubes of wet paper or clay and adhere them above the eye openings. Smooth wet paper strips over these ridges to integrate them into the mask surface. -
Let it Dry:
Allow this base layer to dry completely—usually 24 hours. It needs to be rock hard before you start adding the delicate scales.
Natural Curve Trick
Gently curl each paper scale around a pencil before gluing. This slight bend prevents them from lying flat and lifeless, giving the mask an organic, 3D texture.
Step 2: Scale Creation & Application
-
Draft Scale Patterns:
On scrap paper, sketch three sizes of scales: large elongated ones for the sides (the ‘fins’), medium rounded ones for the forehead, and tiny ones for the bridge of the nose. Cut these out to use as templates. -
Cut the Scales:
Trace your templates onto heavy cardstock or thick watercolor paper. You will need dozens of them, so trace more than you think you need. Cut them out sharply; clean edges are crucial for the final look. -
Apply Side Fins:
Start at the outer bottom edges of the mask. Glue the largest elongated scales so they hang off the edge, creating the flared fin silhouette. Overlap them slightly as you move upward toward the temple. -
Layer the Face Scales:
Begin glueing the medium scales starting from the outer edges and working inward toward the nose. Each new row should overlap the previous one by about half, like roofing shingles, to hide the base layer. -
Detail the Nose and Brow:
Switch to your smallest scales for the bridge of the nose and the area just above the eyes. This size variance helps contour the face and adds realism. -
Add the Central Gem:
Cut a teardrop shape from thick cardboard or layer a few pieces of cardstock together to create a focal point in the center of the forehead. Glue this ‘gem’ securely in place. -
Seal the Texture:
Once all glue is dry, brush a very thin layer of straight white glue or matte medium over the entire mask. This seals the cardstock edges so they don’t get soggy during painting.
Step 3: Painting & Finishing
-
Base Coat:
Mix a pale, creamy white acrylic. Paint the entire mask, ensuring you get the brush under the edges of the scales slightly. This provides a bright underlayer for the colors to sit on. -
Sponge the Gradient:
Mix a teal or turquoise paint with a little water to make it translucent (a glaze consistency). Using a sponge, dab this color heavily on the outer edges and sides of the mask. -
Fade to Center:
With a clean, damp sponge, gently pull the wet teal paint toward the center, fading it out so the nose and forehead remain pale white/cream. This creates the glowing, ethereal transition. -
Add Depth:
Use a darker blue or diluted black in the deepest crevices—specifically along the lash line and under the larger side scales—to make the layers pop. -
Dry Brushing Texture:
Dip a dry brush into white paint, wipe almost all of it off, and lightly sweep it over the surface. This highlights the texture of the paper and makes the scales look weathered. -
Gilded Details:
Using the handle end of a paintbrush dipped in metallic gold paint, dot small ‘rivets’ along the brow line ridge. Paint a thin gold outline around the central forehead gem as well. -
Final Varnish:
Coat the finished piece with a satin or gloss varnish. This mimics the wet, aquatic look and protects the paper. -
Attach Straps:
Punch small holes near the temples (or glue on the inside if the mask feels fragile) and attach your elastic cord or ribbon for wearing.
Iridescent Upgrade
Mix a drop of interference medium or pearlescent mixing medium into your teal paint. The scales will shimmer and change color slightly when the light hits them.
Now your oceanic creation is ready to surface and captivate everyone at the next costume event
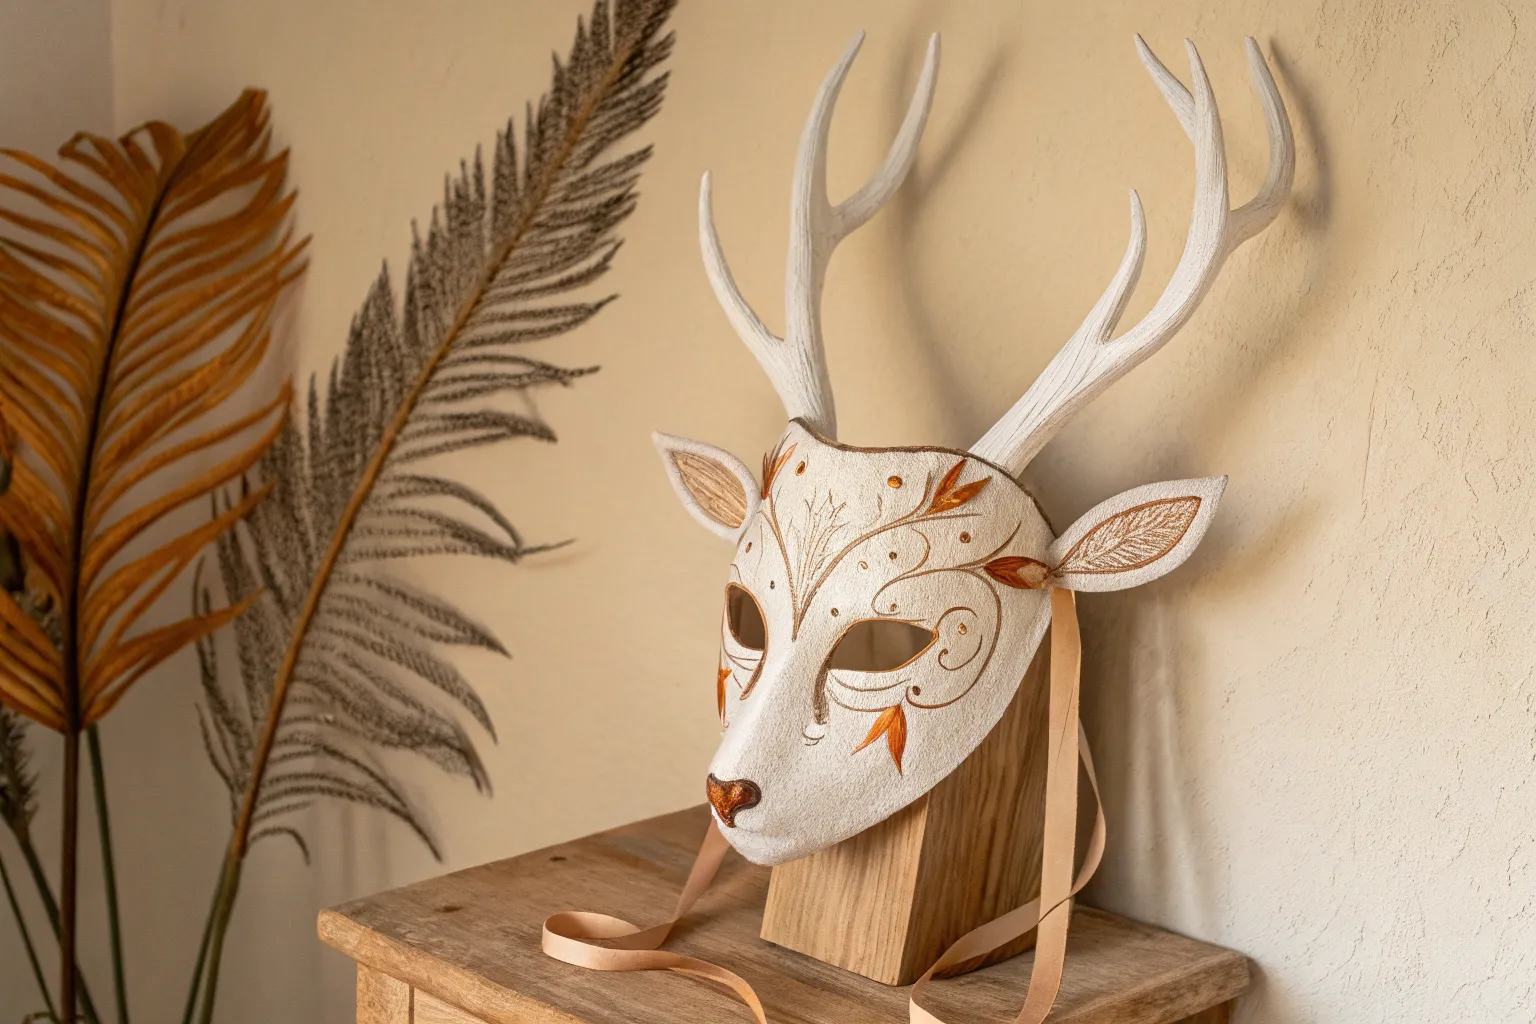
Forest Spirit Mask With Branchy Horns
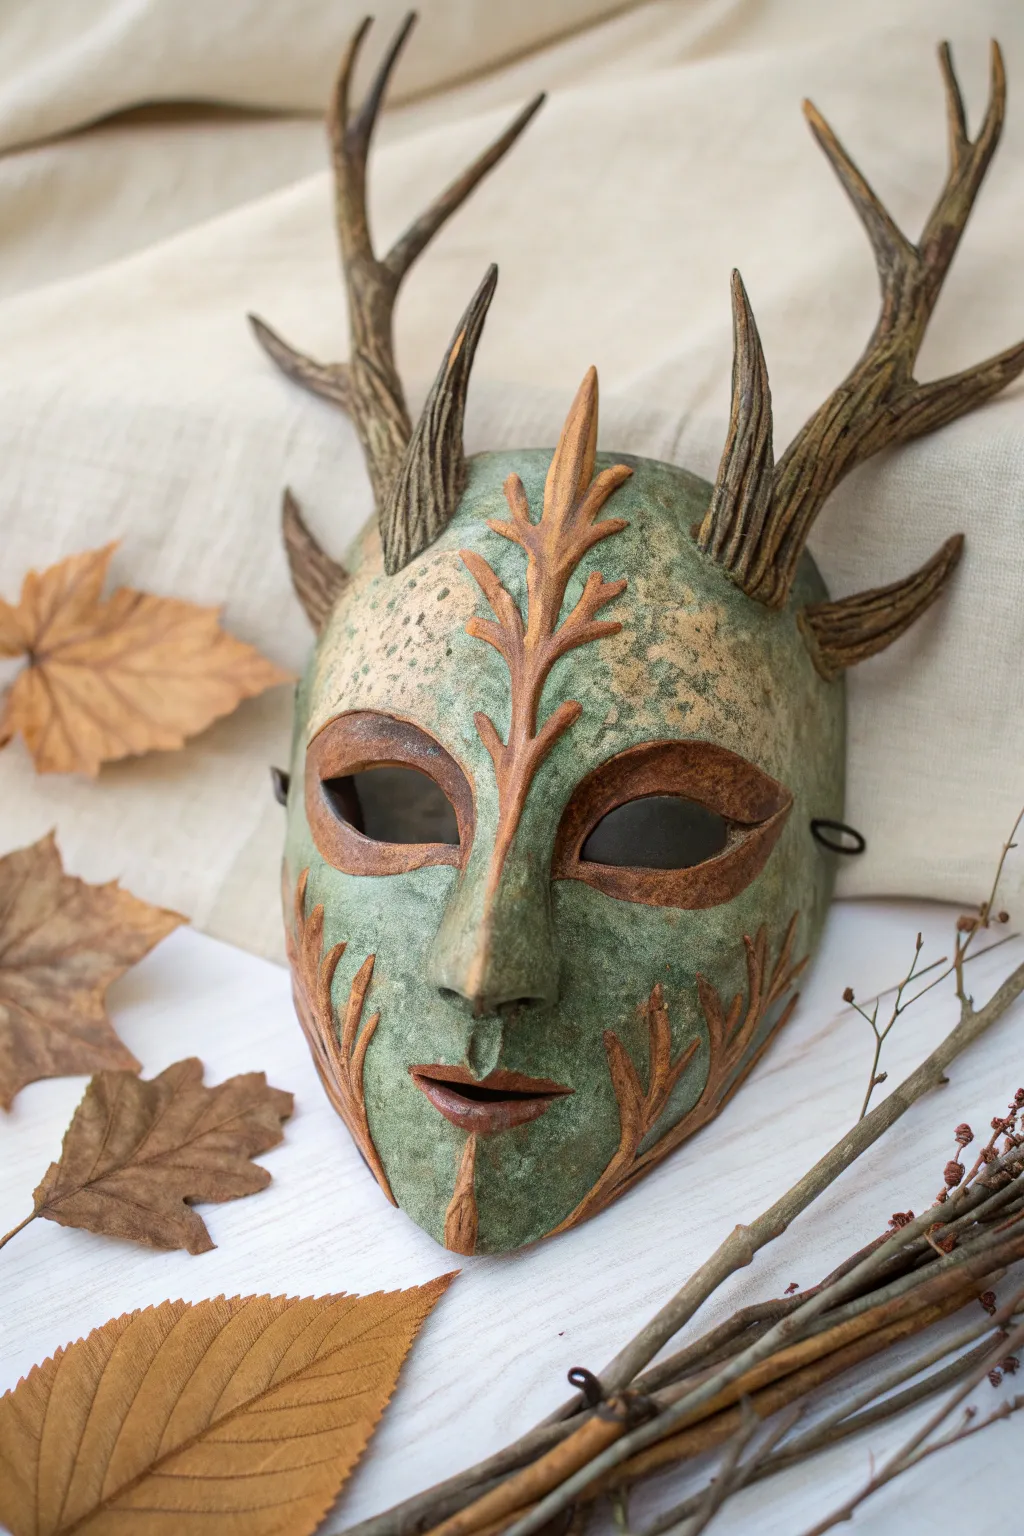
Summon the ancient magic of the woods with this striking Forest Spirit mask, featuring prominent branching antlers and a textured, mossy finish. The design combines organic leaf motifs with an aged, weathered patina to create the look of an artifact discovered deep in an enchanted grove.
Step-by-Step
Materials
- Plastic face mask form (base)
- Rigid wire armature (12-14 gauge)
- Aluminum foil
- Masking tape
- Paper mache clay (recipe: cellulose insulation, joint compound, glue, flour)
- Newspaper strips and PVA glue (for base layer)
- Acrylic paints (Forest Green, Burnt Umber, Ochre, Black, Metallic Bronze/Gold)
- Matte clear coat spray
- Sculpting tools (or a butter knife)
- Hot glue gun
- Elastic strap
Step 1: Building the Armature
-
Prepare the base:
Start with a basic plastic face mask form. If the eyes are too small, carefully trim them into wider almond shapes with scissors to match the reference. -
Wire the horns:
Cut two lengths of heavy-duty wire for the main antlers (about 8-10 inches each) and four shorter pieces for the brow spikes. Poke holes in the mask forehead, feed the wires through, and hot glue them securely on the inside and outside. -
Shape the antler volume:
Crumple aluminum foil tightly around the wire armatures to create the bulk of the antlers. Taper them so they are thicker at the base and pointy at the tips. Add small branching points by taping on extra foil nubs. -
Secure with tape:
Wrap the entire foil antler structure tightly with masking tape. This smooths out sharp foil edges and gives the paper mache something to stick to.
Top Heavy Troubles?
If the mask slips forward due to antler weight, add a second strap specifically going over the top of the head to distribute the load.
Step 2: Sculpting the Features
-
Apply base layer:
Cover the mask and antlers with two layers of traditional paper strips dipped in PVA glue to create a rigid shell. Let this dry completely overnight. -
Add paper mache clay:
Apply a thin, even layer of paper mache clay (about 1/4 inch thick) over the entire face. Smooth it down with a little water on your fingertips. -
Sculpt the central leaf:
Roll a coil of clay and place it vertically down the center of the forehead and nose. Flatten it slightly and use a sculpting tool to carve leaf veins and jagged edges, making it look like a spine. -
Define the eyes and mouth:
Add thick snakes of clay around the eye holes and the mouth slit. Flatten the edges to blend them into the cheeks, but keep the inner rim sharp to create deep, defined sockets and lips. -
Create cheek textures:
Add smaller leaf-like tendrils on the cheeks and jawline using small rolls of clay. Blend the edges so they appear to be growing out of the mask’s skin. -
Detail the antlers:
Coat the antlers in clay. Before it dries, drag a tool or stiff brush lengthwise along the horns to create realistic bark grooves and striations. -
Stipple the skin:
For that pitted, stony texture on the main face area, gently press a stiff bristle brush or a piece of rough sponge into the damp clay.
Pro Tip
Mix fine sand into your green paint for the base layer. This creates a genuine gritty, stone-like texture that dry-brushing will catch beautifully.
Step 3: Painting and Finishing
-
Base coat:
Once bone dry, paint the entire mask in a dark Forest Green mixed with a little Black. Ensure you get paint into every crack and crevice. -
Dry brush the green:
Using a lighter, mossy green, dry brush the raised areas of the face. This highlights the stippled texture while leaving the dark recesses shadowy. -
Highlight the organic details:
Paint the central leaf spine, eye rims, mouth, and cheek veins with an Ochre or light reddish-brown tone. I like to blend the edges slightly with a damp brush for a natural transition. -
Paint the antlers:
Paint the antlers in varied shades of Burnt Umber and grey. Use a dark wash (watered-down black paint) to settle into the bark grooves, then wipe the surface clean. -
Add weathering:
Sponging on tiny touches of dark brown or black randomly across the green skin gives it an ancient, speckled look. -
Seal the work:
Spray the mask with a matte clear coat to protect the paint job and unify the sheen. -
Attach the strap:
Punch small holes near the temples or glue loops to the inside edge, then tie on your elastic cord or ribbon for wearing.
Now your mask is ready to haunt the autumn woodlands or serve as a stunning wall decoration
Geometric Low-Poly Style Paper Mache Mask
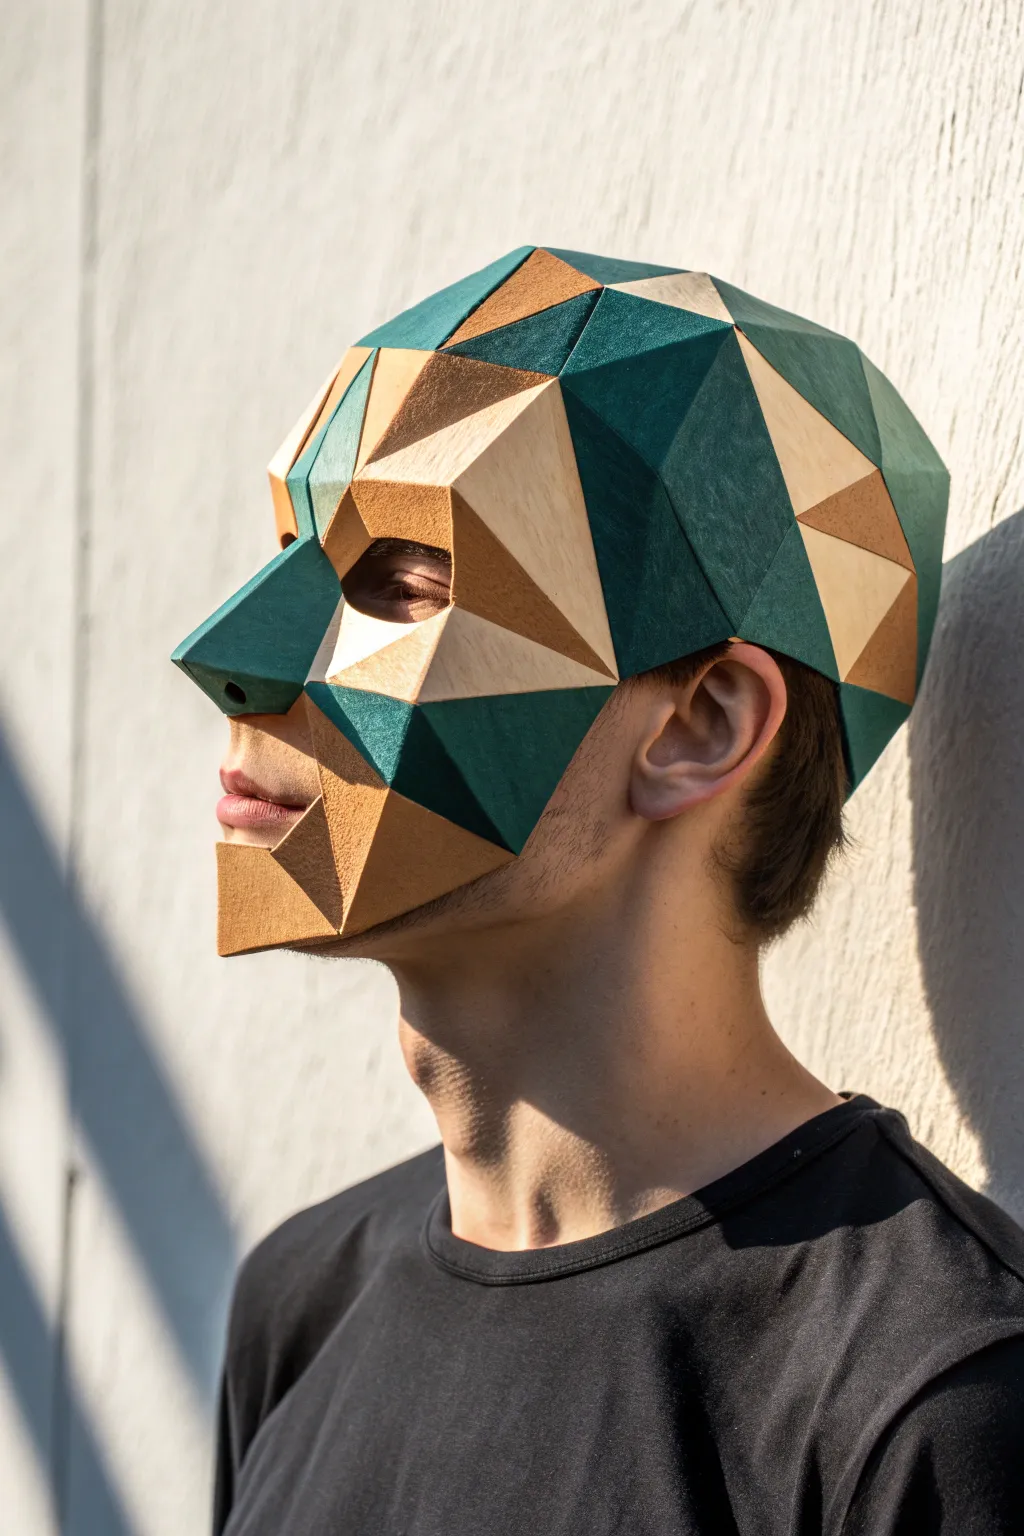
This striking mask combines the modern edge of low-polygon design with an organic, high-contrast color palette of emerald green and faux woodgrain. The result is a futuristic yet earthy headpiece that looks sturdy but remains lightweight enough for comfortable wear.
Detailed Instructions
Materials
- Heavy cardstock (110lb or higher)
- Digital low-poly mask template (or 3D modeling software to generate one)
- Printer
- Precision craft knife (X-Acto)
- Metal ruler
- Self-healing cutting mat
- Quick-setting tacky glue or wood glue
- Toothpicks (for glue application)
- Bone folder (optional but recommended)
- Wood veneer sheets or wood-grain contact paper (light and dark)
- Emerald green acrylic paint
- Matte spray varnish
- Elastic cord
- Hole punch
Step 1: Template Preparation & Cutting
-
Select your pattern:
Begin by sourcing a low-poly full-head mask template online. Look for models labeled ‘low poly’ or ‘pepakura’ that cover the crown of the head, nose, and jawline, as seen in the reference. -
Print the components:
Print your pattern pieces directly onto heavy cardstock. If your printer can’t handle the thick stock, print on regular paper and use spray adhesive to mount it onto your heavier cardstock before cutting. -
Score the fold lines:
Before cutting anything out, use the back of your craft knife or a dedicated bone folder to score every internal line. This is crucial for crisp, sharp angles later. -
Distinguish your folds:
Pay close attention to the line styles on your template. Dashed lines usually indicate ‘valley folds’ (folding inward), while dot-dash lines indicate ‘mountain folds’ (folding outward). Mark these lightly if needed. -
Cut out the shapes:
Using a metal ruler and a fresh blade in your craft knife, carefully cut out each polygon cluster along the solid exterior lines.
Step 2: Assembly & Structure
-
Pre-fold all edges:
Go through every piece and make the folds along your scored lines. Establish the sharp geometric topography now, before glue is involved. -
Identify connection tabs:
Locate the numbered tabs on your template pieces. Matching numbers go together—tab 45 connects to the edge labeled 45. -
Begin gluing the nose:
Start assembly at the center of the face, specifically the nose bridge. This is the structural anchor. Apply a thin layer of tacky glue to the tab using a toothpick. -
Press and hold:
Align the tab perfectly with its straight edge counterpart and pinch tightly for 10-15 seconds until the glue grabs. -
Build outward:
Work your way out from the nose to the cheeks, then the forehead. I find it much easier to build the face fully before attaching the back-of-head pieces. -
Close the form:
Once the face is complete, assemble the crown and back sections. The mask will become more rigid as you close the volumetric shape.
Glue Gaps?
If you see light gaps between seams, don’t panic. Fill the inside of the seam with a tiny bead of hot glue for reinforcement, or use wood filler on the outside before painting.
Step 3: Surface Finishes
-
Map your color scheme:
Plan which facets will be green and which will be wood-toned. Using a reference photo helps balancing the distribution so no area feels too heavy with one color. -
Apply wood veneer (Part 1):
For the wood sections, trace the specific triangular facets of your assembled mask onto your wood veneer or contact paper. Cut them out precisely inside the lines to account for cardstock thickness. -
Apply wood veneer (Part 2):
Carefully adhere the wood shapes to their corresponding facets on the mask. Vibrate between light and dark wood tones to create depth. -
Paint the emerald sections:
Mask off the edges of your wood sections with painter’s tape. Apply the emerald green acrylic paint to the remaining raw cardstock facets. You may need two coats for full opacity. -
Seal the mask:
Once the paint is fully dry, take the mask to a well-ventilated area and apply a light coat of matte spray varnish to protect the paper and unify the finish. -
Add the strap:
Punch small holes near the ear/temple area. Thread your elastic cord through and knot it securely on the inside to make the mask wearable.
Clean Edges Only
When painting the green sections, use a stiff, flat brush rather than a round one. This helps you ‘cut in’ along the sharp geometric ridges without accidentally getting paint on the wood veneer.
Now you have a stunning geometric disguise ready for display or your next costume event
Split-Personality Two-Tone Face Mask

This striking mask explores the concept of duality with a split design featuring warm terracotta tones on one side and cool teal hues on the other. With its carved geometric patterns and central beaded spine, it makes for a sophisticated wall hanging or costume piece.
How-To Guide
Materials
- Plastic face mask form (as a base)
- Paper mache pulp or clay (store-bought or homemade)
- Cardboard or cardstock (for extending the shape)
- Acrylic paints (terracotta, cream/beige, teal, dark brown, gold/copper)
- Sculpting tools or a dull knife
- Fine-grit sandpaper
- Gesso or white primer
- Small round paintbrushes
- Detail brush (size 0 or 1)
- Matte or satin varnish
Step 1: Building the Foundation
-
Prepare the base form:
Start with a plastic mask form. If you want the elongated oval shape seen in the reference, cut an oval from sturdy cardboard slightly larger than the mask and glue the mask form onto it, blending the edges with masking tape. -
Apply the paper clay:
Cover the entire structure with an even layer of paper mache clay or pulp, about 1/4 inch thick. Smoothing it with wet fingers helps create a uniform surface. -
Build up facial features:
Add extra clay to define the nose, the prominent brow ridge, and the lips. The lips should be full and slightly parted. -
Create the central ridge:
Roll a very thin snake of clay and press it directly down the vertical center of the mask, separating the left and right sides. Smooth the edges into the main surface so it looks like a subtle spine. -
Carve the designs while wet:
While the clay is still leather-hard (firm but not dry), use sculpting tools to carve the leaf-like shapes, triangles, and sweeping lines. Press deeply enough to create texture that will hold paint later. -
Add the central beading:
Roll tiny balls of clay and press them gently onto that central vertical ridge you created created earlier. Space them evenly from the forehead down to the chin. -
Let it cure completely:
Allow the mask to dry fully. This usually takes 24-48 hours depending on humidity. Don’t rush this step, as trapped moisture can cause mold. -
Sand and prime:
Lightly sand any rough ridges or unintentional bumps. Apply a coat of white gesso to seal the paper clay and prepare it for painting.
Step 2: Painting the Duality
-
Paint the base tones:
Paint the entire left side of the face in a warm terracotta or reddish-brown. Paint the entire right side in a deep teal or sea-green. Let this base coat dry. -
Highlight the left side:
On the terracotta side, carefully paint the carved sections (the ‘leaves’ and triangles) with a cream or beige color. Use a fairly dry brush to avoid pooling paint in the deep crevices. -
Detail the right side:
On the teal side, use a lighter tan or raw wood color for the carved geometric shapes. This asymmetry in color choice emphasizes the split-personality theme. -
Define the eyes:
The eye details are crucial. On the left (terracotta) side, paint a decorative scalloped border around the eye socket in dark brown. On the right (teal) side, paint a similar scalloped border using black or dark teal. -
Add the incised lines:
Take a very fine brush with diluted dark brown paint and trace inside the carved lines of the leaf shapes and mask border. This ‘wash’ technique adds depth and makes the carving look like wood. -
Paint the central beads:
Paint the row of tiny clay dots down the center using a metallic gold or copper paint to make them pop against the matte background. -
Enhance the lips:
Paint the lips a solid dark brown or mahogany shade. Outline the opening of the mouth clearly to give it depth. -
Final shading:
I like to use a dry brush with a tiny amount of dark paint to lightly dust the edges of the mask and the nose area, giving it an aged, antique appearance. -
Seal the work:
Finish with a coat of matte or satin varnish to protect the paint and give the mask a unified finish.
Clay Cracking?
If small cracks appear as the paper clay dries, don’t panic. Mix a small amount of fresh clay with water to make a paste and fill the cracks, then sand smooth once dry.
Clean Lines Pro-Tip
For the sharpest carved lines, dip your sculpting tool in water frequently while working. This prevents the clay from dragging and creates smooth, professional grooves.
Hang your finished mask in a well-lit spot to let the shadows play across the carved textures


Have a question or want to share your own experience? I'd love to hear from you in the comments below!