
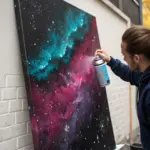
Whenever I want a big “wow” result without overthinking my drawing skills, I reach for spray paint—it’s basically instant atmosphere in a can. These simple spray paint art ideas are the kind you can knock out on a small board, learn fast, and still feel ridiculously proud of when they dry.
Quick Galaxy Ombre Background

This dreamy galaxy painting features a seamless ombre transition, fading from deep midnight blues into soft purples and a warm, glowing horizon. Simple splattering techniques bring the star field to life, creating a magical celestial scene perfect for framing.
How-To Guide
Materials
- Cold press watercolor paper (300 gsm recommended)
- Painter’s tape or asking tape
- Watercolor paints (Indigo, Purple, Alizarin Crimson, Cadmium Orange)
- White gouache or opaque white ink
- Large round brush (size 10 or 12)
- Small round brush (size 2 or 4)
- Old toothbrush (optional for stars)
- Paper towels
- Two jars of water (one for clean, one for dirty)
Step 1: Preparation and Base Wash
-
Secure your paper:
Tape down all four edges of your watercolor paper to a board or table. Press the tape firmly to ensure clean, crisp borders once you peel it off. -
Wet the surface:
Using your large clean brush, apply a generous layer of clean water across the entire rectangular area inside the tape. The paper should glisten but not have standing puddles. -
Start with the light:
Load your brush with a watered-down Cadmium Orange. Paint a horizontal band at the very bottom of the page, letting the wet paper help diffuse the edges upwards. -
Introduce the red:
While the orange is still wet, mix a little Alizarin Crimson and paint a band immediately above the orange, blending them gently where they meet to create a soft transition.
Step 2: Building the Deep Sky
-
Add the purple layer:
Move upwards with a rich purple hue. Apply this band above the red, allowing the colors to bleed into each other naturally without overworking the paper. -
Apply the darkness:
At the very top, saturate your brush with Indigo or a mix of Paynes Grey and Black. Paint the top third of the paper, pulling the dark pigment down to meet the purple. -
Refine the blend:
Clean and dampen your brush slightly. Use it to gently stroke the transition areas between the indigo and purple, and the purple and red, smoothing out any harsh lines. -
Deepen the contrast:
While everything is still damp, drop concentrated Indigo pigment into the top corners and upper edge. This ‘wet-on-wet’ technique adds depth and makes the sky look expansive. -
Create cloud textures:
To mimic the nebulous look in the image, dab a thirstier brush or a crumpled paper towel lightly into the wet purple and blue areas to lift a tiny bit of pigment. -
Let it dry completely:
This is crucial. Walk away and let the background dry 100% until the paper is flat and cool to the touch. Using a hair dryer can speed this up, but be careful not to blow the pigment around.
Bleeding edges?
If paint seeped under the tape, use a white gel pen or opaque white gouache to carefully tidy up the straight edge and cover the mistake.
Step 3: Stars and Finishing Touches
-
Prepare the stars:
Mix white gouache or white ink with a tiny drop of water until it has the consistency of heavy cream. It needs to be opaque enough to sit on top of the dark paint. -
Splatter techniques:
Load a brush (or toothbrush) with the white mix. Hold it over the dark blue section and tap the handle against another brush to spray fine mist droplets for the distant stars. -
Add larger stars:
Using your smallest detail brush, manually dot a few larger stars here and there. Vary the spacing so it looks random and natural rather than uniform. -
Paint the sparkles:
Choose three or four of your larger white dots. Using the tip of the fine brush, gently pull tiny lines outward from the center—up, down, left, and right—to create twinkling cross shapes. -
Dry the details:
Allow the white gouache to dry completely. If you remove the tape too early while the ink is wet, it might smear. -
The reveal:
The best part: slowly peel off the painter’s tape at a 45-degree angle, pulling away from the painting to reveal the crisp white border.
Pro Tip: Drying Shift
Watercolors always dry lighter than they look when wet. Don’t be afraid to go very dark and saturated with your indigo top layer for true contrast.
Now you have a stunning miniature galaxy ready to bring a touch of the cosmos to your space

Easy Star Splatter Night Sky
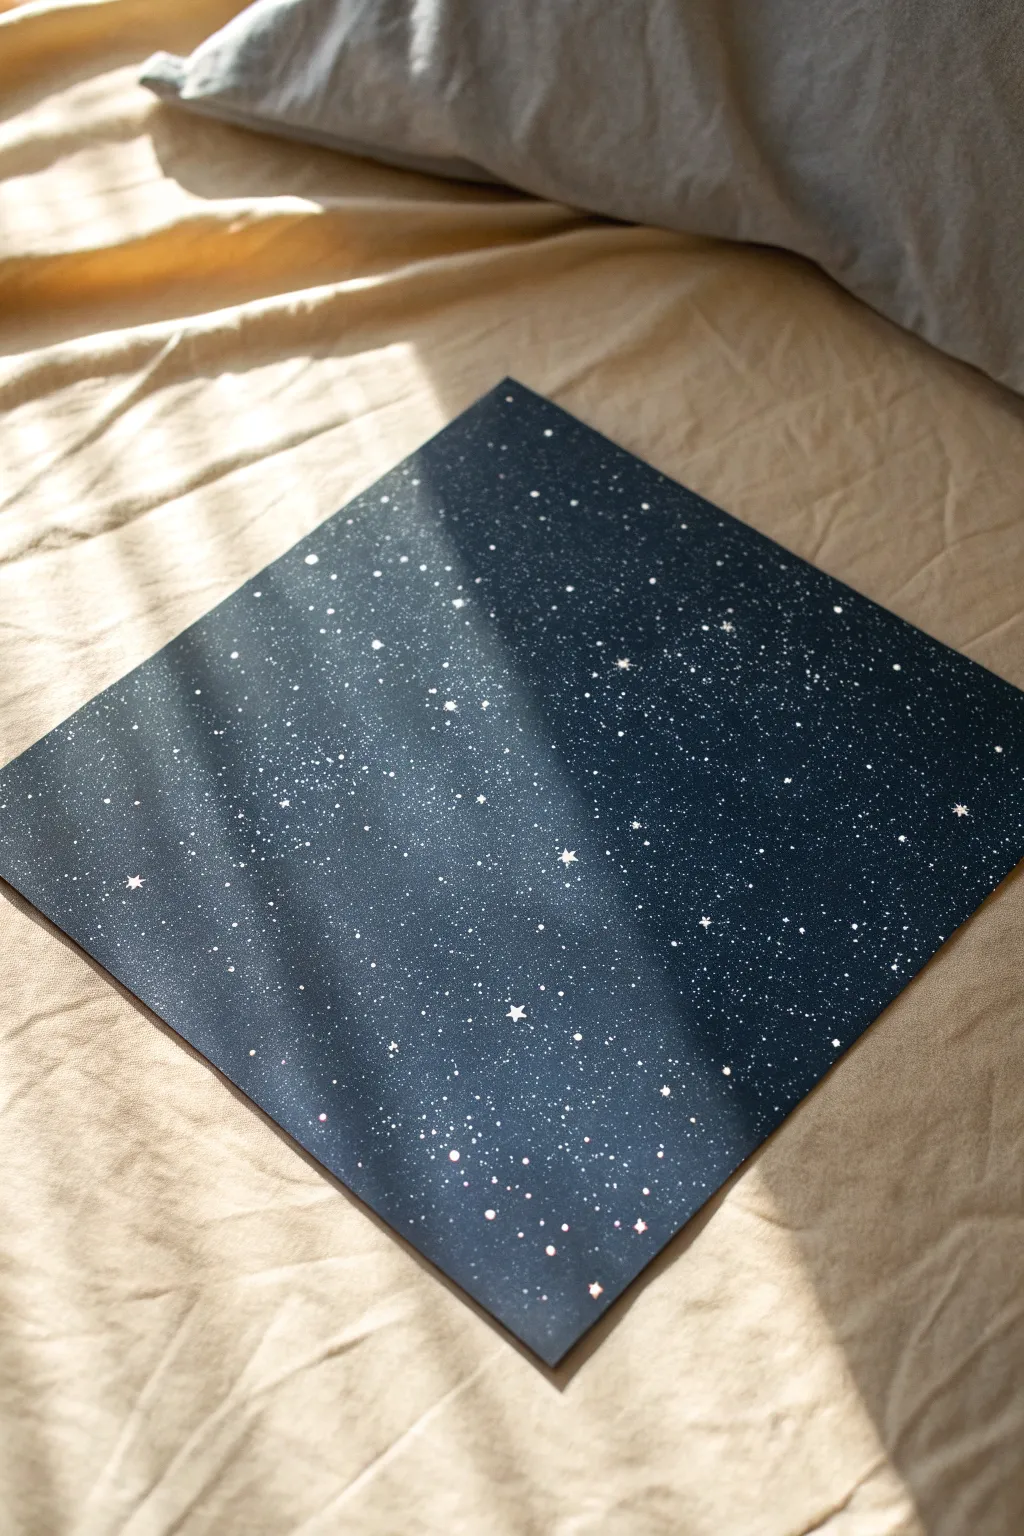
Capture the vastness of space on a simple square canvas with this striking night sky project. Using a deep blue gradient and a clever splatter technique, you can create a mesmerizing field of stars that looks professionally printed.
Step-by-Step Guide
Materials
- Square canvas board or thick cardstock (12×12 inches suggested)
- Midnight blue spray paint (matte)
- Black spray paint (matte)
- White acrylic paint (fluid or high-flow)
- Stiff-bristled toothbrush
- Small round detail brush (size 0 or 1)
- Cardboard box or drop cloth (for workspace)
- Paper plate or palette
- Water
Step 1: Setting the Atmosphere
-
Prepare your space:
Since spray paint and splattering can be messy, set up your workspace outdoors or in a very well-ventilated area. Lay down a large drop cloth or set your canvas inside a deep cardboard box to catch overspray. -
Apply the base coat:
Start by spraying the entire surface of your square canvas or cardstock with the midnight blue spray paint. Aim for full, even coverage so no white background shows through. -
Create depth with black:
While the blue is still slightly tacky, lightly mist the edges and corners with black spray paint. Hold the can about 12 inches away to create a soft vignette effect, keeping the center lighter to establish a glowing focal point. -
Let the background cure:
Allow the spray paint to dry completely. This is crucial because if the surface is wet, your star splatters might bleed into the color rather than sitting crisply on top. I usually give it about 30 minutes in the sun.
Oops! Big Globs?
If a large, unwanted drop falls on your sky, don’t wipe it! Let it dry, then paint over it with a dab of dark blue, or turn it into a larger planet.
Step 2: Creating the Stars
-
Prepare the star paint:
Squeeze a dollop of white acrylic paint onto your paper plate. Add a very small amount of water—just a few drops—to thin it slightly. You want the consistency of heavy cream so it splatters easily but stays opaque. -
Load the toothbrush:
Dip the bristles of a stiff toothbrush into the thinned white paint. Tap off any huge globs on the side of the plate to prevent large, unintentional drips. -
Test your technique:
Practice spraying on a piece of scrap cardboard first. Hold the brush facing down and run your thumb briskly across the bristles to flick the paint forward. -
Splatter the distant stars:
Hold the toothbrush about 10-12 inches above the canvas and flick the bristles to create a fine mist of tiny stars. These represent the furthest galaxies and should be the most numerous. -
Add variance:
Move the brush closer to the canvas (about 6 inches) and flick slightly harder in diagonal bands. This creates slightly larger dots that mimic the density of the Milky Way. -
Check density:
Step back and look at the composition. Ensure you have a good distribution of stars, keeping some areas denser than others for a natural, organic look.
Add a Nebula
Before splattering stars, sponge on faint patches of purple or teal acrylic paint over the dark blue background for a colorful nebula cloud effect.
Step 3: Detailing Constraints
-
Paint specific bright stars:
Using your small round detail brush, dip the tip into un-thinned white acrylic paint. Gently dot a few distinct, larger stars randomly across the canvas to break up the uniform splatter pattern. -
Add a major focal star:
Choose one or two spots for ‘hero’ stars. Paint a slightly larger white dot, perhaps the size of a pinhead. -
Paint the cross flares:
For the largest star, use the very tip of your brush to drag a tiny vertical line through the center of the wet dot, extending just slightly upward and downward. -
Complete the twinkle:
Drag a horizontal line through the same center point, creating a cross shape. Keep your touch incredibly light so the lines taper off into nothingness. -
Dry and seal:
Let the acrylic stars dry for at least an hour. If you want to protect the surface, finish with a light coat of clear matte spray sealant suitable for mixed media.
Place your finished piece near a window where the light can catch the subtle texture of your new galaxy


Mountains in Front of a Space Sky
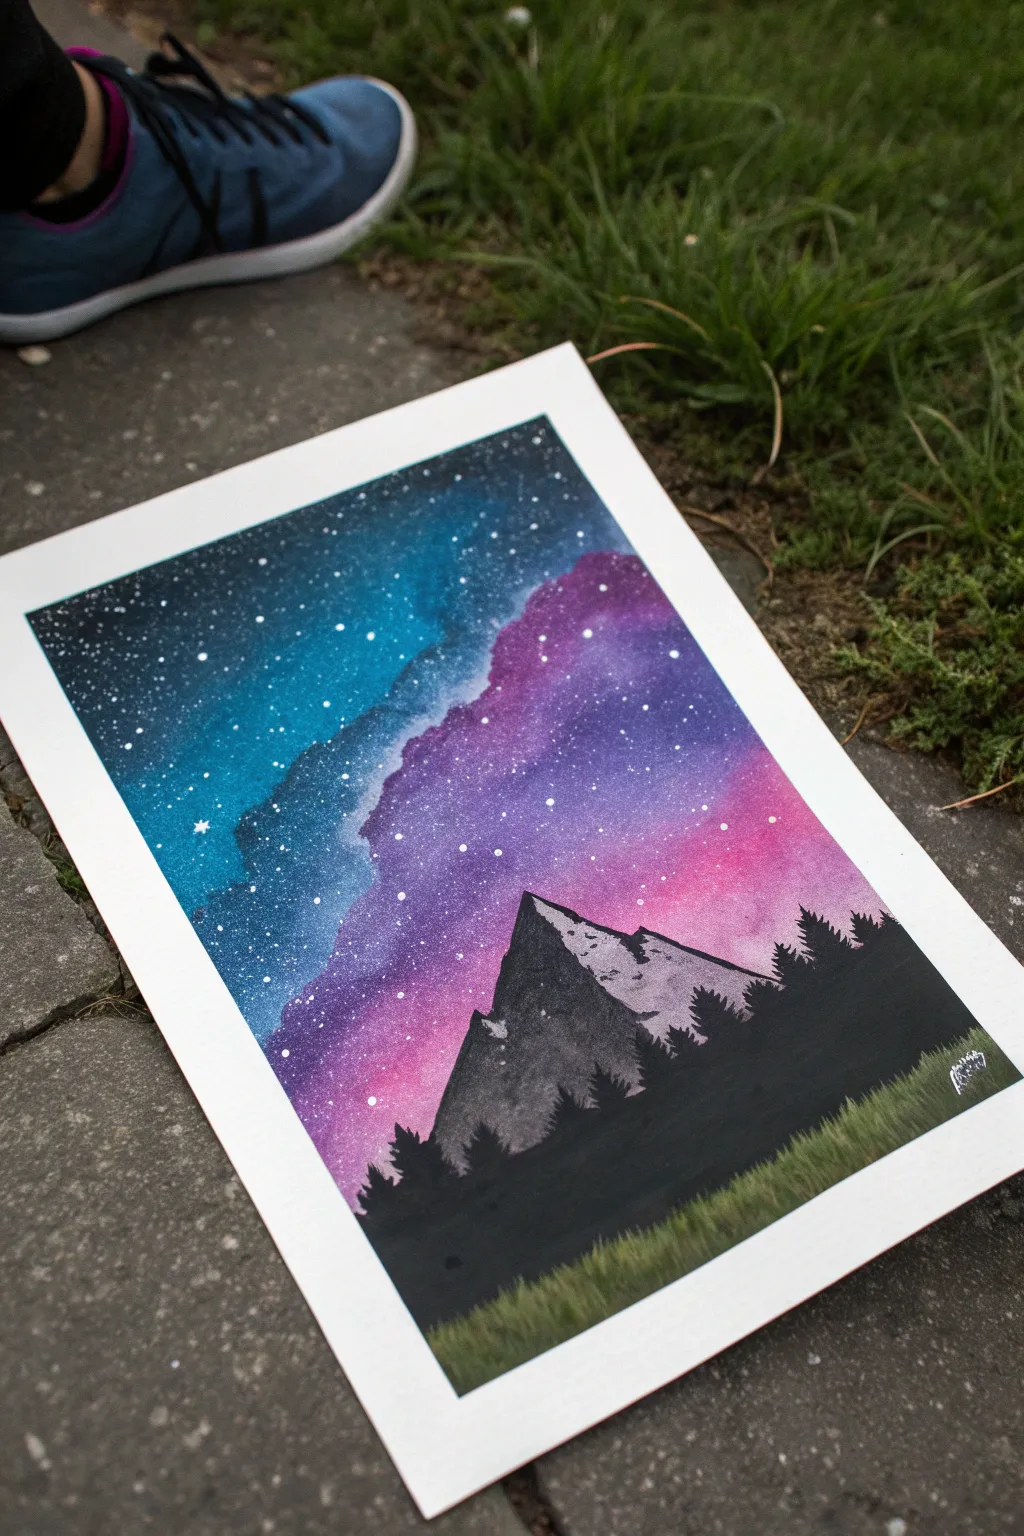
Capture the magic of a starry night over rugged peaks with this vibrant spray paint project. You’ll create a stunning cosmic gradient that fades seamlessly into sharp mountain silhouettes, perfect for adding a touch of wonder to your walls.
How-To Guide
Materials
- Glossy poster board or photo paper (A3 or similar size)
- Spray paint (Black, White, Blue, Purple, light Pink/Magenta)
- Newsprint or scrap paper for texture
- Paper plate or palette
- Palette knife or stiff piece of cardstock
- Old toothbrush
- Newspaper or drop cloth for surface protection
- Gloves and mask (for safety)
Step 1: Setting the Background
-
Prepare your workspace:
Lay down your drop cloth in a well-ventilated area, preferably outdoors. Secure your glossy paper to a flat surface with masking tape if needed to keep it from blowing away. -
Spray the base gradient:
Start by spraying a band of blue paint across the top left corner of your paper. -
Add the middle tones:
Immediately follow the blue with a diagonal stripe of purple through the center, blending slightly into the blue while it’s still wet. -
Finish the sky colors:
Complete the sky by spraying pink or magenta in the lower right section of the sky area, creating a vibrant transition from cool to warm tones. -
Blend with texture:
While the paint is still tacky, crumple up a piece of newsprint or a plastic bag. Gently dab and lift it across the transition lines of your colors. This creates a nebulous, cloud-like texture rather than just flat stripes.
Paint drying too fast?
Spray paint dries quickly! Keep a ‘wet edge’ by working fast. If it dries before you blend, lightly mist a clear coat or transparent spray over the area to re-wet it for blending.
Step 2: Creating the Stars
-
Prepare the white paint:
Spray a small puddle of white paint onto a paper plate or disposable palette. -
Load your tool:
Dip the bristles of an old toothbrush into the white paint puddle. -
Flick the stars:
Hold the toothbrush over your painting and run your thumb across the bristles to flick tiny specks of white paint onto the sky. Vary the pressure to create different sizes of stars. -
Add major stars:
For a few brighter stars, you can dip the very tip of a brush handle or a toothpick into white paint and dot them directly onto the canvas, perhaps adding a tiny cross shape for a twinkle effect. -
Dry time:
Let the background layer dry completely, usually about 10-15 minutes, before moving on to the mountains. This prevents the black paint from bleeding into your beautiful sky.
Step 3: Forming the Landscape
-
Define the horizon:
Using black spray paint, spray the bottom third of the paper completely black to establish the ground. -
Create the mountain shape:
Tear a piece of poster board or stiff magazine paper to create a jagged, mountain-like edge. Place this stencil over the black area, exposing the sky where you want the peak to be, and spray black lightly over the edge to define the mountain silhouette. -
Add dimension with a palette knife:
Spray some white and black paint onto your palette. Using a palette knife or the edge of a credit card, swipe the mixed grey/white paint swiftly down one side of your mountain shape to create snow-capped highlights and rocky texture. -
Paint the tree line:
Spray a little puddle of black paint on your palette. Dip the edge of a stiff piece of cardstock or a small brush into the paint. -
Stamp the trees:
Press the inked edge onto the horizon line, lifting up to create vertical lines. Then, use the corner of the card to dab small branches extending outward, forming the triangular shape of pine trees along the ridgeline. -
Vary tree sizes:
Make the trees on the sides slightly taller and the ones near the mountain base smaller to create a sense of depth and scale. -
Fill the foreground:
Ensure the very bottom of the page is solid black. You can use a fan brush or chip brush to gently flick upward from the bottom edge to simulate tall grass blades in the immediate foreground. -
Final touches:
Check for any gaps in the silhouettes and fill them in with black paint. Sign your masterpiece in the corner with a white paint marker or thin brush.
Starry Night Pro Tip
Don’t aim for perfect, uniform stars. Concentrating more star flicks in the lighter-colored ‘nebula’ parts of your sky makes the galaxy effect look much more realistic and deep.
Allow your artwork to dry fully in a ventilated area before framing it behind glass to make those cosmic colors pop
City Skyline Silhouette at Dusk
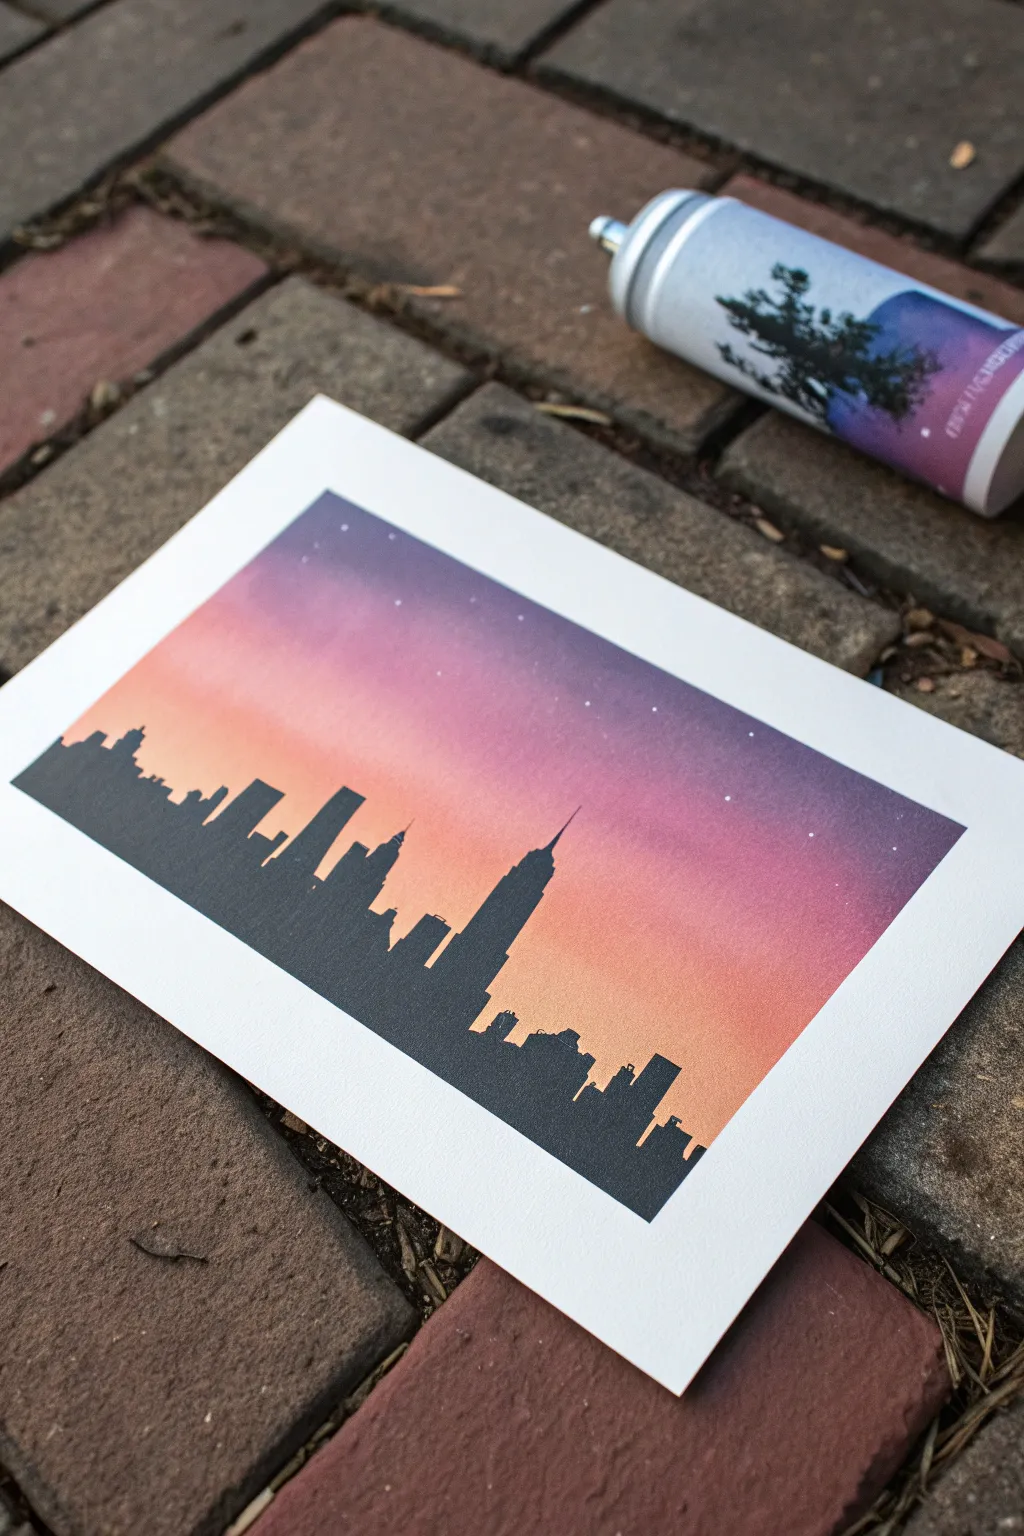
Capture the magic of a city waking up as the sun sets with this striking silhouette project. By blending warm peach tones into deep violet, you’ll create a dreamlike backdrop for sharp, architectural shapes.
Step-by-Step Guide
Materials
- High-quality art paper or cardstock (heavyweight)
- Spray paint: Pastel Orange or Peach
- Spray paint: Magenta or Deep Pink
- Spray paint: Deep Purple or Indigo
- Painter’s tape or stencil adhesive
- Cardboard or scrap paper (for masking)
- Black cardstock or stiff paper
- Hobby knife (X-Acto)
- Cutting mat
- Pencil
- Ruler
- White gel pen or fine paint marker
Step 1: Creating the Sunset Gradient
-
Prepare your workspace:
Set up in a well-ventilated area, preferably outdoors. Lay down a drop cloth or old newspaper to protect surrounding surfaces from overspray. -
Mask the borders:
Place your art paper on a flat surface. Use painter’s tape to create a clean border around the edges if you want a crisp white frame like the reference image. -
Apply the base color:
Start with your lightest color, the pastel orange or peach. Spray a horizontal band across the lower third of the paper, extending slightly higher than you think you need. -
Introduce the mid-tone:
While the first layer is still tacky, grab your magenta or deep pink can. Spray the middle section of the paper, overlapping slightly with the orange to create a seamless transition. -
Add the night sky:
Finish the gradient with the deep purple or indigo at the very top. Direct the spray slightly upward or off the page initially to control the intensity before hitting the paper. -
Blend the layers:
If the transitions look too harsh, you can do a very light ‘mist’ coat of the lighter color over the border where it meets the darker color to soften the line. -
Let it dry completely:
Allow the background to dry fully. This is crucial—if the paint is wet, your stencil or tape in the next steps will ruin the surface.
Step 2: Designing the Skyline Stencil
-
Sketch the outline:
On a separate piece of black cardstock, use a pencil and ruler to draw your skyline. I find it helpful to vary building heights, adding antennas or sloped roofs for visual interest. -
Cut the silhouette:
Place the cardstock on your cutting mat. carefully trace your pencil lines with a sharp hobby knife to cut out the top edge of the buildings. -
Refine the details:
Go back and ensure sharp corners. Tiny details like the spire on the tallest building make a big difference in realism. -
Check the fit:
Hold your cutout silhouette against the dried background to ensure the size and placement look balanced.
Clean Lines Secret
To prevent paint bleeding under your tape border, press the tape edge down firmly with a credit card or fingernail before spraying.
Step 3: Assembly and Finishing Touches
-
Attach the silhouette:
Apply a thin layer of spray adhesive or double-sided tape to the back of your black cutout. Adhere it carefully to the bottom of your painted background. -
Alternative method: Spraying the silhouette:
If you prefer a painted silhouette instead of a paper cutout, use your cutout as a negative stencil. Place it over the sky, cover the sky completely with scrap paper, and spray the bottom area black. -
Trim the edges:
If your black cardstock extends past the paper edges, trim it flush with scissors or your knife. -
Add the stars:
Using a white gel pen or a fine-tip paint marker, gently dot a few stars into the purple area of the sky. Vary the pressure to create different sizes. -
The final reveal:
Slowly peel away the painter’s tape border. Pull the tape away from the center of the artwork at a 45-degree angle to prevent tearing the paper.
Blobs on the page?
If a spray nozzle spits blobs, let them dry completely, then gently scrape them off with the flat edge of a hobby knife before adding the next layer.
Now step back and admire how a few simple layers of color transformed a blank page into a vibrant evening cityscape
BRUSH GUIDE
The Right Brush for Every Stroke
From clean lines to bold texture — master brush choice, stroke control, and essential techniques.
Explore the Full Guide
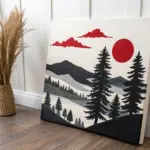
Leaf Resist Botanical Burst
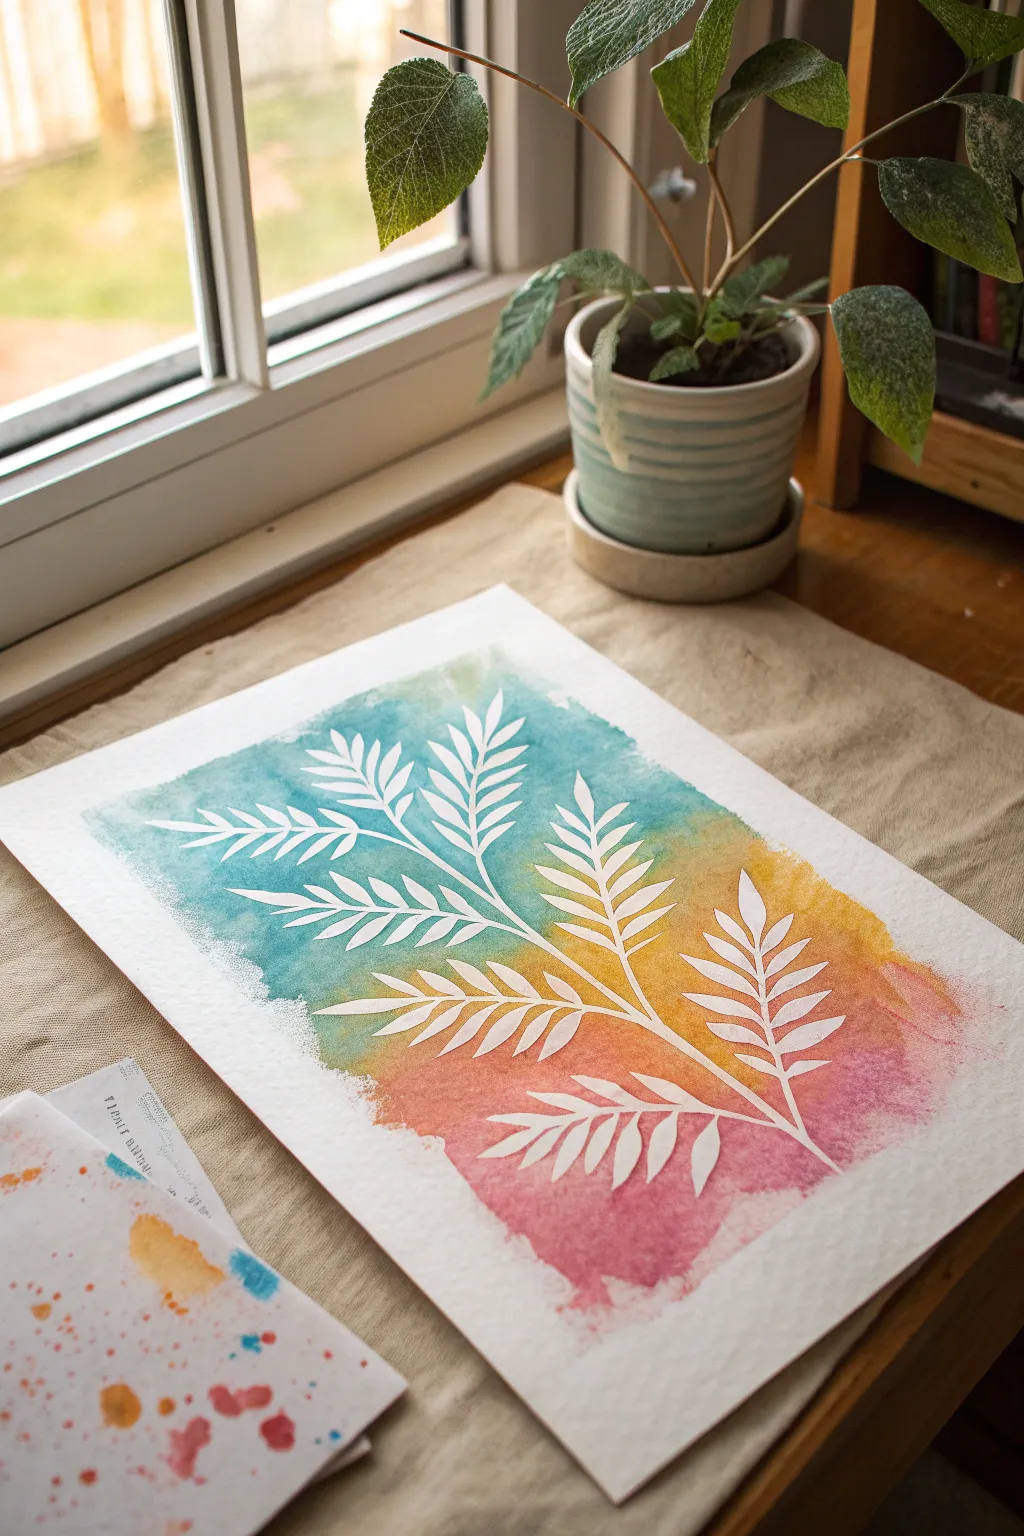
Capture the delicate beauty of fern fronds with this vibrant resist technique that blends the softness of botanical silhouettes with the edgy texture of spray paint. The result is a stunning gradient backdrop revealing crisp white organic forms, perfect for framing or gifting.
Detailed Instructions
Materials
- Heavyweight watercolor paper (300gsm or similar)
- Fresh fern leaves or artificial plastic ferns
- Spray paint in three gradient colors (e.g., teal, golden yellow, rose pink)
- Repositionable spray adhesive or masking tape loops
- Large cardboard box or drop cloth (for overspray protection)
- Gloves and a mask (for safety)
- Newsprint or scrap paper
- Scrap paper for testing colors
Step 1: Preparation & Setup
-
Workspace protection:
Begin by setting up your workspace in a well-ventilated area, preferably outdoors. Lay down a large drop cloth or set up a cardboard box shield to catch any drifting spray paint particles. -
Paper selection:
Choose a heavyweight watercolor paper with a bit of texture. The ‘tooth’ of the paper will catch the spray paint beautifully and add dimension to the final piece. -
Botanical selection:
Select your fern fronds. Artificial plastic ferns work exceptionally well because they lay flat and can be reused, but fresh pressed ferns offer unique natural details. -
Adhesive application:
Take your chosen fern and flip it over to the back side. Lightly mist it with repositionable spray adhesive. You don’t need a heavy coat; just enough tack to hold the leaf flat against the paper. -
Placement:
Carefully press the fern onto the center of your watercolor paper. Smooth down each individual leaflet with your finger to ensure tight contact, preventing paint from seeping underneath the edges.
Sticky Situation
If you don’t have spray adhesive, small loops of painters tape work, but prioritize taping the tips of the leaves to keep edges crisp.
Step 2: Creating the Gradient
-
Color testing:
Before hitting your main artwork, grab a scrap piece of paper. Test your three colors to check the nozzle flow and practice overlapping them to see how they blend. -
First color: The top:
Holding the can about 8-10 inches away from the paper, spray the teal color at the top third of the composition. Use short, sweeping bursts rather than a continuous stream to keep the texture light. -
Second color: The middle:
Move to the golden yellow spray paint for the center section. overlap slightly with the bottom edge of the teal to create a soft green transition where they meet. -
Third color: The bottom:
Finish the gradient by spraying the rose pink at the bottom third. Allow it to mist up into the yellow section, creating a warm orange hue in the blending zone. -
Review coverage:
Look closely at the edges of your stencil. Ensure you have sprayed enough paint directly over the leaf boundaries to create a crisp outline, but avoid soaking the paper too heavily. -
Textural splatters:
For an organic grainy look, I sometimes press the nozzle very lightly so it ‘spits’ slightly larger droplets, adding speckles similar to the test sheet shown in the foreground. -
Initial drying:
Let the paint set for about 5 to 10 minutes. It should be tacky but not wet to the touch before you attempt to move anything.
Step 3: The Reveal
-
Lifting the resist:
Start at the stem of the fern and very slowly peel the leaf away from the paper. Pull it upwards and back to avoid smearing any semi-wet paint into the white negative space. -
Clean up edges:
If any tiny bits of adhesive residue remain on the white paper, wait until the artwork is 100% dry, then gently rub them away with a clean finger or an eraser. -
Flattening:
Spray paint can sometimes cause paper to curl slightly. Once fully dry (give it a few hours), place your artwork under a heavy book overnight to flatten it perfectly.
Metallic Magic
After the main colors dry, mist a very faint layer of gold or copper spray over the entire piece before removing the fern for a shimmering finish.
Enjoy the satisfying moment of peeling back the leaf to reveal your crisp, colorful design underneath
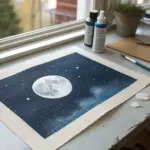
Simple Moon Phase Strip
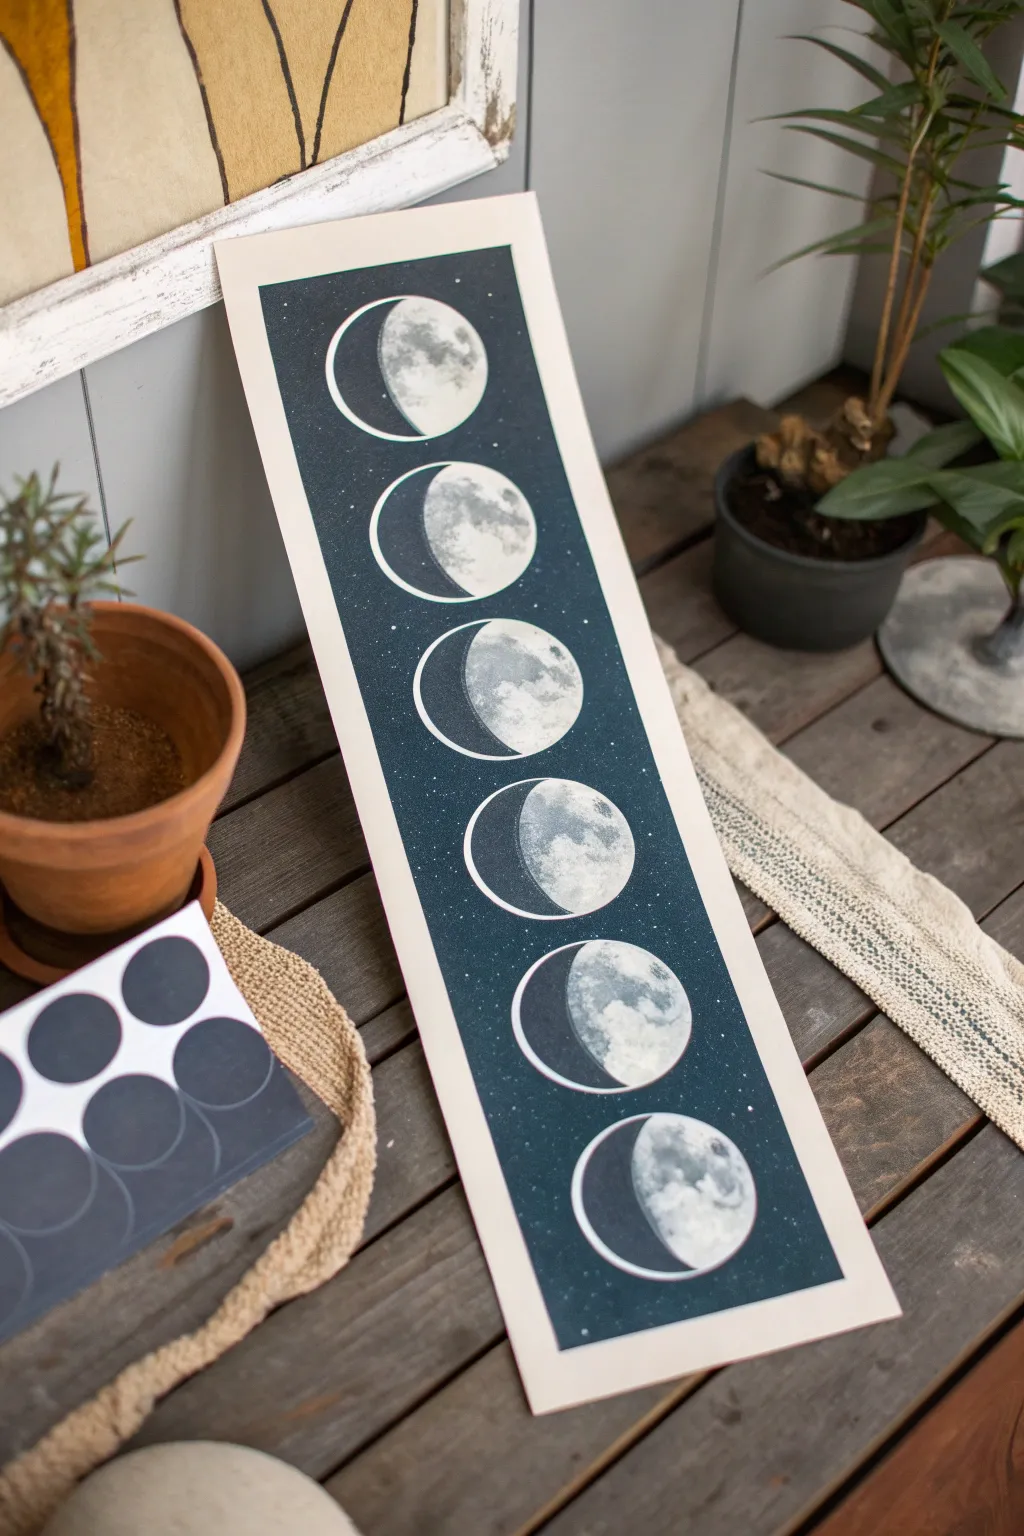
Capture the magic of the lunar cycle with this elegant and monochromatic strip of moon phases. Using simple masking techniques and spray paint, you can create a stunning piece of vertical art that brings a touch of the cosmos into your home.
Step-by-Step Guide
Materials
- Long strip of heavy cardstock or watercolor paper (approx. 6″ x 24″)
- Dark blue or midnight blue spray paint
- Black spray paint
- White spray paint
- Circle stencils or a compass and cutting mat
- Masking tape or painter’s tape
- Removable adhesive spray or masking fluid
- Scrap paper for covering areas
- Old toothbrush (optional for stars)
- Small natural sea sponge
Step 1: Preparing the Canvas
-
Paper selection:
Begin by selecting a sturdy piece of paper. A long, narrow format works best for this vertical design. Ensure the paper is heavy enough to handle paint without buckling. -
Initial masking:
Tape down the edges of your paper strip to a work surface or cardboard backing. This creates a clean white border around your final piece, just like in the photo.
Step 2: Creating the Moon Masks
-
Cutting circles:
Cut out six identical circles from scrap paper or masking film. These will determine the size of your moons. A 2-3 inch diameter is usually perfect for this scale. -
Cutting phase curves:
For each moon phase, you need two parts: the lit part and the shadow part. Take your circle masks and cut them into crescent shapes to represent the waxing and waning phases shown in the image. -
Arrangement:
Lay out your six circle ‘placeholders’ on the strip to ensure even spacing from top to bottom before you start painting.
Cosmic Texture Trick
Crumple a plastic grocery bag, dip it lightly in grey paint, and blot it on your moon circles. It creates incredibly realistic crater textures instantly.
Step 3: Texturing the Moons
-
The base layer:
Remove the masks for a moment. Lightly spray the entire strip area where the moons will be with a very light grey or off-white. This isn’t the final color, but a primer. -
Sponge texture:
To get that craggy, cratered look, dip a small piece of natural sea sponge into white and light grey paint. Dab it curiously onto the areas where your moons will sit. -
Adding depth:
Mix a tiny bit of dark grey and dab it sparingly to create the darker ‘seas’ of the moon. This texture needs to look random and organic. -
Drying time:
Let this textured layer dry completely. This is crucial because you will be placing adhesive masks directly on top of it next.
Bleeding Edges?
If paint bled under your mask, don’t panic. Wait for it to dry fully, then use a white gel pen or paint marker to touch up the crisp edge of the moon.
Step 4: Masking phases
-
Applying the positive masks:
Now, cover the parts of the moon you want to remain visible (the lit crescents) with your paper cutouts. Use a light mist of removable adhesive on the back of your cutouts so they stick but peel off easily later. -
Defining the shadow side:
For the dark side of the moon, you have a choice. You can either mask it completely if you want it to disappear into the background, or leave it exposed to be painted over by the dark background color. -
Protecting the moons:
Ensure every part of the ‘lit’ moon surface is covered by your masks. Press the edges down firmly to prevent paint bleed.
Step 5: The Night Sky
-
First dark pass:
Spray a coat of midnight blue over the entire strip, covering the background and your masked moons. Keep the can moving to avoid drips. -
Deepening the void:
While the blue is still tacky, lightly mist some black spray paint around the edges and corners to create a vignette effect, deepening the space atmosphere. -
Starry splatter:
Spray a small puddle of white paint onto a scrap surface. Dip an old toothbrush into it and flick the bristles with your thumb to mist tiny white stars across the dark background.
Step 6: The Reveal
-
Peeling the masks:
Once the dark paint is dry to the touch, carefully peel away your moon phase masks. Do this slowly to avoid tearing the paper underneath. -
Defining the crescent edges:
You should now see bright, textured moons against a dark starry sky. If you want the dark side of the moon to have a slight outline (like earthshine), I sometimes use a white colored pencil to very faintly trace the full circle’s edge. -
Removing border tape:
Finally, peel off the tape bordering your main paper strip. This reveals the crisp white edge that frames your artwork beautifully.
Hang your vertical slice of the night sky and enjoy the phases of the moon anytime

PENCIL GUIDE
Understanding Pencil Grades from H to B
From first sketch to finished drawing — learn pencil grades, line control, and shading techniques.
Explore the Full Guide
Two-Color Fade Abstract Panels
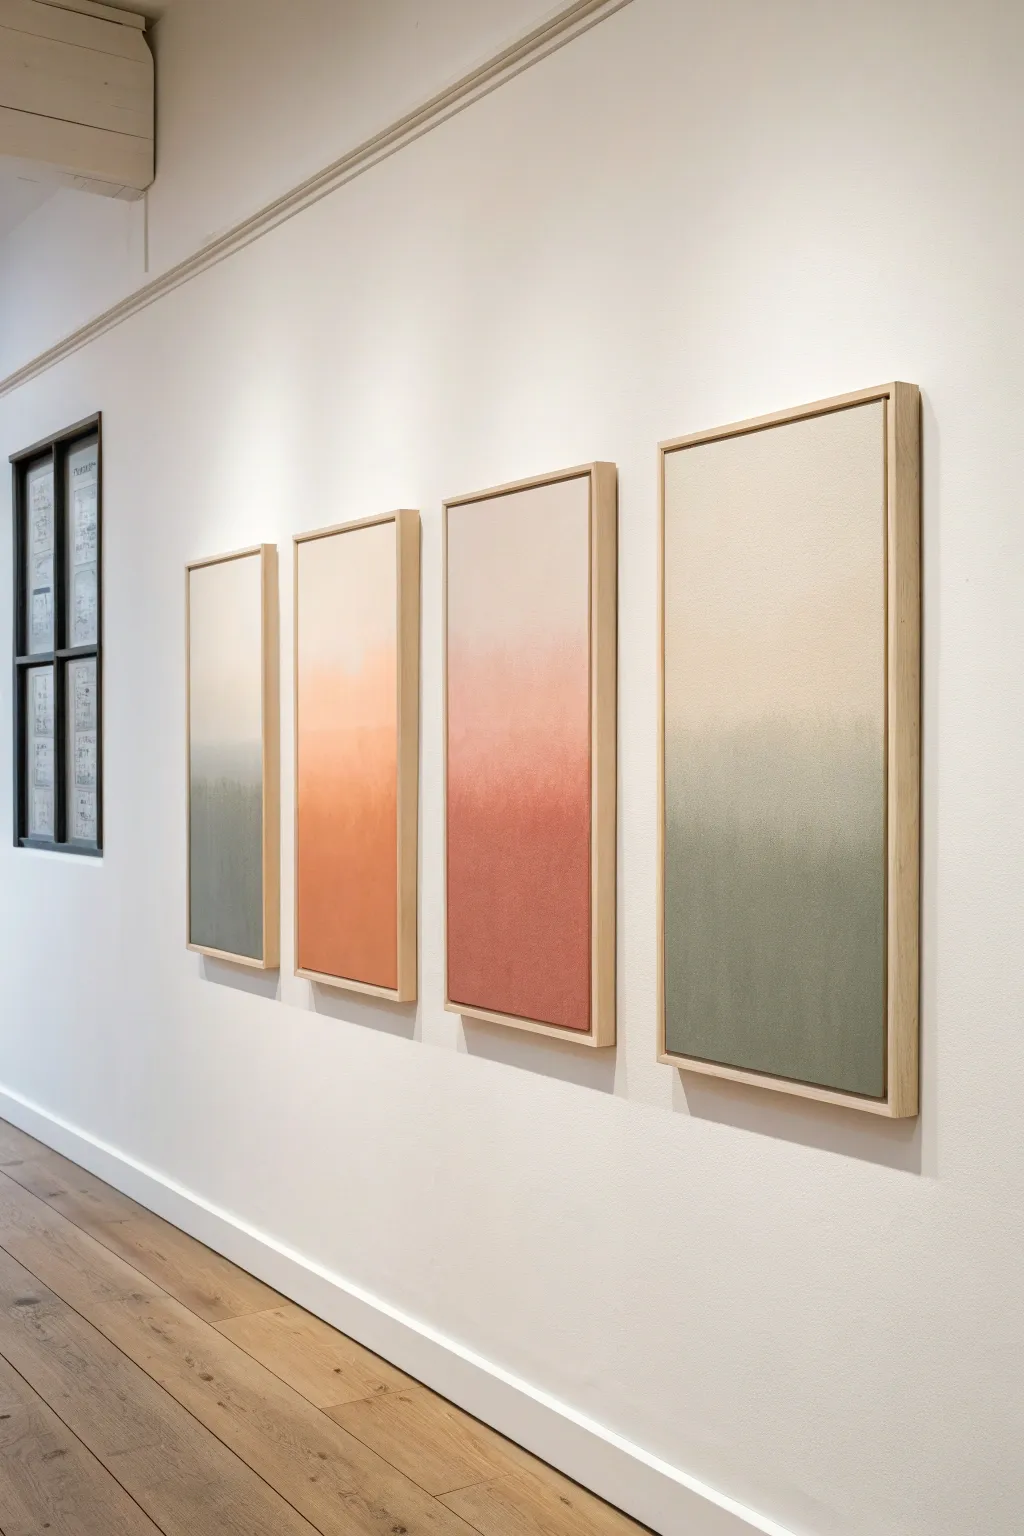
Create a gallery-worthy display with these serene, gradient art panels that blend soft neutrals into grounded earth tones. Using spray paint to achieve a seamless fade, this project mimics high-end modern art for a fraction of the cost.
Step-by-Step
Materials
- 4 large rectangular artist canvases (gallery wrapped)
- 4 floating frames (natural wood finish)
- Spray paint: Matte White or Cream (base)
- Spray paint: Sage Green (satin or matte)
- Spray paint: Terracotta or Rust (satin or matte)
- Spray paint: Muted Peach/Coral (satin or matte)
- Drop cloth or large cardboard sheets
- Painter’s tape
- Respirator mask
- Sandpaper (fine grit)
Step 1: Preparation and Base Coat
-
Set up your workspace:
Find a well-ventilated area, preferably outdoors or in a garage with the door open. Lay down a generous amount of drop cloth to catch overspray, as aerosol travels further than you expect. -
Clean and tape:
Wipe down your canvases to remove any dust. If you want to keep the sides of your canvas raw white, apply painter’s tape along the edges, though painting the sides usually looks more finished in a floating frame. -
Apply the neutral base:
Shake your Cream or Matte White spray paint can vigorously for at least one minute. Hold the can about 10-12 inches away and cover the entire surface of all four canvases with a light, even coat. -
Add a second base layer:
Let the first coat dry for about 15 minutes. Apply a second coat of the cream/white paint to ensure opaque coverage, focusing on the top half of the canvases where this color will remain visible. -
Allow to cure:
Let the base coat dry completely for at least an hour before introducing the colored gradients. This prevents the wet paints from mudding together too much.
Paint Splatter Patrol
If the nozzle spits out large droplets instead of a fine mist, wipe the nozzle tip immediately. Wait for the drops to dry, lightly sand them off, and mist over the spot again.
Step 2: Creating the Gradient
-
Plan your color order:
Decide the sequence of your panels. In the inspiration image, the pattern is: Sage Green, Peach, Terracotta, Sage Green. Arrange your spray cans in this order to avoid confusion. -
Start the first color layer:
Take your Sage Green spray paint. Starting at the very bottom edge of the first canvas, spray a solid, heavy band of color across the bottom 2 inches. -
Work upwards:
Moving up the canvas, spray horizontally back and forth. As you go higher, pull the can slightly further away from the canvas surface. This naturally disperses the paint spray, creating a softer look. -
Feather the transition:
Once you reach the middle of the canvas, change your technique. Instead of steady streams, use quick, short bursts while aiming slightly downward. I find this prevents a hard line from forming where the color meets the white. -
Repeat for warm tones:
Move to the second canvas. Using the Peach spray paint, repeat the process: solid color at the bottom, fading as you move up, stopping the color roughly halfway up the panel. -
Create the deepest contrast:
For the third canvas, use the Terracotta/Rust color. Since this pigment is darker, be extra careful with your feathering near the middle to keep the transition smooth and smoky. -
Finish the set:
Repeat the Sage Green process on the fourth and final canvas to complete the symmetry of the collection. -
Mist for blending:
If a transition line looks too harsh, take your original White/Cream base can. Stand back and lightly ‘dust’ the transition area from a distance to soften the line between color and neutral.
Step 3: Framing and Finishing
-
Dry thoroughly:
Allow the canvases to dry for at least 24 hours in a dust-free area. Spray paint can feel dry to the touch quickly but needs time to harden. -
Inspect the frames:
While paint dries, check your floating frames. Lightly sand any rough spots on the wood to ensure a sleek, professional finish. -
Insert canvases:
Place the dried canvas into the floating frame. There should be a small, even gap between the canvas edge and the frame wall. -
Secure the artwork:
Flip the assembly over carefully. Use the offset clips or screws provided with your floating frame kit to secure the canvas stretcer bars to the frame from the back. -
Hang and align:
Mount the four panels on your wall with equal spacing between them (about 3-4 inches apart) to maintain the cohesive flow of the color story.
Texture Play
For a tactile, stone-like quality, use a ‘stone effect’ spray paint for the neutral base layer before adding your color gradients on top.
Step back and admire how these simple gradients create a calming, modern atmosphere in your room.
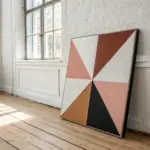
Simple Checkerboard Pop Art
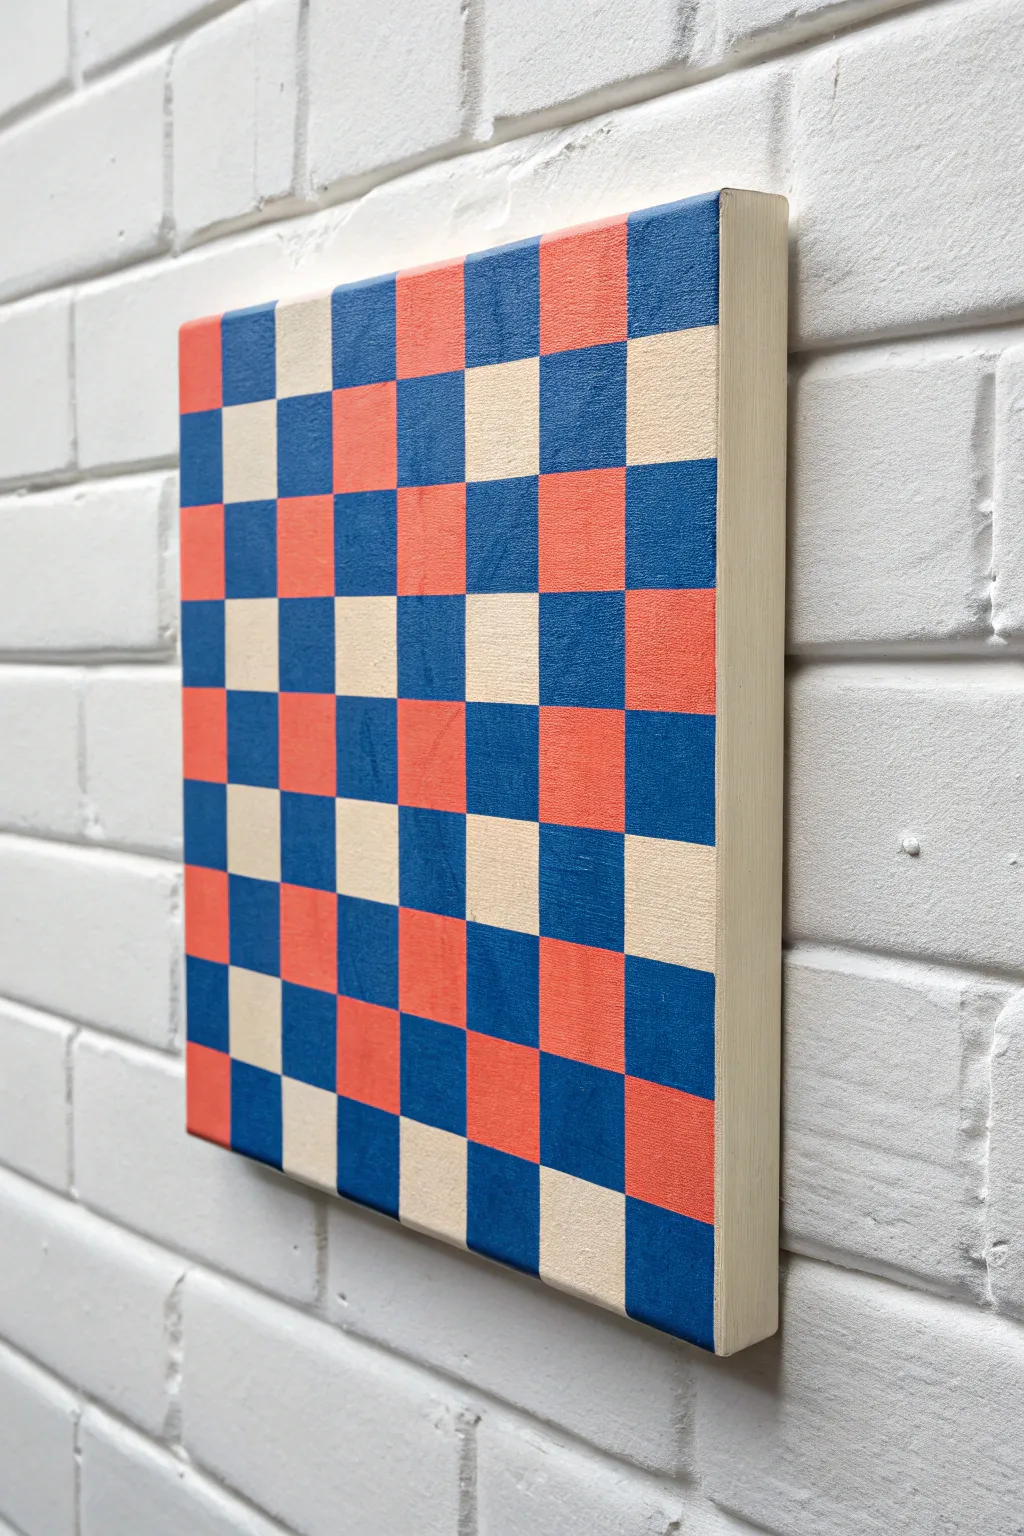
This project transforms a simple wooden panel or deep-edge canvas into a striking piece of optical pop art. By layering masking tape and spray paint, you will create a crisp, modern checkerboard pattern featuring a playful mix of cream, navy, and coral tones.
Step-by-Step
Materials
- Deep-edge wooden cradle panel or stretched canvas (12×12 inches suggested)
- Spray paint in three colors: Cream/Off-White, Navy Blue, and Coral/Orange-Red
- Painter’s tape or dedicated masking tape (specifically the width you want your squares to be)
- Ruler and pencil
- X-Acto knife or craft blade
- Drop cloth or cardboard to protect your workspace
- Sandpaper (fine grit)
Step 1: Preparation and Base Layer
-
Surface Prep:
Begin by prepping your wooden panel. If the surface is rough, give it a light sanding with fine-grit sandpaper to ensure a smooth finish. Wipe away any dust with a tack cloth or slightly damp rag. -
Base Coat Application:
Set up your workspace in a well-ventilated area with a drop cloth. Apply your first color, which will be the lightest shade—the Cream/Off-White. Shake the can vigorously and spray in sweeping motions. -
Layering Up:
Apply 2-3 light coats rather than one heavy one to prevent drips. Let this base layer dry completely for at least 24 hours. This long drying time is crucial because you will be applying tape directly over it.
Bleeding Lines?
If paint bleeds under the tape, it’s usually because the tape wasn’t sealed tight. Next time, spray a light coat of the *base color* over the tape edges first to seal them before adding color.
Step 2: Creating the Grid
-
Measuring the Grid:
Once the paint is fully cured, use a ruler and pencil to lightly mark out your grid. The size of your squares should match the width of your masking tape to make the process easier. For example, if you have 1.5-inch tape, mark every 1.5 inches along the edges. -
Vertical Taping:
Apply strips of painter’s tape vertically across the entire canvas. Place them edge-to-edge so the entire surface is covered in vertical stripes of tape. -
Horizontal Taping:
Now, apply a second layer of tape horizontally directly on top of the vertical strips. You should now have a fully covered canvas with two layers of tape running perpendicular to each other. -
Cutting the Squares:
Using your marked measurements as a guide (or by seeing the grid impression if your tape is slightly translucent), use your X-Acto knife to carefully cut through both layers of tape at the intersections. You are essentially cutting out every individual square.
Add Dimension
For a 3D effect, paint the sides of the canvas or panel in a solid, contrasting color like black or gold, framing the pattern without needing an actual frame.
Step 3: Painting the Colors
-
Exposing the First Set:
Decide which squares will be Coral. Peel away the tape only from those specific squares. Press down the edges of the remaining tape firmly to prevent bleed-under. -
Spraying Coral:
Spray the exposed squares with your Coral paint. Use light, vertical bursts directly over the exposed areas. Let this dry to the touch, usually about 30-45 minutes. -
Protecting the Coral:
Once the Coral paint is dry, carefully place fresh pieces of tape—cut exactly to size—back over the coral squares to protect them. This is tedious but ensures crisp lines. -
Exposing the Nave:
Now, peel away the tape for the squares that will be Navy Blue. Leave the tape on for the squares that are meant to remain Cream (the original base coat) and the newly covered Coral squares. -
Spraying Navy:
Apply your Navy Blue spray paint to the newly exposed squares. Again, use multiple light coats to get solid coverage without soaking the tape edges.
Step 4: The Reveal
-
Final Cure:
Let the final coat of paint sit until it is tacky but not fully hard. This is the sweet spot for tape removal. -
Removing the Masking:
Very slowly peel off all remaining tape. I find pulling at a 45-degree angle away from the paint edge gives the sharpest line. Remove the tape covering the Coral squares and the Cream squares as well. -
Touch Ups:
Inspect your grid. If there are minor bleeds, use a small detail brush and spray a puddle of paint onto a paper plate to use as a palette for touch-ups. -
Sealing:
Once absolutely dry (give it another 24 hours), finish with a clear matte or satin spray varnish to unify the sheen of the different colors and protect your hard work.
Now step back and admire how simple masking techniques can build such a complex and tailored result


Honeycomb Stencil Pattern
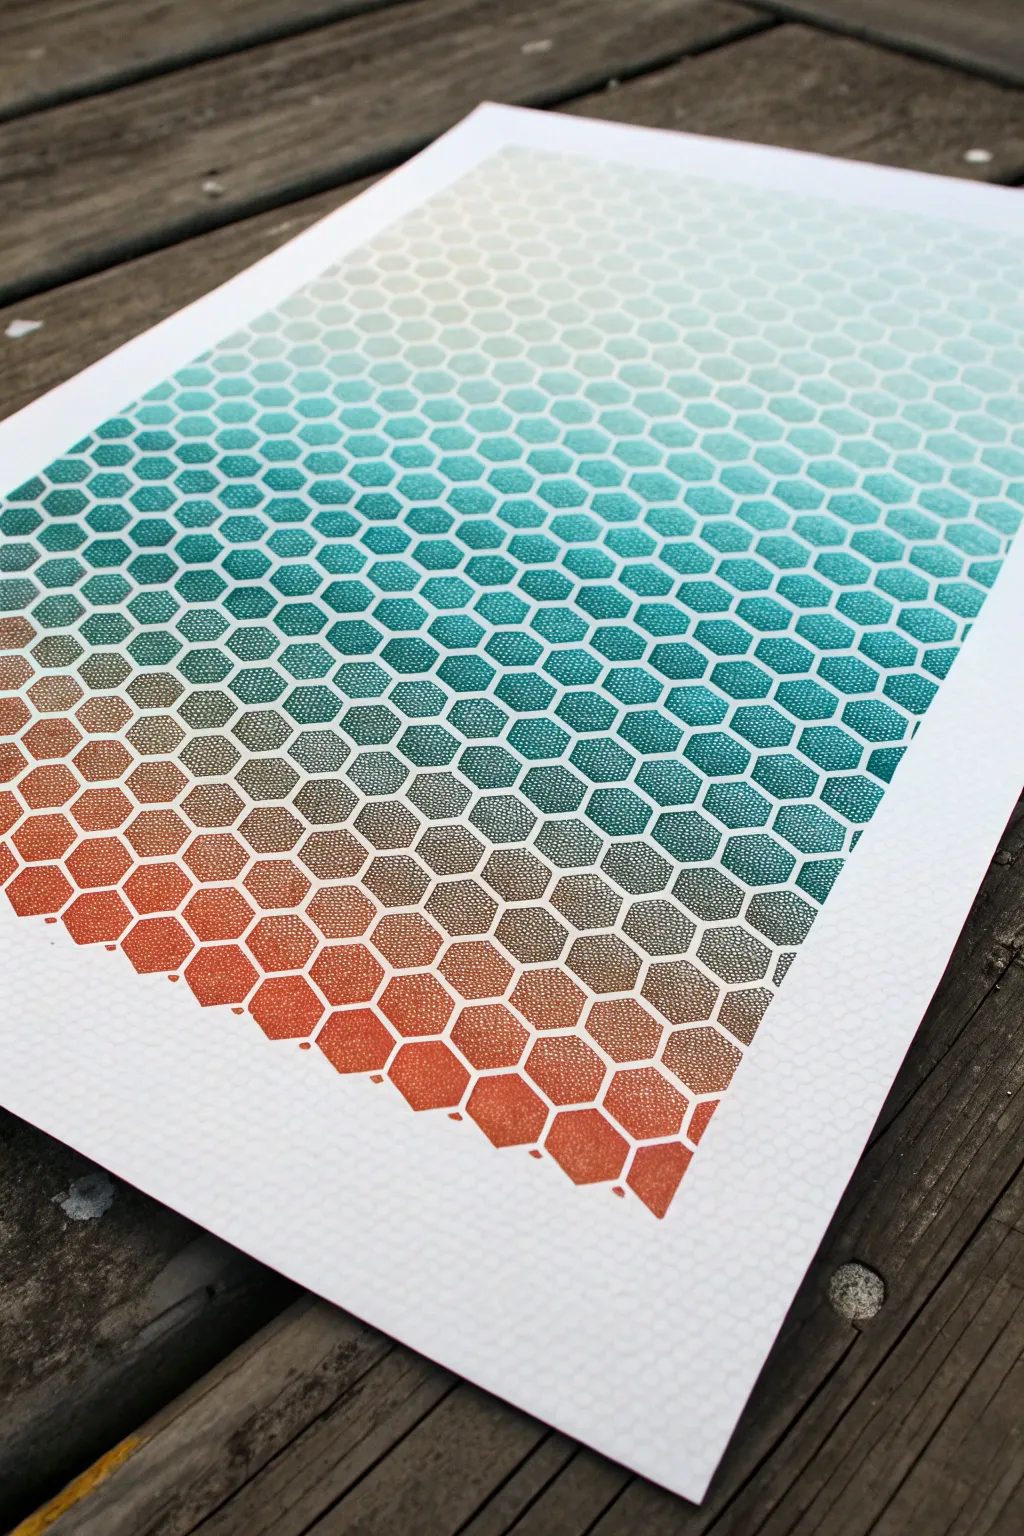
This striking piece proves that simple shapes can create sophisticated modern art when paired with a bold color transition. By combining a precise honeycomb pattern with a seamless spray paint gradient, you’ll create a vibrant, textured print that pops with energy.
How-To Guide
Materials
- Heavyweight art paper or cardstock (white)
- Adhesive spray (repositionable)
- Honeycomb pattern stencil
- Spray paint: Teal/Aqua
- Spray paint: Burnt Orange/Rust
- Paper towels or newspaper
- Cardboard box or drop cloth
- Masking tape (optional)
Step 1: Preparation and Setup
-
Prepare your workspace:
Since spray paint creates fine mist, set up your station in a well-ventilated area, preferably outdoors. Lay down a large piece of cardboard or a drop cloth to protect the underlying surface from overspray. -
Ready the paper:
Place your heavyweight white paper in the center of your workspace. If you’re working outdoors, use small loops of masking tape on the back of the paper to stick it down so the wind doesn’t shift it while you work. -
Apply adhesive to the stencil:
In a separate area away from your art paper, flip your honeycomb stencil over. Give the back a light, even coat of repositionable spray adhesive. Wait about 30 to 60 seconds until it feels tacky but not wet. -
Position the stencil:
Carefully lower the tacky side of the stencil onto your white paper. Start from the center and smooth it outwards to ensure the fine lines of the honeycomb grid are pressed firmly against the paper. This contact is crucial to prevent paint from bleeding under the lines. -
Protect the edges:
If your paper is larger than your stencil, cover the exposed paper edges with extra scrap paper or masking tape to keep the borders crisp and clean.
Sticky Situation
Don’t skip the spray adhesive! Just laying the stencil down isn’t enough; the air pressure from the spray paint will lift the edges and ruin crisp lines if it’s not glued down.
Step 2: Creating the Gradient
-
Test your spray:
Shake your spray paint cans vigorously for at least one minute. Test the spray on a piece of scrap cardboard first to ensure the nozzle is clear and the stream is consistent. -
Start with the teal:
Begin at the top of the paper with your teal spray paint. Hold the can about 8-10 inches away and use sweeping, horizontal motions. -
Creating the fade effect:
Spray heavily at the very top for full opacity, then gradually pull the can further away as you move down toward the middle of the paper. This creates a lighter, mistier application that will blend easier. -
Introduce the orange:
Now, switch to your burnt orange or rust color. Start spraying from the very bottom of the paper, applying a solid coat there. -
Blend the middle:
Work your way up from the bottom with the orange paint. As you approach the middle where the teal mist ended, lighten your touch. Allow the orange mist to gently overlap the fading teal section. -
Refine the transition:
I usually like to step back and squint a little to check the blend. If the transition line looks too harsh, do a very quick, distant mist of the adjacent color to soften the border between the teal and orange.
Add Texture
Before removing the stencil, flick a tiny bit of white acrylic paint from a toothbrush over the colored sections. This adds a distressed, starry texture to the hexagons.
Step 3: reveal and Finish
-
Allow to dry:
Let the paint sit for 5 to 10 minutes. It doesn’t need to be fully cured, but it should be dry to the touch so you don’t smudge wet paint during removal. -
Lift the stencil:
Find a corner of the stencil and slowly peel it back at a sharp angle. Move steadily rather than ripping it off quickly to ensure the paper surface doesn’t tear. -
Inspect the lines:
Check your white grid lines. If there are any tiny spots where paint bridged over the stencil, you can sometimes gently flake them off with a craft knife tip while the paint is fresh. -
Final drying time:
Set the artwork aside in a safe, dust-free place to dry completely for at least an hour before handling or framing.
Once fully dry, frame your geometric masterpiece to highlight those crisp lines and vibrant color shifts
Constellations Over a Nebula
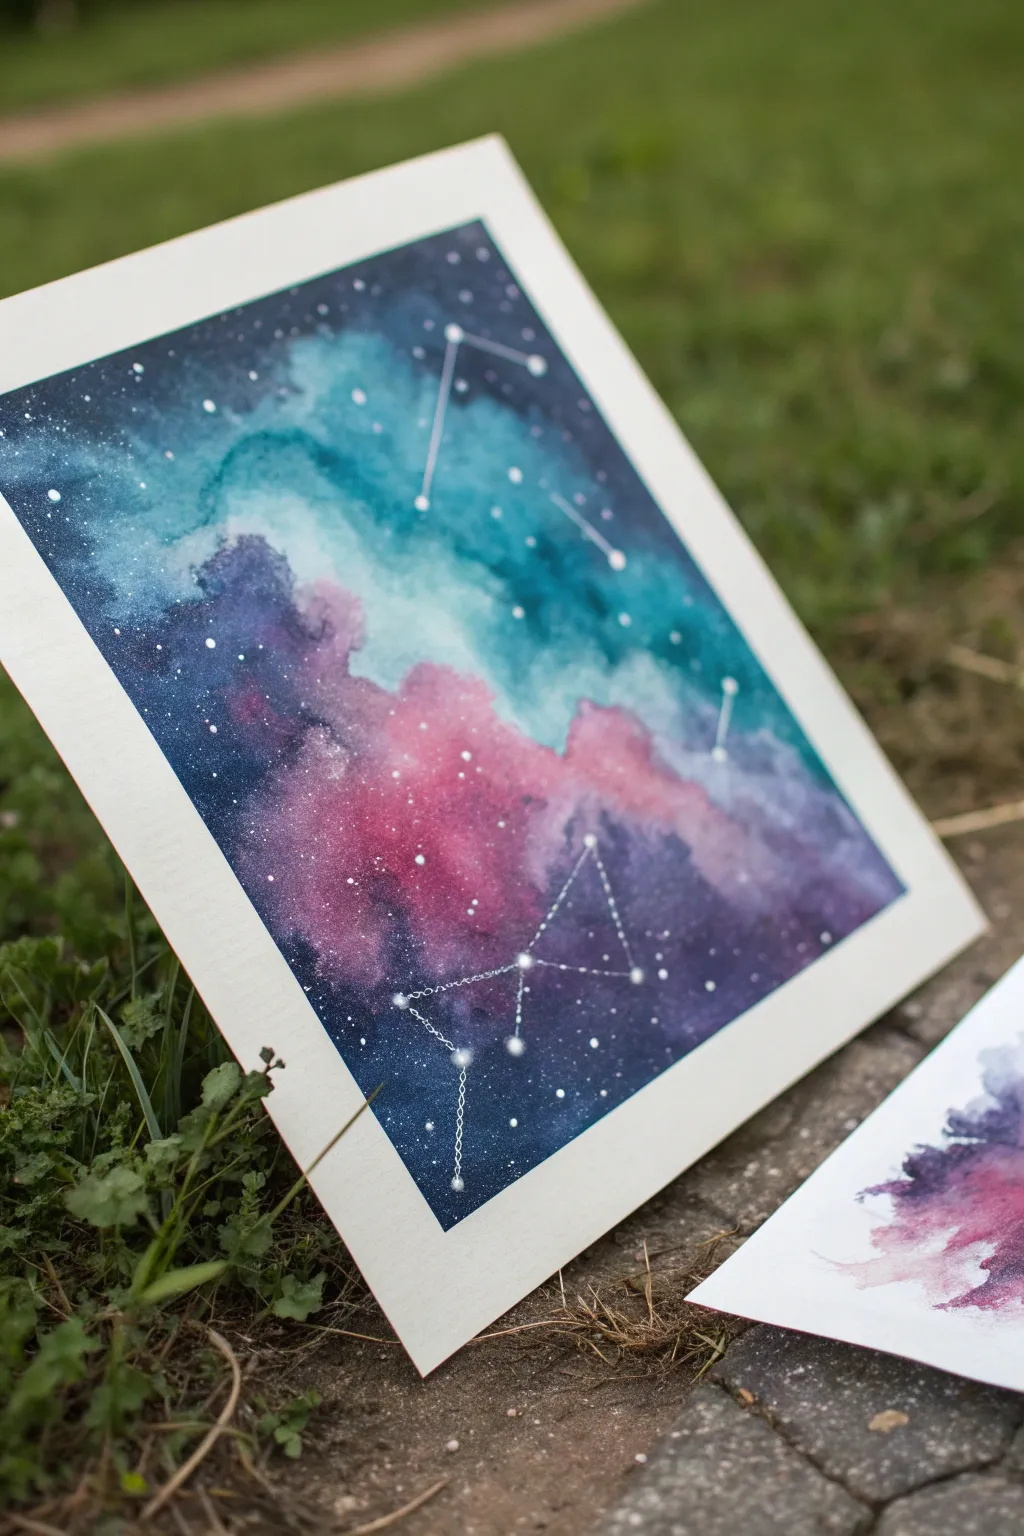
Capture the magic of the cosmos with this dreamy watercolor project that blends celestial blues, rich purples, and vibrant teals into a soft galaxy background. Topped with delicate constellation lines and splatter stars, this piece brings the night sky right to your paper.
Detailed Instructions
Materials
- Watercolor paper (cold press, heavy weight like 300gsm)
- Watercolor paints (Indigo, Teal/Turquoise, Magenta/Pink, Purple)
- White gouache or white ink
- Painter’s tape or masking tape
- Large round brush (size 10 or 12)
- Small detail brush (size 0 or 00)
- A toothbrush (for splattering stars)
- Jar of clean water
- Paper towels
- Palette for mixing paint
- Ruler
Step 1: Preparing the Sky
-
Tap it down:
Begin by securing your watercolor paper to a sturdy board or table using painter’s tape along all four edges. This creates a crisp white border and prevents the paper from buckling when wet. -
Wet the surface:
Use your large brush to apply a generous layer of clean water across the entire area inside the tape. The paper should glisten evenly but not have standing puddles. -
Lay the blues:
While the paper is wet, load your brush with a deep indigo or navy blue. Drop this color into the top left and bottom right corners, letting the water carry the pigment naturally. -
Add the teal drift:
Pick up your teal or turquoise paint. Swipe a broad, diagonal band across the upper-middle section, allowing it to touch and bleed slightly into the dark blue areas. -
Introduce the nebula heart:
Now, mix a vibrant magenta or pink. Drop this color into the center and lower-middle sections where you want the brightest part of the nebula to glow. Let it blend softly with the teal edges to create purple transitions. -
Deepen the shadows:
Go back in with your darkest purple or concentrated indigo while everything is still damp. Dab this into the corners and edges to add depth and contrast, making the bright colors pop. -
Create texture:
Tilting the board slightly can encourage the colors to swirl together naturally. If a puddle forms, use the corner of a paper towel to lift the excess liquid gently. -
Dry completely:
This is crucial: allow the background wash to dry 100%. You can use a hairdryer on a low setting or simply wait until the paper is flat and room temperature to the touch.
Muddy colors?
If colors turn brown or gray where they mix, you likely over-blended. Let the water do the work next time—just drop the colors side-by-side and stop touching them.
Step 2: Adding Stars and Constellations
-
Star splatter:
Mix a small amount of white gouache with a drop of water until it has a milky consistency. Dip an old toothbrush into the mixture. -
Flick the stars:
Hold the toothbrush over your painting and run your thumb across the bristles to flick tiny specks of white paint across the sky. Vary the density; maybe cluster more stars near the nebula clouds. -
Paint larger stars:
Use your smallest detail brush and the white gouache to dot a few prominent stars manually. These will serve as the anchor points for your constellation lines. -
Draft the constellation:
Identify where you want your constellation to sit. Using your ruler and detail brush, connect the larger white dots with very thin, straight lines. -
Refine the lines:
Go over the connecting lines carefully to ensure they are opaque. I like to make these lines slightly broken or faint in spots so they don’t overpower the background. -
Brighten the anchors:
Add a tiny extra dot of concentrated white gouache to the ‘star’ points of your constellation to make them shine brighter than the connecting lines. -
Optional glow:
If you want a glowing effect, dampen a clean brush slightly and gently soften the area immediately surrounding the biggest stars to lift a tiny bit of background pigment. -
Reveal the border:
Once all paint is perfectly dry, slowly peel away the painter’s tape at a 45-degree angle. This reveals your satisfyingly crisp white edge.
Add some sparkle
For a magical finish, mix a tiny pinch of metallic silver watercolor or iridescent medium into your star splatter mix. The painting will shimmer beautifully in the light.
Now you have a piece of the universe framed beautifully by clean white borders
Comet Streaks and Light Trails
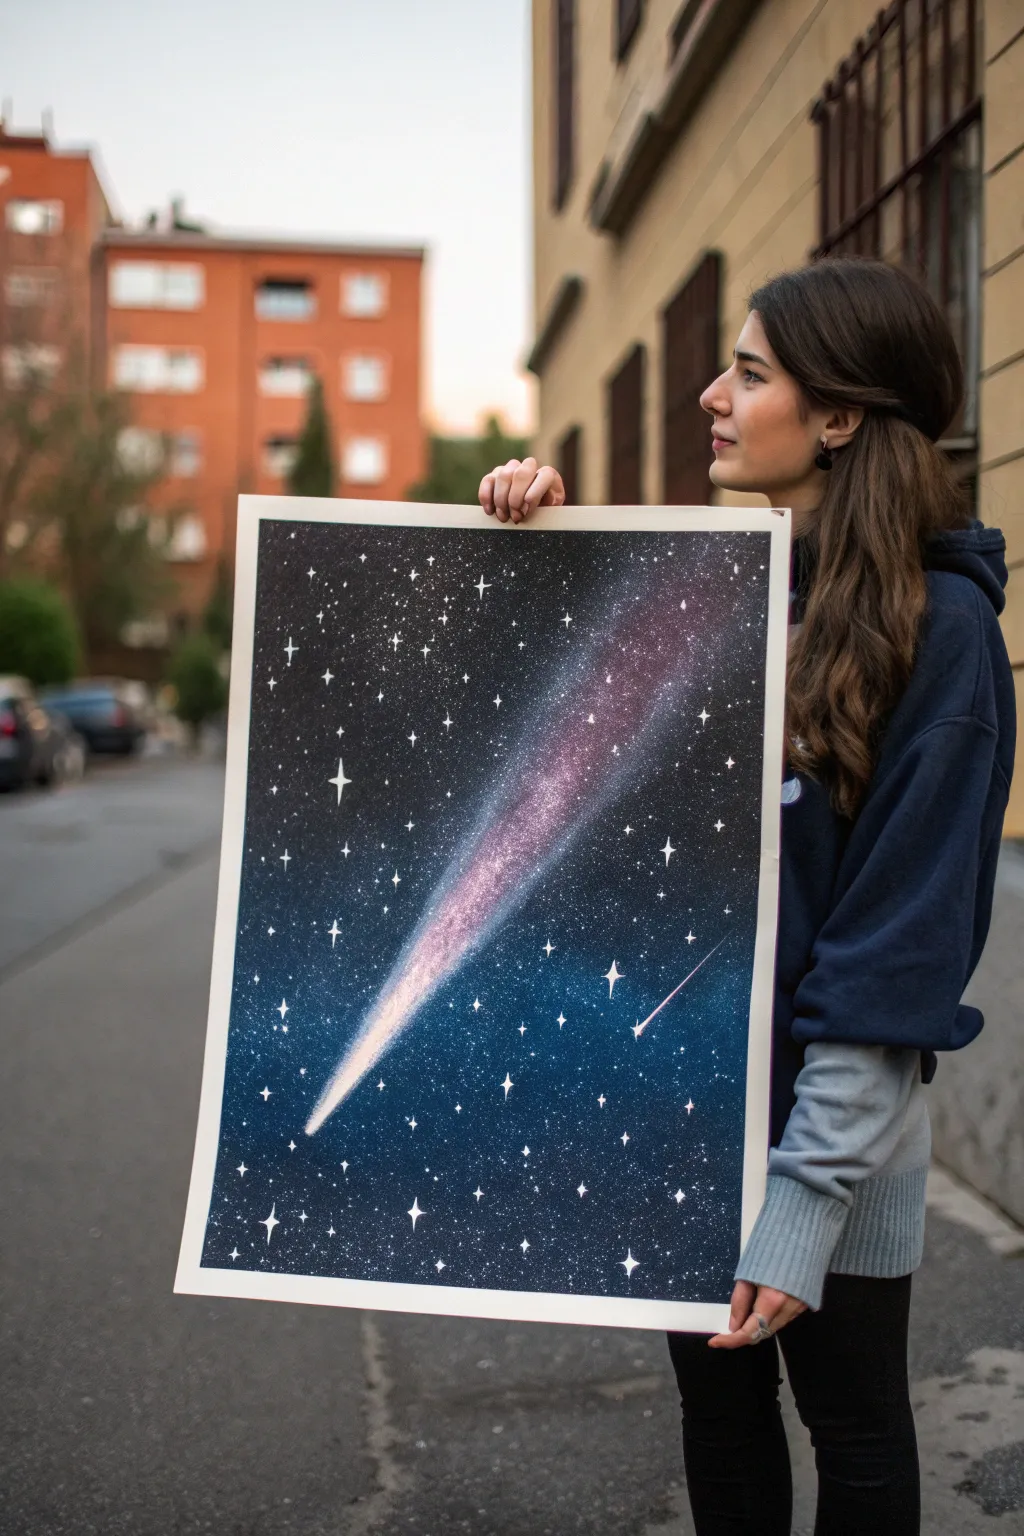
Capture the ethereal beauty of a night sky highlighted by a magnificent, blazing comet streaking through the darkness. This spray paint art project combines vibrant gradient blends with splatter techniques to create a cosmic scene that looks incredibly professional yet is surprisingly achievable.
Step-by-Step Guide
Materials
- Large sheet of glossy poster board or spray paint paper
- Black spray paint (gloss or matte)
- White spray paint
- Dark blue or navy spray paint
- Magenta or pink spray paint
- Purple spray paint
- Piece of card stock or thick paper (for straight edge)
- Small round paint brush
- White acrylic paint (for detailed stars)
- Respirator mask and gloves
- Drop cloth or cardboard to protect workspace
Step 1: Setting the Background
-
Prepare the canvas:
Lay your large paper flat on a protected surface in a well-ventilated area. Weight down the corners if necessary to keep the paper from curling. -
Create the comet core:
Visualize a diagonal line where your comet will travel. Spray a focused line of white paint along the upper-middle section of this path, making the bottom end slightly wider and brighter for the comet’s head. -
Add the color glow:
While the white is still tacky, lightly spray magenta and purple over the tail section of your white line. Let the colors mist out slightly beyond the white to create a glowing aura. -
Deepen the cosmos:
Spray dark blue around the outer edges of your comet path, blending it softly into the pinks and purples without covering the bright white center. -
Apply the void:
Fill the rest of the paper with black spray paint. Work from the corners inward, darkening the blue areas but being careful not to overspray your colorful comet streak.
Muddy colors?
If your comet colors look dull or grey, you likely blended the black into the yellow/pink too aggressively. Next time, let the color layer dry for a minute before adding the black border.
Step 2: Adding Texture and Stars
-
Create background stars:
Spray a small puddle of white paint onto a scrap piece of cardboard. Dip your fingers (gloved) into the paint and flick them quickly towards the painting to create a spray of fine, distant stars. -
Refine the comet shape:
To give the comet movement, take a straight piece of card stock. Place it perpendicular to the comet’s path and lightly overspray black on one side of the card to ‘cut’ into the comet tail, creating sharp streaks or gaps. -
Build the tail texture:
You can also use a crumpled piece of magazine paper to lightly dab the wet paint in the tail, lifting small spots to create a textured, gaseous look. -
Intensify the head:
If the head of the comet got lost during blending, add a quick, sharp burst of white spray directly at the front tip to make it the brightest point. -
Add a secondary streak:
For the smaller shooting star seen in the lower right, spray a tiny white line, followed by a faint dusting of pink, and then cut the edges with a card to make it thin and sharp.
Step 3: Detailing the Galaxy
-
Prepare acrylics:
Once the spray paint is dry to the touch (usually 10-15 minutes), squeeze a small amount of white acrylic paint onto a palette. -
Paint prominent stars:
Using a fine-tip round brush, paint distinct ‘cross’ shapes scattered throughout the dark areas. I find drawing a long vertical line crossed by a shorter horizontal one looks best. -
Vary star sizes:
Don’t make every star the same size. Paint a few large ‘hero’ stars near the comet and fill the darker voids with tiny pinpoint dots using the tip of your brush. -
Add highlights:
Place a solid white dot in the absolute center of your largest painted star crosses to make them appear to shine brightly. -
Final touches:
Inspect the comet’s head one last time. If needed, dry-brush a tiny bit of white acrylic on the leading edge to ensure it pops against the dark background. -
Let it cure:
Allow the entire piece to dry completely for at least an hour before framing or hanging to prevent the paper from sticking to glass.
Brighter Stars
To make your hand-painted stars really pop, mix a tiny drop of water into your white acrylic. This helps the paint flow smoothly off the brush for sharper points on your star crosses.
Now you have a dynamic piece of space art that captures the movement and mystery of the universe


Have a question or want to share your own experience? I'd love to hear from you in the comments below!