
Sometimes the most honest art comes from the heavy, tender places we don’t always talk about out loud. If you’re craving emotional sad painting ideas, here are a bunch of visual prompts to help you turn those feelings into something you can actually see.
Lonely Person Under Streetlight Rain
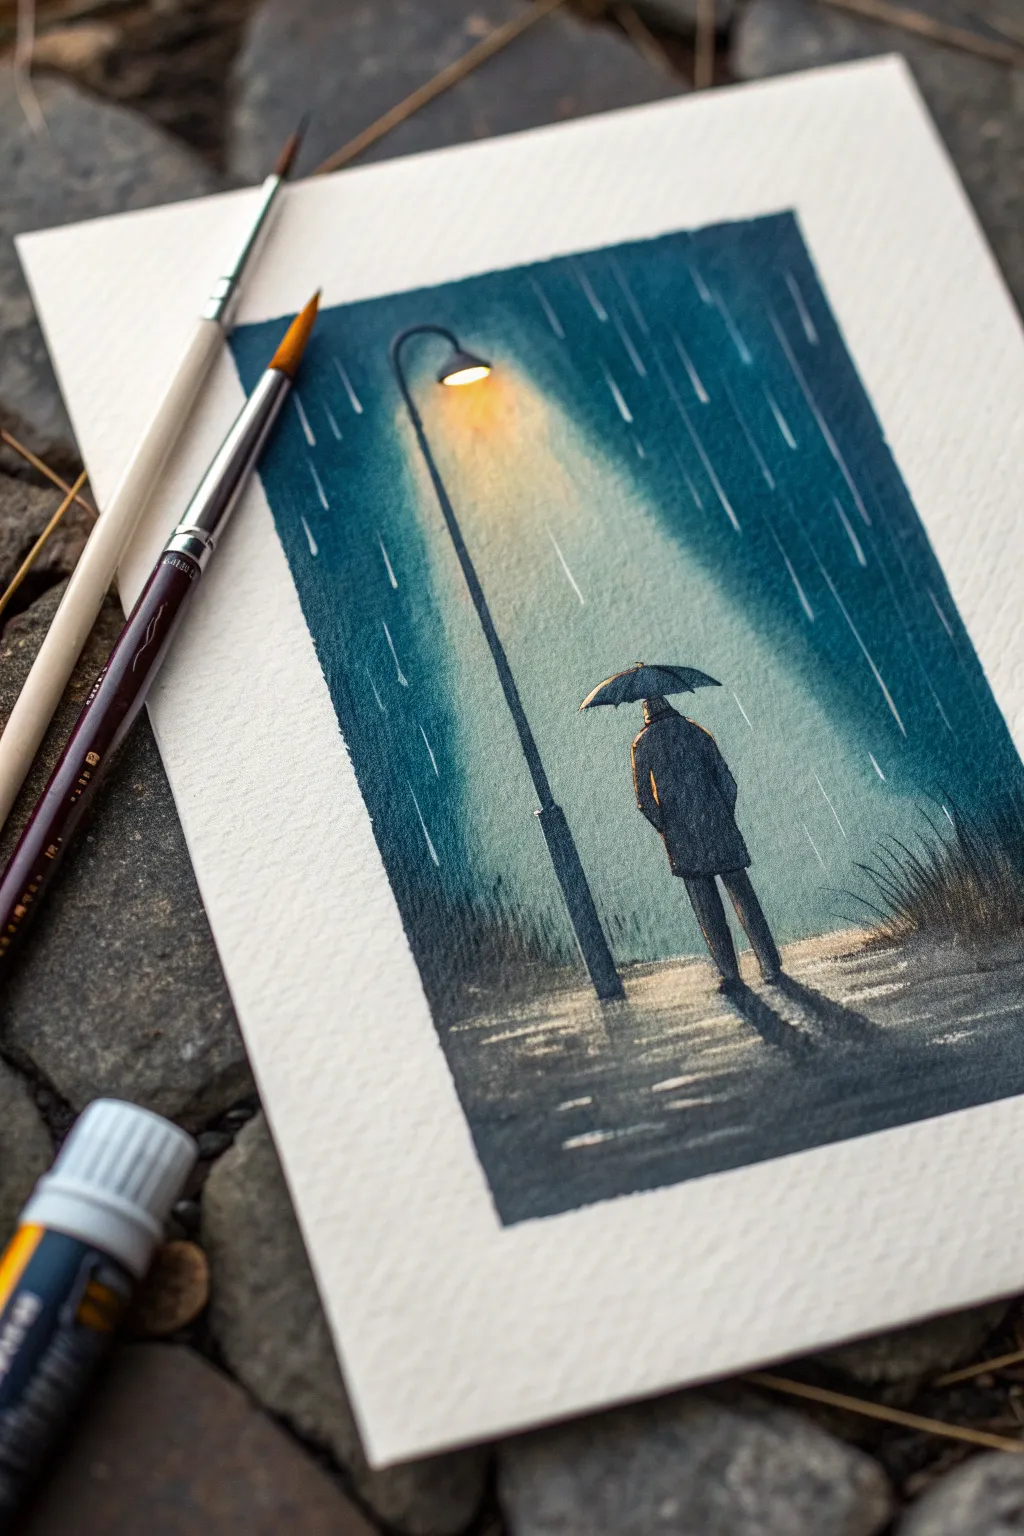
Capture a moment of quiet melancholy with this moody watercolor piece, featuring a solitary figure standing under the warm glow of a streetlamp against a cold, rainy backdrop. The interplay of deep teal blues and vibrant oranges creates a striking contrast that perfectly evokes an emotional rainy night.
Step-by-Step Tutorial
Materials
- Cold press watercolor paper (300 gsm)
- Watercolor paints (Indigo, Payne’s Gray, Turquoise, Cadmium Orange, Yellow Ochre, Burnt Umber)
- Masking fluid (optional)
- White gel pen or white gouache
- Flat wash brush (3/4 inch)
- Round brushes (Size 4 and Size 0 for details)
- Pencil for sketching
- Paper towels and water cup
Step 1: Preparation and Sketching
-
Paper Setup:
Begin by taping down your watercolor paper to a board with masking tape. This creates that crisp, clean white border seen in the final image and prevents the paper from buckling during the wet washes. -
Basic Outlining:
Lightly sketch the composition using a dull pencil to avoid damaging the paper tooth. Draw the vertical line of the lamppost slightly off-center to the left. Place the figure to the right of the post, sketching a simple coat silhouette and an umbrella. -
Marking the Light:
Sketch the cone of light coming from the lamp. This triangular area will need to stay much lighter than the rest of the painting, so marking it lightly helps you remember where to stop your dark washes.
Bleeding Colors?
If your yellow light is turning green when it touches the blue sky, your layers weren’t dry enough. Wait for the yellow zone to be totally dry before painting the blue surroundings.
Step 2: The Glow and First Wash
-
Painting the Light Source:
Start with the streetlamp. Mix a vibrant Light Yellow or diluted Cadmium Orange and paint a small, intense circle at the bulb itself. Wet the area immediately around it with clean water and let the yellow bleed softly outward to create a glowing effect. -
Extending the Beam:
While the paper is still slightly damp, wash a very pale, watered-down Yellow Ochre through the cone of light. I like to keep this extremely subtle, fading into the white of the paper at the bottom. -
First Background Layer:
For the rainy background, mix a light wash of Turquoise and Indigo. Apply this over the entire background area, carefully avoiding the main cone of light and the figure itself. Use vertical strokes to suggest falling rain.
Step 3: Deepening the Atmosphere
-
Building Shadows:
Once the first layer is dry, mix a stronger, darker concentration of Indigo and Payne’s Gray. Start painting the upper corners of the sky, making them the darkest part of the image. -
Gradating the Sky:
Bring this dark wash down, adding more water as you approach the light cone to create a smooth gradient. The transition from the dark blue night to the illuminated mist is crucial for the atmosphere. -
Creating Rain Streaks:
While the background is damp (but not soaking), use a ‘lifting’ technique or a thirsty brush to pull out vertical lines of pigment. This creates faint, soft rain streaks in the distance. -
Ground Reflections:
Paint the ground using horizontal strokes. Use the dark blue mix for the edges, but switch to a diluted mix of Burnt Umber and Yellow Ochre directly under the light to show the wet pavement reflecting the lamp.
Pro Tip: Scratching Out
For subtle rain texture, try scratching the damp dark paper very gently with the edge of an old credit card or palette knife to create indented, darker lines.
Step 4: Silhouette and Details
-
Painting the Post:
Using a size 4 round brush and a thick mix of Payne’s Gray and Burnt Umber, paint the lamppost. Ensure your line is straight and steady, thickening slightly at the base. -
The Figure’s Coat:
Fill in the figure’s coat with a dark, almost black mixture. Leave a tiny sliver of unpainted paper or lighter color on the left shoulder and side of the coat to represent the rim lighting from the streetlamp. -
Shadow and Umbrella:
Paint the umbrella in the same dark tone. Add a cast shadow stretching from the figure’s feet to the right side, blending it softly into the ground wash so it doesn’t look like a sticker. -
Adding Grass Texture:
Use your smallest brush (size 0) with dark paint to flick quick, upward strokes near the base of the lamppost and the right edge, creating the silhouette of tall grass.
Step 5: Final Rain Effects
-
Sharp Rain Lines:
Once the entire painting is completely bone dry, switch to white gouache or a white gel pen. Draw thin, sharp vertical lines of varying lengths throughout the blue areas to represent the heavy rainfall. -
Highlight Accents:
Add tiny dashes of white or pale yellow on the ground to simulate puddles catching the light. You can also add a tiny highlight to the top of the umbrella. -
The Reveal:
Carefully peel away the masking tape at a 45-degree angle to reveal your clean edges, framing the lonely scene perfectly.
Now you have a deeply atmospheric piece that beautifully captures the feeling of solitude in the rain
Tears Turning Into Paint Drips
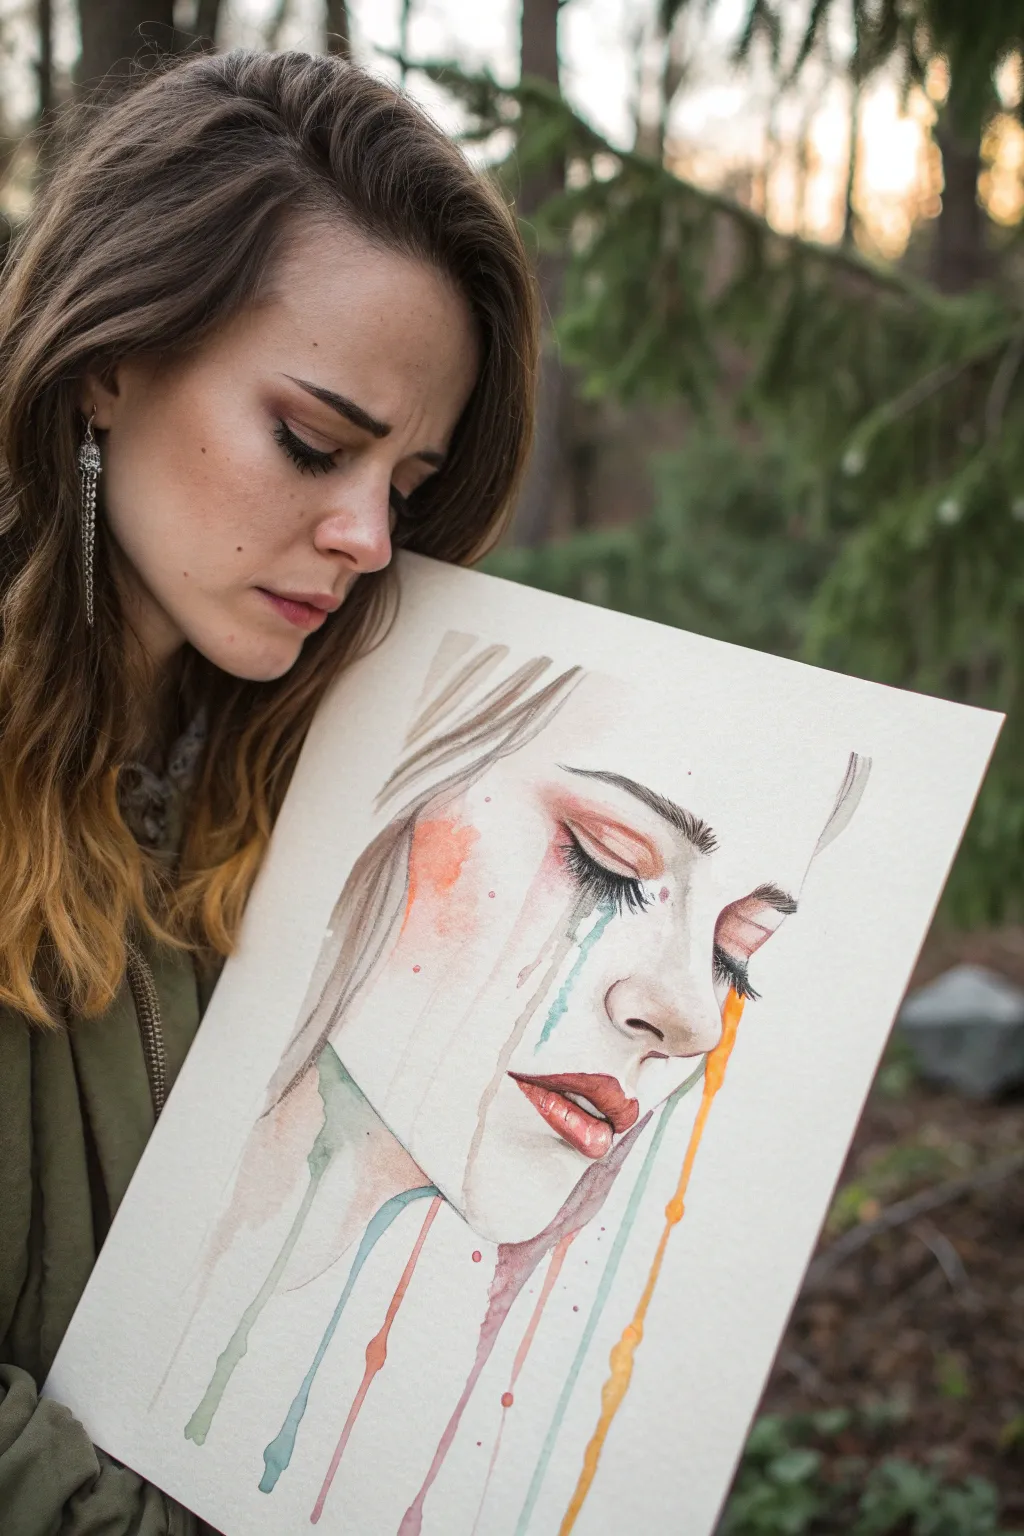
This emotive watercolor project captures the raw beauty of sadness by transforming realistic tears into vibrant, dripping streaks of paint. The contrast between the delicate, monochromatic facial features and the bold, colorful runs creates a striking visual metaphor for releasing emotions.
Step-by-Step
Materials
- Cold press watercolor paper (140lb/300gsm)
- Watercolor paints (tube or pan)
- Graphite pencil (HB or 2B)
- Kneaded eraser
- Round watercolor brushes (sizes 2, 6, and 10)
- Masking fluid (optional)
- Palette
- Two jars of water
- Paper towels
- Table salt (optional for texture)
Step 1: Sketching the Foundations
-
Light Outline:
Begin by sketching the profile of the face very lightly with your graphite pencil. Focus on the angle of the head tilting downward, the closed eyelid, the nose, and the slightly parted lips. -
Refining Features:
Pay special attention to the lashes and eyebrows. Draw individual hairs for the brows rather than a solid block to maintain realism. Keep the lines faint, as watercolor is transparent and heavy graphite will show through. -
Planning the Drips:
Lightly mark where the major tear tracks will originate—specifically from the corner of the eye, the cheek, and the jawline. You don’t need to draw the full drip path, just the starting points.
Step 2: Painting the Face
-
Skin Tone wash:
Mix a very dilute, pale skin tone. Apply a light wash over the face area, leaving the highlights on the nose, upper lip, and eyelid completely white (unpainted) for now. -
Adding Depth:
While the first layer is still slightly damp, drop in slightly darker pigment around the eye socket, the side of the nose, and under the chin to create soft shadows. -
Blush Accents:
Mix a warm coral or rose hue. Gently apply this to the cheek area and even a touch on the eyelid. Let it bloom naturally into the wet surface for a soft, crying-flush effect. -
Defining the Lips:
Use a smaller brush (size 2) to paint the lips. Use a darker red or terracotta shade for the corners and the line between the lips, fading to a lighter wash towards the center. -
Lashes and Brows:
Once the skin layer is bone dry, use a fine liner or the tip of your smallest brush with a dark brown or Payne’s gray to carefully flick in the eyelashes and eyebrow hairs.
Gravity is Your Friend
Don’t try to paint a drip shape manually. Let the water run. The natural physics of water creates a ‘bead’ at the end of the line that you simply can’t replicate with brushstrokes alone.
Step 3: Creating the Emotional Drips
-
Preparing the Palette:
Pre-mix puddles of your chosen drip colors—teal, yellow-orange, rose, and perhaps a dusty purple. You want these to be quite fluid, not thick. -
Gravity Tilt:
Tilt your drawing board or paper at a 45-degree angle. This is crucial for guiding the drips naturally. -
The First Drop:
Load a size 6 brush with plenty of water and pigment (e.g., teal). Touch the tip to the lower lash line and press gently to release a bead of water. Let gravity pull the bead down the paper. -
Guiding the Flow:
If a drip gets stuck, gently encourage it with the tip of a clean, wet brush, but try not to force it too much so it looks organic. -
Layering Colors:
Before the first drip dries completely, start a second color (like yellow-orange) nearby or even intersecting slightly. Allowing them to bleed into each other creates beautiful, accidental transitions. -
Varying Widths:
Create some drips that are thin and faint, and others that are saturated and terminate in a heavier pool at the bottom of the page. -
Neck Shadows:
I like to use the drip colors to constitute the shadows on the neck. Instead of a realistic skin shadow, use a wash of cool green or purple that transitions into a downward drip to separate the head from the background.
Muddy Dps?
If your colorful drips are turning brown where they overlap, let one color dry completely before running a second color over it. This glazes the color rather than mixing it while wet.
Step 4: Final Touches
-
Hair Suggestions:
Use broad, loose strokes to suggest hair. Don’t overwork it; let the white of the paper imply highlights. Use a grayish-brown wash that is lighter than the facial features. -
Splatter Texture:
Load a brush with diluted red or pink paint and tap it against your finger to create tiny splatters around the cheek and eye area, mimicking broken capillaries or messy tears. -
Reinforcing Contrast:
Check your darks. If the lashes or the lip line look washed out next to the colorful drips, go back in with a highly concentrated mix of dark brown to crisp them up.
Allow your painting to dry flat once the drips have settled, resulting in a piece that beautifully balances precision with chaotic emotion


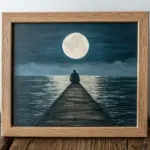
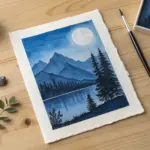
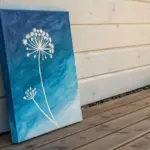
Silhouette in a Giant Empty White Space
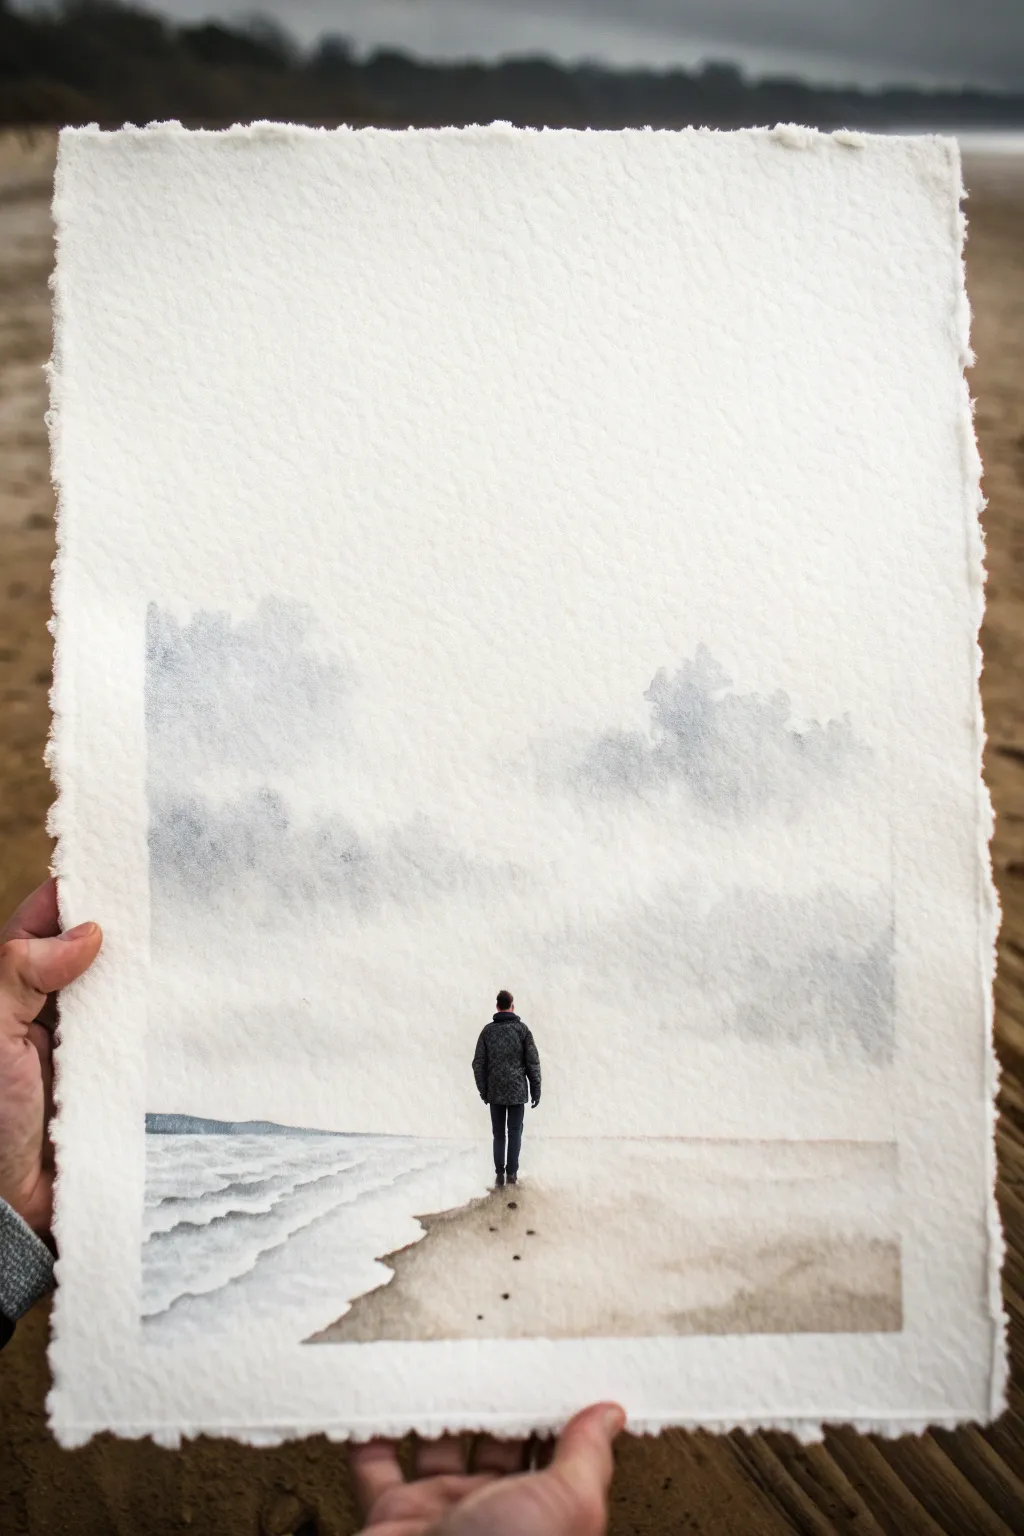
This evocative watercolor study captures the profound feeling of isolation by placing a small, lone figure against a vast, empty sky. Using heavy textured paper and a restricted palette, you will create a piece where the unpainted space is just as powerful as your brushstrokes.
Step-by-Step Tutorial
Materials
- 300lb Cold Press watercolor paper (rough texture preferred)
- Watercolor paints: Payne’s Grey, Indigo, Burnt Umber, Sepia
- Soft round brushes (size 8 or 10 for washes, size 0 or 2 for details)
- Masking tape
- Pencil (HB or 2H)
- Clean water and paper towels
- Board for taping down paper
Step 1: Preparation and Sketching
-
Paper Selection:
Focus on finding a high-quality watercolor paper with ‘deckled edges’ (the torn, rough look). If you only have standard blocks, carefully tear the paper against a ruler to create that organic, raw edge that adds so much character to the final piece. -
Establish the Horizon:
Lightly sketch a horizontal line about one-third of the way up from the bottom of your sheet. This low horizon line is crucial for emphasizing the massive ’empty’ sky above. -
Sketch the Figure:
Draw a very small figure standing centrally on the sand. Keep the outline simple—a coat, legs, and head—as this will mostly be a silhouette. Lightly mark the shoreline angling from the bottom left towards the horizon.
Tip: Rough Paper is Key
Use ‘Rough’ grain paper rather than ‘Hot Press’ smooth paper. The texture naturally creates the sparkly, granular look of sand and foam without you having to paint every detail.
Step 2: Atmospheric Sky
-
Pre-wet the Sky Area:
Using a clean brush and water, gently wet the rectangular area intended for the sky, stopping just above the figure’s head. Don’t soak the entire page; leave the wide white margins completely dry. -
Drop in Grey Clouds:
Mix a diluted wash of Payne’s Grey. While the paper is still damp, touch your brush to the wet area to let the grey bloom into soft, indistinct cloud shapes. Focus the pigment lower down near the horizon, letting it fade to white as it goes up. -
Control the Edges:
Allow the paint to settle. If the edges of your ‘cloud box’ look too sharp, soften them slightly with a damp brush, but maintain a relatively rectangular composition to frame the emptiness.
Level Up: Color Moods
Swap the grey palette for very pale blues and lavenders to create a ‘golden hour’ morning feel, or use muted greens for a stormy, turbulent emotional atmosphere.
Step 3: Painting the Foreground
-
Sand Wash:
Mix a very pale wash of Burnt Umber and Sepia. Apply this to the sand area, starting from the bottom right and sweeping towards the figure. Keep the wash uneven to mimic the texture of sand. -
Ocean Gradient:
For the water on the left, use a mix of Indigo and Payne’s Grey. Paint horizontal strokes that get thinner and lighter as they approach the horizon line to suggest distance. -
Create Waves:
Lift out pigment or leave thin strips of dry paper white between your ocean strokes to represent the foamy crests of small waves rolling onto the shore. -
Dry Texture:
Once the initial sand wash is dry, use a ‘dry brush’ technique (very little water on the brush) with a slightly darker brown mix to drag across the rough paper surface. This highlights the paper’s tooth and looks like textured sand.
Step 4: The Figure and Details
-
Painting the Coat:
Using your smallest brush and a saturated mix of Indigo and Payne’s Grey (almost black), carefully fill in the jacket of the figure. Leave tiny specks of white if you want to suggest texture in the fabric. -
Legs and Stance:
Paint the trousers in a solid dark tone. Ensure the feet connect solidly with the ground shadow; floating feet ruin the illusion of weight. -
The Shadow:
Dilute your dark mix significantly. Paint a soft, short shadow extending from the figures feet slightly to the right, consistent with overcast lighting. -
Footsteps:
This is a subtle but vital detail. Paint tiny, diminishing dark spots trailing behind the figure to show footsteps in the sand. Space them naturally to suggest a slow walking pace.
Step 5: Final Touches
-
Horizon Definition:
With a steady hand, paint a very thin, dark line on the distant horizon to separate the water from the sky, fading it out as it reaches the land side. -
Review Values:
Step back and squint at your painting. The figure should be the darkest point (the focal anchor), contrasting sharply against the vast, pale background. -
Final Drying:
Allow the piece to dry completely flat. If the paper has buckled slightly, you can flatten it under heavy books once it is 100% bone dry.
Now you have a moving piece of art that speaks volumes through its quiet simplicity


Thread-Pulled Puppet Pose of Exhaustion
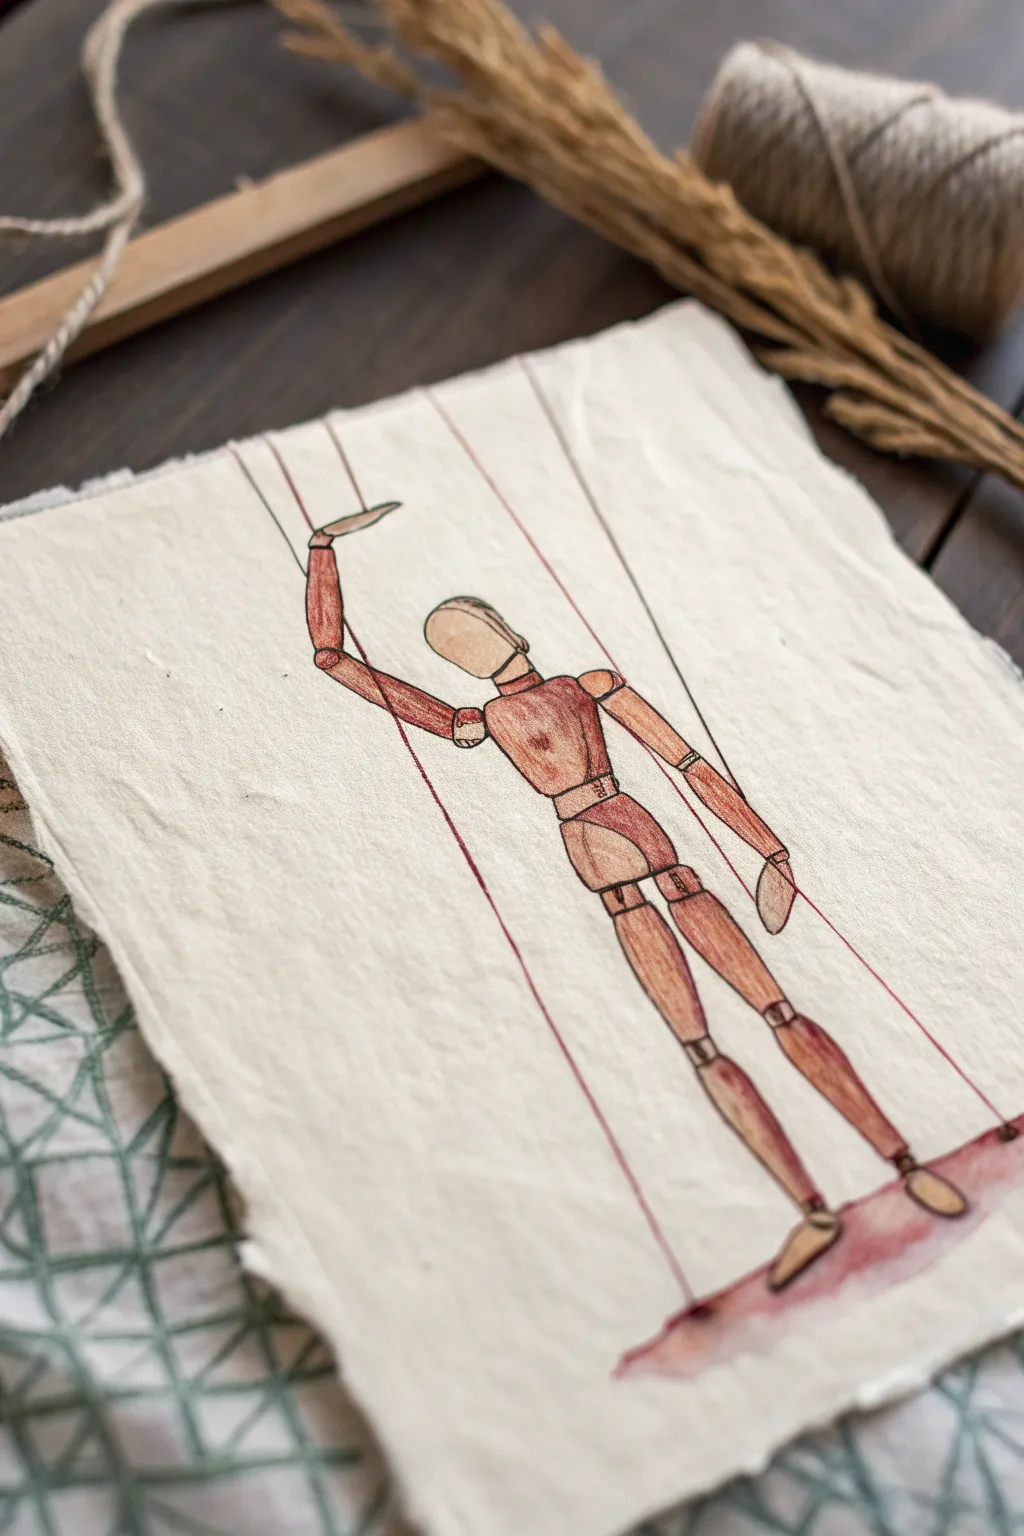
This poignant watercolor illustration captures a wooden artist’s mannequin in a state of suspended exhaustion, evoking feelings of being controlled yet weary. Painted on beautiful handmade deckle-edge paper, it uses warm wood tones and delicate line work to create a piece that feels both rustic and deeply emotional.
How-To Guide
Materials
- Heavyweight handmade cotton rag paper (deckle edge)
- Watercolor paints (Burnt Sienna, Yellow Ochre, Burnt Umber, Alizarin Crimson)
- Fine liner pen (Black or Sepia, 0.1mm and 0.3mm)
- Red fine liner pen or watercolor pencil (for strings)
- Artist’s mannequin (for reference)
- Pencil (HB)
- Kneaded eraser
- Small round watercolor brushes (Size 2 and 4)
- Ruler
Step 1: Sketching the Form
-
Prepare the paper:
Start with a sheet of textured, handmade cotton paper. The rough texture adds to the vintage, weathered feel of the piece. Tape it down gently if it’s prone to curling, though heavyweight rag paper usually lays flat on its own. -
Establish the pose:
Using a light HB pencil, lightly sketch the central axis of the mannequin. Position the figure slightly off-center to leave room for the strings above. The pose is key: tilt the head down and let the arms dangle or reach up feebly. -
Construct the segments:
Draw the basic geometric shapes of the mannequin—ovals for the head and joints, cylinders for the limbs, and a wedge shape for the torso. Focus on the connections between parts, like the ball joints at the shoulders, elbows, and knees. -
Refine the outline:
Go back over your geometric construction and soften the lines to look more like carved wood. Erase the internal construction lines gently with a kneaded eraser so they don’t show through the paint later. -
Add the strings:
Use a ruler to draw straight, taut lines extending from the wrists, knees, and head upward. These lines represent the tension holding the figure up. Make sure they angle slightly inward toward a central point off the page.
Paper Texture Tip
When painting on rough rag paper, use a ‘dry brush’ technique for the highlights. Dragging the brush lightly leaves tiny white speckles of paper showing through.
Step 2: Adding Color and Texture
-
Mix the base tone:
Create a watery wash of Yellow Ochre with a tiny touch of Burnt Sienna. This will be the base color for the light wood, giving it a warm, natural glow. -
Apply the first wash:
Paint the entire mannequin with this light wash. Work carefully within the pencil lines, but don’t worry about perfection; the texture of the paper will create interesting natural variations. -
Shadow mixing:
While the first layer dries, mix a darker wood tone using Burnt Sienna and a hint of Burnt Umber. We want a rich, reddish-brown for the shadows and deeper wood grain. -
Define the volume:
Once the base layer is completely dry, paint the shadowed sides of the limbs (usually the right or bottom edge). This gives the cylinders 3D form. I like to keep the edges of these shadows slightly soft by blending with a damp brush. -
Paint the joints:
Use the darker brown mix to fill in the ball joints and the gaps between body segments. These areas naturally catch less light and need to be distinct to show the mechanical nature of the doll. -
Add wood grain texture:
With a very fine brush (size 0 or 1) and your dark brown mix, paint extremely subtle vertical streaks on the torso and thighs to suggest wood grain. Keep these faint and sparse. -
Create the ground shadow:
Mix a watery wash of Alizarin Crimson and Burnt Umber. Paint a soft, undefined puddle at the feet of the figure. This grounds the subject and adds a slightly surreal, emotional color to the shadow.
Step 3: Inking and Details
-
Outline with ink:
Once the paint is bone dry, use a 0.1mm black fine liner to trace the outline of the mannequin. Keep the line weight delicate. Broken or slightly jittery lines can actually enhance the ‘fragile’ mood of the piece. -
Detail the joints:
Add small curved lines at the elbows, knees, and waist to emphasize the separation of the wooden parts. This technical detail contrasts with the emotional pose. -
Draw the red strings:
Using a red fine liner or a sharpened red watercolor pencil, trace over your ruler lines for the strings. The red color symbolizes a lifeline or perhaps a vein, adding metaphorical weight. -
Strengthen the shadows:
Use the pen to add tiny hatching marks in the deepest shadow areas, such as under the armpits or behind the knees, to increase contrast. -
Final assessment:
Step back and look at the composition. If the ground shadow looks too light, glaze another layer of the reddish-brown wash over it to anchor the feet firmly.
Fixing Wobbly Lines
If your ink lines for the strings get wobbly, don’t panic. Go over them once more to thicken them slightly, or add a second string next to it to suggest movement.
Hang your finished piece in a float frame to show off the beautiful deckle edges of the paper
BRUSH GUIDE
The Right Brush for Every Stroke
From clean lines to bold texture — master brush choice, stroke control, and essential techniques.
Explore the Full Guide
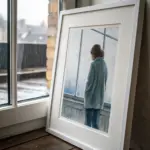
Memories as Fading Polaroid-Like Frames
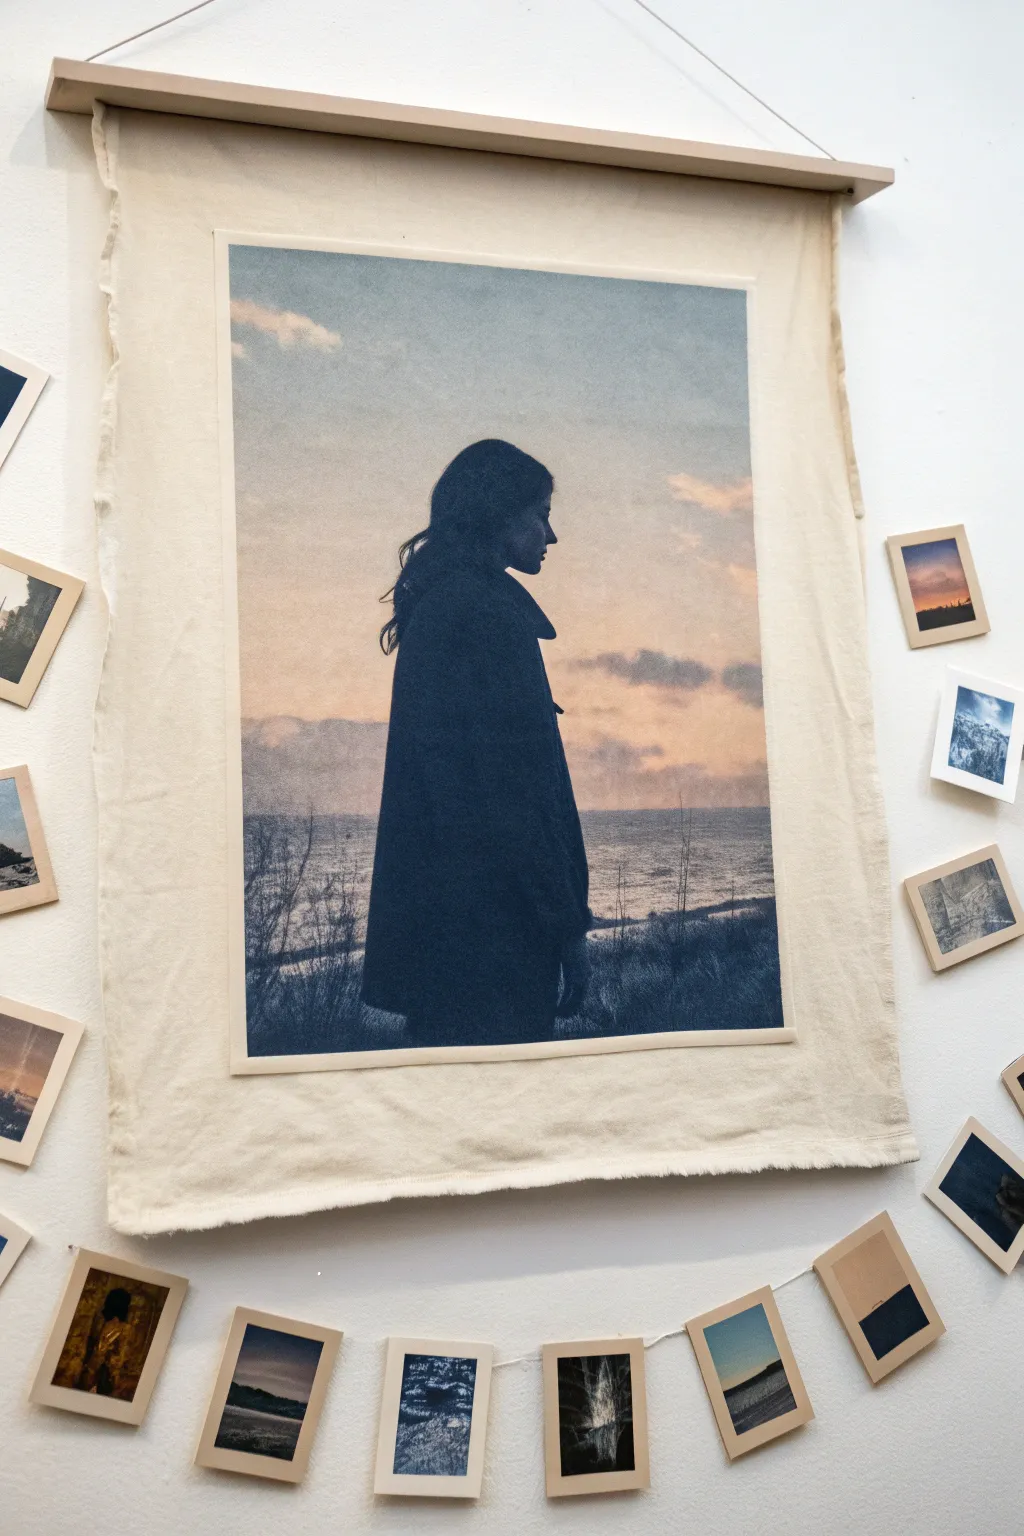
This evocative wall hanging merges the texture of raw textile with the nostalgic quality of a cyanotype or faded photograph. By transferring a moody silhouette image onto unbleached fabric, you create a piece that feels like a tangible, yet slipping, memory.
Step-by-Step
Materials
- Heavyweight unbleached cotton canvas or calico fabric (approx. 24×36 inches)
- Inkjet transfer paper (for dark fabrics) or Iron-on transfer sheets
- Digital photo editing software
- High-resolution photo of a silhouette against a sunset/sky
- Inkjet printer
- Iron and ironing board
- Parchment paper or Teflon sheet
- Wooden dowel (approx. 0.5 inches thick) or flat wood strip
- Cotton twine or leather cord for hanging
- Fabric glue or heavy-duty double-sided tape
- Scissors and ruler
- Fray check sealant (optional)
Step 1: Preparing the Image
-
Select your subject:
Choose a photo that features a strong silhouette against a textured sky. Profile views standing before a landscape work best for this emotional theme. -
Edit for mood:
Open your photo editing software. Lower the saturation slightly to give it a vintage, faded look, and increase the contrast to ensure the silhouette stands out clearly against the background. -
Add a blue tint:
Apply a cool blue or indigo filter over the image to mimic the cyanotype aesthetic shown in the example. This adds a layer of melancholy to the piece. -
Split the image (if necessary):
If your final print is larger than standard printer paper, use a ‘poster print’ or ’tile’ feature in your software to split the image across several sheets of transfer paper.
Step 2: Transfer Process
-
Prepare the fabric:
Cut your unbleached canvas to the desired size, leaving generous margins around where the image will go. Iron the fabric completely flat to remove any creases. -
Print the transfers:
Print your tiled image onto the iron-on transfer sheets. Make sure to follow the specific instructions on your packet regarding mirroring the image if required. -
Trim the transfers:
Cut away any white borders from your printed sheets. If piecing together multiple sheets, trim precisely to the edge of the ink so the seams will disappear. -
Position the image:
Lay the transfer sheets face down (or face up, depending on your brand’s instructions) on the center of the canvas. I find using a ruler here helps ensure the margins are equal on both sides. -
Apply heat:
Using a hot iron (no steam), press firmly onto the transfer paper. Move slowly and apply consistent pressure, especially over the edges and any seams where sheets meet. -
Peel carefully:
Allow the transfer to cool completely before peeling off the backing paper. Peel slowly from one corner to ensure the image has adhered properly to the fabric fibers.
Seamless Merging
If tiling multiple transfer sheets, overlap the edges by 1mm when ironing. The heat will fuse them together, minimizing any visible gaps.
Step 3: Finishing the Scroll
-
Fray the edges:
Gently pull loose horizontal threads from the left and right sides of the canvas to create a raw, frayed edge. This contributes to the rustic, worn aesthetic. -
Seal the sides:
If the fraying seems like it might continue too far, apply a thin line of fray check sealant along the stopping point of your fringe. -
Prepare the mount:
Take your wooden dowel or flat strip and cut it so it is slightly wider than your canvas width. -
Create the top sleeve:
Fold the top inch of the canvas over the wooden strip to create a casing. Secure this fold on the back using strong fabric glue or heavy-duty double-sided tape. -
Attach the hanger:
Tie your cotton twine or leather cord to the exposed ends of the wooden dowel. Adjust the length of the string to suit how low you want the piece to hang. -
Clean up:
Inspect the canvas for any loose threads or lint. A quick roll with a lint roller ensures the focus stays entirely on the silhouette.
Aged Effect
Dip the raw fabric edges in strong tea or coffee before transferring the image. This adds brown staining for an antique, weathered look.
Now you have a hauntingly beautiful wall hanging that captures the fleeting nature of memory

Have a question or want to share your own experience? I'd love to hear from you in the comments below!