A clay ashtray is one of my favorite little projects because it’s functional, fast, and you can make it look like a tiny piece of sculpture. Below are my go-to clay ashtray ideas—starting with the classics and sliding into the weirder, more playful stuff once you’re warmed up.
Classic Pinch Pot Clay Ashtray
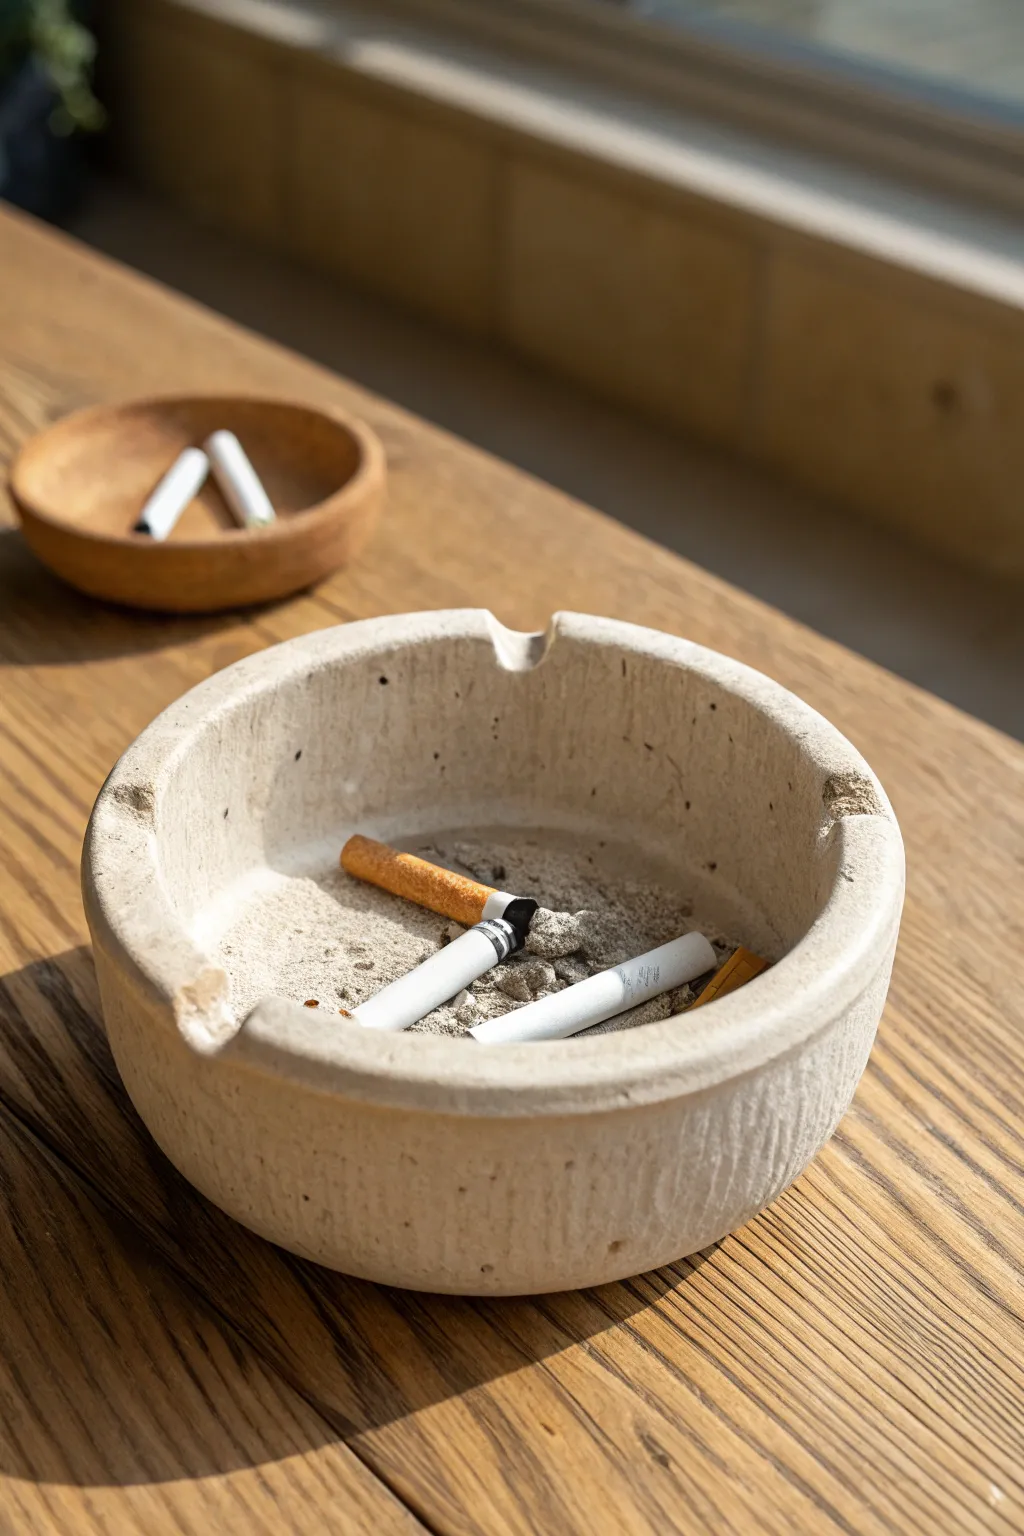
Recreate the rustic charm of hewn stone with this textured clay ashtray project. The design utilizes a classic thick-walled cylindrical shape and a clever sand technique to achieve an authentic, weathered finish that looks perfectly at home on any wooden table.
Step-by-Step Tutorial
Materials
- Stoneware clay (buff or white with grog)
- Fine grit sand (clean)
- Fettling knife
- Rolling pin
- Pony roller or wooden slat
- Slip (clay mixed with water)
- Scoring tool or fork
- Sponge
- Wooden sculpting tool (rounded end)
- Loop tool (optional for carving)
- Matte finish clear glaze (optional)
Step 1: Forming the Base
-
Prepare the Clay:
Begin by wedging a softball-sized amount of stoneware clay to remove air bubbles. Since we want a substantial, stone-like look, don’t skimp on the amount of clay. -
Roll the Slab:
Roll out a slab of clay to a uniform thickness of about 1/2 inch. This thick wall is crucial for the heavy, stone aesthetic seen in the reference. -
Cut the Floor:
Use a round object or a circle template to cut out the base of your ashtray. A diameter of 5-6 inches works well for a standard tabletop size. -
Create the Wall Strip:
From the remaining slab, cut a long rectangular strip. Ideally, this should be about 2.5 to 3 inches tall and long enough to wrap around the circumference of your base.
Step 2: Assembling the Cylinder
-
Texture with Sand:
Before assembling, sprinkle fine sand onto your work surface. Gently press the exterior side of your wall strip into the sand. This embeds the grit directly into the clay for that weathered texture. -
Score the Edges:
Score the outer edge of the circular base and the bottom edge of your wall strip using a fork or scoring tool. Apply a generous amount of slip to the scored areas. -
Attach the Wall:
Wrap the wall strip around the base. Press firmly to join the scored edges. I find it helpful to overlap the ends of the wall slightly, cutting through both layers at an angle for a seamless vertical seam. -
Reinforce the Seams:
Use a wooden tool to blend the clay on the interior seam where the wall meets the floor. Smooth it out until the individual parts disappear into one solid form. -
Shape the Rim:
The rim in the example is flat and substantial. Gently tap the top of the cylinder with a wooden paddle or flat slat to level it completely.
Rim Cracking?
If the rim cracks while pressing the cigarette rests, the clay is likely too dry. Mist it lightly with water, wait 10 minutes, and try pressing again more gently.
Step 3: Refining and Texturing
-
Smooth the Interior:
Use a slightly damp sponge to smooth out the interior walls and floor. The inside needs to be cleaner than the outside to make cleaning ash easier later. -
Add Vertical Texture:
On the exterior heavily-sanded walls, drag a serrated kidney rib or a stiff brush vertically from bottom to top. This mimics notching or chisel marks often found on stone carving. -
Create Cigarette Rests:
Select three or four points around the rim. Use a rounded wooden tool or your thumb to gently press indentations into the rim. -
Refine the Rests:
Clean up the edges of these indentations so they are smooth U-shapes, deep enough to hold a cigarette securely but not so deep they compromise the wall’s structure. -
Distress the Edges:
To match the reference photo’s aged look, gently chip or press a few random spots on the outer rim with a rock or rough tool. Perfection is the enemy here; you want it to look eroded. -
Interior Sanding:
Sprinkle a very small amount of clean sand into the bottom of the tray and press it lightly into the floor. This provides a tactile contrast and hides ash stains over time.
Stone Effect
Mix a small amount of mason stain (like iron oxide or black) into your exterior sand. When fired, this creates realistic speckling that looks exactly like granite.
Step 4: Finishing
-
Slow Drying:
Cover the piece loosely with plastic to let it dry slowly over a few days. Thick walls can crack if they dry too fast. -
Bisque Fire:
Once bone dry, bisque fire the piece to the appropriate cone for your specific clay body (usually Cone 04 or 06). -
Glazing (Optional):
For the exact look in the photo, you might leave the exterior as raw clay. However, implying a clear matte glaze on the interior makes it functional and washable. -
Final Firing:
Fire the piece a final time to vitrify the clay, ensuring it is durable and heat resistant.
Now you have a durable, rugged accessory that blends seamlessly with natural decor


Clean Slab Ashtray With Corner Rests
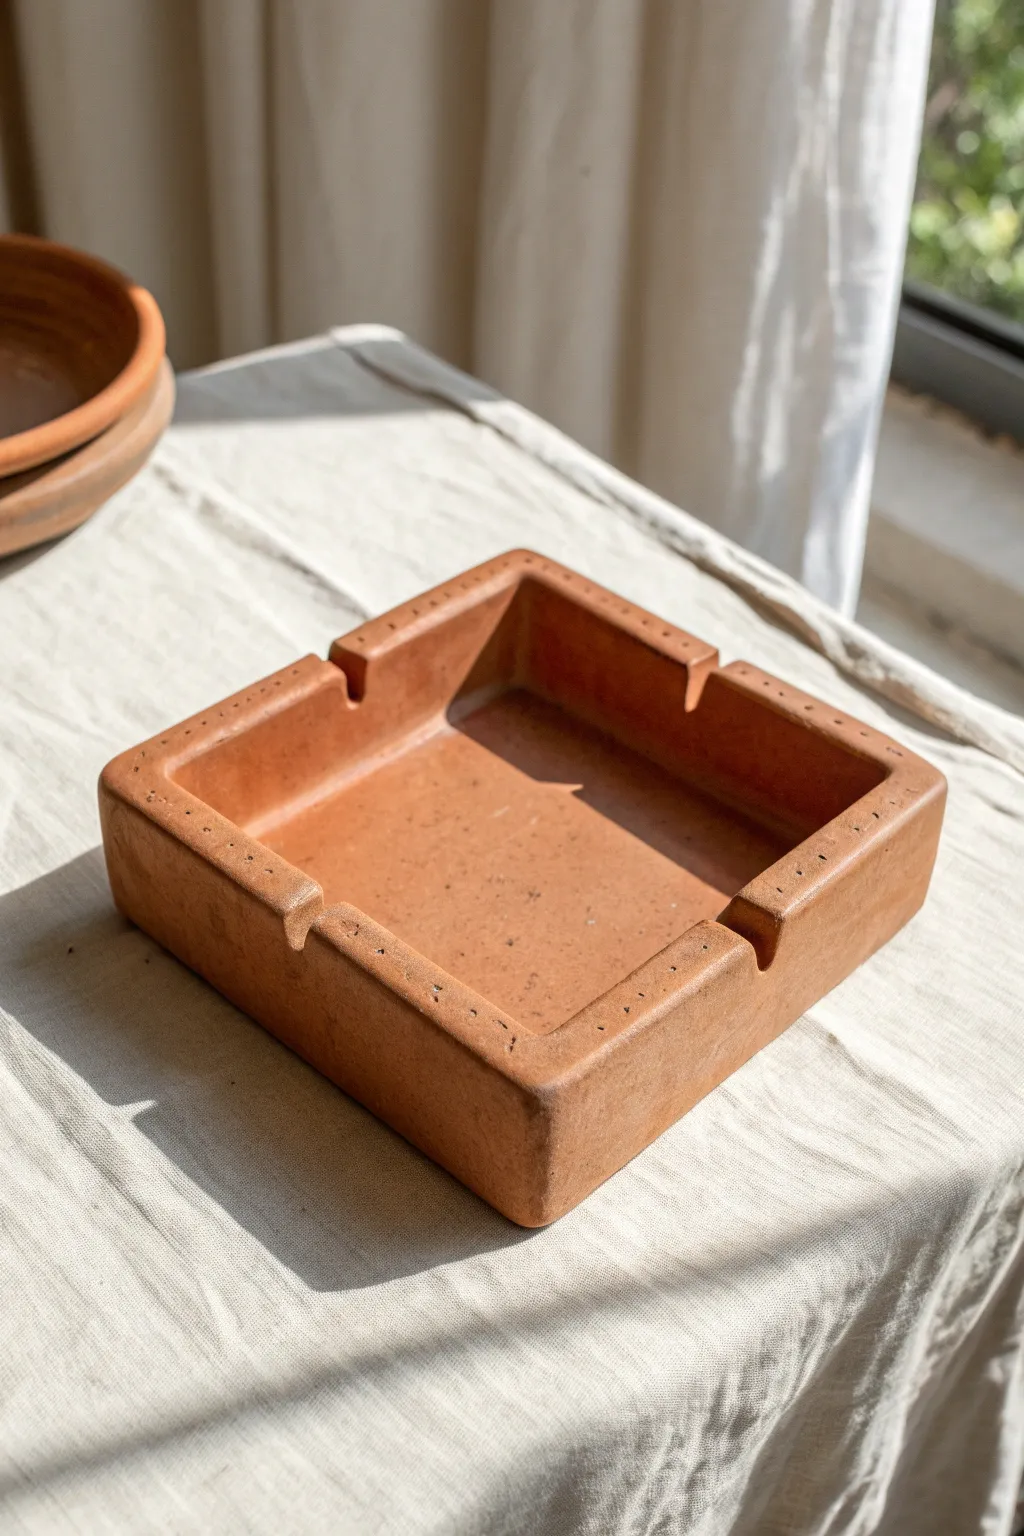
This project features a robust, minimalist square ashtray crafted from warm terracotta clay, perfect for adding an earthy touch to any table utilizing simple slab-building techniques. Its clean lines are softened by rounded edges and subtle decorative stitching marks along the rim.
Step-by-Step Guide
Materials
- Terracotta or stoneware clay (grogged for strength)
- Rolling pin
- Two wooden guide strips (approx. 1/4 inch thick)
- Ruler or square template
- Fettling knife or needle tool
- Scoring tool or serrated rib
- Slip (clay and water slurry)
- Wooden modeling tool or rounded stick
- Sponge
- Canvas or heavy cloth (work surface)
Step 1: Preparing the Slabs
-
Wedge the clay:
Begin by thoroughly wedging your clay to remove any air bubbles and ensure an even consistency, which is crucial for preventing cracks during drying. -
Set up your guides:
Place your canvas on a flat work surface. Lay your two wooden guide strips parallel to each other, slightly wider than the width of your intended slab. -
Roll the main slab:
Place a ball of clay between the guides. Using the rolling pin, roll the clay out until the pin rests on the guide strips, ensuring a perfectly uniform thickness for your base and walls. -
Smooth the surface:
Before cutting, take a damp sponge or a rubber rib and compress the clay surface on both sides. This aligns the clay particles and creates that smooth, professional finish we see in the photo.
Warping Walls?
If your walls start to bow inward or outward while working, stuff the inside of the box with crumpled newspaper or foam to hold the shape while the clay stiffens up to leather hard.
Step 2: Cutting and Assembling
-
Cut the base:
Using a ruler and fettling knife, cut a perfect square for the base. For an ashtray like this, a 5×5 or 6×6 inch square is a good standard size. -
Cut the wall strips:
Cut four long rectangular strips for the walls. These should be the same length as your base sides plus the thickness of the clay, and about 1.5 to 2 inches tall. -
Score the edges:
Take your scoring tool and rough up the outer edges of the base slab and the bottom, side edges of your wall strips where they will connect. -
Apply slip:
Dab a generous amount of slip onto all the scored areas. I find it works best if the slip is the consistency of heavy cream. -
Attach the walls:
Place the wall strips onto the base. Press them firmly into place. You can use a miter joint (cutting ends at 45 degrees) for corners, or simple butt joints, blending the clay together on the inside and outside seams. -
Reinforce the seams:
Roll a very thin coil of clay and press it into the interior corners where the walls meet the base. Smooth this out with a modeling tool to ensure a watertight bond.
Step 3: Refining and Detailing
-
Smooth the walls:
Use a straight edge or a paddle to gently tap the walls straight and ensure the square shape remains true. The walls should be perpendicular to the base. -
Create the cigarette rests:
On the center of each wall rim, mark the width of the rest. Use a rounded tool or your finger to gently press down, creating a U-shaped indentation. -
Refine the rests:
Clean up the edges of the indentations with a wet sponge or finger so they are smooth and curved, matching the soft aesthetic of the piece. -
Round the edges:
The example piece has very soft edges. Run a damp sponge or a piece of plastic wrap over all sharp corners and rims to soften them significantly. -
Add decorative markings:
Using a needle tool or a small point, gently prick a row of small dots along the top rim of the walls on either side of the rests. Space them evenly to mimic the stitched look shown in the image.
Level Up: Texture
Mix sand or grog into your clay body before rolling. When you wipe the finished piece with a damp sponge, the grit will reveal itself, creating a rustic, stone-like surface.
Step 4: Drying and Finishing
-
Slow drying:
Loosely cover the ashtray with plastic. Let it dry slowly over a few days to prevent warping, especially since it is a flat-bottomed object. -
Bisque firing:
Once bone dry, fire the piece to bisque temperature (usually Cone 04). Since the inspiration piece looks like raw terracotta, you might stop here or apply a clear matte glaze. -
Sanding (Optional):
If you want that ultra-smooth texture without glaze, you can lightly sand the piece with fine-grit sandpaper after it is bone dry (wearing a mask) or wet-sand it after the bisque firing.
Enjoy the timeless appeal of your handcrafted terracotta creation on your coffee table or patio


Deep Bowl Wind-Guard Ashtray
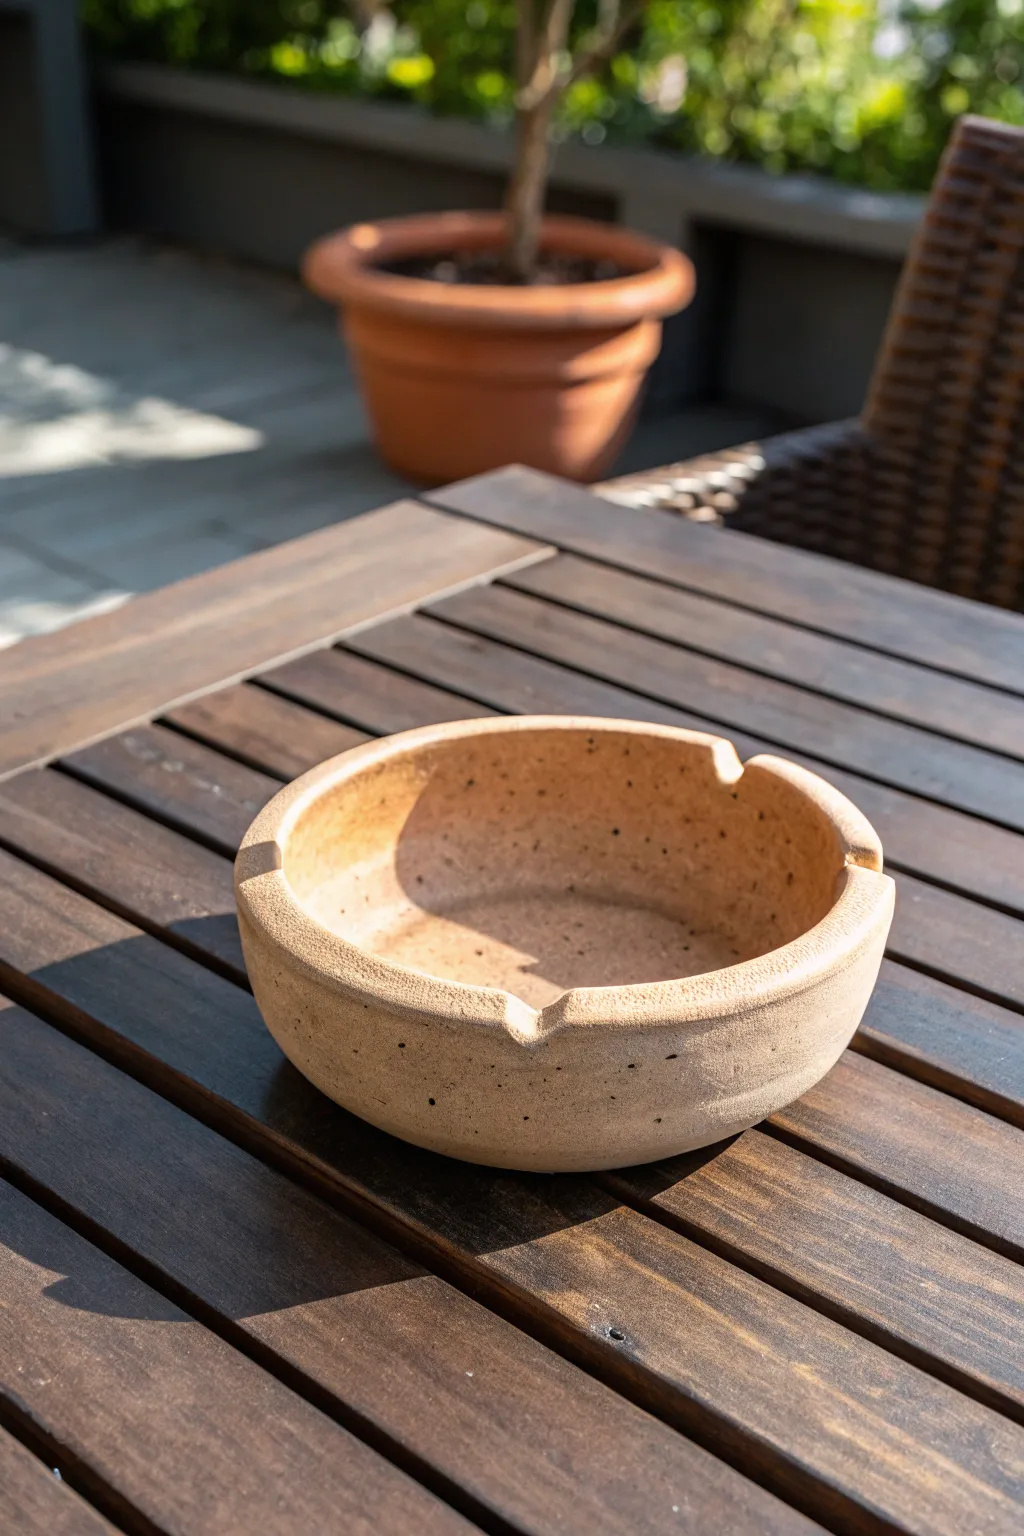
For outdoor spaces where the breeze can be a nuisance, this substantial, deep-walled ashtray is the perfect solution. Its sandy, speckled texture and earthy terracotta tones give it a rustic, grounded feel that blends beautifully with wooden furniture.
Step-by-Step Tutorial
Materials
- Speckled buff stoneware clay or terracotta clay
- Rolling pin
- Canvas mat or slab roller
- Potter’s knife or needle tool
- Rib tool (wooden or rubber)
- Sponge
- Scoring tool or old fork
- Slip (clay mixed with water)
- Small circle cutter (optional, for center)
- Wooden modeling tool or fettling knife
- Coarse sand or grog (optional, for extra texture)
- Matte clear glaze (optional)
Step 1: Prepping the Base
-
Wedge the Clay:
Start by thoroughly wedging about 2-3 pounds of speckled clay. This removes air bubbles and aligns the particles, ensuring the deep walls we build later won’t crack during firing. -
Flatten a Slab:
Using a rolling pin on your canvas mat, roll out a slab of clay. Aim for a distinct thickness, roughly half an inch, to give the ashtray weighted stability against the wind. -
Cut the Base:
Use a round template or a circle cutter to slice out a perfect circle, approximately 5 to 6 inches in diameter. This will serve as the weighty bottom of your ashtray. -
Score the Perimeter:
Take your scoring tool and rough up the outer half-inch of the circle’s top surface. This added texture acts like Velcro for the coil walls.
Uneven Walls?
If your coil walls look lumpy, use a serrated rib tool to scrape and even out the surface before smoothing with a soft rubber rib.
Step 2: Building the Deep Walls
-
Roll a Thick Coil:
Roll out a very thick coil of clay, slightly thicker than your thumb. Since this is a wind-guard style, we want substantial, upright walls rather than thin, delicate ones. -
Attach the First Layer:
Apply slip to the scored base and lay the thick coil around the perimeter. Press it down firmly, ensuring the ends of the coil overlap and blend seamlessly without trapping air. -
Blend the Connection:
Using your thumb or a wooden tool, drag clay from the coil down onto the base on both the inside and outside. This unifies the two pieces into a single structure. -
Add Height:
Repeat the process with a second thick coil on top of the first. I find that two very thick coils usually provide enough depth (about 2-3 inches) to shield ash from the wind effectively. -
Shape the Profile:
Use a rib tool to smooth the exterior and interior walls. As you smooth, gently pull the walls slightly inward at the top to create a slight curve that helps trap ash inside.
Step 3: Creating Texture and Notches
-
Add Texture:
Dampen a sponge slightly and dab it all over the exterior. If your clay isn’t naturally gritty, you can gently press coarse sand into the surface now to replicate that rustic, stony look. -
Mark the Notches:
Identify three equidistant points along the rim. Lightly mark these spots with your needle tool so you know exactly where the cigarettes will rest. -
Carve the Notches:
Using a fettling knife or wire loop tool, carve out U-shaped grooves at your marked points. Angle the cut slightly downward toward the center of the bowl so cigarettes naturally rest securely inside. -
Smooth the Rims:
Run a damp chamois or your finger along the rim and inside the new notches. Sharp edges can be brittle after firing, so rounding them off is crucial for durability.
Better Cleaning
Apply a clear liner glaze just to the inside bowl. This seals the clay pores so ash wipes out easily, while keeping the outside raw and textured.
Step 4: Finishing
-
Slow Drying:
Cover the piece loosely with plastic. Because the walls and base are thick, it needs to dry very slowly over a few days to prevent warping. -
Bisque Fire:
Once bone dry, fire the piece in a kiln to bisque temperature (usually cone 04). This hardens the clay and prepares it for glazing or finishing. -
Final Look:
To maintain the raw texture like the reference photo, simply fire it to maturity without a colored glaze, or apply a very thin matte clear glaze to the inside for easier cleaning.
Now you have a sturdy, wind-resistant piece ready for your patio table

Minimal Round Ashtray With Three Notches
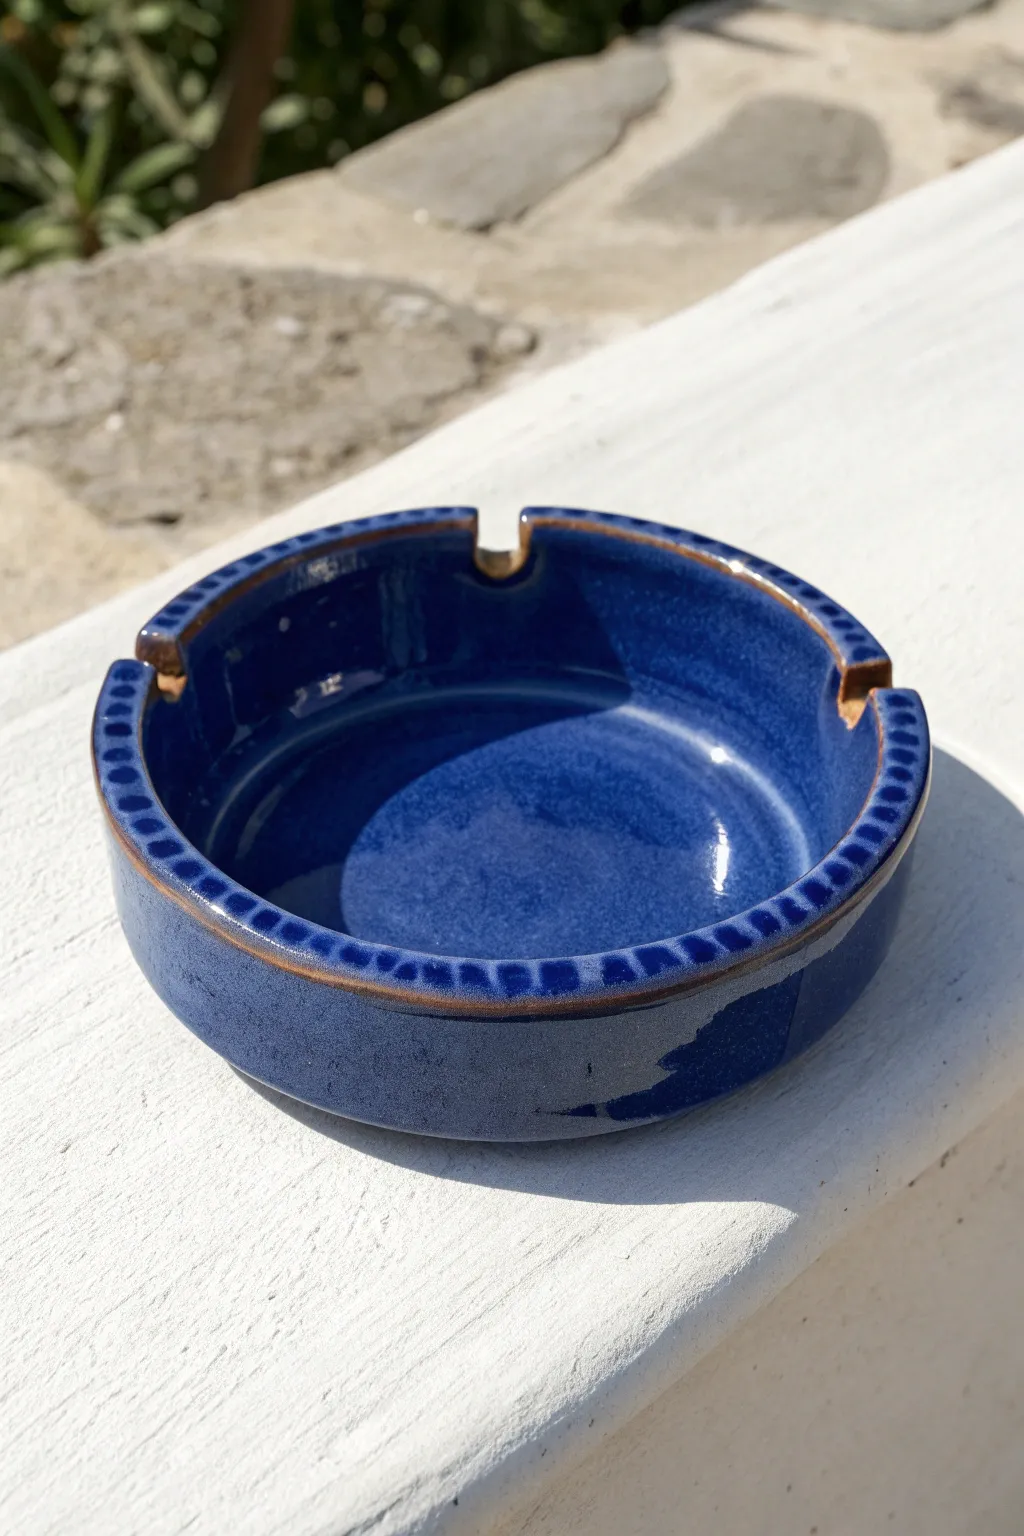
This project produces a robust, high-walled ashtray with a stunning deep blue glaze and subtle rustic exposed edges. Its clean, cylindrical shape and perfectly spaced notches offer a timeless, functional design that feels substantial in the hand.
How-To Guide
Materials
- Earthenware or Stoneware clay (white or light-colored body)
- Pottery wheel (or slab roller for hand-building)
- Needle tool
- Wire clay cutter
- Rib tool (wood and metal)
- Sponge
- Trimming tools (loop or pear-shaped)
- Small circular hole cutter or fettling knife
- Glossy dark cobalt blue glaze
- Liquid wax resist
- Kiln for firing to appropriate cone
Step 1: Throwing the Form
-
Center the clay:
Start with a grapefruit-sized ball of clay on the wheel head. Use your palms and body weight to firmly center the clay until it spins without wobbling. -
Open the well:
Press your thumbs into the center of the mound, leaving about a 1/2 inch of clay at the bottom for the floor. Pull the clay outward to establish the interior width, flattening the bottom thoroughly with a rib tool to compress the particles. -
Pull the walls:
Begin pulling the walls upward. Unlike a bowl, you want to keep the walls vertical and straight to achieve that cylindrical shape. Aim for a wall thickness of about 1/4 inch. -
Define the rim:
Once you have the height (about 2 inches), use a chamois or sponge to compress and round the rim. A slight flattening of the top edge creates a nice surface for the eventual notches. -
Undercut and release:
Use a wooden knife tool to trim excess clay from the base where it meets the wheel. Run your wire cutter underneath to release the pot, then set it aside on a ware board until it reaches a leather-hard state.
Step 2: Trimming and Carving
-
Trim the foot:
Once leather-hard, center the piece upside down on the wheel. Secure it with clay lugs. Use a sharp loop tool to trim the bottom and sides, refining the vertical profile and creating a clean, flat foot ring if desired. -
Mark notch placements:
Flip the piece right-side up. Visualize the rim as a clock face and mark three points equal distances apart (roughly at 12, 4, and 8 o’clock) using a needle tool. -
Create the notches:
Using a U-shaped loop tool or a carefully wielded fettling knife, carve out the three cigar rests. I prefer to use a circular hole cutter pressed halfway into the rim for a perfect semi-circle, then smooth the edges. -
Refine the edges:
Smooth the cut edges of the notches with a damp sponge or your finger to remove any sharp burrs. This ensures the glaze will break beautifully over these curves later. -
Create texture (Optional):
If you want to replicate the subtle rim texture from the photo, gently press the side of a small tool or chopstick repeatedly around the outer edge of the rim to create evenly spaced divots. -
Bisque fire:
Allow the piece to dry completely (bone dry). Load it into the kiln and bisque fire it to the recommended cone for your clay body (usually Cone 04 or 06).
Clean Those Notches
When wiping glaze off the rim, use a firm, barely damp sponge. Too much water will cause the remaining glaze to run and blur that crisp line.
Step 3: Glazing and Finishing
-
Clean the bisque:
Wipe the fired piece down with a damp sponge to remove any kiln dust. This prevents pinholes in your final glaze. -
Apply wax resist:
Apply liquid wax resist to the bottom foot of the ashtray. This prevents glaze from sticking to the kiln shelf. -
Dip into glaze:
Using glazing tongs, submerge the entire ashtray into a bucket of deep cobalt blue glaze for about 3 seconds. Pull it out and let the excess drip off. -
Clean the notches (The secret touch):
To get that exposed clay look, dip a sponge in water and carefully wipe the glaze off just the very top edge of the rim and the inside curves of the notches. This reveals the clay body underneath. -
Check the texture:
If you added the small divots on the rim, the glaze should naturally pool in the depressions and thin out on the high points, enhancing the visual depth. -
Glaze fire:
Load the glazed piece into the kiln. Fire to the maturity temperature of your clay and glaze (often Cone 5 or 6 for stoneware). Allow the kiln to cool naturally before opening.
Add a Speckle
Use a clay body with fine iron speckles or grog. When fired, these specks will bleed through the blue glaze, adding vintage character and depth.
Now you have a durable, custom piece that is ready for heavy use or just to sit pretty as decor on a coffee table
BRUSH GUIDE
The Right Brush for Every Stroke
From clean lines to bold texture — master brush choice, stroke control, and essential techniques.
Explore the Full Guide
Terrazzo Speckled Clay Ashtray
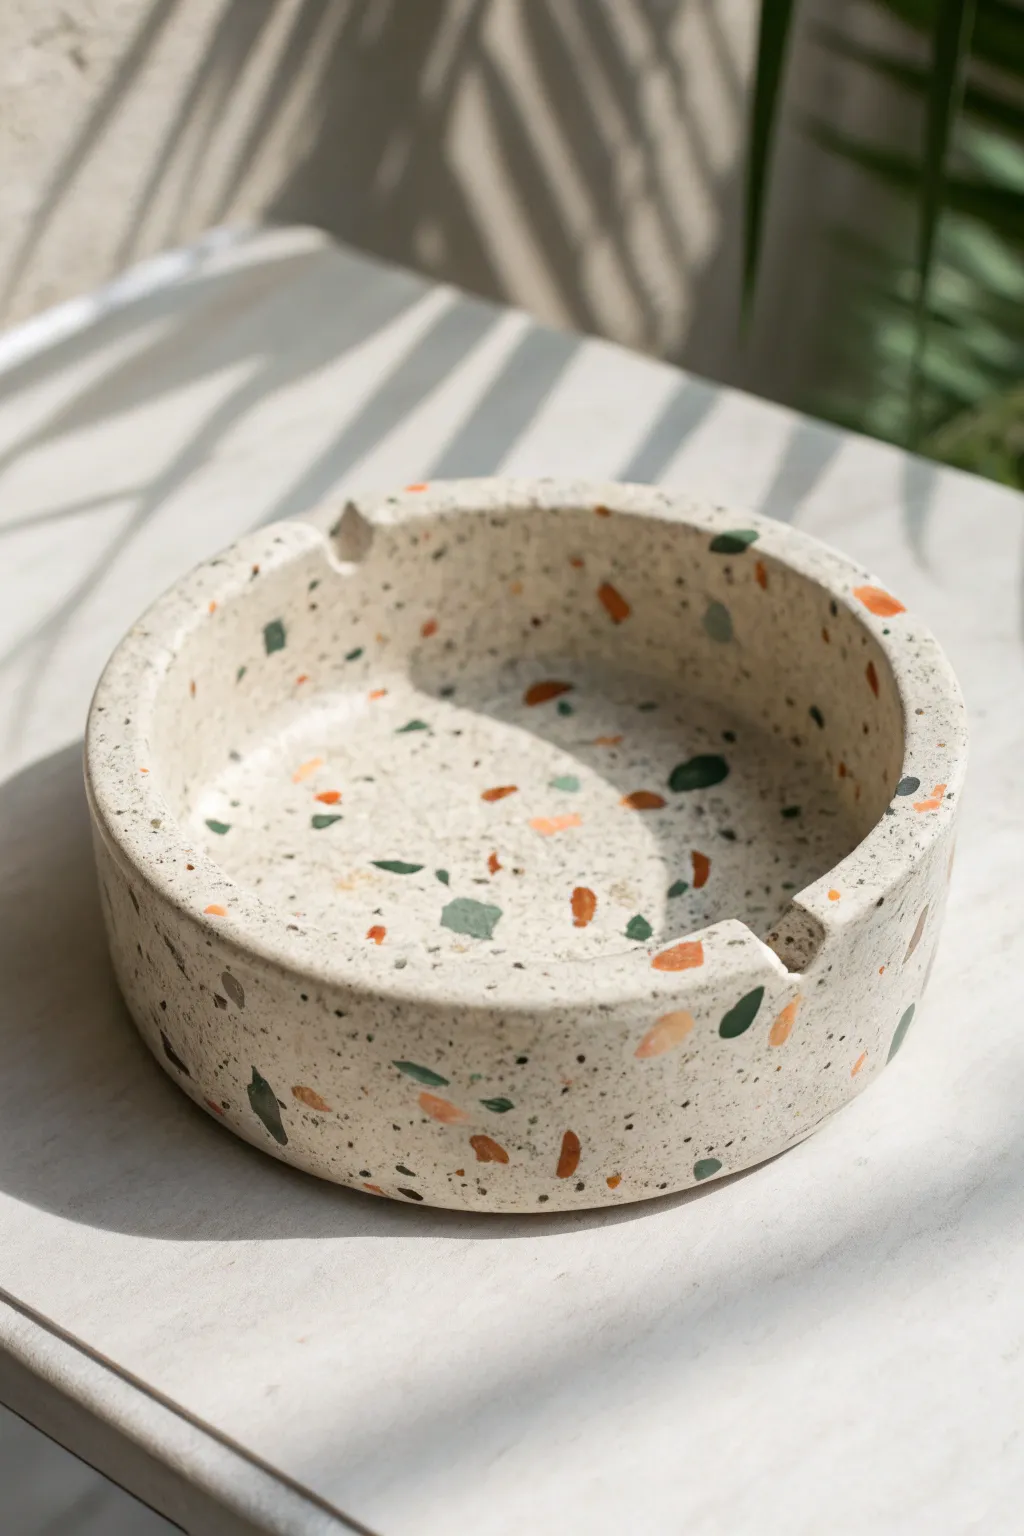
Bring a touch of modern Mediterranean style to your space with this faux-stone terrazzo ashtray. The speckled design is achieved by embedding colorful clay chips into a neutral base, creating a polished, high-end look without the need for a kiln.
Step-by-Step Tutorial
Materials
- Polymer clay (base color: ecru or sand; chips: burnt orange, forest green, terracotta, charcoal)
- Acrylic rolling pin
- Circle cutter or bowl (approx. 5-6 inches)
- Small craft knife or blade
- Sandpaper (grits 400, 600, 1000)
- Glossy polymer clay varnish or UV resin
- Soft paintbrush
- Oven and baking tray
- Parchment paper
Step 1: Creating the Terrazzo Chips
-
Prepare chip colors:
Condition your accent colored clays (orange, green, terracotta, charcoal) by kneading them until soft and pliable. -
Roll thin sheets:
Roll each accent color into a very thin, organic sheet. The thickness doesn’t need to be perfectly uniform, but aim for about 1mm. -
Bake the sheets:
Place these thin sheets on parchment paper and bake them for only about 10-15 minutes according to package directions. You want them hard enough to chop but not fully cured. -
Chop into fragments:
Once cooled, use your craft blade to chop the baked sheets into irregular fragments. Vary the sizes from tiny specks to larger, chunky shards.
Uneven surface?
If the chips are protruding too much after baking, use a heavy grit sandpaper (like 200) to level the surface aggressively before moving to fine polishing papers.
Step 2: Forming the Base
-
Condition base clay:
Take a large block of your neutral base clay (ecru or sand) and condition it thoroughly until it is warm and easy to work with. -
Mix in small specks:
Take a pinch of raw charcoal clay and crumble it into tiny dust-like particles. Mix this directly into your base clay for that fine, peppered background texture. -
Roll the slab:
Roll out the prepared base clay into a thick slab, approximately 1/4 inch thick. This needs to be sturdy enough to hold the rim. -
Apply the chips:
Scatter your pre-baked colored chips generously onto the slab. Press them gently into the surface. -
Embed the texture:
Use the acrylic roller to roll over the slab again. This forces the chips flush with the surface and secures them into the raw clay.
Add metallic flair
Mix small flakes of gold or copper leaf into the raw base clay along with the colored chips for a luxurious, shimmering finish.
Step 3: Shaping the Ashtray
-
Cut the base:
Use your large circle cutter or trace around a bowl to cut a perfect circle from your terrazzo slab. This is the bottom of your ashtray. -
Create the sidewall:
Gather the remaining terrazzo scraps and roll them into a long snake, then flatten it into a long strip about 1 inch tall. -
Attach the wall:
Wrap the strip around the circumference of your circular base. I like to score the edges slightly to help them grip before pressing them together. -
Blend the seams:
On the inside and outside, gently smear the clay downward and upward at the seam where the wall meets the base to create a seamless join. Smooth with your finger. -
Cut cigar rests:
Using a cylindrical object like a marker or directly cutting with a knife, create two or three U-shaped indentations on the top rim for the cigarette rests. -
Smooth edges:
Run your finger dipped in a little baby oil or water over the top rim and the indentations to soften any sharp cutting lines.
Step 4: Finishing Touches
-
Final bake:
Bake the assembled ashtray for the full duration recommended by the clay manufacturer, usually 30-45 minutes at 275°F (130°C). -
Sand for revealing:
Once fully cooled, wet-sand the piece starting with 400 grit. This is the magic step that reveals the sharp edges of the chips buried inside. -
Polish surface:
Move through 600 and 1000 grit sandpapers until the surface feels incredibly smooth and stone-like. -
Apply varnish:
Wipe away all dust and apply a thin coat of glossy varnish or UV resin to seal the piece and make the colors pop.
Place this stylish piece on your coffee table or patio to enjoy the functional art you created
Marbled Swirl Polymer Clay Ashtray
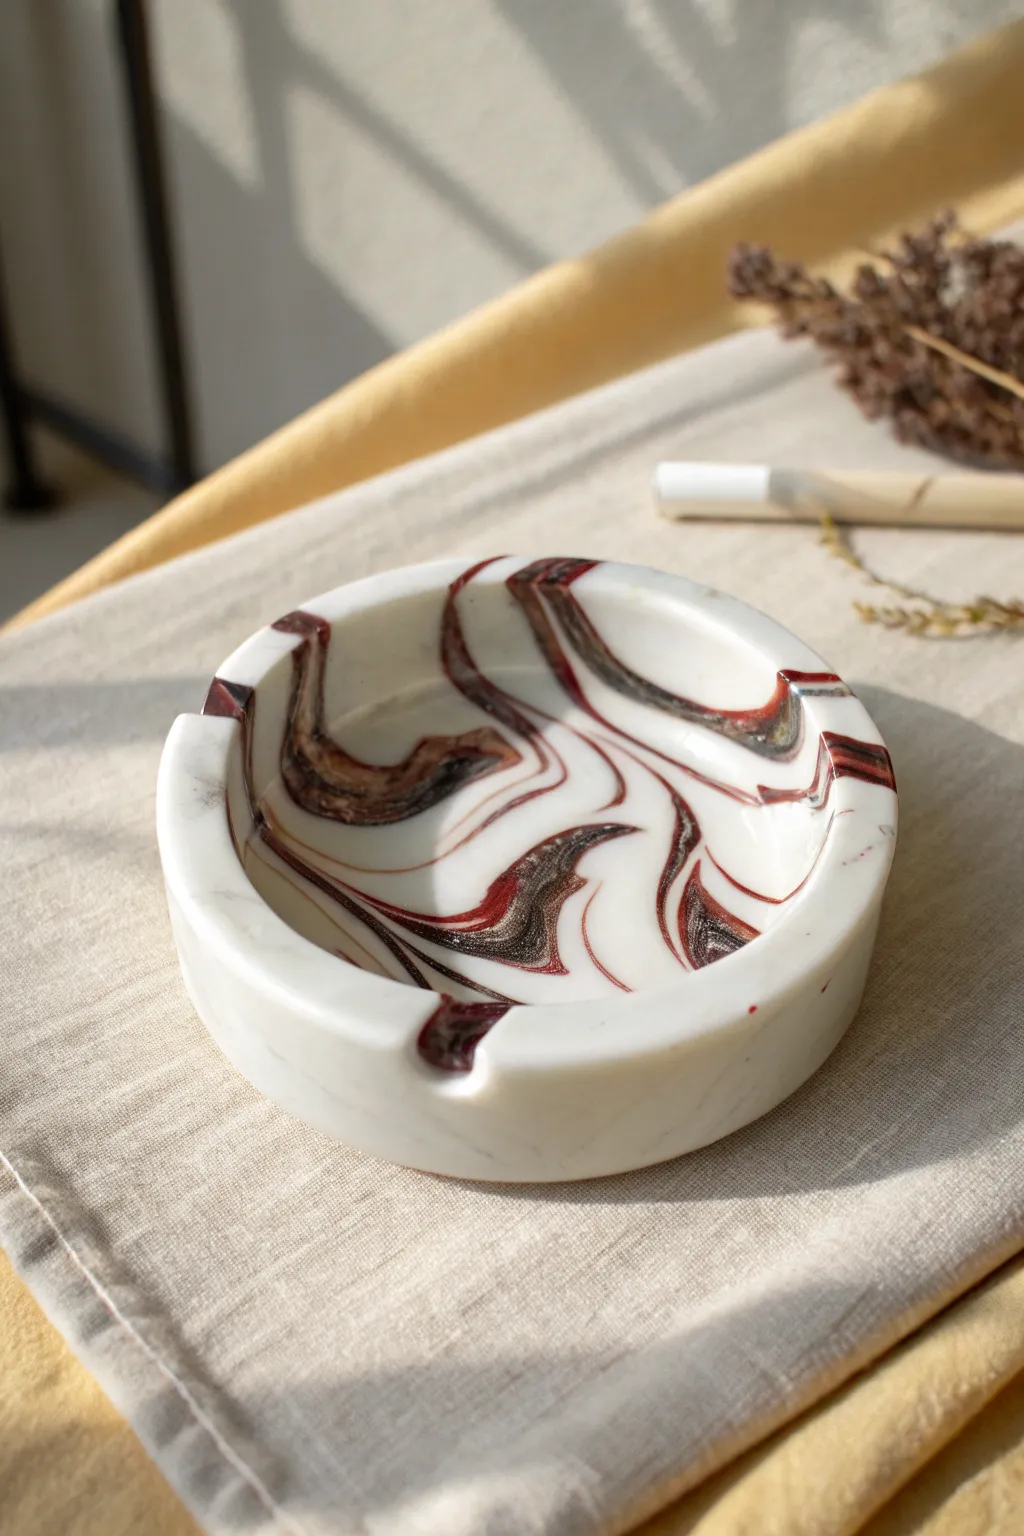
This sophisticated ashtray features a classic white base interrupted by dramatic ribbons of deep red, black, and shimmering charcoal. The high-gloss finish gives it the luxurious look of polished marble, making it a striking conversation piece for any table.
Step-by-Step Guide
Materials
- White polymer clay (large block)
- Black polymer clay
- Deep red or maroon polymer clay
- Translucent or pearl polymer clay (optional for depth)
- Acrylic roller or rolling pin
- Round cookie cutter (approx. 4-5 inches)
- Clay blade or craft knife
- Small round sculpting tool or dowel
- Glossy polyurethane varnish or UV resin
- Soft paintbrush
- Oven and baking sheet
- Parchment paper
Step 1: Preparing the Clay
-
Condition the white base:
Start by taking a generous amount of white polymer clay. Knead it thoroughly in your hands until it is soft, pliable, and warm. This is crucial to prevent cracking later. -
Prepare accent colors:
Condition smaller amounts of the black and red clay separately. Roll them into thin snakes or ropes. I find that varied thicknesses create a more natural stone look. -
Create the base log:
Roll the conditioned white clay into a thick, uniform log, roughly 1.5 inches in diameter. -
Apply the veins:
Place your thin ropes of black and red clay lengthwise along the white log. Don’t worry about being neat; random placement looks more organic. -
Twist and fold:
Twist the log like a candy cane to spiral the colors. Fold the log in half, roll it smooth again, and twist once more. Repeat this 2-3 times, but be careful not to over-mix, or you’ll get muddy gray instead of distinct veins.
Step 2: Shaping the Ashtray
-
Roll the slab:
Ball up your marbled clay and place it on parchment paper. Use your acrylic roller to flatten it into a slab about 1/4 inch thick. Roll in multiple directions to stretch specific swirls. -
Cut the distinct circle:
Use your large round cutter to punch out a clean circle. Save the excess marbled scraps for other small projects. -
Form the rim:
Take a separate strip of white clay (or marbled scrap) and roll it into a long snake. Flatten it slightly to create a wall. Attach this to the outer edge of your base circle, blending the seam on the inside and outside with your thumb or a smoothing tool until the joint is invisible. -
Build up height:
Ensure the wall is roughly 1 inch high. If using the strip method leaves a visible seam, you can alternatively pinch the edges of the thick base slab upwards to form a monolithic wall. -
Smooth the surfaces:
Use a little bit of baby oil or clay softener on your finger to smooth out fingerprints and refine the rim’s shape.
Muddy Colors?
If your red and black are blending into a gray mess, you over-mixed the clay. Stop twisting sooner next time. You want distinct streaks, not a homogenous new color.
Step 3: Detailing and Finishing
-
Create cigarette rests:
Identify 3 or 4 spots along the rim where the marbling looks interesting. Use a dowel or the side of a round tool to gently press indentations into the rim. -
Refine the indentations:
Smooth the edges of these grooves so they curve gently rather than having sharp corners. -
Final inspection:
Check for trapped air bubbles. If you find any, pierce them with a needle and smooth the area down. -
Bake the piece:
Place the ashtray on a parchment-lined baking sheet. Bake according to your clay manufacturer’s instructions (usually 275°F/135°C for 30 minutes per 1/4 inch of thickness). -
Cool down:
Allow the ashtray to cool completely in the oven with the door open. This gradual cooling helps prevent thermal shock cracks. -
Sand for smoothness:
Once cool, use fine-grit wet/dry sandpaper (start at 400, move to 1000) under running water to sand any rough edges or fingerprints. -
Apply the gloss finish:
To achieve the glass-like shine seen in the photo, apply a thin, even coat of polyurethane gloss varnish or UV resin. I prefer UV resin for that instant, hard-shell finish. -
Cure the finish:
Let the varnish dry fully or cure the resin under a UV lamp until it is perfectly hard.
Gold Leaf Accents
For an even more upscale look, press small flakes of gold or copper leaf onto the clay surface before baking. It adheres beautifully and adds a rich mineral vein effect.
Now you have a stunning, stone-effect piece that elevates your decor

PENCIL GUIDE
Understanding Pencil Grades from H to B
From first sketch to finished drawing — learn pencil grades, line control, and shading techniques.
Explore the Full Guide
Scalloped Flower-Petal Ashtray
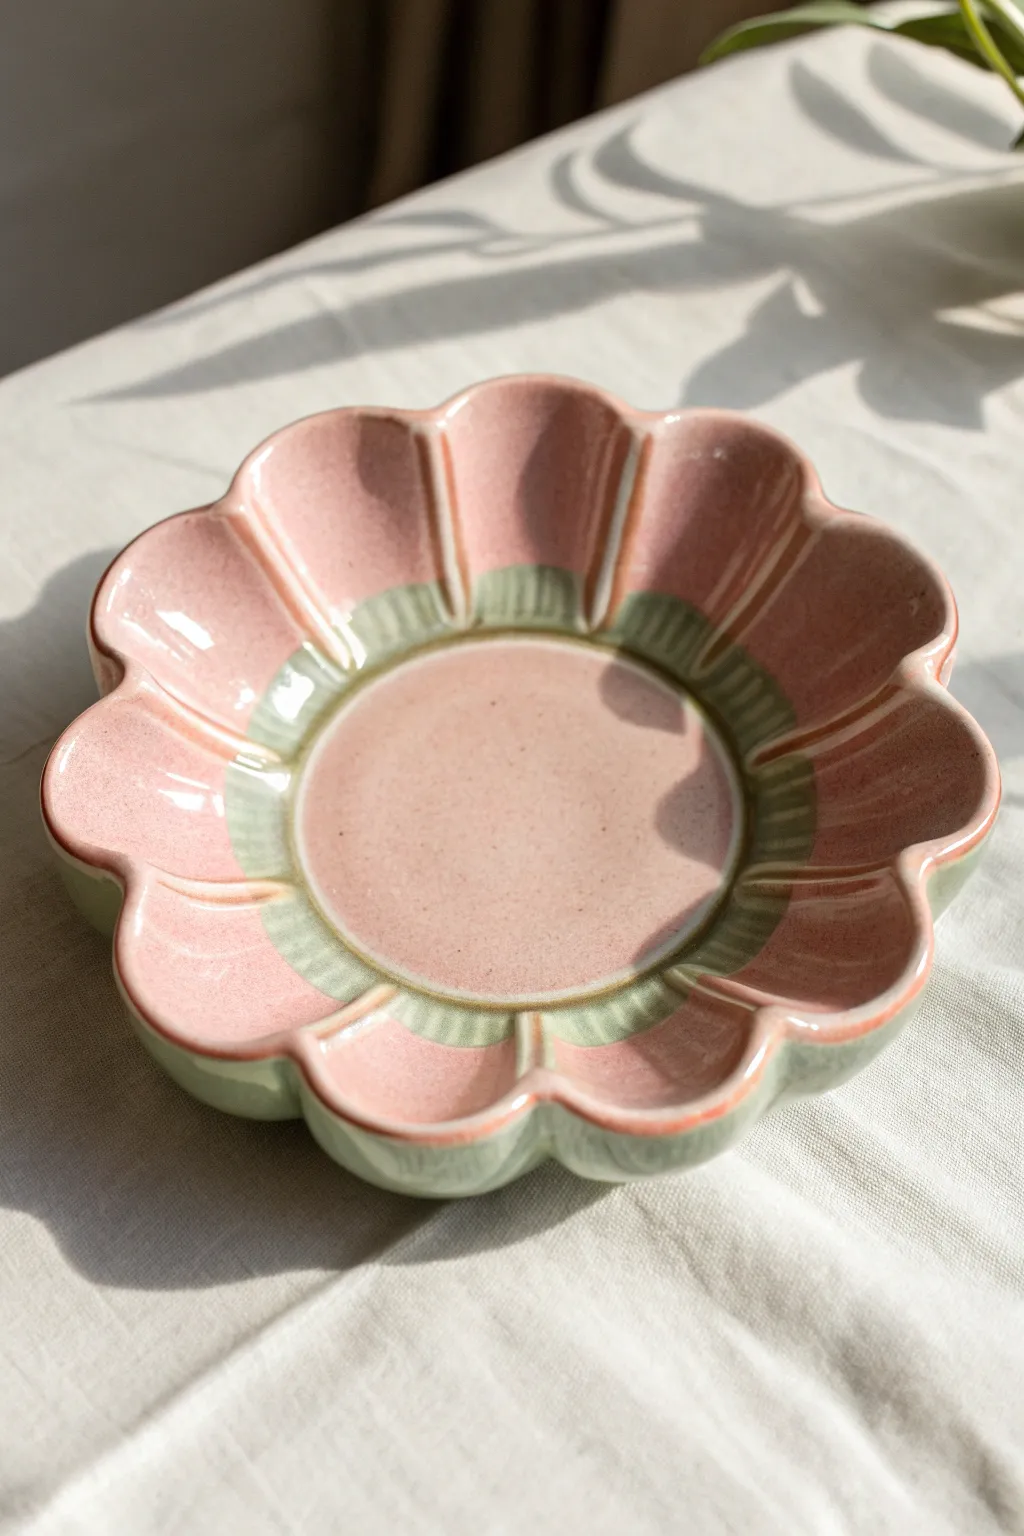
This charming ashtray mimics the soft curves of a blooming flower, featuring delicate scalloped edges and a two-tone pastel finish. The raised petal ridges and dipped center create a functional yet decorative piece that looks lovely on any side table.
How-To Guide
Materials
- White air-dry clay or polymer clay (approx. 500g)
- Non-stick rolling mat
- Rolling pin
- Circular cookie cutter or template (approx. 5 inches)
- Small bowl (for shaping the curve)
- Modeling tools (or a blunt butter knife)
- Sponge or soft paintbrush
- Water (for smoothing)
- Acrylic paints (Dusty Rose, Sage Green, Cream)
- High-gloss varnish or resin
- Fine grit sandpaper
Step 1: Shaping the Flower Base
-
Roll the slab:
Begin by conditioning your clay until it is pliable, then roll it out on your non-stick mat to an even thickness of about 1/4 inch. If you want a chunkier look, go slightly thicker. -
Cut the circle:
Use your large circular cutter or a paper template to cut out a perfect circle from the slab. This will define the overall diameter of your ashtray. -
Mark the center:
Lightly press a smaller circle cutter (or a jar lid) into the very center of the clay disc. Do not cut through; just make an indentation to mark where the flat base ends and the petals begin. -
Divide the petals:
Think of a clock face to help space things evenly. Use a knife to make light marks on the outer edge, creating 8 to 10 equal sections. -
Create the scallops:
Using a modeling tool or your fingers, gently push the clay inward at each mark you made on the rim, creating a concave dip. Round off the sections in between to form the curved petal tips.
Step 2: Defining the Details
-
Sculpt the ridges:
Roll very thin snakes of clay for the petal dividers. Lay one snake along the line from the center circle out to the deepest point of each scallop indentation. -
Blend the ridges:
Using a dab of water and a modeling tool, blend the edges of these clay snakes downward into the petals so they look like raised veins rather than separate pieces attached on top. -
Depress the petals:
Use your thumb to gently press down comfortably into the center of each petal section, creating a slight spoon-like curvature that will catch ash. -
Lift and form:
Carefully lift your clay flower and place it inside a shallow bowl lined with plastic wrap. This will force the petals to curve upward while drying, giving it a bowl shape. -
Smooth everything:
Dip a sponge in water and run it over all surfaces, particularly the rim and the ridge lines, to remove fingerprints and sharp tool marks. I prefer to spend extra time here to get that professional ceramic look. -
Dry completely:
Let the piece dry undisturbed for at least 24-48 hours. Flip it over halfway through the process to ensure the bottom dries evenly.
Smooth Rim Technique
Use a slightly damp baby wipe to smooth the edges of the petals before drying. This is gentler than sanding and preserves the soft, organic ‘ceramic’ shape.
Step 3: Painting and Glazing
-
Sand imperfections:
Once fully dry, use fine-grit sandpaper to gently buff away any rough edges on the rim or surface bumps. -
Base coat:
Paint the bottom and sides with a neutral cream or soft sage green color. Let this dry completely before flipping. -
Paint the interior details:
Mix a dusty rose color and apply it to the main body of the petals and the center circle. Use a small brush to keep the edges crisp. -
Add the contrast ring:
Identify the ‘valley’ area where the petals meet the center circle. Paint a band of sage green here, feathering it slightly outward into the pink to create a soft, organic transition. -
Highlight the ridges:
Use a very fine brush with a lighter shade of pink or white to carefully highlight the top of the raised ridges and the very outer rim of the scallops. -
Gloss finish:
Apply two or three coats of high-gloss varnish or a layer of resin. This is crucial to mimic the glassy look of the reference image and to protect the paint from heat and ash.
Ceramic Speckle Effect
To mimic stoneware clay, dip an old toothbrush in brown paint and flick tiny droplets over the dried pink paint before you apply the final gloss varnish.
Now you have a stunning, glossy floral piece ready to be used or gifted
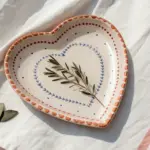
Heart-Shaped Glossy Ashtray
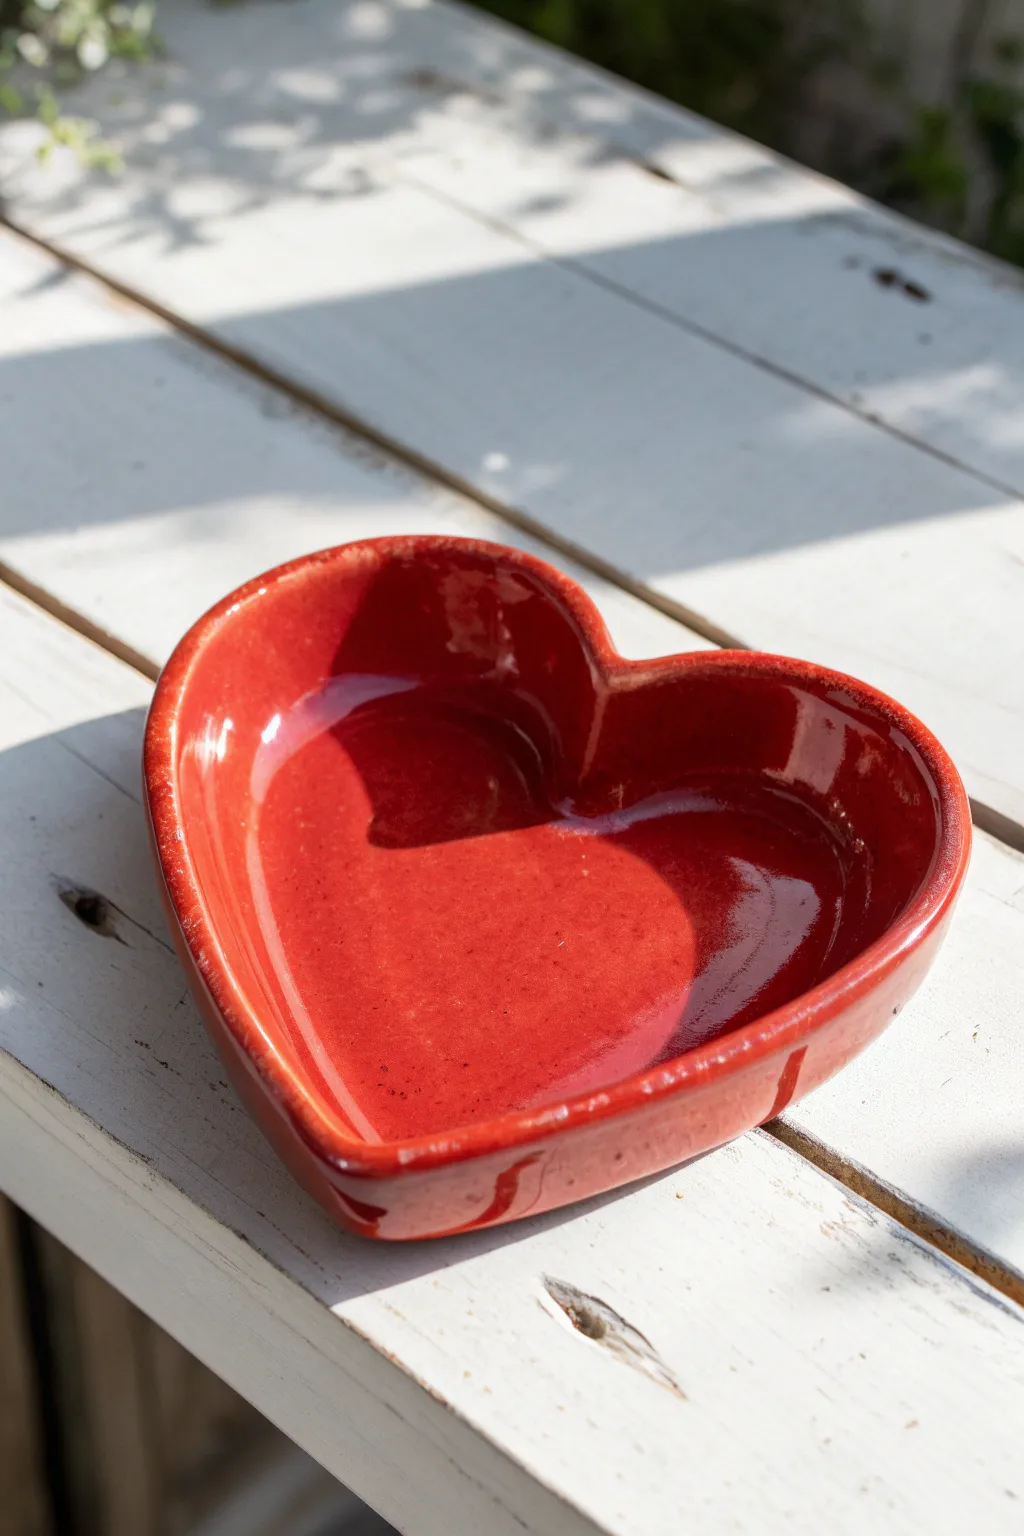
This deep red, heart-shaped dish brings a vibrant pop of color to any table while serving as either a unique ashtray or a charming catch-all for jewelry. Its thick, rounded walls and high-gloss finish give it a professional, store-bought look that feels substantial in the hand.
Step-by-Step Guide
Materials
- Earthenware or stoneware clay (white or light-colored body)
- Rolling pin
- Heart-shaped template (paper or cardstock)
- Fettling knife or clay needle tool
- Sponge
- Smoothing rib (rubber or wood)
- Bright red underglaze or glaze
- Clear gloss glaze (if using underglaze)
- Kiln access (or suitable air-dry clay alternatives with high-gloss varnish)
- Soft fan brush
Step 1: Shaping the Form
-
Prepare the clay slab:
Begin by wedging your clay primarily to remove air bubbles, then roll it out into a slab about 1/4 to 1/2 inch thick. You want it relatively sturdy since this piece has substantial walls. -
Cut the heart base:
Place your heart template onto the slab and trace around it with a needle tool or fettling knife. Cut out the shape cleanly and set the excess clay aside. -
Create the walls:
Roll out a coil or a long, rectangular strip from the remaining clay. This strip should be consistent in thickness—roughly equal to the base—and long enough to wrap around the entire perimeter of your heart base. -
Score and slip:
I like to take a moment here to deeply score the edges of the base and the bottom edge of your clay strip. Apply a generous amount of slip (liquid clay) to both scored surfaces to act as glue. -
Attach the walls:
Gently press the strip onto the base, following the heart’s curve. When you reach the cleft of the heart (the top dip) and the bottom point, ensure the strip bends sharply to maintain a defined heart shape. -
Blend the seams:
Using your thumb or a wooden tool, smear the clay from the wall down onto the base on the inside, and pull the clay from the base up onto the wall on the outside. This unifies the two pieces into a single solid form.
Step 2: Refining and Smoothing
-
Shape the rim:
The rim in the reference image is rounded and soft. Use a damp sponge to consistently round over the top edge of the wall, removing any sharp angles or cutting marks. -
Smooth the surfaces:
Run a rubber rib over the interior and exterior walls to compress the clay and remove fingerprints. The smoother the clay now, the glassier the final glaze finish will look. -
Deepen the heart shape:
While the clay is leather hard, you can accentuate the top dip of the heart by pressing gently with a rounded tool handle, ensuring the silhouette remains distinct. -
Dry slowly:
Loosely cover the piece with plastic to let it dry slowly over a few days. This prevents warping, which is common with flat-bottomed shapes. -
Bisque fire:
Once bone dry, fire the piece in a kiln to bisque temperature (usually Cone 04) to prepare it for glazing.
Smooth Rim Tip
For that ultra-smooth, manufactured look on the rim, wrap a piece of grocery bag plastic around your finger and burnish the rim while the clay is leather hard.
Step 3: Glazing and Finishing
-
Clean the bisque:
Wipe the fired piece with a damp sponge to remove any kiln dust, which can cause pinholes in your glaze. -
Apply the red color:
Using a soft fan brush, apply three even coats of a bright red glaze. Allow each coat to dry to the touch before applying the next one to ensure full, opaque coverage. -
Check the rim:
Pay special attention to the rim where glaze often thins out. Dab a little extra glaze here if needed to match the rich saturation seen in the photo. -
Clean the bottom:
Use a sponge or wax resist to ensure the very bottom of the piece is free of glaze, so it doesn’t fuse to the kiln shelf during firing. -
Glaze fire:
Fire the piece again to the recommended temperature for your specific glaze (often Cone 05/06 for earthenwares or Cone 5/6 for stonewares). -
Inspect the gloss:
After the kiln cools, check the surface. If you used an underglaze, you would have needed a clear coat on top; if you used a gloss glaze, it should now be shiny and reflective like the example.
Cracks at the Seam?
If a crack appears where the wall meets the base during drying, wet the area slightly, pack in fresh soft clay, and compress it thoroughly with a wooden tool.
Once cooled, your glossy red heart is ready to hold small treasures or simply brighten up your coffee table


Cloud-Shaped Soft-Curve Ashtray
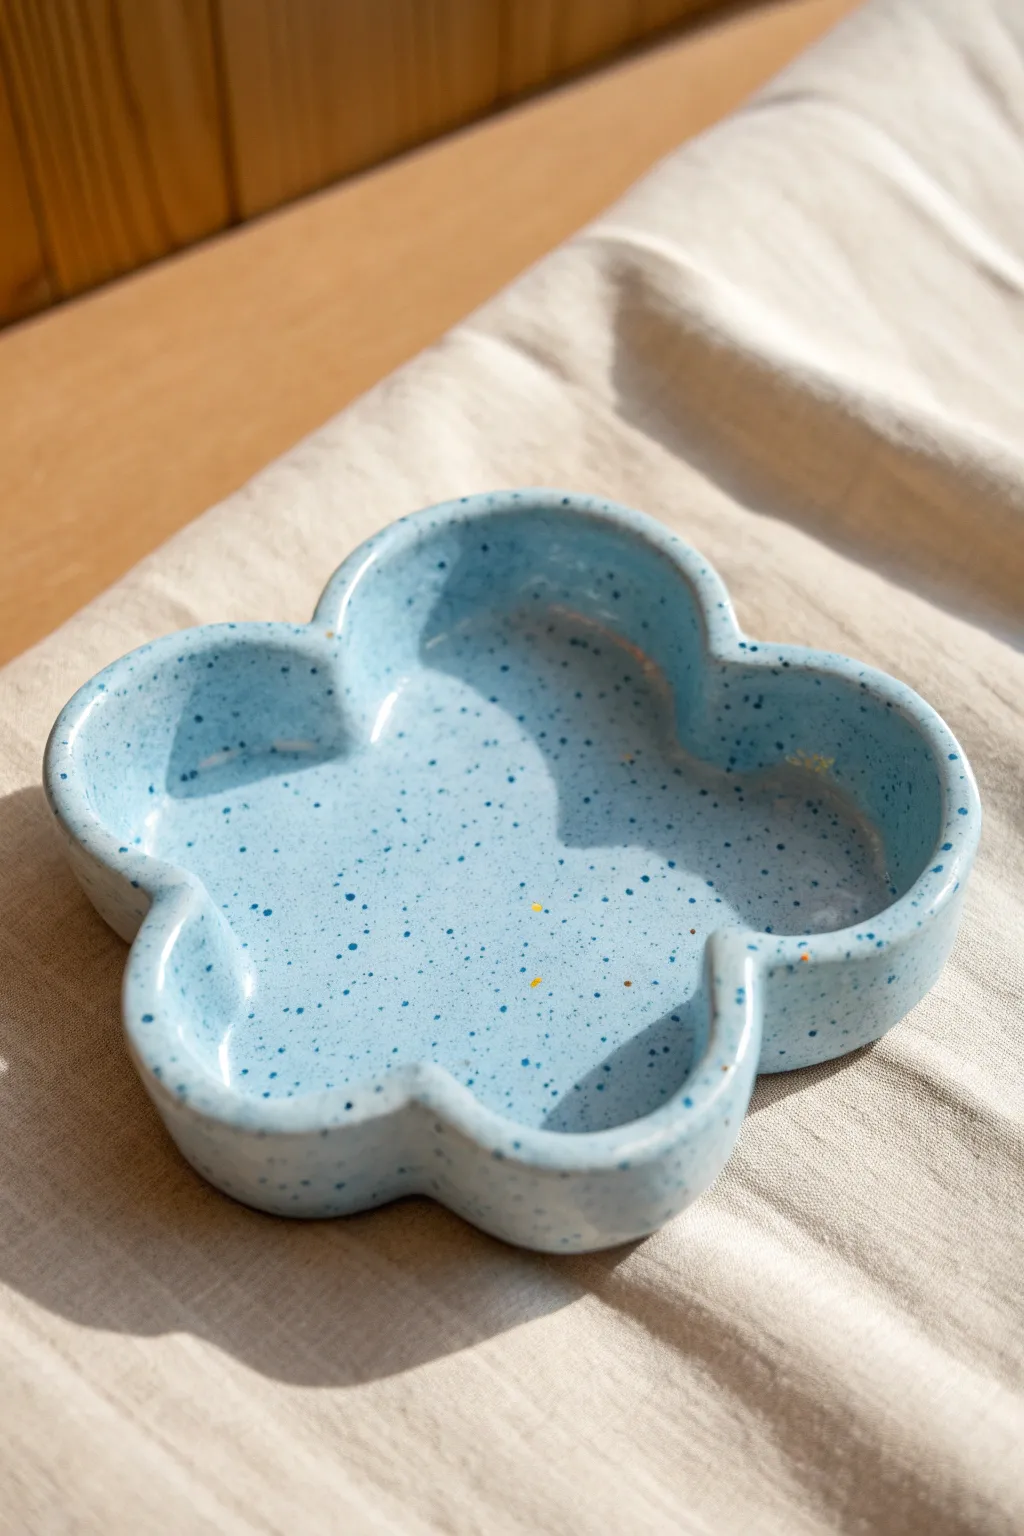
Embrace a dreamy aesthetic with this soft-curved, cloud-shaped ashtray finished in a glossy baby blue glaze. The speckled design adds a touch of organic texture, making this piece perfect for holding sage, incense, or simply serving as a charming trinket dish.
Step-by-Step Tutorial
Materials
- White earthenware or stoneware clay (low-fire or mid-fire)
- Rolling pin
- Two wooden guide strips (approx. 1/4 inch thick)
- Needle tool or X-Acto knife
- Cardstock or paper for template
- Small sponge
- Modeling tool or wooden rib
- Sky blue ceramic glaze (glossy)
- Dark blue glaze or underglaze (for speckling)
- Stiff bristle brush (e.g., a toothbrush)
- Clear dipping glaze (optional, if using underglaze)
- Kiln (or access to a firing service)
Step 1: Shaping the Cloud
-
Draft your template:
Begin by sketching a simple, four-lobed cloud shape onto a piece of cardstock. Aim for symmetry, with deeply rounded curves, and cut it out with scissors to serve as your guide. -
Prepare the clay slab:
Wedge your clay thoroughly to remove air bubbles. Place the clay between your two wooden guide strips and roll it out until the rolling pin rests flat on the guides, ensuring an even thickness of about 1/4 inch. -
Cut the base:
Place your cardstock template onto the slab. Using a needle tool, trace around the shape carefully, keeping the needle upright to create clean, vertical edges. -
Create the walls:
Roll out a separate coil of clay or cut a long strip from the remaining slab, approximately 3/4 inch tall. This will form the raised edge of the ashtray. -
Score and slip:
Score the outer perimeter of your cloud base and the bottom edge of your clay strip. Apply a generous amount of slip (clay mixed with water) to both scored areas. -
Attach the rim:
Gently press the strip onto the base, following the curves of the cloud. If the strip breaks at sharp corners, simply cut it and overlap the edges slightly, blending them together.
Cracks At The Seams?
If tiny cracks appear where the wall meets the floor as it dries, dampen the area slightly and compress it with a rounded tool. This usually happens if the slip dried too fast.
Step 2: Refining the Form
-
Blend the seams:
Use a wooden modeling tool to firmly blend the clay strip into the base on both the inside and outside. I find pulling the clay down from the wall to the floor works best for a strong bond. -
Smooth the curves:
Take a damp sponge and run it along the top rim and the interior curves. You want to soften any sharp angles until the edges look pillowy and rounded. -
Dry and bisque fire:
Allow the piece to dry slowly under loose plastic for a day, then fully uncover until bone dry. Fire it in a kiln to the bisque stage (usually cone 04) to prepare it for glazing.
Step 3: Glazing and Speckling
-
Apply base color:
Once the bisque piece is cool, wipe it with a damp sponge to remove dust. Pour a sky blue glossy glaze into the interior, swirl it to coat, and pour out the excess. Brush the exterior with two to three even coats. -
Clean the foot:
Use a damp sponge to carefully wipe any glaze off the very bottom of the piece where it will touch the kiln shelf, preventing it from sticking during firing. -
Add the speckles:
Dip a stiff bristle brush or toothbrush into a dark blue glaze or underglaze. Hold it about 6 inches from the dish and run your thumb across the bristles to flick tiny droplets onto the surface. -
Control the density:
Focus the splatter slightly more inside the dish for depth. If a drop lands too large, you can dab it gently with a dry finger once the base glaze is powdery to soften the spot. -
Final firing:
Place the piece back in the kiln for the glaze firing (following the temperature instructions on your specific glaze bottle, typically cone 5 or 6 for stoneware).
Make It Golden
For an extra luxurious touch, apply a ceramic gold luster to the very rim of the cloud after the glaze firing, then fire it one last time at a very low temperature (cone 018).
Once cooled, your cloud dish is ready to bring a calming atmosphere to your table
Yin-Yang Split Color Ashtray
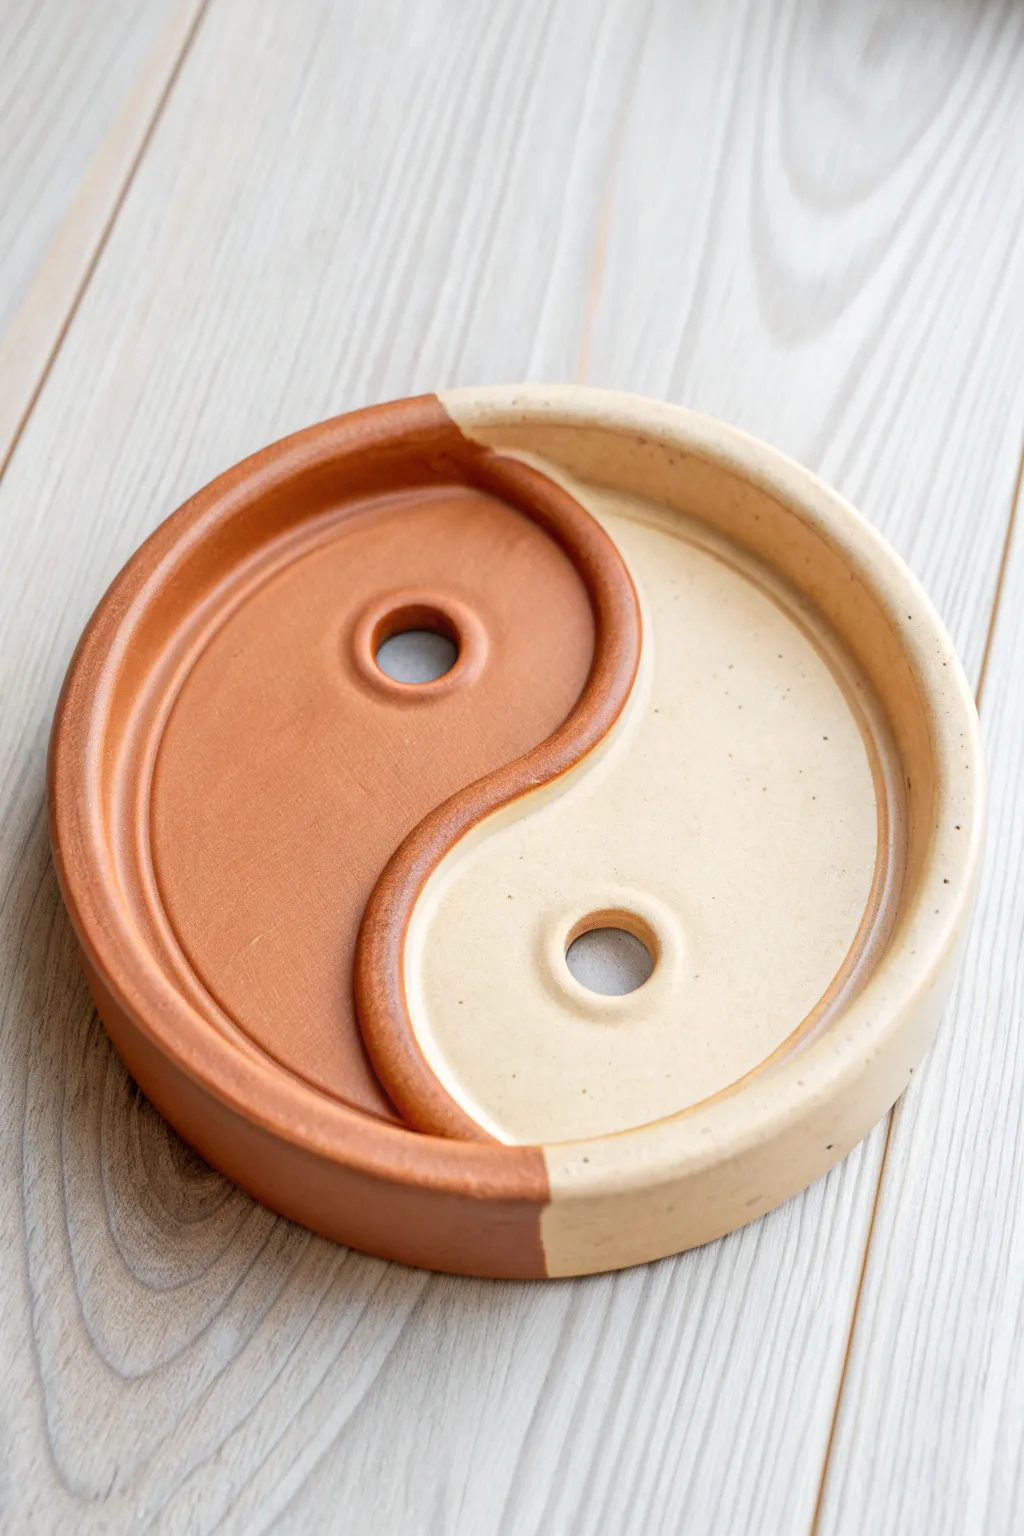
Embrace the harmony of opposites with this dual-toned clay ashtray featuring the classic Yin-Yang symbol. This functional piece combines earthy terracotta warmth with smooth cream tones, creating a perfectly balanced vessel with a satisfyingly tactile finish.
Step-by-Step
Materials
- Air-dry clay (terra cotta color)
- Air-dry clay (white or cream color)
- Rolling pin
- Circle cutter or circular template (approx. 4-5 inches)
- Clay knife or X-Acto knife
- Sponge and water
- Small circular cutter (like a straw or piping tip)
- Sandpaper (fine grit)
- Matte acrylic varnish
- Paintbrush (soft bristle)
Step 1: Prepping and Shaping the Base
-
Condition the Clay:
Begin by taking equal softball-sized amounts of both the terracotta and white air-dry clay. Knead them separately until they are warm, pliable, and free of cracks. -
Roll Out the Slabs:
Roll each color of clay out on a flat surface to a thickness of about 1/4 inch. Try to keep the thickness consistent between the two colors so they join evenly later. -
Cut the Circles:
Using your circle cutter or template, cut one full circle from the terracotta clay and one full circle from the white clay. -
The Yin-Yang Cut:
Take a moment to lightly sketch an ‘S’ curve dividing the circle in half on one slab using a needle tool. Once you are happy with the curve, cut along this line cleanly with your knife. Repeat this exact cut on the other color slab.
Shrinkage Issues?
If gaps appear between the two colors as they dry, fill them with a ‘slip’ paste made of clay and water. Apply into the crack, smooth over, and let dry again.
Step 2: Assembling the Design
-
Join the Halves:
Take one terracotta half and one white half. Score the S-curve edges of both pieces by making small hatch marks with your knife, then add a dab of water or slip to the scored areas. -
Press and Smooth:
Push the two halves together gently on your work surface. Use your finger to smooth the seam on the back side first to secure it, then carefully smooth the top seam until the transition is flush. -
Create the Rim:
Roll two long ‘snakes’ of clay—one terracotta, one white. They should be long enough to wrap around the semi-circle of their respective color. -
Attach the Rim:
Score and slip the outer edge of the base circle. Place the terracotta coil along the edge of the terracotta side, and the white coil along the white side. -
Blend the Walls:
Use a modeling tool or your thumb to smear the clay from the coil down onto the base to lock it in place. Then, smooth the exterior and interior of the wall so it looks like one solid piece. -
Create the Divider:
Roll a thinner snake of clay for the center S-curve divider. I prefer to make half of it red and half of it white, twisting them together slightly at the meeting point, or simply butting them against each other to match the base colors. -
Install the Divider:
Score and slip the central seam line where the two colors meet. Place your divider coil on top, shaping it to follow the S-curve perfectly. -
Refine the Middle Wall:
Smooth the divider walls down onto the base just like you did with the outer rim, ensuring strong adhesion. Wet your finger to smooth out any fingerprints.
Master the S-Curve
Make a paper template of your circle first. Draw the S-curve on the paper and cut it out. Use these paper stencils to cut your clay slabs for a perfect fit.
Step 3: Details and Finishing
-
Punch the Holes:
Using a small circular cutter like a milkshake straw or a large piping tip, punch a hole in the center of the widest part of each teardrop shape. This creates the classic ‘dots’ of the symbol. -
Clean the Edges:
Take a slightly damp sponge and gently wipe the rims, the divider, and the hole edges to remove any sharp burrs or rough textures. -
Allow to Dry:
Set the piece aside in a cool, dry place away from direct sunlight. Let it dry slowly for 24-48 hours. Turn it over halfway through if possible to prevent warping. -
Sanding:
Once bone dry, use fine-grit sandpaper to gently buff the surface. Focus on the rim and the transition points between colors to make them feel seamless. -
Seal the Tray:
Apply a coat of matte acrylic varnish to the entire piece. This protects the clay from ash and moisture while maintaining that natural, earthy look. -
Final Cure:
Let the varnish cure completely according to the bottle instructions before using the tray.
Enjoy the peaceful symmetry of your new handmade creation on your coffee table
Bold Checkerboard Pattern Ashtray
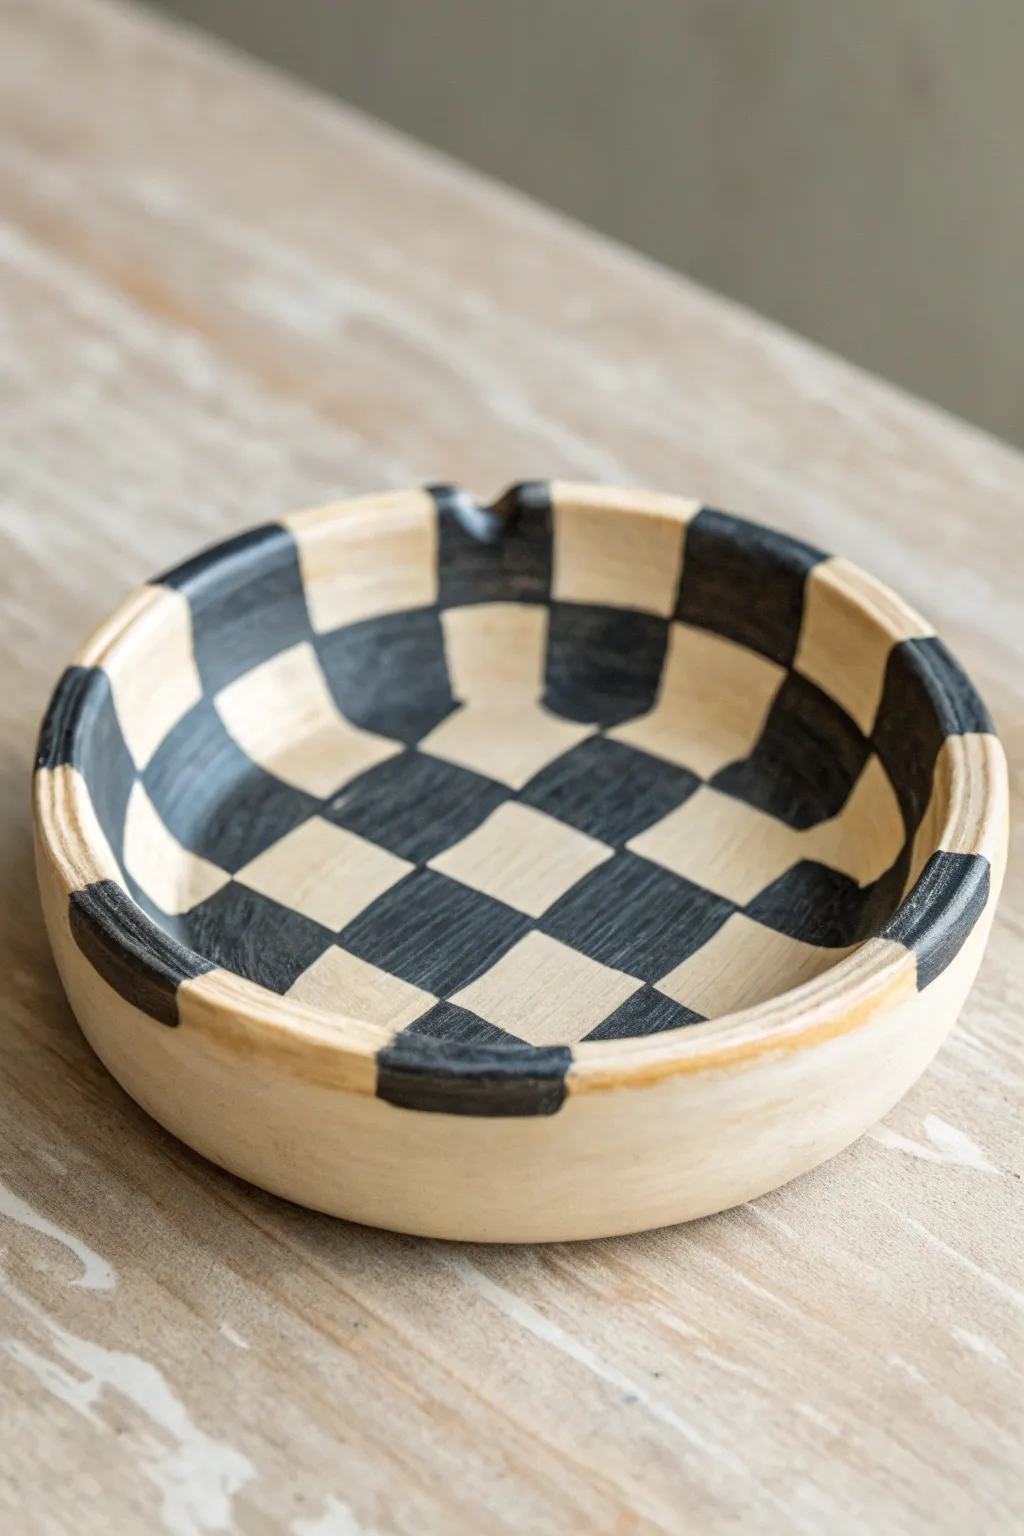
This trendy, statement-making ashtray combines a classic checkerboard motif with an organic, handmade form. The high-contrast black and cream palette ensures it stands out on any coffee table, while the simple shaping technique makes it accessible for beginners.
How-To Guide
Materials
- Air-dry clay (white or cream)
- Rolling pin
- Small bowl (to use as a mold)
- Clay sculpting tools or a butter knife
- Sponge and water
- Acrylic paint (Black and Cream/Off-White)
- Flat shader paintbrush (small size)
- Fine detail paintbrush
- Pencil
- Gloss varnish or sealant
Step 1: Shaping the Form
-
Prep the clay:
Begin by kneading a fist-sized ball of white air-dry clay until it is warm, pliable, and free of air bubbles. -
Roll it out:
Roll your clay out into a slab that is roughly 1/4 inch thick. Aim for an even thickness throughout to prevent cracking during the drying phase. -
Cut the circle:
Place your bowl upside down on the clay slab to use as a template. Trace around it with a knife or needle tool to cut out a perfect circle. -
Form the curve:
Gently lift your clay circle and drape it inside your bowl (if you want a smooth interior) or over the bottom of the upside-down bowl. Gently press it to take the shape of the mold. -
Refine the rim:
The rim in the reference image is thick and distinct. While the clay is in the mold, gently pat the edge down so it is slightly flattened rather than sharp. -
Add cigarette rests:
Using your thumb or the side of a marker, gently press down into the rim at opposite ends to create the subtle indentations for holding cigarettes. -
Smooth the surface:
Dip a sponge in a tiny bit of water and run it over the entire surface of the clay to remove fingerprints and bumps. Smoothness is key for a clean paint job later. -
Allow to dry:
Let the piece dry completely in a cool, dry place. This usually takes 24-48 hours. Don’t rush this step or the paint won’t adhere properly.
Grid Master Tip
Draw your pencil grid lightly! Graphite can smudge into light paint. If you make a mistake sketching the grid, use a white eraser gently.
Step 2: Drafting the Pattern
-
Sand imperfections:
Once fully dry, lightly sand any rough spots or sharp edges with fine-grit sandpaper, then wipe away the dust with a barely damp cloth. -
Base coat interior:
Paint the entire interior and the rim of the bowl with your cream or off-white acrylic paint. Give it two coats for full opacity. -
Mark the center:
Using a pencil, lightly mark the very center of the bowl’s interior. This will be the anchor point for your grid. -
Draw the grid:
Lightly sketch a grid pattern across the interior. The lines should curve slightly with the bowl’s shape rather than being perfectly straight rulers. -
Extend to rim:
Bring your pencil lines up and over the rim. The pattern in the image wraps over the edge, creating a continuous visual flow.
Step 3: Painting the Checks
-
Mark black squares:
To avoid confusion while painting, put a tiny ‘x’ inside every square that needs to be painted black. -
Outline the squares:
Using your fine detail brush and black paint, carefully outline the squares marked with an ‘x’. Keep your hand steady to get crisp lines. -
Fill the centers:
Switch to your small flat shader brush to fill in the centers of the black squares. I find dabbing the paint on rather than stroking helps get solid coverage without streaks. -
Paint the rim segments:
Carefully paint the rim sections black where they align with the interior black squares. Be sure to stop neatly at the outer edge. -
Touch ups:
If any lines look wobbly, use a clean brush and the cream paint to tidy up the edges of the black squares once they are dry. -
Seal the piece:
Apply a coat of gloss varnish to the entire piece. This mimics the glazed look of kiln-fired ceramic and protects your hard work.
Make it Pop
Instead of classic black and white, use a deep cobalt blue or burnt orange for the dark squares to give the checkerboard a colorful, retro twist.
Place your finished piece locally to enjoy its geometric charm
Monstera Leaf Ashtray With Vein Texture
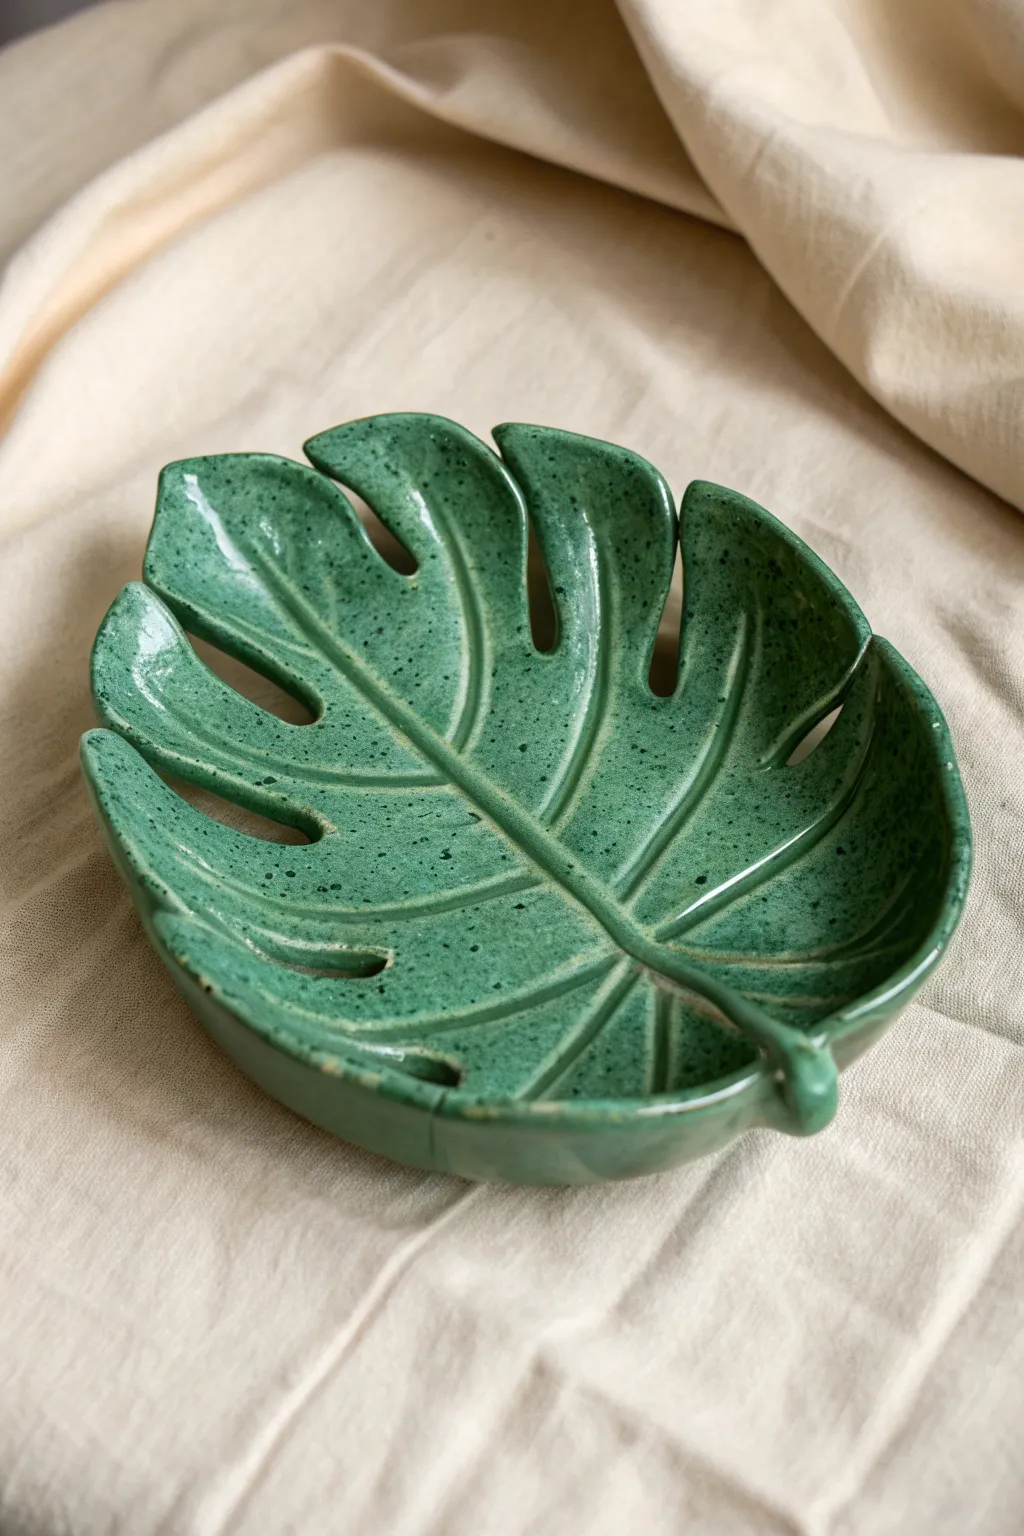
This stunning ceramic piece captures the glossy, tropical allure of a Monstera leaf, complete with realistic fenestrations and a deep, speckled green glaze. It functions beautifully as an ashtray or a jewelry catch-all, bringing a permanent splash of nature to your table.
Step-by-Step Guide
Materials
- Stoneware clay (smooth or lightly grogged)
- Rolling pin
- Guide sticks (approx. 1/4 inch thick)
- Monstera leaf template (paper printout) or real leaf
- Needle tool or X-Acto knife
- Pottery sponge
- Rib tool (metal or rubber)
- Modeling tool or wooden skewer for veins
- Bowl or plate (for use as a slump mold)
- Speckled green stoneware glaze (e.g., Mayco or Amaco)
- Fan brush
- Kiln access
Step 1: Preparation and Shaping
-
Roll the slab:
Begin by wedging your clay thoroughly to remove air bubbles. Flatten it onto a canvas workspace and use a rolling pin with guide sticks on either side to roll out an even slab, approximately 1/4 inch thick. Compress the slab on both sides with a rib tool to align the clay particles and prevent warping. -
Trace the shape:
Lay your paper template or a large, real Monstera leaf directly onto the clay slab. Lightly trace the outline, including the iconic notches (fenestrations) and deep cuts, using a needle tool. Don’t press too hard yet; just mark the surface. -
Cut the clay:
Commit to your lines and cut straight through the slab. Keep your needle tool vertical to ensure clean, square edges. Carefully remove the excess clay from around the leaf shape and between the leaf fingers. -
Smooth the edges:
Use a damp sponge or your fingertip to gently round off the sharp cut edges. Pay special attention to the inner curves of the notches, as these thin areas can be prone to cracking if left jagged.
Step 2: Adding Texture and Form
-
Carve the main vein:
Using a modeling tool, press a distinct central line running from the stem base to the leaf tip. Deepen this groove slightly to create a realistic spine. -
Create branching veins:
Draw secondary veins extending from the center spine out toward the individual leaf sections. I prefer to make these lines slightly lighter than the central spine to add varied visual weight. -
Form the stem:
Roll a small coil of leftover clay to create a short stem. Score and slip the bottom of the leaf and attach the stem securely, blending the clay smoothly so it looks like a natural extension. -
Slump the leaf:
Place a piece of cheesecloth or plastic wrap inside a shallow bowl. Gently lift your clay leaf and lay it inside the bowl. Allow gravity to curve the leaf naturally, pressing down lightly in the center to create a basin shape suitable for holding ash. -
Adjust the rim:
While the clay is soft in the mold, gently curl the very edges of the leaf sections upward. This enhances the three-dimensional look and ensures ash won’t spill out easily. -
Slow drying:
Cover the piece loosely with plastic to let it dry slowly to a leather-hard state. Once firm enough to hold its shape, remove it from the mold and let it dry completely to bone dry.
Vein Definition Tip
Before the final glaze firing, check that your glaze isn’t too thick in the veins. If it is, pin-prick bubbles may form. A thinner coat in deep grooves often looks better.
Step 3: Firing and Glazing
-
Bisque fire:
Fire the bone-dry piece in the kiln to a bisque temperature (usually cone 04). This hardens the clay and prepares it for glaze application. -
Wipe down:
Once cool, wipe the bisque ware with a slightly damp sponge to remove any kiln dust, which can prevent the glaze from adhering properly. -
Apply first coat:
Using a soft fan brush, apply a generous coat of speckled green glaze. Ensure the glaze gets into the carved vein grooves, as this pooling will create the darker definition seen in the reference image. -
Layering glaze:
Allow the first coat to dry to the touch, then apply two more coats. The speckles often appear more prominently with thicker application, giving that organic, spotted variability. -
Clean the foot:
Using a wet sponge, meticulously wipe off any glaze from the very bottom of the piece where it will touch the kiln shelf. This prevents it from fusing to the shelf during firing. -
Glaze fire:
Fire the piece again to the maturation temperature of your chosen clay and glaze (typically cone 5 or 6 for stoneware). This final firing melts the glaze into that lustrous, glass-like finish.
Level Up: Multitone
Brush a darker green or black underglaze into the veins and wipe away the excess with a sponge before applying your main green glaze. This creates incredible depth.
Once cooled, your ceramic leaf is ready to catch ash or trinkets with distinct botanical style.
Wavy Organic Rim River-Rock Ashtray
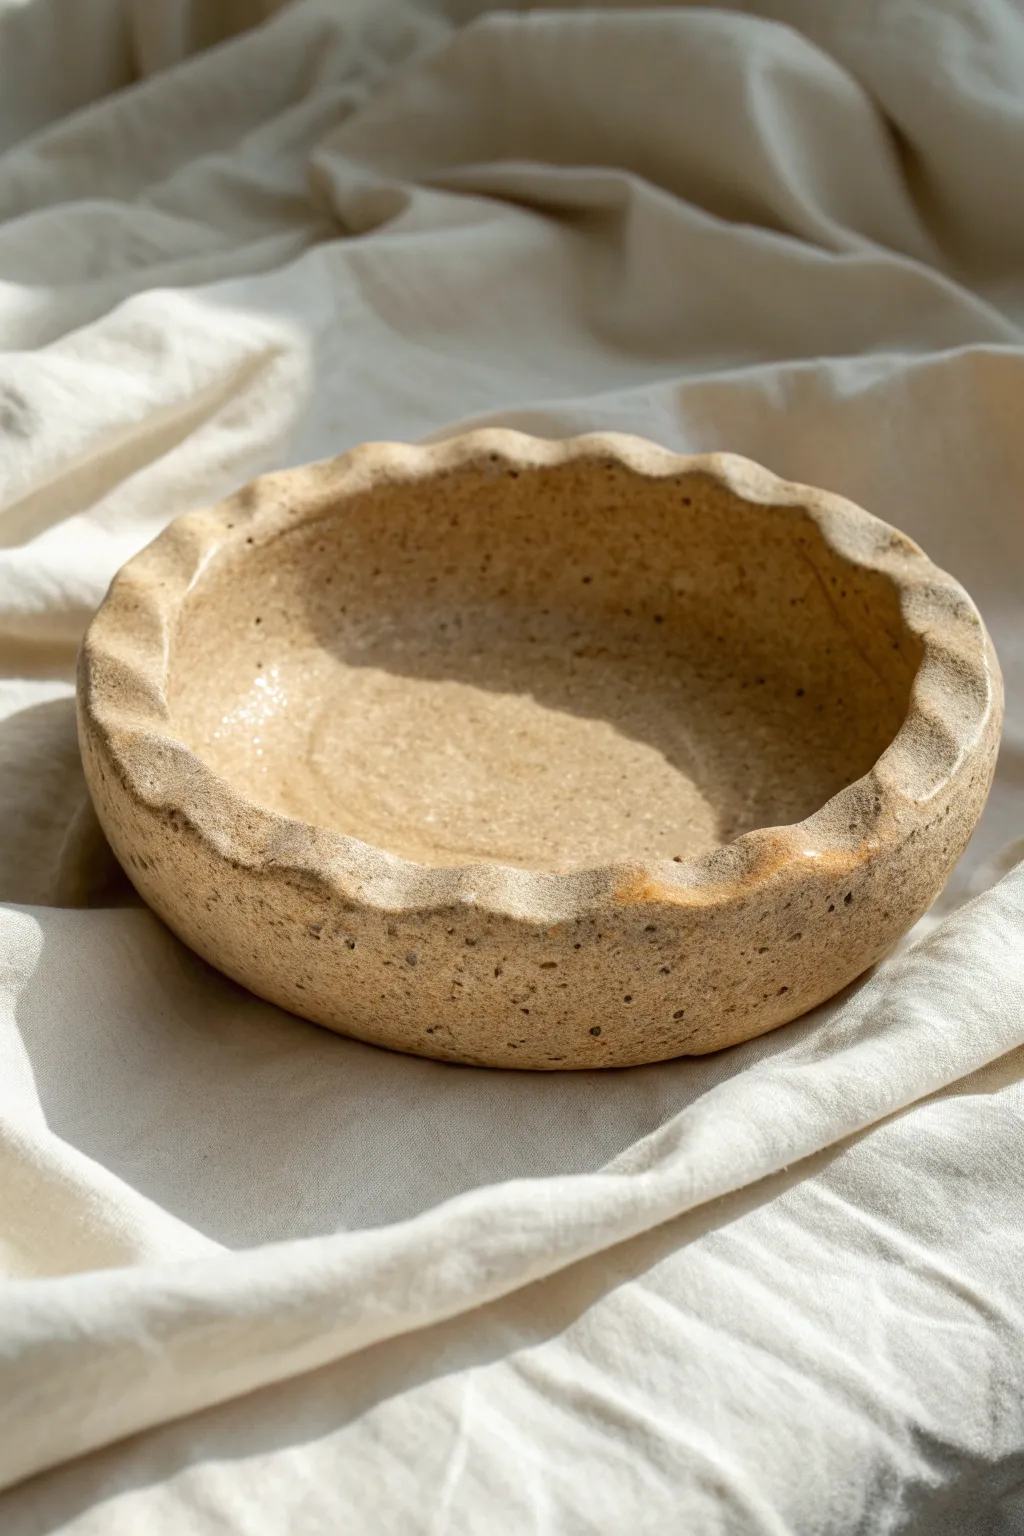
Embrace the natural imperfections of hand-building with this textured, speckled ashtray featuring a rhythmic, wavy rim. The heavy sandy clay body gives it a grounded, river-rock aesthetic perfect for outdoor spaces or rustic interiors.
How-To Guide
Materials
- Speckled stoneware clay (buff or tan)
- Small rolling pin
- Pottery needle tool
- Round slump mold or small bowl (biscuit size)
- Canvas mat or slab roller
- Sponge
- Soft rubber rib
- Wooden modeling tool (rounded tip)
- Clear matte or satin glaze
- Kiln
Step 1: Forming the Base
-
Prep your clay:
Begin with a ball of speckled stoneware clay about the size of a large orange. Wedge it thoroughly to remove air pockets and ensure an even consistency across the mass. -
Roll the slab:
Place the clay onto your canvas mat. Using a rolling pin, roll out a slab to an even thickness of approximately 1/4 inch. If you want a chunkier look, you can leave it slightly thicker. -
Compress the slab:
Take your soft rubber rib and gently drag it across the surface of the clay in multiple directions. This compression aligns the clay particles, reducing the chance of warping later. -
Cut the circle:
Find a round template or bowl about 5-6 inches in diameter. Place it gently on your slab and trace around it with a needle tool to cut out your perfect circle base.
Step 2: Shaping the Bowl
-
Prepare the mold:
Cover your slump mold or small bowl with a strip of plastic or thin fabric to prevent sticking. This makes releasing the clay much easier once it stiffens. -
Slump the clay:
Ideally, center your clay circle over the mold and gently press it down to take the rounded shape. Smooth it with your hands so it conforms completely without trapping air underneath. -
Define the walls:
Once shaped, check the height of the walls. If they are uneven, trim the top edge with your needle tool while spinning the mold manually or on a banding wheel to get a level height. -
Smooth the edge:
Use a slightly damp sponge to round off the cut rim. I like to run my finger along the edge here to compress it, ensuring no sharp burrs remain.
Rim Alignment
Work symmetrically when pinching the rim. Placing hands opposite each other creates even tension.
Step 3: Scalloping the Rim
-
Mark your intervals:
Lightly mark even intervals around the rim with your needle tool. These marks will guide where your waves will peak and trough, keeping the rhythm consistent. -
Create the wave:
Use your thumb and index finger to gently pinch and push down at every other interval mark. Simultaneously, use a finger from your other hand to push up from underneath the rim in between the downward pinches. -
Refine the undulations:
Go around the rim a second time, smoothing the transitions between high and low points. The goal is a soft, organic wave rather than sharp, jagged zig-zags. -
Thicken the rim:
Gently tap down on the high points of the waves with a flat wooden tool or your thumb. This slightly thickens the rim, giving it that substantial, stone-like feel seen in the photo.
Enhance the Speckle
Use a transparent glaze with a slight amber tint. It warms up the clay body and makes the iron speckles pop visually.
Step 4: Finishing and Firing
-
Smooth interior:
While the clay is still in the mold (or just after removing if it’s sturdy enough), use a flexible rib to smooth the interior curve one last time to remove fingerprints. -
Drying:
Let the piece dry slowly under loose plastic for the first day to even out moisture loss, then uncover it to dry completely to the bone-dry stage. -
Bisque fire:
Fire the piece in a kiln to bisque temperature (usually Cone 06 or 04). This prepares the clay for glazing. -
Glazing:
Apply a clear satin or matte glaze to the interior and rim to highlight the natural speckles of the clay body. Leave the exterior raw or use a very thin wash if you prefer the tactile, sandy texture. -
Final wipe:
Wipe the foot (bottom) of the ashtray carefully with a wet sponge to ensure no glaze touches the kiln shelf. -
Glaze fire:
Fire the piece again to the maturation temperature of your specific clay and glaze (often Cone 5 or 6 for stoneware) to finish.
Once cooled, your new ceramic piece is ready to add a touch of organic texture to your coffee table
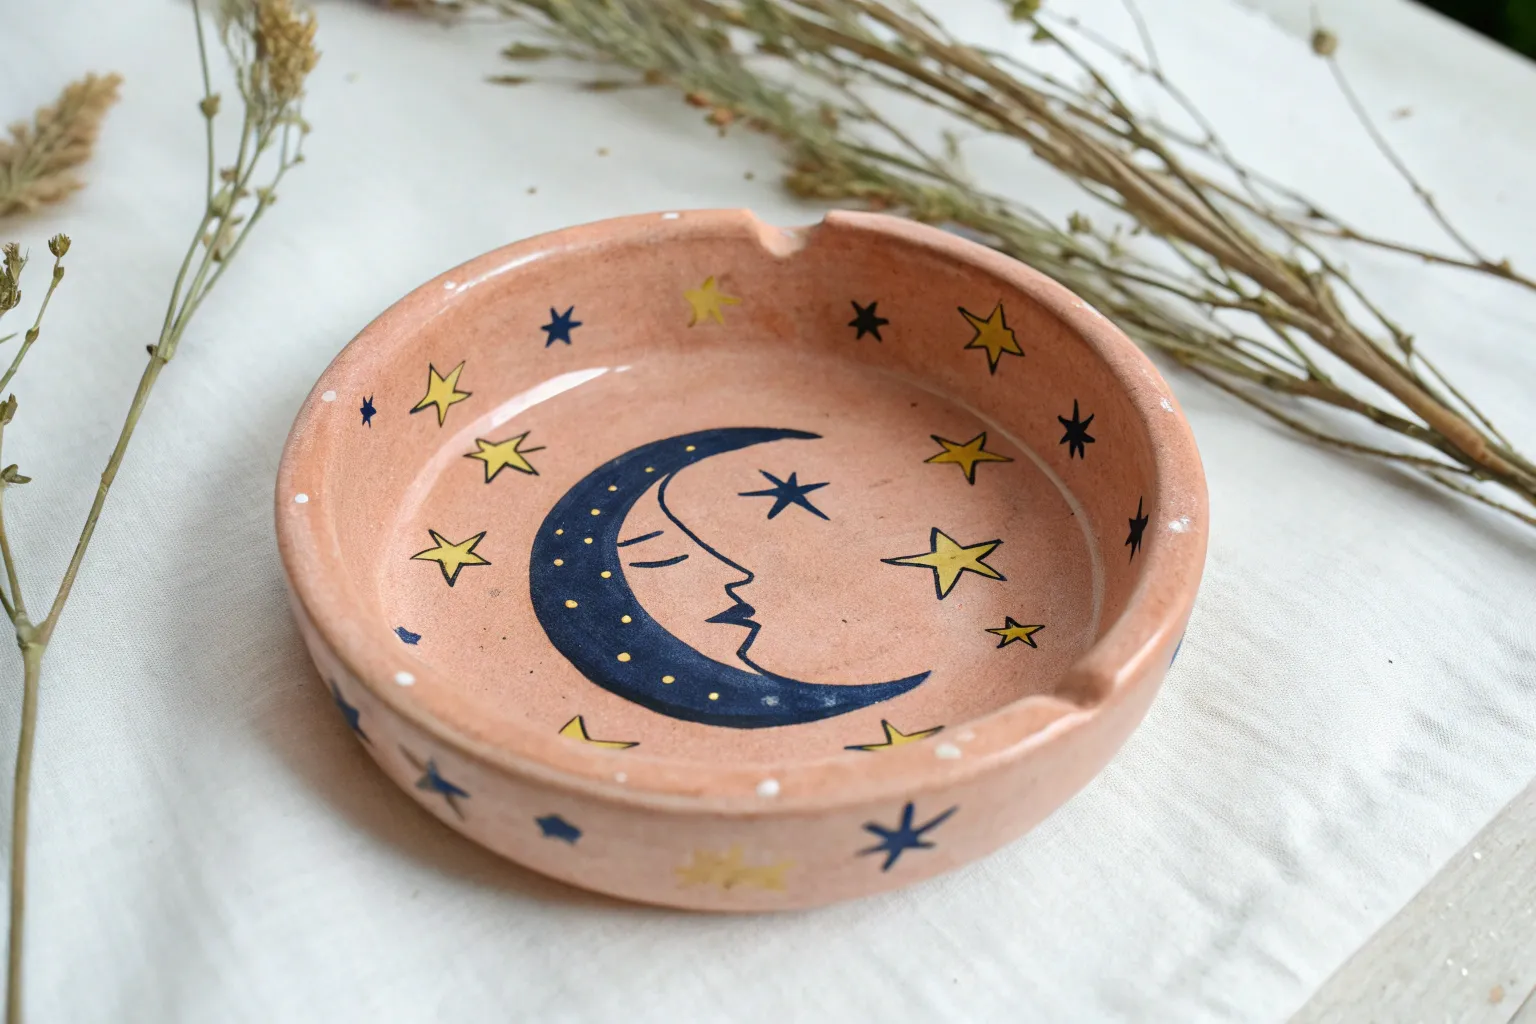
Open-Mouth Character Ashtray
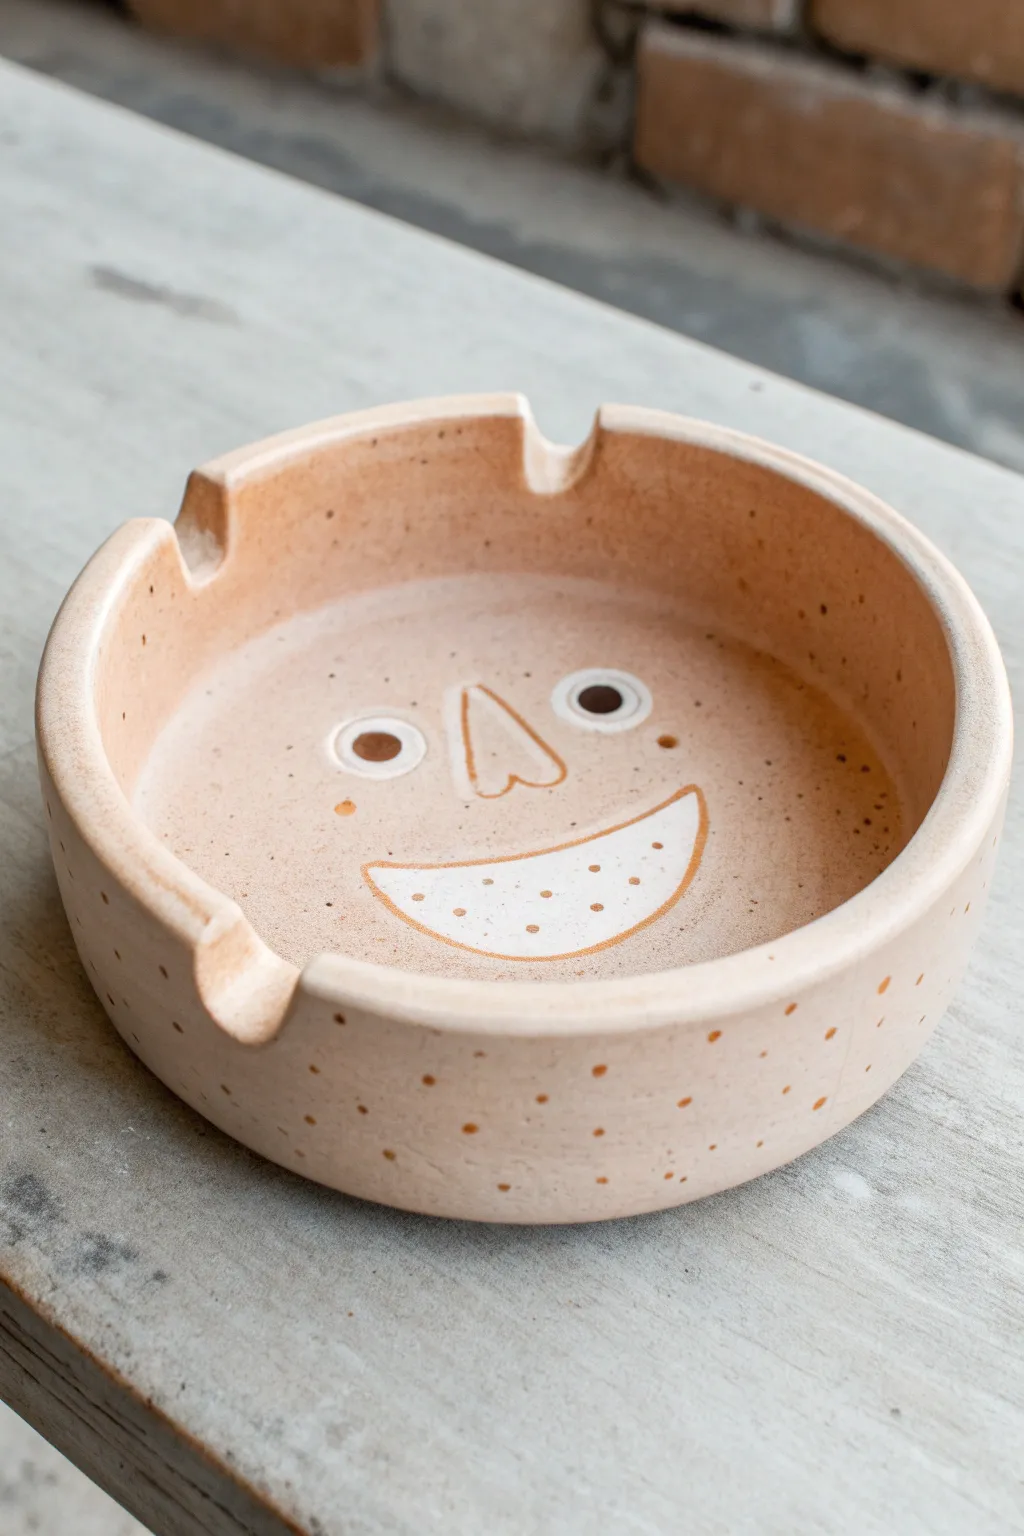
This charming handmade ashtray features a friendly, smiling face that greets you with every use, crafted from speckled clay for a warm, organic feel. The simple line work and glossy finish give it a playful yet modern character perfect for adding personality to a coffee table.
Step-by-Step Guide
Materials
- Speckled buff stoneware clay
- Rolling pin
- Canvas board or mat
- Circle template or bowl (approx. 5-6 inches diameter)
- Needle tool
- Pottery ribs (rubber and metal)
- Sponge
- Underglaze (White and darker accent color like brown or black)
- Clear transparent glaze
- Paintbrushes (small detail and medium)
- Small carving tool
Step 1: Forming the Base
-
Roll the slab:
Begin by wedging your speckled clay to remove air bubbles. Roll it out into an even slab about 1/4 to 3/8 inch thick on your canvas board. -
Cut the circle:
Place your circle template or bowl onto the slab and trace around it with a needle tool to cut out a perfect circle. -
Create the walls:
Roll a long coil of clay, roughly the thickness of your pinky finger. Score the outer edge of your circular base and apply slip. Place the coil on top of the scored edge to form the wall. -
Blend the coil:
Using your thumb or a modeling tool, blend the clay coil downwards onto the base on both the inside and outside ensuring a seamless connection. -
Shape and smooth:
Use a rubber rib to smooth the walls as you rotate the piece. Gently pull the walls up if needed to get a height of about 1.5 inches. Compress the rim with a damp sponge so it’s rounded and smooth.
Uneven Walls?
If your coil walls look lumpy, use a flat wooden paddle to gently tap the outside while supporting the inside with your hand to true up the shape.
Step 2: Adding Details
-
Carve the notches:
Once the clay has stiffened slightly to leather-hard, use a carving tool or even just your thumb to gently press or carve out three semi-circular notches evenly spaced along the rim. -
Refine the surface:
Go over the entire piece with a barely damp sponge to remove any fingerprints or rough textures. The surface needs to be smooth for the face painting later. -
Sketch the face:
Lightly sketch the position of the eyes, nose, and mouth using a pencil directly on the clay. The pencil marks will burn off in the kiln, so don’t worry about mistakes. -
Bisque fire:
Allow the piece to dry completely until bone dry, then bisque fire it according to your clay body’s specifications (usually Cone 04).
Step 3: Glazing and Finishing
-
Paint the eyes:
Using a small detail brush, paint two circles of white underglaze for the eyes. Let this layer dry fully before adding the darker pupils. -
Paint the mouth:
Paint a wide crescent moon shape for the smile using white underglaze. You may need two coats for solid opacity. -
Add line details:
With a very fine brush and dark brown or oxide-rich underglaze, outline the nose (a simple triangle shape), the pupils inside the white eyes, and the outline of the smiling mouth. -
Add texture dots:
Using the same dark color, add small dots inside the white mouth area to represent teeth or texture, and a few freckles on the cheeks if desired. -
Apply clear glaze:
Once the underglaze design is completely dry, dip the entire ashtray into a clear transparent glaze. Shake gently to remove excess drips. -
Final smooth:
Check the notches and rim for any sharp glaze drips and smooth them with a finger while the glaze is powdery. -
Glaze fire:
Load the piece into the kiln ensuring the bottom is wiped clean of glaze. Fire to your clay’s maturity temperature (e.g., Cone 5 or 6).
Clean Lines
For the crispest face details, use an underglaze pencil for the outlines instead of a brush. It offers more control, like drawing on paper.
Now you have a happy little ceramic companion ready to hold ash or trinkets on your table
Lily Pad Scene Ashtray With Tiny Frog
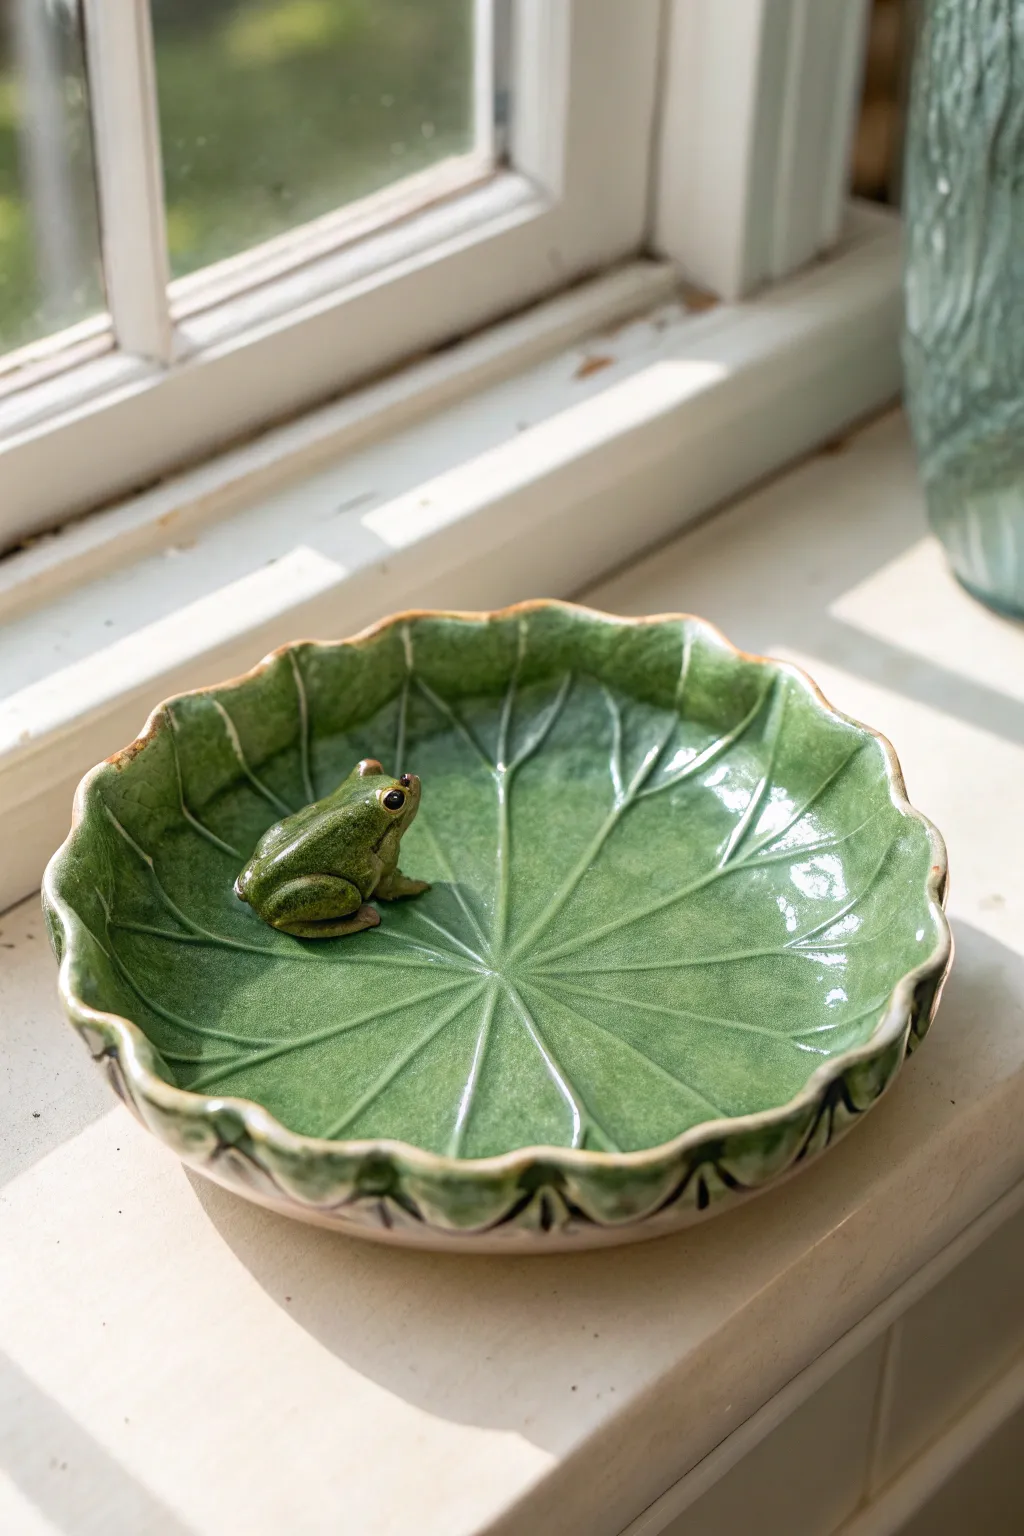
Transform a slab of clay into this charming scene featuring a detailed little frog perched on a glossy green lily pad. The realistic veining and vibrant, pooling glaze make this functional piece feel like a tiny pond ecosystem for your coffee table.
How-To Guide
Materials
- White or buff stoneware clay
- Rolling pin and guide sticks (about 1/4 inch)
- Needle tool
- Rib tool (soft kidney)
- Sponge
- Scoring tool (or fork)
- Slip (clay mixed with water)
- Modeling tools (small ball stylus)
- Celadon or translucent green glaze
- Iron oxide wash (optional)
- Small paintbrush for details
- Kiln access
Step 1: Forming the Lily Pad Base
-
Roll out the slab:
Start by wedging your clay thoroughly to remove air bubbles, then roll it out into a smooth slab about 1/4 inch thick. I find using guide sticks on either side helps keep the thickness perfectly even. -
Cut the circular shape:
Using a needle tool, cut a rough circle roughly 6-7 inches in diameter. Don’t worry about being perfectly geometric; a slightly organic shape looks more natural. -
Create the wavy rim:
Gently pinch and lift the edges of the circle between your thumb and forefinger to create a raised, undulating rim. Smooth the edge with a damp sponge so it’s rounded, not sharp. -
Carve the veins:
Use a needle tool or a small loop tool to carve lines radiating from the center to the edges. Press lightly to create indentations without cutting all the way through. -
Refine the texture:
Go over your carved lines with a damp sponge or soft brush to soften any jagged bits of clay. The glaze will pool nicely in these depressions later.
Sticky Frog Syndrome
If the frog pops off during drying, you didn’t score deep enough. Create a velcro-like texture on both surfaces before slipping and joining.
Step 2: Sculpting the Tiny Frog
-
Form the body:
Roll a small ball of clay (about the size of a walnut) into a smooth oval. Tap one end lightly to flatten the bottom so it sits securely. -
Add the legs:
Roll four tiny coils for the legs. Attach the back legs folded against the body using the score and slip method, blending the clay seamlessly. -
Shape the head and eyes:
Pinch the front of the oval slightly to define a face. Roll two tiny balls for eyes and attach them to the top of the head, blending the clay downwards. -
Detail the features:
Use a needle tool to gently mark the mouth line and poke tiny nostrils. Refine the toes on the frog’s feet. -
Attach the frog:
Choose a spot on the lily pad’s surface. Score both the underside of the frog and the pad, apply slip, and press the frog firmly into place. Wiggle it slightly to ensure a tight bond.
Step 3: Decoration and Glazing
-
Dry and bisque fire:
Let the piece dry slowly under plastic to prevent warping, especially around the rim. Once bone dry, fire it to bisque temperature (usually cone 04). -
Apply oxide wash:
Mix a small amount of iron oxide with water. Paint it into the vein carvings and around the rim, then wipe the surface back with a damp sponge so the dark color only remains in the recesses. -
Glaze the pad:
Apply 2-3 coats of a translucent green celadon glaze to the lily pad. This type of glaze is essential as it breaks over texture, showing off your carving work. -
Detail the frog:
Carefully paint the frog. I often use a slightly mottled or darker green underglaze for the body and a touch of black for the eyes, then cover the frog with a clear or light green transparent glaze. -
Rim accents:
If you want that browned edge look seen in the photo, wipe away a little glaze from the very rim to let the toasted clay body or oxide show through. -
Final wipe:
Clean the bottom of the ashtray thoroughly with a sponge to ensure no glaze remains where it touches the kiln shelf. -
Glaze fire:
Fire the piece to your clay body’s maturity temperature (likely Cone 5 or 6). Allow the kiln to cool completely before opening to avoid thermal shock to the delicate frog sculpture.
Water Droplet Effect
Add tiny balls of clear glass or extra mounds of clear glaze on the leaf surface before firing to simulate permanent morning dew drops.
Once fired, place this delightful piece near a sunny window where the light can catch the glassy green depths of the glaze
Mushroom Garden Diorama Ashtray
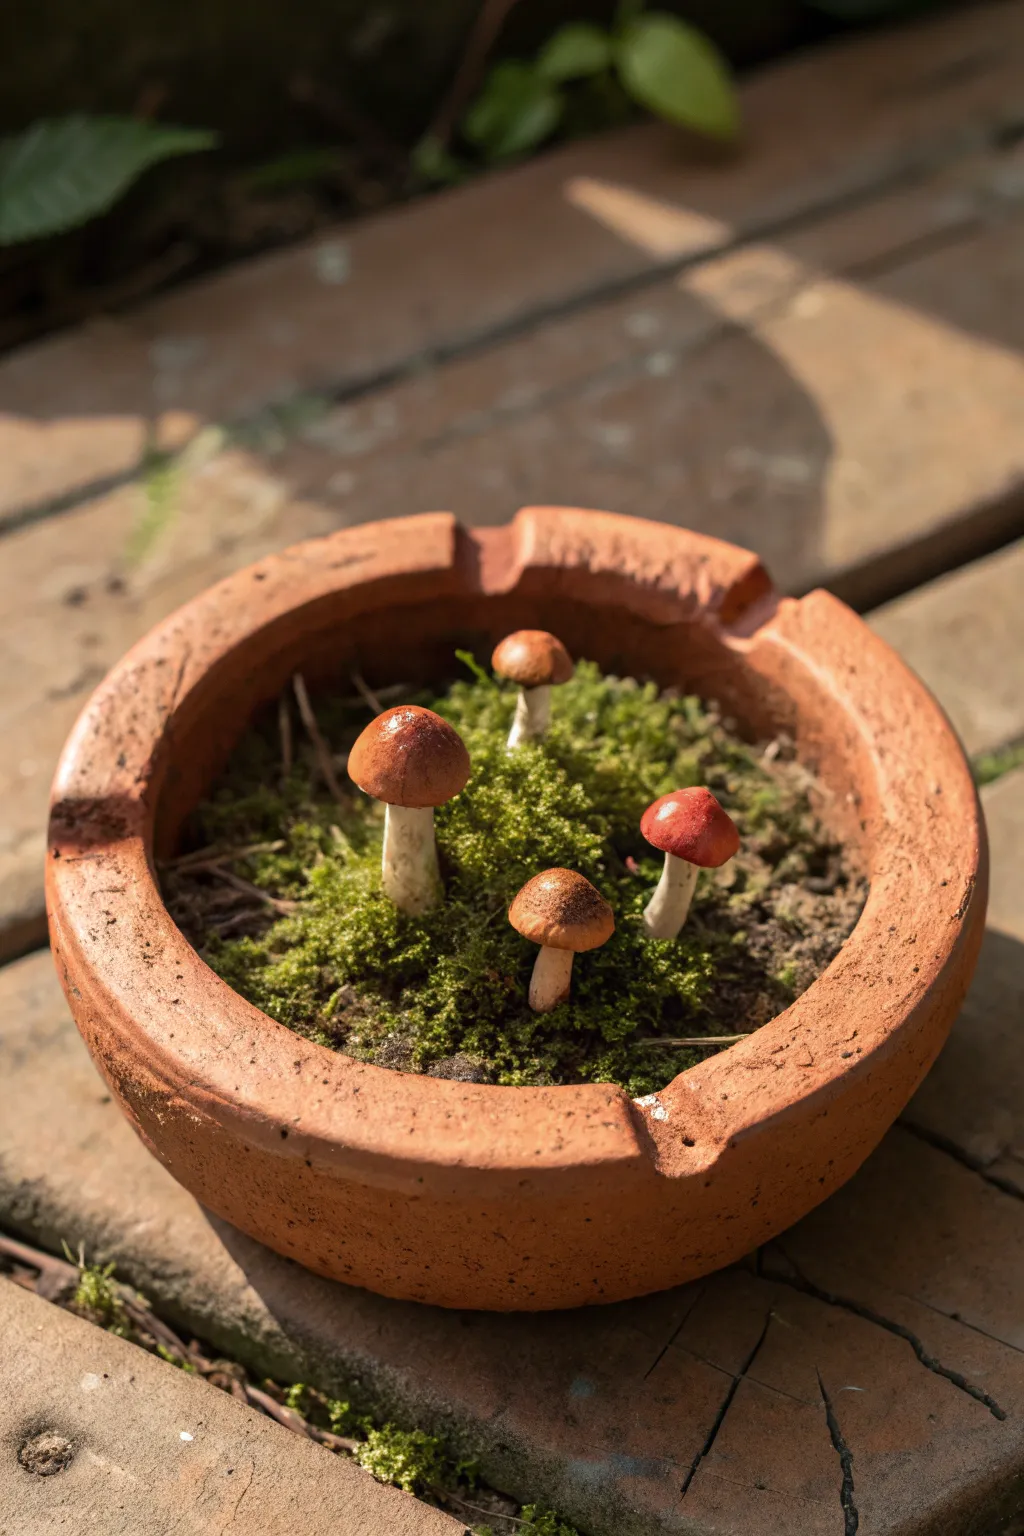
Transform a simple lump of clay into a charming woodland floor contained within a rustic potter’s vessel. This project combines the utility of a classic ashtray shape with a deceptive hyper-realistic diorama hidden inside, perfect for adding a touch of nature to your coffee table.
Step-by-Step
Materials
- Terracotta air-dry clay or polymer clay
- White polymer clay (for mushrooms)
- Red and brown acrylic paints
- Gloss varnish or clear nail polish
- Dried moss (preserved moss)
- Potting soil or dried coffee grounds
- PVA glue (white glue)
- Sculpting tools (needle tool, small ball tool)
- Small paintbrush
- Sandpaper (medium grit)
- Water spray bottle
Step 1: Sculpting the Vessel
-
Form the base:
Start with a large ball of terracotta clay. Flatten it slightly into a thick puck shape, roughly 4-5 inches in diameter. -
Open the interior:
Using your thumbs, press into the center of the puck and pinch outwards to create walls, leaving the base about a half-inch thick. Aim for a sturdy, rustic look rather than perfect symmetry. -
Shape the rim:
Flatten the top rim with a flat wooden tool or your finger so it is wide enough to rest a cigarette on. -
Carve the notches:
Use a modeling tool or the handle of a spoon to press three or four U-shaped indentations into the rim for the traditional ashtray functionality. -
Texture the surface:
Instead of smoothing everything perfectly, dab the exterior with a crumpled ball of aluminum foil or a coarse sponge to mimic the weathered texture seen in the photo. -
First drying phase:
Set the ashtray aside to dry until leather-hard if using air-dry clay, or prepare for baking if using polymer.
Realism Trick
Use actual coffee grounds mixed with a tiny bit of black paint for the soil. The texture is perfect for scale models and mimics rich, dark earth better than real dirt.
Step 2: Creating the Fungi
-
Form the stems:
Take small pieces of white polymer clay and roll them into four distinct cylindrical stems. Make them slightly thicker at the base and thinner at the top. -
Shape the caps:
Roll four small balls of white clay. Flatten the bottoms and round the tops into domes. Vary the sizes slightly for realism. -
Assemble the mushrooms:
Gently press the caps onto the stems. You can use a tiny dab of liquid clay or water (depending on your material) to ensure they stick. -
Paint the caps:
Mix a warm rusty red with a touch of brown acrylic paint. Paint the tops of the caps, fading slightly towards the edges for a natural gradient. -
Add stem details:
Dilute some brown paint with water to make a wash. Lightly brush the very bottom of the stems to make them look dirty. -
Bake or dry:
If using polymer clay for the mushrooms (recommended for durability), bake them according to package instructions. If using air-dry, let them fully cure. -
Gloss the caps:
Once dry, apply a coat of high-gloss varnish strictly to the colored tops of the mushrooms to give them that wet, fresh-from-the-rain look.
Step 3: Planting the Garden
-
Prepare the substrate:
Mix a small amount of potting soil or dried coffee grounds with PVA glue to create a thick, muddy paste. -
Fill the basin:
Spread your soil paste into the bottom of the hardened ashtray, creating an uneven, natural-looking ground layer. -
Position the mushrooms:
While the soil mix is still wet, press the bases of your four mushrooms into the paste. Arrange them in a loose cluster, not a straight line. -
Add greenery:
Tuck small tufts of preserved moss around the base of the mushrooms and in random patches on the soil. I find using tweezers helps get the moss right up against the stems without disturbing the paint. -
Final weathering:
If the ashtray rim looks too clean, dry-brush a little brown paint into the crevices and notches to age it instantly. -
Seal everything:
Allow the glue to dry completely transparent, locking the soil and moss in place definitively.
Glow Up
Use glow-in-the-dark polymer clay for the mushroom caps, then paint over them with a thin wash so they emit a faint, magical luminescence at night.
Set your finished piece on a wooden surface to enjoy your permanent slice of the forest floor
Geode Crystal Cluster Ashtray

Capture the raw beauty of natural stone with this sophisticated clay project that features a stunning faux geode center. The hexagonal shape and gold accents add a modern, geometric touch, making it a perfect functional art piece for holding jewelry or simply admiring.
How-To Guide
Materials
- Polymer clay (granite or stone effect)
- Purple crushed glass or coarse glitter
- Purple extra-fine glitter
- Fine sand (craft or decor sand)
- Gold leaf paint or liquid gilding
- Clear UV resin or epoxy resin
- Hexagon cookie cutter or paper template
- Rolling pin
- Craft knife
- Small paintbrush
- Smoothing tool or finger
- Baking sheet and parchment paper
- Oven (for baking clay)
Step 1: Shaping the Base
-
Condition the Clay:
Begin by warming up your stone-effect polymer clay in your hands. Knead it thoroughly until it is soft, pliable, and free of cracks. -
Roll Out the Slab:
Roll the clay out on a smooth surface or parchment paper until it is about 1/4 inch thick. Aim for an even thickness throughout the slab. -
Cut the Base:
Place your hexagon cutter or template onto the clay and cut out the base shape. Gently remove excess clay from around the edges. -
Create the Walls:
Roll out a long snake of clay and flatten it slightly to create a strip that matches the thickness of your base. Cut this strip into six segments, matching the length of each side of your hexagon. -
Assemble the perimeter:
Place the wall segments on top of the base edges. Use a smoothing tool or your finger to blend the seams on both the inside and outside, ensuring the walls are firmly attached and the corners are sharp. -
Form the Recess:
Using a rounded tool or your thumb, gently press down into the center of the dish to create a slight well. Leave a flat border around the edge, but depress the middle enough to hold your crystal elements.
Natural Stone Look
For a more realistic rock texture, gently tap the outside walls of the clay with a crumpled ball of aluminum foil before baking.
Step 2: Adding the Geode Effect
-
Texture the Core:
Take a small pinch of scrap clay and smear it roughly into the very center of the depression to create an uneven surface for the crystals to grip. -
Apply the Crystals:
Press the larger purple crushed glass pieces firmly into the center. Arrange them so they cluster tightly like a natural crystal formation, leaving some jagged edges facing up. -
Add Fine Details:
Brush a little liquid polymer clay or glue around the larger glass pieces, then sprinkle the extra-fine purple glitter into the gaps to create depth and sparkle. -
Create the Stony Border:
Mix a small amount of liquid clay or white glue with your fine sand. Carefully paint this mixture around the purple crystal cluster, creating a rough, sandy transition zone between the ‘gems’ and the smooth clay walls. -
Bake the Piece:
Transfer the dish to a baking sheet lined with parchment paper. Bake according to your polymer clay package instructions (usually around 275°F/135°C for 15-30 minutes per 1/4 inch thickness). -
Cool Down:
Allow the piece to cool completely in the oven with the door slightly ajar to prevent cracking from sudden temperature changes.
Step 3: Finishing Touches
-
Seal the Crystals:
Once cool, carefully pour a small layer of clear resin over the purple crystals and sand. This locks everything in place and gives the crystals a wet, polished look. -
Cure the Resin:
If using UV resin, cure it under a UV lamp for a few minutes. If using epoxy, cover the piece to protect it from dust and let it cure for 24 hours. -
Paint the Accents:
Dip a fine detail brush into your gold leaf paint. Paint small triangles or geometric shapes over the six corners of the rim, extending slightly down the outer wall. -
Define the Geode Edge:
For extra dimension, I like to lightly dab a tiny bit of gold paint onto the larger chunks of sand surrounding the crystals to mimic pyrite inclusions. -
Final Dry:
Let the gold paint dry completely before handling or using the dish.
Loose Crystals?
If crystals fall out after baking, use a tiny drop of super glue to re-adhere them before pouring your resin layer.
Place your finished geode dish on a side table to add a touch of earth-inspired luxury to your decor
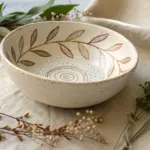


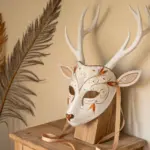
Have a question or want to share your own experience? I'd love to hear from you in the comments below!