Sunflowers are basically bottled sunshine, and they make a wall feel instantly warmer and more alive. Here are my favorite sunflower wall painting ideas—from classic murals to playful, artsy twists you can totally make your own.
Classic Sunflower Field Mural

Transform a blank hallway or nook into a sunny European countryside with this immersive wall mural. Featuring a gently rolling landscape, distant hills, and a foreground bursting with golden sunflowers, this project brings perpetual summer indoors.
Detailed Instructions
Materials
- Interior acrylic latex paint (white base)
- Acrylic artist paints (various yellows, browns, greens, blues)
- Painter’s tape
- Drop cloths
- Large foam roller and tray
- Wide wash brush (3-4 inch)
- Assorted synthetic brushes (rounds, flats, and filberts)
- Chalk or pastel pencil for sketching
- Mixing buckets and palette paper
- Ladder or step stool
- Matte clear coat sealer (water-based)
Step 1: Preparation and Sky Layer
-
Prep the surface:
Begin by cleaning the wall thoroughly to remove dust and grease. Apply painter’s tape to the adjacent walls, ceiling, and baseboards to protect them. Lay down drop cloths to catch any spills. -
Base coat the sky:
Mix a pale, airy blue using white and a touch of phthalo blue. Using your roller, cover the upper two-thirds of the wall. Don’t worry about fading it down perfectly yet; just get the color on. -
Create atmospheric perspective:
While the blue is still slightly wet, blend white paint into the lower section of the sky area, near where the horizon will be. This creates a haze effect that makes the landscape feel vast. -
Paint the clouds:
Using a large, bushy brush or a sea sponge, dab in cloud shapes with soft white and light grey. Keep the edges fluffy and indistinct, allowing some of the blue to show through for depth.
Scale Reference
Step back frequently! When working up close on details, it’s easy to lose perspective. Viewing from across the room ensures your composition stays balanced.
Step 2: Landscape Foundation
-
Sketch the horizon:
Once the sky is dry, use a chalk pencil to lightly sketch the rolling hills. Create a high horizon line on the right that dips down toward the left to create dynamic movement. -
Block in distant hills:
Mix a muted, desaturated green-blue for the furthest hills. Paint this band along the horizon. The color should be pale to suggest distance. -
Paint the mid-ground fields:
For the rolling hills in the middle distance, mix a yellow-ochre and olive green. Apply this in sweeping horizontal strokes to mimic the curvature of the land. -
Establish the foreground:
Paint the bottom third of the wall with a deep, dark green. This will serve as the shadow layer for the sunflower leaves and stalks. I find it helpful to make this layer quite dark to make the bright flowers pop later. -
Add background trees:
Using a small flat brush, tap in tiny, vertical shapes along the horizon line in dark green to represent distant trees. Keep them small and grouped together.
Fixing Smudges
If you make a mistake, don’t wipe it while wet—this smears the paint. Wait for the acrylic to dry completely, then paint over the error with your background color.
Step 3: Painting the Sunflowers
-
Texture the background field:
In the mid-ground yellow fields, use a stippling technique with a stiff brush to create the texture of thousands of distant flower heads. Use tiny dots of bright yellow and orange. -
Map out foreground flowers:
Using your chalk, lightly draw circles where the largest, closest sunflowers will go. Vary their heights so they don’t look like soldiers in a row. -
Paint the leaves:
Using a large filbert brush and various shades of medium to light green, paint large, heart-shaped leaves around your chalk circles. Overlap them to create a lush, dense look. -
Create the flower centers:
Mix burnt umber and a touch of black. Paint the large details of the flower centers. Leave the outer rim of the center slightly lighter brown to show where the seeds are forming. -
Add first layer of petals:
With a golden yellow, paint the back layer of petals. Start from the center and pull the brush stroke outward. These strokes can be slightly darker or more orange-tinted. -
Add highlight petals:
Mix a bright lemon yellow. Paint a second layer of shorter petals on top of the previous ones, focusing on the parts of the flower that would catch the sunlight. -
Detail the centers:
Dip a small, old brush into light brown and stipple texture into the dark centers of the flowers to mimic seeds. A few dots of yellow pollen add realism.
Step 4: Final Details
-
Add stems and grass:
Using a liner brush and light green, paint thin vertical lines for stems and blades of grass peeking through the bottom of the mural to ground the plants. -
Highlight the leaves:
Mix a pale, milky green and add subtle veins and sun-kissed edges to the large foreground leaves. -
Seal the work:
Allow the paint to cure for at least 48 hours. Gently roll on a clear, water-based matte sealer to artwork from UV light and scuffs.
Now you have a breathtaking view that keeps your home bright regardless of the weather outside


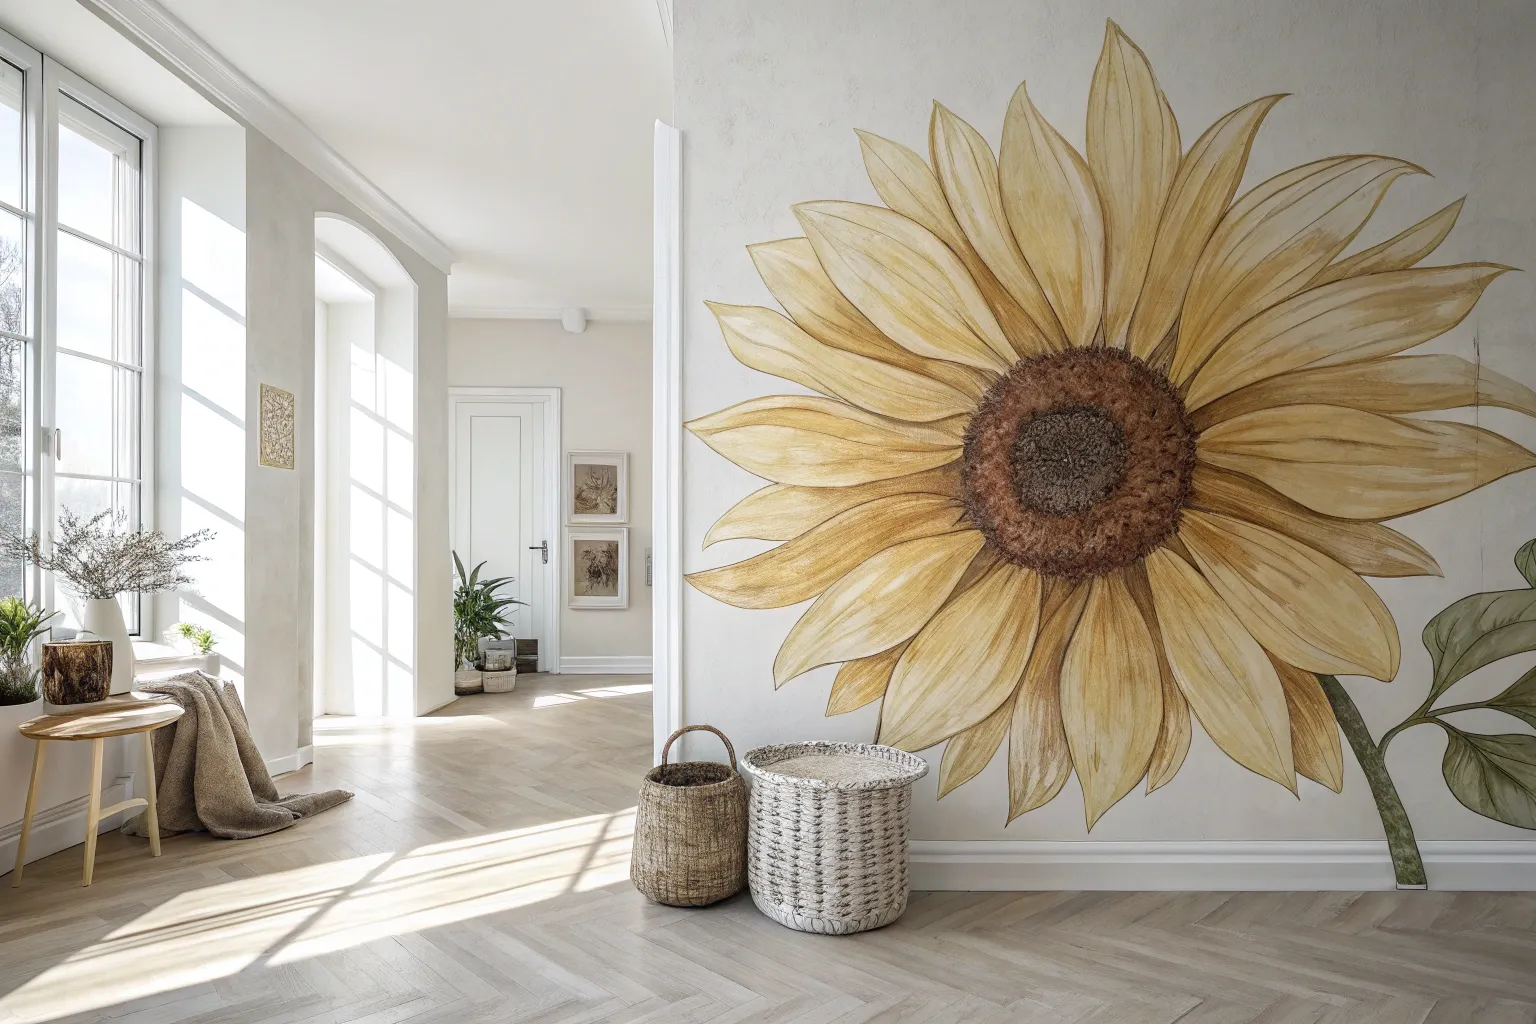
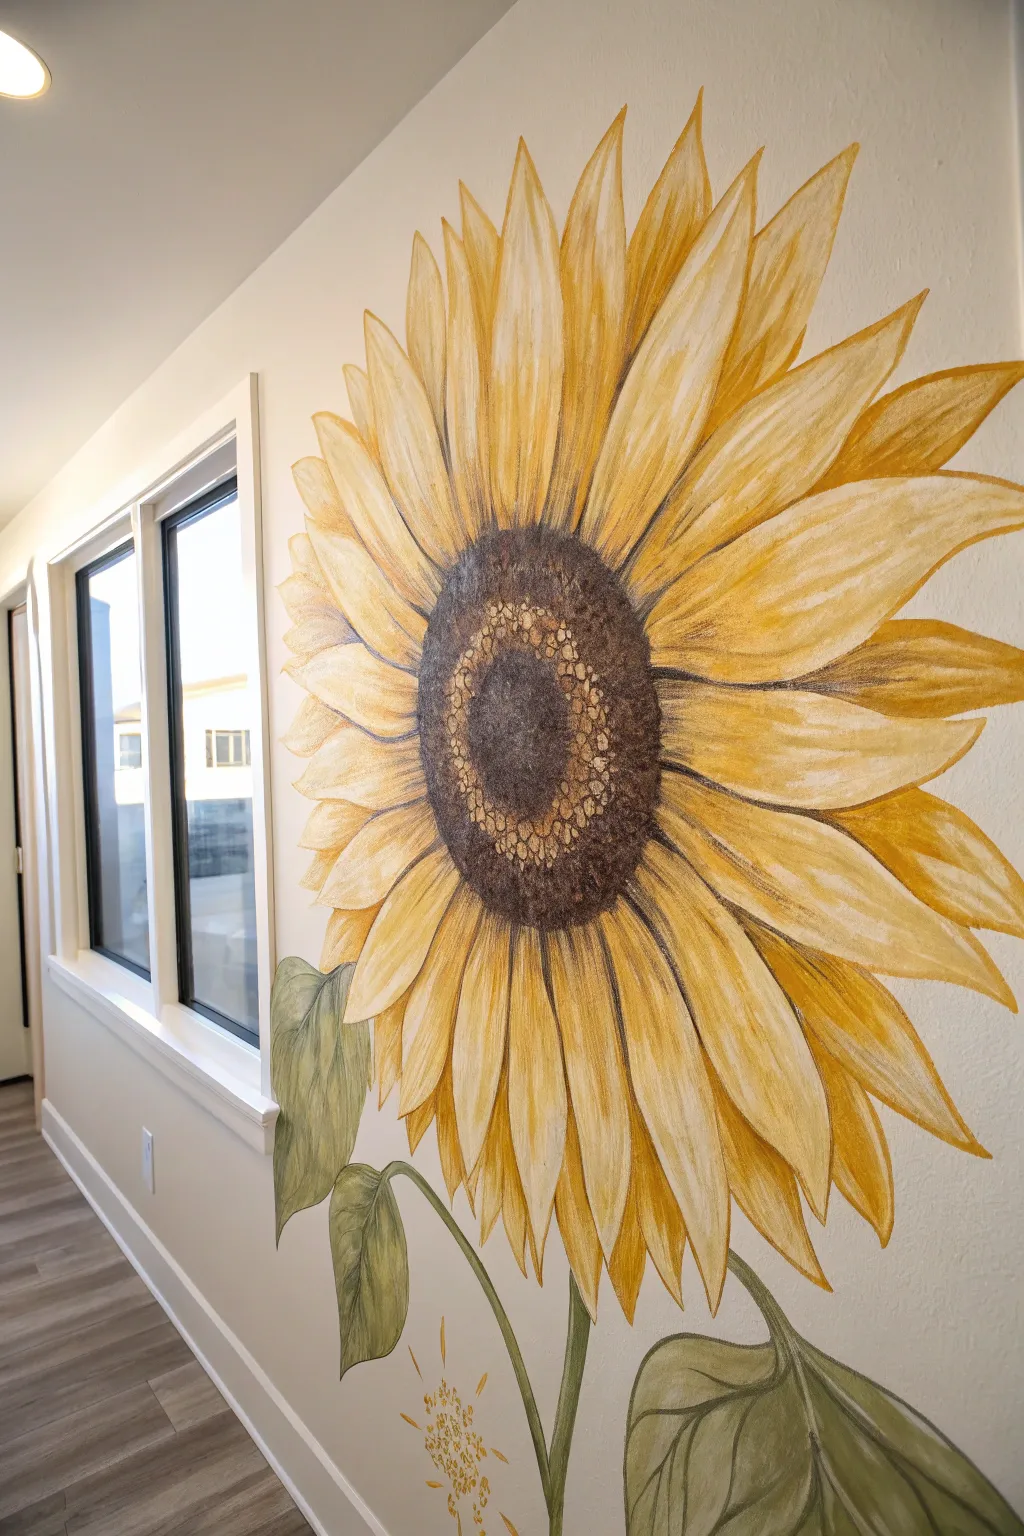
One Giant Sunflower Close-Up
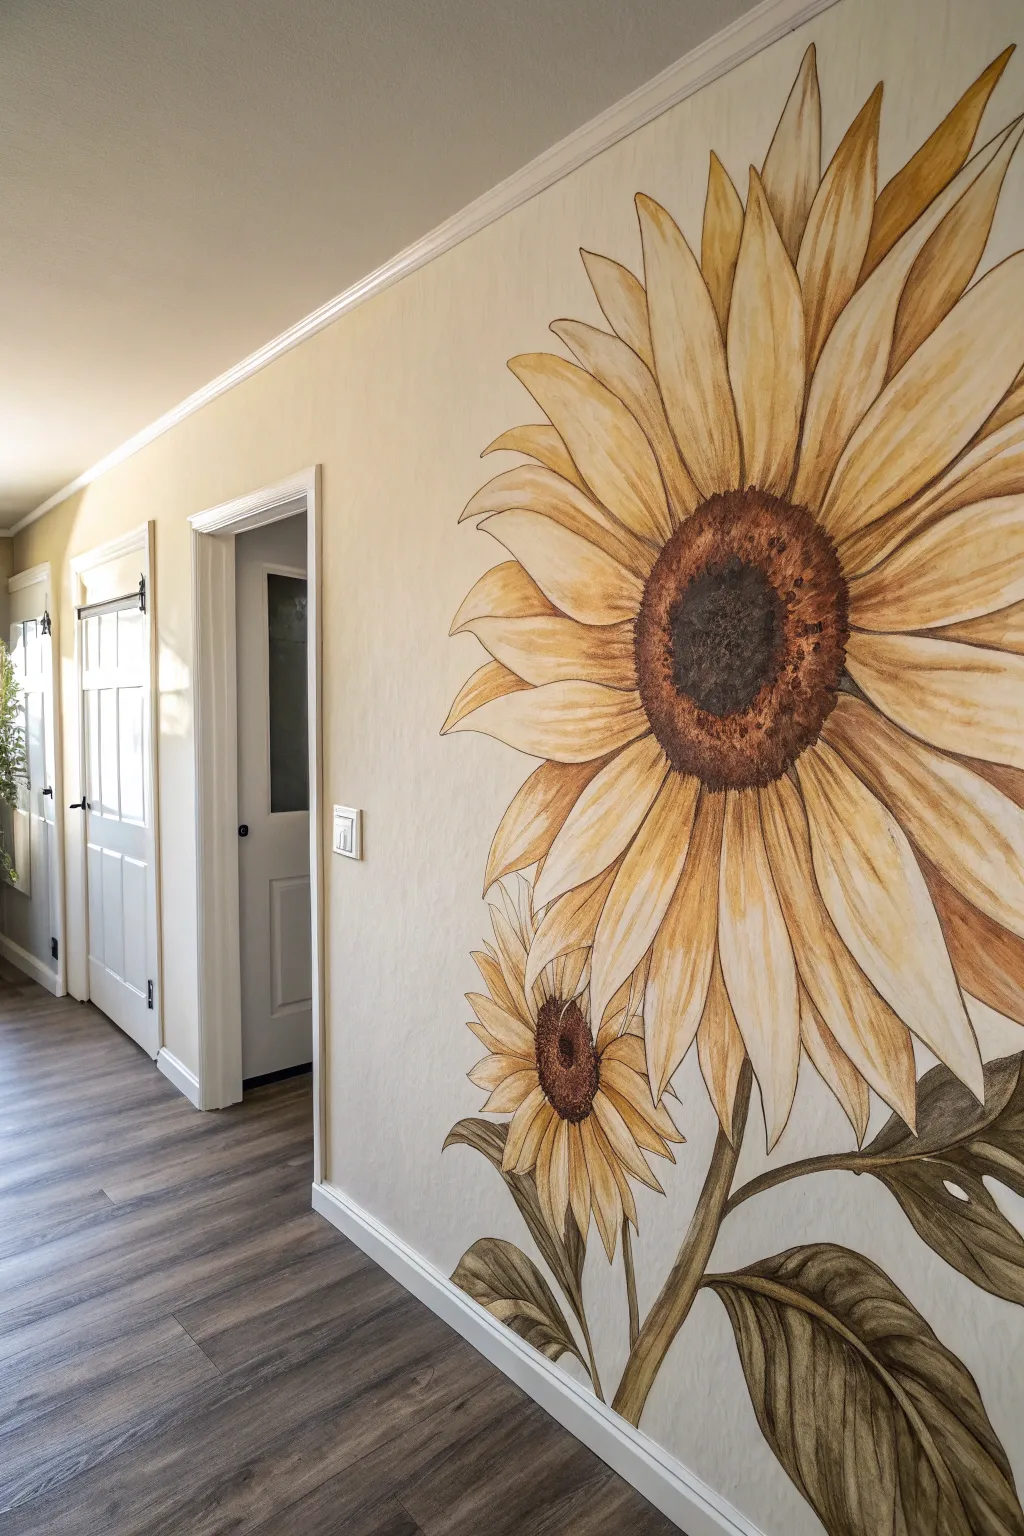
Bring the warmth of a summer garden indoors with this impressive oversized sunflower mural. By focusing on a single, massive bloom paired with a smaller companion, you create a dramatic focal point that feels both artistic and organic.
How-To Guide
Materials
- Latex interior paint (cream base for wall)
- Acrylic craft paints (Deep Yellow, Ochre, Burnt Sienna, Dark Brown, Olive Green, Sage Green, White)
- Pencil for sketching
- Large eraser
- Assorted brushes (2-inch flat brush, various round brushes, liner brush)
- Glazing medium (optional, for transparency)
- Clean rags
- Ladder or step stool
- Painter’s tape
Step 1: Preparation and Sketching
-
Base Coat:
Ensure your wall is clean and prep it with a fresh coat of warm, creamy off-white latex paint. This neutral background mimics the look of parchment paper and allows the yellow tones to really pop. Let this dry completely, preferably overnight. -
Placement Strategy:
Plan your composition so the main flower head sits off-center, dominating the upper right quadrant. The petals should extend all the way to the ceiling line and corner, creating an immersive, cropped effect. -
Rough Sketching:
Use a light pencil to sketch the large central disk of the main flower first. It doesn’t need to be a perfect circle; an oval shape adds perspective. -
Mapping Petals:
Draw the petals radiating outward. Keep them distinct—some overlapping, some twisting slightly. Sketch the smaller, secondary flower near the floor level, leaning inward to balance the composition. -
Refining Lines:
Go back over your sketch to define the stem and large leaves at the bottom. Erase any confusing stray lines now, as paint won’t hide graphite well.
Step 2: The First Layer of Color
-
Petal Base:
Mix a watery wash of Deep Yellow and White. I like to keep this very translucent, almost like a watercolor. Apply this to the entire petal area, letting the brushstrokes follow the direction of the petal growth. -
Center Base:
Fill the center disks of both flowers with a wash of Burnt Sienna. Don’t worry about texture yet; just get the color blocked in. -
Stem and Leaves:
Using the Sage Green mixed with a little water/glazing medium, paint the stems and leaves. Keep the edges relatively loose for now.
Uneven Coverage?
If your acrylic washes look too streaky, mix a drop of dish soap or flow improver into the water cup. This breaks surface tension and helps the paint lay flat.
Step 3: Adding Depth and Detail
-
Shadowing Petals:
Once the base is dry, take your Ochre paint and a smaller round brush. Paint streaks starting from the center of the flower moving outward into the petals. This creates the ribbed texture natural to sunflowers. -
Deepening Shadows:
Mix a touch of Burnt Sienna into your yellow. Apply this deeper tone specifically where petals overlap each other to create separation and shadow. -
Texturing the Center:
Stipple Dark Brown paint over the Burnt Sienna center using an old, stiff brush. Concentrate the darkest darks around the outer ring of the center disk, leaving the very middle slightly lighter. -
Leaf Veins:
Use the Olive Green to paint the veins on the leaves. Feather the darker green outward from the center vein to give the leaves a three-dimensional, curved appearance.
Add Vintage Patina
For an aged, botanical-print look, lightly sponge a very diluted tea stain or brownish glaze over the finished dry painting to unite the colors.
Step 4: Final Definition
-
Outlining:
This is a crucial step for this illustrative style. Thining down Dark Brown paint with water until it’s ink-like, use a liner brush to outline every petal and leaf. Keep the line weight variable—thick in shadowy creases, thin on highlighted tips. -
Highlights:
Add pure White highlights to the tips of the petals and the highest ridges of the leaves. This brings the “sun” into the sunflower. -
Center Pollen:
Dab tiny dots of Ochre and bright Yellow into the dark center disk to simulate pollen texture. -
Clean Up:
Step back and check your work. Use the wall color paint to touch up any areas where the outline got too messy or the wash dripped outside the lines.
Now your room has a permanent burst of sunshine that won’t fade when the seasons change

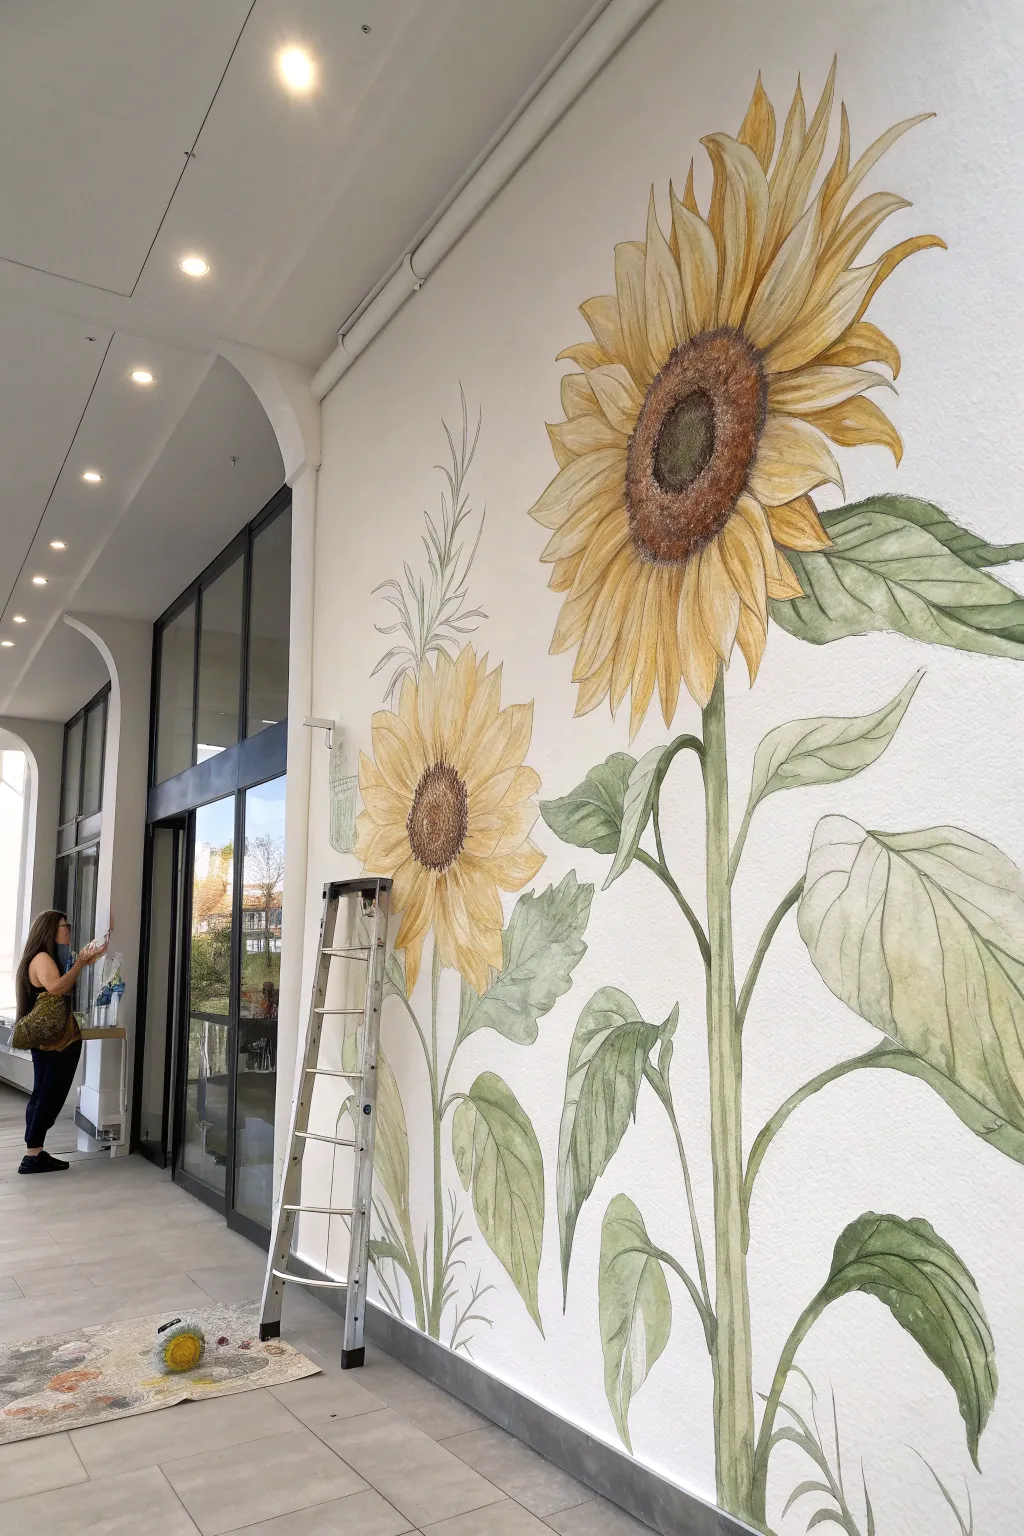
Sunflowers Behind the Sofa Accent Wall
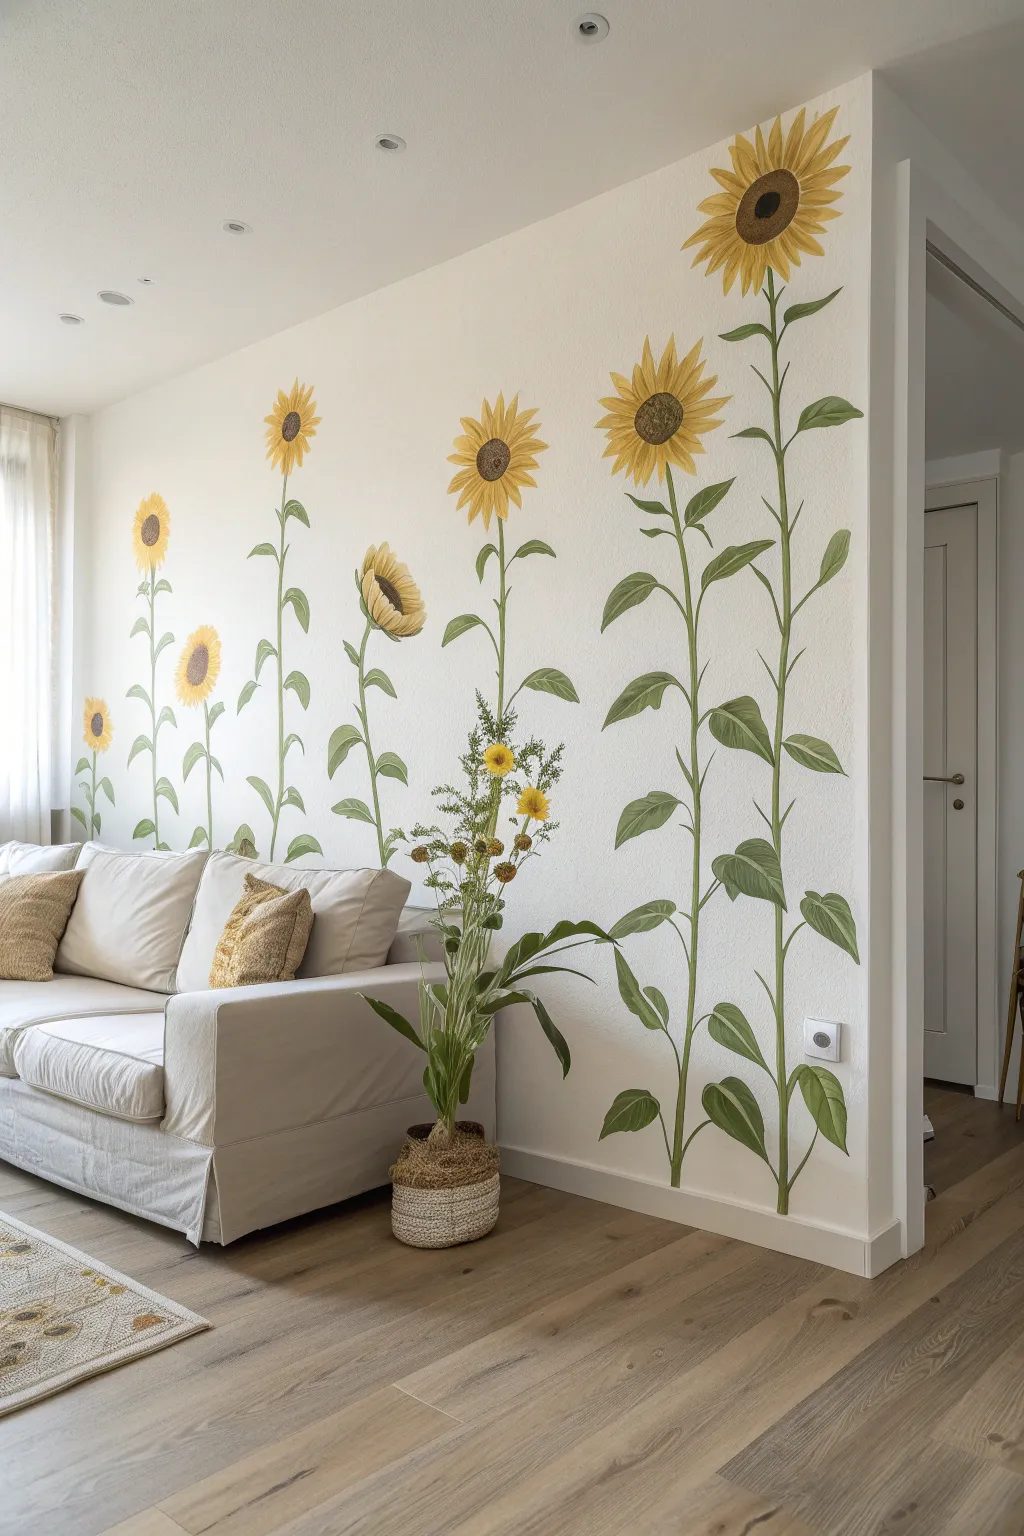
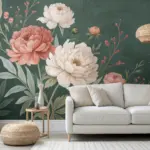
Transform your living space into an everlasting summer day with this stunning sunflower mural. These towering hand-painted blooms add warmth and height to any room, creating a playful yet sophisticated backdrop that peeks charmingly from behind your furniture.
Step-by-Step Tutorial
Materials
- Interior latex paint (white or off-white base)
- Acrylic paints (Cadmium Yellow, Yellow Ochre, Burnt Sienna, Burnt Umber, Sap Green, Olive Green, White)
- Pencil and large eraser
- Measuring tape and level
- Assorted synthetic brushes (1-inch flat, medium filbert, fine liner)
- Painter’s tape
- Drop cloths
- Mixing palette or plastic plates
- Step ladder
Step 1: Preparation & Layout
-
Define the canvas:
Clear the area by moving your sofa away from the wall. Lay down drop cloths to protect your flooring and baseboards. If your current wall color isn’t a fresh white or cream, give the entire wall a base coat of interior latex paint to ensure your colors pop. -
Plan the heights:
Using a pencil, lightly mark horizontal guidelines where the top of your sofa normally sits. This helps you visualize where the stems will disappear and ensures the flower heads are positioned well above the furniture line. -
Sketch the skeleton:
Lightly sketch vertical lines to represent the main stems. Vary the heights to create a natural rhythm—some should be tall enough to nearly reach the ceiling, while others can be shorter. Stagger the spacing so they don’t look like soldiers in a row. -
Draft the blooms:
At the top of each stem line, sketch rough circles or ovals for the flower centers. Vary the angles; drawing some ovals tilts the flower head, making it look like it’s facing different directions rather than straight ahead. -
Refine the drawing:
Flesh out your sketch by drawing the petals radiating from the centers and adding large, heart-shaped leaves along the stems. Keep pencil lines faint so they are easy to cover with paint later.
Step 2: Painting the Greenery
-
Mix your greens:
Create two shades of green: a lighter, warmer ‘sunlit’ green using Sap Green mixed with a little Yellow, and a darker ‘shadow’ green using Olive Green with a touch of Burnt Umber. -
Base coat the stems:
Using a 1-inch flat brush or a medium filbert, paint the long vertical stems. I like to use the lighter green for the main stroke and then immediately run a thin line of the darker green along one side while wet to create instant roundness. -
Fill in the leaves:
Paint the leaves with your medium green mixtures. Make the leaves slightly darker near the stem and lighter toward the tips. Don’t worry about perfect blending; a slightly painterly look adds character. -
Add leaf veins:
Once the leaves are dry to the touch, use a fine liner brush and your palest green mixture (add white to your base green) to paint the central vein and branching veins on each leaf.
Uneven Coverage?
If your yellow paint looks streaky or transparent (common with yellows), don’t overload the brush. Apply a thin coat, let it dry completely, and apply a second coat for opacity.
Step 3: Creating the Blooms
-
Block in the petals:
Start with a mix of Cadmium Yellow and Yellow Ochre. Using a filbert brush, paint the petals, starting from the center and sweeping outward to get a tapered tip. Ensure the petals overlap slightly for a lush look. -
Add petal depth:
While the base yellow is still slightly tacky, mix a little Burnt Sienna into your yellow. Paint delicate streaks near the base of the petals (closest to the center) to create shadow and dimension. -
Highlight the tips:
Mix a bright highlight color using Cadmium Yellow and White. Carefully brush this onto the very tips and upper edges of the petals where the sunlight would naturally hit. -
Paint the centers:
Fill the center circles with a dark brown mix (Burnt Umber). Dab the paint on with a stiff brighter brush using a stippling motion (up and down) to mimic the texture of seeds. -
detail the seeds:
Once the dark center is dry, mix a lighter golden-brown. Lightly stipple this color in a ring shape or on one side of the center disk to show volume and light.
Add a Visitor
Paint a tiny bumblebee or ladybug on one of the leaves or petals. Use a fine liner brush for the legs and wings to add a whimsical narrative element to your garden.
Step 4: Finishing Touches
-
Connect heads to stems:
Check where the flower head meets the stem. Paint rough, green sepal leaves (the little leafy bits) underneath the petals to connect the heavy bloom visually to the stalk. -
Cleanup:
Step back and look for any stray pencil marks. Gently erase them. If you painted outside the lines, use a small brush and your wall’s base color to touch up the edges. -
Protective coat (optional):
If this is a high-traffic area, consider applying a clear matte water-based varnish over the flowers once fully cured (usually 24-48 hours) to protect your artwork.
Now you can slide your sofa back into place and enjoy a garden view that blooms beautifully all year round.


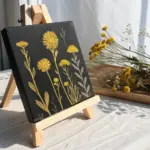
Minimal Sunflower Line Art With Color Pops
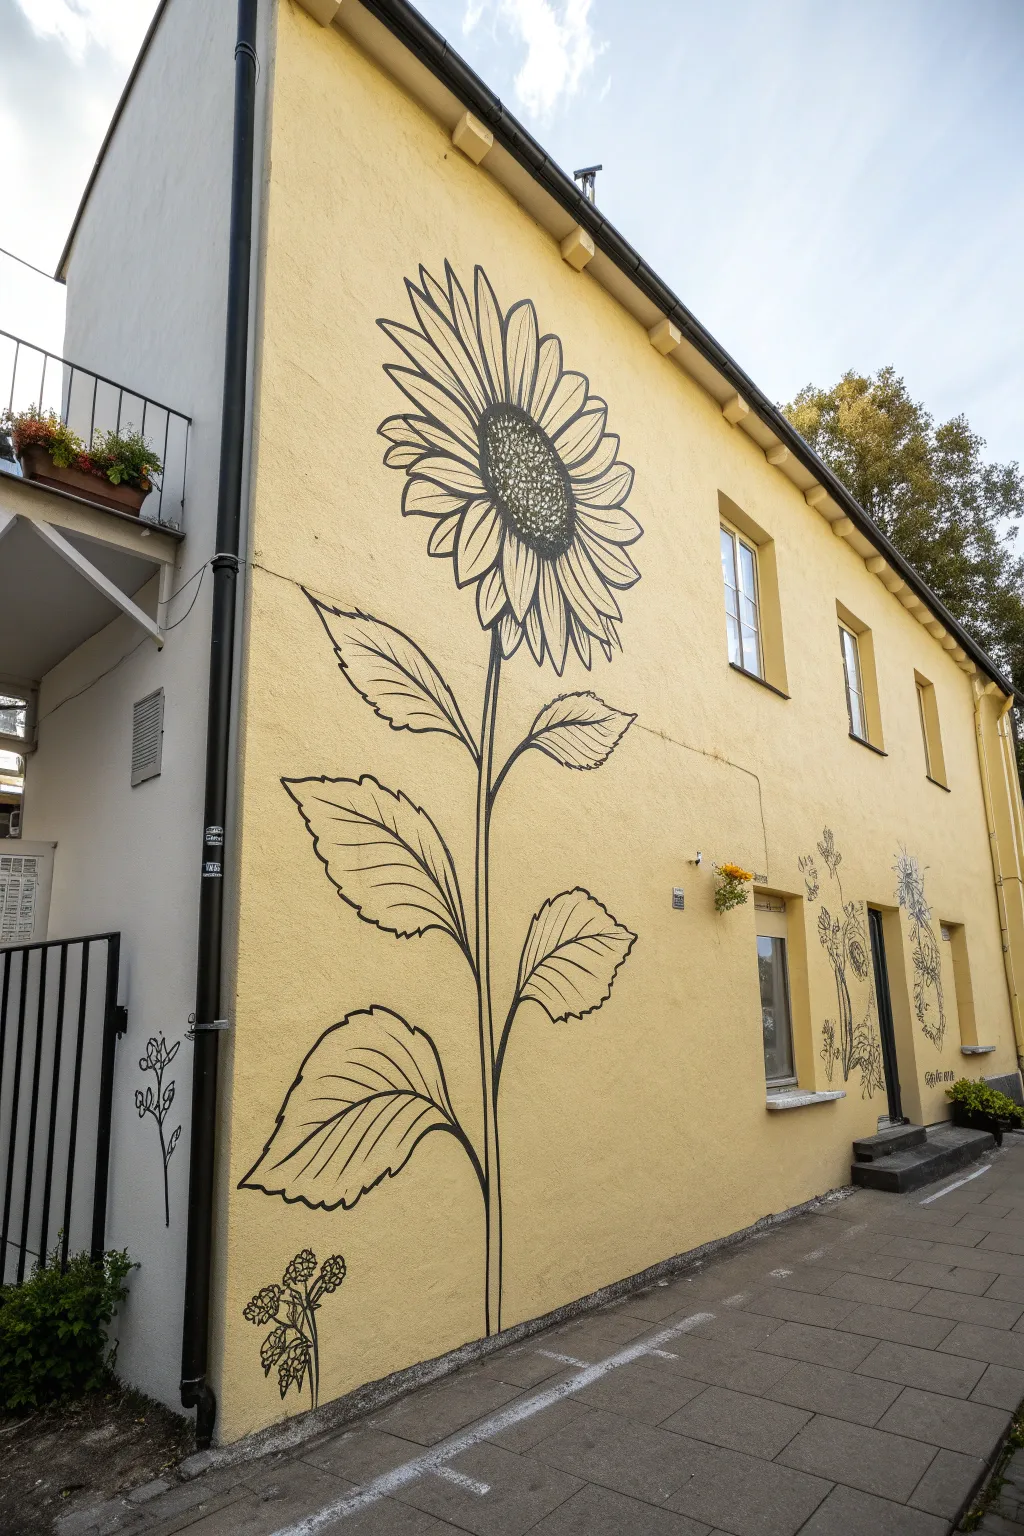
Transform a plain exterior wall into a statement piece with this striking, minimalist sunflower mural. The bold black line art stands out beautifully against a sunny yellow background, creating an illustrative effect that feels both modern and timeless.
Step-by-Step Guide
Materials
- Exterior masonry paint (pale yellow/cream for base)
- Exterior masonry paint (black for linework)
- Wide paint roller and extension pole
- Paint tray and liners
- Chalk or charcoal stick (light grey)
- Small angled brush (1-2 inch) for cutting in
- Round artist brushes (sizes 6, 10, and 12) for detailed lines
- Step ladder
- Cleaning rags and water bucket
- Painter’s tape
Step 1: Preparation and Base Coat
-
Surface Prep:
Begin by thoroughly cleaning the wall surface. Use a pressure washer or a stiff brush with soapy water to remove dirt, moss, and loose paint. Let the wall dry completely for at least 24 hours. -
Tape and Protect:
Apply painter’s tape around window frames, drainpipes, and the base of the wall to protect areas you don’t want to paint. Lay down a drop cloth to catch any drips. -
Cutting In:
Using your angled brush, carefully paint the edges and corners with your yellow masonry paint. I like to get these tedious bits done first so the rolling feels faster. -
First Coat:
Load up your roller with the yellow base color. Apply the paint in a ‘W’ or ‘M’ pattern to distribute it evenly across the large sections of the wall. -
Second Coat:
Once the first coat is fully dry (check the can for specific drying times), apply a second coat to ensure rich, opaque coverage with no patchy spots.
Wobbly Lines?
If your hand is shaking, rest your pinky finger against the wall to stabilize your brush hand. You can also use a mahl stick (or a yardstick) to bridge over wet paint areas.
Step 2: Drafting the Design
-
Rough Sketching:
Using a piece of chalk or a light charcoal stick, sketch the central vertical stem line first. This anchors your composition and helps ensure the flower head ends up at the right height. -
Outline the Head:
Draw a large circle near the top for the flower center. Sketch a second, much larger circle lightly around it to mark the outer limit of the petals. -
Placing Leaves:
Mark out the positions of the large leaves along the stem. Alternate them left and right, starting large at the bottom and getting slightly smaller as you go up. -
Drafting Petals:
Sketch the individual petals radiating from the center. Don’t worry about perfection; draw some overlapping and others slightly twisted to create a natural, organic look. -
Review Proportion:
Step back about 10-15 feet to check your sketch. This is crucial for large-scale work; adjust any wonky lines or odd proportions now before the permanent paint comes out.
Add Dimension
Mix a tiny amount of white into your black paint to create a dark grey. Use this to add subtle highlights on the sunny side of the stem and leaf veins for a 3D effect.
Step 3: Painting the Line Art
-
Stem Definition:
Dip a size 12 round brush into your black exterior paint. Start at the bottom of the stem and pull the brush upward in long, confident strokes. -
Outline Leaves:
Paint the outer contours of the leaves first. Establish the jagged, serrated edges characteristic of sunflower foliage, keeping your line width consistent. -
Leaf Veins:
Switch to a size 10 brush for the internal details. specific the central vein first, then add the side veins curving outward toward the leaf tips. -
Center Texture:
For the seed head, don’t color it solid black. Instead, use a stippling motion or paint many small, tight circles clustered together to mimic the texture of seeds. -
Petal Outlines:
Carefully trace your petal sketches with the size 10 brush. Ensure the lines connect cleanly to the central disk. -
Petal Details:
Using your smallest brush (size 6), add fine vertical lines inside the petals to suggest texture and form. I find that varying the length of these lines adds a lovely sense of depth. -
Lower Blooms:
If your design includes the smaller accent flowers at the bottom left, paint their stems and clusters now, using simpler shapes and thinner lines than the main flower. -
Final Cleanup:
Once the black paint is touch-dry, gently wipe away any visible chalk lines with a damp rag. Check for any yellow touch-ups needed where black might have dripped.
Step back and admire how this simple yet dramatic floral illustration completely revitalizes the building’s character
BRUSH GUIDE
The Right Brush for Every Stroke
From clean lines to bold texture — master brush choice, stroke control, and essential techniques.
Explore the Full Guide
Sunflower Stencil Border
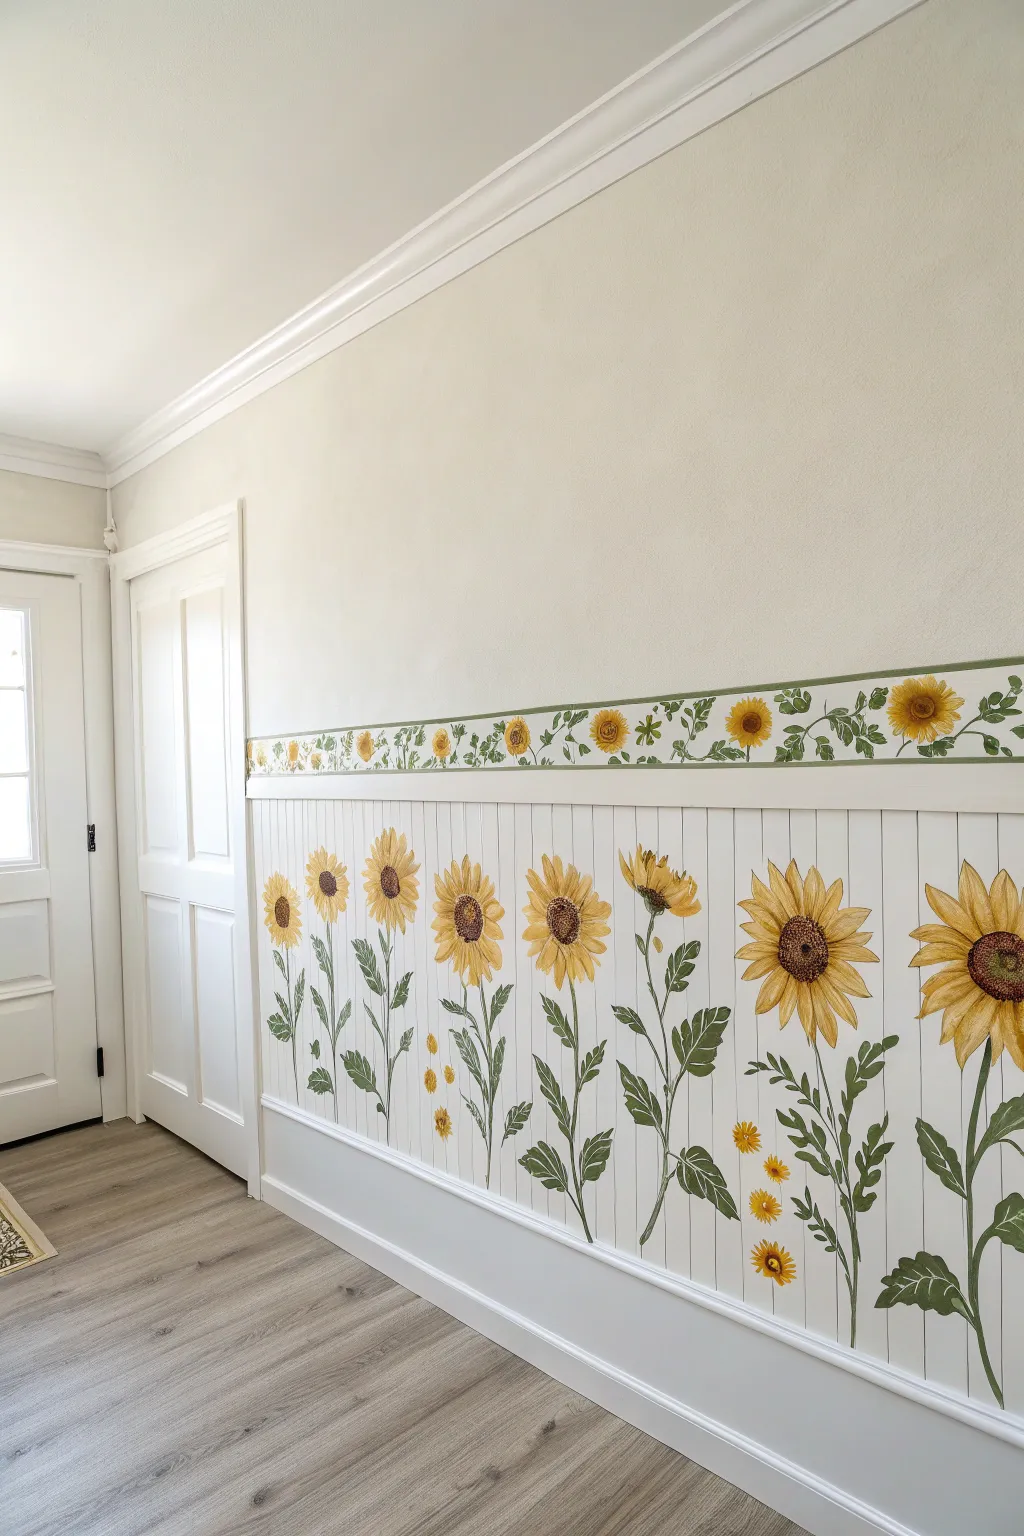
Transform a plain hallway into a sunny garden path with this charming two-part mural project. By combining a faux beadboard effect with hand-painted blooms and a delicate stencil border, you’ll create a layered, architectural look full of warmth.
Step-by-Step
Materials
- Satin interior wall paint (creamy white for base)
- Acrylic craft paints (light yellow, golden yellow, ochre, amber, dark brown, leaf green, olive green)
- Painter’s tape (1-inch width)
- Laser level or long spirit level
- Measuring tape and pencil
- Flat angled sash brush (2-inch)
- Round detail brushes (sizes 4, 6, and 8)
- Small flat brush (1/2 inch) for stems
- Chair rail molding (primed)
- Construction adhesive or finish nails
- Sunflower stencil (border size)
- Stencil brush or high-density foam roller
Step 1: Creating the Faux Beadboard Base
-
Define the height:
Determine how high you want your mural to reach—typically about 32 to 36 inches from the floor is standard for wainscoting. Mark this height horizontally along the wall using a level to unsure a perfectly straight line. -
Paint the base coat:
Paint the area below your marked line with a creamy white satin paint. Applying two coats ensures a solid, opaque background for your flowers. Allow this to fully cure for at least 24 hours. -
Mark vertical stripes:
To mimic beadboard paneling, measure and mark vertical lines every 3 or 4 inches along your white wall section. Use a level and a very light pencil touch to draw these guides from floor to your top line. -
Tape and paint lines:
For crisp, subtle panel lines, you have two options: either draw them with a fine-tip grey paint marker using a straight edge, or use thin painter’s tape to mask off the lines and paint them a soft, barely-there grey. The painted line method looks more authentic. -
Install the rail:
Once the vertical stripes are dry, install a simple flat piece of chair rail molding along the top horizontal line you marked earlier. Secure it with adhesive or finish nails, then paint it the same creamy white as the wall.
Bleeding Stencil Lines?
If paint seeps under your stencil, your brush is too wet. Wait for the mistake to dry, paint over it with the wall color, and retry using a ‘dry brush’ technique.
Step 2: Painting the Large Sunflowers
-
Sketch the layout:
Lightly sketch the flower placement on your faux beadboard. Vary the heights of the flower heads so they don’t look like soldiers in a row; have some stems bending slightly and others standing tall. -
Base coat the stems:
Mix olive and leaf green acrylics. Using your flat ½ inch brush, paint long, fluid stems following your pencil lines. Don’t worry about perfection; natural stems have bumps and curves. -
Paint the leaves:
Use a size 8 round brush to add large, heart-shaped leaves along the stems. Use the darker olive near the stem and brighter leaf green towards the tips to suggest light hitting them. -
Block in flower centers:
Paint the circular centers of the sunflowers using dark brown. Make these circles fairly large and slightly imperfect. Tap the brush to create a stippled texture that resembles seeds. -
Paint first petal layer:
Load a round brush with golden yellow. Starting near the brown center, press the brush down and pull outward, lifting as you reach the tip to create a tapered petal shape. Go all the way around the center. -
Add depth with amber:
While the yellow is still slightly tacky, streak in a little amber or ochre at the base of the petals (nearest the center) to create dimension and shadow. -
Add second petal layer:
Once the first layer is dry, mix a lighter, buttery yellow. Paint a second set of petals in the gaps between the first layer, making these slightly shorter or overlapping for a fuller look. -
Detail the center:
Go back to the brown center. Use a small detail brush or dotting tool with a lighter tan color to add tiny dots around the outer edge of the brown circle, mimicking pollen and seeds. -
Add floating buds:
To fill empty spaces without overcrowding, paint a few smaller, floating yellow buds or tiny dropped petals near the bottom, just above the baseboard.
Step 3: Stenciling the Upper Border
-
Prepare the stencil area:
Measure about 3-4 inches above your chair rail molding. Use painter’s tape to mark a straight horizontal guide for where the top of your border will go. -
Position the stencil:
Secure your vine and sunflower stencil directly above the chair rail. I find it helpful to tape the corners down firmly so it doesn’t shift while I’m working. -
Apply green vines:
Load a stencil brush with leaf green paint, then offload most of it onto a paper towel until the brush is almost dry. Stipple (tap up and down) over the vine and leaf sections of the stencil. -
Detail the flowers:
Switch to a clean brush for the flower heads within the stencil. pounce golden yellow into the petals and dark brown into the centers, being careful not to let the colors bleed into the green areas. -
Repeat the pattern:
Carefully lift the stencil and move it to the right, aligning the registration marks (the start of the pattern) with the end of the section you just painted. Continue until the full border is complete.
Pro Tip: Texture
For the big flower centers, mix a pinch of baking soda or fine sand into your dark brown paint. This actual grit mimics the texture of real sunflower seeds perfectly.
Step back and enjoy the brightness your new garden wall brings to the space.
Tall Sunflower Stalk Corner Wrap
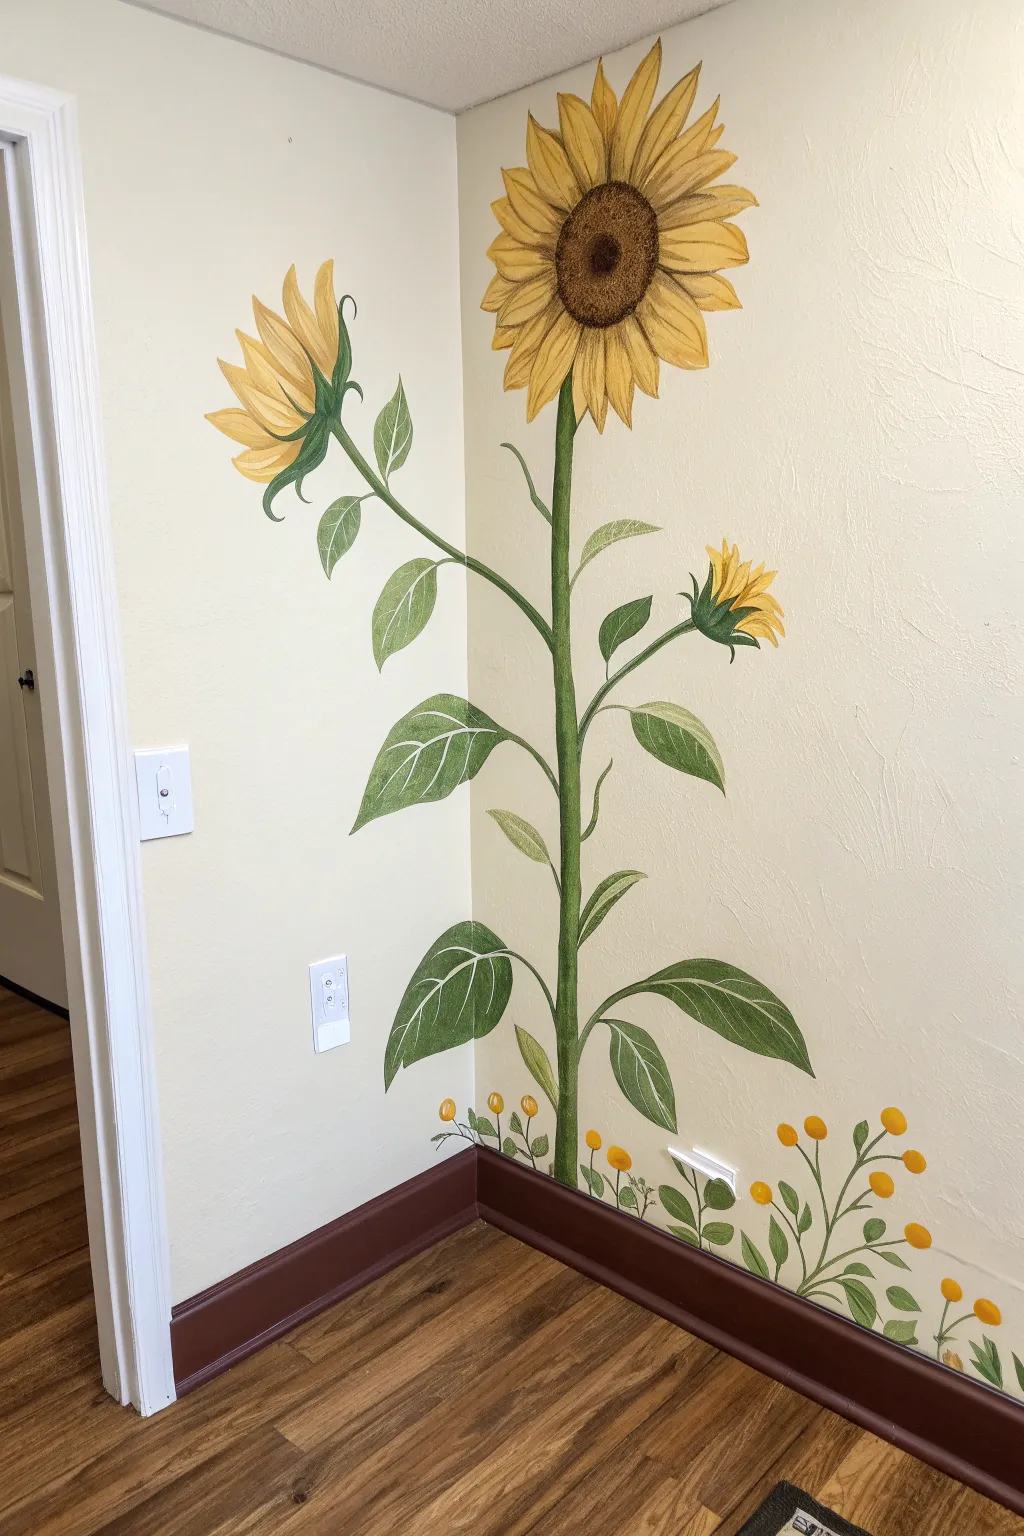
Transform a plain wall corner into a vibrant artistic statement with this life-sized sunflower mural that cleverly wraps around the architecture. This project uses the natural seam of the corner to give the flower stalk a unique three-dimensional presence.
Detailed Instructions
Materials
- Acrylic wall paints (yellow ochre, deep yellow, hunter green, sap green, brown, white)
- Pencil and large eraser
- Painter’s tape
- Medium flat brush (1 inch)
- Small round brush (size 4)
- Liner brush (size 0 or 1)
- Clean rag or paper towels
- Drop cloth
- Water cup
Step 1: Preparation and Sketching
-
Prep the workspace:
Lay down your drop cloth to protect the flooring. Clean the corner walls with a damp cloth to remove dust and ensure good paint adhesion. -
Map out the stem:
Lightly sketch the main central stalk using a pencil. Position the main stem directly in the corner crease, extending from the baseboard almost to the ceiling. -
Sketch the primary blooms:
Draw a large circle near the top right for the main flower head. Sketch a secondary, side-facing bloom on the left wall about a third of the way down. -
Add leaves and buds:
Sketch large, teardrop-shaped leaves extending from the central stalk onto both walls. Add a small, tight bud on the right wall below the main flower. Ensure the leaves arc naturally, some drooping slightly for realism.
Paint Bleed on Texture?
If you have textured walls, paint can seep under tape or stencils. Use a stiff, dry brush and very little paint (dry brushing) for edges to keep lines crisp without bleeding into crevices.
Step 2: Painting the Greens
-
Base coat the stalk:
Using your medium flat brush and hunter green, fill in the main stalk directly in the corner. Paint carefully over the corner seam to bridge the two walls. -
Fill in the leaves:
Paint the base layer of the leaves using the same hunter green. Don’t worry about detailing yet; just get a solid, opaque shape down. -
Add dimension to the stem:
Mix a little sap green with white. Paint a highlight down the center of the stalk to make it look round rather than flat. -
Detail the leaf veins:
With the liner brush and a lighter green mix (sap green + white), paint the central vein and branching veins on each leaf. Keep the lines thin and crisp. -
Highlight leaf edges:
Use the lighter green mixture to add thin highlights along the upper edges of the leaves, suggesting light hitting them from above.
Step 3: Creating the Blooms
-
Paint the petal base:
For the main sunflower, paint the petals using deep yellow. Start from the center and stroke outward to create a tapered tip. -
Layer the lighter petals:
Once the base yellow is dry, mix yellow ochre with a touch of white. Paint a second layer of petals in between the darker ones to add volume. -
Create the center disk:
Fill the large center circle with dark brown paint. Stipple the paint by tapping the brush tip vertically against the wall to create a textured, seedy look. -
Shade the center:
Mix a bit of black into your brown and stipple a darker shadow ring around the outer edge of the center disk for depth. -
Paint the side blooms:
Repeat the petal process for the side-facing flower and the small bud. For the side flower, ensure the green sepals (the leafy parts at the base of the flower) cup the yellow petals properly.
Make It Grow
Add a small bird or butterfly resting on a leaf in a contrasting color like blue or orange. It adds narrative and draws the eye to different parts of the composition.
Step 4: Final Touches
-
Add the bottom details:
Near the baseboard, sketch and paint small sprigs of greenery and tiny yellow buds (billy buttons). These ground the plant so it doesn’t look like it’s floating. -
Refine the outlines:
Step back and look for any shaky edges. Use a small brush with the original wall color to cut in and clean up any mistakes. -
Add final highlights:
I like to use pure white very sparingly on the tips of the petals and the very highest points of the leaves to make the image pop. -
Erase pencil lines:
Wait until the paint is completely dry—at least a few hours—before gently erasing any visible pencil marks remaining around the edges.
Step back into the room and enjoy the sunny garden vibe you have created indoors

PENCIL GUIDE
Understanding Pencil Grades from H to B
From first sketch to finished drawing — learn pencil grades, line control, and shading techniques.
Explore the Full Guide
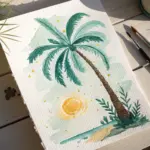
Watercolor-Wash Sunflower Wall Look
Bring the softness of a garden journal to your walls with an oversized sunflower mural that mimics the delicate transparency of watercolor paint. By using diluted acrylic glazes and confident pencil work, you can achieve this airy, botanical illustration style on a grand scale.
Step-by-Step Guide
Materials
- White latex wall paint (eggshell or satin finish)
- Acrylic paints (Yellow Ochre, Cadmium Yellow, Burnt Sienna, Raw Umber, Sap Green, Olive Green)
- Acrylic glazing medium (matte or satin)
- Set of high-quality watercolor-style synthetic brushes (large rounds and flats)
- HB or 2B graphite pencil
- Large eraser
- Water containers and rags
- Ladder or step stool
- Projector (optional but recommended for scale)
Step 1: Drafting the Design
-
Prepare the surface:
Ensure your wall is clean, smooth, and painted with a fresh coat of white paint. The background acts as the ‘paper’ in this watercolor technique, so a pure white base is essential for the colors to glow correctly. -
Sketch the composition:
Start by lightly sketching the placement of the two main flowers. Place the largest bloom higher up on the right and the smaller bloom lower on the left to create a balanced asymmetry. Keep your pencil lines light, as some will remain visible as part of the illustration style. -
Refine the petals and leaves:
Draw the individual petals, varying their shapes—some curving inward, others flopping outward. Sketch large, broad leaves along the stems and add wispy, fern-like filler foliage behind the smaller flower for texture. -
Darken key outlines:
Once happy with the layout, go back over your pencil lines with slightly more pressure to define the final shapes. This mimics the graphite underdrawing often seen in botanical watercolor studies.
Keep it fluid
Work quickly with the glazing medium. If you want hard edges (like water drying on paper), let a puddle sit; for soft blends, wipe with a damp rag immediately.
Step 2: Painting the Blooms
-
Mix the petal glaze:
Mix Cadmium Yellow and a touch of Yellow Ochre with a generous amount of glazing medium and water. You want a consistency that is translucent, like tea, not opaque paint. -
Apply the first wash:
Paint the petals using a large round brush. Start from the center and sweep outward, lifting the brush at the tip to create a natural taper. Don’t worry about filling every spot perfectly; leaving white space adds to the watercolor look. -
Add depth to petals:
While the first layer is tacky but not fully dry, mix a slightly darker, more opaque yellow-orange. Touch this color into the base of the petals near the center disk, letting it bleed naturally outward into the lighter yellow. -
Paint the centers:
For the sunflower centers, mix Burnt Sienna and Raw Umber. Stipple this color into the center circle using a dry brush technique to create a fuzzy, seeded texture. -
Define the center definition:
Darken the very center of the disk with almost pure Raw Umber, fading it out toward the edges where it meets the yellow petals. This creates the concave dimension of the flower head.
Step 3: Adding Foliage and Stems
-
Mix the green wash:
Create a watery mix using Sap Green and Olive Green with your glazing medium. Aim for a muted, natural earth green rather than a bright synthetic emerald. -
Paint the stems:
Using a long flat brush, paint the thick, sturdy stems with a single confident stroke if possible. If the paint pools slightly at the edges, leave it—that ‘coffee ring’ effect enhances the watercolor illusion. -
Wash in the leaves:
Fill in the large leaf shapes with your green wash. I find it helpful to vary the water content here—make some leaves paler and others more saturated to suggest depth and light filtering through. -
Add vein details:
Once the green wash is dry, use a thin liner brush with a slightly darker, less watered-down green to paint the veins on the leaves. Keep the lines fluid and organic, following the curve of the leaf. -
Paint the filler foliage:
Use a very pale, grayish-green wash for the wispy, fern-like plants in the background. These should look faint and distant compared to the bold sunflowers.
Vintage Patina
For an aged parchment look, lightly sponge a very diluted tea-stain colored glaze in random, cloud-like patches on the white wall before starting the flowers.
Step 4: Final Touches
-
Re-evaluate contrast:
Step back from the wall. If the petals look too flat, add a very thin glaze of Burnt Sienna to the shadowed areas where petals overlap. -
Enhance pencil lines:
If your initial pencil sketch got lost under the paint, take your graphite pencil and selectively re-draw outlines around the petals and leaves. This mixed-media look is crucial for the botanical illustration vibe. -
Clean up edges:
Use a clean, damp brush or a white eraser to lift any stray paint splatters or smudges on the white wall, keeping the background pristine.
Enjoy the sunny, artistic atmosphere your new botanical mural brings to the room
Textured Petals With Dry Brush
Transform a blank wall into a permanent summer day with this massive, sun-soaked mural. By utilizing dry brush techniques, you will achieve the soft, fibrous texture of real sunflower petals without needing hyper-realistic painting skills.
Step-by-Step
Materials
- Acrylic latex wall paint (white, deep yellow, pale yellow, ochre, dark brown, burnt sienna, sage green, olive green)
- Pencil and large eraser
- Chalk (optional, for drafting)
- Angle sash brushes (2-inch and 1-inch)
- Round detail brushes (various sizes)
- Clean, dry rags or paper towels
- Painter’s tape and drop cloth
- Mixing palette or paper plates
- Ladder or step stool
Step 1: Planning and Sketching
-
Prepare the workspace:
Clear furniture away from the wall and lay down a drop cloth. Tape off the baseboards and window frames to protect trim from errant brushstrokes. -
Map the center:
Decide on the placement of the sunflower head. Draw a large, slightly oval circle lightly in pencil or chalk to mark where the dark seed center will go. Position it slightly off-center on the wall for a dynamic composition. -
Sketch the primary petals:
Sketch the first layer of large, elongated petals radiating from the center circle. Let them twist and turn slightly at the tips rather than making them perfect triangles. -
Fill in the background petals:
Draw a second layer of petal tips peeking out from behind the first layer to add volume. Don’t worry about erasing overlapping lines perfectly; the paint will cover them. -
Add stem and leaves:
Sketch a thick stem curving upward from the floor. Add large, heart-shaped leaves branching off the stem, keeping the lines loose and organic.
Keep Brushes Thirsty
For the best dry-brush texture, wash your brush very infrequently. If you must wash it, squeeze it completely dry with a towel before dipping back into paint.
Step 2: Painting the Center
-
Base coat the disk:
Paint the central disk with a flat layer of dark brown. It doesn’t need to be perfectly opaque, as some texture is good. -
Stipple the outer ring:
Mix a little burnt sienna into your dark brown. Using an old, stiff brush, stipple (dab repeatedly) a ring around the outer edge of the center to create a fuzzy transition where the seeds meet the petals. -
Create the inner ring texture:
Mix a lighter ochre color. Use a smaller round brush to dot small circles inside the brown center, creating a ring of unformed seeds. Leave the very center dark.
Step 3: Creating Textured Petals
-
Base the petals:
Paint the entire shape of the petals with a creamy white or very pale yellow base coat. This primes the wall and makes the yellow topcoats pop. -
Apply the mid-tone yellow:
Load your brush with deep yellow, then wipe most of it off on a rag until the brush is nearly dry. Drag the brush from the base of the petal outward, letting the bristles create streaky lines. -
Add shadows:
Mix a small amount of ochre or light brown into your yellow. Paint thin, shadowy lines between the petals to separate them visually. -
Highlight with pale yellow:
Clean your brush thoroughly and dry it well. Pick up the pale yellow paint and dry-brush the tips and centers of the petals to simulate sunlight hitting the flower. -
Define the veins:
Use a detail brush with a mix of ochre and dark yellow to paint thin, faint veins running down the length of specific petals for added realism.
Blobs Instead of Streaks?
If your brush strokes look like solid blobs, you have too much paint loaded. Offload more paint onto a paper towel until the brush leaves scratchy, separated lines.
Step 4: Leaves and Final Details
-
Base coat the greenery:
Fill in the stem and leaves with a flat coat of sage green. Allow this to dry completely. -
Shadow the leaves:
Using the olive green, paint the underside of the leaves and one side of the stem to give the plant dimension. -
Dry brush leaf texture:
Similar to the petals, use a dry brush with a lighter green mix to streak texture onto the leaves, following the direction of the veins. -
Outline for crispness:
I like to take a very fine liner brush with diluted brown paint to loosely outline a few key petals and leaves where the definition got lost during the dry brushing. -
Add whimsical details:
Paint a small, faint doodle of a baby sunflower near the bottom stem using just yellow outlines, keeping it airy and illustrative. -
Cleanup:
Once fully dry, carefully remove any visible pencil marks with a large eraser and peel off the painter’s tape.
Step back and admire how this singular, glowing bloom brightens the entire room.


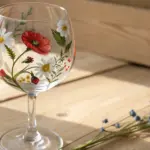
Sunflower “Window” Trompe-l’Œil
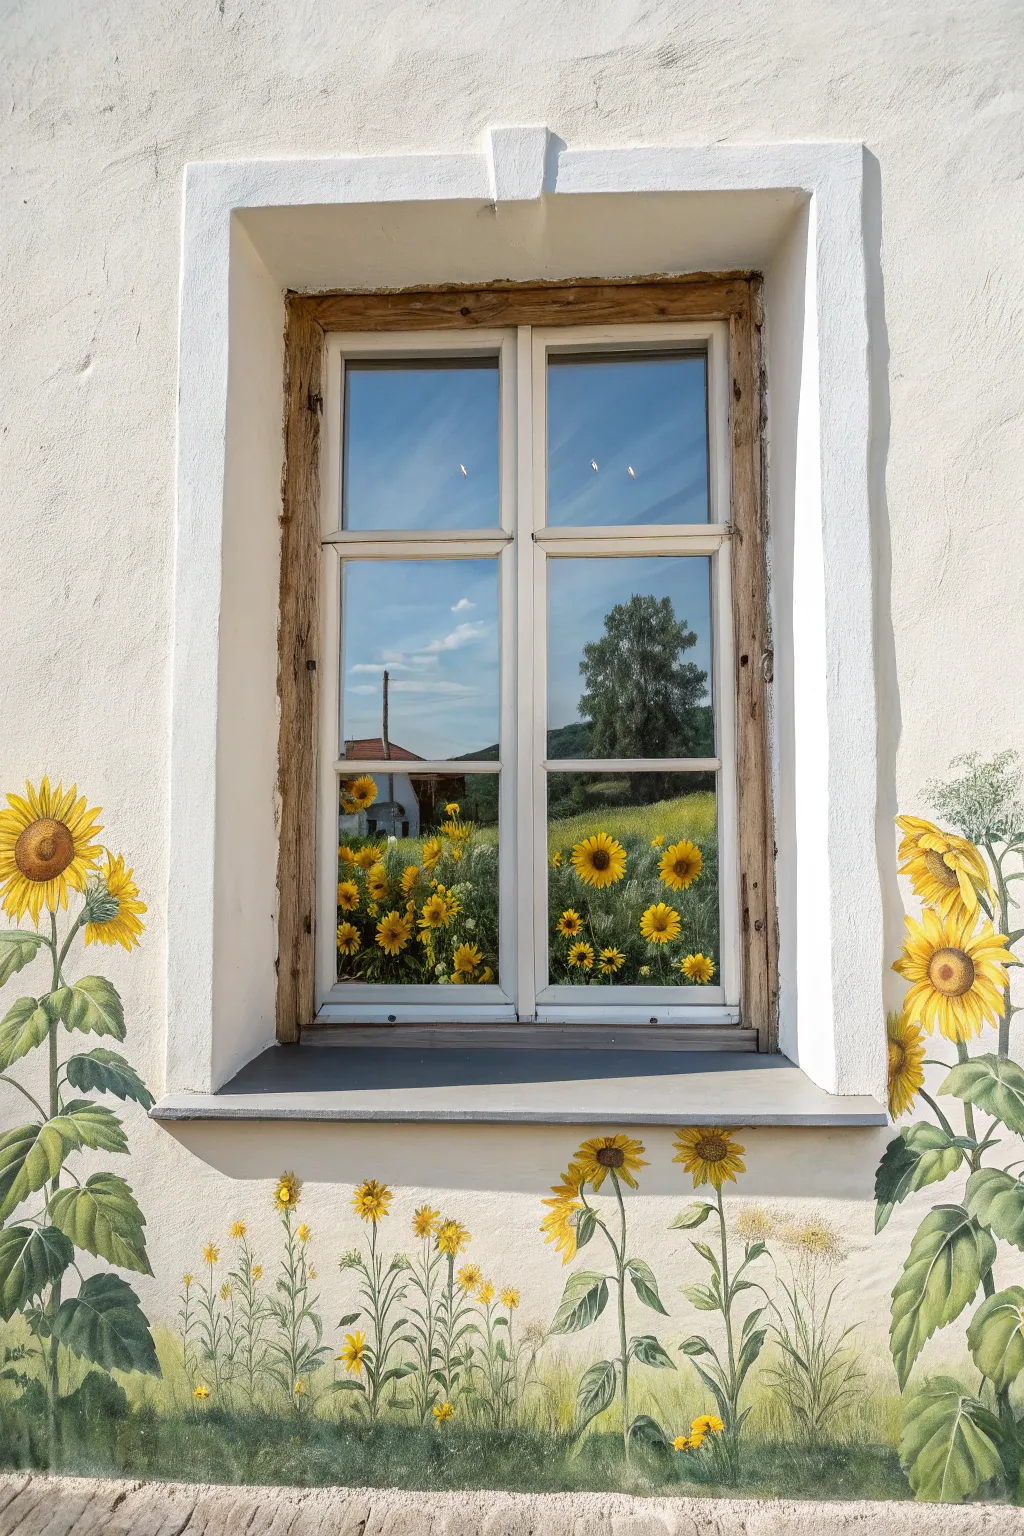
Transform a blank exterior or interior wall into a portal to a summer day with this stunning optical illusion mural. This project combines precise architectural painting with loose, organic floral details to create a convincing window overlooking a sunflower field.
Step-by-Step Guide
Materials
- Exterior or interior latex primer
- High-quality acrylic exterior/interior paints (White, Raw Umber, Burnt Sienna, Phthalo Blue, Cerulean Blue, Sap Green, Hookers Green, Cadmium Yellow, Yellow Ochre)
- Painter’s tape (various widths)
- Level and plumb line
- Chalk line or pencil
- Assorted brushes (2-inch flat, 1-inch angled sash, fan brush, fine liner)
- Palette for mixing
- Rags and water container
Step 1: Drafting the Architecture
-
Prepare the Surface:
Begin by cleaning your wall thoroughly to remove dust or grime. If painting over a dark color, apply a coat of white primer to the entire area where the mural will sit to ensure your colors pop. -
Measure and Mark:
Decide on the size of your window. Using a level and a tape measure, lightly draw the outer rectangle of the window frame. Ensure your vertical lines are perfectly plumb so the illusion feels stable. -
Map the Grid:
Draw the inner window panes. Create a standard four-pane sash design by dividing the large rectangle into quadrants, leaving space for the muntins (the wooden dividers) in the center. -
Mask the Frame:
Apply painter’s tape along the outside edges of your drawn frame lines. This step is crucial for achieving the crisp, sharp edges that make the architectural elements look realistic.
Naturalizing Shadows
Observe where the actual light hits your wall during the day. Paint your simulated shadows in the same direction as the real cast shadows to make the illusion truly convincing.
Step 2: Painting the Window View
-
Paint the Sky Gradient:
Inside the taped window panes, paint the sky first. Start with a deep Cerulean Blue at the top and blend it down into a lighter white-blue mix near the horizon line to mimic atmospheric perspective. -
Block in the Landscape:
Paint a horizon line about one-third up from the bottom of the panes. Fill the bottom section with varying shades of Sap Green and Yellow Ochre to represent a distant field. -
Add Distant Details:
Using a smaller round brush, dab in dark green foliage for the distant trees and small yellow dots for the far-off sunflowers. Keep these details soft and slightly blurry to enhance the feeling of depth. -
Create Glass Reflections:
Once the landscape is dry, mix a translucent glaze of white and water. Lightly drag a dry brush diagonally across parts of the panes to simulate the sheen of glass reflecting the light.
Step 3: Constructing the Frame
-
Base Coat the Wood:
Remove the tape around the panes. Paint the window frame, sill, and muntins with a base coat of beige or light tan. -
Add Wood Grain Texture:
Mix a thin wash of Raw Umber. Using a stiff-bristled brush, drag streaks through the beige paint to simulate wood grain. Add darker brown lines in corners for definition. -
Paint the Shadow and Highlight:
To make the window pop, paint a dark shadow inside the top and left edges of the frame recess. Highlight the opposite edges with pure white to simulate sunlight hitting the casing. -
Detail the Hardware:
Use a liner brush and metallic grey or black paint to add small hinges or latches on the wooden frame for that extra touch of realism.
Perspective Check
If the window looks flat, your shadows are likely too light. Deepen the shadows under the sill and inside the upper frame recess to dramatically increase the 3D effect.
Step 4: Growing the Garden
-
Mock Up the Flowers:
Below and to the sides of the painted window, sketch loose outlines of tall sunflower stalks and leaves. Vary the heights so it doesn’t look like a uniform fence. -
Paint Leaves and Stems:
Using Hookers Green mixed with a touch of yellow, paint the broad, heart-shaped leaves and thick stems. I like to twist the brush slightly while painting leaves to create natural curves. -
Add Leaf Veins:
Once the green is dry, use a lighter yellow-green and a fine liner brush to paint the central veins and ribbing on the large leaves. -
Paint Flower Centers:
Paint large brown ovals or circles at the top of your stems. Stipple dark brown and Raw Umber in the center to create the texture of seeds. -
Layer the Petals:
Using Cadmium Yellow, paint the petals radiating from the centers. Apply a second layer of lighter yellow on the tips of the petals to catch the ‘sun’ light. -
Ground the Garden:
At the very bottom, paint vertical strokes of various greens to create a grassy bed. Blend this seamlessly into the existing wall color or ground level.
Step back and enjoy the permanent sunshine your new window brings to the space
Ceiling-to-Floor Sunflower Growth Chart Wall

Transform a plain strip of wall into a functional piece of art with this botanically inspired height chart. This project combines the utility of measuring your little one’s growth with the gentle, organic beauty of a towering sunflower stem.
How-To Guide
Materials
- Interior wall paint (white for base if needed, varying greens for stem/leaves, yellow/gold/brown for flower head)
- Pencil and large eraser
- Measuring tape (essential)
- Long spirit level or laser level
- Painter’s tape
- Assorted brushes: 2-inch angled sash brush, medium flat brushes, and fine liner brushes
- Black acrylic paint or paint marker
- Clear matte sealer (optional)
- Ruler or yardstick
Step 1: Planning and Mapping
-
Prepare the Canvas:
Ensure your wall surface is clean, dry, and free of dust. If your wall isn’t already white, apply a fresh coat of simple white interior eggshell paint to provide a crisp background for the artwork. -
Establish the Measurements:
Using your measuring tape, measure from the floor upward. Use a pencil to lightly mark every 10 centimeters (or inches, depending on your preference) up the wall where the scale will go. Verify these marks are perfectly vertical using a laser level or long spirit level. -
Draft the Stem:
Lightly sketch a central line for the sunflower stem running parallel to your measurement markings, leaving about 10-15cm of space between the scale and the plant. Don’t make it perfectly straight; a slight organic curve adds realism. -
Sketch the Leaves and Bloom:
Draw the outline of the leaves branching out in alternating pairs as you move up the stem. At the very top, sketch the large sunflower head, ensuring the petals radiate evenly from the center disk.
Uneven Lines?
If your hand shakes while painting the measurement tick marks, use painter’s tape to mask off the top and bottom of each line. It takes longer to prep, but guarantees crisp edges.
Step 2: Painting the Foliage
-
Mix Your Greens:
Create a palette of three greens: a mid-tone olive for the base, a darker forest green for shadows, and a pale sage for highlights. I like to keep the paint consistency creamy but not too thick. -
Base Coat the Stem:
Using a medium flat brush and your mid-tone olive green, paint the main stalk. Use long, smooth strokes to avoid choppy textures, tapering slightly as you reach the neck of the flower. -
Fill in the Leaves:
Paint the leaf shapes with the same mid-tone green. Follow the direction of growth—brushing from the stem outward toward the leaf tip—to mimic natural veins. -
Add Depth with Shadows:
Once the base green is dry to the touch, use a smaller brush and the dark forest green to paint the undersides of the leaves and the shaded side of the stem. Focus on where the leaves attach to the stalk. -
Highlight the Veins:
With a fine liner brush and the pale sage green, carefully paint the central vein of each leaf and add thin highlights to the sun-facing side of the stem to create a cylindrical 3D effect.
Step 3: Creating the Flower Head
-
Paint the Center Disk:
Mix a warm dark brown and dab it into the center circle using a stippling motion (up and down dabbing) to create a fuzzy, seed-like texture. Darken the very center with a touch of black mixed into the brown. -
Layer the Petals:
Start with a deep golden yellow to paint the primary petals shape. Allow this to dry, then layer a lighter, buttery yellow on the top half of each petal to catch the light. -
Refine the Edges:
Use a very fine brush with a mix of watered-down brown to outline the individual petals subtly if needed, separating them from the white background.
Personalize It
Add small painted insects like bees, ladybugs, or butterflies landing on the leaves at the heights your child reaches on their birthdays for a permanent memory.
Step 4: Finalizing the Measurement Scale
-
Draw the Tick Marks:
Return to your pencil marks on the left side. Using a ruler and a fine black paint marker (or a liner brush with black acrylic), draw purely horizontal lines for the measurements. Make the ‘whole number’ marks slightly longer than the intermediate marks. -
Add the Numbers:
Carefully paint or write the numbers next to the corresponding major tick marks (e.g., 80, 90, 100). Choosing a serif font style gives it a classic botanical illustration look. -
Seal the Work:
If this is in a high-traffic area or a kid’s room, apply a clear matte water-based varnish over the painted areas once they have cured for at least 24 hours.
Now you have a beautiful, permanent record of growth that blooms right along with your family


Have a question or want to share your own experience? I'd love to hear from you in the comments below!