Acrylic paint is basically made for bookmarks: it’s bold, opaque, and lets you layer color fast on a tall little strip. Here are my favorite bookmark painting ideas acrylic artists can knock out in an afternoon—classic first, then we’ll get a little wild.
Sunset Gradient With Black Silhouettes
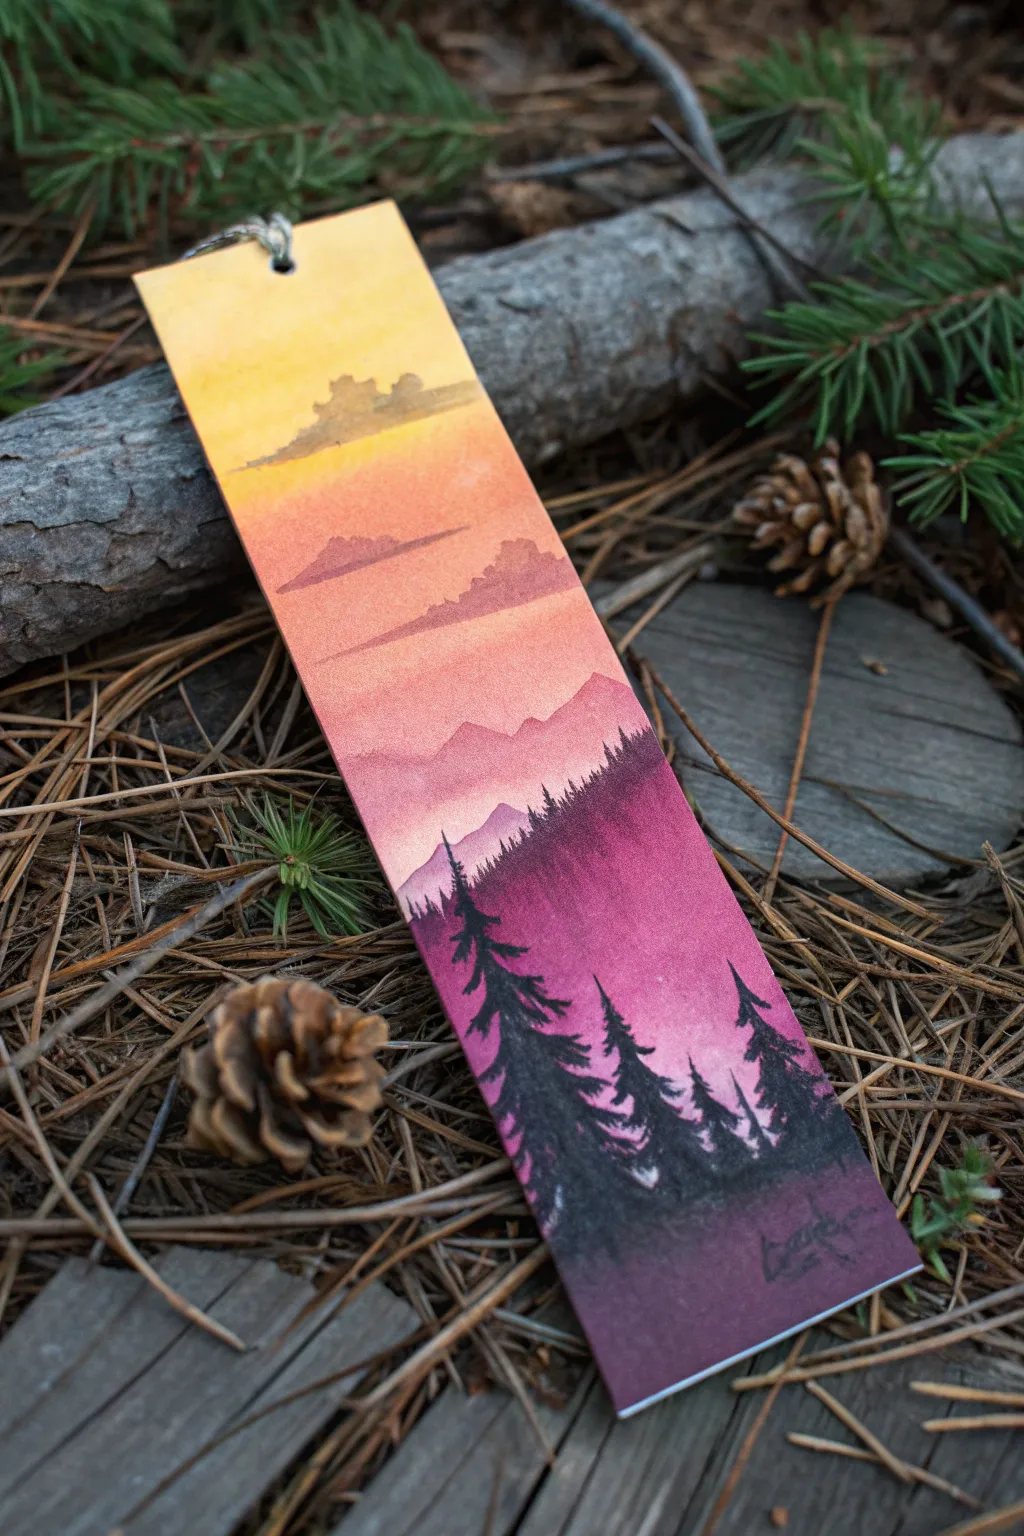
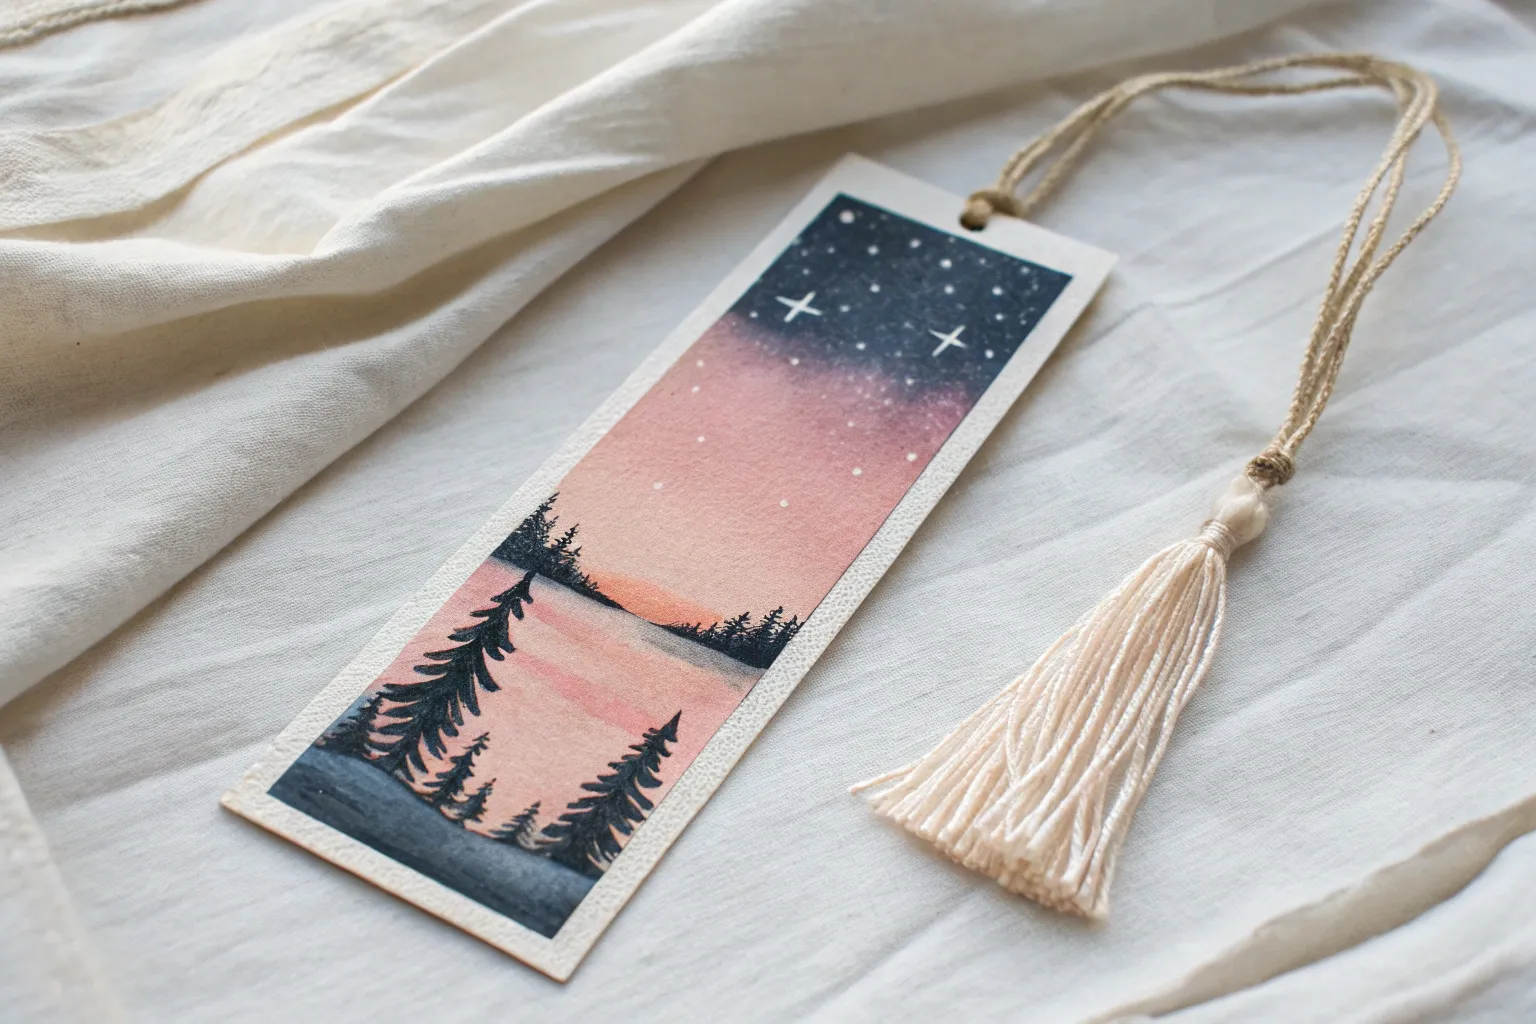
Capture the serene beauty of a mountain dusk with this vibrant gradient bookmark. You’ll layer warm yellows, dusky oranges, and deep purples to create a stunning backdrop for a classic pine tree silhouette.
Step-by-Step
Materials
- Heavyweight watercolor paper or cardstock (cut to bookmark size, approx. 2″ x 6″)
- Acrylic paints: Cadmium Yellow, Orange, Magenta (or Alizarin Crimson), Purple, and Black
- Flat shader brush (medium size)
- Small round detail brush (size 0 or 1)
- Mixing palette
- Cup of water and paper towels
- Washi tape or masking tape
- Hole punch and twine (optional)
Step 1: Creating the Sunset Gradient
-
Prepare your canvas:
Tape down your bookmark to a flat surface using washi tape. This keeps the paper from buckling when wet and creates a clean border if you tape over the edges, though for this look, we are painting edge-to-edge. -
Mix the lightest tone:
On your palette, mix a generous amount of Cadmium Yellow with a tiny touch of white if you want it opaque. This will be the color of the topmost sky. -
Paint the top section:
Using your moist flat brush, paint the top third of the bookmark with the yellow mixture. Use horizontal strokes to keep it smooth. -
Add the orange layer:
Load your brush with orange paint. While the yellow is still slightly wet, paint the middle section, overlapping the bottom of the yellow area. -
Blend the sky:
Clean your brush slightly, then use quick, gentle back-and-forth strokes where the yellow and orange meet to create a seamless transition. -
Introduce the pinks:
Mix a bit of magenta or crimson into your orange to create a coral pink hue. Apply this below the orange section, blending upwards just like before. -
Deepen the horizon:
For the bottom third, transition into a deep magenta or purple. This will serve as the dark, misty backdrop for the forest floor. -
Final gradient smoothing:
If any lines look harsh, wash your brush and use a slightly damp (clean) brush to feather the edges between colors. Let this background layer dry completely.
Smooth Blending Trick
Work quickly while the acrylics are wet but keep a spray bottle handy. A very light misting of water keeps the paint workable for smoother gradients.
Step 2: Layering Clouds and Mountains
-
Mix a muted cloud color:
Take your orange paint and dirty it slightly with a tiny speck of purple or brown. You want a color just slightly darker than the yellow sky. -
Paint distant clouds:
Using the corner of your flat brush or a small round brush, dab in a few thin, horizontal cloud shapes near the top yellow section. -
Soften the clouds:
I like to blur the bottom edge of these clouds with a damp brush so they look like they are floating in the distance. -
Create the distant mountains:
Mix a light purple tone. Outline a jagged mountain range silhouette across the middle of the bookmark, right where the pink meets the purple. -
Fill the mountain shape:
Fill in the mountain shape with the light purple mix, fading it out as you move downward into the darker bottom color. This creates an atmospheric mist effect. -
Dry time:
Allow the mountain layer to dry fully before moving on to the foreground. This prevents the sharp black trees from bleeding into the background.
Step 3: The Silhouettes
-
Load the detail brush:
Switch to your smallest detail brush. Load it with pure black acrylic paint. Ensure the paint flows well; add a drop of water if it feels too thick or sticky. -
Draw the tree trunks:
Paint vertical lines starting from the bottom edge reaching upwards. Vary the heights—make one or two tall trees reaching into the orange sky, and shorter ones below. -
Determine the ground line:
Use the black paint to fill in the very bottom edge of the bookmark, creating a solid ground for your trees to stand on. -
Start the pine branches:
Starting at the top of a tree trunk, paint small downward-sloping dashes. These represent the top branches of the pine. -
Thicken the foliage:
As you move down the trunk, make your branch strokes wider and denser. tap the brush gently to create a texture that looks like needles rather than solid blocks. -
Fill the forest floor:
For the shorter trees in the background, you don’t need much detail. Just suggest triangular shapes emerging from the black ground. -
Final touches:
Add a few tiny birds in the distance using the very tip of your brush, or sign your name in the bottom corner. -
Finish up:
Once fully dry, punch a hole at the top and loop a piece of rustic twine through it.
Make It Sparkle
After the painting is dry, flick a toothbrush with diluted white paint over the top section to add a starry night effect to the upper sky.
Now you have a miniature window into the wilderness to save your page

Starry Night Sky With Paint Splatter Stars
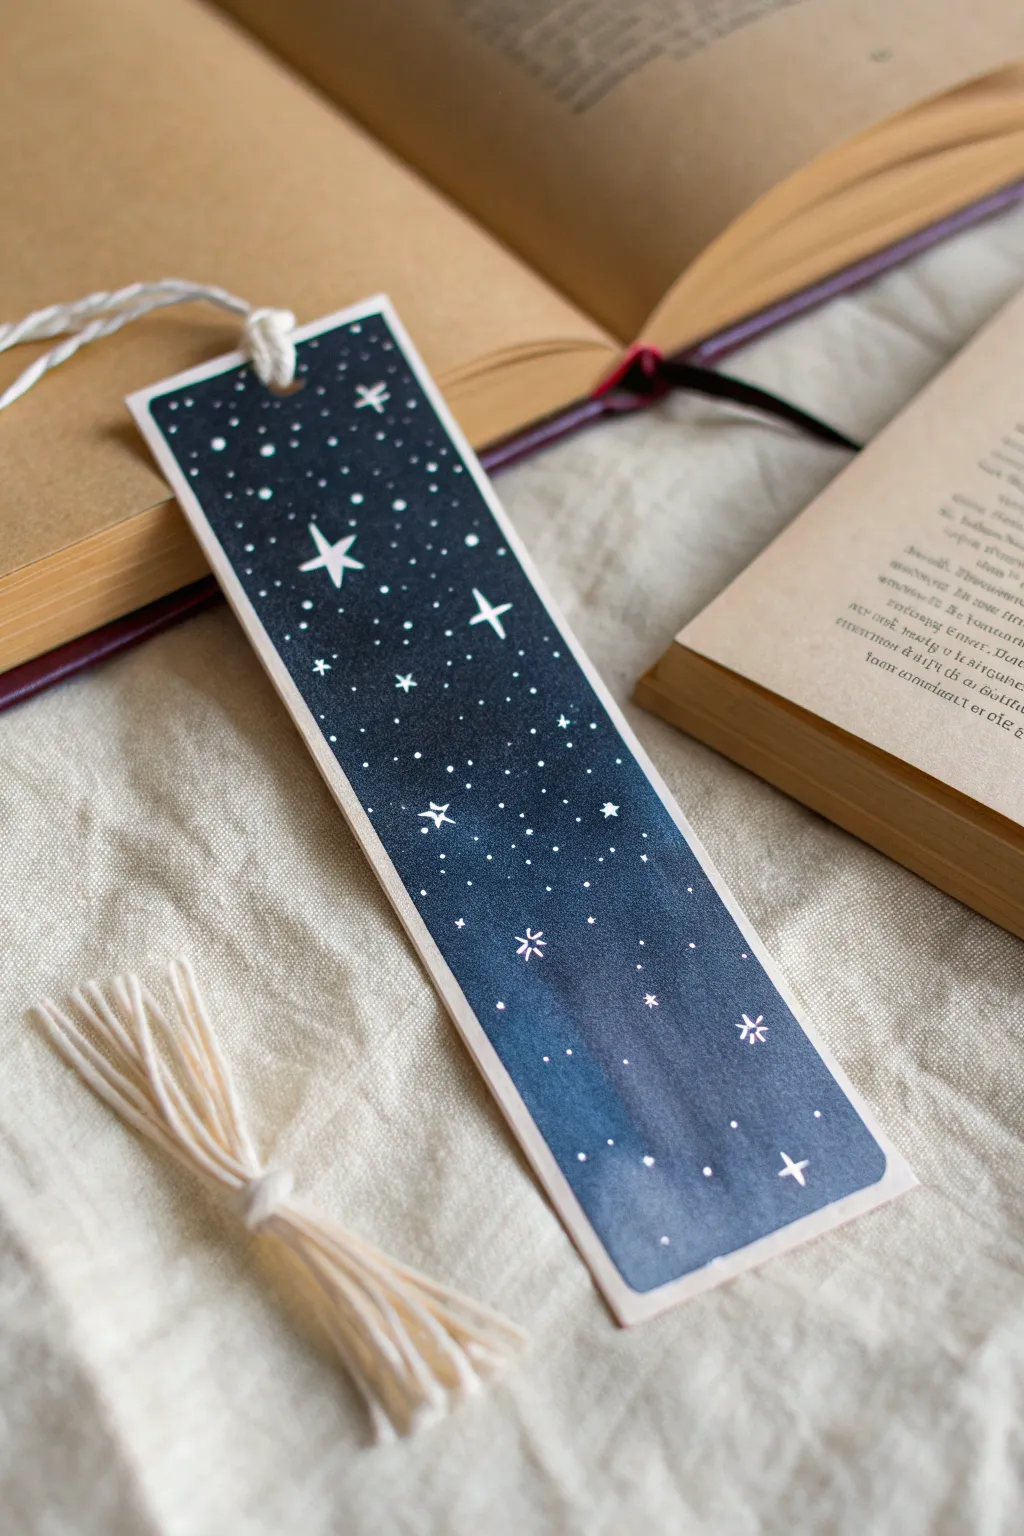
Capture the magic of a starlit evening with this elegant gradient bookmark featuring hand-painted constellations. The deep indigo fades into a soft midnight blue, creating the perfect backdrop for delicate white stars that seem to twinkle right off the page.
Step-by-Step Guide
Materials
- Heavyweight cold-press watercolor paper or cardstock (cut to approx. 2″ x 7″)
- Acrylic paints: Black, Pthalo Blue (or Navy), White
- Flat shader brush (size 6 or 8)
- Small round detail brush (size 0 or 00)
- Painter’s tape or washi tape
- Palette for mixing
- Water cups and paper towels
- Hole punch
- White cotton twine or embroidery floss
Step 1: Preparing the Base
-
Cut and tape:
Begin by cutting your paper to your desired bookmark size. Taping the edges down to your workspace isn’t strictly necessary for acrylics, but it helps keep the paper flat and creates a nice clean border if you prefer one. -
Mix the deepest shade:
On your palette, mix black with a small amount of dark blue. You want a color that reads as a deep, abyssal night sky, barely distinguishable from pure black. -
Mix the transition shade:
Create a second puddle of paint using just your dark blue, perhaps with a tiny touch of black to mute it slightly. -
Mix the lightest shade:
Finally, prepare a slightly lighter blue by mixing your dark blue with a very small dot of white. This will be the bottom-most color of the gradient.
Clean Splatters
Before splattering stars, test the spray on a scrap paper first. If big globs fall off, your paint is too thick or the brush is overloaded. Keep a damp paper towel ready to wipe mistakes.
Step 2: Painting the Gradient
-
Apply the top layer:
Using your flat brush, paint the top third of the bookmark with your darkest black-blue mixture. Make sure to coat the edges fully. -
Apply the middle layer:
While the top paint is still wet, rinse your brush quickly and pick up the medium blue shade. Paint the middle section, overlapping slightly with the dark top section. -
Blend the transition:
Use horizontal strokes back and forth where the two colors meet to create a seamless fade. If the paint feels too sticky, dip just the corner of your brush in water. -
Finish the bottom:
Apply your lightest blue shade to the bottom third of the bookmark. Blend it upwards into the middle blue section just as you did before. -
Smooth it out:
I like to run a clean, slightly damp brush lightly over the entire surface from top to bottom once to unify the gradient. Let this base layer dry completely before moving on.
Level Up: Metallic Touch
For a magical finish, mix a tiny bit of iridescent medium into your white paint, or use a silver metallic paint for the larger stars to make them catch the light as you read.
Step 3: Creating the Stars
-
Prepare the ‘ink’:
Take a dime-sized amount of white acrylic paint and mix in a few drops of water. You want an inky consistency that flows easily off a small brush but isn’t transparent. -
Paint the hero stars:
Using your smallest detail brush (size 00), paint 3-4 larger four-pointed stars. Start with a vertical line, then cross it with a horizontal line, tapering the ends to sharp points. -
Add medium stars:
scatter a few medium-sized five-pointed stars or simple cross shapes around the larger ones. Keep them random to look natural. -
Create the Milky Way effect:
Dip the tip of your brush into the thinned white paint and gently tap it against another brush handle over the bookmark to create a spray of tiny splatter stars. Focus the spray in a diagonal band if you want a galaxy look. -
Fill in gaps:
Use the tip of your brush to manually add tiny dots in any empty spaces, varying the pressure to make some stars larger than others. -
Add twinkle details:
For extra sparkle, paint tiny ‘plus’ signs (+) on a few of the random dots to suggest they are twinkling brightly.
Step 4: Final Assembly
-
Punch the hole:
Once the paint is bone dry, punch a single hole in the center of the top edge, leaving about a half-inch of space from the top. -
Cut the twine:
Cut three or four strands of white cotton twine, each about 8-10 inches long. -
Thread the loop:
Fold the strands in half to create a loop. Push this loop through the hole from the front to the back. -
Secure the tassel:
Pull the loose ends of the twine through the loop and tighten gently to secure the tassel to the bookmark. -
Trim:
Trim the ends of the tassel so they are even and neat.
Now you have a serene piece of the night sky to mark your place in your next adventure

Moonlit Mountains In Layers
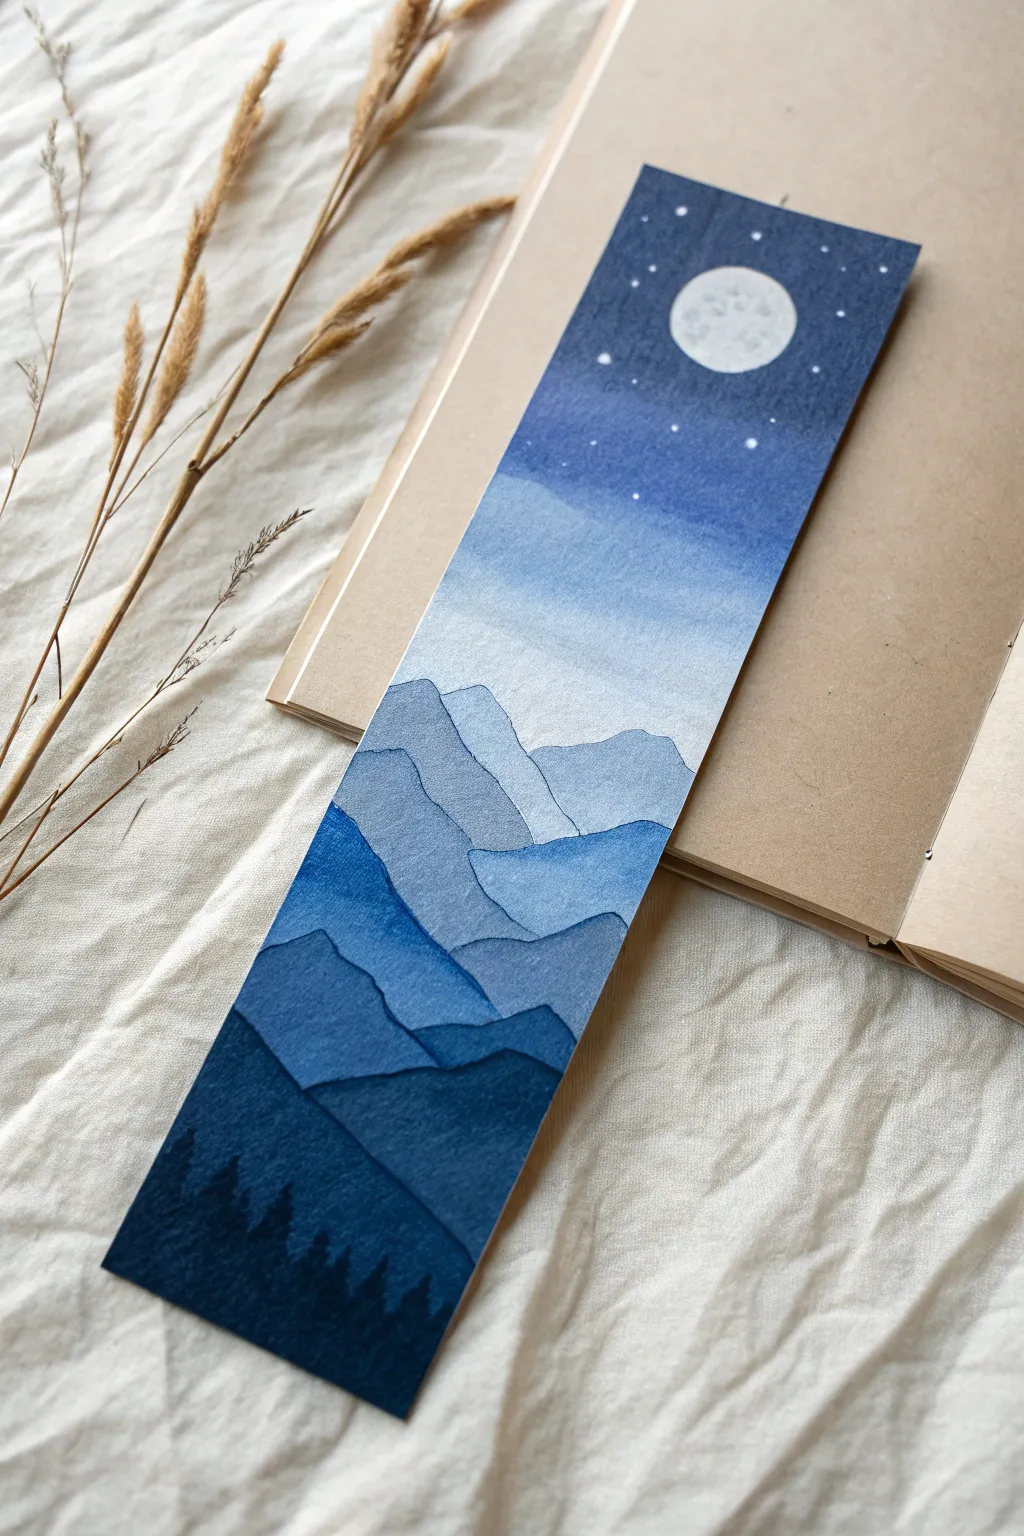
Capture the serenity of a moonlit night with this monochromatic blue mountain landscape. Using simple layering techniques, you’ll create depth that draws the eye from a starry sky down to a shadowy forest floor.
How-To Guide
Materials
- Heavyweight watercolor paper (300 gsm recommended)
- Watercolor paints (Indigo, Prussian Blue, Payne’s Grey, White Gouache)
- Flat wash brush (medium)
- Round detail brushes (size 2 and 0)
- Masking tape
- Jar of clean water
- Pencil and eraser
- Paper towel
Step 1: Preparation & Sky
-
Prepare your canvas:
Cut your watercolor paper into a bookmark strip, roughly 2 x 7 inches. Tape the edges down onto a hard board using masking tape to prevent buckling and to create a clean white border. -
Sketch the moon:
Lightly trace a small circle near the top center for the moon using a pencil or a stencil. Don’t press too hard, as you want the lines to be barely visible. -
Mix your sky colors:
Create a gradient pool on your palette. You’ll need a deep indigo for the top, transitioning into a lighter blue wash. Ensure you have plenty of water mixed in for transparency. -
Paint the upper sky:
Using the flat brush, paint the area around the moon carefully with the darkest indigo. As you move down the bookmark, wet your brush with clean water to dilute the pigment, creating a soft fade. -
Fill the moon:
While the sky dries, use a small round brush to paint the moon with a very pale, watery grey. Leave a few tiny white spots or lift color with a dry brush to create textured craters.
Bleeding Edges?
If paint seeps under the tape, use a slightly damp, clean brush or a ‘magic eraser’ sponge to gently lift the unwanted pigment. Ensure tape is burnished well next time.
Step 2: Layering the Mountains
-
First mountain range:
Mix a very pale, diluted blue wash. Paint the silhouette of the furthest mountain range just below the faded sky. The shape should be jagged but soft. -
Let it dry completely:
This is the most critical step. If the first layer isn’t dry, the next layer will bleed into it. Wait until the paper is bone dry. -
Second mountain tier:
Mix a slightly darker shade of blue. Paint the next range of mountains overlapping the first one slightly. Vary the peak shapes so they don’t look identical to the first row. -
Third mountain tier:
Add a touch more pigment to your blue mix. Paint a third layer of mountains lower down. I like to make the ridges a bit sharper as the mountains get ‘closer’ to the viewer. -
Fourth mountain tier:
Continue the process with an even darker blue mix. Paint the fourth layer, ensuring the contrast between this layer and the previous one is distinct.
Add a Tassel
Punch a hole in the top center and thread a silver or navy ribbon through it. Add a small silver star charm to the tassel for an extra celestial touch.
Step 3: Foreground Details
-
Deep shadow layer:
Mix your darkest blue yet—almost a midnight blue. Paint the final large mountain shape near the bottom, covering almost everything remaining except a small strip at the very base. -
Tree silhouette base:
Using nearly pure pigment (Indigo or Payne’s Grey with very little water), paint the final bottom strip solid dark blue. -
Painting pine trees:
Switch to your smallest detail brush (size 0). Using the same dark pigment, draw tiny vertical lines extending up from the bottom distinct layer. Add jagged, downward-sloping branches to form pine trees. -
Adding stars:
Once the sky involves is completely dry, take white gouache or a white gel pen. Dot random stars into the dark indigo sky area. Cluster a few together for a galaxy effect. -
Reveal the border:
Wait for the entire painting to be completely dry to the touch. Slowly peel away the masking tape at a 45-degree angle to reveal crisp, clean edges.
Enjoy using your new bookmark for your late-night reading sessions


Ocean Ombre With Simple Wave Lines
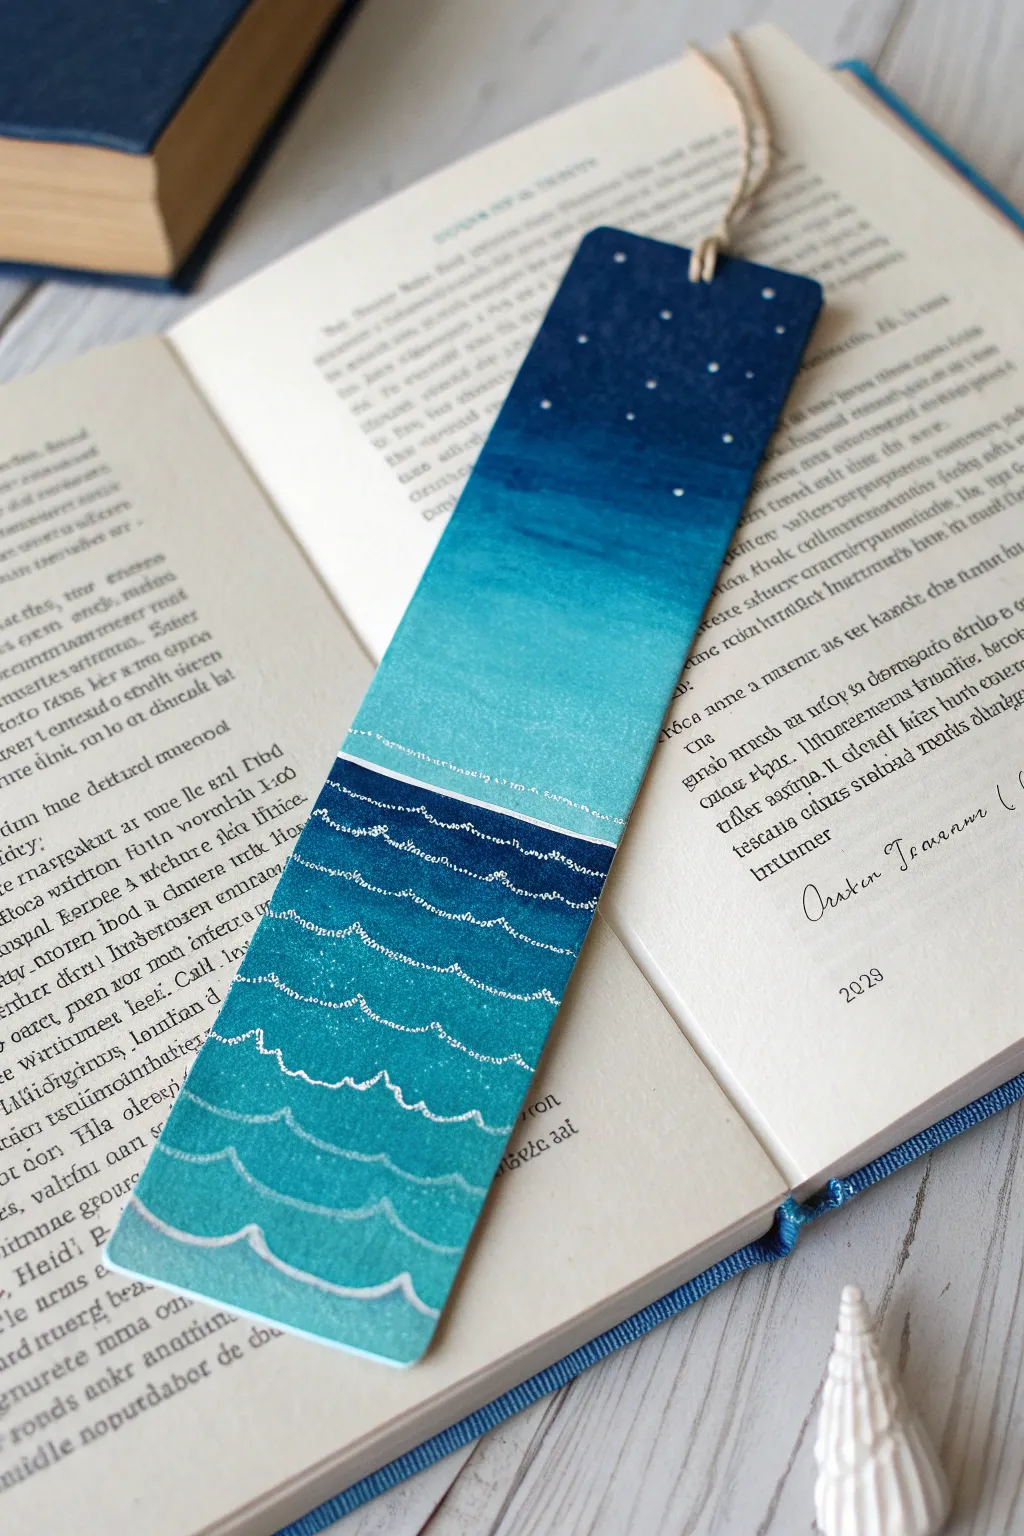
Capture the magic of a starlit ocean with this serene two-tone bookmark design. Combining a smooth gradients of blue with crisp white linework creates a lovely sense of depth perfect for saving your page.
Step-by-Step Guide
Materials
- Heavyweight watercolor paper or cardstock (cut to approx. 2″ x 6″)
- Acrylic paints (Dark Navy Blue, Turquoise/Teal, White)
- Flat shader brush (medium size)
- Fine detail liner brush (size 0 or 00)
- Washi tape or masking tape
- Palette for mixing
- Cup of water and paper towels
- Hole punch
- Twine or ribbon
Step 1: Preparation and Base Gradients
-
Tape the Horizon:
Begin by placing a strip of washi tape horizontally across the middle of your paper bookmark. This will separate the sky from the ocean and ensure a crisp horizon line. -
Mix the Sky Gradient:
Squeeze out your dark navy blue, turquoise, and white paints. Prepare three shades for the sky: pure navy, a mix of navy and turquoise, and a light turquoise mixed with plenty of white. -
Paint the Sky Ombre:
Starting at the very top edge, apply the darkest navy paint. While it’s still wet, blend the mid-tone blue below it, and finish near the tape line with the lightest turquoise mix. Use horizontal strokes to blend them seamlessly. -
Dry and Peel:
Allow the top section to dry completely. Once dry to the touch, carefully peel off the masking tape to reveal a sharp line. -
Tape the Sky:
Place a fresh piece of tape gently over the bottom edge of your painted sky section to protect it while you work on the ocean. -
Paint the Deep Ocean:
For the bottom half, paint a solid block of color just below the horizon line using a mix of navy and teal. This represents the deepest water. -
Create the Lower Gradient:
As you move down the bookmark towards the bottom edge, gradually mix more white into your teal paint, creating a reverse ombre where the water gets lighter near the bottom ‘shoreline’. -
Full Dry:
Remove the tape carefully and let the entire bookmark dry completely. The paint needs to be set before adding fine details.
Step 2: Details and Finishing
-
Mix the Wave Color:
Prepare a very fluid white paint on your palette. You want an ink-like consistency, so add a tiny drop of water if your acrylic is too thick. -
Outline the Waves:
Using your fine detail liner brush, paint thin, scalloped lines horizontally across the ocean section. I find it easiest to work from top (darkest water) to bottom. -
Add Wave Highlights:
Go back over the peaks of your scalloped lines and thicken them slightly to mimic sea foam. You can add tiny dots near the peaks for extra texture. -
Detail the Horizon:
Paint a very thin, straight white line right at the meeting point between the sky and ocean to separate the two zones clearly. -
Paint the Stars:
Dip the tip of your smallest brush or a toothpick into pure white paint. Gently dot the dark navy section of the sky to create a constellation field. -
Vary Star Sizes:
Make a few dots slightly larger than the others to represent brighter stars or planets, keeping them mostly in the darker upper area. -
Punch the Hole:
Once all paint is perfectly dry, use a hole punch centered near the top edge of the bookmark. -
Attach the Tassel:
Fold a length of natural twine in half, thread the loop through the hole, and pull the tails through the loop to secure it.
Smooth Blends
Work quickly while the acrylics are wet to get the smoothest ombre effect. A slightly damp brush helps the colors marry without streaks.
Glossy Finish
Apply a coat of gloss varnish or Mod Podge over the dried painting to make the water look wet and protect your bookmark from wear.
Now you have a tranquil piece of art to mark your place in your next adventure reading
BRUSH GUIDE
The Right Brush for Every Stroke
From clean lines to bold texture — master brush choice, stroke control, and essential techniques.
Explore the Full Guide
Pine Forest Silhouette Fade
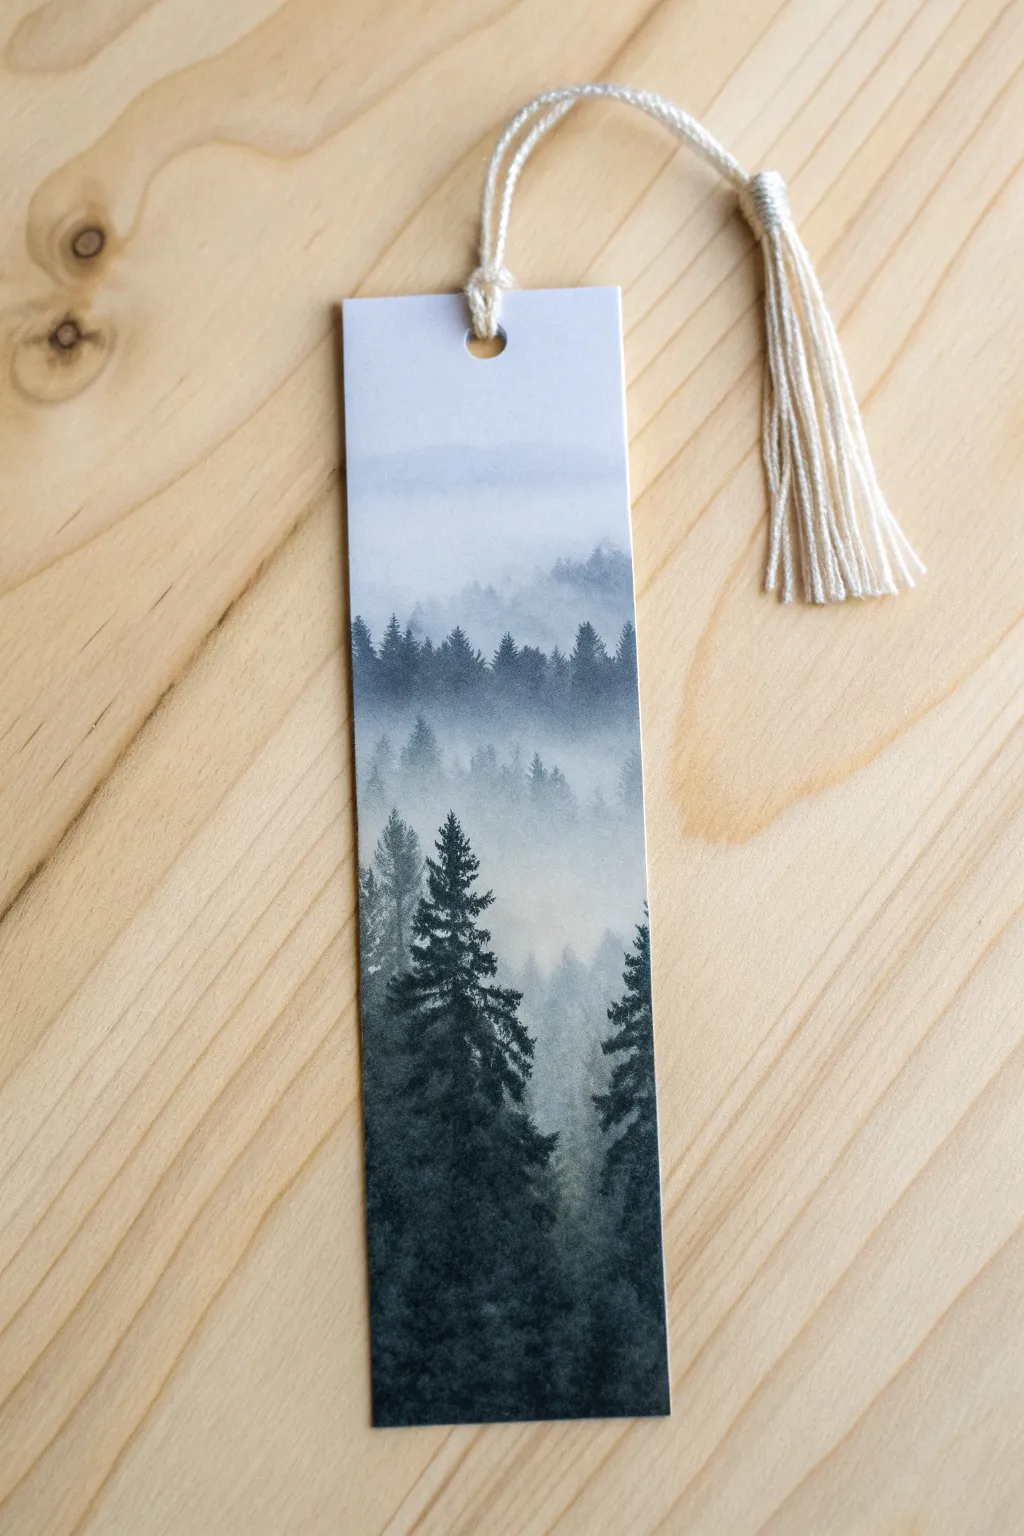
Capture the serene beauty of a foggy woodland with this atmospheric bookmark project. By layering diluted acrylics, you will create a sense of depth and distance that draws the eye into the misty horizon.
Step-by-Step
Materials
- Heavyweight watercolor paper or cardstock (cut to bookmark size)
- White acrylic paint
- Payne’s Grey or dark forest green acrylic paint
- Mixing palette or small cups
- Flat shader brush (size 4 or 6)
- Small round detail brush (size 0 or 1)
- Hole punch
- Cream or off-white tassel
- Paper towels
- Water container
Step 1: Preparation and Background
-
Prepare your canvas:
Cut your heavyweight paper to a standard bookmark dimension, approximately 2 inches by 6 inches. Punch a hole centered at the very top for your tassel later on. -
Mix the sky tone:
On your palette, mix a large amount of white paint with the tiniest speck of Payne’s Grey or dark green. You want an extremely pale, almost-white grey color. -
Apply the base wash:
Using your flat brush, paint the top third of the bookmark with this very pale mixture. Allow it to fade out naturally as you move downward, adding a touch of water to thin the paint so it disappears into the white of the paper.
Step 2: Creating Atmospheric Depth
-
Mix the first distant layer:
Create a slightly darker shade than your sky tone by adding a bit more grey/green. This mixture should still be very light and milky, simulating distant fog. -
Paint the furthest tree line:
About a third of the way down the bookmark, use the tip of your flat brush or a round brush to dab in a faint, jagged tree line. Keep the shapes imprecise and soft. -
Soften the edges:
While the paint is still wet, rinse your brush and run clean water along the bottom edge of this tree line, pulling the pigment down to create a smooth, misty fade. -
Let it dry completely:
Patience is key here. Ensure this first layer of trees is totally dry before moving on, or the layers will muddy together. -
Mix the mid-ground color:
Darken your paint mixture again significantly. It should look like a medium greyish-green now, distinct from the previous layer but not yet full strength. -
Add the middle tree layer:
Paint a second row of trees slightly below the first one. Make these shapes a bit more defined, showing the hints of pine tops, but keep them looking somewhat hazy. -
Fade the mid-ground:
Just as before, use a wet brush to drag the bottom edge of this paint layer downwards, fading it into the white paper below to maintain the foggy effect.
Fog Gone Flat?
If your layers aren’t distinct, your paint is too thick. Add more water or glazing medium to make the distant layers more transparent and ghostly.
Step 3: Foreground Details
-
Prepare the darkest shade:
Mix your darkest color yet—mostly purely Payne’s Grey or dark green with very little white. For acrylics, I like to add a drop of water to improve flow for details. -
Start the main foreground trees:
Switch to your small detail brush. Starting from the bottom right or left corner, paint a vertical line for a large tree trunk. -
Build the pine branches:
Using a stippling motion, tap the brush horizontally coming off the trunk. Make the branches wider as you move down the tree to create that classic conical pine shape. -
Add texture and density:
Fill in the tree with more dabbing motions, leaving small gaps so the background mist peeks through the branches. -
Paint the companion trees:
Add one or two more large, dark trees in the foreground, varying their heights. Ensure the bottom of the bookmark is filled with this dark, solid color to ground the composition. -
Dry thoroughly:
Let the bookmark sit until the thickest parts of the paint are completely dry to the touch.
Snowy Peaks Upgrade
Once dry, use a white gel pen or a tiny brush with pure white paint to add delicate snow highlights on the tips of the darkest foreground branches.
Step 4: Finishing Touches
-
Attach the tassel:
Thread the loop of your cream tassel through the hole you punched earlier. -
Secure the knot:
Pull the tail of the tassel through its own loop and tighten it gently against the top of the bookmark.
Now you have a moody, atmospheric placekeeper for your next reading adventure
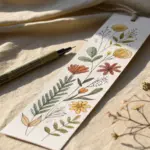
Wildflower Meadow Along The Bottom Edge
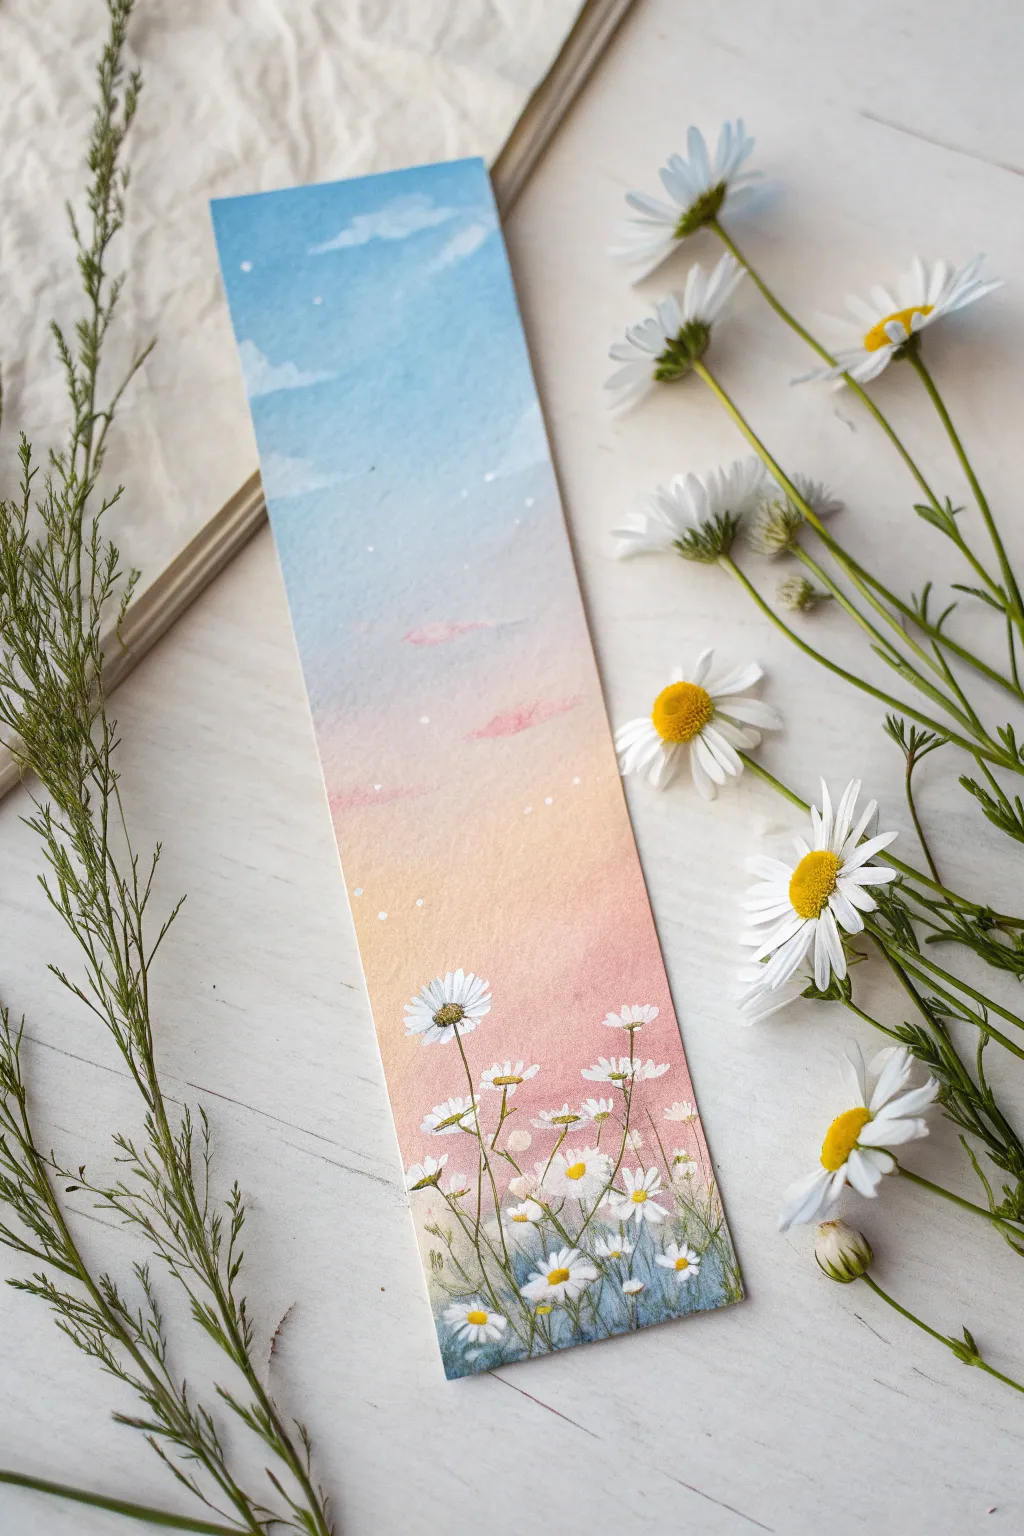
Capture the serene beauty of dusk with this gentle gradient bookmark. By blending soft blues into warm peaches and finishing with delicate field daisies, you’ll create a miniature landscape that marks your page with calm.
Step-by-Step Guide
Materials
- Heavyweight watercolor paper or cardstock (cut to bookmark size)
- Acrylic paints: Sky Blue, White, Peach (or Light Orange), Pink, light green, dark green, yellow
- Painter’s tape or masking tape
- Flat shader brush (medium size)
- Small round detail brush (size 0 or 00)
- Cup of water and paper towels
- Mixing palette
Step 1: Creating the Ombré Sky
-
Secure the paper:
Tape down your bookmark to a flat surface using painter’s tape. This prevents the paper from warping when wet and creates a clean border if you tape over the edges slightly. -
Mix the sky blue:
Start by mixing a very pale blue on your palette using Sky Blue and plenty of White. You want a soft, airy color for the top third of the bookmark. -
Paint the upper sky:
Using the flat shader brush, apply the pale blue to the top section, brushing horizontally back and forth for smooth coverage. I like to keep this layer slightly watered down for smoother blending. -
Transition to white:
While the blue is still wet, clean your brush and pick up pure White paint. Blend the bottom edge of the blue section downwards, fading it into a nearly white middle section. -
Add warmth:
Mix a soft Peach tone. Start painting from the bottom third of the bookmark, working your way up. As you meet the white middle section, blend the peach upward so it meets the fading blue. -
Deepen the horizon:
Add a tiny touch of Pink to your Peach mixture. Apply this slightly deeper tone to the very bottom area where the flowers will sit, creating a ‘golden hour’ glow near the ground. -
Paint the clouds:
Using a smaller brush and a very translucent white (water it down significantly), dab in a few subtle cloud shapes in the blue sky area. Keep them faint and wispy. -
Dry completely:
Let the gradient background dry fully before moving on. The surface must be dry to the touch to prevent the flower stems from bleeding into the sky.
Muddy Gradient?
If your blue and peach turn grey where they meet, let the blue dry first. Then glaze a very thin layer of white over the middle before adding the peach.
Step 2: Painting the Wildflowers
-
Sketch the stems:
Switch to your smallest liner or detail brush. Mix a muted olive green (green + a tiny bit of red or brown). Paint very thin, wavy vertical lines rising from the bottom edge to varying heights. -
Add leaves:
Along the stems, paint small, thin leaves using short, flicking strokes. Keep these sparse near the top and slightly denser near the bottom of the bookmark. -
Base the flowers:
Using pure White paint and the small round brush, paint the petals of the daisies. Use a ‘press and lift’ motion—press down for the wide part of the petal and lift as you pull toward the center. -
Layer the petals:
For the flowers that are facing forward, paint petals in a full circle. for side-facing flowers, paint a fan shape. Don’t worry about perfect opacity yet; a second coat can be added if needed. -
Add depth to white:
Mix a tiny amount of grey or very light blue. Add tiny shadows to the undersides of a few petals to give the flowers dimension so they don’t look like flat stickers. -
Paint the centers:
Dip the tip of your detail brush into yellow paint. Dab a small, textured center into each daisy. For the side-facing ones, place the yellow dot naturally at the base of the petals. -
Highlight the centers:
To make the centers pop, put a tiny speck of light orange or brown on the bottom edge of the yellow dots for shadow, and a speck of white on top for a highlight. -
Add ‘magic’ dust:
This final touch brings it to life. Dip a toothbrush or stiff brush in white paint, wipe off the excess, and gently flick tiny white speckles over the gradient sky to mimic pollen or distant stars.
Add a Quote
Once dry, use a fine-tip waterproof pen to write a favorite short quote in the negative space of the sky for a personalized touch.
Peel off the tape carefully to reveal your crisp edges and enjoy your new piece of art

PENCIL GUIDE
Understanding Pencil Grades from H to B
From first sketch to finished drawing — learn pencil grades, line control, and shading techniques.
Explore the Full Guide
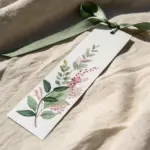
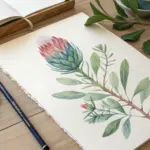
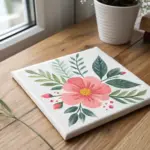
Cherry Blossom Branch Across The Corner
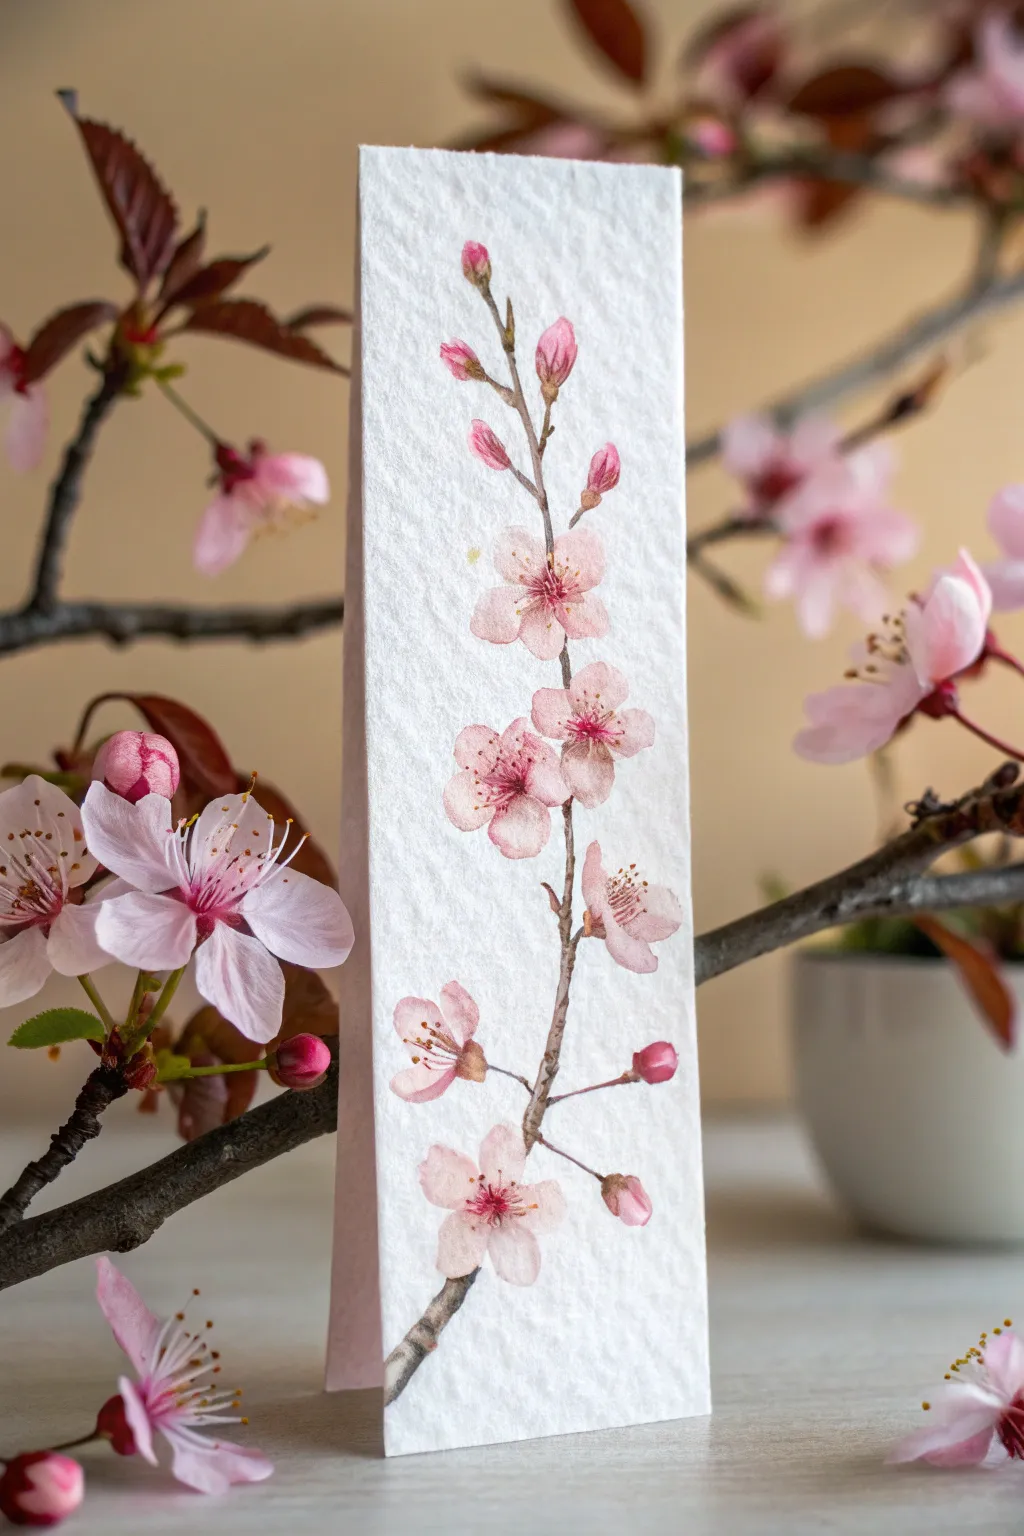
Capture the ephemeral beauty of spring with this elegant cherry blossom bookmark on textured paper. The soft transitions of pink petals against the stark brown branch make for a lovely botanical study perfect for saving your page.
Step-by-Step
Materials
- Cold press watercolor paper (cut to bookmark size, approx 2″ x 6″)
- Watercolor paints (Alizarin Crimson, Sap Green, Burnt Umber, Lemon Yellow)
- Small round brush (size 0 or 2)
- Fine liner brush (size 000)
- Clean water jar
- Paper towels
- Pencil (H or HB)
- Kneaded eraser
- Mixing palette
Step 1: Sketching and Composition
-
Prepare the paper:
Cut your cold press watercolor paper to your desired bookmark dimensions. I find that a 2-inch by 6-inch strip works beautifully for this vertical composition. -
Establish the branch line:
Using a hard pencil lightly, draw a single, slightly jagged line running vertically up the center of the paper. Let it curve gently near the bottom and branch out slightly at the top. -
Mark flower positions:
Sketch small circles or ovals along the branch to indicate where your main blooms will sit. Place them at irregular intervals to keep the look organic. -
Add bud details:
Draw tiny teardrop shapes near the tips of the branches for unopened buds. Vary their angles so they don’t all point the same way.
Step 2: Painting the Blooms
-
Mix your base pink:
Dilute Alizarin Crimson with plenty of water to create a very pale, translucent pink wash. It should be barely there on the white paper. -
Wash the petals:
Using the size 2 brush, fill in the sketched petal shapes with the pale pink. Keep the edges soft and don’t worry about perfect uniformity; nature is imperfect. -
Deepen the color:
While the base layer is still slightly damp, drop a slightly more saturated mix of pink into the center of each flower and near the base of the buds. This creates a natural gradient. -
Define individual petals:
Once the first layers are dry, mix a medium-strength pink. Paint small, curved strokes to separate the petals and give the flowers form, leaving some of the pale underlayer visible. -
Paint the buds:
Fill in the teardrop bud shapes with a deeper pink mix. The buds are tighter, so the color is naturally more concentrated than the open blooms.
Bleeding Petals?
If your pinks are bleeding into one another uncontrollably, let the paper dry completely between layers, or use a hair dryer on low heat to speed up the process.
Step 3: Adding Structure
-
Mix the branch color:
Combine Burnt Umber with a tiny touch of Alizarin Crimson to warm it up. The consistency should be like tea, not too thick. -
Paint the main stem:
Use the liner brush to paint the main branch. Use a shaky hand intentionally to create the knobby, rough texture characteristic of cherry trees. -
Connect the flowers:
Draw very thin, short stems connecting each flower and bud to the main branch. These stems should be slightly green-brown, so mix a little Sap Green into your brown. -
Add woody details:
Once the branch is dry, go back with a darker, less diluted brown mix. Add tiny dots and short horizontal lines to mimic bark texture.
Add Some Shimmer
Mix a tiny amount of iridescent medium into your final pink glaze to give the petals a subtle, pearlescent shimmer that catches the light.
Step 4: Fine Details
-
Create the flower centers:
Mix a vibrant, dark magenta using Alizarin Crimson with very little water. Paint a tiny starburst shape in the absolute center of each open flower. -
Add stamens:
With your finest liner brush or a very sharp colored pencil, draw delicate filaments radiance outward from the center. Top each filament with a barely-there dot of yellow or orange-brown for the anthers. -
Refine the buds:
Add tiny green sepals (the leafy base) to the bottom of your pink buds using a mix of Sap Green and Burnt Umber. -
Final assessment:
Step back and look at the bookmark. If any petals look too flat, add a tiny glaze of pink to the shadowed side to increase the 3D effect. -
Erase pencil lines:
Ensure the paint is completely bone dry, then gently use the kneaded eraser to lift any visible graphite lines, leaving just the delicate paint work.
Allow your bookmark to dry flat overnight before slipping it into your current read
Cactus Silhouettes Against A Desert Sky
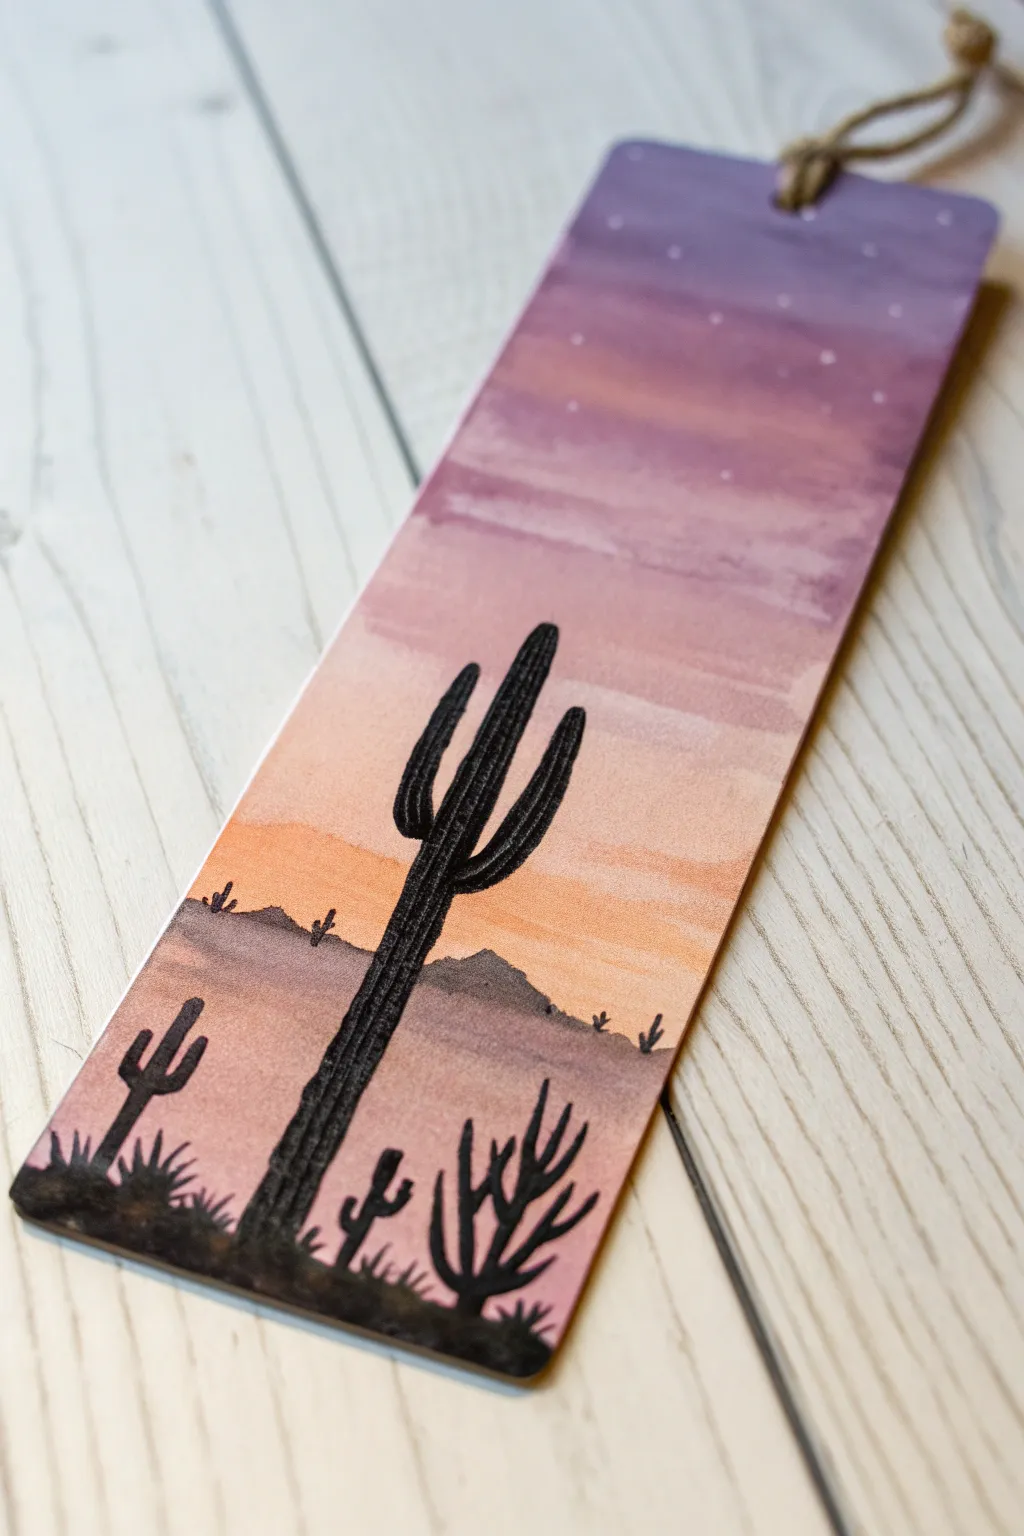
Capture the serene beauty of a desert twilight with this vibrant bookmark project. By blending acrylics to mimic watercolor washes, you’ll create a stunning gradient sky that makes the crisp black cactus silhouettes truly pop.
Step-by-Step Guide
Materials
- Heavyweight cold press watercolor paper (300gsm)
- Acrylic paints (purple, magenta, orange, yellow, black, white)
- Flat shader brush (size 6 or 8)
- Fine liner brush (size 0 or 00)
- Water container and mixing palette
- Paper towels
- Hole punch
- Jute twine or rustic string
- Scissors
Step 1: Preparing the Gradient Background
-
Cut the canvas:
Measure and cut your watercolor paper into a standard bookmark strip, approximately 2 inches wide by 6 to 7 inches tall. -
Mix water into acrylics:
On your palette, prepare your sky colors: deep purple, magenta, muted orange, and a pale sandy yellow. Dilute each with water until they have a milky consistency, almost like watercolor. -
Paint the upper sky:
Load your wet flat brush with the diluted purple. Apply horizontal strokes across the top third of the bookmark, keeping the edges slightly uneven for a cloud-like effect. -
Create the transition:
While the purple is still damp, rinse your brush slightly and pick up the magenta mix. Blend it into the bottom edge of the purple, pulling the color downwards into the middle section. -
Add the horizon glow:
Switch to the orange mixture. Paint below the pink section, blending the seam where they meet. Finally, add the pale sandy yellow at the very bottom third to represent the sun-baked ground. -
Refine the washes:
Dip a clean, damp brush into water and gently run it horizontally across the transition zones to soften any harsh lines. I find this helps mimics that hazy twilight look perfectly. -
Add distant mountains:
Mix a tiny drop of black into your purple and orange mix to create a shadowy brownish-mauve. Using the tip of your flat brush, paint a low, undulating mountain range right where the orange sky meets the sandy bottom. -
Let it dry completely:
Allow the background to dry fully. The paper must be bone dry before adding the crisp black silhouettes to prevent bleeding.
Bleeding Lines?
If your black silhouette bleeds into the background, the sky layer was too wet. Wait for it to dry completely, then touch up the black lines with a thicker paint consistency.
Step 2: Adding the Silhouettes
-
Paint the main cactus trunk:
Using undiluted black acrylic and your fine liner brush, paint a straight vertical line starting from the bottom foreground, reaching up about two-thirds of the bookmark height. Make the base slightly wider than the top. -
Add cactus arms:
Draw an L-shaped arm branching off the main trunk. Add a second arm on the opposite side, perhaps slightly higher or lower, to give the saguaro an organic, asymmetrical feel. -
Texturize the cactus:
While the black paint is wet, use the very tip of your brush to pull tiny vertical streaks throughout the trunk and arms. This creates the illusion of ribs on the cactus surface. -
Create the foreground ground:
Paint a solid, uneven black strip across the very bottom edge of the bookmark to ground your scene. -
Add smaller vegetation:
Paint smaller, simpler cactus shapes in the immediate foreground. Try a small three-armed cactus or a spiky agave plant using quick, upward flicking strokes. -
Include distant details:
Along the distant mountain line you painted earlier, add tiny vertical specks using the barest tip of your liner brush to suggest far-off cacti.
Step 3: Finishing Touches
-
Paint the stars:
Load a clean detail brush or a toothpick with pure white paint. Gently dot tiny stars into the upper purple section of the sky. Keep them random and sparse. -
Seal the artwork:
Once all paint is thoroughly dry, apply a thin coat of clear matte varnish or sealant to protect the painting from wear and tear. -
Add the tassel:
Punch a hole in the center of the top edge. Cut a length of jute twine, fold it in half, loop it through the hole, and pull the tails through the loop to secure it.
Level Up: Metallic Magic
Mix a tiny amount of gold fluid acrylic into your white star paint. It adds a subtle shimmer that catches the light beautifully when you turn the page.
Slide this desert scene into your current read and enjoy a sunset view every time you open your book


Northern Lights Glow Over A Dark Horizon
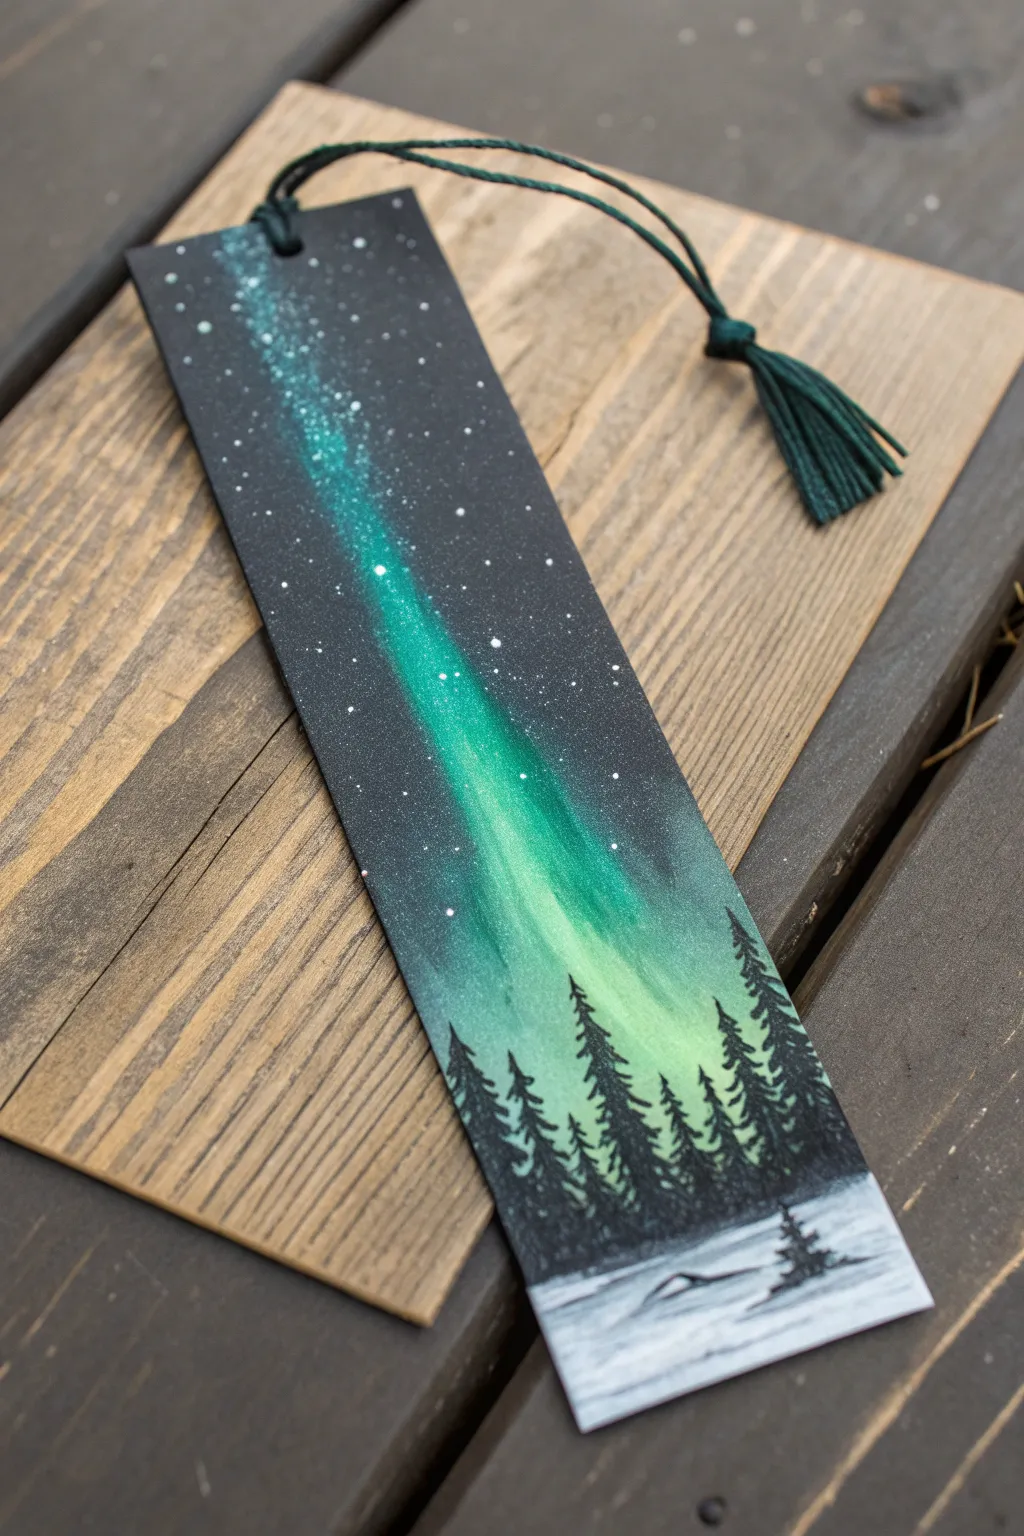
Capture the magic of an arctic night with this striking bookmark design featuring vibrant green northern lights cutting through a starry sky. The contrast between the deep black background and the neon-bright wash creates a dramatic glow that sits perfectly atop silhouetted pines.
Step-by-Step
Materials
- Heavyweight watercolor paper or cardstock (cut to bookmark size)
- Acrylic paints (Carbon Black, Titanium White, Phthalo Green, Yellow)
- Painter’s tape or masking tape
- Small flat brush
- Detail round brush (size 0 or 00)
- Old toothbrush (for splattering)
- Cup of water and paper towels
- Paper palette or mixing tray
- Hole puncher
- Dark green embroidery floss or thin ribbon
Step 1: Setting the Sky
-
Prepare the surface:
Begin by taping down your bookmark paper to a flat surface using painter’s tape. This prevents the paper from curling while wet and creates a clean border if desired, though for this project, we’ll likely paint to the edge. -
Establish the background:
Coat the top three-quarters of the bookmark with a solid layer of black acrylic paint. Leave the bottom quarter white for the snowy ground. -
Dry completely:
Wait for the black background to be fully dry to the touch before moving on. Rushing this step will result in muddy colors.
Starry Pro Tip
Make your stars vary in size by splattering from different heights. Hold the brush closer for dense clusters (like the Milky Way) and higher up for scattered stars.
Step 2: Painting the Aurora
-
Mix the aurora color:
Create a vibrant teal-green by mixing Phthalo Green with a generous amount of Titanium White and a tiny dot of Yellow to warm it up. -
The initial streak:
Using a slightly dry flat brush, start from the horizon line (where the black meets the white unpainted area) and sweep upward diagonally across the black sky. The stroke should be wider at the bottom and taper off as it goes up. -
Enhance the glow:
While the green is still slightly tacky, mix a lighter version of that green (add more white). Gently dry-brush this lighter color down the center of your green streak. This creates the ‘core’ of the light beam. -
Feather the edges:
Clean your brush and dry it well. Gently sweep along the outer edges of the green streak to soften the transition into the black background, making it look like glowing gas rather than a solid line. -
Add secondary shimmer:
If desired, add very faint, barely-there touches of the green wash elsewhere in the sky for atmospheric depth.
Level Up: Metallic Magic
Mix a tiny bit of iridescent or pearlescent medium into your green aurora paint. When the light hits the bookmark, the northern lights will literally shimmer.
Step 3: Starry Details
-
Prepare splatter mixture:
Dilute a small amount of white acrylic paint with water until it reaches a milky consistency. -
Create the stars:
Dip an old toothbrush into the watered-down white paint. Hold it over the bookmark and run your thumb across the bristles to splatter tiny dots onto the black sky. I like to cover the bottom white area with a scrap paper to keep the snow clean. -
Add distinct stars:
Use your smallest detail brush or a toothpick to manually place a few larger, brighter stars in the empty black spaces to balance the composition.
Step 4: The Forest & Snow
-
Paint the tree line foundation:
Load your detail brush with pure black paint. Start painting a series of vertical lines slightly above the white ‘snow’ section, overlapping the bottom of your aurora. -
Detail the pines:
Starting at the top of a vertical line, tap your brush side-to-side, getting wider as you move down, to create the jagged silhouette of pine trees. Vary the heights, making the ones on the right side taller. -
Ground the trees:
Ensure the bases of the trees merge into a dark shadow line just above the white section. -
Shadow the snow:
Mix a very watery grey (black with lots of water/white). Paint thin, horizontal streaks in the white section to suggest uneven snowy ground and shadows cast by the trees. -
Add a lonely tree:
Paint one small, solitary pine tree slightly lower in the snow field to give the foreground perspective.
Step 5: Finishing Touches
-
Punch the hole:
Once the artwork is completely dry, use a hole puncher to create a hole centered near the top edge. -
Attach the tassel:
Cut several lengths of dark green embroidery floss. Fold them in half, thread the loop through the hole, and pull the loose ends through the loop to secure.
Your miniature masterpiece is now ready to hold your place in your next adventure.
Galaxy Swirl With Layered Dots
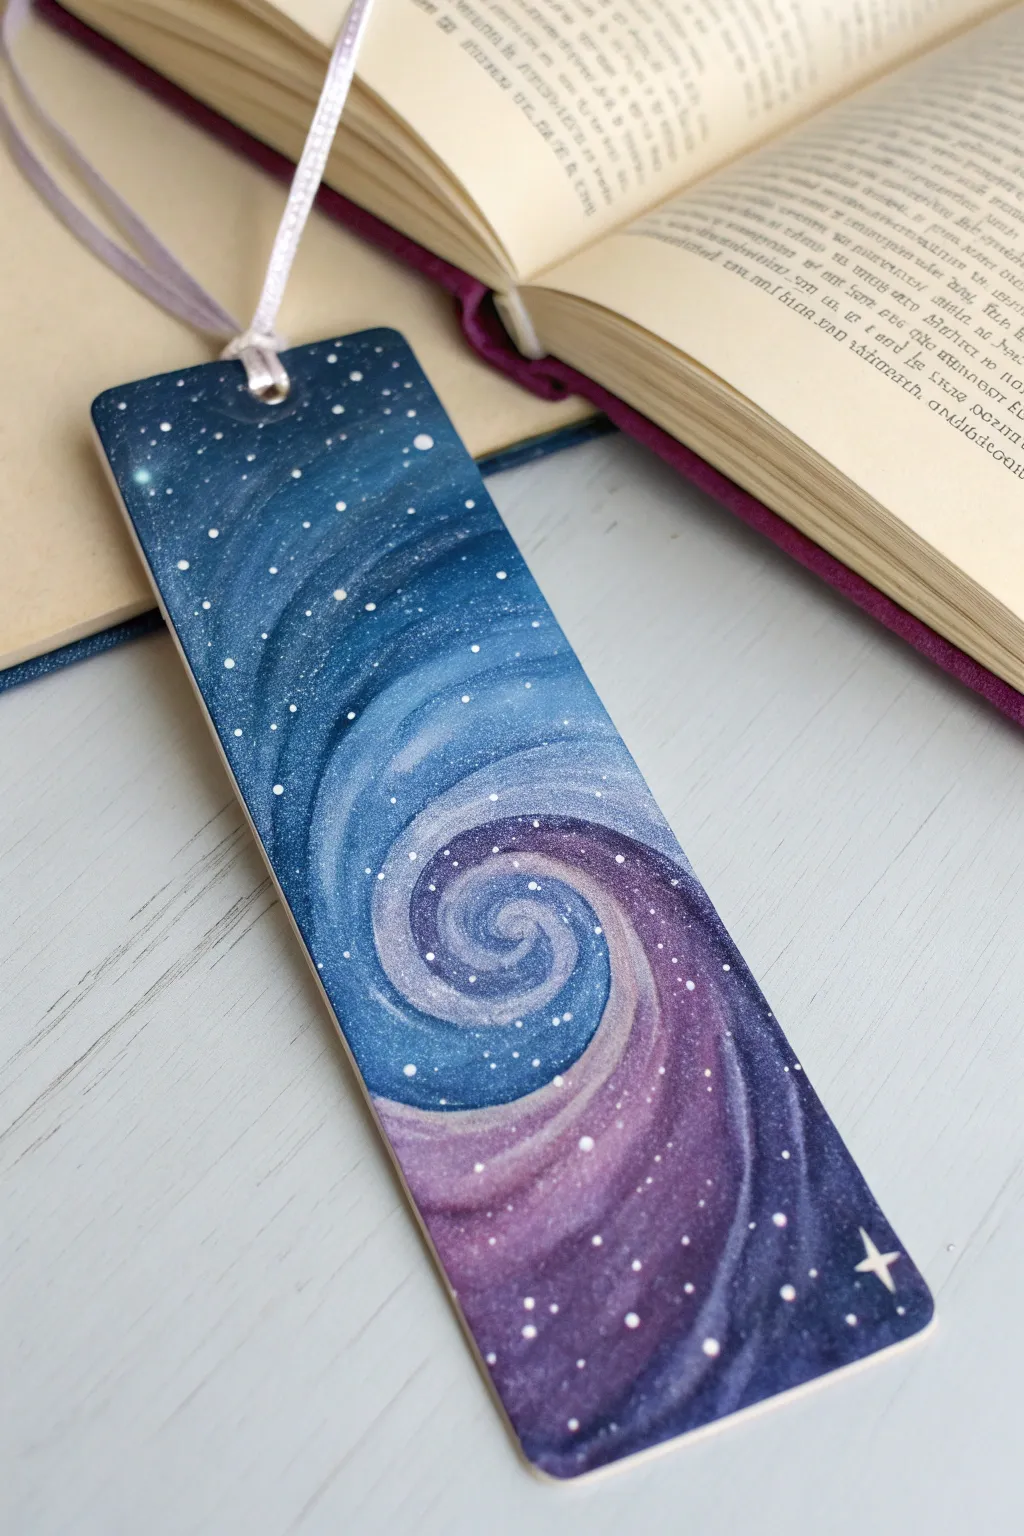
Capture the mesmerizing depth of outer space with this vibrant galaxy swirl bookmark. Using simple blending techniques and layered dots, you’ll create a hypnotic vortex of stars that looks like a miniature portal to another universe.
Step-by-Step Tutorial
Materials
- Heavyweight watercolor paper or cardstock (cut to bookmark size)
- Acrylic paints: Navy Blue, Phthalo Blue (or similar bright blue), Deep Purple, Black, Titanium White
- Flat shader brush (size 6 or 8)
- Small round brush (size 0 or 1)
- Toothbrush (old)
- Hole punch
- Ribbon or cord
- Palette or paper plate
- Cup of water and paper towels
- Masking tape (optional, to secure the bookmark)
Step 1: Setting the Background
-
Prepare your canvas:
Start with your pre-cut bookmark shape. If you prefer crisp edges and stability while painting, use masking tape to secure the back of the bookmark to your work surface. -
Base coat:
Using your flat shader brush, apply a mixed layer of Navy Blue and a tiny touch of Black to the entire bookmark. This doesn’t need to be perfectly opaque, but it provides a dark foundation for the galaxy colors to pop against. -
Dry completely:
Let this base layer dry fully. Acrylics dry darker, so don’t worry if it looks a bit lighter while wet.
Muddy Colors?
If your blue and purple start turning gray or brown where they mix, stop blending immediately. Let that layer dry completely, then apply fresh, clean color on top.
Step 2: Creating the Galaxy Swirl
-
Map the spiral:
Mix a lighter blue (Phthalo Blue with a hint of White) on your palette. With the flat brush, paint a loose, wide spiral starting from the bottom third and swirling outward toward the top left corner. -
Add purple depth:
While the blue is still slightly tacky, load your brush with Deep Purple. Paint alongside the inner curve of your blue spiral, allowing the colors to meet and naturally blend in the middle. -
Intensify the center:
Mix Titanium White with a small amount of Phthalo Blue to create a bright, pale blue. Apply this to the very center of the swirl to create a glowing core effect. -
Darken the edges:
Using pure Black or very dark Navy, shade the outer corners of the bookmark (top right, bottom left) to create a vignette effect, pushing the focus toward the luminous spiral. -
Smooth the transitions:
Clean your brush and leave it slightly damp but not dripping. Gently sweep over the boundaries where the colors meet to soften distinct lines into a misty, gaseous look. -
Second layer of highlights:
Once the first swirl layer is dry to the touch, add streaks of the pale blue and light purple again directly over the brightest parts of the spiral to build dimension.
Step 3: Adding Starts and details
-
Prepare the ‘star’ paint:
Dilute a small amount of Titanium White paint with water until it reaches an ink-like consistency. It needs to be fluid enough to splatter easily. -
Create background stars:
Dip an old toothbrush into the watered-down white paint. Hold it over the bookmark and run your thumb across the bristles to spray a fine mist of tiny stars across the entire surface. -
Targeted larger stars:
Take your small round brush (size 0) and dot distinct white stars specifically along the path of the light blue spiral. Vary the pressure to make some dots larger than others. -
Paint the hero star:
Locate an open dark spot, perhaps near the bottom corner. Paint a simple four-point cross shape to create a twinkling ‘hero’ star for visual interest. -
Final drying time:
Allow the paint to cure completely. Acrylics can feel dry quickly, but give it about 20-30 minutes to set before handling excessively.
Brightest Stars
For the brightest stars, apply a second tiny dot of pure, undiluted white paint right on top of your dry star dots to make them truly glow.
Step 4: Finishing Touches
-
Punch the hole:
Use a standard hole punch to create an opening centered at the top of the bookmark. -
Attach the ribbon:
Fold your ribbon in half. Feed the looped end through the hole from the front to the back, then pull the loose ends through the loop to secure it with a lark’s head knot. -
Optional varnish:
If you plan to use this heavily, I like to add a thin coat of matte or gloss varnish now to protect the paint from scratching inside books.
Slide your new cosmic creation between the pages of your current read and enjoy the view
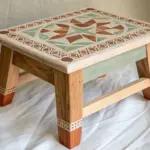
Geometric Color Blocks With Crisp Edges
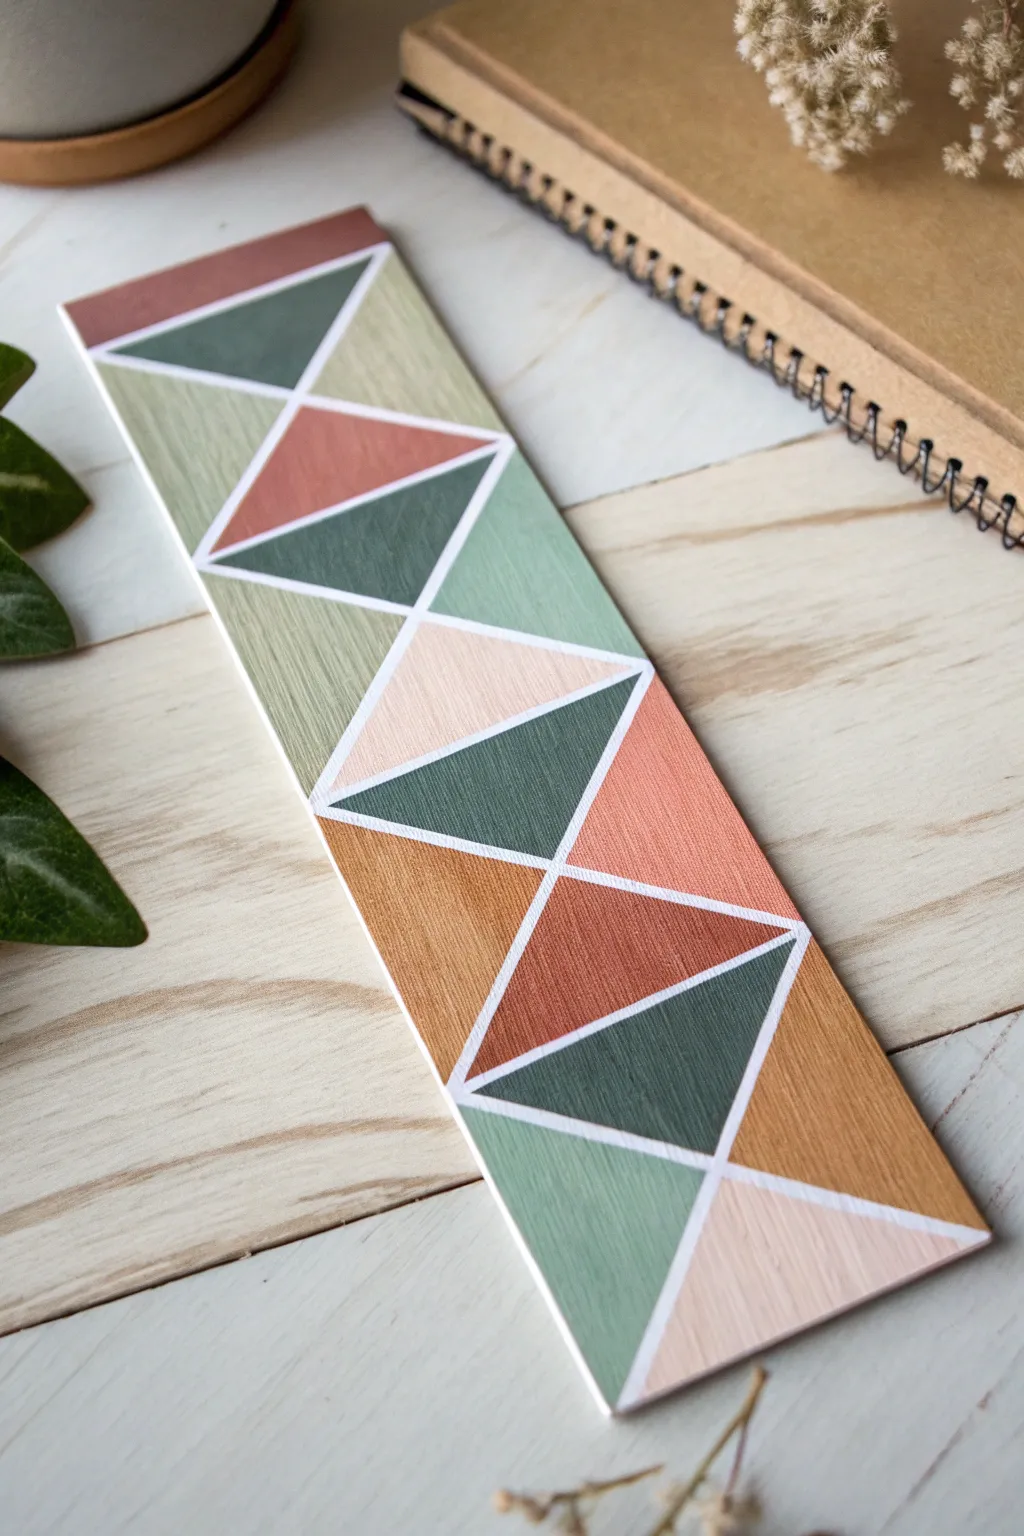
Achieve a modern, high-end look with this geometric bookmark that combines earthy tones with crisp, white lines. The natural wood grain texture peeking through the acrylics adds warmth and character to the sharp angles.
How-To Guide
Materials
- Rectangular wooden bookmark blank (balsa or basswood)
- Acrylic paints (terracotta, sage green, olive green, blush pink, dark forest green, mustard yellow)
- White paint pen (fine tip) or thin lining brush
- Painter’s tape or washi tape (low tack)
- Flat shader brush (size 4 or 6)
- Ruler
- Pencil
- Matte varnish or sealant
Step 1: Preparation & Layout
-
Sand the surface:
Begin by lightly sanding your wooden bookmark blank with fine-grit sandpaper. You want a smooth surface so the paint glides on, but keeping a bit of that natural wood texture is lovely. -
Clean the dust:
Wipe away all sawdust with a damp cloth or tack cloth to ensure your paint adheres properly and doesn’t get gritty. -
Mark the center line:
Using a ruler and a light pencil, draw a very faint vertical line straight down the center of the bookmark. This will act as the spine for your triangles. -
Sketch the zig-zag:
Mark uneven intervals along the center line and both side edges. Connecting these dots, sketch a large zig-zag pattern essentially creating stacked triangles. Don’t worry about perfect symmetry; varied sizes add visual interest.
Bleeding Lines?
If paint bleeds under the tape, let it dry fully, then gently scrape the excess away with a craft knife or touch it up with the neighboring color before lining.
Step 2: Painting the Color Blocks
-
Plan your palette:
Squeeze out small amounts of your earthy colors: terracotta, sage, olive, blush, forest green, and mustard. Arranging them on your palette beforehand helps visualize the color balance. -
Tape the first section:
To get those super crisp edges, apply painter’s tape along the pencil lines of your first triangle. Press the tape down firmly, especially at the edges, to prevent bleed-through. -
Paint the first triangle:
Fill in the taped area with a flat shader brush. I like to brush away from the tape edge inward to minimize the chance of paint slipping under the tape. -
Remove tape while damp:
Carefully peel back the tape while the acrylic is still slightly wet. This helps keep the paint line sharp and prevents it from chipping off later. -
Dry and repeat:
Allow that section to dry completely before taping over it to paint an adjacent triangle. If you rush this steps, the tape might pull up your fresh paint. -
Work scattered:
Instead of working top-to-bottom, paint non-adjacent triangles first. For example, paint a sage triangle at the top and a terracotta one at the bottom, so you can keep working while other sections dry. -
Finish the blocks:
Continue taping and painting until every triangle section is filled with color. Aim for a balanced distribution of heavy colors (like forest green) and light colors (like blush).
Step 3: Detailing & Sealing
-
Check for gaps:
Once all blocks are painted and dried, inspect the boundaries. If there are small gaps of bare wood between colors, that is actually helpful for the next step. -
Add white defined lines:
Using a fine-tip white paint pen or a liner brush with thinned white fluid acrylic, carefully trace over the boundaries between the color blocks. This creates that striking ‘lead came’ stained glass effect. -
Let the lines cure:
Allow the white lines to dry completely. Paint pens can sometimes smear if you seal them too quickly, so give it an extra hour to be safe. -
Seal the bookmark:
Apply a thin layer of matte varnish over the entire front and back. This protects the wood from oils and moisture and keeps those colors muted and sophisticated. -
Add a tassel (optional):
If your wooden blank has a hole at the top, loop a piece of leather cord or a simple twine tassel through it to finish the piece.
Pro Tip: Burnishing
Run the handle of your brush or a credit card firmly over the edge of the painter’s tape to ‘burnish’ it down. This creates an impenetrable seal for perfect lines.
Now you have a durable, stylish bookmark ready to mark the page of your next great read
Boho Arches And Organic Shapes
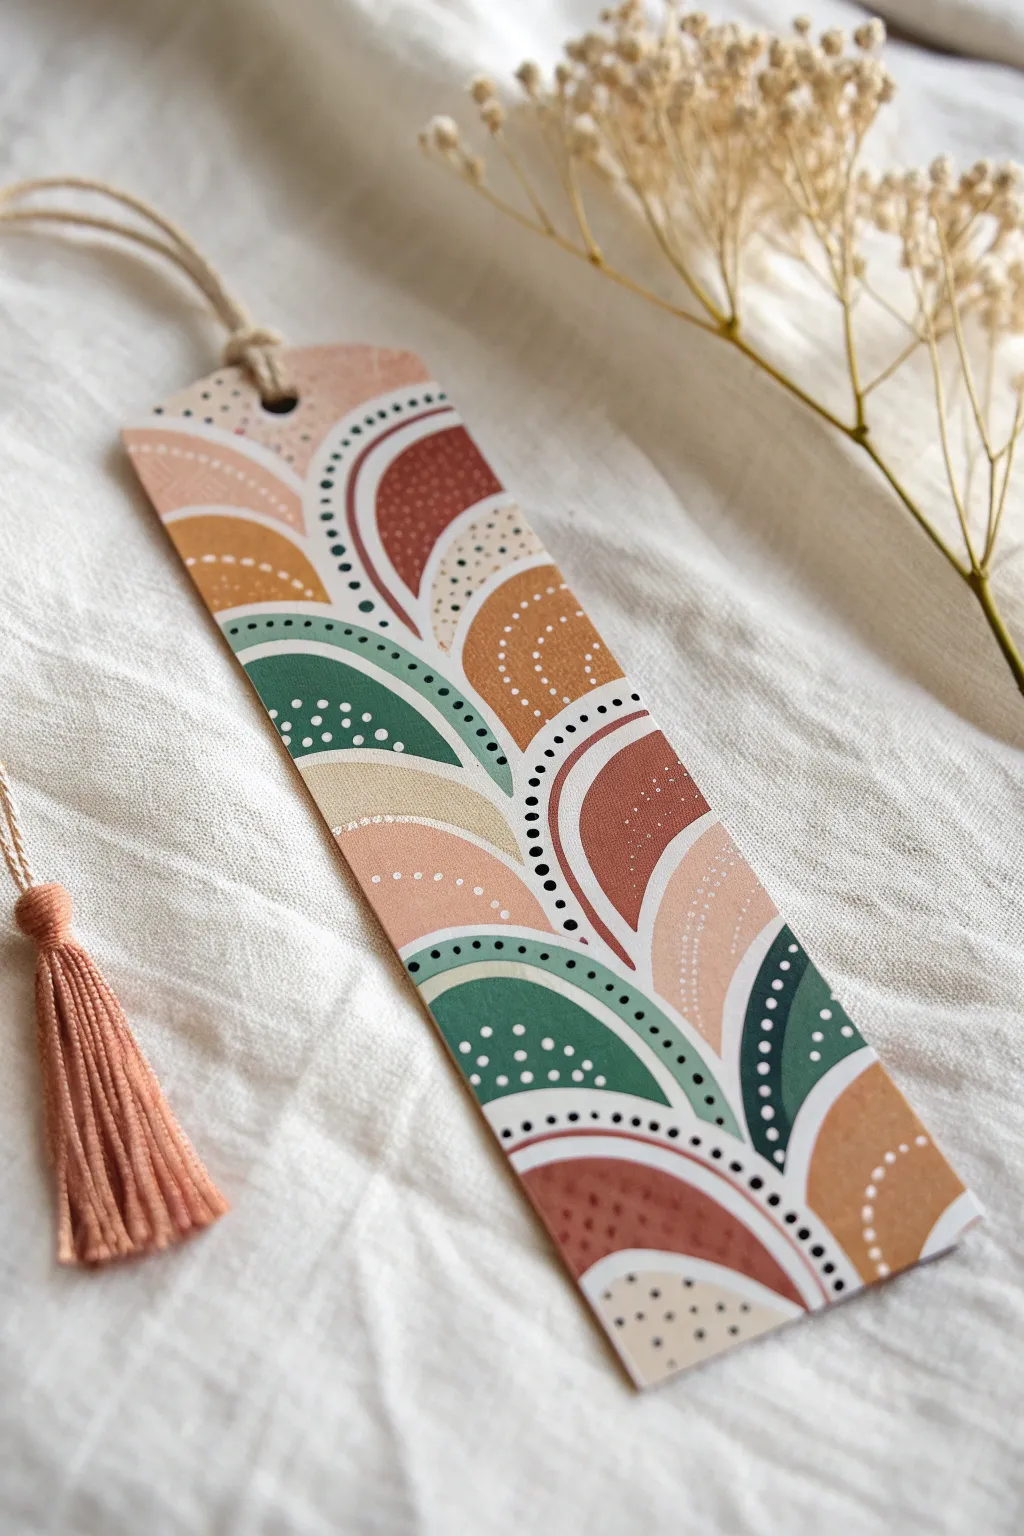
Capture the earthy warmth of bohemian style with this rhythmic, pattern-based bookmark. Using a palette of muted terracotta, sage green, and ochre, you’ll build up layers of organic arches and delicate dotted details for a serene reading companion.
Step-by-Step Tutorial
Materials
- Heavyweight watercolor paper or cardstock (300gsm is ideal)
- Acrylic paints (terracotta, burnt sienna, sage green, ochre/mustard, beige/cream, deeply dark green or black, and white)
- Flat shader brush (size 4 or 6)
- Detail round brush (size 0 or 00)
- Dotting tool (or a toothpick/back of a brush)
- Ruler
- Pencil and eraser
- Scissors or craft knife
- Hole punch
- Jute twine and embroidery floss (muted pink or rust)
Step 1: Preparation & Sketching
-
Cut the base:
Start by measuring and cutting your cardstock into a standard bookmark size, roughly 2 inches by 7 inches. If you want rounded corners like the example, gently snip the sharp points off with your scissors or use a corner rounder punch. -
Punch the hole:
Use your hole punch to create a centered hole at the top of the bookmark now, before painting, so you don’t accidentally ruin the finish later. -
Mix your palette:
Prepare your color palette on a mixing surface. You’ll need distinct piles of terracotta, mustard yellow, sage green, a dark forest green (or black), and a creamy beige. -
Sketch the flow:
Lightly sketch the layout of the arches using a pencil. Start from the bottom corner and draw curved ‘rainbow’ shapes that overlap slightly. Don’t worry about perfection; organic asymmetry adds to the charm. -
Define the sections:
Inside each large arch, sketch concentric curved lines to divide them into bands. Varry the thickness—some bands should be wide for color blocks, others thin for separating lines.
Keep it Clean
Work from the top of the bookmark down (or left to right if right-handed) to avoid smudging wet paint with your hand as you fill in lower arches.
Step 2: Color Blocking
-
Paint the beige details:
Using your flat brush, paint the smaller, inner curves of the arches with the cream or beige paint. This light base helps balance the darker colors coming later. -
Add the terracotta:
Select a few medium-sized bands in your sketch and fill them with the terracotta or burnt sienna paint. Try to space these out so no two terracotta sections are directly touching. -
Fill in the mustard:
Paint the remaining medium bands with your ochre or mustard yellow shade. Keep your brush strokes smooth and following the curve of the arch. -
Apply the greens:
Use the sage green and the dark forest green for the largest, outermost bands of the arches. The contrast between the deep green and the lighter sage creates visual depth. -
Paint the background:
If there are any negative spaces left between the clusters of arches, fill them with a very pale pink or simply leave the white of the paper if it fits your aesthetic. -
Let it dry completely:
Allow the base layer to dry thoroughly. The paint must be matte and dry to the touch before we add the precise details on top.
Step 3: Detailing & Finishing
-
Outline the arches:
Load your smallest detail brush with white paint. Carefully paint thin, clean lines between the colored bands to separate them. This ‘grout line’ effect makes the colors pop. -
Add heavy white curves:
Paint thicker white swoops along one edge of the darker colored bands (specifically the green and large terracotta shapes) to create a highlight effect. -
Create the large dots:
Using a large-tipped dotting tool or the back end of a paintbrush dipped in white paint, stamp uneven polka dots onto the green and mustard sections. -
Add micro dots:
Switch to a toothpick or a very fine tool. Add rows of tiny, delicate white dots over the terracotta and beige sections. Varying the dot density makes the texture look more interesting. -
Detail the black accents:
With the detail brush and black paint (or a fine liner pen), add small dotted lines along the outer edges of some curves. These high-contrast black dots act as a border for the shapes. -
Seal the artwork:
Once fully dry, apply a coat of matte varnish or Mod Podge. This protects the acrylic from scratching and gives the bookmark a professional finish. -
Attach the twine:
Cut a 6-inch piece of jute twine. Fold it in half, push the loop through the hole, and thread the ends through the loop to secure it. -
Create the tassel:
Wrap embroidery floss around two fingers about 20 times. Tie it off at the top, cut the bottom loops, and attach this bundle to the end of your jute twine strings.
Make it Metallic
Swap the mustard yellow paint for a metallic gold acrylic. The shimmering arches will catch the light beautifully when you open your book.
Now you have a stunning piece of functional art ready to hold your place in your next adventure
Mini Mandala Down The Center Line
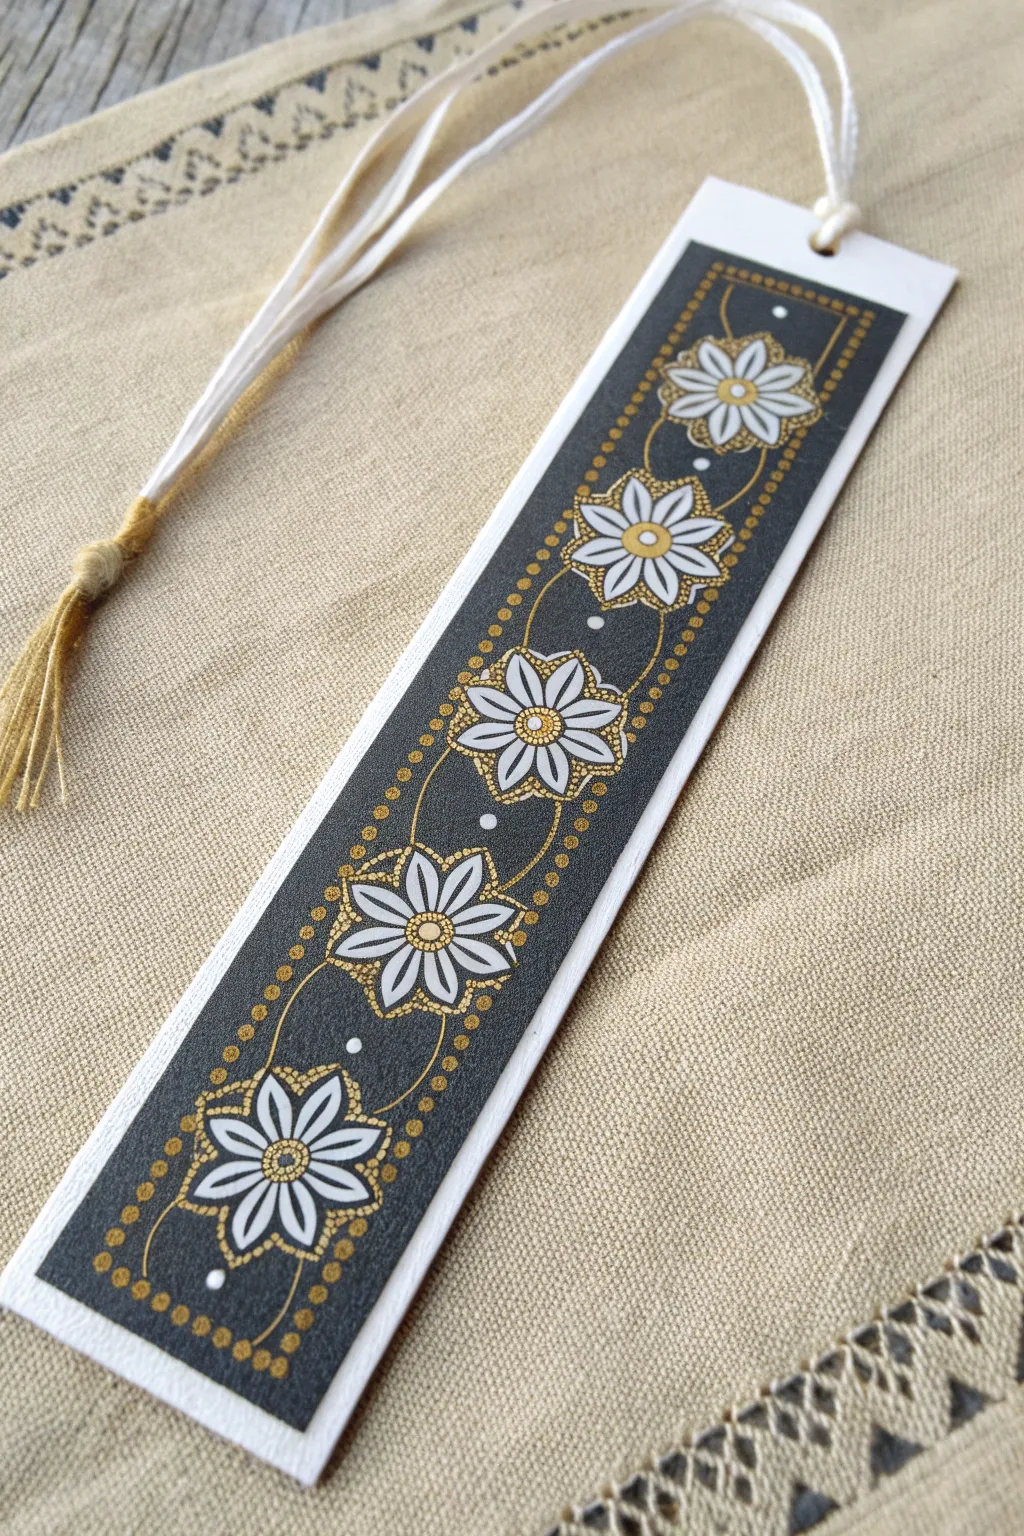
This elegant bookmark features a striking contrast between a deep charcoal background and brilliant white floral motifs. Connected by delicate golden vines and framed with meticulous dot work, it captures the essence of a mini mandala chain.
Detailed Instructions
Materials
- Heavyweight watercolor paper or cardstock (cut to approx. 2” x 7”)
- Black or charcoal grey acrylic paint (matte finish preferred)
- Flat shader brush (size 6 or similar)
- White gel pen (opaque, 0.8mm or 1.0mm)
- Gold metallic paint pen (extra fine tip) or gold acrylic ink with a liner brush
- Ruler
- Pencil and eraser
- Dotting tool or a small toothpick
- Hole punch
- White embroidery floss or thin ribbon
- Clear matte or satin varnish spray
Step 1: Base Preparation
-
Cut and Size:
Begin by cutting your heavyweight paper or cardstock into a standard bookmark strip, approximately 2 inches wide by 7 inches tall. -
Mark the Border:
Using a ruler and a light pencil touch, draw a rectangle inside the bookmark, leaving about a 1/4 inch white border of raw paper on all sides. This inner rectangle will be your painting area. -
Apply the background:
Carefully paint the inside of your penciled rectangle with black or charcoal grey acrylic paint. Use a flat brush to keep the edges crisp against the white border. -
Layering for opacity:
Let the first coat dry completely. If the paper texture shows through too much, apply a second thin coat of the dark paint to ensure a solid, opaque background.
Step 2: Drafting the Design
-
Center Line Guide:
Once the paint is bone dry, lightly sketch a vertical line down the exact center of the dark rectangle using a pencil. -
Spacing the Flowers:
Mark five evenly spaced dots along this center line. These will serve as the centers for your five floral mandalas. -
Sketching the Petals:
Lightly sketch an eight-petaled flower around each center dot. Keep the petals slightly pointed at the tips rather than perfectly round.
Geometric Precision
Use a stencil or a small coin to trace the outer circles of your flowers first. This ensures all five blooms are perfectly uniform in size before you draw petals.
Step 3: Inking the Motifs
-
Outline in White:
Using your white gel pen, carefully trace over your pencil sketches of the flowers. Go slowly to ensure the ink flows smoothly over the acrylic paint. -
Second Pass:
I usually like to go over the white lines a second time once the ink dries to make the white really pop against the dark background. -
Adding Center Gold:
Take your gold metallic pen and draw a small circle in the very center of each flower. -
Inner Details:
Inside each petal, draw a smaller, teardrop shape using the gold pen. This adds a layer of depth and mimics the mandala style.
Clogged Gel Pens?
Painting over acrylic can sometimes clog rollerball pens. Scribble quickly on a scrap piece of paper or wipe usage tip on a damp paper towel to get ink flowing again.
Step 4: Connecting & Framing
-
Drawing the Vines:
With the gold pen, draw delicate curved lines connecting the flowers. Create an ‘S’ curve or simple arcs that weave between the blooms down the center line. -
Accent Dots:
Place a few small white dots with your gel pen in the negative spaces between the flowers to balance the composition. -
Inner Gold Border:
Draw a thin gold line just inside the perimeter of the black painted rectangle, creating a sharp frame. -
Dotted Frame:
Using a dotting tool or the tip of your gold pen, create a sequence of evenly spaced gold dots along the inner edge of your gold line frame.
Step 5: Finishing Touches
-
Erase Guide Lines:
Wait until all ink and paint is absolutely dry, then very gently erase any visible pencil marks from the center line. -
Seal the Artwork:
Spray a light coat of clear matte or satin varnish over the bookmark to protect the paint and pen work from smudging during use. -
Add the Tassel:
Punch a hole in the center of the top white border. Thread your white embroidery floss or ribbon through and secure it with a simple loop knot.
Now you have a sophisticated, hand-painted accessory ready to mark your place in your next favorite read
Textured Dry-Brush Gradient Background
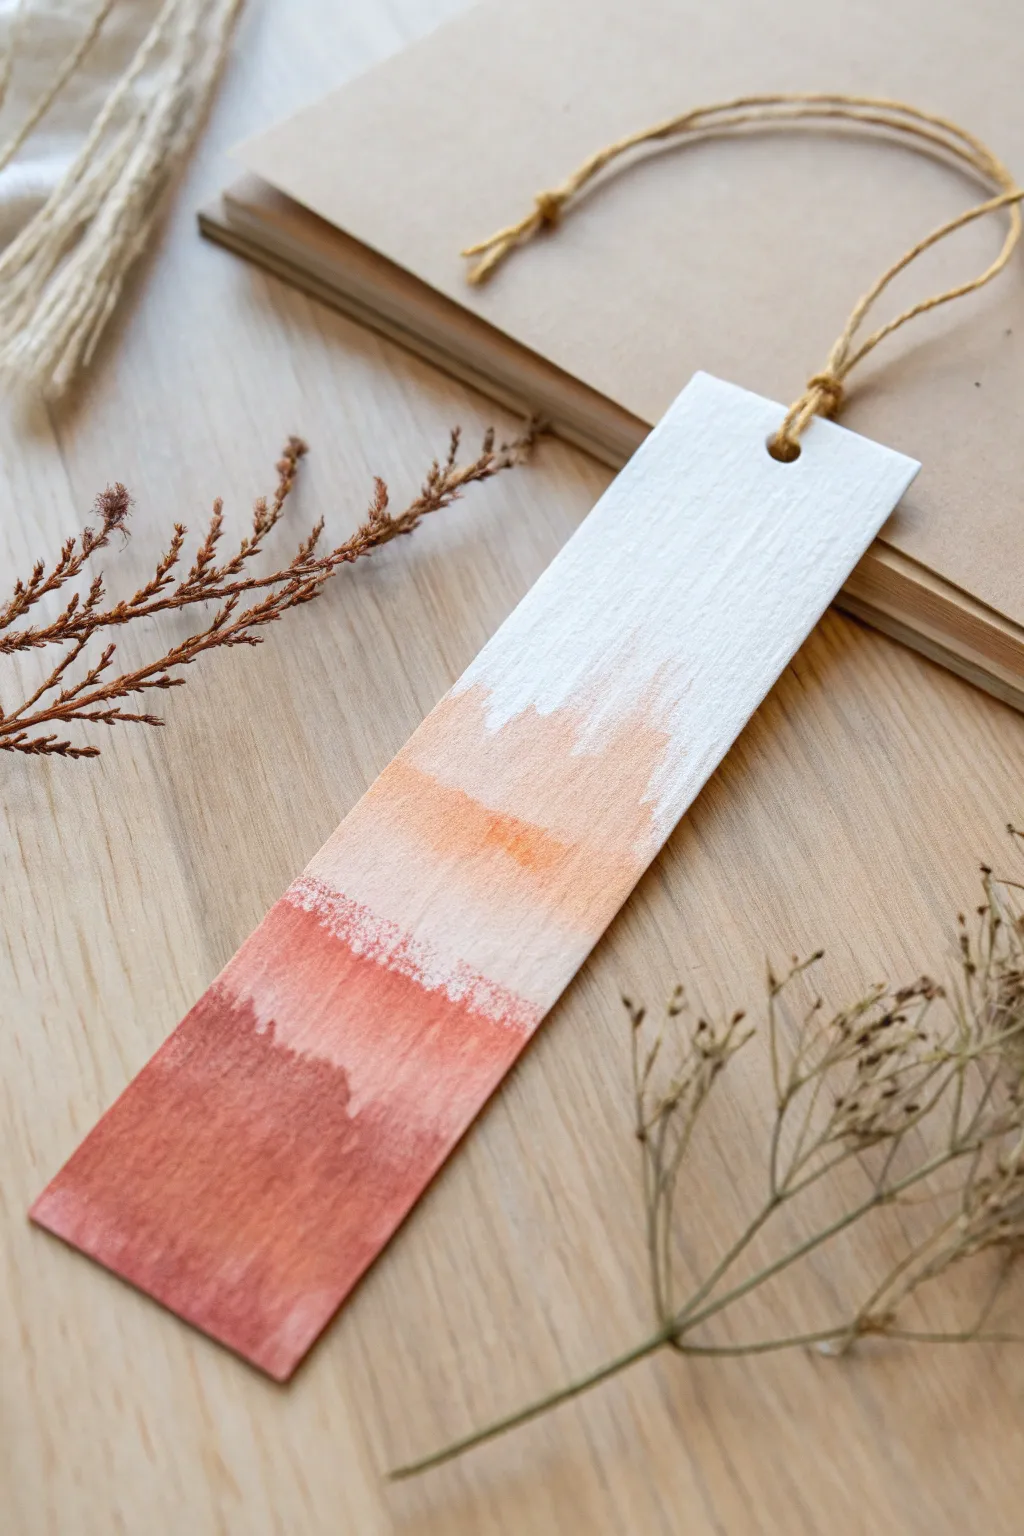
Embrace the beauty of imperfection with this lovely, textured bookmark featuring a soft, earthy gradient that fades into white. The dry-brush acrylic technique creates organic, feathery edges that give the piece a sophisticated, artisanal look.
Step-by-Step
Materials
- Heavyweight watercolor paper or mixed-media cardstock (300gsm)
- Acrylic paints (Titanium White, Burnt Sienna, Unbleached Titanium/Cream)
- Wide flat brush (looks like a size 10 or 12)
- Palette or paper plate
- Paper towels or old rag
- Hole punch
- Jute twine or rustic string
- Scissors
Step 1: Preparation
-
Shape the Base:
Cut your heavyweight paper into a classic bookmark rectangle, roughly 2 inches by 6 inches. Heavy cardstock works best here to hold the texture without curling. -
Punch the Hole:
Before you start painting, punch a hole centered near the top edge. I prefer doing this first so I can paint around it if needed, rather than risking the paper cracking later. -
Prepare the Palette:
Squeeze out small amounts of Burnt Sienna (reddish-brown), Unbleached Titanium (creamy beige), and Titanium White onto your palette. Keep them separate for now. -
Dry the Brush:
Ensure your flat brush is completely dry. Do not dip it in water. If it’s damp, squeeze it thoroughly with a paper towel until no moisture remains. This is crucial for the texture shown in the photo.
Pro Tip: Scratch Test
Brush too wet? Test your stroke on scrap paper first. If the lines are solid, wipe the brush again. You want scratchy, broken lines.
Step 2: Painting the Gradient
-
Load the Darkest Tone:
Dip just the tips of your dry bristles into the Burnt Sienna. Dab the excess paint off onto your paper towel; you want very little paint on the brush, almost “starved” of pigment. -
Apply the Base Layer:
Start at the very bottom edge of the bookmark. Drag the brush upward with light, swift vertical strokes. Stop about one-third of the way up. -
Create the Feathered Edge:
As you reach the top of this first section, lift your pressure even lighter so the brush strokes break up and look scratchy or feathered, rather than a solid block of color. -
Mix the Mid-Tone:
Without washing your brush (wipe it on a rag if it’s too clumpy), pick up some Unbleached Titanium and mix it lightly with the leftover brown on your brush or palette to make a soft peach color. -
Apply the Transition Layer:
Start your strokes slightly overlapping the top of the dark brown section. Drag the brush upward again into the middle third of the bookmark. -
Blend the Seam:
Use quick, vertical flicking motions to blend the peach tone down into the brown and up into the white space. The goal is to see the brush bristles’ texture, not a smooth blend. -
Add the Highlights:
Wipe your brush vigorously on a dry paper towel to remove most of the darker pigment. Pick up straight Titanium White paint. -
Paint the Top Third:
Starting from the very top edge (around the hole punch), drag the white paint downward. Let it streak over the top of the peach section. -
Refine the Texture:
If the white looks too solid, wait a moment for it to tack up, then drag a clean, dry brush through it to re-introduce those scratchy horizontal lines.
Level Up: Metallic Pop
Once the gradient is dry, dry-brush a tiny amount of gold acrylic paint right at the transition line between the brown and peach for subtle shimmer.
Step 3: Finishing Touches
-
Let it Cure:
Acrylic dries fast, but because we used thick body paint for texture, give it about 15-20 minutes to fully set. -
Assess the Back:
Check the back of the bookmark. If paint bled over the edges, you can trim the tiniest sliver off the sides with scissors for a crisp finish. -
Cut the Twine:
Cut a piece of jute twine about 10 inches long. Fold it in half to create a loop. -
Create a Lark’s Head Knot:
Push the folded loop end through the hole punch from the front to the back. -
Secure the Tassel:
Thread the loose ends of the twine through the loop you just pushed through, and pull tight to secure it against the top of the bookmark.
Now you have a beautifully textured placeholder for your next reading adventure
Metallic-Look Accents With Faux Highlights
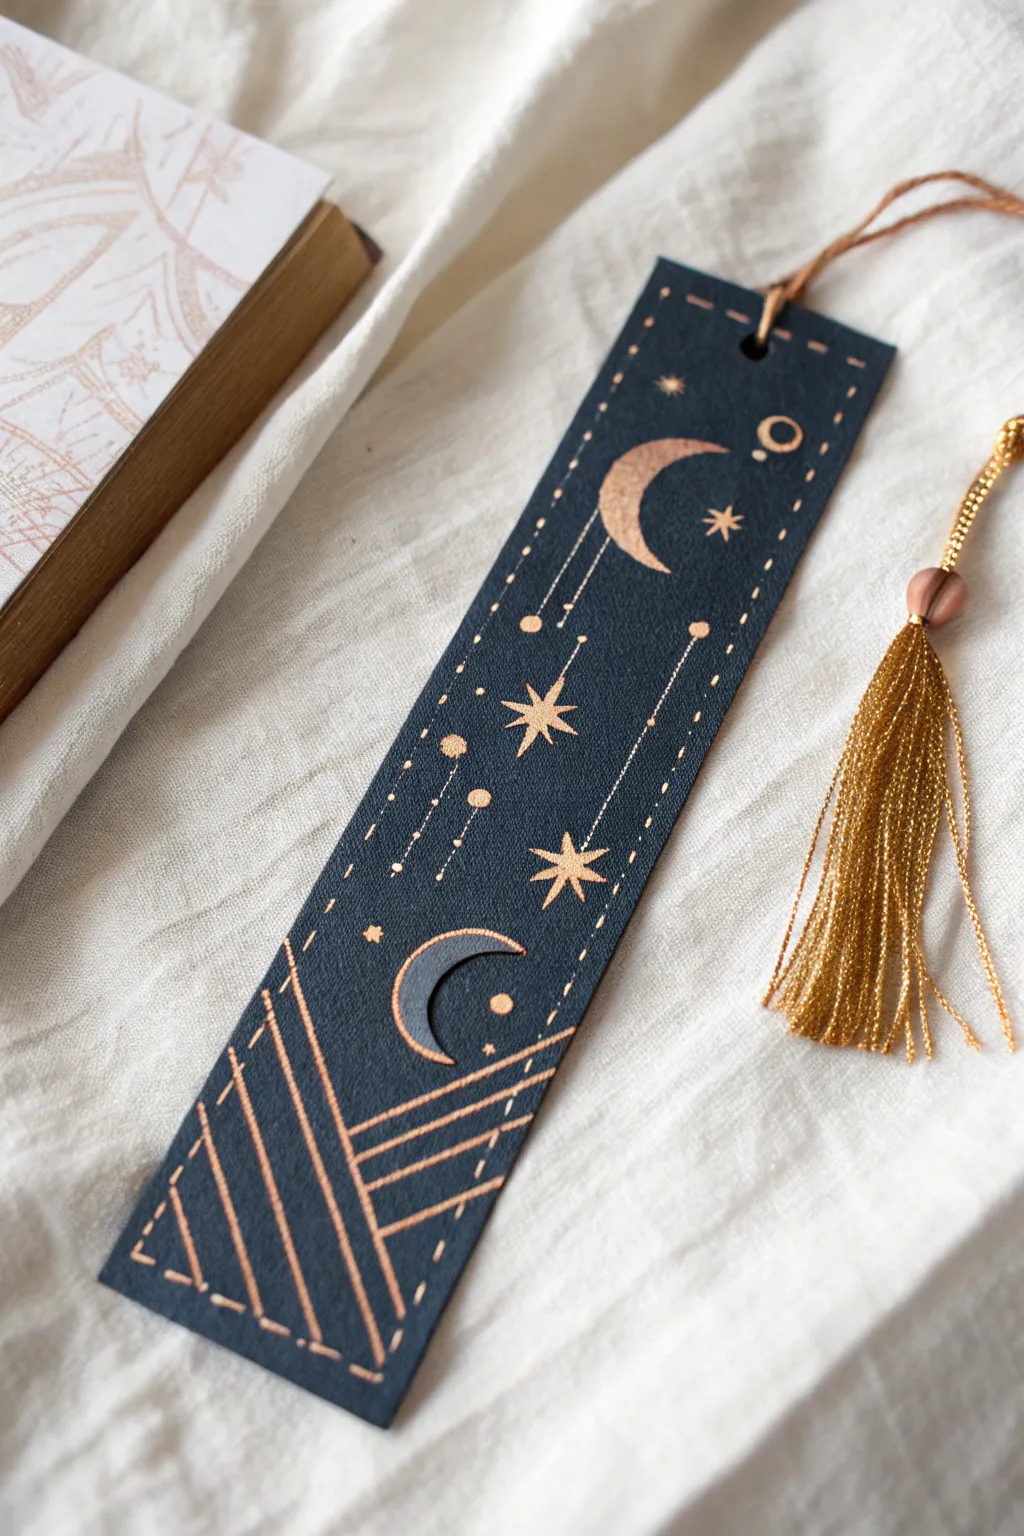
Capture the magic of the night sky with this elegant bookmark project that pairs deep, dark cardstock with shimmering metallic details. The contrast between the midnight blue background and the copper-gold celestial motifs creates a sophisticated, boutique-style finish perfect for marking your place in a fantasy novel.
Step-by-Step Tutorial
Materials
- Heavyweight cardstock (navy blue or black)
- Metallic acrylic paint or gouache (copper or rose gold)
- Fine liner brush (size 00 or 000)
- Ruler
- Pencil
- Eraser
- Hole punch
- Gold embroidery thread or pre-made tassel
- Scissors or paper trimmer
- Small mixing palette
Step 1: Preparation & Base Layout
-
Cut the base:
Start by cutting your dark cardstock into a standard bookmark size, typically around 2 inches by 6-7 inches. A paper trimmer will give you the cleanest edges, but scissors and a steady hand work just fine. -
Punch the hole:
Using a standard hole punch, create a center hole about a half-inch from the top edge. Doing this now ensures you don’t accidentally paint over the area or position your design too high. -
Sketch the mountains:
Lightly sketch the geometric mountain design at the bottom using a pencil. Draw a large triangle for the main peak and intersecting angled lines to suggest overlapping slopes. Use a ruler to keep these lines crisp. -
Place the celestial elements:
Sketch two crescent moon shapes—one larger near the top right and a smaller one near the bottom left above the mountains. Add varied star shapes, focusing on four-pointed glimmers and simple dots. -
Map the trails:
Use your ruler to draw faint vertical guide lines dropping down from the moons and stars. These will become the ‘shooting star’ trails later, so ensure they are perfectly parallel to the bookmark’s long edge.
Metallic Shine Tip
To make the ‘highlights’ pop, paint a tiny sliver of a lighter gold or silver on the inner curve of the moon after the base copper color dries.
Step 2: Painting the Gold Details
-
Prepare the metallic paint:
Squeeze a small amount of copper or rose gold metallic acrylic onto your palette. If the paint feels too thick, add a tiny drop of water to improve flow, essentially creating an ink-like consistency for fine details. -
Outline the moons:
Using your finest brush, carefully outline the crescent shapes. I like to rotate the paper as I curve the brush to maintain a smooth, continuous arc. -
Fill the moons:
Gently fill in the moon shapes. Depending on the opacity of your metallic paint, you might need two thin coats rather than one thick, gloopy one. Let the first coat dry completely before adding a second. -
Paint the geometric mountains:
Switch to painting the straight lines at the bottom. Use the ruler as a hovering guide or just freehand slowly over your pencil marks. Paint the diagonal stripes inside the mountain shapes to add texture. -
Add the stars:
Paint the four-pointed stars by drawing a vertical line crossed by a horizontal one, tapering the ends to sharp points. Scatter small dots around them to represent distant stars.
Level Up: Texture
For a tactile finish, use a metallic paint pen or foil quill instead of a brush. This creates slightly embossed lines that catch the light even better.
Step 3: Finishing Touches
-
Create the dashed trails:
Dip your fine brush again and paint the vertical drop lines. Instead of solid lines, paint them as dashed or dotted lines to give an airy, magical feel. Vary the length of the dashes for visual interest. -
Add the border stitching:
Around the main rectangular border of the bookmark, paint small, evenly spaced dashes to mimic the look of stitched thread. This frames the artwork beautifully. -
Dry thoroughly:
Allow the paint to cure fully. Metallic acrylics can sometimes remain tacky longer than standard mattes, so give it a good 20-30 minutes. -
Erase guidelines:
Once the paint is bone dry, gently erase any visible pencil marks. Be very careful rubbing over the metallic paint, as heavy pressure can dull the sheen. -
Attach the tassel:
Thread your gold tassel through the punched hole. Loop the tassel tail through its own string to secure it tightly against the top of the bookmark.
Slide this shimmering piece of art into your current read and enjoy the celestial sparkle every time you open your book.
Series Set: Four Bookmarks In One Theme
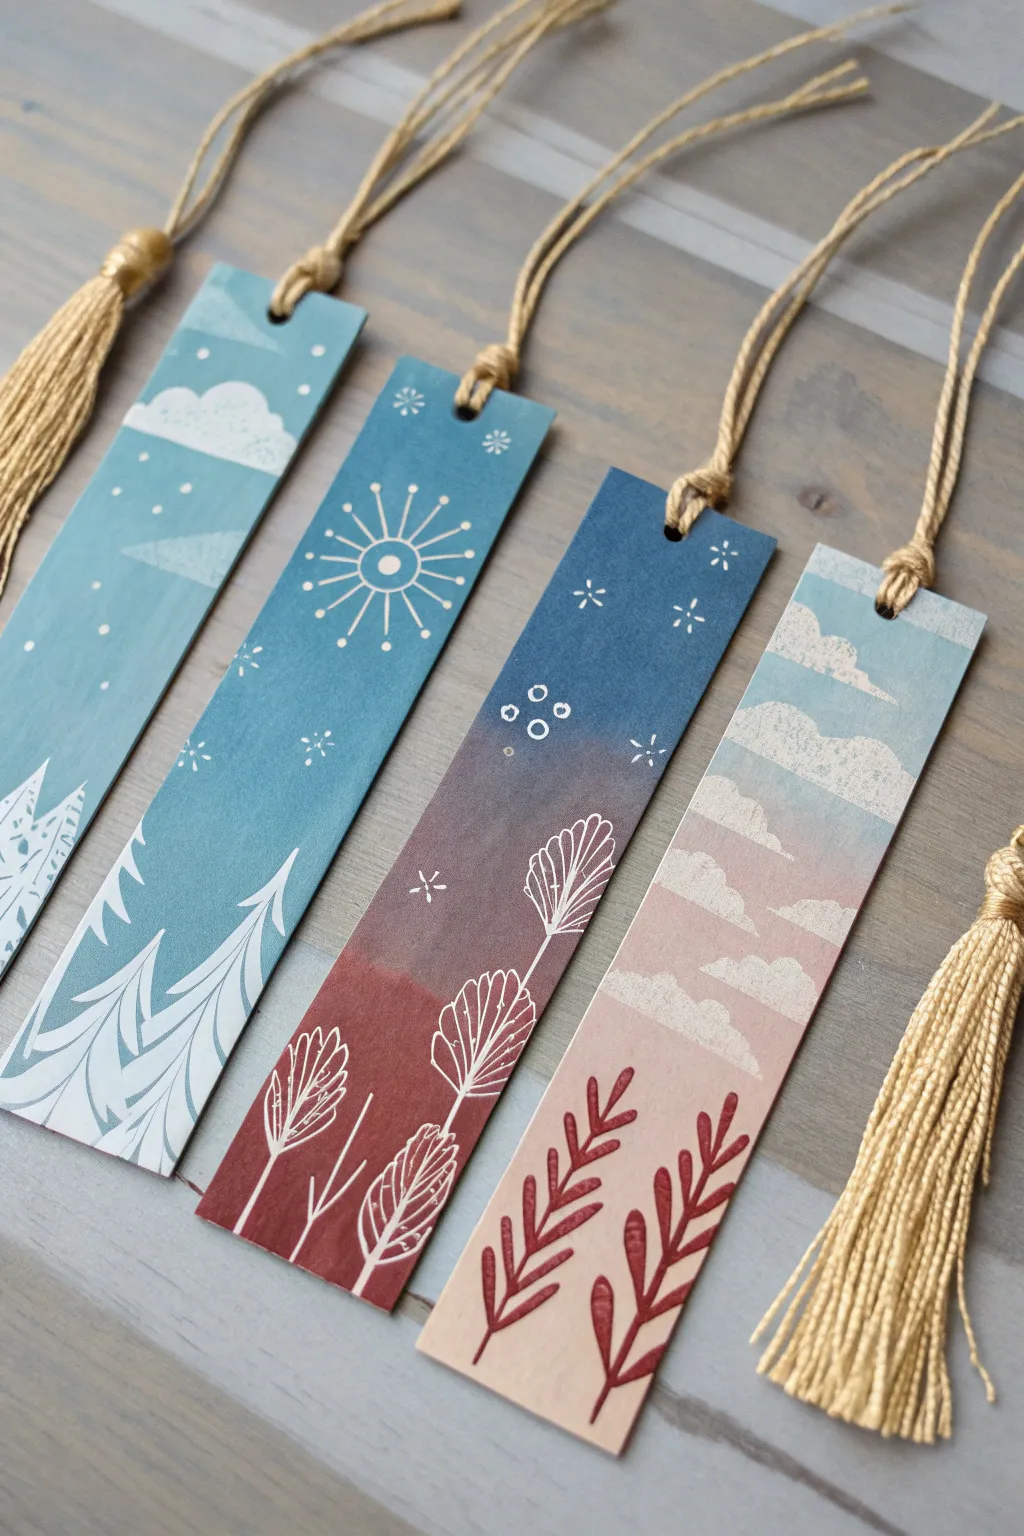
Create a stunning cohesive set of four bookmarks that capture the transition from a snowy day to a starry night using simple acrylic blending techniques and white detailing. This project features beautiful color gradients ranging from icy blues to warm sunsets, unified by delicate botanical and celestial motifs.
How-To Guide
Materials
- Heavyweight watercolor paper or cardstock (cut into four 2×7 inch strips)
- Acrylic paints (Titanium White, Phthalo Blue, Prussian Blue, Burnt Sienna, Red Oxide, Cream/Pale Peach)
- Flat shader brush (size 6 or 8)
- Small round detail brush (size 0 or 00)
- White gel pen (optional, for finest details)
- Hole punch
- Jute twine or gold cord
- Gold embroidery floss (for tassels)
- Paper tape or masking tape
- Palette for mixing
Step 1: Preparation & Base Layers
-
Cut and tape:
Begin by cutting your sturdy paper into four identical bookmark strips. Tape them down to your workspace with masking tape to keep them flat and create a clean border if desired. -
Mix the sky palette:
Prepare your palette with a range of blues and warm tones. You’ll need a light icy blue, a mid-tone cyan, a deep navy, and a gradient for the sunset one involving pale peach fading into dusty red. -
Paint Bookmark 1 (Snowy Day):
For the first bookmark on the left, start with a solid coat of a dusty, light teal-blue. Keep the coverage opaque and smooth. Let it dry completely. -
Paint Bookmark 2 (Bright Sky):
For the second bookmark, paint the entire surface a slightly deeper, richer teal-blue to represent a clear winter afternoon. -
Paint Bookmark 3 (Twilight Gradient):
On the third bookmark, create an ombré effect. Start with deep navy blue at the top and blend it downwards into a dusky reddish-brown at the 2/3 mark. Use a damp brush to smooth the transition between the blue and red zones. -
Paint Bookmark 4 (Golden Hour):
For the final bookmark on the right, blend a pale blue at the very top into a soft peach, ending with a warm terracotta or dusty red at the bottom. Aim for soft, cloud-like transitions rather than hard lines.
Step 2: Adding the Atmosphere
-
Stipple the clouds:
On the first and fourth bookmarks, use a mostly dry brush with Titanium White. Dab gently to create fluffy, textured clouds. I find that wiping most of the paint off on a paper towel first gives that perfect semi-transparent, airy look. -
Add falling snow:
For the first bookmark, use your smallest detail brush or a stylus to dot random white snowflakes over the teal background and clouds. -
Create the sunburst:
On the second bookmark (the solid teal one), paint a stylized sun in the upper third. Draw a small open circle, then add varied lengths of radiating lines using fine white paint or a gel pen.
Fixing Shaky Lines
If your white lines look shaky or uneven, wait for the paint to fully dry. Then, gently use a damp Q-tip to erase the mistake or paint over it with the background color before trying again.
Step 3: Fine Details & Line Work
-
Outline the pines:
On the second bookmark, paint stylized pine trees at the bottom using white. Use long, sweeping curved strokes to suggest snowy branches reaching upward, leaving the bottom area open. -
Detail the twilight flora:
Moving to the third bookmark, paint delicate botanical outlines in white over the reddish bottom section. Draw thin stems with fan-shaped leaves that resemble ginkgo or wildflower silhouettes. -
Add celestial elements:
In the dark blue top section of the third bookmark, add tiny white stars. Group dots in clusters of four to look like flowers or distant constellations. -
Paint the red foliage:
For the fourth bookmark, switch to a dark red or rust-colored paint. Paint climbing vines with small, simple leaves growing upward from the bottom edge, overlaying the peach background. -
Final white accents:
Add tiny geometric details like asterisks, dots, or small crosses to the top of the second and third bookmarks to fill any empty negative space and unify the starry theme.
Add Subtle Shimmer
Mix a tiny amount of iridescent medium into your Titanium White paint for the clouds and stars. This will make the bookmarks catch the light beautifully when tilted.
Step 4: Finishing Touches
-
Punch holes:
Once the paint is thoroughly dry, carefully remove the tape. Punch a centered hole about half an inch from the top of each bookmark. -
Prepare the tassels:
Cut lengths of gold embroidery floss or thin jute string. Loop them through the punched holes. -
Secure the knots:
Create a lark’s head knot to secure the tassels to the bookmarks. You can wrap extra gold thread around the neck of the tassel for a polished, professional finish just like the image.
Your beautiful set of atmospheric bookmarks is now ready to mark your place in your favorite stories
Have a question or want to share your own experience? I'd love to hear from you in the comments below!