Plain glassware is basically a blank canvas, and I love how a few simple techniques can turn DIY wine glasses into personal little works of art. Here are my go-to diy wine glasses ideas—starting with the classic crowd-pleasers and drifting into the fun, weirder experiments I can’t resist.
Easy Polka Dot Party Glasses
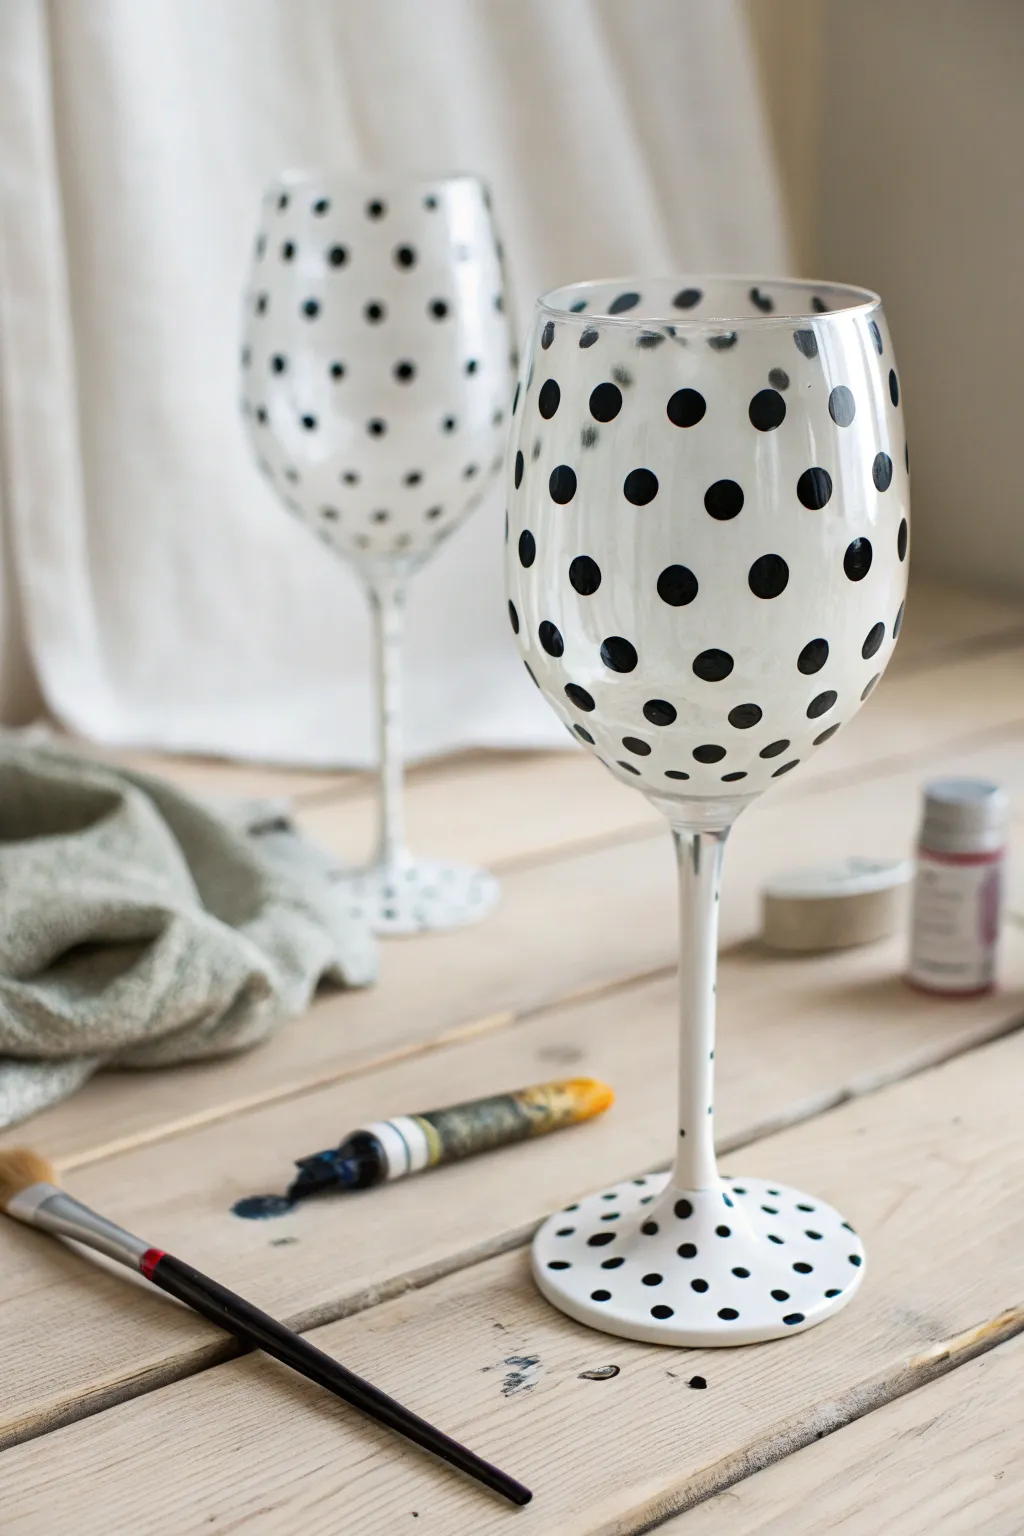
Transform ordinary glassware into festive party pieces with a classic black and white polka dot design. These hand-painted glasses offer a playful yet sophisticated look that is perfect for celebrating any occasion.
Step-by-Step Guide
Materials
- Wine glasses (stemmed)
- Rubbing alcohol
- Cotton rounds or paper towels
- Multi-surface acrylic craft paint (White)
- Multi-surface acrylic craft paint (Black)
- Round foam sponge pouncers (small size)
- Detail paintbrush (fine tip)
- Medium soft-bristle paintbrush
- Paint palette or disposable plate
- Oven (for curing)
Step 1: Preparation and Base Coat
-
Clean the glass:
Before you begin painting, it is crucial to remove any oils or residue from the glass surface. Wipe down the entire exterior of the wine glass, including the stem and base, with rubbing alcohol and a cotton round. -
Dry thoroughly:
Allow the alcohol to evaporate completely so the surface is bone dry. Avoid touching the glass with your fingers where you intend to paint. -
Load the white paint:
Squeeze a generous amount of white multi-surface acrylic paint onto your palette. You will need enough to cover the main bowl and stem without the paint drying out on the palette. -
Paint the background:
Using your medium soft-bristle brush, apply a layer of white paint to the exterior of the wine glass bowl. Use long, vertical strokes to minimize brush marks. -
Extend to the stem:
Continue painting down the stem and onto the top of the foot of the glass. I find it easiest to hold the glass by the rim while painting the lower sections. -
First drying period:
Let this first coat dry for about an hour. The glass might look streaky at this stage, but don’t worry, subsequent coats will fix this. -
Apply second coat:
Apply a second layer of white paint over the same areas. This will increase opacity and create a solid, creamy white canvas for your dots. -
Assess opacity:
Check your coverage by holding the glass up to a light source. If you see significant transparency, a third thin coat may be necessary after another drying period. -
Dry completely:
Allow the white base coat to dry completely, ideally for at least 2-3 hours or overnight, to ensure the next layer doesn’t lift the white paint.
Fixing Smudges
If a dot smudges or isn’t perfectly round, wait for it to dry completely. Then, use a small brush with white paint to touch up the edges and reshape the circle.
Step 2: Adding the Polka Dots
-
Prepare black paint:
Dispense a small amount of black multi-surface acrylic paint onto your palette. -
Load the pouncer:
Dip a small round foam pouncer into the black paint. Dab it lightly on a clean part of the palette to remove excess paint, ensuring a clean circle stamp. -
Start the main pattern:
Press the foam pouncer gently onto the white surface of the wine bowl to create your first dot. Lift straight up to avoid smearing. -
Space the dots:
Continue adding large black dots around the bowl of the glass in a loose, staggered brick pattern. Leave generous white space between them for a balanced look. -
Detail the edges:
Switch to your fine-tip detail brush. Dip it in the black paint to create smaller dots near the rim and the bottom curve of the bowl where the large pouncer won’t fit well. -
Decorate the stem:
Using the detail brush, paint tiny black specks or micro-dots down the length of the white stem for a delicate transition. -
Pattern the base:
Finish the design by painting medium-sized dots on the foot of the glass using either the small brush or a very small pouncer, coordinating with the bowl design. -
Clean up edges:
If any rim edges have paint on the drinking surface, wipe it away carefully with a damp cloth before the paint hardens. -
Cure the paint:
Follow the instructions on your specific paint bottle for curing. Most glass paints require air drying for 21 days or baking in a non-preheated oven at 350°F for 30 minutes to become dishwasher safe.
Pro Tip: Lip Safety
Always leave the top 3/4 inch of the rim unpainted. This ensures that when you drink, your mouth touches clean glass rather than paint.
Once baked and cooled, your custom glassware is ready to add a splash of style to your next gathering


Simple Monogram Initials
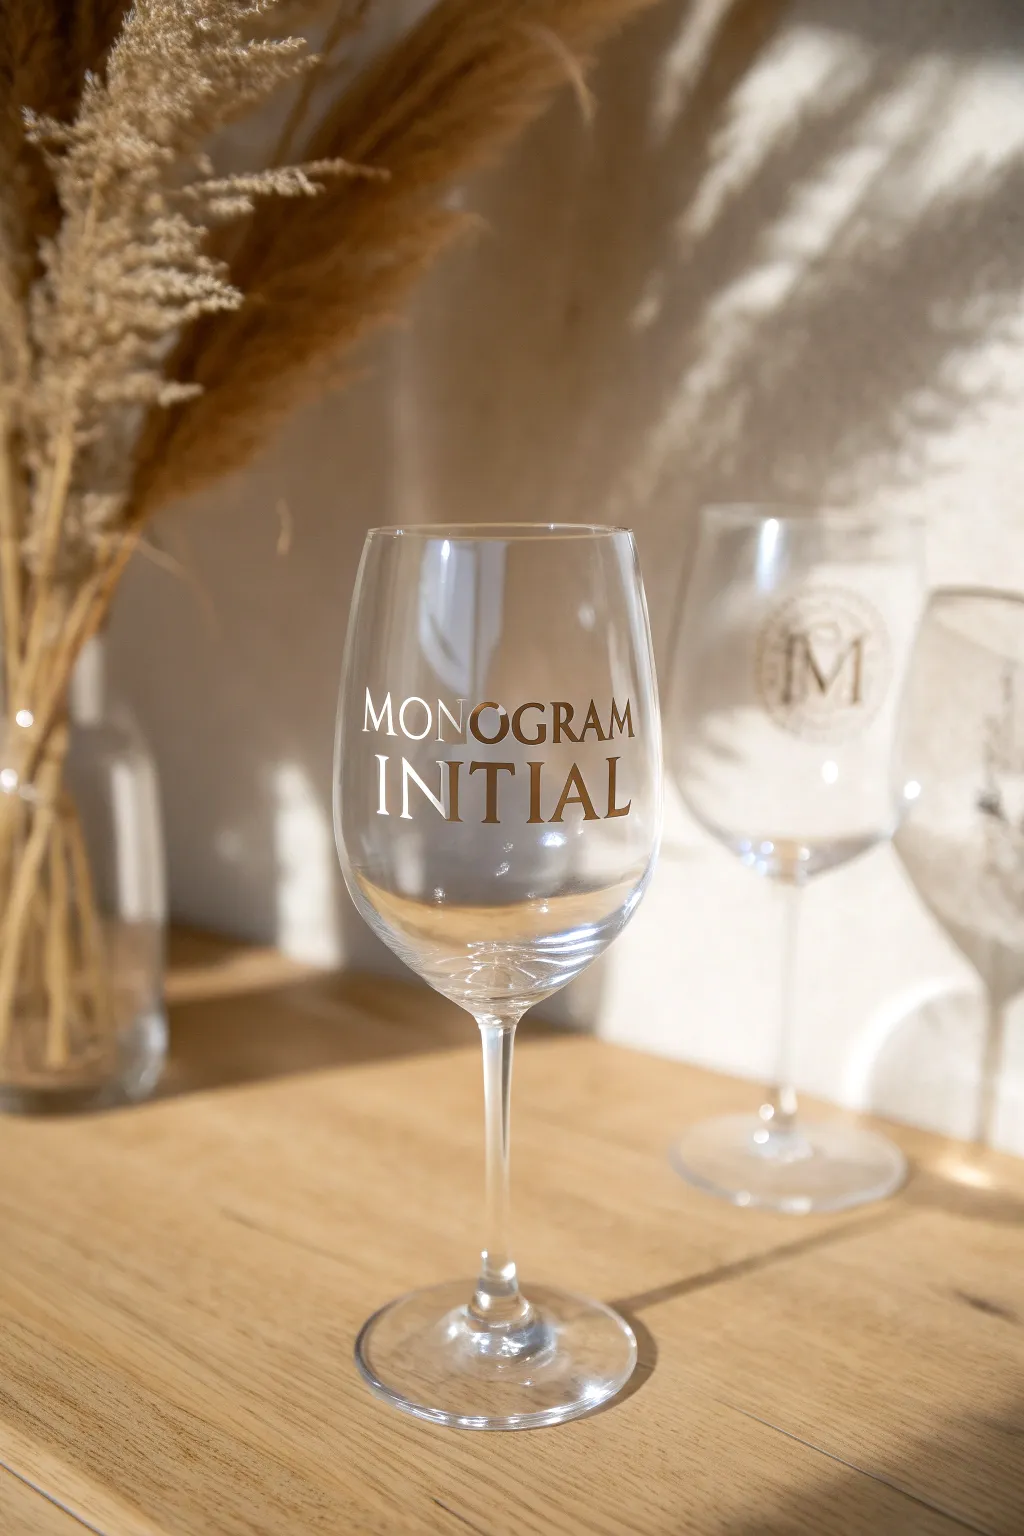
Elevate a simple clear wine glass into a personalized statement piece with elegant metallic lettering. This project uses gold adhesive foil to create a crisp, professional-looking ‘MONOGRAM INITIAL’ design that catches the light beautifully.
How-To Guide
Materials
- Clear wine glass (cleaned)
- Metallic gold adhesive vinyl (permanent)
- Transfer tape
- Electronic cutting machine (Cricut or Silhouette)
- Weeding tool
- Scraper or credit card
- Rubbing alcohol
- Lint-free cloth
- Computer with design software
Step 1: Preparation & Design
-
Clean the surface:
Before anything else, wipe down the wine glass thoroughly with rubbing alcohol and a lint-free cloth. This removes invisible oils and fingerprints which are the enemy of vinyl adhesion. -
Create your design:
Open your design software and type out your text. For this look, use a classic serif font for ‘MONOGRAM’ and a slightly larger size for ‘INITIAL’. Center the two lines creating a balanced stack. -
Measure the glass:
Use a flexible measuring tape to determine the available area on the curve of your glass. You generally want the design to be visible from the front without wrapping too far around the sides. -
Resize and check:
Scale your digital design to fit your measurements. I usually aim for a width of about 2.5 to 3 inches for a standard white wine glass to minimize warping.
Pro Tip: Curved Surface Hack
Fill the wine glass with water up to where you want the text line to be. The water level acts as a perfect, self-leveling guide so your text isn’t crooked.
Step 2: Cutting & Weeding
-
Load the vinyl:
Place your metallic gold vinyl onto your cutting mat, shiny side up. Smooth it down firmly with your scraper tool to ensure no air bubbles are trapped underneath. -
Cut the design:
Send the file to your cutting machine. Make sure to select the correct material setting for ‘Metallic Vinyl’ or ‘Premium Vinyl’ so the blade cuts through the vinyl but leaves the backing intact. -
Start weeding:
Once the cut is complete, unload the mat. Use your weeding tool to carefully lift away the excess vinyl around the letters. Take your time here, especially inside loops like ‘O’ and ‘A’. -
Double check details:
Hold the weeded design up to a light source to ensure you haven’t missed any tiny inside pieces or accidentally lifted a serif.
Troubleshooting: Wrinkles?
If the vinyl wrinkles on the curve, heat it slightly with a hair dryer on low for 3 seconds. The vinyl will become pliable and stretch slightly to lay flat.
Step 3: Transfer & Application
-
Apply transfer tape:
Cut a piece of transfer tape slightly larger than your design. Peel the backing and lay it sticky-side down directly over your gold letters. -
Burnish vigorously:
Use your scraper tool to rub firmly over the transfer tape. You want the vinyl to detach from its white backing and stick completely to the clear tape. -
Clip the transfer tape:
This is a key trick for curved surfaces: use scissors to make small slits in the transfer tape around the design (without cutting the vinyl itself). This allows the flat tape to bend around the rounded glass. -
Position the design:
Hover the design over the glass to find the center. Lightly stick the center of the design down first, leaving the edges lifted like wings. -
Press from center out:
Slowly smooth the design down from the center outwards to the left, and then from the center to the right. This displacement prevents creases in the vinyl. -
Burnish on glass:
Once the vinyl is down, rub firmly over the transfer tape with your finger or scraper to lock the adhesive onto the glass surface.
Step 4: Finishing Touches
-
Remove the tape:
Peel the transfer tape away slowly at a sharp 45-degree angle. If a letter starts to lift, lay the tape back down and burnish that spot again before trying to peel. -
Final cure:
Let the glass sit for at least 24 to 48 hours before washing. This gives the permanent adhesive time to fully cure and bond with the glass surface for long-lasting wear.
Now you have a sophisticated, custom glass perfect for gifting or your next dinner party


Hand-Lettered Names for Guests
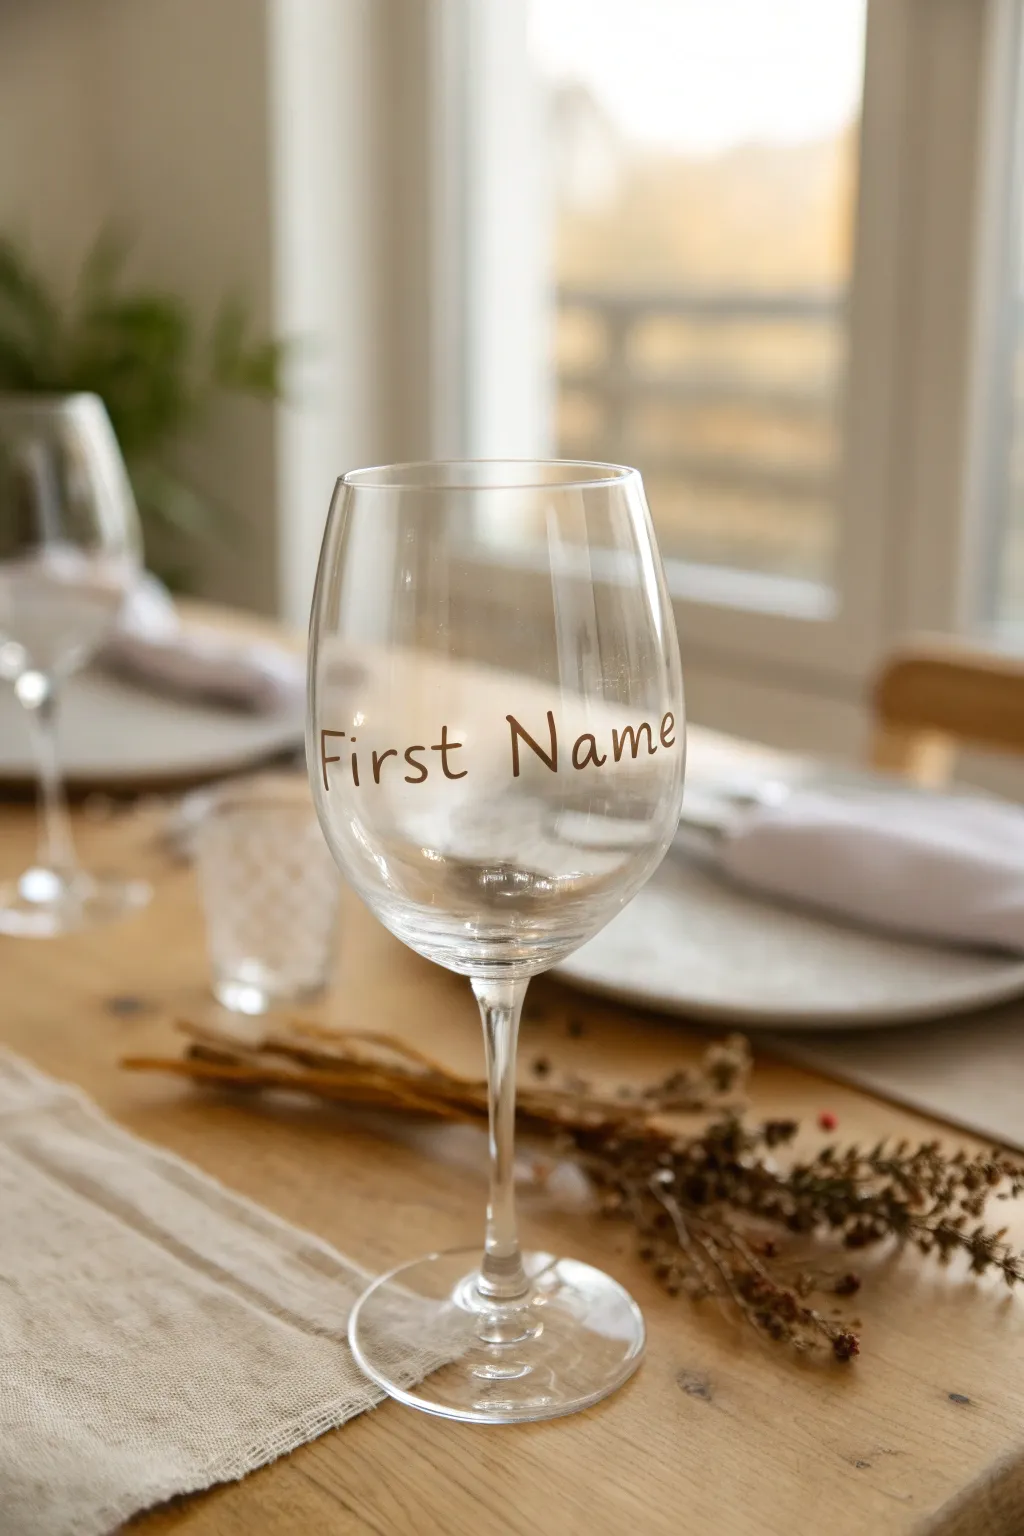
Add a personal and elegant touch to your dinner table with these charming hand-lettered wine glasses. This project uses a warm, copper-toned paint to create delicate script that acts as both a place card and a party favor.
Step-by-Step Guide
Materials
- Clear wine glass
- Rubbing alcohol
- Cotton rounds or paper towels
- Oil-based paint marker (Copper or Metallic Brown, fine tip)
- Scrap paper or sketchbook
- Pencil
- Masking tape (optional)
- Oven (for setting, if applicable to your marker brand)
Step 1: Preparation
-
Clean the surface:
Begin by thoroughly cleaning the exterior of your wine glass. Using soap and warm water is a good start, but drying it is key. -
Degrease with alcohol:
To ensure the paint adheres perfectly, wipe down the area where you intend to write with rubbing alcohol using a cotton round. This removes any invisible oils or fingerprints. -
Avoid touching:
Once cleaned with alcohol, be very careful not to touch that specific area with your bare hands, as skin oils can prevent the paint from setting properly.
Oops, Smudged It!
Don’t panic if you smudge wet paint. A cotton swab lightly dampened with nail polish remover cleans up wet oil paint faster than alcohol.
Step 2: Practice & Layout
-
Draft your script:
On a piece of scrap paper, practice writing the guest’s name in your desired font. The style in the image is a relaxed, slightly separated sans-serif with a handwritten feel. -
Check sizing:
Hold your paper draft up to the glass to visually check if the size of the letters fits nicely within the curve of the glass bowl. -
Create a guide (optional):
If you are nervous about writing straight, you can tape your paper draft inside the glass facing outward to use as a tracing guide. Just make sure the glass is dry inside. -
Prime the marker:
Shake your oil-based paint marker well. Press the nib down on your scrap paper several times until the ink flows smoothly and consistently.
Step 3: Lettering
-
Position your hand:
To steady your hand, I like to rest my pinky finger gently on a part of the glass I’m not writing on, or place the glass on a rolled-up towel to keep it from rolling. -
Write the first word:
Begin writing the first name. Apply even pressure to keep the line width consistent. The copper tone should look opaque; if it’s streaky, your marker might need another shake. -
Spacing check:
Pause briefly before starting the second name or word to ensure you have visually centered the text or left enough room for the surname. -
Finish the lettering:
Complete the name. Keep the strokes fluid and don’t worry about absolute perfection—the hand-written look adds to the charm. -
Correcting mistakes:
If you make an error, act quickly. Use a Q-tip dipped in rubbing alcohol to wipe away the wet paint, let it dry, and try again.
Make It Pop
Add tiny faux-stitch marks on the letters or small dots at the end of the strokes for a whimsical, embroidered look.
Step 4: Setting the Paint
-
Initial dry time:
Allow the glass to sit untouched for at least 24 hours. This lets the solvents in the oil-based paint evaporate fully. -
Oven preparation:
Check your specific paint marker’s instructions. Many require heat setting for durability. If so, place the glass in a *cold* oven. -
Baking process:
Turn the oven on to 350°F (175°C). Once it reaches temperature, bake for 30 minutes. Placing it in cold prevents the glass from shattering due to thermal shock. -
Cool down:
Turn the oven off and leave the glass inside until the oven is completely cool. Removing it while hot can cause cracking. -
Final cure:
Even after baking, it is best to hand wash these glasses gently to preserve the lettering for future dinner parties.
You now have a beautiful set of custom glassware ready to welcome your friends to the table


Glitter-Dipped Stems
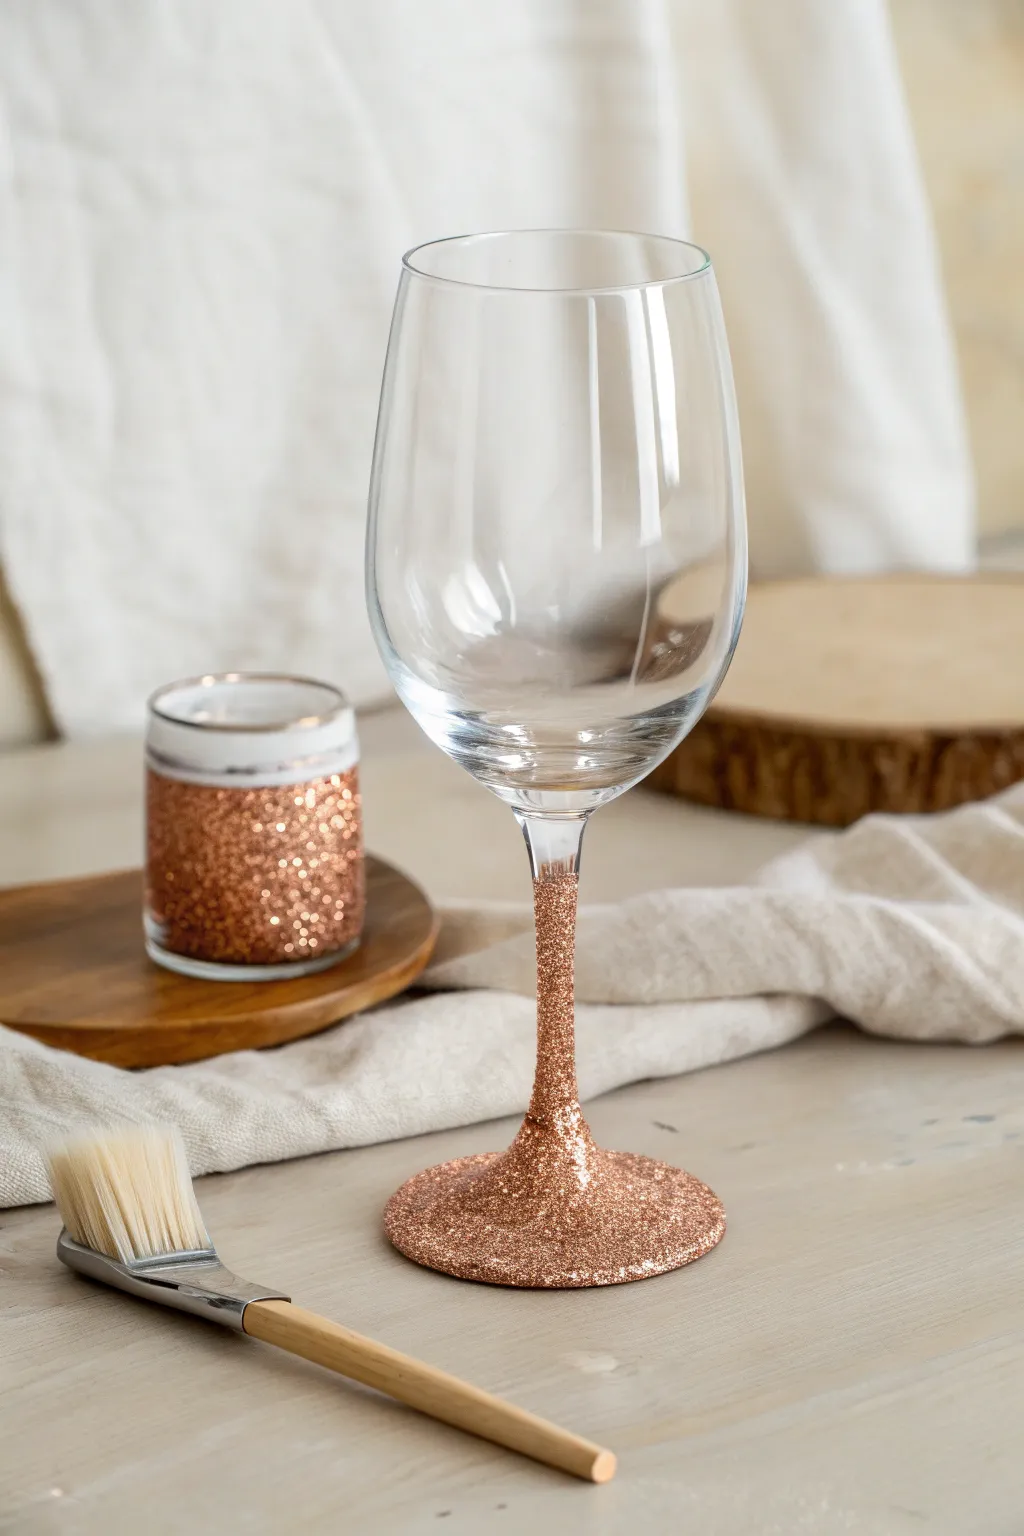
Elevate ordinary glassware into festive showpieces with this simple yet stunning glitter-dipped stem project. The look features a rich coating of rose gold glitter that seamlessly gradients up the stem, adding a touch of glamour to any table setting.
How-To Guide
Materials
- Clear wine glass
- Rose gold or copper extra-fine glitter
- Mod Podge or decoupage glue (dishwasher safe formula recommended)
- Flat craft paintbrush (approx. 1 inch width)
- Painter’s tape or masking tape
- Paper plate or tray (for catching excess glitter)
- Clean cloth or rubbing alcohol
- Clear sealant spray (glossy finish)
Step 1: Preparation and Taping
-
Clean surface:
Begin by thoroughly cleaning the wine glass with warm soapy water. Dry it completely. -
Degrease the glass:
Wipe down the stem and base with a little rubbing alcohol on a cloth. This removes any finger oils or residue that might repel the adhesive, ensuring a lasting bond. -
Determine glitter height:
Decide how far up the stem you want the glitter to go. In the reference image, the glitter stops just below the bowl of the glass. -
Apply tape barrier:
Wrap a piece of painter’s tape horizontally around the top of the stem to create a crisp, clean line where the glitter will stop. Press the edges of the tape down firmly to prevent glue from seeping under.
Step 2: Applying Adhesive
-
Load the brush:
Dip your flat craft brush into the Mod Podge or decoupage glue. You want a generous amount, but not so much that it drips. -
Coat the base:
Starting at the very bottom, paint a layer of glue over the entire circular foot of the wine glass. Ensure you get the edges. -
Paint the stem:
Work your way up the stem with the glue, brushing smoothly all the way to your tape line. The coat should be even and white; it will dry clear later. -
Check for gaps:
Inspect the glass quickly to ensure there are no dry spots on the glass surface you intend to glitter. Any missed spot will result in a bald patch later.
Patchy Glitter?
If you see gaps after the first layer dries, don’t panic. Simply dab a tiny amount of glue onto the bald spot with a small brush and sprinkle a pinch of glitter directly onto it.
Step 3: Glittering
-
Prepare catch tray:
Place a paper plate or a folded piece of paper underneath your work area to catch fallout. This makes cleanup easier and saves glitter. -
Pour the glitter:
Holding the glass by the bowl, gently pour the rose gold glitter over the wet glue. Rotate the glass slowly as you pour to ensure every angle is covered. -
Cover the base:
Tip the glass slightly to ensure the glitter cascades over the flat base and wraps around the rim of the foot. -
Tap off excess:
Once fully coated, gently tap the stem of the glass or shake it lightly over your catch tray to dislodge any loose particles. -
Wait for initial set:
Let this first layer dry for about 20 to 30 minutes. The glue doesn’t need to be rock hard, but it shouldn’t be tacky to the touch.
Ombré Effect
Instead of a hard tape line, lightly feather the glue upward near the bowl and sprinkle less glitter there for a fading, gradient effect rather than a solid block of sparkle.
Step 4: Layering and Sealing
-
Apply second coat (optional):
If I see any transparency after the first coat dries, I like to gently dab a second thin layer of glue right over the glitter and repeat the pouring process. This creates that dense, solid metallic look shown in the photo. -
Remove tape:
Carefully peel away the painter’s tape while the final layer of glue is still slightly damp. This helps prevent the dried glue from cracking or peeling up with the tape. -
Dry completely:
Allow the glass to cure fully according to your glue’s instructions—usually overnight is best to be safe. -
Apply top sealant:
To prevent shedding, apply a final coat of decoupage glue over the glitter, or spray the stem with a clear acrylic gloss sealer. This encapsulates the glitter so it stays on the glass, not on your hands. -
Final cure:
Let the sealant cure for the full recommended time (often several weeks for dishwasher-safe formulas) before washing or using.
Enjoy your beautifully customized glassware at your next festive gathering
BRUSH GUIDE
The Right Brush for Every Stroke
From clean lines to bold texture — master brush choice, stroke control, and essential techniques.
Explore the Full Guide
Glitter Base for Stemless Glasses
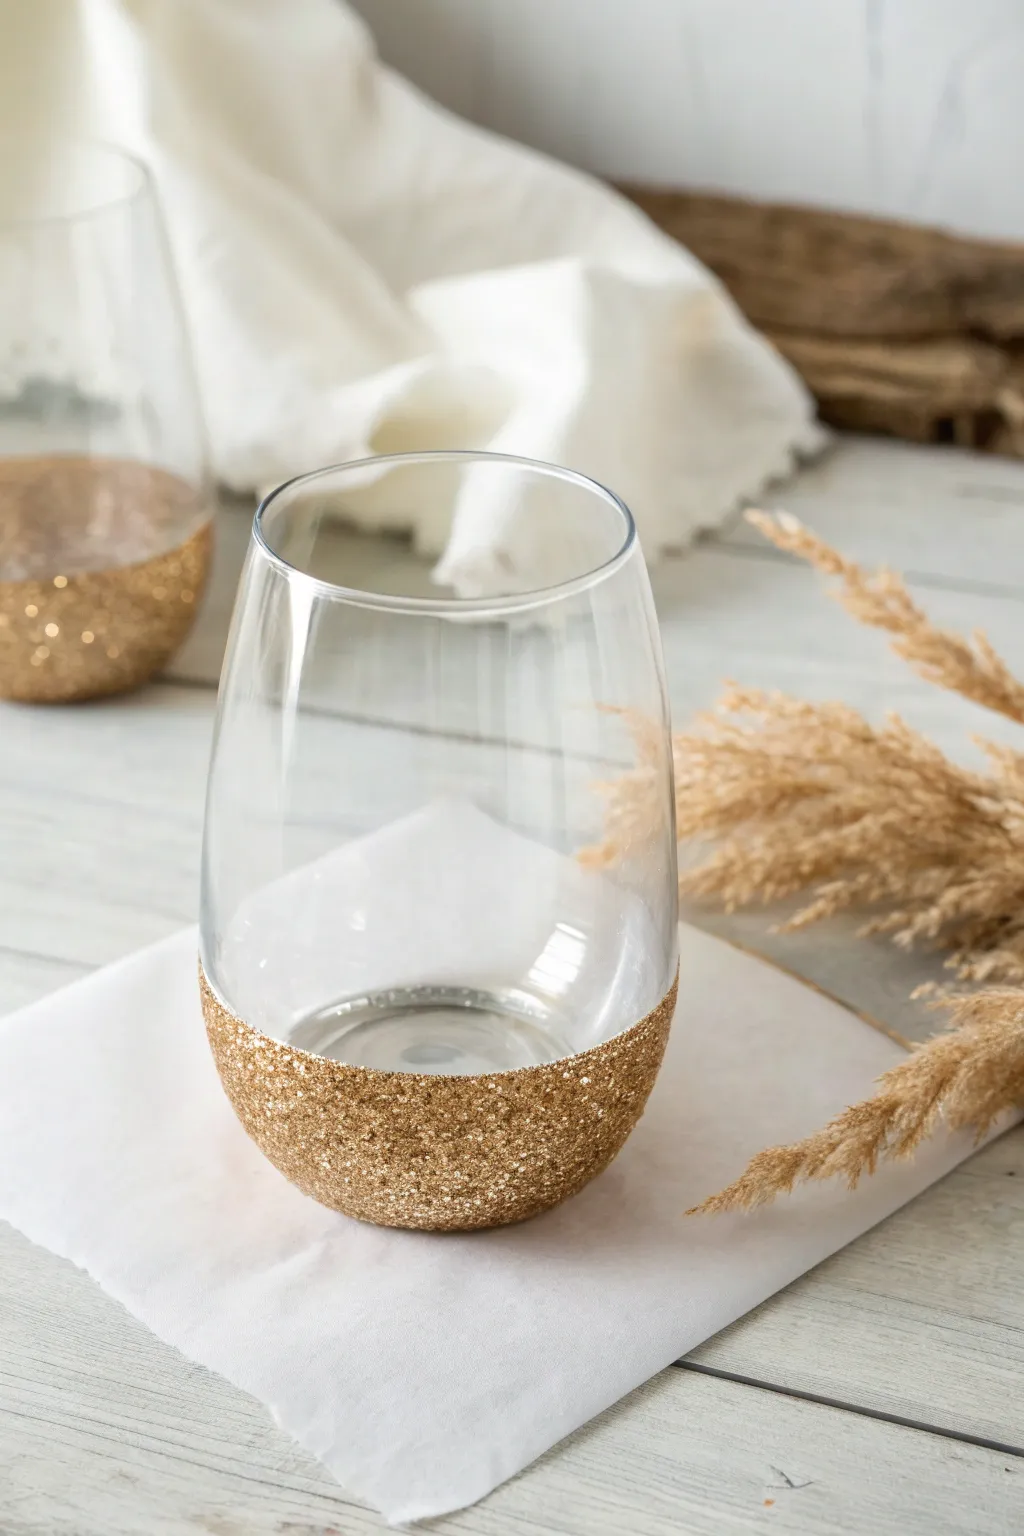
Transform plain stemless glassware into sparkling party accessories with this chic glitter-dipped technique. The crisp line and shimmering base create a sophisticated look that feels expensive but is incredibly simple to achieve at home.
Step-by-Step Guide
Materials
- Stemless wine glasses
- Painter’s tape or electrical tape
- Mod Podge (Dishwasher Safe formula recommended)
- Fine gold glitter
- Foam brush or soft flat paintbrush
- Rubbing alcohol
- Cotton pads or paper towel
- Paper plate or bowl (for catching glitter)
- Clear acrylic sealant spray (optional)
Step 1: Preparation
-
Clean the glass:
Before starting, wipe down the entire outer surface of the wine glass with rubbing alcohol and a cotton pad. This removes oils and fingerprints, ensuring the adhesive sticks perfectly to the glass. -
Define the dip line:
Decide how high you want the glitter to come up the glass; generally, the bottom third looks best. Apply a strip of painter’s tape horizontally around the glass at this height. -
Secure the tape:
Press down firmly on the tape edge, especially where the ends overlap, to prevent any glue from seeping underneath. You want this seal to be completely tight for a crisp line. -
Set up your workspace:
Pour your fine gold glitter onto a paper plate or into a bowl wide enough to fit the bottom of the glass. Keep your foam brush and Mod Podge nearby.
Tape Trick
Use electrical tape instead of painter’s tape if your glass is very curved. It stretches slightly, allowing it to hug the rounded shape without buckling or creasing.
Step 2: Applying the Glitter
-
Apply the adhesive:
Using your foam brush, apply a medium coat of Mod Podge to the glass area below the tape. Ensure you cover the bottom curve and the flat base of the glass evenly. -
Watch the layer thickness:
Avoid applying the glue too thickly, as it may drip, but ensure the entire surface is wet and white. Smooth out any major brush and bubbles strokes before moving to the glitter. -
Apply the first glitter layer:
Hold the glass by the rim and generously sprinkle glitter over the wet glue over your catch plate. Rotate the glass to ensure total coverage on all sides and the bottom. -
Tap off excess:
Gently tap the rim of the glass with your finger to dislodge loose glitter back onto the plate. Don’t touch the glittered surface yet. -
Let it dry:
Place the glass upside down on a clean sheet of parchment paper or drying rack. Allow this first layer to dry for at least one hour until the glue is clear. -
Assess coverage:
Once dry, look for any patchy spots where the glass shows through. If it looks sparse, you will need a second coat. -
Apply second coat:
Gently brush a second layer of Mod Podge directly over the dry glitter. It will look milky white, but don’t worry, it dries clear. -
Re-glitter:
Sprinkle another generous layer of gold glitter over the wet adhesive to fill in any gaps and create a dense, opaque sparkle.
Ombré Effect
Mix two glitter colors! Sprinkle gold near the bottom and slowly transition to a champagne or silver glitter near the tape line for a stunning gradient fade.
Step 3: Sealing and Finishing
-
Remove the tape:
While the second layer of glue is still slightly wet (but not dripping), carefully peel off the painter’s tape. Pulling while wet helps prevent the dried glue from peeling up with the tape. -
Clean the edge:
If any glitter strayed above the line, intricate stray specks can be scraped off carefully with a craft knife or fingernail while the glue is tacky. -
Full dry time:
Let the glass dry completely for several hours, or preferably overnight to ensure the base layers are hardened. -
Seal the glitter:
To prevent shedding, apply a final top coat of Mod Podge over just the glittered area. Extend this layer slightly over the top edge of the glitter onto the glass to ‘cap’ the seal. -
Optional spray seal:
For extra durability, I sometimes take the glasses outside and give the glittered bottom a quick, light mist of clear acrylic sealer, masking off the top of the glass with paper. -
Cure time:
Allow the glasses to cure for 28 days if using Dishwasher Safe Mod Podge before washing, or at least 4-5 days for standard formulas.
Once fully cured, your dazzling new glassware is ready to toast at your next celebration
Classic Painted Daisies
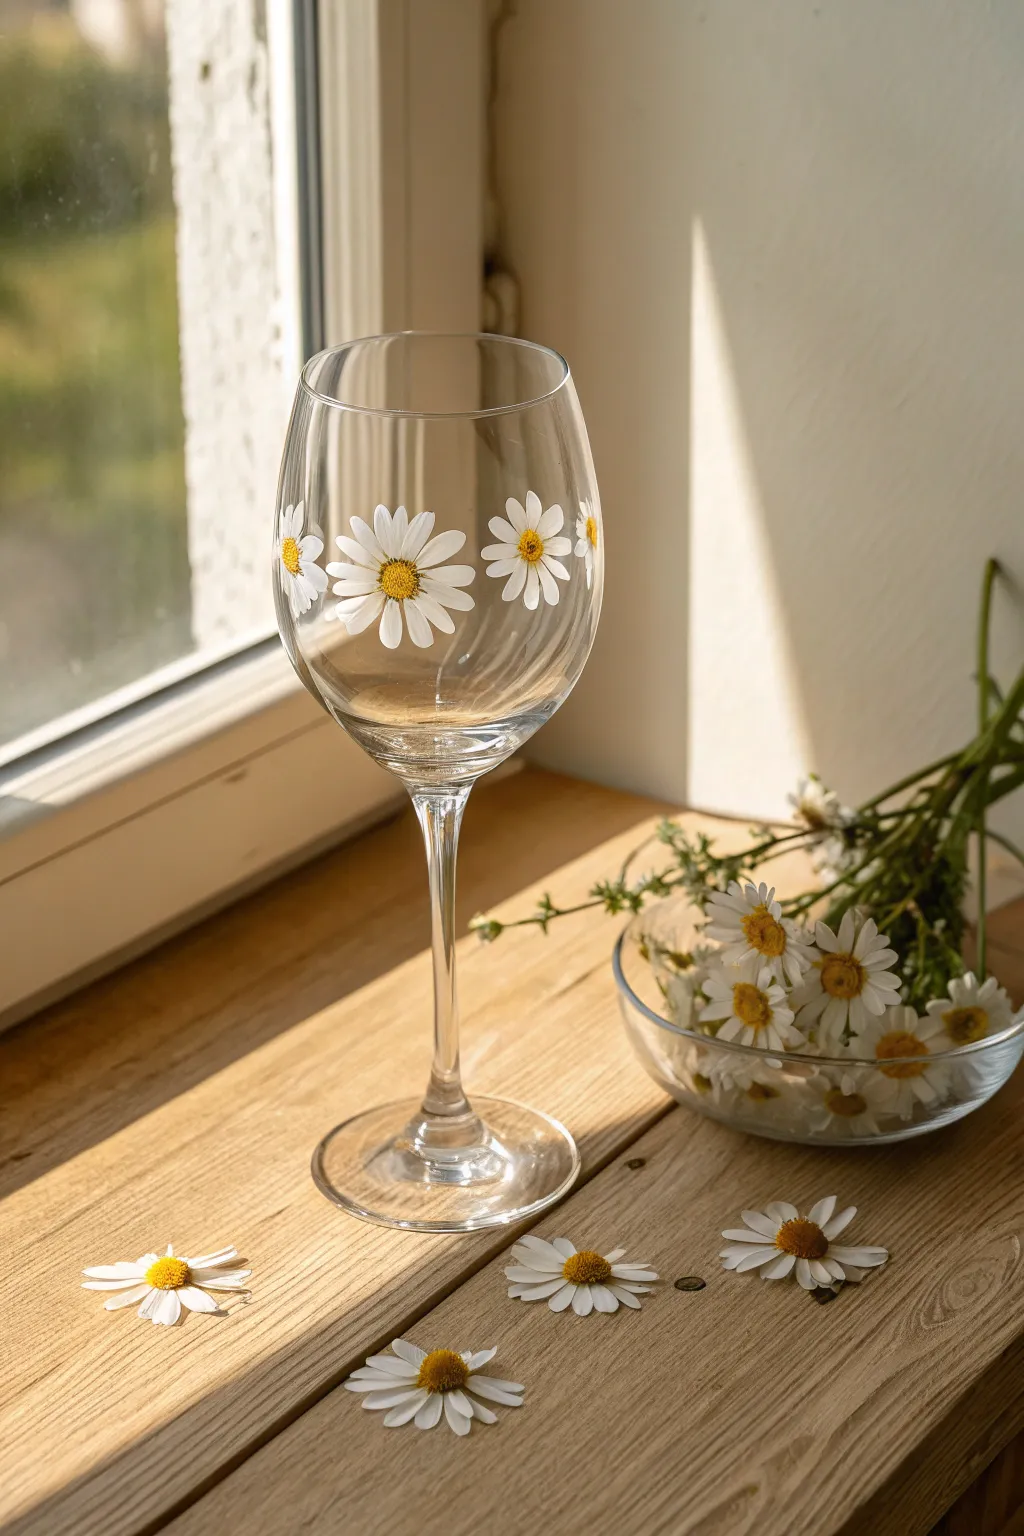
Bring the warmth of a summer garden to your table settings with this delightfully simple painted wine glass. Featuring crisp white petals and sunny yellow centers, this classic daisy pattern adds a touch of rustic charm to any piece of glassware.
Step-by-Step Tutorial
Materials
- Clear wine glass (thoroughly washed and dried)
- Rubbing alcohol
- Cotton pads or paper towels
- Enamel glass paint (Opaque White)
- Enamel glass paint (Golden Yellow or Sunflower)
- Small round paintbrush (size 2 or 4)
- Detail paintbrush or dotting tool
- Palette or small plate
- Oven (for baking/curing)
Step 1: Preparation & Planning
-
Surface Cleaning:
Before you even open a paint bottle, it is crucial to remove any oils or residue from the glass. Wipe the entire outer surface of the wine glass bowl with rubbing alcohol using a cotton pad. Avoid touching the area where you plan to paint with your bare fingers after this step. -
Visualize Spacing:
Look at your glass and visualize where the blooms will sit. You want roughly three to five large daisies spaced evenly around the bowl. I like to imagine a horizontal line running through the widest part of the glass to keep them centered.
Fixing Mistakes
Smudged a petal? Don’t panic. While the paint is wet, use a damp cotton swab or a toothpick to wipe away the error cleanly without ruining the rest of the design.
Step 2: Painting the Petals
-
Load the Brush:
Squeeze a dollop of opaque white enamel paint onto your palette. Load your small round brush fully, ensuring the bristles are saturated but not dripping. -
First Petal Stroke:
Start with your first flower. Press the tip of the brush down gently to create the rounded outer edge of a petal, then drag it inward toward an imaginary center point, lifting pressure as you go to taper the end. -
Complete the Circle:
Continue painting petals in a radial pattern around that center point. Aim for about 12-15 petals per flower for a full look. Don’t worry if they aren’t perfectly identical; slight variation adds organic realism. -
Adding More Blooms:
Rotate the glass carefully and repeat the petal process for the remaining large daisies. Ensure you leave enough negative space between the flowers so the design doesn’t feel cluttered. -
Opacity Check:
Glass paint can sometimes be translucent. If your white looks streaky or too thin, let this first layer dry for about 20 minutes, then carefully go over the petals again with a second coat for a bright, solid white finish. -
Partial Blooms:
For a natural effect, add one or two partial flowers near the edges of your main design, painting only half the petals as if the flower is peeking around the curve of the glass.
Pro Tip: Loading Paint
Don’t overload your brush for the second coat. Too much paint can create a raised ridge that chips easily. Thin, even layers are always stronger than one thick glob.
Step 3: Adding the Centers
-
Yellow Prep:
Clean your brush thoroughly or switch to a detail tool. Squeeze out a small amount of golden yellow enamel paint. -
Dotting the Center:
Once the white petals are dry to the touch (usually 30-60 minutes), dip the back end of a paintbrush or a dotting tool into the yellow paint. Firmly press a large dot right in the middle where your petal tips meet. -
Texturing:
To give the center that fuzzy pollen look, stick with the wet yellow paint. Use a very fine detail brush or a toothpick to gently stipple (tap repeatedly) the yellow dot, spreading it slightly outward to overlap the inner edges of the white petals. -
Highlighting (Optional):
If you want extra dimension, mix a tiny speck of white into your yellow and dab a tiny highlight on the upper right side of each flower center.
Step 4: Curing the Glass
-
Initial Drying:
Allow the painted glass to air dry for at least 24 hours. The paint needs to be fully set before the heat curing process. -
Cold Oven Method:
Place your glass into a cool oven. Do not preheat. Turn the oven on to 350°F (176°C) or the temperature specified by your paint manufacturer. -
Baking:
Once the oven reaches temperature, set a timer for 30 minutes. The gradual heat prevents the glass from shattering. -
Cool Down:
After the timer goes off, turn the oven off and open the door slightly. Leave the glass inside until the oven is completely cool. Removing hot glass too quickly can cause cracks.
Now you have a charming custom glass perfect for your next sunny brunch or outdoor gathering

PENCIL GUIDE
Understanding Pencil Grades from H to B
From first sketch to finished drawing — learn pencil grades, line control, and shading techniques.
Explore the Full Guide
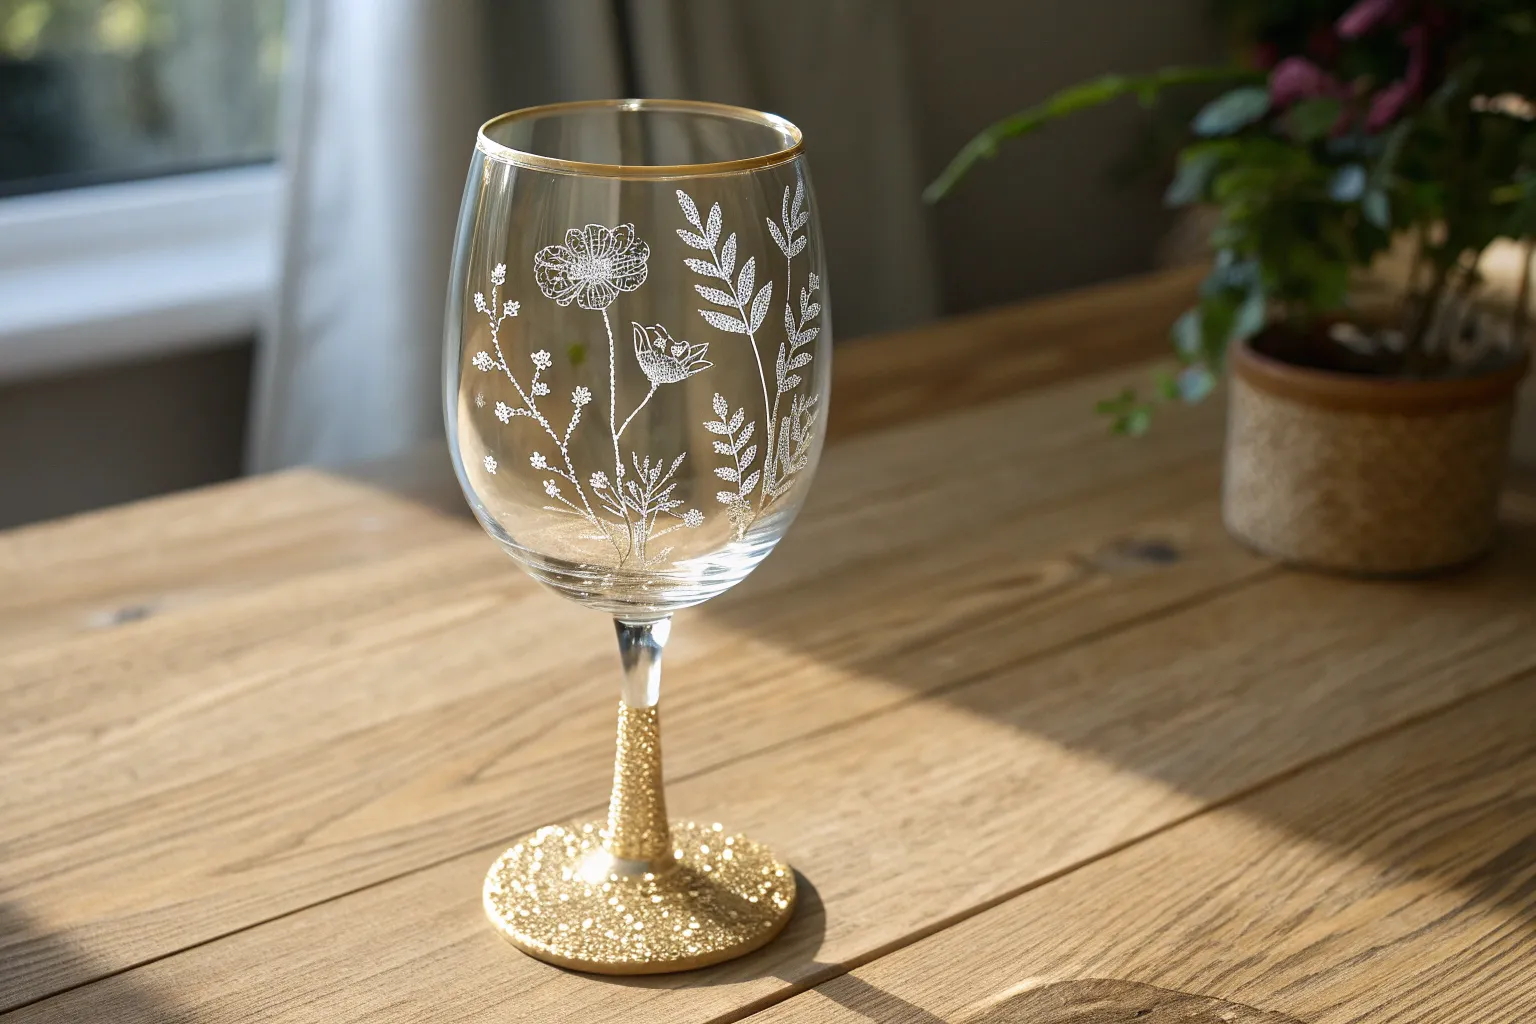
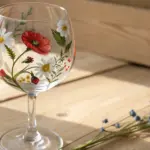
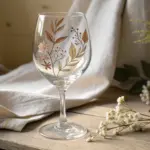
Loose Wildflower Meadow Band
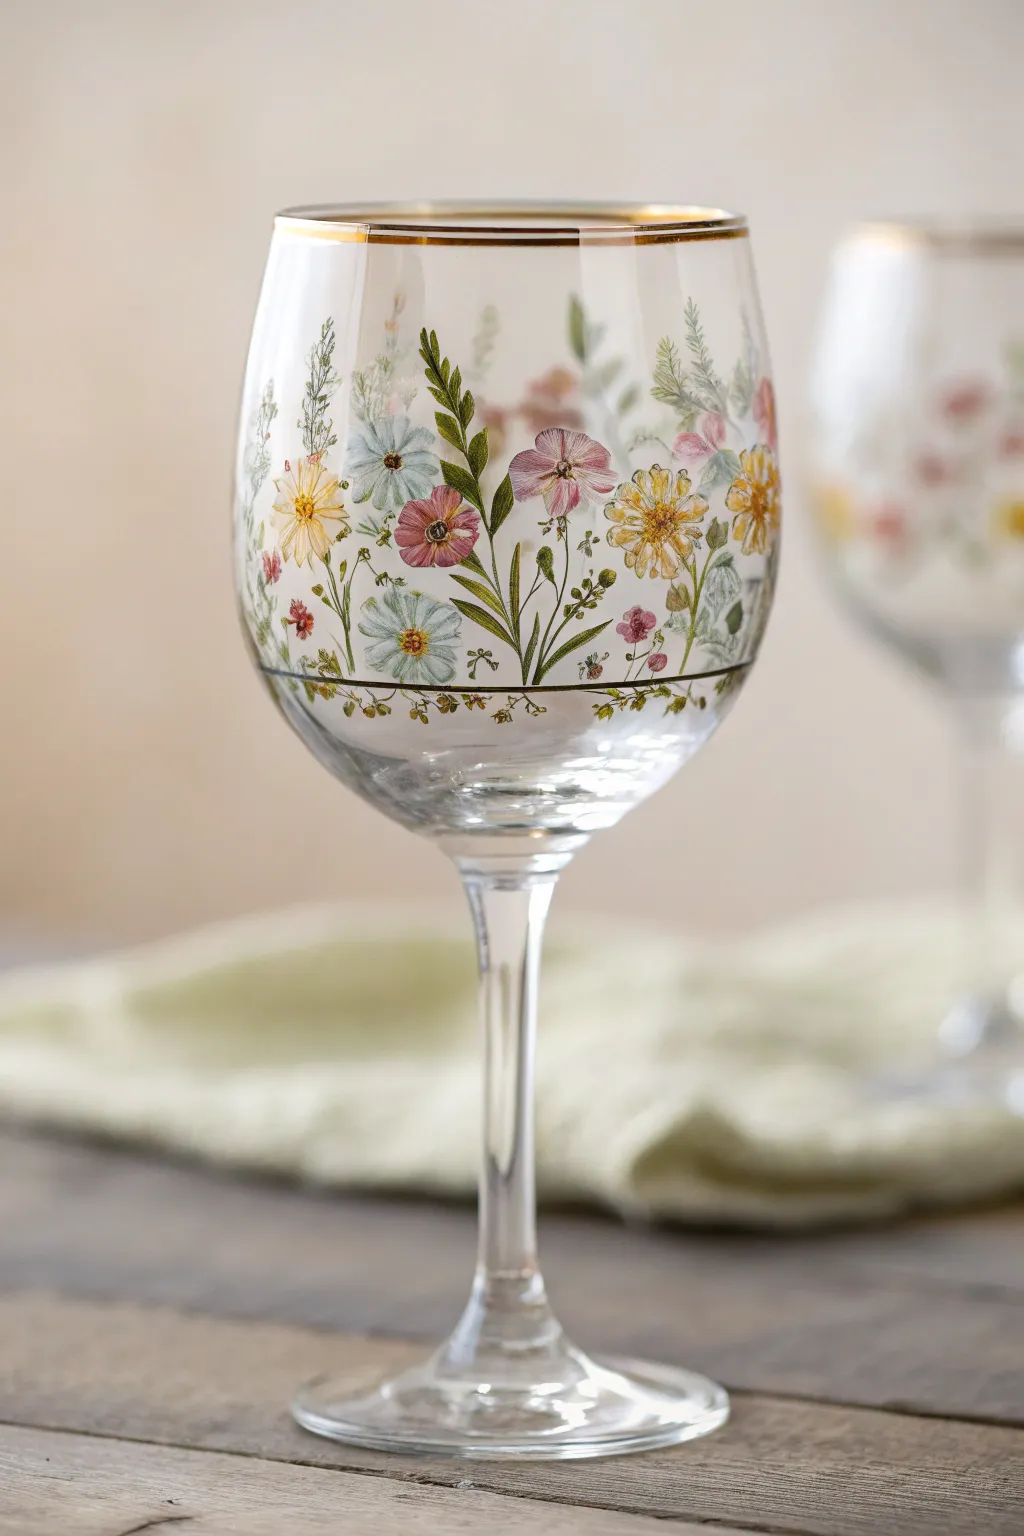
Transform plain stemware into an elegant botanical statement piece with this delicate wildflower band pattern. Featuring fine stems, soft pastel blossoms, and luxurious touches of gold, this project captures the airy beauty of a summer meadow on glass.
Step-by-Step Guide
Materials
- Clear wine glass (cleaned with rubbing alcohol)
- Enamel glass paints (pale yellow, dusty pink, soft blue, sage green, forest green, white)
- Liquid gilding or gold glass paint
- Fine liner brush (size 00 or 000)
- Small round brush (size 1 or 2)
- Painter’s tape
- Rubbing alcohol
- Cotton swabs
- Oven (for curing, if required by paint brand)
Step 1: Preparation & Framework
-
Clean surface:
Begin by thoroughly wiping down the outside of the wine glass with rubbing alcohol to remove any oils or fingerprints, ensuring the paint adheres properly. -
Establish the lower border:
Apply a strip of painter’s tape horizontally around the bowl of the glass, about one-third of the way up from the stem. Ensure it is level all the way around. -
Paint the gold baseline:
Using your fine liner brush and liquid gilding, paint a thin, steady line directly above the painter’s tape edge. This creates the ‘ground’ for your meadow.
Steady Hand Trick
Rest your painting wrist on a coffee mug or small box while you work. This elevates your hand to the same level as the glass and significantly reduces shakiness.
Step 2: Painting the Greenery
-
Draft main stems:
Mix a sage green shade and use the liner brush to paint vertical, slightly wavy lines rising from the gold baseline. Vary their heights, making some reach two-thirds up the bowl and others shorter. -
Add leafy details:
On several stems, add small, alternating leaves. Use a ‘press and lift’ motion with the brush to create tapered leaf shapes. -
Create fern textures:
For variety, paint a few stems with feathery, fern-like fronds using tiny, quick dashes in a darker forest green to add depth. -
Intersperse grass blades:
Fill in gaps with very fine, single strokes of pale green to represent tall grasses, keeping the composition airy rather than cluttered.
Step 3: Blooming the Flowers
-
Paint blue daisies:
Using the small round brush and soft blue paint, create daisy shapes by painting small petals radiating from a center point. Place these on the medium-height stems. -
Add pink cosmos:
Mix a dusty pink and paint slightly larger, cup-shaped flowers with wider petals on the taller stems. Blending a tiny bit of white into the petal tips adds a lovely dimension. -
Detail yellow blooms:
With pale yellow paint, add small clusters of blooms or single yellow wildflowers. I like to dab the brush to create a textured, pollen-heavy look. -
Layer small buds:
Use the tip of your liner brush to add tiny dots of pink and blue near the tops of the grassy stems to represent unopened buds. -
Add flower centers:
Once the petals are dry to the touch, add contrasting centers. use dark brown or gold dots for the blue and pink flowers to make them pop.
Vintage Varnish
Mix a tiny drop of translucent sepia or amber glass paint into your colors. This desaturates bright pigments, giving the wildflowers an aged, botanical illustration feel.
Step 4: Finishing Touches
-
Paint the upper rim:
Carefully paint the very top rim of the glass with the liquid gilding. Hold the brush steady and rotate the glass slowly for a smooth, continuous line. -
Add highlights:
Using a tiny amount of white paint, add microscopic highlights to the edges of the largest leaves and petals to simulate light hitting the meadow. -
Remove tape:
Gently peel away the painter’s tape from the bottom. If any paint bled under, clean it up immediately with a damp cotton swab. -
Cure the paint:
Follow the manufacturer’s instructions for your specific glass paints. This usually involves air-drying for 24 hours and then baking the glass in a cool oven that heats up to 350°F (176°C) for 30 minutes.
Now you can pour a drink and enjoy your own hand-painted garden all year round
Minimal Greenery and Vines
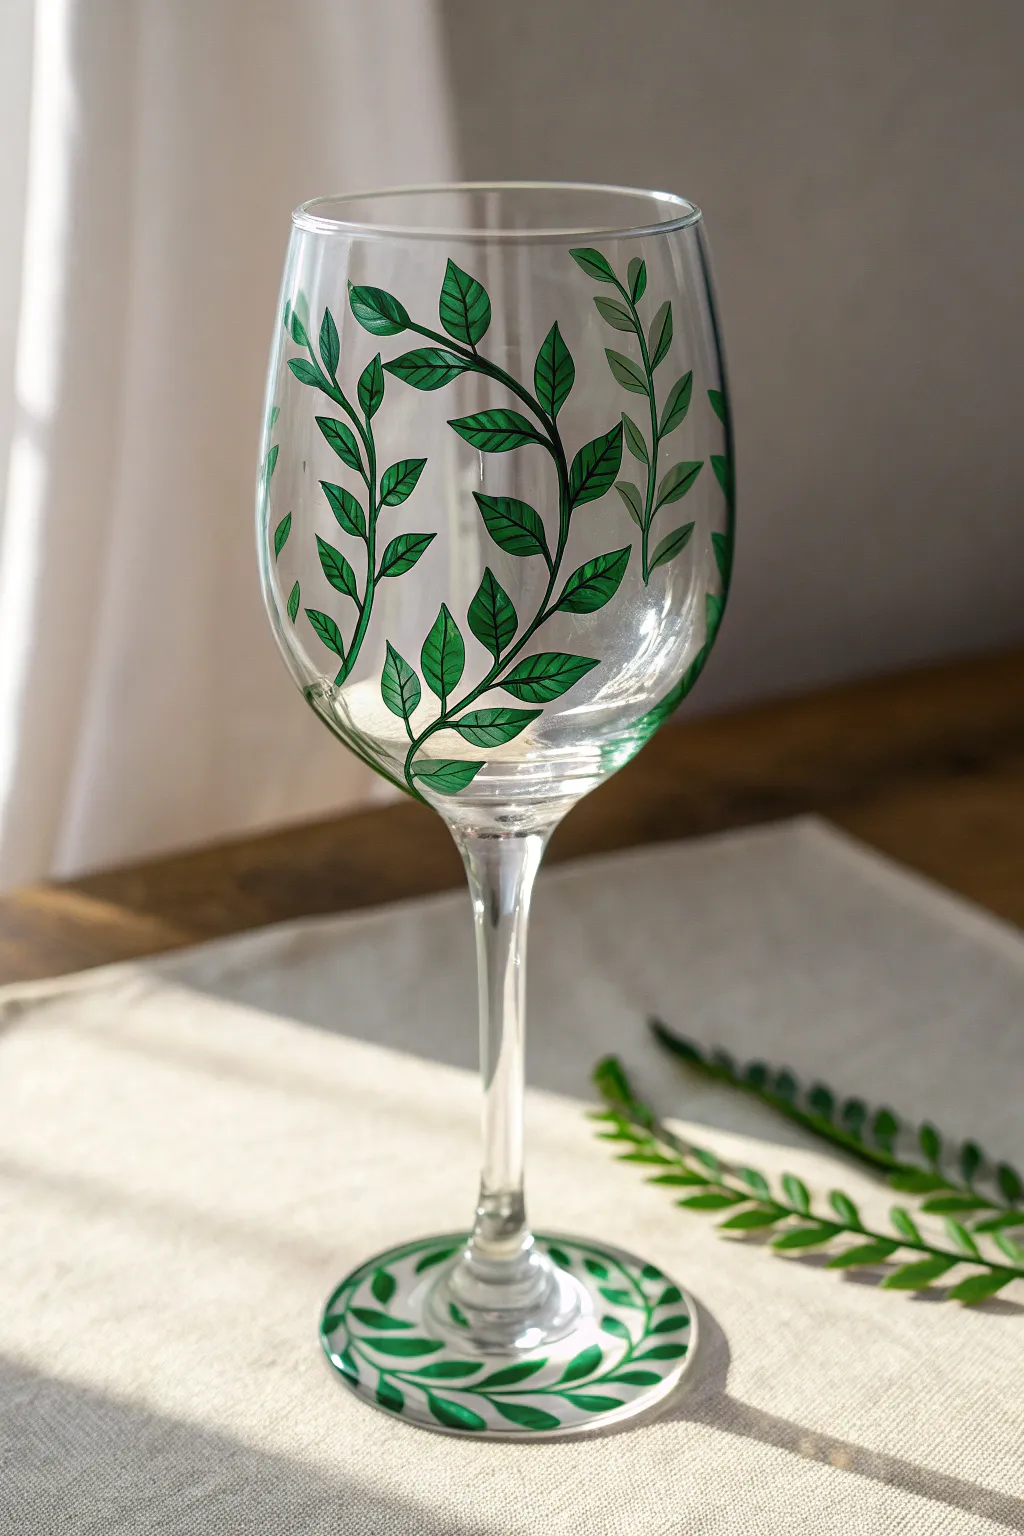
Transform plain stemware into an elegant botanical display with this leafy design. The simple green vines climbing up the bowl and circling the base create a sophisticated, nature-inspired look perfect for outdoor dining or a fresh table setting.
Step-by-Step Tutorial
Materials
- Clear wine glass
- Rubbing alcohol
- Lint-free cloth or paper towel
- Green enamel glass paint (medium to dark shade)
- Black or very dark green enamel glass paint (for outlining/details)
- Fine detail paintbrush (size 0 or 00)
- Small liner brush
- Cotton swabs (for cleanup)
- Oven (for curing)
Step 1: Preparation & Planning
-
Clean the Surface:
Thoroughly wipe down the entire wine glass, focusing on the exterior bowl and the top of the base, using rubbing alcohol and a lint-free cloth. This removes oils and fingerprints that could prevent the paint from adhering properly. -
Let it Dry:
Allow the alcohol to evaporate completely for a few minutes. Avoid touching the glass surface with your bare hands after cleaning to keep it pristine. -
Plan the Vine Composition:
Visualize three to five main vines starting from the bottom of the bowl and reaching upward. The goal is an organic, flowing look rather than perfect symmetry.
Step 2: Painting the Main Stems
-
Load the Liner Brush:
Dip your liner brush into the green enamel paint. You want enough paint to create a smooth line but not so much that it drips. -
Draft the Stem Lines:
Starting near the stem-bowl junction, paint thin, curving lines upward. Create gentle S-curves to mimic natural growth. Vary the lengths, letting some reach higher towards the rim than others. -
Adjust Thickness:
Go back over the lower portions of the stems to slightly thicken them, tapering off to a very fine point at the top ends. -
Base Decoration:
Don’t forget the foot of the glass. Paint a curving vine circling the flat part of the base, connecting it visually to the design on the bowl.
Uneven Paint flow?
If your lines are breaking or looking scratchy, thin your glass paint with a tiny drop of rubbing alcohol or flow medium to help the brush glide smoothly.
Step 3: Adding the Leaves
-
Switch Brushes:
Clean your liner brush and switch to the fine detail brush (size 0) for better control over the leaf shapes. -
Paint Leaf Outlines:
Along the painted stems, paint the outline of small, almond-shaped leaves. Alternate their placement—left, right, left—as you move up the stem. -
Vary Leaf Sizes:
Keep the leaves slightly larger near the bottom of the bowl and smaller near the tips of the vines for a realistic perspective. -
Fill the Leaves:
Fill in the leaf outlines with the same green paint. I find it helpful to leave the paint slightly semi-transparent in the center to give the leaves some depth rather than a solid blocks of color. -
Repeat on the Base:
Add corresponding leaves to the vine you painted on the foot of the glass, creating a wreath effect.
Leaf Shaping Pro-Tip
Press the belly of the brush down to create the wide part of the leaf, then lift completely as you pull away to create a sharp, tapered point.
Step 4: Detailing & Curing
-
Dry Time:
Let the green base layer dry for about 20-30 minutes so it is touch-dry before adding the finer details. -
Mix the Vein Color:
If you don’t have a distinct dark green, mix a tiny dot of black into your green paint to create a shadowed shade. -
Paint the Midribs:
Using the very tip of your smallest brush, paint a delicate line down the center of each leaf. -
Add Veins:
Ideally, paint tiny diagonal veins branching off the center line. Use a very light hand; these lines should be barely there. -
Clean Up Edges:
If any lines went astray, dip a cotton swab in rubbing alcohol and gently wipe away the mistake before it cures. -
Final Air Dry:
Allow the glass to air dry for at least 1 hour (or per the paint manufacturer’s instructions) before baking. -
Bake to Set:
Place the glass in a *cold* oven. Turn it on to 350°F (175°C) and bake for 30 minutes once it reaches temperature. Turn the oven off and let the glass cool completely inside the oven to prevent cracking.
Now you have a stunning, dishwasher-safe piece of art ready for your next dinner party


Ombre Dot Fade
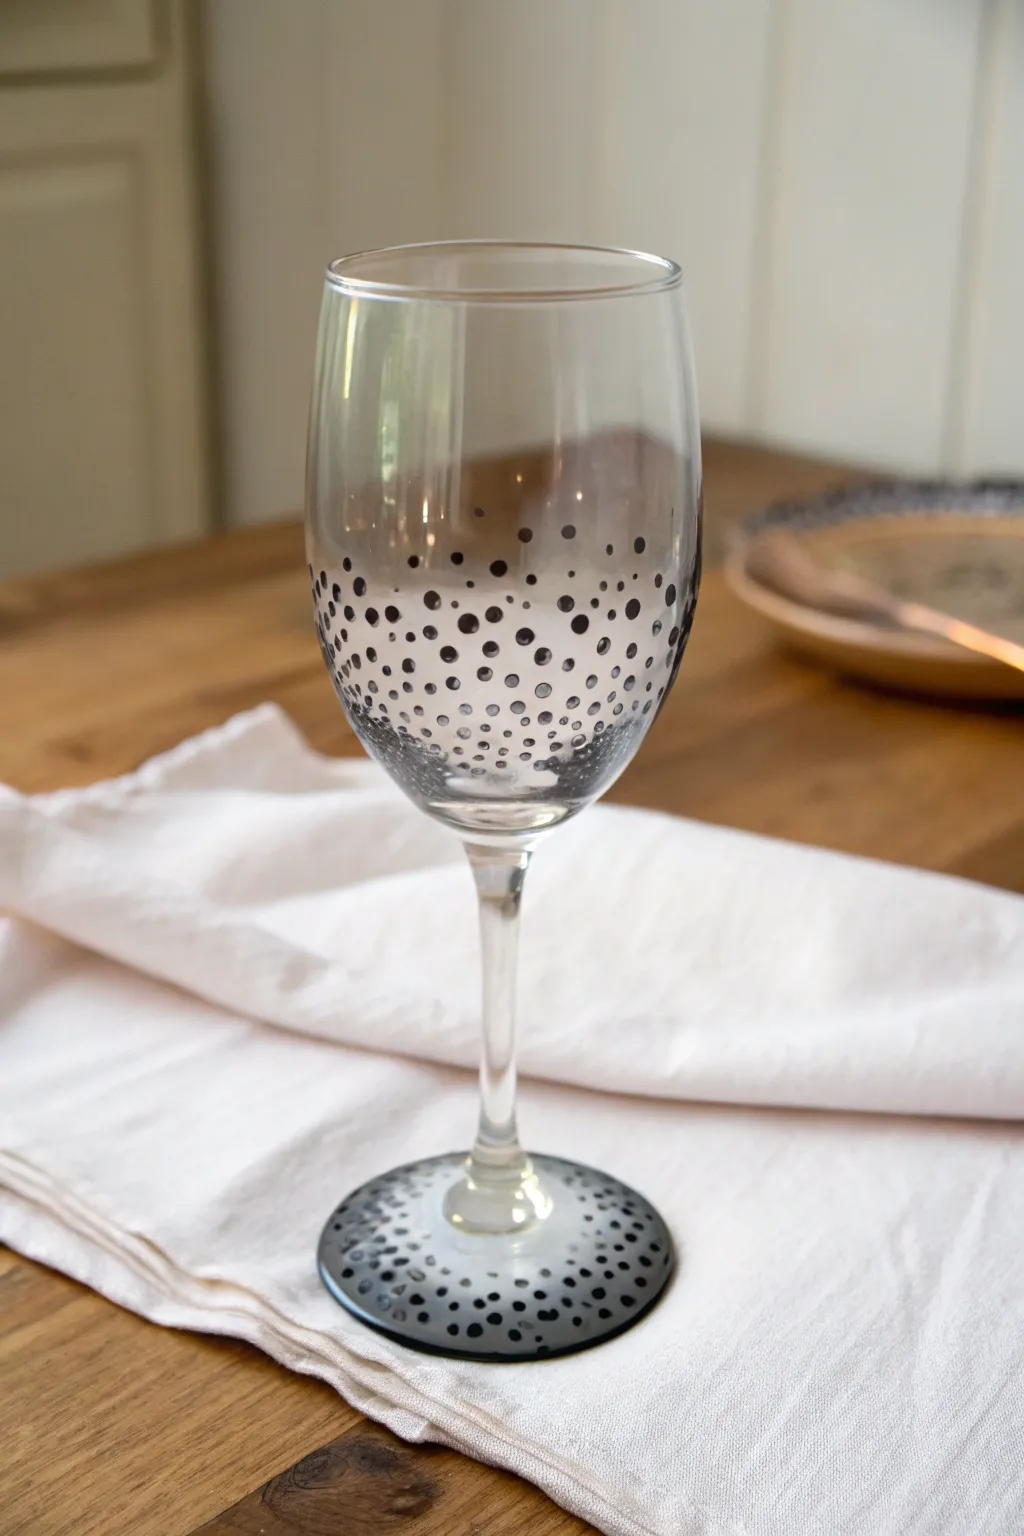
Transform plain stemware into a piece of modern art with this elegant ombre dot technique. By varying the size and spacing of simple black dots, you can create a sophisticated gradient effect that looks professionally printed.
Detailed Instructions
Materials
- Clear wine glass
- Rubbing alcohol
- Lint-free cloth or paper towel
- Black glass paint (gloss or matte)
- Small foam pouncer or dauber (approx. 1/4 inch)
- Q-tips (cotton swabs)
- Paper plate or palette
- Oven (for curing, if paint requires)
Step 1: Preparation
-
Clean the surface:
Before you begin painting, it is crucial to remove any oils or fingerprints from the glass. Wipe the entire exterior surface down thoroughly with rubbing alcohol and a lint-free cloth. -
Dry completely:
Let the alcohol air dry for a few moments to ensure a pristine canvas for your paint to adhere to. -
Prepare your palette:
Squeeze a coin-sized amount of black glass paint onto your paper plate or palette.
Pro Tip: Perfect Circles
For remarkably uniform dots, use the flat end of a drill bit or the back of a paintbrush handle instead of a Q-tip. Dip and stamp straight down.
Step 2: Painting the Glass Bowl
-
Start at the bottom:
Dip your foam pouncer into the black paint. Press it gently around the very bottom curve of the glass bowl, creating a dense row of larger circles. -
Create the dense zone:
Add a second and third row of dots immediately above the first, keeping them tightly packed but not touching. This creates the dark ‘anchor’ for your ombre effect. -
Transition upward:
Switch to using a Q-tip. Remove most of the fuzzy cotton from the tip if you want sharper circles, or keep it fluffy for softer edges. Dip it in paint. -
Start the fade:
Begin placing dots above your initial pouncer work. Space these dots slightly further apart than the bottom rows to start the visual lightening effect. -
Decrease density:
As you move higher up the bowl, increase the distance between each dot significantly. -
Use lighter pressure:
For the highest dots, dip your Q-tip and dab it once on a paper towel before hitting the glass; this leaves a smaller, fainter dot that enhances the fading look. -
Feather the edge:
Stop the pattern about one-third to one-half way up the glass, ensuring the topmost dots are scattered randomly and sparsely.
Level Up: Metallic Glamour
Mix metallic gold or silver dots into the fade. Interspersing a few shiny dots among the black adds a stunning, festive sparkle to the ombre transitions.
Step 3: Painting the Base
-
Outline the rim:
Move to the foot of the glass. Use your foam pouncer or largest tool to stamp a ring of dots right along the outer edge of the base. -
Fill inward:
Work your way toward the stem using the Q-tip again. Just like the bowl, keep the outer edge dense and space the dots out as you get closer to the center stem. -
Check symmetry:
Look at the glass from a distance to ensure the density on the base balances well with the bowl. Add a few extra filler dots if the gradient looks too abrupt.
Step 4: Finishing Touches
-
Clean up mistakes:
If you have any smudges or dots that lost their round shape, use a damp Q-tip or a toothpick to gently scrape or wipe them away while the paint is still wet. -
Let it cure:
Allow the paint to air dry according to the manufacturer’s instructions, typically for at least one hour or up to 24 hours. -
Bake to set:
For a dishwasher-safe finish (if your specific paint allows), place the glass in a cool oven. Turn the heat to 350°F (175°C) and bake for 30 minutes. Turn the oven off and let the glass cool completely inside before removing.
Enjoy your stylish new glassware at your next dinner party or give them as a chic handmade gift
Bold Stripes and Color Blocking
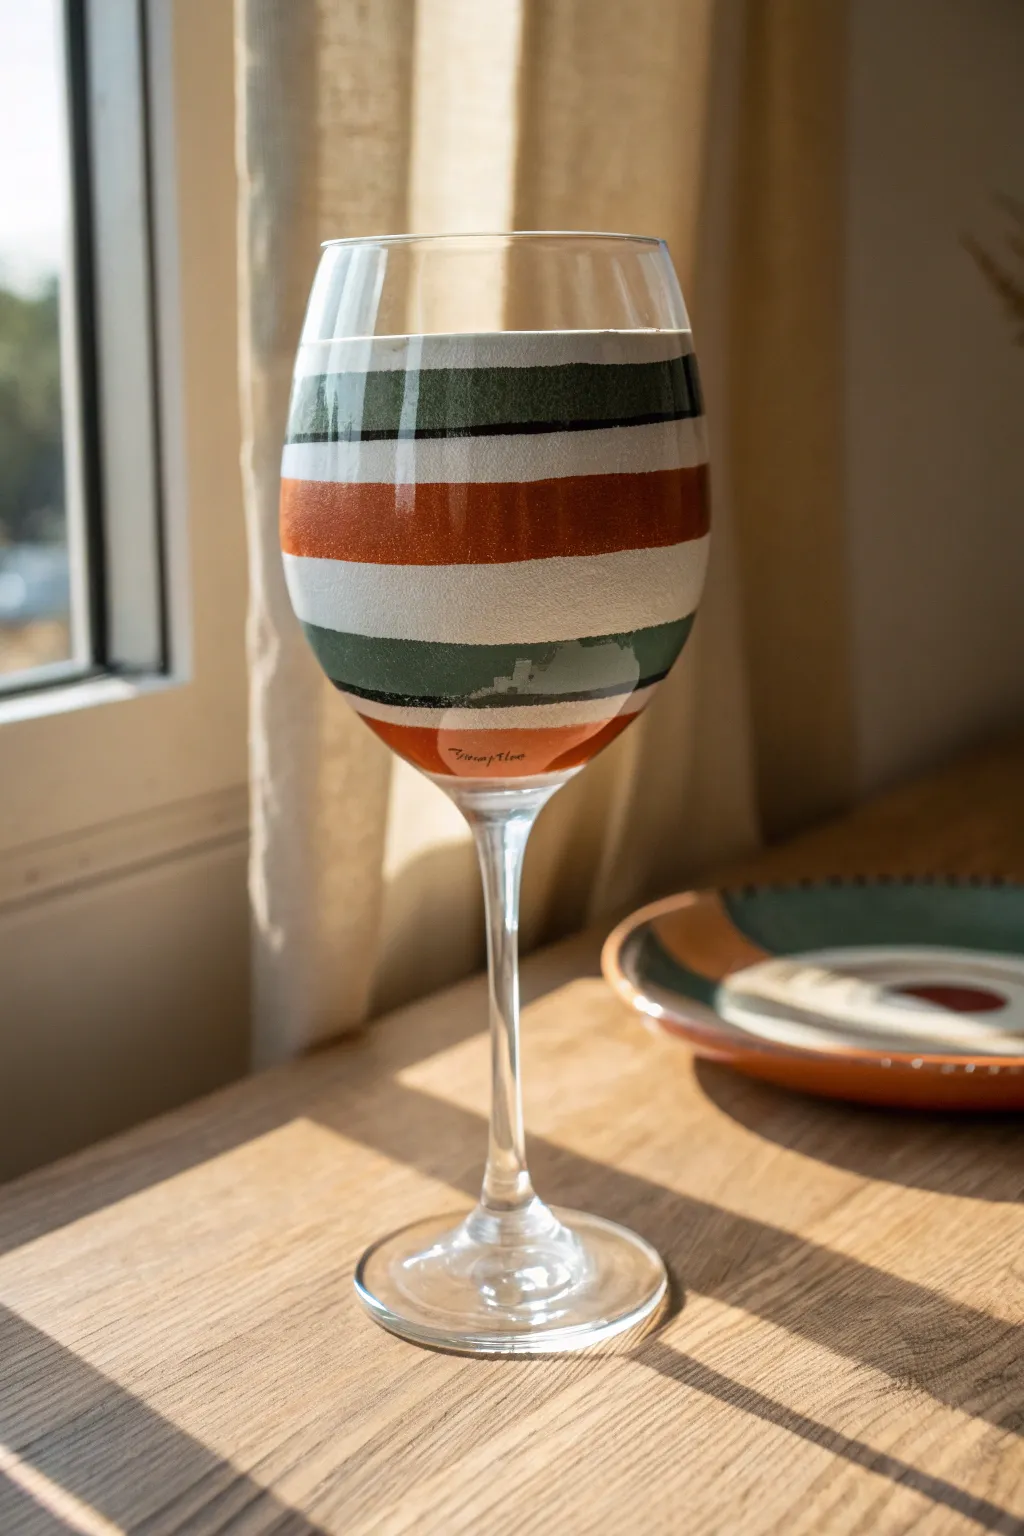
Transform a plain wine glass into a statement piece with bold, horizontal stripes in a sophisticated earth-tone palette. This project uses color blocking to create a textured, hand-painted look that feels both retro and modern.
Step-by-Step
Materials
- Standard clear wine glass (red or white style)
- Rubbing alcohol
- Cotton pads
- Multi-surface acrylic enamel paint (White/Cream, Forest Green, Burnt Orange/Terracotta)
- Flat shader synthetic brushes (medium width for stripes)
- Painter’s tape or lettering artist tape (optional for cleaner lines, though freehand has charm)
- Palette or small plate
- Paper towels
- Cup of water
- Oven (for curing, if paint requires)
Step 1: Preparation
-
Clean the surface:
Before you start, dampen a cotton pad with rubbing alcohol and thoroughly wipe down the exterior of the wine glass bowl. This removes any oils or fingerprints that might prevent the paint from adhering properly. -
Dry completely:
Allow the alcohol to evaporate completely. Avoid touching the glass bowl with your bare hands after this step; try holding it by the stem or base. -
Plan your spacing:
Visualize where your stripes will go. The design features alternating bands of varying widths. You can lightly mark guide points with a washable marker if you’re worried about symmetry, but I find eyeballing it adds to the organic feel.
Uneven Lines?
If freehand stripes look too shaky, apply strips of electrical tape as stencils. It curves better than masking tape on the rounded glass surface.
Step 2: Painting the Base Layer
-
Load your brush:
Start with your white or cream paint. Load a flat shader brush evenly but not too heavily to avoid globs. -
Paint the first white stripe:
Create a broad horizontal band near the top third of the glass. Rotate the glass slowly by twirling the stem with your non-painting hand while keeping your brush hand steady. -
Add a lower white band:
Paint a second, similarly sized white band just below the midpoint of the glass bowl. -
Let the white dry:
Allow these white stripes to dry to the touch. Acrylic enamels dry relatively fast, but give it 15-20 minutes so you don’t smudge your work.
Step 3: Adding Color
-
Apply the burnt orange stripe:
Using a clean brush, paint a wide band of burnt orange or terracotta paint in the space between your two white stripes. This is the focal point, so make this band slightly wider than the others if possible. -
Smooth the edges:
Carefully run your brush along the edges where the orange meets the white. It’s okay if they slightly overlap; this creates a seamless look. -
Paint the bottom green stripe:
Switch to your forest green paint. Apply a band below the bottom white stripe, near the base of the bowl where it begins to curve inward. -
Add the top green stripe:
Paint a thinner green stripe just above the top white band, closer to the rim. Leave a comfortable rim allowance (about an inch) unpainted at the very top for drinking safety. -
Paint the dark accent line:
Using a very thin brush or the edge of your flat brush, paint a thin, dark line (black or very dark green) immediately below the top green band for contrast.
Level Up: Texture
Mix a tiny amount of baking soda into your paint before applying. This creates a matte, ceramic-like texture that mimics handcrafted pottery.
Step 4: Refining and Curing
-
Check for opacity:
Hold the glass up to the light. If the strokes look too streaky or transparent, let the first coat dry completely and add a second coat to deepen the colors. -
Clean up stray marks:
If any paint went where it shouldn’t, use a toothpick or a damp cotton bud to gently scrape or wipe it away while it’s still tacky. -
Dry thoroughly:
Let the glass sit undisturbed for at least 1 hour, or according to the paint manufacturer’s instructions for air drying. -
Cure in the oven:
For durability, place the glass in a cold oven. Set the temp to 350°F (175°C). Once it reaches temperature, bake for 30 minutes. Turn the oven off and let the glass cool completely inside before removing.
Enjoy your beautiful new glassware at your next dinner party or gift it to a friend who loves unique home decor
Metallic Rim Accent
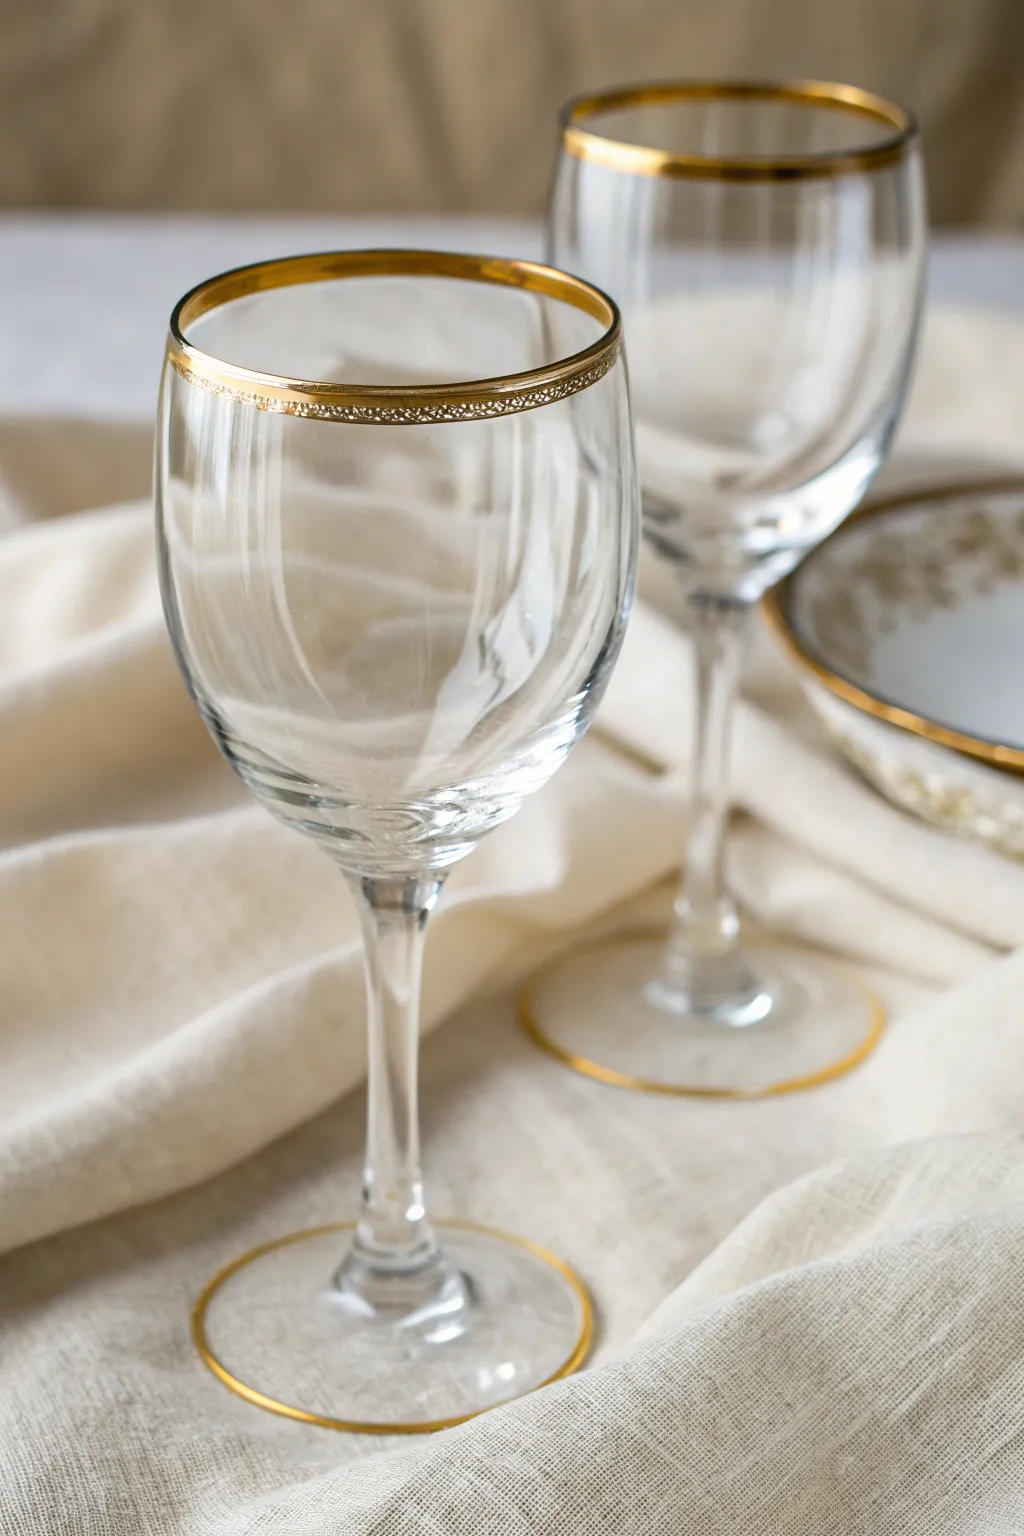
Elevate inexpensive glassware into a luxurious set fit for a wedding toast or a holiday dinner with this golden upgrade. This project uses metallic enamel paint to create a sophisticated, textured rim that mimics the look of vintage crystal gold-work.
Detailed Instructions
Materials
- Clear wine glasses (thoroughly cleaned)
- Rubbing alcohol
- Cotton pads or lint-free cloth
- Gold metallic enamel paint for glass (opaque)
- Fine-point detail brush (size 0 or 00)
- Flat shader brush (small, 1/4 inch)
- Painter’s tape or masking tape
- Small palette or ceramic dish
- Cotton swabs (for cleanup)
- Oven (for curing, if required by paint manufacturing)
Step 1: Preparation & Mapping
-
Clean surface:
Begin by washing your wine glasses with warm soapy water to remove any stickers or residue. Dry them completely with a lint-free towel. -
Degrease the rim:
To ensure perfect paint adhesion, wipe the upper inch of the glass rim and the base perimeter with rubbing alcohol on a cotton pad. Avoid touching these areas with your fingers afterwards. -
Tape the boundary:
Decide on the thickness of your gold band. Place a strip of painter’s tape horizontally around the glass bowl, about 1/4 to 1/2 inch below the rim. Press down firmly to seal the edge so paint doesn’t seep under. -
Protect the lip:
If you plan to drink directly from these glasses, leave the very top millimeter clear of paint for safety, or check if your specific non-toxic glass paint is approved for lip contact. I like to tape off just a hairline below the rim for a clean edge.
Uneven Coverage?
If the gold looks streakier than expected, use a cosmetic sponge to dab on the final layer. This creates instant texture and hides brushstrokes perfectly.
Step 2: Applying the Gold Base
-
Load the brush:
Squeeze a small amount of gold metallic enamel onto your palette. Load your flat shader brush, ensuring the bristles are coated but not dripping. -
Paint the first coat:
Apply the gold paint in the area between your tape lines or focused near the rim. Use smooth, horizontal strokes to minimize brush marks. Don’t worry if it looks slightly sheer; thin layers are better for durability. -
Let it tack:
Allow this initial layer to dry for about 15 to 20 minutes until it is tacky but no longer wet. -
Apply opacity:
Go over the band with a second coat of gold to achieve full, rich opacity. Ensure the gold looks solid against the light. -
Rim the base:
While the top is drying, use your detail brush to carefully paint a thin outline around the very edge of the glass foot. This ties the design together beautifully.
Pro Tip: Long-Lasting Shine
Even after baking, hand wash these glasses gently with a soft sponge. Harsh dishwasher detergents can dull the metallic finish over time.
Step 3: Adding Texture & Detail
-
Create the lace texture:
To mimic the textured look seen in the photo, take your fine-point detail brush. Dip it into a slightly thicker blob of paint and gently stipple or ‘dot’ over the still-damp second coat on the rim. -
Refine the pattern:
You can create a cross-hatch or scroll pattern by dragging the tip of the brush through the wet paint, revealing tiny bits of the glass underneath or creating raised ridges of gold. -
Clean edges immediately:
Before the paint fully sets, remove the painter’s tape carefully. Pull the tape away from the wet paint at a 45-degree angle to keep the line crisp. -
Tidy up:
If any paint bled under the tape, dip a cotton swab in rubbing alcohol and gently wipe away the excess for a sharp, professional line.
Step 4: Curing
-
Air dry:
Set the glasses in a dust-free area and let them air dry for at least 24 hours. The paint needs to harden significantly before baking. -
Prepare for baking:
Place the glasses into a cold oven. Do not preheat the oven, as the sudden temperature change can shatter the glass. -
Bake to set:
Turn the oven to the temperature specified on your paint bottle (usually around 350°F/176°C) and bake for 30 minutes. -
Cool down:
Turn the oven off and leave the door closed. Let the glasses cool down completely inside the oven along with it. This gradual cooling prevents cracking.
Once cooled, your stunning gold-rimmed glasses are ready to add a touch of sparkle to your next gathering
Frosted Glass Look

Transform ordinary glassware into an elegant winter wonderland statement piece with a soft, opaque frosted finish and a delicate touch of sparkle. This project creates a sophisticated, almost pearlescent look that mimics the beauty of frozen glass.
How-To Guide
Materials
- Wine glass (clean and dry)
- Rubbing alcohol
- Cotton pads or lint-free cloth
- Painter’s tape or masking tape (1/4 inch width is best)
- Frosted glass spray paint (white or sheer)
- White pearlescent acrylic paint (optional for extra shimmer)
- Sea sponge or cosmetic sponge (if using acrylics)
- Mod Podge (gloss finish)
- Fine silver or champagne gold glitter
- Small flat paintbrush
- Clear acrylic sealer spray (glossy)
- Paper plate or tray for catching glitter
- Newspaper or drop cloth
Step 1: Preparation & Masking
-
Clean the surface:
Begin by thoroughly wiping down the entire exterior of your wine glass with rubbing alcohol and a cotton pad. This removes oils and fingerprints that could prevent the paint from adhering properly. -
Determine the rim line:
Decide how much clear space you want at the very top of the glass for drinking. While this design has glitter at the rim, it’s safer to keep paints and glues away from where your lips touch. -
Apply the tape guide:
Place a strip of painter’s tape around the very top rim of the glass. Ensure it is perfectly straight and pressed down firmly to prevent paint from bleeding underneath. -
Protect the stem (optional):
If you want the stem to remain crystal clear like in the photo, wrap the entire stem and base in painter’s tape or paper to shield it from the frosting spray.
Clean Lines Promise
Pull your painter’s tape off while the final layer of Mod Podge or paint is still slightly wet. If it dries completely, it might peel up chunks of your finish.
Step 2: Frosting the Glass
-
Set up your workspace:
Move to a well-ventilated area, preferably outdoors or in a garage, and lay down your drop cloth. -
First light coat:
Hold the frosted glass spray paint can about 8-10 inches away from the glass. Apply a very light, misty coat. It won’t look fully white yet, and that’s okay. I like to keep the can moving constantly to avoid drips. -
Let it dry:
Allow this first layer to dry for about 10-15 minutes. It needs to be tacky but not wet before the next coat. -
Build opacity:
Apply a second and possibly third coat of the frosting spray, allowing drying time in between. You want a consistent, milky white opacity. -
Check for evenness:
Hold it up to the light to check for thin spots. Add quick bursts of spray to fill in any uneven areas. -
Remove main masking:
Once the final coat is dry to the touch (usually 20-30 minutes), carefully peel away the tape protecting the stem, but leave the rim tape for a moment to guide your next step.
Step 3: Adding the Glitter Rim
-
Ideally, re-tape for precision:
To get that crisp glitter band, visual is key. If you removed the top tape, apply a new strip about 1/4 inch below the rim. This exposes just the band of glass/frosting you want to glitter. -
Apply adhesive:
Using a small flat brush, paint a generous, even layer of Mod Podge onto the exposed band at the rim. -
Apply the glitter:
Hold the glass over a paper plate and sprinkle your fine glitter onto the wet glue. Rotate the glass slowly to ensure complete coverage. -
Tap off excess:
Gently tap the stem of the glass to knock loose any extra glitter not stuck to the glue. -
Let it set:
Let the glitter and glue dry for at least 30 minutes. The glue will turn clear, leaving just the sparkle. -
Clean up the line:
Immediately after glittering, carefully peel off the painter’s tape while the glue is still slightly pliable to ensure a sharp, clean line.
Color Shift
Mix a tiny drop of metallic silver paint into your Mod Podge before applying glitter. This creates a solid base color so no plain glass shows through the sparkles.
Step 4: Sealing & Finishing
-
Inspect the glitter:
Check for any loose glitter flakes that might fall off. Brush them away gently with a dry, soft brush. -
Seal the glitter:
Apply a top coat of Mod Podge directly over the glitter band. This encapsulates the glitter so it won’t shed while you’re holding the glass. -
Final cure:
Allow the entire glass to cure for at least 24 hours before handling extensively. This helps the frosting paint harden completely.
Enjoy using your beautifully frosted creation for your next festive gathering
Chalkboard Label Wine Glasses
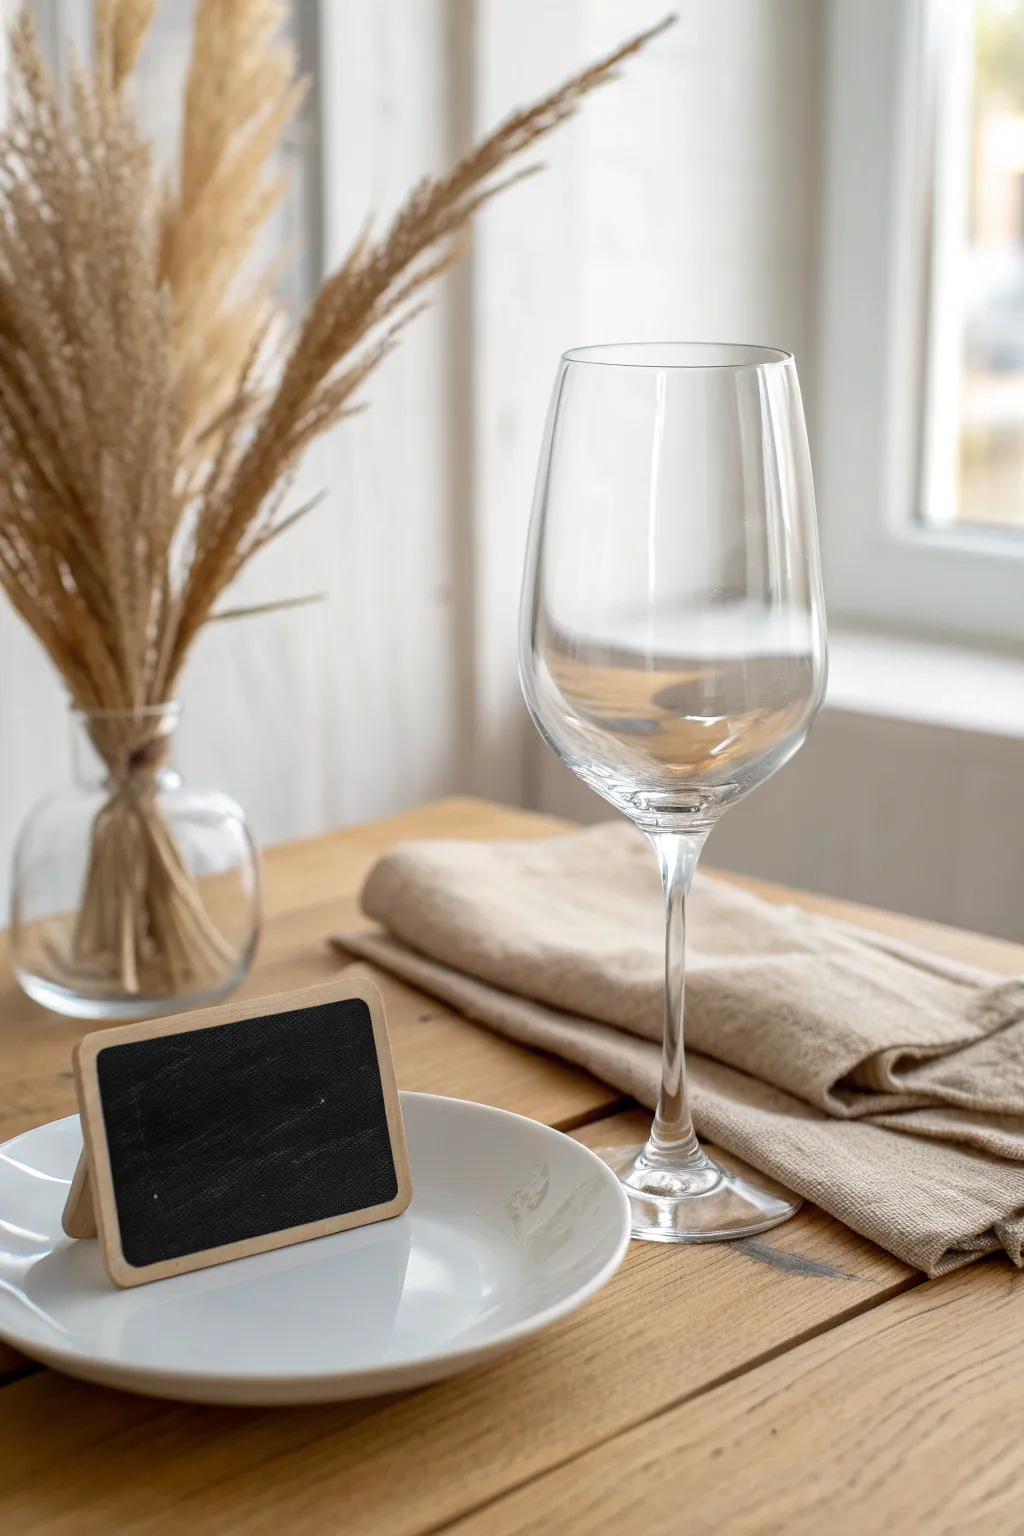
Add a rustic, customizable touch to your table setting with these charming mini chalkboard signs that pair perfectly with wine glasses for elegant seating arrangements. This simple woodworking project creates a reusable name holder that looks professional yet feels wonderfully handmade.
Step-by-Step Tutorial
Materials
- Small rectangular wood block (plaque)
- Small wooden easel stand or small craft wood pieces to build one
- Chalkboard paint (black)
- Small foam brush or soft bristle brush
- Fine-grit sandpaper (220 grit)
- Wood glue
- Painter’s tape
- Natural wood stain (optional)
- Clear matte sealer (optional)
- Clean cloth
Step 1: Preparing the Wood Base
-
Selection and Sanding:
Start with a small, pre-cut rectangular wooden plaque, about 3 inches by 2 inches. If you are cutting your own from scrap wood, ensure the edges are straight. Sand the entire surface, paying special attention to the edges and corners to round them off slightly for a softer, more finished look. -
Dust Removal:
Wipe the wood down thoroughly with a clean, dry cloth or a tack cloth to remove every bit of sawdust. Any dust left behind will create bumps in your chalkboard finish. -
Masking the Border:
To achieve the framed look seen in the image, apply painter’s tape around the outer edge of the front face. Leave about a 1/4-inch border of natural wood exposed. This unpainted border adds a nice contrast and keeps the piece looking like a traditional school slate.
Uneven Paint Edges?
If paint bled under the tape, use an X-Acto knife to gently scrape the excess off the wood grain, or wrap sandpaper around a toothpick for precise removal.
Step 2: Creating the Chalk Surface
-
First Coat Application:
Using a foam brush, apply a thin, even layer of black chalkboard paint to the center area inside your taped border. Brush in horizontal strokes to minimize texture. -
Drying Time:
Allow the first coat to dry completely according to the manufacturer’s instructions. This usually takes about an hour, but humidity can affect drying times. -
Light Sanding:
Once dry, very lightly sand the painted surface. This step is crucial for writing later—it gives the chalk something to grip without being too rough. -
Second Coat Application:
Wipe away the sanding dust and apply a second coat of chalkboard paint. This time, brush vertically (perpendicular to your first coat) to ensure full coverage and a durable writing surface. -
Tape Removal:
While the second coat is still slightly tacky (not fully wet, but not cured), carefully peel away the painter’s tape at a 45-degree angle. This prevents the paint from chipping along the edge.
Step 3: Assembly and Curing
-
Sealing the Wood (Optional):
If you want to protect the natural wood border, carefully apply a small amount of wood stain or clear matte sealer to the unpainted edges using a precise brush, being careful not to touch the black chalkboard area. -
Preparing the Stand:
If you are building your own easel back, take two small, thin strips of wood. Glue one strip securely to the back of the plaque, angled outward to act as a kickstand. -
Alternative Stand Method:
For a simpler approach, glue a small wooden triangle block to the base of the back, creating a solid footer that allows the sign to lean back slightly. -
Full Cure Time:
Let the chalkboard paint cure for at least 24 hours. Even if it feels dry to the touch, the chemical composition needs time to harden so chalk won’t scratch it permanently. -
Conditioning the Board:
Before writing your first name, ‘season’ the chalkboard by rubbing the side of a piece of chalk over the entire black surface, then erasing it. This prevents ‘ghosting’ where your first message stays visible forever. -
Final Cleanup:
Wipe the board clean with a dry cloth. It’s now ready to be placed on a plate or near a wine glass for your next dinner party.
Pro Tip: Liquid Chalk
For crisper lines than standard chalk, use a chalk marker. Just ensure your paint surface is fully cured (min. 3 days) so the marker ink wipes off cleanly later.
You now have a set of reusable, sophisticated place cards that will elevate any table setting for years to come
Stenciled Motifs Made Simple
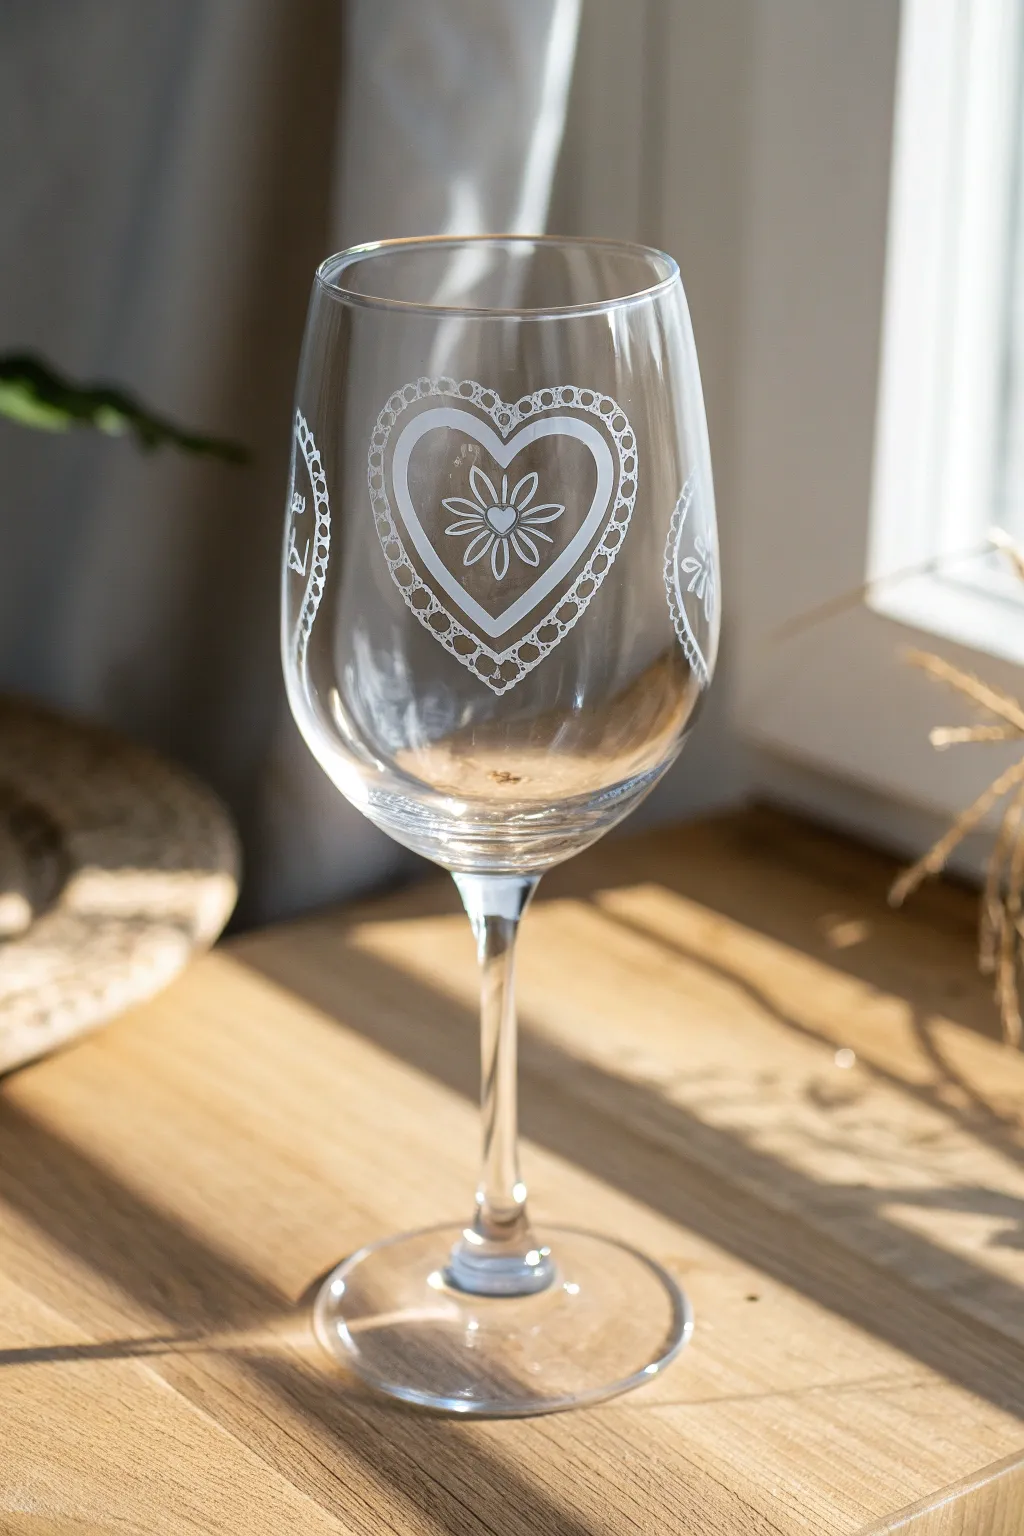
Transform plain stemware into elegant, romantic glassware featuring a delicate lace-heart motif. This project uses simple stenciling techniques to create a frosted, etched look that is perfect for Valentine’s Day, anniversaries, or wedding toasts.
How-To Guide
Materials
- Clear white wine glass
- Rubbing alcohol
- Cotton pads or lint-free cloth
- Adhesive stencil (heart shape with lace border and floral center)
- White glass paint (specialized for baking) or glass etching cream
- Small foam pouncer or stencil brush
- Painter’s tape or masking tape
- Paper plate or palette
- Cotton swabs (for cleanup)
- Toothpick (optional)
Step 1: Preparation
-
Clean the surface:
Begin by thoroughly cleaning the wine glass with warm soapy water to remove any dust or retail stickers. -
Degrease with alcohol:
Soak a cotton pad with rubbing alcohol and wipe down the exterior bowl of the glass where you intend to place the design. This removes oils from your fingers that could prevent the paint from adhering properly. -
Dry completely:
Allow the alcohol to air dry completely. Avoid touching the cleaned area with your bare hands, as natural oils can interfere with the stencil adhesive. -
Inspect the stencil:
Take your adhesive stencil and gently remove it from its backing sheet. Ensure all the intricate inner pieces, like the flower petals and lace dots, remain attached to the stencil carrier.
Bleed-Through Blues?
If paint seeps under the stencil, wait for it to dry completely. Then, gently scrape the excess away with a craft knife or toothpick for a crisp line.
Step 2: Applying the Stencil
-
Center the design:
Position the heart stencil on the widest part of the glass bowl. I find it helpful to look through the glass from the top to ensure it’s centered relative to the stem. -
Adhere the center first:
Press down the center of the stencil (the floral motif) first, then gently smooth the stencil outward toward the edges. -
Smooth the edges:
Work your way around the curved surface, pressing down firmly on all edges, especially near the lace border details. The curve of the glass can cause wrinkles; smooth them out carefully so paint doesn’t bleed under. -
Secure with tape:
If the stencil borders are narrow, apply painters tape around the outside edges of the stencil to protect the rest of the glass from accidental smudges.
Etched Effect
For a permanent, frosted look instead of paint, use glass etching cream over the stencil. Rinse after 5 minutes for a dishwasher-safe matte finish.
Step 3: Painting the Motif
-
Load the pouncer:
Squeeze a small amount of white glass paint onto your paper plate. Dab your foam pouncer into the paint, then tap it repeatedly on a clean part of the plate to offload almost all of the excess paint. -
Apply the first layer:
Using a straight up-and-down motion (do not brush side-to-side), lightly dab the paint over the stencil openings. The first coat should look very sheer and speckled. -
Let it tack up:
Allow this first thin layer to dry for about 5 to 10 minutes until it is tacky but not wet. -
Apply the second layer:
Reload your pouncer—remembering to offload excess—and apply a second coat using the same dabbing motion to build opacity. -
Repeat for opacity:
If a solid white look is desired, repeat with a third light coat. Multiple thin layers prevent the paint from bleeding under the stencil better than one thick coat.
Step 4: Finishing Touches
-
Remove the stencil:
While the final coat is still slightly wet (not fully dry, or it might peel), carefully peel back the stencil. Pull it slowly at a sharp angle. -
Remove inner details:
Use a toothpick or tweezers to carefully lift off any small interior stencil pieces, such as the centers of the flower or the lace dots. -
Clean up edges:
If there is any bleed-through, dampen a cotton swab with a tiny bit of rubbing alcohol or water and gently wipe away the mistake while the paint is fresh. -
Repeat for other sides:
If you want the design on multiple sides of the glass (like the back or sides), let the first design dry fully to the touch before rotating the glass and repeating the process. -
Cure the paint:
Follow the manufacturer’s instructions for your specific glass paint. This usually involves letting the glass air dry for 24 hours, then baking it in a cool oven that heats up to 350°F for 30 minutes to make it dishwasher safe.
Enjoy your beautifully customized stemware at your next dinner party or wrap them up as a thoughtful handmade gift
Negative-Space Tape Designs

Transform a simple glass stem into an elegant, earthy statement piece using nothing but tape and paint. This negative-space technique reveals crisp, intersecting lines against a warm terracotta finish that mimics the look of ceramic stoneware.
Step-by-Step Guide
Materials
- Clear wine glass
- Rubbing alcohol
- Cotton pads or lint-free cloth
- Thin painter’s tape or graphic art tape (approx. 1/4 inch width)
- Terracotta or warm burnt sienna acrylic craft paint (or glass-specific enamel)
- Gloss glaze medium (optional, for a ceramic finish)
- Soft flat paintbrush
- Scissors
Step 1: Preparation
-
Clean surface:
Begin by thoroughly cleaning the wine glass with soap and warm water to remove any factory grease or dust. -
Degrease glass:
Wipe the entire exterior surface with rubbing alcohol on a cotton pad. This step is crucial for ensuring the tape sticks firmly and paint adheres without peeling later. -
Dry completely:
Allow the glass to air dry completely or dry it with a lint-free cloth. Do not touch the surface with bare fingers after this point, as oils can affect adhesion.
Bleeding Lines?
If paint seeps under the tape, lightly score the edge with a craft knife before peeling. Clean up small bleeds with a damp toothpick while the paint is fresh.
Step 2: Creating the Design
-
Cut tape strips:
Pre-cut several long strips of your thin painter’s tape or graphic art tape. You’ll want pieces long enough to wrap partially or fully around the bowl of the glass. -
Apply first band:
Place your first strip across the bowl of the wine glass at a diagonal angle. Press it down firmly, smoothing out any air bubbles, especially at the edges. -
Create intersections:
Apply the next strip so it crosses over the first one. Continue adding strips in random, crisscrossing directions to create an abstract geometric web. -
Wrap the pattern:
Ensure some strips wrap around the curve of the glass to create continuity. I like to leave some larger open spaces and some tighter intersections for visual variety. -
Seal the edges:
Go over every single piece of tape with your fingernail or a burnishing tool, pressing the edges down hard to prevent paint from bleeding underneath.
Step 3: Painting
-
Base coat on bowl:
Dip your flat brush into the terracotta paint. Apply a thin, even coat over the entire taped area of the bowl, brushing right over the tape. -
Paint the stem:
Extend the paint down the stem and cover the entire base of the glass as well. This creates a cohesive, dipped look rather than just a painted bowl. -
Let dry:
Allow this first coat to dry until it is dry to the touch, usually about 15 to 20 minutes depending on your paint thickness. -
Apply second coat:
Apply a second layer of paint to ensure opacity. Since we’re aiming for a faux-ceramic look, solid coverage is key so no clear glass shows through the colored sections. -
Optional third coat:
If your paint is still slightly translucent, add a third thin coat. It’s better to do multiple thin layers than one thick, gloopy one.
Make it Matte
Mix baking soda into your acrylic paint before applying. This creates a textured, ultra-matte finish that looks and feels exactly like real terracotta pottery.
Step 4: Reveal and Finish
-
Peel tape wet:
This is the timing trick: gently peel off the tape strips while the final coat of paint is still slightly tacky but not soaking wet. If the paint is fully hard, it might chip. -
Remove carefully:
Pull the tape slowly at a sharp 45-degree angle away from the painted edge. Use tweezers to grab ends that are buried under other strips. -
Clean edges:
If any paint bled under the tape, use a cotton swab dipped in rubbing alcohol or a toothpick to gently scrape it away for a crisp line. -
Cure or bake:
Follow the instructions on your specific paint bottle. Some acrylic enamels require 21 days of air curing, while others can be baked in a home oven to become dishwasher safe.
Enjoy your sophisticated, custom glassware at your next dinner party
Abstract Brushstroke Art Glasses
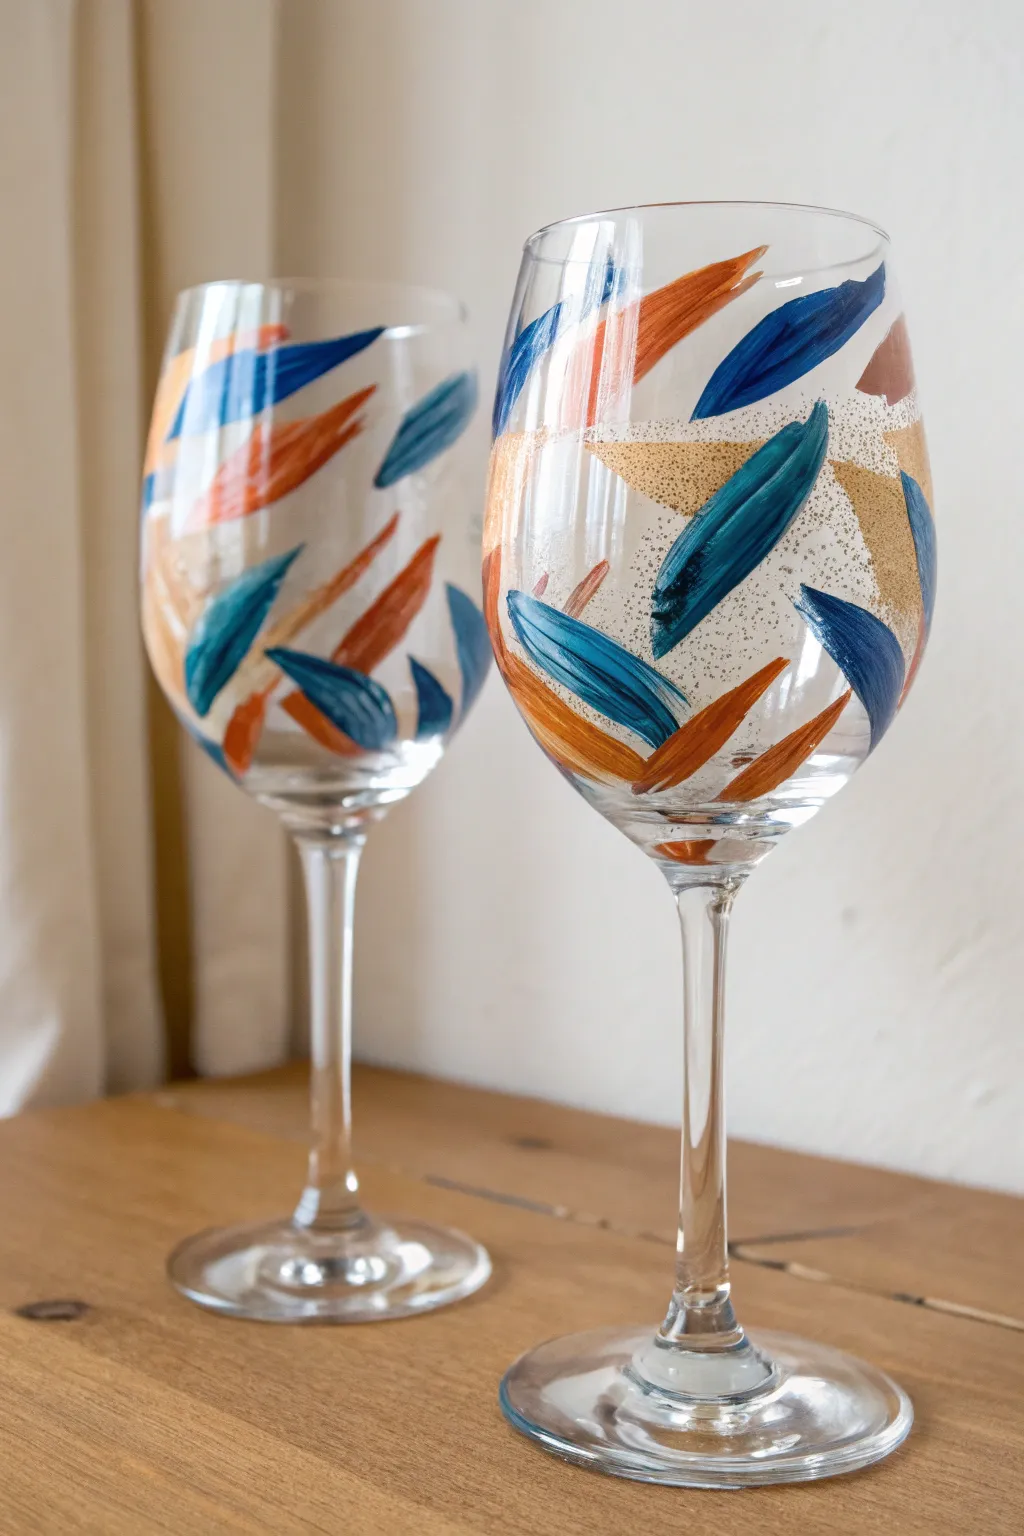
Bring an artistic touch to your next dinner party with these energetic, abstract painted wine glasses. The design features sweeping strokes of navy blue, burnt orange, and metallic gold that create a dynamic, modern look perfect for casual entertaining.
Step-by-Step Tutorial
Materials
- Clear stemmed wine glasses
- Rubbing alcohol
- Cotton pads or paper towels
- Enamel craft paint (opaque navy blue, opaque burnt orange/terracotta)
- Metallic enamel paint (gold)
- Glitter enamel paint or fine loose glitter mixed with clear medium
- Flat shader brushes (approx. 1/4 inch to 1/2 inch width)
- Paper plate or palette
- Painting tape (optional)
- Oven for baking (optional, depending on paint brand)
Step 1: Preparation and Planning
-
Clean the surface:
Before laying down any color, wipe the exterior of the wine glasses thoroughly with rubbing alcohol and a cotton pad. This removes oils and fingerprints that could prevent the paint from adhering properly. -
Plan your placement:
Hold the glass and visualize where your strokes will go. You want an organic, scattered pattern that covers the bowl but leaves some clear glass visible for a light, airy feel. -
Mask the rim:
Since you shouldn’t paint where your lips will touch, apply a strip of painter’s tape around the top 3/4 inch of the rim to keep that area perfectly clear.
Step 2: Applying the Base Strokes
-
Load the brush with blue:
Squeeze a small amount of navy blue enamel paint onto your palette. Dip your flat brush in, ensuring the bristles are fully coated but not dripping. -
Create the first blue strokes:
Press the brush firmly against the glass and lift off quickly while sweeping diagonally to create a tapered ‘leaf’ or ‘feather’ shape. I find a quick, confident motion works best here. -
Randomize the pattern:
Paint 5-7 blue strokes scattered around the bowl of the glass, varying their angles slightly. Ensure some point up and some point sideways. -
Clean your brush:
Wash your brush thoroughly and dry it completely, or switch to a fresh brush for the next color. Wet brushes can make enamel paint runny. -
Add orange accents:
Repeat the stroke technique using the burnt orange paint. Place these strokes in the empty spaces between the blue ones, occasionally letting them drift near each other but not overlapping yet.
Fixing Drips
If paint runs or drips while working on the curved surface, don’t wipe it! Let it dry slightly, then scrape the excess off gently with a craft knife for a clean edge.
Step 3: Adding Metallics and Texture
-
Dry briefly:
Let the first layer sit for about 15-20 minutes. The paint doesn’t need to be fully cured, but it should be tacky enough that adding new colors won’t muddy the existing ones. -
Introduce the gold:
Using a clean brush, apply the metallic gold paint. Use the same sweeping motion, but feel free to make these strokes slightly shorter or broader to add variety to the composition. -
Layering allows depth:
Don’t be afraid to let a gold stroke slightly overlap the tail end of a blue or orange stroke. This layering creates a sense of depth and movement. -
Check for opacity:
Hold the glass up to the light. If the strokes look too sheer or streaky, carefully go over them with a second coat of the same color, keeping the brush movement in the same direction.
Pro Tip: Texture
For that defined brushstroke texture seen in the photo, don’t over-smooth the paint. Leave the ridges created by the bristles visible; they catch the light beautifully.
Step 4: The Glitter Detail
-
Prepare the glitter mix:
If using loose glitter, mix a pinch into a clear gloss medium or directly into a small dab of the gold paint. If you have glitter enamel paint, use it straight from the bottle. -
Apply glitter zones:
Paint large, soft triangular patches or broad swaths of the glitter mixture behind the main colored strokes. In the reference image, the glitter acts almost like a background shadow. -
Let the glitter settle:
Allow the glitter layer to sit. It may look milky at first if using a medium, but it will clear up as it dries, leaving just the sparkle.
Step 5: Finishing Up
-
Remove the tape:
Carefully peel off the painter’s tape near the rim while the paint is still slightly tacky to prevent peeling up dry chips of paint. -
Clean up edges:
If any paint strayed where you didn’t want it, use a cotton swab dipped in rubbing alcohol to wipe it away like an eraser. -
Air cure the glasses:
Follow the manufacturer’s instructions for drying time. Most enamels need to air dry for at least 1 hour before being handled and 21 days for a full cure if not baked. -
Bake for durability:
To make them dishwasher safe (top rack), place glasses in a cool oven, heat to 350°F, bake for 30 minutes, and let them cool completely inside the oven.
Enjoy using your custom stemware to serve your favorite vintages at your next gathering
Marbled Swirl Wine Glasses
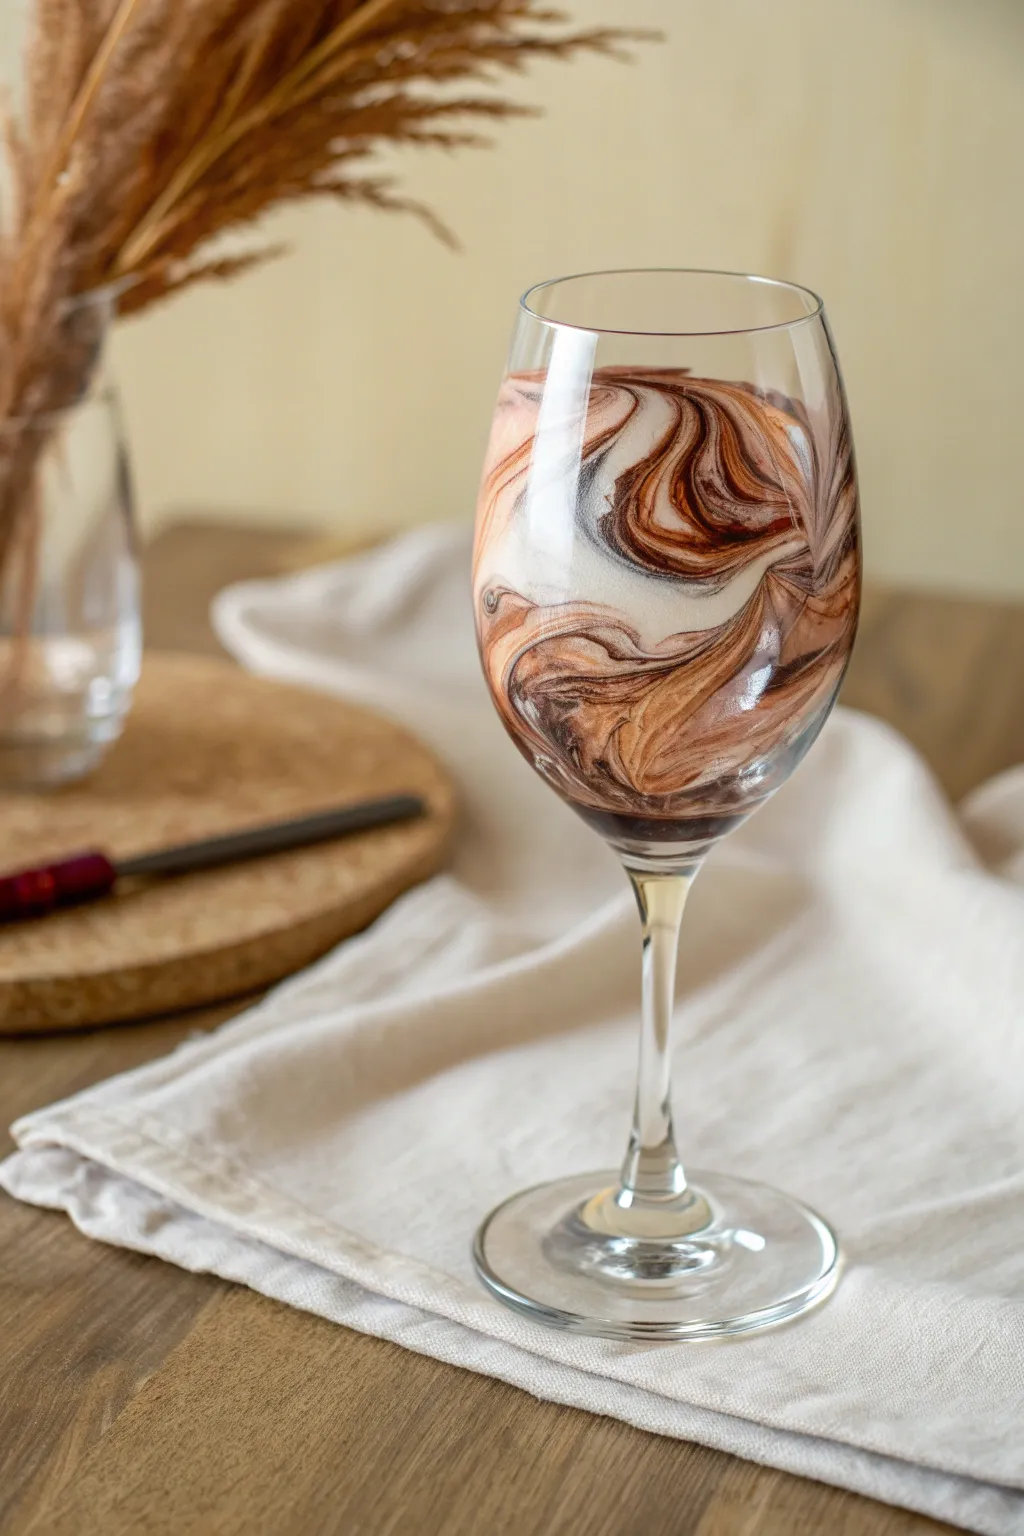
Transform plain stemware into a sophisticated piece of art with this marbled swirl technique that mimics the organic beauty of polished agate or cappuccino foam. The rich blend of chocolate browns, creamy whites, and soft tans creates a unique, fluid pattern that wraps beautifully around the glass.
Step-by-Step
Materials
- Wine glass (clear glass, thoroughly cleaned)
- Rubbing alcohol
- Cotton pads or paper towels
- Large plastic container or bowl (deep enough to dip the glass)
- Nail polish (warm brown, chocolate brown, white, and beige/tan)
- Toothpick or wooden skewer
- Painter’s tape
- Plastic bag or cling wrap (optional)
- Clear acrylic sealant spray (glossy finish)
- Disposable gloves
- Water (room temperature)
Step 1: Preparation
-
Clean the surface:
Before starting, wipe the exterior of the wine glass thoroughly with rubbing alcohol and a cotton pad. This removes oils and fingerprints, ensuring the marbling adheres perfectly to the glass. -
Masking the rim:
Apply a strip of painter’s tape around the top rim of the glass. You want to keep the area where your lips touch free of paint for safety and comfort. -
Protecting the stem:
If you want the stem and base to remain clear as shown in the inspiration photo, wrap the stem tightly with painter’s tape. You can also cover the base with a small plastic bag secured with tape. -
Setting up the dip station:
Fill your large plastic container with room-temperature water. It is crucial that the water is not too cold or too hot, as this affects how quickly the nail polish skins over.
Paint Clumping Up?
If the polish clumps immediately, your water is likely too cold. Use slightly warmer tap water to help the polish spread into a thin, dip-able film.
Step 2: Creating the Marble Effect
-
Prepare your palette:
Unscrew the caps of all your nail polish bottles (white, brown, beige) so they are ready to pour immediately. Speed is key in the next few steps. -
Pour the first color:
Gently drop or pour a liberal amount of the white nail polish onto the surface of the water. It should spread out into a thin film. -
Layer the browns:
Quickly add drops of the chocolate brown and tan polish into the center of the white circle. Alternate the colors to create contrast. -
Swirl the pattern:
Take your toothpick and very gently drag it through the floating polish. Create S-curves or figure-eights to marble the colors together, but don’t over-mix or the colors will become muddy. -
The dip:
Wearing a disposable glove, hold the wine glass by the stem or the protected base. Lower the bowl of the glass slowly into the water at a slight angle. -
Rotating the glass:
As you push the glass down through the paint film, rotate it slightly to wrap the pattern around the curvature. Submerge it until the water line reaches your tape mark. -
Clearing the surface:
Before pulling the glass back out, use your free hand (or blow gently) to clear away the excess floating paint from the water’s surface so it doesn’t double-layer on the glass as you exit. -
Remove and drip:
Lift the glass out of the water and hold it upside down for a moment to let excess water drip off.
Add Some Glamour
For a luxurious twist, add a few drops of metallic gold or copper nail polish into the swirl mix. The metallic flecks will catch the light beautifully.
Step 3: Finishing Touches
-
Initial drying:
Set the glass upside down on a piece of parchment paper or cardboard to dry. Avoid touching the paint while it is still tacky. -
Remove the tape:
Once the paint is dry to the touch but not fully hardened (about 30 minutes), carefully peel off the painter’s tape from the rim and stem to ensure crisp lines. -
Clean up edges:
If any paint seeped under the tape or created a jagged edge, use a Q-tip dipped in nail polish remover to gently neaten the lines. -
Full cure:
Let the glass sit in a well-ventilated area for at least 24 hours to allow the nail polish to fully cure and harden. -
Sealing the design:
To make the glass hand-washable, spray a light coat of clear acrylic sealant over the painted area. I find a glossy finish makes the marble pattern pop best. -
Final dry:
Allow the sealant to dry completely according to the manufacturer’s instructions before using the glass.
Now you have a stunning, custom piece of stemware that is perfect for your next dinner party
Faux Stained-Glass Outlines
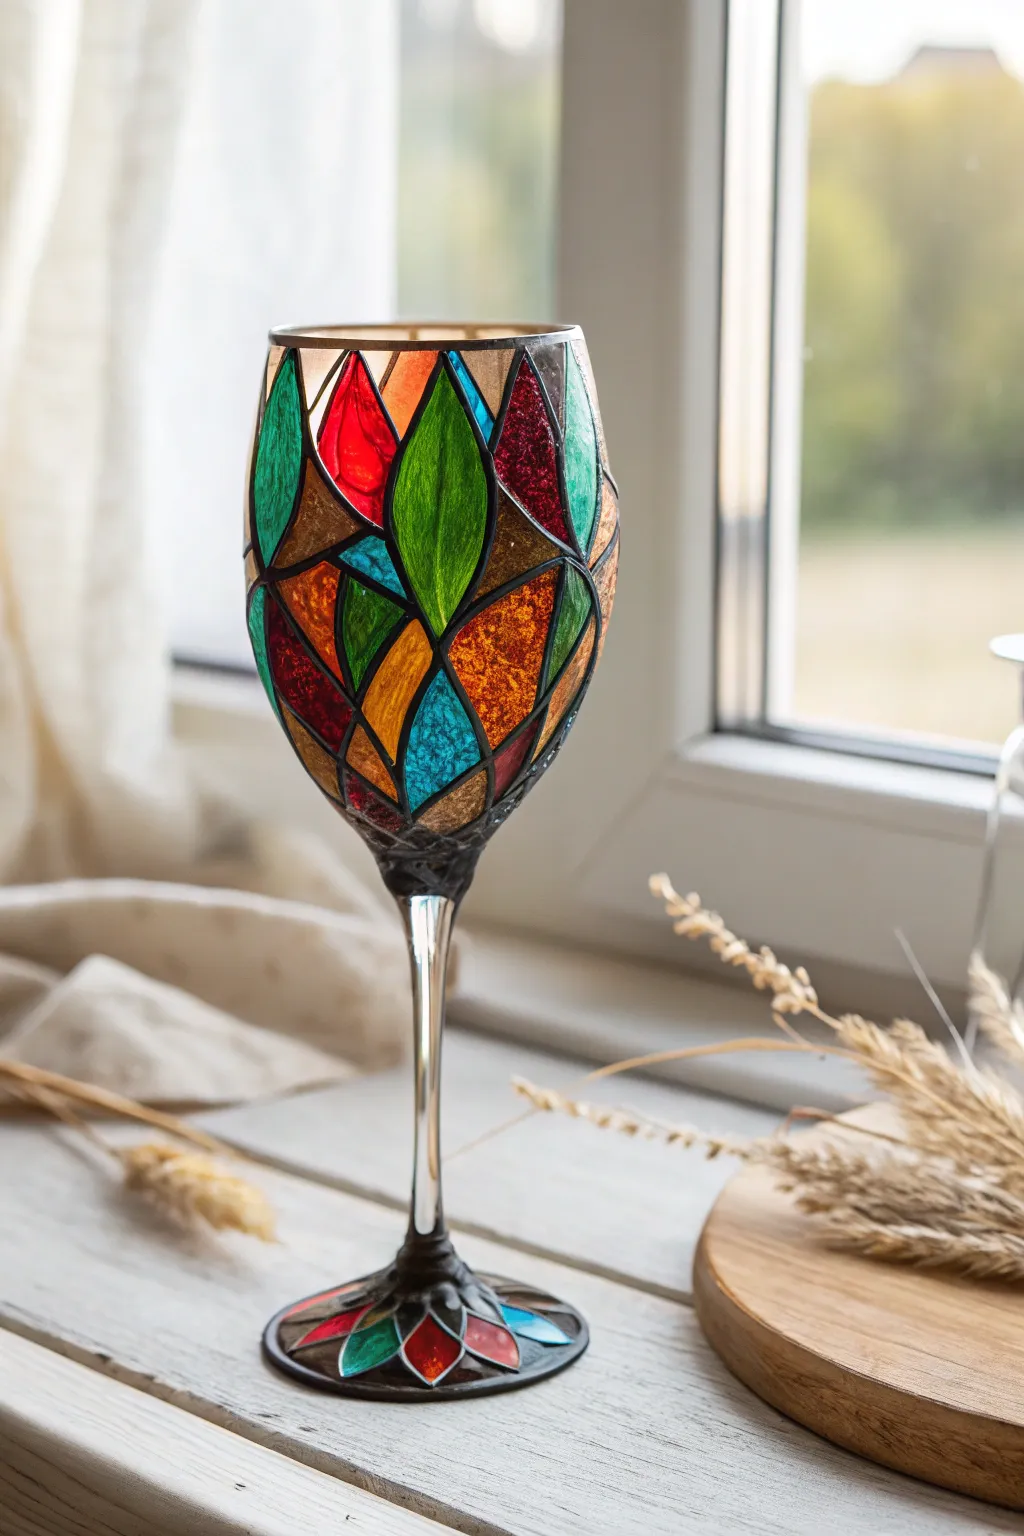
Transform a simple wine glass into a luminous piece of art that looks like authentic leaded glass. This project uses liquid leading and transparent glass paints to create a vibrant, leaf-inspired mosaic pattern that catches the sunlight beautifully.
How-To Guide
Materials
- Clear wine glass (cleaned with rubbing alcohol)
- Peel-and-stick lead lines or liquid leading (black or pewter)
- Solvent-based glass paints (Emerald Green, Teal, Crimson Red, Amber, Brown)
- Fine-point paintbrush or toothpick
- Rubbing alcohol
- Cotton swabs
- Craft knife
- Glass cleaner
- Disposable palette or plastic lid
Step 1: Preparation & Leading
-
Clean surface:
Before starting, wipe the entire outer surface of the wine glass with rubbing alcohol to remove any oils or fingerprints. This is crucial for paint adhesion. -
Map out the design:
You can lightly sketch your leaf pattern directly onto the glass using a dry-erase marker. Aim for large, elongated leaf shapes that interlock, radiating upwards from the stem. -
Start with the base:
Begin applying your leading at the very base of the glass bowl. Create a ring of small petal shapes that hug the transition from stem to bowl. -
Draw the main leaves:
Apply the leading lines for the large, central leaf shapes. Squeeze the bottle gently and keep the tip slightly raised off the glass surface, letting the line fall into place for a smoother finish. -
Fill the gaps:
Connect the large leaf shapes with smaller geometric shards and triangles. The goal is to cover the majority of the glass bowl with enclosed shapes, leaving no large open spaces. -
Detail the foot:
Don’t forget the base of the glass! Create a matching radiating flower or starburst pattern on the foot of the wine glass using the same leading technique. -
Clean up imperfections:
If a line goes astray, wait for it to dry slightly and trim it with a craft knife, or wipe it away immediately with a cotton swab and alcohol. -
Dry the leading:
Allow the leading outline to cure completely according to the manufacturer’s instructions—usually at least 8 to 24 hours—before moving to the painting stage.
Step 2: Adding Color
-
Prepare paints:
Pour small amounts of your solvent-based glass paints onto your palette. I find it helpful to keep a paper towel handy for wiping the brush frequently. -
Paint the green leaves:
Start with the Emerald Green. Using a fine brush, flood the large leaf shapes with paint. Drop the paint into the center and gently push it toward the lead lines without painting over them. -
Add accent colors:
Fill the surrounding shapes with Crimson Red, Teal, and different shades of Amber or Brown. Try to alternate warm and cool colors so no two identical colors touch. -
Texture application:
To mimic the textured look of the glass in the photo, dab the wet paint slightly with a sponge or stiff brush, or use a specific ‘crystal’ or textured glass paint medium. -
Check for opacity:
Hold the glass up to the light to check for thin spots. Stained glass paint looks best when applied generously so it self-levels. -
Paint the foot:
Repeat the color filling process on the base of the glass, matching the colors used on the main bowl. -
Address bubbles:
If you see tiny air bubbles in the wet paint, gently pop them with a toothpick or the very tip of your brush before they dry. -
Final drying time:
Set the glass in a dust-free area to dry. Solvent paints can take several days to fully cure; avoid touching the tacky surface.
Smooth Lines Tip
Keep your elbow resting on the table while applying leading. This stabilizes your hand, preventing shaky lines and ensuring cleaner curves.
Adding Sparkle
Sprinkle a tiny pinch of super-fine clear glitter into wet paint in just a few specific sections. It adds a magical shimmer when candlelight hits the glass.
Place a tea light inside your finished goblet to see the colors glow warmly
Cute Doodles and Tiny Icons
Transform a plain wine glass into a charming, cottagecore-inspired piece with delicate hand-drawn icons. This project uses glass paint markers to create a scattering of tiny strawberries, flowers, hearts, and stars for a lighthearted and personalized look.
Step-by-Step Guide
Materials
- Clear wine glass (stemmed or stemless)
- Rubbing alcohol
- Cotton rounds or paper towel
- Glass paint markers (finetip black, red, yellow, green, pink, white)
- Oven (for curing, if required by your marker brand)
- Cotton swabs (for cleanup)
- Paper for sketching ideas
Step 1: Preparation & Planning
-
Clean the surface:
Thoroughly wipe down the outside of your wine glass with rubbing alcohol and a cotton round. This removes any oils or fingerprints that could prevent the paint from adhering properly. -
Avoid touching the glass:
Once cleaned, try to hold the glass by the stem or place your hand inside the bowl to stabilize it. Touching the painting surface will reintroduce oils. -
Practice your icons:
On a scrap piece of paper, sketch out the tiny icons you want to use. Practice drawing small strawberries, five-petal flowers, simple hearts, and four-point stars to get a feel for the scale.
Step 2: Drawing the Outline
-
Start with the main icons:
take your fine-tip black glass marker. Begin by drawing the largest elements first—the strawberries and the larger flowers—spacing them randomly around the glass. Leave plenty of empty space between them. -
Add secondary elements:
Next, fill some of the gaps with medium-sized doodles like the hollow hearts and small leaves. Rotate the glass as you work to ensure the pattern flows naturally without looking too clustered. -
Sprinkle in the fillers:
Draw tiny four-point stars, little dots, and miniature circles in the remaining negative spaces. These act as ‘confetti’ to tie the whole design together. -
Let the outlines set:
Allow the black ink to dry completely before adding any color. Depending on your marker brand, this usually takes about 10–15 minutes. If you rush this, the colors might smear the black lines.
Shake It Up
Glass paint markers separate quickly. Shake your pen vigorously with the cap on for 30 seconds before use, and pump the tip on paper to get the ink flowing smoothly.
Step 3: Adding Color
-
Color the strawberries:
Use a red glass marker to fill in the body of the strawberries. You don’t need to fill them perfectly; a slightly loose coloring style adds to the hand-drawn charm. -
Add greenery:
Using a soft green marker, color in the leaves on the strawberries and the stems of the flowers. If the green is too translucent, let the first layer dry and add a second coat. -
Brighten the flowers:
Take a yellow marker and carefully color the center dots of the daisies and the small four-point stars scattered around the glass. -
Fill the hearts:
Select a few of the heart outlines and fill them with red or pink. I like to leave some hearts as simple black outlines for visual variety. -
Highlight the strawberries:
Once the red paint is fully dry, use the black fine-liner (or a white one for contrast) to add tiny seeds on top of the red fruit.
Ink Not Stickng?
If the ink beads up or separates on the glass, the surface likely still has oil on it. Wipe that specific spot again with alcohol and let it dry before re-drawing.
Step 4: Finishing Touches
-
Check for mistakes:
Inspect your work. If any lines look shaky or you made a smudge, use a damp cotton swab (or one dipped in alcohol) to gently erase the error while the paint is still relatively fresh. -
Add white accents:
For extra dimension, use a white marker to add a tiny ‘shine’ line on the strawberries or hearts, giving them a glossy appearance. -
Dry completely:
Let the glass sit undisturbed for at least 24 hours to allow the paint to chemically bond with the glass surface. -
Bake to cure:
If your specific markers require heat setting, place the glass in a cool oven. Set the temperature to the manufacturer’s recommendation (usually 350°F/176°C) and bake for 30 minutes. Turn the oven off and let the glass cool down typically inside the oven to prevent cracking.
Now you have a custom piece of drinkware perfect for summer sips or gifting to a friend
Seasonal Theme Wine Glass Sets
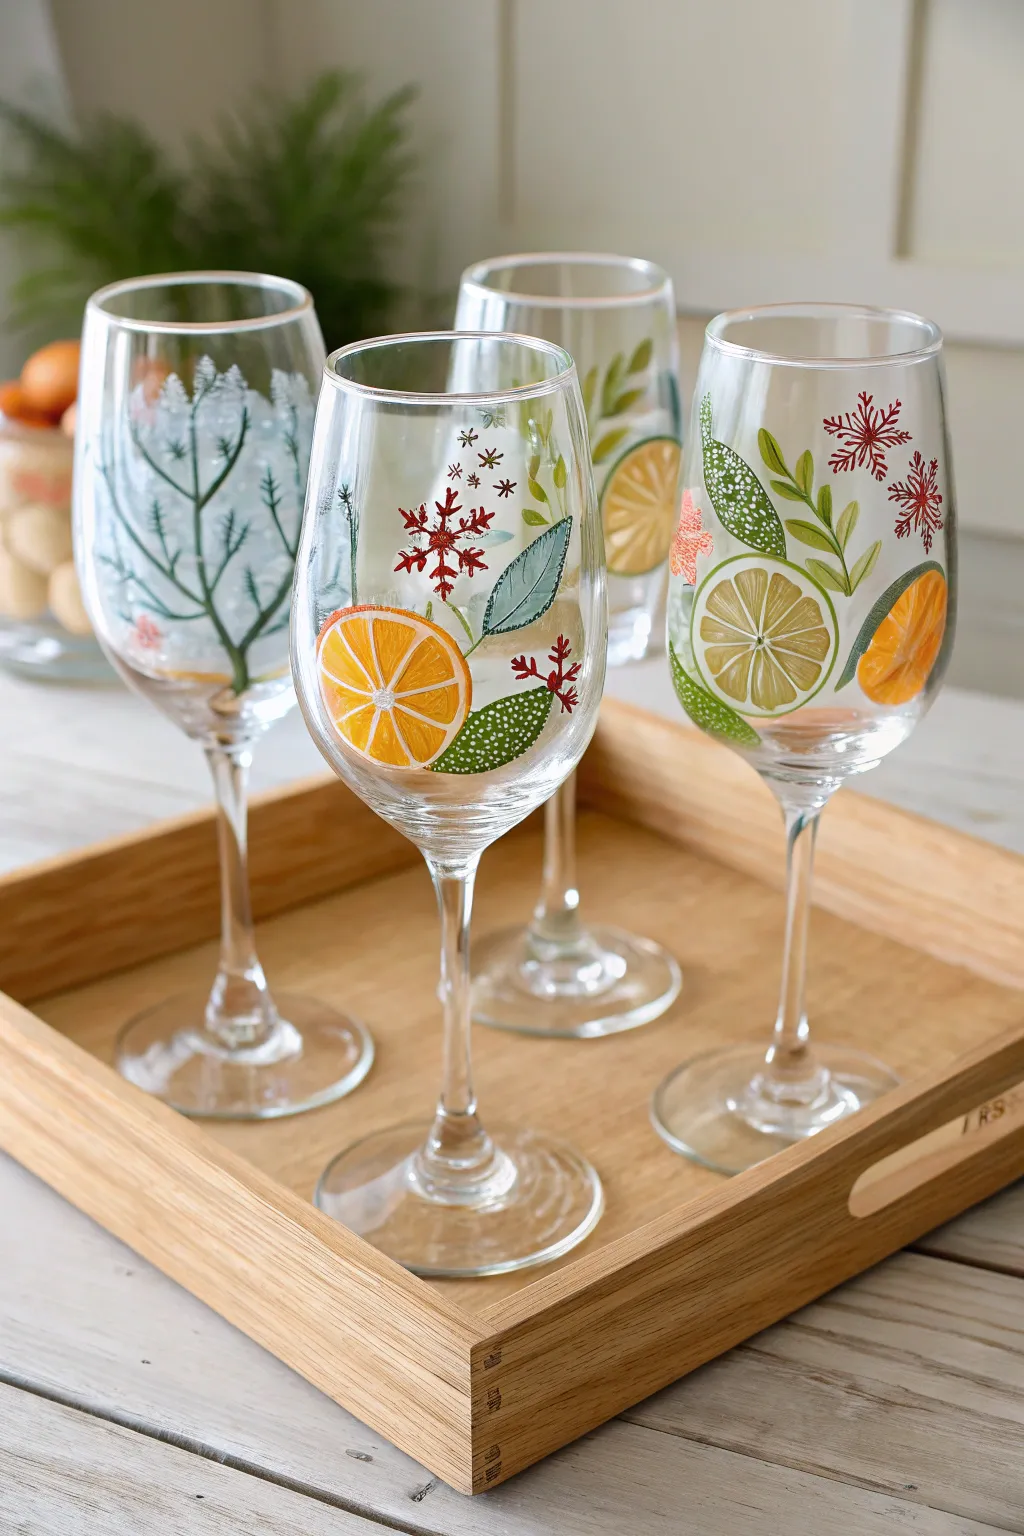
Bring a burst of zesty cheer to your winter table with this botanical wine glass set featuring hand-painted citrus slices, pine sprigs, and delicate snowflakes. The translucent effect of the fruit combined with crisp holiday motifs creates a sophisticated yet festive look perfect for seasonal entertaining.
How-To Guide
Materials
- 4 clear stemmed wine glasses
- Rubbing alcohol and cotton pads
- Enamel glass paints (bright orange, yellow, lime green, deep olive green, white, red)
- Small flat shader brush
- Fine liner brush (size 0 or 00)
- Small round brush (size 2)
- Palette or paper plate
- Paper towels
- Oven for curing
Step 1: Preparation & Base Elements
-
Clean the Surface:
Before painting, wipe down the exterior of each wine glass thoroughly with rubbing alcohol and a cotton pad. This removes any oils or fingerprints that could prevent the paint from adhering properly. -
Plan Your Layout:
Visualize three main elements for each glass to create a balanced composition. Aim for a mix of fruit slices and foliage. You can sketch lightly on the glass with a dry-erase marker if you want a guide. -
Paint Citrus Circles:
Using the flat shader brush, paint circular shapes for your citrus slices. Mix a tiny drop of white into your orange and yellow paints to increase opacity slightly, but keep it translucent enough to look like fruit flesh. -
Add Rind Details:
While the base circles are still wet, carefully outline the edges with a slightly darker shade of the fruit color using your small round brush. This defines the rind. -
Create Fruit Segments:
Once the base circles feel tacky or semi-dry, use the fine liner brush and thinned white paint to draw the ‘spokes’ or segments inside the citrus wheels. Keep lines delicate for a realistic look. -
Paint Large Leaves:
With the small round brush and olive green paint, add large, broad leaves near the fruit. Use a ‘press and lift’ motion: press the brush down to widen the stroke for the leaf belly, then lift as you pull away to create a sharp tip.
Fixing Streaky Paint
If your citrus slices look too streaky, let the first coat dry completely, then dab a second thin layer on top with a sponge pouncer for an even, frosted effect.
Step 2: Botanicals & Winter Motifs
-
Add Pine Sprigs:
On the glass designated for the ‘winter pine’ theme, use the liner brush and deep olive green to paint a central curved stem. From this stem, flick quick, short strokes outward to create the pine needles. -
Layer Frosty Pine:
To give the pine tree depth, mix a pale blue-green or minty white. Paint a second layer of needles over the green ones once they are dry, mimicking snow-dusted branches. -
Paint Stemmed Berries:
Using the liner brush, draw thin twig-like stems in brown or dark red. At the tips, dot small clusters of red or orange paint to resemble winter berries. -
Detail the Leaves:
Return to your broad olive leaves. Use the liner brush and a lighter green or white to add a central vein and delicate cross-hatching or stippling (tiny dots) on some leaves for texture. -
Draw Snowflakes:
Dip the liner brush into red or white paint. Draw an asterisk (*) shape first, then add tiny V-shapes at the end of each line to create festive snowflakes floating between the botanical elements. -
Add Texture to Fruit:
I like to go back to the citrus slices with a very dry brush and dab a little white texture onto the ‘rind’ area. This simulates the pithy texture of real citrus skin.
Level Up: Scented Look
Add a few cinnamon sticks or star anise shapes in reddish-brown paint near the orange slices for a full ‘mulled wine’ visual recipe theme.
Step 3: Finishing & Curing
-
Clean Up Edges:
Inspect your work. If any paint smudged or if a line went stray, use a damp Q-tip or a toothpick to gently scrape away the mistake before the paint fully hardens. -
Air Dry:
Let the glasses sit undisturbed for at least 1 hour until they are dry to the touch, and ideally 24 hours before baking to ensure the best durability. -
Bake in Cold Oven:
Place the glasses in a cold oven. Set the temperature to 350°F (175°C). Once the oven hits that temperature, bake for 30 minutes. -
Cool Down:
Turn the oven off and leave the door closed. Let the glasses cool down completely inside the oven. Removing them while hot can cause the glass to crack.
Once cooled, your custom glassware is ready to serve up holiday cheer at your next gathering
Raised Paint Texture and Pearls
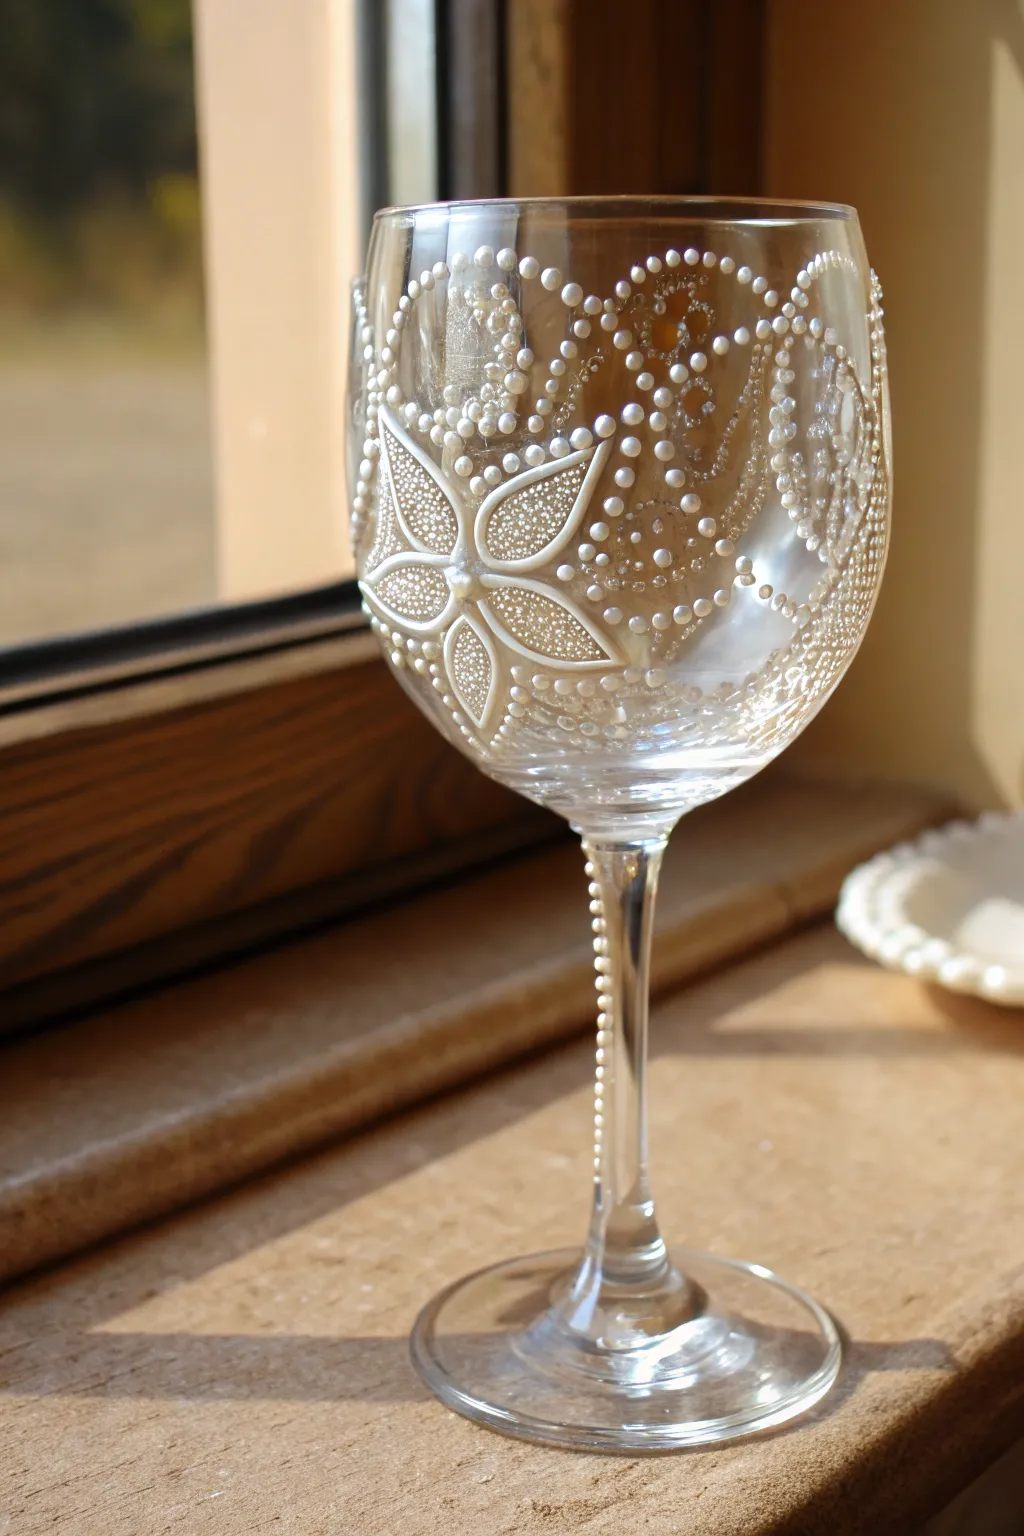
Transform a plain wine glass into a bridal-worthy masterpiece using raised paint and pearl effects. This design mimics the delicate look of vintage lace and sophisticated beadwork, perfect for weddings, anniversaries, or elegant dinner parties.
Step-by-Step
Materials
- Clear wine glass
- Rubbing alcohol
- Cotton pads
- Pearl white liquid leading or 3D glass paint writer
- Fine-grit sandpaper (optional)
- Paper towel
- Printed flower pattern (optional)
- Tape
Step 1: Preparation and Planning
-
Clean the Surface:
Before applying any paint, thoroughly wipe down the outside of the wine glass with rubbing alcohol and a cotton pad. This removes oily fingerprints that could prevent the dimensional paint from adhering properly. -
Decide on Placement:
Visualize where your main flower element will sit; looking at our example, the large flower sits slightly lower on the bowl, allowing the swirling dots to cascade upwards. -
Create a Guide (Optional):
If you aren’t confident freehanding the flower shape, print or sketch a simple five-petal flower on paper. Tape this inside the glass bowl facing outward to serve as a tracing guide.
Tip: No Air Bubbles
Store your 3D paint bottle upside down for 15 minutes before starting. This ensures the paint is at the tip and prevents air bubbles from exploding your perfect dots.
Step 2: Creating the Floral Centerpiece
-
Outline the Petals:
Using your pearl white 3D writer, squeeze gently to create a solid, continuous line defining the five pointed petals of the main flower. Keep your pressure consistent for an even line width. -
Add the Center Pearl:
Squeeze a slightly larger dollop of paint right in the center where the petals meet to create a focused ‘bead’ or seed for the flower. -
Texture the Petals:
Inside each petal outline, apply tiny, dense stippling dots. Hold the applicator vertical and barely touch the surface, creating a rough, glitter-like texture that contrasts with the smooth outlines. -
Let the Flower Set:
Allow this main element to dry for about 15-20 minutes. It doesn’t need to be fully cured, just set enough that you won’t accidentally smudge it while rotating the glass for the next steps.
Level Up: Frosted Feel
Before painting, spray the glass with a light coat of ‘sea glass’ or frosting spray. The pearly dots will pop beautifully against the matte, translucent background.
Step 3: Swirls and Beadwork
-
Start the Large Swirls:
Begin creating the large, sweeping curves that frame the flower. Instead of drawing lines, create these curves using a series of individual dots. -
Gradate the Dot Sizes:
For a more elegant look, vary your pressure. Start a curve with larger dots and gradually release less paint as the curve tapers off to create tiny, delicate points. -
Fill Negative Space:
Look for empty areas between the main flower and your large swirls. Fill these with clusters of medium-sized dots, mimicking the look of baby’s breath flowers. -
Create Chains:
Drape ‘chains’ of dots connecting different elements. I like to imagine these as actual pearl necklaces draping over the glass to find the most natural flow. -
Detail the Rim:
Add a scattered confetti effect near the top rim of the glass using very fine, sparse dots that fade out as they reach the edge.
Step 4: Stem Detail and Curing
-
Decorate the Stem:
Don’t forget the stem. Apply a vertical line of small, uniform pearls running down the length of the stem to connect the bowl design to the base. -
Work on the Base:
Add a simple ring of dots around the foot of the glass if you want to balance the design, though keeping it plain works well too. -
Check for Mistakes:
Inspect your work. If you have a wonky dot or a smudge, use a toothpick or cotton swab to wipe it away immediately before it hardens. -
Initial Drying:
Place the glass in a safe, dust-free area to dry for at least 24 hours. The paint will shrink slightly as it dries, becoming harder and more durable. -
Baking (If Required):
Check your specific paint brand’s instructions. Many glass paints require baking in a cool oven that is heated to 325-350°F to make the design top-rack dishwasher safe.
Once fully cured, your elegant new glass is ready to hold your favorite vintage for a truly special toast
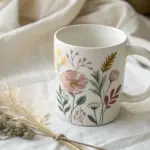
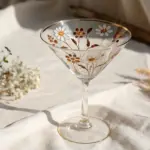

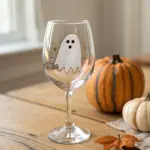
Have a question or want to share your own experience? I'd love to hear from you in the comments below!