When you want that moody vibe without making things complicated, easy dark paintings are my favorite go-to because mistakes disappear into the shadows. With a limited palette and a few bold silhouettes, you can create something dramatic fast—even if you’re keeping it super beginner-friendly.
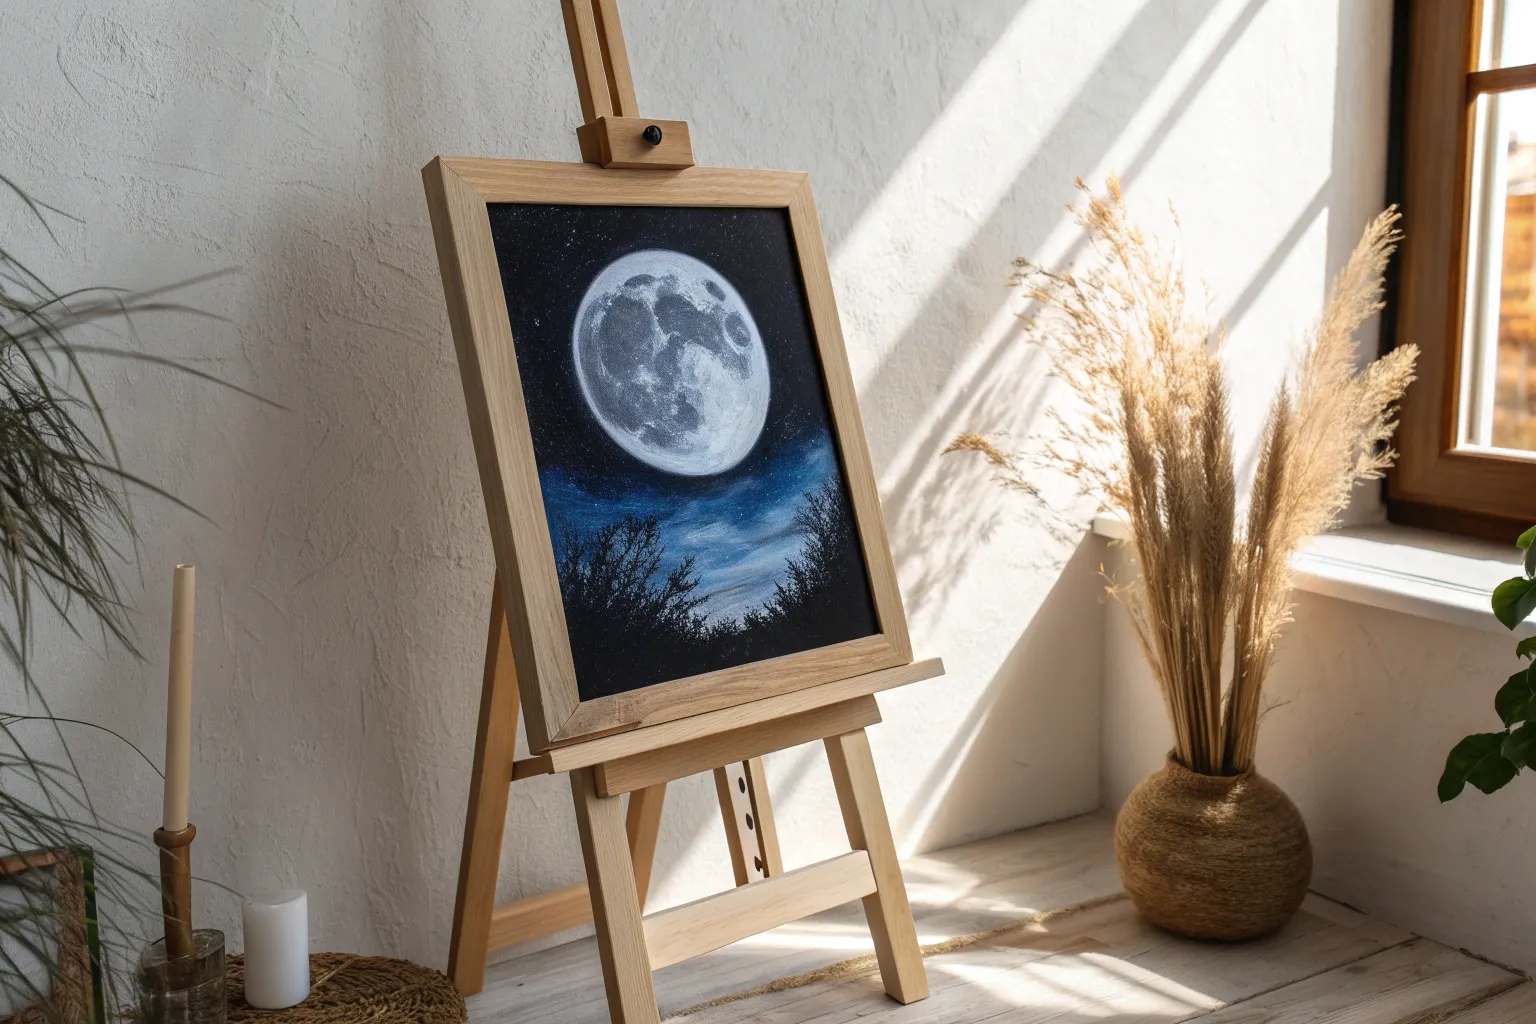
Full Moon Over a Calm Lake
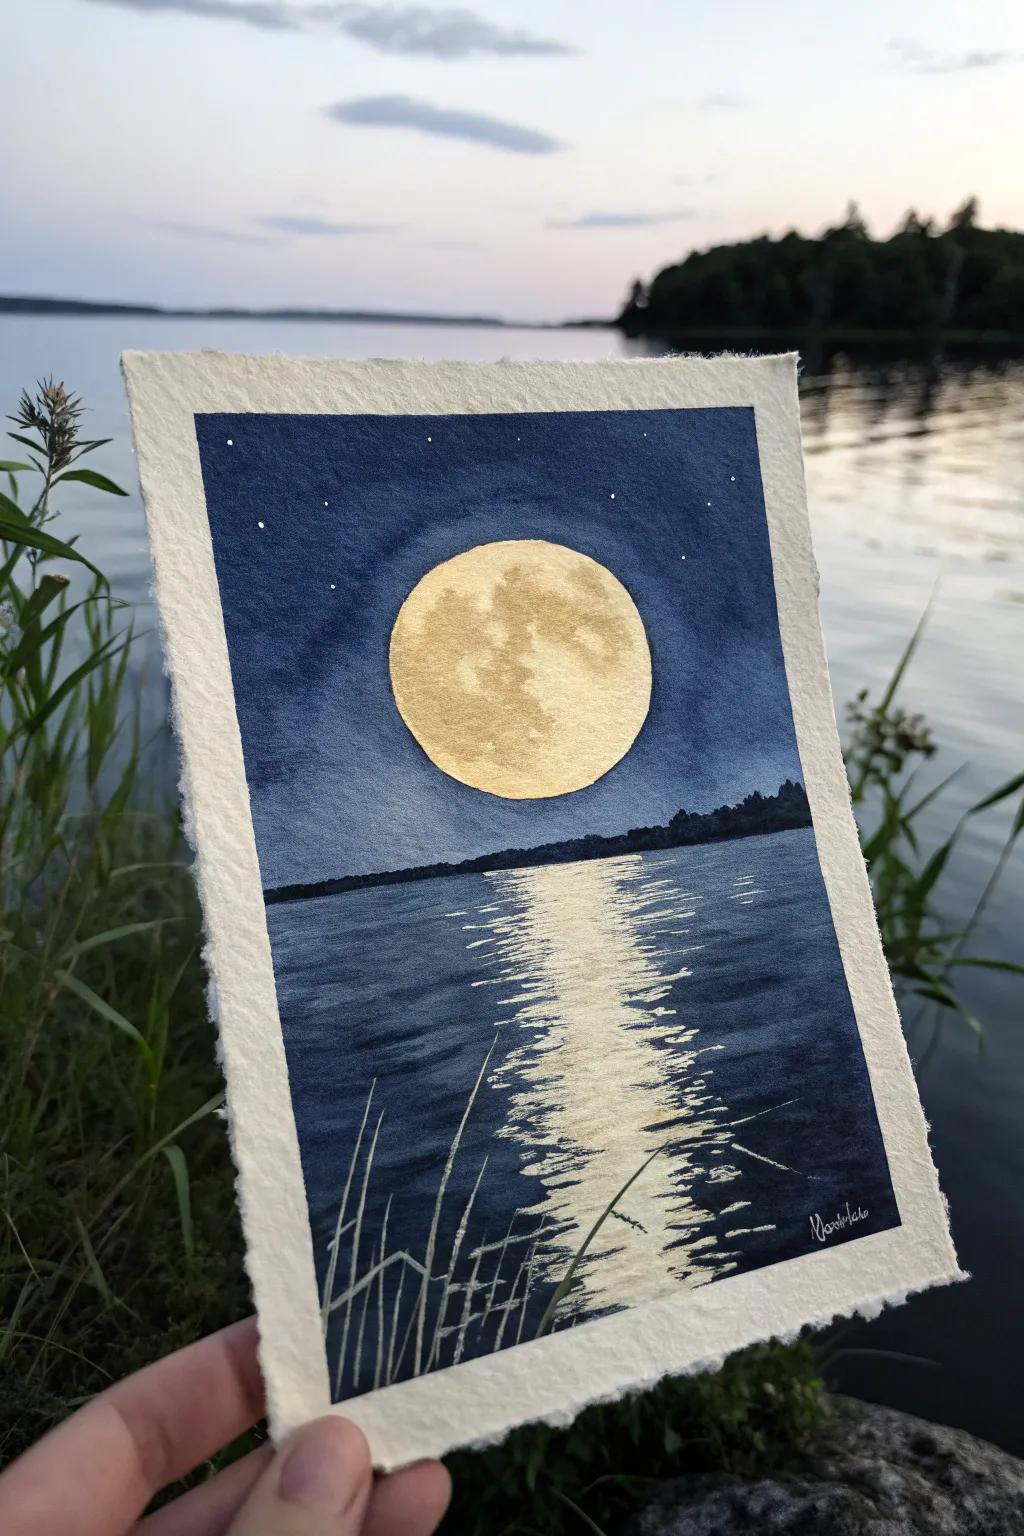
Capture the serene beauty of a full moon rising over dark waters with this striking watercolor project. By combining deep indigo hues with metallic gold paint, you’ll create a contrast that feels both moody and luminous.
Detailed Instructions
Materials
- Cold press watercolor paper (300 gsm)
- Masking tape
- Pencil and round object (for tracing)
- Watercolor paints: Indigo, Payne’s Grey, Black
- Metallic gold watercolor paint or gouache
- Round brushes (sizes 4 and 8)
- Fine liner brush (size 0 or 00)
- White gel pen (optional)
- Clean water and paper towels
Step 1: Preparation and Sketching
-
Secure the paper:
Tape down all four edges of your watercolor paper to a drawing board or table using masking tape. This creates that crisp white border seen in the example and prevents the paper from buckling. -
Define the horizon:
Lightly sketch a horizontal line across the paper, positioning it just below the halfway point. This separates your sky from the lake. -
Place the moon:
Using a small jar lid or a compass, trace a perfect circle in the center of the sky area. Ensure you press lightly so the pencil graphite doesn’t smudge later.
Bleeding Edges?
If paint bleeds under the tape, use a slightly damp stiff brush (like an acrylic brush) to gently scrub and lift the unwanted pigment, then dab with a paper towel.
Step 2: Painting the Sky
-
Outline the moon:
Load your size 8 brush with a deep Indigo mix. Carefully paint around the outer edge of your moon circle first to establish a clean boundary. Don’t paint inside the circle yet. -
Fill the night sky:
Continue filling the rest of the sky with the Indigo paint. You want a solid, dark coverage. While the paint is wet, you can drop in touches of Black near the top corners to create a subtle gradient or vignette effect. -
Create a glow:
I like to take a clean, slightly damp brush and gently lift a tiny bit of pigment just outside the moon’s edge. This softens the transition slightly, giving the impression of atmospheric glow. -
Dry completely:
Let the sky layer dry thoroughly before moving on. The paper should feel room temperature to the touch, not cool.
Make It Shine
For an intense reflection, let the first layer of gold dry completely, then add a second layer just in the center of the reflection path for extra opacity.
Step 3: The Dark Waters
-
Paint the water base:
Using the same dark Indigo mix, paint the water section below the horizon line. Keep your brush strokes horizontal to mimic the natural flow of water. -
Leave space for light:
As you paint the center of the water directly beneath the moon, lift your brush pressure to leave gaps or lighter areas. You don’t need to leave it purely white, but a lighter wash here will help the gold pop later. -
Add the distant shore:
Once the sky and water are barely dry (or dry completely for sharper edges), mix a very thick Black or dark Payne’s Grey. Paint a jagged, uneven silhouette along the horizon line to represent distant trees. Vary the height to make it look natural.
Step 4: Gilding the Moon
-
Fill the moon:
Activate your metallic gold paint with a little water until it has a creamy consistency. Carefully fill in the moon circle. -
Add texture:
While the gold is leveled out, dab in a slightly thicker concentration of gold (or a tiny drop of brown mixed with gold) in random patches to mimic lunar craters and texture. -
Reflect the light:
Using the gold paint and a smaller round brush, create the reflection on the water. Use horizontal, zigzagging strokes that start narrow near the horizon and widen as they come toward the bottom of the page. -
Break up the reflection:
Ensure you leave gaps of the dark blue water showing between your gold strokes. This ‘broken’ look is essential for the shimmering water effect.
Step 5: Final Details
-
Paint foreground reeds:
Mix a light grey or opaque white gouache (or use the white gel pen). With your finest liner brush, paint thin, sweeping lines coming from the bottom left corner to create tall grasses or reeds. -
Add stars:
Take a small amount of white gouache or white ink on a brush and tap it against another brush handle to splatter tiny stars into the dark sky. Keep them sparse for a realistic look. -
Enhance ripples:
If needed, go back with the fine brush and add tiny horizontal lines of Indigo over the gold reflection to break it up further if it looks too solid. -
Reveal the border:
Wait until the painting is 100% dry. Peel the masking tape away slowly at a 45-degree angle, pulling away from the painting to reveal the clean deckled edge.
Frame this piece or gift it to someone who loves the quiet mystery of the night sky

Crescent Moon and Bare Tree Silhouette
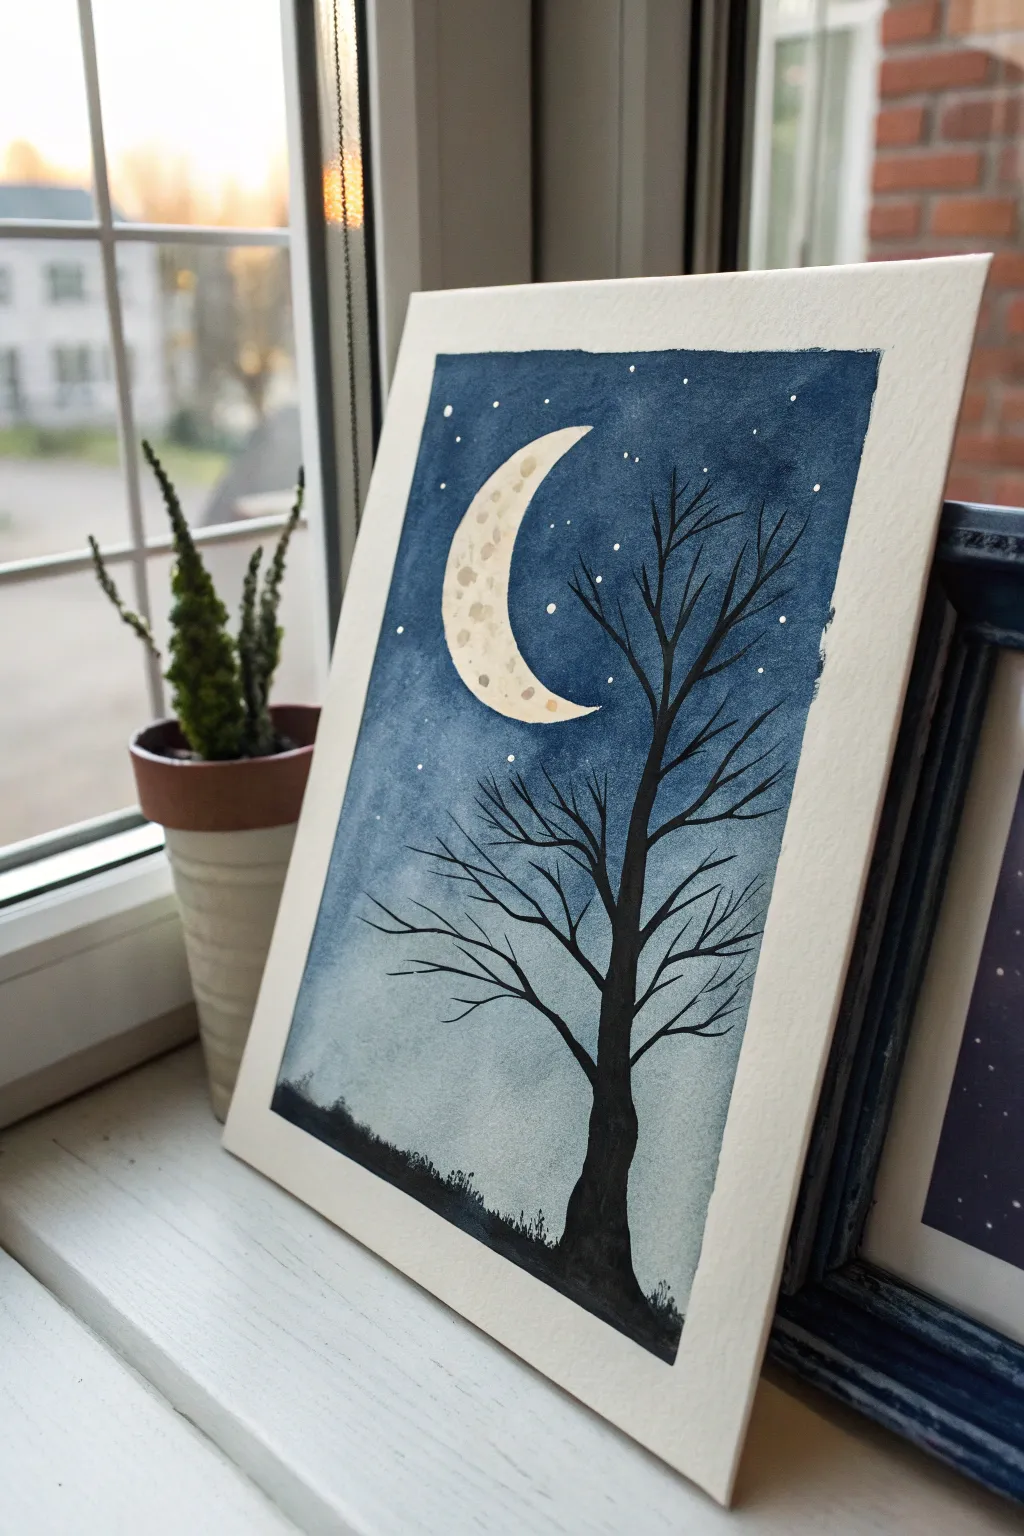
Capture the serene mystery of a quiet night with this striking watercolor project featuring a glowing crescent moon and a lone winter tree. The contrast between the deep, moody sky and the sharp black silhouette creates a dramatic effect that looks impressive but is beginner-friendly.
Step-by-Step Guide
Materials
- Cold press watercolor paper (A5 size recommended)
- Painter’s tape or masking tape
- Watercolor paints: Indigo (or Prussian Blue mixed with Black), Payne’s Grey, and Titanium White (gouache or opaque watercolor)
- Black ink or acrylic paint for the silhouette
- Round watercolor brushes (size 8 or 10 for washes, size 0 or 1 for details)
- Masking fluid (optional) or white wax crayon
- Palette for mixing
- Jars of clean water
- Paper towels
Step 1: Preparation and The Moon
-
Secure the paper:
Tape down all four edges of your paper to a flat, sturdy surface using painter’s tape. This creates a crisp white border and prevents the paper from buckling significantly while wet. -
Sketch the layout:
Lightly sketch the position of your ground line and the large crescent moon. Keep the pencil lines very faint so they disappear under the paint later. -
Masking the moon:
To keep the moon bright, carefully fill in the crescent shape with masking fluid. If you don’t have masking fluid, you can carefully paint around it later, but masking makes the background wash much easier. -
Let it dry completely:
Wait until the masking fluid is perfectly dry to the touch before introducing any water.
Uneven Sky?
If your gradient looks streaky, your paper might have dried too fast. Next time, re-wet the whole sky or use a larger brush to work faster while the paper remains damp.
Step 2: The Night Sky
-
Prepare the gradient colors:
Mix a generous amount of deep Indigo or Prussian Blue for the top of the sky. For the lower section, mix a very watered-down Payne’s Grey or a light slate blue. -
Wet-on-wet technique:
Using your large round brush, wet the entire sky area with clean water. The paper should be glisten, but not hold standing puddles. -
Applying the darkness:
Start at the very top of the paper with your darkest Indigo mix. Paint horizontally across the top, letting the pigment flow into the wet paper. -
Creating the gradient:
As you move down past the moon, rinse your brush slightly and pick up the lighter Payne’s Grey mix. Blend this into the dark blue from above. -
Fading to the horizon:
Near the bottom horizon line, use mostly clean water or the palest grey tint to let the sky fade into a foggy lightness. This creates atmospheric depth. -
Wait for the sky to dry:
Allow the paper to dry completely. It must be bone-dry before you paint the sharp black details.
Step 3: The Moon and Stars
-
Reveal the moon:
Gently rub off the masking fluid with your finger or a clean eraser to reveal the white paper of the crescent moon. -
Texture the craters:
Dilute a tiny amount of brown or grey paint. Dab small, irregular splotches onto the moon to simulate craters and textured surface, leaving plenty of white space. -
Add the stars:
Dip a small brush or toothbrush into white gouache or opaque white watercolor. Tap the brush handle over the dark upper sky to spatter tiny stars. -
Highlight specific stars:
Use your smallest detail brush and white paint to manually dot a few larger, brighter stars in the darkest blue areas.
Make it Mystical
Mix a tiny amount of metallic silver paint into the moon craters or use a silver gel pen for some of the stars to give the piece a magical, reflective shimmer.
Step 4: The Silhouette
-
Paint the horizon:
Using undiluted black ink or heavy black watercolor, paint the uneven ground line at the bottom. Stipple the top edge slightly to suggest grass or distance vegetation. -
Start the trunk:
Plant the base of the tree on the right side of the composition. Paint the trunk curving slightly upward, getting thinner as it rises. -
Branch structure:
Extend primary branches out from the trunk. I find it helpful to paint these with a ‘shaking’ hand motion to give them a gnarled, organic look rather than perfect straight lines. -
Fine details:
Switch to your finest rigr or detail brush. Add many small, spindly twigs extending from the main branches, ensuring some overlap the moon to ground the scene. -
The reveal:
Once the black paint is fully dry, slowly peel off the painter’s tape at a 45-degree angle to reveal your clean white border.
Frame your moody night scene and enjoy the calm atmosphere it brings to your space

Midnight Mountain Ridge Silhouette
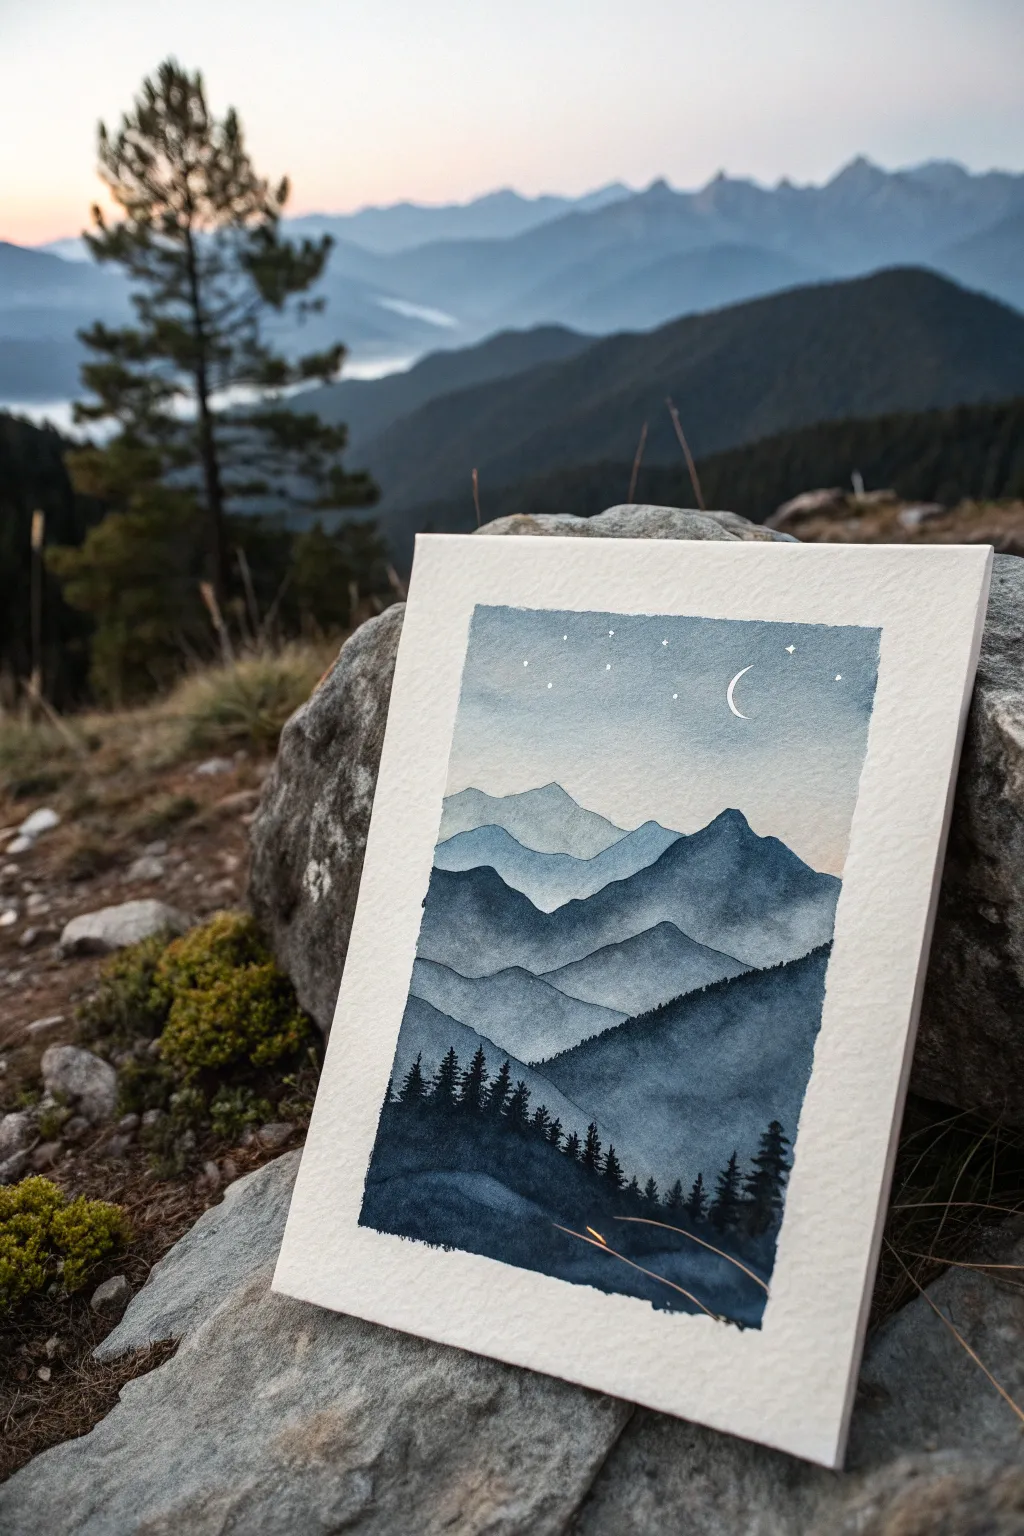
Capture the serene beauty of twilight in the mountains with this layered watercolor piece. You’ll build depth using atmospheric perspective, fading from deep indigo ridges in the foreground to soft, hazy peaks under a starry night sky.
Step-by-Step Tutorial
Materials
- Cold press watercolor paper (300gsm/140lb)
- Masking tape
- Watercolor paints (Indigo, Payne’s Grey, Prussian Blue, Burnt Umber)
- White gouache or white gel pen
- Round brushes (sizes 4, 8, and 0 for details)
- Clean water jar
- Paper towels
- Mixing palette
Step 1: Setting the Sky
-
Tape and Prep:
Secure your paper to a hard board using masking tape on all four sides. This creates a crisp white border and prevents buckling when the paper gets wet. -
Wet-on-Wet Sky:
Using your largest brush, apply clean water to the upper third of the paper. You want an even sheen, not puddles. -
First Wash:
Mix a very dilute wash of Indigo and Payne’s Grey. Drop this color into the top of the wet area, letting it naturally diffuse downward to create a gradient that fades to near-white at the horizon line. -
Lifting the Moon:
While the sky is still damp but not soaking, use a clean, slightly thirsty brush or the corner of a paper towel to lift out a tiny crescent shape. This reserves the white paper for your moon. -
Complete Drying:
Let this sky layer dry completely. The paper must be bone-dry and warm to the touch before you start the mountains to avoid unwanted blooming.
Atmospheric Drift
Add more water to your mix for distant mountains; pigment creates darkness, but water creates distance. The furthest back should barely be visible.
Step 2: Layering the Mountains
-
The Furthest Ridge:
Mix a pale, watery blue-grey. Paint the silhouette of the most distant mountain range across the horizon line. Keep the edges soft and the shape simple. -
Second Layer:
Once the previous layer is dry, mix a slightly darker, more pigmented shade of blue. Paint the next ridge down, overlapping the first one but starting slightly lower. -
Varying Shapes:
Continue this process, moving down the paper. For each new ridge, make your paint mix progressively darker and richer in pigment. Vary the peaks and valleys so they don’t look repetitive. -
Building Contrast:
As you reach the middle ground, incorporate a touch of Prussian Blue to cool down the mix. The shapes should become more defined and jagged as they appear ‘closer’ to the viewer. -
Foreground Ridge:
For the final, large mountain mass at the bottom, mix your darkest Indigo with a tiny bit of Burnt Umber to create a deep, near-black silhouette. Paint a steep slope that fills the bottom third of the composition. -
Softening Edges:
If any mountain edge feels too sharp or harsh, I like to run a clean, damp brush along the bottom edge of that specific ridge before it dries to help it blend downward.
Step 3: Detailed Silhouettes
-
Pine Tree Textures:
Using your smallest detail brush (size 0) and the darkest paint mix possible (creamy consistency), start painting small vertical lines along the top edge of the closest foreground ridge. -
Fleshing Out Trees:
Add branches to your vertical lines using tiny dabbing motions. Keep the tops pointy and the bottoms wider to mimic classic pine shapes. -
Creating Density:
Cluster some trees together and leave gaps elsewhere. Vary the heights significantly—some should be tall sentinels, while others remain low scrub. -
Mid-Ground Trees:
If you wish, add tiny, less detailed tree hints on the second-closest ridge using a slightly lighter grey-blue to maintain atmospheric depth. -
Stars and Sparkle:
Once everything is absolutely dry, use white gouache or a gel pen to refine the crescent moon. Dot tiny stars in the sky, grouping a few close together for a natural constellation look. -
Final Reveal:
Wait for all paint layers to fully cure. Gently peel away the masking tape at a 45-degree angle, pulling away from the painting to ensure a crisp, clean border.
Golden Hour Glow
Before painting the first mountain layer, run a faint wash of diluted peach or pale orange right at the horizon line for a sunset effect.
Step back and admire how simple distinct layers can create such a vast sense of space on a small piece of paper

Pine Forest With Misty Glow
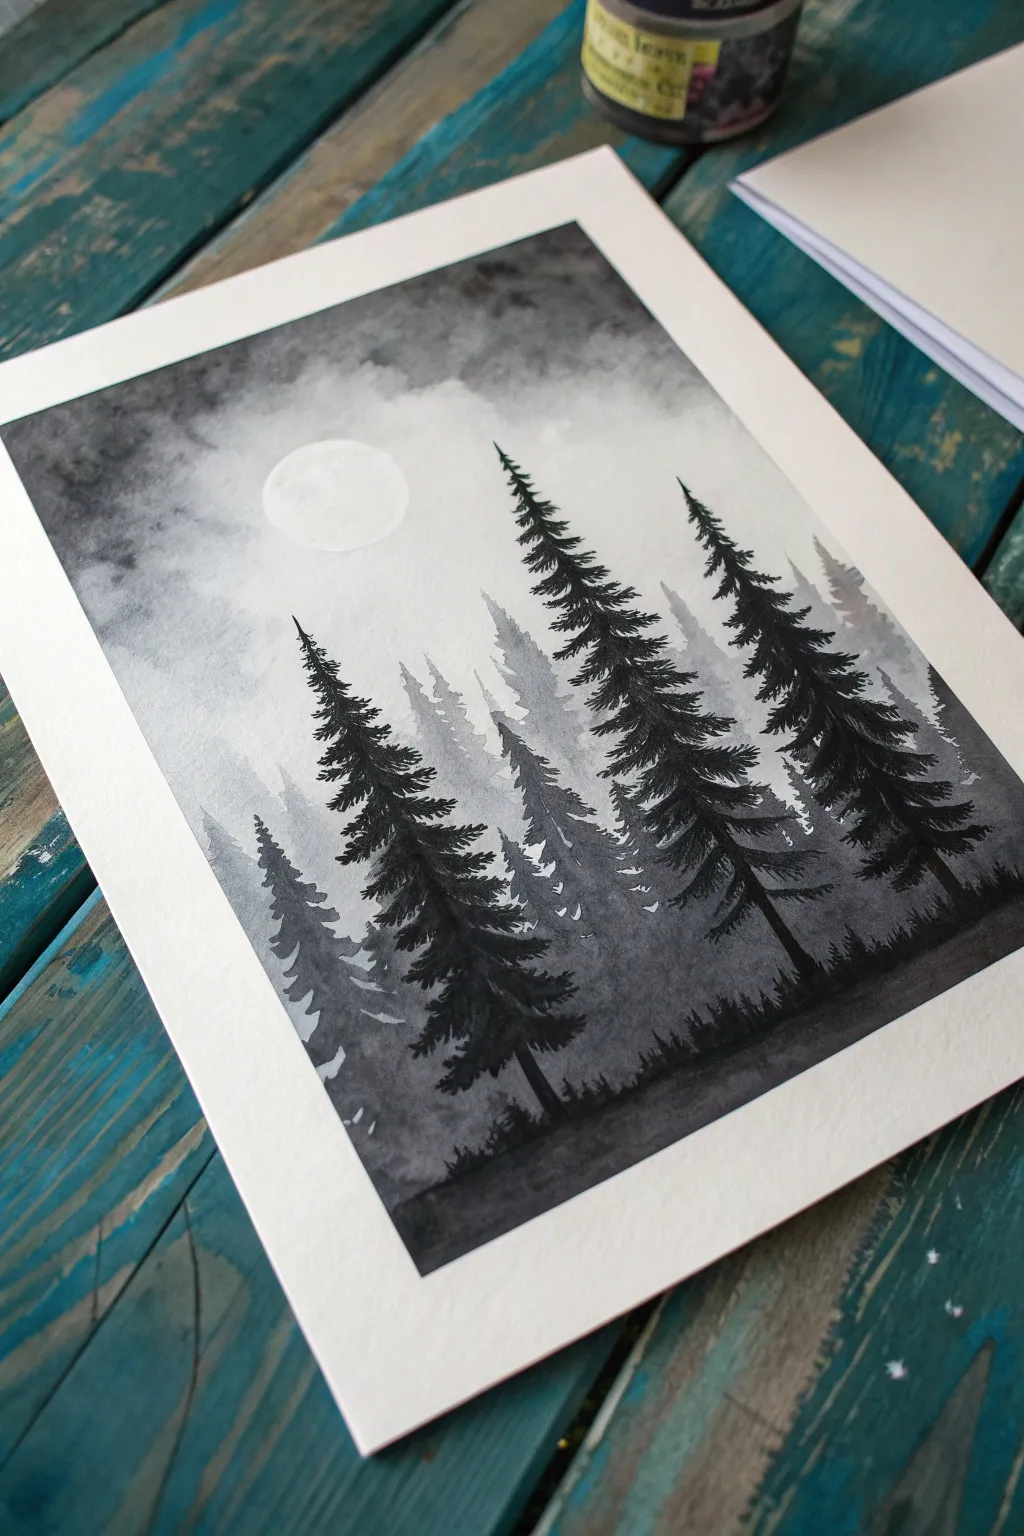
Capture the stillness of a foggy night with this moody black and white watercolor painting. Using a gradient wash and layered tree silhouettes, you’ll create a scene that feels deep, mysterious, and serene.
Step-by-Step Guide
Materials
- Cold Press watercolor paper (140 lb/300 gsm)
- Black watercolor paint (or Payne’s Gray)
- White gouache or white gel pen
- Painter’s tape or masking tape
- Large round brush (size 10 or 12)
- Small fine-point brush (size 0 or 2)
- Two jars of water (one for rinsing, one for clean)
- Paper towels
- Palette for mixing
Step 1: Setting the Atmosphere
-
Secure your paper:
Tape down all four edges of your watercolor paper to a board or table. This prevents buckling when the paper gets wet and creates that crisp white border seen in the final piece. -
Prepare the moon:
Before painting, you have two options for the moon. You can lightly sketch a circle in the upper left quadrant and apply masking fluid to protect it, or simply paint carefully around it. For a softer look, we will carefully paint around it in the next step. -
Wet-on-wet sky base:
Wet the entire paper surface with clean water using your large brush, ensuring an even sheen. Avoid soaking it to the point of puddling. -
Apply the dark corners:
Load your brush with concentrated black paint. Drop heavy pigment into the top corners and edges of the paper, letting the water pull the color inward. -
Create the misty gradient:
Rinse your brush partially so it holds a lighter gray wash. Blend the dark edges toward the center, getting lighter and lighter as you approach the moon area to create a glowing effect. -
Lift the clouds:
While the paper is still damp, crumple a paper towel and gently dab the sky around the moon. This lifts pigment to create soft, fluffy cloud textures within the gray wash. -
Dry completely:
This is crucial. Let the background background dry 100% before moving on. If the paper is cool to the touch, it’s still wet.
Step 2: Painting the Shadows
-
Mix a mid-tone gray:
Dilute your black paint with plenty of water to create a light-to-medium gray. This will be for the distant, foggy trees. -
Paint distant tree shapes:
Using a smaller round brush, paint simple, vertical triangular shapes for trees in the background. Don’t worry about detailed branches yet; just block in the silhouettes. -
Blur the bottoms:
While the distant trees are wet, run a clean, damp brush along their bottom edge to soften them into the ‘mist.’ Let this layer dry. -
Darken the mixture:
Add more pigment to your mix to create a darker charcoal gray. These trees will be closer to the viewer. -
Add the middle ground:
Paint a second layer of trees slightly lower on the page than the first. Start adding jagged branch textures by tapping the tip of your brush outward from the trunk.
Bleeding edges?
If paint bleeds under the tape, use a slightly damp stiff brush (like an acrylic brush) to gently scrub the leaked paint away, then dab with a tissue.
Step 3: Creating the Foreground
-
Prepare intense black:
Load your fine brush with creamy, thick black paint with very little water. We want the foreground trees to be sharp and high-contrast. -
Paint the main trunks:
Draw three large, distinctive vertical lines for the closest trees. Make them taller than the background layers, extending well into the sky. -
detail the branches:
Starting from the top of the trunk, use quick, zig-zag motions to create pine boughs. I find it helpful to vary the pressure, making branches wider at the bottom. -
Ground the forest:
Use the concentrated black to paint a dark strip of ground at the very bottom, connecting all the tree bases. -
Create ground texture:
Use the tip of your brush to flick tiny vertical strokes upward from the ground line, simulating grass or low shrubs. -
Refine the moon:
If your moon got messy, touch it up with white gouache or a gel pen. You can also lightly glaze a very faint gray over parts of it to make craters. -
Reveal the border:
Once the painting is bone dry, slowly peel off the masking tape at a 45-degree angle to reveal clear, sharp edges.
Make it snow
Dip an old toothbrush into white gouache and flick the bristles over the dried painting to create a subtle falling snow effect.
Your moody forest landscape is now complete and ready to be framed
BRUSH GUIDE
The Right Brush for Every Stroke
From clean lines to bold texture — master brush choice, stroke control, and essential techniques.
Explore the Full Guide
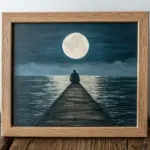
Moon Path on a Dark Ocean
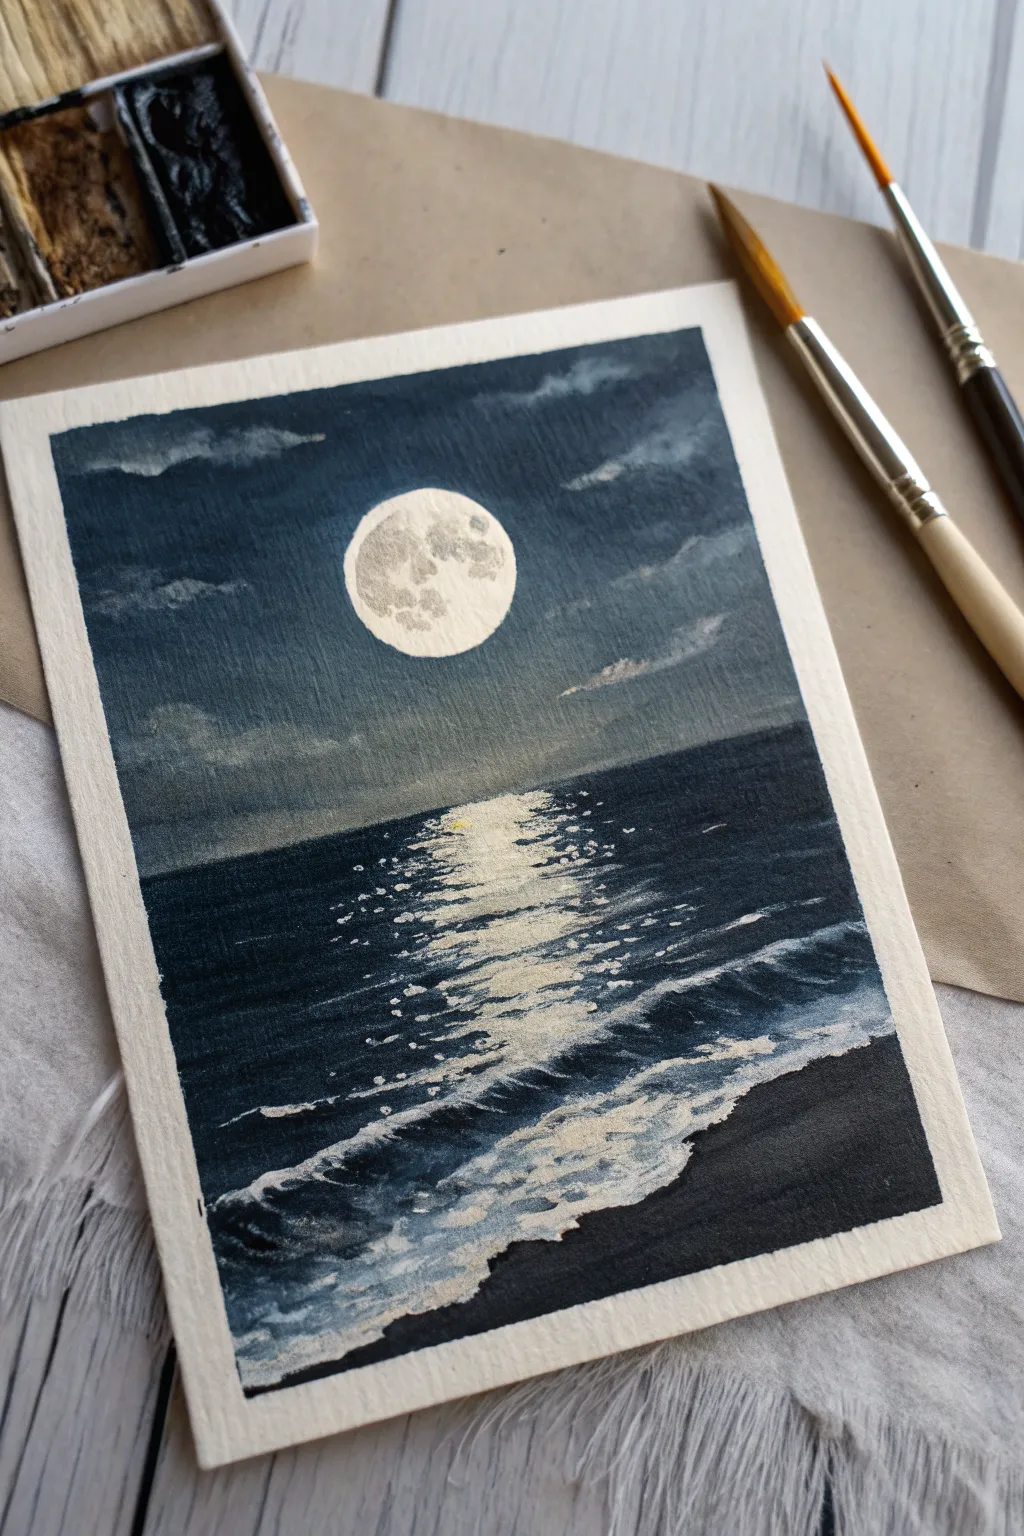
Capture the serene mystery of a night seascape with this striking project featuring a brilliant full moon casting its reflection across dark, turbulent waters. Using simple layering techniques, you’ll create a powerful contrast between the deep indigo sky and the shimmering white moonlight.
Step-by-Step Tutorial
Materials
- Heavyweight watercolor or mixed media paper (300gsm)
- Masking tape
- Paints: Indigo or Payne’s Gray, Black, Titanium White, Phthalo Blue
- Flat shader brush (medium size)
- Round detail brushes (small)
- Small circle template (or a coin)
- Palette for mixing
- Paper towels
- Water cups
Step 1: Setting the Scene
-
Prepare the Canvas:
Begin by taping down all four edges of your paper to a sturdy board or table. This creates that crisp, professional white border seen in the example and prevents the paper from buckling when wet. -
Draft the Moon:
Place your circle template or coin in the upper center of the paper. Lightly trace the outline with a pencil to reserve the space—wiping graphite off the paper is harder later, so keep it faint. -
Paint the Sky Gradient:
Mix a deep indigo shade. Using your flat brush, start painting from the very top edge, moving downwards with horizontal strokes. As you approach the horizon line (about 2/3 down the page), mix in a tiny bit of white or water to lighten the blue slightly, simulating atmospheric perspective. -
Create Clouds:
While the sky is still slightly damp, mix a lighter grey-blue. Use the tip of a round brush to gently dab in horizontal cloud shapes near the top corners and flanking the moon area. Soften edges with a clean, slightly damp brush so they drift naturally.
Uneven Moon Shape?
If your hand shakes while painting the moon’s edge, wait for the white to dry. Then, use the dark sky color to carefully ‘cut in’ and reshape the circle from the outside.
Step 2: Creating the Ocean
-
Establish the Horizon:
Draw a straight horizon line with your paint brush using a mix of indigo and black. This should be a hard, distinct line separating the sky from the sea. -
Paint the Deep Water:
Fill the section below the horizon with a dark navy mix (indigo + black). Paint horizontally, keeping the color solid and opaque at the sides, but leave the center area directly under the moon slightly lighter or thinner to prep for the reflection. -
Form the Shoreline:
At the bottom right corner, paint a sweeping diagonal section in solid black or very dark grey to represent the wet sand beach. Let this foreground layer dry completely before moving on.
Step 3: The Moon and Reflection
-
Paint the Moon Base:
Clean your brush thoroughly. Fill in the traced moon circle with solid Titanium White. Ensure the edges are crisp and circular. -
Add Moon Craters:
Mix a very watery pale grey. Dab tiny irregular blotches onto the dry white moon to create crater texture. Keep the texture subtle; you don’t want the moon to look dirty, just dimensional. -
Start the Reflection:
Load a small round brush with pure white. Starting right at the horizon line under the moon, paint short, horizontal dashes. Group them tightly near the horizon and space them out as you move down. -
Refine the Shimmer:
As you move lower on the water, let the white dashes become slightly wider and more organic to mimic ripples catching light. I find that lifting the brush quickly at the end of each stroke creates a natural taper. -
Add Sparkle:
Scatter a few tiny dots of white paint around the main path of light to represent individual sparkles on distant wave priorities.
Level Up: Texture
Sprinkle a tiny pinch of salt onto the wet sky paint before it dries. Brush it off later to create unique, starry textures that look like distant galaxies.
Step 4: Waves and Foam
-
Form the Main Wave:
Where the deep water meets the black shore, paint a jagged, horizontal line of white foam. Use a ‘scumbling’ technique—rubbing a semi-dry brush—to create a misty, foamy texture rather than a solid line. -
Highlight the Shore:
Paint thinner, wispy lines of white foam stretching up onto the dark sand, following the diagonal angle of the beach. These should look like the water is receding. -
Add Depth to the Waves:
Underneath the brightest white foam of the crashing wave, add a thin line of deep blue-black shadow. This lifts the white foam off the canvas visually. -
Blend the Reflection:
Take a very small brush with watered-down white paint and glaze over the center of the reflection path on the water surface to make it glow intensely. -
Final Details:
Assess the sky. If the stars feel missing, you can flick a tiny amount of white paint off an old toothbrush into the upper dark corners, but keep it sparse to maintain the mood. -
Reveal:
Wait until the painting is 100% dry to the touch. Carefully peel away the masking tape at a 45-degree angle to reveal your clean, frame-ready borders.
Place this moody seascape in a simple frame to highlight the dramatic contrast of light and dark
Easy Star Splatter Night Sky
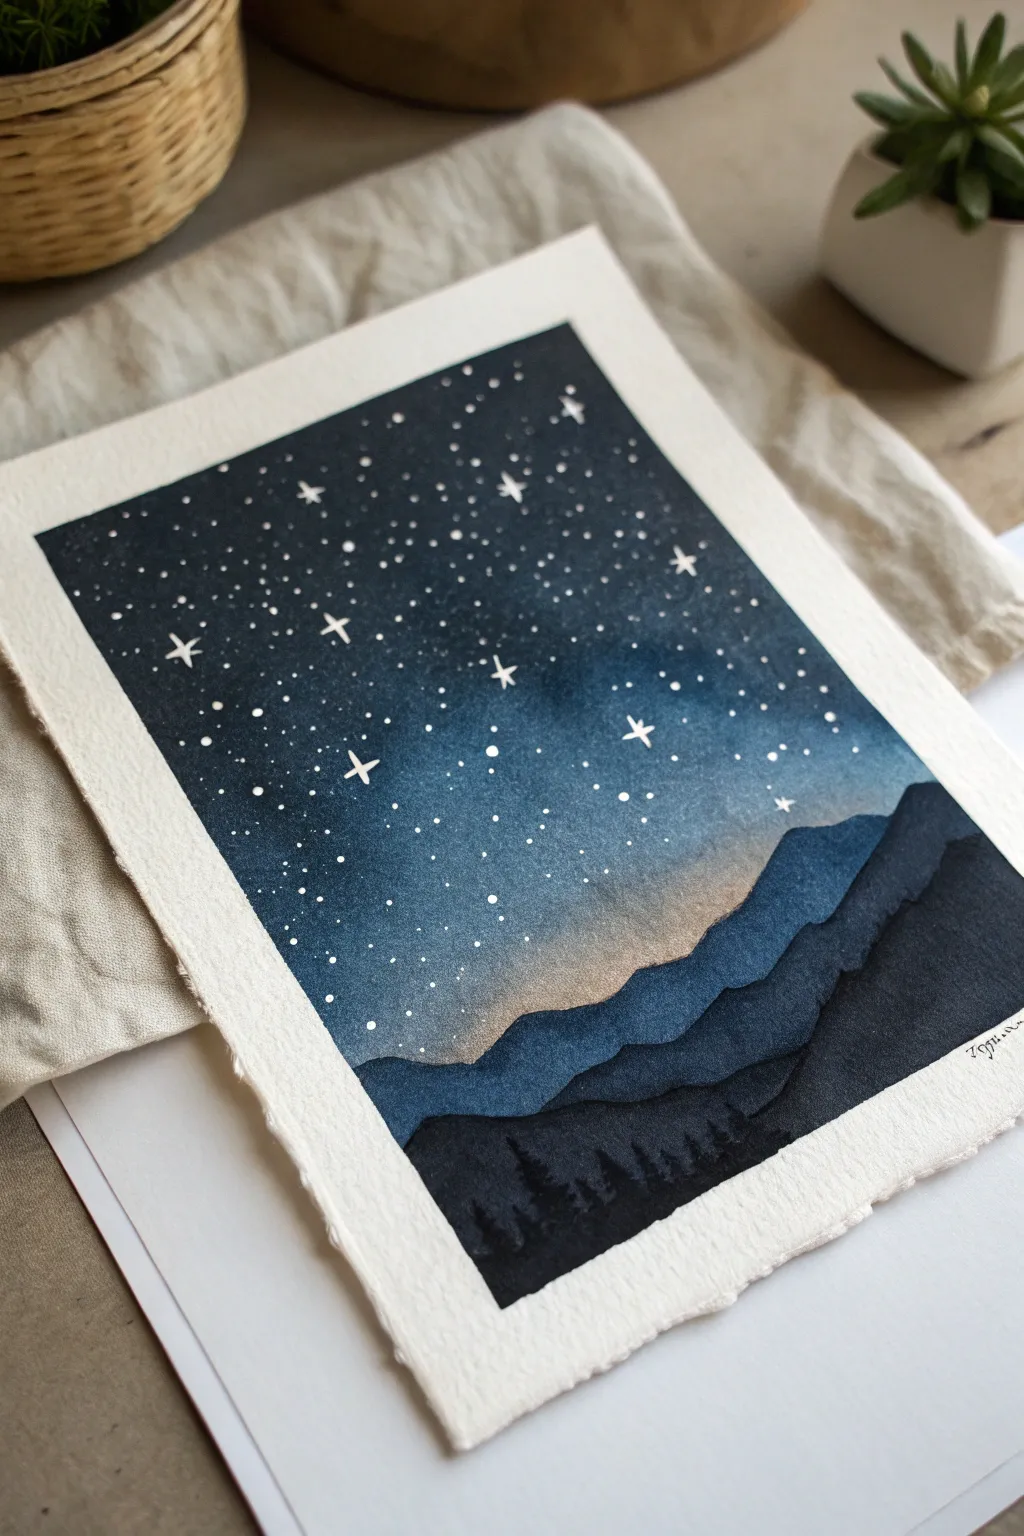
Capture the serene beauty of a deep twilight with this beginner-friendly watercolor project. Using simple layering techniques and a fun splatter method, you’ll create a glowing galaxy sky resting above peaceful mountain ranges.
Step-by-Step Guide
Materials
- Cold press watercolor paper (300 gsm recommended)
- Masking tape
- Watercolor paints (Indigo, Payne’s Gray, Prussian Blue, Black)
- White gouache or white gel pen
- Large flat wash brush
- Medium round brush (size 6-8)
- Small detail brush (size 0-2)
- Two jars of water
- Paper towels
- Old toothbrush (optional for splatter)
Step 1: Preparing the Sky gradient
-
Tap down edges:
Secure your watercolor paper to a board or table using masking tape along all four edges. This creates a crisp white border and prevents buckling when the paper gets wet. -
Wet the paper:
Using a large flat brush and clean water, apply an even coat of water to the upper two-thirds of the paper where the sky will be. The paper should be glistening but not forming puddles. -
Apply the darkest blue:
Load your brush with a concentrated mix of Indigo or Prussian Blue. Start painting at the very top edge, moving horizontally across the paper. Let the pigment bloom into the wet surface. -
Create the gradient:
As you move down the paper, dilute your paint slightly with more water. You want the color to fade from a deep, inky midnight blue at the top to a lighter, washed-out blue near the horizon line. -
Add a touch of warmth:
Near where the mountains will begin, gently brush in a very faint wash of watered-down brown or barely-there orange while the blue is still damp. This creates a subtle sunset afterglow effect. -
Let it dry completey:
Allow the sky layer to dry completely. If the paper feels cold to the touch, it is still damp. You can speed this up with a hair dryer on a low setting.
Uneven Watermarks?
If you see ‘cauliflower’ blooms in your sky, it means you added water to drying paint. Embrace the texture for a cloudy look, or keep the paper consistently wet next time.
Step 2: creating the stars
-
Mix white splatter:
Mix a small amount of white gouache with a drop of water until it has a milky consistency. You want it fluid enough to flick, but opaque enough to show up on the dark blue. -
Splatter the galaxy:
Dip a stiff brush or an old toothbrush into the white mixture. Hold it over the dark upper section of your painting and tap the handle (or flick the bristles) to spray tiny white specks across the sky. -
Hand-paint larger stars:
Using your smallest detail brush or a white gel pen, carefully draw a few larger, four-pointed ‘twinkle’ stars. Place them randomly in the darker upper section to add variety. -
Add focused dots:
Manually dot in a few more medium-sized stars with the tip of your brush to fill in any empty-looking gaps between the fine mist of splatter.
Star Control Pro Tip
Cover your mountain area with a scrap piece of paper before splattering stars. This keeps the starry effect strictly in the sky and keeps your mountains clean.
Step 3: Layering the Mountains
-
Paint the furthest range:
Mix a medium-light blue (like Prussian Blue with plenty of water). Paint a jagged, uneven mountain silhouette about one-third up from the bottom. Fill in the shape all the way down to the bottom tape. -
Wait for the first range to dry:
It is crucial to let this first mountain layer dry completely before starting the next one, otherwise the layers will bleed together. -
Paint the middle range:
Mix a slightly darker shade, perhaps adding a touch of Payne’s Gray to your blue. Paint a second mountain range starting slightly lower than the first one, overlapping it. -
Dry the middle layer:
Ensure this layer is bone dry. I usually take a quick break here to ensure no damp spots remain. -
Paint the foreground range:
Mix your darkest color—Indigo mixed with Black creates a lovely deep shadow. Paint the final, lowest mountain range in the immediate foreground. -
Add tree details:
While the foreground paint is still wet or just after drying, use your smallest brush to paint tiny vertical lines and dabs along the ridge of the closest mountain to suggest pine trees.
Step 4: Finishing Touches
-
Check opacity:
Once dry, check if your foreground mountains look solid enough. If they look patchy, apply a second coat of the dark black-blue mix to make them truly opaque. -
Remove tape:
Carefully peel away the masking tape at a 45-degree angle, pulling away from the painting to ensure you don’t rip the paper surface.
Step back and admire the depth created by your simple layers.

PENCIL GUIDE
Understanding Pencil Grades from H to B
From first sketch to finished drawing — learn pencil grades, line control, and shading techniques.
Explore the Full Guide
Stormy Clouds in Black and Gray
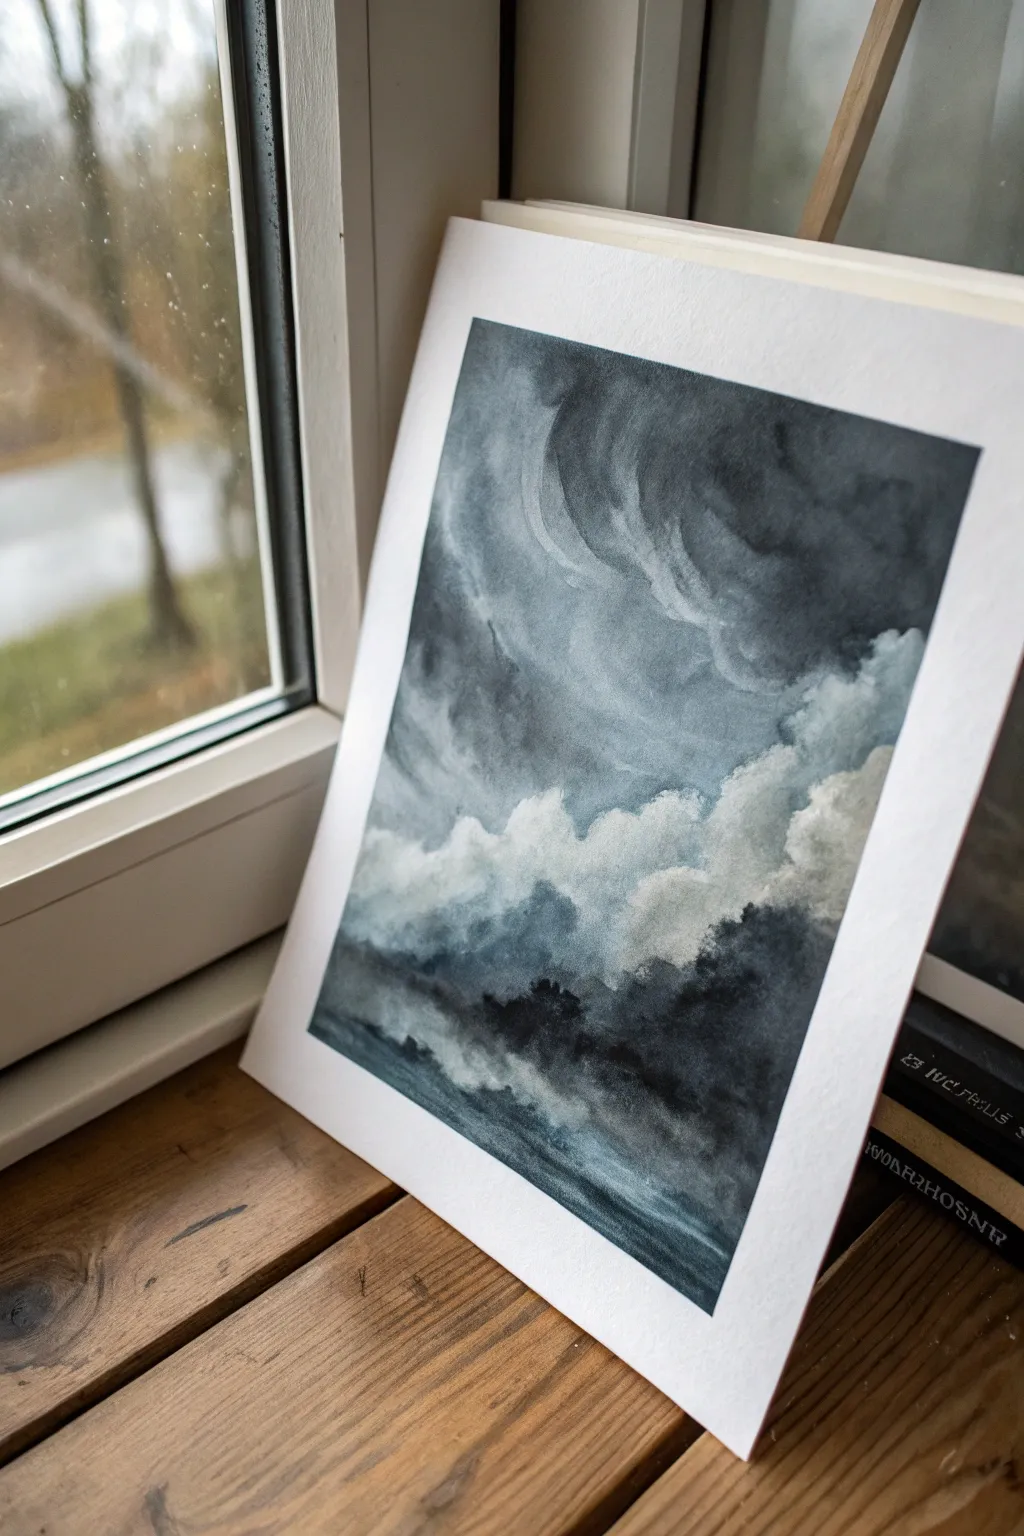
Capture the moody drama of a brewing tempest using only black and white paint to create a stunning range of grays. This project focuses on building layers of soft clouds against sharp, turbulent waves for an atmospheric finish.
Detailed Instructions
Materials
- Cold Press Watercolor Paper (300 gsm)
- Black Watercolor Paint (or Gouache)
- White Gouache Paint
- Large Flat Wash Brush
- Medium Round Brush (Size 8 or 10)
- Small Round Brush (Size 2 or 4)
- Water Container
- Paper Towels
- Masking Tape
Step 1: Setting the Atmosphere
-
Prepare the Surface:
Begin by taping down all four edges of your watercolor paper to a board or table to prevent buckling and create a crisp border. -
Wet the Sky Area:
Using your large flat brush and clean water, thoroughly wet the top two-thirds of the paper where the sky will be. -
Initial Gray Wash:
Mix a very watery, light gray using a tiny drop of black paint. Apply this loosely over the wet sky area to kill the bright white of the paper. -
Define the Horizon:
While the paper is still damp, paint a horizontal guideline roughly one-third up from the bottom using a slightly darker gray mix to establish where the turbulent water meets the sky.
Step 2: Building the Stormy Sky
-
Darker Cloud Masses:
Load your medium round brush with a darker, more concentrated gray. Drop this color into the upper right corner, letting it bloom downward into the wet paper. -
Swirling Shapes:
Add sweeping, curved strokes of dark gray near the top center to suggest swirling wind currents. Keep the edges soft. -
Lifting Light:
Clean and dry your brush slightly (a thirsty brush). Use it to lift pigment away in circular motions near the center of the sky to create soft, illuminated breaks in the clouds. -
Deepening Shadows:
Mix an almost pure black. While the cloud shapes are damp but not soaking wet, tap this dark pigment into the undersides of the top clouds to add volume and weight. -
Wait for the Sky:
Let the sky section dry completely before proceeding. Use a hairdryer on a low setting if you need to speed things up.
Muddy Grays?
If your clouds look muddy rather than fluffy, let the layers dry completely between applications. Wet-on-wet is great for soft skies, but wet-on-dry is essential for crisp cloud edges.
Step 3: Creating the Rolling Clouds
-
White Gouache Base:
Mix white gouache with a tiny hint of gray. Paint billowing, rounded cloud shapes right above the horizon line, overlapping the bottom of your dark sky wash. -
Softening Edges:
Immediately use a damp, clean brush to soften the top edges of these white clouds so they blend slightly into the dark sky above. -
Adding Volume:
Mix a medium gray. Paint shadows on the bottom and right sides of the white cloud puffs to make them look three-dimensional and heavy with rain. -
Bright Highlights:
I prefer to use pure, thick white gouache here to tap the very tops of the cumulus clouds for maximum contrast against the gloomy background.
Add a Splash of Color
Mix a tiny dot of Prussian Blue or Indigo into your black paint. The subtle cool undertone adds a deep, oceanic feel to the storm that pure black can’t achieve alone.
Step 4: The Turbulent Sea
-
Dark Horizon Line:
Using a strong black mix, paint the distant land or wave line right beneath the white clouds. Make the top edge irregular to suggest distant trees or choppy waves. -
Ocean Gradient:
Drag the dark paint downwards, diluting it with water as you move toward the bottom of the page to create a gradient from black to mid-gray. -
Suggesting Waves:
With the small brush and dark gray paint, make quick, horizontal strokes near the bottom to indicate movement in the water. -
Sea Foam Details:
Take a bit of white gouache on a relatively dry brush. Skim it lightly over the textured paper surface at the bottom to create the look of sea foam and crashing water. -
Final Contrast Check:
Step back and look at your painting. If the darks have dried too light, glaze over the darkest shadow areas with one final layer of black for deep, dramatic contrast. -
Remove Tape:
Once the painting is 100% dry to the touch, carefully peel away the masking tape at a 45-degree angle to reveal your clean edges.
Frame this moody piece in a simple white mat to let the stormy textures really stand out on your wall
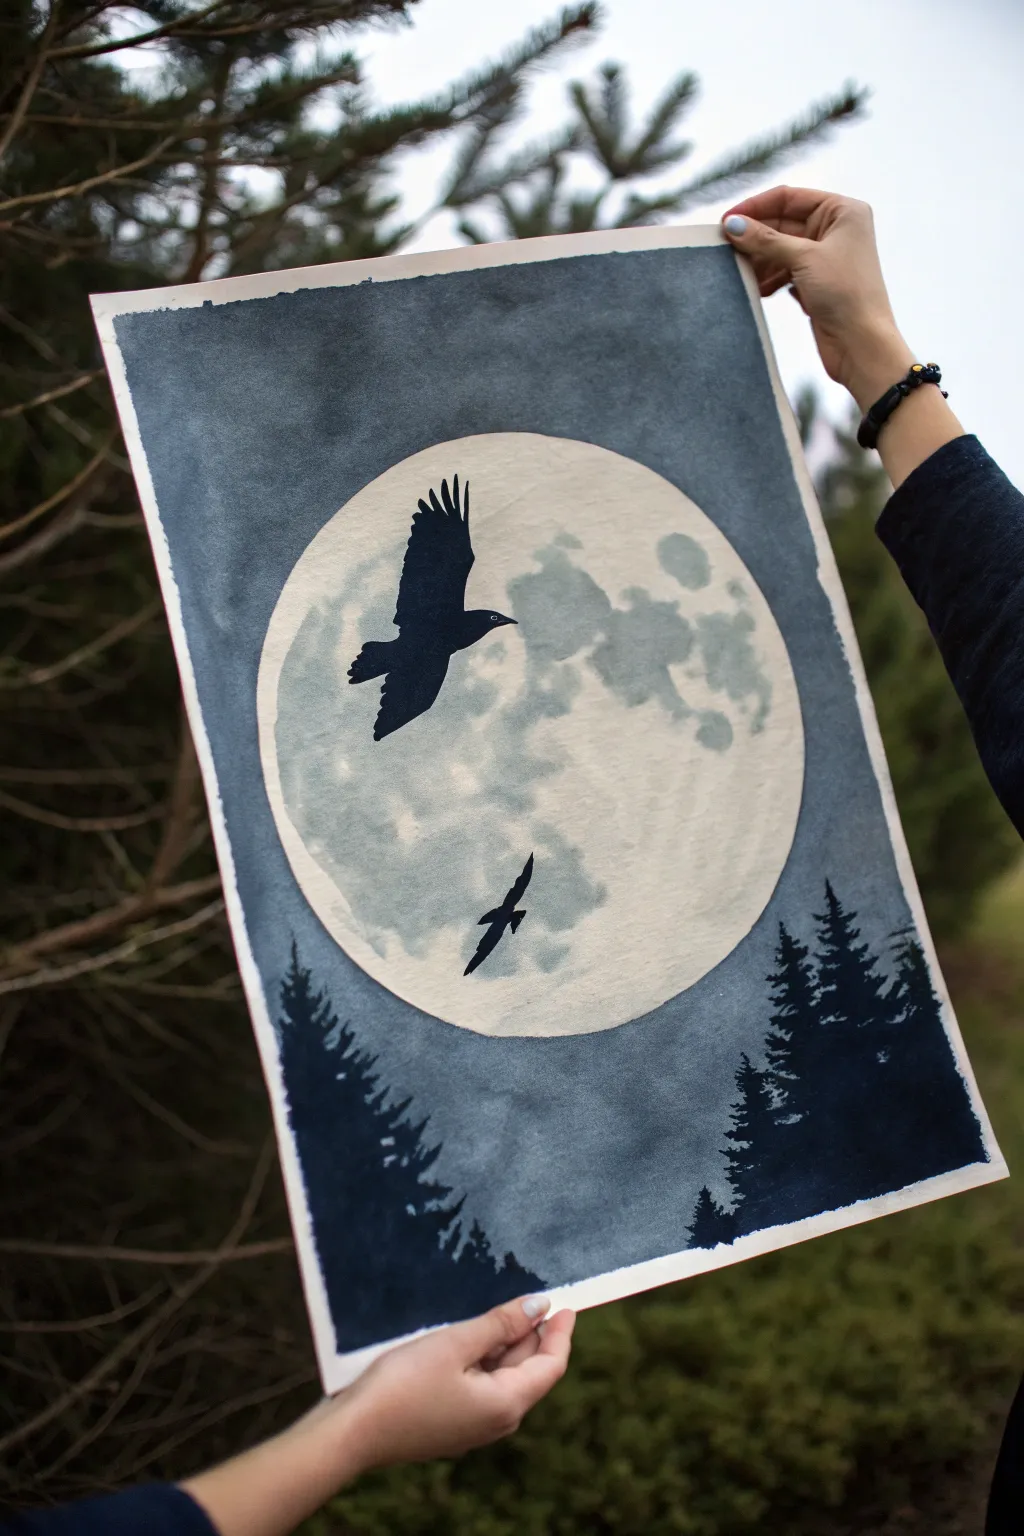
Wolf or Cat Silhouette at Moonrise
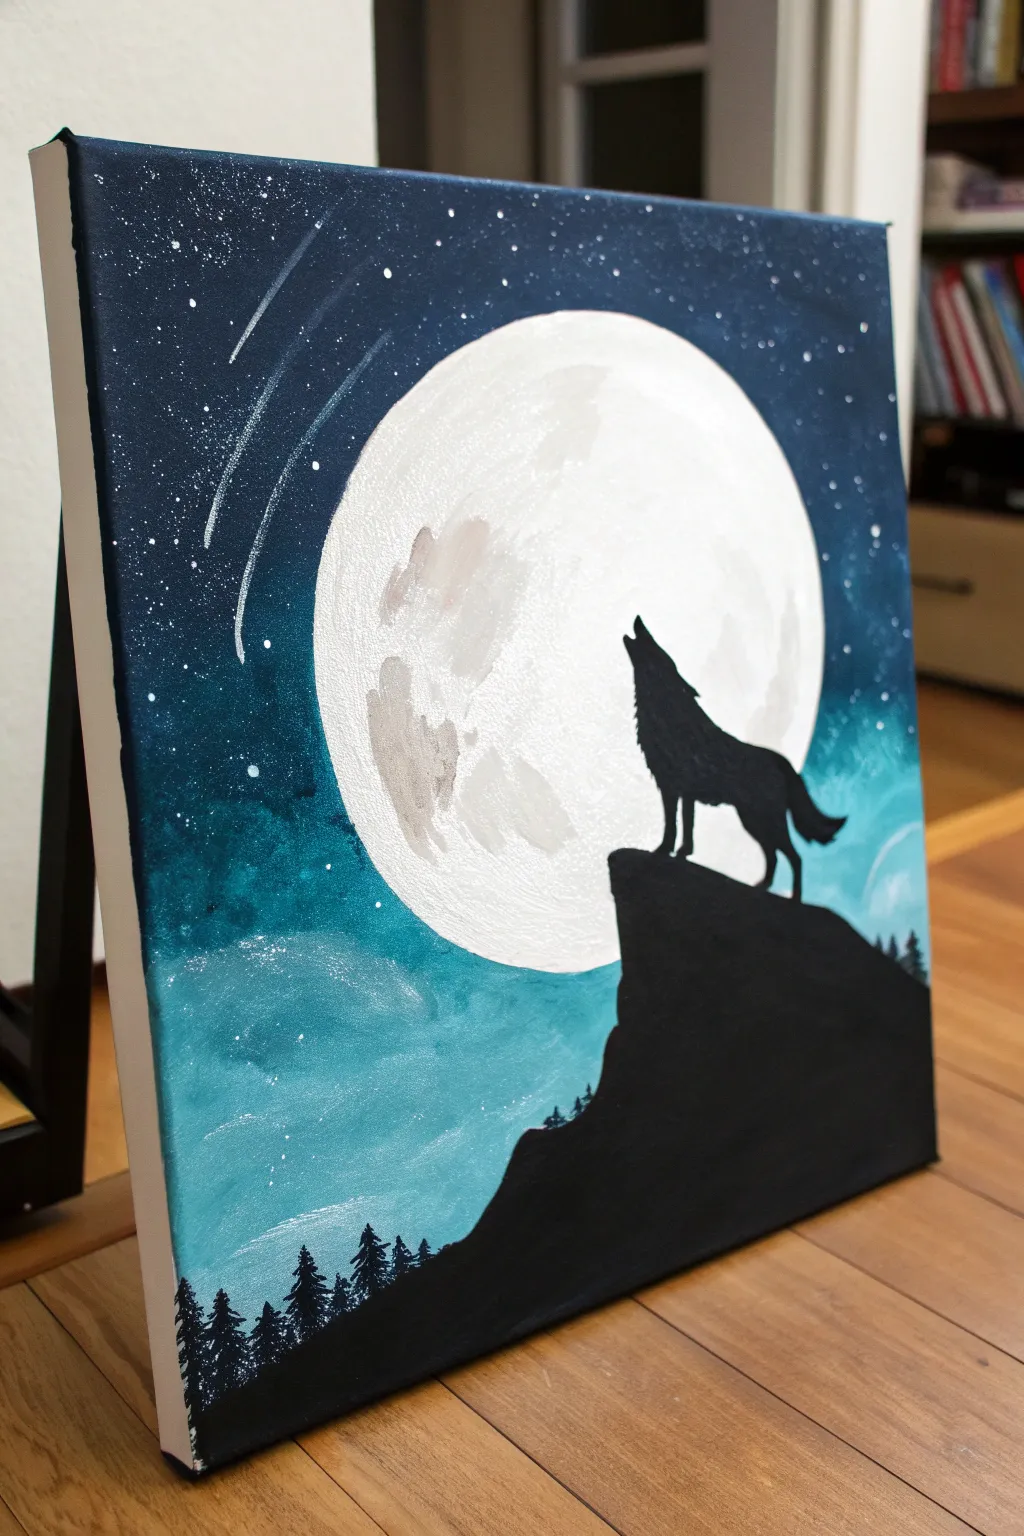
Capture the mystic beauty of a moonlit night with this dramatic silhouette painting. Using simple blending techniques and crisp blacks, you’ll create a glowing moon and a striking wolf figure that stands out against a starry backdrop.
How-To Guide
Materials
- Stretched canvas (e.g., 12×16 inches)
- Acrylic paints: Titanium White, Mars Black, Phthalo Blue (or Navy), Turquoise, Teal
- Large flat brush (1 inch)
- Medium flat brush
- Small round detail brush
- A round object for tracing (like a plate or lid)
- Pencil
- Palette for mixing
- Cup of water and paper towels
Step 1: Setting the Scene
-
Trace the moon:
Position your round object near the upper center of the canvas. Use a pencil to lightly trace a circle. This will preserve your bright white moon area while you paint the background sky. -
Paint the upper sky:
Using your large flat brush, load up a deep blue like Phthalo Blue mixed with a tiny touch of black. Paint the upper left and right corners, bringing the dark color down towards the top edge of your pencil circle. -
Blend the mid-tones:
Without washing your brush completely, pick up some Turquoise or Teal paint. Start blending this color below the dark blue, working around the sides of the moon circle. Use horizontal strokes to create a smooth transition from dark to light. -
Create the glowing horizon:
Mix a light teal by adding white to your turquoise. Apply this to the bottom third of the canvas, blending it upwards into the darker teal. The area closest to the bottom edge can remain a bit brighter to suggest atmospheric mist. -
Paint the moon base:
Wash your brush thoroughly. Fill in the moon circle with pure Titanium White. It might need two coats to be fully opaque and bright. -
Add moon texture:
While the white is still slightly tacky, mix a very faint grey (mostly white with a speck of black). Dab your brush gently to create craters and shadows on the left side of the moon, keeping the texture subtle and misty.
Clean Edges
For a perfect moon circle, wait for the background to dry completely, then place your circular object back on the canvas and trace around it again with white paint.
Step 2: Creating the Stars
-
Splatter stars:
To get realistic stars, thin down some white paint with a few drops of water until it’s inky. Dip a medium brush in it, and tap the handle against another brush over the dark blue areas of the canvas. -
Add feature stars:
Use your smallest detail brush to dot a few larger, brighter stars manually in the darkest corners of the sky. -
Paint shooting stars:
If you like, add a few sweeping lines near the top left corner. Use a dry brush with a small amount of white paint to drag thin, fading trails that curve slightly around the moon’s gravity.
Step 3: The Silhouette
-
Outline the cliff:
Switch to black paint. Pencil in the shape of the cliff first if you are nervous, or go straight in with a medium flat brush. Create a jagged, sloping line starting from the bottom left corner and rising up to a peak on the right side. -
Fill the cliff:
Fill the entire area below your cliff line with solid black. Ensure the coverage is thick so no background blue shows through. -
Sketch the wolf:
Using a pencil or very thin paint, outline the wolf standing on the highest point of the cliff. Focus on the iconic shape: the pointed snout raised high, the sloping back, and the bushy tail hanging down. -
Fill the silhouette:
Carefully fill in the wolf shape with black paint using your small round brush. Pay close attention to the fur texture on the neck and tail—use tiny flicking strokes to make it look fluffy rather than smooth. -
Detail the paws:
Ensure the legs are distinct. You can leave the tiniest sliver of the white moon showing between the front and back legs to define them clearly.
Make it Sparkle
Mix a tiny amount of iridescent glitter medium into your white paint for the stars, or use metallic silver paint for the shooting star trails to catch the light.
Step 4: Finishing Touches
-
Add tree line:
Along the slope of the black cliff, add tiny pine trees. Use the tip of your small brush to tap vertical lines, then tap wider shapes at the bottom of each line to create the triangular pine silhouette. -
Extend the forest:
Continue these small trees all the way down the slope to the bottom left corner, varying their heights slightly to look natural. -
Final inspection:
Check your black areas for any pinholes of light and touch them up. If the moon needs brightening around the wolf’s profile to make it pop, add a final thin layer of white there.
Now step back and admire how the stark silhouette brings the quiet drama of the night to life


Birds on a Wire at Dusk

This serene watercolor project captures the peaceful moment between night and day with a soft, gradient sky and stark, contrasting silhouettes. The minimalist composition of birds on barbed wire creates a striking focal point against the gentle washes of color.
Step-by-Step Tutorial
Materials
- Cold Press Watercolor Paper (approx. 140lb/300gsm)
- Watercolor Paints (Indigo, Prussian Blue, Burnt Sienna, Payne’s Grey)
- Masking Tape
- Flat Wash Brush (3/4 inch or similar)
- Round Brush (Size 4 or 6)
- Fine Liner Brush (Size 0 or 00)
- Clean Water
- Palette or Mixing Tray
- Paper Towels
- Pencil and Eraser (optional)
Step 1: Sky Gradient
-
Prepare the paper:
Begin by taping down all four edges of your watercolor paper to a board or table. This prevents warping and creates that crisp, clean white border when you’re finished. -
Wet the surface:
Using your large flat wash brush, apply a clean layer of water across the entire paper surface. You want it shiny and damp, but not dripping wet with puddles. -
Start the blue wash:
Load your brush with a diluted mix of Prussian Blue or a similar cool blue. Start at the very top of the paper and paint horizontal strokes, letting the color be strongest at the top edge. -
Fade the color:
As you move down the page, dip your brush in water to dilute the paint on the bristles. Continue horizontal strokes to create a gradient that fades to almost white near the center of the page. -
Introduce warmth:
While the paper is still damp, mix a very watery, pale wash of Burnt Sienna or a soft orange. Lightly brush this across the middle section just below the fading blue to create a glowing horizon line. -
Ground the sky:
For the bottom third, mix a soft violet-grey using your blue and a touch of red or purple. Paint loose, horizontal washes at the bottom, blending slightly upward into the orange area to suggest distant atmospheric haze. -
Let it dry:
This step is crucial. Allow the background wash to dry completely until the paper is flat and cool to the touch. Using a hairdryer on a low setting can speed this up.
Step 2: Landscape and Wires
-
Mix the silhouette color:
Create a dark, intense mixture for your silhouettes. I prefer mixing Indigo with Paynes Grey to get a deep, nearly black navy, rather than using straight black which can look flat. -
Paint the distant hills:
Using a size 6 round brush and your dark mix (slightly diluted for atmospheric perspective), paint a low, rolling hill line across the bottom. Keep the top edge rough to mimic distant tree lines. -
Draw the wires:
Switch to your fine liner brush. With a very steady hand and the dark, undiluted paint mixture, paint two straight diagonal lines that cross each other in the middle third of the painting. -
Add the barbs:
Along the wire lines, add tiny ‘X’ marks or small perpendicular dashes at regular intervals to represent the barbs on the wire. -
Perch the bird:
Choose a spot on the wire for your main bird. using the tip of the round brush, paint a simple teardrop shape for the body and a smaller circle for the head, refining the silhouette to include a beak and tail feathers.
Uneven Gradients?
If your sky gradient looks streaky, your paper likely dried too fast. Rewet the whole sky area very gently with clear water and add pigment while wet.
Step 3: Foreground Details
-
Flying companions:
In the upper blue section of the sky, use the fine liner to paint two small ‘V’ or ‘M’ shapes to represent distinct birds flying in the distance. -
Paint foreground grass:
Load your round brush with the darkest, most concentrated paint mix. Start at the very bottom edge and flick your wrist upward to create tall, thin blades of grass overlapping the distant hills. -
Add seed heads:
At the tips of some of the taller grass blades, dab small alternating spots or dashes to create the texture of seed heads like wheat or reeds. -
Vary the heights:
Ensure your grass blades vary in height and direction. Group a few taller ones on the right side to balance the composition against the bird on the left. -
Final touches:
Check for any gaps in the bottom silhouette and fill them in with solid dark paint to ground the image effectively. -
Reveal the border:
Once the painting is 100% dry, carefully peel away the masking tape at a 45-degree angle to reveal your clean white edges.
Add Golden Hour
For a different mood, swap the cool blue sky for a warm pink/purple gradient and use a deep brown for the silhouettes instead of grey-blue.
Frame your tranquil landscape and enjoy the quiet mood it brings to your space
Night City Skyline With Window Dots
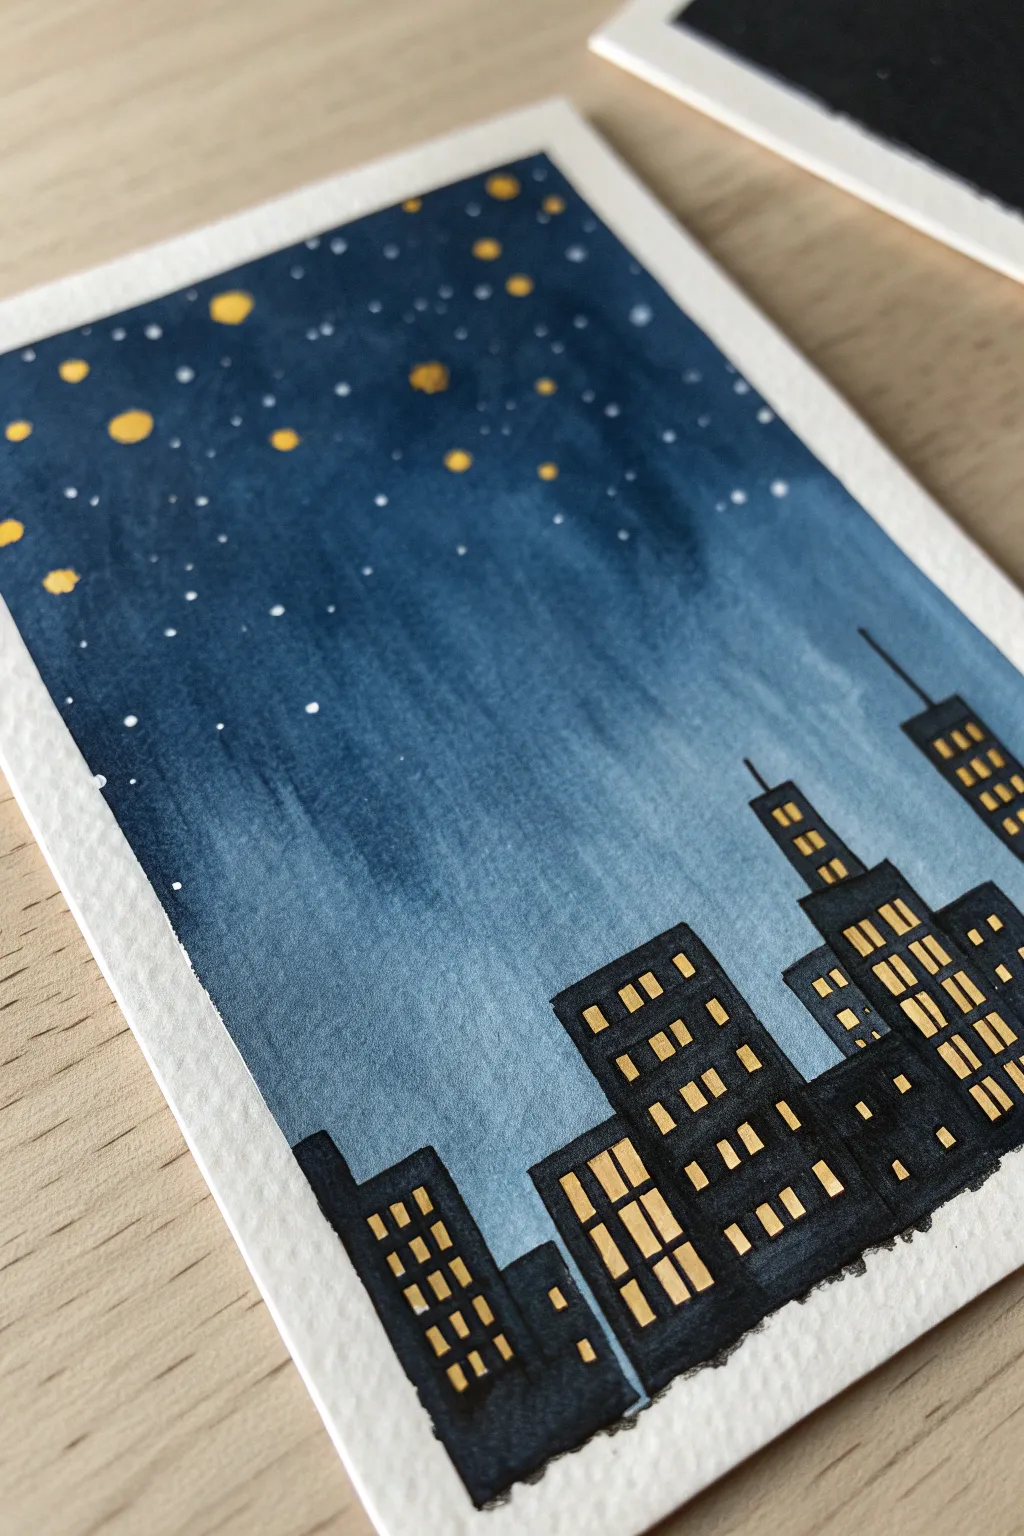
Capture the quiet magic of a sleeping city with this beautiful watercolor project. The deep blue gradient sky contrasts perfectly with the sharp black buildings and warm, glowing windows, creating a striking scene that looks more complex than it is.
Detailed Instructions
Materials
- Watercolor paper (cold press, heavy weight)
- Painter’s tape or masking tape
- Watercolor paints (Indigo, Prussian Blue, or Payne’s Gray)
- Flat wash brush (about 3/4 inch)
- Round brush (size 4 or 6)
- Black waterproof fine liner pen or black acrylic paint
- Gold or opaque yellow gel pen (or metallic watercolor)
- White gel pen or whitewash/gouache
- Paper towels
- Jar of clean water
Step 1: Creating the Night Sky
-
Prepare your canvas:
Start by taping down the edges of your watercolor paper to a hard surface. This creates a crisp white border and keeps the paper from buckling while you paint the wet sky. -
Mix your blues:
Create a puddle of very dark blue paint on your palette. Indigo or a mix of Prussian Blue and Black works well. Make sure you have enough mixed to cover most of the paper. -
Wet the paper:
Use your large flat brush to wet the entire surface of the paper with clean water. You want it shiny and damp, but not dripping with puddles. -
Start the gradient:
Load your brush with the concentrated dark blue paint. Touch the brush to the very top edge of the paper and drag it horizontally across. Allow the color to bleed downwards slightly. -
Pull the color down:
Clean your brush slightly in the water jar so the pigment is less concentrated. Paint the next horizontal stroke just below the first one, blending the edge so there are no hard lines. -
Fade to light:
Continue working your way down the paper, rinsing your brush a little more each time. By the time you reach the bottom third (where the buildings will go), the color should be a very pale, watery blue or almost white. -
Dry completely:
This is crucial: let the background dry 100%. If the paper is cool to the touch, it’s still damp. If you paint the buildings too soon, the black ink will bleed into the sky.
Bleeding Lines?
If your black marker bleeds into the blue sky, the paper wasn’t dry enough. Use a hair dryer on the low setting to completely dry the paper before re-attempting the building layer.
Step 2: Building the City
-
Outline the skyline:
Using a pencil very lightly, sketch the basic rectangular shapes of your buildings. Vary the heights and widths to make the skyline interesting, adding a few antennas or spires on top. -
Fill in the silhouettes:
Use a black waterproof marker or black acrylic paint to fill in the building shapes. Make sure the edges are straight and sharp. Using a maker gives you more control over the straight lines. -
Add architectural details:
Draw thin lines extending upward from some rooftops to represent antennas. These fine details add a lot of scale to the small painting.
Step 3: Adding the Lights
-
Paint the stars:
Using an opaque yellow paint, gold watercolor, or a gold gel pen, add larger dots near the top of the sky. I like to group a few together to suggest constellations. -
Add distant stars:
Switch to a white gel pen or white gouache on a small brush to add tiny white specks between the larger gold stars. These represent the stars further away in the galaxy. -
Light the windows:
Once the black buildings are fully dry, use your gold or yellow gel pen to draw small rectangles inside the buildings. Create rows and columns, but leave some spaces black to show lights that are turned off. -
Vary the window shapes:
For some buildings, draw long vertical strips of glass; for others, stick to small square grids. This variety helps distinguish one skyscraper from another. -
Final touches:
Carefully peel away the masking tape at a 45-degree angle to reveal your crisp white border. Sign your miniature masterpiece in the corner.
Pro Tip: Glowing Windows
Go over the yellow window rectangles twice with your gel pen. The second layer creates a brighter, more opaque ‘light’ against the dark black background.
Enjoy the peaceful view of your handmade illuminated skyline
Glowing Lanterns in the Dark
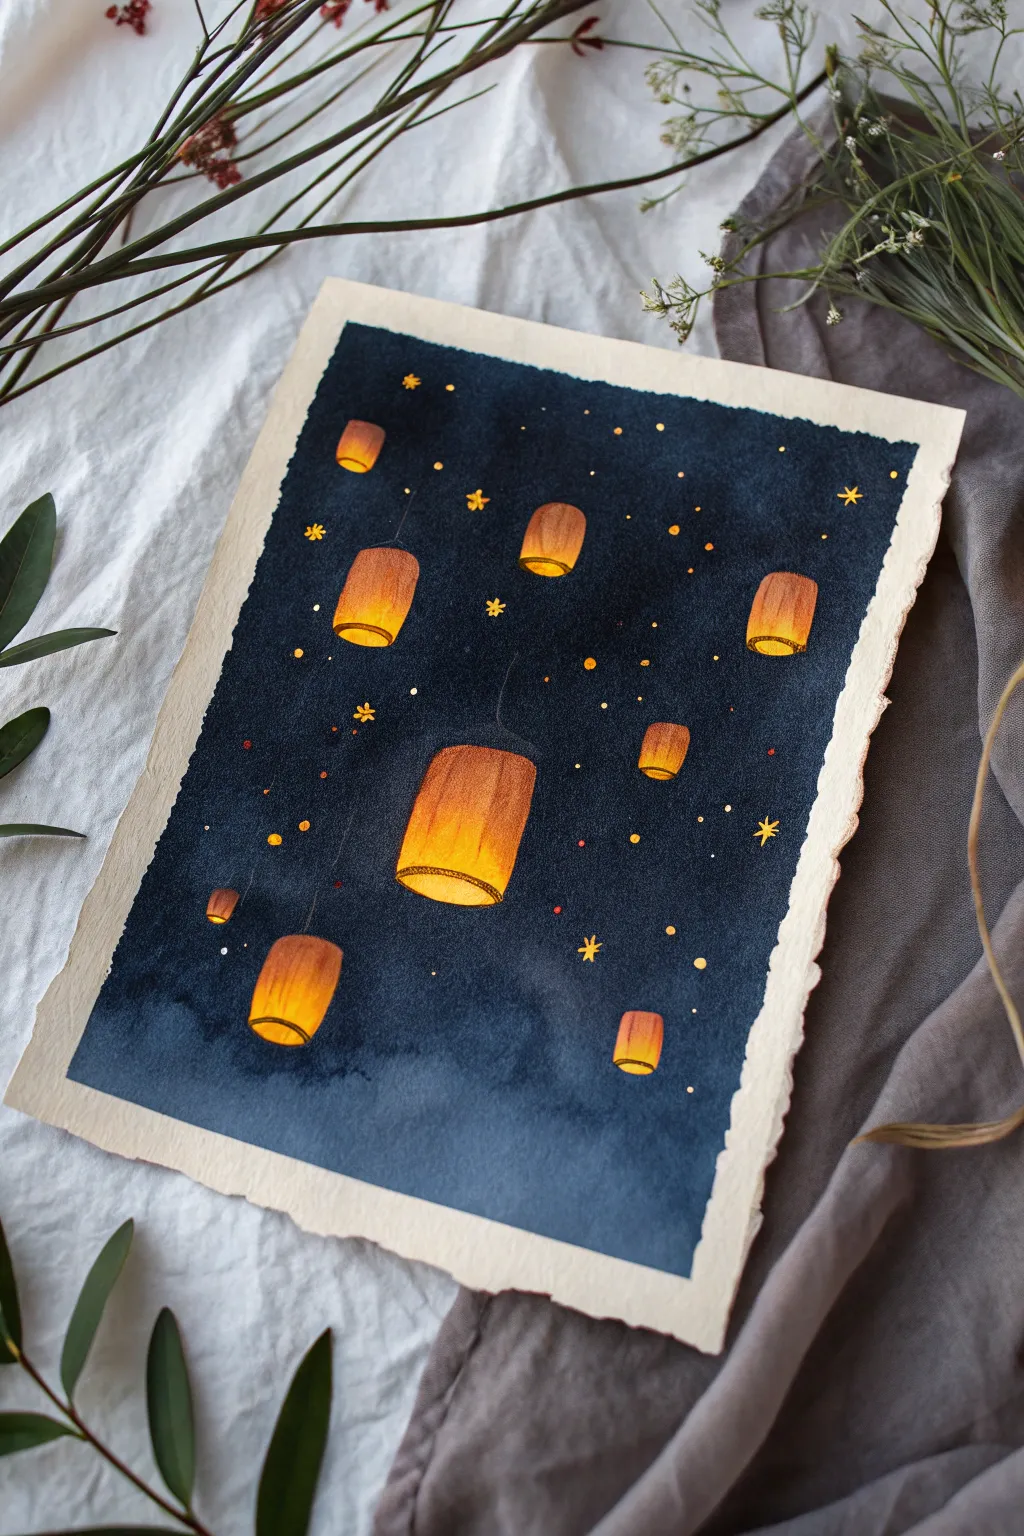
Capture the magic of a lantern festival with this atmospheric watercolor painting, where warm, glowing lights drift against a deep indigo sky. The high contrast makes the lanterns pop, creating a serene and luminous effect perfect for beginners.
Step-by-Step Guide
Materials
- Cold press watercolor paper (deckled edge optional)
- Masking fluid
- Watercolor paints: Indigo, Payne’s Grey, Cadmium Yellow, Cadmium Orange, Burnt Sienna
- Gold metallic paint or gel pen
- Round brushes (flats for wash, small rounds for details)
- Two jars of water
- Paper towels
- Painter’s tape or drawing board
Step 1: Drawing and Masking
-
Sketch the layout:
Begin by lightly sketching the outline of various cylinder-shaped lanterns scattered across your paper. Vary their sizes to create depth—make the central one largest and the distant ones tiny. -
Add floating motion:
Draw faint, curved lines extending from the tops of the lanterns to suggest tethers or the direction of flight, giving the composition a gentle, upward movement. -
Apply masking fluid:
Carefully paint masking fluid over every lantern shape. This crucial step preserves the white of the paper so your glowing yellows will remain bright later. -
Protect the stars:
Use a toothpick or a very fine brush to dot small specks of masking fluid around the sky for stars. Let the fluid dry completely until it’s tacky and transparent.
Bleeding Lines?
If paint bleeds under the tape or fluid, don’t panic. Use a stiff, damp brush to gently lift the dark paint away, or cover the mistake with opaque white gouache before painting the yellow over it.
Step 2: The Night Sky
-
Prepare the background wash:
Mix a generous amount of Indigo and Payne’s Grey in your palette. You want a very saturated, dark mixture to act as the night sky. -
Wet-on-wet technique:
Brush clean water over the entire paper surface (going right over the dried masking fluid). The paper should be glisten, but not hold puddles. -
Paint the darkness:
Load your largest brush with the dark mix and drop it onto the wet paper. Work quickly, letting the colors bleed and blend naturally. -
Deepen the edges:
While the paper is still wet, add more pigment to the edges and corners to create a vignette effect, drawing the eye toward the center where the light will represent. -
Create texture:
I like to blot a few random areas very lightly with a scrunched tissue while the paint is damp to create subtle cloud-like variations in the night sky. -
Let it dry fully:
This is the patience test. Allow the background to dry completely. If you touch it while cool or damp, the masking fluid removal might tear the paper.
Step 3: Creating the Glow
-
Reveal the white:
Gently rub off the masking fluid with your finger or a rubber cement pickup tool. You should now have stark white shapes against the dark blue. -
Base glow layer:
Paint the entire shape of each lantern with a wash of watery Cadmium Yellow. This serves as the bright inner light. -
Adding warmth:
While the yellow is damp, drop Cadmium Orange into the top and bottom edges of the lanterns, blending it slightly toward the middle but keeping the center bright. -
Defining structure:
Use a detail brush and a mix of Burnt Sienna or diluted brown to paint fine vertical lines on the lanterns, suggesting the paper structure or wire frame. -
Painting the rims:
Add a darker, thin brown ring at the bottom of each lantern for the rim, and a small dark shape underneath to represent the fuel source. -
Starry details:
Paint the small masked star dots with yellow. For extra magic, use metallic gold paint to add tiny geometric starbursts or crosses over the brightest stars. -
Final touches:
If any lantern edges look too sharp, you can gently soften them with a damp brush to enhance the glowing, hazy effect against the dark sky.
Golden Hour
Mix a tiny amount of iridescent medium into your yellow paint. This gives the lanterns a physical shimmer that catches the light when the finished painting is viewed from different angles.
Step back and admire how your simple wash techniques have transformed into a radiant night scene.
Simplified Northern Lights Ribbons
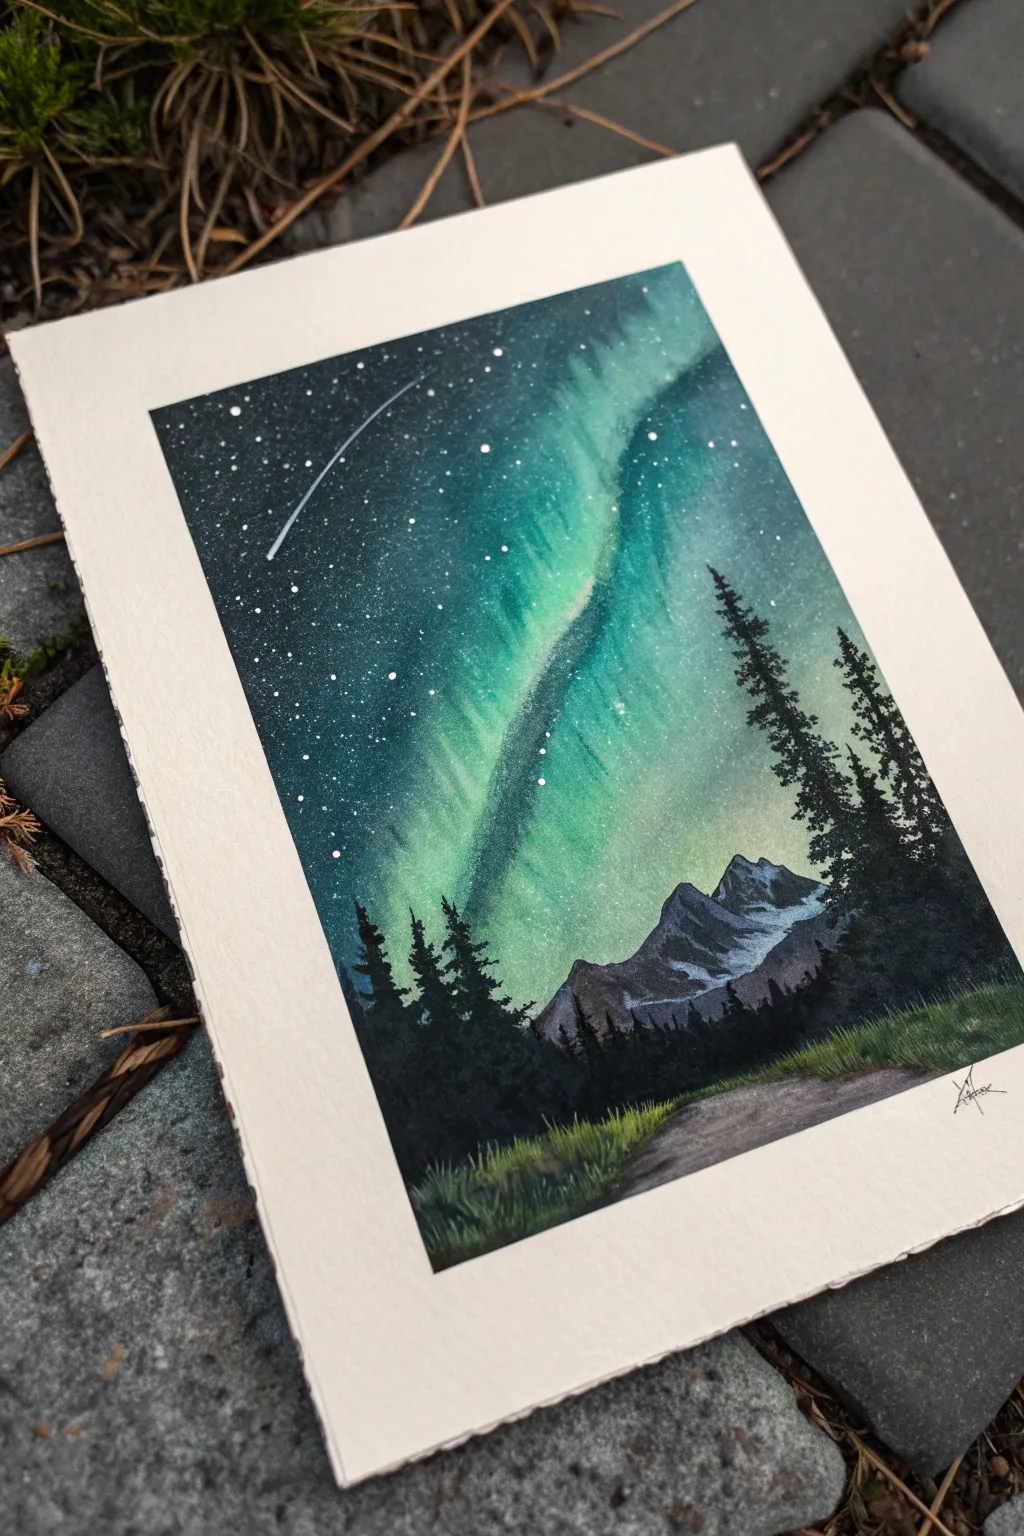
Capture the ethereal glow of the northern lights dancing over a mountain forest in this dramatic watercolor painting. This project focuses on vibrant blending techniques to create a luminous green ribbon against a deep, starry sky.
Detailed Instructions
Materials
- Cold press watercolor paper (with deckled edge optional)
- Masking tape
- Watercolors: Prussian Blue, Phthalo Green, Indigo, Black
- White gouache or white ink
- Flat wash brush (1 inch)
- Round brush (size 6 or 8)
- Detail brush (size 0 or 1)
- Clean water jar
- Old toothbrush (optional for stars)
- Paper towels
Step 1: Painting the Aurora Sky
-
Prepare the paper:
Begin by taping down your paper to a board if it isn’t a block. If you are using loose paper with deckled edges, you can tape carefully from the back or just leave it loose if the paper is heavy enough (300gsm+). Wet the entire sky area with clean water using your flat wash brush until the paper has a gentle sheen. -
Establish the glow:
While the paper is wet, load your brush with a bright, diluted Phthalo Green. Paint a sweeping, diagonal curve across the center of the paper to designate where the aurora borealis will be. Keep this layer light and watery at first. -
Deepen the night sky:
Mix a dark, rich color using Prussian Blue and a touch of Black or Indigo. Apply this dark mixture to the upper left and right corners, working towards the green strip but not painting over it completely yet. Let the colors bleed slightly into the wet green areas. -
Blend the transition:
Clean your brush and use slightly damp bristles to soften the edges where the dark blue meets the bright green. You want a smooth, misty transition rather than a hard line. Add a little more concentrated green to the center of the ribbon to intensify the glow. -
Add texture to the lights:
While the green paint is still damp, you can lift out faint vertical streaks using a clean, thirsty brush, or add tiny vertical strokes of slightly darker green to suggest the curtain-like folds of the aurora. -
Create the starry field:
Allow the sky completely dry. This is crucial. Once dry, cover the bottom third of your painting with a scrap piece of paper to protect it. Dip an old toothbrush or a stiff brush into white gouache diluted with a tiny bit of water. Flick the bristles to spray a fine mist of stars over the dark blue sections of the sky. -
Add the shooting star:
Using your finest detail brush and opaque white gouache, paint a thin, swift line in the upper left corner. Taper the end of the line so it looks like it’s fading out as it streaks across the darkness.
Step 2: Mountains and Trees
-
Sketch the mountain shapes:
With a very light pencil or a dilute mix of blue-grey paint, roughly outline the mountain peaks in the lower third of the composition. They should sit below the main sweep of your aurora. -
Paint the mountains:
Fill in the mountains with a mid-tone grey-blue. Let it be somewhat uneven. While wet, drop in darker shadows on one side of the peaks to suggest dimension and rugged terrain. -
Add snow caps:
If you want snowy peaks, you can lift paint while it’s wet or use white gouache after the grey layer dries to add highlights on the tips of the mountains. -
Paint the distant tree line:
Mix a dense black-green color. Using the tip of your round brush, stipple a jagged, uneven horizon line at the base of the mountains to represent a distant forest. -
Create foreground trees:
Switch to a smaller brush for control. Paint tall, silhouette pine trees on the right and left sides. Use a vertical line for the trunk, then dab horizontal, slightly downward-curving strokes for the branches, getting wider as you move down the tree. -
Fill the dense forest:
Fill in the spaces between your hero trees with solid black or dark green to create a dense forest mass. Ensure the bottom edge is solid darkness to ground the painting.
Star Splatter Mess?
If your star splatters are too big or blobby, blot them immediately with a clean tissue. Ensure your white paint is not too watery before flicking.
Step 3: Foreground Details
-
Establish the ground:
Paint a sloping ground area at the very bottom right. Use a washed-out brown or grey to suggest a dirt path or rocky ground leading into the dark woods. -
Add grassy textures:
Using your smallest brush and a mix of green and yellow (or light opaque green), flick tiny, upward strokes along the bottom edge of the dark forest area to simulate tall grass catching the faint light. -
Final touches:
Review the contrast. If the trees have dried lighter than expected, add another layer of black to ensure they look like true silhouettes against the bright aurora. Sign your name in the bottom corner with a fine pen or thin brush.
Make It Glow
Glaze a thin layer of transparent yellow watercolor over the brightest part of the green aurora once it’s dry to make the light look warmer and more intense.
Peel off the tape to reveal your crisp edges and enjoy the magical night scene you have created
Solar Eclipse Ring of Light
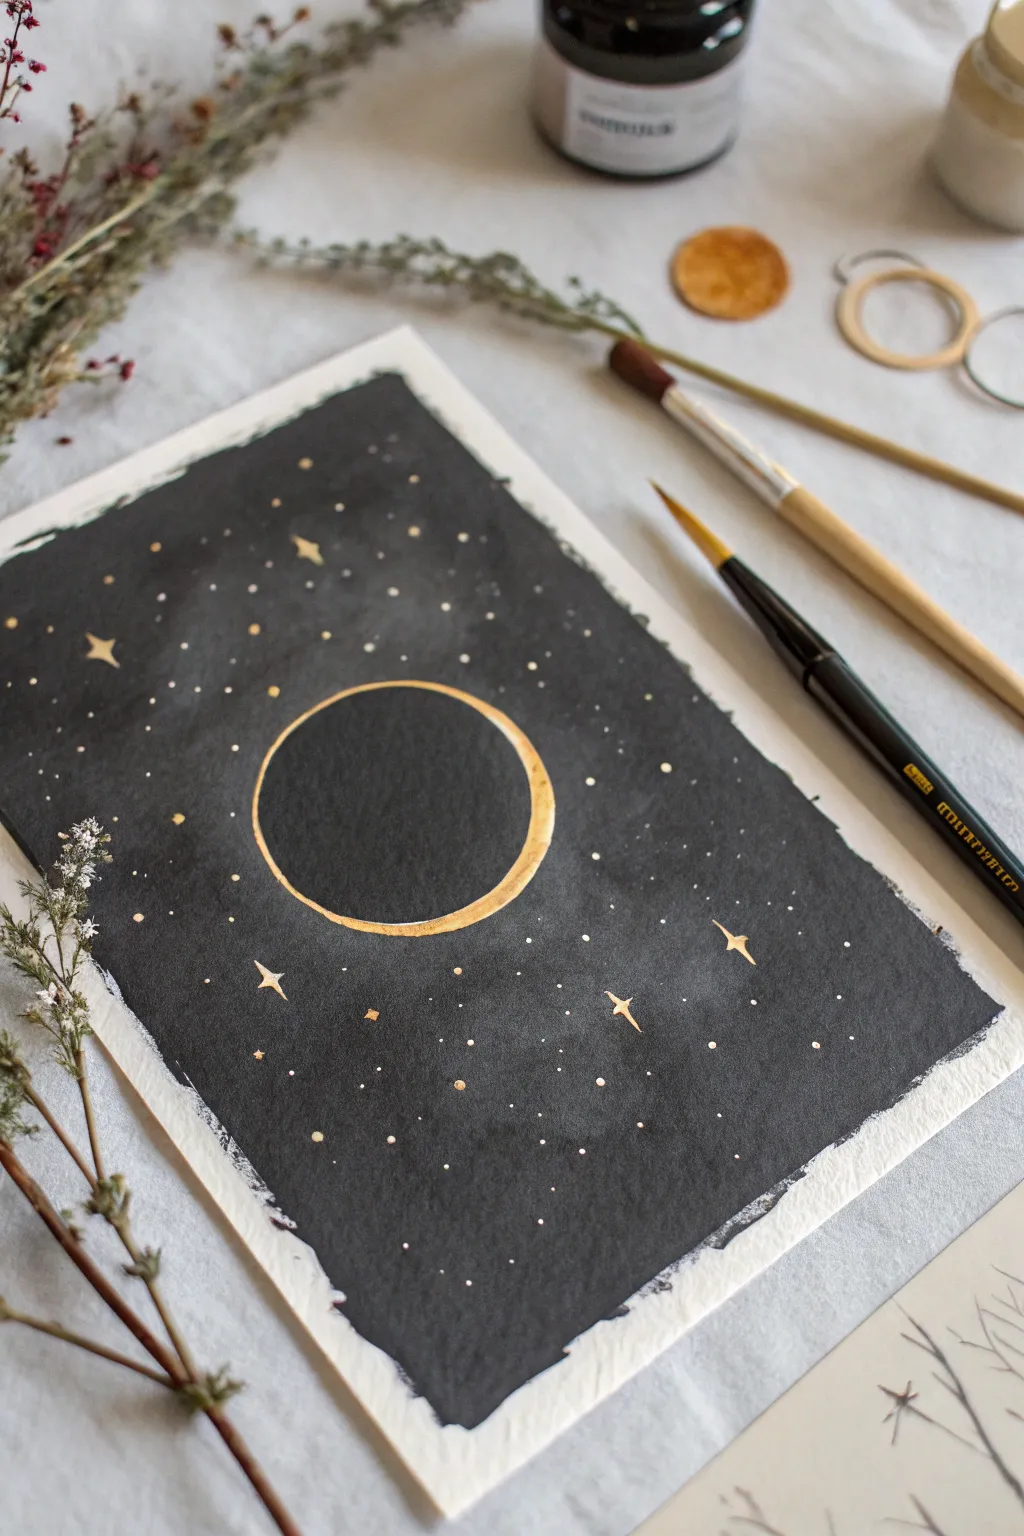
Capture the mystic beauty of a solar eclipse with this striking project that balances deep, matte darkness against shimmering metallic light. Using opaque black gouache or acrylic, you’ll create a void-like canvas that makes the golden ring of fire and delicate stars truly pop.
Step-by-Step Guide
Materials
- Heavyweight watercolor paper (300gsm, cold press texture)
- Black gouache or high-pigment matte black acrylic paint
- Metallic gold watercolor pan or acrylic ink
- Round watercolor brushes (size 6 for washes, size 0 or 00 for details)
- Pencil (HB or H)
- Compass or a circular object to trace (approx. 2-3 inches diameter)
- Palette for mixing paint
- Jar of clean water
- Paper towels
- Painter’s tape or masking tape (optional for borders)
Step 1: Preparation & Sketching
-
Define the borders:
Begin by deciding the size of your painting area. You can tape down the edges of your watercolor paper to create a clean white border, or simply plan to leave uneven, painted edges for a rustic look as seen in the example. -
Draw the celestial body:
Use a compass or trace a circular object in the center of your paper to create the moon’s outline. Press very lightly with your pencil so graphite lines won’t show through later. -
Sketch the ring of light:
Lightly sketch a second circle slightly larger than the first, but offset it just a tiny bit. This creates the crescent shape of the solar corona peeking out from behind the shadow.
Uneven Gold Coverage?
If your gold paint looks transparent, don’t overwork it while wet. Let the first layer dry fully, then apply a second layer. Metallic pigments sit better on top of dry layers.
Step 2: Creating the Void
-
Outline the circle:
Load a medium-sized round brush with your black paint. Carefully paint around the outer edge of your penciled circle, preserving the interior white space where the gold ring will go. -
Fill the background:
Continue painting outward from the circle to fill the rest of the paper. Use broad, uneven strokes near the edges to create a rough, artistic border. -
Fill the moon’s shadow:
Switch to a smaller brush and carefully fill in the inner circle with black paint. Leave a thin gap between this inner black circle and the outer black background—this gap is your ‘ring of fire’. -
Check for opacity:
Let the first layer dry completely. If the black looks streaky or greyish, apply a second coat to ensure a deep, opaque matte finish. -
Refine the edges:
While the black dries, examine the borders of your unpainted ring. Use a slightly damp, clean brush to tidy up any stray black marks that might have crossed the line.
Step 3: Gilded Details
-
Prepare the gold:
Activate your metallic gold watercolor with a few drops of water, mixing until it reaches a creamy, ink-like consistency. -
Paint the corona:
Using a fine detail brush (size 0), carefully fill in the gap between the black moon and the black sky. It’s okay if the width varies slightly; it adds organic realism. -
Add large stars:
Dip the tip of your detail brush into the gold paint. Choose three or four spots for larger stars and paint small four-pointed diamond shapes. -
Extend star rays:
For the largest stars, gently pull the paint outward from the center to elongate the vertical and horizontal points, making them twinkle. -
Dot the constellations:
Load your brush with gold again and gently touch the tip to the paper to create medium-sized dots scattered randomly around the eclipse. -
Create distant stardust:
Dip an old toothbrush or a stiff bristled brush into the gold paint. Run your thumb across the bristles to flick a fine mist of tiny gold specks across the darkness. -
Mix star sizes:
Go back in with your fine brush and add a few ultra-tiny manual dots in the emptier black spaces to create depth. -
Add final highlights:
If the gold ring looks flat, add a second layer of gold paint to the thickest part of the crescent to make it shine brighter.
Level Up: Texture
Sprinkle a tiny pinch of salt onto the wet black background paint before it dries. Brush it off later for a subtle, textured crater effect in the dark sky.
Allow the metallic flecks to dry completely before displaying this celestial piece
Dark Botanical Leaves on Charcoal
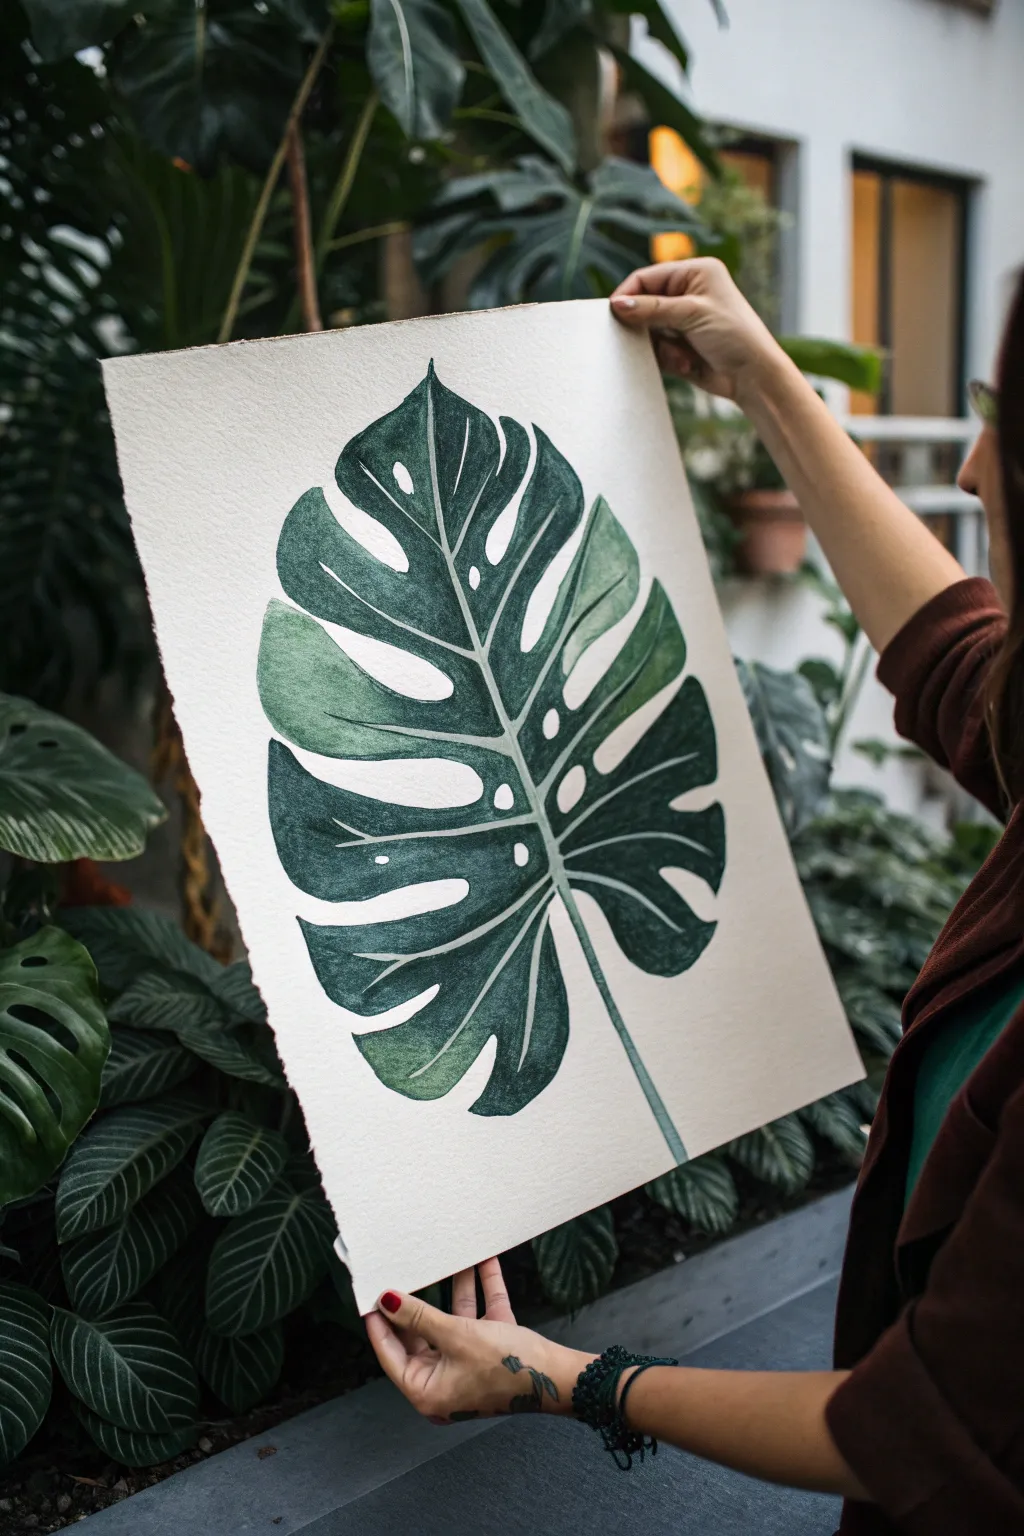
Capture the moody elegance of botanical art with this striking Monstera leaf study. Using deep green tones on heavy, textured paper creates a piece that feels both organic and modern, perfect for adding a touch of nature to a dark-themed space.
Detailed Instructions
Materials
- Heavyweight cold-press watercolor paper (300gsm or higher)
- Watercolor or gouache paints (Hooker’s Green, Indigo, Payne’s Gray, Sap Green, White)
- Pencil (HB or 2H)
- Kneaded eraser
- Round brushes (flats for large areas, fine liners for veins)
- Mixing palette
- Jar of clean water
- Paper towels
- Masking tape (optional for edges)
Step 1: Drafting the Leaf Shape
-
Define the central vein:
Start by lightly sketching a long, slightly curved line down the center of your paper. This will be the midrib of your Monstera leaf and acts as the anchor for the entire shape. -
Outline the perimeter:
Draw a large heart shape around your central line. Don’t worry about being perfect; real leaves have natural asymmetry. Keep your pencil pressure very light so the graphite won’t show through the paint later. -
Sketch the fenestrations:
Add the characteristic splits and holes (fenestrations) of the Monstera. Draw deep, curved indentations coming in from the edges toward the center vein, and add oval holes in the broader parts of the leaf. -
Refine the edges:
Go over your sketch to finalize the leaf’s outline, connecting the outer edge to the deep splits. Use your kneaded eraser to gently lift away any construction lines or sketched areas you no longer need.
Step 2: Applying the Base Layers
-
Mix your base green:
Create a rich, medium green by mixing Hooker’s Green with a touch of Sap Green. You want this first layer to be slightly diluted but not too watery. -
Paint the left sections:
Working on one side of the central vein, paint the leaf sections. Leave a very thin hairline of white paper exposed where the secondary veins will be. This negative space technique saves you from having to paint white lines later. -
Paint the right sections:
Repeat the process on the right side, filling in the leaf segments while carefully preserving those thin white gaps for the veins. If the paint pools, lift the excess with a clean, damp brush. -
Add variance while wet:
While the paint is still damp, drop in small amounts of a lighter yellow-green mix near the tips of the leaf segments to create a subtle gradient and suggestion of light.
Keep it Clean
Rest your hand on a scrap piece of paper while painting the details. This prevents the oils on your hand from getting on the paper and protects your work from smudging.
Step 3: Building Depth and Shadows
-
Mix a shadow color:
Combine your base green with Indigo or Payne’s Gray to create a deep, shadowy forest green. This darker tone is essential for the ‘moody’ look of the piece. -
Deepen the center:
Apply this dark mix near the central midrib of the leaf. Blend it outward toward the edges of each segment to create a curved, three-dimensional effect. -
Enhance the perimeter:
Add touches of the dark mix to the very outer edges of the leaf lobes. This ‘vignette’ effect on the individual segments makes the leaf look heavy and substantial. -
Paint the stem:
Using a mix of Sap Green and a tiny bit of brown or red to dull it, paint the stem. Keep it fairly simple, perhaps darkening one side to suggest a cylindrical shadow. -
Dry thoroughly:
Let the painting dry completely before moving to the final details. If the paper feels cool to the touch, it’s still wet inside the fibers.
Make it Pop
Once fully dry, use a sharp colored pencil in a very pale mint or white to lightly outline just the top edges of the leaf lobes. This mimics a light source hitting the glossy surface.
Step 4: Veining and Final Details
-
Refine the main vein:
If you lost the white centerline during painting, you can use a fine brush with opaque white gouache (or white gel pen) to re-establish the midrib. -
Add secondary veins:
Using a very fine liner brush and your darkest green-black mix, paint extremely thin lines branching off the main veins. These should curve gently with the shape of the leaf segment. -
Highlight the holes:
For the internal holes (fenestrations), paint a tiny, thin rim of dark green on the top edge of the hole to give the illusion of thickness and shadow depth. -
Adding texture:
I like to take a nearly dry brush with dark paint and scumble (lightly drag) it over the darkest areas. The texture of the cold-press paper will catch the pigment, enhancing the organic feel.
Step back and admire the stark contrast between the deep, verdant tones and the crisp paper texture
Lightning Bolt on a Black Sky
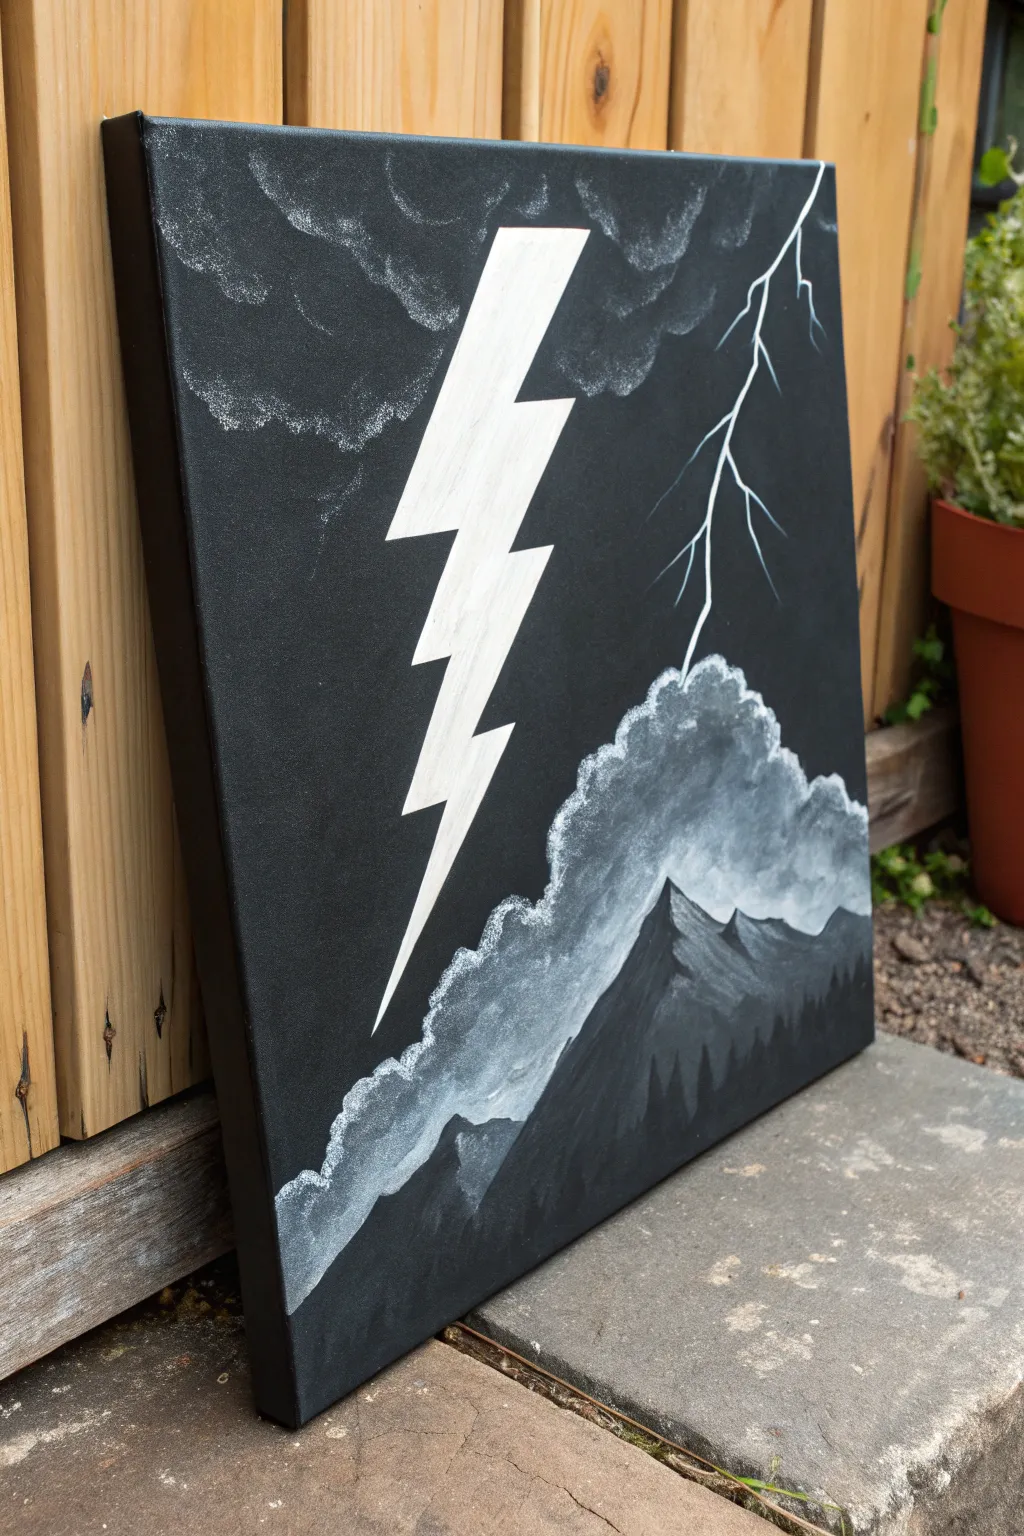
Capture the raw power of a storm with this high-contrast acrylic painting. Featuring a stylized graphic bolt alongside a realistic fork of lightning, this piece uses stark black and white values to create dramatic, moody mountain scenery.
Step-by-Step Tutorial
Materials
- Square stretched canvas (e.g., 12×12 inches)
- Acrylic paints: Black (Mars or Carbon) and White (Titanium)
- Wide flat brush for background
- Medium flat or angle brush
- Small round detail brush (size 0 or linear)
- Masking tape or painter’s tape
- Pencil
- Ruler
- Palette or paper plate
- Cup of water and paper towels
Step 1: Setting the Dark Foundation
-
Prime the canvas:
Begin by covering your entire canvas with a solid coat of black acrylic paint. Use your wide flat brush for this stage to ensure smooth, even coverage. -
Paint the edges:
Don’t forget to paint the sides of the canvas black as well, giving the finished piece a polished, gallery-ready look without needing a frame. -
Let it dry completely:
Allow the base coat to dry fully. If the canvas texture still shows through too much, apply a second coat of black for a deep, opaque finish.
Step 2: Constructing the Graphic Bolt
-
Plan the lightning shape:
Once the black background is bone dry, use a ruler and pencil to lightly sketch a large, jagged lightning bolt shape. Start wide at the top center and taper it down to a sharp point near the bottom left. -
Tape the edges:
Carefully apply masking tape along the outside lines of your pencil sketch. Press the edges of the tape down firmly to prevent paint from bleeding underneath. -
Fill in the bolt:
Using a medium brush, paint the interior of the taped area with titanium white. You may need two coats to get a bright, solid white against the black background. -
Remove the tape:
While the paint is still slightly tacky (or fully dry, if you are careful), peel back the tape slowly to reveal crisp, sharp edges.
Bleeding Lines?
If white paint bled under your tape, wait for it to dry completely. Then, use a small flat brush and black paint to carefully ‘erase’ the mistake and straighten the line.
Step 3: Creating Atmosphere and Clouds
-
Sketch the mountain ridge:
Lightly sketch a jagged mountain line across the bottom third of the canvas. The peaks should rise on the right side and slope down toward the left. -
Mix a hazy grey:
On your palette, mix a small amount of white into your black paint to create a dark charcoal grey. -
Paint the mountain silhouette:
Fill in the mountain shape with this dark grey. Keep the top edge crisp, but let the bottom fade into the black canvas. -
Stipple the clouds:
Load an old or stiff brush with a small amount of white paint—wipe most of it off so the brush is ‘dry.’ Gently tap or stipple cloud shapes along the ridges of the mountain. -
Build cloud density:
Concentrate more white paint at the top edges of the clouds to simulate light hitting them, and let the white fade out as you move downward into the dark mountain. -
Add upper atmosphere:
Using the same dry-brush technique, lightly scumble faint, wispy clouds near the top of the canvas around where the lightning originates.
Make it Glow
Mix a very thin glaze of white or pale blue acrylic with water. Lightly brush it over the clouds closest to the lightning bolts to create a subtle glow effect.
Step 4: Fine Details and Sparks
-
Highlight the mountain peaks:
Take a small amount of light grey or white and paint thin highlights on the sheer, right-facing slopes of your mountain peaks to give them dimension. -
Sketch the realistic bolt:
On the right side of the canvas, use your small round brush and thinned white paint (add a drop of water to make it flow like ink) to paint a thin, erratic line coming from the top right corner. -
Branch out:
Add smaller forks branching off the main thin lightning bolt. Keep your hand loose and shaky to make the electricity look natural and jagged. -
Paint the forest line:
Mix a black-grey shade slightly darker than your mountain. Using a small brush, paint tiny vertical strokes along the bottom edge of the mountain to suggest a distant pine forest silhouette. -
Final touches:
Check your large white graphic bolt. If any black paint smudged onto it, touch it up with pure white for a pristine finish.
Hang your stormy masterpiece on the wall and enjoy the dramatic contrast you have created
Neon Duotone Shapes on Black
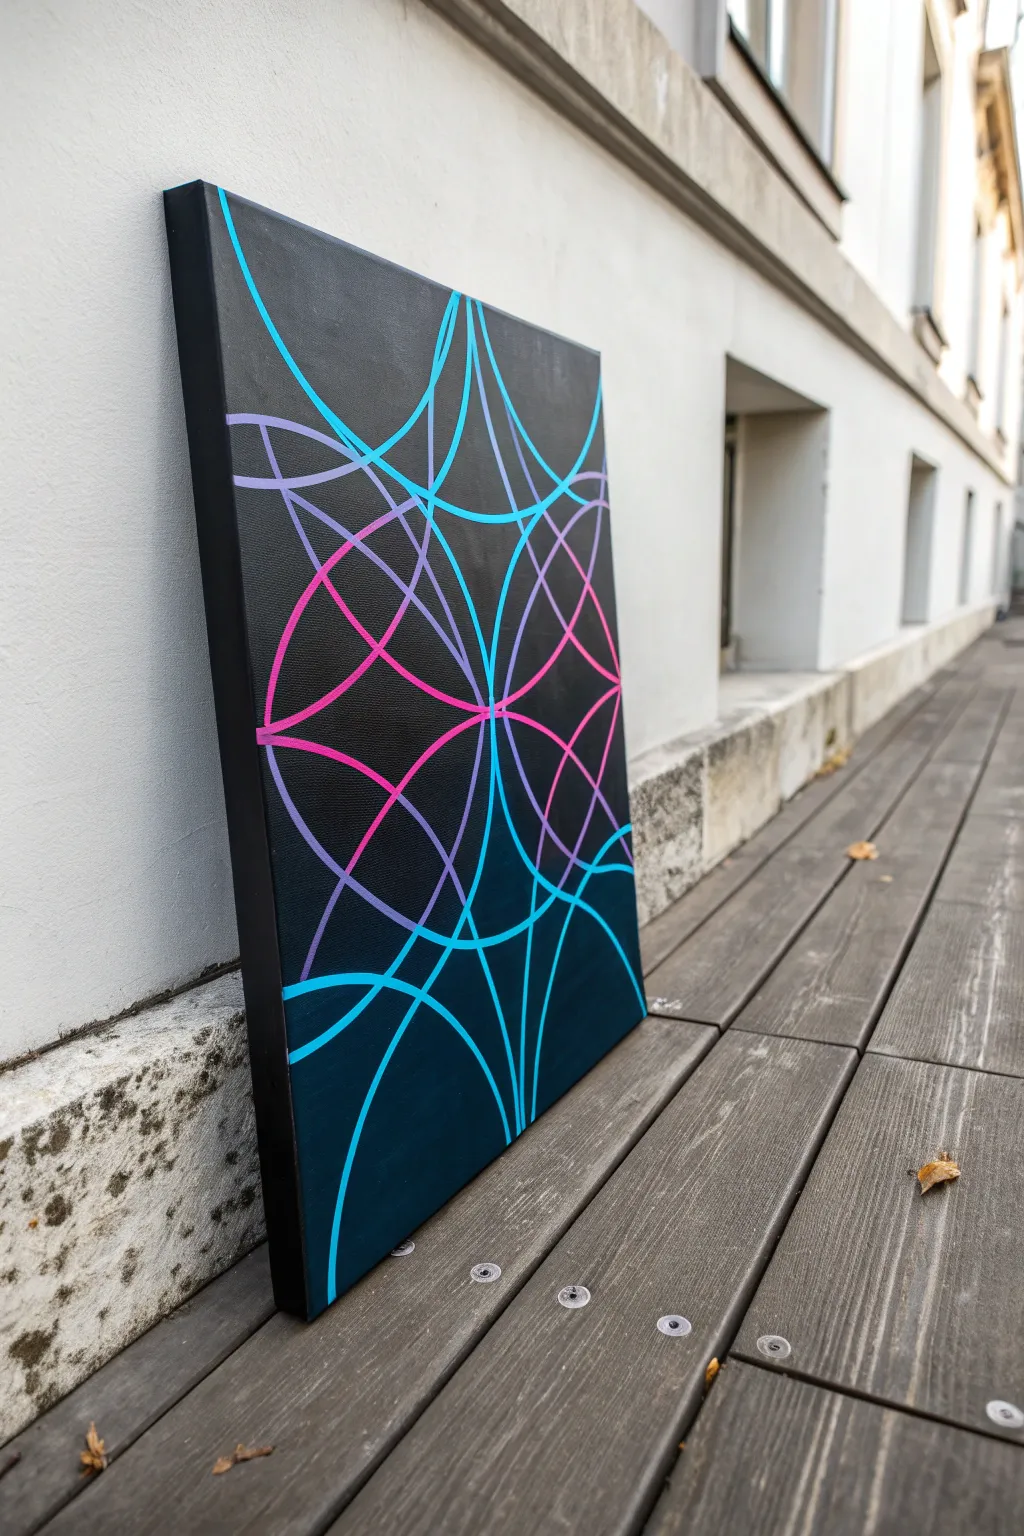
This striking piece relies on high-contrast neon lines against a deep black background to create almost glowing, intersected geometry. The overlapping arcs form a mesmerizing structure that looks complex but is built from simple, repetitive curves.
Detailed Instructions
Materials
- Stretched canvas (rectangular or square)
- Black acrylic paint (matte or satin finish)
- White pencil or white chalk
- Compass with an extension arm (or a large bowl/plate for tracing)
- Acrylic paint markers (Cyan/Light Blue, Magenta/Hot Pink, Purple/Lavender)
- Ruler or straight edge
- Wide flat brush
- Damp cloth
- Varnish (optional)
Step 1: Base Preparation
-
Prime the canvas:
Begin by covering your entire canvas with black acrylic paint. Use a wide flat brush to ensure smooth, even coverage. -
Paint the edges:
Don’t forget to paint the sides of the canvas black as well, giving the finished piece a polished, gallery-ready look without needing a frame. -
Check for opacity:
Once the first coat is dry, hold it up to the light. If you see any pinholes or streaks of white, apply a second coat of black to get a solid, void-like background. -
Define the grid:
Using a ruler and a white charcoal pencil or chalk, lightly mark the vertical and horizontal center lines of your canvas to anchor your pattern.
Step 2: Drafting the Geometry
-
Set your radius:
Decide on the size of your circles. For the pattern shown, set your compass to a radius that is roughly one-third of the canvas width. -
Draw the central anchor:
Place the compass point exactly in the center of the canvas (where your grid lines cross) and draw your first circle lightly with the white pencil. -
Mark intersections:
Note where this central circle crosses your vertical and horizontal guide lines. These four points will be the centers for your next set of arcs. -
Create the overlapping petals:
Place the compass point on the top intersection of the first circle. Draw a new arc that passes through the canvas center. Repeat this for the bottom, left, and right intersection points. -
Expand the pattern:
Continue moving your compass point to the new intersections created by the petal shapes, drawing outwards until the pattern runs off the edge of the canvas. -
Review the layout:
Step back and look at your pencil sketch. The lines should form a network of four-pointed star shapes and curved diamonds.
Wobbly Lines?
If your hand shakes while tracing, try trailing your pinky finger on the canvas for stability, or use a flexible curve ruler as a guide for the marker nib.
Step 3: Applying Neon Color
-
Prepare the markers:
Shake your acrylic paint markers vigorously to mix the pigment. I find it helpful to press the nib on a scrap piece of paper first to ensure the flow is smooth but not dripping. -
Trace the primary curves:
Start with the cyan (blue) marker. Trace the outermost sweeping curves that frame the central design, moving your arm—not just your wrist—to keep the line steady. -
Add the secondary hue:
Switch to the magenta marker. Identify the central ‘petals’ or intersecting arcs in the middle of the design and trace these lines carefully. -
Incorporate the third tone:
Use the purple marker for the remaining connecting lines. These often act as the transition zones between the blue and pink sections. -
Thicken the lines:
Go over your lines a second time to increase their opacity and width. The neon color needs to sit solidly on top of the black to pop effectively. -
Clean up sketch lines:
Once the marker paint is completely dry (give it at least an hour), use a slightly damp cloth to gently wipe away any visible white pencil marks. -
Protect the surface:
If desired, apply a coat of spray varnish to seal the markers and unify the sheen of the black background.
Level Up: Glowing Effect
To make lines glow, dry-brush a tiny amount of transparent white paint along the center of the neon lines, or add a faint halo of color with soft pastel.
Hang your geometric masterpiece on a well-lit wall to maximize that electric neon contrast
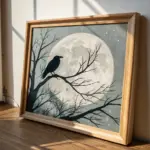
Shadow-Puppet Silhouette Story Scene
Capture the mystic energy of a moonlit night with this high-contrast painting that pairs the softness of a textured moon with crisp, dark silhouettes. Using simple masking techniques, you can achieve a perfect circle and deep, moody atmosphere without needing advanced drawing skills.
How-To Guide
Materials
- Heavyweight watercolor paper or mixed media paper (A3 or A4)
- Circular object for tracing (plate or bowl) or a compass
- Masking fluid or masking tape
- Pencil and eraser
- Watercolor paints (Indigo, Payne’s Grey, Black)
- White gouache or white ink (optional for highlights)
- Large flat wash brush
- Small round detail brush (size 0 or 1)
- Paper towels
- Palette for mixing
- Clean water
Step 1: Setting the Scene
-
Position the Moon:
Start by deciding where your moon will live. Place your circular object (a dinner plate works great for this scale) slightly above the center of the paper to leave room for the trees below. Lightly trace the circle with a pencil. -
Plan the Birds:
Sketch the outlines of two birds flying across the moon area. Place the larger crow higher up and a smaller, simpler bird below it to create a sense of distance. Keep the sketches light, focusing just on the outer shape. -
Mask the Moon:
Apply masking fluid carefully inside the circle, covering the moon’s surface but leaving the bird shapes empty if you want them painted later, or simply mask the whole moon and paint birds on top later. For this look, I prefer masking the entire moon circle to keep the paper pristine white for now. -
Allow to Dry:
Let the masking fluid dry completely. It should feel rubbery and not tacky to the touch before you proceed with any paint.
Bleeding edges?
If paint bleeds under your masking fluid, use white gouache or a white gel pen to tidy up the circle’s edge. It acts like white-out for artists.
Step 2: Creating the Night Sky
-
Prepare the Wash:
Mix a large puddle of dark blue-grey paint. A combination of Indigo and a touch of Black creates that perfect deep twilight hue. Make sure you have enough to cover the whole background. -
Apply the Background:
Using your large flat brush, apply the paint over the entire paper, brushing right over the masked moon area. Use broad, horizontal strokes for a smooth, even sky. -
Add Texture:
While the paint is still wet, drop in slightly more concentrated pigment in the corners to create a vignette effect, darkening the edges of the artwork. -
Review Coverage:
Check for any uneven spots. If the sky looks too streaky, wait for the first layer to dry and apply a second coat for a velvety, opaque finish. -
Dry Thoroughly:
Wait for the background paint to be bone dry. This is crucial; if the paper is damp, removing the mask might tear the surface.
Step 3: Texturing the Moon
-
Reveal the Moon:
Gently rub your finger or an eraser over the masking fluid to peel it away, revealing the crisp white circle underneath. -
Mix Moon Shadows:
Dilute your dark blue-grey paint heavily with water until you have a very pale, watery wash. -
Paint Craters:
Dab the pale wash onto the moon in random, organic blotches to simulate craters and lunar maria. Soften harsh edges with a clean, damp brush to keep the look dreamy. -
Let it Settle:
Allow the moon texture to dry. It should look subtle, like shadows on a pearl.
Go metallic
For a magical twist, mix a little silver or pearl mica powder into the pale wash used for the moon’s craters to make it shimmer in the light.
Step 4: Silhouettes and Details
-
Mix Deep Black:
Prepare a thick, opaque black paint. You want very little water here so the silhouettes are solid and sharp. -
Paint the Birds:
Using your small detail brush, carefully fill in the bird shapes. Pay attention to the jagged edges of the wings on the larger crow to suggest feathers. -
Define the Beak:
Use the very tip of your brush to pull out the fine point of the beak and the talons. Crisp edges here make the birds look realistic. -
Start the Trees:
At the bottom of the paper, paint a wavy baseline for the forest floor using the same thick black paint. -
Build the Pines:
Paint vertical lines for tree trunks, varying their heights. Then, use a stippling or dabbing motion to create pine branches that get wider as they go down the trunk. -
Overlap for Depth:
Ensure the tree silhouettes overlap slightly and vary in height to create a natural, dense forest line. -
Final Touches:
Once the black paint is dry, you can use a tiny dot of white gouache to add an eye to the crow for a piercing focal point.
Now hang your piece and enjoy the quiet mystery of your moonlit creation


Have a question or want to share your own experience? I'd love to hear from you in the comments below!