If you’ve been craving a cozy rural scene, a simple barn painting is one of the most satisfying projects you can finish in one sitting. I’m going to share my favorite easy barn painting ideas that lean on big shapes, bold color, and a few fun details that do all the storytelling for you.
Classic Red Barn With White Trim
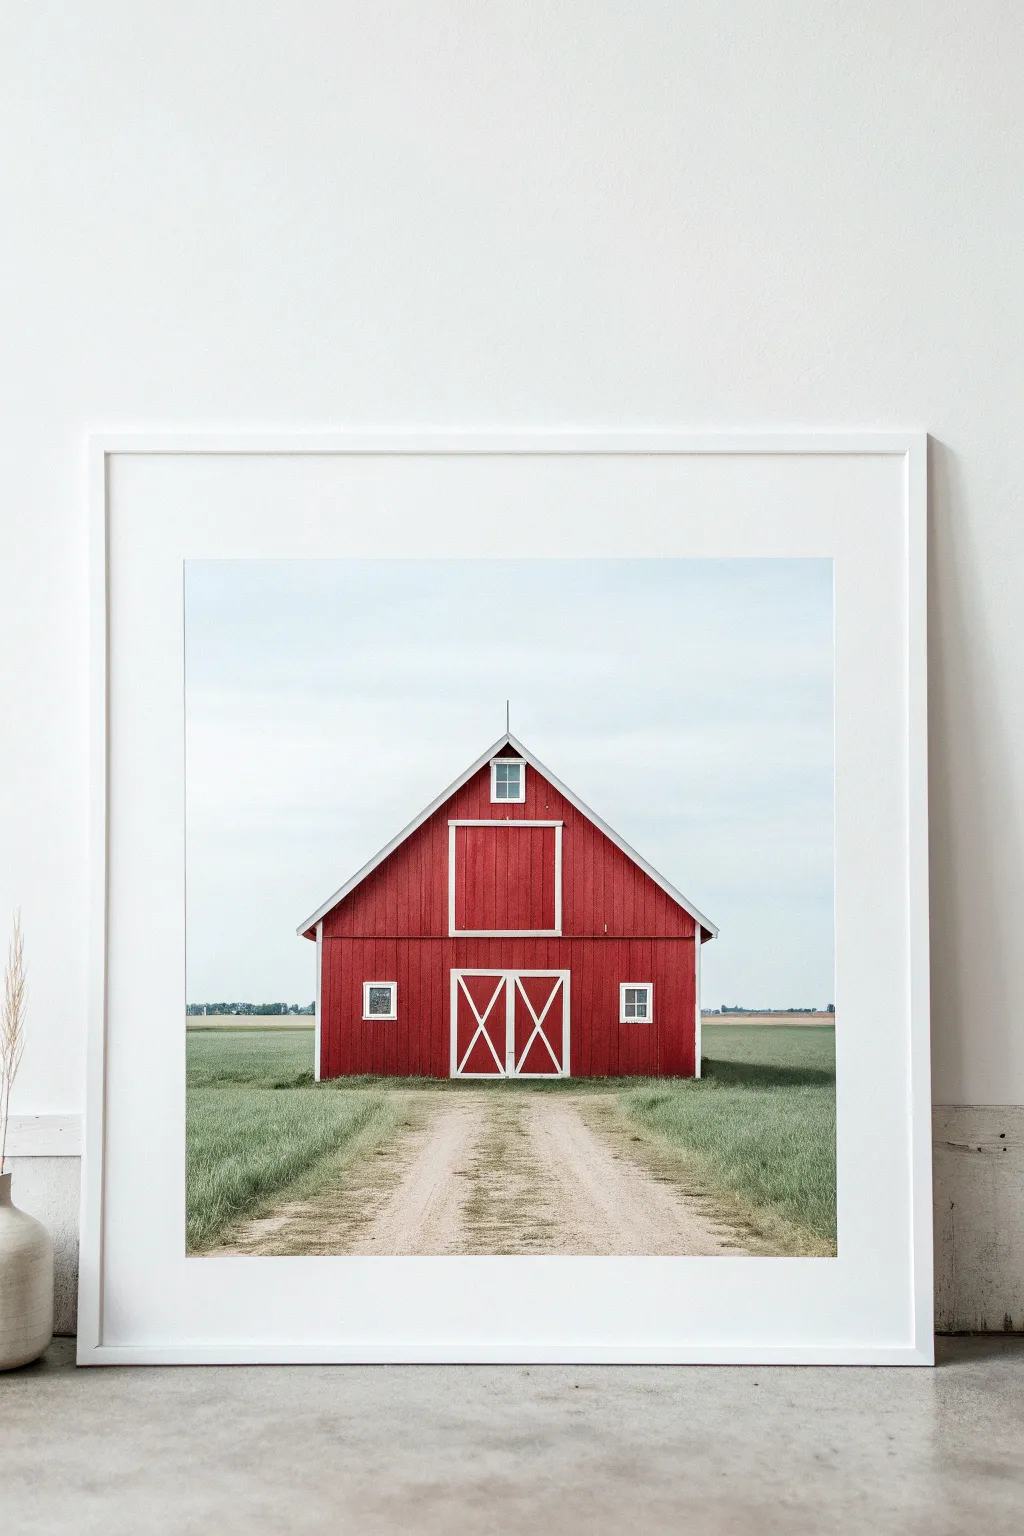
Capture the iconic charm of the American countryside with this serene acrylic painting project featuring a classic red barn centered against a pale sky. With its clean lines and high-contrast white trim, this piece offers a satisfying study in perspective and architectural simplicity.
How-To Guide
Materials
- Heavyweight watercolor paper or canvas panel (16×20 recommended)
- Acrylic paints: Cadmium Red, Titanium White, Raw Umber, Hooker’s Green, Cerulean Blue, Yellow Ochre
- Painter’s tape or masking tape
- Flat brushes (1-inch and 1/2-inch)
- Small round detail brush (size 1 or 2)
- Ruler and pencil
- Palette and water cup
Step 1: Planning and Sky
-
Map the Horizon:
Begin by lightly drawing a horizon line about one-third of the way up from the bottom of your canvas using a ruler and pencil. -
Outline the Barn Structure:
Draw the basic shape of the barn in the center. Start with a square base, then add a wide triangle on top for the roof. Use your ruler to ensure the vertical lines are perfectly straight. -
Detail the Features:
Sketch in the large central barn door with its ‘X’ design, the loft door directly above it, and the two small square windows on either side. Don’t press too hard with the pencil. -
Mix the Sky Gradient:
Create a very pale blue wash by mixing a large amount of Titanium White with a tiny dot of Cerulean Blue. You want an almost-white, hazy sky effect. -
Paint the Background:
Using your 1-inch flat brush, paint the entire sky area. Keep the strokes horizontal and smooth, carefully cutting in around the roofline of the barn sketch.
Clean Lines Hack
For the crispest white trim lines on the barn doors, use narrow painter’s tape (or washi tape) over the dried red paint to mask off the shapes before painting.
Step 2: Painting the Barn
-
Mix the Barn Red:
Mix Cadmium Red with a tiny touch of Raw Umber to deepen the tone slightly, preventing it from looking too bright or cartoony. It should be a rich, weathered red. -
Block in the Color:
Use the 1/2-inch flat brush to fill in the red siding of the barn. Paint vertically to mimic the direction of wood planks. -
Preserve the Trim:
Carefully paint around the doors, windows, and roof edges where the white trim will go. Creating crisp edges here is key, so I often steady my hand against the table for this part. -
Add Subtle Wood Texture:
While the red paint is still slightly tacky, take a mostly dry brush with a slightly darker red mix and drag it vertically down the siding to suggest wooden boards. -
Paint the Trim White:
Once the red layer is completely dry, use a clean detail brush and pure Titanium White to paint the door frames, window casings, and the thick fascia boards along the roofline. -
Detail the Barn Doors:
Using the same small brush, paint the ‘X’ cross-bracing on the main door and the rectangular details on the loft door in crisp white. -
Shadows and Depth:
Mix a dark grey using Raw Umber and Cerulean Blue. Paint extremely thin shadow lines under the roof overhang and inside the window frames to give the building dimension.
Step 3: Foreground and Path
-
Base the Grass:
Mix Hooker’s Green with a little Yellow Ochre and White to get a muted meadow green. Paint the grass areas on either side of the projected path using short, upward strokes. -
Create the Dirt Path:
Mix Titanium White, Raw Umber, and a touch of Yellow Ochre for a sandy beige color. Paint the path leading from the bottom center toward the barn doors, narrowing it as it gets closer to create perspective. -
Blend the Edges:
While the paint is wet, gently blend the edges where the grass meets the dirt path so it looks organic rather than a hard line. -
Add Grass Texture:
Load a fan brush or small flat brush with a lighter green mix. Flick upward rapidly along the sides of the path and across the field to create the look of tall, wild grass. -
Final Touches:
Add a few tiny darker green tufts near the base of the barn to ground the building, and ensure all your white trim lines are opaque and clean.
Adjusting Red
If your red barn looks too transparent or streaky after the first coat, let it dry completely and apply a second coat rather than overworking wet paint.
Step back and admire how the bold red structure pops against the soft landscape you have created


Easy Barn on a Rule-of-Thirds Horizon
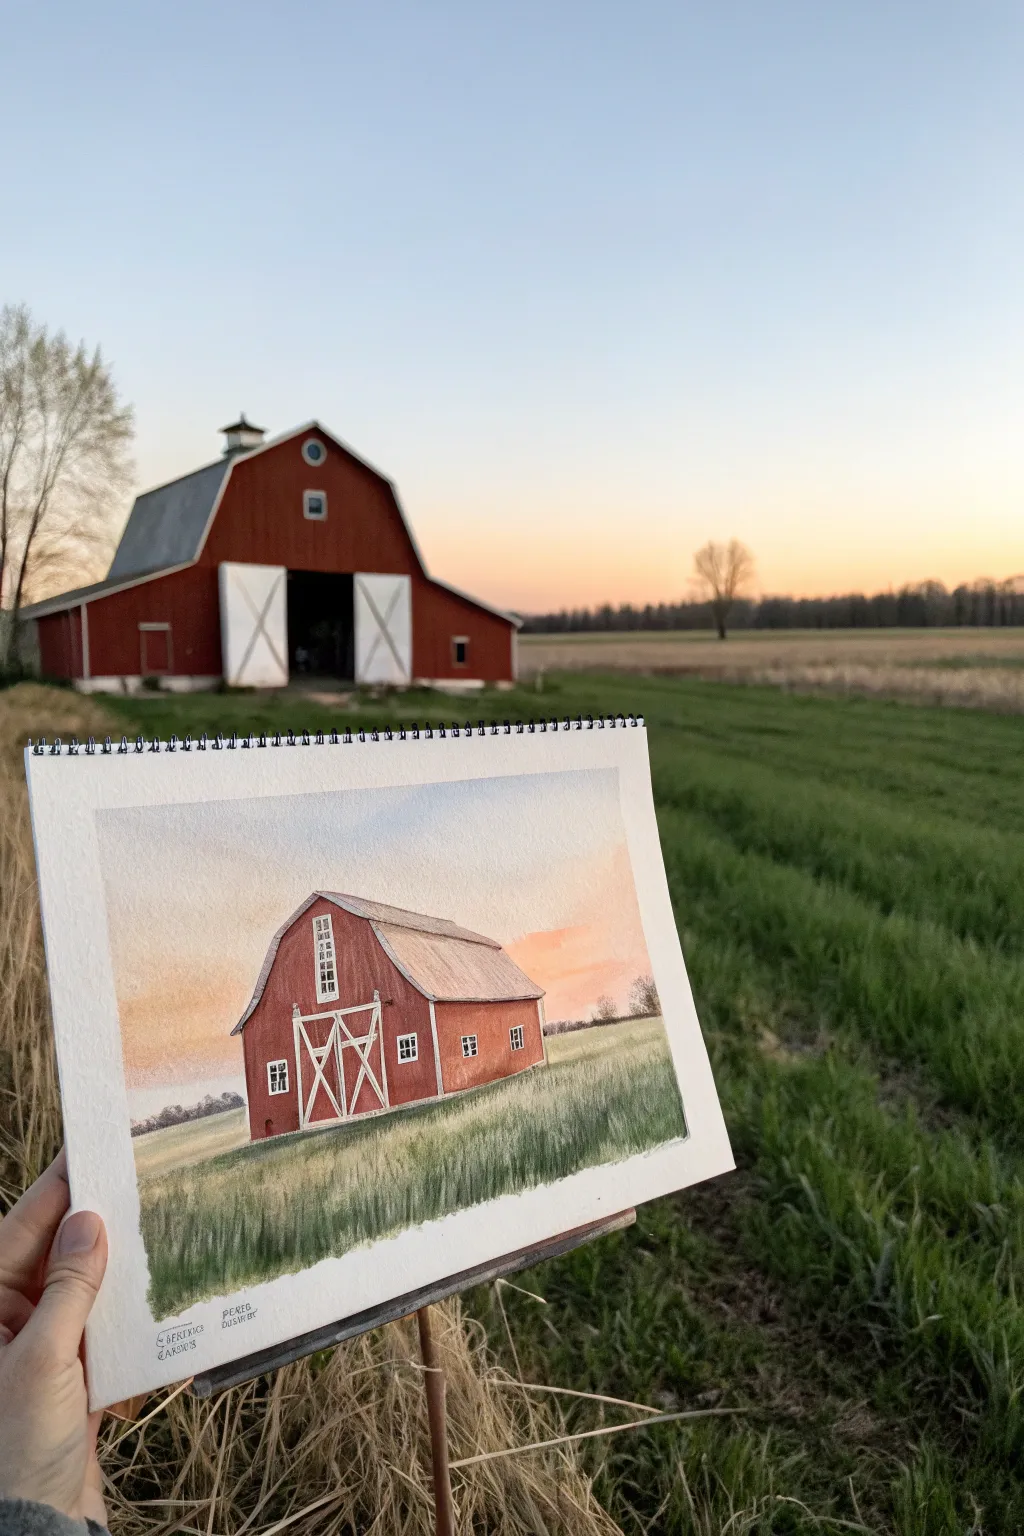
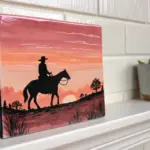
Capture the serene beauty of a rustic red barn bathed in the warm, soft light of sunset with this watercolor project. By placing the horizon line low, following the rule of thirds, you will emphasize the vastness of the sky and create a peaceful, open composition.
Step-by-Step Tutorial
Materials
- Cold press watercolor paper (140lb/300gsm)
- Watercolor paints (Alizarin Crimson, Burnt Sienna, Yellow Ochre, Ultramarine Blue, Sap Green, Burnt Umber)
- Masking fluid (optional but recommended)
- Pencil (HB or H)
- Kneaded eraser
- Synthetic watercolor brushes (Size 8 round, Size 4 round, Size 2 rigger/liner)
- Two jars of water
- Paper towels
- Masking tape
Step 1: Planning and Sketching
-
Tape down your paper:
Secure your watercolor paper to a board using masking tape on all four sides. This creates a clean white border and prevents the paper from buckling too much when wet. -
Establish the horizon line:
Using a ruler or just your eye, lightly draw a horizontal line roughly one-third of the way up from the bottom of the paper. This leaves plenty of room for that expansive sunset sky. -
Sketch the barn structure:
Lightly sketch the outline of the barn. Start with the main body, ensuring the perspective angles slightly so we see both the front and the long side. Add the gambrel roof shape. -
Add architectural details:
Sketch in the large double doors, the loft window above them, and the smaller windows along the side. Keep your pencil lines faint so they don’t show through the final paint. -
Preserve the whites:
If you are using masking fluid, apply it carefully to the white trim around the doors, windows, and the ‘X’ patterns on the barn doors. Let this dry completely before painting.
Step 2: Painting the Sky and Field
-
Wet the sky area:
With a clean, damp brush, apply clear water to the entire sky area, stopping right at the horizon line and carefully painting around the barn roof. -
Drop in warm hues:
While the paper is wet, drop in a very watery wash of Yellow Ochre near the horizon line on the right side. While moving upward and left, blend in a touch of dilute Alizarin Crimson to create a soft, peachy sunset glow. -
Cool down the upper sky:
Near the top left corner, introduce a very light wash of Ultramarine Blue, letting it blend naturally into the pinks and yellows. If the colors bleed too much, tilt your board slightly. -
Paint the distant trees:
While the sky is nearly dry but still damp, mix a muted violet-grey using Ultramarine and Burnt Sienna. Paint a soft, uneven line of distant trees on the left horizon, letting the edges stay slightly fuzzy for depth. -
Lay the field base:
Once the sky is dry, wet the grassy area below the horizon. Apply a varied wash of Sap Green muted with a little Burnt Sienna. Keep the color lighter near the horizon and darker near the bottom foreground.
Protect Those Whites
Don’t have masking fluid? Use white gouache or a white gel pen at the very end to add the trim details back on top of the dried red paint.
Step 3: Bringing the Barn to Life
-
First layer of red:
Mix Alizarin Crimson with a touch of Burnt Sienna to get a rustic barn red. Apply this to the siding of the barn. I like to keep this first layer somewhat translucent to suggest weathered wood. -
Deepen the shadows:
Add more pigment to your red mix (or a touch of Burnt Umber) and paint the side of the barn that is facing away from the light source. This usually means the long side of the barn will be slightly darker than the front face. -
Paint the roof:
Mix a very light grey using a watery Ultramarine and Burnt Sienna. Paint the roof, leaving some white paper showing for highlights. Ensure the roof color is significantly lighter than the walls to show reflected sky light. -
Remove masking:
Once the red paint is bone dry, gently rub away the masking fluid to reveal the crisp white paper underneath. -
Define the trim:
Using a small Size 4 brush and a very pale grey mix, add slight shadows to the white door frames and cross-beams to give them dimension, so they don’t look flat.
Weathered Wood Texture
For an aged look, use the ‘dry brush’ technique on the barn walls. Wipe most paint off your brush and drag it quickly over the paper to creating a rough texture.
Step 4: Final Details and Texture
-
Add window details:
Use a darker grey-brown mixture to carefully paint the panes inside the windows. Leave tiny specks of white to represent glass reflections. -
Create grass texture:
Take your rigger brush or the tip of your round brush. Using a thicker, darker green mix, flick upward strokes in the foreground to create individual blades of tall grass that overlap the bottom of the barn slightly. -
Cast shadows:
Mix a cool shadow color (green with a little blue/purple). Paint a cast shadow stretching to the left of the barn to anchor it to the ground. -
Sign and peel:
Once absolutely everything is dry, sign your work in the corner. Carefully peel off the masking tape at a 45-degree angle to reveal your crisp border.
Step back and admire how the warm colors capture the peaceful feeling of a quiet countryside evening
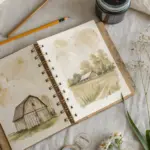

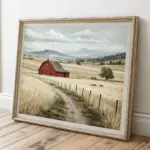
Barn With Puffy Tree Clusters
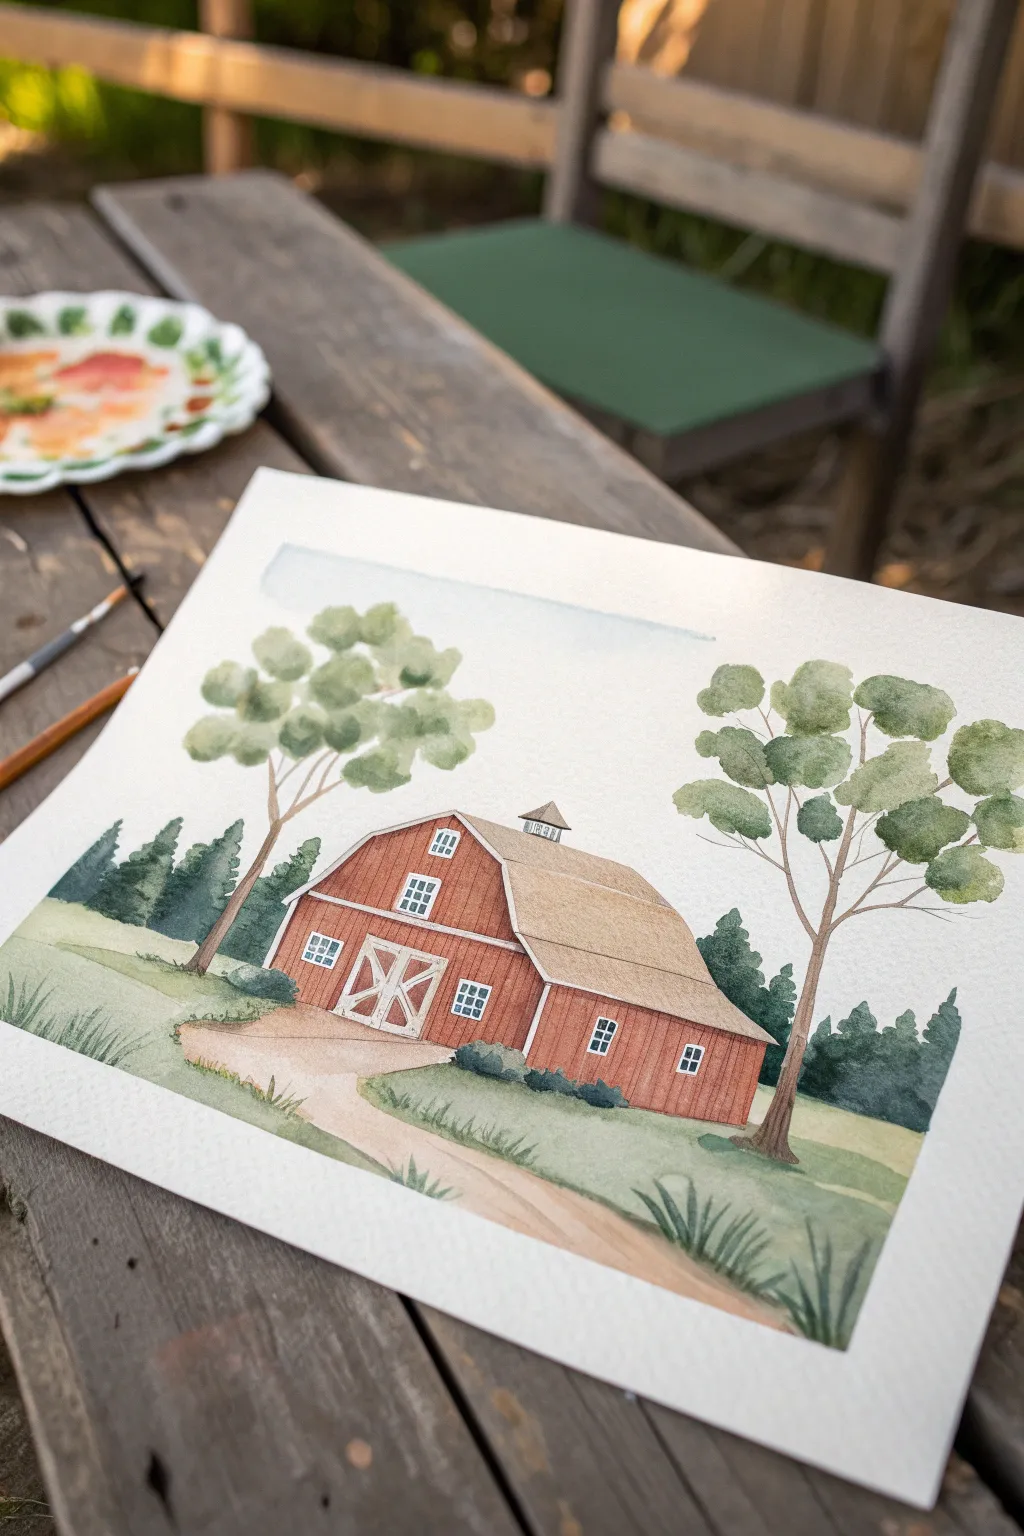
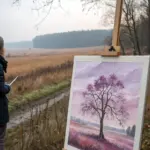
Capture the charm of the countryside with this watercolor study featuring a classic red barn and distinctive, billowy trees. The soft washes and layered foliage create a peaceful, slightly stylized landscape that is perfect for practicing wet-on-dry techniques.
Step-by-Step
Materials
- Cold press watercolor paper (140lb/300gsm)
- Watercolor paints (Alizarin Crimson, Burnt Sienna, Sap Green, Hooker’s Green, Yellow Ochre, Ultramarine Blue, Burnt Umber)
- Round brushes (sizes 4, 8, and 12)
- Pencil (HB or H) and kneaded eraser
- Two jars of water (clean and dirty)
- Painter’s tape or masking fluid (optional)
- Paper towels
Step 1: Sketching and Sky
-
Map out the horizon:
Begin by lightly drawing a horizon line across the lower third of your paper. Sketch the winding path leading from the bottom center toward where the barn will sit. -
Draft the barn structure:
Sketch the outline of the barn, focusing on the gambrel roof shape (the classic two-slope roof). Add the central double doors, the loft window above them, and the small cupola on the roof ridge. Don’t press too hard with your pencil so the graphite doesn’t show through the paint later. -
Place the trees:
Lightly outline the positions of the two main foreground trees—one on the left and a larger one on the right. Sketch the foliage as groups of rounded, cloud-like clusters rather than individual leaves. -
Paint a subtle sky:
Mix a very dilute wash of Ultramarine Blue. Using your largest round brush, paint a soft, horizontal strip across the top of the paper to suggest the sky, fading it out with clear water as you move downward. Let this dry completely before moving on.
Keeping Whites Crisp
For the stark white barn trim, use masking tape cut into thin strips or masking fluid before you start painting. It’s much easier than painting around thin lines manually.
Step 2: Barn and Path Base Layers
-
Wash the barn walls:
Mix Alizarin Crimson with a touch of Burnt Sienna to get a rustic barn red. Paint the siding of the barn, carefully painting around the white trim of the doors, windows, and roof edge. If you don’t have masking fluid, just work slowly to leave the white paper bare. -
Lay in the roof:
While the red walls dry, mix a light wash of Yellow Ochre and Burnt Umber for the roof shingles. Apply this wash evenly to the roof area. -
Paint the path:
For the dirt path, use a watery mix of Burnt Sienna and a tiny bit of Yellow Ochre. Paint the path shape, keeping the edges soft where it meets the grass. -
First grass layer:
Mix a light Sap Green. engaging the wet-on-dry technique, paint the grass areas on either side of the path, bringing the color right up to the horizon line.
Muddy Greens?
If your tree foliage looks dull or muddy, you may be overworking the paint while it’s wet. Lay down the stroke, drop in your shadow color once, and then leave it alone to dry.
Step 3: Foliage and Depth
-
Background pines:
Mix a darker, cooler green using Hooker’s Green and a touch of Ultramarine. Paint the distant pine trees behind the barn with vertical strokes, creating jagged, tree-like tops. -
Puffy tree foliage:
For the main trees, mix a variety of greens. Start with Sap Green for the lighter clusters. Paint rounded, patchy shapes for the leaves, leaving small gaps of white paper between some clusters to define the separate branches. -
Add shadows to trees:
While the green clusters are still slightly damp, drop in a darker green mix (Sap Green + Burnt Umber) to the bottom right of each foliage puff to create volume and shadow. -
Paint the trunks:
Use a medium brown mix for the tree trunks and branches. Use a smaller brush (size 4) to paint fine branches that reach up and disappear into the foliage clusters. I find it helps to hold the brush closer to the end of the handle for looser, more organic branch lines.
Step 4: Details and Definition
-
Barn details:
Once the red paint is bone dry, use a thicker mixture of the red or a dark grey to paint thin vertical lines on the siding to simulate wooden planks. -
Windows and trim:
Paint the window panes with a pale blue-grey. If you accidentally painted over the white trim earlier, you can use a little white gouache or a white gel pen to reclaim those crisp lines now. -
Deepen the shadows:
Add a shadow under the roof overhang using a dark violet-grey mix. This separates the roof from the wall and adds 3D form. -
Foreground grasses:
Using your smallest brush and a dark green mix, flick quick, upward strokes in the foreground corners to create the look of tall wild grasses bordering the path. -
Final touches:
Assess the painting for contrast. If the path looks too flat, glaze a slightly darker brown on the shadowed side. Strengthen the darks in the background pines if needed to make the barn pop.
Remove your tape carefully to reveal a clean border around your peaceful farm scene


Barn at Sunset With a Simple Sky Gradient
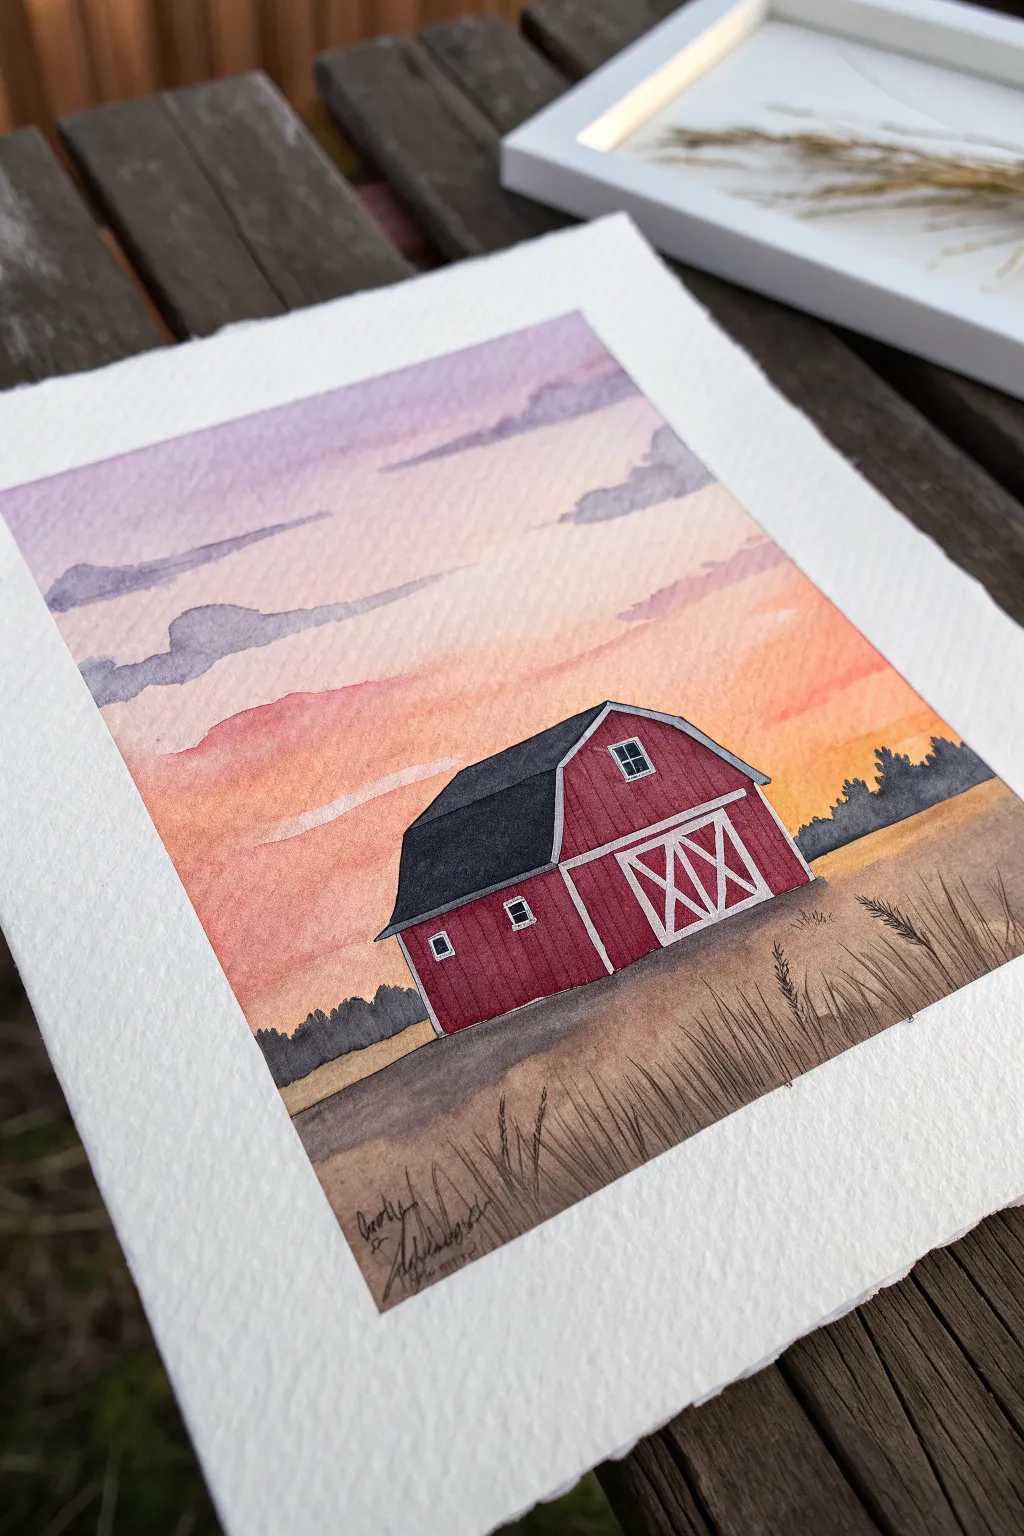
Capture the peaceful mood of twilight on the farm with this watercolor project, featuring a vibrant gradient sky and a distinctively shaped barn. Using simple layering techniques, you’ll create a striking contrast between the soft, blended background and the crisp, architectural details of the building.
Step-by-Step Guide
Materials
- Cold press watercolor paper (with deckled edge optional)
- Watercolor paints (Purple, Pink, Orange, Yellow Ochre, Red, Paynes Gray/Black)
- Masking fluid or white gouache
- Pencil and eraser
- Masking tape
- Round watercolor brushes (sizes 4, 8, and a fine liner)
- Clean water and paper towels
Step 1: Sketch and Sky
-
Outline the Scene:
Begin by lightly sketching the horizon line about one-third up from the bottom of the paper. Draw the geometric shape of the gambrel-roof barn in the center, paying attention to the angles of the roofline. -
Map the Details:
Add the smaller details to your sketch, including the large double doors with their ‘X’ bracing, the smaller side door, and the three small windows. Keep pencil lines light so they don’t show through the paint later. -
Mask the Roof:
If you struggle with staying inside the lines, you can apply a thin layer of masking fluid over the barn shape to keep the paper white while painting the sky. Let it dry completely. -
Wet the Sky Area:
Using your largest brush, apply clean water to the entire sky area, stopping at the horizon line and the roof of the barn. The paper should be glistening but not pooling with water. -
Paint the Gradient:
With a wet-on-wet technique, stroke a soft purple across the very top of the sky. As you move down, blend in a soft pink, and finally transition to a warm orange near the horizon line. -
Add Clouds:
While the sky is still slightly damp but losing its sheen, mix a diluted purple-grey. Gently dab in a few horizontal cloud streaks across the upper sky. Let the paint spread naturally for soft edges.
Uneven Gradients?
If your sunset sky looks streaky, your paper likely dried too fast. Next time, re-wet the entire sky area evenly before adding color to ensure the pigments blend smoothly.
Step 2: The Barn Structure
-
Paint the Siding:
Once the sky involves is bone dry, mix a rich barn red. Carefully paint the vertical siding of the barn, leaving the white trim around the doors, windows, and roof edges unpainted. If you used masking fluid, remove it before this step. -
Fill the Roof:
Mix a dark charcoal or Paynes Gray. Paint the roof panels solid, ensuring a crisp edge where the roof meets the red siding and the sky. -
Detail the Trim:
The white trim is essentially the white of the paper. However, you can use a tiny amount of very diluted gray to add shadow lines along the edges of the white ‘X’ braces and door frames to give them dimension. -
Add Windows:
Using a fine liner brush and dark gray paint, carefully fill in the window panes, leaving tiny white specks to represent reflected light. -
Deepen the Shadows:
To make the barn dimensional, glaze a slightly darker, cool red over the left side of the barn (the side facing away from the hypothetical light source) or under the eaves.
Preserving Whites
If you accidentally painted over the white door trim, don’t panic. Let the red paint dry fully, then re-establish the white lines using opaque white gouache or a white gel pen.
Step 3: Foreground and Finishing Touches
-
Paint the Distant Trees:
Mix a muted, dark gray-blue. Paint a jagged, organic line just above the horizon on either side of the barn to represent a distant tree line. Keep the bottom edge of these trees sharp against the field. -
First Field Layer:
For the ground, start with a wash of yellow ochre or light brown. Apply this across the entire foreground, sweeping your brush horizontally. -
Add Ground Texture:
While the first field layer is still wet, drop in hints of darker brown near the bottom corners and directly under the barn to ground the structure. -
Paint the Grasses:
Switch to your finest rigper or liner brush with a dark sepia or black mixture. Using quick, flicking upward motions, paint fine grasses in the immediate foreground. -
Final Details:
Add a few taller, distinct wheat stalks on the right side. I find that varying the pressure on the brush helps these look more organic and less rigid. -
Sign and Dry:
Allow the entire piece to dry completely before erasing any visible pencil marks. Sign your name in the corner with a fine pen or brush.
Now you have a serene countryside scene ready to frame or display
BRUSH GUIDE
The Right Brush for Every Stroke
From clean lines to bold texture — master brush choice, stroke control, and essential techniques.
Explore the Full Guide
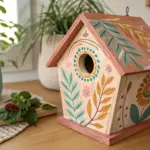
Cozy Barn With a Simple Wreath Detail
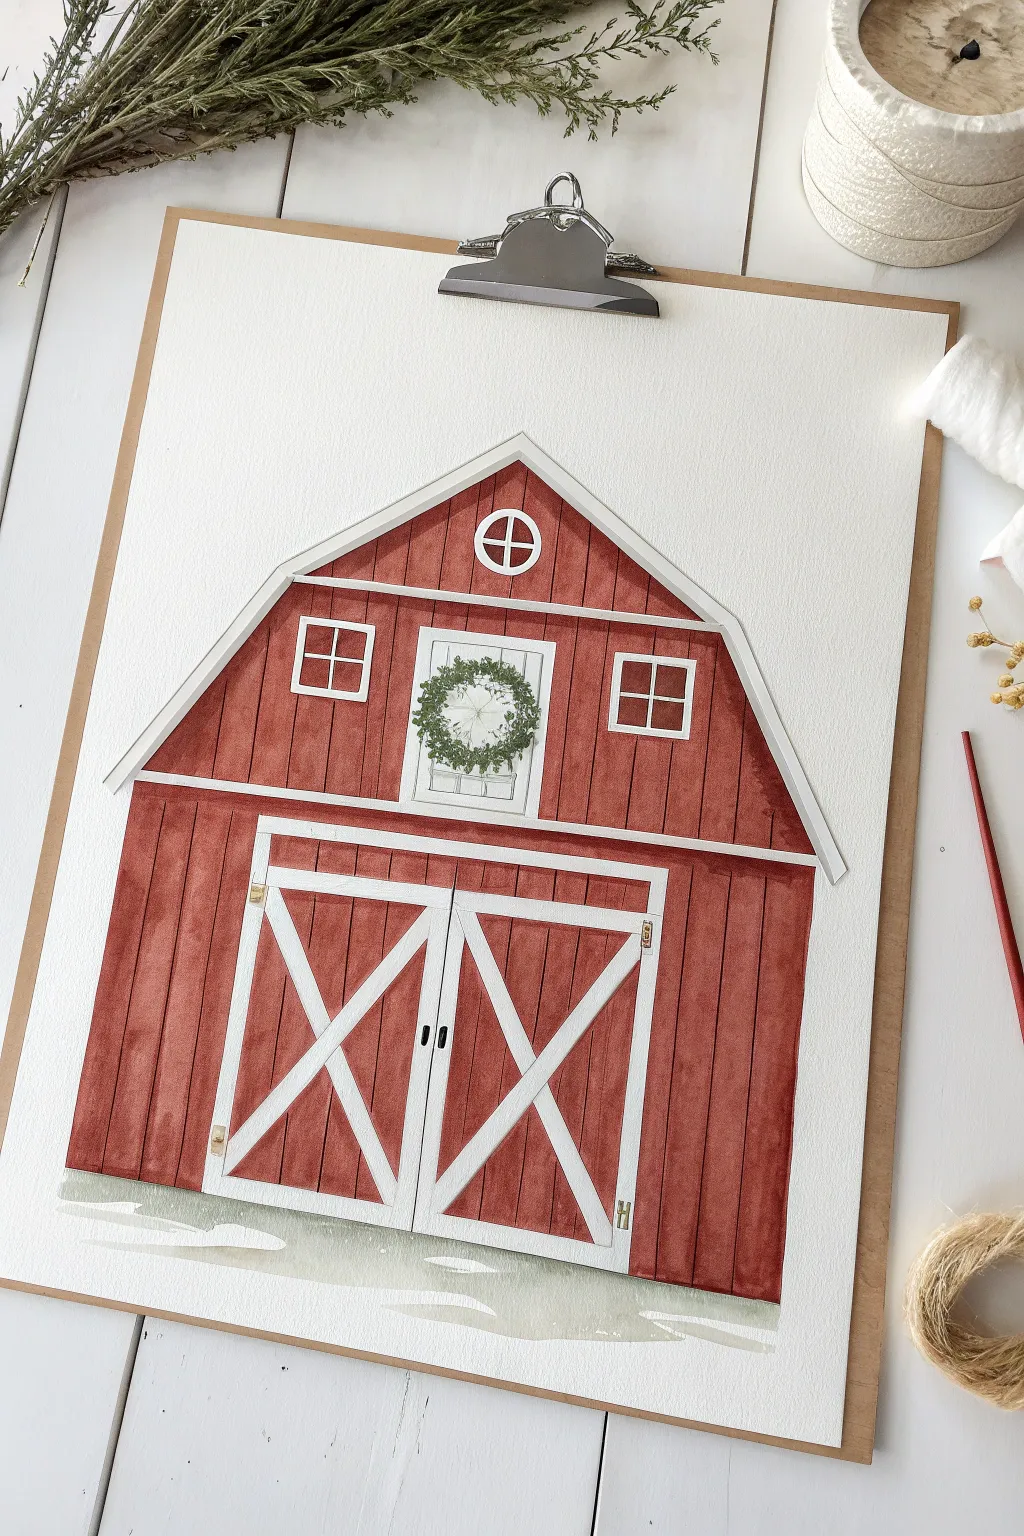
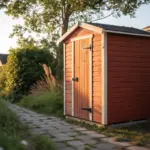
Capture the charm of a country winter with this crisp, illustrative painting of a classic red barn. Featuring clean white trim and a delicate evergreen wreath, this project uses defined lines and flat washes to create a cozy, graphic look suitable for holiday cards or seasonal decor.
Step-by-Step
Materials
- Cold press watercolor paper (approx. 9×12 inches)
- Pencil and eraser
- Ruler
- Watercolor paints (Alizarin Crimson, Burnt Sienna, Payne’s Grey, Sap Green)
- White gouache or white ink
- Masking tape or painter’s tape
- Round watercolor brushes (Size 6 for washes, Size 0 or 00 for details)
- Mixing palette
- Jar of water and paper towels
Step 1: Drafting the Structure
-
Establish the horizon:
Begin by lightly drawing a horizontal line near the bottom of your paper to represent the snowy ground. This anchors your barn. -
Draw the barn outline:
Using your ruler, sketch the main shape of the barn. Start with a large rectangle for the base, then add the gambrel roof shape (the classic ‘barn roof’ with two slopes on each side) on top. -
Map out the doors:
In the center of the bottom rectangle, draw large double doors. Ensure they are symmetrical and take up a significant portion of the lower barn face. -
Add architectural details:
Pencil in the loft door or window directly above the main doors. Add two smaller square windows on either side of the loft opening and a small round window near the roof’s peak. -
Define the trim:
Double up your lines around the roof edges, doors, and windows to create thick borders. These areas will remain white, so keep your pencil lines light and clean.
Uneven Edges?
If your red paint bleeds into the white trim, don’t panic. Wait for it to dry fully, then paint over the mistake with opaque white gouache to reclaim the clean line.
Step 2: The Red Wash
-
Masking tight areas:
If you’re worried about painting over the white trim, apply thin masking tape over the door frames and rooflines. Alternatively, just paint carefully around your pencil markings. -
Mix the barn red:
Create a rich, rusty red by mixing Alizarin Crimson with a touch of Burnt Sienna. You want a color that feels weathered, not neon bright. -
Paint the first section:
Start painting the siding on the main body of the barn. Use a size 6 brush and vertical strokes to mimic wood planks. Leave the trim areas strictly unpainted. -
Complete the upper walls:
Move to the roof section, continuing with the same red mix. Paint around the windows carefully. I find it helpful to turn the paper to get the best angle for these exciting edges. -
Add plank texture:
While the red paint is still slightly damp, take a slightly more concentrated red mix and drag very thin vertical lines down the siding to suggest individual wooden boards.
Step 3: Details & Contrast
-
Paint the wreath:
Mix a dark Sap Green. Using the tip of your smallest brush, stipple tiny dot-like strokes in a circle shape on the upper loft door to form the wreath. -
Deepen the roof shadow:
Add a tiny amount of Payne’s Grey to your red mix to create a shadow tone. Apply a thin line of this shadow right under the roof overhang to give the structure depth. -
Fill the window panes:
Paint the inside of the window panes with a very diluted Payne’s Grey or a soft brown, leaving the muntins (the grid bars) white. -
Refine the doors:
Paint the main door surfaces red, carefully avoiding the ‘X’ bracing and the door frames, which should stay white. -
Sharpen the white trim:
Once the red paint is 100% dry, use white gouache or a white gel pen to crisp up any edges where the red paint might have bled into the trim. This makes the illustration pop.
Level Up: Festive Lights
Use a white gel pen to draw a string of lights draping along the roofline. Add tiny dots of yellow or multicolored paint for the bulbs to make it extra festive.
Step 4: Finishing Touches
-
Add hardware details:
Using a tiny dab of yellow ochre or gold paint, add small rectangles for the door hinges and handles. -
Paint the ground:
Mix a very watery grey wash. Paint strictly below the barn, leaving patches of white paper showing through to represent piles of snow. -
Final erase:
Wait until the painting is completely bone dry. Gently erase any visible pencil lines in the white trim areas to leave a clean, professional finish.
Display your finished barn on a wooden clipboard or in a rustic frame to complete the farmhouse aesthetic
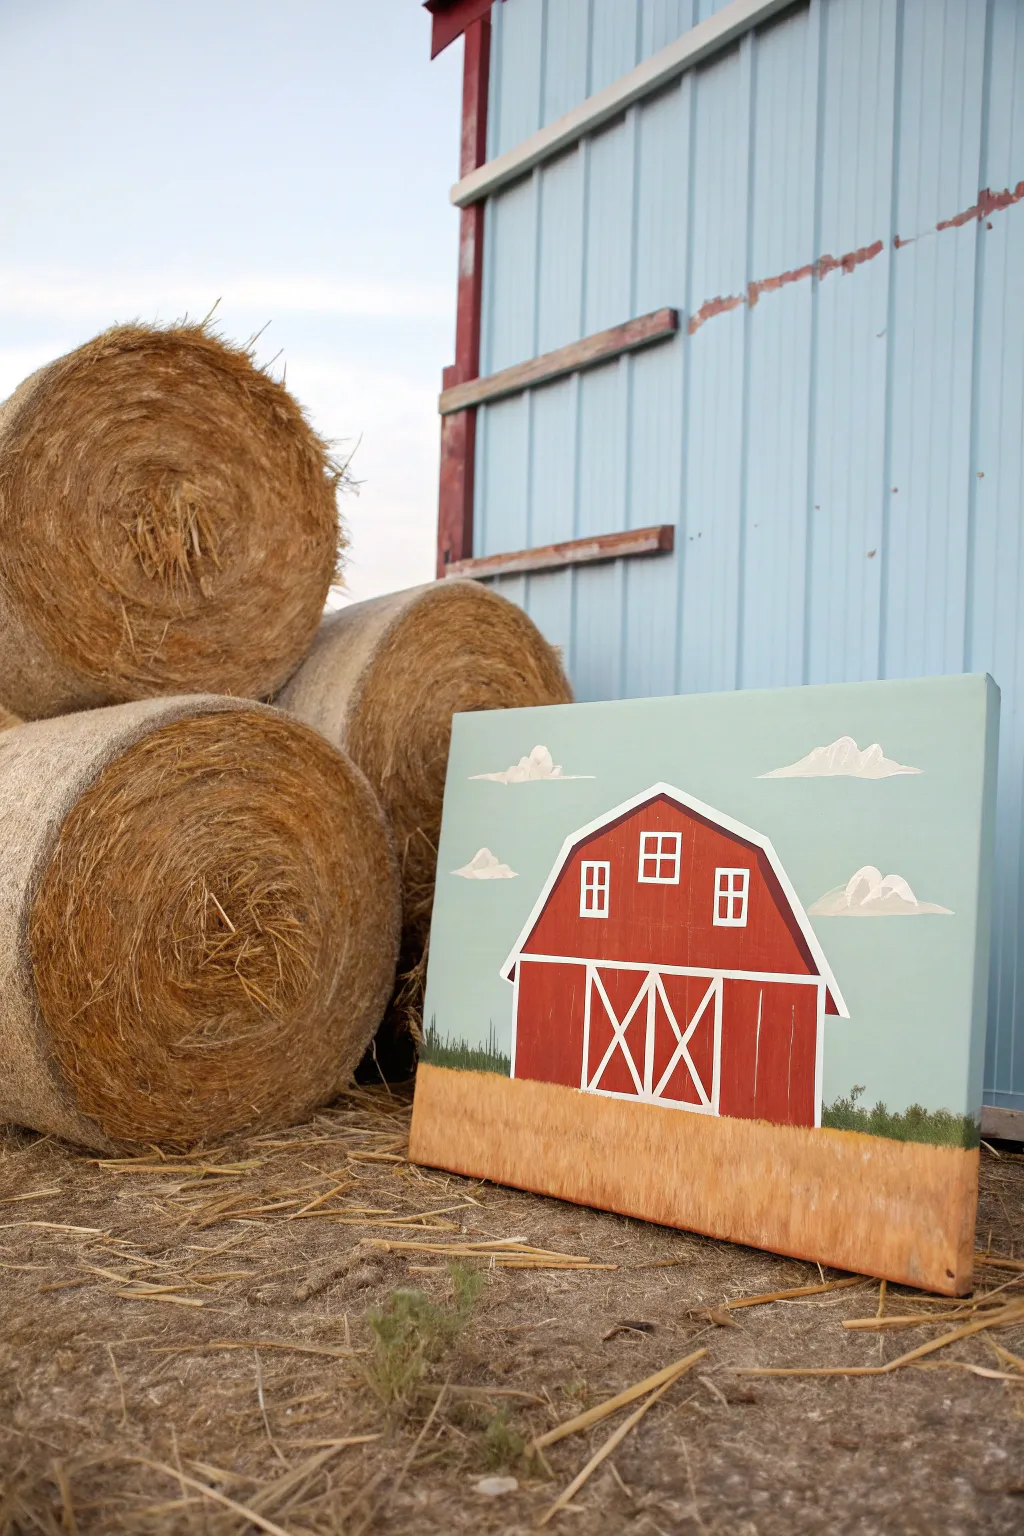
Barn With Hay Bales as Simple Blocks

Capture the charm of the countryside with this crisp, graphic-style barn painting. Featuring bold blocks of color and simple linework, this project is perfect for beginners wanting to create a striking piece of farmhouse decor.
Detailed Instructions
Materials
- Rectangular stretched canvas (e.g., 11×14 or 12×16 inches)
- Acrylic paints: Sky Blue, Titanium White, Barn Red, Burnt Sienna (dark brown), Yellow Ochre, Dark Green
- Flat paintbrushes (1-inch and 1/2-inch)
- Small round detail brush (size 1 or 2)
- Ruler or straight edge
- Pencil
- Painter’s tape (optional)
- Palette or paper plate
- Cup of water and paper towels
Step 1: Setting the Scene
-
Paint the Sky:
Begin by covering the upper three-quarters of your canvas with a smooth coat of Sky Blue acrylic paint. Use your large flat brush for broad, even strokes. If the coverage looks streaky, let the first coat dry completely and apply a second one. Leave the bottom quarter of the canvas unpainted for now. -
Establish the Horizon:
Once the blue sky is dry to the touch, mix a small amount of Yellow Ochre with Titanium White to create a light wheat color. Paint the bottom strip of the canvas with horizontal strokes to establish a base layer for the field. -
Add Distance Foliage:
Using a smaller flat brush and Dark Green paint, dab a very thin, uneven line right along the horizon where the blue sky meets the wheat field. Keep these strokes low and irregular to suggest distant bushes or trees.
Wobbly Lines?
If you struggle painting straight lines for the roof or door trim, use painter’s tape or masking tape. Apply it gently over dry paint to create a stencil for perfect, crisp edges.
Step 2: Constructing the Barn
-
Outline the Shape:
Use a pencil and a ruler to lightly sketch the barn’s outline in the center of the canvas. Start with a rectangle for the base, then add the distinctive gambrel roof shape (two slopes on each side) on top. -
Fill the Barn Color:
Load a medium flat brush with Barn Red. Carefully fill in the entire barn shape you just sketched. Paint vertically to mimic wood siding. This may require two coats to achieve a solid, vibrant red. -
Create Texture:
While the red paint is still slightly tacky, I like to take a brush with a tiny bit of Burnt Sienna (dark brown) and streak it very lightly vertically down the barn. This adds a subtle weathered wood effect without overpowering the red. -
Outline the Roof:
Switch to your small round detail brush and Titanium White paint. Carefully paint a crisp white line along the top edges of the roof to define the eaves. -
Define the Separation:
Paint a horizontal white line separating the roof section from the main body of the barn. This acts as a visual break and framing element.
Make It 3D
Mix modeling paste into your white paint for the clouds to give them actual physical texture that stands off the canvas.
Step 3: Adding Details
-
Paint the Windows:
Using your smallest brush and white paint, create three small squares on the upper portion of the barn—one high in the center, and two flanking it slightly lower. Paint the white outlines first. -
Add Window Panes:
Inside the white window squares, paint a simple cross shape using the red background color (or just leave the red showing through if you only painted the outlines) to create a four-pane look. -
Frame the Door:
Paint a large white rectangular outline at the bottom center of the barn for the main doors. Divide this rectangle in half with a vertical white line. -
Add the X Bracing:
Inside each of the two door sections, paint a large white ‘X’. Use your ruler to guide your brush if your hand feels shaky. -
Paint Vertical Siding Lines:
Mix a very watery dark brown or black. Use your finest brush to paint extremely thin, faint vertical lines across the red sections of the barn to suggest individual wooden planks.
Step 4: Foreground and Atmosphere
-
Texture the Wheat Field:
Return to the bottom section. Load a flat brush with Yellow Ochre and Burnt Sienna. Use short, upward flicking motions to create the texture of tall grass or wheat stalks. Allow these strokes to overlap the bottom of the red barn slightly to ground it in the scene. -
Highlight the Grass:
Clean your brush and pick up some Titanium White mixed with Yellow Ochre. Add a few more upward flicks in the foreground to create highlights where the sun hits the dry grass. -
Form the Clouds:
For the clouds, use pure Titanium White. Create flat-bottomed shapes that look like triangles with softened tops. Keep the bottoms of the clouds straight and horizontal to mimic the stylized look in the example. -
Detail the Clouds:
Add a tiny touch of grey or light blue to the bottom edge of the clouds for gentle dimension, ensuring they don’t look like stickers stuck on the sky. -
Final Inspection:
Step back and check your lines. If any white trim looks messy, use your red paint to touch up the edges for a sharp finish.
Now you have a charming piece of farmhouse art ready to hang or lean on a shelf

Have a question or want to share your own experience? I'd love to hear from you in the comments below!