A skylight can be so much more than a practical light source—think of it as a built-in frame for color and mood. With the right paint choices, that often-ignored skylight well becomes a deliberate design moment that makes the whole room feel more alive.
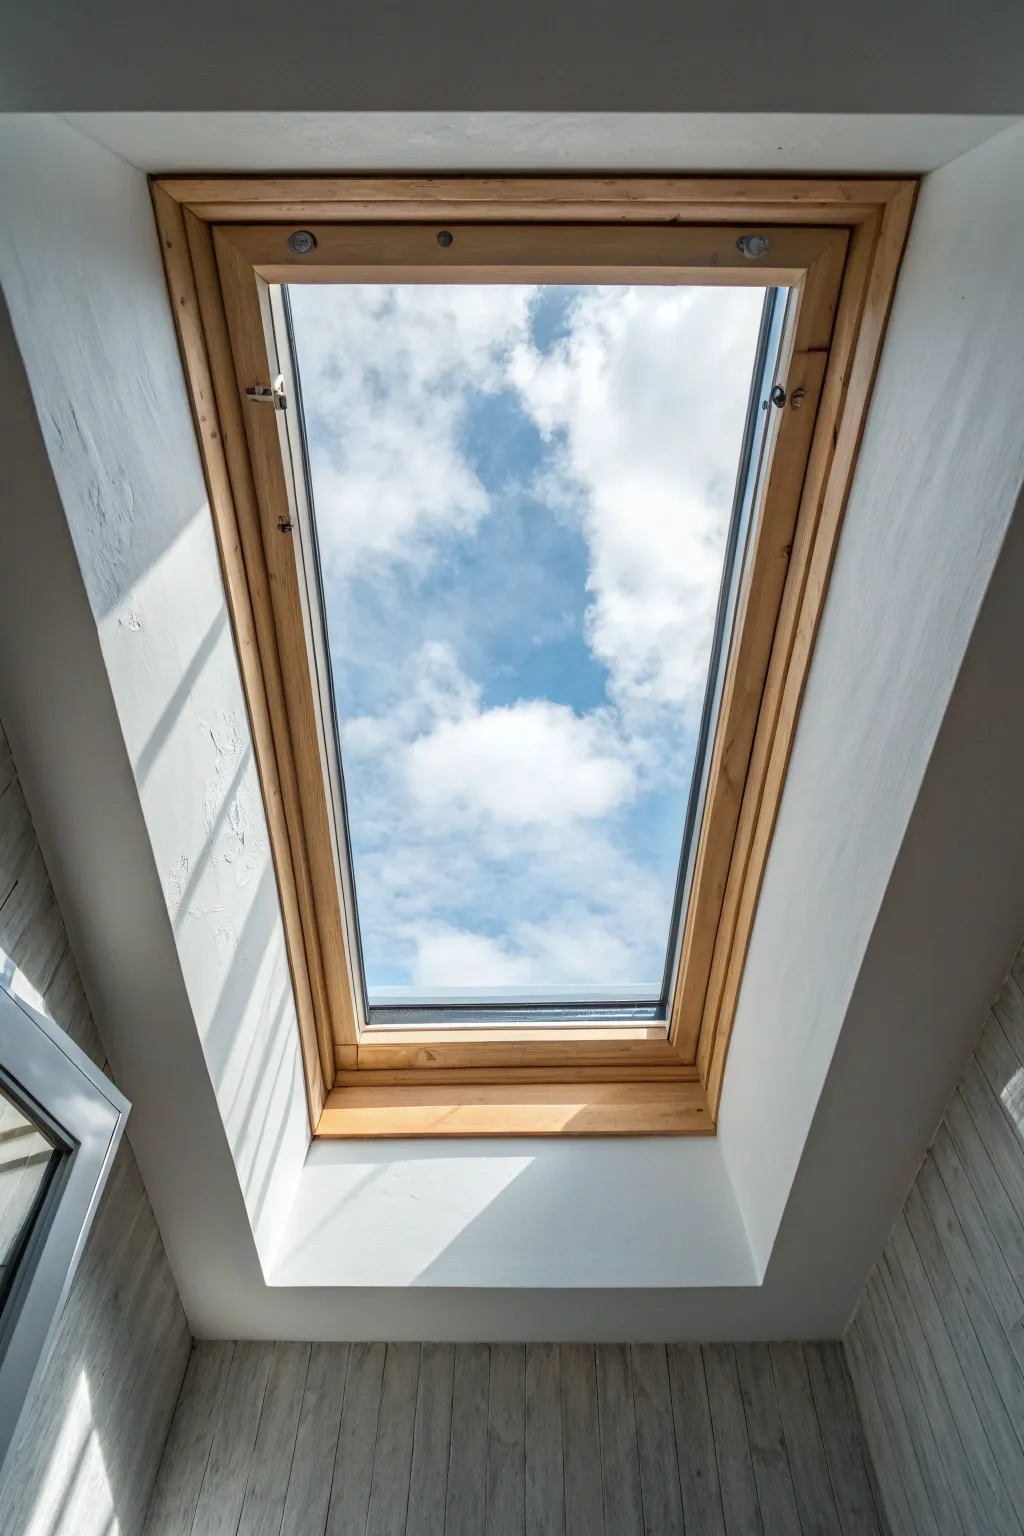
Classic Bright-White Light Well
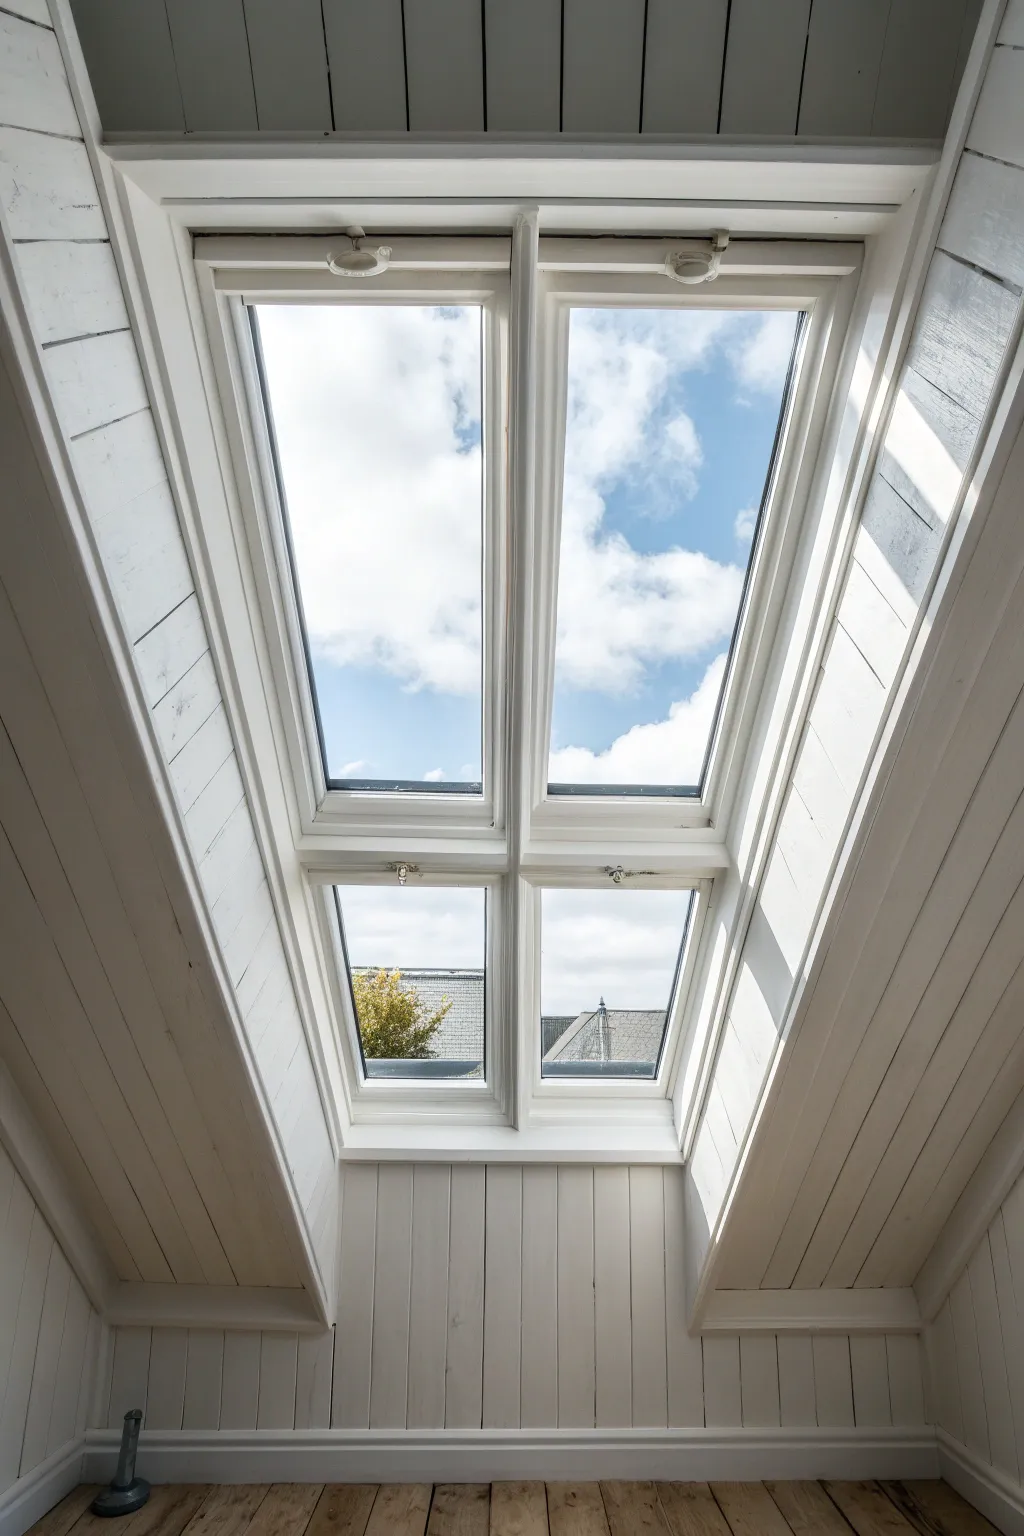
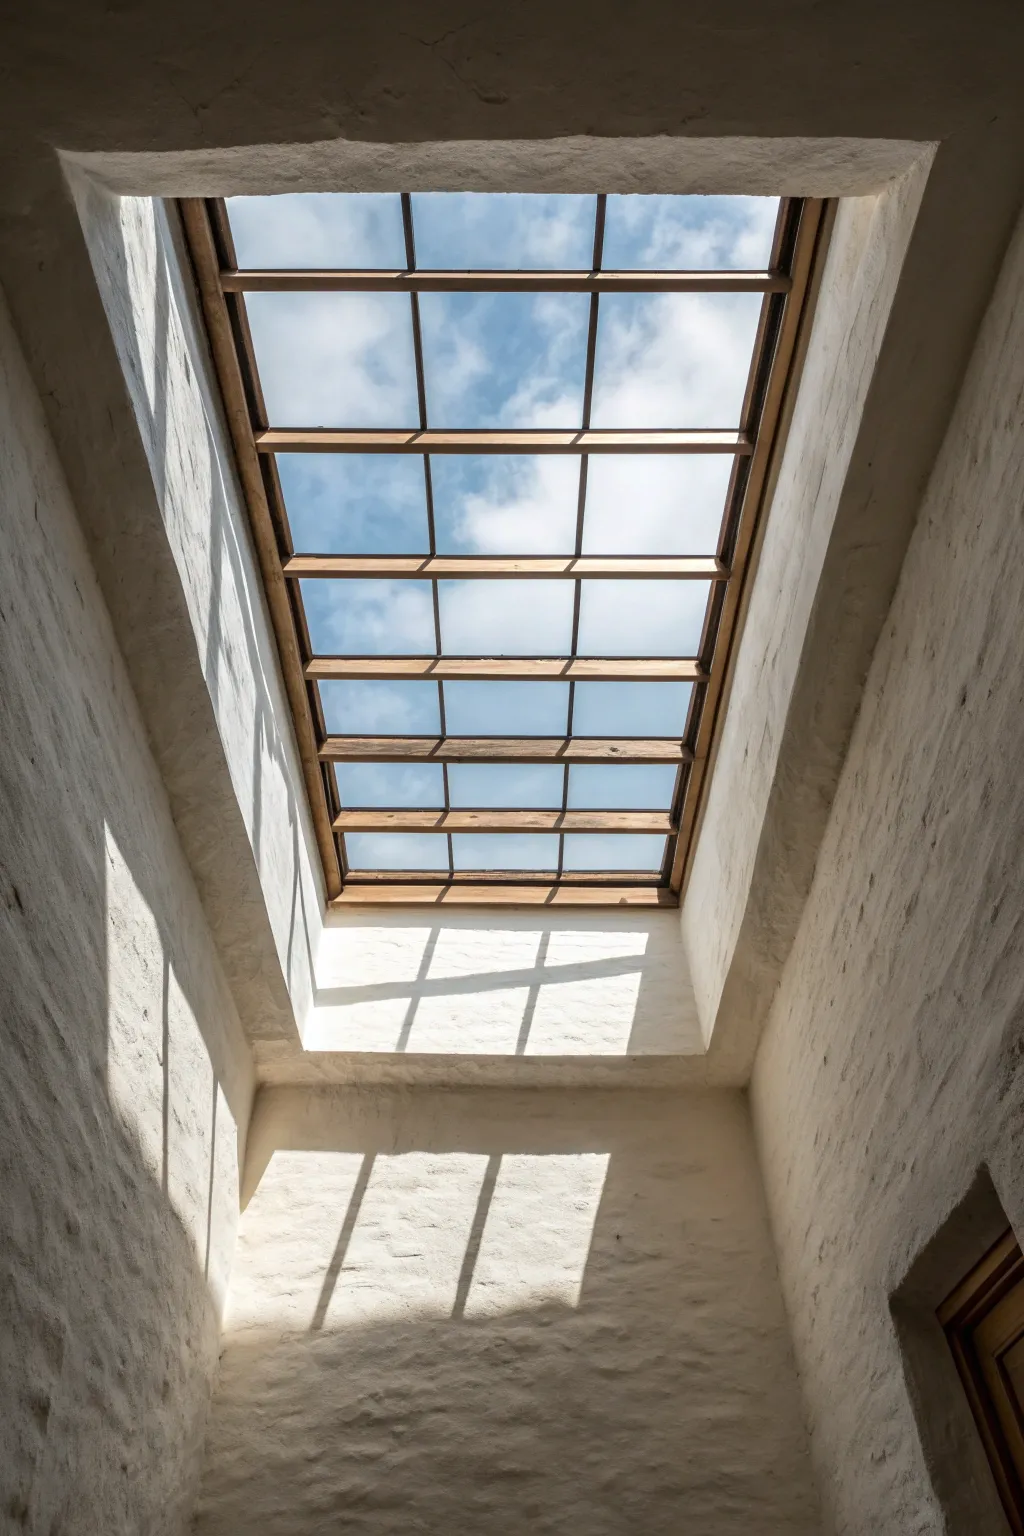
Transform a dark or outdated loft space into an airy sanctuary by embracing a classic bright-white palette on tongue-and-groove paneling. This project focuses on painting the skylight well and surrounding sloped ceiling to maximize natural light reflection and create a sense of height.
Step-by-Step Guide
Materials
- High-quality acrylic primer (stain-blocking)
- Interior satin or semi-gloss paint (Bright White)
- Wide painter’s tape (1.5 – 2 inch)
- Sanding sponge (medium and fine grit)
- Angled sash brush (2 inch)
- Mini foam roller and tray
- Drop cloths
- Degreaser or TSP substitute
- Caulk and caulking gun (white, paintable)
- Ladder or sturdy step stool
Step 1: Preparation & Cleaning
-
Protect the floor:
Begin by laying down drop cloths over the wooden floorboards to catch any paint drips, especially directly under the skylight well. -
Clean surfaces thoroughly:
Wash the tongue-and-groove paneling and the skylight frame with a degreaser or TSP substitute. This removes dust and oils that prevent paint adhesion. -
Sand the paneling:
Lightly scuff the existing finish on the wood paneling using a medium-grit sanding sponge. You don’t need to strip it bare, just create a ‘tooth’ for the primer. -
Mask the glass:
Apply painter’s tape carefully to the edges of the glass panes. Press the edges down firmly with a putty knife or fingernail to prevent paint bleed. -
Address gaps:
inspect the seams where the paneling meets the skylight frame. Run a thin bead of white paintable caulk along any unsightly cracks for a seamless look.
Pro Tip: Avoid Stickiness
Keep the window slightly open while the sash paint dries. If you close it too soon, the paint can bond the frame shut, causing damage when you force it open later.
Step 2: Priming the Woodwork
-
Cut in the edges:
Using your angled sash brush, apply a stain-blocking primer to the corners, the grooves between panels, and around the window hardware. -
Roll the flat surfaces:
Use a mini foam roller to apply primer to the flat faces of the paneling. This ensures a smooth finish without heavy brush marks. -
Prime the frame:
Carefully brush primer onto the window sash interior. I find it helpful to open the window slightly to reach the edges that are usually hidden. -
Let it cure:
Allow the primer to dry completely according to the manufacturer’s instructions, usually 2-4 hours. -
Light sanding:
Once dry, run a fine-grit sanding sponge over the primed surface to knock down any raised grain or dust nubs.
Step 3: Painting for Perfection
-
First coat: Grooves first:
Dip your brush into the bright white topcoat and paint the vertical grooves of the paneling first. Work in sections so the paint doesn’t dry before you roll. -
First coat: Rolling:
Immediately follow the brush work with the mini roller on the flat panels to blend the texture. -
Painting the sash:
Switch back to the angled brush for the detailed window frame area next to the glass. Use long, confident strokes. -
Dry and assess:
Let the first coat dry for at least 4 hours. Check for any bleed-through or thin spots. -
Apply second coat:
Repeat the process for a second coat. This layer provides the true depth of color and durability required for a high-light area. -
Remove tape:
Carefully peel away the painter’s tape while the final coat is still slightly tacky to ensure a crisp, sharp line against the glass. -
Clean hardware:
If any paint got onto the metal latches or handles, gently scrape it off with a fingernail or plastic scraper once dry.
Level Up: Contrast Hardware
Swap out standard white handles for matte black or brushed brass hardware. This adds a modern, sophisticated touch against the fresh white paint.
Enjoy the fresh, expansive feeling your newly brightened skylight brings to the room


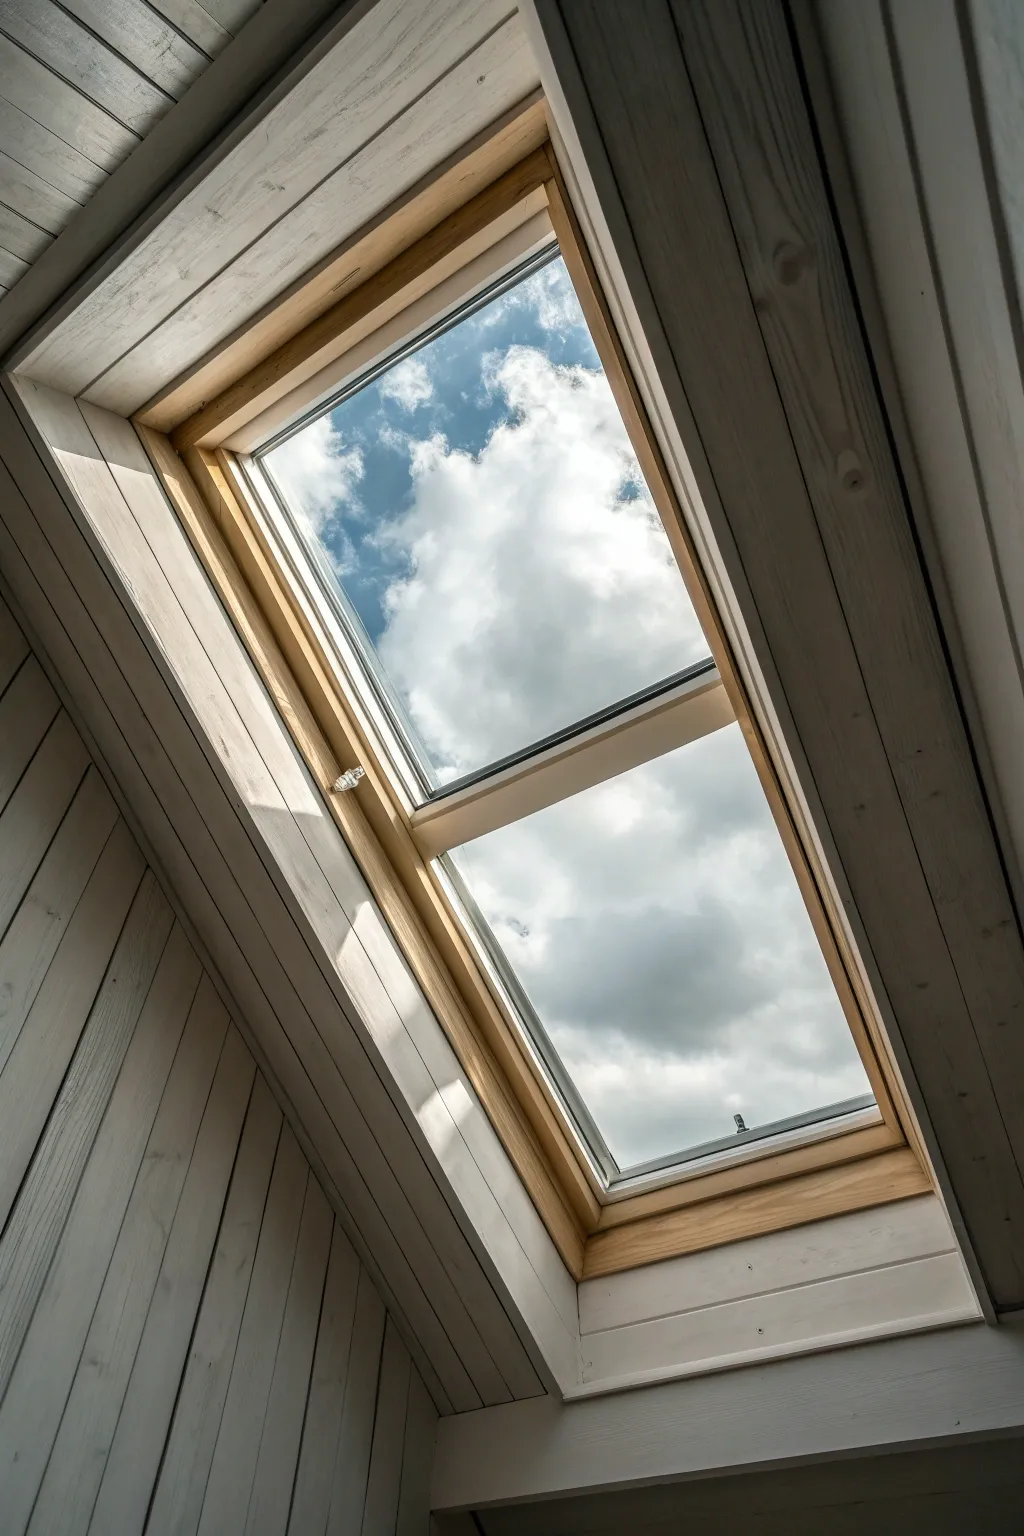
Bold Color-Block Skylight Shaft
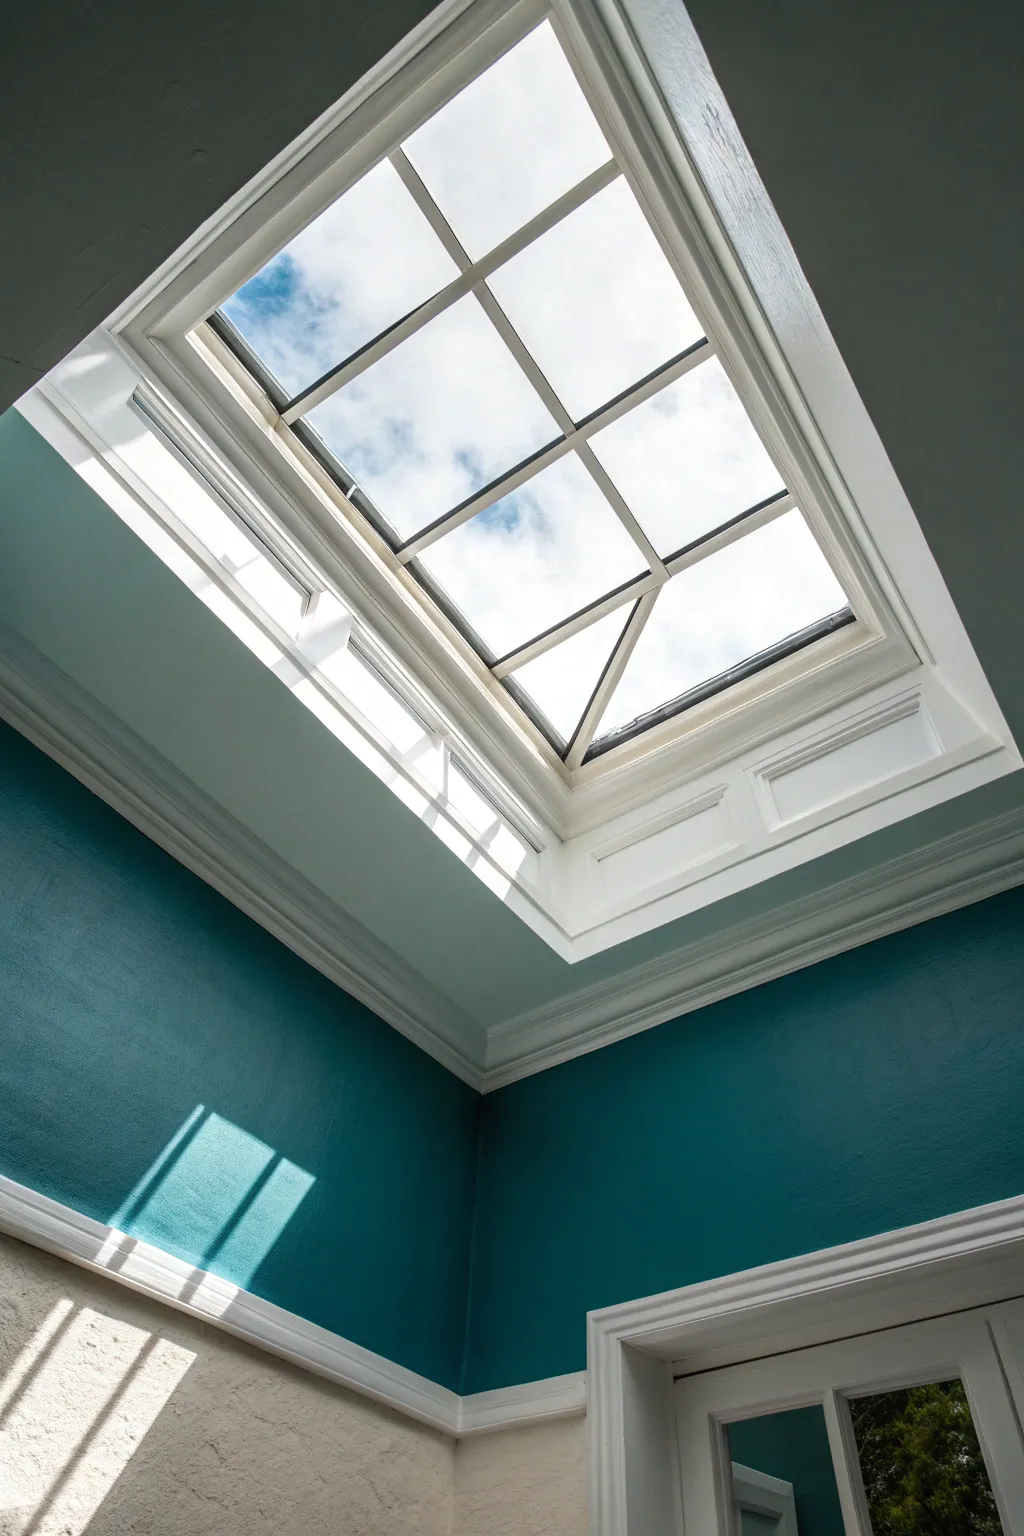
Transform a standard white skylight shaft into a dramatic architectural feature by enveloping the walls in a deep, moody teal while keeping the trim crisp and bright. This high-contrast approach draws the eye upward and emphasizes the natural light pouring into the room.
Step-by-Step Tutorial
Materials
- Deep teal interior latex paint (satin or eggshell finish)
- Bright white semi-gloss trip paint
- Angled sash brush (2.5 inch)
- Microfiber paint roller cover (3/8 inch nap)
- Extension pole for roller
- Painter’s tape (delicate surface)
- Drop cloths
- Sanding sponge (fine grit)
- Spackle and putty knife
- Ladder (height appropriate for your ceiling)
- Primer (tinted gray recommended for dark topcoats)
Step 1: Preparation & Repairs
-
Assess the surface:
Begin by setting up your ladder securely so you can reach deep into the skylight shaft. Examine the walls for any hairline cracks or nail holes that tend to appear in these high structural stress areas. -
Patch imperfections:
Apply lightweight spackle to any holes or dents. Since skylights get direct light, even tiny flaws will cast shadows, so take your time smoothing the putty perfectly flat. -
Sand the walls:
Once the spackle is dry, sand the patched areas and give the rest of the painted surfaces a quick scuff sand. This helps the new paint adhere better, especially in corners. -
Clean thoroughly:
Wipe down the entire shaft with a damp cloth or a tack cloth to remove dust. Dust is your enemy here, as it will get trapped in the paint and sparkle in the sunlight.
Step 2: Trim & Ceiling Work
-
Tape off the glass:
Carefully run painter’s tape along the edge where the skylight frame meets the glass. Press the edge down firmly with a putty knife to prevent bleed-through. -
Paint the upper frame:
Using your angled sash brush, paint the interior frame of the skylight window itself with bright white semi-gloss. I find it easier to tackle this highest point first so drips don’t ruin lower work. -
Paint lower molding:
Move down to the crown molding or trim at the bottom of the shaft. Apply two coats of white semi-gloss, allowing proper dry time between them. -
Isolate the trim:
Once the white trim paint has cured for at least 24 hours, apply delicate surface painter’s tape over the white molding edges to protect them from the upcoming dark wall color.
Sunlight Check
Check your paint coverage at different times of day. Direct noon sun will reveal thin spots that morning light might hide.
Step 3: Applying the Bold Color
-
Prime with gray:
Roll a coat of gray-tinted primer onto the shaft walls. A gray base helps deep teal colors achieve full opacity faster than a white base would. -
Cut in the corners:
Use the angled brush to cut in the teal paint along the corners of the shaft and right up against your taped trim lines. Work one wall at a time to keep a ‘wet edge’. -
Roll the first coat:
Attach your roller to an extension pole if needed for reach. Roll the teal paint onto the walls using a ‘W’ pattern to distribute paint evenly, then smooth it out with vertical strokes. -
Check for holidays:
Let the first coat dry completely. With strong overhead light, missed spots (holidays) will happen. Inspect the walls from the floor to spot any thin patches. -
Apply second coat:
Cut in your edges again lightly, then roll the second coat of teal. Ensure your roller isn’t too dry to avoid stippling texture that looks messy in direct sun. -
Remove tape promptly:
While the final coat is still slightly tacky, slowly peel away the painter’s tape at a 45-degree angle. This prevents the dried paint skin from ripping.
Gloss Factor
Use a high-gloss finish on the teal walls to reflect even more light down into the room, creating a shimmering, water-like effect.
Step 4: Finishing Touches
-
Clean up edges:
If any teal paint bled onto the white trim, wait for it to dry fully, then use a tiny artist’s brush and white paint to touch up the line. -
Clean the glass:
Skylights are hard to reach, so do a thorough glass cleaning now. Remove any paint specks on the window with a razor blade scraper. -
Final inspection:
Stand back and view the shaft from different angles in the room to ensure the color depth is consistent throughout the entire height of the well.
Enjoy the striking new focal point that pulls the eye upward every time you enter the room


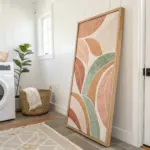
Monochrome Paint Carried Up the Well
Transform a deep skylight well into an architectural feature by carrying a soft, monochromatic cream tone all the way up to the glass. This technique unifies the detailed moldings and panels, creating a sculptural, light-enhancing effect that draws the eye upward.
How-To Guide
Materials
- High-quality interior latex paint (satin or eggshell finish, warm cream/beige)
- Acrylic primer (stain-blocking)
- Painter’s tape (automotive grade for glass)
- Canvas drop cloths
- Extension pole (telescoping)
- Sash brush (2-inch angled)
- Microfiber roller covers (3/8 inch nap)
- Roller cage
- Sanding sponge (medium grit)
- Caulk gun and paintable acrylic latex caulk
- Ladder (tall enough to reach safely)
- Damp rags for cleanup
Step 1: Preparation & Surface Repair
-
Protect the area below:
Since you will be working directly overhead, lay heavy canvas drop cloths extensively on the floor. Gravity makes drips inevitable. -
Inspect the plaster:
Examine the well walls and moldings for cracks or gaps. Use a bright work light to highlight imperfections. -
Fill gaps and cracks:
Apply paintable acrylic caulk to any open seams in the molding corners or where the trim meets the drywall. Smooth it instantly with a wet finger. -
Sand the surfaces:
Lightly sand all flat panels and the detailed molding using a sanding sponge to ensure proper adhesion. Wipe away dust with a damp rag.
Uneven sheen?
If the flat panels look duller than the molding, stick to a satin finish for both. It reflects light down the well better than flat paint and unifies the different textures.
Step 2: Masking & Priming
-
Tape the glass perimeter:
Apply painter’s tape exactly where the glass meets the metal or wood frame. Press the edges down firmly with a putty knife to prevent bleed-under. -
Mask the lower boundary:
If you aren’t painting the main ceiling, tape off the bottom edge of the skylight well to create a crisp separation line. -
Prime the intricate details:
Using your angled sash brush, apply primer into the crevices of the cornices and the recessed panel moldings first. -
Prime the flat sections:
Roll the primer onto the flat panel inserts and the side walls of the well. Allow this layer to dry fully according to manufacturer instructions.
Lighting creates shadows
Use a headlamp while painting. Overhead lights or sunlight coming through the glass will backlight your brush, making it nearly impossible to see where you’ve missed spots.
Step 3: Applying the Monochrome Finish
-
Cut in the top edges:
Start at the very top near the glass. Use the sash brush to carefully paint the uppermost molding against the tape line. -
Paint the molding profiles:
Work your way down, brushing paint into the decorative beads and curves of the trim. Keep a ‘wet edge’ to avoid lap marks. -
Brush the panel corners:
Cut in the corners of the recessed rectangular panels before rolling the centers. -
Roll the large surfaces:
Attach the roller to an extension pole if needed. Apply the first coat of cream paint to the flat sections, smoothing it out with long, even strokes. -
Check for drips:
Immediately inspect the intricate molding for paint pooling in the corners. I like to keep a dry brush handy just to whisk away heavy drips before they set. -
Allow to dry:
Let the first coat dry completely. Monochrome schemes rely on perfect coverage, so patience here is key. -
Apply the second coat:
Repeat the cutting-in and rolling process. A second coat ensures the color is rich and fully opaque.
Step 4: Finishing Touches
-
Remove tape carefully:
Score the edge of the tape near the glass with a utility knife before peeling it away at a 45-degree angle. Do this while the paint is slightly tacky to prevent chipping. -
Clean the glass:
Clean any smudges on the skylight glass immediately with a glass cleaner and lint-free cloth.
Step back and enjoy the elegant, unified look that makes your ceiling feel taller and brighter


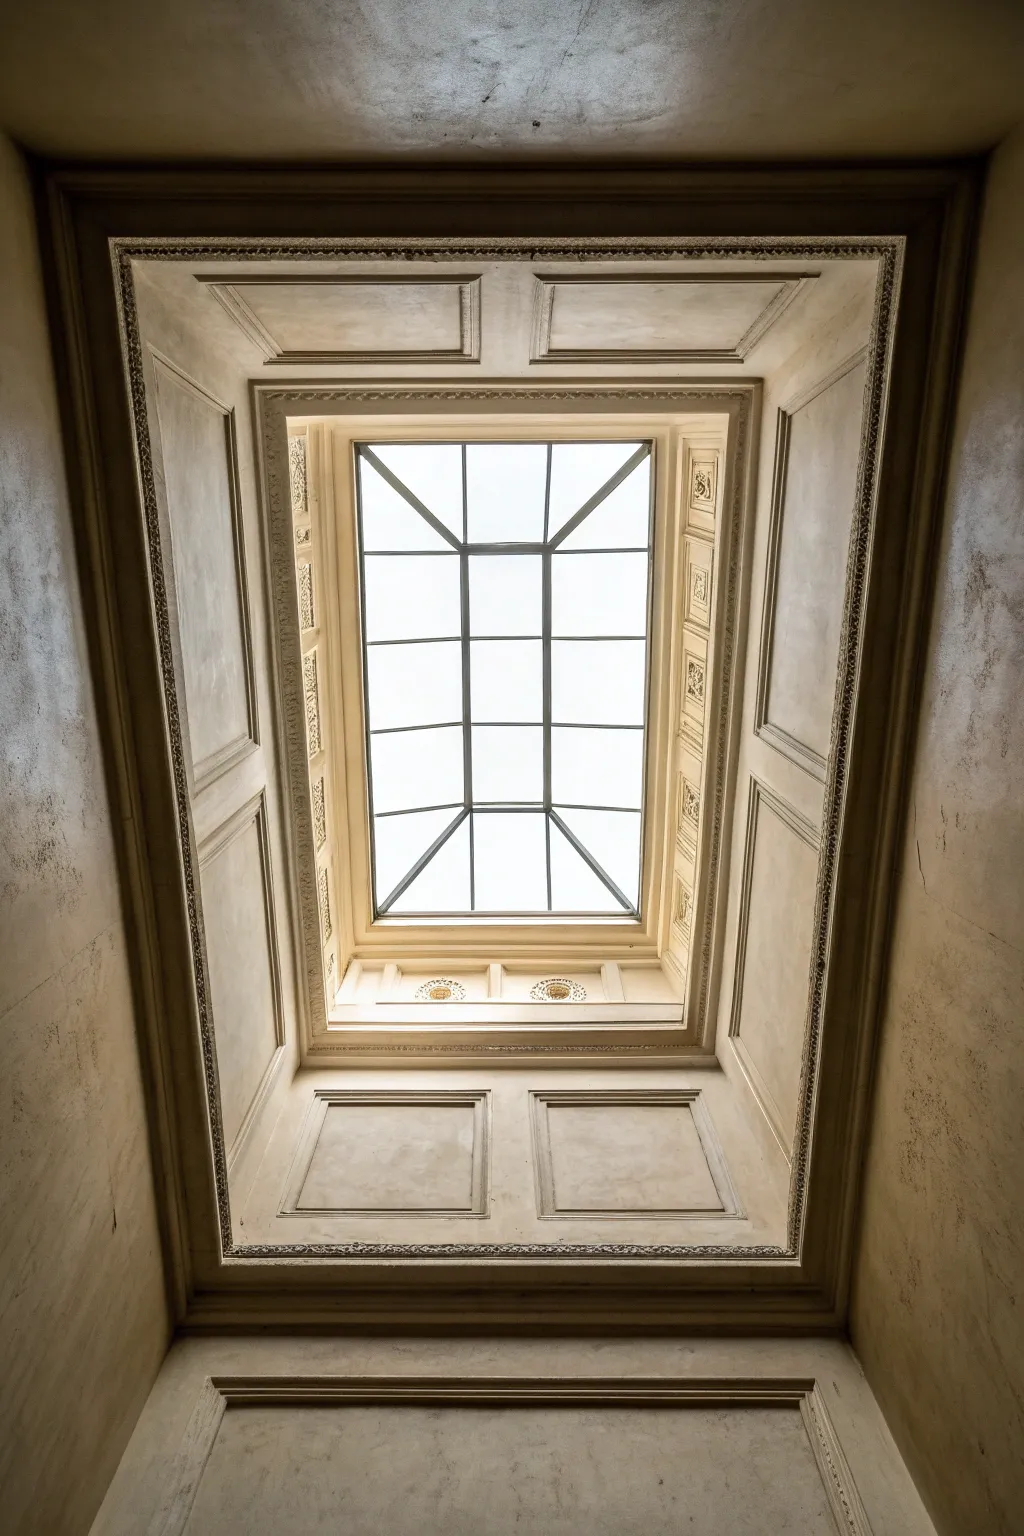
Soft Gradient Ombre Up the Shaft
Transform a stark skylight shaft into a warm, Mediterranean-inspired feature using textured paint techniques. This project creates a stunning visual anchor that draws the eye upward, mimicking the feel of an old Tuscan courtyard bathed in sunlight.
Step-by-Step Guide
Materials
- High-quality interior latex paint (base color: warm terracotta/burnt orange)
- Glazing medium
- Darker accent paint (burnt umber or deep rust)
- Lighter accent paint (pale peach or cream)
- Painter’s tape (multi-surface)
- Drop cloths
- Extension pole
- Roller frame and covers (medium nap)
- Sea sponge or ragging cloth
- Angled sash brush (2.5 inch)
- Ladder (tall enough to safely reach the skylight trim)
- Sanding sponge
- Mild detergent and sponge
Step 1: Preparation & Base Coat
-
Protect the area:
Begin by laying drop cloths directly under the skylight shaft. Cover any furniture or flooring that might catch drips from above. Because you are painting overhead, this step is more critical than usual. -
Clean surface walls:
Using an extension pole with a sponge attachment or a ladder, wipe down the shaft walls with mild detergent and water to remove dust and cobwebs. A clean surface ensures the best paint adhesion. -
Tape edges:
Carefully apply painter’s tape around the white trim of the skylight window itself and any lower moldings or window frames. Press the edges of the tape down firmly to prevent bleed-through. -
Cut in the perimeter:
Using your angled sash brush and the base terracotta color, cut in around the top skylight trim and the corners of the shaft. Create a band about 3-4 inches wide. -
Roll the base color:
Load your roller with the terracotta base paint. Attach it to the extension pole and roll the walls of the shaft. Apply two coats if necessary for full opacity, allowing 4 hours of drying time between coats.
Step 2: Creating the Texture
-
Mix the glaze:
In a separate container, mix one part of your darker accent paint (burnt umber/rust) with four parts glazing medium. This translucency is key to the weathered look. -
Apply glaze in sections:
Working in manageable 3-foot square sections, brush or roll a thin layer of the dark glaze mixture onto the dried terracotta base. -
Rag off the glaze:
Immediately use a damp, crumpled rag or sea sponge to blot and lift the wet glaze. Rotate your hand constantly to avoid creating a repeated pattern. You want a mottled, organic look. -
Soften edges:
As you move to the next section, lightly overlap the wet glaze with the previously worked area. I find feathering these edges with a dry brush helps blend the seam invisible. -
Repeat around the shaft:
Continue this application and removal process around all four walls of the skylight shaft. Step back occasionally to ensure the texture density looks consistent from the floor.
Glaze Drying Too Fast?
If the glaze dries before you can texture it, switch to an extender medium or lightly mist the wall with water before applying the glaze.
Step 3: Creating the Ombre Gradient
-
Mix highlight glaze:
Clean your bucket and mix a new glaze using the lighter accent paint (pale peach) and glazing medium, keeping the same 1:4 ratio. -
Apply highlights near light source:
Focusing primarily on the top third of the shaft near the glass, lightly sponge this paler mixture over the dry texture. This simulates the sun bleaching the surface. -
Blend downward:
Gradually reduce the amount of light glaze as you work your way down the shaft walls, letting the darker terracotta dominate the lower sections. This creates a subtle vertical gradient. -
Detail corners:
Use a small brush to darken the very corners of the shaft with the remnant of the dark glaze. This enhances the perception of depth and height. -
Remove tape:
Once the paint is tacky but not fully dry, carefully peel away the painter’s tape at a 45-degree angle to reveal crisp lines against the white trim. -
Final inspection:
Check for any uneven spots or drips. Use a small artist’s brush to touch up any areas where the tape might have pulled paint or where the glaze looks too heavy.
Pro Tip: Shadow Play
Add a tiny drop of blue to your darkest glaze mix. It adds cool undertones that simulate natural shadows, making the shaft look deeper.
Now you have a warm, inviting architectural feature that brings a touch of the outdoors inside
BRUSH GUIDE
The Right Brush for Every Stroke
From clean lines to bold texture — master brush choice, stroke control, and essential techniques.
Explore the Full Guide
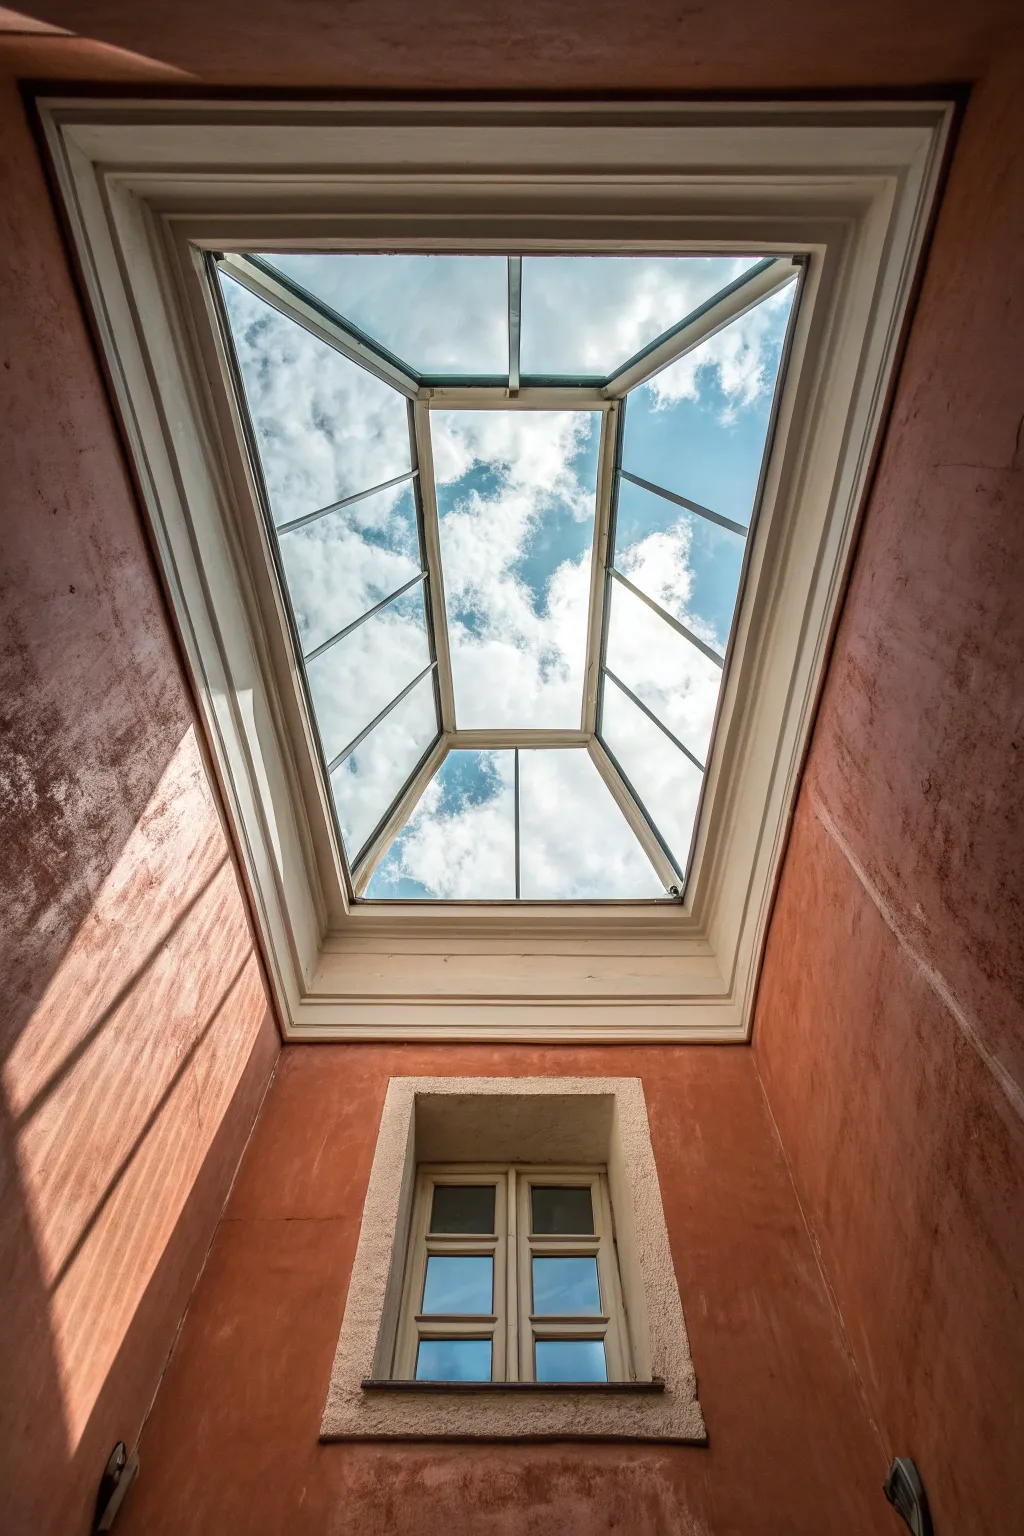
High-Contrast Painted Skylight Trim
Transform a standard skylight into a striking architectural feature by using high-contrast black paint against white rough-hewn walls. This simple but bold update frames the sky view like a piece of art, adding a modern industrial touch to rustic interiors.
Detailed Instructions
Materials
- High-quality painter’s tape (multi-surface)
- Mild degreaser or TSP substitute
- Fine-grit sandpaper (220-grit)
- Tack cloth or microfiber rags
- Metal-bonding primer (if frame is aluminum/metal) or bonding wood primer
- High-heat enamel or high-quality exterior trim paint (Matte or Satin Black)
- Small angled sash brush (1.5 to 2 inch)
- Small foam roller (optional for flat sections)
- Drop cloths
- Ladder
Step 1: Preparation & Cleaning
-
Protect the area:
Begin by laying down drop cloths on the floor directly beneath the skylight to catch any dust or drips. Secure your ladder safely on a stable surface. -
Clean the frame:
Thoroughly clean the interior frame of the skylight using a mild degreaser or TSP substitute. Skylights often collect dust, condensation marks, and oily residue that will prevent paint adhesion. -
Scuff the surface:
Lightly sand the existing frame material using 220-grit sandpaper. You aren’t trying to remove all the old finish, just creating a ‘tooth’ for the primer to grab onto. -
Dust removal:
Wipe away all sanding dust carefully using a tack cloth or a damp microfiber rag. Any leftover dust will create bumps in your sleek black finish. -
Masking the glass:
Apply painter’s tape carefully to the glass edges where it meets the frame. Take your time here—crisp lines are crucial for this high-contrast look. Press the tape edges down firmly with a putty knife or fingernail. -
Masking the wall:
Tape off the surrounding white stonework or plaster wall where it meets the skylight well. Since the walls are rough, you might need to press extra hard to get a seal.
Bleed-Through Blues
Painting on rough stone? Tape alone might fail. Paint a thin layer of the *wall color* over the tape edge first to seal gaps before applying the black paint.
Step 2: Priming & Painting
-
Select the right primer:
If your skylight frame is metal (powder-coated aluminum is common), use a specific metal-bonding primer. If it is wood, a high-quality bonding wood primer is sufficient. -
Apply the primer:
Brush on a thin, even coat of primer. Avoid overloading the brush to prevent drips, especially since you are working overhead against gravity. -
Dry and check:
Allow the primer to dry completely according to the can’s instructions. Briefly inspect for any missed spots or drips and sand them smooth if necessary. -
First coat of black:
Using your angled sash brush, apply the first coat of black paint. Focus on getting into the corners and edges first. I prefer to work from the top down to catch any potential runs. -
Rolling flat areas:
If the frame sides are wide and flat enough, you can use a small foam roller to smooth out the finish, but a brush usually offers better control for narrow skylight profiles. -
Drying time:
Let this first coat dry fully. Do not rush this step; painting over tacky paint will pull up the previous layer and ruin the texture. -
Second coat application:
Apply a second coat of black paint for full opacity and depth. This layer creates that rich, architectural look shown in the photo.
Step 3: Finishing Touches
-
Remove tape (frame):
Score the edge of the tape along the glass with a sharp utility knife before pulling. This prevents the dried paint from peeling off with the tape. -
Remove tape (wall):
Carefully peel back the tape from the rough wall edges. Pull slowly at a 45-degree angle away from the painted line. -
Clean glass:
If any paint seeped onto the glass, wait for it to fully cure, then gently scrape it off with a razor blade held at a low angle. -
Seal timber edges:
If you have exposed timber framing visible around the bottom edge (like the light wood trim in the photo), apply a clear matte sealer to keep the natural wood contrast clean.
Soften the Contrast
For a softer, less industrial vibe, swap the stark black for a deep charcoal gray (like ‘Iron Ore’) or a dark bronze metallic paint for a touch of warmth.
Now step back and enjoy how your new dark frame draws the eye upward to the beauty of the sky above
Ceiling Halo Around the Skylight Opening
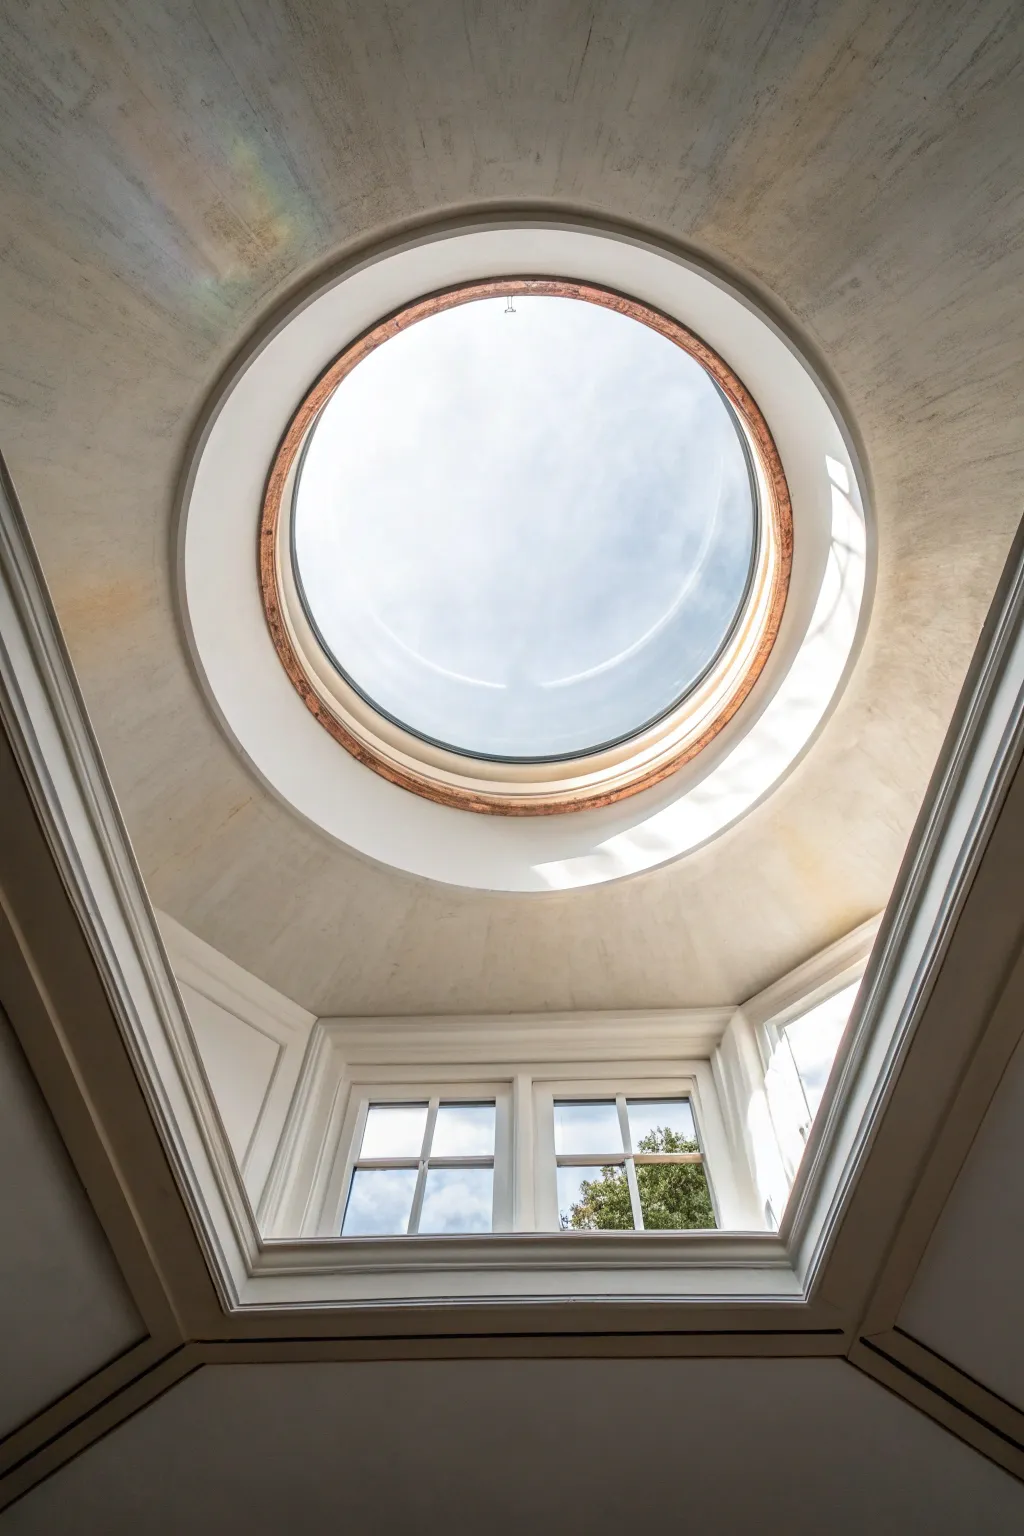
Bring an atmospheric, old-world charm to your modern skylight by creating a subtle, textured halo effect. This faux finish mimics the look of aged vellum or weathered plaster, softening the transition between the bright glass and your ceiling structure.
Step-by-Step Tutorial
Materials
- Latex interior paint (base coat, creamy white)
- Latex glaze medium
- Tinting color (burnt umber or raw sienna)
- Clean cotton rags or cheesecloth
- 2-inch painter’s tape
- Natural sea sponge
- Small angled sash brush (1.5 inch)
- Medium mixing container
- Drop cloths
- Ladder
Step 1: Preparation and Base Coat
-
Protect the area:
Begin by laying down drop cloths directly under the skylight shaft to catch any drips. Use your painter’s tape to carefully mask off the actual glass of the skylight and the trim of any lower windows if they connect directly to the workspace. -
Clean the surface:
Wipe down the drywall or plaster inside the skylight tunnel with a damp cloth to remove dust and cobwebs. A clean surface ensures your glaze will move smoothly without grabbing onto debris. -
Apply the base coat:
If your current ceiling color is dark or uneven, roll or brush on a fresh coat of creamy off-white latex paint. Let this dry completely for at least 4 hours, or preferably overnight, as the glaze needs a sealed, non-tacky surface to work properly.
Rag Rolling Secret
Work with a ‘wet edge’ at all times. If you must stop, end your section in a random, jagged line rather than a straight one to hide the seam later.
Step 2: Mixing and Applying the Glaze
-
Create your wash:
In your mixing container, combine regular latex glaze medium with a small amount of your chosen tint (burnt umber works beautifully for that warm, aged look). A good starting ratio is 4 parts glaze to 1 part paint, but test it on a scrap piece of cardboard first. -
Dampen your sponge:
Soak your sea sponge in water and wring it out thoroughly until it is just barely damp. This prevents the sponge from absorbing too much glaze initially and helps soften the texture. -
Work in sections:
Dip the sponge lightly into your glaze mixture. Do not overload it. Working on one quadrant of the circular opening at a time prevents the edges from drying out before you can blend them, which is crucial for a seamless halo. -
Apply the first pass:
Dab the sponge onto the ceiling surface using a random, twisting motion. Avoid creating a recognizable pattern. You want organic, cloud-like clusters of color rather than a uniform stamp. -
Soften the edges:
While the glaze is still wet, take a clean, dry rag and gently blot the applied texture. This lifts excess pigment and creates that soft, dusty look seen in the photo. Pay special attention to fading the color out as you move away from the skylight ring.
Make it Metallic
For a magical reflective glow, mix a teaspoon of metallic gold or pearlescent mica powder into your glaze. It will catch the sunlight beautifully.
Step 3: Refining the Detail
-
Detail the rim:
Use your small angled sash brush to apply a slightly heavier concentration of the glaze mixture right along the immediate edge of the skylight frame. This emphasizes the architectural circle and creates visual depth. -
Blend the rim overlap:
Before that brush line dries, use your damp sponge to pat the wet edge outward into the rest of your texture. This eliminates hard lines and makes the ‘halo’ feel like it’s glowing from the center. -
Check for balance:
Step down from the ladder to view the work from the floor. Look for any areas that seem too heavy or too bare. Ideally, the effect should look like natural discoloration or shadows rather than applied paint. -
Add a second layer:
If the effect is too subtle after the first pass dries (wait about 30 minutes), apply a second, very whisper-thin layer of glaze in random patches to build dimension. -
Dry brush highlights:
For added texture, dip a dry bristle brush into a tiny amount of your original lighter base color. Off-load almost all the paint onto a paper towel, then lightly whisk it over the dried glaze to highlight the surface texture. -
Final cure:
Allow the entire project to cure for 24 hours. The glaze takes longer to fully harden than standard paint, so avoid touching or cleaning the area during this time. -
Remove masking:
Carefully peel away the painter’s tape. Pull the tape at a 45-degree angle away from the painted edge to ensure a crisp, clean line against the glass or trim.
Now your skylight isn’t just a window, but a warm, artistic focal point that draws the eye upward

PENCIL GUIDE
Understanding Pencil Grades from H to B
From first sketch to finished drawing — learn pencil grades, line control, and shading techniques.
Explore the Full Guide
Cool Sky-Tone Well for Airy Light
Transform a plain ceiling by painting a hyper-realistic skylight mural that opens your room to an eternal summer sky. This illusion combines painted wood grain textures with soft, fluffy cloud techniques to create a stunning architectural feature where none existed before.
Step-by-Step Tutorial
Materials
- Latex wall paint (white, light blue, medium blue)
- Acrylic craft paints (burnt sienna, raw umber, ochre)
- Assorted brushes (2-inch sash brush, fan brush, fine liner)
- Painter’s tape (various widths)
- Sea sponge
- Glazing medium
- Measuring tape and pencil
- Long straight edge or level
- Drop cloth
Step 1: Planning and Framing
-
Map out the grid:
Decide on the size of your faux skylight. Use a measuring tape and pencil to draw a large rectangle on your ceiling. Add depth lines by drawing diagonal lines extending from the four corners of your rectangle outward to a larger outer rectangle, creating the illusion of a recessed light well. -
Tape the light well:
Mask off the central rectangular area (where the sky will be) with painter’s tape. Also mask the outside edge of the ‘recessed’ walls. This isolates the slanted wall sections. -
Paint the recess:
Paint these slanted sections with a clean, matte white paint. Apply two coats for solid coverage. To enhance the illusion of depth, I like to mix a tiny drop of grey into the white for the side that would be in ‘shadow’ based on your room’s natural light source. -
Clean removal:
While the paint is still slightly tacky, carefully peel back the tape to reveal crisp lines. Let this dry completely—preferably overnight—before taping over it.
Wobbly Lines?
If your taped lines bled, don’t panic. Wait for the paint to cure fully, then scrape the bleed gently with a razor blade or touch up with the base wall color using a zero-size brush.
Step 2: Painting the Sky
-
Mask the frame:
Once the white recess is dry, tape off the inner edges of the white walls to protect them. You are now working only inside the central rectangle. -
Gradient base coat:
Mix your medium blue with a glazing medium to extend its working time. Apply it at the ‘top’ of the skylight, blending it into a lighter blue and finally almost white at the bottom. This gradient mimics atmospheric perspective. -
Forming clouds:
Dampen a sea sponge and dip it into white paint mixed with a little glaze. Lightly pounce irregular shapes onto the blue field. Keep the edges soft and indefinite. -
Adding volume:
Using a dry brush, gently swirl the wet sponge marks to blur them. Add brighter white highlights to the top edges of the clouds where the ‘sun’ would hit them. -
Shadowing clouds:
Mix a very faint grey-purple glaze. apply this sparingly to the bottom undersides of your largest clouds to give them weight and 3D form.
Step 3: Creating the Wood Frame
-
Outline the trim:
Once the sky is fully dry, tape off a border regarding the ‘glass’ to create the wooden window frame. You want a thick outer frame and a thinner inner sash. -
Base wood tone:
Paint this masked frame area with a base coat of ochre or warm beige. This will be the undertone of your wood. -
Wood graining:
Mix burnt sienna loosely with glaze. Drag a coarse stiff-bristled brush through this wet glaze along the length of the frame to create wood grain streaks. -
Knot details:
While the glaze is wet, use a fine liner brush and raw umber paint to add small knots or distinct grain swirls. Don’t overdo it; subtle imperfections make it look real. -
Highlighting edges:
Paint a very thin, lighter line on the inner edge of the frame where the light from the ‘sky’ would hit the wood. This tiny detail sells the realism. -
Hardware illusion:
Using a small detail brush and dark grey paint, sketch small hinges or a latch mechanism on the frame. Add a tiny dot of white to simulate a metallic gleam.
Evening Mode
Mix glow-in-the-dark medium into your white cloud highlights. By day it looks normal, but at night you’ll have a faint, glowing moonlit atmosphere.
Step 4: Final Touches
-
Remove tape:
Very slowly remove all remaining tape. If any paint bled, touch it up with a small angled brush. -
Shadow casting:
To ground the frame, paint a very sheer, transparent grey shadow on the white ‘recessed’ wall, just below the bottom edge of the wood frame. This simulates the frame casting a shadow into the well.
Step back and enjoy the permanent sunshine creating a new focal point in your room
Geometric Color Panels Inside the Well
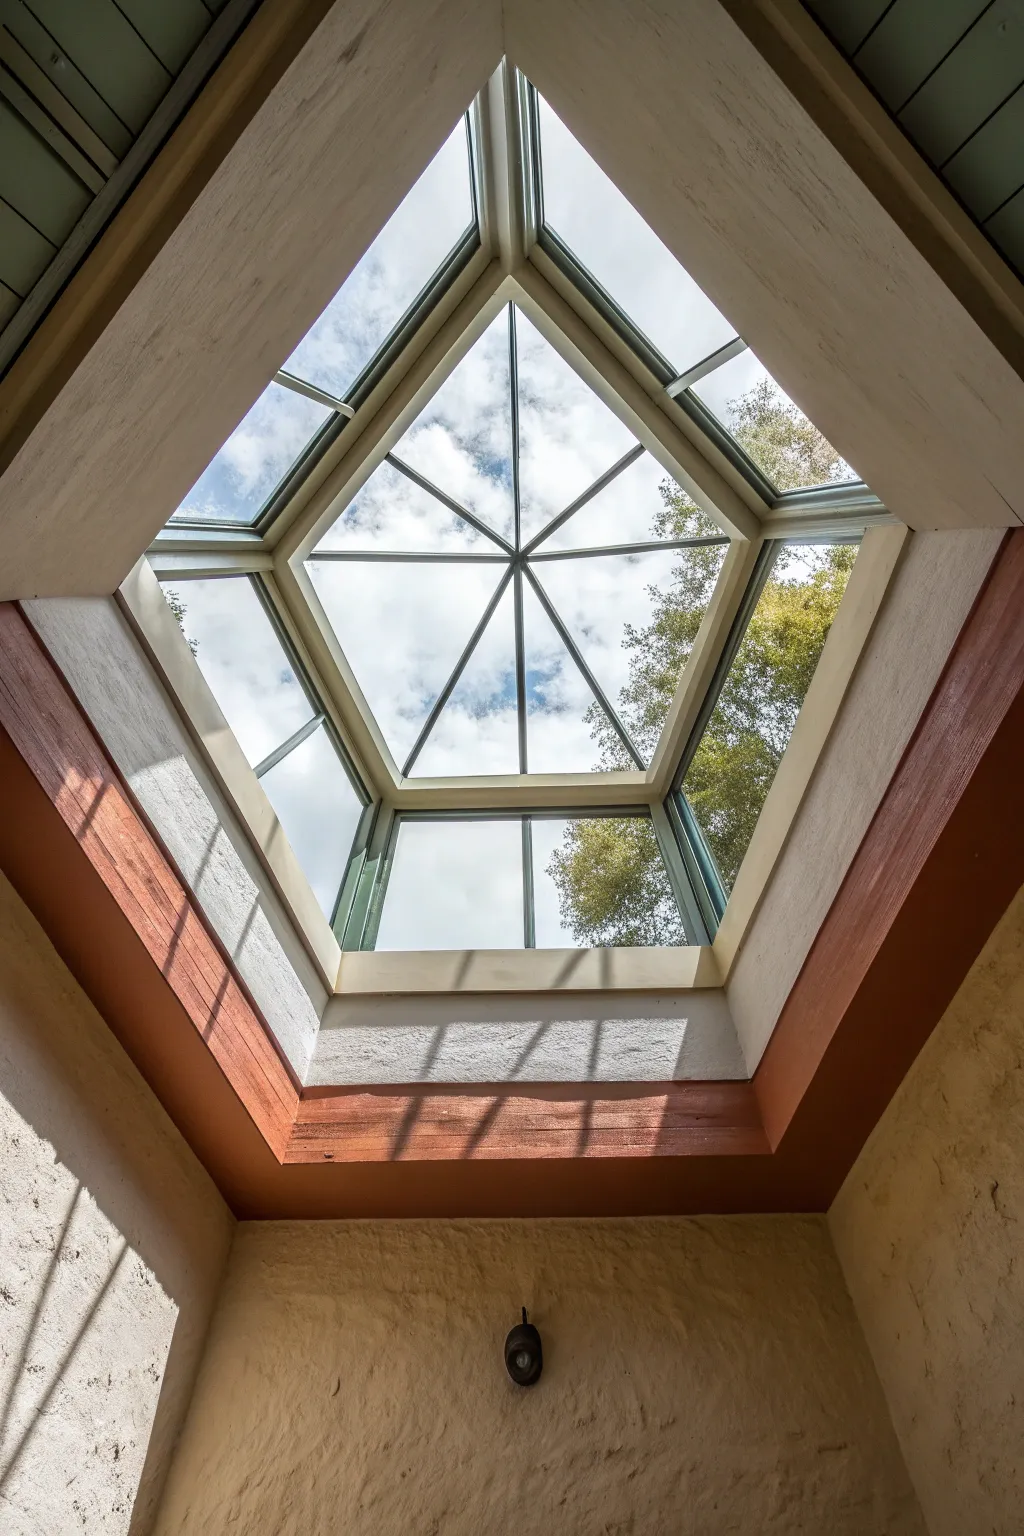
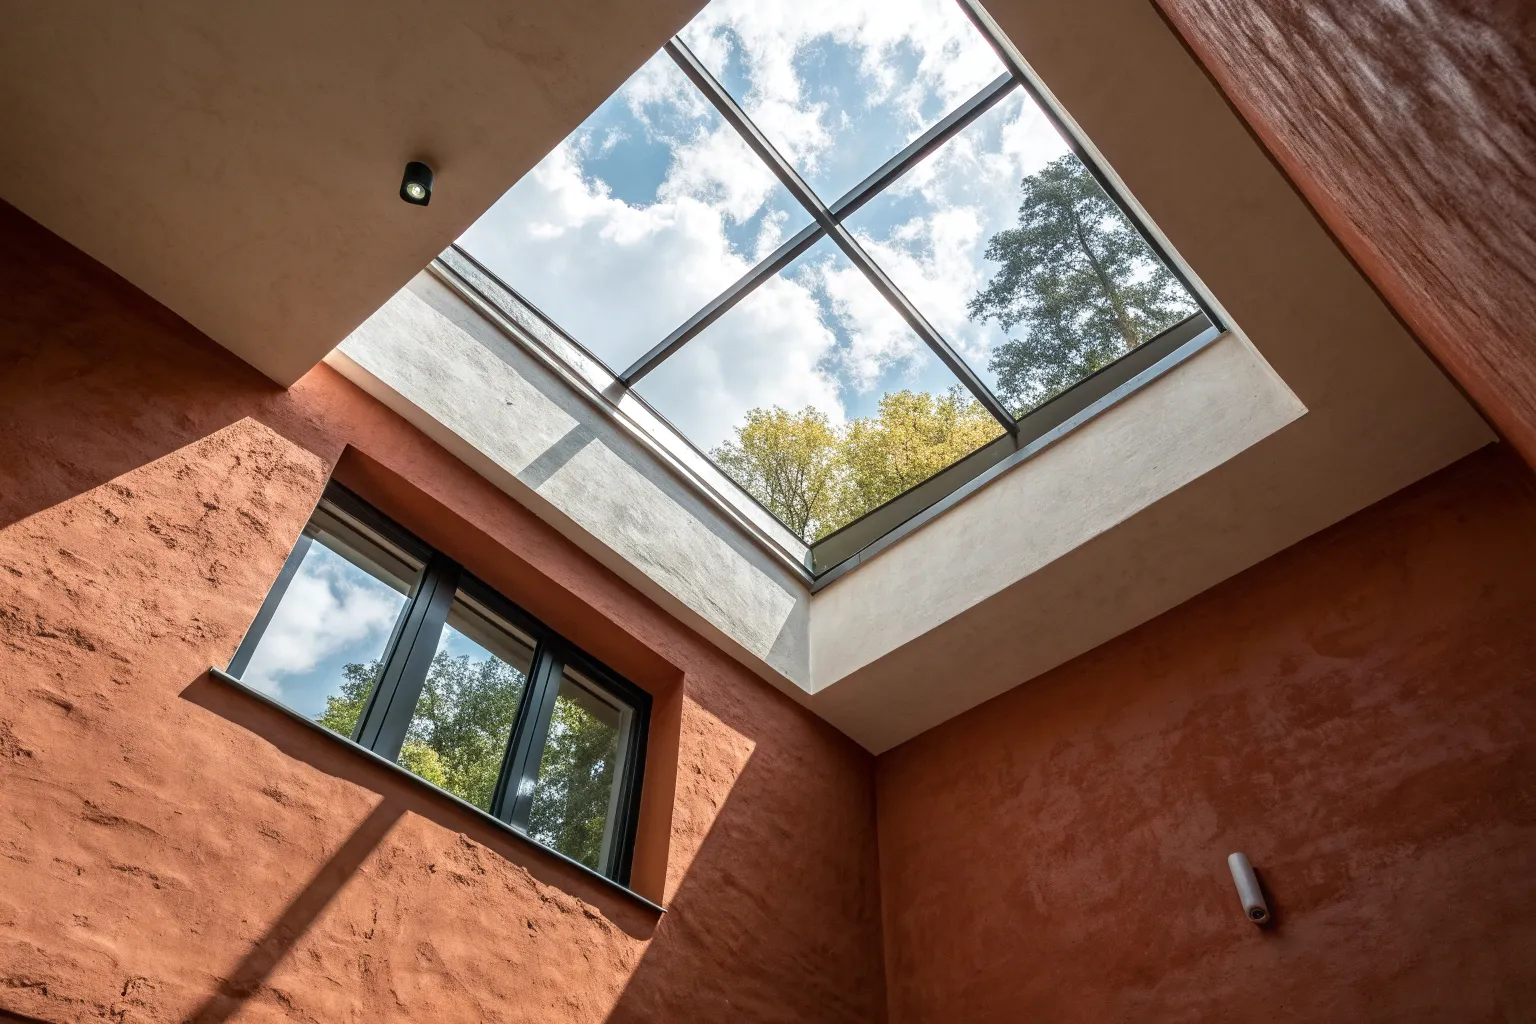
Transform a plain skylight shaft into an architectural feature with strategic color blocking. By painting the lower trim band in a rich terra-cotta tone, you frame the view of the sky and add grounding warmth to the high ceiling space.
How-To Guide
Materials
- Interior semi-gloss or satin paint (Terra-cotta/Red-Brown)
- Interior flat or eggshell paint (Cream/Off-white)
- Painter’s tape (1.5 or 2 inch width)
- Angled sash brush (2 inch)
- Small foam roller set
- Extension pole for roller
- Ladder (tall enough to reach the skylight base)
- Drop cloths
- Sanding sponge (fine grit)
- Clean-up rags and mild detergent
Step 1: Preparation & Safety
-
Secure the workspace:
Since you’ll be working overhead, safety is paramount. Clear all furniture from beneath the skylight and lay down drop cloths to catch any stray drips. Ensure your ladder is stable on a flat surface before ascending. -
Clean the surfaces:
Dust and grime accumulate in high recesses. Use a damp rag with mild detergent to wipe down the trim area and the surrounding wall sections you intend to paint. Let everything dry completely. -
Sand for adhesion:
If the existing trim has a glossy finish or is rough, lightly run a fine-grit sanding sponge over it. This creates a mechanical tooth for the new paint to grab onto. -
Wipe away dust:
After sanding, use a tack cloth or a slightly damp rag to remove all sanding dust. You want a perfectly clean surface for smooth lines.
Prevent neck strain
Painting overhead is tiring. work in 15-minute bursts and take breaks to stretch your neck and shoulders to avoid injury.
Step 2: Taping the Geometry
-
Tape the glass edge:
Apply painter’s tape carefully along the edge where the frame meets the glass. This protects the window pane from accidental brush strokes. -
Define the upper boundary:
Run a line of tape along the top edge of the trim or recess where it meets the upper white walls of the shaft. Press the tape edge down firmly with your fingertip or a putty knife to prevent bleed. -
Define the lower boundary:
Tape the lower line where the trim section meets the main ceiling or the lower wall section. Keeping these lines straight is crucial for the crisp, geometric look shown in the photo. -
Seal the tape edges:
I like to brush a tiny amount of the *base* wall color along the tape edge first. This seals the tape so if any paint bleeds under, it matches the wall, keeping your accent line razor-sharp.
Step 3: Applying the Color
-
Cut in the corners:
Dip your angled sash brush into the terra-cotta paint. Carefully paint into the deep corners and along the taped edges where a roller might not reach effectively. -
Roll the flat sections:
Pour your accent color into a small tray. Using a small foam roller, apply paint to the flat faces of the trim or recessed panel. The foam roller helps achieve a smooth finish on wood or drywall. -
Feather out the paint:
While the paint is wet, lightly go over any ridges left by the roller to ensure a uniform texture. Let this first coat dry according to the can’s instructions, usually about 2-4 hours. -
Apply the second coat:
Repeat the cutting-in and rolling process for a second coat. Darker colors like this rustic red often need two layers to achieve full, rich opacity.
Try a metallic finish
Swap the flat terra-cotta color for a metallic copper or bronze paint. It will catch the incoming sunlight and add a glowing ambiance to the room.
Step 4: Touch-ups & Reveal
-
Remove tape while damp:
For the cleanest lines, peel the tape off slowly at a 45-degree angle while the second coat of paint is still slightly tacky to the touch. -
Refresh the upper walls:
If strict contrast is desired, paint the upper walls of the shaft with the fresh cream/off-white paint. Use an extension pole and roller to reach the high angled sections safely. -
Inspect from below:
Climb down and view the work from the floor. The distance might hide small imperfections, but if you spot any glaring errors, use a small artist’s brush for final touch-ups.
Enjoy the new perspective every time you look up at the sky through your beautifully framed window.


Striped Shaft to Stretch the Height
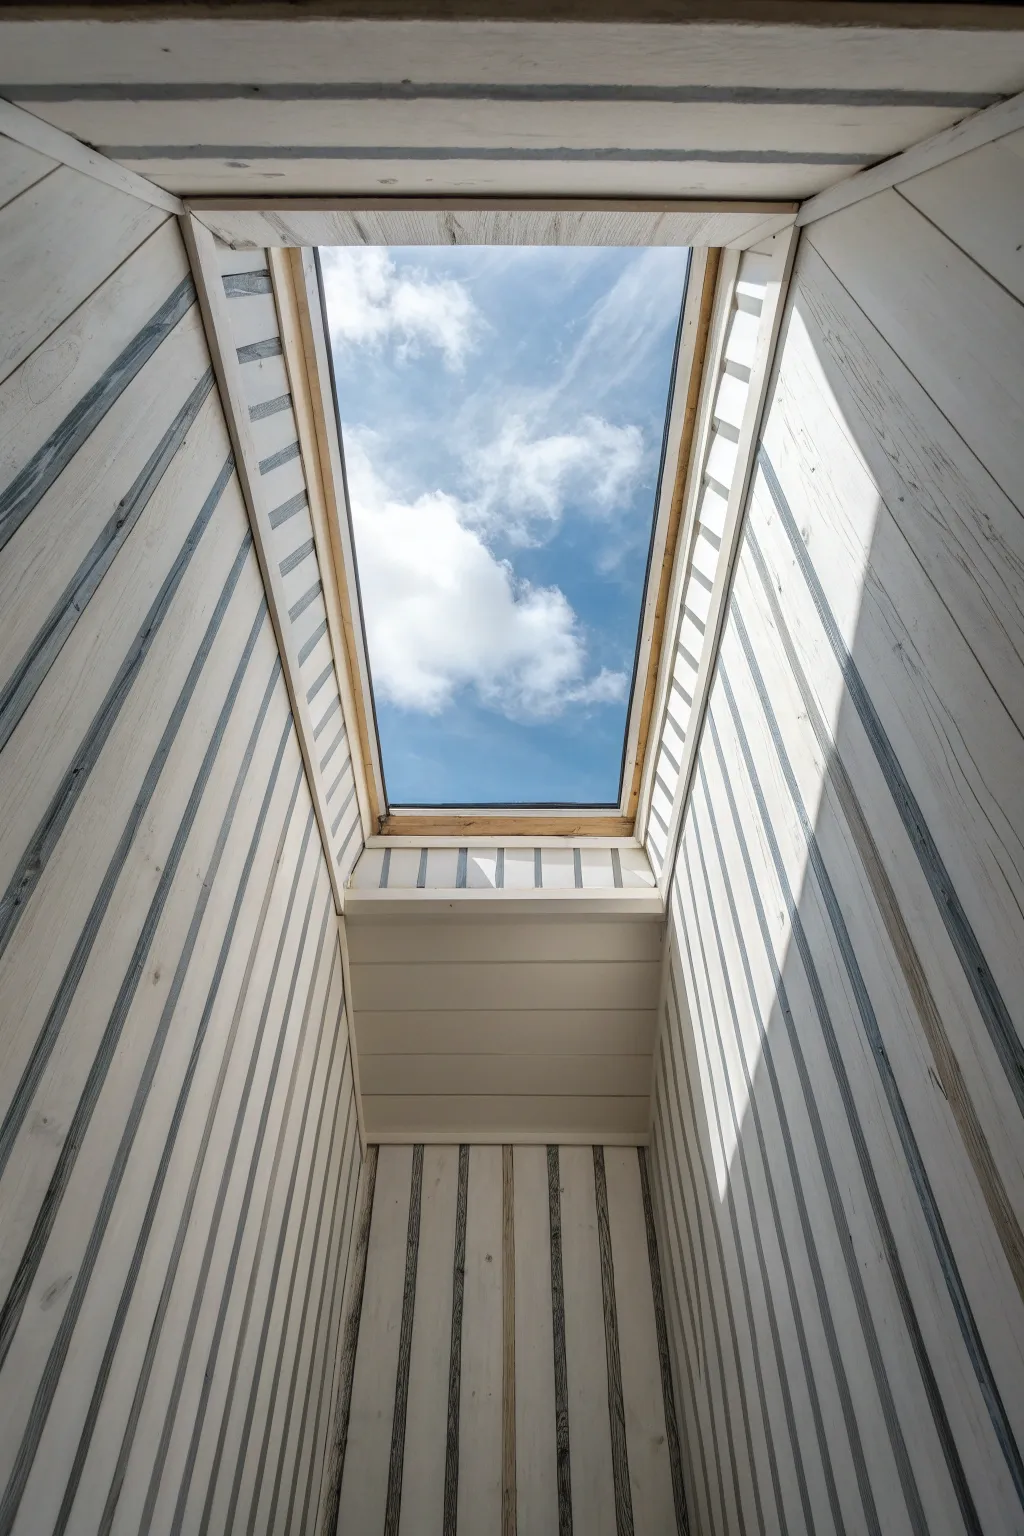
Transform a standard skylight shaft into an architectural feature with this clever painting technique that exaggerates height. By highlighting the vertical grooves of paneling (or faux-painting them), you draw the eye directly upward to the sky, creating a feeling of endless space.
Detailed Instructions
Materials
- White or off-white interior latex paint (satin or eggshell finish)
- Cool grey or slate blue paint (for the stripes)
- 1-inch angled sash brush
- Fine artist’s brush or pinstriping brush
- Painter’s tape (optional but helpful for straight lines)
- Clean, lint-free rags
- Extension pole (for high reaches)
- Sandpaper (220 grit) and tack cloth
- Drop cloths
Step 1: Preparation and Base Coat
-
Protect the area:
Lay down drop cloths directly beneath the skylight shaft. Since you will likely be working overhead on a ladder, ensure your footing is completely stable before starting any work. -
Clean the surface:
Wipe down the interior walls of the shaft to remove dust and cobwebs, which tend to gather in these high corners. If there is existing wood paneling, ensure the grooves are free of debris. -
Light sanding:
Briefly sand the surfaces with 220-grit sandpaper to help the new paint adhere. This is especially important if the previous finish was glossy. Wipe away the dust with a tack cloth. -
Tape the glass edge:
Carefully apply painter’s tape to the frame or trim right where it meets the skylight glass. This protects the view while you work on the shaft walls. -
Apply the white base:
Cut in the corners and edges with the 1-inch angled sash brush using your white base color. Ensure you get into the deep corners near the window frame. -
Roll or brush the panels:
Fill in the rest of the flat surfaces with the white paint. If you have real wood paneling, aim to keep the paint slightly thinner so the wood grain texture still reads through. Let this dry completely before moving to the next step.
Step 2: Creating the Striped Definitions
-
Mix your glazing medium (optional):
For a softer, more weathered look like the reference photo, I like to mix the grey paint with a clear glazing medium (1 part paint to 4 parts glaze). If you want sharp, solid stripes, skip this step and use the paint as-is. -
Test the stripe width:
On a scrap piece of wood or cardboard, test your stripe width. The goal is to mimic the shadow line between tongue-and-groove boards, so the line should be roughly 1/4 inch wide. -
Start from the skylight:
Begin painting your stripes at the very top, near the glass, and pull the brush downward. This prevents drips from ruining work you’ve already done below. -
Paint the grooves:
Using your fine brush or the edge of the angled brush, paint the slate grey color into the vertical grooves of the paneling. If you don’t have real grooves, use a long level and pencil to lightly mark vertical lines, then paint over them. -
Feather the edges:
While the grey paint is still wet, take a clean, slightly damp rag and very gently wipe the edges of the painted line. This creates that ‘aged wood’ look where the paint seems to have accumulated naturally in the crevices. -
Maintain perspective:
As you work your way down the shaft, step back occasionally to look up. The lines should feel continuous from the room below all the way to the glass. -
Address the horizontal beams:
If your shaft has horizontal structural elements, paint them the solid white base color to break up the vertical lines slightly, but consider adding a very subtle grey shadow line underneath them for depth. -
Check for consistency:
Ensure the grey stripes have a similar opacity. Some can be darker to mimic natural weathering, but avoid having one starkly solid line next to a very faint one.
Use an Extender Pole
Work smarter, not harder. Tape your brush handle securely to an extension pole to reach the highest corners of the shaft without precarious ladder positioning.
Step 3: Finishing Touches
-
Remove tape:
Once the paint is dry to the touch but not fully cured (usually about an hour), carefully peel away the painter’s tape near the glass at a 45-degree angle. -
Touch up white areas:
Inspect the white panels between your grey stripes. If any grey glided too far out of the groove, use a small brush with white paint to tidy up the flat surfaces.
Wobbly Lines?
Don’t stress over ruler-straight lines. A slight wobble mimics the natural warping of old wood planks and adds to the rustic charm of the finished aesthetic.
Step back and enjoy the illusion of height you’ve created, drawing every eye upward to the clouds
Faux Shadow Lines to Add Depth
Transform a plain, windowless wall or ceiling nook into a sun-drenched architectural feature with this clever painting technique. By carefully mapping and painting faux shadow lines in soft grey tones, you can mimic the natural cast of sunlight streaming through a grid skylight, adding incredible depth and warmth to any space.
Step-by-Step
Materials
- High-quality painter’s tape (various widths)
- Laser level (optional but helpful)
- Pencil
- Long ruler or straight edge
- Measuring tape
- Base wall paint (creamy white or off-white)
- Glaze medium
- Grey paint (cool or warm tone depending on preference)
- Small angled sash brush
- Mini foam roller
- Clean lint-free rags
- Ladder
Step 1: Preparation and Mapping
-
Assess the Space:
Choose a corner or alcove where a skylight would logically exist. A high ceiling nook or a stairwell landing is ideal for this trick. -
Base Coat Application:
Ensure your walls are primed and painted with a solid base color. A textured, warm white works best to mimic the plaster look in the inspiration photo; let it dry completely for at least 24 hours. -
Determine the Light Source:
Decide on the imaginary angle of the sun. The shadows need to fall consistently from that single point to look realistic. -
Draft the Grid:
Using a pencil and ruler, lightly sketch the outline of the ‘skylight’ grid on the upper ceiling area first. -
Project the Lines:
Extend your pencil lines down the wall to represent the cast shadows. Use a long straight edge, ensuring the lines angle slightly to mimic perspective. -
Mark Crossbeams:
Sketch the horizontal shadow lines of the skylight grid across the vertical beams you just drew. These should get slightly wider as they move ‘closer’ to the viewer.
Pro Tip: Perspective
To nail the perspective, set up a bright clamp light where the sun would be. Trace the actual shadows cast by a cardboard cutout grid for perfect angles.
Step 2: Creating the Shadow Glaze
-
Mix the Glaze:
In a mixing container, combine your grey paint with the clear glaze medium. I prefer a ratio of 1 part paint to 4 parts glaze for a translucent, shadowy effect. -
Test the Translucency:
Brush a small amount of your mixture onto a scrap piece of cardboard or an inconspicuous spot to ensure it looks like a shadow, not a solid grey stripe.
Step 3: Painting the Shadows
-
Tape the Edges:
Apply painter’s tape firmly along the outside edges of your pencil marks. Press the edges down tight to prevent bleed-through on the texture. -
Seal the Tape:
Lightly brush a tiny amount of your base wall color over the tape edge. This seals the tape and ensures crisp lines for the shadow layer. -
Apply the Glaze:
Using the mini foam roller or sash brush, apply the grey glaze mixture between the taped lines. -
Soften the Texture:
While the glaze is still wet, gently dab it with a clean rag if your walls are textured. This helps the ‘shadow’ settle into the nooks and crannies like real light would. -
Feathering Edges:
For the shadows furthest from the ‘skylight,’ you might want to slightly blur the edge by lifting the tape while wet and softening it with a dry brush. -
Repeating the Process:
Work in sections. If your grid lines intersect, let one set of lines dry completely before taping and painting the perpendicular lines. -
Remove Tape Carefully:
Peel off the tape slowly at a 45-degree angle while the paint is tacky, not fully dry, to keep the edges sharp. -
Touch Up:
Once dry, use a small artist’s brush and your base wall color to tidy up any bleeds or pencil marks that are still visible. -
Final Assessment:
Step back and view the work from across the room. If the shadows look too faint, you can carefully re-tape and add a second, very light layer of glaze.
Troubleshooting: Too Dark?
If your shadow glaze looks too heavy or dark once applied, quickly mist it with water and blot with a lint-free rag to lift some pigment before it dries.
Enjoy the permanent sunshine and architectural interest this trompe l’oeil effect brings to your room
Painted “Picture Frame” Border Inside the Well
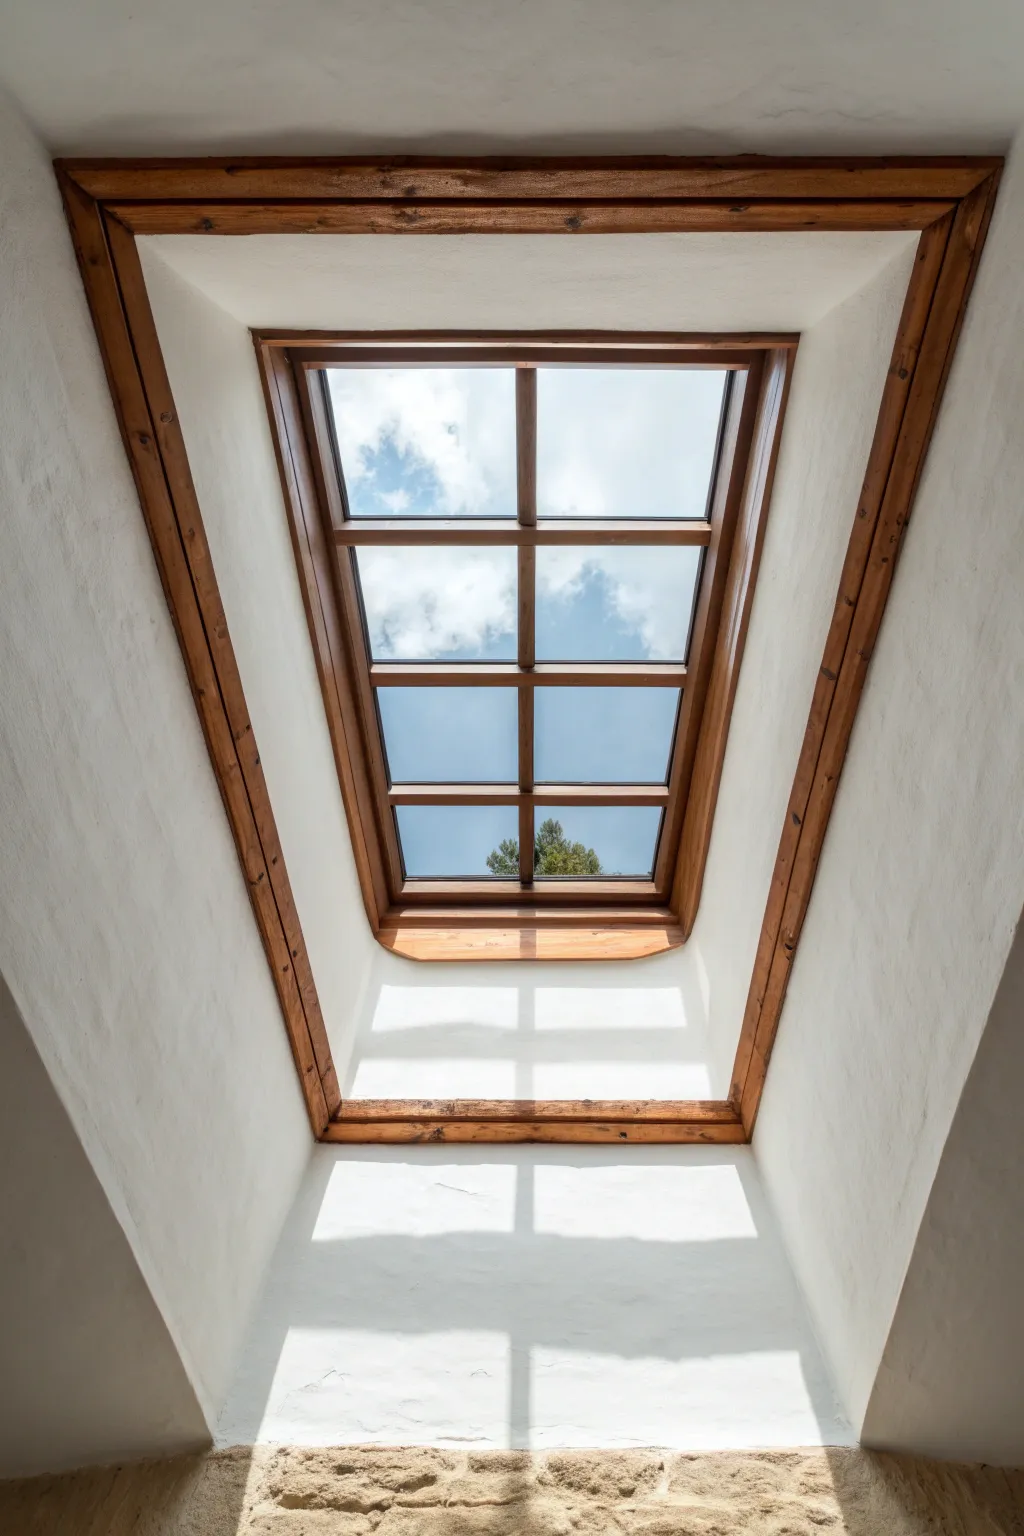
Transform a plain skylight well into a stunning architectural feature by painting a faux wood border that mimics a deep, recessed picture frame. This technique adds warmth and creates a dramatic focal point, drawing the eye upward to the sky beyond.
How-To Guide
Materials
- Painter’s tape (2-inch width)
- Drop cloths
- Ladder
- Sanding sponge (fine grit)
- Primer (acrylic latex)
- Base coat paint (warm beige or tan)
- Dark wood gel stain or glaze (walnut or mahogany)
- Acrylic artist paints (burnt umber, raw sienna)
- Angled sash brush (2-inch)
- Chip brushes (various sizes)
- Clean, lint-free rags
- Grain rocker tool (optional)
- Matte or satin clear sealant (water-based)
- Pencil
- Ruler or straight edge
Step 1: Preparation and Base Layer
-
Safety check and setup:
Before anything else, ensure your ladder is stable and positioned safely on the floor beneath the skylight. Lay down drop cloths to catch any drips, as painting overhead can be messy. -
Clean and sand the surface:
Wipe down the interior walls of the skylight well to remove dust and cobwebs. Lightly scuff the plaster or drywall with a sanding sponge to ensure the new paint adheres properly, then wipe clean again. -
Mark the frame boundaries:
Using a ruler and pencil, measure a consistent width for your ‘frame’ along the top and bottom interior edges of the well. The image shows a thick border, so measure about 4-6 inches down from the glass and essentially ‘outline’ the skylight opening. -
Tape off the walls:
Apply painter’s tape along your pencil lines to protect the white walls you want to keep pristine. Press the tape edges down firmly to prevent bleed-through. -
Protect the window frame:
Don’t forget to tape off the actual window frame (the part holding the glass) so you don’t get paint on the existing structure or the glass itself. -
Prime the area:
Apply a coat of quality acrylic primer to the area between your tape lines. This is crucial for hiding the previous wall color and providing a uniform surface for your faux finish. -
Apply the base coat:
Once the primer is dry, paint two coats of your warm beige or tan base color. This color will serve as the ‘light wood’ tone underneath your darker grain, so ensure it’s completely opaque and allow it to dry fully.
Step 2: Creating the Wood Grain Effect
-
Mix your glaze:
Mix your dark wood gel stain or glaze with a small amount of water or glazing liquid to extend its working time. You want a consistency that flows but isn’t drippy. -
Apply the glaze in sections:
Working on one side of the frame at a time, brush the dark glaze over the tan base coat. Don’t worry about perfection here; you just need full coverage. -
Drag the grain pattern:
While the glaze is still wet, take a clean chip brush or a specific wood graining tool and drag it through the glaze. Move in long, continuous strokes parallel to the skylight edge to mimic the direction of wood grain. -
Add variance:
I prefer to wiggle the brush slightly as I drag it to create natural-looking imperfections and knots in the wood pattern. -
Soften the look:
If the lines look too harsh, lightly brush over them with a dry, soft bristle brush to blend the colors. This ‘softening’ step makes the faux wood look much more realistic. -
Define the corners:
Pay special attention to the corners where the frame sides meet. Use a smaller artist brush to create a diagonal ‘miter’ line where the wood gain directions would naturally intersect, darkening this line slightly to create depth. -
Detailing with artist paints:
Dip a small brush into burnt umber or raw sienna acrylics and add thin, darker streaks or small knots randomly throughout the grain to add visual interest and realism.
Uneven Grain Fix
If a section looks too heavy or dark, wipe it back immediately with a damp rag while wet. If dry, lightly sand it down and re-apply a thin layer of the beige base coat to blend it out.
Step 3: Finishing Touches
-
Remove tape carefully:
Once the paint feels dry to the touch but hasn’t fully cured (usually about an hour), slowly peel back the painter’s tape at a 45-degree angle. This prevents the tape from pulling up chunks of your new artwork. -
Touch up edges:
Inspect the crisp white wall adjacent to your new frame. If any glaze bled through, use a small brush and white wall paint to touch up the edges for a sharp, clean finish. -
Seal the work:
Protect your masterpiece from sun fading and moisture by applying a coat of water-based clear matte or satin sealant over the faux wood areas. This also unifies the sheen of the different paints.
Level Up: Beveled Look
To create a 3D beveled effect, paint a very thin highlight line (lighter tan) on the ‘inner’ edge and a shadow line (dark brown) on the ‘outer’ edge of the frame.
Now stepping back, enjoy the warmth and architectural interest your new faux-finished skylight adds to the room
Botanical Silhouette Mural Climbing the Well
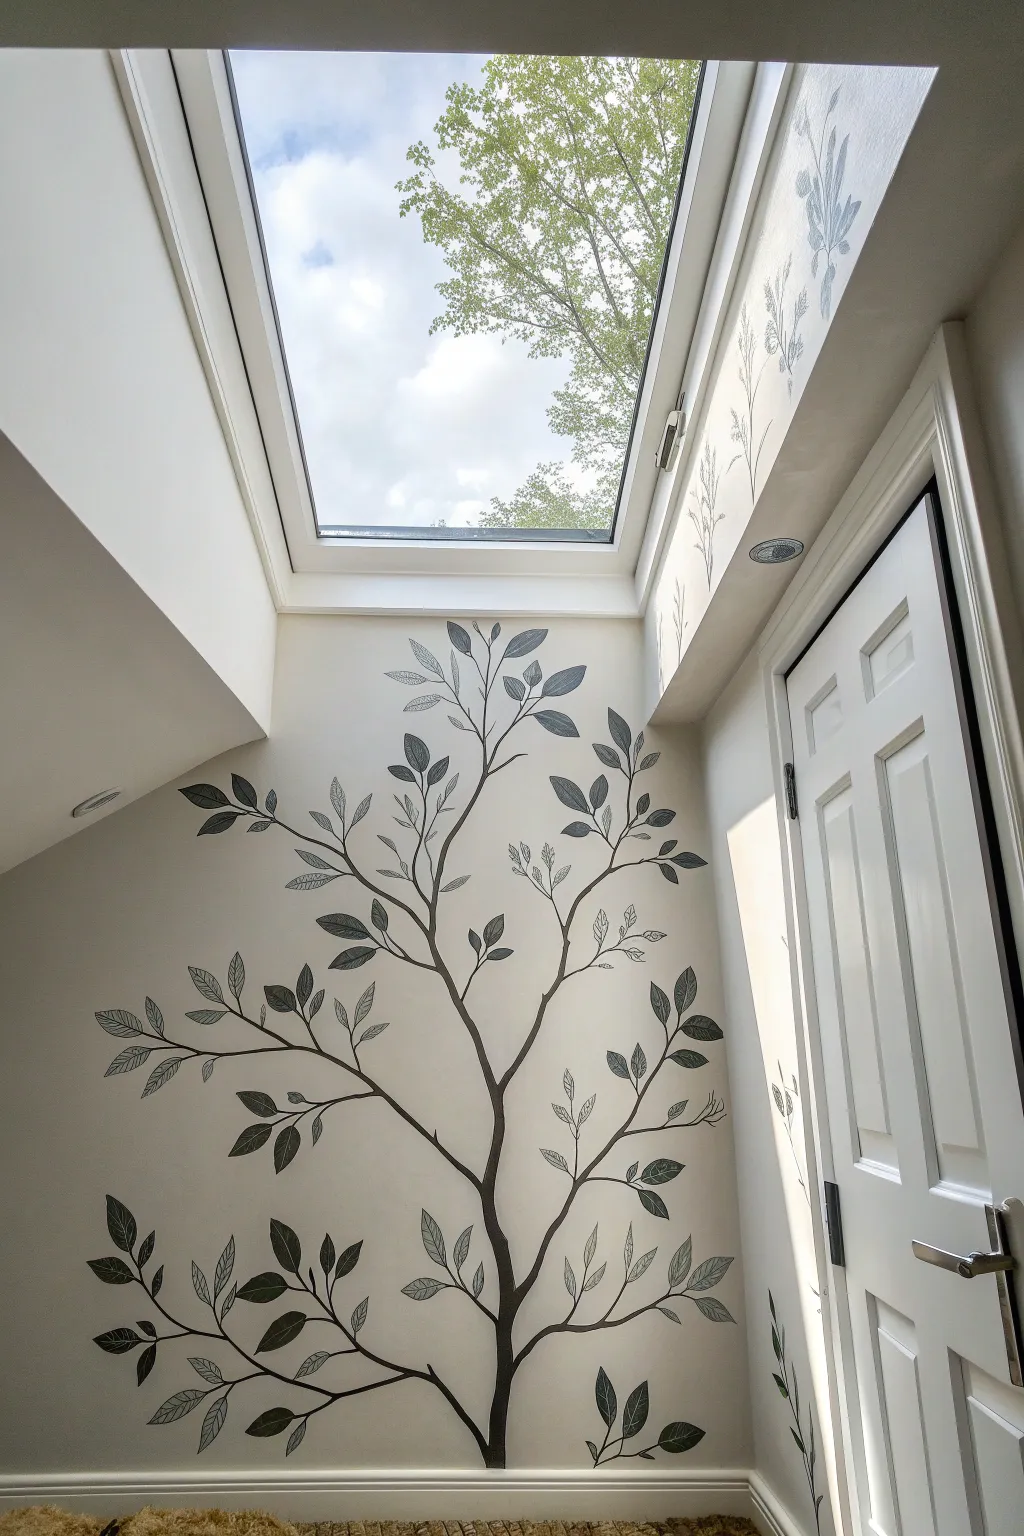
Transform a plain skylight well into an enchanting vertical garden with this botanical silhouette mural. By painting organic branches that reach towards the natural light source, you create a seamless connection between your interior space and the sky above.
Step-by-Step
Materials
- Matte black or dark charcoal interior latex paint
- Pencil for sketching
- Large eraser
- Various round brushes (Sizes 4, 8, and 12)
- Fine liner brush (Size 0 or 1)
- Painter’s tape
- Drop cloth
- Step ladder
- Reference images of leaves and branches
Step 1: Preparation and Mapping
-
Prepare the workspace:
Begin by laying down a drop cloth at the base of the wall to catch any drips. Since you’re working in a stairwell or high area, ensure your ladder is stable and secure before climbing. -
Clean and tape:
Wipe down the wall surface with a damp cloth to remove dust, ensuring a clean canvas. Apply painter’s tape along the baseboard and the door frame to protect the trim from accidental smudges. -
Sketch the main trunk:
Using a pencil, lightly sketch the primary trunk line starting from the bottom center of the wall. Draw a slightly wavy, organic line that reaches upwards, branching off towards the top corners near the skylight. -
Draft major branches:
Add three to four main branches extending from the trunk. Aim for asymmetry; nature is rarely perfectly balanced, so let some branches stretch longer or curve more dramatically than others. -
Plot leaf placement:
Map out the general placement of leaf clusters. Instead of drawing every single leaf in detail right now, just mark light ovals or lines to indicate direction and flow, ensuring the composition doesn’t feel too crowded.
Clean Edges
Make a mistake? Keep a damp Q-tip handy while painting. If you slip, quickly wipe the wet paint away with the Q-tip for an instant eraser effect.
Step 2: Painting the Structure
-
Load the brush:
Dip a size 12 round brush into your matte black paint. You want the paint to flow smoothly, so if it feels too thick or draggy, mix in a tiny drop of water. -
Paint the trunk base:
Start painting at the very bottom of the trunk. Press down firmly on the brush to create a wider stroke for the thickest part of the tree, lifting pressure as you move upward to taper the line naturally. -
Extend the branches:
Switch to a size 8 brush as you move into the main branches. Paint over your pencil lines with confident strokes. I find it helpful to pull the brush toward me rather than pushing it away for smoother curves. -
Add secondary twigs:
Use the size 4 brush to add thinner twigs branching off the main stems. These should look delicate and reach upward, mimicking the way plants grow toward the sun coming from the skylight. -
Refine the connections:
Check the points where branches meet the trunk. Thicken these joints slightly to make the structure look sturdy and realistic, smoothing out any sharp angles.
Natural Flow
To make the tree look natural, always paint your branches growing in ‘Y’ shapes. Branches rarely split at 90-degree angles; they fork upwards.
Step 3: Adding Foliage and Details
-
Outline the leaves:
Using the size 4 brush, carefully paint the outline of your leaves. Follow an almond or teardrop shape, keeping the tips pointed. Vary the sizes—some large and fully open, others smaller and younger. -
Fill the silhouette leaves:
Select about half of your outlined leaves to be solid silhouettes. Fill these in completely with black paint for a bold, graphic look that anchors the design. -
Create veined leaves:
For the remaining leaves, switch to your fine liner brush. Paint a central vein down the middle of the empty leaf outlines, then add delicate side veins branching out. This creates a beautiful visual texture contrast. -
Extend onto the skylight reveal:
If you are feeling adventurous, continue a few faint, tall stems up into the angled reveal of the skylight itself. Use a lighter touch or slightly diluted grey paint here to suggest distance and height. -
Review and touch up:
Step back down the ladder to view the mural from a distance. Look for any uneven lines or patches where the black paint looks thin, and touch them up with your small brush. -
Erase guidelines:
Once the paint is completely dry (give it at least a few hours), gently erase any visible pencil marks. Be careful not to scrub too hard over the painted areas.
Enjoy the feeling of bringing the outdoors inside every time you look up at your new skylight feature
Cloudy Sky Mural on the Skylight Well
Transform a plain skylight well into a breathtaking continuation of the heavens with this trompe-l’œil mural project. By mimicking the colors and softness of real clouds, you can create the illusion of a larger window that keeps the sky bright and blue even on rainy days.
Step-by-Step Guide
Materials
- Interior acrylic latex paint (white base)
- Acrylic artist paints (Phthalo Blue, Ultramarine Blue, Titanium White, Hints of Raw Umber)
- Glazing medium
- Large painter’s drop cloth
- Painter’s tape (frog tape recommended)
- Ladder or sturdy step stool
- Assorted paint brushes (2-inch angled sash, various round brushes)
- Natural sea sponge
- Lint-free rags
- Mixing buckets or trays
- Sandpaper (220 grit)
Step 1: Preparation and Base Coat
-
Protect the area:
Begin by laying down a large drop cloth directly underneath the skylight to catch any potential drips. Secure the ladder safely on a flat surface. -
Clean and sand:
Wipe down the interior walls of the skylight well to remove any dust or cobwebs. If the surface is glossy, give it a quick scuff-sand with 220-grit sandpaper to help the new paint adhere. -
Tape the edges:
Apply painter’s tape carefully along the edges where the skylight well meets the ceiling and around the actual window frame at the top. Press the edges of the tape down firmly to prevent bleed-through. -
Mix the sky blue base:
In a mixing bucket, create your main sky color. Mix white interior latex paint with Phthalo Blue and a touch of Ultramarine. Aim for a color slightly deeper than you think you need, as it will act as the backdrop for the clouds. -
Apply the first coat:
Using a roller or large brush, apply the blue base coat to the entire interior of the skylight well. Cut in carefully around the corners. -
Assess and recoat:
Allow the first coat to dry completely. If the original wall color is showing through, apply a second coat for solid, even coverage.
Natural Lighting Cue
Observe the direction the real sunlight enters the shaft. Paint your cloud highlights on that side and shadows on the opposite side to trick the eye.
Step 2: Painting the Clouds
-
Prepare the cloud mixtures:
Mix three shades of white. One pure Titanium White, one mixed with a tiny drop of blue for shadows, and one mixed with a very small amount of mixing glaze to create transparency. -
Establish cloud shapes:
Using a sea sponge, lightly dab the pure white paint onto the blue background to form the organic, fluffy shapes of cumulus clouds. Keep the edges irregular; real clouds are rarely perfect circles. -
Soften the edges:
While the paint is still tacky, use a dry, soft brush to gently feather the edges of your white shapes. This creates that wispy, atmospheric look rather than a stamped-on appearance. -
Add depth with shadows:
Dip a small round brush into your shadow mixture (white with a drop of blue/grey). Apply this to the bottom undersides of the cloud masses to give them volume and 3D weight. -
Blend the shadows:
Use a clean, dry rag or a dry blending brush to smudge the shadow color upwards into the white body of the cloud, creating a smooth transition. -
Create atmospheric haze:
Using the glaze-white mixture, lightly brush over areas between the distinct clouds. I like to do this to suggest wispy cirrus clouds high in the atmosphere. -
Add highlights:
Go back with pure, unthinned Titanium White and hit the very tops of the cloud forms where the ‘sun’ would be hitting them most directly.
Perspective Fix
If clouds look flat, you’re likely painting them straight-on. Since you look UP at a skylight, paint the bottoms of the clouds larger than the tops.
Step 3: Finishing Touches
-
Review from below:
Climb down the ladder and view the mural from the floor. This perspective shift helps you spot any areas that look unnatural or unbalanced. -
Refine details:
Climb back up to make final adjustments, softening any harsh lines or adding small wisps where the sky feels too empty. -
Remove tape:
Remove the painter’s tape slowly at a 45-degree angle while the paint is still slightly tacky to ensure a crisp, clean edge. -
Clean the glass:
If any paint accidentally got onto the skylight glass, use a razor scraper to gently remove it once dried.
Now you have a permanent patch of perfect summer weather to enjoy, regardless of the forecast outside
Night-Sky Well With Subtle Stars
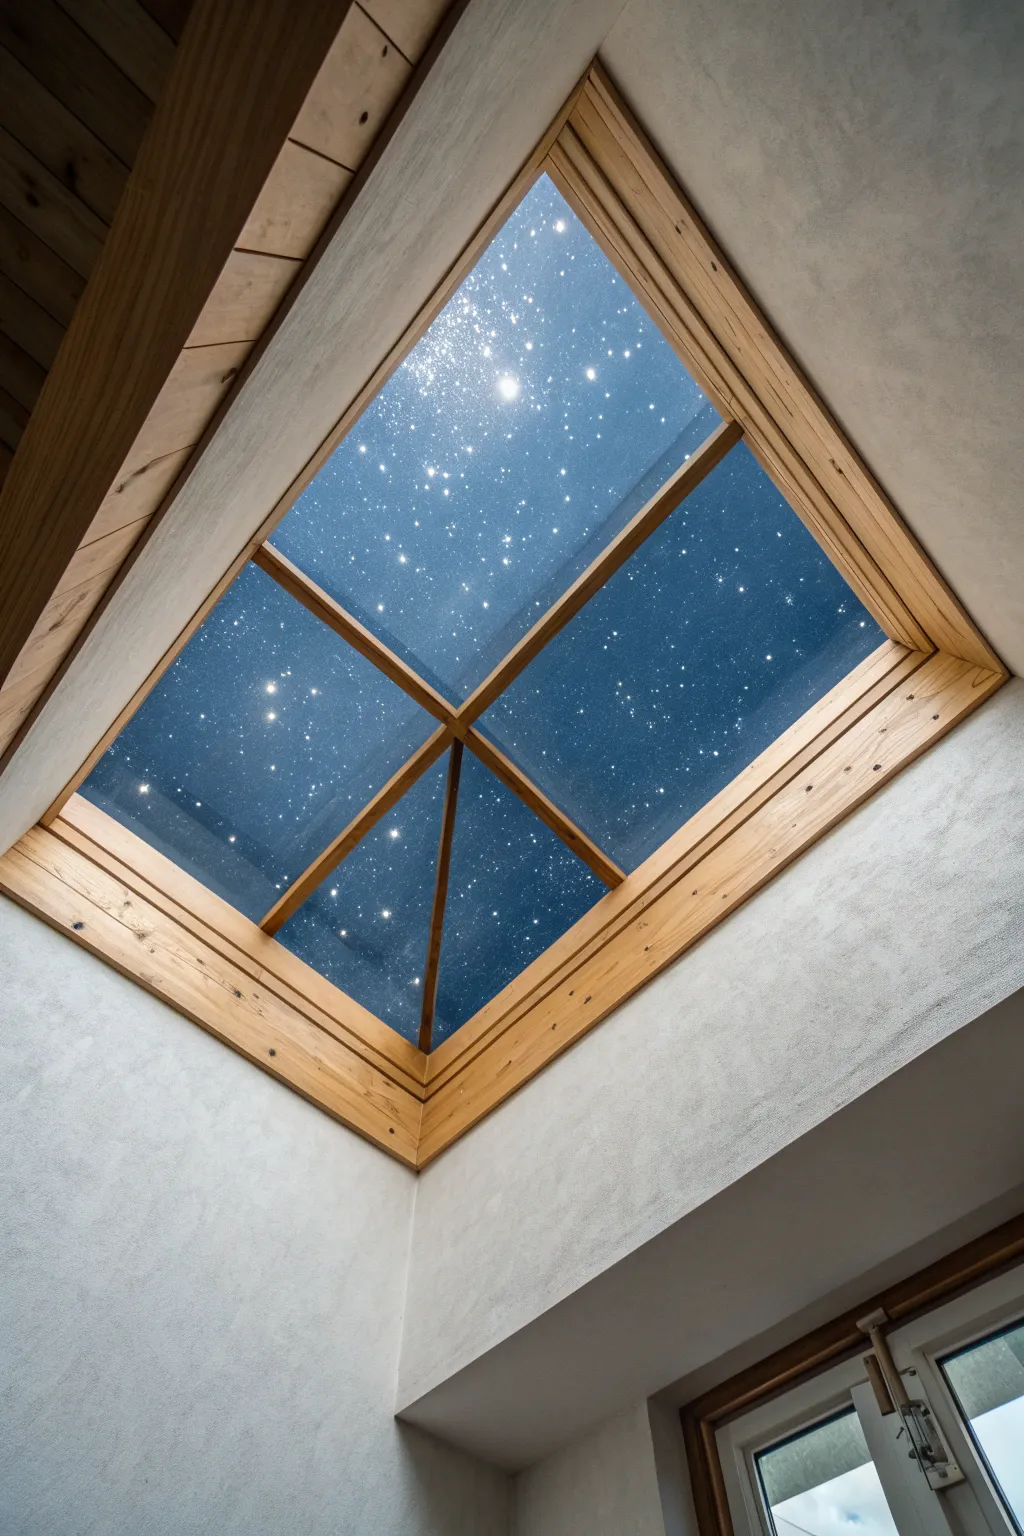
Transform a standard skylight well into a breathtaking window to the cosmos with this trompe-l’oeil painting technique. The result is a surprisingly realistic effect where the structural beams frame a deep, starry night sky.
Step-by-Step
Materials
- Deep navy blue interior latex paint (matte finish)
- Black interior latex paint (matte finish)
- Titanium white acrylic paint
- Glaze medium
- Quality painter’s tape
- Drop cloths
- Roller with extension pole
- Angled sash brush (2 inch)
- Sea sponge or rag
- Old toothbrush or stiff bristle brush
- Fine detail brush (00 or 0 size)
- Mixing cups
- Ladder
Step 1: Preparation and Base Layer
-
Protect the area:
Since you will be working overhead, ensuring the floor is completely covered with drop cloths is crucial. Secure them well so they don’t slip while you are on the ladder. -
Tape the edges:
Apply painter’s tape meticulously along the wooden trim and beams of the skylight. Press down the edges of the tape firmly with a putty knife or your fingernail to prevent paint bleed. -
Clean surfaces:
Dust the skylight well thoroughly. Any cobwebs or dust particles will get dragged into the paint and mar the smooth sky effect. -
Apply the base coat:
Roll on two coats of your deep navy blue paint. This serves as the primary color of the night sky. Allow full drying time between coats according to the can instructions.
Natural Variation
Don’t make your star distribution perfectly even. Real skies have clusters (like the Milky Way) and voids. Clumping stars creates a much more realistic look.
Step 2: Creating Depth and Atmosphere
-
Mix a glaze:
In a mixing cup, combine the black paint with the glaze medium in a 1:4 ratio. You want a translucent mixture that darkens without opaque coverage. -
Apply the vignetting:
Using a sea sponge or rag, dab the black glaze into the corners and along the very edges of the skylight panels. This vignette effect draws the eye toward the brighter center, mimicking atmospheric perspective. -
Blend the edges:
While the glaze is still wet, use a clean, dry brush to feather the black edges inward toward the blue, softening the transition so there are no harsh lines. -
Add lighter nebulas:
Mix a tiny amount of white into your navy base color to create a lighter blue. Sponge this very sparingly in the center areas to suggest distant galactic clouds, blending softly.
Oops, too bright!
If a star splatter gets too large or blobby, simply dab it with a damp rag immediately. If it’s dry, touch it up with a small dot of the navy base color.
Step 3: The Field of Stars
-
Prepare the spatter mix:
Dilute your titanium white acrylic paint with a little water until it reaches the consistency of heavy cream or ink. It needs to flow easily but still be opaque. -
Test your technique:
Before painting the ceiling, practice spattering on a piece of cardboard. Using an old toothbrush is my favorite method here; load the bristles and run your thumb across them to spray fine dots. -
Create background stars:
Gently flick the toothbrush across the different quadrants of the skylight. vary the density—some areas should have clusters of stars, while others remain darker. -
Protect the beams:
Be mindful of overspray hitting the wooden beams. If you are worried, hold a piece of cardboard against the beam while you flick the paint near the edges.
Step 4: Highlights and Details
-
Identify major stars:
Step down from the ladder and look up to see where larger stars would naturally balance the composition. Choose 5-7 spots for prominent stars. -
Paint the bright stars:
Using your fine detail brush and straight white acrylic (undiluted), paint small, solid dots in your chosen spots. -
Add the glow:
Dry brush a tiny, faint circle of white glaze around the biggest stars to create a glowing halo effect. -
Create starbursts:
For the one or two brightest ‘north stars,’ gently pull extremely thin lines outward from the center dot in a cross or an ‘X’ shape to mimic diffraction spikes. -
Remove tape:
Once dry, carefully peel away the painter’s tape at a 45-degree angle to reveal the crisp contrast between the wood and your new night sky.
Enjoy gazing up at your permanent clear night sky, regardless of the weather outside
Trompe-l’Oeil Architectural Ribs and Beams
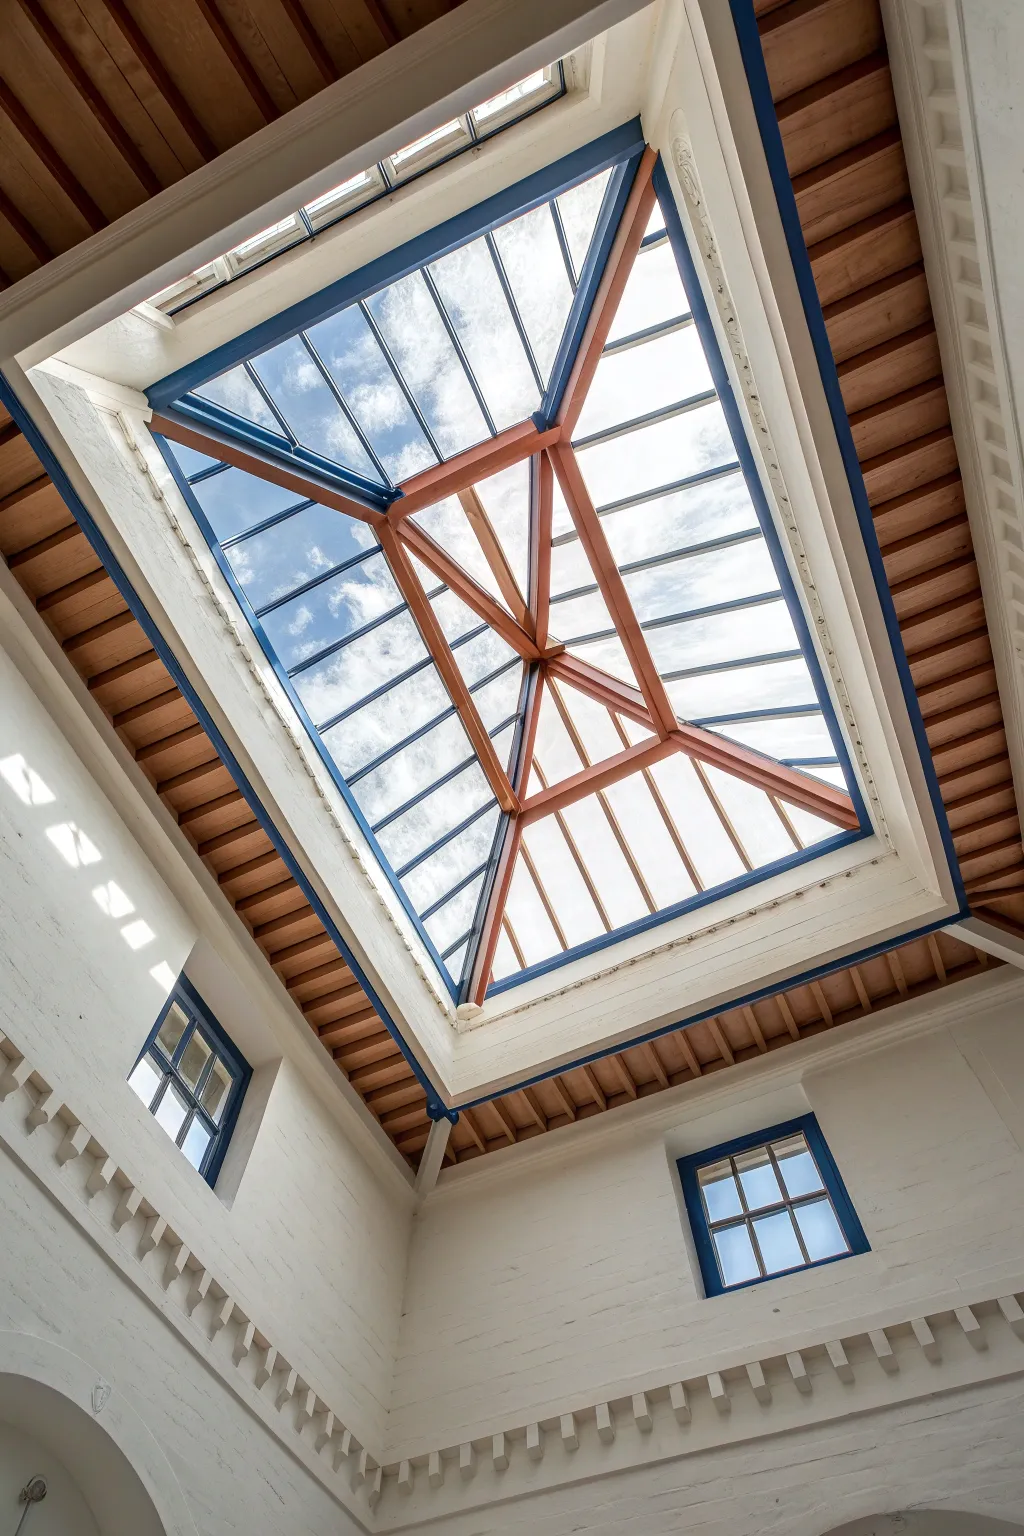
Transform a plain ceiling area into a breathtaking architectural feature with this trompe-l’oeil skylight effect. By carefully layering shades of blue and constructing faux beams with paint, you’ll create the convincing illusion of an open sky framed by sturdy timber and glass.
Detailed Instructions
Materials
- Latex wall paint (white, light blue, medium blue, dark blue)
- Acrylic paints (burnt sienna, raw umber, ochre, dark grey)
- Painter’s tape (various widths, including fine line tape)
- Long level or laser level
- Pencil and eraser
- Chalk line
- Paint rollers and trays
- Angled sash brushes (2-inch and 1-inch)
- Artist brushes (flat and detail)
- Glazing medium
- Straight edge or ruler
Step 1: Preparation and Sky Base
-
Measure and Mark:
Begin by determining the outer square perimeter of your skylight on the ceiling. Use a laser level and a pencil to mark the corners, ensuring perfectly 90-degree angles for a convincing architectural look. -
Tape the Perimeter:
Apply painter’s tape along the outside of your pencil lines to mask off the surrounding ceiling. Press the edges of the tape firmly to prevent any bleed-through. -
Apply the Base Sky Coat:
Roll on a coat of medium sky blue paint within the taped square. This will act as your mid-tone. Let this dry completely before moving on. -
Create Cloud Textures:
Mix a small amount of white paint with glazing medium. Using a rag or a sponge, lightly dab and swirl soft, organic cloud shapes onto the blue base. Keep the clouds sheer and wispy for realism. -
Add Depth to the Sky:
Blend a slightly darker blue into the corners or edges of the ‘glass’ panes you visualize, simulating how glass reflects light differently at angles. I find that keeping the center lighter enhances the sense of height.
Step 2: Drafting the Structural Grid
-
Map the Perspective:
Find the exact center of your square. Snap chalk lines from each corner to the center to create an ‘X’, which will serve as the base for the pyramid shape of the skylight structure. -
Draw the Main Beams:
Using a straight edge, draw parallel lines on either side of your chalk guides to establish the width of the main diagonal rafters. The beams should appear wider at the outer edges and slightly narrower toward the center peak to force perspective. -
Mark Cross-Mullions:
Draw the horizontal or concentric square lines connecting the diagonal beams. These represent the smaller bars holding the individual panes of glass. -
Mask the Glass:
Once your pencil grid is final, tape over the ‘glass’ areas (the blue sky parts) using precise masking tape technique. You want to expose only the grid lines you just drew.
Perspective Trick
Make the central ‘peak’ of the beams slightly lighter and less detailed than the outer edges. This atmospheric perspective makes the peak look farther away.
Step 3: Painting the Faux Timber
-
Base Coat the Wood:
Fill in the exposed beam areas with a solid base coat of ochre or caramel-colored paint. This provides a warm undertone for the wood grain effect. -
Mix the Glaze:
Combine burnt sienna and raw umber acrylics with glazing medium. The mixture should be translucent, allowing the base color to glow through slightly. -
Create Wood Grain:
Drag a stiff-bristled brush or a wood-graining tool through the wet glaze along the length of the beams. Vary your pressure to create natural knots and streaks. -
Define the Shadows:
Mix a dark grey or diluted black glaze. With a thin artist brush, paint a shadow line along one side of every beam (consistently, imagining a light source coming from one direction) to create the 3D illusion of depth. -
Highlight the Edges:
On the opposite side of the beams from the shadow, paint a thin, crisp line of lighter ochre or off-white. This represents the edge catching the light.
Wobbly Lines?
If your taped lines aren’t crisp, seal the tape edge with a thin layer of the base color first. This blocks gaps so the contrasting color won’t bleed under.
Step 4: The Iron Frame Details
-
Mask for the Frame:
Once the wood effect is fully dry, tape off the wood sections to expose the thin strips where the ‘iron’ frame holds the glass. -
Paint the Blue Frame:
Apply a deep navy or dark slate blue to these exposed strips. This mimics the painted metal or ironwork often seen in Victorian skylights. -
Add Metallic Highlights:
Dry brush a tiny amount of lighter blue or grey along the center of these dark strips to make them look rounded and metallic rather than flat. -
Remove Tape and Refine:
Carefully peel away all masking tape. Use a detail brush to touch up any bleed or jagged edges where the sky meets the beams. -
Cast Shadows on Ceiling:
To really seal the deal, glaze a very faint, soft shadow on the white ceiling just outside the frame of your skylight, suggesting the structure is recessed into the roof.
Step back and admire how a flat ceiling has opened up into an airy, light-filled view.
Mirror-Effect Illusion With High-Gloss Paint

Transform a plain slanted wall into a breathtaking window to the outdoors with this high-gloss painting technique. By mimicking the reflective quality of glass and capturing the sharp shadows of nature, you’ll create a trompe-l’oeil skylight that floods your room with imaginary light.
Step-by-Step Guide
Materials
- High-gloss white latex paint
- Semi-gloss white latex paint (for base)
- Acrylic paints (Phthalo Blue, Titanium White, Raw Umber, Sap Green, Cadmium Yellow, Payne’s Grey)
- Painter’s tape (1.5 inch)
- Large flat brush (2-3 inch)
- Medium filbert brush
- Small round detail brush
- Glazing medium
- Plumb line or level
- Pencil
- Ruler or straightedge
- Sandpaper (220 grit)
Step 1: Preparation and Framework
-
Clean surface:
Begin by thoroughly cleaning the slanted ceiling area where you intend to paint. Remove any dust or grease to ensure smooth adhesion, as high-gloss finishes show every imperfection. -
Draft the frame:
Use a pencil, ruler, and a level to draw the rectangular outline of your ‘skylight.’ To match the photo’s perspective, keep the lines parallel to your existing ceiling beams or wall joints. -
Define the recess:
Draw a secondary rectangle inside the first one to create the illusion of depth or a window jamb. The distance should be about 3-4 inches from the outer line. -
Tape the edges:
Apply painter’s tape firmly along the outside of your largest rectangle to protect the surrounding wall. Press down the edges well to prevent bleed-through. -
Paint the jamb:
Paint the space between your two rectangles with a flat or matte white paint that matches your existing ceiling. This matte contrast is crucial for making the ‘glass’ centered area look shiny by comparison.
Step 2: Painting the Sky and Trees
-
Prime the glass area:
Inside the inner rectangle, apply a smooth coat of white primer. Once dry, lightly sand it with 220-grit sandpaper to create a glass-smooth surface foundation. -
Block in the sky:
Mix Titanium White with a touch of Phthalo Blue. Paint the entire inner rectangle, graduating from a deeper blue at the top corners to a nearly white pale blue near the bottom to simulate atmospheric perspective. -
Add cloud forms:
While the blue is still slightly tacky, scumble in pure Titanium White using a dry filbert brush. Focus on the upper left area, keeping the edges soft and fluffy. -
Draft tree trunks:
Using a mixture of Raw Umber and Payne’s Grey, use the edge of a flat brush to distinct, tall vertical lines reaching up from the bottom right. These will start the evergreen trees. -
Add foliage texture:
Mix Sap Green with a tiny bit of Payne’s Grey for the evergreens. Use a stippling motion with an old brush to create the dense, dark needles on the right side of the window. -
Paint deciduous trees:
For the lower yellow trees, mix Cadmium Yellow with a touch of Sap Green. Apply this loosely near the bottom edge, suggesting leaves illuminated by sunlight. -
Refine branches:
Switch to your small round detail brush. With a thinned dark brown, add fine twigs and branches extending from the main trunks, ensuring they overlap the sky naturally.
Uneven Gloss Finish?
If the gloss layer looks streaky, use a high-quality synthetic brush and apply the varnish in long, continuous strokes from top to bottom without stopping.
Step 3: The High-Gloss Finish & Shadow illusion
-
Seal with gloss:
Once the sky and tree painting is completely 100% dry, apply two coats of clear, high-gloss glazing medium or a clear gloss varnish over just the inner rectangle. This mimics the pane of glass. -
Draft the wall shadow:
Now, move outside the window frame to the white wall on the left. Lightly sketch the ‘shadow’ of the tree branches. The angle should match the direction of the sunlight in your painting. -
Mix shadow color:
Create a transparent gray wash using a lot of water or glazing medium mixed with a tiny drop of Payne’s Grey. It needs to be very sheer. -
Paint the cast shadow:
Gently paint the branch shadows on the wall. I find it helpful to wiggle the brush slightly to mimic the diffusion of light through leaves. Keep this very subtle; it should look like light, not a dark stain. -
Add the sun flare:
Return to the window pane area. Using pure white paint, add a small, sharp starburst shape where the sun would be peeking through the trees to enhance the glare effect. -
Remove tape:
Carefully peel away the painter’s tape at a 45-degree angle. Touch up any edges with your original wall color if necessary.
Pro Tip: Shadow Realism
Blur the edges of your wall shadows slightly with a clean, damp brush. Real shadows become softer and fuzzier the further they get from the object casting them.
Step back and enjoy the permanent sunshine and open-air feeling this trompe-l’oeil feature brings to your space


Have a question or want to share your own experience? I'd love to hear from you in the comments below!