If you’re in the mood to paint something bright and instantly recognizable, a pineapple is my favorite little burst of sunshine. Here are a bunch of pineapple painting ideas I use in my own studio—starting with the classics and drifting into the playful, weird, and wonderfully stylized.
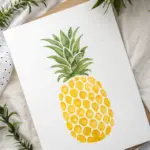
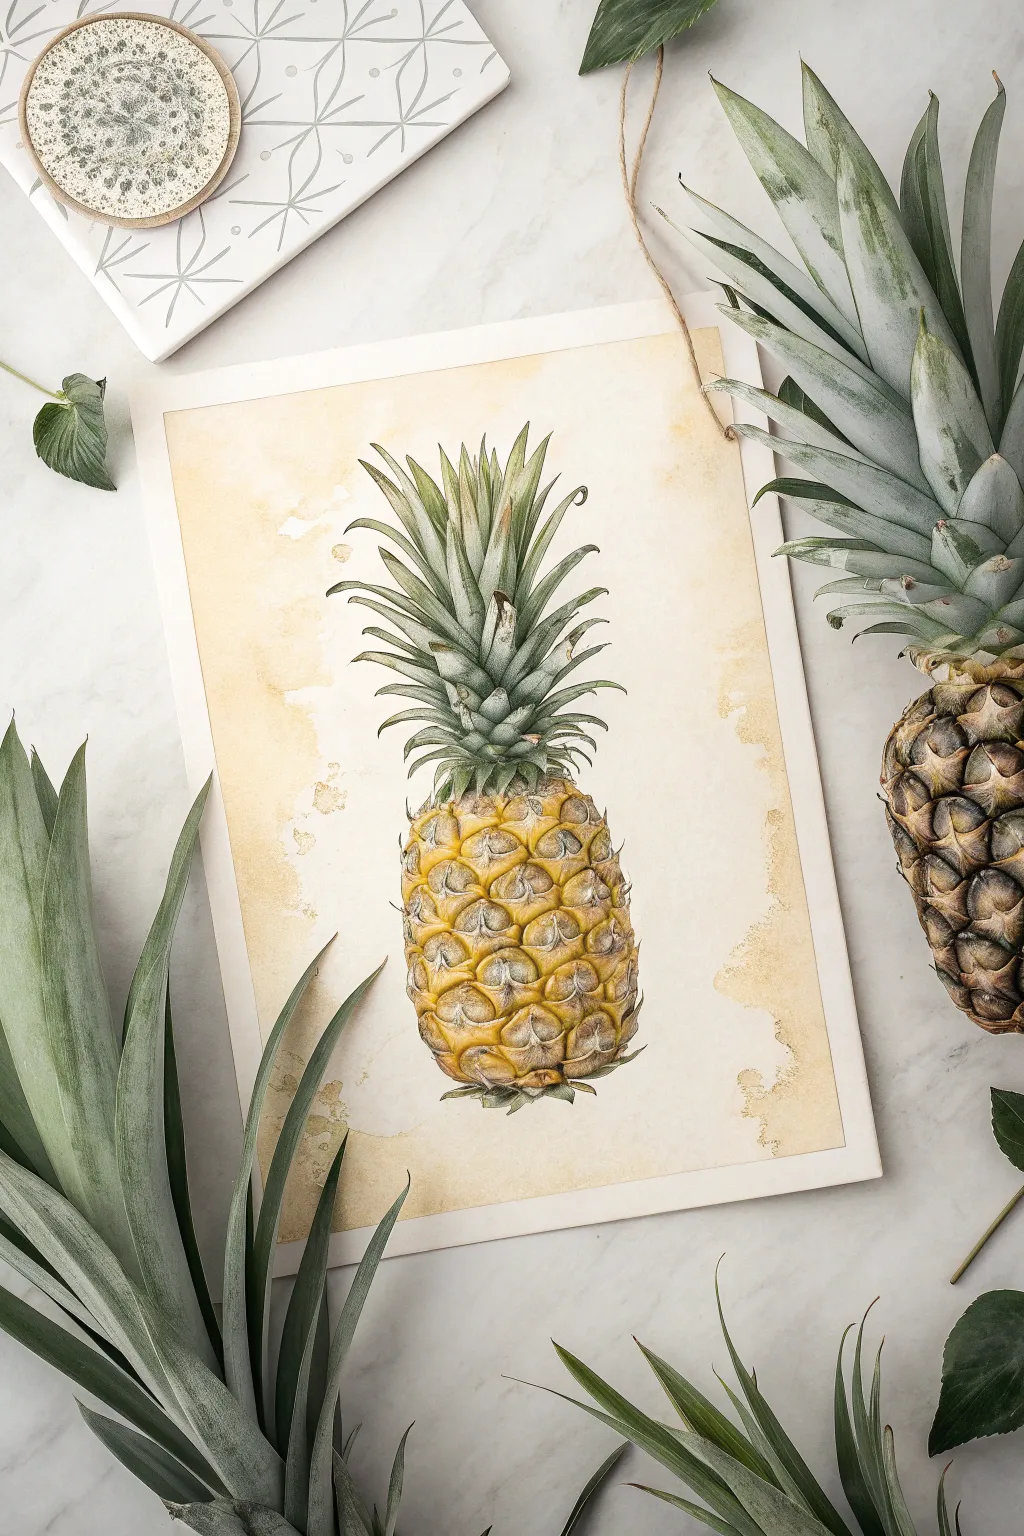
Easy Watercolor Pineapple Wash
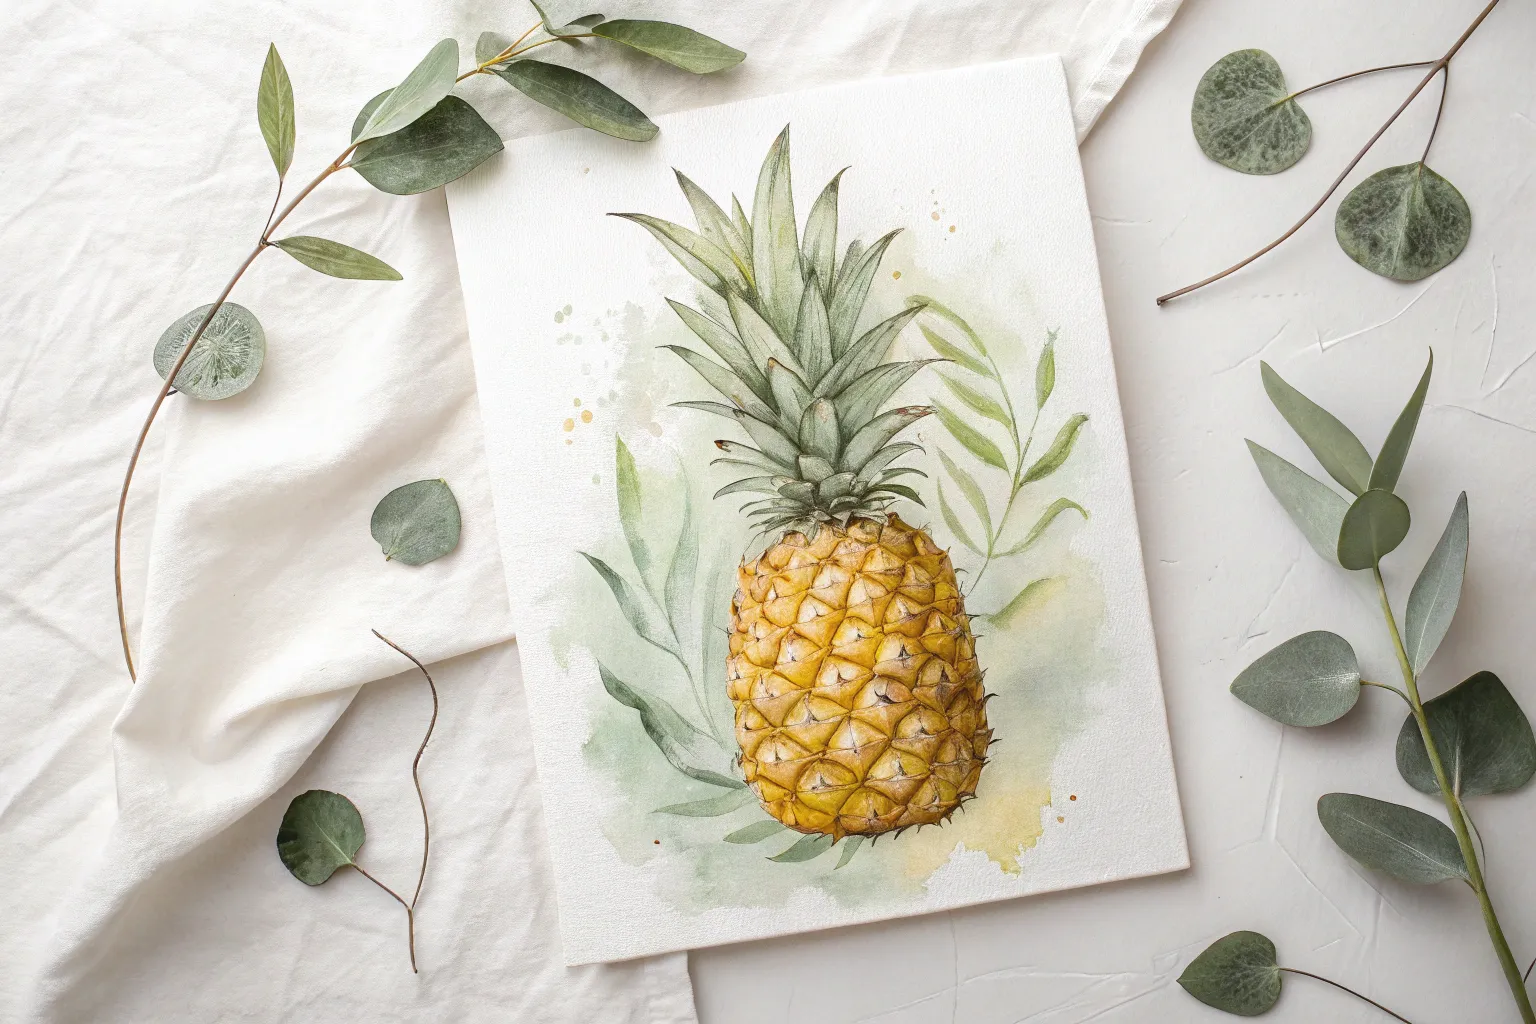
Capture the prickly texture and tropical sweetness of a pineapple with this detailed watercolor study. By combining soft washes for the base with precise linework for the details, you’ll create a piece that feels both botanical and illustrative.
How-To Guide
Materials
- Cold press watercolor paper (300 gsm)
- Watercolor paints (Sap Green, Lemon Yellow, Cadmium Orange, Burnt Umber, Indigo)
- Round brushes (sizes 2 and 6)
- Fine liner brush (size 0 or 00)
- Graphite pencil (HB) and eraser
- Palette for mixing
- Two jars of water
- Paper towels
Step 1: Sketching and Leaf Base
-
Outline the shape:
Begin with a very light pencil sketch in the center of your paper. Draw an oval shape for the fruit body and a series of spiked, curving forms extending upward for the crown. -
Map the texture:
Lightly draw diagonal grid lines across the fruit body to create the diamond pattern pineapples are famous for, adding small spikes at the intersections. -
Base wash for leaves:
Mix a diluted watery Sap Green. Using your size 6 brush, paint the entire crown area with a very pale wash to establish the underlying color, ignoring individual leaves for now. -
Define the leaves:
Once the base is damp but not soaking, mix a slightly stronger green. Paint the shapes of the individual leaves, leaving negative space or the pale wash showing for highlights. -
Deepen leaf shadows:
While the green is still workable, drop a touch of Indigo into the crevices where the leaves meet the fruit to create depth and separation.
Muddy Colors?
If your yellow and green mix into an ugly brown, ensure the yellow layer is 100% dry before painting the green grid lines on top.
Step 2: Painting the Fruit Body
-
First fruit layer:
Moving to the oval body, apply a wet-on-dry wash of Lemon Yellow to the center of each diamond shape you sketched earlier. -
Add warmth:
While the yellow is still wet, touch the bottom corners of the diamonds with a bit of Cadmium Orange, letting it bleed naturally upward. -
Green transitions:
For the diamonds near the top (closest to the leaves) and at the very bottom, blend in some Sap Green to show where the fruit is less ripe. -
Dry completely:
Let this layer dry fully. The yellow and orange sections need to be set before adding the defining lines to prevent muddiness.
Add a Splatter
Dip a toothbrush in diluted yellow paint and flick it over the dried painting for a juicy, energetic vibe.
Step 3: Detailing and Texture
-
Outline the segments:
Switch to your size 2 brush and a mix of Sap Green and Burnt Umber. Carefully paint the lines between the diamond segments. -
Refine the grid:
Make the lines thinner in the center of the fruit (where light hits) and slightly thicker on the sides to suggest roundness. -
Add the spikes:
Use the fine liner brush to paint small, upward-curving spikes or ‘bracts’ in the center of each diamond segment using a darker brown-green mix. -
Create texture:
With a fairly dry brush, add tiny hatching lines or stippling inside the diamonds to give the skin a rough, fibrous look. -
Deepen the crevices:
Go back with your darkest green mixture and reinforce the deepest shadows between the segments, particularly near the bottom of the fruit. -
Sharpen leaf tips:
I like to use the fine liner to add crisp edges to the very tips of the crown leaves, making them look sharp and distinct. -
Final highlights:
If any highlights were lost, you can lift a tiny bit of color from the center of the diamonds with a damp clean brush, or use a touch of white gouache for sparkle.
Step back and admire the vibrant, textured fruit you have created on the page

Pineapple on a Bold Striped Background
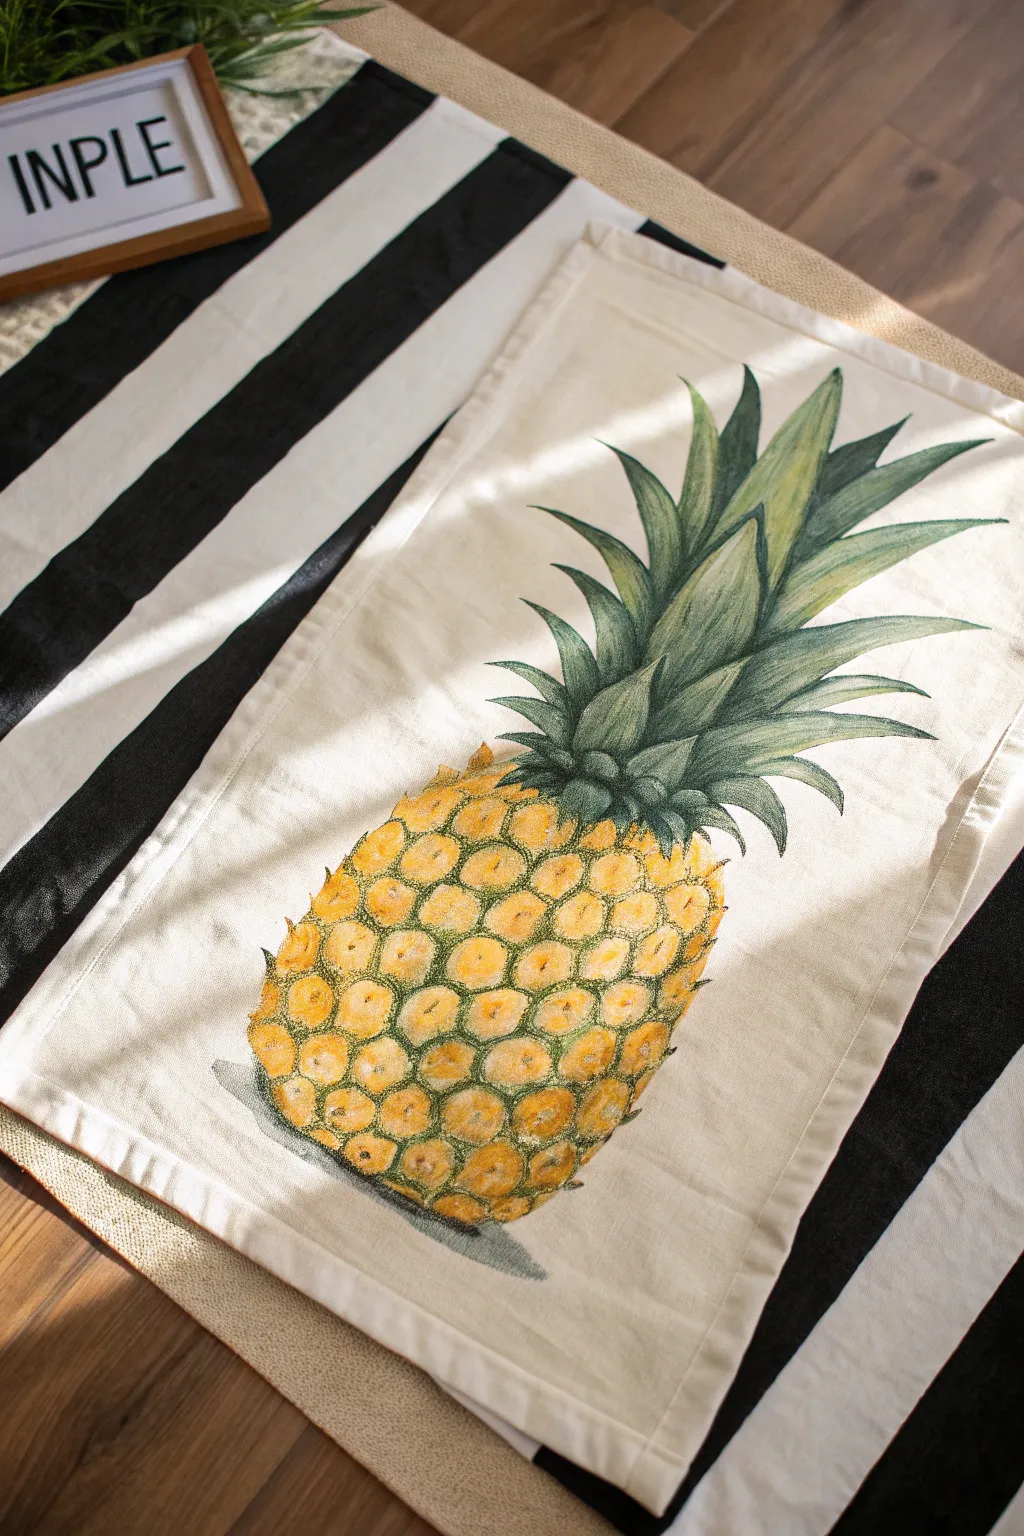
Bring a slice of the tropics to your dining table with this elegant hand-painted pineapple runner. The textured fruit contrasts beautifully against the creamy fabric, creating a sophisticated yet laid-back centerpiece.
Step-by-Step Guide
Materials
- Cream or off-white cotton fabric runner or placemat
- Fabric medium
- Acrylic paints (Yellow Ochre, Burnt Sienna, Hunter Green, Sap Green, Titanium White, Leaf Green)
- Pencil or disappearing fabric marker
- Set of brushes (flat shader for base, round liner for details, stiff bristle for texture)
- Palette or paper plate
- Cardboard or wax paper (to prevent bleed-through)
- Iron (for heat setting)
Step 1: Preparation & Sketching
-
Surface Prep:
Begin by washing and drying your fabric runner to remove any sizing, but do not use fabric softener. Iron perfectly flat to ensure a smooth painting surface. -
Backing Protection:
Slide a piece of cardboard or wax paper directly underneath the area where you will be painting. This crucial step prevents paint from soaking through to the other side of your runner. -
Outline the Shape:
Using a pencil or disappearing fabric marker, lightly sketch the oval body of the pineapple. Add a tall, spiky crown of leaves extending from the top, angling them slightly for a natural look. -
Grid the Body:
Inside the oval body, sketch a diagonal grid pattern to mark the individual segments (eyes) of the pineapple. Don’t make the lines too rigid; a little curvature helps show volume.
Step 2: Painting the Fruit Body
-
Mix the Base Color:
Mix Yellow Ochre with a generous amount of fabric medium. The medium helps the paint penetrate the fibers rather than sitting on top. -
Apply the Underlayer:
Wash this golden yellow color over the entire body of the pineapple. It doesn’t need to be perfectly opaque; a slightly washed look mimics the texture of the fruit skin. -
Define the Scales:
Once the base is tacky but not fully dry, use a round brush with Burnt Sienna to outline the individual scales along your grid lines. -
Add Depth:
Blend a tiny bit of green into your brown mix. Paint the bottom corners of each scale with this darker shade to create shadows, giving the fruit a rounded, 3D appearance. -
Highlighting Centers:
Mix Titanium White with a touches of bright yellow. Dab this highlight into the center of each scale, blending softly outward so the fruit looks plump and ripe.
Fabric Medium Magic
Don’t skip the fabric medium! It prevents the acrylics from drying hard and cracking, keeping your table runner soft and washable.
Step 3: Painting the Crown
-
Base Leaf Color:
Load a flat brush with a mix of Sap Green and fabric medium. Paint the long leaves of the crown, starting from the fruit body and flicking the brush upward to create tapered points. -
Layering Shadows:
While the green is still wet, bring in Hunter Green (a darker shade) along the veins and the base of the leaves where they overlap. This separation is key for realism. -
Adding Light:
Switch to a lighter Leaf Green or mix your base green with yellow. Highlight the edges and tips of the leaves where the sun would naturally hit.
Uneven Edges?
If your pineapple scales look too messy, re-outline them with a confident stroke of deep brown paint once the underlayers are fully dry.
Step 4: Texture & Finishing
-
Stippling Texture:
Using a dry, stiff-bristled brush with very little paint (a mix of brown and green), gently stipple or tap over the transition area between the fruit and the leaves. -
Refining Details:
I like to take a fine liner brush with dark brown paint to add tiny spikes or imperfections on the pineapple skin for extra character. -
Shadowing the Base:
Mix a very watery grey-green wash. Paint a subtle cast shadow underneath the bottom of the pineapple to ground it on the fabric so it doesn’t look like it’s floating. -
Heat Setting:
Allow the project to dry for at least 24 hours. Once completely dry, heat set the paint by ironing the reverse side of the fabric on a cotton setting (no steam) for 3-5 minutes.
Place your finished masterpiece on a striped background for a striking pop of pattern contrast


Simple Crosshatch Pineapple Texture
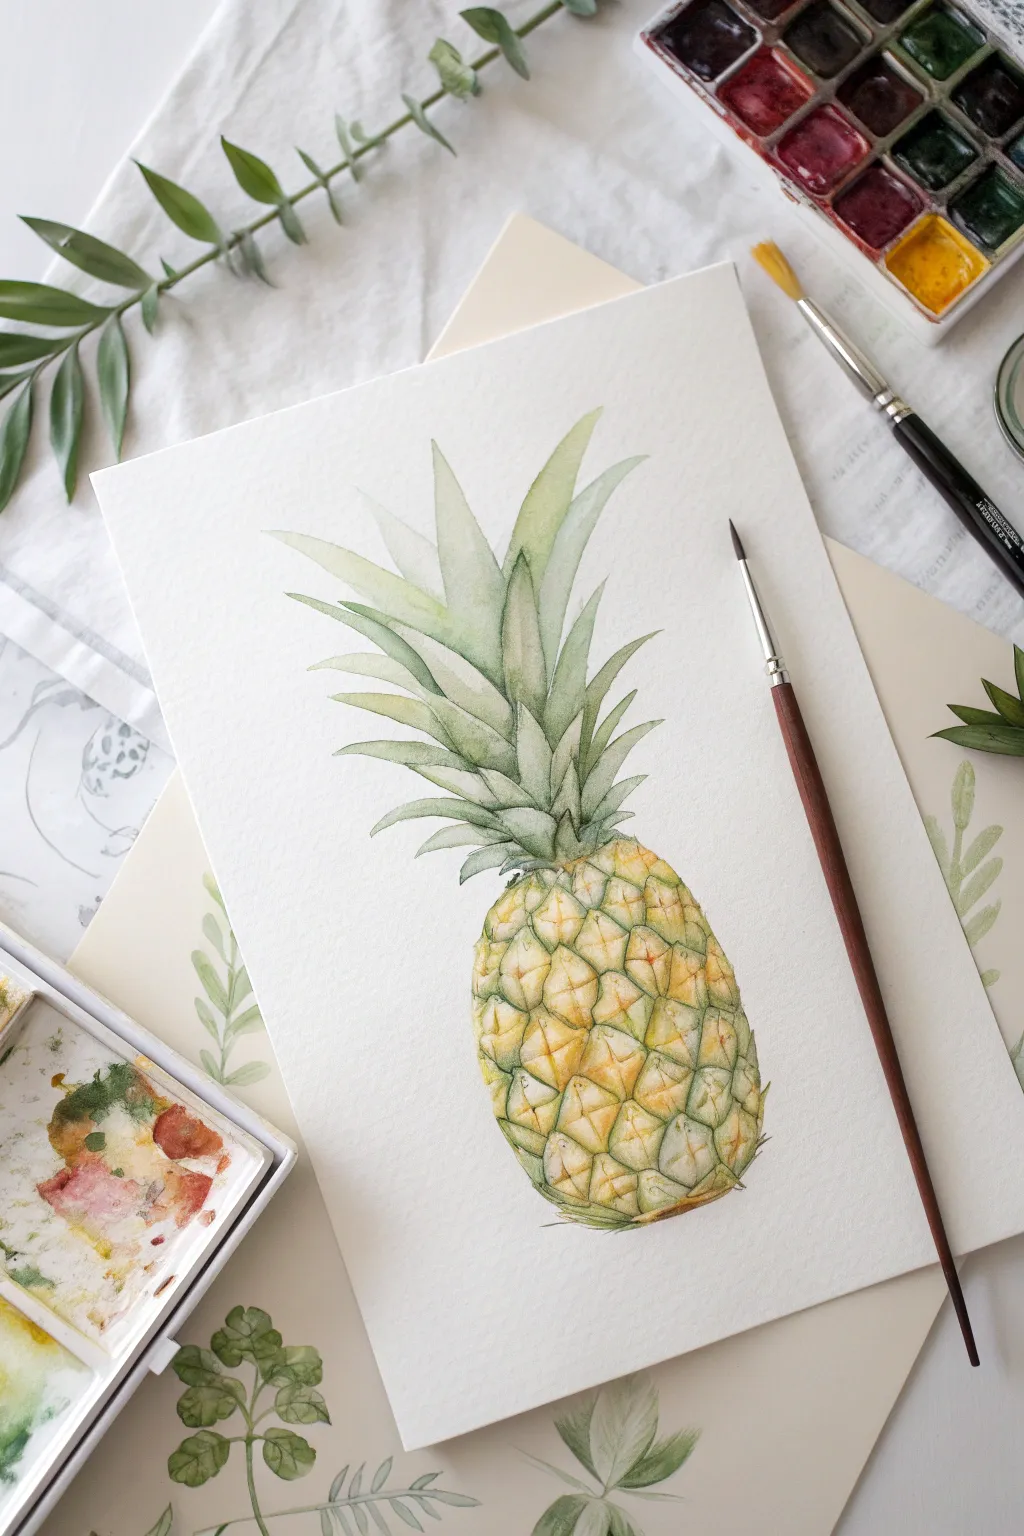
Capture the rustic charm of botanical illustrations with this detailed pineapple study. By combining loose watercolor washes with precise pen-and-ink crosshatching, you can achieve a textured, vintage look that feels timeless.
Step-by-Step
Materials
- Hot press watercolor paper (smooth texture)
- Watercolor paints (Yellow Ochre, Burnt Sienna, Sap Green, Olive Green)
- Round watercolor brushes (sizes 4 and 8)
- Fine liner pen (black or sepia, waterproof, 0.1mm and 0.3mm)
- HB pencil and eraser
- Diluted tea or coffee (optional, for aging paper)
- Paper towels
- Water cups
Step 1: Preparation & Sketching
-
Age the paper:
Before sketching, create that antique look by lightly brushing a wash of diluted coffee or tea across your paper. Focus on the edges to create a vignetted effect. Let this dry completely so the paper is flat and crisp. -
Outline the shape:
Using your HB pencil, lightly draw a tall oval for the pineapples body. Add a slightly curved vertical center line to help align the scales later. -
Draw the crown:
Add the leafy crown on top. Start with the central, vertical leaves and work outward, letting the outer leaves curve downwards gracefully. -
Map the scales:
Sketch diagonal grid lines across the oval body to create the diamond-shaped scales. Don’t make them perfect squares; slightly curve the lines to follow the roundness of the fruit. Round off the corners of each diamond slightly.
Step 2: Watercolor Layers
-
Base wash for the body:
Mix a watery wash of Yellow Ochre. Paint the entire body of the pineapple, leaving tiny slivers of white paper between some scales for highlights. -
Adding depth to scales:
While the base is still slightly damp, drop a touch of Burnt Sienna into the bottom corners of each diamond scale. This creates a natural shadow without hard edges. -
Painting the crown:
Using Sap Green, paint the leaves. Start the stroke at the base of the leaf and lift your brush as you reach the tip to create a fine point. -
Darkening the foliage:
Mix a little Olive Green or add a touch of brown to your green. Paint the shadows where the leaves overlap, particularly near the base of the crown. -
Enhancing the fruit:
Once the first yellow layer is dry, glaze a stronger mix of Yellow Ochre and a hint of orange over the center of the pineapple to make it look ripe and round. -
Let it dry completely:
This is crucial. Before using any ink, the paper must be bone dry to prevent the ink from bleeding or the paper tears.
Pro Tip: Volume Control
Make the crosshatching denser on the sides of the pineapple body and sparser in the center. This gradation mimics a 3D form, making the fruit look round rather than flat.
Step 3: Inking & Detailing
-
Outline the scales:
Use your 0.3mm pen to trace the pencil outlines of the scales. Use broken, organic lines rather than a solid, continuous stroke to keep the sketch-like feel. -
Add scale details:
Draw the small, spiky ‘eye’ in the center of each scale. It usually looks like a small upward-pointing V or U shape. -
Begin crosshatching:
Switch to the finer 0.1mm pen. On the bottom and right side of each individual scale, draw tiny hatched lines. This mimics the rough texture of the pineapple skin. -
Deepen the shadows:
Add a second layer of hatching (crosshatching) in the darkest areas, specifically towards the bottom of the fruit and under the leave overlaps. -
Outline the leaves:
Loosely outline the green leaves. Add a central vein line to the larger leaves, but keep the linework light at the very tips. -
Texture the crown:
Add vertical hatching lines near the base of the leaves where they emerge from the fruit. This grounds the crown and connects it visually to the body. -
Final background touches:
If the background feels too plain, splash a few tiny droplets of your yellow-brown mix around the pineapple for an artistic, weathered effect.
Troubleshooting: Blobby Ink
If your ink lines are spreading or looking fuzzy, the paper is still damp inside. Stop immediately, let it dry for another 20 minutes (or use a hair dryer), and try again.
Once you erase your pencil marks, you will have a stunning botanical illustration ready to frame


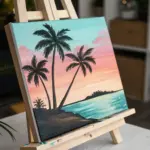
Pineapple Against a Tropical Sky Gradient

Capture the essence of summer with this vibrant yellow watercolor pineapple set against a cool, breezy blue wash. The textured paper adds a lovely organic feel, making the fruit look juicy and three-dimensional.
Step-by-Step Guide
Materials
- Cold-press watercolor paper (300 gsm or heavier)
- Watercolor paints (Sap Green, Hooker’s Green, Yellow Ochre, Burnt Sienna, Cadmium Yellow, Turquoise, Cobalt Blue)
- Round watercolor brushes (sizes 4, 8, and 12)
- Pencil (HB or H)
- Kneadable eraser
- Two jars of water
- Paper towels
- Painter’s tape or masking tape (optional for edges)
Step 1: Sketching and Preparation
-
Outline the shape:
Begin by lightly sketching an oval shape for the body of the pineapple in the center of your paper. Keep your pencil strokes very faint so they don’t show through the transparent watercolor layers later. -
Detail the pattern:
Draw diagonal intersecting lines across the oval to create the diamond scale pattern. Round off the corners of these diamonds slightly to make them look more organic and fruit-like. -
Add the crown:
Sketch the spiky leaves extending from the top. Start with shorter leaves near the center base and extend longer, curving leaves outward and upward. Vary the directions slightly to create a natural, unkempt look. -
Clean it up:
Use a kneadable eraser to gently lift any graphite that looks too dark, leaving just a ghost of an image to guide your painting.
Muddy Colors?
If your yellow pineapple looks muddy, ensure the blue background paint is fully dry before painting near it, or leave a tiny white gap between the fruit and the sky.
Step 2: Painting the Fruit Body
-
Base yellow wash:
Mix a watery wash of Cadmium Yellow and Yellow Ochre. Using your size 8 brush, fill in the individual diamond shapes on the pineapple body. I like to leave tiny slivers of white paper between some scales to act as highlights. -
Adding warmth:
While the yellow is still damp but not swiming, drop in touches of Burnt Sienna on the lower right side of each diamond scale. This establishes the shadow side and gives the fruit volume. -
Deepening the texture:
Once the first layer is dry, mix a stronger concentration of Burnt Sienna and a touch of brown. Use a size 4 brush to paint the ‘eyes’ (the small spikes) in the center of the scales and deepen the crevices between them. -
Boosting contrast:
Glaze a thin layer of Yellow Ochre over the bottom right side of the entire pineapple fruit body to suggest a heavy shadow, reinforcing the round form.
Add Some Sparkle
Sprinkle a tiny pinch of coarse salt onto the wet blue background wash. When it dries and you brush it off, it creates a starry, textured ‘bloom’ effect perfect for tropical skies.
Step 3: Painting the Crown
-
Leaf base layer:
Mix a light Sap Green. Paint the entirety of the leaves with this light wash. Don’t worry about detailing yet; just get the color down. -
Shadows and definition:
Switch to a mix of Hooker’s Green and a tiny bit of blue for a cooler shadow tone. Paint the underside of the leaves and the areas where leaves overlap to separate them visually. -
Sun-kissed tips:
While the green is drying, add a very subtle touch of yellow or light brown to the very tips of a few leaves to simulate that dried, crispy texture often found on real pineapples. -
Final leaf details:
Use your smallest brush to add thin, dark green lines following the curve of the leaves to suggest fibrous texture.
Step 4: The Tropical Background
-
Create the gradient wash:
Mix a large puddle of Turquoise and Cobalt Blue with plenty of water. Using your largest brush, start painting loosely around the pineapple. Keep the edges ragged and uneven for an artistic look. -
Fade upward:
As you move painting toward the top of the paper, add more water to your brush to dilute the pigment, creating a soft fade that disappears before reaching the top edge. -
Ground shadow:
While the blue paint near the bottom is still wet, drop in a more concentrated mix of Cobalt Blue right underneath the pineapple to ground it. -
Horizontal movement:
Use horizontal brush strokes near the base of the pineapple to suggest a surface or table, letting the paint streak naturally across the textured paper.
Let your artwork dry completely before framing it to brighten up your favorite corner
BRUSH GUIDE
The Right Brush for Every Stroke
From clean lines to bold texture — master brush choice, stroke control, and essential techniques.
Explore the Full Guide
Golden Pineapple With Metallic Accents
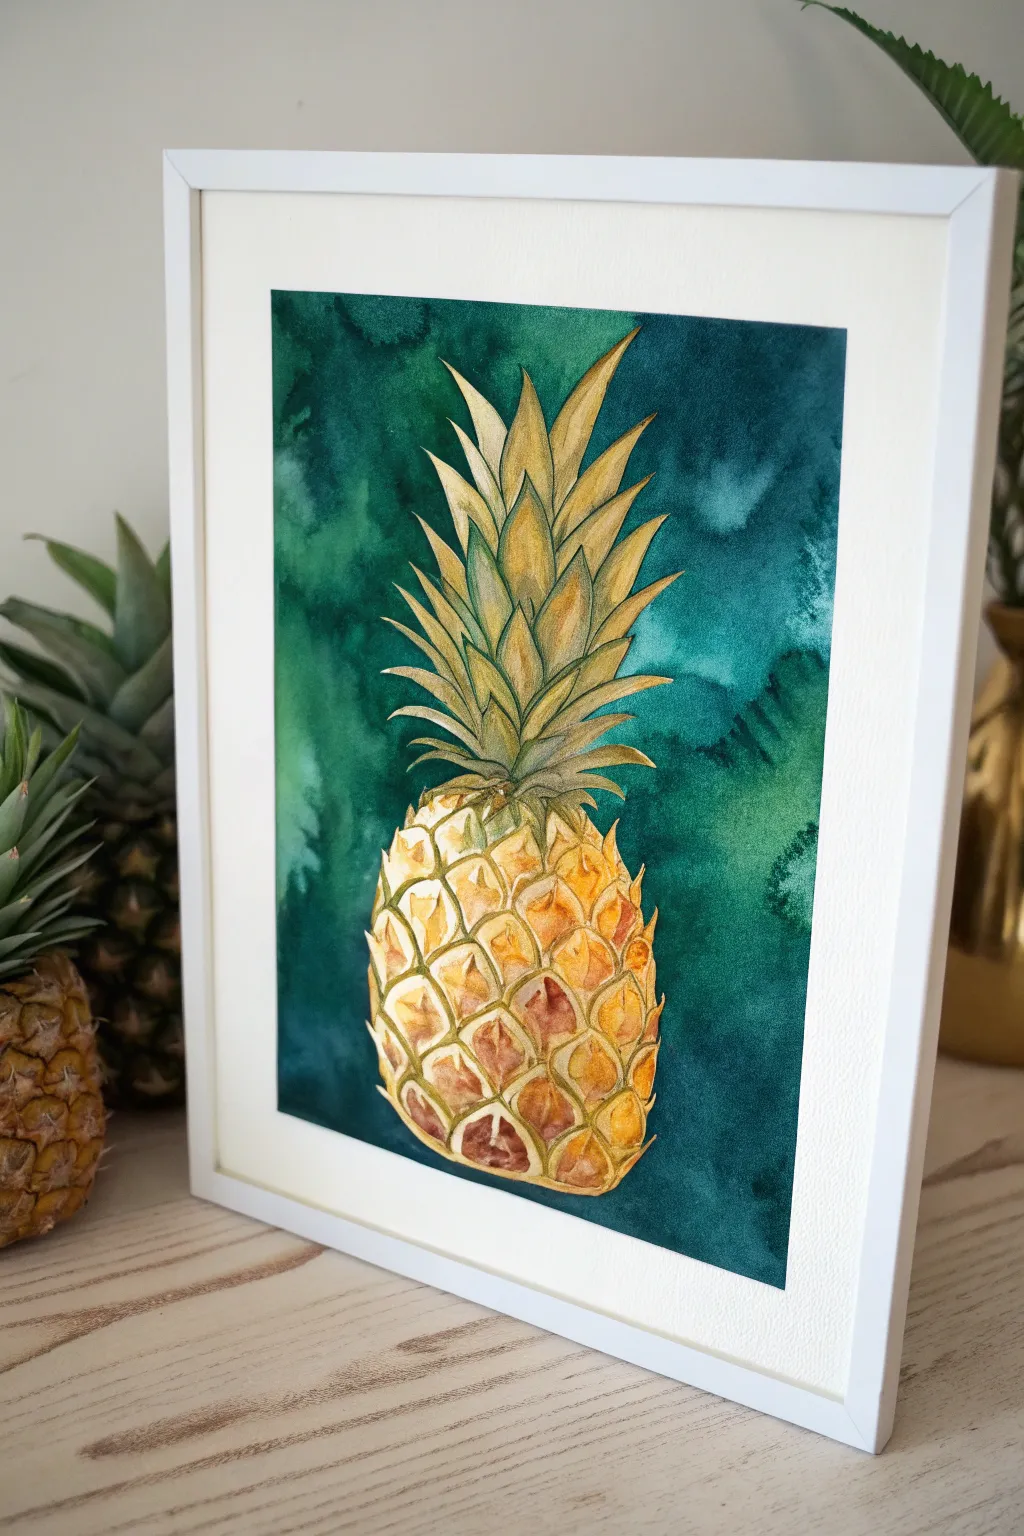
Capture the tropical warmth of a pineapple against a dramatic, moody background with this striking watercolor project. By combining rich emerald washes with detailed golden layering, you’ll create a piece where the fruit seems to glow from within.
How-To Guide
Materials
- Cold press watercolor paper (300 gsm)
- Watercolor paints (Emerald Green, Prussian Blue, Cadmium Yellow, Yellow Ochre, Burnt Sienna, Payne’s Grey)
- Metallic gold watercolor paint or gold ink
- Round watercolor brushes (Size 8 for washes, Size 2 or 0 for details)
- Masking fluid (drawing gum) and an old brush
- Water jars and paper towels
- Pencil and eraser
- Painter’s tape and backing board
Step 1: Preparation and Sketching
-
Secure the paper:
Tape your watercolor paper down firmly to a board using painter’s tape on all four sides. This prevents the paper from buckling during the wet-on-wet background stage and creates that distinctive crisp white border seen in the final piece. -
Outline the shape:
Lightly sketch the oval body of the pineapple in the lower center of the page. Add the sprouting crown of leaves at the top, ensuring the leaves curve naturally outward and come to sharp points. -
Draft the diamond pattern:
Draw diagonal grid lines lightly across the body of the pineapple to create the diamond-shaped segments. Inside each diamond, sketch a smaller, rounded ‘eye’ or bract shape to guide your painting later. -
Protect the subject:
Using an old brush (one you don’t mind ruining), carefully apply masking fluid over the entire pineapple sketch—both the fruit body and the leaves. Let this dry completely until it feels rubbery to the touch.
Pro Tip: Bloom Control
For the background texture, sprinkle a few grains of coarse salt onto the wet paint. When dry, brush it off to create unique, organic starburst patterns that mimic the reference.
Step 2: The Moody Background
-
Wet the background:
With a large, clean brush, wet the entire paper surface around the masked pineapple with clean water. You want an even sheen, not puddles. -
Charge in the darks:
Mix a strong concentration of Emerald Green and Prussian Blue. Drop this dark mixture into the wet paper, focusing heavily around the edges of the pineapple to create high contrast. -
Create texture:
While the paint is still wet, drop in hints of Payne’s Grey or even more concentrated blue in random areas to create the ‘blooms’ and cloudy texture. I sometimes tilt the board slightly to let the pigments drift naturally. -
Dry completely:
Let the background dry fully. If the paper feels cool to the touch, it’s still damp. Once bone dry, gently rub off the masking fluid with your finger or a rubber cement pickup.
Troubleshooting: Muddy Colors
If your pineapple yellow looks greenish against the background, wait for the background to dry fully before painting the fruit. Wet blue paint bleeding into yellow fruit creates unintentional green.
Step 3: Painting the Fruit
-
Base wash for leaves:
Mix a diluted sap green with a touch of yellow ochre. Wash this pale color over the spiky leaves, keeping the tips lighter and the base near the fruit slightly darker. -
Base wash for the body:
Apply a light wash of Cadmium Yellow mixed with plenty of water over the entire body of the pineapple. Let this dry to establish a glowing underlayer. -
Building dimension:
Using a smaller brush (size 4), mix Yellow Ochre and Burnt Sienna. Paint the lower right sides of each individual diamond segment to create a shadowed, rounded effect, leaving the center-left of each segment bright yellow. -
Deepening the shadows:
Switch to a Burnt Sienna mixed with a tiny dot of purple or brown for the deepest crevices between the segments. Carefully outline the separation lines between the diamonds to make them pop. -
Refining the leaves:
Go back to the leaves with a darker green mix (sap green + blue). Paint thin lines along the center of each leaf and definitive shadows where the leaves overlap, giving them a sharp, crisp appearance.
Step 4: Metallic Details and Finish
-
Gilding the fruit:
Load a fine detail brush (size 0 or 2) with your metallic gold paint. Add thin, decisive strokes to the highlights of the pineapple segments, specifically on the upper left ridges where the light would hit. -
Highlighting the crown:
Add subtle gold veins to a few of the leaves, particularly the ones that curve outward. Don’t overdo it; just a few glimmering lines will catch the eye. -
Final contrast check:
Step back and look at your work. If the pineapple needs more grounding, add a very thin, dark glaze of brown along the absolute bottom edge of the fruit to round it out. -
The reveal:
Ensure the painting is 100% dry before carefully peeling off the painter’s tape at a 45-degree angle to reveal your crisp white border.
Frame this vibrant piece in a simple white frame to let the deep emerald tones really stand out against your wall
Patterned Pineapple Repeat Design

This project creates a charming, rhythmic pineapple print that looks professionally designed but is entirely hand-painted. The repeating motif uses simple stamping and brushwork to achieve a lively, organic pattern on textured paper.
Step-by-Step
Materials
- Heavyweight textured watercolor paper (cold press)
- Small flat synthetic brush (size 4 or 6)
- Fine round detail brush (size 0 or 1)
- Amber or burnt sienna watercolor or gouache paint
- Deep teal or forest green watercolor or gouache paint
- Two small potatoes or carved rubber stamp blocks (one for body, one for leaves)
- Carving tool or X-Acto knife
- Palette for mixing paint
- Paper towels
- Pencil and eraser (optional)
Step 1: Preparing the Stamps
-
Choose your medium:
Decide between using a classic potato stamp method or a rubber carving block. For the soft, textured look in the reference, potato stamping works surprisingly well, but rubber provides more durability. -
Carve the pineapple body:
Cut your chosen material into a simple oval shape slightly flattened at the top and bottom. This will form the main orange fruit section. -
Add the grid texture:
Using a knife or carving tool, carefully score diagonal lines across the surface of your body stamp in both directions to create a diamond grid pattern. The relief doesn’t need to be deep; just enough so paint doesn’t settle in the grooves. -
Carve the leafy crown:
Create a separate, smaller stamp for the green top. Carve three to five distinct spikes fanning out from a central base point to mimic the pineapple’s crown.
Uneven Stamping?
If stamps look patchy, place a foam mat or a folded towel underneath your paper. This ‘give’ helps the paper conform to the stamp for a cleaner print.
Step 2: Printing the Fruit Bodies
-
Mix the body color:
Create a warm, golden-brown hue by mixing burnt sienna with a touch of yellow ochre or orange. You want a consistency that is fluid but not watery, similar to heavy cream so it prints clearly. -
Test your stamp:
Apply paint to your body stamp using a flat brush rather than dipping it directly. Press it onto a scrap piece of paper to check the coverage and the clarity of your diagonal grid lines. -
Plan the layout:
Visualize a diagonal grid on your final paper. You can lightly mark small dots with a pencil to guide where the center of each pineapple should go to ensure even spacing. -
Stamp the first row:
Start at the top left corner. brush fresh paint onto the stamp for every single impression to ensure color consistency. Press firmly but don’t rock the stamp. -
Complete the pattern:
Continue stamping the bodies across the paper, offsetting the rows slightly (like brickwork) if you want a dynamic look, or keeping them in straight columns as shown in the example. Let these orange shapes dry completely.
Step 3: Adding the Foliage
-
Mix the green tone:
Prepare a deep teal or forest green shade. It should connect visually with the orange but provide a cool contrast. -
Stamp the leaves:
Using your second carved stamp, apply the green paint and press it directly on top of each dried orange body. Align the base of the leaves with the top center of the fruit. -
Assess the coverage:
The stamped leaves might look a bit solid or blocky initially. Don’t worry if there are gaps; the next step will refine them.
Pro Tip: Consistency
For a truly uniform look, reload your brush with paint for every single stamp impression. ‘Ghost stamping’ (stamping twice) fades the color too much.
Step 4: Refining Details
-
Sharpen the leaves:
I like to take a fine round brush with the same green paint and manually flick the tips of the stamped leaves outward. This adds delicate points and makes the foliage look sharper and less like a block. -
Touch up the bodies:
If any of the diamond grid lines got lost during stamping, use your fine brush with a slightly diluted version of the body color to re-define the negative space between the diamonds. -
Fill accidental gaps:
Check for any large white spots where the stamp didn’t touch the paper properly. Gently dab a little paint into these areas to make the print look solid, yet still hand-crafted. -
Clean the edges:
If you are planning to frame this or use it as a card, ensure your pattern extends naturally off the edge of the paper for a professional ‘bleed’ effect. -
Final drying time:
Let the entire sheet sit flat for at least an hour to ensure the thicker areas of paint are fully cured before handling.
Once dry, your custom pineapple paper is ready to be framed or gifted as a vibrant piece of handmade art

PENCIL GUIDE
Understanding Pencil Grades from H to B
From first sketch to finished drawing — learn pencil grades, line control, and shading techniques.
Explore the Full Guide
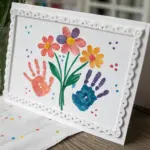
Pineapple Crown Made of Flowers
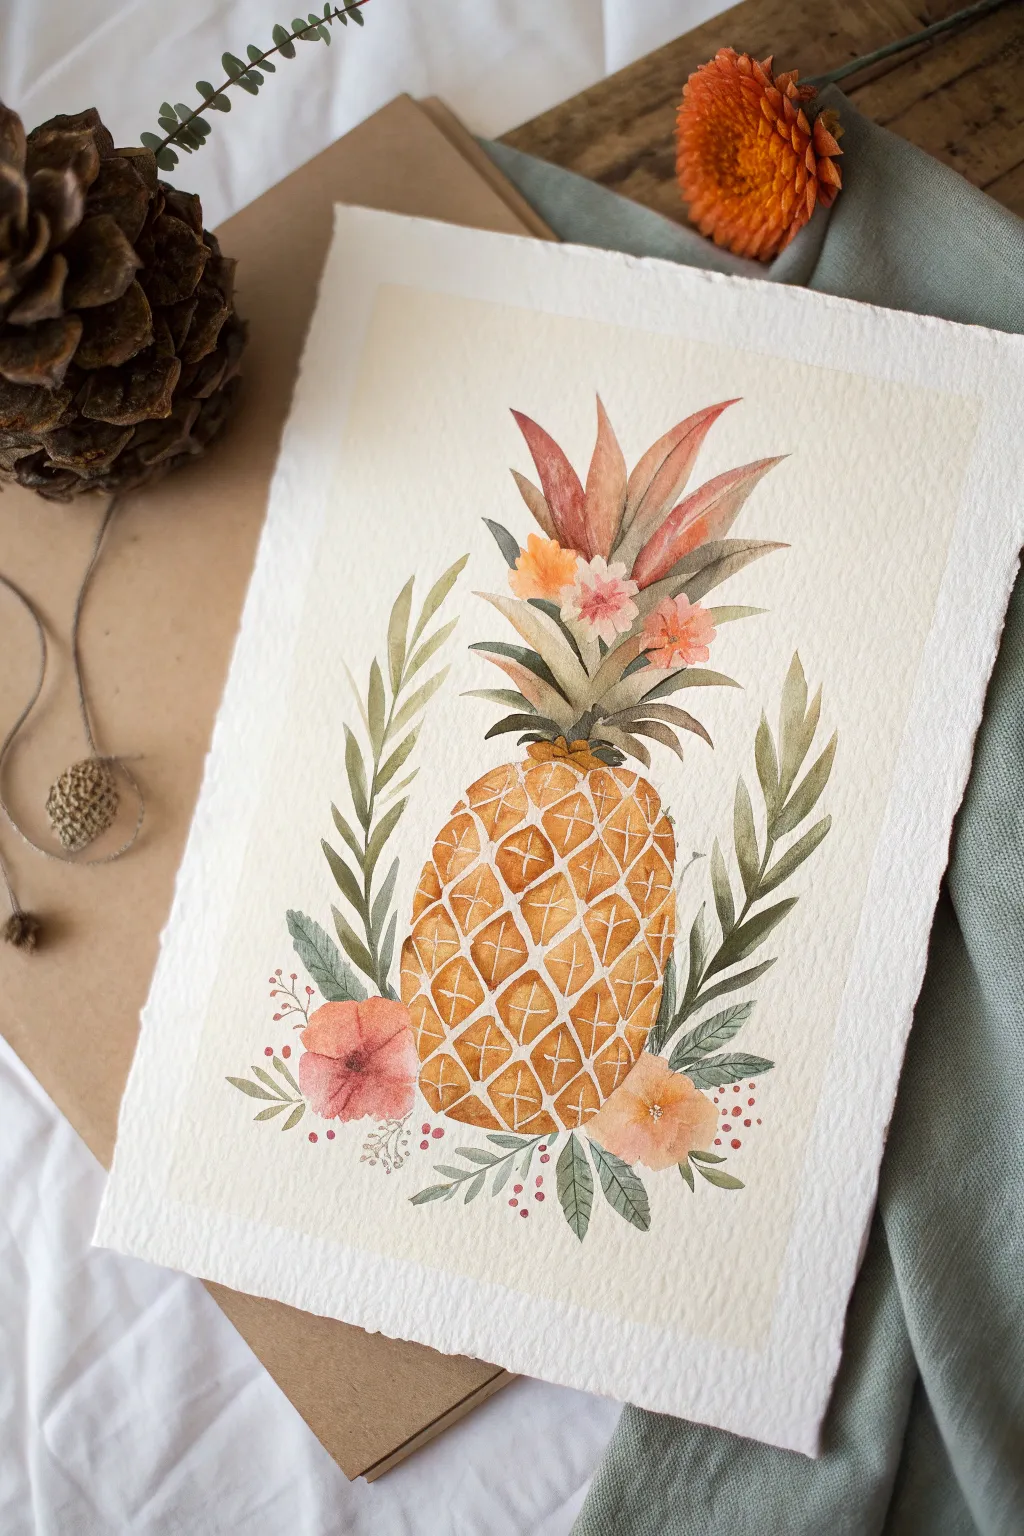
Capture the sweetness of summer with this charming watercolor illustration featuring a stylized pineapple adorned with delicate florals. The soft washes and geometric details create a piece that feels both organic and thoughtfully designed.
Step-by-Step Tutorial
Materials
- Cold-pressed watercolor paper (300 gsm)
- Watercolor paints (Yellow Ochre, Burnt Sienna, Sap Green, Alizarin Crimson, Peach)
- Round brushes (flats sizes 2, 6, and 8)
- White gouache or white gel pen
- HB pencil and kneaded eraser
- Masking tape
- Paper towels
- Water jar
Step 1: Sketching the Structure
-
Outline the body:
Begin by lightly sketching a large oval shape for the main body of the pineapple in the lower center of your page. Keep your pencil pressure very light so the graphite doesn’t show through the transparent watercolor later. -
Map the diamond grid:
Draw diagonal lines crisscrossing the oval body to create the classic diamond pattern of the pineapple skin. Don’t worry about making them mathematically perfect; a little irregularity adds to the hand-painted charm. -
add the crown and florals:
Sketch tall, spiked leaves erupting from the top of the oval. At the base, draw two large circular flower shapes and several sprigs of leaves curving upwards to frame the fruit.
Step 2: Painting the Pineapple Body
-
First wash:
Mix a warm, golden yellow using Yellow Ochre and a touch of Burnt Sienna. With your size 8 brush, paint the inside of each diamond shape, leaving a very thin gap of white paper between them to act as the ‘grout’ lines. -
Building depth:
While the first layer is still slightly damp, drop a more concentrated mix of Burnt Sienna into the bottom right corner of each diamond. This creates immediate volume and shadow. -
Adding texture details:
Once the diamonds are fully dry, use a size 2 brush to paint small ‘v’ or ‘x’ shapes in the center of each diamond using a darker brown mix. This mimics the prickly texture of the skin.
Clean Lines Pro Tip
For the crisp white grid on the pineapple body, try applying thin masking fluid lines before you start painting. Rub it off at the very end to reveal perfect white paper.
Step 3: Creating the Floral Crown
-
Base leaves:
Load your brush with a muted Sap Green and paint the lower leaves of the crown. Use a flicking motion to get sharp, tapered points. -
Adding color variety:
For the taller, central leaves, mix Alizarin Crimson with a touch of brown to create a reddish-rust tone. Paint these leaves interspersed with the green ones to give the crown a vibrant, autumnal feel. -
Tiny crown blooms:
Using a soft peach or light pink, dab in small, simple flower shapes nestled among the crown leaves. These don’t need much detail—just soft splashes of color.
Muddy Colors?
If your pinks and greens are bleeding into brown mud where they touch, ensure the first shape is 100% dry before painting an adjacent wet shape next to it.
Step 4: Painting the Base Elements
-
Large floral wash:
Paint the large flanking flowers at the base using a watery wash of Peach and Alizarin Crimson. Keep the edges soft and let the water do the work of spreading the pigment. -
Framing foliage:
Using two different shades of green—one cooler and one warmer—paint the long, slender leaves that curve up the sides of the pineapple. Varying the greens adds visual interest and depth. -
Berry accents:
With the tip of your smallest brush, dot clusters of small red berries on thin stems near the base flowers. These tiny details help balance the composition.
Step 5: Final Touches
-
Enhancing the grid:
If your white lines between the pineapple diamonds got lost during painting, use white gouache or a white gel pen to re-establish the grid pattern crisply. -
Deepening contrast:
Mix a dark green-grey and carefully paint the deepest shadows where leaves overlap or where the fruit meets the foliage. I find this step crucial for making the illustration pop off the page. -
Add flower centers:
Dot the centers of your large base flowers with a concentrated dark yellow or brown to give them definition.
Now step back and admire the warm, tropical vibes your artwork brings to the room
Negative Space Pineapple Silhouette
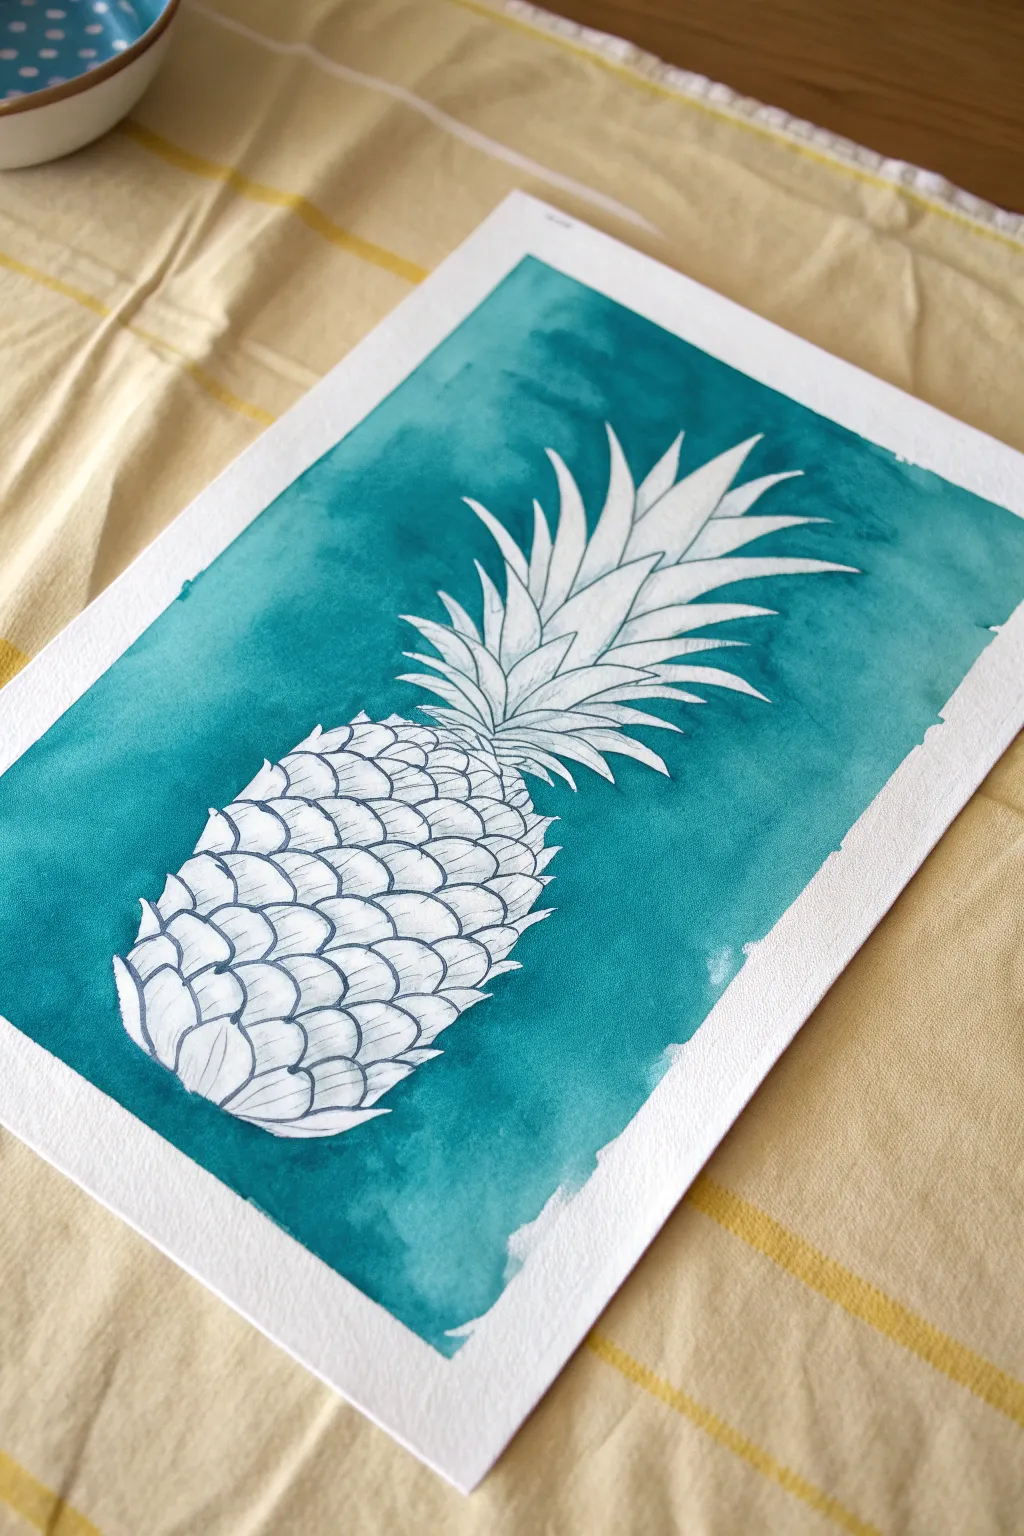
This refreshing project flips the script on traditional fruit studies by painting the space around the subject rather than the subject itself. Using a cool turquoise watercolor wash, you’ll carve out the spiky silhouette of a pineapple, leaving the paper’s brilliant white to act as the fruit’s body.
Detailed Instructions
Materials
- Cold press watercolor paper (A4 or similar)
- Turquoise or Teal watercolor paint
- Large round watercolor brush (size 10 or 12)
- Small detail brush (size 2 or 4)
- Graphite drawing pencil (HB or 2B)
- Kneaded eraser
- Painter’s tape or masking tape
- Clean water jar
- Paper towels
Step 1: Drawing the Base
-
Tape the Edges:
Begin by securing your watercolor paper to your work surface. Apply painter’s tape along all four edges to create a clean white border and prevent the paper from buckling when wet. -
Sketch the Oval Body:
Lightly sketch a large, upright oval shape in the lower center of your paper. This will be the main body of the pineapple. Keep your pencil pressure very light so lines can be erased later if needed. -
Map the Scales:
Inside the oval, draw intersecting diagonal lines to create a diamond grid pattern. These guides will help you place the individual scales. Draw U-shaped curves inside each diamond to define the pineapple skin texture. -
Outline the Crown:
Extend lines upward from the top of the oval to form the leaves. Draw long, spiky shapes that curve slightly outward. Vary the lengths, with shorter leaves near the base and longer ones shooting up from the center.
Step 2: Painting the Negative Background
-
Prepare the Teal Wash:
Mix a generous amount of turquoise watercolor paint with water on your palette. You want a saturated, juicy consistency—not too watery, but fluid enough to spread easily. -
Outline the Silhouette:
Using your smaller detail brush, carefully paint the background color right up to your pencil lines. Start near the spiky leaves, filling the negative gaps between the fronds with precision. -
Define the Body Shape:
Continue using the small brush to trace the outer edge of the pineapple’s body. Paint carefully around the little bumps and curves of the outer scales to give the fruit a natural, organic edge. -
Fill the Large Areas:
Switch to your larger round brush. While the outline paint is still damp, pull that color outward to fill the rest of the background. Work quickly to avoid hard drying lines within the blue area. -
Create Texture:
While the background wash is still wet, drop in slightly more concentrated pigment in random areas. This wet-on-wet technique creates beautiful blooms and cloudy textures as it dries. -
Let it Dry Completely:
Wait for the paint to dry fully. The paper should be cool to the touch but no longer damp. Patience here is key to preventing smudges during the final detailing.
Uneven Wash?
If your background paint dries with unwanted hard lines, re-wet the entire background area slightly and drop in more pigment to smooth the transition.
Step 3: Refining the Details
-
Darken the Contour:
Once dry, re-examine your pencil lines. Go over your initial sketch of the scales and leaves with a slightly darker pencil stroke or a fine-tip grey pen to make the details crisp. -
Add Scale Detail:
Inside each pineapple scale, add a small inverted ‘V’ or extra curved line to suggest depth and texture. This makes the white shape look more three-dimensional. -
Clean Up:
Use a kneaded eraser to gently lift any stray sketch marks that strayed into the white border area or the painted background. -
Remove the Tape:
Peel the masking tape away slowly at a 45-degree angle. This reveals the crisp white frame that contrasts beautifully with your loose teal wash.
Go Graphic
Swap the pencil outlines for a waterproof black ink pen after the paint dries. This creates a bold, illustrative look closer to a print.
Step back and admire how the simple use of negative space creates such a striking tropical statement piece


Have a question or want to share your own experience? I'd love to hear from you in the comments below!