A jean jacket is basically a wearable canvas, and painting one is one of my favorite ways to turn everyday denim into something that feels totally you. Here are my go-to painted jean jacket ideas—starting with the classics and drifting into the fun, unexpected stuff once you’re warmed up.
Back-Panel Floral Bouquet
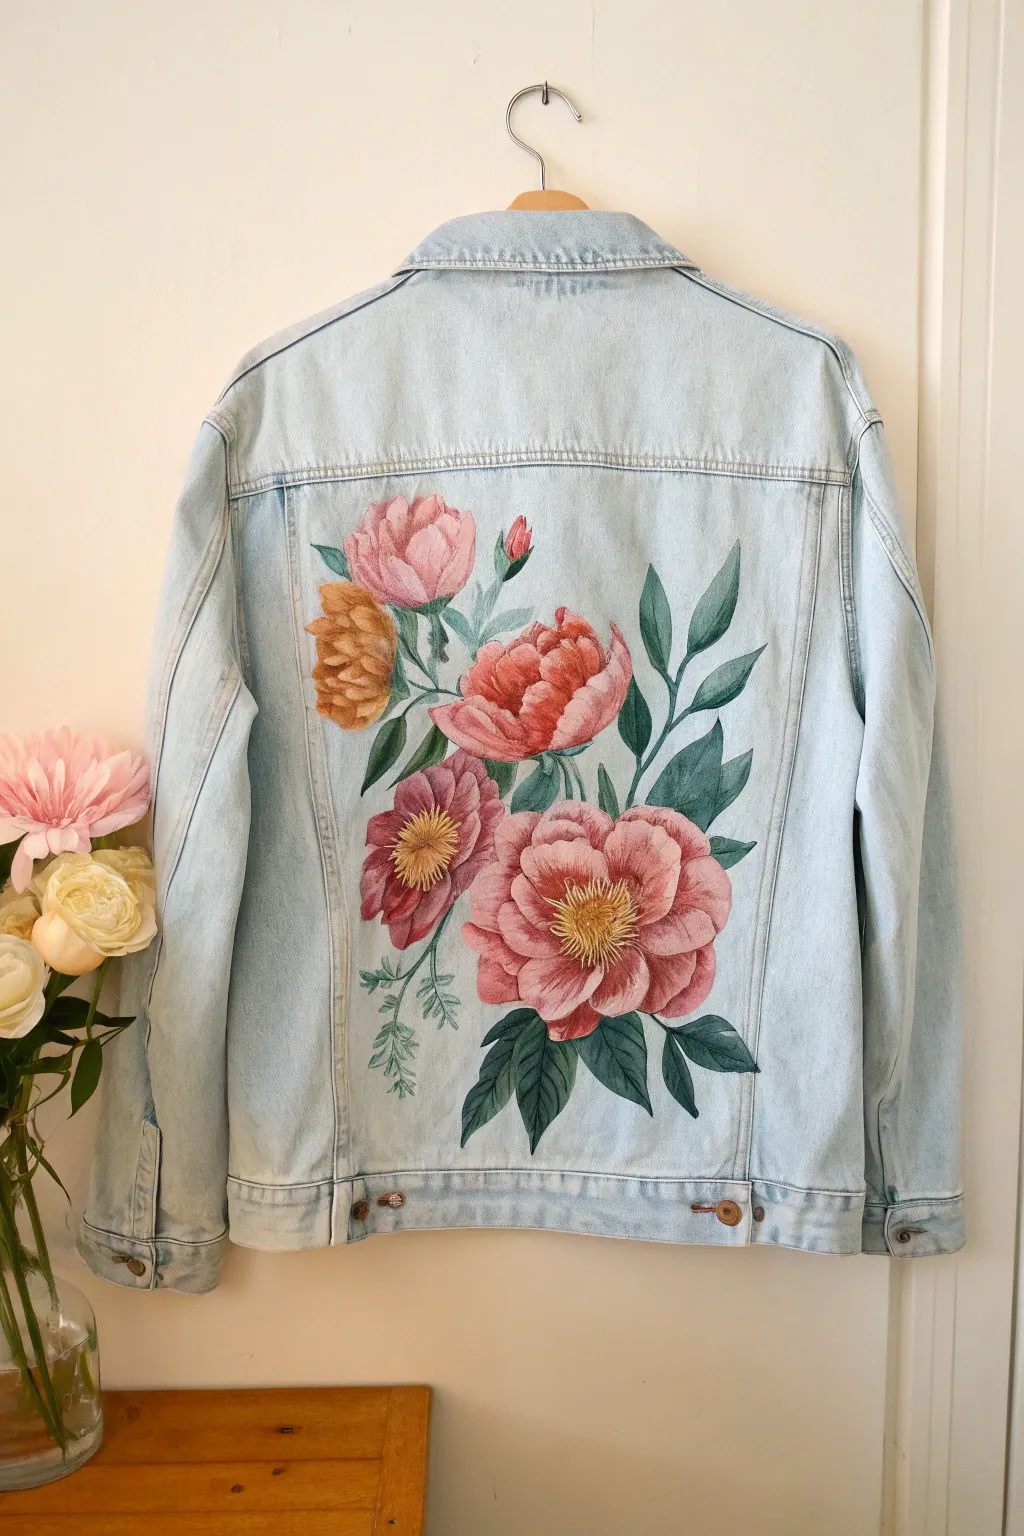
Transform a plain light-wash denim jacket into a wearable garden with this stunning back-panel painting project. Featuring large, realistic peonies and lush greenery, this design balances soft pastels with deep, structured foliage for a sophisticated finish.
Step-by-Step
Materials
- Light-wash denim jacket (washed and dried without fabric softener)
- White fabric paint (for priming)
- Acrylic fabric medium
- Acrylic paints (Titanium White, Alizarin Crimson, Cadmium Yellow, Sap Green, Phthalo Green, Burnt Umber)
- Assorted synthetic brushes (flat shader #6, round #4, fine liner #0 or #1)
- Chalk or a disappearing fabric marker
- Palette or paper plate
- Piece of cardboard (to fit inside the jacket)
- Painter’s tape (optional)
- Iron and parchment paper (for heat setting)
Step 1: Preparation & Sketching
-
Prepare your workspace:
Slip a piece of sturdy cardboard inside the jacket, specifically behind the back panel. This creates a smooth painting surface and prevents paint from accidentally bleeding through to the front of the jacket. -
Secure the fabric:
Smoothing out any wrinkles is crucial before you start. You might want to use clips or masking tape to pull the denim taut against the cardboard backing so it doesn’t shift while you work. -
Map out the composition:
Using white chalk or a disappearing fabric marker, lightly sketch the placement of the main flowers. Focus on the large bottom-right peony, the central reddish peony, and the ruffled yellow bloom on the left. Don’t worry about tiny details yet; just get the circles and ovals in the right spots to ensure balanced spacing. -
Draw the leaves:
Sketch the flow of the stems and leaves, allowing them to curve naturally around the blooms. Notice how the large leaves frame the right side while delicate stems dangle on the bottom left.
Fabric Medium Magic
Don’t skip the fabric medium! It turns standard acrylics into flexible fabric paint. Without it, your beautiful floral work will crack and peel the moment the denim stretches.
Step 2: Base Coating
-
Mix the white base:
Mix titanium white acrylic paint with fabric medium according to the bottle’s instructions (usually a 1:1 or 2:1 ratio). This ensures the paint remains flexible and doesn’t crack on the denim. -
Prime the flower shapes:
Fill in the silhouettes of all your flowers with the white mixture using a flat shader brush. This white underlayer is essential on denim to make the subsequent colors pop; without it, the blue denim will dull your pinks and yellows. -
Prime the leaves:
Paint the leaf shapes with the white base as well. Apply a second coat of white to the flowers and leaves if the denim texture is still showing through heavily after the first coat dries.
Add Some Sparkle
Mix a tiny amount of iridescent medium into your top highlights or sew clear glass seed beads into the yellow centers of the peonies for a 3D texture.
Step 3: Painting the Flowers
-
Block in main colors:
Once the white base is fully dry, mix a soft pink using Alizarin Crimson and White, and a warm yellow using Cadmium Yellow with a touch of Burnt Umber. layout the base colors on the respective flower shapes. -
Define the large peony petals:
For the main bottom-right flower, use a darker rose shade (add more crimson) to paint the shadows between the petals. Keep your brush strokes curving inward toward the center of the flower to mimic the bowl shape of a peony. -
Add highlights:
Mix a very pale pink (almost white) and highlight the outer edges of the petals where the light would naturally hit. This creates dimension and separates the layers of petals. -
Paint the yellow bloom:
For the yellow flower on the left, use a golden ochre color for the crevices and a bright buttery yellow for the exposed ruffled edges. I prefer to use a smaller round brush here to get those tight, ruffled petal shapes. -
Detail the flower centers:
Using a fine liner brush and yellow paint mixed with a tiny bit of white, create the stamen in the center of the open peonies. Use tiny, rapid stippling motions to create a fluffy texture.
Step 4: Foliage & Finishing Touches
-
Create green gradients:
Mix two shades of green: a deep, cool green using Phthalo Green and a touch of Crimson (to darken it), and a lighter, warmer Sap Green mixed with a bit of White. -
Paint the leaves:
Paint the leaves starting with the darker green at the base and veins, blending into the lighter green at the tips. This gradient gives the foliage a realistic, sun-dappled look. -
Add veining:
With your finest liner brush and the darkest green mixture (or even a dark fluid acrylic), carefully paint the central veins and stems connecting the floral elements. -
Final highlights:
Add tiny dashes of pure white to the very tips of the stamens and the wettest-looking parts of the petals for a crisp finish. -
Heat set the design:
Allow the jacket to dry for at least 24 hours. Place parchment paper over the design and iron on a medium setting (no steam) for 3-5 minutes to seal the paint into the fibers.
Wear your new floral masterpiece with pride, knowing you’ve created a one-of-a-kind statement piece.
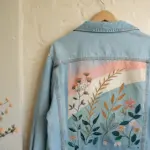

Dreamy Sunset and Clouds
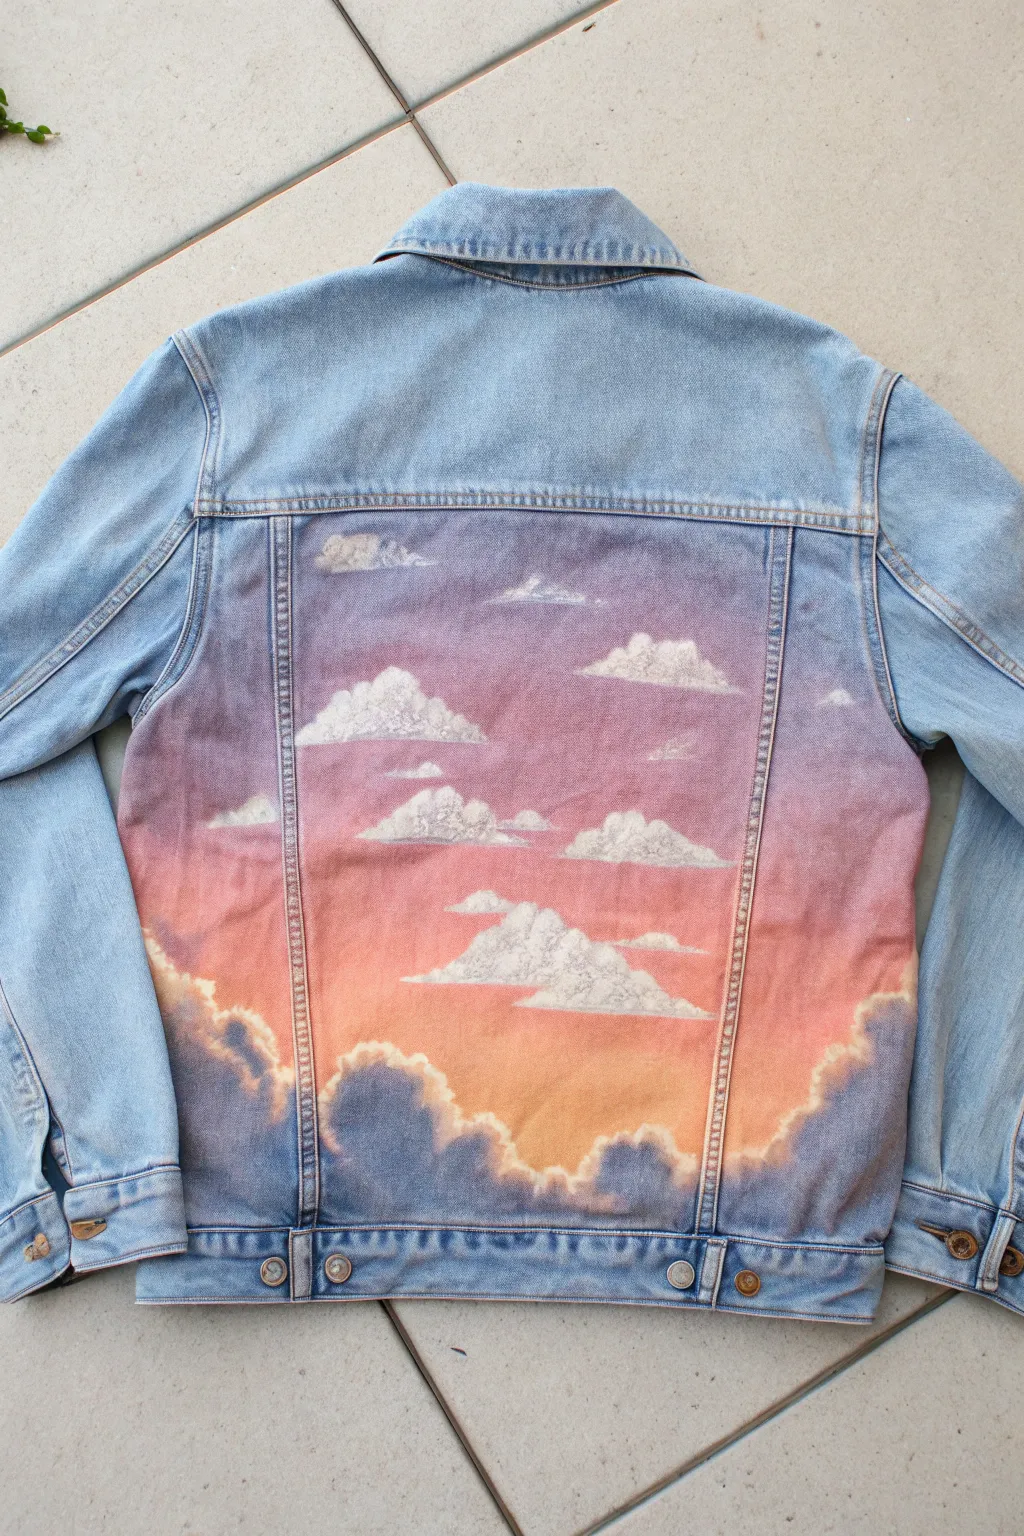
Transform a plain denim jacket into a wearable work of art with this dreamy, gradient sunset design. By blending soft acrylics directly onto the fabric, you’ll create a seamless transition from twilight purple to golden hour warmth, dotted with fluffy, realistic clouds.
Detailed Instructions
Materials
- Light wash denim jacket
- Fabric medium
- White fabric paint or gesso (for priming)
- Acrylic paints: Violet, Magenta, Peach/Coral, Warm Yellow, White, Indigo/Dark Blue
- Wide flat synthetic brush (1-inch)
- Medium round brush
- Small filbert or shader brush
- Masking tape or painter’s tape
- Cardboard or plastic sheet (to insert inside the jacket)
- Palette or paper plate
- Water cup and paper towels
Step 1: Preparation & Gradient Base
-
Protect the layers:
Before you unscrew a single paint cap, slip a thick piece of cardboard or a plastic sheet inside the jacket. This crucial barrier prevents moisture and paint from bleeding through to the front panel or the lining. -
Tape the boundaries:
Use painter’s tape to mask off the seams surrounding the central back panel. Press the edges down firmly with your thumbnail to ensure clean, crisp lines where the painted sky meets the unpainted denim. -
Prime the canvas:
Mix a generous amount of white acrylic paint with fabric medium (about a 2:1 ratio). Paint a thin, even base coat over the entire back panel. This white layer neutralizes the blue denim so your sunset colors will pop vibrantly rather than looking muddy. -
Mix your gradient colors:
Prepare your palette with four main colors mixed with fabric medium: violet for the top, magenta for the upper middle, peach for the lower middle, and warm yellow for the bottom horizon area. -
Apply the top violet section:
Using your wide flat brush, paint a horizontal strip of the violet mix across the top quarter of the panel. Don’t worry about the bottom edge being perfect; a rough edge helps with blending. -
Add the magenta layer:
While the violet is still wet, apply the magenta mix directly below it. Where the two colors meet, brush back and forth horizontally to create a smooth, blurry transition between the purple and pink. -
Blend in the peach tones:
Continue downward with the peach color. Work quickly so the paint remains workable. If the paint feels too tacky to blend, I like to dampen my brush slightly with a tiny bit of water or more fabric medium. -
Finish the gradient:
Fill the remaining bottom section with the warm yellow mix, blending it upward into the peach. You should now have a smooth gradient from purple to yellow covering the main panel. -
Create the bottom cloud base:
For the darker cumulus clouds at the very bottom, mix a slate blue using indigo and a touch of white. sponge or stipple this color along the bottom edge, creating irregular, bumpy cloud shapes that rise up into the yellow section.
Smooth Blends
Work wet-on-wet for the sky gradient. If the acrylic dries too fast, mist the jacket lightly with water to keep the paint movable for smoother blending.
Step 2: Painting the Clouds
-
Map out the upper clouds:
Switch to a medium round brush. Using pure white mixed with fabric medium, gently tap in the general shapes of the floating clouds across the pink and purple sections. Keep the shapes organic and asymmetrical. -
Build cloud volume:
Using a ‘scumbling’ technique—rubbing the brush in small circular motions—add density to the center and top ridges of the white clouds. Leave the bottoms of the clouds somewhat sheer so they fade into the background sky. -
Highlight the bottom storm clouds:
Return to the dark slate blue clouds at the bottom. Use a smaller brush to add highlights to the very tops of these bumps using a pale peach or light yellow, simulating the sunset light hitting them from behind. -
Add dimension with shadows:
Mix a light lavender-grey. Apply this color lightly to the bottom undersides of your white floating clouds. This casts a shadow and makes them look 3D rather than flat stickers. -
Refine the edges:
Take a small dry brush with a tiny amount of white paint and softly feather the top edges of the clouds. This makes them look fluffy and wind-blown rather than hard-edged. -
Final highlights:
Add touches of pure titanium white to the absolute highest peaks of the clouds for maximum contrast. This is what gives them that bright, sun-lit glow. -
The reveal:
Once the painting is dry to the touch, carefully peel away the masking tape. Reveal the crisp straight lines of the denim seams bordering your new sunset. -
Heat set the design:
Allow the jacket to cure for at least 24 hours. Then, place a cotton cloth over the painted area and iron on medium heat (no steam) for 3-5 minutes to permanently seal the paint into the fibers.
Starry Night Option
After the clouds dry, flick a toothbrush loaded with watered-down white paint over the darker purple sections to create a field of early evening stars.
Now you have a stunning, hand-painted piece that captures the magic of golden hour forever


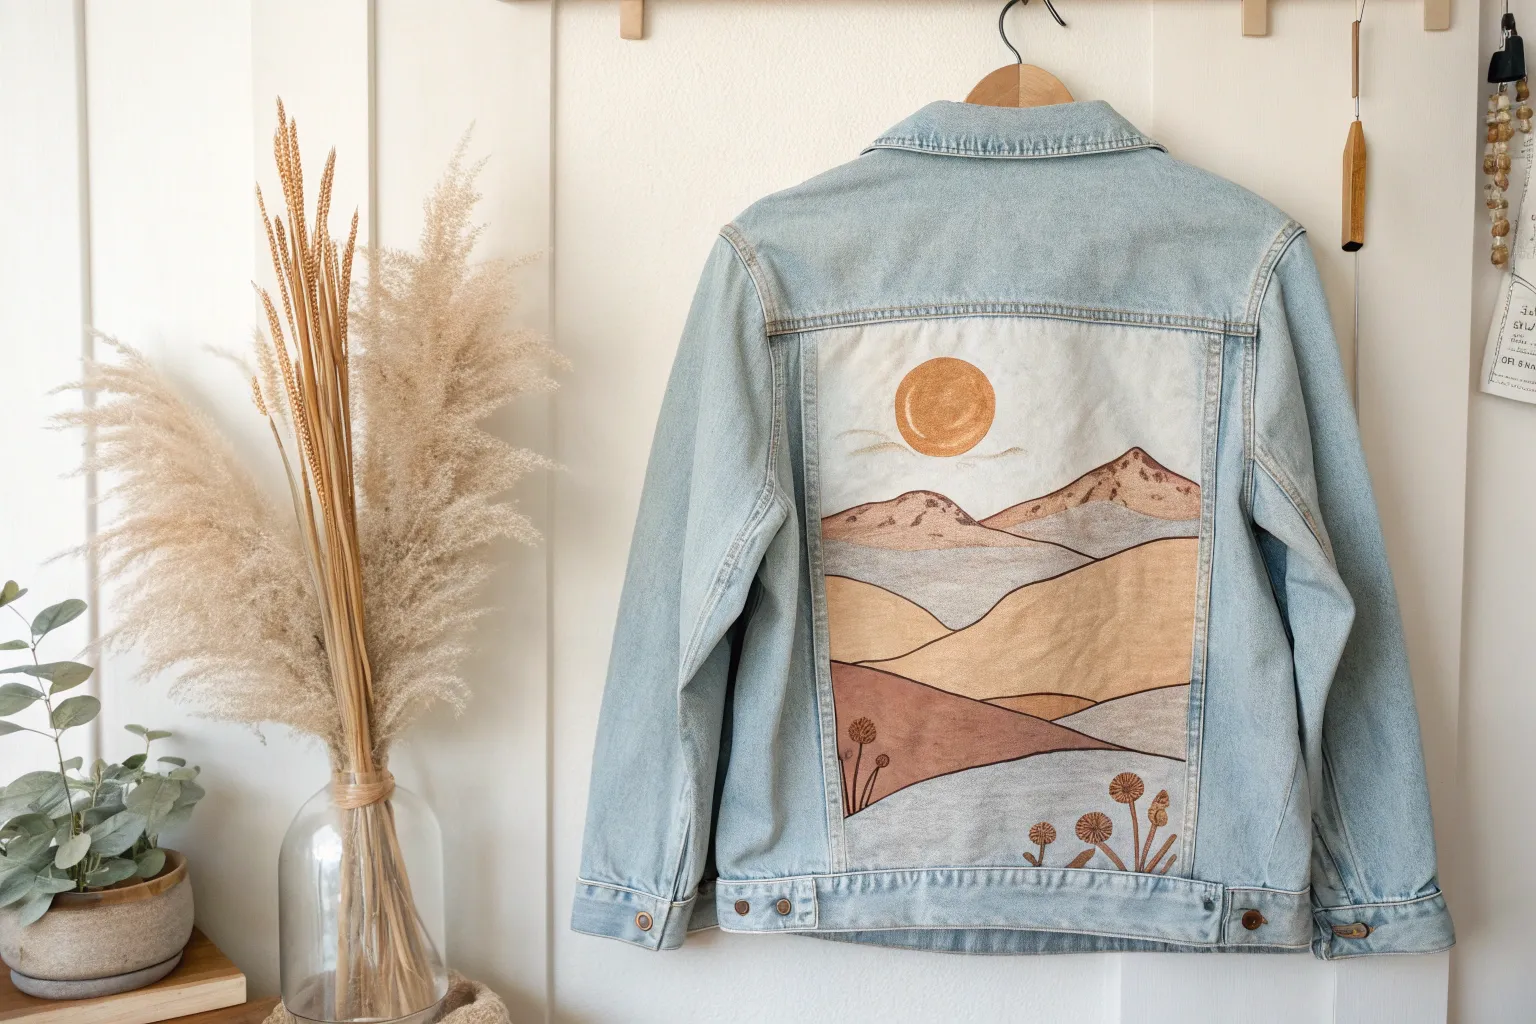
Moody Mountain Horizon
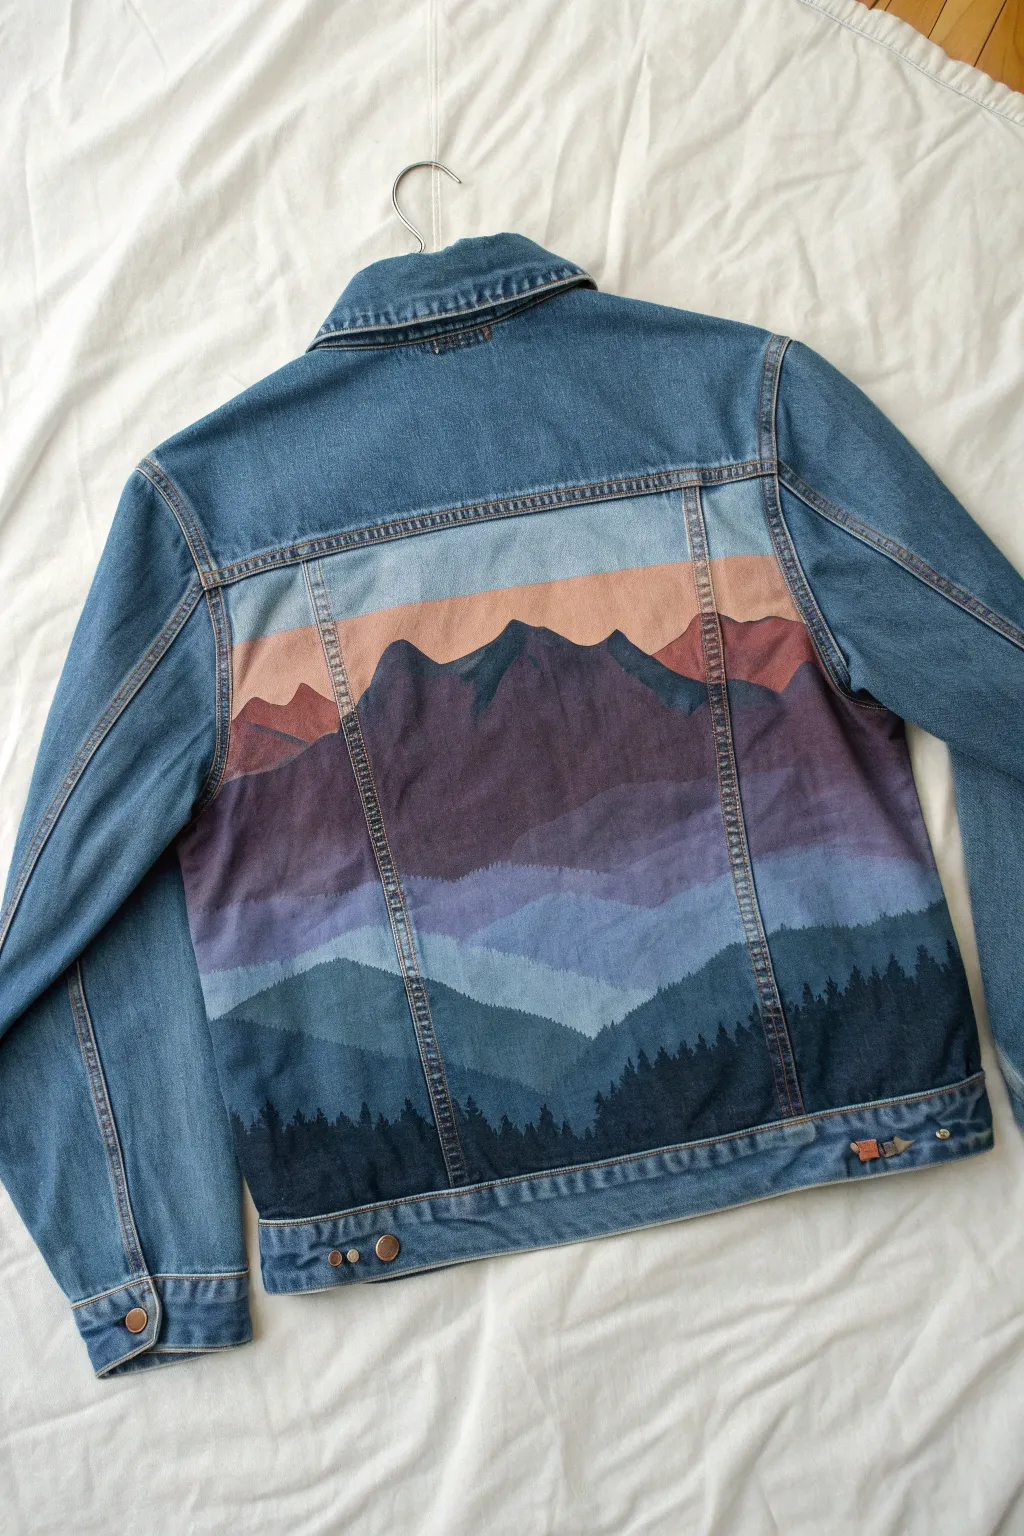
Transform an ordinary denim jacket into a wearable work of art featuring a serene, atmospheric mountain range. This project relies on layering acrylic colors from light to dark to create depth, resulting in a misty, moody horizon that looks professionally printed.
How-To Guide
Materials
- Denim jacket (clean and dry)
- Textile medium (essential for fabric painting)
- Acrylic paints: White, Peach, Lavender, Deep Purple, Navy Blue, Black
- Flat shader brushes (medium and large)
- Small round detail brush
- Masking tape or painter’s tape
- Cardboard insert
- Palette or paper plate
- Water cup and paper towels
- Iron (for heat setting)
Step 1: Preparation & Sky
-
Prepare the canvas:
Start by sliding a piece of cardboard inside the jacket to prevent paint from bleeding through to the front. Lay the jacket flat on a hard surface, smoothing out any wrinkles. -
Tape the boundaries:
Use painter’s tape to mask off the seams surrounding the main back panel. I prefer to tape right over the vertical stitching lines to keep the frame crisp and clean, ensuring the paint only goes where intended. -
Mix the textile medium:
On your palette, mix your acrylic paints with textile medium according to the bottle instructions (usually a 1:1 or 2:1 ratio). This ensures the paint stays flexible on the denim and won’t crack later. -
Create the peach horizon:
Start near the top third of the panel. Mix white with a touch of peach to create a soft, sunset glow. Paint a horizontal band across the jacket, keeping the top edge straight and the bottom edge slightly uneven where the mountains will be. -
Blend the sky:
While the peach is still wet, mix a very light blue using white and a tiny dot of navy. Blend this into the area above the peach band, creating a soft transition for the upper sky. Let this layer dry completely.
Sticky Situation
If paint bleeds under the tape, use a stiff brush with a tiny bit of rubbing alcohol to gently scrub the excess paint off the unpainted denim while it’s still damp.
Step 2: Painting the Mountain Layers
-
The furthest peaks:
Mix a muted, dusty mauve color using white, lavender, and a touch of brown or grey. Paint the first range of mountains directly over the bottom edge of your peach sky. Keep the shapes simple—just soft, rolling triangles. -
Mid-range mountains:
Darken your mauve mixture by adding more purple and a drop of navy blue. Paint a second range of mountains slightly lower than the first, overlapping the previous layer to establish distance. -
Deep purple layer:
Create a rich, dark purple tone. Paint the largest, most prominent mountain range in the center of the design. Focus on creating interesting peaks and valleys here, as this is the focal point of the landscape. -
Adding texture:
While the purple paint is wet, you can streak in slightly lighter or darker variations of the color to mimic the look of ridges and shadows on the rock faces. -
The misty foothills:
Mix a blue-grey shade using navy, black, and white. Paint a layer of rolling hills below the large purple mountains. This transition color bridges the gap between the majestic peaks and the dark forest below. -
Lower foothills:
Add a bit more navy to your mixture to darken it. Paint another band of hills below the blue-grey layer, continuing to move downward on the jacket panel.
Starry Night
Once the sky is dry, dip an old toothbrush in watered-down white paint and flick the bristles to create a spray of subtle stars across the upper sky section.
Step 3: The Forest & Finishing Touches
-
Base forest layer:
Mix a very dark navy blue (almost black). Paint the silhouette of a tree line across the bottom section, leaving about an inch or two of space at the very bottom hem. -
Detailing the trees:
Switch to your small round detail brush. Using the same dark navy, paint tiny vertical lines extending upward from the tree line mass. Add small, downward-angled dashes to these lines to create the look of pine tree branches. -
Deepest shadows:
Mix black with a touch of navy. Paint the final bottom section of the panel solid dark to ground the image. Stipple the top edge of this black section into the navy tree line to blend them seamlessly. -
Dry and peel:
Allow the entire painting to dry for at least 24 hours. Carefully peel away the masking tape to reveal your crisp, clean edges along the seams. -
Heat set the design:
Once fully dry, place a thin cloth or piece of parchment paper over the painted area. Iron on a medium heat setting (no steam) for 3-5 minutes to permanently set the paint into the fabric fibers.
Wear your new custom jacket with pride knowing you are carrying a beautiful view wherever you go


Moon and Stars Night Sky
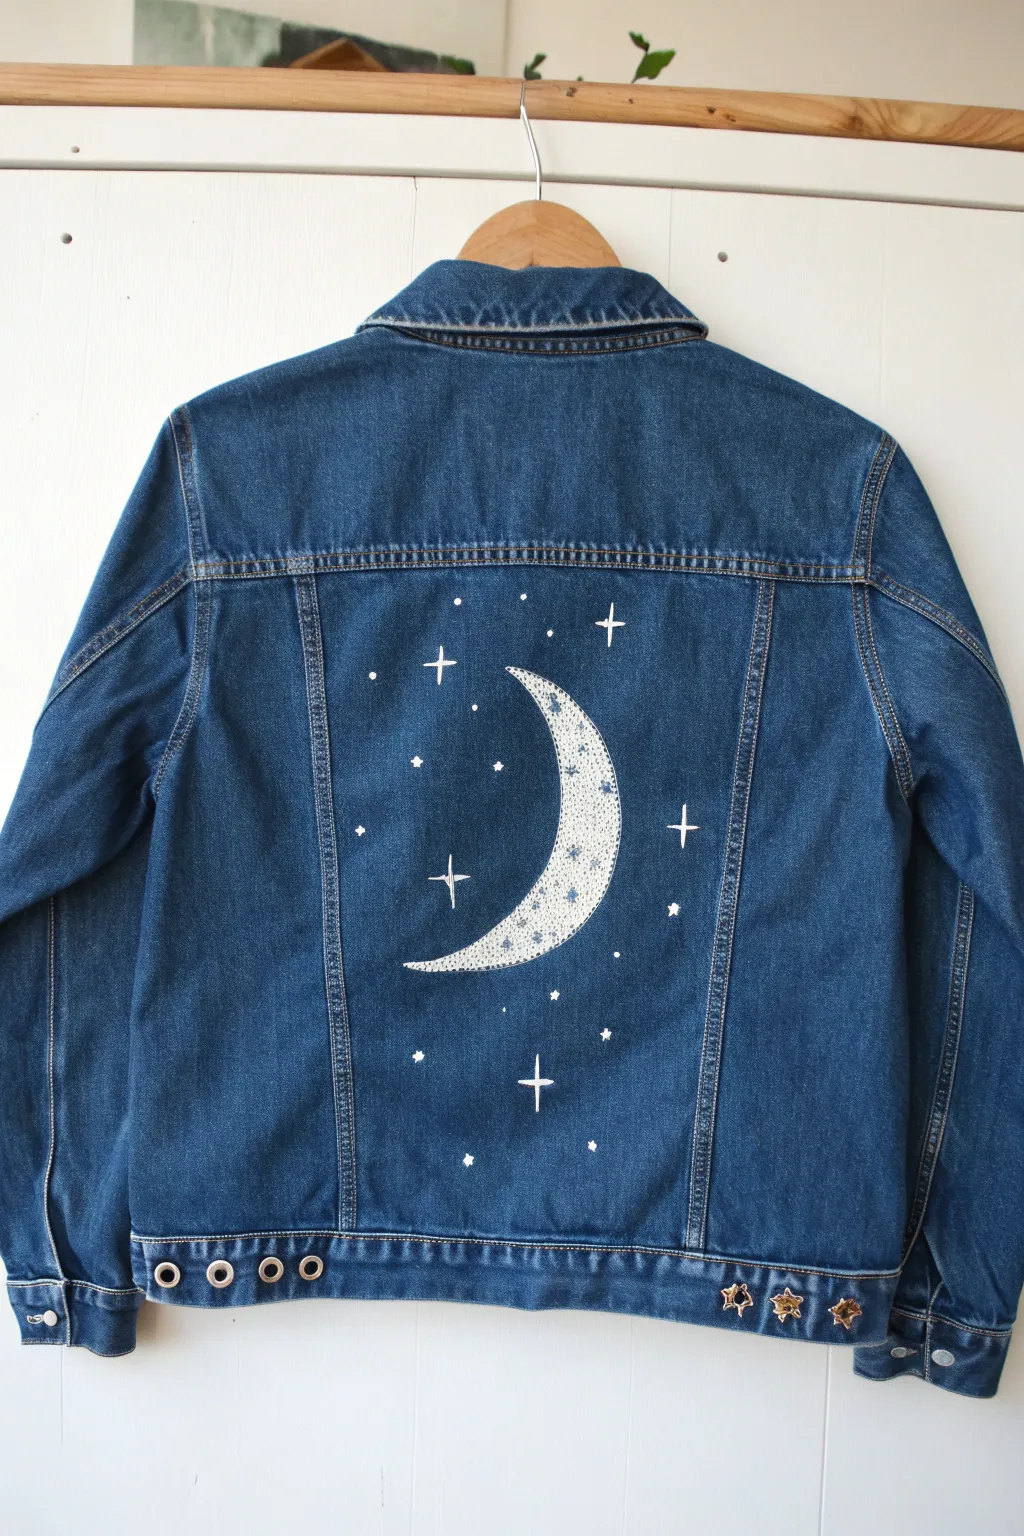
Transform a plain denim jacket into a dreamy night sky with this elegant crescent moon design. This project uses silver glitter and white paint to create a stunning focal piece on the back panel that catches the light beautifully.
Step-by-Step
Materials
- Denim jacket (medium or dark wash)
- White fabric paint
- Silver glitter fabric paint (or silver fabric glitter glue)
- Small flat paintbrush
- Fine liner paintbrush (size 0 or 00)
- Chalk or white pencil for sketching
- Cardboard or wax paper (to put inside jacket)
- Paper plate or palette
- Optional: Silver star studs and eyelets for hem decoration
Step 1: Preparation & Sketching
-
Prepare your workspace:
Lay your jacket flat on a clean table, back side facing up. Slip a piece of cardboard or wax paper inside the jacket, directly under the back panel where you’ll be painting. This prevents any paint from bleeding through to the front. -
Define the painting area:
Identify the central rectangular panel on the back of the jacket. This area, framed by the seams, will be your canvas for the celestial scene. -
Outline the crescent moon:
Using a piece of chalk or a white pencil, lightly sketch a large C-shape in the center of the panel. Focus on getting a smooth outer curve and a tapered inner curve to create a classic crescent moon shape. -
Map out the stars:
Lightly mark the positions for your larger stars. Draw small crosses or dots where you want the brightest stars to be, scattering them randomly around the moon for a natural night sky look.
Paint looking transparent?
Denim absorbs paint quickly. If your white looks faded, let the first layer dry completely and apply a second coat before adding glitter.
Step 2: Painting the Moon
-
Base coat the moon:
Load your small flat brush with white fabric paint. carefully fill in the crescent moon shape you sketched. Don’t worry about complete opacity yet; the goal is to create a bright base for the glitter. -
Refine the edges:
Use the edge of your flat brush or switch to the liner brush to crisp up the points of the crescent moon, ensuring they taper off sharply. -
Apply the glitter layer:
Once the white base is dry to the touch, apply a generous layer of silver glitter fabric paint over the moon. I find dabbing the paint on rather than brushing it creates a denser, more sparkly texture. -
Add moon details:
While the glitter paint is wet, you can embed larger chunky glitter pieces if you have them, or use a tiny brush to dab small dots of pure white paint on top to simulate craters or extra texture.
Step 3: Creating the Stars
-
Paint the major stars:
Using your fine liner brush and white fabric paint, create the larger ‘north star’ shapes. Paint a vertical line crossed by a shorter horizontal line to make a twinkling cross shape. -
Shape the points:
Go back over your cross shapes and gently pull the paint outward from the center to taper the lines into sharp points, making them look like shining light rays. -
Add medium stars:
Paint small 5-point stars scattered in the empty spaces. Keep these simple and smaller than your main cross-shaped stars. -
Create distant stardust:
Dip the very tip of your brush (or use the handle end) into white paint. Dot tiny specks around the moon and larger stars to fill the negative space with distant starlight. -
Highlight with silver:
Once the white stars are dry, take a clean liner brush and add a tiny dot of silver glitter paint to the center of the largest stars for extra dimension.
Level Up: Cosmic Depth
Mix a tiny drop of light blue into your white paint for some stars. This slight color variation adds atmospheric depth to your galaxy.
Step 4: Finishing Touches
-
Clean up sketch lines:
Once all paint is completely dry (check your paint bottle for cure times, usually 24 hours), gently rub away any visible chalk marks with a slightly damp cloth. -
Heat set the design:
To make the design permanent and washable, place a thin cloth over the painted area and iron it on a medium setting for a few minutes. -
Add metal accents (optional):
For the look in the photo, attach silver star studs or eyelets along the bottom hem band of the jacket using pliers or a setting tool. This echoes the celestial theme in the hardware.
Wear your jacket on a clear night and enjoy the sparkle of your personal galaxy
BRUSH GUIDE
The Right Brush for Every Stroke
From clean lines to bold texture — master brush choice, stroke control, and essential techniques.
Explore the Full Guide
Mandala Center Medallion

Transform an ordinary denim jacket into a wearable masterpiece with this rustic, sun-inspired mandala design. Featuring earthy tones of terracotta and blue, this center-back medallion adds a vintage, hand-crafted aesthetic that serves as a perfect focal point.
Step-by-Step Tutorial
Materials
- Light or medium wash denim jacket
- Fabric medium (mixed with acrylics) or dedicated fabric paints
- Acrylic paints: Terracotta/Rust , Cream/Off-White/Beige, Denim Blue, Deep Brown
- Assorted brushes: 1-inch flat brush, small round detail brush (size 0 or 1), medium filbert brush
- Chalk pencil or white transfer paper
- Circle templates (bowls, plates, or a compass)
- Ruler
- Iron (for heat setting)
- Piece of cardboard (to place inside the jacket)
Step 1: Preparation and Mapping
-
Prepare the surface:
Begin by sliding a piece of cardboard inside the jacket, positioning it directly behind the back panel. This prevents paint from seeping through to the front layer of the denim. -
Find the center point:
Using a ruler, measure the width of the back panel between the vertical seams. Mark the exact center point with your chalk pencil to ensure your mandala is perfectly symmetrical. -
Draft the concentric circles:
Using your compass or round household objects (like a small plate for the inner circle and a larger bowl for the outer ring), lightly trace two main concentric circles centered on your mark. -
Sketch the sun rays:
Draw triangular ‘sun rays’ radiating outward from the largest circle. You can freehand these for a organic look or use a ruler to space them evenly around the circumference. -
Sketch the inner flower:
Inside the innermost circle, lightly sketch an eight-petaled flower shape. Don’t worry about perfect precision; the paint will refine the edges later.
Step 2: Painting the Base Layers
-
Mix the terracotta hue:
Mix your rust or terracotta paint with fabric medium according to the bottle instructions. This ensures the paint moves with the fabric rather than cracking. -
Fill the main ring:
Using a flat brush, paint the thick band between your two circles with the terracotta mix. You may need two thin coats to get full opacity on blue denim. -
Block in the center background:
Mix a muted dark blue (slightly darker than the jacket itself) and paint the background area inside the smallest circle, carefully painting around your sketched flower petals. -
Paint the outer rays:
Using a cream or beige color, fill in the triangular sun rays. I find a filbert brush works best here to get nice sharp points on the tips. -
Base coat the flower petals:
Paint the central eight petals with the same cream/beige tone used for the rays. Let all these base laters dry completely before moving to details.
Fixing Wobbly Lines
If your fine lines look shaky, wait for them to dry fully. Then, use the base color (like the terracotta or blue) to carefully ‘cut in’ and tidy up the edges.
Step 3: Detailed Line Work
-
Outline the main ring:
Using your finest detail brush and cream paint, carefully outline the inner and outer edges of the large terracotta ring to separate it from the blue center and the rays. -
Add texture to the ring:
Dip a stiff brush or a specialized stippling tool into dark brown and cream paint. Tap it gently over the dry terracotta ring to create a speckled, textured stone effect. -
Detail the center flower:
Outline the cream petals with the rust/terracotta color. Add a small line down the center of each petal and small dots in the blue negative space between petals. -
Decorate the sun rays:
Paint a smaller, narrower triangle inside each cream ray using a blue-grey tone. Add a tiny vertical line of blue in the center of that inner triangle for depth. -
Add final embellishments:
Using the dark brown or rust color, add small dots or decorative swirls along the cream borders of the sun rays to tie the design together.
Add Some Sparkle
Mix a tiny amount of gold fabric paint or metallic medium into your cream color for the sun rays to make the design shimmer subtly in sunlight.
Step 4: Finishing Touches
-
Dry thoroughly:
Allow the jacket to dry for at least 24 hours. The paint needs to be fully cured before the next step. -
Heat set the design:
Turn the jacket inside out (or place a cloth over the painted side) and iron the back panel on a medium setting without steam for 3-5 minutes. This seals the paint into the fibers.
Wear your new custom jacket proudly knowing you have a completely unique piece of art on your back.
Vintage Rose With Ribbon Banner
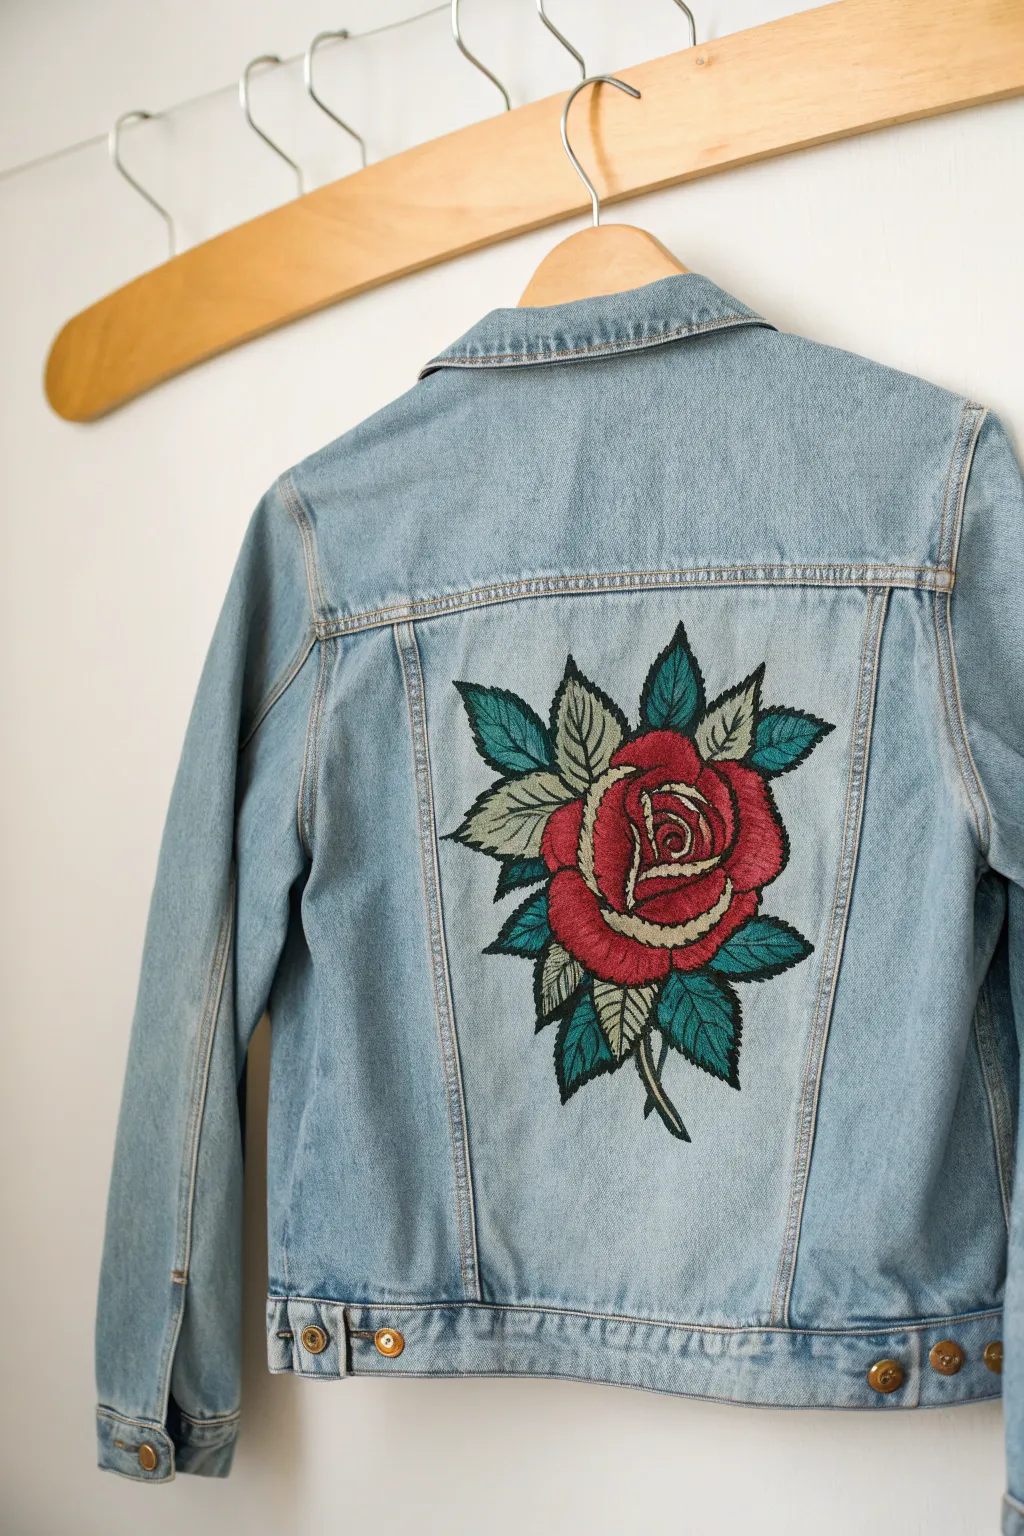
Transform a plain denim jacket into a statement piece with this bold, tattoo-inspired rose design. This project focuses on filling the large back panel with rich textures using satin stitching and clean black outlines for a vintage look.
Detailed Instructions
Materials
- Denim jacket (rigid denim works best)
- Embroidery hoop (8-10 inch)
- Embroidery floss (Dark red, bright red, cream/light yellow, dark teal, light sage green, black)
- Embroidery needles (sizes 3-9)
- Water-soluble fabric stabilizer or transfer paper
- Pencil or fabric marker
- Small sharp scissors
Step 1: Preparation and Transfer
-
Hoop the fabric:
Position your embroidery hoop on the central back panel of the jacket. Denim is thick, so you may need to loosen the screw significantly to get both rings in place. Ensure the fabric is drum-tight. -
Transfer the design:
Sketch your rose design onto the water-soluble stabilizer. Draw a large central bloom with layered petals and surround it with jagged leaves. Peel the backing and stick the stabilizer directly onto the denim inside your hoop area.
Thimble Theory
Denim is tough to push a needle through repeatedly. Invest in a leather thimble or a rubber needle puller to save your fingertips from soreness.
Step 2: Stitching the Rose Bloom
-
Outline the petals:
Using 3-4 strands of black floss, stitch a simple split stitch around the perimeter of every rose petal to create a defined boundary for your satin stitches. -
Fill the outer petals:
Thread your needle with bright red floss (using 2-3 strands). Work satin stitches horizontally across the widest petals, keeping stitches parallel and close together for solid coverage. -
Add depth to the center:
Switch to your darker red floss for the inner, tightly curled petals. The contrast between the bright outer petals and dark inner whorl creates instant dimension. -
Create highlights:
Use the cream or light yellow floss to stitch the very edges of the petals. Satin stitch these small turnover sections where the petal ‘curls’ outward to catch the light. -
Refine the petal shapes:
Go back with a single strand of black floss and stem-stitch over the boundaries between petals to sharpen the definition.
Make it Metallic
Swap the cream highlight thread for a gold metallic embroidery floss. It adds a subtle shimmer that makes the vintage style feel regal.
Step 3: Creating the Foliage
-
Outline the leaves:
Similar to the rose, outline your leaf shapes with black split stitch. Include a central spine line down the middle of each leaf. -
Fill dark leaves:
Select the dark teal floss. Fill the background leaves using a satin stitch, angling your stitches from the central spine outward toward the leaf edge, like the veins of a leaf. -
Fill light leaves:
Use the light sage green for the leaves that are ‘in front’ or interspersed with the teal ones. This color variation adds visual interest and prevents the greenery from looking like a solid block. -
Stitch the stems:
Use a thick stem stitch or whipped backstitch with dark green or black floss to create the thorny stem at the bottom.
Step 4: Finishing Details
-
Add leaf veining:
Thread a single strand of black floss. Stitch delicate straight lines over the green satin stitches to create the veins of the leaves. -
The final outline:
I prefer to do a final pass with a heavy black outline stitch (using 4-6 strands) around the entire outer perimeter of the design to give it that sticker-like, tattoo-style punch. -
Remove stabilizer:
Once all stitching is complete, dissolve the stabilizer by running the embroidered area under warm water. Gently rub away any gummy residue. -
Dry and press:
Let the jacket air dry completely. Once dry, iron the design from the *inside* of the jacket to smoothen the fabric without crushing your beautiful stitches.
Now you have a custom piece of wearable art that looks as timeless as the denim itself

PENCIL GUIDE
Understanding Pencil Grades from H to B
From first sketch to finished drawing — learn pencil grades, line control, and shading techniques.
Explore the Full Guide
Bold Animal Portrait Focus
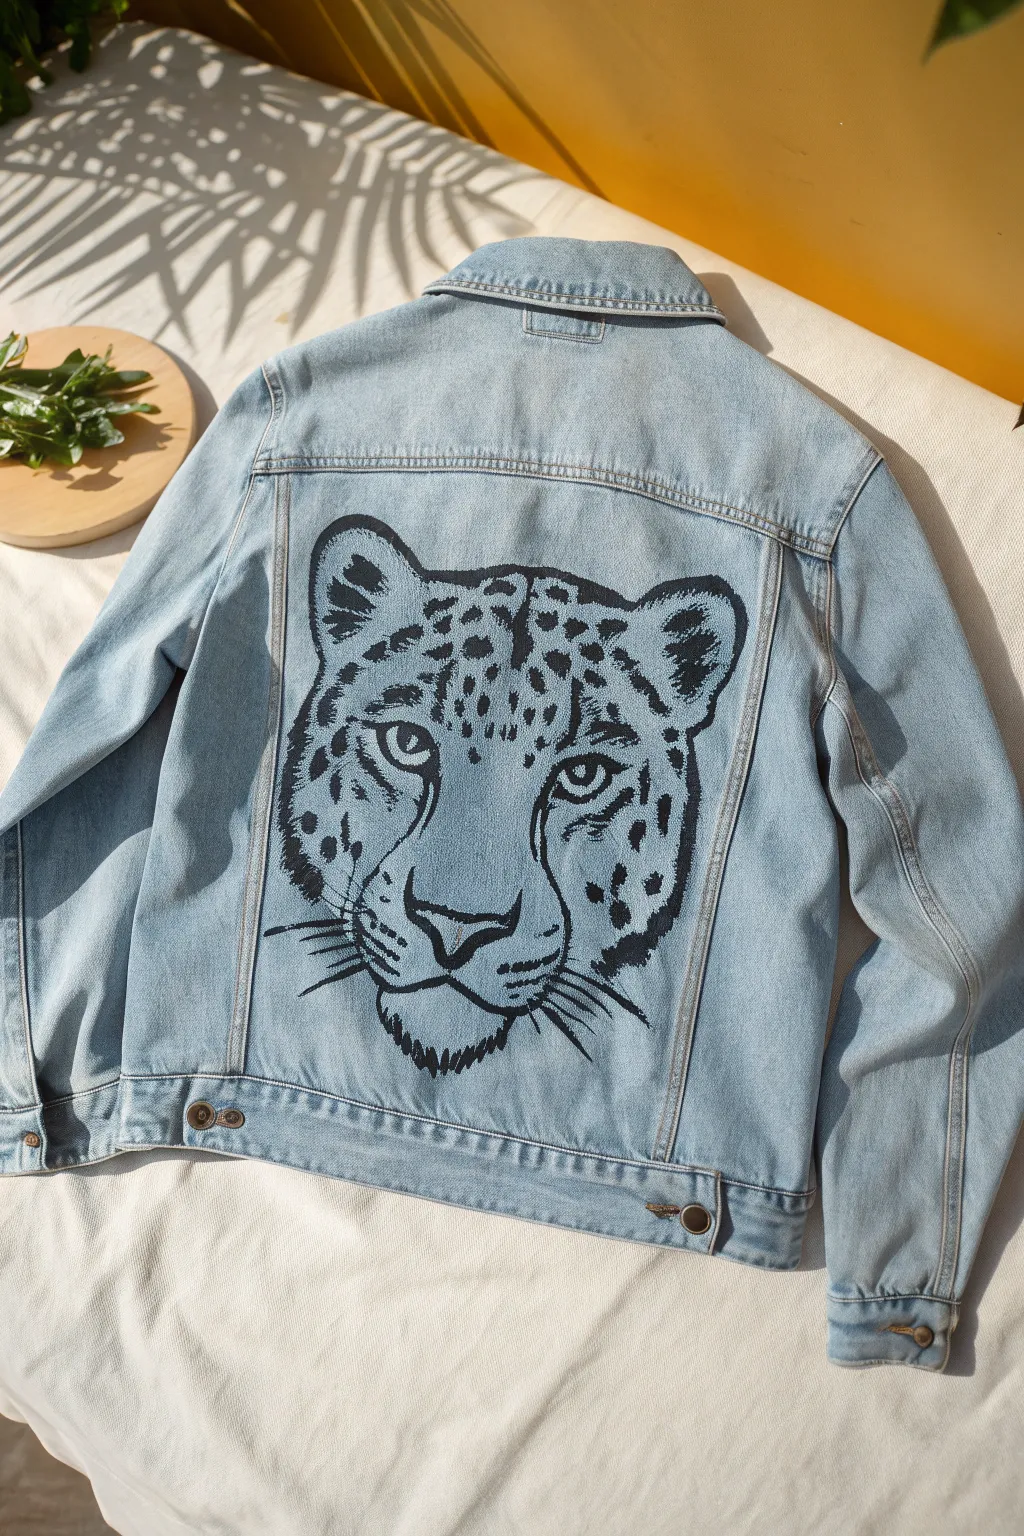
Transform a classic light wash denim jacket into a statement piece with this bold, illustrative leopard portrait. Using just black fabric paint, you’ll create striking contrast and texture through stippling and confident linework.
How-To Guide
Materials
- Light wash denim jacket
- Carbon transfer paper
- Pencil or stylus
- Fabric medium
- Black acrylic paint
- Fine liner brush (size 0 or 00)
- Small round brush (size 2)
- Flat shader brush (size 4)
- Cardboard insert
- Masking tape
- Printed template of leopard face (sized to jacket panel)
Step 1: Preparation & Transfer
-
Prepare the surface:
Wash and dry your denim jacket without using fabric softener to ensure the fibers are ready to accept paint. Iron the back panel flat to remove any wrinkles that could distort your design. -
Insert a barrier:
Place a piece of clean cardboard inside the jacket, directly behind the back panel. This provides a hard surface for drawing and prevents paint from bleeding through to the front of the jacket. -
Align the design:
Print your leopard face design, ensuring it fits neatly within the stitched seams of the central back panel. Position the paper on the jacket and secure the top edge with masking tape to create a hinge. -
Trace the outline:
Slide a sheet of carbon transfer paper (dark side down) under your printout. Using a pencil or stylus, firmly trace over the main contour lines, facial features, and major spot outlines onto the denim.
Smooth Operator
Denim has a heavy grain. Paint in the direction of the fabric weave first, then smooth it out, to ensure the paint settles into the grooves.
Step 2: Blocking & Lines
-
Mix your medium:
Mix equal parts black acrylic paint and fabric medium. This mixture ensures the paint moves smoothly over the rough denim texture and remains flexible after drying. -
Paint the main contours:
Using your size 2 round brush, carefully paint over the traced exterior outline of the leopard’s head. Keep your hand steady and apply even pressure for a consistent line width. -
Define the ears:
Fill in the inner ear details. Use the fine liner brush for the hair texture inside the ears, flicking the brush slightly to mimic fur tufts. -
Outline the eyes:
Switch to your finest brush to outline the eyes. The eyes are the focal point, so take your time getting the almond shape and the pupils crisp and dark. -
Add the nose and mouth:
Paint the nose shape and the central line of the muzzle. I like to anchor my pinky finger on a dry spot of the jacket for extra stability when doing these central features.
Step 3: Details & Shading
-
Fill the spots:
Using the round brush, fill in the larger spots on the forehead and cheeks. Notice that the spots are irregular and organic—they don’t need to be perfect circles. -
Create texture with dots:
For shading on the muzzle and around the eyes, use a stippling technique. Dip the very tip of your fine brush in paint and apply tiny dots. Cluster them closely for darker shadows and spread them out for lighter areas. -
Detail the chin:
Paint the fur texture on the chin using short, downward strokes. This “beard” area helps define the jawline without a solid outline. -
Paint the whiskers:
Load your liner brush with slightly thinned paint (add a drop of water if needed) for the whiskers. Execute these with quick, confident strokes starting from the muzzle and lifting off as you move outward. -
Refine the lines:
Go back over your initial outline to clean up any rough edges. If certain lines look too thin against the texture of the denim, thicken them slightly for better visibility. -
Cure the paint:
Let the jacket dry completely for at least 24 hours. Once dry, heat set the design by ironing the reverse side of the panel on a medium setting (no steam) for 3-5 minutes.
Color Pop
For a fierce twist, paint the leopard’s eyes with a tiny touch of gold or emerald green metallic fabric paint to make them shine.
Enjoy wearing your custom creation and showing off your hand-painted artwork
Butterfly Swarm Gradient
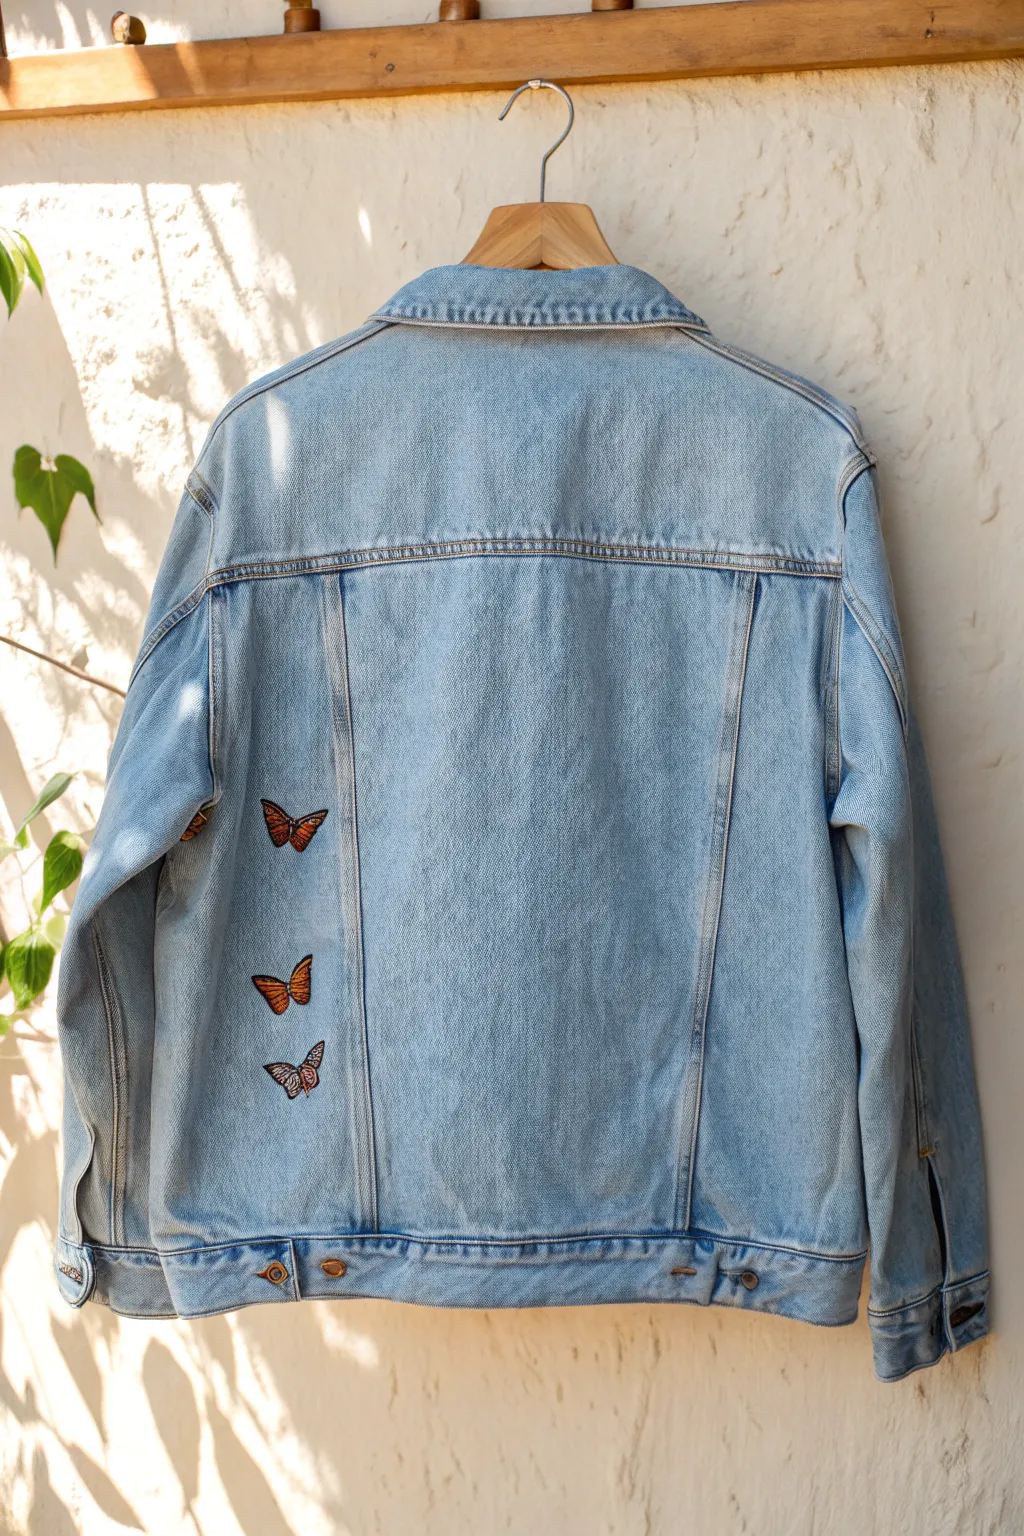
This project transforms a classic denim jacket into a whimsical piece of wearable art featuring a delicate trio of painted butterflies. The design focuses on clean placement and vibrant detailing to create a striking yet minimalist look on the back panel.
Detailed Instructions
Materials
- Light-wash denim jacket
- Fabric medium
- Acrylic paints (Titanium White, Carbon Black, bright orange, deep orange/red-orange)
- Fine detail paintbrushes (sizes 0, 1, and 2/0)
- Small flat brush (size 2 or 4)
- White chalk pencil or fabric transfer paper
- Reference photo of a Monarch butterfly
- Cardboard insert
- Painter’s tape palette or small mixing cup
Step 1: Preparation and Sketching
-
Surface Prep:
Begin by washing and drying your denim jacket without using fabric softener. This ensures the fibers are free of coatings, allowing the paint to adhere properly. -
Protective Measures:
Slide a piece of cardboard inside the jacket, positioning it directly behind the back left panel where you plan to paint. This prevents paint from soaking through to the front of the jacket. -
Planning the Placement:
Locate the vertical panel seam on the left side of the jacket’s back. You will be painting three butterflies within this specific panel. -
Sketching:
Using a white chalk pencil, lightly sketch the outlines of three butterflies. Draw the top one angled slightly up and to the right, the middle one banking left, and the bottom one angled down and right. Vary their sizes slightly for visual interest.
Step 2: Base Layers
-
Mixing the Primer:
Mix Titanium White acrylic paint with an equal amount of fabric medium. This mixture acts as a primer to make the colors pop against the blue denim. -
Applying the Base:
Fill in the butterfly shapes completely with your white mixture using a small flat brush. Don’t worry about internal details yet; just create a solid silhouette. -
Drying:
Let this white base layer dry completely. If the denim blue shows through too much, apply a second thin coat of white and let it dry again. -
Orange Fill:
Mix your bright orange paint with fabric medium. Paint over the dried white silhouette, leaving just the very outer edges white if you want a guide, but covering the main wing areas.
Clean Lines Pro Tip
If your hand is shaky, use a Posca paint marker (fine tip) for loop details and black outlines instead of a brush. It offers much more control.
Step 3: Detailing and Definition
-
Gradient Shading:
While the orange is still slightly tacky, mix a small amount of deep orange or red-orange. Blend this into the wing areas closest to the butterfly’s body to create a subtle gradient of depth. -
Lining the Veins:
Switch to your finest liner brush (size 0 or 2/0) and black paint mixed with fabric medium. Carefully paint the thin black veins radiating from the body to the edges of the wings. -
Creating the Borders:
Using the same black mixture, paint the thick black borders around the edges of the wings. I find resting my hand on a clean paper towel helps stabilize my strokes during this step. -
Body Definition:
Paint the central body of the butterfly in black, making it slightly thicker at the thorax and tapered at the abdomen. Add tiny antennae using the very tip of your brush. -
The Signature Dots:
This is what makes it a Monarch: once the black borders are dry, use a toothpick or the smallest brush with pure white paint to add tiny dots along the black wing margins. -
Highlighting:
Add a few minuscule dashes of white on the upper wings for a light reflection effect, keeping it very sparse.
Level Up: 3D Effect
Add a slight drop shadow under one wing of each butterfly using diluted grey paint to make them look like they are lifting off the fabric.
Step 4: Finishing Up
-
Heat Setting:
Allow the paint to cure for at least 24 hours. Once fully dry, place a pressing cloth or piece of parchment paper over the design. -
Ironing:
Run a dry iron on medium heat over the parchment paper for 3-5 minutes, keeping the iron moving constantly. This heat-setting process makes the design washable and permanent.
Enjoy wearing your custom jacket with its unique flutter of butterflies


Ocean Waves in Motion
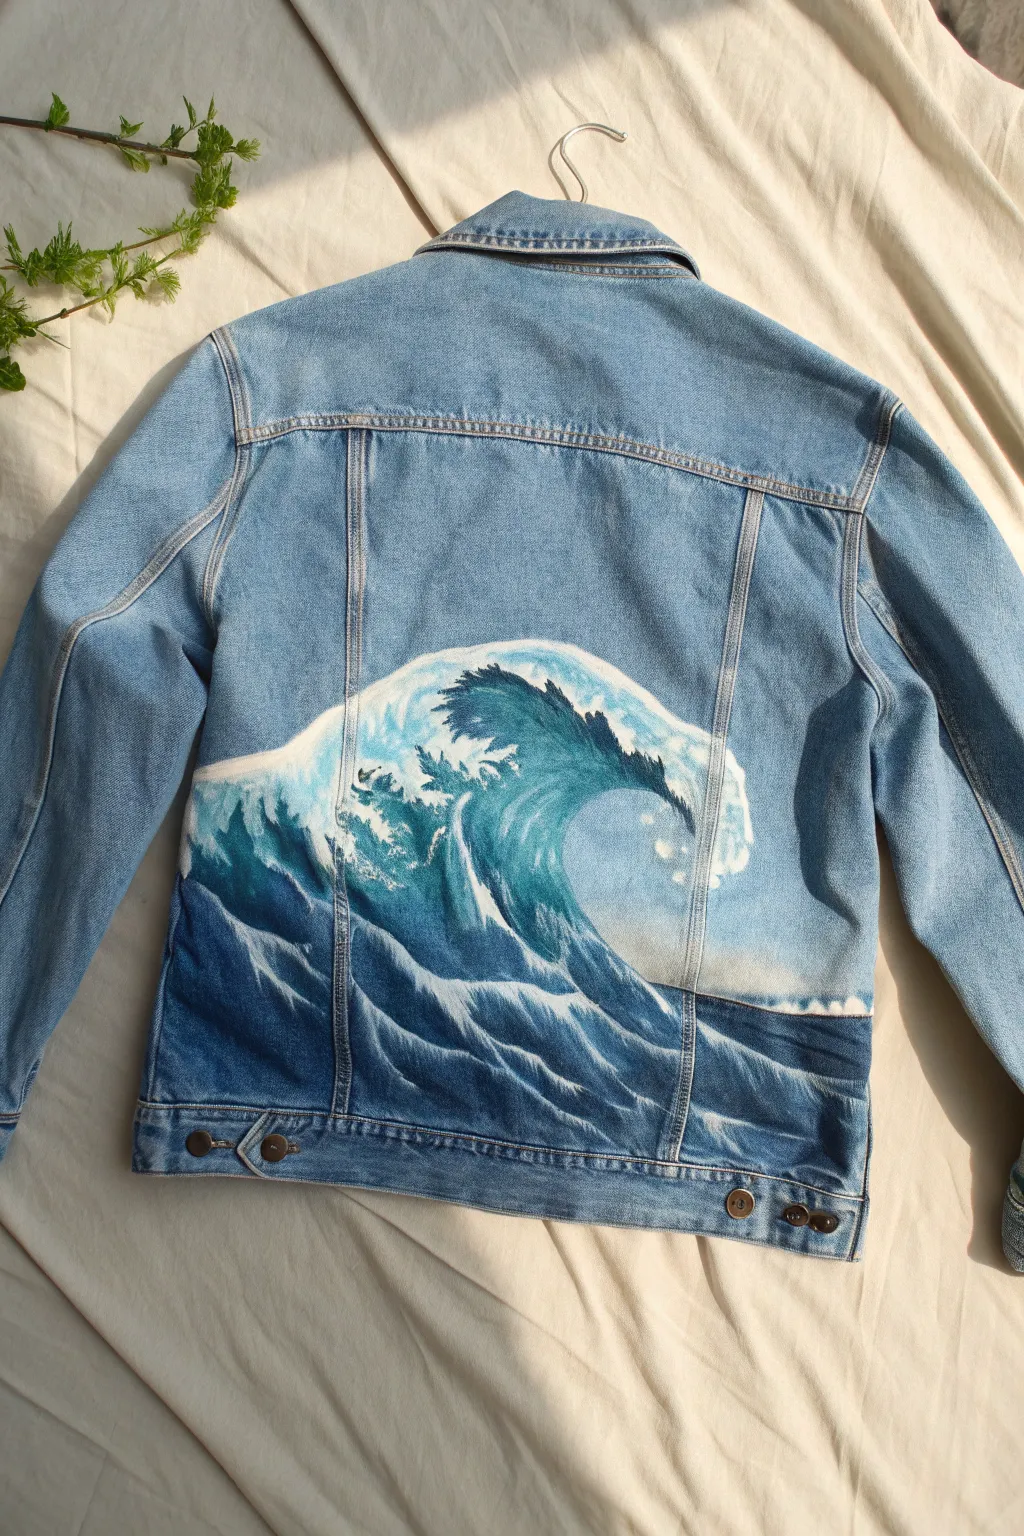
Transform the back panel of a denim jacket into a dynamic seascape with this tutorial, capturing the raw power of a crashing wave. The design uses gradients of deep blues and crisp whites to create movement and depth right on your fabric.
How-To Guide
Materials
- Clean denim jacket (pre-washed without fabric softener)
- White Gesso or white fabric primer
- Fabric medium
- Acrylic paints: Phthalo Blue, Ultramarine Blue, Teal/Turquoise, Black, Titanium White
- Flat shader brushes (large and medium)
- Round detail brushes (small)
- Palette paper or plate
- Cup of water
- Chalk or heat-erasable fabric pen
- Iron and parchment paper (for heat setting)
Step 1: Preparation & Sketching
-
Prime the surface:
Before you sketch, mix white acrylic paint with fabric medium (or use straight Gesso) and paint a solid white base layer across the lower back panel of the jacket. Cover the area where the wave will go, extending from seam to seam. Let this dry completely; a second coat is recommended for true vibrancy. -
Outline the main shape:
Once the white base is dry to the touch, use chalk to lightly sketch the primary curve of the wave. Start low on the left, swoop up high towards the right shoulder blade, and curl the crest back inward. -
Define the horizon:
Draw a faint horizontal line about a third of the way up the panel to separate the dark foreground water from the lighter background sky.
Prime Time
Don’t skip the white base layer! Without it, the blue denim will absorb your colors, making the wave look muddy and dull instead of vibrant.
Step 2: Painting the Background
-
Mix your sky colors:
Create a very pale blue by mixing a tiny dot of Ultramarine Blue into a large amount of Titanium White and fabric medium. -
Paint the sky gradient:
Fill the space behind the main wave, specifically the upper right area. Keep the color lightest near the wave’s crest and slightly darker as it moves away, blending softly while wet. -
Start the deep ocean:
For the bottommost section of the jacket, mix Phthalo Blue with a touch of Black. Paint the dark, churning water at the base, leaving gaps where the white foam trails will go.
Make it Sparkle
Mix a tiny amount of iridescent mixing medium or pearl white paint into your final highlights to make the water look like it’s glistening in the sun.
Step 3: Forming the Wave
-
Establish the wave body:
Blend Teal and Phthalo Blue to create the mid-tone of the wave’s curve. Paint upward strokes following the curve you sketched earlier, mimicking the direction of rising water. -
Add shadow depth:
Take your darkest blue mix and paint under the curl of the wave. This creates the hollow barrel effect, making the wave look three-dimensional. -
Highlight the curve:
While the paint is still workable, introduce a lighter turquoise mix on the upper part of the wave’s face to show where the light hits the water before it breaks. -
Soften the transitions:
Use a clean, damp brush to gently blend the boundary between the dark barrel shadow and the lighter teal face so the water looks fluid rather than striped.
Step 4: Adding Details & Foam
-
Create the crest:
Load a small round brush with pure Titanium White mixed with fabric medium. Use stippling motions (tapping the brush) along the top edge of the wave to create the foamy, breaking lip. -
Detail the spray:
Flick tiny dots of white paint off the crest to simulate sea spray flying into the air. I like to be a bit messy here to capture the energy of the collision. -
Paint seafoam trails:
Using a thin liner brush, paint wandering, web-like white lines across the dark blue water at the bottom. These represent the foam left behind by previous waves. -
Enhance the barrel:
Add sharp, jagged white highlights inside the curl of the wave to show the turbulent water crashing down. -
Final highlights:
Add the brightest white accents to the very top edges of the foam and the water ripples for maximum contrast.
Step 5: Finishing Touches
-
Clean the seams:
If any paint strayed onto the stitching or adjacent denim panels, clean it up carefully with a damp cotton swab or a tiny brush with blue paint matching the denim. -
Dry completely:
Allow the jacket to dry flat for at least 24 hours to ensure all layers are moisture-free. -
Heat set:
Place parchment paper over the painted area and iron on a medium heat setting (no steam) for 3-5 minutes to seal the paint into the fibers.
Wear your masterpiece confidently knowing you’re carrying the energy of the ocean with you wherever you go
Painted Patchwork Blocks
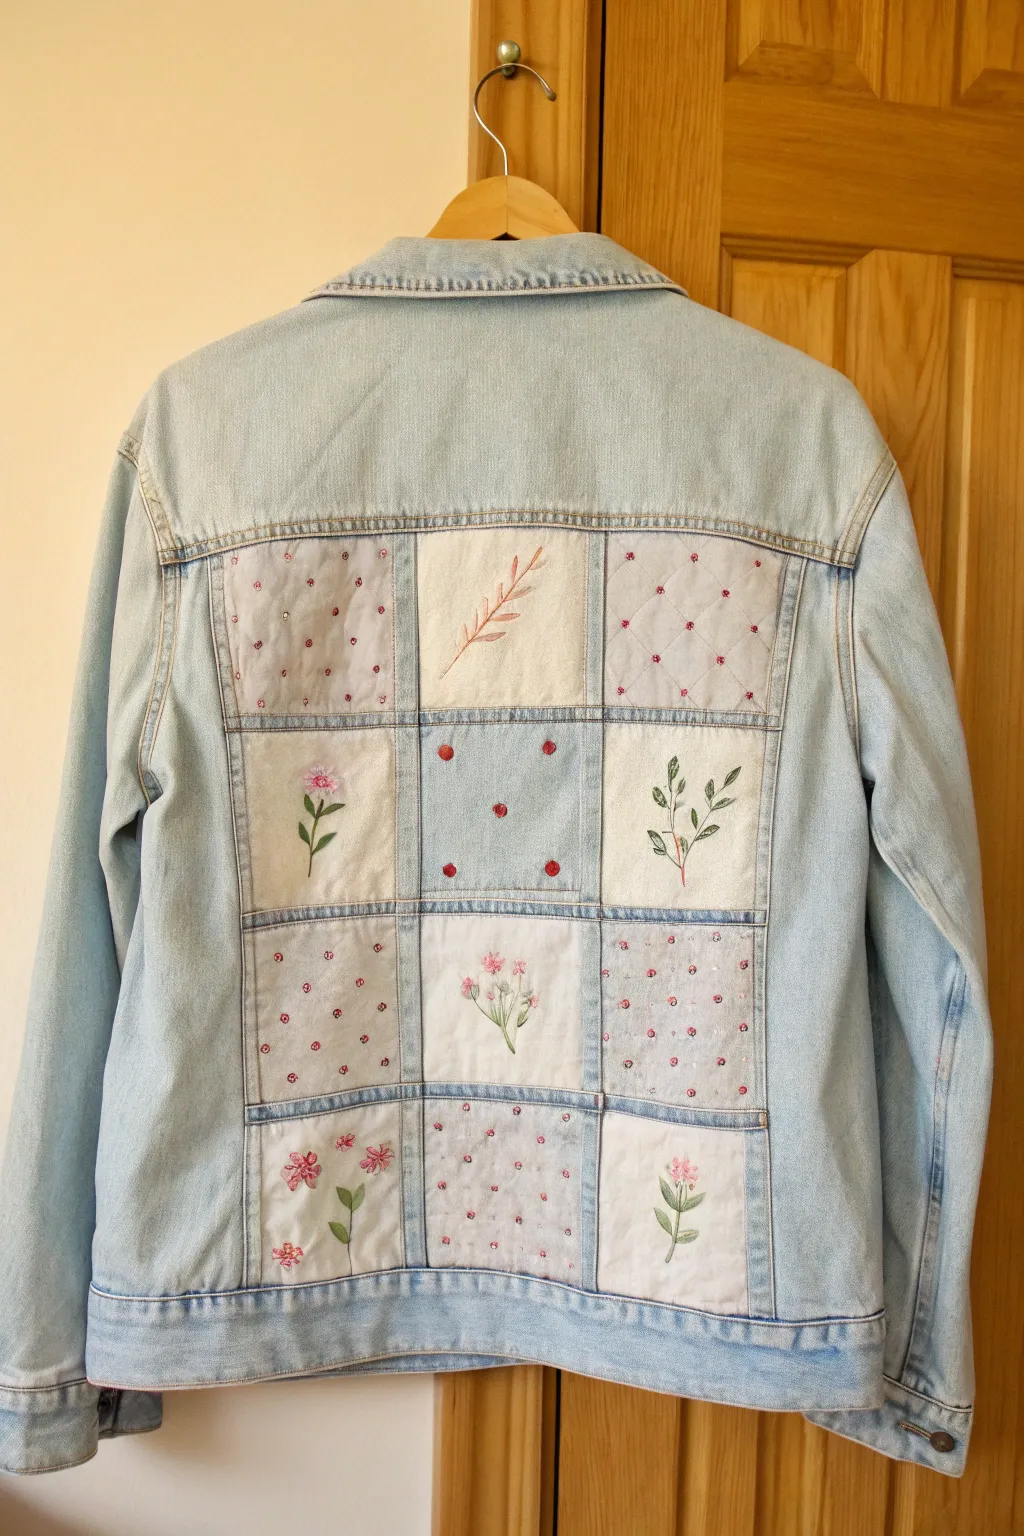
Transform a plain denim jacket into a soft, vintage-inspired masterpiece by painting a grid of delicate floral blocks. This project mimics the look of a cozy patchwork quilt without sewing a single stitch, using diluted fabric paints to achieve a watercolor effect.
Step-by-Step Guide
Materials
- Light wash denim jacket
- White fabric paint (gesso consistency)
- Fabric medium
- Acrylic paints (pinks, greens, reds, soft blues)
- Masking tape or painter’s tape
- Ruler
- Chalk or fabric pencil
- Small flat brush
- Fine liner brush (size 0 or 00)
- Palette for mixing
Step 1: Planning and Priming
-
Clean the canvas:
Begin with a pre-washed, dry denim jacket. Lay it flat on a hard surface, smoothing out the back panel where the grid will go. -
Measure the grid:
Focus on the central back panel of the jacket. Using a ruler and chalk, measure the width and height of this area. Divide the area into a grid of 12 squares (3 columns by 4 rows) and lightly mark the lines. -
Tape the boundaries:
Apply masking tape along your chalk lines to create crisp borders for each square. I find it easiest to tape off all the vertical separation lines first. -
Create a white base:
Mix white fabric paint with a tiny drop of water to improve flow. Paint inside the masked squares to create a bright, neutral canvas. This ensures your delicate floral colors will show up against the blue denim. -
Let it dry completely:
Allow the white base layer to dry fully. If the blue denim still shows through significantly, apply a second thin coat of white for better opacity. -
Re-tape for horizontal lines:
Once dry, carefully remove the vertical tape. Now, apply tape over the dried painted edges to mask off the horizontal grid lines, creating the separation for your rows.
Bleeding Edges?
If paint bleeds under the tape, don’t panic. Once dry, use a stiff brush with a tiny bit of water to scrub the excess off, or paint a thin ‘sashing’ line over the grid in denim blue.
Step 2: Painting the Patterns
-
Mix your palette:
Prepare your colors. Mix fabric medium with small amounts of pink, olive green, deep red, and soft blue acrylics. Aim for a milky, semi-transparent consistency to mimic watercolor. -
Paint the solid blocks:
Select a few random squares in your grid (like the center row, middle block) and paint the background a soft, solid color like pale blue or cream. Leave others white. -
Add polka dots:
On 2-3 chosen squares, use the tip of a brush handle or a dotting tool dipped in red or pink paint to create evenly spaced polka dots. Keep the spacing consistent for a clean quilt look. -
Draft the diamond quilt pattern:
For the ‘quilted’ look squares, use a fine liner brush and very diluted light gray or blue paint to draw diagonal crisscross lines, forming a diamond pattern. -
Detail the diamonds:
Add a tiny pink dot at each intersection of the diamond lattice to simulate knotted thread or buttons.
Step 3: Adding Floral Details
-
Paint single stems:
On the white squares, paint simple, elegant botanical subjects. Use a fine liner brush and olive green to paint slender curved stems rising from the bottom center of the square. -
Add leaves:
Paint small, almond-shaped leaves branching off the main stems. Vary the green shades slightly by mixing in a touch of yellow or blue for depth. -
Bloom the flowers:
Using soft pinks and reds, add the flower heads. Create variety: paint a single large peony-style bloom on one square, a cluster of small buds on another, and a tall sprig of lavender or wheat on a third. -
Refine with fine lines:
Once the flower shapes are dry, use your finest brush with a slightly darker shade of the flower color to add delicate petals definition or stamen details. -
Heat set the design:
Allow the jacket to dry for at least 24 hours. To make the design permanent and washable, iron the painted area on the reverse side (or use a pressing cloth) on a medium heat setting for 3-5 minutes.
Stitched Reality
Enhance the illusion by using a real needle and embroidery thread to stitch running stitches along the painted grid lines, adding actual texture to the visual patchwork.
Enjoy wearing your custom, artistic denim piece that combines the comfort of a jacket with the charm of a vintage quilt
Galaxy Splatter and Drips
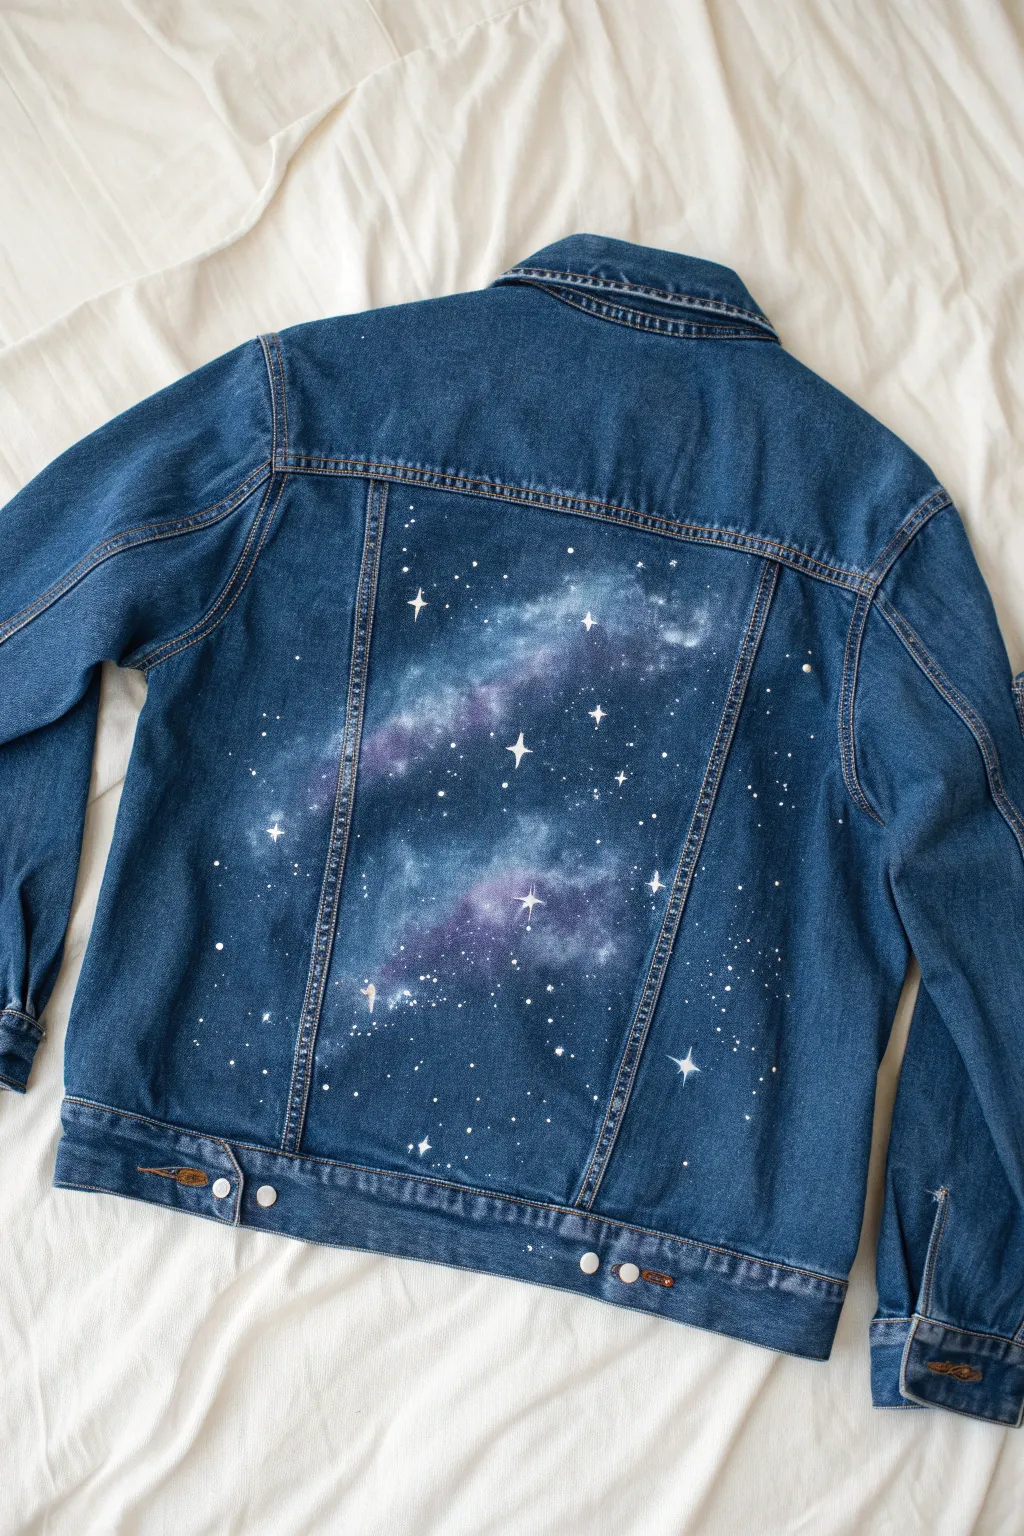
Transform a plain denim jacket into a window to the cosmos with this stunning galaxy painting project. Using blending techniques and crisp white details, you’ll create a deep, dimensional nebula effect directly on the fabric.
Detailed Instructions
Materials
- Denim jacket (clean and dry)
- Fabric medium
- Acrylic paints (black, dark blue, purple, magenta, white)
- Wide flat brush (for base coats)
- Sponge applicators or cosmetic sponges
- Small round detail brush (size 0 or 00)
- Old toothbrush (optional for splatter)
- Painter’s tape or masking tape
- Piece of cardboard (to fit inside the jacket)
- Water cup and paper towels
Step 1: Preparation and Base Layer
-
Prep the surface:
Slip a piece of sturdy cardboard inside the jacket, positioning it directly behind the back panel where you plan to paint. This prevents paint from bleeding through to the front of the coat. -
Tape the borders:
Apply painter’s tape along the outer seams of the central back panel. Press the edges down firmly to ensure crisp lines where the denim stitching meets your painting area. -
Mix the medium:
Mix your black and dark blue acrylic paints with fabric medium according to the bottle’s instructions (usually a 1:1 or 2:1 paint-to-medium ratio). This keeps the paint flexible and prevents cracking later. -
Apply the dark base:
Using the wide flat brush, paint the entire central panel with your dark blue/black mixture. You want a solid, opaque background, so creating a second coat after the first one dries is often necessary for full coverage.
Muddy Galaxy?
If your colors are blending into a gray mess, stop and let the layer dry completely. Clouds need dry lower layers to sit on top and remain vibrant.
Step 2: Creating the Nebula
-
Start the mid-tones:
Once the black base is dry to the touch, mix a brighter blue with a little fabric medium. Dip a sponge into the paint and dab off the excess on a paper towel until it’s almost dry. -
Sponge on the clouds:
Gently dab the sponge in diagonal, cloud-like clusters across the panel. Focus on creating an irregular diagonal flow from the top right to bottom left, keeping the edges soft and hazy. -
Add purple depth:
Switch to purple paint on a fresh sponge. Lightly dab this over parts of the blue sections, blending them slightly where they overlap to create a transition between colors. -
Brighten the core:
Mix a small amount of white with your blue or magenta to create a highlight color. Sponge this sparingly into the absolute center of your cloud clusters to make them look like glowing gas. -
Blend the edges:
If any sponge marks look too harsh, take a clean, slightly damp sponge and gently tap the edges of your colored areas to fade them back into the dark background. -
Dry thoroughly:
Let these nebula layers dry completely. If you paint the stars while the background is wet, they will turn muddy gray instead of bright white.
Pro Tip: Soften the Stars
After painting a large star, tap the center gently with your finger while the paint is wet to diffuse the light and make it look like it’s glowing.
Step 3: Stars and Details
-
Paint the major stars:
Using your smallest detail brush and pure white paint, create the largest stars first. I prefer to paint a small dot, then carefully pull lines outward: one vertical line and one horizontal line to make a four-pointed star. -
Vary the star sizes:
Add smaller four-pointed stars scattered randomly. Make some ‘arms’ of the stars longer and some shorter to create variety and a sense of twinkling distance. -
Add dot stars:
Dip the tip of your brush or a toothpick into white paint and dot single points of light throughout the galaxy. concentrate some clusters near the brighter nebula clouds. -
Create distant dust:
For the tiniest stars, you can use the splatter technique. Dilute a little white paint with water, dip an old toothbrush in it, and run your thumb across the bristles to flick tiny specks onto the jacket. -
Protect the seams:
Be careful when splattering near the edges; try to keep the spray focused inward or use a piece of paper to shield the unpainted denim areas. -
Remove tape:
Once you are happy with your star field, carefully peel away the painter’s tape to reveal the clean, sharp edges along the seams. -
Heat set the design:
Allow the jacket to dry for at least 24 hours. To make it washable, place a thin cloth over the painted area and iron it on medium heat (without steam) for 3-5 minutes to seal the paint.
Wear your new cosmic creation with pride, knowing you have a unique universe right on your back
Hand-Lettered Quote Backpiece
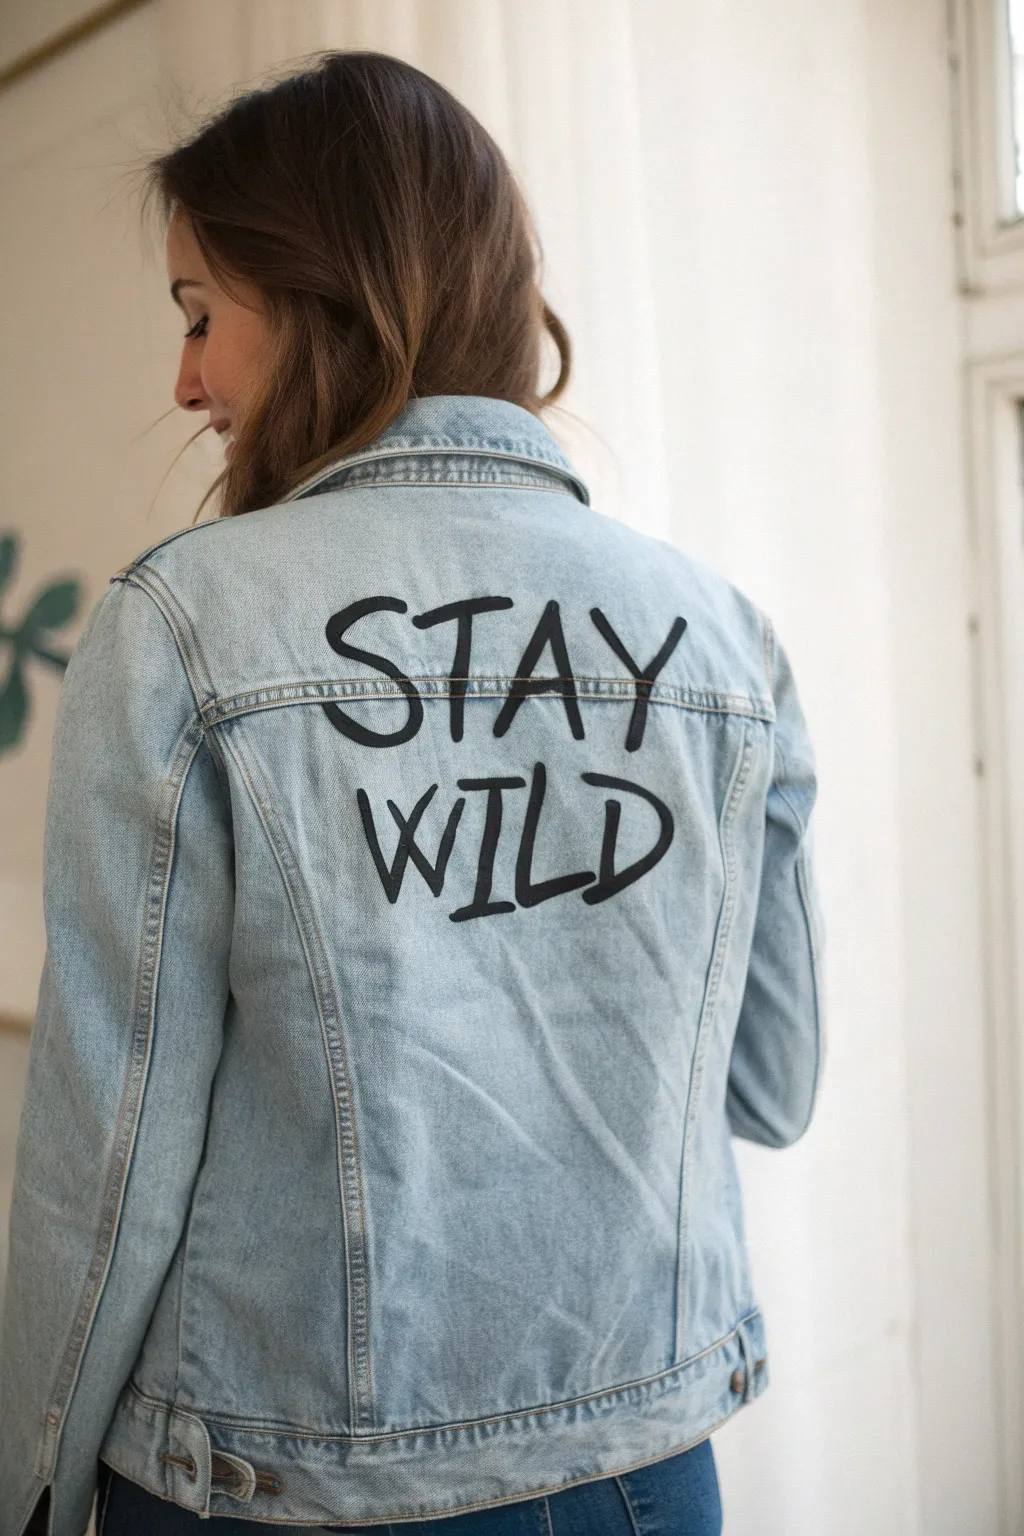
Transform a classic light-wash denim jacket into a personal manifesto with this high-contrast lettering project. The loose, hand-brushed style of the typography creates a carefree, bohemian vibe that perfectly matches the message.
Step-by-Step
Materials
- Light-wash denim jacket (washed and dried without fabric softener)
- Black fabric paint (or acrylic paint mixed with fabric medium)
- Flat shader brush (size 6 or 8)
- Round detail brush (size 2)
- White tailor’s chalk or disappearing fabric marker
- Cardboard insert
- Iron and ironing cloth (or parchment paper)
- Ruler or straight edge
- Computer and printer (optional for stenciling)
- Painter’s tape
Step 1: Preparation and Layout
-
Prepare the canvas:
Begin by sliding a piece of stiff cardboard inside the jacket, positioning it directly behind the back panel. This creates a smooth, flat surface for painting and prevents any paint bleed-through to the other side of the denim. -
Secure the fabric:
Smooth out the jacket’s back panel completely, ensuring there are no wrinkles or folds. Use masking tape or painter’s tape to secure the edges of the jacket to your work surface so it doesn’t shift while you work. -
Plan the spacing:
With your ruler, identify the horizontal yoke seam across the back shoulders. You will be centering your text in the large panel directly below this seam. Measure the width of the panel to find the vertical center line. -
Draft the letters:
Using your tailor’s chalk, lightly sketch the words ‘STAY’ and ‘WILD’ in two stacked lines. Aim for a loose, casual sans-serif style where the letters vary slightly in height and angle to mimic the ‘wild’ aesthetic. ‘STAY’ should sit closer to the yoke, and ‘WILD’ should float centrally below it. -
Refine the sketch:
Step back and look at your chalk draft. Make sure the words feel balanced; the word ‘WILD’ should be slightly larger or wider to anchor the design. The letters ‘S’ and ‘W’ are tricky, so give them extra attention to ensure the curves and angles look natural.
Oops! Uneven Lines?
Don’t panic! Use a toothpick to gently scrape away wet paint mistakes. If dry, turn the bump into a deliberate style choice by thickening the whole letter slightly.
Step 2: Painting the Design
-
Mix your medium:
Pour a small amount of black fabric paint onto your palette. If using acrylics, mix it 1:1 with fabric medium to ensure flexibility. I find adding just a drop of water helps the paint flow better into the denim’s weave. -
Outline the letters:
Using your smaller round detail brush, carefully trace the outer edges of your chalk letters. This establishes your boundaries and ensures sharp, crisp edges before you fill them in. -
Fill the ‘STAY’:
Switch to the flat shader brush to fill in the letters of the top word. Use confident, single strokes where possible to mimic the look of marker ink or brush calligraphy. Ensure the paint is opaque; denim absorbs liquid quickly. -
Fill the ‘WILD’:
Repeat the filling process for the bottom word. Pay close attention to the thicker strokes of the ‘W’ and ‘D’. The beauty of this design is in the varying thickness, so don’t be afraid to let some parts of the letter be bolder than others. -
Touch up intersections:
Check the points where lines meet, such as the center of the ‘A’ or the corners of the ‘E’. Use the tip of your small brush to sharpen these intersections so the letters don’t look blobby. -
Let the first coat dry:
Allow the paint to dry to the touch, which usually takes about an hour. Don’t rush this, as painting over wet layers can lift the pigment and create clumps.
Step 3: Finishing Touches
-
Assess opacity:
Once dry, look for any areas where the blue denim shows through the black paint. You want a solid, deep black for high contrast. -
Apply the second coat:
Go over the letters with a second layer of paint. This is crucial for durability and visual impact. Focus specifically on the middle of the strokes to build up a rich, dark finish. -
Clean up edges:
If any edges look fuzzy or uneven after the second coat, use the detail brush with a very small amount of paint to straighten them out. You want the text to look hand-painted but intentional. -
Remove chalk marks:
After the paint is fully dry (wait at least 4-6 hours), gently brush away any visible chalk lines with a clean, dry toothbrush or a slightly damp cloth. -
Heat set the design:
To make the jacket washable, place a thin cloth or parchment paper over the design. Iron on medium-high heat (no steam) for 3-5 minutes to seal the paint into the fibers.
Pro Tip: Better Flow
Dampen the denim slightly with a spray bottle before painting. It helps the thick fabric paint glide over the rough texture rather than skipping over the surface.
Now you have a custom, rugged piece of wearable art that reminds everyone to keep their spirit untamed
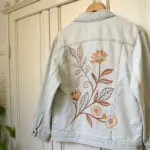
Raised Texture Highlights

Transform a classic light-wash denim jacket into a bohemian masterpiece with this intricate mandala design. Featuring a soothing palette of teal and rust with textured detailing, this wearable art piece is perfect for festival season or casual layering.
Step-by-Step Tutorial
Materials
- Light-wash denim jacket
- Fabric medium
- Acrylic paints (Teal, Burnt Sienna/Rust, Cream, White, Dark Blue)
- Puffy paint or 3D fabric paint (White, Gold for texture)
- White chaulk or fabric pencil
- Round geometry compass (or various sized circular objects)
- Ruler
- Assorted flat and round brushes (sizes 2, 4, 8)
- Fine liner brush
- Cardboard insert
- Masking tape
Step 1: Design and Preparation
-
Prepare the workspace:
Before laying down any color, secure a piece of cardboard inside the jacket to prevent paint from bleeding through to the front. Tape the jacket flat onto a table or board to keep the fabric taut while you work. -
Create the center point:
Find the absolute center of the back panel using a ruler. Mark this spot with your chalk or fabric pencil; this will be the anchor for your entire symmetrical design. -
Draft the concentric circles:
Using a geometry compass, draw a series of concentric circles radiating from the center point. You’ll need a small inner circle, a mid-sized band for the ‘wheel’ section, and larger circles to guide the petal tips. -
Sketch the petal structure:
Lightly sketch the flower petal shapes using the circular guides. Start with the smaller inner petals, then draw the larger, pointed outer petals. Don’t worry about perfection; slight variations add character.
Step 2: Blocking in Color
-
Mix the paint:
Prepare your acrylic mixture by combining acrylic paints with fabric medium according to the bottle instructions (usually 1:1 or 2:1). This ensures the design moves with the fabric and doesn’t crack. -
Paint the inner wheel:
Using a small flat brush, fill in the thick ring surrounding the center with a muted blue-grey tone. I find it helpful to paint the background of this ring first before adding the spoke details later. -
Fill the primary petals:
Paint the inner layer of large petals with a rich Burnt Sienna or rust color. Apply thin, even layers; two coats are usually better than one thick coat to maintain flexibility. -
Paint the outer petals:
Fill the large, pointed outer leaves with a deep teal color. Use a medium round brush to carefully cut in the edges near the other petals. -
Add accent drops:
Paint the small teardrop shapes floating between the petal tips using the rust color to balance the design. -
Let the base dry:
Allow the base colors to dry completely to the touch. This step is crucial so your detail lines don’t muddy the underlying blocks of color.
Smooth Paint Tip
If your brush drags on the denim texture, mist the fabric area lightly with water before painting. It helps the paint flow into the weave without dilution.
Step 3: Refining and detailing
-
Outline the shapes:
With a fine liner brush and a dark blue or black paint mixture, carefully outline every petal and circle. This creates a crisp, stained-glass effect that makes the colors pop. -
Detail the center:
Paint the intricate ‘wheel’ spokes inside the central circle using a rust/orange mix. Add small dots or dashes to create texture within the spokes. -
Add leaf vein details:
Using a lighter shade of rust (mix rust with a little cream), paint delicate veins inside the orange petals. Do the same for the teal petals using a lighter teal mix. -
Create stippled texture:
Dip an old, stiff brush or a stipple sponge into light teal paint. Gently blot texture onto the teal leaves to give them a mottled, stone-like appearance rather than a flat color.
Level Up: Gemstones
Glue small flat-backed rhinestones or studs into the center of the rust-colored teardrops for actual sparkle that catches the sunlight.
Step 4: Raised Highlights
-
Apply puffy paint dots:
Using a bottle of white or pearl 3D fabric paint with a fine nozzle, squeeze tiny dots along the inner edges of the teal petals. This provides the raised, tactile element. -
Embellish the center ring:
Add small dots of gold or copper 3D paint around the perimeter of the central wheel design. Keep your pressure consistent on the bottle to ensure uniform dot sizes. -
Heat set the design:
Once the paint is fully cured (usually 24-48 hours), you need to heat set it. Place a clean cloth over the design and iron on medium heat (no steam) for 3-5 minutes, moving constantly.
Wear your new custom jacket with pride knowing you are showcasing a completely unique piece of art


Have a question or want to share your own experience? I'd love to hear from you in the comments below!