When you want something relaxing, purple painting ideas easy are my go-to because they look dramatic without needing fancy details. Grab your favorite purples (think violet, lavender, plum) and let’s lean on simple blends, bold silhouettes, and a little glow.
Purple Sunset Gradient Over a Calm Horizon
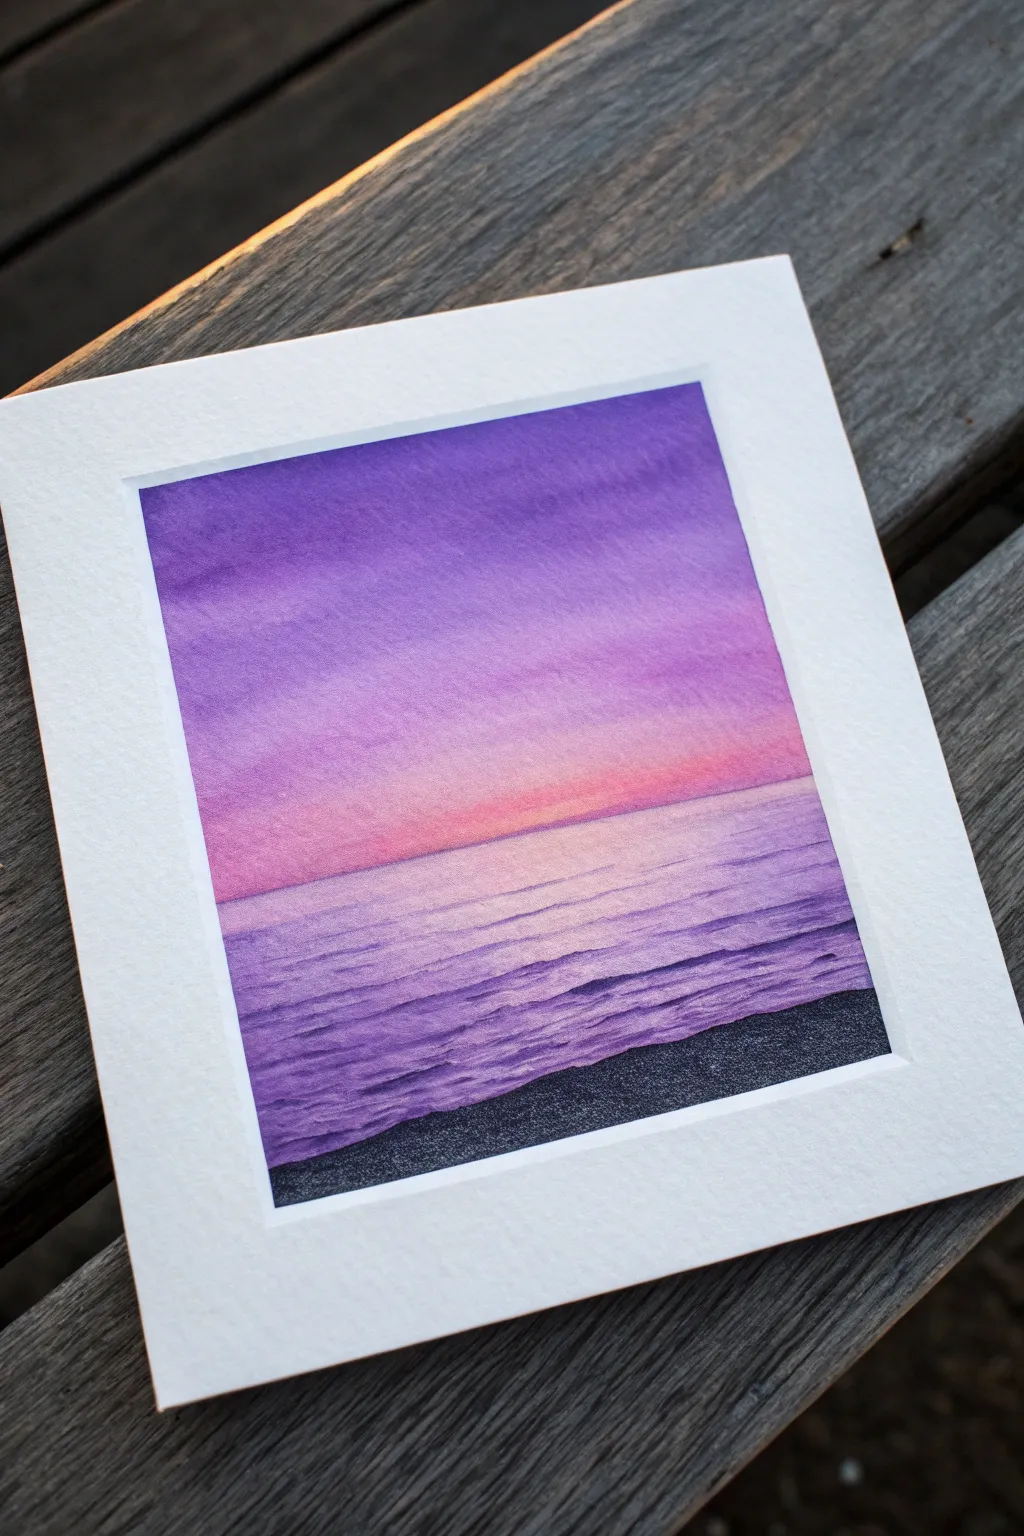
Capture the serene transition from day to night with this monochromatic purple watercolor study. This project focuses on mastering soft gradients for the sky and simple wet-on-dry layering to create gentle ocean waves against a dark, contrasting shore.
Step-by-Step Guide
Materials
- Cold press watercolor paper (square format)
- Painter’s tape or masking tape
- Watercolor paints (Ultramarine Blue, Alizarin Crimson, Dioxazine Purple, Lamp Black)
- Flat wash brush (3/4 inch)
- Round brush (size 6 or 8)
- Small detail brush (size 2)
- Two jars of water
- Paper towels
- Mixing palette
Step 1: Preparation and Sky Gradient
-
Secure the paper:
Tape down all four edges of your watercolor paper to a board or table. This creates that crisp white border seen in the example and prevents the paper from buckling under heavy washes. -
Pre-mix your purples:
Prepare three distinct puddles of paint on your palette: a deep, cool violet (mix blue and purple), a medium true purple, and a lighter, warmer pink-purple tone. -
Wet the sky area:
Using your flat wash brush and clean water, thoroughly wet the top two-thirds of the paper. Stop exactly where you want your horizon line to be, keeping the bottom third dry for now. -
Begin the gradient:
Load your brush with the deepest cool violet. Apply a horizontal stroke across the very top of the wet paper. The paint will naturally start to diffuse downwards. -
Blend downward:
Rinse your brush slightly and pick up the medium true purple. Apply this just below the dark strip, allowing the wet edges to touch and merge softly. -
Complete the sunset glow:
Switch to your warmest pink-purple mix. Paint the area just above the horizon line. I like to keep this strip quite pale to simulate the last light of the sun. -
Refine the sky blend:
While the paper is still damp, use a slightly damp, clean brush to gently smooth out any harsh lines between your purple zones, working from light to dark. -
Let the sky dry completely:
It is crucial that the sky is bone dry before you start the water, otherwise the horizon line will bleed. Use a hairdryer on a low setting if you are impatient.
Fixing “Cauliflowers”
If water blossoms appear in your sky, don’t panic. Wait for it to dry completely, then use a barely damp stiff brush to gently scrub and lift the harsh edge.
Step 2: Ocean and Shoreline
-
Establish the water base:
Mix a diluted wash of medium purple. With a clean flat brush, paint the water section horizontally, starting right at the horizon line and pulling down towards the bottom. -
Reserve highlights:
As you paint the water, leave small horizontal slivers of white paper unpainted near the center. These gaps act as the sun’s reflection on the ripples. -
Define the horizon:
Using your size 6 round brush and a slightly stronger purple mix, carefully trace a straight line across the horizon to sharpen the separation between sky and sea. -
Add distant ripples:
While the water layer is mostly dry but cool to the touch, use the tip of your brush to paint very thin, faint horizontal lines near the horizon to suggest distance. -
Create foreground waves:
Switch to a darker, more saturated violet. Paint slightly thicker, wavy horizontal strokes closer to the bottom to mimic rolling waves approaching the shore. -
Deepen the wave shadows:
Add a touch of blue to your purple mix. Paint underneath the crests of the foreground waves to give them volume and dimension. -
Paint the sand base:
Mix a very dark, thick color using Dioxazine Purple and Lamp Black. Create an uneven, diagonal line at the bottom for the shoreline. -
Texture the sand:
Fill in the rest of the bottom area with this dark sandy mix. While it’s wet, you can tap in a little extra black for texture. -
Final touches:
Once everything is dry, remove the tape slowly at a 45-degree angle to reveal your clean edges.
Add Sparkle
Once the painting is completely dry, use a white gel pen or opaque white gouache to add tiny, sharp highlights on the wave crests for extra glitter.
Step back and admire the calm atmosphere you’ve created with just a few simple hues


Purple Night Sky With a Bright Full Moon

Capture the magic of a twilight evening with this stunning watercolor piece featuring a glowing full moon nestled in a deep violet sky. The gradient washes create a dreamy atmosphere, while crisp white details bring the stars to life against the dark backdrop.
How-To Guide
Materials
- Cold press watercolor paper (approx. 5×7 inches)
- Masking tape or painter’s tape
- Pencil and eraser
- Round object for tracing (like a jar lid)
- Watercolor paints (Deep Purple, Violet, Indigo, Black)
- White gouache or white gel pen
- Round watercolor brushes (Size 8 for washes, Size 0 or 2 for details)
- Clean water and paper towels
- Mixing palette
Step 1: Preparation & Sketching
-
Secure the paper:
Tape down all four edges of your watercolor paper to a hard board or table. This creates that clean, professional white border seen in the final piece and prevents the paper from buckling when wet. -
Outline the moon:
Place your round object (like a small jar lid or tape roll) in the center of the paper, slightly towards the top. Trace a light circle using your pencil. -
Sketch the horizon:
Lightly draw a horizontal line near the bottom of the page to mark where the water meets the sky. Add a slightly uneven line above the bottom right corner to indicate where the treeline vegetation will be.
Clean Moon Edges
Does your hand shake? Use liquid masking fluid to cover the moon before painting the sky. Rub it off once dry for a perfectly round white circle.
Step 2: Painting the Sky
-
Prepare your colors:
On your palette, mix a generous amount of deep purple. Prepare a darker variation by mixing purple with a touch of indigo or black for the outer edges. -
Wet-on-wet technique:
With a clean, wet brush, apply water to the sky area specifically around the moon, being very careful not to get water inside the moon circle itself. -
Apply the base purple:
While the paper is damp, load your Size 8 brush with the purple mix. Start painting around the moon’s perimeter first, letting the color bleed slightly outward. -
Darken the edges:
As you move toward the top corners of the paper, switch to your darker purple-indigo mix. This creates a vignette effect that makes the moon appear brighter. -
Fade the horizon:
Paint downwards toward the horizon line. As you get closer to the bottom, dilute your brush with a little water to make the purple paler and more translucent, simulating atmospheric haze. -
Dry completely:
Let this sky layer dry fully. The paper must be bone-dry before you paint the moon to prevent colors from bleeding into the white crater areas.
Make it Sparkle
For a magical finish, use metallic silver or iridescent watercolor paint for the larger stars. They will catch the light beautifully when viewed from an angle.
Step 3: The Moon & Landscape
-
Base shadow for the moon:
Mix a very watery, pale grey-blue. Paint vague, organic shapes inside the moon circle to represent the lunar mare (seas). Leave plenty of white paper showing for high contrast. -
Deepen lunar details:
While the grey patches are still slightly damp, drop in tiny amounts of slightly darker grey to add texture and depth to the craters. -
Paint the water:
Mix a muted blue hue. Paint a horizontal strip across the bottom for the water, keeping the tone fairly light to distinguish it from the dark trees. -
create the silhouettes:
Using black watercolor (or very concentrated indigo/dark green), paint the foreground landscape. Use the tip of a smaller brush to stipple tiny dots and irregular shapes along the top edge to mimic pine trees and foliage.
Step 4: Stars & Finishing Touches
-
Add the stars:
Using white gouache or a white gel pen, dot the purple sky with stars. Vary the pressure to create different sizes. -
Create twinkle effects:
Select a few larger stars and carefully draw a cross or four-pointed diamond shape over them to make them ‘twinkle’ and stand out. -
Enhance the moon’s glow:
If you lost the crisp edge of the moon during painting, carefully outline the very edge with your white gel pen to make it pop against the purple. -
The reveal:
Wait until the painting is completely dry to the touch. Peel the tape away slowly at a 45-degree angle, away from the painted area, to reveal your crisp white borders.
Frame your mini masterpiece or gift it to someone who loves gazing at the night sky


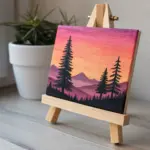

Purple Sky With Pine Tree Silhouettes
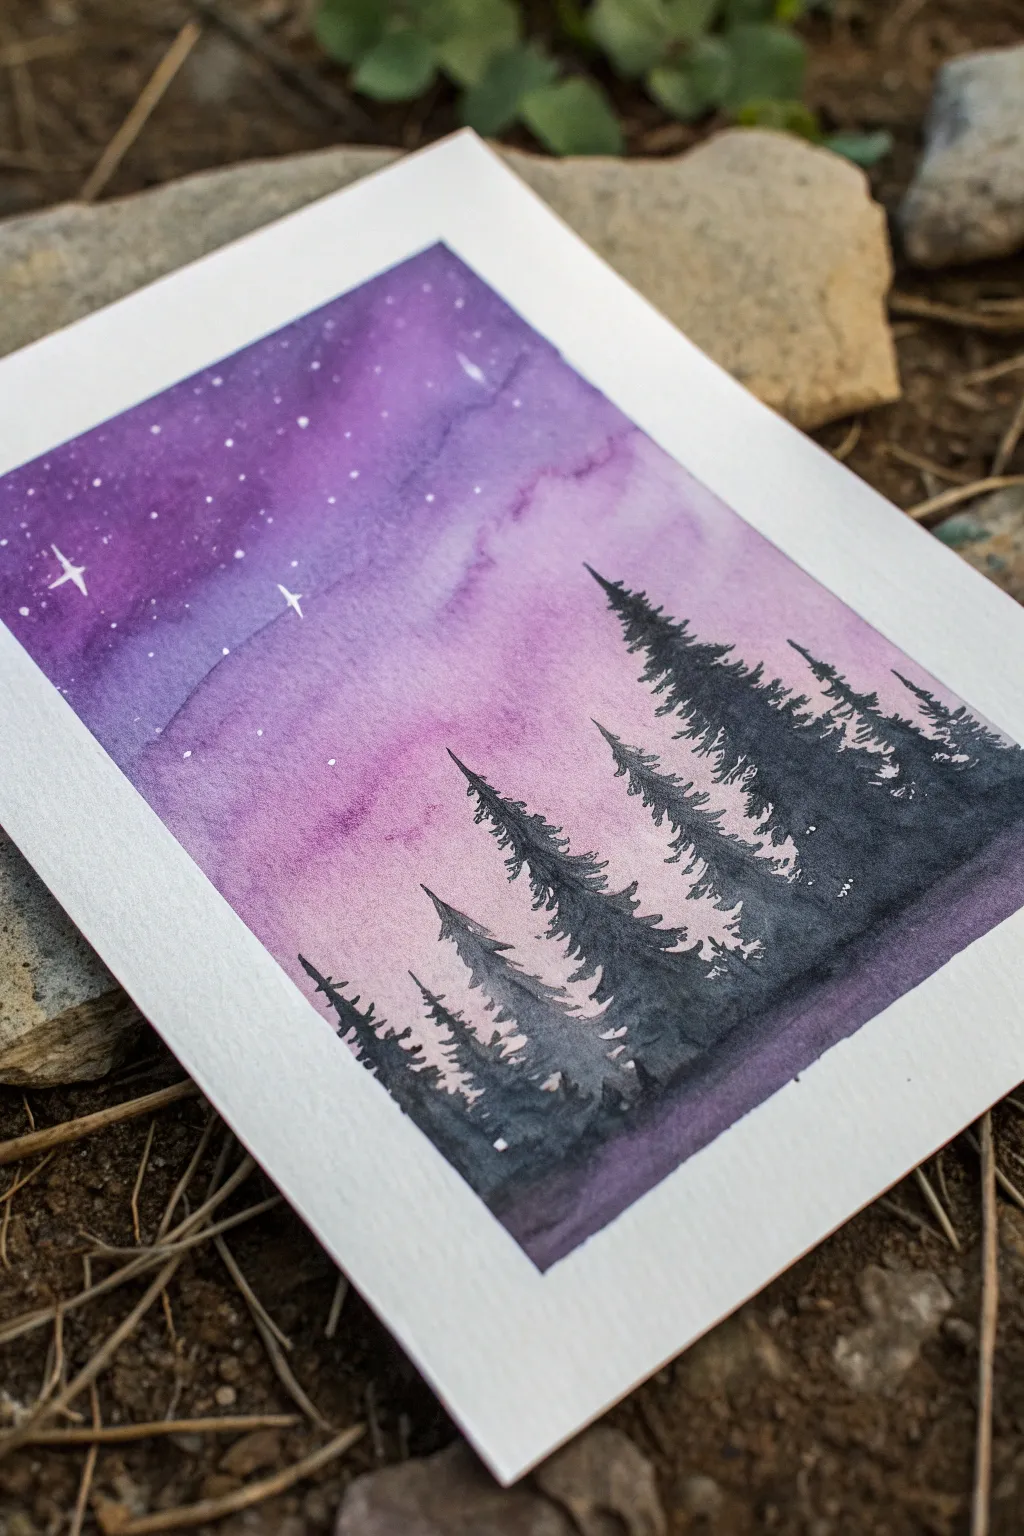
Capture the magic of a silent, starry night with this atmospheric watercolor study. By blending rich violet hues into soft lilacs, you’ll create a glowing backdrop for striking pine tree silhouettes.
Step-by-Step Guide
Materials
- Watercolor paper (cold press, 140lb/300gsm recommended)
- Watercolor paints (Deep Violet, Magenta/Purple Lake, Indigo/Payne’s Gray)
- Masking tape (for borders)
- Flat wash brush (3/4 inch or similar)
- Small round brush (size 2 or 4)
- White gel pen or white gouache
- Jar of clean water
- Paper towels
Step 1: Setting the Sky
-
Prepare the canvas:
Begin by taping down all four edges of your watercolor paper to a board or table. This creates that crisp, professional white border and prevents buckling. -
Wet the paper:
Use your clean flat brush to apply an even coat of clear water across the entire upper two-thirds of the paper where the sky will be. You want a glisten, not a puddle. -
Apply the deepest purple:
Load your brush with a saturated Deep Violet mixed with a touch of Indigo. Apply this to the very top left corner, letting the color bleed naturally into the wet paper. -
Create the mid-tones:
Rinse your brush slightly and pick up a brighter Purple or Magenta. Blend this downwards from the dark corner, moving diagonally across the page. The wet paper will help soften the transition. -
Soften the horizon:
As you move toward the bottom right and the center, dilute your paint significantly with water. You want a very pale, almost white-lavender wash here to imply a glowing light source. -
Add texture:
While the paint is still damp but not soaking, you can drop in tiny touches of clean water or darker violet in the upper section to create those cloud-like blooms seen in the reference. -
Let it dry completely:
This is crucial. The paper must be bone dry before moving onto the trees, or the black paint will bleed into your sky. I usually wait about 15-20 minutes or use a hairdryer on low.
Uneven Blending?
If your sky creates harsh lines instead of a soft gradient, your paper likely dried too fast. Rewet the area with a clean, damp brush to reactivate the paint and smooth it out.
Step 2: Painting the Forest
-
Mix your silhouette color:
Create a very dark, opaque mixture. You can use straight Indigo or Payne’s Gray, but adding a little of your Deep Violet helps harmonize the trees with the sky. -
Start the tallest tree:
Switch to your small round brush. Draw a thin vertical line for the trunk of the tallest tree on the right side, starting about halfway up the paper. -
Add branches:
Using the very tip of the brush, tap small, uneven horizontal marks extending from the trunk. Keep the top branches very narrow and widen them as you move down. -
Create the second tier:
Paint the next tree to the left of the first one. Make this one slightly shorter and thicker. Use a jagged, dry-brush motion to mimic pine needles. -
Fill the treeline:
Continue adding trees moving toward the left, varying their heights. The trees on the far left should be the shortest to balance the composition. -
Anchor the bottom:
Fill in the very bottom of the paper with your dark mix to connect all the tree bases. You can leave the very bottom edge slightly uneven or fade it out with a little water.
Step 3: Starry Details
-
Add distant stars:
Once the sky feels dry to the touch, use a white gel pen to dot tiny stars into the darker purple areas. Group them randomly rather than spacing them evenly. -
Create distinct stars:
Draw one or two larger four-pointed stars (cross shapes) in the darkest part of the sky for visual interest. -
Finish up:
Wait for the tree layer to fully dry, then carefully peel away the masking tape at a 45-degree angle to reveal your clean edges.
Snowy Effect
To turn this into a winter scene, dilute white gouache or acrylic and flick it off a stiff brush over the dry painting for a chaotic snowstorm effect.
Frame your mini masterpiece or turn it into a beautiful handmade greeting card


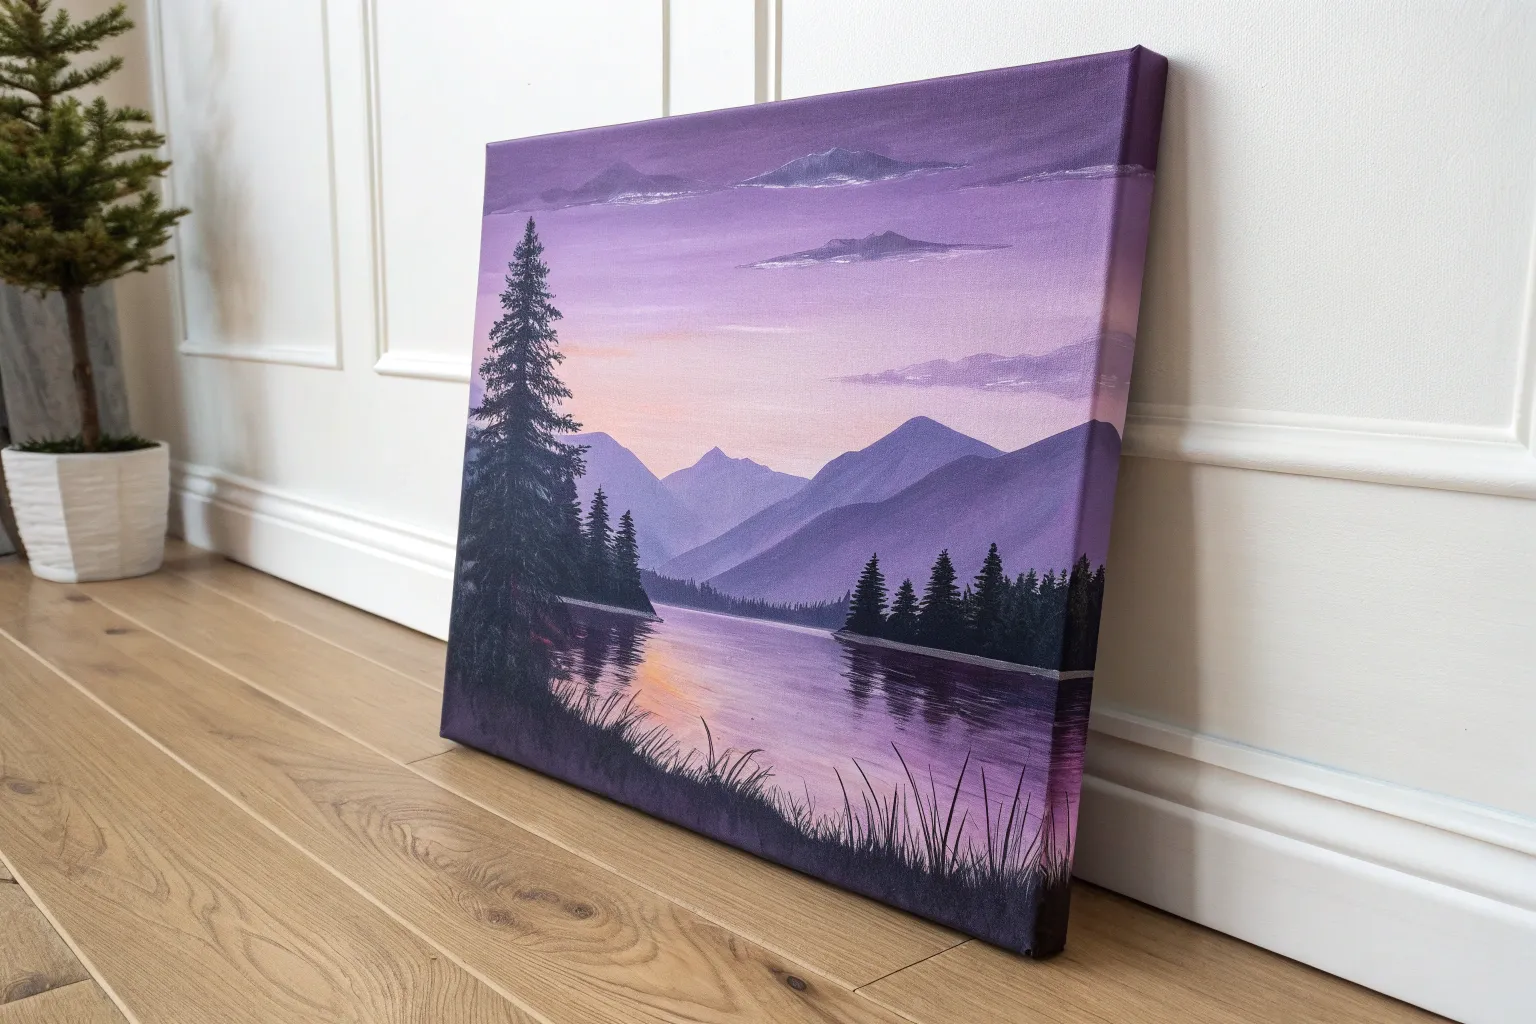
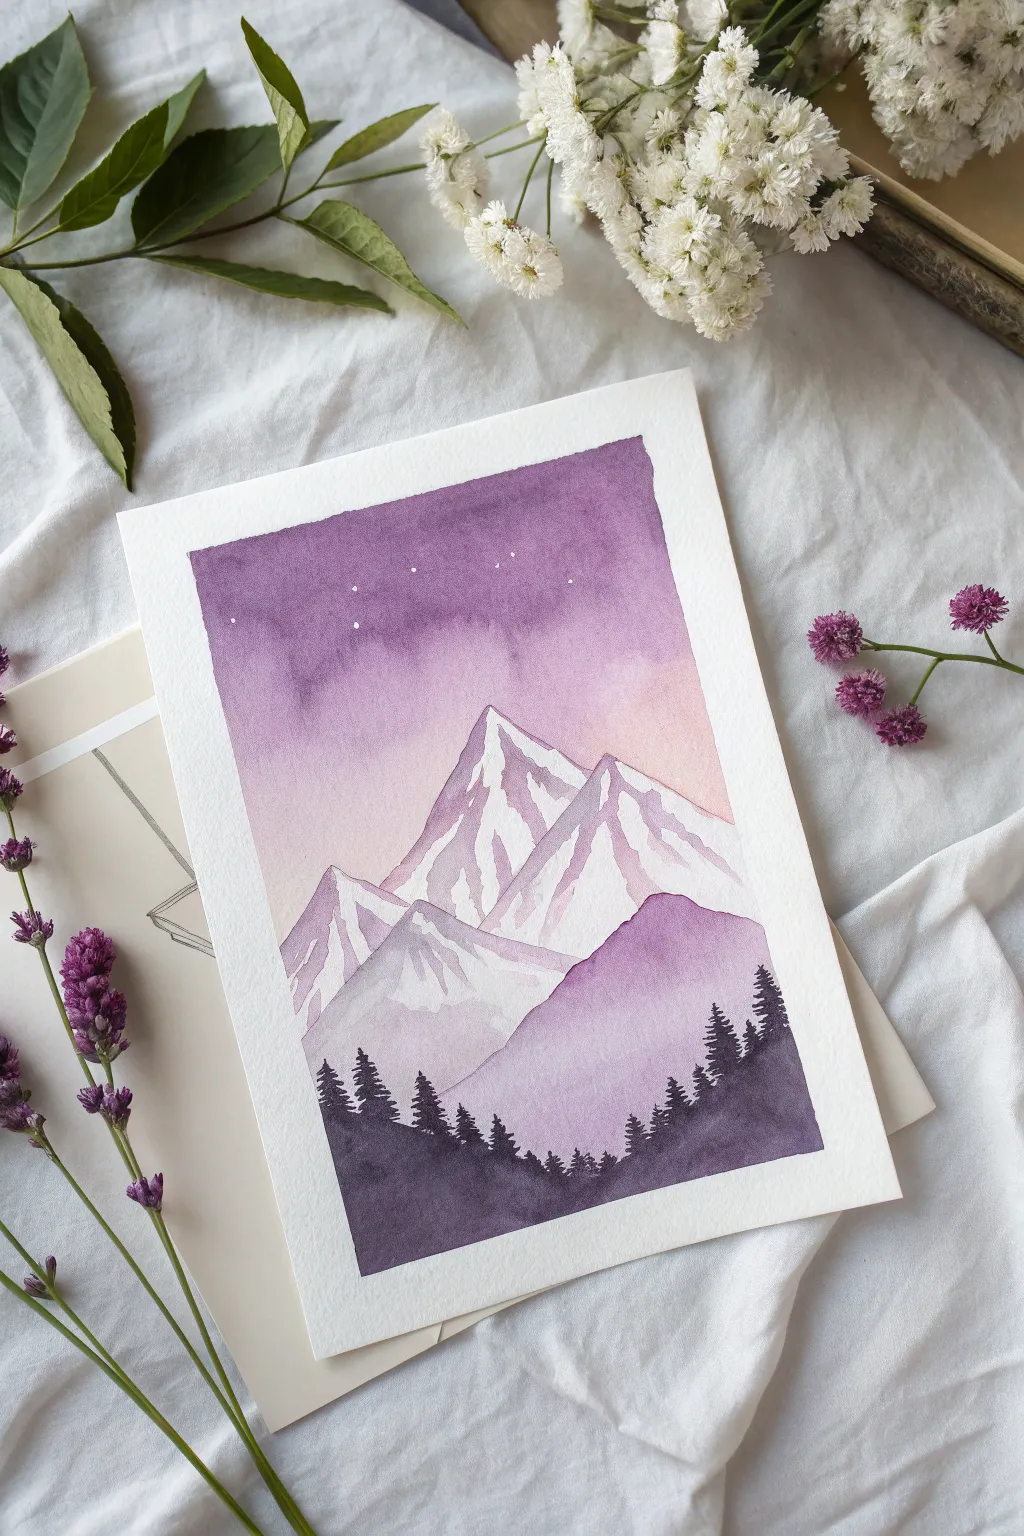
Purple Mountain Range in Soft Layers
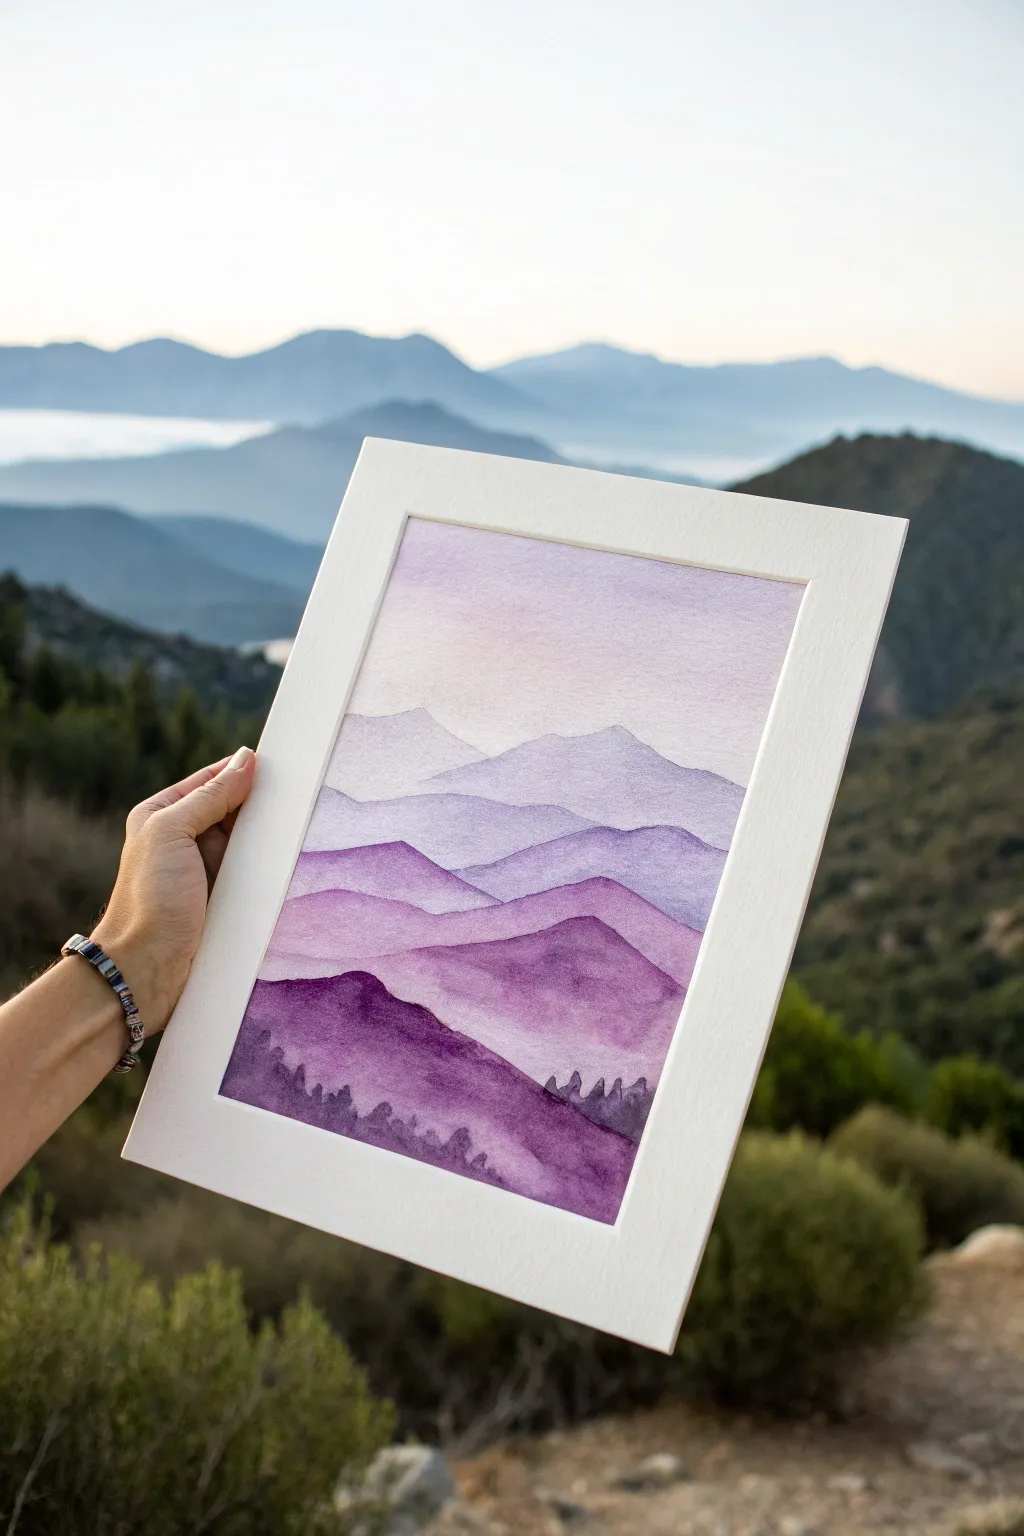
Capture the serene beauty of a receding mountain range using the magic of atmospheric perspective in this monochrome watercolor project. By layering progressively darker shades of violet, you’ll create a stunning sense of depth and distance that mimics looking out over a misty valley.
Detailed Instructions
Materials
- Cold press watercolor paper (140lb/300gsm)
- Watercolor paints (dioxazine purple, ultramarine blue, alizarin crimson)
- Round watercolor brushes (size 8 and size 4)
- Two jars of water (one for clean, one for dirty)
- Paper towels
- Masking tape
- Pencil (HB or lighter)
- Mixing palette
Step 1: Preparation & Sky
-
Secure the paper:
Tape down all four edges of your watercolor paper to a hard board or table surface using masking tape. This prevents the paper from buckling when it gets wet and creates a crisp white border. -
Sketch the ridge lines:
Lightly sketch four to five wavy, overlapping lines horizontally across the paper to represent your mountain ridges. Keep the lines irregular and natural, ensuring they overlap rather than sit stacked on top of each other. -
Mix a pale wash:
On your palette, mix a very watery, pale purple using plenty of water and just a touch of paint. Aim for a whisper of color, almost like a tinted cloud. -
Paint the sky:
Using your larger brush, wash this pale mixture over the top section of the paper, stopping just above your first (highest) mountain line. Let the color fade gently as it moves upward. -
Initial drying time:
Allow this sky layer to dry completely. The paper should feel uniform in temperature and dry to the touch before moving on, or the next layer will bleed into the sky.
Bloom Patrol
If you see ‘cauliflower’ blooms where watercolor pushes back into a drying area, you added water to a semi-dry surface. Try to finish each shape in one go while wet.
Step 2: Layering the Mountains
-
Mix the second wash:
Take your original pale mix and add a tiny bit more purple pigment. You want this shade to be just slightly darker than the sky, establishing the furthest, most distant mountain range. -
Paint the furthest range:
Paint the strip of land defined by your highest pencil line. Drag the wet paint down to meet the line below it, ensuring the bottom edge stays wet so you don’t get hard lines where you don’t want them. -
Fade the bottom edge:
Before the paint dries, rinse your brush and use clear water to soften the bottom edge of this mountain shape, fading it into white as it goes down the page. This prepares the surface for the next overlap. -
Intermediate drying:
Let this layer dry completely. This is crucial for the sharp, crisp ridge lines characteristic of mountain paintings. -
Deepen the color:
Add more pigment to your puddle. I like to mix in a tiny touch of blue here to cool down the middle-ground mountains. Test clarity on a scrap paper; it should be noticeably darker than the previous layer. -
Paint the middle ridges:
Fill in the next mountain shape below the dry one. Carefully trace along the pencil line to create a sharp silhouette against the paler mountain behind it. -
Create texture:
While this layer is still damp, you can drop in slightly more concentrated purple at the peaks of the ridges to create soft shadows and volume. -
Continue the gradient:
Repeat the drying and darkening process for the next two layers. For each new mountain range closer to the bottom, increase the pigment-to-water ratio significantly.
Solar Flare
Before the sky dries, lift a small circle of paint out with a clean, thirsty paper towel to create a soft, glowing sun or moon hovering over the peaks.
Step 3: Foreground & Details
-
Mix the darkest shadow:
For the final foreground mountain, mix your darkest purple. Use very little water, aiming for a creamy consistency. You might add a touch of crimson to make this foreground layer feel warmer and closer. -
Paint the foreground:
Fill in the bottom-most mountain shape with this rich, dark color. The contrast against the lighter layers above is what creates the dramatic sense of depth. -
Add tiny trees:
Switch to your size 4 detail brush. While the foreground wash is still settling but not soaking wet, paint tiny upward vertical strokes along the ridge line to suggest distant evergreen trees. -
Suggest forest density:
Dab the tip of the brush in clustered formations along the bottom ridge to simulate the texture of a thick forest canopy without drawing individual branches. -
Final dry:
Allow the entire painting to dry completely, preferably for several hours or overnight, to ensure the heavy pigment in the foreground is set. -
The reveal:
Gently peel away the masking tape at a 45-degree angle, pulling away from the center of the paper to avoid tearing your artwork.
Frame your misty masterpiece or gift it to a friend who loves the great outdoors
BRUSH GUIDE
The Right Brush for Every Stroke
From clean lines to bold texture — master brush choice, stroke control, and essential techniques.
Explore the Full Guide
Purple Lake Reflection With Horizontal Strokes
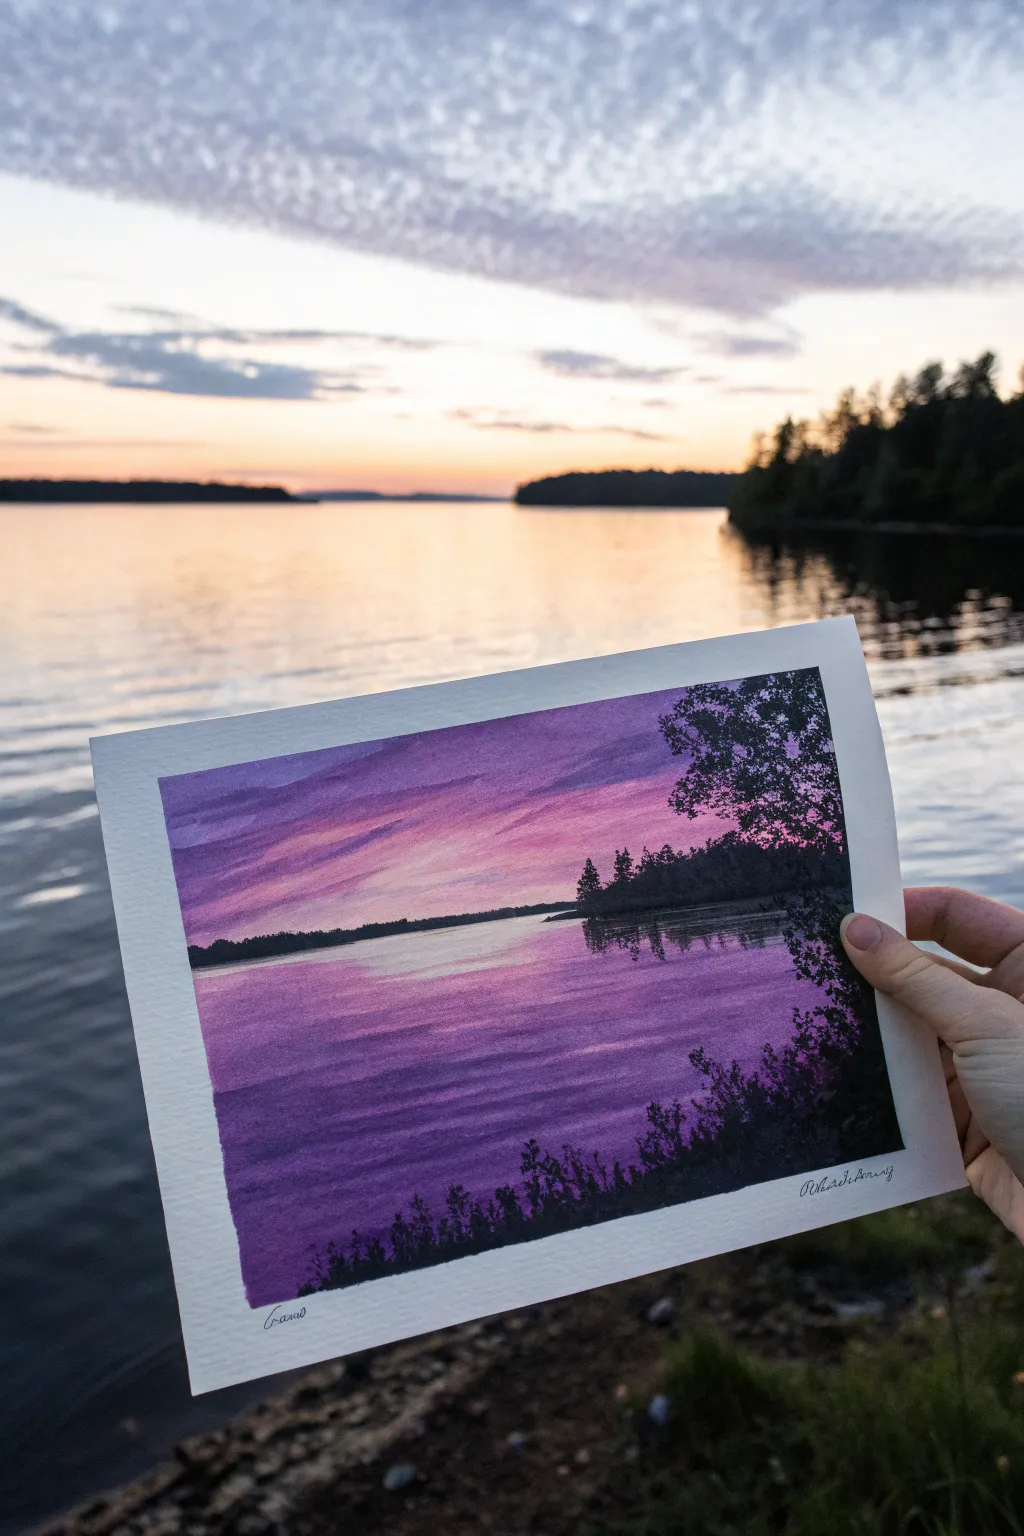
Capture the magic of twilight with this serene landscape study, focusing on the calm beauty of a purple-hued lake at sunset. By using simple horizontal strokes and building up layers of silhouettes, you will create a harmonious scene that feels both peaceful and vibrant.
Step-by-Step
Materials
- Heavyweight watercolor paper or mixed media paper (approx. 5×7 inches)
- Masking tape
- Acrylic paints (Titanium White, Dioxazine Purple, Ultramarine Blue, Mars Black, Magenta)
- Flat brush (1/2 inch or 3/4 inch for background)
- Small round detail brush (size 0 or 1)
- Palette or paper plate
- Jar of water
- Paper towels
Step 1: Setting the Sky and Water
-
Prepare your surface:
Tape down all four edges of your paper to a hard board or table. This creates that crisp, professional white border seen in the example and prevents the paper from buckling when wet. -
Mix the base sky color:
On your palette, mix a substantial amount of Titanium White with a touch of Magenta and a tiny dot of Dioxazine Purple. You want a very pale, soft orchid pink for the lightest part of the sky. -
Paint the horizon line:
Using your flat brush, paint a horizontal band of this pale pink mixture across the middle of the paper. This establishes the horizon line where the sky meets the water. -
Deepen the sky upward:
Add a bit more Purple and a hint of Blue to your pink mix. Paint horizontal strokes above the horizon band, blending the wet edge slightly downward. As you move closer to the top of the paper, gradually add more purple to darken the gradient. -
Create the water reflection:
Mirror the sky colors below the horizon line. Start with the pale pink just under the horizon, and transition into the deeper purple tones as you brush downward toward the bottom edge. Keep your strokes strictly horizontal to mimic water ripples. -
Add streak details:
While the paint is still slightly damp, take a slightly darker purple mix on the edge of your flat brush. Gently drag a few thin, horizontal streaks across the upper sky and the water to suggest cloud layers and wave motion.
Sticky Tape Blues?
If your tape rips the paper upon removal, try heating it briefy with a hair dryer to loosen the adhesive. Next time, stick the tape to your clothes first to reduce its tackiness.
Step 2: Building the Silhouettes
-
Mix the silhouette color:
Create a dark, rich color for the land. Instead of pure black, which can look flat, mix Mars Black with some Dioxazine Purple and a touch of Green (if available) or Blue. This creates a deep, atmospheric shadow tone. -
Paint the distant landmass:
Using the corner of your flat brush or a smaller round brush, paint a thin, uneven strip directly on the horizon line. Keep this line quite flat but slightly bumpy to represent distant trees. -
Add the middle ground island:
On the right side of the composition, paint a slightly larger land shape extending into the water. Use vertical dabbing motions with your brush to create the texture of tree tops jutting up. -
Paint the island reflection:
This is crucial for realism. Directly under the island you just painted, add horizontal zigzag strokes of your dark color into the water. Keep these strokes somewhat translucent or broken to show the water texture beneath. -
Refine the background reflection:
Add a very faint, thin reflection under the distant horizon line as well. It should be barely visible compared to the closer island reflection.
Pro Tip: Atmospheric Depth
To make the distant horizon trees look further away, mix a tiny bit of your sky color into your black paint. This lowers the contrast and creates separation from the foreground.
Step 3: Foreground and Details
-
Establish the foreground shape:
In the bottom right corner, block in a larger, darker mass of foliage. This element is closest to the viewer, so use your darkest black-purple mixture here. -
Stipple the leaves:
Switch to your small detail brush or use an old, splayed brush. Dip it in the dark paint and tap (stipple) the edges of the foreground shape to create the look of leaves and branches extending against the purple water. -
Add foreground grasses:
Along the very bottom edge of the painting, use the tip of your detail brush to flick tiny, upward strokes. These represent tall grasses or small shrubs along the shoreline. -
Enhance water highlights:
Clean your brush thoroughly. Mix a bit of pure Titanium White with a tiny amount of the pale pink. carefully paint very thin lines between the dark reflections and in the open water areas to enhance the shimmering ripple effect. -
Final assessment:
Step back and look at your contrast. If the reflections look too solid, you can gently glaze over them with a watered-down purple to push them back into the water. -
The reveal:
Wait until the painting is completely bone dry. Slowly peel the masking tape away at a 45-degree angle to reveal the clean, sharp edges that frame your landscape.
Now you have a tranquil purple vista ready to display or gift to a friend who loves the sunset.
Purple Clouds With Pink Highlights
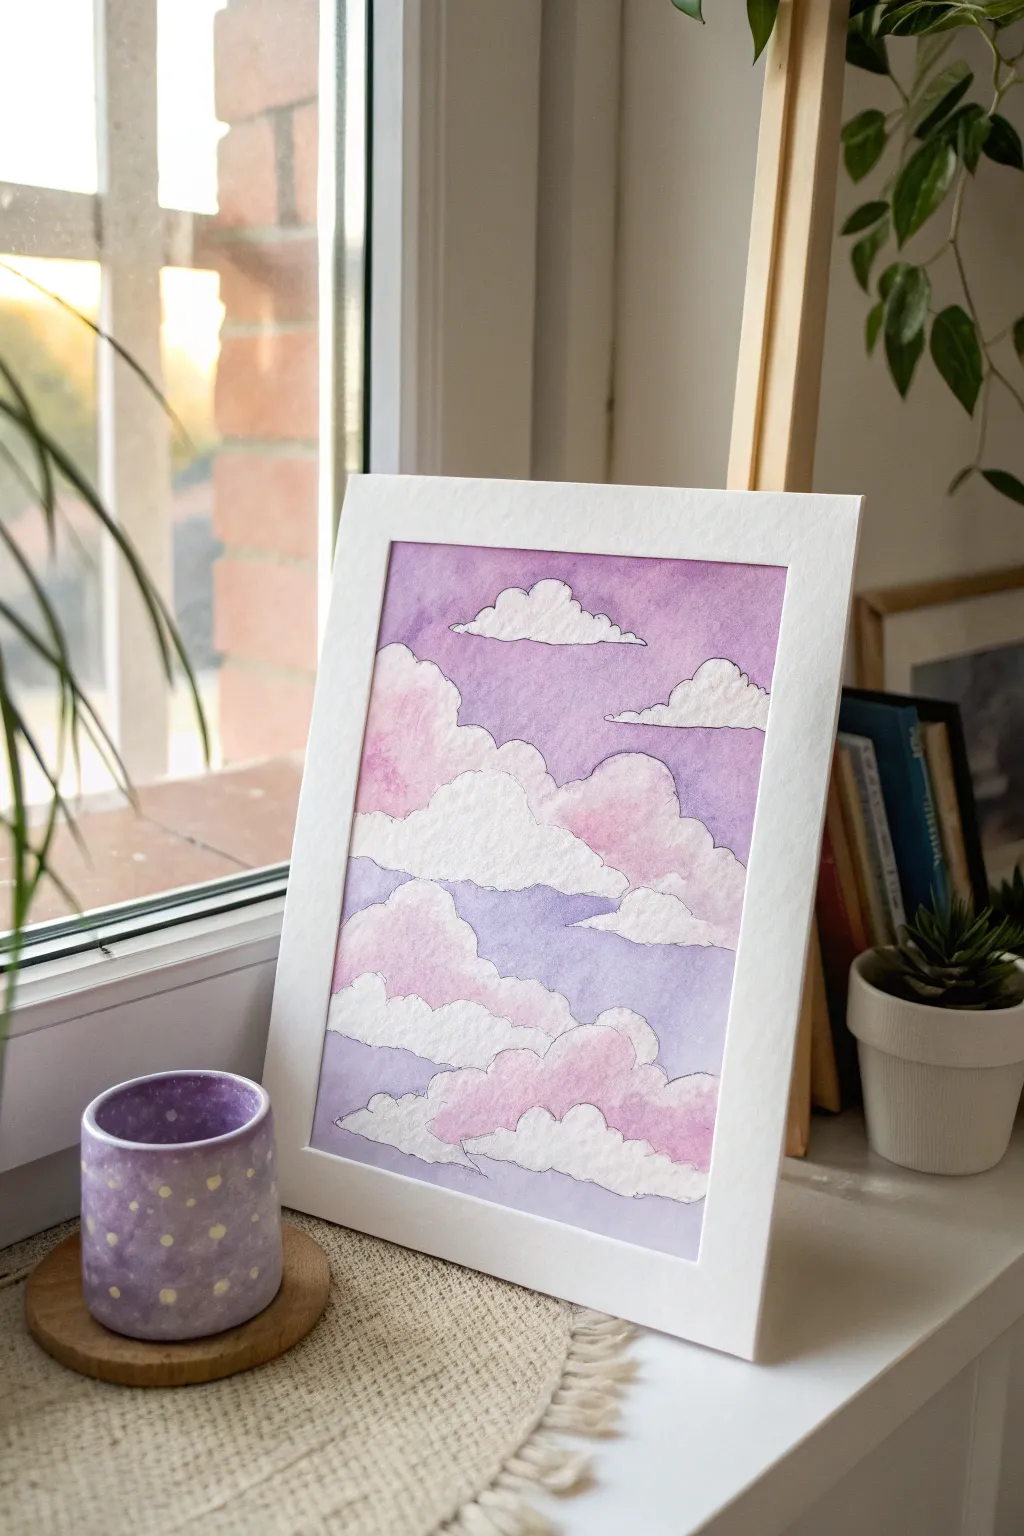
Capture the dreamy softness of a sunset with this illustrative watercolor piece featuring fluffy, defined clouds drifting across a purple sky. The combination of gentle washes and crisp ink outlines creates a charming, almost comic-book style aesthetic that is perfect for beginners.
Step-by-Step Guide
Materials
- Cold press watercolor paper (A5 or 5×7 inch)
- Watercolor paints (Purple, Magenta/Pink, White gouache optional)
- Round watercolor brushes (Size 4 and Size 8)
- Fine liner pen (Black, waterproof, 0.3mm or 0.5mm)
- Pencil and eraser
- Masking tape
- Jar of water
- Paper towels
- Palette for mixing
Step 1: Preparation & Sketching
-
Secure the paper:
Tape down all four edges of your watercolor paper to a drawing board or hard surface using masking tape. This prevents the paper from buckling when it gets wet and creates a clean white border. -
Sketch the cloud shapes:
Lightly sketch the outlines of your cumulus clouds. Think of them as stacked scoops of ice cream or popcorn shapes, creating irregular, puffy mounds. -
Plan the layers:
Arrange your clouds in three distinct horizontal layers: one near the top, a large cluster in the middle, and a few smaller ones near the bottom. Leave plenty of negative space for the sky. -
Lighten the lines:
Gently roll a kneadable eraser over your sketch to lift up excess graphite. You want the lines to be barely visible so they don’t show through the transparent watercolor later.
Wet-on-Dry Control
For this crisp, illustrative look, always use the ‘wet-on-dry’ technique. Apply wet paint onto dry paper to get those hard, defined edges around the clouds rather than fuzzy ones.
Step 2: Painting the Sky
-
Mix the sky color:
On your palette, mix a generous amount of purple paint with plenty of water. You want a consistent, medium-strength wash—not too dark, but vibrant enough to contrast with the white clouds. -
Paint around the top cloud:
Using your size 8 brush, carefully paint the sky area at the very top of the paper, working carefully around the edges of your topmost cloud shape. -
Fill the middle sky:
Continue painting the purple sky in the gaps between the cloud layers. Keep your brush wet to avoid streaks, ensuring the purple color is flat and even. -
Complete the background:
Finish filling in the remaining negative space at the bottom with your purple mix. It’s okay if the purple tone varies slightly, as this adds atmospheric depth. -
Let it dry completely:
Wait until the purple sky layer is bone dry. If the paper feels cool to the touch, it’s still damp. Painting the clouds too soon will cause the colors to bleed.
Step 3: Painting the Clouds
-
Mix a soft pink:
Dilute a magenta or cool pink paint with a lot of water. This needs to be a very pale, whisper-thin wash. -
Apply the first pink wash:
Paint the bottom half of the largest cloud cluster with this pale pink. Using a clean, damp brush, feather the upper edge of the pink so it fades softly into the white paper. -
Add dimension to lower clouds:
Repeat the process for the lower clouds, adding pink to their undersides and blending upwards. This gives the clouds volume and suggests a setting sun reflecting off them. -
Deepen the shadows:
While the pink is still slightly damp, drop a tiny bit of slightly more concentrated purple or darker pink into the very bottom edges of the clouds for shadow. -
Paint the top cloud:
For the isolated cloud at the very top, keep it mostly white. Add just the tiniest hint of very pale purple shadow on its underside to ground it. -
Refine the edges:
If you accidentally painted over a cloud edge with the sky color earlier, you can use a bit of opaque white gouache to reclaim the bright white shape now. -
Final drying time:
Allow the cloud layers to dry fully. The paper must be completely dry before the next step to prevent ink bleeding.
Uneven Streaks?
If your purple sky looks streak, you likely didn’t mix enough paint or worked too slowly. Next time, mix a larger puddle of wash and work quickly while the edge is still wet.
Step 4: Inking & Finishing
-
Outline the main shapes:
Using a waterproof fine liner pen (0.3mm is ideal), trace the perimeter of every cloud. Use a slightly shaky, organic hand rather than a perfect line to emphasize fluffiness. -
Add interior details:
Draw small, curved accent lines inside the cloud shapes. These little ‘c’ shapes suggest distinct puffs and billows within the larger cloud mass. -
Define the connection points:
Where one cloud overlaps another, make sure your ink line clearly defines which cloud is in front. I prefer not to connect every single line, leaving small gaps for a lighter feel. -
Revealing the artwork:
Once the ink is totally dry, slowly peel away the masking tape at a 45-degree angle, pulling away from the painting to ensure precise, crisp edges.
Frame your dreamy skyscape in a simple white frame to make those violet hues pop.

PENCIL GUIDE
Understanding Pencil Grades from H to B
From first sketch to finished drawing — learn pencil grades, line control, and shading techniques.
Explore the Full Guide
Purple Galaxy With Easy Splatter Stars
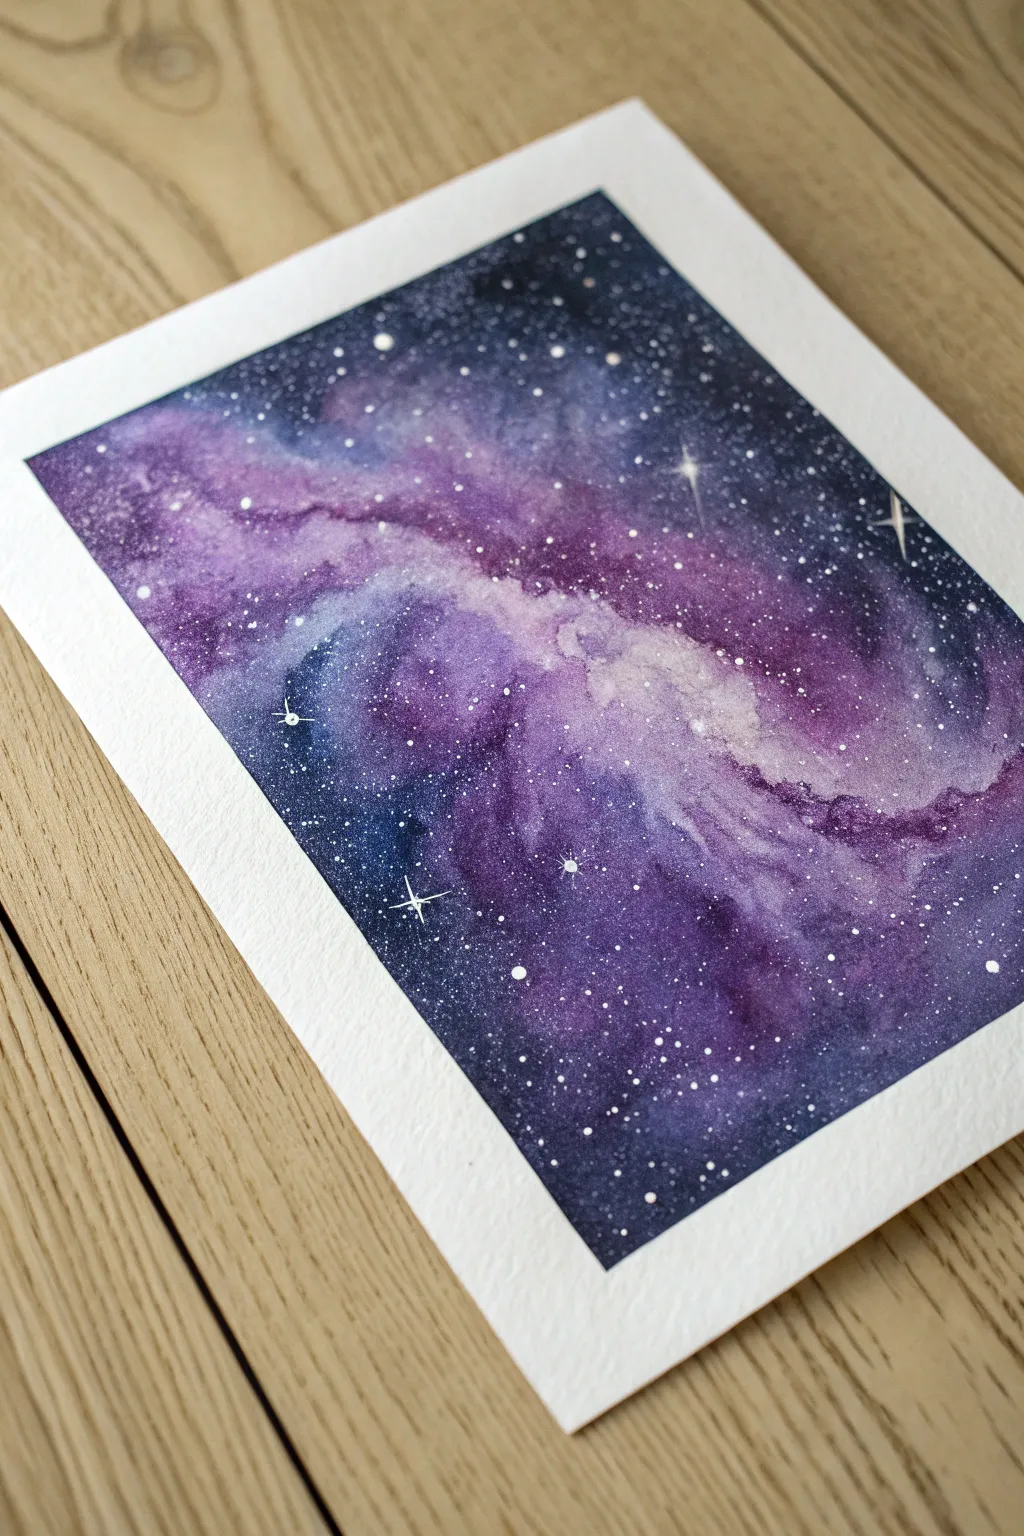
Capture the magic of deep space with this dreamy watercolor galaxy, blending rich indigos and vibrant purples. The soft, flowing nebula clouds contrast beautifully with crisp white stars, making it a perfect project for beginners wanting stunning results.
Step-by-Step Tutorial
Materials
- Cold press watercolor paper (300gsm recommended)
- Painter’s tape or masking tape
- Watercolor paints (Purple, Indigo, Ultramarine Blue, Black, Magenta)
- White gouache or white ink
- Round watercolor brushes (Size 4, 8, and a clear water wash brush)
- Two jars of water (one clean, one for rinsing)
- Paper towels
- Small stiff-bristled brush or old toothbrush
Step 1: Preparing the Canvas
-
Tape the edges:
Secure your watercolor paper to a hard board or your work surface using painter’s tape on all four sides. This creates that crisp, professional white border seen in the final piece and keeps the paper from buckling. -
Wet on wet preparation:
Using a large, clean brush, coat the entire paper surface with clean water. You want the paper to be glistening and evenly damp, but not dripping with puddles.
Step 2: Creating the Nebula
-
Lay down the light path:
While the paper is wet, drop diluted magenta or a light purple paint diagonally across the center. Allow it to bloom softly; this will be the glowing heart of your galaxy. -
Add mid-tones:
Load your brush with a richer purple mix. Dab this color around the lighter center streak, leaving some of that first layer visible. Let the colors bleed into each other naturally. -
Deepen the edges:
Introduce ultramarine blue and indigo to the outer corners and edges of the paper. Gently touch the wet paper with the brush and let the pigment flow inward toward the purple, but don’t cover the center. -
Build contrast:
While the paint is still damp, drop concentrated black or deep indigo into the very darkest corners. This creates the depth of space needed to make the stars pop later. -
Create texture:
If I notice the colors look too flat, I carefully tilt the board to encourage the pigments to mix, creating those organic swirls. -
Lift highlights:
Rinse a clean, damp brush and gently sweep it through the center diagonal to lift clearer highlights, re-establishing the brightness of the nebula’s core. -
First Salt technique (Optional):
For added texture, you can sprinkle a tiny pinch of table salt on the wettest dark areas. This creates starburst-like textures as it dries. -
Let it dry completely:
Allow the painting to dry fully. The paper must be bone-dry before the next step, or your stars will blur. Use a hairdryer on a low setting if you are impatient.
Bleeding edges?
If paint bled under the tape, wait until fully dry, then carefully cover the bleed with thick white gouache or a white gel pen to restore the sharp edge.
Step 3: Bringing the Stars
-
Prepare the splatter:
Mix a small amount of white gouache with a drop of water until it has a heavy cream consistency. Too thick and it clumps; too thin and it disappears. -
Splatter the stars:
Dip a stiff brush or old toothbrush into the white mix. hold it over the dry painting and tap the handle against another brush to spray fine mist dots across the dark areas. -
Focus the clusters:
Concentrate, adding heavier splatters on the dark indigo corners and fewer over the light purple center to simulate depth. -
Paint major stars:
Using your smallest round brush (size 0 or 1), manually paint a few slightly larger white dots in random spots to create variation in star magnitude. -
Add twinkle effects:
Select 3-5 of the larger dots. Carefully paint a thin cross or ‘plus’ sign through the center of each, elongating the vertical line slightly to make a twinkling flare. -
Final drying:
Let the white gouache dry completely so the bright white spots don’t smudge. -
Reveal the border:
Peel the tape away slowly at a 45-degree angle, away from the painting. This prevents the tape from ripping your paper and reveals the clean white frame.
Make it shimmer
Mix iridescent medium into your purple paint or use metallic silver watercolor for the stars to give the galaxy a genuine sparkly finish.
Step back and admire your personal window into the cosmos
Purple Crescent Moon and Starry Sky
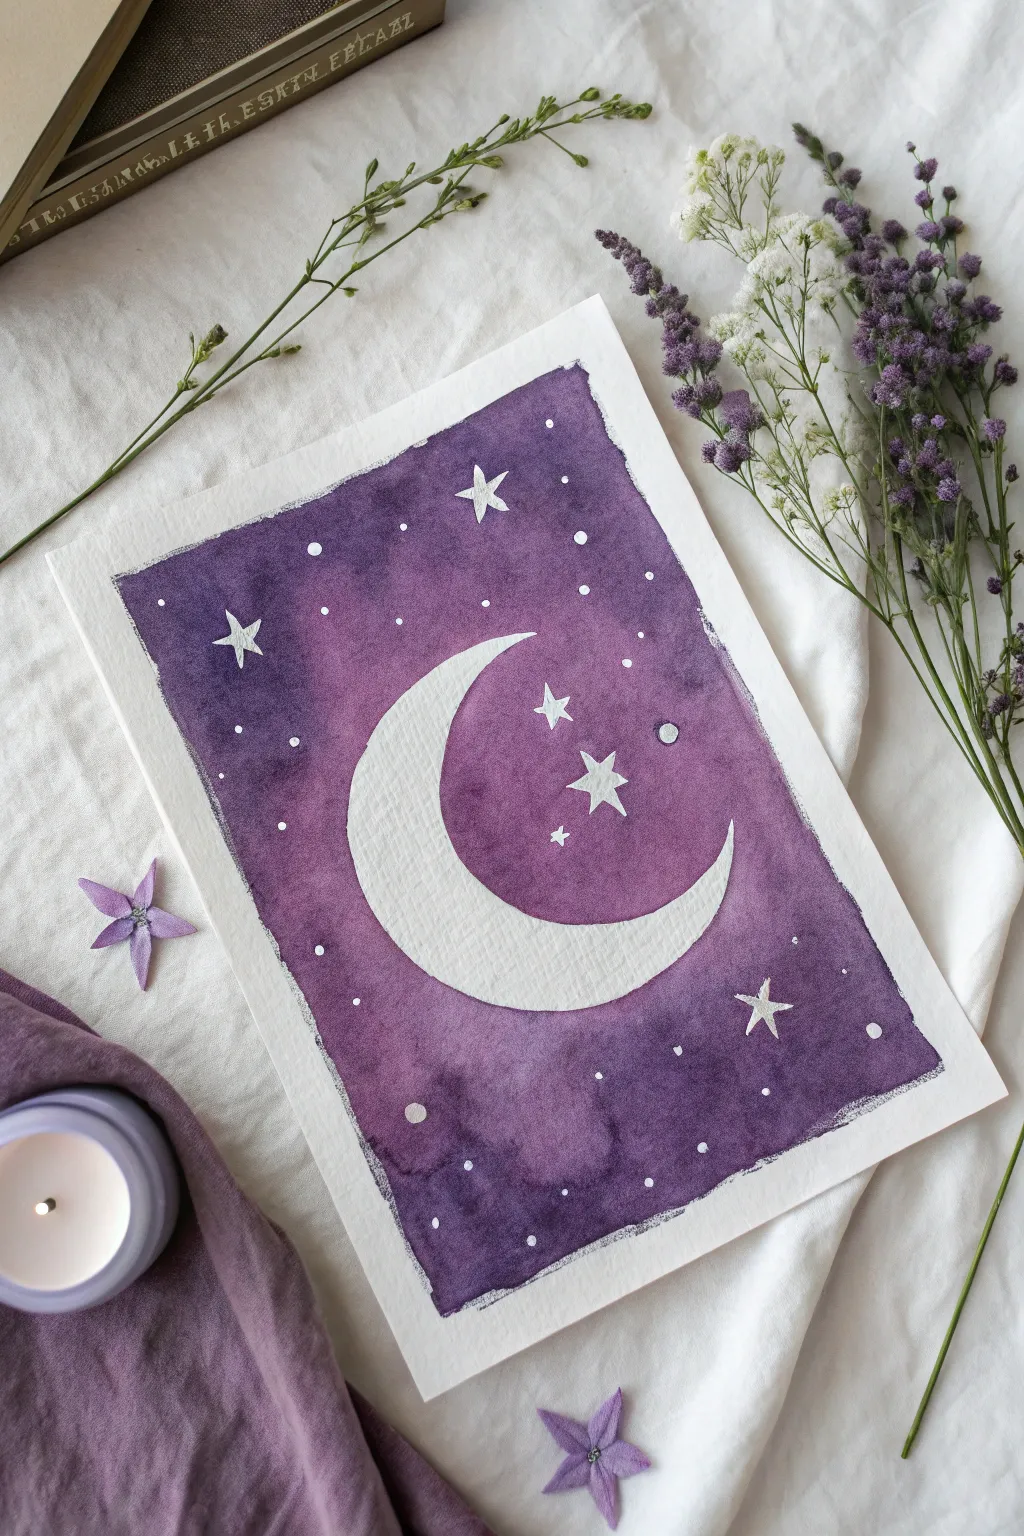
Capture the magic of a twilight sky with this simple yet striking watercolor project. By layering deep purple hues around a masked moon shape, you’ll create a celestial scene that feels both whimsical and serene.
Step-by-Step Guide
Materials
- Cold press watercolor paper (A5 or 5×7 inches)
- Painter’s tape or masking tape
- Liquid masking fluid (or a white wax crayon/oil pastel)
- Purple watercolor paints (Violet, Dioxazine Purple, or mix cool red + ultramarine blue)
- Round watercolor brushes (size 4 and 8)
- White gouache, white ink, or a white gel pen
- Jar of clean water
- Paper towel
- Pencil and eraser
- Round object for tracing (like a small jar lid)
Step 1: Preparation and Masking
-
Tape the borders:
Begin by taping down all four edges of your watercolor paper to a board or table. This creates that crisp, clean white frame you see in the final piece and keeps the paper from buckling. -
Draft the moon:
Lightly sketch a large crescent moon in the center of the paper. You can trace two overlapping circles—one slightly offset from the other—to get the curve just right. -
Refine the shape:
Erase the unwanted intersecting lines so you are left with just the crescent shape. Keep your pencil marks very faint so they don’t show later. -
Sketch larger stars:
Draw three or four larger, five-pointed stars around the moon. Place them randomly to keep the composition balanced but natural. -
Mask the white areas:
Using an old brush or a masking fluid pen, carefully fill in the crescent moon and the larger stars with masking fluid. This preserves the pure white of the paper. -
Allow to dry:
Let the masking fluid dry completely. It should feel transparent and tacky to the touch, not wet. Do not rush this step, or you might smudge the mask.
Soap Savior
Before dipping your brush into masking fluid, coat the bristles with bar soap. This prevents the fluid from drying deep in the brush and ruining it forever.
Step 2: Painting the Sky
-
Prepare the purple wash:
Mix a generous amount of purple paint on your palette. I like to have two slightly different purples ready—one reddish-violet and one deeper blue-violet—to create subtle depth. -
Wet-on-wet technique:
With your larger brush, coat the entire paper inside the taped area with clean water. The paper should be glistening but not forming puddles. -
Apply the first color wash:
While the paper is wet, drop in your purple paint, starting from the edges and working inward. Let the paint flow naturally around the masked moon. -
Deepen the color:
While the first layer is still damp, dab more concentrated purple pigment into areas you want darker, especially near the edges and corners to create a vignette effect. -
Create texture:
If you want the mottled, cloud-like texture seen in the photo, dab the wet paint gently with a crumpled corner of a paper towel to lift small amounts of pigment. -
Wait for drying:
Allow the paint to dry completely. The paper must be bone dry before the next step to prevent peeling or smudging.
Step 3: Details and Unmasking
-
Remove the mask:
Gently rub the dried masking fluid with your finger or a rubber cement pickup tool to peel it away, revealing the pristine white paper underneath. -
Clean up edges:
If any paint seeped slightly under the mask, use a clean, damp brush to gently scrub and lift it away while the white area is still exposed. -
Add tiny stars:
Load a small brush or use a white gel pen to dot tiny stars throughout the purple background. Vary the sizes for a realistic starry night look. -
Paint star clusters:
For extra detail, you can paint a few medium-sized solid white stars using opaque white gouache if you feel the sky needs more sparkle. -
Final reveal:
Slowly peel off the painter’s tape at a 45-degree angle, pulling away from the artwork to ensure a crisp, tear-free border.
Make It Sparkle
Mix a tiny amount of iridescent medium or silver watercolor into your purple wash. The sky will glitter subtly when it catches the light.
Frame your beautiful celestial scene or gift it as a handmade card to a dreamer in your life.


Purple City Skyline Silhouette at Twilight
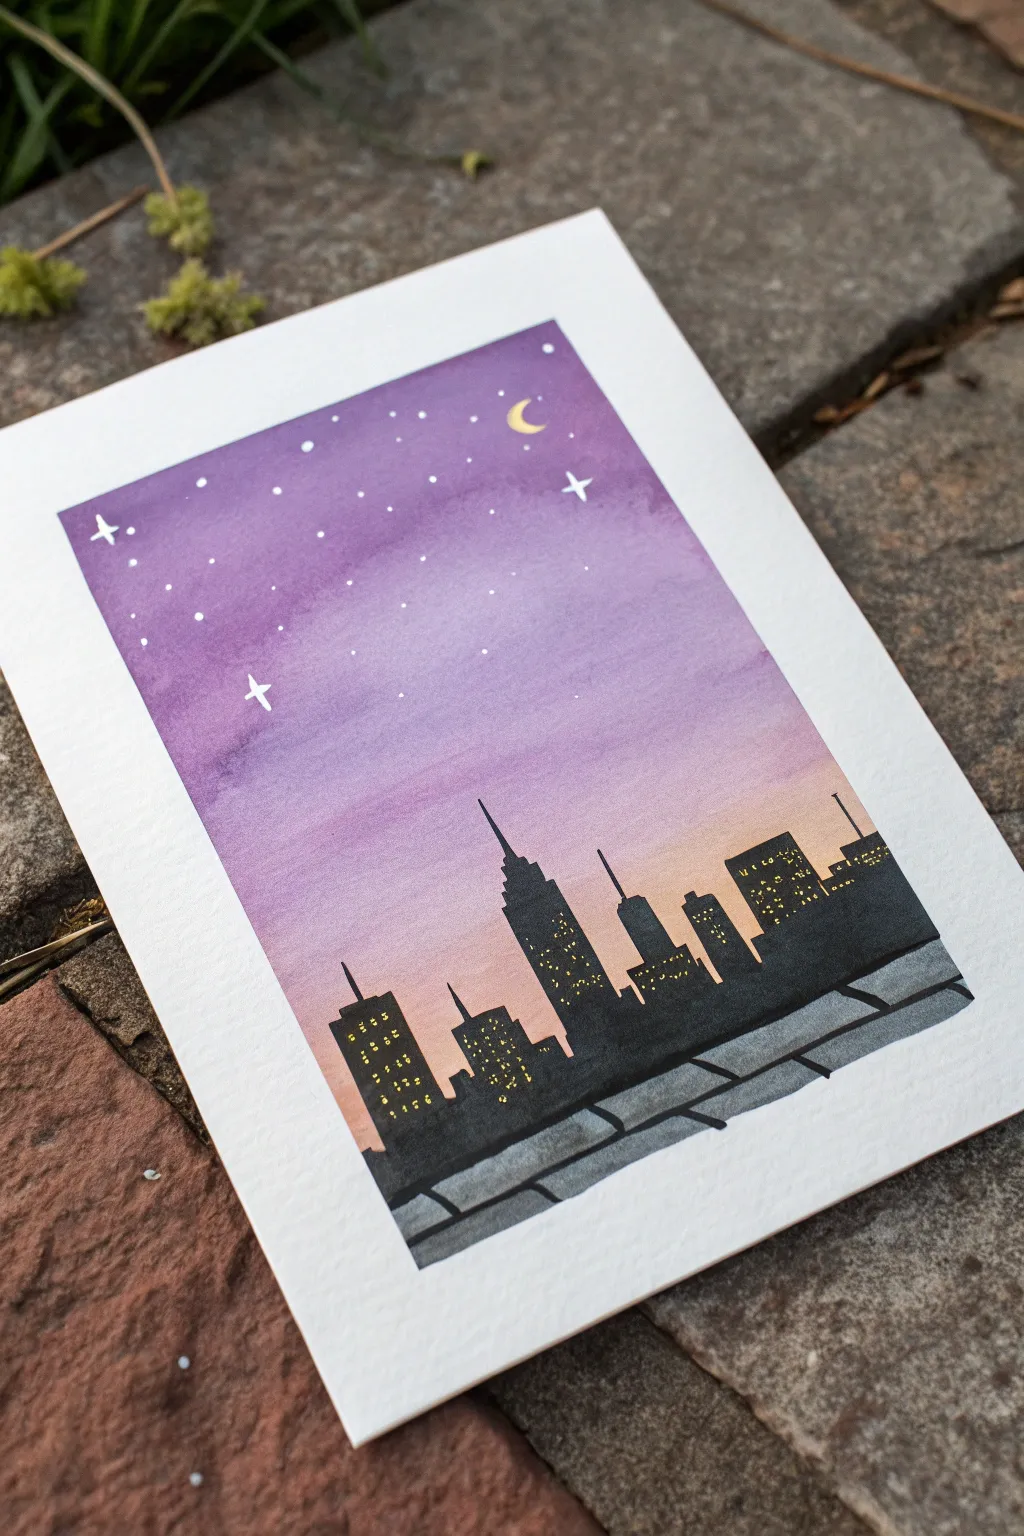
Capture the magic of a city just as the lights flicker on with this atmospheric watercolor project. The blend of soft violet skies against stark black silhouettes creates a striking depth that looks far more complex than it actually is.
Step-by-Step
Materials
- Watercolor paper (cold press, roughly 5×7 inches)
- Masking tape or painter’s tape
- Watercolor paints (Purple, Magenta, Yellow ochre or Peach)
- Black waterproof fine liner pen (0.5mm or 0.8mm)
- Black marker or India ink
- White gel pen
- Gold or yellow gel pen
- medium round watercolor brush
- Small flat brush
- Jar of clean water
- Paper towels
Step 1: Setting the Scene
-
Prepare your canvas:
Begin by taping down all four edges of your watercolor paper to a hard surface. This creates that crisp white border seen in the final piece and prevents the paper from buckling when wet. -
Wet the sky area:
Using your medium round brush and clean water, gently wet the paper starting from the top and stopping about two-thirds of the way down. You want the paper glistening but not swimming in puddles. -
Lay the purple base:
Load your brush with a rich purple watercolor. Apply it heavily at the very top of the wet area, using horizontal strokes to let the color spread naturally. -
Create the gradient:
Clean your brush slightly and grab a touch of magenta. Blend this into the bottom edge of the purple, pulling the color downwards to soften it as you go. -
Add the sunset glow:
Rinse your brush completely. Pick up a very diluted yellow ochre or peach tone and apply it at the bottom of your painted sky area, letting it touch the fading magenta to create a seamless transition. -
Dry completely:
This is crucial—let the sky layer dry 100% before moving on. If the paper is cool to the touch, it’s still wet. I usually wait about 15-20 minutes or use a hair dryer on a low setting.
Clean Edges Trick
Before painting, run your fingernail firmly along the inner edge of the masking tape. This seals it tight and stops paint from bleeding underneath.
Step 2: Building the City
-
Sketch the skyline:
Lightly pencil in the varied heights of your buildings. Include a few iconic shapes like the stepped skyscraper in the center to give the composition a focal point. -
Outline the buildings:
Using your black fine liner pen, carefully trace over your pencil lines to define the edges of the skyscrapers and the antennae. -
Fill the silhouette:
Fill in the building shapes completely with solid black. You can use a thick black marker for speed, or multiple layers of black watercolor paint if you prefer a matte texture. -
Add the foreground ledge:
Below the city skyline, paint a gray strip to represent a rooftop ledge. Mix a watery black to get gray, applying it in a horizontal band. -
Detail the ledge:
Once the gray strip is dry, use a slightly darker gray or diluted black to paint angled lines, creating the look of perspective on the rooftop tiles.
Splotchy Gradient?
If your sky isn’t blending smoothly, re-wet the entire sky area with a clean damp brush (before it dries!) to encourage the pigments to move and mix.
Step 3: Lights and Sparkle
-
Illuminate the windows:
Now for the fun part. Take your gold or yellow gel pen and stipple tiny dots and dashes inside the black buildings to mimic lit office windows. -
Vary the window patterns:
Don’t make them too uniform; group some lights together and leave other areas dark to make the city look lived-in and realistic. -
Create the stars:
Using your white gel pen, dot the purple section of the sky with small stars. Add one or two distinct four-point stars for extra sparkle. -
Draw the moon:
Add a small crescent moon near the top right corner using the yellow or gold pen. -
Reveal the border:
Gently peel away the masking tape. Pull the tape away from the center of the painting at a 45-degree angle to ensure a clean, sharp edge without ripping the paper.
Step back and admire your serene cityscape, perfectly captured in that moment between day and night
Purple Palm Tree Silhouette Sunset
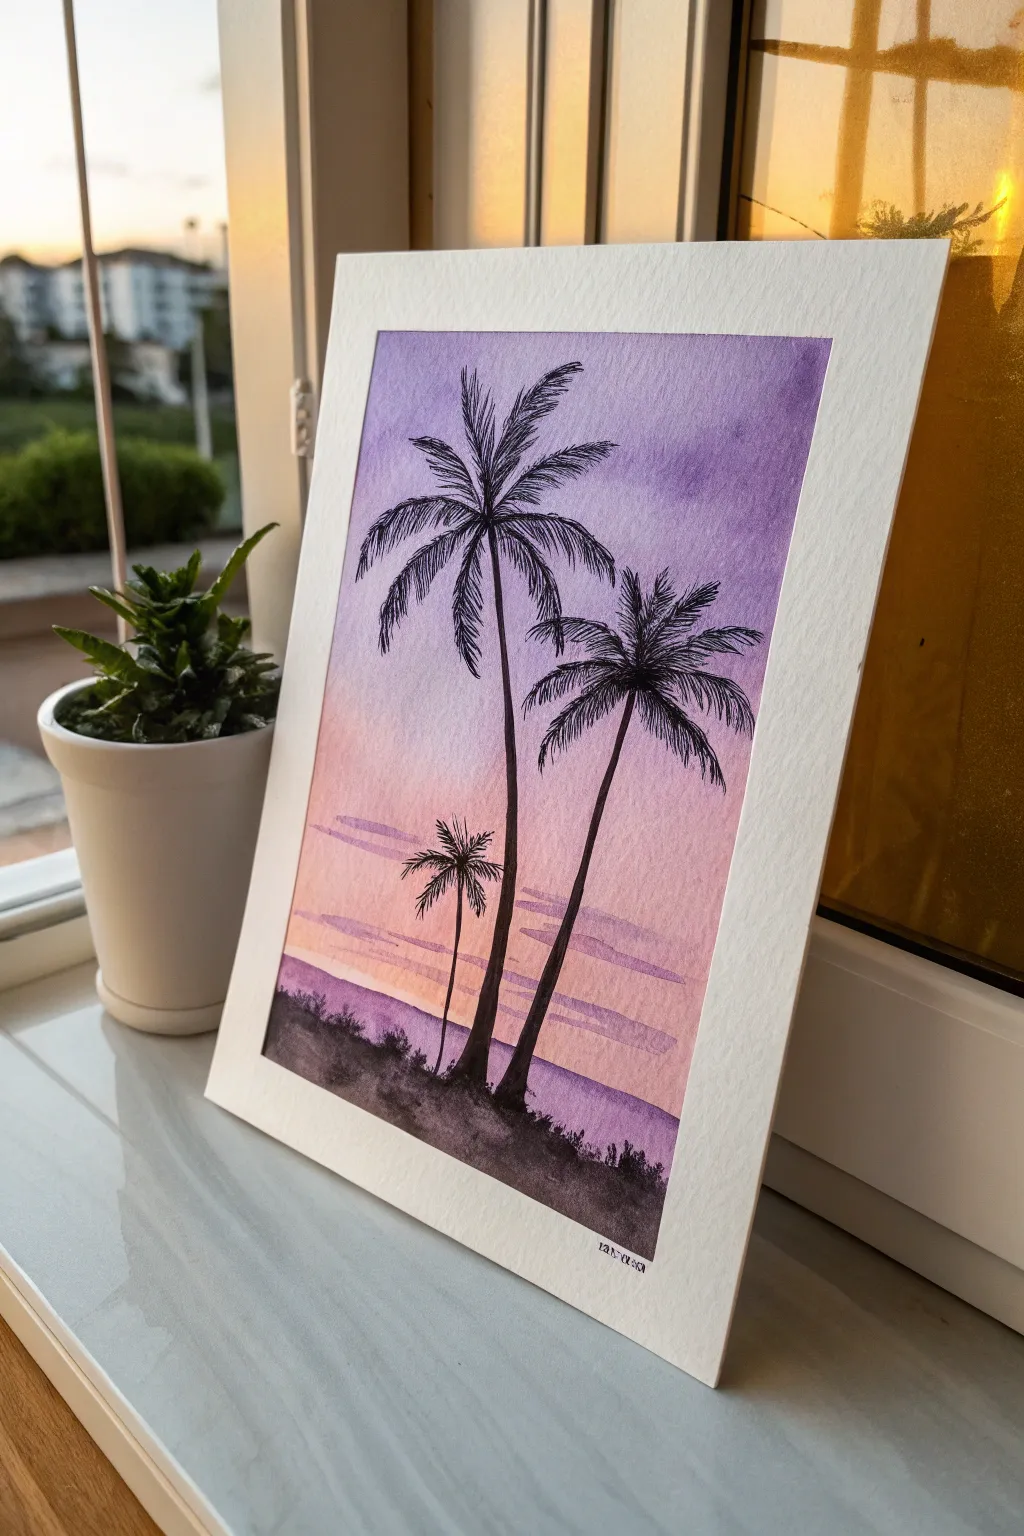
This serene watercolor project captures the magic of a tropical evening with a stunning purple-to-peach gradient sky. The stark black silhouettes of palm trees pop beautifully against the soft, blended background, creating a professional-looking piece of art that fits perfectly on a windowsill or desk.
Step-by-Step Tutorial
Materials
- Cold press watercolor paper (approx. A5 or 5×7 inches)
- Watercolor paints (Purple, Violet, Magenta, Peach/Light Orange, Black)
- Flat wash brush (3/4 inch)
- Round detail brushes (size 2 and 4)
- Masking tape
- Paper towels
- Jars of clean water
- Fine-liner pen (optional, for signature)
Step 1: Setting the Sky Gradation
-
Prepare the paper:
Begin by taping down all four edges of your watercolor paper to a hard board or table. This creates that crisp, clean white border you see in the final piece and prevents the paper from buckling when wet. -
Wet the surface:
Using your large clean flat brush, apply a generous layer of clean water to the entire paper surface. You want it to be glistening and damp, but not forming puddles. -
Apply the top purple:
Load your brush with a deep violet or purple. Start at the very top of the paper and paint horizontal strokes, letting the color bleed downwards slightly. This should be the darkest part of the sky. -
Transition to pink:
Without cleaning your brush thoroughly, pick up some magenta or lighter purple. Blend this just below the dark purple band, allowing the wet-on-wet technique to soften the edge between the two colors naturally. -
Add the horizon glow:
Clean your brush well. Pick up a peach or light orange hue. Paint the bottom third of the sky, carefully blending it upwards into the pink layer. The goal is a seamless fade from purple at the top to a warm glow near the bottom. -
Paint the water line:
At the very bottom strip, re-introduce a washed-out purple or violet to represent the distant ocean reflecting the sky. Keep this horizontal and fairly light. -
Let it dry completely:
The paper must be bone dry before moving on. If you paint on damp paper, your crisp palm trees will bleed. I usually recommend waiting at least 20-30 minutes or using a hairdryer on a low setting.
Wet-on-Wet Secrets
Work quickly while the paper is damp for the sky. If the paper dries while blending, stop! Adding water to a drying wash creates ‘blooms’ or cauliflower marks.
Step 2: Painting the Foreground
-
Add distinct clouds:
Once the background is dry, mix a diluted purple. Using a smaller round brush, paint thin, horizontal cloud streaks across the lower orange section of the sky. Keep them transparent so the sunset color shows through. -
Block in the land:
Switch to your black paint (or a very concentrated mix of purple and burnt umber for a rich dark tone). With a medium round brush, dab in the uneven, textured ground at the very bottom. -
Texture the ground:
While the ground paint is still wet, drop in tiny dots of water or varying saturations of black to simulate grass and uneven earth. -
Draw the main trunks:
Using your smallest round brush or a rigger brush loaded with opaque black paint, pull three curved lines upward for the palm trunks. Make the central one tallest, the right one medium, and the left one shortest. -
Thicken the bases:
Go back over the trunks, making them slightly thicker at the bottom near the ground and tapering off to a very fine point at the top.
Make it Sparkle
Once the painting is dry, use a white gel pen to add a few tiny stars in the upper purple section or highlight the top edges of the palm fronds for a moonlit effect.
Step 3: Adding the Palm Fronds
-
Plot the branches:
From the top point of each trunk, paint 5-7 curved lines radiating outward like fireworks. These usually curve downward due to gravity. -
Paint the leaves:
For the palm leaves, use quick, flicking strokes coming off those main branch lines. These flicks should be jagged and somewhat messy to look realistic. -
Detail the large tree:
Focus on the tallest central tree first. Ensure the fronds overlap slightly and vary in length. A few should hang almost straight down. -
Fill in the smaller trees:
Repeat the flicking motion for the other two trees. The smallest tree on the left can be a bit sparser to create visual depth. -
Add ground foliage:
Using the tip of your brush, add tiny vertical spikes along the black ground line to suggest grass or small bushes growing at the base of the palms. -
Final reveal:
Wait until every drop of black paint is completely dry. Slowly peel off the masking tape at a 45-degree angle to reveal your clean white border.
Now you have a tranquil tropical sunset ready to frame and display
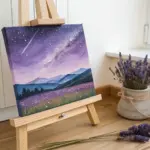
Purple Field With Lavender-Like Strokes
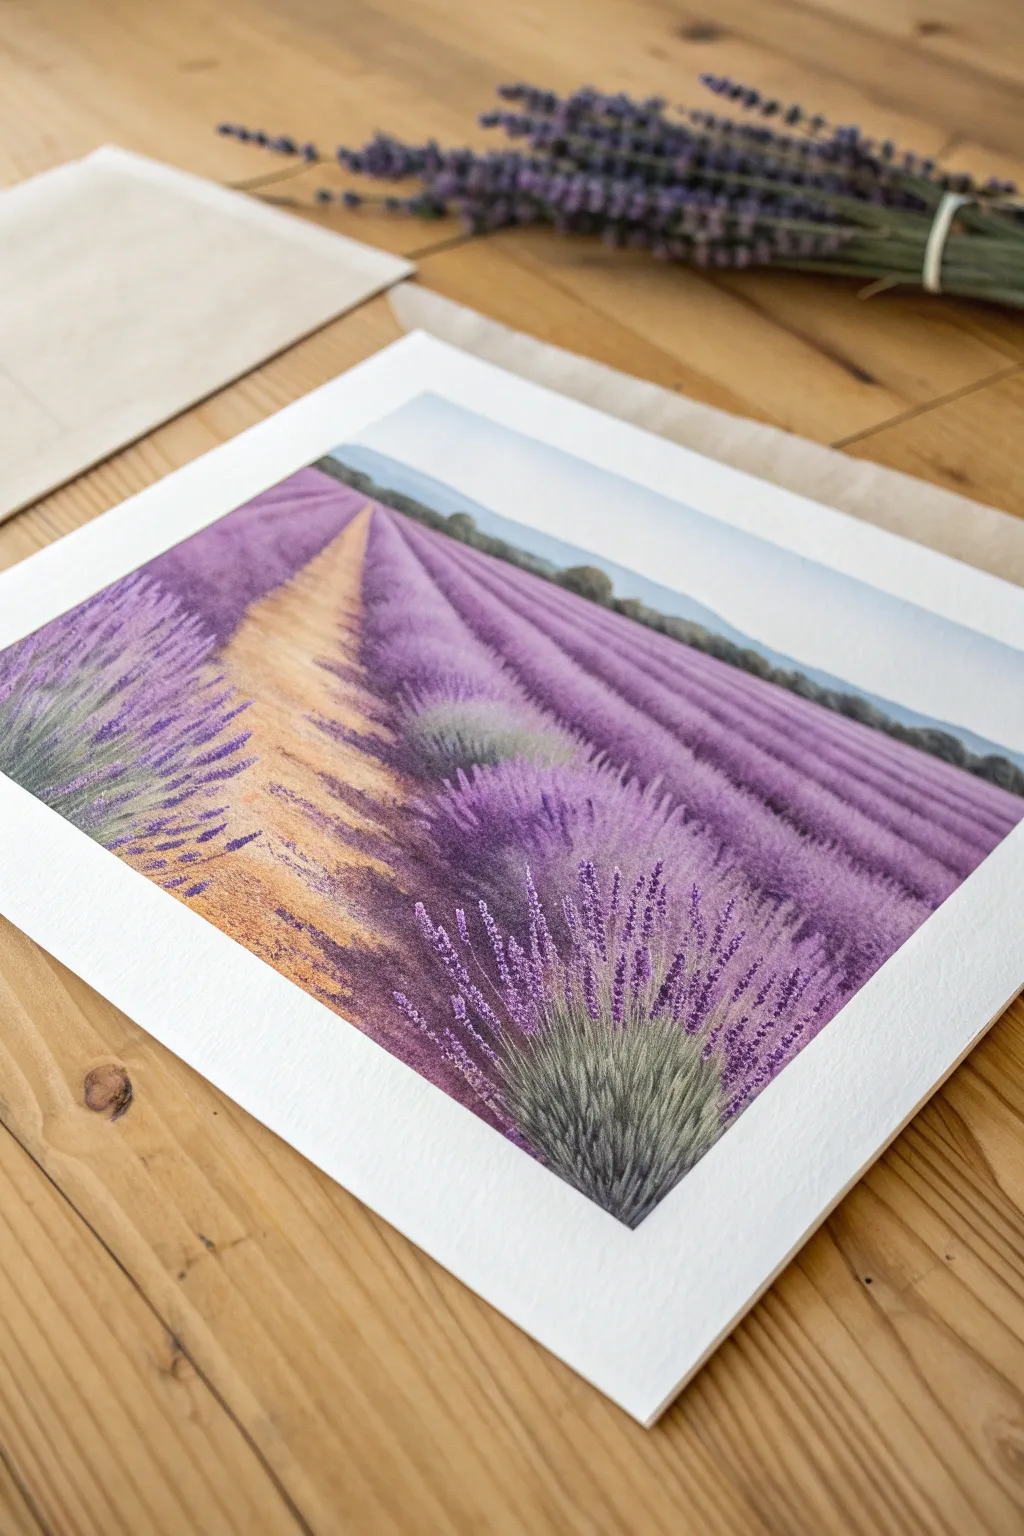
Capture the serene beauty of a Provencal summer with this approachable watercolor landscape. Featuring sweeping rows of purple blooms and soft, atmospheric depth, this project breaks down complex perspective into manageable, painterly strokes.
How-To Guide
Materials
- Cold press watercolor paper (300 gsm)
- Watercolor paints (Ultramarine Blue, Alizarin Crimson, Dioxazine Purple, Yellow Ochre, Burnt Sienna, Sap Green)
- Masking tape
- Large flat wash brush (3/4 inch)
- Medium round brush (size 8)
- Small rigger or detail brush (size 2)
- Two jars of water
- Paper towels
- Pencil (HB) and eraser
Step 1: Planning and Sky
-
Tape and Trace:
Begin by taping down all four edges of your watercolor paper to a board. This creates that crisp white border seen in the example and prevents buckling. Use a pencil to lightly sketch the horizon line about 2/3 of the way up the page. -
Sketch the Perspective:
Sketch a central vanishing point near the middle of the horizon line. Draw radiating diagonal lines coming from this point toward the bottom corners to define the path and the rows of lavender. Keep your lines very faint. -
Wet the Sky:
Using your large flat brush, apply clean water to the sky area above the horizon line. You want an even sheen, not puddles. -
Paint the Gradient:
While the paper is wet, drop in a very pale wash of diluted Ultramarine Blue at the top, letting it fade to almost white as it nears the horizon. -
Distant Hills:
Mix a muted bluish-green for the distant hills. While the sky is just damp (not soaking), sweep in the hill shapes along the horizon to create a soft, out-of-focus edge.
Dry Brush Magic
For realistic lavender texture, fan out the bristles of an old brush. Dip in thick paint and lightly drag it upwards to create multiple stems at once.
Step 2: The Lavender Fields
-
Base Path Color:
Mix Yellow Ochre with a tiny touch of Burnt Sienna to get a sandy color. Paint the central triangular path, using horizontal strokes near the bottom for texture. -
First Purple Wash:
Create a watery mix of Dioxazine Purple and Ultramarine. Using your medium round brush, paint the broad shapes of the lavender rows on either side of the path, following your pencil guidelines. -
Deepening Shadows:
While the first wash is still damp, drop in a more concentrated purple mix into the bottom edge of each row. This creates the rounded, tubular form of the lavender bushes. -
Adding Greenery:
Mix Sap Green with a little purple to desaturate it. Paint small, irregular patches at the base of the lavender rows where the plants meet the soil. -
Distant Rows:
For the rows furthest away near the horizon, use cooler, paler colors and less detail. Simple horizontal bands of light purple suggest distance effectively.
Step 3: foreground Details
-
Let it Dry:
Allow the painting to dry completely. If you paint crisp details on wet paper, they will blur. -
Texture on the Path:
Use a dry-brush technique with a thicker Burnt Sienna mix. Skim your brush over the dried path to create the rough, sandy texture of the dirt road. -
Foreground Tufts:
Switch to your small detail brush. In the immediate foreground (bottom corners), paint individual vertical strokes of green to represent the stems and leaves of the closest plants. -
Spiky Blooms:
Use the tip of your brush to stipple small dots of vibrant purple on top of the green stems in the foreground. I like to vary the pressure to make some blooms look fuller than others. -
Highlighting:
Mix a very light, opaque lavender (add a touch of white gouache if you have it, or very thick paint). Add highlights to the tops of the foreground flowers where the sun hits them. -
Refining Shadows:
Use a dark purple-blue mix to deepen the crevices between the individual stalks in the foreground clumps. This high contrast brings the front of the painting forward. -
Final Assessment:
Step back and look at the whole piece. If the path looks too flat, add a few purple cast shadows stretching across the dirt. -
The Reel Reveal:
Once the paper is bone dry, carefully peel away the masking tape at a 45-degree angle to reveal your clean edges.
Make it Your Own
Try painting a sunset version by changing the sky to warm pinks and oranges, and warming up the highlights on the lavender tips.
Frame your new landscape to bring a permanent window onto the French countryside into your home
Purple Butterflies Over a Soft Wash Background
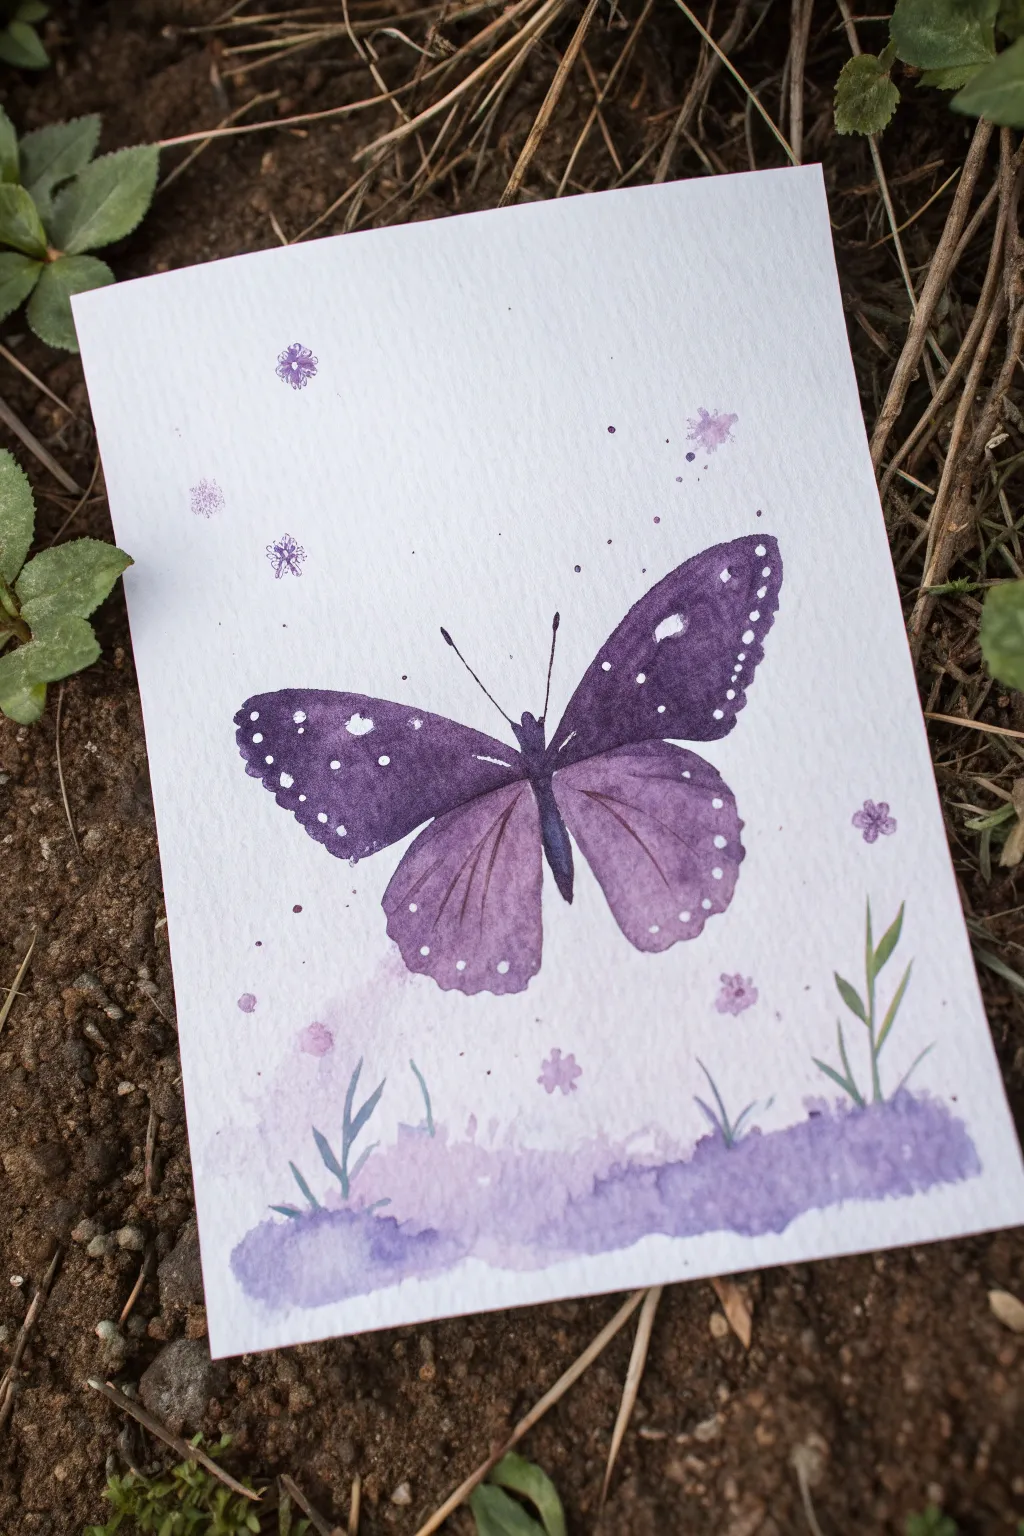
Capture the delicate beauty of a butterfly resting in a misty field with this charming watercolor project. Utilizing various shades of purple, this painting balances a soft, dreamy background with a crisp, detailed focal point.
Detailed Instructions
Materials
- Cold press watercolor paper (postcard size roughly 4×6 or 5×7)
- Watercolor paints (deep violet, lavender, mauve)
- Round watercolor brush (size 4 or 6)
- Fine detail brush (size 0 or 1)
- White gel pen or gouache
- Pencil and eraser
- Clean water and paper towels
Step 1: Sketch and Background Wash
-
Lightly sketch the outline:
Begin by drawing a faint vertical line to center the butterfly’s body. Sketch a narrow, segmented body shape along this line. Then, draw two large, triangular upper wings and two rounded, slightly smaller lower wings. Keep your pencil pressure extremely light so the graphite doesn’t show through the translucent paint. -
Mix your ground color:
Prepare a watery mix of lavender and violet on your palette. You want this to be quite fluid for the ‘wet-on-dry’ technique we’ll use for the ground. -
Paint the bottom wash:
Apply the watery purple mix across the bottom edge of the paper in an uneven, organic strip. Let the top edge of this strip be jagged and irregular to mimic distant terrain or mist. While it’s still wet, I like to drop in tiny touches of darker purple to create soft blooms and texture. -
Add grassy details:
While the purple wash is still damp (but not soaking), switch to a smaller brush. Pull a few quick, upward strokes of a slightly greener or darker purple mix to suggest grass blades growing out of the mist. -
Create scattered textures:
Using a very diluted purple, dab a few irregular spots around the background to represent out-of-focus flowers or magical dust. Let the entire background layer dry completely before moving to the butterfly.
Step 2: Painting the Butterfly
-
Paint the upper wings:
Load your round brush with a saturated deep violet paint. Carefully fill in the upper wing shapes. The color should be solid and bold. -
Paint the lower wings:
Dilute your violet with more water to create a translucent mauve or light purple. Fill in the lower wings with this lighter shade. The contrast between the dark upper wings and light lower wings adds lovely dimension. -
Paint the body:
Use your darkest purple (almost black) to fill in the segmented body in the center. -
Add the antennae:
Switch to your finest detail brush. With the dark purple mix, paint two thin, curved lines extending from the head for the antennae. Add tiny bulbs at the ends. -
Let the base layers dry:
Wait until the wing paint is bone dry. If you work too soon, the details we add next will bleed and blur.
Clean Edges Trick
If you struggle with shaky hands, try outlining the wings with a purple watercolor pencil first. The pencil line dissolves into the paint, leaving a sharp edge.
Step 3: Details and Finishing Touches
-
Add veins to lower wings:
Using a slightly darker shade of purple than the lower wings, paint thin, curving lines radiating from the body outward to the wing edges to create delicate veins. -
Add white spots:
Using a white gel pen or opaque white gouache on a fine brush, add a row of small dots along the outer edges of the dark upper wings. Add a few larger, irregular white spots closer to the center of the upper wings for variety. -
Highlight the lower wings:
Add a few tiny white dots near the bottom edge of the lower wings to tie the design together. -
Paint floating flowers:
Dip your small brush into a medium purple. Paint tiny, simple five-petal flower shapes floating around the butterfly. Keep them loose and not overly detailed. -
Add final splatter:
Load a brush with watery purple paint and tap it against your finger over the paper to create a fine mist of speckles. This adds a magical atmosphere and unifies the composition.
Metallic Magic
Swap the white gel pen for a silver or iridescent watercolor paint for the wing dots. It makes the butterfly shimmer beautifully when it catches the light.
Once the speckles are dry, your whimsical purple butterfly is ready to be framed or sent as a lovely greeting card
Purple Flowers as Loose, Easy Blossoms
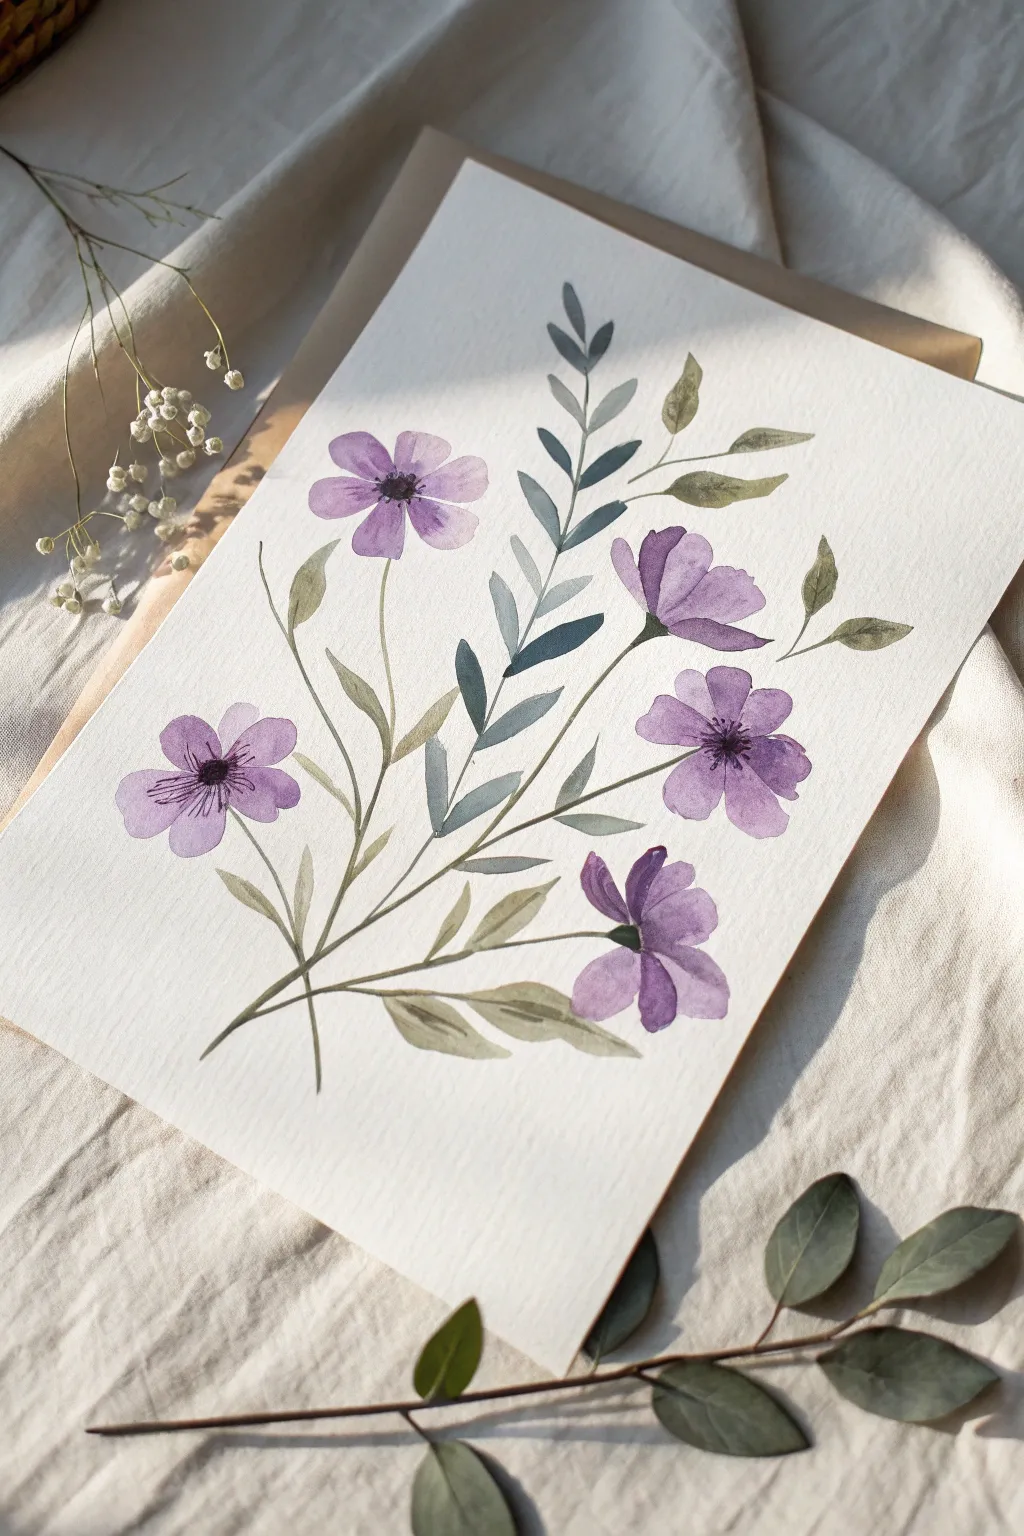
Capture the delicate beauty of a rustic garden with this simple yet elegant watercolor study. Featuring loose purple blossoms and varied foliage, this project creates a serene botanical composition perfect for framing or gifting.
Step-by-Step Guide
Materials
- Cold press watercolor paper (300 gsm)
- Watercolor paints (Purple, Ultramarine Blue, Sap Green, Burnt Umber)
- Round watercolor brushes (Size 2, 4, and 6)
- Water container
- Paper towel
- Pencil (HB or lighter) and kneaded eraser
Step 1: Planning the Layout
-
Light Sketching:
Begin by lightly sketching the main stems with an HB pencil. You want a flowing, organic composition, so curve the stems gently upward from a central point near the bottom. Don’t press too hard; these lines are just guides. -
Positioning Blossoms:
Mark the positions of the five flower heads with faint circles. Place the largest blooms towards the top and middle, varying the angles so some face forward while others tilt to the side.
Step 2: Painting the Foliage
-
Mixing Olive Green:
Mix Sap Green with a tiny touch of Burnt Umber to create a warm, earthy olive tone. This will be used for the lower stems and the broader leaves. -
Main Stems:
Using a size 4 brush, paint the primary stems with long, confident strokes. I find that holding the brush further back on the handle helps create smoother, less shaky lines. -
Base Leaves:
Add the lower leaves using the same olive mix. Press down on the belly of the brush and lift up as you drag to create a tapered, leaf-like shape. Keep these leaves fairly loose and translucent. -
Blue-Green Fern Mix:
Create a second green mixture by combining Sap Green with Ultramarine Blue and plenty of water. This cool, teal-leaning shade adds wonderful depth and contrast. -
Center Fern:
Paint the central, fern-like stem that rises straight up. Use small, rhythmic dabs with the tip of a size 4 brush to create the alternating leaflets, starting wider at the bottom and getting smaller at the top.
Wet-on-Wet Magic
Drop clear water onto a painted leaf while it’s still damp. The water pushes the pigment to the edges, creating a beautiful, natural outline effect when dry.
Step 3: Creating the Blooms
-
Mixing Purple:
Prepare a watery purple wash. You can use a pre-mixed violet or combine blue and red. Ensure it is quite dilute for the first layer to keep the petals transparent. -
First Petals:
Start with the open flower on the left. Paint five to six petals radiating from the center. Leave a tiny sliver of white paper between some petals to define their individual shapes. -
Profile Blossoms:
For the flowers that are angled sideways (like the top right one), paint the petals so they fan out in a cone shape. The petals closer to the stem should be slightly darker to show depth. -
Varying Tone:
While the paint is still wet on the paper, drop a slightly more concentrated purple into the base of the petals. This wet-on-wet technique creates a natural shadow where the petals meet the center. -
Painting the Bottom Flowers:
Complete the lower two flowers. For the bottom-most bloom, try to make the petals look like they are drooping slightly, giving the composition a relaxed feel.
Splatter Texture
Cover your flowers with a scrap paper mask, then gently flick diluted green paint from a toothbrush over the background for an organic, meadow-like atmosphere.
Step 4: Details & Definition
-
Connecting Stems:
Once the flower heads are dry, use a size 2 brush and your olive green mix to carefully connect the flower heads to the main stems. Add the small green ‘cup’ (calyx) at the base of the side-facing flowers. -
Dark Centers:
Mix a very dark purple or almost black tone. With the tip of your smallest brush, stipple tiny dots into the center of the open flowers. Don’t make a solid circle; let the texture look like pollen stamens. -
Petal Veins:
Using a slightly darker purple than your petals and a very dry size 2 brush, paint extremely fine lines radiating from the center of the petals outward. Keep these subtle; they shouldn’t overpower the softness. -
Final Leaves:
Add a few small, floating leaves or extra sprigs near the top using the lighter olive mix to balance out any empty negative space. -
Review and Refine:
Step back and look at your piece. If any steams feel disconnected, extend them gently. Erase any visible pencil marks only after the paper is completely bone dry.
Enjoy the peaceful process of watching your garden grow on paper
Purple Abstract Swirls With Two-Tone Contrast

This mesmerizing watercolor project explores the beauty of a single color family through flowing, organic shapes. By using just two shades of purple—a deep violet and a soft lilac—you’ll create a hypnotic pattern of interlocking spirals and curves that feels both modern and soothing.
Step-by-Step
Materials
- Cold press watercolor paper (A5 or A4 size)
- Pencil (HB or lighter)
- Eraser
- Watercolor paints (Violet/Deep Purple and Lilac/Lavender)
- Mixing palette
- Round watercolor brushes (Size 4 for details, Size 8 for filling)
- Jar of clean water
- Paper towels
- Painter’s tape or masking tape
Step 1: Preparation and Sketching
-
Secure the paper:
Start by taping down your watercolor paper to a hard surface or board. This prevents warping when the paper gets wet and creates a crisp, clean border around your final piece. -
Create the border:
Using a ruler, lightly draw a rectangular frame inside your paper leaving about a 1-inch margin. This will be the contained area for your swirl pattern. -
Outline the main spirals:
With a very light hand, sketch three or four large spiral shapes. Distribute them across the rectangle so they feel balanced but not perfectly symmetrical. -
Add connecting curves:
Draw connecting curved lines between the main spirals. Think of these as waves or echoes that flow from one spiral to the next, filling up the negative space. -
Define the white gaps:
Go back over your sketch and draw a second line parallel to every single curve you just made. These parallel lines create the ‘channels’ of white space that separate your purple sections. -
Refine the composition:
Add smaller, filler spirals in the corners or awkward gaps to ensure the entire rectangle is busy with movement. Make sure your double-lines are consistent in width.
Bleeding Lines?
If paint bleeds across the white gaps, wait for it to fully dry. Then, use a white gel pen or opaque white gouache to carefully paint over the mistake and restore the separation line.
Step 2: Painting the Deep Tones
-
Mix your dark violet:
Prepare a saturated mix of deep violet paint. You want this color to be bold and opaque, so use less water than you usually might. -
Identify dark sections:
Look at your sketch and decide which bands will be dark. Typically, the center of the spirals and alternating outer rings look best in the darker shade. -
Start filling the centers:
Using your smaller round brush (size 4), carefully paint the innermost swirl of your main spirals with the deep violet mix. -
Paint alternating bands:
Work your way outward from the centers, painting every other band in the deep violet. Be extremely careful to stop at your pencil lines to preserve the white separating gaps. -
Work on the corners:
Fill in the dark sections of the smaller corner spirals and background curves. I find it helps to rotate the paper so your hand doesn’t smudge wet paint.
Step 3: Painting the Light Tones
-
Mix the lilac shade:
Create a lighter wash. You can do this by adding more water to your violet mix, or by mixing in a little white gouache if you want a creamier, pastel lavender look. -
Test the contrast:
Swipe a test stroke heavily on scrap paper. It needs to be distinct enough from the dark violet to show a clear pattern. -
Fill remaining bands:
Using the size 8 brush for larger areas, fill in the remaining empty bands with your light lilac wash. -
Mind the edges:
Switch back to the smaller brush when painting the lilac near the white gaps. Clean edges are the secret to making this geometric design pop. -
Check for consistency:
If your wash looks uneven as it dries, you can add a second layer of the lilac once the first is completely dry to smooth it out.
Smooth Curves
When painting the curves, use your whole arm rather than just your wrist. This creates fluid, confident strokes and prevents the shaky look that comes from inching along slowly.
Step 4: Finishing Touches
-
Let it dry completely:
Allow the painting to sit undisturbed until the paper is cool to the touch and no shine remains. -
Erase pencil marks:
Gently erase any visible pencil lines in the white gaps. Use a kneaded eraser if possible to avoid damaging the paper texture. -
Remove the tape:
Peel the masking tape away slowly, pulling it at a 45-degree angle away from the painting to reveal your crisp white border.
Step back and enjoy the calming rhythm of your monochromatic masterpiece
Purple Ombre Heart With a Glowy Edge

Capture the magic of watercolors with this glowing purple heart that seems to pulse with light. This project focuses on wet-on-wet blending to create a soft, ombre interior framed by a delicate, radiant halo.
Step-by-Step Tutorial
Materials
- Cold press watercolor paper (300 gsm)
- Purple watercolor paint (warm undertones)
- Violet watercolor paint (cool undertones)
- Round watercolor brush (size 8 or 10)
- Small detail brush (size 2)
- Pencil
- Eraser
- Clean water jar
- Paper towels
- Painters tape (optional)
Step 1: Sketching and Preparation
-
Prepare your paper:
Start by tearing the edges of your watercolor paper if you want that rustic, deckled look shown in the example. Alternatively, just tape down your sheet to a flat board to prevent buckling. -
Sketch the inner heart:
Lightly draw a classic heart shape in the center of your paper. Keep your pencil strokes faint so they won’t show through the translucent watercolor later. -
Add the outer halo:
Draw a second, slightly larger heart around the first one, leaving about a quarter-inch gap between the two lines. This gap will become the crisp white separation.
Bleeding Lines?
If paint bleeds into the white gap, wait for it to fully dry. Then, use a stiff brush with clean water to gently ‘scrub’ and lift the mistake, blotting instantly.
Step 2: Painting the Core
-
Wet the inner heart:
Using your larger round brush and clean water, carefully wet the entire area inside the smallest or central heart sketch. The paper should glisten but not have standing puddles. -
Drop in color:
Load your brush with a deep, saturated purple. Touch the tip to the wet paper, starting near the top curves. Watch the color bloom and spread naturally. -
Create the ombre effect:
While the paint is still wet, introduce a slightly different shade of violet near the bottom point. Tilt your paper gently to encourage the colors to mix without overworking them with the brush. -
Add depth:
Drop more concentrated pigment into the areas that look too light while the paper is still damp. I find this creates those beautiful, cloud-like textures. -
Lift highlights:
If an area gets too dark, clean your brush, dab it on a paper towel until barely damp, and gently lift some pigment off the paper to create soft light spots. -
Create speckles:
For a bit of texture, you can tap a tiny amount of clean water onto the drying paint. This pushes the pigment away, creating small ‘cauliflower’ blooms or white speckles like stars. -
Let the center dry completely:
This is crucial. The center heart must be 100% dry before you move to the next step, or the colors will bleed across the white gap.
Step 3: The Glowing Edge
-
Prepare a dilute wash:
Mix a very watery, pale version of your purple paint on your palette. This needs to be much lighter than the center heart to achieve the glowing effect. -
Start the halo outline:
Using the smaller detail brush, carefully paint the strip between your outer pencil line and the inner heart, but do not touch the inner heart’s painted edge. -
Mind the gap:
Focus intensely on maintaining a consistent, thin white gap between the dark center heart and this new outer ring. This white space is what makes the heart look dimensional. -
Soften the outer edge:
Before the outer ring dries, rinse your brush and run slightly damp bristles along the very outside edge of the halo. This softens the line, making the glow fade into the white paper. -
Final touches:
Once everything is fully dry, gently erase any visible pencil marks, being careful not to scrub the painted areas.
Make it Sparkle
Once the painting is totally dry, use a metallic silver or gold gel pen to outline the white gap or add tiny constellations inside the dark purple center.
Step back and admire the vibrant depth and soft glow of your new watercolor heart.
Purple Rainy Window With Drip Lines
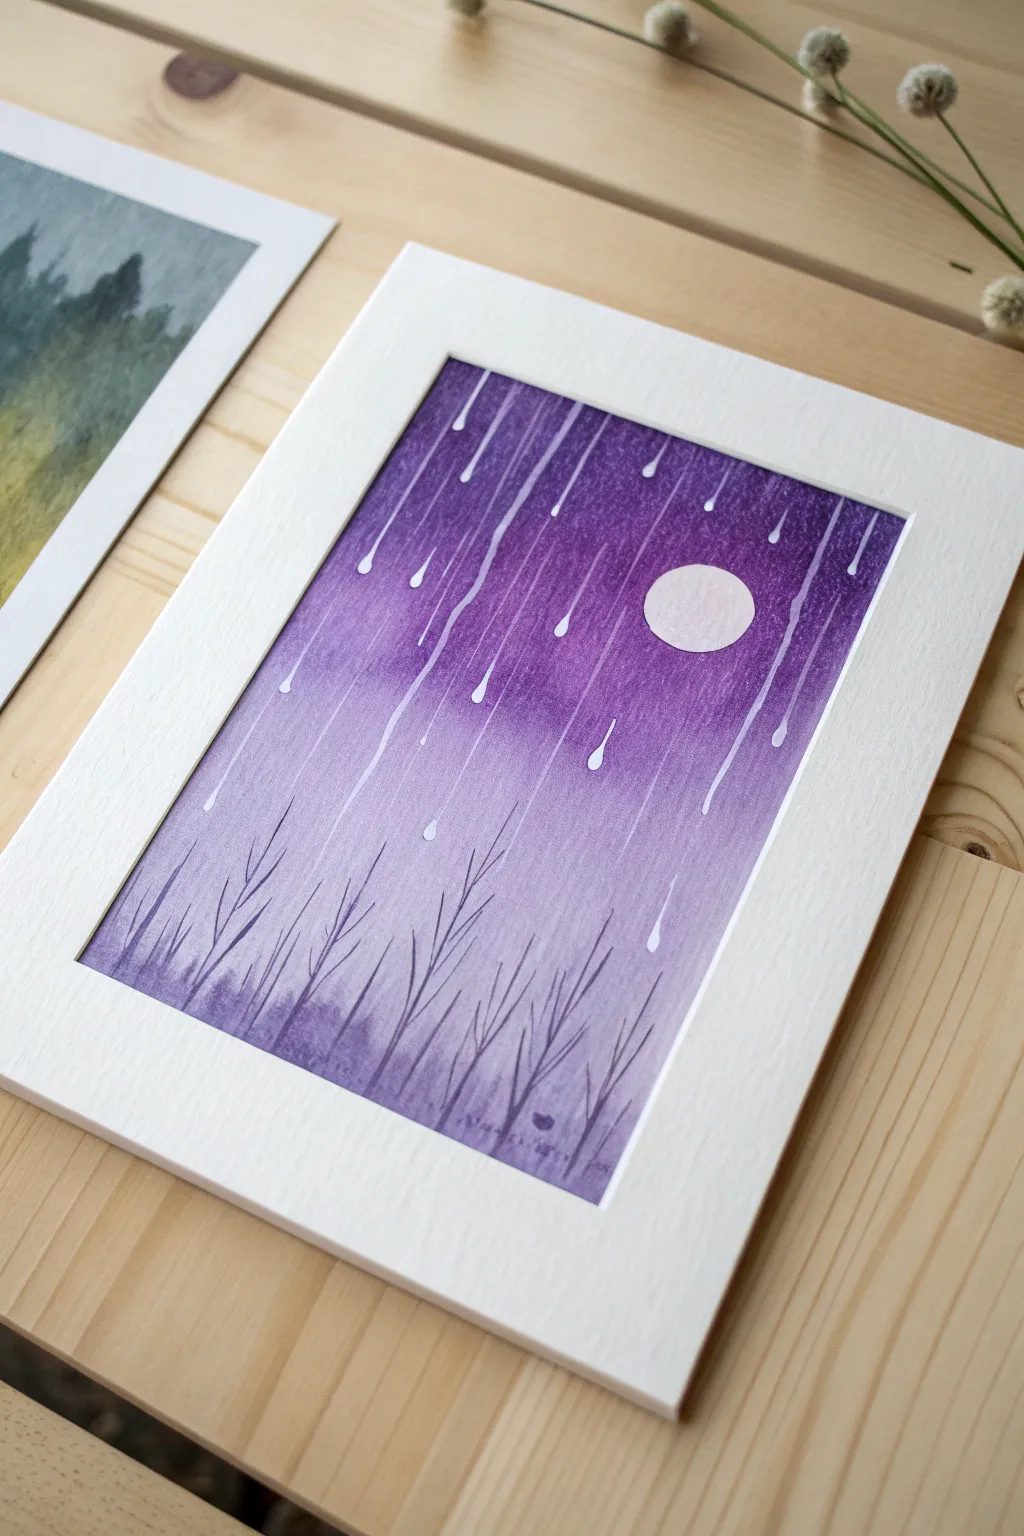
Capture the moody serenity of a rain-streaked window at twilight with this atmospheric watercolor piece. Using simple masking techniques and wet-on-wet blending, you’ll create a striking purple gradation interrupted by glowing droplets.
How-To Guide
Materials
- Cold press watercolor paper (300 gsm)
- Watercolor paints (Purple, Violet, Indigo)
- Masking fluid (drawing gum) with a fine applicator or ruling pen
- Round watercolor brushes (Size 8 and Size 2)
- Painter’s tape
- Pencil
- Jar or round object for tracing (small)
- White gel pen (optional)
- Paper towel
- Clean water
Step 1: Preparation and Masking
-
Secure the paper:
Tape all four edges of your watercolor paper down to a flat board using easy-release painter’s tape. This prevents the paper from buckling when we add water later. -
Sketch the moon:
Place your small round object (like a bottle cap) in the upper right quadrant of the paper and lightly trace a circle with a pencil. -
Mask the moon:
Fill in the traced circle entirely with masking fluid. Apply it carefully to keep the edges sharp and clean. -
Create rain streaks:
Using a fine applicator tip or a ruling pen dipped in masking fluid, draw vertical lines starting from the top of the paper deeply into the main area. -
Add variance to the rain:
Make some lines shorter and others longer. I like to vary the pressure slightly so the lines aren’t perfectly uniform. -
Form the droplets:
At the bottom of each masked line, add a teardrop shape to simulate heavy rain running down glass. Randomly place a few isolated teardrops without trails lower down the page. -
Let it dry completely:
Wait until the masking fluid is distinctively yellow/orange and rubbery to the touch. Do not paint over wet fluid or it will ruin your brush.
Don’t Hesitate
When painting the long rain streaks with masking fluid, move your hand quickly. A confident, fast stroke creates straighter lines than a slow, shaky one.
Step 2: Painting the Background
-
Wet the paper:
Use your large brush to apply a layer of clean water over the entire exposed paper surface. It should be glistening but not forming puddles. -
Apply the first wash:
Charge your brush with a vibrant purple watercolor. Start painting from the top, allowing the color to be darkest there. -
Create a gradient:
As you move down the paper, dilute your paint slightly with more water. The goal is a seamless ombré effect that fades to a very pale lavender near the bottom. -
Deepen the top:
While the paper is still wet, drop concentrated violet or a touch of indigo into the very top section to intensify the night sky look. -
Allow to dry:
Let the wash dry naturally. Using a hair dryer is okay, but be careful not to overheat the masking fluid, which can make it stick permanently.
Add Depth
Paint a very thin shadow underneath the ‘teardrop’ of each rain streak using diluted grey-purple. This makes the water droplets look 3D and sit on top of the glass.
Step 3: Revealing and Detailing
-
Remove the mask:
Once the paint is bone dry, gently rub away the masking fluid with your finger or a rubber cement pickup tool to reveal the crisp white paper underneath. -
Paint the foliage:
Load a size 2 brush with a darker, more saturated purple mix (less water). -
Add grass stems:
Paint thin, slightly curved lines originating from the bottom edge, varying their height and direction to look natural. -
Create branches:
Add small offshoot branches to your stems. Ensure these fine lines overlap the background wash but sit ‘behind’ the white rain streaks visually. -
Ground the scene:
Add a faint, uneven horizontal wash at the very bottom to suggest ground or distant bushes, blending it softly into the stems. -
Tint the moon:
If the moon looks too stark white, add an extremely diluted wash of pale violet over it to help it sit better in the atmosphere. -
Final touches:
If any rain trails look jagged, you can smooth them slightly with a damp brush or a white gel pen for extra brightness.
Peel off your border tape carefully to reveal a clean white frame around your rainy masterpiece
Purple Negative Space Mountains With Tape Edges
Capture the serene beauty of twilight on paper with this monochromatic mountain landscape. By balancing deep violet hues with the stark white of the paper, you’ll create a striking sense of depth and atmosphere.
Step-by-Step Tutorial
Materials
- Cold press watercolor paper (300 gsm recommended)
- Painter’s tape or masking tape
- Watercolor paints (Purple, Magenta/Rose, Indigo/Payne’s Grey)
- Round brushes (flats can work for the sky washes, smaller rounds for trees)
- White opacity marker or white gouache
- Jar of clean water
- Paper towels
- pencil (optional for sketching)
Step 1: Preparation and Sky
-
Tape the borders:
Begin by taping down all four edges of your watercolor paper to a board or table. Press the tape edges firmly to ensure a crisp, clean border later. -
Light sketch:
Very lightly sketch the outlines of your mountain peaks. Keep your pencil pressure minimal so the lines aren’t visible through the lighter paint areas. -
Prepare the sky wash:
Mix a watery wash of reddish-purple or rose. Apply this near the horizon line, just above where your highest mountains will be. -
Deepen the gradient:
While the lower sky is still wet, introduce a deeper, cooler purple at the top of the paper. Gently blend this downwards into the pinkish wash to create a seamless gradient. -
Add a darker cloud layer:
While the sky is damp but not soaking, drop in a slightly more concentrated purple horizontally across the middle sky for a subtle cloudy texture. -
Let it dry completely:
Allow the sky layer to dry fully. If you rush this steps, the mountains you paint next might bleed into the sky.
Step 2: Painting the Mountains
-
Define the first peak:
Mix a medium-strength purple. Paint the shadowed side of the highest central mountain, carefully leaving the left/lit faces pure white to represent snow. -
Create ridges:
Use the tip of your brush to create jagged, irregular lines down the mountain face, mimicking rocky ridges and crevasses. Keep hard edges against the white snow. -
Paint adjacent peaks:
Continue painting the shadowed sides of the neighboring peaks. Vary the purple tone slightly—make some more watery and others more saturated to distinguish the different mountain planes. -
Soften the base:
As you paint toward the bottom of the mountains, rinse your brush and use clean water to soften the bottom edge of the purple paint. This creates a mist effect. -
Layer the lower foothills:
Once the initial mountains are dry, mix a slightly darker, cooler purple. Paint a lower range of hills in front of the main peaks, washing the color out entirely as it reaches the bottom of the page.
Bleeding Lines?
If edges aren’t crisp, your brush might be too wet. Blot excess water on a paper towel before painting edges, especially when defining the snowy peaks.
Step 3: Foreground and Details
-
Mix the darkest shade:
Create your darkest value yet by mixing purple with a touch of indigo or black. It should be nearly opaque. -
Establish the tree line:
Start painting the silhouette of the foreground hill. The top edge should be uneven to suggest distant treetops. -
Paint the pine trees:
Switch to a small detail brush. Using the same dark mixture, paint tiny vertical lines rising from your hill silhouette. -
Detail the branches:
Use a tapping or stippling motion to add branches to your vertical lines. Keep the trees varied in height and spacing for a natural forest look. -
Add the stars:
Using a white gel pen or a tiny dot (use the back of a brush!) of white gouache, carefully place five to seven stars in the upper purple sky. -
Remove the tape:
I always find this part satisfying—slowly peel the tape away at a 45-degree angle to reveal your clean white border.
Constellation Magic
Instead of random dots, arrange your white stars into a real constellation like the Big Dipper or Cassiopeia to add a hidden layer of meaning.
Step back and admire your tranquil mountain scene, perfect for a handmade card or wall art
Purple Silhouette Scene With a Glowing Streetlamp

Capture the magic of a quiet, moonlit evening with this charming acrylic painting. Featuring a bold silhouette set against a glowing, multi-tonal purple backdrop, this project is perfect for practicing blending and clean lines.
Step-by-Step
Materials
- Stretched canvas (e.g., 8×10 or 11×14 inches)
- Acrylic paints: Titanium White, Mars Black, Violet (or Deep Purple), and Lavender (or Light Purple)
- Large flat brush (for the background)
- Medium round brush (for the moon)
- Small liner or detail brush (for the silhouette)
- Cup of water and paper towels
- Compass or a round object to trace (like a plate)
- Pencil
Step 1: Setting the Scene
-
Trace your moon:
Begin by lightly tracing a large circle in the center of your canvas using a pencil. You can use a compass or simply trace around a dinner plate or bowl that fits well within the frame. -
Prepare your purple palette:
Squeeze out your violet and lavender paints onto your palette. It helps to mix a mid-tone purple by combining the two, giving you three distinct shades to work with for the background. -
Paint the dark background:
Using a large flat brush, paint the area outside your pencil circle with the darkest violet shade. Ensure you cover the edges of the canvas for a finished look. -
Fill the moon base:
Clean your brush, then fill the inside of the circle with a mix of lavender and white. You want this base layer to be quite light to create a glowing effect. -
Create the atmospheric glow:
While the paint is still slightly wet, use a clean, dry brush to gently blend the transition between the dark outer purple and the lighter inner circle. Use circular strokes to mimic a halo of light radiating outward.
Circular Brushstrokes
When painting the moon’s interior brightness, replicate the curve of the circle with your brushstrokes. This reinforces the spherical shape rather than making it look flat.
Step 2: Detailing the Moon & Sky
-
Add moon texture:
Mix a very pale lavender (mostly white with a dot of purple). Using a round brush, paint loose, swirling strokes inside the moon circle to create texture and movement, keeping the center the brightest point. -
Add atmospheric specks:
Take a small amount of diluted grey-purple paint. Gently dot a few ‘craters’ or texture spots within the moon’s surface to give it depth, ensuring they aren’t too dark or distracting. -
Splatter stars:
Dilute a bit of white paint with water until it’s the consistency of heavy cream. Load a brush, hold it over the canvas, and tap the handle against another brush to sprinkle fine stars across the sky and moon. -
Paint larger stars:
Use the handle end of a small paintbrush or a detail brush to manually place a few larger, distinct white stars around the upper corners of the purple sky. -
Let it dry completely:
Before moving on to the black silhouette, ensure the background is 100% dry. This prevents the black paint from smearing into the purple and muddying your crisp lines.
Glowing Glass Effect
Mix a tiny bit of yellow glaze or watered-down yellow acrylic into the moon area directly behind the glass panes to make the lamp appear ‘lit’ from within.
Step 3: The Silhouette
-
Paint the tree line:
Mix a dark purple shade (violet with a tiny touch of black). Using a medium brush, dab in a ghostly, uneven tree line along the very bottom left edge. Keep these subtle so they don’t compete with the lamp. -
Outline the lamp post:
With a pencil, lightly sketch the vertical line of the lamp post and the lantern shape at the top. This guide helps keep your structure straight before committing with paint. -
Paint the post:
Using black acrylic and a flat brush turned on its side (or a liner brush), paint the main vertical pole of the lamp. I like to make the base slightly wider than the top for stability. -
Add the post details:
Switch to your smallest liner brush. Add the decorative ridges or ‘collars’ on the lamp post—small horizontal bumps that break up the straight vertical line. -
Draft the lantern frame:
Carefully paint the roof of the lantern (a triangle shape) and the bottom frame. Leave the ‘glass’ panes empty for now so the moon shows through. -
Refine the panes:
Paint the thin vertical bars inside the lantern head. Ensure the lines are crisp; thinning your black paint slightly with a drop of water can help the paint flow smoother for these tiny details. -
Add decorative swirls:
Using the very tip of your liner brush, paint delicate scrollwork or swirls just underneath the lantern head where it meets the post. -
Final touches:
Add the tiny finial spike on top of the lantern roof and check your edges. If the black looks patchy, wait for it to dry and add a second coat for a solid, opaque silhouette.
Sign your name in the corner and enjoy your peaceful purple evening scene


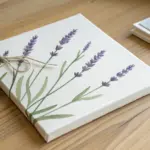
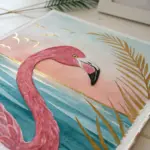
Have a question or want to share your own experience? I'd love to hear from you in the comments below!