Whenever I need a burst of Irish inspiration, I reach for juicy greens, moody skies, and a few cozy symbols that instantly say Ireland. Here are my favorite Irish painting ideas—starting with the classic scenes everyone loves, then drifting into more playful, magical directions.
Emerald Green Hills in Loose Watercolor
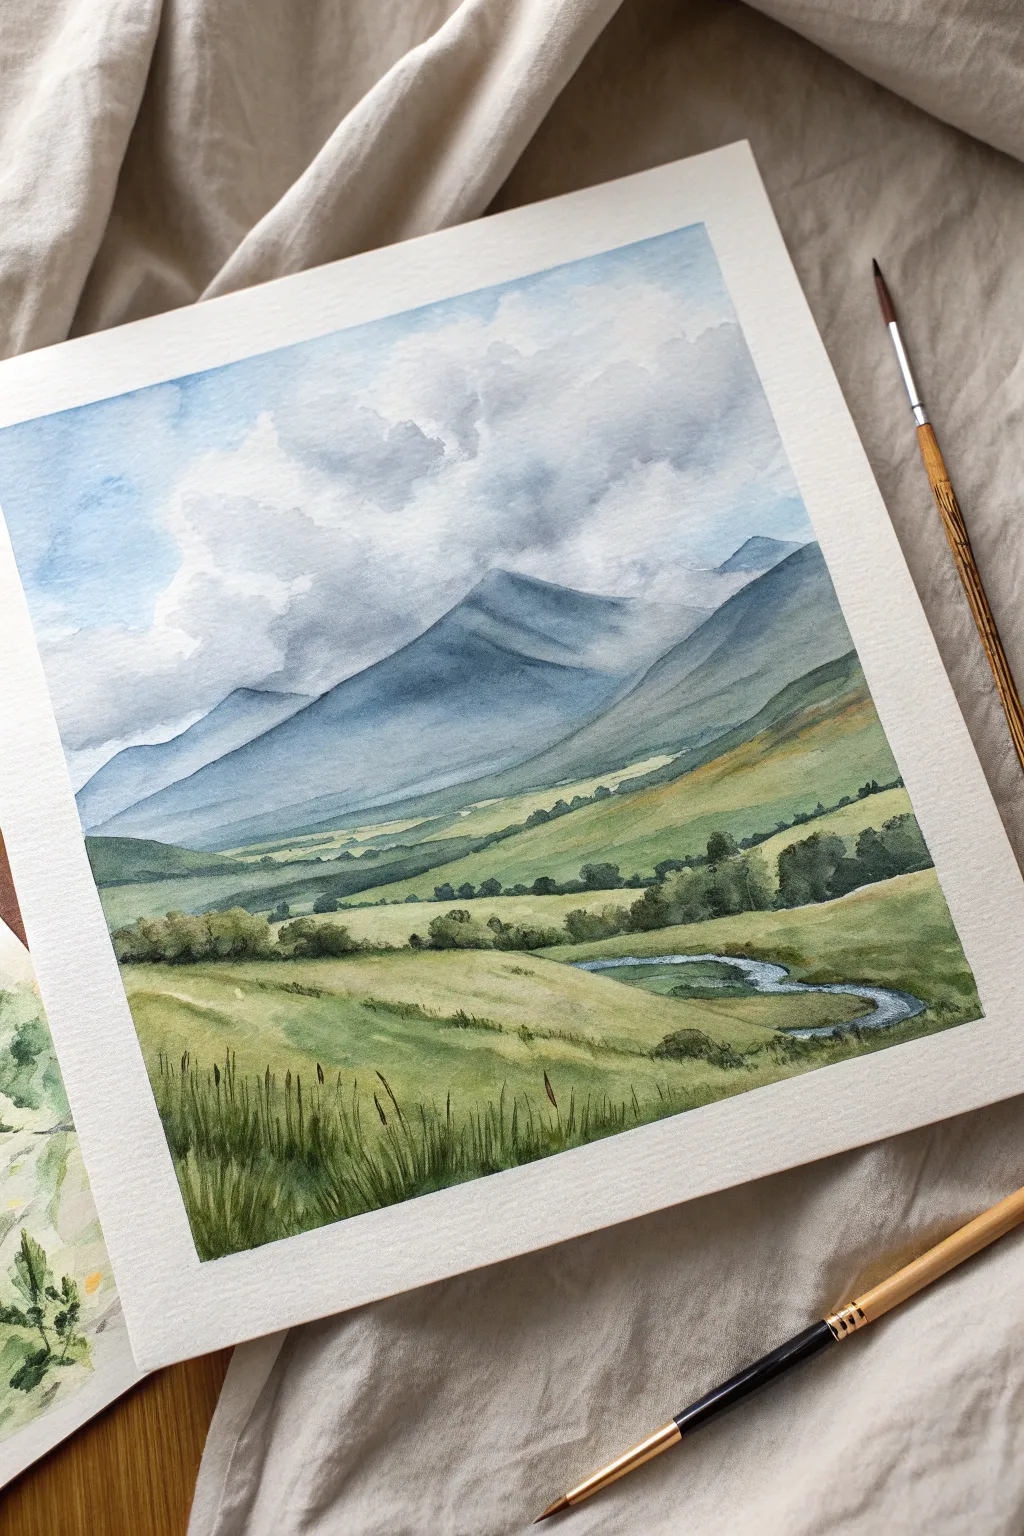
Capture the moody romance of the Irish countryside with this layered watercolor landscape featuring rolling emerald hills and distant, misty peaks. This project balances soft wet-in-wet skies with crisp, dry-brushed foreground details for a sense of incredible depth.
Step-by-Step Guide
Materials
- Cold press watercolor paper (140lb/300gsm), taped down
- Watercolor paints: Indigo, Ultramarine Blue, Sap Green, Olive Green, Burnt Sienna, Yellow Ochre
- Round brushes: Size 12 (large wash), Size 8 (medium), Size 4 or rigger (details)
- Clean water jar and mixing palette
- Paper towels
- Pencil (H or HB) for light sketching
Step 1: Setting the Scene
-
Light sketch:
Begin with a very faint pencil sketch. Outline the horizon line for the mountains about two-thirds up the page, then draw sloping lines for the hills coming down from the sides. Sketch the winding path of the river in the lower right quadrant. -
Sky wash:
Wet the entire sky area with clean water using your size 12 brush. While the paper is glistening, drop in a very diluted mix of Ultramarine Blue and a touch of Indigo. -
Cloud formations:
While the sky is still damp, lift out pigment using a thirsty, clean brush or a crumpled paper towel to create white, fluffy cloud shapes. Add slightly darker grey-blue shadows to the bottom of these clouds to give them volume.
Atmospheric Perspective
Remember: things get bluer and paler the further away they are. Keep your foreground greens warm (add yellow) and your background greens cool (add blue) for depth.
Step 2: Layering the Distance
-
Distant peaks:
Prepare a cool, grey-blue mixture using Indigo and plenty of water. Paint the furthest mountain silhouette with a flat wash, keeping the edges crisp against the sky but letting the color fade slightly towards the bottom. -
Closer mountains:
Once the first layer is dry, mix a slightly stronger, darker blue-grey. Paint the large, dominant mountain shape in the center-left. As you pull the paint downward, add more water to your brush to create a misty transition into the valley floor. -
Valley mist:
While the base of the mountains is still slightly damp, gently touch in the very top edge of your green hills using a pale, watery Sap Green to create a soft, atmospheric blend where land meets mountain.
Step 3: Mid-Ground Valleys
-
Rolling hills base:
Mix a large puddle of Sap Green with a touch of Yellow Ochre for warmth. Using the size 8 brush, paint the broad sloping hills on the right side, following the contour of the land. -
Adding texture:
While the hill wash is drying (but not bone dry), drop in stronger concentrations of Olive Green in the creases/valleys to suggest shadow and undulation. -
Left hillside:
Paint the hills on the left side with a slightly cooler green (add a tiny bit of blue to your green mix) to suggest they are further away or in shadow. -
Distant trees:
With a size 4 brush and a thick, creamy mix of Olive Green and Indigo, dab in tiny, irregular shapes along the ridge lines of the mid-ground hills to represent distant rows of trees and hedgerows.
Make It Moody
For a ‘rainy day’ Irish look, gently spatter clean water onto the distant mountains while the paint is still damp. This creates blooms that look like falling mist.
Step 4: Foreground Detail
-
Foreground wash:
Paint the closest grassy area using a vibrant mix of Sap Green and Yellow Ochre. I like to keep this wash uneven, leaving some lighter patches to suggest sunlight hitting the grass. -
River reflection:
Paint the winding river using a pale wash of your sky blue mixture. Leave a tiny sliver of white paper along some edges to represent the sparkle of water or a banked edge. -
River banks:
Define the river’s edge with a darker green. Use confident, horizontal strokes to situate the water comfortably within the landscape. -
Detailing shrubbery:
Load your small brush with dark green (Olive mixed with Burnt Sienna). Stipple clusters of bushes and trees near the river bend and along the mid-ground slopes, giving the landscape scale.
Step 5: Finishing Touches
-
Tall grasses:
Once the foreground is completely dry, use your smallest brush or rigger with a dark green-brown mix. Flick upward rapidly from the bottom edge of the paper to paint individual blades of tall grass. -
Seed heads:
Add tiny ticking marks or dots to the tops of some grass blades to suggest seed heads, adding texture to the immediate foreground. -
Final assessment:
Step back and evaluate the values. If the mountains look too pale, add a second transparent glaze of blue-grey to deepen the shadows on the peaks.
Peel off your tape carefully to reveal the crisp white border that frames your serene valley scene


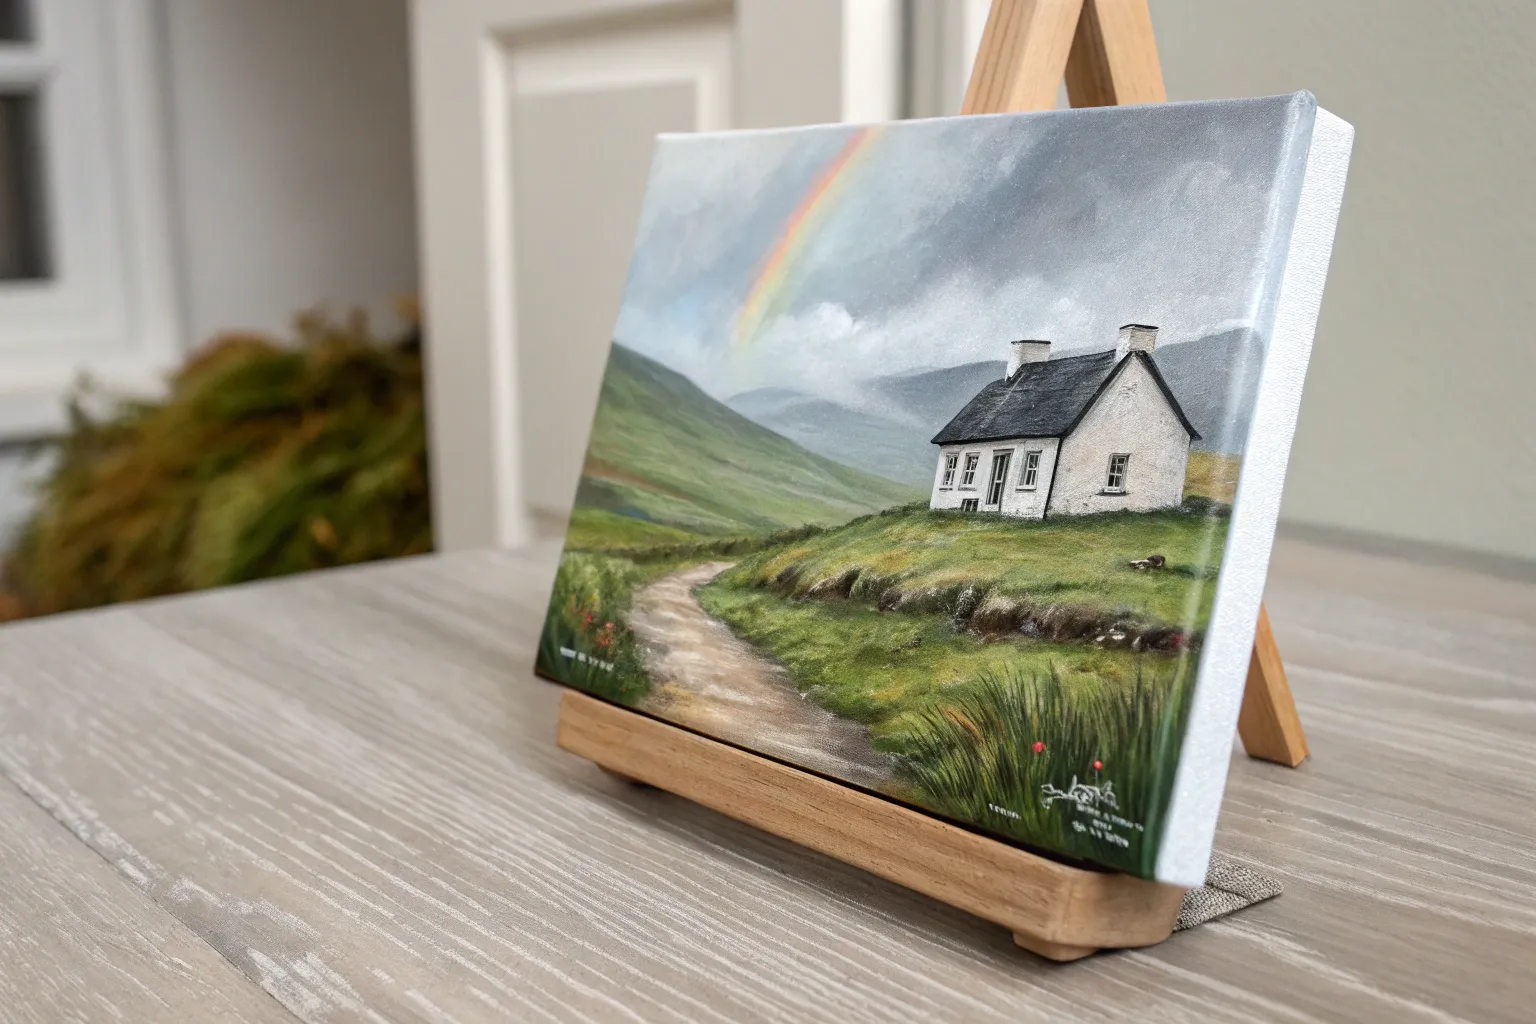
Stone Walls and Fluffy Sheep Fields
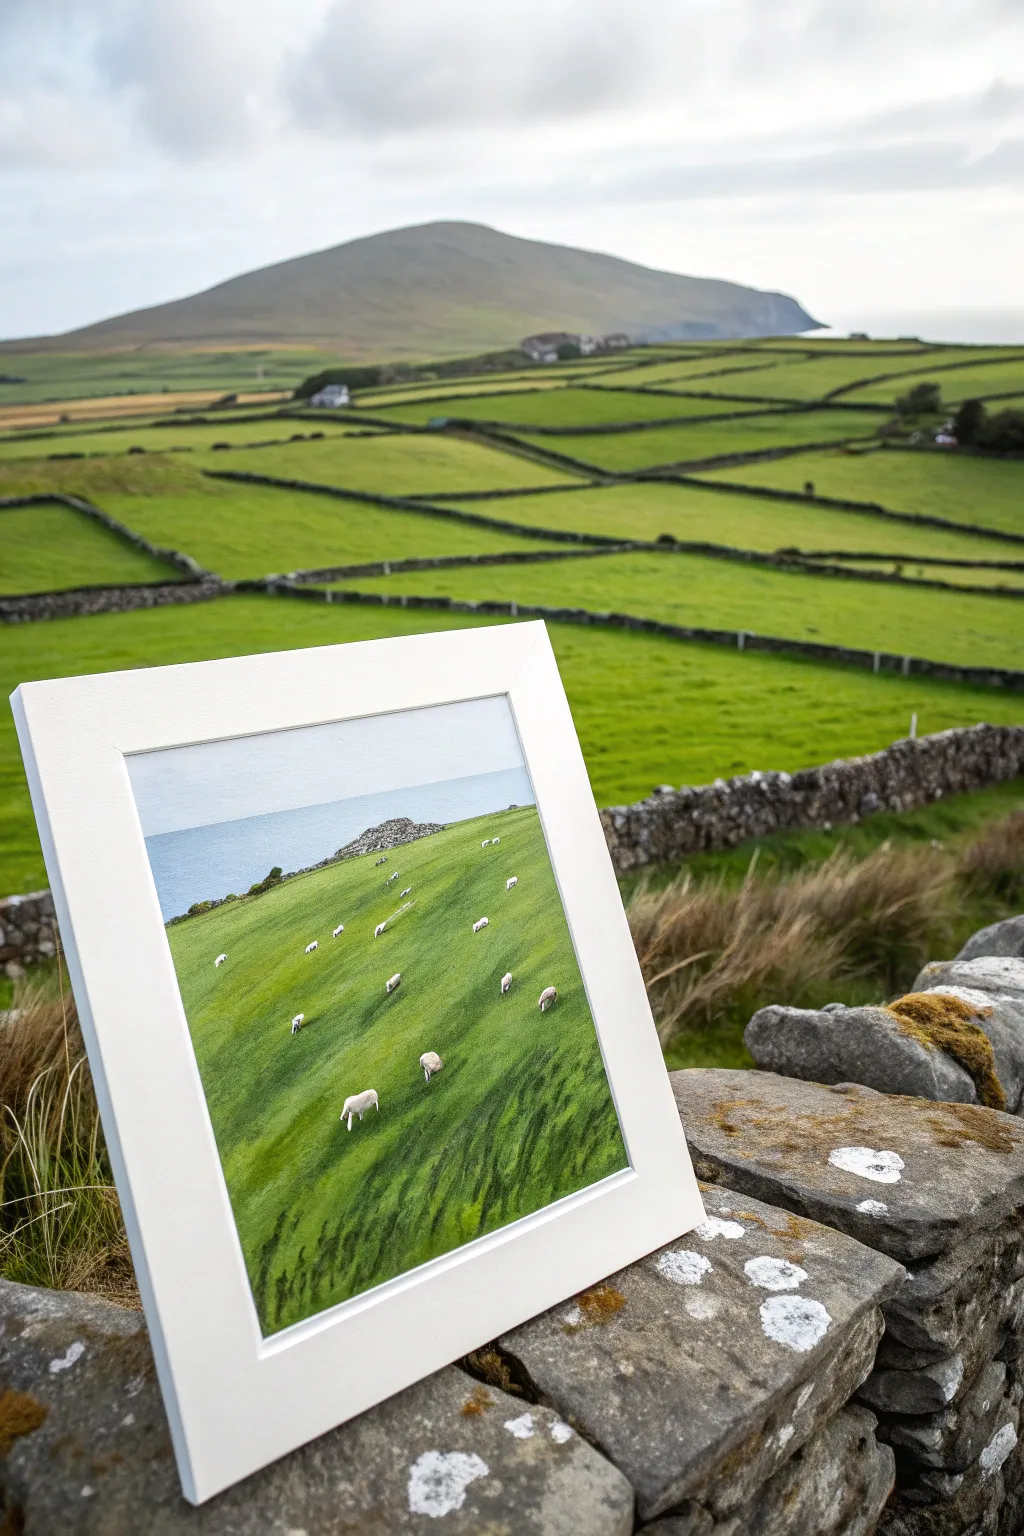
Capture the iconic charm of the Irish countryside with this vibrant landscape painting, featuring lush green slopes dotted with grazing sheep. This project focuses on layering greens to create depth and capturing the simple, peaceful essence of rural Ireland.
Step-by-Step
Materials
- Canvas board or heavy watercolor paper (8×10 inch)
- White mat board frame
- Acrylic paints: Sap Green, Hooker’s Green, Yellow Ochre, Ultramarine Blue, Titanium White, Burnt Umber
- Flat shader brushes (sizes 6 and 10)
- Small round detail brush (size 0 or 1)
- Palette knife (optional for texture)
- Pencil for sketching
- Water cup and paper towels
Step 1: Planning and Sky
-
Sketch the horizon:
Lightly sketch a sloping line across your canvas about one-third of the way down from the top. This will separate your grassy hill from the sea and sky. -
Block in the sky:
Mix Titanium White with just a tiny touch of Ultramarine Blue to create a very pale, overcast sky. Paint the top strip above the horizon with horizontal strokes using your larger flat brush. -
Paint the sea:
Below the sky but above the grassy hill line, paint a band of slightly darker blue. Add a tiny bit of Burnt Umber to the blue to desaturate it, making it look like a distant ocean on a cloudy day.
Pro Tip: Directional Strokes
Paint your grass strokes diagonally in the direction of the slope rather than straight up and down. This simple trick creates the illusion of gravity and wind.
Step 2: Creating the Landscape
-
Base coat for the grass:
Mix a mid-tone green using Sap Green and a little Yellow Ochre. Apply this over the entire hill area to get rid of the white canvas, ensuring solid coverage. -
Establishing the slope:
Once the base is dry, visualize how the wind blows across the grass. Use Hooker’s Green to paint diagonal streaks moving from the top left down toward the bottom right, mimicking the direction of the slope. -
Adding highlights:
Mix Sap Green with more Yellow Ochre and a touch of White. Gently brush this lighter mix onto the upper parts of the slope where sunlight would hit, blending it softly into the darker green below. -
Deepening the shadows:
I find that adding contrast really brings the hill to life, so mix Hooker’s Green with a tiny bit of Blue or Purple. Paint deeper shadows in the lower right corner and in streak-like patterns to suggest rolling terrain. -
Painting the distant wall:
Using a small brush and a mix of Grey (White + Black) and Burnt Umber, dab in a rugged stone texture along the horizon line of the hill. Make the stones smaller as they recede into the distance.
Step 3: Adding the Sheep
-
Positioning the flock:
Plan where your sheep will go. They should be larger in the foreground (bottom) and become tiny specks near the top of the hill to create perspective. -
Painting sheep bodies:
Load your small round brush with thick Titanium White. Dab undefined oval shapes for the bodies. Don’t smooth them out; a textured dab looks more like wool. -
Adding dimension to wool:
Mix a tiny amount of grey or light blue into your white. Add a shadow to the bottom/right side of each sheep puff to give them volume and roundness. -
Detailing heads and legs:
Using a very fine brush and dark grey or black, paint tiny dots for heads and thin lines for legs. Remember, distant sheep might just be white specks without visible legs. -
Grounding the sheep:
Mix a dark green shadow color. Paint a tiny, blurry shadow directly underneath each sheep on the grass so they don’t look like they are floating.
Level Up: Texture Medium
Mix modeling paste or gel medium into your white paint for the sheep. This creates actual 3D texture, making the wool stand out from the canvas.
Step 4: Finishing Touches
-
Foreground texture:
Use your smallest brush to flick a few distinct blades of darker grass in the very bottom corners to suggest proximity. -
framing:
Once the painting is completely dry, mount it behind a crisp white mat board frame to make the green colors pop.
Place your finished piece near a window to let natural light enhance the lush greens of your Irish landscape


Winding Country Road Through Green Valleys
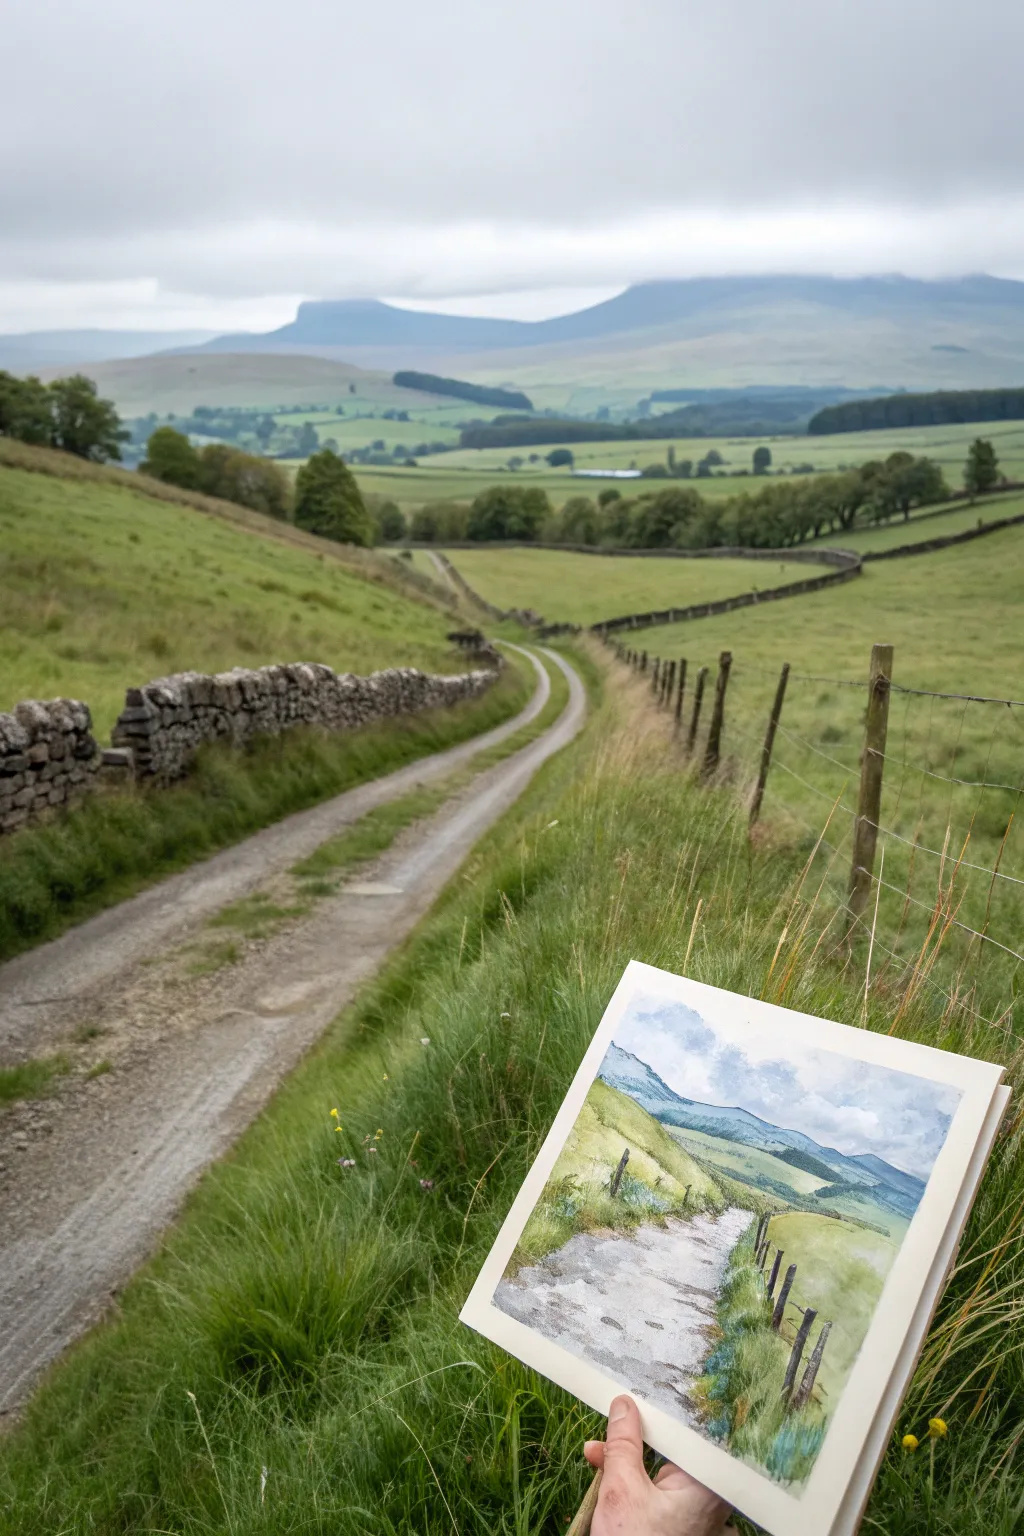
Capture the rolling green hills and atmospheric depth of the Irish countryside with this serene watercolor sketch. This project focuses on atmospheric perspective and capturing the texture of an unpaved country lane winding into the distance.
Step-by-Step Guide
Materials
- Cold press watercolor paper (block or sketchbook)
- Watercolor paints (Sap Green, Hooker’s Green, Ultramarine Blue, Burnt Sienna, Yellow Ochre, Paynes Grey, Alizarin Crimson)
- Round watercolor brushes (Size 4, 8, and a small rigger for details)
- Pencil (HB or 2H)
- Kneaded eraser
- Clean water jar
- Paper towels
- Painter’s tape or clips
Step 1: Sketching the Layout
-
Establish the Horizon:
Begin by lightly drawing your horizon line about three-quarters of the way up the page. This high horizon line emphasizes the sweeping landscape and the road in the foreground. -
Draft the Road:
Sketch the winding road starting wide at the bottom center and narrowing significantly as it curves upward toward the left. The perspective is key; the road should almost disappear into a thin line as it crests the hill. -
Mark the Fence Lines:
Lightly indicate the positions of the fence posts on the right side and the stone wall suggestion on the left. Keep these marks faint, as we just need them for placement, not definitive outlines. -
Outline the Hills:
Draw the overlapping shapes of the distant mountains and hills. Ensure the furthest mountain is simple in shape, while the nearer hills show a bit more contour.
Muddy Colors?
If your greens look dull or muddy, you likely overmixed on the palette. Let colors mix on the paper instead; drop yellow into wet blue wash for vibrant, organic greens.
Step 2: Painting the Sky and Distance
-
Sky Wash:
Wet the sky area with clean water. Drop in a very dilute mix of Ultramarine Blue and a touch of Paynes Grey. Leave some white paper showing to represent the cloudy, overcast Irish sky. -
Distant Mountains:
While the sky is still slightly damp but not soaking, paint the furthest mountain using a cool, pale blue-grey mix (Ultramarine + a tiny dot of Alizarin Crimson). The damp edge will help it recede into the distance. -
Middle Ground Hills:
Mix a pale, cool green using Sap Green and a little Cobalt or Ultramarine. Paint the sloping hills in the middle distance. Keep this layer fairly flat and lacking in harsh details to maintain atmospheric depth. -
Darker Distant Foliage:
Add a few horizontal strokes of a darker blue-green where the hills meet, suggesting distant treelines or valleys.
Step 3: The Foreground Landscape
-
Base Green Layer:
For the grassy banks on either side of the road, mix a brighter, warmer green using Sap Green and Yellow Ochre. Apply this wash freely, allowing the paint to pool slightly in the dips of the land. -
Adding Texture:
While the green wash is damp, drop in touches of thicker Hooker’s Green and Burnt Sienna near the bottom corners to suggest closer, coarser vegetation. -
Road Foundation:
Paint the road surface with a very watery wash of Burnt Sienna and a touch of Cobalt Blue to create a neutral, warm grey. Paint roughly, leaving patches of white paper to suggest stones and light hitting the track. -
Shadows on the Road:
I like to add the shadows while the road is still moist. Drop in a cooler, darker grey (Paynes Grey + Burnt Sienna) along the wheel ruts and the edges of the road to give it form.
Pro Tip: Scratching Out
While the paint on the road is still wet, use a credit card edge or palette knife to scrape out horizontal lines. This instantly creates the texture of rocks and ruts.
Step 4: Defining Details
-
Fence Posts:
Using your small round brush or rigger, mix a concentrated dark brown/black. Paint the fence posts on the right side. Make the posts closer to the viewer taller and thicker, and let them become tiny ticks as they recede. -
Wire Details:
With the rigger brush and very diluted grey paint, suggest the wires connecting the fence posts. Don’t draw straight lines; let them sag slightly and break in places. -
Foreground Grasses:
Use a dry brush technique with some un-diluted green and yellow paint to flick upward strokes at the very bottom of the page, creating the look of tall grasses in the immediate foreground. -
Refining the Road Edges:
Darken the grassy edge where it meets the road. This contrast separates the verge from the track and leads the eye into the painting.
Allow your painting to dry completely before carefully removing any tape or closing your sketchbook.


Coastal Harbor with Colorful Boats
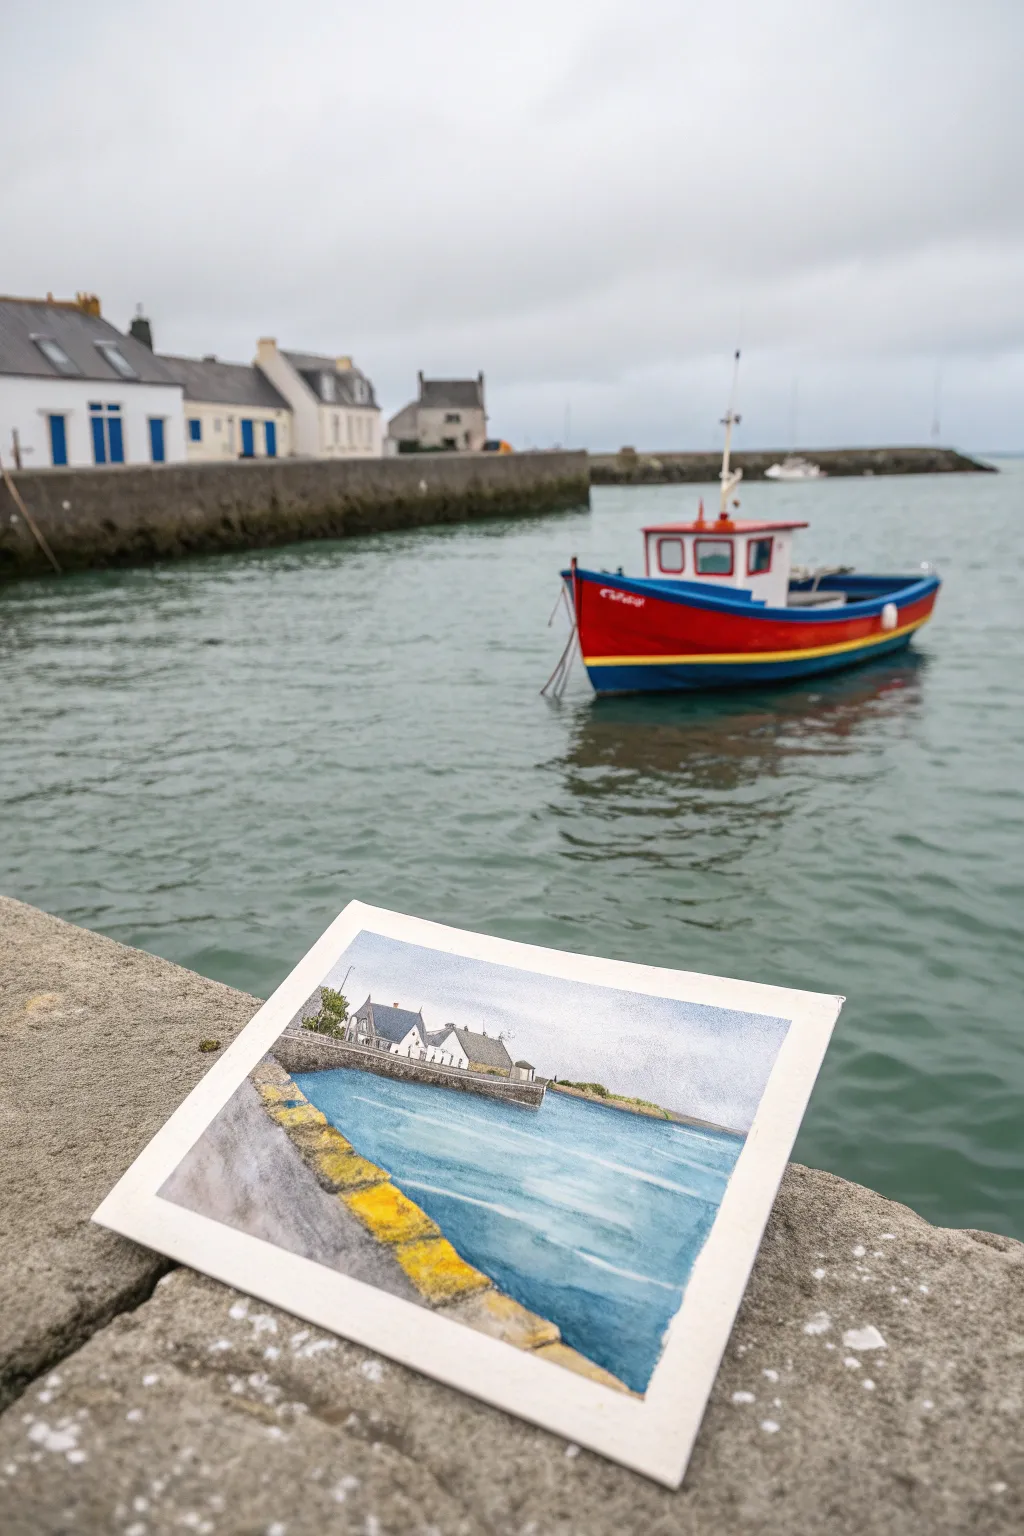
Capture the serene mood of a grey Irish day with this delicate watercolor study. This tutorial guides you through painting the sweeping stone harbor wall and the soft, reflective water, omitting the boat to focus on the peaceful architecture and atmospheric sea.
Step-by-Step
Materials
- Cold press watercolor paper (approx. 5×7 inches)
- Watercolor paints (Ultramarine Blue, Burnt Sienna, Yellow Ochre, Paynes Grey, Sap Green)
- Round watercolor brushes (Size 8 for washes, Size 4 for details)
- Masking tape
- Pencil (HB or 2B) and eraser
- Two jars of water
- Paper towels
Step 1: Planning and Sketching
-
Tape the paper:
Begin by taping down all four sides of your watercolor paper to a board. This creates the crisp white border seen in the reference and keeps the paper flat during wet washes. -
Establish the horizon:
Lightly sketch the horizon line about two-thirds up the page. It needs to be straight but can be soft. -
Map the harbor wall:
Sketch the prominent curve of the harbor wall starting from the left foreground and extending toward the middle ground. Pay attention to the perspective; it should appear wider near you and taper off as it curves away. -
Add the buildings:
Draw the small cluster of houses in the background sitting atop the far wall. Keep the shapes simple—triangles for roofs and rectangles for the structures.
Wet-on-Dry vs. Wet-in-Wet
Use wet-in-wet for the soft sky to avoid hard edges, but switch to wet-on-dry for the buildings and wall shadows to ensure crisp, architectural lines.
Step 2: Atmospheric Washes
-
Sky wash:
Wet the sky area with clean water first. Mix a very dilute wash of Ultramarine Blue with a tiny touch of Paynes Grey for a cloudy look. Drop this in while the paper is wet, letting it fade near the horizon. -
Water base layer:
While the sky dries, mix a light wash of Ultramarine Blue and a hint of Sap Green for the water color. Apply this across the entire water area, keeping your brush strokes horizontal to suggest the surface of the sea. -
Initial wall tone:
Mix a light grey using Ultramarine Blue and Burnt Sienna. Paint the vertical face of the harbor wall. I like to keep this wash uneven to suggest the texture of aged stone.
Step 3: Developing Texture and Depth
-
Detailed stonework:
Once the wall base is dry, use your smaller brush and a darker grey mix to dab in small, irregular shapes along the wall to imply individual stones, especially closer to the foreground. -
Yellow lichen accents:
Mix a vibrant Yellow Ochre. Paint the top edge of the foreground wall where the light hits it. This mimics the bright lichen often found on Irish sea walls. -
Wall shadow:
Add a stronger, darker line of grey along the base of the wall where it meets the water. This grounds the structure. -
Painting the houses:
Using a very small brush, paint the roofs of the distant houses with a dark grey/blue. Leave paper white for the walls, or use a tiny amount of diluted grey for shadows.
Salt Texture Trick
While the grey paint on the foreground stone wall is still wet, sprinkle a tiny pinch of table salt on it. Brush it off when dry for an amazing gritty rock texture.
Step 4: Final Touches
-
Water ripples:
With the Size 4 brush and a slightly more saturated blue mix, paint horizontal lines across the water to create ripples. Vary the thickness—thicker in the front, thinner in the distance. -
Reflections:
Add soft, vertical dashes of grey directly under the far harbor wall to show its reflection in the water. -
Foreground texture:
On the closest part of the stone wall (bottom left corner), enhance the texture with dry brush strokes of dark brown or grey to make it feel rough and solid. -
The Reveal:
Allow the painting to dry deeply. Carefully peel away the masking tape at a 45-degree angle to reveal your clean, professional white border.
You now have a charming pocket-sized seascape ready to frame or gift
BRUSH GUIDE
The Right Brush for Every Stroke
From clean lines to bold texture — master brush choice, stroke control, and essential techniques.
Explore the Full Guide
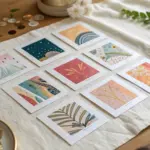
Celtic Knot Border on a Simple Background
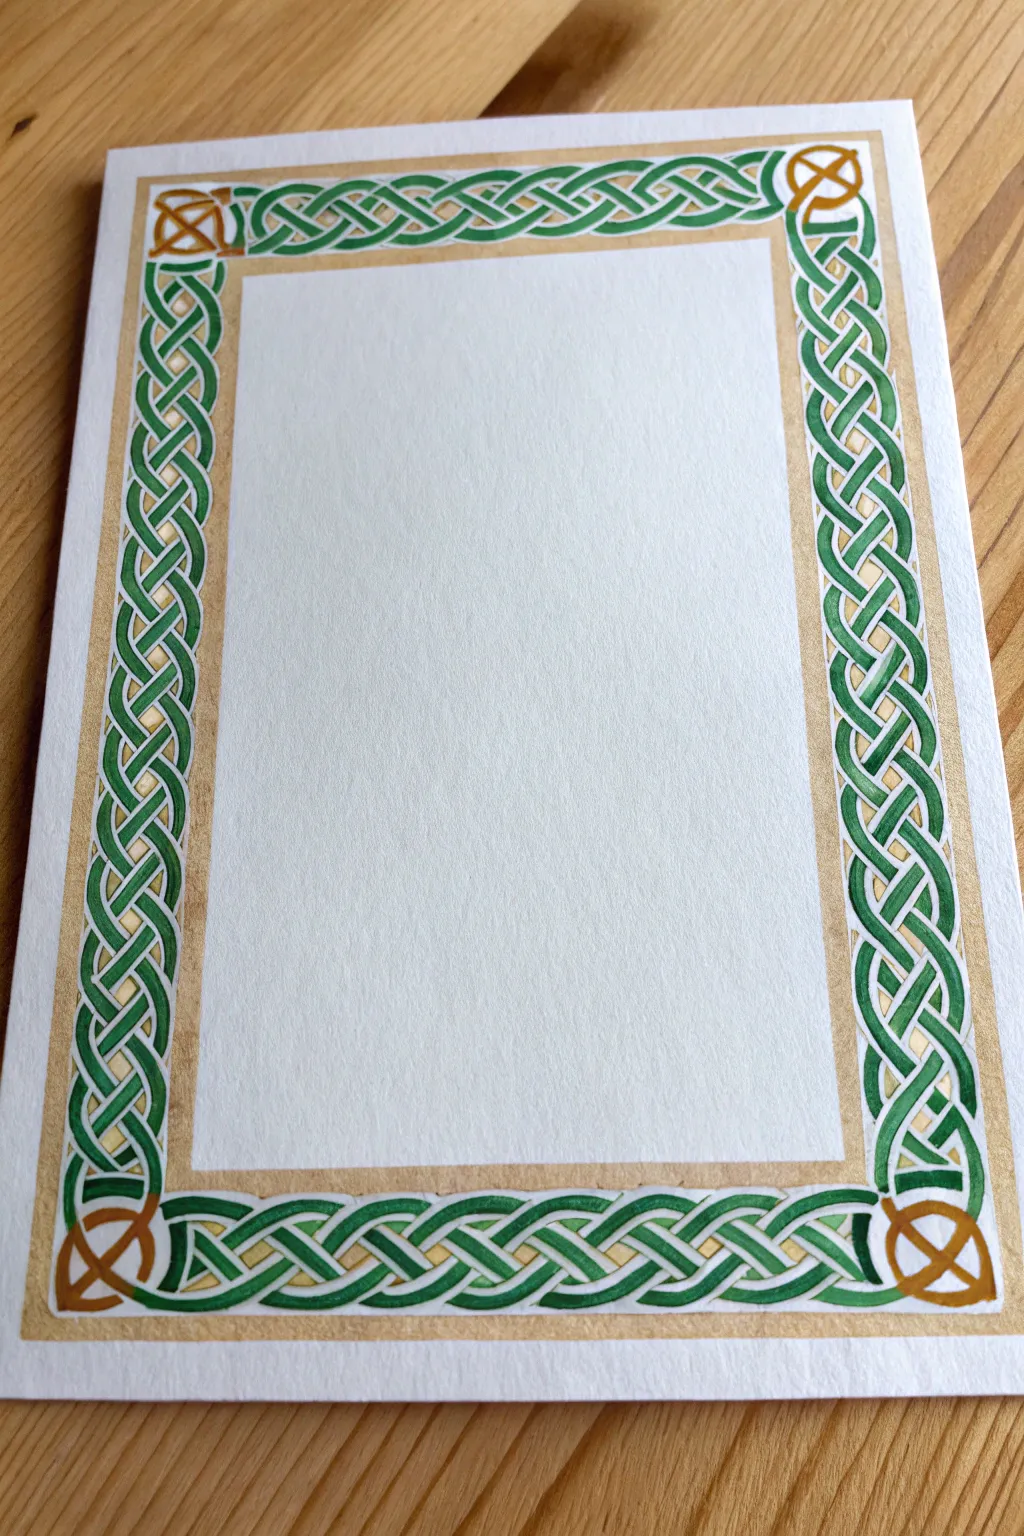
This elegant project features a traditional Celtic knotwork border painted in lush greens and gold on textured paper. The intricate interlace pattern creates a timeless frame perfect for calligraphy, a photo, or a special greeting card.
Step-by-Step Tutorial
Materials
- Heavyweight watercolor paper or cardstock (cold press texture works well)
- Pencil (HB or H for light lines)
- Eraser (kneaded eraser preferred)
- Ruler
- Compass or circle template
- Fine liner pen (green or black, waterproof)
- Watercolor paints or gouache (Sap Green, darker Forest Green, Yellow Ochre/Gold)
- Fine round brush (size 0 or 1)
- Water container and paper towel
Step 1: Drafting the Grid
-
Establish the border width:
Begin by lightly penciling a rectangle on your paper to define the outer edge of your frame. Measure inward about 1 inch (or your desired width) and draw an inner rectangle. This space between the lines is where your knotwork will live. -
Create a dot grid:
Celtic knots rely on a grid structure. Lightly mark a series of evenly spaced dots along the center of your border strips. The spacing depends on how tight you want the weave, but a 1/4 inch spacing is a good standard starting point. -
Sketch the primary weave:
Using the dots as guides, lightly sketch the over-under ribbon path. Think of a sine wave: draw a curved line that goes diagonally up to the right, loops over, and comes down. Repeat this pattern, then do the reverse to create the interlocking ‘plait’ effect. -
Detail the corners:
The corners in this design are distinct loops. Instead of continuing the weave through the corner, stop the green strands short. Sketch a separate, four-pointed loop design in the corner space, which will later be painted gold.
Step 2: Refining the Drawing
-
Thicken the strands:
Once the single-line path is correct, go back and add thickness to the lines. Draw a parallel line on either side of your original sketch to create a ribbon with width. Ensure the width remains consistent throughout the entire border. -
Define the interlace:
This is the crucial step for the 3D effect. Determine which ribbon goes ‘over’ and which goes ‘under’ at every intersection. Erase the crossing lines of the ‘under’ ribbon so the ‘over’ ribbon looks continuous. -
Draw the corner knots:
Flesh out the corner designs into thick ribbons as well, ensuring they look like distinct, self-contained ornamental knots that anchor the four corners.
Lost in the Weave?
If you lose track of the over/under pattern, say ‘over, under, over, under’ aloud as you trace the line with your finger. It really helps keep the rhythm while sketching.
Step 3: Painting the Background
-
Apply the wash:
Mix a very dilute wash of Yellow Ochre or a pale gold. Carefully paint the background space behind the ribbons. I find it easier to do this before painting the dark ribbons to avoid bleeding, but you must be precise. -
Let it dry:
Allow this background layer to dry completely. If the paper feels cool to the touch, it is likely still damp in the fibers.
Level Up: Metallic Pop
Swap the yellow ochre corner paint for real gold leaf or high-quality metallic watercolor. It catches the light beautifuly and adds an authentic illuminated manuscript feel.
Step 4: Painting the Knots
-
Base coat for ribbons:
Mix a medium Sap Green watercolor or gouache. Paint the main woven ribbons carefully. Use the tip of your fine brush to keep the edges sharp against the gold background. -
Paint the corners:
Using a stronger mix of Yellow Ochre or a metallic gold paint, fill in the four corner knot designs. -
Add shadowing:
To make the knotwork pop, mix a darker Forest Green. Apply this color specifically where a ribbon goes ‘under’ another ribbon. This creates a cast shadow effect. -
Highlighting:
If you are using gouache, you can mix a lighter green (green plus white or yellow) and paint a thin line down the center of the ‘high’ points of the ribbons to suggest curvature. -
Outline for crispness (Optional):
For a very graphic look, outline the green ribbons with a very fine dark green or black pen. Alternatively, for a softer look like the reference creates, use a slightly darker green paint and a very steady hand to tidy up any fuzzy edges. -
Final cleanup:
Once the paint is bone dry, gently erase any remaining visible pencil construction lines.
Now you have a stunning, historically inspired border ready to frame your favorite quote or photograph
Whimsical Leprechaun Portrait
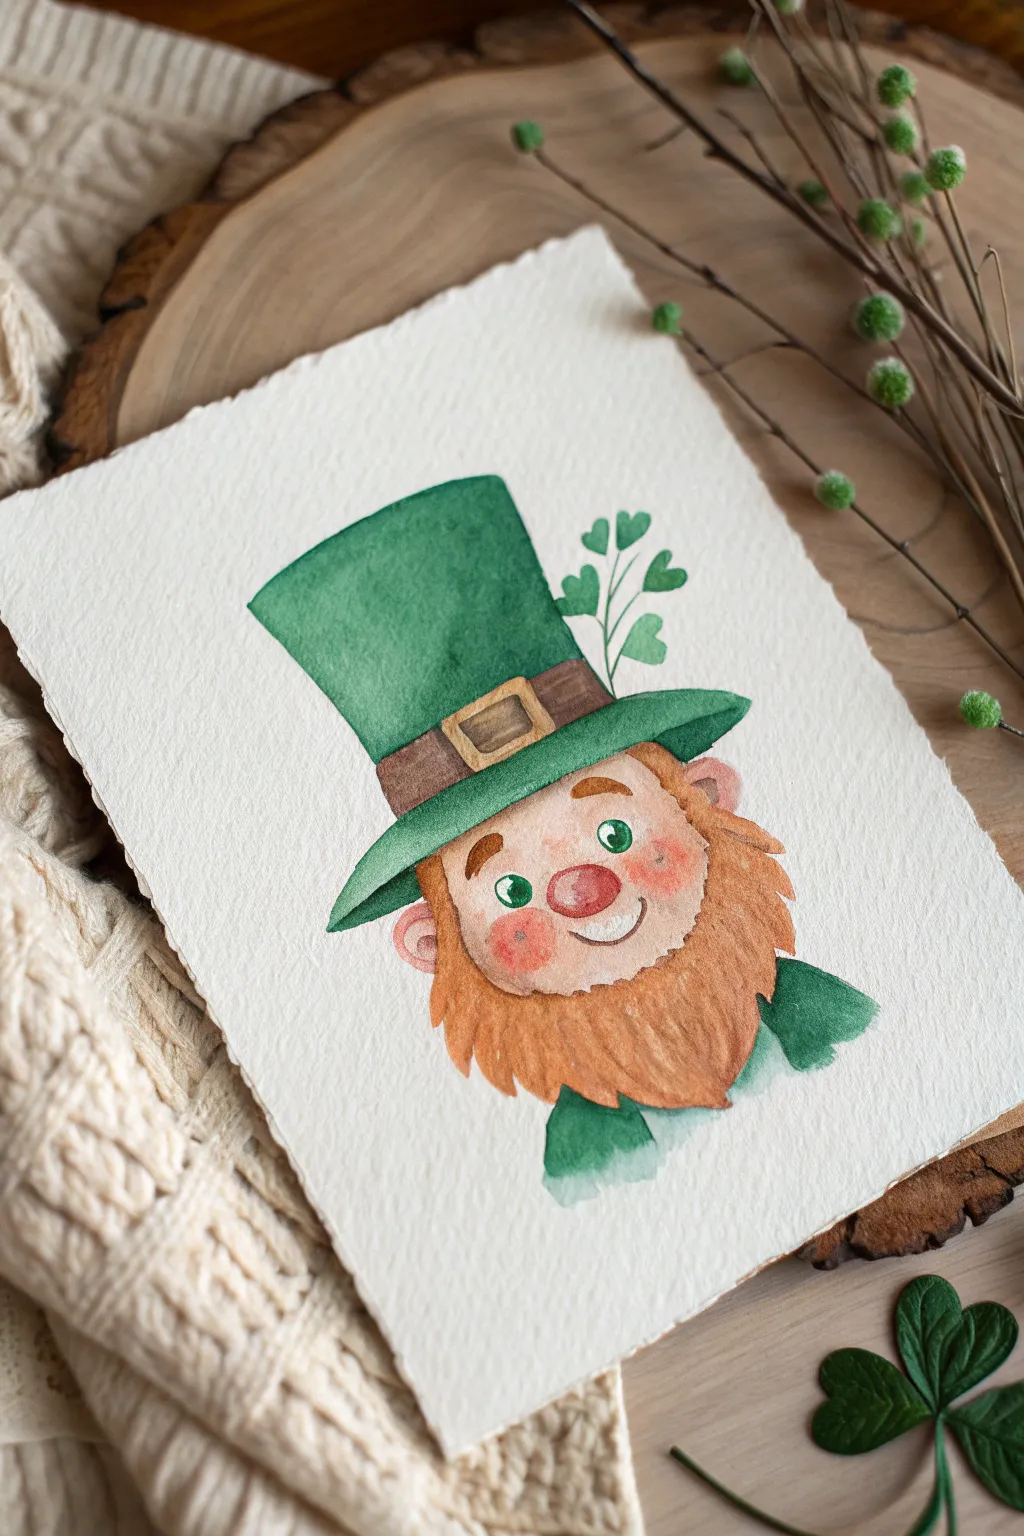
Capture the magic of Irish folklore with this charming leprechaun portrait, featuring soft watercolor textures and a friendly expression. The playful illustration style combined with the rustic, deckled-edge paper creates a heartwarming piece perfect for St. Patrick’s Day décor.
How-To Guide
Materials
- Cold press watercolor paper (deckled edge preferred)
- Watercolor paints (Emerald Green, Sap Green, Burnt Sienna, Yellow Ochre, Alizarin Crimson, Burnt Umber)
- Round brushes (sizes 2, 6, and 8)
- Pencil (HB or H)
- Kneaded eraser
- Clean water jar
- Paper towels
- Mixing palette
Step 1: Sketching the Character
-
Map out the head shape:
Start lightly with your pencil, drawing a rounded U-shape for the chin and jawline. Keep the top open where the hat will rest. -
Add the hat structure:
Draw the brim of the hat dipping slightly over the forehead. Above that, sketch a tall, slightly flared stovepipe shape for the crown of the hat. -
Draft facial features:
Place a round circle for the nose right in the center. Add two wide-set eyes above it, distinct C-shaped ears on the sides, and a merry, curved smile. -
Outline the hair and beard:
Sketch a fluffy, cloud-like beard that cups the chin. Add bits of hair poking out from under the hat brim near the ears. -
Refine details:
Add the belt and buckle to the hat. Sketch a few shamrock stems tucked behind the hat band. Lighten your pencil lines with a kneaded eraser until they are barely visible guides.
Pro Tip: Cheeky Glow
For the rosy cheeks, add the pink paint while the underlying skin tone is slightly damp (not soaking wet) to create a soft, fuzzy edge rather than a hard circle.
Step 2: Painting the Base Layers
-
First skin wash:
Mix a very watery wash of Burnt Sienna and a tiny dot of Alizarin Crimson to make a pale skin tone. Paint the face and ears, leaving the eyes and teeth white. Let this layer dry completely. -
Base green for the hat:
Using a size 8 brush, load up Emerald Green. Paint the crown and brim of the hat. While still wet, you can drop in slightly darker green pigment on the left side to suggest a shadow. -
Painting the beard:
Mix Burnt Sienna with Yellow Ochre. Paint the beard and hair area in sweeping strokes that follow the direction of hair growth. -
Shoulders and clothing:
Add small patches of green at the bottom of the painting to suggest his coat collar. Keep the edges soft and indefinite for a vignette look.
Level Up: Gold Shimmer
Once the painting is totally dry, use metallic gold watercolor paint or a gold gel pen to outline the belt buckle for a magical, shining pop of detail.
Step 3: Adding Depth and Color
-
Warm up the cheeks and nose:
Dilute Alizarin Crimson into a soft pink. Gently dab color onto the cheeks, the tip of the nose, and the insides of the ears. This ‘wet-on-dry’ technique gives him a rosy, cheerful glow. -
Hat details:
Paint the hat’s belt band with Burnt Umber. Once dry, paint the buckle square with Yellow Ochre. Add the green shamrock leaves floating near the hat using a smaller brush. -
Deepening the beard:
Take a more concentrated mix of Burnt Sienna. Use a size 2 brush to paint thin, flicking lines over the dry base layer of the beard to create individual hair textures. -
Defining the features:
Paint the irises of the eyes a bright green, leaving a tiny white speck for the highlight. Use a diluted brown to carefully outline the nose and smile.
Step 4: Final Details
-
Strengthening shadows:
Mix a darker green (Sap Green mixed with a touch of blue or brown) and paint a shadow under the belt on the hat and under the brim where it casts a shadow on the forehead. -
Adding texture to the hat:
I like to use a nearly dry brush with dark green to scuff gently across the hat, enhancing the watercolor paper’s natural texture. -
Final facial accents:
Add the pupils with dark grey or black. Paint the eyebrows thick and expressive using the same reddish-brown mix as the beard. -
Refining edges:
Check the edges of your painting. If you want a softer look, run a clean, damp brush along the bottom edge of the coat to fade it out.
Frame your cheerful leprechaun in a rustic wooden frame to complete the charming folk-art aesthetic

PENCIL GUIDE
Understanding Pencil Grades from H to B
From first sketch to finished drawing — learn pencil grades, line control, and shading techniques.
Explore the Full Guide
Traditional Music Session in Warm Light
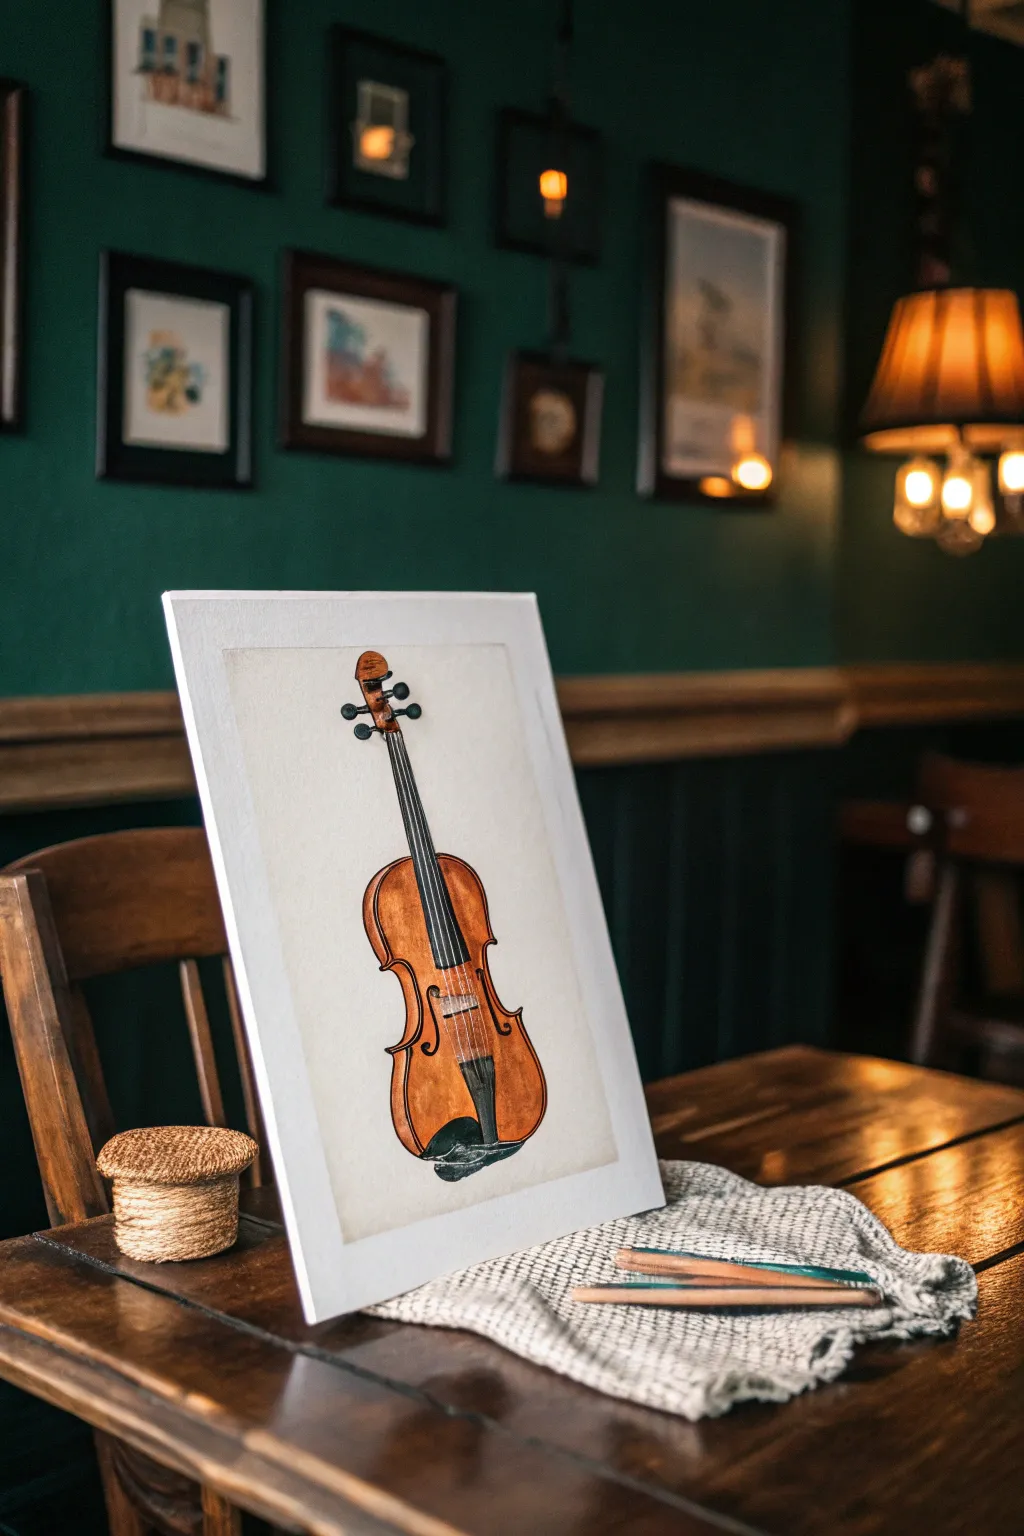
Capture the soul of an Irish trad session with this detailed study of a classic fiddle. This project combines the delicate transparency of watercolor with precise ink lines to create an instrument that looks ready to be played.
Step-by-Step Guide
Materials
- Cold press watercolor paper (A4 or 9×12 inch)
- HB or 2B pencil for sketching
- Kneaded eraser
- Waterproof fine liner pens (0.1mm, 0.3mm, 0.5mm, black)
- Watercolor paints (Burnt Sienna, Yellow Ochre, Burnt Umber, Payne’s Grey)
- Round watercolor brushes (Size 4 and Size 8)
- Two jars of water
- Paper towels
Step 1: Sketching the Form
-
Establish the centerline:
Begin by lightly drawing a vertical line down the center of your paper. This axis is crucial for keeping the violin’s symmetrical body shape balanced. -
Map the body shapes:
Draw two large, rounded bouts (the curves) for the bottom of the instrument and two smaller ones for the top shoulders. Connect them with C-shaped curves at the waist. -
Outline the neck and scroll:
Extend the neck upwards from the body, finishing with the distinctive scroll shape at the very top. Keep your pencil pressure extremely light so lines can be erased later. -
Detail the fingerboard and tailpiece:
Sketch the long, black fingerboard running down the neck. Below it, draw the triangular tailpiece and the small chin rest on the bottom left curve. -
Add f-holes and bridge:
Carefully place the two f-holes on either side of the waist. Draw the bridge—the small, arched piece of wood—centered between the f-holes.
Uneven Wash?
If your wood stain looks blotchy, re-wet the entire area with clean water and lightly brush over it to redistribute pigment before it dries completely.
Step 2: Inking the Details
-
Outline the main body:
Using a 0.3mm waterproof pen, carefully trace your pencil lines for the violin’s body. Use confident, sweeping strokes to avoid shaky edges. -
Detail the hardware:
Switch to a 0.1mm pen to draw the tuning pegs, the bridge, and the fine tuners on the tailpiece. These small mechanical parts need delicate lines. -
Draw the strings:
Use your finest pen (or a ruler if you are unsteady) to draw the four strings running from the tuning pegs, over the bridge, to the tailpiece. -
Textural hatching:
Add very subtle hatching marks near the curved edges of the body and on the scroll to suggest volume and shadow before painting. -
Clean up:
Wait at least ten minutes for the ink to fully set, then gently erase all visible pencil marks with your kneaded eraser.
Aged Varnish Look
Splatter tiny droplets of concentrated Burnt Umber or adding water blooms while drying to mimic the texture of an antique, well-played fiddle.
Step 3: Applying Watercolor
-
First wash of wood tone:
Mix a watery wash of Yellow Ochre. Paint the entire wooden body of the violin, avoiding the fingerboard, tailpiece, and chin rest. -
Adding warmth:
While the first layer is still slightly damp, drop in Burnt Sienna along the outer edges and curves of the body to create that rich, varnished look. -
Darkening the shadows:
Mix Burnt Umber with a touch of Sienna. Paint this darker tone on the sides of the violin (the ribs) and inside the scroll to create 3D depth. -
Painting the ebony parts:
For the fingerboard, tailpiece, and chin rest, use Payne’s Grey. I find pure black looks too flat, so this dark blue-grey offers a richer, more natural ebony look. -
Defining the f-holes:
Fill in the f-holes with a concentrated mix of Burnt Umber and Payne’s Grey to show the dark, hollow space inside the instrument. -
Final highlights:
Once fully dry, you can lift a tiny bit of color from the varnish with a damp brush to create a shine, or use a white gel pen for specular highlights on the tuning pegs.
Frame your finished piece in a simple mount to let the warm wood tones truly sing
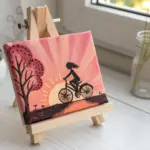
Rainy Dublin Streets in Gouache
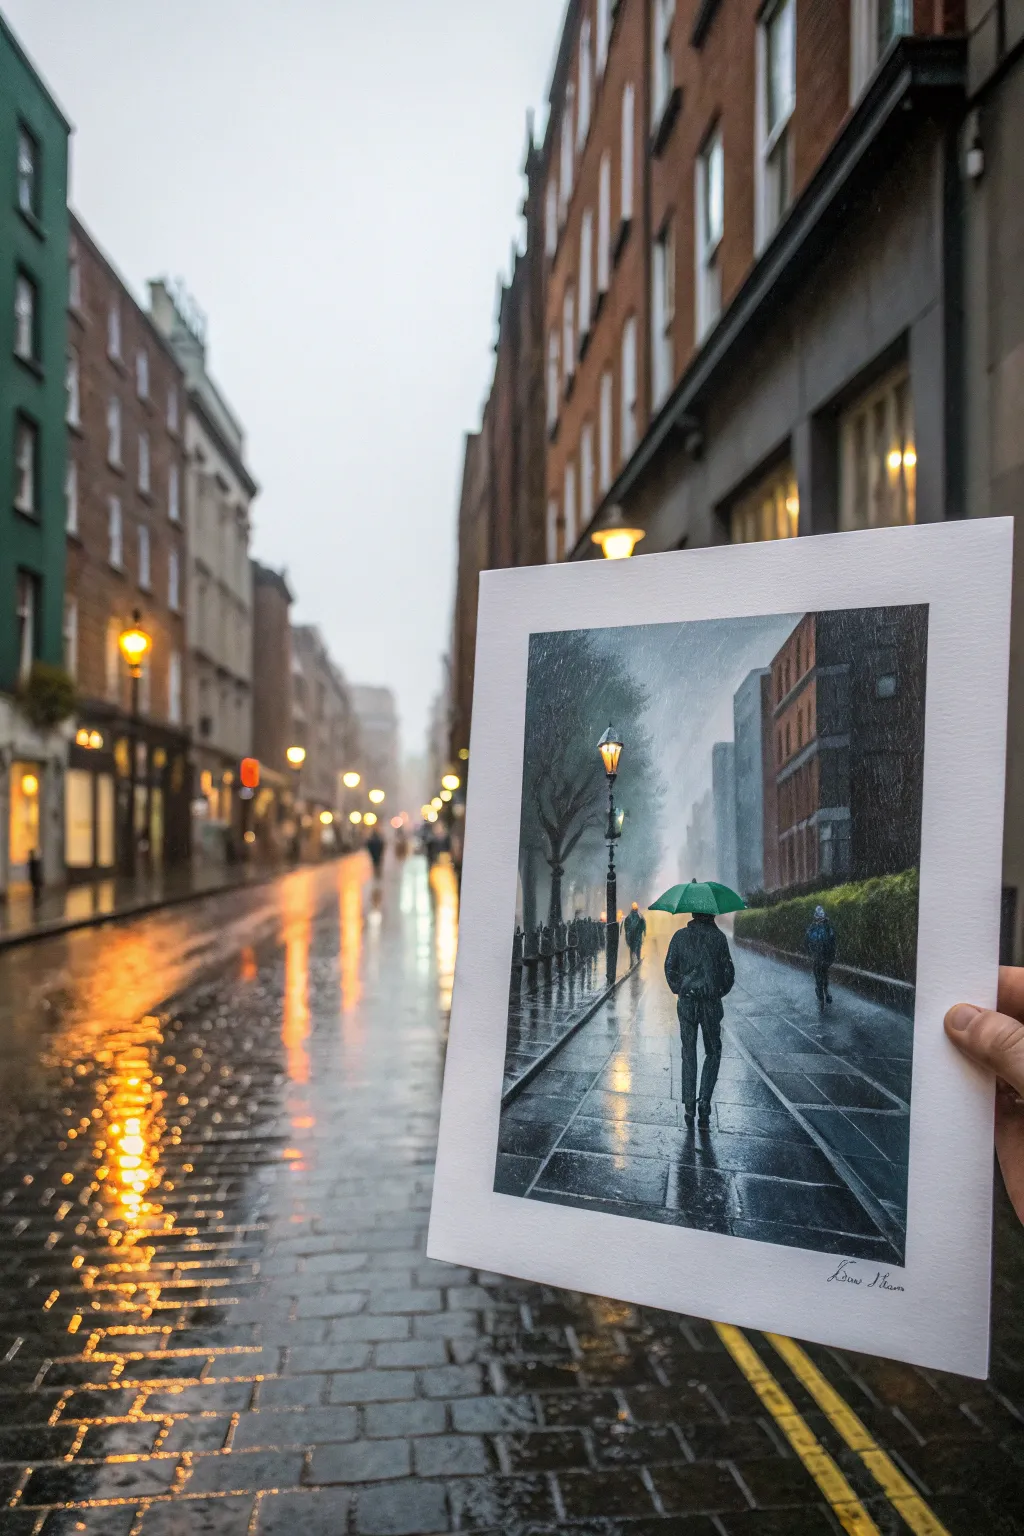
Capture the moody atmosphere of a wet Irish afternoon with this gouache painting of a rainy Dublin street. You’ll learn to handle reflections on cobblestones and create depth using atmospheric perspective.
Step-by-Step Tutorial
Materials
- Gouache paint set (primary colors plus black, white, burnt umber, and yellow ochre)
- Heavyweight watercolor paper or mixed media board (around 300gsm)
- Flat shader brushes (sizes 6 and 10)
- Round detail brushes (sizes 0 and 2)
- Masking tape
- Palette for mixing
- Two jars of water
- Paper towels
- Pencil (HB or 2H)
Step 1: Preparation and Sketching
-
Tape the edges:
Begin by taping down all four edges of your paper to a rigid board. This creates a crisp white border (like a gallery print) and prevents the paper from buckling when wet. -
Map the perspective:
Lightly sketch the horizon line about one-third of the way up the page. Draw a single vanishing point in the distance where the street converges. -
Outline the main shapes:
Sketch the vertical lines for the buildings on the right and the trees on the left. Don’t worry about every brick; just get the large geometric masses in place. -
Feature the figure:
Draw the silhouette of the central figure walking away. Ensure the umbrella is positioned just above the horizon line to ground them in the scene.
Step 2: Blocking in the Background
-
Mix the sky grey:
Create a cool, light grey using white, a touch of black, and a tiny speck of blue. Paint the sky area, keeping the strokes loose and slightly uneven to suggest clouds. -
Paint distant buildings:
While the sky is drying, mix a darker, cooler grey for the distant buildings. Paint these shapes flatly; atmospheric perspective makes distant objects look hazier and less detailed. -
Layer the trees:
For the trees on the left, use a dark grey-green. Use a fairly dry brush to scumble the paint, creating a textured, leafy appearance that fades into the mist. -
Warm up the foreground buildings:
Mix burnt umber with a little red and white to create a brick tone. Paint the prominent building on the right, keeping the edges nearest the viewer sharper than those further away.
Chalky textures?
If your darks look chalky or grey when dry, you likely mixed in too much white. Try glazing painting over the area with a pure, unmixed dark color to restore depth.
Step 3: The Wet Pavement
-
Base coat for the street:
Mix a dark, slate blue-grey using black, blue, and white. Cover the entire street area with horizontal strokes to mimic the direction of the pavement slabs. -
Add vertical reflections:
Before the base coat fully dries, drag vertical strokes of lighter grey and soft yellow downwards from light sources (like streetlamps or the sky) to start the reflection effect. -
Define the curb:
Use a smaller flat brush and dark grey to paint the sharp, diagonal lines of the curbs, leading the eye directly toward the vanishing point.
Pro Tip: Why Gouache?
Unlike watercolor, gouache is opaque. This means you can paint the light reflections (step 14) directly on top of the dark pavement without needing masking fluid.
Step 4: Details and Atmosphere
-
Paint the figure:
Fill in the walking figure with solid black or very dark blue. Once dry, add the bright green umbrella—this pop of color is crucial against the grey background. -
Add streetlamps:
Using a small round brush, paint the black lampposts. Adding a tiny dab of yellow ochre and white inside the lamp housing creates a warm glow. -
Refine the rain:
Take a dry brush with a very small amount of white paint and lightly drag it diagonally across parts of the image to suggest falling rain. -
Highlight the puddles:
Use pure white paint on a detail brush to add sharp, horizontal zig-zags on the pavement. These represent the brightest reflections on the wet stone. -
Final adjustments:
Check your values. If the background looks too sharp, glaze over it with a very watered-down white to push it back further into the mist. -
Reveal the border:
Wait until the painting is completely bone-dry, then slowly peel away the masking tape at a 45-degree angle to reveal clean edges.
Frame this piece behind glass to protect the matte surface of the gouache and enjoy your rainy day scene


Textured Map of Ireland Mixed-Media Painting
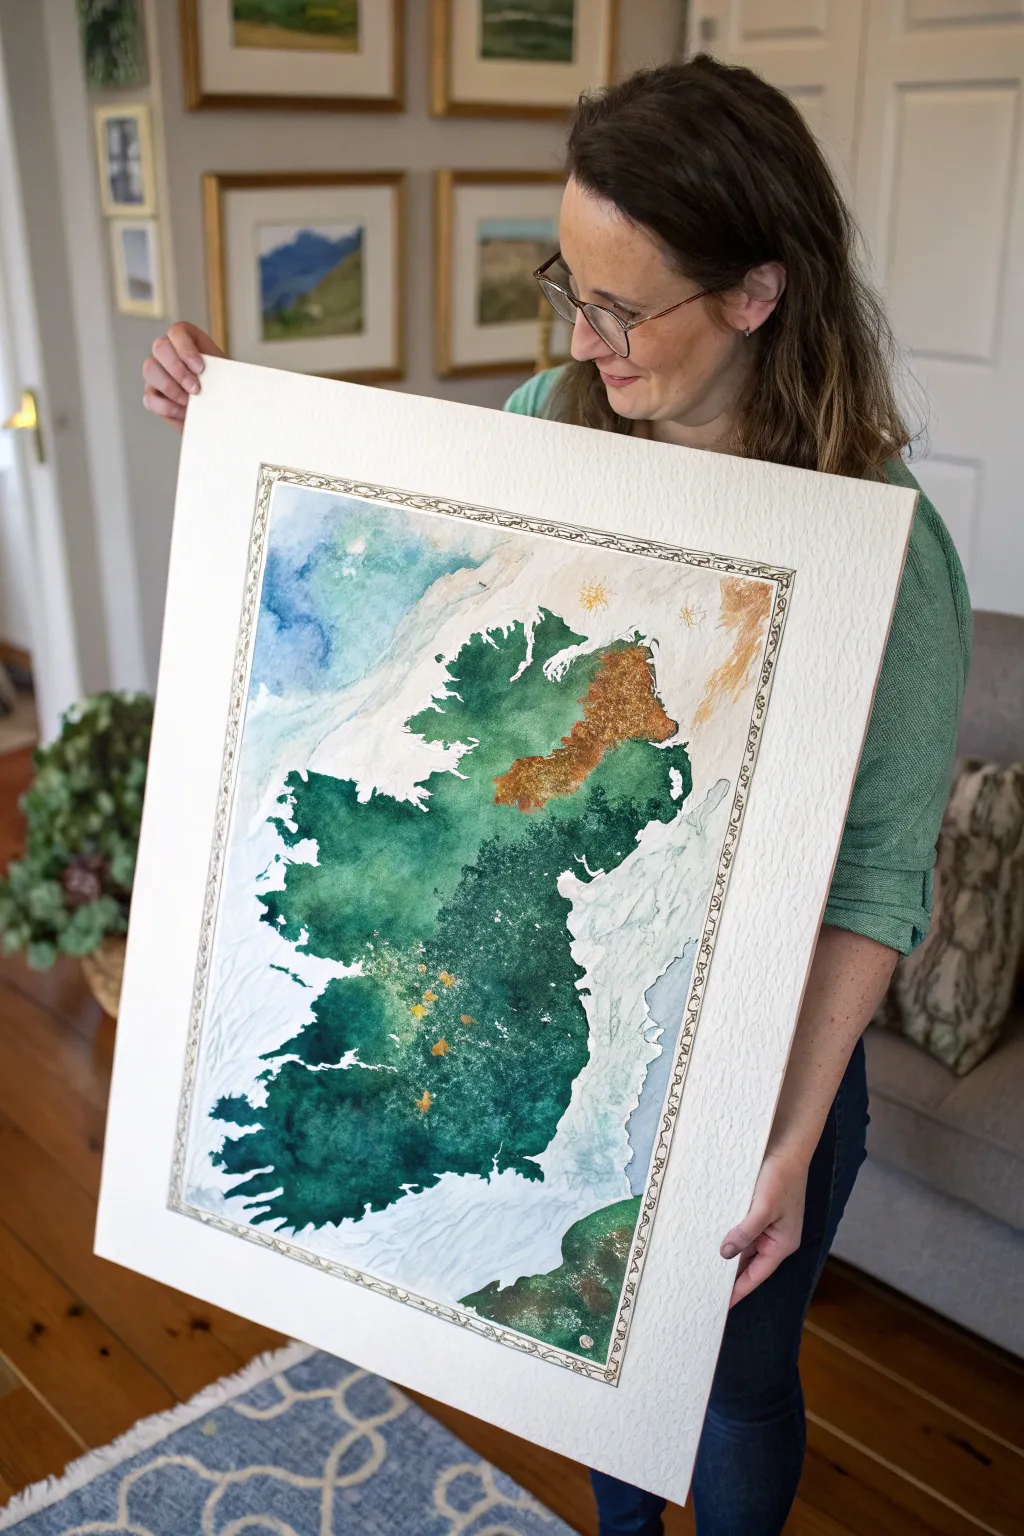
Capture the rugged beauty of Ireland with this stunning mixed-media map that blends loose watercolor washes with crisp ink details. The finished piece features deep, pooling greens for the land and ethereal blue swirls for the sea, all framed by an intricate hand-drawn border.
How-To Guide
Materials
- Large sheet of cold-press watercolor paper (300gsm or heavier)
- Watercolor paints (Hooker’s Green, Sap Green, Indigo, Yellow Ochre, Burnt Sienna, Turquoise)
- Gold ink or gold leaf with adhesive size
- Fine-liner waterproof Micron pens (sizes 01 and 05)
- Large round wash brush
- Medium round brush
- Salt (for texture)
- Pencil and eraser
- Ruler
- Reference map of Ireland
- Masking fluid (optional)
Step 1: Preparation and Sketching
-
Map the boundaries:
Begin by lightly measuring a rectangular border about 2–3 inches from the edge of your paper. Use a ruler to ensure straight lines, but keep the pencil marks faint as they will be inked over later. -
Outline the coast:
Lightly sketch the outline of Ireland in the center. Don’t worry about perfect geographical precision; focus on capturing the jagged character of the coastline. Leave plenty of negative space between the land and your border. -
Define the intricate border:
Inside your pencil rectangle, draw a double line to create a frame channel. Sketch a repeating Celtic-inspired or scrollwork pattern within this channel. This will act as the container for your final decorative ink work.
Step 2: Painting the Land
-
Wet-on-wet technique:
Using your medium round brush, apply clean water to the interior of the Ireland shape. You want the paper glistening but not swimming in puddles. -
Drop in the greens:
Load your brush with a rich Hooker’s Green and touch it to the wet paper. Watch the pigment bloom and spread naturally. Add drops of Sap Green in different areas to create variation in the terrain. -
Add warmth:
While the green is still wet, introduce Burnt Sienna and bits of Yellow Ochre to the northeastern section (representing Northern Ireland or varied terrain) to break up the monochrome palette. Let these colors bleed slightly into the green. -
Create texture with salt:
While the paint is still damp—the crucial ‘shiny’ stage—sprinkle a pinch of table salt over the deep green areas. As it dries, the salt will absorb pigment and create a starburst texture resembling forests or rocky terrain. -
Deepen the tones:
Once the first layer is semi-dry, use a drier brush with concentrated Indigo or dark green to tap in shadows along the western coastlines to suggest depth and cliffs.
Blooms & Backruns
Drop clear water into drying paint to create ‘cauliflower’ blooms. This mistake is actually a great technique for making organic, cloud-like textures in the ocean areas.
Step 3: The Sea and Details
-
Ocean washes:
Switch to a large wash brush. Mix a very watery Turquoise or light blue. Paint loose, swirling strokes around the landmass, careful not to touch the green paint if it’s still wet. -
Keep it loose:
Allow the blue wash to fade out into white space as it approaches the border. The goal is an atmospheric, misty look rather than a solid block of blue water. -
Dry completely:
Let the entire painting dry completely. This is essential before adding ink. I usually leave it for several hours or use a hairdryer on a low, cool setting. -
Remove the salt:
Gently rub off the dried salt crystals with your fingers or a clean cloth to reveal the texture underneath.
Antique Finish
Stain the paper edges with strong tea or watered-down coffee before painting steps begin. This gives the map an aged, parchment-like appearance.
Step 4: Inking and Embellishment
-
Inking the frame:
Using the 05 Micron pen, trace the heavy outer lines of your rectangular border. Switch to the 01 pen for the delicate scrollwork pattern inside the frame. -
Coastline definition:
Use the fine 01 pen to loosely trace the coastline. You don’t need a solid continuous line; broken lines often look more organic and artistic. -
Add gold accents:
Using gold ink or a touch of gold leaf, highlight specific areas like the major cities (Dublin, Cork, Galway) or add small decorative compass points in the ocean area. -
Final touches:
Erase any remaining pencil lines carefully. If desired, lightly splatter white gouache or gold ink over the ocean areas for a magical spray effect. -
Mounting:
Once fully dry, the paper may have buckled slightly. Place it under heavy books overnight to flatten it before mounting it on a backing board for framing.
Hang your masterpiece in a spot with good light to let the gold accents shimmy and shine


Have a question or want to share your own experience? I'd love to hear from you in the comments below!