There’s something magical about a smooth white rock—it already feels like a tiny canvas, so you can jump straight into crisp details without painting a background. Here are my favorite white rock painting ideas that use that natural brightness for clean lines, bold contrast, and lots of satisfying negative space.
Black Henna-Style Mandala
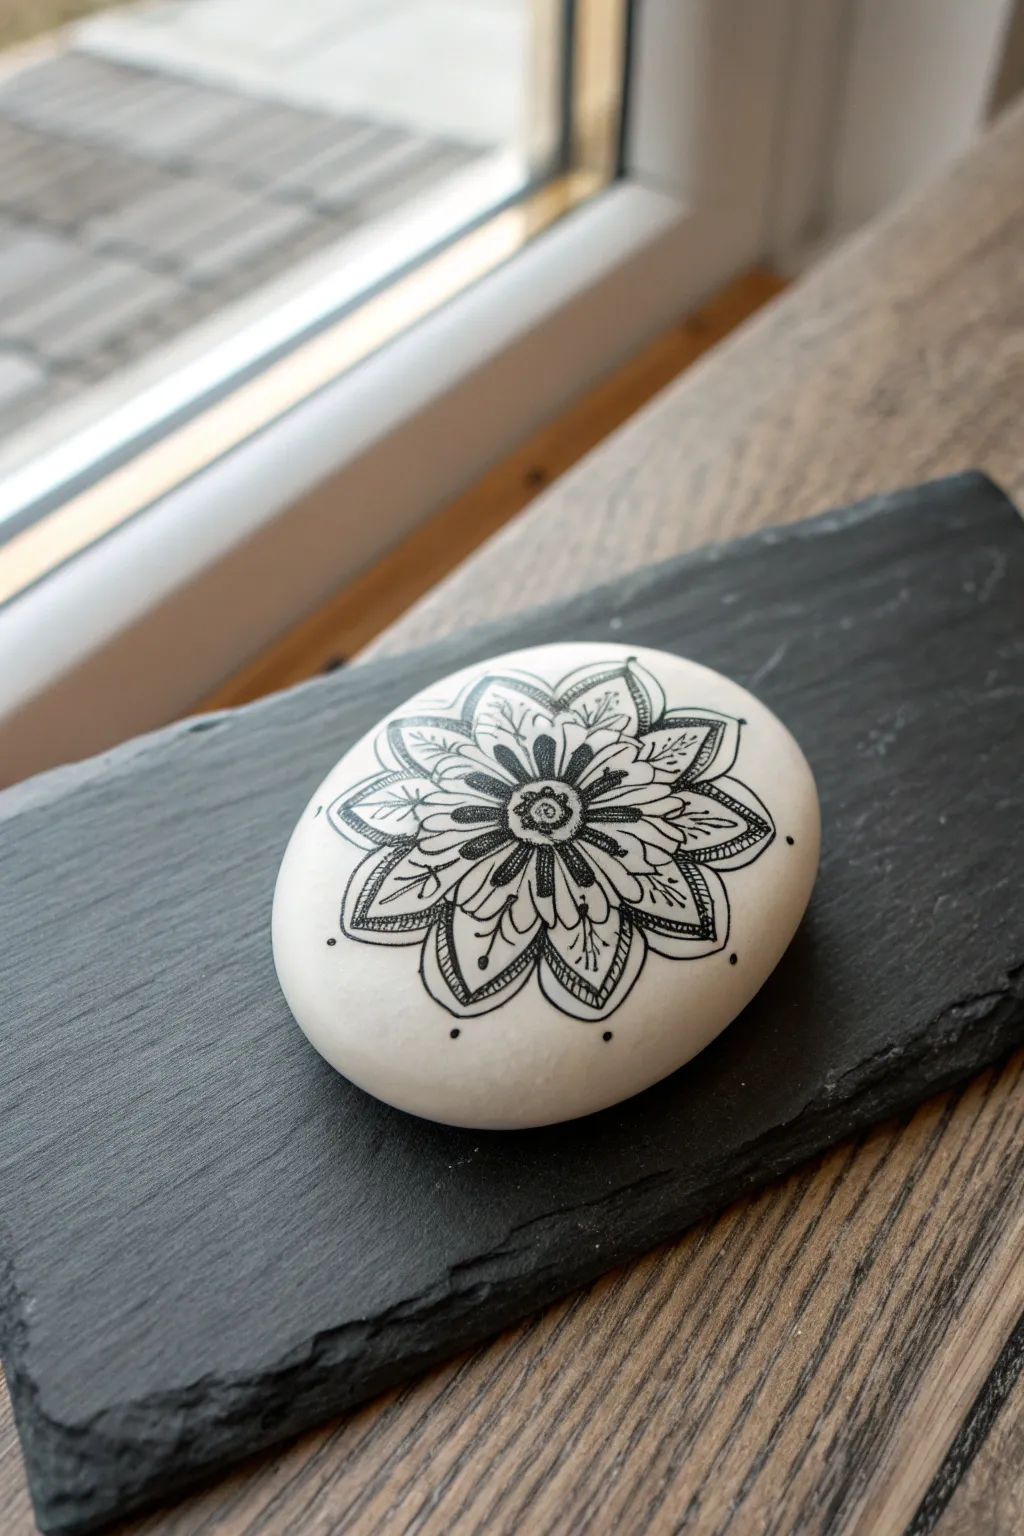
Transform a simple garden stone into a mesmerizing piece of decor with this high-contrast black and white mandala design. The intricate linework mimics the delicate beauty of henna art, creating a calming focal point that fits perfectly on a desk or windowsill.
Detailed Instructions
Materials
- Smooth, round white river stone (approx. 3-4 inches diameter)
- Fine tip black acrylic paint pen (0.7mm or similar)
- Ultra-fine tip black acrylic paint pen (0.5mm) for details
- Pencil (HB or lighter)
- White eraser
- Compass or circle stencil (optional)
- Spray varnish (matric or satin finish)
Step 1: Preparation & Layout
-
Clean the surface:
Before starting, ensure your rock is completely clean and dry. Wash it with mild soapy water to remove any dirt or oils, as these can prevent the ink from adhering properly. -
Find the center:
Visualize the center of your stone. Using a pencil very lightly, make a small dot in the middle. This will anchor your entire mandala design. -
Draft the inner circle:
Lightly sketch a small circle around your center dot, roughly the size of a dime. This will contain the innermost flower core. -
Mark the outer boundary:
Sketch a larger, faint circle about an inch outward from the center to guide where your main petals will end. This helps keep the design symmetrical.
Step 2: Drawing the Core
-
Ink the center:
Take your fine tip black pen and draw a small, solid circle over your center pencil dot. Leave a tiny white highlight in the middle if you like, or fill it completely. -
Add the first ring:
Draw a ring around that center dot. Inside this ring, draw tiny semi-circles or scallops touching the outer edge of the ring. -
Create the core petals:
Draw about 8 small, distinct petals radiating from that central ring. Keep them rounded and relatively uniform in size. -
Detail the core petals:
Inside each of these small petals, add a thin line or teardrop shape. Fill in the negative space between these petals with solid black ink to make the white petals pop.
Smudge Patrol
Work from the center outward to avoid resting your hand on wet ink. If you’re left-handed, rotate the stone frequently so your hand rests on the unpainted side.
Step 3: Expanding the Mandala
-
Outline the main petals:
Draw a larger layer of pointed petals extending from the core. Aim for about 8 large petals, positioning the point of each one directly between two of the smaller inner petals. -
Double the outline:
Carefully draw a second outline inside each of these large pointed petals. This creates a ‘border’ effect inside the petal shape. -
Fill the petal spines:
Draw a straight line down the center of each large petal. At the base of this line (near the center), thicken it slightly or add a small solid teardrop shape for visual weight. -
Add texture marks:
On either side of the center spine within each petal, add tiny diagonal hatch marks or dots. This shading mimics the texture often found in henna designs.
Gold Highlighting
Once the black ink is dry, add tiny dots of metallic gold paint inside the petals or along the outer rim for a luxurious, jewelry-like finish.
Step 4: Outer Flourishes & Finishing
-
Draw the outer scallops:
Between the tips of the large pointed petals, verify drawn connecting arcs or scallops that bridge the gaps. These should look like the tops of a third layer of petals peeking through. -
Embellish the outer layer:
Fill these outer scallops with delicate branching lines—like tiny veins or fern leaves—using your ultra-fine tip pen. -
Add the dot border:
Place a single, distinct black dot at the very tip of each large pointed petal. Then, place a dot in the valley between petals. -
Review and refine:
Look over the entire design. If any black lines look thin or shaky, go over them carefully to thicken and smooth them out. -
Erase pencil guides:
Allow the ink to dry completely—I usually wait at least 30 minutes to be safe. Then, gently erase any visible pencil guidelines. -
Seal the stone:
Finish by applying a light coat of spray varnish. This protects the design from scratches and gives the stone a professional, finished look.
Place your finished mandala stone on a stack of books or use it as a mindful paperweight on your desk.


Single Daisy With Airy White Space
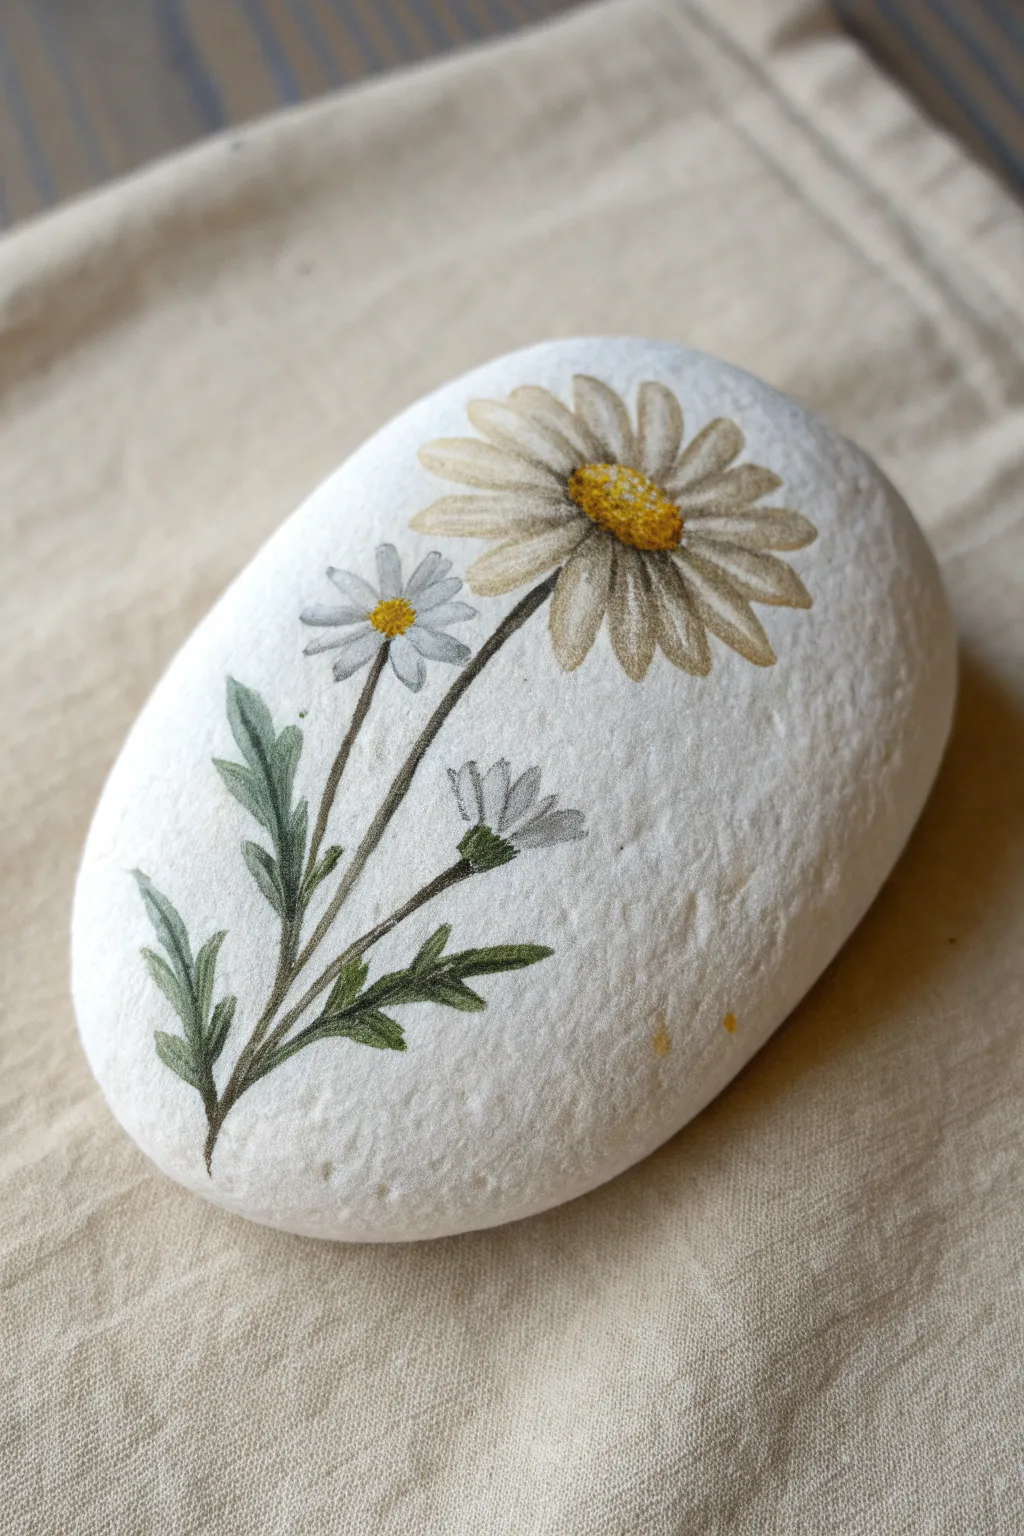
Capture the ethereal beauty of wildflowers with this elegant rock painting project. Using fine lines and muted tones against a stark white background creates a sophisticated, vintage botanical illustration look.
How-To Guide
Materials
- Smooth oval river rock
- White acrylic paint (matte finish)
- Acrylic paints (olive green, forest green, yellow ochre, raw sienna, off-white/cream)
- Fine detail brushes (sizes 000, 0, and 1)
- Flat brush (for base coat)
- Graphite transfer paper (optional)
- Pencil
- Matte spray varnish
Step 1: Base Preparation
-
Clean the surface:
Wash your stone thoroughly with soap and water to remove any dirt or oils that could prevent the paint from sticking. Let it dry completely. -
Apply the first base coat:
Using a flat brush, paint the entire top surface of the stone with matte white acrylic paint. Stroke in one direction for a smooth finish and let dry. -
Add a second coat:
Apply a second layer of white paint to ensure full opacity. The goal is a canvas-like surface where the natural rock texture is minimized visually.
Petals Disappear?
If your white petals vanish into the white background, mix a tiny drop of pale blue-grey into your white paint. It adds just enough contrast without looking dark.
Step 2: Sketching the Composition
-
Lightly sketch the stems:
With a very sharp pencil, lightly draw three curved lines originating from the bottom left area. These will be your main stems. -
Position the flower heads:
Sketch an oval for the large daisy center at the top right, a smaller circle for the middle daisy, and a small cone shape for the lower closed bud. -
Outline the leaves:
Draw jagged, fern-like leaf outlines branching off the main stems low on the rock.
Pro Tip: Texture
For the large yellow center, wait for the base yellow to dry, then use a dry brush with thick orange paint to dab texture on the lower half only.
Step 3: Painting the Stems and Greens
-
Mix your greens:
Create an olive green by mixing forest green with a touch of yellow ochre and white. You want a muted, natural tone rather than a bright grassy green. -
Paint the stems:
Using a size 0 or 000 liner brush, trace over your pencil lines with the olive mix. Keeping plenty of water on your brush helps the paint flow smoothly for long lines. -
Fill in the leaves:
Paint the leaves with the same olive base. Use short, flicking strokes to mimic the jagged edges of daisy foliage. -
Add leafy depth:
Mix a slightly darker forest green and add thin shadow lines along one side of the stems and the underside of the leaves for dimension.
Step 4: The Large Daisy
-
Paint the center:
Fill the large oval center with a mix of yellow ochre and raw sienna. I like to stipple this (tap the brush tip) to create a fuzzy texture. -
Lay out the petals:
Mix a very diluted, watery ‘tea stain’ color using raw sienna and plenty of water. Paint the long petal shapes radiating from the center. They should be semi-transparent. -
Define the petals:
Once the wash is dry, use a slightly darker mix of raw sienna and a size 000 brush to outline each petal very faintly and add linear details inside the petals. -
Highlight the center:
Dot the upper left portion of the yellow center with bright yellow and tiny white specks to show where the light hits the pollen.
Step 5: The Smaller Blooms
-
Paint white petals:
For the middle flower, paint the petals with pure white or a very light cream. Since the background is white, you might need a tiny touch of grey to distinguishing the edges. -
Detail the bud:
For the lowest flower (the bud), paint small white petals emerging from a green cup-like base (the sepal). -
Add the middle center:
Paint a small yellow circle in the middle flower. Add tiny orange dots along the bottom edge of this center for shadow.
Step 6: Final Touches
-
Refine the composition:
Step back and look at your rock. If the white petals are lost against the background, use a very watery grey wash to add tiny shadows between the petals. -
Seal the artwork:
Once absolutely dry, spray lightly with a matte varnish. Avoid brush-on sealers initially as they might smear the delicate fine lines.
Display your botanical stone on a small easel or use it as a lovely minimalist paperweight


Lavender Sprig Botanical Study
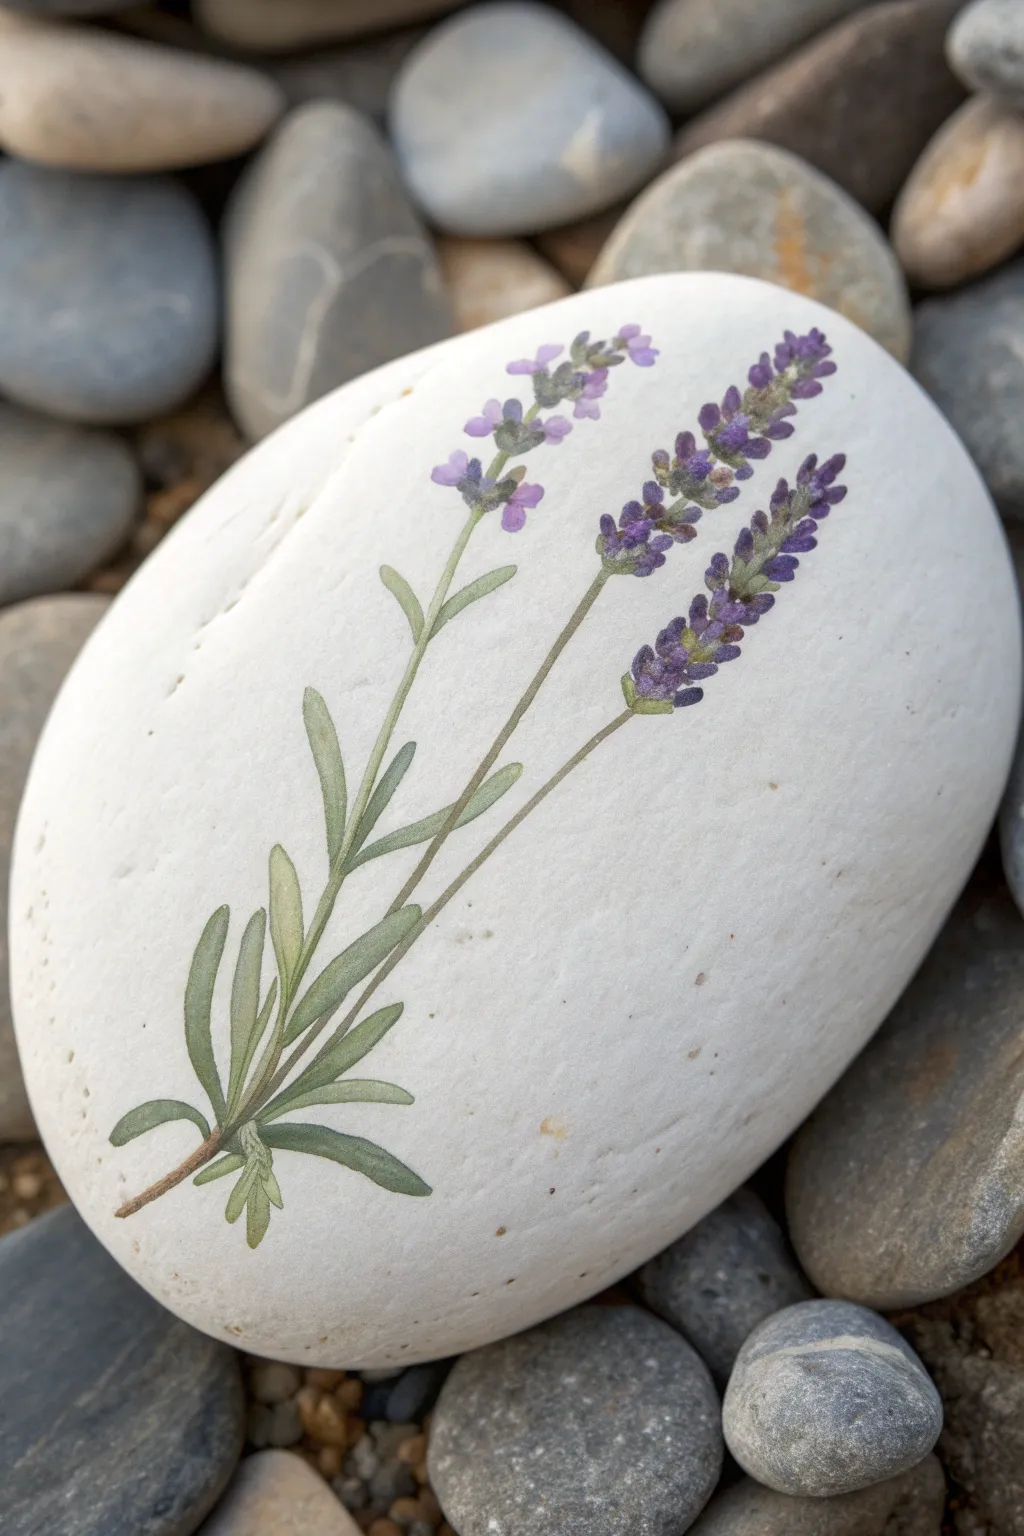
Transform a simple stone into a stunning piece of botanical art with this delicate lavender study. The smooth white background provides the perfect canvas for the soft purple blooms and slender green leaves, creating a peaceful and natural aesthetic.
Detailed Instructions
Materials
- Smooth, white river rock (flat surface preferred)
- Fine-grit sandpaper (optional)
- Pencil (HB or 2H)
- Acrylic paints (Titanium White, Olive Green, Sap Green, Burnt Umber, Deep Violet, Lavender/Lilac)
- Detail brushes (sizes 0, 00, and 3/0 liner)
- Palette for mixing
- Water cup and paper towel
- Matte spray sealant
Step 1: Preparation & Sketching
-
Clean the surface:
Wash your white rock thoroughly with soap and water to remove any dirt or oils. Let it dry completely. -
Smooth imperfections:
If your rock has rough patches, lightly sand the main painting area with fine-grit sandpaper to create a smoother surface for your detail work. -
Prime the background:
Even if the rock is naturally white, painting a thin layer of Titanium White acrylic creates a consistent, bright base that makes the colors pop. -
Plan the composition:
Lightly sketch three main stems using your pencil. Curve them gently toward the left at the base, letting them fan out naturally as they reach the top. -
Sketch foliage placement:
Mark small dashes along the lower half of the stems where the leaves will attach. Keep the arrangement loose and organic rather than perfectly symmetrical.
Paint Consistency Tip
Add a drop of water to your acrylics for the stems. Inky paint flows smoother off a liner brush, creating continuous lines without breaks.
Step 2: Stems & Greenery
-
Mix your base green:
Create a natural stem color by mixing Olive Green with a tiny touch of Burnt Umber to desaturate it slightly. -
Paint the main stems:
Using a size 0 detail brush or liner, paint over your pencil lines for the three stems. Apply light pressure for thin lines, thickening slightly near the base. -
Add base leaves:
Paint the long, slender leaves near the bottom left. Use a ‘press and lift’ stroke: start with light pressure, press down to widen the leaf belly, and lift up to taper to a point. -
Layer lighter greens:
Mix Sap Green with a little White. Paint smaller, fresher leaves higher up the stems and add highlights to the tops of the lower leaves for dimension. -
Connect the sprigs:
Ensure all stems meet naturally at the bottom left corner, creating a unified bunch that looks like it was just picked.
Scented Decor
After sealing, place the rock in a bowl with real dried lavender buds. It makes for a beautiful, fragrant centerpiece arrangement.
Step 3: Blossoms & Details
-
Establish the flower structure:
Along the top third of each stem, paint small, alternating clusters of tiny green buds using your lighter green mix. These act as the anchors for the purple flowers. -
Apply base purples:
Mix a Deep Violet. Using the tip of a 00 brush, dab small, teardrop shapes onto the green bud clusters. Start from the bottom of the flower head and work upward. -
Vary the saturation:
Make the flowers on the right stem darker and denser, while keeping the leftmost stem slightly more sparse and lighter to create depth. -
Add lavender highlights:
Mix Violet with White to create a soft lilac shade. Add tiny dots or strokes to the tops and outer edges of the flower clusters, mimicking sunlight hitting the petals. -
Refine the stems:
Take your thinnest liner brush (3/0) with watered-down brown-green paint. Add very subtle outlines or shadows where the leaves overlap the stems to create separation. -
Clean up edges:
If any paint went outside the lines, use a clean, damp brush or a dot of white paint to tidy up the background negative space. -
Seal the artwork:
Once fully dry (give it at least an hour), spray the rock with a clear matte sealant. I prefer matte over gloss here to maintain the natural, botanical illustration look.
Display your botanical stone on a desk or shelf to bring a calming touch of nature indoors


Fern Frond Silhouette
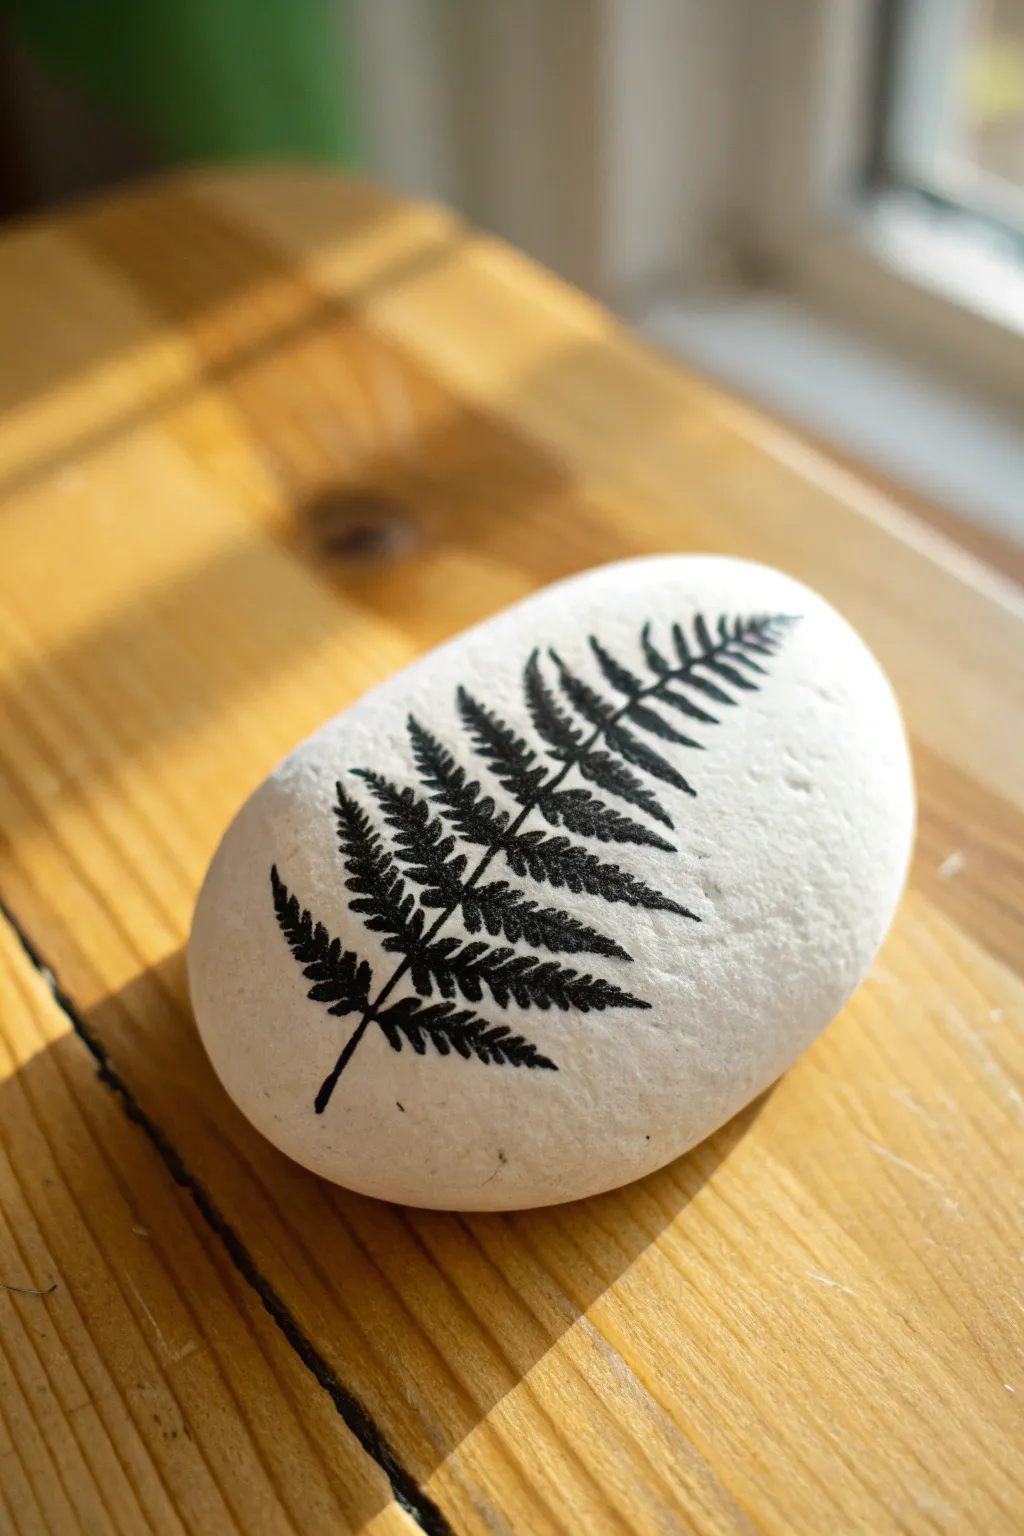
This elegant project captures the delicate structure of a fern frond against a stark white background. The high-contrast design turns a simple garden stone into a sophisticated piece of nature-inspired decor.
How-To Guide
Materials
- Smooth, oval river rock (approx. 3-4 inches)
- White acrylic paint (matte finish)
- Black acrylic paint or black acrylic paint pen (extra fine tip)
- Flat paintbrush (medium size)
- Detail paintbrush (size 0 or 00)
- Pencil (HB or lighter)
- Eraser
- Matte spray varnish
Step 1: Preparation & Base Coat
-
Clean surface:
Begin by washing your stone thoroughly with warm soapy water to remove any dirt or oils. -
Dry completely:
Let the rock dry fully in the sun or use a hair dryer to speed up the process. -
First layer:
Using your flat brush, apply a smooth coat of white acrylic paint over the entire top surface of the rock. -
Build coverage:
Allow the first coat to dry, then create a second layer to ensure the rock’s natural color doesn’t show through. -
Final smooth:
If needed, add a third thin coat to create a porcelain-like finish and let it cure completely for at least an hour.
Step 2: Drafting the Design
-
Central stem:
With a light pencil touch, draw a curved line diagonally across the rock to serve as the main stem or rachis of the fern. -
Leaf placement:
Sketch faint guide lines extending from the stem to mark where the main leaflets (pinnae) will go, getting shorter as they reach the tip. -
Refine shape:
Lightly detail the triangular shape of the leaflets, ensuring they taper gracefully towards the top of the frond.
Uneven Lines?
If your brush strokes feel shaky or thick, switch to a 0.5mm black pigment liner pen. It offers more control than a brush for beginners.
Step 3: Painting the Fern
-
Anchor the stem:
Using your black paint and detail brush (or a paint pen), carefully trace over your pencil line for the central stem, starting from the bottom. -
Bottom leaflets:
Begin painting the lowest, largest leaflets first. Focus on the central vein of each leaflet before adding the jagged edges. -
Serrated edges:
Use the very tip of your brush to create the tiny, saw-tooth edges on the larger bottom leaves. -
Work upwards:
Move up the stem, painting the middle section of leaves. These should be slightly smaller and angled more acutely towards the top. -
Detail handling:
I usually hold my breath for a second when doing these fine lines to keep my hand steady. -
Upper section:
Paint the upper leaflets. These will be much smaller and less detailed, appearing almost as solid, elongated shapes. -
The tip:
Finish with the very tip of the frond, which should be a tiny, singular leaf shape. -
Cleanup:
Once the paint is fully dry, gently erase any visible pencil marks that weren’t covered by the black paint.
Verdant Variation
Instead of solid black, try painting the fern in a very dark forest green, then highlight the tips with a lighter sap green for depth.
Step 4: Finishing
-
Inspect:
Check for any uneven edges or spots where the white background might need a tiny touch-up. -
Seal:
In a well-ventilated area, spray the rock with a matte varnish to protect the artwork from chipping or fading.
Place your finished fern stone on a windowsill or desk to enjoy a touch of permanent greenery
BRUSH GUIDE
The Right Brush for Every Stroke
From clean lines to bold texture — master brush choice, stroke control, and essential techniques.
Explore the Full Guide
Lacy Snowflake Geometry
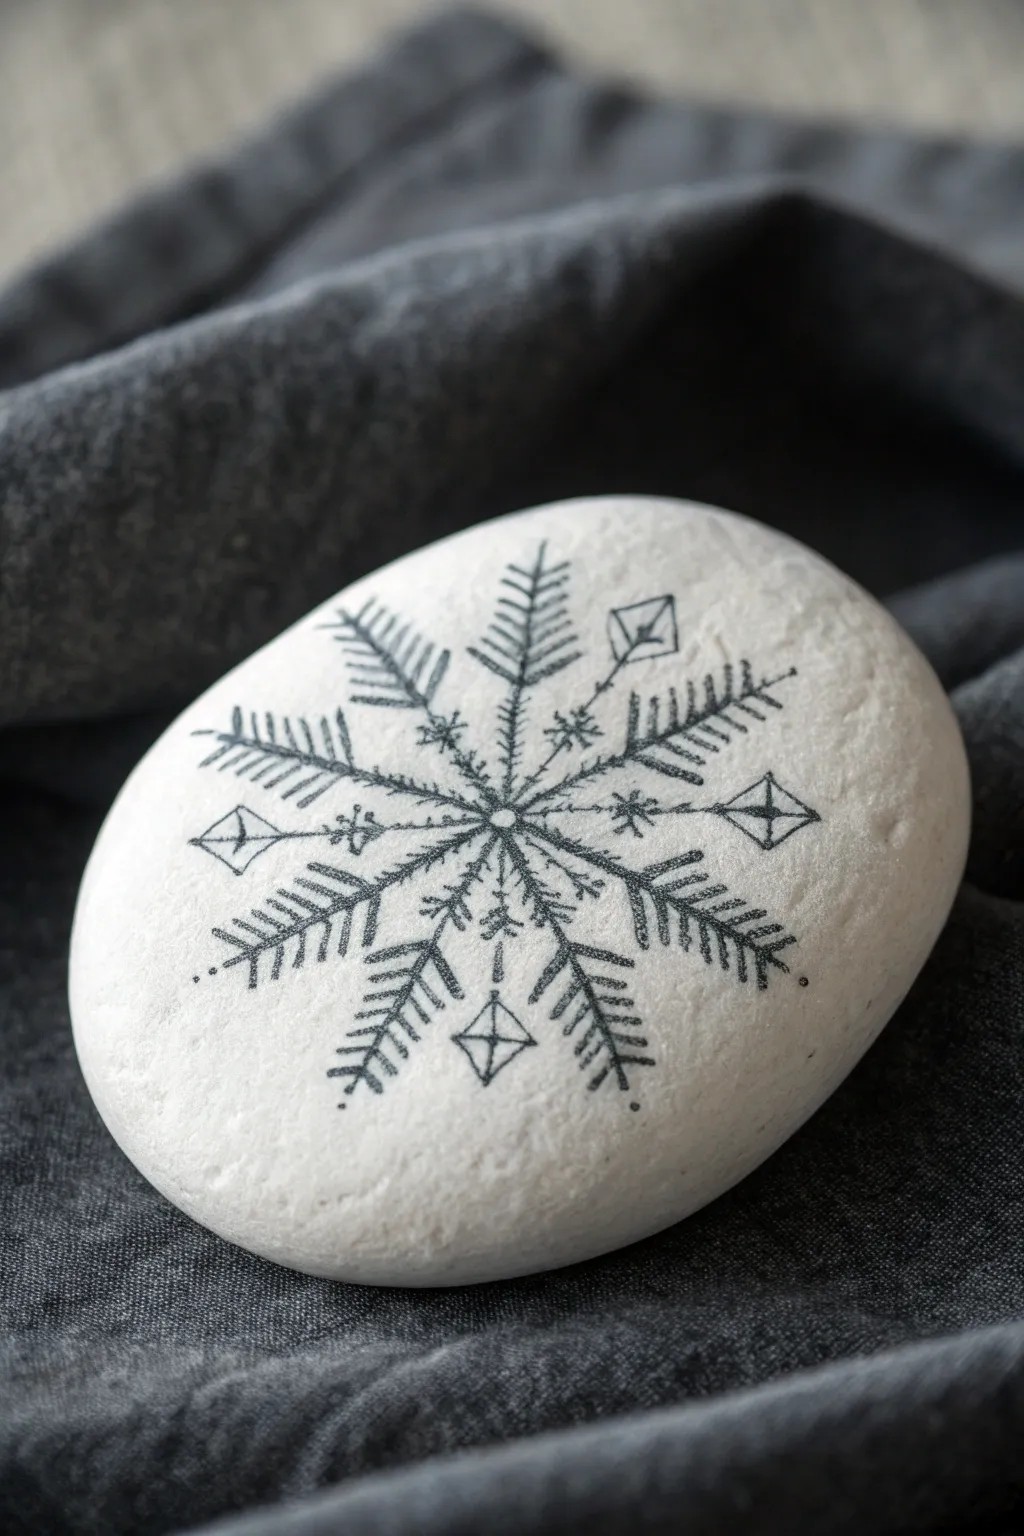
This elegant project transforms a simple smooth stone into a piece of winter art using fine line work. The design combines geometric precision with feathery textures, creating a lacy snowflake that looks striking against the stark white background.
Step-by-Step
Materials
- Smooth oval river rock
- White acrylic paint (matte finish)
- Wide flat paintbrush
- Fine-tip black permanent marker or archival ink pen (0.3mm or 0.5mm)
- Pencil (HB or H)
- Eraser
- Ruler
Step 1: Preparation & Base Coat
-
Clean the surface:
Begin by washing your stone thoroughly with soap and water to remove any dirt or oils that might prevent the paint from adhering, then dry it completely. -
Apply the base color:
Using a wide flat brush, coat the entire top surface of the rock with matte white acrylic paint. You want a smooth, solid finish. -
Build opacity:
Allow the first layer to dry fully, then apply a second or third coat until the natural rock color is completely hidden and the surface looks like smooth porcelain. -
Find the center:
Once the white paint is bone dry, lightly mark the absolute center of your stone with a pencil.
Step 2: Drafting the Structure
-
Draw the main axes:
Use a ruler or straight edge to lightly draw a vertical line and a horizontal line through your center dot, creating a cross. -
Add diagonal axes:
Draw two diagonal lines intersecting the center, dividing your space into eight equal pie-slice sections. These are the skeleton lines for your snowflake arms. -
Define the lengths:
Decide on the pattern: mark four alternating lines (top, bottom, left, right) as your ‘long’ arms, and the four diagonal lines between them as your ‘short’ arms.
Ink Stability Pro-Tip
Test your pen on a scrap piece of painted paper first. If the ink bleeds into the acrylic paint, switch to a pigment liner or archival ink pen.
Step 3: Inking the Design
-
Draw the central ring:
Switch to your fine-tip black pen. Draw a small, precise circle around the center point where all lines intersect. -
Ink the main spines:
Trace over your pencil guidelines with the pen, extending the four long arms and the four shorter diagonal arms to their desired lengths. -
Create the feathery texture:
On the four long arms, draw a series of short, angled hatch marks on both sides of the spine. Start near the center and work outward, keeping the spacing consistent so it resembles a fern leaf or fir branch. -
Add diamond tips:
For the four shorter diagonal arms, draw a diamond shape at the very tip of each line. -
Detail the diamonds:
Draw a vertical line through the center of each diamond tip to split it, adding a geometric touch. -
Connect the inner web:
Near the center circle, draw tiny curved bracket shapes { } connecting the arms together to create a subtle inner starburst effect. -
Add decorative nodes:
Along the spine of the shorter arms, midway down, add a tiny ‘x’ or cross-hatch detail to create visual interest. -
Refine the edges:
Go back to your long feathery arms and add tiny dots at the very tips of the spines and occasionally along the sides for a delicate, snowy finish.
Fixing Smudges
If you accidentally smudge wet ink, don’t wipe it! Let it dry completely, paint over the mistake with white acrylic, and redraw that section.
Step 4: Finishing Touches
-
Erase guidelines:
Wait at least 30 minutes to ensure the ink is totally set. I prefer to wait an hour just to be safe. Then, very gently erase any visible pencil marks. -
Seal the artwork:
If desired, apply a spray sealer (matte or satin) to protect the design, holding the can well away from the rock to prevent the ink from bleeding.
Display your monochrome masterpiece as a sophisticated paperweight or part of a winter centerpiece
Penguin With Built-In White Belly
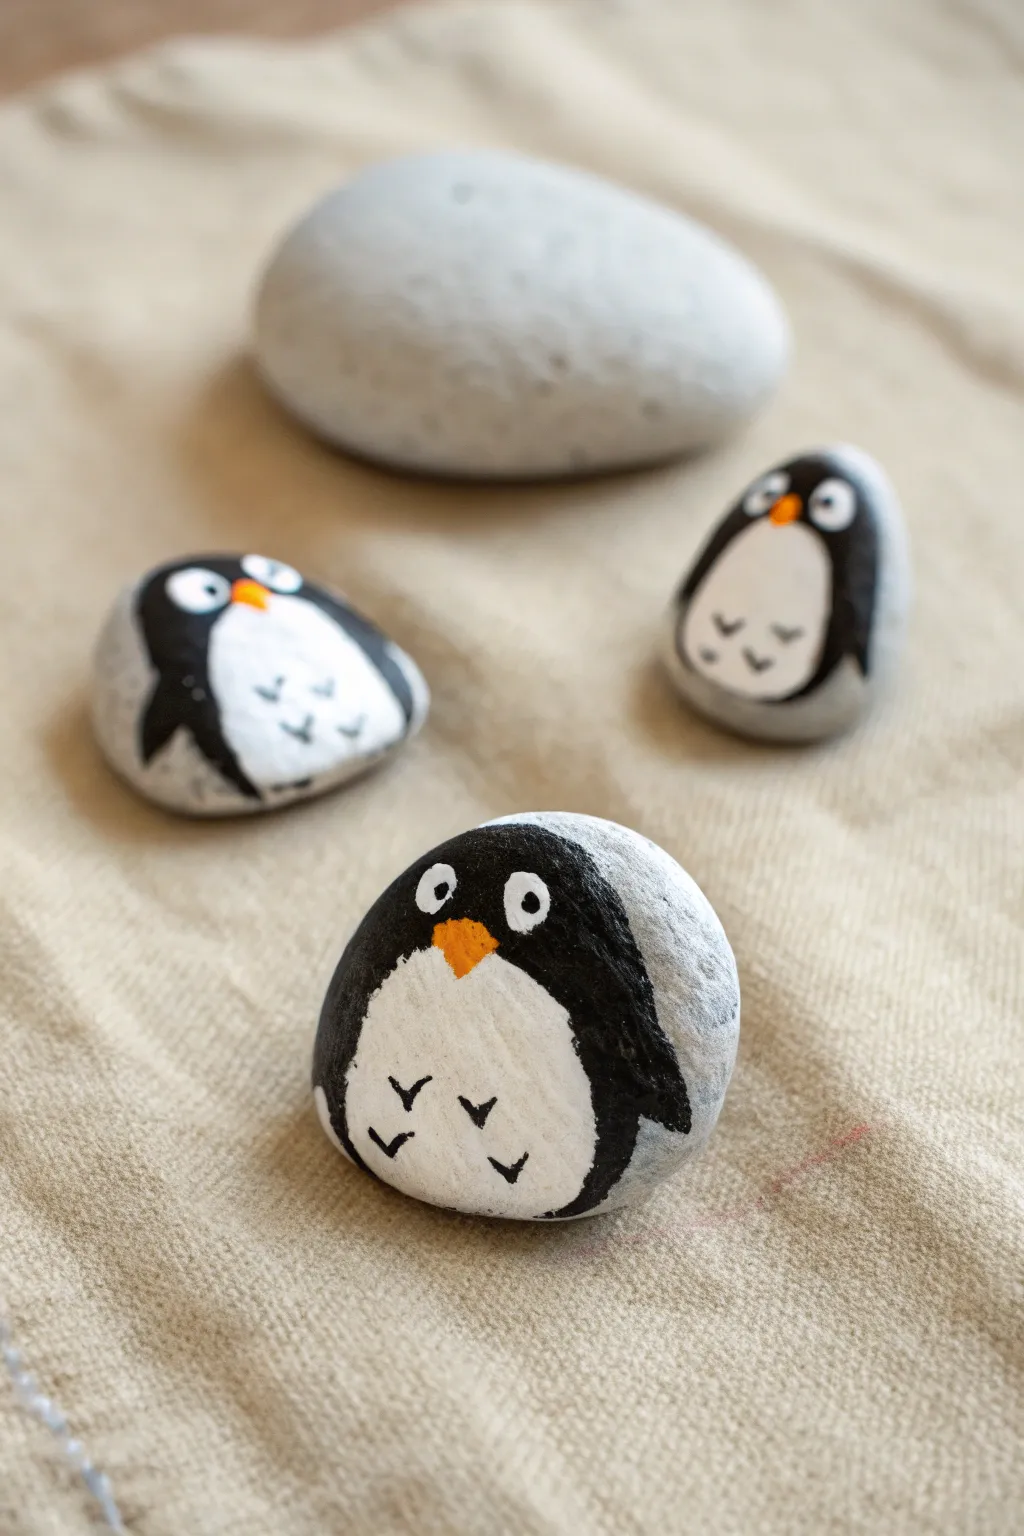
These adorable penguins are a minimalist delight because they utilize the natural color of the stone for their bright white bellies. By simply adding the black tuxedo outline and a few details, the rock instantly transforms into a charming little bird.
Detailed Instructions
Materials
- Smooth white or light grey river rocks (oval or round shape)
- Black acrylic paint or paint pen (fine tip)
- Orange acrylic paint or paint pen
- Small round paintbrush (if using bottle paint)
- Clear acrylic sealer (matte or gloss)
- Pencil (optional for sketching)
Step 1: Planning and Outline
-
Select your canvas:
Choose a smooth, light-colored stone. The best candidates are oval or slightly triangular shapes that can stand upright or lay flat while still resembling a penguin’s chubby body. -
Clean the surface:
Wash your rocks with warm soapy water and let them dry completely. Dust or dirt will prevent the paint from adhering essentially to the stone’s surface. -
Visualize the white space:
Look at the rock and decide which part is the smoothest and brightest—this will be the belly. You aren’t painting the belly; you are painting *around* it. -
Draft the shape:
Using a light pencil, verify the shape by sketching a large arch for the belly and face area. The top of the arch should be narrower for the head, widening at the bottom for the body.
Fixing Wobbly Lines
If your black outline enters the white belly area, don’t worry. Use a white paint pen to correct the edge once the black paint is fully dry.
Step 2: Painting the Tuxedo
-
Outline the body:
With black acrylic paint or a black paint pen, trace over your pencil line. This line defines where the black feathers meet the white stomach. -
Create the wings:
On the sides of the body where your black line curves down, paint two small triangular shapes pointing downward to represent the flippers tucked against the sides. -
Fill the background:
Paint the entire rest of the rock black, extending from your outline all the way around the back of the stone. I find holding the rock by the ‘white’ belly helps keep fingers clean. -
Refine the edges:
Go back over the edge between black and white to ensure it is crisp and smooth. If the stone is porous, you might need a second coat of black for full opacity. -
Let it dry:
Allow the black paint to dry completely. This is crucial before adding facial features to avoid smudging.
Step 3: Adding Personality
-
Paint the eyes:
In the upper white area (the face), paint two small white circles if your rock isn’t perfectly white, or simpler yet, paint two black dots for pupils. If you want larger cartoon eyes, paint white circles first on top of the black head area, let dry, then add black pupils. -
Add the beak:
Just below the eyes, paint a small orange inverted triangle. This adds that necessary pop of color to bring the character to life. -
Draw belly feathers:
Using a very fine black marker or the tip of a small brush, paint small ‘v’ shapes or little check-marks on the lower white belly area to simulate ruffled feathers. -
Allow final drying:
Let all the details dry completely for at least 30 minutes to an hour. -
Seal the artwork:
Apply a coat of clear acrylic sealer. A matte spray looks natural, while a gloss finish makes the ‘wet’ penguin look freshly emerged from the ocean.
Natural Texture
Don’t over-coat the white belly area. Leaving some of the stone’s natural grit visible adds organic texture that flat white paint can’t mimic.
Place your little colony of penguins in a garden pot or on a windowsill for a touch of winter whimsy

PENCIL GUIDE
Understanding Pencil Grades from H to B
From first sketch to finished drawing — learn pencil grades, line control, and shading techniques.
Explore the Full Guide
Hatching Chick in a Cracked Egg
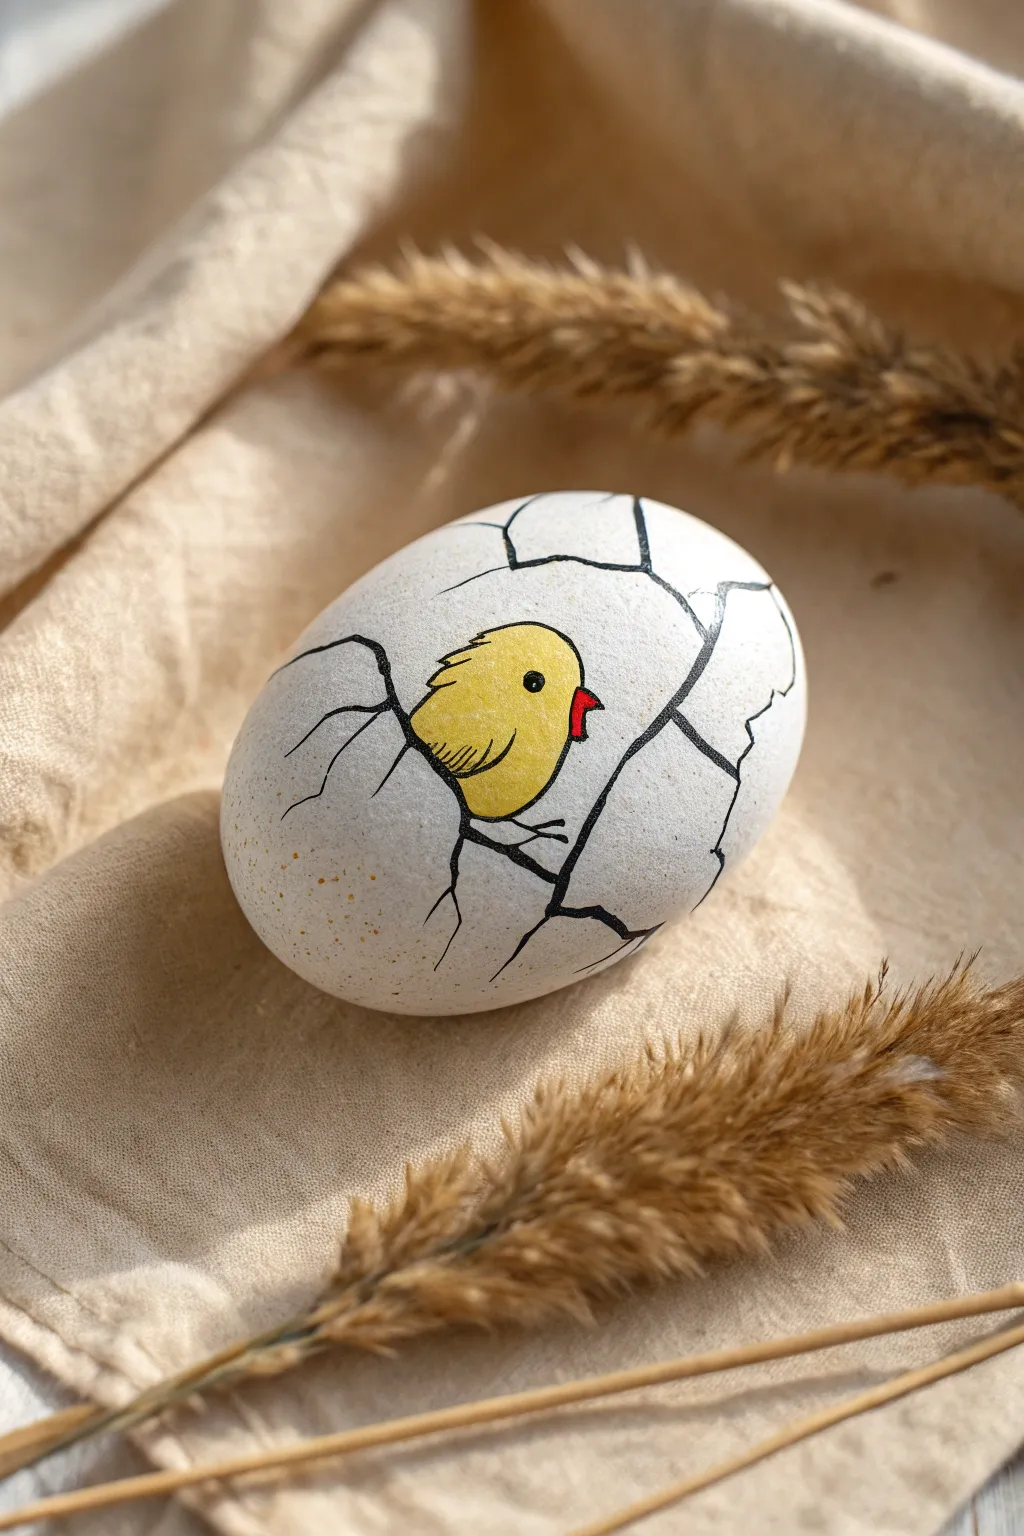
Transform a simple stone into a delightful springtime surprise with this clever illusion painting. By illustrating jagged cracks and a small yellow chick, you can turn a smooth white rock into a hatching egg that looks almost real.
How-To Guide
Materials
- Smooth, egg-shaped rock (approx. 2-3 inches)
- White acrylic paint (matte finish)
- Yellow acrylic paint
- Red or orange acrylic paint
- Black fine-point paint pen (0.7mm or similar)
- Flat paintbrush (medium size)
- Small round detail brush
- Pencil and eraser
- Sealer (matte or satin varnish)
Step 1: Preparation & Base Coat
-
Clean the stone:
Start by scrubbing your rock with warm, soapy water to remove any dirt or oils that might prevent the paint from sticking. Let it dry completely. -
Prime the surface:
Apply a base coat of white acrylic paint over the entire visible surface of the rock. Use a flat brush for even coverage. -
Apply a second coat:
Once the first layer is dry, check for any dark spots where the stone shows through. Apply a second coat of white to ensure a solid, eggshell-like opacity. -
Sketch the outline:
Using a pencil very lightly, draw an oval shape slightly off-center for the chick’s body. Don’t worry about being perfect; this is just a guide.
Step 2: Painting the Chick
-
Fill the body color:
Use your small round brush to paint the oval sketch with bright yellow acrylic paint. The edges can be rough since you’ll be outlining them later. -
Layer the yellow:
Yellow paint is often translucent, so let the first layer dry and add a second coat to make the color pop against the white background. -
Add the beak:
Paint a very small triangle pointing to the right using red or orange paint. Position it on the right side of the yellow oval, about halfway down. -
Create the eye:
Dip the back end of a small paintbrush or use a dotting tool with black paint to place a small dot for the eye. Place it slightly above and to the left of the beak. -
Add the eye highlight:
Once the black dot is fully dry, add a tiny speck of white paint inside the black dot to give the chick a spark of life.
Uneven Lines?
If your hand shakes while drawing cracks, don’t worry! Cracks are naturally jagged. Use the shake to your advantage by intentionally making the lines waver.
Step 3: Linework & Cracks
-
Outline the chick:
Switch to your black fine-point paint pen. Carefully outline the yellow shape. Instead of a smooth line, use small, jagged marks at the top and back to simulate fluffy feathers. -
Define the wing:
Draw a small, curved wing shape inside the yellow body using the pen. Add a few small hatched lines on the wing to suggest texture. -
Start the main crack:
Draw a bold, uneven black line extending from the top and bottom of the chick’s outline. This creates the illusion of the shell splitting apart. -
Draw radiating fractures:
From that main split, draw jagged lines branching out across the white surface. Think of lightning bolts or tree branches—keep the angles sharp and erratic. -
Connect the lines:
Connect some of the fracture lines to create puzzle-piece shapes. Varied sizes of cracked sections make the effect more convincing. -
Thicken key intersections:
Go back over the points where three or more crack lines meet. I find that slightly thickening these intersections adds depth and makes the shell look separated. -
Add subtle speckling:
Dip an old toothbrush or stiff brush into diluted brown or gold paint. Flick the bristles with your thumb to create tiny speckles near the chick’s base for an organic egg look. -
Seal the artwork:
Wait at least 24 hours for the paint pen to cure fully. Apply a matte or satin varnish to protect the design without making it look unnaturally glossy like plastic.
Pro Tip: Depth
Mix a tiny drop of grey paint and add a very thin shadow line along one side of the widest cracks. This makes the shell pieces appear slightly raised.
Now you have a charming little hatchling that looks ready to chirp its way into your garden decor
Simple Cat Face and Whiskers
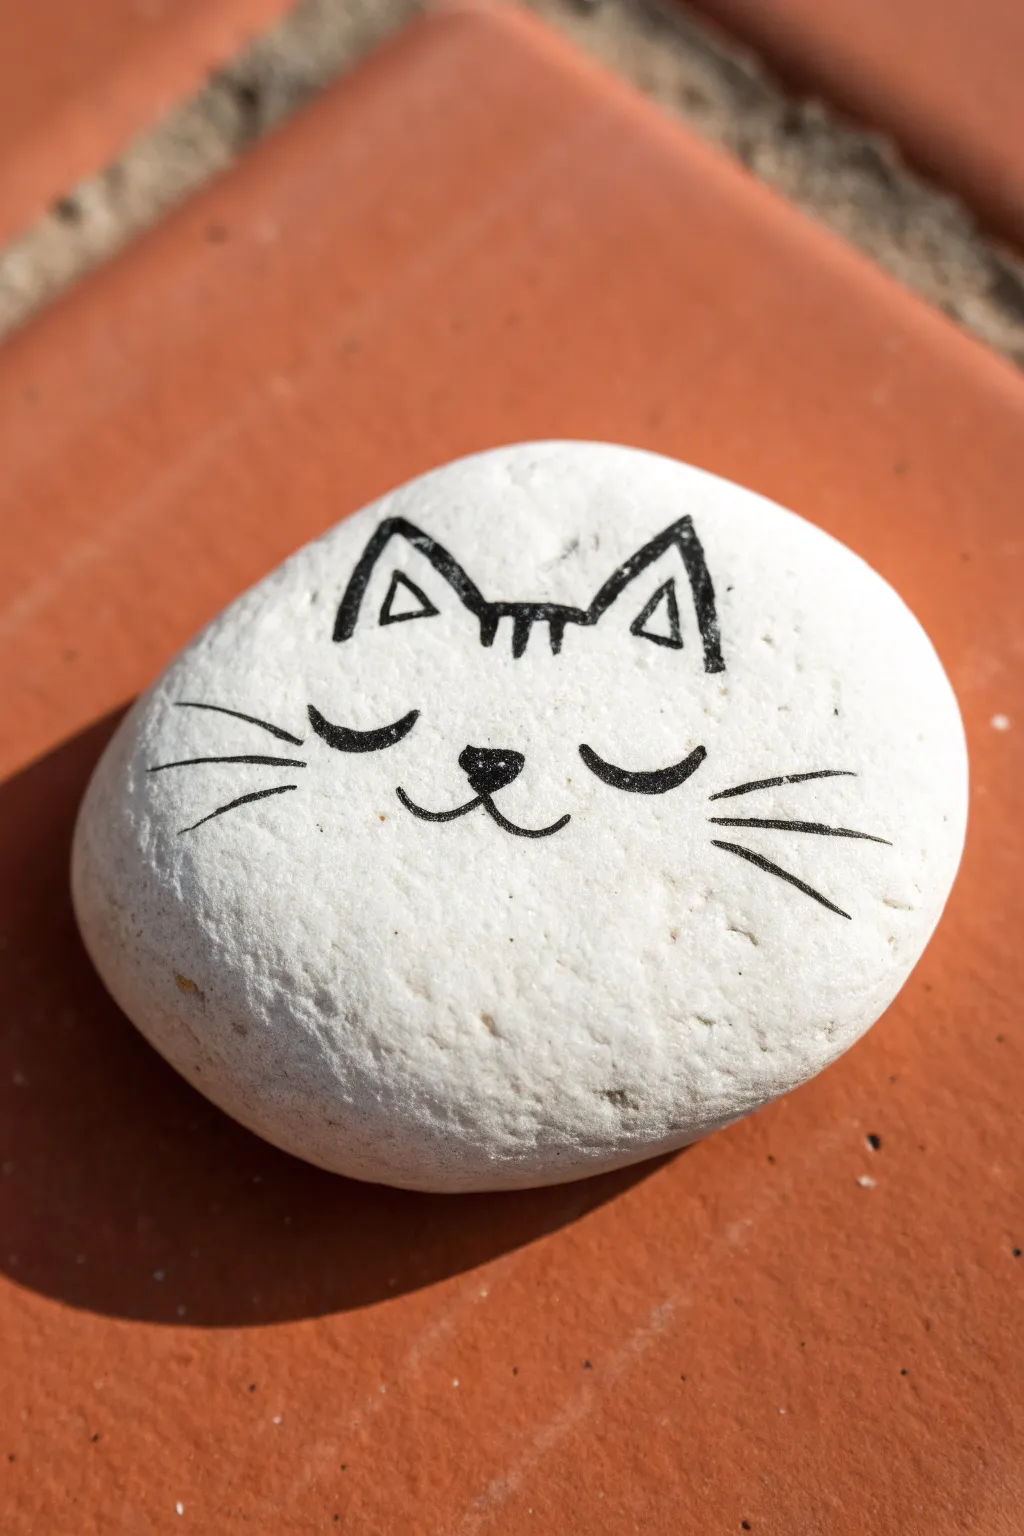
This charming project captures the essence of a sleeping cat using just a few deliberate strokes on a pristine white background. It’s a wonderful exercise in minimalism, transforming an ordinary smooth stone into a peaceful desk companion.
Detailed Instructions
Materials
- Smooth, round river rock (approx. palm-sized)
- White acrylic paint (matte finish preferred)
- Wide flat paintbrush
- Fine point black permanent marker or paint pen (approx. 0.5-0.7mm tip)
- Pencil (optional)
- Clear spray varnish or sealant (matte)
Step 1: Preparing the Canvas
-
Clean the stone:
Begin by scrubbing your rock with warm soapy water to remove any dirt or grease. Rinse it thoroughly and let it dry completely in the sun or with a cloth. -
Apply the base coat:
Using your wide flat brush, paint the entire top surface of the rock with white acrylic paint. Smooth out your brushstrokes so the texture remains flat. -
Layer for opacity:
Once the first coat is dry to the touch, apply a second coat of white. This ensures a solid, opaque background where the natural color of the stone doesn’t peek through. -
Dry thoroughly:
Allow the white base to cure completely. I usually give this at least an hour, as drawing on tacky paint can ruin your marker tip.
Step 2: Drafting the Face
-
Locate the center:
Visualize the center of your rock. This is where the nose will eventually go, serving as the anchor point for the rest of the features. -
Sketch lightly:
If you are nervous about going straight to ink, use a pencil to very lightly sketch the placement of the ears and eyes. Keep the pressure minimal to avoid scratching the paint.
Ink Bleeding?
If your black marker lines look fuzzy or spread out, your white base coat wasn’t fully dry. Let the paint cure longer, or switch to a paint pen instead of a permanent marker.
Step 3: Inking the Features
-
Draw the nose:
Using your fine point black marker or paint pen, draw a small, inverted triangle in the center of the rock face. -
Fill the nose:
Color in the triangle completely with black ink to create a solid, cute button nose. -
Create the mouth:
Starting from the bottom point of the nose, draw a small anchor shape—two curved lines sweeping up to the left and right—to form the smiling mouth. -
Add the eyes:
Move slightly up and to the left of the nose. Draw a small, downward-curving crescent for the closed eye. Repeat on the right side, ensuring they are level. -
Thicken the lash line:
Go over the eye curves a second time to slightly thicken the line, giving the impression of eyelashes or deep sleep. -
Position the ears:
Near the top edge of the rock, draw two triangles for the ears. The base of the triangles should be imagined, not drawn, so only draw the two angled sides. -
Detail the ears:
Inside each large ear triangle, draw a smaller matching triangle. Then, connect the two ears with three short vertical dashes to represent the fur on top of the head. -
Start the whiskers:
Position your pen on the cheek area to the left of the face. Draw three long lines radiating outward toward the edge of the stone. -
Finish the whiskers:
Repeat the process on the right cheek, trying to match the length and angle of the left side. Quick, confident strokes work best here to keep the lines smooth.
Make it Pop
Add two tiny pink circles just below the whiskers with a cotton swab dipped in diluted pink paint to give the cat soft, blushing cheeks.
Step 4: Finishing Touches
-
Clean up sketch lines:
If you used a pencil earlier and any marks are still visible, gently erase them now that the ink is dry. -
Seal the artwork:
To protect your kitty from scratches, apply a light coat of clear spray varnish. Hold the can about 12 inches away and spray in a sweeping motion.
Place your sleeping stone cat in a potted plant or on a windowsill to enjoy a moment of calm every time you see it


Classic Ladybug on a White Stone
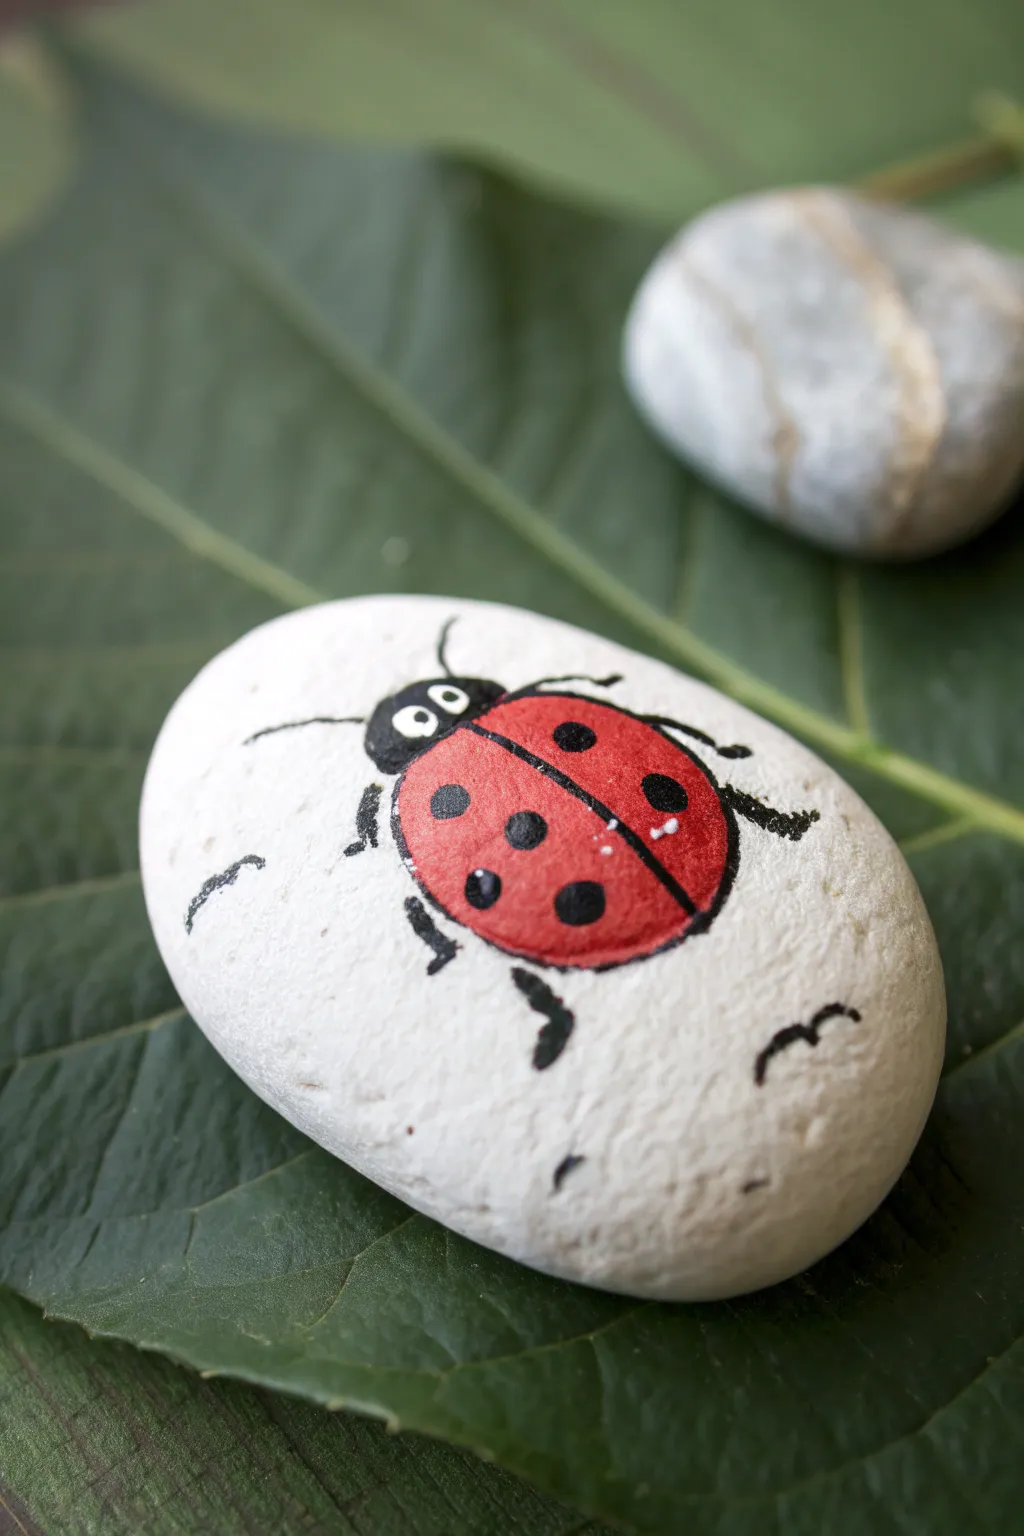
Transform a simple white river rock into a charming garden friend with this delightful ladybug design. Its bright red shell and friendly eyes pop beautifully against the stark porcelain-white background, making for a cheerful addition to any planter or desk.
Step-by-Step Tutorial
Materials
- Smooth, flat river rock (primed white)
- Acrylic paint (Bright Red, Black, White)
- Pencil for sketching
- Fine detail brush (size 0 or 00)
- Small round brush (size 2)
- Dotting tool or toothpick
- Clear acrylic sealer (spray or brush-on)
- Palette or paper plate
- Water cup and paper towels
Step 1: Preparation and Base
-
Prime the Surface:
Ensure your stone is completely clean and dry before starting. While many stones are naturally light, painting the entire surface with two coats of white acrylic paint creates that smooth, porcelain-like finish seen in the photo. Let it dry fully. -
Pencil Sketch:
Lightly sketch a large oval shape for the ladybug’s body in the center of the rock. It should be slightly tilted for a dynamic look. -
Head Placement:
Draw a smaller semi-circle attaching to the top of the oval to mark the head area. -
Define the Wings:
Draw a faint line down the center of the oval body to split the wings, curving it slightly to match the rounded shape of the insect.
Step 2: Adding Color
-
Paint the Body Red:
Using your small round brush, fill in the main oval body shape with bright red acrylic paint. Work carefully around the edges to keep the shape neat. -
Second Coat:
Red paint can be translucent, so apply a second coat once the first is dry to ensure a vibrant, opaque color. -
Paint the Head:
Switch to black paint and fill in the semi-circle head shape. Be careful where the black meets the red; you want a crisp line. -
Outline the Wings:
Once the red paint is totally 100% dry, use a fine detail brush and black paint (thinned slightly with a drop of water) to trace the center line separating the wings. -
Outline the Body:
Continue with the fine brush to outline the entire red oval in black. This gives the cartoonish, illustrative style shown in the reference.
Smooth Operator
To get thin, crisp outlines like the ones around the wings, mix a tiny drop of water into your black paint until it has the consistency of ink. It will flow much smoother.
Step 3: Details and Personality
-
Add Spots:
Dip the handle end of a paintbrush or a dotting tool into black paint. Press gently onto the red wings to create round polka dots. Vary the placement but try to keep it somewhat symmetrical. -
Paint the Legs:
Using the very tip of your detail brush, paint small, slightly jagged lines extending from the body for the legs. Do three on each side, angling them to look like the bug is scurrying. -
Antennae:
Paint two thin, curved lines coming from the top of the black head for antennae. -
Create the Eyes:
Dip a smaller dotting tool or a toothpick into white paint. Place two white dots on the black head area. Let these dry completely. -
Pupils:
Once the white eye dots are dry, use a toothpick with a tiny amount of black paint to add the pupils. I like to place them looking slightly off to the side or up for a goofy expression. -
Movement Lines:
To make the bug look alive, paint small curved dashes or ‘motion marks’ around the rock’s white space, suggesting a flight path or footprints. -
Highlighting:
Add tiny specks of white to the red wings for a ‘shiny’ shell effect, just a couple of small dots near the center line.
Family Reunion
Don’t stop at one! Paint a whole family of bugs in different colors—yellow for cucumber beetles or green for June bugs—to create a colorful garden collection.
Step 4: Finishing
-
Check Your Work:
Look over the painting for any smudges. You can fix mistakes on the white background easily by dabbing a little white paint over them. -
Seal the Stone:
Once the rock has cured for 24 hours (or at least overnight), apply a clear acrylic sealer. This protects the paint from chipping and gives it a nice sheen.
Place your finished beetle in a potted plant or on a windowsill to bring a little bit of nature indoors
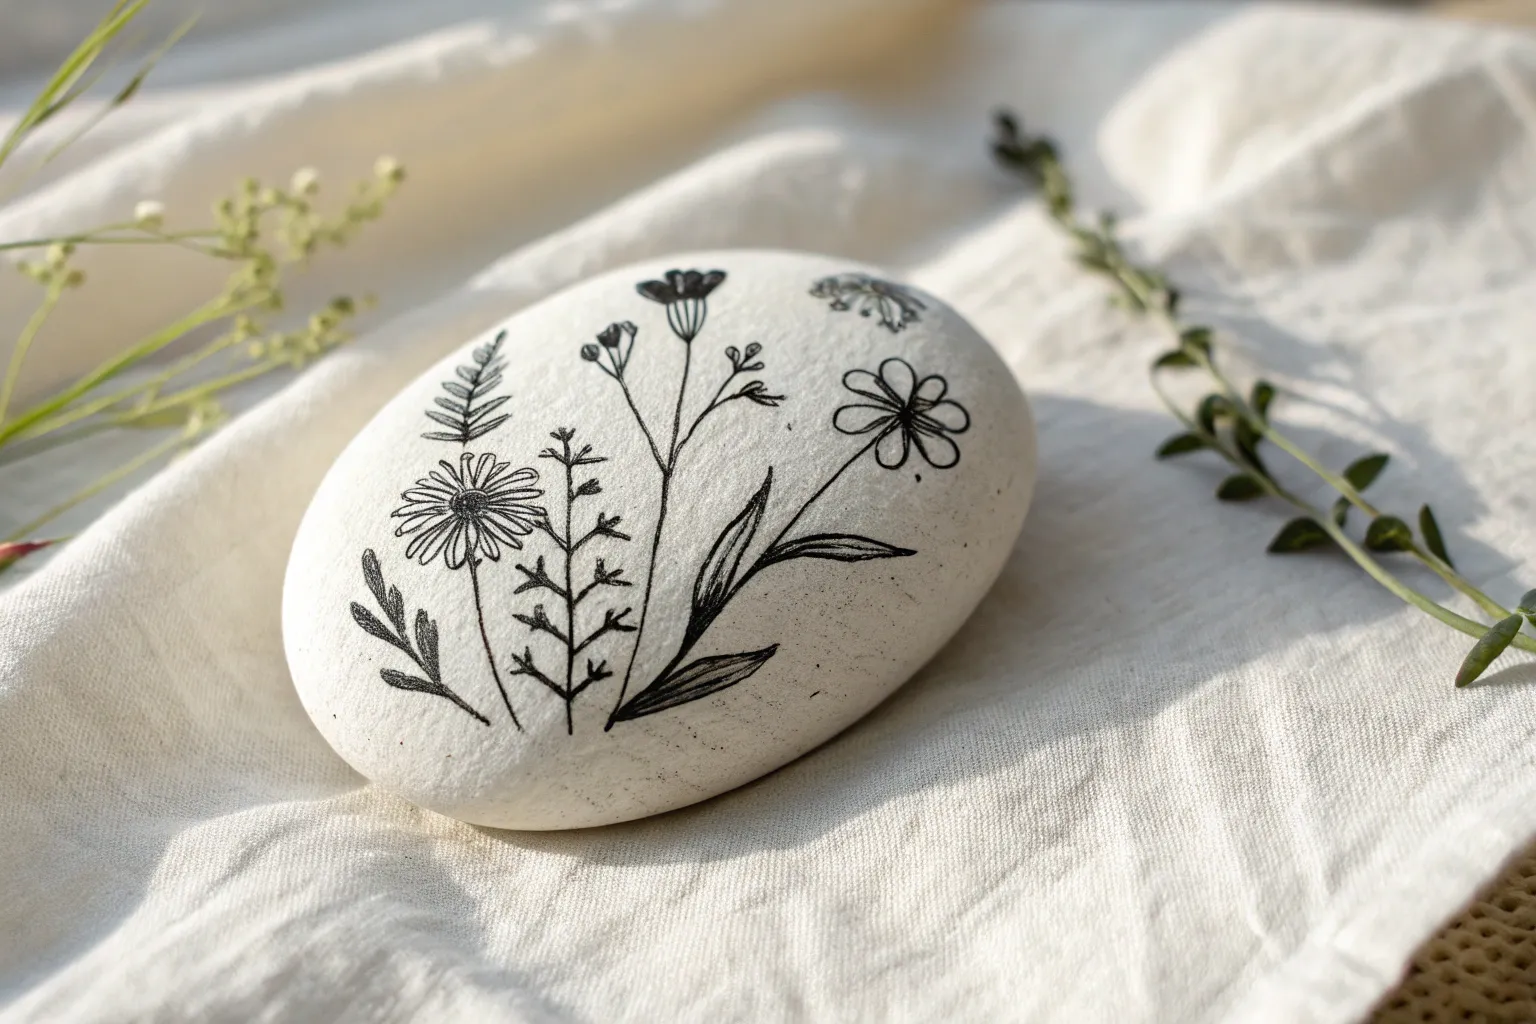
Tiny Line-Art Wildflower Bouquet
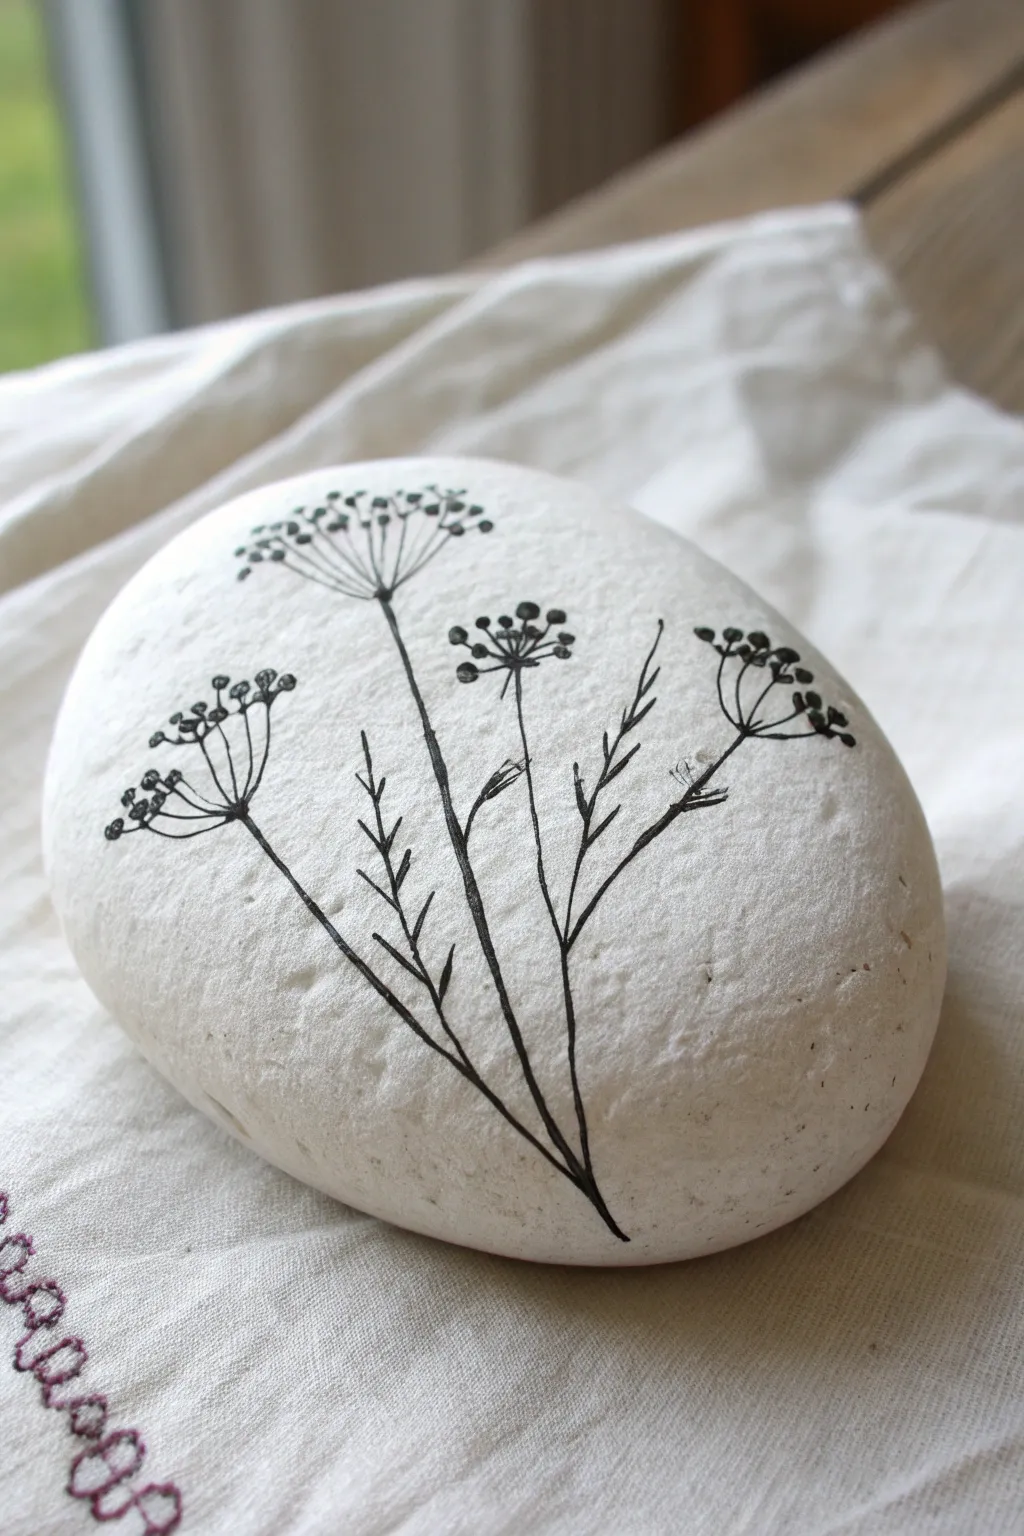
This minimalist project transforms a simple smooth river stone into a piece of botanical art. Using just a fine-point pen against the stark white background, you’ll create elegant wildflower silhouettes that capture the fragile beauty of a summer field.
Detailed Instructions
Materials
- Smooth oval river rock
- White acrylic paint (matte finish)
- Wide flat paintbrush
- Black ultra-fine point permanent marker (0.1mm or 0.3mm) or liner pen
- Pencil (HB or lighter)
- Kneaded eraser (optional)
- Clear matte spray sealer
Step 1: Preparation & Base Coat
-
Clean surface:
Begin by washing your rock thoroughly with soap and water to remove any dirt or oils. Scrub well with an old toothbrush if needed to get into the pores. -
Dry completely:
Let the rock dry absolutely completely before applying any paint. Trapped moisture can ruin the finish later. -
First coat:
Using your flat brush, apply a layer of white acrylic paint. It doesn’t need to be perfectly opaque yet. -
Solidify the white:
Allow the first coat to dry, then apply a second and possibly third coat until you have a solid, opaque white surface with no stone color showing through. -
Smooth finish:
Check for brush strokes; if the paint is too thick, lightly sand it after it is dry, or just ensure you are using thin, even layers.
Smudge Prevention
If you are right-handed, draw the leftmost flower first and work right to keep your hand from resting on wet ink.
Step 2: Drafting the Design
-
Visualize the layout:
Look at your rock’s shape. You want the stems to curve slightly to follow the contour of the stone, fanning out from a central point at the bottom right. -
Main stems:
With a very light pencil touch, sketch three main lines radiating upward. Make the center one the tallest, and the side ones slightly shorter and curved outward. -
Flower heads:
At the top of each stem, lightly sketch an oval or saucer shape where the flower clusters will sit. This helps you keep the proportions correct before inking.
Step 3: Inking the Wildflowers
-
Trace the stems:
Take your fine-point black pen. Start at the bottom of the central stem and draw a confident, single line moving upward. -
Add flanking stems:
Draw the left and right stems, tapering them slightly so they look like they are emerging from the same bunch at the base. -
Flower structure:
For the main flower on the central stem, draw several small lines radiating outward from the top of the stem, like the spokes of an umbrella. -
Add the blooms:
At the end of each ‘spoke’, draw tiny clusters of dots or small circles. These represent the individual tiny flowers of the umbellifer. -
Repeat for side flowers:
Move to the left and right stems. Draw their radiating spokes and top them with similar dot clusters. Keep these slightly smaller than the central bloom for variety. -
Lower foliage:
About halfway down the stems, add small, sparse leaves. Draw short, upward-angled lines that branch off the main stems. -
Refining the details:
Add tiny V-shapes to the leaf branches to give them a fern-like or feathery appearance, typical of this type of wildflower. -
Clean up:
I prefer to wait at least 30 minutes to ensure the ink is totally set. Then, very gently dab with a kneaded eraser to lift any visible pencil guidelines without smudging the ink.
Crisp Lines
Use a technical drawing pen (like a Micron) rather than a standard Sharpie, as they bleed less on painted surfaces.
Step 4: Protection
-
Sealing:
Because ink can smear easily under brush-on varnish, use a spray sealer. Hold the can 10-12 inches away and apply a light mist. -
Final coat:
Once the first mist is dry, apply a slightly heavier coat to ensure the rock is durable and weather-resistant if placing outside.
Place this serene little stone on a desk or windowsill to add a permanent touch of nature to your indoor space
Minimal Mountain Range and Sun
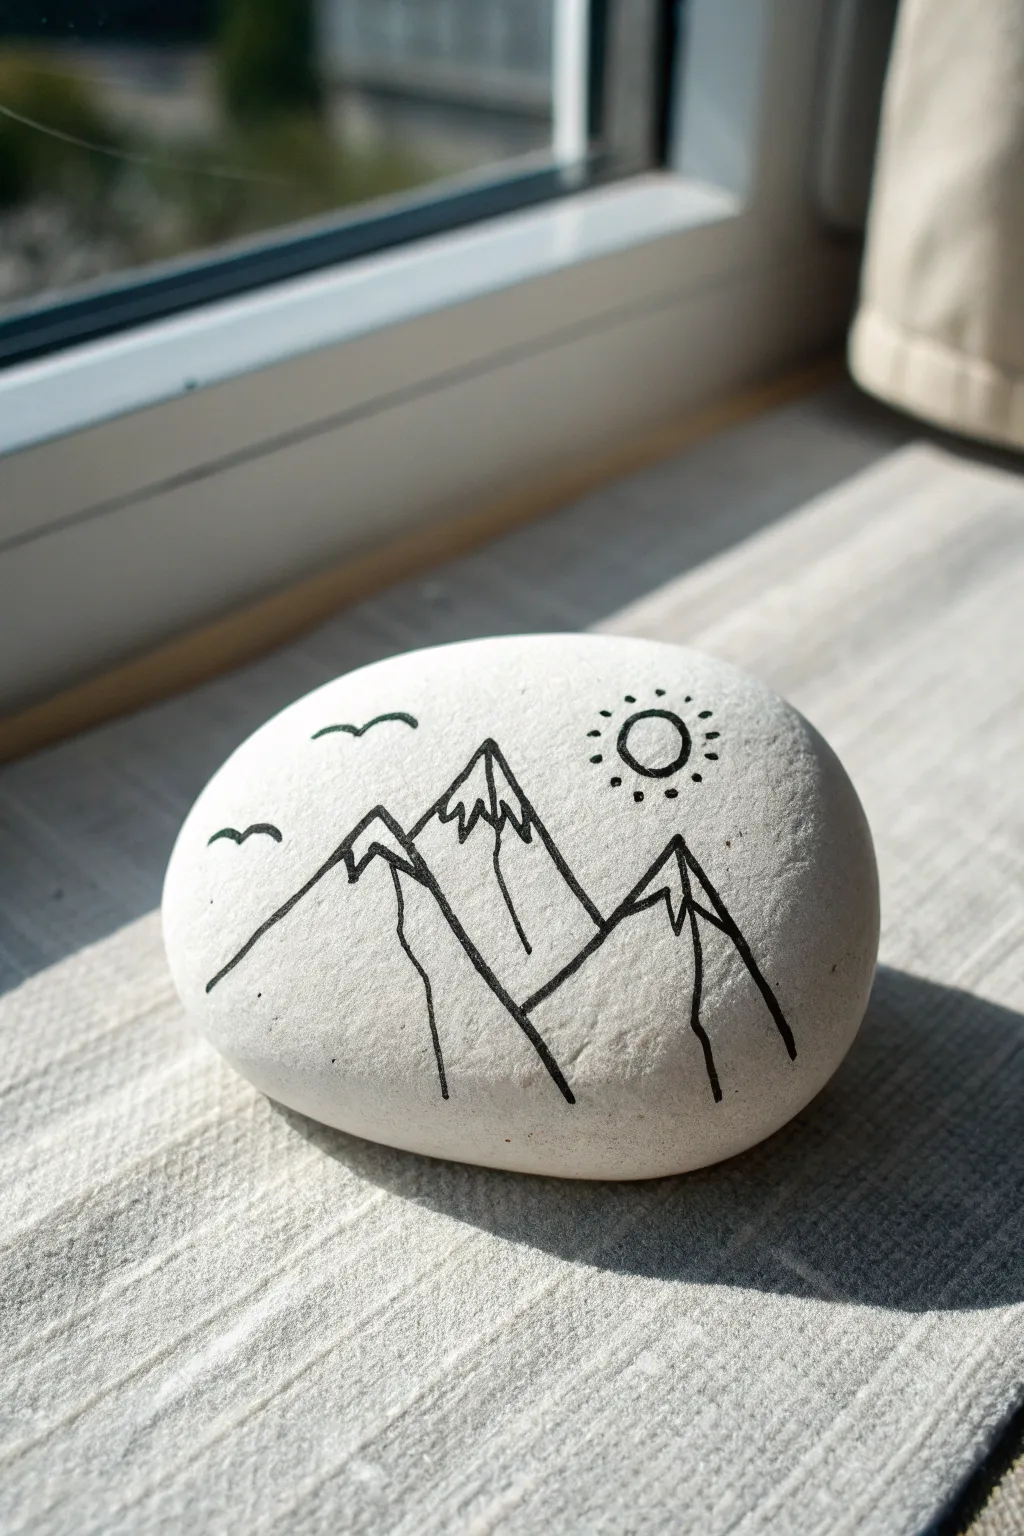
This project creates a striking, modern look by pairing a smooth, bright white background with bold black linework. The beauty lies in its simplicity, making it a perfect beginner-friendly design that brings a touch of nature’s serenity indoors.
Step-by-Step Guide
Materials
- Smooth, oval river rock
- White acrylic paint (matte finish preferred)
- Wide flat paintbrush
- Fine-point permanent marker (black) or black acrylic paint pen (0.7mm tip)
- Pencil and eraser (optional)
- Matte spray sealant or clear varnish
Step 1: Preparing the Canvas
-
Clean the surface:
Begin by thoroughly washing your rock with warm soapy water to remove any dirt or oils. Scrub it gently and let it dry completely before starting. -
Apply the base coat:
Shake your white acrylic paint well. Using the flat brush, apply a smooth, even layer over the top surface of the rock. Don’t worry if it looks streaky at first. -
Layer for opacity:
Allow the first coat to dry to the touch, usually about 15 minutes. Apply a second—and potentially a third—coat until the stone’s natural color is completely hidden and you have a solid white canvas. -
Dry completely:
Wait for the paint to cure fully. If the paint is even slightly tacky, the marker ink might bleed or snag.
Ink Control Pro-Tip
If you’re using a paint pen, test the flow on a scrap paper first. If the pen floods, the intricate mountain lines will blotch. A consistent, medium flow is key for crisp edges.
Step 2: Drafting the Design
-
Sketch the peaks:
Lightly sketch three main triangles with a pencil to position your mountains. Place the central peak slightly higher than the two flanking it for balance. -
Add the sun:
Draw a small circle in the upper right quadrant of the sky area. This doesn’t need to be perfectly round; a hand-drawn look adds charm. -
Place the birds:
Mark two small ‘m’ shapes in the upper left area to represent distant birds.
Level Up: Golden Hour
For a subtle pop of color, paint the circle of the sun with metallic gold paint before outlining it. It adds a lovely shimmer when the light hits the rock just right.
Step 3: Inking the Mountains
-
Outline the left peak:
Using your black paint pen or marker, trace the outline of the leftmost mountain. Extend the bottom line down past the other mountains to create depth. -
Outline the center peak:
Trace the tall central peak next. Ensure its left slope tucks slightly behind the first mountain’s outline to establish perspective. -
Outline the right peak:
Draw the third mountain on the right side, connecting it to the central peak’s base. -
Add snow caps:
Draw jagged, zig-zag lines slightly below the tip of each peak. These lines should mimic the angle of the mountain slopes. -
Detail the ridges:
Draw a vertical, slightly wavering line down the center of each mountain from the tip through the snow cap line. I find slightly breaking this line makes it look more organic. -
Define the slopes:
Extend a few rough vertical lines down the body of the mountains to suggest rocky texture and height.
Step 4: Sky and Finish
-
Ink the sun:
Trace over your pencil circle for the sun. Add short, dashed lines radiating outward around the circle to create the rays. -
Ink the birds:
Carefully trace the small flying bird silhouettes on the left side, keeping the lines thin. -
Erase guidelines:
Once you are absolutely certain the ink is dry (give it at least 20 minutes), gently erase any visible pencil marks. -
Seal the artwork:
In a well-ventilated area, apply a matte spray sealant. Use light, sweeping mists rather than one heavy coat to prevent the ink from running.
Place your finished mountain scene on a windowsill where the natural light can highlight the crisp contrast
Dandelion Puff With Floating Seeds
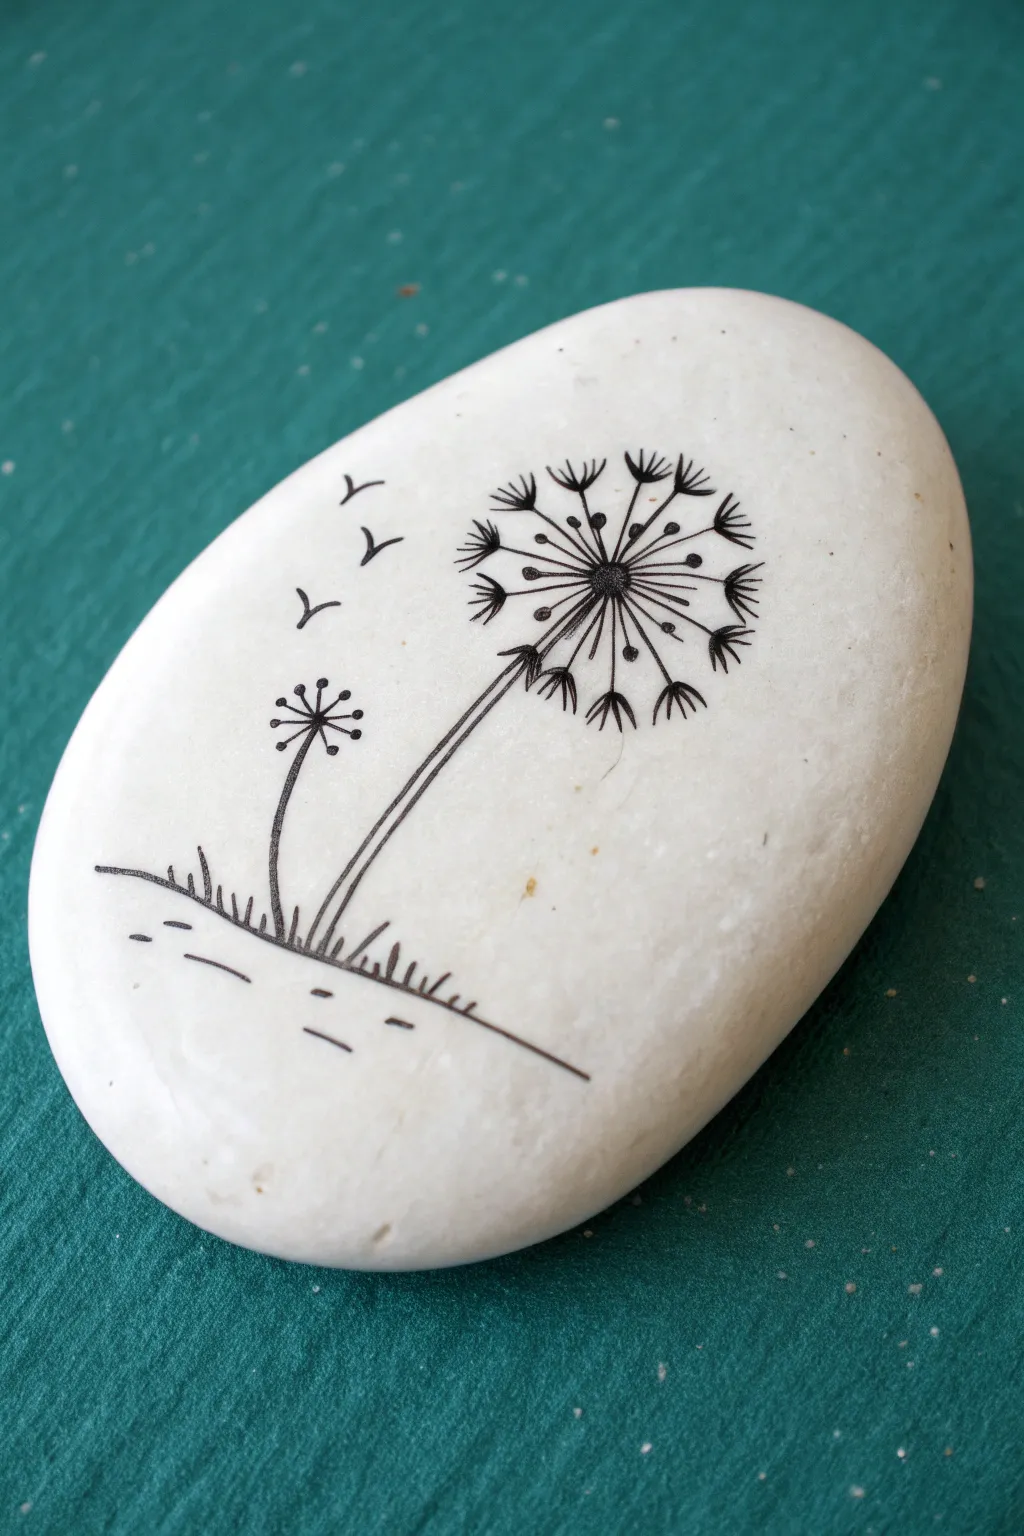
Capture the delicate beauty of a dandelion wish on a smooth canvas. This minimalist black-and-white design focuses on fine line work to create a serene and elegant piece of stone art.
How-To Guide
Materials
- Smooth, flat white rock (river stone works best)
- Black ultra-fine point permanent marker (0.1mm or 0.2mm nib)
- Black fine point permanent marker (0.5mm nib)
- Pencil (HB or lighter)
- Eraser
- Clear acrylic sealant (spray or brush-on)
- Soap and water for cleaning
Step 1: Preparation and Sketching
-
Clean the Stone:
Begin by washing your rock thoroughly with soap and warm water to remove any dirt or oils. Let it dry completely, as any moisture will cause the ink to bleed. -
Find the Center:
Visualize where you want the main dandelion head to be. It should be slightly off-center to the right to allow room for the floating seeds on the left. -
Lightly Sketch the Stem:
Using your pencil, draw a very faint, slightly curved line starting from the bottom third of the rock, reaching up towards the center point you visualized. -
Plan the Flower Heads:
Sketch a light circle at the top of your stem for the main puffball. To the left and slightly lower, sketch a smaller stem and a small circle for the secondary bud. -
Draft the Ground Line:
Draw a gentle, uneven horizontal line near the bottom of the rock to represent the ground. You can sketch in a few small vertical dashes for grass blades now to guide your inking later.
Ink Control
If your hand shakes, rest your wrist on a scrap piece of paper or a small beanbag. This stabilizes your hand while protecting the white stone from oils.
Step 2: Inking the Foundation
-
Draw the Main Stem:
Switch to your fine point (0.5mm) marker. Trace your pencil line for the main stem, actually drawing two very thin parallel lines close together to give the stem just a bit of thickness. -
Add the Bud Stem:
Draw the shorter stem on the left using a single thick stroke or two very close thin lines, curving it slightly away from the main flower. -
Create the Ground:
Go over your ground line with the marker. Instead of a solid straight line, use broken, sketchy strokes. -
Add Grass Details:
Flick your pen upward quickly along the ground line to create varied heights of grass. Some should overlap the base of the stems to ground them in the scene.
Step 3: Creating the Dandelion Puff
-
The Center Point:
At the top of the main stem, draw a small, filled-in rough circle or dot. This acts as the anchor for all your seeds. -
Primary Spokes:
Using the ultra-fine (0.1mm) pen, draw straight lines radiating outward from that center dot like a wheel. Vary their lengths slightly, but keep the overall shape circular. -
Adding the ‘Parachutes’:
At the tip of every other spoke, draw three or four tiny ‘V’ shapes or little dashes that fan out. These represent the feathery pappus of the seed. -
Secondary Details:
For the spokes that don’t have the V-shapes, simply add a small dot at the end. This creates depth and makes the puffball look fuller without being too cluttered. -
The Smaller Bud:
Move to the smaller stem on the left. Draw shorter radiating lines from its top, adding only dots or very small ‘V’ shapes at the ends to show it is less mature or partially blown away.
Make a Wish
Add a single word like ‘Wish’, ‘Dream’, or ‘Hope’ in a tiny, delicate cursive font along the curve of the drifting seeds for added meaning.
Step 4: Atmosphere and Finishing
-
Floating Seeds:
To the left of the main dandelion, draw three loose seeds drifting away. Draw a tiny ‘T’ or ‘Y’ shape, then add the feathery top separate from the stem to show movement. -
Ground Texture:
Add a few dashes underneath the main ground line to suggest uneven earth or shadows. -
Erase Pencil Marks:
Wait at least 15 minutes for the ink to fully set. Gently erase any visible pencil sketch lines, being careful not to smudge the artwork. -
Seal the Art:
Apply a thin coat of clear acrylic sealer. I prefer a spray sealant for the first coat to avoid dragging the ink, followed by a brush-on varnish for durability if desired.
Now you have a permanent reminder of summer days to decorative your garden or desk
Feather With Metallic Highlights

Transform a simple white stone into an elegant piece of decor with this striking feather design. Using a combination of deep charcoal tones and shimmering metallic paints creates a sophisticated contrast that looks beautiful on a smooth, pale surface.
Step-by-Step Guide
Materials
- Smooth white river rock or beach stone
- Pencil (HB or lighter)
- Black acrylic paint or Posca paint pen (fine tip)
- Dark grey acrylic paint
- Metallic gold or bronze acrylic paint
- White acrylic paint or gel pen
- Fine detail brushes (size 0 and 00)
- Small flat brush
- Matte or satin varnish
Step 1: Planning and Sketching
-
Clean your canvas:
Begin by washing your stone with soapy water to remove any dirt or oils. Let it dry completely before starting, as moisture can affect paint adhesion. -
Sketch the central quill:
Lightly draw a curved line down the center of the rock using your pencil. This line will act as the spine (rachis) of your feather, guiding the overall shape. -
Outline the feather shape:
Sketch the outer boundary of the feather. Keep the top rounded and smooth, while allowing the bottom section to be looser and more ragged where the downy barbs would be.
Natural Flow
Feather barbs aren’t straight lines. Always paint them with a slight ‘S’ curve or gentle arc to mimic how a real feather bends.
Step 2: Painting the Base Layers
-
Paint the quill base:
Using your metallic gold or bronze paint and a fine liner brush, paint the central spine of the feather. Start thicker at the bottom and let it taper off to a very fine point at the top. -
Block in the dark sections:
With black paint or a charcoal grey, fill in the main body of the feather on either side of the quill. Leave small gaps occasionally to simulate the separation of barbs. -
Create the wispy bottom:
At the base of the feather, use quick, flicking strokes to create the soft, downy fluff. These strokes should curve away from the quill and look unpredictable and airy. -
Let it dry:
Allow the base layer to dry completely. Acrylics dry fast, but giving it an extra few minutes ensures you won’t muddy your colors in the next step.
Step 3: Adding Detail and Texture
-
Paint individual barbs:
Reload your brush with black paint. Paint fine lines extending from the quill outward to the edge of your shape. Ensure these strokes follow the curve of the feather to give it a realistic flow. -
Add bronze highlights:
Mix a small amount of bronze metallic paint with a touch of water. Paint thin, curved strips essentially parallel to the barbs, primarily focusing on the upper half of the feather’s vanes. -
Enhance the quill:
Go over the central gold quill again to increase its opacity. I find a second coat really makes that metallic shine pop against the white stone background. -
add textural depth:
Using a very dark grey (lighter than black), add subtle strokes between the black barbs. This creates a sense of volume and prevents the feather from looking like a flat silhouette.
Double the shine
For extra dimension, layer two shades of metallic paint (like copper and gold) on the quill to simulate light hitting a round object.
Step 4: Metallic Accents and Finishing
-
Apply decorative dots:
Dip the very tip of a small brush or a dotting tool into white paint. Add tiny, precise dots along the bronze highlight strips you created earlier. -
Add larger dots:
In the wider bronze sections, place slightly larger white dots to create variety. These imitate the natural spotted patterns found on guinea fowl or hawk feathers. -
Refine the edges:
Check the outer edges of your feather. If they look too solid, use a very fine brush with a tiny bit of black paint to add microscopic flicks, breaking up the smooth line. -
Touch up the highlights:
If the gold quill got covered by any black strokes, carefully re-paint those sections now to ensure the spine appears to sit on top of the vanes. -
Seal the artwork:
Once the paint is bone dry (give it at least an hour), apply a coat of matte or satin varnish. This protects the delicate paint work and enhances the stone’s natural texture.
Display your finished stone on a desk or shelf where the light can catch those beautiful metallic details
Bold Initial Letter With Florals
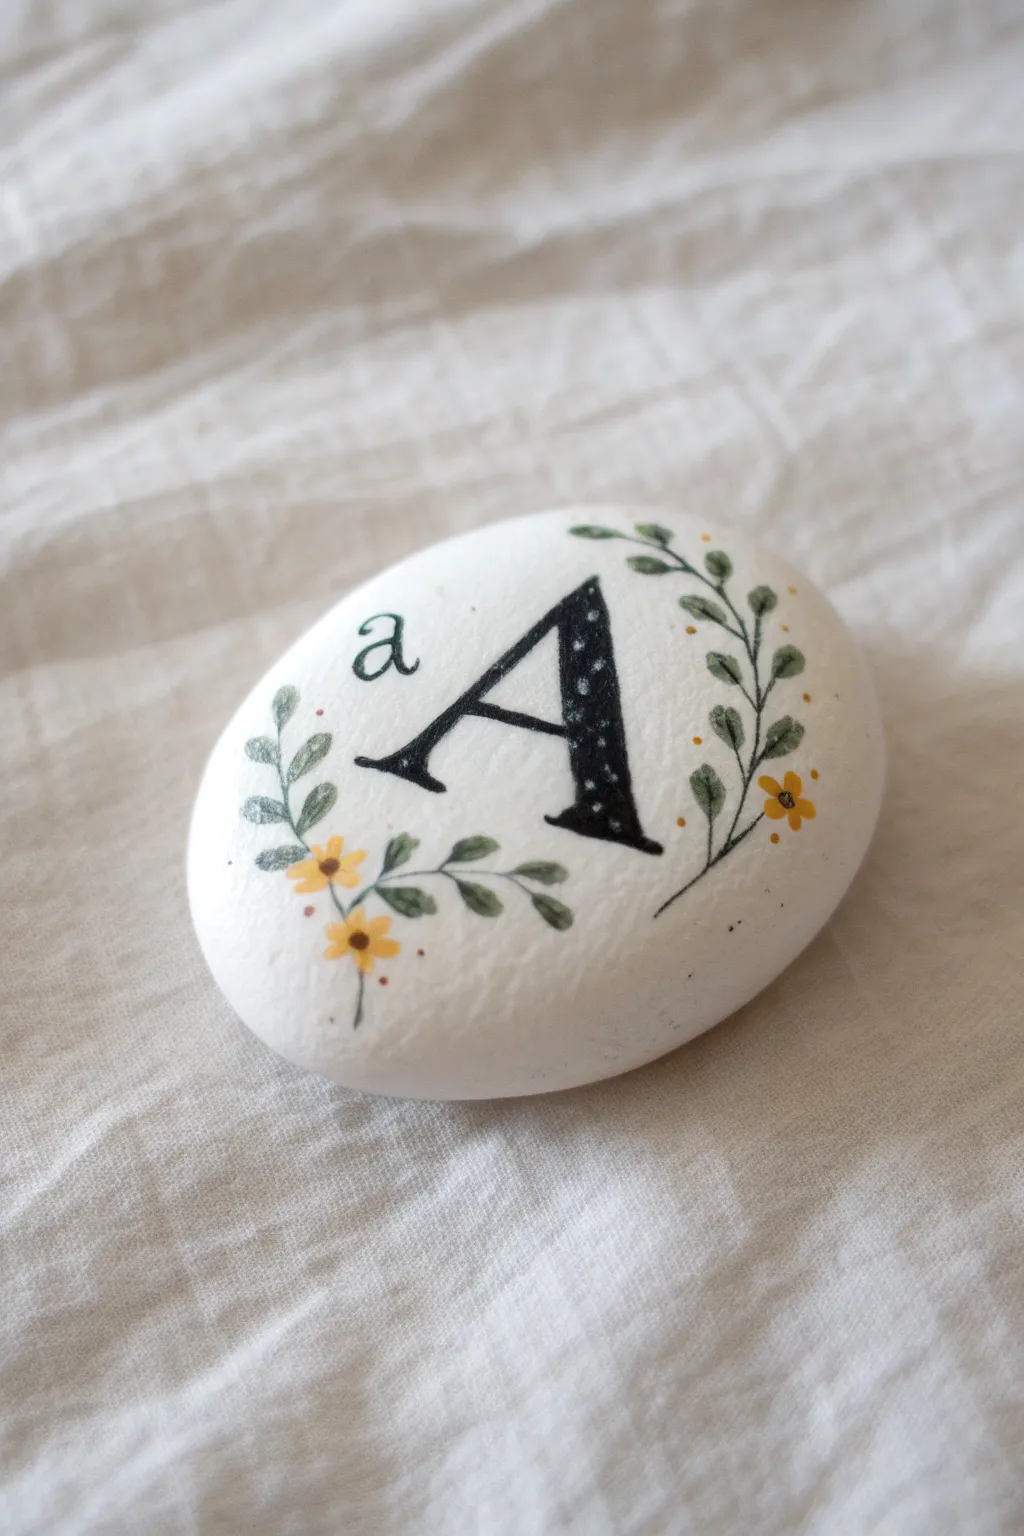
This elegant project transforms a simple stone into a personalized keepsake featuring a classic serif initial framed by delicate greenery and tiny yellow blooms. The clean white background makes the black lettering pop, while the surrounding vines add a soft, organic touch perfect for garden decor or a thoughtful gift.
Step-by-Step
Materials
- Smooth, flat river rock (palm-sized)
- White acrylic paint (matte finish)
- Black acrylic paint or fine-tip paint pen
- Forest green and sage green acrylic paint
- Mustard yellow acrylic paint
- Wide flat brush
- Detail liner brush (size 00 or 000)
- Pencil with a light touch
- Eraser
- Matte spray sealant
Step 1: Base Preparation
-
Clean the surface:
Begin by washing your stone thoroughly with warm soapy water to remove any dirt or oils. Scrub gently with an old toothbrush if needed and let it dry completely. -
Apply base coat:
Using a wide flat brush, paint the entire top surface of the stone with white acrylic paint. You want a solid, opaque background, so don’t be afraid to be generous. -
Layer for opacity:
Once the first coat is dry to the touch, apply a second or even third coat. Aim for a smooth, matte finish where the natural color of the rock no longer shows through.
Fixing Wobbly Lines
If your vine lines get too thick or shaky, let the green dry completely. Then, use your white background paint to carefully ‘erase’ or thin the line from the outside content.
Step 2: Drafting the Design
-
Sketch the letters:
Lightly pencil in your chosen capital letter in the center of the rock. Use a classic serif font style. To the upper left of the capital, sketch a much smaller lowercase version of the same letter. -
Outline the vines:
Draw faint curved lines extending from the bottom left and top right of the capital letter to establish the flow of the floral wreath. Keep these lines loose and organic.
Pro Tip: Lettering
Don’t trust your freehand lettering? Print your letter on paper first, rub graphite on the back, and trace it onto the rock for a perfect transfer every time.
Step 3: Painting the Typography
-
Outline the capital letter:
Using a fine-tip black paint pen or a liner brush with black paint, carefully trace the outline of your large capital letter. -
Fill the letter:
Fill in the thick downstrokes of the letter with solid black. Leave the thin upstrokes delicate. I find distinct contrast between thick and thin lines really elevates the look. -
Add the starry detail:
While the black paint is wet or after it dries (depending on your preference for blending), use a tiny dotting tool or the very tip of a brush to add small white speckles inside the thickest part of the black letter for a whimsical texture. -
Paint the lowercase letter:
Carefully paint the small lowercase letter in simple black outlines. Keep this letter simpler than the main one to ensure it acts as an accent rather than a focal point.
Step 4: Adding Flora
-
Paint main stems:
Mix a dark forest green and use your liner brush to trace over the pencil lines for the vines. Keep your pressure extremely light to ensure lines remain thin and elegant. -
Add varied leaves:
Along the stems, paint small, almond-shaped leaves. Use the darker green for some and a lighter sage green for others to create depth and visual interest. -
Paint flower placement:
Identify a few spots along the vine—specifically near the bottom left and mid-right—where you want your blooms. -
Create yellow blooms:
Using mustard yellow paint, dab four or five small petals in a circle to form simple flowers. They don’t need to be perfect; a loose shape looks more natural. -
Add floral centers:
Once the yellow paint dries, place a tiny dot of dark brown or black in the center of each flower to define them. -
Final decorative dots:
Dip the tip of a toothpick or a small dotting tool into orange or yellow paint and add tiny scattered dots around the vines to simulate pollen or small buds.
Step 5: Finishing Touches
-
Clean up:
Check the white background for any accidental smudges. You can touch these up with a bit of white paint once the rest of the design is fully dry. -
Seal the artwork:
After the rock has dried for at least 24 hours to ensure no moisture is trapped, spray it with a matte sealant. This protects the paint from chipping and UV fading.
Now you have a beautifully personalized stone that looks lovely on a desk or tucked into a planter
Tiny Quote, Big White Space

Sometimes the simplest messages are the most powerful, as seen in this minimalist rock that features a single, meaningful word surrounded by calming negative space. The crisp, clean serif text against the natural texture of a white stone creates a perfect mindfulness token or desk accessory.
Step-by-Step Tutorial
Materials
- Smooth white river rock (flat surface is best)
- Rubbing alcohol and cotton pad
- Pencil (HB or lighter)
- Fine grit sandpaper (optional)
- Fine-point black paint pen (e.g., Posca .7mm) or superfine paintbrush
- Black acrylic paint (if using brush)
- Carbon paper (optional for tracing)
- Printed word template
- Matte spray sealant
Step 1: Preparation
-
Select the perfect canvas:
Choose a river rock that is predominantly white or creamy gray. Look for one with a relatively flat top surface to make lettering easier. -
Clean the surface:
Wash the rock thoroughly with soap and water to remove any dirt or grit. Let it dry completely. -
Degrease:
Wipe the surface with a cotton pad soaked in rubbing alcohol. This removes natural oils from your hands that could repel the paint. -
Smooth the texture:
If your rock has rough bumps where you plan to write, gently sand that specific area with fine-grit sandpaper until smooth to the touch. -
Dust off:
Wipe the rock one final time with a clean, dry cloth to ensure no sanding dust remains.
Step 2: Design & Layout
-
Choose your word:
Pick a short word like ‘Breathe’, ‘Peace’, or ‘Hope’. Type it on a computer using a serif font like Times New Roman or Garamond and size it to fit your rock. -
Print and trim:
Print your word out and cut the paper closely around the text so you can see exactly where it will sit on the stone. -
Transfer method setup:
Place a small piece of carbon paper dark-side down on the rock, then tape your printed word template securely on top of it. -
Trace the outline:
Using a pencil or ballpoint pen, firm trace over the letters of your printed word. Apply enough pressure to transfer the carbon, but not so much that you dent the stone.
Clean Lines
If you make a mistake, don’t panic. A damp toothpick can often gently scrape away wet acrylic paint from a smooth rock surface before it sets.
Step 3: Inking the Lettering
-
Outline the letters:
Carefully remove the paper. Using your extra-fine black paint pen, slowly trace the faint carbon outlines of each letter. I find resting my wrist on a table stabilizes shaky hands. -
Fill in the serifs:
Pay special attention to the ‘serifs’—the little feet and decorative tips of the letters. These need to be sharp and distinct to get that printed look. -
Fill the body:
Once the outlines are dry, fill in the thicker parts of the letters. Work slowly to ensure the black is solid and opaque. -
Touch up edges:
Inspect the edges of your letters. If any lines look ragged, smooth them out with the very tip of your pen or a superfine brush. -
Wait for drying:
Let the black ink dry completely. This might take 15-20 minutes depending on the thickness of the paint. -
Clean up guidelines:
If any carbon lines are still visible outside the paint, very gently erase them with a soft eraser. -
Seal the work:
To protect the lettering without altering the rock’s natural look, finish with a light coat of matte spray sealant.
Custom Vibe
Instead of black, use metallic gold or copper paint for the lettering to add a touch of luxury while keeping the minimalist aesthetic.
Place your finished stone on a desk or windowsill as a gentle daily reminder to pause and reset
Dot Gradient Border Frame
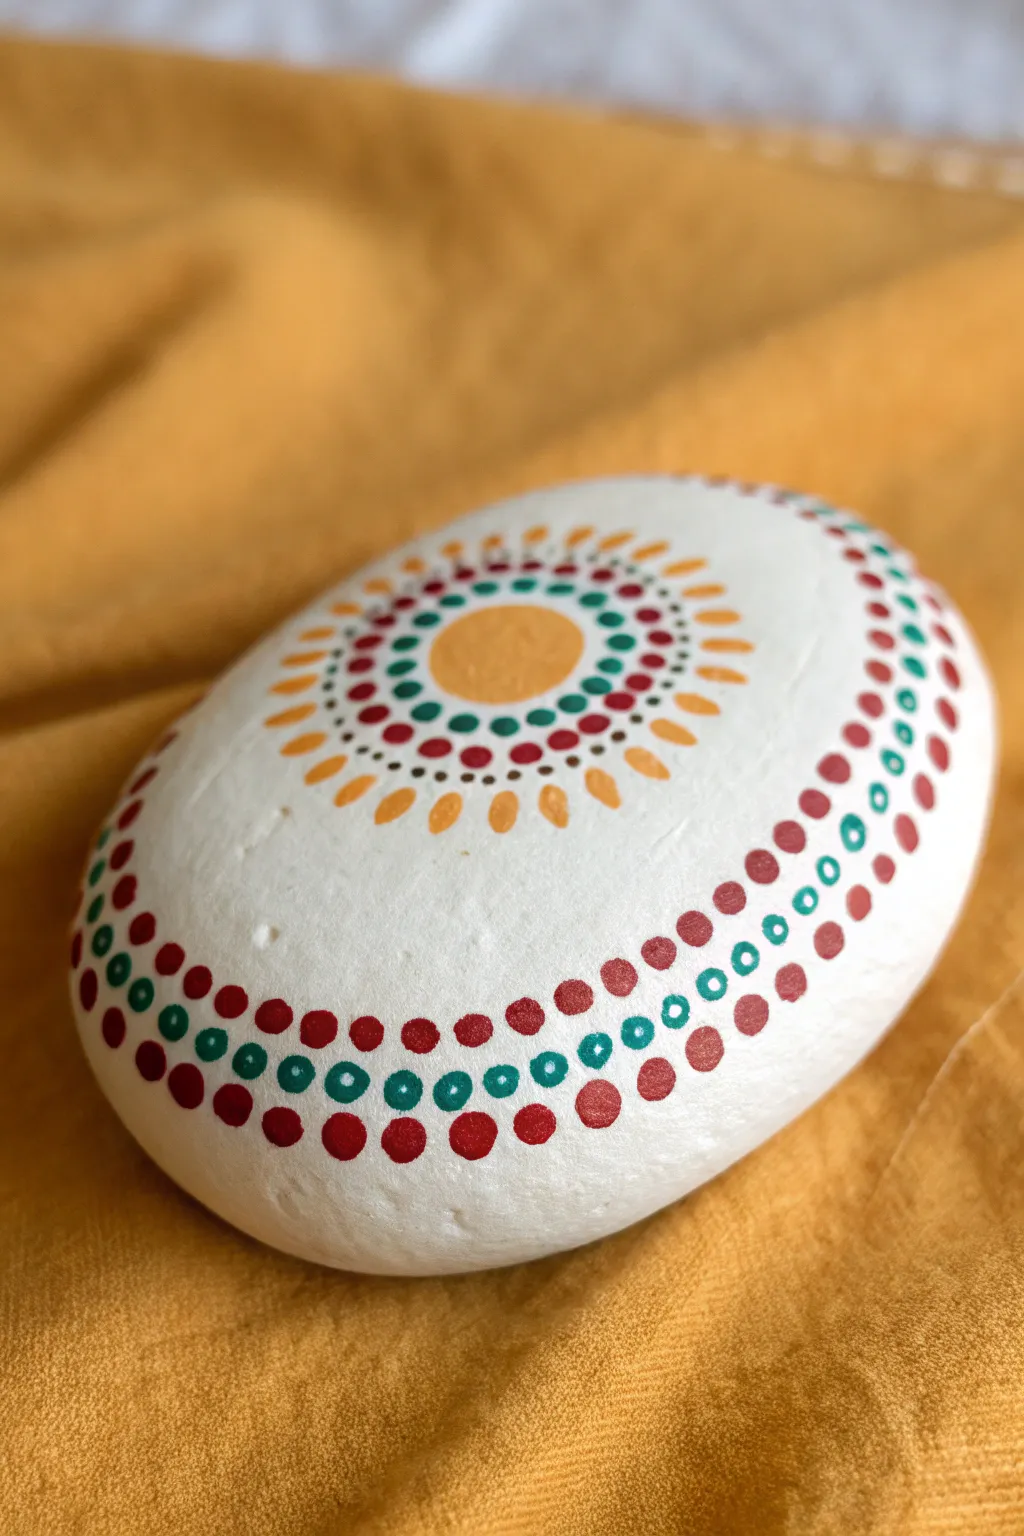
Transform a simple river rock into a piece of radiating art with this mandala-inspired design. The pattern combines a sunny central gradient with a clever wraparound border that frames the stone perfectly.
Step-by-Step Guide
Materials
- Smooth, oval river rock
- White acrylic paint (base coat)
- Acrylic paints: yellow ochre, deep red/maroon, dark teal
- Dotting tools (various sizes)
- Small round paintbrush
- Matte or glossy sealer (spray or brush-on)
- Palette or small plate for mixing
Step 1: Base Preparation
-
Clean the surface:
Begin by thoroughly washing your rock with soap and water to remove any dirt or oils. Let it dry completely before starting. -
Apply the base coat:
Paint the entire top surface of the rock with white acrylic paint. You may need 2–3 layers to get a solid, opaque coverage where the natural rock color doesn’t show through. -
Smooth the foundation:
Ensure the white paint is completely dry and smooth. If your brushstrokes are ridges, they will distort your dots later, so aim for a flat finish.
Fixing Wonky Dots
If a dot turns out oval or smears, wait for it to dry completely. Then, simply paint over it with your white base color, let that dry, and re-dot the spot.
Step 2: Central Motif
-
Paint the center circle:
With a medium-sized brush, paint a solid yellow ochre circle right in the middle of the rock. It doesn’t have to be geometrically perfect, but try to keep it relatively centered. -
Add first teal ring:
Using a small dotting tool, place a ring of small teal dots immediately around the yellow center. Keep them close together but not touching. -
Create the red ring:
Switch to a slightly larger dotting tool and your deep red paint. Create a second ring of dots outside the teal one, following the curve. -
Add outer teal accents:
Place a third ring of teal dots. For a nice variation, try using a slightly smaller tool again to keep the pattern delicate as it expands. -
Paint the sun rays:
Using a small brush or a drag-dotting technique, paint teardrop shapes radiating outward from the lat dot ring using yellow ochre. They should look like little sun rays pointing away from the center.
Pro Tip: Consistency
Paint consistency is key for round dots. If paint is too thick, it forms peaks. Mix in a drop of pouring medium or water until it flows like heavy cream.
Step 3: The Wraparound Border
-
Start the lower border:
Move to the bottom edge of the rock where the curve begins downward. Use a large dotting tool to place a row of large red dots along this perimeter line. -
Add the inner red row:
Just above that first border row (moving slightly inward toward the center), place a second row of red dots. Use the same size tool and offset them so they sit in the ‘valleys’ of the previous row. -
Create the teal band:
Using a medium dotting tool and teal paint, add a row of dots directly above your inner red row. I like to press gently to creating a ‘ring’ effect if the paint is slightly translucent, or use opaque paint for a solid dot. -
Detail the teal dots:
For extra detail, once the teal dots are semi-dry, use a tiny tool to place a minuscule white dot in the center of each teal one, creating a bead-like appearance. -
Add the final red tier:
Complete the border pattern with one more row of red dots above the teal band. These should be slightly smaller than your base border dots to help the design taper inward.
Step 4: Finishing Touches
-
Clean up stray marks:
Inspect your rock for any unintended smudges. You can carefully touch up the white background with a small brush if needed. -
Let it cure:
Allow the stone to dry completely for at least 24 hours. Thick dots take much longer to dry than thin layers of paint, so be patient. -
Seal the artwork:
Apply a coat of clear sealer to protect your design from scratches and fading. A satin or glossy finish tends to make the dot colors pop beautifully.
Place your finished mandala stone on a desk or in a garden pot to enjoy your handiwork
Yin and Yang With Gold Accents

Achieve perfect harmony with this elegant take on the classic Yin and Yang symbol, painted onto a smooth river rock. The stark contrast of black and white is elevated by shimmering gold accents and mysterious glyphs, creating a sophisticated piece of decor.
Detailed Instructions
Materials
- Smooth, round river rock (medium size)
- White acrylic paint (high opacity)
- Black acrylic paint
- Gold metallic paint or paint pen
- Pencil for sketching
- Medium flat paintbrush
- Small round detail brush (size 0 or 00)
- Dotting tool or toothpick
- Matte or satin clear sealant spray
Step 1: Preparation and Base Shape
-
Clean your canvas:
Begin by washing your rock thoroughly with soap and water to remove any dirt or oils that might prevent the paint from sticking. Let it dry completely. -
Sketch the divide:
Using a pencil, lightly draw a curved ‘S’ line down the center of the rock to divide it into two equal swirling sections. -
Outline the circles:
Sketch a small circle in the center of the widest part of each teardrop shape. These will be the contrasting dots typical of the Yin Yang symbol.
Fixing Wobbly Lines
If your central ‘S’ curve is shaky, don’t stress! The gold line added in the final phase naturally hides uneven edges between the black and white paint.
Step 2: Color Blocking
-
Paint the white side:
Fill in one side of the ‘S’ curve with white acrylic paint. You may need two to three coats to get a solid, opaque finish, especially if your rock is dark. -
Reserve the dark circle:
While painting the white side, be careful to paint *around* the small circle sketch you made earlier, leaving the stone bare or prepping it for black paint. -
Paint the black side:
Once the white side is dry to the touch, fill in the opposite side with black acrylic paint. Use a steady hand along the central ‘S’ line to keep the edge crisp. -
Fill the white circle:
On the black side of the symbol, paint the small reserved circle carefully with your white paint. -
Fill the black circle:
On the white side of the symbol, paint the small reserved circle with black paint. Allow the entire base coat to dry completely before moving on to details.
Zodiac Customization
Instead of abstract swirls, paint your sun and moon astrological signs in gold on the opposing halves for a personalized astrological talisman.
Step 3: Gilded Details
-
Outline the divide:
Using your gold paint and a fine liner brush (or a gold paint pen), retrace the central ‘S’ curve to create a striking metallic border between the black and white halves. -
Add symbolic glyphs:
In the open space of each teardrop half, next to the contrasting circle, paint a small decorative spiral or symbol in gold. I like to use a paint pen here for better control over the delicate curves. -
Plan the border dots:
Visualize spacing for a dotted border that runs around the outer perimeter of the design. -
Apply gold dots:
Dip a dotting tool or the blunt end of a toothpick into your gold paint. Gently press dots along the outer edge of the black section first. -
Complete the border:
Continue the dotted gold line around the white section. Try to keep the spacing consistent, but embrace slight irregularities for a hand-crafted look. -
Seal the artwork:
Once all paint is visibly dry, take the rock outside and apply a coat of matte or satin spray sealant to protect the finish.
Place your finished stone on a desk or shelf as a calming reminder of balance
Constellation Map on White Rock
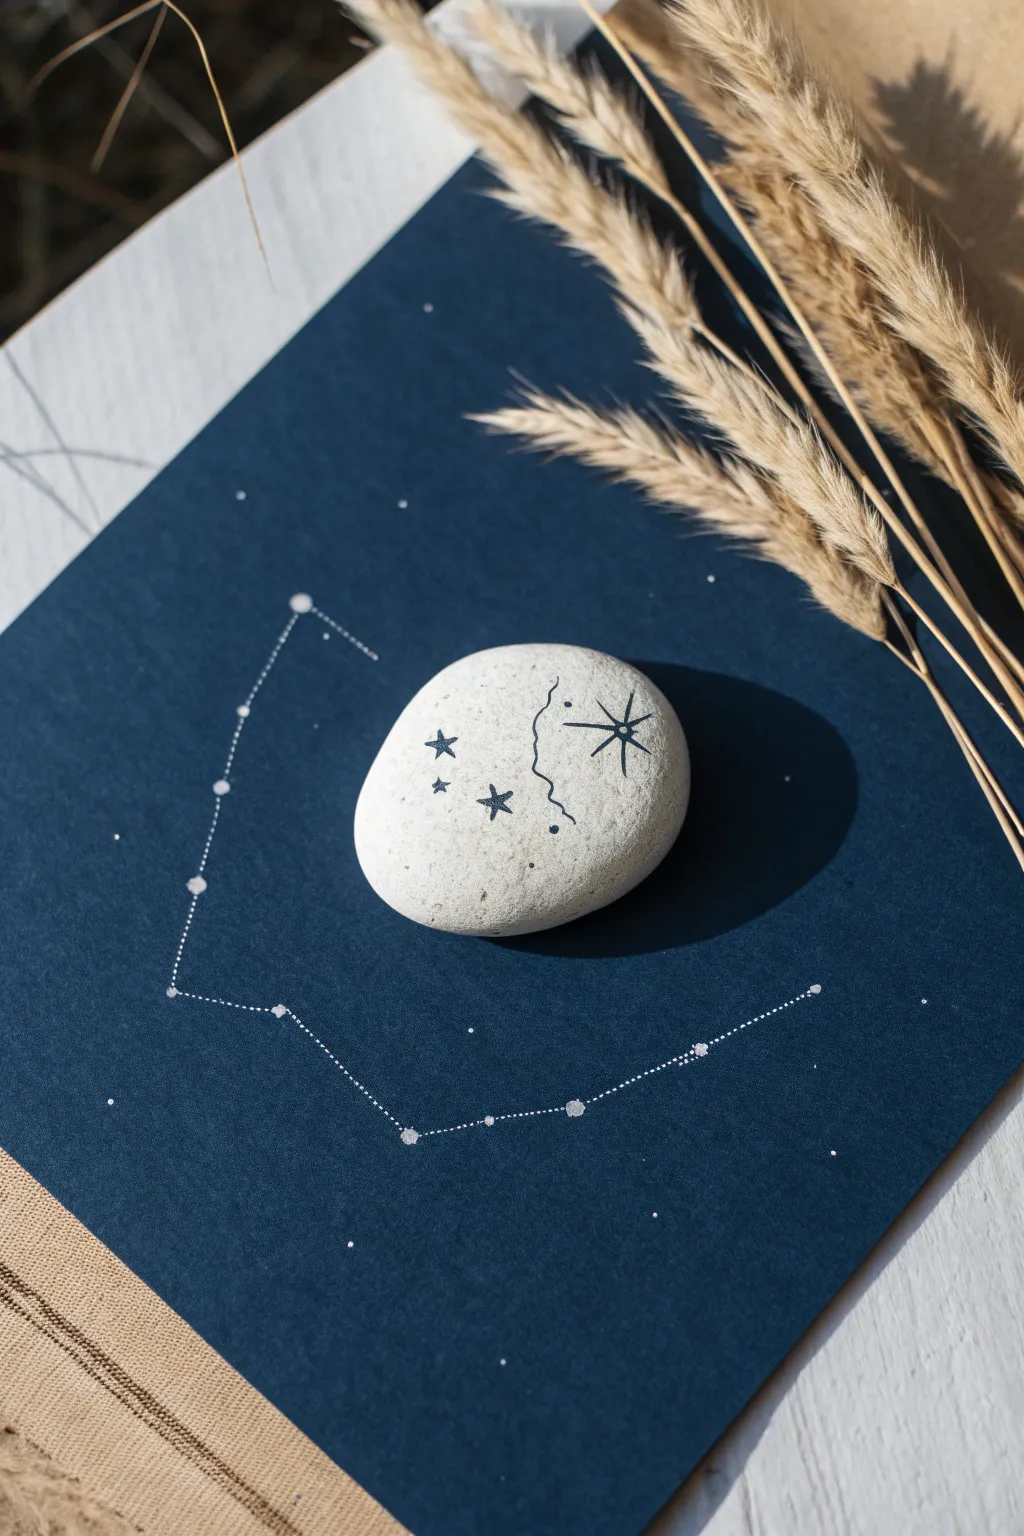
Capture the magic of the night sky with this minimalist project that pairs a hand-painted stone with a custom constellation background. The contrast between the matte white rock and the deep navy cardstock creates a striking display for any desk or bookshelf.
How-To Guide
Materials
- Smooth white river rock or pebble (flat surface preferred)
- Fine-point black paint pen or permanent marker
- Deep navy blue cardstock or heavy paper
- White gel pen (0.5mm or 0.8mm)
- Pencil and eraser
- Ruler
- Matte spray varnish (optional)
Step 1: Preparing the Stone
-
Select your canvas:
Choose a rock that is naturally smooth and pale. If you can’t find a perfect white one, apply two coats of white acrylic paint as a base, letting it dry completely between layers. -
Clean surface:
Wipe the stone with a damp cloth or a little rubbing alcohol to remove oils and dust. This ensures your marker ink adheres properly without skipping. -
Plan the design:
Lightly sketch your design onto the rock face using a pencil. For this look, draw a gentle vertical wavy line slightly off-center to divide the space. -
Add celestial elements:
On the right side of the wavy line, sketch a large, eight-pointed starburst. On the left side, sketch a cluster of three smaller five-pointed stars.
Ink Flow Pro-Tip
Store your white gel pen vertically with the tip down for 10 minutes before starting. This ensures smooth, opaque ink flow on the dark paper.
Step 2: Inking the Rock
-
Trace the main lines:
Using your fine-point black paint pen, carefully go over your pencil lines. I prefer to start with the central wavy line to establish the boundary. -
Define the large star:
Draw the vertical and horizontal rays of the large star first, making them the longest. Then, add the smaller diagonal rays in between to complete the eight-pointed shape. -
Fill in the cluster:
Ink the three smaller stars on the left. You can leave them as outlines or fill them in solid black for more visual weight. -
Add detail dots:
Place a single small black dot near the tip of the large star’s bottom ray, and another dot near the bottom of the wavy line. These tiny accents balance the negative space. -
Clean up:
Allow the ink to dry for at least 15 minutes. Once fully set, gently erase any visible pencil marks. If desired, seal with a matte spray to protect the design.
Step 3: Creating the Constellation Backdrop
-
Map the layout:
Place your finished rock in the center of the navy blue cardstock. Lightly mark its position with a pencil so you know where to draw the constellation lines around it. -
Draft the constellation:
Remove the rock. Using a ruler and pencil, lightly sketch a geometric shape that mimics a constellation. Use straight lines that angle around where the rock sits, creating a ‘container’ for it. -
Mark the stars:
At the corners or ‘joints’ of your constellation lines, draw small circles to represent major stars. -
Apply white ink:
Switch to your white gel pen. Carefully fill in the major star circles you just drew. Make them opaque and bright. -
Connect with dots:
Instead of solid lines, connect the major stars using a series of tiny, evenly spaced dots. This stippled effect gives the artwork a delicate, map-like quality. -
Add background stars:
To make the sky feel vast, sprinkle tiny random dots across the rest of the blue paper. Keep them sparse so they don’t compete with the main constellation.
Smudge Control
If your black paint pen bleeds into the rock’s porous surface, dab a tiny bit of white acrylic paint over the mistake, let it dry, and redraw the line.
Place your painted stone back onto its constellation map and enjoy your personal piece of the universe
Blue Tile-Inspired Pattern
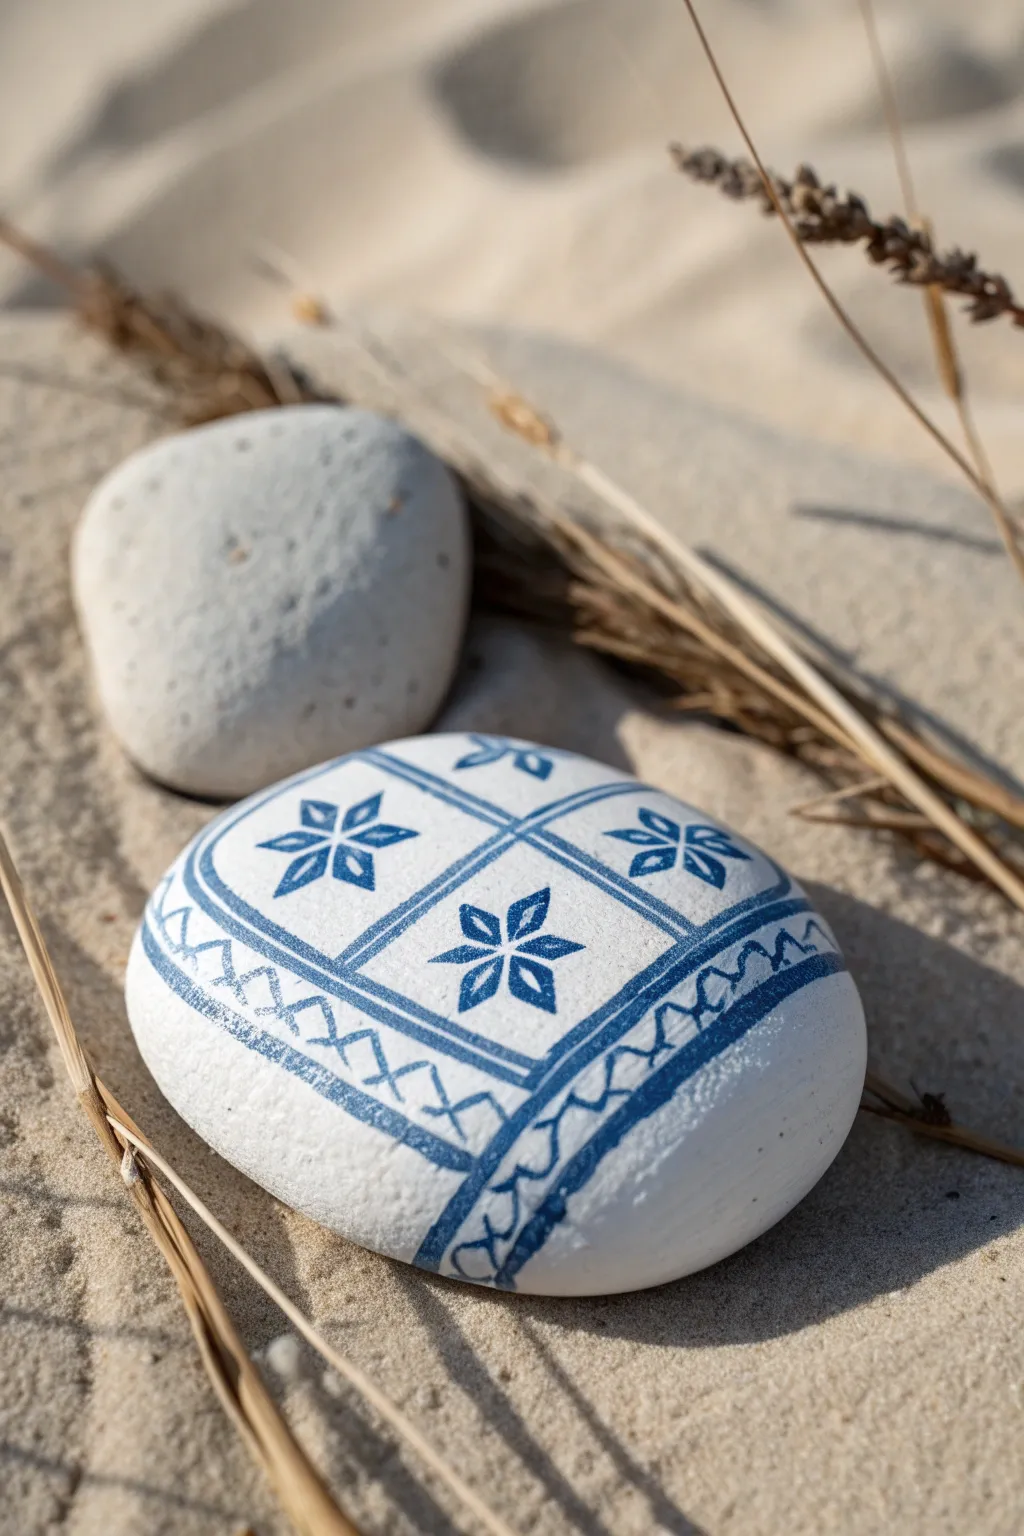
Transform a simple smooth stone into a charming piece of faux-Delftware art with this intricate blue pattern. The crisp white background and geometric floral motif capture the breezy elegance of seaside tile work.
Step-by-Step
Materials
- Smooth, oval river rock (medium size)
- White acrylic paint (matte finish)
- Cobalt blue acrylic paint
- Navy blue acrylic paint (optional for depth)
- Wide flat paintbrush
- Fine liner brush (size 0 or 00)
- Graphite pencil
- Ruler or straight edge
- Varnish or sealant (matte or satin)
- Palette or paper plate
- Water cup and paper towel
Step 1: Preparing the Canvas
-
Clean the stone:
Start by washing your stone with warm soapy water to remove any sand, dirt, or oils. Scrub gently with an old toothbrush if needed to get into porous areas. Let it dry completely in the sun. -
Prime with white:
For that crisp ceramic look, apply a base coat of white acrylic paint. Use your wide flat brush and smooth out the strokes. Let this layer dry fully. -
Apply second coat:
Apply a second coat of white to ensure full opacity. You want the rock to look like glazed porcelain, so opacity is key here. Allow this to dry for at least 30 minutes.
Step 2: Mapping the Grid
-
Lightly sketch the grid:
Using a pencil, very lightly draw a large rectangle on the top face of the rock. Divide this rectangle into four equal smaller squares using a central cross shape. -
Outline the border:
Sketch a parallel line around the outside of your main rectangle to create a border area. This is where the zig-zag pattern will eventually go. -
Paint the main grid lines:
Load your fine liner brush with slightly watered-down cobalt blue paint. Carefully paint over your pencil lines for the central cross and the inner box outline. Keep the lines steady but don’t worry about perfection; hand-painted charm is part of the look. -
Thicken the grid lines:
Go over the central cross lines again to make them slightly bolder than the rest. This creates the definition of ’tiles’.
Wobbly Lines?
If your hand shakes, rest your pinky finger on the dry part of the rock for stability. Thinning your paint slightly with water helps it flow smoother for long lines.
Step 3: Painting the Flowers
-
Mark flower centers:
Place a tiny dot of blue paint in the exact center of each of the four squares. This will guide your petal placement. -
Paint the first petals:
In the top-left square, paint four teardrop shapes radiating from the center dot—up, down, left, and right. Use the tip of your liner brush and press down gently to widen the stroke. -
Add diagonal petals:
Paint four smaller, thinner lines or tiny teardrops in the diagonal spaces between your main petals. This creates an eight-point star flower. -
Complete the motif:
Repeat this flower process for the remaining three squares. Try to keep the flowers roughly the same size, but remember that variations make it look authentic. -
Refine the petals:
If any petals look uneven, carefully touch them up with a little more blue paint to sharpen the points.
Make it Ancient
Mix a tiny drop of brown or grey into a watery glaze and brush it over the dried white areas (wipe off excess immediately) to create an ‘antique’ ceramic effect.
Step 4: Adding the Border Details
-
Paint the outer limit:
Paint the final outer rectangle line defining the edge of your design. This frames the whole piece. -
Create the zig-zag:
In the border space between your two rectangle outlines, paint a continuous zig-zag line. I find it easier to paint a series of ‘V’ shapes connecting the top and bottom lines. -
Add corner details:
If your rock shape leaves extra space at the rounded corners outside the border, add small curved lines or dots to fill the negative space gracefully. -
Texture the blue (optional):
To mimic the look of aged tile print, you can dry-brush a tiny bit of white very lightly over the thickest blue parts once they are dry, giving it a weathered look.
Step 5: Finishing Up
-
Clean up smudges:
If you made any mistakes, use a small brush with white paint to ‘erase’ errant blue marks once they are dry. -
Seal the stone:
Once the paint is completely cured (give it an hour or so), apply two thin coats of matte or satin varnish. This protects your artwork from scratching and gives it that finished ceramic feel.
Place your finished piece in a sunny spot or use it as a lovely paperweight
Cut-Paper Shadow Illusion
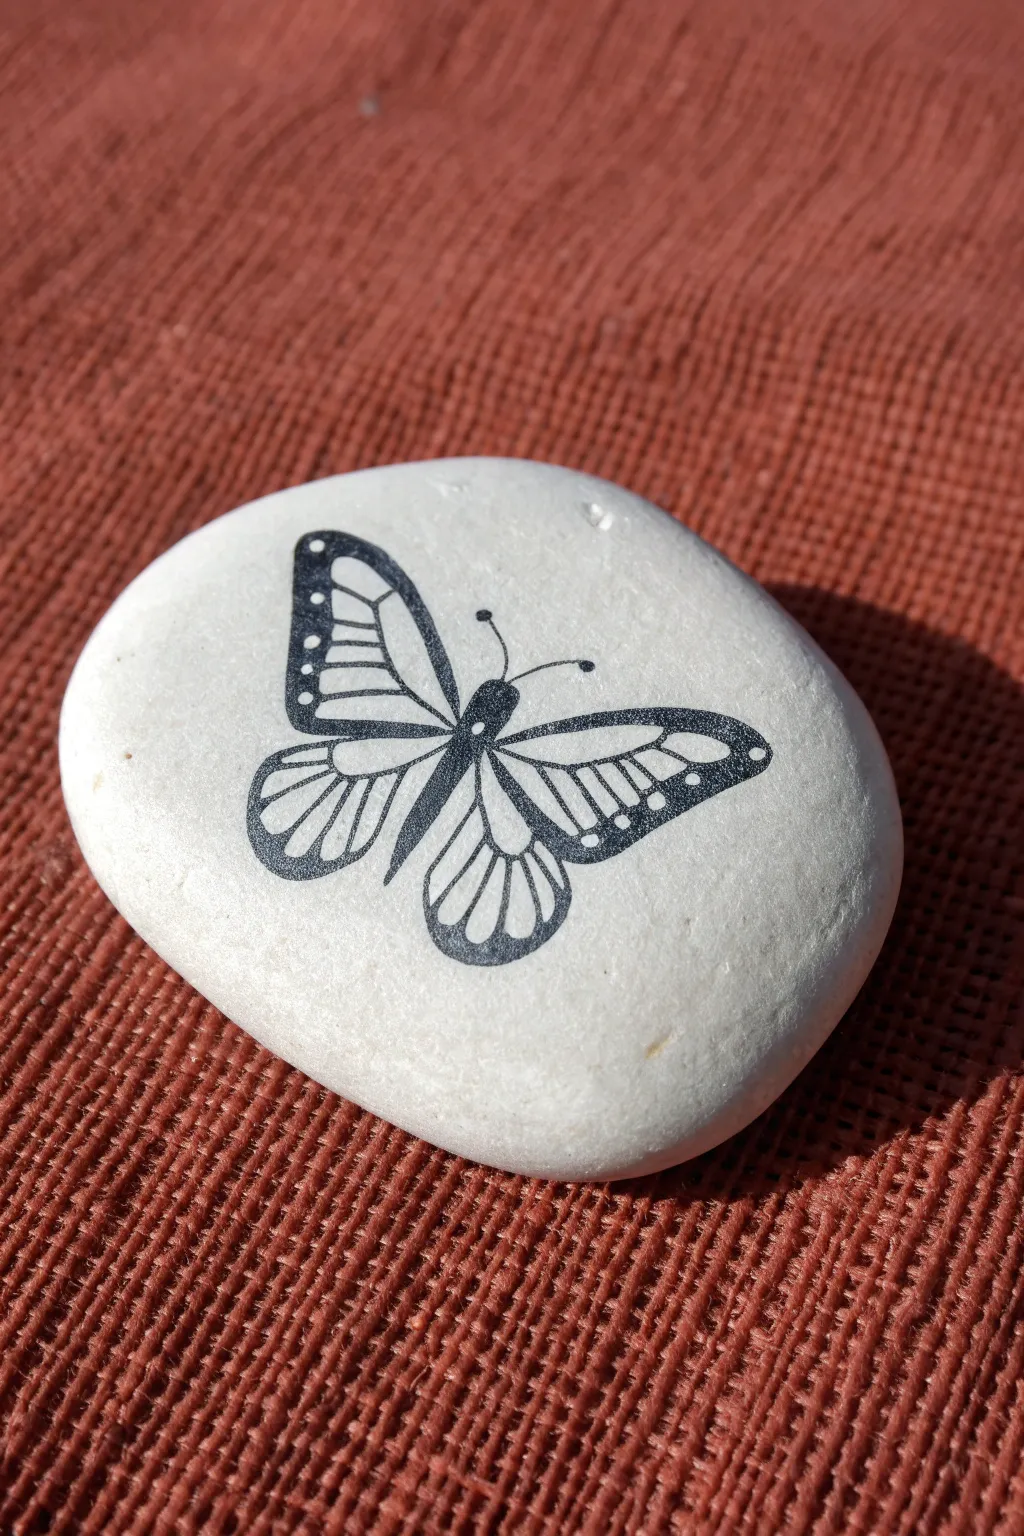
This elegant project transforms a simple white stone into art using a clever decoupage technique that mimics a hand-painted illustration. The result is a crisp, detailed black butterfly that contrasts beautifully against the smooth, pale surface of the rock.
How-To Guide
Materials
- Smooth white river rock (flat surface preferred)
- Black construction paper or heavy cardstock
- Small, sharp craft scissors or precision craft knife
- Cutting mat (if using a knife)
- Pencil
- Mod Podge (matte finish)
- Small flat paintbrush
- Fine-point black permanent marker (optional)
- Tweezers
- Clear acrylic sealant spray (matte)
Step 1: Preparation & Design
-
Stone selection:
Choose a smooth white stone that is relatively flat on top. Wash it thoroughly with soap and water to remove any dirt or oils, then let it dry completely. -
Drafting the design:
Sketch a simple butterfly outline on a scrap piece of paper first to size it correctly for your stone. It should fit comfortably with a small border around the edges. -
Transfer to black paper:
Once you are happy with the size, draw your butterfly directly onto the black paper using a pencil. Press lightly so the graphite doesn’t smear.
Fixing Paper Lift
If wing tips curl up while drying, place a piece of wax paper over the wet design and weigh it down with a heavy book for 10 minutes.
Step 2: Cutting the Shape
-
Cutting the main outline:
Carefully cut out the butterfly’s overall silhouette. If you are using scissors, move the paper rather than the scissors for smoother curves. -
Internal details:
For the delicate inner wing patterns, switch to a precision craft knife and a cutting mat. Carefully remove the inner sections of the wings to create the lacy, open effect. -
Handling delicate parts:
Be extremely gentle with the thin veins of the wings. I find using tweezers helps hold small sections down while cutting. -
Refining edges:
Inspect your cutout for any jagged edges or hanging paper fibers. Use your craft knife to clean these up so the silhouette is sharp. -
Antennae strategy:
The antennae are often too thin to cut from paper without tearing. Instead, trim them off the paper cutout entirely; we will draw them in later.
Simplifying the Cut
Can’t cut tiny details? Cut the solid wing shape first, adhere it, and then paint the white inner sections on top with white acrylic paint.
Step 3: Application
-
Base coat adhesive:
Apply a thin, even layer of Mod Podge to the area of the stone where the butterfly will sit. -
Placement:
Using tweezers, carefully pick up your black paper butterfly and position it onto the wet adhesive. -
Smoothing:
Gently press the paper down, starting from the center body and working outward to the wingtips to push out any air bubbles. -
Top sealing:
Immediately brush another thin layer of Mod Podge over the top of the paper to seal it in place. Don’t worry if it looks white; it will dry clear. -
Flattening edges:
Check that all the tiny edges and wing tips are fully adhered to the stone. Use the tip of your brush to tap them down if they lift. -
Drying time:
Allow the adhesive to dry completely. This usually takes about 20-30 minutes, until the surface is no longer tacky.
Step 4: Finishing Touches
-
Adding antennae:
Once the decoupage is dry, use a fine-point black permanent marker to carefully draw the thin antennae and the small dots on the wing tips if you couldn’t cut them out. -
Connecting gaps:
If any tiny gaps appeared in the black paper during application, fill them in gently with the permanent marker to make the design look solid. -
Final clean up:
If any glue residue is visible around the edges of the butterfly on the white stone, you can scrape it away gently with a fingernail or damp Q-tip. -
Protective coat:
Take the stone outside and spray it with a matte clear acrylic sealant. This protects the paper from moisture and UV fading.
Display your monochrome masterpiece on a shelf or use it as a striking paperweight that celebrates nature’s symmetry
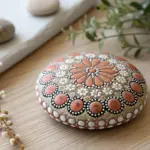


Have a question or want to share your own experience? I'd love to hear from you in the comments below!