If you love one-point perspective but want it to feel less stiff and more alive, a winding path threading through space is the perfect twist. I’m sharing my favorite ideas that use a single vanishing point plus a looping “worm” shape to guide the eye and make your drawing feel like a visual adventure.
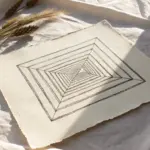
Floating Cubes With a Winding Tube
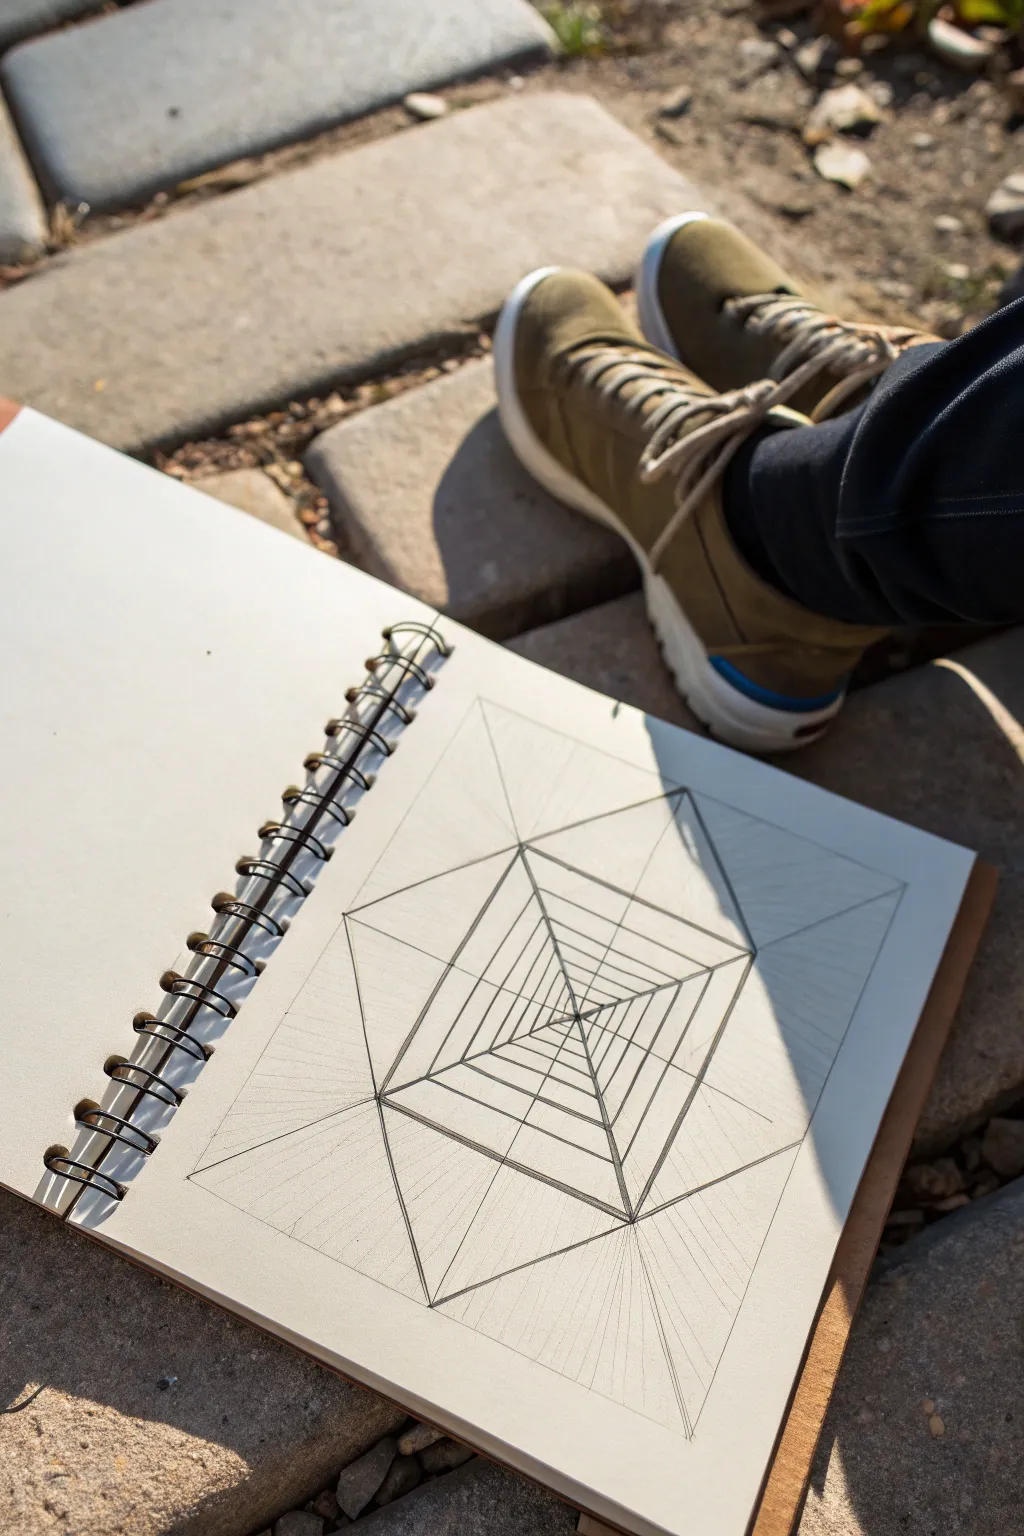
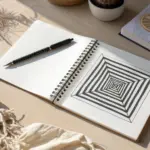
This project creates a mesmerizing optical illusion using fundamental principles of one-point perspective. By layering concentric squares and connecting their corners, you’ll build a geometric tunnel that appears to recede deep into the page.
Detailed Instructions
Materials
- Sketchbook or drawing paper (medium weight)
- Graphite pencil (HB or 2B recommended)
- Fine-point mechanical pencil (optional, for precision)
- Ruler or straightedge
- Eraser
Step 1: Setting the Foundations
-
Establish the Horizon:
Begin by lightly drawing a large square in the center of your page. This will act as the outer frame for your entire composition. -
Find the Center:
Using your ruler, lightly draw diagonal lines connecting opposite corners of your large square. The point where they cross is your vanishing point. -
Draw the Inner Square:
Draw a significantly smaller square centered around that vanishing point. Ensure its sides are parallel to the outer square, essentially creating a ‘bullseye’ effect. -
Connect the Corners:
Draw straight lines connecting the four corners of the small inner square to the corresponding four corners of the large outer square. This creates the basic tunnel depth.
Step 2: Building the Tunnel Layers
-
Mark the Intervals:
Along one of the long diagonal lines you just drew, make small tick marks. Space them closer together as you get nearer to the center point to exaggerate the feeling of depth. -
Create the Second Layer:
Starting from your first tick mark (closest to the outer square), draw a vertical line connecting the two upper diagonals. Then draw a horizontal line connecting the side diagonals. Continue until you have a complete square. -
Repeat the Process:
Move to the next tick mark inwards and repeat the process, drawing another complete square that fits within the perspective lines. -
Consistency is Key:
Continue drawing these concentric squares all the way down to the smallest central square. I find it helpful to rotate the sketchbook occasionally to keep my ruler lines straight. -
Check Your Parallels:
Pause and verify that all horizontal lines are truly horizontal and all vertical lines are vertical. If they slant, the illusion of depth breaks.
Wobbly Lines?
If your lines aren’t meeting perfectly at the center, don’t restart. Just thicken the lines slightly at the connection points to hide the misalignment.
Step 3: Refining and Shading
-
Darken the Main Lines:
Take your pencil and firmly re-trace the lines of the squares you just created. You want these structural lines to stand out clearly. -
Define the Corners:
Go back and darken the diagonal lines that connect the corners of all the squares together. This creates the ‘edges’ of your tunnel walls. -
Add Secondary Diagonals:
For extra complexity, draw straight lines from the midpoint of each side of the outer square directly to the vanishing point in the center. -
Erase Guidelines:
Gently erase any stray marks or original construction lines that aren’t part of the final geometric shape. -
Clean the Edges:
Use a sharp edge of your eraser to clean up the corners where lines intersect, ensuring crisp, sharp angles throughout the drawing. -
Optional Shading:
If you wish to add volume, lightly shade alternating sections of the ‘walls’ to enhance the 3D effect, though the line art looks striking on its own.
Depth Perception
Make the spaces between squares progressively smaller as they approach the center. This logarithmic spacing tricks the eye into seeing infinite depth.
Your geometric tunnel is now complete, offering a perfect window into infinite space right on your page
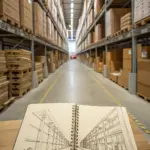
A Perspective Hallway of Floating Crates
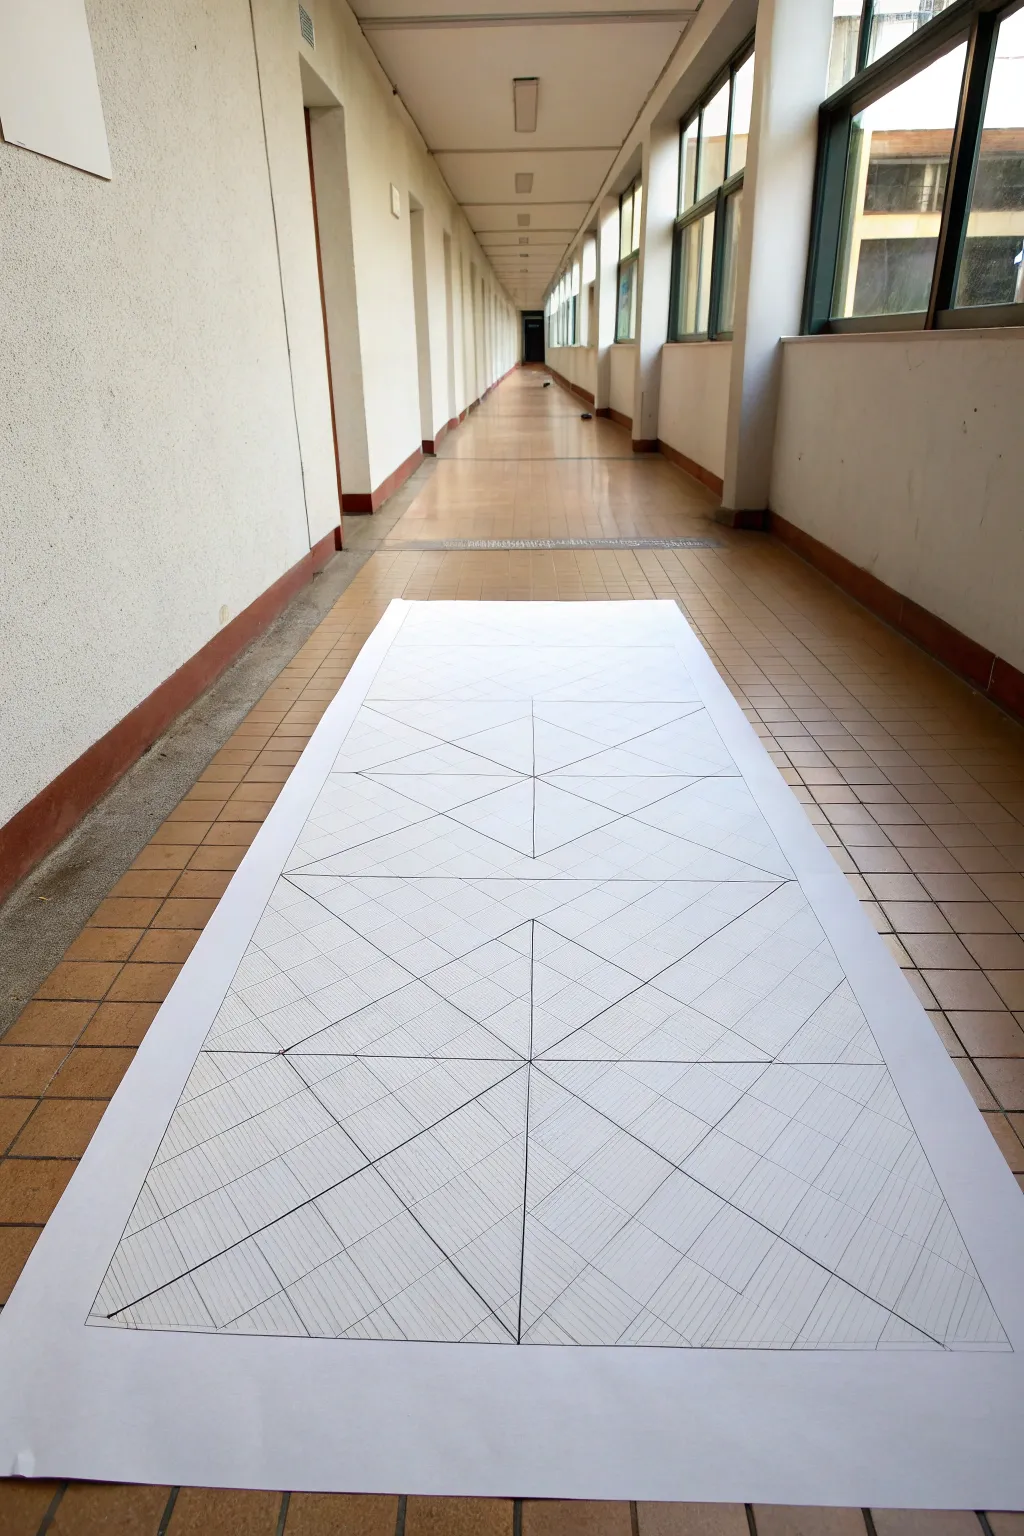
Transform a long hallway into an immersive optical illusion with this large-scale perspective drawing project. By using a continuous roll of paper and precise architectural drafting techniques, you will create a grid of geometric forms that appear to stretch endlessly into the distance.
Step-by-Step Guide
Materials
- Large roll of heavy white seamless paper (approx. 3-4 feet wide)
- Painter’s tape or drafting tape
- Long metal straightedge (meter stick or longer)
- Graphite pencils (H for guidelines, HB/2B for final lines)
- Large eraser
- Triangle ruler or T-square
- Kneadable eraser
Step 1: Setting the Stage
-
Surface preparation:
Begin by thoroughly sweeping the hallway floor where you intend to work. Any small grit or dust will create bumpy textures under the paper and ruin your straight lines. -
Rolling out the canvas:
Unroll your seamless paper along the center of the hallway. You want a very long strip, ideally covering 10-15 feet to get the full effect of the perspective. -
Securing the paper:
Pull the paper taut to remove any waves. Secure the corners and edges firmly to the floor using painter’s tape; this prevents shifting while you draw and keeps the paper flat.
Smudge Prevention
working on a floor drawing means you’ll be crawling over your work. Place a scrap sheet of paper under your drawing hand to prevent dragging graphite across the white areas.
Step 2: Establishing the Horizon
-
Finding the vanishing point:
Decide on your vanishing point. For a classic one-point perspective, this should be a single dot located near the top center of your paper run, representing the deepest point of current vision. -
Drawing the center line:
Use your long straightedge to draw a faint vertical center line running from the bottom edge of the paper all the way to your vanishing point. This acts as the spine of your drawing. -
Marking horizontal intervals:
Starting from the bottom edge (closest to the viewer), mark horizontal lines at getting progressively closer intervals as they move up toward the vanishing point. This accumulation creates the illusion of receding depth. -
Connecting to the vanishing point:
Draw diagonal lines from the bottom corners of your grid sections directly to the vanishing point. Use an H pencil for these initial construction lines so they remain light and erasable.
Step 3: Constructing the Geometry
-
Creating the diamond grid:
Within your established perspective grid, begin drawing large diamond or ‘X’ shapes. Connect opposite corners of your grid squares. These intersecting diagonals are crucial for the ‘floating crate’ aesthetic. -
Adding vertical structure:
Where your diagonal lines intersect the center line or side boundaries, drop vertical lines downwards. This creates the sides of your geometric box forms. -
Defining the planes:
Clarify which shapes represent the tops of the crates and which represent the sides. I find it helpful to lightly tick the areas that will be shaded later so I don’t lose track of the pattern. -
Refining the line weight:
Switch to an HB or 2B pencil. Go over the definitive edges of your shapes with a firm, confident hand, darkening the lines that will remain part of the final illusion.
Tape Trick
If using standard masking tape, stick it to your clothes first to remove some tack. This prevents the tape from ripping the surface of the paper when you remove it later.
Step 4: Shading and texture
-
Starting the hatching:
Begin adding texture to the side planes of your crates using a hatching technique. Draw closely spaced, parallel diagonal lines inside specific geometric sections. -
Consistent angles:
Ensure your hatch marks all follow a consistent angle relative to the perspective. If the lines are random, the surface will look flat rather than three-dimensional. -
Building density:
For shadowed areas that need to appear deeper, cross-hatch by layering a second set of lines perpendicular to the first. This creates a darker value without smudging the graphite. -
Cleaning up:
Take your kneadable eraser and lift away any stray graphite dust or construction lines that fall outside your defined shapes. Keep the white negative space pristine. -
Final inspection:
Stand at the very end of the paper (the intended viewing point) to check the illusion. If certain lines look crooked from this angle, correct them now to ensure the perspective holds up.
Step back and enjoy the depth of your new optical illusion hallway runner


Room Interior With a Looping Cord Path
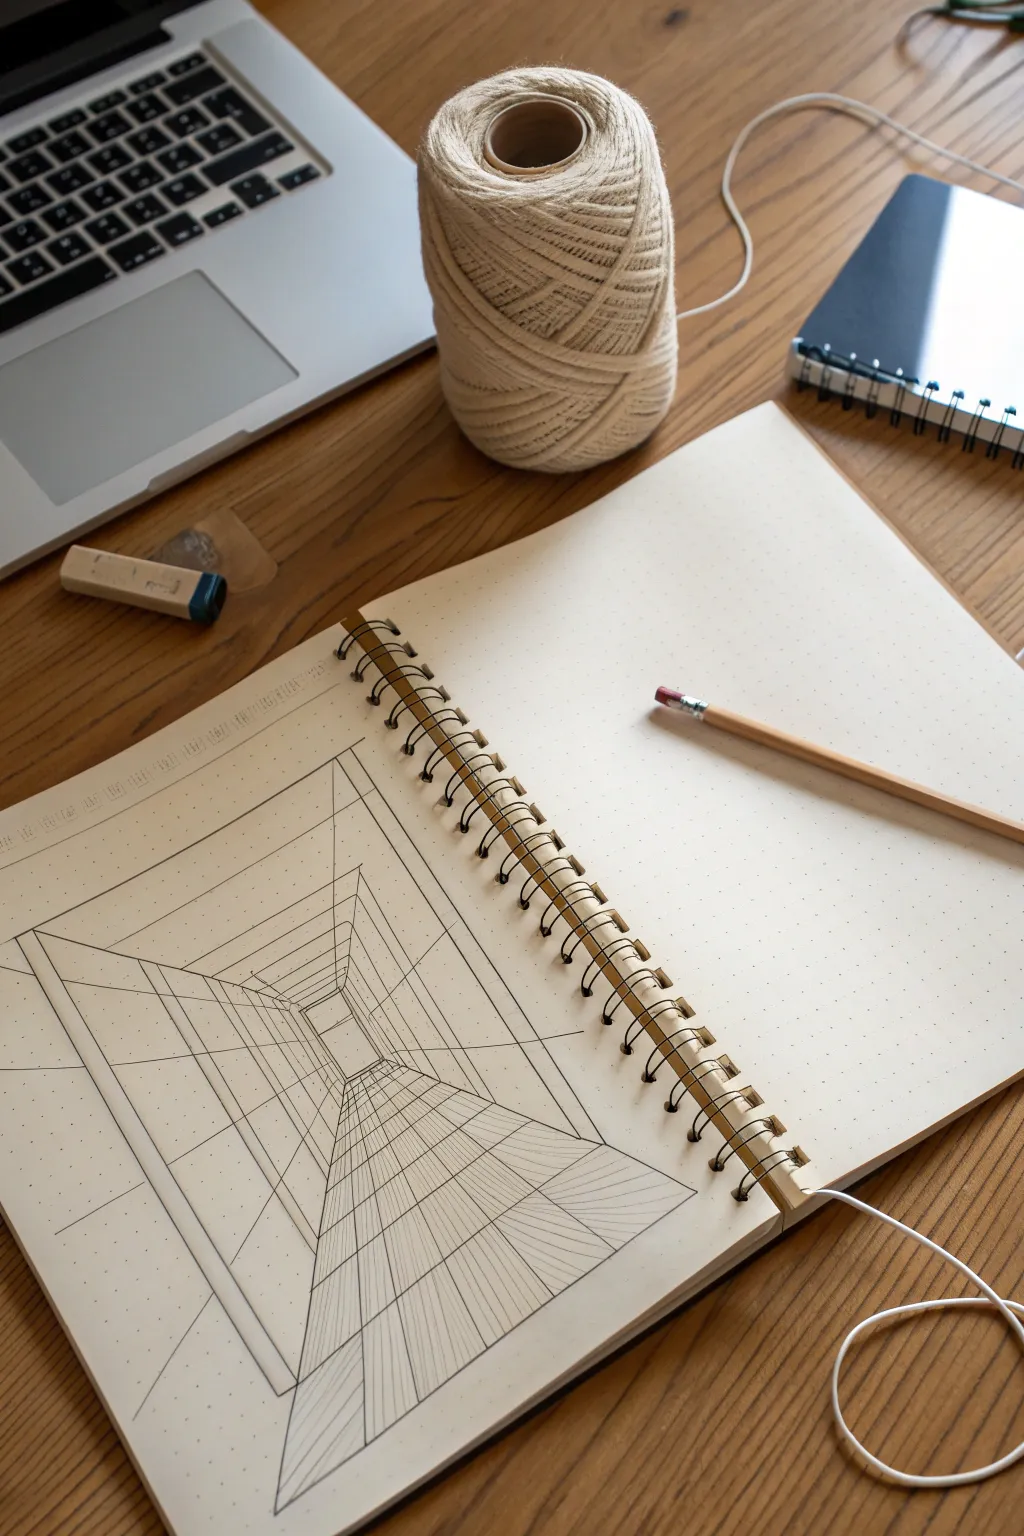
This project explores the illusion of depth using a classic one-point perspective technique on dot grid paper. By connecting simple corners to a central vanishing point, you’ll create a mesmerizing hallway effect that looks like it’s stretching deep into the page.
Step-by-Step
Materials
- Spiral-bound notebook with dot-grid paper
- Mechanical pencil or sharp HB pencil
- 12-inch clear ruler or straightedge
- Block eraser
- Fine-liner pen (optional, for final inking)
Step 1: Setting the Foundation
-
Identify the center:
Begin by finding the approximate center of your dot grid page. You can do this by counting the dots or lightly drawing diagonal lines from corner to corner; where they intersect is your central vanishing point. -
Mark the vanishing point:
Make a tiny, distinct mark at this central spot. This will be the anchor for every depth line you draw throughout the tutorial. -
Draw the back wall:
around your central point, draw a small rectangle or square. Keep it symmetrical around the center point. This shape represents the furthest end of your tunnel. -
Establish the outer frame:
Using your ruler, draw a large rectangle near the edges of the page to serve as the ‘opening’ of the tunnel. This frames your composition. -
Connect the corners:
Place your ruler so it connects the top-left corner of the inner square to the top-left corner of the large outer rectangle. Draw a straight line connecting them. Repeat this for all four corners to create the main walls, floor, and ceiling.
Step 2: Building the Segments
-
Determine segment spacing:
Along one of the diagonal ‘corner’ lines you just drew, make small tick marks. Space them closer together near the center square and further apart as you move toward the outer edge. This graduating spacing is crucial for the illusion of depth. -
Draw the first concentric rectangle:
Starting from the tick mark closest to the center, draw a vertical line connecting the floor diagonal to the ceiling diagonal. Keep your ruler perfectly vertical, using the dot grid as a guide. -
Complete the first ring:
From the top of that vertical line, draw a horizontal line across to the other side. Continue around until you have a complete rectangle that sits just outside your initial center square. -
Continue outward:
Move to the next tick mark and repeat the process. Draw the vertical ties, then the horizontal ties. I find it easiest to do all the verticals first, then connect them with horizontals. -
Check your parallels:
Pause to ensure every vertical line is straight up-and-down and every horizontal line is perfectly flat. The dot grid makes this much easier than plain paper.
Wonky Lines?
If your depth looks warped, check your verticals. Even a slight tilt ruins the illusion. Align your ruler strictly with the vertical column of dots on the paper.
Step 3: Adding Grid Details
-
Create floor tiles:
On the bottom edge of the innermost square, make small, evenly spaced marks. Do the same on the bottom edge of the large outer frame. -
Project the floor lines:
Align your ruler with the central vanishing point and the marks on the outer frame. Draw lines extending from the intricate center outward, creating a fan-like pattern on the floor. -
Mirror on the ceiling:
Repeat this fanning process for the ‘ceiling’ section if you want a fully gridded look, or leave it blank to emphasize the floor pathway. -
Add wall verticals:
For the side walls, draw vertical lines dropping down from the ceiling intersections to the floor intersections. These should follow the perspective, getting taller as they move outward. -
Refine the lines:
Go over your main structural lines with a slightly heavier hand to make the architecture pop. Keep the receding grid lines lighter to suggest distance. -
Clean up:
Use your block eraser to carefully remove the initial diagonal guidelines that intersect the walls, leaving only the structural corners of the tunnel visible.
Grid Master
To make the tunnel look incredibly long, pack the concentric rectangles very tightly together near the center vanishing point.
Now you have a dynamic architectural study that draws the viewer’s eye right into the center of the page

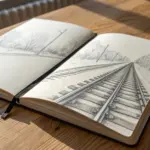
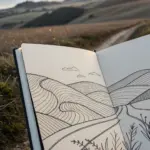
Stair-Step Platforms With a Twisting Vine
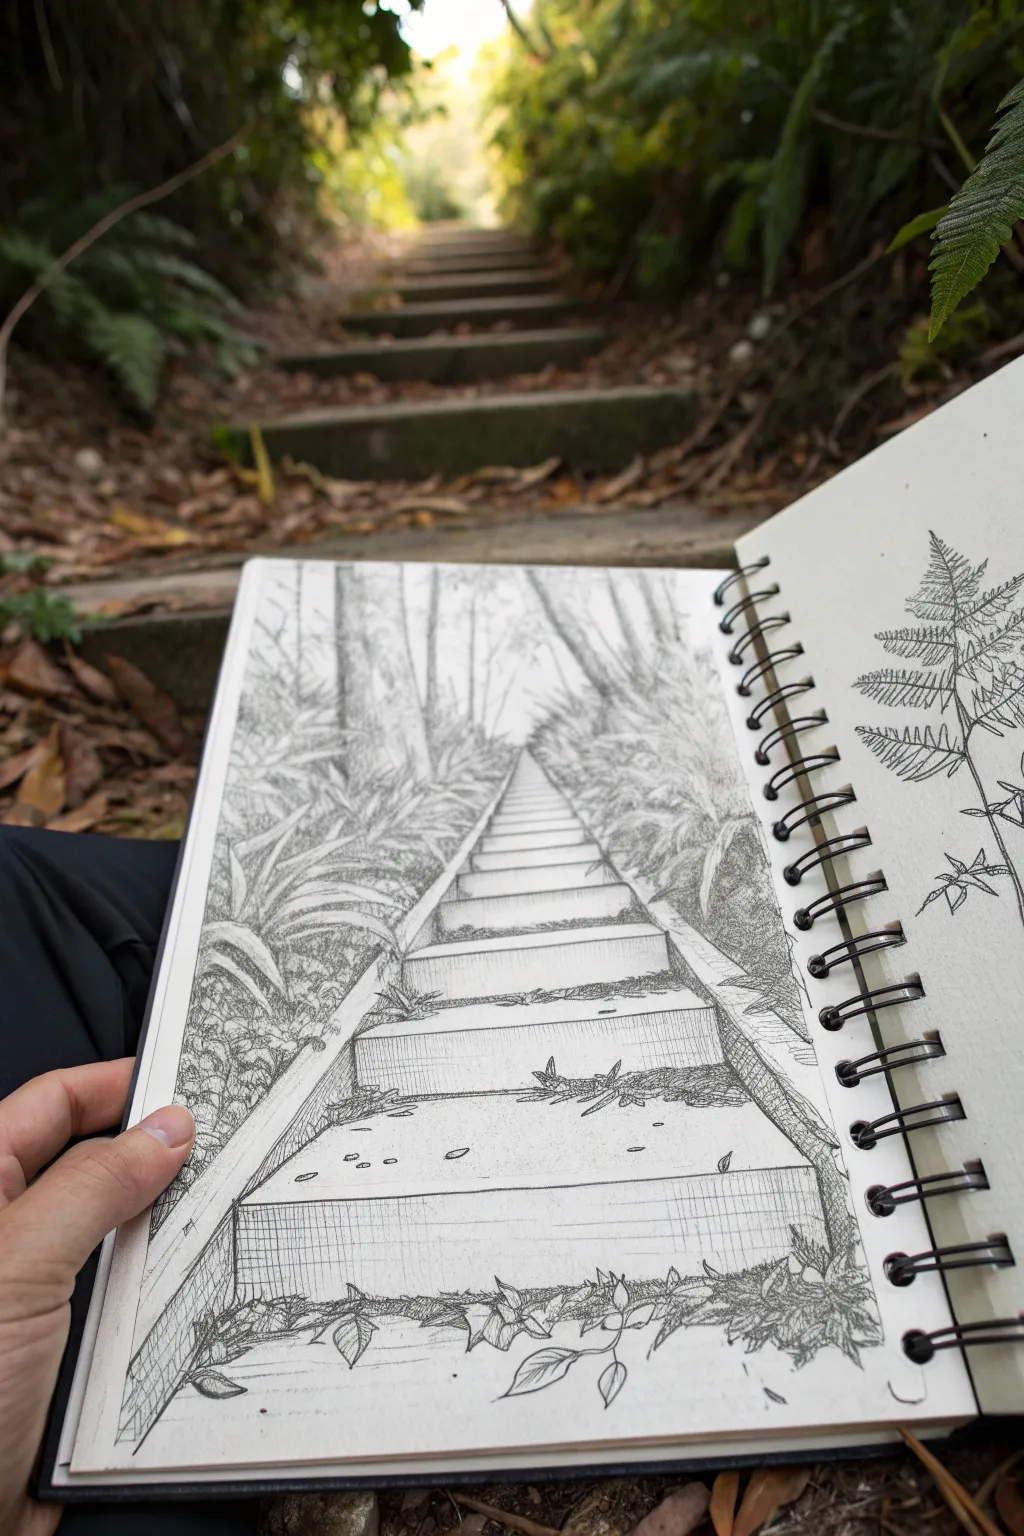
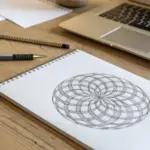
Capture the serene depth of a woodland path with this detailed pen and ink study, focusing on linear perspective and organic textures. The contrast between rigid stair geometry and wild, overgrown foliage creates a captivating visual journey up the page.
Step-by-Step Guide
Materials
- Spiral-bound sketchbook (heavyweight creative paper)
- HB Graphite pencil
- Kneadable eraser
- Ruler or straight edge
- Fine liner pens (0.1mm, 0.3mm, 0.5mm)
- White gel pen (optional for highlights)
Step 1: Establishing the Grid
-
Establish the horizon:
Begin by lightly drawing a horizon line near the upper third of your page. Place a single vanishing point right in the center of this line; this will be the anchor for your entire perspective. -
Draw the path boundaries:
From the bottom corners of your page (or slightly inward), draw two diagonal lines that converge directly at your vanishing point. These guides define the outer width of the staircase. -
Mark step placement:
Along one of the diagonal guidelines, make small tick marks to indicate where each step begins. Space them wider apart at the bottom and progressively closer together as they ascend to mimic distance. -
Construct the risers and treads:
Use horizontal lines to connect the tick marks across the path for the step edges. Then, drop short vertical lines down from each horizontal to create the ‘rise’ of each step, connecting them back to the perspective lines to give the blocks 3D form.
Distance Trick
To make the stairs look like they recede far away, drastically reduce the vertical height of sum ‘risers’ as they get closer to the vanishing point. The top steps should look like thin slivers.
Step 2: Drafting the Environment
-
Sketch vertical trunks:
On either side of the stairs, lightly sketch vertical lines for tree trunks. Vary their thickness and angle slightly—nature rarely produces perfectly straight lines—and ensure they stop behind foliage areas. -
Outline foliage masses:
Draw loose, cloud-like shapes along the sides of the staircase to block out where the ferns and bushes will go. Don’t worry about individual leaves yet; just focus on the volume. -
Add foreground vines:
Sketch a twisting vine creeping across the bottom-most step. Let it meander organically, breaking the strict geometric lines of the man-made structure.
Step 3: Inking the Structure
-
Define the stairs:
Switch to a 0.3mm pen. Carefully trace your pencil lines for the stairs, but break the line occasionally where debris or leaves might overlap the edge to keep it looking integrated with the environment. -
Texture the concrete:
Using a 0.1mm pen, add vertical hatching to the risers (the vertical faces) of the steps. Keep the lines close together to simulate shadow. Leave the tops of the steps (the treads) mostly white to suggest sunlight hitting them. -
Add surface details:
Draw small cracks, pebbles, or scattered leaves on the flat surfaces of the steps using tiny circles and jagged lines. I find less is more here; just a few imperfections make the concrete look real.
Go Botanical
Instead of generic scribbles for foliage, pick one specific plant type (like the sword fern in the reference) and repeat that specific leaf shape throughout for a cohesive ecosystem look.
Step 4: Building Organic Texture
-
Ink the foreground leaves:
With a 0.3mm pen, outline the specific leaves and vines in the immediate foreground. Give the leaves serrated edges or veins to distinguish them from the background noise. -
Create depth with stippling:
In the darker areas between the ferns and under the bushes, use a stippling technique (lots of small dots). Group the dots densely near the ground and disperse them as you move upward into the light. -
Hatch the tree trunks:
Use vertical contour hatching on the tree trunks to give them roundness. Make the side of the tree furthest from the light source darker with cross-hatching. -
Fill the mid-ground foliage:
For the bushes further back, switch to a rapid, scribbly texture. You don’t need to draw every leaf; distinct scribbles suggest dense growth without cluttering the focal point. -
Fade into the distance:
As you reach the top of the stairs near the vanishing point, lighten your touch. Use thinner lines and less detail to create atmospheric perspective, making the path seem like it disappears into a bright haze.
Step 5: Final Refinements
-
Clean up the sketch:
Wait for the ink to be completely dry—give it a few minutes—then gently erase all remaining graphite guidelines. -
Deepen the shadows:
Take a 0.5mm pen and go back into the deepest crevices, like the corners where steps meet the dirt or the undersides of the foreground leaves, to punch up the contrast. -
Final leaf detailing:
On the facing page, if desired, draw a botanical study of a single fern frond to complement the main scene. Use crisp, deliberate lines to show the vein structure clearly.
Close your sketchbook knowing you have captured a permanent path into the woods
BRUSH GUIDE
The Right Brush for Every Stroke
From clean lines to bold texture — master brush choice, stroke control, and essential techniques.
Explore the Full Guide
Striped Ribbon That Wraps and Dives
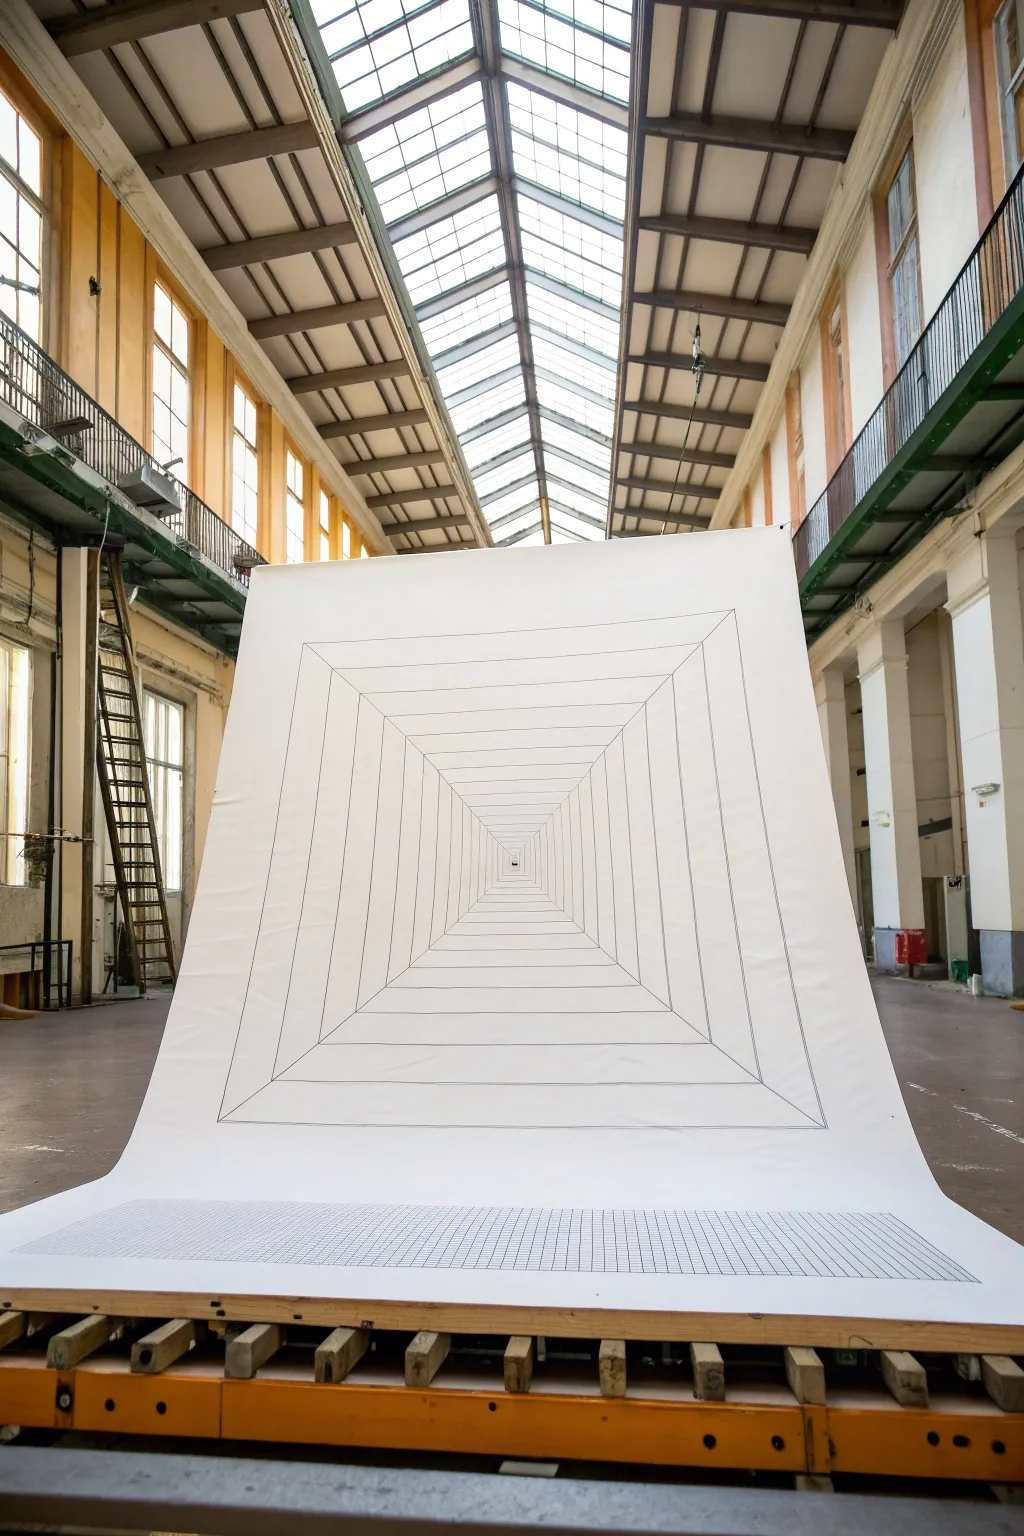
This captivating project creates the illusion of an endless geometric tunnel by combining a large-scale one-point perspective drawing with a sculptural paper installation. The long curved roll enhances the depth, making the viewer feel as though they are stepping right into the artwork.
Step-by-Step Tutorial
Materials
- Large roll of heavy-duty drawing paper or seamless backdrop paper (white, at least 4-5 feet wide)
- Graphite pencils (HB and 2H for light drafting)
- Large T-square or long straightedge (48 inch+ recommended)
- Black framing square
- Fine-tip black permanent markers or illustration pens
- Broad-tip black markers (for thickening lines)
- Masking tape or drafting tape
- Measuring tape
- Wooden pallet or staging platform (for display base)
- Rigid backing board or wall space (for the vertical section)
Step 1: Setting the Stage
-
Prepare your workspace:
Find a large, clean area where you can unroll a significant length of paper. If possible, tape the top edge of your paper high up on a wall and let it drape down onto the floor to simulate the final curved installation. -
Plan the horizon line:
Decide where your viewer’s eye level will be. Lightly mark a horizontal horizon line across the paper, positioned roughly one-third of the way up from the bottom of the vertical section. -
Establish the vanishing point:
Mark a single, distinct dot in the exact center of your horizon line. This will be the anchor for every receding line in your drawing.
Smudge Prevention
When inking long lines with a ruler, tape a few pennies to the underside of the ruler. This lifts the edge slightly off the paper, preventing ink from bleeding under and smearing.
Step 2: Drafting the Tunnel
-
Draw the main diagonals:
Using your long straightedge, draw four long lines radiating outward from the vanishing point toward the four corners of your paper. These ‘orthogonals’ form the corners of your tunnel. -
Create the first square:
Draw your outermost square. Keep your vertical lines perfectly plumb and your horizontal lines perfectly level. The corners of this square should intersect with the four diagonal lines you just drew. -
Draft concentric squares:
Moving inward toward the vanishing point, draw a series of smaller and smaller squares. I like to space them wider apart at the outside and let them get progressively closer together as they approach the center to exaggerate the depth. -
Add vertical depth lines:
To create the ‘ribbon’ or ‘block’ effect on the walls, mark spacing points along the top and bottom edge of the outermost square. Connect these markings to the vanishing point with light guidelines. -
Define the wall panels:
Where these new receding lines intersect your concentric squares, draw vertical lines on the side walls and horizontal lines on the floor and ceiling sections. This creates the segmented grid look.
Step 3: Inking and Refinement
-
Commit to ink:
Once your pencil draft is perfect, go over your lines with a fine-tip black marker. Use a straightedge for every single line to maintain mechanical precision. -
Vary line weight:
To enhance the 3D effect, thicken the lines of the main concentric squares using a broad-tip marker, while keeping the receding orthogonal lines thinner. This atmospheric perspective helps the center recede. -
Erase guidelines:
Wait for the ink to dry completely to avoid smears, then gently erase all remaining pencil marks, leaving a crisp black-and-white graphic.
Perspective Pro-Tip
The illusion works best when the spacing decreases geometrically. If the first gap is 10 inches, try making the next 8, then 6.4, shrinking by 20% each time toward the center.
Step 4: The Floor Grid
-
Extend to the floor:
On the section of paper lying flat on the floor (or bottom platform), measure out a dense, uniform grid. Unlike the perspective drawing above, this should be a flat, 2D grid. -
Draft the grid:
Draw evenly spaced vertical and horizontal lines to fill the bottom unrolled section. This flat geometry contrasts with the illusion of depth above it. -
Ink the base:
Ink the floor grid with the same precision as the tunnel. This creates a visual foundation that anchors the floating perspective.
Step 5: Installation
-
Mount the top:
Secure the top edge of your paper to a high wall or suspended frame. Ensure it hangs straight down without twisting. -
Curve the transition:
Allow the paper to gently curve from the wall to the floor. Do not crease the paper at the corner; the smooth curve is essential for the seamless effect. -
Secure the base:
Lay the grid section flat on your wooden pallet or floor. Tape the edges down or use invisible weights to keep it taut and perfectly flat.
Step back and adjust your viewing angle until the tunnel snaps into a perfect deep corridor
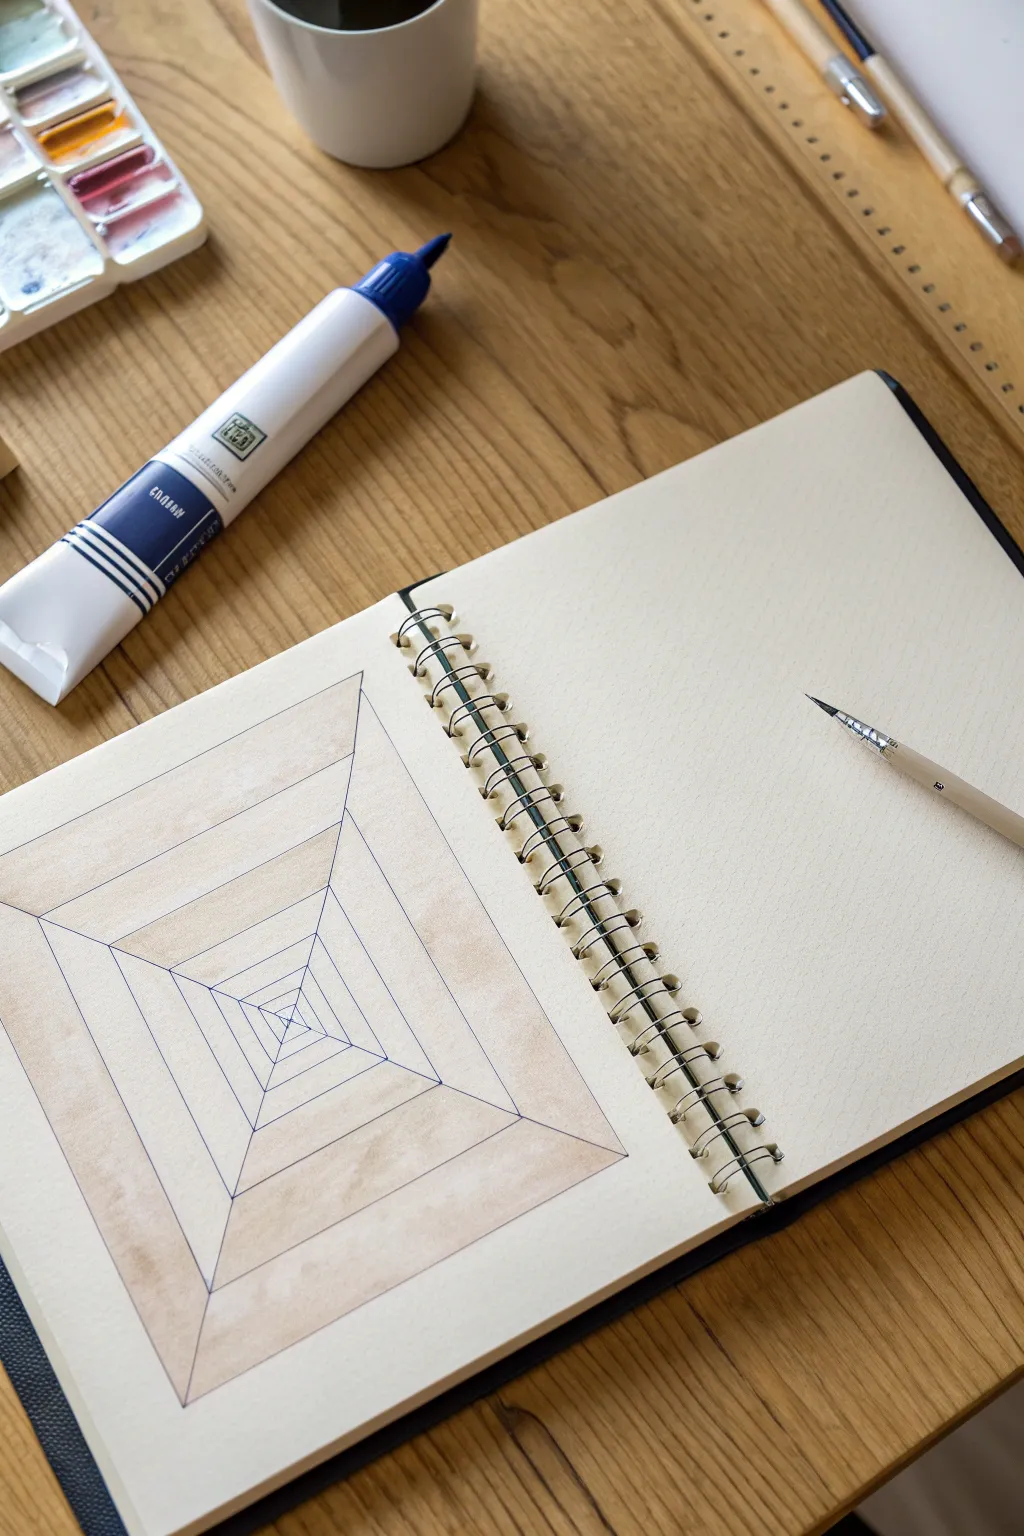
Gravity-Defying Drips Along the Path

Create a mesmerizing sense of depth with this simple yet effective one-point perspective tunnel. Using a combination of crisp pen lines and soft watercolor washes, you’ll build an infinite hallway effect that draws the viewer’s eye straight to the center.
Step-by-Step Guide
Materials
- Spiral-bound watercolor sketchbook (A5 or similar)
- Fine liner pen (black or dark blue, waterproof, 0.3mm or 0.5mm)
- Ruler
- Pencil (HB) and eraser
- Watercolor paints (brown/sepia tones)
- Round watercolor brush (size 4 or 6)
- Water container and palette
Step 1: Drafting the Perspective Grid
-
Find the center:
Begin by lightly marking the center point of your page with a pencil. This will be your vanishing point where all diagonal lines converge. -
Draw the main diagonals:
Using your ruler, draw four diagonal lines extending from the center vanishing point out to the four corners of your page. These ‘orthogonals’ form the skeleton of your tunnel. -
Sketch the first rectangle:
Draw the largest rectangle first. Place your ruler horizontally and vertically to connect the four diagonal lines near the outer edges of the paper. Ensure the lines are parallel to the paper’s edges. -
Add nested rectangles:
Move inward toward the center and draw a series of smaller, concentric rectangles. Space them unevenly—wider gaps at the outside and getting progressively tighter as you approach the center—to enhance the illusion of depth. -
Finalize the draft:
Continue drawing these nested shapes until you reach a tiny rectangle in the very center. Check your symmetry; it doesn’t have to be perfect, but consistent spacing helps the effect.
Uneven Washes?
If your watercolor dries with hard edges or ‘blooms’, try pre-wetting the paper slightly with clean water before dropping in the pigment for a smoother, softer spread.
Step 2: Inking the Structure
-
Select your pen:
Choose a waterproof fine liner. A dark blue or black ink works well to give the drawing a crisp, architectural finish. -
Trace the diagonals:
Carefully trace over your pencil diagonals, starting from the center and moving outward. Use the ruler to keep these lines perfectly straight. -
Ink the rectangles:
Trace the horizontal and vertical lines of your nested rectangles. Rotate your sketchbook if needed to get a comfortable angle for drawing straight lines. -
Clean up:
Once the ink is completely dry, gently erase all underlying pencil marks to leave a clean grid ready for painting.
Level Up: Color Shift
Make the tunnel feel endless by using a gradient. Use cool blues for the outer rings and warm yellows for the center to simulate light at the end of the tunnel.
Step 3: Adding the Wash
-
Mix your wash:
Prepare a very diluted wash of brown or sepia watercolor. You want a faint ‘tea-stain’ color rather than a heavy opaque paint. -
Paint the first section:
Starting with the outermost ‘walls’ of your tunnel (the trapezoid shapes between the diagonal lines), apply a light wash to the top and bottom sections only, leaving the side walls white for now. -
Alternate the pattern:
Move to the next inner ring of the tunnel. For this layer, paint the side walls and leave the top and bottom sections white. This alternating checkerboard pattern creates visual rhythm. -
Continue the sequence:
Work your way toward the center, swapping which segments get painted for each concentric ring. I find it helpful to mark the sections I plan to paint with a tiny dot of water first so I don’t lose track. -
Refine the edges:
Use the tip of your brush to carefully push the pigment right up to the inked lines without crossing them. The crisp contrast is key to the 3D effect. -
Add gradients (optional):
While the paint is still damp on a specific section, you can touch a slightly darker mix of the same color to the outer corners. This adds a subtle shadow that reinforces the tunnel shape.
Step 4: Finishing Touches
-
Let it dry:
Allow the watercolor to dry completely. The paper might buckle slightly if it’s thin, so let it settle naturally. -
Reinforce the center:
If the very center point got lost in the painting process, use your fine liner to re-darken the smallest central rectangle to provide a strong focal point.
With your final lines inked and washes dry, you have a striking geometric study that pulls viewers right into the page


Have a question or want to share your own experience? I'd love to hear from you in the comments below!