If you’re craving fantasy painting vibes without getting stuck in tiny details, you’re in the right place. These easy fantasy ideas lean on bold shapes, simple gradients, and that magical trick I love most: making one glowing focal point do all the storytelling.
Moonlit Castle Silhouette
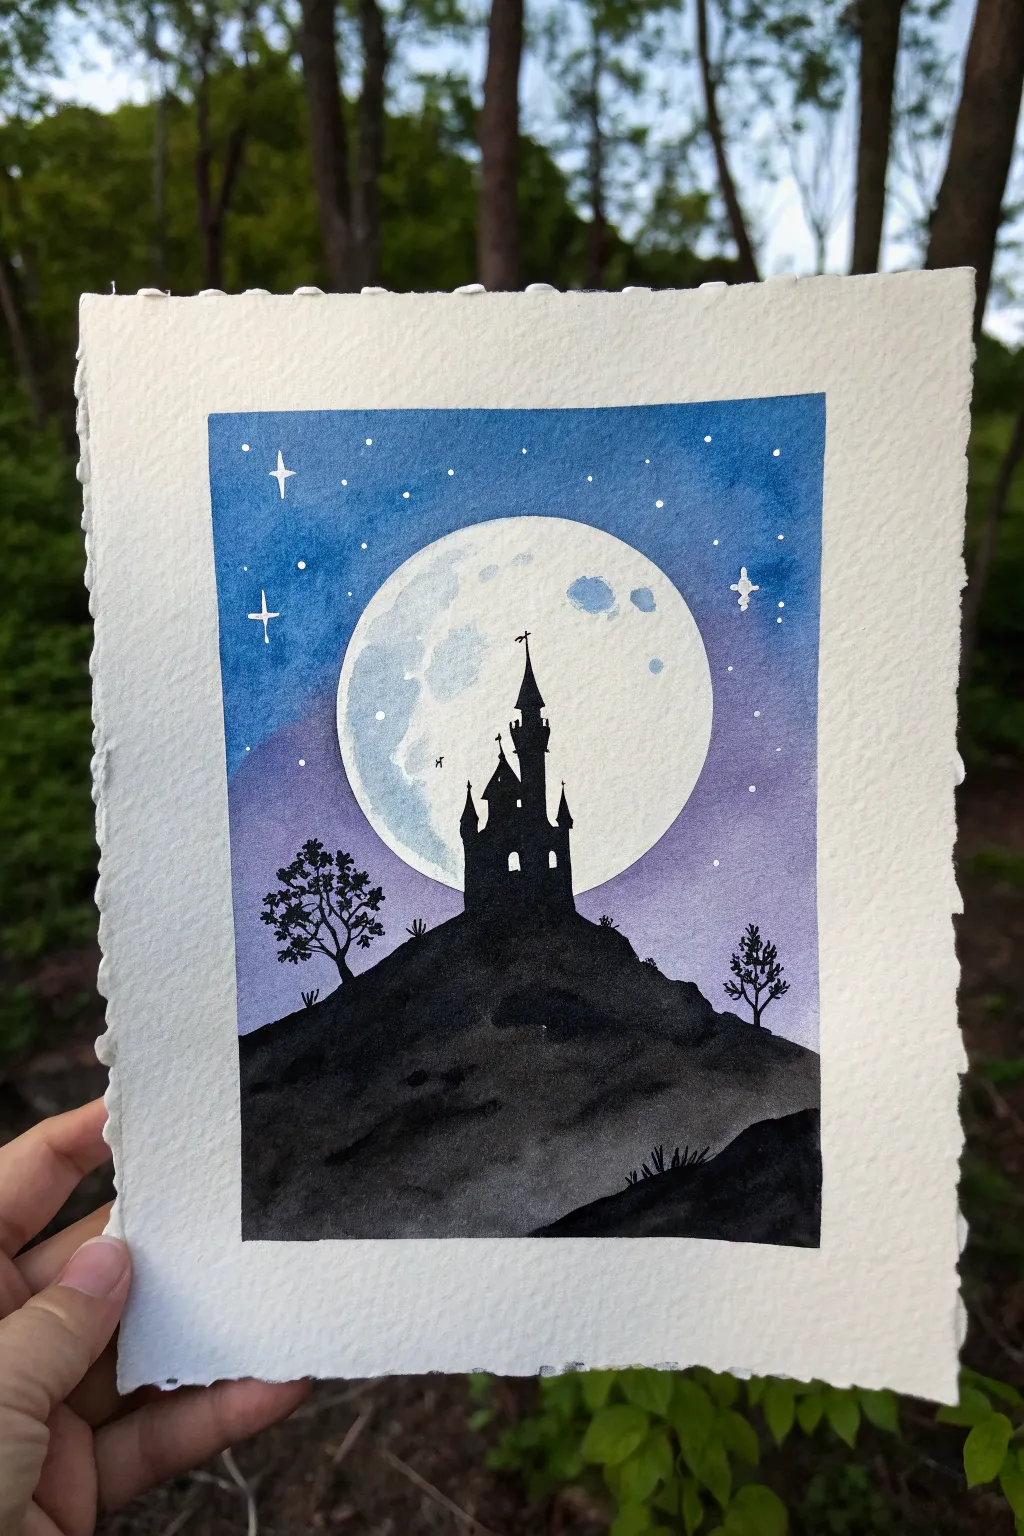
Capture the magic of a fairytale night with this striking silhouette painting. By using simple watercolor washes for the sky and bold black ink for the castle, you can create high contrast drama that looks incredibly professional but is surprisingly beginner-friendly.
Detailed Instructions
Materials
- Cold press watercolor paper (300 gsm)
- Watercolor paints (Indigo, Ultramarine Blue, Purple/Violet)
- Black gouache or waterproof India ink
- Masking tape or painter’s tape (for the border)
- Circle template (a jar lid or compass)
- Masking fluid (drawing gum) with an old brush
- Flat wash brush (3/4 inch)
- Small round detail brush (size 0 or 1)
- White gel pen or white gouache
- Pencil and eraser
- Paper towels and water cup
Step 1: Preparation and Masking
-
Tape the borders:
Begin by taping down all four edges of your watercolor paper to a board or table. This creates that crisp, clean white border shown in the final piece and prevents the paper from buckling when wet. -
Sketch the moon:
Place your circular object or lid in the center—slightly towards the top—of your paper. Lightly trace around it with a pencil to define your moon. -
Initial masking:
Using an old brush or a silicone applicator, carefully fill in the entire moon circle with masking fluid. This protects the white paper underneath so it stays bright while we paint the dark sky. -
Add star masks:
Dip a toothbrush or stiff brush into the masking fluid and flick tiny specks onto the sky area to create distant stars. You can also dot a few larger stars manually with the tip of a brush handle. -
Let it dry completely:
Wait for the masking fluid to turn transparent or rubbery. It must be 100% dry before you add any paint, or you risk tearing the paper later.
Moon Texture Trick
To get those realistic crater textures, blot the wet grey paint on the moon with a crumpled tissue or a dry brush. It lifts pigment unevenly for a natural look.
Step 2: Painting the Sky
-
Prepare the gradient colors:
Mix a deep indigo or navy blue on your palette for the top of the sky, and a lighter purple or violet for the horizon line near the bottom of the sky area. -
Wet-on-wet technique:
With clean water, gently wet the paper area outside the moon (the entire sky rectangle). The paper should be glisten, but not maintain puddles. -
Apply the dark blue:
Load your flat wash brush with the deep indigo. Start at the very top edge and paint horizontally, bringing the color down about halfway. -
Blend into purple:
Rinse your brush slightly and pick up the purple paint. Start from the bottom masking tape edge and paint upward to meet the blue. Gently brush back and forth where the colors meet to create a smooth, seamless gradient. -
Add depth:
While the paper is still damp, drop concentrated indigo into the top corners to create a vignette effect, making the night feel deeper. -
Dry and reveal:
Allow the paint to dry completely. Once dry to the touch, gently rub away the masking fluid from the moon and the stars using your finger or a rubber cement pickup.
Uneven Gradients?
If your sky dries with harsh lines between blue and purple, re-wet the entire sky area gently with clear water and smooth over the transition while it’s damp.
Step 3: The Moon and Castle
-
Texture the moon:
Dilute a very tiny amount of blue-grey paint with lots of water. Dab this actively onto parts of the white moon to create craters and shadows. Keep it subtle—you want the moon to remain mostly white. -
Sketch the silhouette:
Lightly sketch the outline of the hill and the castle shape with a pencil. Position the castle so the main tower overlaps the moon, which creates a great focal point. -
Paint the hill:
Switch to black gouache or ink. Paint the rolling hill first, ensuring the bottom is completely opaque black. You can add a second layer of slightly diluted black near the bottom right to suggest a foreground ridge. -
Build the castle:
Using your smallest detail brush, carefully fill in the castle silhouette. Keep your edges sharp. Start with the main structure, then add the turrets. -
Refine the details:
Add tiny details like the fierce pointed rooftops, a flag on the tallest spire, and small rectangular gaps for windows. I like to leave the windows unpainted (white) or paint them white later to show light coming from inside. -
Add vegetation:
Paint small, scraggly trees on the hillside using just the tip of your detail brush. Ensure the branches look distinctive against the lighter background sky. -
Final highlights:
Use a white gel pen or white gouache to add the distinctive four-point sparkle stars in the sky. Make the vertical line slightly longer than the horizontal line for a twinkling effect.
Peel off the tape carefully at an angle to reveal your crisp edges and enjoy your mystical night scene


Floating Island With Waterfall
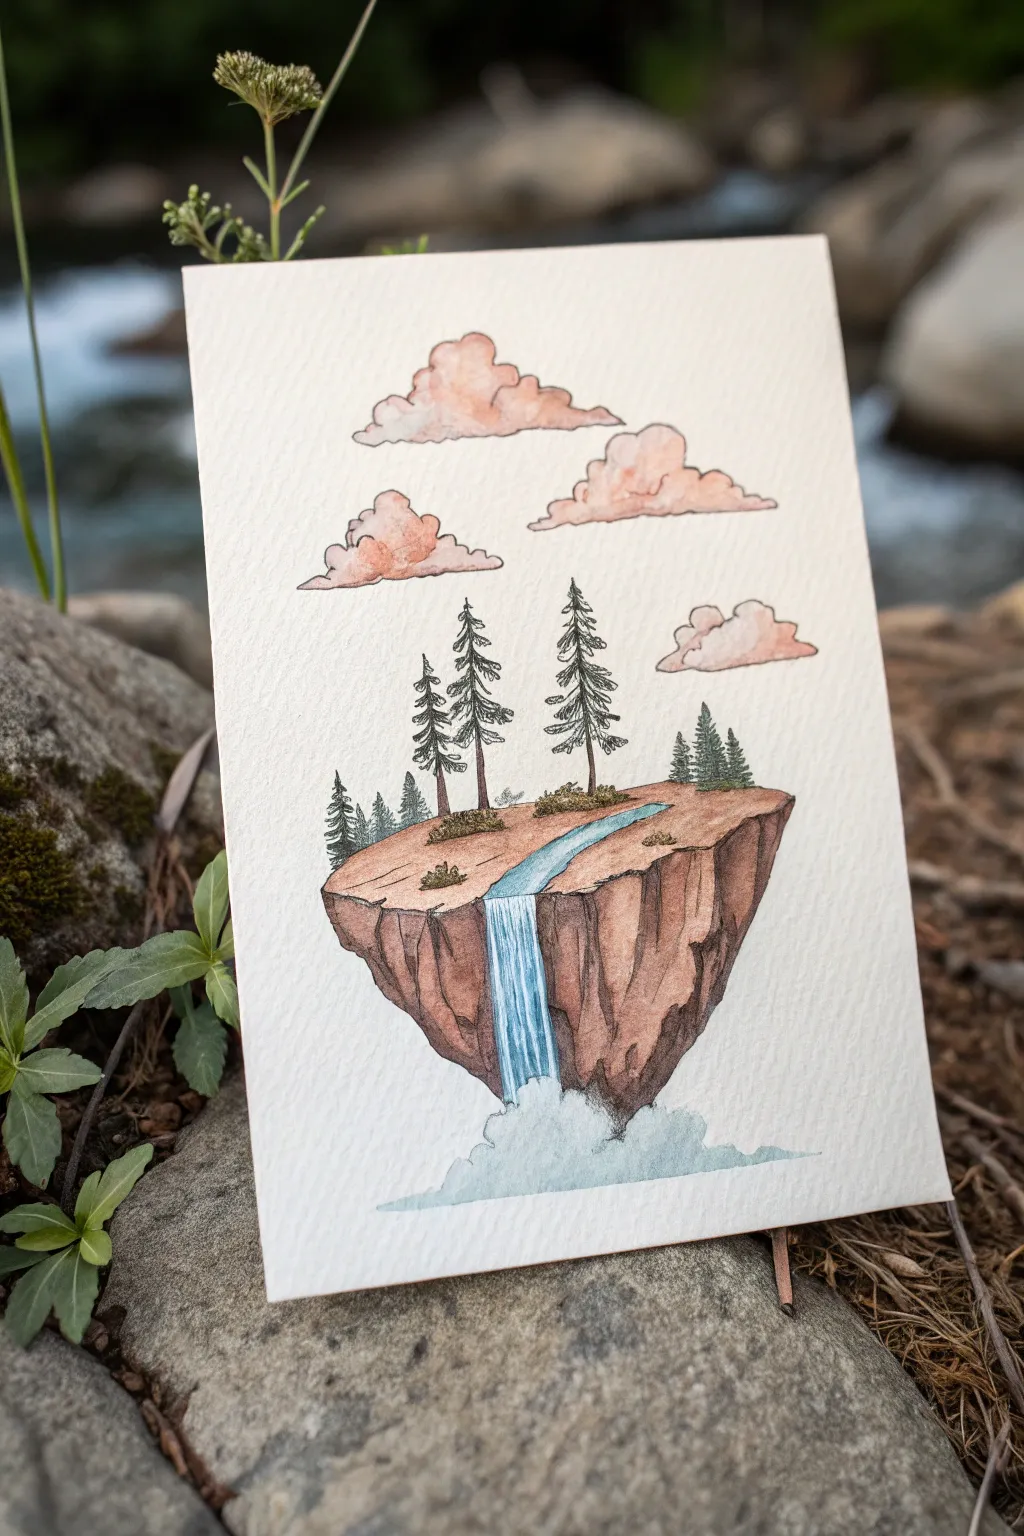
This whimsical watercolor and ink illustration captures the magic of a floating island suspended in mid-air. With soft washes of pink and brown contrasting against crisp ink lines, this project is perfect for practicing texture and composition.
Step-by-Step
Materials
- Cold press watercolor paper (A5 size or greeting card)
- Waterproof fine liner pens (0.1, 0.3, and 0.5mm)
- Watercolor paints (Burnt Sienna, Yellow Ochre, Cobalt Blue, Sap Green, Alizarin Crimson)
- Round watercolor brushes (Size 2 and 6)
- Pencil (HB) and eraser
- Jar of water and paper towels
- White gel pen (optional)
Step 1: Sketching the Foundations
-
Outline the island shape:
Start with a light pencil sketch in the center of your paper. Draw a rough, jagged diamond shape for the rock mass, keeping the top flat for the plateau. -
Position the trees:
Lightly mark the placement of the pine trees. I like to group three taller ones on the left-center and a cluster of smaller ones on the far right edge for balance. -
Sketch the water path:
Draw a winding river shape starting from the back of the plateau and flowing off the front edge. Sketch a vertical column for the waterfall spilling down the front face of the rock. -
Add cloud shapes:
Draw three to four fluffy, organic cloud shapes floating above the island. Keep the bottoms flat and the tops bumpy.
Ink Smearing?
Check your pen barrel! It must say ‘waterproof’ or ‘archival.’ If the ink runs when painting, let it dry for at least 20 minutes, or paint first and ink last.
Step 2: Inking the outlines
-
Outline the rock and grass:
Using a 0.3mm waterproof pen, ink the outline of the floating island. Use jagged, angular lines for the rock sides and softer, slightly scribbled textures for the grassy top. -
Detail the trees:
Switch to a 0.1mm pen for the trees. Draw a straight vertical line for the trunk, then use quick, downward scribbling or zigzag motions to create the pine needles, getting wider as you go down. -
Define the water:
Ink the river banks but leave the flowing water mostly open. For the waterfall, draw vertical lines downward to suggest movement. Add a bubbly cloud shape at the very bottom where the water turns to mist. -
Texture the rock face:
Add vertical striations and cracks to the rock face using the 0.1mm pen. These lines should follow the contour of the stone to give it weight. -
Erase pencil marks:
Wait until the ink is completely dry, then gently erase all your pencil sketches.
Step 3: Applying Watercolor Washes
-
Paint the rock base:
Mix Burnt Sienna with a touch of purple or blue to desaturate it. Apply a wash to the rock face, keeping the color darker near the bottom and under the overhangs for shadow. -
Color the plateau:
Use a light wash of Yellow Ochre mixed with a tiny bit of brown for the grassy top surface. Keep this quite pale to contrast with the trees. -
Fill the clouds:
Mix a very watery wash of Alizarin Crimson or faint pink. Dab this onto the fluffy parts of the clouds, letting the pigment bloom naturally. Leave some white space for highlights. -
Paint the river:
With dilute Cobalt Blue, paint the river on top of the island. As you move to the waterfall, use quick, downward strokes, leaving thin strips of white paper showing to represent foam. -
Create the mist:
At the base of the waterfall, wet the paper slightly first, then drop in a very pale blue-grey. Let it bleed outwards to look like soft vapor.
Pro Tip: Texture
Use the ‘dry brush’ technique on the rock face. Load your brush with dark brown paint, wipe most of it off on a paper towel, and drag it lightly over the paper grain.
Step 4: Final Details
-
Darken the trees:
Once the sky area is dry, use a concentrated mix of Sap Green and a little black or brown to carefully paint the pine trees. Staying inside the lines isn’t crucial; loose color adds charm. -
Enhance rock shadows:
Mix a darker brown and glaze it over the crevices of the rock face to deepen the form. -
Add cloud shadows:
Add a tiny line of grey or purple shadow to the flat bottoms of the clouds to give them volume. -
Final highlights:
If you lost any white areas in the waterfall, re-add them with a white gel pen or opaque white gouache.
Your floating island is now complete and ready to drift off into your sketchbook

Round Portal in the Woods
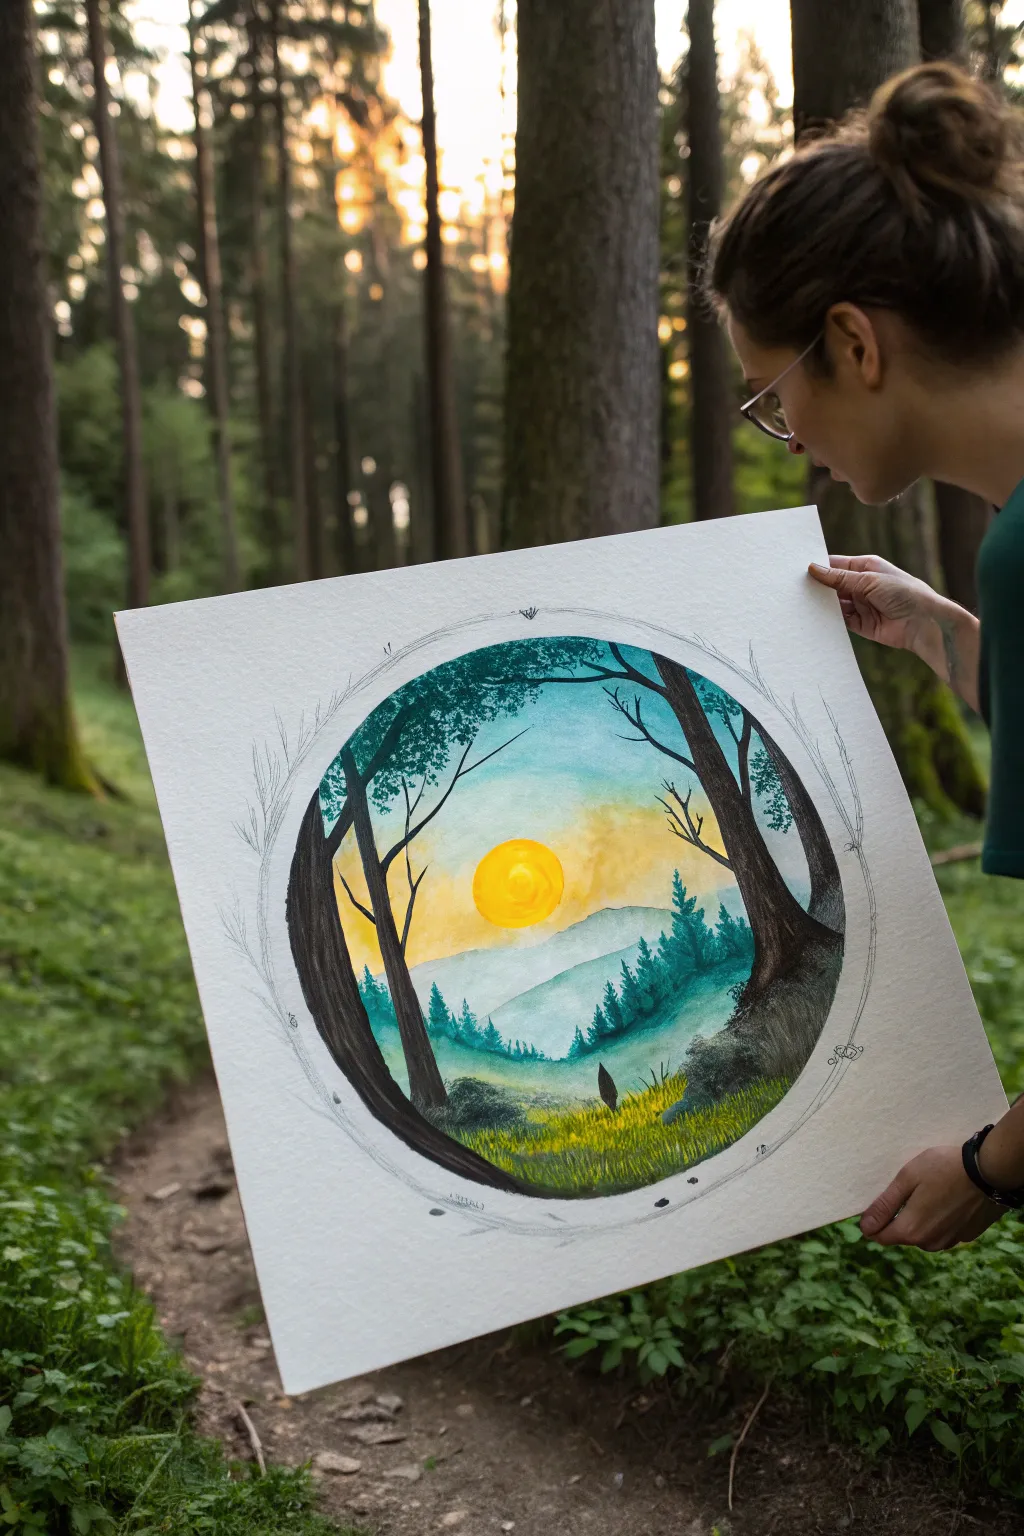
Capture the magic of a hidden world with this enchanting circular landscape painting. Using a blend of watercolor washes and crisp silhouette details, you’ll create a sun-drenched valley viewed through a natural woodland window.
Detailed Instructions
Materials
- Large square watercolor paper (cold press, at least 140lb)
- Watercolor paints (Yellows, Teals, Greens, Blues)
- Black gouache or waterproof black ink
- Large compass or a round plate for tracing
- HB Pencil and eraser
- Round brushes (Sizes 4, 8, and a fine liner)
- Masking tape (optional)
- Jar of water and paper towels
Step 1: Setting the Scene
-
Define the boundary:
Begin by lightly tracing a large circle in the center of your paper using a compass or by tracing a round object like a dinner plate. This will be your viewport. Keep the pencil lines light. -
Sketch the composition:
Inside the circle, sketch faint guidelines for your landscape. Draw a horizon line about a third of the way up, outline the sun’s position slightly left of center, and mark the slopes of the distant mountains. -
Draw the frame:
Sketch the rough shapes of the foreground trees that will frame the scene. These should curve slightly with the circle’s edge, acting as the ‘portal’ entrance.
Step 2: The Sky and Sun
-
Wet-on-wet technique:
Using a clean, damp brush, wet the sky area inside the circle, avoiding the sun circle itself for now. This helps the colors blend seamlessly. -
Wash of teal:
Apply a dilute wash of turquoise or teal at the top arc of the sky, letting it fade as it moves downward. Keep this layer transparent and airy. -
Golden glow:
Introduce a warm yellow near the horizon and around the sun area. Allow the yellow and teal to meet gently; if they mix too much, you’ll get green, which is fine, but try to keep a separation for a dramatic sky. -
Paint the sun:
Fill in the sun circle with a saturated, warm yellow. I like to drop in a tiny hint of orange while it’s still wet to give the celestial body some depth and roundness.
Keep it Clean
Work from top to bottom to avoid smudging wet paint with your hand. If painting the dark trees makes you nervous, rest your hand on a clean sheet of scrap paper while you work.
Step 3: Layering the Landscape
-
Distant mountains:
Once the sky is dry, mix a watery blue-grey. Paint the furthest mountain range with this pale color. Atmospheric perspective dictates that things further away are lighter and bluer. -
Mid-ground hills:
Mix a slightly darker teal-green for the next layer of hills. Paint their shape overlapping the distant mountains, creating a sense of receding space. -
Distant pines:
Using a smaller brush (size 4) and a darker teal mixture, dab in tiny vertical shapes along the ridges of the mid-ground hills to suggest a dense pine forest. -
The grassy valley:
For the valley floor, switch to a vibrant olive or sap green. Paint upward, flickering strokes to simulate tall grass, letting the yellow undertone show through in places to mimic sunlight hitting the field.
Add Magic Dust
Once the painting is totally dry, use a white gel pen to add tiny stars in the teal sky or highlight the edges of the dark branches for a mystical effect.
Step 4: Foreground Contrast
-
Dark framing trees:
Switch to black gouache or very concentrated dark brown watercolor. Paint the large tree trunks on the left and right sides. These should be the darkest elements in your painting to push the landscape backward. -
Adding branches:
Extend branches from these trunks, letting them reach into the sky area. Taper the lines so they get thinner at the ends. -
Defining the grass:
Use your dark paint to add individual blades of grass and small bushes at the base of the framing trees. This connects the dark silhouette fore-ground to the colorful mid-ground. -
The lonely figure:
Paint a tiny, dark silhouette of a figure or a rock near the center-bottom of the composition. This provides a crucial sense of scale to the mountains. -
Outer rim sketch:
To finish, take your pencil and loosely sketch some vines or abstract lines circling the painted edge. This emphasizes the ‘portal’ feel and breaks the perfect geometric circles.
Step back and admire the depth of your handcrafted portal, inviting viewers to step into a peaceful fantasy world.

Dragon in Sunset Outline
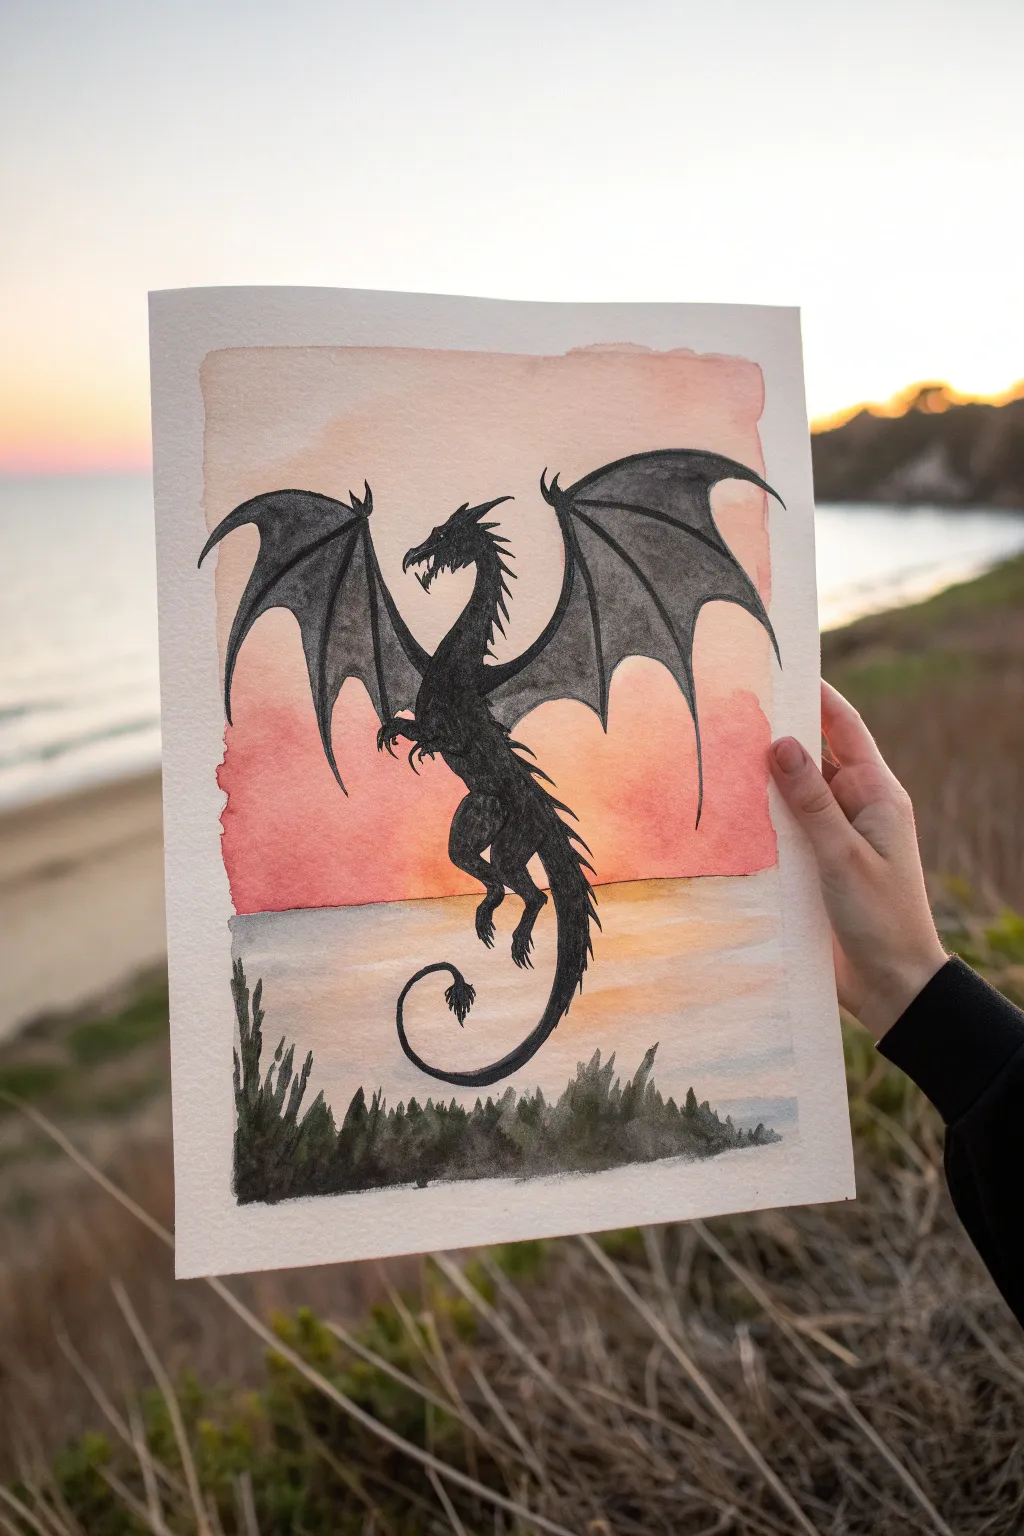
Capture the magic of twilight with this striking silhouette painting that plays with negative space and warm gradients. You will layer watercolor washes to create a glowing sky before defining a majestic dragon in bold, black ink.
How-To Guide
Materials
- Watercolor paper (cold press, heavy weight)
- Painter’s tape or masking tape
- Watercolor paints (Peach, Rose Madder, Cadmium Yellow, Payne’s Grey or Black)
- Soft round brush (size 10 or 12)
- Small detail brush (size 0 or 2)
- Black drawing ink or high-quality black acrylic paint
- Fine liner pen (optional, for initial sketching)
- Pencil and eraser
- Cup of water
- Paper towels
Step 1: Setting the Sky
-
Prepare the canvas:
Tape down all four edges of your watercolor paper to a board or table. This creates that clean, crisp white border you see in the final piece and prevents the paper from buckling when wet. -
Sketch the horizon:
Lightly draw a straight horizontal line about one-third of the way up from the bottom of the paper. This will separate your sky from the dark grassy foreground. -
Wet the sky area:
Using your large round brush and clean water, gently wet the paper area above the horizon line. You want it shiny and damp, but not dripping with puddles. -
Apply the warm tones:
While the paper is wet, load your brush with a soft peach or rose color. Start near the top and paint loose, horizontal strokes, letting the pigment bloom naturally. -
Blend downward:
As you move down toward the horizon, rinse your brush slightly and pick up a pale yellow. Blend this into the rose, allowing the colors to fade into nearly white paper just above your horizon line. -
Paint the water reflection:
Below the horizon line but above the future grass area, wash in a very watered-down greyish-blue or pale purple to suggest water or distant land, leaving some white space for reflection. -
Let it dry completely:
Wait until the paper is bone dry. If it is cold to the touch, it’s still damp. I usually give this at least 20 minutes because painting the dragon on damp paper will cause the ink to bleed.
Pro Tip: Sharp Points
For razor-sharp wing tips and claws, switch to a waterproof fine-liner pen instead of a brush for the outlines, then fill them in with paint.
Step 2: The Dragon Silhouette
-
Outline the dragon:
Using a pencil, very faintly sketch the outline of the dragon. Focus on the curve of the tail, the arched wings, and the jagged spikes along the spine. -
Fill the body:
Load your smaller brush with opaque black ink or acrylics. Start by filling in the solid central body and the long, curving tail. Keep the edges clean and sharp. -
Define the wings:
Carefully paint the skeletal structure of the wings first—the ‘arms’ and ‘fingers’—before filling in the connective webbing. The webbing can be slightly more transparent if you want a textural effect. -
Add texture to the silhouette:
Use the tip of your smallest brush to pull out tiny spikes along the neck and back. These small details stop the silhouette from looking like a simple blob. -
Detail the head:
Paint the dragon’s head carefully. Leave a tiny speck of white paper for the eye, or paint it white later, to give the creature life and focus. -
Create the talons:
Paint the legs and talons, making sure they look tensed as if the dragon is preparing to land or strike. Sharp, pointed strokes work best here.
Step 3: Foreground and Finishing Touches
-
Paint the grass layer:
At the very bottom of the page, use a dark mix of Payne’s Grey and Green (or just black). Paint an uneven, organic line of grass and foliage. -
Add vertical blades:
Using upward, flicking motions with your brush, create individual blades of grass and small bushes growing out of the bottom dark mass. Vary the heights to make it look natural. -
Check opacity:
Look over your dark areas. If the watercolor background is showing through the dragon too much, apply a second coat of black ink to ensure a solid, deep silhouette. -
Dry and reveal:
Ensure the ink is totally dry to avoid smearing. Slowly peel away the painter’s tape at a 45-degree angle to reveal your crisp white border.
Level Up: Metallic Touch
Once dry, use a metallic gold gel pen to outline just the top edge of the dragon’s wings and scales, mimicking the sunset’s light hitting them.
Step back and admire how the dark silhouette makes those sunset colors glow even brighter
BRUSH GUIDE
The Right Brush for Every Stroke
From clean lines to bold texture — master brush choice, stroke control, and essential techniques.
Explore the Full Guide
Unicorn Silhouette in Mist
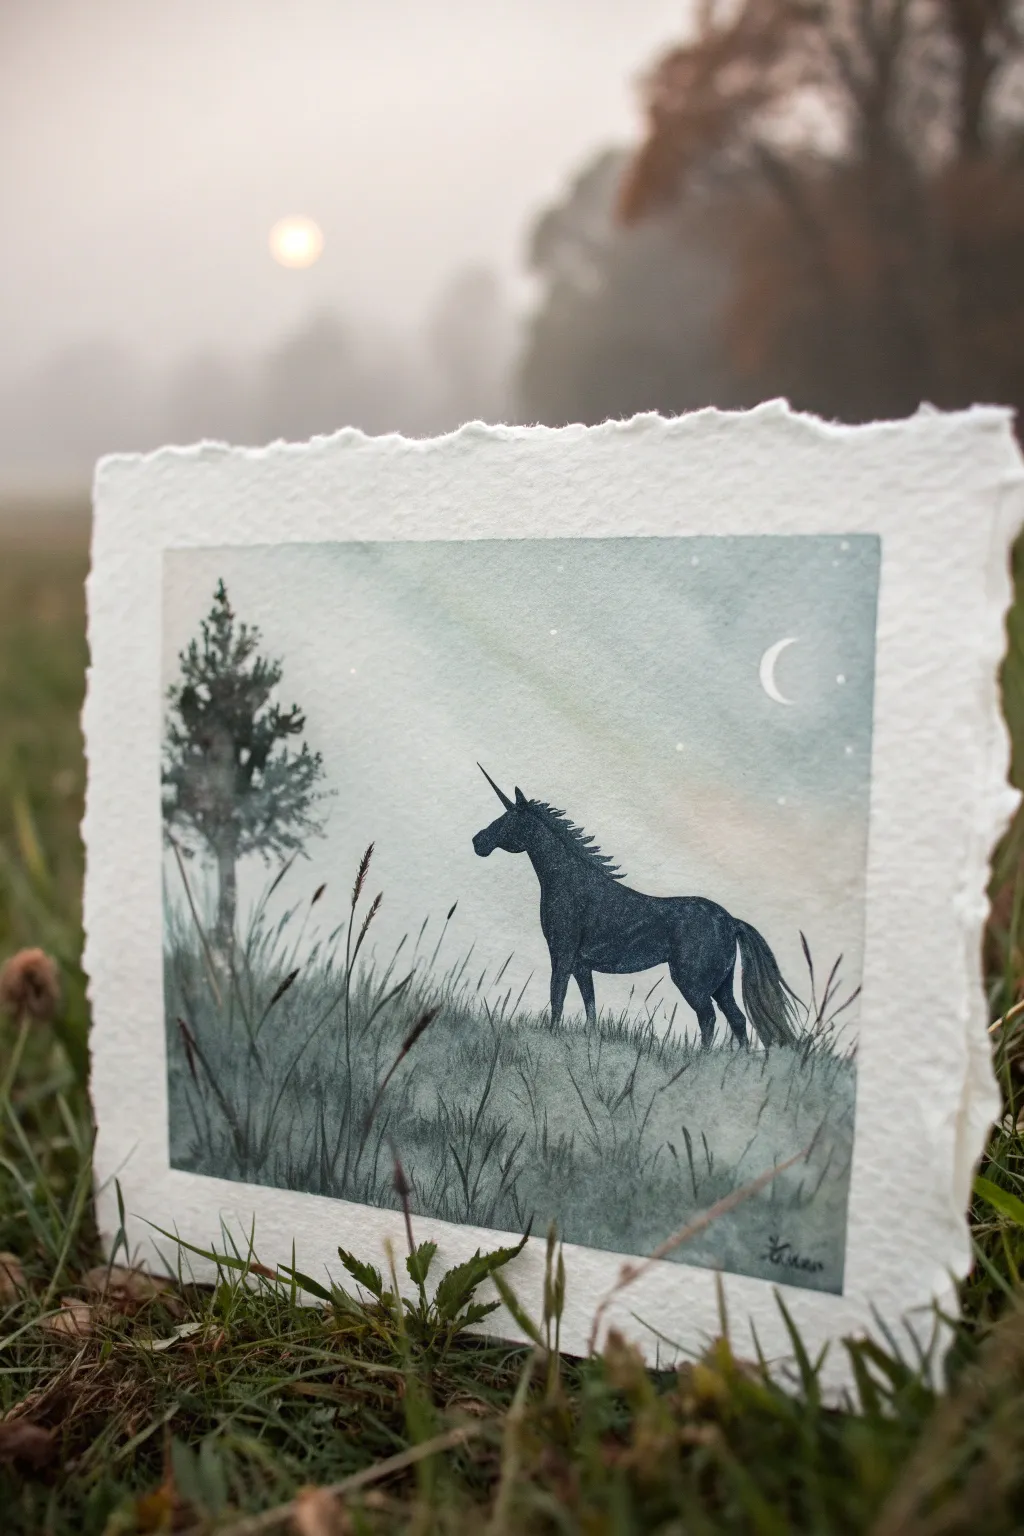
Capture the ethereal beauty of a unicorn standing in a moonlit glade with this gentle watercolor project. The high-contrast silhouette against a soft, misty background creates a striking effect that looks magical but is surprisingly simple to achieve.
Step-by-Step
Materials
- Cold-pressed watercolor paper (deckle-edge preferred for rustic look)
- Masking tape or painter’s tape
- Watercolor paints (Indigo, Payne’s Grey, Deep Green, a touch of Cyan)
- White gouache or white gel pen
- Round watercolor brushes (sizes 2, 6, and a fine liner)
- Pencil and eraser
- Two jars of water
- Paper towels
Step 1: Setting the Scene
-
Preparing the paper:
Since we want clean edges on the painted area but a rustic edge on the paper itself, measure a rectangle in the center of your deckle-edged paper. Tape off the borders firmly with masking tape to create a crisp frame for your painting. -
Basic sketching:
Lightly sketch the horizon line about one-third up from the bottom. Outline the shape of the evergreen tree on the left and the unicorn in the center. Keep these lines faint as they will be filled in later. -
Creating the wash:
Pre-wet the sky area with clean water until it glistens but doesn’t pool. We are aiming for a “wet-on-wet” technique here to get that misty look. -
Painting the sky:
Mix a very dilute wash of Indigo with a hint of Cyan. Start painting from the top corners, letting the color fade as you move toward the horizon line to suggest a glowing mist near the ground. Leave the area where the moon will be unpainted or lift color out with a dry brush. -
Adding atmospheric texture:
While the sky is still damp, you can drop in tiny hints of darker blue-grey clouds, but keep everything soft and undefined. Let this layer dry completely before moving on.
Pro Tip: Clean Lines
For the sharpest silhouette edges, don’t overload your brush with water. A creamy, ink-like consistency gives you better control than a watery puddle.
Step 2: The Dark Silhouette
-
Mixing the darks:
For the silhouette, you need a deep, dark color that isn’t just flat black. I like to mix Indigo with Deep Green and Payne’s Grey to get a rich, cold shadowy tone. -
Painting the tree:
Using your size 6 brush, dab in the foliage of the tree on the left. Use a stippling motion (tapping the brush tip) to create the texture of pine needles. Keep the edges slightly rough and organic. -
Filling the foreground:
Paint the grassy ground below the horizon line using a slightly more diluted version of your dark mix. This anchors the scene. While wet, you can pull up some grass blades, but save the sharp details for later. -
Outlining the unicorn:
Switch to your size 2 brush. Carefully outline the unicorn’s body based on your sketch. Pay attention to the elegant curve of the neck and the sturdy legs. -
Filling the unicorn:
Fill in the unicorn shape with your darkest, most opaque mixture. Ensure the paint is solid so no background sky shows through the body. -
Adding the mane and tail:
Use the tip of your brush to flick paint outwards for the mane and tail. These strokes should be swift and tapering to look like flowing hair. -
The horn detail:
With your finest liner brush or a very sharp point, paint the horn. It should be thin, straight, and pointed, extending from the forehead.
Step 3: Refining Details
-
Adding tall grasses:
Using the liner brush and your dark paint mix, flick rapid strokes upward from the shadowy ground. Vary the height and direction to make the grass look natural and wind-blown. -
Adding seed heads:
At the tips of some of the taller grass blades, add small, oblong shapes to represent seed heads or wheat stalks. This adds lovely texture to the foreground. -
Painting the moon:
Once the sky is bone dry, paint a crisp crescent moon using white gouache. If you don’t have gouache, a white gel pen works perfectly for this sharp detail. -
Creating stars:
Dip a toothbrush or stiff brush into diluted white gouache and gently flick it to splatter tiny stars across the sky. Keep it subtle—just a few speckles to suggest a starry night. -
The reveal:
Wait until the painting feels cool to the touch (indicating it is totally dry) before slowly peeling away the masking tape. Pull the tape away from the paper at a 45-degree angle to prevent tearing.
Level Up: Magical Glow
Add a tiny dot of metallic silver or interference blue watercolor to the unicorn’s horn or the moon for a subtle shimmer that only appears when the light hits it right.
This serene little painting makes a perfect greeting card or a peaceful addition to a small frame
Crystal Cave Entrance
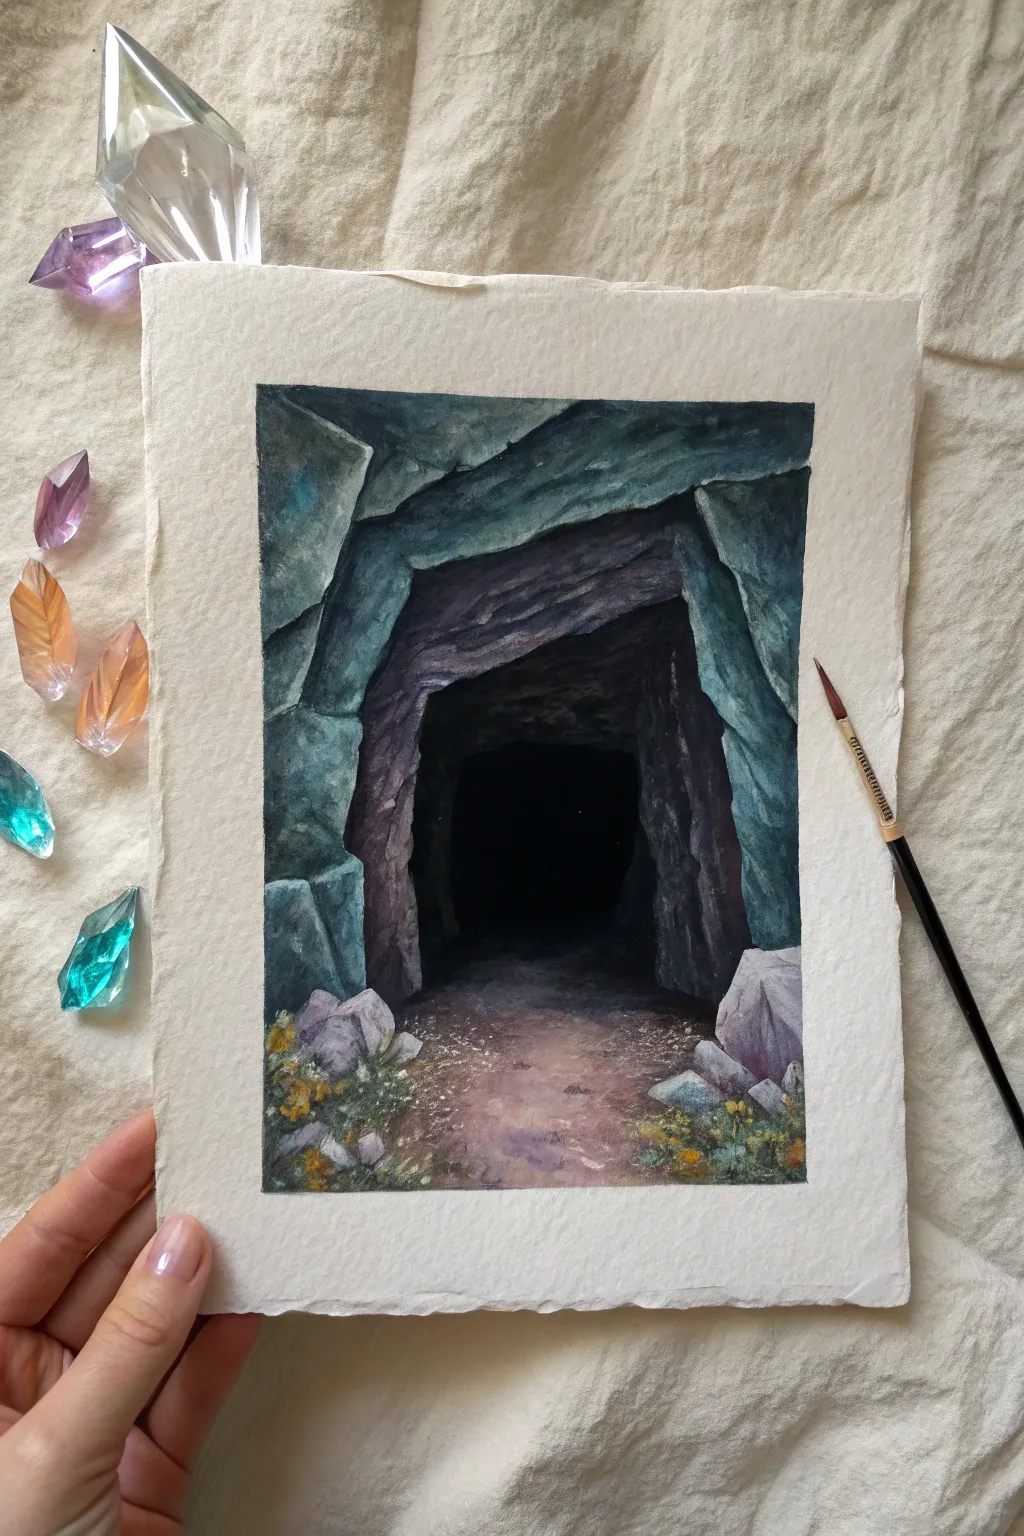
Capture the mystery of a hidden underworld with this striking watercolor and gouache tunnel study. By layering cool stone tones against profound darkness, you’ll create a dramatic focal point that draws the viewer deep into the painting.
Step-by-Step Guide
Materials
- Cold Press Watercolor Paper (approx. 300gsm)
- Watercolor Paints (Indigo, Paynes Gray, Burnt Sienna, Yellow Ochre, Ultramarine Blue, Lamp Black)
- Gouache Paints (White, Black – optional for opacity)
- Masking Tape
- Flat Brush (1/2 inch) for blocking
- Round Detail Brushes (Size 2 and 4)
- Pencil for light sketching
- Palette for mixing
- Two Cups of Water
Step 1: Drafting the Depths
-
Prepare your borders:
Begin by taping down all four edges of your watercolor paper to a board. This creates the crisp, clean white border seen in the original piece and prevents the paper from buckling under heavy washes. -
Sketch the primary shapes:
Lightly sketch the jagged outline of the cave opening. Focus on the main archway shape—it’s roughly an inverted ‘U’ but made of sharp, angular lines rather than curves. Draw the floor line where the path meets the darkness. -
Define the rock strata:
Add a few faint lines indicating the layers of rock on the left and right walls. Don’t over-detail this; you just need guides for where the light and shadow planes will shift direction.
Pro Tip: Edges
Keep your brushstrokes sharp and angular. Soft, round strokes make rocks look like marshmallows. Use the flat edge of your brush to ‘stamp’ rigid stone shapes.
Step 2: Blocking the Dark Void
-
Mix the deepest darks:
Combine Lamp Black with a touch of Indigo or Paynes Gray. Pure black can look flat, so adding a blue undertone gives it a rich, atmospheric depth suitable for a cave interior. -
Paint the center abyss:
Fill in the central tunnel shape with your dark mixture. Paint confidently right up to the pencil lines of your archway. This absolute darkness is the anchor of the composition. -
Feather the edges:
While the black center is still slightly damp near the floor area, soften the bottom edge just a tiny bit so the ground doesn’t look like a hard sticker pasted on top. Let this layer dry completely.
Troubleshooting: Flatness
If your cave looks flat, your values aren’t diverse enough. Make the entrance pitch black and the highlighted edges bright white. High contrast equals high drama.
Step 3: Sculpting the Stone Walls
-
Create a slate gray mix:
Mix a base stone color using Ultramarine Blue, a little Burnt Sienna to gray it down, and a touch of white gouache or plenty of water for transparency. You want a cool, teal-gray hue. -
Apply the left wall wash:
Paint the large rock slabs on the left side. Use the flat brush to create angular, blocky strokes that mimic the fracture lines of stone. Keep the color slightly uneven to suggest texture. -
Paint the archway shadows:
Mix a slightly darker, purple-gray version of your stone color. Paint the inner rim of the archway (the ceiling of the cave entrance) to show where the rock recedes into the shadow. -
Layering the right wall:
Repeat the stone wash on the right side. I find that varying the water ratio here helps create ‘cracks’ naturally as the paint pools and dries in different concentrations. -
Deepen the crevices:
Once the base gray is dry, use a smaller round brush and a darker version of your gray mix to paint thin, jagged lines between the rock slabs. This separates the stones and adds dimension.
Step 4: The Path and Foreground
-
Wash the pathway:
For the ground, mix a dusty purple-brown using Burnt Sienna and a dot of purple. Apply a wash on the floor area, fading it out slightly as it moves toward the viewer. -
Add foreground boulders:
Paint the small rocks in the bottom corners using a lighter, cooler gray mix. Use sharp, angular brushstrokes to give them a chiseled look, distinct from the smoother dirt path. -
Texture the ground:
Splatter tiny droplets of clean water or diluted brown paint onto the drying path. This creates a blooming texture that looks like gravel and dirt without needing to paint individual pebbles.
Step 5: Final Details and Highlights
-
Introduce vegetation:
Mix Yellow Ochre with a tiny bit of green. Using the tip of your smallest brush, dab small clusters of dots around the base of the rocks in the foreground to suggest sparse cave-dwelling plants. -
Highlight the stone edges:
Using opaque white gouache (or very thick watercolor straight from the tube), dry-brush the top edges of the rock slabs and the foreground boulders. This catches the ‘light’ and makes the stones pop forward. -
Refine the contrast:
Check the central black hole. If it has dried too light, apply a second coat of black to ensure it is a true void. Ensure the transition into the purple ceiling area is smooth. -
The reveal:
Wait until the paper is completely bone-dry. Carefully peel away the masking tape at a 45-degree angle to reveal the sharp, clean borders that frame your cave entrance perfectly.
Step back and admire the mysterious depth you’ve created on a simple sheet of paper

PENCIL GUIDE
Understanding Pencil Grades from H to B
From first sketch to finished drawing — learn pencil grades, line control, and shading techniques.
Explore the Full Guide
Fairy Lights Through Trees
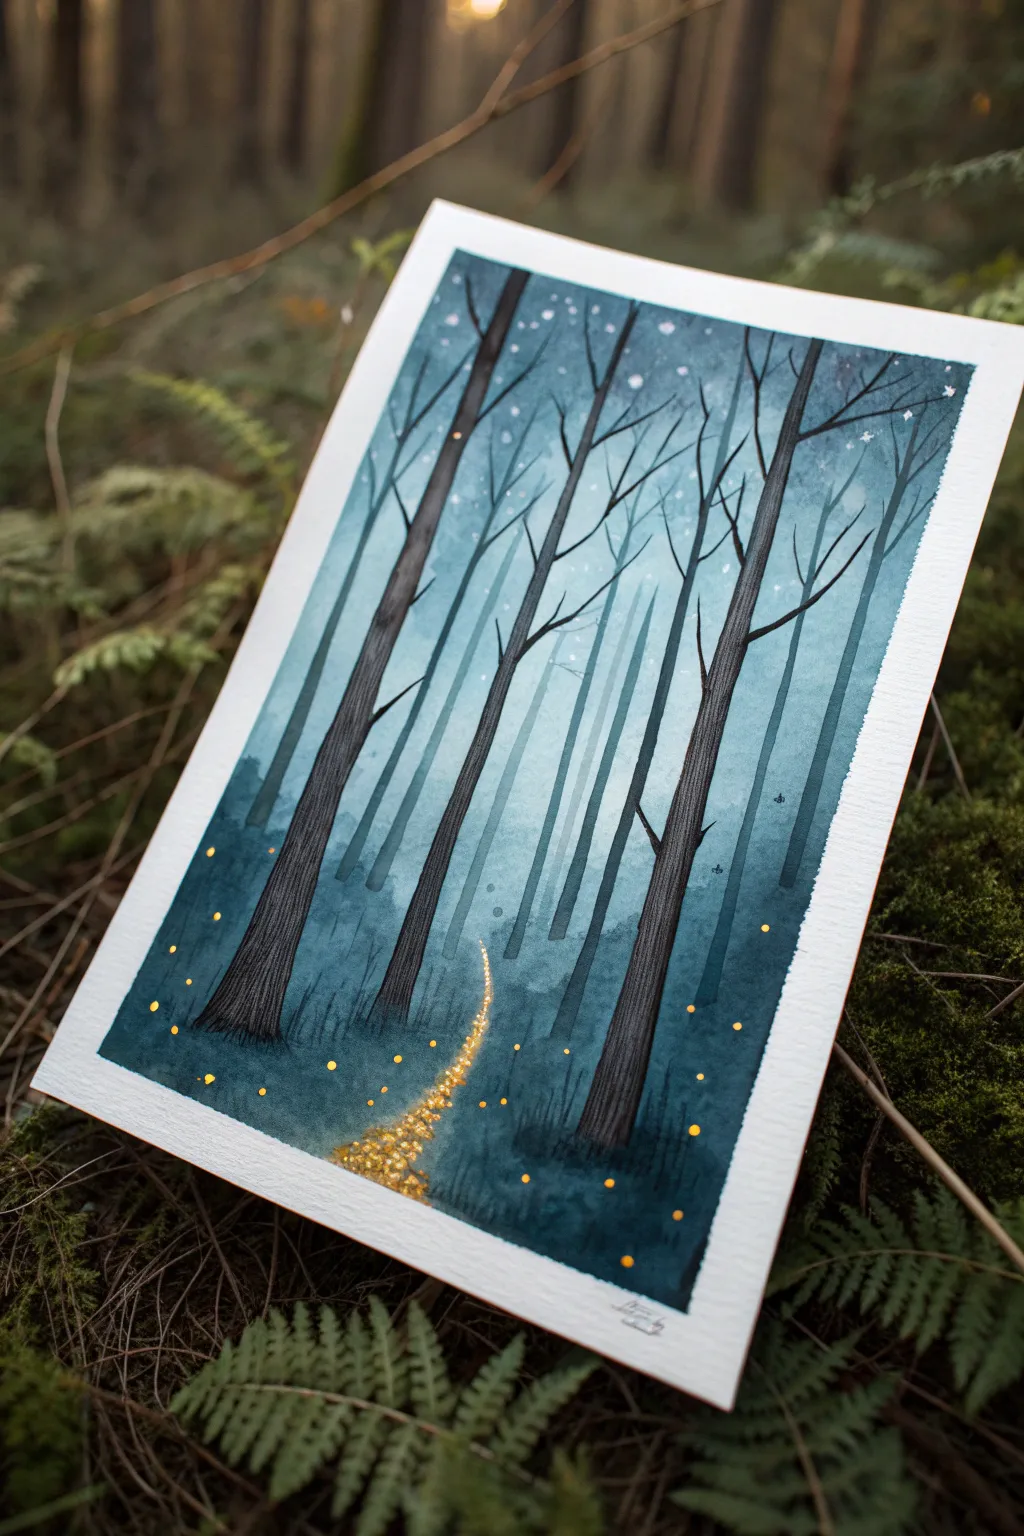
Capture the magic of an enchanted evening with this atmospheric watercolor painting, featuring a misty blue forest illuminated by a trail of golden fireflies. The contrast between the cool, foggy background and the warm, sparkling fairy lights creates a captivating depth that is surprisingly simple to achieve.
Detailed Instructions
Materials
- Cold press watercolor paper (300 gsm)
- Masking tape
- Watercolor paints (Indigo, Prussian Blue, Turquoise, Payne’s Grey)
- White gouache or white gel pen
- Gold metallic watercolor or gold ink
- Round brushes (large size 10 or 12, medium size 4 or 6, small detail brush size 0 or 1)
- Jar of clean water
- Paper towels
- Pencil and eraser
Step 1: Setting the Atmosphere
-
Prepare your canvas:
Tape down all four edges of your watercolor paper to a board or table to prevent buckling and create a crisp white border. -
Wet the paper:
Using your largest clean brush, apply a generous layer of clear water to the entire surface of the paper until it glistens evenly. -
Create the base gradient:
Mix a watery wash of Turquoise and Prussian Blue. Start painting from the top and sides, bringing the color inward but leaving the center much lighter to establish a misty focal point. -
Deepen the edges:
While the paper is still wet, drop stronger pigment of Indigo mixed with Payne’s Grey into the corners and very top edge to create a vignette effect. -
Build misty layers:
Let this first layer dry completely. Then, re-wet just the background area and paint faint, vertical ‘ghost’ trees using a very diluted grey-blue mix for depth. -
Ensure dryness:
Allow the background to dry fully before moving on; use a hairdryer on a low setting if you are impatient to speed things up.
Step 2: Painting the Forest
-
Outline the main trees:
On the dry background, lightly sketch the positions of 3-4 prominent foreground trees and a few thinner mid-ground trees. -
Paint silhouettes:
Mix a dark, saturated color using Indigo and Payne’s Grey—you want this opaque. Using a medium rounded brush, paint the mid-ground trees first. -
Paint foreground trunks:
Paint the thickest trees closest to the viewer. Make the edges slightly rough to mimic bark texture. -
Add detail to bark:
Once the trunks are semi-dry, use a smaller brush with even darker pigment (nearly black) to add vertical striations and lines up the trunks for dimension. -
Branching out:
Switch to your smallest liner or detail brush. Extend fine, spindly branches from the tops of your trees, letting them cross over each other naturally. -
Adding the forest floor:
Use a dry-brush technique with your dark mix at the bottom of the trees to suggest grass or mossy undergrowth.
Bleeding Trees?
If your dark trees are fuzzing into the background, the paper wasn’t dry enough. Let it dry completely, or use a hairdryer, before painting sharp foreground elements.
Step 3: The Magic Touches
-
Create the stars:
Dip a toothbrush or stiff brush into white gouache and gently flick it over the top third of the painting for a starry sky. -
Define the path:
Visualize a winding S-curve path on the forest floor where your lights will go. -
Apply the glow:
Using gold metallic paint or ink, dab small dots along your visualized path, clustering them densely near the bottom and spacing them out as they recede. -
Add scattered fireflies:
Paint random single gold dots floating higher up among the tree trunks to suggest drifting fireflies. -
Enhance luminosity:
I prefer to place a tiny dot of white gouache in the center of the largest gold lights to make them look like they are truly shining. -
The reveal:
Wait for all paint to be bone-dry, then carefully peel away the masking tape at a 45-degree angle to reveal your clean edges.
Metallic Pop
Make the gold lights really shine by painting a tiny halo of pale yellow watercolor around the gold dots before adding the metallic center.
Step back and admire how a simple palette can create such a deep, magical forest scene perfect for framing
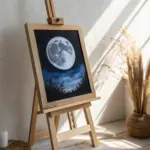
Cozy Potion Cottage at Night
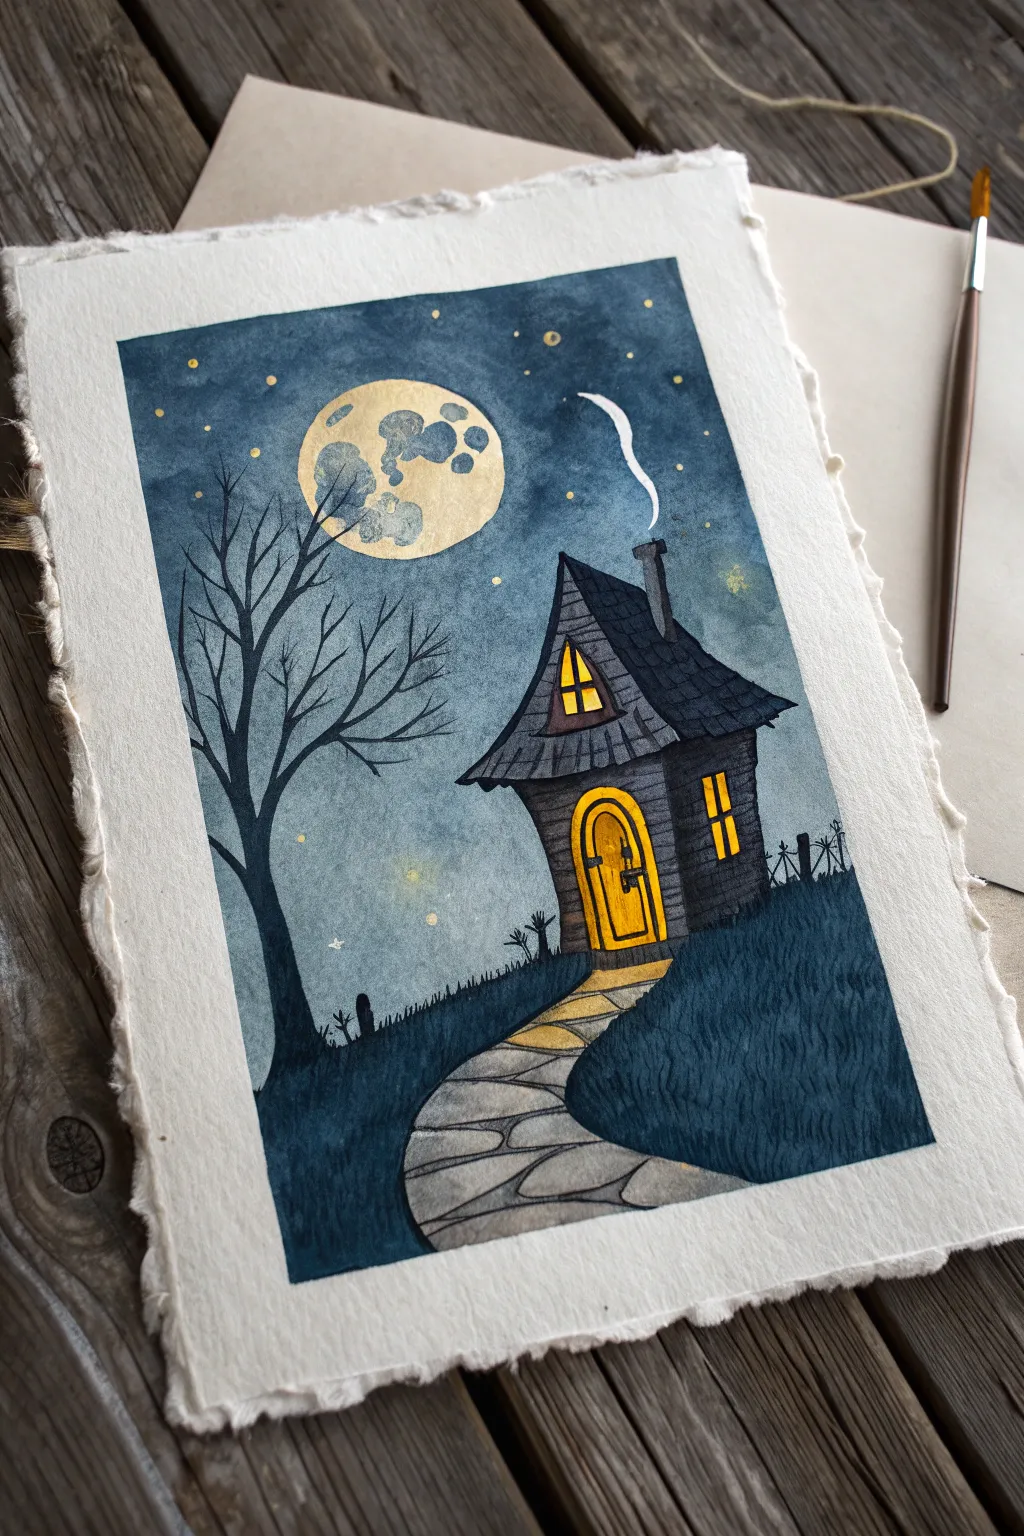
Capture the magic of a serene night with this charming illustration of a crooked little house under a giant, glowing moon. Using a mix of deep blues and vibrant yellows, you’ll create a cozy yet mysterious atmosphere on textured paper.
Step-by-Step Tutorial
Materials
- Heavyweight watercolor paper (300gsm, preferably with deckled edges)
- Watercolor paints (Indigo, Payne’s Gray, Yellow Ochre, Cadmium Yellow, Burnt Umber)
- White opacity gouache or white gel pen
- Gold metallic watercolor or ink
- Round brushes (sizes 2, 6, and 10)
- Pencil and kneaded eraser
- Masking tape (low tack)
- Palette for mixing
- Two jars of water
Step 1: Sketch and Sky Base
-
Tape down the paper:
Begin by taping the edges of your deckle-edged paper to a hard board. Since the charm of this piece relies on a crisp rectangular border floating in the middle, define your painting area carefully with masking tape, pressing down firmly to prevent leaks. -
Lightly sketch the scene:
Using a faint pencil line, draw the large circle for the moon in the upper left. Sketch the crooked outline of the house with its pointy roof, the winding stone path, and the bare tree on the left. Keep the lines light so they don’t show through the yellow paint. -
Apply the moon’s base:
Start by painting the moon circle with a very pale, watery wash of Yellow Ochre. While it’s still wet, drop in tiny touches of a darker gray-blue to create the beginning of craters and texture. -
Paint the first sky layer:
Mix a large puddle of Indigo and Payne’s Gray. Carefully paint around the moon and the house roof. Don’t go too dark immediately; this first wash establishes the blue tone of the night. -
Deepen the sky:
While the first layer is damp (not soaking wet), add a second, more concentrated layer of Indigo near the top of the painting and fade it down toward the horizon. This creates a gradient effect where the sky looks deeper overhead.
Metallic Moon Magic
Apply the gold paint to the moon when the paper is completely dry. If the paper is damp, the gold will bleed and lose its crisp, crater-like definition.
Step 2: The Cottage and Tree
-
Paint the house structure:
Mix Burnt Umber with a touch of Payne’s Gray to get a dark, grayish-brown. Paint the walls of the cottage, leaving the windows and door completely white for now. Use vertical strokes to suggest wooden siding. -
Add the roof:
Using a darker concentration of Payne’s Gray (almost black), paint the roof. Allow the edges to be slightly uneven to give it that shingled, rustic look. -
Create the glowing light:
Once the wall paint is dry, fill in the windows and the arched door with bright Cadmium Yellow. I like to drop a tiny bit of orange into the center of the door while it’s wet to make the light look warm and intense. -
Silhouette the tree:
Switch to your size 2 brush and the darkest Indigo/Black mix. Paint the tree on the left, starting with the thick trunk and branching out into fine, spindly twigs that reach up toward the moon. -
Add the grassy hill:
Paint the ground using a deep blue-green mix. Use short, upward flicking strokes along the top edge of the hill to simulate grass blades silhouetted against the lighter sky.
Fixing Sky Blooms
If you get ‘cauliflower’ blooms in your sky layover, don’t panic. Gently lift the pigment with a damp brush or wait for it to dry and paint stars over the uneven areas.
Step 3: Details and Magic
-
Define the stone path:
Paint the stones on the path using a diluted gray wash. Leave thin gaps between the stones to represent the grout lines. Once dry, add slight shadows to the bottom of each stone for dimension. -
Add architectural details:
With a fine brush or a black fine-liner pen, outline the window panes, the door hinges, and the texture of the roof shingles. Add the chimney with a little puff of white smoke rising up. -
Enhance the moon:
Return to the moon. Use the gold metallic paint to add broad, textured craters and highlights. This gives the moon a magical, celestial shimmer that contrasts beautifully with the matte blue sky. -
Paint the stars:
Using white gouache or gold paint, dip a small brush and tap it against another handle to splatter tiny stars across the sky. You can also manually dot a few larger stars for specific placement. -
Final touches:
Add small details like the fence posts on the right side and the tiny tombstone shapes near the tree base. Use a white gel pen to add subtle highlights to the path and the door handle. -
The reveal:
Wait until the painting is 100% bone dry. Very slowly peel away the masking tape at a 45-degree angle to reveal the crisp, clean edges that frame your spooky cottage scene.
Now you have a charmingly spooky little scene ready to be framed or gifted.


Mermaid Tail Splash Scene
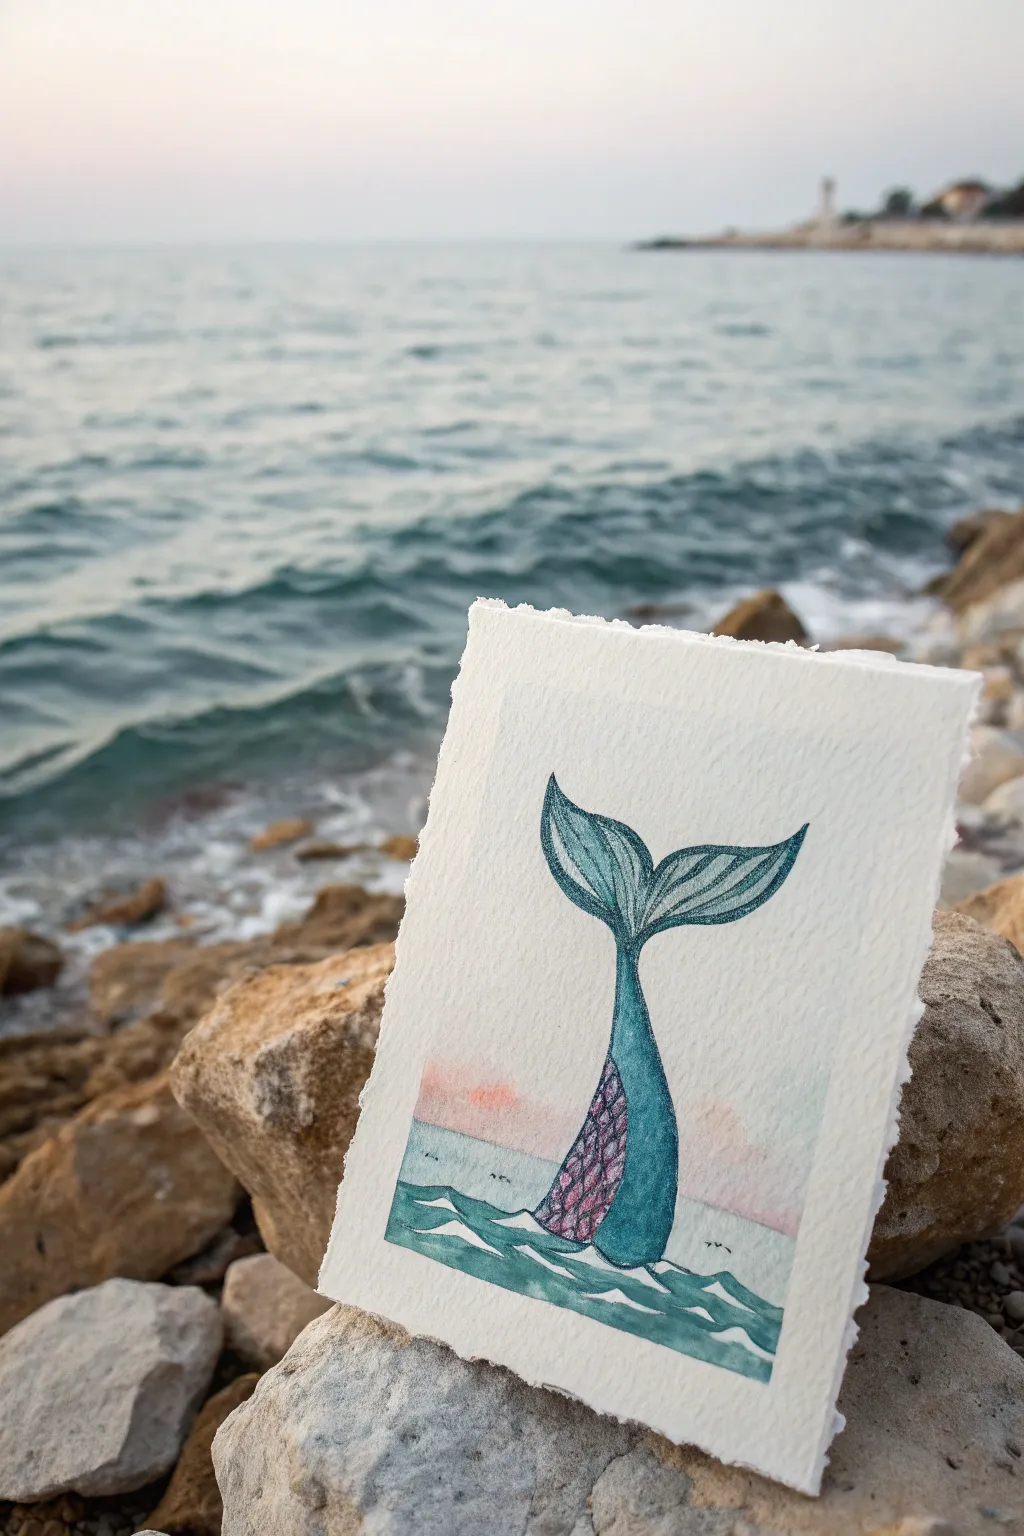
Capture the magic of the ocean with this charming watercolor painting of a mermaid diving into the waves. Using soft washes and delicate ink details on textured paper, you’ll create a whimsical scene perfect for fantasy lovers.
Detailed Instructions
Materials
- Cold press watercolor paper (deckled edge preferred)
- Watercolor paints (teal, indigo, purple, magenta, pink)
- Small round brushes (size 2 and 4)
- Fine liner pen (waterproof, black or dark grey)
- Pencil and eraser
- Jar of clean water
- Paper towels
- White gel pen (optional)
Step 1: Sketching the Composition
-
Outline the tail:
Start by lightly sketching a curved, tapered shape rising from the bottom third of the paper. This will be the mermaid’s body. At the top, draw a wide V-shape that curves outward to form the flukes of the tail. -
Refine the shape:
Soften the connection between the body and the tail fins so it looks organic and seamless. Add a gentle curve to the tail fins to suggest movement. -
Add the wave line:
Sketch a horizon line for the sea surface near the bottom of the tail. Draw jagged, triangular wave shapes splashing up around the base where the tail enters the water. -
Define the horizon:
Lightly mark a straight horizon line in the background, separating the sea from the sky.
Step 2: Initial Watercolor Washes
-
Paint the sky:
Wet the sky area lightly with clean water. Drop in a very watered-down mix of pink and purple near the horizon line to create a soft sunset glow. -
Paint the distant sea:
Using a very pale wash of teal or light blue, paint the strip of ocean between the horizon and the foreground waves. Keep this layer transparent and light. -
Base coat for the tail:
Mix a vibrant teal color. Paint the upper tail fins and the main body of the tail, avoiding a small triangular patch near the base which will be for scales later. Let the color pool slightly at the edges for texture. -
Base coat for the waves:
Using a slightly darker teal or sea green, fill in the wave shapes at the bottom. Leave the very tops of the waves unpainted white to represent sea foam.
Deckled Edge Secret
To get that torn-paper look without buying expensive paper, fold your watercolor paper sharply, lick the crease or wet it with a brush, and slowly tear it apart by hand.
Step 3: Adding Details and Contrast
-
Adding the scales:
In the small triangular patch you left unpainted on the tail, dab in small touches of magenta and purple paint to create a shimmering scale effect. -
Deepening the tail color:
Once the first layer is dry, add a second coat of teal to the right side of the tail body to create a shadow and roundness. I find this helps the tail look three-dimensional rather than flat. -
Enhancing the waves:
Mix a darker indigo or blue-green. carefully paint under the white crests of the waves to give them depth and definition. -
Drying time:
Wait for the entire piece to dry completely. If the paper is damp, your ink lines will bleed in the next step.
Fixing Strange Bleeds
If colors bleed into each other where they shouldn’t, dab instanty with a clean, dry paper towel corner. Let it dry fully before trying to repaint that specific spot.
Step 4: Inking and Finishing Touches
-
Outline the tail:
Using your fine liner pen, carefully trace the outline of the mermaid tail. Keep your line weight relatively consistent but relaxed. -
Detail the fins:
Draw curved lines inside the tail fins, radiating from the center outward to the tips. Add a few horizontal curved lines across these to mimic the texture of a fish fin. -
Define the scales:
Ink over the purple/magenta patch with small ‘U’ shapes to create a defined scale pattern. -
Detail the waves:
Outline the waves with jagged, expressive lines. Add smaller lines inside the water to show current and movement. -
Add distant birds:
Draw tiny ‘v’ shapes or simple dashes on the horizon line to represent distant seagulls. -
Optional highlights:
If you have a white gel pen, add tiny dots or sparkles to the fin tips and the water surface for extra magic.
Now you have a serene seascape that brings a little bit of mermaid myth to your desk
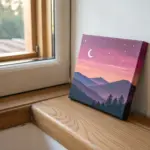
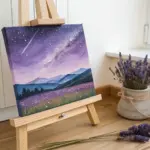
Aurora Sky Over Simple Peaks
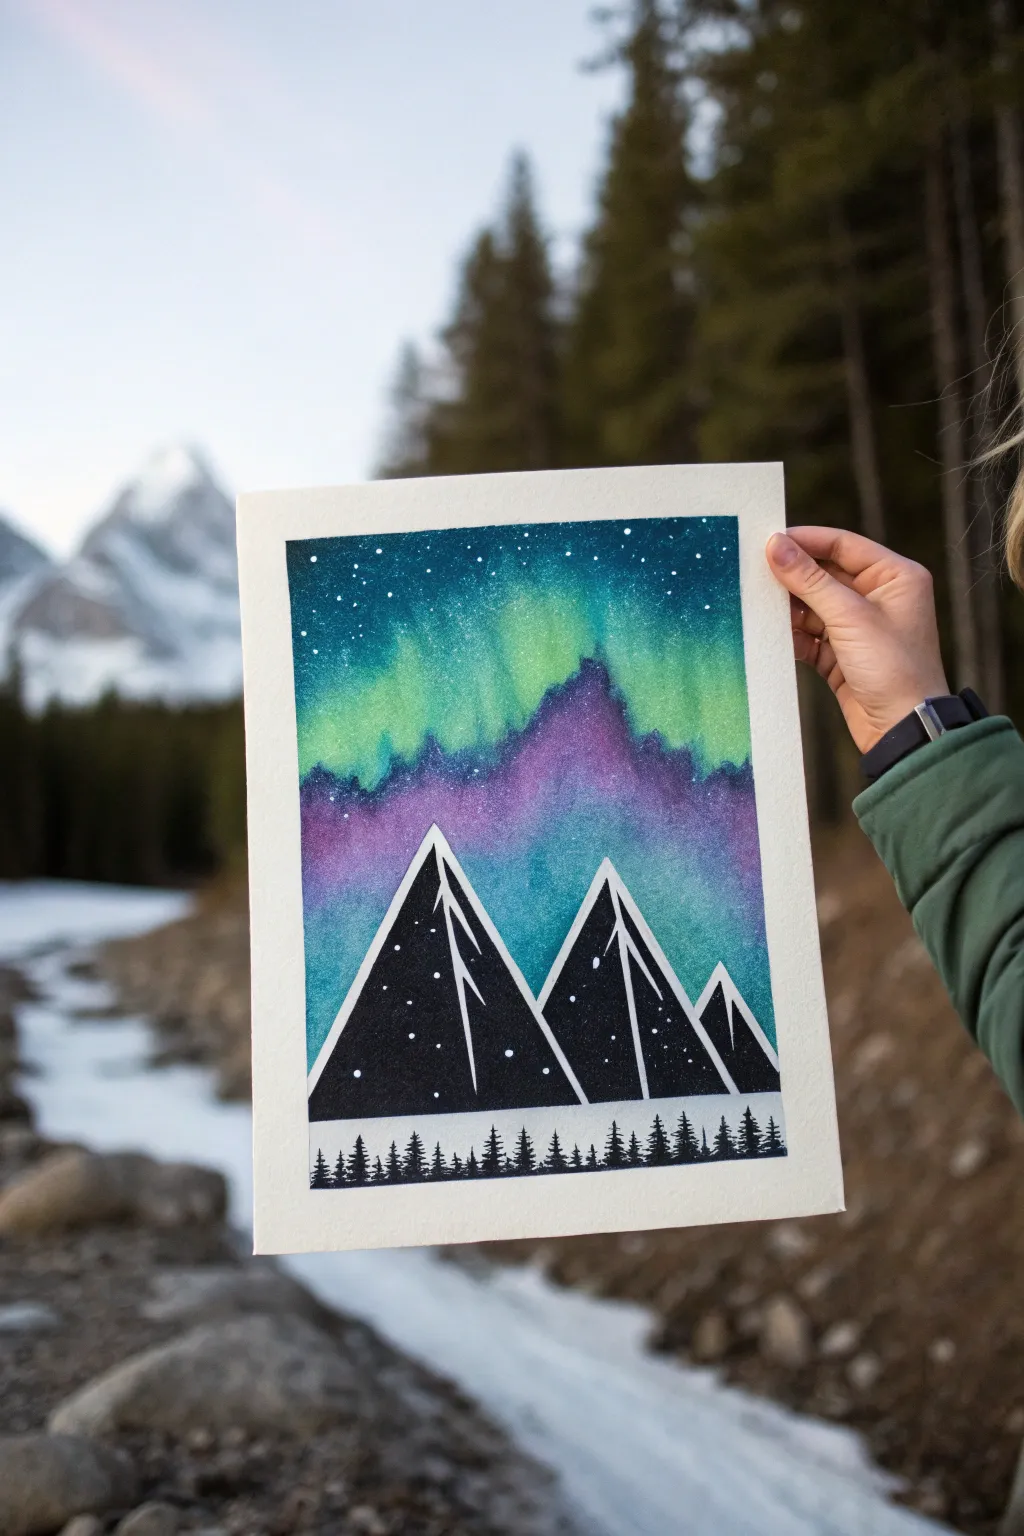
Capture the magic of an aurora borealis with this beginner-friendly mixed media painting. By combining soft watercolor blends with bold, graphic silhouettes, you’ll create a striking contrast between the vibrant night sky and dark, snowy mountains.
Step-by-Step Tutorial
Materials
- Cold press watercolor paper (140lb/300gsm)
- Watercolor paints (Indigo, Turquoise, Viridian or Sap Green, Purple/Violet)
- Masking tape or Washi tape
- Black India ink or black acrylic gouache
- White gel pen (size 08 or 10) or white acrylic paint
- Large flat wash brush
- Small round brush (size 2 or 4)
- Fine liner brush
- Old toothbrush (for splattering)
- Paper towels and water cups
Step 1: Setting the Sky
-
Tape the borders:
Begin by taping down all four edges of your watercolor paper to a board or table. This creates that crisp, clean white border shown in the photo and prevents the paper from buckling when it gets wet. -
Wet the paper:
Using your large flat wash brush, apply a generous coat of clean water to the upper three-quarters of the paper where the sky will be. The paper should glisten but not have puddles. -
Apply the green band:
Load your brush with a watery mix of Viridian or a bright yellow-green. Drop this color horizontally across the middle of the wet area, letting it bleed upwards. -
Add the purple transition:
While the paper is still wet, mix a vibrant Purple or Violet. Apply this color immediately below the green band, allowing the two colors to touch and softly merge. Tilt the paper slightly if needed to encourage blending. -
Darken the night sky:
For the top portion of the sky, use a deep Indigo or mixed dark blue. Paint this starting from the top tape line and bring it down to meet the green, creating a dark celestial canopy. -
Create texture:
If the colors look too flat, dab in small amounts of concentrated turquoise or dark blue while wet to create cloud-like variations in the aurora. -
Let it dry completely:
This is crucial: allow the sky layer to dry 100%. If you rush this, the sharp lines we add later will bleed. The paper should be flat and warm to the touch.
Step 2: Stars and Snow
-
Splatter the stars:
Cover the bottom white section of your paper with a scrap sheet to protect it. Dip an old toothbrush into white acrylic paint (thinned slightly with water) or white gouache. -
Flick the paint:
Run your thumb across the bristles to flick tiny white specks onto the dried watercolor sky. Focus more distinct stars near the top dark section. -
Add larger stars:
Use a white gel pen or a fine brush with white paint to manually dot in a few prominent, larger stars in the upper corners for variety.
Pro Tip: Wet-on-Wet
For the best aurora glow, ensure your paper stays wet while blending the sky. If it dries, mist it lightly with a spray bottle before adding more color.
Step 3: Mountains and Trees
-
Outline the peaks:
Using black India ink or fluid acrylics and a small round brush, draw the outline of three large triangles. The middle one should be the widest, with two smaller peaks flanking it. -
Fill the mountains:
Fill in the triangle shapes completely with solid black. Ensure the coverage is opaque; you may need a second coat if using watercolor. I advise sticking to ink or gouache here for the deepest matte black. -
Add snowy highlights:
Once the black mountains are dry, use your white gel pen or a fine liner brush with white paint to draw the snowy peaks. Create jagged, linear patterns coming down from the tip of each mountain. -
Detail the mountain snow:
Add a few small white dots within the black body of the mountains to represent falling snow or texture on the rock face. -
Paint the tree line foundation:
Draw a thin horizontal black line across the very bottom of the mountains, leaving a small strip of white paper beneath it for the ground level. -
Create miniature trees:
Switch to your finest brush or a fine-tip pen. Draw tiny vertical lines along that horizontal base, varying their heights slightly. -
Foliage details:
Add tiny horizontal dashes or downward scribbles on those vertical lines to create the pine tree silhouettes. Keep them loose and organic. -
The reveal:
Wait for every element to be perfectly dry. Carefully peel the tape away at a 45-degree angle to reveal your clean edges.
Level Up: Metallic Pop
Swap the white paint on the mountain peaks for silver or iridescent metallic watercolor. It catches the light beautifully when viewing the art from an angle.
Frame your masterpiece or gift it to a nature lover to bring a piece of the winter wilderness indoors
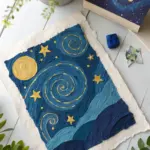
Underwater Moon Garden
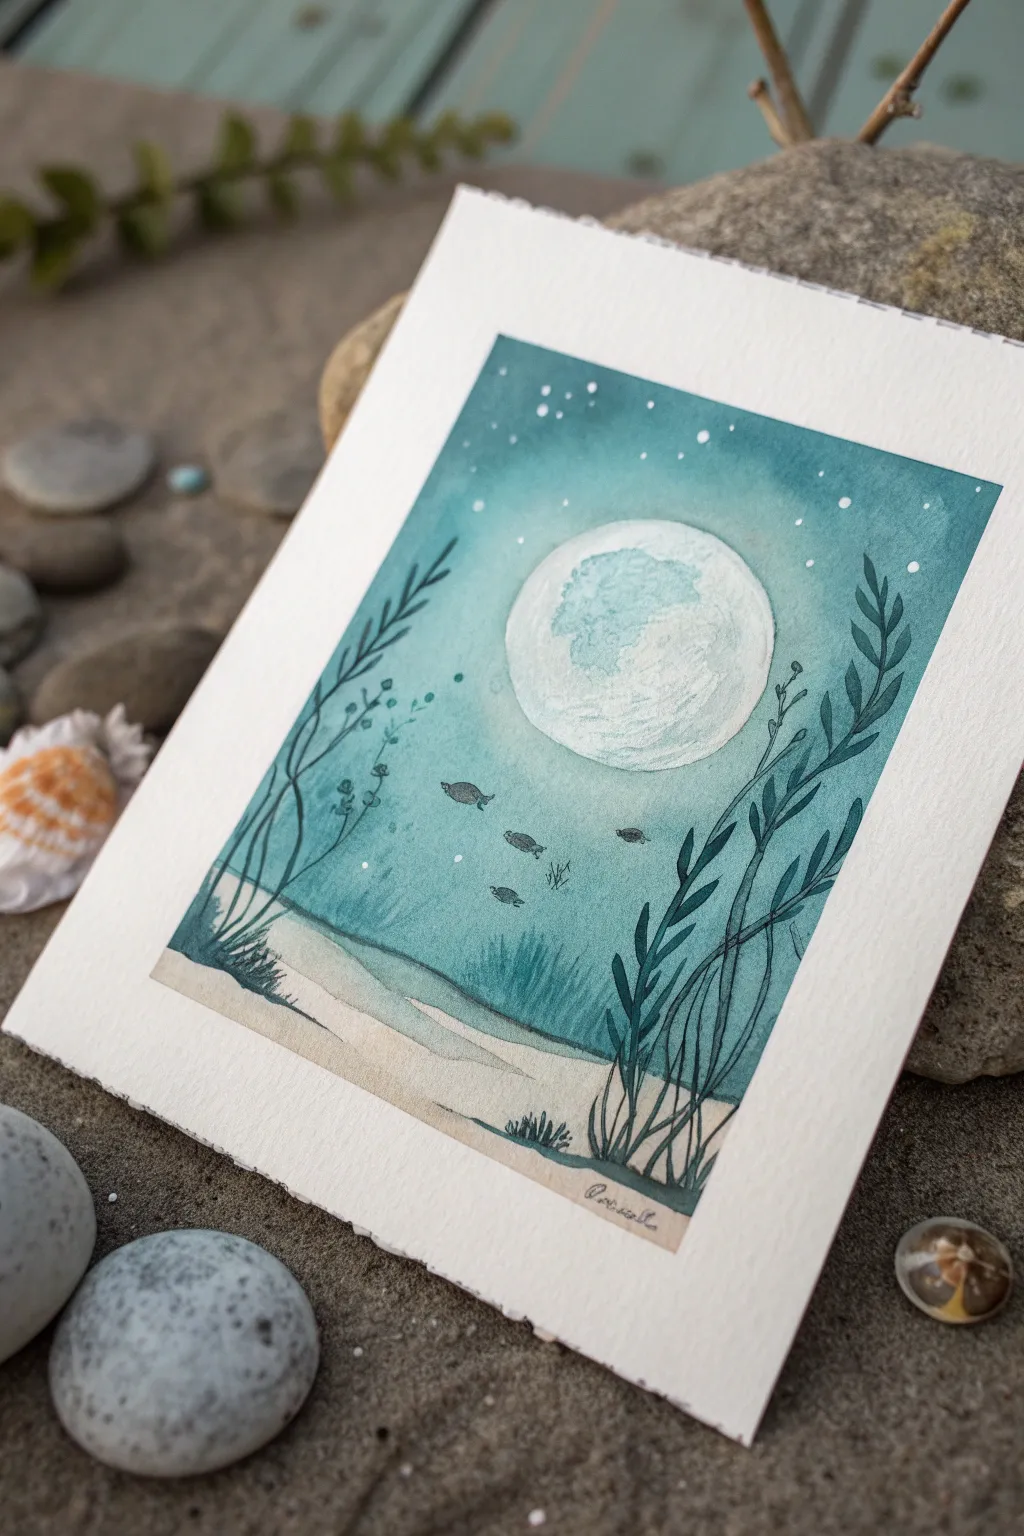
Merge the mystery of the deep ocean with the magic of the night sky in this serene watercolor piece. This project features a luminous underwater moon surrounded by gentle currents, floating turtles, and swaying aquatic flora, all rendered in soothing teal and sandy tones.
Step-by-Step
Materials
- Cold press watercolor paper (deckled edge optional)
- Watercolor paints (Teal, Payne’s Gray, Yellow Ochre, Burnt Sienna)
- White gouache or white ink
- Masking fluid (drawing gum)
- Round brushes (sizes 2, 6, and 10)
- Pencil and eraser
- Painter’s tape or board for mounting
- Paper towels and water cup
- Old toothbrush (optional)
Step 1: Sketching and Masking
-
Prepare your paper:
Begin by taping down your watercolor paper to a board to prevent buckling. If you are using paper with a natural deckle edge, just tape the corners or use gummed tape along the back. -
Sketch the composition:
Lightly sketch a large circle in the upper center for the moon. Draw a gentle, sloping line near the bottom for the sandy seabed. Add faint outlines for the four small turtles swimming horizontally across the center. -
Mask the moon:
Apply masking fluid carefully to the entire moon circle. This is crucial for keeping that area pristine white while we paint the watery background. Let the masking fluid dry completely before moving on.
Bleeding Edges?
If paint bleeds under your masking fluid, wait until it’s 100% dry. Then, gently use a damp stiff brush (like an acrylic brush) to scrub and lift the unwanted paint away.
Step 2: Creating the Ocean Depths
-
Mix your teal wash:
Prepare a large puddle of watery teal paint. You want a gradient effect, so mix a lighter version (more water) and a darker version (more pigment, perhaps a touch of Payne’s Gray). -
Apply the background wash:
Using your largest brush, wet the paper above the sand line with clean water. Drop in the darker teal at the top edges and corners, transitioning to the lighter teal as you move toward the center and bottom. Paint right over the masked moon. -
Create soft texture:
While the wash is still wet, you can lift out faint, cloud-like shapes using a crumpled paper towel or a clean, damp brush around the moon area to suggest glowing light. -
Paint the sand bed:
Once the blue section is damp but not soaking, mix Yellow Ochre with a tiny touch of Burnt Sienna. Paint the bottom section, letting it bleed slightly into the blue water line for a natural transition, or keep it crisp if preferred.
Pro Tip: Depth Control
Atmospheric perspective is key here. Make background plants lighter and bluer; make foreground plants darker and sharper. This instantly creates the illusion of deep water.
Step 3: Adding Flora and Fauna
-
Paint distant plants:
Using a size 6 brush and a watery teal mix, paint faint, wavy seagrass shapes in the background. These should look transparent and distant. Let everything dry completely. -
Detail the turtles:
Use a darker teal or grey-blue mixture and a size 2 brush to fill in the turtle silhouettes. They are small, so focus on the oval shell shape and tiny flippers. -
Paint foreground seaweed:
Switch to a darker, more saturated teal (add Payne’s Gray for depth). Paint long, flowing kelp stalks rising from the right and left corners. Add small leaves in pairs along the stems. -
Add grassy texture:
At the very bottom of the seabed, use short, flicking strokes with a detail brush to create patches of sea grass and small darker clumps of coral or rocks.
Step 4: Celestial Details
-
Remove the mask:
Once the paper is bone-dry, gently rub off the masking fluid with your finger or a rubber cement pickup to reveal the stark white moon. -
Texture the moon:
Mix a very faint, watery grey wash. Dab this onto the moon’s surface to create craters and shadows, leaving some areas pure white for brightness. -
Add magical stars:
Using white gouache or ink, paint tiny dots in the upper teal water area to represent stars or bioluminescent particles. Vary the sizes slightly for a natural look. -
Highlight the water:
Add a few tiny white dots or thin lines near the plants and turtles to suggest bubbles or catching light. -
Final touches:
Assess the contrast. If the foreground plants need to stand out more, glaze over them with another layer of dark teal once the previous layer is dry.
Now you have a tranquil underwater scene captured forever on paper
Cloud Whale in a Starfield

Bring the magic of the ocean to the night sky with this dreamy watercolor project featuring a gentle whale swimming amongst clouds and stars. The deep indigo background makes the white whale and shimmering gold accents pop beautifully.
Detailed Instructions
Materials
- Cold press watercolor paper (300 gsm)
- Painter’s tape or masking tape
- Watercolors: Indigo/Payne’s Grey, Phthalo Blue, Burnt Sienna (for mixing greys), White gouache
- Gold metallic watercolor paint or gold ink
- Round brushes: sizes 6, 2, and 0 for details
- Pencil and eraser
- Compass or round object for tracing
- Two jars of water
- Paper towels
Step 1: Planning & Sketching
-
Prepare the workspace:
Tape down all four edges of your watercolor paper to a board or table to create a clean white border and prevent buckling. -
Create the central frame:
Lightly draw a rectangle in the center of your paper to define the painted area. Inside this, use a compass or trace a bowl to pencil in a large circle that touches the left and right sides of your rectangular frame. -
Sketch the subject:
Inside the circle, sketch the outline of the humpback whale. Keep the tail curved upwards beautifully. Draw a large, billowy cloud formation hovering just above the whale’s back. -
Add floral elements:
Sketch two simple leafy branches at the bottom corners, growing upwards into the scene. Keep these lines faint so they don’t show through the paint later.
Keep Your Whites Bright
Work carefully around the whale shape. If you accidentally get dark paint inside the whale, lift it immediately with a clean, wet brush and paper towel.
Step 2: Painting the Background
-
Block in the night sky:
Mix a deep, rich color using Indigo or Payne’s Grey with a touch of Phthalo Blue. Carefully paint the entire background inside the rectangle, working around the whale, the main cloud mass, and the bottom leaves. -
Refine the edges:
While painting the background, pay close attention to the edges of the whale and clouds. Clean, crisp negative space is crucial here to make the white whale stand out against the dark sky. -
Let it dry completely:
Wait until the background is bone dry. If you rush this steps, the dark blue might bleed into your pristine white whale.
Step 3: Painting the Whale & Clouds
-
Paint the clouds:
Dilute your blue slightly to create a soft, grey-blue wash. Paint the cloud shape using a wet-on-wet technique, dropping in hints of darker blue at the bottom of the cloud for shadow and a tiny touch of pink or purple for dimension. -
Base layer for the whale:
Mix a very watery, pale grey using diluted Indigo and a speck of Burnt Sienna. Paint a light wash over the whale’s body, leaving the belly area mostly white paper. -
Define the belly pleats:
Using a size 2 brush and a slightly darker grey mix, paint thin, curved lines along the whale’s throat and belly to create the signature pleats. -
Add shadows:
Deepen the color on the fins and the top of the whale’s back to give it form. Blend these shadows out with a clean, damp brush so there are no harsh lines. -
Add the eye:
Once the skin is dry, use concentrated dark indigo or black on the tip of a size 0 brush to dot the whale’s eye.
Dull Gold Paint?
If your metallic paint looks transparent, it needs less water. Let a drop of water sit on the paint pan for a minute to soften it into a creamy, opaque consistency.
Step 4: Gilded Details
-
Paint the gold circle:
Using your gold metallic paint or ink and a steady hand, trace over your pencil circle line. Make this a dashed or dotted line rather than solid to give it a whimsical feel. -
Gild the foliage:
Fill in the sketched leaves at the bottom with solid gold paint. These will shine brilliantly against the dark blue background. -
Add celestial magic:
Paint small gold stars and dots scattered throughout the dark sky. Create a few larger ‘north star’ shapes with cross beams and hanging vertical lines for variety. -
Decorate the whale:
I love adding tiny gold speckles along the whale’s back and fins to make the creature look magical and part of the starfield. -
Final touches:
Remove the masking tape carefully at a 45-degree angle to reveal your crisp white borders.
Frame this celestial piece or gift it to a dreamer who loves the ocean
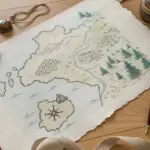
Stacked Books as Floating Cliffs
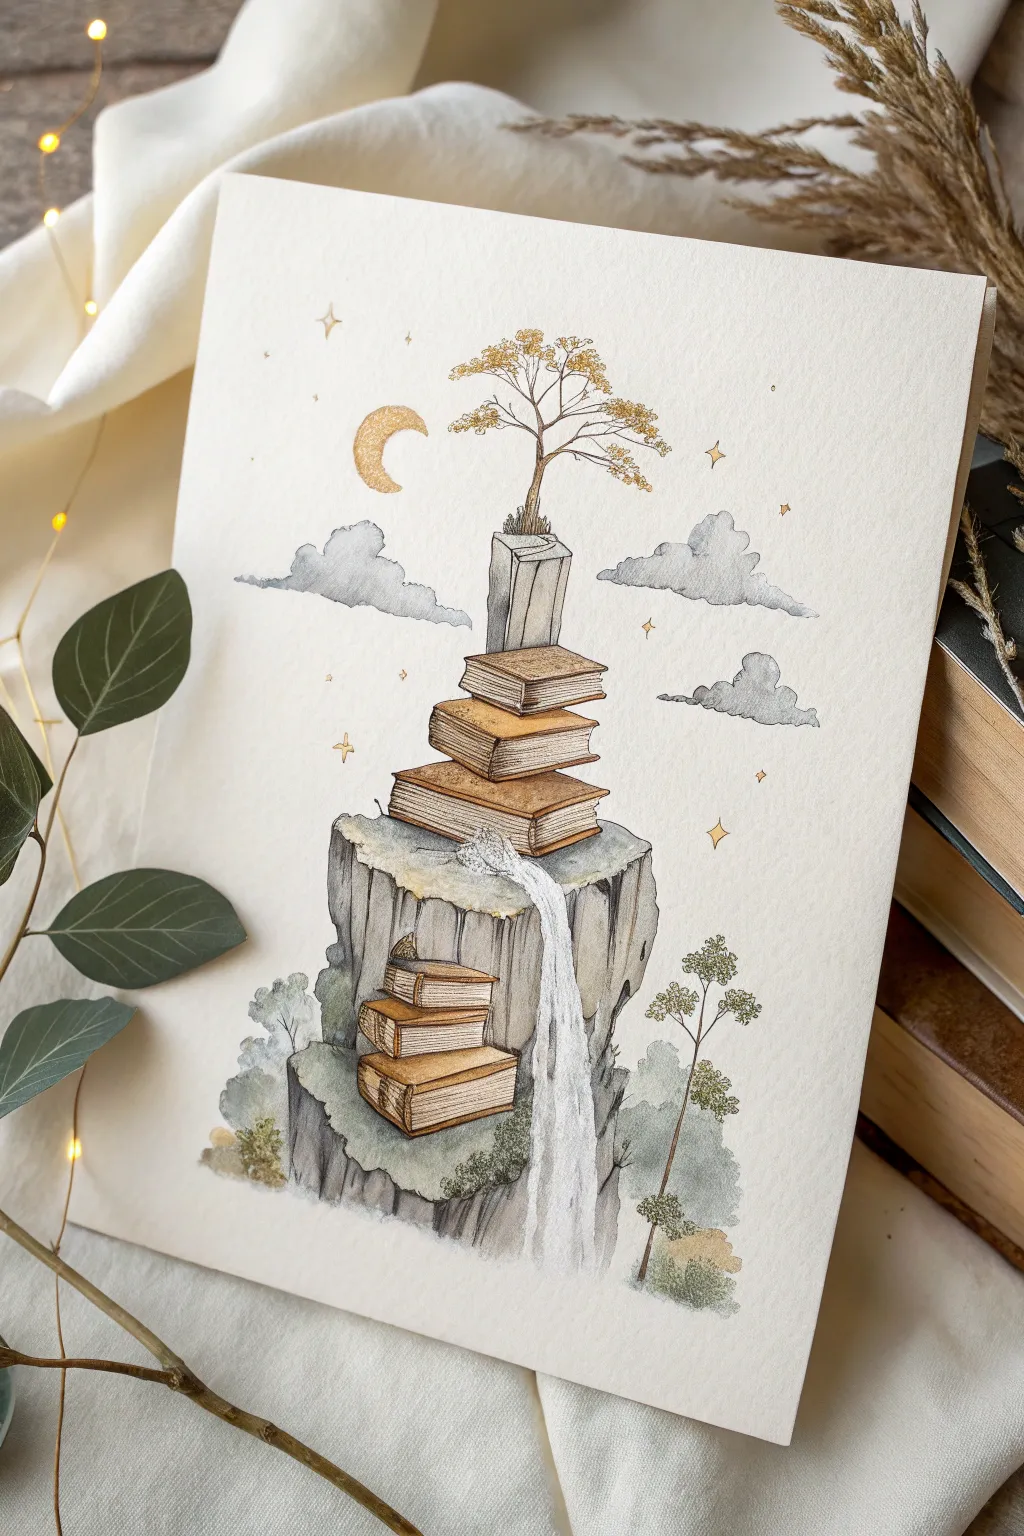
Transform a simple stack of books into a fantastical landscape where stories spill over like waterfalls. This tutorial combines precise ink line work with soft watercolor washes to create a whimsical floating island scene.
Detailed Instructions
Materials
- Heavyweight watercolor paper (300 gsm recommended)
- Fine liner pens (sizes 005, 01, and 03) – waterproof
- Watercolor paint set (pans or tubes)
- Small round brushes (sizes 2 and 4)
- Pencil (HB or 2H)
- Kneadable eraser
- Gold ink or metallic watercolor
- White gel pen or gouache (optional)
Step 1: Sketching the Foundations
-
Establish the main cliff:
Begin with a light pencil sketch in the center-bottom third of your paper. Draw a large, jagged rock formation that serves as the base, keeping the top flat to support the books. -
Stack the primary books:
Sketch a winding pile of three large books sitting atop the main rock. Vary their angles slightly so the spine directions alternate, making the stack look pleasantly precarious. -
Add the upper tier:
Draw a tall, rectangular stone pillar rising from the top book. On top of this pillar, sketch a solitary tree with delicate, spreading branches reaching upward. -
Carve the lower cavern:
On the left side of the main cliff face, sketch a recessed cutout or cave. Inside this nook, draw a smaller, huggable stack of three fat books nestled safely within the rock. -
Outline decorative elements:
Lightly sketch in the flowing waterfall cascading from the main cliff, fluffy clouds floating on either side, and the crescent moon in the upper left.
Keep it Loose
Don’t outline the waterfall with solid ink lines. Broken lines or no lines at all creates the illusion of moving water better than a rigid container.
Step 2: Inking the Details
-
Ink the books:
Using an 01 pen, carefully outline the books. Add fine parallel lines (hatching) purely on the spines to suggest curves and texture, but leave the pages mostly open. -
Texture the rocks:
Switch to an 005 pen for the cliffs. Use vertical, wiggly lines to create the striations of the rock face. I like to concentrate these lines in shadow areas to build volume immediately. -
Define the foliage:
Ink the trees using tiny stippling dots or small irregular scribbles for the leaves. Ink the moon and stars with clean, crisp lines, but leave the waterfall outline very faint or broken to keep it fluid. -
Erase guidelines:
Once the ink is completely dry—give it a good ten minutes to be safe—gently roll your kneadable eraser over the entire page to lift all pencil marks.
Step 3: Watercolor Washes
-
Paint the book covers:
Mix a warm ochre or light brown. Paint the covers of the books, varying the dilution so some are darker than others. Leave the page edges white or distinctively cream. -
wash the cliff faces:
Create a watery mix of Payne’s Grey and a touch of Ultramarine. Apply this loosely to the rock faces, letting the color pool at the bottom of the cliffs for natural shading. -
Add nature’s greens:
Use a muted sage green for the trees and the moss patches on the cliff tops. Dab the color on freely to keep the organic, soft feel. -
Create the waterfall:
Using a very dilute pale blue-grey, paint the water. Use vertical strokes following the fall, leaving slivers of dry white paper between strokes to represent rushing foam. -
Paint the clouds:
Wet the cloud shapes with clean water first, then drop in a tiny amount of grey at the bottom edges. Let it bleed upward for a fluffy, soft gradient.
Hidden Stories
Personalize the artwork by writing tiny, illegible script on the spines of the books, suggesting ancient titles or secret grimoires.
Step 4: Finishing Touches
-
Enhance texturing:
Once the base washes are dry, go back with a slightly darker brown to add shadows under the book overhangs and definition to the spines. -
Texturize page edges:
Use a very dry brush with pale yellow ochre to sweep across the page edges of the books, mimicking the look of aged paper without filling them in solid. -
Add celestial gold:
Using your gold ink or metallic paint, carefully fill in the crescent moon and the small stars scattered around the sky. Also dab a little gold on the upper tree leaves for a magical glow. -
Final highlights:
If needed, use a white gel pen to reclaim any lost highlights in the waterfall’s splash zone or to add sparkles to the dark rock crevices.
Step back and admire your surreal library landscape as the water dries and the gold ink catches the light
Constellation Animals With Splatter Stars
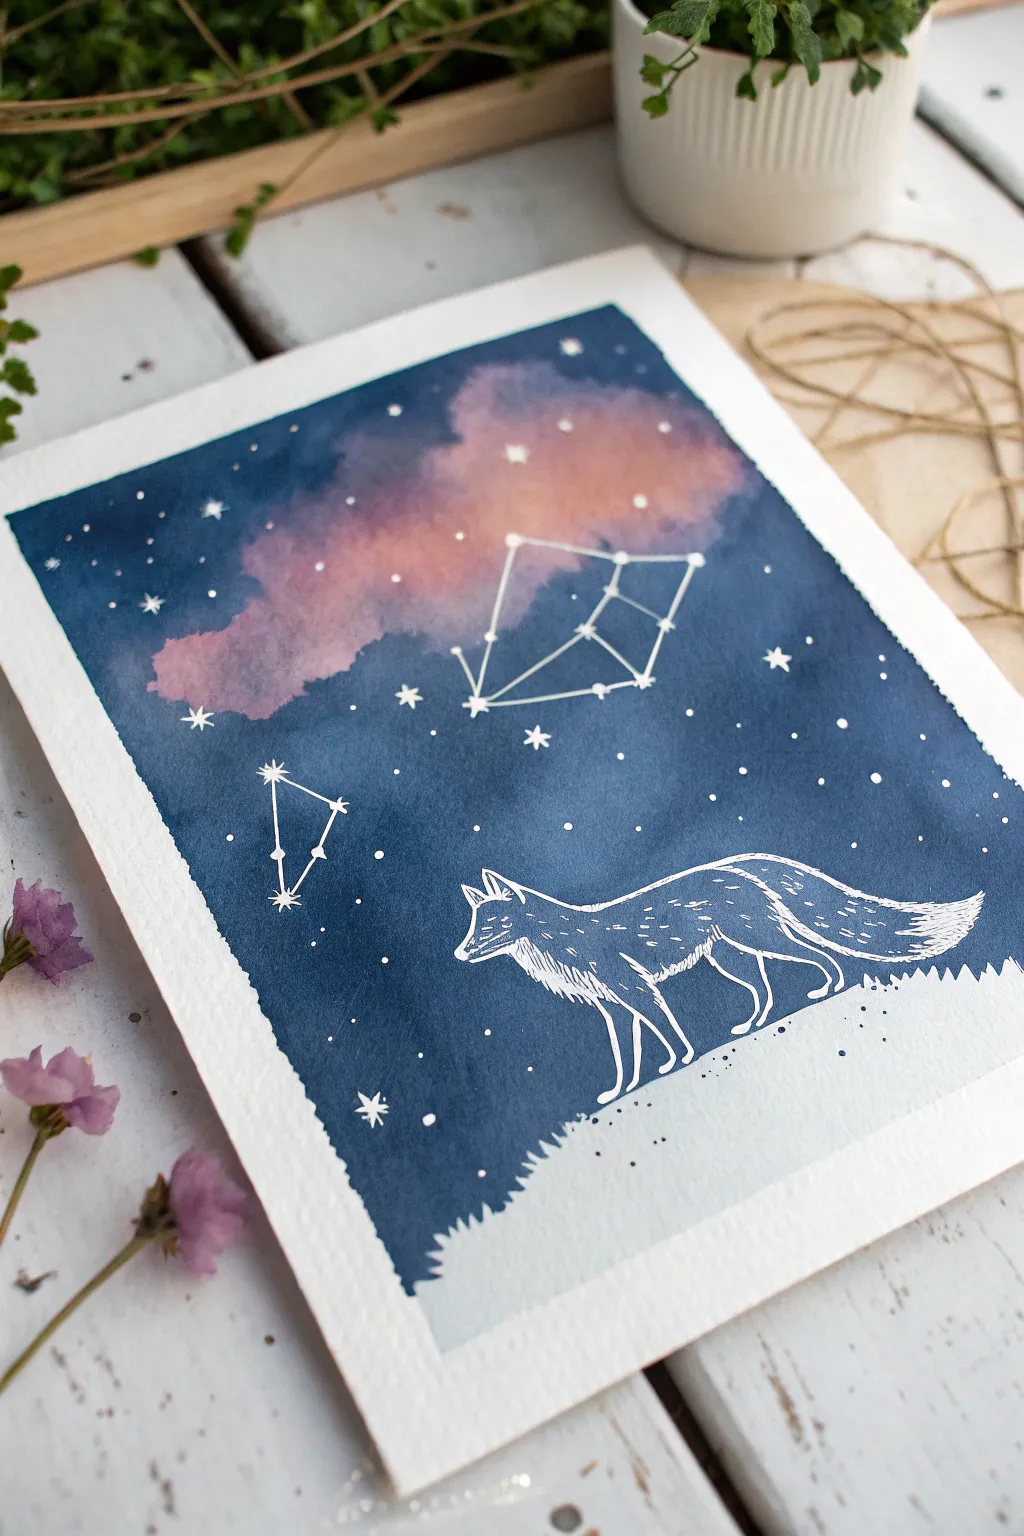
Capture the magic of a starry night with this deep blue watercolor painting featuring a mystical white fox gazing at constellations. The contrast between the dark, moody sky and the crisp white line art creates a striking fantasy scene that is simpler to achieve than it looks.
Step-by-Step Tutorial
Materials
- Cold press watercolor paper (300 gsm recommended)
- Watercolor paints (Indigo, Prussian Blue, Payne’s Grey, Quinacridone Rose or Magenta)
- White gel pen (Signo Uniball Broad or Gelly Roll)
- White gouache or white acrylic ink
- Flat wash brush (3/4 inch)
- Round brushes (size 4 and 8)
- Masking tape
- Pencil and eraser
- Paper towels
- Clean water
Step 1: Preparation and Sketching
-
Tape the edges:
Secure your watercolor paper to a board or table using masking tape. For the jagged, uneven border seen in the example, tear the masking tape lengthwise first to create a rough ‘deckled’ edge before applying it to the paper. -
Sketch the composition:
Lightly sketch the outline of the fox near the bottom right third. Keep your lines very faint so they don’t show through the final paint. You can also mark small dots where your main constellation stars will go. -
Mask the fox (optional):
For the crispest white silhouette, you can use masking fluid to cover the fox shape. However, in this project, we will simply be painting carefully around the shape, or painting over it later with opaque white if you prefer a different look. The example uses negative space.
Step 2: Painting the Galaxy Sky
-
Wet the paper:
Using your large flat brush, apply clean water to the entire sky area, avoiding the fox shape at the bottom. The paper should be glisten, but not hold puddles. -
Drop in the nebula colors:
While the paper is wet, load a round brush with watery Quinacridone Rose or a soft pink. Drop this color into the upper middle section to create the cosmic cloud. Let it bloom and spread naturally. -
Add the deep blues:
Mix a strong concentration of Indigo and Prussian Blue. Start painting from the top corners and edges, working inward toward the pink cloud. Let the blue touch the wet pink edges so they blend softly into a purple transition. -
Darken the night:
While the first layer is still damp, drop in concentrated Payne’s Grey or more Indigo into the darkest parts of the sky to create depth. Keep the paint lighter near the horizon line where the fox stands. -
Define the ground:
Paint the ground area using the same deep blues, carefully shaping the ‘grass’ texture along the bottom edge. Leave the fox shape completely white. I like to use the tip of a smaller brush to make little jagged upward strokes for grass blades. -
Let it dry completely:
This is crucial. The paper must be bone dry before you add the stars and details, otherwise, your crisp white lines will bleed into the blue background.
Nebula Tip
Don’t overwork the pink and blue blend! Let the water do the mixing on the paper. If you brush it too much, the colors will turn muddy instead of creating a soft purple transition.
Step 3: Details and Constellations
-
Splatter the stars:
Dilute a small amount of white gouache or acrylic ink with water. Load a stiff brush or toothbrush, and tap it over the painting to create a spray of fine white stars. Focus denser splatters near the pink nebula. -
Draw the major stars:
Using your white gel pen, draw larger twinkling stars. Draw a cross shape first, then add a small ‘x’ in the center to make them shine. -
Connect the constellations:
Identify where you want your constellations to be (perhaps one over the fox’s head). Draw the main star points with the gel pen, then use a ruler or steady hand to connect them with straight white lines. -
Outline the fox:
Go over your pencil outline of the fox with the white gel pen. Use short, broken strokes to simulate the texture of fur, especially on the neck and tail. -
Add fur details:
Fill in the body of the fox with small, dashed lines and little ‘v’ shapes to suggest a thick coat. Don’t outline every single hair; suggestive marks are more effective. -
Ground the fox:
Use the white pen to draw a few blades of grass overlapping the fox’s paws. This helps the animal look like it is standing *in* the scene rather than floating on top of it. -
Final touches:
Check for any areas that need more pop. You might add a few tiny white dots directly onto the fox’s back to mimic starlight reflecting on its fur. -
Remove the tape:
Once everything is absolutely dry, slowly peel off the masking tape at a 45-degree angle to reveal your jagged, artistic border.
Make it Metallic
Swap the white gel pen for a metallic silver or gold marker for the constellations. It catches the light beautifuly and adds an extra layer of fantasy magic to the piece.
Frame your starry creation and enjoy the peaceful atmosphere it brings to your space
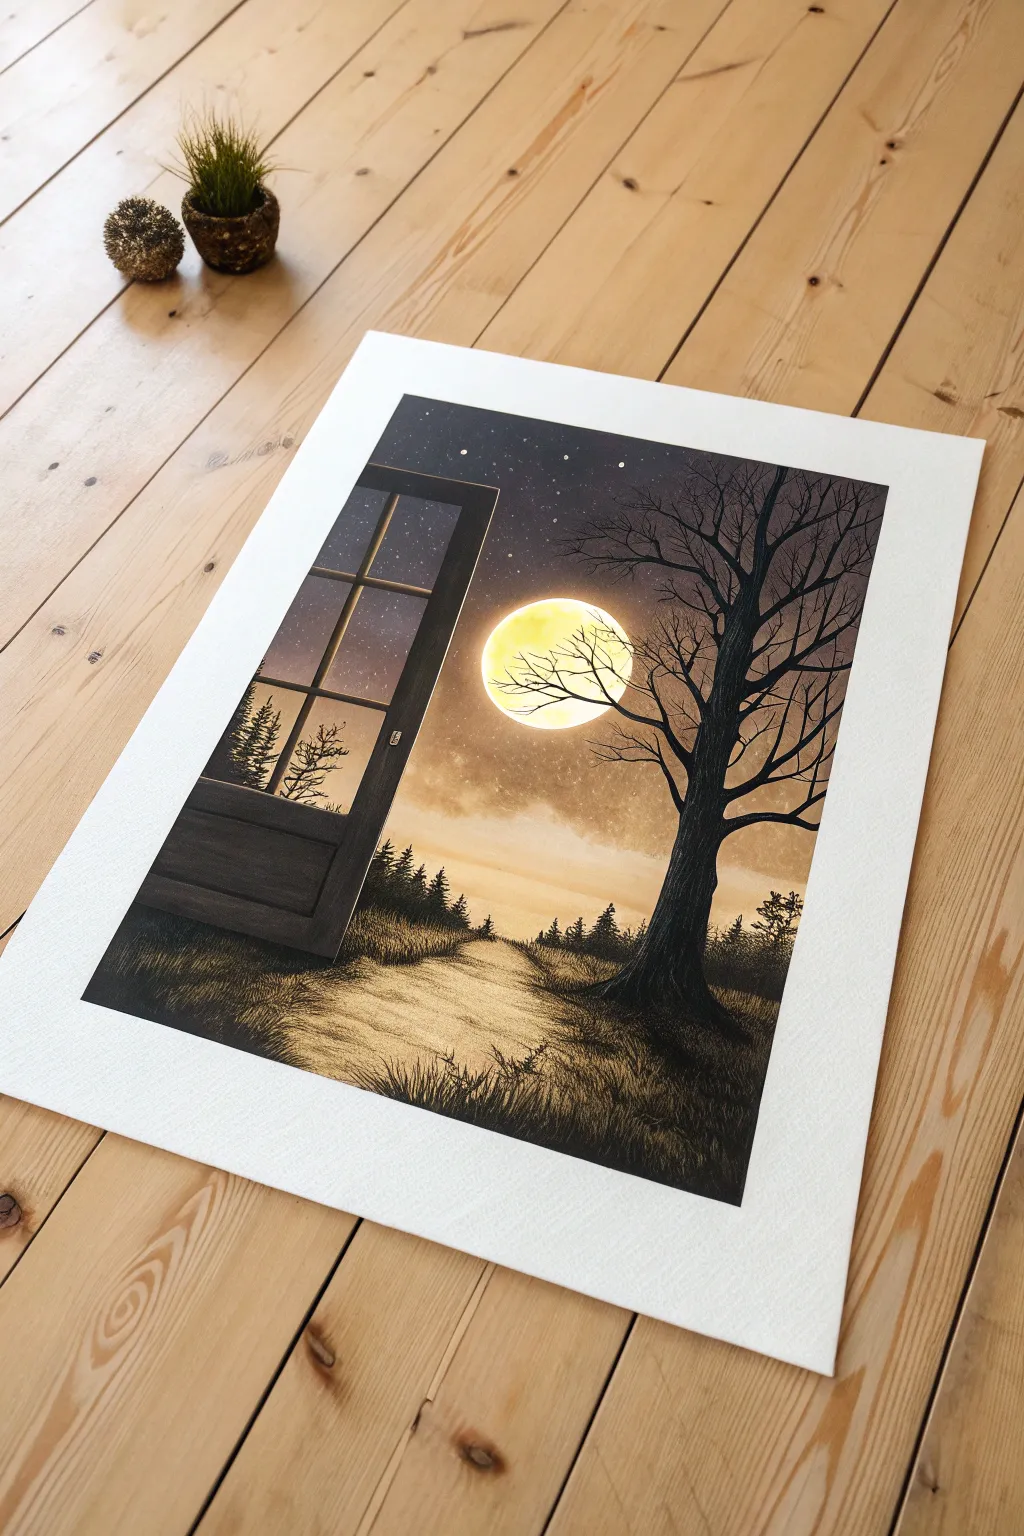
Window Shadow to Another World

Step through a window into a dreamlike world with this atmospheric painting project. You will capture the contrast between a rigid architectural frame and a glowing, organic nightscape, focusing on dramatic lighting and silhouette techniques.
Step-by-Step
Materials
- Heavyweight watercolor paper or mixed media board (A3 size recommended)
- Masking tape or painter’s tape
- Acrylic paints: Carbon Black, Titanium White, Ultramarine Blue, Burnt Umber, Yellow Ochre, Cadmium Yellow Medium
- Soft synthetic brushes: wide flat wash brush, medium filbert, fine liner brush
- Sponge or stippling brush
- Ruler
- Pencil and eraser
- Palette and water containers
Step 1: Setting the Composition
-
Prepare the borders:
Begin by taping down all four edges of your paper to a flat board. This creates the crisp white border seen in the original image and keeps the paper flat during painting. -
Draft the window structure:
Using a ruler and light pencil strokes, draw the large rectangular window frame on the left side. Include the vertical and horizontal mullions (the bars separating the panes) and give the frame perspective by angling the top and bottom lines slightly downward and upward respectively. -
Sketch environmental elements:
Lightly sketch the position of the large moon right of the center. Use a circular object like a lid to trace if you want a perfect circle. Sketch the rough outline of the path leading from the foreground toward the horizon, and draw a simple vertical line for the main tree trunk on the right.
Edge Control
For the crispest window lines, apply tape over your pencil lines, paint the black frame, and peel the tape off only when the paint is 100% dry.
Step 2: Painting the Atmospheric Sky
-
Create the moon’s glow:
Mix Titanium White with a touches of Cadmium Yellow. Paint the moon completely, making the center almost pure white and the edges yellower. While the paint is wet, drag some of that yellow-white haze outward into the surrounding sky area to create a glowing halo. -
Establish the night gradient:
Mix Ultramarine Blue with a touch of Black and Burnt Umber to create a deep, desaturated indigo. Start painting at the top corners of the sky, working downward. As you approach the moon and horizon, mix in more White and Yellow Ochre to create a warm, foggy transition. -
Blend the clouds:
While the sky layers are still tacky, use a soft, damp sponge or a dry brush to gently blend the transition between the dark upper sky and the warm horizon, creating soft, wispy cloud textures around the moon. -
Add the stars:
Once the sky is fully dry, cover the moon area with a scrap of paper. Dilute white paint with water and gently flick it from a toothbrush or stiff brush onto the upper dark section of the sky to create stars. Keep them sparse and deliberate.
Season Shift
Change the mood by adding pink blossoms to the tree branches for spring, or broaden the leafy canopy with heavy dark greens for a summer night.
Step 3: Developing the Landscape
-
Paint the distant horizon:
Mix a hazy grey-purple using Blue, White, and a tiny bit of red or brown. Paint a soft, flat horizon line slightly above the bottom third of the paper. This establishes the far distance. -
Create the illuminated path:
Using Yellow Ochre mixed with White, paint the winding path. Keep your brushstrokes horizontal and rough to mimic the texture of dirt or grass catching the light. Ensure the path is brightest where the moonlight hits it directly. -
Build the grassy foreground:
Mix Carbon Black with a little Green or Yellow to make a very dark shadow color. Use a fan brush or an old rough brush to flick upward strokes along the edges of the path, creating the silhouette of tall grasses. I like to let these overlap the path slightly to ground it. -
Add the distant tree line:
Using a small flat brush and your dark shadow mixture, tap in the shapes of small pine trees along the horizon line. Keep these small and less detailed to suggest distance.
Step 4: Defining the Silhouettes
-
Paint the main tree trunk:
Load your medium filbert brush with pure Carbon Black. Paint the large tree on the right, making the base wide and the trunk narrowing as it goes up. Add texture to the bark by dragging the brush vertically. -
Branch out:
Switch to your finest liner brush. Pull branches outward from the main trunk, tapering them to thin points. Ensure some branches reach across the glowing moon for dramatic contrast. Remember that tree branches generally grow upward and outward in a ‘V’ shape. -
Paint the window frame:
Carefully fill in the window frame structure on the left with solid black or very dark grey. Use a straight edge or ruler to guide your brush if your hand feels unsteady. This creates the ‘portal’ effect. -
Fill the window panes:
The glass itself effectively shows the background, but slightly darker. Glaze over the sky area ‘inside’ the window panes with a very watered-down grey wash to suggest the tint of glass compared to the open air. -
Add pane reflections:
To make the glass look realistic, add a few tiny, sharp white lines along the edges of the window panes or diagonally across corners to simulate reflections on the glass surface. -
Final details:
Check your foreground. Use your fine liner brush to add a few individual sharp blades of grass in the very front, overlapping the bottom of the window frame and the tree roots to integrate the elements.
Now stepping back, you can admire how a simple frame transforms a landscape into a story.
Have a question or want to share your own experience? I'd love to hear from you in the comments below!