Garden rocks are basically free little canvases just waiting to become something charming, weird, or downright magical. Here are my favorite garden rock art ideas—from classic painted cuties to more unexpected stone projects that make your flowerbeds feel like an outdoor gallery.
Painted Ladybug Rocks in Garden Beds
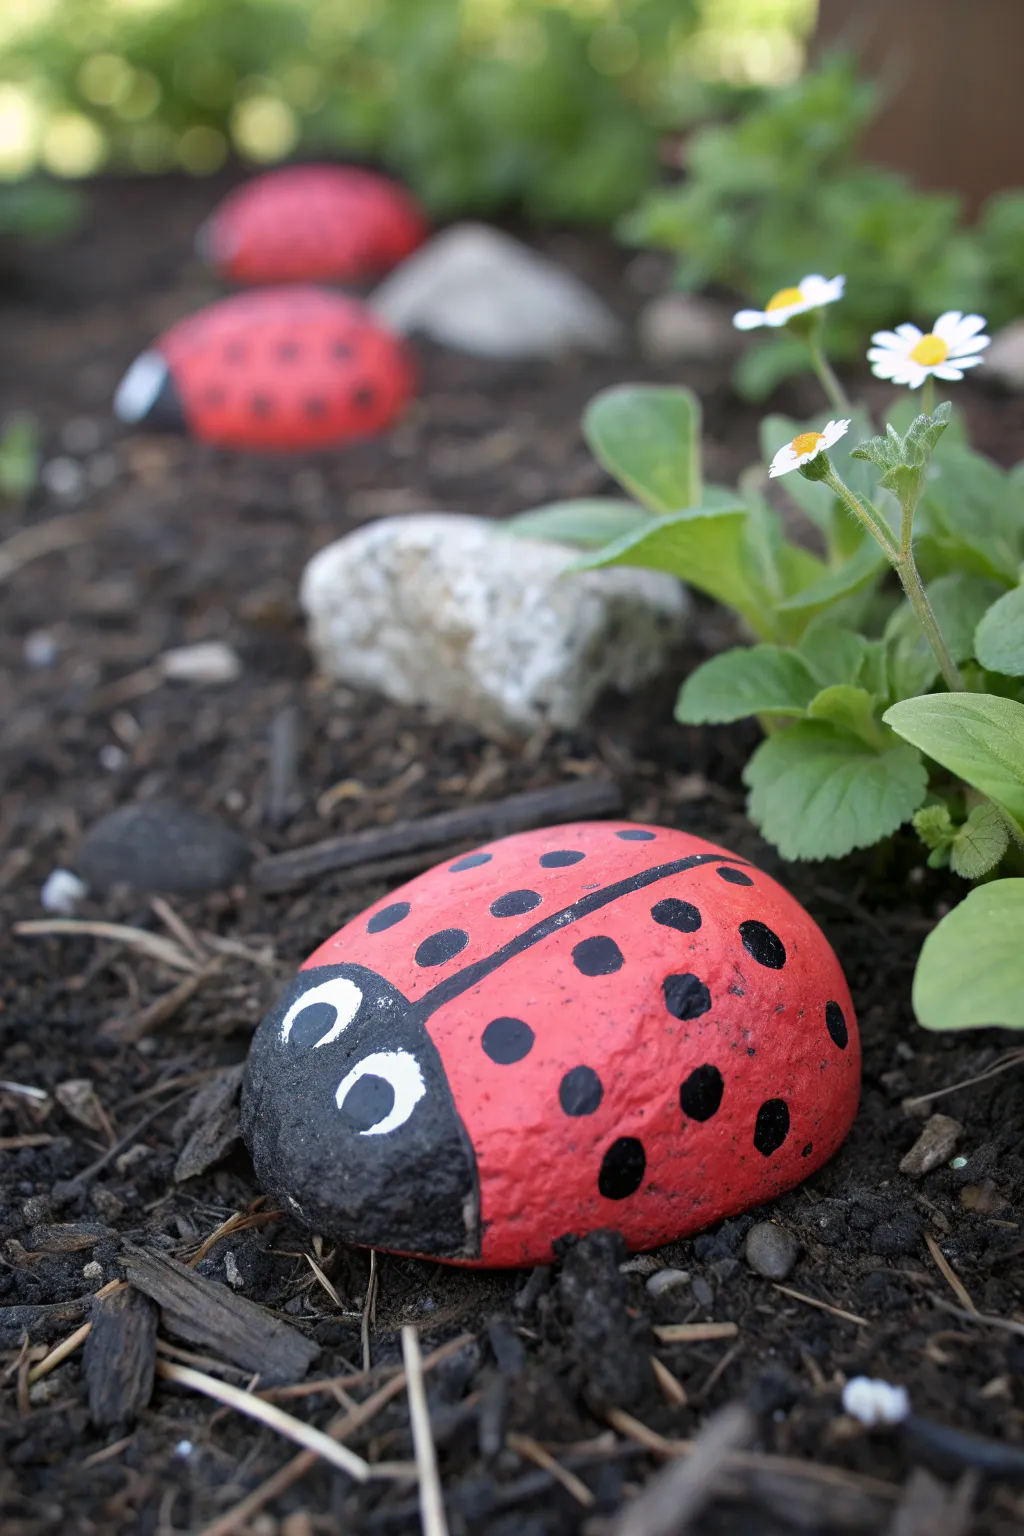
Transform ordinary garden stones into a charming family of beetles with this simple painting project. These vibrant red-and-black ladybugs add a delightful pop of color to any flower bed or walkway, peeking out from beneath your plants.
Step-by-Step
Materials
- Smooth, oval-shaped river rocks (various sizes)
- Red outdoor acrylic craft paint
- Black outdoor acrylic craft paint
- White outdoor acrylic craft paint
- Flat paintbrush (medium width)
- Small round detail brush
- Warm water and soap for cleaning rocks
- Clear outdoor sealant spray (matte or gloss)
- Pencil (optional)
- Palette or paper plate
Step 1: Preparation and Base Coat
-
Clean your canvas:
Begin by scrubbing your chosen rocks thoroughly with warm, soapy water to remove any dirt or moss. Rinse them well and let them dry completely in the sun, as paint won’t stick to a damp or dirty surface. -
Map out the design:
If you feel unsure about freehand painting, use a pencil to lightly sketch a curved line separating the ‘head’ (about one-quarter of the rock) from the ‘body’. -
Paint the body red:
Using your medium flat brush, paint the larger portion of the rock with bright red acrylic paint. Extend the paint down the sides to the soil line so it looks finished from all angles. -
Apply a second coat:
Acrylics can be somewhat translucent on dark stone. Once the first red layer is dry to the touch, apply a second coat to ensure a rich, opaque color. -
Paint the head black:
Wipe off your flat brush or switch to a clean one. Paint the front section of the rock—the head area—with solid black paint. Carefully cut in the line where the black meets the red to keep it crisp. -
Connect the color:
Ensure there is no bare rock showing between the red and black sections; overlap the black slightly over the red if necessary for a clean join.
Spotty Coverage?
If your black spots look transparent or streaky, wait for them to dry fully and dab a second layer of paint directly on top. Don’t brush it; just dab to deposit more pigment.
Step 2: Adding Details
-
Draw the wing line:
Switch to your small round detail brush and dip it in black paint. Draw a single, distinct line running from the center of the black head straight down the back of the red body to the tail. -
Thicken the divider:
Go over the center line again if needed to make it bold enough to be seen from a distance, but keep the edges relatively smooth. -
Add the spots:
Dip the round brush or the handle end of a paintbrush into the black paint to create the iconic spots. Press straight down and lift up to make varying sizes of circles on the red wings. -
Vary the placement:
Place the spots randomly but evenly on both sides of the center line. I find that making them different sizes adds a bit of organic character rather than perfect uniformity. -
Paint the eye whites:
Clean your detail brush thoroughly. Dip it into the white paint and create two oval shapes on the black head section for the eyes. You may need two coats of white to cover the black base effectively. -
Add pupils:
Once the white ovals are bone dry, use the very tip of your smallest brush (or a toothpick) to add a tiny black dot inside each white oval. Placing the pupils slightly off-center gives the ladybug a cute, looking-sideways expression.
Create a Colony
Make a whole family by using different sized rocks. Paint some yellow or orange instead of red to mimic different beetle species found in nature.
Step 3: Finishing Touches
-
Dry thoroughly:
Allow the finished rock to dry for at least 24 hours. The thick dots of paint may take longer to cure than the base coats. -
Seal the rock:
Take the rocks outside to a well-ventilated area. Spray them with a clear outdoor sealant to protect the paint from rain and UV fading. -
Position in the garden:
Nestle your new ladybug slightly into the soil or mulch near some green foliage to create the illusion that it is crawling through your garden bed.
Enjoy watching your colorful stone critters brave the elements in your garden all season long


Bee and Butterfly Rock Scatter Accents
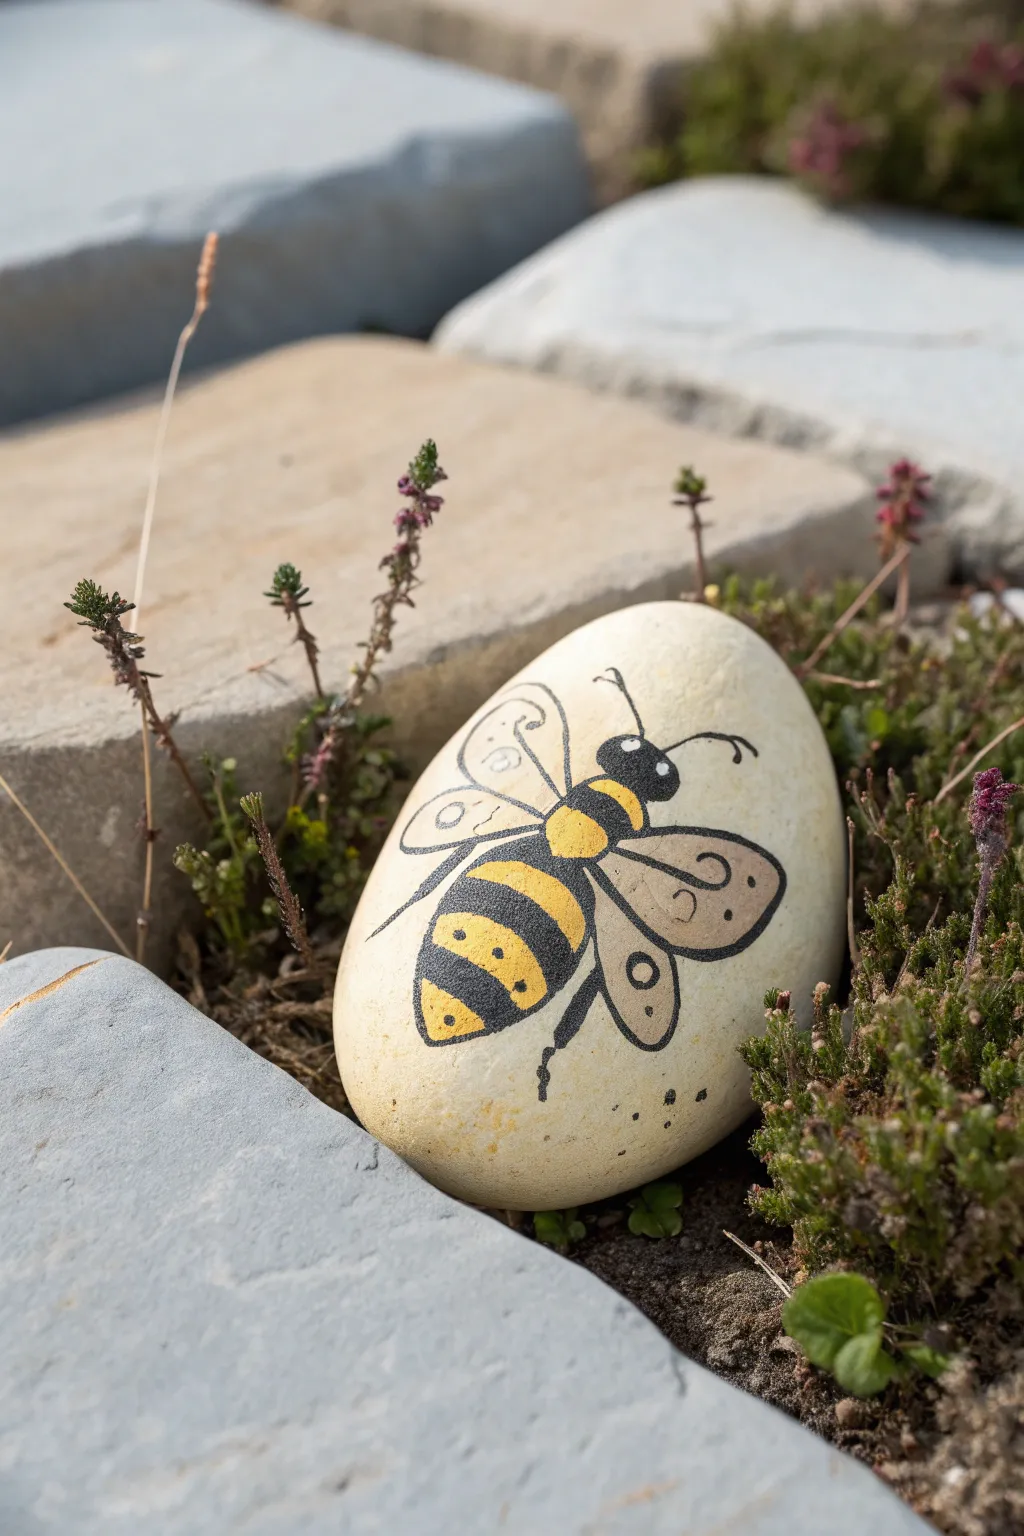
This charming project features a stylized bumblebee hand-painted onto a smooth, pale river stone, tucked perfectly among garden pavers. The look combines bold black outlines with soft yellow stripes and whimsical wing details for a delightful, natural aesthetic.
How-To Guide
Materials
- Smooth, egg-shaped river rock (pale beige or off-white)
- Black acrylic paint pen (fine tip)
- Black acrylic paint pen (medium tip)
- Yellow acrylic paint pen (medium tip) or acrylic tube paint
- Pencil and eraser
- Matte finish outdoor sealant spray
- Water and scrub brush (for cleaning the rock)
- Paper towels
Step 1: Preparation and Sketching
-
Clean the canvas:
Begin by thoroughly scrubbing your chosen rock with water and a brush to remove any garden dirt or grit. Let it dry completely in the sun; any moisture left inside the stone will ruin the paint finish later. -
Sketch the body:
Using a pencil, lightly draw the central body shape of the bee. Start with a small oval for the head, a slightly larger oval for the thorax (middle), and a longer, tapered oval for the abdomen. -
Add the wings:
Sketch two large teardrop shapes extending from the thorax on either side for the upper wings. Add smaller, curved wing shapes tucked underneath the top pair. -
Refine the details:
Lightly mark where the stripes will go across the bee’s body. Don’t press too hard with the pencil, as graphite can sometimes smudge into yellow paint.
Smudge Control
Work from the center of the rock outward. If you’re right-handed, move left to right to avoid dragging your hand through wet ink.
Step 2: Painting the Base Colors
-
Apply the yellow:
Fill in the yellow stripes on the abdomen and the thorax using your yellow paint pen. You’ll want a bright, sunny yellow for this. Leave the alternate stripes blank for now. -
Double the layers:
Yellow pigment is often translucent, so I like to let the first coat dry and apply a second layer to ensure the color pops against the stone’s natural tone. -
Paint the black segments:
Using the medium-tip black pen, fill in the head and the alternate stripes on the body. Carefully meet the edges of the yellow without overlapping while the yellow is still wet to avoid muddy colors. -
Wing base color:
The wings in this design are semi-transparent and pick up the stone’s color, but you can add a very faint wash of watered-down white acrylic if your stone is too dark. Otherwise, leave the stone natural inside the wing outlines.
Make it Sparkle
Add a coat of glitter paint or crushed glass over the wings before sealing. It catches the sunlight and mimics real insect wings.
Step 3: Outlining and Patterning
-
Outline the body:
Once the base colors are fully dry, use the fine-tip black pen to go over your initial pencil lines, creating a crisp border around the entire bee body. -
Outline the wings:
Draw the wing outlines with a confident, continuous stroke. Notice how the wings in the example have a slightly organic, curvy shape rather than being perfectly geometric. -
Add wing details:
Inside the wings, draw decorative swirls and dots. The top wings feature a simple spiral design near the connection point and a few dots near the tips. -
Lower wing details:
For the lower wings, simply add a small circle or oval in the center. This stylized approach gives it a folk-art feel. -
Draw the legs:
Using the fine-tip pen, sketch spindly legs extending from the body. Don’t overthink them; simple bent lines work best. -
Antennae and eyes:
Add two curved antennae coming from the head. Since the head is solid black, add a tiny dot of white paint or simply leave a negative space if you haven’t filled it yet to suggest an eye.
Step 4: Final Touches
-
Texture dots:
To give the bee a fuzzy appearance without drawing individual hairs, add tiny black dots inside the yellow stripes. -
Background speckles:
Create some atmosphere by adding a few random black ink splatters or dots on the stone around the bee, grounding the design. -
Seal the deal:
Once the paint is cured (wait at least an hour), spray the rock with a matte outdoor sealant. This protects your art from rain and UV fading.
Place your finished bee in a sunny spot among low-growing garden plants for a sweet surprise


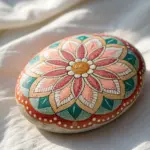
Mandala Rocks for a Calm Garden Corner
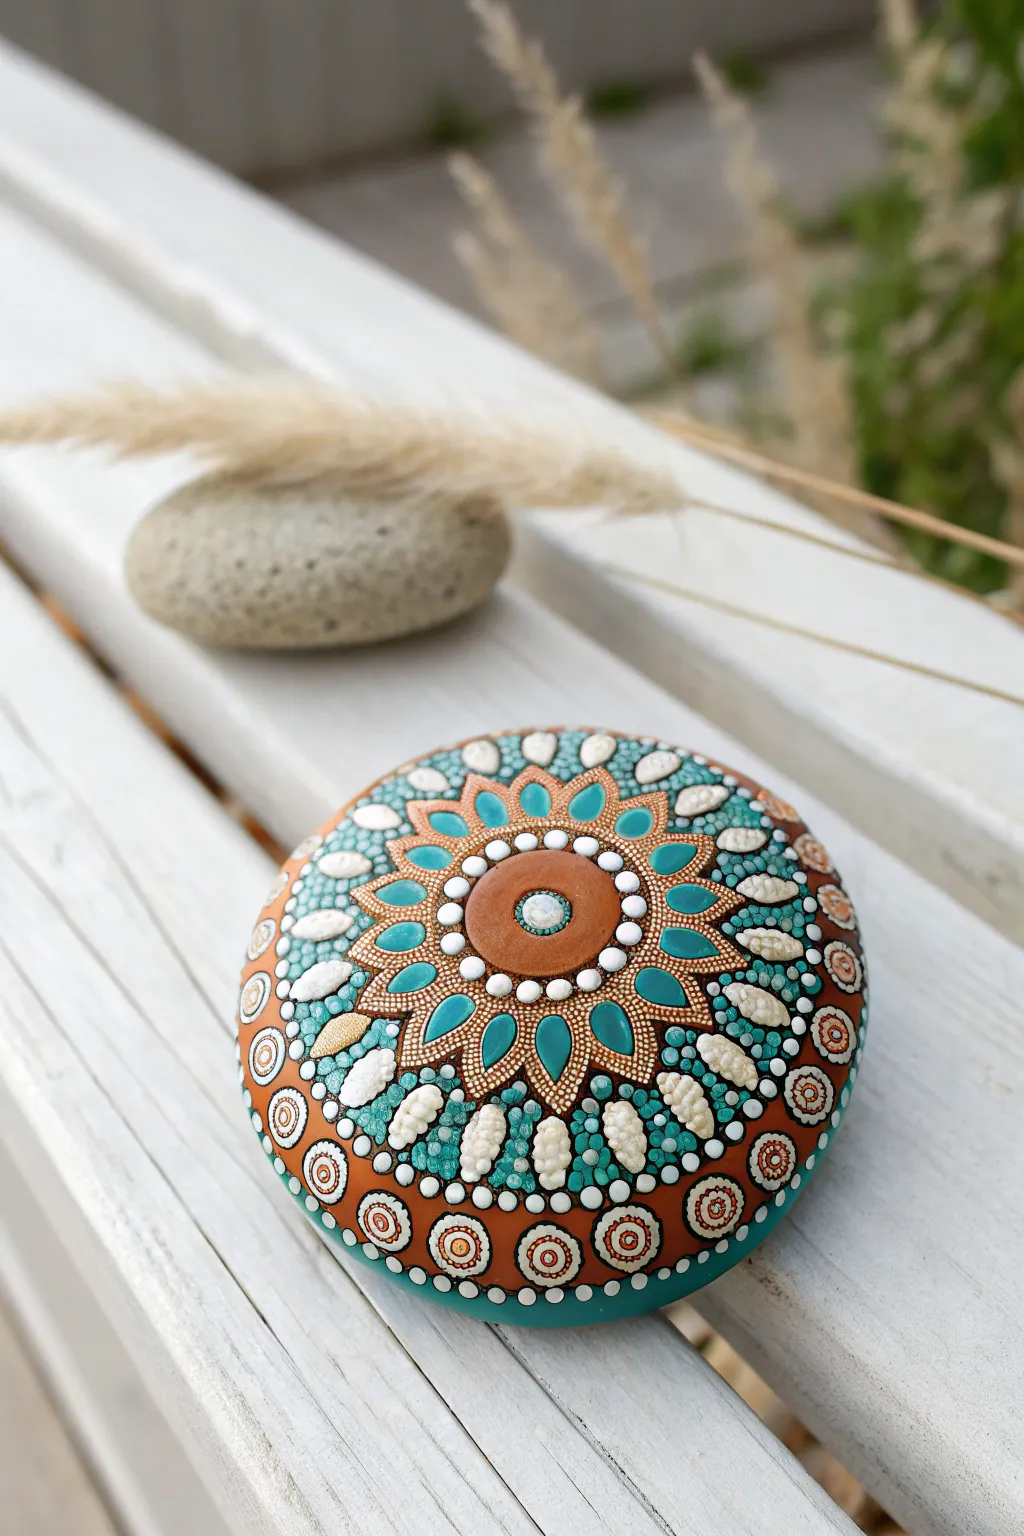
Bring peace to your favorite outdoor nook with this intricately detailed mandala stone, featuring a soothing palette of teal, rust, and white. This project uses precise dotting techniques to create a mesmerizing radial pattern that looks stunning resting on a garden bench or nestled among greenery.
Detailed Instructions
Materials
- Smooth, round river rock (approx. 4-5 inches diameter)
- Acrylic paints (Teal/Turquoise, Rust/Terracotta, White, Gold)
- Matte or satin acrylic topcoat/sealer
- Dotting tools (various sizes from stylus to large rods)
- Fine detail paintbrush (size 0 or 00)
- Compass or white chalk pencil (for guidelines)
- Palette for mixing paint
- Damp cloth or paper towel
Step 1: Preparation and Base
-
Clean the surface:
Begin by thoroughly washing your stone with soapy water and a scrub brush to remove any dirt or oils. Let it dry completely in the sun or with a hairdryer before painting. -
Apply the base coat:
Mix a custom base color using the rust/terracotta paint. Apply a smooth, even base coat over the top surface where the design will go. You may need two thin layers for full opacity. -
Mark the center:
Once the base is visibly dry, find the approximate center of the stone. Use a white chalk pencil or a compass to lightly mark the center point and draw a few concentric circle guidelines to help keep your mandala symmetrical.
Step 2: Building the Core Mandala
-
Create the central focal point:
Using a large dotting tool or the end of a paintbrush, place a significant rust-colored dot right in the center. While wet, add a smaller white dot inside it, and a tiny teal dot inside that for a layered effect. -
Circle the center:
Use a small dotting tool to place a ring of tiny white dots closely around your central focal point. Try to keep the spacing consistent. -
Paint the petal outlines:
Using your fine detail brush and the rust paint, hand-paint a series of pointed petal shapes radiating outward from the center circle. Aim for about 10-12 petals depending on your stone’s size. -
Fill the petals:
Fill the inside of these petal shapes with distinct teal paint. I like to leave a tiny gap between the fill and the outline to create definition. -
Outline petals with dots:
Switch to a very fine dotting tool and the gold paint. Carefully placing tiny micro-dots along the outer edge of each petal to create a shimmering border.
Paint Consistency Pro-Tip
If your paint peaks instead of flattening into a smooth dome, mix in a tiny drop of pouring medium or water. You want a creamy, yogurt-like texture for perfect dots.
Step 3: Expanding the Pattern
-
Add the first outer ring:
In the energetic space between the tips of the petals, place medium-sized white dots. This establishes the rhythm for the next layer. -
Create teal teardrops:
Above each petal tip, paint a small teal teardrop shape pointing outward. You can do this by placing a dot and dragging the paint slightly downward with a needle tool. -
Layering the dots:
Create a ‘walking the dots’ effect around the teal teardrops. Place a medium white dot at the top tip, then progressively smaller dots down each side of the teardrop using the remaining paint on your tool. -
Form the textured white ring:
This is a key texture element. Use a medium tool to place large, thick white oval shapes or heavy dots in a ring outside your previous work. Let the paint sit high on the surface for a 3D effect. -
Fill the gaps with teal:
Between these large white textured shapes, fill the background spaces with many tiny teal micro-dots. This creates a mosaic-like background that makes the white pop.
Level Up: Top Dots
Once your base dots are completely dry, add smaller dots of a lighter shade directly on top. This creates the stunning 3D ‘urchin’ effect seen in advanced mandalas.
Step 4: The Outer Border
-
Paint the decorative circles:
Create a ring of large rust-colored circles near the outer edge of the stone. Space them evenly. -
Detail the outer circles:
Inside each rust circle, add a smaller white circle using a dotting tool, and finish with a tiny orange or gold dot in the very center. -
Add the dotted halo:
Surround each of these outer decorative circles with a ring of very fine white dots to give them a finished, lacy look. -
Final background fill:
Fill any remaining open background space near the bottom border with small teal or turquoise dots to unify the color scheme. -
Seal the artwork:
Allow the stone to dry for at least 24 hours to ensure the thick dots are hard all the way through. Apply two coats of outdoor-grade acrylic sealer to protect your work from the elements.
Place your finished mandala in a quiet corner of the garden to serve as a beautiful focal point for meditation


Fairy Doors Leaned Against Tree Bases
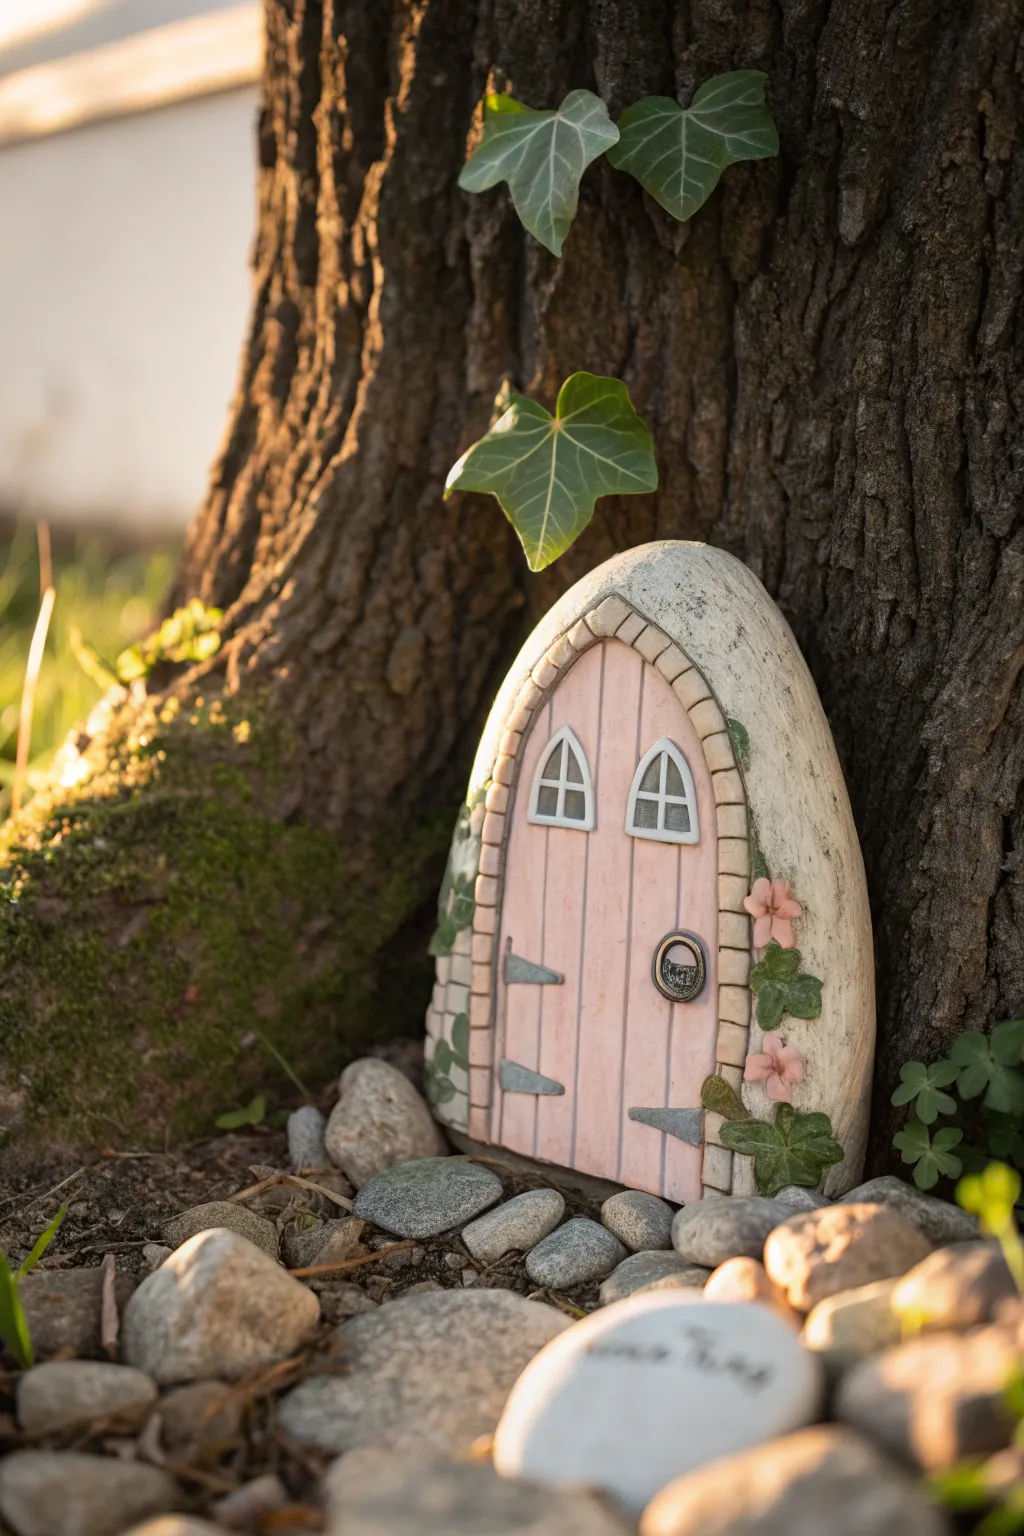
Transform a simple river rock into an enchanting portal for garden visitors with this delightful painting project. The design features a warm pink wooden door nestled within a rustic stone archway, complete with climbing vines and tiny floral details.
How-To Guide
Materials
- Large, smooth, oval-shaped river rock (flat bottom preferred)
- Outdoor acrylic paints (pale pink, cream/beige, grey, white, silver, green)
- Pencil or chalk for sketching
- Fine-grit sandpaper (optional)
- Assorted brushes: medium flat brush, small detail brush, fine liner brush
- Outdoor sealant or polyurethane varnish (matte or satin finish)
- Palette tray and water cup
Step 1: Preparation and Planning
-
Prep the Surface:
Begin by scrubbing your chosen rock with soapy water and a stiff brush to remove any dirt or moss. Allow it to dry completely in the sun. If the surface is very rough, you can lightly sand the front face to create a smoother canvas for your painting. -
Sketch the Design:
Using a pencil or a piece of white chalk, lightly outline the inner door shape. Draw an arch that follows the natural curve of the rock’s top, leaving a border of about an inch all around for the stone frame. Mark the vertical lines for the wooden planks.
Stone Texture Trick
Mix a pinch of baking soda into your beige paint for the door frame. This creates a grainy, gritty texture that looks and feels like real mortar and sandstone.
Step 2: Painting the Foundation
-
Create the Stone Border:
Mix a warm beige or cream color and paint the outer border area surrounding your sketched arch. Don’t worry about perfect texture yet; just get a solid base coat down to define the frame. -
Base Coat the Door:
Fill in the central arch area with a soft, pale pink paint. This will likely need two coats to be opaque, especially if your rock is dark. Let the first coat dry completely before applying the second to ensure a smooth finish. -
Define the Frame Stones:
Once the cream border is dry, use a slightly darker beige or light grey to paint individual rectangular shapes around the arch to mimic masonry stones. Leave small gaps between them for the ‘mortar’ lines.
Step 3: Adding Architectural Details
-
Draw Wood Planks:
Using a fine liner brush and disjointed, thin lines of darker pink or light brown, trace the vertical lines you sketched earlier. These lines separate the individual wooden planks of the door. -
Add Wood Grain Texture:
With the same liner brush and very watered-down dark pink paint, add subtle vertical grain lines on each plank. Vary the length and opacity to make the wood look weathered and natural. -
Paint the Windows:
Near the top of the door arch, paint two small, gothic-style arched windows using a dark grey or black. Keep them symmetrical. Once dry, use a stark white paint and your finest brush to add the window panes or dividers. -
Install the Hardware:
Paint a small circle on the right side for the doorknob base, and three horizontal wedge shapes on the left side for the hinges. Use a dark grey or black for the base layer. -
Metallic Highlights:
I like to use a tiny touch of silver or metallic grey paint on top of the black hinges and doorknob to give them a forged iron look. Add a tiny dot of white on the doorknob to simulate a glint of light.
Add Glow
Paint the window interiors with glow-in-the-dark yellow paint instead of plain grey. At night, it will look like someone is home inside the tree.
Step 4: Bringing it to Life
-
Sculpt the Vines:
Mix a leaf green shade and paint a wandering vine climbing up the right side of the stone frame. Paint small, three-lobed ivy shapes branching off the main stem, overlapping onto the stone frame. -
Paint Tiny Blooms:
Using a small detail brush, add simple five-petal flowers in soft pink or peach along the vine. A tiny dot of yellow or white in the center of each flower adds a lovely pop of detail. -
Add Shadows for Depth:
This step is crucial for realism. Use a watered-down grey or brown wash to paint a thin shadow line right where the door meets the stone frame. This makes the door look recessed rather than painted flat on the surface. -
Highlight the Stonework:
Dry brush a little white or very light cream over the textured stone frame. This catches the high points of the paint and rock, making the masonry looking rugged and three-dimensional. -
Protective Coat:
Allow the entire rock to cure for at least 24 hours. Finish by applying two thin coats of outdoor matte or satin sealant to protect your artwork from rain and UV fading.
Set your finished door at the base of a sturdy oak or maple to invite a little magic into your backyard
BRUSH GUIDE
The Right Brush for Every Stroke
From clean lines to bold texture — master brush choice, stroke control, and essential techniques.
Explore the Full Guide
Mini Fairy House Rock Village Cluster
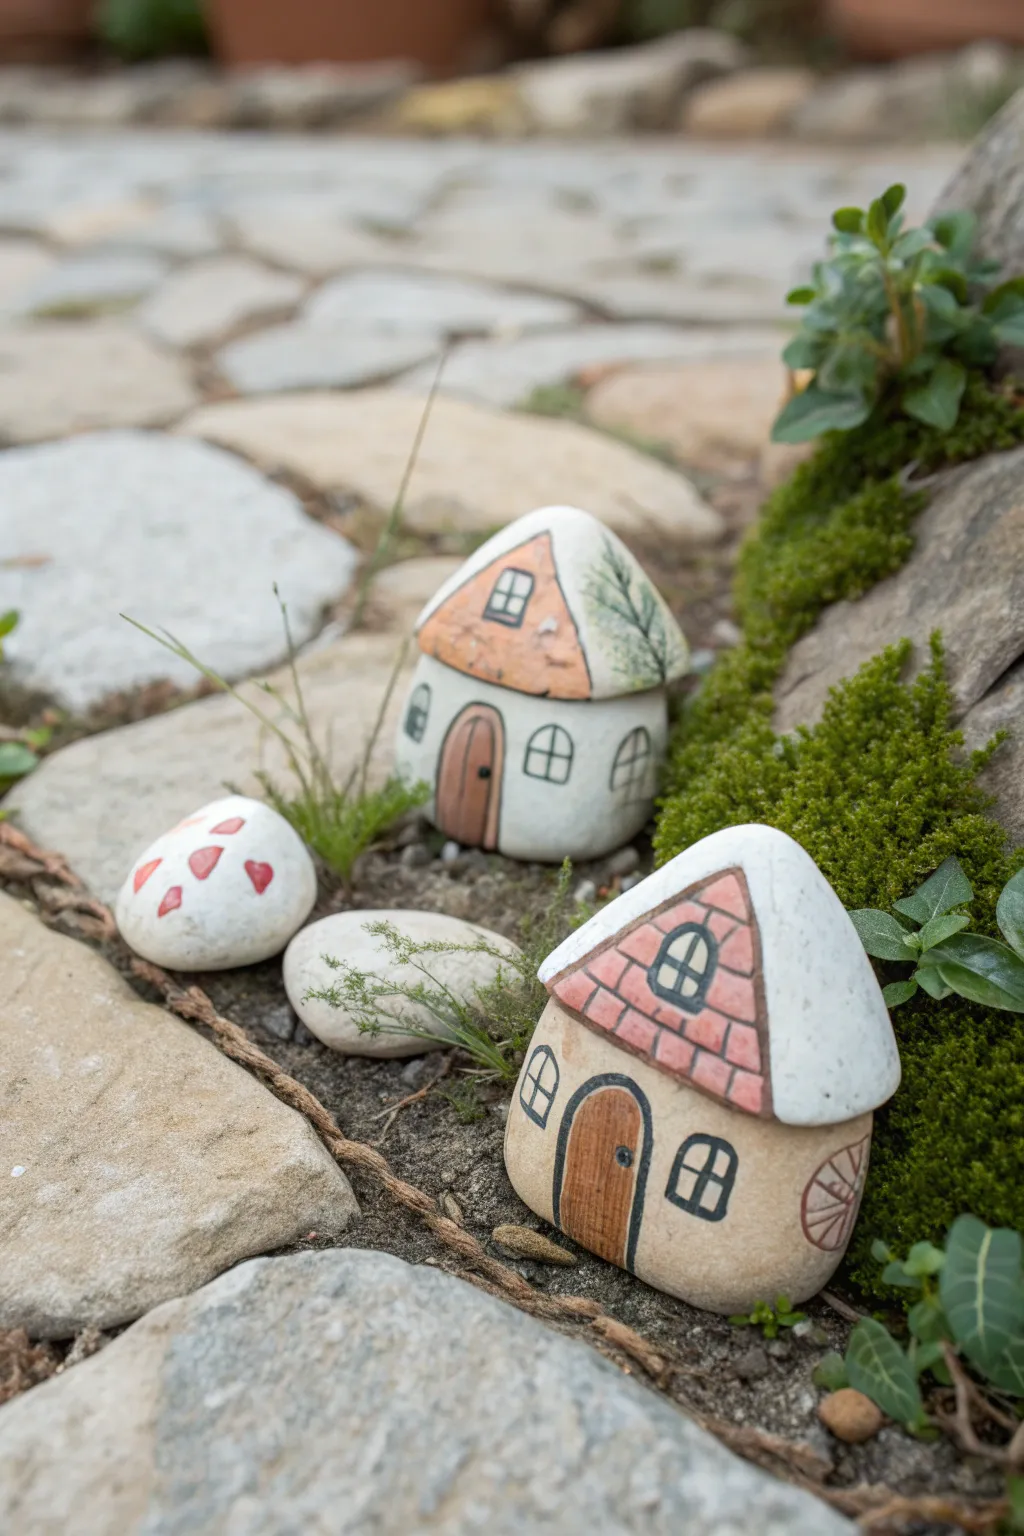
Transform ordinary garden stones into a charming miniature neighborhood with this delightful rock painting project. These tiny cottages, complete with shingled roofs and inviting wooden doors, add a magical touch nestled among moss and pavers.
Step-by-Step Guide
Materials
- Smooth, rounded river rocks (various sizes with flat bottoms preferred)
- Acrylic craft paints (white, beige/cream, terracotta/brick red, brown, black, dark green)
- Fine grit sandpaper (optional)
- Pencil
- Assorted paintbrushes (medium flat brush, small detail brush, fine liner brush)
- Outdoor sealant or varnish (matte or satin finish)
- Water cup and paper towels
Step 1: Preparation and Base Coat
-
Clean the Canvases:
Begin by thoroughly scrubbing your chosen rocks with soap and water to remove any dirt or oils. Let them dry completely, preferably in the sun. -
Smooth the Surface:
If your rocks have rough patches that might interfere with painting fine lines, lightly sand them with fine-grit sandpaper and wipe away the dust. -
Sketch the Design:
Using a pencil, lightly outline the shape of the roof on the top portion of the rock. Draw a curved line separating the roof from the house walls to establish the basic structure. -
Paint the Base Colors:
Fill in the wall section of the rock using a beige or cream acrylic paint. You may need two coats for opaque coverage. -
Base the Roof:
Paint the roof area. For one cottage, keep the roof entirely white to look like heavy thatch or snow; for others, paint a terracotta triangle for the front gable while leaving the sides white.
Natural Texture
Don’t paint the entire rock! Leaving the bottom or back unpainted helps the stone blend seamlessly into the dirt or gravel for a grounded look.
Step 2: Adding Architectural Details
-
Outline the Roof:
Mix a small amount of brown with a drop of black. Using your fine liner brush, outline the triangular gable of the roof to separate it clearly from the white sections. -
Create Shingles:
On the terracotta-colored roof section, use the liner brush and the dark brown mixture to paint a grid pattern. Offset the vertical lines in every other row to create a brick or shingle effect. -
Block in the Doors:
Paint an arch shape at the base of the rock using a warm medium-brown shade. Varnish the shape slightly if you want doors of different heights. -
Add Door Details:
Once the brown door is dry, use your thinnest brush with black paint to outline the arch and draw vertical lines for wood planks. Add a tiny dot for the doorknob.
Shaky Hands?
If painting straight window lines is difficult, use a fine-tip permanent marker instead of a brush. Just ensure the base paint is 100% dry first.
Step 3: Fine Details and Finishing
-
Draw Windows:
paint small arch or square shapes using black paint on the cream walls. Add a cross or grid inside each to represent window panes. -
Add Greenery:
On the side of the roof or near the base, lightly stipple some dark green paint to look like climbing ivy or moss. -
Paint Accessory Rocks:
For the smaller companion rock, paint it white and add tiny red hearts or simple geometric shapes to sprinkle around the village. -
Seal the Artwork:
Allow the paint to cure for at least 24 hours. Ensure every layer is bone dry. -
Apply Protection:
Coat the entire rock with an outdoor-grade varnish. I prefer a matte finish to keep the stones looking natural rather than glossy. -
Let it Set:
Let the varnish dry according to the manufacturer’s instructions before placing the rocks outside. -
Arrange the Scene:
Find a cozy nook in your garden, perhaps near some moss or small pavers, to nestle your new village into its permanent home.
Now you have a durable little neighborhood ready to welcome wonder into your garden path
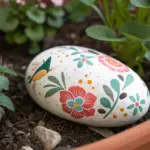
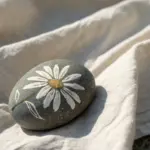
Stone Flower Blooms Arranged on Mulch
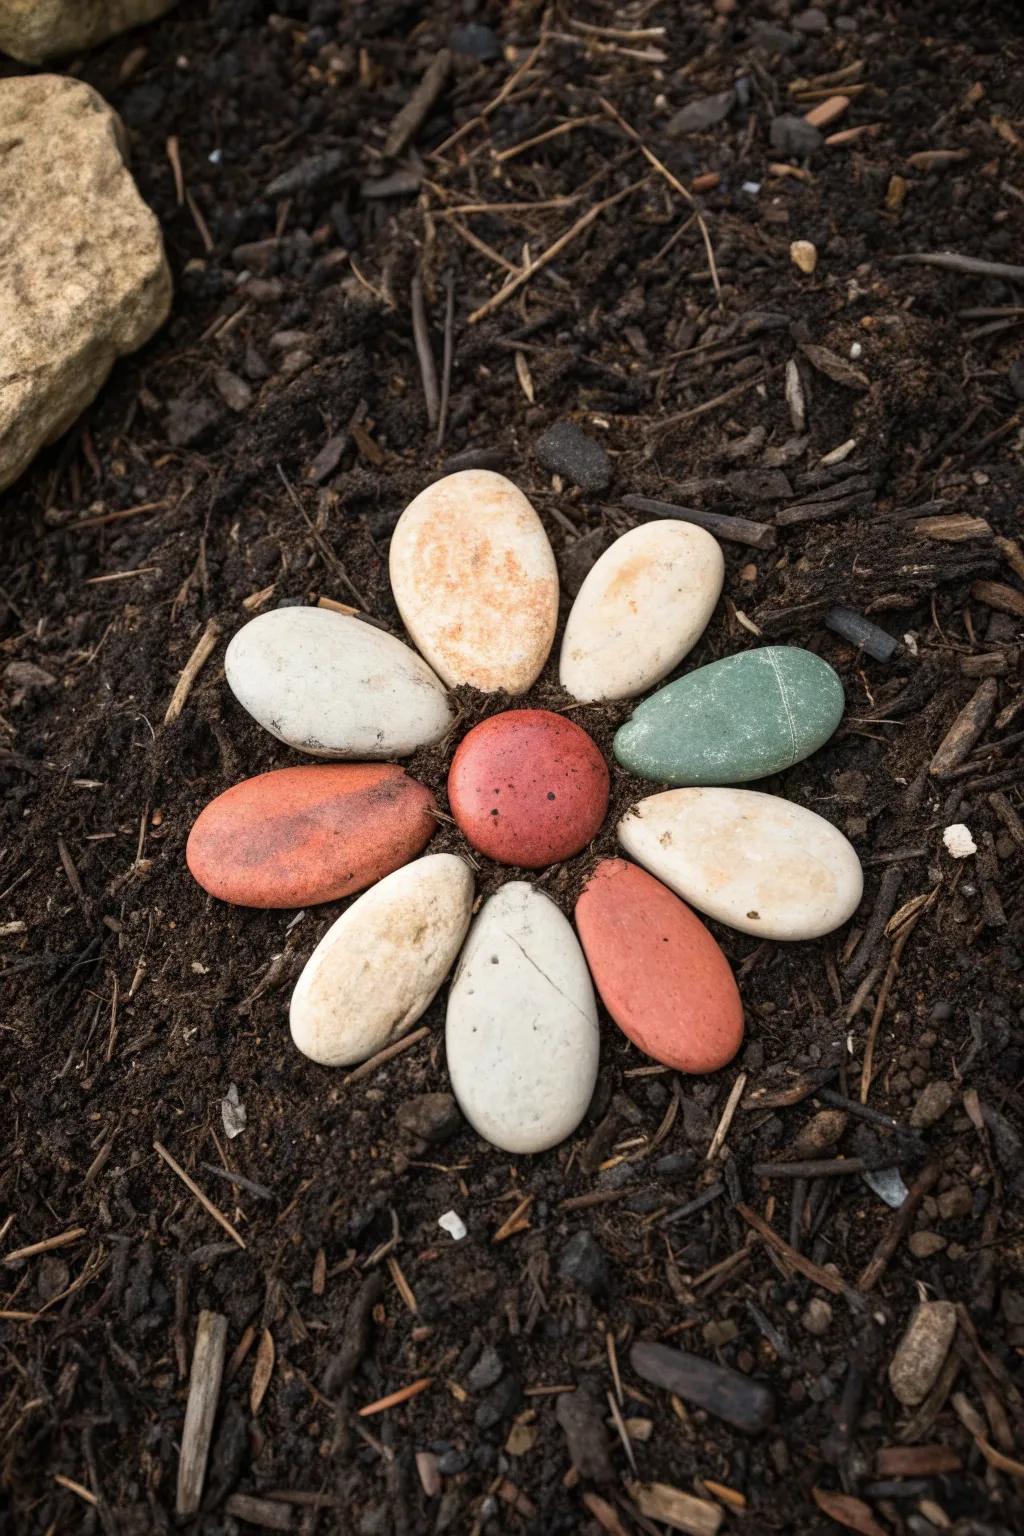
Brighten up bare patches of soil with this cheerful, imperishable bloom made entirely from smooth river rocks. The natural variations in stone shape and color create a lovely, organic mosaic that looks right at home nestled in the mulch.
How-To Guide
Materials
- One medium round stone (center)
- Eight oval or teardrop-shaped stones (petals)
- Acrylic craft paints (red, orange, green, ivory, white)
- Clear weather-resistant sealer (spray or brush-on)
- Paintbrushes (flat shader and small detail brush)
- Soap and water
- Garden trowel or hand rake
Step 1: Preparation and Base Coat
-
Stone selection:
Gather your stones, looking for smooth, flattened river rocks. You’ll need one distinctively round stone for the center and eight slightly elongated stones for the petals. Try to find petals that are roughly the same length for a symmetrical look. -
Cleaning:
Scrub all the stones thoroughly with soap and warm water to remove any dirt or moss. Rinse them well. -
Drying:
Set the stones out in the sun or on a towel and allow them to dry completely. Any trapped moisture underneath the paint will cause it to peel later. -
Priming (optional):
If your stones are very dark, you might want to apply a base coat of white acrylic paint to the top surface. This helps the final colors pop, especially for the lighter petals.
Natural Texture
Don’t aim for perfect opacity. Allowing the stone’s natural pits and grain to show through the paint makes the flower feel more organic and earthy.
Step 2: Painting the Flower Parts
-
Painting the center:
Paint the round center stone a deep, vibrant red or pinkish-red. I find that applying two thin coats gives better coverage than one thick, gloppy coat. -
Creating the green leaf:
Choose one of your petal stones to act as a leaf. paint this one a soft, sage green. -
Accent leaves:
Paint two stones with a terra cotta or burnt orange hue. These add warmth and contrast to the arrangement. -
Natural petals:
Paint the remaining five stones in shades of ivory, cream, or off-white. You can leave some of the natural stone showing through or mix a little brown into your white paint for a textured, organic look. -
Adding texture:
Once the base colors are dry, use a dry brush technique to lightly dab a slightly darker or lighter shade onto the center stone and the orange petals. This mimics the natural texture of a flower head. -
Detailing the green stone:
Using a very fine liner brush and white paint, carefully draw a thin line down the center of your green stone to create a leaf vein. Add a second faint line crossing it if you wish. -
Drying time:
Let all the painted stones sit undisturbed for at least an hour until the paint is dry to the touch. -
Sealing:
Apply a clear, weather-resistant outdoor sealer to the tops and sides of all stones. This is crucial for protecting your art from rain and UV fading.
Glow in the Dark
Mix a little glow-in-the-dark powder into your white paint or topcoat. Your stone flower will charge in the sun and softly illuminate your garden path at night.
Step 3: Garden Assembly
-
Site preparation:
Find a spot in your garden bed where the soil is relatively flat. Clear away any large twigs or debris. -
Smoothing the soil:
Use your hand or a small trowel to pat down the mulch or dirt, creating a level canvas for your artwork. -
Placing the center:
Nestle the red center stone into the soil first. Press it down slightly so it feels anchored and doesn’t wobble. -
Arranging the first layer:
Place the distinctive orange and green stones around the center first. Spacing them out helps balance the colors. -
Information regarding spacing:
Position the stones so they are touching the center stone, radiating outward like sun rays. -
Completing the bloom:
Fill in the remaining gaps with the white and cream stones. Move them around slightly until you are happy with the symmetry. -
Final adjustment:
Once satisfied with the placement, press each petal firmly into the soil so they sit flush with the ground surface.
Step back and enjoy the permanent pop of color this stone arrangement brings to your garden bed

PENCIL GUIDE
Understanding Pencil Grades from H to B
From first sketch to finished drawing — learn pencil grades, line control, and shading techniques.
Explore the Full Guide
Pebble Mosaic Spiral in a Pathway
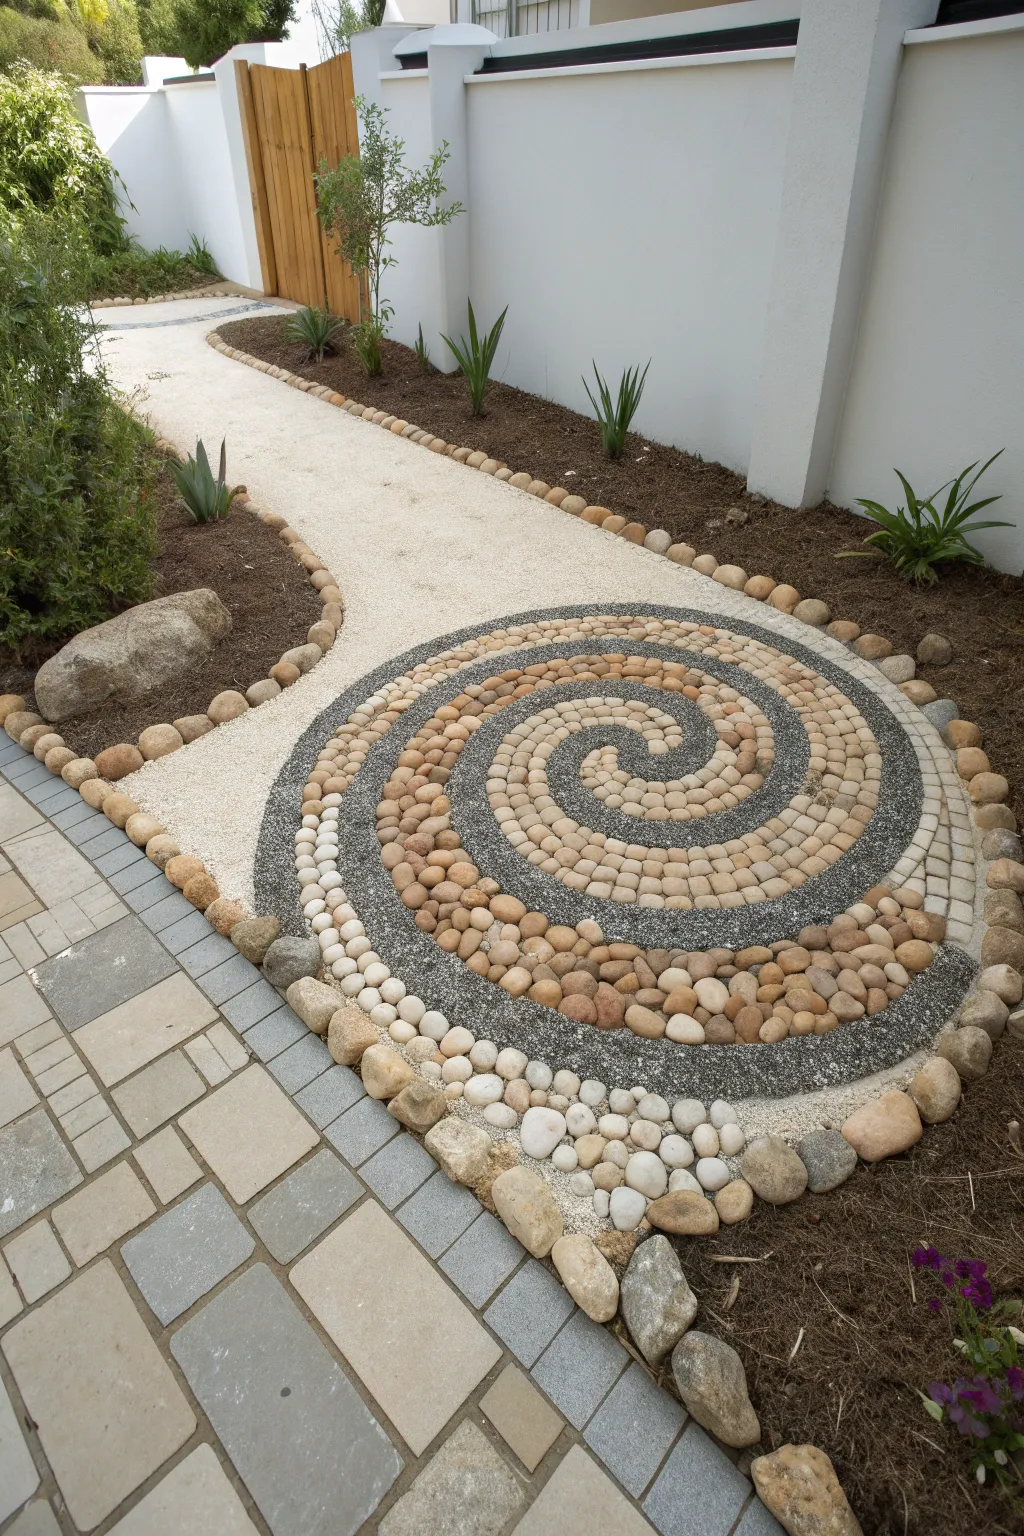
Transform a simple garden walkway into a centerpiece with this mesmerizing spiral pebble mosaic. By combining contrasting textures of smooth river stones and fine dark grit, you’ll create a durable, artistic focal point that guides the eye and the feet.
Step-by-Step Tutorial
Materials
- Dry concrete mix or mortar mix
- Beige/tan smooth river pebbles (sorted for size)
- White or light grey smooth river pebbles
- Dark grey runner grit or crushed basalt
- Larger border rocks (rough and smooth)
- Compacted crushed stone base
- Fine spray nozzle for garden hose
- Trowel
- Rubber mallet
- Plywood or foam board (for kneeling)
- String and stake (for drawing the spiral)
Step 1: Preparation and Layout
-
Prepare the base:
Begin by digging out the area for your spiral to a depth of about 4-5 inches. Ensure the ground is level and fill the bottom 2-3 inches with a crushed stone base, tamping it down firmly to create a stable foundation. -
Define the perimeter:
Arrange the large, rough border rocks along the outer edge of your pathway curves. These will act as the containment frame for your mosaic, so ensure they are seated securely in the soil or base material. -
Set the inner border:
Place a second, tighter ring of medium-sized, smooth round stones just inside your rough outer rocks. This creates a clean frame for the mosaic work. I find dry-fitting these first helps visualize the final shape. -
Add the setting bed:
Pour a 2-inch layer of dry concrete mix (often called a dry-pack method) over your compacted base. Smooth it out with a trowel, but do not add water yet. -
Sketch the spiral:
Using a stick or a trowel tip, highly lightly scratch your double-spiral design directly into the dry concrete dust. You can use a string tied to a center stake to guide your curves if you want geometric perfection, or freehand it for a more organic feel.
Sorting Matters
Before mixing any concrete, sort your pebbles by size and color gradient. Having pre-sorted piles (small-tan, medium-white, etc.) speeds up the laying process significantly.
Step 2: Laying the Mosaic
-
Start the center:
Begin at the very center ‘eye’ of the spiral. Press a cluster of small round stones vertically (on their edge) into the dry mix. Setting them on edge, rather than flat, ensures they lock into the concrete securely. -
Create the light bands:
Working outward from the center, press lines of your beige and tan river pebbles along the spiral paths you drew. Pack them tightly against each other so there are minimal gaps. Use a rubber mallet to gently tap them level. -
Add the white accents:
For the outer tail of the spiral, transition into using slightly larger, whiter pebbles. This gradation in color adds visual depth to the swirling motion. -
Fill the dark voids:
Once your stone spiral lines are set and stable, carefully pour the dark grey runner grit or crushed basalt into the negative spaces between the pebble swirls. Use a small spoon or scoop to keep it tidy. -
Level the surface:
Place a flat board over the section you’ve just completed and tap it with the mallet. This ensures the grit and the pebbles share the exact same surface height, preventing tripping hazards. -
Outer fill:
Fill the remaining space between the spiral mosaic and the rock border with the dark grit, packing it down firmly. For the adjacent path area, pour and smooth your light-colored decorative gravel or decomposed granite.
Step 3: Curing and Clean-up
-
Mist the mosaic:
Using the finest mist setting on your hose nozzle, gently wet the entire mosaic area. You want to saturate the dry concrete mix beneath the stones without washing away the surface grit. -
Wait and repeat:
Let the water soak in for about an hour, then mist heavily again. A slow, deep soak is key to strong concrete. -
Clean the stones:
As the concrete begins to cure but before it’s rock hard, use a damp sponge to wipe any cement film off the tops of the beige pebbles so their color shines through clearly. -
Final cure:
Cover the mosaic with a plastic sheet or damp burlap for 24-48 hours to let it cure slowly. Keep foot traffic off the path for at least three days to ensure the stones don’t shift.
Loose Stones?
If a stone feels loose after the initial cure, don’t panic. Remove it, mix a tiny amount of wet mortar in a cup, place a dollop in the hole, and press the stone back in.
Once fully cured, your unique garden path will be ready to weather the seasons beautifully
Stepping Stones With Simple Painted Patterns
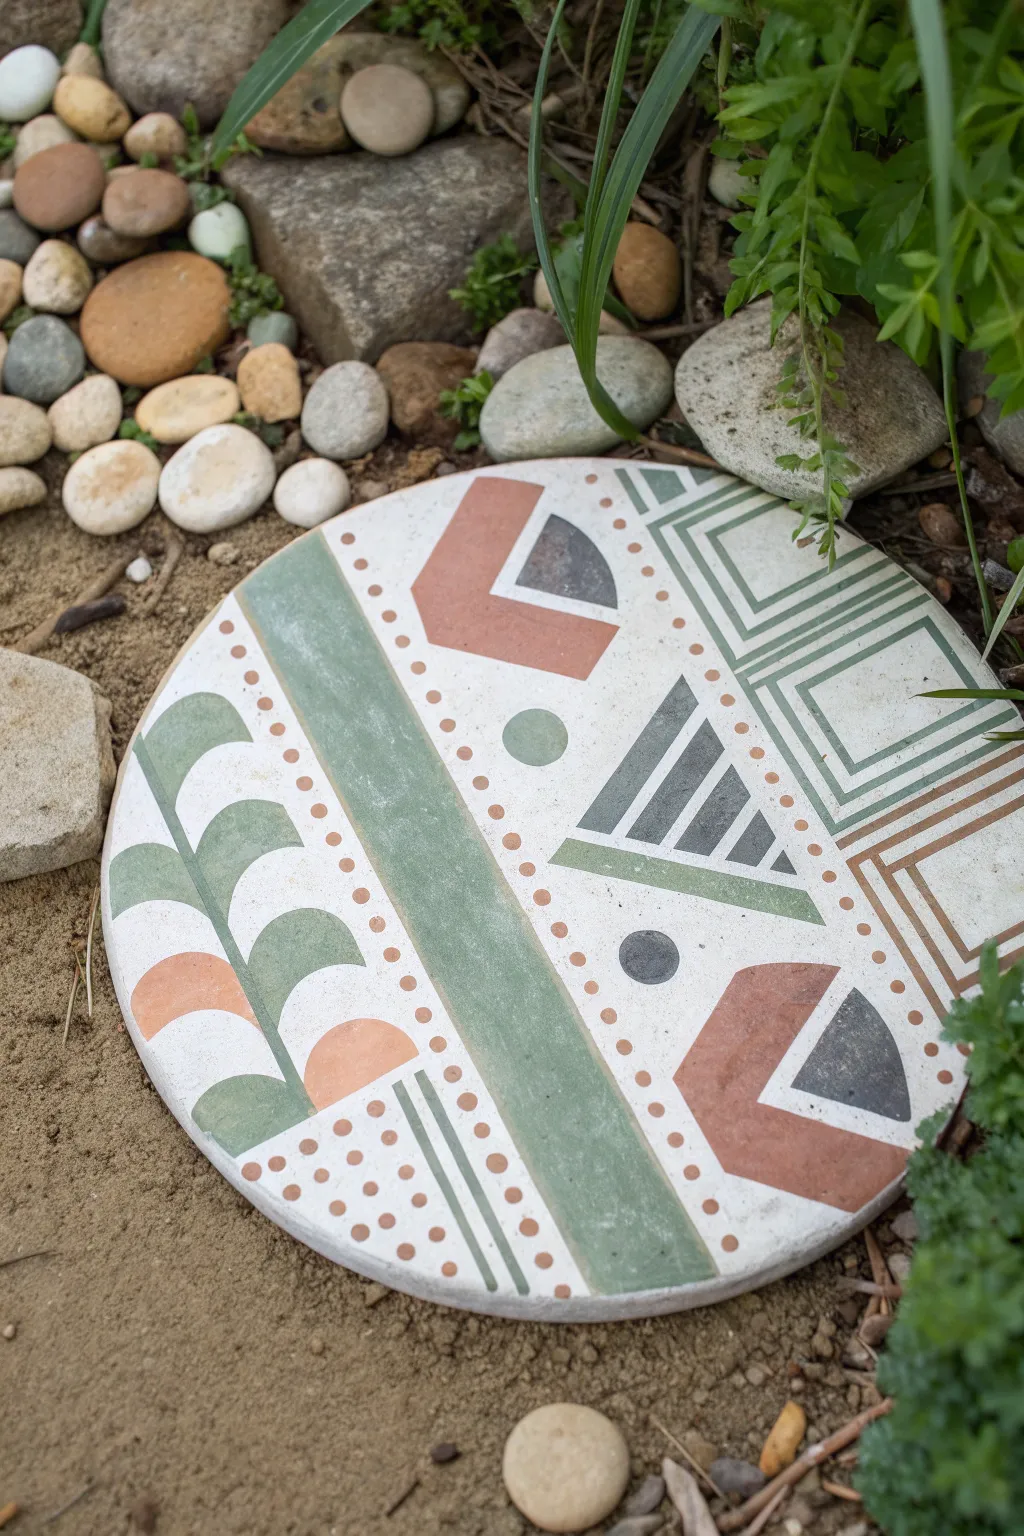
Transform a plain concrete paver into a modern garden accent with this geometric design. Featuring earthy terracotta, sage green, and charcoal tones, this project uses simple shapes and clean lines to create a sophisticated, boho-inspired look for your pathway.
How-To Guide
Materials
- Round concrete stepping stone (12-14 inch diameter)
- Outdoor acrylic patio/porch paints (White/Cream, Sage Green, Terracotta, Charcoal/Dark Grey)
- Assorted painter’s tape (various widths including 1/4 inch and 1 inch)
- Pencil and ruler
- Compass or round object for tracing circles
- Flat paintbrushes (various sizes)
- Detail liner brush
- Dotting tool or back of a paintbrush
- Clear outdoor polyurethane sealer (matte or satin finish)
- Damp cloth for clean up
Step 1: Preparation & Base Coat
-
Clean the surface:
Begin by thoroughly scrubbing your concrete stepping stone with a stiff brush and water to remove any dust, dirt, or moss. Allow it to dry completely in the sun, as moisture trapped inside can ruin the paint later. -
Apply the base color:
Using a wide flat brush, coat the entire top and sides of the stone with your white or cream outdoor paint. This provides a neutral canvas that makes the other colors pop. -
Verify coverage:
Let the first coat dry for about an hour. If the grey concrete is still showing through, apply a second coat of the base color and let it cure fully, preferably overnight, to ensure a rock-hard foundation for your taping.
Bleeding Paint Lines?
If paint seeps under your tape, let it dry completely. Then, use a stiff, damp brush to gently scrub away the error, or paint over it with the base cream color for a clean fix.
Step 2: Mapping the Design
-
Establish the centerline:
Place your ruler across the center of the stone. Lightly mark a wide central band with a pencil; this will become the large green stripe running through the middle. -
Mark the quadrants:
Visualize the stone in sections. Roughly sketch out where your major shapes will go: the leaf motif on the left, the geometric squares on the right, and the abstract triangles and circles in the remaining spaces. -
Tape the main stripe:
Apply two strips of painter’s tape to define the long, central rectangular band. Press the edges of the tape down firmly with your fingertip to prevent paint bleed. -
Paint the center band:
Fill in the taped area with sage green paint. Use a flat brush and stroke away from the tape edge to keep the line crisp. Peel the tape off while the paint is still slightly wet to avoid lifting the dry film.
Sharper Geometric Shapes
For the crispest lines on rough concrete, paint a thin layer of your base cream color over the tape edge first. This seals the gap, so the colorful paint sits perfectly on top.
Step 3: Geometric Sections
-
Create the square corner:
Focus on the upper right quadrant. Use thin 1/4 inch tape to mask off concentric square shapes. Paint the lines sage green and the outer corner details in terracotta. -
Draft the triangle motif:
In the lower right area, use a ruler to draw a large triangle divided into horizontal stripes. Hand-paint alternating stripes of charcoal grey and sage green using a small flat shader brush. -
Add the hexagonal accents:
Sketch the geometric ‘arrow’ shapes (the split hexagons) near the top and bottom. Paint the outer ‘V’ shape in terracotta and the inner triangle in charcoal grey to create depth. -
Paint the leaf measuring:
On the left side of the central band, sketch a simple vine with curved leaves. I find it easiest to paint the stem first in sage green, then add the curved leaf shapes attached to it. -
Detail the leaf colors:
Alternate the colors of the leaves or semicircles on your vine pattern. Use sage green for the majority, but swap in a terracotta semi-circle at the bottom and top for visual balance.
Step 4: Details & Dotwork
-
Add solid circles:
Using a compass or a small bottle cap as a guide, pencil in the small solid circles scattered around the design. Carefully fill these in: use sage green for the larger dots and charcoal for the smaller focal points. -
Create the dotted lines:
Dip a dotting tool or the handle end of a paintbrush into terracotta paint. Create lines of evenly spaced dots bordering the central green band and surrounding the geometric shapes. -
Refine the lines:
Take a step back and look for any shaky edges. Use a liner brush with a tiny amount of your base cream color to touch up and straighten any geometric lines that got messy. -
Seal the stone:
Once the artwork is completely dry (give it at least 24 hours), apply 2-3 coats of clear outdoor polyurethane sealer. This protects your hard work from rain and UV fading.
Place your new art piece in a garden bed or gravel path where it can be admired while keeping your feet dry


Frog and Turtle Rocks Tucked by Water
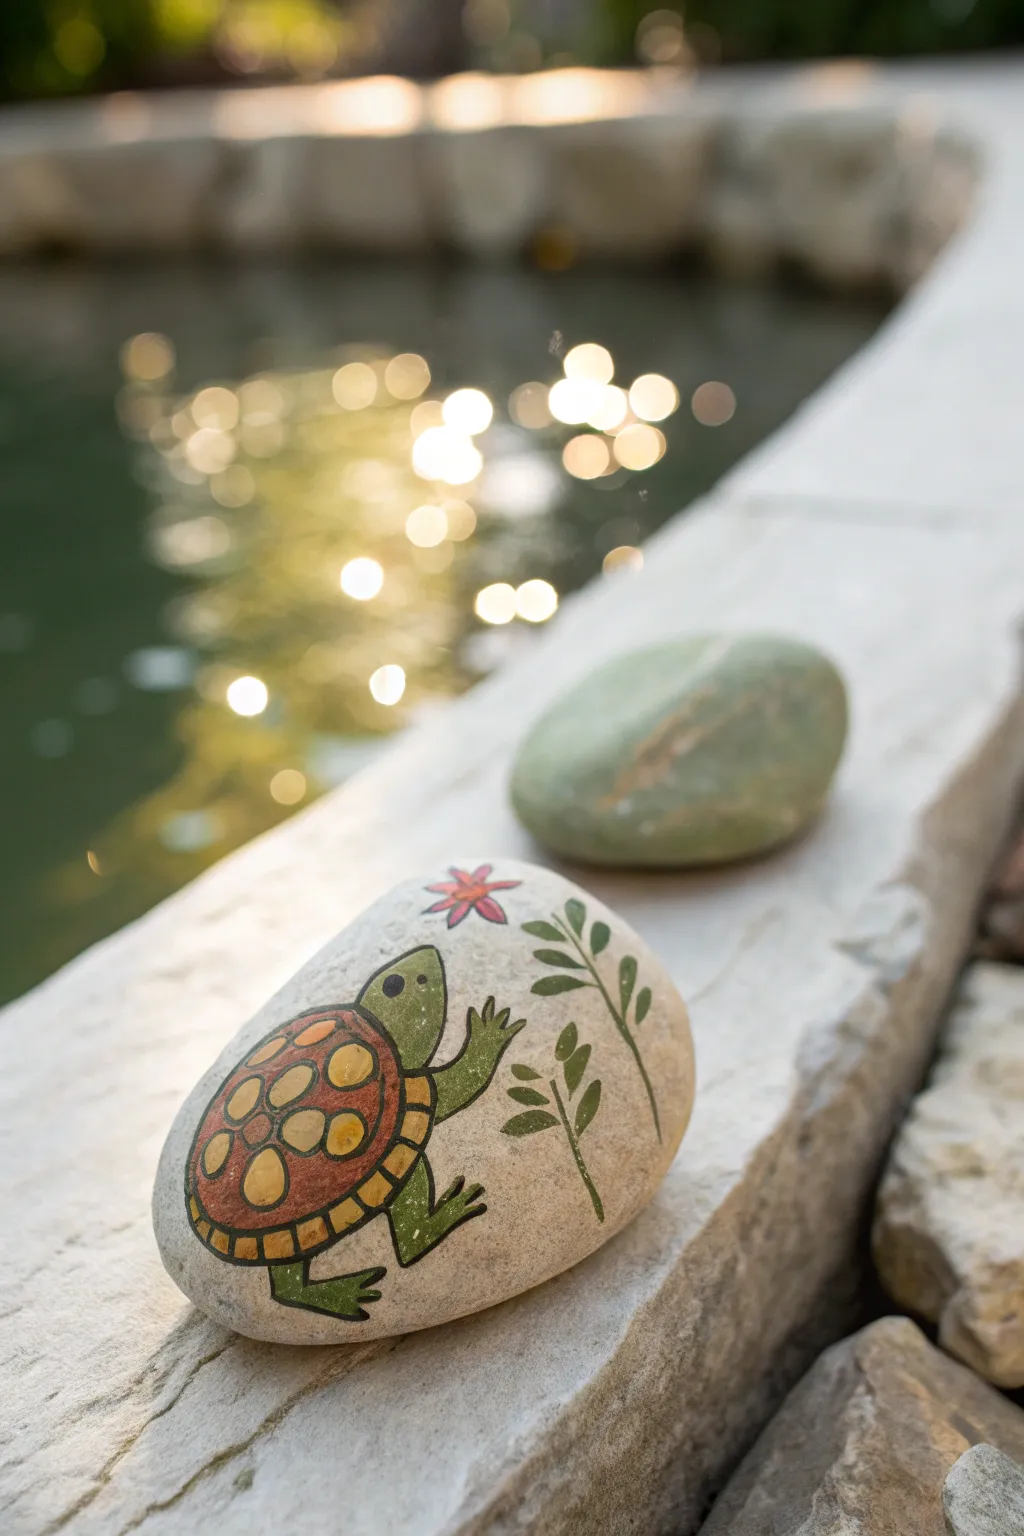
Bring a little slow-moving charm to your garden pond’s edge with this delightful painted turtle. The design features a cheerful turtle with a patterned shell and simple botanical accents, all set against the natural stone background for an organic look.
Step-by-Step
Materials
- Smooth, oval-shaped river rock (clean and dry)
- Pencil for sketching
- Acrylic paints: Olive green, golden yellow, burnt orange (terracotta), black
- Fine-point black permanent marker or paint pen (Posca optional)
- Small round paintbrushes (sizes 0 and 2)
- Outdoor sealant or varnish (satin or matte finish)
Step 1: Preparation and Sketching
-
Stone selection:
Choose a rock that is relatively flat and smooth. A light-colored stone works best here because it allows the negative space to act as the background without needing a base coat. -
Clean the surface:
Wash your rock thoroughly with soap and water to remove any dirt or oils. Let it dry completely in the sun before you begin. -
Placement planning:
Visualize where your turtle will sit. He should be slightly off-center to leave room for the plant details on the right side. -
Initial sketch:
Lightly sketch the outline of the turtle with a pencil. Start with a large oval for the shell, a smaller oval for the head, and four simple legs. Don’t press too hard, as graphite can sometimes smudge into yellow paint.
Step 2: Base Painting
-
Paint the shell base:
Fill in the large oval shell area with your burnt orange or terracotta paint. You might need two thin coats to get solid coverage. -
Add the body color:
Using olive green, paint the head, legs, and the tiny tail. Make the legs look like simple, bent shapes as if he is walking. -
Create the shell rim:
Mix a little yellow into your terracotta paint to lighten it, or use a mustard yellow. Paint a distinct rim around the bottom edge of the shell. -
Paint shell accents:
Once the orange base is dry, use your golden yellow paint to add oval spots on the shell. Place a large one in the center and arrange smaller ones around it in a circle. -
Rim details:
Add small rectangular yellow distinctive marks along the bottom rim of the shell to create a segmented look.
Fixing Smudges
Did your black outline wobble? wait for it to dry completely, then paint over the mistake with the original color (green or orange). Don’t wipe wet paint, it smears
Step 3: botanical Accents
-
Stem structure:
To the right of the turtle, use your olive green paint (thinned slightly with water for better flow) to paint two slender, curving stems rising upward. -
Adding leaves:
Paint small, teardrop-shaped leaves along the stems. Keep them simple and stylized rather than realistic. -
Flower detail:
Above the turtle’s head, paint a simple five-petaled flower shape using a coral or pinkish-red acrylic.
Make it Sparkle
Mix a tiny pinch of ultra-fine gold glitter into your final coat of sealant. It catches the sunlight and mimics the way water glistens on a wet shell
Step 4: Outlining and Finishing
-
Outline the turtle:
This is where the cartoon style comes to life. Using a fine liner brush with black paint or a black paint pen, carefully outline the entire turtle. -
Detail the shell:
Outline the yellow spots on the shell and draw lines separating the segments on the shell’s rim. -
Add the face:
Dot a solid black eye on the turtle’s head and draw a tiny, curved line for a smile. -
Claws and texture:
Add three small toes or claw marks to the end of each foot using your black liner. -
Plant outlines:
I like to leave the plants without heavy outlines to keep them looking delicate, but add a very thin center line to the leaves if you want more definition. -
Seal the stone:
Allow the paint to cure for at least 24 hours. Then, apply two coats of outdoor sealant to protect your art from rain and sun damage.
Place your finished turtle near the water’s edge so he looks ready to take a dip
Rock Border Edging With Color-Blocked Stones
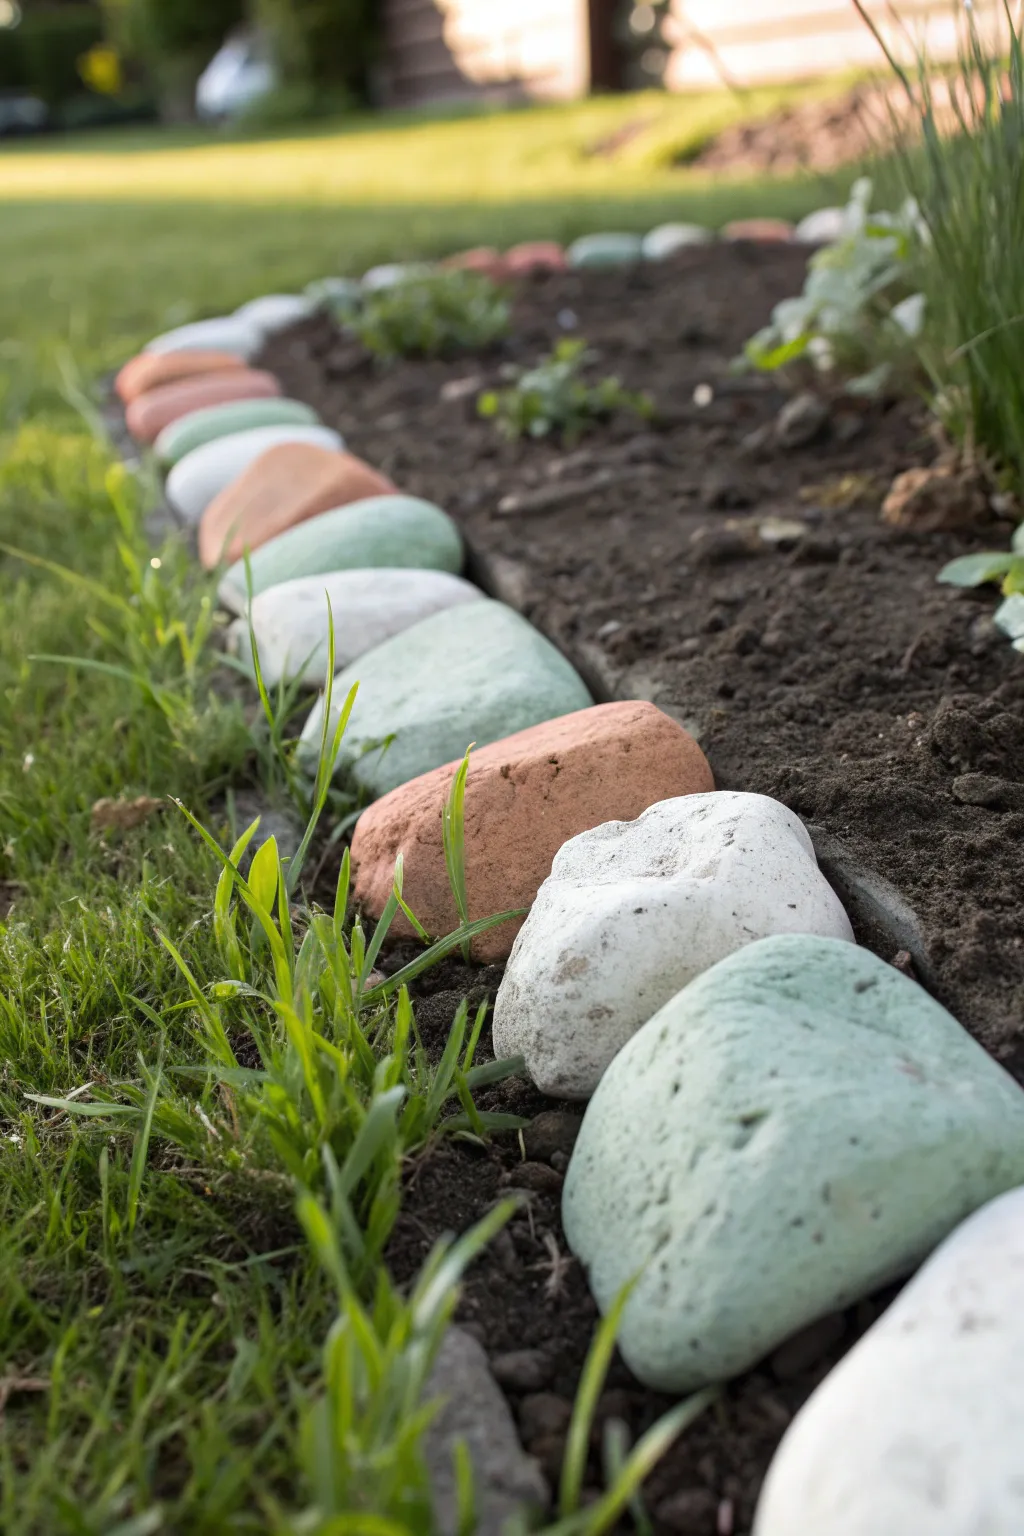
Transform ordinary river rocks into a charming, candy-colored garden border that defines your planting beds with soft hues. By color-blocking smooth stones in terracotta, mint, and white, you create a tidy visual rhythm that separates your lawn from the soil.
Step-by-Step Tutorial
Materials
- Smooth river rocks (roughly fist-sized, approximately 4-6 inches wide)
- Mild dish soap and scrub brush
- Outdoor acrylic craft paints (Terracotta, Mint Green, White)
- To create custom mint: Green, White, and a touch of Yellow paint
- Synthetic flat brushes (1-inch width)
- Clear outdoor sealant spray (matte or satin finish)
- Garden trowel or spade
- Drop cloth or cardboard
- Paper towels
Step 1: Preparation & Cleaning
-
Select your stones:
Choose river rocks that are similar in size and shape. Look for ones with at least one relatively flat or smooth face, which will be the visible top side of your border. -
Wash the rocks:
Fill a bucket with water and a squirt of dish soap. Scrub each rock vigorously with a brush to remove all dirt, moss, and debris. Paint won’t adhere well to dusty surfaces. -
Dry thoroughly:
Lay the rocks out in the sun on a drop cloth. Let them dry completely, flipping them once to ensure no moisture is trapped underneath. This step is crucial for paint longevity.
Paint Peeling?
Peeling usually means moisture was trapped inside. Ensure rocks are bone-dry before painting, and never paint on a humid day. Avoid sealing the very bottom of the rock so moisture can escape into the soil.
Step 2: Painting the Stones
-
Mix your colors:
Prepare your palette. Use straight white for the white stones. For the terracotta, you might need to mix orange with a little brown. For the mint green, mix plenty of white with green and a tiny drop of yellow for that soft pastel look. -
Apply the base coat:
Starting with the white stones, apply a thin, even layer of paint to the top and sides of the rock. You don’t need to paint the very bottom that will sit in the dirt. -
Let it dry:
Allow the first coat to dry for about 20-30 minutes. Acrylics dry quickly outdoors, but humidity can slow this down. -
Paint second coats:
Apply a second coat to your white stones for solid opacity. Then move on to your colored stones—painting the terracotta and mint ones with two coats each as well. -
Check for coverage:
Inspect the stones from different angles. Make sure the paint covers far enough down the sides so that no raw stone shows once they are embedded in the soil. -
Curing time:
Let all the painted rocks cure for at least 24 hours before sealing. This ensures all moisture has evaporated from the paint layers.
Step 3: Sealing & Installation
-
Seal the stones:
Spray the painted sides of the rocks with a clear outdoor sealant. I find that a matte or satin finish looks more natural in a garden setting than high gloss. Apply two light coats. -
Prepare the trench:
While the sealant dries, use a garden trowel to dig a shallow, narrow trench along the edge of your flower bed. It only needs to be an inch or two deep. -
Plan the pattern:
Lay your stones out on the grass next to the trench to finalize your color pattern. A simple repeating sequence like white-mint-white-terracotta works deeply well. -
Place the stones:
Set the stones into the trench one by one. Nestle them close together so there are no large gaps for weeds to poke through. -
Backfill and secure:
Pack soil firmly against the back (garden side) of the stones and press the lawn grass against the front. The stones should feel stable and not wobble when touched. -
Clean up:
Brush off any loose soil that got on the painted tops during installation. A soft, dry paintbrush works perfectly for this final touch-up.
Glow Up Idea
Mix glow-in-the-dark powder into your white paint or add a final coat of glow-in-the-dark glaze. Your garden border will charge in the sun all day and emit a soft, magical luminescence at night.
Now you have a neat, colorful boundary that highlights your garden beds all season long
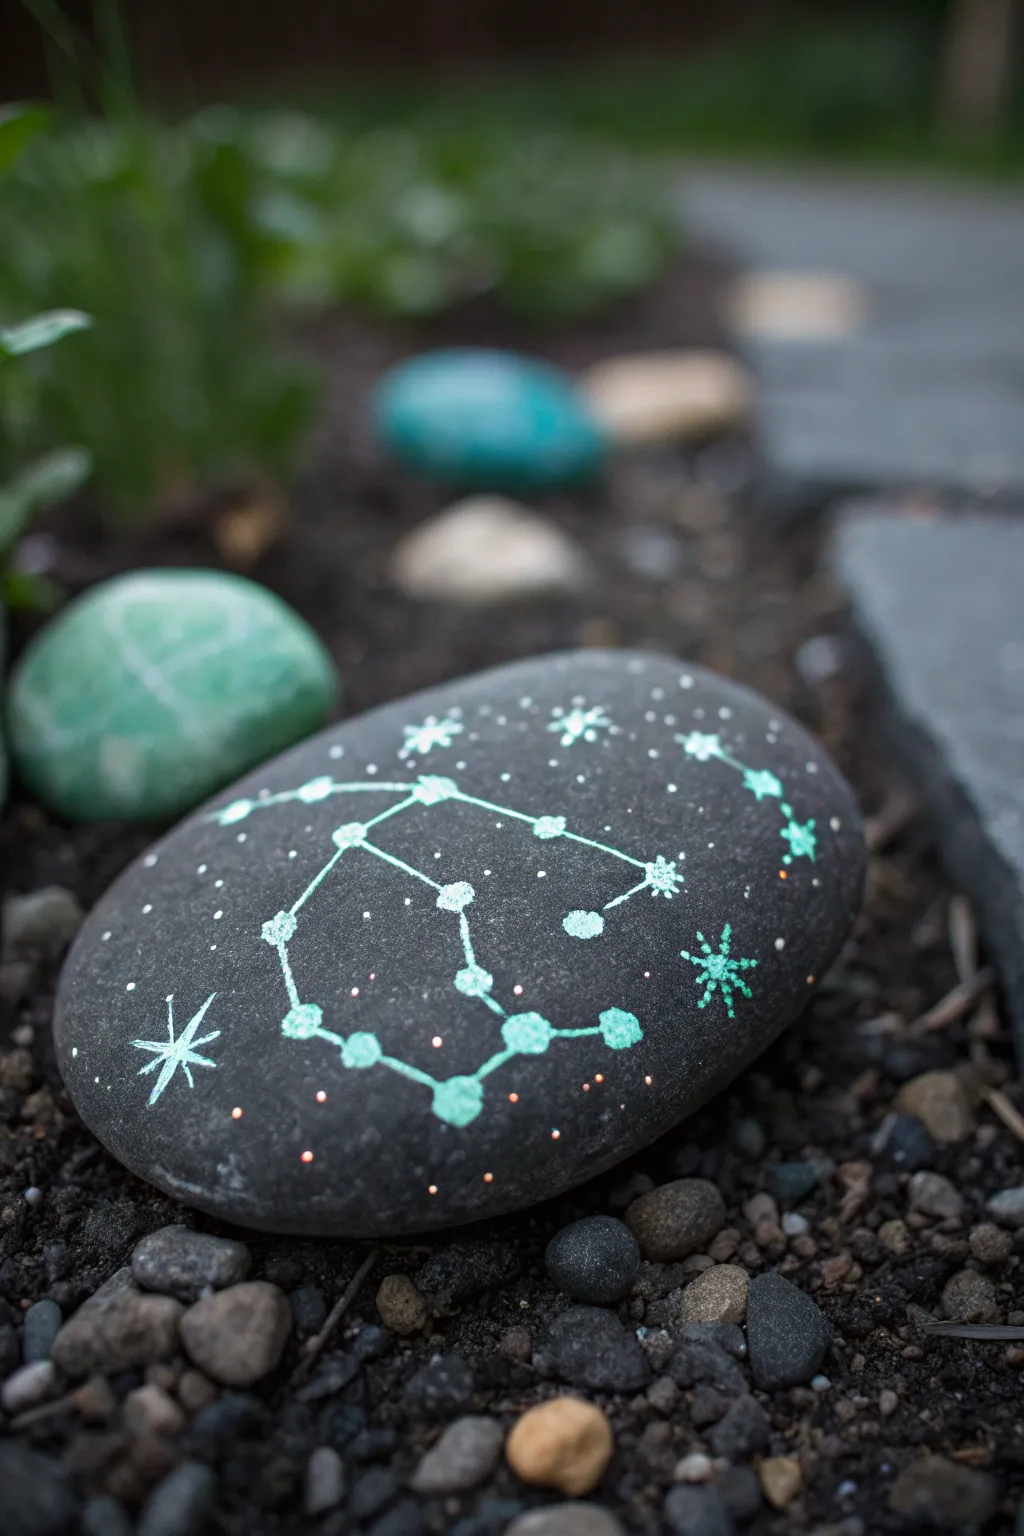
Glow-In-The-Dark Constellation Rock Trail

Transform ordinary garden pebbles into a starlit galaxy with this simple yet enchanting project that reveals its magic after sunset. By painting interconnected constellations using glow-in-the-dark pigment, you can create a trail that guides visitors through your garden with a soft, ethereal light.
Detailed Instructions
Materials
- Large, smooth river rock (dark grey or black works best)
- Glow-in-the-dark acrylic paint (aqua or green tint)
- Fine-grit sandpaper (optional)
- White pencil or chalk
- Soap and water
- Small round paintbrush (size 0 or 1)
- Dotting tool or toothpick
- Outdoor sealer spray (clear matte or satin)
Step 1: Preparation & Planning
-
Select the perfect stone:
Choose a rock with a flat, smooth surface. Darker rocks provide better contrast for the glow paint, making the design pop even in daylight. -
Clean the surface:
Wash the rock thoroughly with soap and water to remove any dirt or moss. Scrub gently to ensure a clean canvas, then let it dry completely in the sun. -
Prep the texture:
If your rock feels too slick or polished, lightly scuff the surface with fine-grit sandpaper. This helps the paint adhere better and last longer outdoors. -
Design your constellation:
Sketch your chosen star pattern lightly onto the stone using a white pencil or chalk. You can look up real constellations like Gemini (shown here) or invent your own celestial shapes.
Supercharge the Glow
Paint a base layer of white acrylic under your glow paint. The white creates a reflective background that makes the phosphorescent pigment appear twice as bright.
Step 2: Painting the Stars
-
Establish the main stars:
Dip your dotting tool or the back of a paintbrush into the glow-in-the-dark paint. Press gently onto the main points of your sketched constellation to create solid, round dots. -
Connect the dots:
Using a fine liner brush (size 0), carefully draw thin lines connecting the star points. Keep your hand steady and reload the brush often to maintain a consistent line thickness. -
Add first layer drying time:
Glow paint is often translucent. Allow this first layer to dry for about 15-20 minutes until it is no longer tacky to the touch. -
Layer for brightness:
Apply a second layer of paint directly over your initial dots and lines. I find that building up 3-4 thin coats creates a much stronger glow than one thick, gloopy layer. -
Create starbursts:
Once the main structure is dry, paint a few decorative 8-point stars around the constellation. Draw a simple cross, then add a smaller ‘X’ through the center.
Step 3: Detaling & Sealing
-
Add background dust:
Dip a toothbrush or stiff brush into the paint and flick it lightly to create a spray of tiny ‘star dust’ dots around the main design. -
Paint scattered stars:
Use a toothpick to place tiny, varying-sized dots randomly in the empty black spaces, mimicking distant stars in the galaxy. -
Charge and test:
Before sealing, place the rock under a bright lamp for a few minutes, then take it into a pitch-black room to check your coverage. Touch up any faint spots now. -
Final dry:
Let the rock sit undisturbed for at least 24 hours to ensure the acrylic paint cures completely. -
Seal for protection:
Spray the rock with a clear, outdoor-rated sealer to protect against rain and UV fading. Apply two light coats rather than one heavy one. -
Placement:
Position your finished rock in a spot that receives direct sunlight during the day so it can charge up fully for its nightly show.
Fixing Wobbly Lines
If a line goes astray, don’t wipe it! Let it dry completely, then gently scrape the mistake off with a craft knife or paint over it with black acrylic.
Place your finished constellations along a walkway to create a magical guide that appears as soon as the sun goes down


Have a question or want to share your own experience? I'd love to hear from you in the comments below!