Folded paper drawings are my favorite kind of art magic—one simple sketch turns into a full-on surprise the moment you open the fold. If you love playful reveals, visual jokes, and those satisfying “before and after” transformations, these folded paper drawing ideas will keep your sketchbook busy.
Cute Cat Becomes Roaring Saber-Tooth
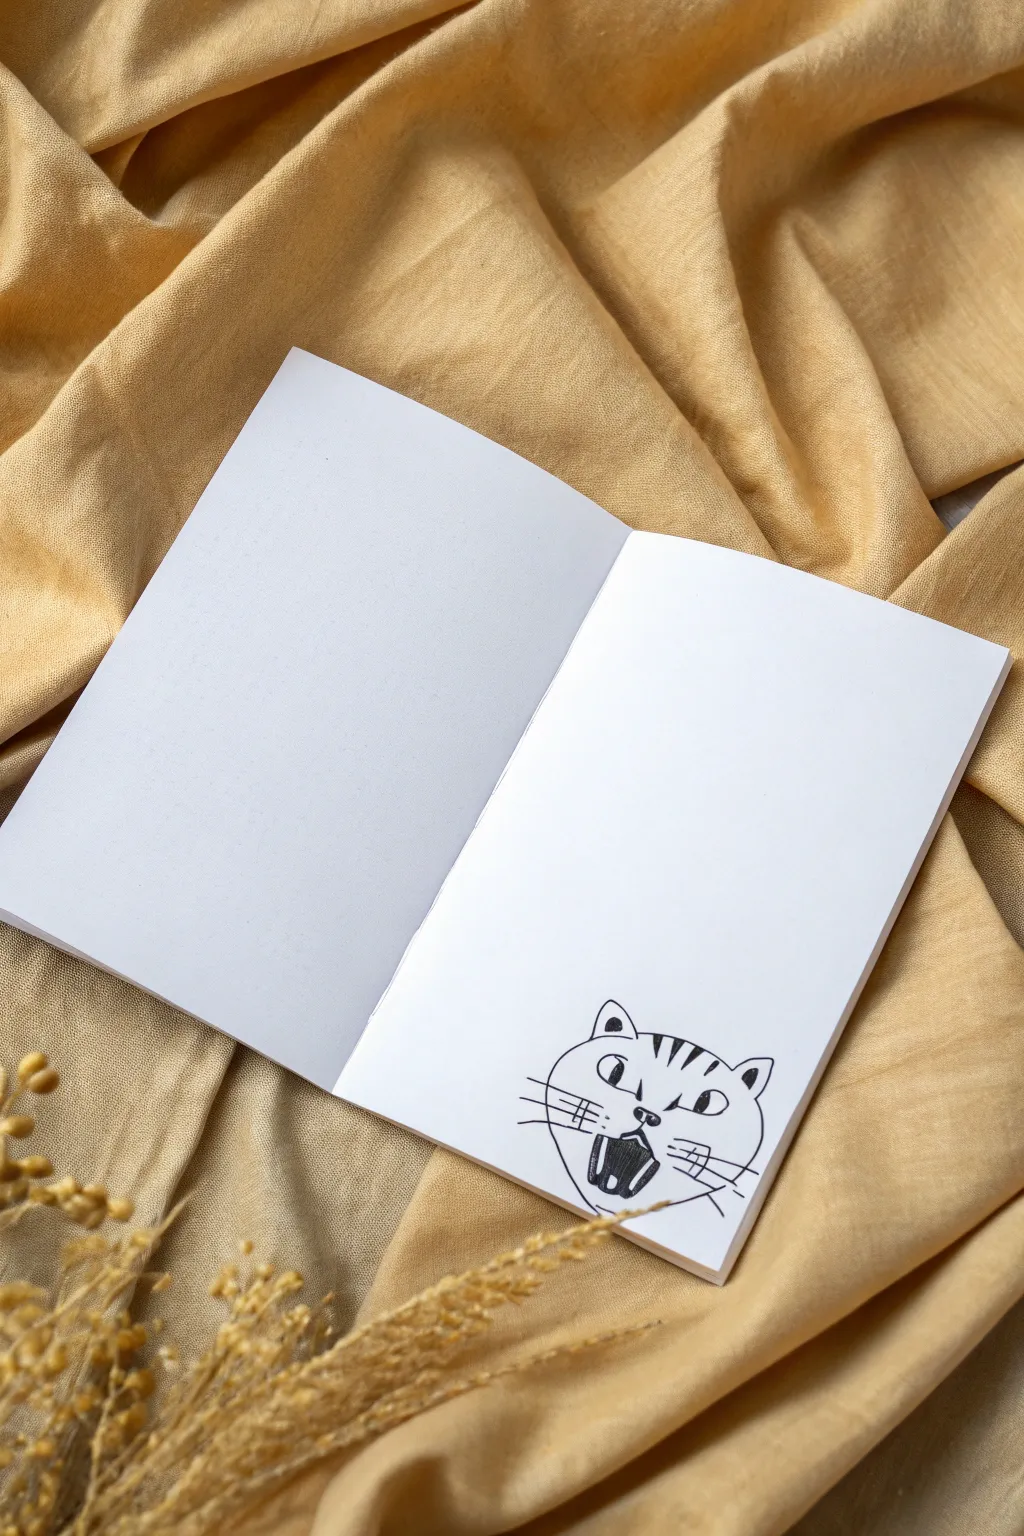
This clever optical illusion starts as a simple, innocent cat face when the paper is folded, but reveals a hilarious, roaring expression when opened up. Using just a single sheet of paper and a black marker, you can create an interactive drawing that delights anyone who unfolds it.
How-To Guide
Materials
- White variety paper or sketchbook page
- Black fine liner pen (0.5mm)
- Black brush pen or thick marker
- Pencil (HB or 2B)
- Eraser
- Ruler (optional)
Step 1: Preparing the Fold
-
Establish the paper size:
Start with a rectangular piece of white paper. A standard A5 or A4 sheet works perfectly, or you can use a double-page spread in a sketchbook as shown in the inspiration photo. -
Create the central fold:
Fold the paper in half horizontally to create a booklet shape if using a single sheet. If you are working within a sketchbook, simply open it to a fresh two-page spread. -
Make the surprise pleat:
This is the crucial step for the trick. Take the top layer of your page (or the right-hand page) and fold the bottom edge upward so it meets the top edge. Crease it sharply. Then, fold that same flap downward again so the edges align perfectly. You should now have a hidden section of paper tucked away inside a pleat.
Fixing Alignment Issues
If your lines don’t meet perfectly when folded, thicken the outline at the seam. This slight boldness hides minor misalignments and helps bridge the gap visually.
Step 2: Sketching the Closed Cat
-
Draft the head shape:
With the paper folded shut (hiding the middle section), use your pencil to lightly sketch a rounded oval shape for the cat’s head. Draw the top half on the upper fold and the bottom half on the lower section, bridging across the seam. -
Add the ears:
Draw two triangular ears on top of the head outline. Keep them relatively small and upright for a cute appearance. -
Position the facial features:
Lightly mark where the eyes and nose will go. Place the eyes on the top section of the fold and the nose/mouth area right near the crease line where the paper splits. -
Draw the closed mouth:
Sketch a small, simple mouth right at the seam intersection. It should look like a normal, calm cat face when the paper is folded in this position.
Step 3: Creating the Roaring Reveal
-
Unfold the paper:
Gently pull the pleat open to reveal the blank space between your top and bottom head sections. You now have a very long, stretched-out head shape. -
Connect the sides:
Draw vertical lines connecting the outer cheeks of the top section down to the bottom section. This elongates the face and creates the space for the giant mouth. -
Draft the open mouth:
Inside this new elongated space, sketch a massive, wide-open mouth shape. It should take up almost the entire hidden area to maximize the surprise effect. -
Add teeth and tongue:
Draw sharp upper and lower teeth (or saber-tooth fangs for drama) and a curved tongue at the bottom of the mouth cavity.
Try a New Creature
Use this same folding technique to make a fish that eats a smaller fish, or a gift box that opens to reveal a puppy. The mechanic works for anything that opens vertically.
Step 4: Inking and Details
-
Outline the main features:
Switch to your fine liner pen. Trace over your pencil lines for the head shape, ears, and facial outline. Keep your hand steady for clean, crisp lines. -
Detail the eyes:
Draw the pupils. I usually like to make them look slightly to the side or cross-eyed for a sillier expression. Leave a tiny white dot in each pupil for a highlight. -
Add texture stripes:
Draw small, triangular tabby stripes on the cat’s forehead and cheeks towards the ears. Fill them in with solid black. -
Draw the whiskers:
Add three long, swift whiskers on each cheek. Ensure they cross over the lines of the face slightly for a natural look. -
Ink the mouth interior:
Trace the teeth and tongue carefully. Use your thicker marker or brush pen to fill in the dark empty space of the mouth around the teeth and tongue. This high contrast makes the mouth pop. -
Erase pencil marks:
Wait until the ink is completely dry to avoid smudging. Then, gently erase all underlying pencil sketches to clean up the artwork. -
Refine the fold:
Re-crease your folds firmly so the paper snaps back into the ‘closed’ position easily. Test the opening mechanism a few times to ensure the alignment is smoothly transitioning from cute to fierce.
Fold it up and get ready to surprise your friends with your transforming art


Smiling Frog With A Giant Tongue Reveal
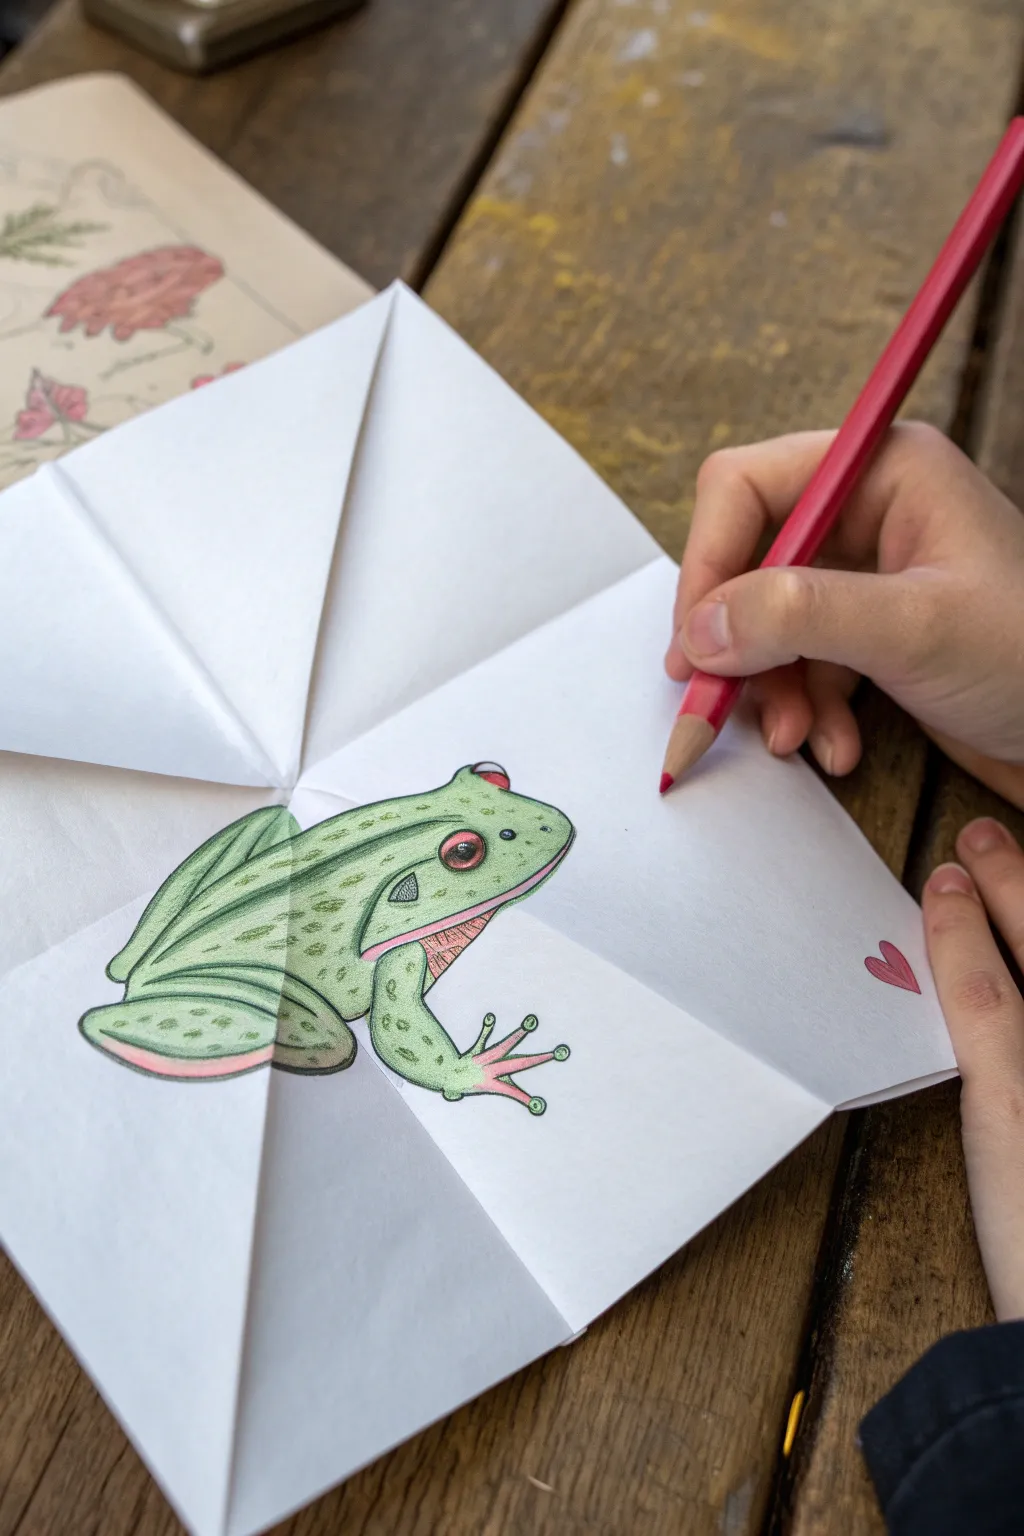
This clever optical illusion creates a resting frog that reveals a hidden surprise when unfolded. By using precise folds to hide the middle section of your drawing, you can transform a compact little amphibian into a stretched-out character with a secret.
Detailed Instructions
Materials
- A4 or Letter-sized white construction paper or cardstock
- Pencil (HB or H)
- Eraser
- Fine-liner black pen or marker
- Colored pencils (Green, Pink, Red, Dark Green)
- Ruler (optional)
Step 1: The Folding Mechanism
-
Prepare your canvas:
Start with a standard rectangular sheet of white paper. While the image shows a square-ish finished look, beginning with a rectangle offers more room for the surprise section inside. -
Create the first fold:
Fold the top half of the paper down towards the bottom edge, but don’t align the edges perfectly. You want the fold to land hidden somewhere in the top third of the page. -
Create the return fold:
Take the edge you just folded down and fold it back up, creating a ‘Z’ shape or accordion pleat. The folded edge should sit roughly in the middle of your paper space. -
Secure the paper:
Press these creases firmly flat. This folded state is where you will draw the ‘closed’ version of your frog.
Uneven Lines?
If your drawing doesn’t line up perfectly when folded, gently re-crease the paper slightly higher or lower to align the illustration segments.
Step 2: Sketching the Frog
-
Outline the head:
On the top flap of the fold, lightly sketch the frog’s head, including big, round eyes and the top half of the body. Make sure the line for the upper jaw runs exactly along the folded edge. -
Draw the lower body:
On the paper directly beneath the fold, sketch the lower jaw and the frog’s crouching legs. The entire frog should look complete and connected when the paper is folded shut. -
Open the reveal:
Gently unfold the paper so it lies completely flat. You will now see a large blank gap between the head you drew on the top section and the legs on the bottom section. -
Connect the lines:
Draw two long vertical lines connecting the sides of the head to the body below. This creates an absurdly long torso for the reveal. -
Add the mouth interior:
Inside this new hidden space, draw the inside of the mouth details. You can add a long, swirling tongue or even a fly being caught.
Step 3: Coloring and Details
-
Inking lines:
Go over your pencil sketches with a black fine-liner pen. Be careful when crossing the fold lines; ink sometimes bleeds or skips in the creases. -
Base colors:
Using a light green colored pencil, fill in the skin of the frog. Use smooth, circular strokes for an even finish. -
Adding texture:
With a darker green pencil, add spots and mottling to the frog’s back and legs to give it a realistic amphibian texture. -
Shading for volume:
Add shadows under the legs and along the belly curve using the dark green or a touch of gray to make the drawing pop off the page. -
Coloring the eyes:
Fill the eyes with a reddish-brown hue and use black for the pupils, leaving a tiny white circle for a highlight. -
Finishing touches:
Color the throat area and the pads of the feet with a soft pink. I usually add a small heart symbol in the corner just like the reference photo for a sweet final touch.
Make It Pop
Draw a small fly or insect buzzing in the very center of the unfolded section so the frog appears to be catching it when opened.
Fold it back up and hand it to a friend to discover the hidden surprise inside

Sweet Ladybug Opens Into Wing Spread
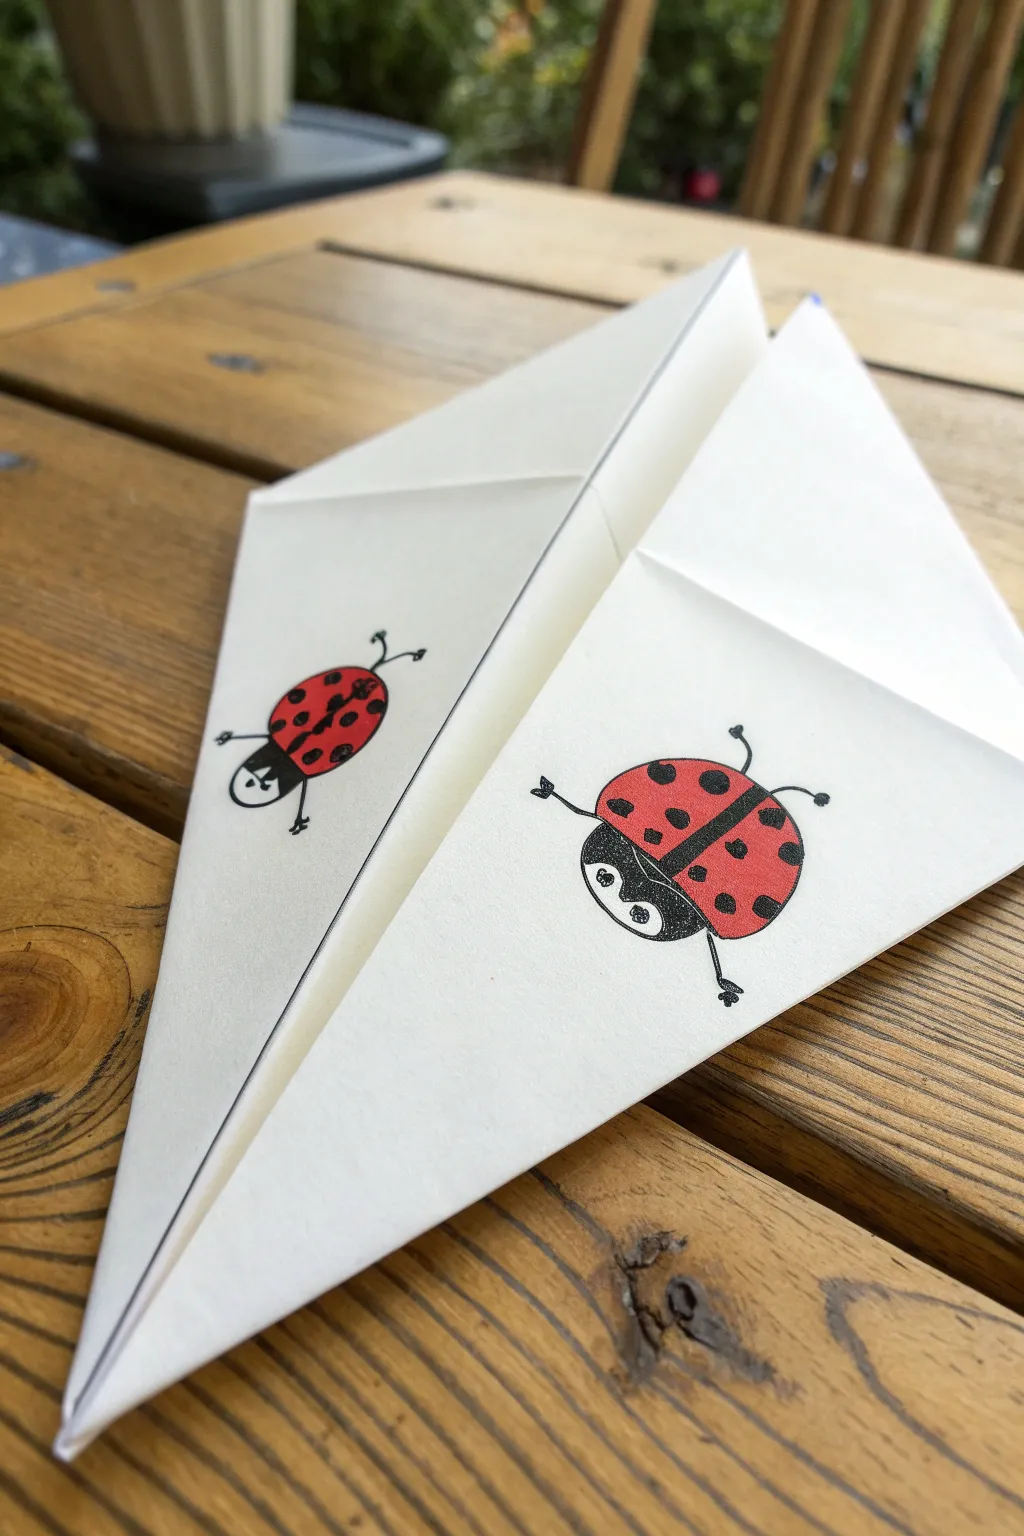
Create a delightful surprise with this cleverly folded drawing that transforms a resting ladybug into one ready for flight. This interactive paper craft uses a simple accordion-style fold to hide a secret middle section until you pull it open.
Step-by-Step Tutorial
Materials
- A4 or Letter-sized white paper
- Black fine-liner or marker
- Red colored pencil or marker
- Ruler (optional)
- Pencil for sketching
- Eraser
Step 1: Preparing the Fold
-
Initial vertical fold:
Start with your rectangular sheet of paper in a portrait orientation. Fold the paper in half vertically, bringing the top edge down to meet the bottom edge. -
Creating the flap:
Take the top layer of the paper (the edge you just brought down) and fold it back upwards so the edge meets the top fold crease. This creates an accordion or ‘Z’ fold. -
Sharpen creases:
Run your fingernail or a ruler along all the creases to ensure the fold lays totally flat. It is crucial that the paper stays closed while you do the initial drawing.
Step 2: Drawing the Closed Ladybug
-
Outline the body:
With the paper folded shut, draw a large oval shape. Position it so the top half of the oval is above the fold line and the bottom half is below it. -
Add the head:
On the bottom half of the oval, draw a semicircle for the ladybug’s head, filling in the dark area but leaving two small circles white for the eyes. -
Draw the center line:
Draw a straight line down the center of the ladybug’s back to separate the wings, stopping exactly at the fold line. -
Add spots and legs:
Draw several circular spots on the wings. Add tiny stick legs poking out from the sides—two pointing forward near the head and two pointing backward. -
Color the closed version:
Use your red marker or pencil to color the wings of this compact ladybug, being careful not to color over the black spots.
Keep it seamless
When coloring the red body, overlap your strokes slightly across the fold line while the paper is open. This prevents white gaps from showing when you refold it.
Step 3: Revealing the Transformation
-
Open the fold:
Gently pull the paper open so it is flat again. You will see the top half of your ladybug separated from the bottom half by a large blank space in the middle. -
Connect the body lines:
Draw straight vertical lines connecting the outer edges of the top oval to the bottom oval, creating an elongated body shape. -
Connect the center line:
Extend the center line from the top section all the way down to meet the head section. -
Add hidden spots:
In the newly revealed middle section, draw more black spots to fill the empty red space. -
Draw the spread wings:
This is the fun part: Sketch large, curved wing shapes extending outward from the middle section, as if the hard shell has lifted to reveal delicate flying wings underneath. -
Add extra legs:
If I feel the body looks too long, I sometimes add an extra set of legs in the middle section to balance it out. -
Color the expansion:
Color the rest of the elongated red shell. For the inner flying wings, you can leave them white or use a very light blue to suggest transparency.
Make it a card
Write ‘Happy Birthday’ or a secret message inside the hidden middle section. The message will only be revealed when the recipient pulls the card open.
Fold it back up and surprise your friends by revealing the ladybug’s hidden wings


Shy Snake Turns Into Wide-Fanged Strike
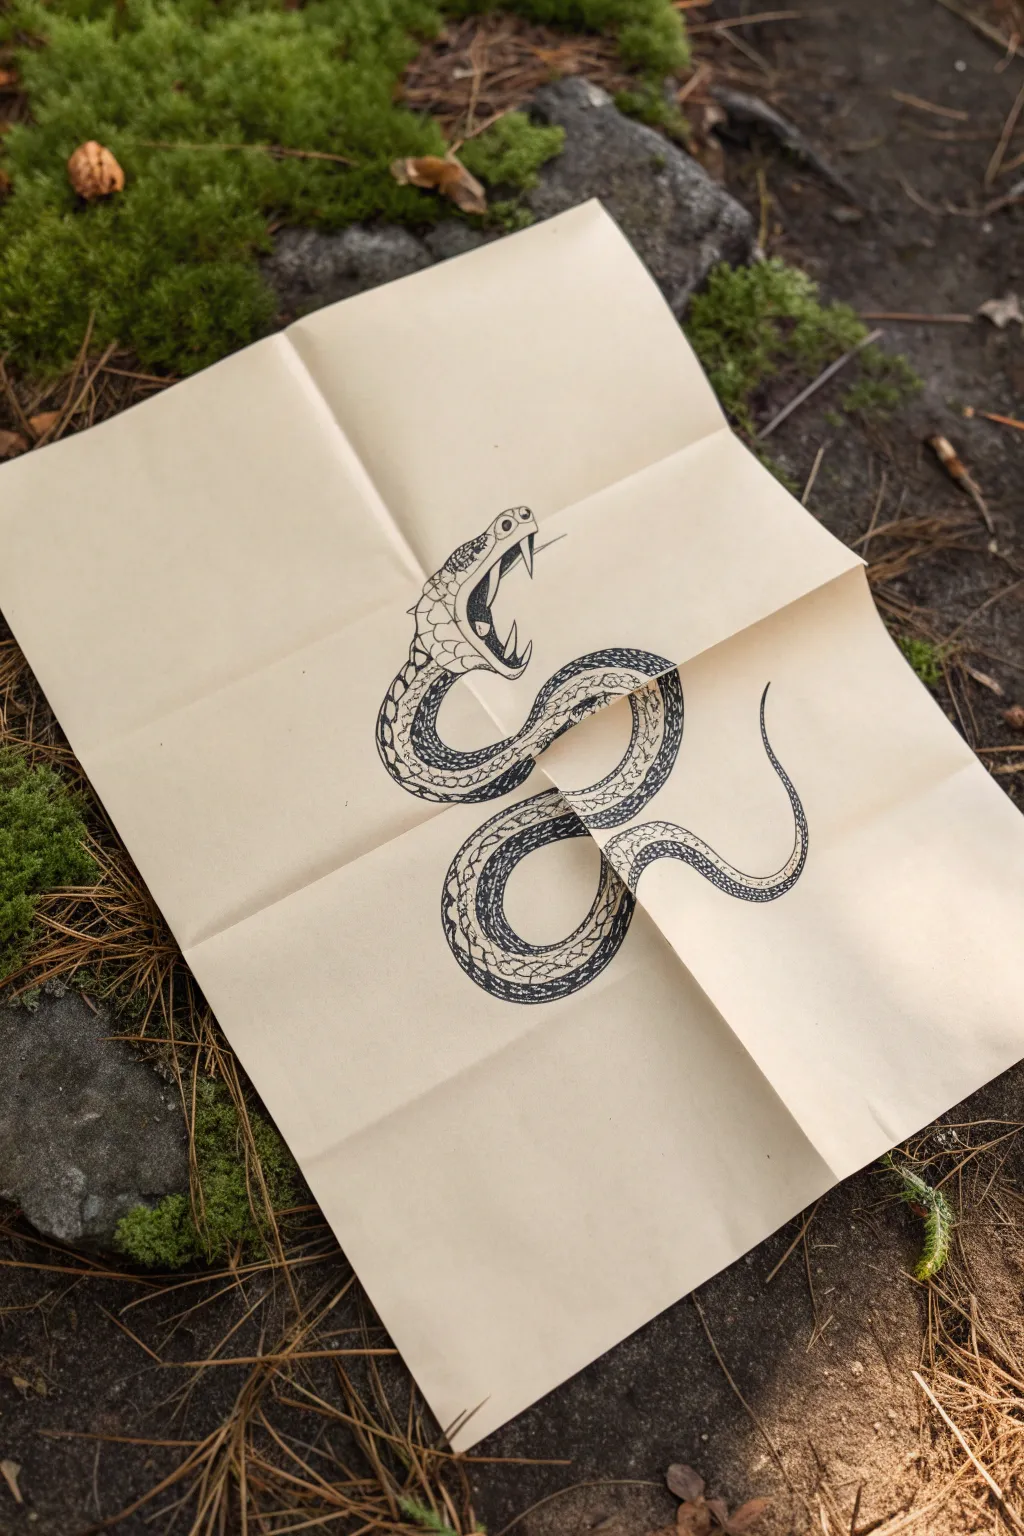
This clever optical illusion relies on a simple tri-fold mechanism to transform a seemingly innocent snake into a long, striking predator. Using just a sheet of cream paper and ink, you’ll create an interactive drawing that delights anyone who unfolds it.
How-To Guide
Materials
- Cream or off-white A4 paper (heavyweight sketch paper preferred)
- Pencil (HB or 2B)
- Eraser
- Fine liner pen (0.3mm or 0.5mm, black)
- Thicker marker (0.8mm or small brush pen, black)
- Ruler (optional)
Step 1: Preparing the Fold
-
Initial vertical orientation:
Place your sheet of paper vertically on a flat surface. Imagine dividing the paper into thirds horizontally, but we won’t be folding it quite evenly. -
The top fold:
Take the top edge of the paper and fold it backwards (away from you) about one-third of the way down the page. Crease it sharply. -
The bottom fold:
Now, bring that folded top edge down. You want to create a second fold so that the bottom part of the paper comes up to meet the top ‘flap’. Essentially, you represent the hidden middle section by folding the paper like an accordion. -
Checking the mechanism:
Ensure that when the paper is closed, the top flap and bottom section touch perfectly. When you pull them apart, the hidden middle section should reveal itself fully. Keep the paper folded ‘closed’ for the next step.
Step 2: Sketching the Closed View
-
Roughing the head:
With the paper folded shut, use your pencil to lightly sketch the snake’s head on the top flap. Draw the round eye, the snout, and the top jaw. -
Connecting the body:
Continue the drawn line directly across the fold seizure onto the bottom section. Draw the lower jaw and the beginning of the curved body here. -
Refining the closed shape:
Make sure the lines match up perfectly across the gap. It should look like a complete, compact snake when the paper is folded. The mouth should look slightly open but contained.
Choosing Paper
Avoid standard printer paper as it’s too transparent. Use 100gsm+ sketch paper so the hidden drawing doesn’t show through the back.
Step 3: Sketching the Open View
-
Reveal the canvas:
Gently pull the paper open, flattening it out completely. You will now see a large blank space between the head (top) and the tail (bottom). -
Elongating the body:
Use your pencil to connect the neck from the top section to the body in the bottom section. Draw two long, winding parallel lines to create a stretched, striking neck. -
Adding the open mouth:
This is the fun part. Extend the upper jaw line downwards into the new space and the lower jaw upwards. Draw a wide, gaping mouth interior. -
Drawing the fangs:
Sketch large, curved fangs hanging from the top jaw and smaller teeth on the bottom. Add a forked tongue flicking out from the center.
Line Alignment
If your lines don’t meet perfectly when folded, thicken the outline at the seam. A bolder line hides minor misalignments easily.
Step 4: Inking and Detailing
-
Outlining the main shape:
Switch to your thicker marker or brush pen. Carefully trace the main outline of the snake’s body, head, and mouth. I find bold outer lines help the drawing pop off the page. -
Adding texture:
Using the fine liner (0.3mm), draw the scales. Start with larger scales on the back and smaller, smoother segments for the belly. You don’t need to draw every single scale; suggesting them in clusters works well. -
Detailed shading:
Use stippling (tiny dots) or hatching inside the mouth to create depth. Darken the back of the throat significantly to make it look cavernous. -
Pattern work:
Add the diamond or oval patterns along the snake’s back. Fill these in with scribbly, textured lines to contrast with the white paper. -
Bridging the gap:
Double-check the transition points where the paper folds. Ensure your ink lines flow smoothly across the crease lines so the illusion holds up when opened. -
Clean up:
Once the ink is completely dry—give it a good few minutes—erase all visible pencil marks underneath. -
Final crease check:
Re-fold the paper carefully to reinforce the creases, as drawing over them can sometimes flatten them out. Your surprise snake is now ready to strike.
Fold it up and hand it to a friend for a harmless little scare
BRUSH GUIDE
The Right Brush for Every Stroke
From clean lines to bold texture — master brush choice, stroke control, and essential techniques.
Explore the Full Guide
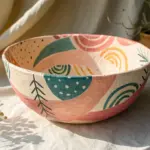
Ice Cream Cone Expands Into Tall Stack
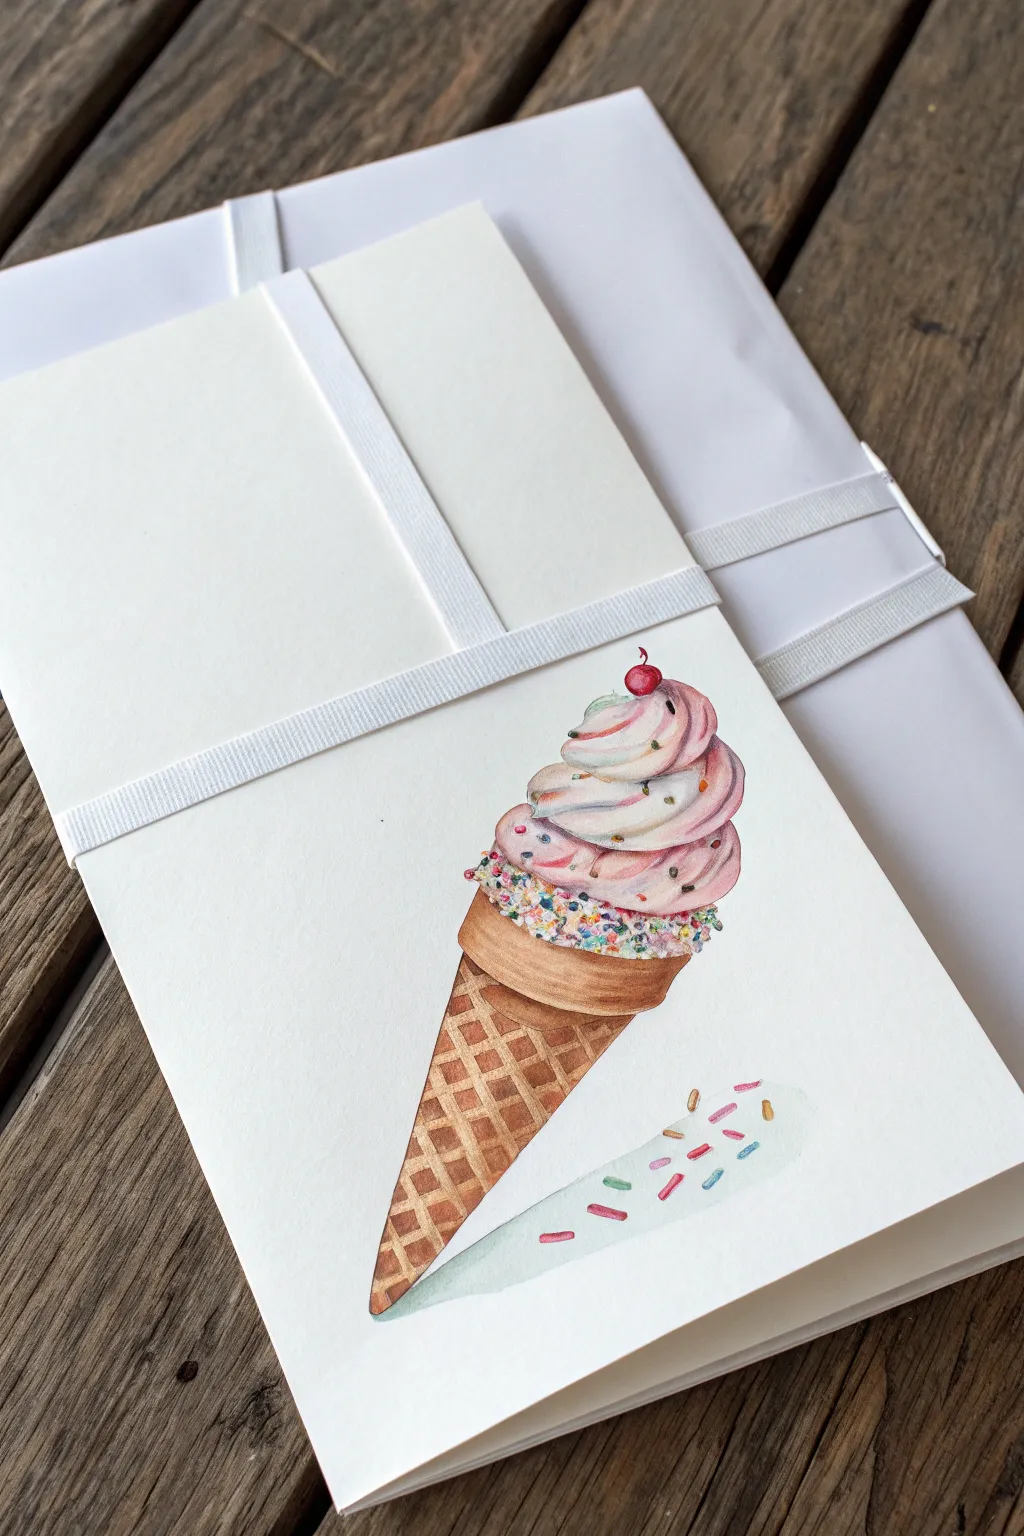
Create a delightful interactive drawing where a simple ice cream cone magically expands into a towering treat when unfolded. This playful watercolor project combines simple paper engineering with sweet, illustrative details perfect for card-making.
How-To Guide
Materials
- Heavyweight watercolor paper (smooth or cold press)
- Watercolor paints (pinks, browns, ochre, bright mix for sprinkles)
- Round brushes (flats for washes, fine liners for details)
- Pencil (HB) and eraser
- Ruler
- Bone folder (optional but helpful)
- White gel pen or gouache for highlights
- Masking tape
Step 1: Paper Preparation & Sketching
-
Prepare the fold:
Begin with a rectangular sheet of watercolor paper. Fold the paper to create a hidden mid-section. Bring the top edge down and the bottom edge up to meet in the middle, or fold in thirds so that one section is hidden inside a pleat. The goal is to have the top and bottom meet to form a continuous surface. -
Draft the ‘closed’ state:
With the paper folded shut, lightly sketch the ice cream cone. Draw the waffle cone on the bottom flap and the main scoop of ice cream on the top flap so they align perfectly across the seam. -
Connect the drawing:
Unfold the paper completely. You will now see a large gap between the cone base and the top scoop. Lightly sketch extra scoops or an elongated swirl of soft serve connecting the top scoop to the cone base. -
Refine the details:
Add texture lines for the waffle cone, swirls for the soft serve, and small ovals for sprinkles. Don’t forget the cherry on top!
Step 2: Painting the Cone Base
-
Base wash:
Mix a warm golden-brown ochre color. Paint a flat wash over the entire cone area. Keep the paint fairly wet to allow for smooth coverage. -
Waffle texture:
Once the base is damp-dry, use a darker brown mix to paint the diagonal grid lines of the waffle cone. Make sure your lines follow the curve of the cone to give it volume. -
Deepen shadows:
To make the cone look round, glaze a slightly darker brown along the left and right edges. Add a cast shadow just under the rim of the cone where the ice cream sits. -
Add the rim:
Paint the rim of the cone with a saturated ochre-brown, creating a thicker band that suggests the crispy edge of the wafer.
Seamless Seams
When painting over the fold, use slightly less water on your brush. Too much water can pool in the crease and weaken the paper fibers, causing it to tear.
Step 3: Painting the Ice Cream
-
First layer of pink:
Using a very dilute pale pink, paint the main shapes of the soft serve swirls. Leave some white paper showing on the upper curves for natural highlights. -
Defining the swirls:
While the first layer is still slightly damp, drop in a deeper rose pink into the creases and shadowy under-curves of the soft serve. This wet-on-wet technique creates soft, creamy transitions. -
Painting the cherry:
Use a bright, concentrated red for the cherry on top. Leave a tiny speck of white paper unpainted for a glossy reflection. -
Chocolate drip:
Mix a thick, dark brown for the melted chocolate or syrup area just above the cone. Paint irregular drips, letting the color bleed slightly into the pink for a tasty look. -
Shadow grounding:
Mix a very watery cool blue-grey. Paint a simple oval shadow on the ‘ground’ to the right of the cone to anchor the object in space.
Make It Huge
Instead of just one extra scoop inside, accordion fold a longer strip of paper to create an comically tall ice cream stack that reaches floor to ceiling.
Step 4: Finer Details & Finishing
-
Sprinkle base:
Where the sprinkles sit on the ice cream, dab tiny spots of water or very pale color first to prepare the area, or simply paint them directly if using opaque paints. -
Adding color sprinkles:
With a fine liner brush and concentrated paint (or gouache), dot on multicolored sprinkles—blue, green, yellow, and red. Add a few loose sprinkles to the shadow on the ground. -
Refining edges:
I like to use a sharpened colored pencil or a very fine brush with dark brown paint to crisp up the edges of the waffle cone grid for extra definition. -
Highlights:
Once everything is bone dry, use a white gel pen or white gouache to add bright highlights to the cherry, the wettest parts of the ice cream, and the sprinkles. -
Final fold check:
Refold the paper gently along your original creases. Press firmly with a bone folder to ensure it lies flat and the surprise mechanism works smoothly.
Now you have a sweet interactive artwork ready to surprise anyone who opens it up
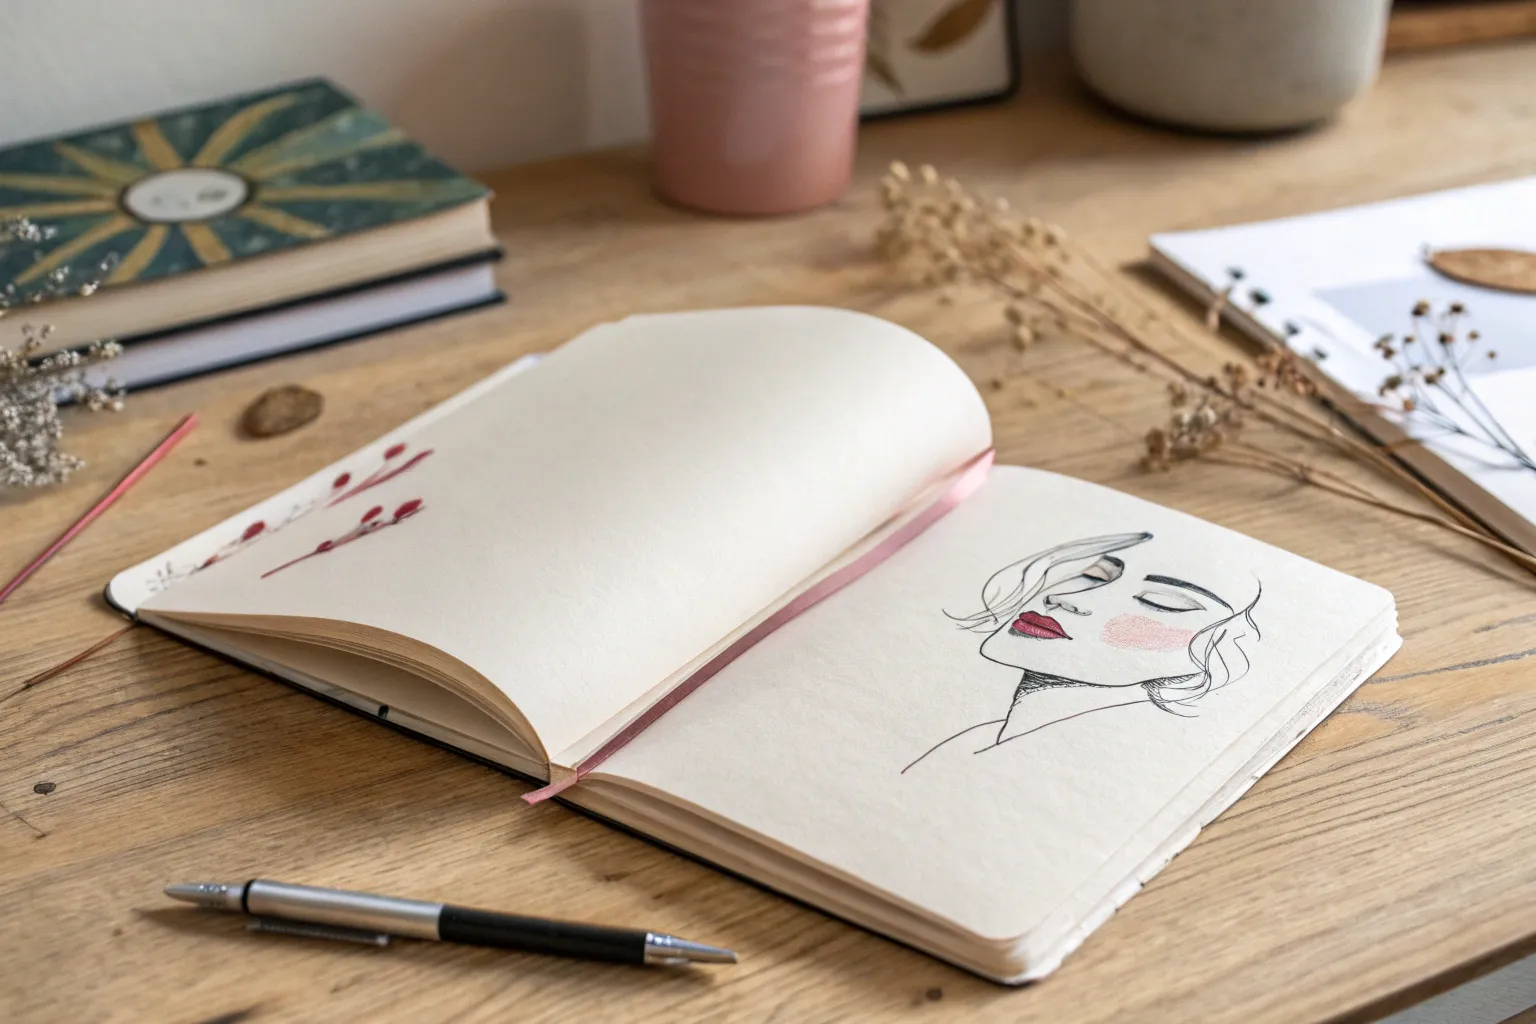
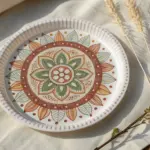
Flower Bud Becomes Full Bloom Surprise
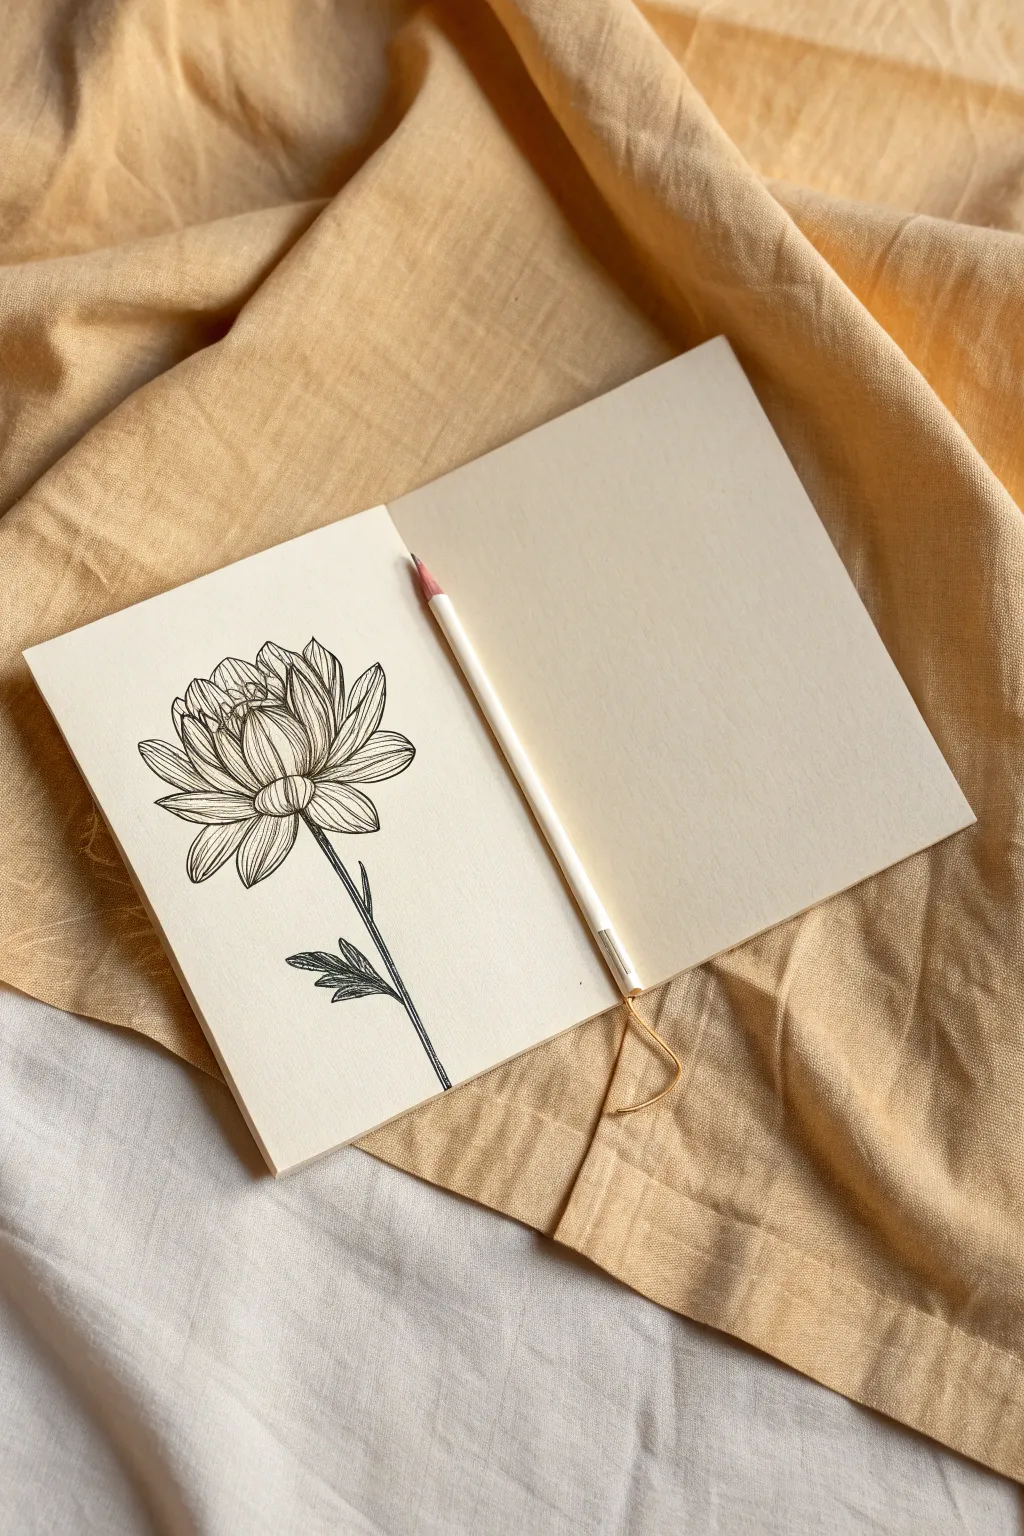
Capture the delicate elegance of botanical illustration with this detailed black ink drawing of a chrysanthemum bloom. The stark contrast of fine lines against warm cream paper creates a timeless, minimalist aesthetic perfect for sketchbook practice.
Step-by-Step
Materials
- Cream or off-white sketchbook (smooth paper)
- Fine liner pen (0.1mm or 0.3mm, black archival ink)
- Pencil (HB or 2H for sketching)
- Kneaded eraser
- Reference photo of a chrysanthemum or dahlia
Step 1: Planning the Composition
-
Positioning the stem:
Begin by lightly sketching a single, slightly curved line for the stem using your pencil. Position it so the flower head will sit comfortably in the upper center of the left page, leaving negative space around it. -
Mapping the bloom shape:
Draw a faint oval or U-shape at the top of your stem line to define the overall boundary of the flower head. This helps ensure your petals won’t run off the page later. -
Locating the receptacle:
Mark a small semi-circle or cup shape at the very top of the stem where the petals will originate. This is the base of the flower.
Tip: Line Variation
Vary your pressure. Use heavier pressure for the outer edges of petals and barely touch the paper for the delicate interior texture lines.
Step 2: Penciling the Structure
-
Drafting the central petals:
Sketch the central cluster of petals first. These should be tightly packed and upright, forming a bulb-like shape in the middle of your oval guide. -
Adding outer petals:
Working outward from the center, sketch larger petals that curve away. Draw the ones closest to the viewer first, then layer the petals behind them. -
Defining the lower petals:
Sketch the bottom-most petals that droop slightly downward, covering the connection to the stem. Make these slightly broader to anchor the bloom visually. -
Sketching the leaves:
Add two small leaves branching off the lower part of the stem. Keep the outlines jagged to mimic the natural texture of chrysanthemum foliage.
Step 3: Inking the Outlines
-
Tracing principal lines:
Switch to your fine liner pen. Start by carefully outlining the most prominent petals—the ones fully visible in the front layer. Use a confident, continuous stroke. -
Inking background layers:
Outline the petals tucked behind the front ones. Be careful not to draw through the lines you’ve already established; stop your pen when it hits a foreground petal. -
Refining the stem:
Ink the stem using two parallel lines that mimic the slight curve of your sketch. Add the leaf outlines now, emphasizing their serrated edges. -
Erasing the guide:
Once the ink is completely dry—I usually give it a full five minutes to be safe—gently erase all the underlying pencil marks with your kneaded eraser.
Level Up: Wash Effect
Before the ink dries completely, take a barely-damp water brush and gently drag it over shadow areas to create a soft gray wash.
Step 4: Adding Texture and Detail
-
Shading the petals:
Use extremely fine, straight lines to add texture to each petal. Start from the base of the petal and flick the pen outward toward the tip, fading the line out halfway up. -
Creating depth:
Add denser hatching (closely spaced lines) where petals overlap or cast shadows on each other. This separation is crucial for a 3D effect. -
Detailing the stem:
Add vertical striations along the length of the stem to give it a fibrous, woody texture rather than leaving it smooth. -
Veining the leaves:
Draw a central vein line down each leaf, then add smaller diagonal veins branching out. Use short, hatching strokes between veins to darken the leaf surface. -
Final assessment:
Step back and look for areas that lack contrast. Add a few extra distinct lines to the deepest shadows, particularly near the center of the bloom, to make the drawing pop.
Enjoy the quiet satisfaction of seeing your botanical study come to life on the page

PENCIL GUIDE
Understanding Pencil Grades from H to B
From first sketch to finished drawing — learn pencil grades, line control, and shading techniques.
Explore the Full Guide
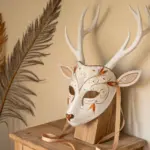
Gift Box Turns Into Surprise Creature

Transform ordinary gift wrapping into a whimsical character with just a few simple additions. This charming project combines rustic kraft paper with googly eyes and delicate lace for an adorable surprise.
Step-by-Step Guide
Materials
- Square or rectangular gift box
- Brown kraft paper
- Cream lace ribbon (approx. 0.5-1 inch wide)
- Natural jute twine
- Paper for eyes (white cardstock or sticker paper)
- Black marker or pen
- Scissors
- Clear tape or glue stick
Step 1: Wrapping the Base
-
Measure the paper:
Roll out your brown kraft paper and place your gift box in the center. Ensure you have enough paper to cover the top and sides fully, plus a little extra for overlap. -
Wrap the box:
Fold the paper over the box neatly, securing the long seam with a piece of clear tape. Try to keep the paper taut for a professional finish. -
Fold the ends:
At one end of the box, push the sides of the paper inward to create triangular flaps on the top and bottom. Crease the edges sharply with your fingernails. -
Secure the flaps:
Fold the top flap down and the bottom flap up, then secure with a small piece of tape. Repeat this process for the other end of the box.
Loose Ribbon Fix
If the lace slips on the smooth paper, use a tiny dot of double-sided tape or a glue dot underneath the ribbon on the bottom of the box to hold it in place while tying.
Step 2: Creating the Eyes
-
Sketch the shapes:
On a small piece of white cardstock or sticker paper, draw two oval shapes for the eyes. They should be large enough to be visible but small enough to fit near the ribbon crossing. -
Add pupils:
Draw large black circles inside your ovals for the pupils. I like to leave a tiny white spot inside the black pupil to act as a ‘catchlight’, making the eyes look more alive. -
Cut them out:
Carefully cut around the outline of your eye shapes. If you aren’t using sticker paper, apply glue to the back of each eye. -
Position the eyes:
Place the eyes near the center-top of your wrapped box. They should be spaced slightly apart so the ribbon will eventually pass between them.
Step 3: Adding the Ribbon and Twine
-
Measure the lace:
Cut a length of cream lace ribbon long enough to wrap around the box vertically and horizontally, plus extra for tying. -
Wrap the lace:
Wrap the lace around the box in a cross shape. The vertical strip should run right between the two eyes you placed earlier. -
Prepare the twine:
Take your jute twine and lay it directly on top of the lace ribbon. The twine adds a nice textural contrast and helps secure the softer lace. -
Cross and flip:
Bring the ends of both the lace and twine to the center of the box (between the eyes). Twist them around each other to start the knot. -
Tie the knot:
Pull the ribbons snug so they stay in place but don’t crush the box edges. Tie a standard overhand knot to secure everything. -
Form the bow:
Create loops with both the lace and the twine simultaneously. Treat them as one single strand as you form the bow for a layered look. -
Adjust the loops:
Gently tug on the loops to even them out. The bow should sit right between the eyes, looking almost like a nose or a quirky accessory. -
Trim the ends:
Snip the ends of the twine and lace at an angle. I usually cut the twine slightly longer than the lace for a whimsical, uneven finish.
Creative Twist
Draw eyebrows directly onto the kraft paper above the eyes for extra expression, or use different sized googly eyes to give the creature a goofy, confused look.
Now your gift has a personality all its own, ready to smile at the lucky recipient
Calm Volcano Turns Into Full Eruption

This clever interactive drawing uses a simple paper fold to hide a fiery surprise inside a dormant mountain. When opened, the serene peak transforms into a dramatic eruption with billowing smoke and flowing lava.
Step-by-Step Guide
Materials
- Heavyweight drawing paper or mixed media paper (A5 size)
- Graphite pencil (HB or 2B)
- Colored pencils (Warm greys, Cool greys, Black)
- Colored pencils (Reds, Oranges, Pinks, White)
- Fine liner pen (optional, for details)
- Eraser
- Pencil sharpener
Step 1: Setting the Stage
-
Fold the foundation:
Begin with your rectangular piece of paper oriented vertically. Fold the paper in half horizontally, bringing the top edge down to the bottom edge. Crease sharply. -
Create the hidden section:
Take the top layer of your folded paper and fold it back up, aligning its edge with the very top fold. This creates a pleat or accordion-style mechanism where the middle of the drawing will be hidden. -
Sketch the ‘calm’ volcano:
With the paper completely folded shut, lightly sketch a simple triangular mountain shape. The tip of the volcano should be right at the fold line, perhaps just barely cut off. -
Reveal the interior:
Open the paper fully flat. You will see a large gap between the bottom base of the mountain and its top peak. This empty middle section is where the eruption will live.
Alignment Issues?
If the drawing doesn’t line up when folded, hold the folded paper up to a bright window. Trace the lines from the top layer lightly onto the bottom layer to guide you.
Step 2: Drafting the Eruption
-
Connect the lines:
In the open gap, extend the sides of the volcano upwards and downwards to connect the base to the separated peak. The mountain should now look much taller and steeper. -
Sketch the lava flow:
Draw jagged, flowing lines cascading down from the crater rim. Make them branch out like river deltas as they run down the mountain’s flanks. -
Outline the smoke plume:
Above the crater, sketch a large, billowing cloud of smoke. Use varying sizes of circular, puffy shapes that drift upward and to the left to suggest wind direction.
Step 3: Adding Texture and Color
-
Base layer for the mountain:
Using a light cool grey pencil, shade the rocky surface of the mountain. Use diagonal strokes that follow the slope of the volcano to simulate rugged terrain. -
Deepening shadows:
Switch to a dark grey or black pencil. Add texture by pressing harder in the crevices and valleys of the rock face. I find adding scribbly, irregular lines here helps it look more like organic stone. -
Ignite the lava:
Color the lava flows with a vibrant orange first, then layer bright red on top, leaving some orange showing through for heat intensity. -
Highlight the heat:
Use a yellow or white pencil right at the center of the lava flows near the top to make it look hottest at the source. -
Coloring the smoke:
Ideally, use a soft pink or light salmon color for the smoke clouds. Keep the shading light and airy, focusing the color on the bottom ‘shadow’ side of each puff. -
Adding smoke volume:
Take a dark red or maroon pencil and gently stipple (dot) texture into the denser parts of the smoke cloud, primarily near the crater, to give it weight and depth. -
Refining the edges:
Go back over your main outlines with a sharpened black pencil or a very fine darker grey to crisp up the edges of the lava and the mountainside. -
Final texture check:
Add small specks or dots around the crater opening to represent flying debris and ash.
Make it Pop
Add glitter glue to the lava streams for sparkle, or use a true watercolor wash for the sky background to make the mountain stand out.
Step 4: The Final Reveal
-
Refold and check:
Fold the paper back into its original closed position. Ensure the lines of the small, calm volcano still match up perfectly. -
Connect the closed state:
If the lines are slightly off when closed, gently extend the lines on the bottom flap to meet the top flap seamlessly.
Fold it up and surprise your friends with this explosive transformation


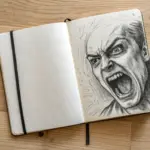
Peaceful Whale Opens Into Deep-Sea Teeth
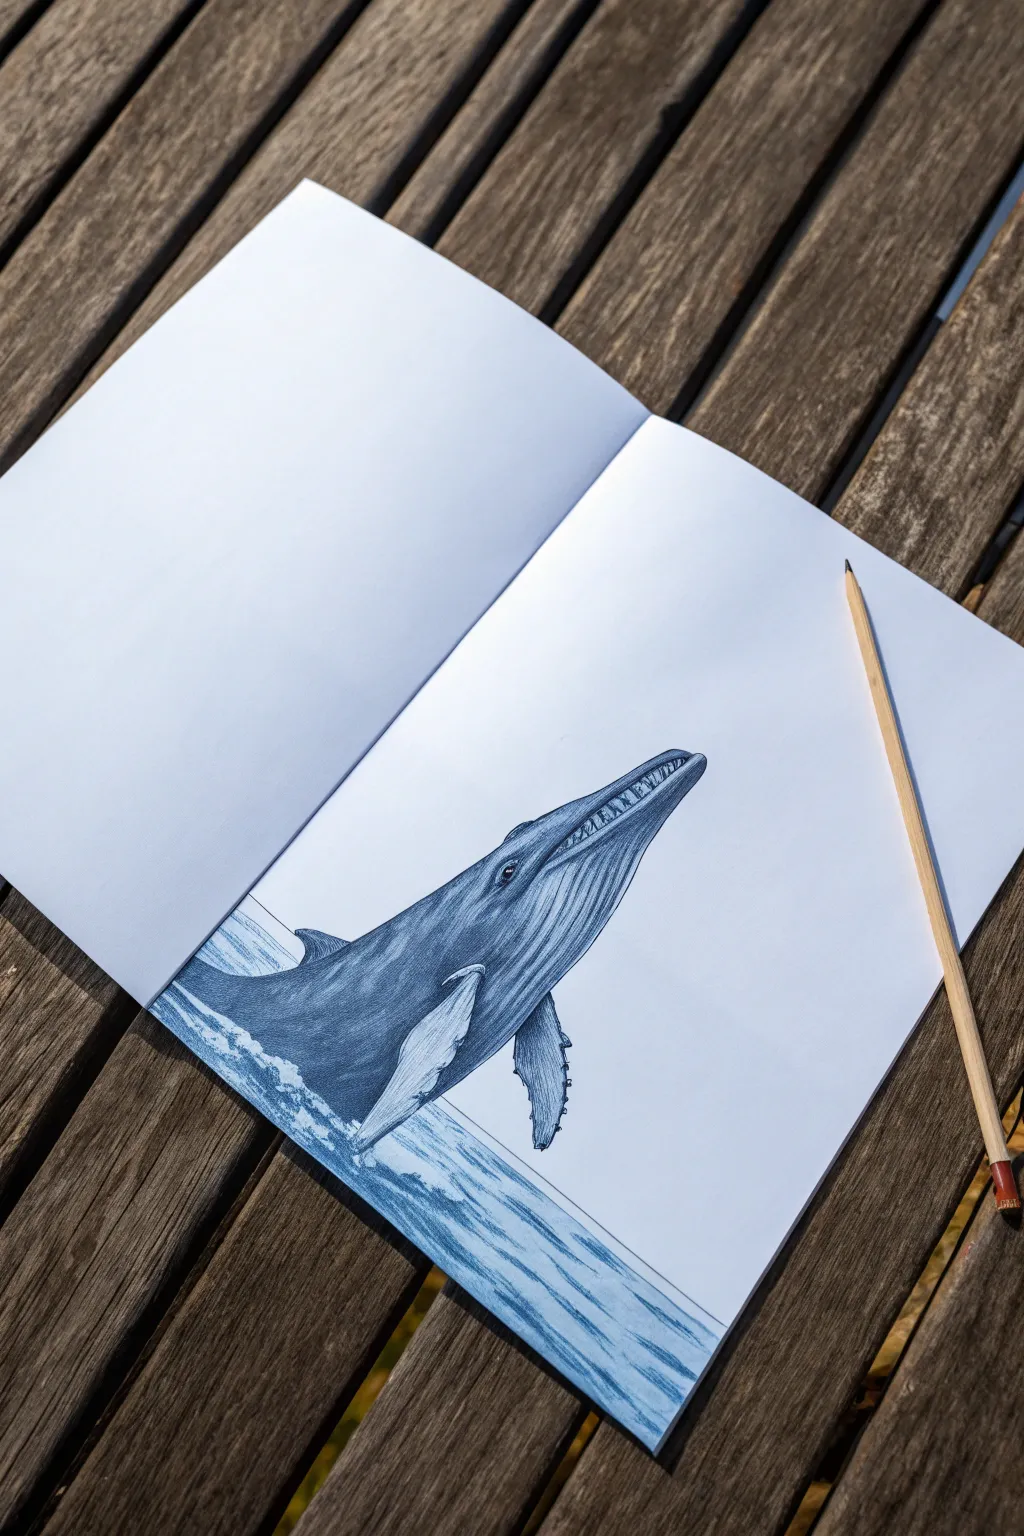
This clever drawing project utilizes a simple paper fold to create an interactive artwork that transforms from a peaceful scene into a dramatic surprise. Using nothing but a pencil and paper, you’ll sketch a realistic humpback whale breaching the surface, ready to reveal its hidden secrets when unfolded.
How-To Guide
Materials
- White drawing paper (A4 or heavier sketch paper)
- Graphite pencils (HB for sketching, 2B and 4B for shading)
- Eraser (kneaded or vinyl)
- Ruler (optional, for fold lines)
Step 1: Preparing the Canvas
-
Create the folds:
Start with your paper laid vertically. Fold the bottom third of the paper upwards, then fold that same flap downwards in half again. This creates a hidden section in the middle of your page where the surprise will eventually go. -
Flatten the drawing surface:
Keep the paper folded so that the top section and the bottom flap meet perfectly. You should see a continuous white surface, hiding the middle pleat. Press the creases firmly so the paper lies relatively flat while you draw.
Fixing Alignment
If your lines don’t match perfectly across the fold, thicken the outline of the whale or darken the shading right at the seam to disguise the mismatch.
Step 2: Sketching the Whale
-
Outline the body shape:
With an HB pencil, lightly sketch the main body of the whale bridging across the fold. The head should be on the top section and the body on the bottom flap. Draw a diagonal, torpedo-like shape pointing upwards. -
Position the mouth line:
Draw the line of the mouth right along the seam where your paper meets. This effectively hides the seam within the drawing itself. -
Add key features:
Sketch the prominent, knobby head of the humpback on the upper section. Add the long pectoral fin extending downwards on the lower section, and hint at a second fin on the far side. -
Establish the water line:
Draw a horizon line near the bottom of the sketch, indicating where the whale is breaking through the surface.
Make it Pop
Add a tiny diver or boat next to the whale when the paper is unfolded to exaggerate the scale and make the giant mouth look even more intimidating.
Step 3: Shading and Texture
-
Define the throat pleats:
Humpback whales have distinct ventral pleats (grooves) running from chin to belly. Draw these curved lines carefully, following the contour of the body on the lower flap. -
Apply base shading:
Switch to a 2B pencil. Begin shading the darker upper back of the whale, leaving the belly and throat lighter. Use smooth, directional strokes that follow the curvature of the animal. -
Detail the head:
Add small, bumpy tubercles (sensory nodules) on the snout and jawline. Darken the area around the eye to make it pop. -
Refine the fins:
The pectoral fins often have white patches and irregular, scalloped edges. Shade around these white areas to create contrast, and add barnacle textures on the leading edge of the fin. -
Create water splashing:
around the base of the whale, use quick, scribbly marks to represent splashing water and foam. Leave the paper white for the brightest highlights of the chaotic water.
Step 4: The Hidden Reveal
-
Unfold the paper:
Gently pull the paper fully open to reveal the blank middle section. You now have the top half of a head separated from the bottom body by a large gap. -
Connect the lines:
Draw vertical lines connecting the outer edges of the top head section to the bottom body section. This elongates the whale’s mouth enormously. -
Draw the baleen or teeth:
Inside this vast open mouth, draw rows of baleen plates (vertical textured lines) or, for a fantasy twist, rows of sharp teeth. This is the ‘surprise’ element. -
Shade the interior:
Darken the inside of the mouth significantly with a 4B pencil to create depth, making the teeth or baleen stand out against the darkness. -
Final touches:
Re-fold the paper to check alignment. Ensure the drawing looks seamless when closed, then open it again to add any final shading needed to blend the hidden section with the outer drawing.
Fold it back up and hand it to a friend to see their reaction when the peaceful whale reveals its secret
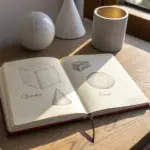
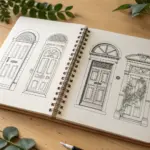
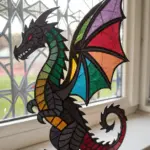
Book Cover Opens Into A Wild Scene
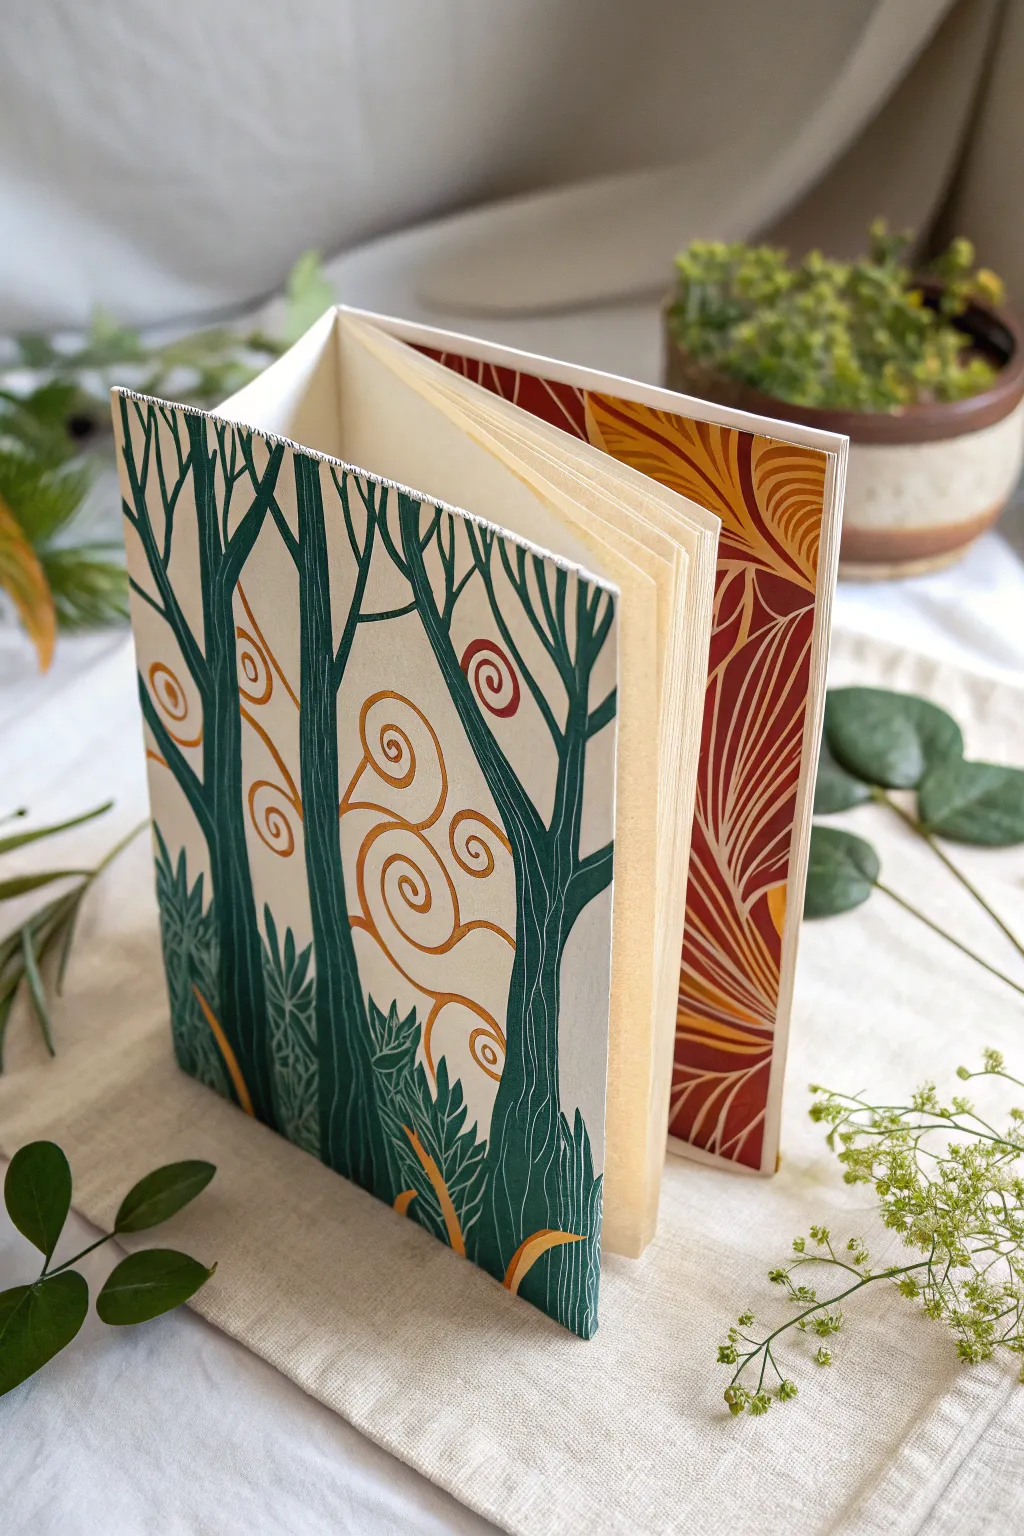
This charming project transforms a simple strip of paper into a dimensional forest scene that stands on its own. Featuring stylized green trees and swirling golden accents, this accordion-fold book combines the elegance of print-style illustration with sculptural paper craft.
Step-by-Step Guide
Materials
- Heavyweight watercolor paper or mixed media paper (long strip)
- Bone folder
- Ruler
- Pencil and eraser
- Deep forest green gouache or matte acrylic paint
- Golden-yellow or ochre paint pen (or fine brush)
- Fine liner brushes (sizes 0 and 2)
- Flat shader brush (size 4 or 6)
- Cutting mat and craft knife
- Paper towels and water cup
Step 1: Preparing the Structure
-
Cut the paper strip:
Begin by cutting your heavyweight paper into a long, rectangular strip. Aim for dimensions like 6 inches high by 24 inches long, depending on how many folds you desire. A longer strip allows for more panels. -
Measure the panels:
Using a ruler, lightly mark even intervals along the length of the strip. For a classic accordion book, 4-inch or 5-inch panels work well. Ensure each section is identical in width. -
Score the fold lines:
Place your ruler against the pencil marks and firmly score the paper using a bone folder. This compression prepares the paper fibers for a clean, crisp fold without cracking. -
Create the accordion fold:
Fold the paper back and forth along your scored lines like a fan. Press each crease firmly with the bone folder to ensure the book stands upright effectively. Open it back up partially to begin sketching.
Clean Lines Pro-Tip
For ultra-crisp tree edges that look like a print, use low-tack artist’s tape or washi tape to mask off the sides of the trunks before painting.
Step 2: Sketching the Design
-
Horizontal composition:
With the paper flat, sketch your forest scene. Draw tall, slightly curving tree trunks that span the entire height of the paper. Let some trunks cross over the fold lines to create continuity when the book is open. -
Add lower foliage:
At the base of the trees, sketch clusters of leafy, spiky undergrowth. Keep shapes simplified and graphic, mimicking a linocut style. -
Plan the swirls:
In the negative space between the tree trunks, lightly pencil in swirling spiral patterns. These will become your golden wind gusts later. -
Design the reverse side:
Flip the paper over. Sketch a different pattern for the back, such as the large, leafy abstract botanical motif seen in the reference image (dark red/orange background with light veins).
Level Up: Cut-Outs
Carefully cut out the negative space between the trees on just the front cover panel. This reveals the artwork on the second page, adding incredible depth.
Step 3: Painting the Forest
-
Block in green trunks:
Using your flat shader brush and deep forest green gouache, carefully paint the tree trunks. Gouache is ideal here for its matte, velvety opacity. -
Detail the texture:
While painting the trunks, use vertical brush strokes to imply bark texture. If using acrylics, you might need two coats for solid coverage. -
Paint the undergrowth:
Switch to a smaller brush to fill in the spiky foliage at the bottom. I like to mix a tiny bit of blue into the green here to create slight distinctness between the leaves and the trunks. -
Refine edges:
Once the main green shapes are dry, use a fine liner brush to tidy up any edges against the cream paper background, ensuring the shapes look crisp and graphic.
Step 4: Adding Details & Reverse Side
-
Draw the spirals:
Take your golden-yellow paint pen (or a liner brush with ochre paint) and trace over your swirling pencil lines. Keep the line weight consistent to match the illustrative style. -
Add accent leaves:
Use the same yellow/gold color to add small accents to the bottom foliage, painting a few single blades of grass or leaf spines to tie the color palette together. -
Paint the back panel:
For the reverse side (seen on the right in the image), paint the negative space with a deep terracotta or maroon paint, leaving the veins of the leaves unpainted (the color of the paper) or painting them later with a lighter cream color. -
Final pressing:
Allow all paint to dry completely—at least an hour. Once dry, re-fold the accordion along the original creases. Place the folded book under a heavy weight (like a stack of books) overnight to crisp up the form.
Display your distinctive accordion book on a shelf where the light can catch the golden details
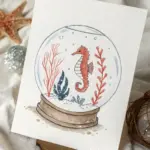
Underwater Clam Reveals A Secret Monster Pearl
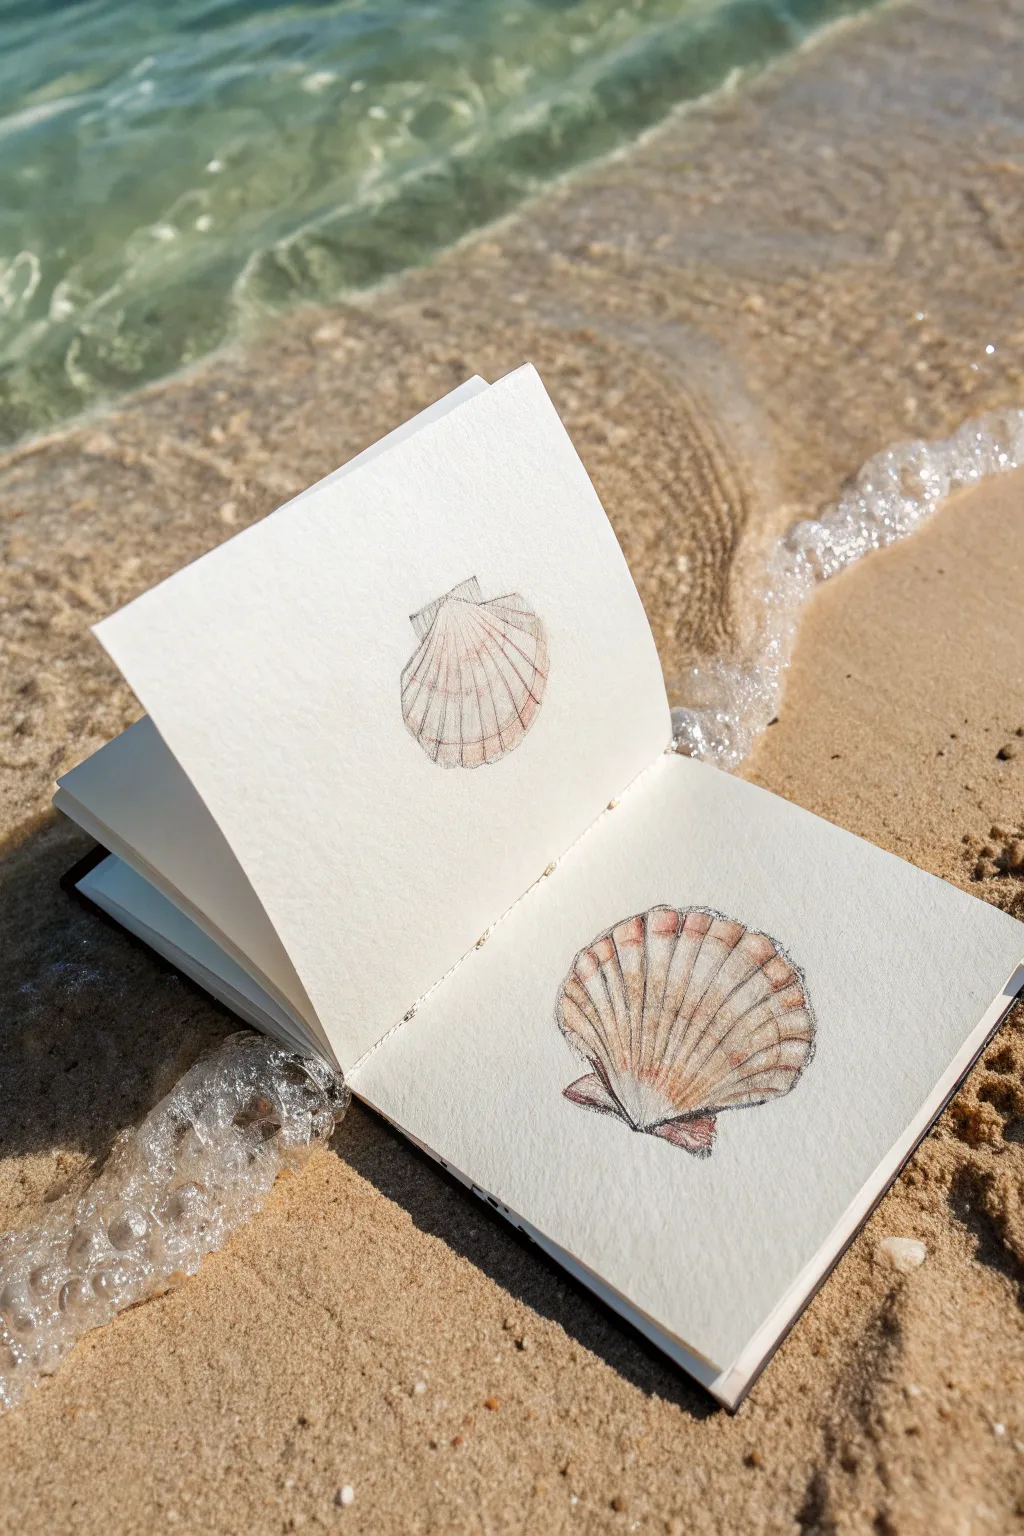
Capture the magic of the ocean with this clever folded paper drawing that transforms a simple closed shell into an open surprise. Using colored pencils and fine liners, you’ll create a realistic scallop shell that spans across the fold of a sketchbook page.
Detailed Instructions
Materials
- Small sketchbook (smooth or mixed media paper recommended)
- Graphite pencil (HB or H)
- Eraser
- Fine liner pen (black or sepia, 0.1mm)
- Colored pencils (cream, peach, light brown, dark brown, grey)
- Ruler (optional)
Step 1: Planning the Fold
-
Prepare the page:
Begin with a small sketchbook. You will need two facing pages or a single sheet that can be folded. If using a standard bound sketchbook, simply open it to a fresh spread where the paper lies relatvely flat. -
Draft the closed shape:
Lightly sketch the outline of a complete scallop shell shape on the bottom page first. Aim for a symmetrical fan shape with a rounded bottom edge and the distinctive ‘ears’ near the hinge. -
Establish the midpoint:
Imagine where the shell would naturally open. Draw a faint horizontal line across your shell sketch to represent the separation point between the top and bottom valves. -
Transfer the top half:
This is the trickiest part. You need the top half of the shell to appear on the upper page. You can either trace your bottom sketch onto a scrap piece of paper and transfer it, or carefully redraw the top half of the shell on the upper page, ensuring it aligns vertically with the bottom half.
Step 2: Drawing the Details
-
Refine the outlines:
Once satisfied with the placement, sharpen your pencil sketch. Define the scalloped edges of the shell’s rim and clean up the hinge area at the bottom of the upper drawing. -
Add ribs and ridges:
Draw the radiating ribs of the scallop shell. Start from the hinge point (the center bottom of the shape) and fan them out towards the scalloped edges. Press lightly, as these guide your shading later. -
Inking the line art:
Using a 0.1mm fine liner, carefully trace over your pencil lines. Use broken or slightly wavy lines for the ridges to give them an organic, weathered texture rather than a perfect geometric look. -
Erase pencil marks:
Allow the ink to dry completely to avoid smudging. Then, gently erase all graphite guidelines from both pages.
Shell Texture Tip
When coloring the ribs, use curved hatching strokes that follow the contour of the shell. This reinforces the rounded, fanned-out shape better than straight shading.
Step 3: Coloring and Shading
-
Base layer:
Apply a light wash of cream or pale peach colored pencil over the entire shell surface on both pages. Keep the stroke pressure even and light. -
Define the shadows:
Use a light brown pencil to shade the grooves between the ribs. This creates the 3D ripple effect. The shadow should be darkest in the deepest part of the groove. -
Add warmth:
Layer a peach or coral color on the raised parts of the ribs, focusing on the center area of the shell where the color tends to be richer. -
Deepen contrast:
Take a dark brown or sepia pencil and deepen the shadows near the hinge and along the very bottom edge of the lower shell. This adds weight and realism. -
Highlighting:
If you have a white gel pen or a very sharp eraser, lift a tiny highlight along the highest point of each rib to make the texture pop. -
Shadowing the paper:
To make the drawing sit ‘on’ the page, add a very faint grey or cool brown drop shadow underneath the bottom of the shell on the lower page.
Level Up: Hidden Gem
Draw a small, shiny pearl or a tiny crab on the bottom page right at the fold line, so it’s only ‘revealed’ when the viewer fully flattens the sketchbook.
Step 4: The Surprise Element
-
Connect the halves visually:
Open the book slightly to see how the two halves interact. I like to darken the ‘cut’ edge where the shell opens (the bottom of the top page and top of the bottom page) to show thickness. -
Optional interior:
For the ‘monster pearl’ effect referenced in the concept, you would draw the pearl or creature on a separate piece of paper glued behind the fold, or simply draw it on the bottom page if you are using a single-sheet z-fold technique. For this specific image, the artist kept it simple with just the shell exterior.
Now you have a serene beach treasure captured forever in your sketchbook, ready to surprise anyone who turns the page

Have a question or want to share your own experience? I'd love to hear from you in the comments below!