When you’re choosing exterior paint for your house, you’re really choosing a whole first impression—shape, light, and mood all at once. I pulled together these exterior paint for house ideas like we’re flipping through swatches in the studio, so you can picture a real-life curb appeal glow-up before you ever pick up a brush.
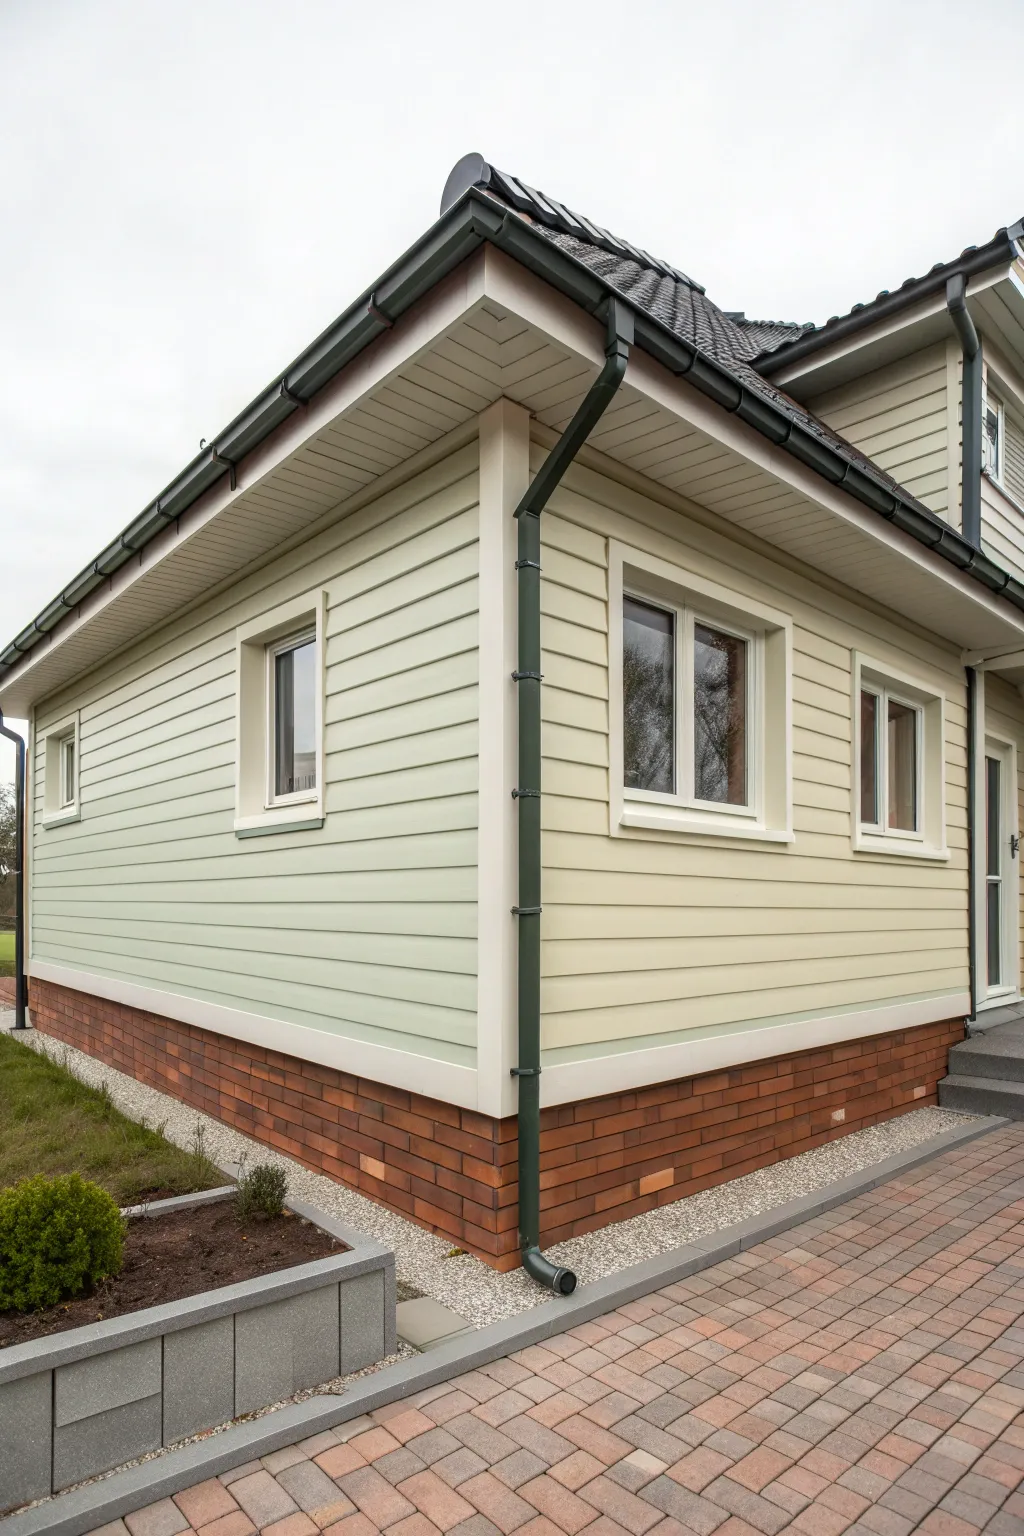
Classic White With Crisp Trim
Capture the pristine charm of Nordic-inspired architecture with this classic exterior painting project. This look relies on a monochromatic palette where texture, rather than color, defines the beauty of the home.
Step-by-Step Tutorial
Materials
- High-quality exterior acrylic latex paint (Pure White)
- Exterior primer (oil-based for bare wood, bonding for repainting)
- Pressure washer
- Wood filler or exterior caulk
- Caulk gun
- Scrapers and wire brushes
- Medium and fine-grit sandpaper (80 and 120 grit)
- Painter’s tape and plastic sheeting
- Drop cloths
- 4-inch exterior paint brush (synthetic bristle)
- 2-inch angled sash brush
- Paint sprayer (optional for large siding areas)
- Roller and extension pole
- Ladder or scaffolding
Step 1: Preparation & Repair
-
Assess the Surface:
Begin by walking the perimeter of the house to inspect the existing siding and trim. Look specifically for rotting wood, loose boards, or peeling paint that needs addressing before any new coating is applied. -
Clean Thoroughly:
Use a pressure washer to remove dirt, mildew, and chalky residue from the siding. Keep the nozzle moving to avoid gouging the wood, and let the house dry completely for at least 24 to 48 hours. -
Scrape Loose Paint:
Once dry, take a scraper or wire brush to any areas with flaking or blistering paint. You want a solid substrate, so remove anything that isn’t firmly adhered to the wood. -
Sand for Smoothness:
Sand the scraped edges with 80-grit sandpaper to feather them out, ensuring a seamless transition between old paint and bare wood. Follow up with 120-grit on trim areas for a smoother finish. -
Patch Imperfections:
Fill nail holes, cracks, and gaps with high-quality exterior wood filler or caulk. I find it helpful to overfill slightly and sand it flush once cured to ensure it’s perfectly invisible. -
Protect Surroundings:
Mask off windows, light fixtures, and brick foundations with painter’s tape and plastic sheeting. Lay drop cloths over garden beds and walkways to catch any drips.
Step 2: Priming
-
Spot Prime or Full Prime:
If you have exposed bare wood, spot prime those areas with an oil-based primer to prevent tannin bleed-through. If you are making a drastic color change, apply a full coat of bonding primer to the entire facade. -
Cut in Edges:
Using your 2-inch brush, cut in the primer around windows, under eaves, and in corners where a roller or sprayer won’t reach effectively. -
Apply Primer Coat:
Roll or spray the primer onto the main siding boards. Allow this coat to dry according to the manufacturer’s instructions before assessing if a second spot-coat is needed on difficult areas.
Uneven Texture?
If old paint layers are visible as ridges, use a high-build primer. It’s thicker than standard primer and helps level out the surface texture.
Step 3: Painting Siding & Trim
-
Paint the Eaves First:
Start at the highest point, painting the underside of the decorative eaves and fascia boards first. This prevents drips from ruining your freshly painted lower siding later. -
Address the Siding:
Moving top-to-bottom, apply your premium exterior white paint to the horizontal siding. If using a sprayer, always ‘back-brush’ immediately after spraying to work the paint into the wood grain. -
Detail the Decorative Trim:
Switch to a 2-inch angled sash brush for the intricate work. Carefully paint the decorative rafter tails (the small notched details under the roofline) and the horizontal trim bands. -
Paint Window Casings:
Paint the window frames and sills. Since this look is monochromatic, use the same white paint but ensure you get into the corners of the mullions. -
Apply Second Coat:
A single coat is rarely enough for a truly crisp, durable finish. Apply a second full coat to all siding and trim once the first is dry to the touch. -
Check for Drips:
While the paint is still wet, inspect the bottom edges of horizontal siding boards and window sills for drips and smooth them out with your brush. -
Clean Up:
Remove painter’s tape slowly while the final coat is still slightly tacky to ensure a sharp line. Clean your brushes immediately and dispose of masking materials properly.
Choosing Your White
Test whites outdoors! ‘Classic White’ can look yellow or blue depending on sun exposure. Paint large swatches on different sides of the house first.
Step back and admire how a fresh coat of white paint completely transforms the character of your home


Soft Greige for Easy Curb Appeal
Capture the welcoming glow of a suburban home at dusk with this acrylic painting tutorial. You’ll layer soft greige tones against clean white trim while mastering the warmth of illuminated windows.
How-To Guide
Materials
- Canvas board or stretched canvas (11×14 inches recommended)
- Acrylic paints: Titanium White, Unbleached Titanium, Burnt Umber, Payne’s Grey, Yellow Ochre, Cadmium Yellow, Cadmium Orange, Sap Green
- Flat brushes (1 inch and 1/2 inch)
- Round brushes (sizes 2 and 4)
- Fine liner brush
- Pencil and ruler
- Palette knife
- Water cup and paper towels
Step 1: Sketch and Sky
-
Draft the Architecture:
Begin by sketching the main house structure using a pencil and ruler. Pay attention to the perspective; the rooflines should angle downward toward a vanishing point off the right side of the canvas. Outline the porch columns, the gabled peaks, and the prominent window placements. -
Block in the Sky:
Mix a very pale wash of Titanium White with a tiny dot of Payne’s Grey. Apply this to the sky area, starting darker at the top and fading to almost pure white near the horizon line on the left to simulate that soft, evening light.
Tape for Clean Lines
Use low-tack artist’s tape or painter’s tape to mask off the rooflines and columns. This ensures your architectural lines remain perfectly straight and crisp against the sky.
Step 2: Base Layers and Siding
-
Mix the Greige:
To get that perfect ‘soft greige’ siding color, mix Unbleached Titanium with a touch of Burnt Umber and a tiny hint of Payne’s Grey. You want a color that is warm but neutral. -
Paint the Siding Base:
Using a 1/2 inch flat brush, fill in all the siding areas with your greige mix. Don’t worry about the individual planks yet; just establish a solid, opaque base color for the walls. -
Add Shadow Tones:
Mix a slightly darker version of your greige by adding more Payne’s Grey. Paint the side of the house that is in shadow (the left-facing walls under the porch and eaves) to create immediate dimension. -
Create the Siding Lines:
Once the base is dry, use a liner brush with a watered-down mix of Burnt Umber and Payne’s Grey. Carefully paint thin, horizontal lines across the siding sections to represent the clapboards. Use your ruler if you need a steady hand, but a slightly imperfect line looks more natural. -
Vertical Board details:
For the vertical board-and-batten style siding in the top gables, switch the direction of your lines to be vertical. Keep these lines crisp to distinguish the change in architectural texture.
Add a Gradient
Make the windows glow realistically by painting a gradient in the glass panes—bright yellow/white in the center fading to darker orange/ochre near the edges.
Step 3: Trim and Windows
-
Brighten the Trim:
Load a clean flat brush with pure Titanium White. Paint the fascia boards, the window frames, the corner boards, and the thick porch columns. You may need two coats here to ensure it pops against the greige. -
Paint the Window Panes:
For the unlit upper windows, use a mix of Payne’s Grey and White to create a reflection color. For the lit windows, fill the panes with a blend of Yellow Ochre and Titanium White. -
Add the Warm Glow:
Glaze the center of the lit windows with a small amount of Cadmium Yellow or Orange. I like to dry-brush a little of this warm yellow onto the surrounding window frames and porch ceiling to show the light casting outward. -
Detail the Roof:
Mix Payne’s Grey with Burnt Umber for a dark, charcoal color. Fill in the roof shapes. Use the edge of your brush to imply shingle texture near the ridges.
Step 4: Landscaping and Final Touches
-
Base Foliage:
Mix Sap Green with a touch of Burnt Umber creates a deep, natural green. Block in the shapes of the bushes along the foundation and the foreground plants. -
Texture the Bushes:
Using a round brush, stipple lighter greens (mix Sap Green with Yellow Ochre) onto the tops of the bushes to catch the imaginary light. -
Add White Flowers:
With a small round brush, dab clusters of Titanium White onto the foreground bushes to create the hydrangea-like flowers shown in the bottom right corner. -
Paint the Steps and Path:
Use a cool grey mix (White and Payne’s Grey) for the concrete porch steps and the walkway in the foreground. Keep the brushstrokes horizontal to suggest the flat surface. -
Final Highlights:
Add the final touches: tiny white highlights on the metal light fixtures, the edges of the porch railing, and the tips of the flowers.
Step back and admire the cozy, inviting home you’ve built with color and light


Light Gray With Bright White Framing
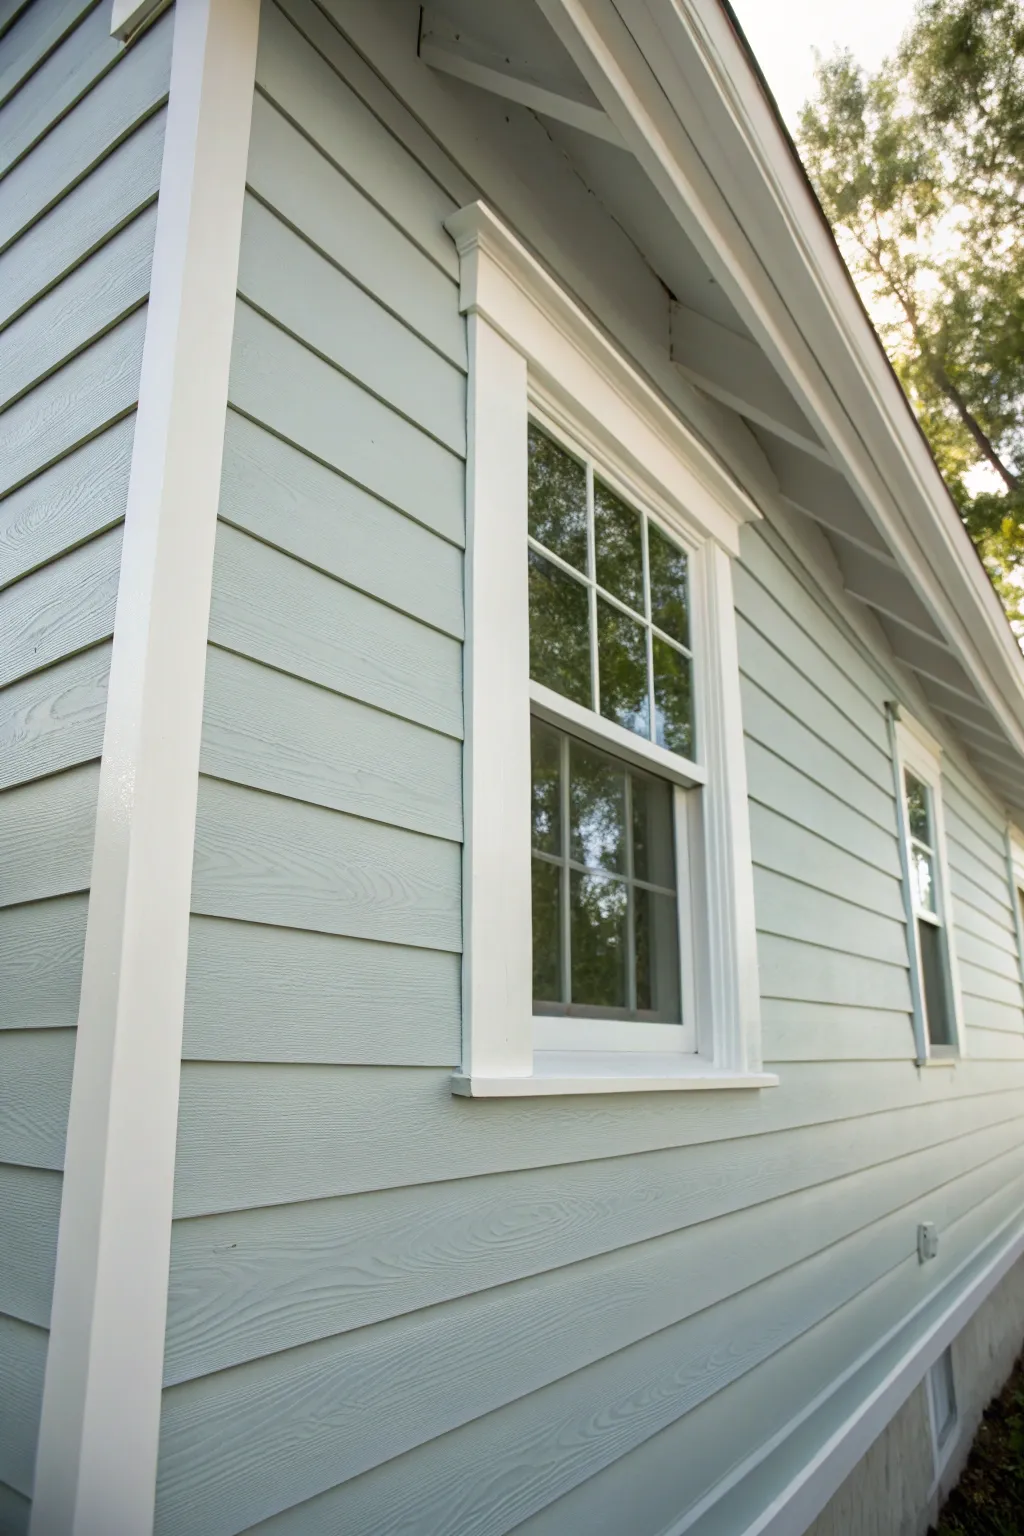
Transform your home’s curb appeal with a classic, airy color palette featuring soft light gray siding and crisp bright white trim. This clean and modern look highlights architectural details while providing a welcoming, serene atmosphere.
Step-by-Step
Materials
- High-quality exterior latex paint (Light Gray/Blue-Gray satin finish)
- High-quality exterior trim paint (Bright White semi-gloss finish)
- Pressure washer
- Exterior primer (if needed for bare spots)
- Caulk gun and exterior-grade acrylic latex caulk
- Scrapers and sanding blocks (medium grit)
- Painter’s tape (exterior grade)
- Drop cloths or plastic sheeting
- Ladder
- 2.5 to 3-inch angled sash brush
- 4-inch mini roller with 3/8-inch nap (for siding)
- Paint sprayer (optional, but speeds up siding significantly)
Step 1: Preparation and Cleaning
-
Inspect the Siding:
Walk around the entire perimeter specifically looking for loose boards, rot, or protruding nails. Tap in loose nails and mark areas that need significant repair. -
Wash the Exterior:
Use a pressure washer on a low setting to remove dirt, mildew, and chalky residue. Work from the top down to prevent dirty water from streaking clean areas. -
Let it Dry:
Allow the siding to dry completely for at least 24 to 48 hours. Painting over damp wood or fiber cement can trap moisture and cause bubbling. -
Scrape and Sand:
Scrape away any loose or peeling paint flakes. Lightly sand rough edges to feather them into the surrounding surface for a smoother finish. -
Caulk Gaps:
Apply fresh exterior caulk to cracks around windows, trim joints, and corner boards where the old caulk has failed. Smooth the bead with a damp finger or rag.
Sun Strategy
Chase the shade! Direct sunlight makes exterior paint dry too fast, causing lap marks. plan your work around the house to stay on the shady side.
Step 2: Priming and Cutting In
-
Protect Surroundings:
Cover landscaping, walkways, and fixtures (like lights or outlets) with drop cloths or plastic sheeting. Tape off window glass to speed up painting the frames. -
Spot Prime:
Apply primer to any bare wood or areas you scraped down to the raw material. If you are making a drastic color change, prime the entire surface. -
Paint the Soffits and Fascia First:
Start at the highest point with your white trim paint. Painting the eaves first prevents drips from landing on your freshly painted gray siding later. -
Cut In the Siding:
Using your angled brush, paint the light gray color into the edges where the siding meets the corner boards and under the lap of each board where rollers might miss.
Step 3: Painting the Siding
-
Apply the First Gray Coat:
Work in small sections, applying the satin light gray paint to the siding. If using a sprayer, follow immediately with a roller (back-rolling) to push paint into the wood grain texture. -
Maintain a Wet Edge:
Always paint from one side of the wall to the other without stopping in the middle of a board. This prevents lap marks from forming where wet paint overlaps dry paint. -
Paint the Underside:
Don’t forget the bottom edge of each lap siding board. I like to crouch down occasionally to check upward angles to ensure no old color is peeking through. -
Apply Second Coat:
Once the first coat is fully dry, apply a second coat for deep, true color coverage and better weather protection.
Add Dimension
For a subtle custom look, paint the window sashes (the moving parts) a dark charcoal or black to create high contrast against the white frames.
Step 4: Detailing the Trim
-
Paint Window Frames:
Switch back to the bright white semi-gloss paint and a clean angular sash brush. Carefully paint the window casings and sills. -
Paint Corner Boards:
Apply the white paint to the vertical corner trim. Use long, smooth strokes to minimize brush marks. -
Check for Drips:
Inspect corners and ledges for paint runs while the paint is still wet and brush them out immediately. -
Clean Up:
Remove painter’s tape carefully while the trim paint is still slightly tacky to prevent peeling. Clean brushes and replace any fixtures you removed.
Step back and admire how the fresh gray and white combination instantly modernizes and brightens your home’s exterior


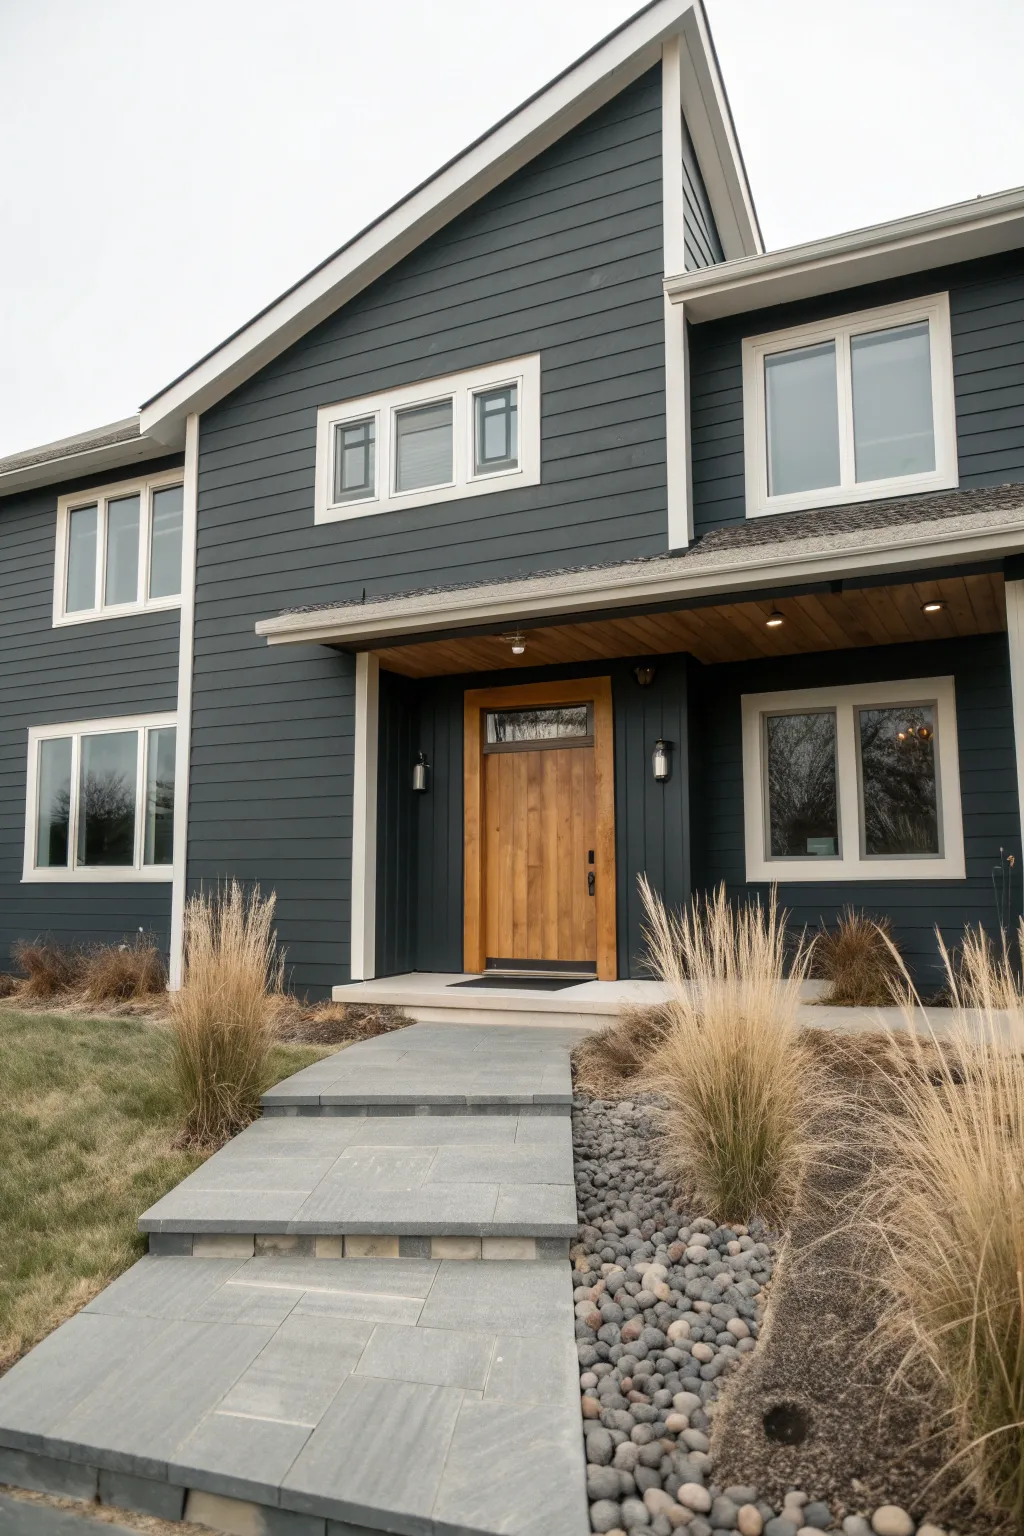
Navy Siding With White Trim

Transform your home’s curb appeal with this classic yet striking combination of deep navy siding and crisp, brilliant white trim. This project creates a timeless look that feels both modern and welcoming, anchored by the warmth of a natural wood-tone door.
Step-by-Step Guide
Materials
- High-quality exterior primer
- Exterior latex paint (Navy Blue – Satin or Eggshell finish)
- Exterior latex paint (Bright White – Semi-Gloss finish)
- Wood stain (Honey or Cedar tone)
- Exterior spar urethane or clear coat
- Pressure washer
- Painter’s tape and plastic sheeting
- Caulk and caulking gun
- Scrapers and sanding sponges (various grits)
- Angled sash brushes (2.5 inch)
- Paint rollers (3/8 inch nap) and extension pole
- Drop cloths
Step 1: Preparation and Cleaning
-
Deep clean the surface:
Begin by thoroughly pressure washing the entire exterior to remove dirt, mildew, and chalky residue. Start from the top and work your way down to ensure dirty water doesn’t streak clean areas. -
Dry time:
Allow the siding to dry completely for at least 24 to 48 hours before applying any primer or paint. Trapped moisture can cause bubbling later. -
Scrape and sand:
Inspect the siding for any peeling or flaking paint. Use a scraper to remove loose debris, then follow up with a sanding sponge to feather out the edges for a smooth transition. -
Repair and caulk:
Fill any cracks, nail holes, or gaps around windows and trim with exterior-grade caulk. Let the caulk cure fully according to the manufacturer’s instructions. -
Protect surrounding areas:
Use painter’s tape to mask off windows, light fixtures, and hardware. Cover landscaping, the porch floor, and the walkway with drop cloths or plastic sheeting to catch drips.
Uneven Sheen?
If you notice ‘flashing’ shiny spots in the navy paint, you likely painted over partially dried sections. Keep a ‘wet edge’ and ensure consecutive strokes overlap before the previous one dries.
Step 2: Painting the Siding
-
Prime the surface:
Apply a coat of high-quality exterior primer, especially if you are painting over a darker color or bare wood. This ensures the navy blue will have true color saturation. -
Cut in the edges:
Using an angled sash brush, carefully paint the navy color along the edges where the siding meets the trim, roofline, and corners. I maintain a ‘wet edge’ here to blend seamlessly with the roller work. -
Roll the main surfaces:
Use a roller with a 3/8 inch nap to apply the navy paint to the broad sections of the siding. Work in small sections, typically 4-foot widths, from top to bottom. -
Apply the second coat:
Once the first coat is dry to the touch (usually 4 hours), apply a second coat of navy paint. Dark colors like this almost always require two coats for full, rich coverage.
Step 3: Trim and Door Detailing
-
Paint the eaves and soffits:
Switch to your bright white paint. Start with the highest points, painting the eaves and soffits first to avoid dripping onto freshly painted lower areas. -
Detail the window frames:
Carefully paint the flat casing around the windows with white semi-gloss. Use a steady hand and an angled brush to get crisp lines against the navy siding. -
Paint vertical trim and posts:
Apply the white paint to corner boards, porch columns, and door frames. Multiple thin coats are better than one thick coat to prevent sagging. -
Prepare the door:
If the door is previously painted, strip it down to bare wood. If it’s new, sand it lightly to open the grain. -
Apply the stain:
Using a clean rag or brush, apply the honey-toned wood stain. Work with the grain of the wood, wiping off excess stain after a few minutes to achieve the desired depth of color. -
Seal the door:
Finish the door with three coats of exterior spar urethane, sanding lightly with fine grit sandpaper between dry coats for a furniture-grade finish. -
Final touches:
Remove all painter’s tape while the final trim paint is still slightly tacky to ensure clean lines. Reinstall light fixtures and house numbers once everything is fully cured.
Add Dimension
To make the porch pop, paint the ceiling a pale ‘haint blue’ instead of pure white. It contrasts beautifully with the navy siding and visually lifts the space.
Step back and admire how the deep blue tones interact with the changing daylight on your revitalized home exterior
BRUSH GUIDE
The Right Brush for Every Stroke
From clean lines to bold texture — master brush choice, stroke control, and essential techniques.
Explore the Full Guide
Warm Beige With Creamy Highlights
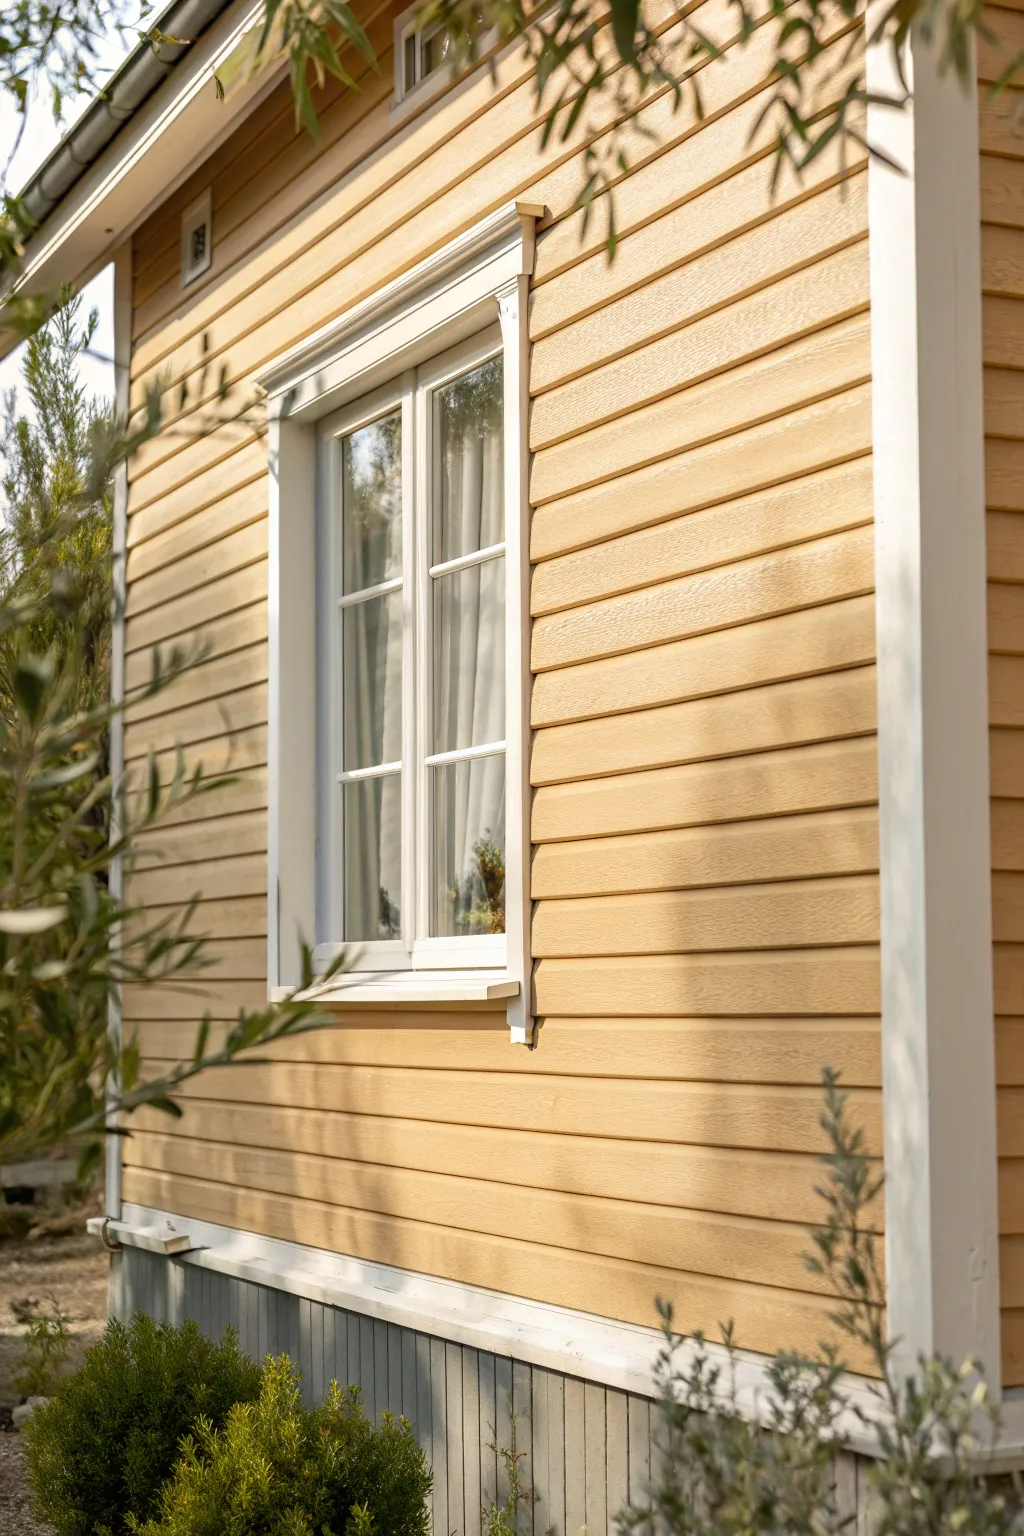
Revitalize your home’s exterior with this inviting palette that pairs warm, sun-kissed beige siding with crisp, creamy white trim for a timeless look. This project creates a soft, welcoming glow that highlights architectural details without overwhelming the landscape.
Step-by-Step Tutorial
Materials
- Exterior acrylic latex primer
- Exterior acrylic latex house paint (Warm Beige / Golden Sand color, satin finish)
- Exterior acrylic latex trim paint (Creamy White / Off-White, semi-gloss finish)
- Exterior acrylic latex foundation paint (Cool Grey, flat finish)
- Pressure washer (or garden hose with nozzle)
- Scrub brush with extension pole
- Exterior house cleaner / TSP substitute
- Caulk gun and exterior-grade acrylic caulk
- Scraper and wire brush
- Sandpaper (80 and 120 grit)
- Painter’s tape (exterior grade)
- Drop cloths and plastic sheeting
- Angled sash brush (2.5 inch)
- Flat brush (3-4 inch)
- Roller frame, extension pole, and medium-nap sleeves (3/8 or 1/2 inch)
- Ladder
Step 1: Preparation & Cleaning
-
Clear the area:
Remove any obstacles near the house walls, such as outdoor furniture, planters, or trellises. Tie back nearby bushes or tree branches to ensure you have clear access to the siding. -
Wash the surfaces:
Using a pressure washer on a low setting or a hose with a scrub brush, clean the siding thoroughly with an exterior house cleaner. Work from the top down to remove dirt, mildew, and chalkiness. -
Scrape loose paint:
Once the wood is dry, inspect for peeling or flaking paint. Use a scraper and wire brush to remove any loose material until you reach a solid surface. -
Sand edges:
Feather out the edges of any scraped areas with 80-grit sandpaper to create a smooth transition, then finish with 120-grit for a uniform texture. -
Repair caulking:
Inspect gaps around windows, door frames, and corner boards. Remove old, cracked caulk and apply fresh exterior-grade caulk to seal these joints against moisture.
Sticky Tape Trouble?
If painter’s tape pulls up paint when removed, score the edge gently with a utility knife before peeling. Always pull the tape away at a 45-degree angle.
Step 2: Painting the Siding
-
Protect trim:
Apply painter’s tape carefully to the edges of window frames, corner boards, and the foundation line if you aren’t painting them immediately. Cover the ground with drop cloths. -
Prime bare spots:
Spot-prime any areas of bare wood resulting from scraping and sanding. If you are making a drastic color change or the old paint is very chalky, apply a full coat of primer. -
Cut in edges:
Using your 2.5-inch angled brush, ‘cut in’ the warm beige paint along the edges where the siding meets the trim and under the laps of the siding boards. -
Apply first coat:
Here I prefer to roll the paint onto the flat surfaces of the siding boards for speed, then immediately back-brush with a wide flat brush to work the paint into the wood grain and ensure even coverage. -
Allow to dry:
Let the first coat dry completely according to the manufacturer’s instructions, typically 4 hours or overnight. -
Apply second coat:
Repeat the painting process for a second coat. This deepens the warm beige tone and provides the necessary durability against weather.
Step 3: Trim & Foundation Details
-
Tape separation:
Once the beige siding is fully cured (give it at least 24 hours), tape off the siding edge where it meets the window trim and corner boards to ensure a crisp line. -
Paint the trim:
Apply the creamy white semi-gloss paint to the window casings, sills, and vertical corner boards. Use the angled sash brush for precision, applying distinct, long strokes. -
Coat the window sashes:
Carefully paint the inner window sashes and muntins (the grid bars). Use a smaller brush if needed and keep a damp rag handy for quick cleanups on the glass. -
Paint the foundation:
Finish by painting the foundation base in a cool grey flat paint. This grounds the house visually and hides dirt splash-back effectively. -
Final touch-ups:
Remove all tape while the paint is still slightly tacky to prevent peeling. Inspect for any missed spots or drips and touch them up with a small artistry brush.
Sun Smart
Chase the shade! Avoid painting in direct, hot sunlight. The paint dries too fast, leading to visible lap marks and poor adhesion. Follow the sun around the house.
Step back and enjoy the soft, inviting glow of your newly refreshed home exterior
Charcoal Body With Soft Light Trim
Capture the crisp lines and striking contrast of modern architecture with this acrylic painting tutorial. You will learn to render deep charcoal siding against bright white trim, all balanced by the warmth of natural wood textures.
Detailed Instructions
Materials
- Canvas board or stretched canvas (11×14 or similar)
- Acrylic paints: Titanium White, Mars Black, Payne’s Gray, Burnt Sienna, Yellow Ochre, Raw Umber
- Flat brushes (various sizes: 1 inch, 1/2 inch, 1/4 inch)
- Small round detail brush (size 1 or 0)
- Ruler or T-square
- Pencil (HB or 2H)
- Painter’s tape (optional)
- Palette and water cup
Step 1: Sketching the Structure
-
Establish the horizon and ground line:
Begin by lightly drawing a line near the bottom third of your canvas for the walkway and landscaping. This grounds your house. -
Map out the rooflines:
Using your ruler, draw the sharp, angular roof peaks. The main peak should dominate the composition, slightly off-center to the left, with the secondary peak overlapping on the right. -
Draft the windows and door:
Sketch the rectangular frames for the windows and the central entryway. Pay close attention to the perspective; the walkway leads the eye directly to the front door, so ensure that spacing feels inviting. -
Define the siding lines:
Lightly rule horizontal lines across the house sections to represent the lap siding. Keep them parallel and evenly spaced to maintain that clean, modern look.
Uneven Lines?
If your siding lines look shaky, use a strip of painter’s tape or the edge of a piece of cardstock to shield the area while you paint the clean straight edge.
Step 2: Blocking in Base Colors
-
Mix the charcoal body color:
Combine Payne’s Gray with a touch of Mars Black and a tiny bit of White. You want a deep, cool slate color. Test it on a scrap paper—it should look almost black but with a distinct blue-gray undertone. -
Paint the siding:
Using a 1/2 inch flat brush, fill in the main body of the house with your charcoal mix. Don’t worry about the white trim lines yet; just get a solid, opaque coat down. I like to let this dry briefly before deciding if a second coat is needed for depth. -
Fill the trim areas:
Once the gray is dry, use Titanium White to carefully paint the thick fascia boards, roof edges, and window frames. You might need two coats here to ensure the white pops against the dark gray. -
Base coat the door and soffit:
Mix Burnt Sienna with a little Yellow Ochre. Paint the front door and the wooden underside of the porch roof. This warm tone is crucial for breaking up the cool grayscale palette.
Add Evening Glow
Glaze a transparent layer of watered-down yellow over the door and porch ceiling to make the recessed lights look like they are glowing warm at dusk.
Step 3: Refining Architectural Details
-
Sharpen the siding:
Mix a slightly darker version of your charcoal color. Using the edge of a flat brush or your ruler as a guide, paint thin shadow lines underneath each horizontal siding plank to create dimension. -
Detail the windows:
Paint the window panes with a mix of black and gray. To suggest reflection, add diagonal streaks of lighter gray or white across the glass surface. -
Wood grain texture:
Using your smallest round brush and a mix of Raw Umber and a little water, paint fine vertical grain lines on the door and the porch ceiling. This adds that realistic, organic touch. -
Add the hardware and lighting:
Use pure black to paint the small sconce lights beside the door. A tiny dot of white or yellow in the center gives the illusion of a lightbulb.
Step 4: Landscaping and Walkway
-
Paint the pavers:
Mix a light neutral gray for the walkway stone. Paint the large rectangular pavers, leaving tiny gaps between them for the grout lines. -
Create the river rocks:
Along the side of the path, dab small ovals of various gray and brown shades. Don’t overthink them; random placement looks more natural for river rocks. -
Add ornamental grasses:
Use a fan brush or an old, splayed bristle brush. Dip it in a mix of Yellow Ochre, White, and a touch of Raw Umber. Flick the brush upward quickly to create wispy, dried grass textures. -
Final touches:
step back and look for contrast. Add a bright white highlight to the top edge of the roof trim and ensure the entryway feels deep and shadowed.
Now you have a stylish architectural portrait that captures modern curb appeal

PENCIL GUIDE
Understanding Pencil Grades from H to B
From first sketch to finished drawing — learn pencil grades, line control, and shading techniques.
Explore the Full Guide
Modern Farmhouse Contrast
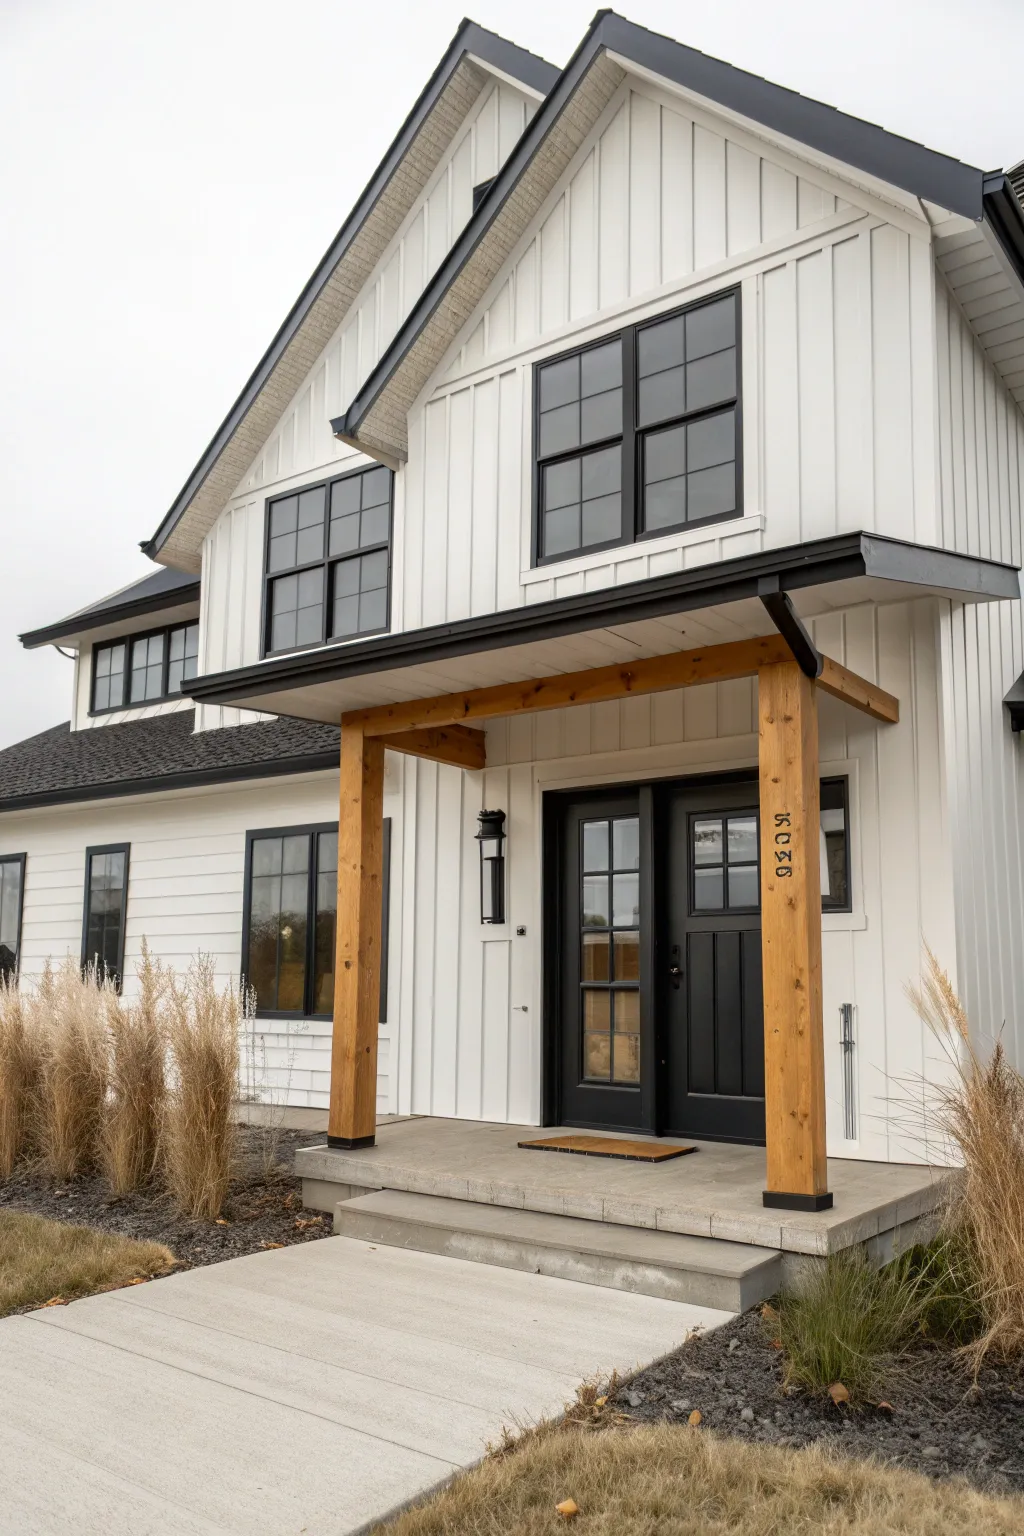
Capture the stark elegance of a modern farmhouse façade with this architectural illustration tutorial. You’ll layer crisp ink lines over soft marker washes to achieve that distinct high-contrast look of white siding against black trim and warm wood accents.
Step-by-Step Tutorial
Materials
- Heavyweight bristol board or mixed media paper (smooth surface)
- H and 2B graphite pencils
- Kneaded eraser
- Ruler or T-square
- Fine liner pens (sizes 0.1, 0.3, 0.5 – black)
- Alcohol-based markers (Cool Greys: C1, C3, C5)
- Alcohol-based markers (Warm tones: beige, saddle brown, burnt umber)
- White gel pen or gouache for highlights
- Masking tape
Step 1: Drafting the Structure
-
Establish the horizon:
Tape doown your paper to prevent shifting. Use your H pencil and ruler to lightly mark a horizon line about a third of the way up the page to ground your composition. -
Block in the main volumes:
Lightly sketch the large geometric shapes of the house. Focus on the two main gable peaks and the projecting porch volume. Keep your lines faint so they are easy to erase later. -
Define the rooflines:
Draw the steep angles of the gable roofs. Pay close attention to the perspective; the peaks should align vertically, and the eaves should have a consistent overhang thickness. -
Adding architectural details:
Sketch the placement of the windows, ensuring the mullions (the grid lines inside the windows) are evenly spaced. Draw the vertical lines for the board-and-batten siding lightly—don’t press too hard. -
Refine the porch:
Outline the thick timber columns and the front door assembly. Be precise with the door setbacks to create depth.
Uneven Marker Coverage?
If your large black areas look streaky, apply a second coat in a perpendicular direction or use a broad-nib marker for better saturation.
Step 2: Inking the Lines
-
Outline the main structure:
Switch to a 0.5 fine liner. Use your ruler to ink the main structural lines of the roof, the corners of the house, and the porch beams. Keep your hand steady for clean, architectural strokes. -
Detailing the windows:
Use a 0.3 pen for the window frames and sashes. Be careful to leave the glass panes clear. For the muntins (the grid), I find a 0.1 pen works best to keep them delicate. -
Inking the siding:
Use the 0.1 pen for the vertical board-and-batten strips. You don’t need to draw every single line perfectly straight all the way down; sometimes a broken line adds character. -
Erase pencil marks:
Once the ink is completely dry—give it a few minutes—gently erase all the graphite guides with your kneaded eraser.
Level Up: Seasonal Vibes
Change the feel by altering the landscape colors—use bright greens for spring or muted browns and sparse branches for a late autumn look.
Step 3: Adding Color and Shadow
-
Base layer for windows:
Use a C5 cool grey marker to fill in the window panes. Leave tiny rectangles of white uncolored to suggest reflections. -
Rendering the white siding:
The house is white, but needs shadow to look 3D. Use a C1 marker to add subtle shadows under the eaves and along the right side of the vertical batten strips. -
Coloring the wood beams:
Start with a beige marker for the base of the porch columns. While it’s still wet, layer in saddle brown to add warmth and grain texture. -
Darkening the roof and trim:
Fill the roof area and the fascia boards with a C5 or black marker. Ensure the coverage is solid and consistent for that high-contrast look. -
Developing the entryway:
Use a burnt umber or dark grey for the front door area, keeping it slightly lighter than the black trim to show it’s recessed.
Step 4: Final Landscapes & Highlights
-
Grounding with concrete:
Use a C3 marker for the porch floor and walkway. Use horizontal strokes to mimic the texture of the steps. -
Sketching the landscaping:
With a thin pen, draw the feathery textures of the ornamental grasses in the foreground. Use quick, upward flicking motions. -
Adding warmth to grass:
Lightly wash over the grasses with the beige and saddle brown markers. Don’t fill them completely; let the paper show through for airiness. -
Final highlights:
Take your white gel pen and add tiny highlights to the black window frames and the edges of the timber columns to make them pop.
Step back and admire the clean lines and bold contrast of your architectural rendering.
Craftsman Earth Tones That Glow
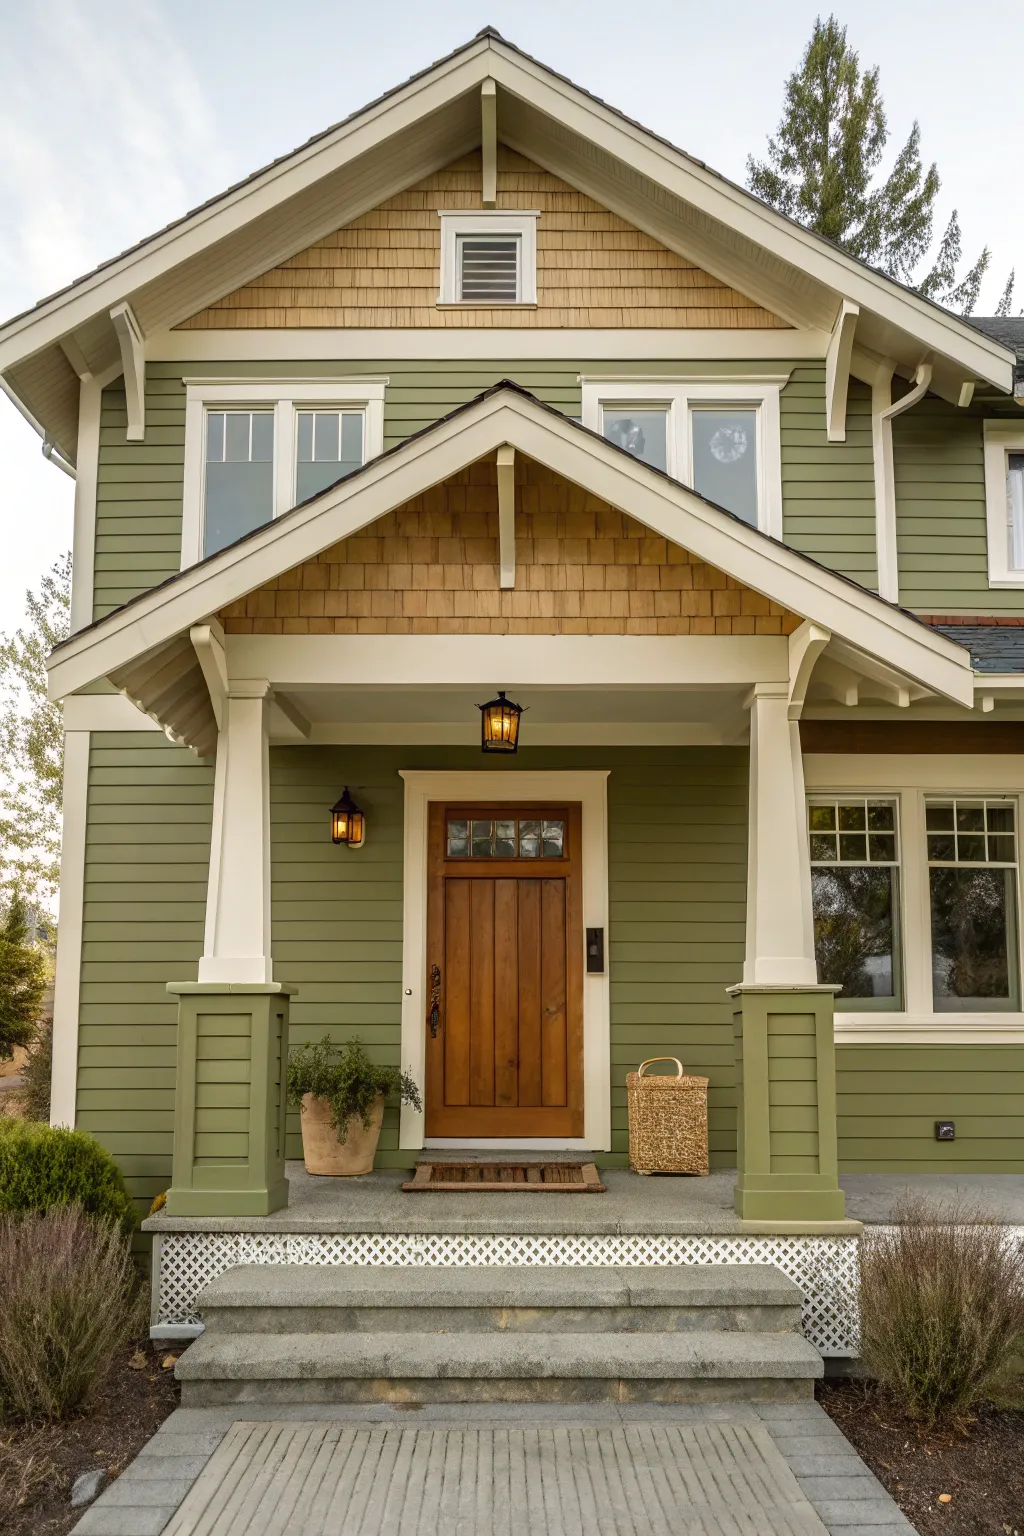
Transform your home’s facade into a welcoming Craftsman masterpiece with this earthy, glowing color palette. By layering rich mossy greens with warm wood tones and crisp cream accents, you’ll achieve a timeless look that feels deeply rooted in nature and architectural tradition.
How-To Guide
Materials
- Exterior acrylic latex paint (Moss Green, Cream/Off-White)
- Exterior semi-transparent stain (Cedar or Warm Oak tone)
- High-quality primer (tinted grey for green areas, white for trim)
- Painter’s tape (exterior grade)
- Drop cloths and plastic sheeting
- Pressure washer
- Scrapers and sanding blocks (80-120 grit)
- Caulk gun and exterior paintable caulk
- 2.5-inch angled sash brush (synthetic bristle)
- 4-inch exterior brush
- Paint roller frame, extension pole, and 3/8-inch nap covers
- Ladder (check stability)
- Sanding sponges for detail work
Step 1: Preparation & Cleaning
-
Clean surfaces thoroughly:
Before any paint touches the brush, power wash the entire exterior to remove dirt, mildew, and chalking. Start from the top, working downward to prevent streaking, and allow the siding to dry completely—usually 24 to 48 hours. -
Scrape loose paint:
Inspect the siding and trim for any peeling or flaking areas. Use a sharp scraper to remove loose paint until you reach a solid edge, ensuring the new coat will bond properly. -
Sand and smooth:
Feather out the edges where you scraped using 80-grit sandpaper to blend them into the surrounding wood. I like to give glossy surfaces a quick scuff sand as well to help the new paint grip better. -
Repair and caulk:
Fill any cracks, nail holes, or gaps around windows and trim with exterior paintable caulk. Smooth the bead with a damp finger or rag immediately, as neat caulking is the secret to a professional-looking finish. -
Protect unpainted areas:
Mask off window glass, light fixtures, and hardware with painter’s tape. Lay drop cloths over bushes, walkways, and the porch floor to catch drips.
Uneven Sheen?
If you notice ‘flashing’ (shiny spots), it usually means the paint dried too fast or coverage is uneven. Apply another thin coat, working when the sun isn’t beating directly on the wall.
Step 2: Painting the Body & Priming
-
Prime bare spots:
Apply a high-quality exterior primer to any raw wood or repaired areas. If you are making a drastic color change, priming the whole house isn’t a bad idea, but spot-priming is essential at a minimum. -
Cut in the siding:
Starting at the top of the house, use your angled brush to ‘cut in’ the moss green paint along the edges of the siding where it meets the trim also under the lap of each board. -
Roll the siding:
While the cut-in paint is still wet, use a roller with a 3/8-inch nap to apply the green paint to the flat surfaces of the siding. Work in small sections (about 3-4 feet wide) to maintain a wet edge. -
Back-brushing technique:
Immediately after rolling a section, run a wide brush over the wet paint horizontally. This pushes paint into the wood grain and levels out roller stipple for a hand-painted look authentic to Craftsman homes. -
Apply second coat:
Once the first coat is fully dry (check the can for recoat times), apply a second coat of green using the same cut-in, roll, and back-brush method for rich, true color coverage.
Step 3: Trim, Accents & Staining
-
Paint the trim:
Switch to the cream or off-white paint for the window casings, corner boards, fascia, and porch columns. Use the angled sash brush for precision, applying two coats to ensure the lighter color fully covers. -
Detail the columns:
Pay special attention to the tapered porch columns. Paint the upper wooden post in cream, but switch to the moss green for the paneled base to ground the structure visually. -
Prepare shingles for stain:
If your gable ends have cedar shakes like the example, ensure they are stripped or clean raw wood. If previously painted, you’ll need to paint them; if raw, they are ready for stain. -
Stain the shakes:
Apply the semi-transparent cedar-tone stain to the shakes in the gables. Work from bottom to top of the gable section, brushing the stain well into the grooves to highlight the texture. -
Paint the front door:
For the entryway, you can either stain the wood door to match the gable shakes or use a high-gloss spar varnish if the wood is already in good condition. If painting, a deep russet or natural wood tone paint works well. -
Final touch-ups:
Remove all tape slowly at a 45-degree angle while the final coat is tacky but not fully cured—this prevents peeling. Walk around with a small brush to catch any missed spots or drips.
Enhance the details
Paint the underside of the roof eaves (soffits) a lighter shade of your trim color. It reflects more light into the windows and makes the roofline feel airy and lifted.
Step back and admire how the warm earth tones harmonize with the landscape, giving your home a sturdy and inviting presence


Bungalow Porch Three-Color Palette
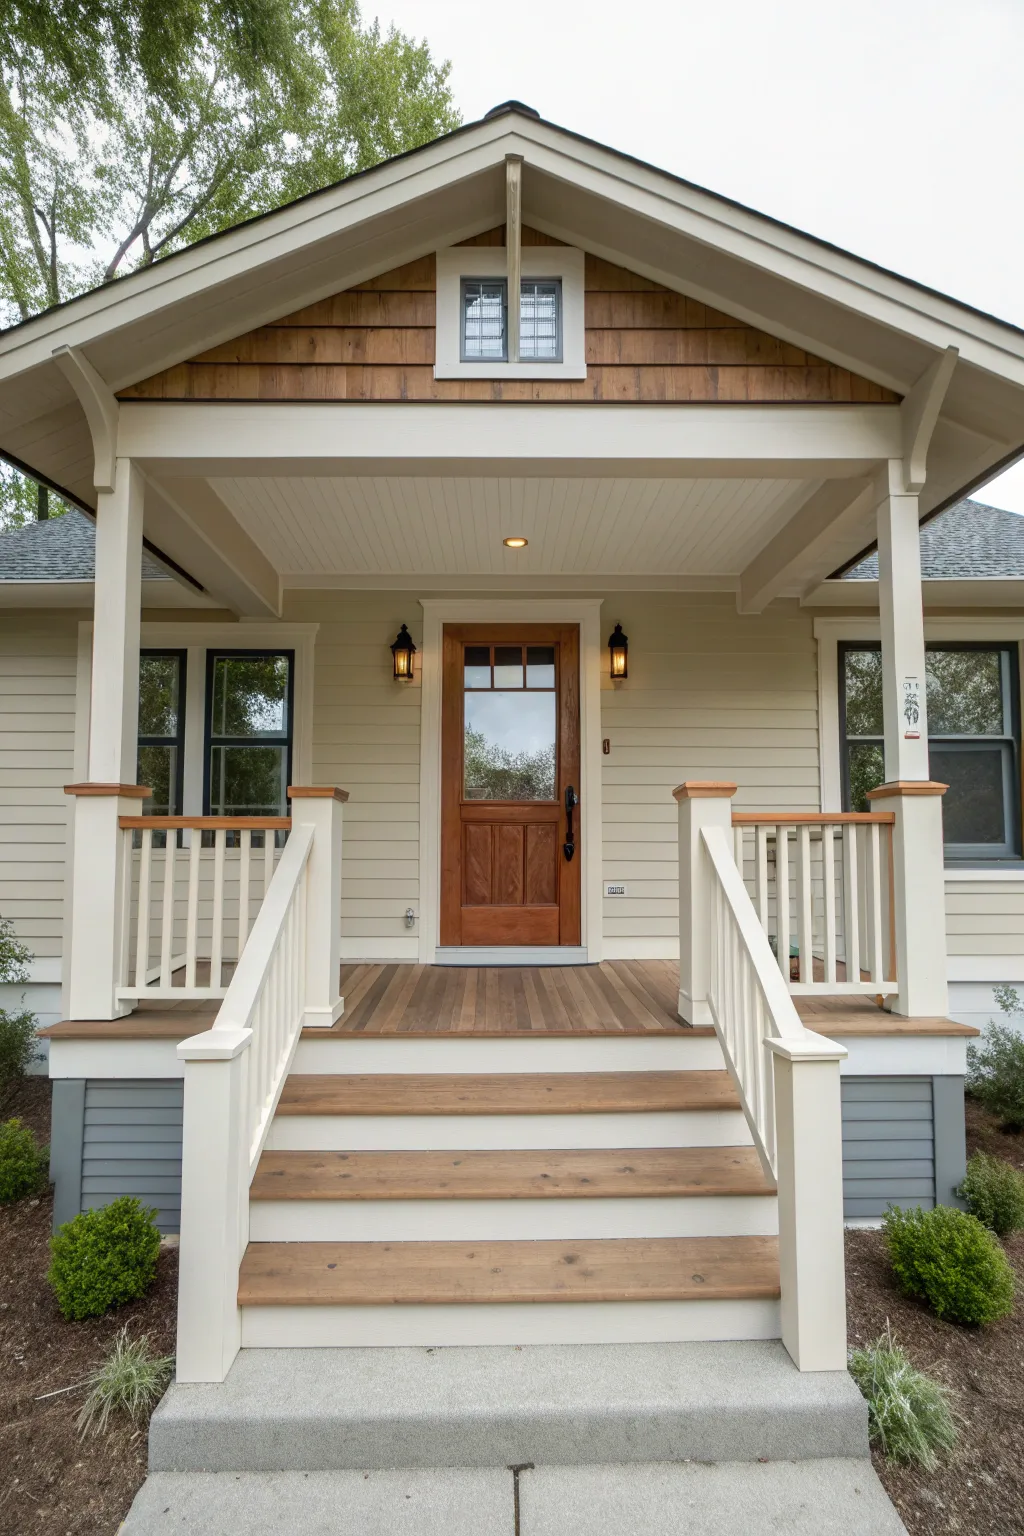
This project focuses on transforming a standard bungalow porch using a sophisticated three-color palette that highlights architectural details. The look combines a warm, neutral siding color with crisp white trim and a contrasting grey-blue foundation skirt for a classic Craftsman aesthetic.
Step-by-Step Guide
Materials
- Exterior acrylic latex paint (Satin sheen for siding: Cream/Beige)
- Exterior acrylic latex paint (Semi-gloss sheen for trim: Warm White)
- Exterior acrylic latex paint (Flat or Satin sheen for skirting: Grey-Blue)
- Clear exterior wood sealer or stain (for door, decking, and accents)
- Pressure washer
- scraper
- sandpaper (80 and 120 grit)
- Exterior primer
- Painter’s tape
- Drop cloths
- 2.5-inch angled sash brush
- 4-inch exterior brush
- Paint rollers (3/8 inch nap) and extension pole
- Caulk and caulking gun
Step 1: Preparation
-
Clean Surfaces:
Begin by thoroughly cleaning the entire porch area with a pressure washer to remove dirt, mildew, and loose paint. Let the wood dry completely for at least 24-48 hours before proceeding. -
Scrape and Sand:
Inspect the siding and trim for any peeling paint. Use a scraper to remove loose flakes, then sand the edges smooth with 80-grit sandpaper to ensure a seamless transition. -
Repair Imperfections:
Fill any cracks, nail holes, or gaps in the siding and trim with exterior-grade wood filler or caulk. Smooth the filler as you apply it to minimize sanding later. -
Protect Areas:
Use painter’s tape to mask off window glass, light fixtures, and the door hardware. Lay down drop cloths to protect the landscaping and any concrete walkways. -
Prime:
Apply a high-quality exterior primer to any bare wood spots or significant repairs. If you are making a drastic color change, priming the entire surface is recommended for better coverage.
Pro Tip: Weather Watch
Check the forecast before starting! Aim for a string of dry days with temperatures between 50°F and 85°F. Direct, hot sun can cause paint to dry too fast and blister.
Step 2: Painting Siding and Foundation
-
Cut in Siding:
Start with your main body color (the warm cream/beige). Use a 2.5-inch angled brush to cut in around the trim, windows, and corners on the main siding clapboards. -
Roll Siding:
Using a roller with a 3/8 inch nap, apply the siding paint to the flat areas of the clapboards. Work in small sections, maintaining a wet edge to avoid lap marks. -
Second Coat Siding:
Allow the first coat to dry according to the manufacturer’s instructions, then apply a second coat for full depth of color and durability. -
Paint Foundation Skirt:
Move to the lower foundation area. Apply the grey-blue paint to the skirting boards beneath the porch. I find a flat or satin finish works best here to hide imperfections near the ground.
Step 3: Trim and Details
-
Paint Trim:
Switch to the semi-gloss warm white paint for the trim. Carefully paint the columns, window casings, fascia boards, and porch railing balusters. The angled sash brush is essential here for clean lines. -
Detail Work:
Pay special attention to the decorative brackets and the underside of the roof overhang. These areas may require a smaller brush to fully coat the crevices without dripping. -
Stain Wood Accents:
If your door, porch floor, and stair treads are natural wood like the example, sand them lightly with 120-grit paper. Apply a clear sealer or a transparent stain to enhance the grain and provide weather protection. -
Cedar Shakes:
For the decorative cedar shakes in the gable peak, apply a semi-transparent stain that mimics a warm cedar tone, contrasting slightly with the painted siding below.
Level Up: Door Pop
Instead of natural wood, consider painting the front door a bold accent color like deep red or sage green to create a stunning focal point against the neutral palette.
Step 4: Final Touches
-
Remove Tape:
Carefully remove the painter’s tape while the paint is still slightly tacky to prevent peeling up the edges of your fresh paint. -
Clean Hardware:
Wipe down the light fixtures and door hardware to remove any dust or accidental paint splatters. Reinstall any removed items. -
Inspect:
Do a final walk-around to check for missed spots or drips. Touch up as necessary with a small artist’s brush.
Step back and admire how this fresh, cohesive color scheme revitalizes the curb appeal of your home.
Colonial Balance With Shutters
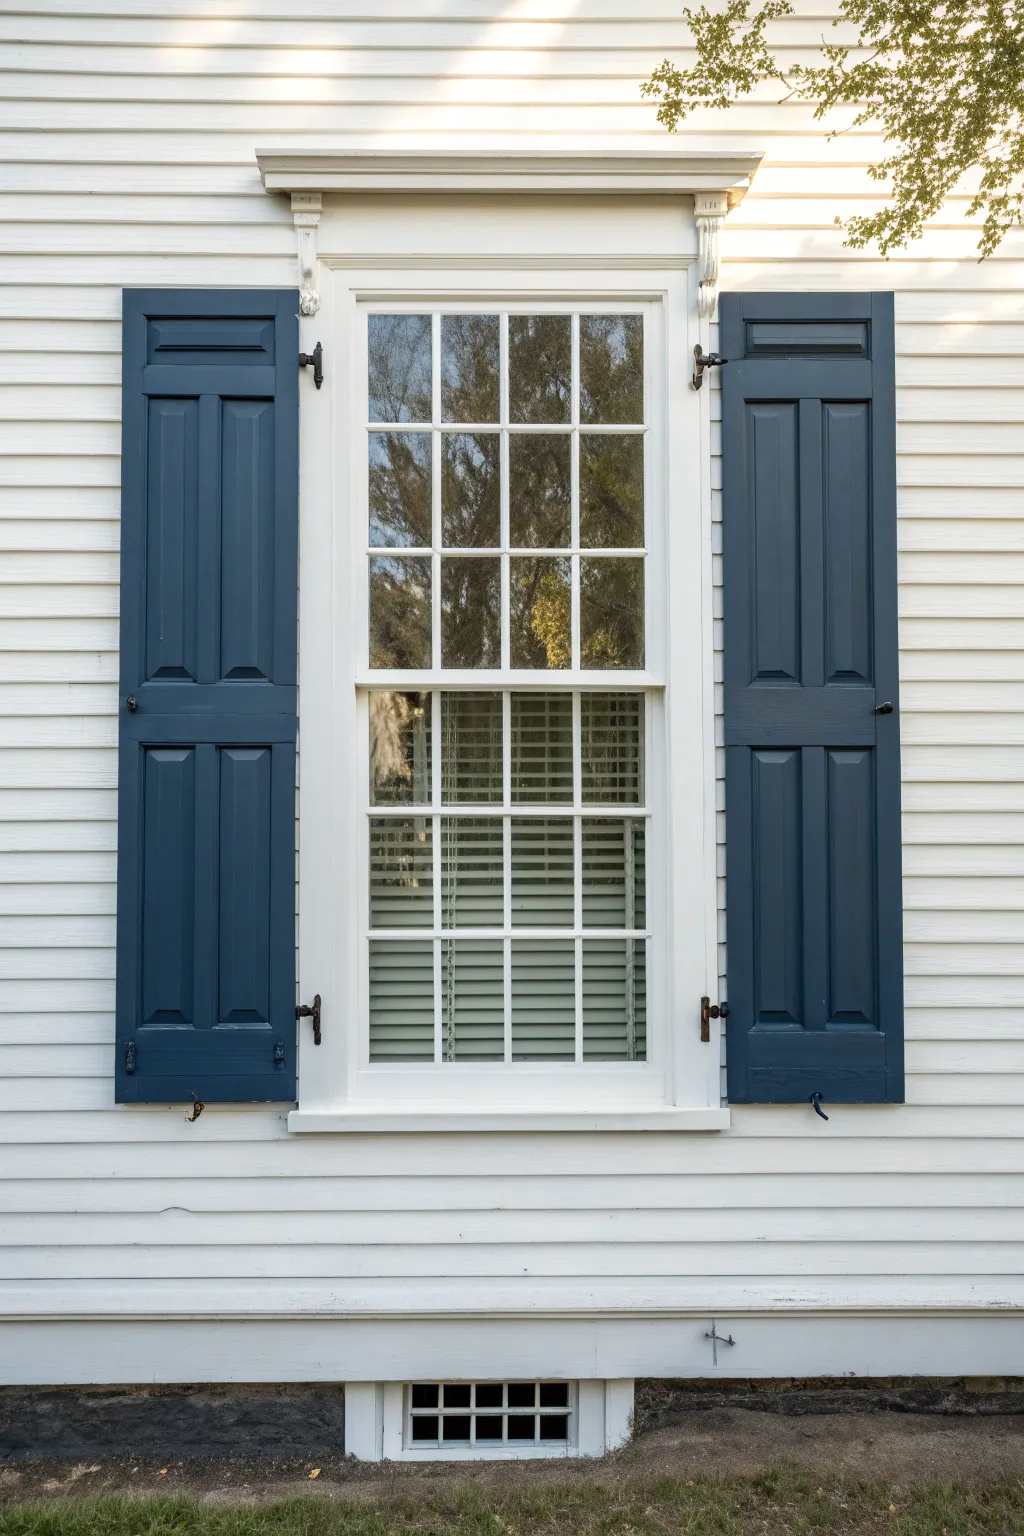
Transform your home’s exterior by focusing on the timeless elegance of this window treatment, featuring crisp white siding contrasted with stately blue shutters. This project revitalizes the façade through careful color blocking and detailed trim work.
Step-by-Step Tutorial
Materials
- High-quality exterior primer
- Exterior semi-gloss paint (bright white)
- Exterior semi-gloss paint (deep slate blue)
- Sandpaper (120 and 220 grit)
- Painter’s tape
- Drop cloths
- Sash brush (2-inch angled)
- Flat trim brush (3-inch)
- Paint scraper
- Caulk and caulk gun
- Ladder (if necessary)
- Screwdriver or drill
Step 1: Preparation & Surface Work
-
Clear the Area:
Begin by removing any screens or storm windows to access the main sash easily. -
Hardware Removal:
Unscrew the shutter dogs (the hardware holding the shutters open) and the hinges if possible. It’s much easier to paint shutters when they are laid flat on sawhorses rather than hanging vertically. -
Surface Cleaning:
Wash the siding, window trim, and shutters thoroughly with a mild detergent or TSP substitute to remove dirt, mildew, and chalking paint. Let everything dry completely. -
Scrape and Sand:
Scrape away any loose or peeling paint carefully. Follow up by sanding all surfaces with 120-grit paper to smooth rough edges, then 220-grit for a fine finish ready for fresh coats. -
Repair Imperfections:
Fill any cracks in the wood or gaps between the trim and siding with exterior-grade caulk. Smooth the bead with a wet finger or cloth for a seamless look.
Hardware Contrast
Don’t paint over your hinges! Remove or tape them. The contrast of black metal against blue wood is key to the colonial look.
Step 2: Painting the Window & Siding
-
Masking Off:
Apply painter’s tape to the glass panes, leaving a tiny gap (about 1/16th inch) so the paint seals the glass to the frame. -
Prime Bare Wood:
Spot-prime any areas where you sanded down to bare wood. This ensures your topcoat adheres properly and lasts longer against the elements. -
Window Sash First:
Using the 2-inch sash brush, paint the muntins (the grid bars) first, working from the center outward. Then move to the sash frame itself using steady vertical strokes. -
Frame and Trim:
Paint the exterior casing and the decorative header above the window with your bright white semi-gloss. I find it helpful to continuously check for drips in the detailed corners of the header molding. -
Siding Refresh:
Paint the clapboard siding surrounding the window. Use long, horizontal strokes with the 3-inch flat brush to follow the wood grain, ensuring full coverage under the lap of each board.
Go Historical
For maximum authenticity, research ‘Historical Colors’ palettes. A dark hunter green or oxblood red are classic alternatives to blue.
Step 3: The Shutter Statement
-
Panel Depth:
Start painting the shutters with your deep slate blue. Begin with the recessed panels, getting the brush into the corners without letting paint pool there. -
Stiles and Rails:
Once panels are done, paint the vertical stiles and horizontal rails. Use long, smooth strokes to minimize brush marks on these flat surfaces. -
Second Coat:
Allow the first coat to dry fully according to the manufacturer’s instructions, then apply a second coat for a rich, true color depth. -
Hardware Restoration:
While the paint dries, clean the metal shutter dogs and hinges. A quick spray of matte black metal paint can make them look brand new. -
Reassembly:
Once the shutters are fully cured (give them at least 24 hours to avoid sticking), reattach them to the house. -
Clean Up:
Remove the painter’s tape from the window glass slowly at a 45-degree angle. Use a razor blade to gently scrape off any stray paint specks on the glass. -
Basement Detail:
Don’t forget the small basement window at the bottom. Give its frame a fresh coat of white to match the trim above, grounding the entire look.
Step back and admire how a simple palette change creates such a welcoming and distinguished facade for your home
Cottage Pastels With Crisp Edges
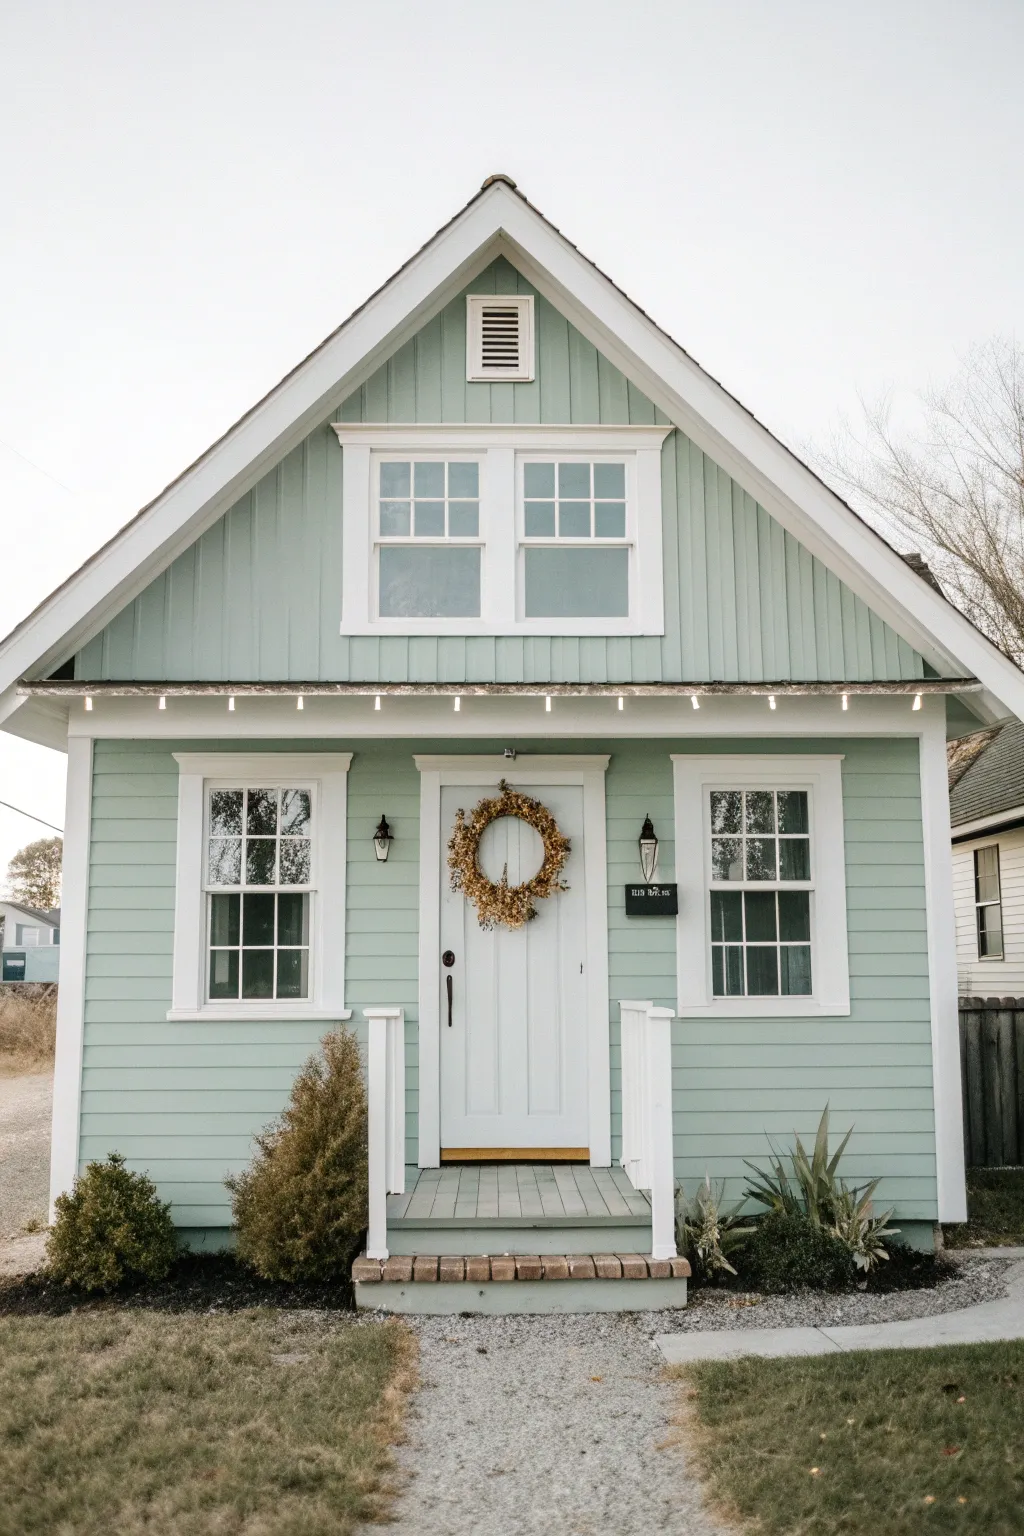
Bring a breath of fresh air to your home’s facade with this charming pastel mint and crisp white color scheme. This project transforms a standard exterior into a storybook cottage using soft hues and contrasting trim to highlight architectural details.
How-To Guide
Materials
- High-quality exterior latex paint (Mint Green/Seafoam)
- Exterior trim paint (Bright White, semi-gloss)
- Exterior porch floor paint (Grey-Green)
- Pressure washer
- Painters tape (exterior grade)
- Drop cloths
- Scraper and wire brush
- Exterior wood filler or caulk
- Caulk gun
- Sandpaper (80 and 120 grit)
- Paint sprayer (optional but recommended for siding)
- Angled sash brushes (2.5 inch)
- Roller frame and extensions
- Ladder
Step 1: Preparation
-
Clean surface:
Begin by thoroughly pressure washing the entire exterior to remove dirt, mildew, and loose paint. Allow the wood siding to dry completely for at least 24 to 48 hours. -
Scrape and repair:
Inspect the siding and trim for peeling paint. Use a scraper to remove any loose flakes, then sand the edges smooth to ensure the new paint adheres properly. -
Fill gaps:
Apply exterior caulk to cracks around windows, door frames, and where siding boards meet corner trim. Use wood filler for any nail holes or gouges in the wood. -
Protect areas:
Cover the windows, light fixtures, and landscaping with plastic sheeting and drop cloths. Tape off the roofline and foundation to prevent accidental overspray or drips.
Step 2: Painting the Siding
-
Prime bare wood:
If your scraping revealed bare wood, spot prime those areas. If you are making a drastic color change, apply a full coat of tinted primer to the entire house. -
Cut in edges:
Using an angled brush, paint the mint green color along the edges where the siding meets the trim, roofline, and foundation. -
Apply main color:
Apply the mint green exterior paint to the siding. A paint sprayer works best for even coverage on vertical siding, but a roller followed by back-brushing works well too. -
Second coat:
Once the first coat is dry to the touch, apply a second coat of mint green to ensure a rich, consistent color without any bleed-through.
Uneven Siding Coverage
If vertical grooves in the siding aren’t catching paint, use a thick-nap roller to push paint into the channels, then immediately smooth it out with a dry brush.
Step 3: Trim and Details
-
Paint window trim:
Switch to your semi-gloss bright white paint. carefully paint the window casings, sills, and sashes. I find an angled sash brush gives the best control here. -
Define the roofline:
Paint the fascia boards and soffits under the roof overhangs in the same bright white. This creates that distinctive ‘crisp edge’ against the pastel siding. -
Highlight corner boards:
Paint the vertical corner trim boards white. These vertical lines help frame the house and emphasize the cottage structure. -
Refresh the door:
Paint the front door and its surrounding frame in the bright white trim color to create a seamless, welcoming entryway. -
Porch columns and rails:
Coat the porch posts and railings in white. Ensure you get into all the nooks and crannies of the woodwork for moisture protection.
Add a Pop of Color
For a bolder look, paint the front door a coral or soft yellow instead of white. This maintains the cottage pastel theme but creates a distinct focal point.
Step 4: Porch and Finishing Touches
-
Paint porch floor:
Apply the grey-green porch floor paint to the decking boards and steps. Use a roller on an extension pole for the main areas and a brush for the edges. -
Install hardware:
Once the paint is fully cured, reinstall or replace exterior light fixtures. Black matte lanterns provide a lovely contrast to the mint and white. -
Hang décor:
Place a natural dried floral wreath on the center of the door to add texture and warmth to the cool palette. -
Add lighting:
String small white lights along the fascia board above the porch for a cozy evening glow that highlights your new paint job. -
Clean up:
Remove all tape and plastic sheeting carefully. Touch up any small drips or mistakes with a small artists brush.
Step back and admire how this soft palette completely refreshes the character of your home
Ranch Refresh With a Unified Garage Door
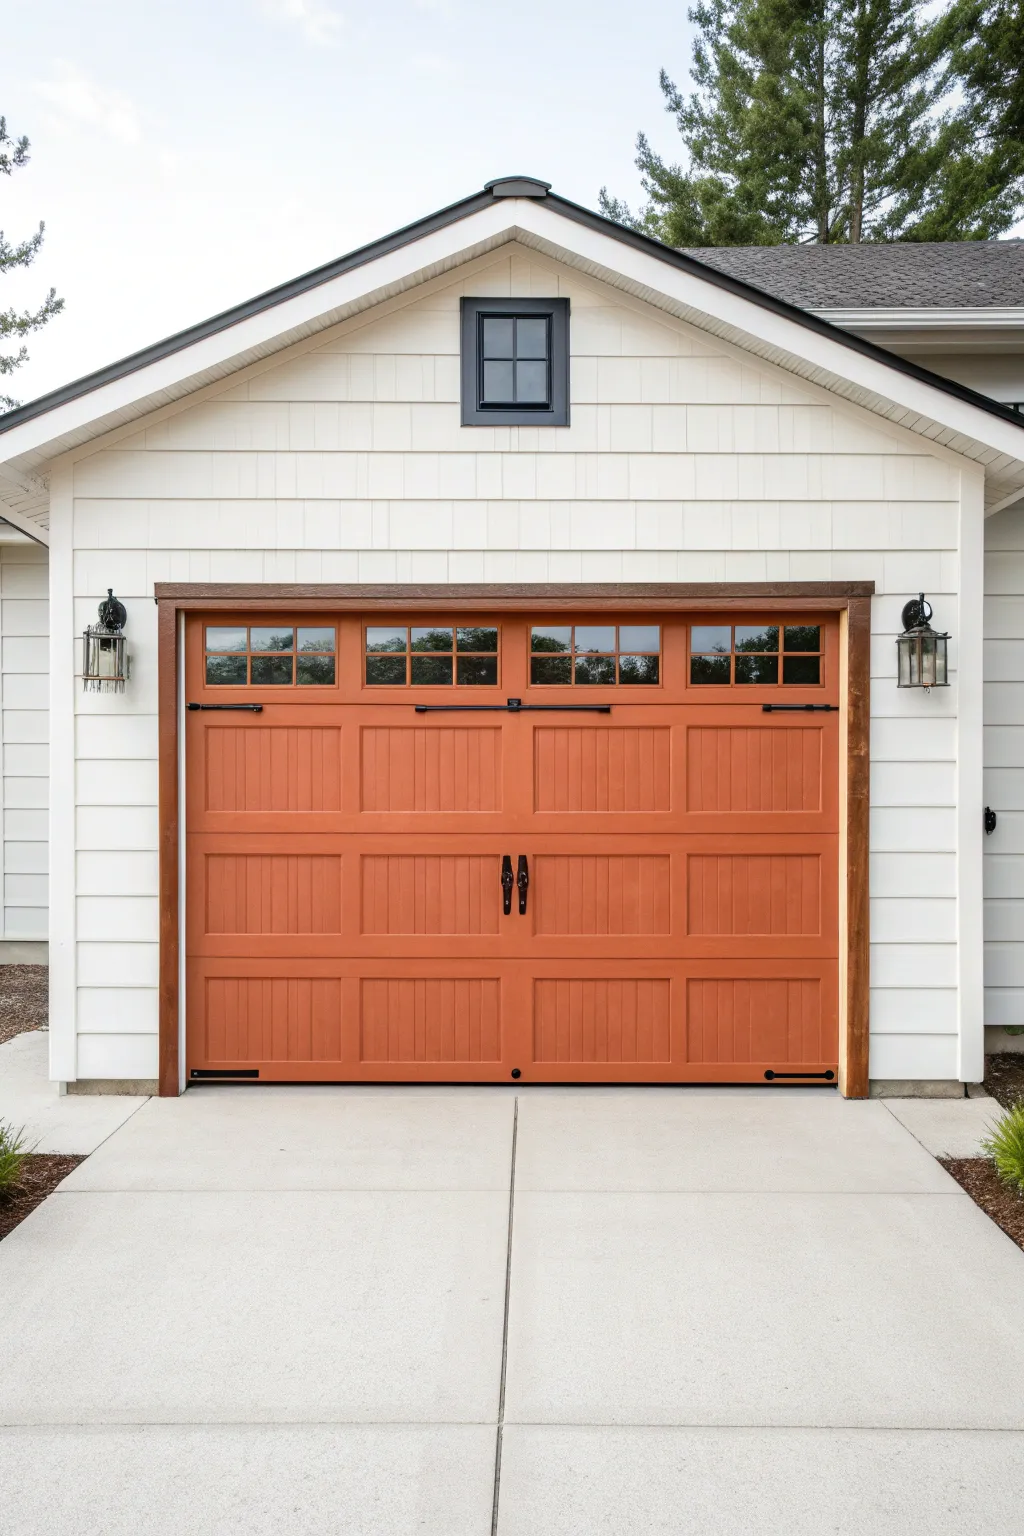
Give your garage door a warm, inviting focal point with this vibrant terracotta paint refresh. This project balances the crisp white siding with an earthy, saturated orange-brown hue that completely modernizes a classic ranch exterior.
Step-by-Step Guide
Materials
- Exterior acrylic latex paint (satin or semi-gloss finish)
- High-quality bonding primer (tintable recommended)
- Mild detergent or TSP substitute
- Scrub brush and sponge
- Painter’s tape (exterior grade)
- Drop cloths or plastic sheeting
- Sandpaper (180 to 220 grit)
- Sanding block
- Synthetic bristle sash brush (2.5 inch)
- 4-inch foam or microfiber roller
- Small roller tray
- Rags for cleanup
- Screwdriver or drill
Step 1: Preparation & Cleaning
-
Check the weather:
Before starting, ensure you have a stretch of 2-3 dry days with temperatures between 50°F and 85°F. Direct sun can dry paint too fast, so aim for an overcast day or paint when the door is in the shade. -
Remove hardware:
Use your screwdriver or drill to carefully remove any decorative handles, hinges, or lock hardware. Store these screws in a labeled baggie so you don’t lose them. -
Protect the perimeter:
Lay down drop cloths on the driveway. Open the garage door slightly to slide a drop cloth underneath the bottom seal to protect the concrete when the door is closed again. -
Clean thoroughly:
Mix a mild detergent or TSP substitute with water. Scrub the entire door surface vigorously to remove dirt, grease, chalkiness, and mildew. Rinse completely with a hose and let it dry fully. -
Sand the surface:
Lightly scuff the existing finish using 180-grit sandpaper on a block. You aren’t trying to remove the old paint entirely, just creating ‘tooth’ for the new coat to stick to. Wipe away all dust with a damp rag. -
Tape off edges:
Apply exterior painter’s tape to the trim surrounding the door frame, the window inserts (if they aren’t removable), and the rubber weatherstripping at the bottom and sides.
Step 2: Priming the Door
-
Apply bonding primer:
If you are painting over a drastically different color or bare metal/wood spots, apply a coat of high-quality exterior bonding primer. Start with recessed panels first. -
Work in sections:
I prefer to tackle one horizontal panel section at a time. Use your brush to cut in the corners and recessed edges of the panels. -
Roll the flat surfaces:
While the brushed edges are still wet, use the 4-inch roller to smooth out the flat areas of the panels and styles. This maintains a ‘wet edge’ and prevents lap marks. -
Let primer cure:
Allow the primer to dry according to the can’s instructions, usually 2-4 hours.
Stuck Shut?
To prevent the door from sticking to the weatherstripping, lift the door slightly while drying, or apply a thin layer of petroleum jelly to the rubber seal once the paint is dry to the touch.
Step 3: Applying the Finish Coat
-
Stir the paint:
Mix your terracotta-colored exterior paint thoroughly. Pour a small amount into your handheld tray. -
Paint window grids first:
If your windows have grilles or muntins, use the tip of your sash brush to paint these delicate areas first. Keep a damp rag handy to immediately wipe any slips on the glass. -
Brush recessed panels:
Just like with the primer, brush the paint into the deep corners and angled edges of the raised panels. Don’t overload the brush to avoid drips in the corners. -
Roll the styles and rails:
Use the foam or microfiber roller to cover the flat vertical and horizontal dividers (styles and rails). Roll gently to avoid creating bubbles. -
Check for gaps:
Raise the garage door slightly to paint the very bottom edge that meets the concrete, ensuring no white strip is visible when the door is closed. -
Apply second coat:
After the first coat is dry to the touch (usually 4+ hours), assess coverage. A bold terracotta color often needs a second coat for true depth and durability. Repeat the painting process.
Faux Wood Grain
For a rustic look, use a gel stain over the terracotta base. Drag a graining tool through the wet glaze to mimic wood texture, then seal with a clear exterior UV topcoat.
Step 4: Finishing Touches
-
Remove tape:
Carefully peel away the painter’s tape while the final coat is still slightly tacky. Pulling it at a 45-degree angle helps prevent peeling up any dry paint. -
Clean hardware:
While the door dries completely (give it 24 hours before heavy use), clean off your metal hardware. If it looks faded, spray paint it matte black to match the photo’s contrast. -
Reinstall hardware:
Once the paint is fully cured and hard, screw the handles and hinges back into place to complete the look.
Step back and admire how a simple color change has completely revitalized your home’s curb appeal
Two-Tone Upper and Lower Split
This tutorial guides you through renovating a home exterior with a striking two-tone design that emphasizes architectural geometry. By combining stark black vertical panelling with crisp white siding and stucco, you’ll create a modern, high-contrast look that instantly boosts curb appeal.
Step-by-Step Tutorial
Materials
- Exterior masonry paint (pure white)
- Exterior wood paint or stain (charcoal or matte black)
- Exterior wood paint (pure white)
- Exterior wood stain (golden oak or teak for door)
- Pressure washer
- Painter’s tape (exterior grade)
- Drop cloths
- Ladder or scaffolding
- Paint rollers with extension poles
- Angled sash brushes (2.5 inch)
- Sandpaper (120 and 220 grit)
- Wood filler (exterior grade)
- Primer (masonry and wood formulations)
Step 1: Preparation and Cleaning
-
Wash the exterior:
Begin by thoroughly pressure washing the entire facade. You need to remove all dirt, moss, mildew, and loose paint from both the upper siding and the lower stucco walls. Let the house dry completely for at least 24-48 hours. -
Repair surfaces:
Inspect the stucco for cracks and the wood siding for rot. Fill any masonry cracks with suitable filler and repair wood imperfections. Sand any rough patches on the wood to ensure a smooth base for the new paint. -
Protect surroundings:
Lay down drop cloths over the flower beds, walkway, and porch area. Use painter’s tape to meticulously mask off window frames, light fixtures, the mailbox, and the door hardware to prevent accidental splatters.
Step 2: Painting the Lower Stucco
-
Prime the masonry:
Apply a high-quality masonry primer to the lower half of the house. This seals the stucco and ensures the topcoat adheres evenly. -
Cut in edges:
Using an angled sash brush, cut in the white exterior masonry paint around the door frame, windows, and along the ground line where the grey foundation begins. -
Roll the main walls:
With a high-nap roller designed for rough surfaces, apply the white paint to the large stucco areas. Work in W-patterns to push the paint into the texture. -
Apply second coat:
Once the first coat is dry, apply a second coat for full opacity and weather protection. The white should look bright and clean against the grey foundation strip.
Bleeding Lines?
If paint bleeds under the tape on the siding, don’t panic. Wait for it to dry fully, then use a small, stiff artist brush with the correct color to dab over the mistake for a crisp edge.
Step 3: Executing the Two-Tone Upper Siding
-
Mark the center line:
Find the exact center vertical line of the upper gable. This usually aligns with the peak of the roof. Mark this line lightly but clearly, perhaps using a plumb line or laser level for accuracy. -
Tape the divide:
Apply painter’s tape strictly along this center line. Decide which side you are painting first—let’s start with the white right side—and tape over the side that will eventually be black to protect it. -
Paint the white section:
Paint the right half of the vertical siding boards in pure white. Use a brush to get into the grooves between boards first, then roll or brush the flat surfaces. -
Let white cure:
Allow the white section to dry completely. This is crucial before moving the tape. -
Reverse the tape:
Remove the tape from the center line. Now, apply fresh tape carefully over the newly painted white edge to protect it while you paint the black side. Press the edge of the tape firmly to prevent bleed. -
Paint the black section:
Apply the charcoal or matte black paint to the left side of the gable. Again, focus on the grooves first. I prefer doing two thin coats of dark paint rather than one thick one to avoid drips. -
Remove tape:
Peel off the center tape while the black paint is still slightly tacky to get the sharpest line possible. If any small bleeds occurred, touch them up with a small artist’s brush later.
Level Up: Lighting
Install up-and-down exterior sconces on either side of the door. At night, the light will graze the texture of the stucco and the vertical timber, highlighting the contrast even more.
Step 4: Details and Finish
-
Frame the windows:
Paint the exterior window trim. In this design, a dark charcoal or black is used for the window frames to tie in with the dark siding, creating a cohesive modern look. -
Refinish the door:
If your wooden door looks tired, sand it down lightly. Apply a golden oak or teak stain to bring out the natural wood grain, providing a warm contrast to the black and white facade. -
Paint the foundation strip:
Paint the visible concrete foundation strip at the very bottom in a neutral grey. This grounds the house visually and hides dirt splashes from rain. -
Final touches:
Reinstall any light fixtures or house numbers. Remove all drop cloths and tape from the walkway. Clean the windows to remove any dust or stray paint specks.
Step back and admire how this bold split-tone design completely transforms the character of the home
Color Match to Roof, Brick, and Stone
Learn to capture the clean, coordinated look of this modern home exterior in an architectural illustration. This tutorial focuses on rendering the interplay between pale sage siding, warm brickwork, and dark trim details using watercolor and gouache.
Step-by-Step
Materials
- Hot press watercolor paper (140lb)
- HB pencil and eraser
- Waterproof fine liner pens (0.1 and 0.3mm)
- Watercolor paints (Sage Green, Yellow Ochre, Burnt Sienna, Payne’s Grey, Alizarin Crimson)
- White gouache
- Round brushes (sizes 2, 6, and 10)
- Ruler or straight edge
- Masking tape
Step 1: Planning and Sketching
-
Establish the perspective:
Begin by lightly sketching the corner of the house. Use two-point perspective, ensuring the lines of the siding and roof converge toward vanishing points off the page to create depth. -
Draft the main structures:
Block in the large rectangular shapes for the walls and the overhanging roof. Add the vertical line for the corner post and the horizontal line separating the siding from the brick foundation. -
Detail the siding and windows:
Use a ruler to draw evenly spaced horizontal lines for the siding panels. Sketch in the window frames, ensuring they align with the perspective lines set earlier. -
Add architectural elements:
Draw the drainpipe running vertically down the corner and the gutter along the roofline. Don’t forget the paver stones in the foreground. -
Ink the lines:
Go over your pencil sketch with a 0.1mm waterproof pen for fine details like siding lines, and a 0.3mm pen for main structural outlines. Let the ink dry completely before erasing pencil marks.
Step 2: Painting the Foundation and Siding
-
Base coat for siding:
Mix a very pale wash of Sage Green with a touch of Yellow Ochre. Apply this to the siding area, keeping it light and airy to match the photo. -
Shadowing the siding:
While the base is drying, mix a slightly darker, cooler green. Once the first layer is dry, paint thin shadow lines just under each horizontal siding board to create dimensionality. -
Brickwork base layer:
For the foundation, mix Burnt Sienna with a hint of Alizarin Crimson. Paint the entire brick area with a variegated wash, dropping in slightly more pigment in random spots for texture. -
Defining individual bricks:
When the brick wash is dry, use a small brush to deepen the color of individual bricks, leaving thin lines of the lighter base wash visible to represent mortar. -
Render the pavers:
Paint the foreground pavers with a diluted mix of the brick color and Payne’s Grey. Use the same technique as the wall bricks but keep the colors more muted and earthy.
Straight Lines Only
If your siding lines look shaky, use a piece of masking tape as a guide for your brush, moving it down for each new line.
Step 3: Roof, Trim and Final Details
-
Dark accents:
Use Payne’s Grey mixed with a touch of Green for the gutters and downspout. Painted solidly, this dark value will anchor the composition. -
Roof texture:
Paint the roof tiles with a dark grey wash. I like to lift out small highlights with a thirsty brush while it’s still damp to suggest the sheen of the tiles. -
Window reflections:
Paint the window glass with a dark grey-blue. While wet, lift out diagonal streaks to mimic reflections of the sky or trees. -
Adding landscape elements:
Stipple in the small green bush in the foreground using varied greens to create a fluffy texture. -
Highlighting with gouache:
Use white gouache to add crisp highlights to the window frames, the edge of the gutter, and the corner trim to make them pop. -
Final shadows:
Add a cast shadow under the roof overhang using a transparent grey wash. This step is crucial for connecting the roof to the walls convincingly.
Add Some Life
To make the illustration feel lived-in, add a small detail like a potted plant near the door or a bird perched on the roof gutter.
Your finished illustration should now beautifully showcase the harmonious color palette of this modern home.
Pop-of-Color Front Door Moment
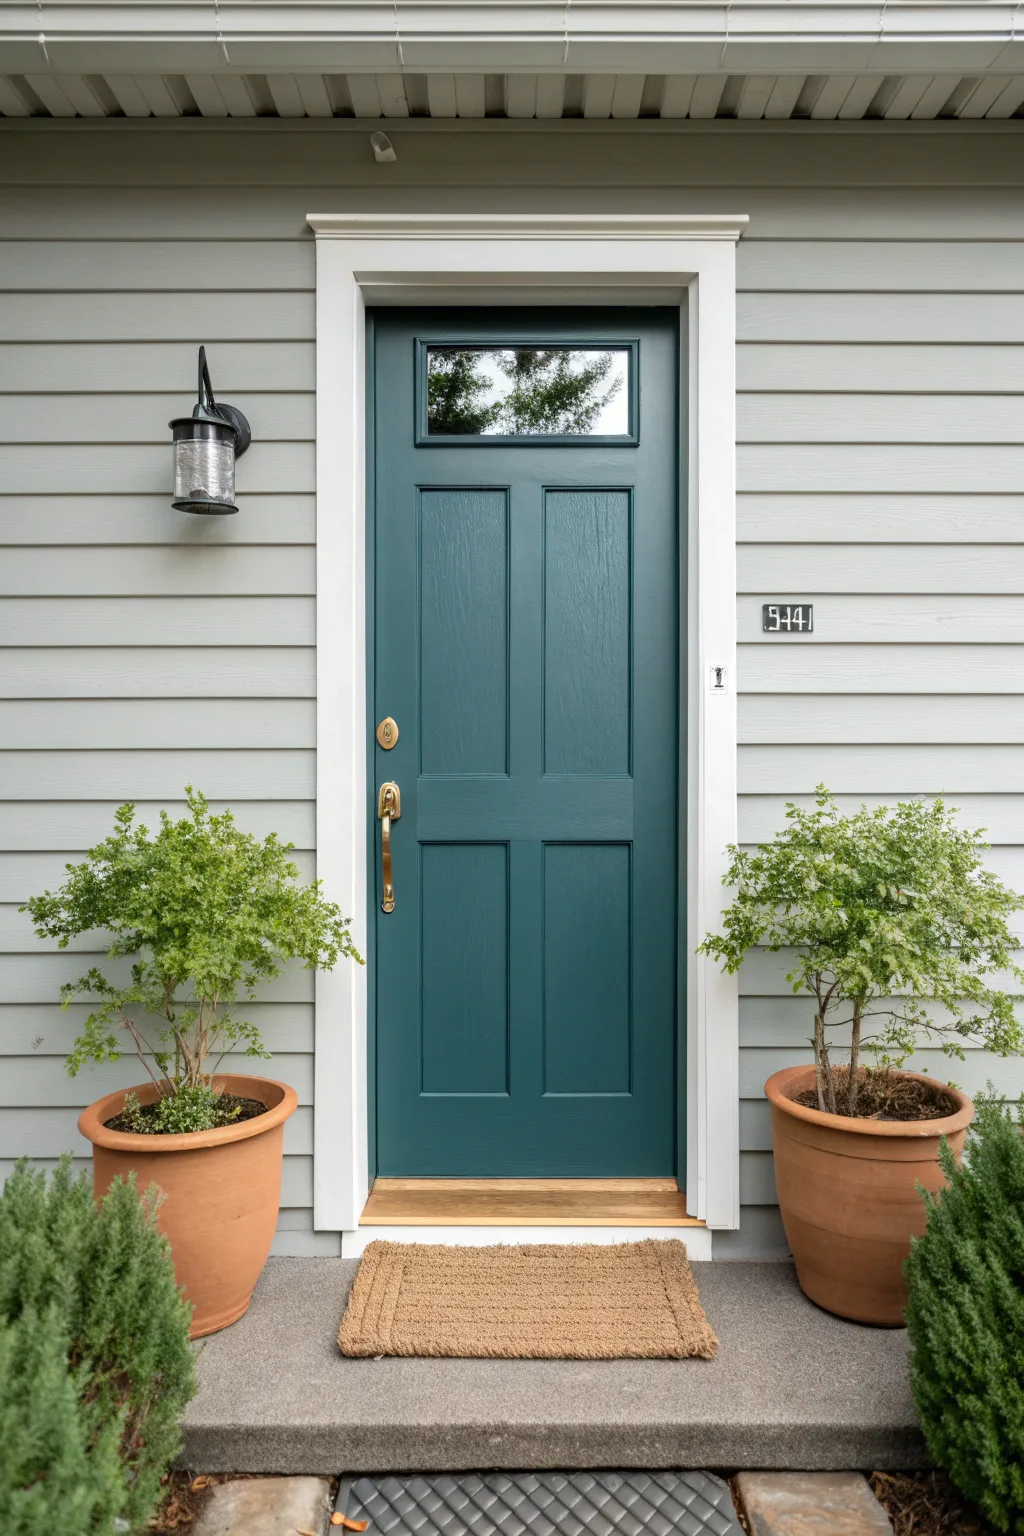
Transform your home’s curb appeal with a simple yet striking project that breathes new life into your entryway. This vibrant teal door, framed by crisp white trim and flanked by lush greenery, creates an inviting focal point that feels both modern and timeless.
Detailed Instructions
Materials
- Exterior semi-gloss paint (Teal/Blue-Green shade)
- Exterior semi-gloss paint (Pure White)
- Course, medium, and fine grit sandpaper (80, 120, 220)
- Painter’s tape (multi-surface)
- Angled sash brush (2.5 inch)
- High-density foam roller (4-6 inch) and tray
- Wood filler or exterior spackle
- Screwdriver or drill
- Drop cloths
- TSP (Trisodium Phosphate) cleaner or degreaser
- Clean rags
- Exterior primer
Step 1: Cleaning and Prep
-
Clear the area:
Begin by removing any welcome mats, planters, or decor items away from the door area to create a clear workspace. Lay down your drop cloths to protect the concrete porch and threshold from drips. -
Remove hardware:
Using your screwdriver or drill, carefully remove the door handle, deadbolt, kick plate, and any other attached metal hardware. It is much easier to paint a flat surface than to paint around intricate locks; store screws in a labeled baggie so they don’t get lost. -
Clean the surface:
Mix TSP with warm water according to package directions and scrub the entire door and the surrounding white trim. This step is critical to remove grime, oils, and dirt that could prevent new paint from adhering properly. -
Rinse and dry:
Wipe down the door with clean water to remove any chemical residue. Allow the door to air dry completely before moving on to sanding.
Step 2: Sanding and Repairs
-
Initial sand:
If the existing paint is peeling or glossy, start with 80-grit sandpaper to knock down the shine and smooth out rough edges. For purely cosmetic updates on sound surfaces, start with 120-grit. -
Fill imperfections:
Inspect the door and trim for dings or deep scratches. Apply wood filler to these spots, slightly overfilling them to account for shrinkage. -
Smooth it out:
Once the filler is dry, sand those spots flush with 120-grit paper. Follow up by sanding the entire door and trim with 220-grit paper to create a velvety smooth surface ready for paint. -
Remove dust:
Vacuum the door and trim thoroughly to catch sanding dust in crevices. Follow up with a tack cloth or damp rag to ensure the surface is perfectly clean.
Brushwork Secret
Add a conditioner like Floetrol to water-based paint. It slows drying time, reducing visible brush marks for a glass-smooth finish.
Step 3: Masking and Priming
-
Protect the glass:
Carefully apply painter’s tape to the glass window pane at the top of the door. Press the edges of the tape down firmly with a putty knife or credit card to seal it against paint bleed. -
Prime the door:
Apply a coat of exterior primer to the door, especially focusing on bare wood spots or filled areas. I like to use a brush for the recessed panels first, then smooth out the flat stiles and rails with a foam roller. -
Prime the trim:
While the door primer dries, apply primer to the door casing and trim if you are making a drastic color change or if the wood is bare.
Level Up Your Entry
Update the hardware finish too! Spray paint old brass handles with a matte black metal paint for a modern, high-contrast look.
Step 4: Painting the Color
-
Paint the panels:
Start applying your teal paint color to the recessed molding of the four door panels using an angled sash brush. Work quickly to smooth out brush strokes before they tack up. -
Roll the center stile:
Use your foam roller to paint the vertical center stile (the strip between the panels). Rolling gives a smoother finish than brushing that mimics a factory spray job. -
Paint the rails:
Paint the horizontal rails (top, middle, and bottom sections) next. Feather the edges where they meet the vertical stiles to avoid hard ridges of paint. -
Finish the vertical stiles:
Finally, paint the long vertical stiles on the far left and right of the door. Run your roller from top to bottom in long, continuous strokes for the cleanest look. -
Second coat:
Allow the first coat to dry according to the manufacturer’s suggested time (usually 2-4 hours). Apply a second coat following the exact same order: panels, center stile, rails, then outer stiles.
Step 5: Trim and Finishing Touches
-
Refresh the trim:
With the door drying (open, so it doesn’t stick!), paint the surrounding door casing with your semi-gloss White paint. Use the angled brush for a crisp line where the trim meets the siding. -
Remove tape:
Carefully score the edge of the painter’s tape on the glass with a utility knife before peeling it away. This prevents the dried paint film from lifting off with the tape. -
Reinstall hardware:
Once the paint has cured—ideally wait 24 hours for it to harden slightly—reinstall your lockset, handle, and house numbers. -
Style the entry:
Place your welcome mat back down and position potted greenery on either side to frame your fresh, colorful work.
Step back and admire how a single weekend project completely revitalized the character of your home entrance
Deep, Moody Exterior With Warm Accents
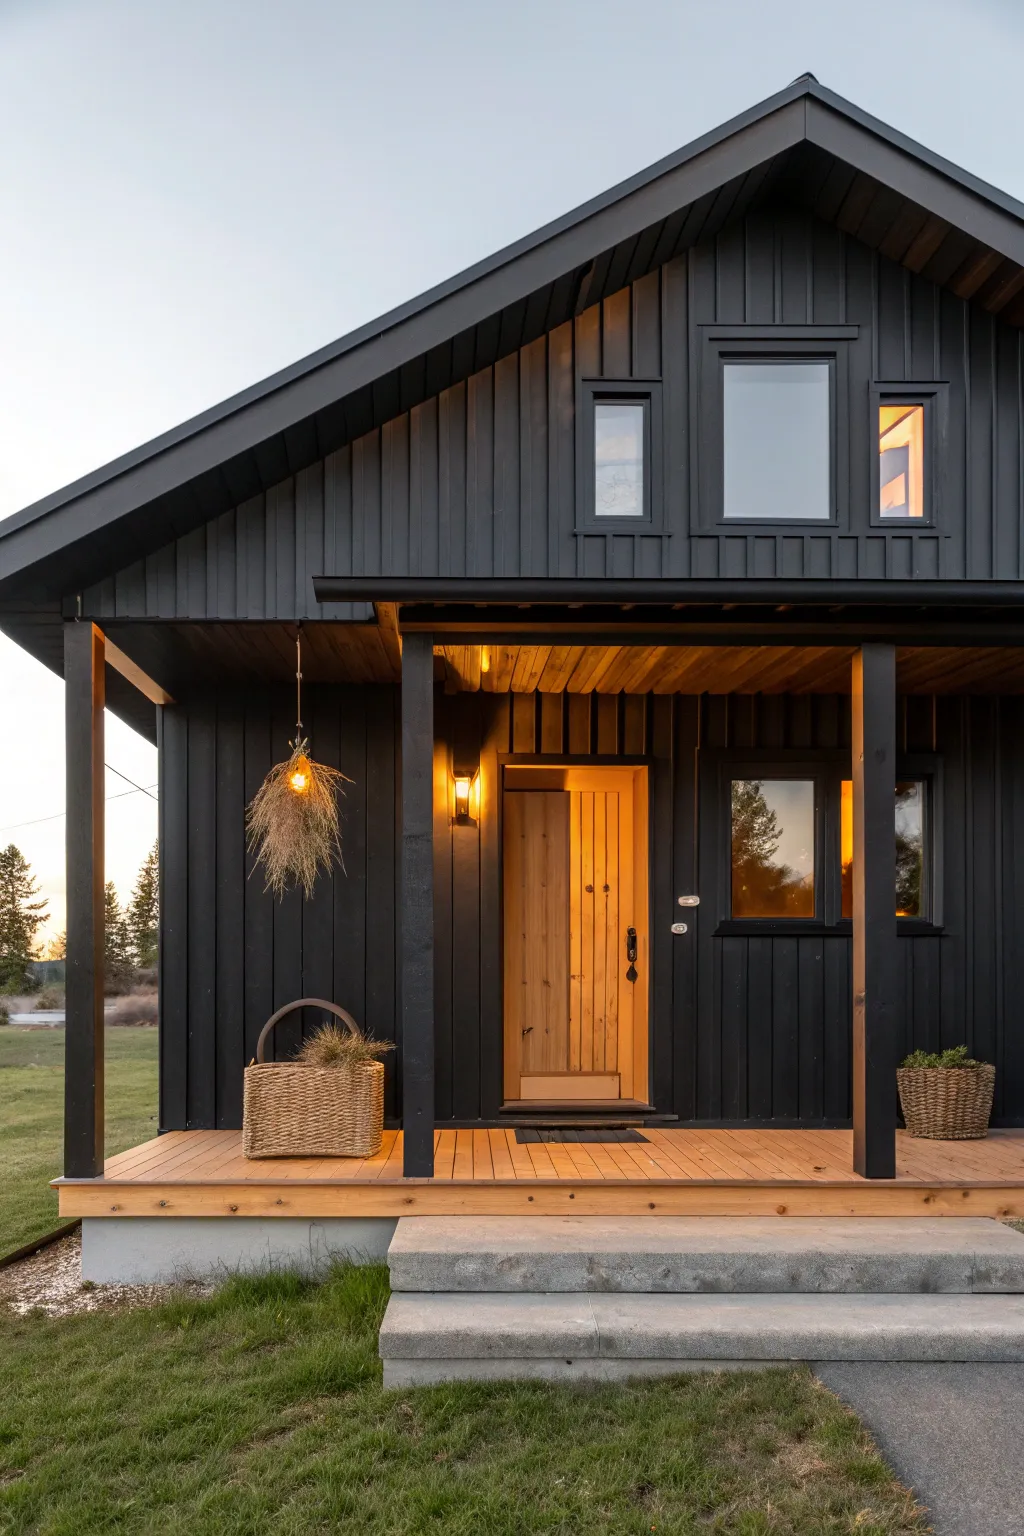
Transform a plain exterior into a striking, moody statement piece by combining deep matte black siding with warm, inviting natural wood tones. This project captures the essence of modern Scandinavian design, balancing dark drama with cozy, illuminated accents.
Step-by-Step
Materials
- High-quality exterior primer (tinted gray)
- Exterior acrylic latex paint (matte or flat finish, color: Tricorns Black or similar deep charcoal)
- Semi-transparent exterior wood stain (color: Cedar or Natural/Honey)
- Exterior clear sealer (matte or satin)
- Painter’s tape and plastic drop cloths
- Pressure washer or heavy-duty scrub brush
- Wood filler and exterior caulk
- Sandpaper (80 and 120 grit)
- Paint sprayer (airless recommended for siding)
- Angled sash brushes (2.5 inch and 1.5 inch)
- Roller set with extension pole
- Ladder or scaffolding
- Outdoor lighting fixtures (sconces and pendant)
- Decorative planters and baskets
Step 1: Preparation & Cleaning
-
Assess and Repair Siding:
Inspect your existing board-and-batten or vertical siding for any rot or damage. Replace compromised boards and fill smaller cracks or nail holes with exterior-grade wood filler, smoothing it out once dry. -
Deep Clean surfaces:
Thoroughly pressure wash the entire exterior to remove dirt, mildew, and chalky residue. This step is critical for paint adhesion; if you skip it, your beautiful black paint might peel prematurely. -
Caulk Gaps:
Apply fresh exterior caulk around windows, door frames, and trim joints where necessary to ensure a weather-tight seal and a professional, seamless look. -
Protect Surrounding Areas:
Cover the ground, landscaping, and any unpainted hardware with plastic drop cloths. Use painter’s tape to meticulously mask off the windows, door, and porch floor if you aren’t refinishing them immediately.
Tinting Tip
Ask the paint store to mix 2-3 ounces of black colorant into your primer. Gray primer makes achieving true black much faster.
Step 2: The Dark Transformation
-
Prime the Surface:
Apply a coat of gray-tinted primer. Using a gray tint rather than white helps the final black topcoat cover much better, requiring fewer layers to achieve that deep saturation. -
Cut in Edges:
Using your angled sash brush, ‘cut in’ the black paint around windows, rooflines, and difficult corners where a sprayer or roller might miss. -
Apply First Coat of Black:
Using an airless sprayer for the smoothest finish, spray the main siding sections with your matte black exterior paint. Maintain a consistent distance and overlap your strokes by 50%. -
Back-Roll if Necessary:
If the siding texture is rough, have a helper follow behind the sprayer with a roller to push the paint into the wood grain and grooves. -
Second Coat Application:
Allow the first coat to dry according to the manufacturer’s instructions, then apply a second coat to ensure a completely opaque, rich finish that absorbs light. -
Paint Trim and Posts:
Don’t forget the vertical posts and window trim. For this look, paint them the same matte black as the siding to create a monolithic, modern silhouette.
Step 3: Warm Wood Accents
-
Prep the Porch and Door:
Sand the porch decking, the front door, and the soffit (underside of the roof overhang) down to bare wood to remove old finishes and open the grain. -
Stain Application:
Apply a semi-transparent stain in a warm tone like Cedar or Honey. I like to work in small sections of 2-3 boards at a time to keep a wet edge and avoid lap marks. -
Detail the Soffit:
Staining the soffit is key to this look. Use a brush or pad to apply stain to the ceiling boards, creating a warm ‘glow’ that contrasts beautifully against the black siding. -
Seal the Wood:
Once the stain is dry, apply a clear exterior sealer to the deck and door to protect against foot traffic and UV rays.
Golden Hour Glow
Use ‘amber’ or ‘vintage’ style LED bulbs. Clear glass filaments enhance the golden wood tones better than frosted white bulbs.
Step 4: Final Styling & Lighting
-
Install Lighting:
Mount warm-toned sconces beside the door and hang a pendant light on the porch. The yellow temperature of the bulbs (around 2700K) is crucial for creating that amber reflection on the wood. -
Clean Windows:
Remove the masking tape and clean any paint splatter from the glass to make the reflections crisp. -
Style the Porch:
Place a woven basket planter with greenery and perhaps a dried botanical hanging arrangement to soften the hard architectural lines.
Step back and admire how the moody dark siding makes the warm wood tones pop with an inviting glow.
Monochrome in One Color Family
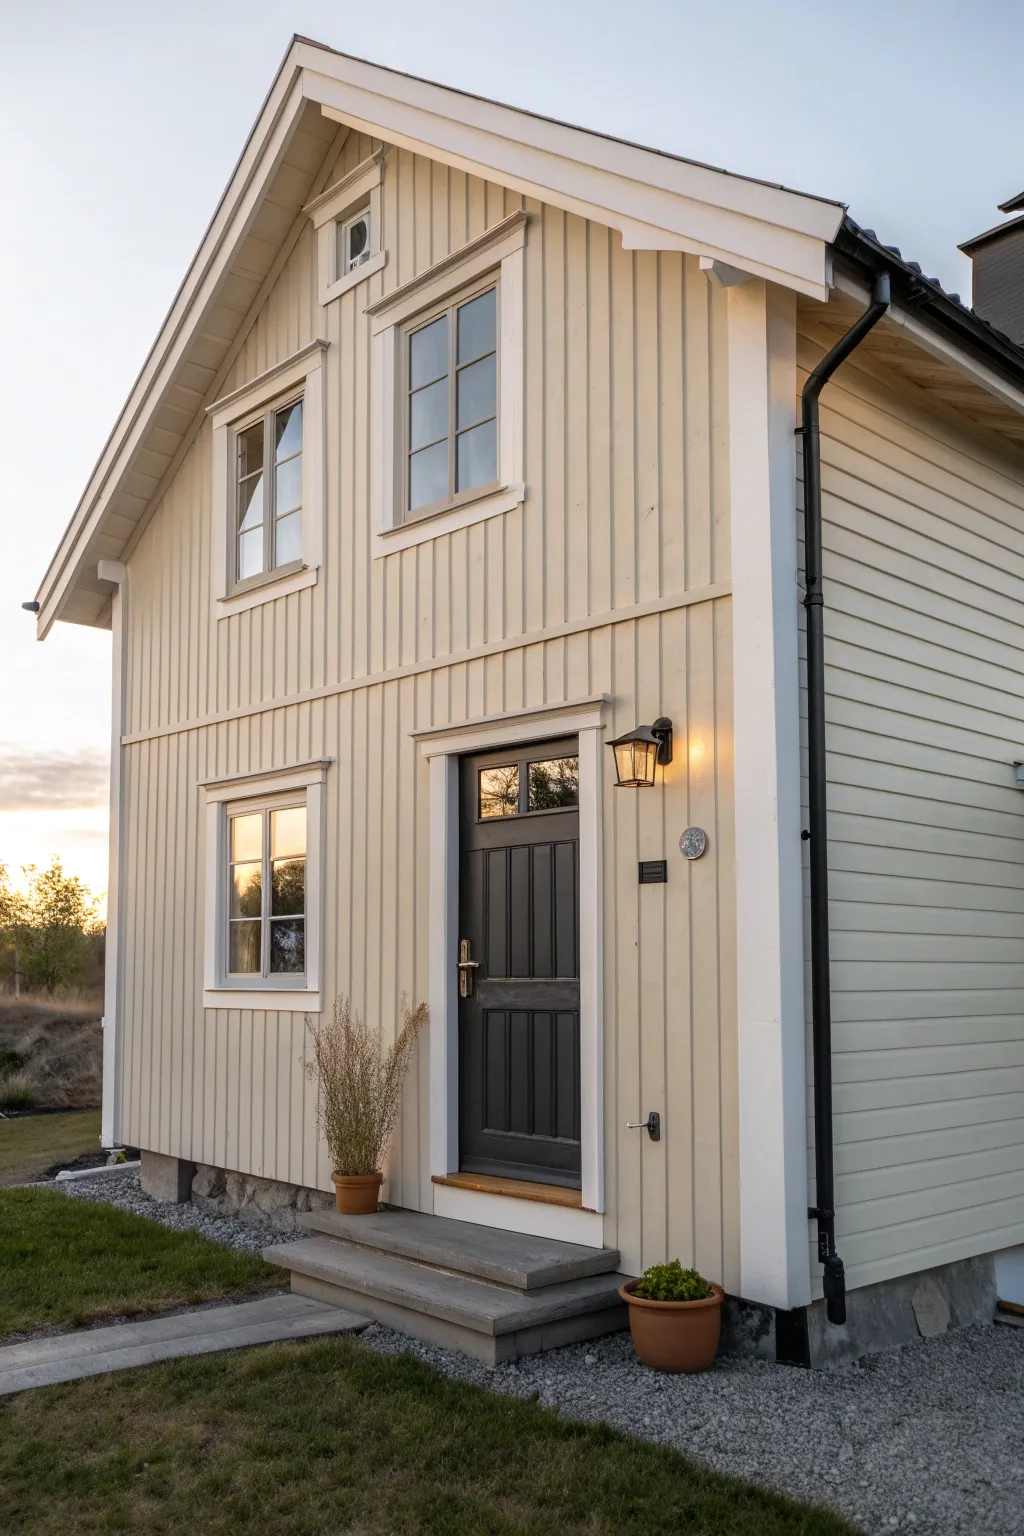
Embrace the serenity of Scandinavian design by wrapping your home’s exterior in soft, monochromatic cream tones that feel both warm and modern. This project focuses on subtle contrast using sheer varying shades within the same color family, grounded by a dark door for a sophisticated finish.
Detailed Instructions
Materials
- High-quality exterior primer
- Exterior acrylic latex paint (Light Cream/Oatmeal shade)
- Exterior semi-gloss trim paint (Pure White)
- Exterior satin or semi-gloss paint (Dark Charcoal/Black for door)
- Angle sash brushes (2.5 inch)
- Paint rollers with extension pole (3/8 inch nap)
- Painter’s tape
- Pressure washer
- Drop cloths
- Caulk and caulking gun
- Sanding block (medium grit)
Step 1: Preparation & Priming
-
Clean surface:
Begin by thoroughly pressure washing the entire siding to remove dirt, mildew, and old loose paint. Allow the wood to dry completely, ideally for 24-48 hours. -
Scrape and sand:
Inspect the siding for any peeling paint. Scrape these areas down and use a sanding block to smooth the edges so the new paint transitions seamlessly. -
Caulk gaps:
Run a bead of exterior-grade caulk along cracks, joints near windows, and where trim meets siding to ensure a weather-tight seal. -
Masking:
Apply painter’s tape carefully around window glass, light fixtures, and the door hardware. Cover the ground and nearby landscaping with drop cloths. -
Prime the wood:
Roll or brush a coat of high-quality exterior primer over the bare wood siding. This step is crucial for ensuring your subtle cream color looks true and adheres properly.
Step 2: Painting the Siding
-
Select your cream:
Choose a soft, warm cream or oatmeal shade. I personally prefer testing a small patch first to see how the color changes in morning versus evening light. -
Cut in edges:
Using your angle sash brush, paint along the edges of the siding boards, under the eaves, and around the window frames. -
Roll the siding:
Use a roller on an extension pole to cover the larger flat areas of the vertical siding. Work in sections of 3-4 boards at a time to maintain a wet edge. -
Back-brushing:
Immediately after rolling, run a brush vertically down the length of the boards. This pushes paint into the wood grain and smooths out roller texture. -
Second coat:
Once the first coat is dry (check your can for recoat times), apply a second coat using the same cut-in and roll method for a rich, solid finish.
Uneven Coverage?
If the cream color looks patchy after two coats, you might be stretching the paint too thin. Load your brush more heavily and apply with confident strokes rather than over-brushing.
Step 3: Trim & Details
-
Painting trim:
Switch to your pure white semi-gloss paint. Carefully brush the corner boards, window casings, and fascia boards. The white should offer a crisp, subtle pop against the cream siding. -
Window sashes:
For the window sashes (the parts holding the glass), use a smaller brush. Paint these carefully in the same cream tone or a slightly darker taupe if you want subtle depth, though keeping them light maintains the monochromatic feel. -
The door statement:
Paint the front door in a dark charcoal or soft black. This provides a necessary anchor point for the eye amidst the light monochromatic scheme. -
Painting the foundation:
If your foundation is visible concrete, paint it a neutral grey that bridges the gap between the ground and the siding. -
Final touches:
Remove all painter’s tape while the final coat is still slightly tacky to prevent peeling. Reinstall any light fixtures or house numbers once fully cured.
Add Texture
Install a simple matte black outdoor sconce next to the door. The dark metal hardware echoes the door color and breaks up the large vertical lines of the siding.
Step back and admire how a single color family can create such a sophisticated and welcoming entrance to your home
Terracotta and Sunbaked Neutrals
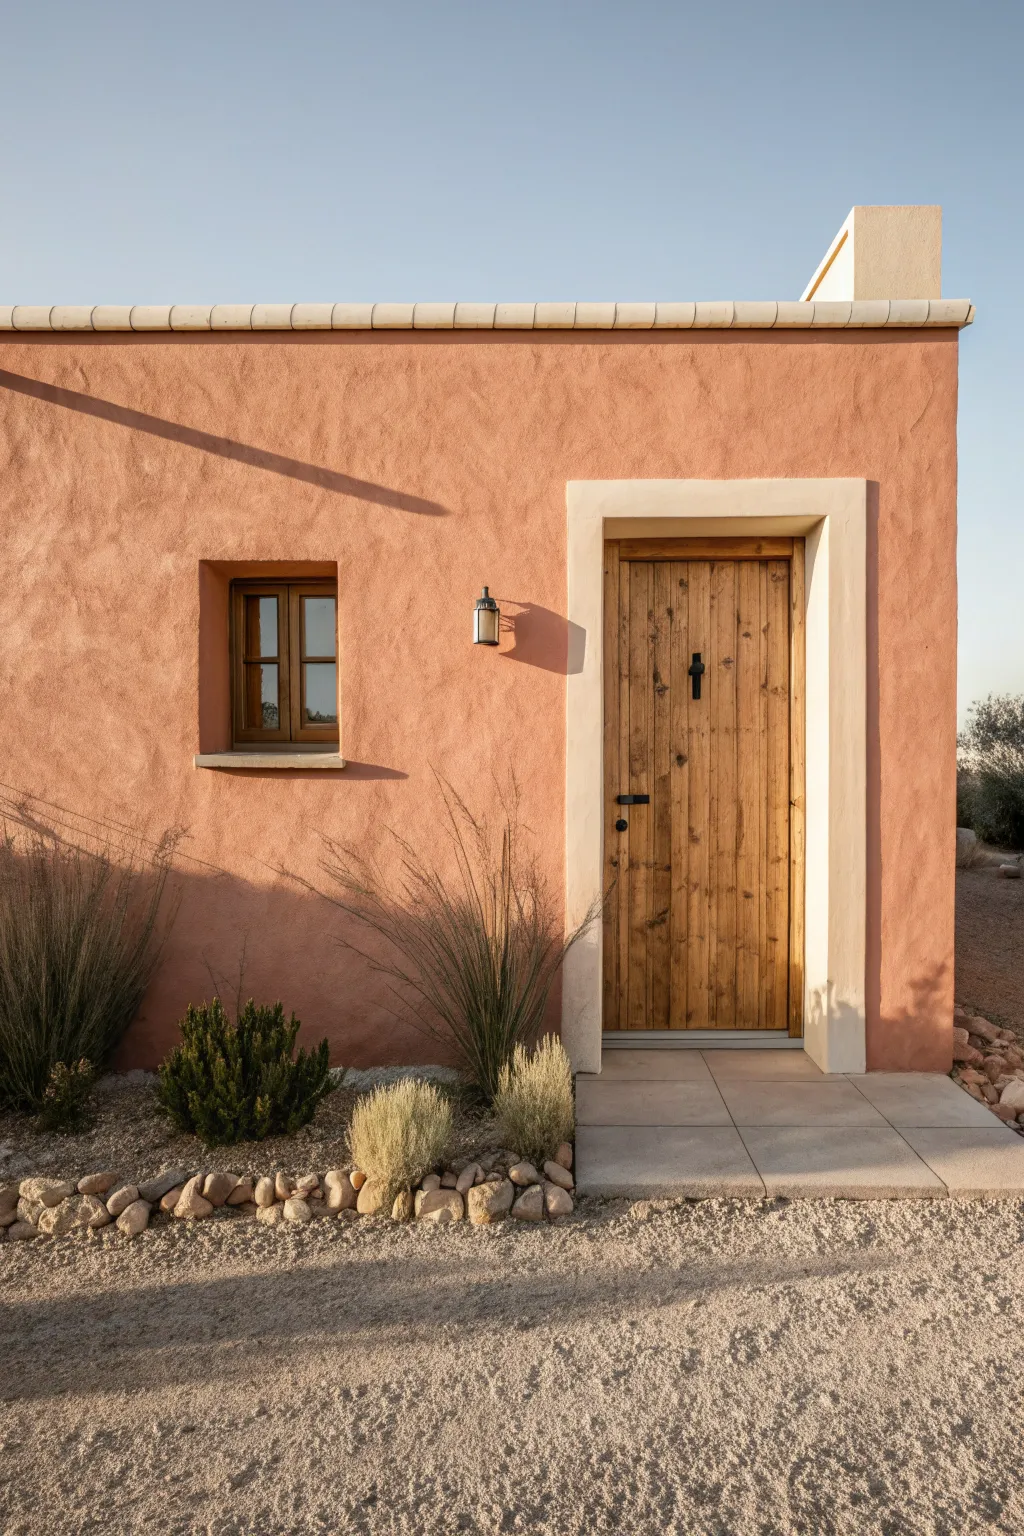
Capture the warmth of a Mediterranean afternoon with this textured wall painting tutorial. You’ll recreate the look of sunbaked stucco, weathered wood, and stark shadows using acrylics and modeling paste to bring depth and realism to your canvas.
Step-by-Step Guide
Materials
- Stretched canvas or canvas board (16×20 inches recommended)
- Acrylic paints (Terracotta, Burnt Sienna, Yellow Ochre, Titanium White, Raw Umber, Black, Unbleached Titanium)
- Acrylic modeling paste or texture medium
- Palette knife
- Flat brushes (1-inch, 1/2-inch)
- Round detail brushes (size 2 and 4)
- Pencil and ruler
- Painter’s tape
- Sandpaper (fine grit)
- Matte varnish
Step 1: Creating the Textured Base
-
Texture application:
Begin by spreading a layer of acrylic modeling paste over the main wall area of your canvas using a palette knife. Don’t smooth it out perfectly; use random, sweeping strokes to mimic the irregularities of real stucco plaster. -
Defining smooth areas:
While the paste is wet, carefully scrape away or smooth down the areas where the door frame, window frame, and sky will go. You want the wall to be rough, but these architectural elements should be relatively flat. -
Drying time:
Allow the texture paste to dry completely, preferably overnight. Once hard, lightly sand any overly sharp peaks that might damage your brushes later. -
Sketching the layout:
Using a pencil and ruler, lightly draw the horizon line for the gravel, the vertical rectangle for the door frame, and the smaller square for the window. Add the roofline near the top.
Texturing Like a Pro
For ultra-realism, mix fine sand into your base paint for the wall instead of just modeling paste. It catches the light exactly like real stucco.
Step 2: Blocking in Color
-
Painting the sky:
Mix Titanium White with a tiny touch of cool blue. Paint the sky area at the top with horizontal strokes, blending it to be slightly lighter near the horizon line to suggest atmospheric depth. -
Base terracotta coat:
Mix Terracotta with a bit of Yellow Ochre and Titanium White. Apply this base color over the textured wall area. work the paint into all the crevices of the texture paste for solid coverage. -
Adding wall variation:
While the base coat is still slightly tacky, dry-brush a mixture of pure Terracotta and Burnt Sienna in random patches. This creates that uneven, sun-bleached look typical of aged plaster. -
Door frame foundation:
Paint the door frame using Unbleached Titanium mixed with White. It should be a warm, creamy off-white, not a stark refrigerator white, to match the warm tones of the scene.
Fixing Flat Shadows
If your shadows look like grey stickers, glaze over them with a thin wash of your wall color (terracotta). This unifies the shadow with the surface behind it.
Step 3: Architectural Details
-
Wood grain base:
Fill in the door and window frame area with a flat coat of Yellow Ochre mixed with a touch of Burnt Sienna. This serves as the undertone for the wood. -
Creating wood texture:
Using a small flat brush and Raw Umber, paint vertical stripes on the door to simulate planks. I like to wobble the line slightly to show the wood’s age and character. -
Knots and grain:
Switch to a fine liner brush. With thinned Raw Umber or Black, paint thin subtle wavy lines for wood grain and small ovals for knots within the planks. -
Window details:
Paint the interior of the window glass with a dark grey-blue to reflect the sky, then add the wooden cross-bars using the same wood technique as the door. -
Hardware installation:
Use Black paint to add the small lantern next to the door, the door handle, and the cross-shaped viewer. Add tiny highlights of white to simulate metallic sheen.
Step 4: Shadows and Landscape
-
Casting shadows:
Mix a glaze of Burnt Sienna and a touch of Purple (or Blue) to create a transparent shadow color. Paint the long diagonal shadow cast by the roof overhang and the smaller shadow from the lantern. -
Doorway depth:
Paint a thin, dark shadow line on the left inside edge of the door frame and window inset to create the illusion of recession and depth. -
Groundwork:
Stipple a mix of Unbleached Titanium, Grey, and Raw Umber for the gravel ground. Use a tapping motion with an old stiff brush to create a pebbly texture. -
Adding foliage:
Using a fan brush or an old splayed brush, flick upward strokes of dark green and dull yellow to create the dry desert grasses and bushes along the base of the wall. -
Rock border:
Paint small, irregular oval shapes along the base of the plants for the rocks. Highlight the tops with Unbleached Titanium and shadow the bottoms for volume. -
Final touches:
Enhance the brightest highlights on the top of the door frame and roof edge with pure Titanium White to show the intensity of the sun.
Step back and admire the sun-drenched atmosphere you have created on your canvas
Architectural Details Painted to Stand Out
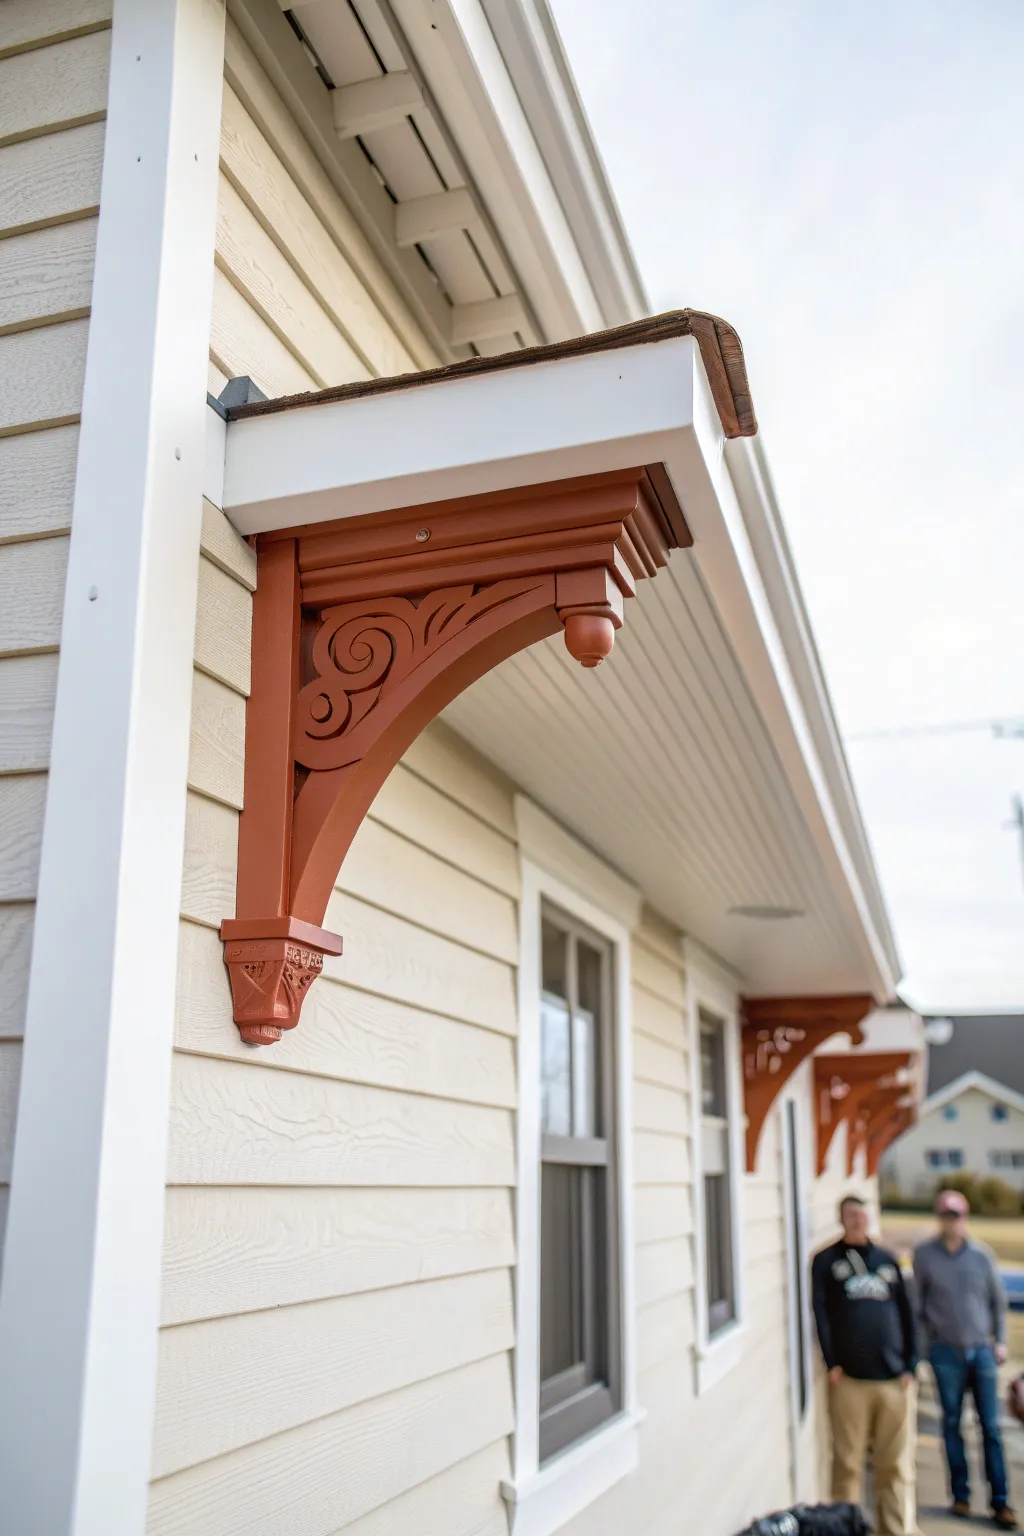
Elevate your home’s curb appeal by turning structural brackets into artistic focal points with a bold, terracotta-inspired finish. This project demonstrates how contrasting paint colors can highlight intricate scrollwork and bring depth to exterior woodwork.
Step-by-Step
Materials
- High-quality exterior latex paint (terracotta/red-brown shade)
- Exterior primer (if wood is bare or peeling)
- Wide painter’s tape (2-inch)
- Drop cloths or plastic sheeting
- Sanding block (medium grit)
- Tack cloth
- Angled sash brush (2-inch)
- Small artist brush or fitch brush (for scrollwork)
- Ladder (stable and appropriate height)
- Cleaning solution (TSP or exterior timber cleaner)
- Caulk and caulking gun (exterior grade)
- Wood filler (if repairs are needed)
Step 1: Preparation & Repair
-
Set the Stage:
Begin by securing a sturdy ladder on level ground. Place drop cloths directly underneath the work area to catch paint drips or sanding dust, protecting the walkway or landscaping below. -
Clean the Surface:
Wash the brackets thoroughly using an exterior timber cleaner or a mild TSP solution to remove dirt, mildew, and spiderwebs. Let the wood dry completely before moving on. -
Sand for Adhesion:
Using a medium-grit sanding block, scuff the existing paint surface. You don’t need to strip it to bare wood unless it’s peeling, but you want to dull the gloss to help the new coat stick. -
Inspect and Fill:
Check the scrollwork and joints for cracks or rot. Dig out any soft wood and fill holes with high-quality exterior wood filler. Once dry, sand these patches flush. -
Caulk the Seams:
Examine where the bracket meets the siding and the overhang. If the old caulk is cracked, scrape it out and apply a fresh bead of exterior-grade caulk to ensure a weather-tight seal.
Step 2: Priming & Taping
-
Masking Off:
Carefully apply wide painter’s tape to the siding and the white soffit immediately adjacent to the bracket. Press the edges down firmly to prevent the dark paint from bleeding onto your light surfaces. -
Priming Bare Spots:
If you exposed bare wood during sanding or repairs, spot-prime those areas. If you are making a drastic color change, I find it helpful to apply a full coat of tinted primer to ensure even coverage. -
Dust Removal:
Run a tack cloth over the entire bracket one last time to pick up any residual sanding dust that could spoil your finish.
Brush Maintenance
Wrap your brush in plastic wrap or a wet bag between coats. This keeps the bristles moist and prevents the paint from hardening, saving you from washing it out mid-project.
Step 3: Painting
-
Cut in the Edges:
Dip your angled sash brush into the terracotta paint. Carefully cut in along the top edge where the bracket meets the white trim, and the back edge against the siding. -
Paint the Flat Surfaces:
Brush the paint onto the broad, flat sides of the bracket. Use long, smooth strokes following the grain of the wood to minimize brush marks. -
Tackle the Scrollwork:
Switch to a smaller artist brush or fitch brush to get inside the intricate curves and spiral cutouts. Dab paint into the tight corners, then smooth it out to avoid pooling. -
Detail the Finial:
Paint the bottom drop finial (the rounded decorative piece at the tip) carefully. Ensure you coat the underside fully, as this is visible from the ground. -
Check for Drips:
Inspect the underside of the curves and corners for drips or heavy buildup. lightly brush them out while the paint is still wet. -
Apply Second Coat:
Allow the first coat to dry according to the manufacturer’s instructions (usually 4 hours). Apply a second coat to deepen the color and provide a uniform sheen. -
Remove Tape:
While the second coat is still slightly tacky, slowly peel away the painter’s tape at a 45-degree angle. This helps ensure a crisp line without pulling up dried paint.
Sheen Selection
Choose a satin or semi-gloss finish for these details. The slight shine highlights the curves of the scrollwork better than flat paint and makes cleaning much easier.
Step back and admire how a simple pop of color has completely transformed the character of your home entrance
Graphic Color Blocking on Gables and Bumps
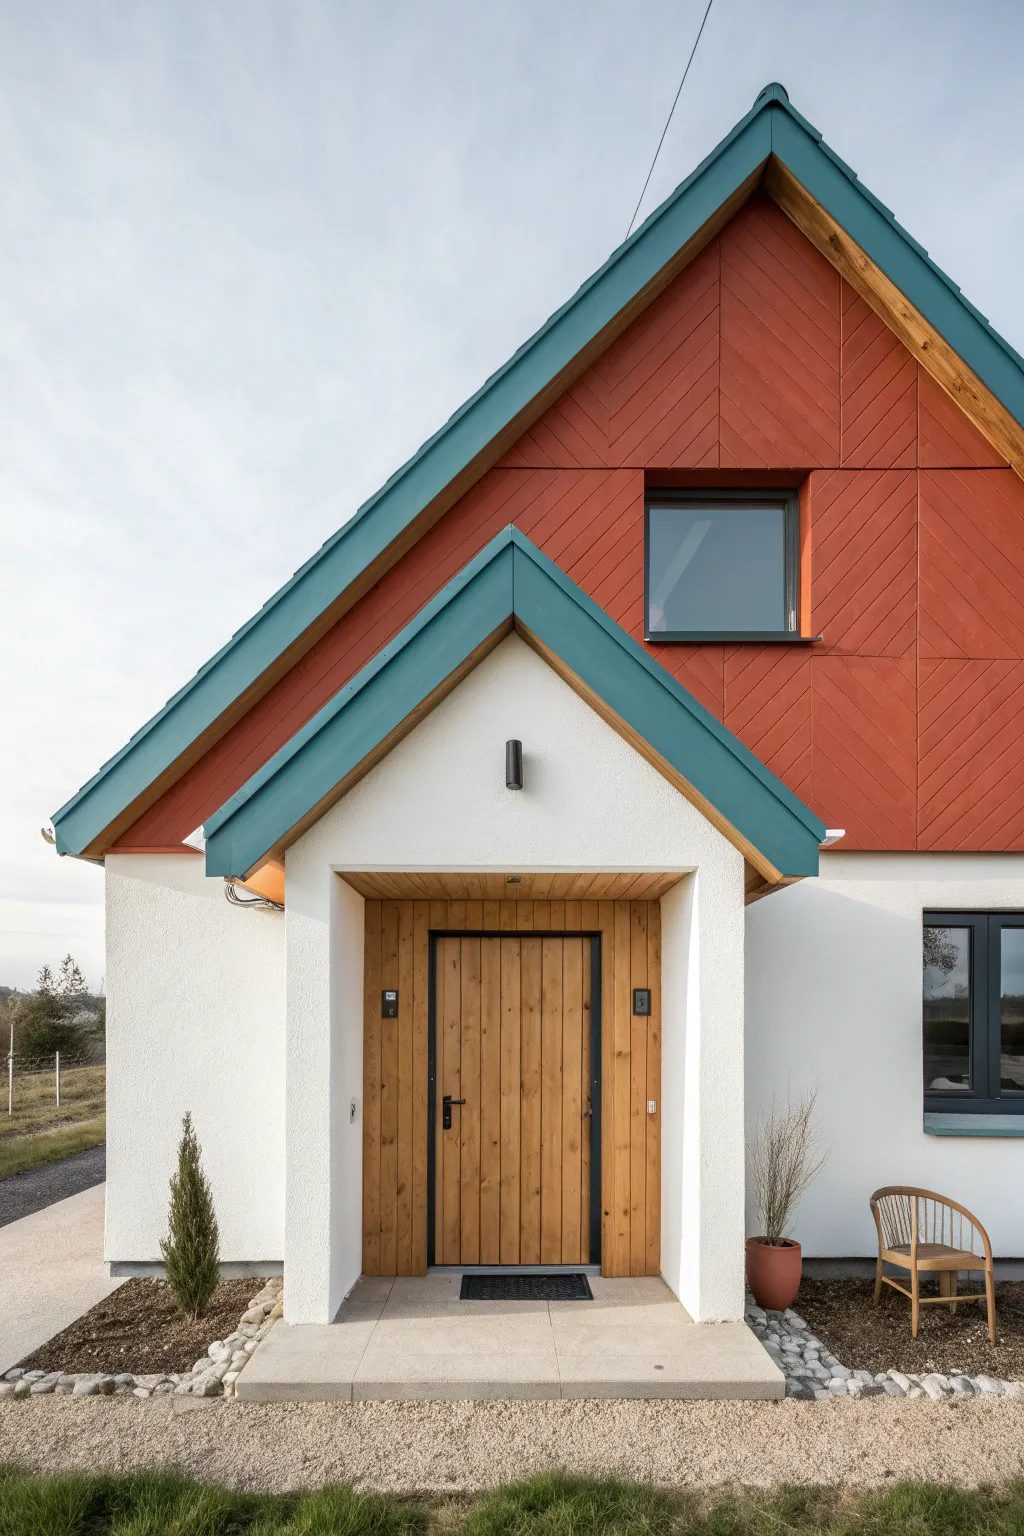
Transform a standard home exterior into a modern architectural statement by applying bold, graphic color blocking to specific architectural features. This project focuses on highlighting the gable end with a chevron-patterned cladding and accenting the roofline with a striking teal trim.
Step-by-Step Tutorial
Materials
- Exterior masonry paint (White)
- Exterior wood/metal paint (Teal/Blue-Green)
- Exterior wood stain or paint (Terracotta/Reddish-Brown)
- Painter’s tape (exterior grade)
- Drop cloths
- Ladder or scaffolding
- Pressure washer
- Paint rollers (medium nap for stucco, smooth for trim)
- Angled sash brushes
- Sanding block or power sander
- Exterior primer
- Caulk and caulking gun
Step 1: Preparation and Cleaning
-
Assess the surfaces:
Begin by inspecting the current condition of your stucco, wood cladding, and fascia boards. Look for any rot, cracks, or peeling paint that needs addressing before you start. -
Clean everything thoroughly:
Use a pressure washer to clean the stucco walls and the upper gable cladding. Removing dirt, moss, and chalky residue is crucial for adhesion. Be gentle around windows and door seals. -
Repair and prep:
Fill any cracks in the white stucco with appropriate masonry filler. For the wood trim and gable cladding, scrape away loose paint and sand rough spots to ensure a smooth finish. -
Masking off:
Apply exterior painter’s tape around window frames, the door frame, and where the soffit meets the wall. I find covering the ground with drop cloths now saves a lot of headache later.
Step 2: The White Base
-
Prime the stucco:
If you have repairs or bare spots, spot-prime them first. If changing color drastically, apply a full coat of masonry primer to the lower walls and the entrance bump-out. -
Cut in the edges:
Using a wide brush, cut in the white masonry paint around the base warmth, the corners, and under the roofline of the bump-out. -
Roll the main walls:
Use a medium-nap roller to apply the white exterior paint to the large stucco sections. Work in sections to maintain a wet edge and avoid lap marks. -
Second coat:
Once the first coat is fully dry, apply a second coat for a crisp, opaque finish that contrasts sharply with the colors to come.
Clean Lines on Stucco
Tape rarely sticks well to rough stucco. For a sharp line between the terracotta gable and white wall, paint the white first, let it dry, then carefully cut in the top color freehand with a stiff angled brush.
Step 3: The Geometric Gable
-
Plan the chevron pattern:
If your gable siding isn’t already patterned, you can simulate this look using tape. Measure and mark a vertical center line, then tape off diagonal chevron stripes radiating downward from the center. -
Apply the Terracotta color:
Paint or stain the gable siding in your reddish-brown terracotta hue. If painting existing wood, use a brush to get deep into the grooves or gaps between panels. -
Detailing the grooves:
For the specific look in the photo, ensure the vertical and diagonal grooves are fully saturated with color so the pattern reads clearly from the street. -
Clean lines:
Carefully cut in the terracotta paint where it meets the white wall below. A steady hand and high-quality sash brush are better than tape here for rough stucco surfaces.
Go Monochromatic
For a subtler modern look, choose a dark charcoal for the gable pattern and a lighter grey for the fascia trim, keeping the white base for high contrast.
Step 4: Teal Accents and Woodwork
-
Prep the fascia:
Ensure the fascia boards (the roof trim) are clean. If they were previously glossy, sand them lightly to de-gloss for better adhesion. -
The teal transformation:
Apply your teal exterior trim paint to the bargeboards on the main roof and the smaller entrance roof. This outlines the house’s shape. -
Window sills:
Don’t forget to paint the exterior window sill in the same teal shade to tie the look together. -
Stain the entryway:
For the recessed door area, sand down the wood cladding and door. Apply a natural warm wood stain or clear UV-protective oil to contrast with the painted surfaces. -
Final touches:
Remove all tape while the paint is still slightly tacky to avoid pulling up edges. Reinstall any exterior light fixtures, like the cylinder light above the door.
Step back and admire how a few strategic color choices have completely redefined the architectural character of your home


Have a question or want to share your own experience? I'd love to hear from you in the comments below!