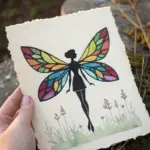
When I’m craving color and calm at the same time, I reach for universe painting—it’s basically permission to blend, splatter, and let the glow do the heavy lifting. Here are a bunch of universe painting ideas you can try on canvas or paper, from classic star fields to the weirder, studio-daydream kind of cosmic scenes.
Classic Starry Gradient Background

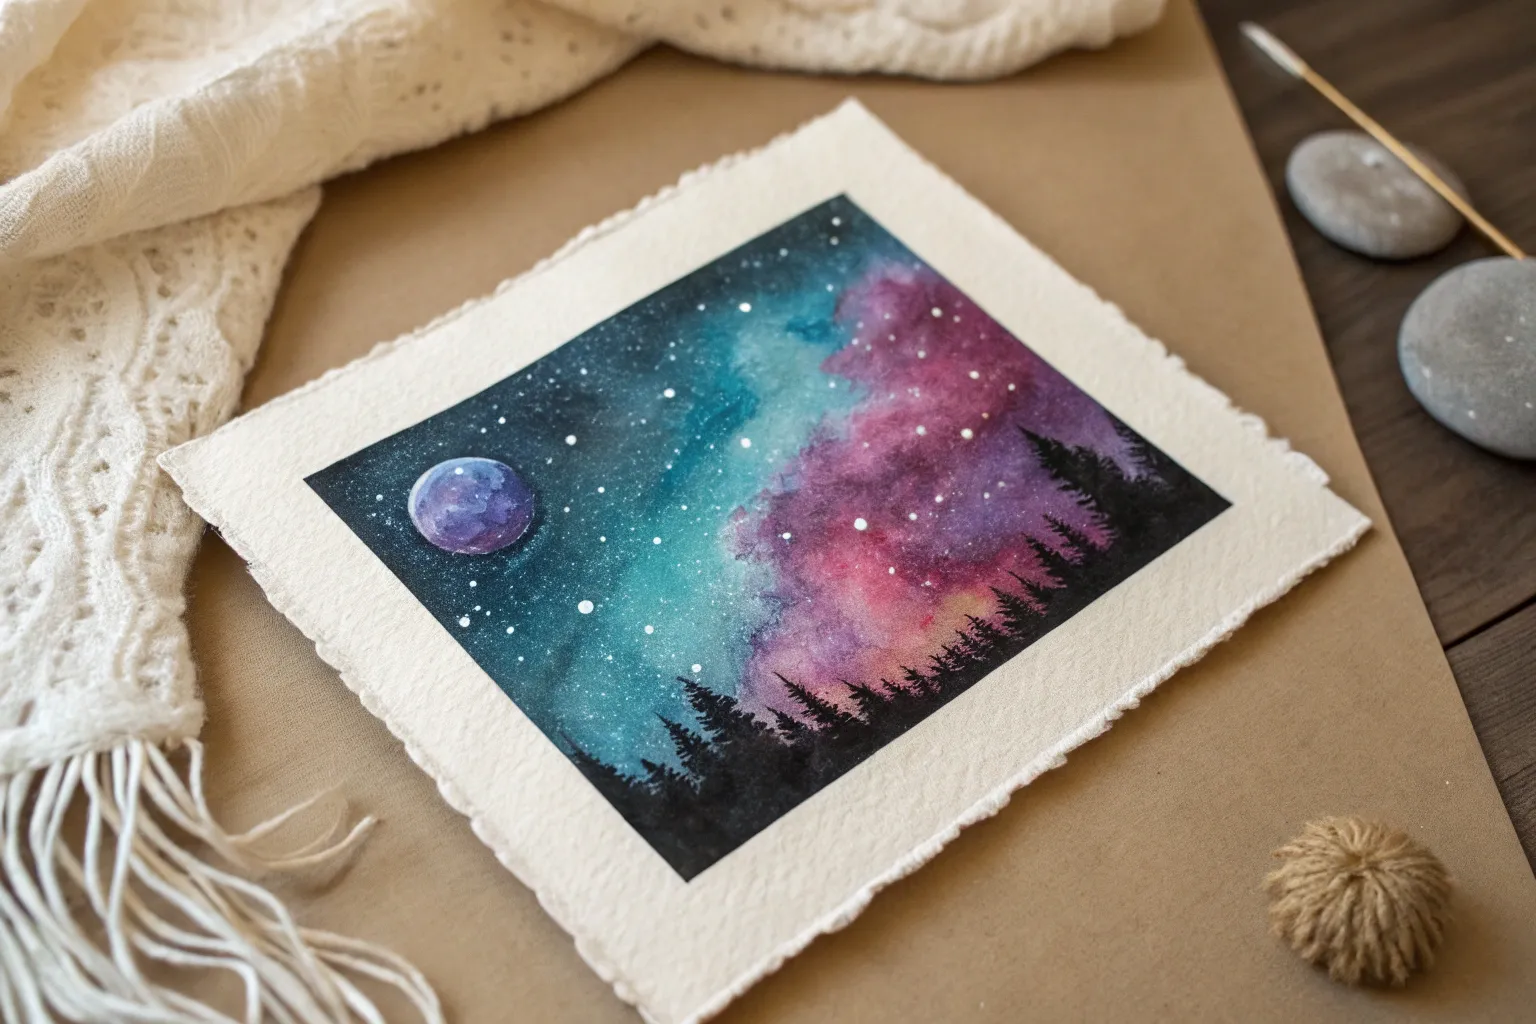
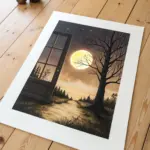
Capture the magic of a clear night sky with this moody, deep blue watercolor piece. This project focuses on building layers to create a sense of vast depth, featuring bright, sparkling stars against a classic gradient background.
How-To Guide
Materials
- High-quality watercolor paper (cold press, 300gsm or heavier)
- Masking fluid or white gouache
- Painter’s tape
- Watercolor paints: Indigo, Prussian Blue, Phthalo Blue, Black
- Large flat wash brush
- Round brush (size 6 or 8)
- Fine detail brush or white gel pen
- Two water containers
- Paper towels
- Salt (optional for texture)
Step 1: Preparation & First Wash
-
Secure the paper:
Tape down all four edges of your watercolor paper to a board using painter’s tape. Press the edges firmly to ensure a crisp white border later. -
Plan your stars:
If you want pure white stars, dip a fine brush or a specialized tool into masking fluid and dot it onto the white paper. splatter varying sizes for a natural look, or place specific larger stars where you want focal points. Let this dry completely. -
Wet the surface:
With a large clean brush, apply clear water across the entire taped area. The paper should be glisten with moisture but not have standing puddles. -
Apply lighter blues:
Load your brush with a diluted Phthalo Blue. Drop this color into the center and lower-middle areas of the paper, letting it bloom softly to create the ‘nebula’ glow. -
Add depth:
While the paper is still wet, bring in Prussian Blue around the lighter center, blending outwards. Leave some lighter patches visible to establish the glowing effect.
Starry Texture Tip
Before the first dark wash dries, sprinkle a pinch of table salt onto the wet paint. As it dries, the salt pushes pigment away, creating amazing star-like blooms.
Step 2: Building the Darkness
-
Introduce dark tones:
Mix a strong Indigo with a touch of Black. Begin painting the corners and edges of the paper, working wet-in-wet so the dark color bleeds naturally toward the center. -
Create cloud textures:
Dab concentrated dark paint into the bottom area to simulate heavy cloud formations. I find lifting the brush straight up creates organic, fluffy edges that look like distant nebulae. -
Refine the gradient:
Tilt your board slightly if needed to encourage the pigment to flow. The goal is a seamless transition from the inky black-blue edges to the lighter, glowing azure center. -
Let it dry:
Allow this initial heavy layer to dry completely. The paper must be bone dry before the next step to prevent mud.
Level Up: Metallic Pop
Mix a small amount of silver or iridescent watercolor medium with your white gouache for the largest stars. They will catch the light beautifully when viewed from an angle.
Step 3: Second Layer & Details
-
Deepen the contrast:
Once dry, re-wet just the darkest corners carefully. Glaze another layer of Indigo and Black over these areas to make the night sky truly pitch black at the edges. -
Soft transitions:
Use a clean, damp brush to feather out the edges of this second glazing layer so you don’t get hard lines where the new paint meets the lighter middle section. -
Remove masking:
If you used masking fluid in the beginning, gently rub it away with your finger or a rubber cement pickup once the paint is 100% dry to reveal the crisp white stars underneath. -
Enhance the stars:
Using white gouache or a white gel pen, add cross-shapes to the largest stars to create a twinkling effect. Vary the size of the cross-beams for realism. -
Splatter creates galaxies:
Cover the darker edges with scrap paper to protect them if you want the galaxy focused in the center. Load a stiff brush with white gouache and tap it against another brush handle to spray fine mist-like stars over the lighter blue areas. -
Final manual touches:
Manually dot in a few tiny stars in the dark corners to connect the scene. Don’t overdo it; the darkness needs to look vast. -
The reveal:
Wait until everything is absolutely dry. Slowly peel away the painter’s tape at a 45-degree angle, pulling away from the painting to ensure a perfect clean edge.
This serene galaxy painting brings a piece of the infinite cosmos right into your home


Soft Nebula Clouds in Pink and Teal
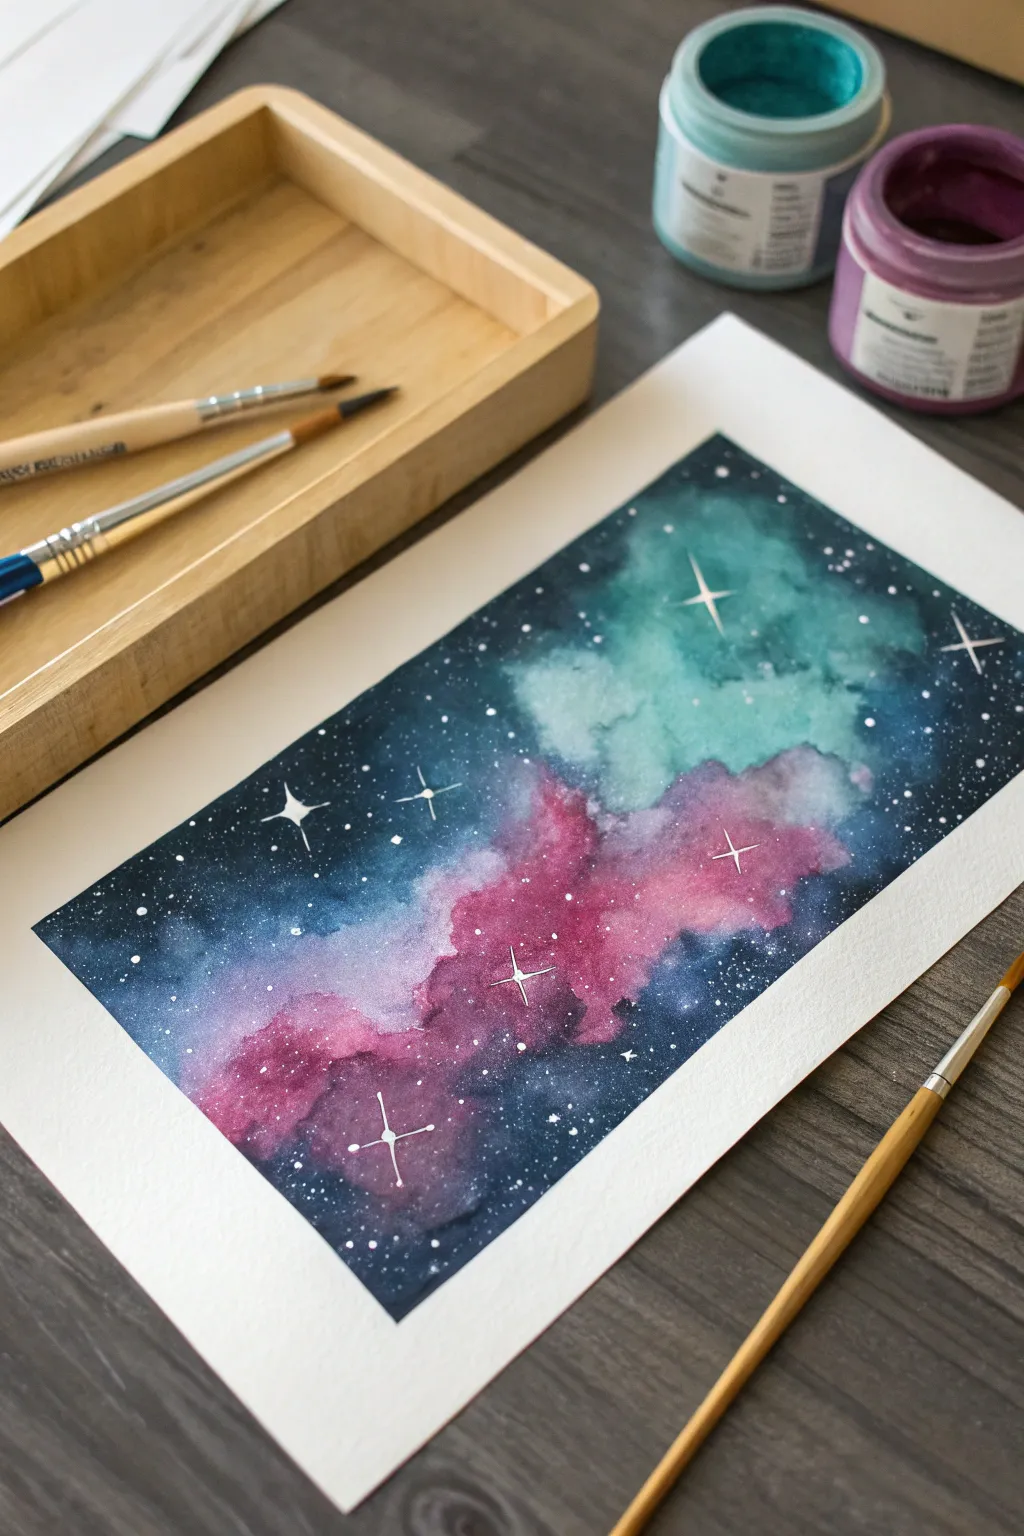
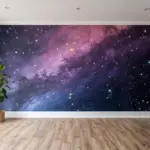
Capture the magic of deep space with this ethereal watercolor painting, featuring billowing clouds of teal and magenta against a dark, starry expanse. The wet-on-wet technique creates soft, dreamy transitions that make the nebula feel vast and organic.
Step-by-Step Guide
Materials
- Cold press watercolor paper (300 gsm)
- Watercolor paints: Indigo, Turquoise/Teal, Magenta/Rose, Black
- White gouache or white gel pen
- Washi tape or masking tape
- Round watercolor brushes (Size 4 and Size 8)
- Clean water jar
- Paper towels
- Mixing palette
Step 1: Preparation and Base Washes
-
Secure the paper:
Tape down all four edges of your watercolor paper to a hard board or table surface. This creates that crisp white border and prevents the paper from buckling when we add lots of water. -
Pre-wet the nebula zones:
Using a clean, wet brush, paint clear water onto the paper in the two areas where you want your colored clouds. Create an irregular shape in the upper right for the teal and another in the lower center for the pink. -
Drop in the teal:
Load your brush with a watery teal or turquoise mix. Gently touch the tip to the wet upper-right area, letting the pigment bloom and spread naturally. Don’t fill the shape completely; leave some lighter areas for dimension. -
Add the pink cloud:
Clean your brush thoroughly, then load it with a watery magenta or rose mix. Drop this color into the lower wet area. I like to let the edges of the pink and teal touch slightly in the middle to create a soft violet transition. -
Softening edges:
If the edges of your colored clouds look too harsh, use a damp, clean brush to gently feather them outward. You want the color to fade into nothingness rather than having a hard stop. -
First drying phase:
Let this initial layer dry completely. The paper must be bone dry before moving to the dark background, or the dark paint will bleed into your bright clouds.
Nebula Tip
While the cloud paint is barely wet, sprinkle a tiny pinch of salt on it. As it dries, the salt absorbs pigment, creating unique textures perfect for gas clouds.
Step 2: Deep Space Background
-
Mix the expanse color:
On your palette, mix a rich, dark color for space. Combine Indigo with a touch of Black to get a deep midnight blue. Make a generous puddle of this; you’ll need to work somewhat quickly. -
Outline the nebula:
Start painting the dark blue around the dried pink and teal shapes. Use jagged, irregular strokes along the border of the clouds so the nebula looks gaseous, not like a solid object. -
Fill the void:
Fill in the rest of the outer corners and edges with the dark indigo mix. Keep the wash wet as you work so you don’t get streaks. -
Blending the transition:
While the dark indigo is still wet near the clouds, rinse your brush and leave it slightly damp. Run this brush along the boundary between the dark paint and the bright nebula to soften the transition. -
Second drying phase:
Allow the entire painting to dry fully again. If the background looks too pale, apply a second layer of indigo, repeating the blending process.
Cauliflower Blooms?
If weird watermarks appear, you likely added water to a drying wash. Don’t fight it! In nebula paintings, these ‘mistakes’ actually look like realistic gas textures.
Step 3: Stars and Details
-
Prepare the stars:
Squeeze out a small amount of white gouache. Add a tiny drop of water to make it creamy but opaque. If you don’t have gouache, a high-quality white gel pen works for the next steps. -
Create the splatter:
Load a small brush or an old toothbrush with the white mix. Tap the brush handle against another brush or your finger over the paper to create a spray of fine white dots. -
Painting large stars:
Using a very fine detail brush or gel pen, manually dot in larger stars randomly across the dark areas. Group a few together for a natural look. -
Add the flares:
Choose 4-5 of your largest white dots to turn into glimmering stars. Draw a thin vertical line and a thin horizontal line crossing through the center of the dot. -
Enhance the flare shape:
To make them look like the photo, curve the inner corners of the cross slightly so the star looks like a four-pointed diamond with long tails. -
Adding nebula dust:
Add a few tiny white dots directly over the darkest parts of the pink and teal clouds to simulate stars shining *through* the gas. -
The reveal:
Wait until every speck of white paint is dry. Carefully peel off the masking tape at a 45-degree angle to reveal your clean white border.
Now you have a stunning piece of the galaxy to hang on your wall
Glowing Full Moon With Crater Texture
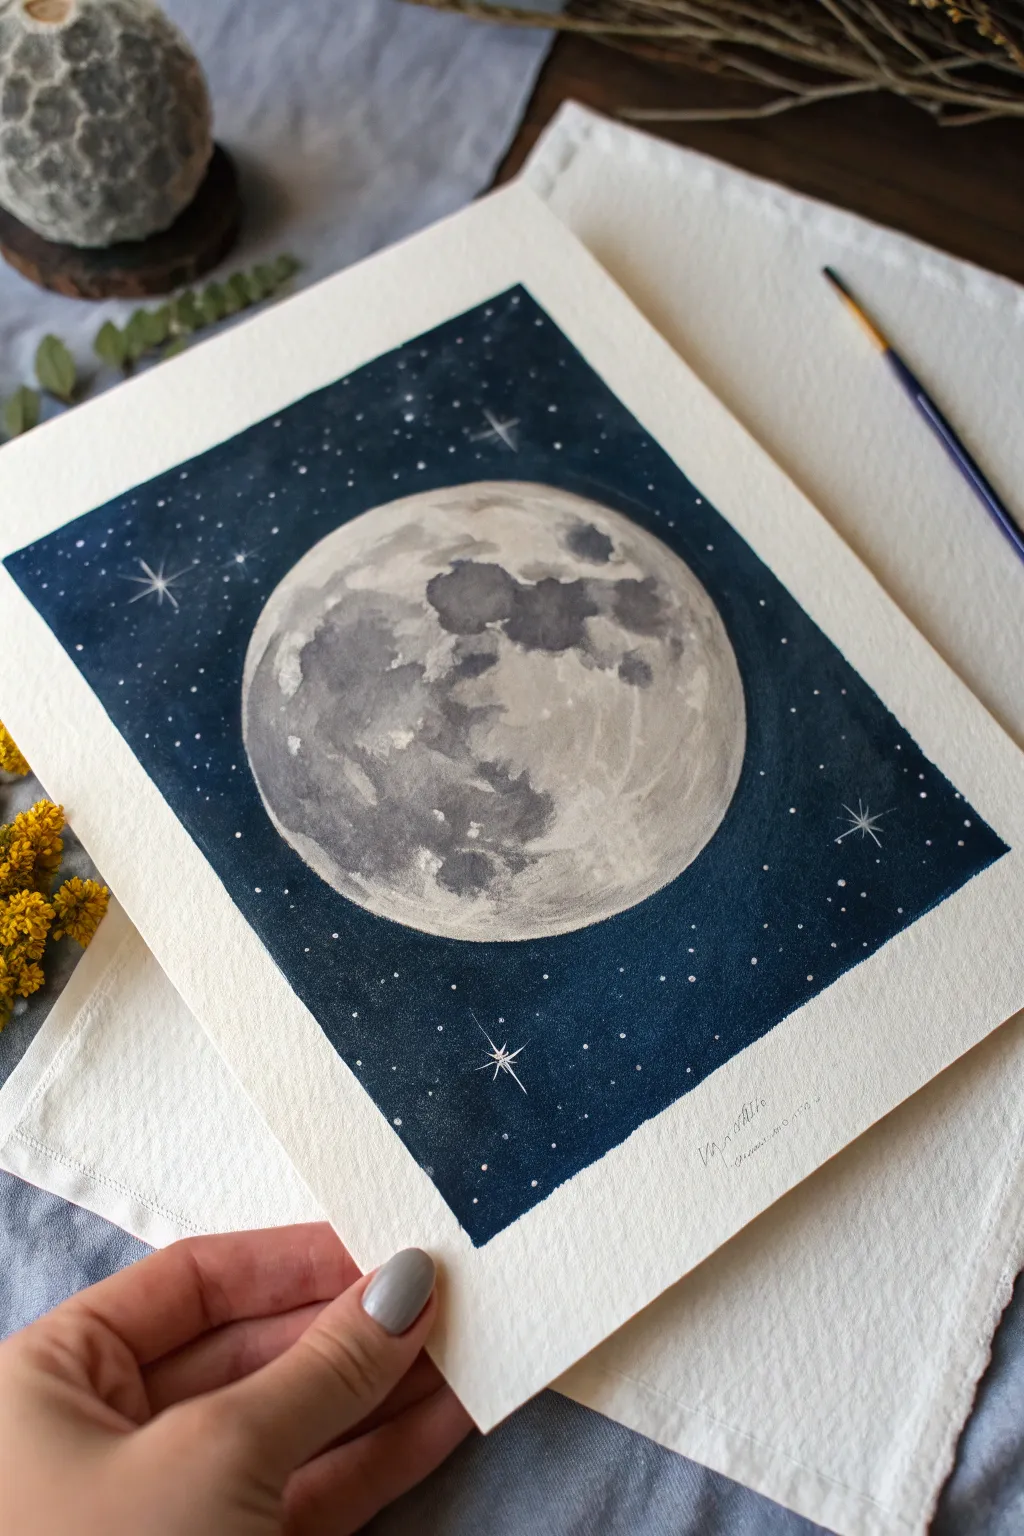
Capture the serene beauty of a full moon glowing against a deep, starry canvas with this watercolor guide. By laying down intricate crater textures first and contrasting them with rich indigo, you’ll create a piece with depth and celestial charm.
Detailed Instructions
Materials
- Cold press watercolor paper (preferably 300gsm/140lb)
- Watercolor paints: Indigo (or Payne’s Grey), various shades of warm and cool Grey, Black
- White opacity medium (white gouache, thick white watercolor, or a white gel pen)
- Round watercolor brushes (sizes #2, #6, and #10)
- Masking fluid (drawing gum) and old brush
- Drafting compass or circular object to trace
- Pencil and eraser
- Paper tape or washi tape
- Salt (optional for texture)
Step 1: Drafting and Masking
-
Outline the boundary:
Begin by taping down the edges of your paper to a flat board to prevent buckling and create a crisp border. Leave about an inch of margin around the painting area. -
Draw the celestial body:
Use a compass or trace a round bowl to draw a perfect circle in the center of your paper. Keep your pencil lines very faint so they don’t show through the final paint layers. -
Protect the moon:
Using an old brush that you don’t care about, apply a layer of masking fluid to cover the entire circle of the moon. This ensures the moon remains pristine white while we paint the dark sky.
Step 2: The Night Sky
-
Mix your darkest hue:
Prepare a generous amount of your dark sky color. A mixture of Indigo with a touch of Payne’s Grey or Black creates a deep, atmospheric night shade. -
Apply the first wash:
With your largest brush (size #10), wet the area outside the moon circle with clean water. Then, drop in your dark mix, letting the color flow freely but staying within the taped borders. -
Deepen the contrast:
While the paper is still slightly damp, add a second, more concentrated layer of indigo, especially near the moon’s edge and the painting’s corners. This creates a vignetting effect that makes the moon pop. -
Wait for total dryness:
Allow the background sky to dry completely. If you touch it and it feels cool, it’s not ready. Patience here prevents the dark paint from bleeding into your bright moon later.
Keep it Clean
Coat your brush in dish soap before dipping it into masking fluid. The soap creates a barrier that makes cleaning the rubbery fluid off the bristles much easier later.
Step 3: Texturing the Cratered Surface
-
Reveal the canvas:
Gently rub off the masking fluid with your finger or a rubber cement pickup tool to reveal the clean white circle underneath. -
Base shadow layer:
Mix a very watery, pale grey. Using a #6 brush, paint organic, blobb-like shapes on the moon’s surface. Reference photos of the real moon to see where the major ‘seas’ (maria) are located. -
Building crater depth:
While the base layer is wet, drop slightly darker grey pigment into parts of the damp shapes. I like to let this bloom naturally to create that uneven, rocky texture. -
Adding texture details:
Switch to a smaller #2 brush. With a medium-grey tone, stipple small dots and create rough edges around your larger grey shapes to simulate impact craters and rugged terrain. -
Softening edges:
Use a clean, damp brush to gently soften any harsh lines within the moon. You want the craters to look like shadows, not rigid drawings. -
Final shadow pass:
Identify the darkest areas of the moon. Apply a concentrated dark grey mix sparingly to these spots to give the sphere maximum dimension and roundness.
Level Up: Galactic Haze
While the dark blue sky wash is still wet, drop in tiny amounts of purple or teal paint. The colors will blend softly, creating a subtle, nebula-like effect in the deep space background.
Step 4: Starlight and Finishing
-
Splatter stars:
Cover your finished moon with a scrap piece of paper. Load a stiff brush with white gouache or white watercolor and tap the handle to splatter fine white mist over the dark blue background. -
Large star placement:
Using the #2 brush or a white gel pen, manually place a few larger, distinct white dots in the sky. -
Create the twinkle:
Select three or four of the larger stars to turn into twinkles. Draw a thin cross shape (+) through the dot, then add a smaller diagonal cross (x) through the center to create an eight-pointed flair. -
The reveal:
Once the white paint is totally dry, carefully peel away the border tape at a 45-degree angle to reveal your clean, crisp edges.
Frame your celestial masterpiece and enjoy the quiet glow of your own personal moon
Ringed Planet With Dramatic Light
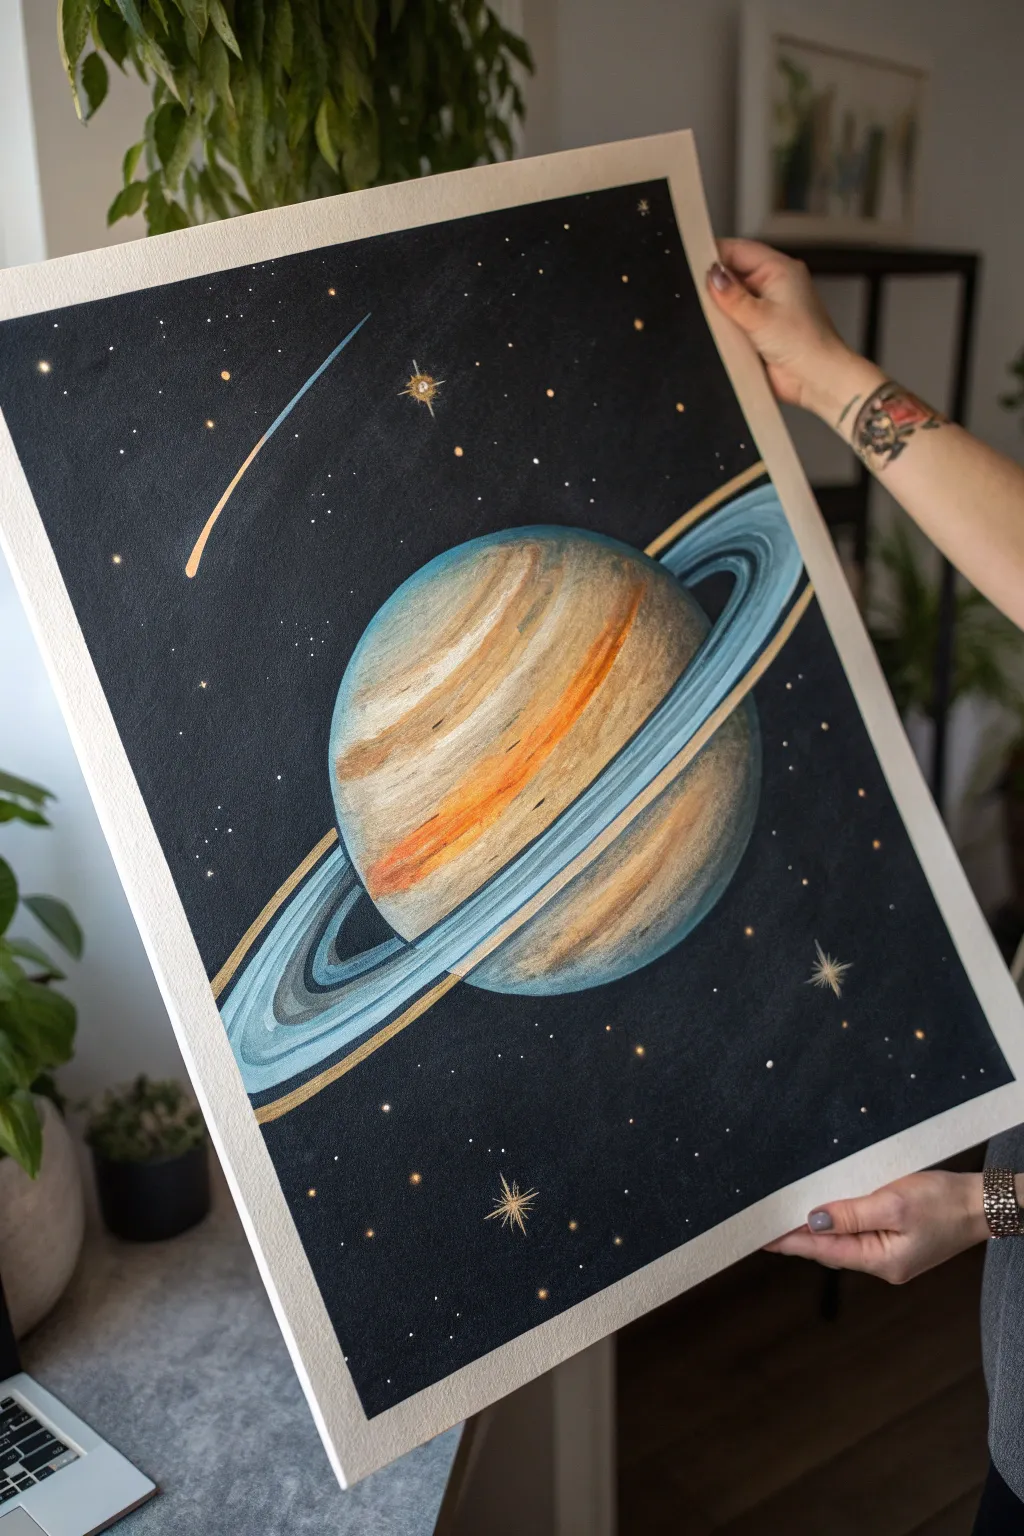
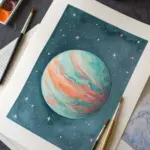
Capture the moody elegance of deep space with this striking painting of a ringed gas giant. Featuring warm, rusty bands of planetary atmosphere contrasted against icy blue rings and a deep black void, this project is perfect for practicing dramatic lighting effects.
How-To Guide
Materials
- Thick watercolor paper or mixed media board (A3 or similar size)
- Acrylic paints (Mars Black, Titanium White, Burnt Sienna, Yellow Ochre, Phthalo Blue)
- Gold metallic paint or gold paint pen
- Painter’s tape or masking tape
- Large flat brush
- Medium filbert brush
- Fine detail liner brush
- Circular stencils or a compass and pencil
- Palette for mixing
- Water cup and paper towels
Step 1: Preparation & Background
-
Secure your canvas:
Begin by taping down the edges of your watercolor paper to a board or table. This creates that clean, crisp white border you see in the final piece and prevents the paper from buckling under layers of paint. -
Draft the planet:
Use a compass or trace a large circular object to lightly sketch the main body of the planet in the center of the page. Don’t press too hard; you just need a guide. -
Sketch the rings:
Draw elliptical rings around the planet. Start narrow at the back and widen them as they sweep around the front. Ensure the front section of the rings overlaps the planet sketch, while the planet obscures the back section. -
Paint the void:
Load a large flat brush with Mars Black. Carefully paint the entire background around your planet and ring sketches. I like to use two coats here to get a truly opaque, velvety black finish that makes the colors pop later.
Clean Edges Trick
Before painting the black background, run a damp brush or a bit of white paint over the tape edge first. This seals the tape and prevents black paint from bleeding underneath.
Step 2: Painting the Planet
-
Base coat the sphere:
Mix Titanium White with a tiny touch of Burnt Sienna just to warm it up. Paint the entire circular planet shape, ignoring the rings for a moment. This white base ensures your atmospheric colors will be bright. -
Add atmospheric bands:
While the base is still slightly tacky, mix Burnt Sienna with Yellow Ochre. Using a medium filbert brush, paint curved, horizontal strokes across the planet’s surface to mimic cloud bands. Follow the curvature of the sphere to create volume. -
Deepen the shadows:
Mix a little black into your brown mixture to create a shadow tone. Apply this to the bottom-right curve of the planet and along the edges, blending softly inward to make the planet look spherical and 3D. -
Highlight the atmosphere:
Using pure white or a very pale cream, add thin, sweeping highlights to the upper-left area of the planet’s bands where the light source hits. -
Refine the edges:
Clean up the circular edge of the planet. If your black background encroached too much, carefully reshape it with the planet colors, or touch up the black background if you went over the lines.
Starry Depth
Paint some stars with slightly gray or blue-tinted white. Varying the opacity and color of the stars creates a sense of immense depth, pushing some stars further back than others.
Step 3: Creating the Rings
-
Block in the rings:
Mix Titanium White with a small amount of Phthalo Blue to create an icy, light blue. Paint the ring shapes you sketched earlier. Remember, the rings cross *in front* of the planet’s face. -
Add ring definition:
Load a liner brush with a slightly darker blue (add more Phthalo Blue to your mix). carefully paint thin, concentric lines within the ring shape to separate the bands. This gives them texture. -
Create shadows on the rings:
Where the planet casts a shadow on the rings (usually where they go behind the planet on the right side), darken the blue significantly with black. This helps anchor the rings in space. -
Brighten the foreground:
For the section of rings closest to the viewer (front and center), add almost pure white highlights to the edges to make them gleam.
Step 4: Cosmic Details
-
Splatter stars:
Dilute a bit of white paint with water until it’s milky. Load a brush or toothbrush and gently flick it over the black background to create distant, tiny stars. Cover the planet with a scrap paper mask if you want to keep it clean. -
Hand-paint larger stars:
Using your finest liner brush and pure white paint, dot in specific larger stars. Add cross shapes or four-pointed flares to a few of the brightest ones to make them twinkle. -
Add the comet:
In the upper left corner, paint a small diagonal streak using light blue or white. Taper the tail so it fades into the blackness. -
Apply gold accents:
Use metallic gold paint or a gold pen to outline the outer edge of the rings and add sparkle to the centers of the largest stars. This adds a magical, illustrative finish. -
Final reveal:
Wait until the painting is completely dry to the touch. Slowly and carefully peel away the painter’s tape at a 45-degree angle to reveal your crisp white border.
Now step back and admire how the dark background makes those planetary colors truly shine
BRUSH GUIDE
The Right Brush for Every Stroke
From clean lines to bold texture — master brush choice, stroke control, and essential techniques.
Explore the Full Guide
Colorful Planet Scatter Across Deep Space
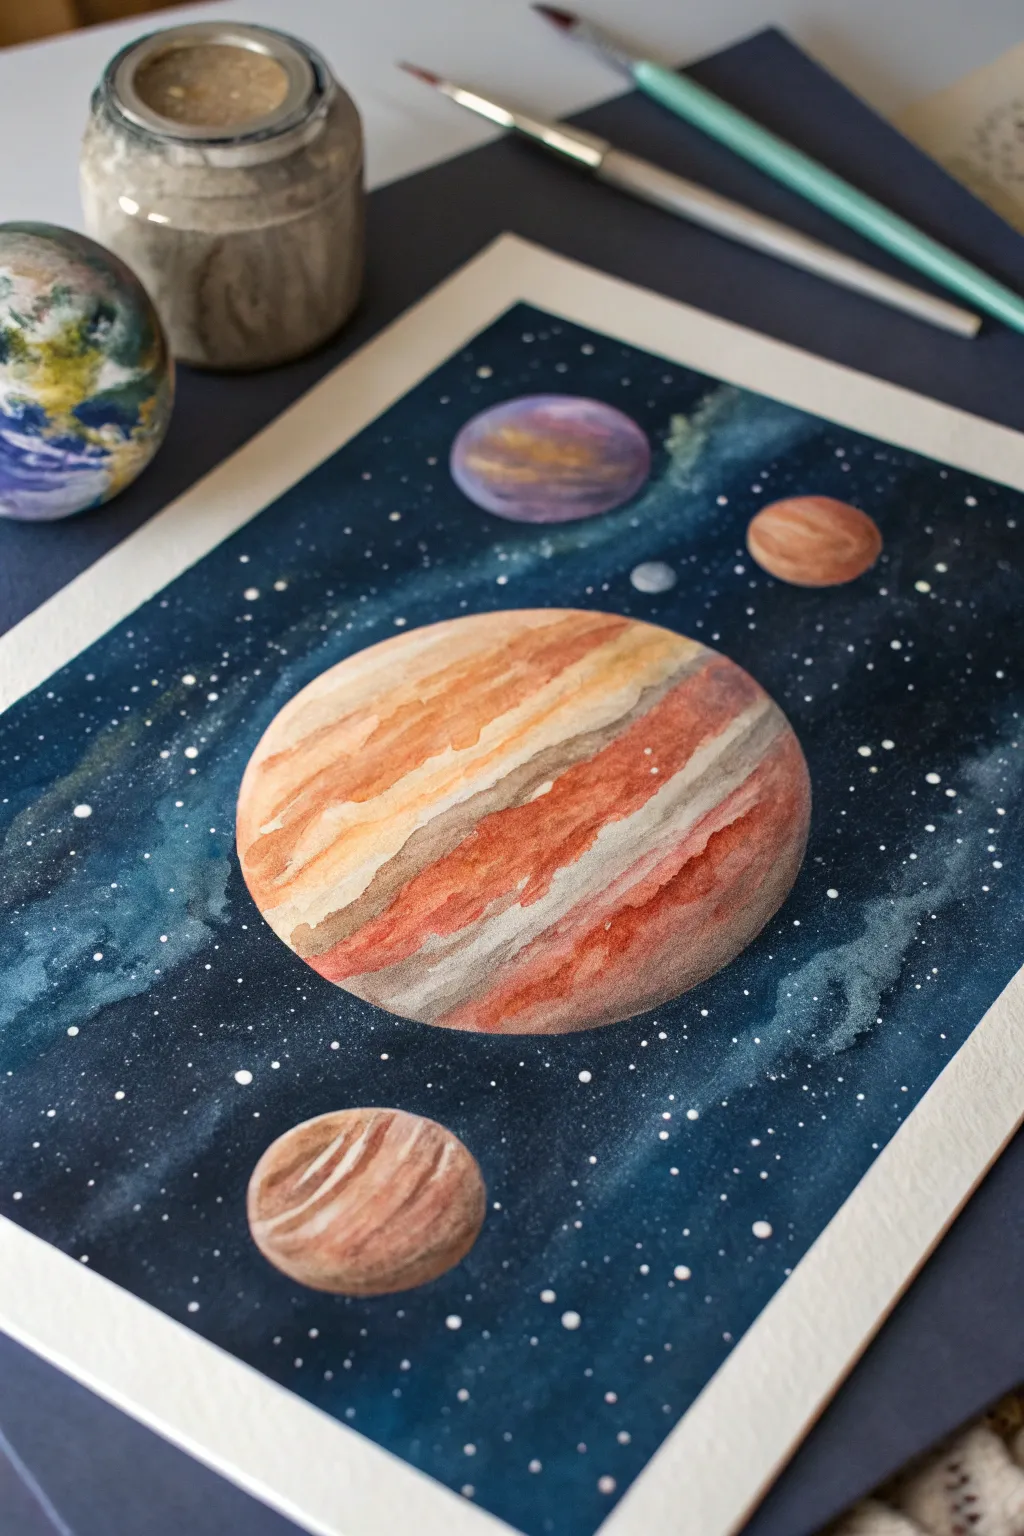
Capture the majesty of our solar system with this vibrant watercolor painting featuring a massive, Jupiter-inspired gas giant. Using wet-on-wet techniques, you will create swirling atmospheric bands and a deep, starry cosmos that pops against the crisp white border.
Detailed Instructions
Materials
- Cold-press watercolor paper (300 gsm)
- Painter’s tape or masking tape
- Watercolor paints (Indigo, Payne’s Gray, Burnt Sienna, Yellow Ochre, Alizarin Crimson, Burnt Umber)
- White gouache or opaque white ink
- Round watercolor brushes (sizes 2, 6, and 10)
- Pencil and eraser
- Jar of clean water
- Paper towels
- Mixing palette
- Drawing compass or circular objects to trace
Step 1: Preparation and Sketching
-
Secure the paper:
Tape down all four edges of your watercolor paper to a board or table. This creates that clean, professional white border seen in the final piece and prevents the paper from buckling under heavy washes. -
Sketch the celestial bodies:
Using a compass or by tracing circular objects (like cups or lids), lightly draw a large circle in the center for the main planet. Add three smaller circles scattered around the composition: one below, one to the top right, and one to the top left. -
Protect the planets:
You need the planets to remain white while you paint the dark background. Carefully apply masking fluid over the circles if you have it. Alternatively, simply be very careful to paint around your pencil lines in the next phase.
Pro Tip: Spherical Illusion
To make planets look round, lift out a small highlight on the upper left side while the paint is still damp using a thirsty, clean brush to reveal the paper’s white.
Step 2: The Deep Space Background
-
Mix your space colors:
Prepare a large puddle of very dark blue using Indigo and Payne’s Gray. For the lighter nebula sections, mix a thinner wash of Prussian Blue or add a touch of teal. -
Wet the background:
With your largest brush and clean water, wet the entire background area, avoiding the planet circles. The paper should be glistening but not forming puddles. -
Drop in the darks:
While the paper is wet, load your brush with the dark Indigo mix. Start dropping color into the corners and edges, letting it bloom toward the center. -
Create nebula clouds:
In the open spaces between the dark corners, drop in your lighter blue or teal mix. Use a clean, slightly damp brush to soften the edges where the light and dark blues meet, creating a misty, cloud-like transition. -
Intensify depth:
While the wash is still damp, add concentrated black or indigo into the darkest corners to increase contrast. Let this background layer dry completely before moving on.
Step 3: Painting the Gas Giant
-
Base wash:
Wet the large central circle with clean water. Apply a very faint wash of Yellow Ochre across the whole shape to establish a warm undertone. -
Paint the first bands:
While the base is damp, stripe in horizontal bands of Burnt Sienna. Let the paint naturally bleed slightly into the wet surface to create soft, fuzzy edges typical of gas giants. -
Add darker stripes:
Mix Burnt Umber with a touch of Alizarin Crimson for a reddish-brown. Paint thinner, more defined stripes in between the lighter orange bands. Vary the pressure on your brush to make the lines irregular. -
Deepen the shadows:
Add a shadow to the right side of the planet to create a spherical 3D effect. Glaze a transparent layer of diluted Payne’s Gray or violet over the dry bands on the right edge, curving it slightly to follow the planet’s roundness.
Level Up: Cosmic Texture
While the background wash is still wet, sprinkle a pinch of table salt into the dark blue paint. Let it dry completely, then brush it off for a stunning starburst texture.
Step 4: Surrounding Planets and Stars
-
Paint the bottom planet:
For the planet at the bottom specifically, use a similar banding technique but angled diagonally. Use cooler browns and muted reds to distinguish it from the central giant. -
Color the upper planets:
Paint the top-left planet with a wash of purple and blue, letting the colors swirl together wet-on-wet. Paint the small top-right planet a solid terracotta color. -
Refine edges:
Once all planets are dry, use a small detail brush with your dark background color to neatly touch up any jagged edges where the planets meet space. -
Splatter the stars:
Cover your painted planets with scrap paper to protect them. Load a brush with white gouache diluted slightly with water. Tap the brush handle against another brush to spray fine white speckles across the dark background. -
Add hero stars:
I like to manually paint a few larger, brighter stars using the tip of a size 0 brush and pure white gouache to create focal points in the starfield. -
The Reveal:
Wait until the painting is bone dry. Slowly peel away the painter’s tape at a 45-degree angle to reveal your crisp edges.
Frame your cosmic creation and enjoy the view of your personal galaxy.
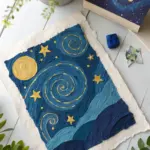
Milky Way Spiral Galaxy Swirl

Capture the awe-inspiring beauty of the cosmos with this vibrant painting of a spiral galaxy set above a silhouette landscape. Using watercolors or gouache, you will learn to build layers of luminous color to create a sense of deep space and swirling motion.
Step-by-Step Guide
Materials
- High-quality watercolor paper (cold press, at least 300gsm)
- Painter’s tape or masking tape
- Watercolor or gouache paints (Indigo, Black, Prussian Blue, Violet, Alizarin Crimson, Burnt Sienna, Yellow Ochre, White)
- Round brushes (sizes 2, 6, and 10)
- Old toothbrush (for splatter)
- White gel pen or opaque white acrylic ink
- Two jars of water
- Paper towels
Step 1: Preparation and Base Layer
-
Secure the paper:
Tape down all four edges of your watercolor paper to a board or table. This creates a crisp border and prevents the paper from buckling under heavy washes. -
Sketch the spiral:
Lightly use a pencil to map out the center of your galaxy and the general flow of the spiral arms. Keep the lines very faint so they won’t show through the lighter paint later. -
Wet the center:
With clean water and your largest brush, wet the circular area in the center of the galaxy. It should be damp but not creating puddles. -
Paint the core:
Drop in a wash of Yellow Ochre mixed with a tiny touch of Burnt Sienna into the wet center. Leave the very middle almost white for the brightest glow. -
Extend the glow:
While the center is still damp, mix a soft pinkish-violet using Alizarin Crimson and White. Paint this around the yellow core, letting the colors bleed slightly into each other.
Muddy Colors?
If your galaxy looks muddy, stop and let layers dry completely between applications. Wet-on-wet is great for background blending, but detail layers need a dry surface.
Step 2: Building the Galaxy
-
Start the spiral arms:
Using a size 6 brush, begin painting the spiral arms moving outward from the core. Use a mix of Prussian Blue and Violet, keeping the paint fairly watery so it looks misty. -
Darken the edges:
The further you get from the center, the darker the space becomes. Switch to intense Indigo and Black for the outer corners and the spaces between the spiral arms. -
Blend the transition:
Use a clean, damp brush to soften the edges where the dark space meets the lighter spiral arms. We want a feathery look, not hard lines. -
Deepen the contrast:
Once the first layer is dry, go back in with your darkest black. Paint negative space between the arms to make the glowing parts pop. This is crucial for the 3D effect. -
Add colored dust lanes:
Mix a rusty red color and glaze it carefully along the edges of the spiral arms. I find this creates that realistic ‘dust lane’ look seen in astrophotography.
Starry Night Hack
Cover the landscape area with a scrap piece of paper before splattering your stars. This keeps your black mountain silhouette perfectly clean and dark.
Step 3: Stars and Foreground
-
Dry completely:
Ensure the entire painting is bone dry before proceeding to the stars, otherwise the white specks will bleed into the background. -
Splatter the stars:
Dip an old toothbrush into watered-down white gouache or acrylic. Run your thumb over the bristles to spray a fine mist of stars over the dark areas. -
Paint major stars:
Use a white gel pen or a fine brush with opaque white ink to add larger, specific stars. Add cross-shaped flares to the biggest ones for a twinkling effect. -
Rough in the landscape:
At the bottom right corner, paint a solid black silhouette of a mountain slope. Ensure the horizon line is uneven to mimic rocky terrain. -
Add distant foliage:
Mix opaque Yellow Ochre and Burnt Sienna. Stipple small dots onto the black slope to suggest autumn trees illuminated by the starlight. -
Final touches:
Add a few tiny white highlights onto the tips of the ‘trees’ and ensure your galaxy core is bright enough. Peel off the tape slowly to reveal the clean border.
Hang this piece where it can catch the light and remind you of the vastness above

PENCIL GUIDE
Understanding Pencil Grades from H to B
From first sketch to finished drawing — learn pencil grades, line control, and shading techniques.
Explore the Full Guide
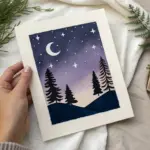
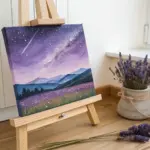
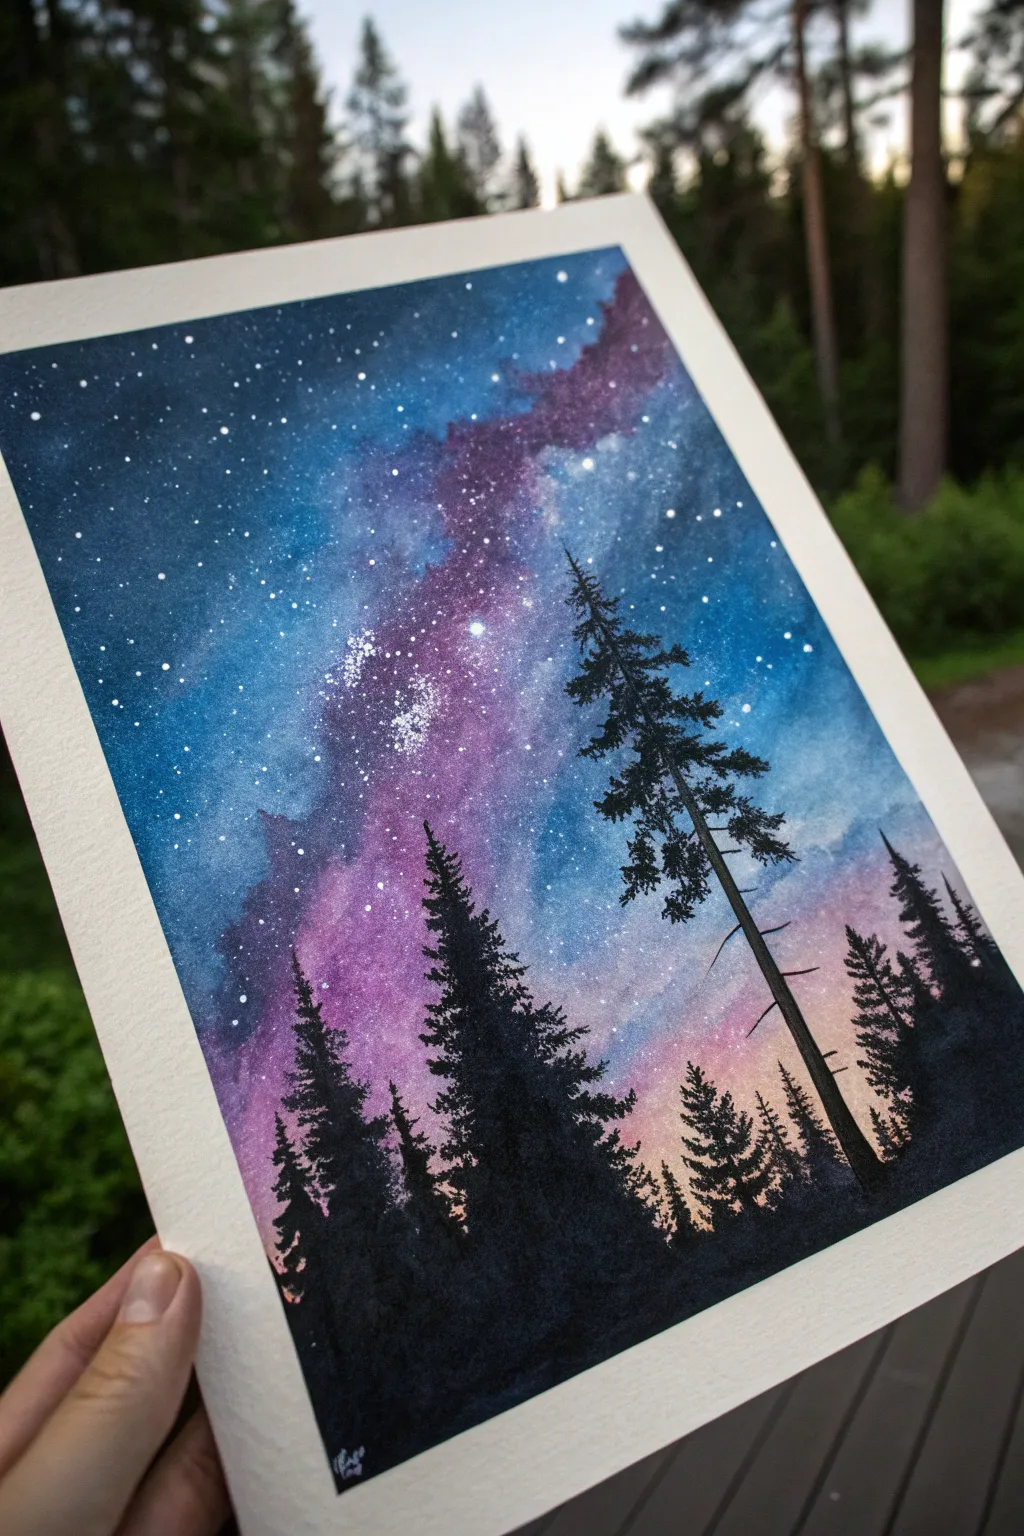
Galaxy Horizon With Mountain Silhouettes
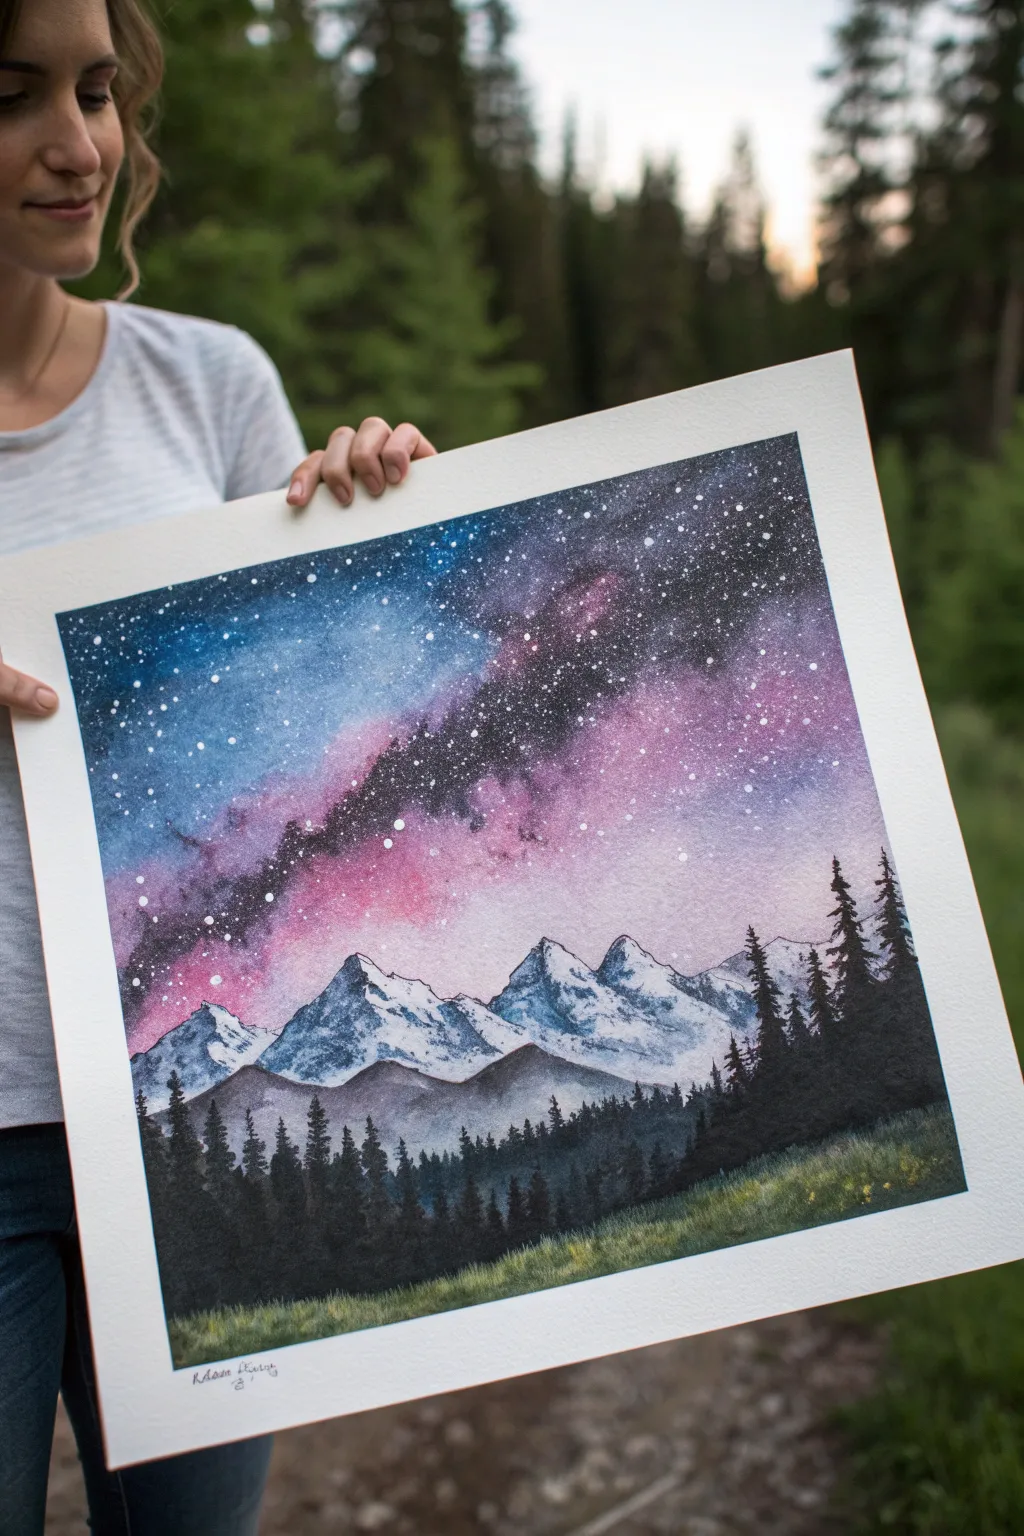
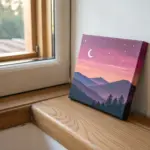
Capture the magic of a serene alpine night with this breathtaking watercolor landscape. You’ll layer vibrant celestial hues to create a glowing Milky Way that rises dramatically above snow-capped peaks and a shadowed pine forest.
Step-by-Step
Materials
- High-quality cold press watercolor paper (block or taped down)
- Watercolor paints (Indigo, Prussian Blue, Phthalo Blue, Quinacridone Magenta, Purple)
- White gouache or opaque white ink
- Large flat wash brush
- Medium round brush (size 6-8)
- Small detail brush (size 0-2)
- Old toothbrush or stiffness bristle brush
- Masking tape
- Paper towels
- Two jars of water
Step 1: Setting the Celestial Stage
-
Secure the paper:
Begin by taping down all four edges of your watercolor paper securely to a board or table to prevent buckling, leaving a crisp white border once finished. -
Map the horizon:
Lightly sketch the outline of your mountain range about one-third of the way up from the bottom of the page. Keep the lines faint so they don’t show through later. -
Wet the sky:
Use your large wash brush to apply clean water to the entire sky area, stopping carefully at the pencil line of the mountain peaks. The paper should be glisten but not have standing puddles. -
Lay the Milky Way base:
While the paper is wet, drop in a diagonal band of Quinacridone Magenta mixed with a touch of Purple across the center of the sky. Keep this layer soft and somewhat dilute so it seems to glow. -
Deepen the cosmos:
Surround the pink band with Phthalo Blue and Prussian Blue. Let the blue bleed slightly into the pink edges to create seamless, violet transitions. -
Add the darkest depths:
While the wash is still damp but not soaking, apply concentrated Indigo or a mix of dark blue and black to the upper corners and the areas furthest from the central galaxy band. This creates the deep contrast needed for space. -
Create the stars:
Allow the sky to dry completely. Dilute white gouache with a tiny bit of water. Dip an old toothbrush or stiff brush into the mixture and flick the bristles to spray fine white specks across the dark sky. -
Add larger stars:
Use your smallest detail brush to manually place a few larger, brighter stars in the darker blue areas to add depth and variety to the constellation.
Starry Splatter Control
Prepare for the star-flicking step by covering the lower mountain area with a scrap piece of paper. This prevents unwanted white speckles from landing on your dark mountain silhouettes.
Step 2: Painting the Peaks
-
Define the peaks:
Once the sky is fully dry, mix a very watery, pale blue-grey. Paint the shadow sides of the mountains, leaving the paper white on the illuminated faces to represent snow. -
Add rugged texture:
While the grey wash is drying, drop in slightly darker, more concentrated grey-blue pigment near the ridges and crevices to give the mountains volume and a rocky appearance. -
Paint the foothills:
Below the white snowline, paint a soft, muted brownish-grey wash to represent the rocky base of the mountains, blending it downward until it fades out near where the treeline will begin.
Bloom Prevention
Wait until your galaxy wash loses its shine (satin finish) before dropping in the darkest indigo. Adding wet paint to a drying wash causes ‘cauliflower’ back-runs.
Step 3: Fulfilling the Foreground
-
Block in the forest:
Mix a dense, dark color using Indigo and a dark green or black. Using the medium round brush, paint a solid, undulating shape at the base of the mountains for the distant forest mass. -
Detail the treetops:
Switch to your smaller brush. Along the top edge of that dark mass, paint tiny vertical lines and dabs to create the illusion of individual pine treetops breaking the horizon. -
Create the middle ground trees:
Move slightly lower on the paper and paint larger, more distinct pine tree silhouettes on the right side, overlapping the mountain base. Use quick, downward zig-zag strokes to mimic pine branches. -
Balance the composition:
Paint a similar cluster of slightly smaller pine trees on the left side. I find varying the heights of these trees makes the forest feel more organic and less like a fence. -
Paint the meadow base:
For the grassy area at the very bottom, apply a wash of deep sap green mixed with a little brown. Paint right over the bottom of your tree trunks to ground them. -
Highlight the grass:
While the green is still wet, lift out a few horizontal streaks with a thirsty brush or drop in a slightly brighter yellow-green to suggest light catching the tall grass. -
Final touches:
Once everything is bone dry, carefully peel away the masking tape at a 45-degree angle to reveal your clean, crisp edges.
Frame your new celestial masterpiece and enjoy the peaceful view of the mountains from your own home
Pine Tree Silhouette Under a Cosmic Sky
Capture the magic of a starry night with this vibrant watercolor project that contrasts deep blues and purples against stark black silhouettes. It’s a fantastic exercise in wet-on-wet blending to create a dreamy, soft galactic cloud effect.
Detailed Instructions
Materials
- Cold press watercolor paper (300gsm/140lb)
- Painter’s tape or masking tape
- Watercolors: Indigo, Phthalo Blue (or Prussian Blue), Quinacridone Magenta (or Purple), Black
- White gouache or white ink for stars
- Large flat wash brush
- Medium round brush (size 6 or 8)
- Small liner brush (size 0 or 00) for details
- Two jars of water
- Paper towels
- Old toothbrush (optional for stars)
Step 1: Preparing the Sky Layer
-
Secure Your Paper:
Begin by taping down all four edges of your watercolor paper to a hard board or table. This creates that crisp white border seen in the example and prevents the paper from buckling when it gets wet. -
Wet the Surface:
Using your large flat brush, apply a generous layer of clean water across the entire paper. You want the surface to be glistening but not forming puddles. -
Lay the Milky Way Base:
While the paper is still wet, load your medium round brush with diluted magenta or purple. Paint a diagonal, uneven streak starting from the bottom right and reaching towards the top center. Let the pigment bloom softly into the wet paper. -
Deepen the Galaxy Core:
Drop in slightly more concentrated purple and pinks into the center of your streak to create depth, keeping the edges soft and feathery. -
Add the Blues:
Surround the purple streak with Phthalo Blue. Allow the blue to touch the edges of the purple where they will naturally blend into a violet transition, but try not to overtake the pink center completely. -
Darken the Corners:
Mix Indigo with a touch of Black to create a very deep midnight color. Apply this to the top left and bottom right corners of the painting, darkening the sky as you move away from the galaxy band. -
Wait or Dry:
This step requires patience. Allow the paint to dry completely. If the paper feels cool to the touch, it’s still damp. You can use a hairdryer on a low setting to speed this up.
Keep it Random
Make your tree branches vary in spacing. Perfectly even branches look like a ladder; nature is imperfect and asymmetrical.
Step 2: Creating the Stars
-
Flick the Stars:
Dilute a small amount of white gouache or ink with water until it has a milky consistency. Dip an old toothbrush or a stiff brush into it, and flick the bristles with your thumb to spray tiny droplets over the dry sky. -
Add Major Stars:
Using your smallest liner brush or a white gel pen, manually dot in a few larger, brighter stars. Place a couple near the center of the galaxy band to act as focal points. -
Create Clusters:
Add a dense cluster of tiny dots right in the lighter, pinkish section of the galaxy to mimic distant star clusters or nebulae details.
Muddy colors?
If your pink and blue turn gray where they meet, you are overworking the blend. Lay the colors side-by-side and let the water mix them naturally.
Step 3: Painting the Silhouettes
-
Mix the Black:
Prepare a rich, opaque black. I find using black gouache or a very concentrated watercolor mix (hardly any water) gives the best coverage for silhouettes. -
Outline the Tall Tree:
Start with the tall, prominent tree on the right. Use the liner brush to draw a thin, slightly wavering vertical line for the trunk, extending about two-thirds up the paper. -
Detail the Branches:
Switching to a small round brush, dab in the pine needles. Start at the top of the tree with small strokes and gradually make the branches wider and heavier as you move down the trunk. -
Keep it Organic:
Don’t make the tree perfectly symmetrical. Leave gaps between branches to let the galaxy sky peek through the foliage. -
Add the Forest Floor:
Paint a solid, undulating black mass at the very bottom of the paper to represent the ground or distant canopy line. -
Fill in the Background Trees:
Add shorter, triangular tree shapes to the left and right of your main tree. These can be less detailed, serving as a supporting dense forest mass. -
Final Touches:
Use the liner brush to add a few tiny, bare distinct branches sticking out from the main trunks or the tops of the distant trees for a realistic silhouette look. -
The Reveal:
Once the black paint is 100% dry, carefully peel off the masking tape at a 45-degree angle to reveal your clean edges.
Now you have a stunning window into the cosmos right on your desk


Shooting Star With Long Glow Trail
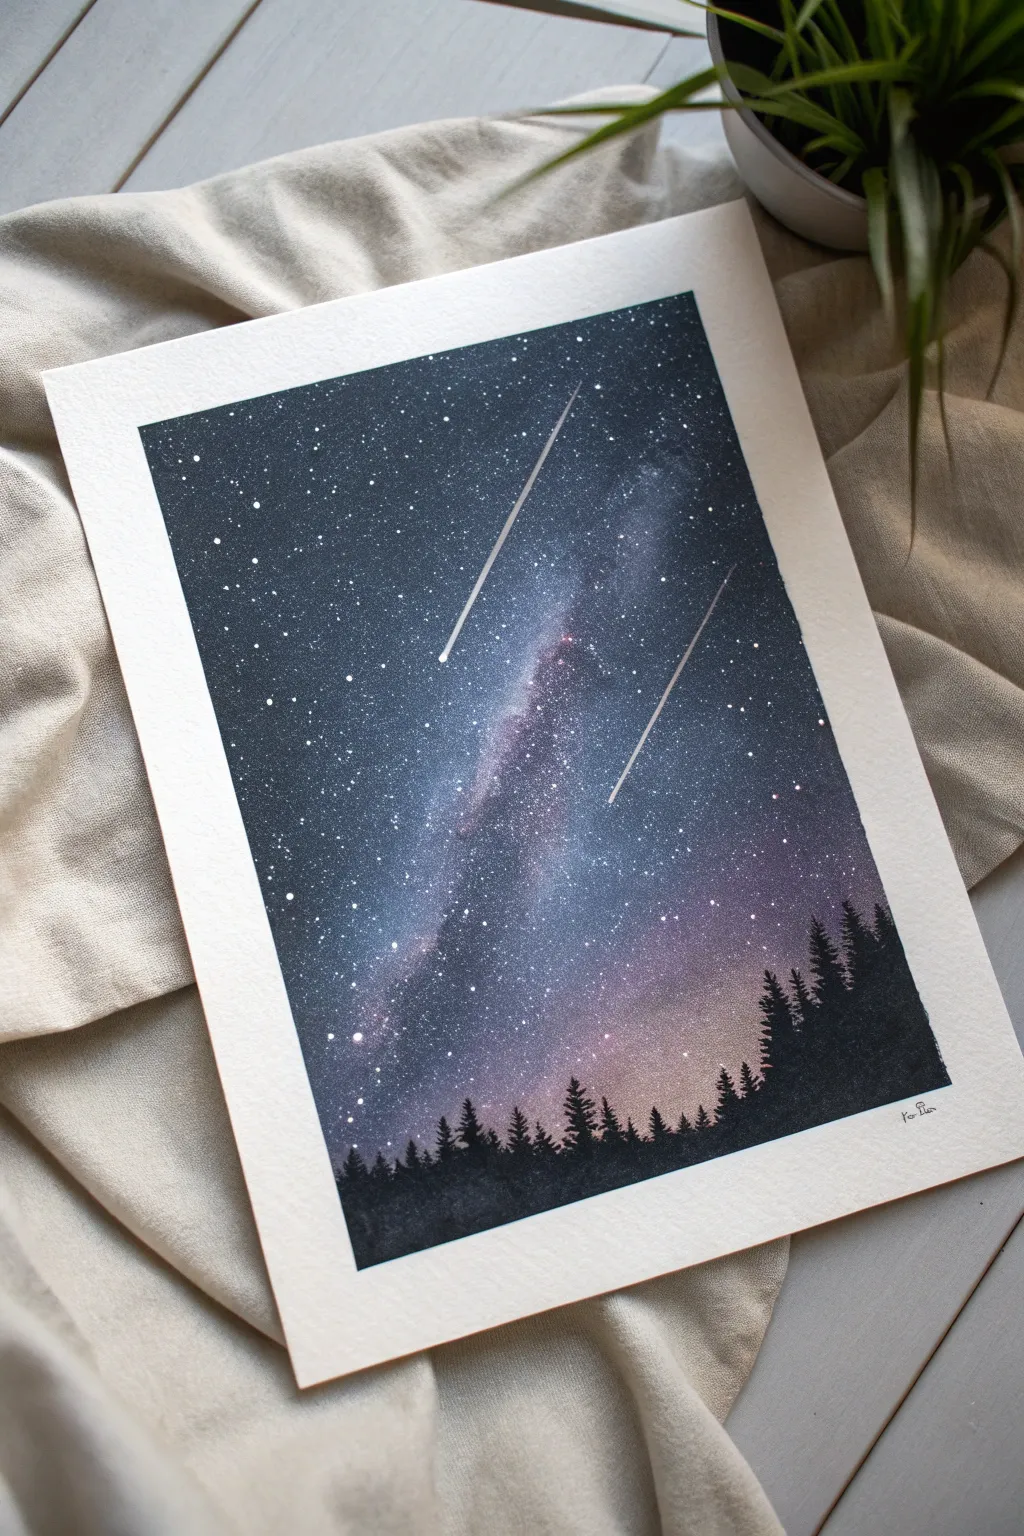
Capture the serene magic of a clear night sky with this striking watercolor composition featuring a vibrant Milky Way and dramatic shooting stars. The sharp, dark silhouettes of the forest trees provide a perfect grounding contrast to the ethereal, spattered galaxy above.
How-To Guide
Materials
- Cold press watercolor paper (300 gsm recommended)
- Painter’s tape or masking tape
- Watercolor paints (Indigo, Payne’s Grey, Violet, Magenta, Black)
- White opacity medium (white gouache, white ink, or gel pen)
- Large flat wash brush
- Round brush (size 6 or 8)
- Fine detail brush (size 0 or 00)
- Ruler
- Old toothbrush (optional for stars)
- Clean water and spray bottle
- Paper towels
Step 1: Setting the Sky
-
Secure your canvas:
Begin by taping down all four edges of your watercolor paper to a board or table. This creates that crisp white border seen in the final piece and prevents the paper from buckling when wet. -
Wet-on-wet preparation:
Using your large flat brush, apply a clean coat of water across the entire sky area, stopping about an inch from the bottom where the trees will eventually go. The paper should be glisten, but not hold puddles. -
Milky Way base:
While the paper is wet, drop in a diagonal band of lighter colors through the center. Mix a watery wash of magenta and violet, letting the colors bleed softly into the wet paper to form the galaxy’s core. -
Deepening the darkness:
Load your round brush with Indigo and Payne’s Grey. Start painting the corners and edges of the sky, working your way inward toward the violet band. The goal is to keep the edges darkest and the center lighter.
Protect the Center
When painting the dark outer sky, avoid painting over the central pink/purple galaxy band too much. Keeping that area clean preserves the luminous ‘glow’ effect.
Step 2: Creating the Galaxy
-
Blending the transition:
Clean your brush and use slightly damp bristles to soften the transition where the dark blue meets the purple band. You want a seamless gradient rather than hard lines. -
Intensifying the void:
Before the first layer dries completely, drop concentrated black or deep indigo into the very corners of the sky. This wet-in-wet addition adds depth that makes the stars pop later. -
Let it dry completely:
This is crucial. Walk away and let the painting bone-dry. If the paper feels cool to the touch, it’s still wet. Using a hairdryer on a low setting can speed this up.
Step 3: Stars and Details
-
Spatter the stars:
Mix white gouache or ink with a tiny drop of water until it has a milky consistency. Dip an old toothbrush or stiff brush into the white, then flick the bristles with your thumb to spray fine mist stars over the dark sky. -
Highlighting major stars:
I like to take a fine brush or gel pen and manually add a few larger, brighter stars in the dark areas to create variety in the constellation sizes. -
Shooting star trails:
Using a ruler and a white gel pen or thin liner brush with white gouache, draw two straight, sharp diagonal lines representing the shooting stars. Vary their lengths for interest. -
Fading the tails:
Immediately after drawing the line, use a slightly damp, clean brush to gently gently feather the back end of the trail, making it look like it’s fading into the atmosphere.
Metallic Magic
Mix a tiny amount of iridescent or silver watercolor medium into your white star mixture. The stars will shimmer subtly when looking at the painting from different angles.
Step 4: The Forest Silhouette
-
Mixing the forest color:
Prepare a very concentrated mix of black paint. You want this to be opaque and bold, with very little water content. -
Painting the tree line:
Start by blocking in a solid, uneven strip of black across the bottom of the paper for the forest floor. -
Adding tree peaks:
Switch to your smallest detail brush. Paint vertical lines extending upward from the black base to establish the height of your trees. Make the trees on the right side taller to mimic the reference image. -
detailing the branches:
Using the very tip of the brush, stipple or tap horizontal, zig-zag motions down the sides of your vertical lines. Keep the tops narrow and pointy, widening the branches as you move down. -
Final dense layer:
Fill in the gaps between trees with solid black, leaving the distinct pine shapes only at the varied top canopy. -
The reveal:
Once the trees are fully dry, carefully peel away the masking tape at a 45-degree angle to reveal your clean, crisp borders.
Now step back and admire the depth of the galaxy you just created
Floating Astronaut in a Nebula
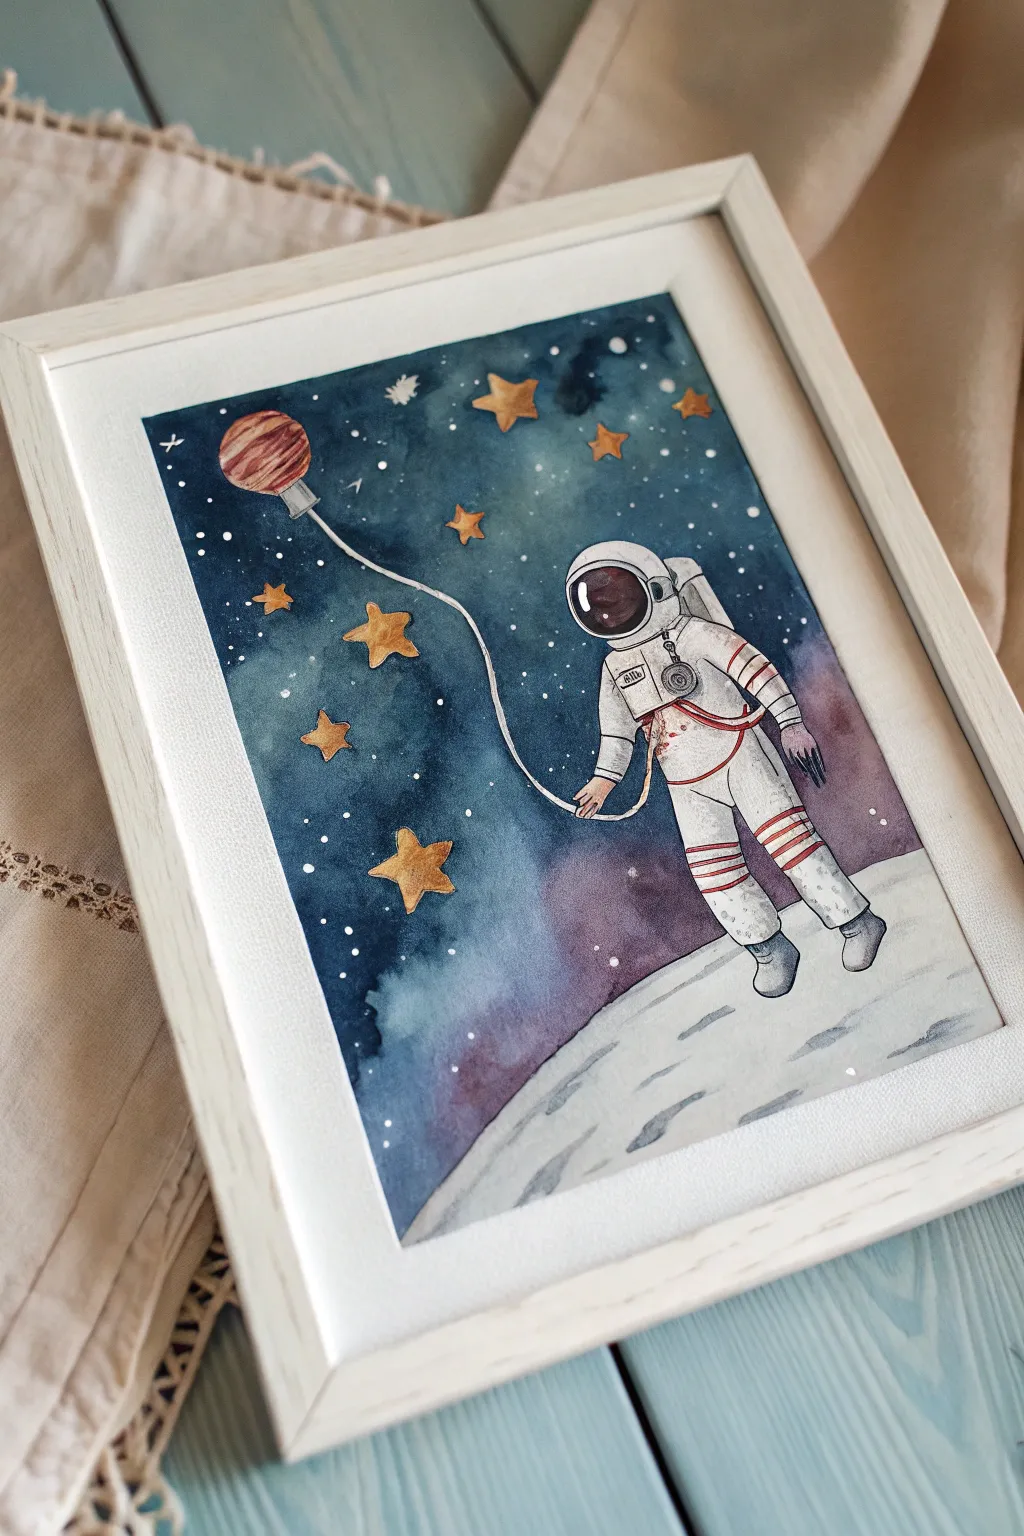
Capture the magic of space exploration with this charming watercolor piece featuring an astronaut holding a planetary balloon. This project combines loose wet-on-wet nebula backgrounds with precise illustration for a dreamy, storybook feel.
Step-by-Step Guide
Materials
- Cold press watercolor paper (300 gsm)
- Watercolor paints (Indigo, Payne’s Grey, Alizarin Crimson, Violet, Burnt Sienna, Yellow Ochre)
- White gouache or white gel pen
- Masking fluid (optional but recommended)
- HB Pencil
- Kneaded eraser
- Round brushes (sizes 2, 6, and 10)
- Paper towels
- Two jars of water
- Painter’s tape
Step 1: Sketching and Preparation
-
Tape the Edges:
Secure your watercolor paper to a board using painter’s tape along all four edges. This creates a clean white border and prevents the paper from buckling during the heavy washes later. -
Sketch the Composition:
Using an HB pencil, lightly sketch the curve of the moon at the bottom. Position your astronaut hovering slightly above it, making sure the head is large and round for that cute, illustrative style. -
Add Details:
Draw the balloon string extending from the astronaut’s hand up to a planet-shaped balloon. Sketch in a few prominent five-pointed stars around the figure. -
Protect the Whites:
Apply masking fluid carefully over the astronaut, the moon surface, the stars, and the planet balloon. This is crucial for keeping these areas pristine white while we paint the dark background.
Step 2: Creating the Nebula Background
-
Wet the Sky:
Once the masking fluid is bone dry, use your largest brush to wet the entire background area with clean water until it glistens. -
Drop in Deep Blues:
While the paper is wet, load your brush with concentrated Indigo and Payne’s Grey. Start at the top corners and drop the color in, letting it bloom naturally. Keep the color darkest at the top edges. -
Add Nebula Hues:
Clean your brush slightly and pick up some Violet or Alizarin Crimson. Touch this into the wet blue near the horizon line to create a soft, nebular glow that transitions into the darkness. -
Lift and Soften:
If an area looks too heavy, use a damp, clean brush or a twisted paper towel to lift a little pigment, creating cloudy textures in your galaxy. -
Salt Texture (Optional):
For extra starry texture, sprinkle a tiny pinch of table salt onto the wet paint and let it sit. I love doing this to create unpredictable starbursts. -
Splatter Stars:
Once the shine has just left the paper but it’s still damp, load a brush with clean water or watered-down white gouache and flick tiny droplets over the sky for distant stars. -
Dry and Reveal:
Let the background dry completely—using a hairdryer carefully if impatient. Once 100% dry, gently rub off the masking fluid with your clean finger or a rubber cement pickup.
Fixing Masking Tears
If masking fluid rips the paper upon removal, don’t panic. Smooth the tear with the back of a spoon, then paint over it with opaque gouache to hide the texture damage.
Step 3: Painting the Subjects
-
Warm Gold Stars:
Paint the exposed stars using a mix of Yellow Ochre and a touch of Burnt Sienna. Keep the centers lighter and edges darker to clear volume. -
The Planet Balloon:
Paint the balloon using stripes of Burnt Sienna and watered-down Crimson. Leave a small sliver of white paper unpainted on the top left side for a highlight. -
Astronaut Visor:
Paint the visor essentially black or deep purple, but leave a distinct white oval reflection. This small reflection is key to making the glass look shiny and rounded. -
Suit Shadows:
Use a very watered-down grey-blue mix to add shadows to the white space suit. Focus on the underside of the arms, legs, and backpack to give the figure dimension. -
Red Accents:
Using a small size 2 brush, carefully paint the red stripes on the astronaut’s arms and legs. Add the red harness detail across the chest. -
Moon Surface:
Wash a pale grey over the moon area. While wet, drop in slightly darker grey ovals to suggest craters, soft and diffused.
Metallic Magic
Swap the yellow ochre for metallic gold watercolor paint on the stars and the balloon string. It catches the light beautifully when the painting is framed.
Step 4: Final Details
-
Inking the Outlines:
Once all paint is dry, you can use a fine black pen or a very fine brush with concentrated black paint to outline the astronaut, stars, and balloon string for a crisp finish. -
Highlight Pop:
Use white gouache or a gel pen to add final bright highlights on the top of the helmet and the balloon string.
Peel off your tape to reveal those crisp edges and enjoy your serene piece of outer space art
Rocket Launch Through the Star Field
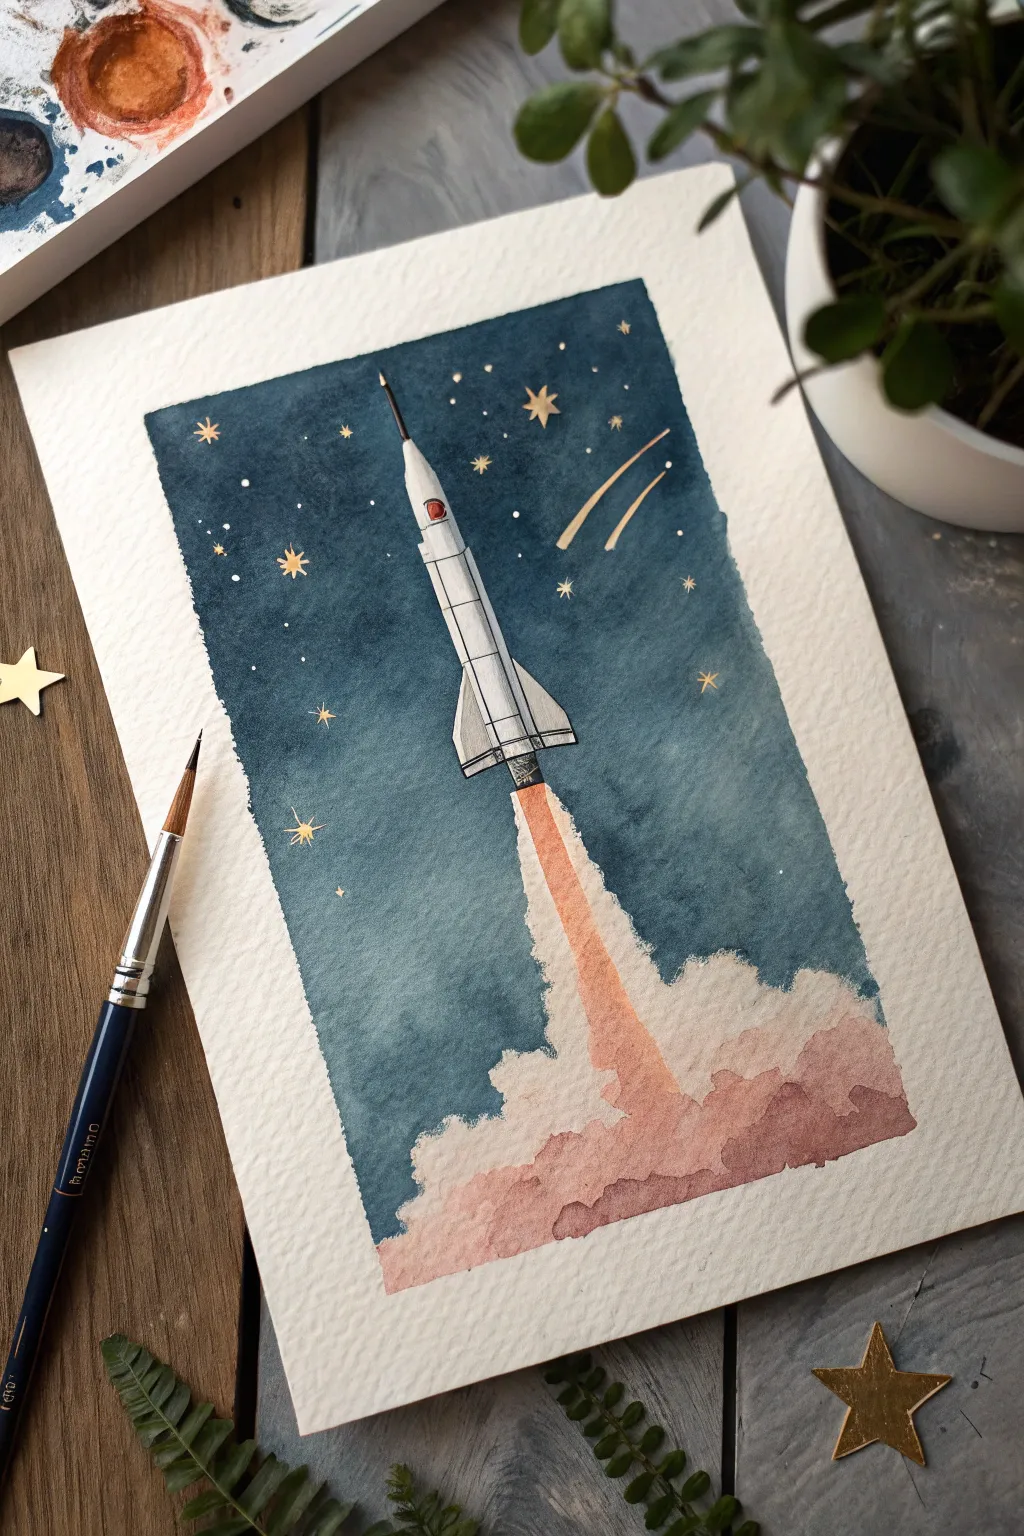
Capture the thrill of space exploration with this vintage-inspired rocket painting. Using deep indigo washes and clever masking, creates a striking contrast between the bright spacecraft and the infinite cosmos.
Step-by-Step Tutorial
Materials
- Cold press watercolor paper (300 gsm)
- Masking fluid or drawing gum
- Watercolor paints (Indigo, Payne’s Gray, Burnt Sienna, Alizarin Crimson, Yellow Ochre)
- Pencil and eraser
- Gold gouache or metallic watercolor
- Fine liner pen (waterproof, black or dark grey)
- Round brushes (size 4, size 8)
- Fine detail brush (size 0 or 00)
- Painter’s tape
- Paper towel and water jars
Step 1: Preparation & Sketching
-
Tape the edges:
Secure your watercolor paper to a board using painter’s tape on all four sides. This creates a crisp white border and prevents buckling when we apply heavy washes later. -
Sketch the rocket:
Lightly draw the rocket shape in the center-top half of the paper. Focus on the cylindrical body, the pointed nose cone, and the retro fins at the base. Keep your pencil lines faint so they don’t show through excessively. -
Outline the plume:
Sketch the billowing cloud shapes at the bottom. Draw the central flame shooting down from the engine, merging into the wider smoke clouds. -
Apply masking fluid:
Carefully paint masking fluid over the entire rocket body and the brightest parts of the exhaust flame. This preserves the white paper, which is crucial for the glowing effect. Let it dry completely.
Step 2: The Cosmic Background
-
Prepare the sky wash:
Mix a large puddle of deep blue fluid using Indigo and a touch of Payne’s Gray. You want a rich, dark value. -
Paint the gradient:
Starting at the top of the paper, apply the dark blue wash. As you move down towards the rocket’s plume, dilute the paint slightly with water to create a subtle gradient, but keep it generally dark. -
Cut around the clouds:
carefully paint around the edges of the smoke clouds at the bottom. Use the tip of your brush to create the jagged, fluffy edge where the smoke meets the night sky. -
Add texture:
While the sky is still damp, you can drop in concentrated hints of pure Indigo or even a tiny bit of black in the upper corners to deepen the space effect. -
Let it dry:
Wait until the background is bone dry. If the paper feels cool to the touch, it’s still wet.
Uneven Sky Wash?
If your large blue wash is drying with streaks, pre-wet the paper slightly with clean water first (wet-on-wet technique). This buys you more time to blend smoothly.
Step 3: Rocket & Plume Details
-
Remove masking:
Gently rub away the masking fluid with your finger or a rubber cement pickup to reveal the pristine white paper of the rocket. -
Paint the rocket body:
Use a very diluted gray (watered-down Payne’s Gray) to add shadows to the side of the rocket, giving it a cylindrical 3D form. Keep the center bright white. -
Detail the fins:
Paint the fins with a slightly darker gray mix. I like to outline the panels and fins with a superfine brush or a waterproof pen for that graphical illustration look. -
Add red accents:
Drop a small dot of Alizarin Crimson for the porthole window or emblem near the top of the fuselage. -
Paint the flame core:
Mix a vibrant orange using Yellow Ochre and a touch of Red. Paint the central thrust column directly under the rocket, letting it fade out as it goes down. -
Create the smoke clouds:
Wet the smoke area with clean water first. Drop in watery mixtures of Burnt Sienna and a touch of the sky blue color to create shadowy, billowing volumes. -
Layer the smoke:
While the smoke is damp, add concentrated reddish-browns to the bottom edge of the clouds to suggest density and shadow near the ground.
Pro Tip: Masking Fluid
Coat your brush in bar soap before dipping it into masking fluid. This creates a barrier that makes cleaning the rubbery fluid out of the bristles much easier later.
Step 4: Stars & Final Touches
-
Add gold stars:
Using your smallest brush and metallic gold paint, carefully paint small star shapes and dots scattered across the blue sky. -
Draw the shooting stars:
Paint two swift lines near the rocket with the gold paint to represent shooting stars or space debris, adding movement to the composition. -
Define the antenna:
Use your fine liner or black paint to draw the sharp antenna spike on the very tip of the nose cone. -
Final assessment:
Check your contrast. If the rocket needs more definition, darken the fine outlines slightly. Let everything dry before peeling off the tape.
Peel back the tape to reveal your crisp edges and enjoy your journey to the stars
Black Hole With Accretion Ring
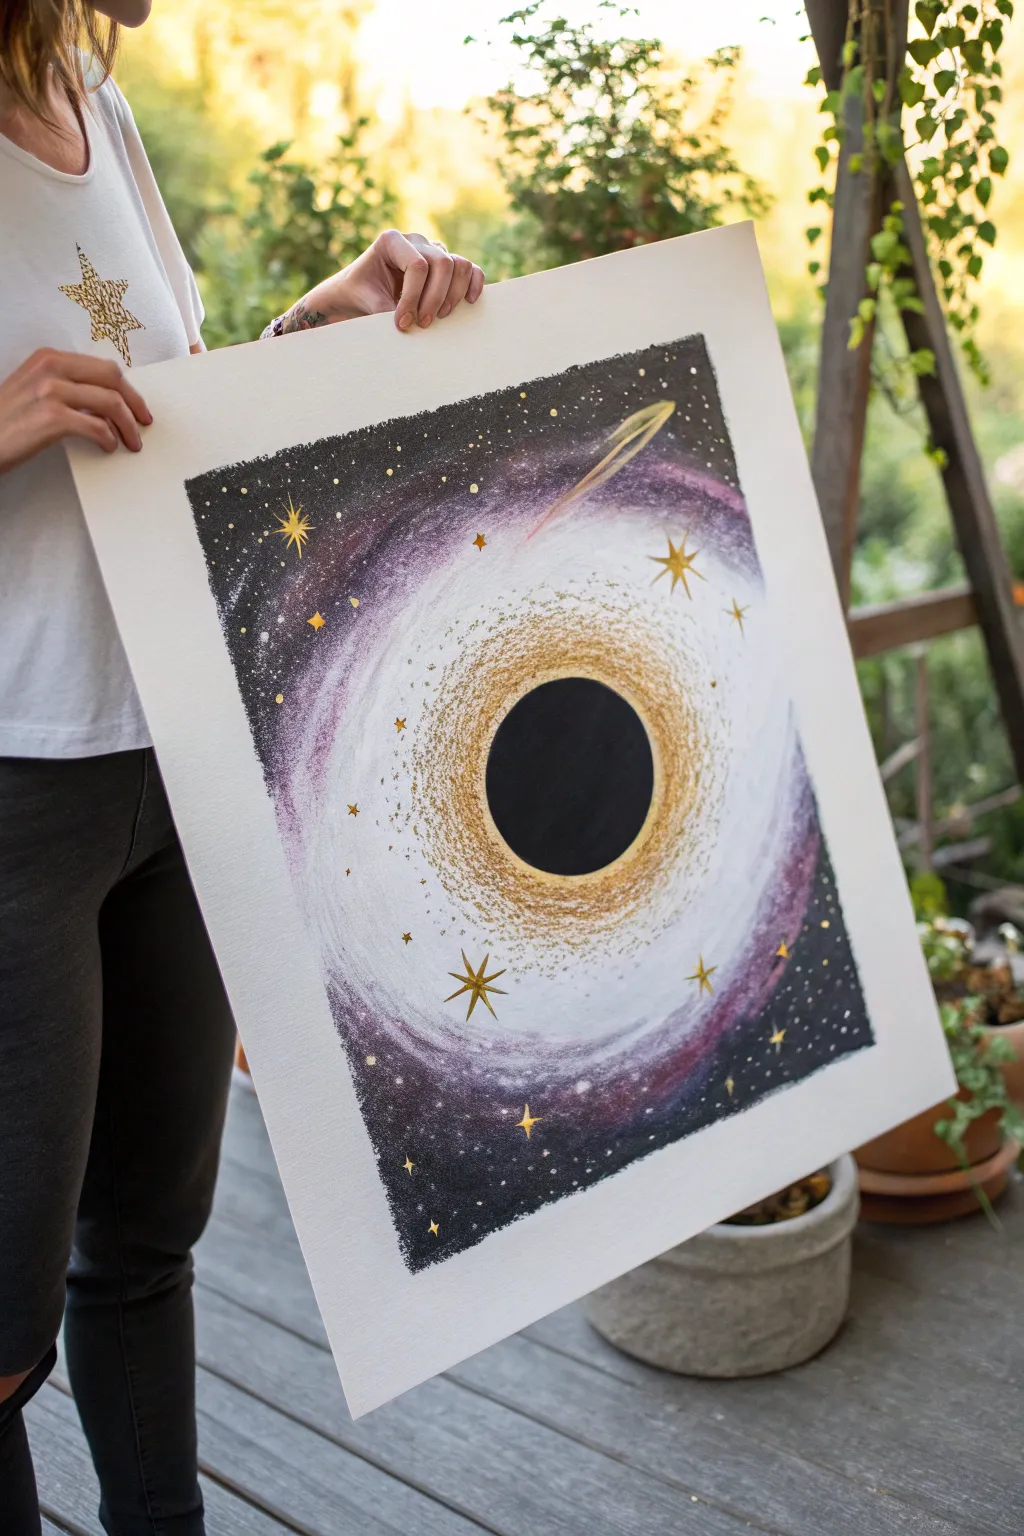
Capture the mysterious beauty of deep space with this striking mixed-media piece. Contrasting deep, velvety blacks with shimmering gold and soft purples creates a dramatic accretion disk effect that leaps off the page.
Step-by-Step
Materials
- Heavyweight mixed-media or watercolor paper (A3 size recommended)
- Soft pastels (black, dark purple, violet, white, cream)
- Gold metallic paint or gold ink
- Fine detail paintbrush (size 0 or 1)
- Circle template or compass
- Fixative spray (workable)
- Painter’s tape
- Blending stump or tortillon
- Paper towels
Step 1: Setting the Void
-
Tape the borders:
Secure your paper to a flat surface using painter’s tape. Create a clean, sharp border by taping off a rectangle in the center, leaving a wide white margin around the edges like in the photo. -
Outline the singularity:
Using a compass or a round object as a template, lightly trace a perfect circle in the center of your taped area. This will become the absolute black center of your black hole. -
Fill the center:
Use a black soft pastel to fill in the central circle completely. Press firmly to get a dense, opaque coverage. Be careful to stay inside your traced line for a crisp edge. -
Create the outer dark space:
Apply black pastel to the four corners of your rectangular frame, leaving a large, rough circular area around the central black hole empty for now. This frames the galaxy.
Smudge Control
If black pastel dust migrates into your white halo, use a kneaded eraser to lift the dust straight up without rubbing, then re-apply fresh white.
Step 2: Building the Galaxy
-
Lay down the purple base:
In the negative space between the black corners and the center circle, apply strokes of dark purple and violet pastel. Sketch in a swirling, circular motion to mimic the rotation of the galaxy. -
Blend the transition:
Use your fingers or a blending stump to smudge the black corners into the purple areas. You want a seamless gradient where deep space fades into the galactic cloud. -
Add secondary colors:
Layer lighter purples and touches of pink near the inner sections of the swirl. Keep your strokes loose and directional to maintain that sense of movement. -
Introduce the white glow:
Take a white or cream pastel and apply a thick ring around the central black circle. Smudge this outward into the purple, creating a bright, glowing halo effect. -
Refine the spiral:
Add smaller streaks of white in the purple sections to suggest spiral arms. I usually soften these lines with a clean finger so they look like gaseous clouds rather than solid stripes.
Step 3: Gilded Details
-
Seal the base:
Lightly spray the artwork with a workable fixative. This prevents the pastel dust from muddying the wet media you are about to add. Let it dry completely. -
Stipple the accretion disk:
Dip a stiff brush or an old toothbrush into gold metallic paint. Carefully stipple or flick tiny dots concentrated heavily around the black center circle. This mimics the dense matter of the accretion ring. -
Paint the golden stars:
Using a fine detail brush and gold paint, draw several four-pointed or eight-pointed stars scattered throughout the lighter parts of the galaxy. Vary their sizes for visual interest. -
Add distant starlight:
Dip the tip of a paintbrush handle or a toothpick into white paint (or gold) and dot tiny stars into the dark black corners. Keep them sparse and random. -
Create the comet trail:
Paint a faint, sweeping gold line in the upper right corner, curving slightly toward the center to resemble a comet or a distinct arm of gas being pulled in. -
Highlight the edge:
Paint a very thin, precise gold line right on the border where the black center meets the white/gold halo. This sharpens the contrast and makes the hole pop.
Cosmic Shimmer
For extra depth, mix a tiny pinch of iridescent glitter into your gold paint for the central ring. It catches the light beautifully when framed.
Step 4: Final Touches
-
Enhance contrast:
If the central black circle has gathered any dust, carefully go over it again with black pastel or charcoal to ensure it remains the darkest point of the image. -
Gold dust finish:
Flick a very small amount of watered-down gold paint from a distance to create a fine mist over the spiraling arms, adding texture and sparkle. -
Reveal the border:
Once everything is dry, slowly peel away the painter’s tape at a 45-degree angle. This reveals the crisp, clean edges that make the artwork look professional.
Hang your cosmic creation where the light can catch those golden details and enjoy the view
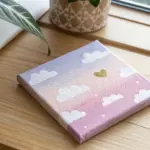
Simple Constellation Lines Over Stars
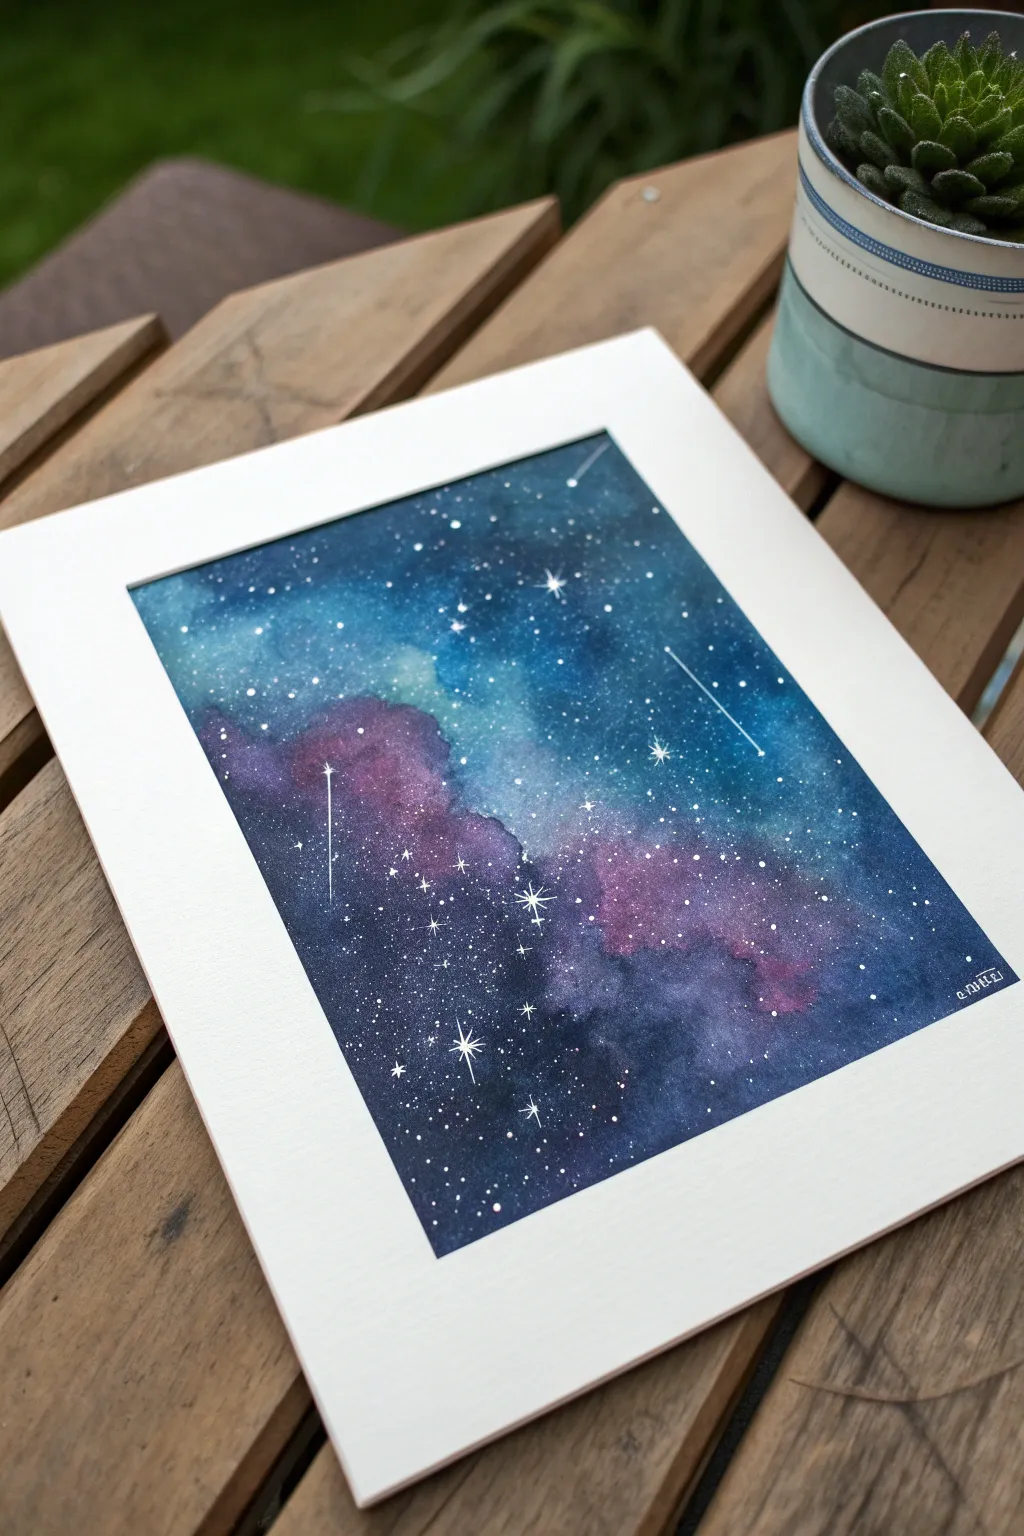
Capture the magic of deep space with this ethereal galaxy painting, featuring swirling nebulas in blues and violets. The addition of crisp white stars and delicate constellation lines transforms a colorful wash into a structured view of the night sky.
Step-by-Step
Materials
- Cold press watercolor paper (300 gsm)
- Watercolor paints (Indigo, Phthalo Blue, Dioxazine Purple, Ultramarine)
- White gouache or white gel pen
- Large round brush for washes
- Small detail brush (size 0 or 00)
- Masking tape
- Parchment or mat board for mounting
- Clean water and paper towels
Step 1: Setting the Atmosphere
-
Prepare the borders:
Begin by taping down the edges of your watercolor paper to a rigid board. This creates the crisp, clean white border seen in the final piece and prevents the paper from buckling under heavy water usage. -
Wet-on-wet base:
Using your large round brush, coat the entire paper surface with clean water until it glistens but doesn’t puddle. This wet-on-wet technique allows colors to bleed naturally. -
Lay in the light blues:
Load your brush with a watery mix of Phthalo Blue. Dab this randomly across the upper center and right side, leaving some organic shapes. -
Introduce the nebula clouds:
While the paper is still wet, drop in concentrated Dioxazine Purple in the lower left quadrant. Let it touch the blue edges so they bleed together softly, creating that cloudy nebula effect.
Starry Splatter Tip
Cover the areas you want to keep dark with a scrap piece of paper before flicking paint. This controls the star density and keeps your deep space voids looking empty and vast.
Step 2: Deepening the Cosmos
-
Add depth with indigo:
Mix a strong, dark Indigo or Payne’s Gray. Appy this to the corners and the spaces between your colored clouds to create the deep emptiness of space. -
Enhance the contrast:
If the colors look too pale as they dry, add a second layer of pigment while the paper is slightly damp. I prefer to keep the center lighter to make the nebula appear glowing. -
Texture with water blooms:
For a natural, chaotic texture, flick a few tiny drops of clean water onto the semi-dry paint. This pushes pigment away and creates subtle star-like blooms. -
Complete drying:
Let the painting dry completely. The paper must be bone-dry before adding stars, or the white lines will feather and blur.
Make it Shimmer
Mix a small amount of iridescent medium or pearl watercolor into your purple nebula sections. When the light hits the painting, the clouds will have a subtle, magical glow.
Step 3: Starlight and Constellations
-
Flick the distant stars:
Dilute white gouache with a tiny bit of water until it’s creamy. Load a stiff brush or toothbrush and gently flick it over the painting to create a spray of fine, distant stars. -
Paint prominent stars:
Using your smallest detail brush or a white gel pen, manually dot larger, brighter stars in the darker areas where they will pop the most. -
Create the flares:
Select 3-5 of your largest stars to turn into twinkling focal points. Draw a thin cross shape through the center of the dot, extending the vertical line slightly longer than the horizontal one. -
Draw constellation lines:
Connect a few neighboring stars with very thin, straight lines. Don’t worry about real astronomical accuracy; simply connect dots that form pleasing geometric shapes or trails. -
Add shooting stars:
Draw one or two distinct lines that trail off into nothingness, representing shooting stars or comets passing through your view. -
The final reveal:
Review your work. Once the white ink is fully dry, carefully peel away the masking tape at a 45-degree angle to reveal the sharp white border. -
Mounting:
Place your painting behind a mat board frame to give it a professional gallery finish, just like the example image.
Step back and admire how a few simple splashes of color have transformed into a window to the infinite universe
Cosmic Aurora Ribbons in Space
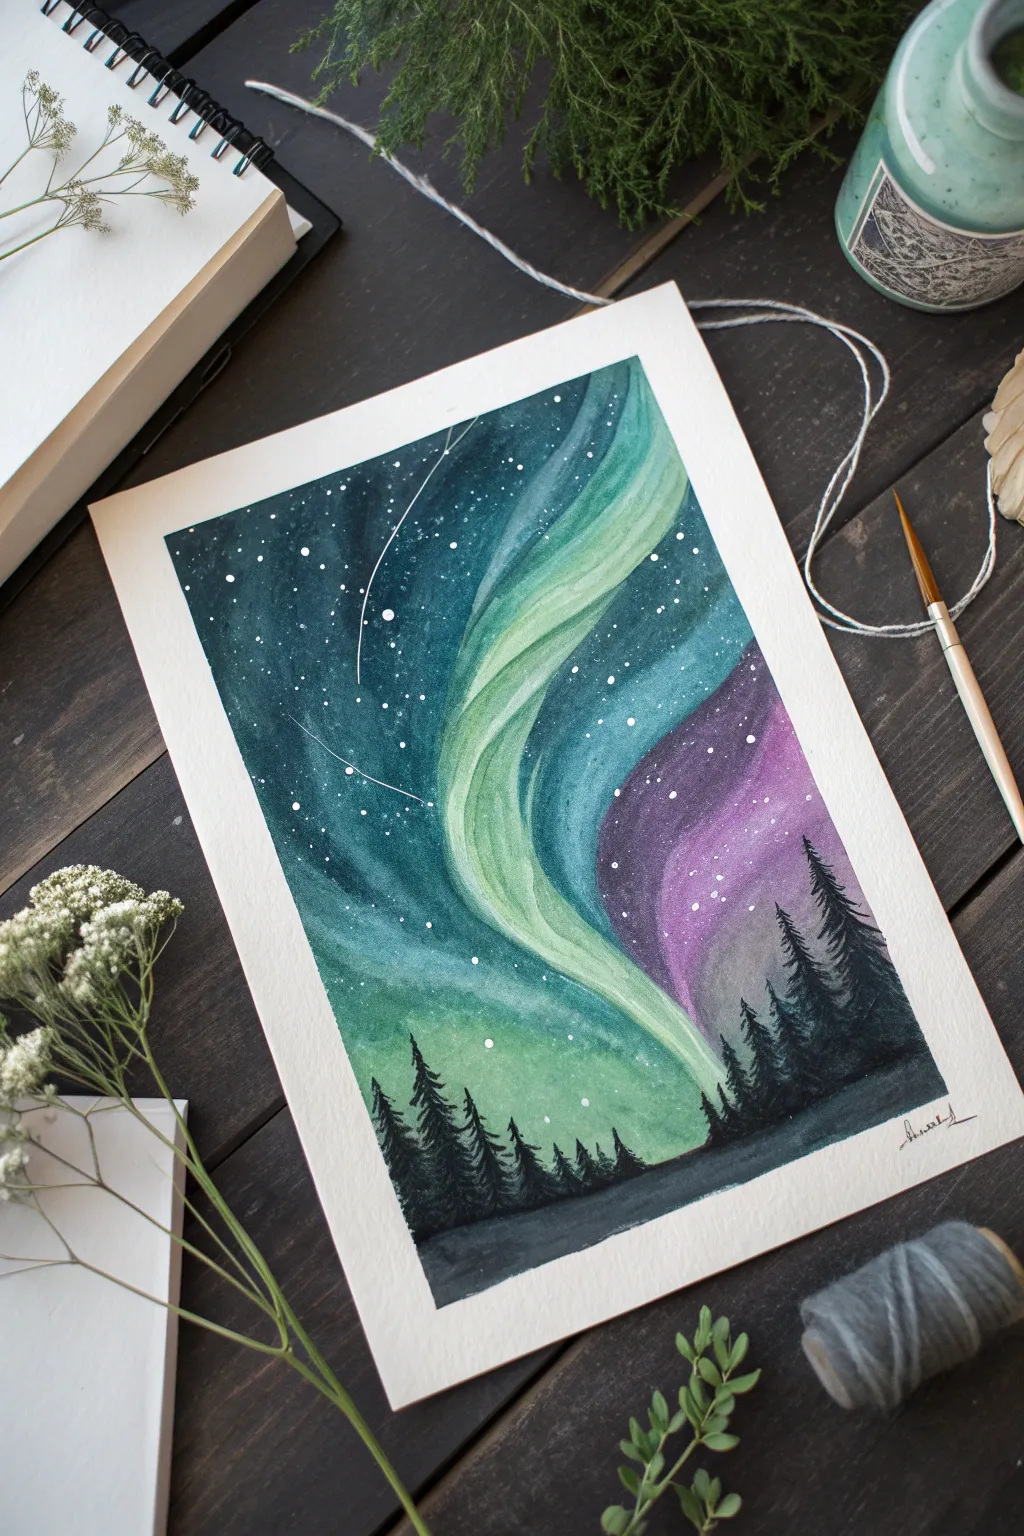
Capture the ethereal beauty of the Aurora Borealis using fluid watercolor techniques to create dancing ribbons of light across a starry sky. This project combines wet-on-wet blending with stark silhouetted details for a high-contrast, magical landscape.
Detailed Instructions
Materials
- Cold press watercolor paper (300 gsm recommended)
- Masking tape
- Watercolor paints (Emerald Green, Phthalo Blue, Dioxazine Purple, Indigo, Lamp Black)
- White gouache or white acrylic ink
- Round watercolor brushes (sizes 8 and 2)
- Old toothbrush (optional for stars)
- Clean water jar and paper towels
Step 1: Setting the Sky
-
Prepare the canvas:
Begin by taping down all four edges of your watercolor paper to a hard board. This ensures the paper stays flat during the heavy washes and creates a crisp, clean border when finished. -
Map the flow:
Sketch very faint, sweeping S-curve lines with a pencil to mark where your main aurora ribbons will flow. Keep these loose and organic; they are just guides. -
Initial wet-on-wet layer:
Using a large clean brush, wet the entire sky area with clear water. It should be glistening but not forming puddles. -
Laying the light:
Drop diluted Emerald Green or a bright yellow-green into the center of your wet S-curves. Allow the paint to bleed and bloom naturally, keeping the edges soft.
Muddy Colors?
If your green and purple turn brown where they meet, let the green layer dry completely first. Then, glaze the purple over nearby areas rather than mixing them wet-on-wet.
Step 2: Deepening the Cosmos
-
Introducing blue tones:
While the paper is still damp, pick up Phthalo Blue. Paint along the outer edges of your green ribbons, letting the blue and green mix slightly on the paper to create teal transitions. -
Adding the violet shift:
In the lower right section or spaces between ribbons, introduce Dioxazine Purple. Blend this gently into the blue areas, but try to keep it from mixing too much with the bright green to avoid muddy colors. -
Darkening the night sky:
Mix a deep, dark hue using Indigo and a touch of Black. Apply this to the upper corners and the far edges of the sky, creating a vignette effect that makes the central lights pop. -
Refining the ribbons:
With a clean, slightly damp brush, gently lift a little pigment from the center of the green ribbons to imply transparency and movement. -
Dry partially:
Let this first major wash dry until it is no longer shiny, but still cool to the touch. -
Second layer for depth:
Re-wet specific dark areas (avoiding the bright green centers) and add another layer of Indigo and Black to intensify the night sky contrast.
Step 3: Detailed Embellishments
-
Creating the stars:
Once the sky is completely bone-dry, load a brush or old toothbrush with white gouache diluted to a creamy consistency. Tap the brush handle to splatter fine white specks across the sky. -
Adding larger stars:
Use a detail brush to hand-paint a few larger, deliberate stars or even a shooting star with a faint tail, as seen in the upper left of the reference. -
Painting the tree line base:
Mix a dense, opaque black using Lamp Black with very little water. Paint a rolling hill shape across the very bottom of the paper. -
Creating pine trees:
Switch to your smallest round brush (size 2). Start with a vertical line for the trunk, then use jagged, downward strokes to create pine branches, making them wider as you move down. -
Varying the forest:
Alternate the height of your trees. I like to group a few tall ones on the right side to balance the composition against the aurora’s flow. -
Final touches:
Ensure the tree silhouette connects solidly to the bottom black hill. Let the painting dry completely before carefully peeling off the masking tape at a 45-degree angle.
Level Up: Salt Texture
While the dark blue sky wash is still wet, sprinkle a pinch of table salt into the corners. It absorbs pigment as it dries, creating unique, starry textures automatically.
Step back and admire your personal window into a calm, starlit winter night
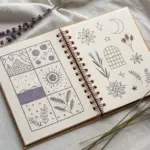
Clean Tape-Border Mini Galaxy Panels
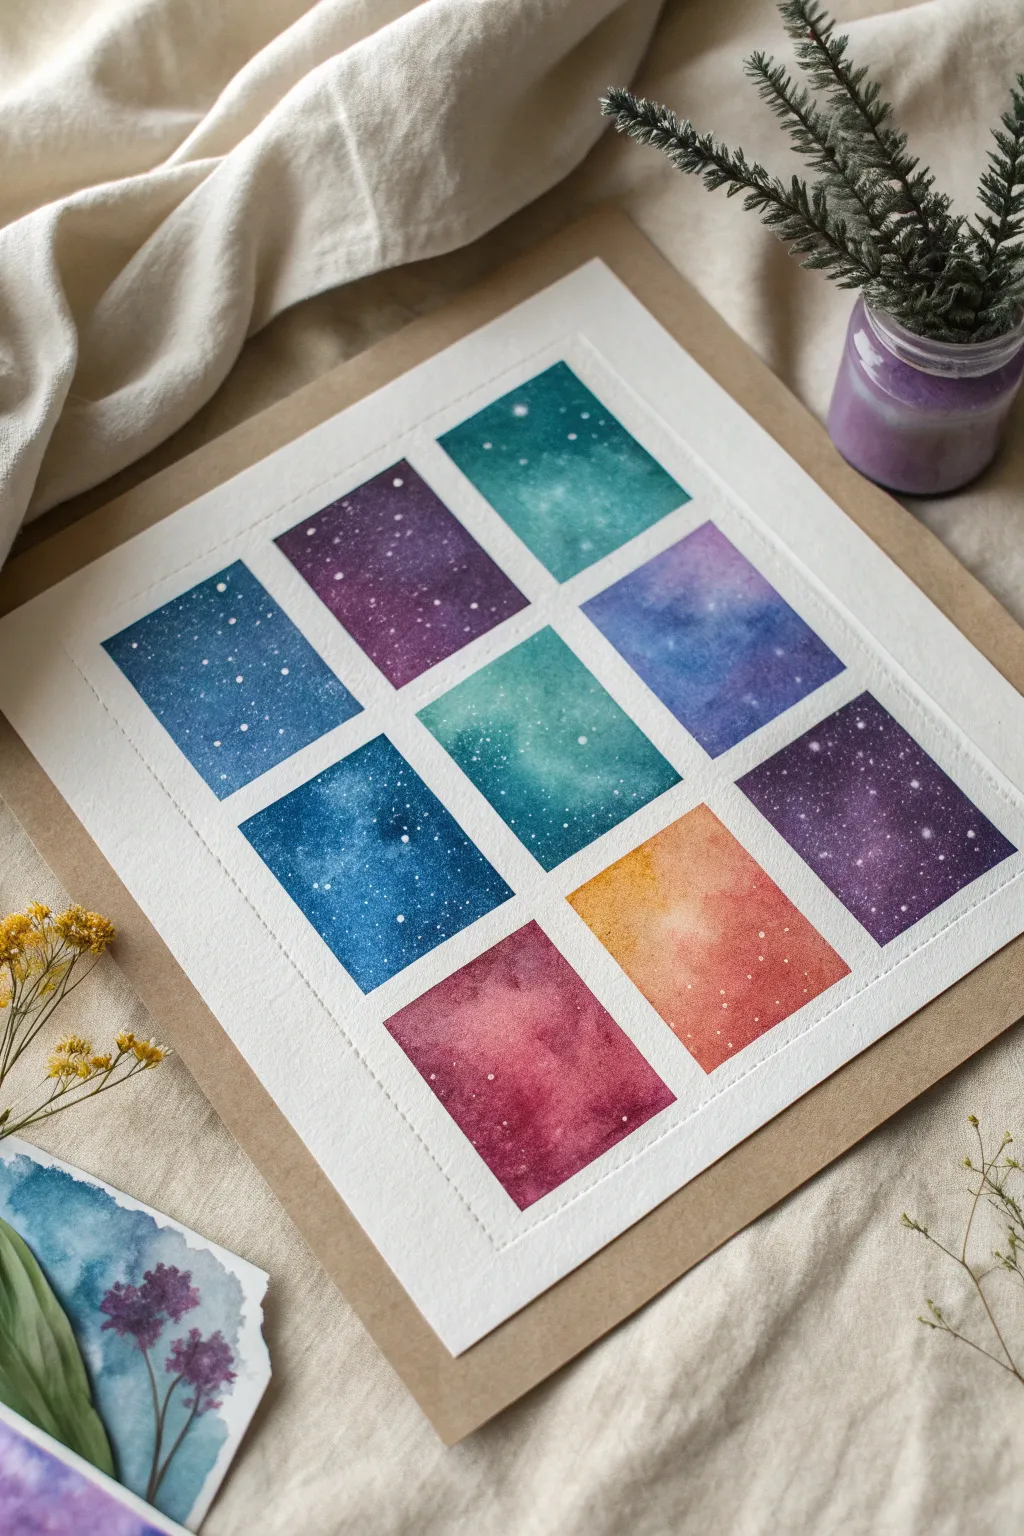
Transform a single sheet of watercolor paper into a window looking out at nine different corners of the universe with this structured yet free-flowing project. By using masking tape to create a crisp 3×3 grid, you can experiment with distinct color palettes in each mini-painting while maintaining a cohesive, gallery-ready look.
Step-by-Step
Materials
- High-quality watercolor paper (cold press, 300gsm or 140lb is ideal)
- Artist’s masking tape or painter’s tape
- Watercolor paints (tube or pan set)
- Round watercolor brushes (sizes 6 and 2)
- White gouache or white acrylic ink
- Clean water jars
- Paper towels
- A flat drawing board or hard surface to tape paper onto
- Small stiff-bristled brush or toothbrush
Step 1: Preparation & Taping
-
Secure the paper:
Start by taping your watercolor paper down securely to a board. Use a strip of tape along all four outer edges to create a clean white margin around the entire piece. -
Create the grid structure:
Measure and lightly mark your paper to divide the interior space into nine equal rectangles. Place two long strips of masking tape vertically and two strips horizontally to create the grid lines. -
Seal the edges:
Run your fingernail or a bone folder firmly along every edge of the tape. It is crucial that the tape is fully adhered to prevent paint from seeping underneath and ruining your crisp lines.
Bleeding Edges?
If paint leaked under the tape, wet a stiff, clean brush and gently scrub the mistake to lift the pigment. Blot with a paper towel. Repeat until the border is clean again.
Step 2: Painting the Galaxy Panels
-
Wet-on-wet technique:
Select your first square. Pre-wet just the paper inside this square with clean water until it has a subtle sheen, but no puddles. -
Drop in base colors:
Load your size 6 brush with a deep blue or indigo. Drop the color onto the wet paper, letting it bloom naturally. Keep the color concentrated near the edges or corners to create depth. -
Blend secondary hues:
While the paint is still wet, introduce a second color, like purple, teal, or magenta, into the center or opposite corner. Let the colors touch and merge on their own for soft transitions. -
Repeat for all squares:
Continue this process for the remaining eight squares. Vary your color combinations for each one—try a teal/green mix, a red/orange nebula, or a classic deep violet/black scheme to keep the grid dynamic. -
Deepen the shadows:
Once the first layer is damp (not soaking), dab concentrated black or Payne’s Gray into the corners of a few squares. This adds the intense contrast needed for a deep-space effect. -
Allow to dry completely:
This is the hardest part—patience. Let the entire grid dry completely before moving on. If the paper is cool to the touch, it is still wet.
Step 3: Creating the Stars
-
Prepare the star mix:
Dilute a small amount of white gouache or white acrylic ink with water until it reaches a milky, splatter-friendly consistency. -
Splatter texture:
Dip a stiff brush or old toothbrush into the white mixture. Hold it over the painting and tap the handle (or flick the bristles) to spray fine white dots across the panels. -
Selective variations:
Vary the density of your stars. Some galaxies might be dense clusters, while others have sparse, distant stars. You can protect specific squares with a scrap piece of paper if you want to control where the splatter lands. -
Add prominent stars:
Using your smallest detail brush (size 2 or smaller), carefully paint a few larger, distinct dots by hand in the darker areas of the galaxies to mimic brighter planets or nearby stars.
Pro Tip: Cosmic Glow
Before drying, lift color from the center of a panel with a clean, thirsty brush. This creates a bright, glowing core for your galaxy against the darker edges.
Step 4: The Reveal
-
Final drying:
Wait until all the white star splatter is completely dry to the touch to avoid smearing during tape removal. -
Peel the tape:
Identify which tape strips are on top. I prefer to peel the tape slowly at a 45-degree angle away from the painted area. This minimizes the risk of tearing the paper. -
Continue revealing:
Systematically remove the remaining horizontal and vertical strips, followed by the outer border tape. -
Clean up edges:
If there was any minor bleeding, you can gently cover it with a touch of white gouache, though slight imperfections often add to the handcrafted charm.
Now you have a stunning, organized collection of cosmic scenes ready to be framed or gifted
Planet Close-Up With Atmospheric Rim Light
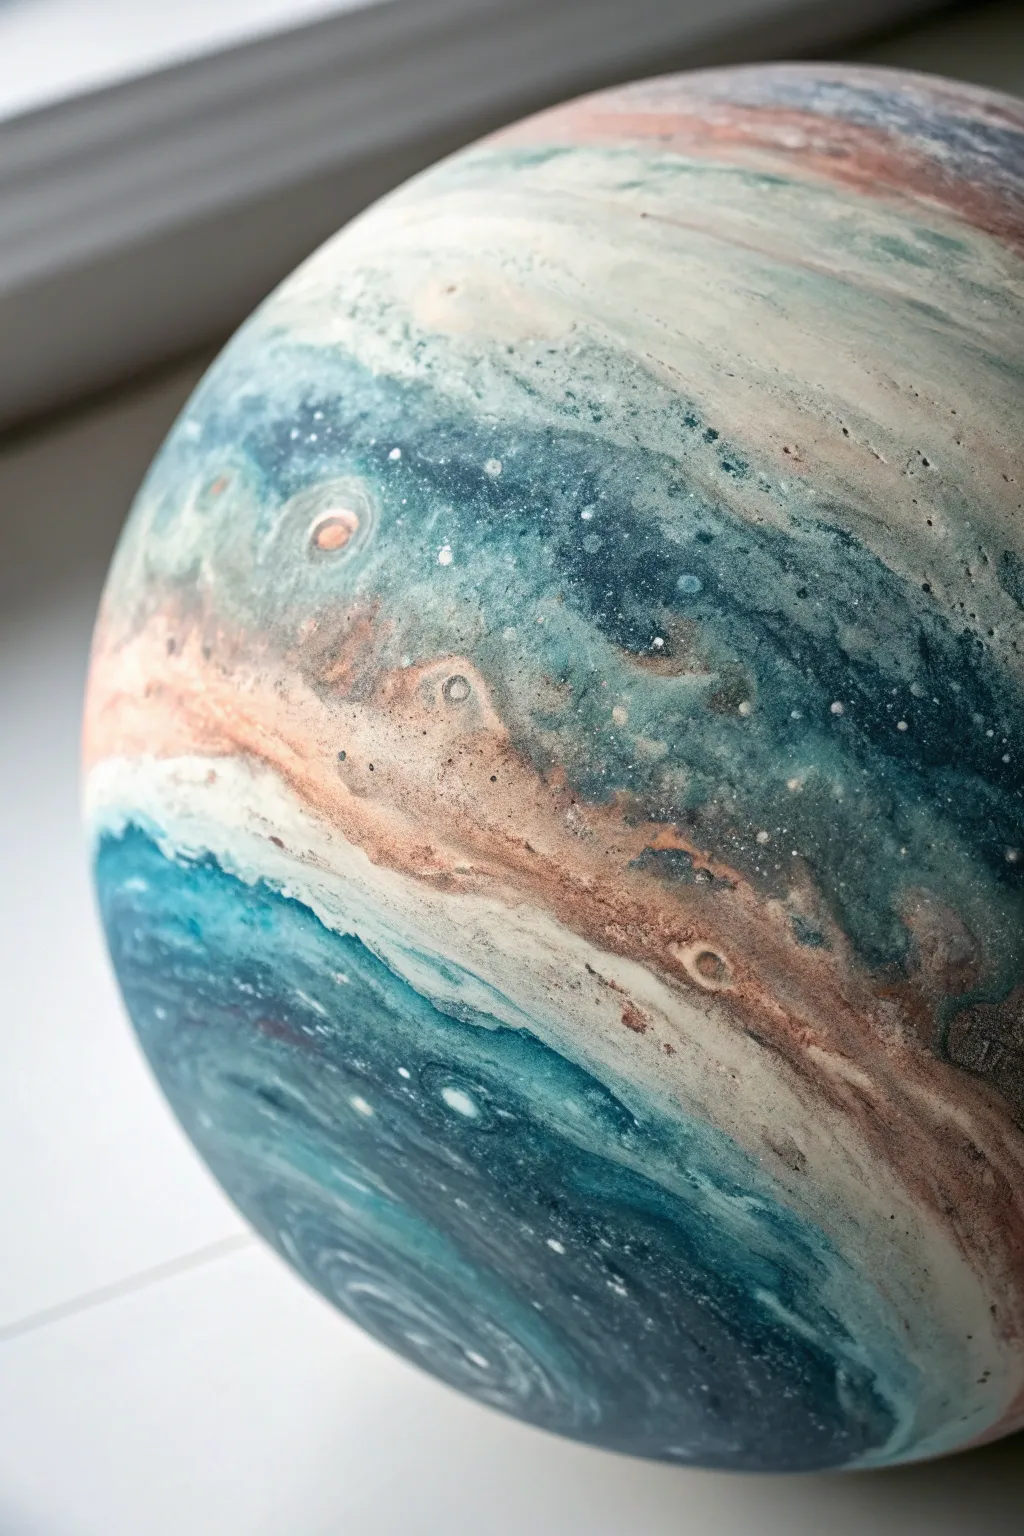
This project uses acrylic pouring and swirling techniques on a spherical base to create the striking, marbled atmosphere of a gas giant planet. The result is a hyper-realistic, three-dimensional celestial body with deep oceans of teal and storms of copper and cream.
Step-by-Step Tutorial
Materials
- Smooth styrofoam or wooden ball (6-8 inch diameter)
- Gesso primer
- Acrylic paints (Teal, Prussian Blue, Titanium White, Copper/Terracotta, Cream)
- Pouring medium
- Silicone oil (optional for cells)
- High-gloss varnish
- Disposable cups and stir sticks
- Wooden skewer or drying stand
- Heat gun or straw
- Fine bristle brush
- Old toothbrush
Step 1: Preparation and Base Coat
-
Prep the sphere:
Insert a sturdy wooden skewer into the bottom of your styrofoam or wooden ball. This will act as a handle while you paint and a stand while it dries. -
Apply primer:
Coat the entire sphere with a layer of gesso. This ensures the paint adheres properly and doesn’t soak into the styrofoam, which can ruin the smooth finish. -
Mix your paints:
In separate cups, mix each acrylic color with pouring medium. Aim for a consistency similar to warm honey—fluid enough to flow but thick enough to hold separate bands of color. -
Add silicone (optional):
If you want the small crater-like cells seen in the reference image, add 1-2 drops of silicone oil to the teal and copper mixtures and stir very lightly.
Paint Rolling Off?
If paint drips off too fast, let your mixed cups sit for 10 minutes to thicken slightly before pouring. A thicker mix clings better to the curved surface.
Step 2: Creating the Atmosphere
-
Start the pour:
Holding the sphere by the skewer horizontally, slowly pour a band of Prussian Blue mixed with Teal around the ‘equator’ or central band of your planet. -
Layer the colors:
Pour thinner streams of Copper, Cream, and White alongside the blue band. Don’t worry about perfection; organic overlap is key for a natural planetary look. -
Tilt and rotate:
Gently rotate the skewer and tilt the sphere to let the paint slide around the curve. This movement creates the initial banded structure typical of gas giants. -
Blow for details:
Use a straw to gently blow air across the bands of wet paint. This pushes colors into each other, creating wispy, cloud-like transitions between the dark oceans and light storms. -
Create turbulence:
I like to use a heat gun on a low setting here to pop air bubbles and encourage the silicone cells to expand, creating those tiny crater textures. -
Define the storms:
If the bands look too uniform, dip a toothpick into white paint and carefully drag it through the wet copper sections to simulate swirling storms.
Step 3: Refining and Finishing
-
Add stellar speckles:
Once the base pour has settled but is still tacky, dip an old toothbrush in thinned white paint and flick it very gently to create tiny atmospheric particles or distant stars reflecting on the surface. -
Deepen the shadows:
For added dimension, you can glaze a very thin, transparent layer of dark blue wash over the bottom pole once the main pour is dry to simulate shadow. -
Dry thoroughly:
Place the skewer upright in a jar or foam block. Let the sphere dry completely for at least 24-48 hours. The thick layers of paint need time to cure fully. -
Apply varnish:
Finish with two coats of high-gloss varnish. This replicates the shiny visual effect of a dense planetary atmosphere and protects the paint.
Add planetary rings
Cut a flat ring from stiff acetate or clear plastic. Paint it with matching swirls and slide it onto the sphere’s mounting rod for a Saturn-like look.
Display your miniature world on a simple black stand to let the colors truly shine
Surreal Hot Air Balloon Drifting in Space
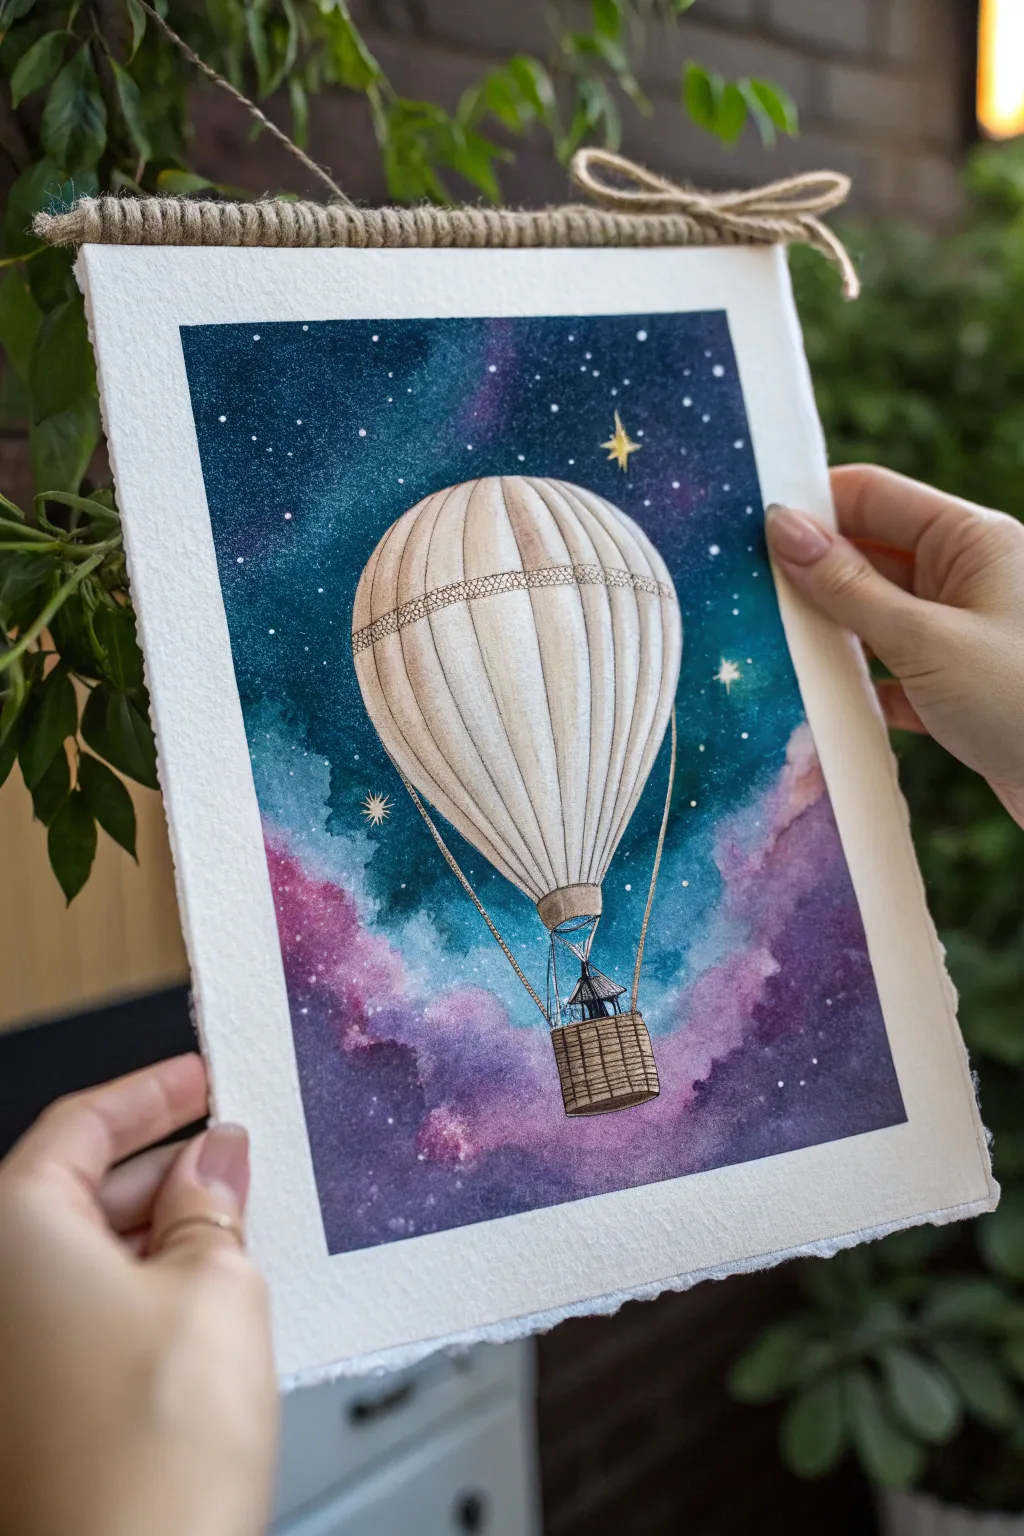
Transport a vintage hot air balloon into the depths of a colorful galaxy with this dreamy watercolor project. Combining wet-on-wet nebula techniques with precise illustration, this piece is finished as a charming hanging scroll perfect for wall decor.
How-To Guide
Materials
- Cold press watercolor paper (300 gsm, rough edge preferred)
- Watercolor paints (Indigo, Prussian Blue, Turquoise, Magenta/Purple, Black, Payne’s Grey, Burnt Sienna)
- White opacity gouache or bleed-proof white ink
- Gold metallic watercolor or pen
- Masking fluid (drawing gum) and old brush
- Fine liner pen (black, waterproof, 0.1mm)
- Round watercolor brushes (Size 8 or 10 for washes, Size 2 for details)
- Jute twine or hemp cord
- Wooden dowel (thin) or a stiff cardboard strip
- Hot glue gun
- Pencil and eraser
Step 1: Sketching and Masking
-
Outline the balloon:
Start by lightly sketching a large, teardrop-shaped balloon in the center of your paper. Add vertical curved ribs to give it volume, and sketch the basket and suspension ropes hanging below. -
Refine the details:
Draw the horizontal band encircling the upper part of the balloon envelope. Add details to the basket, sketching a woven texture. -
Protect the subject:
Using an old brush or a silicone applicator, carefully apply masking fluid over the entire balloon, the ropes, and the basket. Don’t forget the tiny stars you want to keep pure white later. -
Let it cure:
Allow the masking fluid to dry completely. It should feel rubbery and not tacky to the touch before you introduce any water.
Starry Depth Pro-Tip
Apply your white splatter stars in two layers. Do one while the background is damp (for soft, distant stars) and one when it’s dry (for crisp, bright foreground stars).
Step 2: Painting the Galaxy
-
Wet the background:
With a large clean brush, apply clear water to the entire background area surrounding the masked balloon. The paper should be glisten but not have puddles. -
Lay in the deep space:
Drop in concentrated Indigo and Black watercolor at the very top corners and edges of the paper. Let the pigment bloom into the wet surface to create deep space darkness. -
Add nebula clouds:
While the paper is still wet, introduce Turquoise and Magenta near the center and bottom areas. I find tapping the brush helps create organic, cloud-like shapes. -
Blend the transitions:
Clean your brush and slightly soften the edges where the dark blues meet the purple and pink nebula clouds, allowing them to bleed together naturally for a soft, ethereal look. -
Splatter the stars:
Once the shine has just started to leave the paper but it’s still damp, load a brush with white gouache and tap it against another brush handle to spray fine mist stars over the dark areas. -
Dry completely:
Wait for the background to be bone dry. This is crucial—if it’s cool to the touch, it’s still wet.
Level Up: Salt Texture
Sprinkle coarse sea salt onto the wet watercolor in the purple nebula sections. Once dry, brush it off to create crystal-like blooming textures in your clouds.
Step 3: The Balloon & Details
-
Reveal the paper:
Gently rub away the masking fluid with your finger or a rubber cement pickup tool to reveal the pristine white paper underneath. -
Base shadow layer:
Mix a very watery wash of Payne’s Grey and Burnt Sienna. Paint vertical stripes along the shaded sides of the balloon ribs to create a 3D rounded effect. -
Add warmth:
Glaze a pale, creamy yellow or diluted ochre over the sunlit sections of the balloon to make it feel vintage and warm against the cool space background. -
Define the basket:
Use a thicker mixture of Burnt Sienna and Dark Brown to paint the basket area, using small horizontal strokes to mimic the wicker weave. -
Inking the lines:
Once the paint is dry, use your 0.1mm waterproof pen to outline the balloon ribs, the ropes, and the basket details. Use broken lines on the highlighted side for a lighter feel. -
Golden accents:
Paint the decorative band around the balloon with metallic gold paint. Add a few larger, hand-painted four-point stars in the sky with gold for extra magic.
Step 4: Scroll Assembly
-
Prepare the hanger:
Cut a piece of jute twine about 12 inches long. Prepare a thin wooden dowel or a stiff strip of cardboard cut to the width of your paper. -
Wrap the top edge:
Place the dowel on the top edge of the back of the paper. Fold the top of the watercolor paper over the dowel and secure with glue. -
Create the rustic binding:
Apply hot glue along the folded top edge and tightly wrap jute twine around the entire length of the dowel, concealing the paper fold completely. -
Add the bow:
Tie the ends of your hanging twine into a simple bow at the top right corner of the wrapped dowel to complete the rustic look.
Now your surreal voyager is ready to hang on the wall and inspire colorful dreams

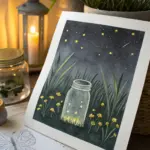
Have a question or want to share your own experience? I'd love to hear from you in the comments below!