When I’m brainstorming Ramadan drawing ideas, I always start with the symbols that instantly feel like the month—night skies, gentle light, and meaningful details. Below are my favorite go-to compositions, from super simple sketches to more artistic, unexpected spins you can really make your own.
Crescent Moon and Stars Sketch
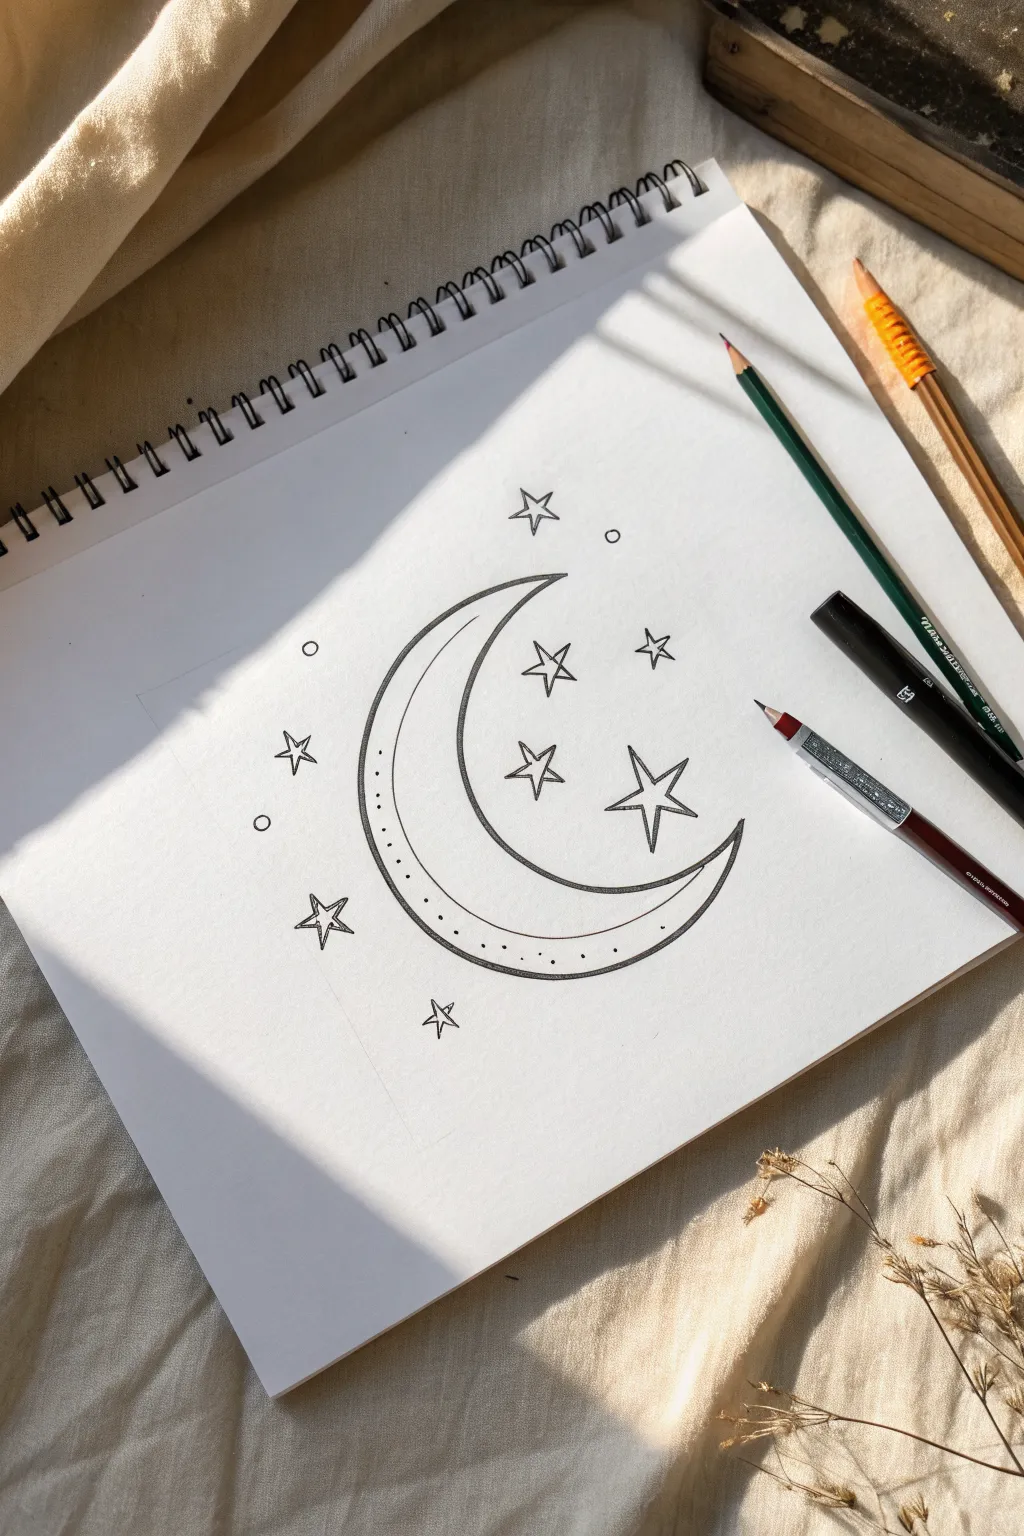
This simple yet enchanting sketch captures the serene beauty of a crescent moon surrounded by twinkling stars, perfect for Ramadan themes. The clean line art style makes it an accessible project for beginners looking to practice their inking skills.
Step-by-Step Guide
Materials
- Sketchbook or drawing paper (heavyweight preferred)
- HB or 2B pencil for sketching
- Fine-point black fineliner pen (0.3mm or 0.5mm)
- Thicker black marker or pen (optional, for varied line weight)
- Eraser
- Ruler (optional)
Step 1: Sketching the Foundations
-
Establish the curve:
Begin by lightly sketching a large ‘C’ shape in the center of your page with your pencil. This will form the outer edge of your crescent moon. Keep your hand loose to get a smooth, flowing curve. -
Complete the crescent:
Draw the inner curve of the moon, connecting the top and bottom points to the outer ‘C’ shape. Make the moon slightly thicker in the middle and tapering to sharp points at the ends. -
Add the inner detail line:
Sketch a third curve inside the moon shape, running parallel to the inner edge. This creates a decorative border within the crescent body where we will later add details. -
Position the stars:
Lightly mark small dots or ‘X’s around the moon to decide where your stars will go. Place larger stars near the center of the arc and scatter smaller ones further out for balance. -
Outline the stars:
Draw the five-pointed stars over your placement marks. Don’t worry about making them geometrically perfect; a hand-drawn look adds charm. vary their sizes slightly for visual interest. -
Add decorative circles:
Draw tiny circles scattered in the empty spaces between the stars and the moon. These small ‘bubbles’ help fill the negative space without cluttering the composition.
Pro Tip: Smooth Curves
Draw curves using your whole arm, pivoting from your shoulder or elbow rather than just your wrist. This creates much smoother, less shaky arcs.
Step 2: Inking and Refining
-
Ink the main moon outline:
Switch to your black fineliner. Carefully trace over the main outer and inner pencil lines of the crescent moon. Use confident, steady strokes to avoid shaky lines. -
Ink the interior border:
Trace the interior parallel curve you drew earlier. I suggest stopping and lifting your pen occasionally if the curve is long, so you can reposition your hand for better control. -
Ink the star outlines:
Go over your pencil sketches for the stars with the fineliner. Make the points sharp and crisp. -
Ink the small circles:
Trace the tiny scattered circles. Ensure these are closed loops for a tidy finish. -
Erase pencil marks:
Wait a moment for the ink to dry completely to prevent smudging. Then, gently erase all the underlying pencil sketches until only the clean black ink remains. -
Add stippling details:
Inside the decorative parallel border of the moon, add a row of small dots. Space them evenly along the length of the curve. -
Thicken select lines:
To give the drawing depth, carefully go back over the outer edge of the moon a second time to slightly thicken the line weight, or use a slightly thicker marker if you have one. -
Detail the stars:
Add a simple line design inside the larger stars. Draw lines from the inner corners toward the center to give them a faceted, gem-like appearance. -
Final touches:
Inspect your drawing for any gaps in the lines. Fill in any tiny breaks and ensure all your star points are sharp and defined.
Troubleshooting: Inconsistent Stars
If drawing 5-point stars is hard, lightly draw a circle first. Place 5 dots evenly on the circle’s edge, then connect them to a center point or each other.
Now you have a serene celestial drawing ready to frame or color

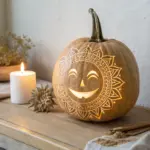
Crescent Moon Filled With Patterns
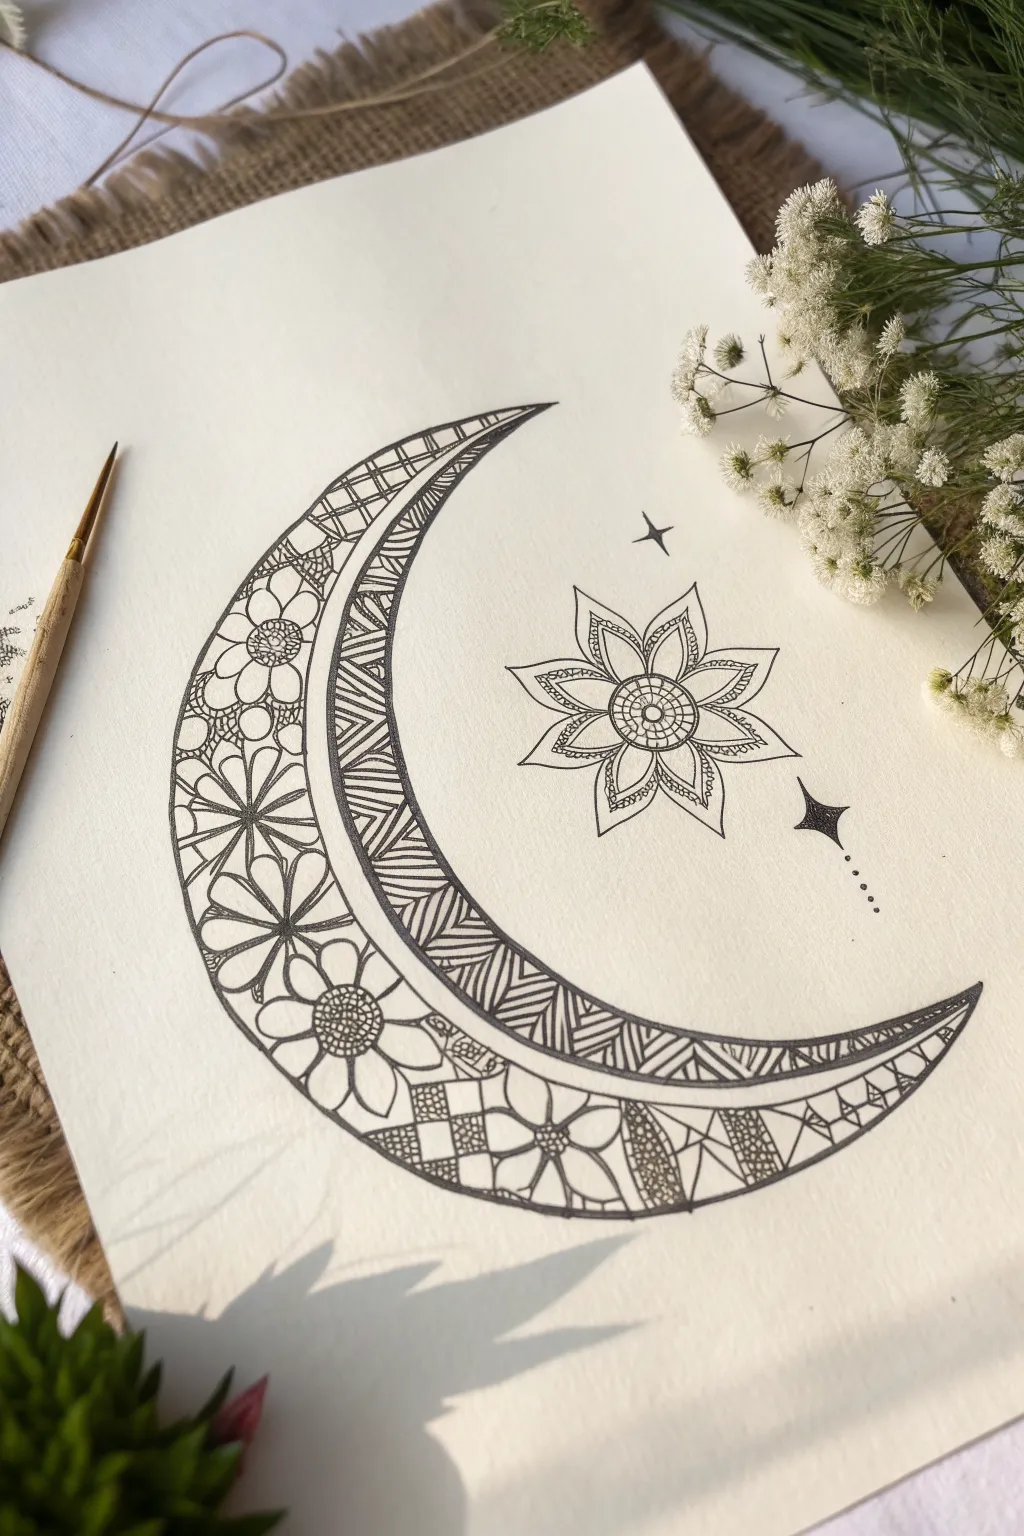
Celebrate the holy month with this serene crescent moon illustration, featuring intricate floral details and geometric bands. The finished piece combines the calming rhythm of zentangle patterns with the symbolic beauty of the Ramadan moon.
How-To Guide
Materials
- Heavyweight drawing paper or mixed media paper (smooth texture preferred)
- Pencil (HB or H for light sketching)
- Eraser (kneaded eraser works best)
- Fine liner pen (size 0.5 or 0.8) for outlines
- Ultra-fine liner pen (size 0.05 or 0.1) for details
- Circular stencils or a compass (optional)
- Ruler
Step 1: The Foundation Sketch
-
Establish the curve:
Begin by lightly sketching a large ‘C’ shape in the center of your paper. This will be the outer edge of your crescent moon. Keep your pencil pressure very light so it erases easily later. -
Define the inner edge:
Draw a smaller, parallel curve inside the first one to create the moon’s shape. Taper the ends so they meet at sharp points at the top and bottom tips. -
Divide the space:
Within the crescent shape, draw a long, curving line that splits the moon lengthwise into two distinct sections. This divides the floral section from the geometric band. -
Draft the star:
In the open space to the right of the crescent, sketch an eight-pointed flower or star. Start with a small circle, add a second larger circle around it, and then lightly mark out eight petals radiating outward.
Steady Hand Pro Tip
When drawing long curves or hatching, lock your wrist and move your whole arm from the elbow. This creates smoother lines than just moving your fingers.
Step 2: Inking the Outlines
-
Trace the main shapes:
Switch to your 0.5 or 0.8 fine liner pen. Carefully trace over the main exterior outlines of the crescent moon. -
Define the internal divider:
Ink the dividing line you drew down the center of the moon. This creates the ‘spine’ of the design. -
Outline the star:
Ink the central bloom. Start with the center circle, then draw the pointed petals. Add an internal ‘V’ shape inside each petal to give them depth. -
Add decorative elements:
Draw small four-pointed stars and a diamond shape with a hanging dotted line around the main flower to balance the composition. -
Erase guidelines:
Wait a moment for the ink to truly set, then gently erase all your initial pencil sketches to reveal a clean framework.
Step 3: Filling the Patterns
-
Start the floral band:
Working on the outer/left section of the moon, begin drawing large daisy-like flowers. Place simple five-petal flowers at intervals along the curve. -
Connect the blooms:
Fill the gaps between the main flowers with partial petals or leaves, creating a continuous chain of floral shapes. -
Detail the flowers:
Using your ultra-fine (0.1) pen, add small circles to the center of each flower and draw straight lines radiating from the center to texture the petals. -
Shade the gaps:
Identify the tiny negative spaces between the floral petals. Color these in solidly with your black ink to make the white flowers pop. -
Begin the geometric band:
Move to the inner/right strip of the moon. Use a ruler or a steady hand to draw diagonal hatch lines across sections of this band. -
Add variety:
Alternate pattern blocks. Leave some sections blank or fill them with simple checkerboards or triangles to create visual interest against the diagonal lines. -
Detail the center star:
Return to the main star motif. Fill the central circle with a tight grid or honeycomb pattern using the 0.05 pen. -
Texture the star petals:
Fill the inner ‘V’ shapes of the star petals with tiny stippling (dots) or very fine lines to distinct them from the outer petal edges.
Level Up: Gold Leaf
Apply gold leaf or metallic gold ink to just the geometric band or the center of the star. It adds a stunning, festive shimmer perfect for Ramadan.
Step 4: Final Touches
-
Deepen contrast:
Look over the geometric band again. I find that darkening specific triangles or squares to solid black helps anchor the design. -
Refine lines:
Go over any main outlines that look a bit thin with your thicker pen (0.8) to give the drawing a bold, finished look. -
Clean up:
Do one final pass with your eraser to catch any stray graphite merging with your intricate ink work.
Display your beautiful crescent art in a frame or use it as a design for custom greeting cards

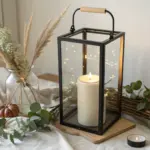
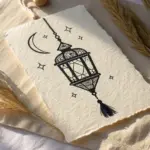
Lantern and Crescent Moon Combo

This elegant greeting card design pairs a finely detailed crescent moon with a central, hanging lantern to celebrate Ramadan. The striking contrast of black ink against creamy paper, highlighted with touches of gold, creates a sophisticated yet handcrafted feel.
Step-by-Step Tutorial
Materials
- Heavyweight cream or off-white cardstock (watercolor paper works well)
- Pencil (HB or H)
- Eraser
- Fine liner pen (black, 0.1mm and 0.3mm)
- Thicker marker or brush pen (black)
- Gold metallic marker or gold gel pen
- Ruler
Step 1: Sketching the Foundations
-
Outline the crescent:
Start by lightly sketching a large ‘C’ shape in the center of your cardstock to form the crescent moon. Draw an inner curve to give the moon thickness, tapering the ends to sharp points at the top and bottom. -
Position the lantern:
Find the center point inside the curve of the moon. Sketch a vertical guideline hanging down from the top area, passing through the moon’s opening. Draw a simple rectangle and dome shape on this line to block out where the lantern will hang. -
Add hanging stars:
Sketch varying lengths of straight vertical lines dropping from the top edge of the paper. At the end of each line, draw small five-pointed star outlines. Include a couple of stars dangling from the bottom tip of the moon as well.
Step 2: Inking the Structure
-
Define the moon:
Using your 0.3mm fine liner, trace the main outline of the crescent moon. Keep your hand steady to ensure smooth, continuous curves. -
Detail the lantern:
Refine the lantern sketch. Draw the top dome, the main body with arched ‘windows,’ and the pointed base. Use the 0.1mm pen for the intricate details inside the lantern windows. -
Draw the chains:
Ink the vertical hanging lines. Instead of straight lines, draw tiny interconnected loops or ovals to resemble delicate chains. Vary the sizes slightly—use larger links for the main lantern chain and finer dots or dashes for the star strings.
Smudge Alert
Metallic markers often take longer to dry than regular ink. Test your gold pen on a scrap paper first to time the drying speed before erasing pencil lines.
Step 3: Adding Patterns and Contrast
-
Decorate the moon:
Inside the crescent shape, draw a series of curved lines that mimic the outer curve, dividing the moon into sections. Inside these sections, draw repeating scallop or half-circle patterns to create a textured, ornamental look. -
Fill the lantern:
Switch to your thicker black marker or brush pen. Fill in the solid areas of the lantern—specifically the dome, the frames around the windows, and the bottom section—leaving the window panes clear for now. -
Star details:
Outline the hanging stars with the 0.1mm pen. For a whimsical touch, you can add a second, smaller star shape inside some of the larger ones.
Pro Tip: Texture
Use a rougher watercolor paper. The ‘tooth’ of the paper will break up the black ink slightly, giving the drawing an antique, vintage illustration look.
Step 4: Gilded Touches
-
Illuminate the windows:
Take your gold metallic marker and carefully fill in the window panes of the lantern. This gives the illusion of warm light glowing from within. -
Gold stars:
Choose a few specific stars to fill completely with gold. For the others, you might just trace the inner star outline in gold, leaving the rest black and white for variety. -
Floating accents:
Draw tiny, free-floating stars and dots scattered around the background using both the black pen and the gold marker. This fills the negative space and adds magical sparkle. -
Erase and finalize:
Once you are absolutely certain the ink is dry—I usually wait at least 5 minutes—gently erase all visible pencil sketches to leave a crisp, clean finish.
This beautiful handmade card is now ready to be gifted to friends or displayed as seasonal decor

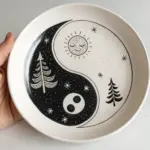
Mosque on the Moon Scene
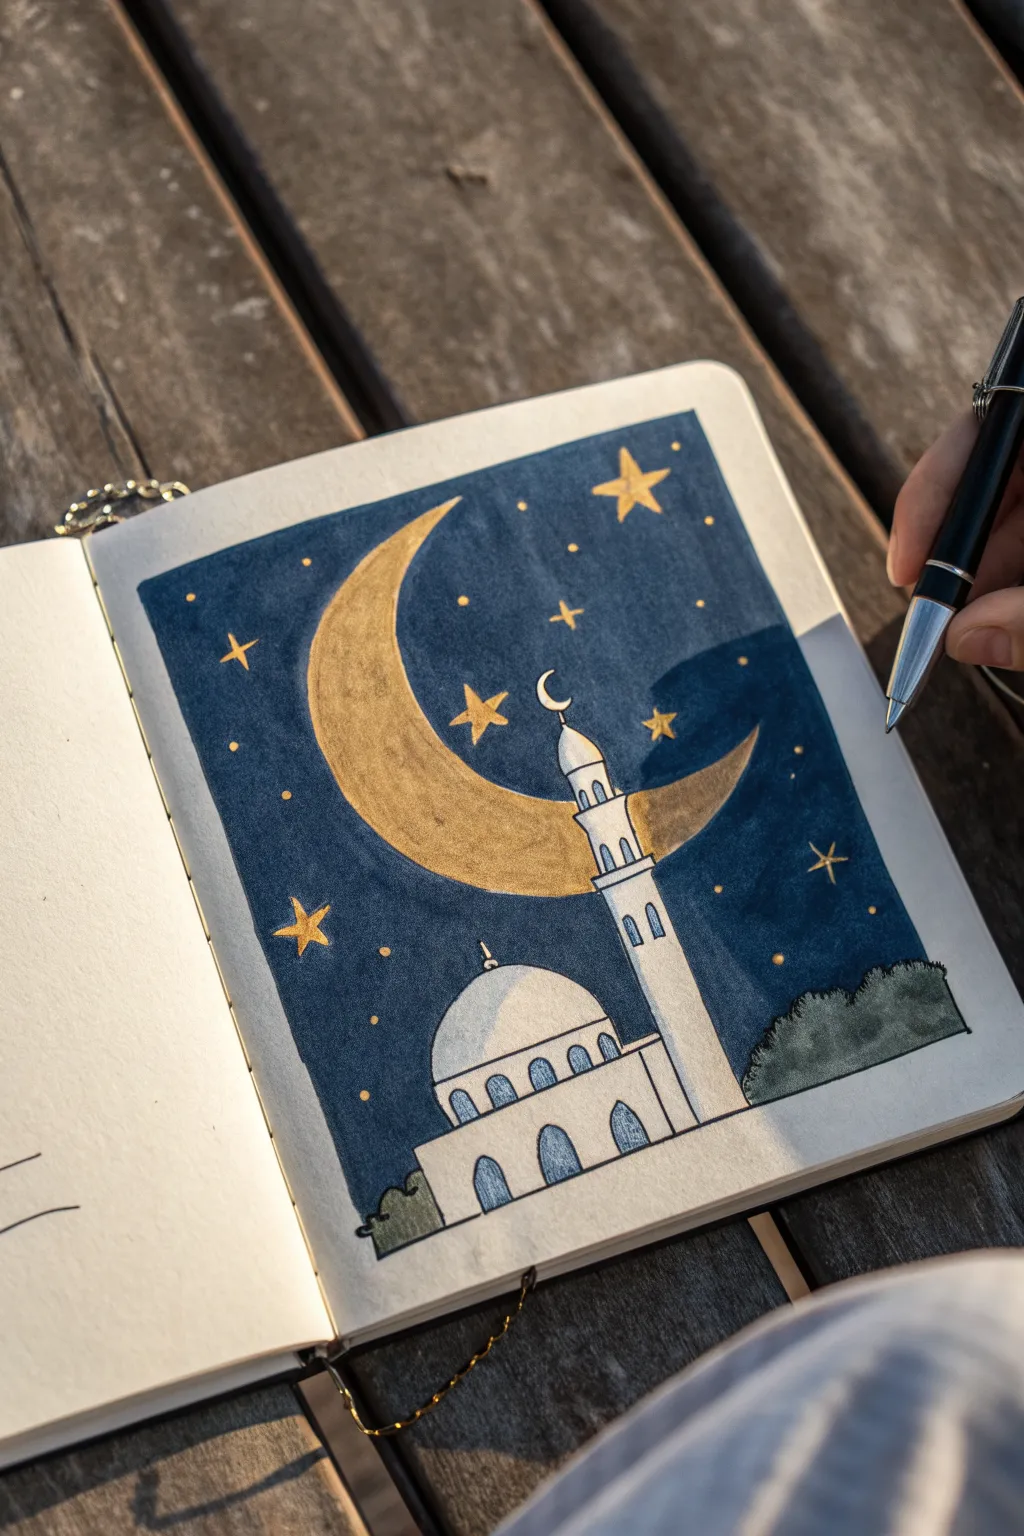
This serene sketch contrasts the bright white of a mosque against the deep navy of a starry night sky. The large golden crescent cradling the minaret creates a dreamy, symbolic composition perfect for Ramadan journaling.
Detailed Instructions
Materials
- Sketchbook with thick paper (mixed media or heavy cartridge)
- Pencil and eraser
- Fine liner pen (black, 0.3mm or 0.5mm)
- Deep blue alcohol marker or watercolor paint
- Gold jelly roll pen or metallic gold paint
- Grey marker (light, cool grey tone)
- Dark green marker or colored pencil
- White gel pen (optional for stars)
Step 1: Conceptual Sketch
-
Outline the frame:
Begin by drawing a square boundary for your illustration in the center of your page. This frame helps contain the deep blue background and gives the piece a polished look. -
Place the mosque:
Lightly sketch the mosque at the bottom center. Start with a rectangular base, then add the central dome as a simple semicircle. Don’t press too hard with your pencil so lines can be erased later. -
Add the minaret:
Draw the tall, slender minaret rising from the right side of the mosque. Sketch it in three tiered sections that get slightly narrower as they go up, capped with a tiny cone and crescent. -
Draw the giant crescent:
Sketch a large, sweeping crescent moon that dominates the upper half of the square. Position it so the curve seems to cradle the minaret without overlapping it too awkwardly. -
Mark the bushes:
Add rough, cloud-like shapes on the bottom left and right corners to represent bushes or trees flanking the mosque.
Clean Edges Pro-Tip
Before coloring the blue sky, apply washi tape or masking tape along the four outer edges of your square frame. When you peel it off at the end, you’ll have perfectly crisp, straight boundaries.
Step 2: Inking the Details
-
Define the architecture:
Using your fine liner, carefully trace over the main lines of the mosque and minaret. Add small arched windows: three on the dome’s base, two larger ones on the main building, and tiny slits on the minaret. -
Texture the bushes:
Outline the bushes with a bumpy, organic line to suggest leafy texture, contrasting with the straight architectural lines. -
Outline the moon:
Go over the pencil lines for the large crescent moon. Keep your hand steady to ensure a smooth, continuous curve. -
Clean up:
Once the ink is completely dry—give it a minute to be safe—erase all the underlying pencil sketches so your paper is clean for coloring.
Level It Up
Make the moon glow! Use a white colored pencil to lightly shade a ‘halo’ on the blue background right next to the gold crescent, blending it outward for a luminous effect.
Step 3: Coloring the Night
-
Fill the background:
Using your deep blue alcohol marker or paint, fill in the entire square space behind the mosque and moon. Work carefully around the edges of your main subjects to keep them white and crisp. -
Layering for depth:
If using markers, I often do a second pass over the blue while it’s still wet to eliminate streakiness and get that rich, midnight tone. -
Gilding the moon:
Color in the large crescent shape using metallic gold paint or a gold marker. The contrast between this shimmering gold and the matte blue background is the highlight of the piece. -
Shadowing the mosque:
Use a very light cool grey marker to add subtle shadows. Apply it to the left side of the dome, the minaret, and the building walls to give the structure 3D form. -
Coloring the windows:
With a lighter blue pen or marker, fill in the window arches. This reflects the sky and makes the building feel open. -
Adding greenery:
Color the bushes with a dark, muted green. This grounds the bottom of the illustration and prevents the white building from floating.
Step 4: Finishing Touches
-
Draw the stars:
Switch back to your gold pen or a yellow marker. Draw several five-pointed stars scattered across the blue sky. Vary their sizes for interest. -
Add tiny stardust:
Dot tiny specks of gold or white ink between the larger stars to create the look of distant galaxies and fill empty spaces. -
Final border check:
If your blue background bled outside the square slightly, you can thicken the outer black border line to cover any imperfections and neatly frame the scene.
Now you have a peaceful, reflective piece of art ready to start your journaling practice
BRUSH GUIDE
The Right Brush for Every Stroke
From clean lines to bold texture — master brush choice, stroke control, and essential techniques.
Explore the Full Guide
Hands Making Dua Under the Moon
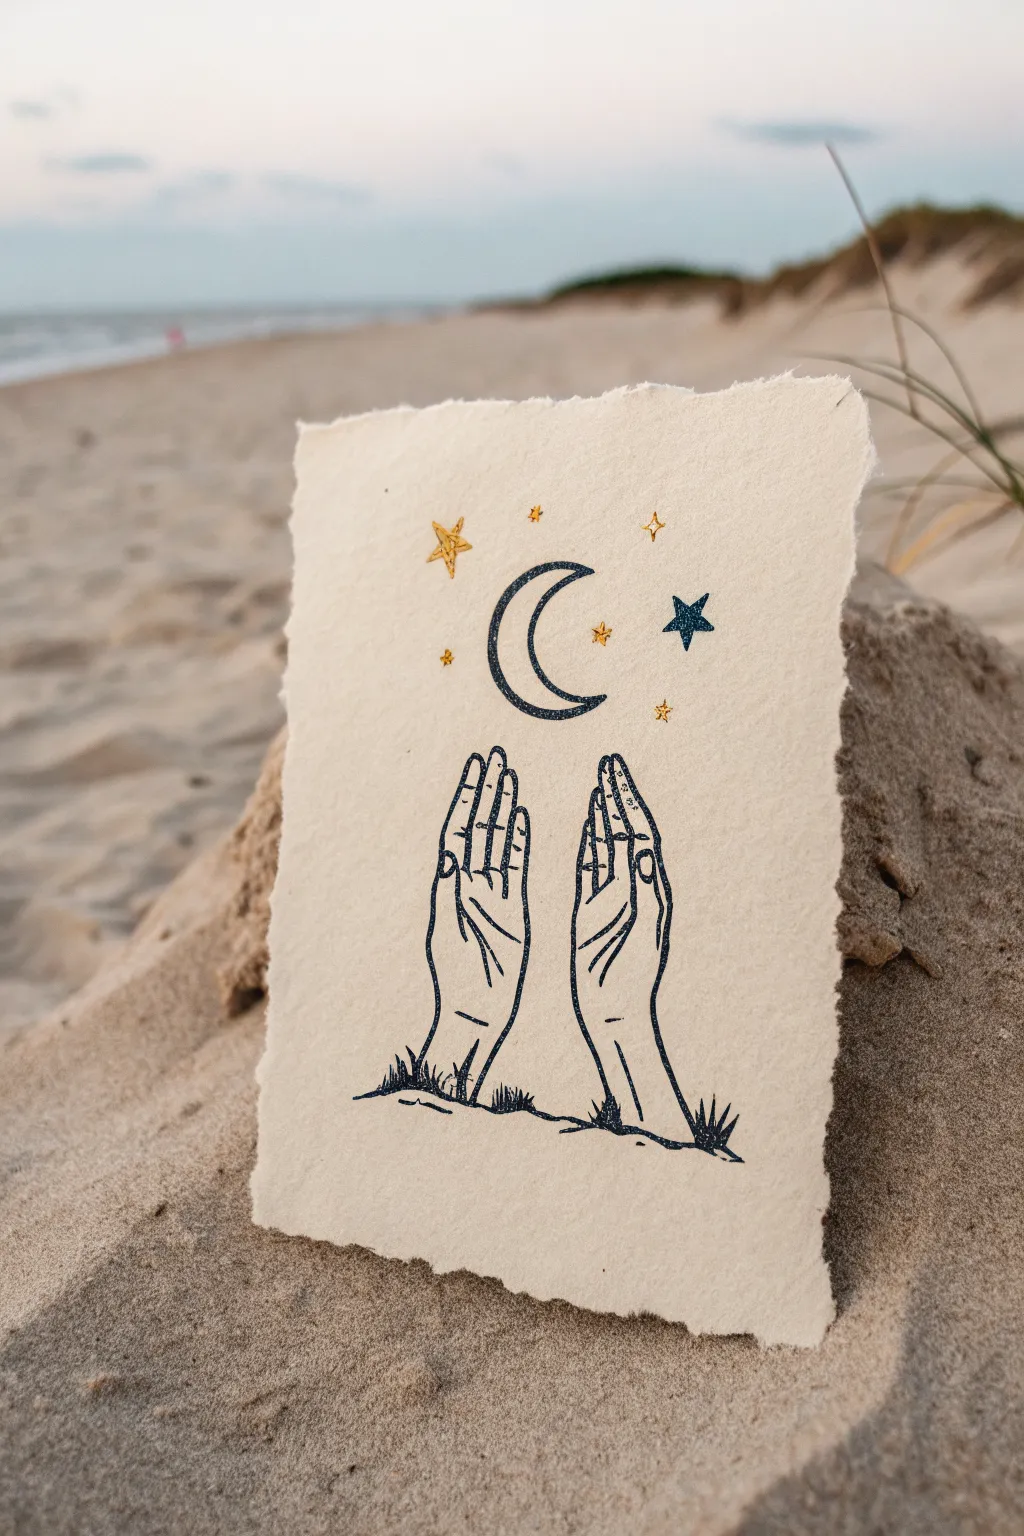
This serene artwork captures a moment of prayer under a starry sky, drawn on beautiful handmade paper for an organic, textured feel. The contrast between the deep ink lines and the soft golden stars creates a peaceful visual narrative perfect for Ramadan.
Step-by-Step Tutorial
Materials
- Textured handmade paper (deckle edge)
- Fine liner pens (archival ink, black)
- Gold metallic marker or gel pen (fine tip)
- Pencil (HB or H)
- Kneaded eraser
- Ruler
Step 1: Planning and Sketching
-
Prepare your paper:
Select a piece of heavy, handmade paper with a rough texture. The jagged ‘deckle’ edges are crucial for this specific rustic look, so don’t trim them straight. -
Mark the center:
Use your ruler to very lightly find the vertical center of the paper. This will help you balance the moon directly above the space between the hands. -
Sketch the moon:
About a third of the way down from the top, sketch a crescent shape. Keep the curve elegant and not too thick, ensuring the tips point slightly inward. -
Rough in the hands:
Lightly sketch two oval shapes below the moon to represent the general area where the hands will be. They should be vertical, extending up from the bottom edge. -
Refine the fingers:
Transform your ovals into hands. Outline the fingers, keeping them long and slender. The thumbs should face outward, and the palms should be facing inward/upward in the Dua position.
Step 2: Inking the Design
-
Outline the moon:
Using a fine liner pen, carefully trace your moon sketch. I find it helpful to turn the paper as I draw the curve to keep my hand movement natural. -
Inline the moon:
Draw a second line just inside the first moon outline. This creates a double-lined effect that adds visual weight without needing to fill it in completely. -
Ink the hands:
Go over your pencil lines for the hands with the black pen. Use confident strokes; broken or shaky lines actually work well with the textured paper, so don’t stress about perfection. -
Add hand details:
Draw the creases of the palms and fingers. Keep these lines thinner or lighter than the outline to suggest form without cluttering the drawing. -
Create the fingernails:
Draw small, simple U-shapes at the tips of the fingers to indicate nails. -
Ground the drawing:
At the very bottom where the wrists meet the paper edge, draw small, jagged grass-like spikes. This makes it look as though the hands are rising from the earth.
Ink Bleeding?
Handmade paper is very absorbent. Test your pen on a scrap piece first. If it bleeds, switch to a pigment liner or a ballpoint pen for sharper edges.
Step 3: Golden Details
-
Erase pencil marks:
Wait for the black ink to be completely dry, then gently roll a kneaded eraser over the page to lift any graphite ghost lines. -
Draw the main stars:
Switch to your gold metallic marker. Draw a few five-pointed outlines scattered around the moon. Make one or two slightly larger than the others. -
Add tiny sparkle stars:
Fill in the gaps with very small four-pointed stars or simple gold dots to create a ‘galaxy’ effect. -
Incorporate a dark star:
Balance the composition by drawing one solid black star near the moon using your fine liner, creating a nice contrast with the gold elements. -
Highlight the moon:
Add just a tiny touch of gold inside the double lines of the moon if you wish, or leave it hollow for a cleaner look.
Level Up: Galaxy
Dilute a drop of dark blue watercolor and splatter it very lightly near the moon (using a toothbrush) before drawing to create a misty night sky backdrop.
Now you have a spiritually resonant piece of art that serves as a beautiful reminder of reflection and prayer
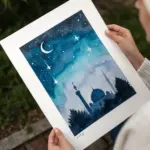
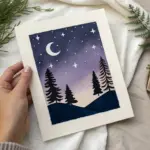
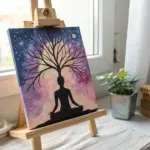
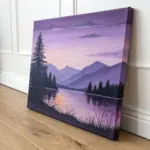
Mosque Outline With Watercolor Sky Wash
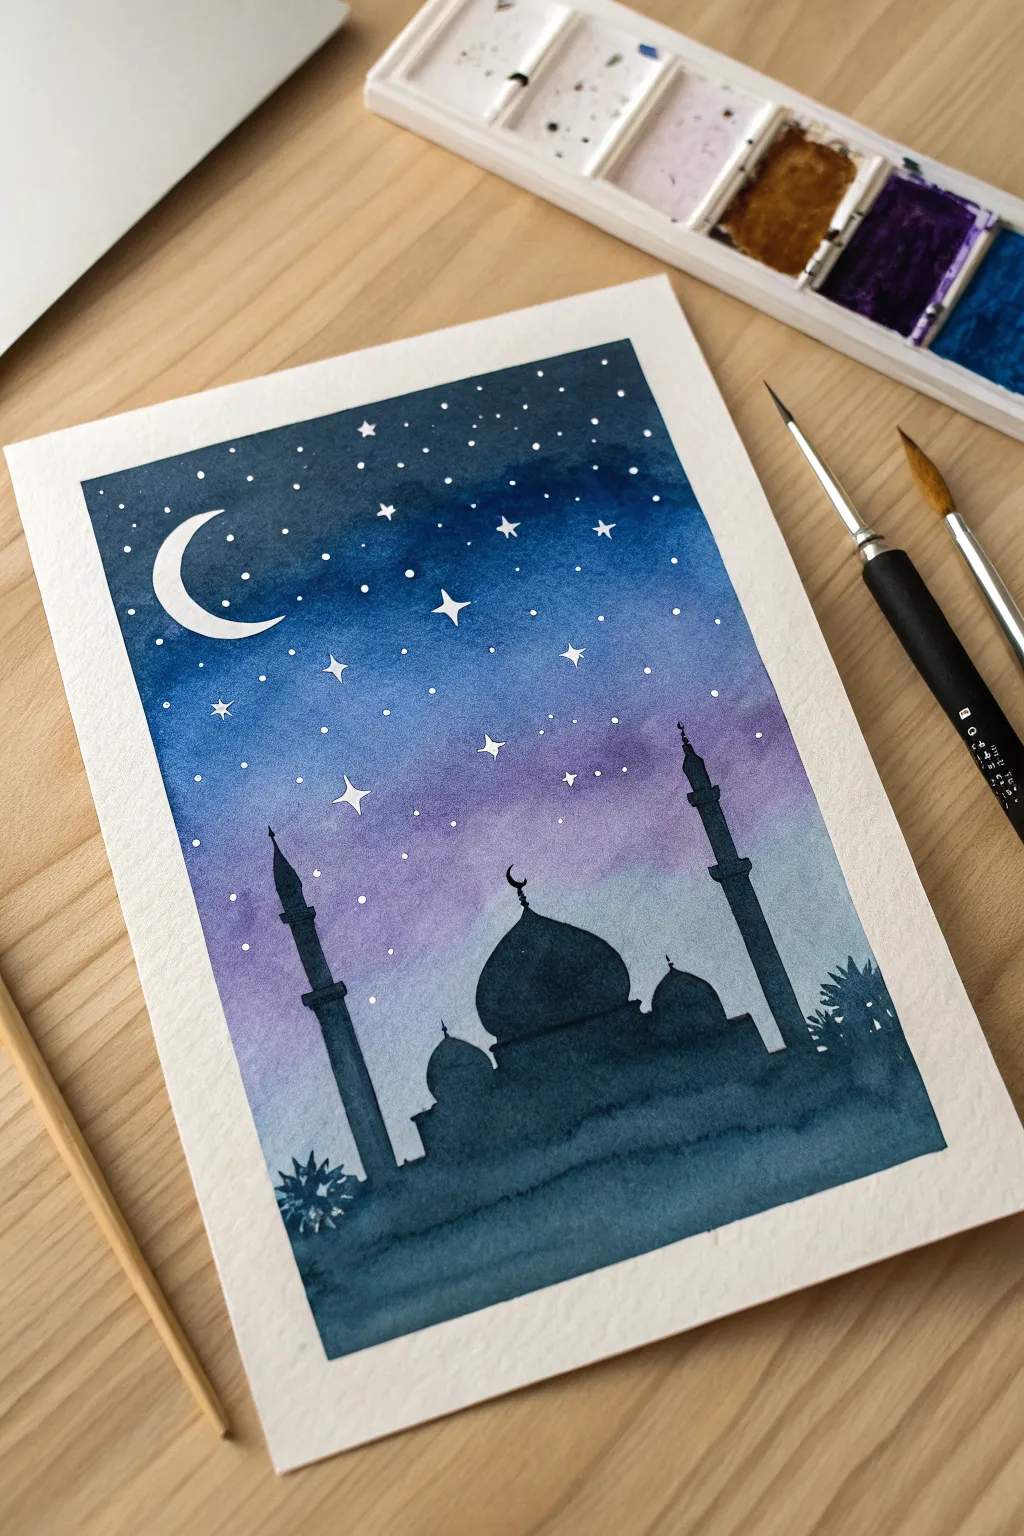
Capture the serenity of a Ramadan night with this beautiful watercolor project. By blending deep blues and purples into a dreamy galaxy sky, you create the perfect backdrop for a striking mosque silhouette.
Step-by-Step Guide
Materials
- Cold press watercolor paper (300 gsm)
- Watercolor paints (Indigo, Prussian Blue, Violet, Black)
- White gouache or white gel pen
- Round brushes (sizes 6 and 2)
- Pencil and eraser
- Masking tape
- Clean water and paper towels
Step 1: Preparing the Sky Wash
-
Tape the edges:
Secure your watercolor paper to a board or table using masking tape along all four edges. This creates a crisp white border and prevents the paper from buckling when wet. -
Sketch the moon:
Lightly draw a crescent moon shape in the upper left quadrant. You don’t need to sketch the mosque yet; focusing only on the sky area keeps things simple. -
Wet the paper:
Using a clean, large brush, apply a layer of clear water across the entire paper, carefully avoiding the inside of your crescent moon sketch. The paper should be glisten, but not hold puddles. -
Apply the first wash:
Load your brush with a watery violet or purple. Drop this color into the lower third of the paper, letting it bloom upwards slightly. This creates the soft glow near the horizon. -
Deepen the sky:
While the paper is still wet, introduce Prussian Blue above the violet, blending the edges where they meet. Moving further up, switch to a deep Indigo or dark blue for the top section of the night sky. -
Intensify the contrast:
While looking at the wet paint, drop in concentrated Indigo or a touch of black into the very top corners to create a vignette effect. Let the colors merge naturally on the page. -
Let it dry completely:
Allow the background to dry fully. The paper must be bone-dry before you paint the silhouette, or the black paint will bleed into your beautiful sky.
Uneven Blending?
If your sky creates bard lines instead of a gradient, your paper was likely too dry. Next time, re-wet the whole area or work faster while the paper is still shiny and damp.
Step 2: Painting the Silhouette
-
Draft the horizon:
Once the sky is dry, use a pencil to lightly sketch the uneven, rolling ground line along the bottom of the page. -
Sketch the mosque:
Draw the outline of the mosque structure. Start with the central large dome, add smaller domes on the sides, and sketch two tall, slender minarets flanking the building. -
Mix the silhouette color:
Create a rich, dark color by mixing your darkest blue with black. I prefer this over pure black from the tube because it harmonizes better with the blue sky tone. -
Fill the silhouette:
Using a smaller round brush (size 2), carefully fill in the mosque domes and minarets. Keep your hand steady for the sharp points and edges. -
Paint the ground:
Fill in the rolling ground area with the same dark mixture. You can dilute the paint slightly near the very bottom to create a subtle textual variation in the terrain. -
Add vegetation details:
Use the tip of your smallest brush to flick tiny agave-like shapes or small palm bushes on the ground level to break up the solid mass.
Add Gold Accents
For a luxurious touch, paint the crescent moon or the finials on the domes with metallic gold watercolor or ink instead of leaving them white. It catches the light beautifully.
Step 3: Stars and Details
-
Add the crescents:
With a steady hand and your smallest brush (or a fine liner pen), add the tiny crescent moon symbols to the top of the main dome and minarets. -
Splatter the stars:
Load a brush with white gouache diluted slightly with water. Tap the handle against another brush over the sky area to create a spray of tiny stars. -
Hand-paint larger stars:
Using white gouache or a gel pen, draw specific larger stars. Create a few four-pointed glimmer stars and dot in slightly larger circles for variation. -
Reveal the border:
Once the artwork is completely dry, slowly peel away the masking tape at a 45-degree angle to reveal your clean white edges.
Frame your finished piece to celebrate the peaceful atmosphere of the season

PENCIL GUIDE
Understanding Pencil Grades from H to B
From first sketch to finished drawing — learn pencil grades, line control, and shading techniques.
Explore the Full Guide
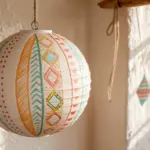
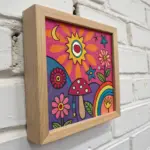
Star Garland and Lantern Border

This delicate greeting card design features a decorative border of hanging stars and a stunning Arabic lantern, all framed by soft botanical leaves. The combination of fine ink lines and warm, textured markers creates an elegant yet handmade feel perfect for Ramadan greetings.
How-To Guide
Materials
- Heavyweight cream or off-white cardstock (A5 size)
- Kraft paper envelope (A5 size)
- Fine-liner pen (black, 0.1mm and 0.3mm)
- Pencil (HB) and quality eraser
- Ruler
- Orange-gold brush marker or colored pencil
- Metallic gold gel pen (optional for accents)
Step 1: Planning the Layout
-
Set the boundaries:
Begin by lightly sketching a border margin around your cardstock with a pencil. Aim for about 1 inch from the edge to keep your design centered, though for this specific look, we will be drawing coming in from the top and bottom edges primarily. -
Draft the hanging lines:
Using a ruler and pencil, lightly draw several vertical lines dropping down from the top edge. Vary their lengths significantly—some short, some reaching halfway down the page. -
Add the swag curve:
Sketch a gentle, scalloped curve connecting the top left corner to a point about a third of the way across the page. This will become the beaded garland.
Pro Tip: Texture
Use a felt-tip brush pen for the coloring. It naturally leaves slight variations in opacity, giving the lantern glass and leaves a beautiful, textured watercolor look.
Step 2: Drawing the Lantern & Stars
-
Sketch the lantern shape:
At the end of the longest vertical line on the left side, sketch the lantern. Start with a small dome top, a rectangular body, and a pointed bottom finial. -
Outline the lantern body:
Switch to your 0.3mm fine-liner. Carefully ink the main structure of the lantern. Add double lines to the top and bottom of the rectangular section to create a rim effect. -
Detail the lantern glass:
Inside the lantern’s body, draw vertical lines to create glass panels. I find that keeping these lines slightly loose adds to the charm. -
Add the stars:
At the ends of your other vertical lines, draw five-pointed stars. Vary the sizes—some tiny, some medium. Leave a small gap between the line and the star, connecting them with a tiny loop or knot. -
Create the beaded garland:
Along that scalloped curve you sketched earlier, draw small semi-circles hanging downwards. These represent the decorative beads or lights.
Step 3: Adding the Botanical Border
-
Draft the stems:
Along the bottom right corner, pencil in curved lines reaching upwards and towards the center. Let them flow naturally, like grass swaying in a breeze. -
Ink the stems:
Go over your pencil stems with the 0.1mm fine-liner for a delicate look. Add small branches splitting off the main stems. -
Draw the leaves:
Draw elongated oval shapes for the leaves. Instead of coloring them solid, draw the outline and a central vein, leaving the inside open for color later. -
Fill the dense corner:
Add smaller shoots and leaves near the very bottom edge to ground the design, making the foliage look fuller at the base and airier at the top.
Troubleshooting: Smudges
If you smudge fresh ink, don’t panic. Turn the smudge into a soft shadow behind a leaf or a new background sparkle. Whimsy is forgiving.
Step 4: Refining and Coloring
-
Erase guidelines:
Once the ink is completely dry (give it a few minutes to avoid smudges), gently erase all your pencil marks. -
Color the garland:
Use your orange-gold marker to fill in the semi-circles on the top garland. A stippling motion can add a nice texture here. -
Illuminate the lantern:
Color the glass panels of the lantern with the same orange hue. If you want a glowing effect, leave the very center of the panels white or use a lighter touch there. -
Tint the leaves:
Carefully color strictly the inside of the leaves. I like to leave a tiny sliver of white space near the outline to keep it looking crisp and illustrative. -
Add twinkling details:
Using the 0.1mm pen, add tiny dots and small ‘plus sign’ sparkles in the empty space around the hanging stars to simulate a night sky. -
Final decorative touches:
Add small horizontal details or intricate patterns to the metal parts of the lantern using your finest pen to give it an ornate, antique look.
Place your finished card on a kraft envelope to complete this warm and inviting stationary set
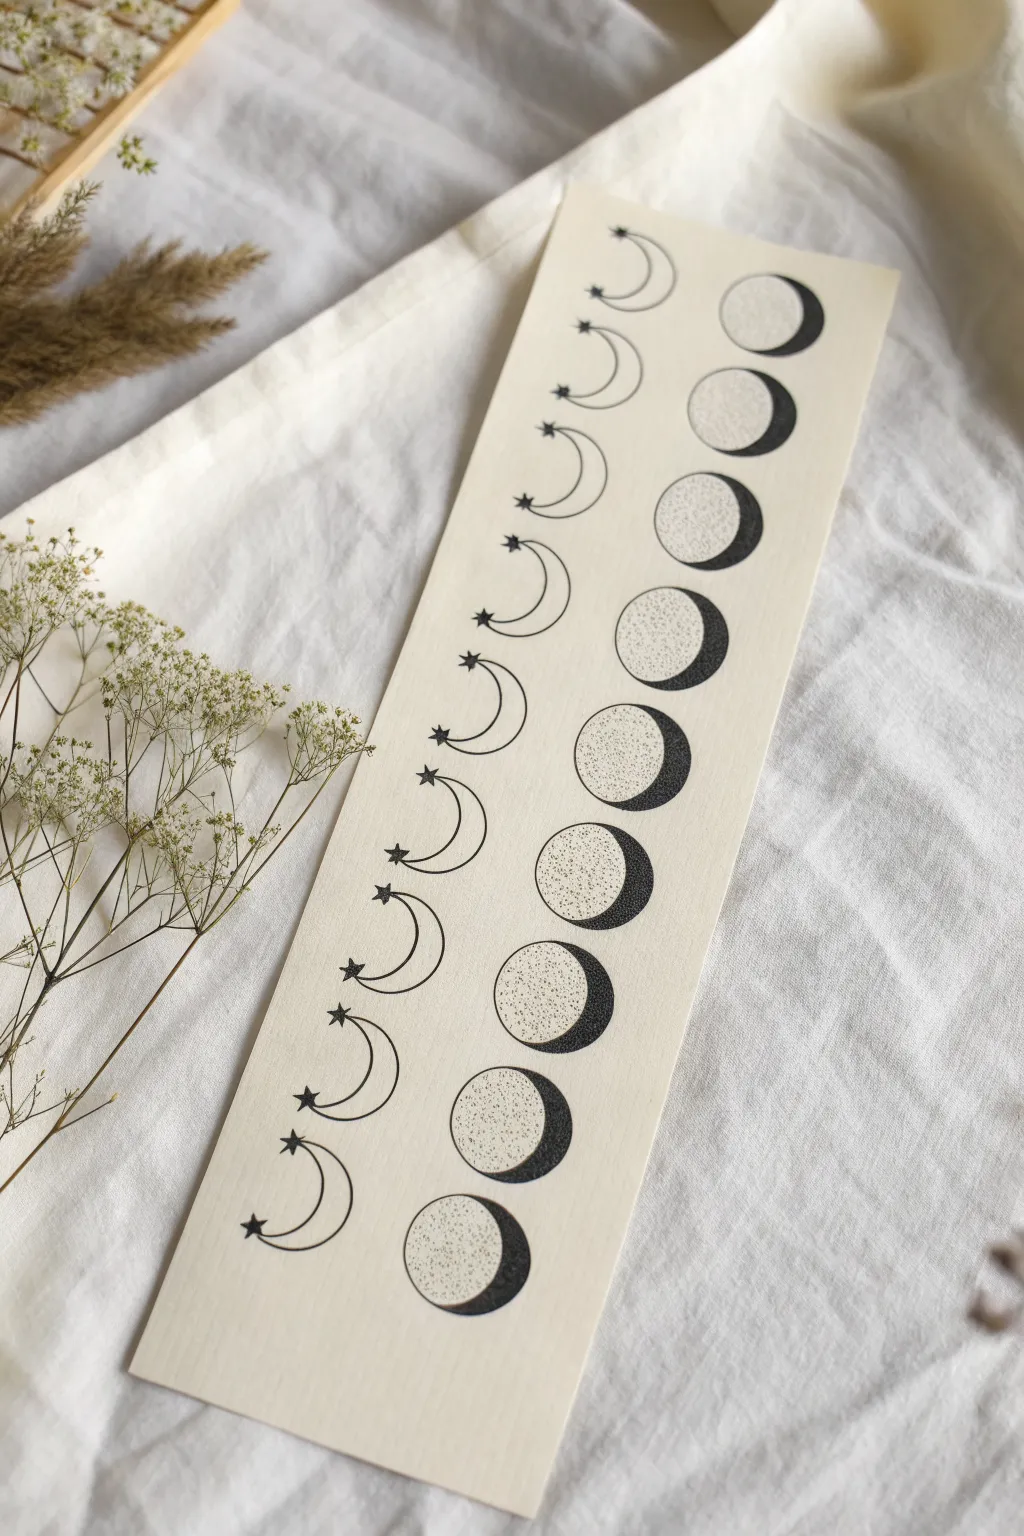
Geometric Tessellation Moon Phase Strip

Create a stunning monochromatic bookmark featuring a dual-column design of celestial motifs. This project combines simple line art with meditative stippling techniques to render moon phases with beautiful, textured depth.
Step-by-Step Tutorial
Materials
- Heavyweight drawing paper or cardstock (cream or off-white)
- Fine liner pens (0.1mm and 0.3mm black)
- Pencil (HB or H)
- Eraser
- Ruler
- Circle template or compass
- Scissors
Step 1: Preparation & Layout
-
Prepare the strip:
Cut your cardstock into a vertical strip, roughly 3 inches wide by 8 inches long. -
Mark the centerline:
Using your ruler and pencil, lightly draw a vertical line down the exact center of the strip to separate the two columns. -
Space the moons:
Measure and mark eight evenly spaced points down the length of the strip. These will be the center points for your moon illustrations.
Stippling Ryhthm
Keep your pen vertical while stippling. Slanted hold creates tiny dashes instead of round dots. Tap gently; don’t press hard.
Step 2: Sketching the Shapes
-
Draft the circles:
Using a circle template or compass, draw eight circles in the right-hand column, centered on your marks. Keep them uniform in size. -
Outline the crescents:
In the left-hand column, lightly sketch eight crescent moon shapes. These should mirror the placement of the circles on the right. -
Add floating stars:
Sketch two small 5-point stars near the tips of each crescent moon in the left column. Place one slightly higher and one lower for balance.
Golden Accent
Use metallic gold ink or paint for the stars and crescents on the left side to add a touch of luxury and contrast against the black dots.
Step 3: Inking the Outlines
-
Ink the crescents:
Switch to your 0.3mm fine liner. Carefully trace over the pencil lines for the crescent moons and the small stars in the left column. -
Ink the circles:
Outline the eight circles in the right column. Use a steady hand to keep the curves smooth. -
Mark the phases:
Inside each circle on the right, lightly pencil in the curve that separates light from shadow. vary these curves to show the progression from a thin crescent to a gibbous moon.
Step 4: Stippling & Shading
-
Start the stippling:
Using your finest pen (0.1mm), begin adding dots to the shadow side of the first moon phase circles. I find it easiest to start with the darkest edge first. -
Build density:
Cluster your dots tightly along the dark edge of the moon phase to create a solid black shadow area. -
Create the gradient:
As you move toward the ‘light’ side of the moon, space the dots further apart. This transition creates the spherical 3D effect. -
Fill the light side:
Even the ‘lit’ portion of the moon needs texture. Fill these areas with very sparse, widely spaced dots to mimic the cratered surface. -
Repeat the process:
Continue this stippling process for all eight moon circles, adjusting the shadow curve for each phase.
Step 5: Finishing Touches
-
Wait for ink to dry:
Let the ink sit for at least 15 minutes to ensure it is completely dry and won’t smudge. -
Erase pencil guides:
Gently erase all visible pencil marks, including the central divider line and the inner curves of the moon phases. -
Check contrast:
Look over your moon phases. If any shadows look too light, go back in with the 0.1mm pen and add a few more dots to deepen the black.
This serene piece of art doubles as a functional bookmark for your favorite reading material

Have a question or want to share your own experience? I'd love to hear from you in the comments below!