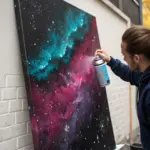
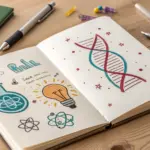
Whenever I’m stuck on what to draw, space doodles instantly pull me back into that fun, curious headspace. Here are my go-to cool space drawing ideas—starting with the classics and drifting into the delightfully weird.
Classic Solar System Lineup
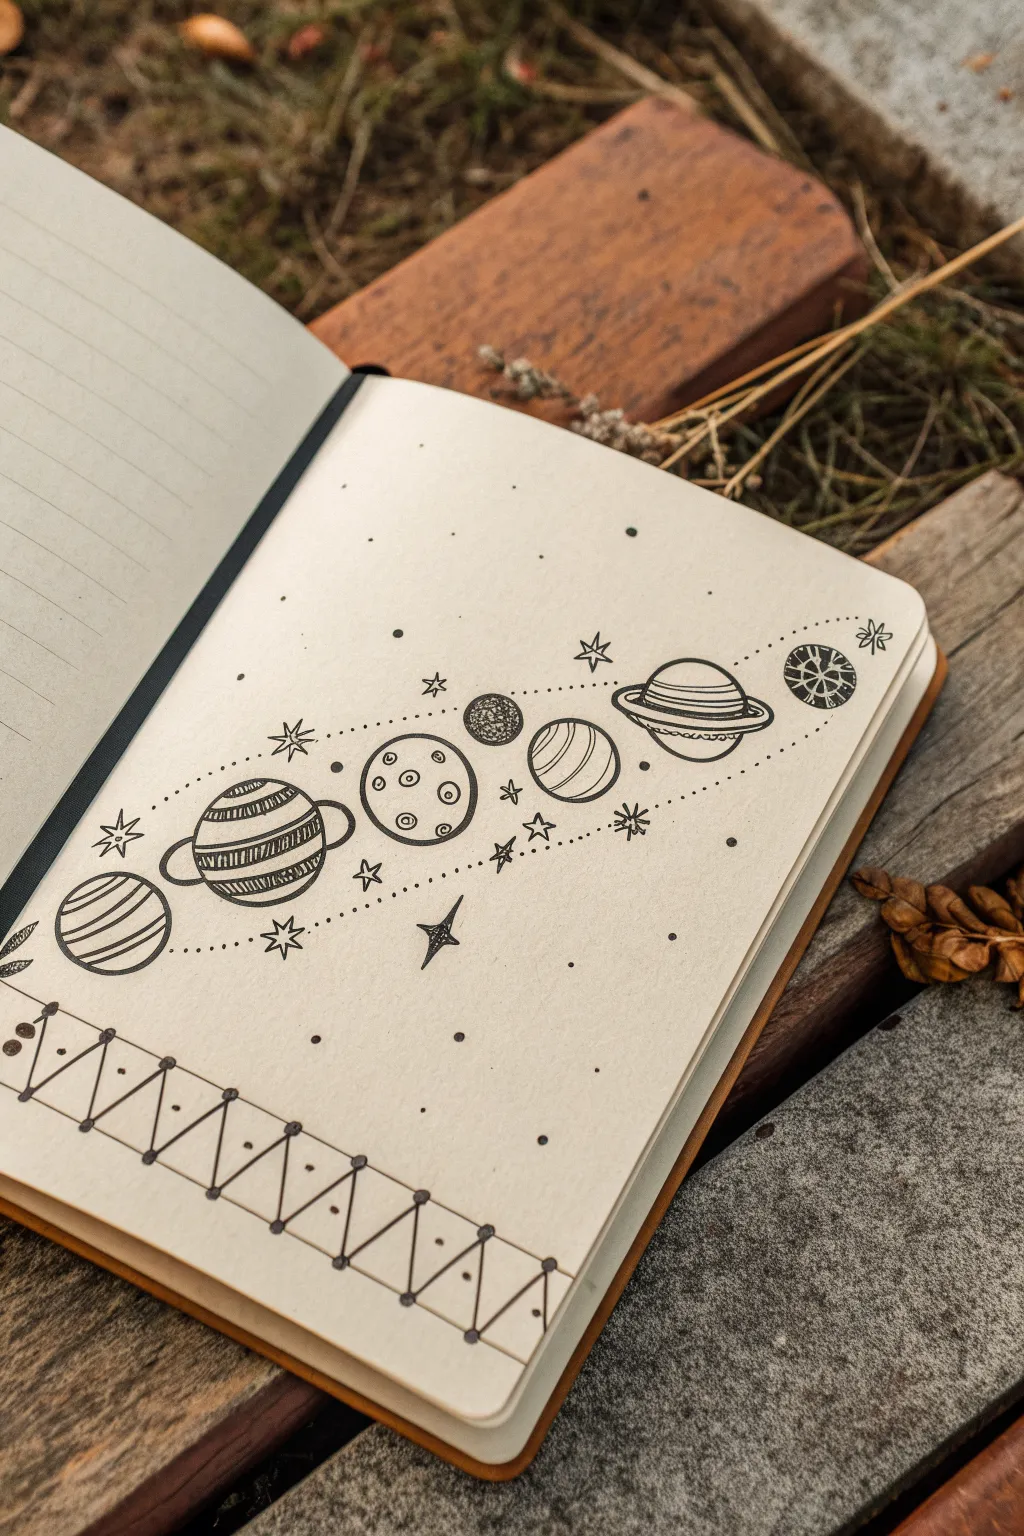
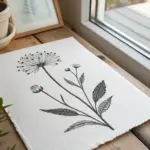
Transform a blank journal page into a charming celestial scene with this simple yet effective ink drawing. Featuring a playful lineup of planets arranged along a dotted orbital path, this design balances clean line art with doodle-style details.
Step-by-Step
Materials
- Blank or lined journal/notebook (cream paper works beautifully)
- Fine liner pen (black, size 03 or 05)
- Thinner fine liner pen (black, size 01 for details)
- Pencil (HB or H)
- Eraser
- Ruler
Step 1: Setting the Structure
-
Draft the orbital path:
Start by lightly sketching a pencil curve across the middle of your page. It should dip slightly in the center and rise at the ends, creating a gentle smile shape. -
Position the planets:
Using your pencil, sketch circles of varying sizes along this curved path. Don’t worry about perfect astronomical order; focus on visual balance. Try placing a large ringed planet (Saturn) near the center or right side as a focal point. -
Sketch the rings:
For the planets with rings, draw flattened ovals around the main sphere. Angle them slightly to match the flow of your curved line. -
Map out the bottom border:
At the bottom of the page, use your ruler to pencil two horizontal parallel lines about an inch apart. Inside this band, sketch a zigzag line that bounces between the top and bottom borders, creating a row of triangles.
Oops! Smudged Ink?
If you smudge ink while erasing, turn it into a nebula! Draw a small cluster of stars over the smudge and add more stippling dots to camouflage the mistake.
Step 2: Inking the Celestial Bodies
-
Outline the planets:
Switch to your thicker fine liner (03 or 05). Carefully trace over your pencil circles. For the ringed planets, draw the front of the ring first, interrupting the circle of the planet so it looks like the ring is passing in front. -
Details on the first planet:
Starting from the left, add stripes to your first planet using curved lines. These curves help give the 2D circle a 3D spherical look. -
Drawing Saturn and Jupiter:
For the larger gas giants, use varied patterns. I like to use close horizontal hatching for striped textures and small circles or craters for rocky surfaces. -
Texturing the smaller moons:
Fill in some of the smaller circles completely with black ink to create contrast, or use a stippling technique (lots of little dots) to give them a dusty texture. -
Inking the orbital dots:
Take your thinner pen (01) and add the dotted line that connects all the planets. Follow your initial pencil curve, breaking the line whenever it hits a planet illustration.
Add a Splash of Color
Use watercolor pencils to lightly color the planets, then blend with a damp brush for a soft, ethereal look that won’t overpower the line work.
Step 3: Adding the Stars and Border
-
Draw the star shapes:
scattered around the planets, draw simple typically five-pointed outline stars. Vary their sizes to create depth. -
Fill the space with stardust:
Using your finest pen, tap the paper gently to create tiny random dots throughout the empty space. This stippling effect ties the composition together. -
Ink the geometric border:
Moving to the bottom, ink the zigzag line. at every point where the zigzag touches the top or bottom parallel line, draw a small solid circle. -
Connect the border details:
In the triangles pointing down, draw a vertical line from the center of the base to the bottom point. For upward-pointing triangles, do the reverse. -
Clean up the page:
Wait at least five minutes to ensure the ink is completely dry. Gently erase all your underlying pencil marks, being careful not to smudge the heavy black areas.
Your sketchbook now has a customized galactic spread ready for journaling or doodling

Ringed Planet With Bold Shading
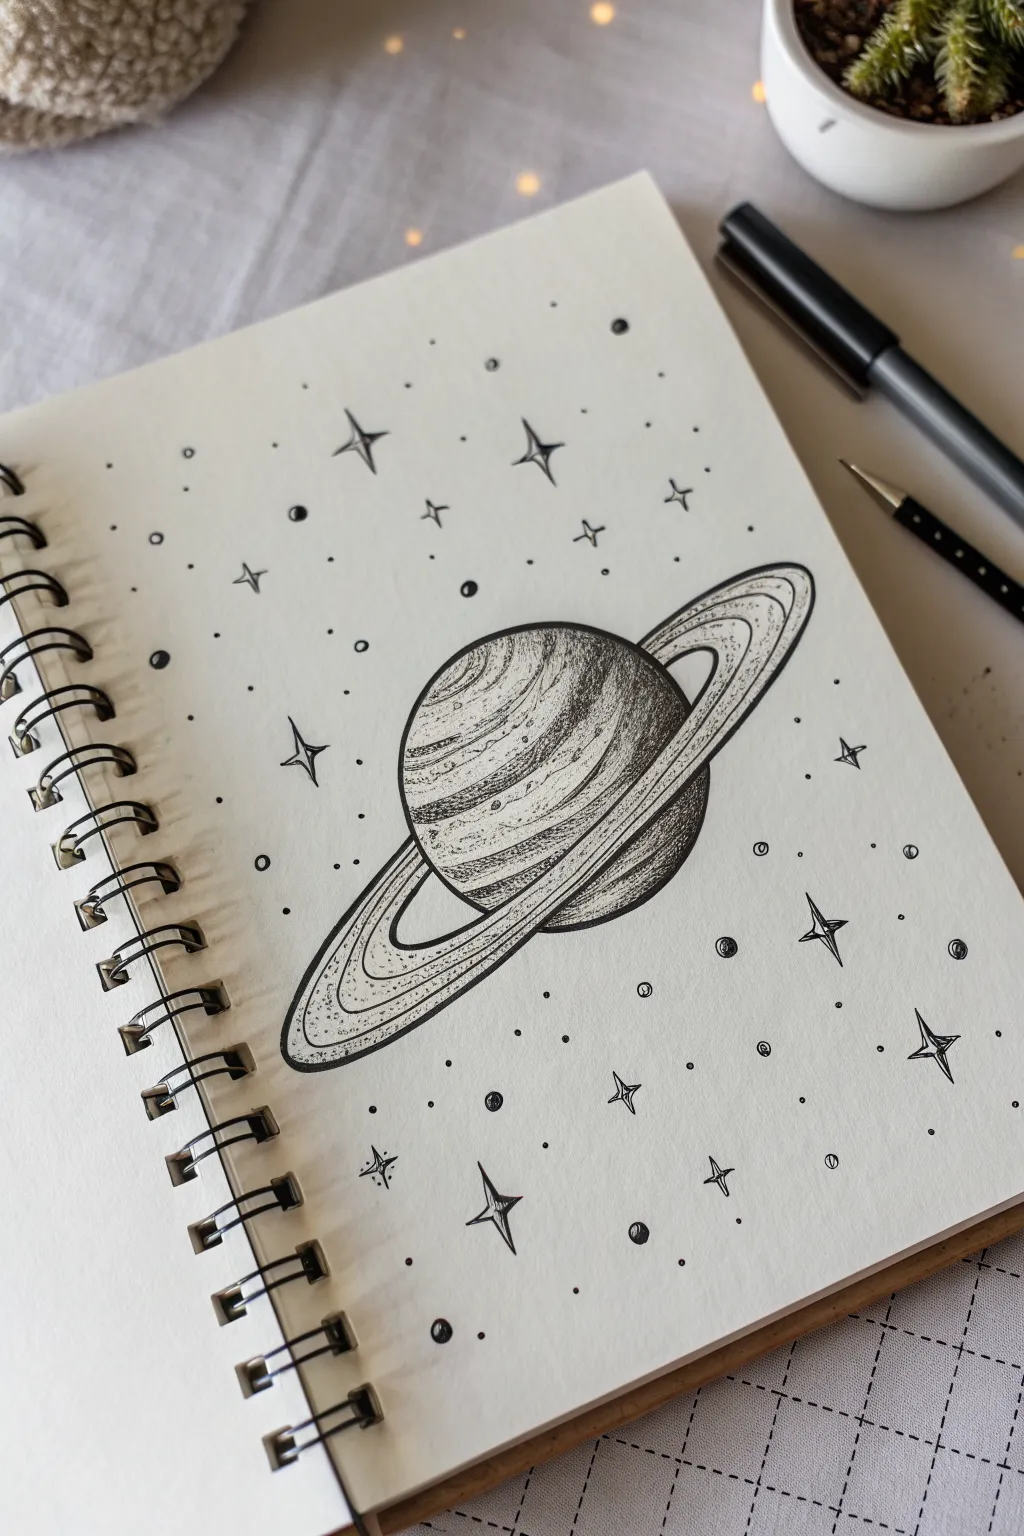
Capture the magic of the cosmos with this detailed pen-and-ink drawing of a ringed planet surrounded by a field of stars. Using stippling and line work, you will create a high-contrast piece that pops off the sketchbook page.
How-To Guide
Materials
- Spiral-bound sketchbook (smooth paper preferred)
- HB or 2H graphite pencil for sketching
- Fine liner pen (0.1mm or 0.3mm)
- Thicker drawing pen (0.5mm or 0.8mm)
- Clean white eraser
- Compass or circular object (optional)
Step 1: Planning and Pencil Sketching
-
Draw the Planet Body:
Begin by lightly sketching a perfect circle in the center of your page using your pencil. You can sketch this freehand or use a compass; keep the lines faint so they erase easily later. -
Sketch the Tone Zones:
Lightly draw curved bands across the face of the planet. These shouldn’t be straight lines; curve them slightly downwards to give the sphere a sense of 3D volume. -
Outline the Flat Ring:
Draw an elliptical shape that surrounds the planet. The back of the ring should disappear behind the sphere, and the front should cross over it. Make this ellipse fairly wide to accommodate details. -
Define the Ring Thickness:
Inside the first ellipse, draw two more concentric ellipses to create separate bands within the rings. Ensure there is a gap between the planet body and the inner edge of the rings.
Step 2: Inking the Planet
-
Outline the Main Shapes:
Using your thicker pen (0.5mm), carefully trace over your pencil outlines for the planet body and the rings. Keep your hand steady to create smooth, continuous curves. -
Start the Planet Shading:
Switch to your finer pen (0.1mm) to shade the planet’s surface. Use a technique called stippling—creating thousands of tiny dots. The areas at the edges of the sphere should have dense dots for deep shadow. -
Add Texture with Hatching:
Layer thin, curved hatching lines over the stippled areas, following the curvature of the planet’s bands. This mix of dots and lines gives the drawing that distinctive bold texture. -
Leave Highlights:
As you shade, leave certain bands on the planet almost entirely white or with very sparse dots. This contrast creates the shiny, gaseous look of the surface. -
Shade the Bottom Shadow:
Focus heavy ink application on the bottom right curve of the planet sphere itself. I find building this up slowly prevents it from becoming a solid black blob too quickly.
Steady Hands
For the long, curved lines of the rings, lock your wrist and move your entire arm from the elbow. This produces smoother arcs than just moving your fingers.
Step 3: Detailing the Rings
-
Texture the Inner Ring:
Fill the innermost band of the ring with dense stippling. It should be darker than the outer rings to create separation. -
Line the Outer Rings:
For the outer ring bands, use long, continuous curved lines running parallel to the edge of the ring. Break these lines up occasionally with dots to keep the texture interesting. -
Cast Shadows:
Where the ring passes in front of the planet, add a small, dark shadow on the planet surface just under the ring. This grounds the object and adds depth. -
Erase Pencil Guidelines:
Once the main ink is completely dry—give it a few minutes—gently erase all your original graphite marks to clean up the drawing.
Smudge Alert
If you are right-handed, work from left to right across the page (and vice versa) to avoid dragging your hand through fresh ink while drawing the stars.
Step 4: Background and Atmosphere
-
Position Large Stars:
Scattered around the planet, draw several four-pointed stars. Draw a cross, then curve the lines inward toward the points to make them look sharp and twinkling. -
Add Medium Planetesimals:
Draw small circles throughout the background. Fill the bottom half of these tiny circles with black ink and leave the top half white to make them look like distant moons. -
Fill with Stardust:
Using your finest pen, tap single dots randomly throughout the remaining white space. Vary the spacing—clusters of dots look more natural than a uniform grid. -
Final Contrast Check:
Step back and look at your drawing. Darken the deepest shadows on the planet’s edge one last time to ensure the image has strong contrast.
Now you have a stunning piece of celestial art ready to be admired

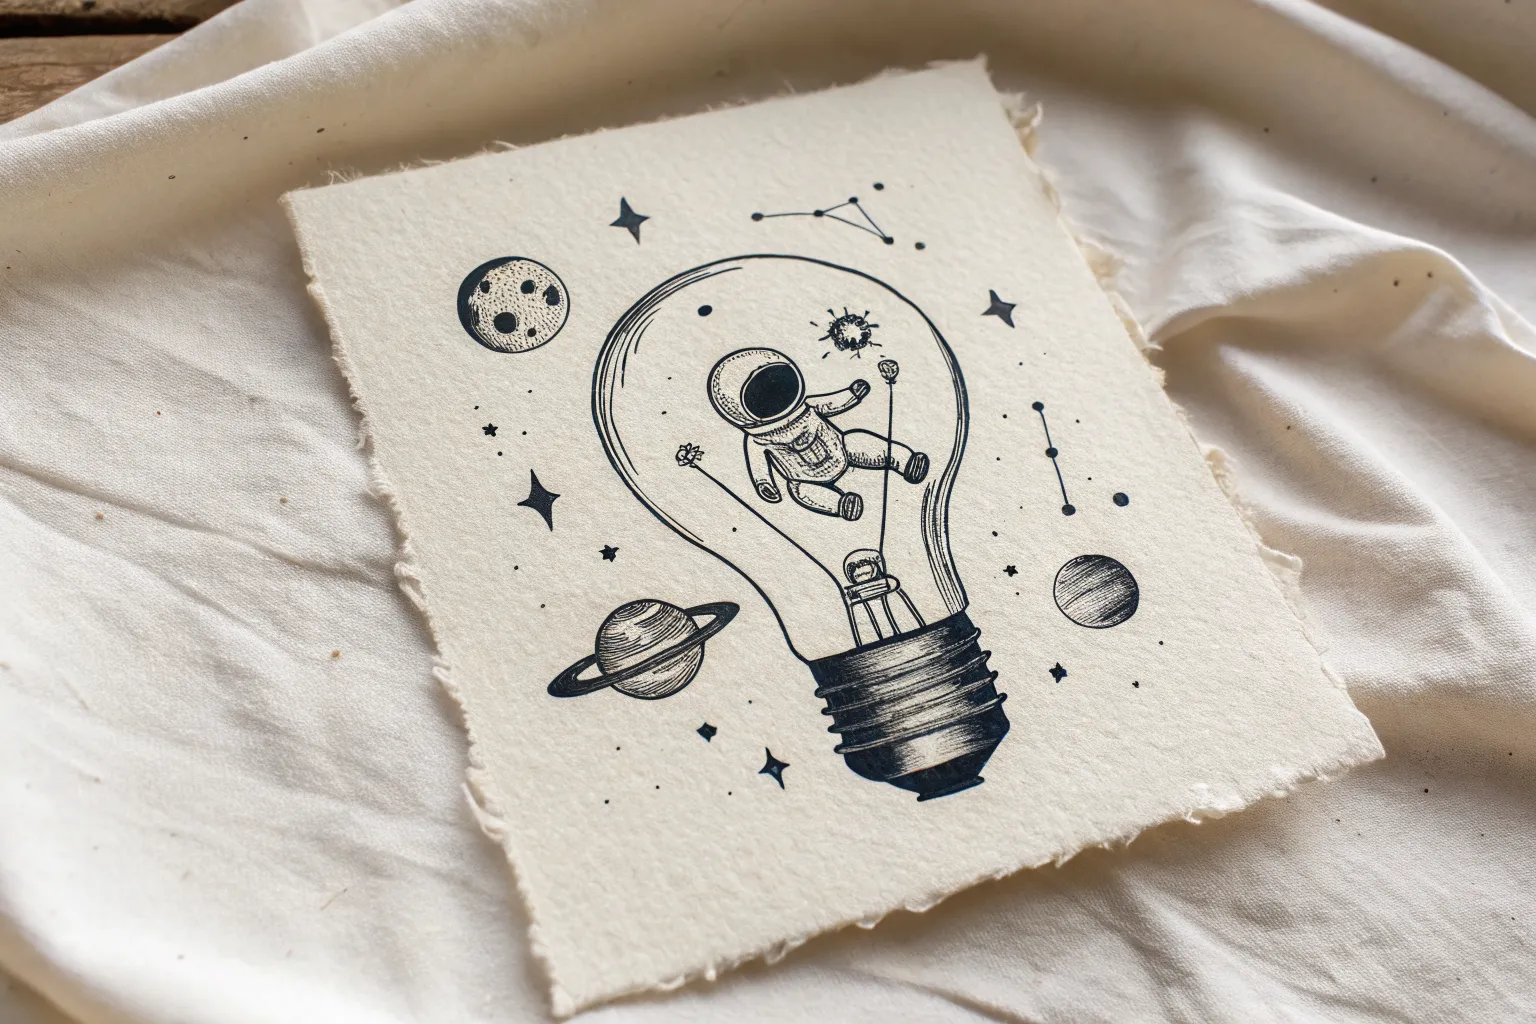
Simple Astronaut Floating Pose
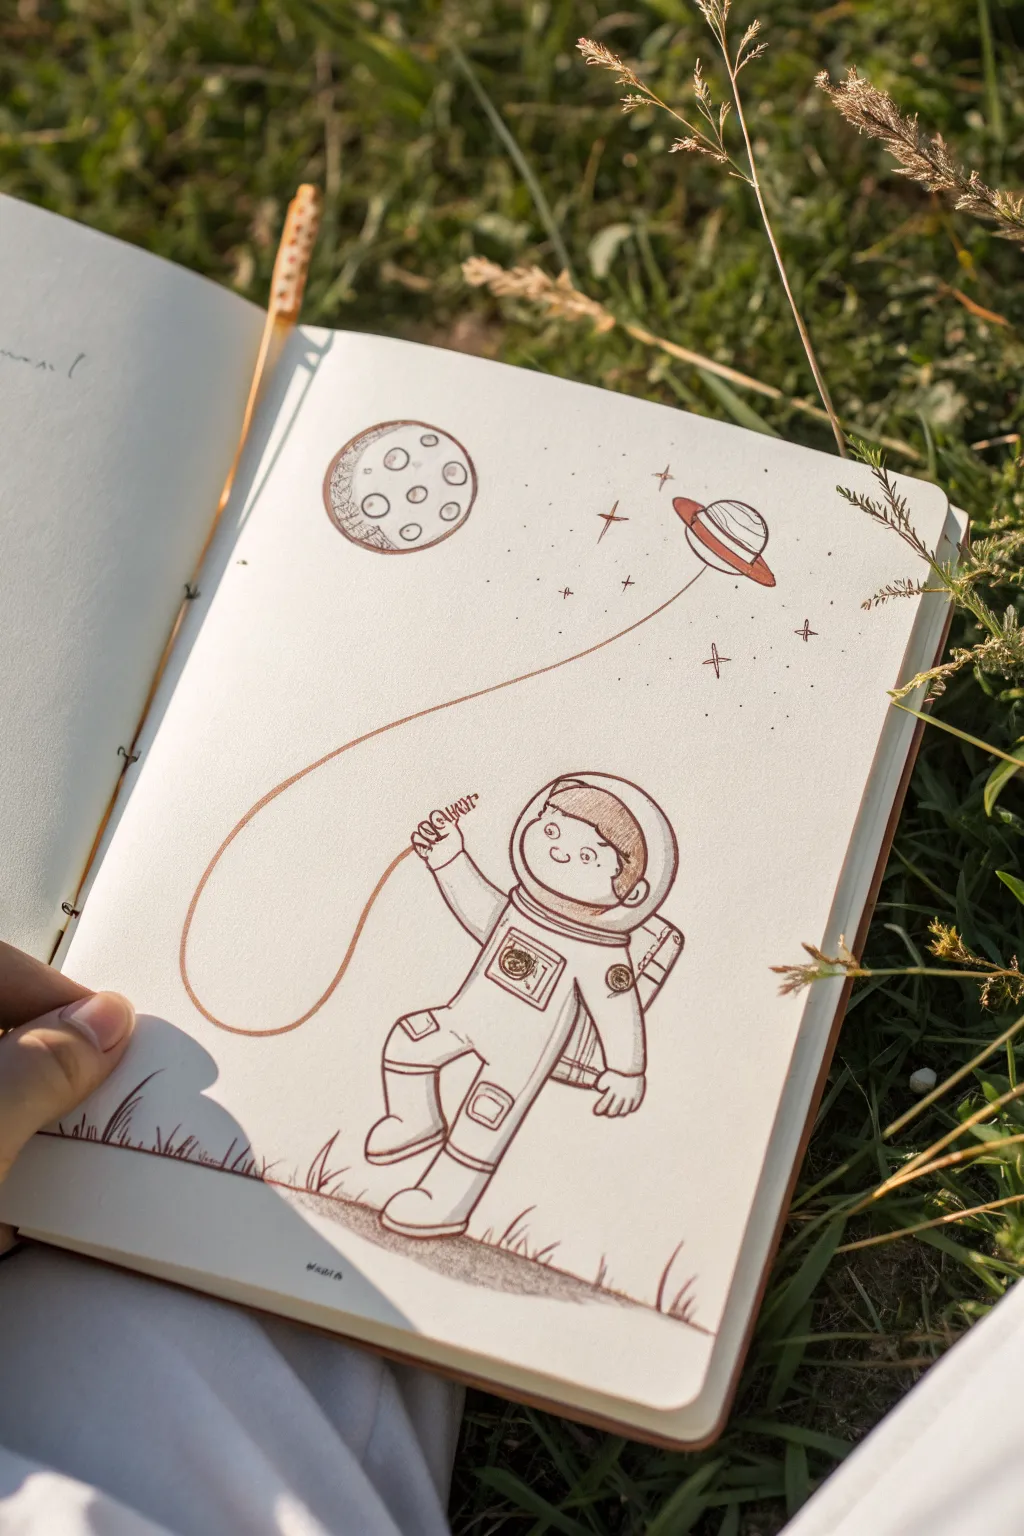
This charming sketch captures a playful astronaut tethering a planet like a balloon, rendered in a warm, nostalgic sepia tone. Its clean lines and gentle shading make it a perfect project for a sketchbook spread, bringing a touch of cosmic wonder to a grassy afternoon.
Detailed Instructions
Materials
- Sketchbook or drawing paper (cream or white)
- Pencil (HB or 2B for initial sketching)
- Eraser
- Fine liner pen or ballpoint pen (sepia, brown, or black)
- Ruler (optional)
Step 1: Sketching the Foundations
-
Outline the head:
Start by lightly sketching a large circle for the helmet. Inside this, draw a slightly smaller oval for the face opening, leaving room for the helmet’s thickness. -
Draw the body shape:
Below the helmet, sketch a rectangular shape for the torso. Angle it slightly to the left to match the astronaut’s leaning pose. -
Add limbs in motion:
Sketch the arms and legs. Draw the right arm resting by the side and the left arm reaching up to hold the string. Position one leg firmly on the ground and the other lifted slightly, as if mid-step. -
Place celestial objects:
In the upper left area, lightly draw a circle for the moon. In the upper right, draw a flattened oval with a ring around it for the balloon-planet (Saturn). -
Connect the string:
Draw a long, sweeping curve connecting the astronaut’s raised hand to the bottom of the planet-balloon. Let the line have a bit of slack to show movement.
Step 2: Inking the Drawing
-
Ink the helmet details:
Using your sepia or brown pen, trace over your pencil lines for the helmet. Add a second inner line to the face opening to create the rim. -
Define the face:
Draw simple, cute facial features inside the helmet. Two small dots for eyes, a curved nose, and a happy smile. Sketch the hair with short, curved strokes. -
Outline the suit:
Go over the body outlines. Add small rectangular patches on the chest and knees to represent suit details. Incorporate crease lines at the elbows and knees. -
Detail the backpack:
Draw the life-support backpack peeking out from behind the astronaut’s right shoulder. Add a few vertical lines for texture. -
Ink the moon and planet:
Trace the moon circle and add several small craters inside. For the planet, carefully ink the rings and the body of the planet, ensuring the string connects directly to the bottom pole. -
Add the stars:
Scatter small four-pointed stars and tiny dots across the empty space between the astronaut, moon, and planet to create a starry sky effect.
Drawing Tip: Line Weight
Make the outer contour lines of the astronaut slightly thicker than the interior detail lines. This helps the character pop off the page.
Step 3: Shading and Finishing Touches
-
Erase guidelines:
Once the ink is completely dry, gently erase all underlying pencil sketch lines. I usually wait a minute or two to prevent smudging. -
Shade the helmet:
Use parallel diagonal hatching lines (lines going in one direction) to shade the side of the helmet, giving it volume. -
Add depth to the suit:
Apply hatching to the side of the body, under the arms, and on the legs. Keep the lines light and evenly spaced. -
Texture the moon:
Add cross-hatching (lines crossing each other) to the dark side of the moon to create a shadowed crater effect. -
Ground the figure:
Draw a subtle shadow beneath the astronaut’s feet using horizontal hatching to show where they are standing. -
Create the grassy base:
Sketch a few jagged, grass-like strokes along the bottom of the page to give the astronaut an earth-bound context.
Level Up: Watercolor Wash
After inking with a waterproof pen, add a very pale blue or purple watercolor wash to the background for a soft, dreamy atmosphere.
Enjoy your little space explorer floating on the page

Retro Rocket Ship Blast-Off
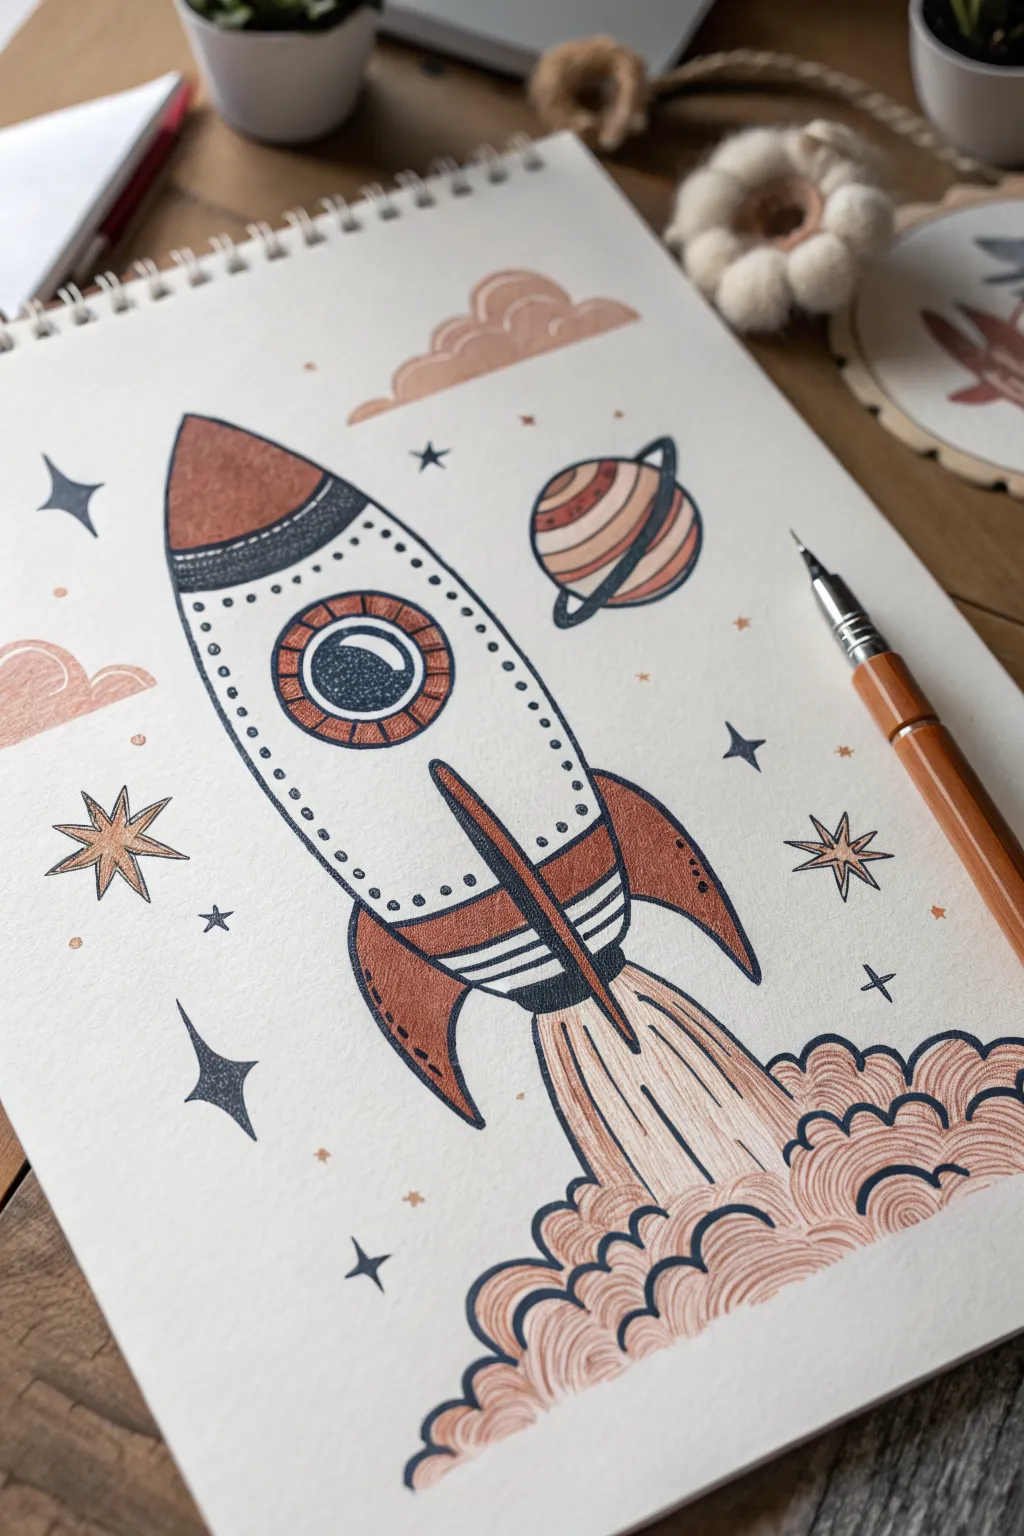
Capture the magic of classic sci-fi with this charming, retro-style rocket ship illustration. With its earthy color palette, stipple shading, and dynamic smoke clouds, this drawing feels like a page torn from a vintage adventure book.
Step-by-Step Guide
Materials
- Heavyweight drawing paper or mixed media sketchbook
- Graphite pencil (HB or 2B) for sketching
- Fine liner pens (Black, sizes 01 and 05)
- Alcohol-based markers or colored pencils (Terra cotta/rust, dark grey/black, cream/beige)
- White gel pen (optional for highlights)
- Eraser
Step 1: Planning the Launch
-
Map out the rocket body:
Start by lightly sketching a large, elongated teardrop shape in the center of your page. The pointy end should be at the top, and the bottom should flare out slightly, curved like a smile. -
Define the nose cone:
Draw a curved horizontal line near the top point of the teardrop to separate the nose cone from the main fuselage. Add a second, thinner band just below it for decorative detail. -
Add the fins:
Sketch three fins: one large central fin running down the front (overlap the bottom curve), and two side fins curving outward from the base. Make them look sturdy and aerodynamic. -
Create the porthole:
Placement is key here—draw a circle in the upper third of the body. Draw a smaller circle inside it for the glass, and a larger ring around the outside for the frame. -
Sketch the smoke clouds:
At the base of the rocket, draw billowing, scallop-shaped clouds. Let them pile up on top of each other, getting wider as they reach the bottom of the page to show the force of the blast.
Clean Lines
Rotate your paper while drawing the rivets and curved lines. It’s much easier to draw smooth curves by pulling the pen toward your body rather than pushing away.
Step 2: Inking & Outlining
-
Bold outlines:
Using your thicker 05 fine liner, trace over your main pencil lines. Give the outer edge of the rocket and the main curves of the smoke a nice, definitive weight. -
Add decorative rivets:
Switch to a finer 01 pen. Carefully dot small circles along the seams of the rocket—down the sides of the fuselage and along the fin edges—to look like metal rivets. -
Draw the planet:
In the upper right corner, ink a circle with a ring around it. Add curved stripes across the planet’s surface to give it form. -
Scatter the stars:
Fill the empty space with a variety of star shapes: some four-pointed diamonds, some simple crosses, and a few hollow outlined stars for variety.
Cosmic Texture
Try using a piece of textured watercolor paper instead of smooth cardstock. The grain will catch the pencil shading on the smoke clouds, adding an instant vintage feel.
Step 3: Adding Vintage Color
-
Color the rust accents:
Use a terra cotta or rust-colored marker to fill in the nose cone, the outer ring of the porthole, and the fins. Use broad, even strokes to avoid streakiness. -
Darken the details:
Color the band below the nose cone and the center of the porthole with a dark grew or soft black. Leave a small white crescent or dot in the porthole glass to represent a reflection. -
Shade the smoke:
Take that same rust color and add thin, curved hatch lines inside the smoke clouds. Follow the curve of the ‘scallops’ to make the smoke look puffy and voluminous. -
Stipple the dark areas:
I love adding texture here—use your fine pen to add tiny dots (stippling) on the dark grey band and near the edges of the rust-colored fins to simulate shadow and grit. -
Color the planetary ring:
Apply the rust tone to alternate stripes on your planet and the ring system, keeping the palette cohesive.
Step 4: Atmosphere & Finish
-
Add motion lines:
Draw vertical lines coming down from the rocket exhaust into the smoke clouds. This emphasizes the downward thrust of the engines. -
Warm up the clouds:
Lightly shade the bottom outlines of your smoke clouds with a blush or light tan pencil to give them warmth without engaging fully with the rust marker. -
Final Cleanup:
Once the ink is completely dry, gently erase any remaining pencil guidelines so the illustration looks crisp and professional.
Now you have a timeless piece of space art ready to frame or gift to a sci-fi fan

PENCIL GUIDE
Understanding Pencil Grades from H to B
From first sketch to finished drawing — learn pencil grades, line control, and shading techniques.
Explore the Full Guide
Twinkly Star Doodle Sampler

Create a charming vertical border for your bullet journal with this collection of whimsical celestial shapes. This project combines simple geometric lines with dot-grid precision to produce a dreamy, starry margin perfect for any space-themed spread.
Step-by-Step Tutorial
Materials
- Dot grid notebook or journal
- Fine liner pen (black, 0.3mm or 0.5mm)
- Pencil (HB or H)
- Eraser
- Ruler (optional, for crisp straight lines)
Step 1: Planning the Layout
-
Establish the margin:
Visualize a vertical column running down the right-hand side of your page, about 1.5 to 2 inches wide. This will be the designated zone for your star collection. -
Mark anchor points:
Using your pencil lightly, sketch the rough positions for the main stars. Aim for a zigzagging or meandering path rather than a straight line to keep the composition organic. -
Select your shapes:
Plan to alternate between different star types: a classic radiant star, a five-point star, a geometric mandala star, and exploding spark bursts.
Step 2: Drawing the Radiant Star
-
Start the center:
Using your fine liner, locate a central dot for your largest star, situated near the top third of the page. -
Draw cardinal points:
Draw four long, sharp triangular spikes extending North, South, East, and West from the center point. I prefer making the vertical spikes slightly longer than the horizontal ones. -
Add diagonal points:
In the spaces between the four main spikes, draw four smaller, shorter triangular spikes to complete the eight-pointed radiant star.
Grid Guide
Use the dots on your paper as coordinate points. Count dots to ensure your star points are symmetrical and equal in length.
Step 3: Adding Geometric Varieties
-
Draw the open five-point star:
Moving down the page, draw a classic five-pointed star outline. Keep the lines crisp and ensure the points felt balanced. -
Create the mandala star:
Further down, near the bottom third, start a ‘snowflake’ or mandala star by drawing an asterisk (*) shape with six or eight lines intersecting at a center point. -
Connect the tips:
Connect the tips of your asterisk lines with small, inward-curving arcs. Then, draw a second layer of smaller details or loops around the center to add complexity. -
Inker the solid burst:
Near the bottom, draw a star composed entirely of solid, blacked-out triangles radiating from a center. This adds visual weight and contrast to the delicate line work.
Galaxy Glow
Use a white gel pen to add tiny highlights inside the solid black stars, or use a grey mildliner to add drop shadows for depth.
Step 4: Fillers and Details
-
Add floating elements:
Draw smaller, simpler stars in the gaps. These can be tiny four-pointed diamonds or simple ‘plus’ signs with tapered ends. -
Incorporate the linear burst:
Include a star that looks like a firework—just straight lines crossing at a center point, varying the length of the lines for a dynamic feel. -
Sprinkle stardust:
To tie the whole column together, add single dots and very tiny circles randomly around your main stars. This mimics the look of distant galaxies. -
Erase pencil guides:
Wait until the ink is completely dry to prevent smudging. Gently erase any visible pencil sketches or placement marks.
Now you have a sparkling celestial border ready to frame your daily tasks or notes
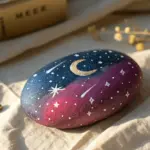
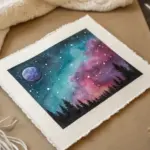
Swirly Spiral Galaxy Centerpiece
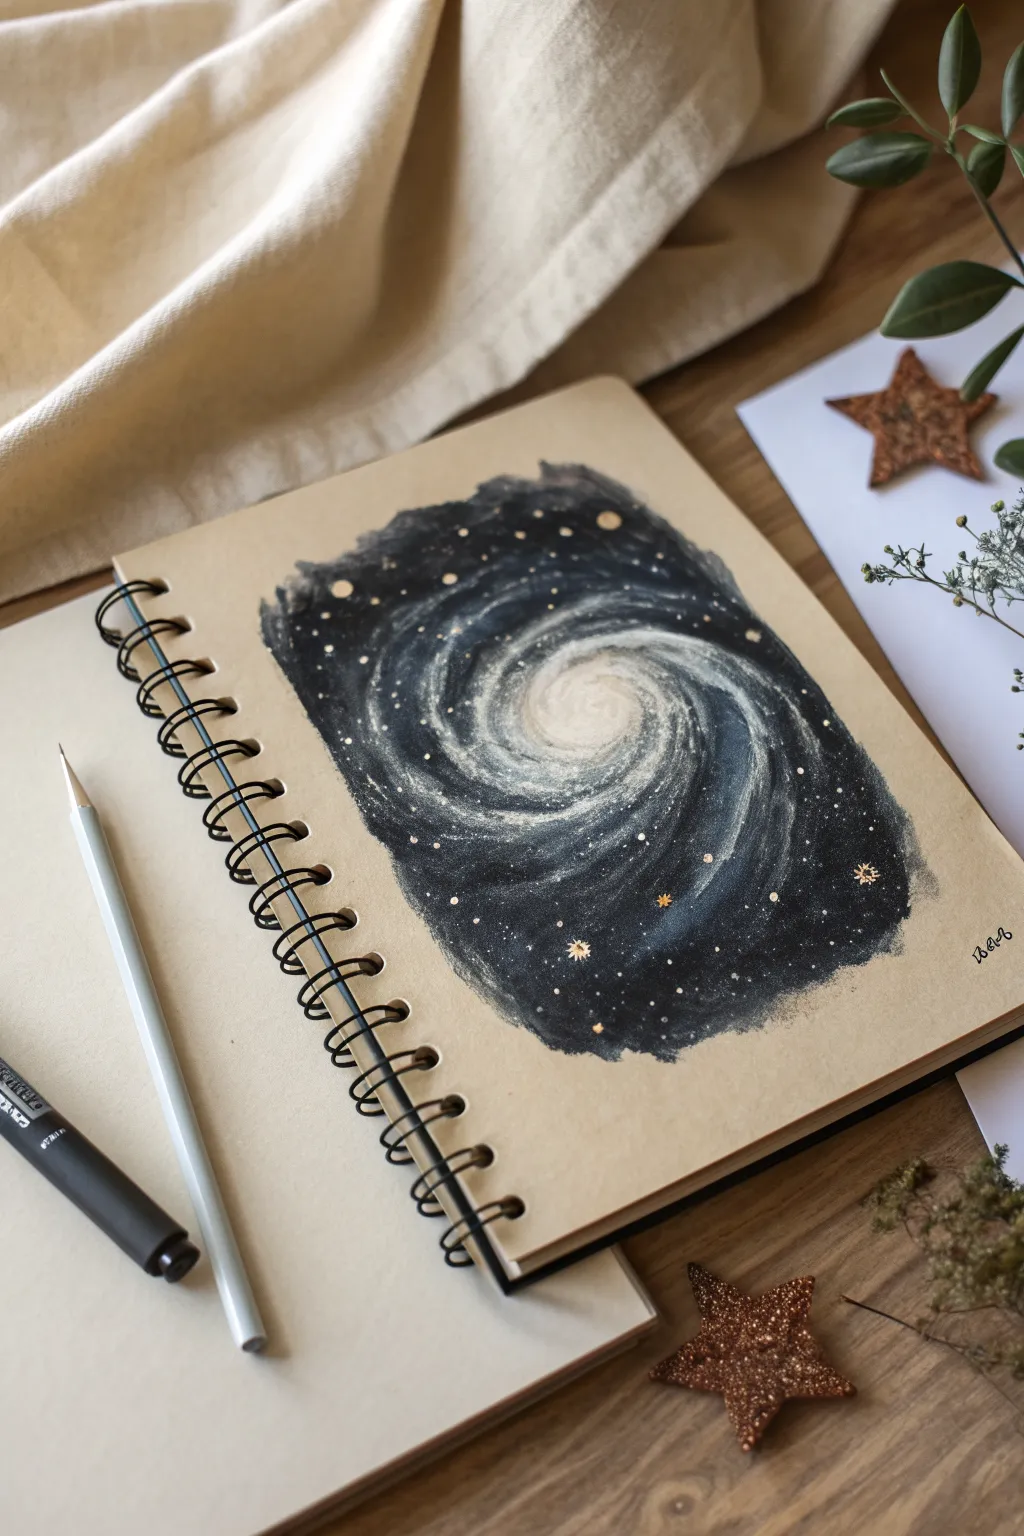
Capture the mesmerizing depth of the cosmos with this stunning spiral galaxy painting on toned paper. By layering dark acrylics or gouache against the warm tan background, you’ll create a striking contrast that makes the starry swirl pop right off the page.
How-To Guide
Materials
- Tan or kraft paper sketchbook (mixed media weight)
- Black acrylic paint or gouache
- Dark blue acrylic paint or gouache
- Titanium white acrylic paint or gouache
- Metallic gold paint or gel pen
- Flat shader brush (small)
- Round detail brush (size 0 or 1)
- Water cup and palette
- Pencil for light sketching
Step 1: Planning the Void
-
Sketch the outline:
Begin by lightly sketching a rough, organic rectangular shape in the center of your page. Don’t use a ruler; the wavy, uneven edges give it a floating, dreamy quality. -
Mark the spiral:
Very faintly sketch a spiral shape starting from the center and winding outwards. This will serve as a guide for your paint flow, so keep the lines barely visible. -
Mix your base darks:
On your palette, squeeze out black paint and a touch of dark blue. Mix them to create a deep, rich midnight color that isn’t quite flat black.
Step 2: Creating the Galaxy Base
-
Fill the background:
Using your flat brush, fill in the organic rectangle shape with your dark mixture. Apply the paint somewhat thickly so it’s opaque, covering the tan paper completely. -
Soften the edges:
As you reach the outer boundaries of your rectangle, use a slightly drier brush to feather the edges. This dry-brush technique creates a textured, torn-paper look rather than a crisp line. -
Add blue depth:
While the black base is still slightly damp, mix a bit more blue into your black and streak it loosely along the spiral path you planned earlier. This subtle shift adds dimension. -
Let it dry:
Allow this base layer to dry completely. If the paper buckles slightly, you can place a heavy book on it once the paint is fully cured, but toned sketchbook paper usually handles this well.
Dry-Brush Drama
For the ‘milky’ look, wipe most paint off your brush on a paper towel before hitting the canvas. This scratchy texture mimics cosmic dust perfectly.
Step 3: Painting the Spiral
-
Start the center glow:
Mix a small amount of white into your dark blue to make a mid-tone grey-blue. Using a round brush, paint a small, solid circle in the absolute center of the galaxy. -
Build the arms:
Add more white to your mixture. Start painting the spiral arms, extending outward from the center. Use short, wispy strokes that follow the curvature of the spiral. -
Create the milky texture:
Transition to nearly pure white paint. Dry-brush this over the grey-blue arms you just painted. The goal is to let the darker colors show through underneath, simulating gas clouds. -
Highlight the core:
Dab pure, thick white paint right in the center core and drag it slightly outward into the inner arms. This should be the brightest part of the image. -
Feather the outer arms:
As the spiral arms reach the edge of the galaxy, use very little paint on your brush to fade them out into the black background. They should look like they are evaporating into space.
Oops, too white?
If your spiral becomes a solid white blob, wait for it to dry and create a thin wash of black paint (watery transparency) to glaze over it and push it back.
Step 4: Stellar Details
-
Splatter the stars:
Dilute a bit of white paint with water until it’s milky. Load a small brush, hold it over the painting, and tap the handle against another brush to spray tiny specks across the galaxy. -
Add major stars:
I prefer to use a fine-tip brush here to dot specific, larger white stars in the dark negative spaces between the spiral arms. -
Introduce gold accents:
Using metallic gold paint or a gold gel pen, add medium-sized dots randomly throughout the outer edges of the galaxy to represent distant suns. -
Draw star flares:
Select three or four of your gold dots and carefully draw tiny crosses over them to create twinkling star flares. -
Final touches:
Review the contrast. If the center feels too dim, add one last dab of bright white. Ensure the edges of the main dark shape still look organically rough and textured.
Close your sketchbook and let your personal universe dry before showing it off
BRUSH GUIDE
The Right Brush for Every Stroke
From clean lines to bold texture — master brush choice, stroke control, and essential techniques.
Explore the Full Guide
Shooting Star Trail Study
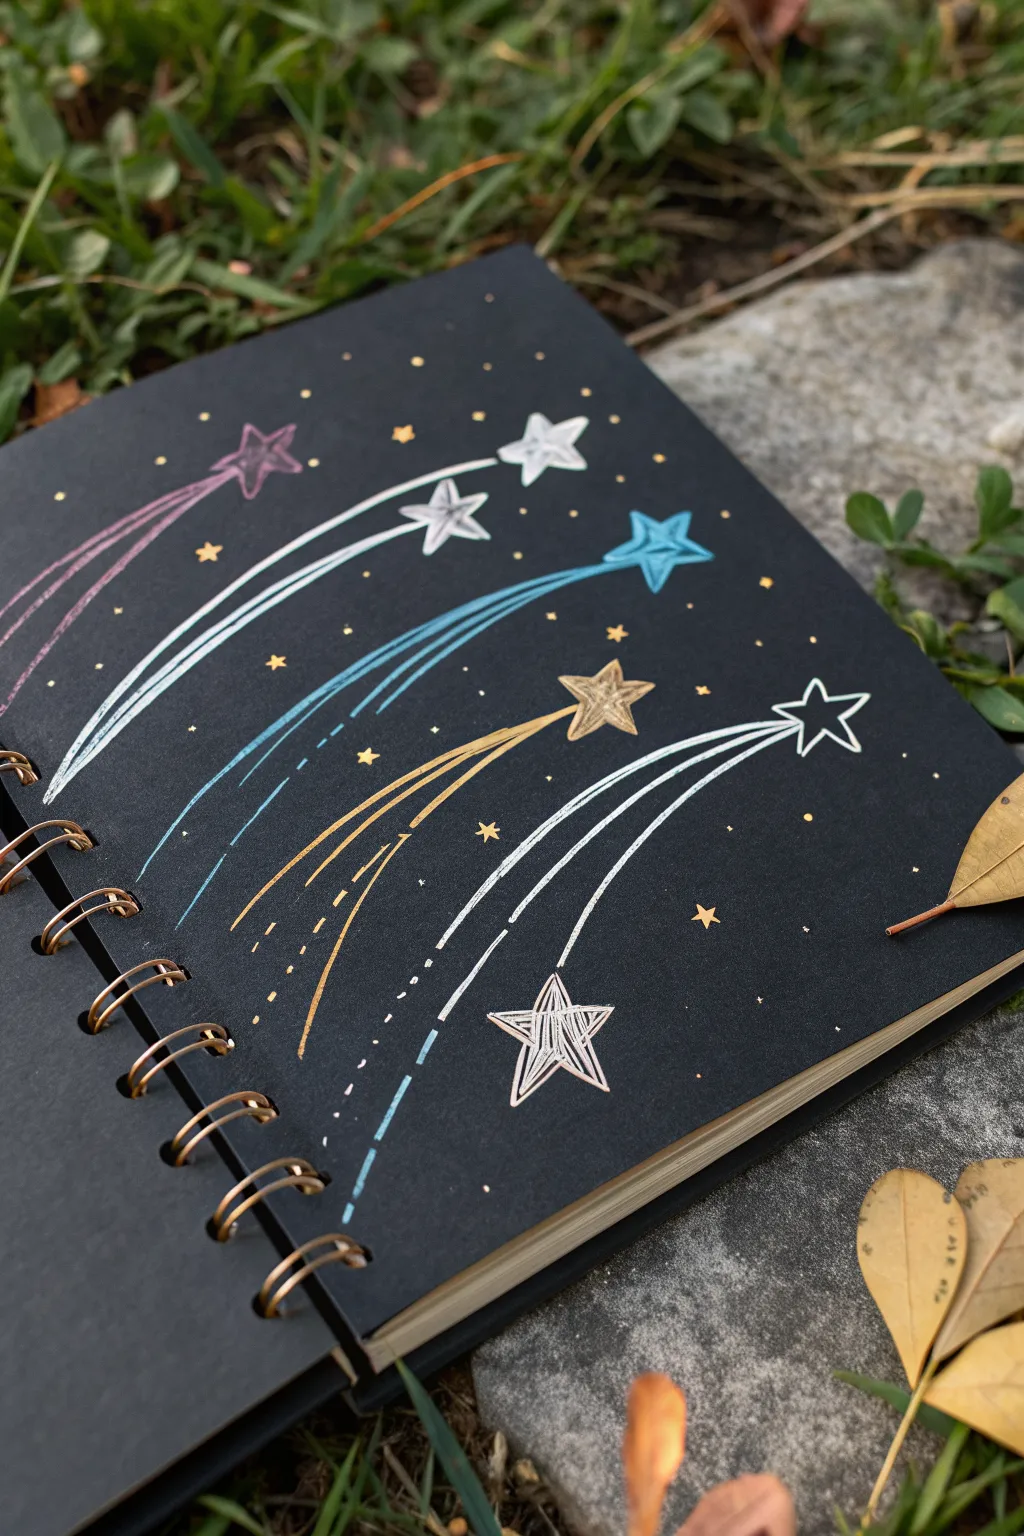
Capture the magic of a meteor shower on deep black paper using metallic markers to create these elegant, arching shooting star designs. This study combines solid lines, dashed trails, and simple starlight shapes for a celestial page that shimmers against the dark background.
Step-by-Step Guide
Materials
- Black sketchbook or cardstock (heavyweight)
- Metallic gel pens or paint markers (pink, silver, light blue, gold)
- White gel pen (fine tip)
- Ruler (optional, for spacing)
- Pencil (optional, for sketching)
Step 1: Planning and First Stars
-
Visualizing the Arcs:
Before putting pen to paper, visualize the curved path each star will take. You want them to cascade from the top left towards the bottom right in gentle, sweeping arcs. -
Drawing the Base Pink Star:
Start near the top left corner with a metallic pink pen. Draw a simple five-pointed star shape. Don’t fill it in completely; keep the lines loose and sketchy for a hand-drawn feel. -
Adding the Pink Trail:
From the back tail of your pink star, draw three long, curved lines sweeping downward and backward. Let the lines taper off and fade slightly at the very end. -
Creating the Silver Star:
Move slightly down and to the right. Using a silver metallic pen, draw a second five-pointed star. This one should be fully filled in with solid silver ink for contrast. -
Silver Trail Details:
Draw the trail for the silver star using white or light silver ink. Create distinct, separate streaks rather than a solid blocks to give the impression of speed.
Uneven Ink Flow?
If metallic pens skip on the black paper, scribble on a scrap piece of paper first to get the ink flowing. Draw slowly to allow more ink to deposit for opaque lines.
Step 2: Adding Color and Variety
-
The Blue Meteor:
Below the silver star, switch to a metallic light blue marker. Outline a hollow five-pointed star, keeping the lines crisp. -
Blue Trail Texture:
For the blue trail, draw long, sweeping lines that curve slightly more than the previous ones. Add a few shorter, dashed lines in between the main arc lines to create texture. -
The Golden Star:
Position a gold star below the blue one. Sketch this star using a ‘messy’ scribble technique, filling the shape with rapid back-and-forth lines rather than solid coloring. -
Gold Dashed Trail:
Instead of solid lines, draw the gold trail entirely with dashes. Start with longer dashes near the star and make them shorter and more spaced out as they trail away.
Step 3: Final Stars and Background
-
The Outline Star:
Further right, near the edge, draw a distinct star outline using a fine white gel pen. Keep the shape sharp and angular. -
Clean White Trails:
Draw two very long, smooth, parallel curves trailing behind this white star. These should be the longest trails on the page, sweeping across the bottom. -
The Scribble Star:
Place a final star near the bottom center. Draw a loose, scribbly star shape with the white pen, going over the lines multiple times for a layered look. -
Dotted Tail Effect:
Create a tail for this last star using only small dots. Curve the line of dots to follow the flow of the other shooting stars. -
Scattered Stardust:
Take a gold metallic pen and add tiny dots randomly throughout the black space to represent distant stars. -
Adding Twinkles:
Intersperse small four-pointed crosses or diamond shapes in gold and silver among the dots to add variety to your background starry field.
Cosmic Glow Up
Use a white colored pencil to lightly shade around the star heads. This creates a soft, glowing halo effect on the black paper without overpowering the sharp pen lines.
Now you have a dynamic page of celestial motion that really pops against the dark background
UFO Over a Tiny Planet Horizon
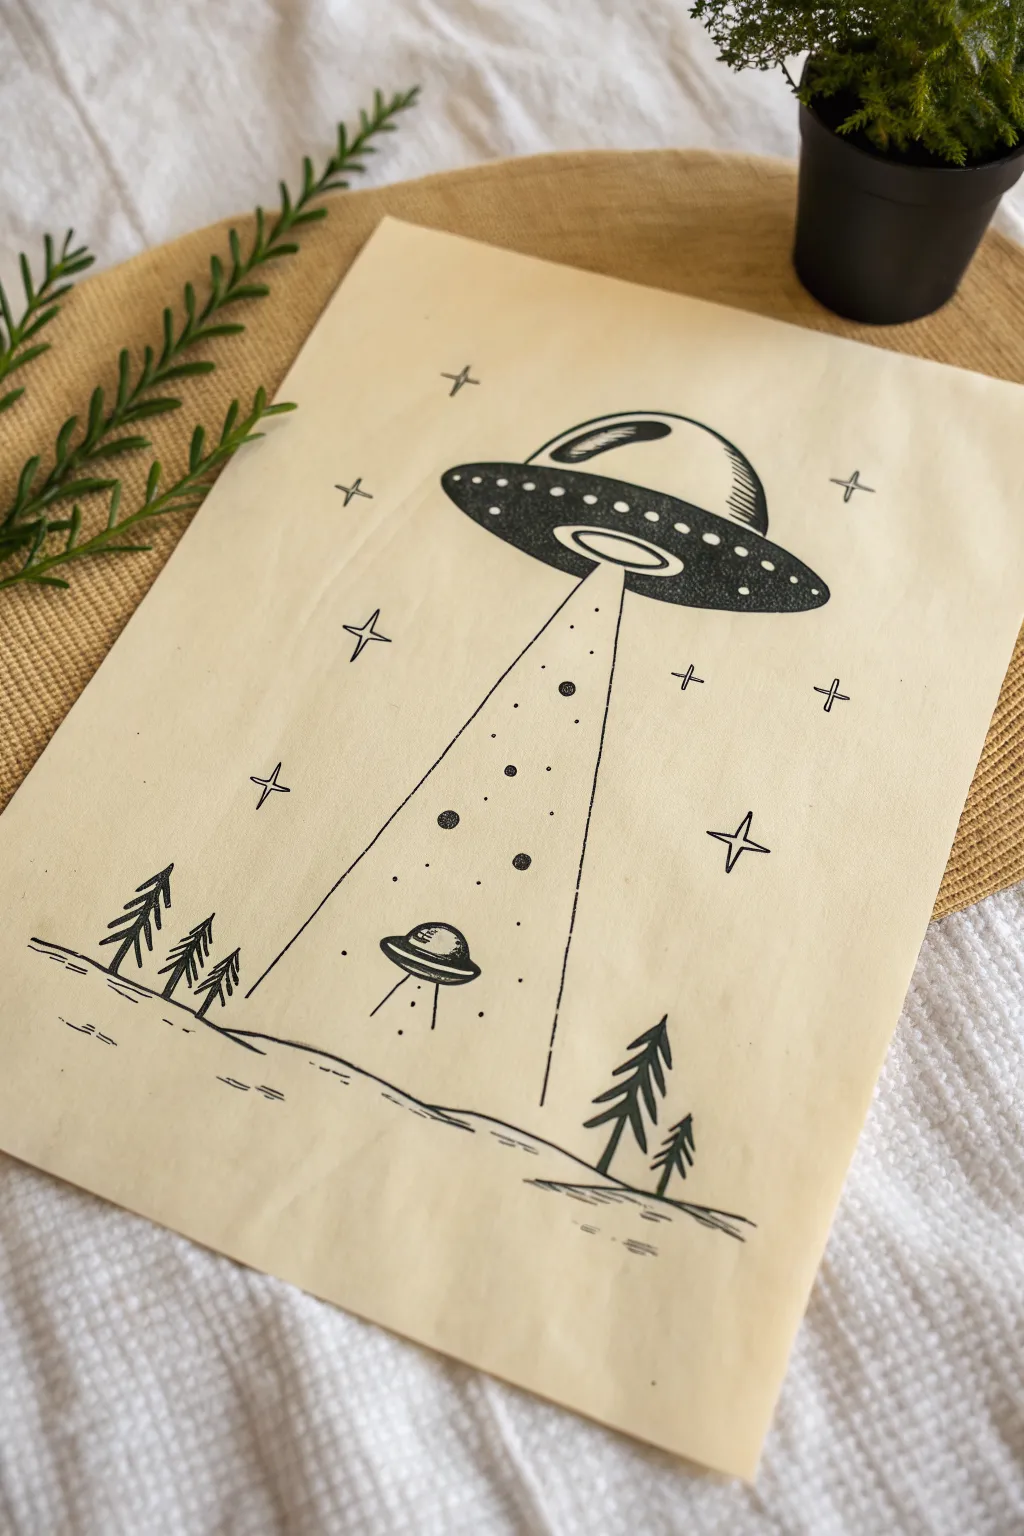
Capture a whimsical extraterrestrial moment with this clean, retro-style ink drawing on tan paper. The high-contrast black ink against the warm background creates a classic sci-fi poster vibe that is deceptively simple to recreate.
How-To Guide
Materials
- Light tan or cream-colored cardstock (or tea-stained paper)
- Pencil (HB or 2H)
- Eraser
- Fine liner pens (0.1mm, 0.3mm, and 0.5mm)
- Thick black marker or brush pen
- Ruler
Step 1: Drafting the Scene
-
Set the Horizon:
Start by lightly sketching a slightly curved horizon line about one-quarter of the way up from the bottom of your page. This curve suggests a small planet surface. -
Position the Main UFO:
In the upper center of the page, sketch a large oval for the base of the main flying saucer. Add a larger semi-circle dome on top to form the cockpit area. -
Create the Beam:
Using a ruler, lightly draw two lines extending downward from the center of the UFO base. Angle them outward slightly so they get wider as they reach the ground, creating a cone shape. -
Sketch the Trees:
Place a few simple pine trees on the horizon line. I like to group three on the left and two on the right for balance. Keep them stylised with simple triangular tiers. -
Add the Baby UFO:
Inside the beam area, near the ground, sketch a tiny version of the main UFO. It should look like it is floating mid-abduction.
Clean Lines Tip
When filling large black areas, outline the shape with a fine pen first to create a ‘barrier,’ then fill the center with a marker to prevent bleeding.
Step 2: Inking the Outlines
-
Ink the Landscape:
Switch to a 0.5mm pen to trace your horizon line. Add a few extra horizontal dashes below the line to give the ground some texture and depth. -
Outline the Saucer:
Trace the main oval and dome of the large UFO. Make the bottom curve of the main saucer slightly thicker to imply shadow and weight. -
Detail the Rim:
Draw an inner oval within the saucer’s main body to create a rim. Sketch small circles along this band to serve as lights. -
Draw the Trees:
Ink the pine trees using quick, downward zigzag strokes to mimic needles. Fill the tree trunks with solid black.
Step 3: Filling and Texturing
-
Fill the Saucer Body:
Using your thick marker or brush pen, carefully fill in the main body of the large saucer with solid black. Leave the small circular lights and the upper dome white. -
Shade the Dome:
On the upper dome, use a finer pen to add hatching lines on the right side. Leave a white oval shape on the top left to represent a shiny reflection. -
Stipple the Beam:
This is the patience test. Instead of drawing solid lines for the beam, use a 0.1mm pen to create the edge of the beam using only dots. Keep the dots closer together at the edges. -
Populate the Beam:
Add randomly placed dots within the beam’s cone. Include a few larger filled circles to look like floating debris or captured space dust. -
Ink the Tiny UFO:
Outline the small UFO inside the beam. Add vertical hatching on its tiny dome and horizontal lines on its body for detail.
Vintage Vibes
For an authentically aged look, gently crumple the paper into a ball and smooth it back out before you start drawing to create texture cracks.
Step 4: Final Touches
-
Add Stars:
Scatter four-pointed stars around the sky. Draw a vertical line and a horizontal line crossing in the middle, then connect the tips with curved lines. -
Detail the Lights:
Inside the white circular lights of the main ship, add tiny stippling or very small dots to give them a glowing texture rather than leaving them stark white. -
Clean Up:
Wait at least 10 minutes for all ink to be completely dry. Gently erase all your pencil guides, being careful not to smudge the heavy black areas.
Hang your finished piece in a simple black frame to let the retro sci-fi narrative take center stage


Satellite With Geometric Panels
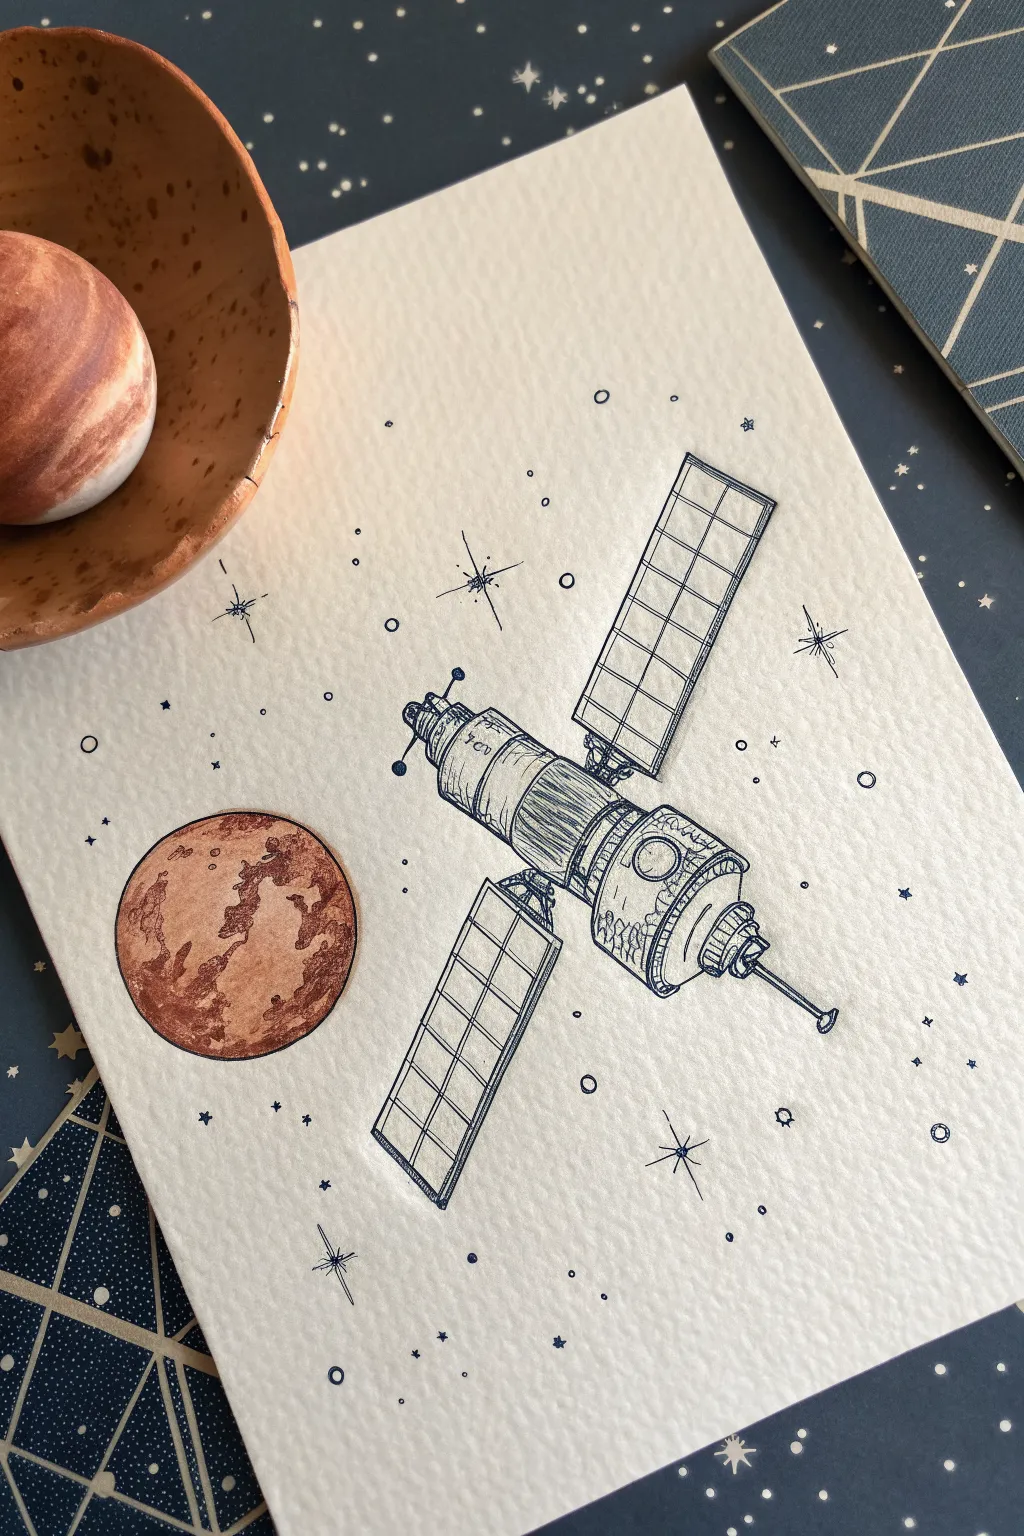
Capture the mechanical beauty of a satellite drifting past a rusty red planet in this intricate ink and watercolor illustration. The combination of precise technical lines and soft, organic planetary textures creates a striking contrast on heavy-textured paper.
Step-by-Step Guide
Materials
- Heavyweight textured watercolor paper (cold press)
- Fine liner pens (0.05mm, 0.1mm, and 0.3mm)
- Pencil (HB or 2H for sketching)
- Ruler
- Compass or circular object for tracing
- Watercolor paints (burnt sienna, rust, or reddish-brown)
- Small round watercolor brush (size 2 or 4)
- Eraser
Step 1: Drafting the Layout
-
Map the composition:
Start by lightly sketching the placement of your two main elements. Position the planet in the lower left quadrant and the satellite diagonally across the center, leaving plenty of negative space for stars. -
Draw the planet circle:
Use a compass or trace a small circular object (like a spice jar lid) to create a perfect circle for the planet. Keep your pencil pressure very light so graphite doesn’t show through later. -
Block in the satellite:
Sketch the main cylindrical body of the satellite as a long rectangle tilted at a slight angle. Add a smaller, wider cylinder section near the bottom end to define the thruster area. -
Add solar panels:
Draw the two large solar panel wings extending from the central body. Use your ruler to ensure the sides are straight and parallel. They should look like long, thin rectangles angled slightly away from the viewer.
Steady Hands Pro-Tip
Rest the heel of your hand on a scrap piece of paper while inking. This prevents skin oils from staining the expensive textured paper and stops accidental smudging of wet ink.
Step 2: Inking the Satellite
-
Outline the main body:
Switch to a 0.1mm fine liner pen. Carefully trace over your pencil sketch of the satellite’s central cylinder. Add small horizontal bands to segment the machinery. -
Detail the panels:
Use the ruler and a 0.05mm pen to draw the grid pattern inside the solar wings. Create a 2×6 or 2×7 grid of squares within each rectangular panel frame. -
Connect the components:
Draw the small struts and intricate joints that connect the solar panels to the main body. Add tiny circles and bolts where pieces join together. -
Add mechanical texture:
On the main cylinder, add vertical shading lines (hatching) to give it a rounded form. Draw small squares, lenses, and technical greebles on the wider bottom section to suggest cameras or sensors. -
Extend the antennas:
Draw the thin communication antennas extending from the top and bottom. Place a small dish or bulb at the end of each stick for realistic detail. -
Deepen the shadows:
Using a 0.3mm pen, re-line the bottom edges of the satellite components to create visual weight and shadow, making the object feel solid.
Level Up: Cosmic Glow
Dilute a tiny drop of white gouache or acrylic ink and flick it off a toothbrush over the drawing to create a realistic, randomized field of distant stars and nebulas.
Step 3: Painting the Planet
-
Outline the planet:
Ink the perfect circle of the planet with your 0.1mm pen. Keep the line steady and consistent. -
Apply a base wash:
Mix a watery wash of burnt sienna or rust watercolor. Carefully paint inside the circle, leaving a few tiny white spots for craters if you wish, or keep it solid. -
Create craters and texture:
While the paint is still slightly damp, dab in concentrated spots of darker brown pigment. Let these bleed slightly to create the look of terrain and craters. -
Define the shadow side:
Once the first layer is dry, add a glaze of darker brown on the lower left curve of the planet to give it spherical dimension.
Step 4: Finishing Touches
-
Draw the stars:
Using your 0.05mm pen, scatter tiny circles, dots, and four-pointed stars throughout the background. Clump a few together to simulate distant constellations. -
Erase pencil marks:
Wait until the ink is completely set and the paint is bone dry. Gently erase all remaining pencil guidelines to clean up the illustration.
Now stepping back, you’ll see a crisp, technical illustration floating in a personal galaxy tailored just for your space project
Asteroid Cluster With Cracks
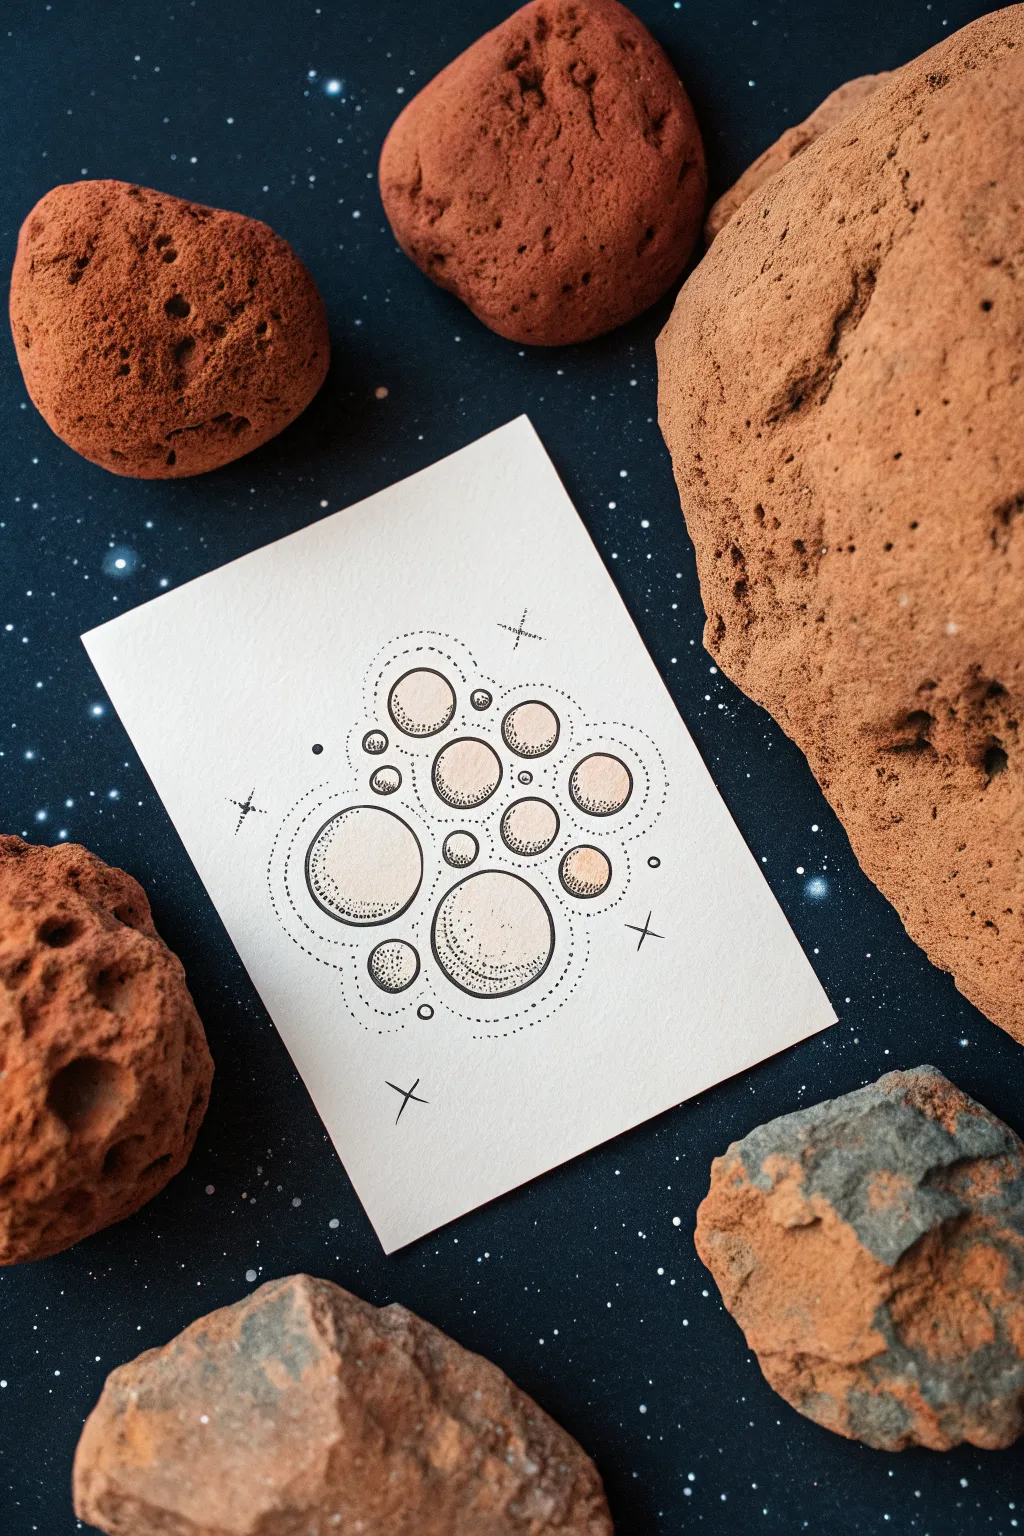
This minimalist ink and watercolor illustration captures a stylized galaxy of spheres, using delicate stippling and line work to create depth. It’s a meditative drawing exercise that results in a sophisticated piece perfect for framing.
How-To Guide
Materials
- Thick white drawing paper or mixed media cardstock
- Fine liner pens (sizes 0.1, 0.3, and 0.5)
- Circle stencil template (optional but recommended)
- Pencil (HB or H for light lines)
- Kneaded eraser
- Watercolor paints (warm beige or pale peach tones)
- Small round watercolor brush (size 2 or 4)
- Compass (for larger circles)
Step 1: Planning the Composition
-
Sketch the main bodies:
Begin by lightly sketching your circles using a pencil. Use a stencil or compass to draw about 10-12 circles of varying sizes clustered together in the center of the paper. -
Establish the layout:
Keep the largest circles toward the bottom left and center, scattering smaller ones upward and outward to create an organic, drifting feeling. -
Draw orbital rings:
Lightly sketch uneven, concentric rings rippling out from the cluster. These shouldn’t be perfect circles but rather wobbly, natural lines that echo the shape of the group.
Step 2: Inking the Outlines
-
Trace the circles:
Switch to your 0.5 fine liner pen. Carefully trace over your pencil circles. A steady hand is key here, but don’t worry if they aren’t mechanically perfect; slight wobble adds character. -
Add detail lines:
Inside the larger spheres, draw a curved line near the bottom edge to demarcate where the shadow and texture will go. This creates a crescent shape at the bottom of the spheres. -
Ink the orbits:
Using a thinner 0.1 pen, trace the rippling orbital lines you sketched earlier. Instead of solid lines, use a broken, dotted line technique to give them an ethereal, non-solid appearance. -
Add cosmic debris:
In the spaces between the main spheres, add tiny floating dots and very small circles with your 0.1 pen to represent distant dust or asteroids.
Ink Smudge Savior
If you accidentally smudge wet ink, turn it into a nebula! Use a white gel pen to draw small stars over the smear, or stipulate more dots around it to blend it into the background texture.
Step 3: Adding Color
-
Mix your wash:
Prepare a very watery, pale wash of warm beige or peach watercolor. You want the color to be subtle and translucent, not opaque. -
Paint the spheres:
Gently fill in the circles with your wash. I like to leave a tiny sliver of white paper unpainted on the upper left side of each sphere to act as a highlight. -
Let it dry completely:
Wait for the paint to be bone dry before moving on to the next step. If the paper is cool to the touch, it’s still damp.
Metallic Upgrade
Once the drawing is dry, add accents of gold leaf or metallic watercolor paint to the ‘lit’ side of the planets for a shimmering, luxurious finish that catches the light.
Step 4: Texture and Depth
-
Begin stippling:
Using your 0.3 pen, start adding dots (stippling) inside the crescent shapes you marked at the bottom of the spheres. -
Build density:
Consult the reference image and notice how the dots are dense at the very bottom edge and get sparser as they move up toward the center. This gradient creates the 3D volume. -
Texture the small circles:
For the smallest circles, just a few dots clustered on one side is enough to suggest shadow. -
Add surface details:
On the largest spheres, add a few tiny, faint scratches or broken lines within the shaded area to suggest craters or surface topology.
Step 5: Finishing Touches
-
Erase pencil marks:
Once you are absolutely certain the ink and paint are dry, gently roll your kneaded eraser over the entire drawing to lift the graphite guides. -
Draw stars:
Using the 0.3 pen, draw a few simple four-pointed stars (crosses with tapered ends) around the periphery of the cluster. -
Final assessment:
Step back and look at the overall balance. If the cluster feels too light, add a second pass of stippling to the darkest shadow areas to increase contrast.
Now you have a serene piece of cosmic art ready to be displayed on your desk or wall
Planets With Cute Faces
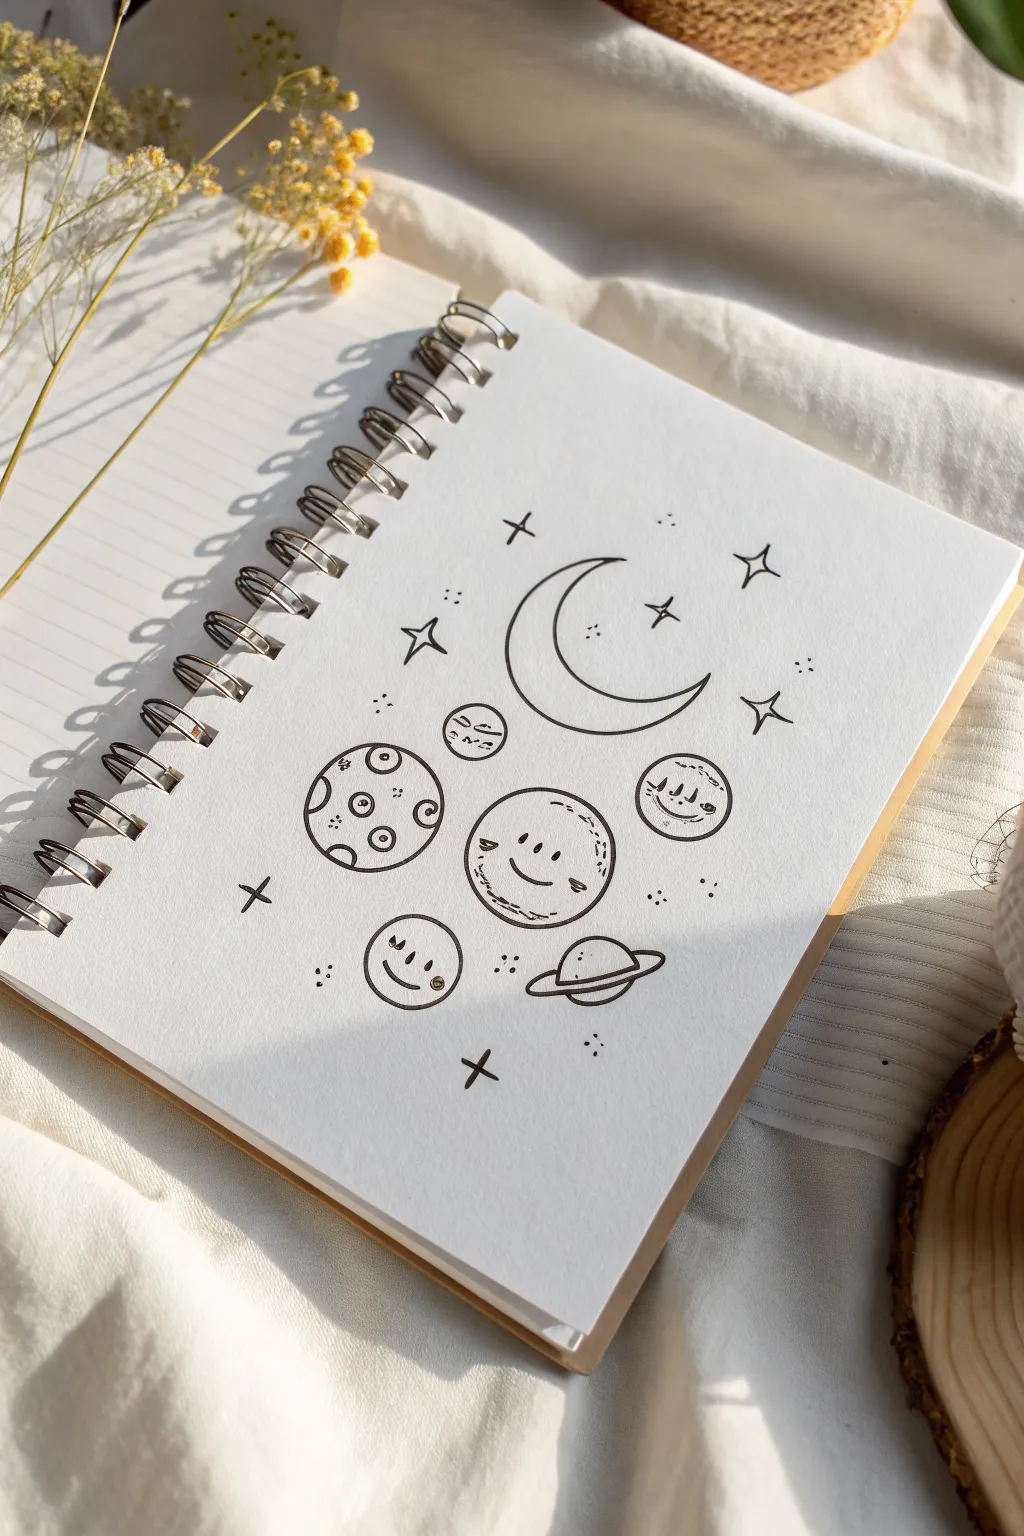
Turn a blank notebook page into a cheerful galaxy with just a pen and some imagination. These simple line drawings feature planets and moons with adorable expressions, perfect for filling the margins of your journal or creating a dedicated art spread.
How-To Guide
Materials
- Spiral-bound notebook or sketchbook with smooth paper
- Black fineliner pens (sizes 05 and 08 usually work best)
- Pencil (HB or H for sketching)
- Eraser (kneaded or plastic)
- Small circle stencils or a compass (optional)
Step 1: Planning and Sketching
-
Observe the layout:
Start by lightly visualizing where your main elements will go. Notice that the crescent moon is the anchor at the top right, while the various planets cluster below it in an organic, scattered arrangement. -
Sketch the moon:
Using your pencil, draw a large crescent shape in the upper right quadrant. Keep the lines light so they are easy to erase later. -
Place the planetary circles:
Lightly sketch four main circles below the moon. Draw one large central circle, a slightly smaller one to its left, a small one to the right, and a tiny one tucked near the bottom left. -
Add the ringed planet:
Near the bottom right, sketch a flattened oval for a ringed planet, adding the ring looping around its middle. -
Position the stars:
Mark small ‘x’ spots or faint dots where you want your larger four-pointed stars and smaller accent sparkles to be.
Ink Confidence
Work from top-left to bottom-right (if right-handed) to avoid smudging wet ink with your hand as you draw across the page.
Step 2: Inking the Outlines
-
Trace the moon:
Switch to your black fineliner (size 08 is good for bold outlines). carefully trace over your pencil crescent, stopping to lift your hand if you need to reposition for a steady curve. -
Outline the main planets:
Go over your circle sketches with the pen. Don’t worry if the circles aren’t mathematically perfect; a slight wobble adds to the hand-drawn charm. -
Define the ringed planet:
Ink the planet body and the ring. Make sure the line of the planet breaks where the ring passes in front of it to create depth. -
Erase pencil guides:
Wait a moment for the ink to dry completely, then gently erase all your initial pencil markings to reveal a clean black-and-white base.
Make It Pop
Use a white gel pen to add tiny highlights to the black eyes of the planets, or color the cheeks with a pale pink highlighter for a blush effect.
Step 3: Adding Faces and Details
-
The central smiling planet:
On the largest central circle, draw two small distinct eyes. Add a wide, simple ‘U’ shape for a smile. Add tiny curved lines at the ends of the mouth for cheeks. -
Texture the central planet:
Draw broken, dashed curved lines near the top and bottom edges of this planet to suggest spherical volume and surface texture. -
The cratered planet:
Move to the planet on the left. Draw small circles of varying sizes inside it to represent craters. Add a smaller dot inside some circles to give them depth. -
The sleepy small planet:
For the small planet on the right, draw closed eyes using two small downward curves with tiny eyelashes. Add a contented smile below. -
The bottom left buddy:
On the lowest planet, draw simple dot eyes and a curved smile. Give it rosy cheeks by drawing tiny spirals or ovals at the corners of the mouth. -
Detail the ringed planet:
This one is too small for a face, so just ensure the ring lines are clean. You can add a single line across the planet body for a stripe effect.
Step 4: Starry Embellishments
-
Draw large stars:
Create the four-pointed stars by drawing a cross, but curve the lines inward toward the center point. There should be about 3-4 of these scattered around. -
Add simple stars:
Draw simple ‘plus’ sign stars (+) in the empty spaces to balance out the composition. -
Sprinkle stardust:
Group tiny dots in clusters of three. Place these little triangular arrangements of dots in the negative spaces between the planets and the moon.
Now you have a charming page of celestial friends ready to brighten up your day
Astronaut Swinging From Planet Rings
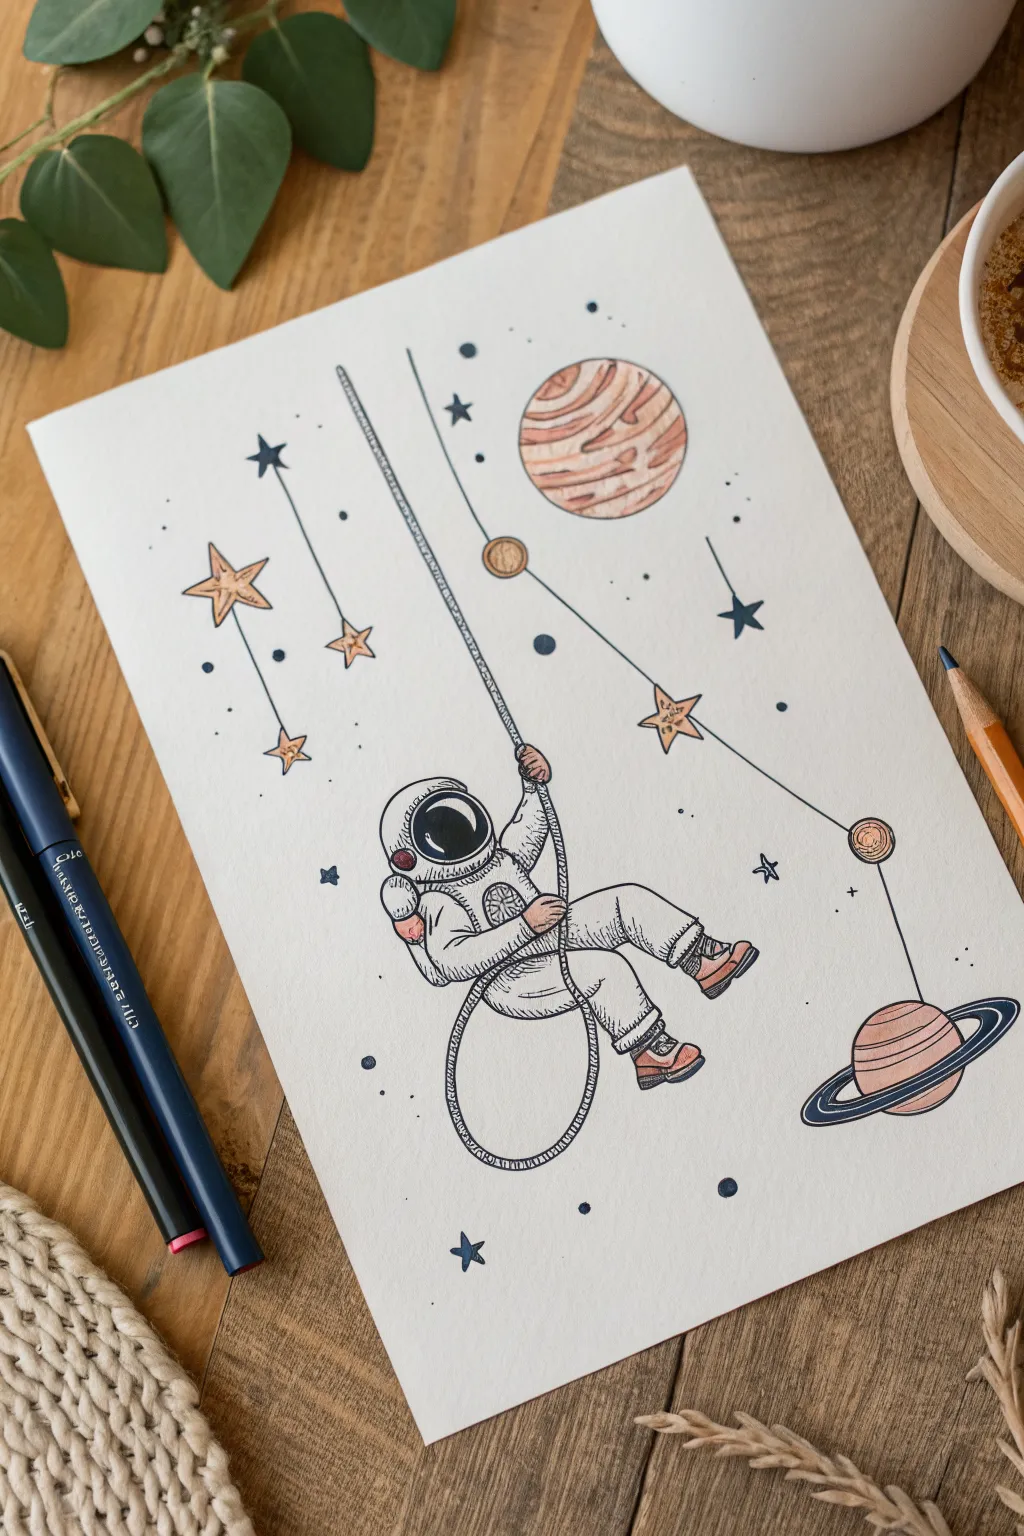
Create a whimsical scene featuring a playful astronaut swinging through the cosmos. This charming illustration combines clean fineliner ink work with soft touches of color for a minimalist yet detailed look.
Step-by-Step Guide
Materials
- Heavyweight drawing paper or mixed media paper (A5 size)
- Black archival fineliner pens (sizes 005, 01, and 05)
- Pencil (HB or 2H)
- Eraser
- Ruler
- Colored pencils or alcohol markers (terracotta, light grey, dark blue)
- White gel pen (optional)
Step 1: Conceptual Sketching
-
Plan the composition:
Start by lightly sketching a vertical line slightly off-center for the main rope. This will anchor your swinging astronaut. -
Sketch the astronaut body:
Draw the basic shapes of the astronaut’s suit. Start with a rounded helmet shape, then add the puffy torso, bent legs to mimic a sitting/swinging motion, and arms reaching up to hold the rope. -
Add space elements:
Sketch a large striped planet in the upper right. Add a ringed planet in the lower right corner. Scatter various sizes of five-pointed stars and small circles throughout the empty space to balance the composition. -
Detail the rope and swing:
Connect the stars and planets with thin, straight lines to create a hanging mobile effect. Draw a loop at the bottom of the main rope for the astronaut to sit in.
Step 2: Inking the Outline
-
Ink the main lines:
Using an 01 fineliner, carefully trace over your pencil lines for the astronaut, rope, and large planets. Use a steady hand to keep lines consistent. -
Refine the helmet:
Switch to a thicker 05 pen to fill in the dark visor of the helmet, leaving a small white crescent shape empty to represent a reflection. -
Texture the rope:
With an 005 pen, add tiny diagonal hatch marks along the length of the main rope to give it a twisted, fibrous texture. -
Add suit details:
Use the fine 005 pen to add seams, pockets, and ribbed textures to the spacesuit. Add small folds where the joints bend to emphasize the puffy material. -
Ink the background elements:
Trace the stars and smaller hanging elements. Use a ruler if you want the hanging strings to be perfectly straight, or freehand it for a more organic feel. -
Cleanup:
Wait at least 15 minutes for the ink to fully cure, then gently erase all visible pencil marks.
Uneven Ink Lines?
If your long straight lines are shaky, try ‘ghosting’ the motion with your hand in the air before committing the pen to paper, or just embrace the wobble for a hand-drawn look.
Step 3: Adding Color
-
Color the celestial bodies:
Using a terracotta or light brown pencil, gently shade the planets. For the top planet, create stripes by alternating pressure. Keep the coloring soft and somewhat sketchy. -
Fill the stars:
Lightly color the centers of the stars with the same terracotta tone, fading out toward the points. -
Shade the astronaut:
Use a light grey marker or pencil to add shadow to the underside of the astronaut’s limbs and helmet. This adds dimension to the white suit. -
Add accent colors:
Color the astronaut’s boots with terracotta. Use a dark blue for small details like the ring on the lower planet or tiny distant stars.
Add Metallics
Use a gold or silver gel pen for the stars and planet rings instead of terracotta. It adds a magical shimmer when the light hits the paper.
Step 4: Final Touches
-
Enhance contrast:
Go back with your 01 pen and re-darken any outlines that got faded by the colored pencil. Add tiny stippling dots around the planets for a subtle glow effect. -
Add detail dots:
Scatter tiny blue and black dots in the empty white space using your fineliners. This creates the illusion of distant stardust without cluttering the page. -
Highlight:
If you have a white gel pen, add a tiny dot to the helmet visor reflection to make it pop.
Now you have a charming piece of space art ready to frame or display
Astronaut Blowing Planet Bubbles
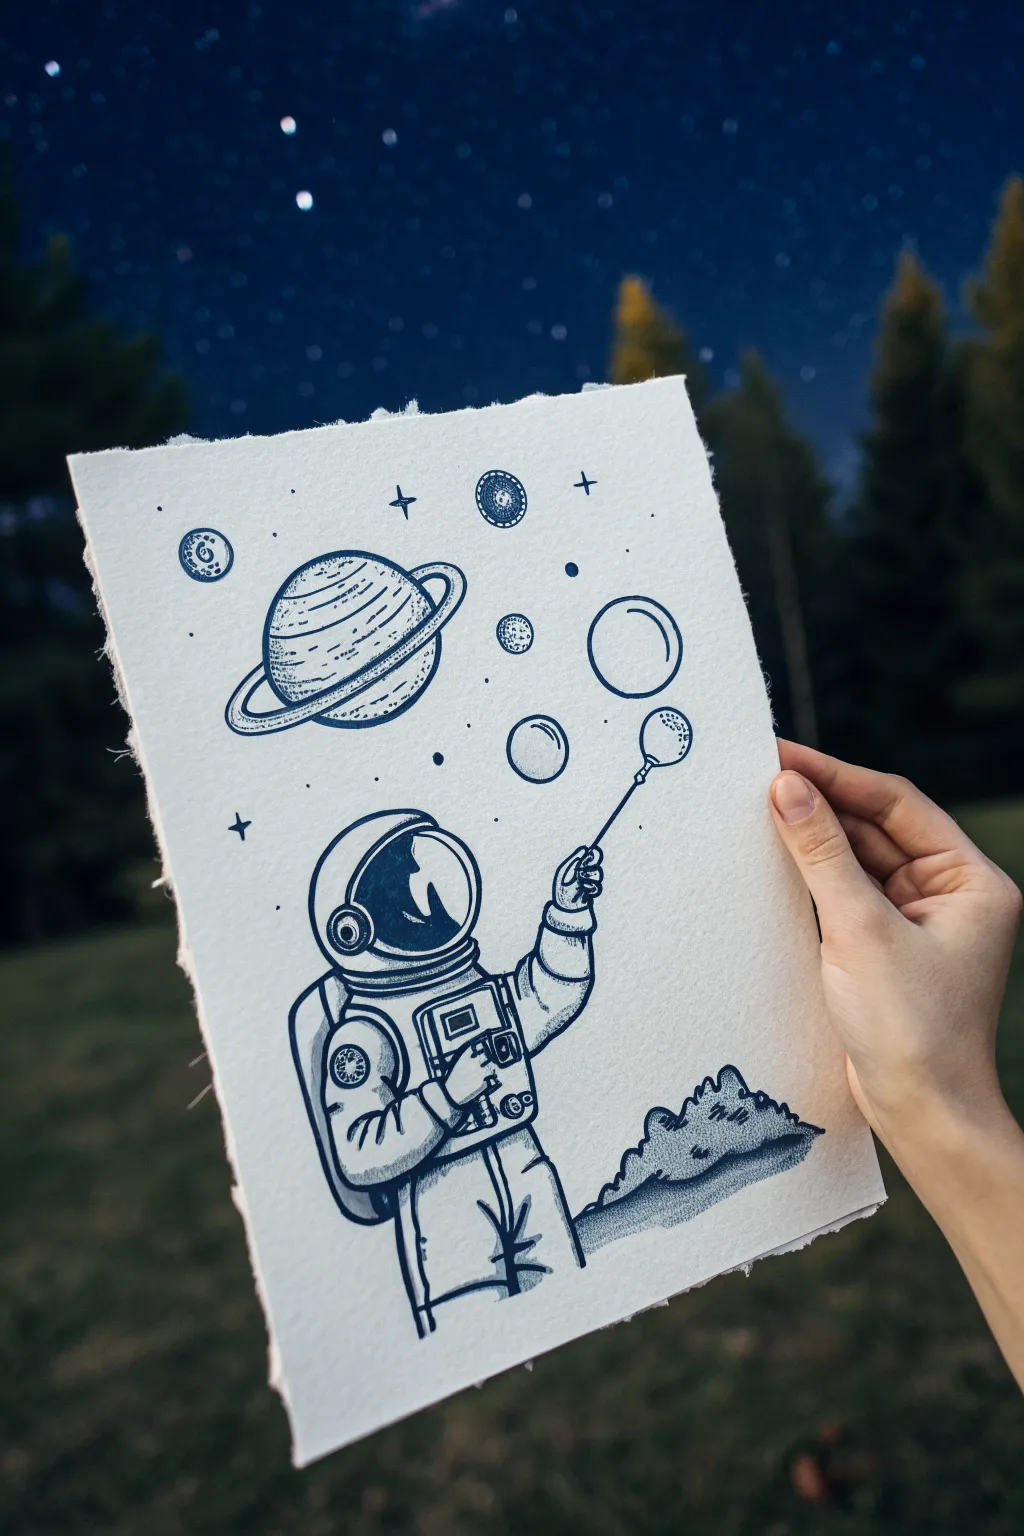
This whimsical illustration captures an astronaut playfully blowing planets instead of bubbles, blending science fiction with childhood nostalgia. Executed in deep blue ink on textured paper, the piece uses simple line work and stippling to create shading and depth.
How-To Guide
Materials
- Heavyweight textured paper (cold press watercolor paper or handmade cotton paper with deckled edges)
- Pencil (HB or 2H)
- Kneaded eraser
- Dark indigo or navy blue fine liner pens (sizes 0.1, 0.3, and 0.5)
- Ruler (optional)
- Circle template or compass (optional)
Step 1: Sketching the Foundations
-
Position the astronaut:
Begin by lightly sketching the astronaut figure in the lower center of your paper. Use simple geometric shapes: a large oval for the helmet, a rectangle for the torso, and cylinders for the arms. Leave plenty of space above for the floating planets. -
Detail the suit:
Refine the suit’s shape by adding the backpack (Life Support System) peeking out from the left shoulder. Sketch the control box on the chest and the creases in the suit fabric where the arms bend. -
Draw the hand and wand:
Carefully sketch the gloved hand raised up. I find it helpful to draw a simple mitten shape first, then refine the fingers gripping the thin wand. Draw the bubble wand extending upward, ending in a small oval loop. -
Outline the planets:
Above the wand, sketch several circles of varying sizes to represent the ‘bubbles.’ Place the largest one—Saturn with its rings—to the left. Add a few smaller spheres floating freely to simulate moons or distant planets. -
Add the ground:
Ground your astronaut by sketching a small, rugged mound of lunar surface beneath their feet to the right side.
Dot Control
When stippling, hold the pen vertically. Slanted strokes create tiny dashes instead of clean round dots, which ruins the texture effect.
Step 2: Inking the Outlines
-
Main outlines:
Switch to your 0.5 pen. Go over the main contours of the astronaut’s suit, the helmet, and the large planet shapes. Keep your hand steady but allow for slight organic wobble to match the hand-drawn aesthetic. -
Fine details:
Use a thinner 0.3 pen for internal details like the buttons on the chest unit, the ridges on the breathing tubes, and the specific fingers on the glove. -
Saturn’s rings:
Carefully ink the rings around the large planet. Make sure the rings pass behind the planet body to create a 3D effect. Add the swirling surface lines on the planet itself. -
The wand connection:
Draw the bubble wand stick with a straight, clean line. Draw the loop at the end, and create a small ‘bubble’ just beginning to form on the wand itself, showing the transition from liquid to sphere.
Step 3: Shading and Stippling
-
Helmet reflection:
Inside the helmet visor, outline a silhouette that suggests a reflection or the astronaut’s face hidden in shadow. Fill the darkest areas of the visor with solid black ink, leaving white space for the glass glint. -
Shadowing the suit:
Using the 0.1 pen, add shading to the astronaut’s suit. Focus on the underside of the arms, the side of the backpack, and the leg folds. Use short, parallel hatching lines for the fabric creases. -
Stippling the planets:
For the planets, use a stippling technique (masses of tiny dots). Add more dots on one side of the spheres to create a shadow side, giving them volume. Keep the dots sparse on the highlighted side. -
Texturing the ground:
Fill the lunar mound with dense stippling. The bottom and crevices should be almost solid with dots, fading out as you move toward the top edge of the rocks. -
Adding stars:
Scatter small details in the background sky. Draw tiny crosses for twinkling stars, small open circles for distant moons, and single dots for far-off stars.
Galaxy Wash
Dilute a drop of your blue ink with water and paint a very faint, watery wash inside the darkest shadows for a softer, watercolor-like depth.
Step 4: Final Touches
-
Erase pencil lines:
Once the ink is completely dry—give it a few minutes to be safe—gently erase all visible pencil sketches with your kneaded eraser. -
Deepen contrast:
Review your drawing. If some shadows look too light, go back in with the 0.1 pen and add more stippling dots. Deepen the darkness inside the helmet visor if needed to make the white highlights pop. -
Deckle edges:
If you used a standard sheet of paper, you can carefully tear the edges against a ruler to create that rough, handmade deckled look shown in the photo.
Now you have a charming piece of space art that turns the cosmos into child’s play
Space Pet in a Mini Spacesuit
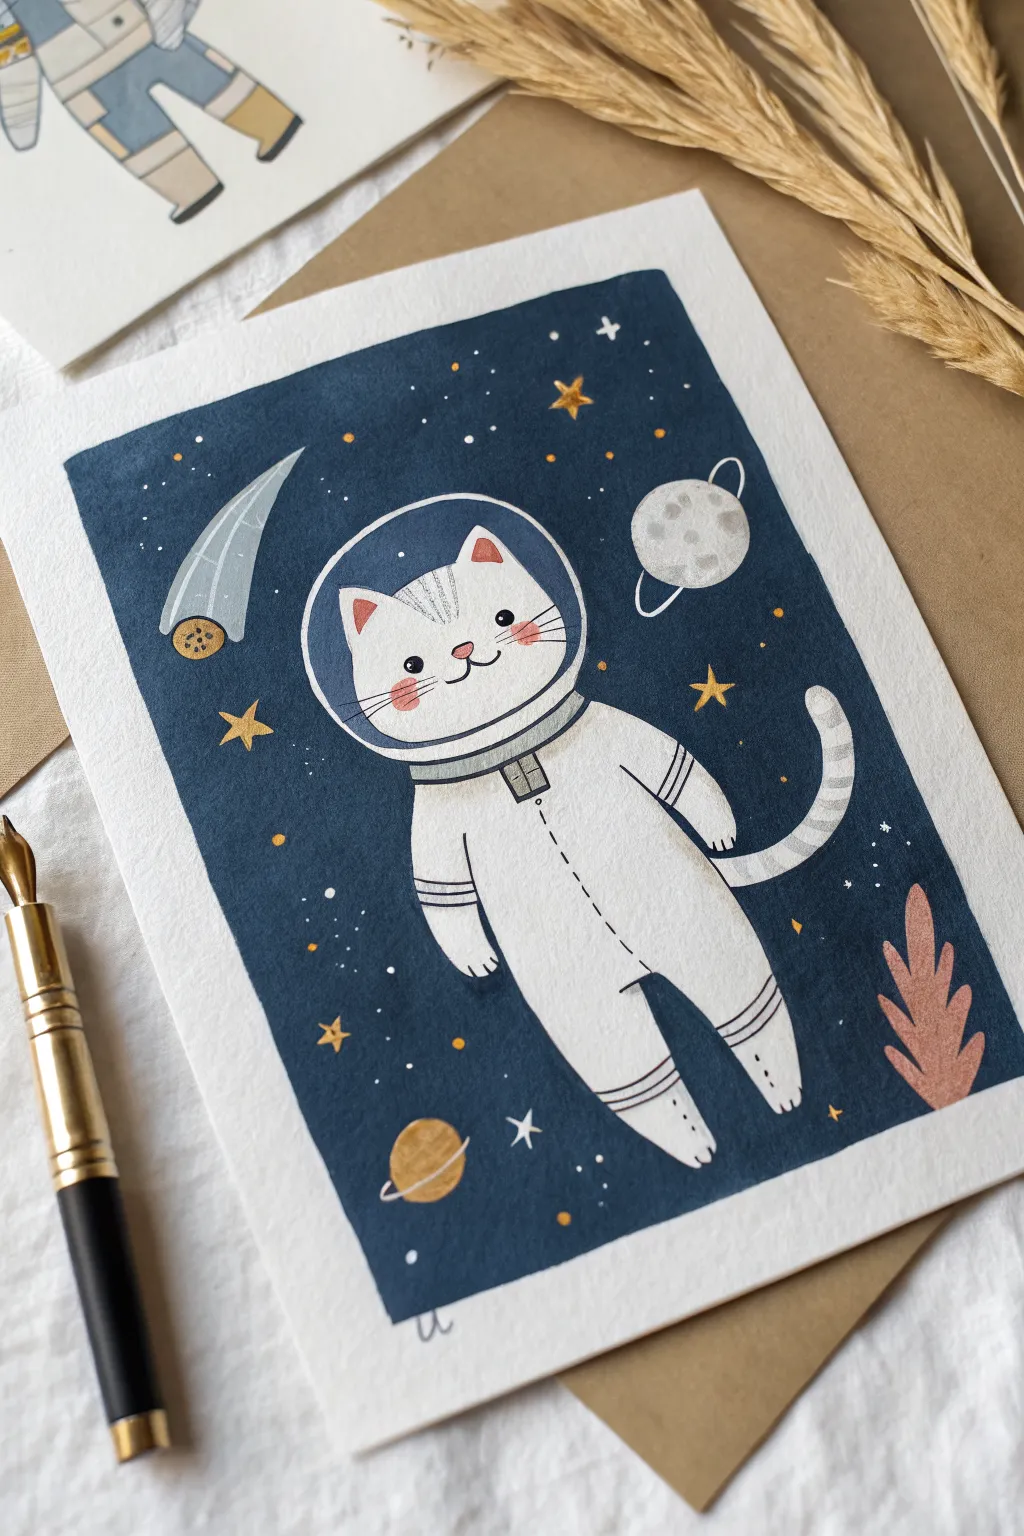
Launch your creativity into orbit with this adorable illustration of a cat astronaut floating through a starry void. Using opaque paints like gouache helps achieve the crisp, flat colors and the striking contrast between the bright suit and the deep blue background.
Detailed Instructions
Materials
- Cold press watercolor paper (300gsm)
- Gouache paint (Prussian Blue, Titanium White, Lamp Black, Yellow Ochre, Burnt Sienna, Pink)
- Synthetic brushes (medium flat, small round, fine liner)
- Pencil (HB) and eraser
- Gold metallic paint or gold gel pen
- Masking tape
- Palette for mixing
Step 1: Sketching the Scene
-
Draft the astronaut:
Begin by lightly sketching the central figure. Draw a large oval for the helmet and a chubby, tapered body beneath it. Add sausage-shaped limbs for the arms and legs, making sure the feet point downward as if floating. -
Add the face:
Inside the helmet oval, sketch the cat’s head. Keep the ears perky and triangular. Mark the position for simple eyes, a nose, and a curved mouth. -
Place cosmic elements:
Around the cat, sketch a few playful space objects. Add a comet tail in the upper left, a cratered moon on the right, and a ringed planet at the bottom. Don’t forget the alien plant shape in the bottom right corner.
Paint Lifting?
If the dark background blue bleeds into your white suit while painting edges, let it dry completely. Then dab—don’t scrub—thick white paint over the mistake to cover it up.
Step 2: Painting the Void
-
Mix the background color:
Create a deep, rich space blue. I like to mix Prussian Blue with a touch of Lamp Black to get that midnight hue without it being completely flat black. -
Fill the negative space:
Using a medium flat brush, carefully paint around your pencil sketches. This is ‘cutting in.’ Fill the entire background with your dark blue mixture. Gouache dries fast, so work relatively quickly to avoid streakiness.
Make it Personal
Paint your own pet inside the helmet! Change the fur markings and ear shape to match your dog, bunny, or hamster for a truly custom space portrait.
Step 3: Suiting Up
-
Paint the spacesuit:
Once the blue background is dry, fill in the cat’s suit with Titanium White. You may need two coats here to ensure the blue paper doesn’t show through. Leave the cat’s face area unpainted for now if you want it to be a slightly different shade, or paint it white if your cat is white. -
Detail the helmet:
Mix a very light grey-blue to paint the rim of the helmet and the collar piece. This separates the head from the suit visually. -
Color the celestial bodies:
Paint the comet tail a soft grey-blue. Use a mix of white and a tiny dot of black for the moon. For the ringed planet and comet head, use Yellow Ochre mixed with a little white for a creamy gold tone.
Step 4: Fine Details
-
Review contrast:
Check that the opacity of the white suit is solid. If it looks patchy, add one more thin layer of white paint. -
Add the plant:
Mix Burnt Sienna with white and a touch of pink to create a muted coral color for the alien plant leaves in the bottom right. -
Paint the cat’s features:
Using a fine liner brush and black paint (or a waterproof ink pen), carefully draw the eyes, nose, and mouth. Add pink cheeks with a watery wash of pink gouache. -
Line work:
Use a fine liner brush with diluted black paint to add the zipper line down the suit, the cuffs on the sleeves, and the segments on the helmet collar. Don’t forget the helmet reflection line. -
The helmet glass:
Outline the helmet bubble with white to define the glass. Add a simple white curve inside the blue background area of the helmet to show transparency.
Step 5: Starry Finish
-
Add gold accents:
Using metallic gold paint or a gel pen, paint the stars—some as simple dots, others as five-pointed shapes. Add gold details to the ringed planet and the asteroid. -
Final touches:
Use a white gel pen or very fine brush to add tiny white highlight dots to the background (distant stars) and specifically on the cat’s eyes to bring them to life.
Now you have a charming piece of galaxy art ready to be framed or given as a card


Have a question or want to share your own experience? I'd love to hear from you in the comments below!