When you want drawing to feel doable (and genuinely fun), directed drawing is my go-to—simple lines, basic shapes, and clear steps that build confidence fast. Here are some of my favorite step-by-step ideas you can draw along with, then personalize with color, patterns, and little details that make it yours.
Dog Directed Drawing
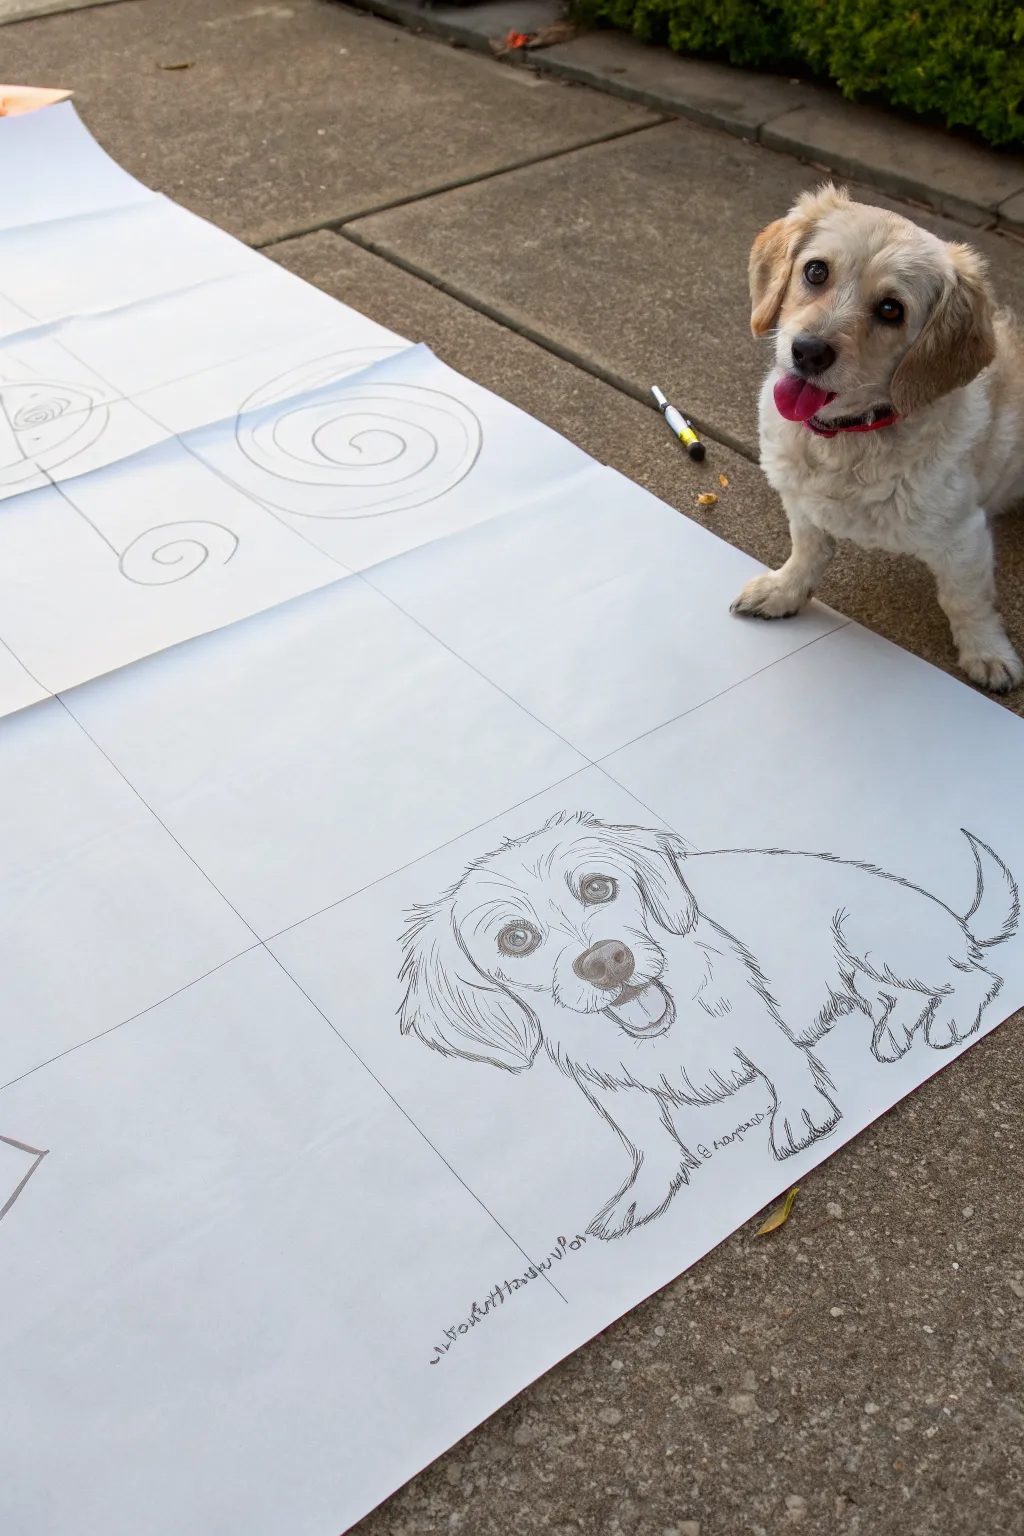
Capture the charm of your furry friend with this ambitious yet achievable large-scale drawing project. By using a simple grid method on a long roll of paper, you’ll create a striking, oversized sketch that mirrors your pet’s playful personality.
Step-by-Step Tutorial
Materials
- Large roll of white paper (easel paper or butcher paper)
- Graphite drawing pencils (HB and 2B)
- Black fine-point marker (Sharpie or similar)
- Long straightedge or ruler
- Eraser
- Reference photo of a dog or a live model
Step 1: Preparation & Layout
-
Prepare the canvas:
Roll out a long strip of butcher paper or easel paper on a flat surface. Using a hard floor or a paved outdoor area works well for this scale, as it allows you to move around the artwork easily. -
Create the grid foundation:
Using a long straightedge and a graphite pencil, lightly draw a large four-square grid near the bottom section of your paper. This grid acts as the structural guide for the dog’s body. -
Establish the head position:
In the upper-left quadrant of your grid, sketch a loose circle to represent the dog’s head. Keep your pencil pressure light so these lines can be erased later. -
Map the body shape:
Extend a curved line from behind the head into the right-hand quadrants to form the back. Add rough ovals for the chest and hindquarters to establish the seated posture.
Step 2: Sketching the Features
-
Refine the face shape:
Draw the floppy ears hanging down from the sides of the initial head circle. Add the snout shape protruding slightly from the lower center of the face. -
Add facial details:
Place two circular eyes above the snout line. Draw an oval nose and an open mouth with a tongue hanging out to capture a happy expression. -
Outline the front paws:
Sketch the front legs coming down from the chest area. Ensure the paws look planted firmly on ‘ground’ level at the bottom of the grid. -
Define the hind legs:
Flesh out the rear leg bent in a sitting position, tucked under the body in the lower right quadrant. Add the tail curving upward at the very back. -
Incorporate fur texture:
Go over your structural lines with short, quick pencil strokes to simulate fur. Focus especially on the ears, chest, and tail for a fluffy appearance.
Grid Magic
If drawing from a photo, draw a grid on the photo first. Match the drawing grid to the photo grid to scale up perfectly.
Step 3: Inking & Final Touches
-
Begin the ink outline:
Using a black fine-point marker, start tracing over your refined pencil sketch. Use broken lines rather than solid ones to maintain the texture of the fur. -
Detail the eyes:
Fill in the pupils with black ink, leaving a small white circle in each eye for a highlight. This ‘catchlight’ brings the drawing to life. -
Darken the nose and mouth:
Color in the nose, leaving a small highlight at the top. Outline the tongue and shade the inside of the mouth for depth. -
Add artistic flourishes:
If you have extra space on the paper roll above the dog, consider adding decorative elements like spirals or geometric shapes to balance the composition. -
Erase guidelines:
I prefer to wait a few minutes to ensure the marker is completely dry before erasing. Gently rub away the initial grid lines and rough pencil sketches to reveal the clean ink drawing. -
Sign your masterpiece:
Add your signature or the name of the dog near the bottom paw for a professional finish.
Colorful Twist
After inking, use watercolor paints or chalk pastels to lightly color the puppy for a soft, artistic look.
Step back and admire your grand puppy portrait, ready to be hung on a door or long hallway wall

Owl Night Sky Directed Drawing
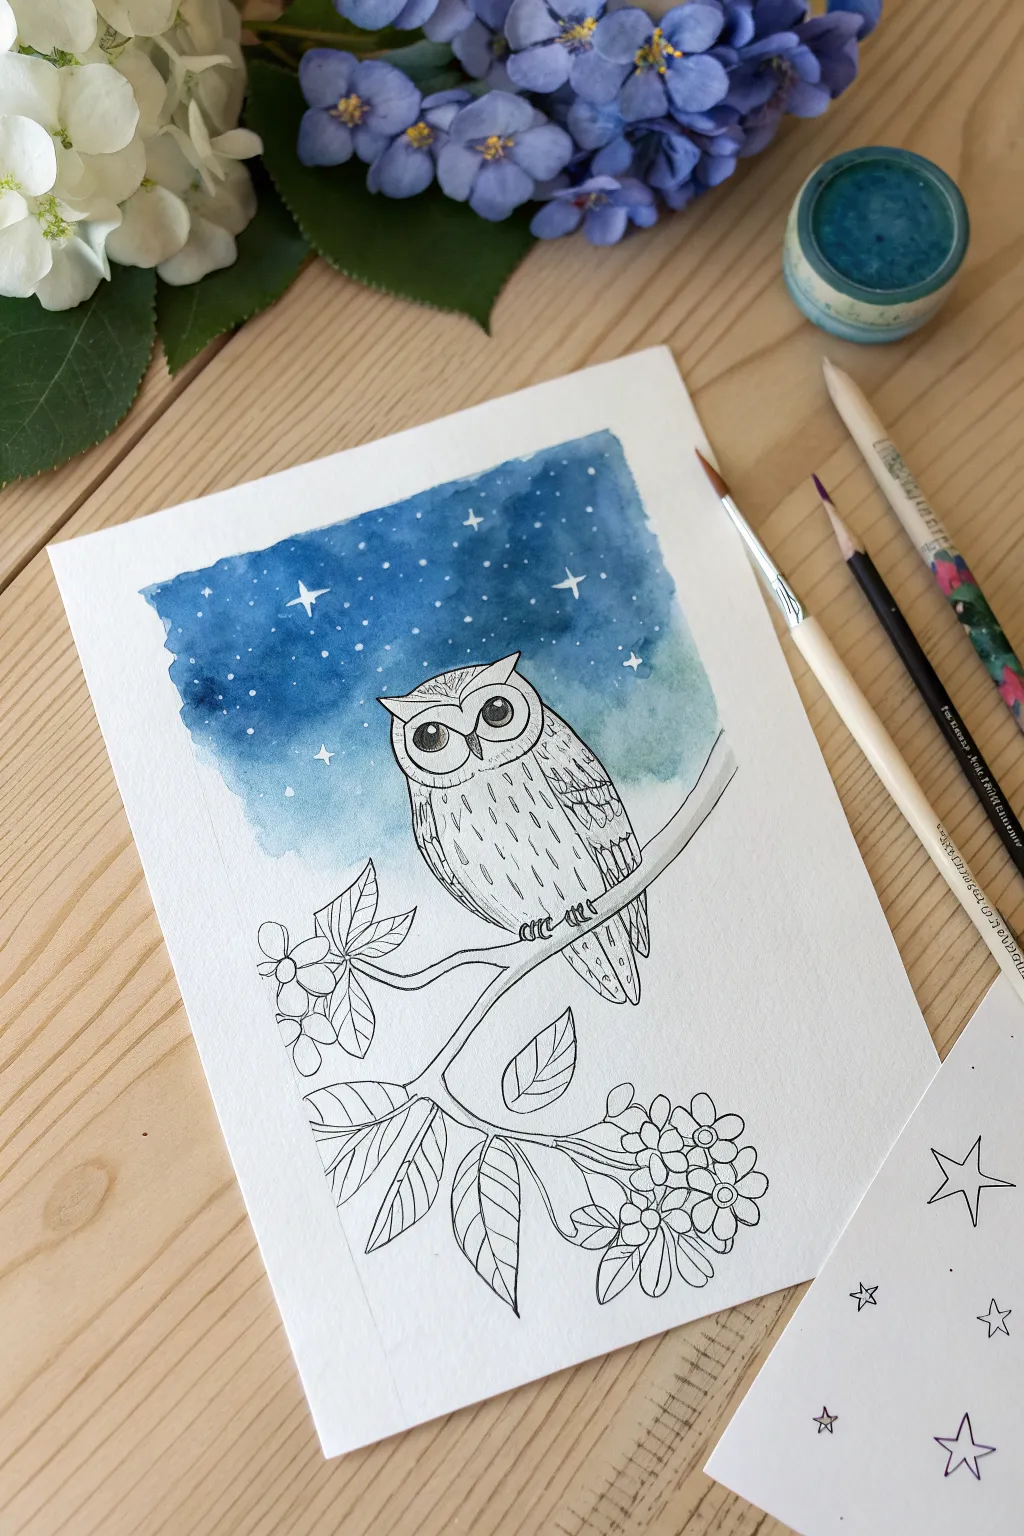
This charming project combines the precision of ink drawing with the soft magic of watercolor. You’ll create a whimsical owl perched under a starry night sky, blending sharp lines with a dreamy, galaxy-inspired background.
Step-by-Step
Materials
- Watercolor paper (cold press recommended)
- Blue watercolor paint (Prussian Blue or Indigo)
- Fine-liner pen (black, waterproof)
- Pencil and eraser
- Paintbrush (round, size 6 or 8)
- White gel pen or white gouache
- Jar of water & paper towel
Step 1: Painting the Sky
-
Outline the sky area:
Start by lightly sketching a rough rectangular box in the upper center of your paper where the sky will go. You don’t need a ruler; a slightly shaky, organic edge looks artistic. -
Prepare your wash:
Mix a generous amount of deep blue watercolor. I like to keep it quite watery but pigmented so the color flows easily. -
Apply the first layer:
With a wet brush, fill in the top portion of your sketched box with the darkest blue. As you move downward, dip your brush in water to dilute the paint, creating a gradient that fades into a very pale blue near the bottom. -
Add texture while wet:
While the paint is still damp, you can drop in tiny touches of darker blue or even a hint of turquoise near the top to create depth in your galaxy. -
Let it dry completely:
This is crucial. The paper must be bone dry before you start drawing, or your ink will bleed. You can use a heat tool or hairdryer if you’re impatient.
Keep it Clean
Place a scrap piece of paper under your drawing hand. This prevents skin oils from smudging the pencil sketch or transferring ink before it’s fully dry.
Step 2: Drawing the Owl
-
Sketch the head shape:
Using a pencil, lightly draw a broad, curved line for the top of the head with two small points for ear tufts. It should sit near the bottom edge of your painted blue sky. -
Add the body:
Draw an oval shape extending downward from the head. Imagine a simplified egg shape to guide the owl’s posture. -
Draw the eyes and beak:
Sketch two large circles for eyes, framing them with slight curves to create the facial disk. Add a small, downward-pointing triangle for the beak right between the eyes. -
Detail the feathers:
Add the wings folded against the body. Sketch vertical dashes on the chest to suggest plumage detail. -
Ink the main outlines:
Switch to your waterproof black fine-liner. Go over the main pencil lines of the owl’s body, head, and eyes. Do not ink the branch yet.
Uneven Wash?
If your sky dries with harsh lines or “blooms,” don’t panic. Gently re-wet the area with clean water and lift excess pigment with a tissue, or embrace the bubbly texture as part of the galaxy.
Step 3: Adding the Nature Elements
-
Sketch the branch:
Draw a thick branch extending from the bottom left, curving underneath the owl’s feet. Make sure it looks sturdy enough to hold him. -
Add leaves and blossoms:
Sketch open leaves and clusters of small, five-petaled flowers hanging from the branch below the owl. These fill the negative space at the bottom nicely. -
Ink the branch and flora:
Carefully trace your pencil lines with the ink pen. For the leaves, you can add a central vein line for extra detail. -
Draw the feet:
Add the owl’s talons gripping the branch. Three small loop shapes for each foot work perfectly. -
Erase pencil marks:
Once the ink is fully dry, gently erase all visible pencil lines to clean up your artwork.
Step 4: Final Magical Touches
-
Add stars:
Using a white gel pen or a fine brush with white gouache, draw small four-pointed stars in the darker blue area of the sky. -
Create stardust:
Dot tiny specks of white around the larger stars to create a distant galaxy effect. -
Highlight the eyes:
Add a tiny white gleam in the black pupils of the owl’s eyes to bring it to life.
Step back and admire your quiet, moonlit scene

Butterfly Symmetry Directed Drawing
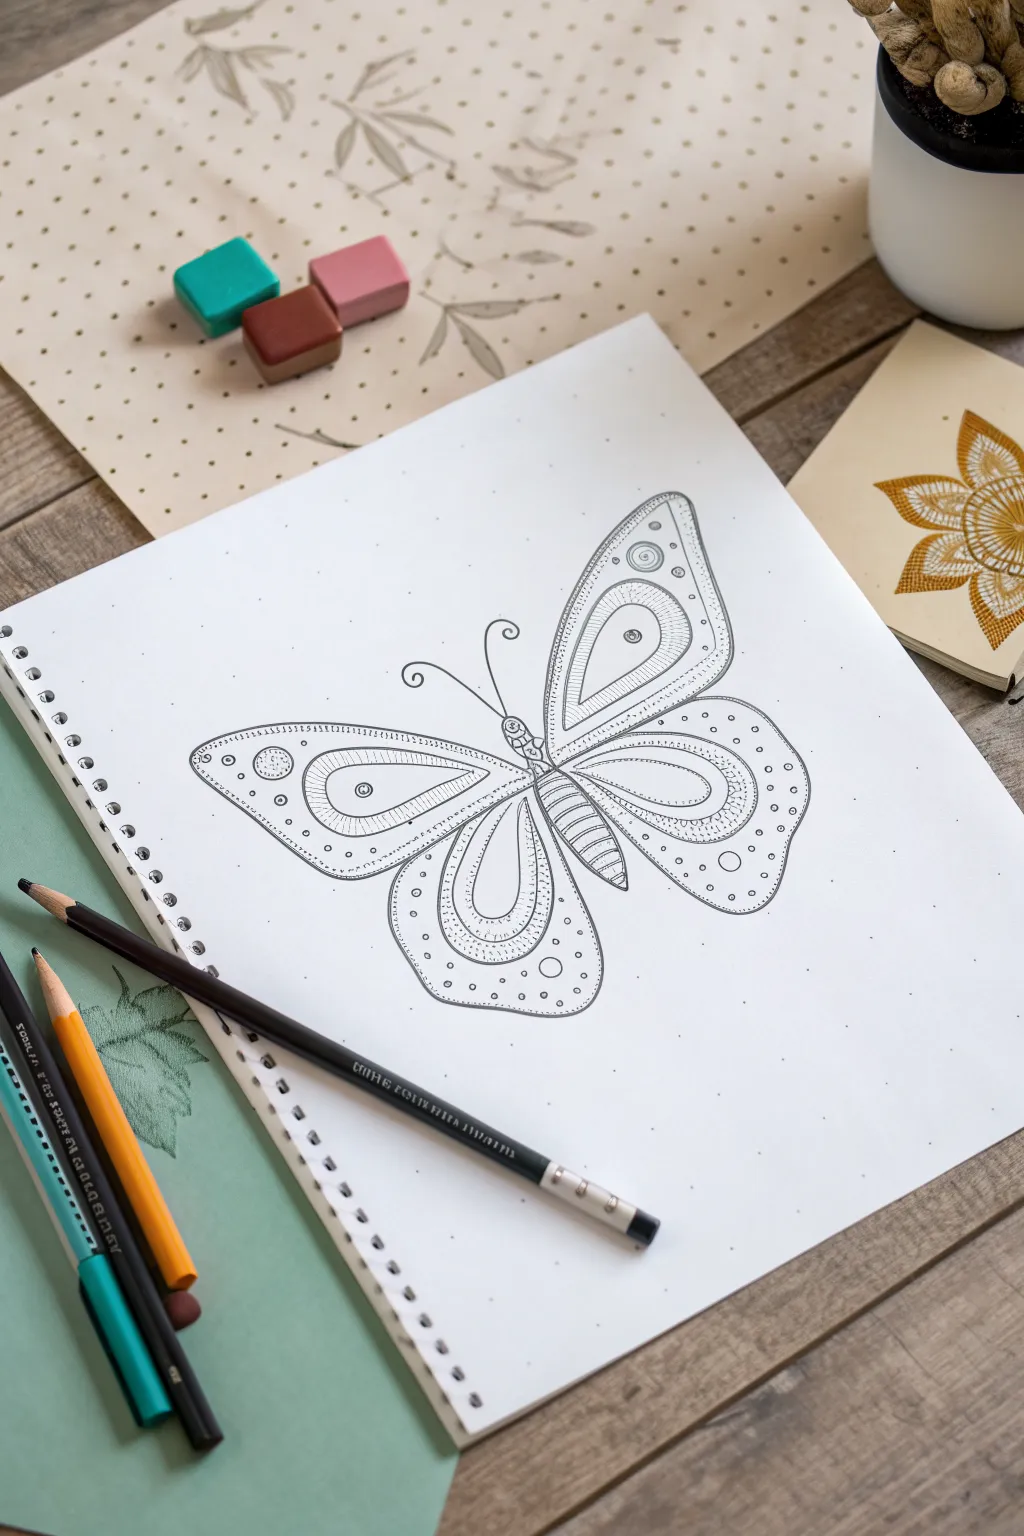
This delicate line drawing transforms a simple butterfly outline into a mesmerizing study of symmetry and pattern. Using dotted paper as a discreet guide, you’ll create intricate wings filled with circles, stripes, and stippling for a relaxing and mindful drawing experience.
Detailed Instructions
Materials
- Dotted or grid notebook paper (A4 size)
- HB pencil for sketching
- Fine-liner pen (0.3mm or 0.5mm, black)
- Medium-point black marker or pen
- Eraser
- Ruler (optional)
Step 1: Drafting the Structure
-
Establish the centerline:
Begin by lightly sketching a vertical line down the center of your page using your pencil. Since we are using dotted paper, you can simply follow a vertical column of dots to keep things straight without a ruler. -
Sketch the body:
Draw a long, slender oval shape for the abdomen along the bottom half of your centerline. Above that, add a smaller oval for the thorax, and a small circle on top for the head. -
Outline the upper wings:
Starting from the thorax, sketch two large, triangular shapes extending outward and upward. Round off the outer corners so they look soft rather than sharp. Use the grid dots to ensure the left wing mirrors the right wing in width and height. -
Outline the lower wings:
Draw two rounded tear-drop shapes extending from the bottom of the upper wings, curving down towards the abdomen. These should be slightly smaller and rounder than the top wings. -
Add antennae:
From the head, draw two long, curving lines extending upward. Curl the ends into small spirals to give the butterfly a whimsical feel.
Use the Grid
Don’t ignore the dots! Count the dots from the centerline to ensure your left wing tip ends at the exact same coordinate as the right one.
Step 2: Adding Interior Details
-
Create inner wing borders:
Inside each of the four wing sections, draw a smaller version of the wing shape. Leave about a finger-width of space between this new line and the outer edge. -
Draw the teardrop focal points:
In the center of the upper wings, draw a large teardrop shape pointing inward. Repeat this on the lower wings, but make the shape slightly more curved to follow the wing’s contour. -
Segment the body:
Draw horizontal curved lines across the abdomen to create segments. Add two large, simple eyes to the head circle.
Metallic Accent
Trace over just the innermost teardrop shapes or the antennae spirals with a gold or silver gel pen to add a subtle, elegant shimmer.
Step 3: Inking and Patterning
-
Ink the main outlines:
Switch to your medium-point black pen. Carefully trace over your main pencil outlines—the wings, body, and antennae. Keep your hand steady and confident. -
Detail the abdomen:
Inside the segments of the abdomen, draw closely spaced horizontal lines (hatching) to create a sense of texture and roundness. -
Fill the inner wing borders:
Using your finer pen, fill the space between the inner and outer wing outlines with closely spaced, thin lines. These should radiate outward like sun rays. -
Decorate the upper teardrops:
Inside the large teardrops on the upper wings, draw a series of concentric shapes—smaller teardrops inside the larger one—to create a tunnel effect. Place a small circle in the very center. -
Pattern the lower teardrops:
For the lower wings, fill the inner teardrop shapes with parallel curved lines. I like to keep these lines fairly tight to contrast with the open spaces around them. -
Add the circle accents:
In the open spaces of the wings (outside the teardrops but inside the border), draw various sizes of circles. Place larger circles near the wing tips and smaller ones near the body. -
Apply stippling:
Use your fine pen to add tiny dots (stippling) inside the circles you just drew. Group dots closer together on one side of each circle to suggest a shadow or highlight. -
Decorate the outer margins:
Along the very outer edges of the wings, add a row of small, simple circles or dots. This acts like a decorative frame for the entire butterfly. -
Final clean up:
Wait at least five minutes for the ink to dry completely. Gently erase all visible pencil lines, leaving only your crisp black ink drawing.
Now you have a beautifully symmetrical butterfly illustration ready to be framed or colored


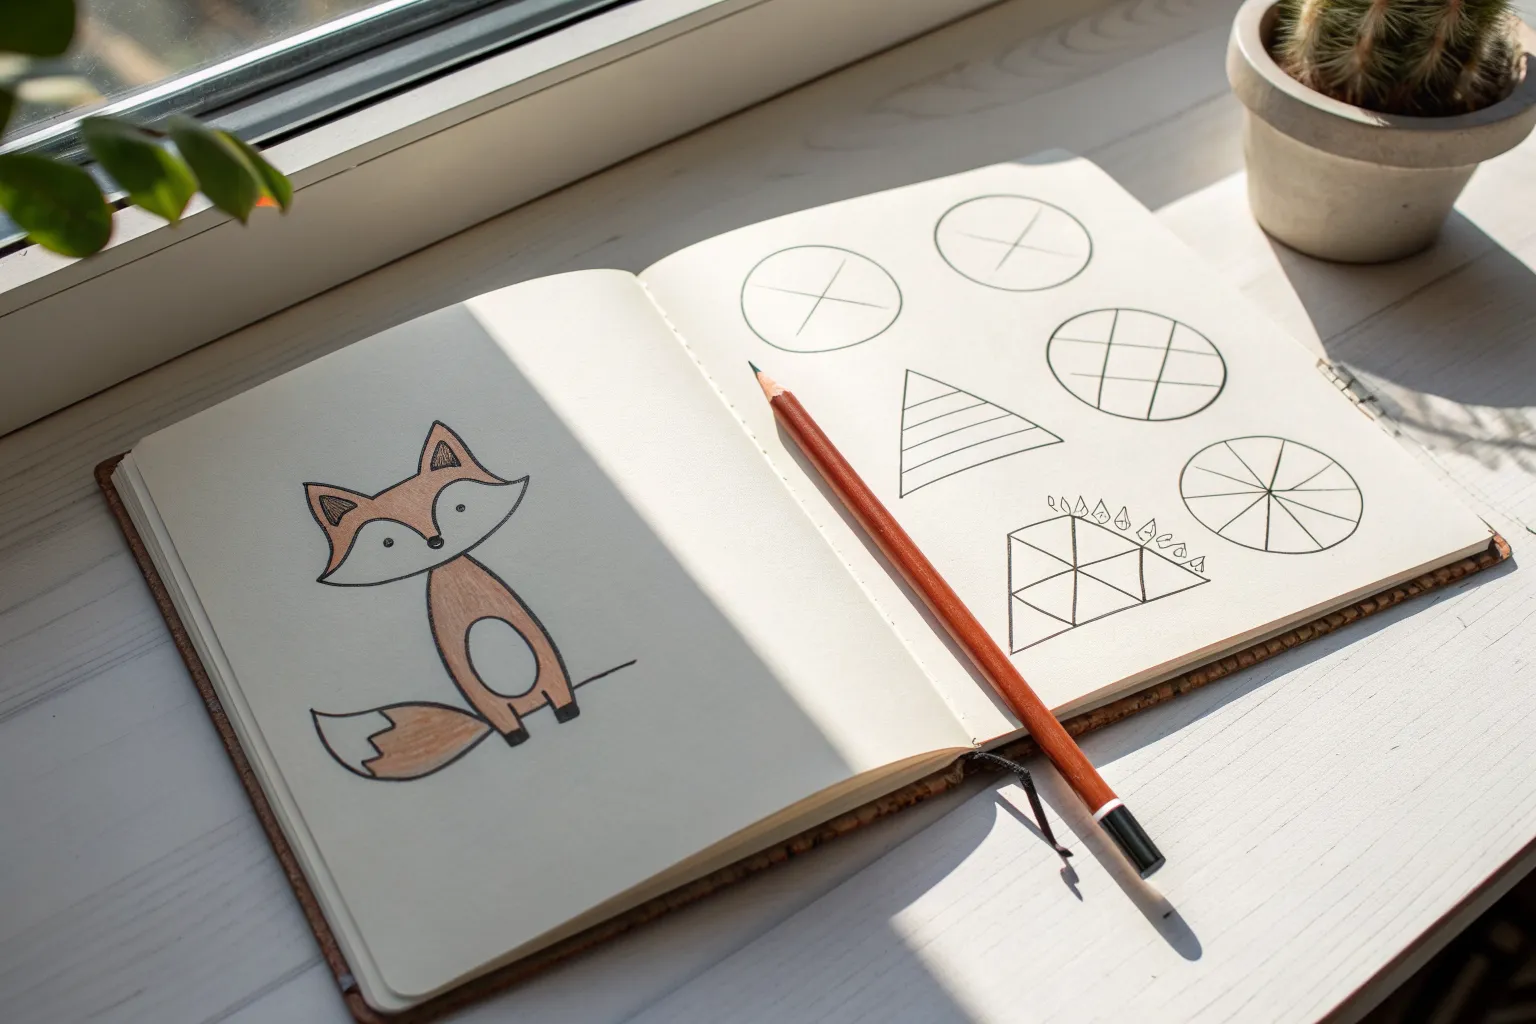
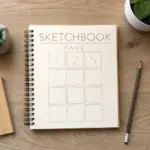
Pumpkin Directed Drawing

Capture the essence of autumn with this study of pumpkins drawn in a clean, vertical layout. This exercise focuses on observing different shapes and ribbed textures to create a trio of distinct gourds using simple graphite lines.
Step-by-Step Tutorial
Materials
- Spiral-bound sketchbook or drawing paper
- HB or 2B graphite pencil
- Eraser
- Ruler or straight edge
Step 1: Setting up the Framework
-
Define the layout:
Begin by lightly drawing a large vertical rectangle on your page to contain all three drawings. This helps keep everything centered. -
Create section dividers:
Using your ruler, divide this large rectangle into three roughly equal square sections, stacked one on top of the other. These guidelines should be very faint so they can be erased later. -
Establish center lines:
Draw a faint vertical line down the center of your stack. This axis will help you keep the pumpkins symmetrical and balanced on the page.
Step 2: The Top Pumpkin
-
Draft the basic shape:
In the top box, sketch a wide oval that sits comfortably within the frame. Make sure the bottom curve is slightly flatter than the top to show weight. -
Add the stem:
Draw a curved stem emerging from the top center divot. I like to curve this one to the left slightly to give it character. -
Draw the central ribs:
Starting from the base of the stem, draw two curved lines coming down the front center of the pumpkin, creating the main front segment. -
Complete the side ribs:
Add curved lines on either side of the center segment that follow the contour of the outer oval. Think of them like parentheses that get wider as they move outward.
Grid Lines Matter
Don’t skip the box guidelines! They ensure your pumpkins stay unrelated in size and perfectly aligned vertically.
Step 3: The Middle Pumpkin
-
Sketch the silhouette:
For the middle box, draw a slightly rounder, more circular pumpkin shape compared to the top one. -
Position the stem:
Place a thick stem at the top. Detail the cut end of the stem with a small jagged line or oval to show where it was harvested. -
Create deep ridges:
Draw your rib lines starting from the stem base. For this pumpkin, make the lines curve inward more sharply at the top and bottom to suggest deeper characteristic grooves. -
Refine the contour:
Go over the outer edge of the pumpkin, making sure to create little dips where the rib lines meet the outline. This ‘scalloped’ edge makes it look realistic.
Ink It In
Go over your final pencil lines with a fine-tip waterproof ink pen, then erase the pencil for a professional botanical look.
Step 4: The Bottom Pumpkin
-
Outline the final gourd:
In the bottom section, draw a squat, wide pumpkin shape that feels heavy and grounded. -
Draw a sturdy stem:
Add a short, stout stem that sits vertically. Add small lines along the length of the stem to give it a woody texture. -
Map the segments:
Sketch the vertical curved lines to divide the pumpkin sections. Since this pumpkin is viewed more ‘head-on’, the lines on the far left and right should be very close to the edge. -
Darken the drawing:
Once satisfied with all three sketches, go over your main lines with firmer pressure. Use your pencil to slightly darken the nooks around the stems for depth. -
Clean up:
Gently erase your initial box guidelines and center axis line, leaving only the crisp pumpkin illustrations behind.
Now you have a trio of perfectly proportioned pumpkins ready for shading or coloring

PENCIL GUIDE
Understanding Pencil Grades from H to B
From first sketch to finished drawing — learn pencil grades, line control, and shading techniques.
Explore the Full Guide
Snowman Directed Drawing

Learn to draw a delightful trio of snowmen with soft shading and crisp ink outlines. This project captures the winter spirit with a large central figure and two adorable smaller companions, all rendered with a mix of pencil sketching, ink, and colored pencil.
How-To Guide
Materials
- Sketchbook with quality mixed-media or drawing paper
- Set of colored pencils (light blue, orange, red, brown, grey, green)
- Fine-point black ink pen or micron pen (01 or 03 size)
- Graphite pencil (HB or 2B) for initial sketching
- Eraser (kneaded eraser works best)
- Pencil sharpener
Step 1: Sketching the Foundations
-
Main Snowman Shape:
Begin in the upper center of your page. Lightly sketch a medium-sized circle for the head, followed by a slightly larger circle directly beneath it for the middle section, and an even larger, slightly flattened circle at the bottom for the base. Keep your pencil pressure very light so you can erase later. -
Adding Arms and Hat:
For the stick arms, draw simple lines extending outward from the middle section, adding small ‘V’ shapes at the ends for fingers. Sketch a rectangle on top of the head for the hat, adding a brim that curves slightly around the head to show volume. -
Scarves and Details:
Draw the scarf by sketching a curved band around the neck area where the top two snowballs meet. Let the tail of the scarf drape down over the middle section. Add small circles for buttons down the front. -
Baby Snowman Sketch:
Move to the bottom left corner. Sketch a simple two-ball snowman this time: a small circle for the head and a slightly larger one for the body. Give this little one a simple curved hat brim and a rounded top. -
Third Snowman Sketch:
In the bottom right, sketch a three-ball snowman slightly larger than the baby one but smaller than the main figure. Tilt his hat at a jaunty angle and add stick arms similar to the first snowman.
Step 2: Refining and Inking
-
Inking the Outlines:
Take your fine-point black pen and carefully trace over your pencil lines. Don’t worry about being perfectly smooth; a slightly organic line adds character. Outline the snowballs, hats, and scarves. -
Drawing Facial Features:
With the pen, draw two small dots for eyes on each snowman. Add a carrot nose—a small, horizontal triangle—pointing to the right on each face. Draw simple curved lines for smiles. -
Detailed Button Work:
Ink the small circular buttons down the front of the bodies. On the largest snowman, draw five buttons; on the smallest, use three. Make sure they are aligned roughly down the center. -
Adding Texture:
For the large snowman’s scarf, draw tiny circles or a speckled pattern inside the scarf outline to suggest wool texture. For the medium snowman’s scarf, draw vertical lines to create a ribbed knit look. -
Final Erasure:
Wait a moment for the ink to dry completely to avoid smudging. Then, gently use your eraser to remove all visible graphite pencil lines, leaving only the crisp ink drawing.
Oops! Uneven Circles?
Snowmen represent packed snow, so perfect circles look unnatural anyway. Embrace the lumpy lines; they make the snow look softer and more realistic.
Step 3: Bringing it to Life with Color
-
Snowball Shading:
Using a light blue colored pencil, shade only the left side of each snowball segment. Use a soft, circular motion to fade the blue into the white of the paper, creating a 3D rounded effect. -
Coloring the Main Hat:
Color the large snowman’s hat with a grey pencil. Press harder on the left side for shadow and lighter on the top. Use a bright orange or brown for the hat band. -
The Red Scarf:
Fill in the large snowman’s textured scarf with a warm red or burgundy pencil. Let the ink texture show through the color. -
Carrot Noses:
Use a sharp orange pencil to fill in the carrot noses. Adding a tiny touch of red at the base of the nose gives it a bit more depth. -
Coloring the Smaller Accessories:
For the bottom-right snowman, color the hat brown with an orange band, and make his scarf a soft green. The smallest snowman gets a simple brown hat. -
Stick Arms:
Take a dark brown pencil and trace over the stick arm lines you inked earlier. This adds a subtle richness that plain black ink lacks. -
Grounding Shadows:
I find that adding a very faint smudge of grey or light blue directly under the base of each snowman helps ‘ground’ them so they aren’t floating in space.
Make It Sparkle
Once your drawing is finished, use a white gel pen to add tiny dots on the scarves or hats for a ‘snowy’ texture, or add highlights to the button eyes.
Enjoy your charming winter scene and consider drawing a whole family of snow-people next time
Rose Directed Drawing
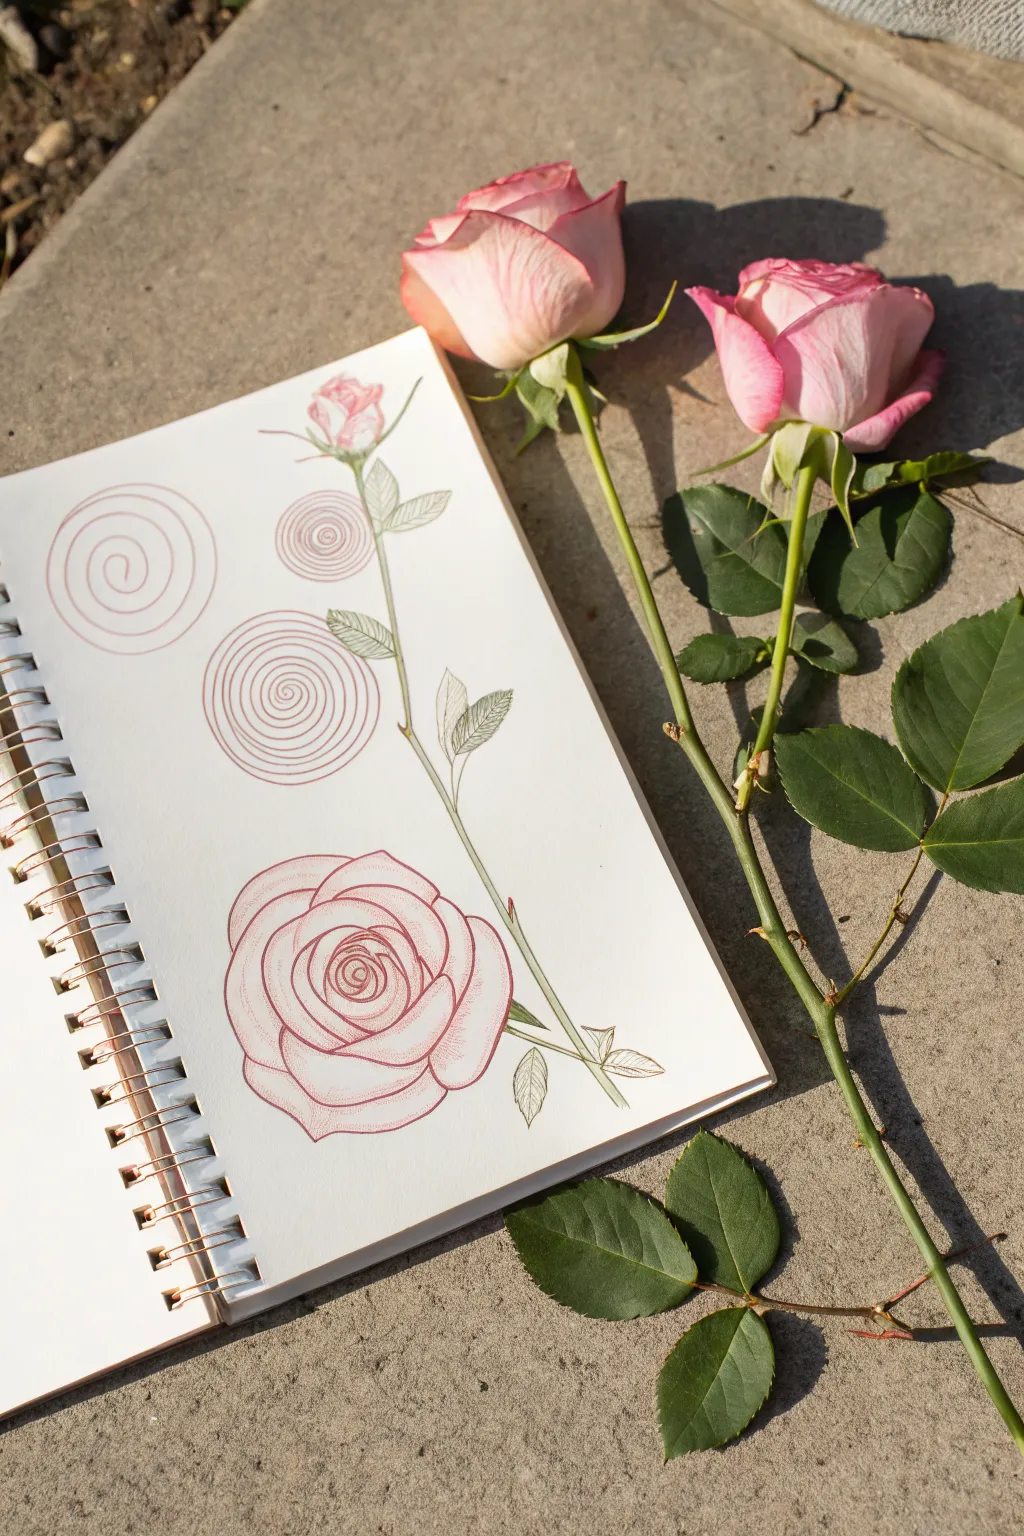
This tutorial guides you through creating a sophisticated botanical illustration that breaks down the complexity of a rose into manageable geometric forms. Using fine liners, you will construct a delicate, long-stemmed rose starting from simple spirals and refining it into a realistic bloom.
Detailed Instructions
Materials
- Spiral-bound sketchbook with smooth, white paper
- Fine liner pen (brown or sepia, approx. 0.3mm)
- Fine liner pen (green or olive, approx. 0.3mm)
- Fine liner pen (red or rose-pink, approx. 0.1mm)
- Graphite pencil (HB or 2H)
- Kneaded eraser
Step 1: Planning the Composition
-
Sketch the primary spiral:
Begin with your graphite pencil. Near the bottom center of the page, draw a loose, open spiral. This will serve as the center of your main rose bloom. Keep your hand relaxed to create fluid curves. -
Outline the outer petals:
Around your spiral, lightly sketch large, rounded shapes that overlap each other. These circles don’t need to be perfect; they represent the unfolding outer petals of the rose. -
Draft the stem line:
Draw a long, slightly curved vertical line extending upwards from the top of the main bloom. This unique composition places the bud above the full flower. -
Position the bud and leaf nodes:
At the very top of your stem line, sketch a small oval for the rosebud. Along the stem, mark three or four points where leaves will emerge, alternating sides. -
Practice spirals:
To the left of the stem, draw three separate spirals of varying sizes—large, medium, and small. These are practice elements that become part of the final aesthetic, showing the geometric breakdown of the flower.
Step 2: Inking the Blooms
-
Start the main center:
Switch to your red or rose-pink fine liner. Carefully trace over your pencil spiral in the main bloom. Instead of a perfect line, add tiny wobbles or irregularities to mimic the texture of petals tightly packed together. -
Define the petal layers:
Working outward from the spiral, draw cup-shaped lines that hug the center. Each new line should start and end at the midpoint of the previous petal, creating an overlapping effect. -
Add petal details:
For the largest outer petals, allow the edges to fold slightly outward. I like to add very faint, broken lines near the base of the petals to suggest veins or shadowing. -
Draw the upper bud:
Move to the top of the page. Ink the rosebud using tight, overlapping curves that meet at a pointed tip. Keep this shape compact. -
Ink the decorative spirals:
Go over your three floating practice spirals on the left with the red pen. Make these lines smooth and continuous to contrast with the organic texture of the flower itself.
Wobbly Lines?
Perfect circles look unnatural for flowers. If your hand shakes, embrace it! Those slight tremors create more realistic jagged petal edges.
Step 3: Adding Greenery
-
Trace the stem:
Using the green fine liner, draw the main stem. Make the line slightly thicker at the bottom and let it taper as it reaches the bud. -
Draw the sepals:
At the base of the top bud, draw small, leafy spikes (sepals) that curl downwards, connecting the bud to the stem. -
Outline the leaves:
At your marked nodes, draw the leaf outlines. Rose leaves are generally oval with a pointed tip. Draw them singly or in small clusters of three. -
Add serrated edges:
Go back over your leaf outlines and add tiny triangular points along the edges to create the characteristic serrated look of rose foliage. -
Detail the leaf veins:
Draw a central vein down the middle of each leaf. Then, create diagonal veins branching out toward the edges. Use a very light touch here so the veins don’t overpower the leaf shape.
Add Color Washes
After the ink dries, lightly brush a diluted watercolor wash over the blooms. Pink for the petals and a sap green for leaves adds lovely softness.
Step 4: Refining and Shading
-
Thorn placement:
Add a few small, triangular thorns along the main stem using the green pen. Color them in lightly or use hatching to give them dimension. -
Cross-hatching petals:
Return to the red pen. Add very fine hatching (closely spaced parallel lines) to the deepest parts of the spiral and where petals overlap. This adds depth and volume to the bloom. -
Leaf shading:
Use the green pen to add similar hatching near the base of the leaves and along the central veins. -
Erase guidelines:
Wait until the ink is completely dry to avoid smearing. Gently rub the kneaded eraser over the entire drawing to lift all initial pencil sketch lines.
You have now captured the delicate geometry of a rose.
BRUSH GUIDE
The Right Brush for Every Stroke
From clean lines to bold texture — master brush choice, stroke control, and essential techniques.
Explore the Full Guide
Robot Directed Drawing

Capture the charm of classic sci-fi with this detailed robot drawing in your bullet journal or sketchbook. This project breaks down a whimsical mechanical friend into simple geometric shapes, finishing with soft block colors for a vintage sticker look.
Step-by-Step
Materials
- Dotted or blank journal notebook
- Pencil (HB or mechanical)
- Black fineliner (0.3mm or 0.5mm)
- Colored pencils or alcohol markers (silver/grey, orange/coral, blue, red)
- Eraser
- Ruler (optional)
Step 1: Planning & Outline
-
Head start:
Begin on the right page of your layout. Draw a wide rectangle with rounded corners near the top center of the page to form the robot’s head. -
Facial features:
Inside the head, draw two large circles for eyes. Add a smaller concentric circle inside each, and a solid dot for the pupil. Below the eyes, add a small horizontal rectangle for the mouth/grill. -
Antenna & ears:
Draw a single straight line sticking up from the center of the head, topped with a small circle. Add rectangular ‘ear’ muffs on either side of the head. -
Neck connection:
Connect the head to the body area with a short, ribbed cylinder. Draw a small rectangle, then add horizontal lines across it to create the ribbed texture. -
Body frame:
Draw a large square box for the chest, slightly wider than the head. Give it rounded corners similar to the head shape. -
Control panel:
Inside the chest square, draw a slightly smaller square. Within that, add a large circle on the left (a gauge or button) and two rows of small rectangles on the right to represent lights or vents. -
Arm structure:
Sketch the arms coming from the top corners of the body. Use flexible, curved tubes that look like dryer vents or springs. Draw these by making a curved outline and filling it with horizontal rings. -
Claw hands:
At the end of each arm, draw a ‘U’ shape or a wrench-like C-shape to create simple mechanical claws. -
Leg supports:
Draw two straight legs extending from the bottom of the body. Use the same ribbed texture as the neck—parallel horizontal lines all the way down. -
Heavy boots:
Anchor the robot with large, trapezoidal feet. Draw a dome shape at the top where the leg enters, and a flat, thick sole at the bottom.
Step 2: Alternative Sketches (Left Page)
-
Thumbnail practice:
On the facing left page, draw four small square frames to practice different robot parts or variations. -
Quick concepts:
In the top frames, sketch a simple cityscape line graph or a floating component to test shapes. In the lower frames, try drawing a boxier robot body or a TV-head variation.
Wobbly Lines?
Don’t stress about perfect straight lines. A slightly shaky hand actually gives the robot a charming, hand-drawn vintage schematic feel.
Step 3: Inking & Coloring
-
Inking the lines:
Go over your pencil sketch with a black fineliner. Use a consistent pressure for the main outlines, but perhaps a lighter touch for the internal texture lines on the flexible arms and legs. -
Clean up:
Wait a moment for the ink to set completely, then gently erase all underlying pencil marks to keep the drawing crisp. -
Grey tones:
Using a grey marker or colored pencil, color in the metal components: the main head box, the outer rim of the chest, and the ribbed arms and legs. Leave the ‘face’ plate white. -
Accent colors:
Color the ear muffs and the large feet with a soft coral or orange tone. I like to add tiny ‘rivet’ dots on the feet with the black pen for extra detail. -
Dashboard details:
Color the inner chest panel blue. Make the round button red and leave the vent rectangles white or light grey. -
Eye color:
Fill the irises of the eyes with the same blue used on the chest panel to tie the color scheme together. -
Final polish:
Color the antenna tip red. If you used markers, you can go back with a white gel pen to add small highlights on the eyes and metal curves for a shiny effect.
Pro Tip: Depth
Add a thin grey shadow line along the right side and bottom of the head and body. This simple step makes the robot ‘pop’ off the paper immediately.
Now you have a quirky mechanical companion ready to guard your weekly spread or notes
Dinosaur Directed Drawing
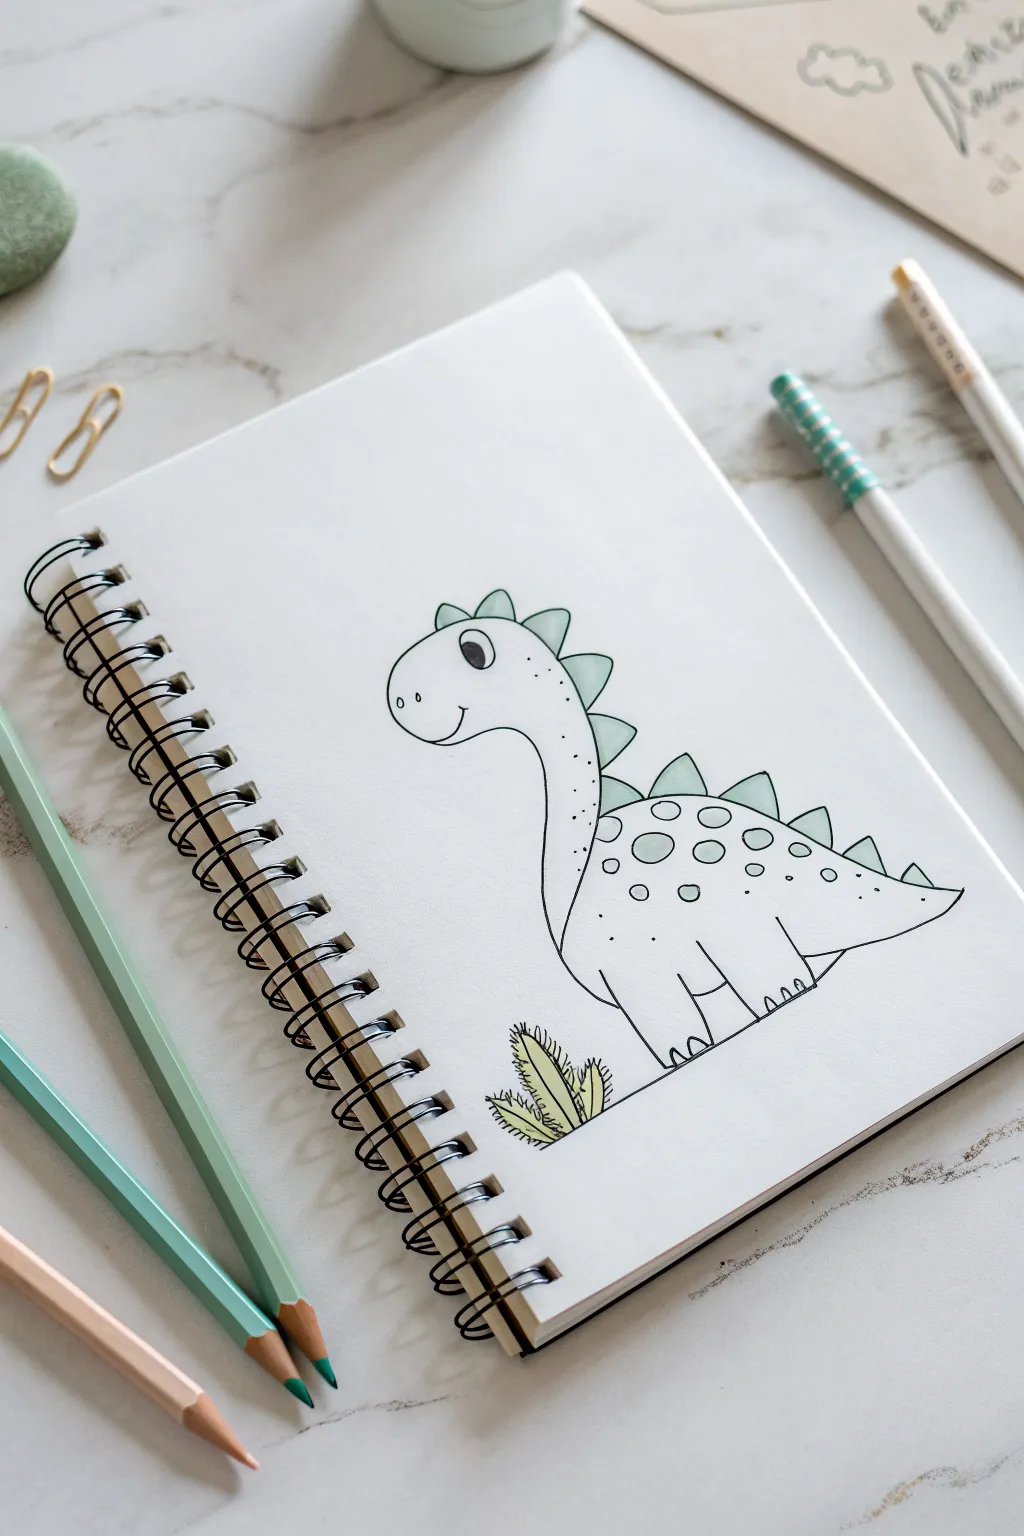
This charming, easy-to-draw dinosaur makes for a delightful addition to any sketchbook or card. Characterized by simple curves and a friendly expression, the finished piece features a soft, pastel-green color palette that feels fresh and fun.
Step-by-Step Tutorial
Materials
- White sketchbook paper (A4 or A5)
- Black felt-tip pen (fine liner, approx. 0.4mm)
- Pencil (HB for sketching)
- Eraser
- Light mint green colored pencil
- Sage or olive green colored pencil
- Pencil sharpener
Step 1: Sketching the Outline
-
Head start:
Begin by lightly sketching the dinosaur’s head. Think of a rounded, elongated oval shape that tilts slight upward to the left. -
Neck connection:
From the bottom of that oval, draw two curved lines extending downward to form the neck. The left line should curve inward (concave), while the right line curves outward (convex). -
Body formation:
Continue the neck lines into a larger, rounded bean shape for the body. The back should arch gently, leading down to a pointed tail. -
Leg placement:
Sketch two sturdy, rectangular shapes at the bottom for the legs. Erase the body line that runs through the legs so they look connected. -
Tail details:
Extend the tail starting from the dinosaur’s lower back, tapering it to a gentle point that points slightly upward.
Step 2: Inking the Details
-
Trace the head:
Using your black fine liner, carefully trace over your pencil lines for the head shape. Add a small ‘C’ curve for the snout area. -
Friendly face:
Draw a large circle for the eye near the top right of the head. Fill in a smaller black pupil, leaving a white highlight. Add a small curved smile and two tiny dots for nostrils. -
Spiny back:
Starting from the top of the head, draw a series of triangles running all the way down the neck, back, and tail. Vary the sizes slightly—larger on the back, smaller on the tail. -
Body spots:
Inside the body area, draw several circles of varying sizes. These act as decorative spots for your dino. -
Define the toes:
At the bottom of each leg, draw three small ‘U’ shapes to create simple, cartoonish toes. -
Final body lines:
Trace the remaining body lines, connecting the neck to the back and belly. I usually pause here to let the ink dry for a minute before erasing the pencil marks. -
Grass tuft:
Draw three simple, pointed leaf shapes near the dinosaur’s feet to ground the drawing.
Clean Lines Tip
When inking over pencil, focus on pulling the pen towards you rather than pushing it away. This often gives you a smoother, more confident line.
Step 3: Adding Soft Color
-
Pastel spikes:
Take your light mint green pencil and gently fill in the triangle spikes. Keep the pressure light for a soft, airy look. -
Spot coloring:
Use the same mint green to fill in the circular spots on the dinosaur’s body. -
Head shading:
Very lightly shade just the top portion of the dinosaur’s head and a tiny bit near the neck with the mint green to give it some dimension. -
Grounding green:
Switch to your sage or olive green pencil. Color the tufts of grass you drew earlier. -
Texture lines:
Using the black pen again, add tiny tick marks inside the grass blades to suggest texture. -
Dotted details:
Finally, add some very small stippled dots along the dinosaur’s neck and back with your black pen to add a bit of finish and texture.
Go Prehistoric
Try changing the colors to light pinks or purples for a different vibe, or add a simple horizon line and a volcano in the distance.
You now have an adorable dinosaur friend ready to greet anyone who opens your sketchbook


Shark Directed Drawing
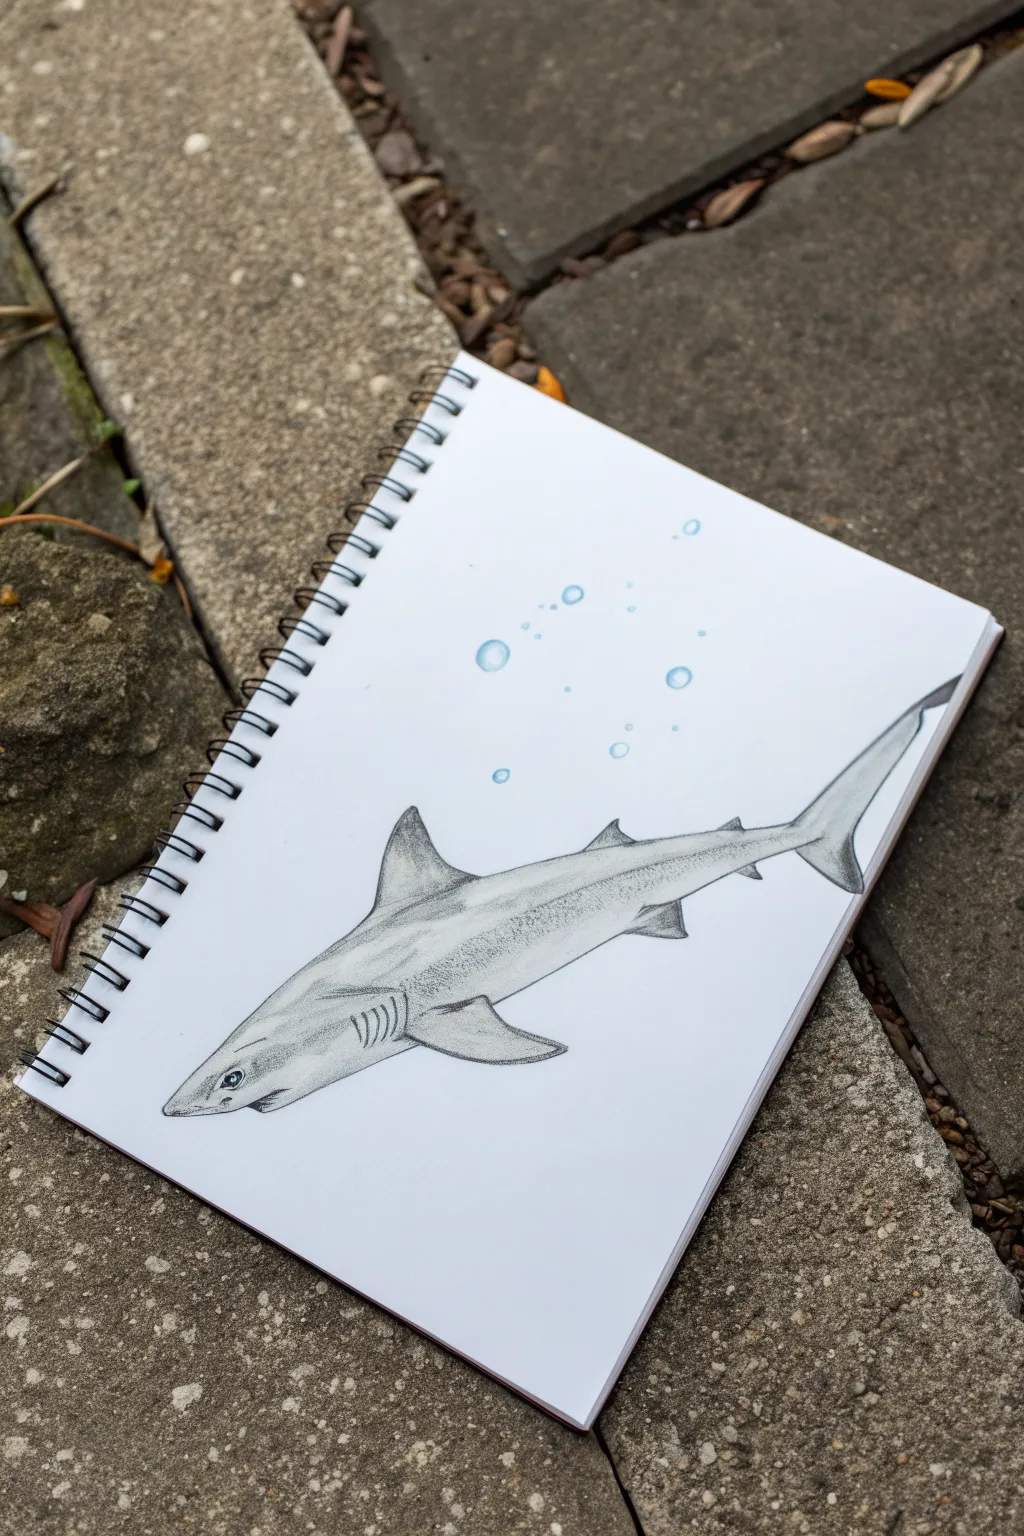
Dive into marine art with this realistic shark drawing that captures the streamlined power of the ocean’s most famous predator. By working with graphite and subtle touches of color, you’ll create a piece that feels both dynamic and detailed, complete with delicate bubbles rising to the surface.
Step-by-Step
Materials
- Sketchbook or drawing paper (heavyweight)
- HB Graphite pencil (for initial sketching)
- 2B and 4B Graphite pencils (for shading)
- Light blue colored pencil
- Kneaded eraser
- Fine-point eraser or eraser shield
- Blending stump or cotton swab
Step 1: Forming the Predator
-
Establish the main axis:
Begin by lightly drawing a long, gentle diagonal line across your page, sloping slightly upward from left to right. This will serve as the spine and movement line for the shark. -
Draft the body shape:
On top of your axis line, sketch a long, torpedo-like oval. Make the front end (the nose) more tapered and pointed, and the back end (the tail peduncle) narrow. -
Define the head and nose:
Refine the front section into a classic pointed shark snout. Just underneath the tip, create a slight indentation for the mouth, curving it back toward the gills. -
Place the fins:
Draw a large triangle on the shark’s back for the dorsal fin. Add two triangular pectoral fins on the bottom: one fully visible closer to us, and the tip of the other peeking out from the far side. -
Add secondary fins:
Further down the body towards the tail, sketch the smaller pelvic and anal fins, keeping them aerodynamic and swept back. -
Sketch the caudal fin:
At the very end, draw the tail (caudal fin). The top lobe should be significantly longer than the bottom lobe, with a distinctive notch near the tip of the upper section.
Step 2: Adding Details and Refinement
-
Draw the gills:
Locate the area between the head and the pectoral fin. Draw five slightly curved, vertical slits for the gills, keeping them parallel to each other. -
Detail the eye and nostril:
Place a small circle for the eye slightly forward of the mouth line. Add a tiny dot near the tip of the snout for the nostril. -
Refine the outline:
Go over your sketch with a firmer hand using the HB pencil. Smooth out the connections between fins and body, erasing any messy construction lines inside the form. -
Mark the lateral line:
Lightly trace the separation between the darker upper body and the lighter underbelly. This line usually runs from the nose, under the eye, and along the flank to the tail.
Shark Skin Texture
Use the side of your pencil lead rather than the tip when shading the body. This creates a grainier ‘denticle’ texture closer to real shark skin.
Step 3: Shading and Texture
-
Begin base shading:
Using a 2B pencil, lightly shade the entire upper portion of the shark. Use smooth, elongated strokes that follow the curve of the body to suggest skin texture. -
Deepen the shadows:
Switch to a 4B pencil to add darker values. Focus on the base of the dorsal fin, the shadowed underside of the pectoral fins, and the area surrounding the gill slits. -
Create volume:
To make the shark look round rather than flat, darken the top edge of the back and fade the graphite gradually as you move toward the lighter lateral line. -
Blend for smoothness:
I prefer using a blending stump here to gently smudge the graphite, creating that sleek, leathery texture sharks are known for. Avoid blending the very sharpest edges to keep them crisp. -
Highlight the eye:
Darken the pupil completely black, but leave a tiny speck of white paper to represent the reflection of light. This brings the shark to life. -
Clean up highlights:
Use a fine eraser to lift pigment along the top ridge of the nose and the leading edges of the fins to suggest light hitting the wet skin.
Smudged Paper?
Graphite loves to smear on white space. Place a scrap piece of paper under your drawing hand to protect the clean background while you shade.
Step 4: Atmospheric Touches
-
Draw bubbles:
Scatter a few circles of varying sizes above the shark’s back. Don’t make them perfect circles; slight wobbles look more organic. -
Color the bubbles:
Take your light blue pencil and outline the bubbles. Shade only the bottom right curve of each bubble, leaving the top left white for a transparent glass-like effect. -
Final assessment:
Step back and check your contrast. If the shark looks too pale, add one final layer of 4B shading to the darkest crevices to make the drawing pop off the page.
You have captured the silent elegance of the deep blue sea right in your sketchbook
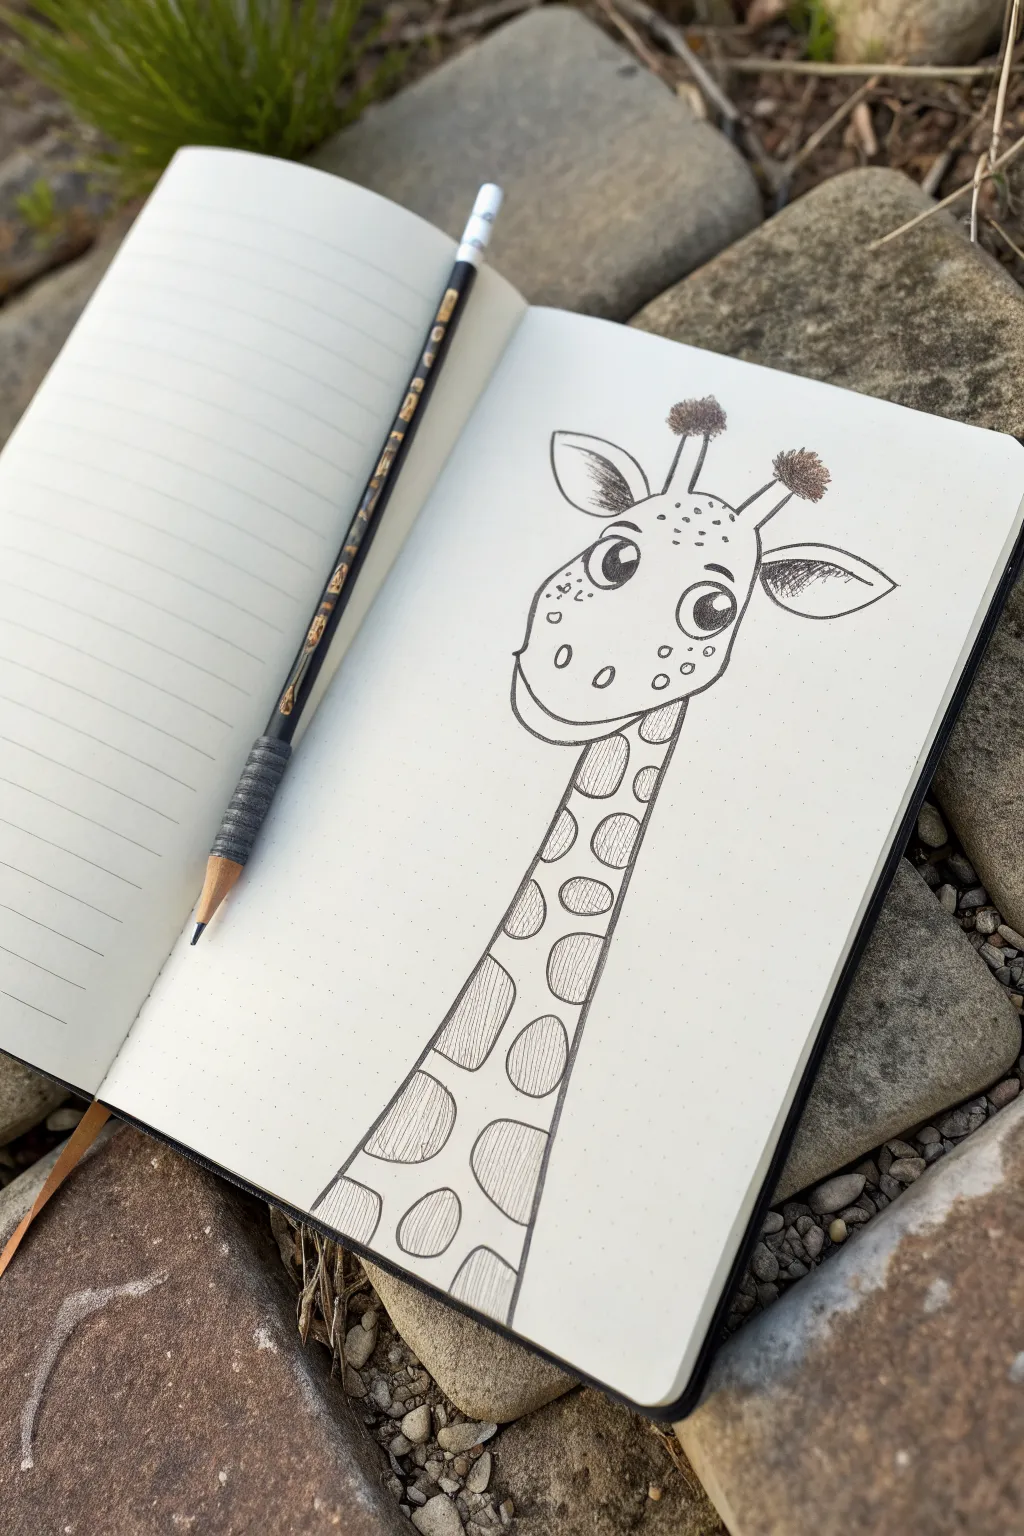
Giraffe Directed Drawing
Draw a charming giraffe with big, expressive eyes and a jaunty ossiphone style using simple shapes and fine linework. This project focuses on clean ink outlines and delicate hatching to give your sketch character and depth.
Step-by-Step Tutorial
Materials
- Sketchbook or drawing paper
- Pencil (HB or 2B)
- Fine-liner pen (black, 0.5mm)
- Eraser
- Brown colored pencil (optional, for shading ossiphones)
Step 1: Basic Sketching
-
Head Shape:
Start by drawing a large, rounded rectangle shape for the head. Make the bottom slightly wider than the top to create a jawline. -
Neck Lines:
From the bottom of the head, draw two long lines extending downward. These should start slightly narrower at the top and widen broadly as they reach the bottom of the page, creating a solid base. -
Ossiphones and Ears:
At the very top of the head, sketch two small stems with tufted circles on top for the ossiphones (horns). Beside them, add two large, leaf-shaped ears extending outward. -
Facial Features:
Inside the head shape, lightly sketch two large circles for eyes. Below them, draw a curved line for the snout area and two small ovals for nostrils.
Uneven Spots?
Perfect! Giraffe spots are naturally irregular. Don’t try to make them perfect circles or squares; wobbly edges actually make the drawing look more organic and realistic.
Step 2: Inking the Outline
-
Tracing the Head:
Switch to your fine-liner pen. Carefully trace the outline of the head, giving the jaw a slight curve to emphasize a smile. -
Defining the Eyes:
Ink the large circles for the eyes. Inside each eye, draw a smaller circle for a highlight sparkle, then fill the rest of the pupil in solid black, leaving the highlight white. -
Ears and Horns:
Ink the ears, drawing a curved line inside each one to show depth. For the ossiphones, use short, quick strokes for the tops to make them look fuzzy rather than perfectly round. -
Snout Details:
Draw the nostrils and the smiling mouth line. Add a few tiny dots around the cheeks for texture. -
Neck Outline:
Go over your pencil lines for the neck with confident, smooth strokes.
Step 3: Pattern and Texture
-
Creating Shapes:
Down the length of the neck, draw a series of irregular, rounded polygons. These are the giraffe’s spots. Leave spaces between them like a stone path. -
Hatching Technique:
Instead of coloring the spots solid black, use hatching. Draw thin, parallel diagonal lines inside every spot on the neck. -
Ear Texture:
Add similar hatching lines inside the inner curve of the ears to create shadow and depth. -
Fuzzy Horns:
At this point, I like to take a sharpened pencil and scribble tightly over the tufted tops of the ossiphones to give them a distinct, darker texture compared to the ink. -
Final Clean Up:
Once the ink is completely dry, gently erase the underlying pencil structure lines from the first phase.
Hatching Tip
Keep your hand relaxed when drawing the parallel lines inside the spots. Don’t press too hard; light, consistent strokes create a cleaner shading effect than heavy ones.
Now you have a friendly giraffe companion ready to greet you from your sketchbook page
Penguin With Scarf Directed Drawing
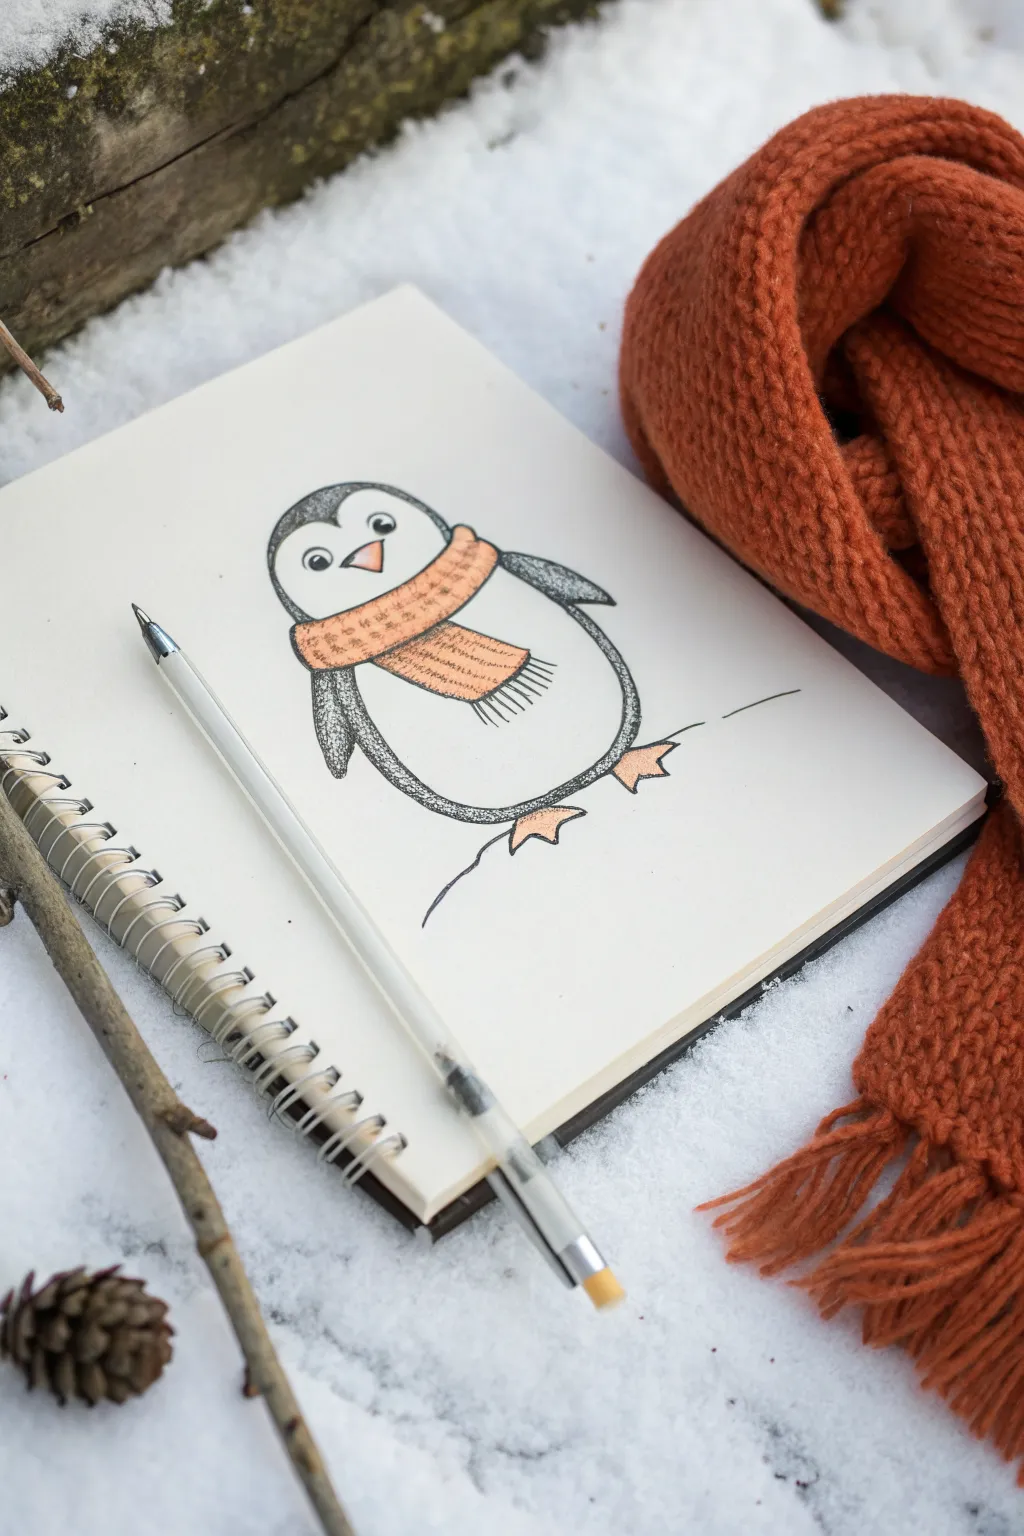
Celebrate the chillier months with this adorable sketch of a small penguin wrapped snugly in a scarf. This simple drawing uses clean lines and stippling textures to create a charming, minimalist illustration perfect for a sketchbook page.
Step-by-Step
Materials
- White sketchbook paper (heavier weight preferred)
- Fine-tip black ink pen (a standard ballpoint or 0.5mm fineliner)
- Orange colored pencil or felt-tip marker
- Pencil and eraser (for initial sketching)
Step 1: Drawing the Basic Shape
-
Start the head:
Begin near the top-center of your page. Draw a smooth arc that resembles an upside-down ‘U’ to form the top of the penguin’s head. -
Outline the body:
Extend the lines from the head downwards, curving them out slightly to create a plump, rounded body, but stop before you close the shape at the bottom. -
Close the shape:
Connect the two side lines at the bottom with a gentle, wide curve to complete the penguin’s main body outline. -
Define the face:
Inside the head shape, draw a ‘heart-like’ dip or a curved ‘M’ shape across the forehead area. Bring the lines down the sides to separate the black feathers from the white face.
Step 2: Adding Features and Accessories
-
Sketch the scarf neck:
Draw a thick, curved band directly under the face area. It should wrap slightly around the neck to look snug. -
Add the scarf tail:
On the penguin’s right side (your left), draw the hanging tail of the scarf, letting it drape slightly over the belly. -
Draw the fringe:
At the end of the scarf tail, add several short, vertical lines to create the look of a fringed edge. -
Draw the beak:
Place a small, downward-pointing triangle right in the center of the face, just above the scarf. -
Add the eyes:
Draw two neat circles on either side of the beak. Add a tiny dot inside each for the pupils to give him a sweet expression. -
Draw the flippers:
Sketch two small, triangular wings sticking out from the side of the body. Position them just below where the scarf sits. -
Add the feet:
At the bottom of the body, draw two webbed feet pointing outwards. Three small points on each foot work perfectly.
Easy Stippling Tip
Don’t press too hard when stippling! Light, rapid taps save your pen tip and hand. Varying density creates much better texture than solid coloring.
Step 3: Inking and Coloring
-
Ink the outlines:
Using your black pen, carefully trace over your pencil lines. I find going slow here helps keep the line weight consistent and clean. -
Fill the dark feathers:
Instead of coloring solid black, use a stippling technique. Ideally, tap your pen repeatedly to create thousands of tiny dots in the dark areas of the head, wings, and sides. -
Densify the shading:
Add more dots closer together near the edges and under the scarf to create shadow and depth, letting the dots get sparse toward the white belly. -
Color the scarf:
Take your orange pencil or marker and fill in the scarf. Apply the color lightly for a soft, knit texture appearance. -
Color the beak and feet:
Use the same orange shade to gently color the beak and the two webbed feet. -
Add ground lines:
Draw a simple horizontal line intersecting with the feet to suggest the snowy ground, ensuring your penguin isn’t floating in space. -
Cleanup:
Wait a moment for the ink to fully dry, then erase any remaining visible pencil sketch lines for a crisp finish.
Uneven Eyes?
If the eyes look lopsided, thicken the outer rim of the smaller one slightly with your black pen until they appear equal in size.
Now you have a charming winter friend ready to brighten up your sketchbook pages
Bunny Face Directed Drawing
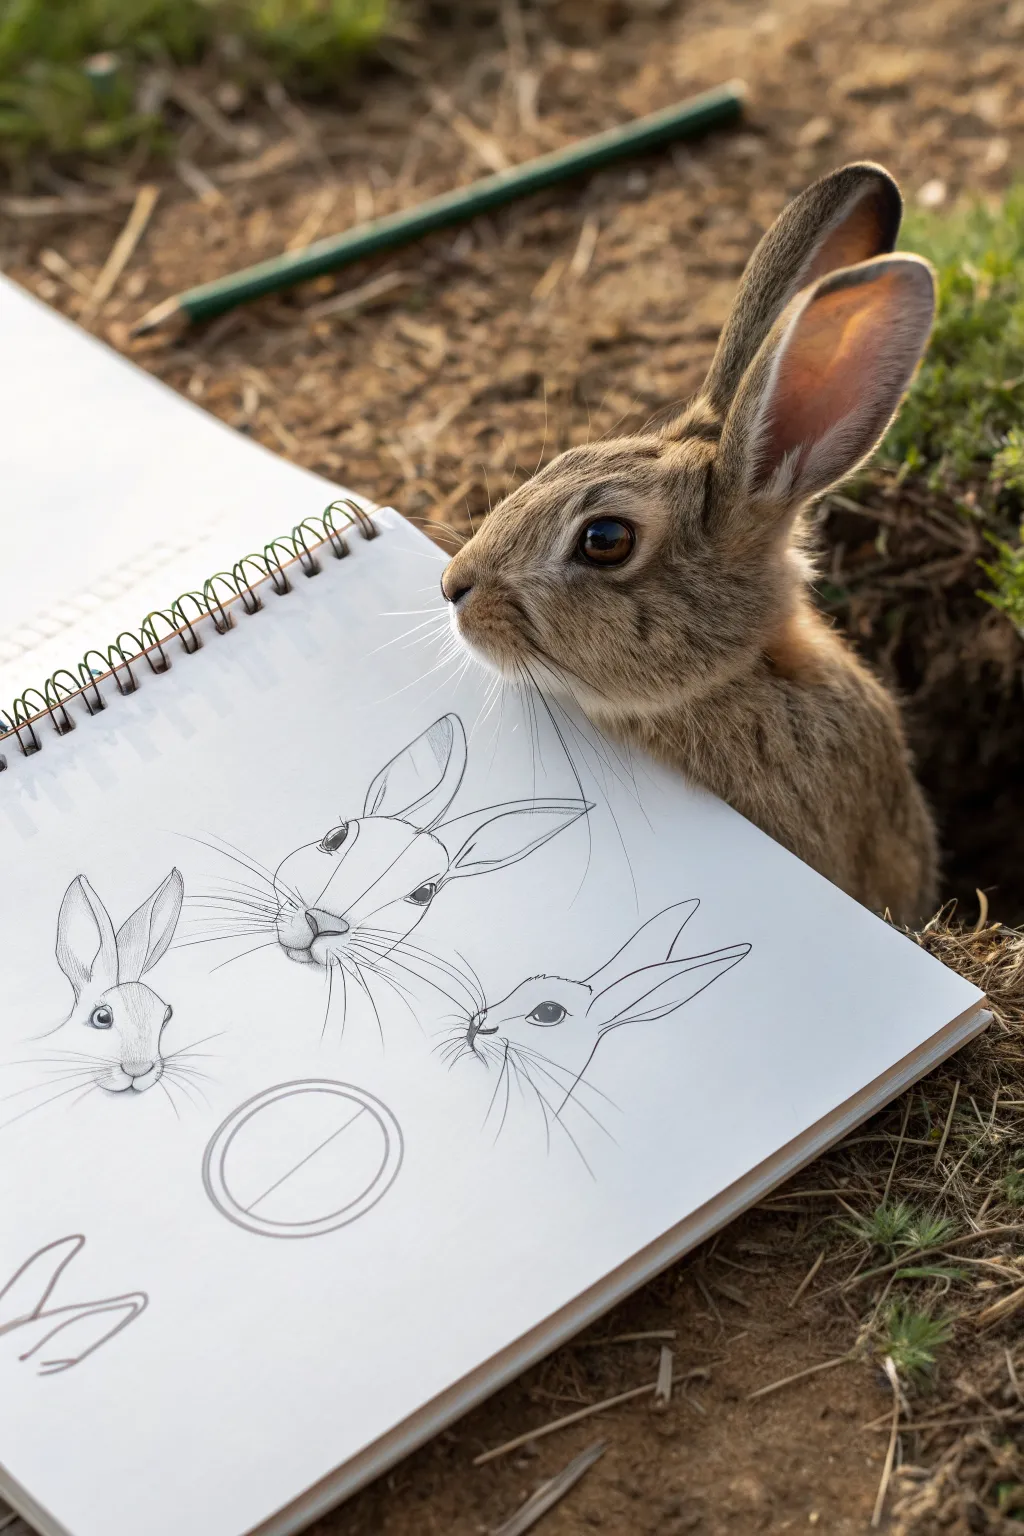
Capture the delicate features of a wild rabbit with this study of three different facial angles using simple graphite pencil. The result is a clean, academic-style page that breaks down the rabbit’s anatomy into manageable shapes and refined lines.
Step-by-Step Tutorial
Materials
- Spiral-bound sketchbook (smooth or vellum surface)
- H or HB pencil (for initial structural lines)
- 2B or 4B pencil (for darker details and shading)
- Kneaded eraser
- Pencil sharpener
Step 1: Laying the Groundwork
-
Analyze the Composition:
Visualize the layout of your page. You will be drawing three distinct heads: one small profile view on the left, a large central three-quarter view, and a side profile on the right. Leave space at the bottom for a structural circle diagram. -
Draw the Central Head Shape:
Start with the main drawing in the center. Lightly sketch a large oval for the head, slightly tilted downward to the left. Keep your pencil pressure very light so these lines can be erased later. -
Add the Muzzle and Jaw:
Attach a smaller circle to the lower left of your main oval to form the muzzle area. Connect these shapes with smooth lines to define the jawline and the bridge of the nose. -
Rough in the Ears:
Draw two long, leaf-shaped forms extending from the top right of the head. The ear closest to the viewer should be slightly wider, while the back ear is partially hidden.
Step 2: Refining the Main Portrait
-
Place the Eye:
Locate the eye on the side of the head, roughly halfway between the ear base and the nose tip. Draw a large almond shape, making the pupil dark and leaving a small white highlight for life. -
Define the Nose:
At the tip of the muzzle, draw a soft ‘Y’ shape for the nose and mouth. The cleft of the lip should extend downward slightly. -
Add Structural Guidelines:
Lightly draw a centerline down the forehead and across the cheeks. This helps give the drawing volume, making it look like a 3D form rather than a flat sketch. -
Sketch the Whiskers:
Using quick, confident flicks of your wrist, draw long whiskers extending outward from the muzzle. Vary the lengths to keep it looking natural.
Wonky Lines?
If your whiskers look stiff, try drawing them from the shoulder rather than the wrist. A quick, sweeping motion creates a natural taper at the end.
Step 3: Adding the Supporting Sketches
-
Draft the Left Head:
To the left of your main drawing, sketch a smaller, front-facing rabbit head. Start with a circle, add two tall, upright ears, and place the eyes wide apart on the sides of the head. -
Detail the Left Face:
Refine the muzzle on this smaller sketch with a tiny ‘V’ shape for the nose and add short, outward-flicking lines for whiskers. -
Draft the Right Profile:
On the right side, draw a side profile view. Focus on the elongated slope of the forehead leading down to the nose. The ear here should be swept back, showing the streamlined shape of the head. -
Refine the Right Profile:
Darken the eye and add the pupil. Ensure the whisker pads look soft by using broken, light lines instead of a solid outline.
Level Up
Use a white gel pen to add tiny highlights to the eyes or the tips of the fur after your graphite work is done for extra sparkle.
Step 4: Final Touches & Diagram
-
Draw the Structural Circle:
At the bottom center of the page, draw a clean circle. Add a diagonal line through it. This represents the underlying geometry used to build the head shapes. -
Strengthen Line Weight:
Switch to your softer drawing pencil (2B or 4B). Go over the key outlines of the ears and jawlines to make them pop. I favor varying the line thickness—thicker on the shadowed underside, thinner on top. -
Add Subtle Shading:
Lightly shade inside the ears and under the chin to suggest depth. Don’t overwork it; keep the shading minimal to maintain the clean ‘sketchbook study’ aesthetic. -
Clean Up:
Use your kneaded eraser to lift away any stray construction lines or smudges, leaving the page looking crisp and professional.
You now have a beautiful page of anatomical studies that captures the gentle essence of a rabbit.
Hot Cocoa Mug Directed Drawing

Capture the warmth of a winter evening with this adorable hot cocoa drawing on toned paper. The combination of black ink outlines and white highlights creates a charming pop that makes the marshmallows look fluffy and the cocoa rich.
Step-by-Step Guide
Materials
- Spiral-bound sketchbook with kraft / toned paper
- Black drawing pen (fineliner or gel pen)
- White colored pencil or white gel pen
- Dark brown colored pencil
- Peachy-pink colored pencil
- Pencil (HB or 2B) for sketching
- Eraser
Step 1: Sketching the Base Shape
-
Draw the Oval Opening:
Begin lightly with a pencil. In the center of your page, draw a somewhat flattened oval for the mouth of the mug. It should be wider than it is tall, tilting slightly forward to show the drink inside. -
Form the Cup Body:
From the ends of the oval, draw two curved lines extending downward. They should taper slightly inwards as they go down, mimicking a classic ceramic mug shape. -
Close the Bottom:
Connect the bottom of those two lines with a gentle curve that mimics the curvature of the front rim of the oval you drew first. -
Add the Handle:
On the right side of the mug, sketch a C-shaped ear for the handle. Draw a smaller C-shape inside it to give the handle thickness.
Make it Pop
On kraft paper, white is your best friend. Layer the white pencil heavily on the marshmallows. The opacity creates a convincing 3D effect.
Step 2: Filing the Mug
-
Outline the Marshmallows:
Inside the top oval, draw three fluffy, cloud-like shapes floating in the liquid. Make them irregularly round, overlapping slightly if you like. -
Define the Liquid Level:
Draw faint lines around the marshmallows within the oval to represent the surface of the hot chocolate, leaving a small gap between the liquid and the mug’s inner rim. -
Sketch the Face:
Lower down on the mug’s body, plan out the kawaii face. Place wide-set eyes and a small, U-shaped smiling mouth right in the middle.
Step 3: Inking and Coloring
-
Ink the Outlines:
Using your black drawing pen, trace over your pencil lines. Go over the main mug shape twice or use a slightly thicker nib to give it a bold, cartoon definition. -
Refine the Floating Marshmallows:
Ink the marshmallows with a finer line, adding tiny dots to give them a sugary texture. -
Color the Cocoa:
Take your dark brown colored pencil and fill in the liquid areas around the marshmallows. Press firmly to get a rich, chocolatey tone that contrasts with the lighter paper. -
Highlight the Marshmallows:
This step is crucial on toned paper. Use a white colored pencil to color the marshmallows completely solid white, making them pop against the kraft background. -
Add Inner Rim Definition:
With the dark brown pencil, lightly shade the inner rim of the mug just above the cocoa line to show depth. -
Ink the Facial Features:
Fill in the small black circles for the eyes and trace the smile. Add rosy cheeks using the pink colored pencil with soft, oval strokes. -
Draw the Steam:
Above the mug, draw two or three whimsical, swirling lines with your black pen to represent rising steam. -
Ground the Mug:
Add a few quick, horizontal scratchy lines at the base of the mug on the right side to create a simple shadow.
Smudge Alert
If your black ink smears when coloring the cocoa, let the outline dry for at least 5 minutes before coloring, or color the brown sections first.
Now you have a sweet piece of art perfect for a winter journal spread or a handmade card
Rocket Ship Directed Drawing
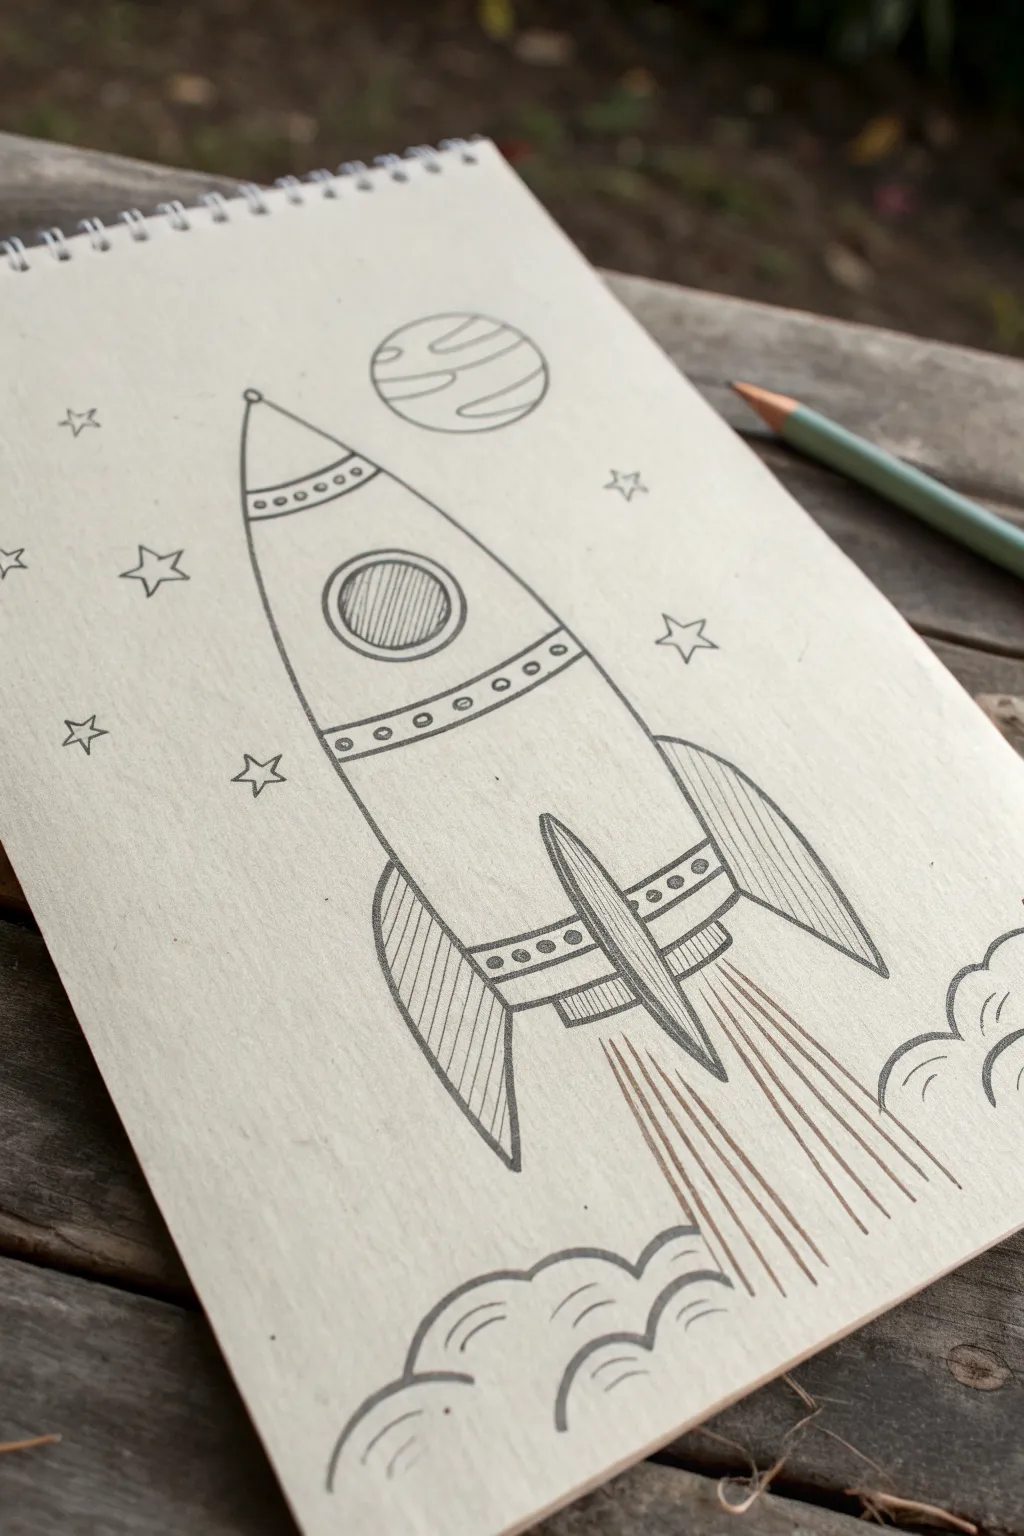
Blast off into creativity with this classic rocket ship sketch, featuring retro fins and a plume of exhaust smoke. The clean lines and hatched shading give this drawing a charming, hand-illustrated feel perfect for any sketchbook.
Detailed Instructions
Materials
- Spiral-bound sketchbook or heavy drawing paper
- Pencil (HB or 2B for sketching)
- Fine-tip black drawing pen (archival ink preferred)
- Eraser
- Ruler (optional, for straight lines)
Step 1: Shaping the Hull
-
Draw the main body:
Start by drawing a tall, elongated arch shape in the center of your page. The bottom should be slightly wider than the top, curving gently to a point. -
Add the nose cone:
Near the top point, draw a curved horizontal line to separate the nose cone from the body of the rocket. -
Detail the nose cone:
Inside that nose cone area, draw a second curved line just below the first one. Add a row of small circles inside this band for rivets. -
Create the porthole window:
In the upper third of the rocket body, draw a circle. Draw a slightly smaller circle inside it to create a rim. -
Shade the window:
Using your pen, fill the inner circle of the window with vertical hatching lines to suggest glass reflection or depth.
Hatching Pro-Tip
Keep your hatching lines parallel and evenly spaced. Rotating your paper while you draw can help your hand maintain a consistent angle.
Step 2: Fins and Engines
-
Draw the center fin:
At the very bottom center of the rocket body, draw a long, narrow fin shape that points straight down, extending below the hull. -
Add the side fins:
Draw two large, curved triangular shapes attached to the left and right sides of the rocket’s base. These should swoop outwards like wings. -
Detail the mid-section:
Draw a curved band across the lower third of the rocket body. Add small circles (rivets) along this band, matching the style of the nose cone. -
Connect the fins:
Draw a horizontal band connecting the bottom of the hull to the fins, adding another row of rivets here for consistency. -
Texture the fins:
Fill the left, right, and center fins with closely spaced diagonal lines (hatching) to give them a metallic, textured look distinct from the smooth body.
Wobbly Circles?
If freehanding the porthole or planet is difficult, trace a coin or a glue stick cap to get a perfect circle every time.
Step 3: Atmosphere and Launch
-
Blast off lines:
From the bottom of the engine area, draw divergent straight lines shooting downward to represent high-speed exhaust. -
Draw cloud puffs:
At the bottom of the page, beneath the exhaust lines, draw billowy, cloud-like shapes using connected scalloped curves. -
Add cloud details:
Inside the cloud shapes, add a few extra curved lines to give the smoke volume and fluffiness. -
Draw a planet:
In the upper right background, draw a circle. Add slightly curved stripes across it to create a gas giant appearance. -
Sprinkle in stars:
Fill the empty space around the rocket with simple five-pointed stars. Vary their sizes slightly for visual interest. -
Inking the outline:
Go over your pencil sketch with the fine-tip black pen. Use confident, steady strokes, especially on the long curves of the rocket body. -
Cleanup:
Once the ink is completely dry, gently erase all underlying pencil marks to reveal a clean, crisp illustration.
Now you have a dynamic space scene ready for coloring or displaying as a striking black and white sketch
Lighthouse Scene Directed Drawing

Capture the moody atmosphere of the sea with this dual-page sketchbook spread featuring two distinct lighthouse scenes. You’ll combine precise ink line work with soft watercolor washes to create contrast between the crashing waves and standing structures.
Step-by-Step Guide
Materials
- Spiral-bound mixed media or watercolor sketchbook
- HB graphite pencil
- Kneaded eraser
- Fine liner pens (sizes 0.1, 0.3, and 0.5, waterproof)
- Watercolor paints (pan or tube set)
- Round watercolor brushes (size 4 and 8)
- White gel pen or gouache for highlights
- Container of water and paper towels
Step 1: Left Page: The Wave-Swept Tower
-
Map out the horizon:
Begin on the left page by drawing a light pencil horizon line about one-third of the way up the page. Sketch a tall, slightly tapered cylinder rising from the water, tilting slightly to suggest perspective. -
Draft the waves:
Lightly sketch irregular, jagged shapes around the base to represent crashing whitewash. Draw rolling wave lines in the foreground, curving them to show movement towards the rocks. -
Ink the structure:
Using a 0.3 pen, ink the vertical lines of the lighthouse. Switch to a 0.1 pen for the delicate lantern room details at the top and the faint horizontal bands on the tower. -
Texture the water:
Use the 0.5 pen to draw the dark, rocky foreground at the bottom left. Use lighter, broken horizontal strokes in the water to suggest ripples, leaving white space for the foam. -
Watercolor the sea:
Mix a deep indigo or payne’s gray. Paint the ocean, carefully painting around the white foam areas at the base of the lighthouse and the foreground waves. Keep the horizon line crisp. -
Paint the sky:
Dilute a touch of yellow ochre or warm grey for the sky. Wash it horizontally across the upper section, adding a few simple cloud shapes with a slightly darker grey mix. -
Detail the rocks:
Dab shades of brown, grey, and rust onto the foreground rocks. Let the colors bleed slightly into each other for a natural, stony texture.
Fixing Muddy Colors
If your ocean colors look muddy, let the paper dry completely. Then, glaze over with a pure, transparent blue to restore vibrancy without reworking the layers.
Step 2: Right Page: The Shore Station
-
Outline the composition:
On the right page, draw a large rectangular frame leaving a wide border. Lightly sketch the horizon line lower than the previous page to emphasize the sky. -
Build the lighthouse:
Sketch a tall, white lighthouse tower on the right side. Add attached keepers’ houses with slanted roofs. Ensure the buildings sit solidly on a sandy dune base. -
Add vegetation:
Sketch clumps of tall dune grass in the immediate foreground. Add a few large, rounded boulders at the very bottom edge to frame the scene. -
Inking the outlines:
Go over your pencil lines with waterproof ink. Use a continuous line for the buildings but switch to short, flicking upward strokes for the grass to imply texture. -
Paint the sky gradient:
Wet the sky area with clean water first. Drop in cerulean blue at the top and let it fade into white as it reaches the horizon. Leave space for fluffy white clouds. -
Structure colors:
Paint the roofs with a vibrant red or terracotta. Keep the lighthouse walls white, but run a very pale blue-grey wash down the shadowed side (usually the right) to give it 3D form. -
Sand and grass:
Wash the ground with raw sienna or buff titanium for sand. Once dry, use sap green and olive green for the grassy tufts, using flicking brush strokes. -
Rock details:
Paint the foreground boulders with cool greys. Drop a little blue into the wet paint on the shadowed sides of the rocks for depth. -
Final touches:
Once everything is completely dry, use your finest pen to add brick textures, window panes, and a railing around the lantern room. Sign your work at the bottom.
Add Realistic Foam
Use a white gel pen or a tiny brush with white gouache to add sea spray dots over the dark ocean paint and highlights on the lantern glass for sparkle.
This simple yet striking spread is a perfect way to practice different coastal textures and moods side by side
Abstract Face Directed Drawing
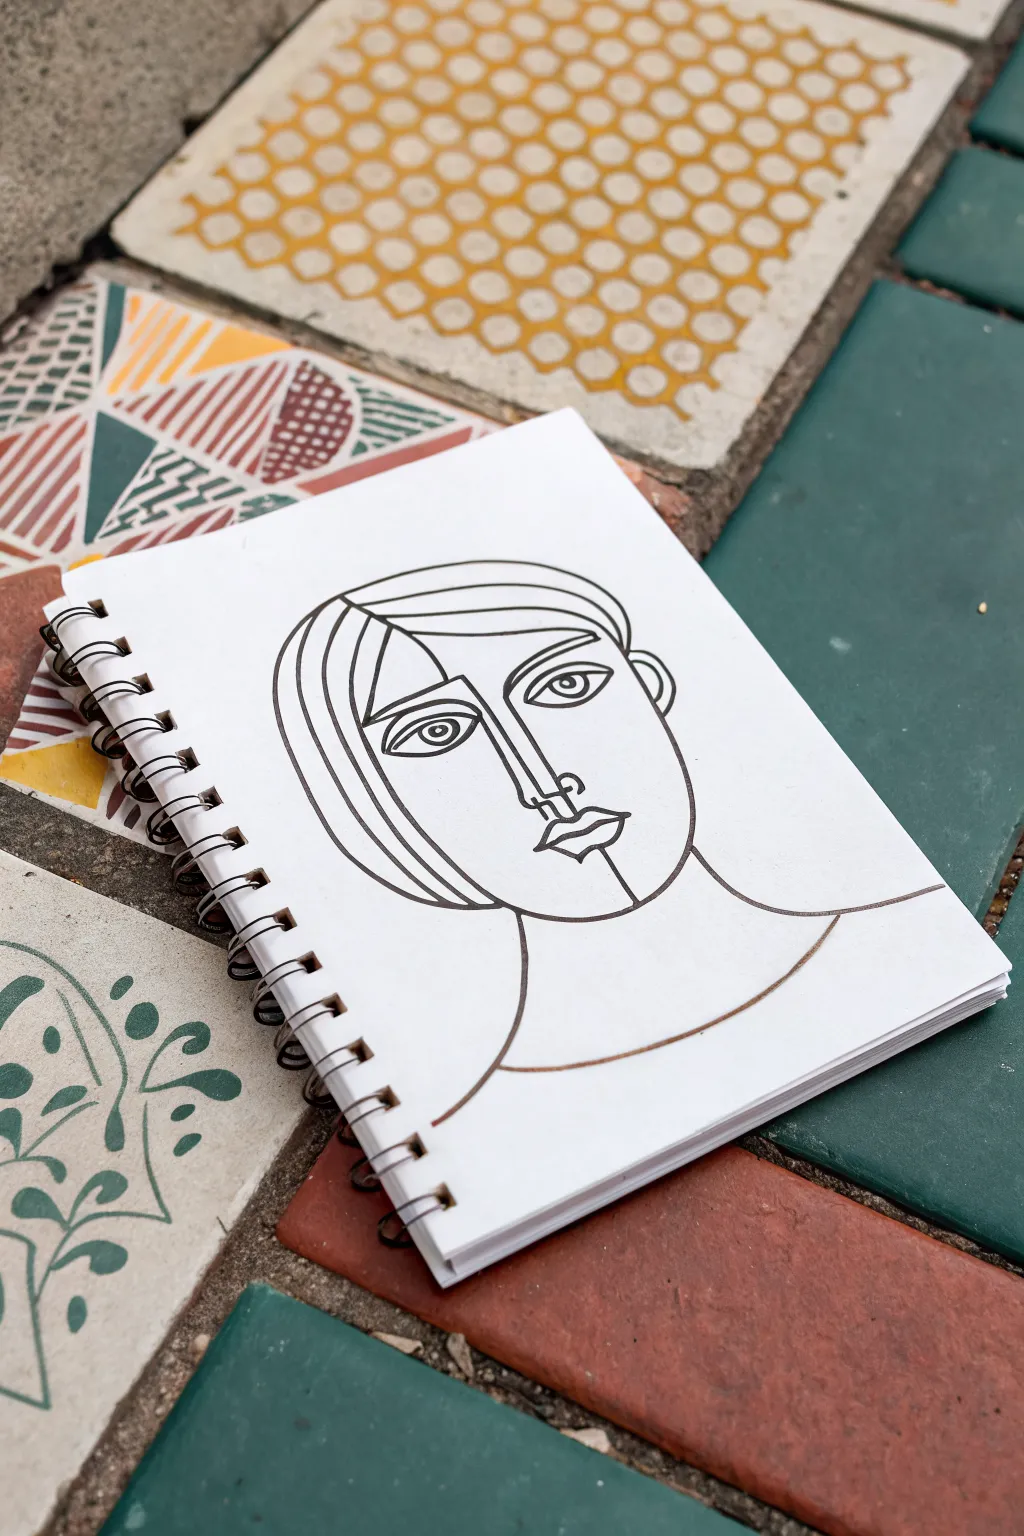
Capture the essence of abstract modernism with this striking line art portrait. Using simple geometric shapes and bold strokes, you’ll create a face that feels both timeless and artistic.
Step-by-Step Tutorial
Materials
- Spiral-bound sketchbook or drawing paper
- Fine-point black marker or drawing pen (0.5mm or 0.8mm)
- Pencil (HB or 2B) for sketching
- Eraser
Step 1: Face Outline and Structure
-
Draw the jawline:
Begin near the center of your page by drawing a large ‘U’ shape for the jaw and chin. Make the left side slightly straighter and the chin curve gentle but defined. -
Add the hairline:
Connect the top points of the ‘U’ with a wide, curving arch to form the top of the head. This doesn’t need to be a perfect circle; a slightly flattened oval shape works well. -
Create the hair partition:
Starting from the top left of the forehead area, draw a long curved line sweeping down across the forehead towards the right side to establish the hairline. -
Detail the hair strands:
On the left side of the face, draw three or four curved lines cascading down from the top center part to the jawline, mimicking hair falling over the side of the face.
Confident Lines
Don’t lift your pen too often. Long, continuous strokes make the drawing look smoother and more intentional than short, sketchy dashes.
Step 2: Distinctive Facial Features
-
Form the nose bridge:
Starting from the hairline curve, draw a vertical line straight down the center of the face. At the bottom, create a small geometric angle to define the tip of the nose. -
Draw the left eye:
To the left of the nose bridge, draw an almond shape. Inside, place a circle for the iris and a smaller dot for the pupil. Add a straight horizontal line above it for a bold eyebrow. -
Draw the right eye:
On the right side, draw a matching almond eye. I find it adds character if this one is slightly higher or lower than the first to emphasize the abstract style. -
Unify the nose and brow:
Connect the top of the nose bridge line directly into the right eyebrow with a seamless stroke, creating that classic continuous-line look. -
Sketch the lips:
Below the nose, draw the upper lip as two small mountains (a classic ‘M’ shape). Draw a slightly fuller curve underneath for the bottom lip. -
Add the chin detail:
Draw a short vertical line extending downward from the center of the bottom lip to the midpoint of the chin.
Wobbly Lines?
If a line goes crooked, don’t erase it. Instead, thicken the line slightly in that area to disguise the wobble as an artistic choice in line weight.
Step 3: Neck and Finishing Touches
-
Draw the neck:
Extend two curved lines downward from the jawline to form the neck. Make the base wide where it meets the shoulders. -
Shoulder line:
Curve the neck lines outward dramatically at the bottom to suggest the slope of the shoulders. -
Refine the ear:
On the right side of the head, roughly aligned with the eye, add a simple ‘C’ shape for the ear. -
Ink the drawing:
Carefully trace over your pencil lines with your black marker. Keep a steady hand and try to maintain a uniform line thickness throughout. -
Erase guidelines:
Once the ink is completely dry, gently erase any visible pencil marks underneath to leave a crisp, clean design.
Now you have a sophisticated piece of abstract art ready to display
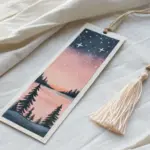
Watercolor Resist Directed Drawing
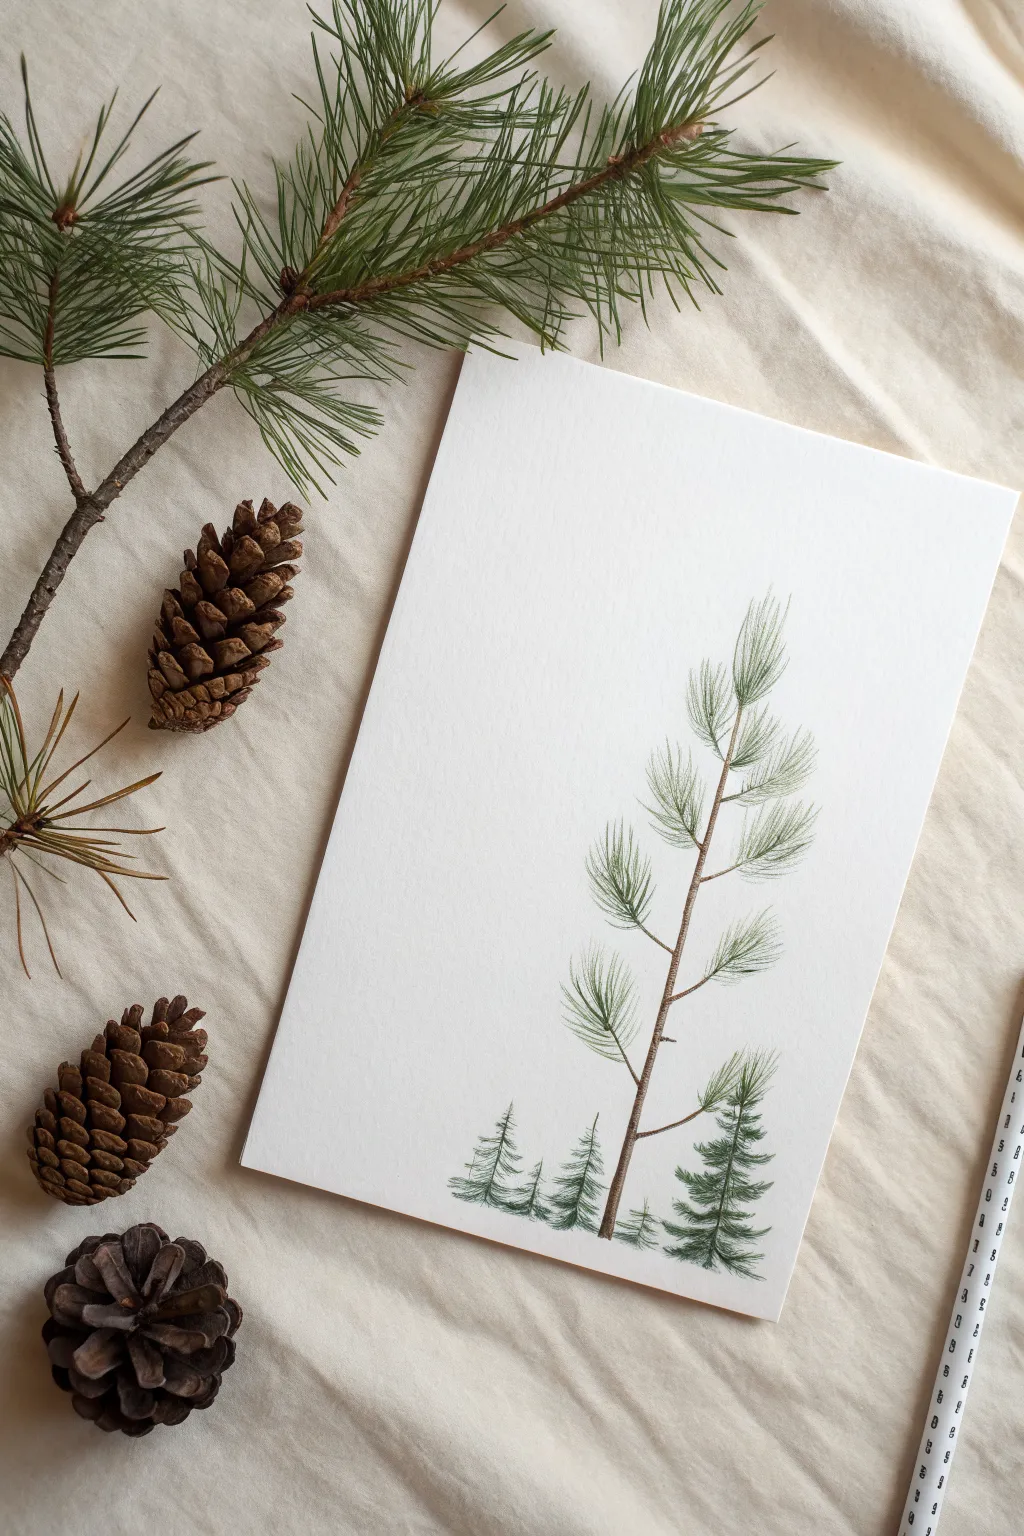
Capture the whisper-thin elegance of pine needles using a clever resist technique that preserves crisp white lines amidst soft washes of green. This project results in a serene, minimalist forest composition perfect for winter greeting cards or simple wall art.
How-To Guide
Materials
- Cold press watercolor paper (A5 or similar size)
- Fine tip masking fluid pen or liquid masking fluid with a small brush
- Watercolor paints (Sap Green, Hooker’s Green, Burnt Umber)
- Small round brushes (size 0 and 2)
- Pencil (HB)
- Kneaded eraser
- Rubber cement pickup tool (optional, for removing masking)
- Paper towels
- Water cups
Step 1: Sketching and Masking
-
Light Skeleton Sketch:
Begin by drawing a very faint vertical line for the main tree trunk using your HB pencil. Add a few small, staggered diagonal lines coming off the trunk to indicate where the branches will sit. -
Base Tree Placement:
Lightly sketch three to four tiny triangle shapes at the very bottom of the page. These will become the smaller background trees that anchor the composition. -
Masking the Needles:
Shake your masking fluid pen well. Starting at the tip of one branch, flick the pen outward in quick, short strokes to mimic pine needle clusters. Keep the clusters somewhat sparse and airy. -
Building the Foliage:
Continue adding masked needle bursts to all your branch guides. Remember that pine branches often curve upward, so angle your clusters slightly toward the sky. -
Trunk Masking:
Use the masking fluid to draw a very thin, broken line along the trunk. You don’t want to mask the whole trunk, just highlights where the light might hit the bark. -
Masking the Little Trees:
For the tiny trees at the bottom, use tiny dots or horizontal dashes of masking fluid to represent snow-capped tips or highlighted branches. Let the masking fluid dry completely until it is transparent and tacky-free.
Clean Lines Tip
Don’t shake liquid masking fluid too vigorously, as bubbles can ruin the fine lines. Instead, roll the bottle gently or stir with a toothpick before applying.
Step 2: Watercolor Application
-
Mixing Greens:
On your palette, mix a natural pine green. I prefer combining Sap Green with a touch of Burnt Umber to take the brightness down, creating a more realistic forest hue. -
First Wash – Needles:
Using a size 2 brush, gently wash your green mix over the dried masking fluid needle clusters. The resist will protect the white paper, creating the illusion of light hitting the needles. -
Softening Edges:
While the paint is still wet, rinse your brush and slightly feather the edges of the green paint so it fades out naturally rather than having a hard stop. -
Painting the Trunk:
Switch to a thin mix of Burnt Umber. Using a size 0 brush, paint the trunk of the main tree, carefully navigating between the needle clusters. Allow the brown to bleed slightly into the green wet areas for a cohesive look. -
Developing the Base Trees:
Paint the small bottom trees with a darker, more concentrated green mix. Use horizontal scribbling motions to suggest density, painting right over those masked highlights you created earlier. -
Adding Depth:
Once the first layer is touch-dry, mix a darker cool green (perhaps adding a tiny bit of blue or black to your green). Add small dabs of this shadow color near the center of the needle clusters where branches would be densest.
Winter Texture
Splatter faint white gouache or acrylic ink over the finished dry painting to create a gentle snowfall effect that complements the resist highlights.
Step 3: Reveal and Refine
-
Total Drying Time:
Wait for the paper to be completely bone dry. Any moisture left will cause the paper to tear during the next step, so be patient. -
Removing the Mask:
Gently rub your finger or a rubber cement pickup tool over the masked areas to peel away the fluid. You will see crisp white lines emerge from the green washes. -
Refining Needles:
Take your smallest brush with a very pale green wash. Gently glaze over some of the stark white needles to push them back into the distance, leaving only a few pure white for bright highlights. -
Bark Texture:
Use the very tip of your brush with dark brown paint to add tiny dots or lines on the trunk, adding texture where the white paper was revealed. -
Grounding:
Add a very faint wash of watered-down grey-brown at the base of the little trees to ground them, so they don’t look like they are floating.
Step back and admire how the negative space brings your quiet forest scene to life
Overlapping Scene Directed Drawing
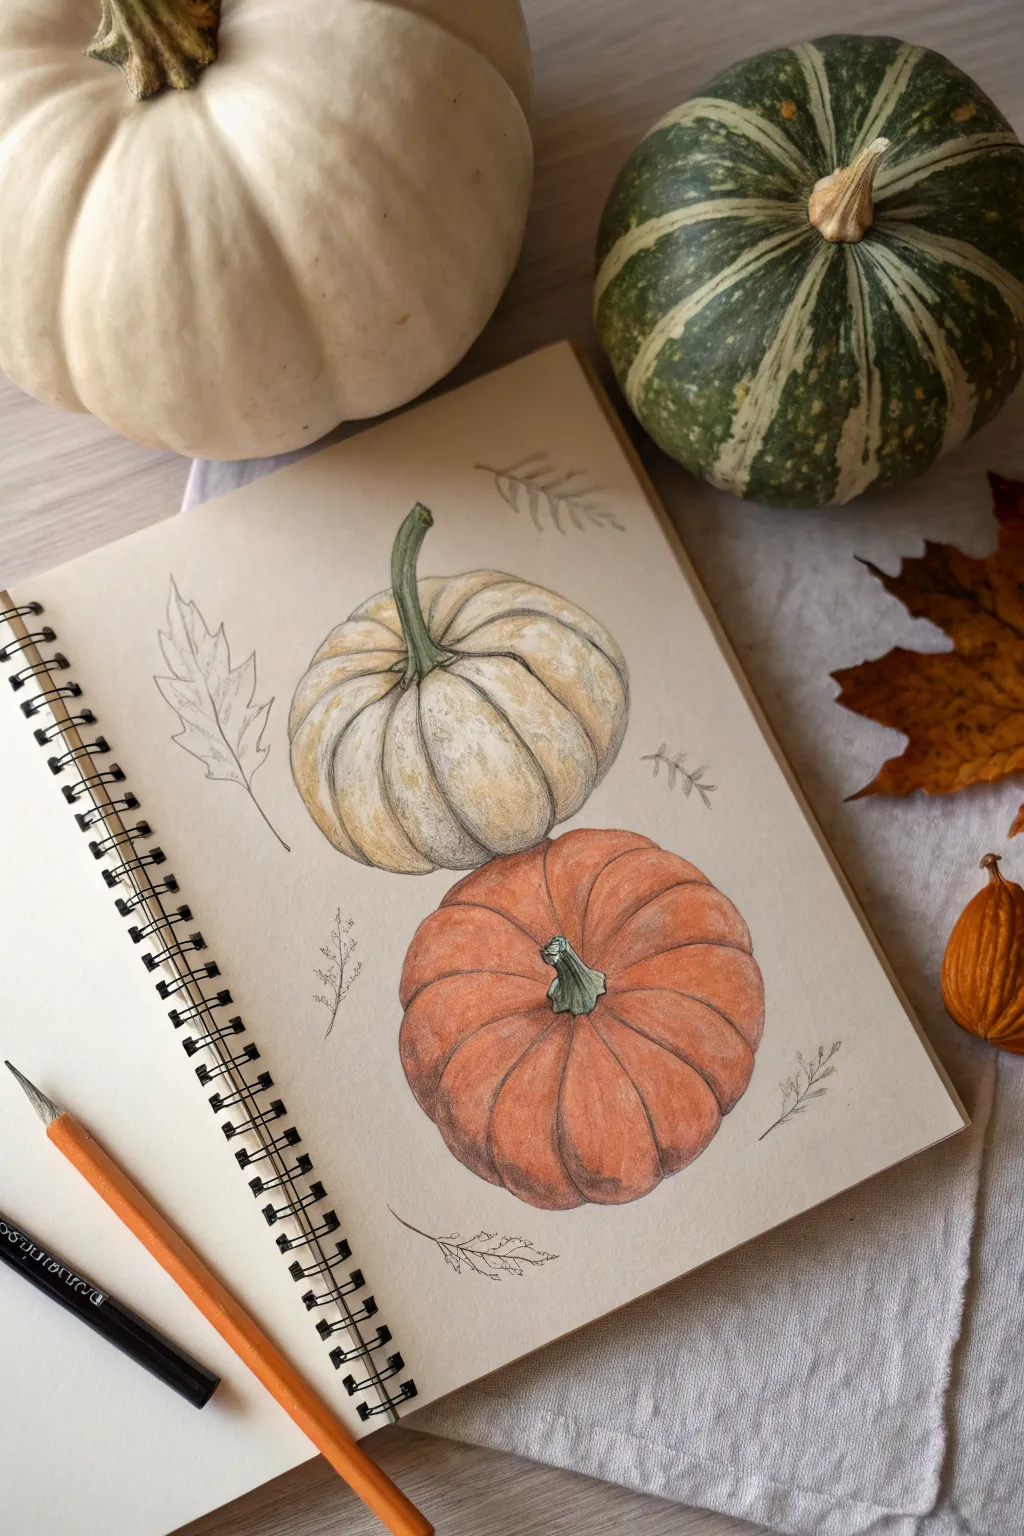
Capture the essence of autumn with this overlapping pumpkin study that emphasizes volume and texture. By layering colored pencils over a light graphite sketch, you will create a soft yet realistic illustration that pops off the page.
Step-by-Step Tutorial
Materials
- Spiral-bound sketchbook (medium tooth paper)
- Graphite pencil (HB or 2H)
- Kneaded eraser
- Colored pencils (cream, ochre, olive green, burnt orange, terracotta, warm grey)
- Fine liner pen (light grey or sepia, optional for outlines)
- Pencil sharpener
Step 1: Structural Sketching
-
Establish the composition:
Begin by lightly drawing two overlapping oval shapes in the center of your page. The top oval should be slightly smaller and tilted to the left, while the bottom oval should be fuller and wider, sitting directly in front of the lower portion of the top shape. -
Define the top pumpkin:
For the top pumpkin, sketch a long, curved stem extending upward and slightly to the left. Draw curved vertical ribs radiating from the base of the stem down to the bottom of the pumpkin, following the contour of the oval. -
Define the bottom pumpkin:
Draw a shorter, stubby stem in the center of the bottom oval. Sketch deep, curved ribs radiating outward from this stem, ensuring the lines wrap around the form to demonstrate volume. -
Add botanical accents:
Lightly sketch a few floating leaf shapes and delicate sprigs around the pumpkins. Include a maple-style leaf to the left and small fern-like fronds scattered near the edges. -
Refine and erase:
Go over your sketch to firm up the shapes of the ribs and stems. Use your kneaded eraser to gently lift the overlapping lines where the bottom pumpkin covers the top one, and lighten the entire drawing until it’s barely visible.
Step 2: Color Application: Top Pumpkin
-
Base layer:
Using a cream or very light beige colored pencil, shade the entire surface of the top pumpkin. Use light, circular motions to create a smooth base without hard stroke lines. -
Add rib definition:
Take a pale ochre or light brown pencil and gently shade along the drawn rib lines. Deepen the shadow specifically where the ribs dip inward to create the grooved texture. -
Color the stem:
Fill in the long stem with an olive green pencil. Add strokes of dark green or brown along the ridges of the stem to show its fibrous texture. -
Highlight and contrast:
Leave the highest points of the pumpkin bulb sections nearly white or very light cream. Add a touch of cool grey to the bottom edge where it sits behind the orange pumpkin to create separation.
Fixing Waxy Buildup
If colors stop layering, you have ‘wax bloom.’ Lightly scribble over the area with a colorless blender pencil or a tiny specific touch of mineral spirits to melt the wax into the paper.
Step 3: Color Application: Bottom Pumpkin
-
Base application:
Start with a light orange pencil and fill in the bottom pumpkin. I prefer to follow the curve of the pumpkin with my strokes here to reinforce the roundness. -
Deepen the tones:
Layer a rich burnt orange or terracotta color over the shadow areas and the grooves between the ribs. Build this up slowly; colored pencil works best with many light layers rather than one heavy one. -
Enhance the stem:
Color the short center stem with a mix of sage green and dark grey. Ensure the base of the stem looks rooted in the pumpkin by adding a small rim of shadow around it. -
Final shading:
Use a warm grey or dark brown to gently darken the very bottom of the pumpkin and the deepest creases between segments. This high contrast makes the form look three-dimensional.
Boost the Realism
Add tiny imperfections! Use a sharp dark brown pencil to add small speckles, warts, or scratches on the pumpkin skin for an organic, freshly-picked look.
Step 4: Finishing Details
-
Outline the leaves:
Using a very sharp grey pencil or a fine liner, create delicate outlines for the floating leaves. Sketch the veins lightly inside the maple leaf shape. -
Draw delicate sprigs:
Add the tiny fern-like botanical elements using short, quick dashes with a grey or olive pencil. keep these loose and airy compared to the solid pumpkins. -
Clean up:
Check your highlights and ensure the paper white is still showing through on the highest curves of the pumpkins. Use an eraser to reclaim these highlights if they became too muddy.
Now you have a beautifully layered autumn study preserved in your sketchbook.
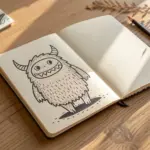
Mix-and-Match Monster Directed Drawing
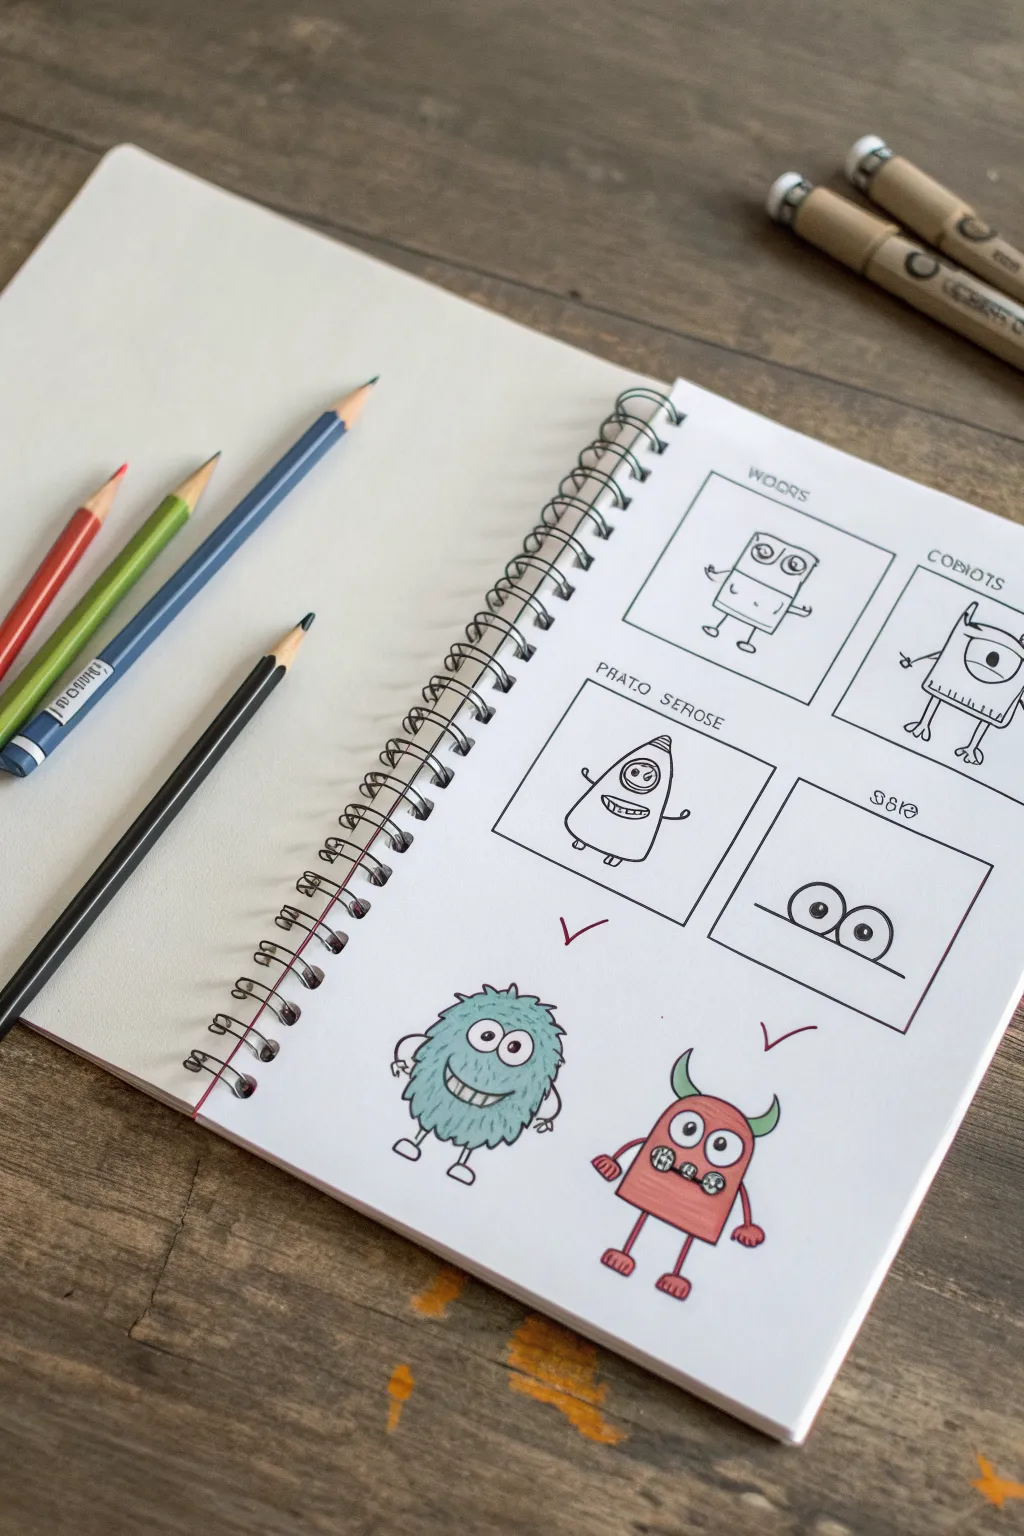
Encourage creativity with this playful mix-and-match drawing exercise that breaks monster-making into simple, customizable components. By practicing body shapes first, you can combine elements to invent wildly unique creatures with distinct personalities.
How-To Guide
Materials
- Spiral-bound sketchbook or drawing paper
- Fine-tipped black drawing pen or marker
- Colored pencils (red, green, blue, brown)
- Pencil for sketching
- Ruler
Step 1: Setting Up the Template
-
Draw the grid:
Begin by using your ruler and black pen to draw four equal-sized squares in a row across the top half of your sketchbook page. These will serve as your ‘idea bank’ for monster parts. -
Label the categories:
Above each square, write a category title. You can use standard labels like ‘Heads,’ ‘Bodies,’ and ‘Eyes,’ or get creative with custom names for your creature types.
Clean Lines Tip
When inking over pencil, wait at least a full minute before erasing sketching lines. This prevents the fresh ink from smearing and ruining your crisp edges.
Step 2: Creating the Monster Menu
-
Sketch the first body shape:
In the first square, draw a simple rectangular robot-style body with small stick legs and wheels. Add big, round eyes near the top to give it character. -
Add a cyclops variation:
In the second square (or next to your first sketch), draw a square body shape featuring a single large eye and spindly arms to offer a different style option. -
Draw a blob shape:
In the next box, sketch a smooth, triangular ‘blob’ shape with a wide mouth showing teeth. This gives you a softer, organic option compared to the robot shapes. -
Detail the eyes:
In the final box, focus purely on facial features. Draw a pair of round eyes sitting on a flat line to practice different expressions you might want to use later. -
Ink the menu:
Go over your pencil sketches in the boxes with your fine-tipped black pen to make the ‘menu’ clear and permanent.
Step 3: Drawing the Fuzzy Monster
-
Outline the body:
Below your grid on the left side, lightly sketch a large oval shape using a jagged, zig-zag line to create a furry texture. -
Add facial features:
Draw two large, touching circles for eyes near the top center. Below them, add a wide crescent smile filled with a grid pattern to represent teeth. -
Attach limbs:
Sketch thin, curved arms resting on the hips and short legs with simple oval feet. -
Color the fur:
Use a teal or light blue colored pencil to fill in the furry body. Use small, circular strokes to mimic the texture of the fur. -
Final outlines:
Trace the pencil lines with your black ink pen, emphasizing the spiky fur texture.
Texture Twist
Try using distinct strokes for coloring—circular scribbles for fur, straight lines for metal, or dots for scales to give each monster a unique tactile look.
Step 4: Drawing the Horned Monster
-
Sketch the boxy shape:
To the right of the fuzzy monster, draw a rectangle with slightly rounded corners for the body. -
Add horns and face:
Draw two curved horns on top of the head. Add two large eyes—one slightly larger than the other—and a mouth showing braces or teeth for a goofy expression. -
Draw the limbs:
Add thin arms with three-fingered hands and stick legs ending in three-toed feet. -
Color the body:
Shade the body with a reddish-pink colored pencil, pressing lightly for an even fill. I like to leave the eyes and teeth stark white for contrast. -
Color the accents:
Use a light green pencil for the horns to create a complementary color pop against the red body. -
Ink the details:
Finalize the drawing with your black pen. Add small ‘v’ checkmarks above the finished monsters to show they are complete.
Now you have a whole page of friendly creatures ready to mix and match for your next drawing session

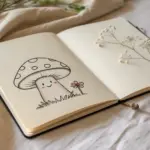
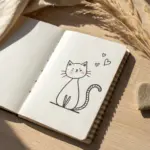

Have a question or want to share your own experience? I'd love to hear from you in the comments below!