If you want something spooky without stressing over tiny details, acrylic paint is perfect for bold shapes and eerie contrast. These easy creepy painting ideas lean on silhouettes, foggy blends, and simple focal points that still feel seriously unsettling.
Moonlit Haunted House Silhouette
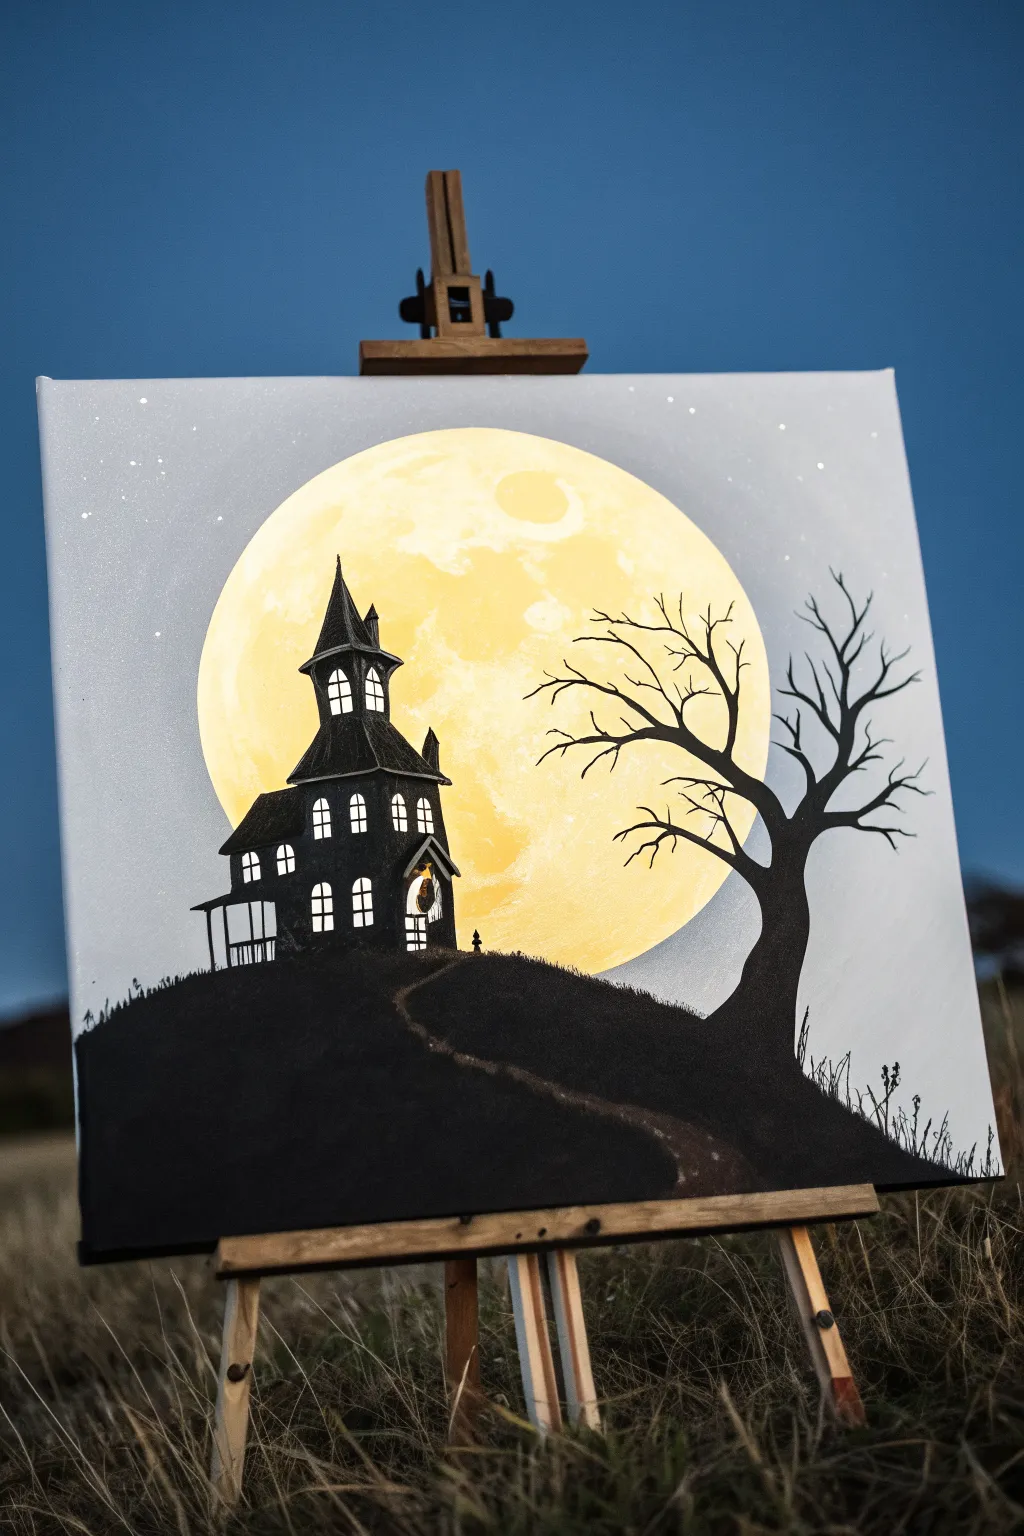
Capture the eerie beauty of a haunted silhouette against a dominating, luminous moon in this atmospheric acrylic painting. The striking contrast between the glowing yellow orb and the stark black details creates a spooky yet sophisticated piece perfect for Halloween decor.
Step-by-Step
Materials
- Square canvas (e.g., 12×12 or 16×16 inches)
- Acrylic paints: Titanium White, Mars Black, Cadmium Yellow, Yellow Ochre, tiny touch of grey/blue
- Large flat brush (1-inch)
- Medium round brush
- Fine liner or detail brush
- Circular object for tracing (plate or bowl) or a compass
- Pencil
- Palette
- Water cup and paper towels
Step 1: Setting the Sky and Moon
-
Prepare the background:
Begin by painting your entire canvas with a mix of Titanium White and the tiniest drop of grey or blue to create a misty, pale night sky tone. Let this base layer dry completely before moving on. -
Outline the moon:
Place a large circular object (like a dinner plate) in the center of the canvas, slightly offset toward the top. Lightly trace around it with a pencil to define your moon’s shape. -
Base coat the moon:
Fill in the circle with a bright, solid coat of Cadmium Yellow mixed with a considerable amount of White to make it opaque and glowing. -
Add lunar texture:
While the yellow base is still slightly tacky, mix small amounts of Yellow Ochre and plain White. Use a scruffy or dry brush to dab these colors onto the moon’s surface, creating craters and cloud-like textures. -
Refine the glow:
Blend the edges of your texturing softly so there are no harsh lines inside the moon. I find using a clean, dry brush helps soften these transitions beautifully.
Step 2: Building the Silhouette Landscape
-
Draft the hill:
Using your pencil, lightly sketch a large, rounded hill shape at the bottom of the canvas, letting it slope downwards from left to right. -
Sketch the house and tree:
Draw the outline of a tall, narrow Victorian-style house on the left side of the hill. On the right, sketch the trunk and main branches of a gnarly, leafless tree reaching toward the moon. -
Paint the hill black:
Load your large flat brush with Mars Black and fill in the entire hill area. Ensure the paint is thick enough to be fully opaque. -
Create the pathway:
Before the black hill dries completely, mix a dark grey/brown shade. Paint a winding path starting from the bottom right and leading up to the house entrance, blending it slightly into the wet black for a shadowy look. -
Define the tree:
Switch to a medium round brush and paint the trunk of the tree in solid black. Extend the branches outward, tapering them into fine points as they stretch over the moon.
Smooth Circles
Can’t get a crisp edge on your moon? After painting the yellow, carefully re-outline the circle with your background grey/white color to clean up any messy edges.
Step 3: House and Fine Details
-
Fill the house shape:
Paint the main silhouette of the house in black. Include details like the steep roof peaks, the chimney, and the porch columns on the left side. -
Add windows:
Let the black house silhouette dry fully. Then, using a fine liner brush and Titanium White, paint small grid shapes for the windows. The bright white against the black makes them look illuminated. -
Detail the porch light:
For the front door area, paint a small arch of yellow/orange light to simulate a porch lantern casting a warm glow. -
Refine the tree branches:
Use your finest liner brush with slightly watered-down black paint to add the tiniest twigs to the ends of your tree branches. The thinner paint flows better for these delicate lines. -
Add grass texture:
along the top edge of the black hill silhouette, use the tip of a small brush to flick tiny upward strokes, creating the look of wild grass. -
Paint the stars:
Dip a toothbrush or stiff brush into watered-down white paint. Roughly flick the bristles to splatter tiny stars across the grey sky areas, avoiding the black silhouette.
Level Up: Bats over the Moon
Add three small ‘m’ shapes in black silhouette flying across the face of the moon to add depth and movement to your spooky scene.
Step back and admire how the stark contrast makes your haunted scene practically pop off the canvas


Gnarled Tree Against a Full Moon
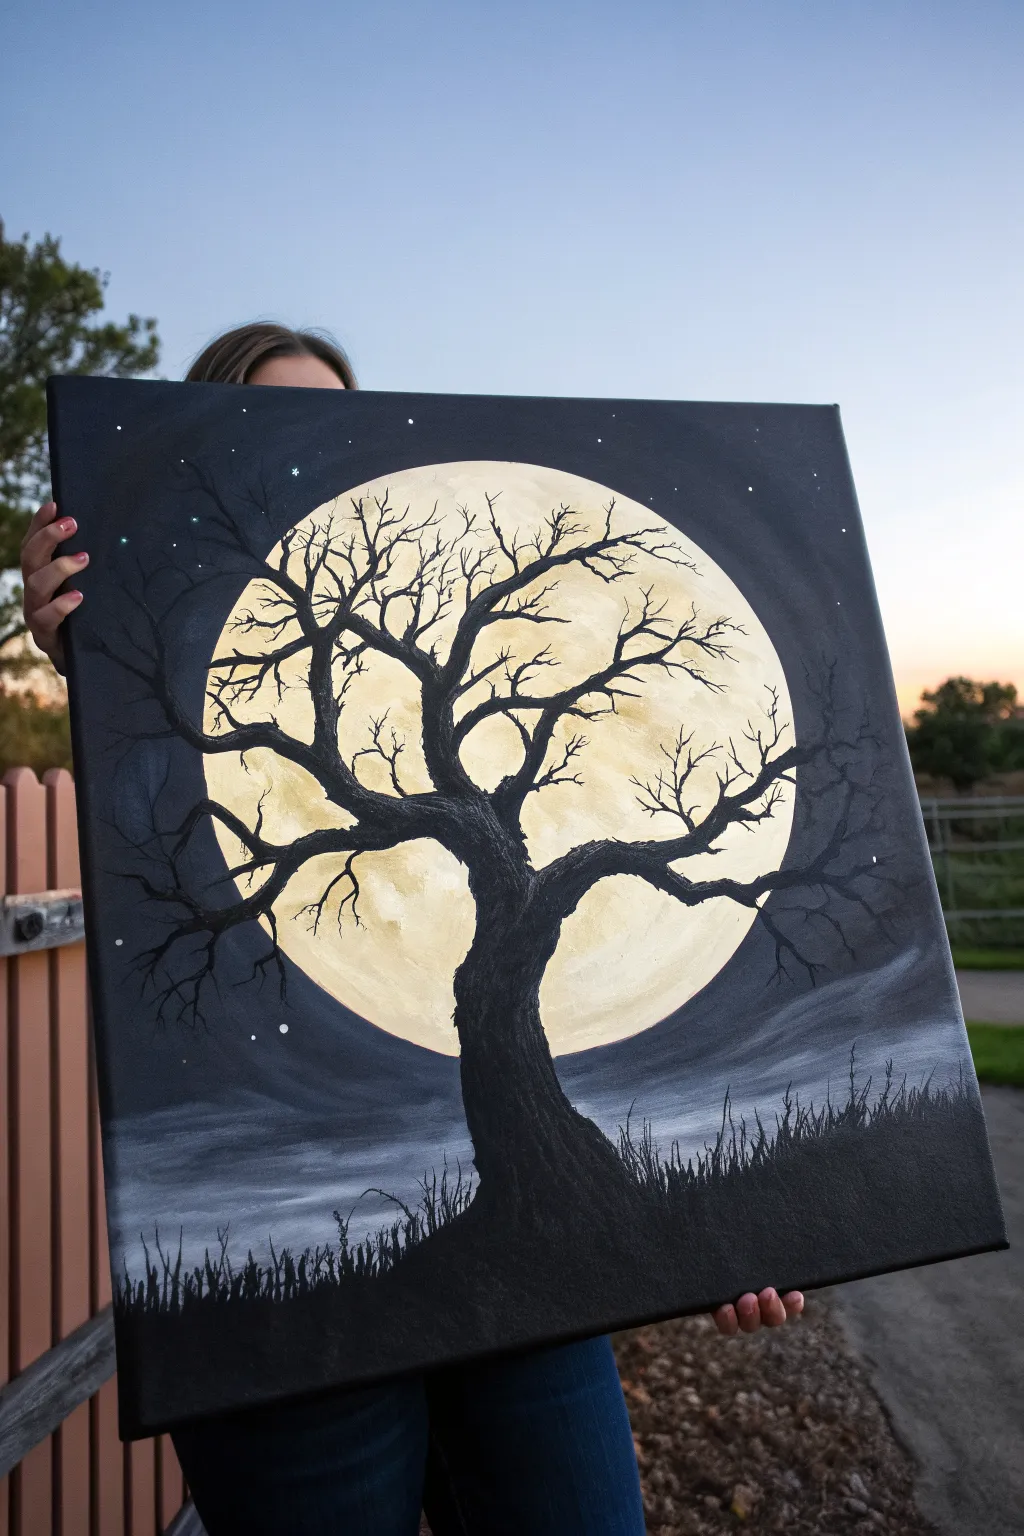
This striking silhouette painting captures the eerie beauty of a gnarled tree reaching across a massive, glowing moon. By playing with harsh contrasts between light and dark, you’ll create a dramatic night scene that feels both spooky and serene.
Step-by-Step Tutorial
Materials
- Square stretched canvas (approx. 16×16 or 20×20 inches)
- Acrylic paints: Mars Black, Titanium White, Yellow Ochre, Raw Umber
- Large flat brush (1-2 inch) for background
- Medium filbert brush for clouds and moon texture
- Small round detail brush (size 0 or 1) for branches and grass
- Round object for tracing (plate or bucket lid) or a compass
- Chalk or pencil
- Palette for mixing
- Water cup and paper towels
Step 1: Setting the Night Sky
-
Trace the moon:
Place your circular object slightly off-center on the canvas. It should be large, dominating the central space. Lightly trace around it with chalk or a pencil to mark your moon’s boundary. -
Paint the void:
Using your large flat brush and straight Mars Black paint, fill in the entire sky area outside the circle. Work carefully around the edge of your traced line to keep the moon shape crisp. -
Add subtle depth:
While the black is still slightly wet, mix a tiny drop of white into your black to create a dark charcoal grew. Sweep this loosely near the outer corners and edges to create a very faint atmospheric vignette, but keep the area near the moon pure black. -
Create the mist:
Near the bottom third of the painting, mix a medium grey. Using horizontal strokes with a filbert brush, blend this grey into the black background to create low-lying fog banks. Let the strokes fade out as they move upward.
Uneven Moon Edge?
If your circle gets wobbly while painting the sky, wait for it to dry completely. Then, use a small flat brush with thick white paint to carefully carve the circular shape back out.
Step 2: The Glowing Moon
-
Base layer:
Fill the entire moon circle with a mix of Titanium White and a very small touch of Yellow Ochre. This serves as a glowing underpainting. I like to let this layer dry completely before adding texture. -
Mapping craters:
Mix a light beige using white, a dab of Yellow Ochre, and a tiny speck of Raw Umber. Using a dry-brush technique (wipe most paint off the brush), scumble cloudy patches onto the moon to suggest craters and maria. -
Highlighting:
Go back in with pure Titanium White on the areas between your beige patches. Blend the edges softly so the moon looks organic and textured rather than like a flat sticker. -
Softening the edge:
If the edge of your moon looks too sharp, take a clean, slightly damp brush and very gently run it along the perimeter to blur the line between the bright moon and the black sky just a hair.
Glow Up
Mix a clear glazing medium with a tiny drop of glow-in-the-dark pigment or fluorescent paint. Glaze this over the moon’s surface for a hidden effect that appears when the lights go out.
Step 3: The Silhouette Tree
-
Drafting the trunk:
Load a medium brush with slightly watered-down Mars Black. Paint the thick, winding trunk starting from the bottom center, making it wider at the base and twisting as it moves up toward the moon’s center. -
Main branches:
Extend 3-4 primary branches out from the trunk. Make them crooked and hesitant, avoiding straight lines. Let them overlap the bright moon face to maximize contrast. -
Adding texture:
Before the trunk dries, dab the brush to create a rough, bark-like edge on the sides of the tree so it doesn’t look smooth. -
Fine twigs:
Switch to your smallest liner or detail brush. Paint -
Extending the reach:
Continue adding fine twigs until they reach past the moon and into the black sky. This connection integrates the background and foreground. -
Grounding the scene:
Paint a sloping black hill at the very bottom to anchor the tree. The top edge of the hill should be organic and uneven. -
Initial grass blades:
Using the tip of your detail brush, flick quick upward strokes along the hill’s horizon line to create tall, wild grass silhouettes. -
Refining the grass:
Vary the height and direction of the grass blades. Some should cross over each other for a natural, unkempt look.
Step 4: Final Touches
-
Adding stars:
Dilute a small mount of white paint with water until it’s milky. Dip a toothbrush or stiff brush in it and flick the bristles to create tiny stars in the black sky areas. Keep them sparse. -
Prominent stars:
Use your detail brush to manually dot in a few larger, brighter stars. You can add a tiny cross shape to one or two to make them twinkle. -
Review contrast:
Step back and check your blacks. If the tree trunk looks patchy, add a second coat of Mars Black to ensure it is completely opaque against the light moon.
Hang your painting in a spot where evening light might catch it to enhance the nocturnal mood

Glowing Eyes in the Darkness
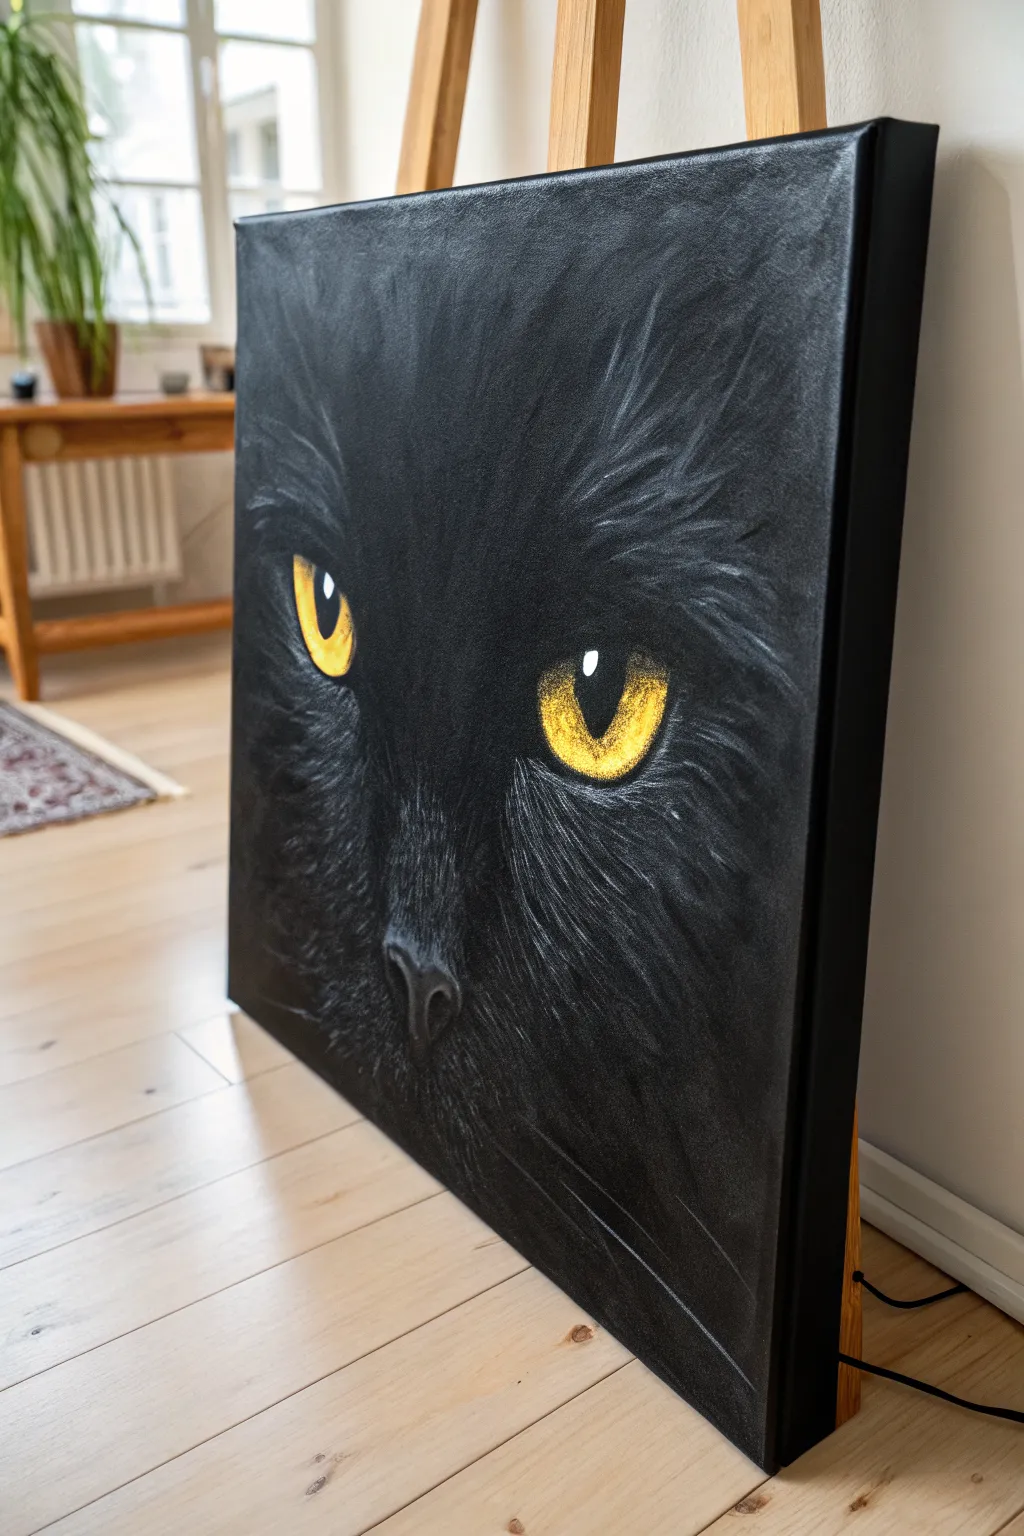
This striking acrylic canvas project captures the mysterious allure of a black cat emerging from shadows, focusing intensely on piercing yellow eyes. By using simple dry-brushing techniques on a dark background, you can create realistic fur textures that seem to glow against the darkness.
Step-by-Step Tutorial
Materials
- Stretched canvas (square or rectangular)
- Black gesso or black acrylic paint (heavy body)
- Titanium White acrylic paint
- Cadmium Yellow acrylic paint
- Yellow Ochre acrylic paint (optional for depth)
- Large flat brush (for background)
- Round synthetic brushes (sizes 2 and 4)
- Fine liner brush (size 0 or 00)
- Old, stiff bristle fan brush or flat brush (for texture)
- Palette and water cup
- Chalk or white charcoal pencil
Step 1: Setting the Darkness
-
Prime the Surface:
Start by covering your entire canvas with black gesso or a heavy layer of black acrylic paint. Ensure full coverage, including the sides, to give it a finished, gallery-wrap look without needing a frame. -
Ensure Complete Dryness:
Let the base layer dry completely. If the black looks patchy or thin in bright light, apply a second coat to ensure a deep, void-like background. -
Sketch the Basics:
Using a piece of white chalk or a white charcoal pencil, very lightly sketch the placement of the eyes and the general triangle of the nose. Keep these lines faint; they are just guides for positioning.
Step 2: The Glowing Eyes
-
Base the Eyes:
Fill in the almond shapes of the eyes with a mix of Titanium White and a tiny dot of yellow. This underlayer makes the subsequent yellow colors pop vividly against the black background. -
Apply Primary Yellow:
Once the white base is dry, paint over it with pure Cadmium Yellow. Depending on your paint brand’s opacity, you might need two coats for a solid, bright finish. -
Add Depth with Ochre:
While the yellow is still slightly wet, blend a tiny amount of Yellow Ochre or a darker golden shade around the outer edges of the iris to create a 3D spherical effect. -
Define the Pupil:
Switch to a small round brush and paint the vertical slit pupil using pure black. Ensure the edges are sharp and clean. -
The Spark of Life:
Using your smallest liner brush or even the tip of a toothpick, place a small, crisp dot of pure Titanium White on the upper curve of each pupil. This ‘catchlight’ is crucial for making the eyes look wet and alive.
Fuzzy Fur Fix
If your fur looks like solid stripes, your brush is too wet. Use a hair dryer to dry the canvas, then switch to a stiff, dry brush with barely any paint.
Step 3: Creating Fur Texture
-
Mix a Grey Value:
On your palette, mix a dark charcoal grey utilizing black and a small amount of white. You want a color that is just slightly lighter than the background. -
Dry Brush Technique:
Load an old fan brush or stiff flat brush with your grey mix, then wipe most of it off on a paper towel until the brush is almost dry. -
Map the Flow:
Lightly flick the dry brush outward from the nose bridge and around the eyes. Follow the natural direction of cat fur—radiating out from the center of the face. -
Build Lighter Layers:
Add a bit more white to your grey mix. Using the same dry-brush technique, apply this lighter shade sparingly on key highlight areas: the bridge of the nose, above the eyes, and the cheekbones. -
Refining with a Liner:
Switch to a liner brush with watered-down light grey paint. Paint individual, longer guard hairs around the ears and eyebrows to break up the uniform texture. -
Detailing the Nose:
Paint the nose leather with a dark grey, tapping the brush to create a stippled, porous texture. Add a tiny highlight on the top curve of the nose for dimension. -
Whiskers:
Dilute some light grey or white paint until it is inky. With a confident, quick motion, sweep on long whiskers protruding from the muzzle and shorter whiskers above the eyes. -
Final Contrast Check:
Step back from the painting. If the fur looks too bright, lightly glaze over it with a watered-down black wash to push it back into the shadows.
Make It Glow
Mix a tiny amount of neon yellow or glow-in-the-dark medium into your final yellow eye layer for an extra spooky effect when the lights go down.
Hang your finished masterpiece in a hallway or dim corner where the eyes can ‘watch’ passersby with eerie silent intensity


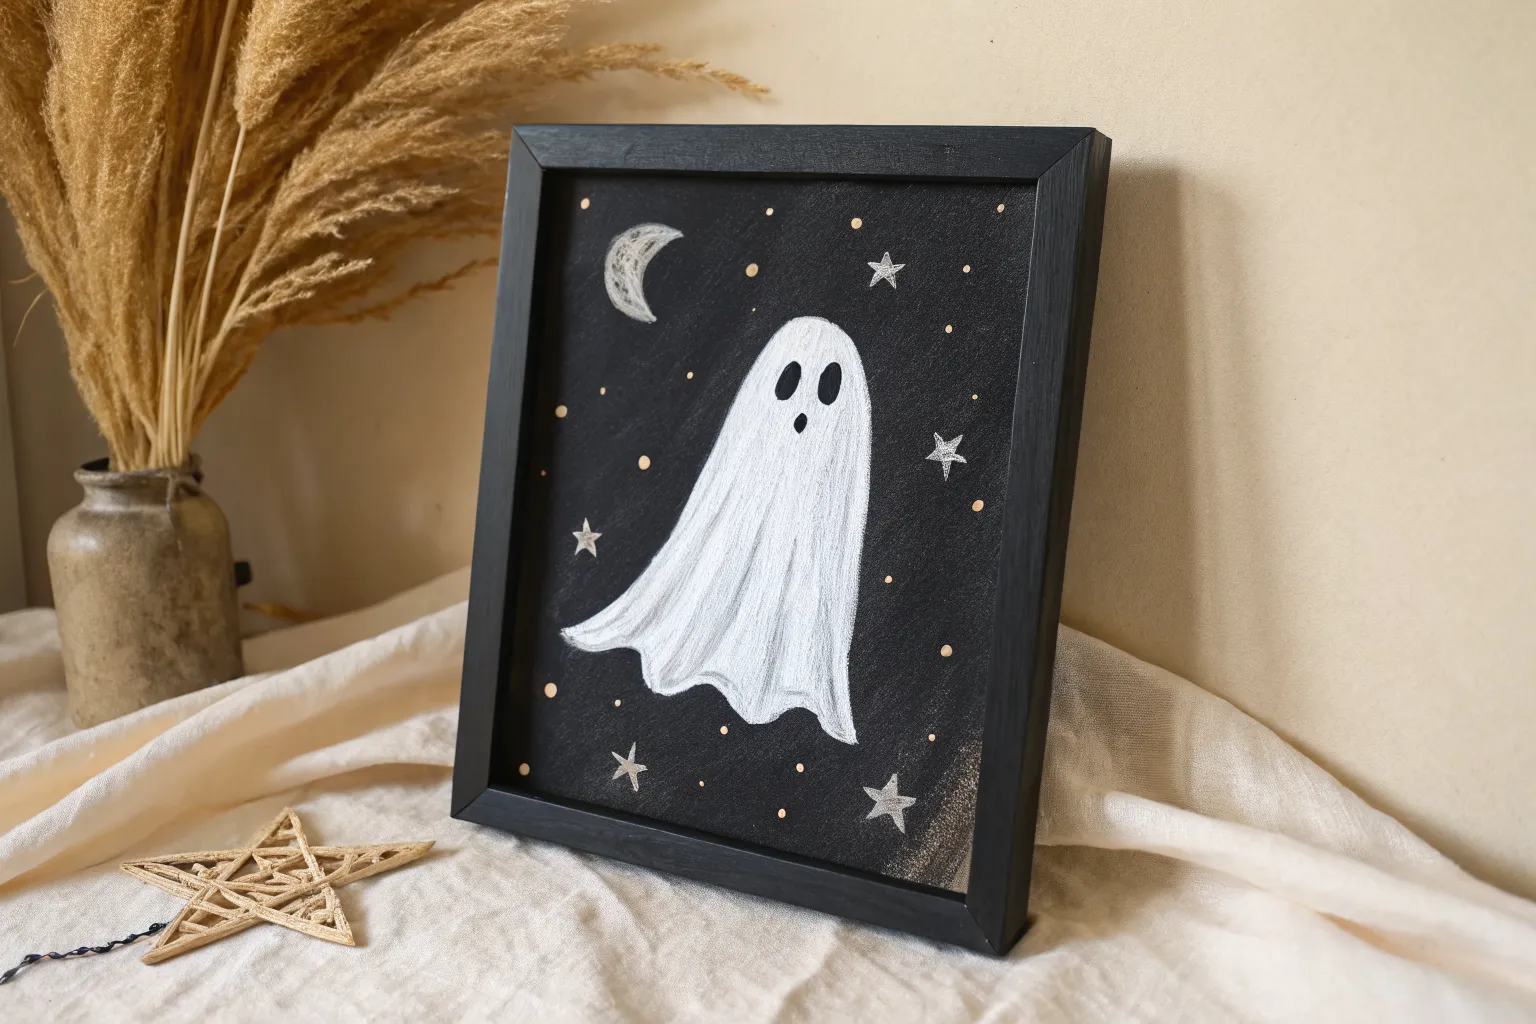
Sheet Ghost in a Dark Woods
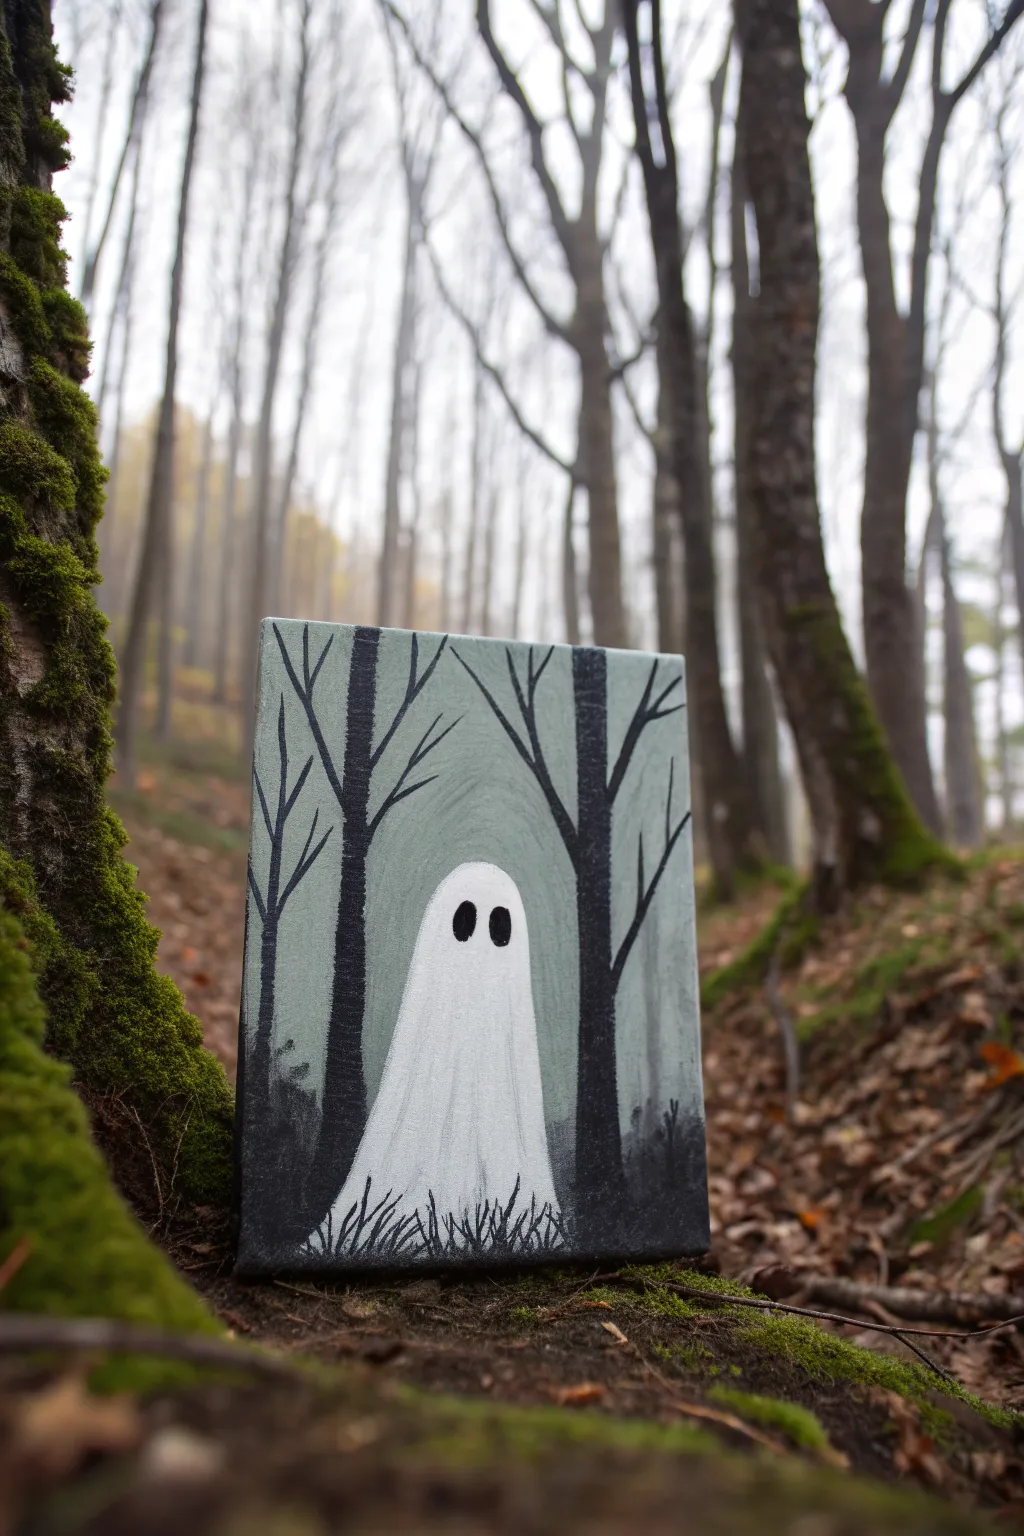
Capture the eerie stillness of an autumn woodland with this charming sheet ghost painting. Using a muted palette and simple shapes, you will create a spooky yet sweet scene that balances dark atmosphere with a bright, focal character.
How-To Guide
Materials
- Small stretched canvas or canvas panel (e.g., 5×7 or 8×10 inches)
- Acrylic paints: Titanium White, Mars Black, Burnt Umber, Hooker’s Green, and Unbleached Titanium (or a light beige)
- Flat shader brush (medium size)
- Round detail brush (small size)
- Pencil for sketching
- Palette or paper plate
- Cup of water and paper towels
Step 1: Setting the Atmosphere
-
Mix the background color:
Creating the right moody backdrop is key. Mix a large amount of Titanium White with a tiny touch of Mars Black and a drop of Hooker’s Green. You want a very pale, desaturated grey-green that looks like overcast forest mists. -
Apply the base coat:
Using your flat shader brush, cover the entire canvas with your mixed grey-green color. Ensure you paint the sides of the canvas too for a finished look. -
Create a gradient (optional):
While the paint is still wet, you can add a tiny bit more white to the center and blend it outwards. This creates a subtle glow effect behind where the ghost will stand. -
Let it dry completely:
This background needs to be totally dry before you start layering, or the black trees will turn muddy. A hair dryer on a cool setting can speed this up.
Clean Ghost Edges
If you have shaky hands, lightly outline the ghost shape with a white paint pen or marker first. This acts as a barrier and makes filling in the details much easier.
Step 2: Sketching and Blocking
-
Sketch the layout:
Lightly draw a simple arch shape in the bottom center for your ghost. Then, draw vertical lines for two main trees on roughly either side of the ghost, plus a few thinner branches reaching out. -
Paint the tree trunks:
Mix Mars Black with a tiny dot of Burnt Umber to make a warm, deep charcoal color. Use the flat brush to paint the thick vertical trunks, keeping the edges slightly rough to mimic bark texture. -
Add the branches:
Switch to your round detail brush. With the same black-brown mix, pull thin branches upward and outward from the main trunks. Let them fork and twist like spooky fingers.
See-Through White?
White acrylic is notoriously transparent. Don’t glob it on thick; instead, engage your patience and apply thin layers, letting each dry fully before adding the next.
Step 3: Painting the Ghost
-
Fill in the ghost shape:
Using pure Titanium White and a clean flat brush, fill in the ghost’s silhouette. You will likely need two coats to ensure the grey background doesn’t show through. -
Add subtle shadows:
To make the sheet look drapey, mix a tiny amount of your background grey with white. Paint very faint vertical streaks near the bottom hem and sides of the ghost to suggest folds in the fabric. -
Paint the eyes:
Once the white is dry, use your small round brush and pure Mars Black to paint two oval shapes for eyes. Place them slightly higher than center for that classic spooky look.
Step 4: Final Details
-
Ground the scene:
Using your black mix, stipple (tap repeatedly) paint along the very bottom edge of the canvas to create a dark forest floor. This hides the bottom of the ghost slightly, making it look like it’s drifting through grass. -
Add grass blades:
I like to use a liner brush or the very tip of a round brush here. Flick quick, short strokes of black upward from the bottom edge to create wild grass overlapping the bottom of the ghost and trees. -
Refine the tree lines:
Go back over your tree branches if any look too transparent. You can also add very faint white highlights on the right side of the trees to suggest a light source coming from the ghost. -
Clean up edges:
Check the perimeter of your ghost. If the black background paint accidentally overlapped the white, touch it up with a bit of fresh white paint for a crisp silhouette.
Prop your painted phantom on a shelf or mantle for a subtle seasonal touch
BRUSH GUIDE
The Right Brush for Every Stroke
From clean lines to bold texture — master brush choice, stroke control, and essential techniques.
Explore the Full Guide
Bare Branches Framing a Moon
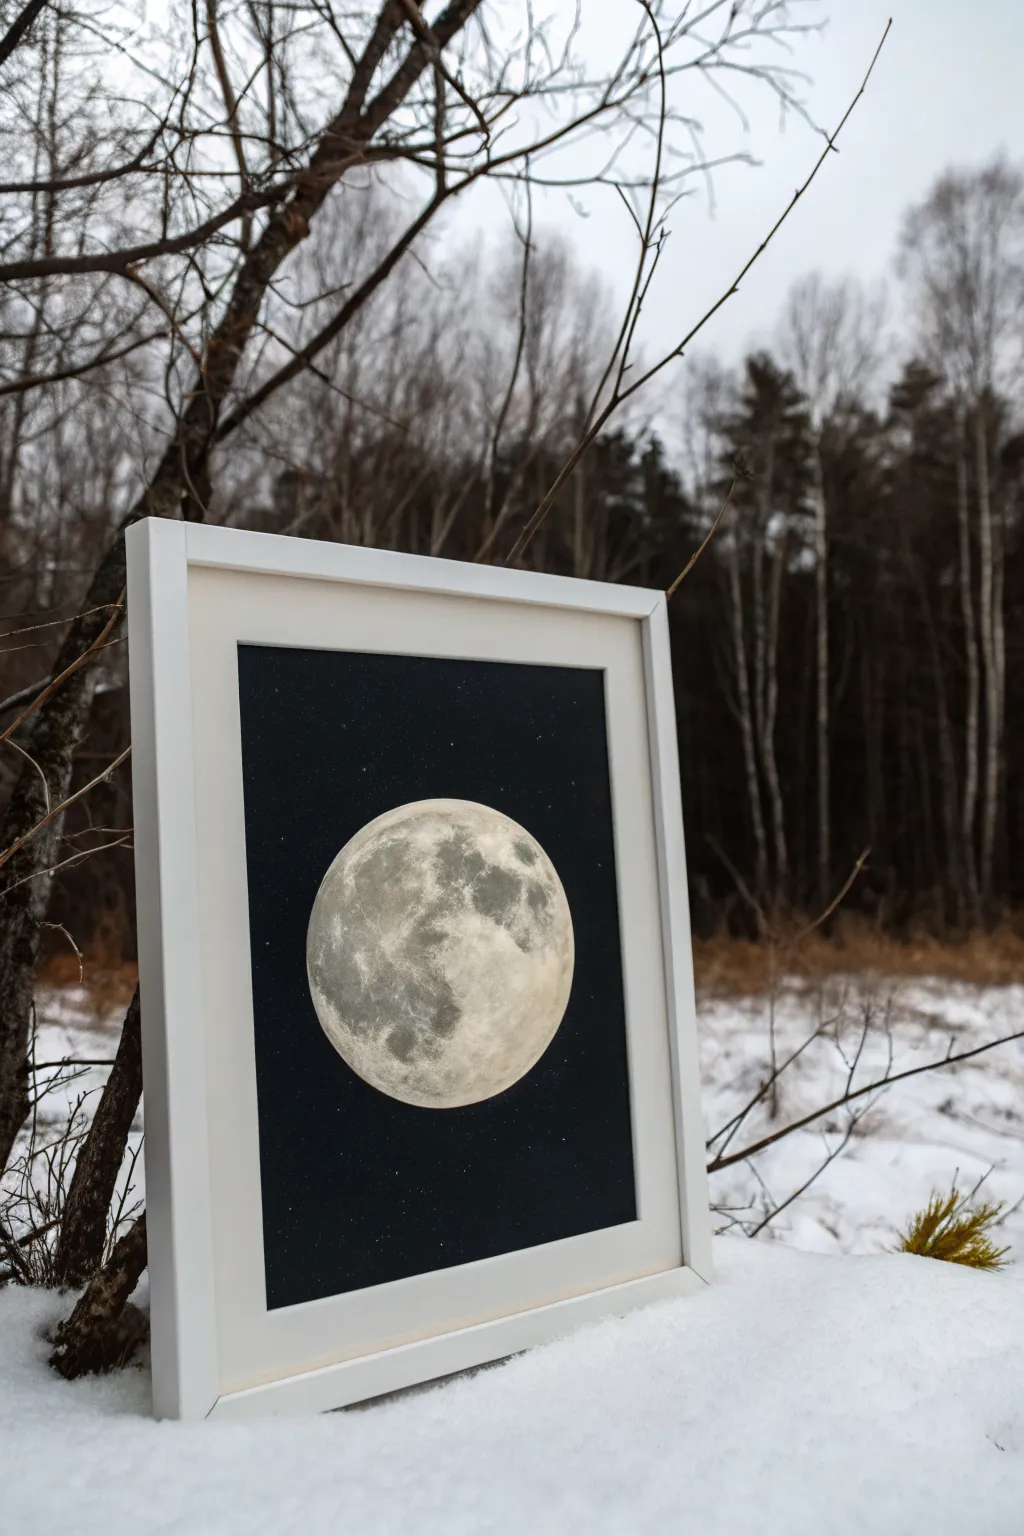
Capture the stark, haunting beauty of a full moon glowing in the dead of space with this high-contrast painting project. This piece relies on simple sponge techniques to create complex craters, resulting in a professional-looking lunar portrait perfect for a moody gallery wall.
Step-by-Step Tutorial
Materials
- Black acrylic paint (matte finish preferred)
- Titanium White acrylic paint
- Grey acrylic paint (or mix black/white)
- Canvased board or thick mixed media paper (sized to fit your frame)
- White or light wood frame with matting
- Compass or round object for tracing (plate/bowl)
- Sea sponge or coarse kitchen sponge
- Small round detail brush
- Medium flat brush
- Old toothbrush
- Pencil
Step 1: Setting the Void
-
Prepare your surface:
Begin by assessing your canvas or paper size. If you are using a frame with a mat as shown in the reference, measure the window opening of the mat to ensure your moon will be centered. -
Create the background:
Load your medium flat brush with matte black acrylic paint. Cover the entire surface thoroughly. I find that two thin coats provide a deeper, more velvety void than one thick coat. -
Outline the subject:
Once the black background is completely dry to the touch, use a compass or trace around a circular object (like a dessert plate) with a pencil to establish the moon’s shape in the center.
Natural Texture
Don’t overthink the sponge placement. Looking at a reference photo of the real moon helps, but random blotches often look more organic and realistic than perfectly painted circles.
Step 2: Building the Lunar Surface
-
Base coat the moon:
Fill in your pencil circle with a solid coat of Titanium White. It doesn’t need to be perfectly opaque yet, but ensure you stay neatly within the lines to keep that sharp contrast against the black. -
Prepare your palette:
Squeeze out small amounts of white, light grey, and a darker charcoal grey. If you don’t have greys, simply mix your black and white to create three distinct tonal values. -
Sponge texture application:
Dampen your sea sponge and squeeze out all excess water. Dip it lightly into the light grey paint and dab it onto a paper towel first to remove globs. -
Create the maria:
Gently dab the sponge over the white moon base. Focus the grey heavily on the left side and bottom quadrant to mimic the ‘seas’ (maria) of the moon, leaving the top right area brighter. -
Deepen the shadows:
Switch to a slightly darker grey on your sponge. Lightly stamp over the previous grey areas, specifically focusing on the large, irregular shapes that make up the ‘Man in the Moon’ face features. -
Add high contrast:
Taking a very small amount of white on a clean section of the sponge, dab over the brightest areas on the upper right to re-establish the highlight where sunlight would hit most directly.
Step 3: Refining Details
-
Paint specific craters:
Using your small round detail brush and diluted grey paint, create the ‘Tycho’ crater near the bottom. Paint a small dot, then flick tiny, faint lines radiating outward from it like sunlight rays. -
Softening edges:
If any sponge marks look too harsh or digital, use a barely damp brush to feather the edges of the grey patches, melting them into the white base for a spherical look. -
Enhance the glow:
Mix a very translucent glaze using water and a tiny drop of white. Paint a thin ring just inside the very edge of the moon on the brightest side to make it look spherical and glowing. -
Adding stars:
Cover your painted moon with a paper circle or a bowl to protect it. Dip an old toothbrush into watered-down white paint. -
Flick the stars:
Run your thumb across the bristles to flick a fine mist of white specks onto the black background. Keep this subtle; too many stars will distract from the main subject. -
Final touches:
Remove the cover from the moon. Check the black edge around the circle; if you painted over the line, touch up the background with fresh black paint for a razor-sharp silhouette. -
Framing:
Allow the piece to dry completely, ideally overnight. Mount the artwork behind a white mat and place it in your frame to complete the high-contrast presentation.
Fixing Overspray
If you accidentally flick ‘stars’ onto your finished moon crater details, instantly dab them away with a clean, slightly damp Q-tip before the acrylic paint sets.
Hang your lunar portrait in a spot where it can catch low light to emphasize its ghostly, celestial atmosphere
Blood-Red Moon Over Black Hills

Capture the unsettling beauty of a blood-red moon looming over a stark landscape with this dramatic acrylic painting. The high contrast between the vibrant celestial body and the pitch-black foreground creates a captivating, moody atmosphere perfect for spooky decor.
Step-by-Step
Materials
- Small stretched canvas (square format, approx. 8×8 or 10×10)
- Acrylic paints: Mars Black, Titanium White, Cadmium Red, Cadmium Yellow (or Orange), Burnt Umber
- Flat brush (1-inch) for background
- Round brush (size 4) for the moon
- Fine liner brush (size 0 or 00) for branches
- Pencil and round object (for tracing moon shape)
- Palette or paper plate
- Water cup and paper towels
Step 1: Setting the Scene
-
Prepare the canvas:
Start by painting the entire canvas with a solid coat of Mars Black acrylic. Ensure you cover the sides of the canvas as well for a polished finish. -
Let it dry:
Allow the black background to dry completely. This step is crucial because any wet black paint will muddy the vibrant colors of the moon later on. -
Outline the massive moon:
Find a round object slightly smaller than your canvas width (like a small bowl or large lid). Place it near the center, slightly higher up, and lightly trace the circle with a pencil or white chalk pencil.
Step 2: Painting the Blood Moon
-
Base coat the moon:
Fill in the circle with a mix of Titanium White and a tiny drop of red. This light pink underlayer helps the subsequent red layers pop against the black background. -
Add the first red layer:
Once the underlayer is tacky, mix Cadmium Red with a touch of Orange. Apply this roughly over the moon, but don’t worry about perfect smoothness; texture adds to the crater effect. -
Create moon texture:
While the paint is still wet, dab in some pure Cadmium Yellow and White near the top right edge to create a highlight zone. -
Add shadowy craters:
Mix a tiny bit of black or brown into your red to make a dark maroon. Stipple this color onto the left side and bottom of the moon to give it a spherical, 3D appearance. -
Blend the surface:
Use a clean, slightly damp brush to gently swirl the boundaries between your light, medium, and dark varied reds. The goal is a mottled, organic surface rather than a perfect gradient. -
Background glow:
Using a dry brush with very little red paint on it, gently scumble some red haze onto the black background around the moon and falling towards the horizon line to simulate ambient light.
Fixing a Wobbly Moon
If your circle’s edge looks messy, wait for the moon paint to dry fully. Then, take black paint on a small brush and carefully carve back into the shape from the outside to refine the edge.
Step 3: The Dark Landscape
-
Block in the hills:
With Mars Black and a medium round brush, paint two rolling hills at the bottom. Make the hill on the right slightly higher than the one on the left. -
Add subtle highlights:
Mix a dark grey-green or greenish-gold color. Lightly dry-brush the top edges of the hills to suggest moonlight catching the grass texture. -
Paint the main tree trunk:
Using black and a smaller round brush, paint the thick trunk of the main tree on the right hill. It should twist and lean slightly, reaching towards the moon. -
Branch structure:
Switch to your fine liner brush. Pull branches outward from the trunk, ensuring they get thinner as they extend. Paint them crossing directly over the face of the moon to create immediate depth. -
Fine details:
Add tiny twigs splitting off the main branches. A shaky hand actually helps here to make the tree look gnarled and creepy. -
Secondary trees:
Paint a smaller, more distant tree silhouette on the far right edge, and a small, dead shrub-like tree on the left hill. Keep these simpler than the main focal tree. -
Small figure:
Paint a very small, indistinct vertical shape near the bottom center between the hills to suggest a lone figure or tombstone watching the scene.
Make It Glow
Mix a glazing medium or water with neon orange paint. Apply a very thin, transparent layer over the dried moon to make it look brilliantly fluorescent under blacklight.
Step 4: Final Touches
-
Starry night:
Load a toothbrush or stiff brush with watered-down white paint. Flick the bristles with your thumb to spray a fine mist of stars over the upper black areas. -
Clean up stars:
If any stars landed on the black tree silhouette where they shouldn’t be, simply paint over them with a dab of black.
Step back and admire how the dark silhouettes accentuate that ominous red glow.

PENCIL GUIDE
Understanding Pencil Grades from H to B
From first sketch to finished drawing — learn pencil grades, line control, and shading techniques.
Explore the Full Guide
Creepy Cat Silhouette With Bright Eyes
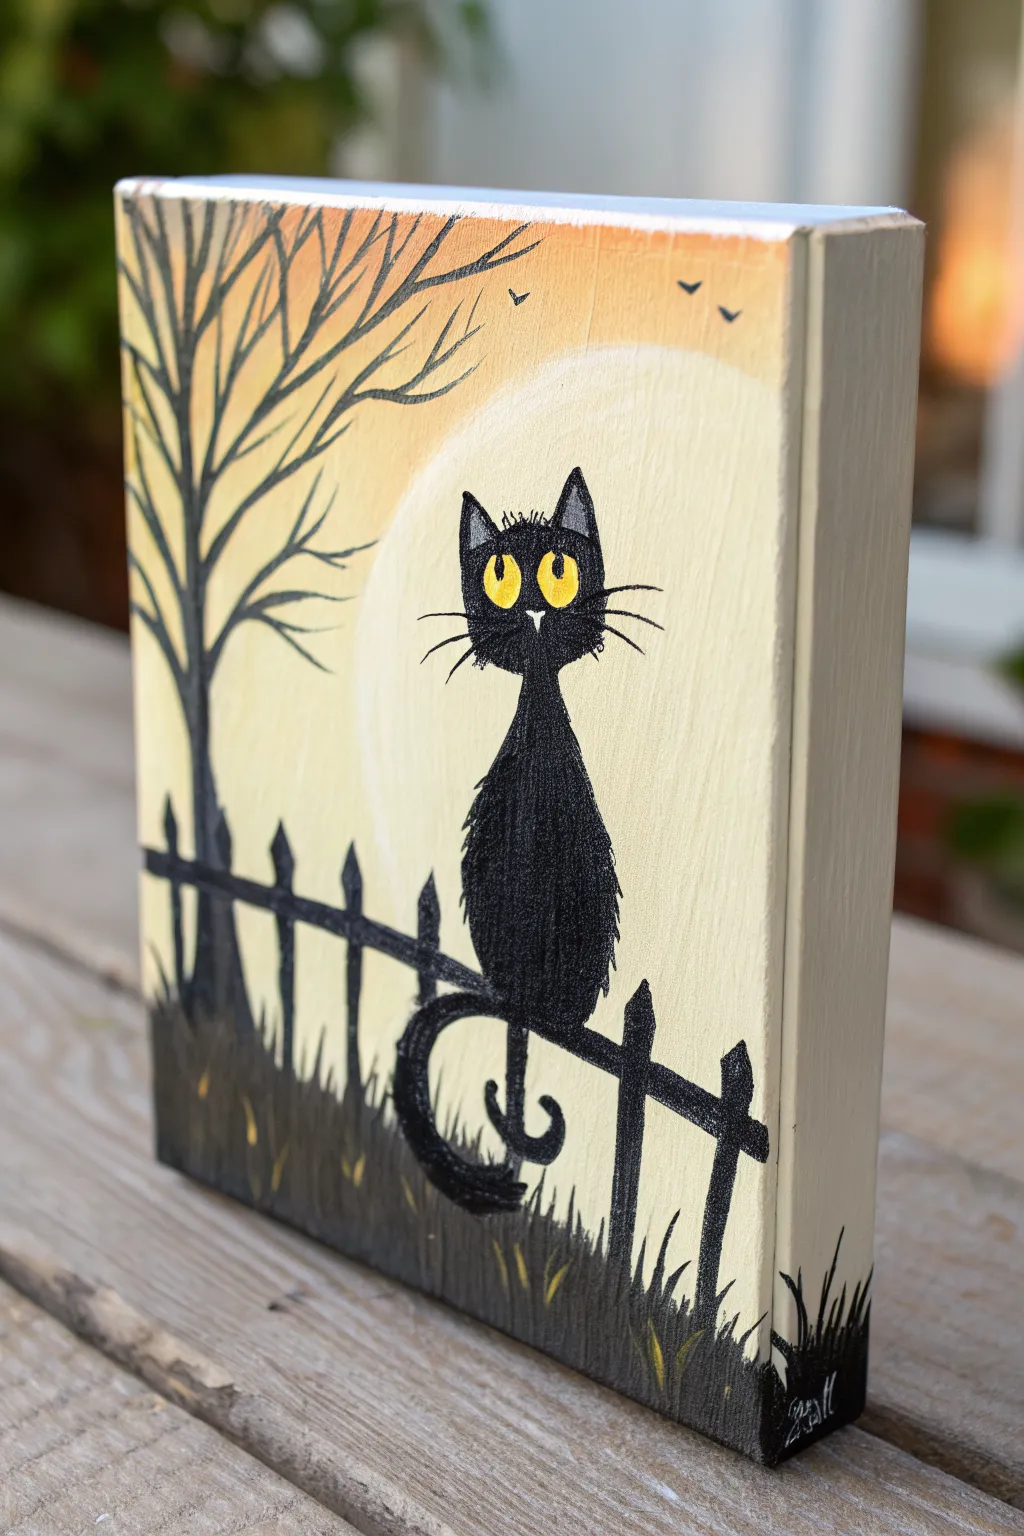
This charming acrylic painting features a delightfully fuzzy black cat perched on a fence against a pale, glowing moon. Its mix of simple silhouettes and scruffy textures makes it a perfect project for beginners looking to add a touch of playful spookiness to their decor.
Step-by-Step Tutorial
Materials
- Small square canvas (e.g., 6×6 or 8×8)
- Acrylic paints: Titanium White, Mars Black, Cadmium Yellow, Orange, Burnt Umber
- Flat brush (approx. 1 inch)
- Small round brush (size 2 or 4)
- Fine liner brush (size 0 or 00)
- Cup of water and paper towels
- Pencil
Step 1: Setting the Scene
-
Paint the base sky:
Start by mixing Titanium White with just a tiny drop of Orange and Yellow to create a very pale, warm cream color. Cover the entire canvas with this shade using your flat brush, ensuring you paint the sides of the canvas as well for a finished look. -
Add the sunset gradient:
While the base is still slightly tacky, mix a slightly stronger pale orange. Apply this to the top third of the canvas, blending it downwards into the cream color to create a soft, sunset-like fade. -
Create the moon:
Load your clean flat brush with pure Titanium White. In the center-right area, paint a large, soft circle to represent the moon. Don’t worry about hard edges; blend the white outwards slightly into the background color to give it a glowing, hazy effect. -
Sketch the layout:
Once the background is completely dry, lightly use a pencil to mark the horizon line for the grass, the vertical posts of the fence, and the basic oval shapes for the cat’s body and head.
Dry Brushing Tip
For the scruffy fur, wipe most of the paint off your brush onto a paper towel first. The brush should feel stiff and dry to get that scratchy texture.
Step 2: Building the Silhouette
-
Paint the tree structure:
Using Mars Black and a small round brush, paint the tree trunk on the left side. Create a thick base that tapers as it goes up, effectively framing the left edge of your scene. -
Add branches:
Switch to your liner brush to pull thin, jagged branches extending from the trunk towards the center over the moon. Keep your hand loose to mimic the natural, spooky twists of dead wood. -
Construct the fence:
Using the small round brush and black paint, fill in the horizontal rail and the vertical pickets of the fence. Add pointed tops to the pickets for that classic wrought-iron or picket fence look. -
Paint the grass:
Fill the bottom section below the fence with black. Use short, upward flicking strokes along the top edge of this black area to simulate blades of grass poking up around the fence bottom. -
Add foreground depth:
Mix a very small amount of bright yellow with your black to interact with the grass tips, or simply dab a few tiny faint yellow streaks in the grass to suggest moonlight catching the blades.
Step 3: The Cat and Details
-
Block in the cat’s body:
Paint a tall, elongated teardrop shape for the cat’s body sitting on the fence rail. Top it with a wider oval for the head. Fill these shapes in with solid Mars Black. -
Create the fur texture:
Once the black block-in is dry, take a nearly dry small brush with black paint. Use a stippling or dab-and-pull motion around the edges of the cat’s silhouette to create a scruffy, fuzzy fur texture. -
Add the ears and tail:
Paint two triangles on top of the head for ears. Then, paint a long, curling tail that drops down below the fence line and curls back up in a spiral, adding that same fuzzy texture to the tail’s edges. -
Paint the eyes:
Using your small round brush, paint two large, bright Cadmium Yellow ovals on the cat’s face. Let this coat dry completely, and apply a second coat if the black shows through. -
Add eye details:
With the fine liner brush, paint vertical black slits for pupils. Outline the yellow eyes with a thin black line to define them sharply against the face. -
Highlights and whiskers:
Add a tiny white dot in each pupil slightly off-center to make the eyes look shiny. Then, using the liner brush and black paint, flick long, thin whiskers extending outwards from the cheeks. -
Final touches:
Paint tiny ‘V’ shapes in the sky using black to represent distant birds. I usually add a small white triangle for the nose and grey triangles inside the ears to give the face more dimension. -
Seal the sides:
Check the sides of your canvas to ensure the design wraps around or borders neatly. Add your signature in the bottom corner with a contrasting color like white or light grey.
Make It Glow
Mix a tiny bit of fluorescent yellow into your standard yellow paint for the eyes. This will make them pop intensely under different lighting conditions.
Now you have a quirky little feline friend watching the moon rise from your wall
Raven on a Fence Post at Dusk
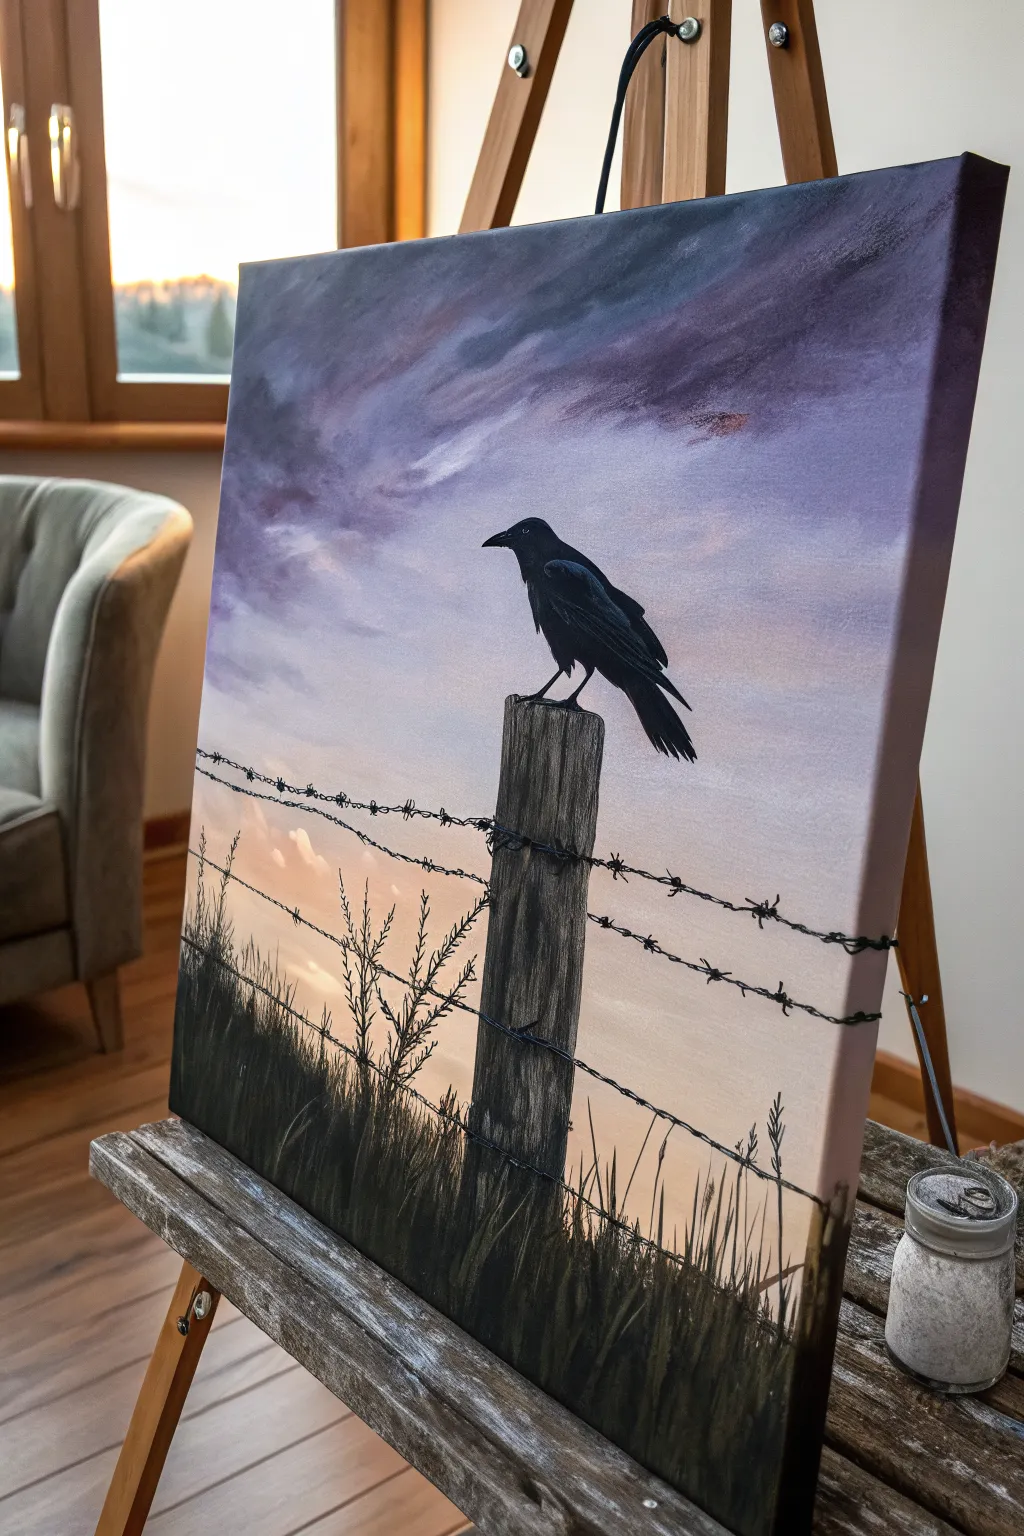
This atmospheric painting captures the solitary mood of a raven perched against a fading twilight sky. By blending soft acrylic gradients with crisp silhouettes, you will create a hauntingly beautiful scene that feels both peaceful and slightly ominous.
Detailed Instructions
Materials
- Stretched canvas (e.g., 16×20 inches)
- Acrylic paints (Titanium White, Mars Black, Burnt Umber, Dioxazine Purple, Hooker’s Green, Cadmium Orange, Yellow Ochre)
- Large flat brush (1-2 inch) for blending
- Medium flat brush (square tip)
- Small round brush (size 2 or 4)
- Fine liner brush (size 0 or 00)
- Palette knife (optional for texture)
- Cup of water and paper towels
- Pencil for sketching
Step 1: Painting the Atmospheric Sky
-
Map out the horizon:
Begin by deciding where your fence line will sit. Lightly draw a horizontal line with your pencil about one-third of the way up from the bottom of the canvas to establish the ground level. -
Mix the twilight colors:
Prepare your palette for the gradient sky. You will need a pale orange mix (White + Cadmium Orange), a muted lavender (White + Dioxazine Purple), and a darker stormy purple (Dioxazine Purple + a touch of Black). -
Apply the horizon glow:
Using your large flat brush, apply the pale orange mix starting just above your pencil horizon line. Blend it upward, adding a little White to keep it soft and hazy. -
Transition to purple:
While the orange paint is still slightly wet, pick up the muted lavender color. Start painting from the middle of the canvas upward, gently blending the bottom edge into the orange to create a seamless transition. -
Create the stormy upper sky:
Switch to the darker purple mix for the top third of the canvas. Use sweeping, horizontal strokes to suggest moody clouds, allowing some of the darker pigment to streak down into the lighter purple area for a dramatic effect. -
Add cloud details:
With a clean, dry brush, soften the edges of the dark clouds. You can also dab a tiny bit of the orange mix onto the underside of the purple clouds to reflect the setting sun.
Uneven Gradients?
If your sky colors aren’t blending smoothly, your paint is likely drying too fast. Keep a spray bottle handy and lightly mist the canvas to keep the acrylics workable longer.
Step 2: The Fence Post and Foreground
-
Block in the post shape:
Once the sky serves as a dry backdrop, use a medium flat brush and Burnt Umber mixed with a little Black to paint the thick, vertical rectangle of the fence post in the center foreground. -
Add wood grain texture:
While the post is drying, mix a lighter grey-brown (White + Burnt Umber). Use a fairly dry brush to drag vertical streaks down the post, mimicking the look of weathered, aged wood. -
Paint the grassy foreground:
Mix a deep, dark green using Mars Black and Hooker’s Green. Using the medium brush, fill in the bottom third of the canvas below the horizon line with vertical, upward strokes to simulate tall, shadowed grass. -
Layer grass details:
Switch to your small round brush. With the same dark mixture, flick swift, upward strokes extending from the dark mass into the lower part of the sky to create individual blades of tall grass and weeds.
Pro Tip: Inky Lines
For the barbed wire, thin your black paint with water until it has the consistency of heavy cream. This helps the paint flow off the liner brush for long, uninterrupted lines.
Step 3: The Raven and Details
-
Sketch the raven:
Wait for the post to be fully dry. Lightly sketch the outline of the raven standing on top of the post. Focus on the silhouette: a sleek head, a beak pointing left, and long wing feathers drooping slightly. -
Paint the raven silhouette:
Fill in the raven shape with pure Mars Black using the small round brush. Ensure the edges are crisp and sharp against the soft sky. -
Add subtle highlights:
I like to mix a tiny drop of Blue or Purple into White to create a cool grey. Use this sparingly on the top of the wing and the beak to give the bird just a hint of dimension, suggesting glossy feathers. -
Draw the barbed wire:
Using your fine liner brush and thinned black paint (add a drop of water to make it flow like ink), paint two horizontal lines crossing behind the post. Let the lines wobble slightly; they shouldn’t be ruler-straight. -
Add the barbs:
Along the wire lines, paint small clustered ‘X’ shapes or loops at regular intervals to represent the sharp barbs of the wire. -
Final touches:
check your foreground grasses. If the grass line looks too uniform, add a few taller, stray weeds or seed heads using the liner brush to break up the pattern.
Step back and admire how the stark silhouettes pop against your beautifully blended twilight sky


Spiderweb Corner With a Single Spider
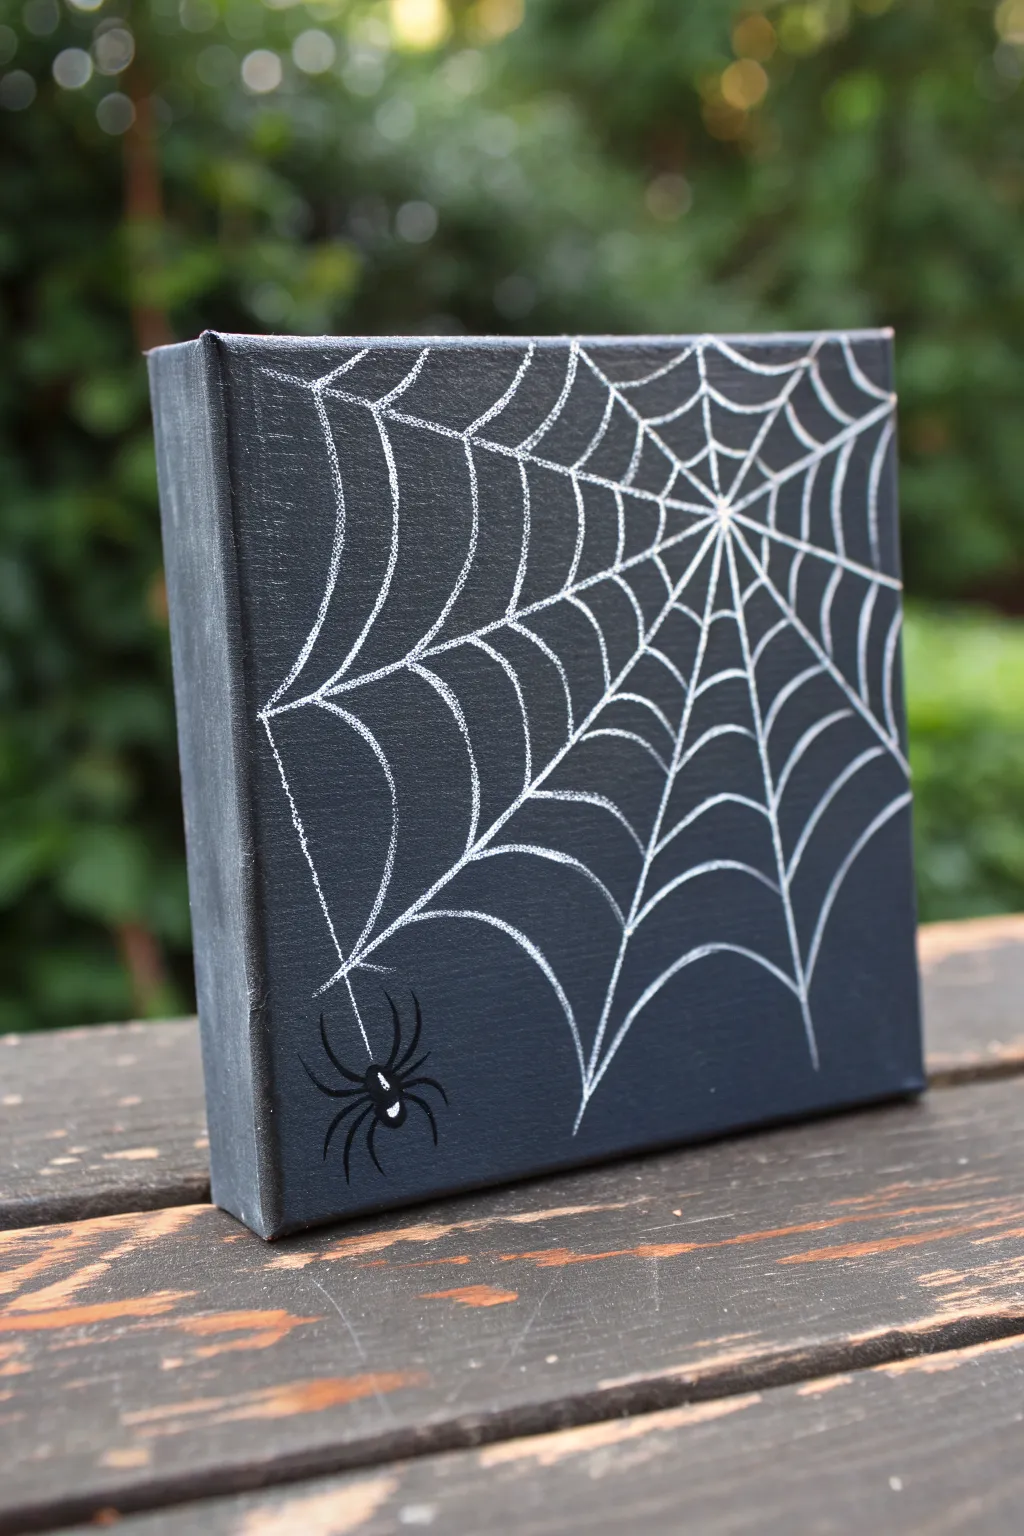
Capture the classic spookiness of a damp cellar with this high-contrast spiderweb painting. The striking white lines against a matte black background make for a bold, minimalist piece of Halloween decor that works perfectly on a small canvas.
Detailed Instructions
Materials
- Small square stretched canvas (e.g., 6×6 or 8×8 inches)
- Black acrylic paint (Matte finish preferred)
- White paint pen (Fine or medium tip) OR white acrylic paint with a liner brush
- Pencil (optional)
- Small round paintbrush (size 2 or 4)
- Water cup and paper towels
Step 1: Setting the Stage
-
Prime with black:
Start by coating the entire front surface of your canvas with black acrylic paint. Use broad strokes to ensure even coverage. -
Paint the edges:
Don’t forget the sides! Extend the black paint around all four edges of the canvas for a professional, finished look that doesn’t require a frame. -
Let it dry completely:
Allow the base coat to dry fully. If the canvas texture still shows through too much, apply a second coat of black and let that dry as well. A solid, opaque background is crucial for the high contrast we want.
Fixing Smudges
If you smudge a white line while it’s wet, don’t wipe it! Let it dry completely, then paint over the mistake with black paint before re-drawing.
Step 2: Spinning the Web
-
Establish the anchor point:
Identify the ‘center’ of your web. For this composition, we want the web originating from the top right third of the canvas, slightly off-center to the right. -
Draw the radial threads:
Using your white paint pen (or liner brush), draw long, straight lines radiating outward from your chosen center point. Think of these like the spokes of a bicycle wheel. -
Extend to the edges:
Make sure some of these radial lines go all the way off the edges of the canvas, while others stop mid-way down to create varying lengths. -
Begin the spiral:
Starting near the center point, draw small curved lines connecting the radial spokes. These little swoops should curve inward towards the center point, creating a scalloped effect. -
Expand the web:
Continue adding rows of these curved lines, moving further outward with each ring. As you move away from the center, the spacing between the rings can get slightly wider. -
Vary the line weight:
Don’t worry if the lines aren’t perfectly uniform. A little shakiness or varying thickness actually makes the web look more organic and aged. -
Add the drop line:
Select a spot on the lower part of the web, towards the left side. Draw a single straight line hanging down vertically—this will be the thread your spider is descending from.
Step 3: The Spider
-
Paint the body:
At the end of your drop line, paint two small black distinct shapes: a larger oval for the abdomen and a smaller circle for the head/thorax. Since the background is black, use a slightly glossier black or just outline it faintly with white first if you can’t see what you are doing. -
Add the legs:
Using a very fine brush or pen, draw four legs on each side of the body. The front two should reach forward slightly, while the back legs curve backward. -
Highlight the body:
To make the spider visible against the black background, add a small white highlight or marking on the back of the abdomen. -
Add leg highlights:
Add tiny, subtle white ticks on the joints of the spider’s legs. This little bit of contrast separates the spider from the dark background. -
Final touches:
Check your web lines. If any areas look too faint, re-trace them gently with your white pen to make them pop.
Glow in the Dark
Trace over your white web lines with glow-in-the-dark acrylic medium. By day it looks normal, but at night the web will eerily illuminate.
Hang this little masterpiece near a doorway to startle your guests with its realistic charm
Pumpkin With an Unsettling Grin
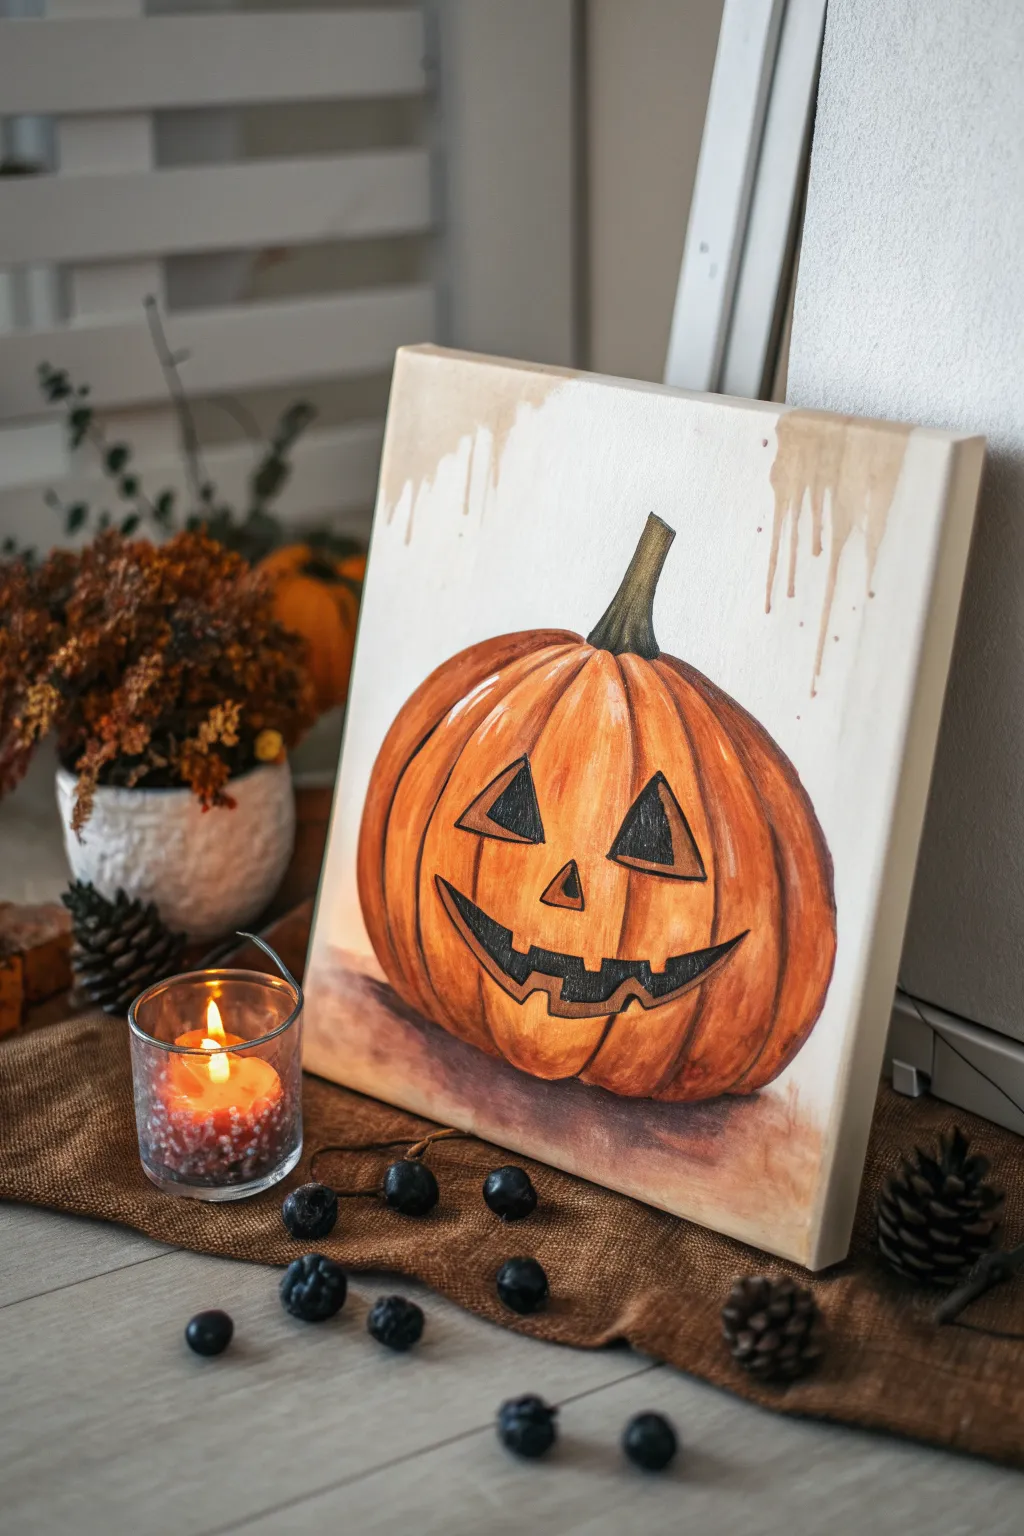
This project explores the classic Halloween icon with a painterly twist, featuring a realistically shaded pumpkin set against a simple cream background with subtle, rustic drips. The result is a charmingly spooky piece that balances traditional autumn warmth with a touch of uncanny grit.
Step-by-Step Tutorial
Materials
- Small square canvas (e.g., 8×8 or 10×10 inches)
- Acrylic paints (Titanium White, Burnt Sienna, Cadmium Orange, Yellow Ochre, Burnt Umber, Mars Black)
- Flat brush (medium)
- Round brush (small for details)
- Fine liner brush
- Pencil and eraser
- Palette
- Water cup and paper towels
Step 1: Sketch and Background
-
Prime the background:
Mix a generous amount of Titanium White with a tiny drop of Yellow Ochre and a hint of Burnt Sienna to create a creamy bone color. Cover the entire canvas with this mixture using your flat brush and let it dry completely. -
Add the drip effect:
Create a watery wash of Burnt Sienna and water. Using your round brush, load it with the wash and press it against the top edge of the canvas, allowing gravity to pull trails of paint down the surface naturally. Do this mainly near the corners. -
Outline the pumpkin:
Once the background is dry to the touch, lightly sketch a large, slightly squat oval shape in the center of the canvas. It shouldn’t be a perfect circle; give it some natural lumps. -
Map the ridges:
Draw curved vertical lines radiating from the top center point down to the bottom, defining the pumpkin’s ribs. These sections should be wider in the middle and taper at the ends. -
Draw the face and stem:
Sketch the classic triangle eyes and nose, and a wide, jagged grin. Add a crooked, rectangular stem sprouting from the top center indentation.
Paint Lifting?
If blending layers lifts the paint underneath, you’re slightly overworked the acrylic. Stop immediately, let that area dry completely, and then apply a fresh layer on top to fix it.
Step 2: Painting the Pumpkin Body
-
Base coat the orange:
Mix Cadmium Orange with a little Burnt Sienna to tone down the brightness. Fill in the entire pumpkin shape, painting around the eyes, nose, and mouth features you sketched. -
establish shadows:
While the base is still slightly tacky, mix Burnt Sienna with a touch of Burnt Umber. paint along the vertical ridge lines you drew earlier to create deep grooves between the pumpkin segments. -
Blend the shadows:
Use a clean, slightly damp brush to gently soften the hard edges of your dark ridge lines, pulling the darker color slightly outward into the orange segments to create a rounded form. -
Add highlights:
Mix Cadmium Orange with White and a little Yellow Ochre. Paint this lighter color on the highest point of each pumpkin segment (the center of each rib) to make them look plump and three-dimensional. -
Refine the gradients:
Go back and forth between your shadow color and highlight color, blending them wet-on-wet where they meet to ensure the transition looks smooth and curved rather than striped.
Make It Glow
To simulate a candle inside, paint the bottom interior of the eyes and mouth with bright yellow, fading to orange and then black towards the top, rather than filling them with solid black.
Step 3: Details and Definition
-
Paint the stem:
Fill in the stem shape with a mix of Yellow Ochre and a tiny bit of Mars Black to get a greenish-brown olive tone. Add thin lines of darker brown for wood grain texture. -
Fill the features:
Use straight Mars Black to fill in the eyes, nose, and mouth. I find using a small flat brush here helps keep the straight edges of the triangles sharp. -
Create depth in the carving:
To show the thickness of the pumpkin rind, paint a thin line of light orange mixed with white along the right-hand inner edge of the carved holes. This simulates the cut flesh catching the light. -
Add surface imperfections:
Dilute some Burnt Umber and use a liner brush to add tiny specks, scratches, or extra thin lines on the pumpkin skin for realistic texture. -
Ground the object:
Mix a dark purplish-brown using Burnt Umber and a tiny touch of black. Paint a soft, hazy shadow directly underneath the bottom of the pumpkin to anchor it to the surface.
Now you have a wonderfully rustic piece of Halloween decor that looks great on a mantle or shelf
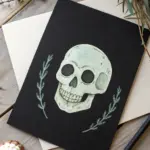
Black Jar With a Ghost Trapped Inside
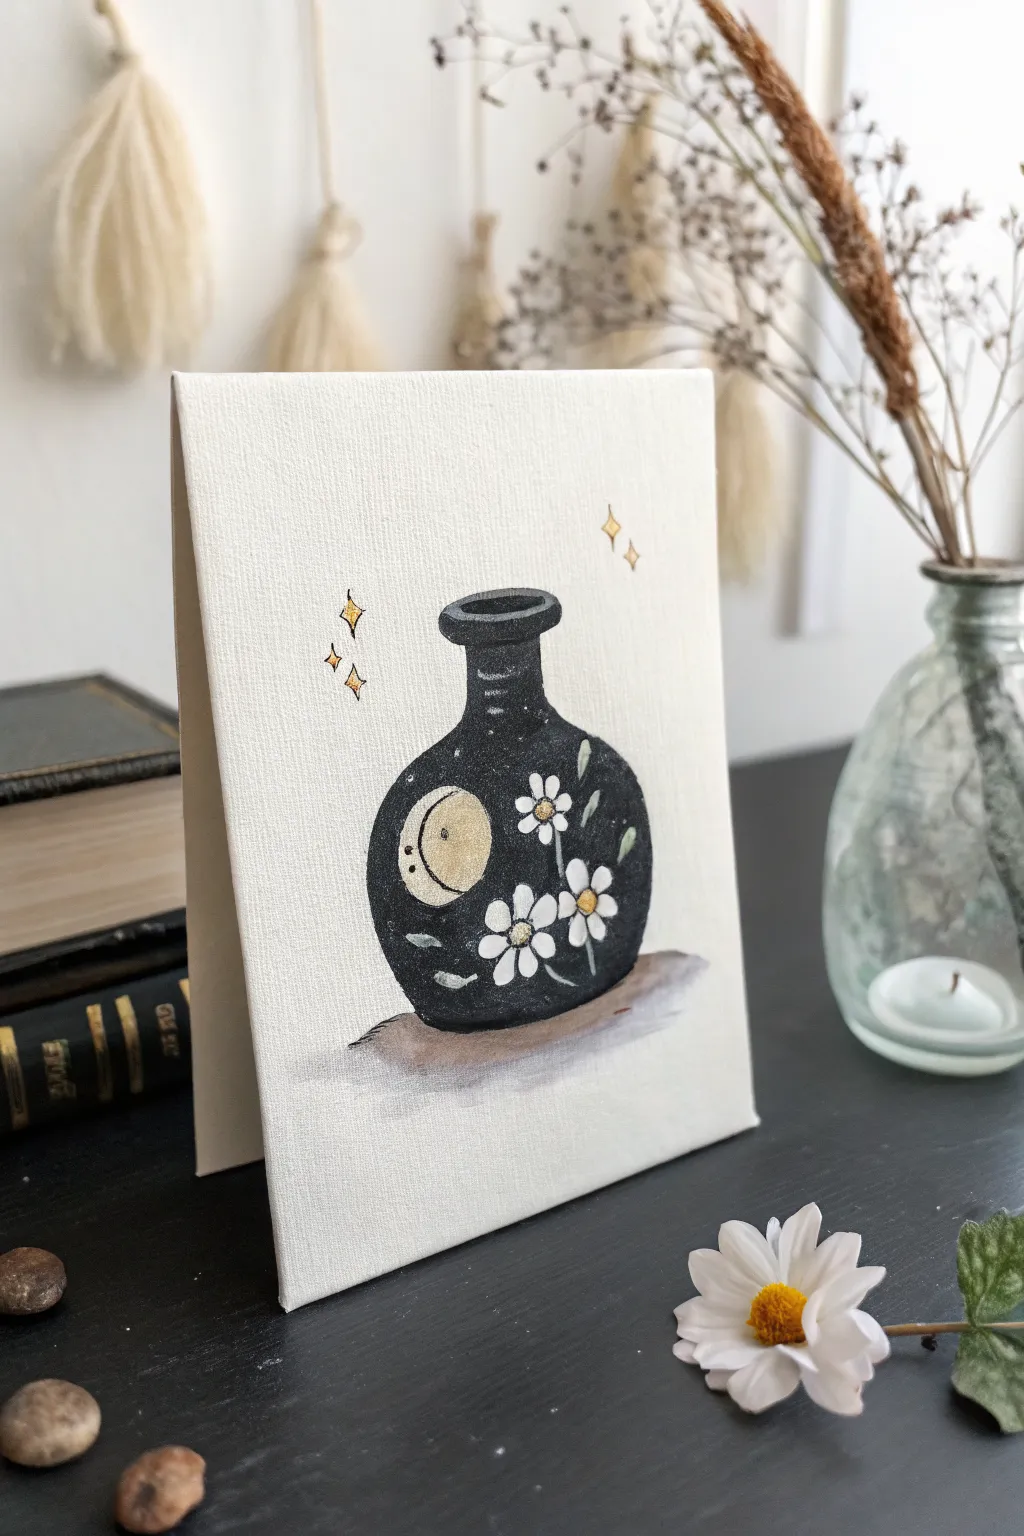
This whimsical little painting features a dark, rounded potion bottle adorned with a sleepy crescent moon and delicate white wildflowers. It’s a perfect blend of cozy cottagecore and spooky season vibes, painted simply on a small canvas panel.
Detailed Instructions
Materials
- Small stretched canvas or canvas panel (approx. 5×7 inches)
- Acrylic paints: Black, Titanium White, Raw Umber (brown), Yellow Ochre or Gold
- Pencil and eraser
- Round brushes (sizes 2, 4, and 0 for details)
- Water cup and palette
- Paper towels
Step 1: Sketching the Composition
-
Outline the bottle:
Start by lightly sketching the outline of the bottle in the center of your canvas. Draw a round, bulbous bottom and a short, narrower neck with a thick lip at the very top. -
Add internal details:
Inside the bottle shape, sketch a crescent moon on the left side. Then, draw three small five-petaled flowers scattered on the right side. -
Sketch the sparkles:
Draw a few four-pointed diamond shapes floating above the bottle to represent magical sparkles.
Step 2: Painting the Base Layers
-
Fill in the bottle shape:
Load a size 4 brush with black acrylic paint. Carefully fill in the entire bottle shape, painting around the moon and flowers you sketched. It’s okay if you overlap the pencil lines slightly, but try to keep the internal shapes clear. -
Let the black dry:
Wait for the black paint to dry completely. Since we are painting white over black for the details later, a dry base is crucial to prevent the colors from turning gray. -
Paint the bottle shadow:
Mix a little Raw Umber with white to make a light taupe. Using a damp brush, paint a wash of this color underneath the bottle to create a grounding shadow.
Oops! Paint too thick?
If your white details look chunky or textured, mix in a singular drop of water. This helps the paint flow smoothly off the brush for crisp petals.
Step 3: Adding the Moon and Flowers
-
Base coat the moon:
Paint the crescent moon shape with a mix of Titanium White and a tiny drop of Yellow Ochre to create a pale cream color. You may need two coats here for opacity. -
Paint the flower petals:
Using a clean size 2 brush and pure Titanium White, paint the petals of the flowers. Start from the center and pull outward for a teardrop shape. -
Add flower centers:
Dip the tip of a brush (or the handle end) into Yellow Ochre or Gold paint and dot the centers of the daisies. -
Paint the leaves:
Mix a tiny bit of black into green or yellow to make a muted olive tone. Paint simple, small leaf shapes floating near the flowers.
Make it Magical
Use metallic gold paint for the moon and the floating sparkles. It will catch the light beautifully when displayed on a shelf.
Step 4: Detailing and Highlights
-
Draw the moon’s face:
Use your smallest detail brush (size 0) with slightly watered-down black paint. Carefully paint two tiny dots for eyes and a small curved mouth on the crescent moon. -
Add bottle highlights:
Mix a dark grey color. Add curved highlight lines on the neck and the side of the bottle to give the glass some dimension and shine. -
Paint stems:
With a fine liner brush and white paint, connect the flower heads with very thin, delicate stems. -
Create the sparkles:
Paint the diamond shapes floating above the bottle using Gold or Yellow Ochre. Make the points sharp and crisp. -
Refine the shadow:
If the bottom shadow looks too flat, add a slightly darker brown directly under the bottle’s base to deepen the contact point. -
Final touches:
Look over your painting. If the black background looks streaky, carefully add a second coat around the designs to make it solid and matte.
Allow the canvas to dry completely before displaying it alongside your favorite books or candles
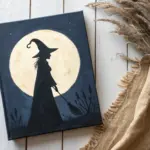
Witch Hat and Shadowy Swirl Smoke

This minimalist painting captures the spooky season perfectly with a stark black witch’s hat billowing mysterious grey smoke. The clean white background makes the swirling vapor and sharp hat shape really pop, creating a modern yet eerie piece of decor.
Step-by-Step Tutorial
Materials
- Small stretched canvas (e.g., 8×10 or 11×14 inches)
- Black acrylic paint
- White acrylic paint
- Grey acrylic paint (or mix black and white)
- Medium flat brush
- Small round brush for details
- Pencil for sketching
- Water cup and paper towels
- Palette or paper plate
Step 1: Sketching the Composition
-
Outline the hat shape:
Start by lightly sketching the witch hat near the bottom center of your canvas. Draw a wide, curved oval for the brim that tilts slightly downward. -
Add the cone:
Draw the cone of the hat rising from the brim, giving it a playful crook or bend at the very tip rather than making it perfectly straight. -
Sketch the smoke path:
Lightly trace a path where the smoke will flow, starting from the hat band area and billowing upward and outward to the top right corner. -
Define the smoke shapes:
Flesh out the smoke sketch by drawing cloud-like clusters and swirling loops along your path. Don’t worry about perfection; smoke is naturally irregular.
Step 2: Painting the Hat
-
Fill the hat base:
Using your medium flat brush and pure black paint, fill in the large brim of the hat. Use smooth strokes to keep the edges crisp. -
Paint the cone:
Continue with the black paint to fill in the main triangular cone shape of the hat. -
Paint the hat band:
Switch to a dark grey paint (or mix a little white into your black). Paint the band that sits just above the brim where the cone starts. This slight contrast separates the two black sections. -
Refine the edges:
Go back with a small round brush and tidy up the outline of the hat to ensure the silhouette is sharp against the white canvas.
Wispy Texture Trick
Mix a glazing medium or a lot of water into your grey acrylics. This transparency allows you to layer the smoke gradually, creating a more realistic vapor effect.
Step 3: Creating the Smoke Effect
-
Mix your grey tones:
Prepare a palette with a few shades of grey. You’ll need a medium grey for the main smoke body and a lighter grey for highlights. -
Block in the smoke:
Using a slightly damp round brush and medium grey paint, fill in the sketched smoke shapes. Use a dabbing or swirling motion rather than straight strokes to mimic texture. -
Soften the paint:
While the grey paint is still wet, dip your brush in a tiny bit of water and blur the edges slightly so the smoke looks wispy. -
Add smoke volume:
Mix a darker charcoal grey. Paint the bottom/underside of the smoke clouds to create shadow and volume. -
Add highlights:
Using a very light grey (almost white), paint the tops of the smoke curves where the light would hit.
Sparkle Upgrade
Once dry, paint a thin layer of silver glitter glue over the swirls or add tiny rhinestone stars around the smoke for a magical, glittering finish.
Step 4: Final Details and Flourishes
-
Paint decorative swirls:
Load your small liner brush with watered-down light grey paint. Add thin, decorative curly-cues and swirls extending off the main smoke cloud giving it a magical feel. -
Connect the smoke:
Ensure the smoke looks like it is originating from the hat band by painting a thin, wavy line of grey connecting the hat to the first cloud puff. -
Add hat highlights:
Add a faint, dry-brushed highlight of dark grey along the curved side of the hat cone to give it a 3D cylindrical appearance. -
Deepen the shadows:
If the black hat looks flat after drying, add a second coat of black to make it opaque and rich. -
Clean up the background:
Look for any accidental smudges on the white background. Clean them up with a dab of white paint to keep the negative space pristine.
Hang your new spellbinding creation on the wall to add a touch of magic to your room
Scream-Style Mask on a Red Background
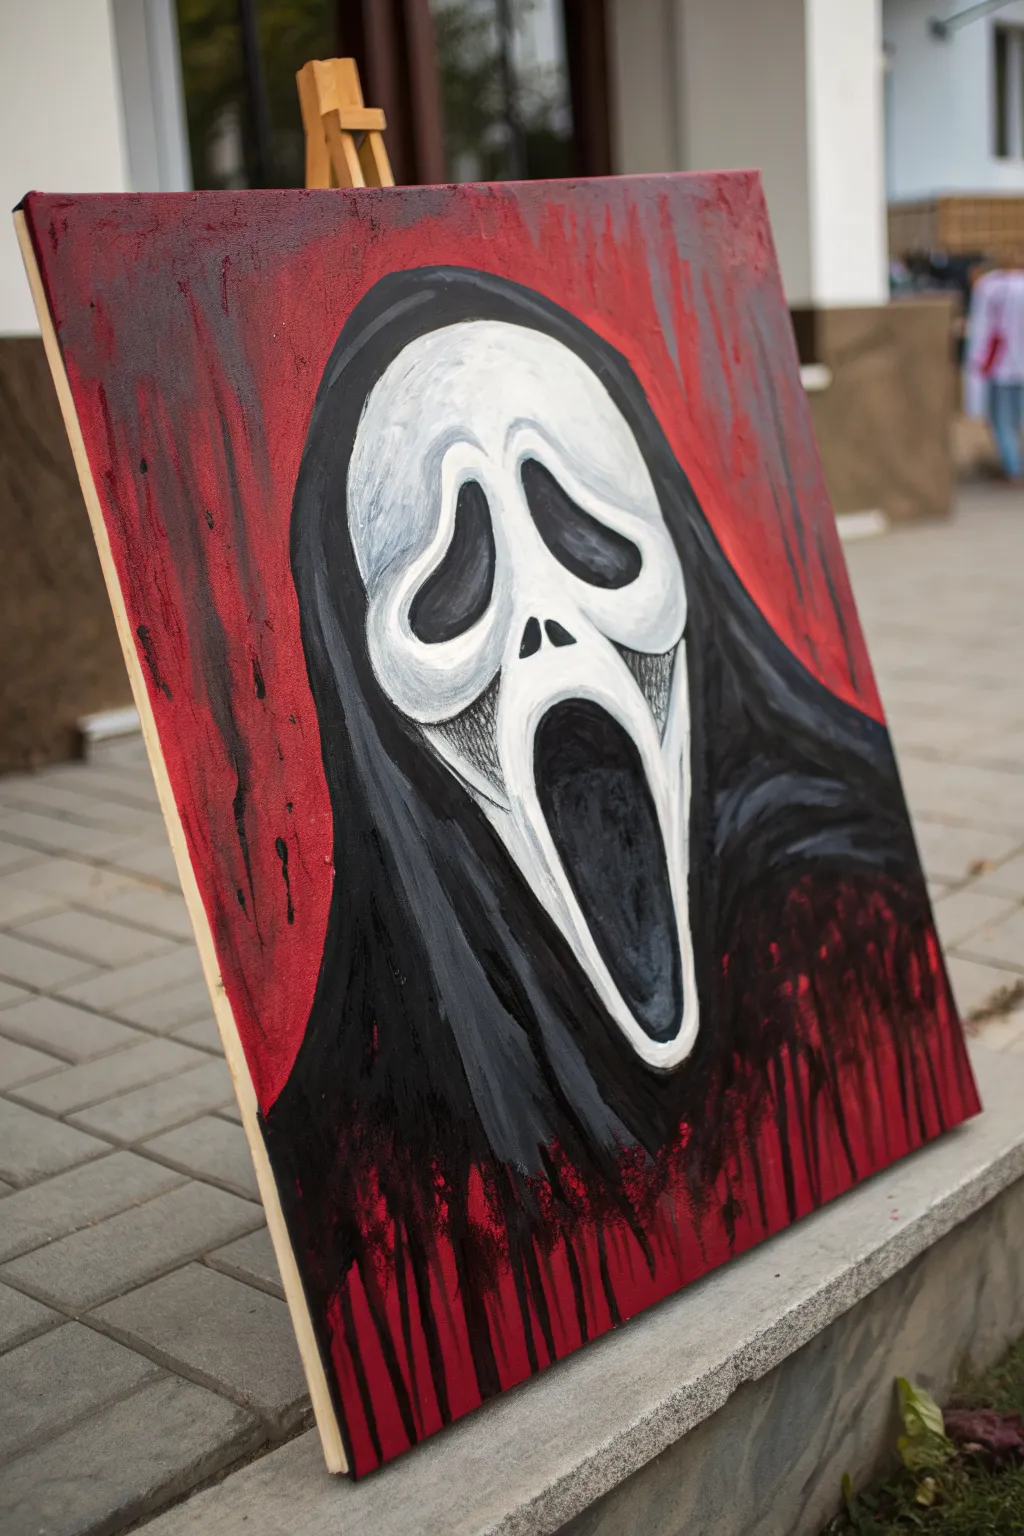
Channel iconic horror vibes with this striking acrylic painting featuring the classic Ghostface mask against a dramatic blood-red backdrop. This project uses bold contrast and expressive drip techniques to create a piece that feels both spooky and artistic.
Step-by-Step
Materials
- Canvas (16×20 inch or similar rectangular size)
- Acrylic paints: Mars Black, Titanium White, Cadmium Red (or Alizarin Crimson for darker tone), Burnt Umber
- Large flat brush (1-2 inch) for background
- Medium filbert brush for blocking shapes
- Small round detail brush
- Pencil for sketching
- Palette or paper plate
- Cup of water and paper towels
Step 1: Setting the Bloody Scene
-
Prepare the red base:
Squeeze a generous amount of red acrylic paint onto your palette. Mix in a tiny touch of black or Burnt Umber to create a deeper, moodier blood-red shade rather than a bright cherry red. -
Apply the background:
Using your large flat brush, cover the entire canvas with your red mixture. Don’t aim for perfect smoothness; use vertical strokes to create a slightly streaky, unsettling texture. -
Add distressed textures:
While the red is still tacky, lightly dry-brush some darker red or black streaks vertically, particularly near the edges and corners, to give it a worn, grunge appearance. Let the background dry completely before moving on.
Red Peeking Through?
If the red background bleeds into your white mask paint, let it dry fully, then apply a layer of grey first before adding a final topcoat of white.
Step 2: Sketching the Icon
-
Outline the mask shape:
Lightly sketch the elongated, peanut-like shape of the Ghostface mask in the center of the canvas. It should tilt slightly to the left for a dynamic composition. -
Define the features:
Draw the two drooping eye sockets, the small nose slits, and the long, gaping mouth. These features are essentially distorted teardrop shapes. -
Map the shroud:
Sketch the flowing hood and robe that surround the mask. Let the lines drape downwards off the bottom of the canvas, creating the silhouette of the head and shoulders.
Make It Look Glossy
Once the painting is 100% dry, apply a high-gloss varnish only on the white mask part. This makes it look like smooth plastic against the matte fabric.
Step 3: Painting the Face
-
Base coat the mask:
Using Titanium White and a medium brush, fill in the mask area. You may need two coats to ensure the red background doesn’t show through. -
Add grey shadows:
Mix a light grey wash. Paint shadows around the perimeter of the mask and under the cheekbones to give it 3D form. The mask isn’t flat; it curves. -
Fill the dark voids:
With pure Mars Black, fill in the eyes, nose, and mouth. Paint carefully to keep the edges crisp against the white mask. -
Highlight the face:
Add pure white highlights on the forehead and cheekbones to make the mask pop forward. I like to add a tiny grey line inside the mouth edge to show the thickness of the mask material.
Step 4: The Shroud and Drips
-
Paint the hood:
fill in the black shroud surrounding the mask. Use long, sweeping strokes to mimic the fabric folds. -
Add highlights to the fabric:
Mix a dark charcoal grey. Add subtle highlights on the peaks of the fabric folds, particularly on the right shoulder area, to separate the hood from the deep black shadows. -
Create the bottom dissolve:
At the bottom of the black robe, don’t finish with a clean line. Instead, feather the black paint downwards into the red using vertical strokes. -
Paint the drip threads:
Load a small round brush with thinned black paint (add a drop of water). Paint uneven lines dragging explicitly downward from the bottom of the robe to the canvas edge. -
Enhance the background drips:
Add a few random black drips or splatters in the red background area, mirroring the vertical movement of the robe’s bottom edge. -
Rough up the edges:
Use a dry brush with a tiny bit of black to scuff up the red background around the mask, making the atmosphere feel dirty and chaotic. -
Final touches:
Check your contrast. If the white mask looks too clean, glaze it with a very watery grey to age it slightly. Ensure the eyes are pitch black.
Hang this piece up and enjoy the thrill of a classic horror icon watching over your room
Forest Pareidolia Skull in the Branches
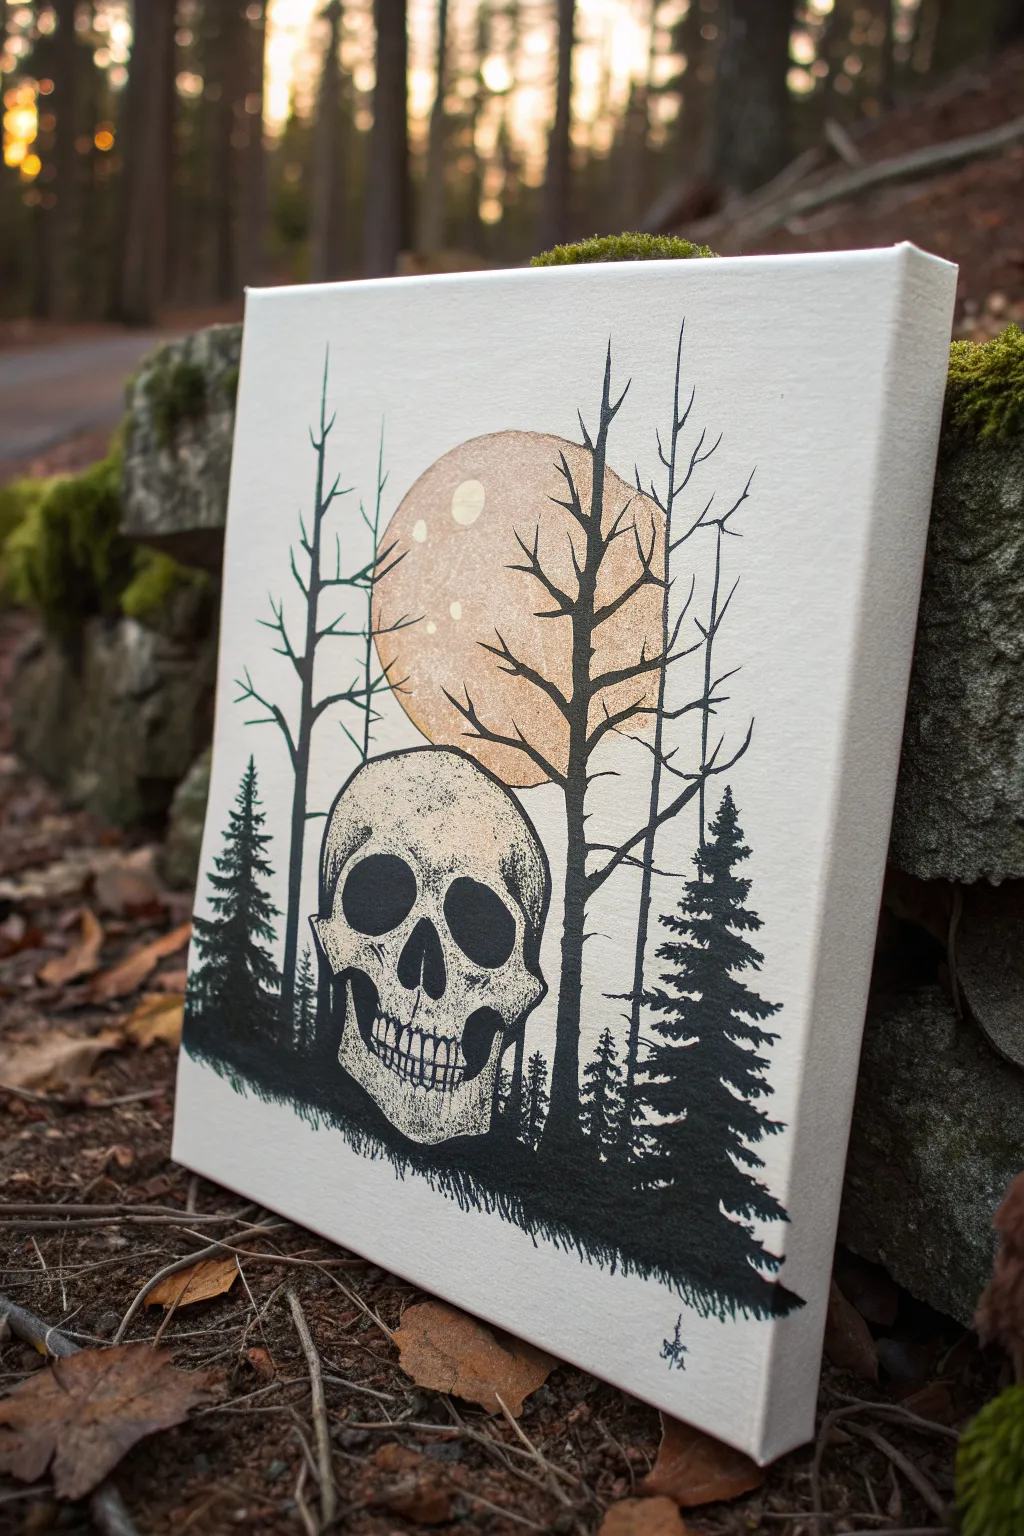
This striking acrylic painting combines sleek graphic silhouettes with textured details to create a haunting woodland scene. By layering a pale moon, a detailed skull, and stark black trees, you’ll achieve a perfect balance of creepy and cool on a crisp white background.
Step-by-Step Guide
Materials
- Stretched canvas (e.g., 8×10 or 11×14 inches)
- Acrylic paints: Mars Black, Titanium White, Raw Sienna or Gold Ochre, Burnt Umber
- Pencil (HB or lighter) for sketching
- Round object for tracing (bowl or lid) or compass
- Fine liner brushes (size 0 and 00)
- Medium round brush (size 4 or 6)
- Small flat brush
- Mixing palette
- Water cup and paper towels
Step 1: Planning and The Moon
-
Trace the moon:
Start by positioning your round object in the upper center of the canvas. Trace the circle lightly with your pencil to establish the moon’s placement. -
Sketch the skull:
Below the moon, overlapping slightly with the bottom edge of the circle, sketch the outline of a skull. Focus on the large eye sockets and the nasal cavity first, then draw the jaw and teeth structure. -
Mix the moon color:
Mix a pale, dusty orange using Titanium White with a touch of Raw Sienna and the tiniest speck of Burnt Umber to dull it down. You want a color that looks like a harvest moon. -
Paint the base layer:
Fill in the moon circle with your mixed color using the flat brush. Don’t worry if it looks flat right now; we will add texture later. -
Add moon craters:
While the paint is still wet, mix a slightly lighter version of your moon color (add more white). Dab small, irregular circles onto the moon to create craters and surface texture.
Ink Flow Secret
For sharp, thin tree branches, mix a drop of water or flow improver into your black paint until it has the consistency of heavy cream.
Step 2: The Skull Detail
-
Base coat the skull:
Mix a bone color using Titanium White and a very small drop of Raw Sienna. Faintly fill in the skull shape, keeping the paint application somewhat thin so you can still see your sketch lines or re-sketch them once dry. -
Define the hollows:
Using Mars Black and your medium round brush, fill in the deep shadows of the eye sockets and the nasal cavity. Make these solid black for high contrast. -
Texturing the bone:
Switch to a fine liner brush. I like to dilute the black paint slightly with water to make it flow like ink. Stipple tiny dots and small scratches around the eye sockets and temples to simulate porous bone texture. -
Detail the teeth:
Carefully outline the teeth with your fine liner. Paint the gaps between the teeth black, and add small vertical cracks on the tooth surfaces for an aged look. -
Add shading:
Use a very watered-down grey or brown wash to add subtle shadows under the cheekbones and around the jawline to give the skull dimension.
Step 3: The Forest Silhouette
-
Establish the ground:
Using pure Mars Black and the flat brush or medium round brush, paint an uneven, jagged horizon line across the bottom of the canvas. Stipple the top edge of this line to look like grass. -
Draft the main trees:
Identify where you want your three main bare trees to stand. Using the medium round brush, paint the vertical trunks. Make the lines taper as they go up, crossing in front of the moon and skull. -
Add branches:
Switch to your fine liner brush for the branches. Paint them reaching upward and outward, making them jagged and angular rather than curvy. Let them intersect with the moon to push it into the background. -
Paint the pine trees:
On the left and right sides of the skull, add shorter pine trees. Use a dabbing motion with a small brush to create the textured, needle-like silhouette of the pine branches. -
Refine the grass:
Go back to the bottom edge and use the fine liner to flick upward small strokes of grass, blending the base of the trees and the skull into the ground. -
Final touches:
Inspect your black silhouettes. If the canvas shows through, add a second coat of black to ensure they are opaque and stark against the light background.
Shaky Hands?
If you struggle with fine lines, use a black acrylic paint pen for the intricate branches and teeth details instead of a brush.
Step back and admire how the dark silhouettes bring a spooky depth to your creation


Have a question or want to share your own experience? I'd love to hear from you in the comments below!