If you’re craving that cozy fall vibe without stressing over fancy realism, easy pumpkin painting is my go-to on canvas. These ideas are super beginner-friendly and still give you that finished, decorative look you’ll want to hang up right away.
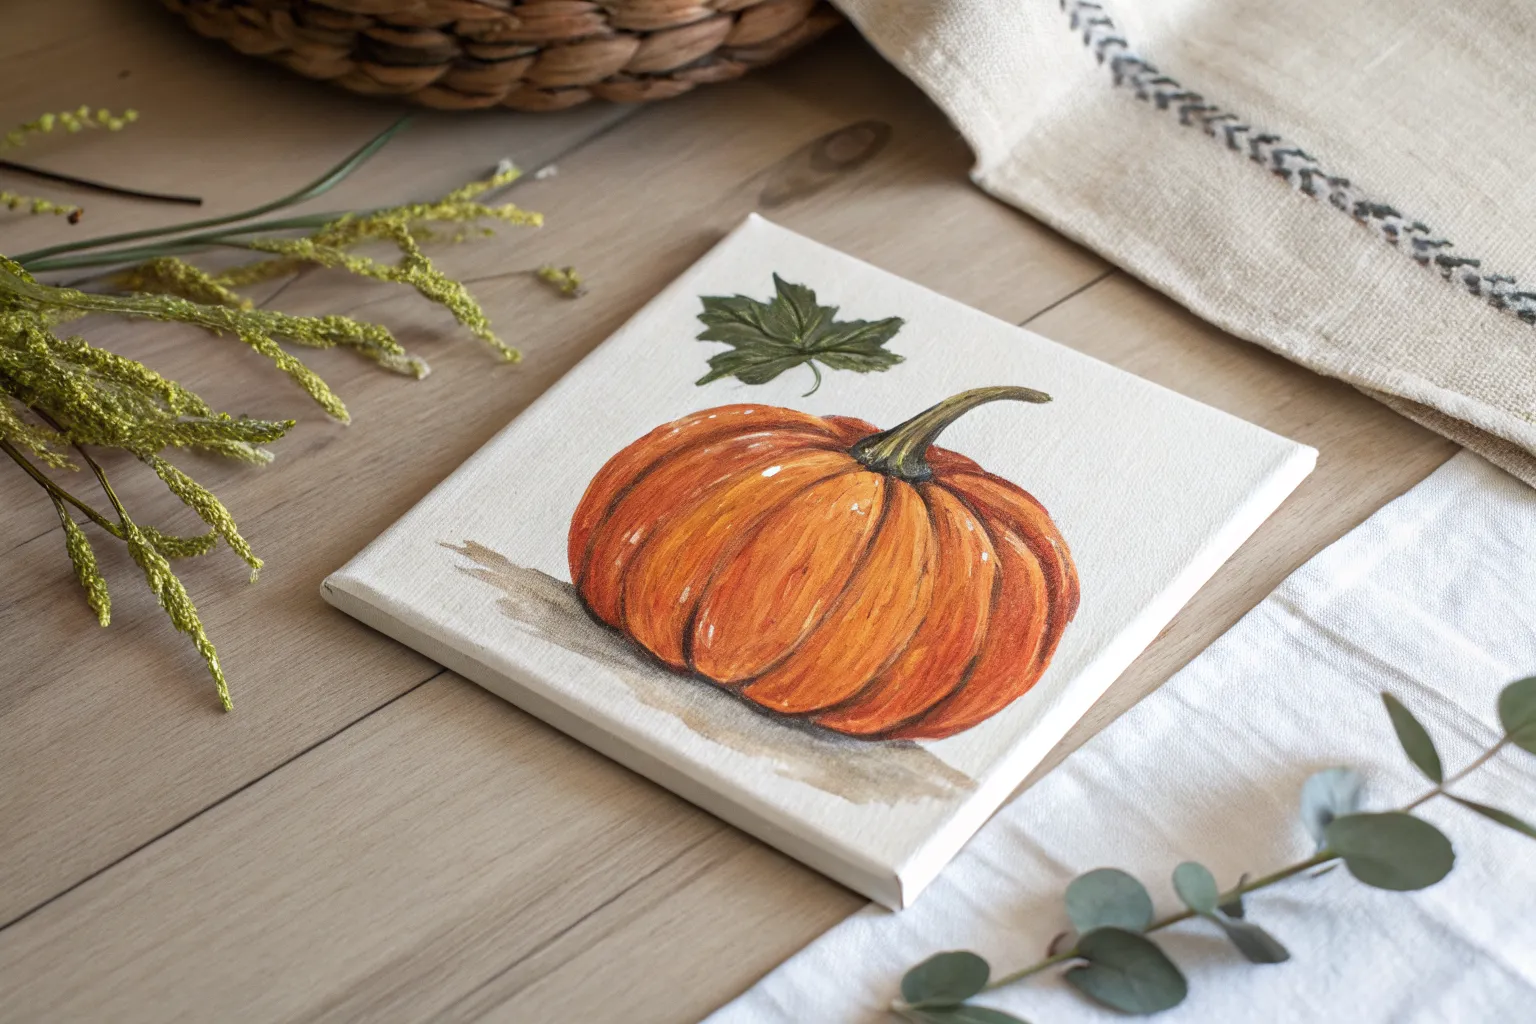
Classic Orange Pumpkin With Simple Ridges

Capture the essence of autumn with this warm, classic pumpkin study painted on a gallery-wrapped canvas. The softly blended background and textured ridges give this piece a delightful, homespun charm that fits perfectly with farmhouse decor.
Step-by-Step
Materials
- Square stretched canvas (gallery wrap preferred, e.g., 8×8 or 10×10)
- Acrylic paints (Titanium White, Burnt Umber, Yellow Ochre, Cadmium Orange, Burnt Sienna, Olive Green, Black)
- Round brushes (sizes 4 and 8)
- Small flat brush (size 6)
- Detail liner brush
- Palette or paper plate
- Cup of water
- Paper towels
- Pencil
Step 1: Sketch and Background
-
Lightly sketch the shape:
Start by lightly drawing a squat oval shape centrally on your canvas using a pencil. Don’t worry about making it a perfect circle; a slightly flattened bottom makes it look heavier and more realistic. -
Add the stem:
Draw a curved stem extending from the top center. Let it curve gracefully to the right, slightly wider at the base where it attaches to the pumpkin. -
Mark the ridge lines:
Lightly sketch curved vertical lines following the contour of the pumpkin to indicate where the main ridges will be. These lines should radiate from the stem base down to the bottom. -
Prepare the background wash:
Mix a watery wash of Titanium White with a touch of Yellow Ochre and a tiny dab of Burnt Umber. You want a very pale, warm beige color. -
Paint the background:
Use your larger round brush to apply this wash loosely around the pumpkin. I like to keep the edges irregular and expressive rather than perfectly filled in. -
Add background texture:
While the background is still slightly damp, dab in small touches of slightly darker beige or watered-down Burnt Sienna near the pumpkin outline to create a soft, abstract glow.
Step 2: Painting the Pumpkin
-
Base coat the pumpkin:
Mix Cadmium Orange with a little Yellow Ochre. Fill in the entire pumpkin shape, painting in the direction of the ridges (top to bottom curves). -
Define the shadows:
Mix Burnt Sienna with a touch of Burnt Umber. With the size 4 round brush, paint along the pencil lines you drew for the ridges to create deep crevices. -
Blend the shadows:
Before the shadow paint dries completely, use a clean, slightly damp brush to soften the one side of those dark lines, blending them into the orange base to create a rounded form. -
Add highlights:
Mix Titanium White with a tiny bit of Cadmium Orange. Apply this lighter color to the center of each ridge section, where the light would naturally hit the roundest part. -
Deepen the contrast:
For extra depth, go back into the deepest crevices (especially near the bottom) with pure Burnt Sienna or a mix of Burnt Umber and Orange. -
Base coat the stem:
Paint the stem solid Olive Green. Ensure the base of the stem overlaps the top of the pumpkin slightly to show connection. -
Texture the stem:
Using a detail brush and a mix of Black and Olive Green, paint thin, scratchy lines running up the length of the stem to mimic the woody texture. -
Highlight the stem:
Add a thin line of Yellow Ochre mixed with white along the top curve of the stem to make it look three-dimensional.
Curve Your Strokes
Always paint your brushstrokes in a ‘C’ curve following the shape of the pumpkin. Straight vertical lines will make the pumpkin look flat like a beach ball, while curves create volume.
Step 3: Grounding and Finishing
-
Paint the ground surface:
Use the flat brush to paint horizontal strokes under the pumpkin using a mix of Yellow Ochre, White, and Burnt Umber to suggest a wooden table. -
Add the cast shadow:
Mix a dark grey-brown wash. Paint a soft shadow directly underneath the pumpkin, blending it outwards so it fades gently. -
Refine the pumpkin edges:
If the background paint has overlapped the pumpkin too much, use your orange mix to tidy up the outer silhouette. -
Add final sparkles:
Place tiny dots or streaks of pure white on the highest points of the pumpkin shoulder for a ‘wet’ or shiny look. -
Sign your work:
Use your finest liner brush and thinned dark paint (like Burnt Umber) to sign your initials in the bottom corner of the ‘table’ area.
Muddy Colors?
If your orange and brown colors are blending into a dull grey, let the base layer dry completely before adding the shadow stripes. Acrylics blend wet-on-wet but layer cleanly when dry.
Now you have a charming piece of autumn art ready to display on a mantel or easel


Cozy Pumpkin Trio Still Life
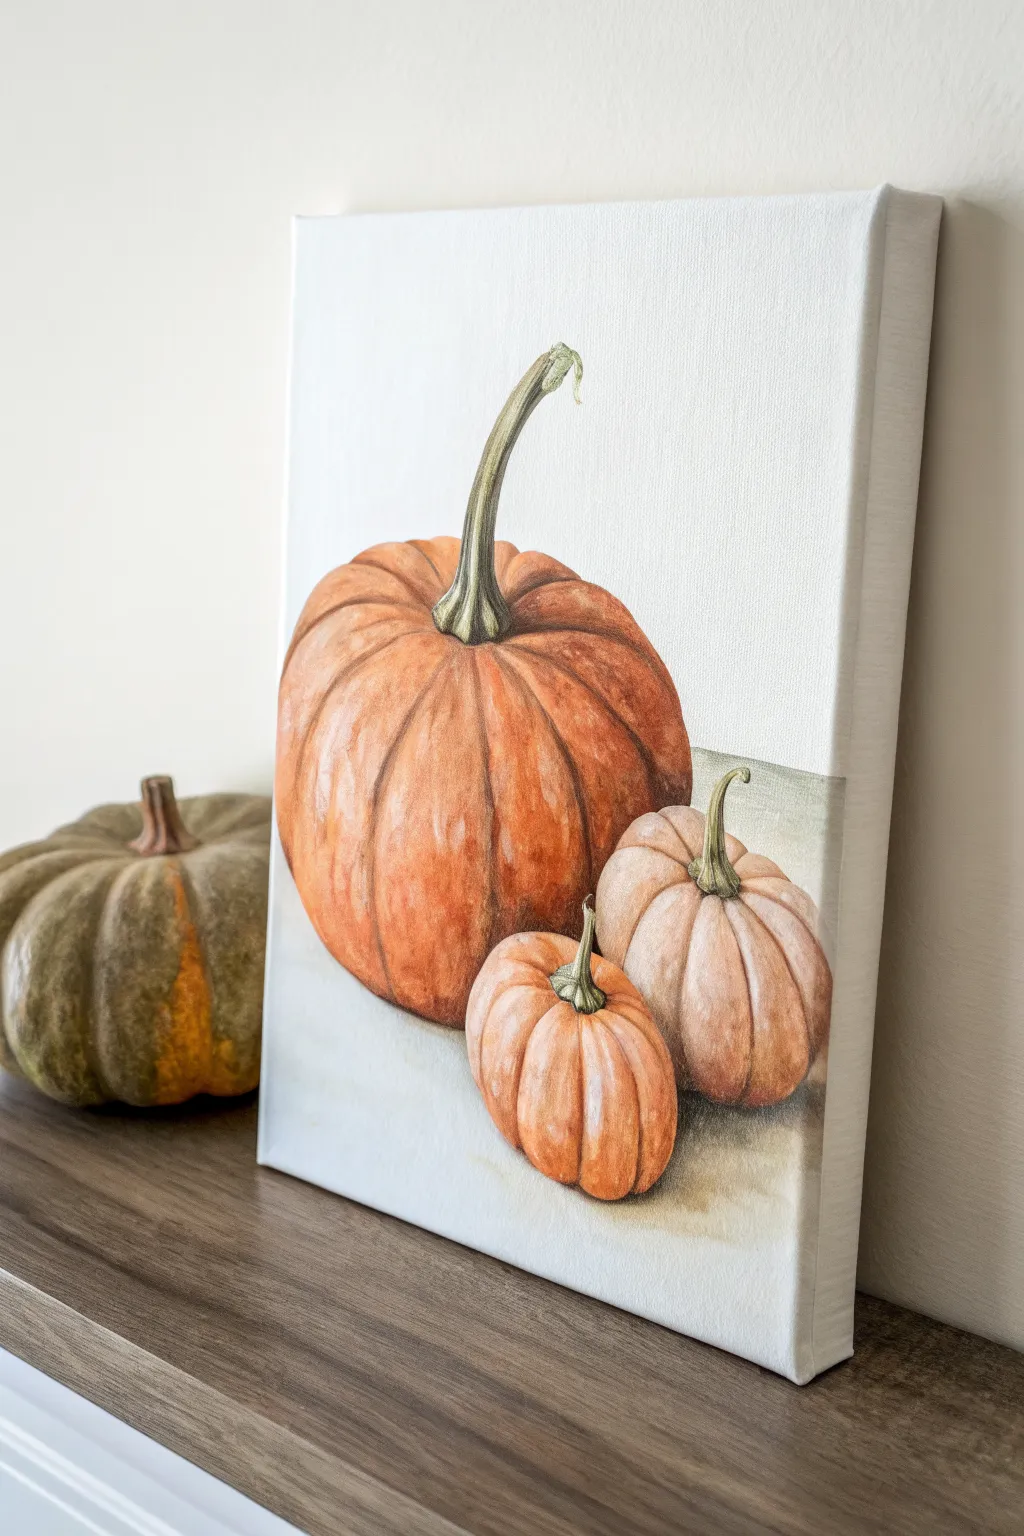
Capture the essence of autumn harvest with this realistic yet soft canvas painting featuring three pumpkins of varying sizes. This project focuses on building dimensional form through careful layering and observing subtle color shifts.
Step-by-Step Guide
Materials
- Stretched canvas (e.g., 11×14 or similar)
- Acrylic paints (Burnt Sienna, Cadmium Orange, Yellow Ochre, Titanium White, Burnt Umber, Sap Green)
- Pencil for sketching (HB or 2B)
- Kneaded eraser
- Synthetic brushes (various sizes: flats for blocking, rounds for detail)
- Palette for mixing
- Cup of water and paper towels
- Glazing medium (optional, for smoother layers)
Step 1: Sketching the Composition
-
Establish the horizon:
Begin by lightly drawing a horizontal line across the lower third of your canvas. This separates the wall space from the table or surface where your pumpkins will sit. -
Outline the main pumpkin:
Sketch a large, slightly flattened oval shape on the left side. Make sure the top dips inward where the stem will be. This will be your primary focal point. -
Add the smaller companions:
Draw two smaller pumpkin shapes to the right of the large one. Position the middle one slightly behind the smallest front pumpkin to create depth and overlap. -
Define the ribs:
Drawing curved lines from the top center of each pumpkin down to the bottom helps define the ribs. These lines should curve with the form of the pumpkin, wider in the middle and tapering at the ends. -
Sketch the stems:
Add the stems emerging from the sunken centers. Give the large pumpkin a tall, curved stem for elegance, and keep the smaller stems short and twisty.
Step 2: Blocking in Color
-
Base coat the large pumpkin:
Mix Cadmium Orange with a touch of Burnt Sienna. Paint the entire surface of the large pumpkin, leaving the stem blank. Don’t worry about shading yet; just get the color on the canvas. -
Base coat the smaller pumpkins:
For the two smaller pumpkins, mix Titanium White with a tiny dot of Burnt Sienna and Yellow Ochre to create a pale, creamy beige. Cover their shapes completely. -
Paint the background:
While the pumpkins dry, mix a generous amount of Titanium White with a speck of Burnt Umber for an off-white wall color. Paint the background carefully around your pumpkin shapes. -
Establish the surface:
Paint the table surface below the horizon line using a light grey-beige mix. Keep your brushstrokes horizontal to emphasize the flat surface.
Curve Control
Always paint your brushstrokes in the direction of the pumpkin’s curve (top to bottom arcs). Vertical or horizontal strokes will flatten the shape.
Step 3: Building Form and Depth
-
Shadowing the large pumpkin:
Mix Burnt Sienna with a little Burnt Umber. Using a smaller brush, paint along the rib lines and the bottom of the pumpkin to create deep grooves and shadows. Feather the edges so the transition isn’t too harsh. -
Highlighting the orange skin:
Mix Cadmium Orange with Yellow Ochre and a touch of White. Apply this lighter tone to the center of each rib section on the large pumpkin to make it look round and plump. -
Shading the pale pumpkins:
Using a very watered-down mix of Burnt Sienna, glaze the shadows into the crevices of the smaller pumpkins. I find that keeping this layer translucent helps maintain that delicate, pale skin look. -
Adding stem base colors:
Paint the stems with a mix of Sap Green and Burnt Umber. The base of the stem where it meets the pumpkin should be darker to show connection. -
Detailing the stems:
Once the green base is dry, use a fine liner brush with a lighter yellow-green mix to add vertical ridges and texture to the stems.
Make it Matte
To get the soft, realistic finish seen here, mix a matte medium into your paints instead of water to prevent a plastic-like shine.
Step 4: Refining and Finishing
-
Deepening contrast:
Go back in with your darkest brown mix (Burnt Umber) and deepen the shadows right where the pumpkins touch the table and where they overlap each other. -
Cast shadows:
Glaze a transparent grey-brown shadow on the table surface to the right of the pumpkins, grounding them so they don’t look like they are floating. -
Final highlights:
Add tiny touches of pure Titanium White to the highest points of the pumpkin ribs and the very tips of the stems for a sharp, realistic shine. -
Texture glazing:
Optional: lightly dry-brush a little orange texture over the highlighted areas to mimic the slightly bumpy skin of a real pumpkin.
Step back and admire your harvested trio, ready to bring warmth to your home decor


White Pumpkin With Soft Shadow
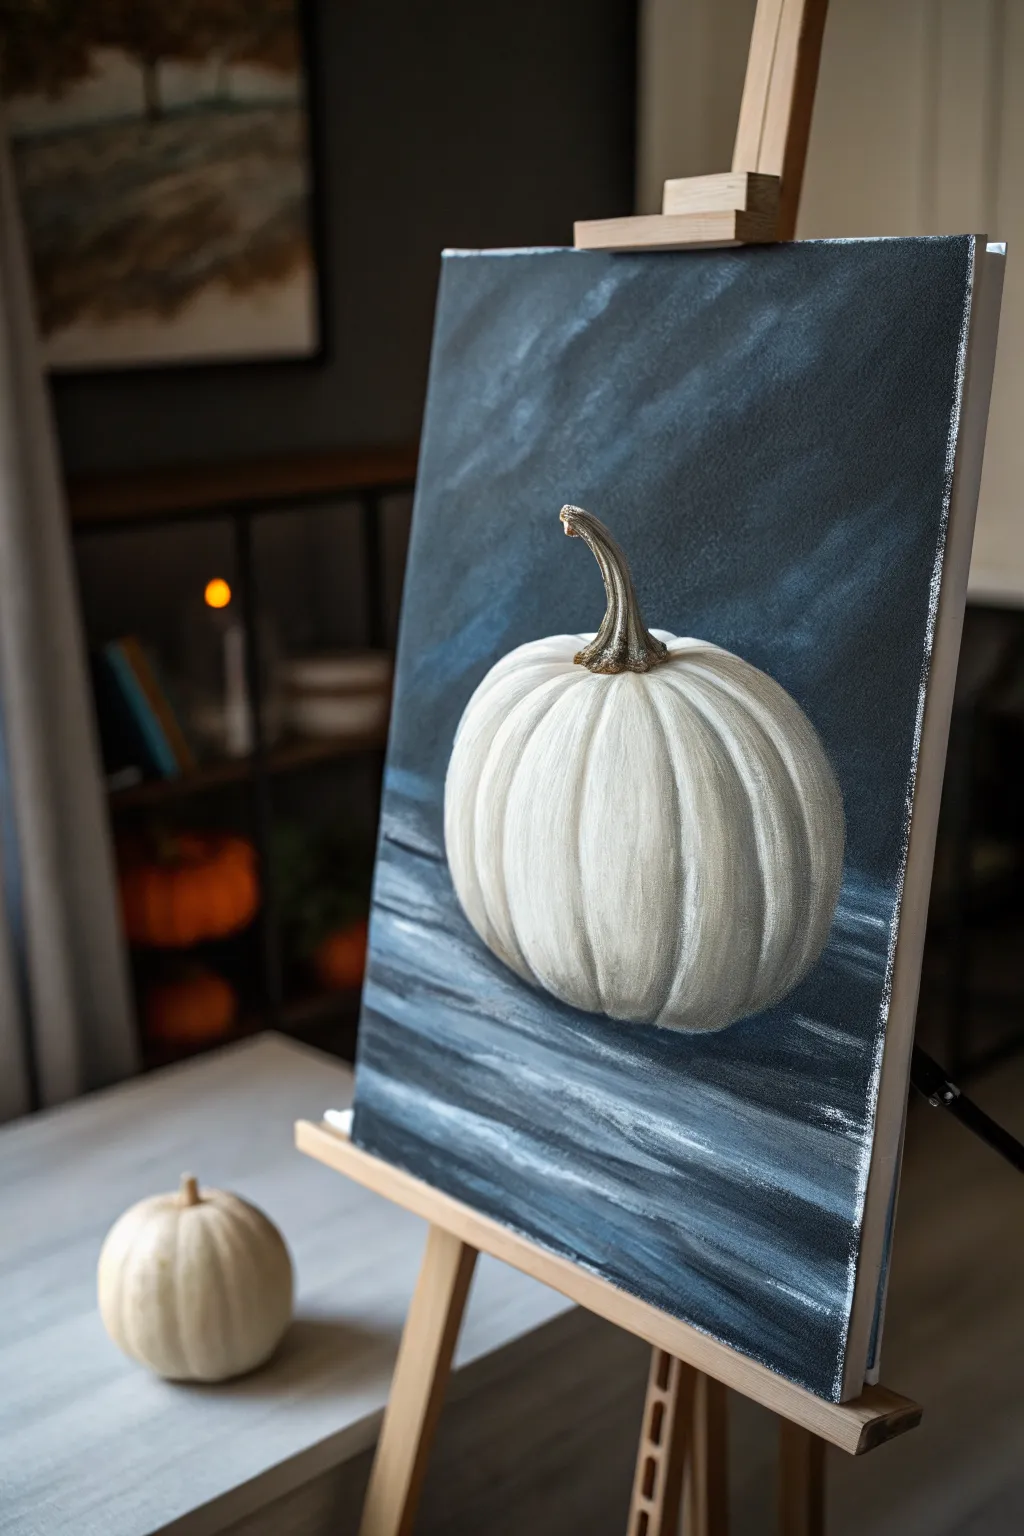
Capture the ghostly elegance of autumn with this moody, monochromatic pumpkin study. The stark contrast between the bright white gourd and the stormy blue-grey background creates a striking focal point for your seasonal decor.
Detailed Instructions
Materials
- Stretched canvas (11×14 or similar size)
- Acrylic paints: Titanium White, Mars Black, Prussian Blue or Payne’s Grey, Burnt Umber, Yellow Ochre
- Large flat brush (1 inch)
- Medium filbert brush
- Small round detail brush
- Palette knife (optional for mixing)
- Cup of water and paper towels
- Chalk or pastel pencil for sketching
Step 1: Background Foundation
-
Mix the storm color:
Begin by creating a deep, moody background color. Mix a generous amount of Prussian Blue (or Payne’s Grey) with a touch of Mars Black and a tiny bit of White. You want a color that resembles a dark, stormy sky. -
Apply the first layer:
Using your large flat brush, cover the entire canvas with this dark mixture. Don’t worry about it being perfectly smooth; visible brushstrokes add to the painterly texture. -
Add directional texture:
While the paint is still wet, introduce some diagonal streaks. Dip your dirty brush lightly into a small amount of white and streak it through the background from the top left to bottom right to create a sense of atmosphere and light direction. -
Create the table surface:
For the bottom third of the canvas, add horizontal strokes using a slightly darker version of your background mix. This differentiates the ‘wall’ from the ‘table’ surface where the pumpkin will sit. -
Let it dry completely:
Allow the background to dry fully before moving on. This prevents the white pumpkin paint from turning muddy grey.
Pro Tip: Blending
Keep a second dry brush handy while painting the pumpkin ribs. Use it to feather the harsh edges of your grey shadow lines immediately after painting them for a soft, realistic curve.
Step 2: Shaping the Pumpkin
-
Sketch the outline:
Use a piece of chalk or a pastel pencil to lightly sketch the oval shape of the pumpkin in the center of the canvas. It should be slightly wider than it is tall. -
Mark the ribs:
Draw curved lines radiating from the top center point (where the stem will be) down to the bottom, defining the pumpkin’s segments or ribs. -
Block in the base white:
Take your medium filbert brush and fill in the pumpkin shape with Titanium White. It may look a bit translucent over the dark background, which is fine for this first pass. -
Dry and opaque layer:
Once the first white layer is dry, apply a second coat of Titanium White. This ensures the pumpkin pops brightly against the dark backdrop.
Level Up: Metallic Touch
Mix a tiny amount of gold or metallic pearl paint into your final white highlights. It adds a subtle, magical shimmer that catches the light beautifully on the finished canvas.
Step 3: Adding Dimension and Details
-
Mix a shadow grey:
Create a very light grey wash by mixing a tiny dot of your background blue-grey color into a large pile of Titanium White. -
Paint the rib shadows:
Using the filbert brush turned on its edge, paint along the curved lines you sketched earlier. These shadows separate the pumpkin’s segments. -
Blend the segments:
While the shadow paint is wet, use a clean, slightly damp brush to blend the grey outward into the center of each white segment. This makes the ribs look rounded rather than flat. -
Highlight the curves:
Add pure Titanium White back into the center of each segment (the highest point of the curve). I find this push-and-pull between shadow and highlight is what really gives the pumpkin volume. -
Create the stem base:
Mix Burnt Umber with a touch of Yellow Ochre. Using the small round brush, paint the twisting stem shape, making it thicker at the base where it connects to the fruit. -
Detail the stem:
Add highlights to the stem using a mix of Ochre and White. Paint thin, winding lines up the stem to mimic the textured, woody ridges. -
Ground the pumpkin:
Mix a dark shadow color (Black and Blue). Paint a thin, blurry shadow directly underneath the pumpkin to anchor it to the surface. -
Final highlights:
Use your smallest brush with pure white to add a few sharp highlights on the top of the pumpkin shoulder and the very tip of the stem for a wet, glossy look.
Step back and admire the dramatic simplicity of your painted harvest centerpiece


Teal Pumpkin for Modern Fall Style

Move away from traditional oranges and embrace a cool, modern aesthetic with this striking teal pumpkin painting. The vibrant blue-green hues paired with crisp white highlights create a fresh look perfect for contemporary decor.
Step-by-Step Tutorial
Materials
- Square canvas (approx. 10×10 or 12×12 inches)
- Acrylic paints: Teal/Turquoise, White, Burnt Umber (dark brown), Yellow Ochre (optional)
- Flat shader brushes (medium and large)
- Small round brush for details
- Pencil and eraser
- Palette for mixing
- Cup of water and paper towels
Step 1: Planning the Shape
-
Sketch the outline:
Begin by lightly sketching a wide oval shape in the center of your canvas. It doesn’t need to be perfectly round; pumpkins have character, so a slightly flattened top and bottom work best. -
Add the stem guide:
Draw the stem emerging from the center dip. Make it curve slightly to the left or right for a natural look, with a wider base where it connects to the pumpkin. -
Divide the segments:
Sketch curved lines radiating from the stem base down to the bottom edge. These lines define the pumpkin’s ribs, giving it that classic scalloped appearance.
Step 2: Base Layers
-
Mix your base color:
On your palette, mix your primary teal color. If it’s too dark straight from the tube, add a tiny touch of white to make it creamy and opaque. -
Paint the pumpkin body:
Fill in the entire pumpkin shape with your base teal mix, painting right over your pencil lines. Don’t worry about shading yet; just get a solid, even coat down. -
Base coat the stem:
While the teal dries, mix a light brown using Burnt Umber and a bit of White (or Yellow Ochre). Paint the stem solid brown. -
Let it dry completely:
Wait until the base coat is dry to the touch. This prevents your next layers from turning muddy.
Smooth Curves
When painting the curved rib lines, move your whole arm, not just your wrist. This creates fluid, confident strokes that make the pumpkin look rounder.
Step 3: Adding Dimension
-
Create a shadow mix:
Take your original teal color and mix in a very small amount of black or dark blue to deepen it. You want a color that is just a few shades darker than your base. -
Define the ribs:
Using a medium flat brush turned on its edge, paint curved lines along the grooves where the segments meet. This recreates the rib lines you sketched earlier. -
Feather the shadows:
While the shadow paint is still wet, gently blend it outward into the segment slightly. This creates a soft curve rather than a harsh stripe. -
Add deep bottom shadows:
Apply this darker teal mix to the very bottom curve of the pumpkin to give it weight and roundness.
Metallic Twist
Swap the plain white highlight paint for a metallic silver or pearl white acrylic. It adds an elegant shimmer perfect for modern holiday decor.
Step 4: Highlights and Details
-
Mix a bright highlight:
Clean your brush thoroughly. Mix white with just a speck of your original teal to create a very pale, almost white, mint color. -
Apply the main highlights:
Paint bold, curved strokes on the top-center part of each pumpkin rib. Visualize where the light hits the ‘shoulders’ of the pumpkin. -
Blend softly:
I like to use a dry brush to lightly feather the edges of these white highlights so they glow rather than look like stickers. -
Detail the stem:
Switch to your small round brush. Use straight Burnt Umber to paint thin, vertical lines up the stem to simulate woody texture. -
Highlight the stem:
Add a few thin strokes of pure light brown or tan on the raised ridges of the stem for contrast. -
Final touches:
Step back and look at your painting. If any highlights look too dull, dab a tiny bit of pure white right in the center of the brightest spots for extra pop.
Display your chic pumpkin on a mantel or shelf to bring a fresh pop of color to the season
BRUSH GUIDE
The Right Brush for Every Stroke
From clean lines to bold texture — master brush choice, stroke control, and essential techniques.
Explore the Full Guide
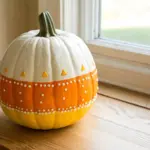
One-Stroke Pumpkin Segments
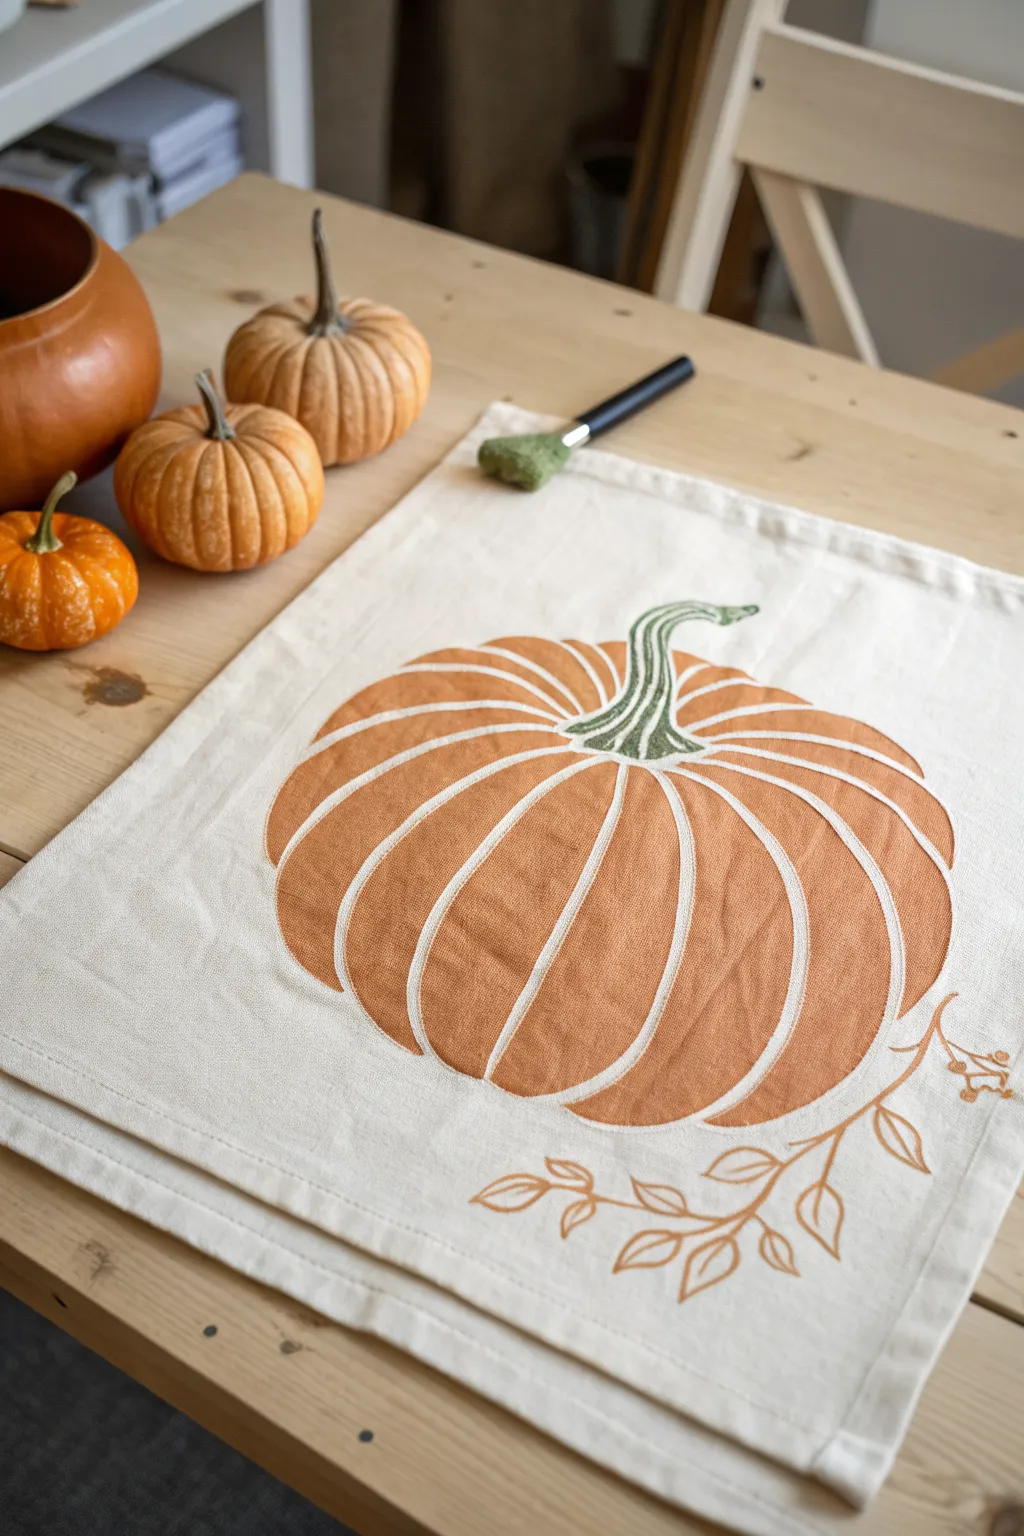
Transform a plain canvas tote or placemat into vibrant autumn decor with this deceptively simple painting project. By focusing on negative space between bold orange segments, you create a dimension-rich pumpkin that feels both rustic and modern.
Step-by-Step Guide
Materials
- Cotton canvas fabric, tote bag, or placemat
- Fabric paint (terra cotta or pumpkin orange)
- Fabric paint (sage green or olive)
- Fabric paint (brown or dark ochre for stems)
- Small flat brush (approx. 1/2 inch) for filling segments
- Fine liner brush for details
- Pencil or disappearing fabric marker
- Paper plate or palette
- Piece of cardboard (to place inside the bag so paint doesn’t bleed through)
- Iron (for setting the paint)
Step 1: Preparation and Sketching
-
Prepare your surface:
Before starting, ensure your canvas is clean and wrinkle-free. If you are painting on a tote bag or pillow cover, slip a piece of cardboard inside to prevent paint from seeping through to the other side. Smooth out the fabric on a flat work surface. -
Lightly sketch the outline:
Using a pencil or disappearing fabric marker, draw a large oval shape slightly wider at the bottom. This will be the overall footprint of your pumpkin. Don’t press too hard; you just need a faint guide. -
Mark the center segment:
Draw a tall, narrow oval right in the middle of your pumpkin shape. This acts as the central foreground segment and anchors the entire design. -
Sketch side segments:
Working outward from that center oval, draw curved segments on the left and right. Leave a small gap (about 1/8th inch) between each segment line. This negative space is crucial—it acts as the white outline separating the sections. -
Define the stem area:
At the top of your central segments, sketch a curly, organic stem shape that dips slightly into the top of the pumpkin. Add a few small tendrils coming off it if you like.
Clean Lines Hack
Work from the center outward. If you’re nervous about painting the gaps freehand, apply thin strips of masking tape or drafting tape between segments before painting to get perfect negative space.
Step 2: Painting the Pumpkin
-
Load your brush:
Squeeze a generous amount of terra cotta or pumpkin orange fabric paint onto your palette. Load your small flat brush thoroughly but wipe off any major globs. -
Paint the center segment:
Carefully fill in the central oval you sketched first. Use smooth, vertical strokes that follow the curve of the shape. Keep your edges crisp, but leave the sketched gap lines unpainted. -
Fill the side segments:
Move on to the segments adjacent to the center. Paint them with the same vertical, curved strokes. Remember to respect the gap! The unpainted canvas between segments creates the visual separation. -
Continue outward:
Paint the remaining outer segments. As the pumpkin curves away, your brushstrokes should curve more dramatically to mimic the roundness of the gourd. -
Refine the edges:
Go back over any spotty areas to ensure solid coverage. If any edges look too ragged, smooth them out with the edge of your brush, but maintain that crucial unpainted gap between sections. -
Let the orange dry:
Allow the orange paint to dry to the touch before moving on. I find this usually takes about 15-20 minutes depending on humidity. You don’t want to accidentally smudge wet orange paint into your green stem.
Uneven Paint Coverage?
Fabric absorbs paint quickly. If your first coat looks patchy or the canvas texture shows through too much, let it dry completely and apply a second thin coat for opaque, bold color.
Step 3: Adding Details and Stem
-
Paint the stem base:
Switch to your sage green paint and a smaller brush. Fill in the main body of the stem. Create vertical striations or lines within the stem using a slightly darker green or by mixing a tiny bit of brown into your green. -
Add stem texture:
Using a fine liner brush, add thin lines of darker green or even a little white along the length of the stem to give it a fibrous, realistic texture. -
Sketch faint vines:
Look at the bottom right corner of your design area. Lightly sketch a flowing vine with small leaves attached using your pencil. -
Paint the vine outline:
Using a very fine liner brush and thinned brown or dark ochre paint, trace over your vine sketch. Keep the touch light and elegant. -
Heat set the design:
Once the entire painting is completely dry (preferably overnight), place a thin cloth over the design and iron it on a medium-hot setting without steam. This sets the fabric paint so it becomes permanent and washable.
Now you have a charming, custom piece of autumn decor ready to display on your table or carry to the market
Dry-Brush Highlights for Instant Glow
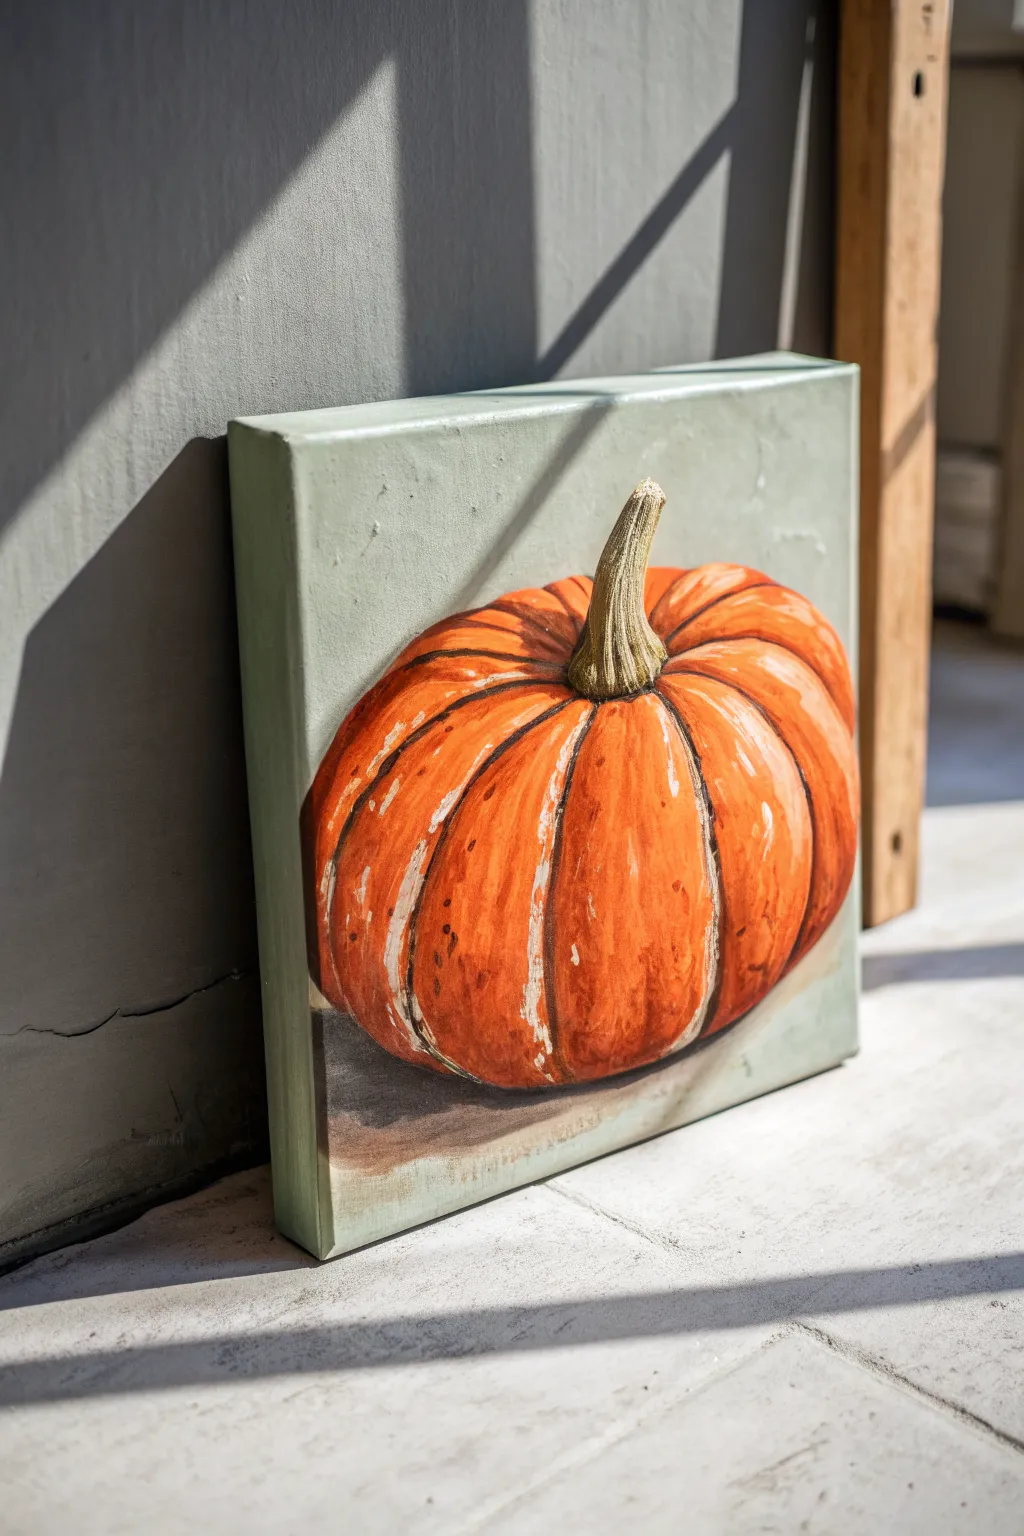
Capture the essence of autumn with this vibrant acrylic painting featuring a classic orange pumpkin against a soft sage background. The technique focuses on building layers and using dry-brushing to create a striking, lit-from-within effect.
Step-by-Step Tutorial
Materials
- Small square canvas (e.g., 8×8 or 10×10 inches)
- Acrylic paints: Burnt Sienna, Cadmium Orange, Yellow Ochre, Titanium White, Hooker’s Green, Burnt Umber
- Flat shader brushes (sizes 6 and 10)
- Small round detail brush (size 2)
- Palette or paper plate
- Water cup and paper towels
- Pencil for sketching
Step 1: Laying the Groundwork
-
Background wash:
Begin by mixing a generous amount of Titanium White with a tiny dot of Hooker’s Green and a touch of Burnt Umber to create a pale, muted sage color. Paint the entire canvas surface, smoothing out brushstrokes for a clean, matte finish. -
Sketching the form:
Once the background is completely dry, lightly sketch a large, flattened oval shape in the center of the canvas. Ensure it sits towards the bottom to ground the pumpkin. -
Adding ribs and stem:
Draw the stem curving slightly at the top center. From the base of the stem, draw curved lines radiating outward and down to the bottom edge to define the pumpkin’s ribs.
Brush Control Secret
For the best dry-brush effect, keep your bristles stiff and use rapid, confident strokes. Avoid overworking the same spot or the paint will start to blend and look muddy.
Step 2: Building Color and Form
-
Base coat blocking:
Use your larger flat brush to paint the entire pumpkin shape with a solid coat of Cadmium Orange. Don’t worry about shading yet; just get a good, opaque layer of color down. -
Defining the shadows:
Mix Burnt Sienna with a little Burnt Umber. Using the edge of your flat brush, paint along the pencil lines you drew for the ribs. -
Blending the curves:
While the shadow lines are still slightly tacky, use a clean, slightly damp brush to soften the edges of the dark lines, blending them outward into the orange to create a rounded, 3D illusion. -
Painting the stem base:
Mix Yellow Ochre with a spot of Hooker’s Green. Paint the main shape of the stem, stroking upward from the pumpkin’s top. -
Stem detailing:
Add thin vertical lines of Burnt Umber along the stem to give it a woody, fibrous texture.
Step 3: The Dry-Brush Technique
-
Prepare the highlight color:
Mix Titanium White with a very small amount of Cadmium Orange and Yellow Ochre. The goal is a very pale, creamy peach color, not a stark white. -
Load the brush:
Dip a dry flat brush into the highlight mixture, then wipe most of the paint off onto a paper towel. The brush should have very little pigment left on it. -
Applying the glow:
Lightly drag the brush vertically down the center of each orange section (between the dark rib lines). This creates that scratchy, textured highlight seen in the reference. -
Building intensity:
Repeat the dry-brushing process, focusing more pressure on the upper curve of the pumpkin where the light would naturally hit. -
Adding stark white:
I like to take pure Titanium White on a detail brush and add tiny, broken lines near the brightest highlighted areas for extra crispness.
Rustic Variations
Try painting a ‘fantasy’ pumpkin by swapping orange for teal or cream. The dry-brush technique works beautifully on any base color to add instant dimension.
Step 4: Final Touches
-
Deepening crevices:
If you lost some contrast, go back with your dark brown mix and carefully re-darken the deepest parts of the crevices between the ribs. -
Grounding shadow:
Mix a watery glaze of Burnt Umber and a tiny bit of blue or black. Paint a soft shadow underneath the pumpkin on the left side to anchor it to the surface. -
Rim highlights:
Add a few touches of your pale highlight color to the ridges of the stem to make it pop. -
Review and refine:
Step back and look at your contrast. If the pumpkin looks flat, add more dry-brush highlights to the roundest parts of the segments.
Display your new artwork on a shelf or mantel to bring a permanent touch of harvest warmth to your home

PENCIL GUIDE
Understanding Pencil Grades from H to B
From first sketch to finished drawing — learn pencil grades, line control, and shading techniques.
Explore the Full Guide
Curly Vines and Easy Leaf Clusters
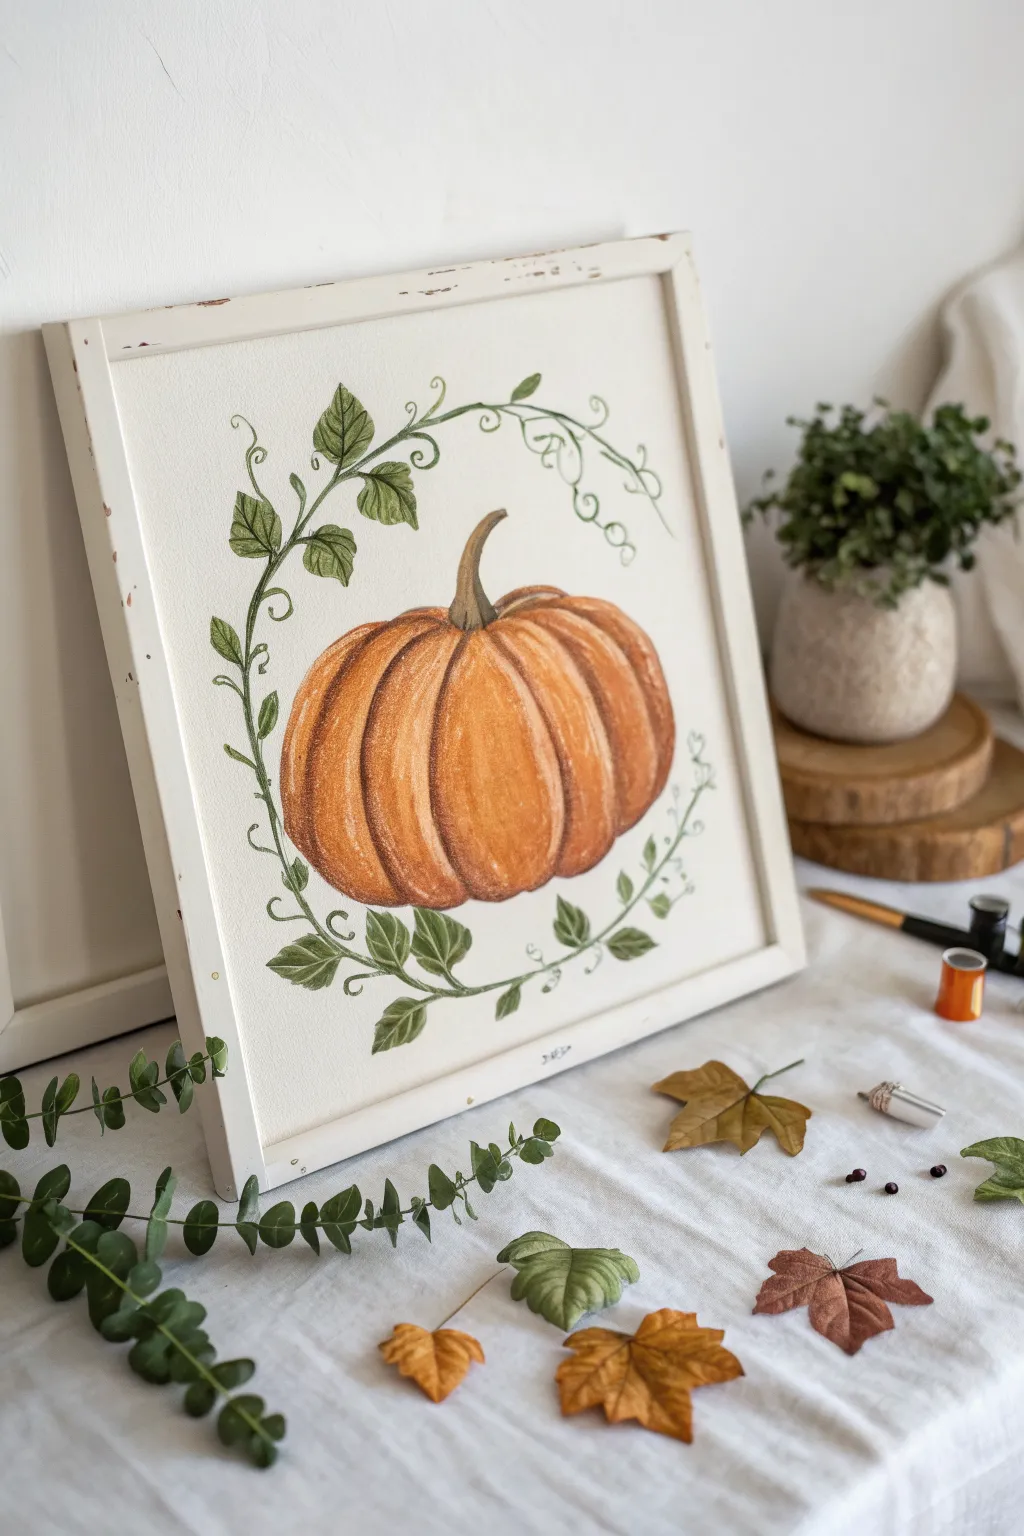
This charming canvas project combines the warm, textured look of a classic orange pumpkin with delicate, whimsical vines and leaves. The finished piece has a lovely vintage botanical feel that makes for perfect autumn decor.
How-To Guide
Materials
- Square canvas (12×12 or similar)
- White acrylic paint (for background)
- Acrylic paints (Orange, Yellow Ochre, Burnt Sienna, Dark Brown, Olive Green, White)
- Small flat brush
- Fine liner brush (size 0 or 00)
- Round brush (size 4 or 6)
- Pencil for sketching
- Palette or paper plate
- Water cup and paper towels
- Wooden frame (optional, for finishing)
Step 1: Base and Sketch
-
Prep the canvas:
Start by giving your canvas a coat of warm white or cream acrylic paint. Even if the canvas is already white, a painted layer adds better texture for the subsequent steps. -
Let it dry:
Allow the base coat to dry completely. It should be dry to the touch so your pencil sketch doesn’t dig into wet paint. -
Sketch the pumpkin shape:
Lightly draw a wide oval in the center of the canvas. Don’t worry about perfection; organic shapes look more natural. -
Add the ribs:
Draw curved lines starting from the top center divot down to the bottom, creating the segmented ribs of the pumpkin. -
Draft the vines:
Sketch a loose, circular vine structure surrounding the pumpkin. Keep the lines wavy and irregular, leaving plenty of open space.
Dry Brush Magic
To get that colored-pencil look with paint, wipe most of the paint off your brush before applying the final texture layers on the pumpkin ribs.
Step 2: Painting the Pumpkin
-
Base coat the pumpkin:
Mix orange with a tiny bit of yellow ochre. Using a round brush, fill in the pumpkin shape. Apply the paint thinly to let a bit of the canvas texture show through. -
Add shadows:
While the orange is still slightly tacky, mix burnt sienna with your orange. Paint vertical strokes along the ‘valleys’ where the ribs meet to create depth. -
Create highlights:
Mix white with a touch of yellow. Brush this lighter color onto the center of each rib segment to make the pumpkin look round and plump. -
Paint the stem:
Use dark brown mixed with a little olive green to paint the stem. Make the base of the stem wider where it connects to the pumpkin and taper it toward the top. -
Refine the texture:
Once the first layers are dry, use a dry flat brush with a very small amount of burnt sienna to add light, scratchy vertical strokes. This mimics the fibrous texture visible in the reference image.
Step 3: Vines and Details
-
Paint the main vine:
Switch to your fine liner brush and thinned olive green paint. Trace over your vine sketches with shaky, fluid lines. -
Add curlicues:
Extend small, curly tendrils off the main vine stems. Some can be tight spirals, while others can be loose waves. -
Paint leaf clusters:
Using a small round brush, press down and lift to create small, teardrop-shaped leaves along the vines. Group them in pairs or threes for a natural look. -
Detail the leaves:
I like to mix a slightly darker green (olive plus a dot of brown) and paint a thin central vein on slightly larger leaves for added dimension. -
Final touches:
Check your composition. If any area looks too empty, add a small floating leaf or a tiny extra vine tendril to balance the wreath. -
Frame it:
Once fully dry, place the canvas into a rustic or distressed white wooden frame to complete the farmhouse aesthetic.
Collage Twist
Instead of painting the leaves, cut leaf shapes from old book pages or green patterned distinct paper and glue them onto the painted vines.
Hang your new artwork in the kitchen or entryway to welcome the season
Pumpkin With Hand-Lettered Word
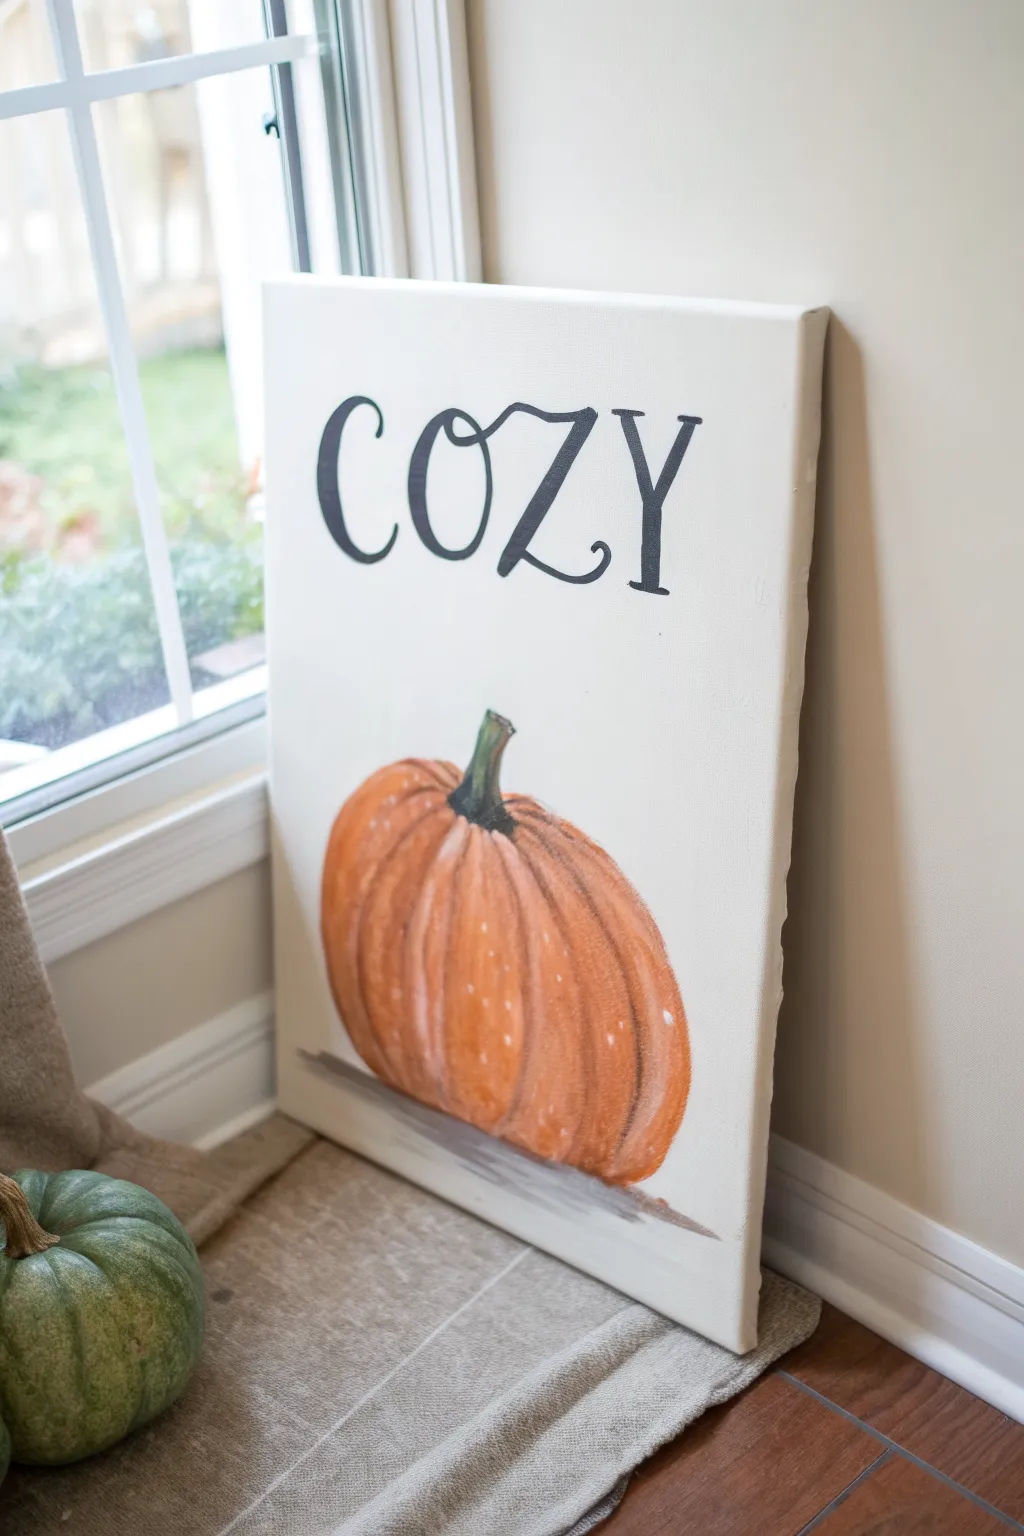
Embrace the warmth of autumn with this charming canvas painting that captures the rustic beauty of the season. Featuring a realistic orange pumpkin grounded by soft shadows and topped with elegant hand-lettering, this piece makes a perfect statement for your entryway or mantel.
Detailed Instructions
Materials
- Large stretched canvas (e.g., 16×20 or 18×24 inches)
- Acrylic paints: Burnt Orange, Yellow Ochre, Burnt Umber, Titanium White, Carbon Black, Sap Green
- Assorted paintbrushes: large flat brush, medium filbert brush, small round detail brush
- Pencil and eraser
- Ruler
- Palette or paper plate
- Water cup and paper towels
- Easel (optional)
Step 1: Planning and Sketching
-
Prepare the canvas:
Start with a clean, white canvas. If you prefer a warmer background tone rather than stark white, you can apply a very thin wash of cream or off-white paint over the entire surface and let it dry completely. -
Sketch the pumpkin placement:
Using a pencil, lightly draw a large oval shape near the bottom third of the canvas. Don’t worry about making it a perfect circle; natural pumpkins are slightly squat and irregular. -
Define the pumpkin ribs:
Sketch the vertical ribs of the pumpkin. Start with a central curve in the middle, and add C-shaped curves radiating outward on both sides to give the pumpkin its distinct segmented look. -
Add the stem:
Draw a sturdy stem emerging from the top center of your pumpkin shape. Angle it slightly for a natural look, and sketch a small, irregular base where it attaches to the pumpkin. -
Draft the lettering:
Measure the space above the pumpkin to center your text. Lightly sketch the word ‘COZY’ in a tall, serif font. Pay attention to the spacing between letters and the curve of the ‘Y’ tail.
Step 2: Painting the Pumpkin
-
Block in base colors:
Mix a medium orange tone using your Burnt Orange and a touch of Yellow Ochre. Using a medium filbert brush, fill in the pumpkin shape, painting in curved strokes that follow the direction of the ribs. -
Add shadows:
While the base coat is still slightly wet, mix a little Burnt Umber into your orange. Paint this darker shade into the crevices between the ribs and at the very bottom of the pumpkin to create dimension. -
Create highlights:
Clean your brush and mix Titanium White with a tiny bit of Yellow Ochre. Apply these highlights to the highest points of each pumpkin rib—the ‘bulging’ parts—to make them look round and plump. -
Blend the tones:
Use a dry or slightly damp clean brush to gently soften the lines between your shadows, mid-tones, and highlights. You want a smooth transition that suggests a rounded form. -
Paint the stem:
Mix Sap Green with a little Burnt Umber for a deep, earthy green. Paint the stem, adding a touch of lighter green or yellow on one side to show where the light hits it. -
Add texture details:
Once the pumpkin is dry, use a small detail brush or an old toothbrush to flick tiny speckles of watered-down white or light orange paint onto the pumpkin skin for realistic texture. -
Paint the ground shadow:
Mix a watery grey or light brown wash. Using horizontal strokes, paint a subtle shadow directly underneath the pumpkin to ground it so it doesn’t look like it’s floating.
Wobbly Lines?
If painting text is intimidating, print out the word ‘COZY’ in your desired font size, rub graphite on the back of the paper, and trace it onto the canvas for a perfect guide.
Step 3: Lettering and Finishing
-
Outline the text:
Using a small round brush and slightly thinned Carbon Black paint, carefully go over your pencil outlines for the word ‘COZY.’ steady your hand by resting your pinky on a dry part of the canvas. -
Fill in the letters:
Switch to a slightly larger brush if needed to fill in the thick parts of the letters. Keep the edges crisp and sharp. I find that doing a second coat of black ensures the letters look solid and bold. -
Refine the serif details:
Use your smallest detail brush to sharpen the serifs (the little feet and decorative ends) on the letters, giving them that classic typographic look. -
Erase guidelines:
Wait until the black paint is absolutely 100% dry. Then, gently erase any visible pencil marks from your initial sketch around the letters or pumpkin.
Pro Tip: Depth of Field
When blending your pumpkin colors, keep your brush strokes curved like parentheses ( ) to mimic the roundness of the fruit. Straight strokes will flatten the image.
Display your artwork near a window or entryway to welcome guests with cozy autumn vibes


Easy Jack-o’-Lantern Face Pumpkin
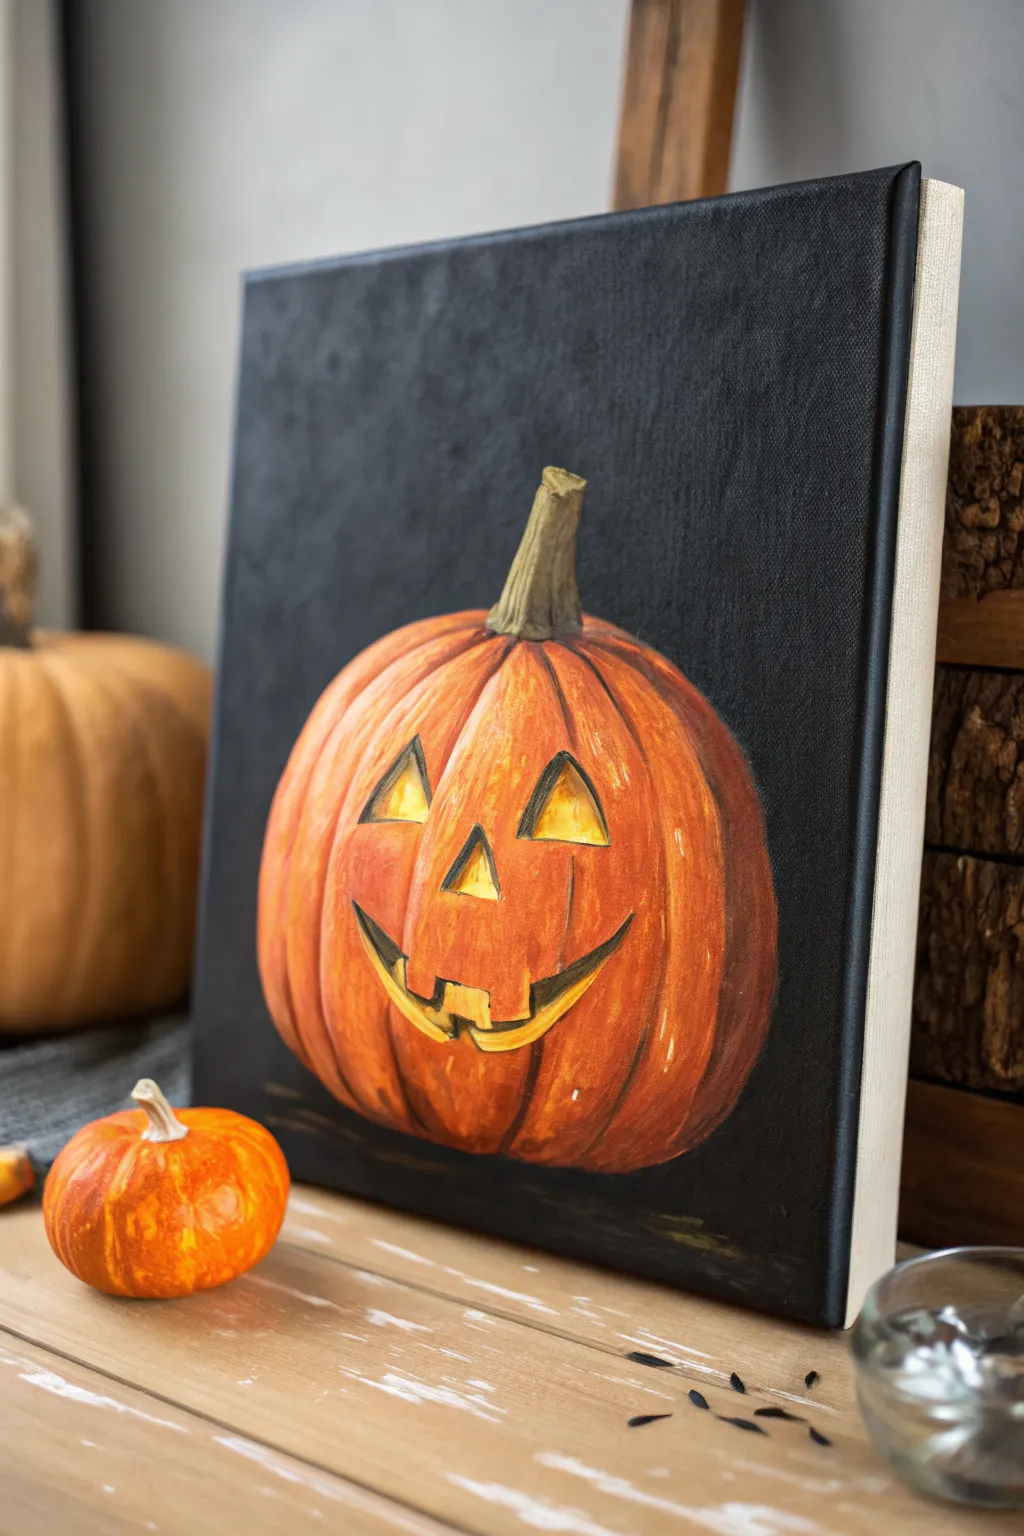
Capture the essence of Halloween with this striking portrait of a carved pumpkin glowing against a stark black background. The high contrast makes the orange pop vividly, creating a spooky yet cheerful centerpiece for your seasonal decor.
Step-by-Step
Materials
- Stretched canvas (e.g., 10×12 or 11×14 inch)
- Acrylic paints (Titanium White, Mars Black, Cadmium Orange, Burnt Sienna, Cadmium Yellow, Yellow Ochre)
- Flat brush (1-inch) for background
- Filbert brushes (medium and small)
- Round detail brush (size 1 or 2)
- Pencil for sketching
- Palette
- Water cup and paper towels
Step 1: Setting the Scene
-
Prepare the background:
Begin by painting the entire canvas with Mars Black. Use your large flat brush to get smooth, even coverage. Don’t forget to paint the sides of the canvas for a professional finish. -
Let it dry completely:
Allow the black background to dry fully. Acrylics darken slightly as they dry, so you might need a second coat if any canvas texture shows through. -
Sketch the pumpkin shape:
Once the black is bone dry, lightly sketch the outline of your pumpkin using a white chalk pencil or a regular pencil (if you can see the sheen). Draw a wide oval shape that dips slightly at the top where the stem will sit. -
Map out the face:
Sketch two triangles for eyes, a small triangle for the nose, and a wide, jagged smile. Keep the lines light so they are easily covered by paint later. -
Draw the ribs:
Lightly draw curved vertical lines running from the stem area down to the bottom of the pumpkin to indicate the ribs. These lines help define the roundness.
Paint Opacity Tip
Orange acrylics are notoriously transparent. Don’t be afraid to paint a layer of white or yellow under your orange base coat first to make the color truly opaque and vibrant against the black.
Step 2: Blocking in Color
-
Base coat for the pumpkin:
Mix Cadmium Orange with a tiny touch of Burnt Sienna to create a warm, deep orange. Fill in the entire pumpkin shape, carefully painting around the eyes, nose, and mouth features. You want those facial features to remain black for now. -
Base coat for the stem:
Mix Yellow Ochre with a bit of Mars Black to get a muted olive-brown tone. Paint in the stem shape, making the top edge jagged where it was ‘cut’. -
Establish shadows:
While the orange is still slightly tacky, mix a darker shade using Burnt Sienna and a dot of purple or black. Paint this dark mix along the vertical rib lines you sketched earlier to create grooves. -
Strengthen the edges:
Add this darker shadow color to the very bottom curve of the pumpkin and the outer left and right edges to make the pumpkin look round rather than flat.
Fixing Wobbly Lines
If your Jack-o’-Lantern’s smile looks shaky, wait for the orange to dry completely. Then use the black background color to ‘cut back’ into the shape, refining the teeth and sharp corners.
Step 3: Building Form and Light
-
Add highlights:
Mix pure Cadmium Orange with a little Yellow Ochre. Using a filbert brush, paint broad strokes in the center of each rib section. This creates the bulging effect of the pumpkin skin. -
Refine the ribs:
Blend the highlight color gently into the darker groove color. You don’t want harsh stripes, but rather a soft transition from the deep grooves to the rounded, lit sections. -
Create the glowing interior:
Paint the inside of the eyes, nose, and mouth with Cadmium Yellow mixed with a touch of Titanium White. This bright yellow base represents the candlelight inside. -
Add depth to the carving:
To show the thickness of the pumpkin flesh, paint the ‘rim’ of the cutouts. On the right side of the eyes and smile, paint a thin sliver of light orange. On the left inside edges, use a darker orange to emulate shadow.
Step 4: Final Details
-
Detail the stem:
Using your small round brush, add thin vertical lines to the stem with a lighter brownish-yellow. This mimics the woody texture of a dried pumpkin stem. -
Enhance the glow:
Mix a very pale yellow-white. Dab this into the center of the eyes and the lowest part of the smile to make the light source look most intense there. -
Crisp up the edges:
Go back with your black paint and a small detail brush. Clean up any orange edges that got messy or sharpen the points of the eyes and teeth. -
Add final textures:
I like to use a dry brush with a tiny bit of nearly-white orange to add little scratches or imperfections to the pumpkin skin for realism.
Hang your spooky masterpiece near the entryway to greet guests with a festive autumn grin.
Spiderweb Corner With a Hanging Spider
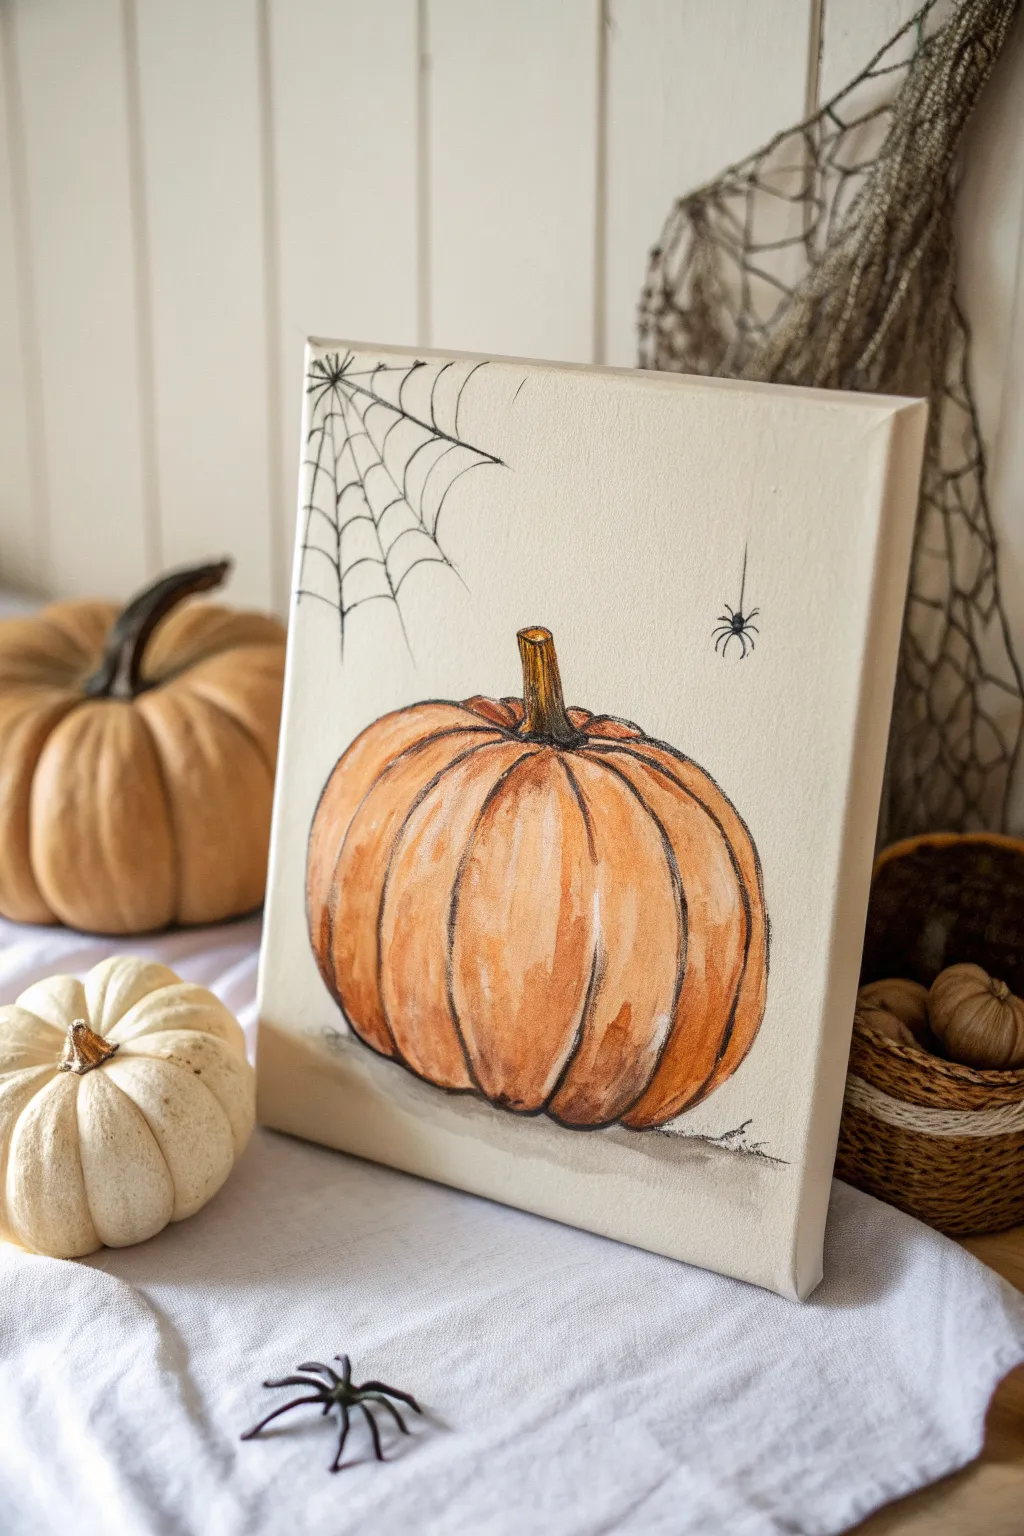
This charming canvas project combines the classic symbol of harvest with a spooky twist, featuring a plump orange pumpkin and a creeping spider companion. The soft watercolor-like finish and crisp pen details create a balanced look that is perfect for elegant Halloween decor.
Step-by-Step Tutorial
Materials
- Small square canvas (e.g., 8×10 or 10×10 inches)
- Acrylic paints (Burnt Sienna, Cadmium Orange, Yellow Ochre, Titanium White, Burnt Umber)
- Black fine-liner pen or waterproof ink marker
- Flat shader brush (size 6 or 8)
- Round detail brush (size 2)
- Pencil and eraser
- Cup of water and paper towels
- Mixing palette
Step 1: Sketching the Composition
-
Outline the pumpkin shape:
Begin by lightly sketching a wide, flattened oval shape for the main body of the pumpkin. Keep your pencil pressure very light so the graphite doesn’t smudge later. -
Add ribs and stem:
Draw curved vertical lines contouring the shape to create the pumpkin’s segments. Add a sturdy, slightly angled stem at the top center. -
Sketch the spooky details:
In the upper left corner, draw a simple spiderweb shape radiating outward. In the open space on the right, sketch a small vertical line dropping down with a tiny oval for the spider.
Ink Smudge Savior
If your pen smudges on damp paint, stop immediately. Wait for it to dry fully, then paint a thin layer of the background color (or white) over the smudge before redrawing the line.
Step 2: Painting the Pumpkin Base
-
Mix your base orange:
On your palette, mix Cadmium Orange with a touch of Yellow Ochre and a drop of water. This thins the acrylic slightly, giving it a translucent, watercolor-like wash effect. -
Fill the segments:
Using your flat shader brush, paint the pumpkin segments. Leave tiny slivers of white canvas showing between the ribs to naturally create highlights and separation. -
Add initial shadows:
While the paint is still damp, pick up a tiny bit of Burnt Sienna. Glaze this darker color along the bottom curves and the crevices where the ribs meet to add immediate volume. -
Paint the stem:
Use the round brush and a mix of Burnt Umber and Yellow Ochre to color the stem. Stroke vertically to mimic the texture of dried wood.
Step 3: Adding Depth and Highlights
-
Deepen the crevices:
Once the base layer is dry to the touch, mix Burnt Sienna with a tiny dot of Burnt Umber. Carefully paint thin, transparent lines inside the grooves of the pumpkin ribs. -
Highlight the curves:
Mix a pale peach tone using Titanium White and a dot of orange. Dry brush this lightly on the upper rounded parts of the pumpkin segments to make them look plump and round. -
Grounding shadow:
Dilute a very small amount of Burnt Umber with plenty of water. Paint a soft, hazy shadow underneath the pumpkin so it doesn’t look like it’s floating in mid-air.
Metallic Magic
For a magical touch, trace over the spiderweb lines with a silver or gold metallic paint pen. It will catch the light beautifully when walking past.
Step 4: Inking the Details
-
Outline the pumpkin:
Wait until the painting is *completely* dry. Take your black fine-liner pen and loosely outline the pumpkin ribs and stem. I like to keep the lines scratchy and broken rather than perfect and solid for an artistic feel. -
Draw the spiderweb:
Trace over your pencil sketch for the web in the corner. Use quick, confident strokes for the straight spoke lines and slight drooping curves for the connecting threads. -
Create the spider:
Draw the hanging thread first, stopping just above the pumpkin. Draw a solid black oval for the spider’s body and add eight spindly legs growing out from the center. -
Enhance texturing:
Add a few extra scratchy ink marks near the base of the pumpkin and on the stem to emphasize the rough texture. -
Final cleanup:
Once the ink is fully set, gently erase any visible pencil marks that weren’t covered by paint or ink.
Hang your new masterpiece in an entryway or lean it on a mantle to celebrate the spooky season
Minimalist Pumpkin Outline With Color Wash
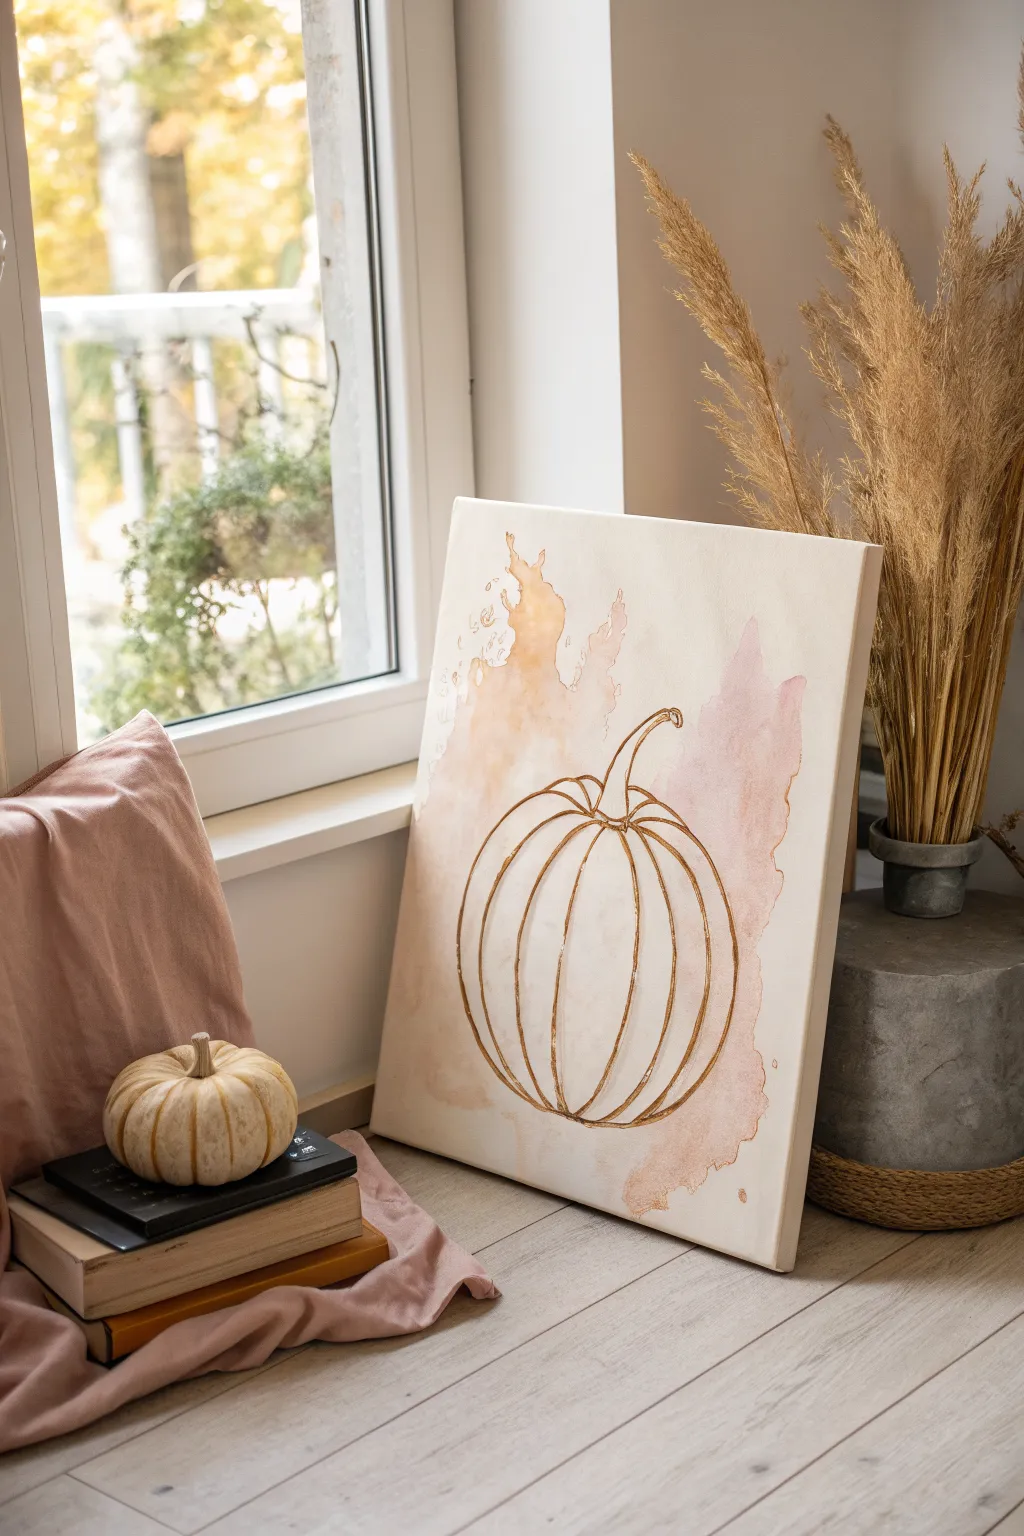
Elegance meets simplicity in this stunning canvas project that combines loose, fluid watercolor effects with structured metallic linework. The soft, bleeding edges of peach and pink tones provide a dreamy backdrop for the crisp, golden pumpkin silhouette.
How-To Guide
Materials
- Stretched canvas (11×14 or similar)
- Acrylic paints (Soft Peach, Dusty Rose, Warm Ochre)
- Water spray bottle
- Medium flat paintbrush
- Gold metallic paint marker or gold acrylic paint with fine liner brush
- Pencil and eraser
- Paper towels
- Mixing palette
- Optional: Watercolor medium (if using heavy body acrylics)
Step 1: Creating the Color Wash
-
Prepare your palette:
Squeeze out small amounts of Soft Peach and Dusty Rose onto your mixing palette. Since we want a watercolor effect on canvas, you’ll need to thin your acrylics significantly with water until they have an inky consistency. -
Dampen the canvas:
Lightly mist the center of your canvas with your water spray bottle. You don’t want it soaking wet, just damp enough to help the paint travel and bloom. -
Apply the first wash:
Load your brush with the watered-down Soft Peach. Touch the brush to the damp canvas in the center and let the color spread naturally, guiding it slightly into an abstract, organic shape that is roughly centered but extends outward. -
Introduce the second tone:
While the first layer is still wet, dip into your watered-down Dusty Rose. Dab this randomly around the edges of your peach shape and in a few spots near the top right, allowing the colors to bleed into one another. -
Encourage drips:
For that artistic, uneven edge seen in the photo, hold the canvas upright for a moment or tilt it differently. Let gravity pull a few dribbles of paint upward or downward to create irregular ‘splashes’ at the top and bottom. -
Soften the edges:
If any edges look too harsh, dip a clean brush in water and gently run it along the perimeter of your paint splotch to feather it out into the white canvas. -
Let it dry completely:
This step is crucial. The background must be bone dry before you sketch or line over it. You can speed this up with a hair dryer on a cool setting if you’re impatient.
Step 2: Sketching the Pumpkin
-
Find the center:
Locate the visual center of your dried color wash. This is where the body of your pumpkin will sit. -
Sketch the central oval:
Using a pencil very lightly, draw a tall, narrow oval in the middle. This acts as the front-most segment of the pumpkin. -
Add side segments:
Draw curved ‘C’ shapes extending from the top point of your central oval down to the bottom point. Add about two or three of these segments on each side, getting progressively wider. -
Draw the stem:
Sketch a curved, hook-like stem emerging from the top center. Keep the lines elegant and slightly tapered. -
Refine the shape:
Step back and look at your sketch. The pumpkin should look round and full, contrasting with the scratchy, abstract background. Lightly erase and adjust lines until you are happy with the symmetry.
Clean Up Tip
To erase pencil marks without smudging the metallic paint, use a kneadable eraser. Just press and lift rather than rubbing back and forth aggressively.
Step 3: Gilding the Lines
-
Prime your marker:
Shake your gold metallic paint marker well and press the tip on a scrap piece of paper until the ink flows smoothly. -
Trace the central lines:
Begin tracing your pencil lines, starting with the central oval. Use a steady hand and consistent pressure to get a solid, glistening line. -
Outline the segments:
Work your way outward, tracing the curved side segments. I find it helpful to rotate the canvas physically to get the best angle for my hand while drawing these curves. -
Detail the stem:
Trace the stem outline. At the base of the stem where it connects to the pumpkin, you can double-line it slightly or add a small extra curve to suggest depth. -
Add artistic variation:
Go back over a few random sections of the lines to make them slightly thicker. This variation in line weight makes the drawing feel more organic and hand-sketched rather than computer-generated. -
Final cleanup:
Once the gold paint is fully dry (give it at least 20 minutes), gently erase any visible pencil marks that peek out from underneath the gold.
Add Sparkle
While the watercolor wash is still wet, sprinkle a tiny pinch of salt onto the paint. Brush it off when dry for a textured, speckled effect.
Now you have a chic, modern piece of fall decor that looks beautiful all season long
Mixed-Media Pumpkin With Pattern Layers
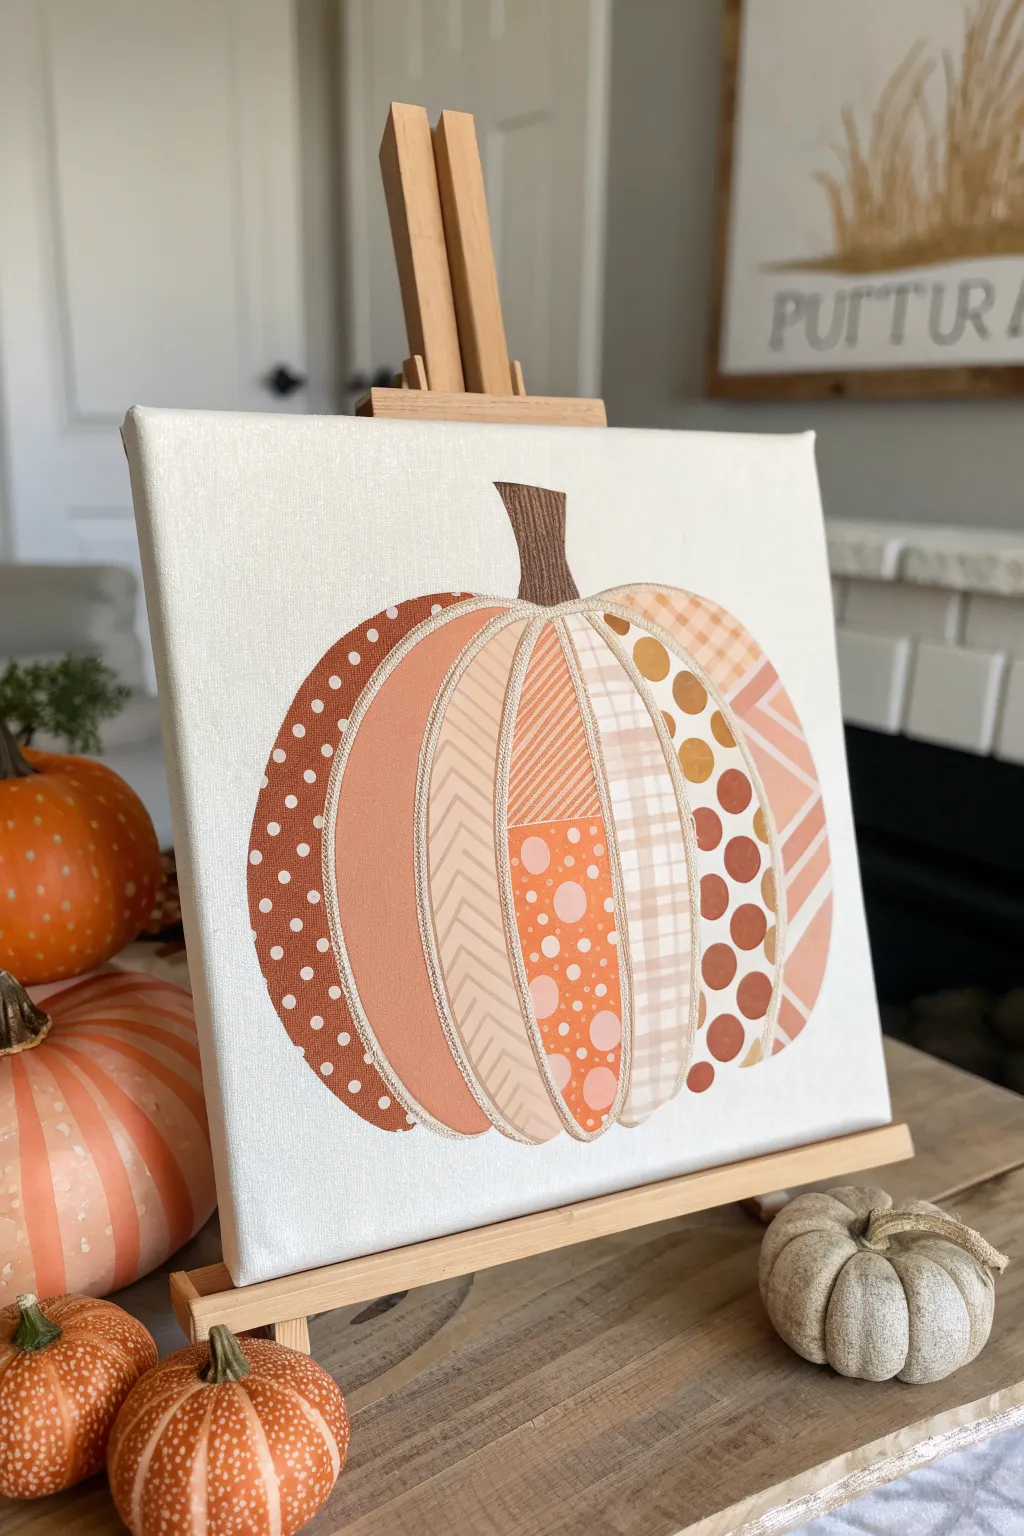
Embrace the cozy vibes of fall with this charming mixed-media pumpkin project. By combining patterned paper cutouts with cord accents on a simple canvas, you’ll create a textured, patchwork-style centerpiece that looks intricate but comes together easily.
How-To Guide
Materials
- Square stretched canvas (10×10 or 12×12 inches)
- Scrapbook paper pack (fall colors: oranges, browns, creams, patterns)
- Mod Podge or decoupage glue
- Pencil
- Scissors and precision craft knife
- Tracing paper
- Brown acrylic paint
- Fine paintbrush
- Beige or off-white jute cord or thick twine
- Hot glue gun and glue sticks
- Foam brush
Step 1: Planning and Cutting
-
Draft your shape:
Start by lightly sketching a large pumpkin shape directly onto your canvas using a pencil. Make sure to draw the distinct vertical segments (or ribs) of the pumpkin, giving them a nice, plump curve. -
Make pattern templates:
Place a sheet of tracing paper over your canvas sketch and trace each individual pumpkin segment. Number them on the tracing paper so you remember which piece goes where. -
Cut the templates:
Cut out each traced segment shape from the tracing paper to create your templates. -
Select your papers:
Browse through your scrapbook paper and choose a different pattern for each segment. I like to alternate between busy patterns (like polka dots) and simpler ones (like plain colors or subtle textures) to keep the design balanced. -
Transfer and cut:
Trace your paper templates onto the corresponding patterned scrapbook papers. Carefully cut out each shape with scissors.
Step 2: Adhering the Collage
-
Prepare the surface:
Apply a thin, even layer of Mod Podge to the center area of the canvas where the pumpkin will sit using a foam brush. -
Place the segments:
Beginning with the center segment and working your way outwards, press your paper cutouts onto the canvas. Arrange them so they touch or slightly overlap to fit your original sketch. -
Smooth it out:
Use your fingers or a clean brayer to smooth out any air bubbles, ensuring the edges of the paper are firmly stuck down. -
Seal the design:
Brush a layer of Mod Podge over the top of the entire pumpkin to seal the paper and give it a uniform finish. Let this dry completely before moving on.
Pro Tip: Paper Weight
Use cardstock-weight patterned paper rather than thin printer paper. It is less likely to wrinkle or bubble when you apply the decoupage glue.
Step 3: Adding Details and Texture
-
Paint the stem:
Using brown acrylic paint and a fine brush, fill in the stem shape at the top of the pumpkin. You can add a few vertical streaks of a darker brown for a wood-grain effect. -
Outline loosely:
Take your beige jute cord and measure pieces that match the length of the curved lines between your pumpkin segments. -
Glue the borders:
Apply a very thin line of hot glue directly over the seams where the paper segments meet. Carefully press the jute cord into the glue to create a raised, textured division between patterns. -
Define the outer edge:
Continue gluing cord around the entire outer perimeter of the pumpkin body to give it a finished, framed look. -
Trim excess cord:
Snip off any excess cord ends at the top near the stem or bottom for a clean edge. You can tuck the very tips under slightly with a dab of glue to prevent fraying. -
Clean up:
Check for any hot glue strings or stray pencil marks and gently remove them once everything is cool and dry.
Troubleshooting: Peeling Edges
If paper edges lift after the top coat dries, slip a tiny bit of glue under the lifted area with a toothpick, press down for 30 seconds, and re-seal.
Now you have a unique, textured piece of autumn art ready to display on your mantel


Have a question or want to share your own experience? I'd love to hear from you in the comments below!