Few things bring as much warmth and personality to a patio or balcony as a row of hand-painted terracotta pots. Whether clustered around a lounge chair or lined up along a garden wall, painted terracotta adds texture, color, and a touch of artistry to outdoor spaces. Terracotta’s porous surface and natural hue make it ideal for creative finishes that feel at once handcrafted and timeless.
This guide walks through the practical steps and creative ideas for painting terracotta pots, from surface preparation to sealing and design inspiration. The process is straightforward, but small professional techniques ensure your pots stay beautiful season after season.
Understanding Terracotta

Terracotta, literally meaning “baked earth,” is an earthenware clay that remains slightly porous even after firing. This porosity allows water and air to move through the material, helping the roots of plants breathe. It also means terracotta has a high absorption rate, which affects how paint and sealants behave on its surface.
When unsealed terracotta is left outside, it naturally develops a patina as salts and minerals migrate through the clay. Many people appreciate this rustic quality. However, if you want to control the pot’s color or integrate it into a designed patio aesthetic, painting and sealing provide the best long-term results.
Because terracotta interacts directly with moisture, understanding its material properties helps you avoid common pitfalls—like flaking paint or trapped dampness. Think of each pot as both a design object and a living habitat for plants.

Choosing the Right Pots

Before opening paint cans or sketching designs, take a few minutes to assess your materials. The type and condition of the pots determine your success more than the brand of paint.
- Condition: Inspect for cracks, uneven rims, or white mineral crusts. Minor surface roughness can be sanded smooth, but cracks often spread once the pot is filled and watered.
- Size: Smaller pots are ideal for practice and accent detail. Larger ones offer space for geometric patterns or gentle gradients.
- Shape: Cylindrical pots display stripes and bands best, while slightly tapered shapes emphasize color washes and organic designs.
- Previous use: Clean off all soil and calcium residues using a stiff brush. If the pot has absorbed fertilizer salts, soak it in a mixture of water and white vinegar for 20–30 minutes and then rinse thoroughly.
Let the pots dry in a shaded, airy spot for at least a day before painting. Fully dry clay gives paint an even, consistent grip.
Preparing the Surface

Surface preparation is not glamorous, but it makes the difference between a finish that lasts one season and one that remains beautiful for years.
- Wipe down: Use a damp cloth to remove dust and sanding residue.
- Seal or prime (optional but recommended): Apply a water-based primer or masonry sealer compatible with porous surfaces. This acts as a barrier coat, reducing absorption and giving the paint a smoother glide. Without sealing, paint can sink unevenly into the clay, darkening quickly and drying patchy.
- Dry time: Allow the primer to cure for at least 4 hours. Rushing this stage traps moisture beneath the paint layer, leading to blistering in sunlight.
- Optional interior seal: If painting both inside and out, be aware that sealing interiors will reduce the pot’s natural breathability. Many gardeners prefer leaving interiors unpainted to preserve evaporative cooling and improve root health.
At this stage, you have a clean, sealed canvas ready for design.
Selecting Paints and Tools

For exterior projects, durability matters as much as aesthetics. Terracotta accepts watercolor-like washes beautifully but needs robust pigment to withstand ultraviolet exposure and moisture fluctuations.
- Paint type: Acrylic and outdoor latex paints provide excellent adhesion, flexibility, and color vibrancy. Both resist cracking as the clay expands and contracts with temperature changes.
- Finish: Matte paints give a natural, chalky look, while satin or semi-gloss finishes brighten color saturation and repel more dirt.
- Tools: A combination of soft synthetic brushes, small foam rollers, and sponges provides versatility. Painter’s tape helps achieve clean geometric lines, and a fine liner brush supports detailed patterns.
- Work setup: Paint outdoors or in a well-ventilated area, ideally on a day with mild weather—between 60 and 75°F, with low humidity.
If using multiple colors, organize your palette before starting. Keeping tones within the same temperature range—cool blues and greens, or warm reds and ochres—creates visual harmony even among varied designs.
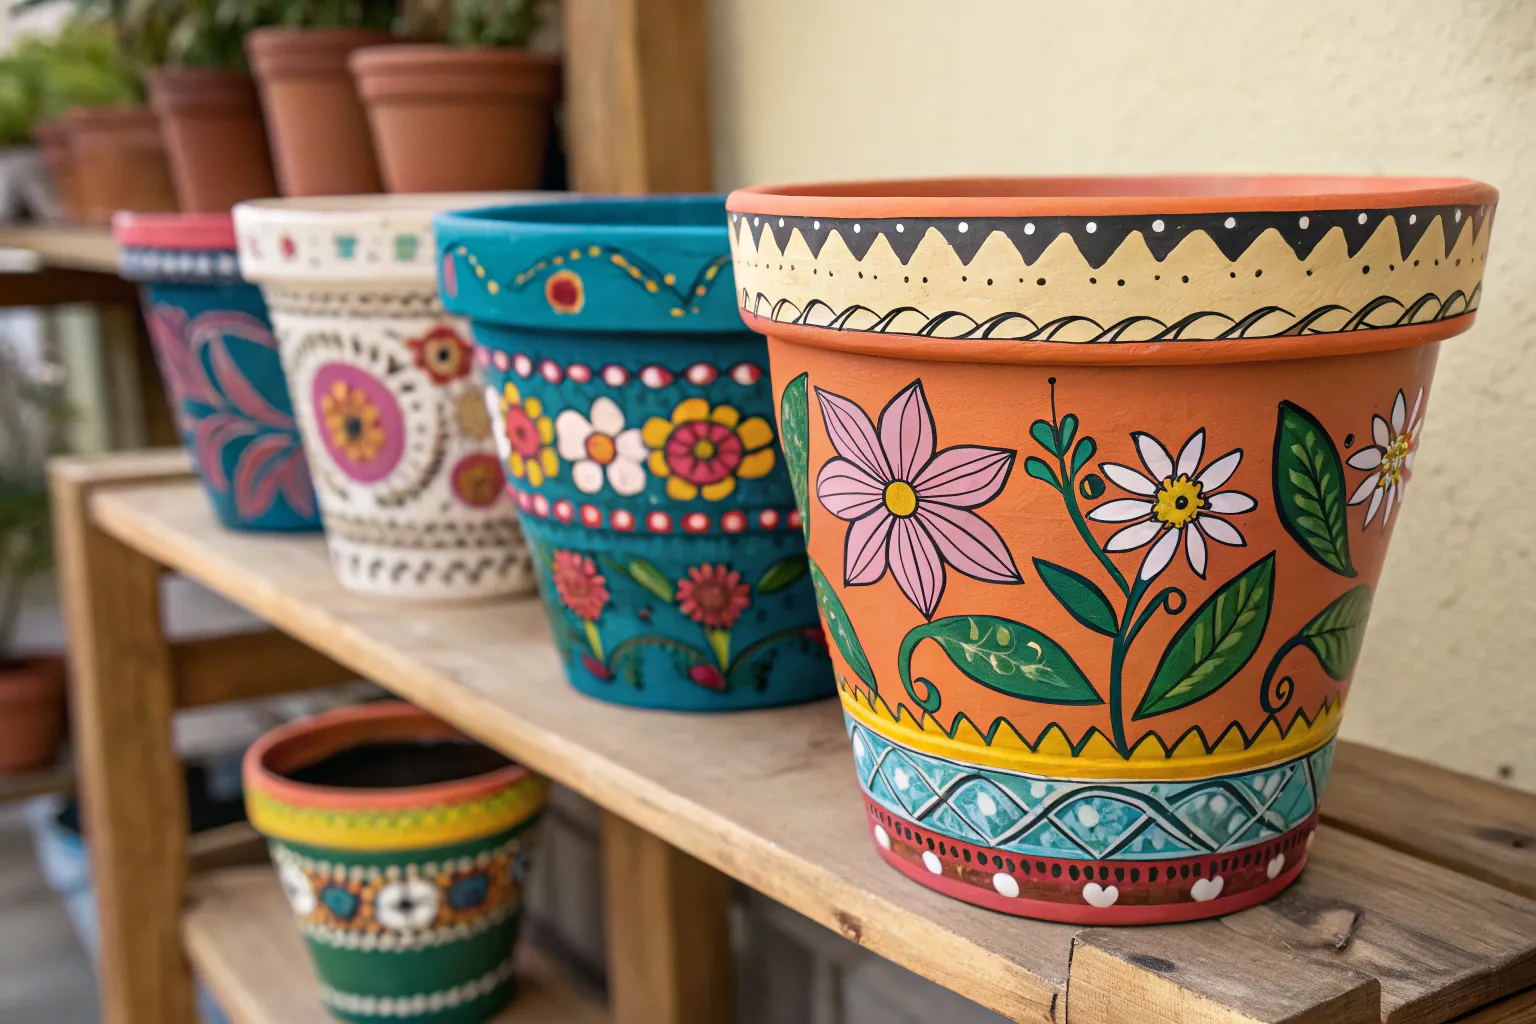
Painting Techniques and Design Ideas

Painting terracotta is part craft, part art. You can layer colors, sponge textures, or keep it clean and graphic depending on your outdoor aesthetic. Below are several techniques that balance artistic expression with durability.
1. Washed Mediterranean Look
Thinned paint mixed with water (about two parts paint to one part water) mimics the weather-softened surfaces of southern Europe. Apply unevenly with broad strokes or a slightly damp sponge. When dry, lightly sand the raised areas to expose hints of the clay underneath.
Ideal colors: dusty white, light azure, faded coral.
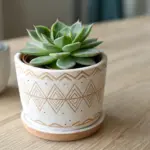
2. Masked Geometrics
For modern patios, clean shapes stand out against natural surroundings. Use painter’s tape to create precise triangles, blocks, or bands. Paint one section at a time, letting each layer dry fully. This method pairs beautifully with neutral tones—gray, charcoal, sage, or stone.
Finish with a satin topcoat for a smooth, architectural feel.
3. Botanical Texture
A stippling technique, achieved by dabbing a half-dry sponge or brush, brings visual depth reminiscent of moss or stone. It works well in natural palettes—soft greens, sand beige, and brown with subtle metallic accents.
This texture hides dust and water spots better than flat color, making it a good choice for frequently watered pots.
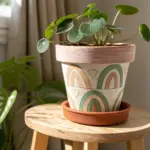
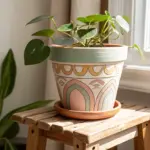
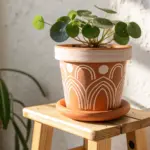
4. Freehand Bohemian Art
For expressive, casual charm, sketch lacework or mandala patterns with fine brushes. Use a dry brush for a hand-drawn appearance rather than sharp edges. Complement with cloth cushions, woven lanterns, or artisanal tile to establish a cohesive boho patio look.
5. Opaque Layered Gradient
Start with a base color, then slowly blend a second tone upward or downward for an ombré effect. Feather transitions with a soft sponge. Cool gradients evoke ocean hues; warm gradients complement desert succulents.
A simple table of ideas shows how tones and finishes shape mood:
| Style | Technique | Color Inspiration | Suggested Finish |
|---|---|---|---|
| Mediterranean wash | Diluted acrylic layers | Terracotta orange, white, cobalt | Matte |
| Minimal geometry | Masked lines, single-tone fields | Charcoal, sage, cream | Satin |
| Botanical texture | Stippled, layered dots | Fern green, ivy, ivory | Matte or satin |
| Boho or folk art | Freehand motifs | Turquoise, coral, sun gold | Semi-gloss |
| Coastal gradient | Blended top-down fade | Ocean blue, sand, pale gray | Satin |
Try combining two complementary techniques—for example, a geometric base with a subtle wash overlay—to achieve dimension without visual clutter.
Drying and Layer Control
Every professional painter learns patience here. Each layer must dry thoroughly before continuing; otherwise, the next brushstroke can lift partially cured paint from the porous terracotta. Depending on climate, drying usually takes between 30 minutes and 2 hours per coat.
Avoid using hair dryers or heaters—they accelerate surface drying, but moisture trapped deeper in the clay can push outward later, causing bubbles.
When applying multiple colors, work in stages. Begin with light tones, moving to darker or more opaque shades last. This order maintains clarity and reduces visible brush lines.
Sealing and Protection
Once the paint is fully dry, seal the design against moisture, UV rays, and temperature swings. Modern sealants come in various finishes—matte, satin, or glossy—and can dramatically alter the look of the final piece.
- Acrylic clear coat: Long-lasting and water-resistant; ideal for outdoor use.
- Polyurethane: Tougher surface, suitable for high sun exposure but can slightly yellow over time.
- Application: Hold the can or brush about 8–10 inches away from the surface and apply two thin coats rather than one heavy one.
- Drying time: Allow at least 24 hours before placing plants or saucers beneath the pots.
If your patio receives strong midday sun, consider UV-protective coatings used for outdoor art. These sealants slow pigment fading while maintaining natural color balance.
Additional Practical Tips
- Drainage holes: Never seal or paint over the drainage hole. Adequate drainage prevents root rot and preserves soil health.
- Base rings or risers: Elevate each pot slightly using stone coasters or foot pads so moisture can evaporate from underneath.
- Cleaning: During the season, clean surfaces with mild soap and a soft brush. Harsh chemicals strip the finish.
- Winter storage: If winters are very cold, store painted terracotta indoors or under shelter to prevent freeze-related cracking.
- Refinishing: After a few years, lightly sand the surface, reapply a fresh coat, and reseal—your pots will look new without losing character.
The Science Behind Longevity
Understanding why certain paints or sealants perform better helps you make informed creative decisions. Terracotta’s porosity encourages capillary movement of water through microchannels. If the inner and outer layers are sealed differently, differential moisture stress can lead to cracking or flaking.
Acrylic formulations accommodate this expansion and contraction better than oil-based products because their polymer chains remain flexible as temperature fluctuates. For outdoor painting, elasticity and UV stability matter more than thickness. Two thin coats of acrylic, well-cured and sealed, typically outperform a heavy single layer of oil paint.
Moisture equilibrium also plays a role. Before filling pots with soil, let them rest for at least a day after sealing to ensure any solvents have evaporated. Once in use, the natural moisture from watering maintains a balanced internal humidity, reducing stress on the paint film.


Have a question or want to share your own experience? I'd love to hear from you in the comments below!