There is something deeply satisfying about taking a simple, porous clay vessel and transforming it into a personalized piece of art that brightens up a windowsill. Whether you are looking to create a cozy home for your succulents or a whimsical gift for a friend, these techniques will help you unleash your creativity on a classic canvas.
Modern Geometric Shapes
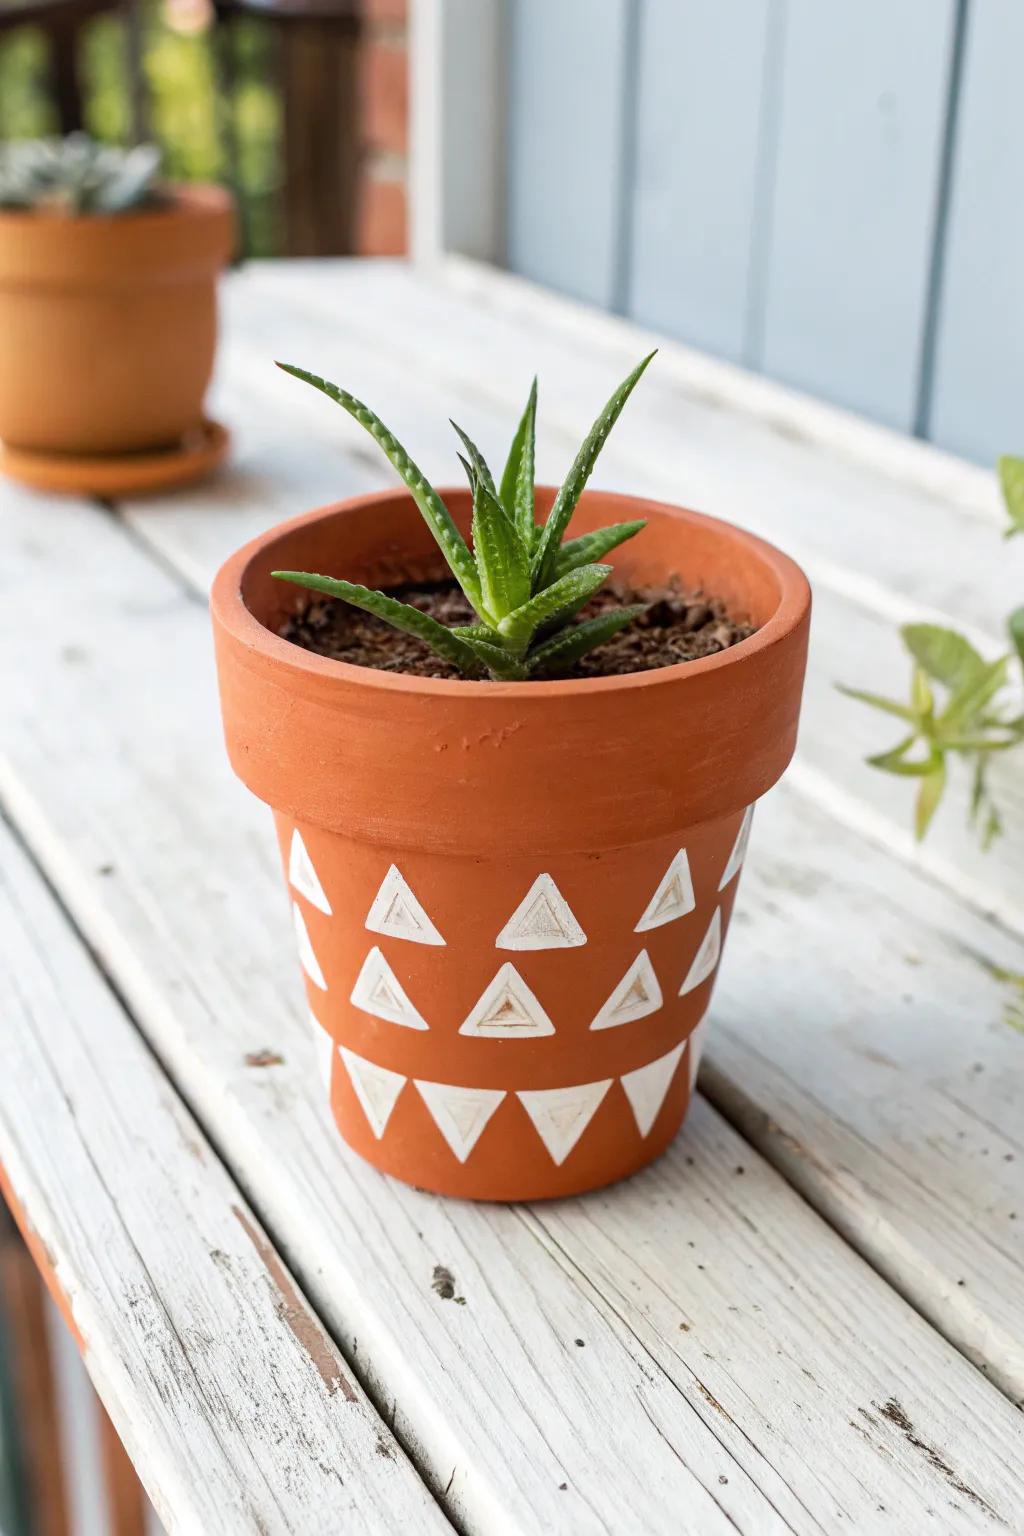
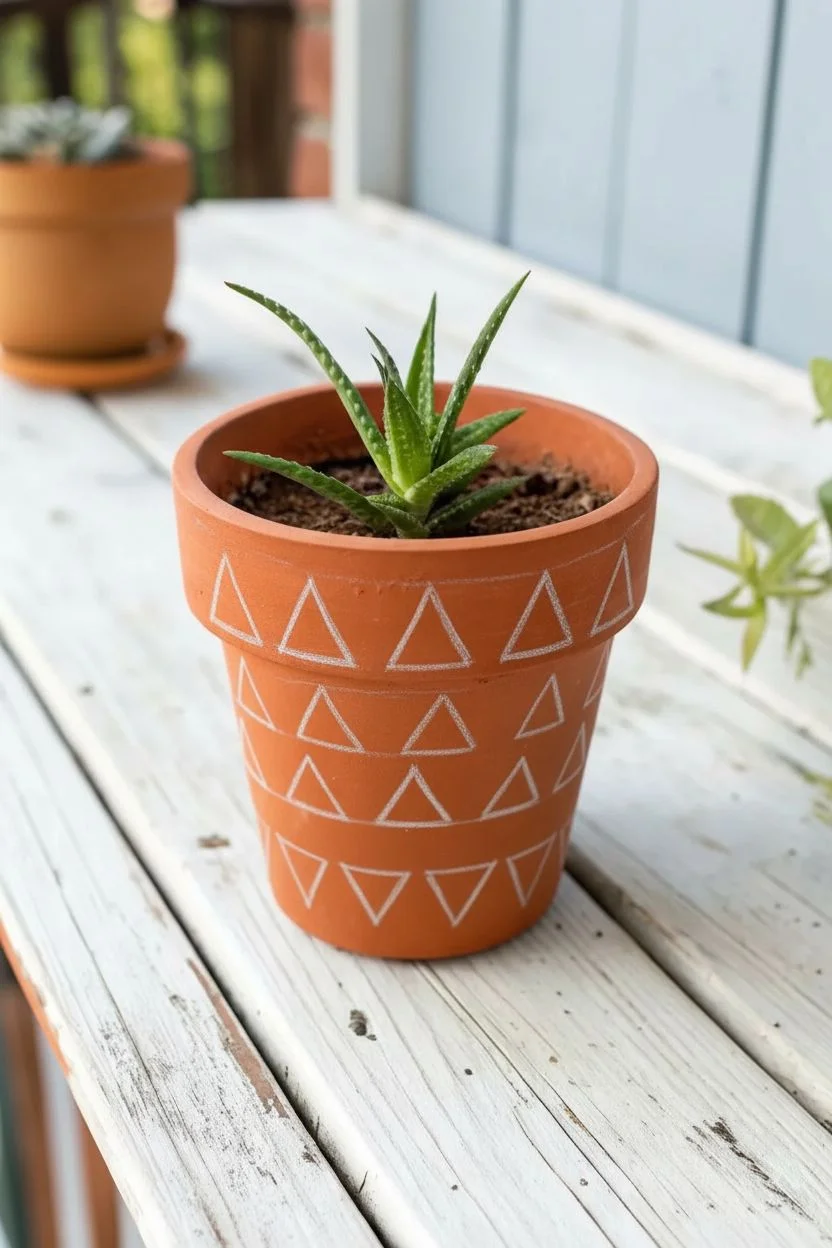
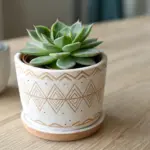
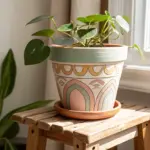
Bring a touch of modern bohemian style to your plant collection with this high-contrast design. By utilizing the raw clay color as a background for crisp white geometric shapes, you create a striking vessel that looks perfect with succulents.
Step-by-Step Guide
Materials
- Standard terracotta pot (4-6 inch)
- White acrylic craft paint
- Small flat angled brush (size 1/4 inch)
- Fine detail liner brush
- Pencil
- Eraser
- Paper plate or palette
- Water cup
Step 1: Cleaning and Layout
-
Prepare the surface:
Remove any stickers from your pot and wipe it down with a damp cloth to remove loose red dust. Let it dry completely. -
Mark horizontal guides:
Using your pencil, lightly draw three horizontal rings around the pot to define where your three rows of triangles will sit. -
Plan the top row:
Sketch a row of upward-pointing triangles along the top guide line. Leave about a half-inch of space between each triangle. -
Align the middle row:
Sketch a second row of upward-pointing triangles directly below the first set. Try to align the points so they sit straight under the triangles above. -
Sketch the bottom row:
For the bottom tier, draw downward-pointing (inverted) triangles. Position these in the gaps between the middle row triangles to create a nesting effect.
Fixing Wobbly Lines
If a paint edge looks messy, let it dry completely. Then, use a toothpick or a craft knife to gently scratch away the excess white paint from the terracotta to sharpen the line.
Step 2: Painting the Pattern
-
Load your brush:
Squeeze a small amount of white acrylic paint onto your palette. I prefer to dab the flat angled brush in and wipe the excess off so the bristles are coated but not dripping. -
Outline the top triangles:
Using the flat brush, paint the outline of the triangles in the top row. Keep the brush perpendicular to the pot for the sharpest edge. -
Fill the top styling:
Instead of filling them in solid, paint a smaller, nested triangle inside the outline, or simply thicken the outline to create a chunky, hollow triangle look. -
Paint the middle row:
Repeat the process for the middle row of triangles. Focus on keeping the vertical alignment with the top row consistent. -
Create the rustic texture:
Don’t worry about perfect opacity; a slightly streaky or ‘dry brush’ application adds to the rustic, hand-carved aesthetic seen in the inspiration image. -
Paint the bottom row:
Switch to painting the inverted triangles at the bottom. These act as the visual ‘base’ of the pattern. -
Fill the bottom triangles:
Paint these inverted triangles more solidly than the top rows, filling in the centers to give the design some visual weight at the bottom.
Texture Twist
To mimic the carved look further, mix a little baking soda into your white paint. This creates a gritty, stone-like texture that makes the triangles pop off the smooth clay surface.
Step 3: Refining and Finish
-
Check the edges:
Use your fine detail liner brush to tidy up the points of the triangles where the angled brush might have been too wide. -
Allow to dry:
Let the paint set for at least 20 minutes until it is dry to the touch. -
Clean up guidelines:
Once you are certain the paint is bone dry, use your eraser to gently remove any visible pencil marks between the shapes. -
Final inspection:
Look for any large gaps or light spots in the paint and do a quick touch-up if necessary, keeping that handcrafted texture in mind.
Pot up your favorite succulent and enjoy this chic, handmade addition to your windowsill

Rustic Dry-Brushed Finish
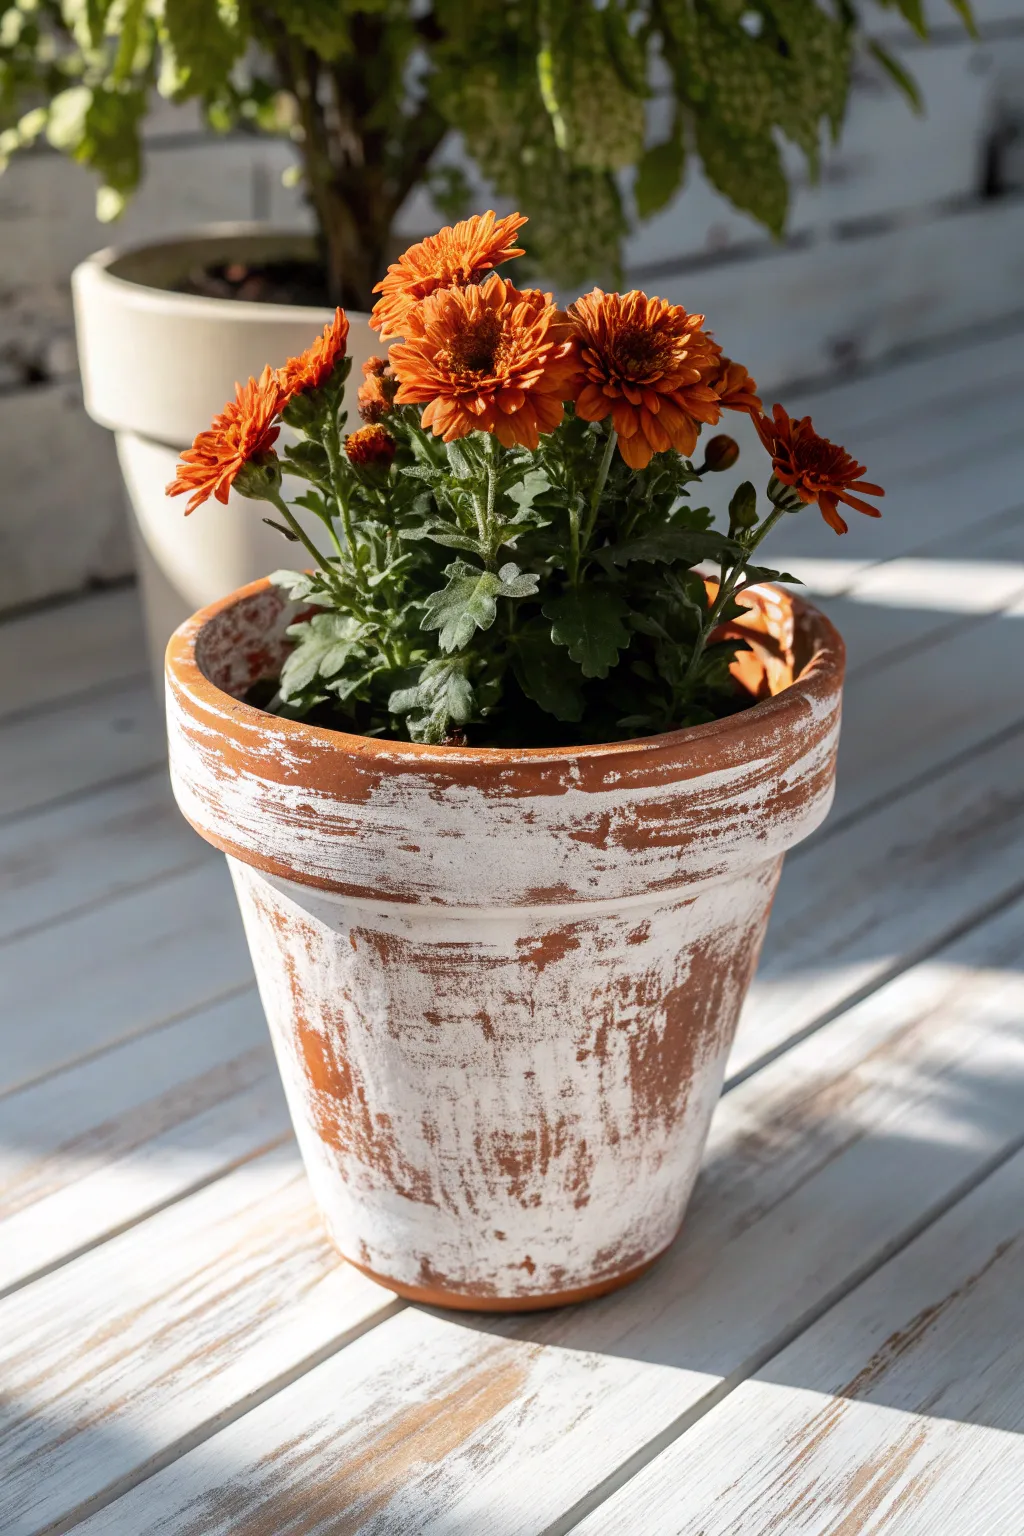
Transform a standard orange clay vessel into a weathered, time-worn treasure perfect for rustic decor. This technique relies on texture and negative space to let the warm terracotta tones peek through a chalky white finish.
Step-by-Step Tutorial
Materials
- Unsealed terracotta pot
- White chalk paint or matte acrylic paint
- 2-inch chip brush (coarse bristles)
- Paper plate or palette
- Paper towels
- Medium-grit sandpaper (100-150 grit)
- Clear matte spray sealer
- Damp cloth
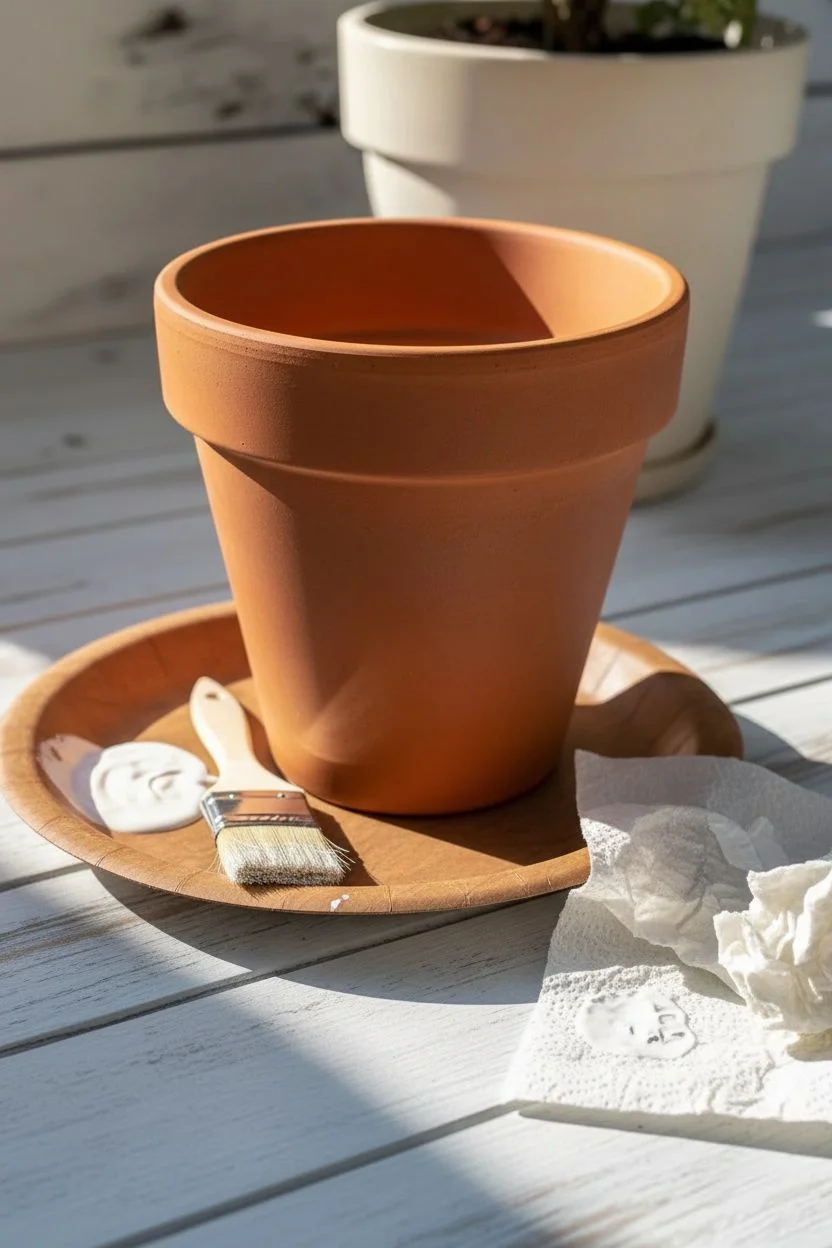
Step 1: Preparation
-
Clean surface:
Remove any price stickers from the bottom or sides of your terracotta pot. -
Wipe down:
Wipe the entire exterior with a damp cloth to remove loose red clay dust, which can turn your white paint pink. -
Dry completely:
Allow the pot to air dry fully before painting; moisture in the clay will prevent the paint from adhering properly. -
Setup:
Pour a small amount of white chalk paint onto your paper plate.
Cheap Brushes Work Best
Avoid soft artist brushes for this. A cheap hardware store ‘chip brush’ has stiff bristles that naturally create the scratchy streaks you want.
Step 2: Dry Brushing
-
Load the brush:
Dip just the very tips of your chip brush into the white paint. -
Offload excess:
Dab the brush firmly onto a paper towel repeatedly until almost no wet paint comes off. The brush should feel nearly dry. -
Rim technique:
Holding the pot by the base, drag the brush horizontally around the rim, applying light pressure to catch the raised textures. -
Body application:
Moving to the body of the pot, change your stroke direction to vertical. Start from the bottom and flick upward. -
Create texture:
Cross-hatch occasionally by brushing side-to-side in random patches to build up that messy, aged look. -
Interior detail:
Paint the top two inches of the inside rim so the raw clay doesn’t show when soil is added. -
Drying break:
Let this thin, scratchy layer dry for about 10 to 15 minutes. -
Second pass:
I like to go back in with a slightly wetter brush and dab extra white paint onto random spots to create highlights, mimicking uneven aging.
Add Organic Texture
Glue small patches of preserved reindeer moss to the rim or base after sealing to make the pot look like it was found in an old garden shed.
Step 3: Distressing & Finishing
-
Full cure:
Allow the paint to dry completely to the touch before starting the distressing process. -
Sand the rim:
Take your medium-grit sandpaper and firmly scrub the raised lip of the pot to reveal distinct lines of orange clay. -
Scuff the body:
Sand vertical patches on the body of the pot, focusing on areas where the paint looks too thick or uniform. -
Clean up:
Use a dry brush or cloth to sweep away all the white paint dust created by sanding. -
Seal:
Spray the exterior with a clear matte sealer to lock in the chippy finish and prevent water from blobbing the paint later. -
Plant:
Once the sealer is dry, fill with potting soil and add vibrant flowers, like the mums shown here, to contrast with the white pot.
Place your newly aged pot in a sunny spot and enjoy that instant antique charm


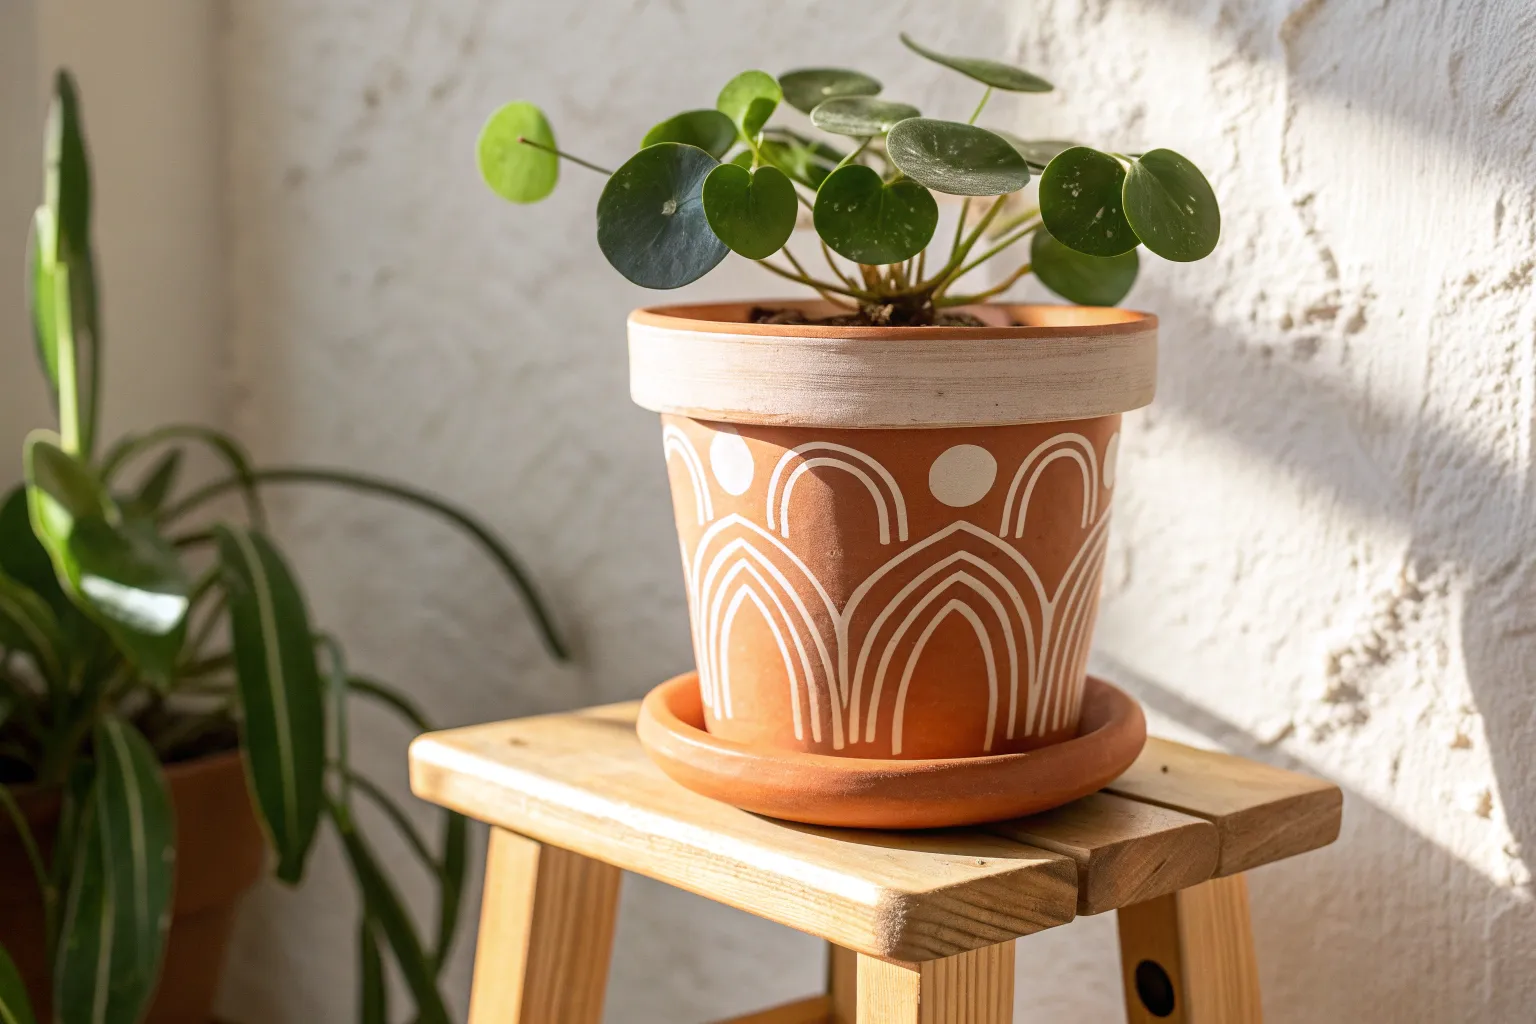
Sunrise Ombre Blends
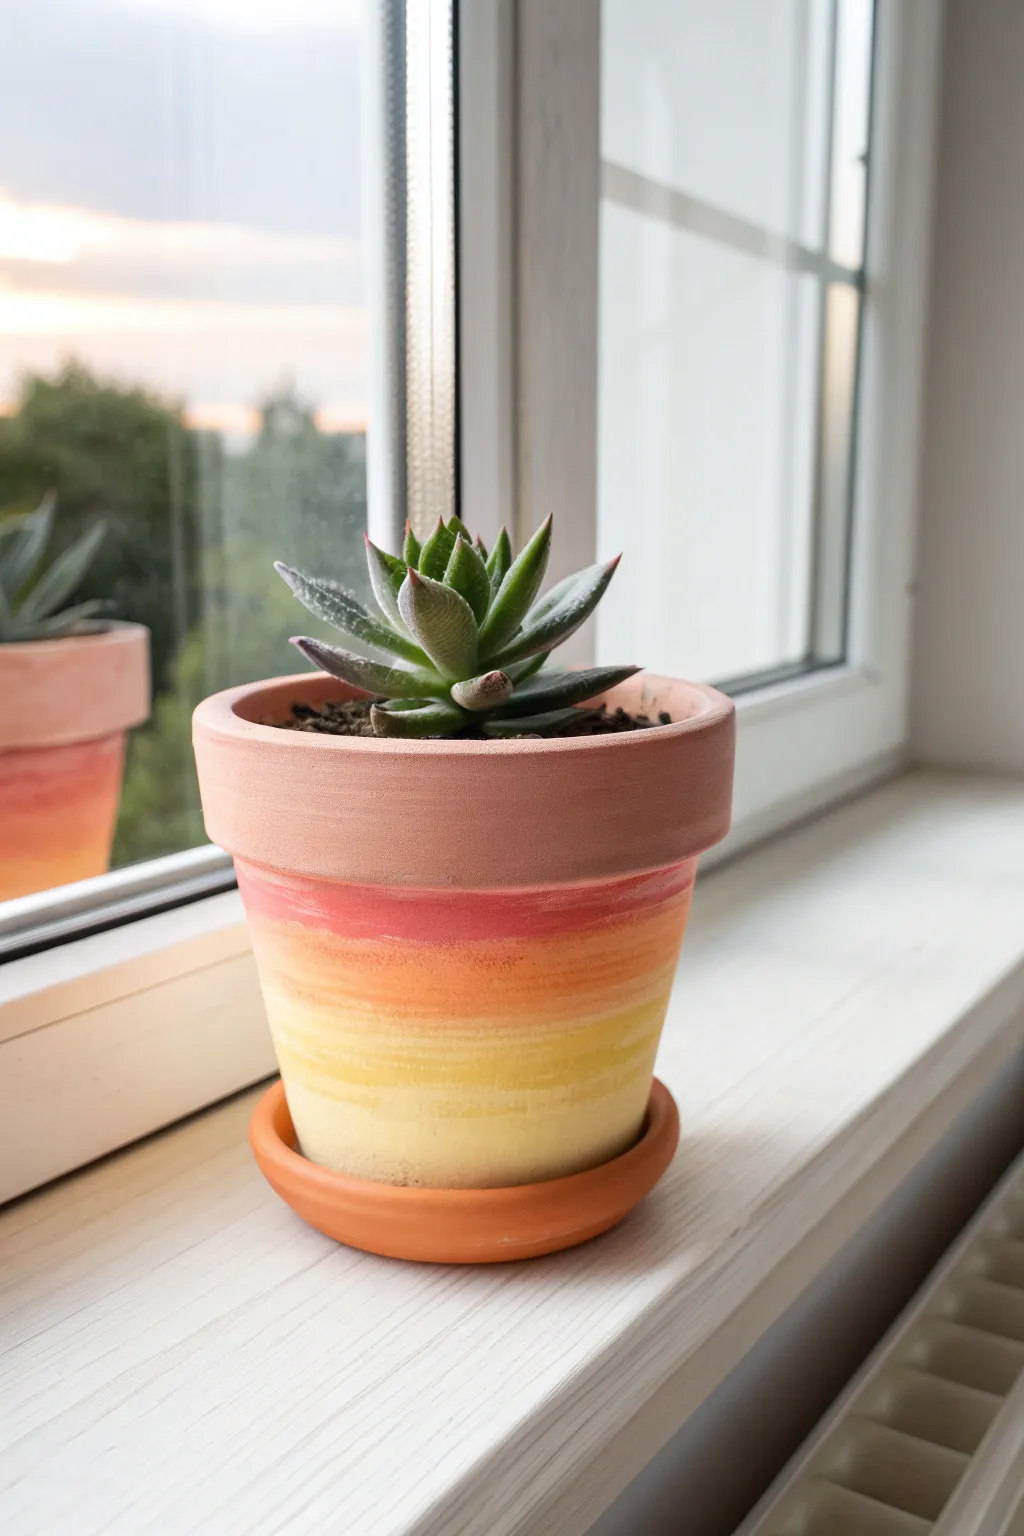
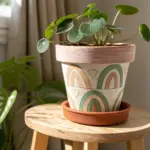
Capture the soft warmth of a morning sky directly on your windowsill with this glowing ombre pot project. Using simple horizontal blending techniques, you will transform a standard clay vessel into a stunning, sun-kissed home for your favorite succulent.
Step-by-Step Guide
Materials
- 4 to 6-inch Terracotta pot with saucer
- Acrylic craft paints (Dusty Rose, Coral, Sunshine Yellow, White)
- 1-inch flat synthetic paintbrush
- Painter’s tape
- Painting palette or paper plate
- Water cup
- Paper towels
- Clear matte acrylic sealer spray
Step 1: Preparation
-
Clean surface:
Wipe down your terracotta pot with a damp cloth to remove any warehouse dust or loose clay particles, then let it dry fully. -
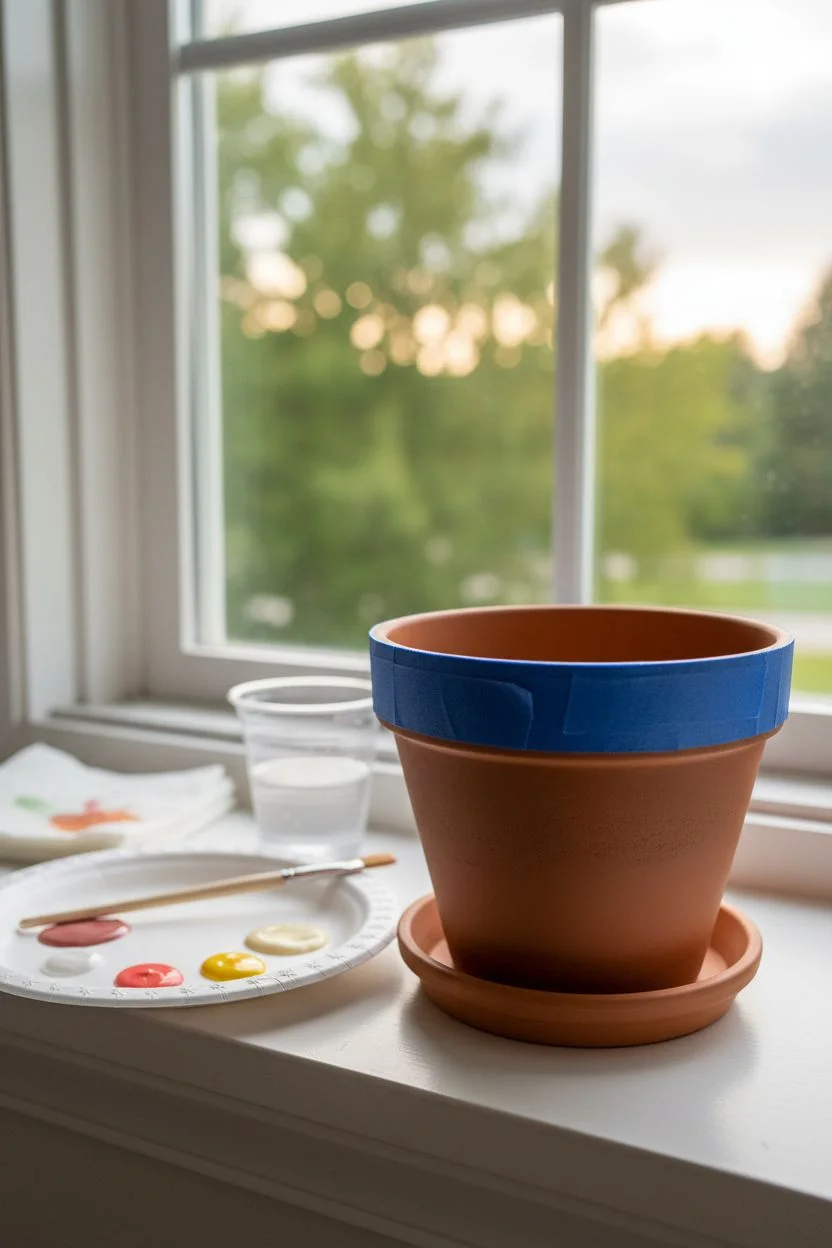
Tape the rim:
Apply a strip of painter’s tape around the exterior rim of the pot. Press the edges down firmly with your fingernail to prevent paint from seeping underneath, as we want to keep the rim natural. -
Prepare palette:
Squeeze dime-sized amounts of dusty rose, coral, and yellow paint onto your palette. I also like to mix a separate pile of white with a tiny dot of yellow to create a pale lemon cream color for the base.
Step 2: Painting the Gradient
-
Start with pink:
Load your flat brush with the dusty rose paint and apply a horizontal band just below the tape line, covering about the top quarter of the pot’s body. -
Add the coral layer:
Without rinsing your brush fully, pick up some coral paint. Apply this directly below the pink band, ensuring the wet edges touch. -
Blend the first transition:
While both paint strips are still wet, use long, horizontal brush strokes to sweep back and forth over the line where the pink and coral meet until the boundary softens and blurs. -
Clean your brush:
Rinse your brush thoroughly in water and dab it on a paper towel until it is damp but not dripping wet. -
Apply sunshine yellow:
Paint the next band using the bright yellow acrylic, slightly overlapping the bottom edge of the coral section. -
Blend the middle:
Working quickly, brush horizontally across the seam between the coral and yellow to create a smooth, orange-toned transition. -
Add the lightest shade:
Rinse your brush again, then dip it into your custom-mixed pale lemon cream color. -
Paint the base:
Fill in the remaining bottom section of the pot with this lightest hue, bringing it all the way down to the bottom edge. -
Final blend:
Gently stroke the brush along the meeting point of the bright yellow and pale cream to soften the final transition line.
Paint drying too fast?
Terracotta is porous and sucks moisture from acrylics quickly. If blending is difficult, lightly dampen the clay surface with a wet sponge before you start painting to buy yourself more working time.
Step 3: Finishing Up
-
Check for gaps:
Inspect your work while the paint is damp; if the clay texture is showing through too much, you can lightly dab more paint onto specific areas and re-blend carefully. -
Remove tape:
Carefully peel off the painter’s tape while the paint is still slightly tacky to ensure a crisp, clean line against the natural terracotta rim. -
Dry time:
Allow the pot to sit undisturbed for at least one hour until the paint is completely dry to the touch. -
Seal the work:
Take the pot to a well-ventilated area and apply a light coat of clear matte sealer to protect your gradient from water damage and soil. -
Pot your plant:
Once the sealer has cured, confirm the saucer is clean and place your pot on top, ready for a new succulent.
Level Up: Texture
Instead of a brush, use a makeup wedge sponge to dab the paint on. This creates a soft, stippled airbrush effect that makes the color transitions even smoother and more cloud-like.
Now you have a vibrant piece of art that brings a permanent sunrise to your room, regardless of the weather outside


Juicy Watermelon Designs
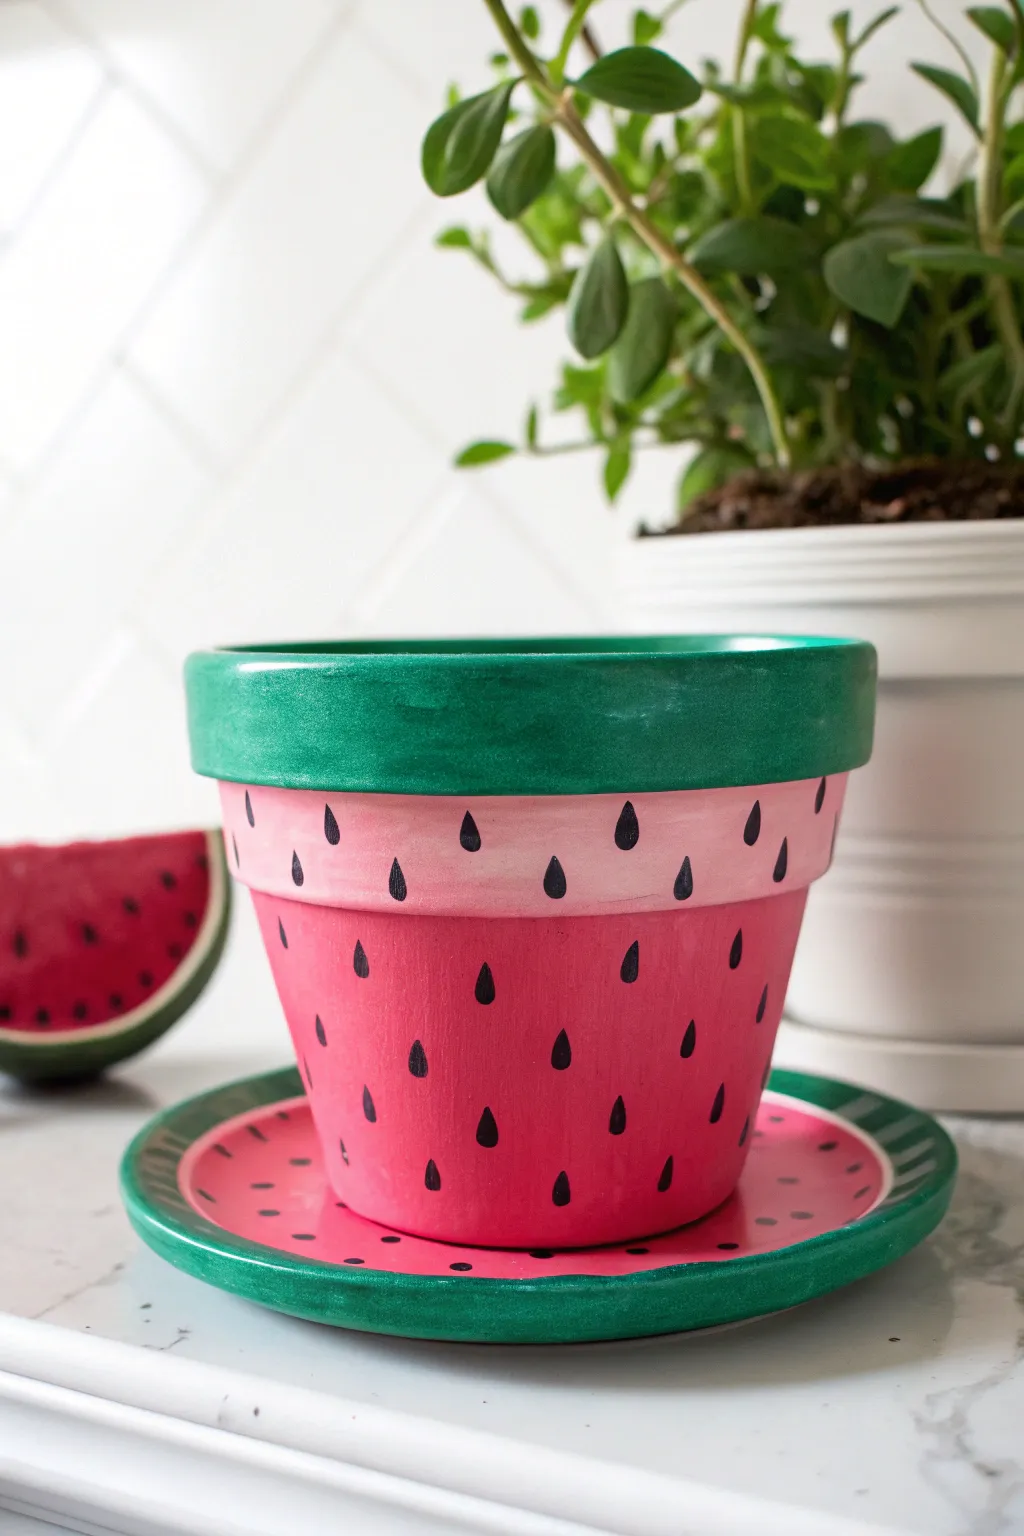
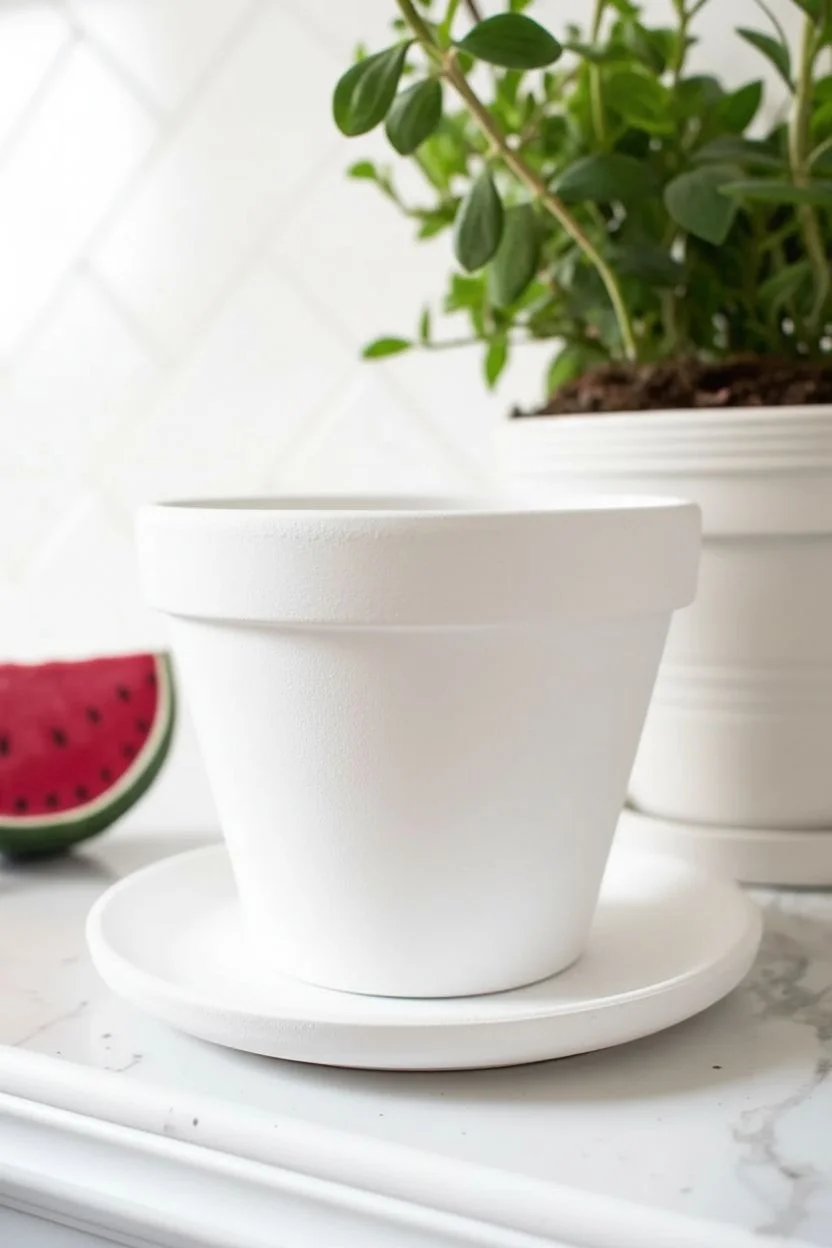
Transform a plain clay planter into a summer centerpiece with this juicy design. By layering shades of pink and green, you’ll capture the mouth-watering look of fresh fruit with minimal effort.
How-To Guide
Materials
- Terracotta pot and saucer
- White acrylic primer or gesso
- Acrylic paints: Emerald green, bright watermelon red, titanium white, black
- Flat shader brush (1 inch)
- Medium flat brush
- Fine detail brush (size 0 or 1)
- Glossy clear acrylic sealer
Step 1: Preparation & Priming
-
Clean surface:
Wipe down your terracotta pot and saucer with a damp cloth to remove any dust or sticker residue, ensuring a smooth painting surface. -
Prime the clay:
Apply a coat of white primer or gesso to the entire exterior of the pot and the top of the saucer. This step is vital because terracotta absorbs paint, and the white base makes the pinks and greens pop vividly. -
Dry and repeat:
Allow the primer to dry completely. I usually add a second coat to ensure no orange clay is showing through, creating a blank canvas.
Seed Spacing Tip
Don’t overdo the seeds! Keep about an inch of space between them. If you paint too many, the project can start looking more like a strawberry than a watermelon.
Step 2: Blocking the Colors
-
Paint the rim:
Using the 1-inch flat brush, paint the heavy rim of the pot with emerald green. Extend this color just over the top lip into the inside of the pot for a clean finish. -
Paint the saucer edge:
While you have the green paint out, color the raised outer rim of the saucer to match the pot’s rim. -
Mix the transition shade:
Mix a small amount of watermelon red with titanium white to create a pale, creamy pink. This represents the lighter flesh near the watermelon rind. -
Apply the light band:
Paint a horizontal band of this pale pink mixture directly under the green rim, making it about 1 to 1.5 inches wide depending on your pot size. -
Paint the fruit body:
Use your bright watermelon red to paint the remainder of the pot’s body, starting right where the pale pink line ends and working down to the base. -
Fill the saucer:
Paint the center well of the saucer with the same bright watermelon red. -
Touch ups:
Inspect your work for streaks. The red often needs a second coat to look fully opaque and juicy. -
Dry time:
Let all base layers dry completely before moving on to the details to prevent smudging.
Level Up: The Bite Mark
Feeling playful? Paint a white, jagged semi-circle on the rim to look like a bite mark! Paint the exposed ‘flesh’ white, then outline with green where the rind was bitten.
Step 3: Seeding & Sealing
-
Practice the shape:
Using your fine detail brush and black paint, practice painting small teardrop shapes on a scrap piece of paper first to get the pressure right. -
Add pale band seeds:
Paint a row of black teardrop seeds along the pale pink band. Space them out generously. -
Fill the body:
Continue painting seeds on the dark red body. Stagger the placement so they don’t form perfect vertical lines, mimicking nature’s randomness. -
Saucer details:
Add a ring of seeds to the pink center of the saucer to tie the whole look together. -
Final drying:
Allow the black seeds to dry fully, which usually takes about 20 minutes. -
Protect the art:
Apply a glossy clear acrylic sealer over the entire project. The gloss finish gives the ‘fruit’ a wet, fresh look and protects the paint from water damage.
Now your vibrant creation is ready to house your favorite fern or succulent.
BRUSH GUIDE
The Right Brush for Every Stroke
From clean lines to bold texture — master brush choice, stroke control, and essential techniques.
Explore the Full Guide
Midnight Galaxy Silhouettes
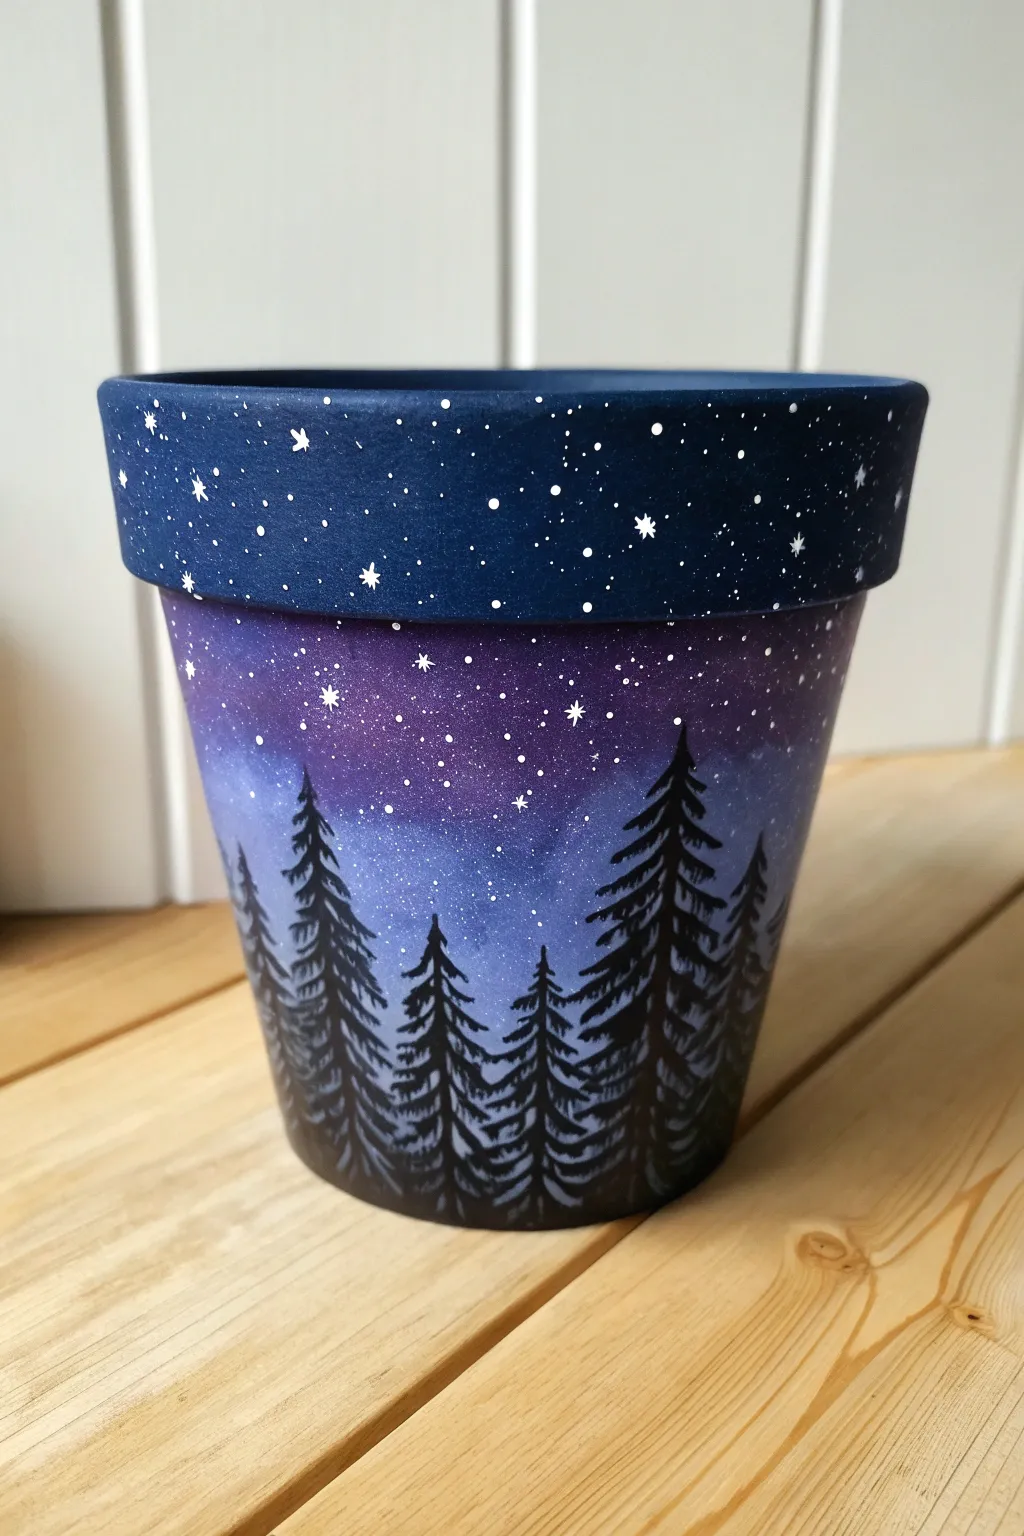
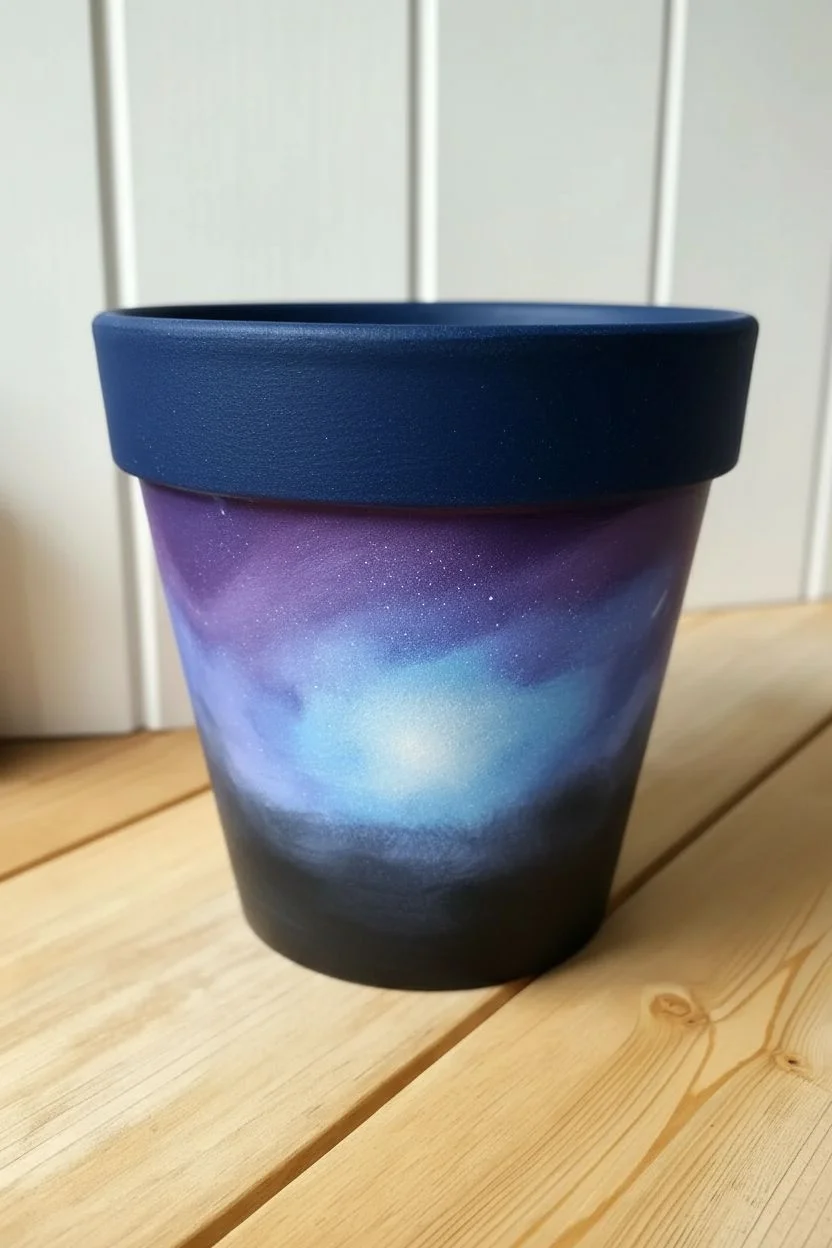
Transform a plain planter into a mystical evening landscape featuring a vibrant nebula sky and silent pine trees. This design uses simple sponge blending techniques to create a professional-looking gradient that glows behind the dark forest silhouette.
Step-by-Step Guide
Materials
- Terracotta pot (clean and dry)
- White acrylic primer or gesso
- Acrylic paints: Navy Blue, Deep Violet, Lavender, Light Blue, Black, Titanium White
- Makeup sponges (wedges) or small kitchen sponge pieces
- Old toothbrush
- Fine liner brush (size 0 or 00)
- Small flat brush
- Palette or paper plate
- Water cup and paper towels
Step 1: Creating the Nebula Sky
-
Prime the surface:
Apply a coat of white primer or white acrylic paint to the entire exterior of the pot. This creates a bright base that will make your galaxy colors pop. -
Paint the rim:
Using a flat brush, paint the upper rim of the pot with a solid coat of Navy Blue. Extend the color just slightly over the inner lip for a clean finish. -
Start the gradient:
Pour a small amount of Deep Violet, Lavender, Light Blue, and Navy onto your palette. Dip a makeup sponge into the Deep Violet and dab it onto the pot body, right underneath the rim. -
Blend the mid-tones:
Pick up some Lavender on a fresh part of the sponge. Dab this below the violet layer, overlapping the wet edges slightly to create a soft transition. -
Add the glow:
In the central area of the pot body, sponge on patches of Light Blue mixed with a tiny dot of White to create the glowing nebula cloud effect. -
Darken the horizon:
Load a sponge with Black paint. Dab this around the very bottom of the pot where the trees will eventually sit, blending it upward slightly into the lighter colors. -
Smooth the transitions:
I like to go back with a clean, slightly damp sponge and gently tap over the areas where colors meet to soften any harsh lines. -
Dry break:
Let the paint dry completely. The surface must be dry before adding sharp details like stars.
Muddy colors?
If your galaxy colors turn gray or muddy while blending, stop immediately. Let the current layer dry fully before sponging fresh color on top to keep the hues vibrant.
Step 2: Stars and Constellations
-
Splatter distant stars:
Mix a little water into your White paint until it is runny. Dip an old toothbrush into the mix, face the bristles toward the pot body, and run your thumb across them to flick a fine mist of stars over the galaxy. -
Detail the rim:
Switch to your fine liner brush. Dip the tip in undiluted White paint and gently dot stars all around the Navy Blue rim. -
Add twinkling stars:
Paint a few larger, four-pointed distinct stars on the rim and a few scattered within the galaxy background to make the sky look dimensional.
Make it magical
Mix a tiny drop of glow-in-the-dark medium into your white paint for the stars. The pot will look beautiful by day and magically light up by night.
Step 3: The Forest Silhouette
-
Outline tree trunks:
Using thin Black paint and the liner brush, paint vertical lines of varying heights rising from the black bottom edge. These are the spines of your trees. -
Start the branches:
Starting at the top tip of a trunk, use the very point of your brush to tap small, downward-sloping branches. -
Build the volume:
As you move down the trunk, make your horizontal strokes wider and slightly thicker to create the classic conical pine tree shape. -
Layering trees:
Once the main trees are painted, add smaller, shorter peaks in the gaps between them to create the illusion of a dense, deep forest. -
Final touches:
Check for any gaps at the very bottom edge and fill them in with solid black to ground the forest. -
Seal the work:
Once absolutely dry, apply a clear acrylic sealer to protect your painting from water damage and UV fading.
Place your favorite fern or succulent inside to complete this serene midnight scene.
The Dripping Ice Cream Cone
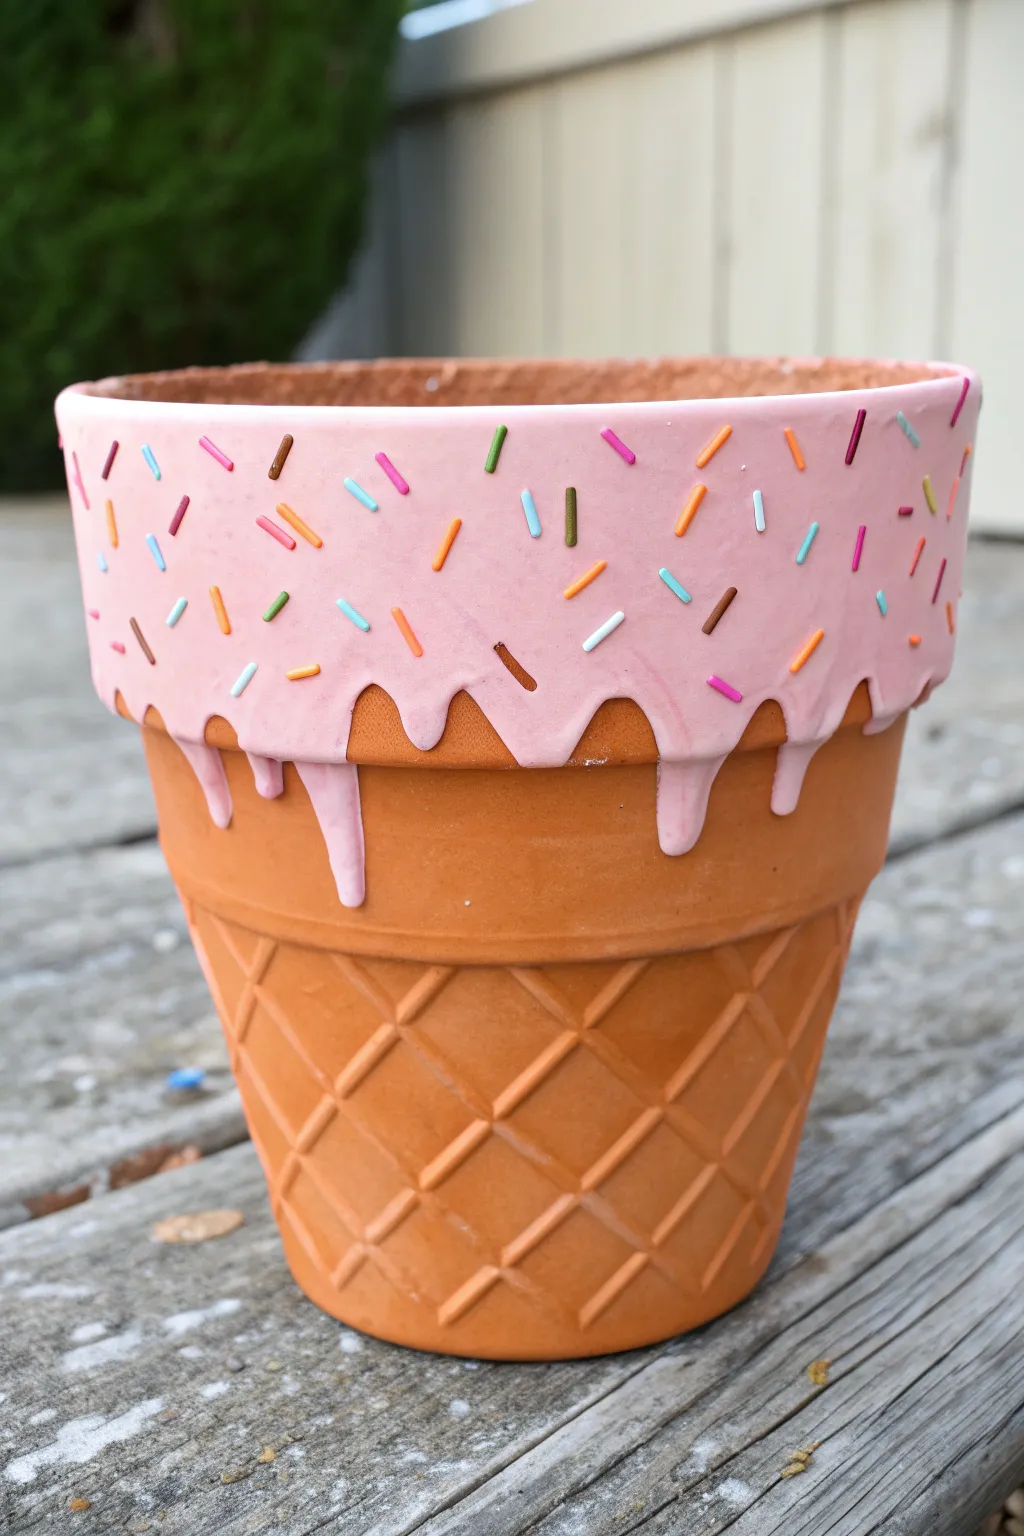
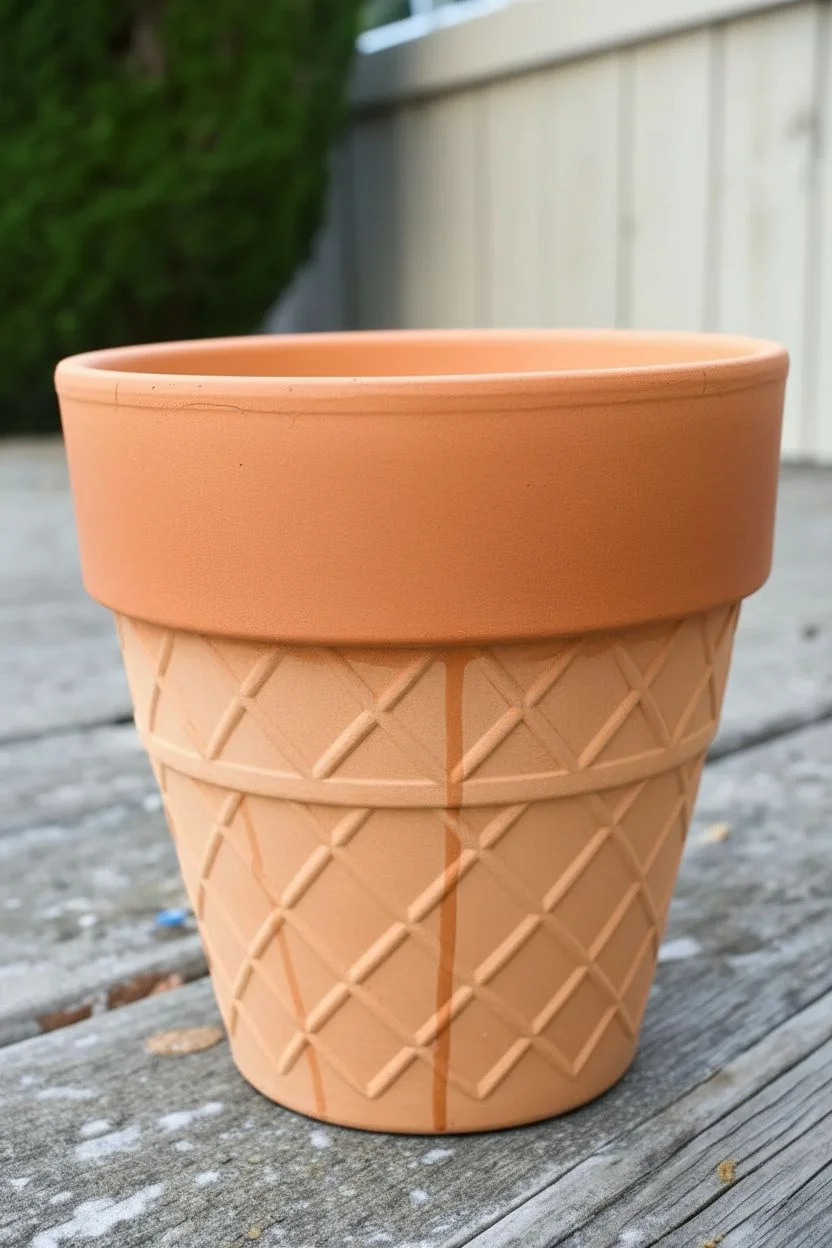
Transform a standard garden pot into a delicious-looking summer treat that never melts. This playful project uses masking techniques to create a realistic waffle cone texture topped with a generous scoop of strawberry ice cream.
Detailed Instructions
Materials
- Terracotta pot (clean and dry)
- Acrylic craft paints (pastel pink, burnt sienna/dark orange, assorted colors for sprinkles)
- Thin painter’s tape or washi tape (approx. 1/4 inch width)
- Flat paintbrush
- Fine detail paintbrush
- Pencil
- Palette or paper plate
Step 1: Baking the Waffle Cone
-
Tape the first diagonal:
Start applying strips of thin tape diagonally across the body of the pot. Space them evenly, leaving about an inch or so between each strip to form the basis of your grid. -
Create the diamonds:
Apply a second layer of tape strips diagonally in the opposite direction. The intersection of these strips should create a neat diamond pattern all around the lower half of the pot. -
Mix the batter color:
On your palette, mix a ‘toasted’ waffle shade. I usually combine a little brown with orange paint to get a color that is slightly darker and richer than the natural terracotta clay. -
Paint the waffle grid:
Using a flat brush, paint over the entire taped area with your mixed waffle color. Ensure you get into the corners of the diamonds, but try not to glob the paint on too thickly. -
Reveal the texture:
While the paint is still slightly tacky (but not wet), carefully peel off the tape strips. This reveals the lighter natural clay underneath as the raised ‘grid’ lines of the cone.
Bleeding Lines?
If paint seeped under your tape, don’t worry! Use a small stiff brush dipped in water to gently scrub away excess paint while it’s fresh, or touch up the lines with a paint color that matches the raw terracotta.
Step 2: Adding the Ice Cream
-
Sketch the melt:
Using a pencil, lightly draw a wavy, dripping line around the upper portion of the pot. Let the drips extend down over the rim and slightly onto your new waffle pattern. -
Apply the base coat:
Paint the area above your pencil line with pastel pink acrylic paint. Use a medium-sized brush to carefully follow the curves of your drip outline. -
Build opacity:
Pastel colors can be translucent, so let the first coat dry and apply a second or third coat. This layering also helps give the ‘ice cream’ a slight physical thickness, making it look more realistic.
Make it Pop
To make the ‘ice cream’ look extra thick and realistic, mix a teaspoon of baking soda into your pink acrylic paint. This creates a fluffy texture that stands out against the smooth pot surface!
Step 3: Sprinkles & Finishing
-
Prep your palette:
Squeeze out tiny dots of various bright colors—yellow, blue, green, chocolate brown, and white—onto your palette for the sprinkles. -
Paint the sprinkles:
Using your finest detail brush, dab small dashes of color onto the dry pink area. Rotate the dashes in different directions to keep the look random and playful. -
Clean up edges:
If any pink paint went outside the lines, you can gently scrape it off with a damp toothpick or touch it up with a bit of your waffle-color mixture. -
Seal the deal:
Once completely dry, apply a clear matte sealer spray to protect your artwork from water and sunlight, especially if this planter will live outside.
Pop a succulent or some colorful flowers inside to complete your sweet new garden accent.

PENCIL GUIDE
Understanding Pencil Grades from H to B
From first sketch to finished drawing — learn pencil grades, line control, and shading techniques.
Explore the Full Guide
Stacked Garden Toadstools
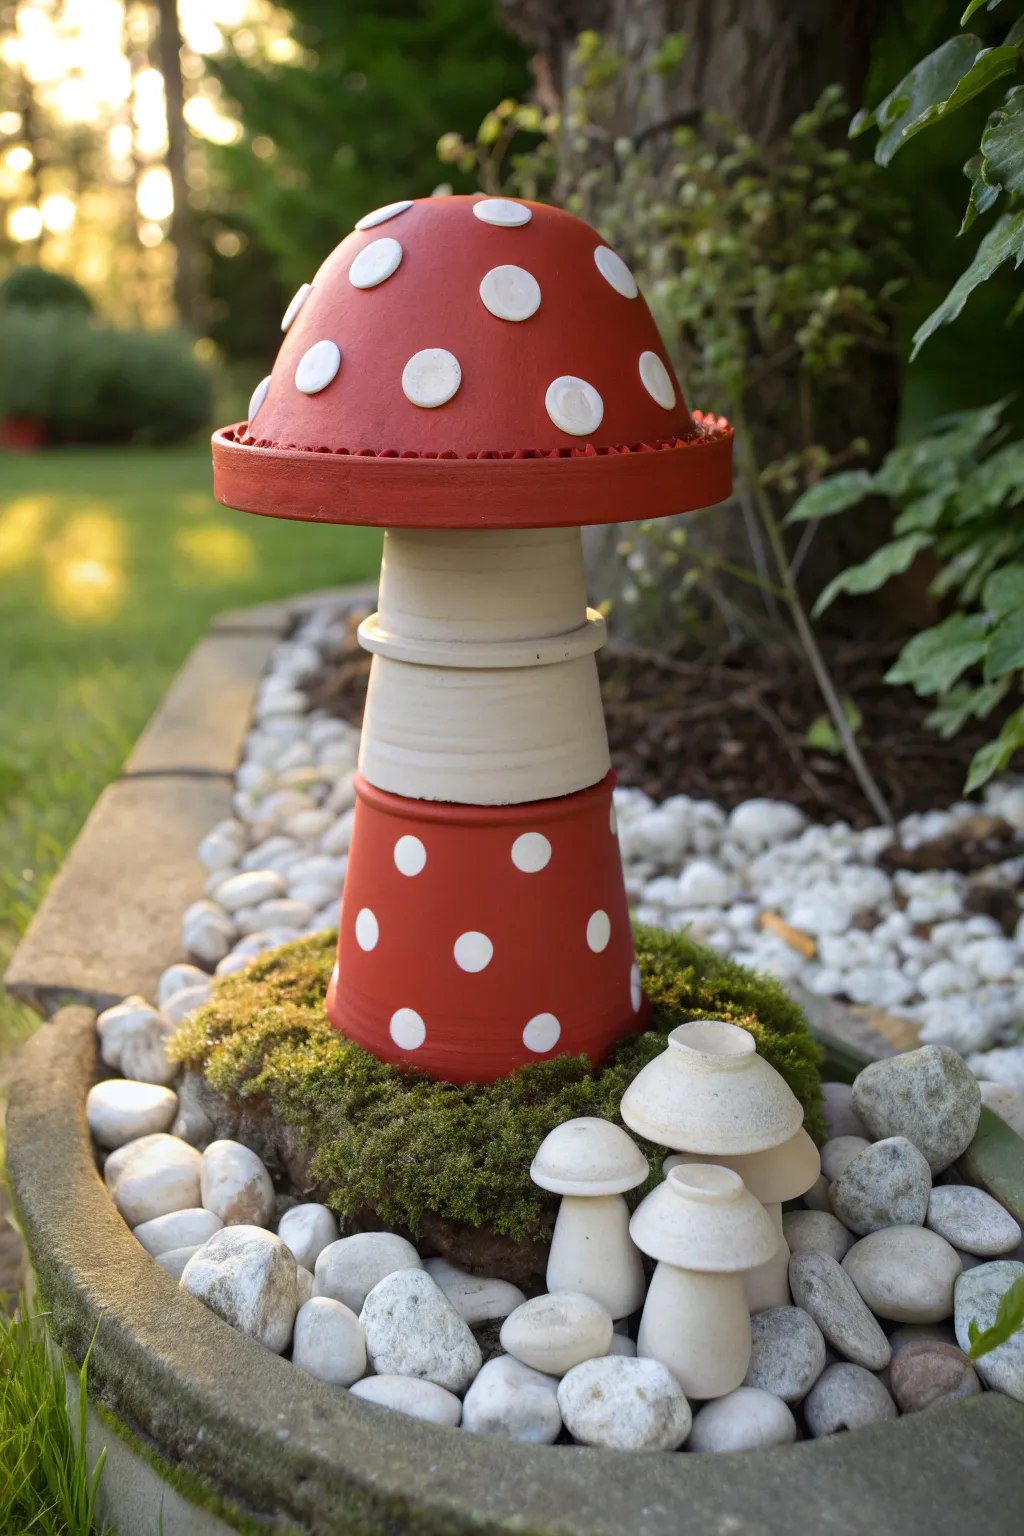
Transform ordinary clay pots into a charming, multi-tiered mushroom sculpture that adds a fairytale touch to your garden bed. This project uses graduated pot sizes to create a playful height variance, topped with a classic polka-dot cap.
Step-by-Step Tutorial
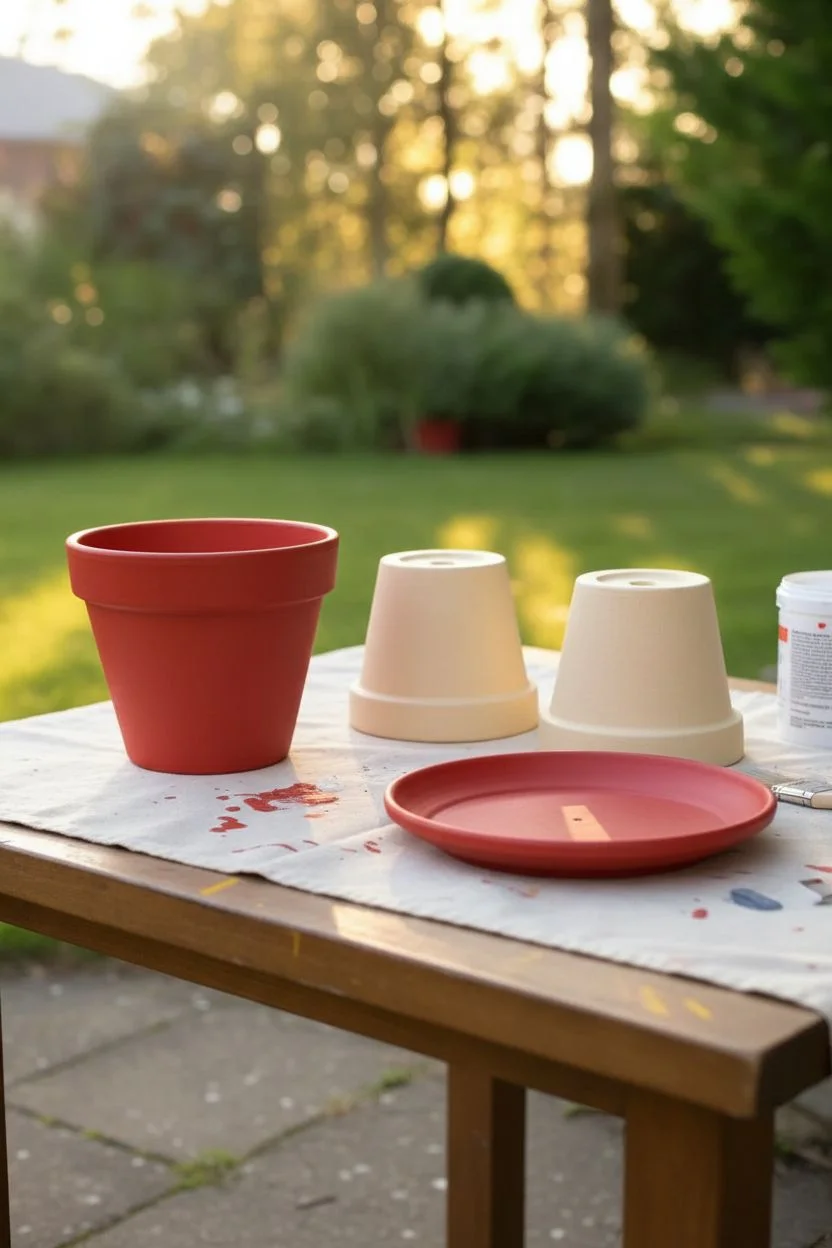
Materials
- 1 Large terracotta pot (base)
- 2 Medium/Small terracotta pots (stem)
- 1 Large terracotta saucer (cap)
- Outdoor acrylic craft paint (Bright Red, Cream/Off-White, Pure White)
- Round foam pouncers (sponge dabbers) in two sizes
- Flat paintbrushes
- Strong outdoor adhesive (e.g., E6000)
- Clear weather-resistant spray sealer
- Wooden craft circles (optional, for 3D spots)
Step 1: Base Coating
-
Clean the terracotta:
Begin by thoroughly scrubbing all your pots and the saucer with warm soapy water to remove dust and sticker residue. Allow them to dry completely, preferably in the sun, to ensure the clay is moisture-free. -
Base priming:
Apply a base coat of white paint to the exterior of the large pot and the saucer. This step is optional but highly recommended, as it prevents the terracotta orange from dulling the brightness of your red top coat. -
Paint the red sections:
Using a wide flat brush, paint the largest pot (the base) and the saucer (the cap) with bright red outdoor acrylic paint. You will likely need two or three coats to achieve a solid, opaque color. -
Paint the stem sections:
Take the two smaller/medium pots that will form the stem. Paint these with the cream or off-white color. I find that using a slightly warm white looks more organic than disjointed bright white. -
Dry completely:
Set all pieces aside and let them dry fully between coats. If the paint is tacky, the texture will be ruined during the next steps.
Step 2: Detailing
-
Prepare the dots:
Pour a small amount of pure white acrylic paint onto a palette or paper plate. Select a round foam pouncer that fits the scale of your large red pot. -
Apply dots to the base:
Load the foam pouncer with white paint, dab off the excess on paper, and press firmly onto the red base pot. Rotate the pot and create a random pattern of polka dots all around the surface. -
Create the cap spots:
For the saucer (the mushroom cap), apply white dots using the same pouncer method. Ensure the dots are spaced evenly for that classic cartoon mushroom look. -
Refine the circles:
If the sponge leaves bubbles or uneven edges, use a small detail brush to fill in the white circles and smooth out the paint while it is still wet. -
Seal the paint:
Once all paint is bone dry, take the pieces to a ventilated area and spray them with a clear, UV-resistant outdoor sealer. This protects your hard work from fading in the sunlight.
Paint Troubleshooting
If your white dots look translucent against the red, don’t overload the sponge. Instead, let the first layer of the dot dry, then simply stamp perfectly over it a second time for full opacity.
Step 3: Assembly
-
Position the base:
Place the large red pot upside down on your work surface. Apply a generous ring of outdoor adhesive strictly to the rim of the pot’s bottom (which is now facing up). -
Attach the first stem section:
Take one of the cream-colored pots and place it upside down onto the glued area of the base. Press down firmly to bond them. -
Extend the stem:
Apply glue to the top (bottom rim) of the cream pot you just placed. Stack the second cream pot upside down on top of it to create a tall, tapered stem. -
Attach the cap:
Apply a final ring of glue to the rim of the highest cream pot. Center the red saucer on top, ensuring it is balanced perfectly. -
Cure time:
Leave the structure undisturbed for at least 24 hours to allow the heavy-duty glue to cure completely before moving it to the garden.
Level Up: 3D Texture
To replicate the raised texture seen in the photo exactly, glue wooden craft circles onto the saucer and paint them white instead of just painting flat dots. This adds a fantastic tactile element.
Nestle your new creation into a bed of moss or white stones to complete this enchanting garden scene
Crayon Box Teacher Gifts
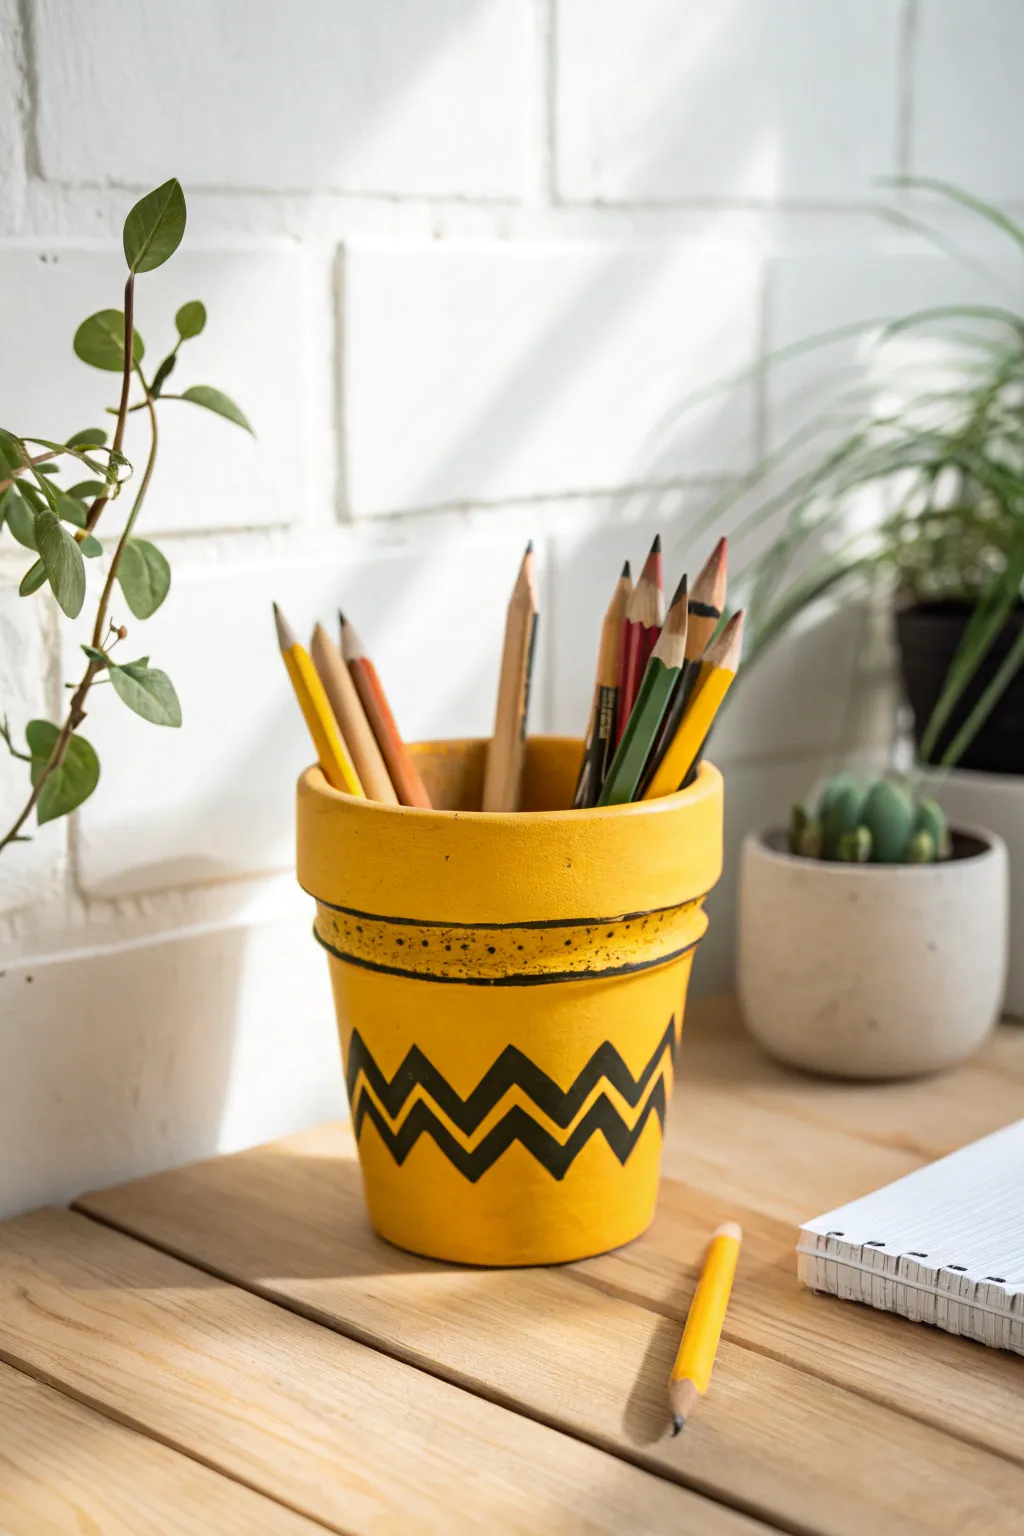
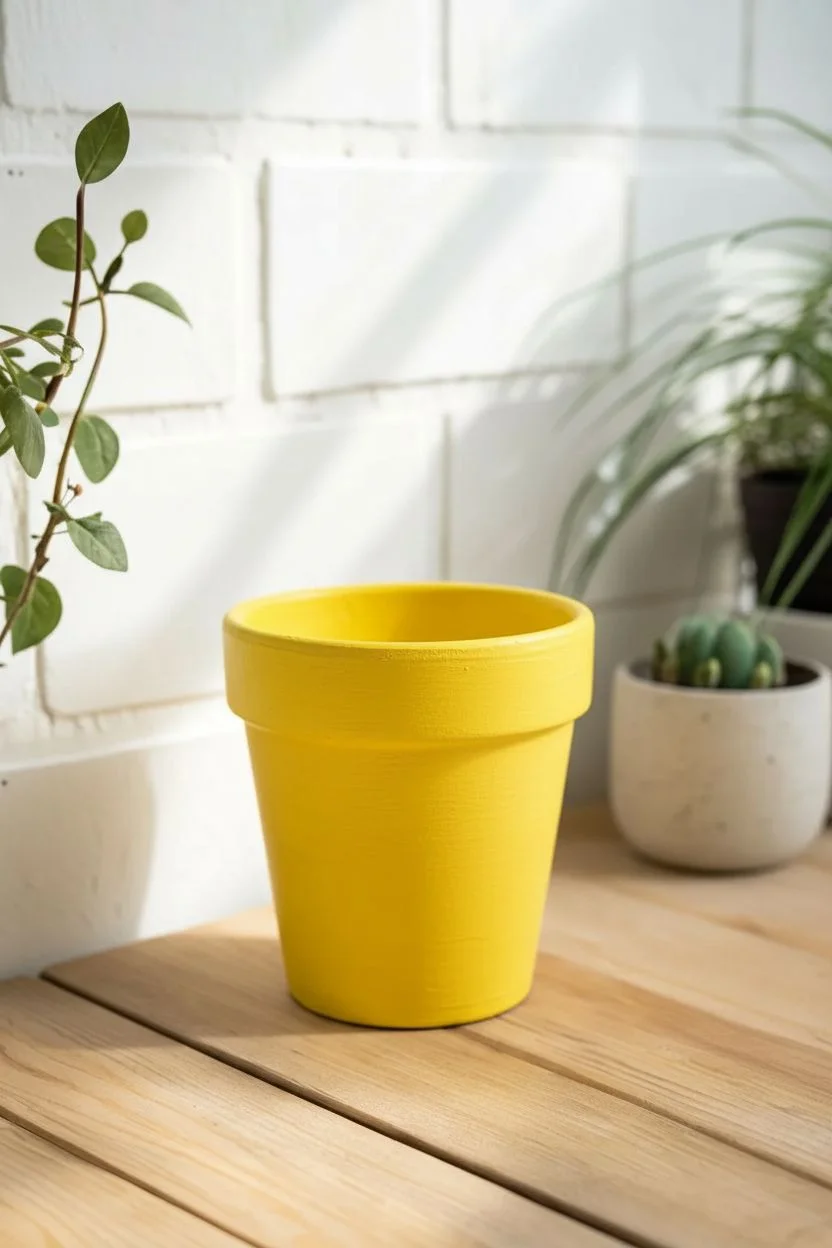
Transform a plain clay pot into a nostalgic desk accessory that mimics a beloved cartoon character’s iconic shirt pattern. With its sunny yellow base and bold black chevron stripe, this project makes a cheerful teacher gift or a fun organizer for your own workspace.
How-To Guide
Materials
- Terracotta pot (4 to 6 inch diameter)
- Acrylic paint (School Bus Yellow or Bright Yellow)
- Acrylic paint (Black)
- Wide flat paintbrush
- Fine round liner brush (size 0 or 1)
- Pencil
- Matte clear finish spray or sealer
Step 1: Base Preparation
-
Clean surface:
Wipe the terracotta pot down with a damp cloth to remove any store dust or loose clay particles. -
Dry completely:
Allow the moisture to evaporate fully before starting; painting on damp clay can cause peeling later. -
Paint interior rim:
Using the flat paintbrush, paint the top two inches of the inside of the pot with yellow paint so the clay doesn’t show when filled. -
Base coat exterior:
Apply a coat of yellow paint to the entire exterior of the pot, brushing in smooth horizontal strokes. -
Dry and repeat:
Let the first coat dry for 15-20 minutes. Yellow pigment is often semi-transparent, so apply a second coat for better opacity. -
Final smooth coat:
I usually add a third thin coat to ensure a solid, bright color without streaks. Let this dry thoroughly before moving to the design phase.
Uneven Zig-Zags?
Cut a small triangle out of cardstock or stiff paper. Use this as a stencil to trace your pencil guide around the pot for perfectly consistent peaks.
Step 2: Designing the Stripe
-
Mark height guides:
Lightly use a pencil to mark a top and bottom boundary for your zig-zag stripe on the lower third of the pot. -
Sketch the pattern:
Draw the continuous zig-zag (chevron) line lightly in pencil between your guides, trying to keep the peaks and valleys evenly spaced. -
Outline the shape:
Switch to your fine liner brush loaded with black paint. Carefully paint the outline of your zig-zag pattern essentially creating a hollow ribbon. -
Fill the stripe:
Use the liner brush to fill in the space between your outlines with solid black paint.
Complete the Theme
To elevate this gift, fill the finished pot with a bouquet of freshly sharpened yellow No. 2 pencils to match the school-day aesthetic perfectly.
Step 3: Rim Details & Finish
-
Paint the groove:
Locate the indented groove where the pot rim meets the body. Run a thin line of black paint inside this groove to define the collar. -
Add texture marks:
Dip the very tip of your fine brush in black and add tiny, slightly irregular dots or dashes along the bottom edge of the rim collar to mimic the texture seen in the photo. -
Touch ups:
If any lines look wobbly, wait for the black to dry completely, then use a small dab of yellow to clean up the edges. -
Erase markings:
Gently erase any visible pencil lines once the paint is fully cured to avoid smudging. -
Seal the work:
Spray the pot with a matte clear acrylic sealer. This protects the paint from chipping and keeps the finish non-glossy.
Pop in your favorite stationery supplies and enjoy the bright, retro vibe on your desk


Enchanted Fairy Cottages
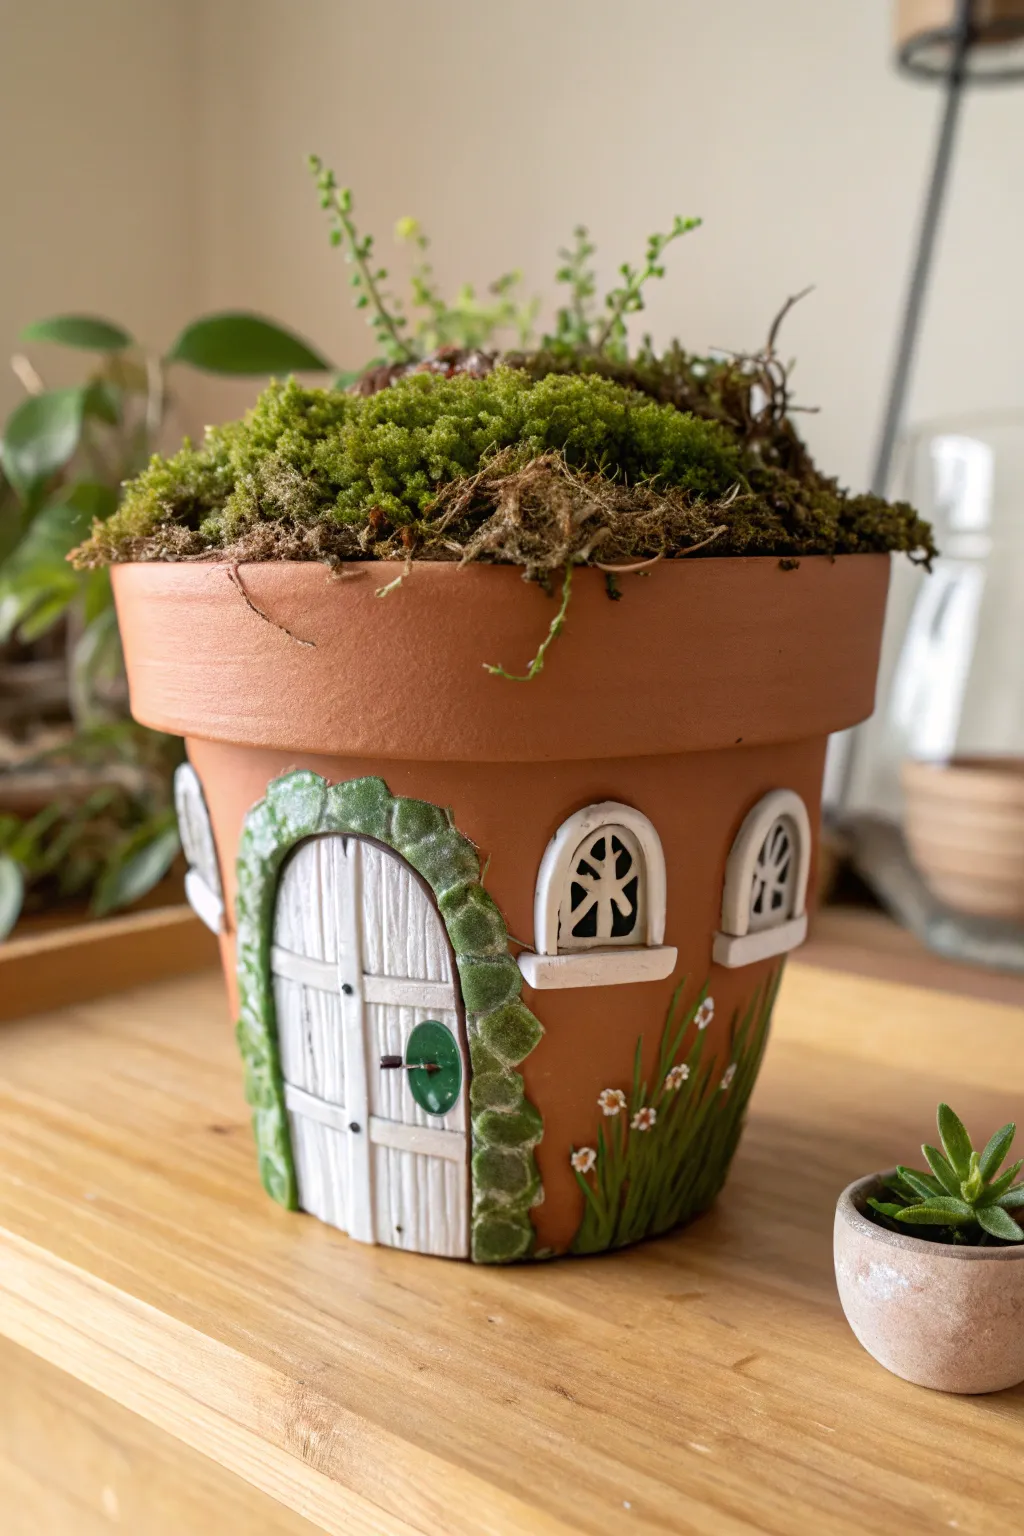
Transform a standard terracotta planter into a whimsical dwelling fit for a garden sprite. This project combines simple polymer clay sculpting with painted details to create a charming 3D textured cottage with a living roof.
Detailed Instructions
Materials
- Standard terracotta pot (4-6 inch)
- Oven-bake polymer clay (white and sage green)
- Clay sculpting tools or a toothpick
- Rolling pin (acrylic or glass)
- Craft knife
- Acrylic paints (black, emerald green, white, yellow)
- Fine detail paintbrushes
- Strong waterproof adhesive (e.g., E6000)
- Potting soil and live sheet moss
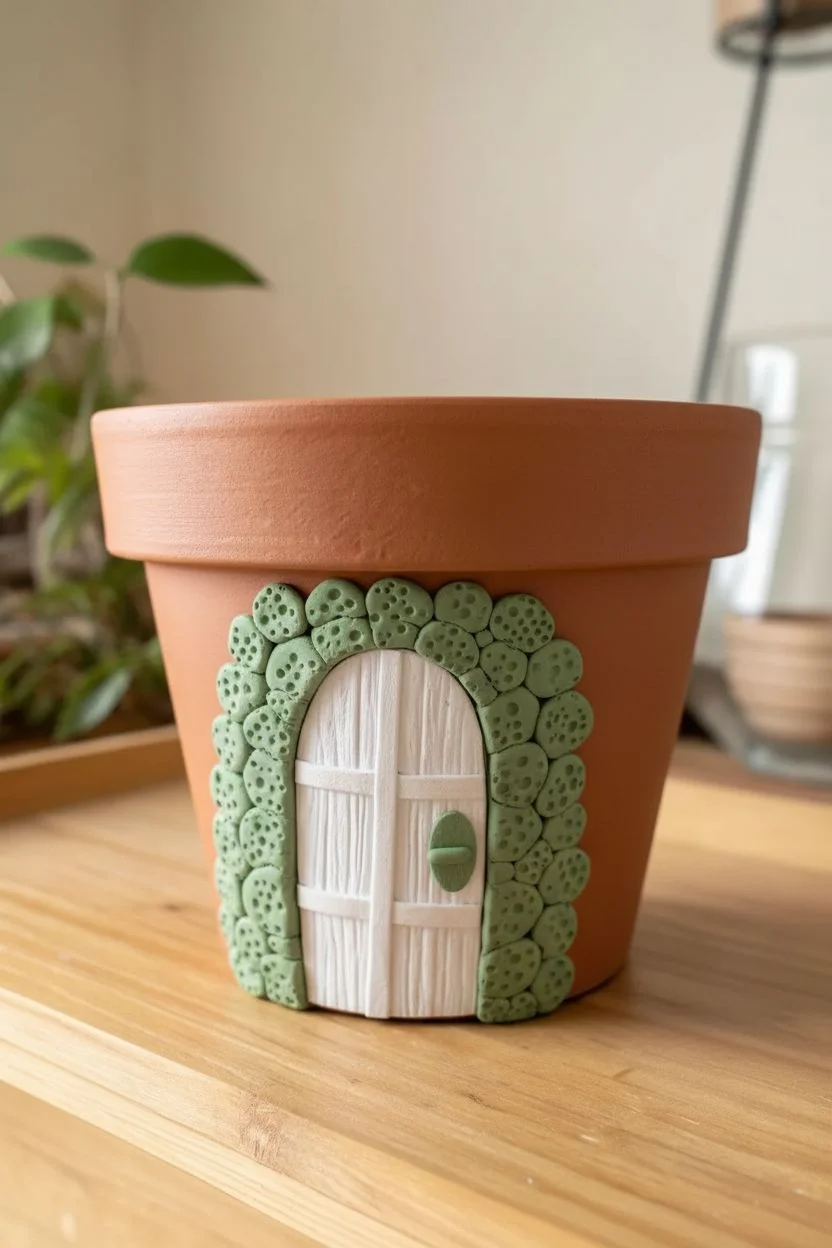
Step 1: Sculpting the Entryway
-
Prepare the surface:
Wipe down your terracotta pot with a damp cloth to remove any dust or sticker residue, ensuring a clean surface for the clay to grip. -
Shape the door base:
Roll out a slab of white polymer clay to about 1/4 inch thickness. Cut a tall arch shape that fits comfortably on the side of your pot. -
Texture the wood:
Gently press the white arch onto the pot. Use a needle tool or toothpick to score deep vertical lines down the door to mimic wooden planks. -
Create the stone surround:
Roll small, irregular balls of sage green clay and flatten them slightly with your thumb to create flagstones. -
Apply the stonework:
Press the flattened green stones around the perimeter of the white door arch, molding them to the curve of the pot and ensuring they touch firmly. -
Texture the stones:
Dab the surface of the green stones with an old toothbrush or a crumpled ball of foil to give them a rough, realistic rock texture. -
Add door hardware:
Form a tiny oval of green clay for the handle plate and press it onto the right side of the door, then add a tiny horizontal strip for the handle.
Step 2: Adding Windows and Baking
-
Form window backings:
For the side windows, roll out two smaller white clay arches and press them onto the pot on either side of the door. -
Create mullions:
Roll very thin snakes of white clay. Lay them across the window arches in a starburst or cross pattern to create the window panes. -
Frame the windows:
Roll a slightly thicker snake of white clay and wrap it around the edge of each window to create a finished sill and frame. -
Bake the project:
Place the entire pot with the clay attached into a cold oven. Set it to the temperature recommended on your clay package (usually 275°F) and bake for 15-20 minutes. -
Cool down safely:
Turn the oven off and open the door slightly, letting the pot cool completely inside. I prefer this method as it prevents the terracotta from cracking due to sudden temperature changes. -
Secure the pieces:
If any clay pieces pop off after cooling, simply apply a dab of strong waterproof glue and reattach them to the pot.
Clay Adhesion Trouble?
If the clay refuses to stick to the raw terracotta while you are sculpting, smear a tiny layer of liquid clay (Bake & Bond) or white glue on the pot surface before pressing your clay pieces down.
Step 3: Painting and Planting
-
Paint window depth:
Use a fine brush and black acrylic paint to carefully fill in the negative spaces between the white window mullions, creating the illusion of deep, dark glass. -
Hings and hardware:
Paint small black horizontal lines on the door for hinges and add a black dot to the green handle plate for contrast. -
Paint the garden:
Using emerald green paint, flick your brush upward from the base of the pot to create wispy grass blades growing up around the clay door. -
Add floral details:
Dip the tip of a toothpick into white paint and dot it onto the grass tips to create flowers, adding a tiny yellow dot in the center of each once dry. -
Fill the pot:
Fill the container with potting soil almost to the rim to prepare for the ‘roofing’. -
Install the living roof:
Tuck a generous layer of sheet moss over the soil, letting some strands drape over the rim of the pot to enhance the overgrown cottage aesthetic.
Level Up: Twilight Magic
Hide a small, waterproof battery-operated tea light inside the moss on top, or paint the window panes with glow-in-the-dark yellow paint instead of black for a cozy nighttime glow.
Place your finished cottage in a sunny corner and watch your miniature garden come to life


Have a question or want to share your own experience? I'd love to hear from you in the comments below!