There is nothing quite like soaking up the warm sun while adding a splash of color to a smooth river stone found on a weekend hike. This season offers us the most vibrant palette of all, perfect for turning ordinary pebbles into miniature works of art that celebrate the joy of being outdoors.
Juicy Watermelon Wedges
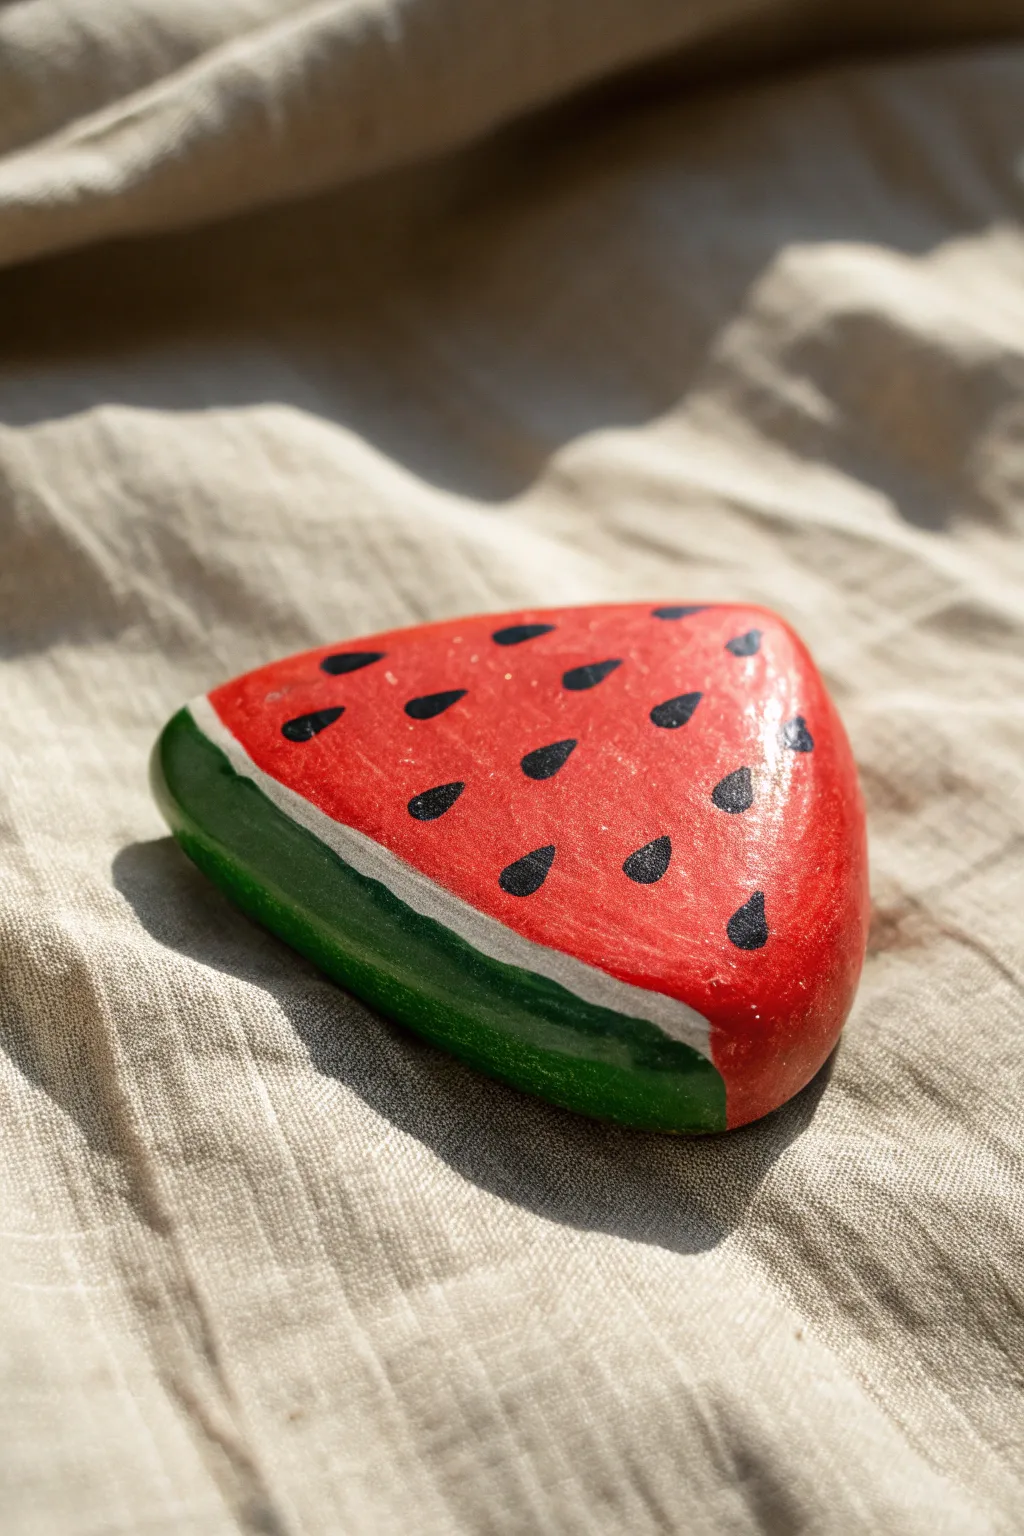
Transform a simple triangular stone into a mouth-watering wedge of summer fruit that looks good enough to eat. This cheerful project relies on bold color blocking and a high-gloss finish to mimic the wet, juicy texture of a fresh watermelon slice.
Step-by-Step Tutorial
Materials
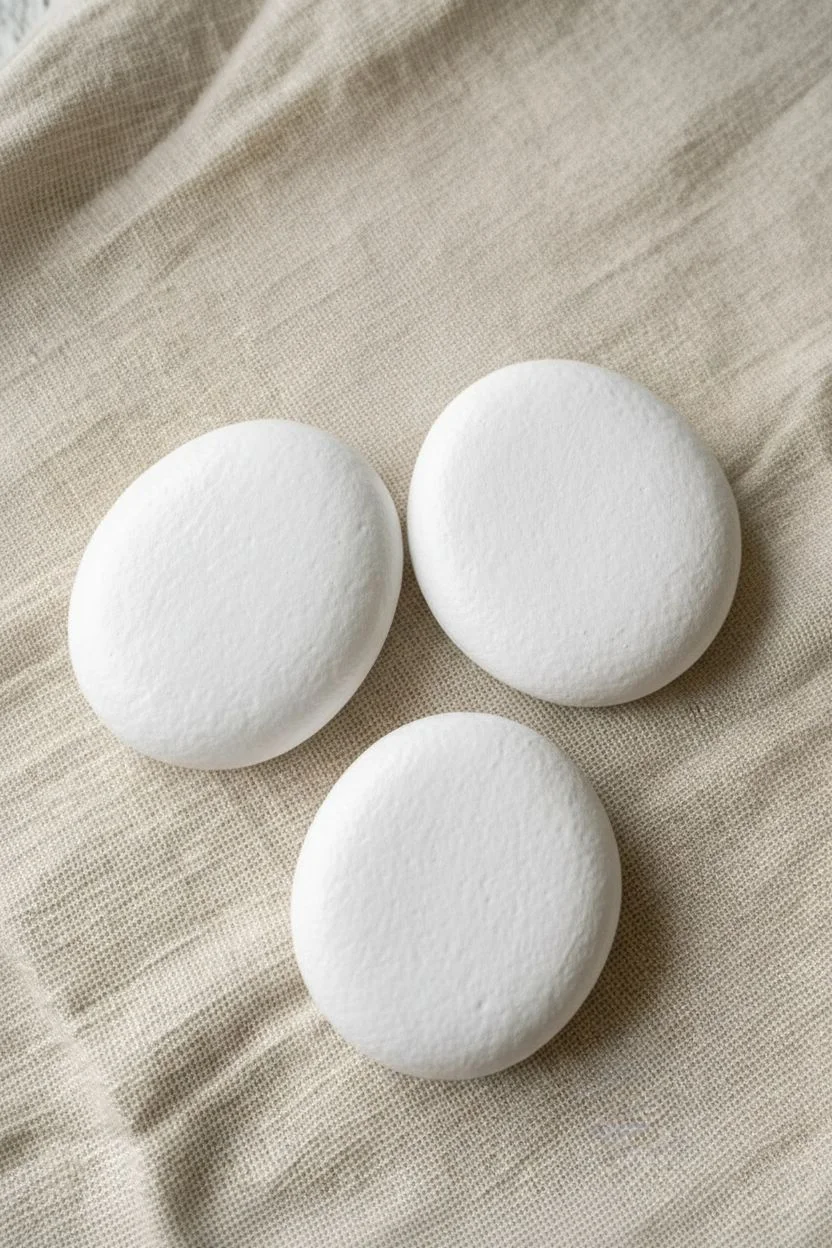
- Smooth triangular rock
- Acrylic paint types: Bright red, dark green, titanium white, black
- Wide flat paintbrush
- Fine liner brush (size 0 or 1)
- Pencil
- High-gloss varnish or sealant
- Water cup and paper towels
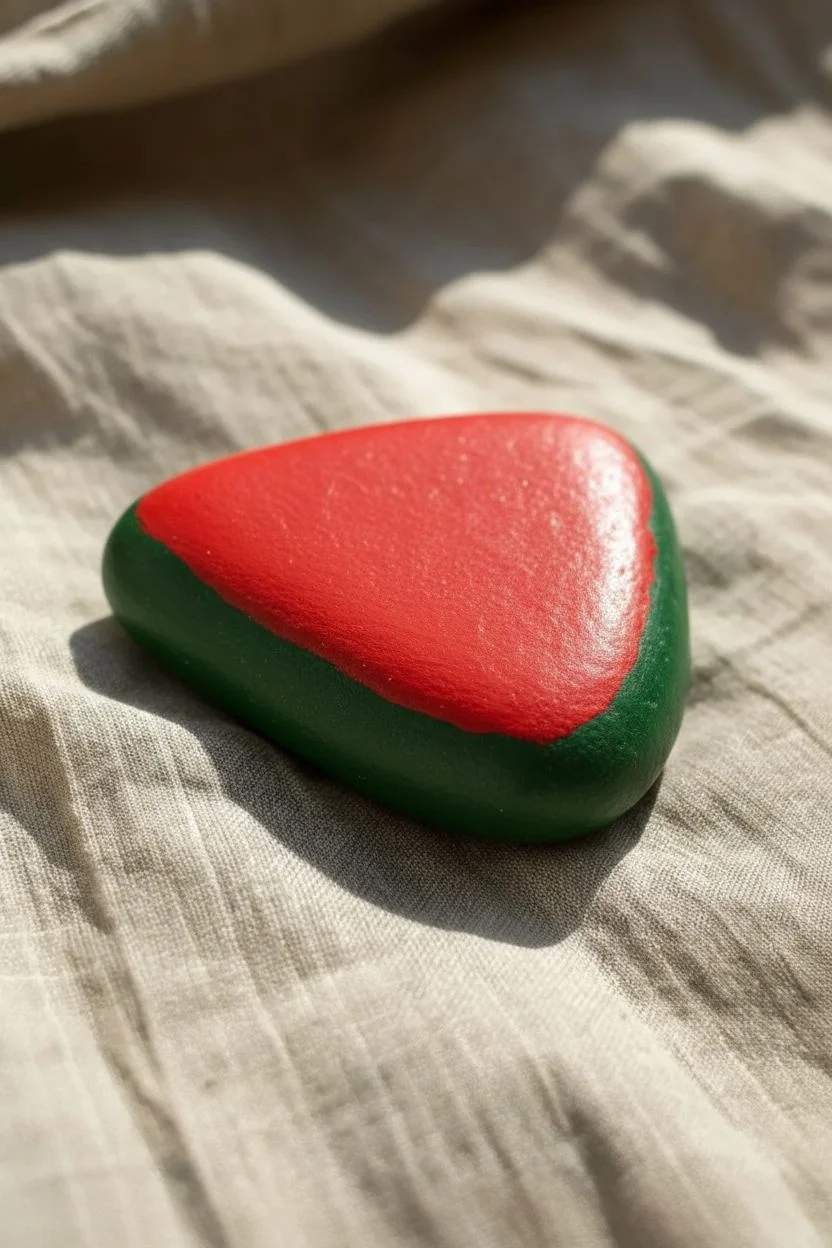
Step 1: Base Colors
-
Clean the canvas:
Scrub your rock thoroughly with soap and water to remove any dirt or oils, then let it dry completely. -
Sketch the layout:
Using a pencil, lightly draw a line around the slanted edge of the rock to mark where the red fruit ends and the rind begins. -
Prime the top:
Paint the top triangular surface of the rock with a layer of white paint first; this ensures the red layer on top will look vibrant rather than muddy. -
Apply the red:
Once the white primer is dry, paint the top surface with your bright red acrylic paint. -
Build opacity:
Allow the first coat of red to dry, then apply a second coat to achieve a rich, solid color without streaks. -
Paint the skin:
Use your dark green paint to cover the sides and bottom of the rock, simulating the hard outer skin. -
Touch up edges:
Bring the green paint up to meet your pencil line, ensuring full coverage of the stone’s raw surface.
Wobbly Lines?
Rest your pinky finger on a dry section of the rock to stabilize your hand while painting the thin white rind line.
Step 2: Rind and Seeds
-
Create the rind:
Load your fine liner brush with titanium white paint to create the signature pale rind. -
Paint the dividing line:
Carefully paint a consistent white stripe right along the edge where the red top meets the green side. -
Load the detail brush:
Switch to black paint and make sure your liner brush has a nice sharp point for the seeds. -
Form the seeds:
Create teardrop shapes by pressing the brush down firmly to start the seed and lifting up quickly as you drag it to the point. -
Arrange the pattern:
Scatter the seeds across the red surface, angling them slightly toward the center of the wedge for a realistic look. -
Let it cure:
Allow the paint to dry fully; handling distinct colors like red and white while wet can lead to unwanted pink smudges.
Step 3: Finishing Touches
-
Apply varnish:
Coat the entire rock with a high-gloss outdoor varnish or sealer. -
Add the shine:
I usually apply a second coat of gloss specifically to the red area to make the fruit look extra juicy and wet. -
Dry and display:
Place the rock in a dust-free area to cure completely according to your varnish instructions.
Level Up
Mix a tiny pinch of fine iridescent glitter into your final coat of red varnish to mimic the glistening crystallization of sweet fruit.
Place your finished slice in the garden or on a sunny windowsill for endless summer vibes.


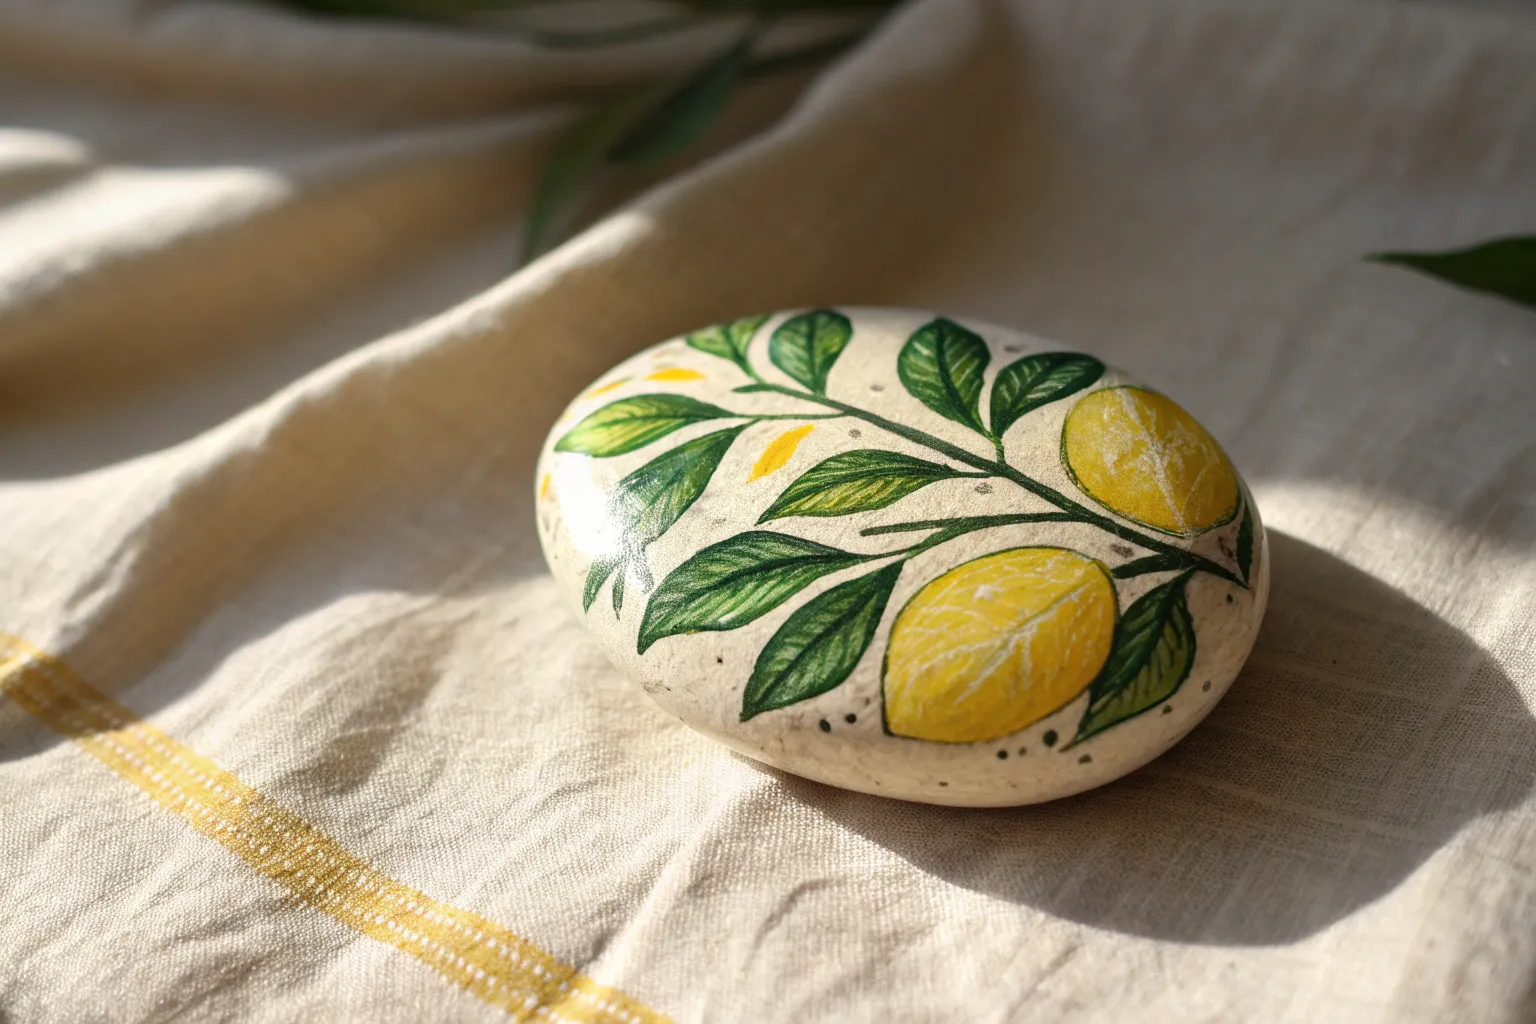
Fresh Squeezed Citrus Slices

Capture the freshness of summer with these vibrant citrus slice rocks that look good enough to squeeze. This project uses bright acrylics and simple geometric lines to transform smooth stones into juicy lemons and limes.
How-To Guide
Materials
- Smooth, round river rocks
- White acrylic paint (priming and details)
- Bright yellow acrylic paint
- Lime green and dark green acrylic paints
- Flat paintbrush
- Fine detail liner brush (size 00 or 0)
- Toothpick or small dotting tool
- Clear gloss varnish
Step 1: Prep and Prime
-
Clean the surface:
Wash your stones thoroughly with soapy water and let them dry completely to ensure the paint adheres properly. -
Apply base coat:
Paint a solid base coat of white acrylic over the entire top surface of the rock. -
Dry and repeat:
Allow the white layer to dry; I like to let this dry briefly while getting my colored paints ready. -
Ensure opacity:
Apply a second coat of white if the rock’s natural color is still showing through, creating a blank canvas.
Shaky Lines?
If your white segment lines look uneven or too thick, wait for them to dry perfectly. Then, use your original fruit color (yellow or green) to paint along the edges, ‘erasing’ the white until it’s thin.
Step 2: Fruit Color Application
-
Select color:
Choose your citrus shade—bright yellow for lemons, pale green for limes, or dark green for unripe citrus. -
Paint the background:
Paint the entire surface of the primed rock with your chosen fruit color. -
Smooth the finish:
Use long brushstrokes to flatten the paint texture for a smooth, even finish. -
Layer for vibrancy:
Let the first coat dry fully, then apply a second or third coat until the color is rich and opaque.
Step 3: Creating the Segments
-
Switch brushes:
Change to a fine detail liner brush loaded with creamy consistency white paint. -
Define the rind:
Paint a thin white circle positioned just slightly inside the outer edge of the rock to act as the pith. -
Mark the center:
Place a tiny dot of white paint in the absolute center of the rock to serve as your guide. -
Draw the spokes:
Paint a straight vertical line from the center dot up to the white rind circle, then a line straight down. -
Complete the wheel:
Paint a horizontal line across, followed by two diagonal lines, dividing the fruit into eight even triangular segments. -
Refine lines:
Carefully go over the white lines again to brighten them, keeping edges as crisp as possible.
Fruit Salad
Expand your collection by using ruby reds and warm pinks to create blood oranges and pink grapefruit slices, making a complete colorful citrus bowl for your garden.
Step 4: Juicy Details
-
Prepare the texture:
Dip the tip of a toothpick or a very small dotting tool into your white paint. -
Add vesicles:
Dot small clusters of white paint inside each fruit segment, concentrating them near the outer white circle. -
Vary sizes:
Make some dots slightly smaller than others to mimic organic, juicy fruit texture. -
Detailed curing:
Allow the detailed artwork to cure for at least 24 hours to prevent smearing. -
Gloss finish:
Apply a coat of clear gloss varnish to seal the paint and give the fruit a permanently wet, fresh-squeezed look.
Scatter these cheerful stones around your garden or porch for a pop of vitamin C color that lasts all year.


Sweet Summer Strawberries
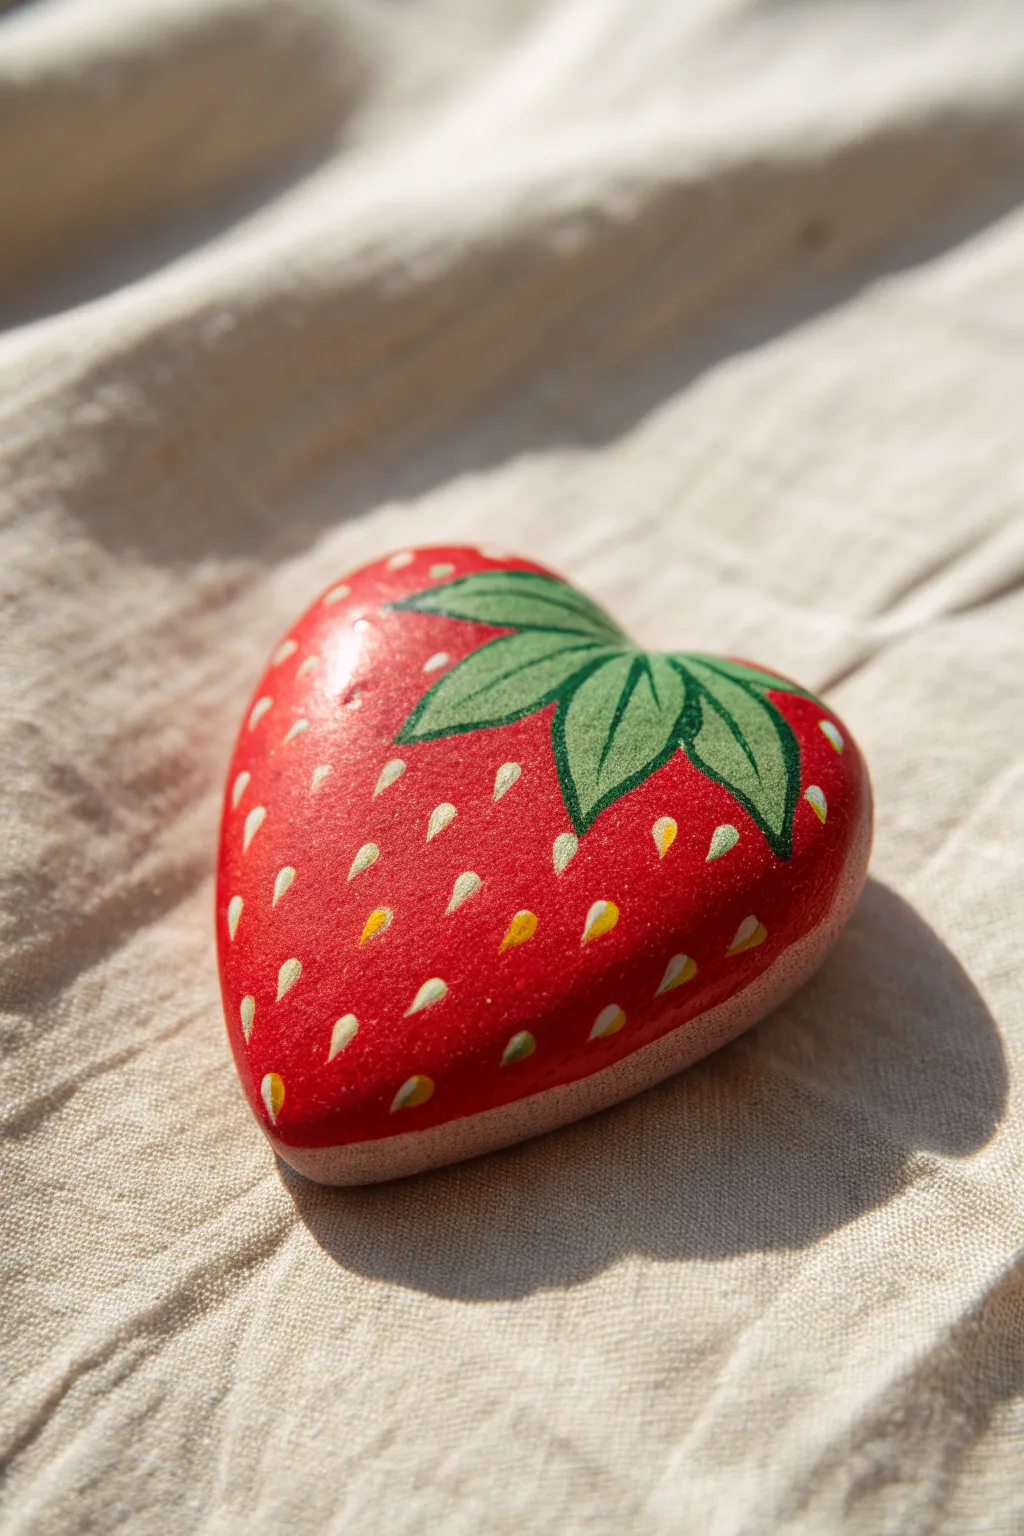

Transform a lucky heart-shaped find into a juicy, permanent piece of fruit. This quick project relies on bold colors and simple patterns to create a charming, glossy finish that captures the essence of summer.
Step-by-Step
Materials
- Smooth heart-shaped rock
- Bright red acrylic paint
- Leaf green acrylic paint
- Pale yellow or cream acrylic paint
- Black acrylic paint
- Flat shader brush
- Fine detail liner brush (size 0 or 00)
- Pencil
- High-gloss varnish or sealer
Step 1: Base Coating
-
Clean surface:
Scrub your stone with soapy water and let it dry completely to ensure the paint adheres properly. -
First red layer:
Load a flat shader brush with bright red acrylic paint. -
Apply base:
Paint the top face of the heart shape, leaving the very bottom edges and underside unpainted to reveal the natural stone texture. -
Dry and repeat:
Allow the first coat to dry until it is no longer tacky, then apply a second coat for full opacity. -
Full cure:
Let the red base dry completely before starting any detail work to prevent colors from muddying.
Shaky Lines?
Rest your pinky finger on a dry unpainted section of the rock (or the table surface) while painting. This creates a stabilizer for your hand, giving you much cleaner control over the fine outlines.
Step 2: Adding Greenery
-
Sketch leaves:
Lightly draw three to five leaf shapes radiating from the top notch of the heart using a pencil. -
Fill color:
Use a small round brush to fill in your sketched leaves with leaf green paint. -
Drying time:
Wait for the green layer to dry fully. -
Prepare liner:
Thin a small amount of black paint with a drop of water to help it flow smoothly off a fine liner brush. -
Outline:
I prefer to anchor my hand on the table here while outlining the green leaves with the thin black paint. -
Vein details:
Paint a single, thin curved line down the center of each leaf to create the midrib vein.
Step 3: Seeds and Finish
-
Mix seed color:
Prepare a pale yellow or cream color; pure white can look a bit too stark against the red. -
Form teardrops:
Using the tip of your fine brush, press down gently to make the round base of a seed, then lift while dragging slightly up to make a point. -
Seed orientation:
Ensure the pointed ends of the teardrop seeds are facing toward the top of the strawberry. -
Pattern distribution:
Scatter these seeds across the red area, staggering the rows slightly for a natural look. -
Remove pencil:
If any pencil lines are still visible around the leaves, gently erase them once the paint is bone dry. -
Seal it:
Apply a thick coat of high-gloss varnish to give the strawberry a wet, freshly picked appearance.
Juicy Highlights
To add realistic depth, paint a tiny white dot or thin line on the upper left side of the red area (near the leaves) before sealing. It mimics light hitting the curved fruit surface.
Place your finished strawberry in a plant pot or on a windowsill for a sweet decoration that never spoils


Colorful Garden Ladybugs
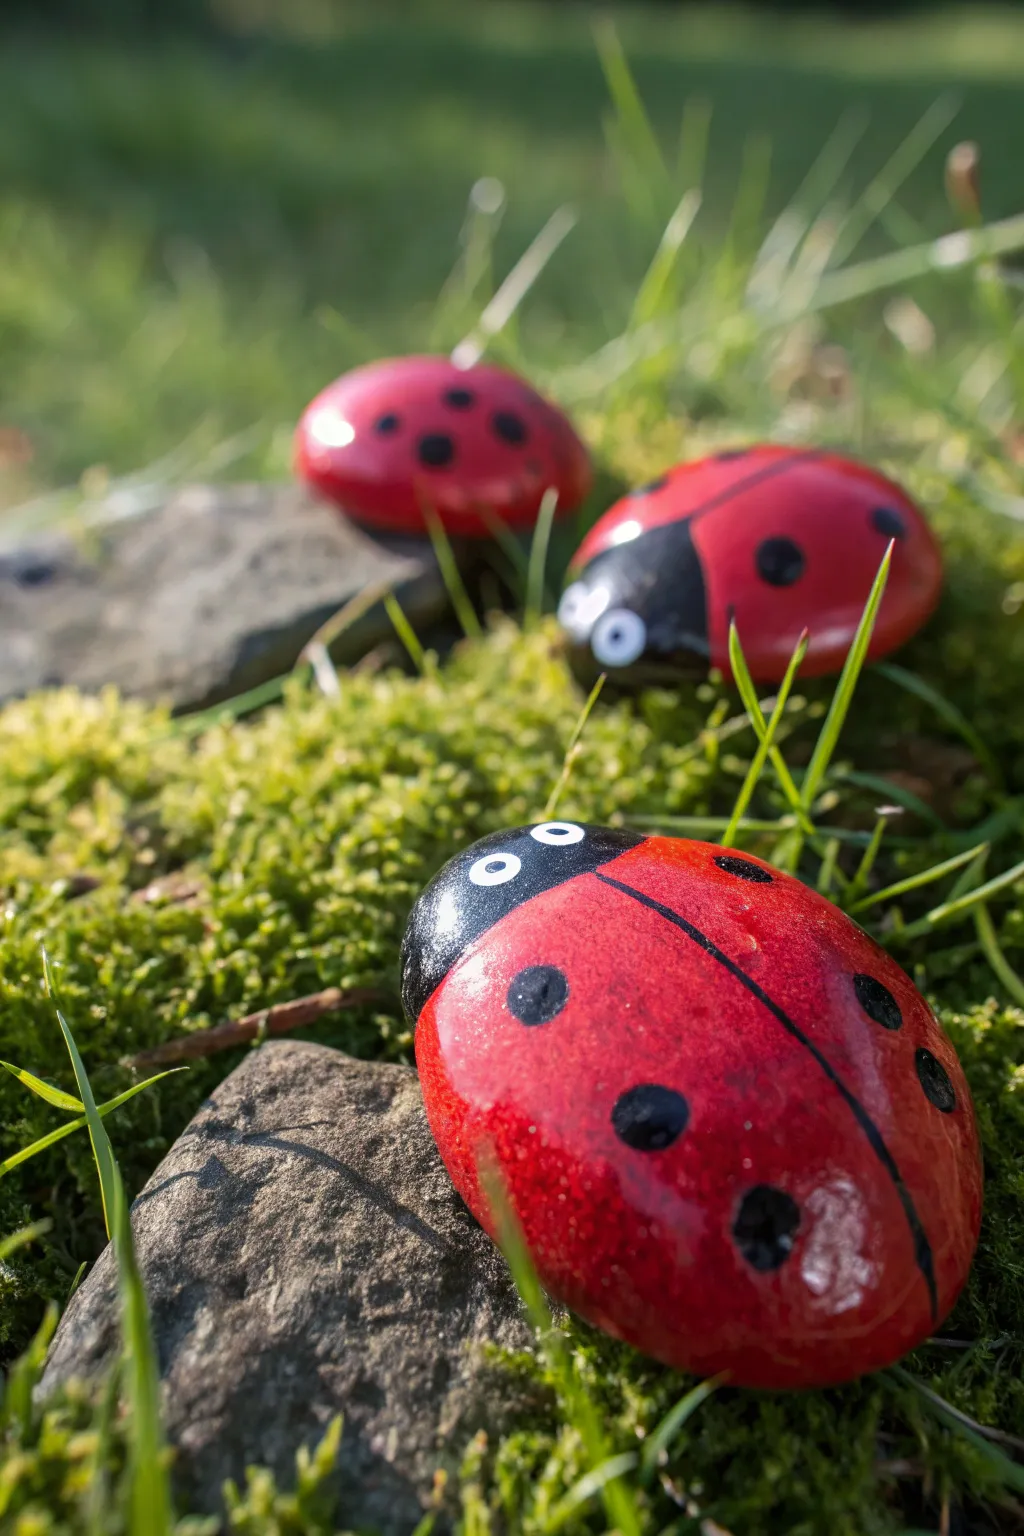
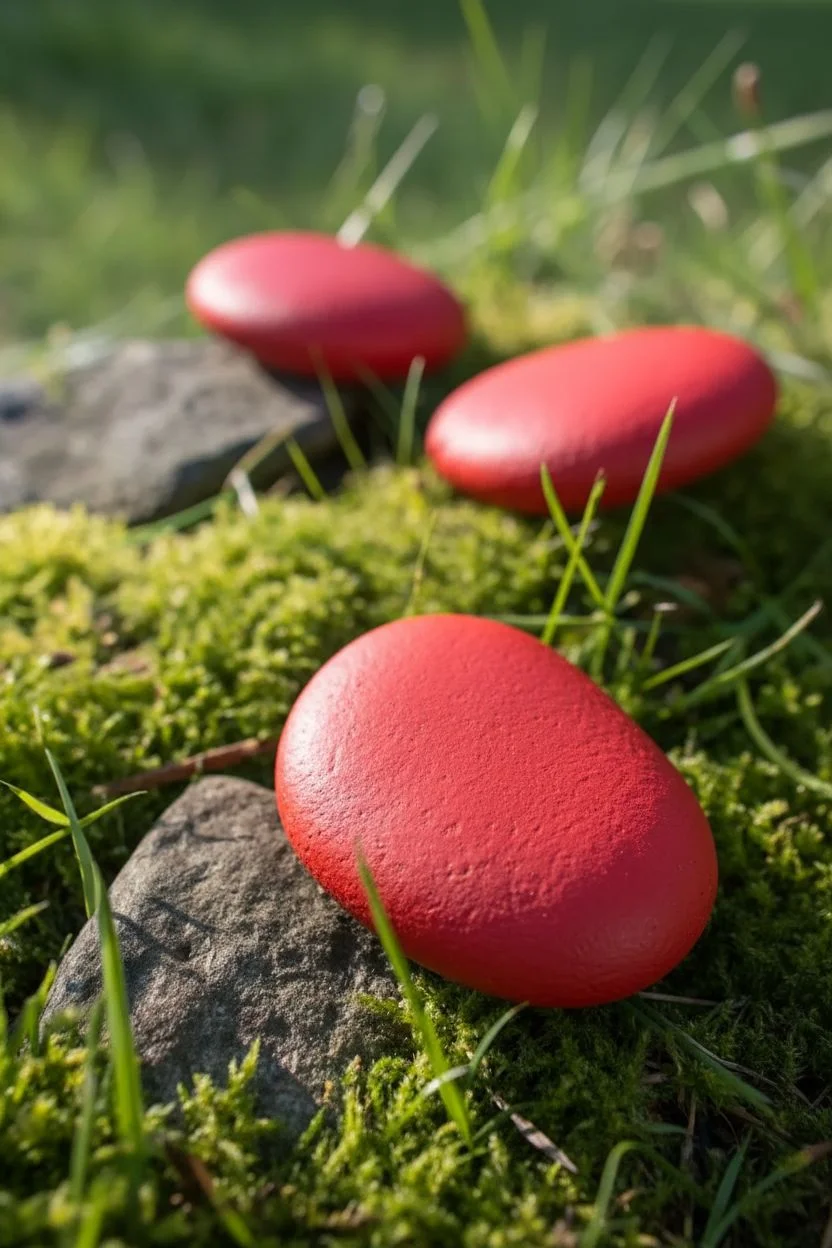
Transform smooth river stones into charming garden inhabitants with this classic rock painting project. These vibrant ladybugs feature a high-gloss finish that makes them look wet and shiny against the mossy textures of your backyard.
How-To Guide
Materials
- Smooth, oval river stones
- Red acrylic paint (opaque)
- Black acrylic paint
- White acrylic paint
- Flat paintbrush (size 4 or 6)
- Fine liner brush (size 0 or 1)
- Dotting tool or pencil eraser
- High-gloss clear varnish (outdoor rated)
- Water cup and paper towels
Step 1: Preparation and Base Color
-
Clean the canvas:
Scrub your stones with warm soapy water to remove any dirt or grit that might prevent the paint from sticking, then let them dry completely in the sun. -
Apply the first red coat:
Using your flat paintbrush, cover the top and sides of the rock with a layer of bright red acrylic paint. -
Let it dry:
Allow the first layer to dry for about 15 to 20 minutes; acrylics dry darker, so don’t worry if it looks bright at first. -
Deepen the color:
Apply a second coat of red paint to ensure the coverage is solid and opaque, hiding the natural color of the stone underneath. -
Check coverage:
Inspect the stone for any streaks and smooth them out with a lightly damp brush before the paint sets.
Step 2: Adding the Anatomy
-
Sketch the head:
Once the red base is bone dry, use a pencil to lightly draw a curved line across the top quarter of the rock to mark where the head will go. -
Paint the head:
Fill in the marked head area with black acrylic paint, using the edge of your flat brush to create a crisp, clean curve against the red body. -
Draw the wing divide:
Switch to your fine liner brush and carefully paint a thin, straight black line running from the center of the head down to the tail end of the rock. -
Create the spots:
Dip a dotting tool or the handle end of a paintbrush into black paint to create uniform circular spots on the red wings. -
Vary spot placement:
Place three to four spots on each side of the dividing line; I like to keep them somewhat symmetrical for a classic look. -
Allow thorough drying:
Let the black paint dry completely, as thick dots take longer to set than thin brushed layers.
Perfect Dot Hack
If you don’t have dotting tools, use household items like the flat end of a chopped stick or a pencil eraser dipped in paint for perfect circles.
Step 3: Eyes and Finishing Touches
-
Paint the eye whites:
Using a smaller dotting tool or a toothpick, stamp two white circles onto the black head area, spacing them widely apart. -
Wait for white to set:
Give the white paint plenty of time to dry to prevent the colors from mixing and turning gray. -
Add pupils:
Dip a fine tip or toothpick into black paint and place a tiny dot inside each white circle to create the pupils. -
Clean up details:
Look over the rock for any jagged edges or accidental smudges and touch them up with the appropriate background color. -
Initial seal:
Once the artwork is cured, brush on a layer of high-gloss varnish to protect the paint and give it that ‘bug shell’ shine. -
Second seal:
Apply a second coat of varnish after the first is tacky-dry to ensure the rock is fully weatherproof for garden use. -
Final cure:
Let the rocks sit undisturbed for at least 24 hours to ensure the sealant has hardened completely before placing them outside.
Level Up: 3D Reflection
Add a tiny dash of white paint on the side of the black head or on the larger black spots to mimic a light reflection for a cartoonish 3D effect.
Nestle your new glossy friends into some moss or leave them on a doorstep to welcome visitors
BRUSH GUIDE
The Right Brush for Every Stroke
From clean lines to bold texture — master brush choice, stroke control, and essential techniques.
Explore the Full Guide
Buzzing Bumblebees
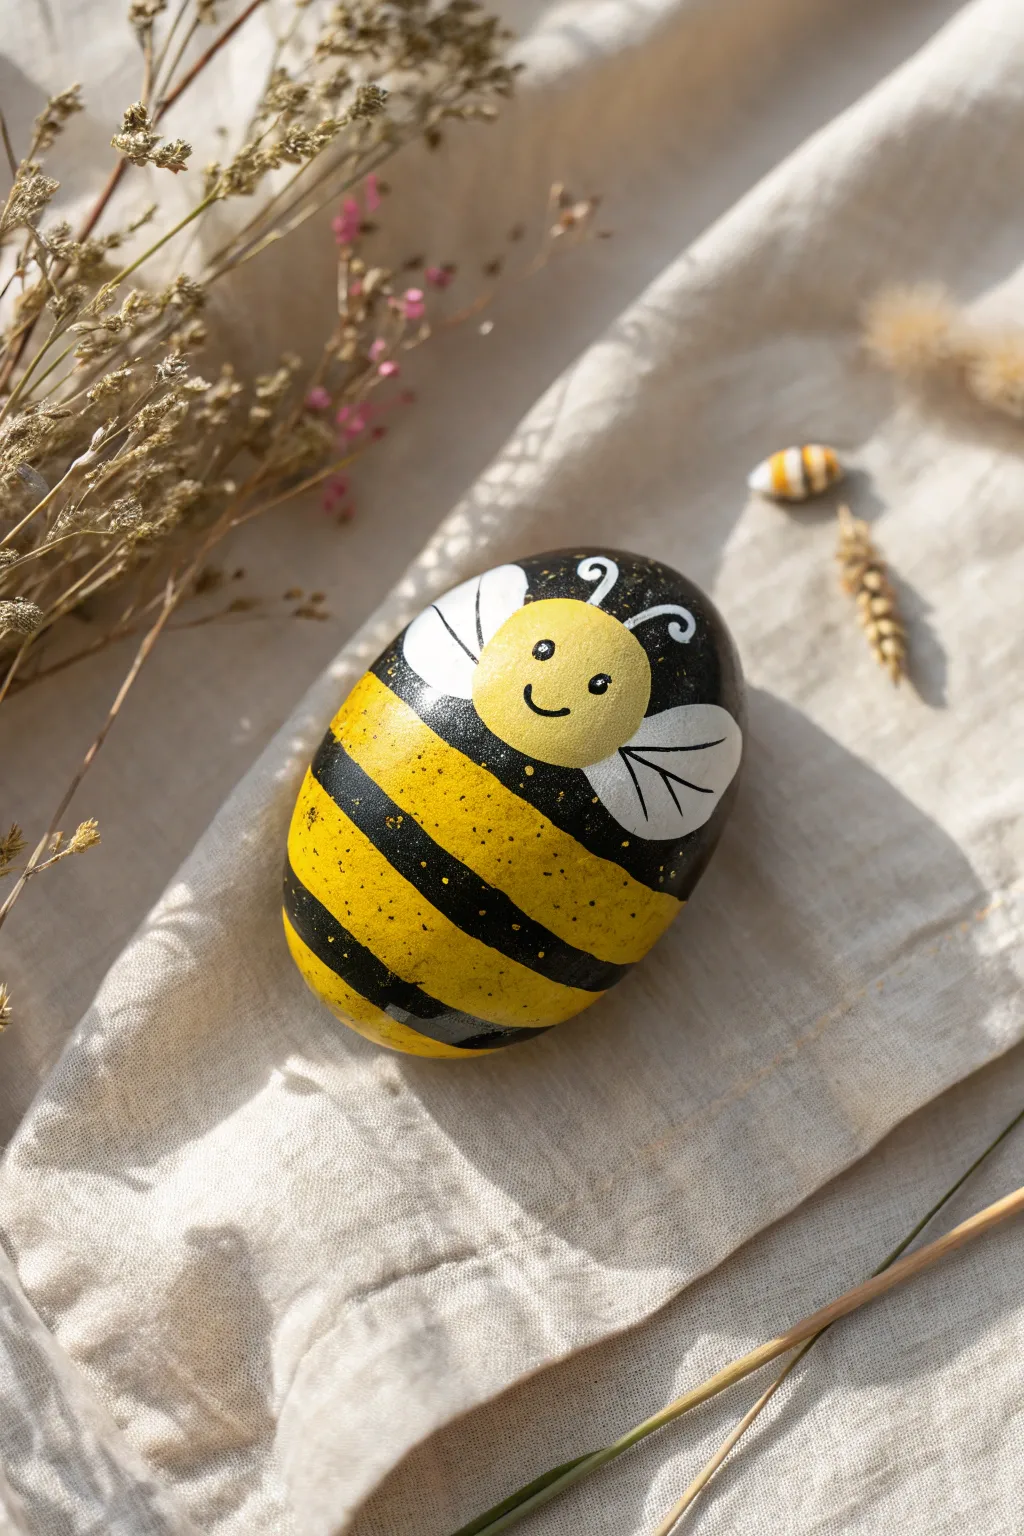
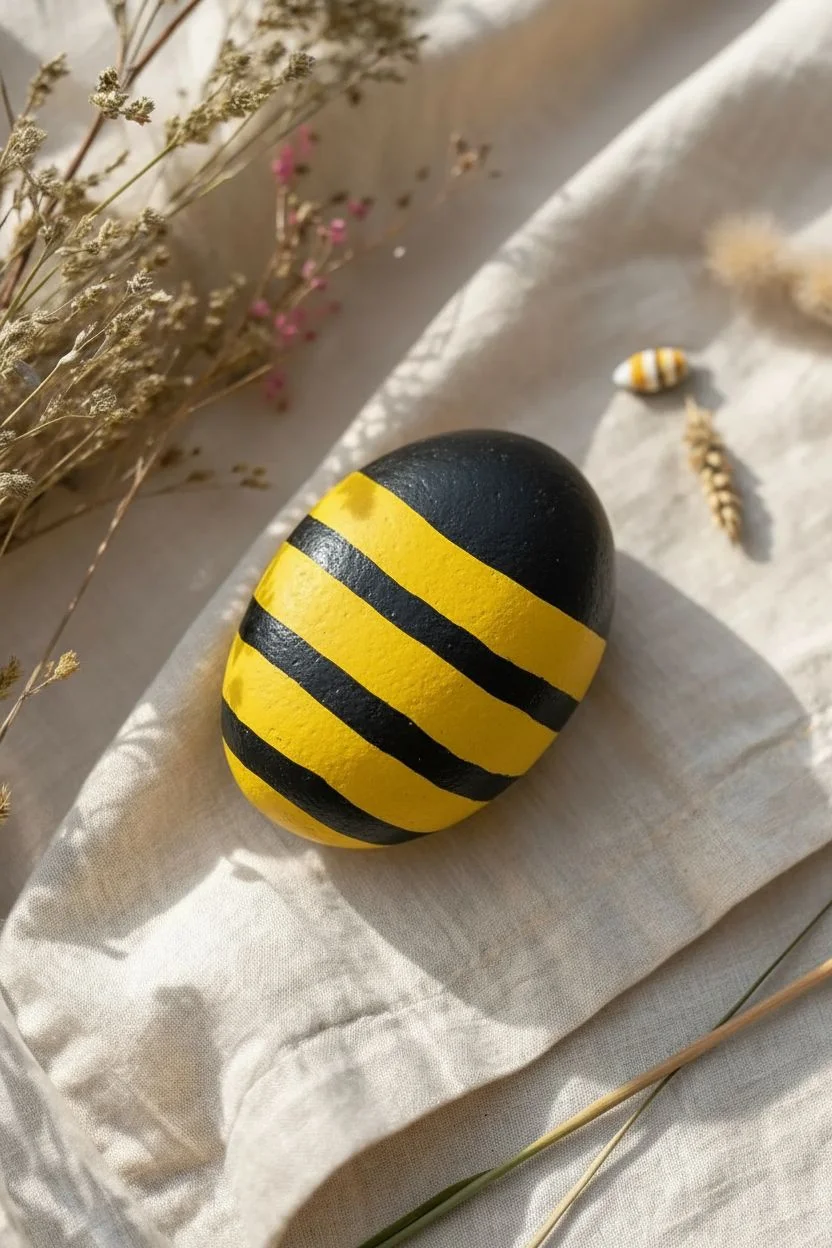
Transform a simple garden stone into an adorable buzzing friend with this cheerful painting project. The result is a vibrant, striped bumblebee with a sweet face and rustic speckled finish, perfect for hiding in flower pots or brightening up a desk.
Detailed Instructions
Materials
- Smooth oval rock
- Acrylic paints (bright yellow, black, white)
- Flat paintbrush (size 4 or 6)
- Fine detail liner brush (size 0 or 00)
- Old toothbrush
- Pencil
- Clear acrylic sealer (matte or gloss)
- Water cup and paper towels
Step 1: Base and Body
-
Prepare the canvas:
Scrub your rock with soapy water to remove any dirt or grit, then let it dry completely. A clean surface ensures the paint sticks properly. -
Base coat:
Paint the entire top surface of the rock with your bright yellow acrylic paint. I like to bring the color down the sides to the bottom edge. -
Solidify the color:
Allow the first layer to dry to the touch, then add a second coat of yellow to ensure full, opaque coverage without streaks. -
Sketch the stripes:
Once the yellow is bone dry, lightly use a pencil to mark out where your black stripes will go. Plan for a black tip at the bottom, a middle black stripe, and a large black section at the top for the head. -
Paint the black bands:
Using a flat brush, carefully fill in the pencil-marked areas with black paint. Keep your hand steady to create clean, curved lines that follow the rock’s shape. -
Refine edges:
If the edges of your stripes look a little rough, wait for the paint to dry and use a clean brush to touch them up with the contrasting color.
Paint opacity help
If your yellow paint looks dull over the black background, try painting a circle of white first. Let it dry, then paint the yellow over the white for a vibrant pop of color.
Step 2: Face and Wings
-
Create the face shape:
Paint a medium-sized yellow circle in the center of the top black section (the head). This will be the bee’s face. -
Ensure opacity:
Yellow over black can be transparent. Let the first face layer dry and add one or two more coats until the yellow is bright and solid. -
Paint the wings:
Use white paint to create two teardrop shapes on the black stripe just below the head area. Position them so they look like they are folded against the body. -
Add antennae:
Switch to your fine liner brush. Dip it in white paint and draw two swirly, curled lines coming up from the top of the head. -
Face details:
With the detail brush and black paint, add two small dots for eyes and a simple U-shaped curve for a happy smile inside the yellow face circle. -
Wing definition:
Use the liner brush with black paint to draw a thin outline or a simple vein line inside each white wing to give them definition. -
Sparkle in the eyes:
Dip the very tip of your liner brush handle (or a toothpick) into white paint and add a tiny white speck to each black eye for a cute highlight.
Make it shimmer
Swap the plain black splatter for metallic gold paint. The subtle gold flecks will catch the sunlight and give your bumblebee a magical, high-end finish.
Step 3: Texture and Finishing
-
Prepare splatter paint:
Mix a small amount of black paint with a few drops of water on your palette until it is thin and inky. -
Apply speckles:
Dip the bristles of an old toothbrush into the thinned black paint. Point it closely at the rock and run your thumb along the bristles to flick tiny specks over the yellow bands. -
Add contrast speckles:
Rinse the toothbrush and repeat the previous step using thinned yellow or gold paint. Flick these lighter specks primarily over the black bands for a rustic texture. -
Dry completely:
Let the rock sit undisturbed until all paint layers and splatters are fully cured. This usually takes a few hours. -
Seal the deal:
Apply a coat of clear acrylic sealer to protect your artwork from weathering, especially if it will live in the garden.
Find a sunny spot for your new stone pet and enjoy the smiles it brings!
Beach Day Flip Flops
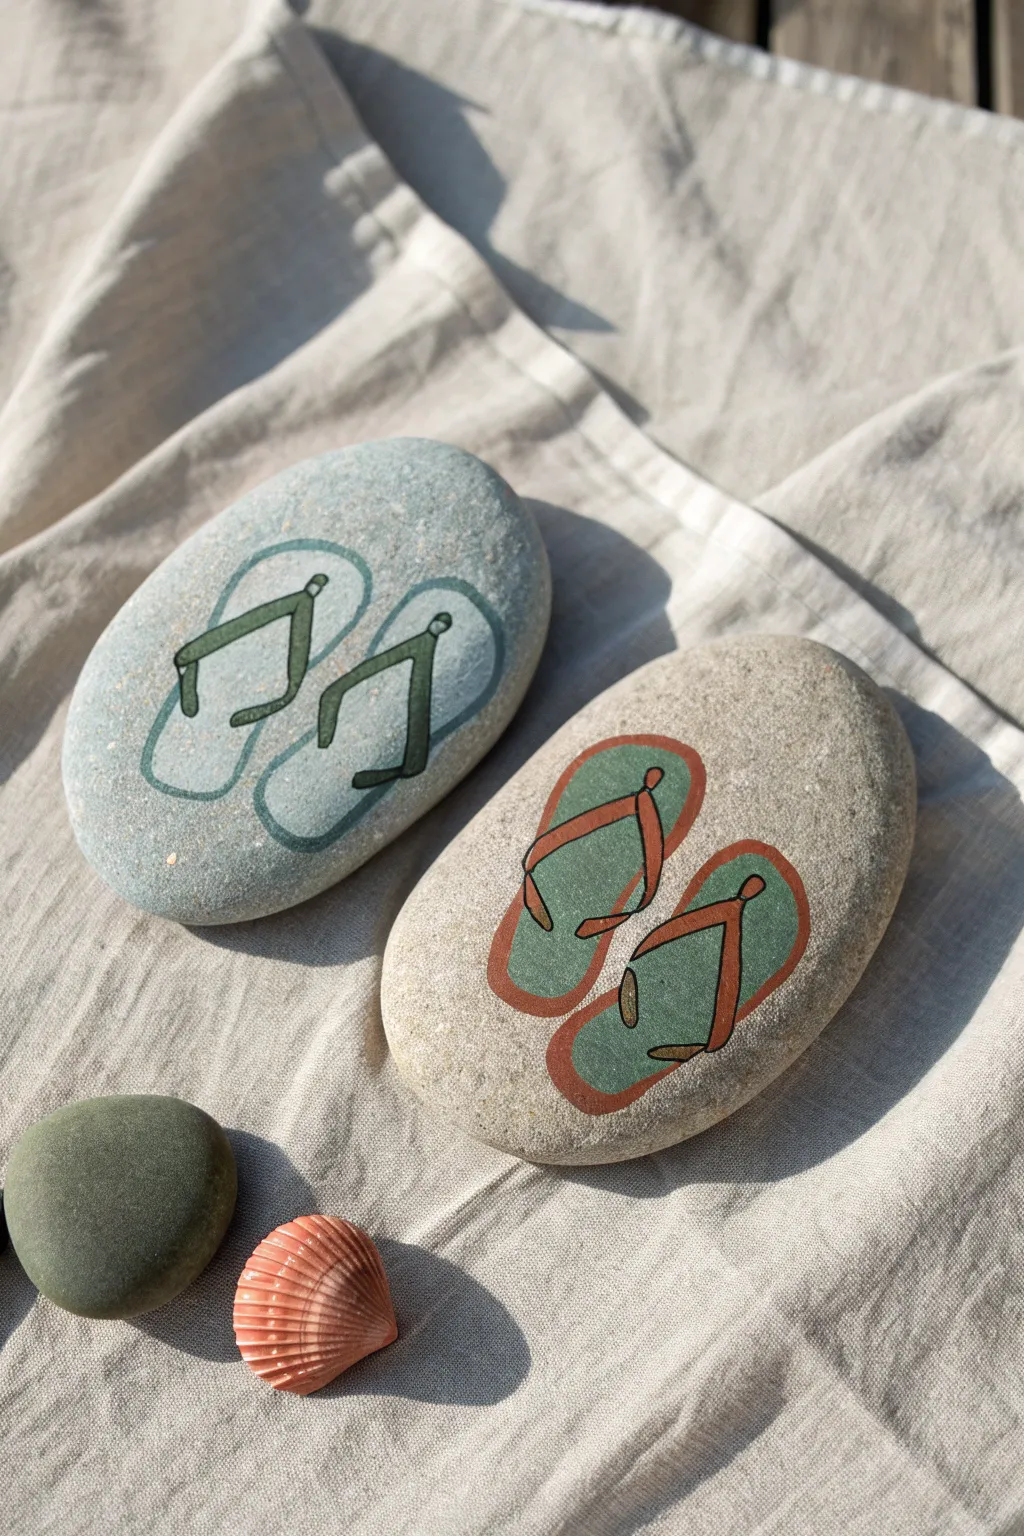
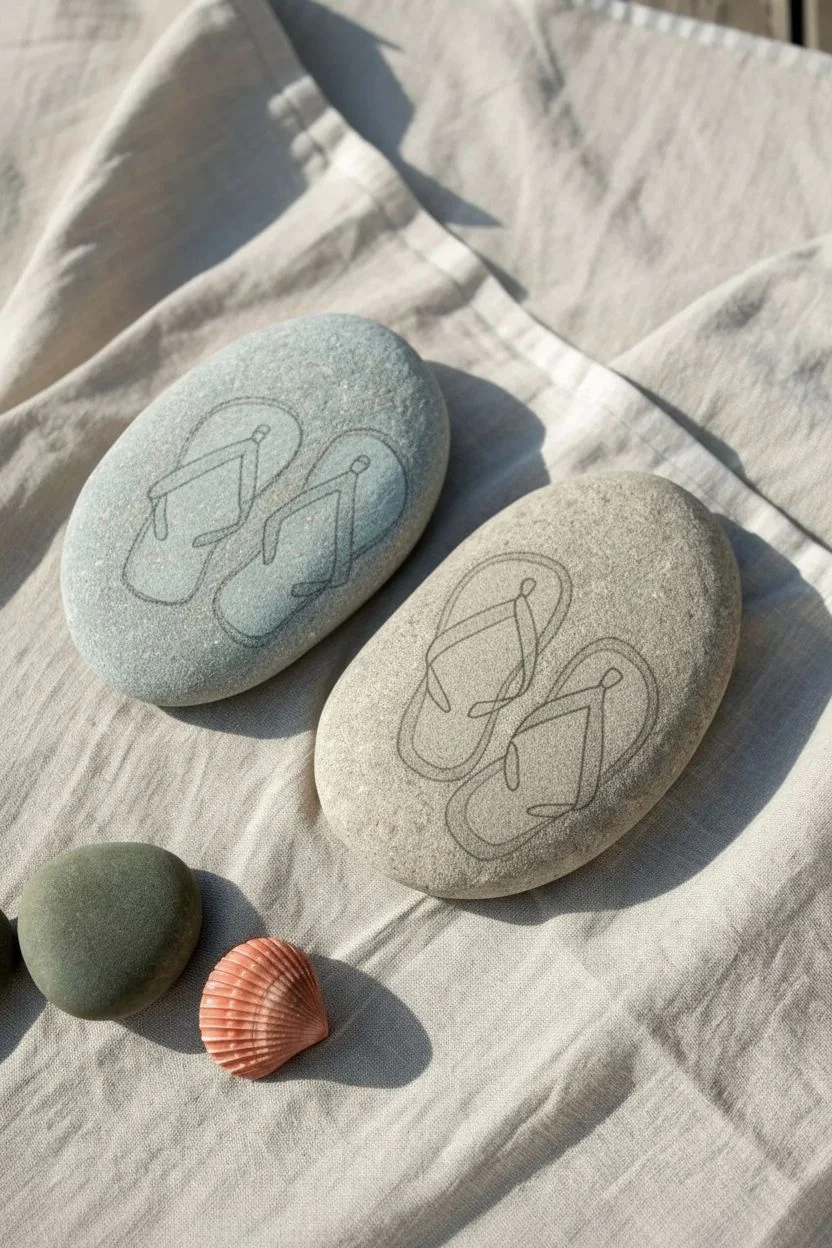
Capture the relaxed vibe of a day at the beach with these charming painted pebbles. Using smooth river stones as your canvas, you will create a set of rugged flip flops that look like they were just kicked off in the sand.
How-To Guide
Materials
- Smooth, oval river rocks (preferably grey, beige, or white)
- Acrylic paints (sage green, terracotta, white, light blue)
- Acrylic paint pens (fine point: dark green, rust/brown, black)
- Fine liner paintbrush
- Pencil and eraser
- Palette or small dish
- Matte spray varnish
Step 1: Preparation & Sketching
-
Clean the canvas:
Wash your rocks thoroughly with warm soapy water to remove any dirt or oils, then let them dry completely in the sun. -
Plan the position:
Orient your rock so the flattest, widest surface is facing up, simulating a patch of sand. -
Sketch the left sole:
Using a pencil, lightly draw a kidney-bean shape for the left flip flop, angling it slightly diagonally across the stone. -
Mirror the right sole:
Draw the second shoe next to the first, mirroring the shape. Keep a small gap between them so they don’t overlap. -
Mark the straps:
Sketch a ‘V’ shape on each sole, starting about one-third down from the top, to indicate where the straps will sit.
Step 2: The Sage & Terracotta Pair
-
Paint the soles:
On your beige rock, fill in the sketched sole shapes with sage green acrylic paint. You may need two thin coats for full coverage. -
Dry time:
Wait for the green base to dry completely before touching it with another color to prevent smudging. -
Outline the shape:
Use a rust or terracotta colored paint pen to trace the outer edge of the green soles, creating a clean rim. -
Create the straps:
Using the same terracotta pen or a fine brush, paint the V-shaped straps. Make them slightly thicker than the outline. -
Add detail points:
Draw small circles at the three points where the strap connects to the sole: one at the toe and two at the sides.
Wobbly Lines?
Rest your pinky finger on the table or a dry spot on the rock to stabilize your hand while drawing. Using extra-fine tip acrylic paint pens instead of brushes also offers much better control.
Step 3: The Blue & Green Pair
-
Outline first:
For the greyish rock, use a dark green paint pen to outline the shape of the soles directly on the bare stone. -
Mix a wash:
I like to mix a tiny drop of light blue or white paint with water to create a very translucent glaze. -
Tint the soles:
Carefully paint this watery wash inside the outlines. It should be sheer enough to see the rock texture beneath, just slightly lighter than the stone. -
Draw the straps:
Once the wash is dry, use your dark green pen to draw the V-shaped straps. -
Detail the side plugs:
Draw small semi-circles on the outer edges of the straps where they would tuck into the sole to mimic the rubber attachment.
Add Depth
Mix a drop of black, grey, or brown into your base paint color and paint a very thin shadow line along the right side of the flip flops. This makes them look 3D and lifted off the stone.
Step 4: Finishing Touches
-
Clean up sketch lines:
Once the paint is absolutely bone dry, use your eraser to gently remove any visible pencil marks around the edges. -
Refine edges:
If any paint lines look jagged, smooth them out with your fine tip pen for a crisp finish. -
Define the toe post:
Add a tiny dot of a darker shade (or black) right in the center of the toe post circle to give it a little depth. -
Highlighting (Optional):
Add a tiny speck of white to the top of the straps to make them look like shiny rubber reflecting the sun. -
Seal the deal:
Spray the rocks with a matte varnish. A matte finish is best here to maintain the natural, beachy look of the stone.
Place these cute creations in your garden or on a windowsill to keep the summer spirit alive all year round.

PENCIL GUIDE
Understanding Pencil Grades from H to B
From first sketch to finished drawing — learn pencil grades, line control, and shading techniques.
Explore the Full Guide
Radiant Sunflowers
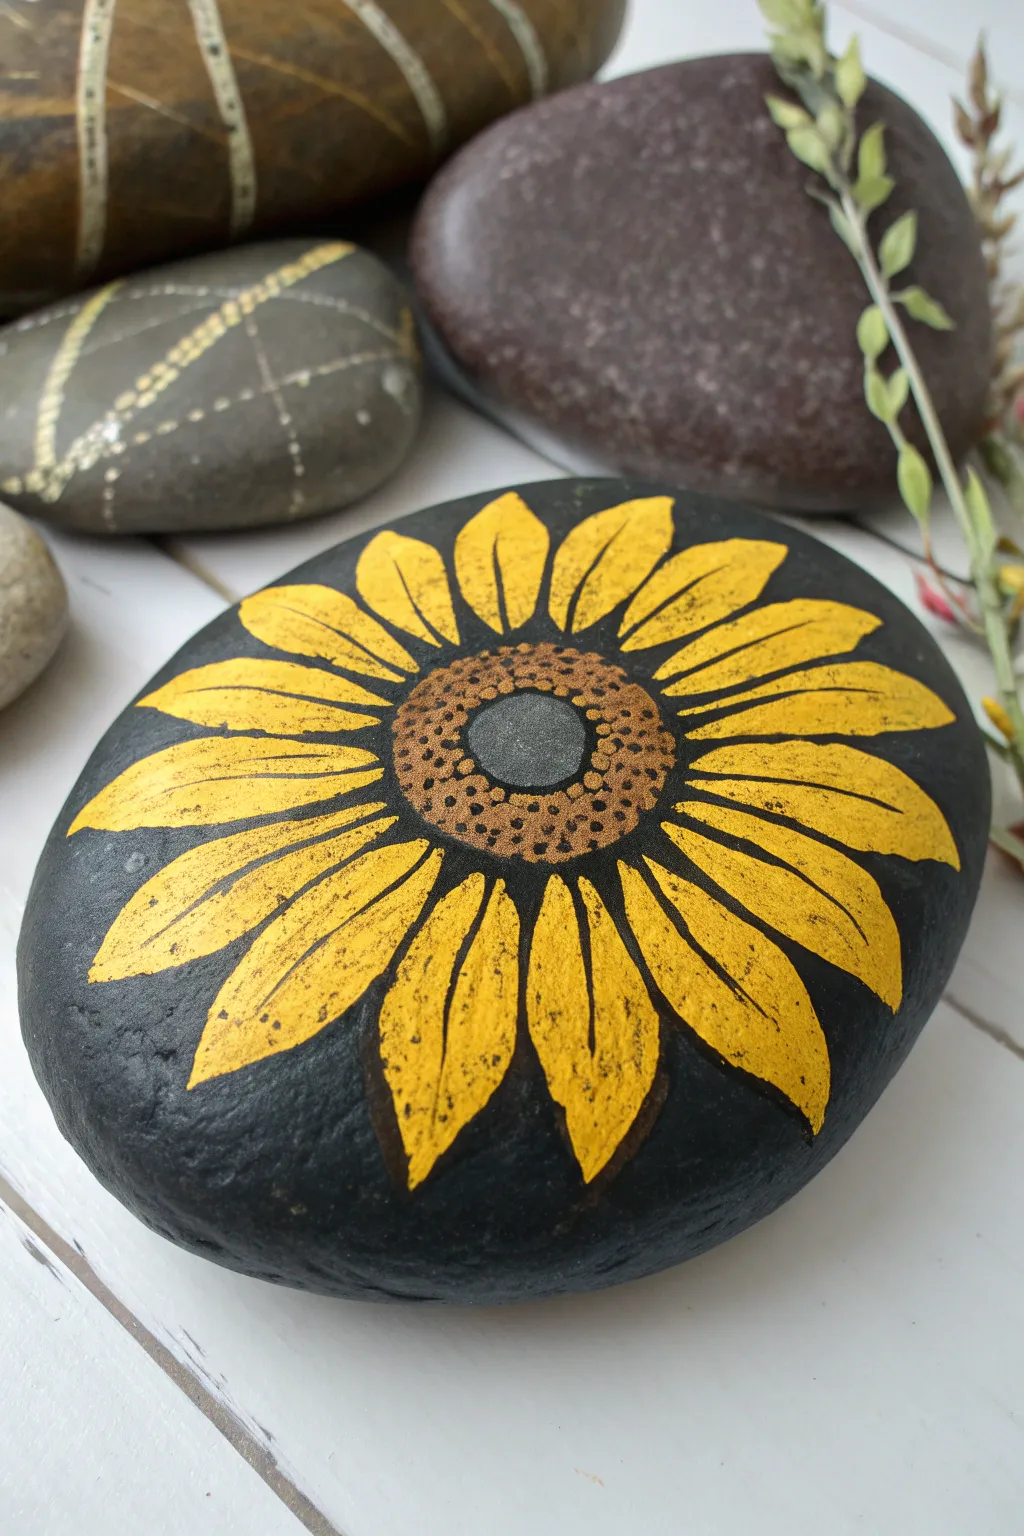
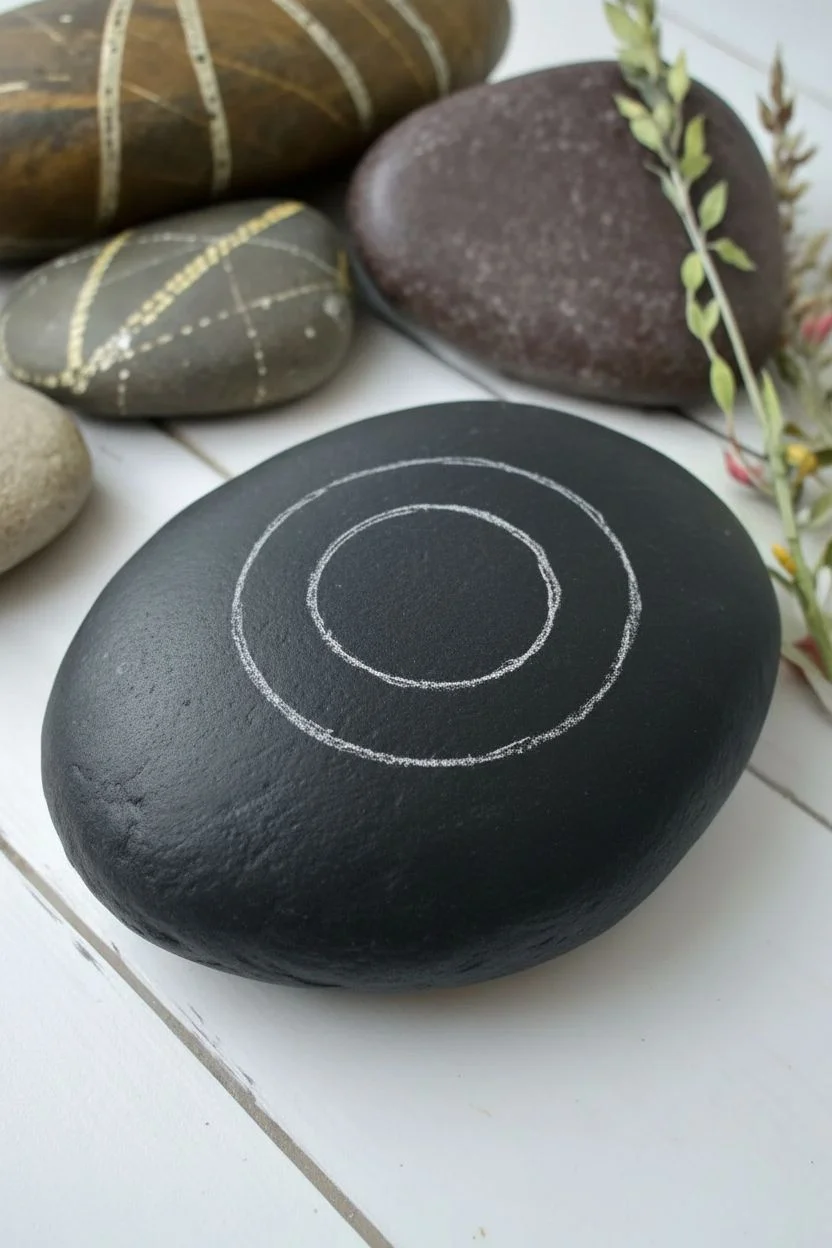
Capture the radiant warmth of summer with this striking sunflower design set against a dramatic black background. The high contrast makes the yellow petals truly pop, creating a sophisticated piece of garden décor that looks harder to paint than it actually is.
Detailed Instructions
Materials
- Smooth, oval river rock
- Acrylic paint (Matte Black)
- Acrylic paint (Bright Yellow)
- Acrylic paint (Goldenrod or Deep Yellow)
- Acrylic paint (Light Brown/Ochre)
- Acrylic paint (Dark Grey)
- Small flat paintbrush
- Fine detail liner brush
- Dotting tool or toothpick
- White chalk pencil (optional)
- Spray sealer (Matte or Satin)
Step 1: Preparing the Canvas
-
Clean and dry:
Scrub your rock with soap and water to remove any dirt or oil, then let it dry drastically ensures your paint adheres properly. -
Apply base coat:
Cover the entire top surface of the rock with matte black acrylic paint. You may need two thin coats for complete opacity. -
Let it cure:
Allow the black base to dry completely before starting the design to prevent the colors from muddying. -
Sketch the center:
Using a white chalk pencil or a very light touch with a regular pencil, draw a small circle in the middle of the rock, then a slightly larger circle around it to form a ring.
Pro Tip: Brighter Yellows
Yellow paint can struggle to cover black. Paint your petals in white first, let them dry, and then paint yellow over them. The white undercoat makes the yellow incredibly neon and bright.
Step 2: Painting the Petals
-
Start the compass points:
To keep the flower symmetrical, paint a yellow petal at the top, bottom, left, and right sides first using your small flat brush. -
Fill the gaps:
Paint two or three petals in the spaces between your initial four petals, tapering them to a point as they reach the edge of the stone. -
Build opacity:
Yellow paint is often translucent, so let the first layer dry and apply a bright yellow second coat. I assume you’ll need at least two passes to get that vibrant pop against the black. -
Add dimension:
Mix a tiny amount of goldenrod or deep yellow into your bright yellow and paint streaks from the base of each petal upward to create simulated texture.
Level Up: Morning Dew
Once sealed, use a 3D clear gloss medium or a drop of clear UV resin on a few petals to create permanent, raised ‘water droplets’ that look like morning dew.
Step 3: Creating the Center
-
Block in the ring:
Fill the outer ring of your center circles with the light brown or ochre paint, carefully maintaining the circular shape. -
Fill the core:
Paint the innermost circle with dark grey paint. If you don’t have grey, mix a little black into your white paint. -
Create pollen texture:
Dip a dotting tool or the non-brush end of your paintbrush into black paint and stamp dots around the outer edge of the brown ring. -
Add finer details:
Using a toothpick or a finer dotting tool, add smaller black dots closer to the inner grey circle to mimic the dense texture of a sunflower head.
Step 4: Final Definition
-
Add petal veins:
With your finest liner brush and slightly watered-down black paint, drag very faint, thin lines from the center of the petals outward. -
Sharpen the edges:
If any yellow paint went outside the lines, use your black base color to carefully touch up the background and sharpen the tips of the petals. -
Highlight the core:
Dab a tiny amount of lighter grey or watered-down white in the very center of the grey circle to give it a slightly rounded look. -
Dry thoroughly:
Let the rock sit for several hours or overnight to ensure all thick layers of paint are fully hardened. -
Seal the artwork:
Spray the rock with a clear matte or satin sealer to protect it from the elements if you plan to keep it outside.
Now you have a permanent piece of sunshine to brighten up your garden path or windowsill
Tropical Sunset Silhouettes
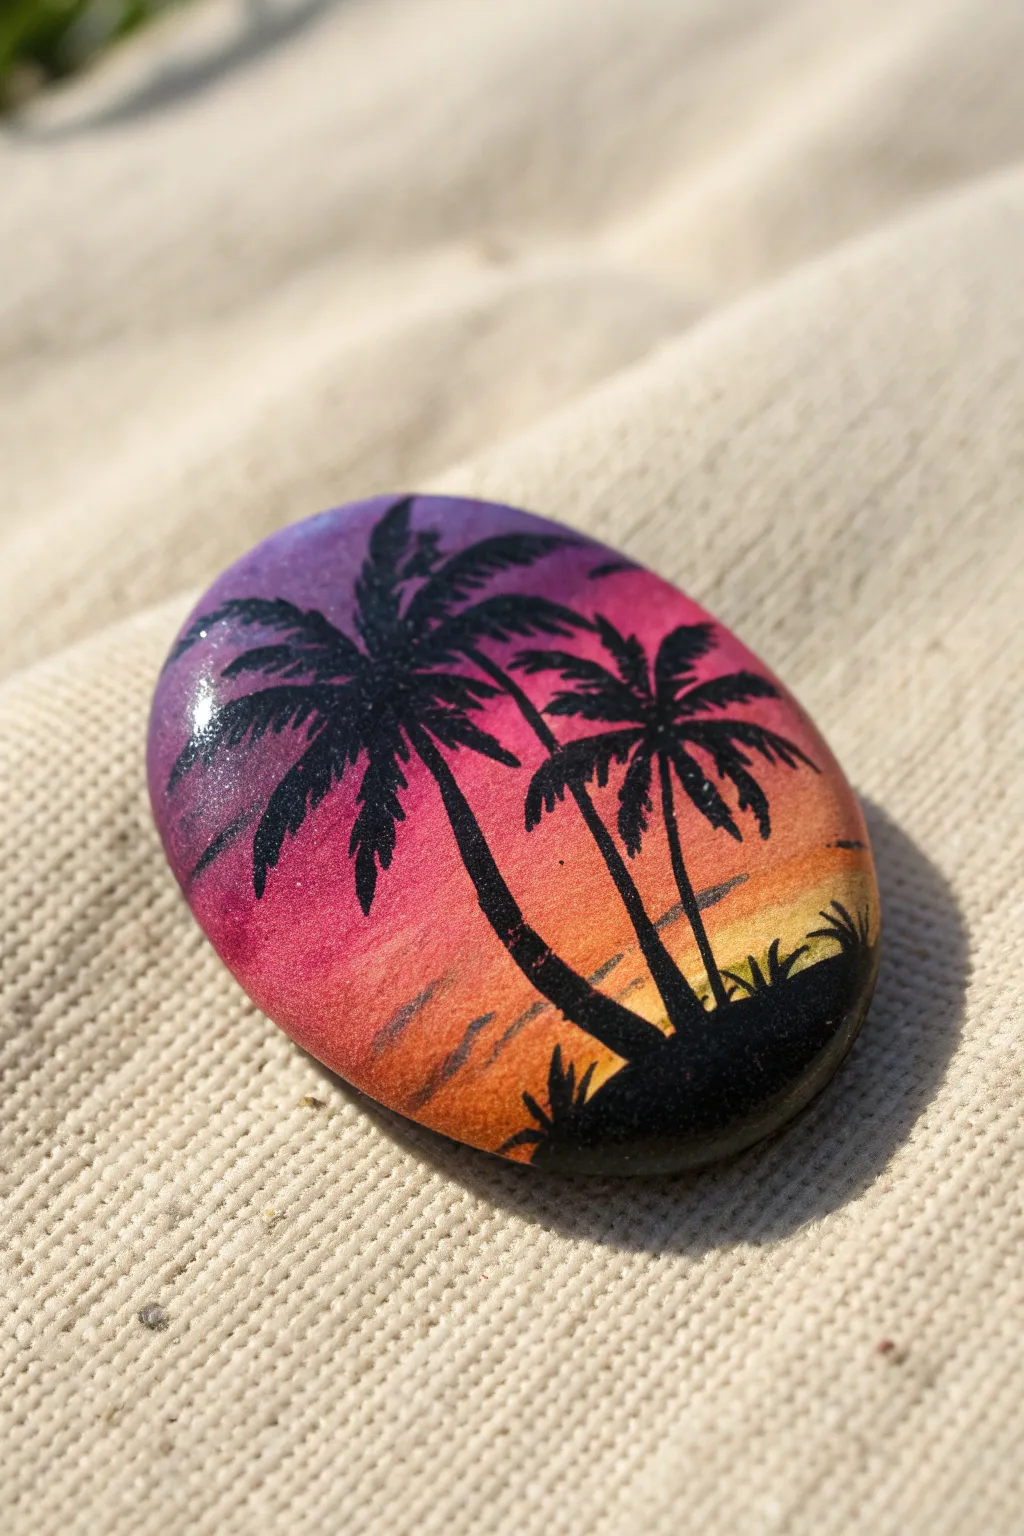
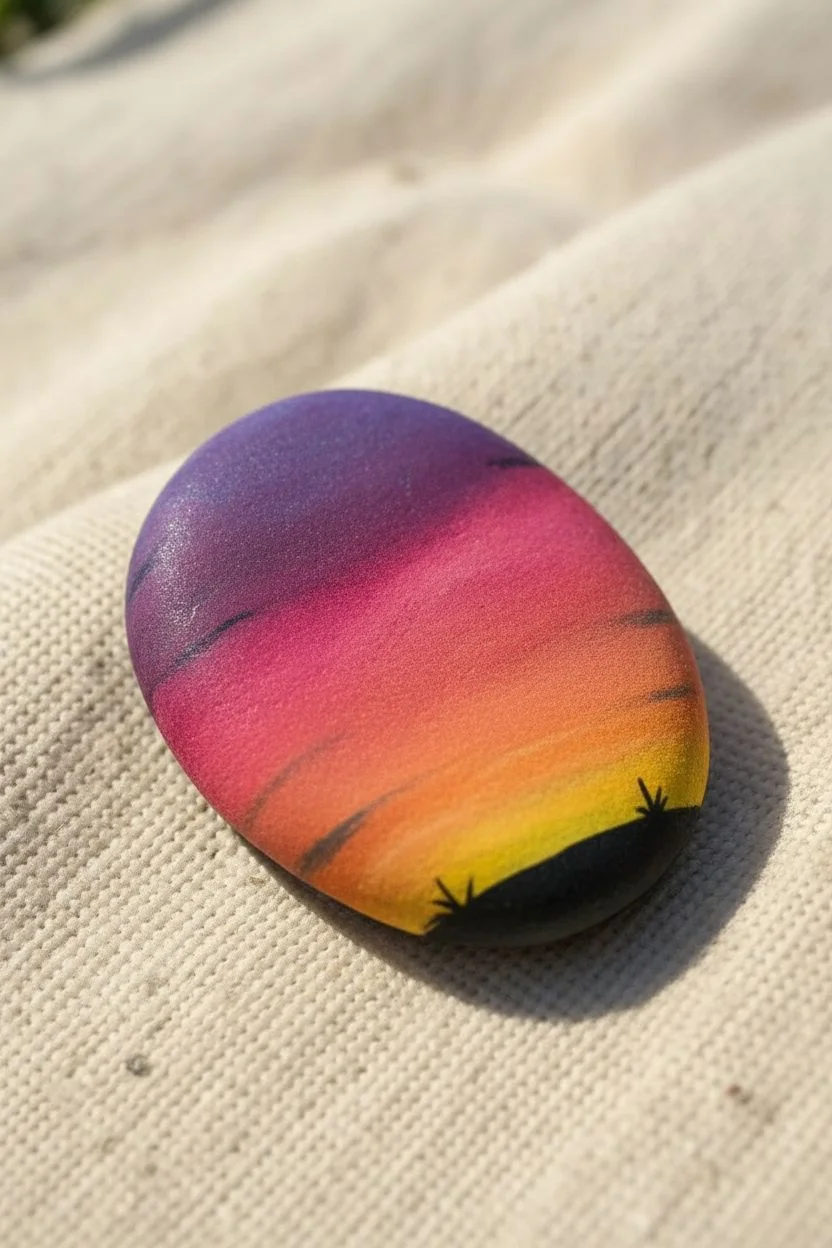
Capture the warmth of a tropical evening with this vibrant sunset gradient rock featuring recognizable palm silhouettes. The high-gloss finish enhances the rich colors, making it a perfect paperweight or summer decoration.
How-To Guide
Materials
- Smooth oval river rock
- Acrylic paints (White, Violet/Purple, Magenta/Pink, Orange, Bright Yellow, Black)
- Flat shader brush (size 6 or 8)
- Fine liner brush (size 00 or 000)
- Gloss varnish or spray sealer
- Water cup and paper towel
- Palette or mixing plate
Step 1: Setting the Scene
-
Prepare the surface:
Wash your stone with soap and water to remove any dirt or grease, then dry it completely with a cloth. -
Apply the primer:
Paint a coat of white acrylic paint over the entire top surface of the rock. This essential step ensures your sunset colors will look bright and distinct rather than soaking into the stone. -
Begin the sky:
Once the white base is dry, load your flat brush with violet paint and create a horizontal band across the top quarter of the rock. -
Add the pink layer:
Without cleaning your brush thoroughly, pick up magenta paint and apply a band directly beneath the violet. -
Blend the upper sky:
While both paint strips are still wet, gently gently brush back and forth where the colors meet to create a smooth, blurry transition from purple to pink. -
Transition to orange:
Wipe your brush on a paper towel, load up the orange paint, and create a third band below the pink. -
Create the warmth:
Use the same wet-on-wet technique to blend the seam between the pink and orange layers, softness is key here.
Sticky Situation?
If your brush drags while painting the fine black lines, mix a single drop of water into your black paint. Ink-like consistency flows smoother.
Step 2: Golden Hour & Silhouettes
-
Finish the gradient:
Paint the final section at the bottom with bright yellow, blending it upward into the orange to complete the sunset spectrum. -
Dry thoroughly:
Let the gradient background dry completely. I like to give this a good 15-20 minutes, as painting black on wet color will result in muddy gray smears. -
Paint the ground:
Using black paint and your fine liner brush, paint a solid, slightly uneven mound at the very bottom right to represent the shoreline or island ground. -
Draft the trunks:
With the liner brush, paint three curved lines extending upward from the ground. Note how the trees in the image curve slightly inward toward the center. -
Thicken the trees:
Go back over your trunk lines, making them slightly thicker at the base and tapering as they reach the top. -
Draw frond spines:
At the top of each trunk, paint 5 to 7 curved lines radiating outward like a firework starburst. These are the spines of the palm leaves. -
Add the leaves:
Using the very tip of your fine brush, make tiny, quick flicking motions hanging down from each spine to create the feathery palm leaves. -
Detail the ground:
Add a few small vertical flicks rising from the black mound at the bottom to suggest shore grass or small bushes.
Step 3: Sealing the Art
-
Final drying time:
Allow the black silhouette work to dry completely; black acrylic takes a little longer to set than other colors. -
Apply varnish:
Coat the entire rock with a high-gloss varnish or spray sealer. This mimics the ‘wet’ look in the photo and protects your sunset.
Pro Tip: Glossy Pop
Don’t skip the gloss varnish! It deepens the contrast between the black silhouettes and the colors, making the sunset look vibrant and glowing.
Place your tropical masterpiece in a sunny spot to remind you of summer evenings all year round


Whimsical Garden Snails
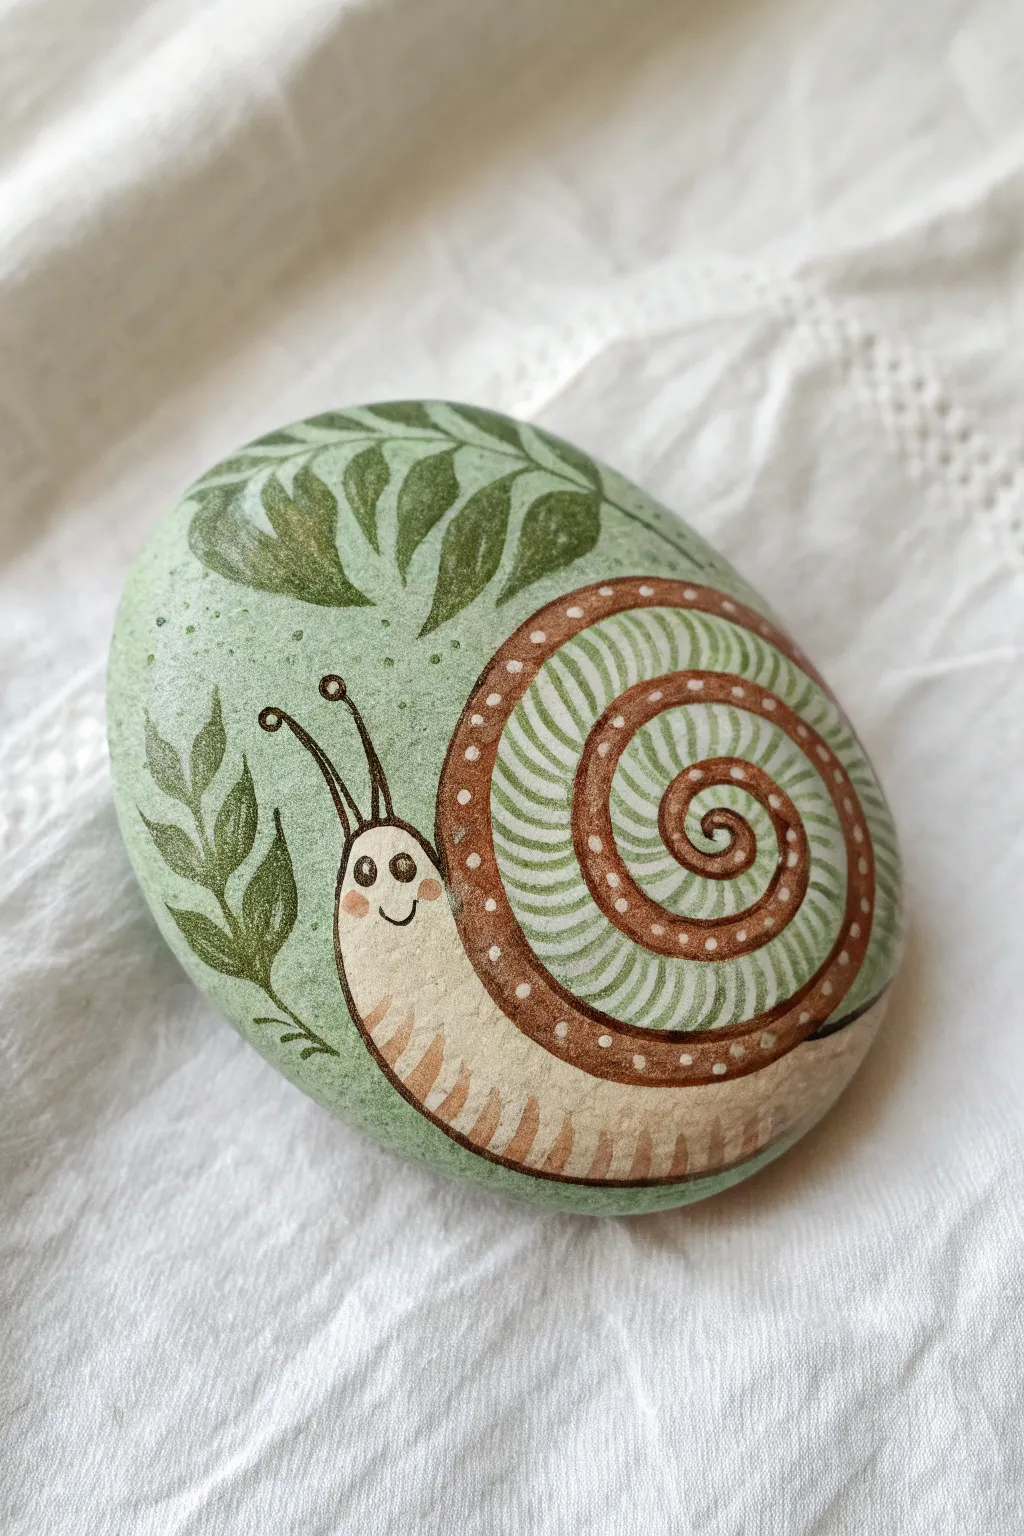
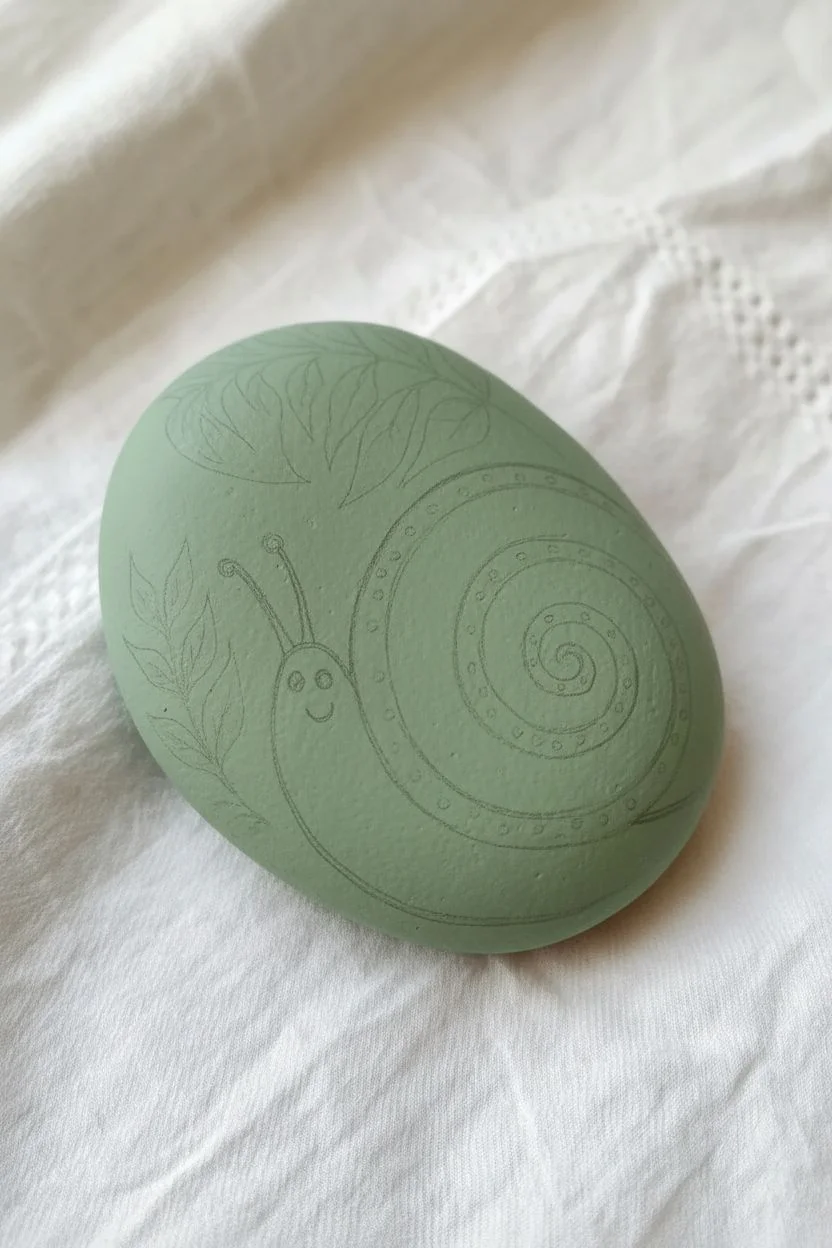
Transform a smooth river rock into a charming garden friend with this detailed painting project. Featuring a soft sage green background and an intricate spiral shell pattern, this piece adds a gentle, natural touch to your summer decor.
Step-by-Step Guide
Materials
- Smooth, oval river rock
- Acrylic paints: Sage green, creamy white, rust brown, olive green, black, soft pink
- Fine detail brushes (sizes 0 and 00)
- Small flat brush
- Dotting tool or toothpick
- Pencil and white eraser
- Matte varnish
Step 1: Base & Sketch
-
Prep the Surface:
Begin by washing your stone with soap and water to remove any dirt or grease. Let it dry completely in the sun. -
Apply Background Color:
Using a flat brush, coat the entire top surface of the rock with a soft sage green acrylic paint. You may need two coats for an opaque, even finish. -
Sketch the Design:
Once the green base is bone dry, lightly sketch your snail using a pencil. Draw a large circle for the shell and a curved, teardrop shape encompassing the bottom for the body so it looks like the snail is sliding forward. -
Map the Spiral:
Inside the shell circle, sketch a continuous spiral starting from the center and expanding outward. Also, lightly sketch the placement of the leaves in the upper left corner.
Brush Control Tip
For the ultra-fine painted antennae and shell stripes, add a tiny drop of water to your acrylic paint. This improves flow and prevents the bristles from dragging.
Step 2: Painting the Snail
-
Block in the Body:
Paint the snail’s soft body using creamy white paint. Ensure the edges are smooth and clean against the green background. -
Define the Spiral:
With a fine round brush and rust brown paint, carefully trace the spiral line you sketched on the shell. Make this line fairly thick, leaving a gap of unpainted space (or filled with very pale cream) between the brown swirls. -
Detail the Shell Tracks:
In the lighter gaps between the brown spiral lines, use diluted olive green paint and your finest brush to paint small, curved hatch marks or stripes repeating all the way to the center. -
Add Shell Dots:
Using a dotting tool or the tip of a toothpick dipped in white paint, place small, evenly spaced dots along the center of the rust brown spiral line. -
Shade the Body:
Create the ribbed texture on the snail’s belly by mixing a little brown with water to make a glaze. Paint short, vertical stripes along the bottom edge of the cream body, fading them out as they move upward.
Step 3: Face & Flora
-
Paint the Face:
Dip a fine detail brush or a toothpick into black paint to create two small oval eyes towards the top of the body. Add a tiny curved line for the smile. -
Add Facial Highlights:
Once the black eyes are dry, add a microscopic dot of white to each pupil to bring the character to life. Dab a sheer wash of soft pink below the eyes for rosy cheeks. -
Draw Antennae:
Using thin black paint or a waterproof fine-tip paint pen, draw two long, slender antennae extending from the head, topped with small open circles. -
Paint the Foliage:
Mix a muted olive green to paint the leaves in the background. I like to use a slightly dry brush here to give the leaves a bit of natural texture rather than solid opacity. -
Leaf Details:
Use a slightly darker shade of green to paint thin central veins on the leaves for added dimension. -
Final Texture:
To integrate the subject with the background, use a toothbrush or stiff brush to flick a tiny amount of diluted dark green paint around the snail for a speckled effect. -
Seal the Work:
Allow the rock to cure for 24 hours. Finish by applying a matte varnish to protect the artwork without adding high gloss, keeping the natural stone look.
Level It Up
Make the snail magical by using metallic copper paint for the spiral shell instead of rust brown, or add a little clear glitter glaze over the shell once dry.
Now you have a delightful little garden companion that won’t eat your plants
Nautical Sailboats

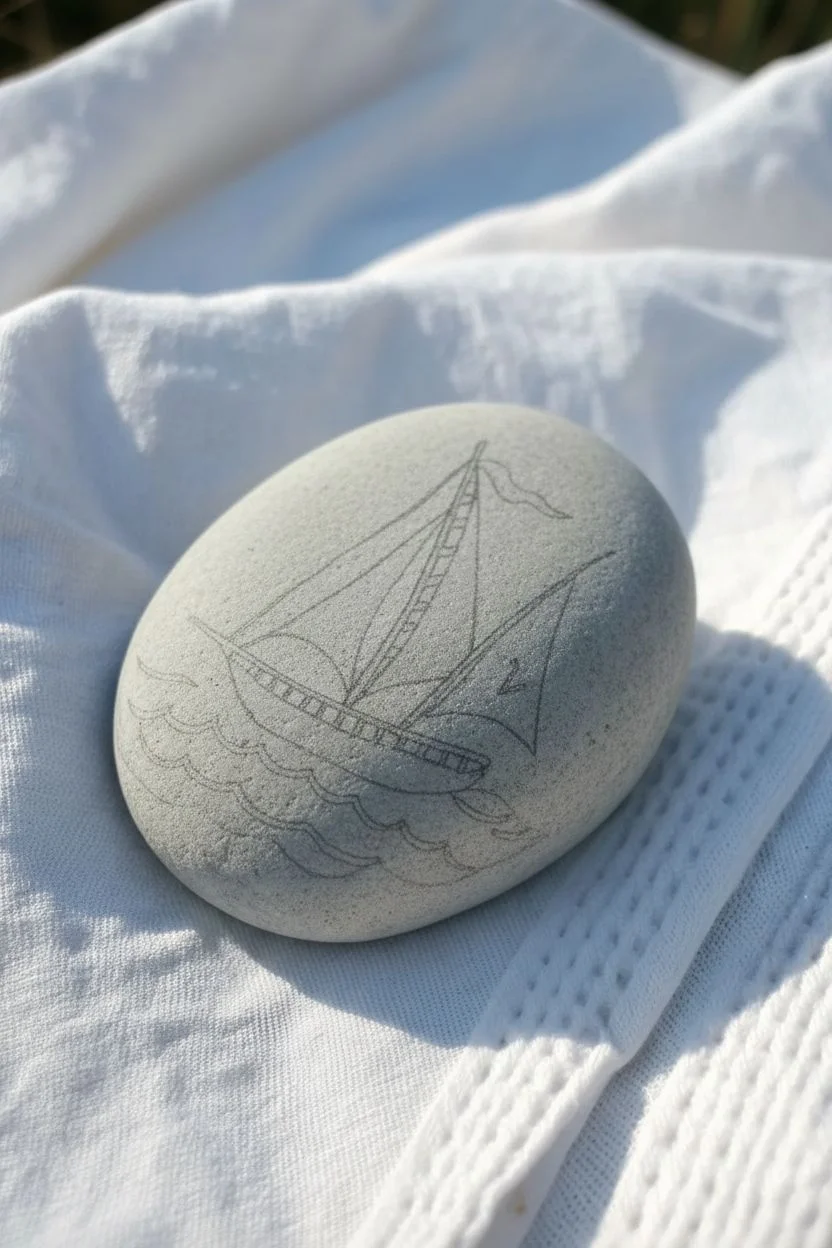
This charming nautical design uses the natural stone background to create a crisp, clean look perfect for summer decor. The bright red sails and deep blue waves pop against the grey rock, making a delightful paperweight or garden accent.
Step-by-Step Tutorial
Materials
- Smooth oval grey rock
- Acrylic paints: Bright Red, Navy Blue, Black, White
- Pencil and eraser
- Fine liner brush (size 00 or 000)
- Small round brush (size 1)
- White paint pen (optional)
- Clear varnish or sealer
Step 1: Sketching the Regatta
-
Prepare the surface:
Ensure your stone is clean and completely dry; I find smooth river rocks work best for this detailed design. -
Sketch the water line:
Using a pencil, lightly draw a wavy horizon line across the bottom third of the rock. -
Outline the hull:
Sketch the boat’s hull resting on the waves, curving it upward at the bow and stern. -
Add the mast and sails:
Draw a tall central mast tilting slightly backward, then outline three triangular sails and a small flag at the very top.
Detail Disaster?
If painting the tiny white squares on the hull feels too tricky with a brush, use a fine tip white gel pen or paint marker for better control and clean lines.
Step 2: Blocking Basic Colors
-
Paint the red elements:
Using a small round brush, fill in the hull, the three sails, and the top flag with bright red paint. -
Check coverage:
Apply a second coat of red if needed to ensure the grey stone doesn’t show through the paint. -
Paint the ocean:
Fill the bottom wave section with navy blue paint, carefully tracing the scalloped edge just below the hull. -
Let it dry:
Allow these base colors to dry completely to prevent any smudging during the detailing phase.
Make it Yours
Swap the racing number ‘2’ for a significant date, like a birthday or anniversary, to turn this rock into a personalized keepsake or gift.
Step 3: Rigging and Structure
-
Detail the mast:
Switch to your finest liner brush and black paint to create the mast; paint short black segments leaving small gaps for white stripes later. -
Outline the shapes:
Carefully outline the red sails and the hull with very thin, steady black lines to define their shapes. -
Add the gunwale:
Paint a thick black band along the top edge of the hull to represent the gunwale rail. -
Install rigging:
Draw thin black lines extending from the mast to the tips of the sails to mimic ropes.
Step 4: Crisp White Details
-
Create sea foam:
Using a clean detail brush and white paint, add curved, scalloped lines over the dry blue paint to represent waves. -
Detail the hull:
Paint small white squares inside the black gunwale strip on the boat’s hull to look like railing gaps. -
Finish the mast:
Carefully fill the gaps you left in the mast with white paint to create a striped effect. -
Add the racing number:
Paint a small number ‘2’ on the bottom right sail using a fine brush or a white paint pen. -
Seal the artwork:
Once the artwork is fully cured, apply a coat of varnish to protect your miniature fleet from the elements.
Now you have a seaworthy piece of art ready to display on your desk or patio
Miniature Cactus Garden
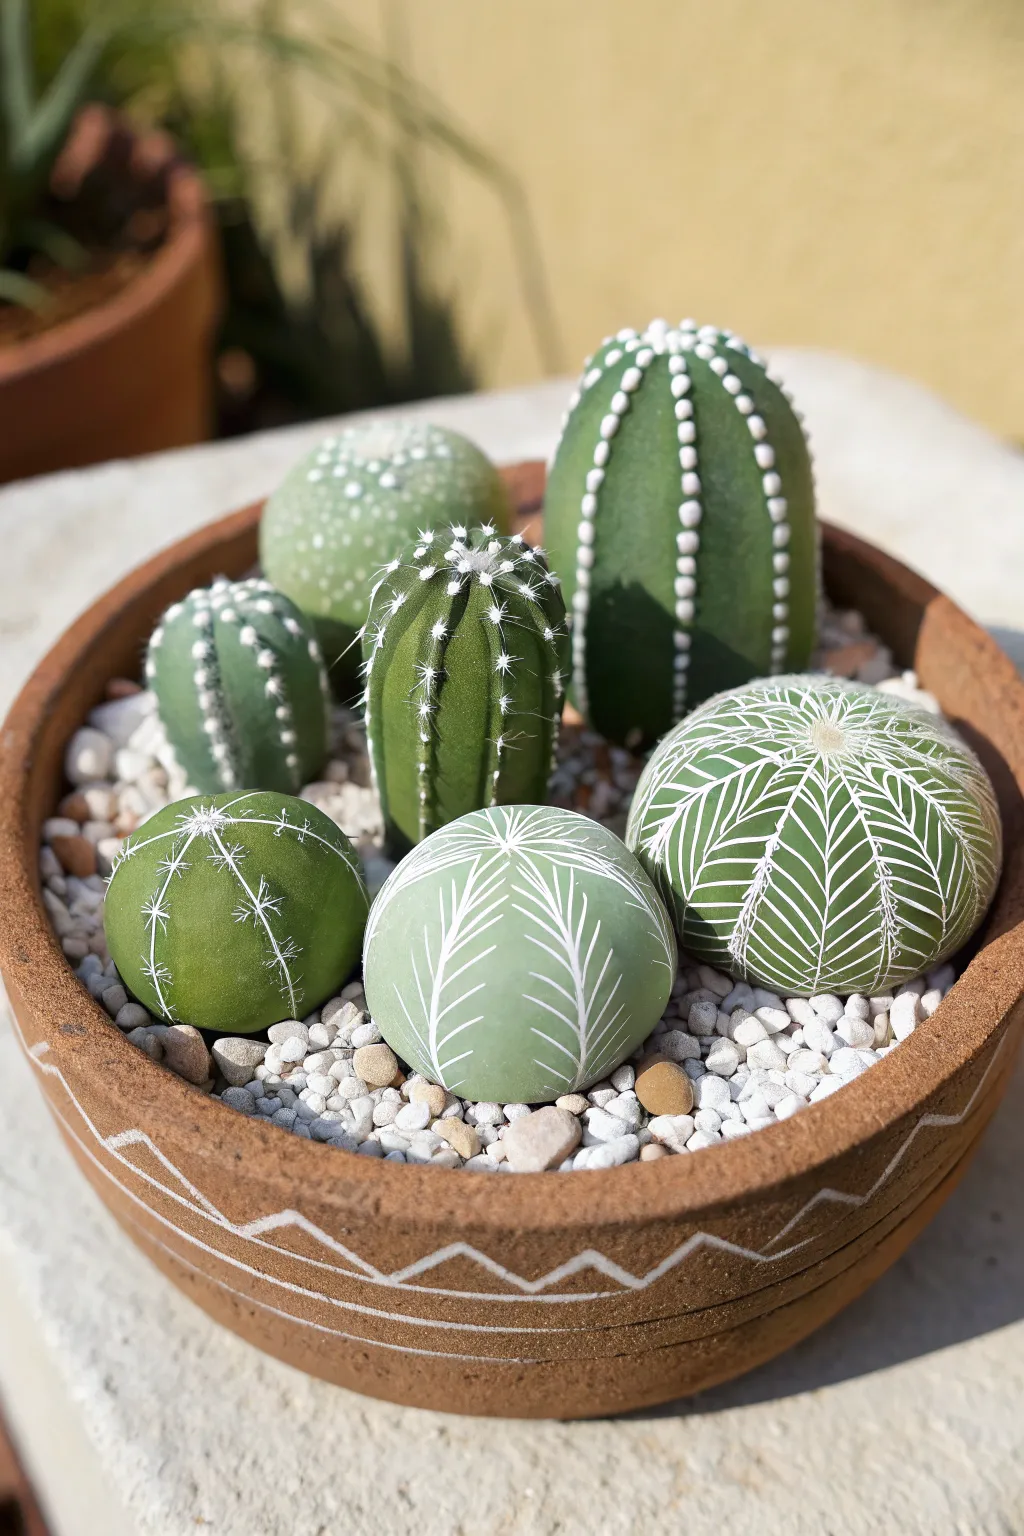
Transform ordinary smooth stones into a charming, zero-maintenance succulent sanctuary that captures the textures of the desert. By using varying shades of green and intricate white linework, you can mimic the look of spines and ribs on these faux botanicals.
Detailed Instructions
Materials
- Smooth river rocks (various shapes: oval, round, flat)
- Acrylic paints (Dark hunter green, olive green, sage, white)
- Flat paintbrush (medium)
- Fine liner brush (size 00 or 000)
- Dotting tool or toothpick
- Matte spray sealant
- Shallow terracotta bowl or saucer
- Small white or neutral decorative gravel
Step 1: Preparation & Base Colors
-
Rock Selection:
Choose a variety of rock shapes to emulate different cactus species. Look for tall, oblong stones for column cacti and round, slightly flattened stones for barrel cacti. -
Clean and Dry:
Scrub the rocks thoroughly with soap and warm water to remove any dirt or oily residue, then let them dry completely so the paint adheres properly. -
Mixing Greens:
Prepare your palette with three distinct shades of green: a deep forest green, a vibrant medium olive, and a pale sage. Diversity in color adds realism to the cluster. -
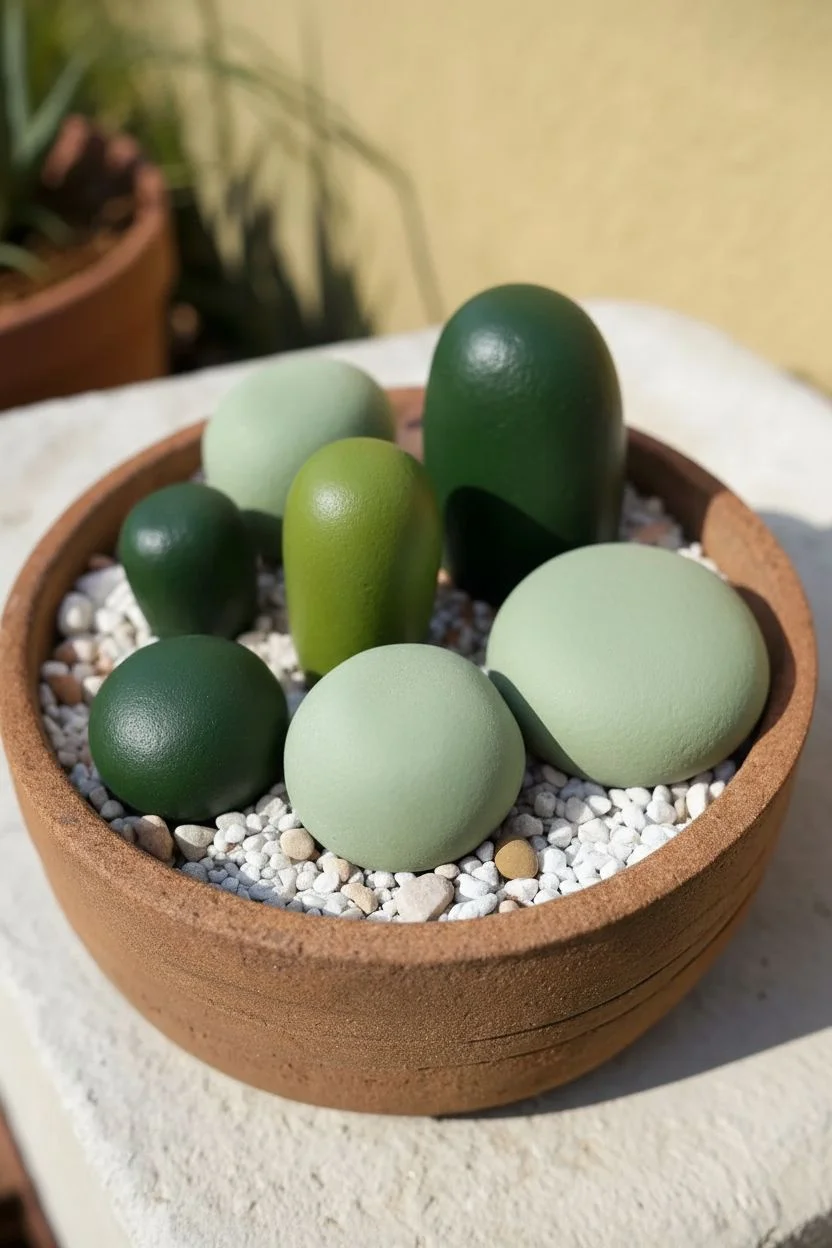
Base Coating:
Paint each rock entirely in one of your green shades. Painting one side, letting it dry, and then flipping it to do the other is the cleanest method. -
Solidifying Coverage:
Apply a second coat of green to ensure the color is solid and opaque. Use a smooth, flat brush to minimize visible brushstrokes.
Step 2: Needles & Texture Details
-
The Dotted Column:
On a tall, dark green rock, create vertical ribs using a dotting tool. Dip the tool in white paint and stamp lines of evenly spaced dots running from the top center down to the base. -
The Starburst Barrel:
Select a round rock painted in a medium green. Using your fine liner brush, paint small asterisk (*) shapes scattered evenly across the surface to mimic clusters of sharp spines. -
The Spider Web Pattern:
For the intricate geometric cactus, carefully paint thin vertical lines dividing the rock into segments. Connect these vertical ribs with angled chevron or ‘V’ lines to create a netted web effect. -
Steady Hand Trick:
I find it helpful to rest my pinky finger on the table or the dry part of the rock to stabilize my hand while painting these delicate white veins. -
The Leaf Vein Design:
On a pale sage rock, draw long, curved lines radiating from the top center. Add smaller branches coming off these main lines, resembling the skeletal structure of a leaf or fan. -
The Ribbed Cactus:
Take a standard oval rock and paint solid white vertical stripes. Once the stripes are dry, you can add tiny perpendicular dashes along the lines to represent small spines. -
Rim Details:
If you want to decorate your terracotta bowl as shown, use the fine brush to paint a simple white geometric zigzag pattern around the rim.
Fixing Shaky Lines
If your white lines look thick or clumpy, thin the paint with a tiny drop of water until it has an ink-like consistency. This helps the paint flow smoothly from a detail brush.
Step 3: Potting & Display
-
Sealing the Art:
Once all paint is perfectly dry, spray the rocks with a matte varnish. A glossy finish tends to look artificial, while matte preserves the natural stone look. -
Preparing the Soil:
Fill your shallow terracotta bowl nearly to the top with small decorative gravel or white aquarium stones. -
Planting:
Nestle the painted rocks into the gravel. Place the taller rocks in the back and the smaller, rounder ones in the front to create a visually balanced composition.
Blooming Accents
Glue tiny pink pom-poms or small bits of tissue paper to the tops of a few rocks to mimic bright cactus flowers in bloom, adding a pop of color to the greenery.
Enjoy your everlasting garden on a sunny windowsill or desk.
Shimmering Mermaid Scales
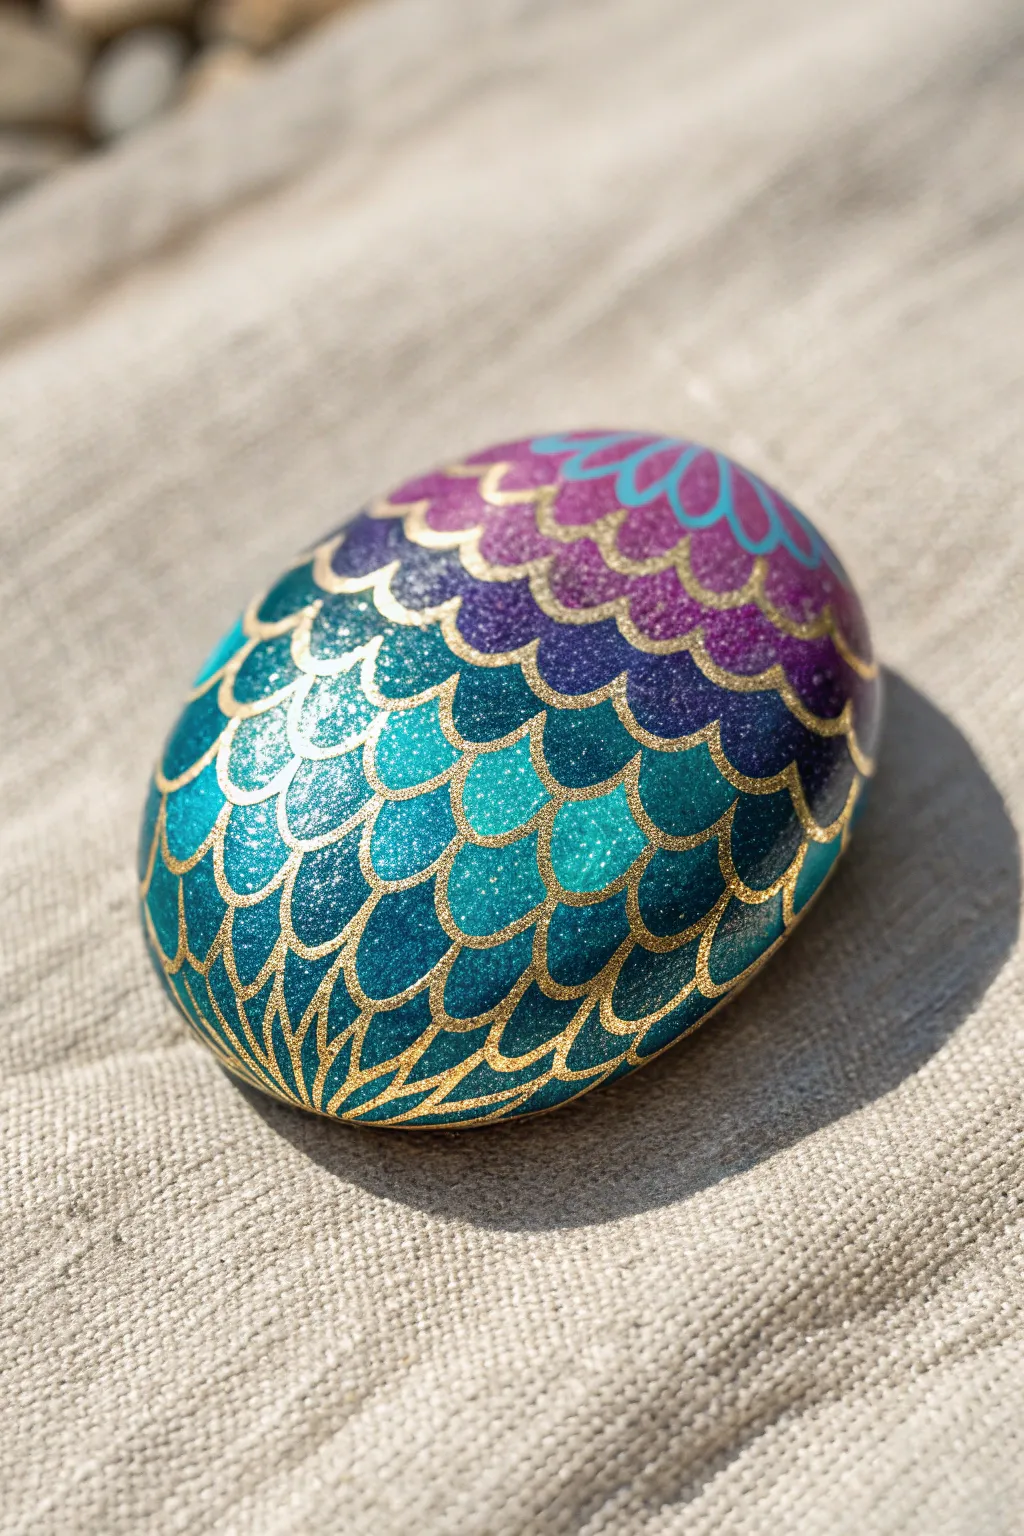
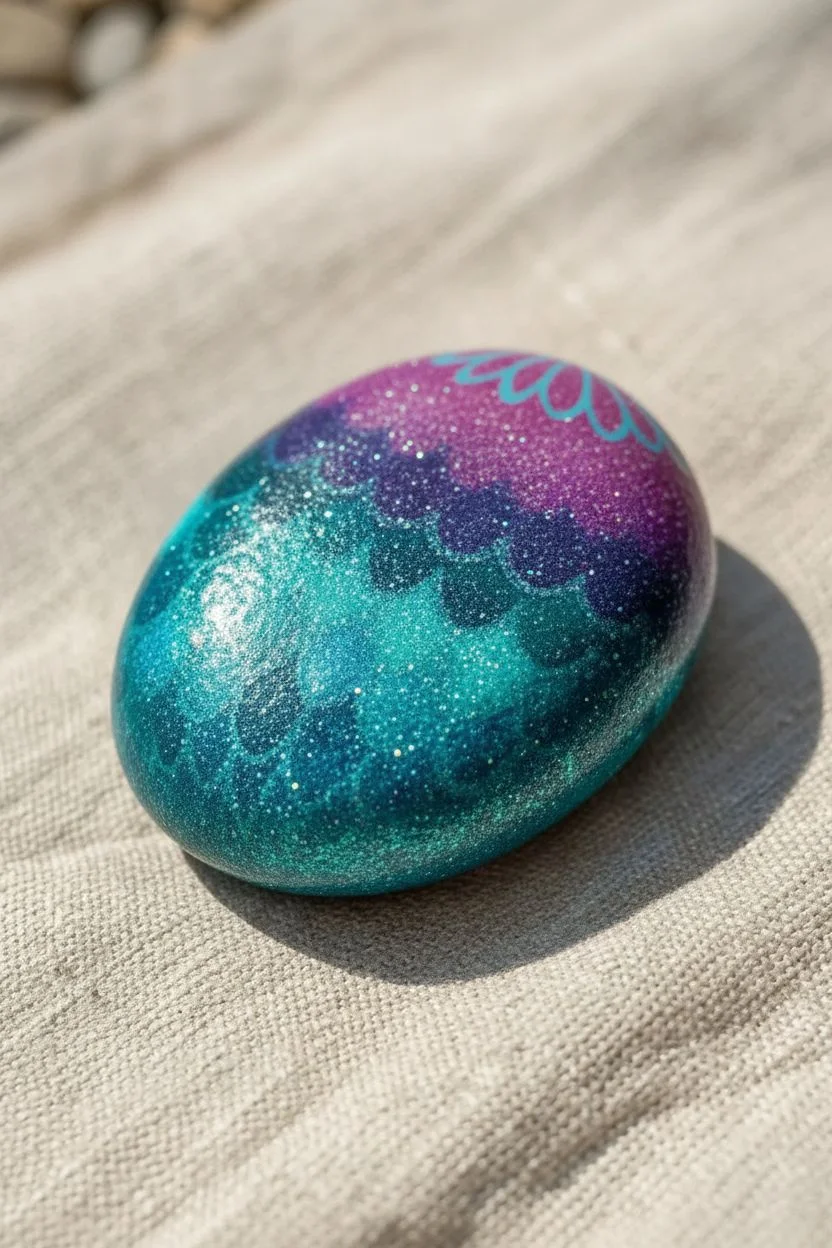
Capture the magic of the ocean with this mesmerizing mermaid scale design that shifts from deep teal to royal purple. This project combines simple blending techniques with precise gold detailing to transform an ordinary stone into a mythical artifact.
Step-by-Step Guide
Materials
- Smooth oval river rock
- Acrylic paints: Teal, Navy Blue, Purple, Magenta
- Holographic or iridescent glitter topcoat
- Gold paint pen (extra fine tip, oil-based works best)
- Makeup sponges or foam pouncers
- Small flat paintbrush
- High-gloss spray varnish
Step 1: Creating the Base Gradient
-
Clean surface:
Scrub your rock with soap and water to remove any dirt or oils, then let it dry uniformly. -
Base coat:
Apply a coat of teal paint over the entire surface of the rock. This ensures no bare stone shows through your gradient. -
Sponge the teal:
Once the base is dry, squeeze fresh teal paint onto a palette. Dip a makeup sponge into it and dab it heavily onto the bottom-left third of the rock. -
Transition to blue:
Take a fresh sponge with navy blue paint. Dab this across the middle of the rock, slightly overlapping the wet teal edge to create a soft blend. -
Add the purple:
Sponge the purple and magenta paints onto the top-right section of the stone. -
Blend the seams:
While the paints are still wet, gently tap over the areas where colors meet to blur the lines, creating a seamless ombré effect. -
Glitter application:
Allow the gradient to dry completely. Since I love a magical finish, I apply a generous layer of holographic glitter glaze over the entire painted surface at this stage. -
Dry time:
Let the glitter layer cure fully. It must be bone dry so the paint pen doesn’t dig into the texture.
Skipping Ink?
If the gold pen skips over the rough glitter texture, wipe the nib on a damp paper towel and pump it on scrap paper to re-establish the flow before returning to the stone.
Step 2: Drawing the Golden Scales
-
Prime the pen:
Shake your gold paint pen vigorously. Press the nib on a scrap piece of paper until the metallic ink flows smoothly. -
Anchor point:
Start at the very bottom edge of the teal section. Draw a small, fan-like semi-circle with lines radiating outward. -
First row:
Draw your first row of small arches (scales) directly above your starting fan, connecting them side-by-side. -
Offset technique:
Begin the second row. Place the bottom of each new arch in the ‘valley’ between the two scales below it, creating a brick-laying pattern. -
Follow the curve:
Continue adding rows of scales, allowing your lines to curve naturally with the rounded shape of the stone. -
Adjusting size:
As you move toward the middle and top of the rock, you can make the scales slightly larger and more elongated for visual interest. -
Top bloom:
When you reach the top purple section, instead of closing with small scales, draw longer, petal-like loops that extend to the edge of the stone.
Level Up
For a ‘Dragon Egg’ variation, replace the gold outlines with silver, and glue a tiny flat-back rhinestone into the center of the three largest scales for a 3D effect.
Step 3: Protection
-
Final check:
Look over your gold lines. If any look faint against the dark paint, carefully trace over them a second time. -
Seal the magic:
Spray the rock with a high-gloss varnish. This not only protects the art but illuminates the glitter and makes the stone look permanently wet.
Place your shimmering creation in the sun to see the full spectrum of colors sparkle.
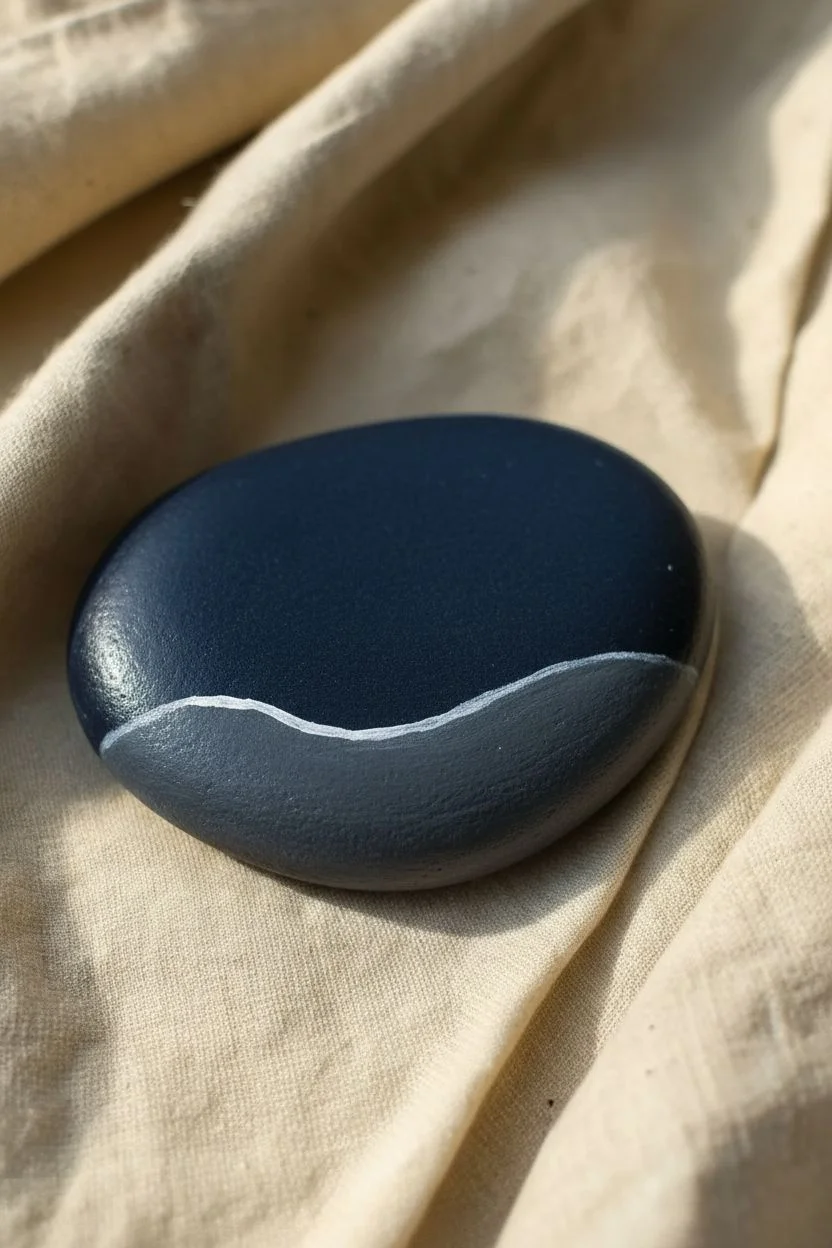
Camping Under the Stars
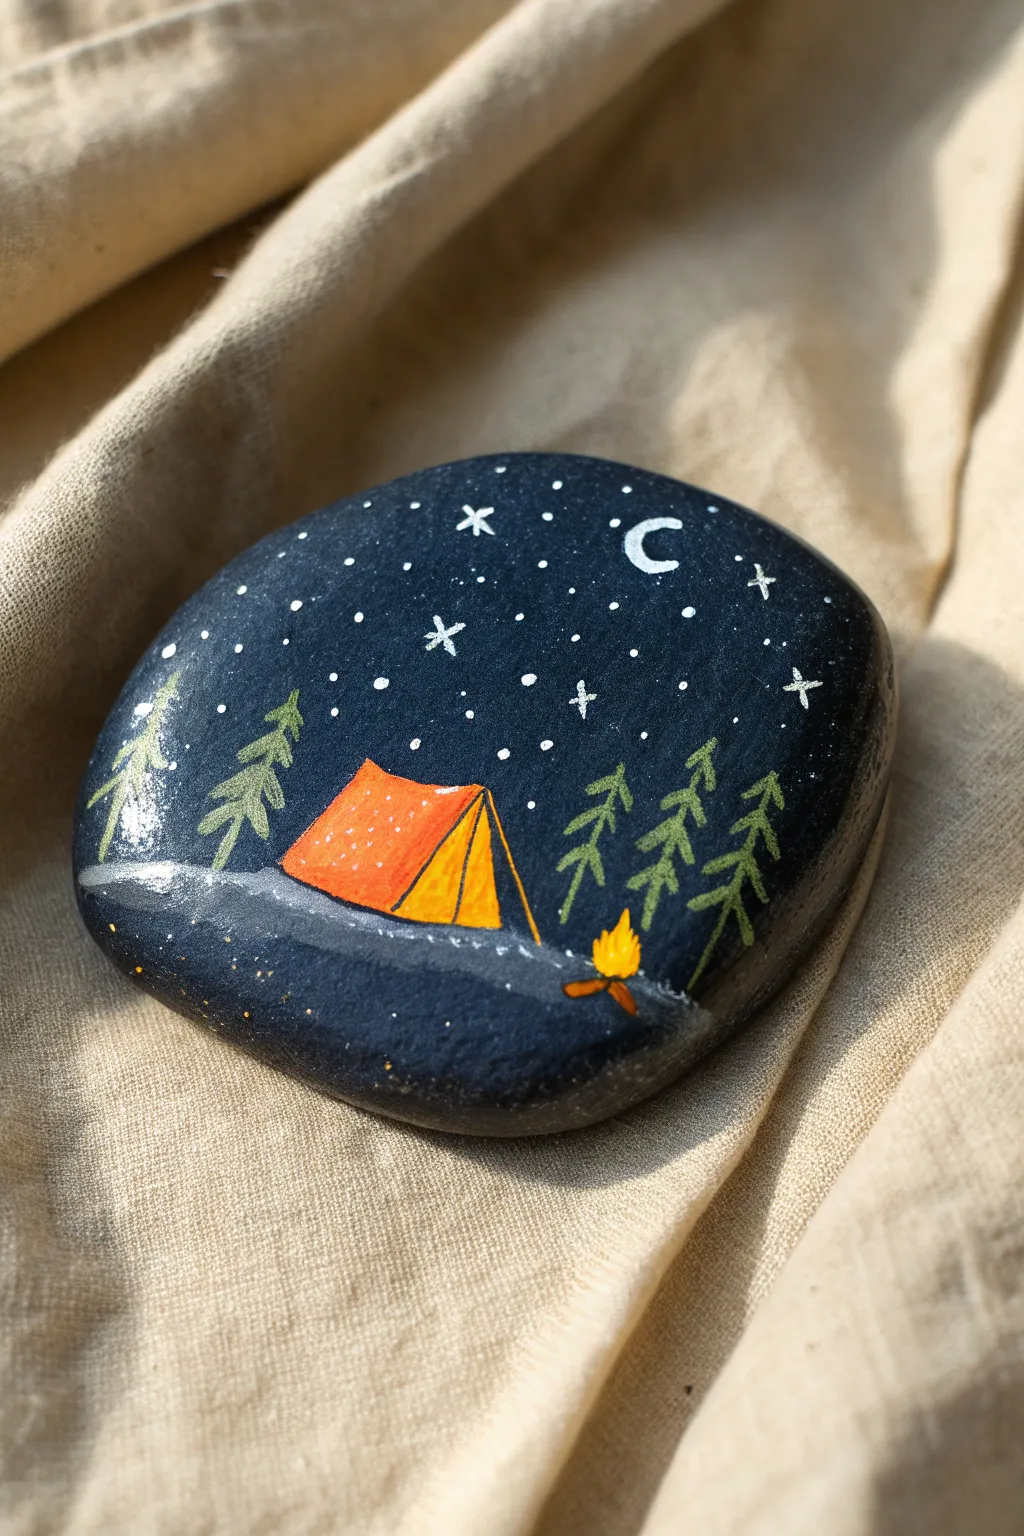
Capture the cozy magic of sleeping outdoors with this high-contrast painted stone. This project focuses on simple shapes and bright accent colors to make a camping scene pop against a deep night sky background.
Detailed Instructions
Materials
- Smooth, rounded river rock
- Acrylic paints (black, dark blue, white, orange, yellow, forest green, brown)
- Fine detail paintbrush (size 0 or 00)
- Small flat paintbrush
- Dotting tool or toothpick
- Spray sealer or varnish
Step 1: Setting the Scene
-
Clean the surface:
Begin by washing your rock with soap and water to remove any dirt or oils, then let it dry completely. -
Base coat:
Mix a tiny drop of dark blue into your black paint to create a rich midnight shade. Paint the entire top surface of the rock with this mixture. -
Define the ground:
Once the sky is dry, mix a slightly lighter charcoal grey. Paint a wavy horizon line across the lower third of the rock to distinguish the ground from the sky. -
Add moonlight highlight:
Dip a nearly dry brush into white paint and gently swipe it along the left crest of your ground hill to simulate moonlight hitting the ridge.
Color Pop Secret
Painting yellow or orange on a black rock can look muddy. Always paint a silhouette of the shape in white first, let it dry, and then layer the color on top for maximum vibrancy.
Step 2: Pitching the Tent
-
Tent underpainting:
Paint a small, triangular shape in the center of the ground area using pure white paint. I always do this first because bright colors like orange will disappear if painted directly onto black. -
Color the tent:
Once the white triangle is dry, cover the main body of the tent with a bright orange acrylic. -
Create the opening:
Paint a smaller, narrower triangle in yellow on the right side of the orange shape to represent the open tent flaps. -
Add structure:
Using your finest brush and diluted black paint, carefully outline the tent and add a vertical line separating the orange side from the yellow opening.
Step 3: The Forest & Fire
-
Tree placement:
Using forest green paint, draw thin vertical lines on either side of the tent to serve as tree trunks. -
Pine branches:
Starting from the top of each trunk, use quick, downward strokes to create jagged pine branches. Keep them uneven for a natural look. -
Campfire base:
Paint two tiny intersecting brown lines just to the right of the tent for the firewood. -
Ignite the flame:
Dab a small spot of bright yellow on top of the logs, then add a tiny flick of orange to the center while the yellow is still wet to blend a glowing fire.
Level Up: Glow Mode
For a magical touch, re-paint the crescent moon and the campfire’s center using glow-in-the-dark acrylic paint so your campsite lights up when the lights go out.
Step 4: Celestial Details
-
Paint the moon:
In the upper right quadrant of the sky, paint a small, crisp white letter ‘C’ for the crescent moon. -
Distant stars:
Dip a dotting tool or a toothpick into white paint and gently dot the sky area to create distant stars. -
Twinkling stars:
Use your finest liner brush to paint a few small ‘plus’ signs (+) or crosses scattered among the dots to look like twinkling stars. -
Highlighting trees:
Mix a light mossy green and add tiny highlights to the tips of the tree branches that are facing the moon or the fire. -
Protect the art:
Allow the rock to cure for at least 24 hours, then apply a coat of clear spray sealer to protect your miniature landscape from scratches.
Place this little adventurer on your desk or hide it in the garden for someone to discover
Glowing Mason Jar Fireflies
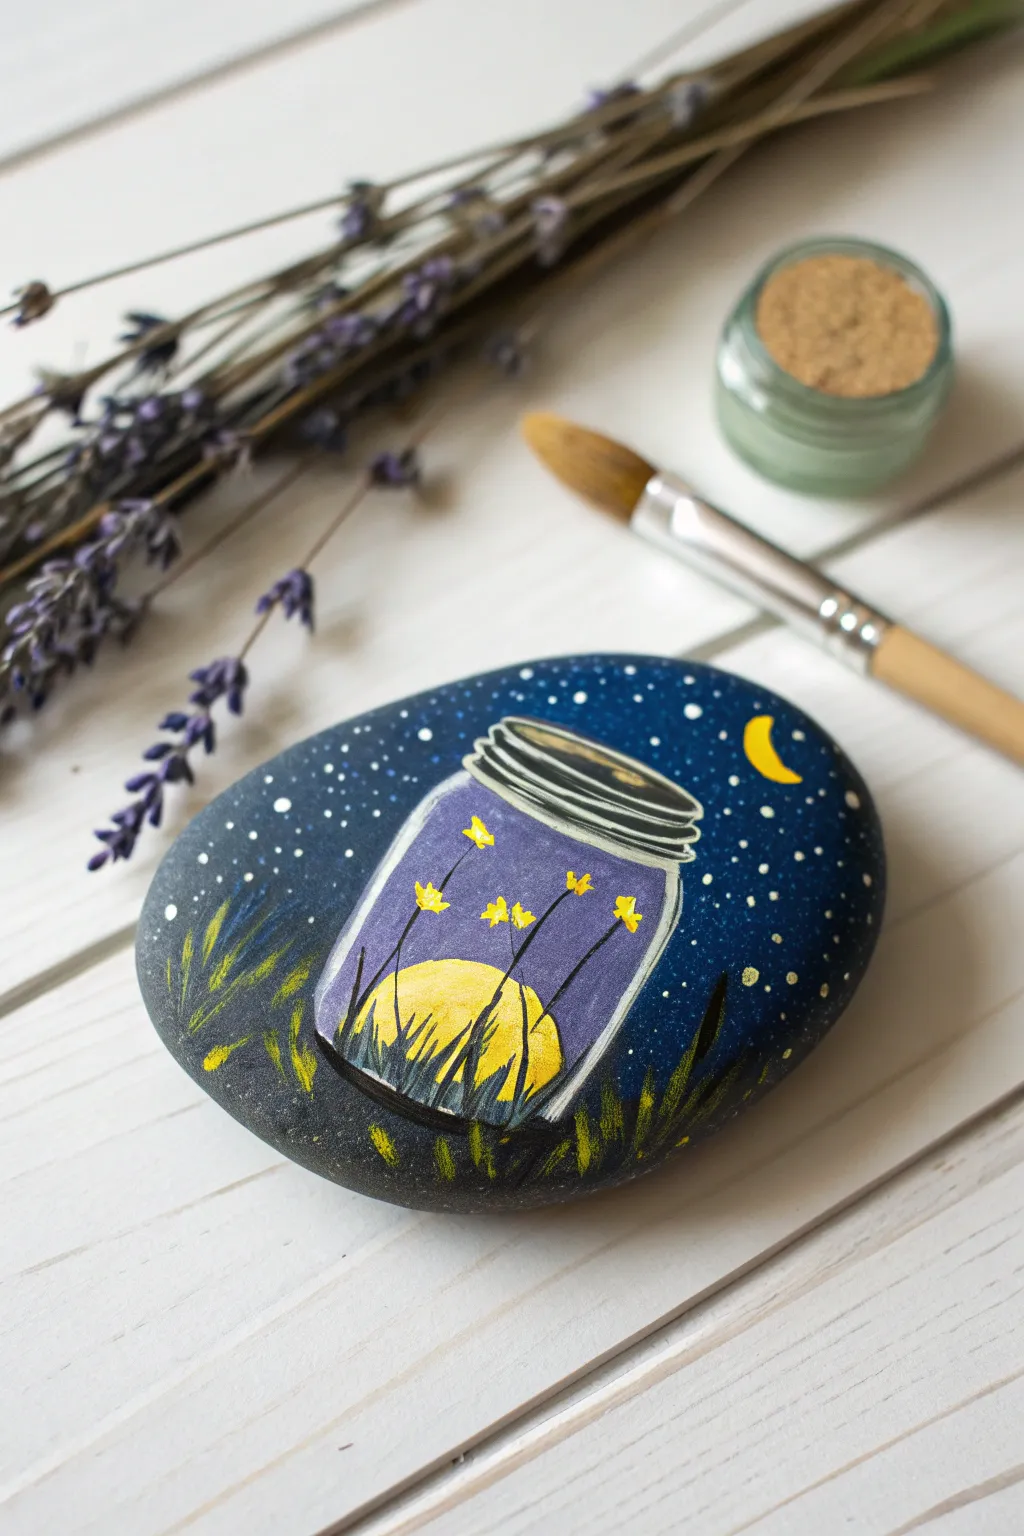
Capture the nostalgia of warm summer evenings spent chasing fireflies with this enchanting painted rock. The contrast between the deep night sky and the bright yellow jar creates a magical glowing effect that fits perfectly in any garden.
Step-by-Step
Materials
- Smooth, oval river rock
- Acrylic paints: Navy Blue, Deep Violet, Bright Yellow, Titanium White, Mars Black, Metallic Silver
- Paintbrushes: Medium flat brush, fine liner brush (size 0 or 00)
- Pencil (optional)
- Palette and water cup
- Spray sealer (glossy)
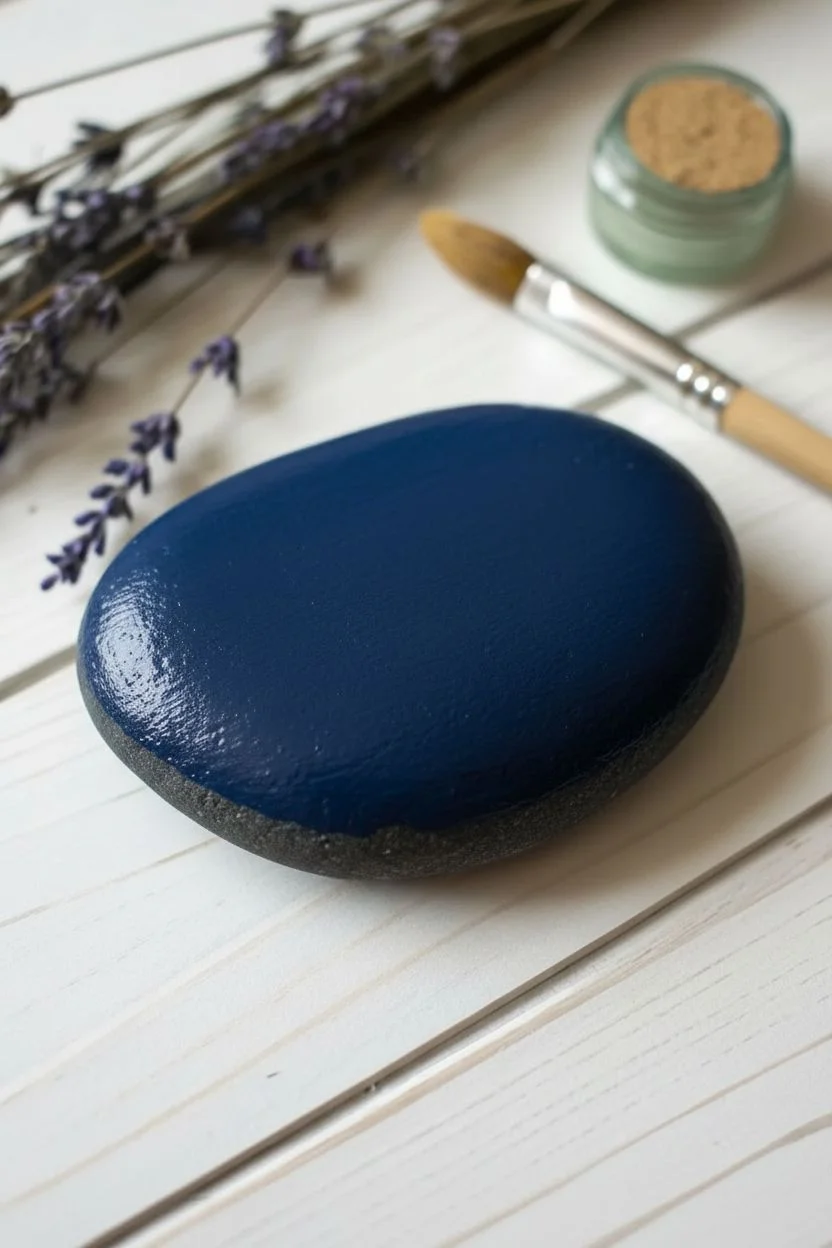
Step 1: Setting the Night Scene
-
Prepare your canvas:
Begin by washing your stone with soap and water to remove any dirt or grease, then dry it completely with a cloth. -
Paint the background:
Using a flat brush, paint a large oval or circle of Navy Blue to serve as the night sky. You can leave the natural edges of the rock showing for a rustic frame. -
Let it dry:
Allow the blue base coat to dry thoroughly. I usually wait about 15 minutes or use a hair dryer to speed this up.
Make it Pop
Yellow looking dull? Paint the glow area and moon with White first. Let it fully dry, then layer your Bright Yellow on top for a color that truly shines.
Step 2: Painting the Jar
-
Sketch the outline:
Once the base is dry, lightly sketch the shape of a mason jar in the center using a pencil. Draw a rectangle with rounded bottom corners and a slightly narrower opening at the top. -
Fill the glass:
Mix a drop of White into your Deep Violet to make it slightly opaque, then fill in the body of the jar. This color difference separates the glass from the night sky. -
Create the lid:
Paint horizontal bands across the jar opening using Metallic Silver or light grey to represent the screw-top lid. -
Add the glow:
Paint a large semicircle of Bright Yellow at the very bottom inside the jar to create the main source of light.
Level Up
Apply a top coat of glow-in-the-dark acrylic paint over the fireflies and moon to make your magic jar light up for real when the sun goes down.
Step 3: Adding Life and Light
-
Paint the stems:
Switch to your finest liner brush and Mars Black paint. Draw very thin, delicate lines rising from the yellow glow inside the jar to act as flower stems. -
Create fireflies:
Dip the tip of your liner brush in Bright Yellow and dab small, messy star shapes or dots at the top of the black stems to resemble fireflies or glowing flowers. -
Refine the glass:
Mix a very pale grey or use watered-down White to outline the jar and the lid. This defines the edges beautifully. -
Add reflections:
Paint thin, curved white lines along the ‘shoulders’ of the jar and continuously along the rim to mimic light reflecting off the glass.
Step 4: Atmospheric Details
-
Ground the jar:
Using Mars Black, paint jagged, upward strokes at the bottom of the rock to create grass. Let these strokes overlap the bottom of the jar slightly to set it in the scene. -
Highlight the grass:
Add tiny dashes of yellow to the tips of the black grass blades near the jar, showing where the light is hitting them. -
Paint the moon:
In the upper right corner of the sky, paint a crisp yellow crescent moon. -
Scatter the stars:
Dip the handle end of a paintbrush into White paint and gently dot stars of various sizes around the Navy Blue sky. -
Seal the magic:
Once the paint is 100% dry, apply a glossy spray sealer to protect your artwork and make the colors pop.
Place your glowing jar rock among your garden plants for a whimsical surprise.
Relaxed Sea Turtles
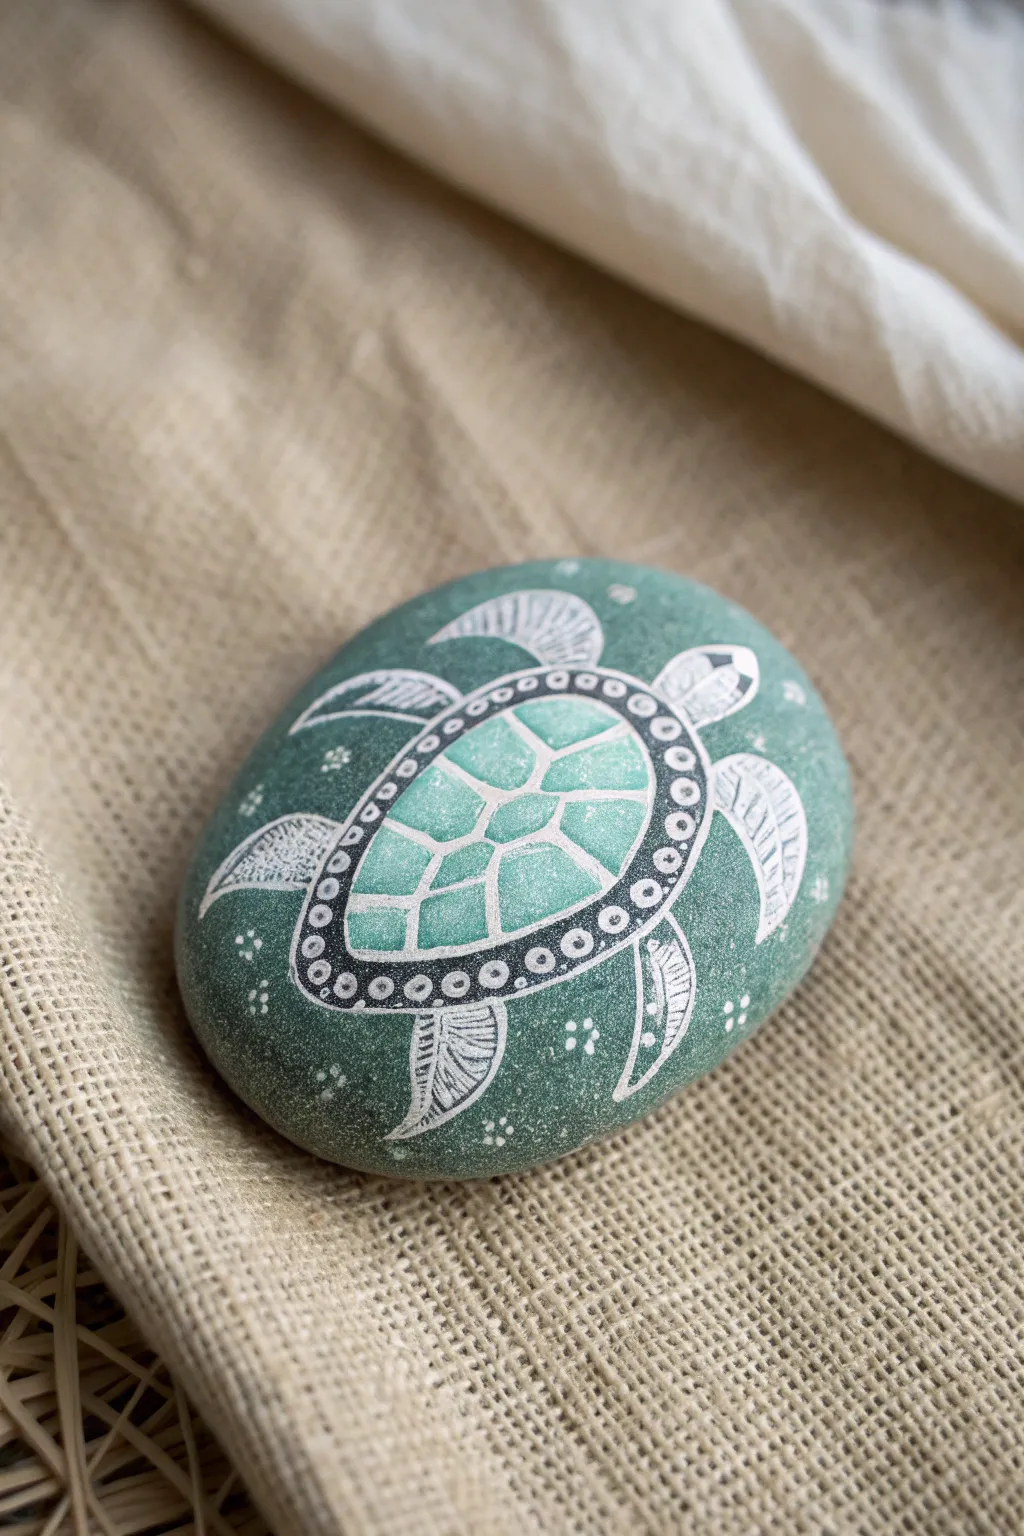
Capture the serenity of the ocean with this beautifully detailed sea turtle rock. Using a calming palette of sea greens and crisp white linework, you’ll create a geometric shell design that looks intricate but is surprisingly simple to build layer by layer.
Detailed Instructions
Materials
- Smooth, oval river rock
- Acrylic paints: Dark sea green, emerald green, mint/pale turquoise
- Fine tip paint pens (0.7mm): Black and White
- Small flat paintbrush
- Small sponging tool or cosmetic sponge
- Pencil and eraser
- Spray sealer or varnish
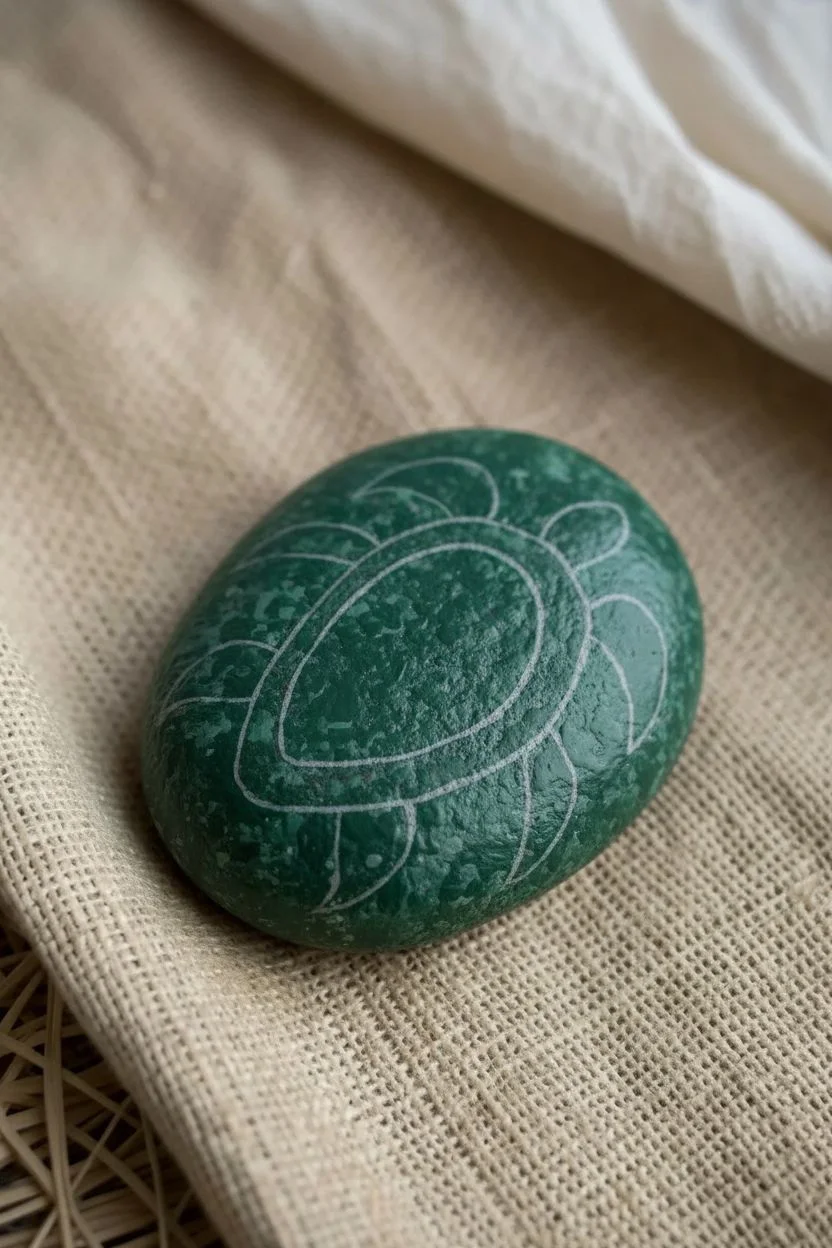
Step 1: Setting the Scene
-
Clean the canvas:
Wash your stone with soapy water and scrub away any dirt or grit to ensure a smooth painting surface, then dry completely. -
Create the texture:
Squeeze out dark sea green and emerald green paints. Dip a small sponge into both colors and dab them onto the rock to create a mottled, underwater texture. -
Dry thoroughly:
Allow this base coat to dry completely. I like to let this dry briefly in the sun or use a hair dryer to speed things up. -
Sketch the outline:
Lightly sketch a large oval in the center for the shell, followed by the head at the top and four fin-shaped flippers extending outward.
Step 2: Designing the Shell
-
Paint the scutes:
Using a small brush and mint green paint, fill in the central oval shape of the shell. Don’t worry about being perfect at the edges. -
Draw the grid:
Once the mint paint is dry, use your black paint pen to draw the shell segments. Start with a central polygon, then draw lines radiating out to the shell’s edge. -
Create the border:
Draw a thick black oval ring surrounding the entire mint green section to frame the shell. -
Dotted detail:
Using the white paint pen, carefully place small, evenly spaced dots all the way around inside the thick black border ring. -
Refine the segments:
Go back over your interior shell lines with the clear white pen, highlighting the edges of the mint segments to make them pop against the black lines.
Fixing Wobbly Lines
If your hand shakes while drawing fine lines with the paint pen, rest your wrist on a heavy book placed next to the rock to anchor your hand.
Step 3: Flippers and Features
-
Outline the body:
Trace the pencil sketches of the head and flippers with your black paint pen to define the turtle’s silhouette. -
Detail the front flippers:
Inside the front flippers, draw a smaller matching shape with the white pen, leaving a small gap of green showing between the white line and black outline. -
Add texture stripes:
Fill the interior of the white flipper shapes with fine curved hatching lines to mimic the texture of skin or scales. -
Detail the back flippers:
Repeat the same white outlining and hatching process for the smaller back flippers. -
Face and neck:
Draw two small diamond shapes on the head for eyes. Add a few small white triangles or curved lines on the neck area for detail.
Level Up: Metallic Touch
Swap the white paint pen for a metallic silver or pearl marker. This gives the turtle’s shell a shimmering effect when the light hits it.
Step 4: Final Atmosphere
-
Add ocean bubbles:
In the negative space around the turtle, add clusters of three or four small white dots to represent bubbles or floating sea particles. -
Clean up:
If any black lines look shaky, use a tiny bit of the dark green base paint to tidy up the edges. -
Seal only when dry:
Wait at least an hour for the paint pen ink to fully cure to avoid bleeding. -
Varnish:
Finish with a coat of spray sealer to protect your artwork and give the stone a “wet” look that enhances the colors.
Now you have a peaceful, decorative stone that brings a bit of marine magic to your garden or desk.
Golden Pineapples
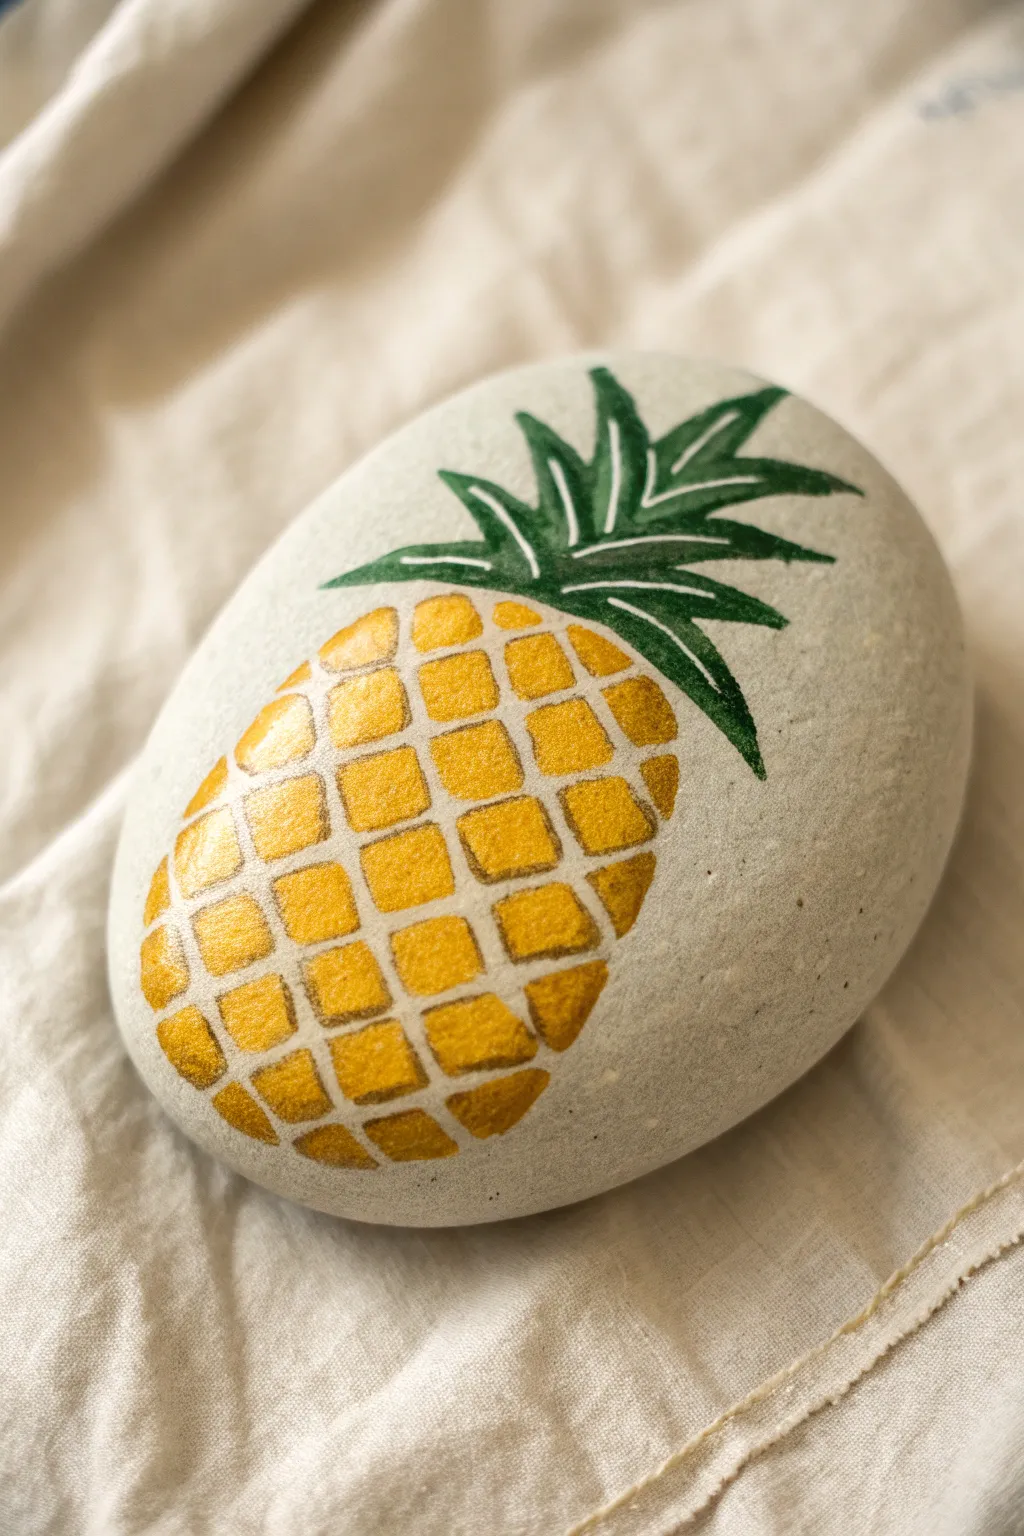
Bring a slice of tropical luxury to your garden with this sophisticated rock painting project. The metallic gold paint catches the sunlight beautifully, contrasting against the matte white stone for a modern summer decoration.
Step-by-Step Guide
Materials
- Smooth oval river rock
- Acrylic paint: Titanium White (or light grey)
- Acrylic paint: Metallic Gold
- Acrylic paint: Yellow Ochre
- Acrylic paint: Burnt Sienna or Umber
- Acrylic paint: Forest Green
- Fine liner brush (size 00 or 0)
- Small round brush (size 2)
- Pencil and eraser
- Spray sealer (gloss or matte)
Step 1: Preparation and Sketching
-
Clean the surface:
Scrub your rock with soap and water to remove any dirt or grease, then let it dry drastically ensures the paint adheres properly. -
Apply base coat:
Paint the entire top surface of the rock with Titanium White or a very pale grey. You might need two layers to get a solid, opaque coverage. -
Allow to dry:
Wait until the base coat is completely dry to the touch before starting your sketch. -
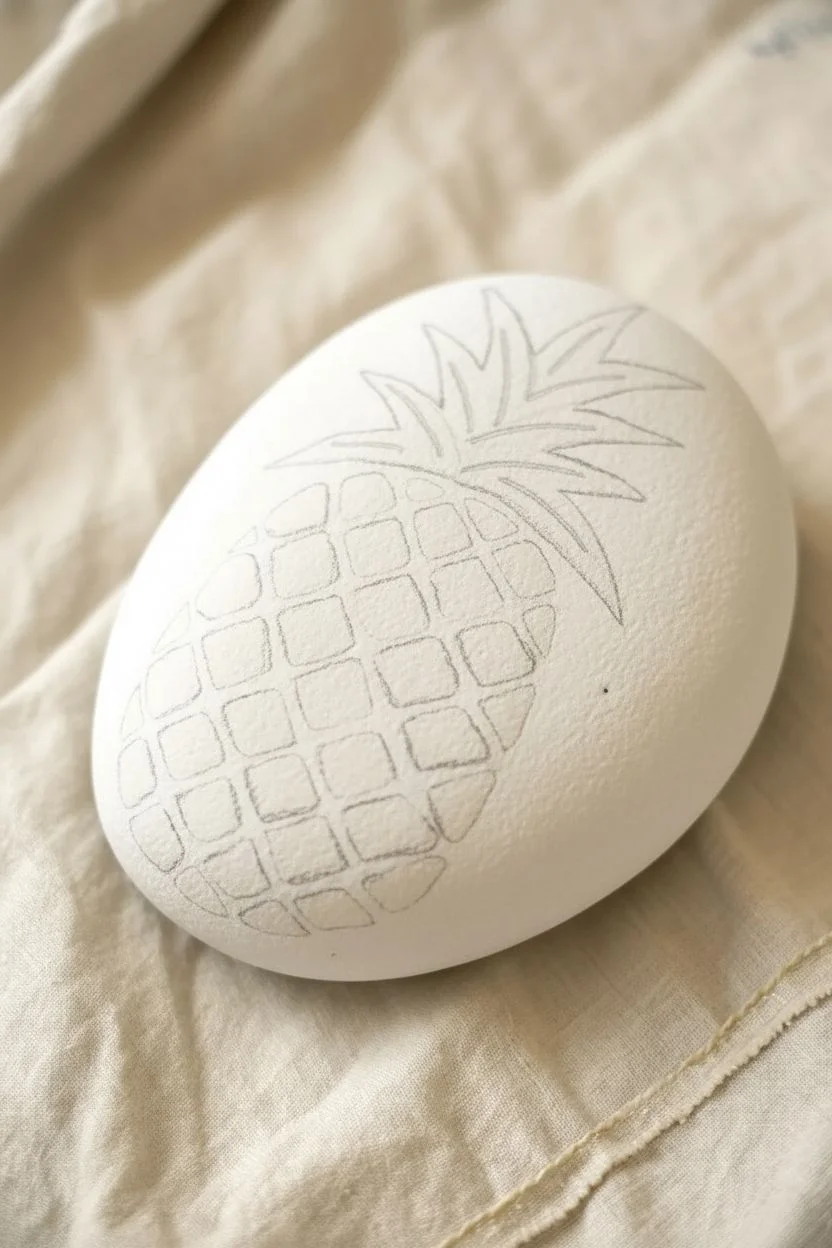
Outline the shape:
Lightly sketch a large oval shape for the main body of the pineapple using a pencil. -
Sketch the grid:
Draw diagonal lines across the oval in one direction, then cross them in the opposite direction to create a grid of diamond shapes. -
Add the crown:
Sketch spiky, curved leaves erupting from the top of the oval, varying their lengths for a natural look.
Steady Hand Pro-Tip
To keep your lines crisp when painting the grid spacing, rest your pinkie finger on a dry part of the rock to stabilize your painting hand.
Step 2: Painting the Golden Fruit
-
Mix the highlight color:
Mix a small amount of Metallic Gold with a drop of Titanium White to create a very bright, reflective gold tone. -
Paint the highlight zone:
Using the small round brush, paint the diamond shapes located on the upper-left curve of the pineapple body with your light gold mix. -
Fill the mid-tones:
Switch to pure Metallic Gold and fill in the central diamond shapes, blending slightly where the new color meets the highlighted section. -
Mix the shadow color:
Mix Metallic Gold with a tiny touch of Burnt Sienna or Yellow Ochre to create a deeper, richer gold. -
Paint the shadow zone:
Fill in the remaining diamonds on the bottom and right edges with this darker gold mix to give the fruit a rounded, 3D appearance. -
Maintain the grid:
I always act carefully here to leave small gaps between the diamonds so the white base coat shows through, creating the grid pattern.
Grid Troubleshooting
If your gold diamonds accidentally touch, don’t panic. Wait for the gold to dry, then use a white paint pen or fine brush to redraw the separation line over it.
Step 3: Leaves and Final Details
-
Base the leaves:
Using your liner brush and Forest Green paint, carefully fill in the leaf shapes you sketched earlier. -
Refine the edges:
Use the tip of the liner brush to pull the green paint out into sharp, crisp points at the end of each leaf. -
Add leaf veins:
Once the green is dry, mix a tiny bit of white into the green (or use pure white) and paint very thin lines down the center of each leaf. -
Clean up:
Check the white grid lines between the gold scales; if any paint spilled over, you can touch it up with white paint on a fine brush. -
Erase markings:
If any pencil marks are still visible around the edges, gently erase them once the paint is fully cured. -
Seal the art:
Finish by applying a spray sealer to protect your design from weather and chipping.
Place your shimmering pineapple rock in a sunny spot to watch it glow
Iridescent Dragonflies
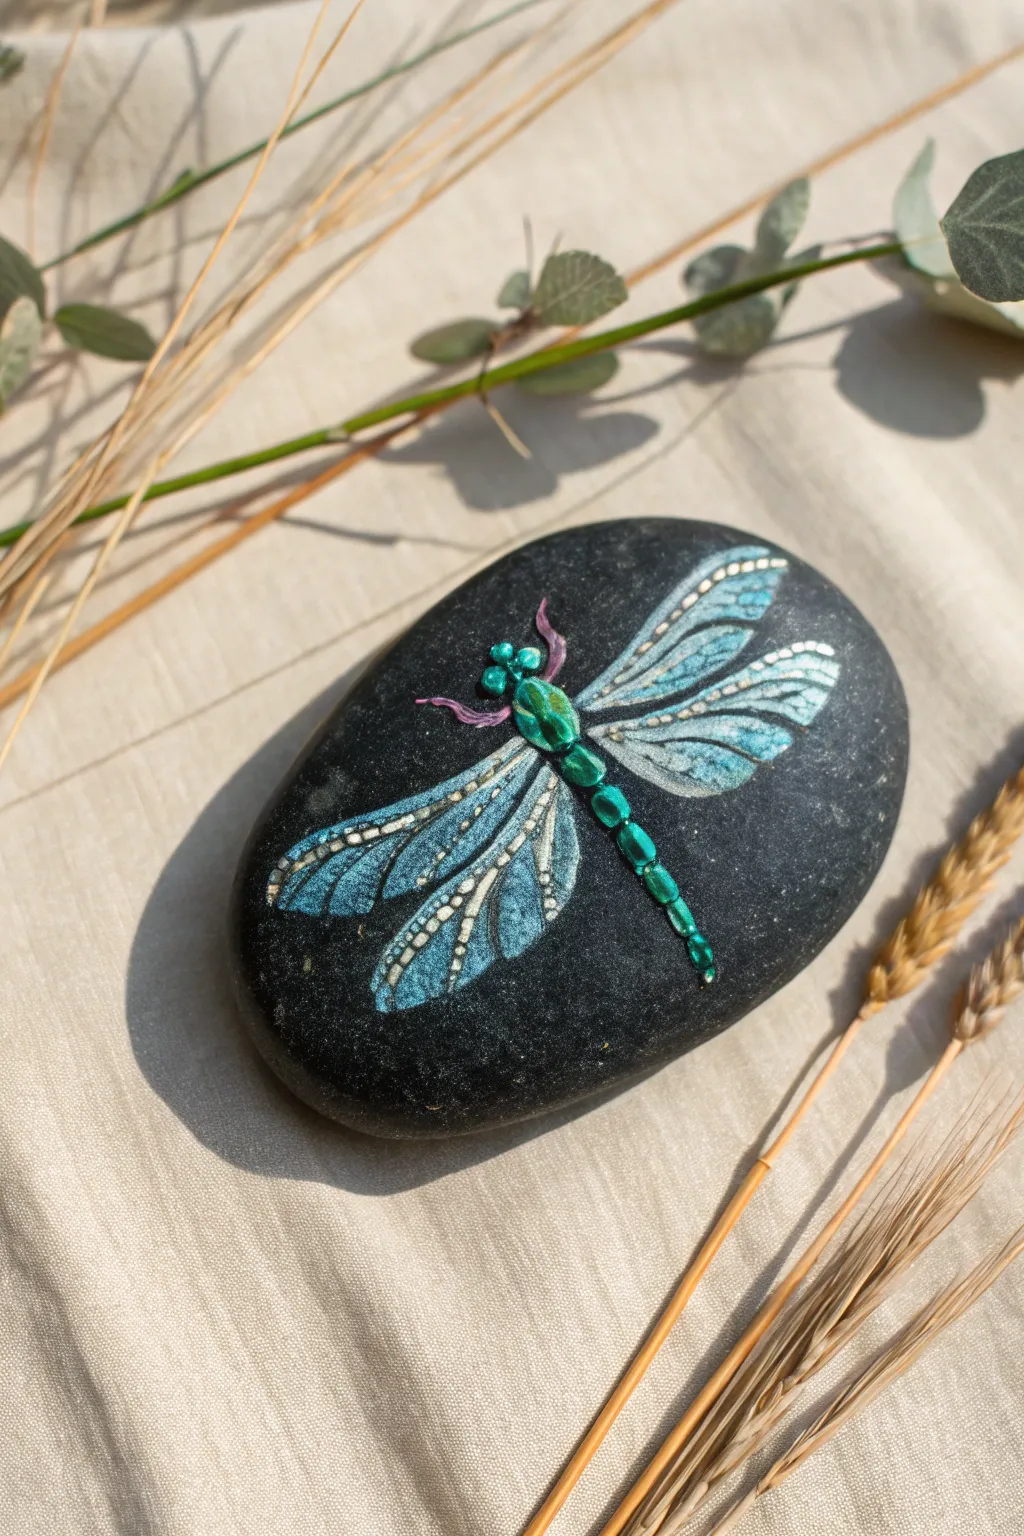
Capture the iridescent beauty of a summer dragonfly with this jewelry-inspired rock painting project. The contrast between deep metallic greens and the matte black stone creates a stunning, glowing effect perfect for garden decor.
Detailed Instructions
Materials
- Smooth, flat oval river rock
- Matte black acrylic paint
- Metallic acrylic paints (Teal, Emerald Green, Aquamarine)
- Titanium White acrylic paint
- Small amount of magenta or purple paint
- White slate pencil or chalk pencil
- Fine detail brush (size 0 or 00)
- Small round brush (size 2)
- Dotting tool (optional)
- Spray gloss varnish
Step 1: Preparation & Base
-
Clean the surface:
Scrub your stone with warm soapy water to remove any dirt or oils, then let it dry completely in the sun. -
Apply base coat:
Paint the entire top surface of the stone with matte black acrylic paint to provide a high-contrast background. -
Dry and repeat:
Allow the first coat to dry fully, then add a second black coat to ensure the surface is opaque and smooth. -
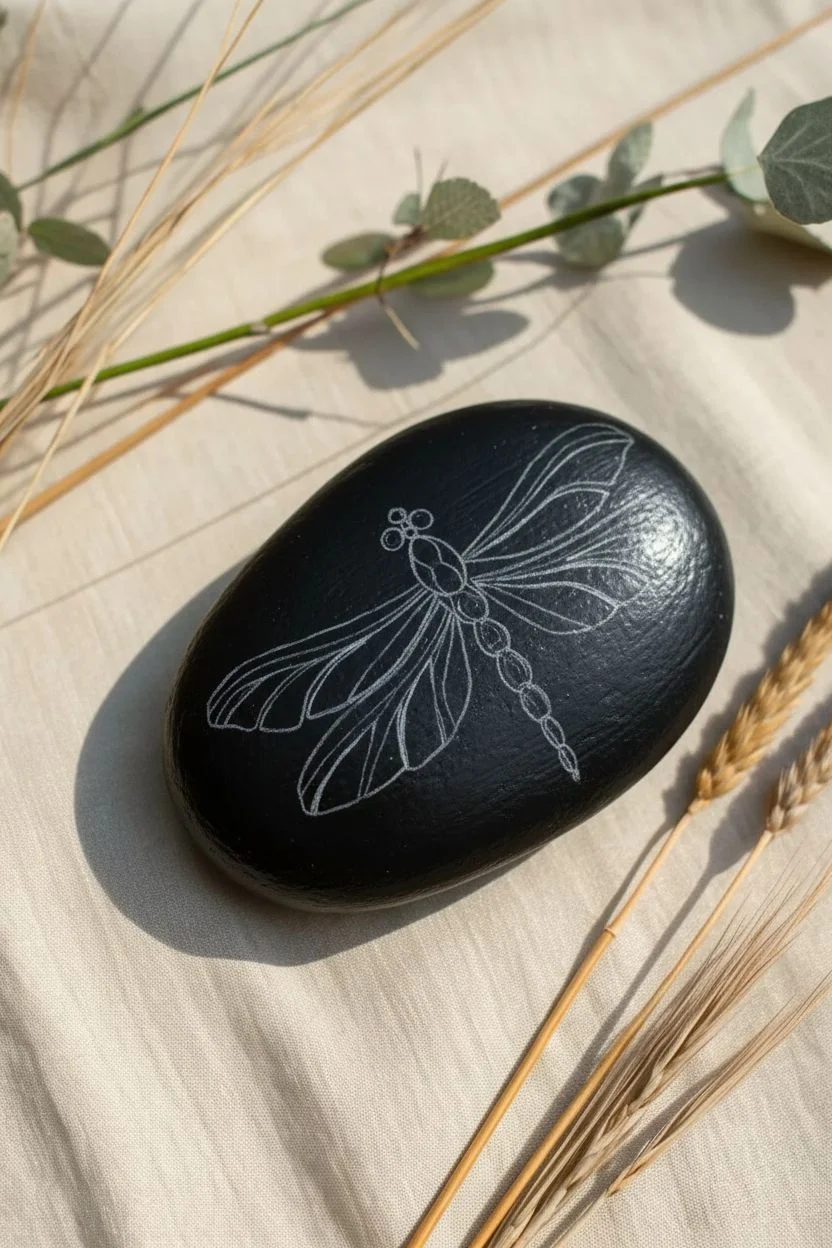
Draft the design:
Using a sharp white chalk pencil, lightly draw a central curved line for the body and four long, petal-like shapes for the wings.
Step 2: Painting the Wings
-
Base the wings:
Mix metallic teal with a tiny bit of white. Fill in the wing shapes using your round brush, keeping the paint semi-translucent. -
Add wing shimmer:
Once the base is tacky, brush a layer of pure metallic aquamarine over the wings, stroking from the body outward. -
Outline the edges:
With the fine detail brush and white paint (thinned slightly with water), carefully outline the upper and lower edges of each wing. -
Create distinct sections:
Draw a dividing line down the middle of each wing to separate the leading edge from the trailing edge. -
Paint the veins:
Using your thinnest brush, paint delicate, web-like veins inside the wing sections with white paint.
Perfect Circles
For the segmented body, try using the handle end of your paintbrush or a metal dotting tool. Dipping it in thick paint and stamping it creates perfect, raised circles.
Step 3: The Jeweled Body
-
Paint the head:
Dip your round brush into metallic emerald green and dab two distinct dots at the top for the eyes. -
Create the thorax:
Paint a larger, elongated oval shape just below the eyes to form the middle section of the body. -
Form the tail segments:
Paint a series of connecting small ovals trailing down the body line, making them gradually smaller as you reach the tail tip. -
Highlight the segments:
I like to mix a little teal with white and add a tiny comma-shaped highlight on top of each green body segment to make them look rounded and dimensional. -
Deepen the shadows:
Use a diluted black wash along the very edges of the green segments to make the body pop against the wings.
Level Up Texture
Make the dragonfly truly 3D by using dimensional puffy fabric paint for the body segments. The raised texture simulates the look of a real insect or embossed jewelry.
Step 4: Finishing Touches
-
Add delicate details:
Mix a small amount of magenta or purple with white. Paint wispy, curved lines coming from the head for antennae or front legs. -
Intensify wing highlights:
Add pure white dots along the leading edge of the upper wings for extra sparkle. -
Clean up:
Use a damp Q-tip or a wet brush to gently erase any visible chalk sketch lines once the paint is fully cured. -
Seal the stone:
Finish with a coat of spray gloss varnish to protect the artwork and enhance the metallic shimmer of the paints.
Place your finished piece in a sunny spot where the light can catch the metallic wings and bring the dragonfly to life
Sun-Drenched Mandalas
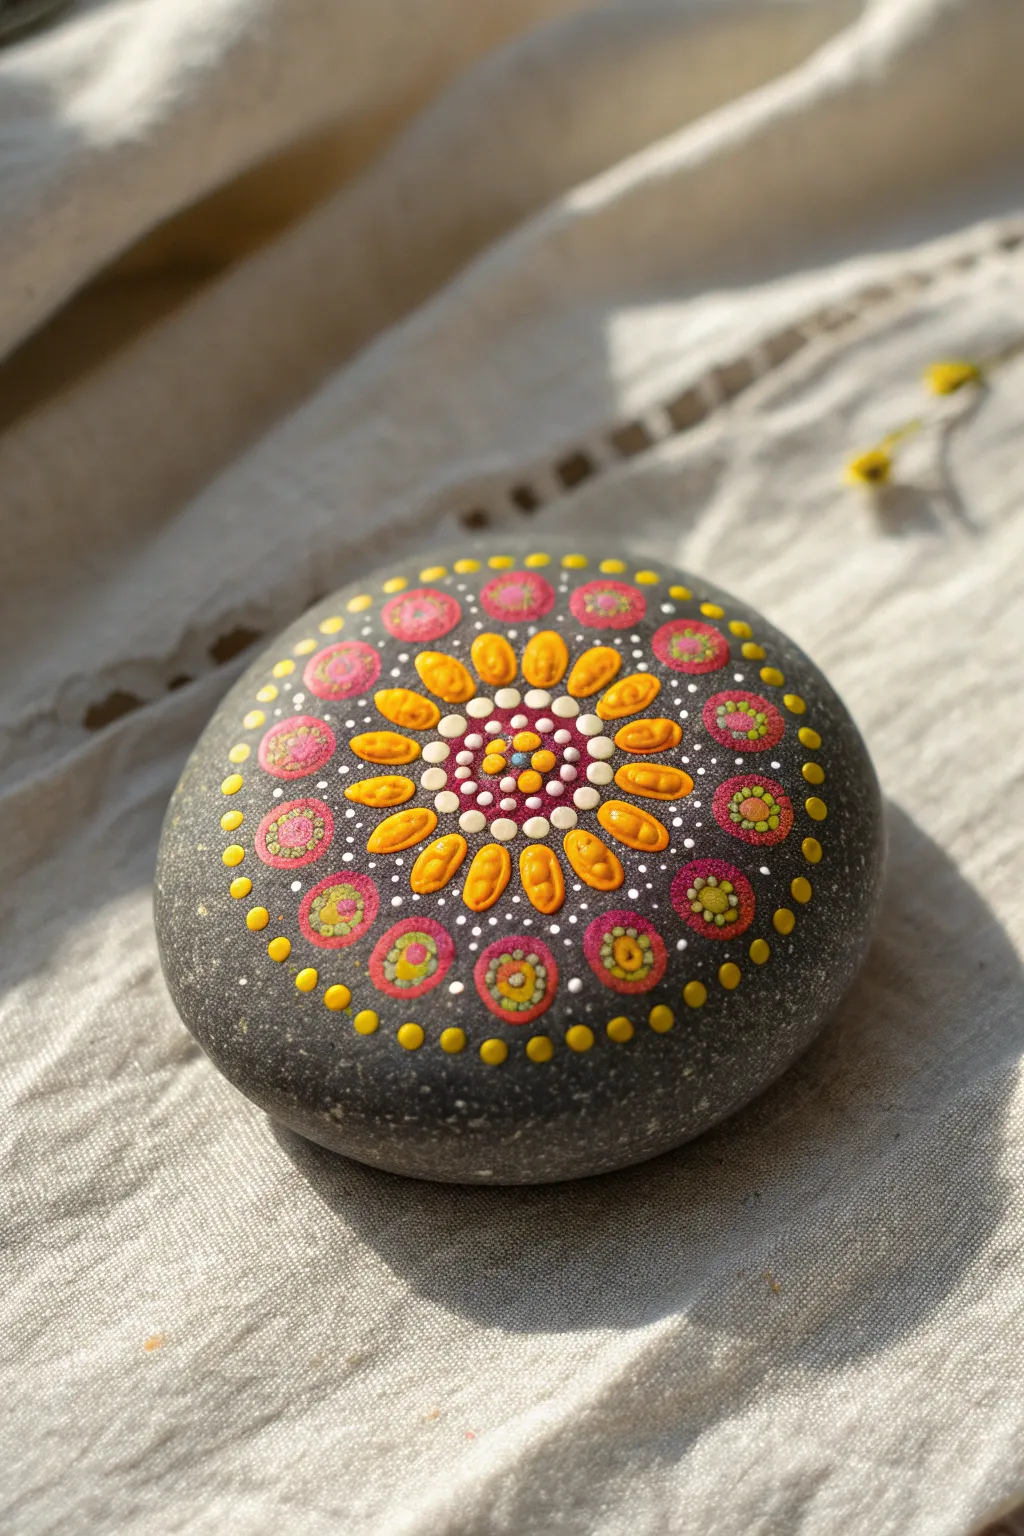
Capture the golden hour with this vibrant mandala stone. The design features a glowing central sunburst expanding into detailed floral motifs, perfect for brightening up your garden or desk.
Step-by-Step Tutorial
Materials
- Smooth, round river stone (dark grey or black naturally)
- Acrylic paints: Bright Yellow, Tangerine Orange, Magenta, Lime Green, White
- Set of dotting tools (various sizes from stylus to 6mm)
- Palette or plastic lid
- Gloss varnish
- Damp cloth for clean up
Step 1: The Core
-
Preparation:
Wash your stone with soapy water and let it dry completely to ensure the paint adheres properly. -
Center Dot:
Find the approximate center of the stone. Using a medium-sized dotting tool, place a single teal or blue dot. -
First Ring:
Using a smaller tool, place a ring of small white dots closely surrounding the center dot. -
Second Ring:
Switch to magenta paint. Place medium-sized dots in the gaps between the white dots from the previous step. -
Inner Details:
Using a tiny stylus, place very small white dots in the crevices between the magenta dots to tighten the center cluster.
Troubleshooting Peaks
If your dots have pointy peaks (like meringue), your paint is too thick. Mix in a drop of water or pouring medium until it has the consistency of melted ice cream.
Step 2: The Sunburst
-
Yellow Petals:
Load a medium tool with bright yellow paint. Place a dot between each magenta dot, then gently drag the tool outward to create a teardrop or petal shape. -
Petal Tips:
Once the yellow is slightly set, use a small tool to place a tangerine orange dot at the very tip of each yellow petal. -
Separation Dots:
I like to add contrast here by placing small white dots between the bases of the yellow petals, closer to the center. -
Outer Spacing:
Place a small white dot floating just beyond the tip of each orange dot. This acts as a guide for the next ring.
Step 3: The Floral Border
-
Large Base Dots:
Using your largest dotting tool, place big magenta circles in the spaces between the yellow petal tips. -
Drying Phase:
Take a short break. These large magenta dots act as a base for stacking, so they must be surface-dry before proceeding. -
Green Layer:
Place a smaller lime green dot inside the center of each large magenta dot. -
Orange Layer:
Once the green is tacky, stack an even smaller orange dot in the center of the green one. -
Center Highlight:
Finish the floral stack with a tiny pin-prick of yellow or white in the very center of the orange dot. -
Filler Decoration:
In the triangular spaces between the large floral circles, add a cluster of three tiny white dots or a single medium yellow dot to fill the void.
Level Up: Ombre Effect
For the large outer circles, mix a little white into your magenta for the second layer instead of green. This creates a soft, glowing gradient effect inside the flower.
Step 4: Finishing Touches
-
Outer Frame:
Using a medium tool, create a final border ring of uniform bright yellow dots around the entire design. -
Curing:
Allow the stone to dry overnight. Thick dots can take longer to dry than thin brushstrokes. -
Sealing:
Apply a coat of high-gloss varnish to protect the artwork and make the colors look permanently wet and shiny.
Place your finished sun-drenched stone in a sunny spot to enjoy the sparkle all summer long.


Have a question or want to share your own experience? I'd love to hear from you in the comments below!