Finding the right inspiration can sometimes feel like a challenge, especially when looking for subjects that capture a mix of adventure, mystery, and style. I have gathered a collection of concepts that range from edgy street art vibes to dynamic sci-fi scenes to keep your sketchbook full of creative energy.
The Classic Graffiti Skull
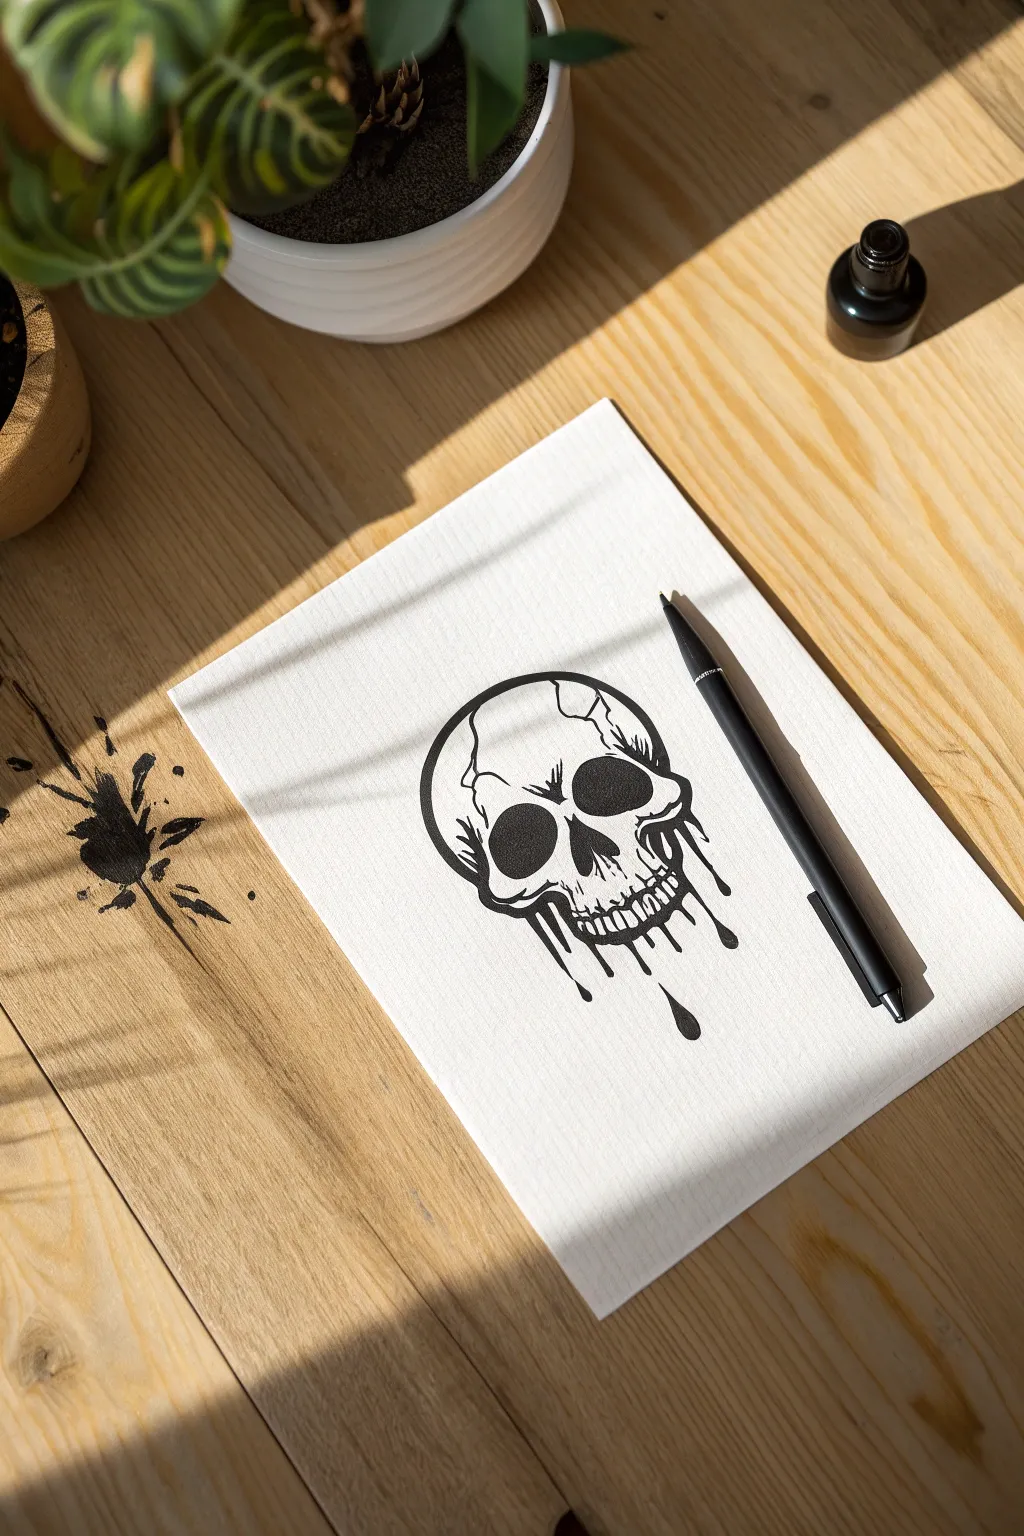
Master the edgy aesthetic of street art with this high-contrast skull illustration. You will combine solid graphic shapes with fluid, melting details to create a strikingly cool piece that looks like a tattoo flash design.
Step-by-Step Guide
Materials
- Heavyweight drawing paper or cardstock
- HB graphite pencil
- Quality eraser
- Fine liner pen (0.3mm or 0.5mm)
- Thick black marker or brush pen
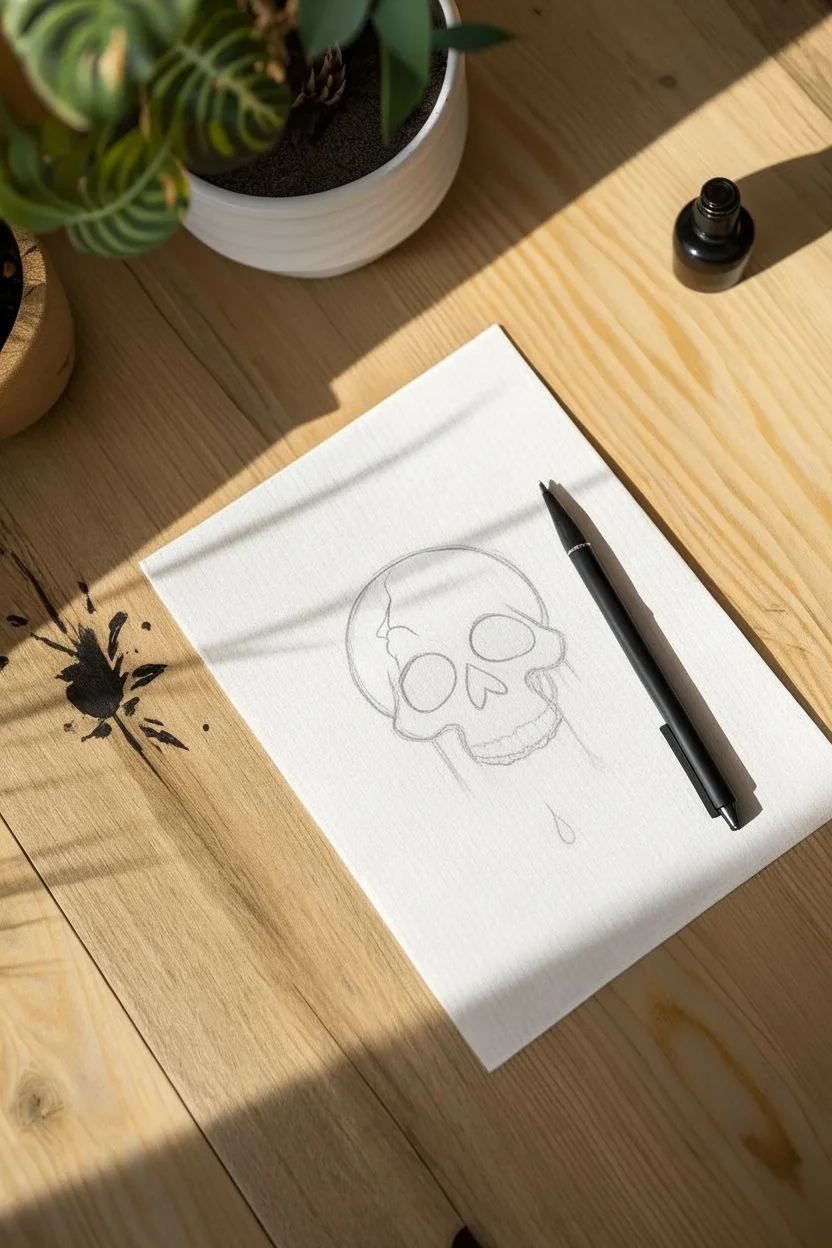
Step 1: Sketching the Structure
-
Cranial Base:
Start by lightly sketching a large, slightly imperfect circle near the center of your page to form the main part of the cranium. -
Cheekbone Guides:
On the lower sides of the circle, sketch two outward bumps to indicate the zygomatic arches, or cheekbones. -
Eye Sockets:
Draw two large, uneven oval shapes in the middle of the skull. Angling them slightly inward gives the skull a more menacing expression. -
Nasal Cavity:
directly between and slightly below the eyes, sketch an upside-down heart shape for the nose hole. -
Cracked Details:
Lightly draw a jagged, wandering line starting from the top of the skull down to the left eye socket to represent a cranial crack. -
Secondary Cracks:
Add a few smaller branching lines coming off the main crack to add texture and age to the bone.
Troubleshooting: Shaky Lines?
If your long lines aren’t smooth, try moving your entire arm from the shoulder rather than just your wrist. This helps create fluid, confident strokes, especially on the drips.
Step 2: Adding the Drip
-
Upper Teeth:
Sketch a row of small, rectangular shapes along the bottom curve of the cheekbones for the upper teeth. -
Melting Jaw:
Instead of drawing a lower jawbone, draw wavy, organic lines extending downward from the teeth and cheekbones. -
forming Drops:
Terminate these wavy lines with rounded teardrop shapes to make it look like thick ink or paint is dripping off the skull. -
Detached Droplets:
Draw one or two isolated teardrop shapes floating below the main drips to enhance the liquid effect.
Pro Tip: The Sticker Look
To make your drawing look like a die-cut sticker, add one final, extra-thick outline around the entire perimeter of the finished drawing, leaving a tiny gap of white space if you dare.
Step 3: Inking and Definition
-
Solid Blacks:
Using your thick marker, completely fill in the eye sockets and the nasal cavity. This high contrast is key to the graffiti look. -
Fine Details:
Switch to your thinner fine liner. Carefully trace the cracks on the forehead and the small separations between the teeth. -
Outlining the Form:
Trace over your exterior pencil lines with a steady hand. I like to use a slightly thicker line for the outer silhouette to make it pop. -
Inking the Drips:
Trace the dripping lines smoothly. Try to keep the curves fluid rather than jagged so they look like liquid. -
Line Weight Variation:
Go back over the bottom curves of the cheekbones and eye sockets to thicken those lines, implying shadow and depth. -
Final Cleanup:
Allow the ink to dry completely for several minutes, then gently erase all remaining pencil sketches to reveal the clean artwork.
Now you have a bold, graphic skull design ready to be framed or scanned for your next project.


Fierce Dragon Head
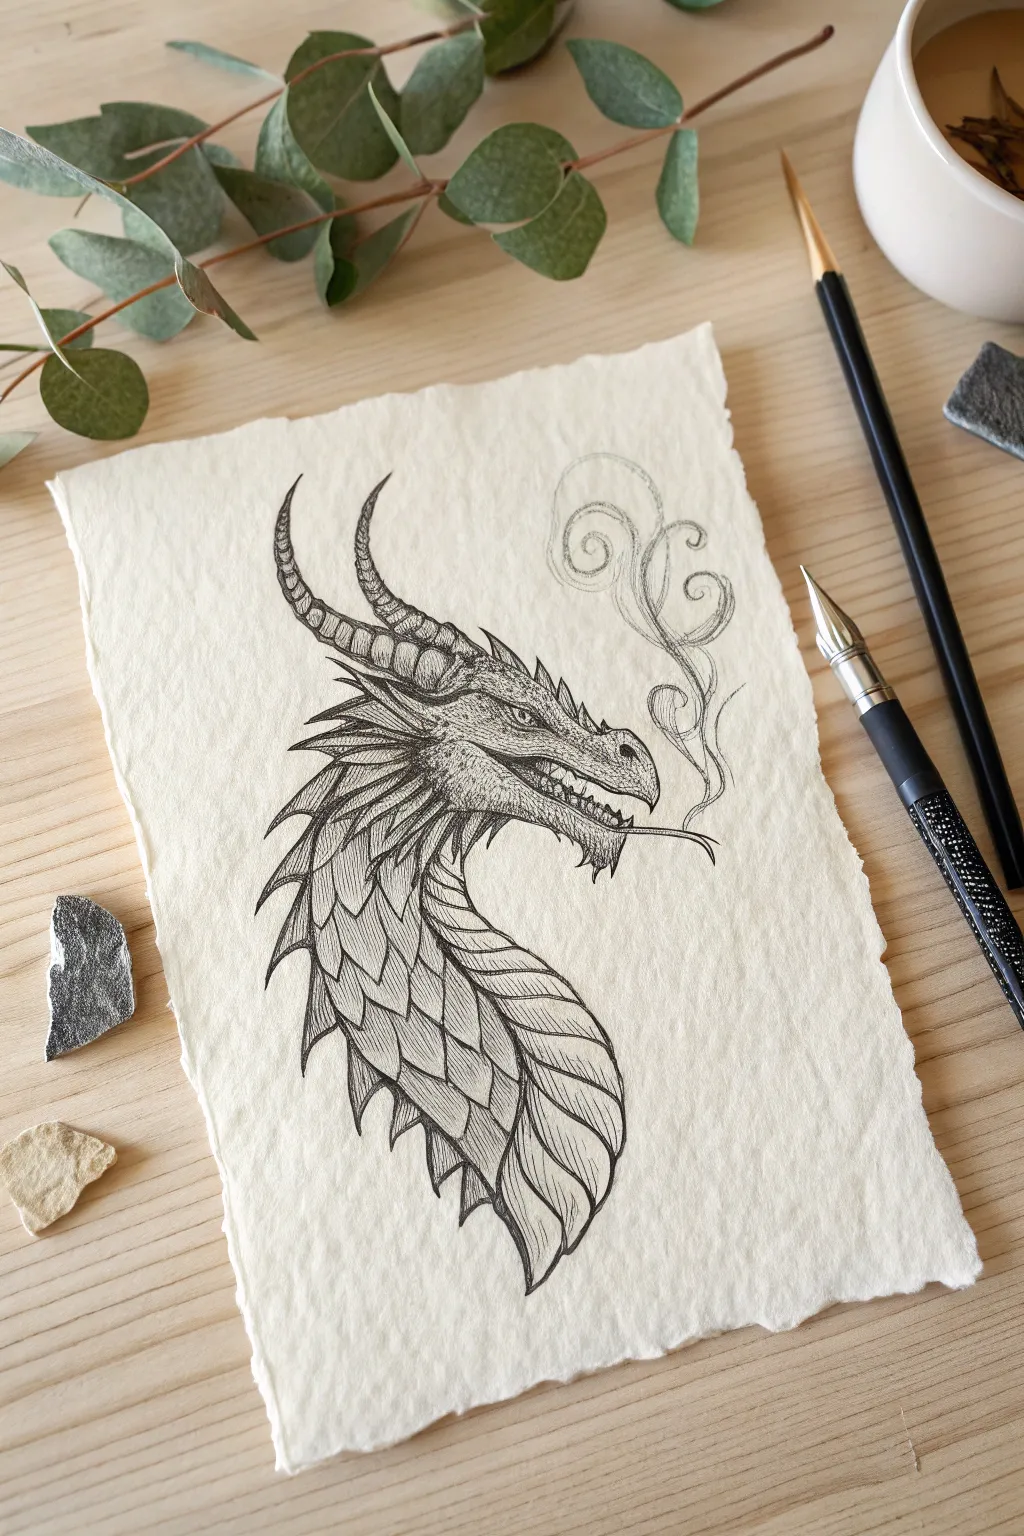
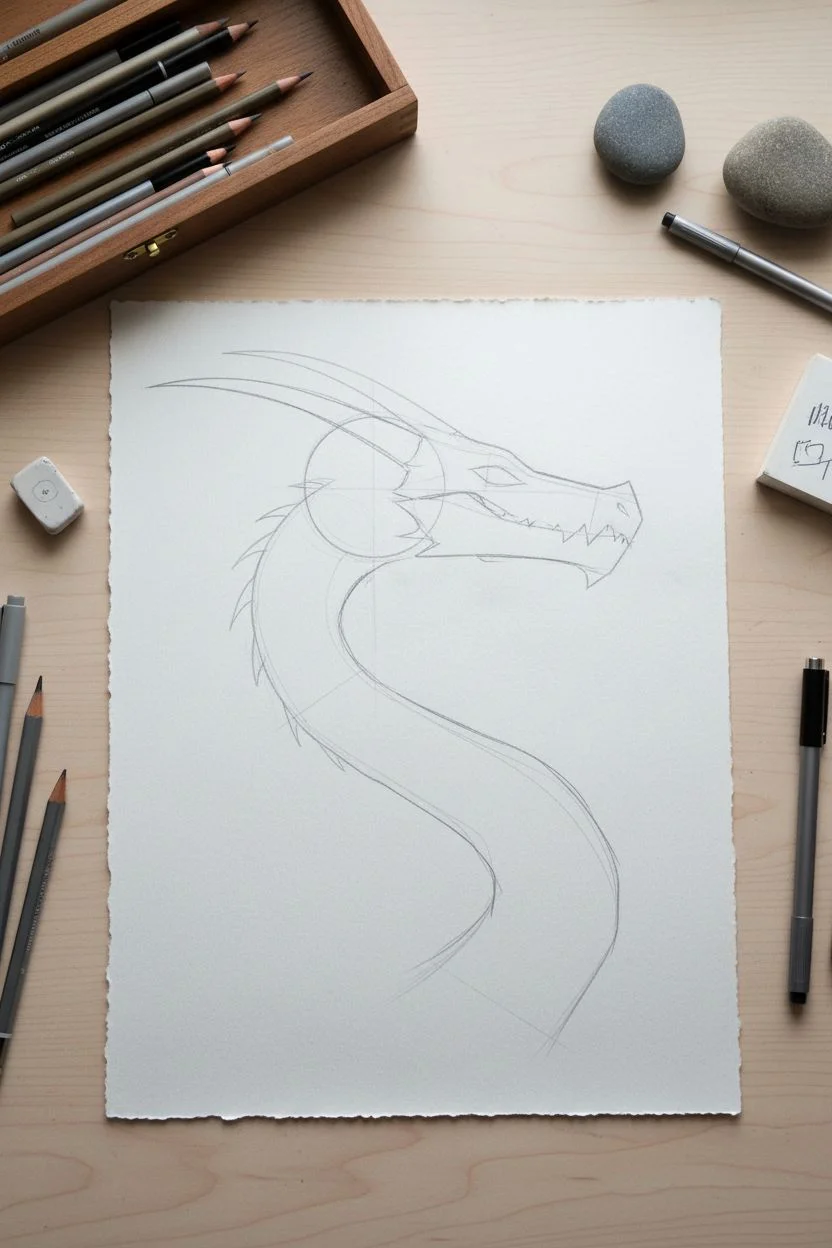
Master the art of mythical creature anatomy with this detailed pen-and-ink project. Using fine liners on textured paper, you will build a fierce dragon profile through careful layering of scales and intricate hatching.
Detailed Instructions
Materials
- High-quality textured paper (deckle edge optional)
- HB or 2H pencil for sketching
- Kneaded eraser
- Fine liner pens (sizes 0.05, 0.1, and 0.5mm)
- Scrap paper
Step 1: Structural Sketching
-
Cranial foundation:
Begin by lightly sketching a medium-sized circle in the upper center of your paper to represent the main skull mass. -
Snout placement:
Attached to the right side of your circle, draw a rectangular box shape that slightly tapers toward the end to define the dragon’s snout. -
Neck flow:
Sweep two curved parallel lines downwards from the skull, creating a thick, S-curved neck that widens as it goes towards the hypothetical shoulders. -
Horn guidelines:
Sketch two long, curved lines sweeping backward from the top of the skull to map out the primary horns. -
Jaw and mouth:
Define the mouth line within the snout block, giving it a slight jagged grimace, and sketch the lower jaw slightly recessed from the upper snout.
Step 2: Defining Anatomy
-
Eye and brow:
Draw a heavy brow ridge above the snout area and place a small, sharp triangular eye beneath it. -
Details of the deep:
Refine the horns by adding thickness and drawing segmented rings all the way up their length, similar to a goat’s horn. -
Spine spikes:
Along the back line of the neck, sketch a series of sharp, triangular spikes that get progressively larger as they move down. -
Throat armor:
Map out the large, plate-like scales on the throat and neck; these should overlap like shingles and follow the curve of the neck. -
Forked tongue:
Sketch a thin, forked tongue extending slither-like from the front of the mouth.
Smudge Prevention
Smudging fresh ink is the enemy here. Keep a clean piece of scrap paper under your drawing hand to protect the tedious linework as you move across the page.
Step 3: Inking Phase
-
Initial outlines:
Using your 0.5mm pen, carefully go over the main outline of the head, horns, and neck, keeping your hand steady. -
Scale definition:
Switch to a 0.1mm pen to ink the individual scales; allow the lines to break occasionally to give them an organic, worn texture. -
Teeth and claws:
Ink the small, sharp teeth lining the jaw and the delicate line of the forked tongue. -
Clean up:
Once the ink is completely dry—I usually give it a full five minutes just to be safe—gently erase all underlying pencil marks with the kneaded eraser.
Ancient Aesthetics
To enhance the fantasy vibe, lightly dab a wet tea bag over the paper before you start (let it dry fully!) to give the background an aged parchment look.
Step 4: Texture and Atmosphere
-
Horn texture:
Use the 0.05mm pen to add fine curved hatching lines on the heavily segmented horns to show roundness. -
Shadows and depth:
Apply cross-hatching (criss-crossed lines) under the jawline and beneath the neck scales to create deep shadows. -
Stippling:
Add tiny dots (stippling) around the eye socket and snout to create a rough, leathery skin texture without using harsh lines. -
The smoke:
Using your lightest touch or a nearly dry pen, sketch swirling, ribbon-like wisps of smoke rising from the nostrils. -
Final weight:
Go back with the 0.5mm pen and thicken the bottom edges of the neck and horns to add visual weight to the drawing.
You now have a mythical beast ready to guard your sketchbook.


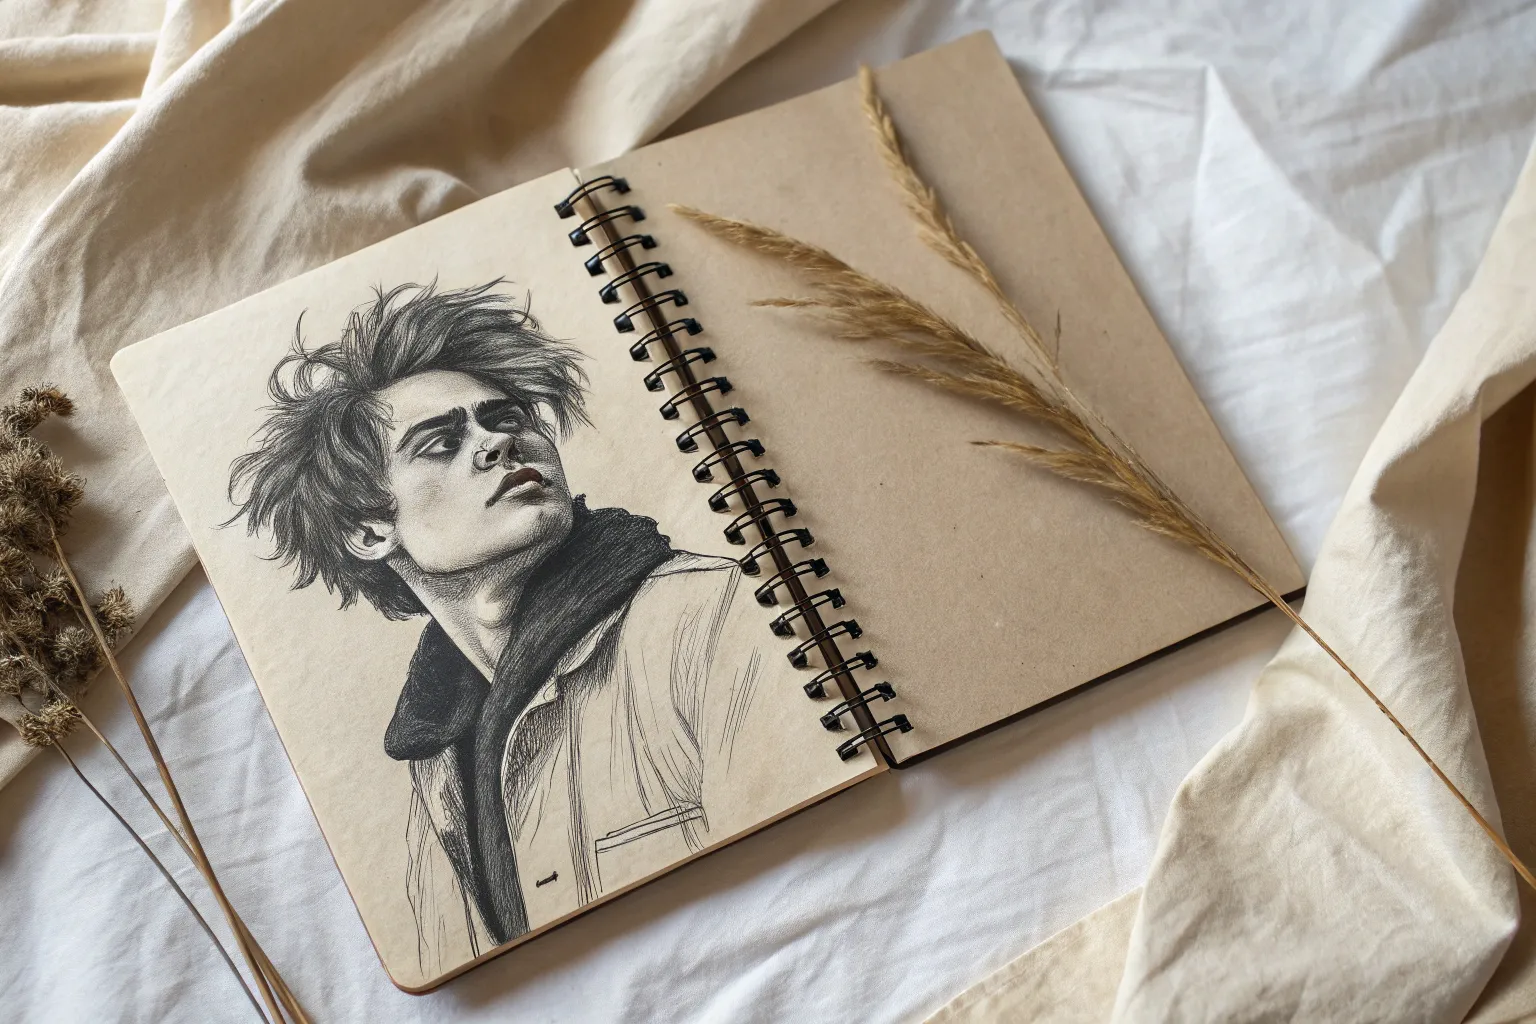
The Mysterious Hooded Figure

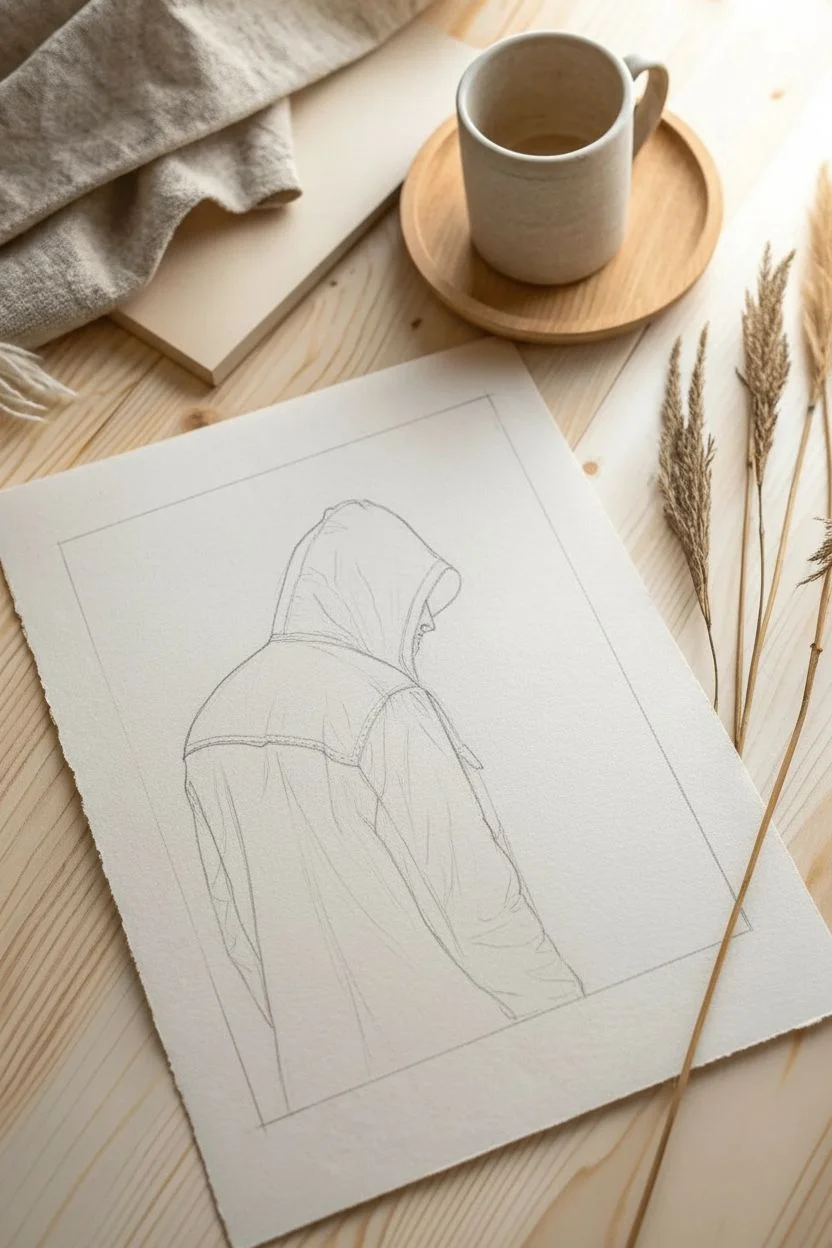
Capture the moody atmosphere of a storm with this high-contrast pencil drawing featuring a mysterious hooded figure. You will focus on fabric textures and creating a realistic rain effect using simple graphite techniques.
Step-by-Step Guide
Materials
- Heavyweight textured drawing paper (vellum surface)
- Graphite pencils (HB for outlines, 4B and 8B for shading)
- Kneaded eraser
- Precision stick eraser (or white gel pen)
- Blending stump or tissue
- Ruler
Step 1: Structuring the Scene
-
Set the boundaries:
Begin by lightly drawing a rectangular frame in the center of your paper using an HB pencil and a ruler; this confines the composition. -
Outline the silhouette:
Sketch the basic shape of the figure seen from behind, focusing on the curve of the shoulders and the triangular form of the hood. -
Map the seams:
Draw the structural seams of the jacket, placing a horizontal line across the upper back and a vertical line down the center to mimic a denim jacket construction. -
Add hood details:
Sketch wrinkles around the neck area where the fabric bunches up, ensuring the hood looks distinct from the main body of the jacket.
Smudge Prevention
Graphite smearing? Place a clean sheet of scrap paper under your drawing hand. This protects the finished areas of the jacket while you work on the atmosphere.
Step 2: Defining Texture and Form
-
Establish the light source:
Identify that the light comes from above and slightly to the right, meaning the left side and deep folds will be your darkest areas. -
Base shading:
Use a 4B pencil to apply a mid-tone layer of shading over the entire jacket, leaving the very tops of the folds white for highlights. -
Deepen the shadows:
Switch to an 8B pencil to darken the deep creases in the hood and the area under the shoulder seam to create volume. -
Create denim texture:
Instead of smooth shading, use short, cross-hatching strokes in different directions to simulate the rough weave of heavy denim fabric. -
Refine the folds:
I like to use a blending stump here to soften the transition between the deep shadows and the denim texture while keeping the fabric looking heavy.
Step 3: Atmospheric Background
-
Sketch background elements:
Lightly block in rough shapes of trees or bushes in the lower right and clouds in the upper left within your rectangular frame. -
Create mist:
Side-shade with a 4B pencil roughly over the background trees, then smudge aggressively with a tissue to make them look out of focus and distant. -
darken the mood:
Add heavy charcoal or 8B graphite to the cloud shapes, blending them downwards to suggest a heavy, overcast sky. -
Contrast check:
Ensure the shoulder of the figure stands out against the background; if the background is dark, keep the shoulder rim light, and vice versa.
Level Up: High Contrast
For ultra-bright rain streaks that really pop against the dark jacket, skip the eraser and use a white gel pen to draw the rain lines over the dried graphite.
Step 4: The Rain Effect
-
Prepare for rain:
Ensure all your heavy shading is complete and relatively smudge-proof before adding the final weather effects. -
Draw vertical streaks:
Using a sharp HB pencil, draw long, thin, slightly diagonal lines across the background areas to simulate falling rain. -
Erase rain lines:
For rain passing *in front* of the dark jacket, use a precision stick eraser to lift out thin, sharp vertical lines from the graphite. -
Vary the lengths:
Make the rain lines varying lengths—some long streaks and some short dashes—to create a sense of depth and movement. -
Final touches:
Clean up the edges of your rectangular border with a ruler and eraser to make the drawing look like a crisp snapshot.
Now you have a brooding, atmospheric piece that perfectly captures the feeling of a rainy walk


Anime Protagonist Portrait
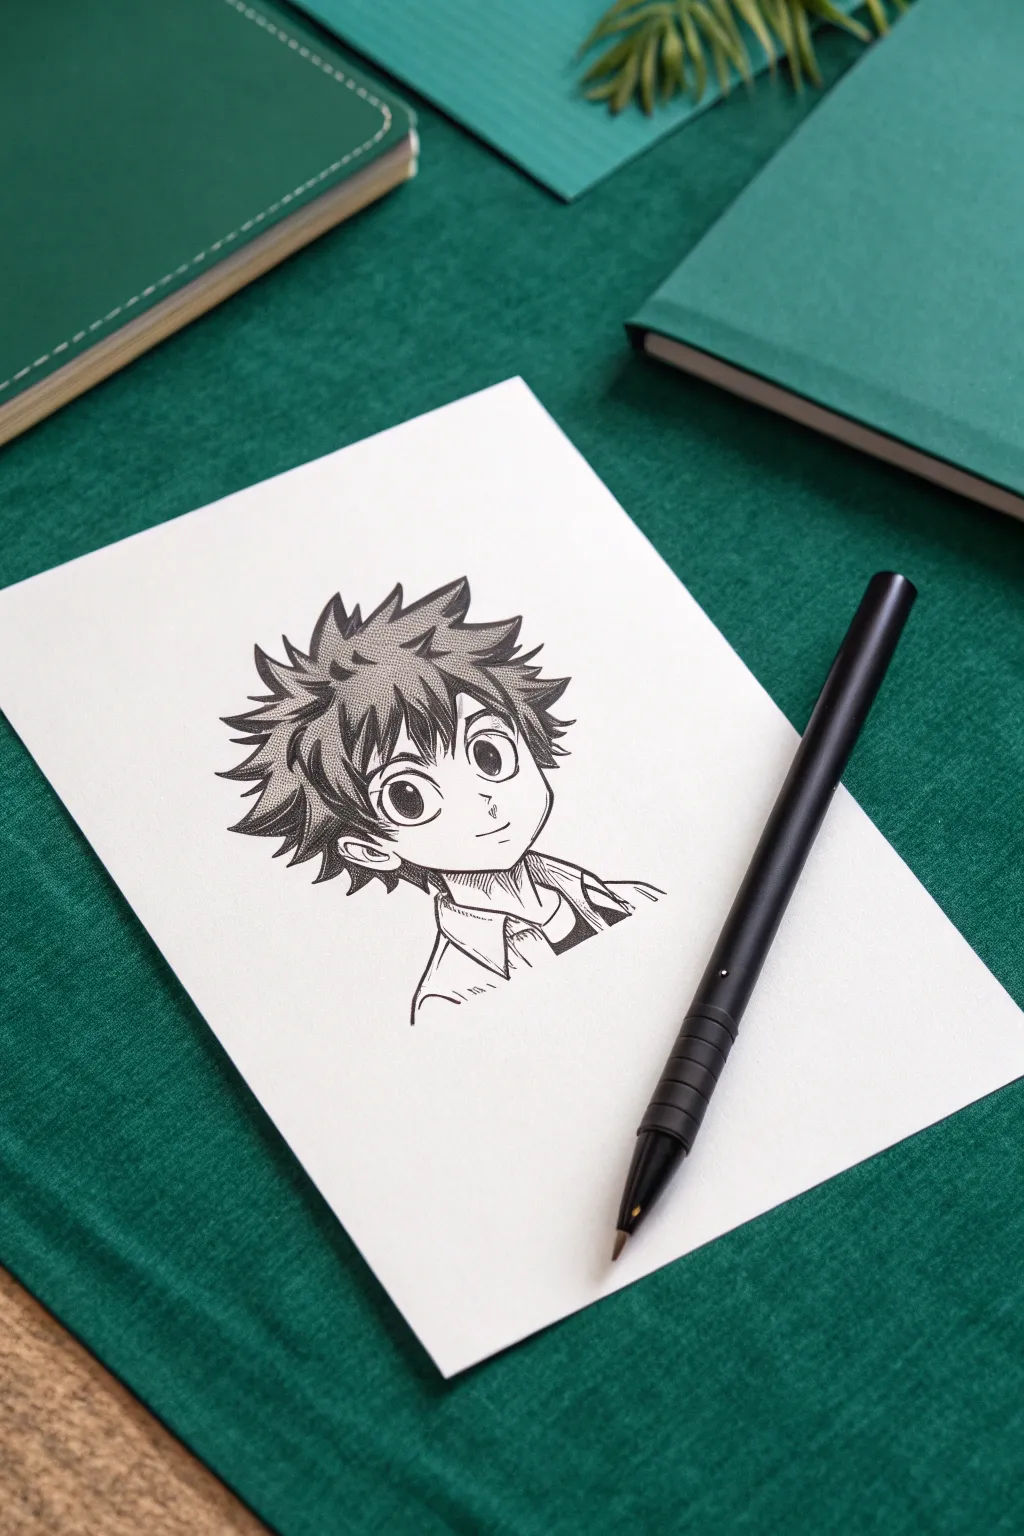
Capture the energetic spirit of classic shonen manga with this clean, crisp character portrait. Using precise inking techniques and structured layering, you will create a dynamic anime protagonist that looks professionally drawn.
Step-by-Step Tutorial
Materials
- Smooth Bristol board or heavy cardstock (A5 size)
- HB graphite pencil for sketching
- Kneaded eraser
- Black fine liner pens (sizes 0.1mm, 0.3mm, and 0.5mm)
- Ruler (optional)
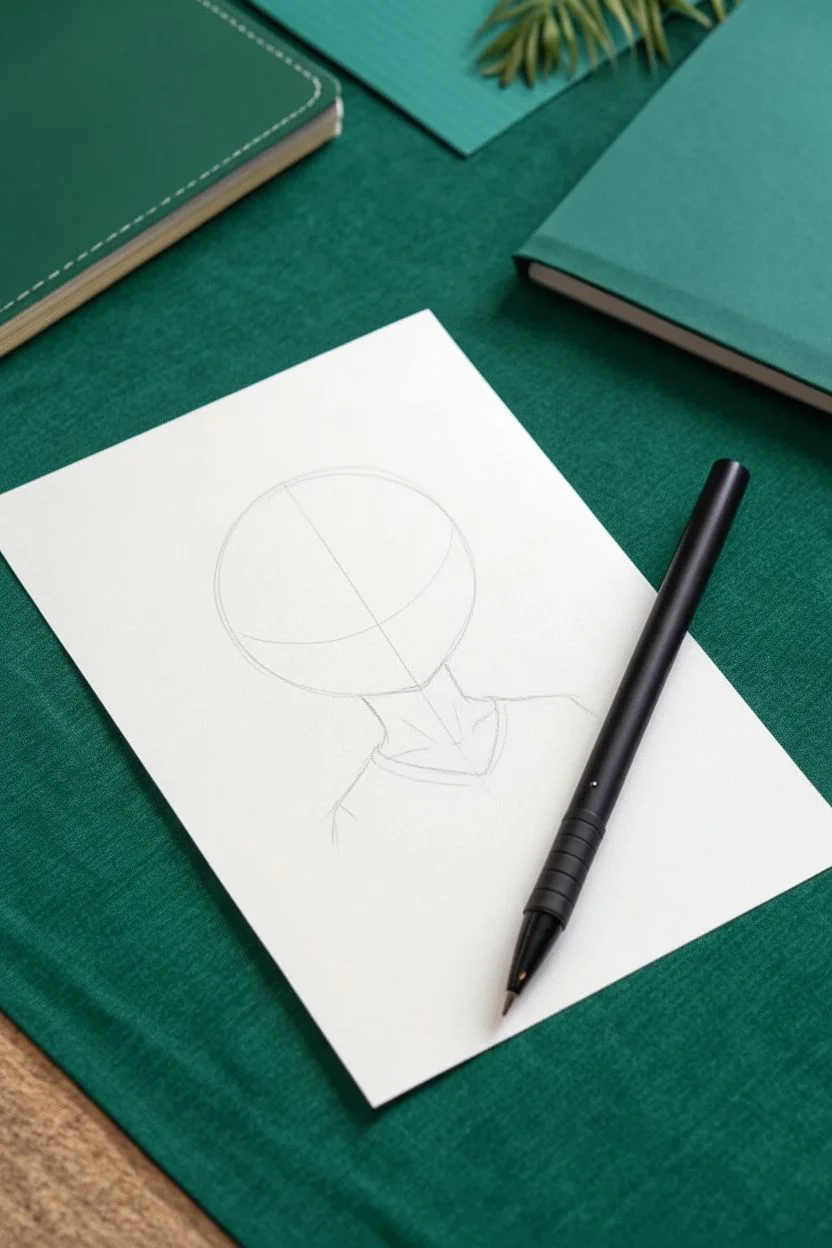
Step 1: Drafting the Skeleton
-
Draw the head circle:
Begin lightly with your HB pencil, drawing a circle in the center of the paper to form the cranial mass. -
Shape the jawline:
Extend a vertical line down from the center of the circle, then draw two angled lines meeting at a pointed chin to define the face shape. -
Place guidelines:
Lightly sketch a horizontal curved line halfway down the face to mark where the eyes will sit. -
Sketch the neck:
Draw two vertical lines coming down from the jaw, slightly thinner than the width of the head, and fan them out into the shoulders. -
Outline the clothes:
Sketch a simple collar around the neck and the v-neck shirt underneath, adding folds near the shoulders for realism.
Line Weight Magic
Use the 0.5mm pen for the outer silhouette and the 0.1mm pen for inner details (like inside the ears). This contrast creates instant professional depth.
Step 2: Facial Features & Hair
-
Draft the eyes:
Resting on your horizontal guideline, draw two large, tall ovals. Leave a significant gap between them. -
Refine eye details:
Draw the pupils and irises inside the ovals, ensuring you mark out a small white circle in each for the ‘catchlight’ or reflection. -
Add nose and mouth:
Place a small, angular checkmark for the nose just below the eye line, and a small curved line for a confident smile. -
Map the hairline:
Sketch a jagged fringe (bangs) that falls over the forehead, using ‘M’ shapes that curve slightly inward. -
Create the volume:
Draw the outer spikes of the hair, making them larger and wilder than the fringe. I find it helps to think of these as clumps of leaves rather than individual hairs. -
Add ear details:
Sketch the ears on the sides of the head, roughly aligned between the eyes and the nose tip.
Step 3: Inking & Texturing
-
Outline the face:
Switch to your 0.3mm fine liner. Carefully trace the jawline and neck, using quick, confident strokes to keep lines smooth. -
Ink the eyes:
Use the 0.5mm pen to thicken the upper lash line significantly, making the eyes pop. -
Fill the pupils:
Color in the pupils with the 0.5mm pen, leaving the catchlights purely white. -
Texture the hair:
Outline the hair spikes with the 0.3mm pen. For the two-tone effect seen in the reference, use your 0.1mm pen to create tight diagonal hatching lines on the ‘inner’ side of the hair spikes. -
Ink the clothing:
Go over the collar and shirt lines. Add small jagged lines at the fabric folds to suggest crisp uniform material. -
Erase guidelines:
Wait at least 5 minutes for the ink to fully cure, then gently remove all pencil marks with the kneaded eraser. -
Final heavy outline:
Take the 0.5mm pen and go over the very outer perimeter of the character (the silhouette) one last time to make the drawing stand out from the background.
Smudge Alert
Ink smears easily on smooth Bristol paper. Always place a scrap piece of paper under your drawing hand to protect your work while you ink.
Now that your character is inked and clean, you have a perfect manga-style portrait ready for display.

PENCIL GUIDE
Understanding Pencil Grades from H to B
From first sketch to finished drawing — learn pencil grades, line control, and shading techniques.
Explore the Full Guide
Music Lover with Over-Ear Headphones
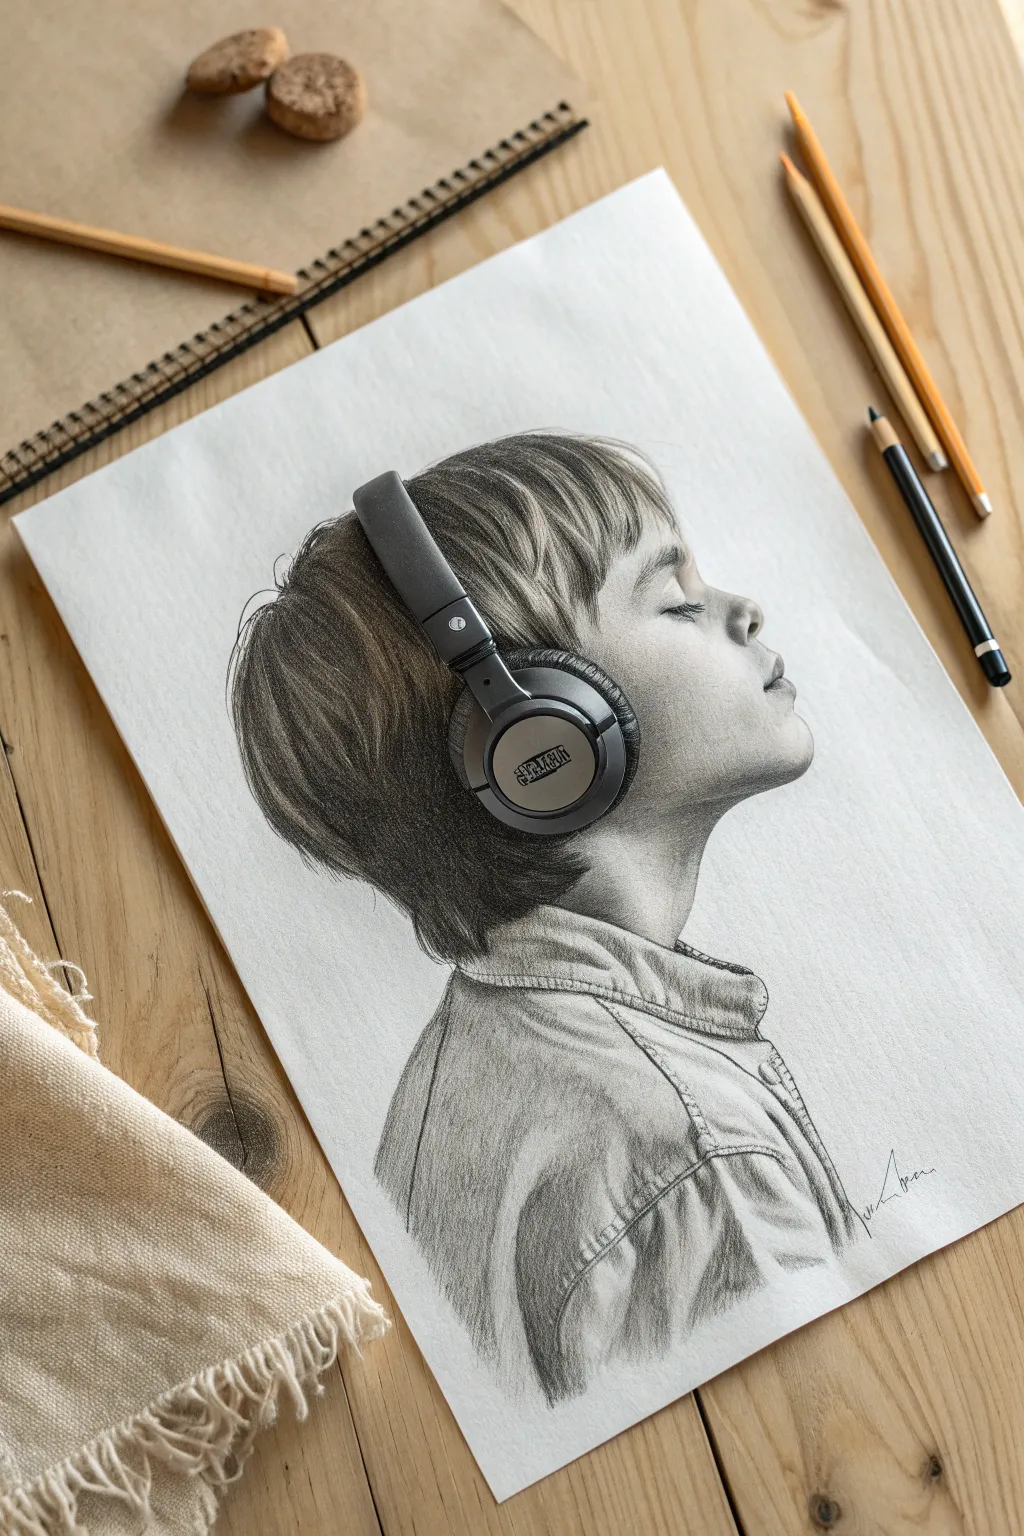
Capture the serene moment of getting lost in music with this realistic graphite portrait. You will learn to render different textures, from smooth skin and soft hair to the rigid structure of mechanical headphones.
Detailed Instructions
Materials
- High-quality drawing paper (smooth surface)
- Graphite pencils (2H for sketching, HB, 2B, 4B for shading)
- Mechanical pencil (0.5mm)
- Blending stumps (tortillons)
- Kneaded eraser
- Precision eraser (pencil style or mono zero)
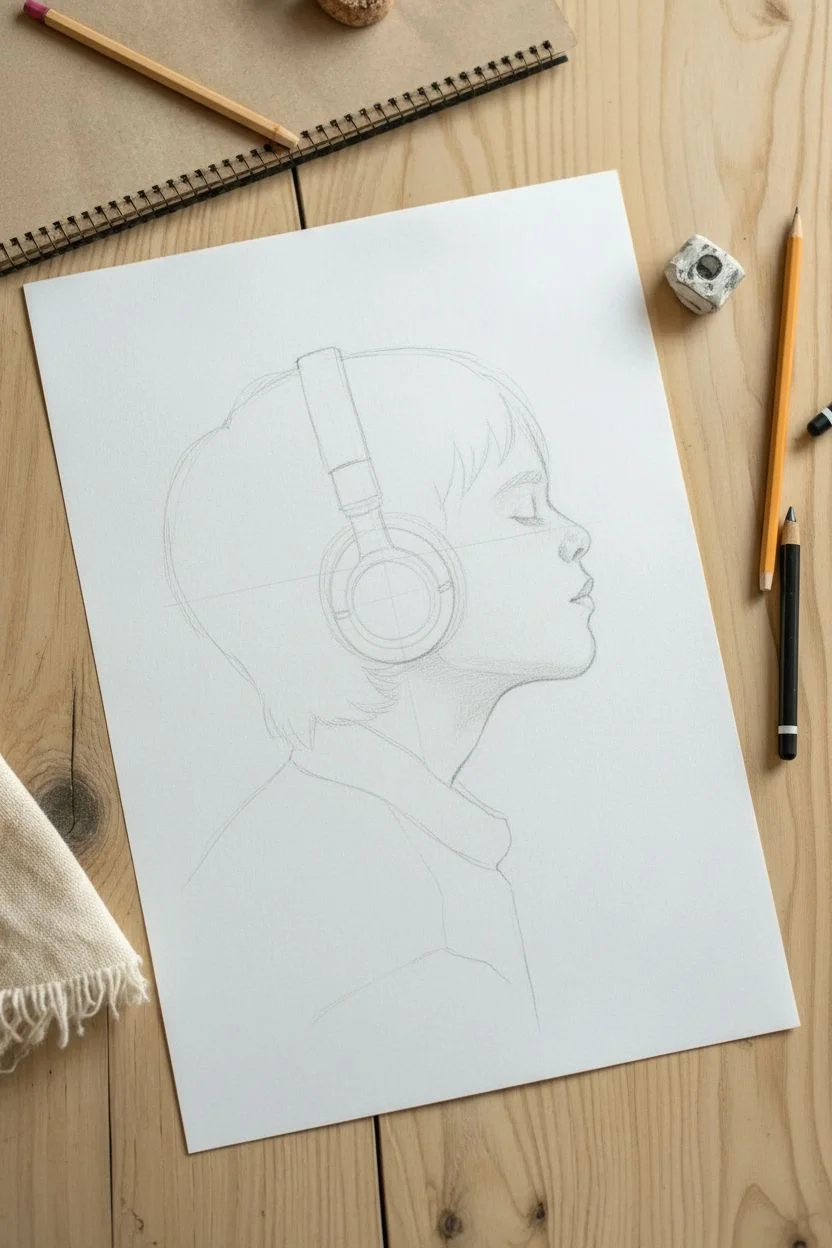
Step 1: Structural Sketch
-
Basic Shapes:
Using a 2H pencil with very light pressure, draw a circle for the cranial mass and a curved line extending down for the jaw profile. Mark the eye line and nose placement. -
Profile Outline:
Refine the profile. Sketch the forehead, the indent of the nose bridge, the tip of the nose, and the lips. Keep the chin slightly lifted to show the neck extension. -
Headphone Placement:
Draw the oval shape of the ear cup over where the ear would be, tilting it slightly to match the head angle. Sketch the headband arching over the hair. -
Hair and Shirt:
Lightly map out the hair direction, flowing from the crown and tucking behind the headphones. add the basic collar shape of the shirt at the neck base.
Smudge Prevention
Graphite smues easily. Always place a clean scrap sheet of paper under your drawing hand to protect the finished skin textures from oil and friction.
Step 2: Shading the Face
-
Base Tone:
With an HB pencil, apply a soft, even layer of graphite over the skin areas, leaving the bridge of the nose and cheekbone lighter for highlights. -
Defined Features:
Use a sharp 2B pencil to draw the closed eyelid and eyelashes. Shade the nostril and the corner of the mouth, keeping the lines crisp but not harsh. -
Smooth Blending:
Use a blending stump to soften the graphite on the face. Smooth the transition from the shadowed jawline to the lighter cheek. -
Neck Shadows:
Darken the area under the chin and jawline using a 2B pencil to create depth, making the head appear to come forward.
Pro Tip: Contrast
To make the drawing pop, ensure the headphones are the darkest element. Use your softest pencil (4B/6B) here to contrast against the lighter skin tones.
Step 3: The Headphones
-
Mechanical Details:
Outline the mechanical hinges and the circular rim of the headphones with a mechanical pencil for precision. -
Plastic Texture:
Shade the hard plastic parts with a 4B pencil. Establish high contrast here—I like to press firmly for deep blacks while leaving stark white paper showing for the shiny reflections. -
Leather Cushion:
Draw small, accordion-like crease lines on the ear cushion. Shade in between these creases to simulate soft, wrinkled leather material.
Step 4: Hair and Clothing
-
Hair Foundation:
Using an HB pencil, draw long, flowing strokes following the direction of the hair growth. Avoid crossing lines to keep the hair looking sleek. -
Darker Strands:
Switch to a 2B pencil to darken the roots and the areas where the hair tucks under the headphone band and behind the neck. -
Lifting Highlights:
Take your kneaded eraser, pinch it into a wedge, and ‘lift’ graphite out of the hair to create strands of light hitting the curve of the head. -
Shirt Texture:
Shade the shirt using a cross-hatching technique with an HB pencil to mimic the weave of denim or heavy cotton. -
Fabric Folds:
Identify the stress points on the collar and shoulder. Darken the deep recesses of the fabric folds using a 4B pencil to give the clothing volume.
Take a moment to clean up any stray smudge marks around the edges for a gallery-ready finish
The Lone Astronaut
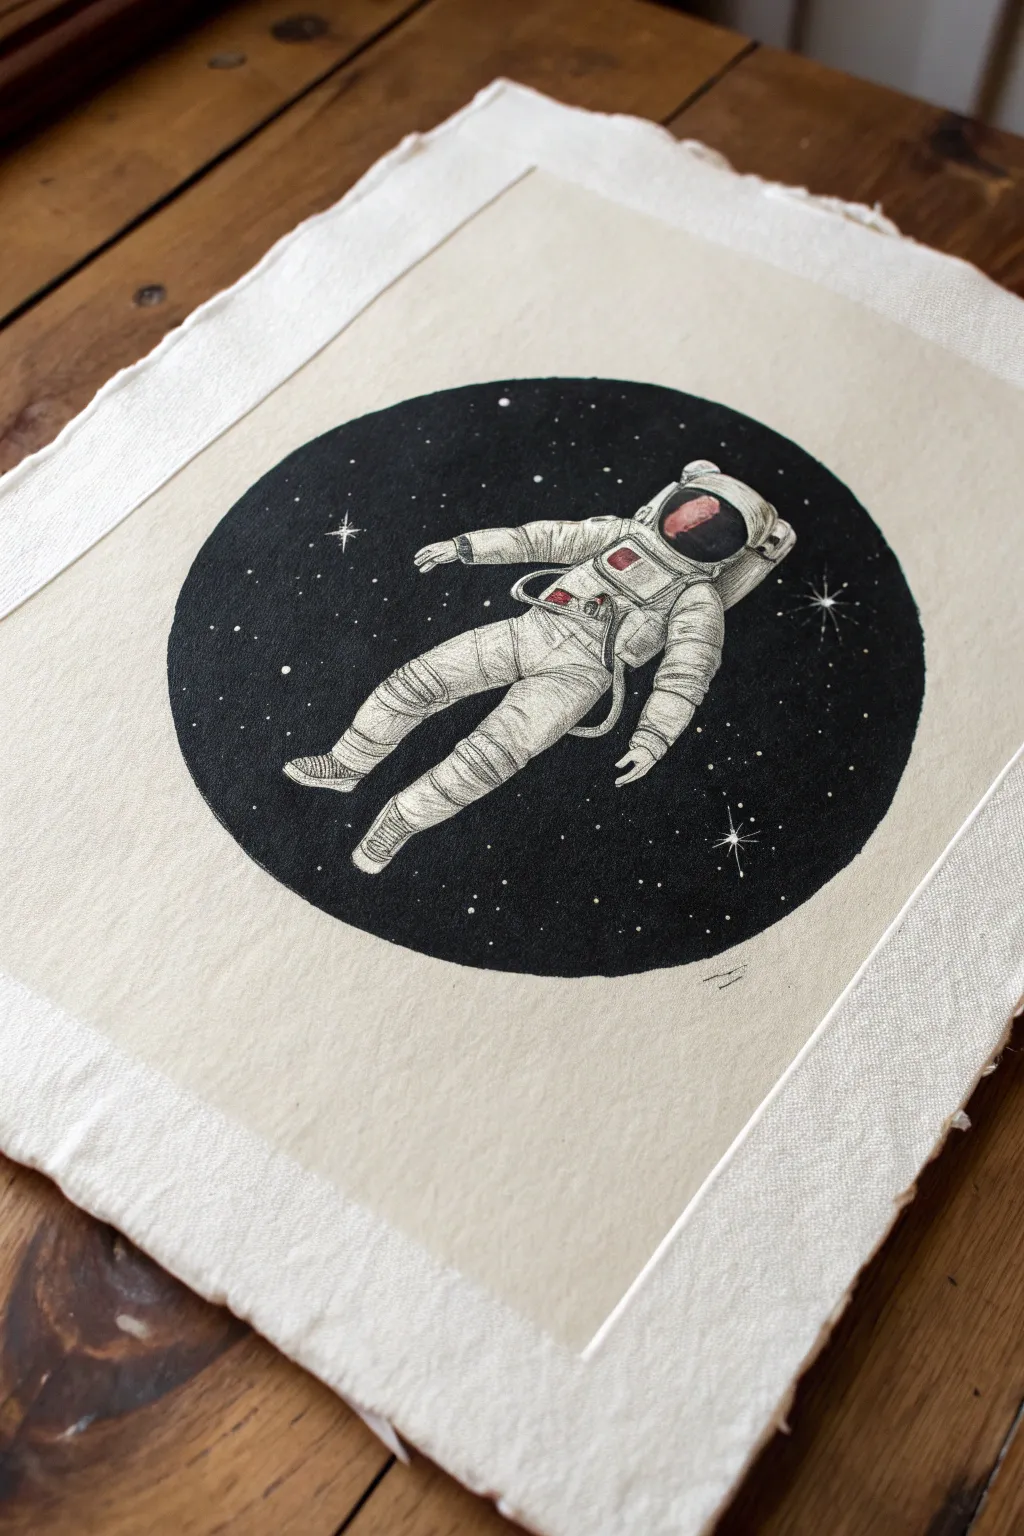
Capture the silent beauty of deep space with this striking monochromatic illustration. Using high-contrast ink techniques on textured paper creates a dramatic window into the cosmos that looks professional yet is surprisingly approachable.
Step-by-Step Guide
Materials
- Heavyweight cold-press watercolor paper
- Pencil (HB) and eraser
- Compass or round object to trace (approx. 6-inch diameter)
- Waterproof fine liners (sizes 005, 01, and 05)
- Black India ink or black Gouache paint
- Small round paintbrush (size 2 or 4)
- White gel pen
- Ruler
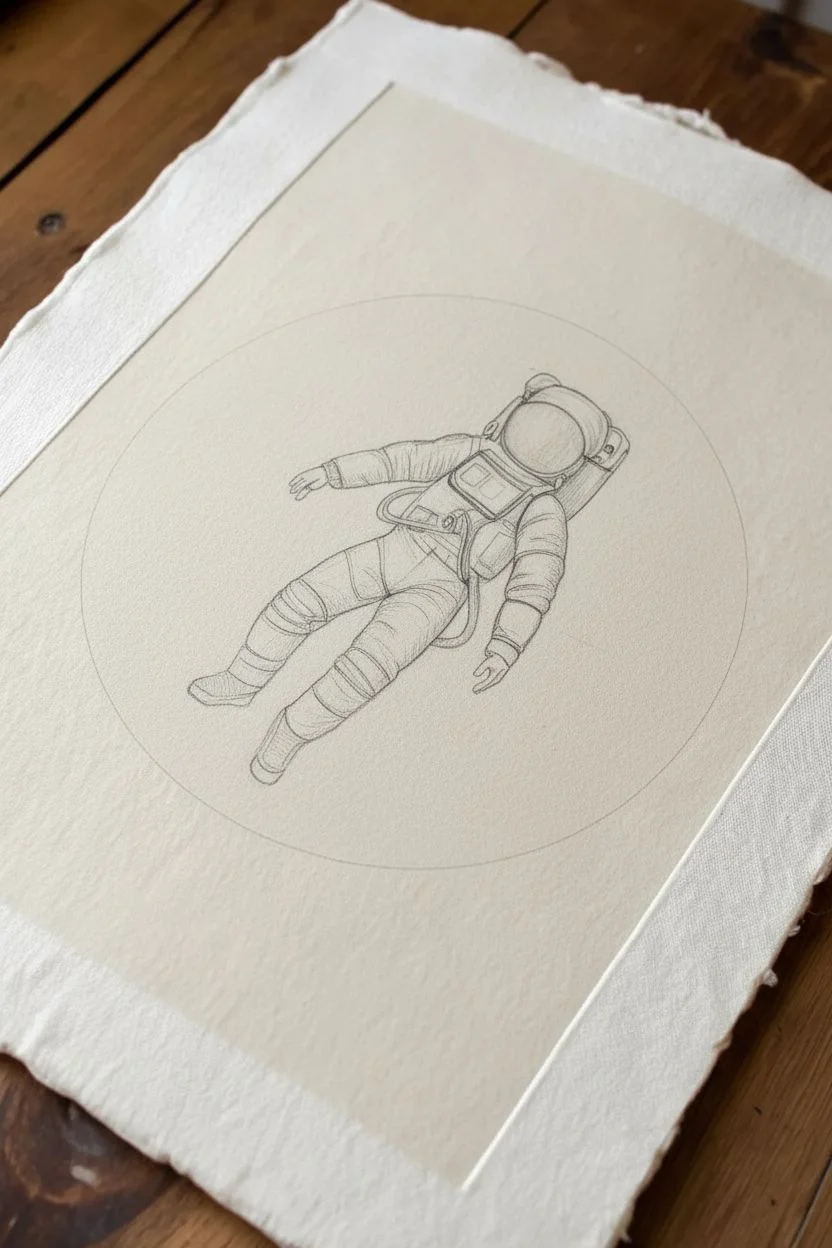
Step 1: Drafting the Design
-
Set the boundary:
Begin by finding the center of your paper and using a compass (or tracing a bowl) to lightly draw a perfect circle. This will be your window into space. -
Establish the pose:
Sketch a diagonal line through the circle to guide the astronaut’s angle. Draw a basic stick figure drifting along this axis, keeping the legs bent and arms floating outward to mimic zero gravity. -
Block in the volume:
Draw oval shapes over your stick figure to build the bulk of the space suit. Keep the helmet large and round, and sketch the rectangular backpack (PLSS) just visible behind the shoulders. -
Refine the suit details:
Erase your guide lines and define the suit’s sections. Sketch the ribbed joints at the knees, elbows, and shoulders, and add the control module box on the chest.
Step 2: Inking the Astronaut
-
Clean outlines:
Using a 01 waterproof fine liner, carefully go over your pencil sketch. Use a slightly broken or wavy line for the suit fabric areas to suggest a heavy, wrinkled texture rather than rigid plastic. -
Adding texture:
Switch to your thinnest 005 pen for internal details. Draw curved hatching lines across the arms and legs; this curvature is crucial to make the limbs look cylindrical rather than flat. -
Creating dimension:
Add deeper shadows where the limbs overlap or bend using cross-hatching. I like to concentrate these dark marks specifically under the backpack and between the legs to “pop” the figure forward. -
The helmet reflection:
Inside the visor, draw a reflection of a horizon or simple geometric shapes. Color the dark parts of the visor with the pen, but leave small white areas or use a touch of diluted reddish ink for the glass tint.
Bleed Prevention
Ensure your fine liner outlines are 100% waterproof before applying the black ink wash. If unsure, test your pen on a scrap piece of paper and brush water over it first.
Step 3: Filling the Void
-
Outline the barrier:
Trace the main large circle border with your 05 pen to create a hard stop for the paint. Be extremely careful not to cross through the astronaut’s limbs where they extend near the edge. -
Painting the black:
Using India ink or black gouache, fill in the negative space around the astronaut. Use a small brush to cut in close to the suit outlines first, then fill the rest of the circle. -
Drying time:
Allow the black background to dry completely. If the black looks patchy, apply a second coat for that deep, infinite space look. -
Stars and sparkle:
Once fully dry, take a white gel pen and dot in the stars. Vary your pressure to make some stars tiny specks and others larger dots. -
finishing touches:
Add a few ‘lens flare’ stars by drawing a small cross with the white pen. Finally, create the rustic deckled look by placing a ruler along the paper’s edge and tearing the excess paper against it gently.
Pro Tip: Fabric Weight
To make the space suit look heavy and pressurized, draw small ‘C’ shaped creases around the elbows and knees. This mimics thick material bunching up.
Frame your floating astronaut to inspire cosmic dreams in any room
BRUSH GUIDE
The Right Brush for Every Stroke
From clean lines to bold texture — master brush choice, stroke control, and essential techniques.
Explore the Full Guide
High-Top Sneaker Studies
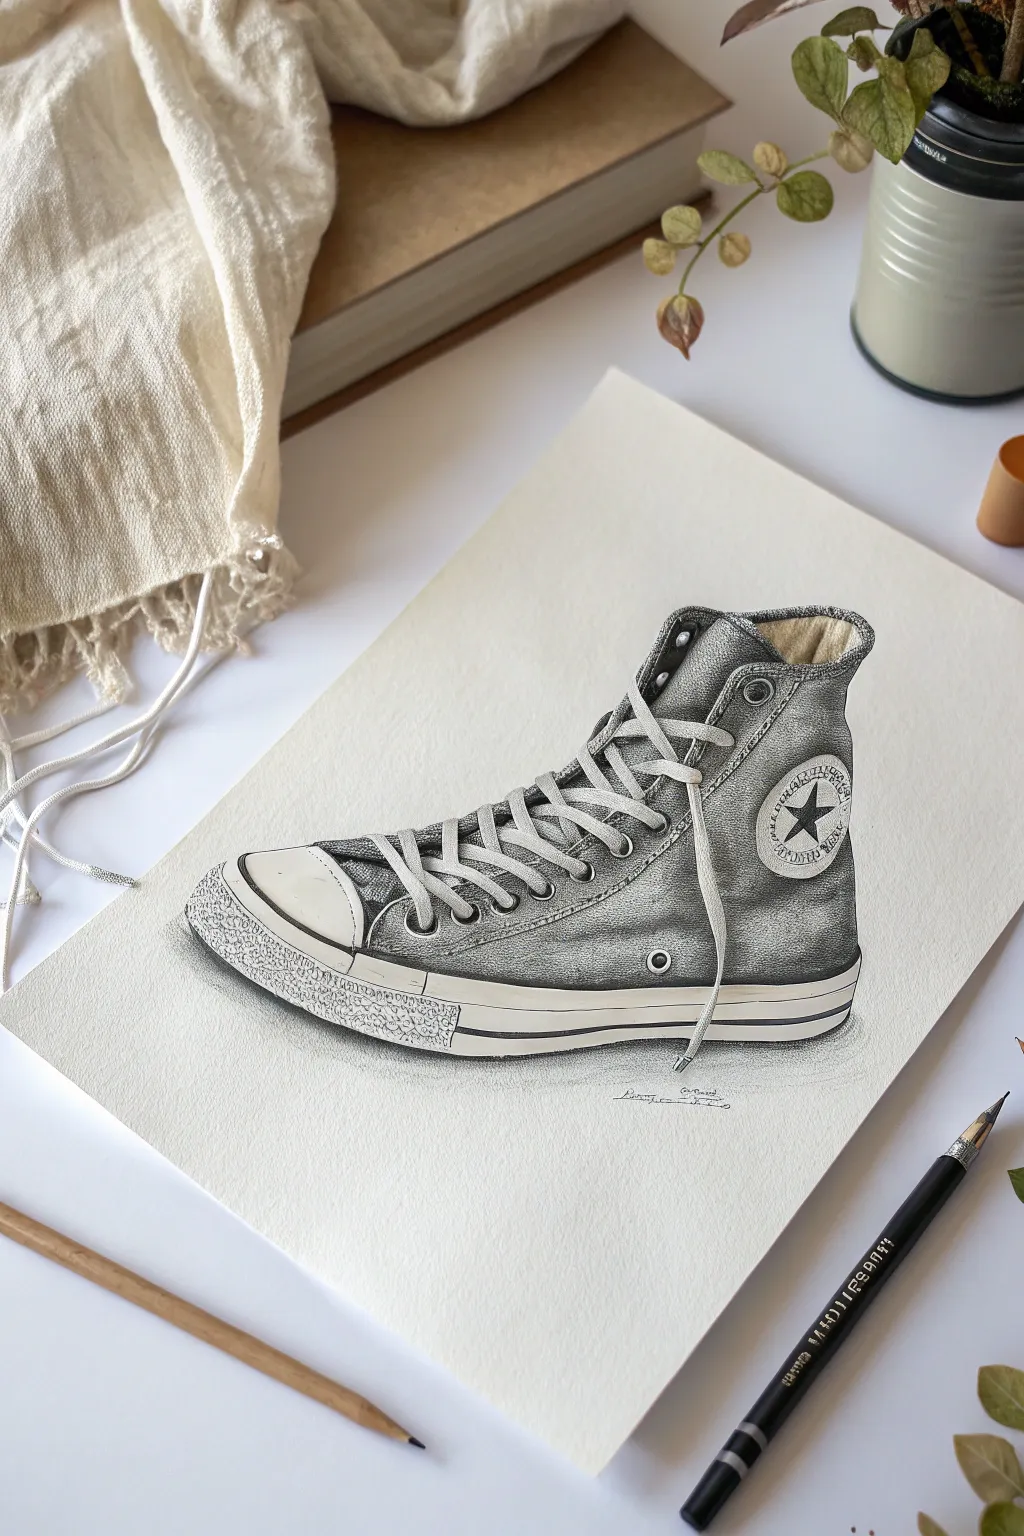
Master the art of texture and shading with this realistic study of a vintage high-top sneaker. You will learn to differentiate between the woven canvas fabric and the smooth, bumpy rubber sole using simple graphite techniques.
How-To Guide
Materials
- Drawing paper (medium tooth)
- Graphite pencils (HB, 2B, 4B, 6B)
- Mechanical pencil (0.5mm)
- Kneaded eraser
- Precision stick eraser
- Blending stump (tortillon)
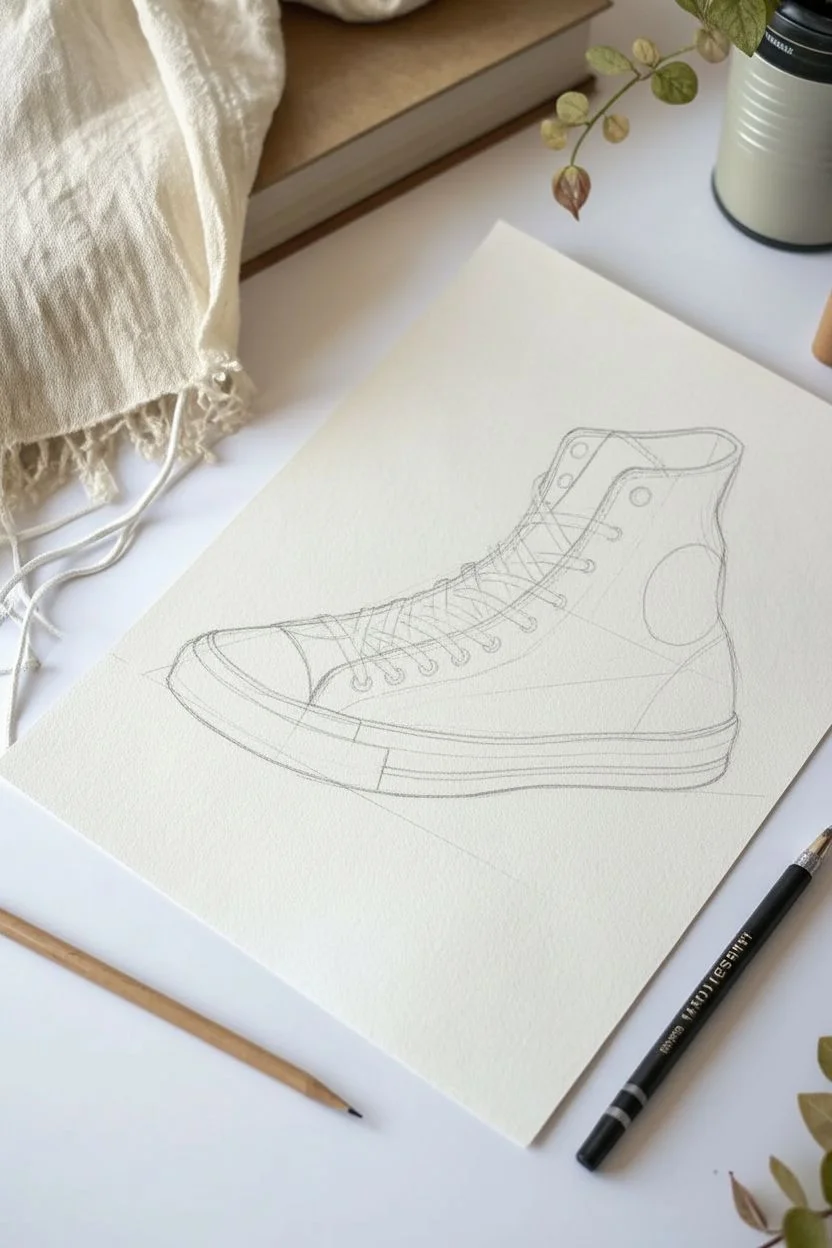
Step 1: Drafting the Silhouette
-
Establish the baseline:
Start by lightly drawing a horizontal line for the bottom of the sole, curving it slightly upward at the toe area. -
Block the shape:
Sketch the main body of the shoe using light, geometric lines. Think of it as a boot shape that leans slightly forward. -
Define the sole:
Draw a parallel line above your baseline to create the thick rubber midsole. Mark off the rounded toe cap at the front. -
Placement details:
Sketch the rough position of the circular ankle patch, the tongue, and the curve where the shoelaces will sit.
Smudge Prevention
Graphite sketches get messy quickly. Place a piece of scrap paper under your drawing hand to prevent smearing your work as you move across the page.
Step 2: Lacing Up
-
Eyelet positioning:
Mark small circles for the metal eyelets running up the front edge of the sneaker. -
weaving the laces:
Draw the laces crisscrossing through the eyelets. Don’t make them perfectly straight; give them slight curves to show tension and slack. -
Loose ends:
Sketch the aglets (tips) of the laces hanging down loosely over the side of the shoe for a casual look. -
Refining contours:
Go over your outline with a mechanical pencil to sharpen the edges, adding the stitching lines along the seams.
Step 3: Shading the Canvas
-
Base fabric tone:
Using an HB pencil, lightly shade the entire upper canvas part of the shoe. Avoid the laces, rubber sole, and logo patch. -
Creating texture:
For that denim-like look, I like to use a scumbling technique here—making tiny, tight circular motions to build up a grainy texture. -
Deepening shadows:
Switch to a 2B pencil to darken the areas where the fabric folds, particularly around the ankle and under the laces. -
The logo patch:
Carefully draw the star and text inside the circle patch. Shade the background of the patch lightly, leaving the star and letters white. -
Metal details:
Fill in the centers of the eyelets with a 4B pencil so they look like holes. Leave tiny white spots on the metal rings to mimic shiny reflections.
Level Up: Aged Look
Don’t keep the sole perfectly white! Add random scuffs and faint grey smudges on the rubber to make the sneaker look well-loved and worn.
Step 4: Sole and Finishing
-
Toe cap texture:
The rubber toe cap has a unique diamond or bumpy texture. Use small dots and ‘u’ shapes to create this rough surface. -
Midsole stripe:
Draw the signature racing stripe along the middle of the rubber sole. Darken it firmly with a 4B or 6B pencil. -
Lace shadows:
Add small, dark cast shadows directly underneath where the laces overlap the tongue to create depth and separate the layers. -
Grounding the shoe:
Use your softest pencil (6B) to smudge a dark shadow underneath the entire sole so the sneaker doesn’t look like it’s floating. -
Highlight recovery:
Take your precision eraser and lift out bright highlights on the top of the rubber toe cap and the edges of the laces.
Step 5: Final Touches
-
Contrast check:
Step back and look at your drawing. Darken the deepest blacks in the creases and the sole stripe to make the image pop. -
Sign it:
Add your signature near the heel to complete the study.
You’ve just created a timeless piece of footwear art that looks ready to walk off the page.
Roaring T-Rex Skeleton
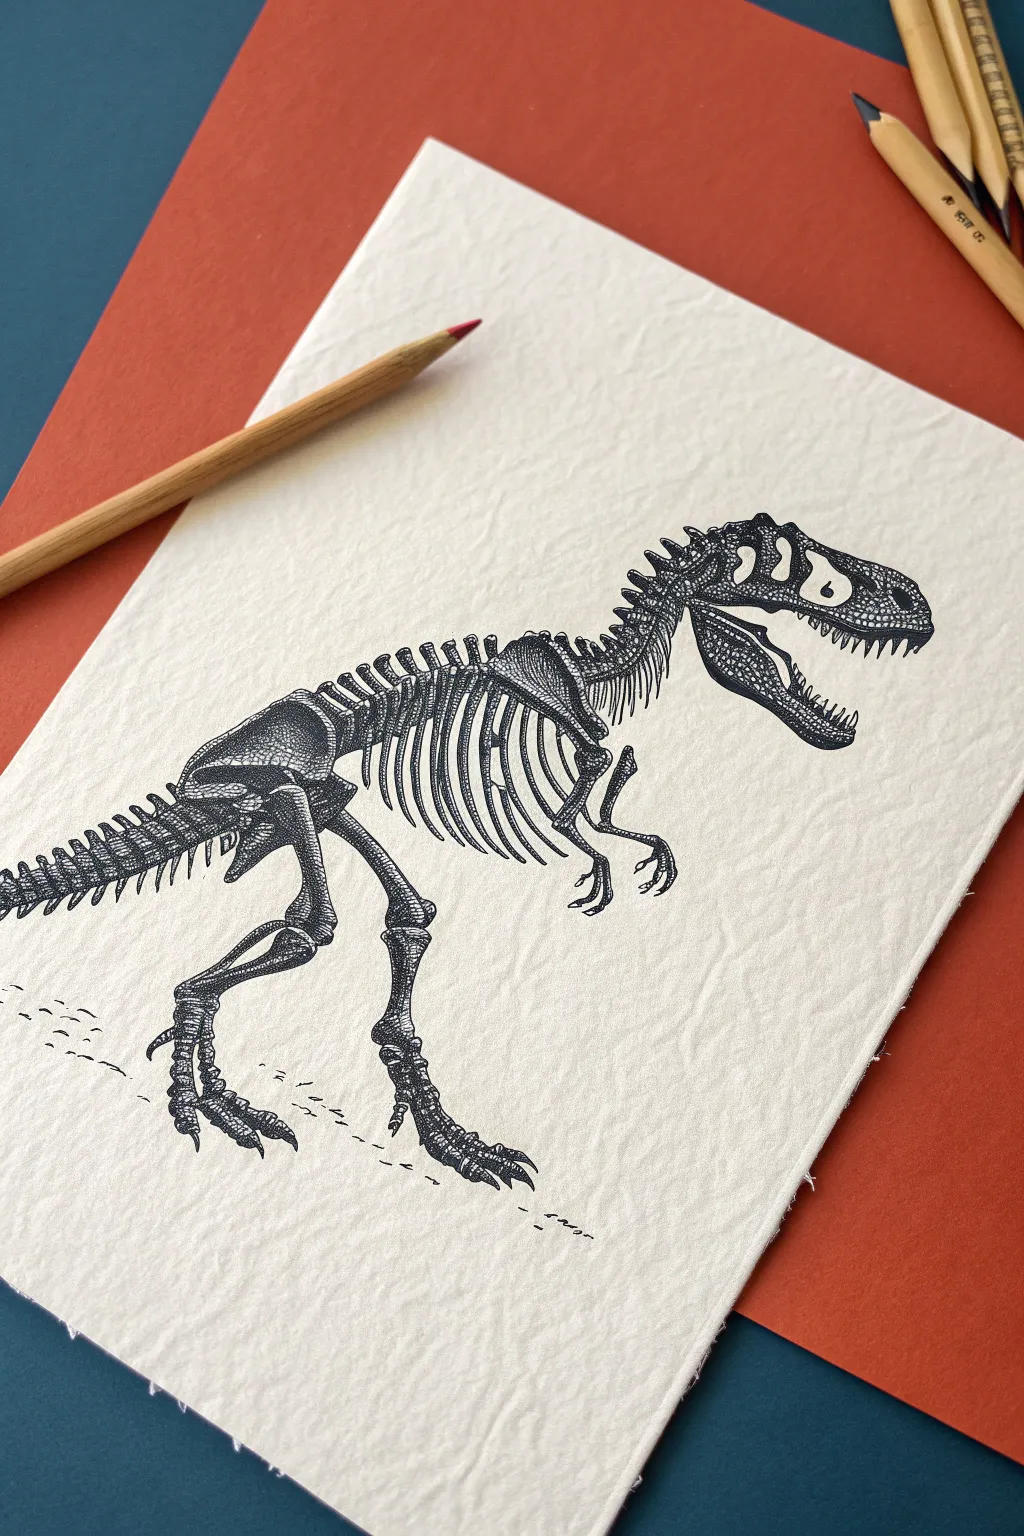
Capture the raw power of the prehistoric world with this detailed skeletal drawing. By using fine liner pens on textured paper, you will achieve a museum-quality look that highlights the intricacies of dinosaur anatomy.
Step-by-Step Guide
Materials
- Textured heavy paper (cold press watercolor or sketching paper)
- HB graphite pencil
- Kneaded eraser
- Black fine liner pens (sizes 01, 005, and 05)
- Reference image of T-Rex skeleton
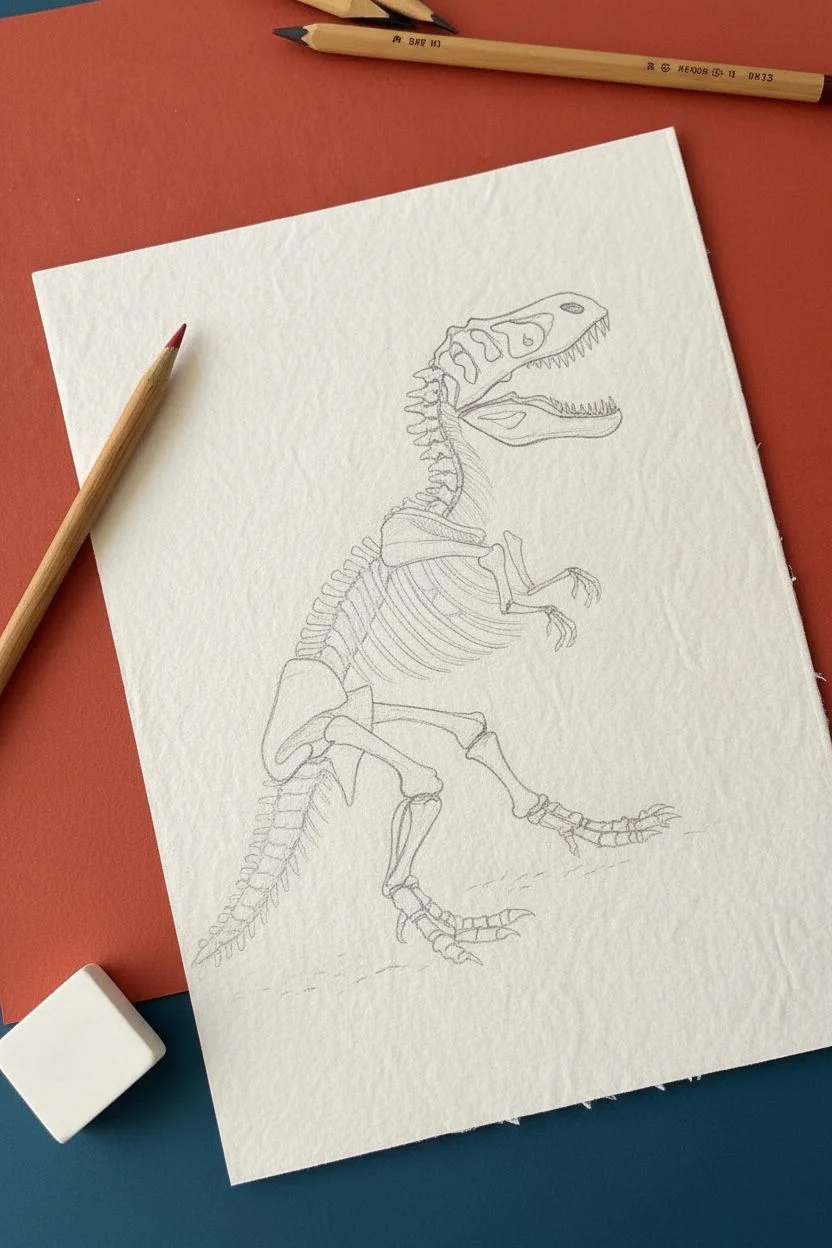
Step 1: The Pencil Framework
-
Spine curve:
Begin by lightly sketching a long, sloping ‘S’ curve across your paper to establish the dinosaur’s spine and tail. -
Body masses:
Draw an oval shape near the front of the curve for the ribcage and a smaller, rounded triangle further back for the hip section. -
Skull blocking:
Sketch a large, rectangular block with a rounded snout at the top of the spine for the skull, keeping the jaw open to create a roaring pose. -
Limb placement:
Map out the legs using stick-figure lines first, noting the heavy thigh bone and the bird-like backward bend of the ankle. -
Tiny arms:
Add the extremely small forearm lines coming from the front of the ribcage.
Bone Texture Tip
Don’t draw straight, continuous lines for the bones. Use slightly shaky or broken lines to give the skeleton an aged, organic fossil appearance.
Step 2: Anatomical Details
-
Vertebrae definiton:
Along the spinal line, sketch small, individual blocky shapes to represent the vertebrae, making them smaller as you reach the tail tip. -
Rib cage:
Draw slender, curved lines dropping down from the spine to form the ribs, slightly overlapping them near the chest. -
Skull features:
Refine the skull by sketching the large openings (fenestrae) behind the eye and near the jaw; add jagged triangles for teeth. -
Foot claws:
Detail the feet with three massive forward-facing toes and sharp talons on each. -
Hip and leg bones:
Thicken the leg sketches into bone shapes, widening the ends where joints connect.
Smudge Prevention
Ink on textured paper takes longer to dry than on smooth paper. Wait at least 5 minutes before erasing pencil lines to avoid ruining the blacks.
Step 3: Inking and Texture
-
Main outlines:
Switch to your 05 fine liner pen to trace the outer edges of the skull, legs, and main spinal column. -
Rib detailing:
Use a finer 01 pen to ink the ribs; this lighter line weight helps them look more delicate compared to the leg bones. -
Clean up:
Once the ink is completely set, gently erase all underlying graphite pencil lines with your kneaded eraser. -
Shadow blocking:
With the 05 pen, color in the darkest areas, particularly inside the skull openings and the shadowed side of the hip bone. -
Hatching technique:
Using the 01 pen, add series of short, parallel lines (hatching) to the undersides of the ribs and tail vertebrae to create volume. -
Stippling texture:
I like to switch to the ultra-fine 005 pen here to add tiny dots (stippling) on the skull and joints, mimicking the porous texture of fossilized bone. -
Grounding:
Add a few broken, horizontal dashed lines under the feet to imply the ground handling the dinosaur’s weight.
Now you have a dynamic piece of paleo-art ready to frame or display.


Cyberpunk Cyborg Arm
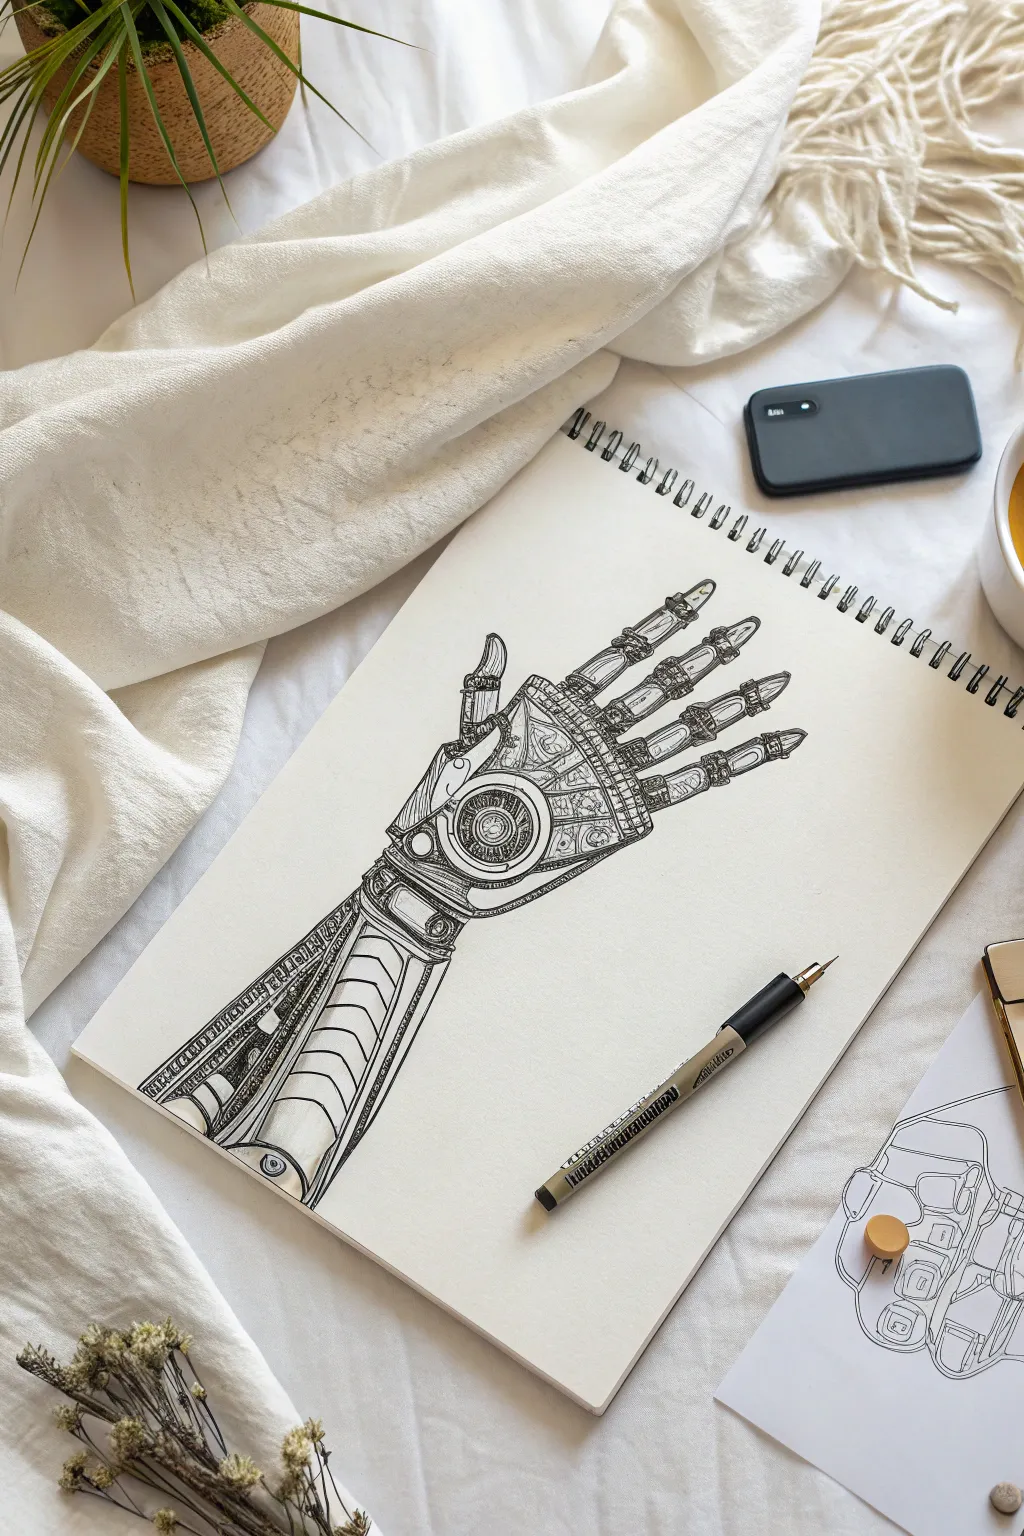
Merge human anatomy with futuristic machinery in this detailed pen-and-ink study. You will build a robotic arm from simple geometric blocking all the way to intricate gears and piston details.
Step-by-Step
Materials
- Smooth drawing paper or sketchbook
- HB or 2B pencil
- High-quality eraser
- Fine liner pens (sizes 0.1mm, 0.3mm, and 0.5mm)
- Ruler (optional)
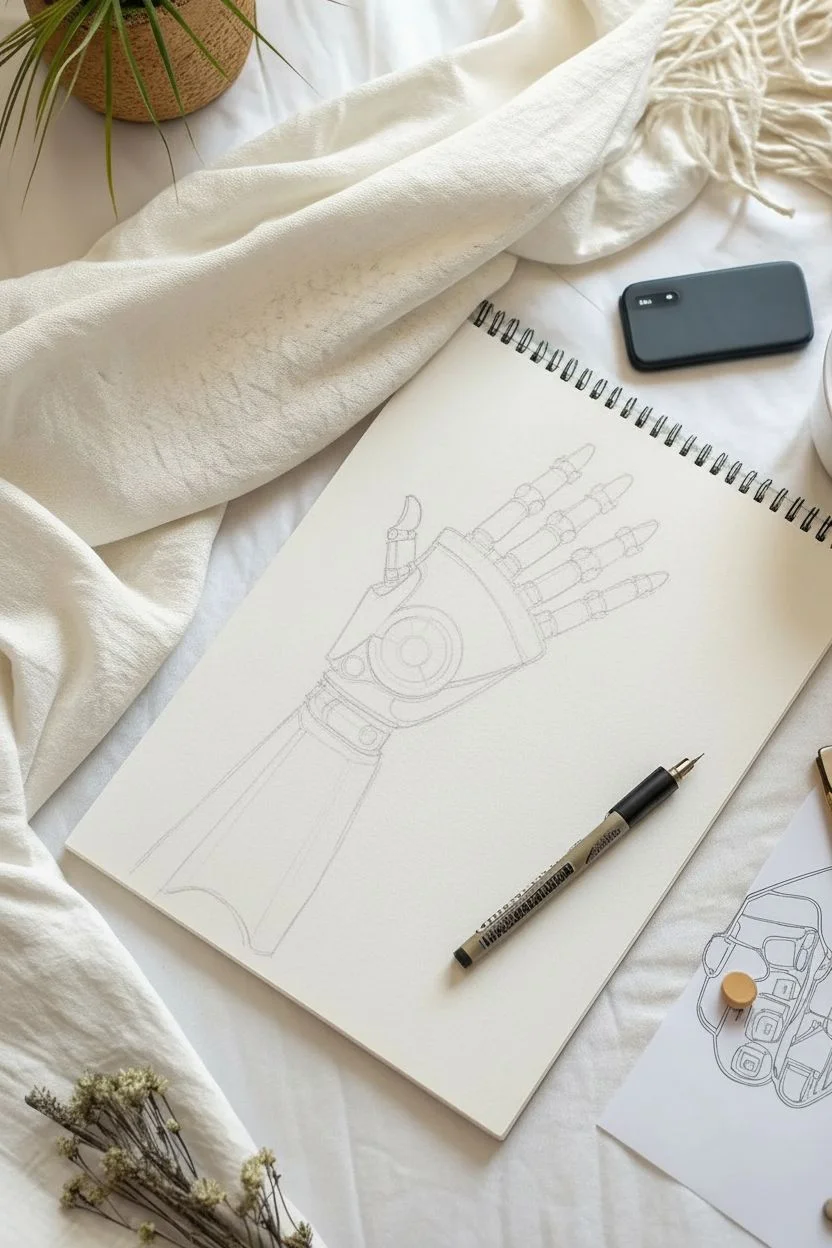
Step 1: Structural Sketching
-
Map the palm:
Start with a light pencil sketch. Draw a roughly pentagonal shape to represent the palm of the hand. -
Position the joints:
Draw small circles where the fingers will connect to the palm to act as your primary knuckles. -
Block in the fingers:
Sketch lines extending from the knuckles for the fingers, marking the joint locations with smaller circles. Keep the fingers slightly spread. -
Create volume:
Draw cylinders around your finger guidelines. Instead of soft skin, think of these as segmented metal tubes with gaps at the joints. -
Form the arm:
Extend a large cylinder down from the wrist for the forearm. Taper it slightly as it reaches the wrist joint. -
The central core:
Draw a distinct circle right at the wrist area. This will become the central power core or main hinge of the cyborg arm.
Smudge Alert
Ink needs patience! If you erase the pencil sketch too soon, the black lines will smear gray. Wait at least 5-10 minutes after your last pen stroke before erasing.
Step 2: Mechanical Detailing
-
Segment the plating:
Inside the forearm cylinder, draw curved lines to create overlapping metal plates. Think of armadillo armor shifting over muscle. -
Add pistons:
Sketch long, thin rectangles running parallel along the underside of the arm to represent hydraulic pistons. -
Detail the fingers:
Refine the finger segments. Make the tips pointed or chiseled like tools, and draw small horizontal bands at the knuckles to look like flexible tubing. -
Wire it up:
Draw thin, winding tubes connecting the back of the hand to the fingers. These wires add complexity and realism to the machinery. -
Refine the core:
Inside your wrist circle, draw concentric rings and small gear teeth to make it look like a functional mechanical part.
Step 3: Inking and Definition
-
Start the main outlines:
Switch to your 0.5mm pen. Trace the outer silhouette of the entire arm and the main finger shapes to make them pop. -
Ink the mechanics:
Use a 0.3mm pen for the internal machinery, like the pistons and large armor plates. Keep your hand steady but don’t worry if lines aren’t perfect. -
Detail the core:
Carefully ink the wrist core. I like to use the 0.1mm pen here to keep the tiny gear teeth from bleeding into a black blob. -
Add texture marks:
Using the 0.1mm pen, draw tiny circles for rivets or screws on the corners of the metal plates. -
Create shadows:
Add hatching (closely spaced parallel lines) to the underside of the fingers and the side of the arm to create cylindrical depth. -
Darken the gaps:
Fill in the deep spaces between the wires and pistons with solid black ink. This high contrast makes the metal parts stand out. -
Clean up:
Wait for the ink to dry completely, then erase all underlying pencil lines to reveal the crisp mechanical structure. -
Final polish:
Go back with your finest pen and add random scratches or scuff marks to the metal plates for a worn, battle-tested look.
Power Visuals
Want to make the arm look active? Use a neon gel pen or colored pencil (blue, red, or green) just inside the wrist core and between the plated segments to create a glowing energy effect.
Now you have a complex piece of futuristic tech ready to be part of a larger character design.
Menacing Shark
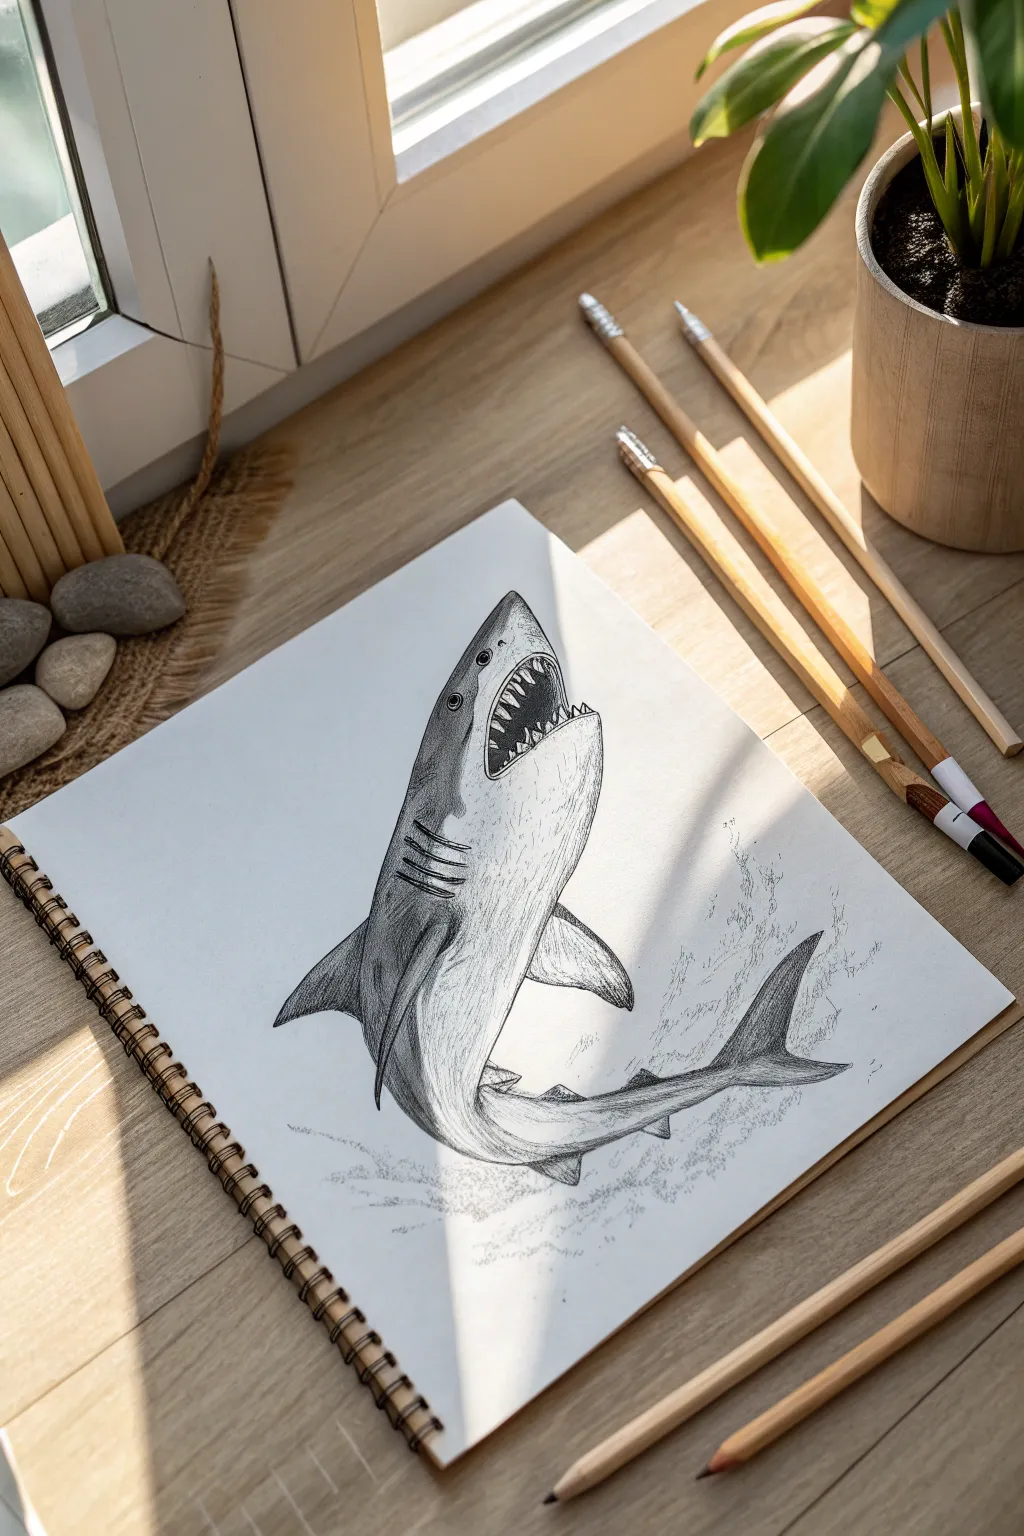
Capture the raw power of the ocean’s top predator with this dynamic pencil sketch. You will learn to render smooth skin textures, sharp teeth, and energetic water splashes to create a shark that looks like it is launching right off the page.
How-To Guide
Materials
- Sketchbook paper (heavyweight)
- Graphite pencils (HB, 2B, 4B, and 6B)
- Kneaded eraser
- Pencil sharpener
- Blending stump or tissue
- Fine liner pen (optional for darkest details)
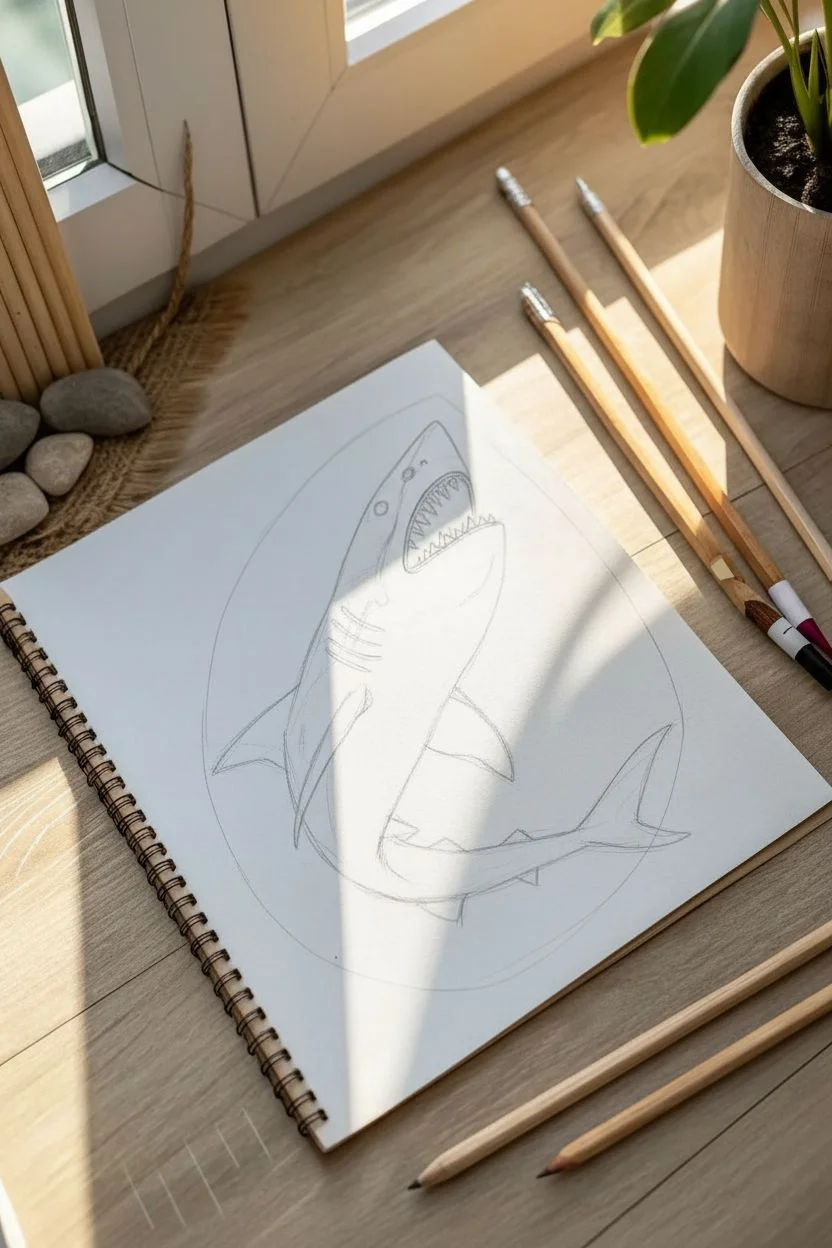
Step 1: Basic Structure
-
Line of Action:
Start with your HB pencil and draw a long, curved line diagonally across the page. This ‘C’ curve will define the movement of the shark jumping out of the water. -
Torpedo Body:
Lightly sketch a torpedo-like oval shape around your action line, making it thicker towards the chest and tapering significantly towards the tail. -
The Mouth Block:
At the top end of the oval, sketch a wedge or sideways ‘V’ shape to indicate the open jaw. Keep this loose for now; we just need the placement. -
Fin Placement:
Add a large triangle on the back for the dorsal fin, a long curved triangle on the side for the pectoral fin, and the crescent moon shape for the caudal (tail) fin.
Shark Skin Texture
Use a blending stump to soften the transition between the dark back and white belly. It shouldn’t be a sharp line, but a soft gradient for realism.
Step 2: Defining Features
-
Refining the Outline:
Go over your initial shapes with a confident line, connecting the fins smoothly to the body. Give the snout a slight point and ensure the belly curve looks full. -
Gill Slits:
Just behind the jaw but before the pectoral fin, draw five short, curved parallel lines for the gills. These should curve slightly backward. -
The Eye and Nostril:
Place a small circle for the eye right above the corner of the mouth. Add a tiny dot near the tip of the snout for the nostril. -
Razor Teeth:
Inside the open ‘V’ of the mouth, draw rows of small, sharp triangles. Sharks have messy teeth, so they don’t need to be perfectly aligned.
Level Up: Action Lines
Draw faint, swift lines following the direction of the jump near the fins and tail. This ‘speed blurring’ effect amplifies the sense of motion.
Step 3: Shading and Texture
-
Separation Line:
Lightly sketch a wavy line running from the snout, along the side, to the tail. This separates the dark grey top of the shark from the white underbelly. -
Base Shading:
Using a 2B pencil, fill in the upper section of the body above your separation line. Use consistent strokes following the curve of the body. -
Deepening Values:
Switch to a 4B pencil to add darker shading near the spine and the edges of the fins. This creates a rounded, 3D effect. -
Detailed Mouth:
Shade the inside of the mouth behind the teeth very darkly, perhaps with a 6B. I like to leave the teeth pure white to make them pop against the dark background. -
Fin Texture:
Add shading to the dorsal and pectoral fins, making the trailing edges slightly darker than the front edges. -
Blending:
Use a blending stump or a tissue to smooth out your graphite strokes on the body, creating that sleek, leathery skin look.
Step 4: Atmosphere and Finish
-
Underbelly Shadows:
Even though the belly is white, add very subtle, light shading underneath the pectoral fin and near the tail to show volume. -
Water Splash Base:
At the base of the tail, sketch light, erratic scribbles to represent churning water. -
Splash Details:
Add small dots and energetic sprays of lines extending outward from the tail area. Keep your hand loose here to simulate the chaos of splashing water. -
Highlights:
Use your kneaded eraser to lift off a small highlight on the top of the snout and the leading edge of the fins to suggest wet skin reflecting sunlight. -
Final Contrast:
Do one last pass with your darkest pencil (6B) to deepen the eye, the gills, and the deepest shadows of the tail for maximum impact.
Now you have a ferocious great white leaping from the depths, ready to display on your wall
Cool Hand Gestures
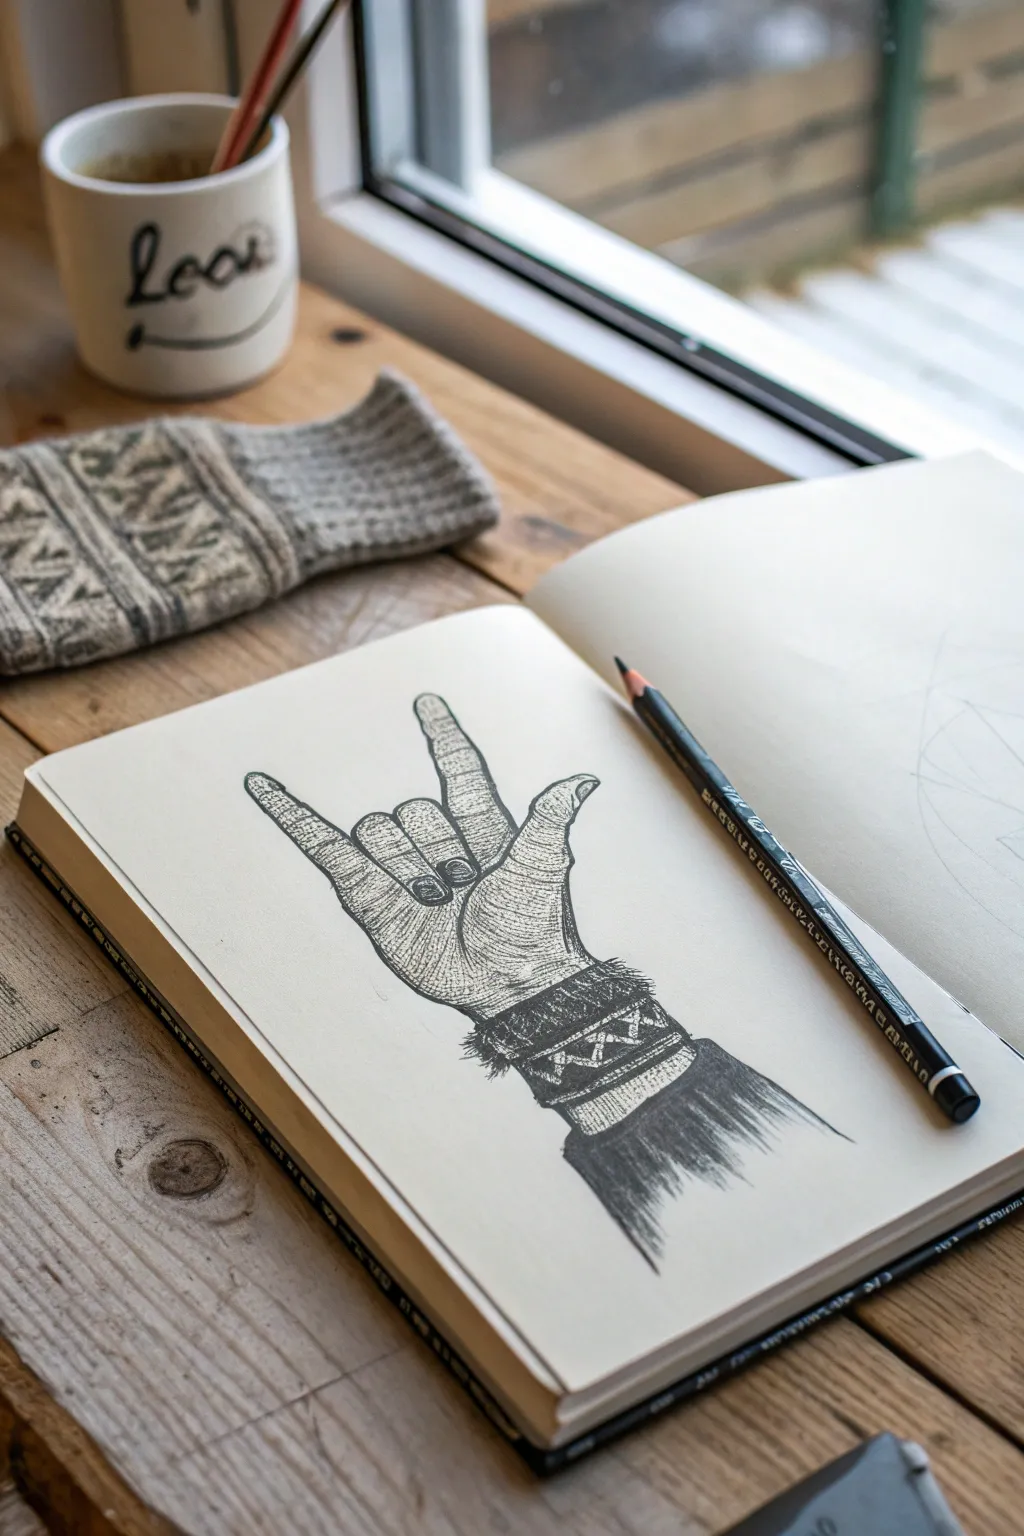
Capture the attitude of rock and roll with this detailed sketch of the classic “horns” hand gesture. Using distinct hatching techniques and high contrast shadows, you will create a drawing that looks like a vintage engraving or a cool band logo.
Step-by-Step Guide
Materials
- Sketchbook with smooth drawing paper
- HB pencil for outlining
- Black fine liner pens (0.1mm and 0.5mm) OR soft charcoal pencil
- Eraser (kneaded preferred)
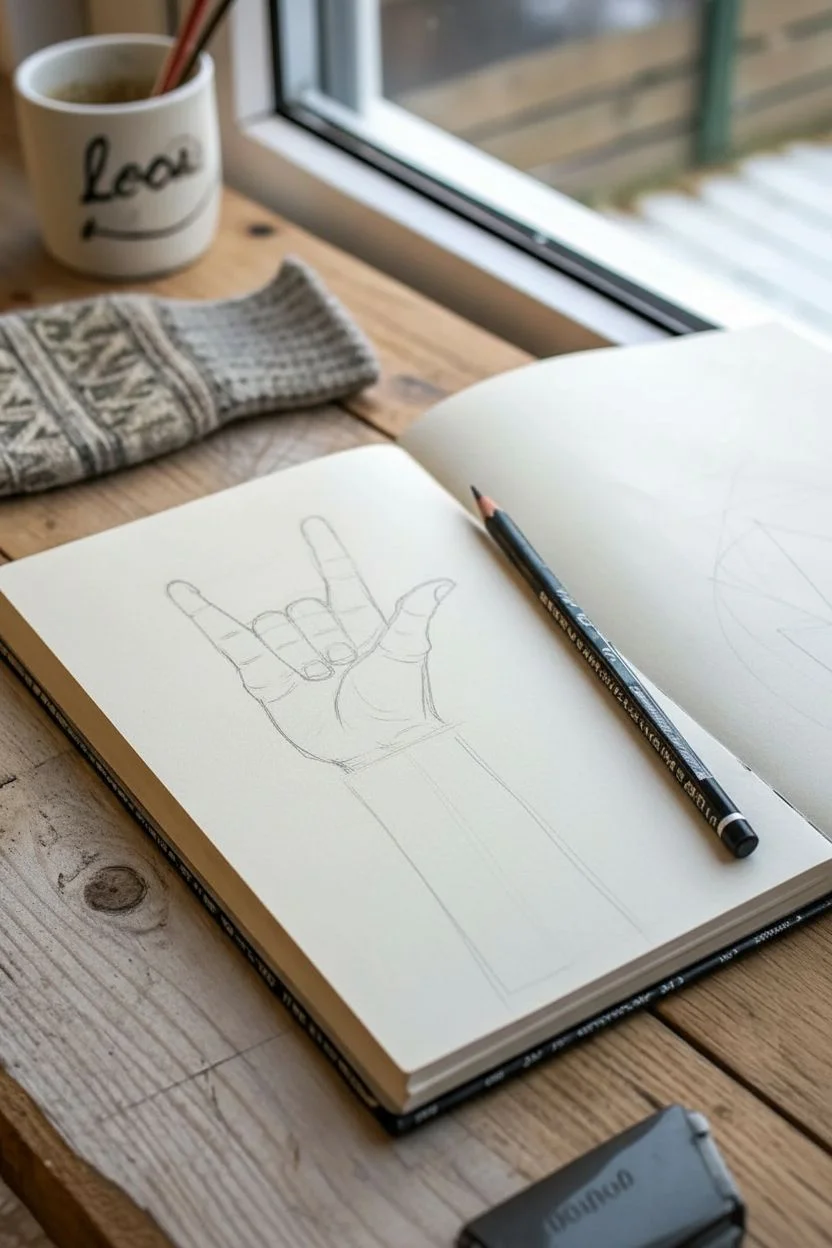
Step 1: Structural Sketch
-
Block the palm:
Start by lightly sketching a rounded square shape in the center of your page to represent the palm of the hand. -
Position the extended fingers:
Draw two cylinders extending upward from the left and right corners of the palm to form the index and pinky fingers. -
Sketch the folded fingers:
In the gap between the extended fingers, sketch two shorter shapes curled downward to represent the middle and ring fingers. -
Place the thumb:
Draw the thumb shape crossing horizontally over the folded fingers, tucking the tip slightly inward. -
Add the wrist:
Extend two vertical lines down from the bottom of the palm to create the wrist and forearm area. -
Refine the outline:
Go over your shapes to create a single contour line for the hand, adding slight bumps where the knuckles protrude.
Step 2: Pattern & Detail
-
Define the cuff:
Draw a thick band around the wrist area to simulate a knitted cuff or bracelet. -
add geometric pattern:
Inside the cuff band, lightly sketch a repeating ‘X’ or diamond geometric pattern. -
Draw the nails:
Sketch the fingernails on the index and pinky fingers, keeping them somewhat short and rounded. -
Add skin folds:
Draw clear, curved lines at the finger joints and across the thumb to indicate wrinkles and skin folds. -
Solidify the contour:
Using your 0.5mm pen or sharp charcoal, trace the final outer perimeter of the hand with a confident, dark line.
Curve Control
When hatching the fingers, curve your lines slightly like a rainbow. Straight lines make drawings look flat, but curved lines instantly create volume.
Step 3: Shading & Texture
-
Black out the nails:
Fill in the fingernails completely with black ink for a bold, painted look. -
Directional hatching:
Using a finer 0.1mm tip, shade the fingers with horizontal curved lines; I find this really helps convey the round 3D shape of the fingers. -
Deepen the shadows:
Add denser cross-hatching (overlapping lines) in the crevices between fingers and under the thumb. -
Texture the hand:
Add short, fine hatching marks across the back of the hand to mimic the texture of skin pores and tension. -
Fill the cuff:
Darken the negative space around your ‘X’ pattern on the cuff so the geometric shape stands out in white. -
Add fuzzy edges:
Draw tiny, loose strokes along the edges of the cuff to give it a soft, knitted wool appearance. -
Create the fade:
Below the cuff, scribble a solid dark block of shadow that fades out into loose, scratchy lines at the bottom. -
Final touches:
Let the ink dry completely, then erase your initial pencil guides to reveal the crisp illustration.
Skeleton Upgrade
Want to make it edgier? Instead of drawing skin, use the same pose but draw finger bones and knuckles for a skeleton hand version.
Give yourself a hand for finishing this gritty, stylized artwork.
Samurai or Ninja Warrior
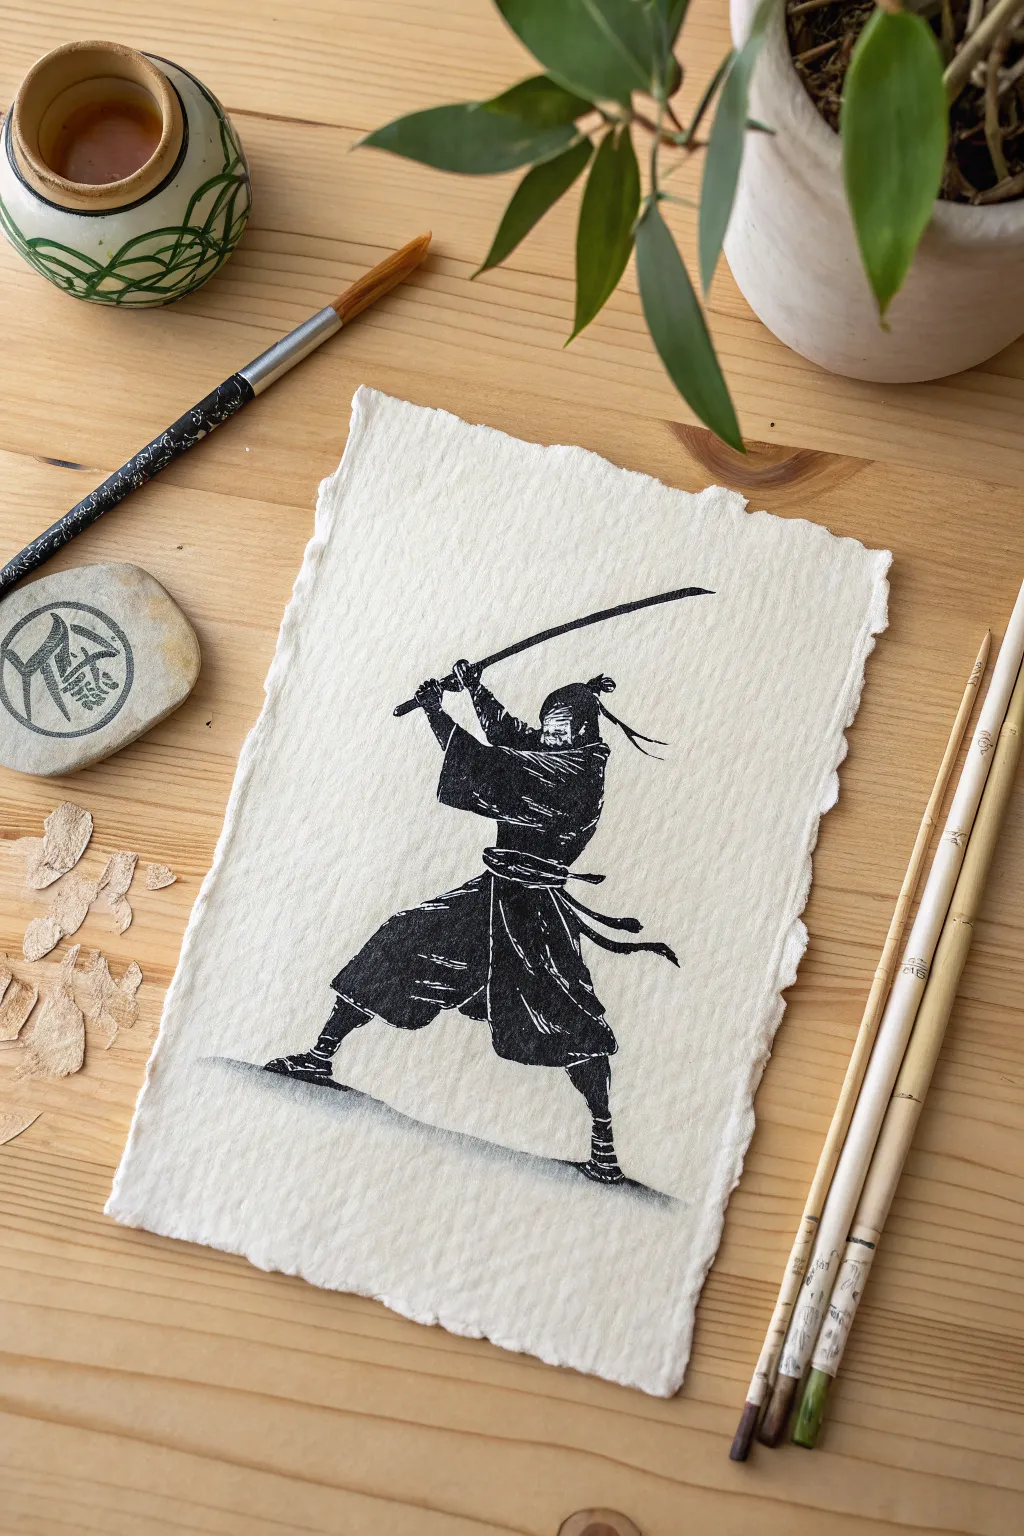
Capture the focused energy of a warrior with this striking high-contrast ink drawing. Using textured paper and bold black strokes, you will create a timeless piece that mimics the look of a traditional woodblock print.
Detailed Instructions
Materials
- Heavyweight textured paper (watercolor or handmade cotton paper)
- HB Drawing pencil
- Kneaded eraser
- Black brush pen (or India ink with a round brush)
- Fine-point black illustration pen (0.5mm)
- White gel pen (optional, for corrections)
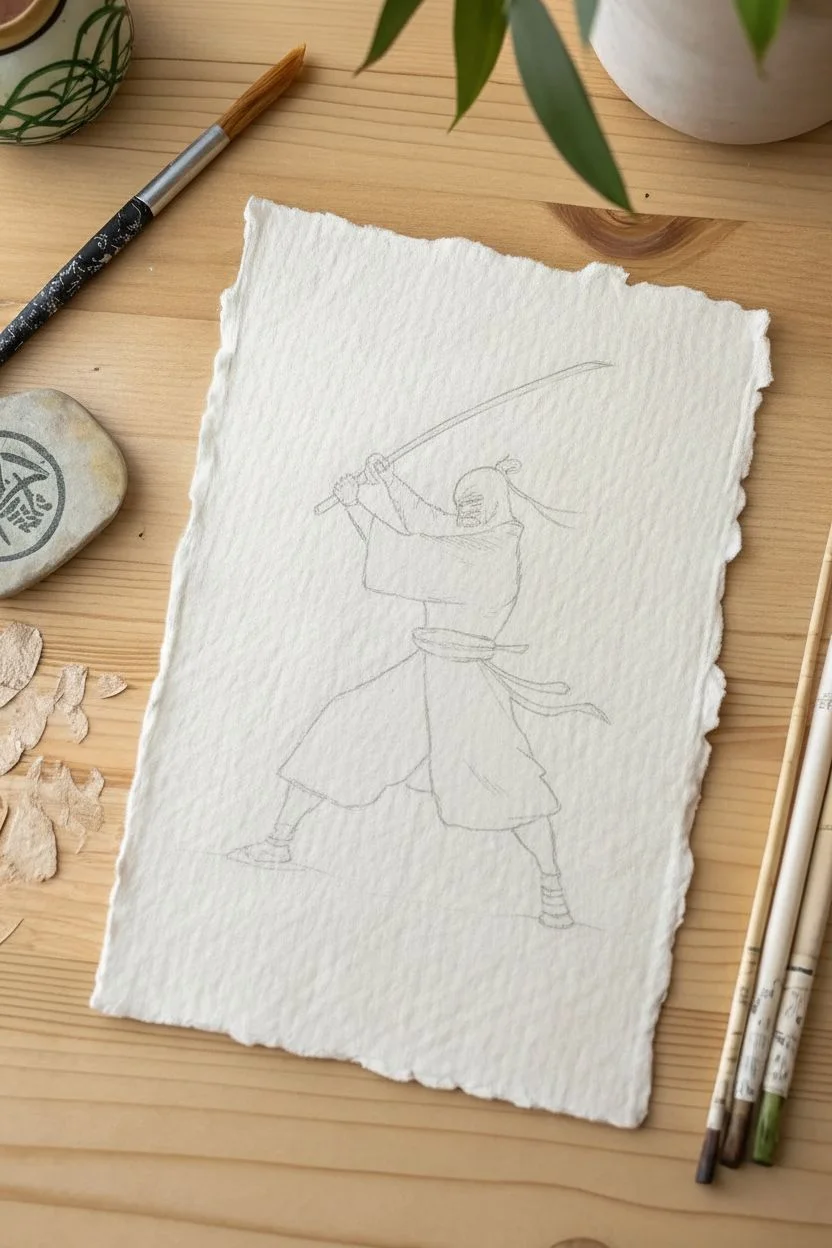
Step 1: Drafting the Warrior
-
Prepare the edges:
To mimic the handmade look in the photo, gently tear the edges of your paper against a ruler instead of cutting them. This creates a soft ‘deckle’ edge that adds instant character. -
Map the gesture:
Start with a very light stick figure to capture the pose. Draw a wide, triangular stance for the legs and a curved line for the spine leaning slightly forward into the strike. -
Position the arms:
Sketch the arms raised high above the head. The hands should be close together, gripping the imaginary handle, with elbows bent outward to show power. -
Add the sword:
Draw a long, slightly curved line extending from the hands. Ensure the blade angles downward significantly to suggest the moment before a strike. -
Flesh out the form:
Draw the wide ‘Hakama’ pants. These should look like a large, flowing skirt split in the middle. The fabric should billow out to the left, following the momentum of the swing. -
Define the sleeves:
Add the large, rectangular kimono sleeves. Let gravity do the work here; the sleeve fabric should hang down heavily from the raised wrists. -
Head and details:
Sketch the silhouette of the head. You can add a flowing headband or topknot blowing in the wind behind the head to accentuate the movement.
Step 2: Inking the Silhouette
-
Outline the highlights:
Before you touch the black ink, use your pencil to draw small ‘islands’ inside the clothing shapes. These will remain white to represent folds, muscle tension, and light hitting the fabric. -
Start the black fill:
Switch to your brush pen. Begin filling in the darkest areas of the torso and sleeves. I prefer to work from the top down to avoid smudging the ink with my hand. -
Detailing the hands:
Use the fine-point illustration pen for the hands and the sword hilt. These areas need precision that the brush pen might obscure. -
Creating texture:
When filling the pants, don’t make it a solid black block. Use quick, sweeping strokes with the brush pen that lift off at the end, leaving tiny streaks of white paper showing through to look like rough fabric texture. -
Defining the belt:
Leave a thin white gap (negative space) between the upper torso and the lower pants to represent the sash (obi). This visual separation is crucial for clarity. -
Inking the sword:
Carefully trace the sword blade with your fine-point pen. You can leave the top edge of the blade slightly open or thinner to catch the light.
Dry Brush Secret
To get the scratchy white lines inside the black pants perfectly, wipe most of the ink off your brush onto a paper towel first. Then, drag it quickly across the textured paper.
Step 3: Finishing Touches
-
Legs and feet:
Ink the lower legs and sandals. Keep the ankles distinct from the pants so the figure feels grounded. -
Dynamic ribbons:
If you added a headband or sash ties, ink them now with fluid, tapered strokes that look like they are whipping in the wind. -
The ground shadow:
Using a nearly dry brush pen (or lightly rubbing the side of your marker), create a horizontal, fuzzy shadow under the feet. This grounds the warrior so he isn’t floating in space. -
Refining edges:
Go back over the outer contour. If you want a rougher look, add small ‘chatter’ marks or loose lines around the silhouette to enhance the energetic feel. -
Cleanup:
Wait at least 15 minutes for the heavy ink to cure completely. Once dry, gently erase all visible pencil sketches to leave a stark black-and-white contrast.
Level Up: Hanko Seal
Carve a simple design into a small potato chunk or eraser and stamp it in red ink near the bottom corner. It mimics the traditional ‘chop’ signature found on ancient Japanese artwork.
Display your artwork in a simple floating frame to show off those beautiful torn edges
Glitch Effect Facial Feature
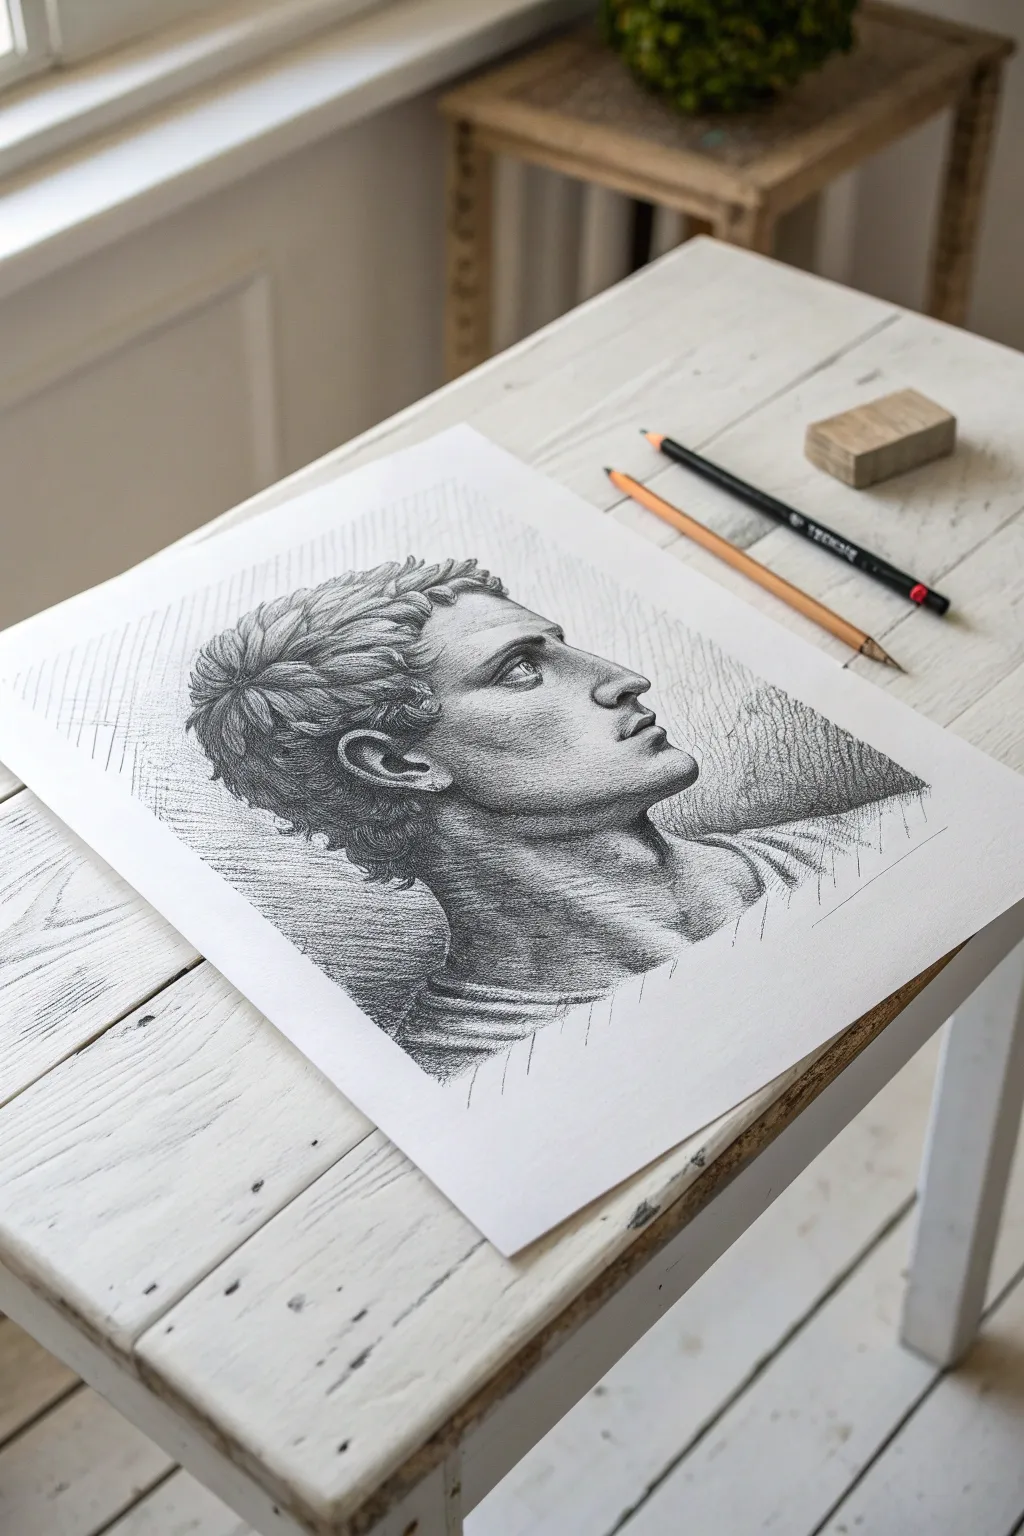
Capture the timeless beauty of a classical sculpture on paper using traditional shading techniques. This project focuses on drawing a male profile that mimics the texture and volume of carved marble through careful hatching.
Step-by-Step Tutorial
Materials
- High-quality white drawing paper
- Set of graphite pencils (HB, 2B, 4B)
- Kneaded eraser
- Vinyl eraser
- Pencil sharpener
- Blending stump (optional)
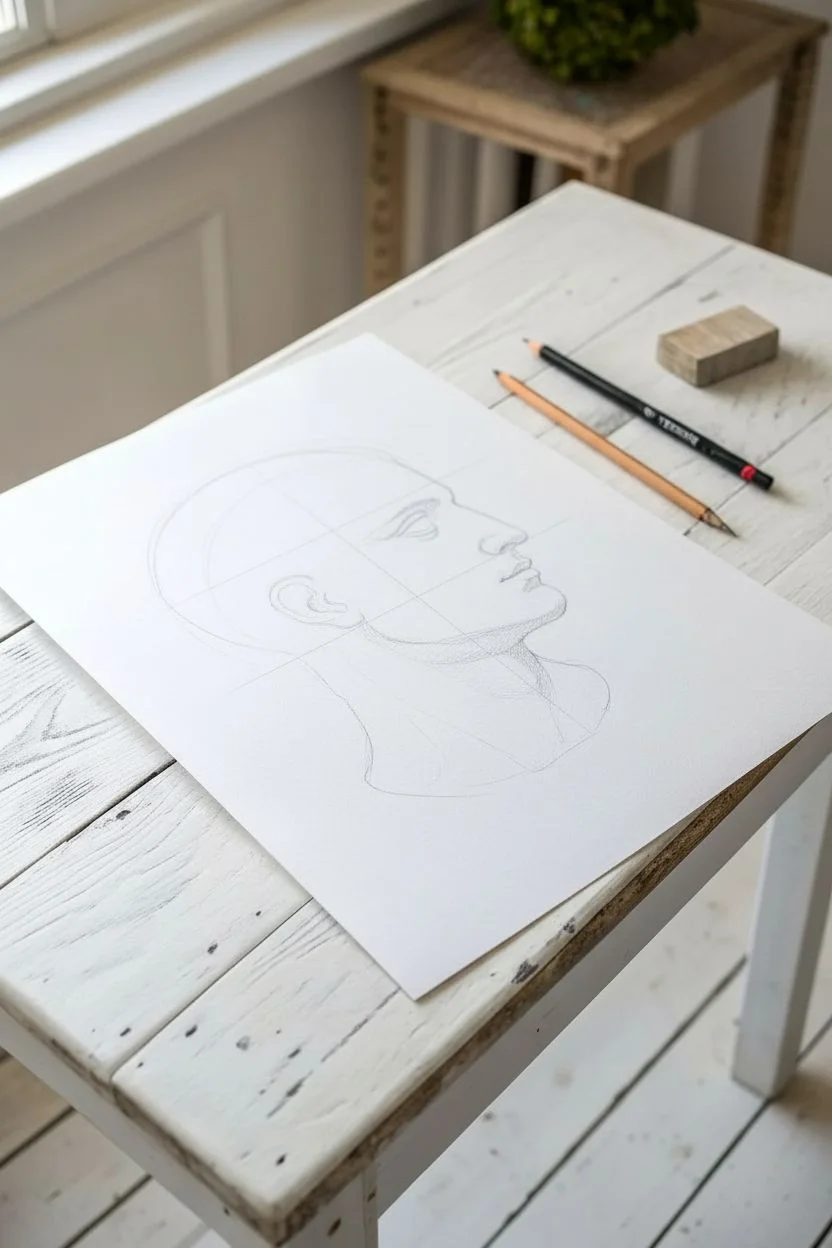
Step 1: Structural Layout
-
Cranium circle:
Begin with your HB pencil using a very light touch. Draw a large circle to represent the main mass of the skull, leaving plenty of room on the left side for the face. -
Jaw and chin:
Extend a curved line down from the circle to indicate the jaw, angling it inward to form a strong, square chin. -
Facial plane:
Draw a vertical line tangental to the front of the face to mark where the forehead, nose, and lips will align. -
Neck placement:
Sketch two thick lines for the neck, ensuring the back of the neck connects smoothly to the base of the skull circle. -
Feature guidelines:
Lightly mark horizontal lines to establish the height of the eye, the bottom of the nose, and the center of the mouth.
Clean Edges
Keep a piece of scrap paper under your drawing hand. This prevents your palm from smudging your pencil work and keeps the ‘marble’ skin looking pristine.
Step 2: Defining the Profile
-
Forehead and nose:
Trace a continuous contour from the forehead down to the bridge of the nose. Give the nose a straight, classical Roman shape with a distinct downward turn at the tip. -
Lips and chin:
Sketch the lips, keeping the upper lip slightly forward of the lower one. Define the chin with a firm, rounded curve. -
The eye:
Place the eye in a side profile view, looking upward. Since this simulates a statue, draw the iris and pupil without coloring them in darker than the rest of the eye; keep them sculptural. -
Ear construction:
Draw the ear between the eye and nose, angling it slightly backward. Focus on the C-shape of the outer rim and the inner cartilage details. -
Hair volumes:
Instead of drawing individual hairs, outline large, chunky shapes to represent the clusters of curls, similar to how a sculptor would carve them.
Dramatic Depth
To make the drawing look ancient, smudge the background hatching slightly with a tissue, but keep the face sharp and linear.
Step 3: Shading and Texture
-
First shadow pass:
Switch to a 2B pencil. Apply a base layer of diagonal hatching lines across the neck, under the jaw, and the side of the cheek. -
Deepening values:
Use a 4B pencil to darken the deepest shadow areas, specifically right under the chin and behind the ear. -
Sculpting the hair:
Shade the recesses between the hair clumps darkly, leaving the tops of the curls white to look like polished stone catching the light. -
Refining the face:
Add subtle shading around the eye socket and the corner of the nose. I like to keep my pencil strokes visible here to mimic the texture found in old academic drawings. -
Neck details:
Add horizontal curved lines across the neck shadows to suggest the texture of skin folds or muscle strain. -
Background hatching:
Create a background using quick, diagonal sketching lines behind the head. This separates the pale ‘marble’ face from the white paper. -
Final contrast:
Darken the background shading directly adjacent to the light side of the face to make the profile pop forward. -
Highlight recovery:
Take your kneaded eraser and tap it on the cheekbone, nose bridge, and hair curls to lift off any excess graphite and create bright white highlights.
Now you have a striking classical study that looks like it came straight from an artist’s sketchbook
Futuristic Laser Blaster
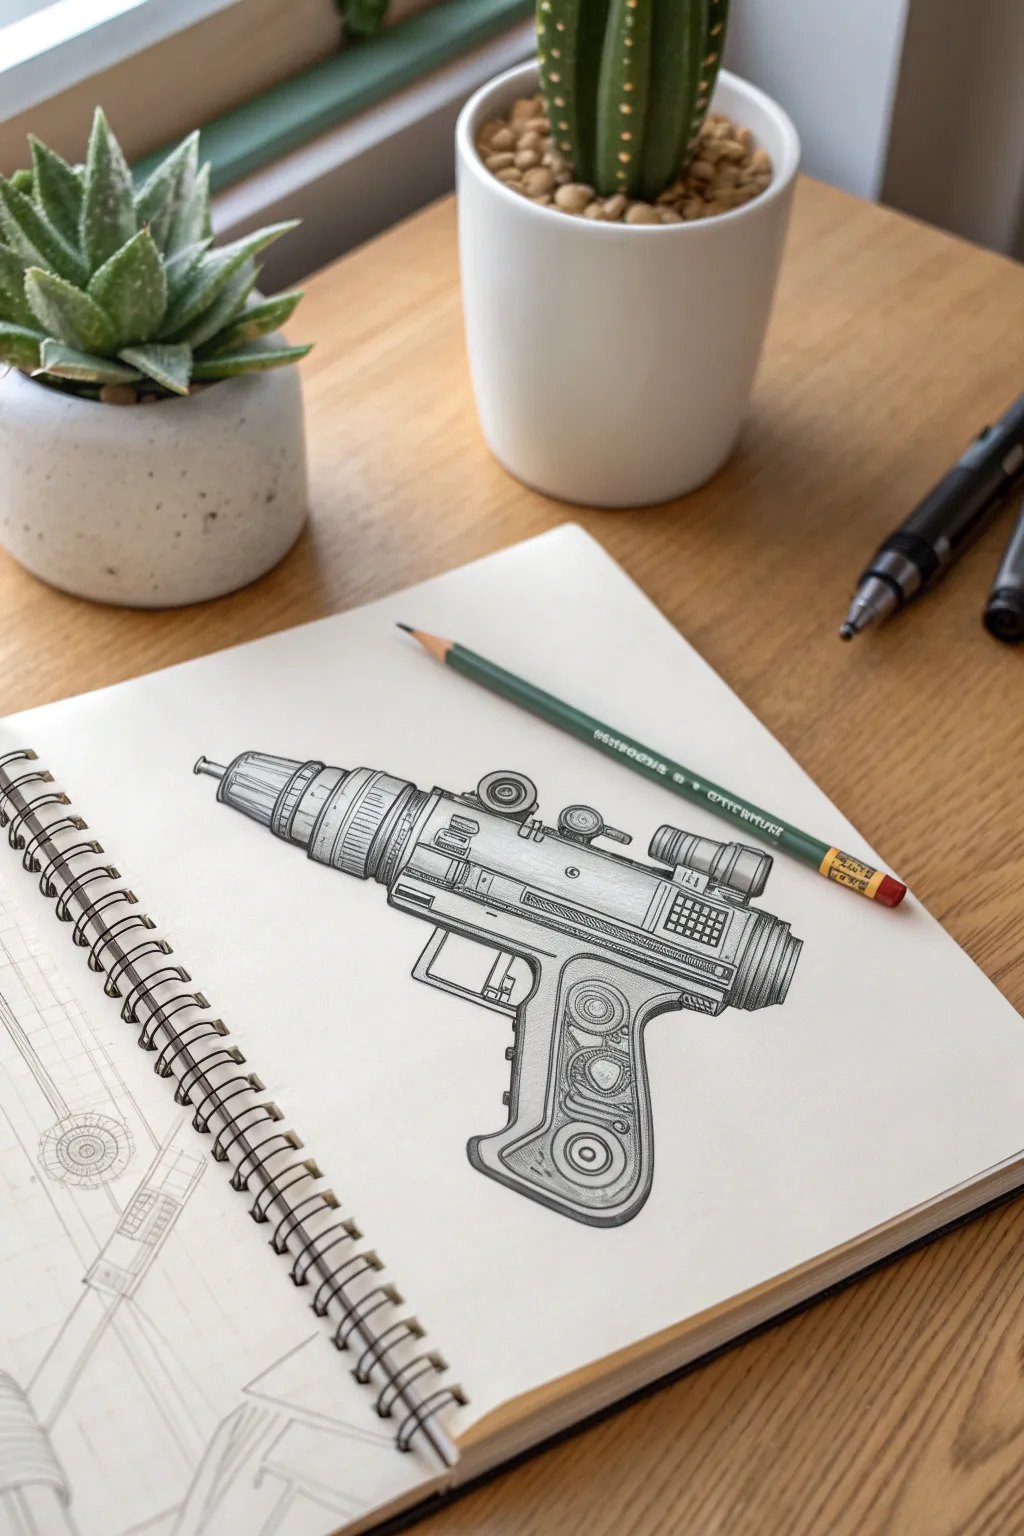
Master the art of technical illustration by drawing this detailed, retro-futuristic ray gun. This project focuses on turning simple geometric shapes into a complex mechanical device with realistic metallic shading.
How-To Guide
Materials
- Smooth sketchbook paper
- HB pencil (for initial sketching)
- 2B or 4B pencil (for shading)
- Fine-point black pen or marker (0.3mm or 0.5mm)
- Ruler
- Eraser
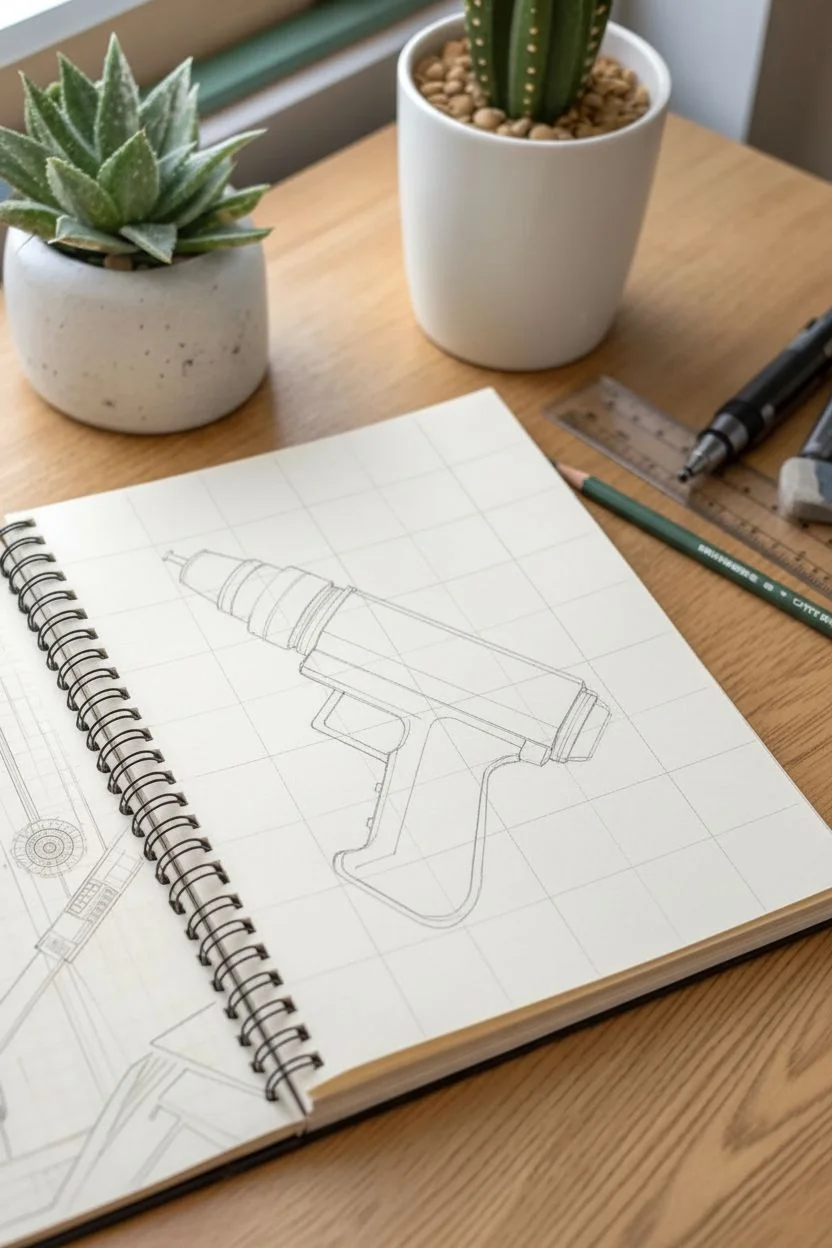
Step 1: Blocking the Blueprint
-
Establish the axis:
Start by using a ruler to draw a faint horizontal line across the center of your page. This will serve as the central axis for the blaster’s barrel to ensure it stays straight. -
Draft the main body:
Sketch a long, rectangular box closer to the right side of the paper, resting just above your center line. This box houses the main mechanism of the blaster. -
Position the handle:
Draw a rectangle angling downwards from the back of the main body slightly past a 90-degree angle. Add a slight curve at the bottom for the heel of the grip. -
Form the barrel:
On the front of the main body, sketch three distinct cylindrical sections that get progressively narrower, mimicking the look of a power drill chuck. -
Add the trigger guard:
Connect the underside of the main body to the front of the handle with a squared-off ‘L’ shape to create the trigger guard area.
Straight Talk
To keep the barrel symmetrical, sketch the cylinders as full see-through shapes first, then erase the overlapping lines. It prevents the ‘bent pipe’ look.
Step 2: Engineering the Details
-
Detail the barrel chuck:
Add vertical ridges inside the cylindrical barrel sections. These lines should curve slightly outward to emphasize the roundness of the form. -
Mount the scope:
On top of the main body, draw two small circular mounts holding a small tube or flashlight shape. Add a small dial on the side resembling a knob. -
Refine the grip:
Soften the hard angles of the handle. Draw an inner panel shape inside the grip area where the texture will go later. -
Install the ventilation grid:
Near the back of the main body, draw a small square box. Fill it with a tight grid pattern to look like a heat vent or speaker grill. -
Add panel lines:
Draw horizontal seam lines across the side of the gun body to simulate separate metal plates. Add tiny circles in the corners to represent screws or rivets. -
The emitter tip:
Finish the very front of the barrel with a small, narrow nozzle. Make sure the tip has a flat face.
Step 3: Shading and Texture
-
Inking the outline:
Once satisfied with the pencil sketch, go over the main structural lines with your fine-point pen or a sharpened darker pencil. Keep the lines crisp and steady. -
Create metallic volume:
Using a 2B pencil, shade the top and bottom of the barrel cylinders, leaving a strip of white in the middle. This creates a metallic highlight effect. -
Cross-hatch the shadows:
For the darker areas under the barrel and behind the trigger, use cross-hatching (overlapping diagonal lines) to build up deep contrast. -
Texture the grip:
Fill the inner panel of the handle with a different texture. I like to use small swirls or tight stippling here to make it look like a rubberized grip. -
Final polish:
Erase any remaining construction guidelines. Reinforce the darkest shadow areas, especially directly under the blaster, to give the drawing weight.
Level Up: Blueprint Mode
Draw a faint light-blue grid behind the blaster and add some fake technical readouts or measurements to make it look like a top-secret schematic.
Your technical drawing is complete and ready for the workshop of the future
Urban Graffiti Lettering
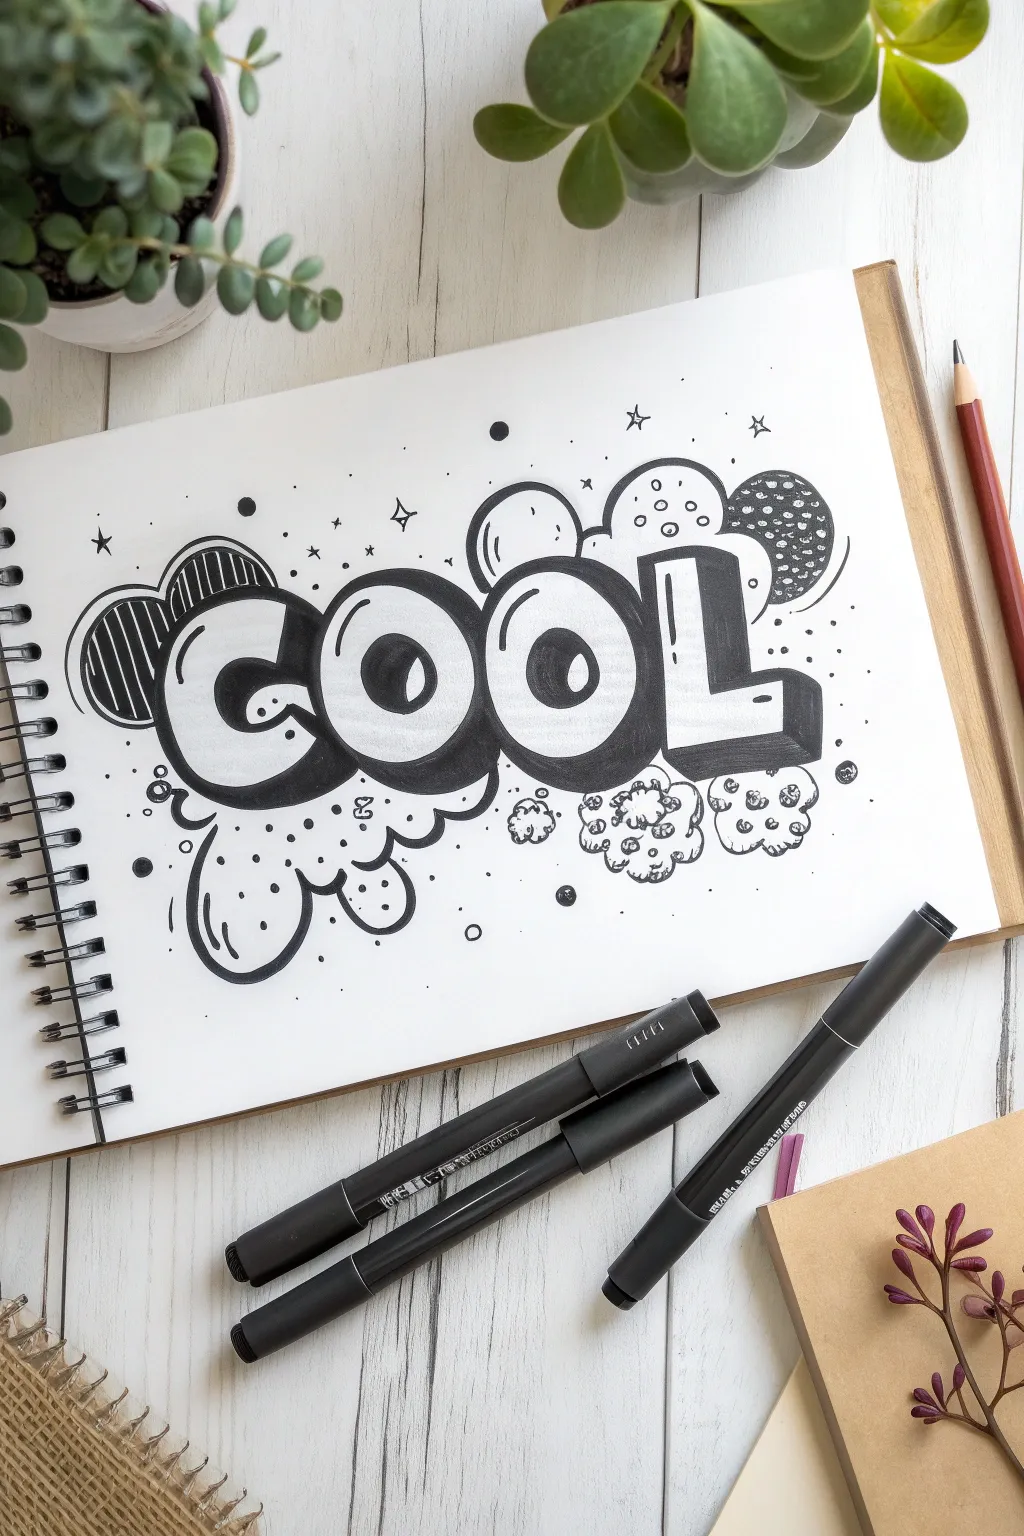
Learn to draw this punchy, street-style art piece that makes a simple word look like an urban masterpiece. By using deep black shading against white paper, you’ll create high-contrast 3D letters surrounded by playful doodles.
Step-by-Step Guide
Materials
- Smooth heavyweight drawing paper or sketchbook
- HB Pencil
- High-quality eraser
- Fine-tip black drawing pen (0.3mm or 0.5mm)
- Thicker black marker (bullet tip or brush pen) for filling
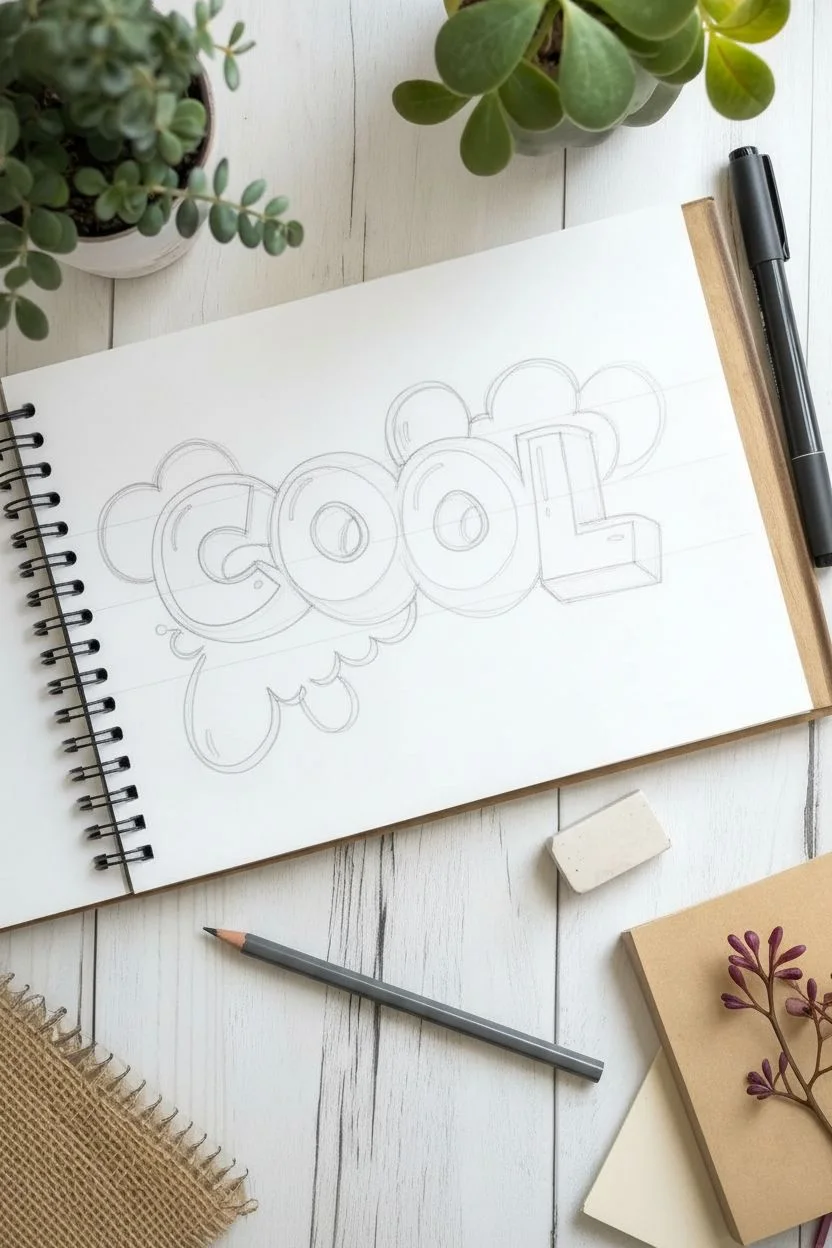
Step 1: Sketching the Layout
-
Map out the spacing:
Start with your HB pencil. Lightly draw a horizontal guiding line in the center of your page so your text stays straight. -
Draw the skeleton letters:
Sketch the letters C, O, O, and L in a simple, stick-figure style first to ensure they are evenly spaced and centered. -
Bubble the shapes:
Draw rounded outlines around your skeleton lines. Exaggerate the thickness, making the letters look like inflated balloons. Let the edges of the C and first O overlap slightly, and do the same for the others. -
Add the 3D depth:
To give the letters volume, sketch a drop shadow extending to the bottom and slightly to the left of every curve. Keep these depth lines consistent so the letters look like thick blocks. -
Mark the highlights:
Inside the bubble part of each letter, sketch small oval shapes or ‘jelly beans’ near the top or corners. These will remain white later to look like shiny reflections.
Step 2: Inking the Text
-
Outline the main shapes:
Switch to your fine-tip black pen. Carefully trace the outer bubble shape of the letters ‘COOL’. Do not trace the 3D drop shadow lines yet. -
Define the shadows:
Now, outline the 3D block sections you sketched earlier. This separates the face of the letter from its heavy shadow. -
Fill the shadows:
Using your thicker black marker, fill in the 3D shadow areas completely solid black. I find that doing this slowly prevents the ink from bleeding into the white letter face. -
Refine the holes:
Don’t forget the centers of the ‘O’s. The shadow inside the hole should be on the top and right side to match the perspective.
Line Weight Secret
Use a 0.3mm pen for internal details (like the bubbles) and a 0.8mm or 1.0mm pen for the main letter outlines. This contrast clarifies the drawing.
Step 3: Adding Urban Elements
-
Sketch left-side elements:
With your pencil, draw two semi-circle cloud shapes nestled against the left side of the ‘C’. Add vertical stripes inside the larger one. -
Create right-side bubbles:
Draw a cluster of circles rising from the ‘L’. Make some overlap like real bubbles. -
Pattern the bubbles:
Ink these circles. Leave the top one white with small rings inside. Fill the bottom right bubble solid black with white stippled dots (leave the paper white for dots or use a white gel pen later). -
Draw the bottom drip:
Underneath the ‘C’ and ‘O’, draw a fluid, puddle-like shape that looks like splashing liquid. Outline it with a thicker line weight for emphasis. -
Add floating debris:
Scatter small popcorn-shaped clouds underneath the ‘O’ and ‘L’. Ink them with jagged, fluffy lines to contrast the smooth letters. -
Fill the empty space:
Draw small 4-point stars, tiny solid black dots, and small open circles randomly around the entire composition to balance the whitespace.
Inking Trouble?
If your large black areas look streaky, let the first layer of ink dry completely, then apply a second layer in the opposite direction for a solid matte finish.
Step 4: Final Polish
-
Erase guidelines:
Wait until the ink is completely dry to the touch so you don’t smudge your work. Gently erase all visible pencil sketches. -
Thicken the perimeter:
Take your thicker marker and go around the entire outer perimeter of the word ‘COOL’ one more time to make the word pop off the page.
Now you have a bold piece of graffiti art ready to display or customize with colors next time.
3D Optical Illusion Ladder
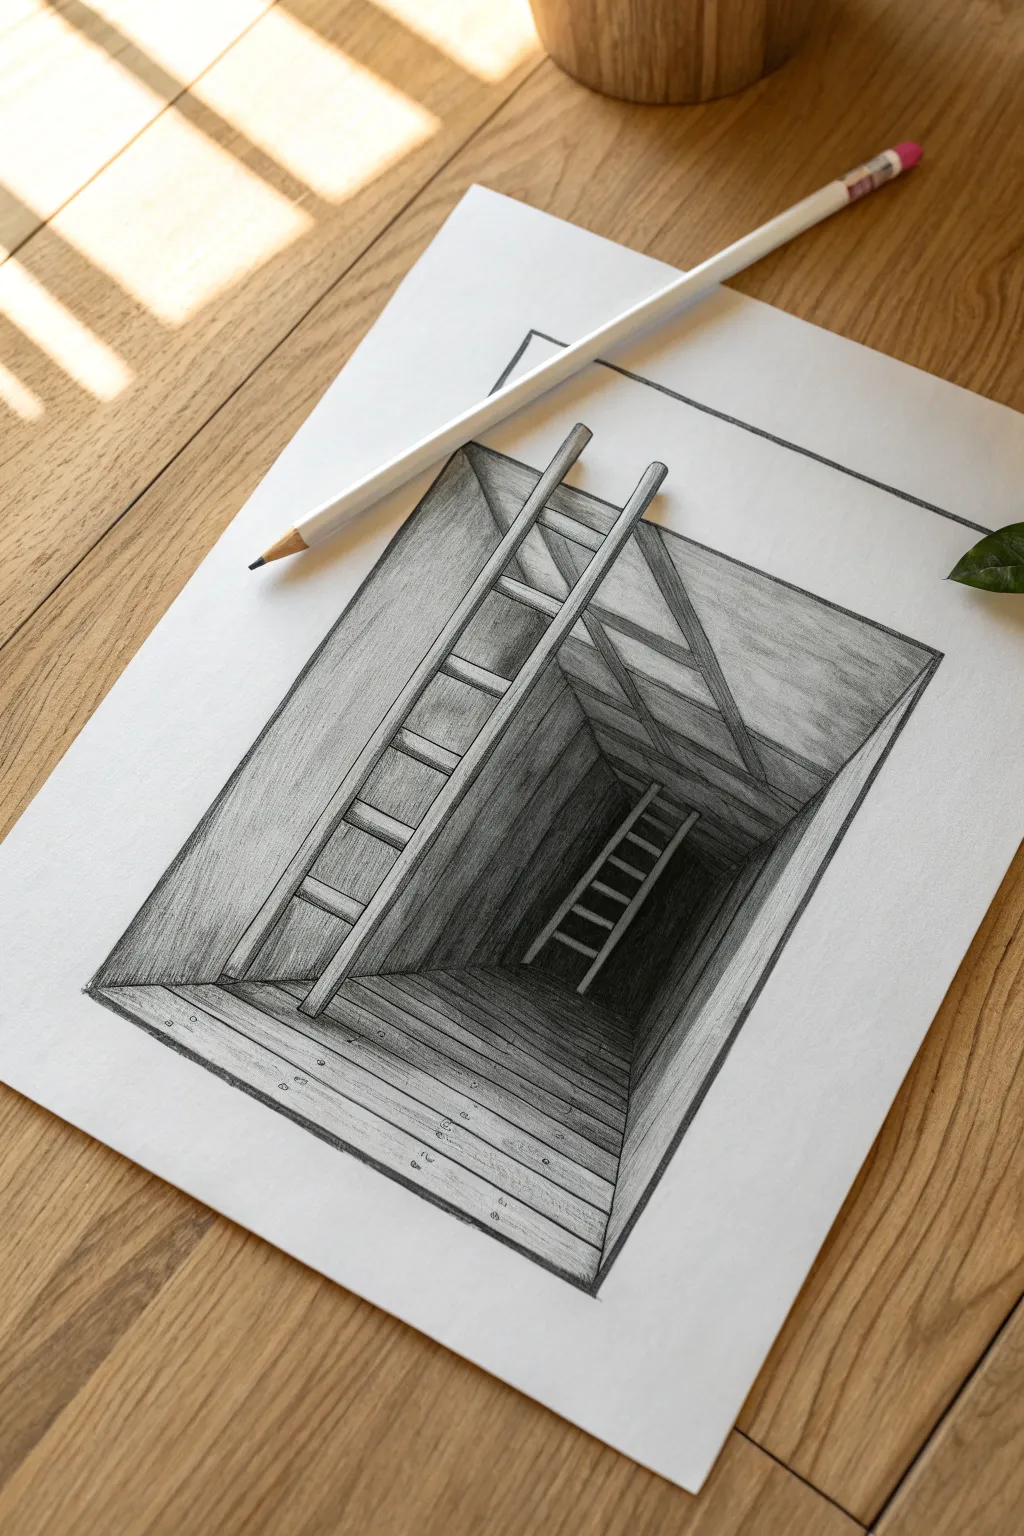

Create a mind-bending optical illusion that looks like a ladder descending into a deep, wooden underground shaft. This project uses one-point perspective and clever shading to trick the eye into seeing depth on a flat piece of paper.
How-To Guide
Materials
- White drawing paper
- HB pencil (for outlines)
- 4B or 6B pencil (for dark shading)
- Ruler
- Eraser
- Blending stump or tissue
Step 1: Constructing the Perspective
-
Draw the frame:
Use your ruler to draw a large rectangle in the center of your paper. This will be the opening of the hole. -
Establish the floor:
Draw a much smaller rectangle deep inside the first one, positioning it slightly lower than the perfect center to create a realistic angle. -
Connect the corners:
Draw straight lines connecting the corners of the large outer rectangle to the corresponding corners of the small inner rectangle to form the walls. -
Position the main ladder:
Draw two long vertical lines for the ladder rails starting from the bottom floor and reaching up. Important: Let the tops of the rails extend past the top edge of your outer rectangle frame. -
Add the rungs:
Sketch horizontal lines between the rails for the ladder steps. Space them closer together near the bottom and farther apart near the top to enhance the depth effect. -
The secondary ladder:
If you want extra detail, draw a tiny, second ladder leaning against the back wall at the very bottom of the shaft.
Smudge Alert
Graphite smudges easily, ruining the 3D crispness. Place a scrap piece of paper under your drawing hand to protect your shading as you work.
Step 2: Adding Wood Textures
-
Wall planks:
Draw horizontal lines along the side walls. These should angle slightly downward to match the perspective of the floor lines. -
Floorboards:
Draw horizontal lines across the bottom floor square and the foreground ‘ledge’ closest to you at the bottom of the paper. -
Nail details:
Add small circles or dots on the ends of the planks in the foreground to look like nail heads. -
Wood grain:
Using your HB pencil, lightly sketch wiggly, organic lines on the visible planks to simulate wood grain texture. -
Thicken the ladder:
Go back over your ladder rails and rungs to give them thickness, turning the single lines into narrow rectangular shapes.
Step 3: Shading for Depth
-
Deepen the bottom:
Switch to your 4B or 6B pencil. Shade the very bottom floor and the lower corners of the walls as dark as possible to create the murky depths. -
Gradient walls:
Shade the walls, pressing firmly near the bottom and getting lighter as you move up toward the opening. -
Blend the shadows:
Use a blending stump or tissue to smooth out the pencil strokes on the walls, ensuring a seamless transition from dark to light. -
Ladder highlights:
Shade the ladder rails a medium grey, but leave the top-facing edges slightly lighter to show where the light hits. -
Cast shadows:
Draw a shadow on the left wall right next to the ladder. This helps lift the ladder off the wall visually. -
The illusion shadow:
I usually save this for last: draw a small shadow going to the right from the very tips of the ladder that stick out of the frame. This makes them look like they are resting on the paper. -
Final contrast:
clean up the white paper outside the main rectangle with an eraser to make the drawn hole look crisp and distinct.
Level Up: Cut it out
For a pro finish, cut the top half of the paper away, carefully cutting around the ladder tips. This physical cut makes the ladder actually stick up!
Place your finished drawing flat on a table and invite someone to take a look at the secret tunnel you found.
Post-Apocalyptic Gas Mask
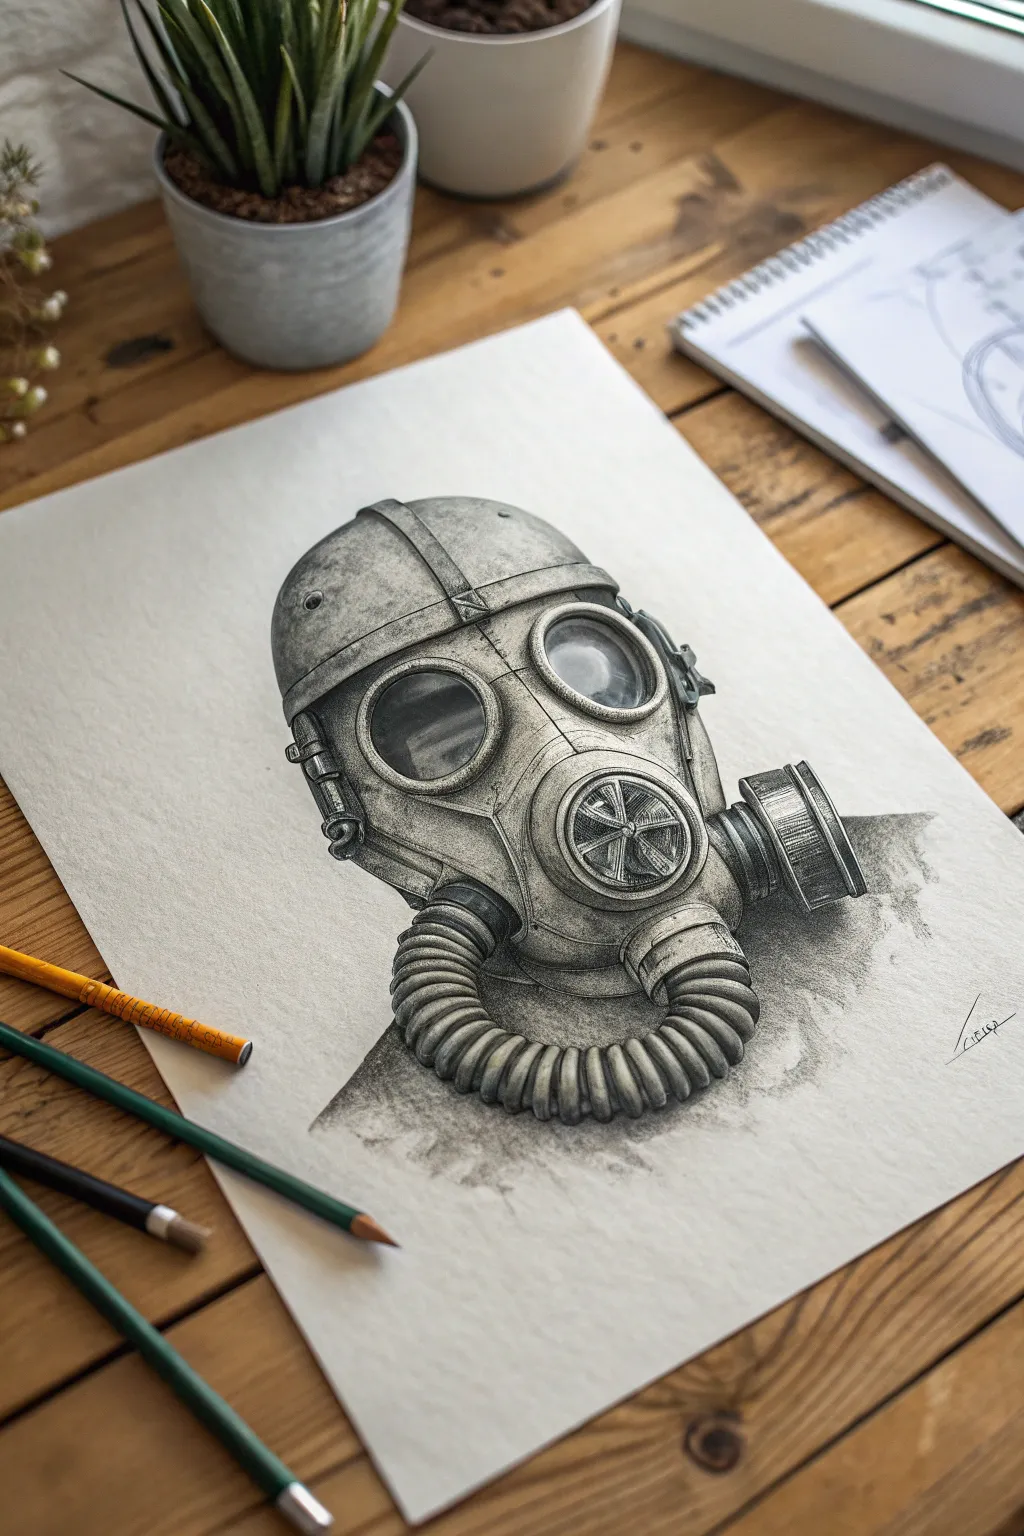
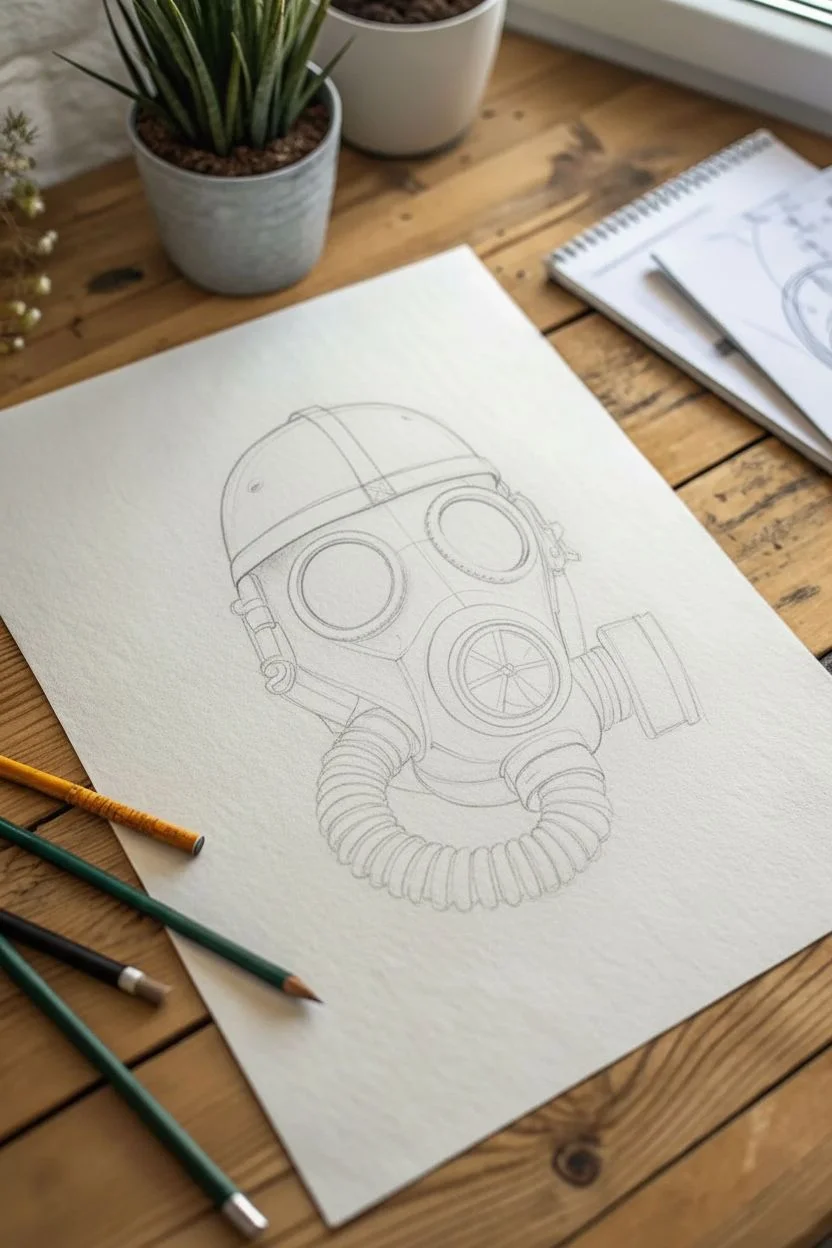
Master the art of metallic textures and realistic shading with this gritty, industrial gas mask illustration. You will build layers of graphite to create a 3D effect that looks ready for the wasteland.
Step-by-Step Tutorial
Materials
- High-quality drawing paper (smooth or medium tooth)
- Graphite pencils (2H, HB, 2B, 4B, 6B)
- Blending stumps (tortillons)
- Kneaded eraser
- Precision eraser (stick or pencil style)
- Ruler (optional)
Step 1: The Architectural Framework
-
Basic Shapes:
Start with a light touch using a 2H pencil to sketch a large oval for the mask’s main volume and a centerline for symmetry. -
Eye Placement:
Draw two large circles for the eye sockets, ensuring they are evenly spaced from your centerline. -
Valve and Filter:
Sketch a circle below the eyes for the exhaust valve and a cylinder shape protruding from the right cheek for the filter canister. -
Helmet Structure:
Define the helmet cap on the top third of the oval, drawing a vertical band down the center to represent the metal seam. -
The Hose Path:
Draw a thick, curving tube shape that loops from under the chin area; focus on getting the flow and width consistent before adding details.
Pro Tip: Sharp Glare
To make the glass lenses look realistic, the contrast must be extreme. Consider using a template or tape to mask off the pure white highlights before shading the dark glass.
Step 2: Refining the Machinery
-
Detailing the Eyes:
Thicken the outlines of the eye circles to create heavy, industrial rims. -
Ventilation Grill:
Draw the intricate spoke pattern inside the central nose valve, keeping your lines crisp. -
Ribbed Texture:
Along the heavy hose, draw a series of parallel ‘C’ curved lines to create the corrugated rubber look. -
Hardware Accents:
Add small circles for rivets along the helmet seams and rectangular clasps where the straps meet the mask. -
Clean Up:
Take your kneaded eraser and lift away the initial construction lines, leaving only your refined outline.
Step 3: Shading and Form
-
Base Tone:
Using an HB pencil, apply a light, even layer of shading to the helmet and cheek areas. -
Glass Reflections:
Shade the eye lenses darkly with a 2B pencil, but leave sharp, geometric shapes completely white to represent staring glass reflections. -
Smooth Blending:
Use a blending stump to smooth out your graphite on the helmet, making the metal look worn but seamless. -
Defining the Hose:
Shade the ribbed hose by darkening the bottom of each ring and leaving the top crests light to show roundness. -
Deep Shadows:
I like to switch to a 4B pencil here to darken the deepest creases, particularly under the chin and around the filter base.
Troubleshooting: Smudging
Graphite smears easily on white paper. Always keep a clean sheet of scrap paper under your drawing hand to protect your finished areas while you work on other details.
Step 4: Texture and Atmosphere
-
Filter Details:
Add vertical hatching lines on the side filter canister to suggest a brushed metal texture. -
Surface Imperfections:
Create grit by tapping your pencil to make varying dots and tiny scratches on the helmet surface. -
Contrast Boost:
Use a 6B pencil to blackout the darker areas inside the exhaust valve grill and the deepest shadows beneath the hose. -
Cast Shadow:
Ground your object by adding a soft, diffuse shadow on the surface underneath the hose and mask. -
Final Highlights:
Use your precision eraser to wipe away graphite on the topmost curves of the metal plates and hose rings for a shiny finish.
Now you have a striking, detailed piece of industrial art that showcases your texturing skills.


Have a question or want to share your own experience? I'd love to hear from you in the comments below!