
There is nothing quite like capturing the radiant energy of the season with bubbles of sunny yellows and ocean blues on your palette. Whether you are looking for a relaxing solo project or a fun idea for your next paint party, these designs are perfect for unleashing your creativity.
Tropical Sunset Silhouettes
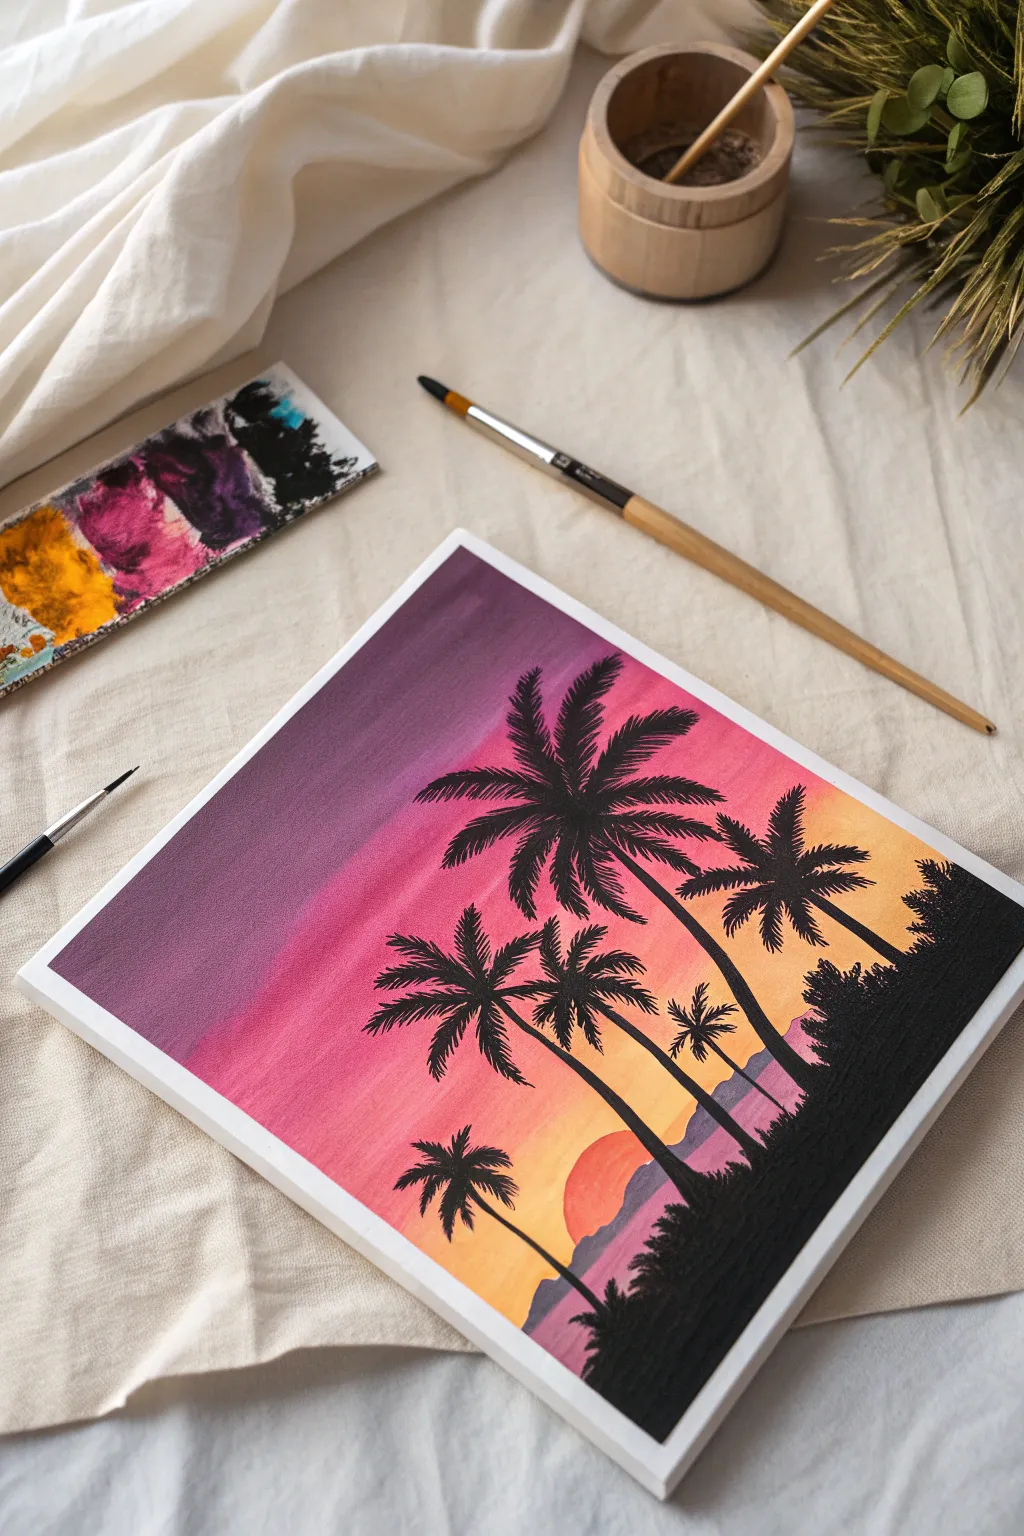
Bring the warmth of a summer evening indoors with this vibrant gradient landscape. You will capture the stunning transition of a setting sun behind swaying palm silhouettes, creating a piece that feels like a vacation on canvas.
Step-by-Step Guide
Materials
- Square canvas or heavy watercolor paper
- Acrylic paints (Deep Violet, Magenta, Orange, Cadillac Yellow, Black, White)
- Wide flat brush (3/4 inch)
- Small round detail brush (size 1)
- Cup of water and paper towels
- Mixing palette
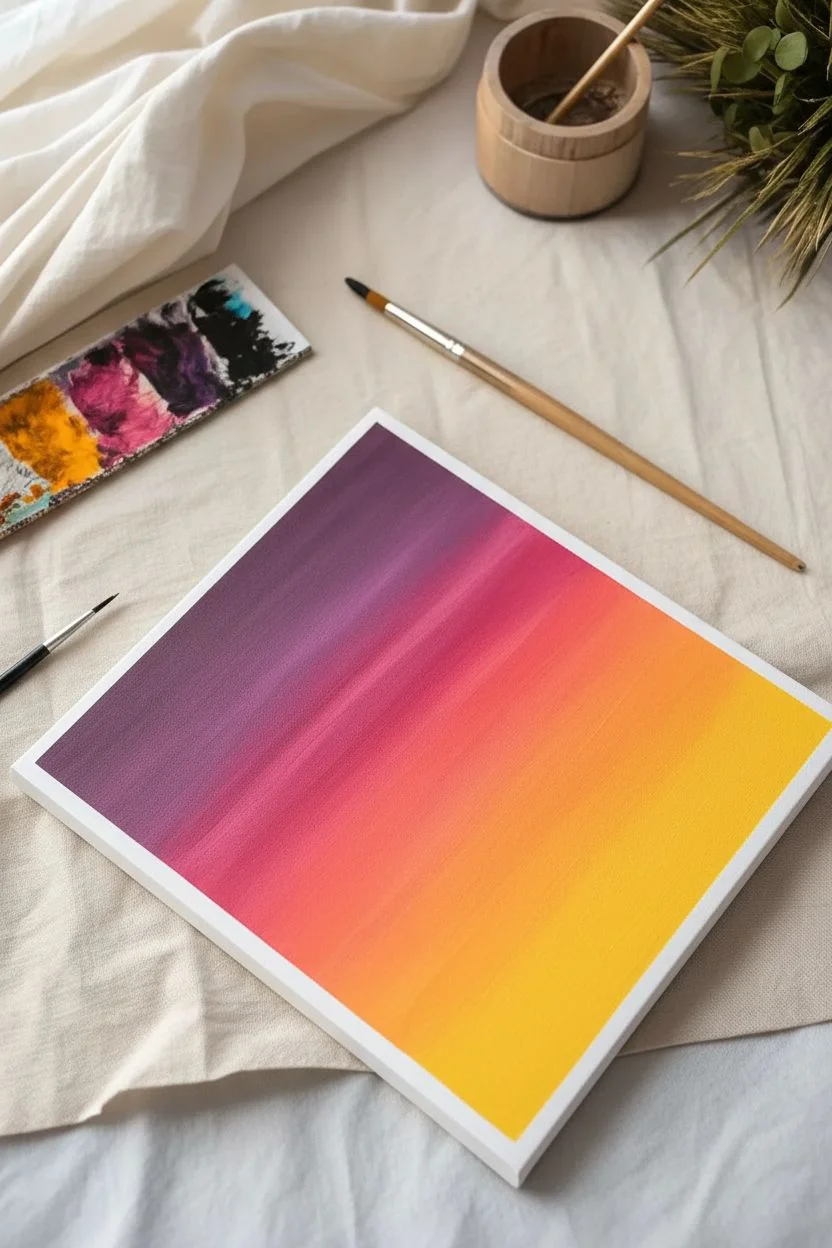
Step 1: Painting the Gradient Sky
-
Prepare the yellow base:
Squeeze out your warm colors. Start by mixing a bright yellow with a tiny dot of white to increase opacity. -
Apply the horizon line:
Using your damp flat brush, paint the bottom quarter of the canvas with horizontal strokes of your yellow mix. -
Transition to orange:
While the yellow is still slightly wet, pick up pure orange on your brush. Apply it just above the yellow section. -
Blend the warm tones:
Gently stroke the brush back and forth between the orange and yellow border to create a soft, seamless peach transition. -
Add the pink layer:
Clean your brush, then load it with magenta. Paint the next section up, blending the bottom edge into the wet orange paint below. -
Finish with purple:
Fill the remaining top portion of the canvas with deep violet. Blend it down into the pink until you have a smooth sunset gradient. -
Let it set:
Allow the background layer to dry completely. This is crucial so your silhouette work later remains crisp and dark.
Step 2: Adding Depth and Distance
-
Create the sun:
Mix a soft tangerine shade using orange and white. Paint a semi-circle rising from the bottom edge of the canvas, slightly off-center to the right. -
Mix the mountain color:
Take your violet paint and water it down significantly, or mix it with a little white to create a hazy, translucent lavender. -
Paint distant mountains:
Paint a jagged, uneven mountain range across the lower horizon line. It should overlap the bottom of your sun slightly for depth. -
Layer the foothills:
Once the first range is tacky, paint a slightly darker, lower range of hills in front of the first one to create atmospheric perspective.
Blending Blues?
If your acrylics are drying too fast to blend smoothly, lightly mist the canvas with water or mix a drop of slow-drying medium into your paint to keep the gradient workable longer.
Step 3: The Palm Silhouettes
-
Outline the foreground:
Switch to pure black paint. Fill in the bottom inch of the canvas with solid black to represent the ground and shoreline foliage. -
Texture the ground:
Use the tip of your brush to make small, stippling motions along the top of the black ground line to simulate grass and bushes. -
Placement of trunks:
Using a thin round brush, paint long, slender lines for the palm trunks. I like to curve them slightly so they look like they are bending in the breeze. -
Vary the heights:
Make sure your trees are different sizes. Paint one tall focus tree, a few medium ones, and a small one to balance the composition. -
Start the fronds:
For the leaves, draw five or six curved lines exploding outward from the top center of each trunk. -
Flick the leaves:
From those curved center lines, use quick, short flicks of your brush to create the feathery palm leaves hanging downwards. -
Add final details:
Add a few tiny palm saplings or extra jagged texture to the black ground area to finish the scene.
Ink-Like Flow
For the sharpest palm fronds, thin your black acrylic with a few drops of water until it has the consistency of ink. This helps the liner brush glide effortlessly without drag.
Step back and admire your personal slice of tropical paradise.


Juicy Watermelon Slices
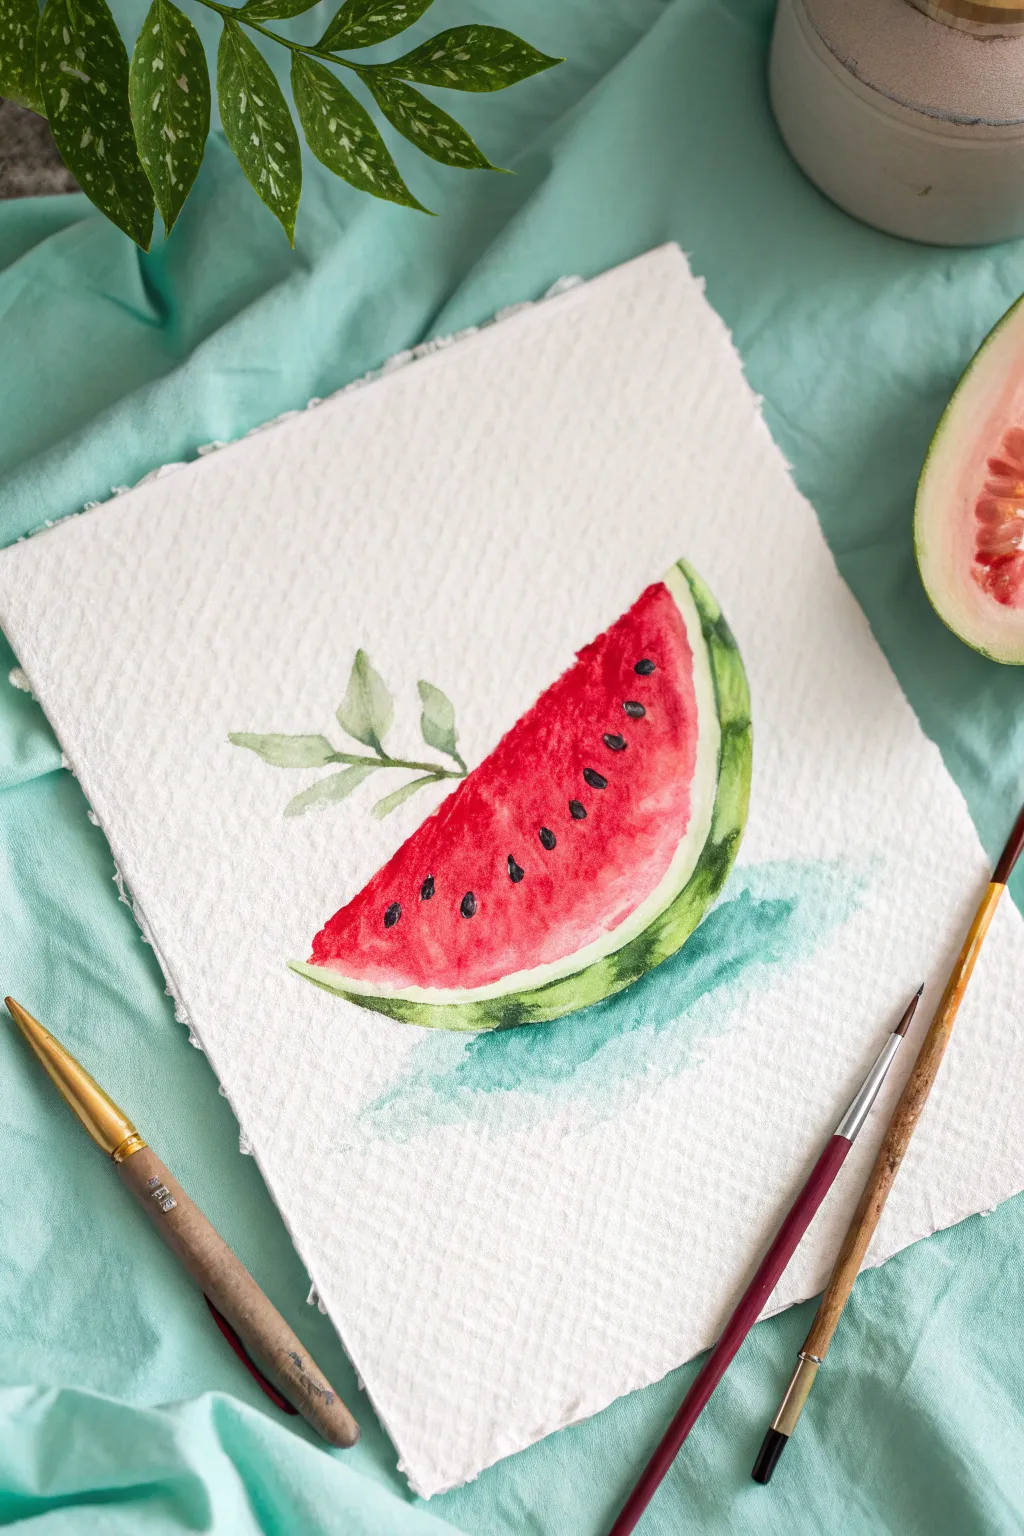
Capture the essence of summer with this vibrant, juicy watermelon slice painting. Using loose watercolor techniques and textured paper, you will create a refreshing piece of art that looks good enough to eat.
Detailed Instructions
Materials
- Cold, rough press watercolor paper (300gsm)
- Round watercolor brushes (size 4 and 8)
- Watercolor paints (Alizarin Crimson, Sap Green, Payne’s Gray, Turquoise)
- HB Pencil and kneaded eraser
- Jars of water
- Paper towel
- White gel pen (optional)
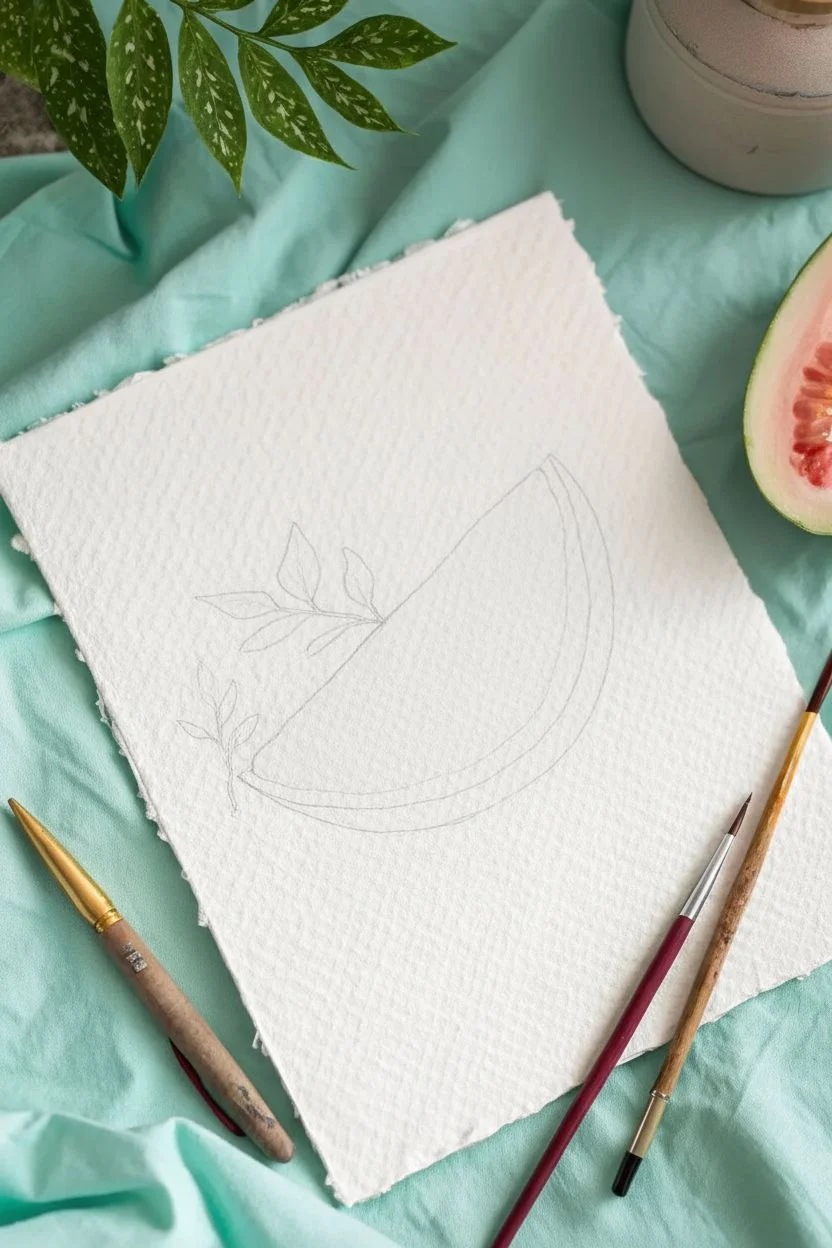
Step 1: Sketching the Shape
-
Outline the wedge:
Lightly sketch a large inverted triangle on your paper, tilting it slightly to the right for a casual look. -
Curve the rind:
Round off the bottom of the triangle with a gentle curve to form the classic watermelon wedge shape. -
Define the layers:
Draw a faint inner line parallel to the bottom curve, about a half-inch up, to mark where the red flesh ends and the white rind begins. -
Add nature elements:
Sketch a simple, delicate sprig with three or four leaves protruding from the left side of the slice.
Step 2: Painting the Fruit
-
Wet the paper:
Dip your size 8 brush in clean water and wet the triangular ‘flesh’ area of the watermelon, staying inside your pencil lines. -
Drop in color:
Load your brush with a watery mix of Alizarin Crimson and touch it to the top point of the wedge, letting the color bloom downwards. -
Create a gradient:
Add more concentrated red pigment near the top and right edge, allowing it to fade into a paler pink as it nears the bottom rind line. -
Mind the gap:
Leave a thin sliver of dry white paper between the red paint and the pencil line for the rind; this acts as the white pith.
Bleed Control
Colors bleeding together? Let the red section dry completely before painting the green rind. Use a hair dryer on low heat to speed this up.
Step 3: The Rind and Greenery
-
Base green layer:
Using a diluted Sap Green, paint the curved strip at the very bottom of the wedge. -
Darken the skin:
While the green is still damp, run a stroke of thicker, darker green along the very bottom edge to create volume and shadow. -
Add rind stripes:
I like to dab a few vertical dashes of dark green into the wet rind to mimic the fruit’s natural striping pattern. -
Paint the leaves:
Switch to the smaller size 4 brush and paint the leafy sprig using a muted olive green tone.
Salt Texture
Sprinkle a pinch of salt onto the wet red paint. Once dry, brush it off to create a unique, grainy texture that mimics real fruit flesh.
Step 4: Details and Depth
-
Ground the subject:
Mix a watery Turquoise wash and paint a loose, jagged shadow directly underneath the rind to ground the object. -
Dry completely:
Wait until the red section is bone dry before proceeding, otherwise your seeds will bleed into the pink. -
Paint the seeds:
Using a thick mixture of Payne’s Gray or Black, paint small teardrop shapes scattered across the red flesh. -
Vary direction:
Ensure the pointed ends of the seeds generally face inward toward the center of the slice for realism. -
Add highlights:
Once the black seeds are dry, use a white gel pen to add a tiny dot or line on each seed for a glossy shine.
Once dry, frame your refreshing artwork to keep the summer vibes going all year round.


Aerial Beach Umbrella View
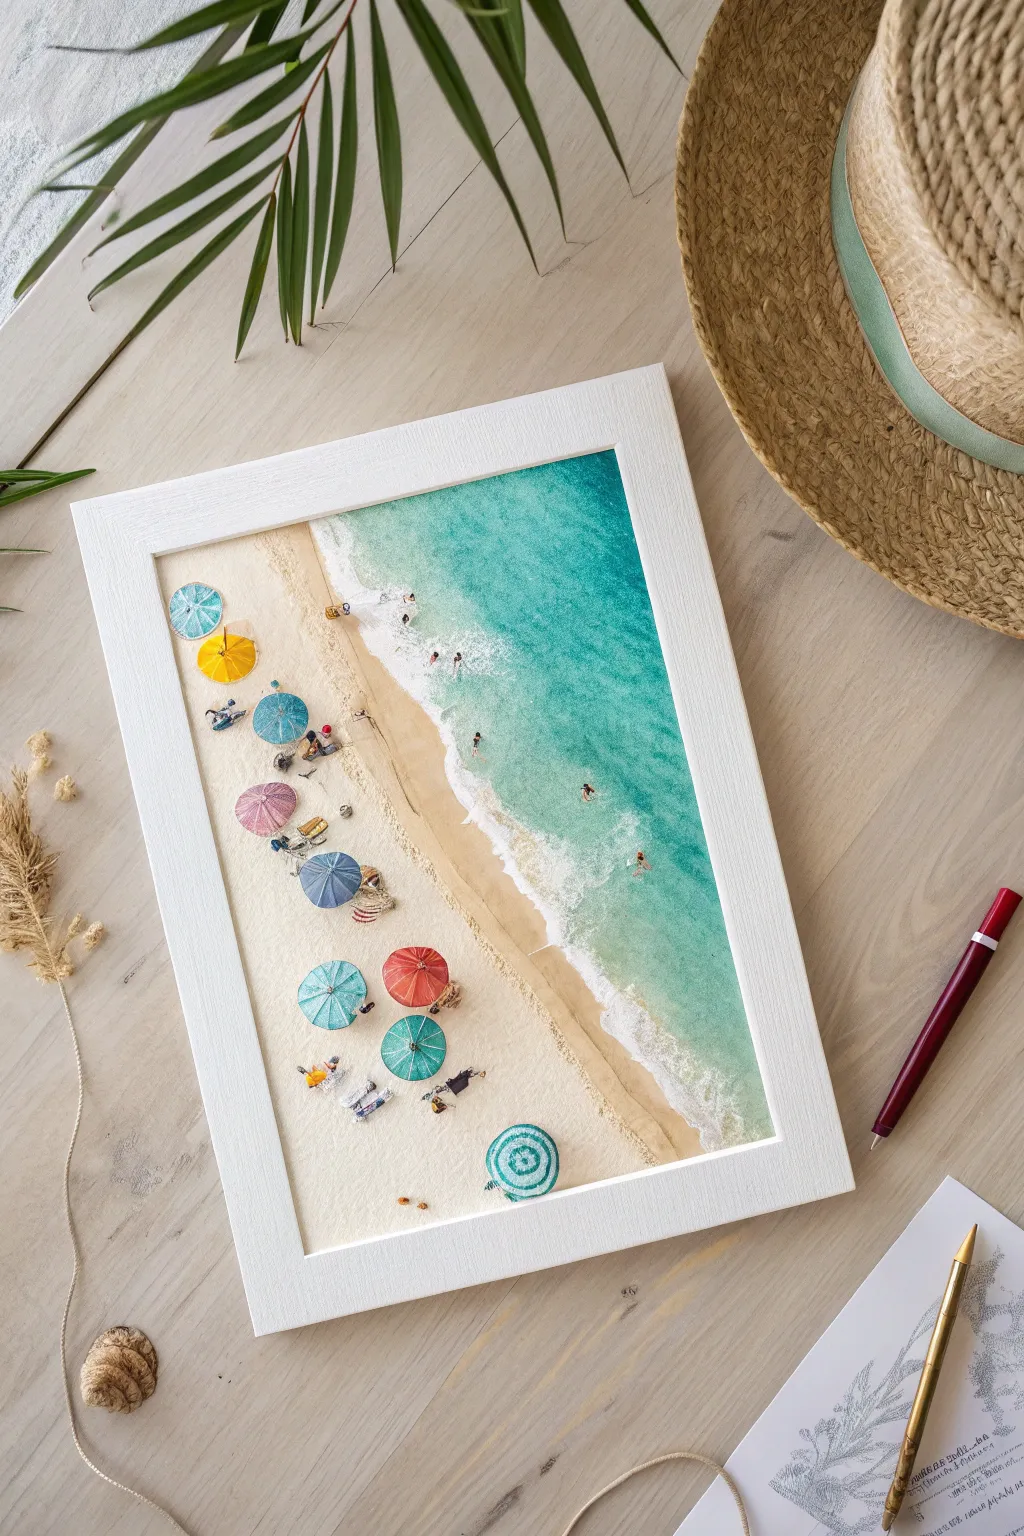
Transport yourself to a sunny coast with this delightful aerial perspective painting. By focusing on texture and vibrant pops of color against a sandy backdrop, you’ll create a bird’s-eye view scene that feels lively and warm.
How-To Guide
Materials
- Heavyweight watercolor paper or canvas board
- Acrylic paints (Titanium White, Yellow Ochre, Burnt Sienna, Turquoise, Phthalo Blue, various brights for umbrellas)
- Texture paste or baking soda (optional)
- Flat shader brush (size 6 or 8)
- Detail liner brush (size 00 or 0)
- Old stiff brush or sea sponge
- Pencil
- Palette
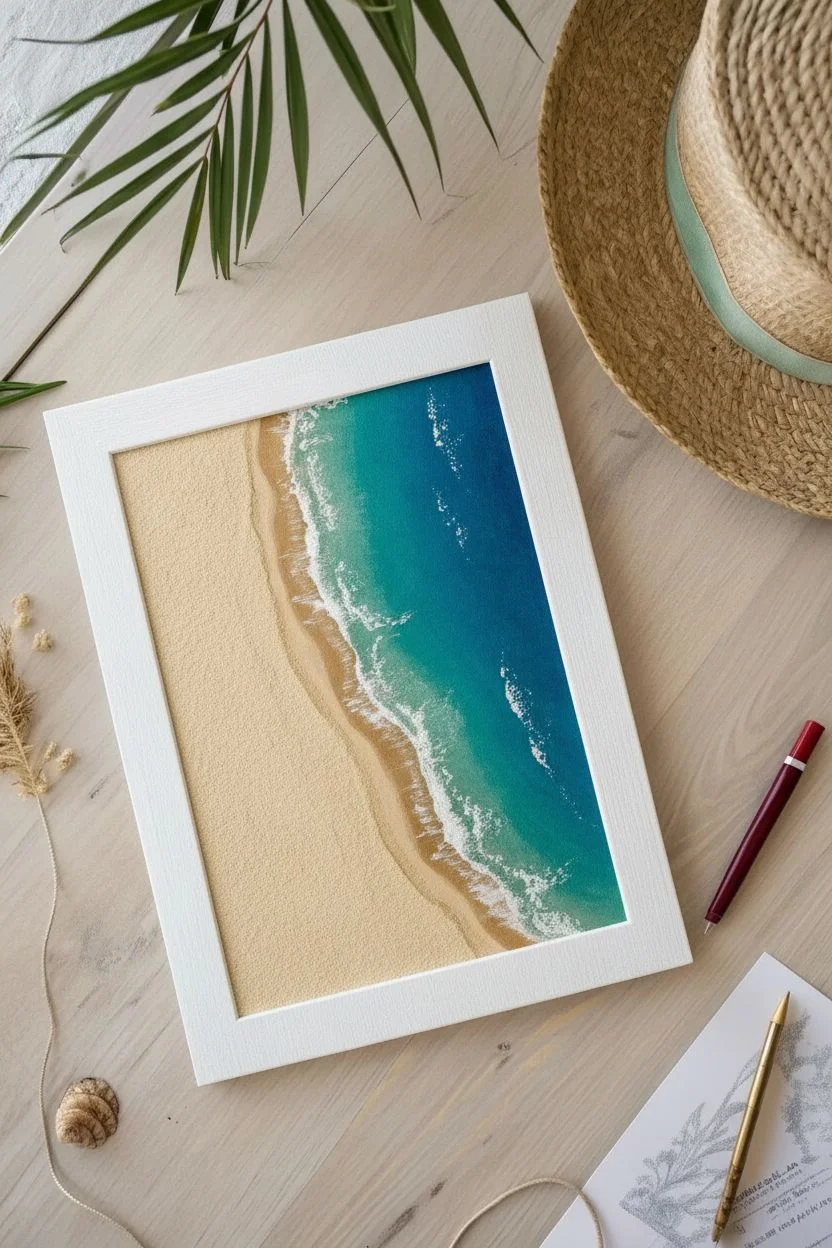
Step 1: Setting the Scene
-
Sketch the shoreline:
Begin by lightly sketching a diagonal line across your canvas to separate the sand from the ocean. Keep the line slightly organic and wavy rather than perfectly straight. -
Mix the sand color:
Combine Titanium White with a small amount of Yellow Ochre and a tiny dot of Burnt Sienna. You want a warm, light beige tone that dominates the bottom left section. -
Paint the beach:
Fill the bottom diagonal half with your sandy mix. For added realism, I sometimes mix a pinch of baking soda into the paint here to give the sand actual grit and texture. -
Create the deep ocean:
On the top right corner, apply a mix of Phthalo Blue and Turquoise. This represents the deepest part of the water, so keep the color rich and saturated. -
Blend the shallows:
As you move toward the shoreline, gradually mix more White and Turquoise into your blue. Blend this wet paint into the darker section to create a smooth gradient toward the beach. -
Paint the wet sand:
Where the water meets the dry sand, paint a thin, irregular strip of darker beige (add a touch more Burnt Sienna to your base mix) to mimic sand saturated by the tide. -
Add the sea foam:
Dip an old, stiff brush or a piece of sponge into pure Titanium White. Gently tap and stipple this over the boundary between the water and the wet sand to create frothy waves. -
Detail the waves:
Add a few smaller, fainter lines of white foam further out in the turquoise water to suggest incoming waves breaking before the shore.
Sun Direction
Ensure all your shadows fall in the exact same direction (e.g., to the right). This consistency effectively sells the illusion of height and a bright overhead sun.
Step 2: Umbrellas and Life
-
Plan the layout:
Use your pencil to lightly mark small dots where you want your umbrellas to be. Scatter them casually along the dry sand area, keeping them roughly the same size. -
Paint umbrella bases:
Using a small round brush, paint colorful circles or octagons over your pencil marks. Use bright reds, yellows, and blues to contrast against the sand. -
Add patterns:
Once the base circles are dry, use your liner brush to add details like stripes, segments, or polka dots. A white mix works well for highlights on the fabric. -
Cast the shadows:
Mix a translucent grey (black with a lot of water or glazing medium). Paint a small, elongated shadow extending from the same side of every umbrella to create a consistent light source. -
Populate the beach:
With the finest tip of your liner brush, dab tiny specks of tan and brown near the umbrellas to represent people sunbathing. These don’t need detail—just simple shapes work best. -
Add accessories:
Paint tiny rectangles for beach towels next to your figures. Vary the orientation slightly so they don’t look too uniform. -
Final shadow details:
Add tiny drop shadows next to the people and towels. This step is crucial as it lifts the objects off the canvas and provides that 3D aerial effect. -
Highlight the water:
If the ocean has dried too flat, dry-brush a little distinct white sparkle on the crests of the waves to make the water look glistening and wet.
Textured Coast
Mix gloss gel medium into your blue water paints. This gives the ocean a glossy, wet sheen that contrasts beautifully with the matte finish of the sandy beach area.
Frame your finished coastline in a simple white frame to let those turquoise waters really pop.


Stacked Ice Cream Cones

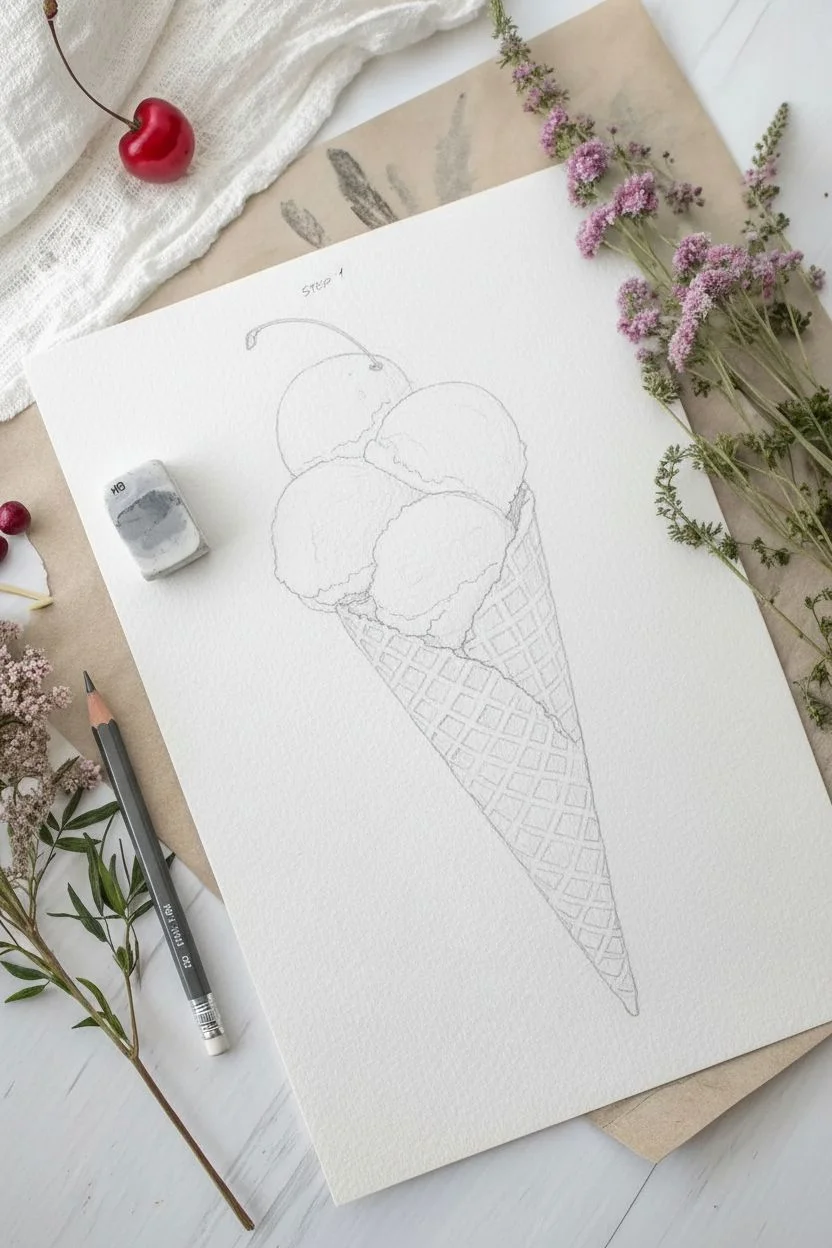
Capture the sweetness of summer with this vibrant watercolor painting featuring four luscious scoops balanced on a crisp waffle cone. You will explore different texturing techniques to distinguish the berry, mint, raspberry, and sherbet flavors against the geometric pattern of the cone.
Step-by-Step Guide
Materials
- Cold-press watercolor paper (minimum 140lb/300gsm)
- Watercolor paints (Yellow Ochre, Burnt Sienna, Teal, Alizarin Crimson, Orange, Purple)
- Round brushes (sizes 2, 6, and 10)
- HB Pencil and kneaded eraser
- White opacity gouache or gel pen
- Paper towels
- Masking tape
Step 1: Sketching the Structure
-
Outline the shapes:
Begin by lightly sketching a long, inverted triangle for the cone on your cold-press paper. Top this with four overlapping circles for the scoops, arranging them slightly diagonally to convey a playful, towering balance. -
Define the grid:
Draw the waffle grid pattern on the cone. To make the cone look round rather than flat, curve the grid lines slightly downward and make the squares tighter/narrower near the edges. -
Refine the scoops:
Add irregular, bumpy edges to the bottom of each circle to mimic the ‘skirt’ of the ice cream where it melts slightly over the scoop below. Sketch a cherry with a long stem resting on the very top.
Bleeding Colors?
If your scoops are bleeding into each other, paint non-adjacent scoops first (e.g., top and third). Let them dry completely before painting the middle and bottom ones.
Step 2: Painting the Waffle Cone
-
Base wash:
Mix a loose wash of Yellow Ochre with plenty of water. Paint the entire cone area, keeping the application even but light. -
Adding shadows:
While the base is still slightly damp, drop a mix of Burnt Sienna along the right edge of the cone to create a cylindrical shadow. Let this layer dry completely. -
Detailed grid work:
Using your size 2 brush and a concentrated Burnt Sienna, carefully paint the lines of the waffle grid. I prefer to thicken the lines where they intersect to mimic the baked batter texture. -
Deepening contrast:
Once the grid lines are dry, glaze a darker brown over the individual diamond shapes on the right side of the cone, leaving the diamonds on the left side lighter to act as a highlight.
Step 3: Creating Texture in Scoops
-
Top scoop (Berry):
Paint the top circle with a diluted purple-pink mix. While wet, drop in concentrated violet pigment in random spots. Let the pigments bloom naturally to create a swirled surface. -
Second scoop (Teal):
Move to the second scoop using a bright teal or turquoise. After laying down the color, blot the center gently with a crumpled paper towel to lift pigment and create a porous, icy texture. -
Third scoop (Raspberry):
For the red scoop, use Alizarin Crimson. To get the specific bumpy raspberry texture shown in the artwork, use a stippling motion (dotting with the brush tip) rather than smooth strokes, layering darker red dots over lighter ones. -
Bottom scoop (Orange):
Paint the final scoop with a bright orange mix. Keep this one relatively smooth and creamy, but darken the bottom edge where it meets the cone to add weight. -
Shadows between layers:
Once all scoops are bone dry, mix a dark, cool tone (like a diluted purple). Paint thin, curved shadow lines right underneath each scoop where it overlaps the one below to separate the forms.
Pro Tip: Salt Texture
To get a realistic icy look on the teal scoop, sprinkle a pinch of table salt onto the paint while it is still very wet. Brush it off once totally dry for a unique pitted effect.
Step 4: Final Details
-
The cherry on top:
Paint the cherry using a deep red, leaving a tiny white spot unpainted for a shine. Use a fine liner brush and dark brown to draw the delicate, curved stem. -
Scattered sprinkles:
Load your smallest brush with various colors from your palette (pinks, blues, yellows). Paint tiny dashes and dots scattered around the background and on the cone to resemble fallen sprinkles. -
Seeds and texture:
Using a fine liner brush and a brownish-yellow mix, paint small teardrop shapes near the cone and background to mimic seeds or nuts. -
highlights:
Use white gouache to add tiny specular highlights to the wettest looking parts of the ice cream and the upper ridges of the waffle pattern for extra crunch appeal.
Sign your name near the bottom corner and enjoy your delicious-looking creation that never melts
BRUSH GUIDE
The Right Brush for Every Stroke
From clean lines to bold texture — master brush choice, stroke control, and essential techniques.
Explore the Full Guide
Playful Pink Flamingos
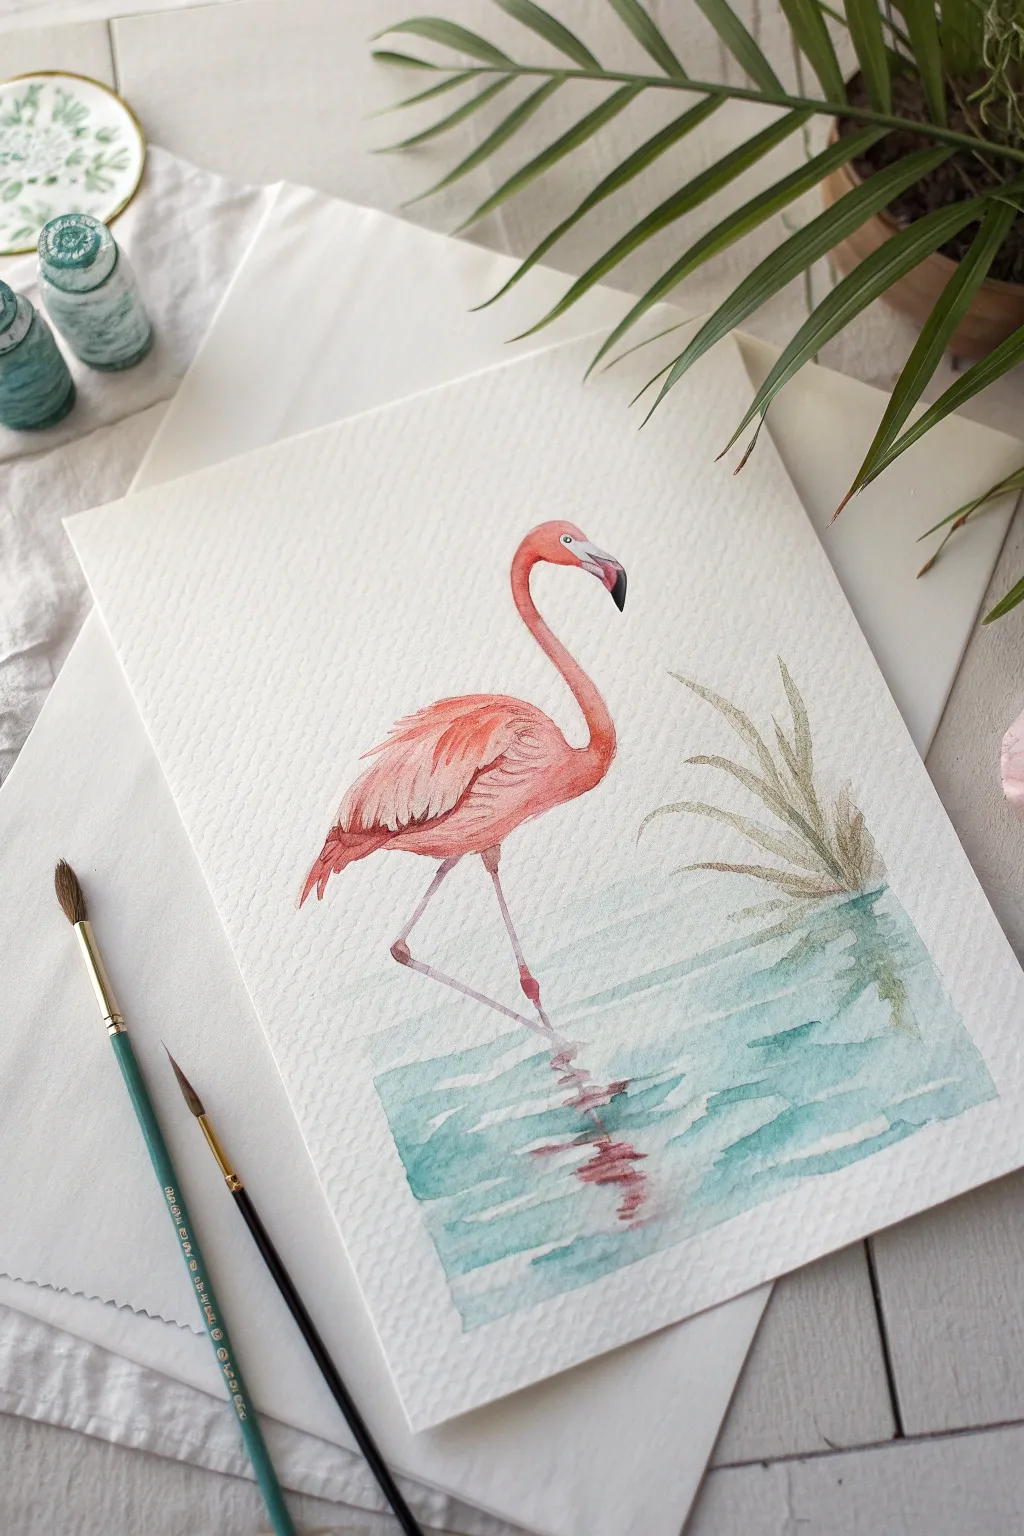
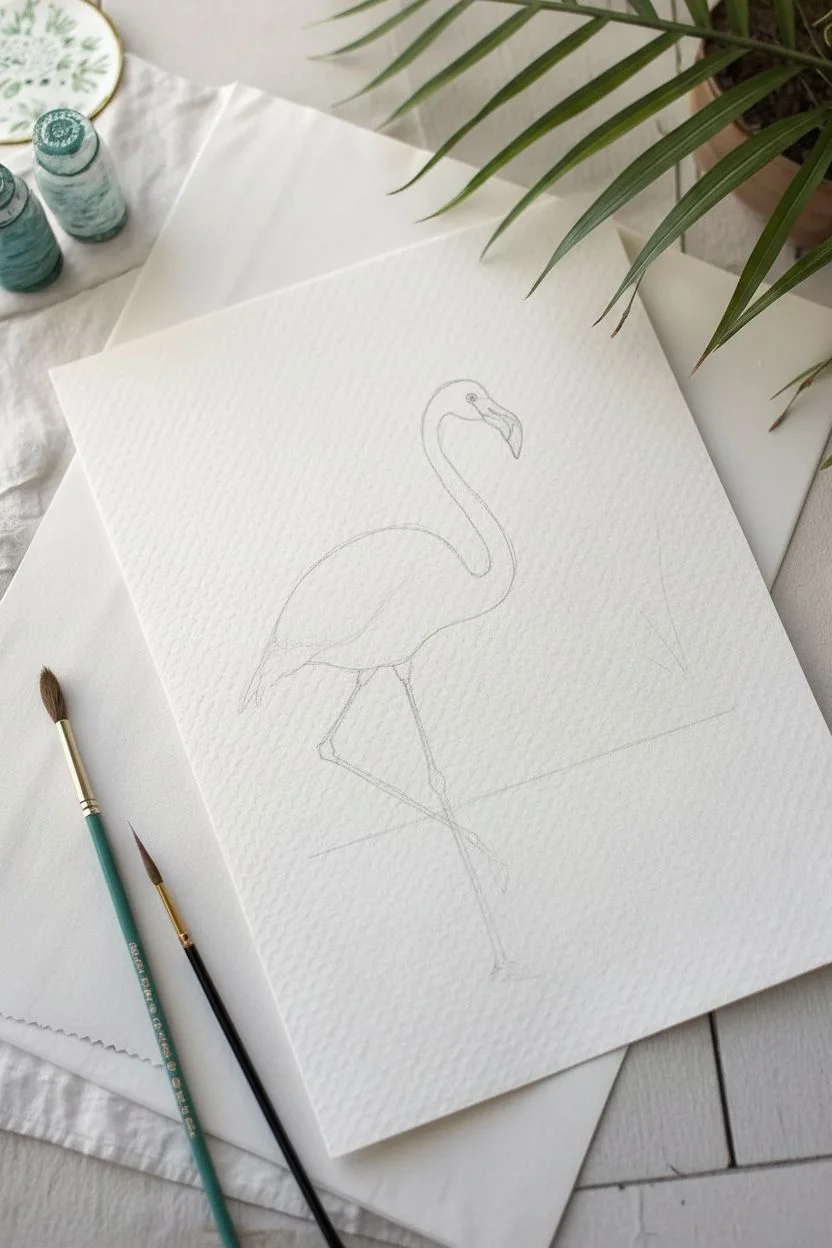
Capture the elegance of summer with this graceful flamingo painting that plays with soft textures and vibrant reflections. The rough grain of cold-pressed paper adds a beautiful organic feel to the watery scene.
Step-by-Step Tutorial
Materials
- Cold-pressed watercolor paper (300gsm)
- Watercolor paints (Coral, Rose, Turquoise, Sap Green, Payne’s Grey)
- Round brushes (sizes 2 and 6)
- HB Pencil and kneadable eraser
- Jar of water
- Paper towels
- Masking tape
Step 1: Sketching the Silhouette
-
Basic Shapes:
Start by lightly sketching an oval for the body and a small circle for the head, connecting them with a graceful ‘S’ curve for the neck. -
Refining the Beak:
Draw the signature curved beak, ensuring the tip points downward, and mark the position of the eye. -
Adding Legs:
Sketch the long, slender legs. Draw one leg straight down and the other bent at the knee, suggesting a striding motion. -
Environment Hints:
Lightly indicate a waterline across the legs and sketch a few tall grass reeds on the right side for balance. -
Clean Up:
Gently roll a kneadable eraser over your sketch to lift excess graphite so lines won’t show through the transparent paint.
Step 2: Painting the Flamingo
-
First Wash:
Mix a watery pale pink and apply it to the entire body and neck using a size 6 brush, keeping the edges soft. -
Adding Depth:
While the first layer is still damp, drop concentrated coral or rose paint onto the wing area and lower neck to create a soft, wet-on-wet gradient. -
Feather Details:
Once the base is dry, use a size 2 brush with confident, flicking strokes to paint detailed feathers on the wing using a darker pink mix. -
The Beak:
Paint the upper part of the beak extremely pale pink or white, and use Payne’s Grey or black for the sharp, curved tip. -
Facial Features:
Carefully paint the eye with a tiny dot of black, leaving a microscopic spec of white paper for the highlight if possible. -
Legs:
Paint the legs with a fleshy pink tone, adding a touch of darker red at the knees and joints for structure.
Muddy Waters?
If your pink reflection turns purple when hitting the blue water, let the turquoise layer dry completely first. Then, glaze the pink reflection on top quickly to keep the colors separate.
Step 3: Water and Background
-
Painting Reeds:
Mix a muted olive green and paint the grass reeds with quick, upward strokes, letting them fade out at the bottom. -
Water Base:
Wet the paper area below the bird with clean water using your larger brush. -
Adding Color:
Load your brush with diluted turquoise and make horizontal strokes across the wet area to create a rippled water effect. -
Reflections:
While the blue wash is still damp, I like to drop in a little pink paint directly below the legs to create a soft, watery reflection. -
Ripple Definition:
Add slightly darker teal horizontal lines in the foreground to suggest movement and depth in the water. -
Finishing Touches:
Allow everything to dry completely, then erase any remaining visible pencil marks for a crisp, professional finish.
Summer Sparkle
once the painting is fully dry, add tiny accents of metallic gold watercolor to the water ripples or the bird’s eye to give your artwork a sun-kissed, shimmering effect.
Step back and admire your vibrant summer artwork.
Swimming Sea Turtle
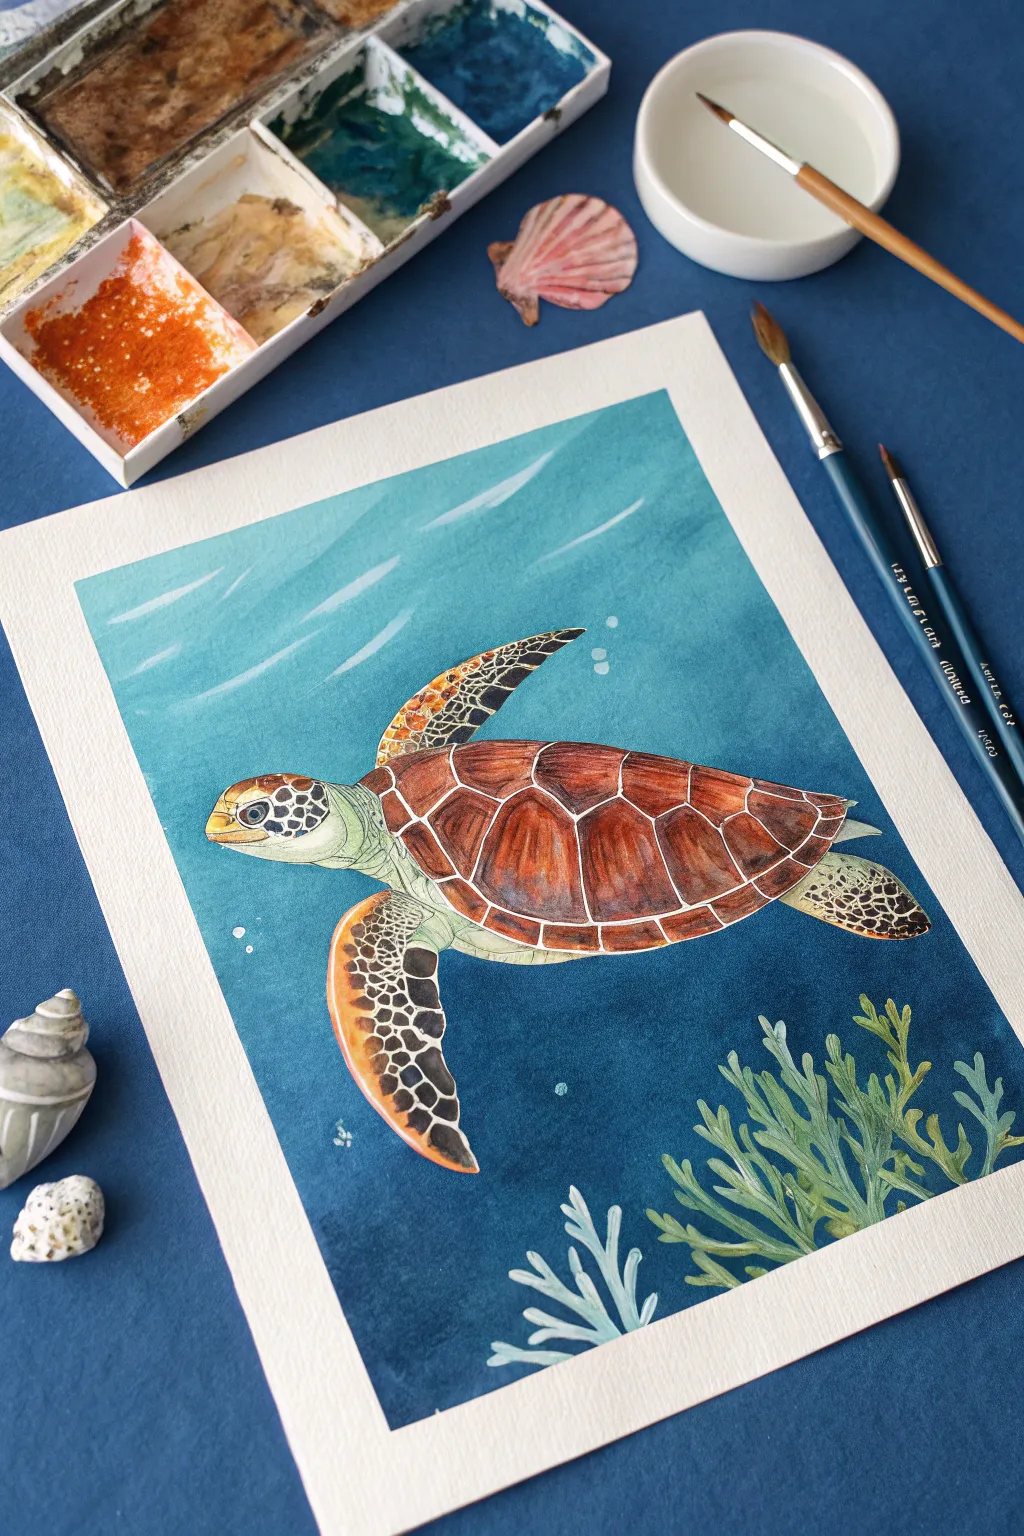
Capture the calm beauty of the ocean with this watercolor project, featuring a sea turtle gliding through light-filled waters. You will practice creating a gradient wash for the deep blue sea and fine brushwork to detail the turtle’s intricate shell patterns.
How-To Guide
Materials
- Cold-pressed watercolor paper (300 gsm)
- Watercolor paints (Turquoise, Phthalo Blue, Indigo, Burnt Sienna, Burnt Umber, Sap Green, Yellow Ochre)
- Round brushes (size 2 for details, size 6 for general work)
- Large flat or mop brush for the background
- Masking tape
- White gouache or white gel pen
- Pencil and eraser
- Two jars of water
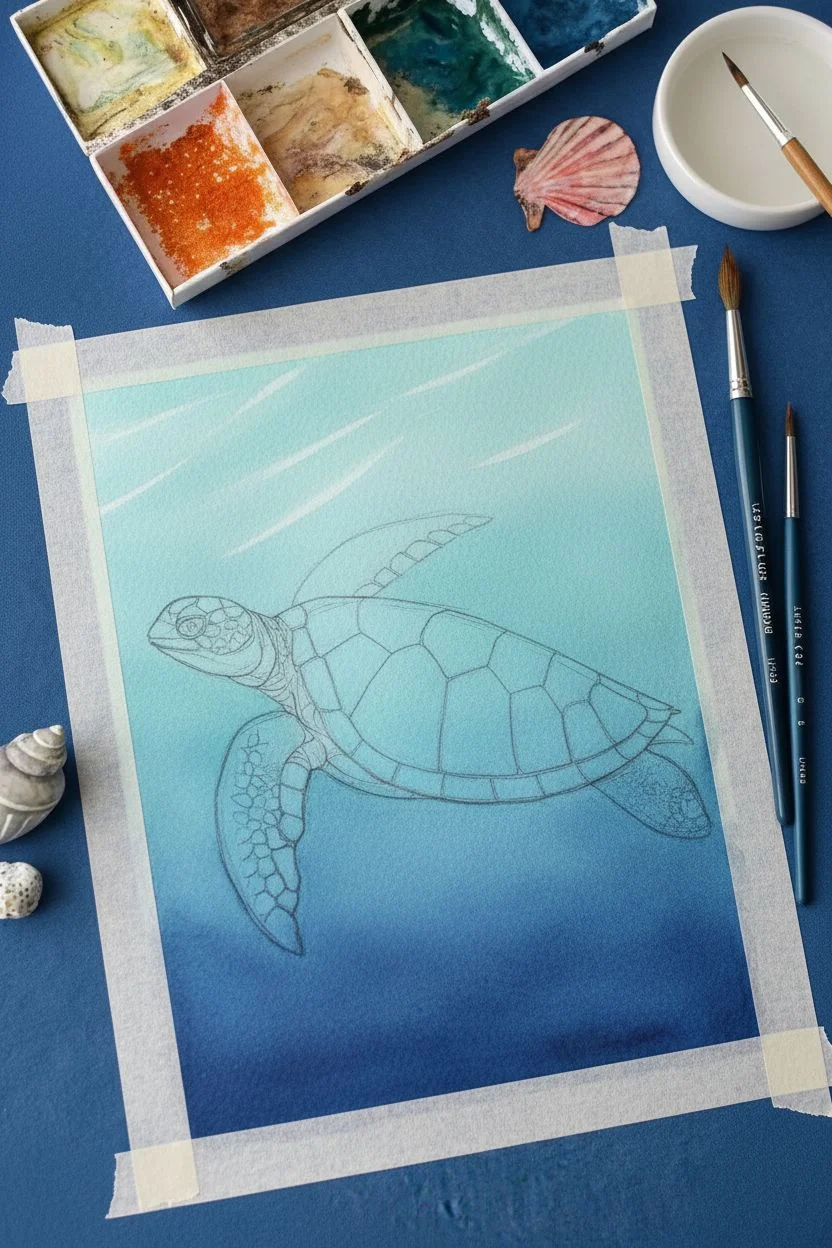
Step 1: Sketch and Background
-
Outline the subject:
Lightly sketch the sea turtle in the center of your paper, paying attention to the hexagonal patterns on the shell and the mosaic-like shapes on the flippers. Add a few loose shapes at the bottom right to represent coral. -
Prepare the background:
Tape your paper down to a board to prevent buckling. Using your large brush, apply clean water to the entire smooth background area, carefully painting around the turtle and coral sketches so they remain dry. -
Apply the upper ocean:
While the paper is wet, drop in a light turquoise or watery blue at the very top of the page, letting it flow naturally. -
Deepen the depths:
Gradually transition into Phthalo Blue as you move down the page, and finally mix in Indigo at the bottom third to create a deep, dark ocean effect. -
Create light rays:
Before the background dries completely, use a clean, damp brush to lift off pigment in diagonal strokes from the top left corner. I like to do this when the paper is matte-damp to create soft, sun-dappled light rays.
Bleeding Lines?
If the dark blue background bleeds into your turtle sketch, blot it immediately with a paper towel. Once dry, scrub gently with a damp stiff brush to lift the unwanted color back to white.
Step 2: The Turtle Shell
-
Base layer:
Once the background is bone dry, apply a very diluted wash of Yellow Ochre over the entire shell and the skin areas to create a warm undertone. -
Paint the scutes:
Switch to a size 6 brush and fill the shell plates (scutes) with Burnt Sienna. Be sure to leave thin gaps between the plates to show the pale under-layer, creating the shell’s segmented look. -
Add dimension:
While the Burnt Sienna is still damp, drop darker Burnt Umber into the bottom-right corners of each shell segment to suggest shading and curvature. -
Enhance contrast:
Once dry, use a fine size 2 brush to sharpen the edges of the plates with a concentrated mix of reddish-brown, making the pale dividing lines pop.
Step 3: Skin and Scales
-
Skin tone:
Mix a pale Sap Green with a touch of the blue from your background. Apply this to the head, neck, and flippers. -
Head details:
Using the size 2 brush and a dark grey or indigo mixture, carefully paint the small, puzzle-piece scales on the turtle’s face, leaving thin green lines between them. -
Flipper patterns:
Paint the larger dark scales on the front flipper using a mix of Burnt Umber and Indigo. Notice how the scales get smaller and denser towards the tip of the fin. -
Shadowing:
Add a soft shadow along the turtle’s underbelly and beneath the chin using a diluted purple or grey mix to give the body volume.
Level Up: Texture
Sprinkle a tiny pinch of salt onto the wet coral area while painting. When it dries and you brush the salt off, it leaves beautiful, organic textures that look just like underwater flora.
Step 4: Coral and Finishes
-
Coral base:
Paint the coral shapes at the bottom right with varying shades of Sap Green and dilute turquoise. Keep these strokes somewhat loose to suggest movement. -
Coral definition:
Add darker green veins or shadows within the seaweed clumps to separate the fronds. -
Bubbles:
Use white gouache or a gel pen to dot small clusters of bubbles rising from the turtle and the coral. -
Final highlights:
Add a tiny dot of white to the turtle’s eye for a glint of life and reinforce any light rays with a very faint white wash if needed.
Peel off your tape to reveal crisp white borders and enjoy your peaceful underwater scene

PENCIL GUIDE
Understanding Pencil Grades from H to B
From first sketch to finished drawing — learn pencil grades, line control, and shading techniques.
Explore the Full Guide
Retro Summer Camper
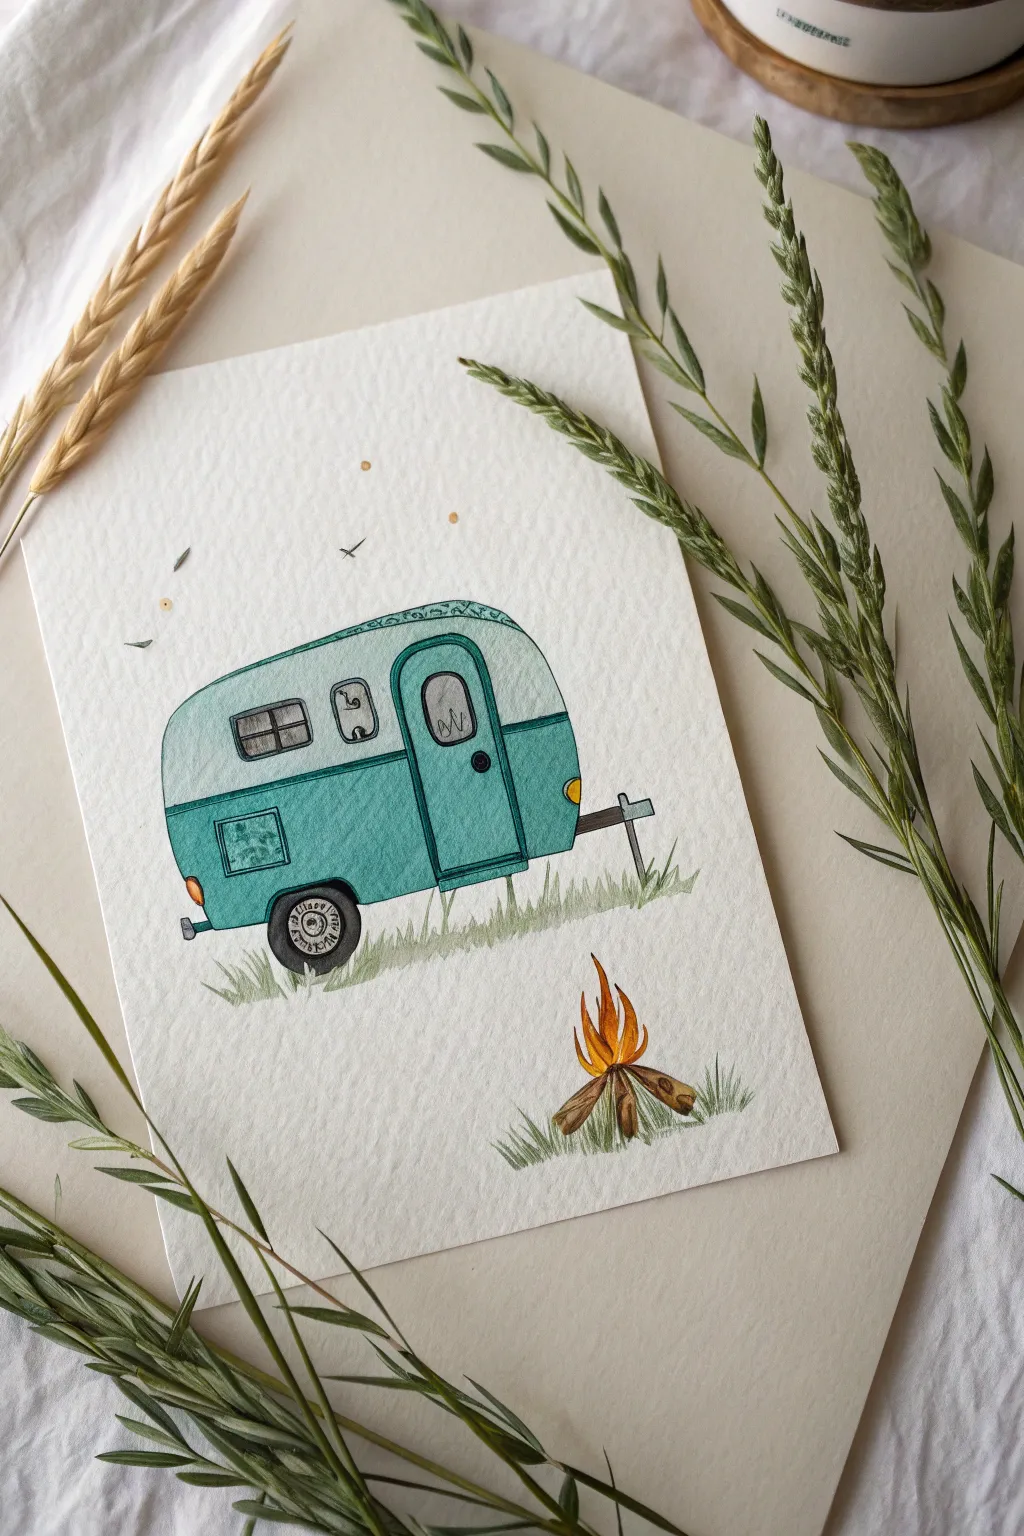
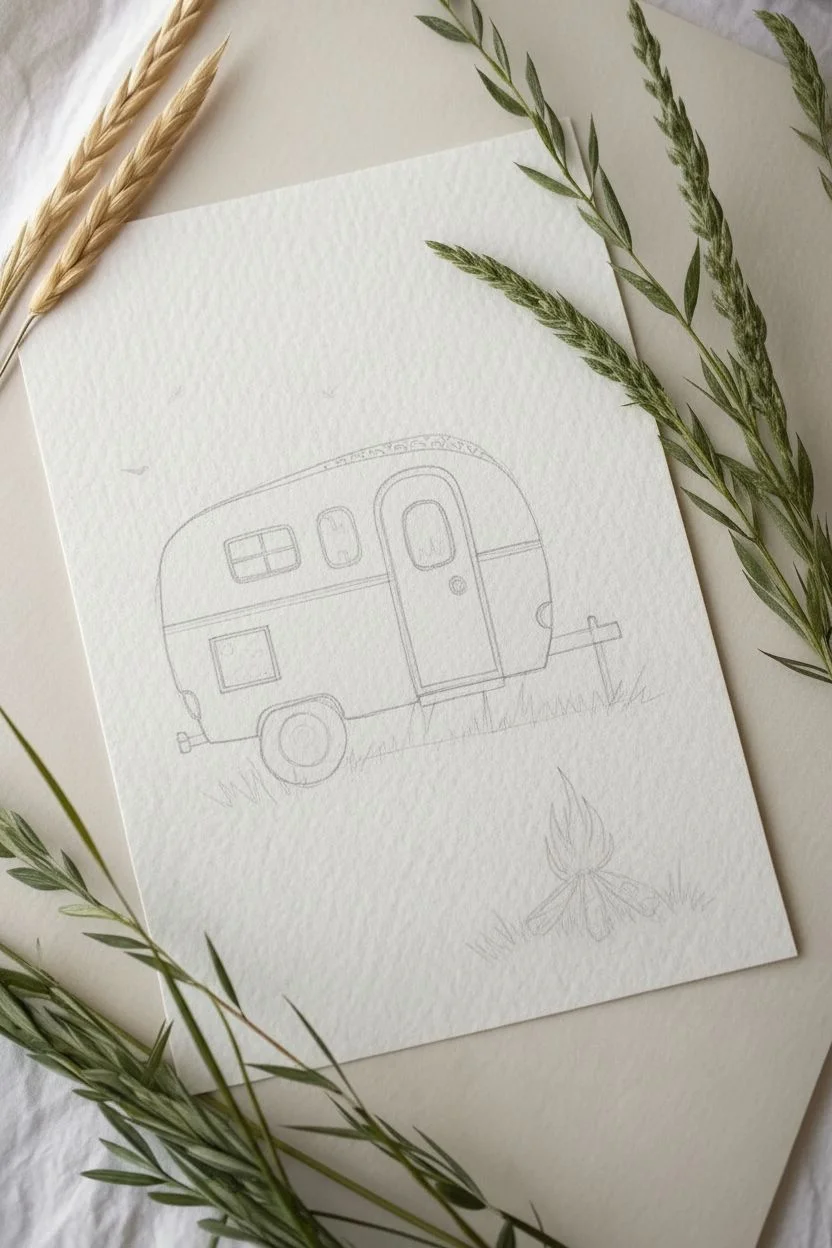
Capture the spirit of summer adventure with this charming illustration of a retro teardrop camper and a cozy campfire. Using waterproof ink and watercolors, you will create a nostalgic scene that evokes memories of road trips and nights under the stars.
Step-by-Step
Materials
- Cold press watercolor paper (300 gsm)
- Waterproof fine liner pens (01 and 03 sizes, black)
- Watercolor paints (Teal, Mint Green, Burnt Sienna, Yellow Ochre, Lamp Black)
- Round watercolor brushes (size 2 and 6)
- HB Pencil and kneaded eraser
- Jar of water and paper towels
Step 1: Sketching the Scene
-
Outline the camper body:
Start by lightly sketching a large, rounded rectangle shape for the camper body, slightly curved at the top and bottom like a loaf of bread. -
Define the wheel and hitch:
Draw the wheel well circle near the back bottom edge, add the tire inside it, and sketch the triangular hitch structure protruding from the front. -
Add doors and windows:
Sketch a rectangular door with rounded corners on the front half. Add a small window on the door and a larger rectangular window towards the back. -
Divide and detail:
Draw a horizontal line across the middle of the camper to separate the two color zones. Add small details like the side marker light, door handle, and a square hatch cover near the back. -
Campfire placement:
To the lower right of the camper, sketch three small logs leaning against each other in a tripod shape, with flame shapes flickering upward.
Step 2: Inking the Lines
-
Trace the main lines:
Using a 03 waterproof fine liner, carefully trace over your pencil lines for the camper body, door, and windows. Keep your hand steady for clean curves. -
Detail the wheel:
Switch to a finer 01 pen to draw the intricate spokes or hubcap details inside the wheel. I find it helps to rotate the paper to get the angles right. -
Ink the fire and surroundings:
Ink the logs and the flame outlines. Add small jagged grass lines underneath the camper tires and the fire pit. -
Erase pencil marks:
Wait a few moments to ensure the ink is bone dry, then gently use a kneaded eraser to remove all underlying pencil sketches.
Smudged Ink?
If your ink smears when you add watercolor, your pen might not be fully waterproof or dry. Test your pen on a scrap paper first, and always wait 5-10 minutes before painting.
Step 3: Painting
-
Paint the top half:
Mix a very watery, pale mint green. Apply a wash to the top half of the camper above the dividing line, careful to paint around the window glass. -
Paint the bottom half:
Mix a deeper teal or turquoise color. Paint the bottom half of the camper, ensuring a crisp edge where it meets the lighter top section. -
Add window details:
Use a diluted grey-blue to fill in the windows. If you like, you can leave tiny specks of white paper unpainted to simulate glass reflection. -
Color the accents:
Paint the tire with diluted black or dark grey. Use a bright yellow-orange for the side marker light and the turn signal. -
Ignite the fire:
Paint the flames using a blend of yellow at the base and orange at the tips. Use brown for the logs, varying the tone to show wood texture. -
Ground the scene:
Mix a sap green with a little brown. using the tip of your small brush, flick short, upward strokes to paint the grass under the camper and fire. -
Final atmosphere:
Add tiny identifying marks like birds or distant stars in the sky using your finest pen or small dots of paint to complete the composition.
Pro Tip: Highlights
Leave tiny slivers of white paper unpainted on the top curve of the wheel and the camper roof. These negative spaces act as highlights and make the metal look shiny.
Now your retro camper is ready for a painted road trip.
Glowing Mason Jar Fireflies
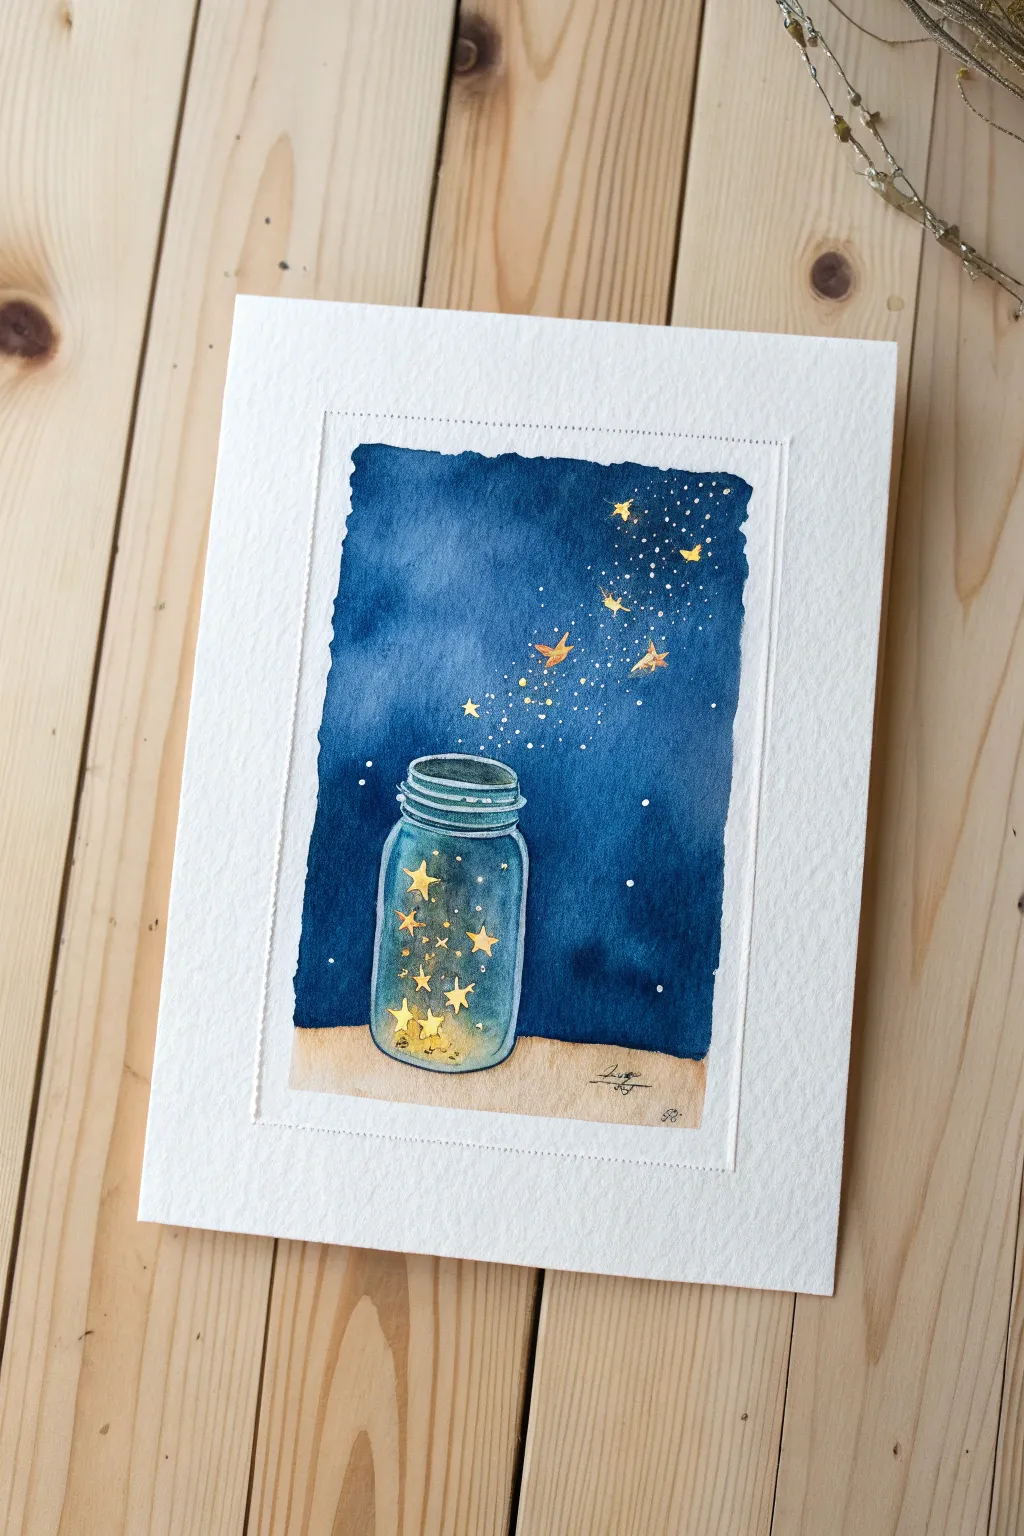
Capture the magic of summer nights with this whimsical watercolor tutorial featuring glowing stars escaping a glass jar. By using masking fluid and wet-on-wet techniques, you will create a stunning contrast between bright light and deep indigo shadows.
Step-by-Step Guide
Materials
- Cold press watercolor paper (300 gsm)
- Watercolor paints (Indigo, Phthalo Blue, Turquoise, Yellow Ochre, Burnt Sienna, Lemon Yellow)
- Masking fluid
- Old brush or silicone tool (for masking)
- Round brushes (flats sizes 4 and 8)
- White opacity gouache or white gel pen
- Heavyweight white cardstock (for mounting)
- Paper piercing tool or sewing needle
- Glue stick or double-sided tape
Step 1: Drafting and Masking
-
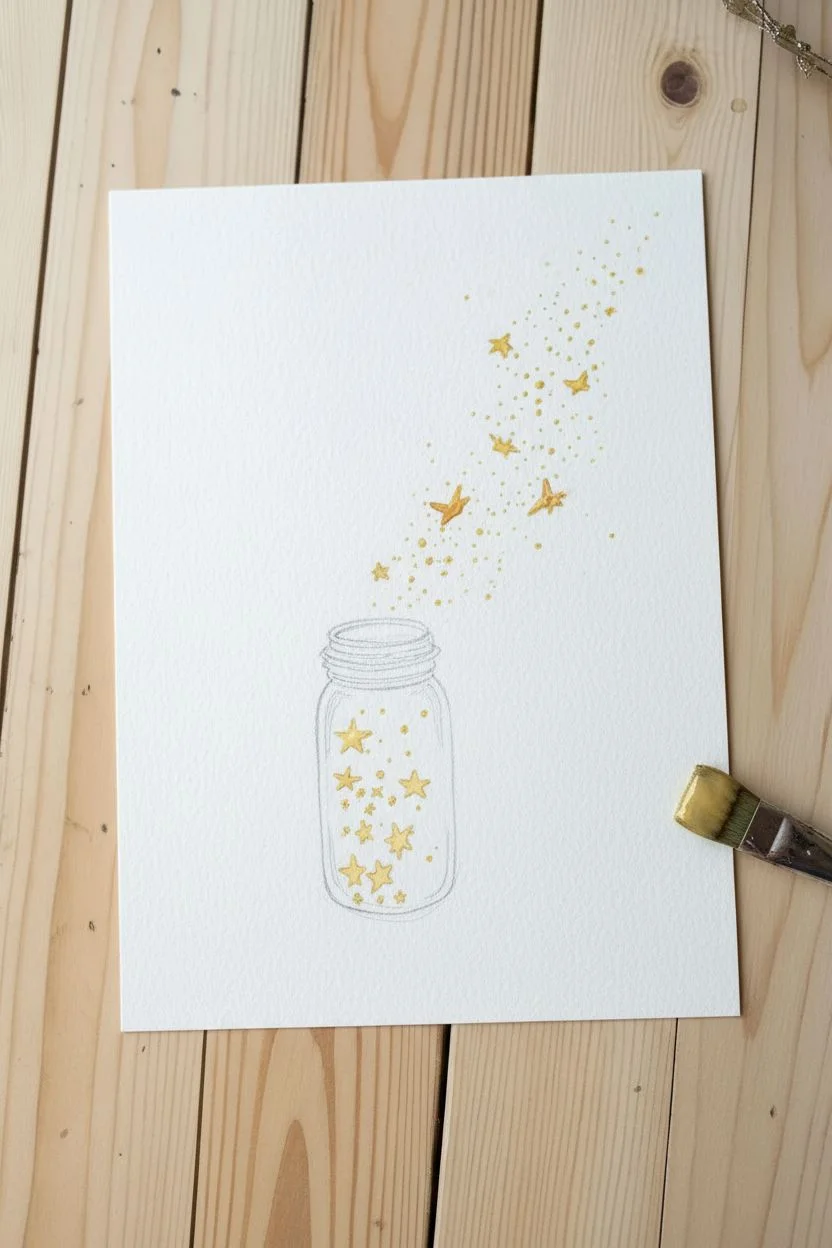
Sketch the composition:
Begin by lightly penciling the outline of a mason jar in the bottom third of your watercolor paper. Sketch a stream of varying-sized stars flowing out from the jar towards the upper right corner. -
Protect the brush:
Dip an old, designated paintbrush into soapy water before dipping it into your masking fluid. This soap barrier prevents the fluid from ruining the bristles permanently. -
Apply masking fluid:
Carefully filling in all your penciled stars with masking fluid. Add tiny, random dots around the main stream to represent distant fireflies or magic dust particles. -
Dry completely:
Allow the masking fluid to cure fully. It must be solid to the touch before you introduce any water, otherwise, it will smear and tear the paper.
Step 2: Painting the Atmosphere
-
Paint the night sky:
Load a larger round brush with a rich mixture of Indigo and Phthalo Blue. Paint the area around the jar, keeping the edges of the painted rectangle slightly rough and organic rather than perfectly straight. -
Create a gradient:
As you get closer to the jar and the star stream, dilute your blue paint with a little water. This makes the sky appear lighter near the light source. I often tilt the paper slightly to help the wash settle evenly. -
Paint the ground:
While the sky dries, mix a light wash of Yellow Ochre with a touch of Burnt Sienna. Paint a horizontal strip beneath the jar for the ground, letting it bleed slightly into the bottom of the sky for a soft transition. -
Define the jar:
Using diluted Turquoise, paint the glass of the jar. Leave sheer patches of white paper showing to mimic reflective highlights on the glass surface. -
Add jar details:
With a fine brush and slightly darker blue-grey, paint the threaded rim of the jar and add thin vertical lines down the sides to define the cylindrical shape.
Pro Tip: Masking Fluid
If you don’t have masking fluid, you can use white wax crayon or white candle wax to draw the stars first. The watercolor will resist the wax, leaving those areas white!
Step 3: Revealing the Glow
-
Remove the mask:
Once the paint is bone-dry, gently rub away the masking fluid using your finger or a rubber cement pickup tool. You should now have stark white stars against the dark background. -
Color the stars:
Paint the exposed stars with bright Lemon Yellow. For the stars inside the jar, you can do a second glaze of yellow once the first is dry to make them appear more intense. -
Add magical sparkles:
Dip a toothbrush or stiff brush into white gouache and flick tiny splatters over the star stream to create a galaxy effect. You can also use a white gel pen to sharpen specific star points.
Level Up: Metallic Touch
Use metallic gold watercolor paint for the stars instead of standard yellow. It will catch the light beautifully when the card is tilted.
Step 4: Finishing and Mounting
-
Trim the artwork:
Cut your painted paper into a neat rectangle, leaving about a half-inch of white space around the painted sky area to frame it. -
Prepare the card base:
Take your folded cardstock base. Place your painting in the center to measure where it will sit, then set the painting aside. -
Create the stitched border:
Using a ruler and a paper piercing tool (or a thick needle), poke a line of evenly spaced holes around the area where the painting will sit. This creates a faux-stitched, embossed texture frame. -
Mount the artwork:
Apply adhesive to the back of your watercolor piece and center it inside your pierced border on the cardstock to complete the project.
Share this enchanting jar of light with someone special to brighten their day


Zesty Citrus Patterns
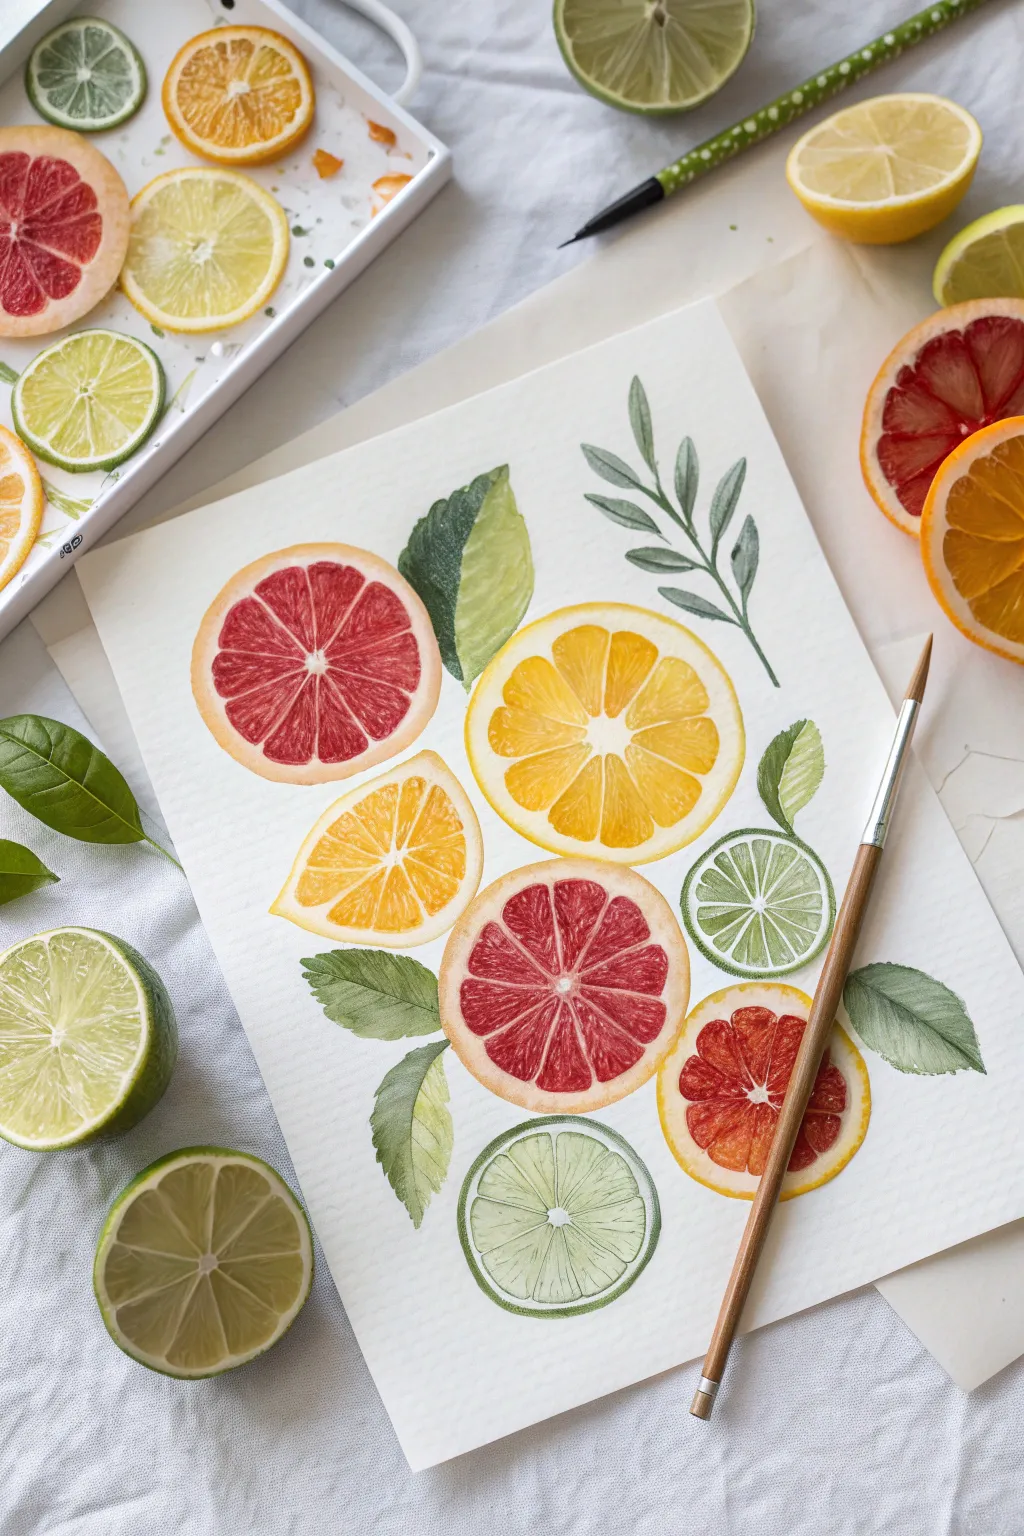
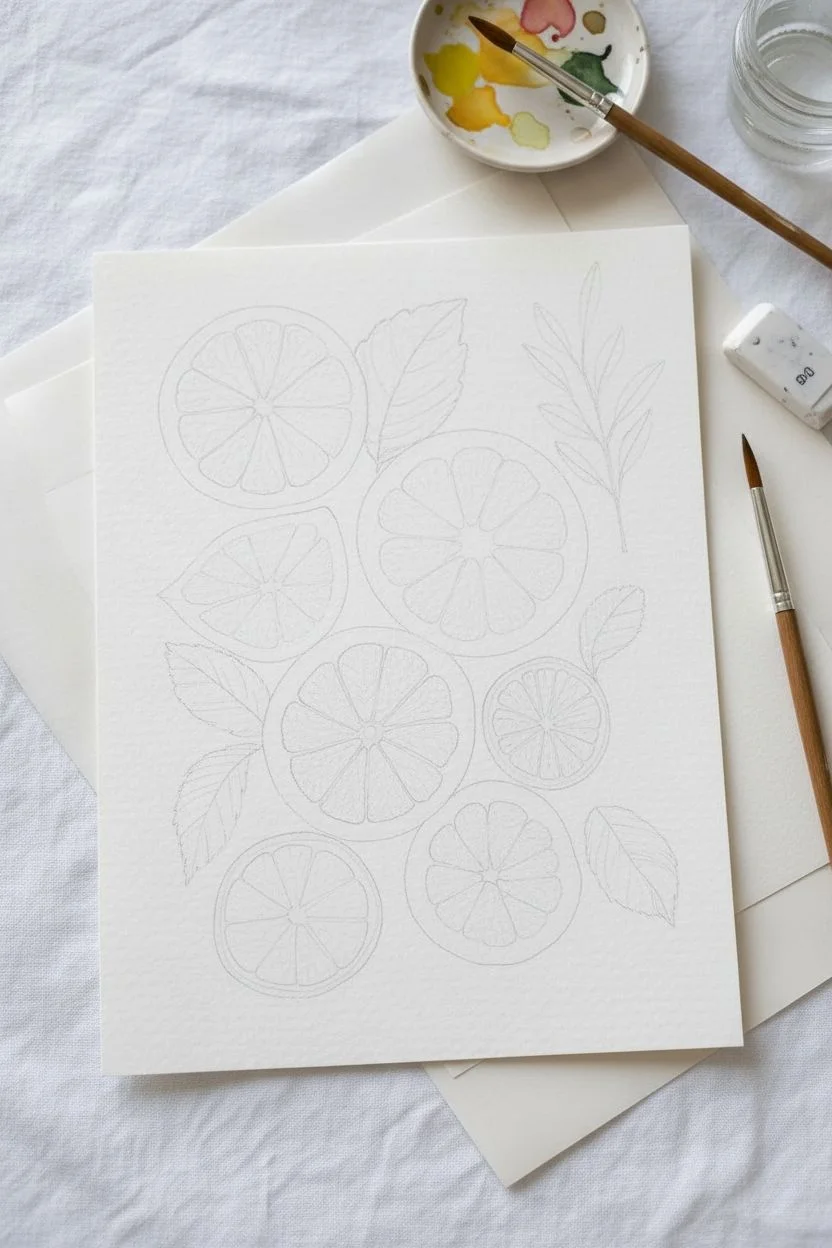
Capture the refreshing essence of summer with this vibrant study of sliced citrus fruits and greenery. This project teaches you how to control water usage to create crisp white piths and juicy, translucent pulp textures completely from scratch.
Detailed Instructions
Materials
- Cold press watercolor paper (300gsm)
- Round watercolor brushes (size 2 for details, size 6 for washes)
- Watercolor paints (Lemon Yellow, Cadmium Orange, Alizarin Crimson, Sap Green, Viridian)
- HB Pencil and kneaded eraser
- Mixing palette
- Two jars of water
- White opacity adjustment (White gouache or white gel pen)
Step 1: Sketching the Composition
-
Map out the circles:
Begin by lightly drawing five circles of varying sizes scattered across your paper to represent the fruit slices. Add a semi-circle shape near the center-left to represent the lemon wedge. -
Define the segments:
Mark the center point of each circle. Lightly sketch lines radiating outward like bicycle spokes, dividing the circles into triangular segments. Typically, a citrus slice has between 8 and 10 segments. -
Add nature elements:
Sketch small clusters of leaves tucking in between the fruit shapes. Draw a central vein line down the middle of each leaf.
Step 2: Painting the Fruit Flesh
-
Mix the grapefruit pink:
Create a watery mix of Alizarin Crimson with a touch of orange for the pink grapefruit slices. Load your size 6 brush. -
Paint the pink segments:
Fill in the triangular segments of the large top-left circle and the bottom-center circle. Crucial tip: Leave a tiny gap of dry white paper between each segment and around the outer edge to act as the pith. -
Create the yellow tones:
Rinse your brush thoroughly and mix a bright Lemon Yellow. Paint the segments of the central large circle and the triangular wedge shape, maintaining those crisp white gaps. -
Paint the blood orange:
For the bottom-right slice, mix a deeper red using Alizarin Crimson and a tiny bit of purple or cool blue. Fill in the segments. -
Add the lime accents:
Use a light, watery mix of yellow-green for the bottom center lime slice and the side details. Keep the paint fluid but controlled.
Bleeding edges?
If your segments are blending into each other, you’re painting adjacent areas too quickly. Paint every other segment first, let them dry, and then fill in the gaps.
Step 3: Rinds and Texture
-
Outline the skins:
Using the size 2 brush and a more saturated version of each fruit’s color (less water), carefully paint a thin ring around the outside of each fruit slice. Leave a white gap between this ring and the juicy segments. -
Texturize the pulp:
Once the initial wash is dry, take a slightly darker shade of the fruit color. Use the tip of your small brush to dab tiny dots or fine lines near the outer edge of each segment to mimic juice sacs. -
Deepen the wedge:
For the lemon wedge, add a second layer of darker yellow to the bottom edge to give it dimension and shadow.
Make it Pop
Once dry, add tiny dots of pure white gouache to the wettest-looking parts of the pulp. This creates a specular highlight, making the fruit look freshly cut and glistening.
Step 4: Foliage and Finishing Touches
-
Base coat the leaves:
Mix a natural Sap Green. Paint each leaf entirely with a light wash. I like to rotate the paper to get the angle just right for these curves. -
Add leaf dimension:
While the green is still slightly damp, drop a darker, cool green (like Viridian) into just one half of the leaf (divided by the pencil vein) to create a shadow effect. -
Define the veins:
Let the leaves dry completely. Use your smallest brush and dark green paint to draw a thin central vein and delicate branching veins. -
Refine the white lines:
If your paint accidentally bled into the white pith areas, use a white gel pen or a tough of white gouache to reclaim those crisp dividing lines. -
Erase pencil marks:
Wait until the painting is bone dry—warm to the touch—then gently erase any visible graphite lines for a clean, professional finish.
Frame your zest-filled artwork in a simple white frame to let those citrus colors really shine.
Magical Mermaid Tail
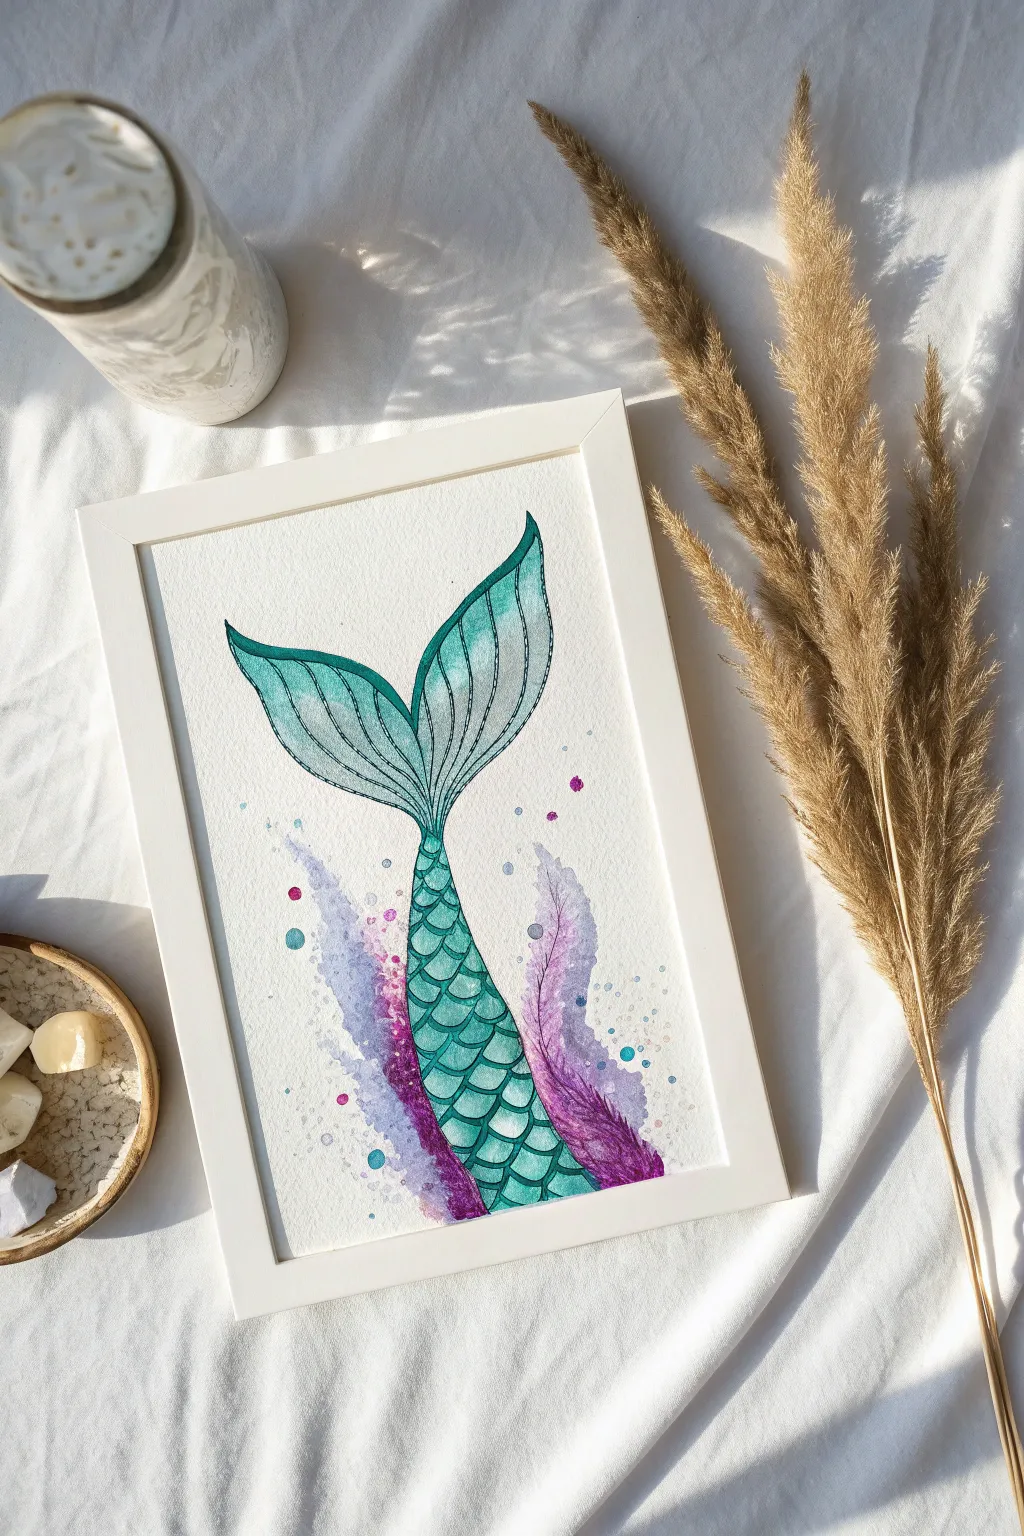
Capture the magic of the deep sea with this elegant painting of a mermaid tail diving into abstract waves. The contrast between the structured scales and the loose, splashy background makes for a balanced and beautiful summer art piece.
Step-by-Step Tutorial
Materials
- Cold press watercolor paper (300gsm)
- Watercolor paints (Teal, Turquoise, Purple, Magenta)
- Round brushes (Size 6 for washes, Size 0 or 1 for details)
- Pencil and kneaded eraser
- Masking tape
- Jar of water
- Paper towels
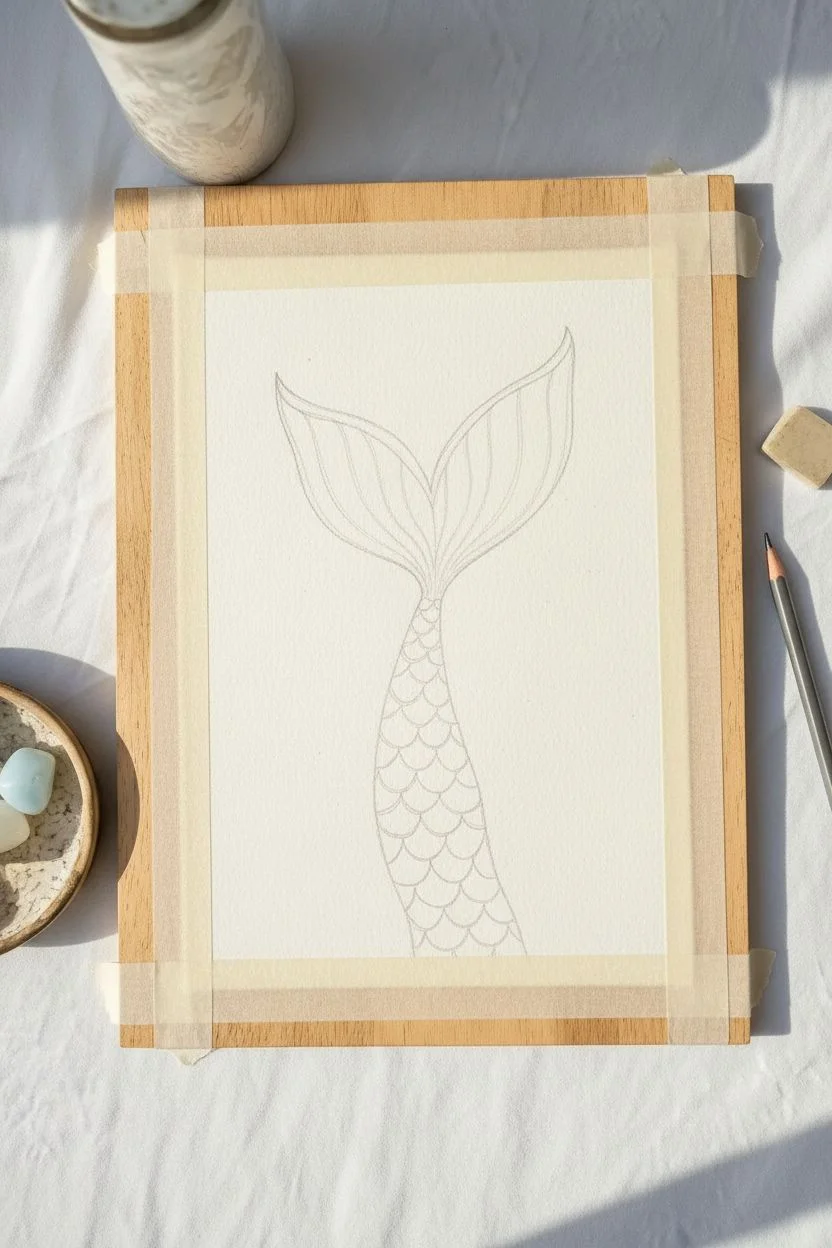
Step 1: Sketching the Shape
-
Prepare the paper:
Tape your watercolor paper down to a hard surface on all four sides. This prevents buckling and leaves a crisp white border later. -
Outline the tail:
Lightly sketch a long, curved cone shape pointing upwards to form the main body of the tail. Ensure the bottom is wider and it creates a gentle ‘S’ curve as it tapers up. -
Add the flukes:
At the top of the tapered point, draw two large, leaf-shaped fins (flukes) fanning out. They should look like a graceful ‘V’ shape. -
Draft the scales:
Lightly draw a grid of small scallop shapes (U-curves) filling the tail body. I find it easiest to start large at the bottom and make them progressively smaller as you move up toward the flukes. -
Detail the fins:
Draw long, vertical curved lines inside the top flukes to mimic the texture of fins.
Clean Lines
If your scale outlines are bleeding into the base color, the paper is still too wet. Use a hairdryer on a low setting to speed up the drying process before adding fine details.
Step 2: Painting the Tail
-
Base wash:
Mix a very watery, pale teal color. Paint over the entire tail and fluke area with this light wash to establish a base tone. -
Let it dry completely:
Wait for the base layer to be bone dry. If you paint the next steps while it’s damp, your scales will blur together. -
Scale outlines:
Using a size 0 or 1 brush and a saturated, darker turquoise mix, carefully paint the U-shaped outline of each scale. -
Shading scales:
While you are outlining, gently thicken the bottom curve of each scale with the darker paint to create a shadowed effect, giving the tail dimension. -
Fin texture:
Using the same dark turquoise, trace the vertical lines on the tail flukes. Add a second layer of color to the outer edges of the flukes for definition.
Step 3: Abstract Splashes
-
Mix the splash color:
Create a juicy mix of purple and violet on your palette. You want this to be fairly loose and watery. -
Paint the waves:
On either side of the tail’s base, paint upward, flame-like strokes to represent splashing water. Keep your wrist loose and allow the shapes to be irregular. -
Add contrast:
While the purple splash is still wet, drop in tiny touches of magenta or dark blue near the bottom so the colors bleed and blend naturally. -
Create distinct bubbles:
Once the main splashes are damp but not soaking, use the tip of your brush to dot small circles of turquoise, pink, and purple around the splash for a bubbling effect. -
Splatter effect:
Load your brush with watery paint, tap it against your finger over the paper to create tiny, random droplets around the artwork. -
Final outlines:
Once everything is perfectly dry, take your finest brush with the darkest teal (almost black-green) and re-trace the main outer silhouette of the tail to make it pop against the white paper.
Add Some Magic
Once the painting is dry, use a metallic gold or iridescent watercolor topcoat on the scales. It will make the tail shimmer beautifully when it catches the light.
Peel off the tape to reveal your crisp border and enjoy the coastal vibes of your new artwork.
Vibrant Hibiscus Blooms

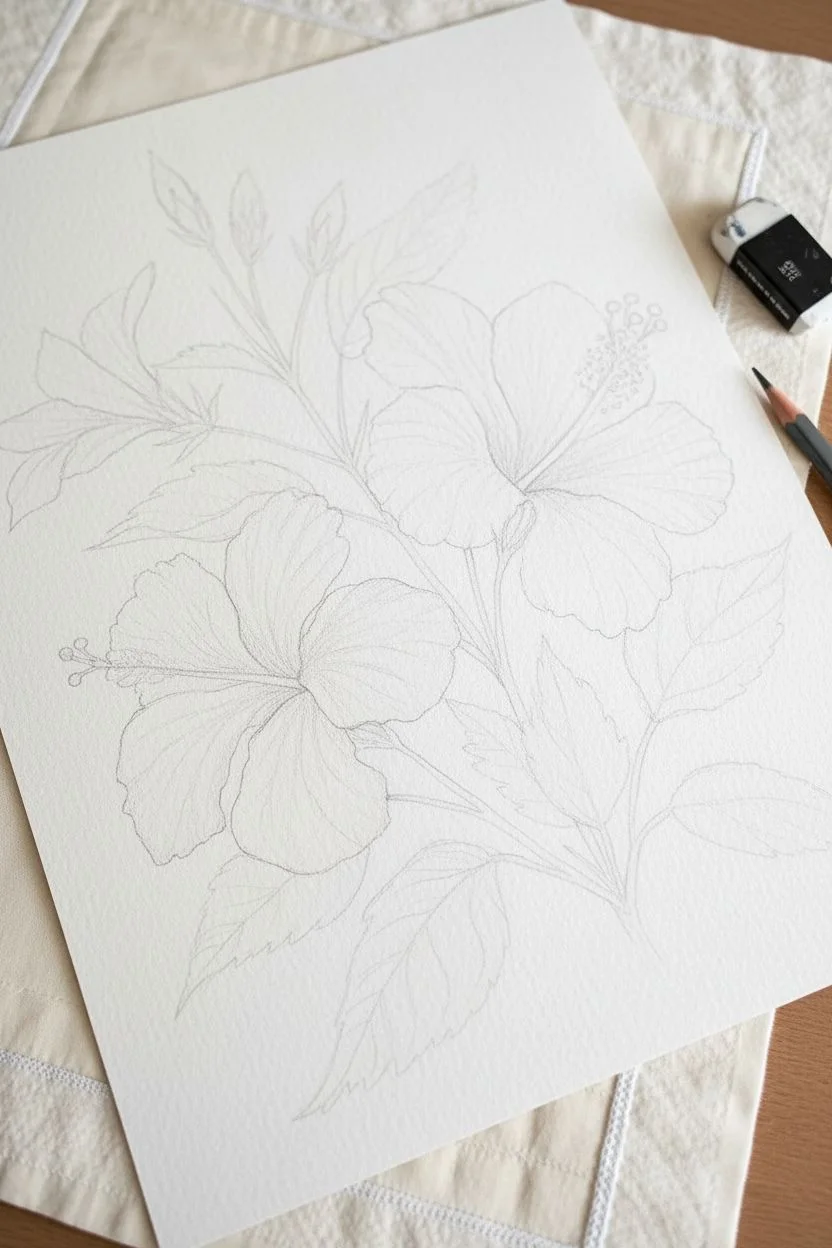
Capture the essence of the tropics with this vibrant botanical study featuring two distinct hibiscus blooms. You will master wet-on-wet blending to create delicate petals and rich, shadowed depth.
Detailed Instructions
Materials
- Cold-press watercolor paper (300 gsm with deckle edge)
- Watercolor paints: Alizarin Crimson, Cadmium Red, Operatic Pink, Sap Green, Hookers Green, Yellow Ochre
- Pointed round brushes (size 6 for washes, size 2 for details)
- HB pencil and kneaded eraser
- Two water jars and paper towels
- Palette for mixing
Step 1: Sketching the Composition
-
Outline the blooms:
Lightly sketch the large open hibiscus on the upper right and the slightly angled view of the second flower below it. -
Add floral details:
Draw the central pistils extending outward and the cluster of three unopen buds on the upper left side. -
Place the foliage:
Sketch the stems connecting the flowers and add several serrated leaves radiating from the main stem lines.
Step 2: Painting the Pink Hibiscus
-
First wash:
Wet the petals of the top flower with clean water. Drop a dilute mix of pink onto the outer edges, keeping the paper white in the highlight areas. -
Deepen the throat:
While the paper is still damp, drop a concentrated dark pink or magenta into the center where the pistil emerges. -
Create veins:
Use a damp, clean brush to lift out faint lines radiating from the center, simulating the delicate texture of the petals. -
Edge definition:
Once the initial wash is dry, use your small brush to sharpen the ruffled edges of the petals with a slightly darker pink mix.
Fixing Blooms
If you see “cauliflower” backruns in your wash, your brush was too wet when adding new paint. Smooth it out immediately with a damp, thirsty brush or camouflage it as a petal vein.
Step 3: Painting the Red Hibiscus
-
Base layer:
Mix a vibrant Cadmium Red. Paint the petals of the lower flower one by one, leaving tiny gaps between them to prevent merging. -
Adding shadow:
Drop Alizarin Crimson or a touch of purple into the base of the petals and areas where they overlap to create volume. -
Softening gradients:
I like to wash my brush and run the damp bristles along the petal edges to soften the crimson into the brighter red. -
Detailing:
Paint the ruffled outer edges with care, ensuring the red looks velvety and saturated.
Textured Touch
For the botanical look shown here, use paper with a “deckle edge.” You can manually tear your watercolor paper against a thick ruler to mimic this rough, handmade finish.
Step 4: Leaves and Stems
-
Stem work:
Mix Sap Green with a touch of red to create a natural olive tone. Paint the thin stems connecting the buds and blooms. -
Leaf gradients:
Paint the leaves starting with a yellowish-green at the tips, transitioning to a dark Hookers Green near the stem. -
Serrated edges:
Use the tip of your size 2 brush to carefully flick paint outward along the leaf perimeters to create the jagged, saw-tooth edges. -
Leaf veins:
While the leaves are semi-wet, use a thirsty brush (damp but no paint) to lift out the center vein line.
Step 5: Final Details
-
Bud clusters:
Paint the left-side buds with a gradient from green at the base to pink at the tips. -
Pistil base:
Paint the long filament extending from the center of each flower using a mix of cream and Yellow Ochre. -
Anthers:
Dot the ends of the filaments with thick yellow paint to represent the pollen-covered anthers. -
White highlights:
If you lost any highlights on the red pistil, add tiny dots of white gouache or gel pen for shine.
Frame your botanical masterpiece in a rustic wood frame to bring a permanent slice of summer into your home
Neon Glow Jellyfish
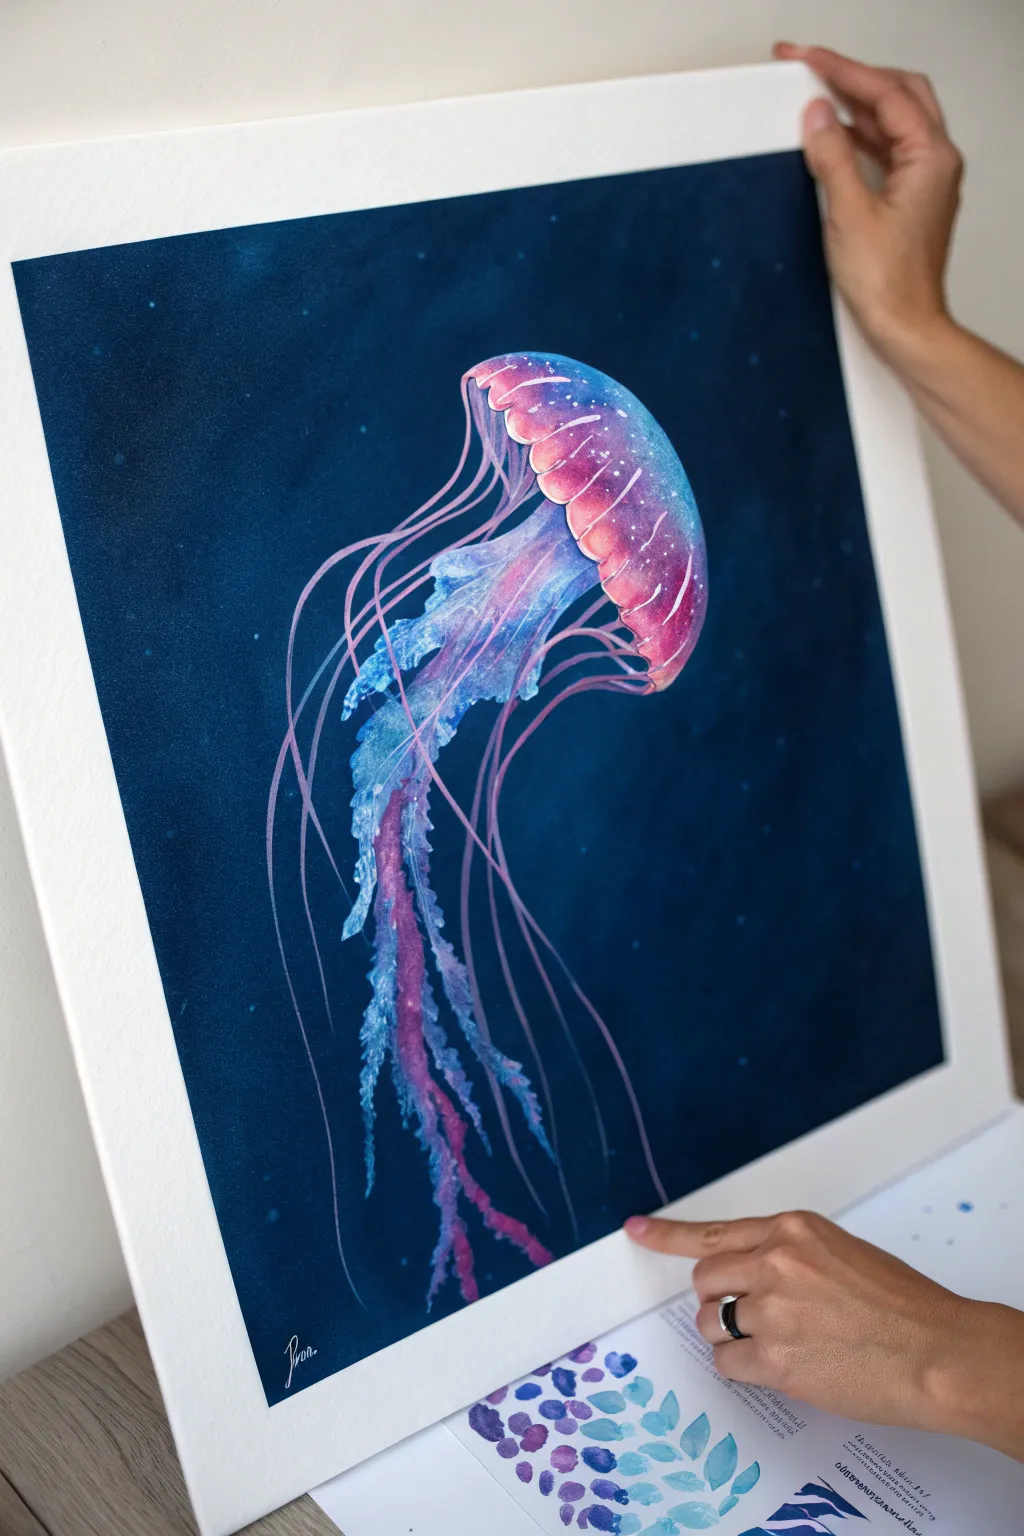
Capture the ethereal beauty of the ocean depths with this striking watercolor and gouache project. By contrasting deep indigo hues with electric neons and opaque whites, you’ll create a glowing jellyfish that appears to drift right off the paper.
How-To Guide
Materials
- Cold press watercolor paper (300gsm)
- Watercolors: Indigo, Phthalo Blue, Magenta, Purple
- White Gouache (essential for the glow)
- Round brushes: Sizes 8, 4, and a 0 liner
- Masking tape
- Palette and water jars
- Pencil and eraser
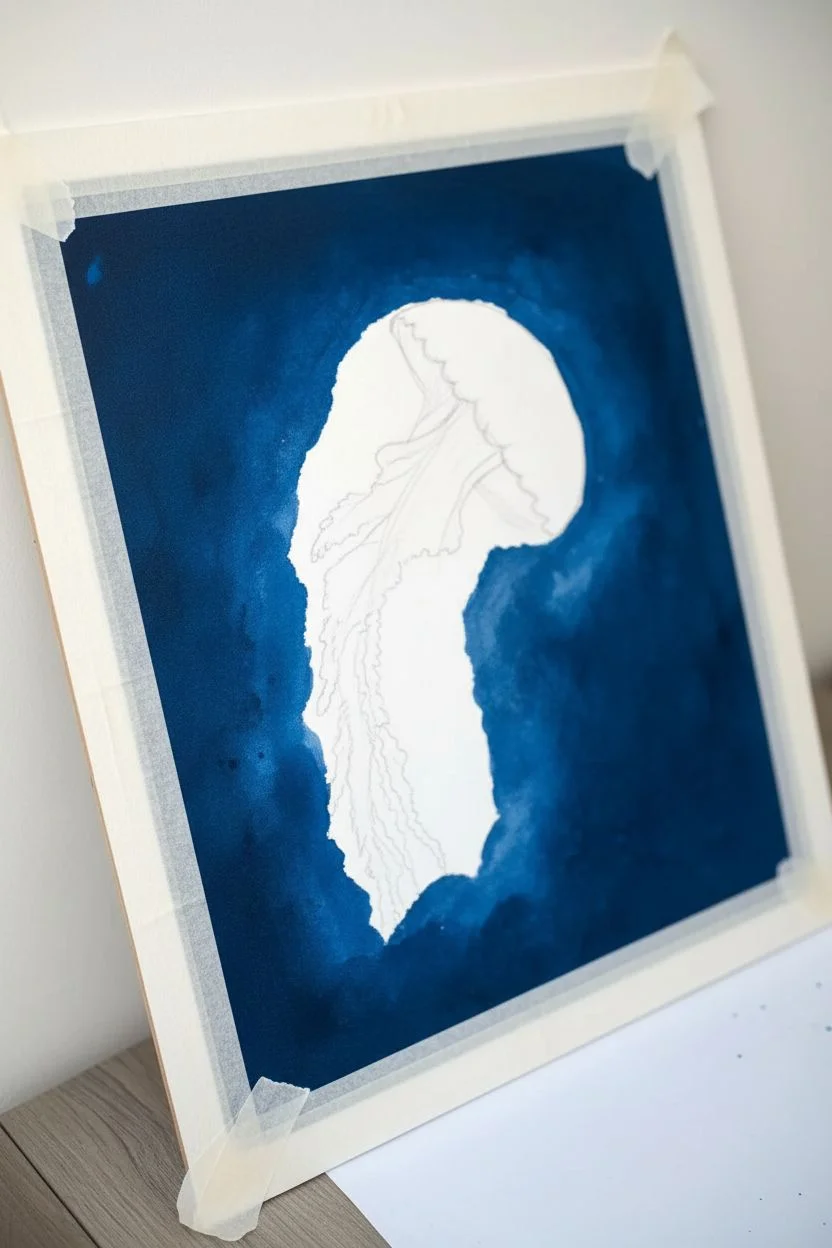
Step 1: Setting the Scene
-
Secure the paper:
Tape down all four edges of your paper to a hard board using masking tape. This prevents buckling and creates a crisp white border later. -
Light sketch:
Using a pencil, lightly draw the mushroom-cap shape of the jellyfish bell in the center. Sketch a rough guide for the central ruffled arms, but leave the thin trailing tentacles for the brushwork. -
Mix the abyss:
Create a rich, dark background color by mixing Indigo with a touch of Black or concentrated Phthalo Blue. You want a deep navy closest to midnight. -
Paint the background:
Using your largest brush, carefully paint the negative space around your jellyfish sketch. I find it helpful to rotate the paper as I work around the curves to keep the edges neat. -
Add background depth:
While the background is still slightly damp, drop in hints of slightly lighter blue in random patches to create a watery, non-flat texture. Let this layer dry completely.
Glow Troubleshooting
If your neon colors look dull against the paper, wait for them to dry and layer a mix of white gouache + pigment on top. The opaque white base is crucial for making the color pop against dark surroundings.
Step 2: The Glowing Bell
-
Base wash:
With a clean, damp brush, wet the inside of the jellyfish bell. Drop in watered-down Magenta at the top and Cyan near the bottom rim, letting them bleed into each other to form purple in the middle. -
Define the ridges:
Once the base is damp-dry (cool to the touch but not shiny), use a size 4 brush to paint stripes of slightly darker magenta curving from top to bottom, following the dome shape. -
Add the rim:
Paint the scalloped edge of the bell with a mix of purple and blue. Keep the edges soft to maintain a gelatinous look. -
Texture the bell:
Mix a small amount of white gouache with your pinks. Stipple (dabbing dots) this texture near the top of the dome to mimic the speckled skin of the jellyfish.
Level Up: Iridescence
For a magical finish, use iridescent or metallic watercolor paint for the final highlights on the bell. This adds a subtle shimmer that mimics real bioluminescence when the light hits the artwork.
Step 3: Tentacles and Details
-
Inner arms base:
painting the thick, ruffled ‘oral arms’ hanging from the center requires a loose touch. Mix Cyan with white gouache for an opaque, milky blue and paint jagged, flowing shapes downward. -
Ruffled details:
Layer a darker violet mixture into the crevices of the blue ruffled arms to give them dimension and form. -
Trailing stingers:
Switch to your size 0 liner brush. Mix Magenta with a little white gouache. Paint long, sweeping lines that curve gracefully from the bell’s edge to the bottom of the page. -
Secondary tentacles:
Repeat the previous step with a pale blue-white mix, crossing over and under the pink lines to create a tangled, floating effect. -
Enhance the opacity:
Go over parts of the tentacles with pure white gouache where they would catch the most light. This layering creates the illusion of transparency and depth. -
Bell highlights:
Use the liner brush and pure white gouache to paint fine vertical lines along the ridges of the bell and tiny dots along the scalloped rim. -
Atmospheric particles:
Load a brush with watery white gouache mixed with a tiny bit of blue. Tap the handle against another brush to splatter fine droplets over the background, looking like refined plankton or distant stars.
Peel off your tape to reveal crisp borders and enjoy the serene glow of your deep-sea creation.
Summer Beach Gnome
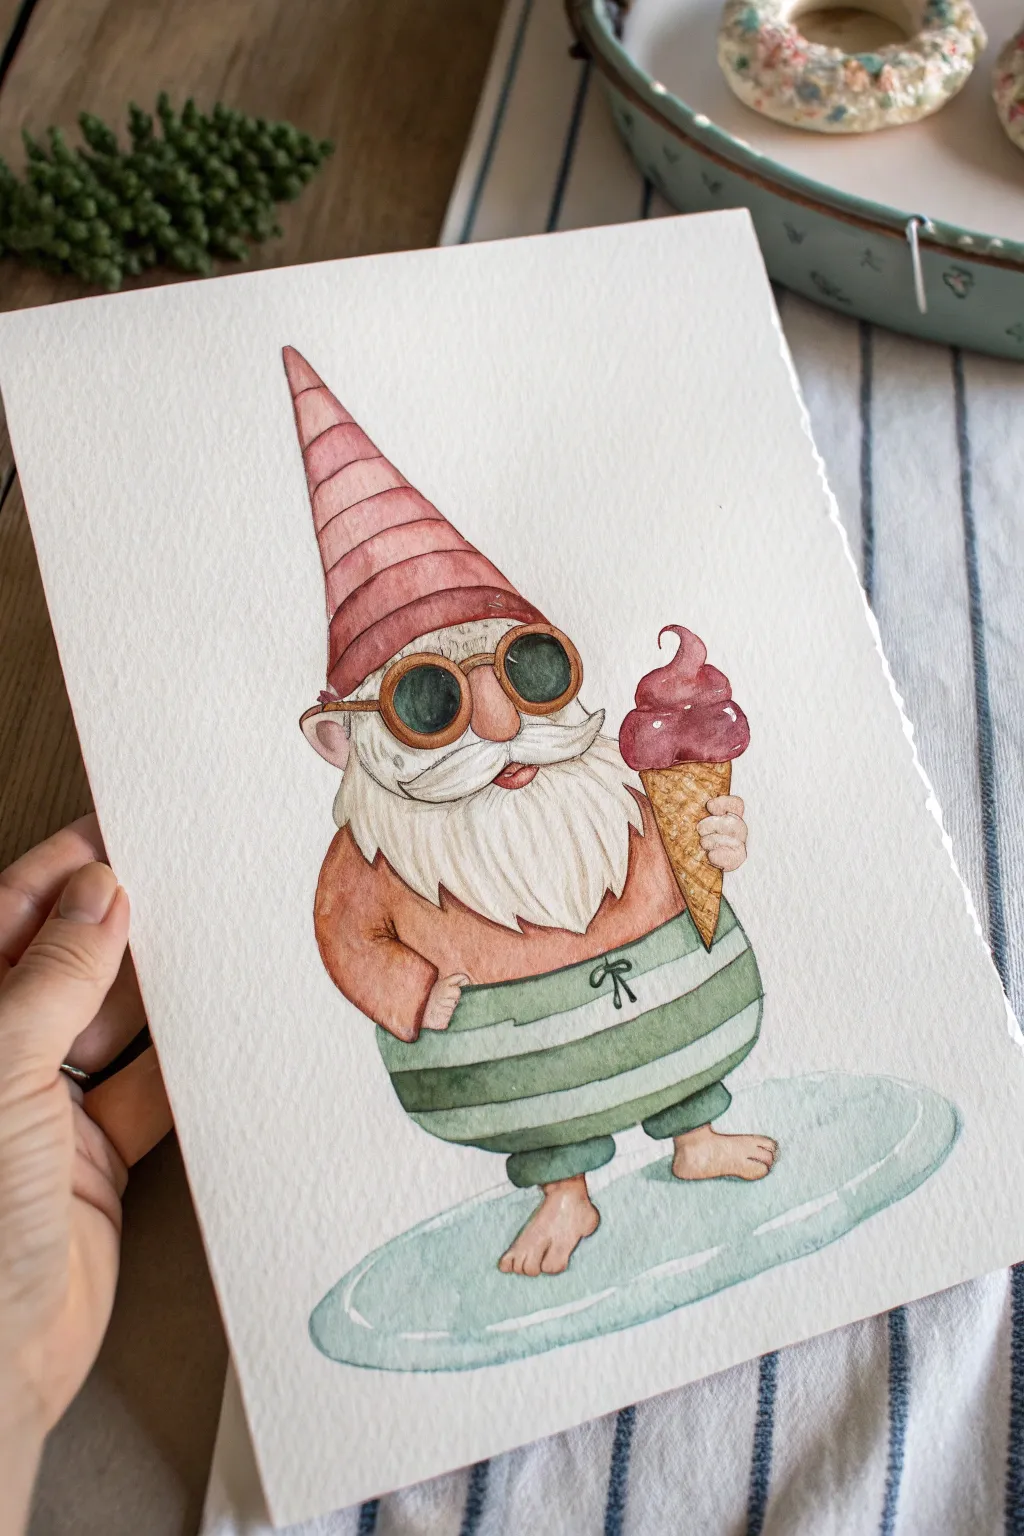
Capture the whimsical spirit of summer with this charming watercolor painting of a beach-ready gnome. You will learn how to build soft layers and paint crisp stripes to bring this surfing character to life.
Detailed Instructions
Materials
- Cold press watercolor paper (140lb/300gsm)
- Watercolor paints (Peach, Dusty Pink, Sage Green, Ochre, Teal, Dark Grey)
- Round watercolor brushes (Size 6 for washes, Size 2 for details)
- HB Pencil and eraser
- Jar of water and paper towels
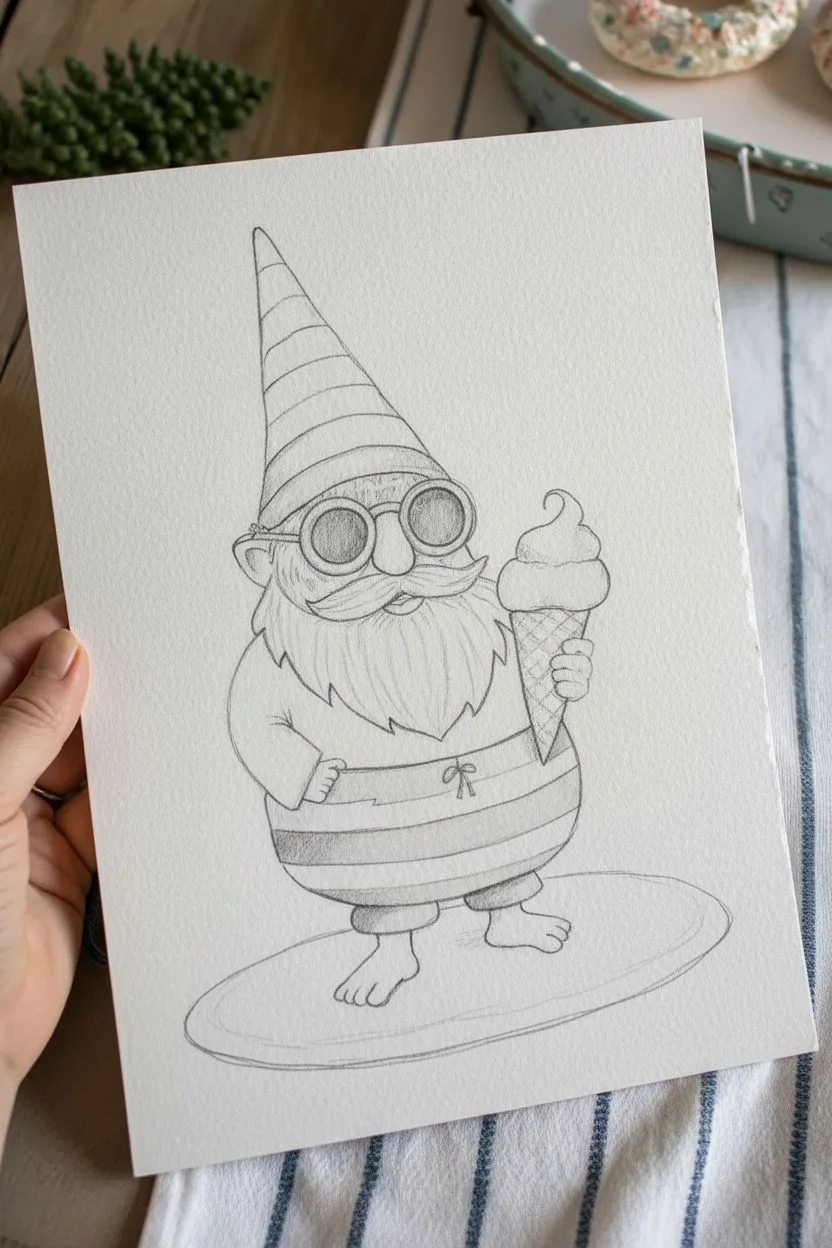
Step 1: Sketching the Gnome
-
Outline the Basics:
Lightly sketch a large oval shape for the body and a tall, slightly curved triangle on top for the hat. -
facial Features:
Draw a large circle in the upper third of the body for the nose. Sketch two round shapes for sunglasses resting on the nose, and draw a flowing mustache underneath. -
Beard and Body:
Outline the beard shape cascading down the chest. Sketch the arms (one on the hip, one raised) and the swimming trunks. Add small bare feet at the bottom. -
Accessories:
Sketch the ice cream cone in the raised hand and draw a flat, oblong oval shape beneath the feet for the surfboard. -
Refining Lines:
Erase unnecessary guidelines. Add horizontal curved lines on the hat and trunks to mark the stripes. I find clear pencil lines help immensely with the painting stage.
Highlight Hack
Leave tiny slivers of dry white paper on the nose and ice cream to represent bright highlights; it looks cleaner and brighter than adding white paint later.
Step 2: Applying Base Colors
-
Skin Tones:
Mix a watery peach or tan color. Paint the nose, arms, torso area above the trunks, and feet. Let this dry completely. -
Hat Stripes:
Using a dusty pink or muted red, paint alternating stripes on the hat. Be careful to leave the white stripes unpainted. -
Swim Trunks:
Switch to a sage green. Paint the stripes on the shorts, again following the curve of the sketch to make the gnome look round. -
Sweet Treat:
Paint the ice cream scoop with a berry pink shade. Paint the cone with a light yellow-ochre. -
The Shades:
Carefully fill in the sunglass lenses with a dark grey or black. Leave a tiny speck of white paper showing in each lens to act as a reflection.
Glossy Finish
Once the artwork is fully dry, paint over just the sunglass lenses with a clear gloss medium or clear nail polish to make them look like real glass.
Step 3: Shading and Details
-
Beard Texture:
The beard is white, so we paint the shadows rather than the hair. Use a very diluted, watery grey to paint soft strokes under the mustache and to define clumps of hair. -
Skin Depth:
Mix a slightly darker, reddish-peach. Glaze this over the edges of the nose (like a sunburn!), under the hairline, and between the toes to add volume. -
Defining the Surfboard:
Use a large brush with plenty of water and a teal or aquamarine pigment to wash in the surfboard shape. Keep edges soft for a watery look. -
Cone Details:
Once the cone is dry, use a size 2 brush and a darker brown to paint a crisscross waffle pattern. -
Clothing Shadows:
Add a second layer of pink and green to the sides of the hat and shorts stripes to create a shadow on the right side, giving the figure 3D form. -
Final Touches:
Paint the rims of the sunglasses with a golden brown. Add the drawstring on the shorts with fine dark green lines. -
Cleanup:
Once the paint is bone dry, gently erase any remaining heavy pencil marks to clean up the illustration.
Now you have a breezy summer gnome ready to hang on your wall or turn into a greeting card.
Moonlit Ocean Reflections
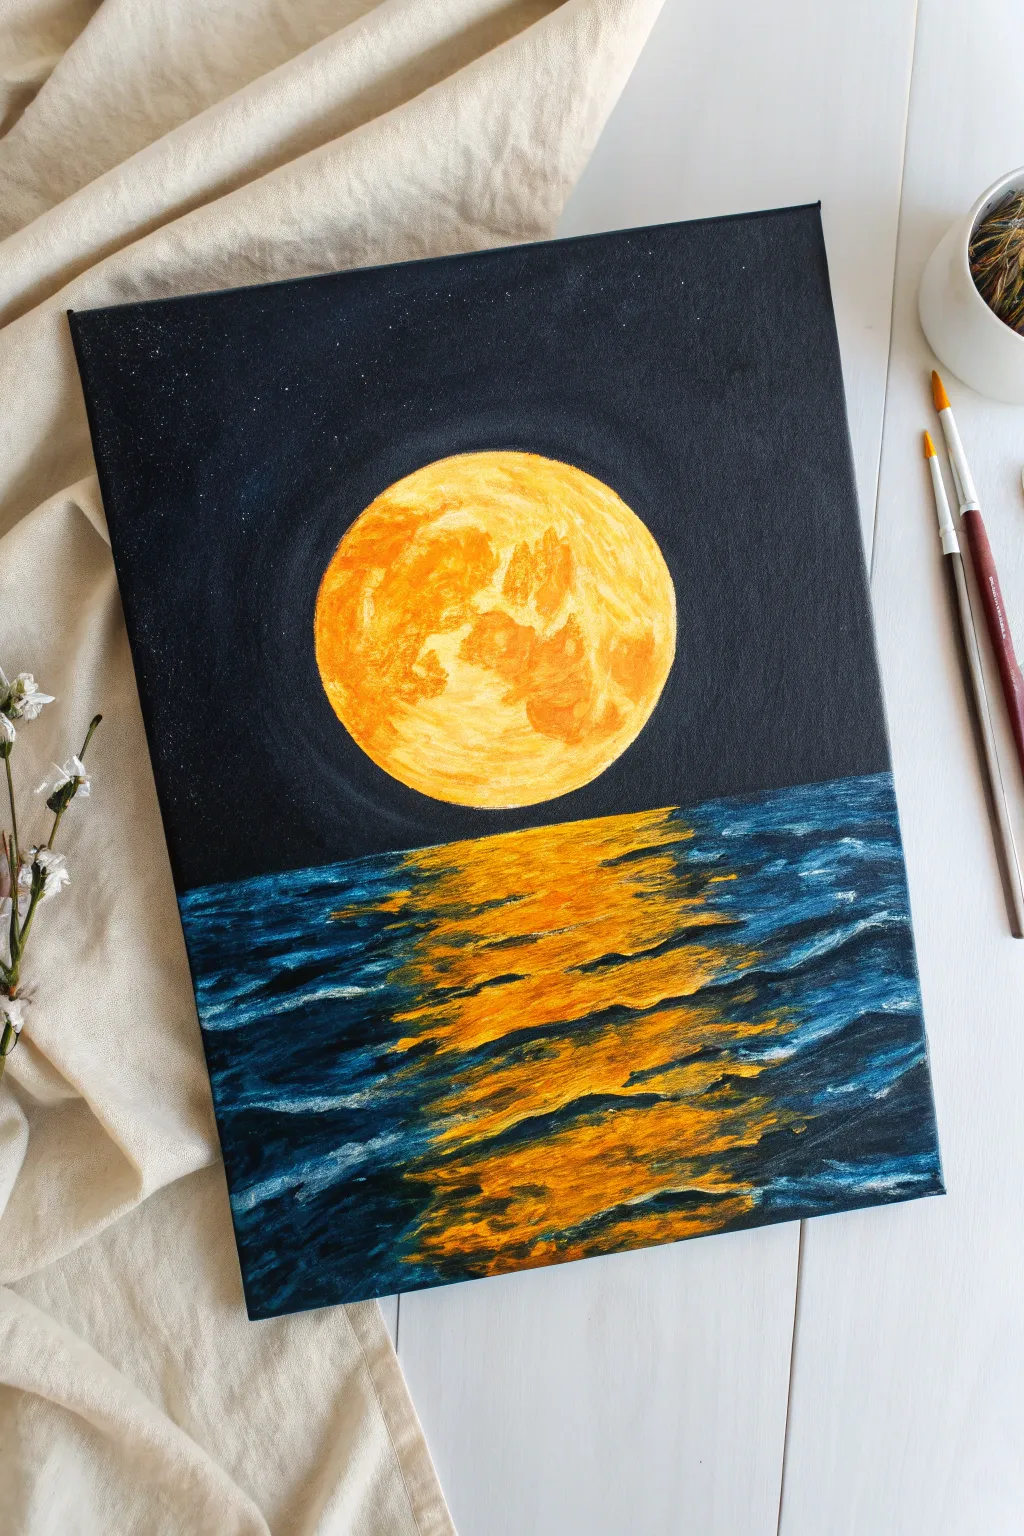
Capture the serene beauty of a supermoon rising over midnight waters with this high-contrast acrylic painting. The striking blend of warm golds against deep, cool blues creates a dramatic effect that looks impressive but is surprisingly beginner-friendly.
Step-by-Step Guide
Materials
- Canvas panel (black, or painted black)
- Acrylic paints: Titanium White, Mars Black, Cadmium Yellow, Cadmium Orange, Phthalo Blue
- Large flat brush
- Medium round brush
- Small liner or detail brush
- Round object for tracing (like a bowl or lid)
- Chalk or slate pencil
- Palette and water cup
Step 1: Setting the Night Scene
-
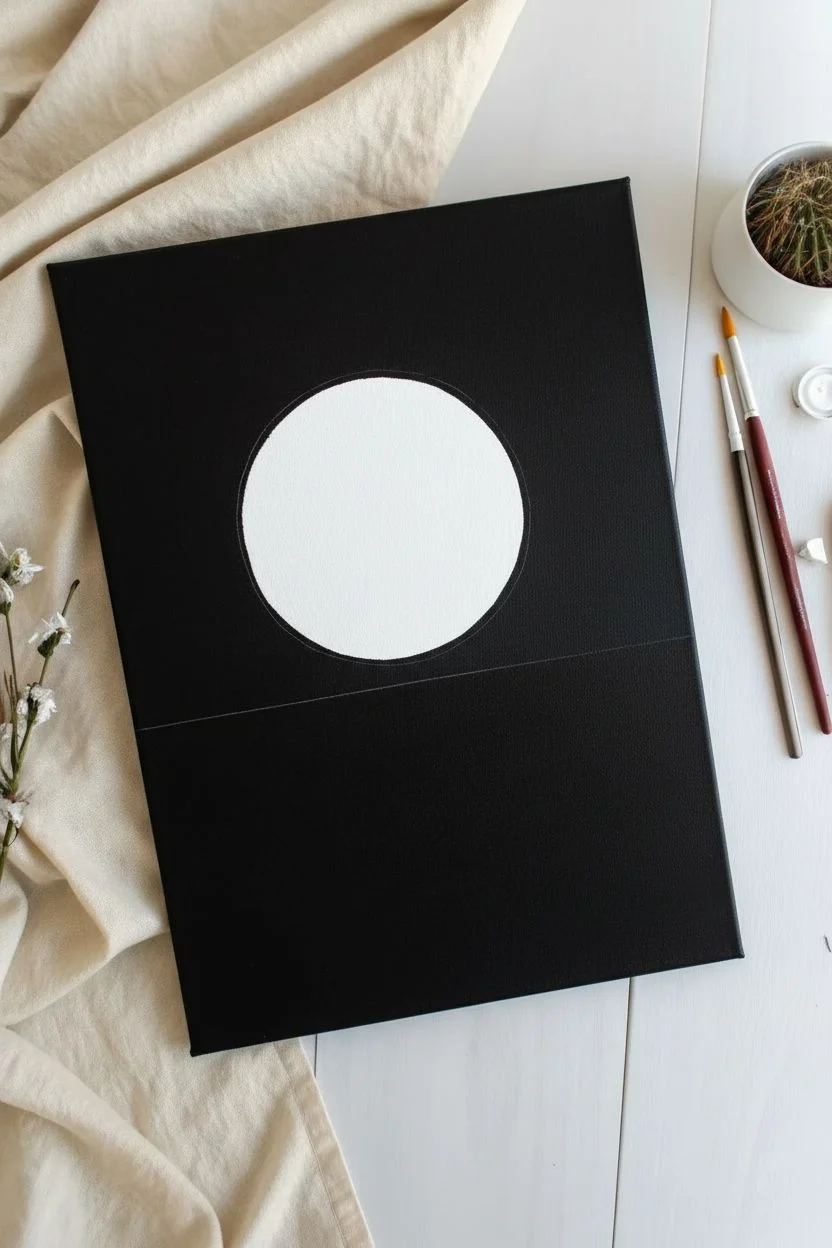
Prepare the background:
If you aren’t using a pre-primed black canvas, cover your entire surface with a smooth coat of Mars Black and let it dry completely. -
Trace the moon:
Place your circular object in the upper center of the canvas. Lightly trace around it using a piece of chalk or a slate pencil so the lines are visible on the black. -
Mark the horizon:
Draw a straight horizontal line across the canvas about one-third of the way up from the bottom to separate the sky from the ocean. -
Prime the moon:
Fill the moon circle with a solid coat of Titanium White. Yellow is transparent, so this white base is crucial for making the color pop against the black background.
Uneven Moon Shape?
If your hand wobbled while painting the moon, wait for it to dry completely. Re-trace your circular object over the moon, then paint over the lumpy edges with black to sharpen the circle.
Step 2: Painting the Supermoon
-
Apply the yellow base:
Once the white underlayer is dry to the touch, paint the entire circle with a bright Cadmium Yellow. -
Add craters and texture:
Mix a little Cadmium Orange with your yellow. Use the tip of a round brush to dab blobs and irregular shapes onto the moon to mimic craters. -
Deepen the shadows:
I like to take pure orange on a mostly dry brush and stipple it over the darker texture areas to add depth and dimension to the lunar surface. -
Highlight the craters:
Mix Titanium White with a tiny dot of yellow. Dab this lightest color on the top-right edges of your orange craters to make them look 3D.
Pro Tip: Sharp Horizon
To get a perfectly straight horizon line, place a strip of masking tape or painter’s tape across the canvas. Paint the sky and moon first, then peel the tape off to start the ocean section.
Step 3: Creating the Deep Ocean
-
Mix the ocean base:
On your palette, mix Phthalo Blue with a small amount of Mars Black to create a deep, midnight blue. -
Paint the water background:
Fill the area below the horizon line with this dark blue mix, using long horizontal strokes to establish the water’s direction. -
Add wave movement:
Dip your flat brush into pure Phthalo Blue (without cleaning it fully). Paint loose, horizontal streaks on the left and right sides of the water, leaving the center dark for now. -
Brighten the waves:
Mix a little White into your Blue to make a medium tone. Add choppy, thin distinct lines on the sides of the water to look like cresting wave adjustments.
Step 4: The Glowing Reflection
-
Lay the reflection base:
Using Cadmium Orange, paint horizontal zigzag strokes in the center of the water, directly beneath the moon. -
Shape the reflection:
Make the strokes wider near the horizon and slightly more scattered as you move toward the bottom of the canvas. -
Layer the yellow:
Paint Cadmium Yellow strokes directly over the orange ones, but keep them slightly shorter so the orange peaks out at the edges. -
Intensify the brightness:
Mix yellow with white. Use a detail brush to add thin, sharp highlights in the very center of the reflection path, focusing heavily near the horizon line. -
Integrate the water:
Use your dark blue mix to gently paint thin lines cutting into the edges of the yellow reflection, making it look like the waves are breaking up the light.
Step 5: Final Details
-
Add stars:
Dilute white paint with water.Load a stiff brush and flick the bristles to splatter tiny stars across the black sky. -
Halo effect:
With a dry brush and a tiny amount of pale yellow, very gently buff a faint haze around the outer edge of the moon to make it glow.
Step back and admire how the warm light cuts through the darkness of your beautiful nightscape.


Have a question or want to share your own experience? I'd love to hear from you in the comments below!