There is something incredibly captivating about capturing the soul of a subject through the intricate details of an eye painting. Whether you prefer hyper-realism or surreal abstractions, these diverse prompts will help you explore new techniques and perspectives in your studio.
Capturing the Catchlight Reflection

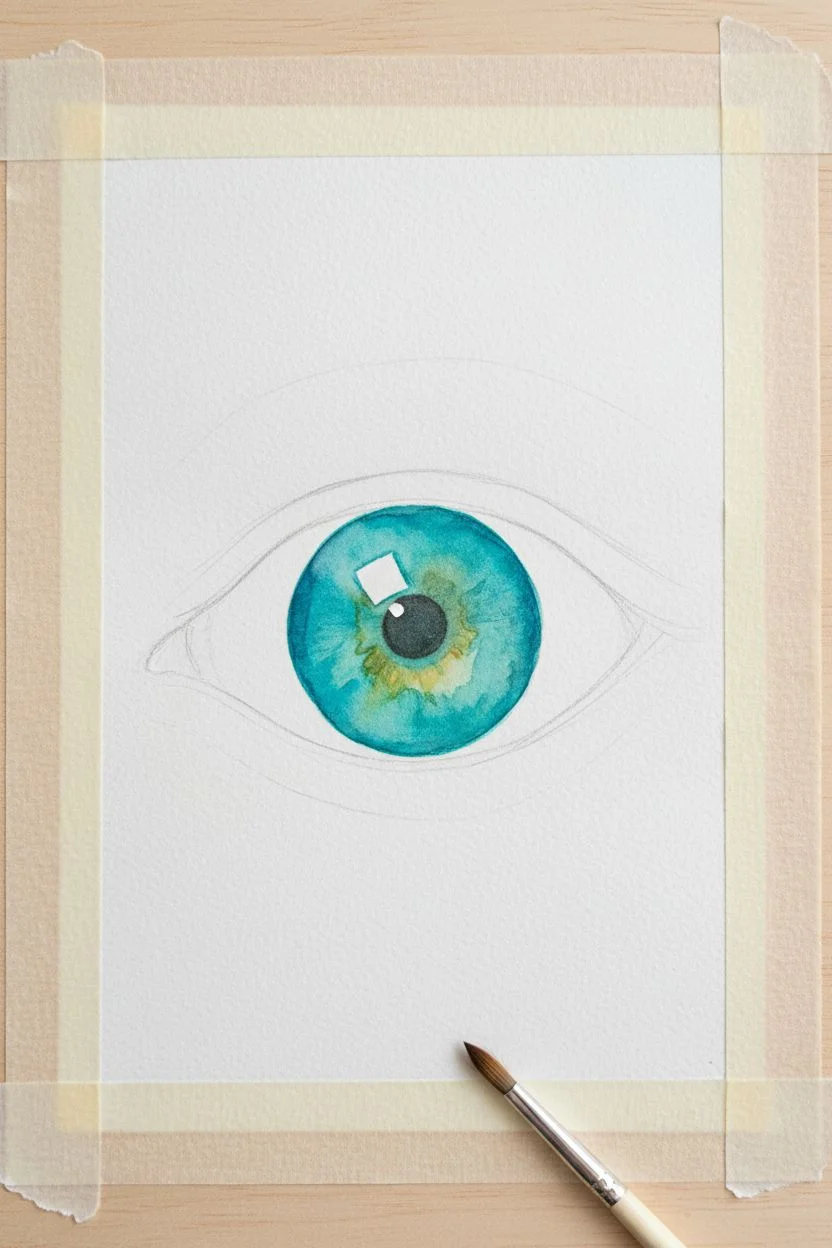
This project focuses on creating a hyper-realistic blue eye using watercolor techniques on textured paper. You will learn to build depth in the iris and preserve the crucial white catchlight that brings the eye to life.
Step-by-Step Tutorial
Materials
- Cold press watercolor paper (300 gsm/140 lb)
- Watercolor paints (Phthalo Blue, Ultramarine, Burnt Umber, Lamp Black, Alizarin Crimson)
- Round brushes (size 4 for washes, size 0 or 00 for details)
- HB pencil and kneadable eraser
- Masking fluid (optional but recommended)
- White gouache or white gel pen
- Two jars of water
- Paper towels
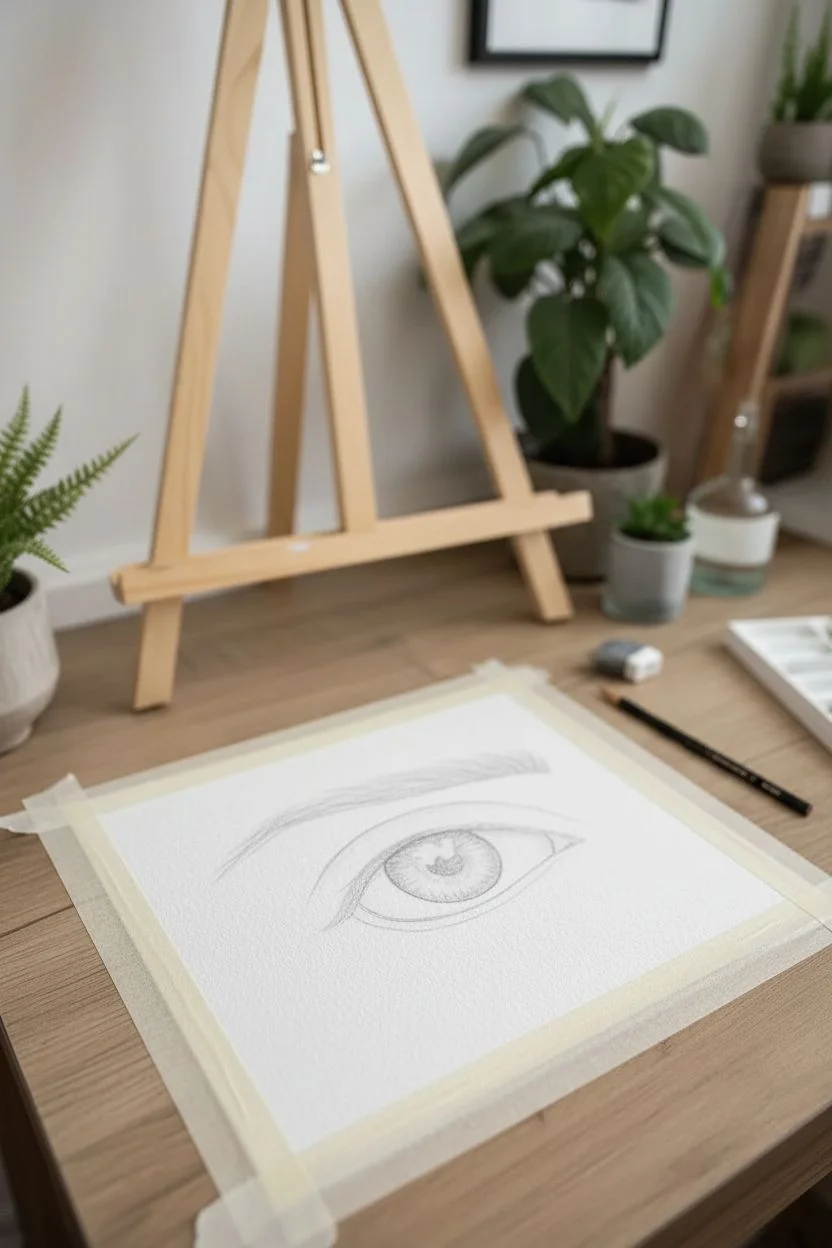
Step 1: Sketching and Masking
-
Outline the shapes:
Lightly sketch the almond shape of the eye, the circular iris, and the pupil using your HB pencil. Keep lines faint so they don’t show through the paint later. -
Define the reflection:
Draw the shape of the window reflection (the catchlight) overlapping the pupil and upper iris. Accuracy here is key for realism. -
Protect the highlights:
Apply masking fluid carefully over the sketched catchlight area. This preserves the white paper, which is brighter than any white paint.
Pro Tip: Texture
Use cold press or rough paper. The grain naturally breaks up the pigment, doing half the work for you when creating the organic texture of the eye.
Step 2: Painting the Iris
-
Base wet-on-wet layer:
Wet the iris area with clean water, avoiding the pupil. Drop in a dilute wash of Phthalo Blue, letting it bloom softly. -
Darkening the rim:
While the paper is still damp, dab a mix of Ultramarine and a touch of Burnt Umber around the outer edge of the iris to create the limbal ring. -
Adding radial texture:
Once the base layer is dry, use a size 0 brush with darker blue to paint fine lines radiating from the pupil toward the outer edge, mimicking iris fibers. -
Creating variation:
Lift out some pigment in the lower iris using a damp, clean brush to create lighter, luminous areas. -
Deepening the pupil:
Paint the pupil using a rich black mixture (Lamp Black or mixed darks). Be extremely careful not to paint over the masked catchlight.
Step 3: Shadows and Skin
-
Sclera shadows:
Mix a very watery grey-blue. Paint the shadows on the white of the eye (sclera), focusing under the upper eyelid and in the corners to create curvature. -
Inner corner details:
Mix Alizarin Crimson with a little Burnt Umber and water. Paint the tear duct (caruncle) in the inner corner, keeping edges soft. -
Skin tone wash:
Apply a pale skin tone wash around the eye shape. I like to add a hint of red near the lower lash line to make the eye look organic. -
Crease definition:
Use a darker skin tone mix to paint the fold of the upper eyelid, softening the upper edge with a clean, damp brush.
Troubleshooting
Lost your white highlight? Don’t panic. Use opaque white gouache or a white gel pen at the very end to re-establish the bright catchlight.
Step 4: Details and Catchlight
-
Upper eyelashes:
Using a rigger brush or size 00 with thick black paint, flick curved lines upward for the top lashes. Group some together for a natural look. -
Lower lashes:
Paint shorter, more sparse lashes on the bottom lid. Keep the stroke pressure light so the lines taper to a fine point. -
Cast shadows:
Glaze a faint shadow across the top of the iris and sclera, just underneath the upper lashes, to ground them. -
Reveal the light:
Rub away the masking fluid to reveal the crisp white catchlight. If you didn’t use fluid, use white gouache now. -
Refining the reflection:
If the window reflection looks too stark, paint a faint, geometric light blue shape inside the white area to simulate the sky reflection.
Step back and admire how the contrast of the deep blue pupil and the bright catchlight makes the eye look truly three-dimensional


The Layered Acrylic Process
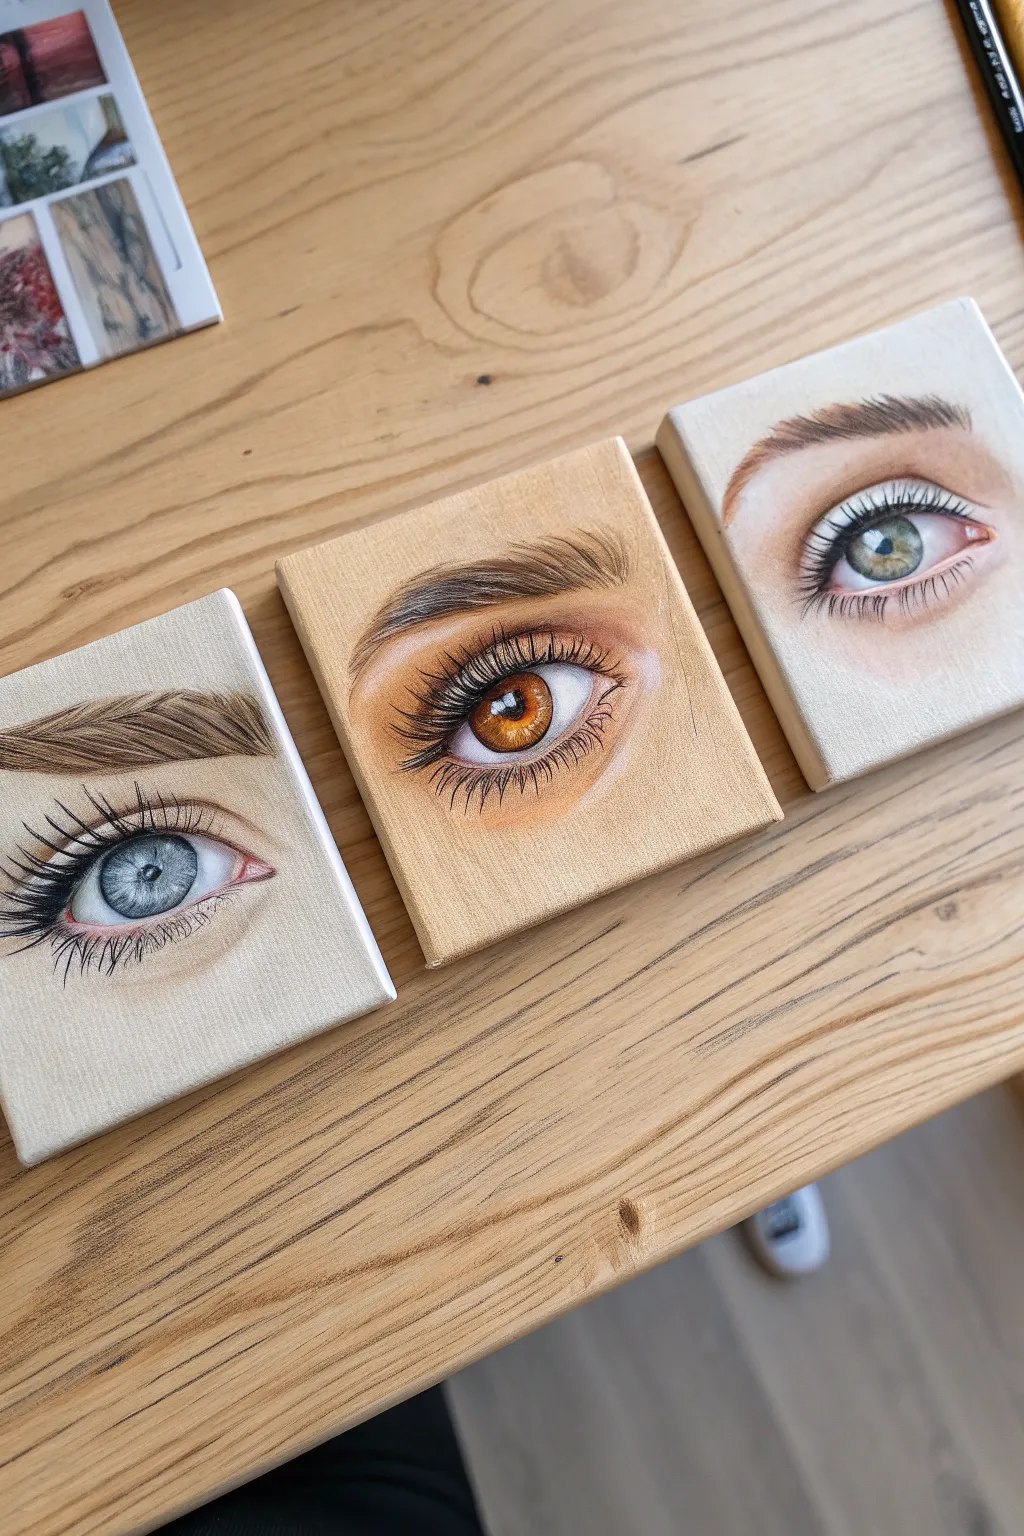
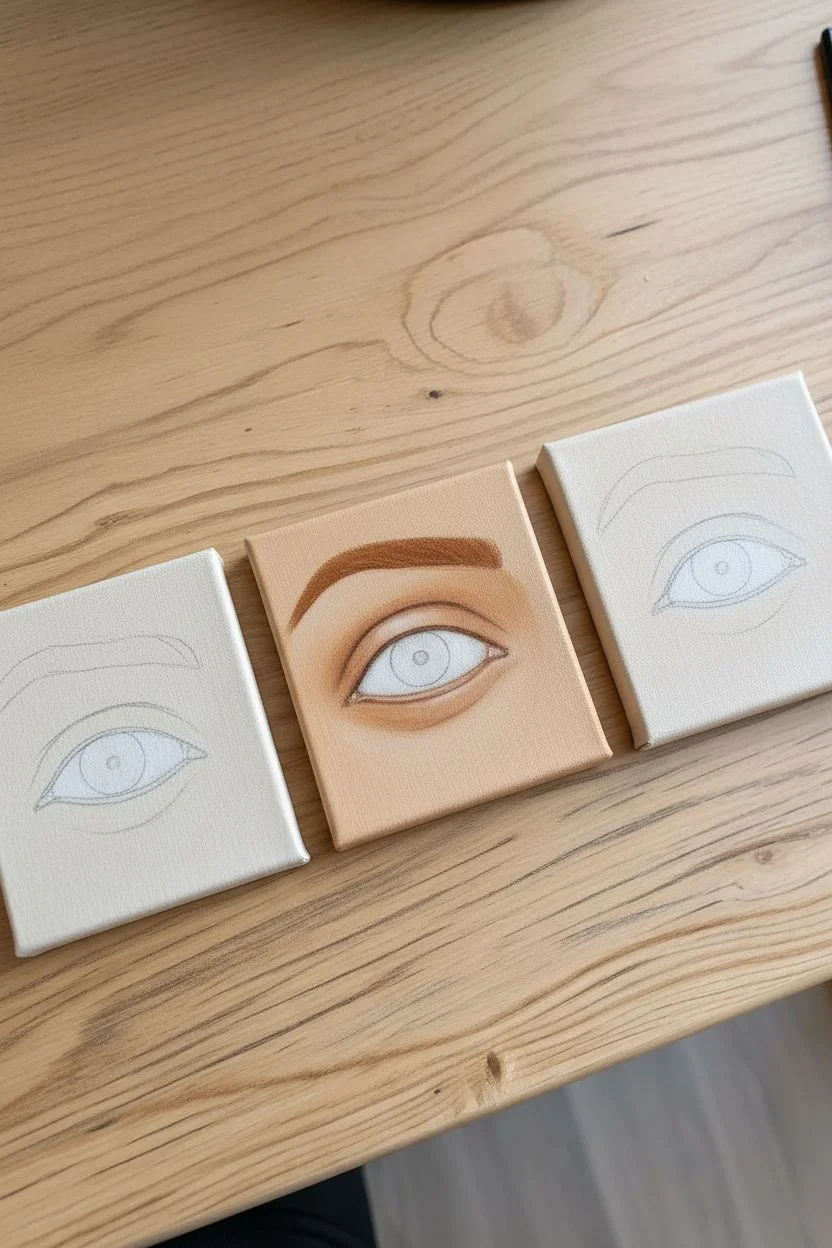
Master the art of observation by creating this set of three distinct eye portraits on miniature canvases. This project creates a captivating series that explores different iris colors—icy blue, warm amber, and hazel-green—along with varied skin tones and brow shapes.
Step-by-Step
Materials
- 3 small square canvas panels (4×4 or 5×5 inches)
- Heavy body acrylic paints (Titanium White, Mars Black, Burnt Sienna, Yellow Ochre, Ultramarine Blue, Alizarin Crimson)
- Acrylic glazing liquid or retarder
- Flat shader brush (size 4)
- Round brush (size 2)
- Detail liner brush (size 000 or 10/0)
- Pencil (HB) and eraser
- Water cup and palette
Step 1: Sketching and Skin Base
-
Prime and prep:
Ensure your canvas panels are clean. If you want a smoother surface for fine details, apply a coat of gesso and sand it lightly once dry. -
Outline the shapes:
Lightly sketch the almond shape of the eye on each canvas using an HB pencil. mark the circle of the iris, the pupil in the center, and the tear duct area. Vary the shapes slightly; make one wider or one more narrow to differentiate the subjects. -
Mix skin tones:
On your palette, mix three distinct skin tones using White, Yellow Ochre, and a touch of Burnt Sienna. For the center eye shown in the example, add more Burnt Sienna for a warmer, tan complexion; keep the outer two paler. -
Apply base skin layer:
Paint the skin area around the eye outlines. Use a flat brush to lay down smooth, opaque coverage, blending out toward the edges of the canvas. -
Create depth in the skin:
Mix a slightly darker version of your skin tone and paint the crease of the upper eyelid and the shadowed area under the lower lash line. Blend edges while the paint is still wet for a soft transition. -
Base the sclera:
Paint the ‘white’ of the eye. Avoid pure white here; instead, mix a light grey-blue or creamy off-white. This makes the final white highlights pop later.
Flow Control
For realistic, tapered eyelashes, your paint must be the consistency of ink. If the paint is too thick, your lashes will look like thick distinct logs rather than fine hairs.
Step 2: The Iris and Pupil
-
Block in iris colors:
Fill the iris circles with their base colors: a muted blue-grey for the left, a warm golden-brown for the center, and a mossy green for the right. -
Darken the pupil:
Using your round brush and Mars Black, carefully paint the pupil in the dead center of the iris. I like to let this dry briefly before moving to the next step so the colors don’t muddy. -
Add the limbal ring:
With a steady hand, outline the outer edge of the iris with a dark charcoal or deep blue tone. Blend this slightly inward so it isn’t a harsh cartoon line. -
Create radial fibers:
Using your darker iris mix and a liner brush, paint thin lines vivid radiating from the pupil outward like the spokes of a wheel. Keep these strokes irregular and organic. -
Add inner light:
Mix a lighter version of your iris color (adding yellow or white). Paint short, flickering strokes near the pupil to simulate the complex fibers of the iris catching light. -
Shade the eyeball:
To make the eye look spherical, paint a curved shadow across the top third of the eyeball (sclera and iris) where the upper lid casts a shadow. Use a dilute grey glaze for this.
Shaky Hands?
If you struggle with the tiny pupil or iris lines, rest your pinky finger on a dry part of the canvas (or the table next to it) to stabilize your hand while painting details.
Step 3: Lashes, Brows, and Highlights
-
Define the waterline:
Mix a soft pinkish-red using Alizarin Crimson and White. Paint the waterline (the thin rim of skin between the eye and lashes) and the tear duct in the inner corner. -
Preparation for lashes:
Thin your black paint with a little water or flow flowing medium until it has an ink-like consistency. This is crucial for sharp, tapered lines. -
Paint upper lashes:
Using the 000 liner brush, flick paint from the upper lash line outward. Press down at the root and lift completely off at the tip to create a natural taper. Group some lashes together so they aren’t perfectly uniform. -
Paint lower lashes:
Repeat the process for the lower lashes, but make these strokes shorter, thinner, and more spaced out than the upper ones. -
Structure the eyebrows:
Mix a hair color (brown, blonde, or black) and paint individual hair strokes following the natural arch of the brow bone. Layer darker strokes over lighter base strokes to create realistic volume. -
The spark of life:
Finally, take pure Titanium White on the tip of your smallest brush. Add a crisp, hard-edged dot or small window-pane shape on the iris, overlapping the pupil slightly. This ‘catchlight’ brings the painting to life.
Display your trio of eyes together to showcase the beautiful variety found in human features.


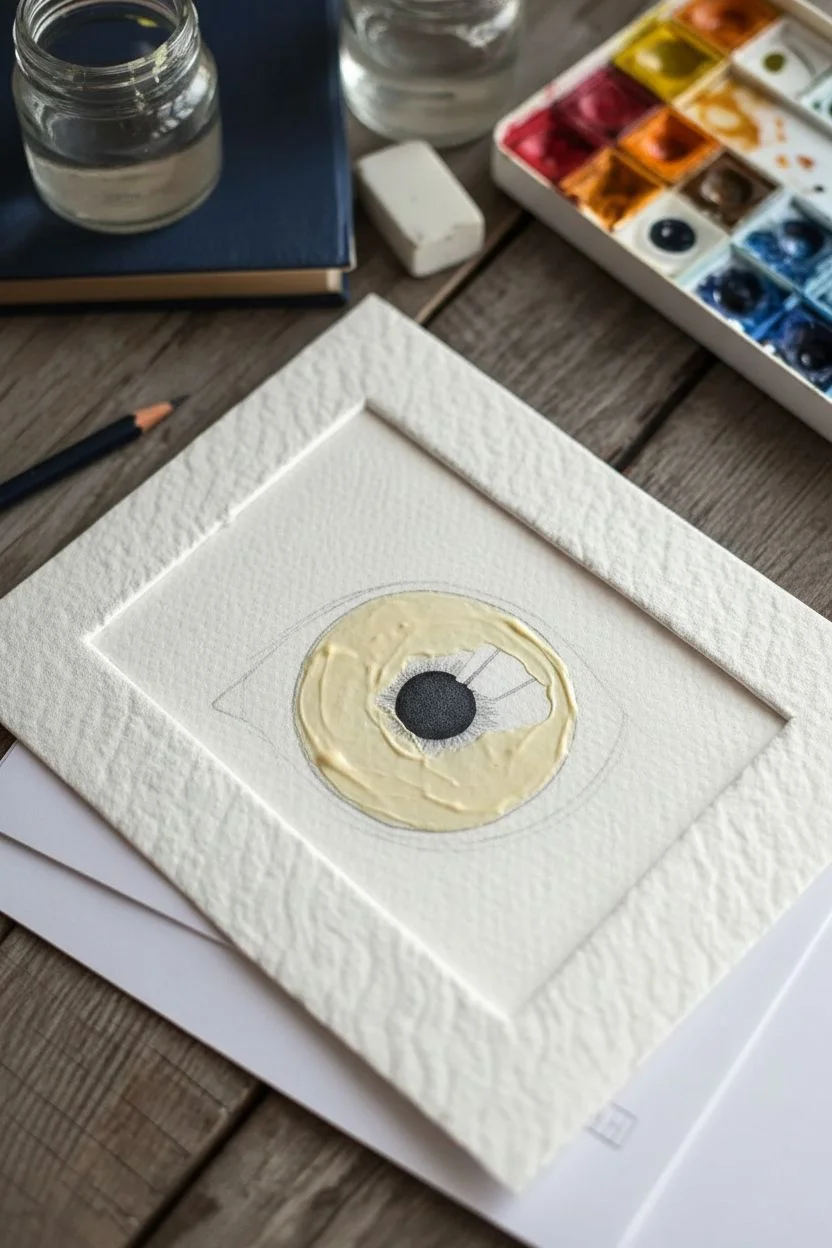
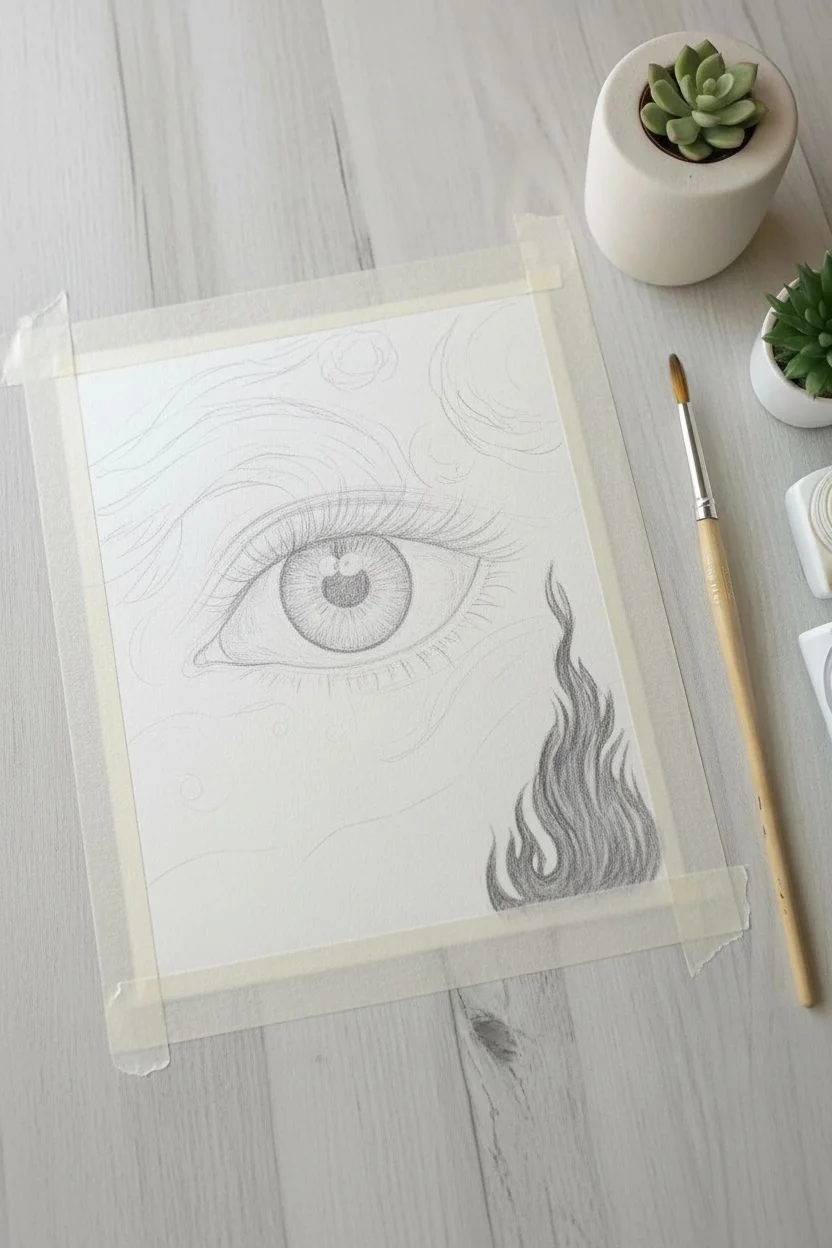
Soft Watercolor Washes

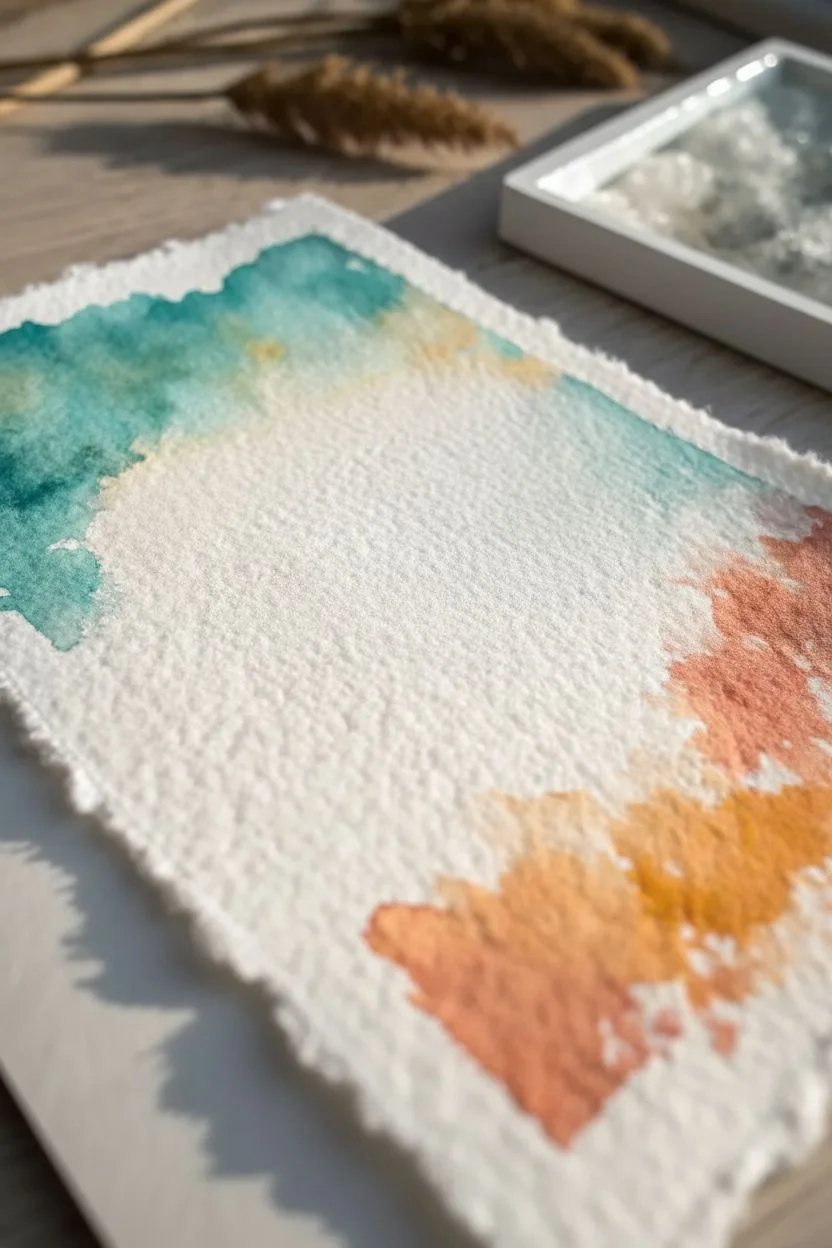
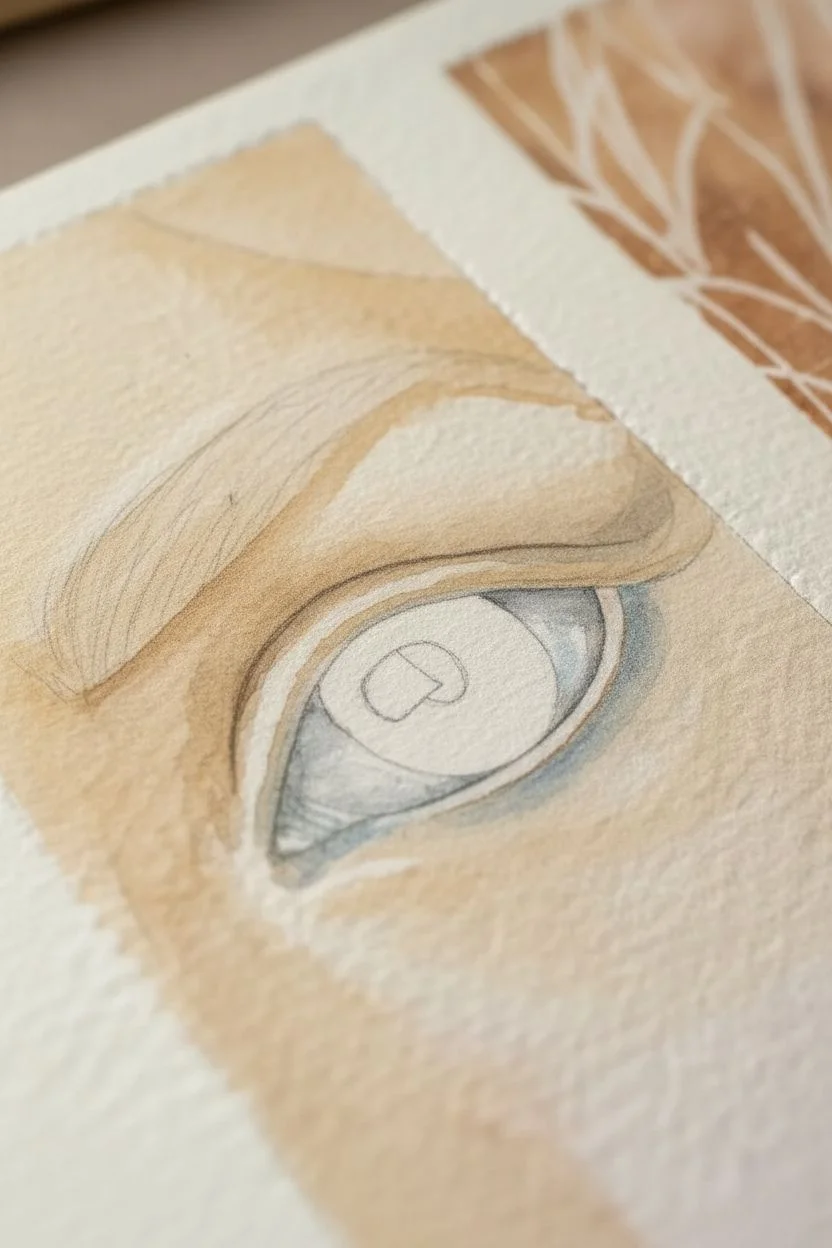
This project balances the freedom of loose watercolor washes with the precision of fine ink details to create a serene, dreamlike portrait. The heavy texture of the paper adds a beautiful, organic quality that makes the simple composition feel rich and tactile.
How-To Guide
Materials
- Heavyweight rough grain watercolor paper (300gsm)
- Watercolor paints (Turquoise/Teal and Burnt Orange/Ochre)
- Round watercolor brush (size 6 or 8)
- Black waterproof fine liners (sizes 0.1 and 0.5)
- Brush pen or thicker black marker
- HB Pencil and kneaded eraser
- Clean water and paper towels
Step 1: Creating the Watercolor Backdrop
-
Prepare your canvas:
Start with a piece of rough-textured watercolor paper. For that authentic artisan look shown in the example, you can tear the edges of the paper against a ruler to create a soft deckled edge. -
Mix the cool tone:
Load your brush with a watery mix of turquoise or teal paint. You want a high water-to-pigment ratio so the color remains transparent and airy. -
Apply the upper wash:
Gently paint the upper left corner of the paper with the turquoise mix. Allow the natural texture of the paper to show through by not overworking the surface. -
Fade the edges:
Rinse your brush slightly and use clean water to soften the inner edge of the turquoise, fading it out towards the center of the page. The center must remain pure white. -
Mix the warm tone:
Clean your brush thoroughly, then mix a diluted wash of burnt orange, ochre, or a soft rust color. -
Apply the lower wash:
Paint the bottom right corner with the warm wash, mirroring the placement of the blue but on the opposite diagonal. -
Creating the gradient:
Just like before, use a damp, clean brush to feather the edges of the orange wash towards the middle, ensuring it stops before touching the center area. -
Adding texture:
While the paint is still damp, you can drop in slightly more pigmented color in the far corners to create a subtle gradient from dark to light. -
The crucial wait:
Let the paper dry completely. Touching the paper should feel room temperature, not cool. This is vital because ink will bleed uncontrollably on damp paper.
Bleeding Lines?
If your ink ‘spiders’ or spreads, your paper is still damp inside. Use a hairdryer to ensure it’s bone dry before inking.
Step 2: Sketching and Inking
-
Placement sketch:
With an HB pencil, very lightly sketch the arch of the main eyelid and the general shape of the eyebrow in the white negative space. -
Start the eyebrow:
Using your 0.1 fine liner, start drawing the eyebrow hairs. Begin at the inner corner (left) with short, upward strokes. -
Building the brow arch:
As you move towards the arch, angle your strokes more diagonally. I like to overlap the lines slightly to create a realistic density. -
Tapering the tail:
Is the outer edge of the brow, flatten the stroke angle out and make the hairs sparser and finer. -
Drawing the lid:
Switch to a 0.5 pen or a small brush pen. Draw the main curve of the closed eyelid with a smooth, confident stroke. Make this line thicker than the brow hairs. -
Thickening the lash line:
Go over the main eyelid curve again, adding extra weight to the center and outer corner to simulate the density of the lash roots. -
Main eyelashes:
Using quick, flicking motions, draw the long upper eyelashes. Start firmly at the lash line and release pressure as you flick outward to get a sharp tip. -
Curving the lashes:
Ensure the lashes at the outer corner sweep out to the right, while the lashes toward the center curve slightly upward. -
The crease detail:
Use the thinnest pen (0.1) again to draw the delicate crease line just above the main eyelid. This line should be broken or very thin to keep the look soft. -
Finishing touches:
Add a few tiny, sparse lashes to the lower lid area, and erase any visible pencil marks once the ink is totally set.
Pro Tip: The Flick
For realistic lashes, flick your wrist swiftly. A slow hand makes shaky, blunt lines; a fast hand makes tapered, natural hairs.
Frame this delicate piece in a simple white frame to let those beautiful deckled edges and soft colors shine.


Focusing on Lash Details
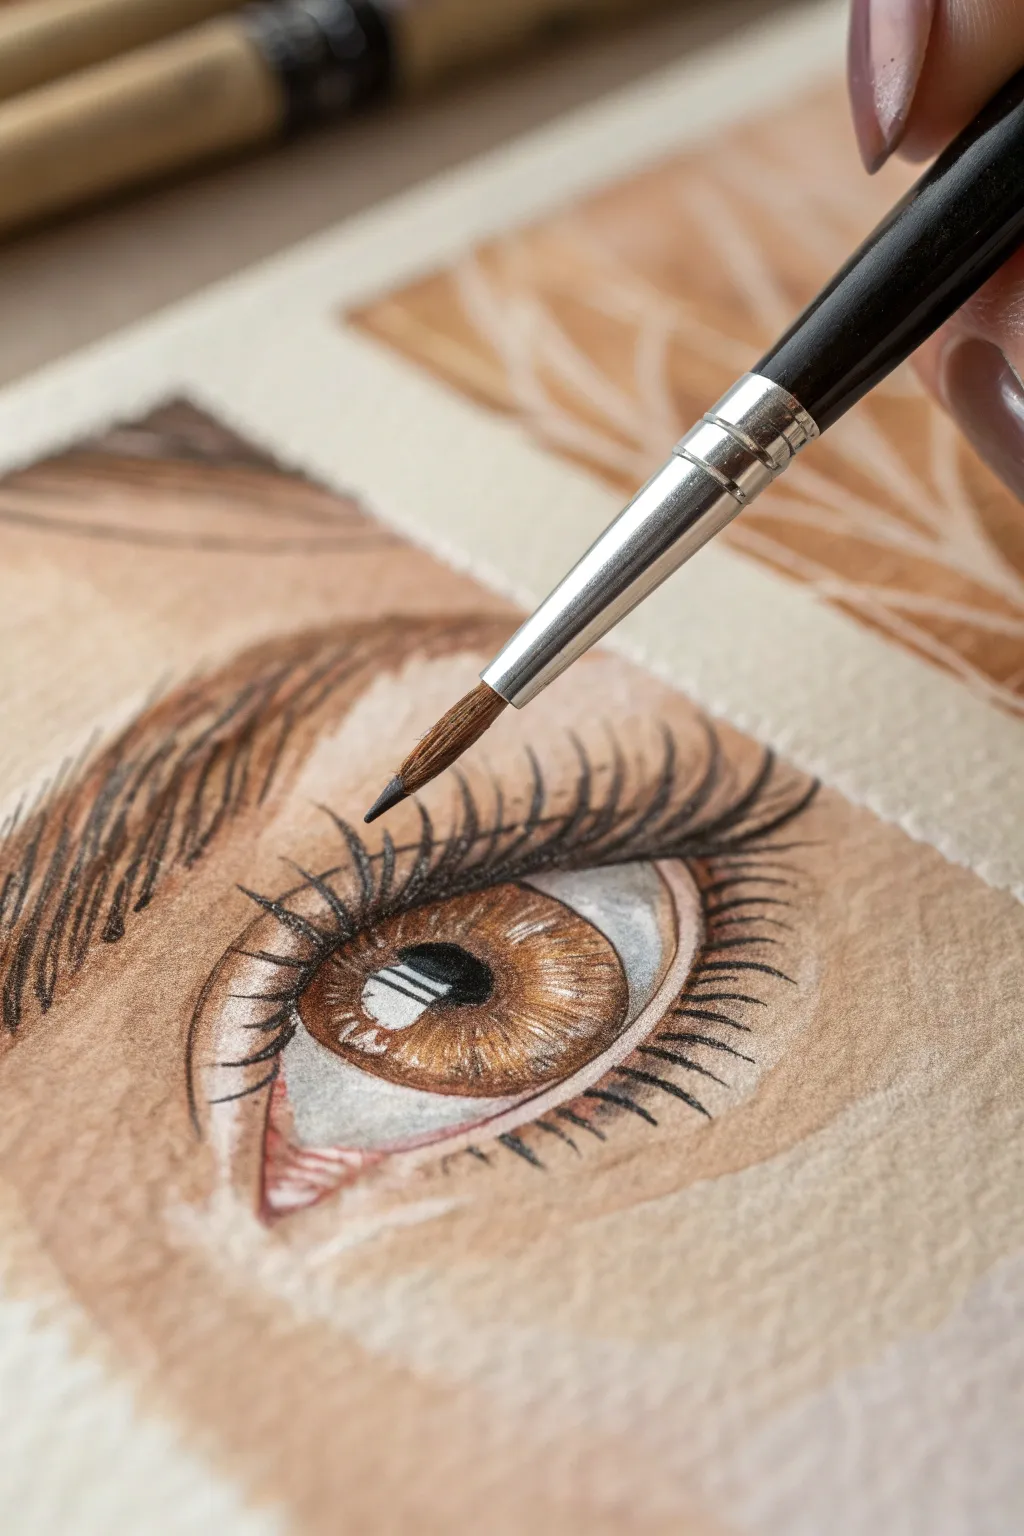
Capture the soulful depth of the human eye with this detailed watercolor guide. You will learn to layer skin tones, create a glistening iris, and master the delicate flicking motion required for hyper-realistic eyelashes.
Detailed Instructions
Materials
- Cold press watercolor paper (300gsm)
- Round watercolor brushes (size 4 for washes, size 0 or 00 liner for details)
- Watercolor paints (Burnt Umber, Yellow Ochre, Alizarin Crimson, Sepia, Lamp Black)
- White gouache or white gel pen
- HB pencil for light sketching
- Paper towels and two water jars
Step 1: Sketching and Base Washes
-
Initial Outline:
Lightly sketch the almond shape of the eye, the circular iris, the pupil, and the crease of the upper lid using your HB pencil. Mark out a rectangular ‘window’ reflection in the iris to preserve as white paper. -
Skin Base Tone:
Mix a watery wash of Yellow Ochre with a tiny touch of Alizarin Crimson. Apply this over the skin area, avoiding the eye itself. -
Deepening Values:
While the skin is still slightly damp, drop a mix of Burnt Umber and the previous skin tone into the upper eyelid crease and the corner of the eye to create soft depth. -
Sclera Shadowing:
The white of the eye is never purely white. Dilute a tiny amount of Cobalt Blue and Burnt Umber to make a cool grey, and paint the shadows under the upper lid and in the corners of the eyeball.
Brush Control Pro Tip
For the finest lash tips, roll the brush handle between your fingers as you pull the stroke away from the eye. This keeps the bristles gathered in a perfect point.
Step 2: Iris and Pupil
-
Iris Base Layer:
Paint the iris with a light wash of Yellow Ochre or Raw Sienna, carefully working around the rectangular highlight you sketched earlier. -
Defining the Pupil:
Using a size 4 brush, fill in the pupil with a rich mix of Sepia and Lamp Black. Ensure edges are crisp but blend slightly into the upper iris shadow. -
Iris Texture:
Switch to a smaller brush. Using Burnt Umber, paint fine radiating lines from the pupil outward to mimic the muscle fibers of the iris. -
Limbal Ring:
Outline the outer edge of the iris with a darker brown mix to create the limbal ring, blending softness inward so it doesn’t look like a cartoon outline.
Level Up: Reflections
Paint the reflection of the eyelashes into the white highlight window. Small, curved vertical lines inside the white box add incredible realism.
Step 3: Brows and Fine Hairs
-
Brow Foundation:
Paint a soft, transparent wash of brown where the eyebrow sits to act as a shadow for the hairs. -
Brow Hairs:
Once the shadow is dry, use your size 0 brush with a Sepia mix to paint individual brow hairs. Follow the natural growth direction, flicking the brush upward and outward. -
Layering Hairs:
Add a second layer of darker brow hairs to create volume, ensuring you leave some gaps so the skin tone peeks through.
Step 4: Lashes and Final Details
-
Mixing Lash Color:
Create a creamy, ink-like consistency using Sepia and Lamp Black. The paint needs to flow smoothly from the brush for long strokes. -
Upper Lash Line:
Run a thin line of this dark mix along the upper waterline to root the lashes, making the base look thick and luscious. -
The Perfect Flick:
Load your liner brush (size 00). Starting from the dark root line, press down slightly and then flick upward and curve outward, lifting the brush at the end to create a tapered point. -
Varying Direction:
I like to vary the angle slightly with each stroke; lashes rarely grow in a perfect row. Let some hairs cross over others for a natural, messy look. -
Lower Lashes:
Paint the lower lashes using a lighter touch and less paint. These should be shorter, thinner, and more spaced out than the upper set. -
Refining the Highlight:
If you lost the crispness of the eye reflection, use opaque white gouache to tidy up the rectangular shape. Add a tiny white dot to the tear duct for a wet look. -
Final Contrast:
Assess the painting. If the lashes look flat, go back in with pure black on just a few dominant lashes to make them pop against the iris.
Step back and admire the soulful expression you’ve captured through those detailed lashes.
BRUSH GUIDE
The Right Brush for Every Stroke
From clean lines to bold texture — master brush choice, stroke control, and essential techniques.
Explore the Full Guide
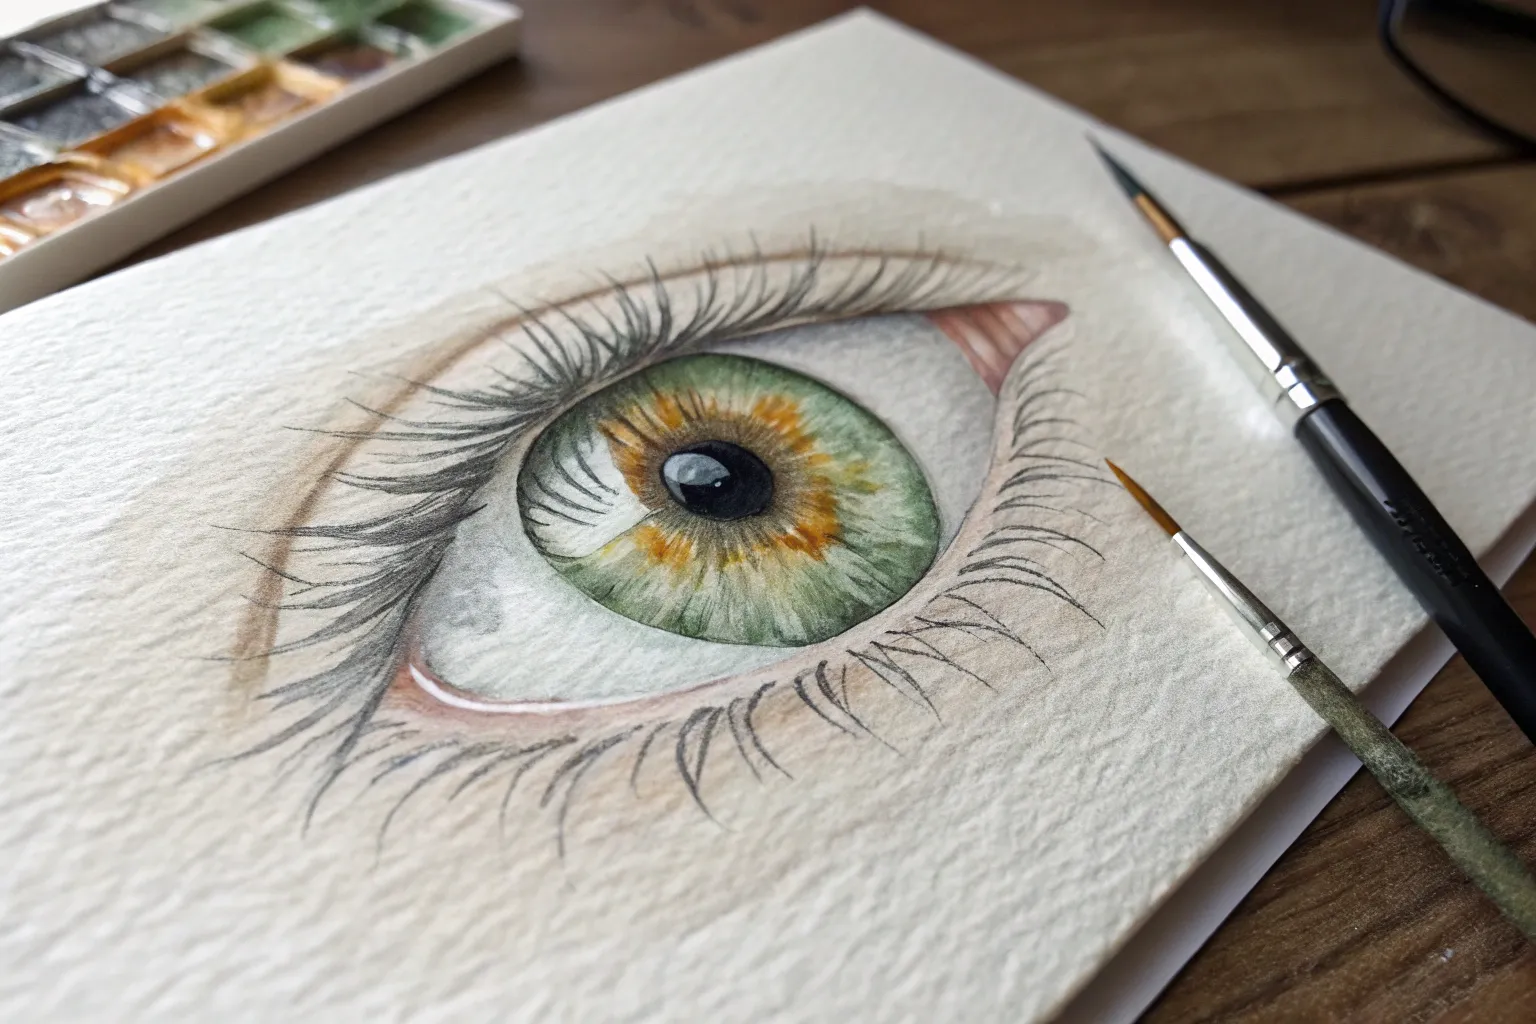
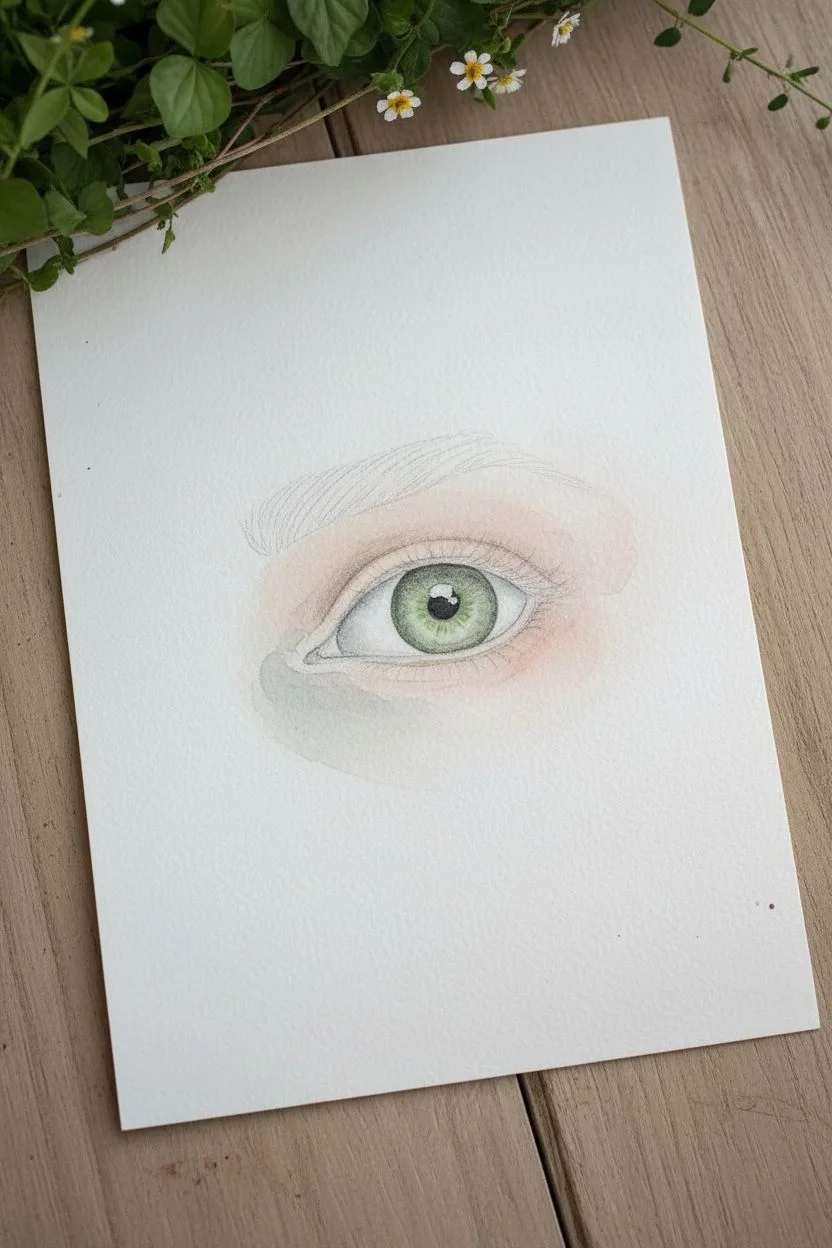
Monochromatic Color Schemes
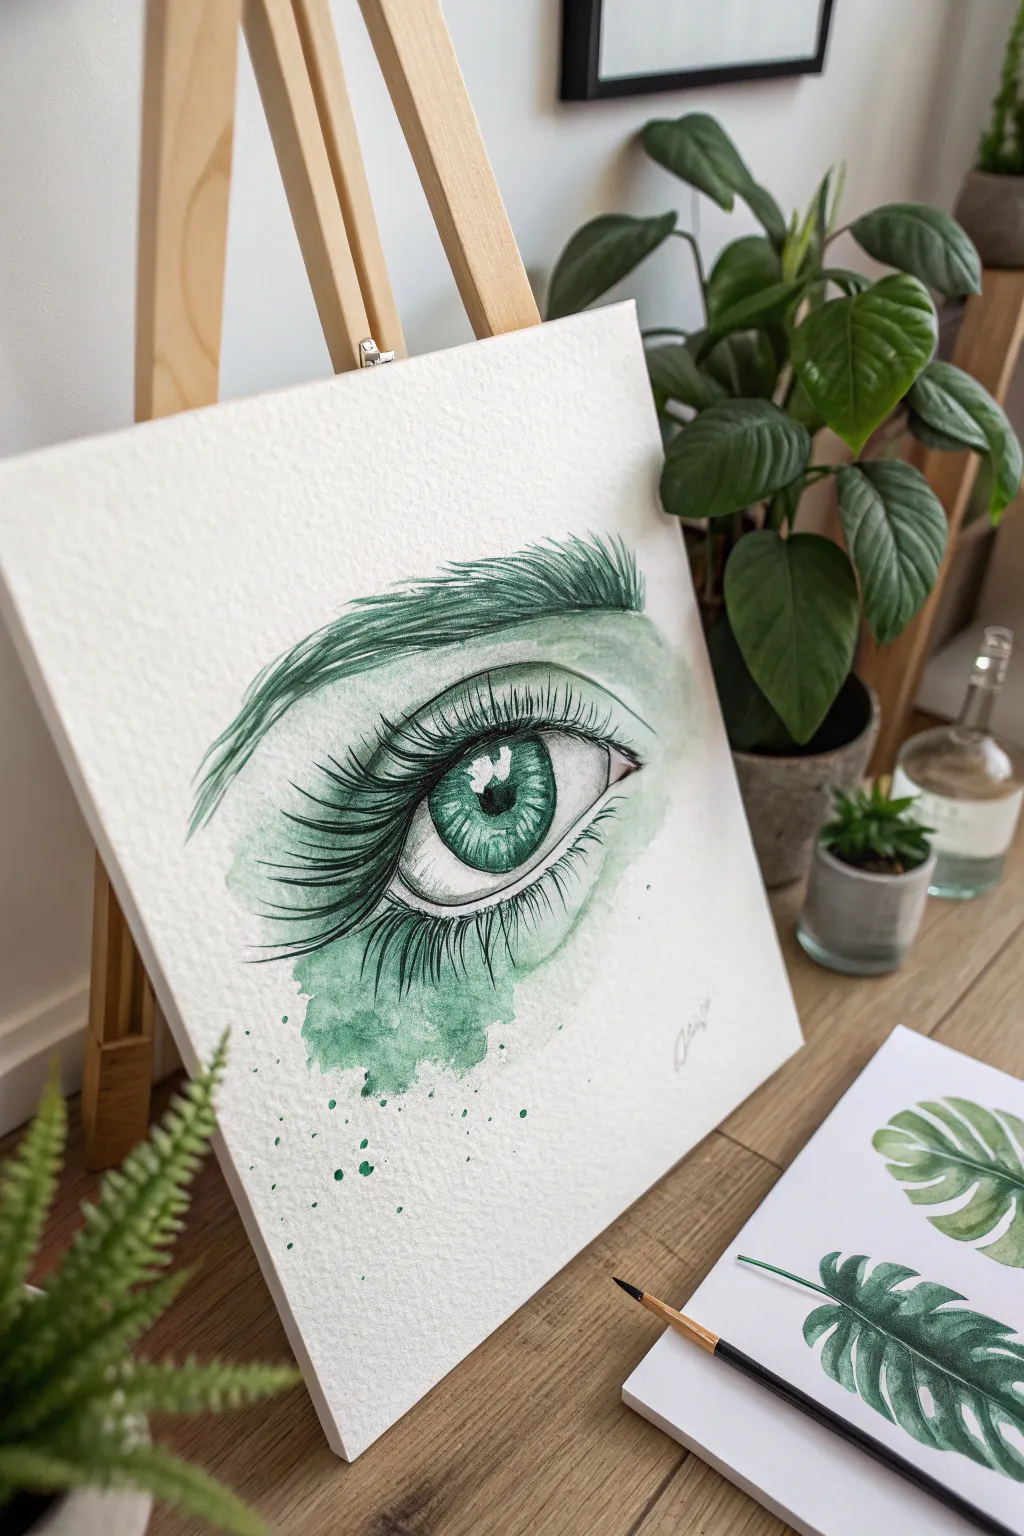
Explore the depth and emotion of a single color with this striking monochromatic eye study. Using various shades of green, you will learn to build form and texture through layering, creating a piece that feels both expressive and organically vibrant.
Step-by-Step Guide
Materials
- Cold press watercolor paper (300 gsm)
- Watercolor paints (Emerald, Sap Green, Deep Green)
- Round brush (size 6 or 8)
- Detail/Liner brush (size 0 or 1)
- HB Pencil and kneadable eraser
- Masking tape
- Palette
- Water jars
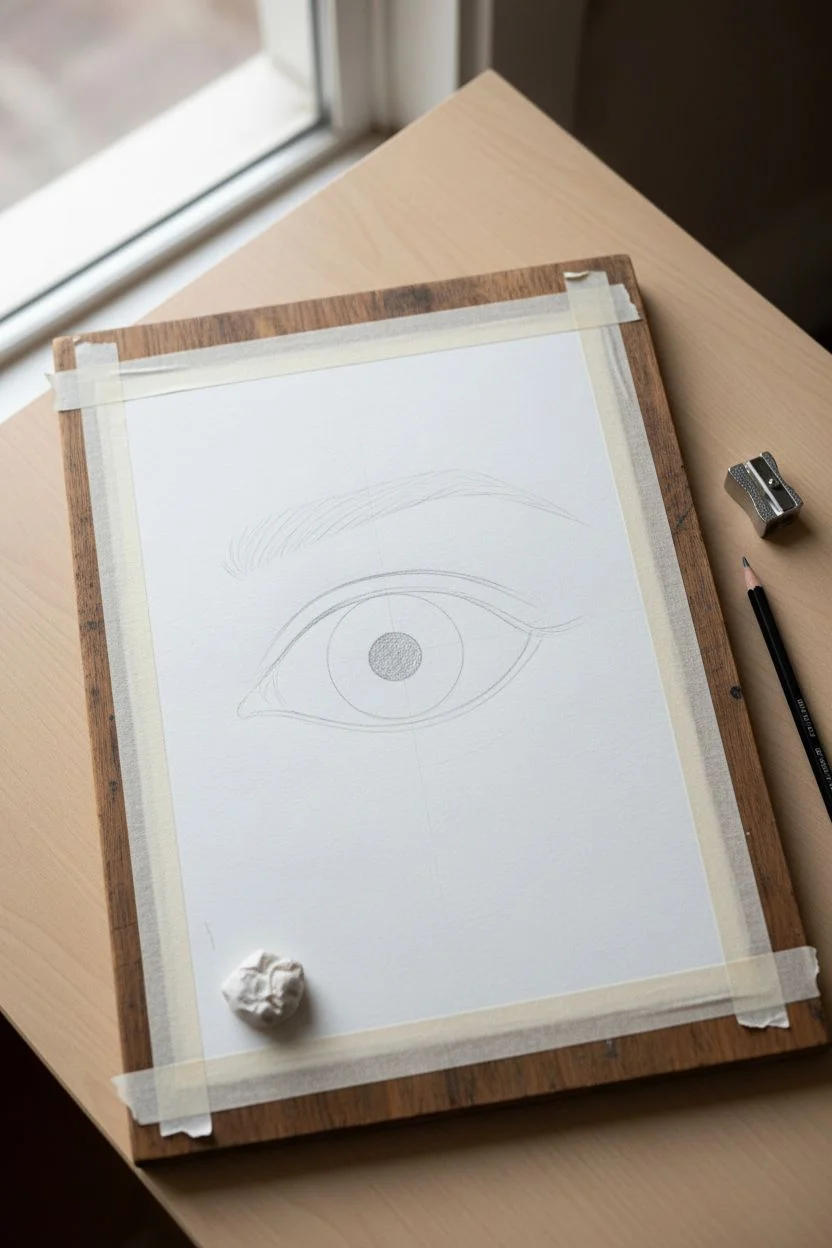
Step 1: Sketching and Preparation
-
Secure the paper:
Tape your watercolor paper down to a board using masking tape to create a clean border and prevent buckling when wet. -
Outline the eye:
Lightly sketch the almond shape of the eye in the center of the paper using an HB pencil. Keep the lines faint so they disappear under the paint. -
Mark the iris and pupil:
Draw a perfect circle for the iris, partially covered by the upper eyelid. Inside that, draw the smaller pupil circle. -
Reserve the highlight:
Crucially, draw a small, jagged shape overlapping the pupil and iris to serve as the reflection. This area must remain unpainted. -
Define the surroundings:
Sketch the arch of the eyebrow and the crease line of the eyelid above the eye.
Step 2: Washes and Values
-
Mix the lightest wash:
Dilute your green paint with plenty of water to create a very pale, transparent tea-consistency wash. -
Apply the skin base:
Paint a loose, organic wash around the eye shape, focusing on the eyelid and the under-eye area. Don’t worry about staying perfectly within lines here; let the edges remain rough. -
Paint the iris base:
Fill the iris area (excluding the highlight) with a slightly more saturated light green. Let the colors pool naturally. -
Shade the sclera:
Using extremely watered-down paint, add tiny shadows to the corners of the white of the eye to give it spherical volume. -
Deepen the pupil:
While the iris is drying, mix a highly pigmented, dark green. Carefully paint the pupil, avoiding the white highlight shape entirely.
Pro Tip: Masking Magic
To ensure your highlight remains pure white without stress, apply a drop of masking fluid to the reflection spot before painting. Rub it off only after the painting is completely dry.
Step 3: Details and Texture
-
Add the limbal ring:
Once the iris base is dry, outline the outer edge of the iris with a dark green to create the limbal ring, feathering it slightly inward. -
Create iris texture:
Using a fine point brush, draw thin, radiating lines from the pupil outward to mimic the muscle fibers of the iris. -
Darken the crease:
Run a stripe of medium-dark green along the eyelid crease line, softening the top edge with a damp brush to blend it into the skin. -
Paint the eyebrow:
Using quick, short strokes in the direction of hair growth, build up the eyebrow. Start with lighter strokes and layer darker ones on top for dimension. -
Lash preparation:
Mix your darkest possible green (add a touch of red or just use less water) to get an ink-like consistency. -
Upper eyelashes:
With your liner brush, paint long, curved lashes sweeping up from the upper lash line. I find it helps to flick the wrist at the end of the stroke for a tapered tip. -
Lower lashes:
Paint shorter, more sparse lashes along the bottom line, grouping some together for a natural look. -
Artistic splashes:
Load a round brush with watery paint and tap it against your finger over the bottom left section to create the splatter effect shown in the image.
Troubleshooting: Paper Buckling?
If your paper warps significantly during the wet washes, you may be using too much water at once. Let the paper dry completely between layers to flatten it out before adding details.
Let your painting dry thoroughly before removing the tape to reveal your crisp, vibrant monochromatic masterpiece
Expressive Gouache Emotions
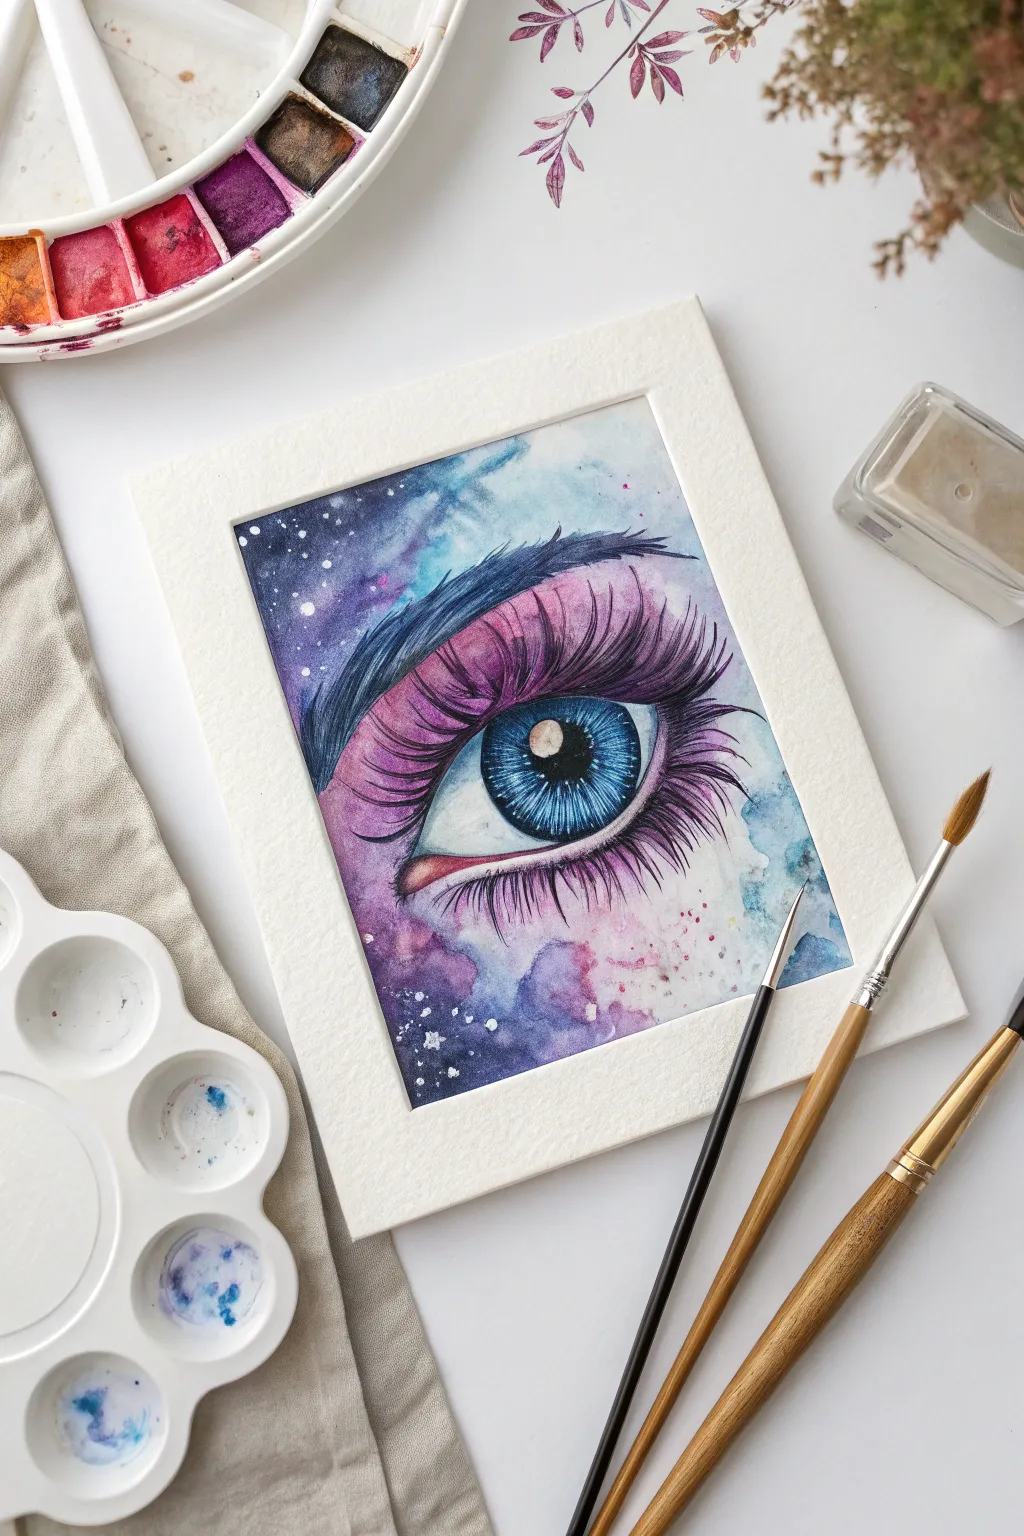
Capture the universe within a single glance by blending dreamy watercolors with sharp details. This project combines loose, wet-on-wet galaxy textures for the skin with precise, opaque strokes for dramatic lashes.
Step-by-Step Tutorial
Materials
- Cold press watercolor paper
- Watercolor paints (Indigo, Purple, Magenta, Turquoise, Black)
- Opaque white gouache or white gel pen
- Round brushes (approx. size 6 and 2)
- Fine liner brush (size 00)
- Pencil and kneaded eraser
- Painter’s tape and board
- Two jars of water
Step 1: Sketching the Foundation
-
Secure the paper:
Tape your watercolor paper down to a hard board to prevent buckling when we apply the wet washes later. -
Outline the eye:
Lightly sketch a large almond shape for the eye, followed by a perfect circle for the iris. -
Add key details:
Mark the pupil in the center of the iris, sketch the crease of the eyelid above the eye, and outline the shape of the eyebrow.
Pro Tip: Nebula Blooms
To get that cloudy space look, lightly sprinkle coarse salt onto the wet purple paint. Let it dry completely, then brush the salt off to reveal unique crystal textures.
Step 2: Creating the Galaxy Skin
-
Wet the surface:
Using a clean brush, wet the paper around the outside of the eye shape, avoiding the eye itself. -
Drop in color:
While the paper is wet, dab in purple and magenta watercolor near the eyelids and crease. -
Deepen the cosmos:
Introduce indigo and turquoise to the outer edges of the skin area, letting the colors bleed naturally into the pinks. -
Add texture:
I like to drop tiny splashes of clean water onto the drying paint to create bloom textures that look like nebulas. -
Let it dry:
Allow this background layer to dry completely so the colors don’t bleed into the eye area.
Step 3: Painting the Eye
-
Base the iris:
Paint the iris circle with a semi-transparent wash of bright turquoise or blue. -
Add radial details:
While the blue is still slightly damp, use a smaller brush to paint darker blue lines radiating from the center like wheel spokes. -
Paint the pupil:
Fill the center pupil with solid black paint, leaving a small spot unpainted for the highlight if you wish (or add it later with white). -
Shadow the sclera:
Dilute a tiny drop of purple with lots of water to paint a faint shadow on the upper part of the white eyeball. -
Define the tear duct:
Paint the inner corner of the eye with a mix of red and a touch of purple for a realistic fleshy tone.
Troubleshooting: Muddy Colors
If your galaxy blends turn brown or muddy, stop and let the layer dry. You can glaze a fresh layer of pure transparent color (like heavy magenta or blue) over the top once dry to restore vibrancy.
Step 4: Lashes and Galactic Highlights
-
Paint the eyebrow:
Using a dark indigo or black mix, paint the eyebrow hairs with quick, outward flickering strokes. -
Create upper lashes:
Switch to your fine liner brush and black paint to draw long, curved lashes sweeping up from the upper lid line. -
Add lower lashes:
Paint shorter, sparser lashes along the bottom lid, curving them slightly downward. -
Intensify the crease:
Run a line of concentrated purple paint along the eyelid crease to add depth and definition. -
Sprinkle the stars:
Load a brush with white gouache and gently tap it against another brush to splatter tiny white stars over the purple skin areas. -
Final highlights:
Use the white gouache or a gel pen to place a crisp highlight in the pupil and subtle accents on the longest lashes.
Now step back and admire the celestial depth of your new creation.

PENCIL GUIDE
Understanding Pencil Grades from H to B
From first sketch to finished drawing — learn pencil grades, line control, and shading techniques.
Explore the Full Guide
The Macro Skin Texture Zoom
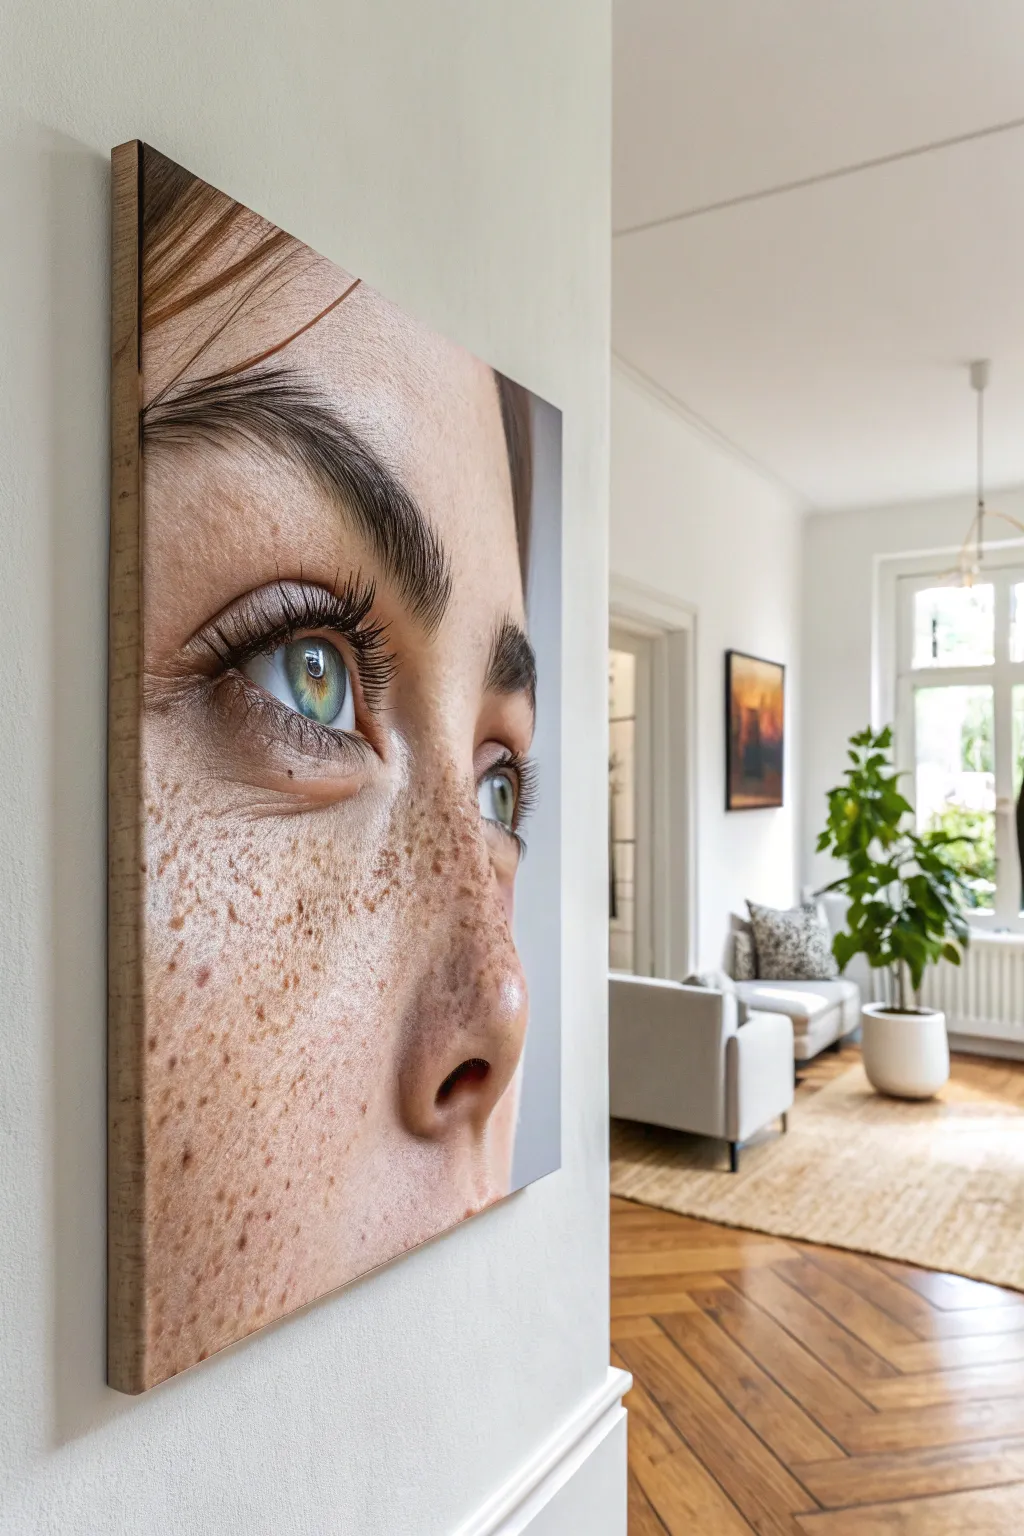
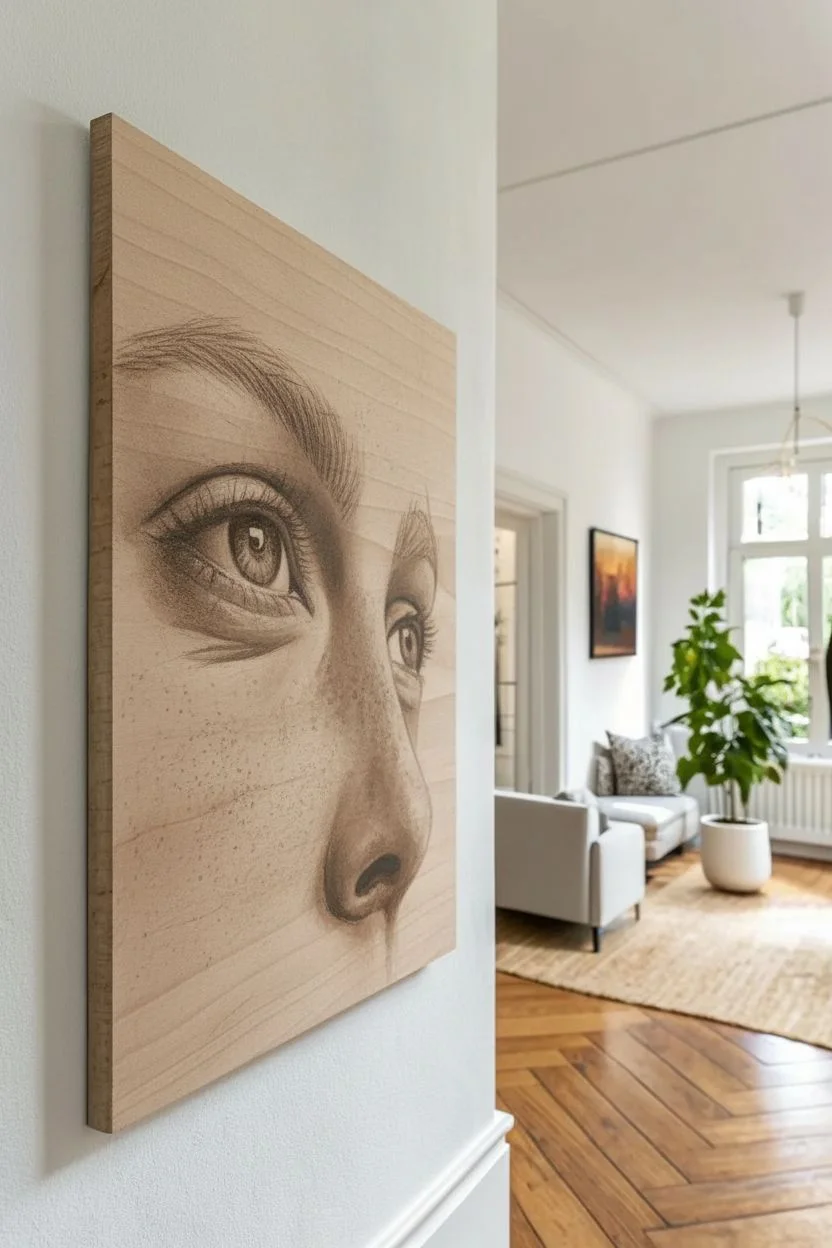
Capture the incredible intricacy of human skin and the depth of a gaze with this macro painting project on a chunky wood panel. This tutorial focuses on building translucent layers to create lifelike freckles and pore texture.
Step-by-Step Tutorial
Materials
- Deep cradled wood panel (2-inch depth)
- Acrylic Gesso (White)
- Oil paints (Titanium White, Burnt Sienna, Yellow Ochre, Alizarin Crimson, Ultramarine Blue, Burnt Umber, Ivory Black)
- Painting medium (Liquin or similar)
- Soft synthetic brushes (filberts and rounds)
- Fine liner or rigger brush
- Mop brush for blending
- Fine-grit sandpaper
- Graphite paper
Step 1: Preparation & Structure
-
Prepare the surface:
Sand your wood panel with fine-grit sandpaper until it feels perfectly smooth to the touch. -
Prime the front:
Apply three thin coats of white acrylic gesso to the face of the panel, sanding lightly between each coat to eliminate brush strokes. -
Transfer the reference:
Use graphite paper to transfer a high-contrast macro photo of an eye and nose onto the panel. Focus on the outlines of the iris, pupil, tear duct, and major shadows. -
Tonal underpainting:
Using Burnt Umber thinned with mineral spirits, paint a monochrome version of the image to establish your darks and mid-tones, defining the dimensional curve of the nose and eye socket.
Plastic Skin Fix
If the skin looks too smooth or plastic-like, lightly spatter a very thin wash of Burnt Sienna over the area using an old toothbrush to create instant organic irregularity.
Step 2: Base Layers
-
Mix skin tones:
Pre-mix three flesh values (shadow, mid-tone, highlight) using White, Yellow Ochre, Burnt Sienna, and a touch of Blue for the shadows. -
Apply base flesh:
Paint the skin areas, blending the wet edges of your three mixtures with a soft mop brush to create a seamless gradient across the cheek and bridge of the nose. -
Paint the sclera:
Block in the ‘white’ of the eye using a mixture of White, a tiny dot of Blue, and Burnt Umber. Remember, eyeballs are spheres, so shade the corners darker to make it look round. -
Base iris color:
Fill in the iris circle with your base hue—likely a muted grey-blue or hazel—keeping it slightly darker around the outer rim.
Step 3: The Macro Details
-
Iris texture:
Using a small round brush, paint radiating lines from the pupil outward using lighter and darker variations of your iris color. -
Pupil and reflection:
Paint the pupil jet black. Once the iris is slightly tacky, add the reflection (catchlight) with pure Titanium White to bring the eye to life. -
Skin texture starts:
I like to mix a glazing medium with a reddish skin tone and stipple it gently over the nose area to create the illusion of uneven surface texture. -
First layer of freckles:
Dilute Burnt Sienna with medium until it is semi-transparent. Dab on irregular spots across the nose and cheek. These should look faint, as if they are ‘under’ the skin. -
Defined freckles:
Using a thicker mix of Burnt Umber and Sienna, add sharper, darker freckles on top of the faint ones. Vary the size and shape; perfect circles look unnatural. -
Lid creases:
Deepen the creases above and below the eye using a mix of Alizarin Crimson and Burnt Umber to show the thin, folded skin.
Exposed Edges
Keep the sides of the wood panel unpainted. Sand them clean and apply a clear matte varnish or wax to create a beautiful contrast between the raw organic material and the painted realism.
Step 4: Fine Hairs & Finish
-
Eyebrows:
With a rigger brush and thinned paint, flick in individual eyebrow hairs, following the natural growth direction outward. -
Eyelashes:
Paint the eyelashes in quick, curved strokes. Ensure they clump slightly at the base and taper to a fine point. -
Lash reflections:
Paint subtle, curved reflections of the eyelashes into the highlight of the eye for extreme realism. -
Final highlights:
Add tiny specular highlights on the tear duct and the tip of the nose where the skin is naturally oily.
Step back and admire how those tiny details come together to create a captivating, realistic gaze.
Dripping Rainbow Tears
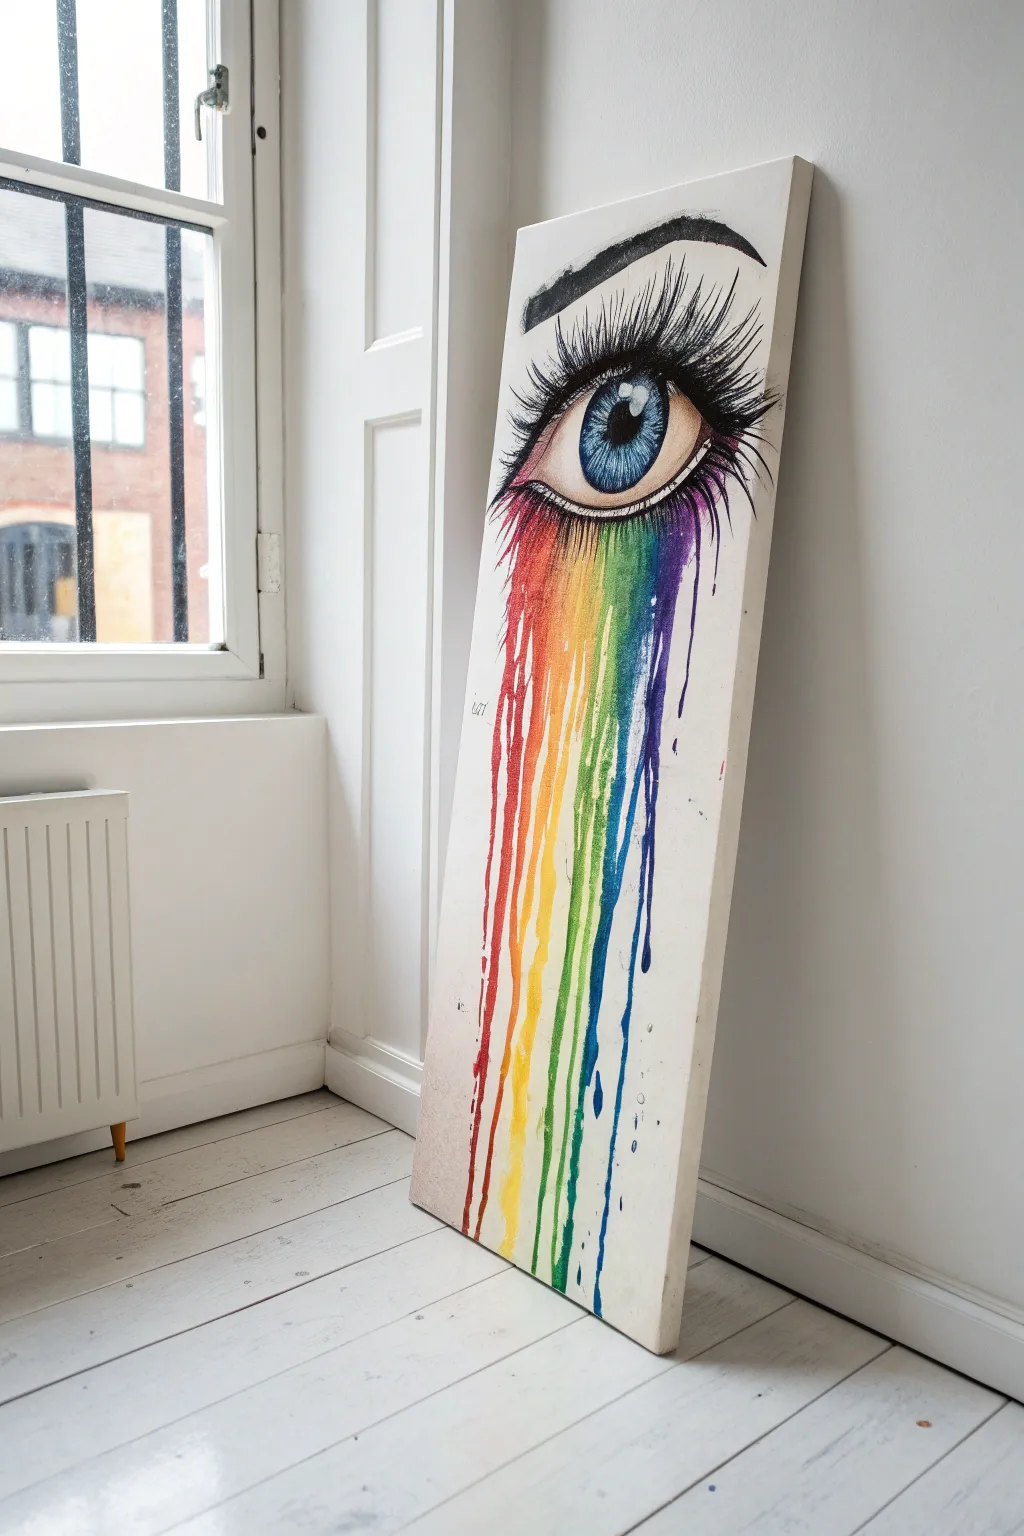
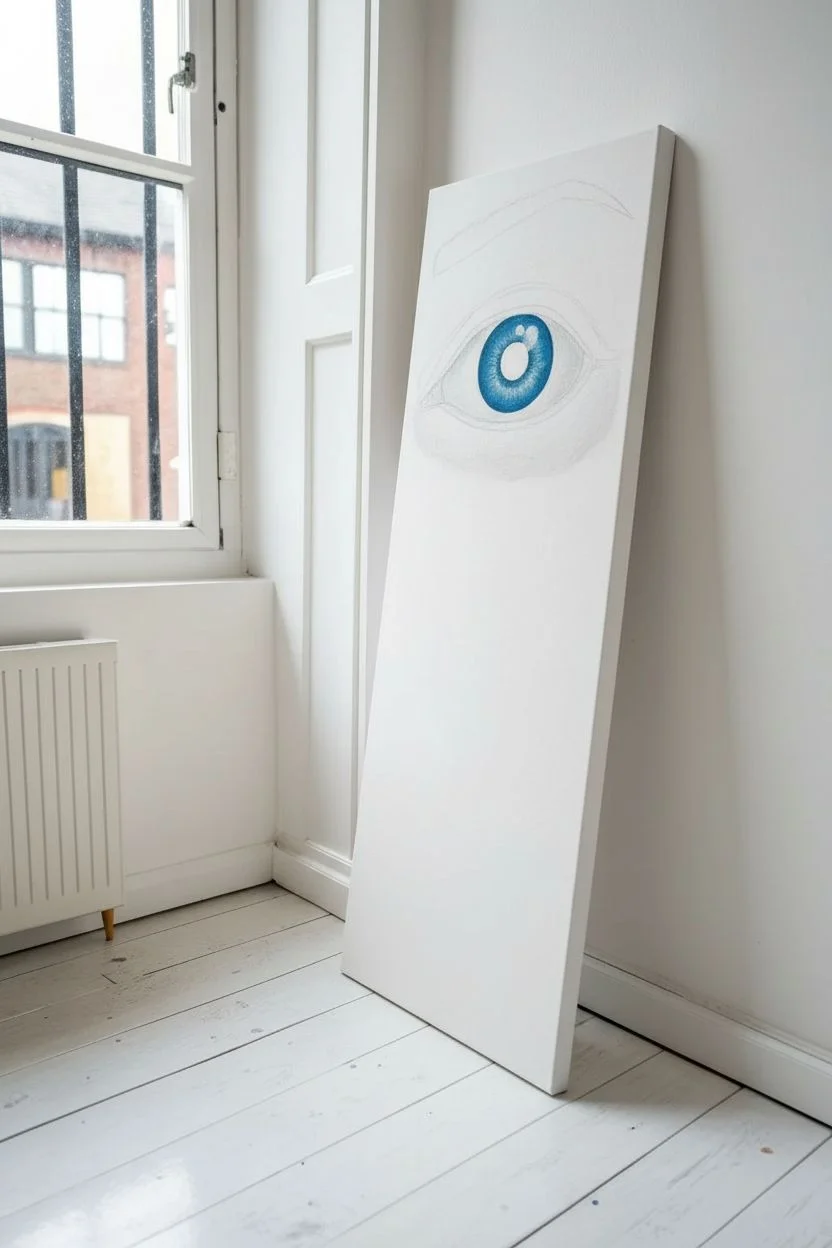
This striking vertical composition blends realistic portraiture with abstract fluid art to create a captivating statement piece. You will capture a piercing blue gaze that dissolves into a vibrant cascade of rainbow colors, creating a look that is both edgy and emotive.
Detailed Instructions
Materials
- Tall, narrow canvas (e.g., 12×36 inches)
- Acrylic paints (Titanium White, Mars Black, Primary Blue, Red, Yellow)
- Acrylic flow improver or water
- Pencil and eraser
- Fine liner brush
- Small round brush
- Flat shader brush
- Spray bottle with water (optional)
- Palette
Step 1: Sketching and Base Layers
-
Position the gaze:
Place your canvas upright and lightly sketch the outline of a large eye in the top third of the space. Include the almond shape, the circular iris, the pupil in the center, and the crease of the eyelid above. -
Draft the brow:
Sketch the eyebrow shape well above the eye, indicating the direction of hair growth with faint lines. -
Block in the whites:
Paint the sclera (the white part of the eye) using Titanium White carefully mixed with a tiny dot of black or blue to create a very pale grey for the corners, adding depth. -
Iris foundation:
Fill the iris circle with a medium blue shade. Don’t worry about detailing yet; just get solid coverage.
Wandering Drips?
If a drip runs sideways, your canvas isn’t perfectly vertical. Use a clean, damp brush to quickly wipe away the stray mark, then wipe the canvas edge with a paper towel to guide the flow back down.
Step 2: Detailing the Eye
-
Create the pupil:
Paint the center pupil distinctively black using your round brush. -
Add iris dimension:
Mix a darker navy blue and outline the iris rim. Use a fine liner brush to flick small lines from the pupil outward and from the rim inward to simulate eye texture. -
The spark of life:
Add a crisp, white highlight (catchlight) overlapping the pupil and iris. I prefer placing this on the upper right side to make the eye look wet and reflective. -
Shade the skin:
Using a very diluted mix of brown or grey, add subtle shading to the eyelid crease and under the brow bone to create three-dimensional form. -
Eyebrow texture:
Using black paint and a flat brush turned sideways, paint the eyebrow hairs with short, upward strokes that curve outward toward the temple. -
Lash line definition:
Paint a thick black line across the upper eyelid to serve as the base for the eyelashes.
Step 3: Lashes and Rainbow Drips
-
Dramatic upper lashes:
Using your fine liner brush and black paint, create long, sweeping eyelashes. Press down at the root and flick your wrist quickly as you lift off to create tapered, sharp points. -
Prepare the rainbow:
Mix your red, orange, yellow, green, blue, and violet paints individually with flow improver or water until they reach a consistency similar to heavy cream or melted ice cream. -
Start the red drip:
Starting at the inner corner (left) of the lower lash line, load a round brush with the thinned red paint. Press it against the canvas and let gravity pull the paint down. -
Continue the spectrum:
Moving rightward, apply the orange, yellow, green, blue, and purple paints in sequence along the lower eyelid, allowing them to drip naturally down the length of the canvas. -
Encourage the flow:
If the paint stops midway, you can gently mist the canvas with water or tilt it vertically to help the drips reach the bottom. -
Varying lengths:
Let some drips run all the way off the canvas edge while others can fade out sooner for an organic look. -
Define the lower lash line:
Once the rainbow drips are mostly dry, paint a solid black line along the bottom of the eye, covering the starting points of the colored drips to make them look like they are pouring from the eye itself. -
Lower lashes:
Add smaller, spikier lashes along the lower black line using black paint. Let these overlap the colored drips slightly to integrate the sketch with the abstract tears.
Flow Control
Use a pipette or dropper to apply the watered-down paint exactly where you want the drip to start. This gives you more control than a brush when initiating the long tears.
Lean your masterpiece against a wall or hang it high to let those vibrant colors elongate your space.


Cosmic Galaxy Irises
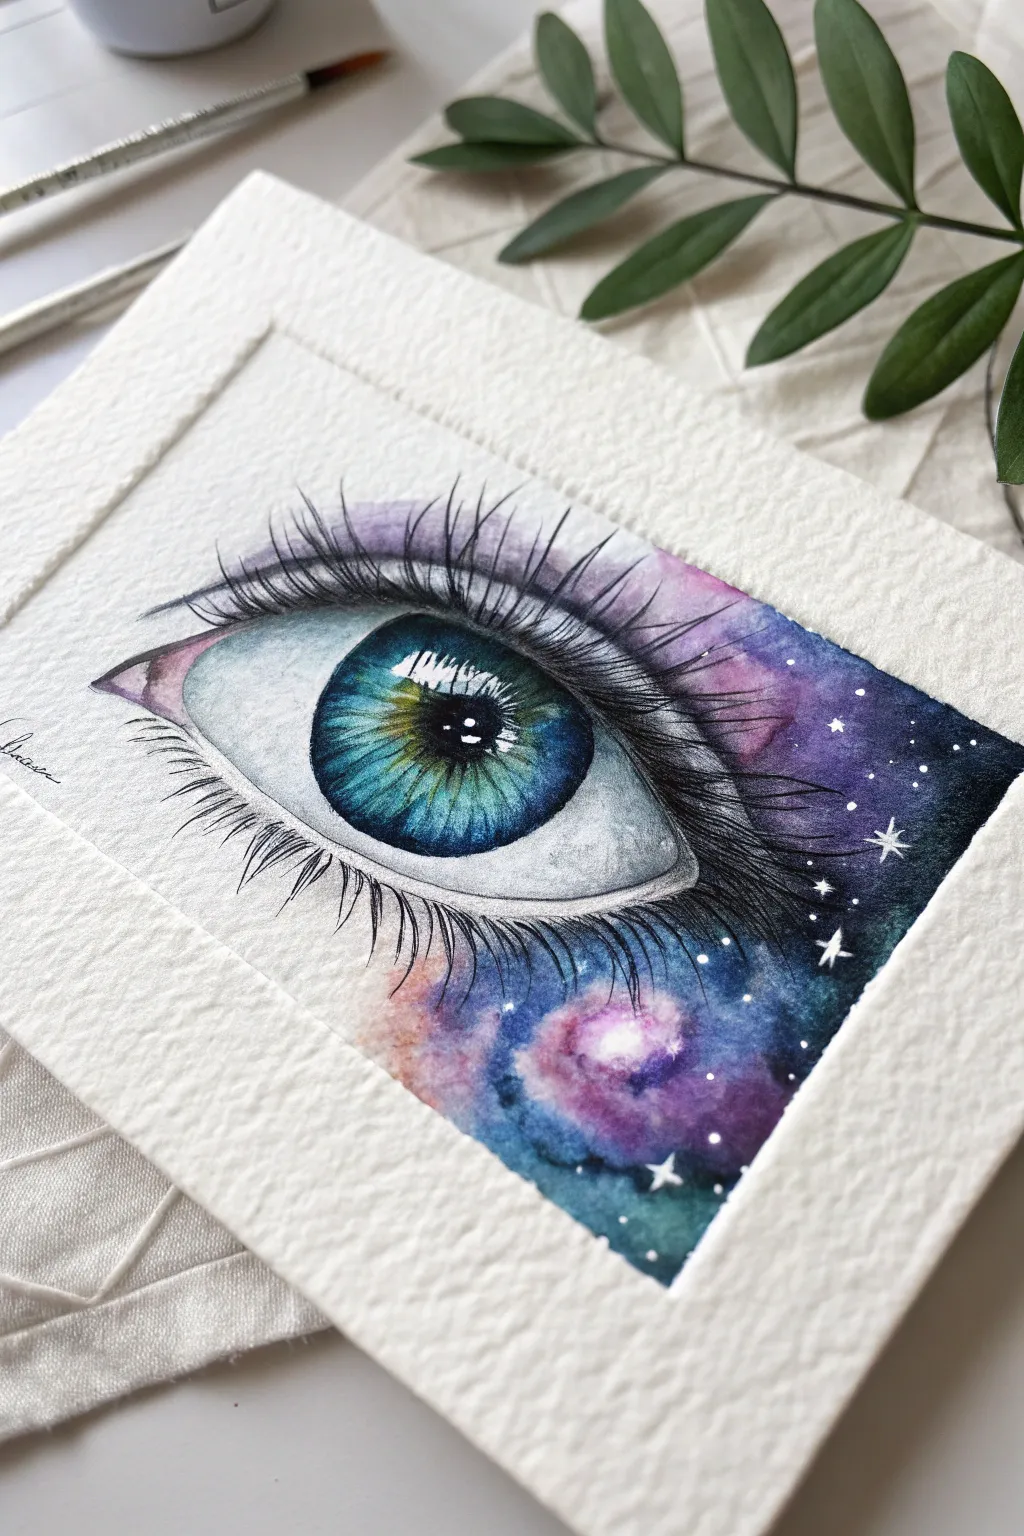
Merge the realism of human anatomy with the ethereal beauty of a nebula in this striking watercolor project. You will create a vibrant teal iris framed by skin that transforms into a deep, sparkling cosmos.
Step-by-Step
Materials
- Cold Press Watercolor Paper (300 gsm)
- Watercolor Paints (Teal, Sap Green, Indigo, Violet, Magenta, Lamp Black)
- Round Brushes (Size 4 for washes, Size 0 and 00 for details)
- White Gel Pen or Opaque White Gouache
- HB Pencil
- Masking Tape
- Paper Towels
Step 1: Sketch and Iris Base
-
Prepare the Surface:
Tape your watercolor paper down to a board on all four sides to prevent buckling when we add water. -
Light Outline:
Using the HB pencil, lightly sketch the almond shape of the eye, the circular iris, and the pupil in the center. Mark out a rectangular window reflection in the upper iris to keep it pure white. -
Wet-on-Wet Iris:
Dip your Size 4 brush in clean water and dampen only the iris area, carefully avoiding the marked reflection and the pupil. -
Base Color:
Drop in a vibrant teal or turquoise color, letting it flow into the wet paper to create a soft base layer. -
Inner Warmth:
While the teal is still damp, touch a small amount of sap green or yellow ochre near the center of the iris to add depth and warmth.
Bloom Control
To create those beautiful ‘cauliflower’ blooms that look like gas clouds, drop a tiny bead of clean water or rubbing alcohol into the galaxy wash just as the shine begins to leave the paper.
Step 2: Deepening Values
-
Pupil Definition:
Using a smaller brush and concentrated black paint, fill in the pupil. Be extremely careful to keep the edges sharp and the reflection area clear. -
Limbus Ring:
Mix a dark indigo or deep blue. With the tip of your brush, carefully paint the outer edge of the iris (the limbus). Feather this color slightly inward toward the pupil. -
Iris Detail:
Once the initial iris layers are damp but not soaking, use a size 0 brush to paint thin, radiating lines from the pupil outward using a dark teal or blue to mimic iris fibers. -
Sclera Shading:
For the white of the eye, mix a very watery grey-blue. Paint shadows in the corners and under the upper eyelid area to create a spherical 3D form.
Make it Pop
Once the painting is fully dry, re-trace the very darkest parts of the upper lash line and pupil with a black fineliner pen. This extreme contrast makes the watercolor textures stand out more.
Step 3: Cosmic Skin
-
Wetting the Surroundings:
Clean your brush thoroughly. Apply clean water to the skin area surrounding the eye, extending out to your desired jagged border. -
Galaxy Base:
Drop in patches of magenta and violet wet-in-wet. Allow them to bleed naturally into one another. -
Nebula Depth:
While the pinks are wet, drop concentrated indigo and black into the outer corners and edges of the painted area to create the look of deep space. -
Creating Clouds:
I like to use a clean, slightly damp brush to lift a little pigment in the center of the dark patches, creating soft, nebulous clouds. -
Total Dry Time:
This is crucial: Let the painting dry completely before moving on. The paper must be bone dry to keep the next details crisp.
Step 4: Lashes and Stars
-
Upper Lashes:
Using your finest brush (00) and thick black paint (cream consistency), paint the upper lashes. Start from the lid line and flick upward in a curve. Make them clump slightly for realism. -
Lower Lashes:
Paint the lower lashes, which should be shorter, thinner, and more spaced out than the top ones. Ensure they curve outward. -
Eye Reflections:
With the white gel pen or gouache, refine the window reflection in the pupil. You can add a subtle reflection of the eyelashes over the white highlight for extra realism. -
Star Clusters:
Dip a toothbrush or stiff brush in white gouache and flick it over the dried galaxy areas to create distant star clusters. -
Brightest Stars:
Use the gel pen to draw a few larger, four-pointed stars and distinct dots in the darker areas of the nebula to finish the piece.
Now you have a mesmerizing window to the universe captured right on your paper.
The Van Gogh Tribute
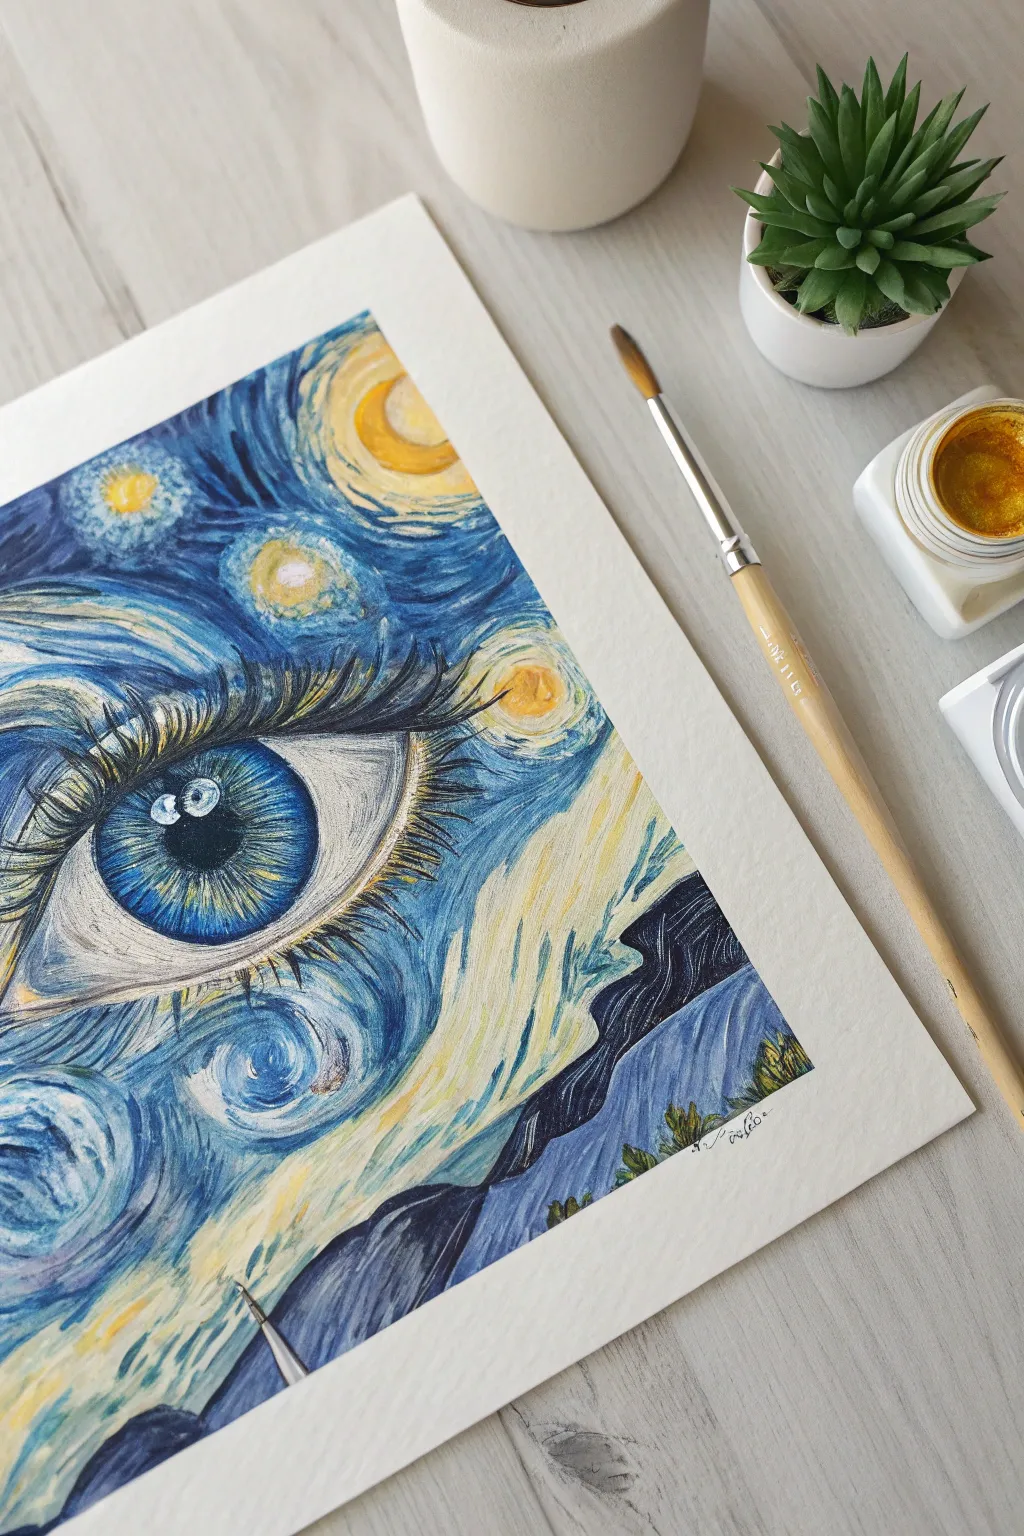
Merge the soulful depth of a realistic eye with the iconic swirls of Vincent van Gogh’s masterpiece in this mixed-media project. By replacing traditional skin texture with the expressive, dashed brushstrokes of ‘The Starry Night,’ you will create a surreal and captivating piece of art.
Step-by-Step Guide
Materials
- Cold press watercolor paper (300 gsm)
- Watercolor paints (Ultramarine, Prussian Blue, Cadmium Yellow, Burnt Sienna)
- White Gouache paint
- Gold metallic ink or watercolor paint
- Round brushes (sizes 2, 4, and 8)
- Fine liner brush (size 0 or 00)
- Masking tape
- HB Pencil and kneaded eraser
- Palette and water jars
Step 1: Sketching the Composition
-
Prepare the surface:
Secure your watercolor paper to a board using masking tape to create a clean border and prevent buckling when the paper gets wet. -
Outline the eye:
Lightly sketch a large, realistic eye shape in the center-left of the page, drawing the iris large enough to hold detail. -
Map the landscape:
Instead of drawing a standard tear duct and lower eyelid, sketch a flowing, dark shape resembling a cypress tree on the bottom right that morphs into the lower lash line. -
Indicate the flow:
Draw faint directional lines around the eye to map out where the ‘wind’ swirls will go, mimicking the flow of an eyelid crease and brow bone.
Pro Tip: Directional Flow
To truly capture the Van Gogh style, ensure your short brushstrokes follow the anatomy of the face. Curve the dashes around the eyeball to exaggerate the 3D form.
Step 2: Painting the Iris
-
Base layer:
Apply a wet-on-wet wash of light blue to the entire iris circle, leaving a small, distinct white circle blank for the reflection highlight. -
Add radial texture:
While the base is damp, drop darker blue pigment into the outer ring of the iris, pulling it inward toward the pupil with quick flicks. -
Define the pupil:
Paint the pupil in the center with a saturated black or deep indigo, carefully preserving the sharp white highlight next to it. -
Create complexity:
Once the blue layer is dry, I like to use a small brush to add thin strokes of yellow and green near the pupil to give the eye a realistic, fibrous look.
Step 3: Creating the Starry Skin
-
Yellow underpainting:
Dilute your yellow paint and apply a pale, sweeping wash where the ‘stars’ and light swirls will be—specifically above the eye and in the inner corner. -
The dashed technique:
Load a size 4 brush with Ultramarine blue. Instead of smooth blending, paint short, separate dashes that follow the curve of the eye socket. -
Deepening the tones:
Switch to Prussian blue and add rows of darker dashes in the crease of the eyelid and the outer corners to build recessed depth. -
Adding the stars:
Paint small spirals of yellow and orange over the dried pale yellow areas, using the dashed stroke method to create the glowing halo effect found in the original painting.
Trouble: Muddy Colors?
If your yellow stars look green against the blue sky, your blue layer was too wet. Let the blue background dry completely before layering the yellow dashes on top.
Step 4: Landscape and Lashes
-
The cypress morph:
Paint the large, flame-like shape on the bottom right using very dark blue and black, ensuring the vertical strokes mimic the texture of a cypress tree. -
Connecting the land:
Extend the top of the cypress tree to the left, letting it taper thinly to become the lower lash line of the eye. -
Rolling hills:
Below the eye, paint sweeping bands of blue and white to represent the village hills, using long, continuous strokes rather than dashes. -
Upper eyelashes:
Using your fine liner brush and black paint, create long, dramatic upper eyelashes. Start firmly at the lid and flick upward, curving them slightly.
Step 5: Highlights and Details
-
Brighten the swirls:
Mix white gouache with a tiny bit of blue. Paint fresh dashes in the lighter areas of the sky to make the movement pop against the dark background. -
Enhance the white:
Apply pure white gouache to the sclera (the white of the eye), adding a tiny touch of shadow under the top lid for realism. -
The golden touch:
Dip a clean liner brush into gold metallic ink and carefully trace the center of the yellow stars and a few flecks within the iris for a magical shimmer. -
Final reveal:
Allow the painting to dry completely before gently peeling away the masking tape to reveal the crisp white borders.
Frame your starry masterpiece and enjoy the surreal beauty of your artistic fusion.
Gilded Accents and Gold Leaf
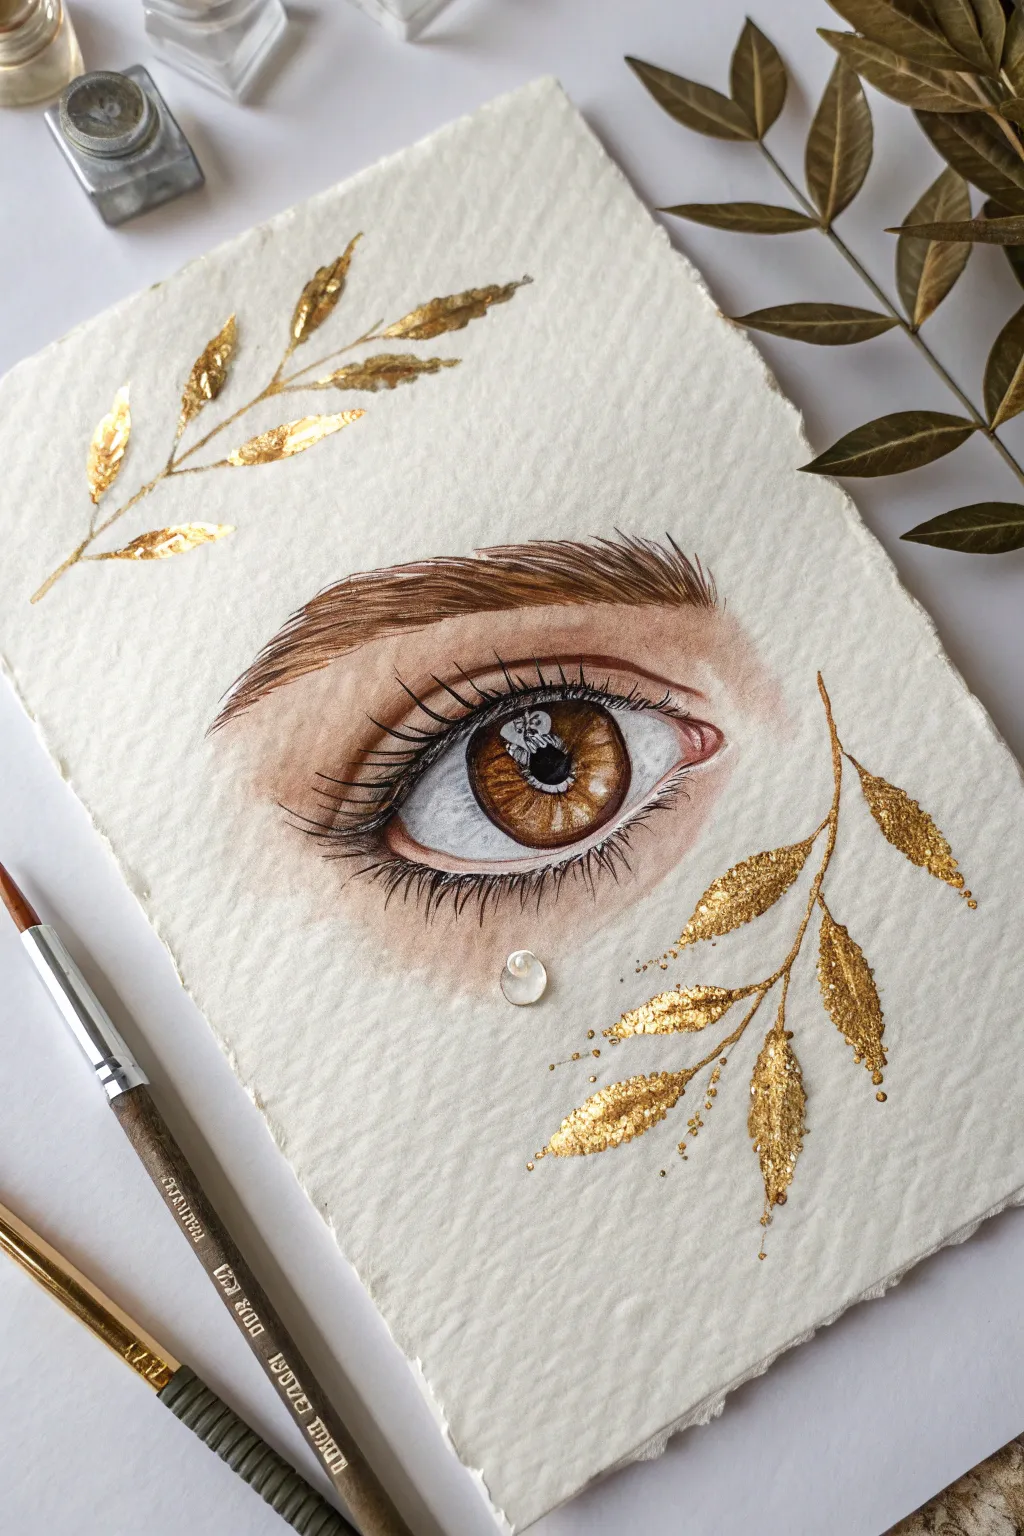
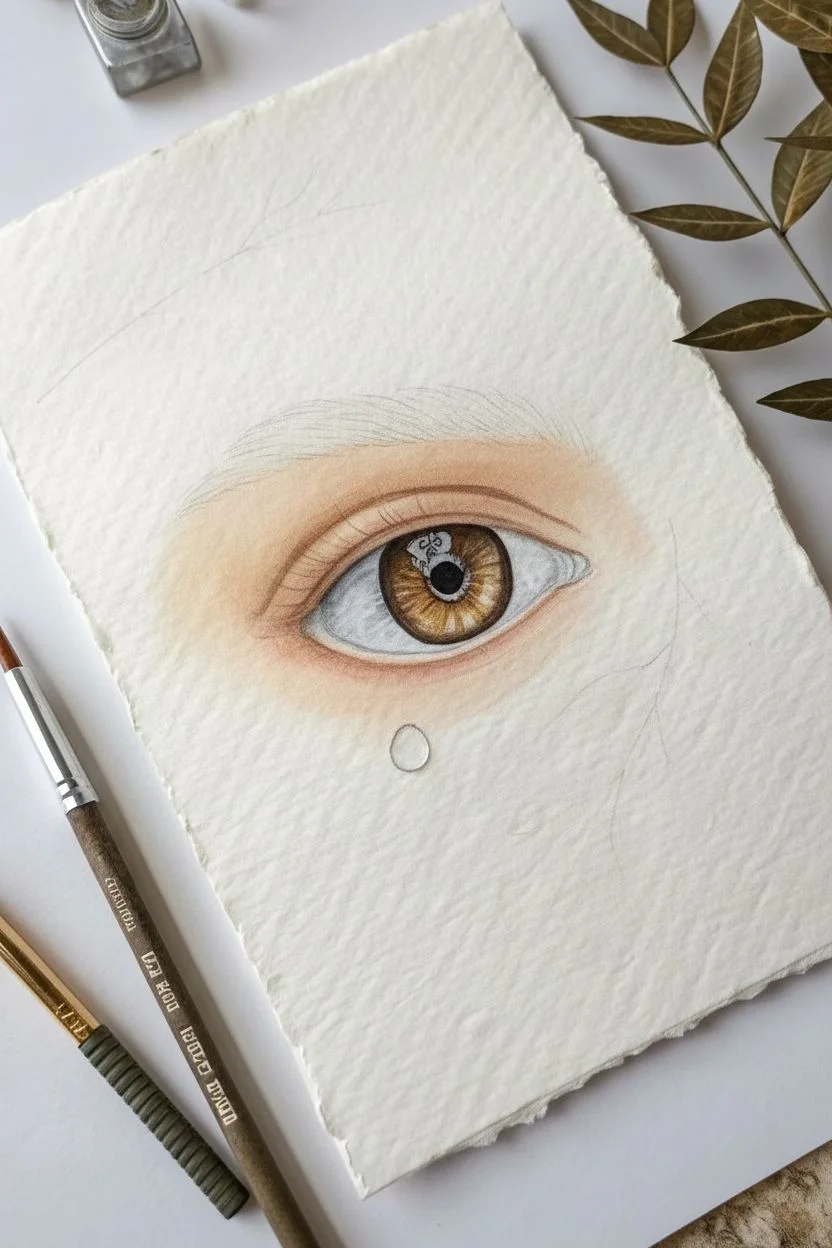
Combine the delicate realism of portraiture with the luxurious texture of gold leaf in this stunning mixed-media project. You will learn to paint a soulful, detailed eye and frame it with metallic botanical accents on textured paper.
Step-by-Step
Materials
- Heavyweight cold-press watercolor paper (300gsm)
- Watercolor paints (burnt umber, yellow ochre, burnt sienna, skin tones, payne’s gray)
- White gouache or white gel pen
- Round watercolor brushes (size 4 for washes, size 0 and 000 for details)
- Gold leaf sheets and gilding size (glue) OR high-pigment metallic gold watercolor
- HB Pencil and kneaded eraser
Step 1: Sketching and Base Layers
-
Paper Preparation:
Start with a piece of heavy deckle-edge paper to match the rustic aesthetic. If you don’t have deckle edges, you can tear the edges of a standard watercolor sheet against a ruler for a fibrous look. -
Initial Outline:
Lightly sketch the almond shape of the eye, the circular iris, the pupil, and the arch of the eyebrow. Mark the position of the single teardrop and the two botanical branches. -
Skin Wash:
Mix a diluted wash of your skin tone (a blend of ochre and a touch of rose works well). Apply this softly around the eye area, fading it out into the white of the paper with clean water to avoid hard edges. -
Deepening Shadows:
While the paper is slightly damp, drop a slightly darker reddish-brown mix into the crease of the eyelid and the inner corner near the tear duct to build dimension. -
Sclera Shading:
The ‘white’ of the eye is never truly white. Paint the corners of the eyeball with a very watery cool grey or blue-grey, leaving the area right next to the iris bright.
Taming the Gold
Gold leaf sticking everywhere? Ensure your paper is 100% dry before applying glue. You can also dust the non-glued areas with baby powder beforehand to prevent stray leaf from sticking to the paper grain.
Step 2: The Realistic Iris
-
Iris Base:
Fill the iris circle with a wash of glowing yellow ochre or light brown. Leave a specific shape unpainted in the upper pupil area to act as the window reflection later. -
Pupil Definition:
Using a size 2 brush and concentrated black or dark sepia, carefully fill in the pupil. Be extremely precise around the reflection shape you preserved in the previous step. -
Iris Texturing:
Switch to your smallest brush (size 0 or 000). Using burnt umber, paint fine lines radiating from the pupil toward the outer rim, mimicking the fibers of the iris. -
Outer Ring:
Define the outer edge of the iris (the limbal ring) with a dark brown line, softening the inner edge of this line so it blends slightly into the iris color. -
Reflection Detail:
Inside the white reflection space in the pupil, sketch a tiny ‘window’ pattern with faint grey to mimic a realistic room reflection.
Step 3: Lashes, Brows, and Tear
-
Eyebow Base:
Lay down a soft, warm brown wash in the shape of the eyebrow. Let this dry completely before adding texture. -
Hair Texture:
With a fine liner brush and dark brown paint, flick individual hairs in the direction of growth. I like to overlap some hairs to create a natural, bushy density. -
Upper Lashes:
Load your brush with thick, dark paint. Create the upper lashes with quick, curved strokes that start thick at the lid and taper to a point. Ensure they clump slightly and curve different ways. -
Lower Lashes:
Paint the lower lashes with a lighter hand; these should be shorter, thinner, and more spaced out than the top lashes. -
Painting the Tear:
Outline the teardrop with a faint grey. Add a dark shadow crescent at the very bottom and a bright white highlight dot at the top to create volume.
Dimensional Tear
To make the teardrop look incredibly real, apply a drop of clear UV resin, glossy Mod Podge, or dimensional glaze (like Glossy Accents) strictly over the painted tear and let it dry.
Step 4: Golden Accents
-
Stem Structure:
Using a thin brush and yellow ochre watercolor, paint the thin stems for the branches at the top left and bottom right as a guide. -
Adhesive Application:
If using gold leaf, apply the gilding size (glue) in leaf shapes along the stems. If using metallic paint, simply paint the leaves thickly to build texture. -
Applying Gold:
Once the size is tacky (usually after 10-15 minutes), gently press the gold leaf sheet over the glue spots. Rub the back of the sheet smoothly. -
Dusting Off:
Use a dry, soft brush to sweep away the excess gold leaf, revealing the crisp leaf shapes. Add tiny gold dots around the lower branch for a magical dust effect. -
Final Highlights:
Use white gouache or a gel pen to add the brightest highlights to the wetline of the eye, the tear, and the center of the iris to make the painting pop.
Step back and admire how the metallic shimmer contrasts with the deep, soulful details of your watercolor eye.
Acrylic Pour Cells
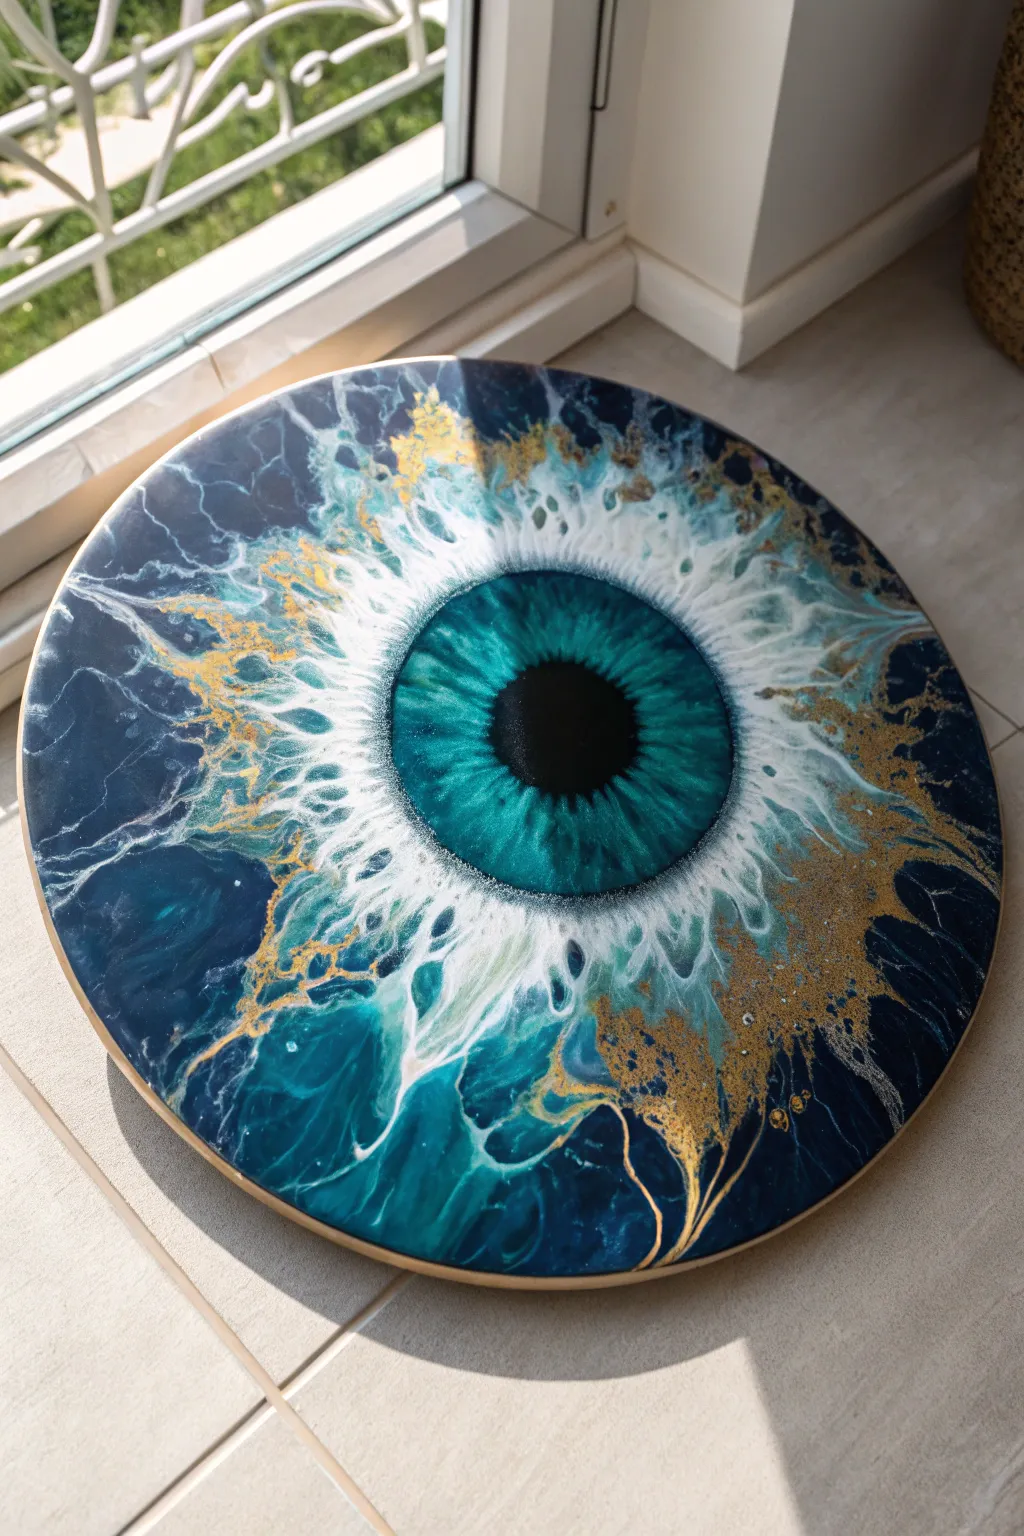
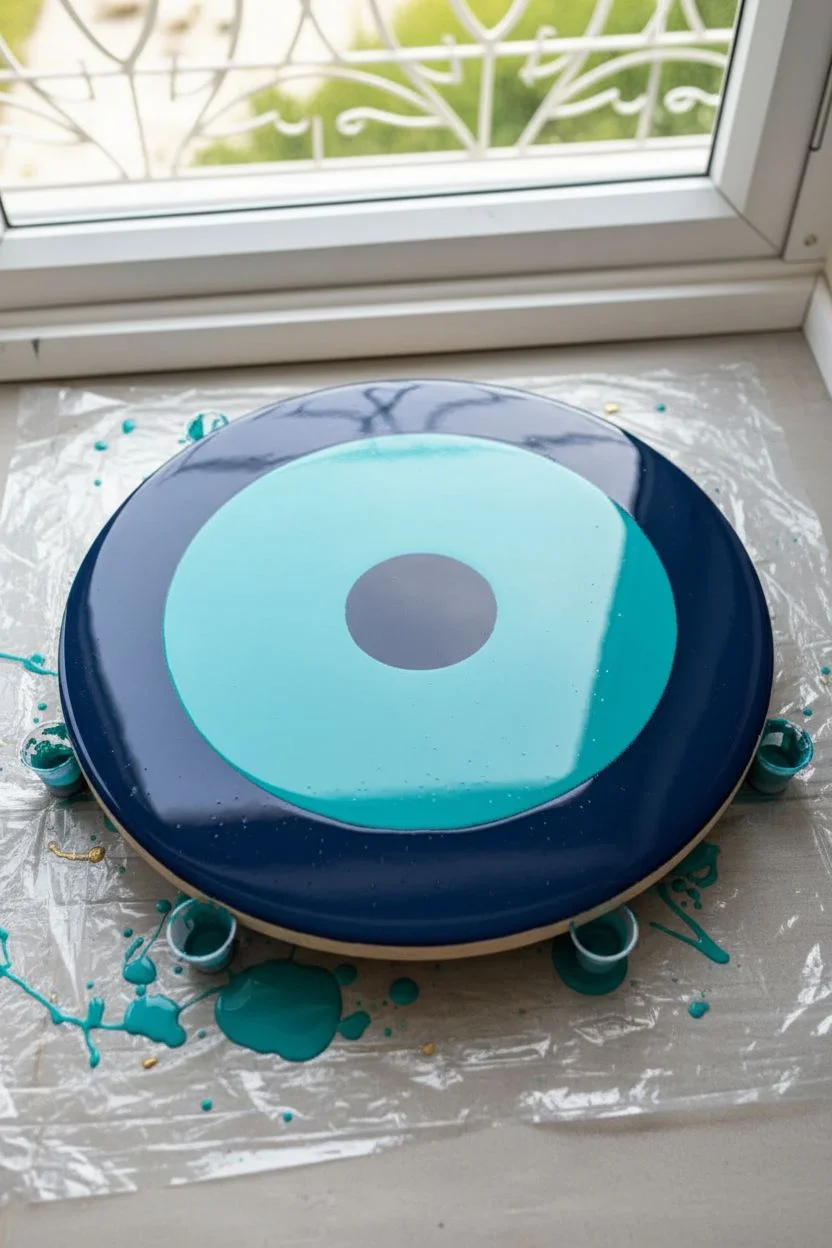
Capture the mesmerizing depth of a giant iris using fluid art techniques that mimic the organic striations of a real eye. This project combines the unpredictability of acrylic pouring with the glass-like finish of epoxy resin to create a stunning, circular statement piece.
Step-by-Step Tutorial
Materials
- Round wooden cradle board or canvas (12-16 inch)
- Acrylic paints (Navy Blue, Turquoise, Black, Titanium White, Metallic Gold)
- Pouring medium (Floetrol or Liquitex)
- Silicone oil (treadmill lubricant)
- Plastic cups and stir sticks
- drinking straw
- Kitchen torch (butane)
- Epoxy resin kit (Part A and Part B)
- Disposable gloves
Step 1: Mixing and Base Pour
-
Prepare the workspace:
Cover your table with plastic sheeting and elevate your round board on cups so paint can drip freely off the edges. Ensure the board is perfectly level. -
Mix the pouring paints:
In separate cups, mix your acrylic colors with pouring medium at a 1:2 ratio (one part paint to two parts medium). Add water sparingly until the consistency resembles warm honey. -
Add cell creator:
Add 2-3 drops of silicone oil specifically to the Turquoise, Gold, and White cups only. Stir just one or two times; over-stirring breaks the oil down too much. -
Pour the pupil:
Start by pouring a generous puddle of Black directly in the dead center of the board. It should be roughly 15% of the board’s diameter. -
Create the iris base:
Pour a ring of Turquoise around the black puddle, followed immediately by a ring of Navy Blue that extends almost to the edge of the board.
Step 2: Details and Blown Effect
-
Add metallic accents:
Drizzle a thin, uneven circle of Gold right where the Navy and Turquoise meet. This will create the sparkling flecks seen in the reference. -
Layer the white lacing:
Pour a thin ring of Titanium White directly over the boundary between the Turquoise iris and the central Black pupil. -
Blow the iris lines:
Using a drinking straw, aim at the white ring and blow firmly outwards toward the edge of the board. Rotate the board as you work to create radial spikes. -
Extend the details:
Continue blowing the Turquoise sections outward into the Navy. I find that varying my blowing pressure creates those natural-looking organic ridges and valleys. -
Reform the pupil:
The blowing step likely distorted your perfect black center. Carefully pour a fresh, small amount of Black right in the center to restore the sharp, round pupil. -
Activate the cells:
Briefly pass a kitchen torch over the painted areas, keeping the flame 3 inches away. This pops air bubbles and helps the silicone create those small, lacy cells in the gold and teal areas. -
Refine the composition:
If the eye looks too uniform, use a wooden skewer to drag thin lines of Navy into the Turquoise, or drag White outward to sharpen the spikes. -
Dry the painting:
Allow the acrylic pour to dry completely in a dust-free area for at least 3 to 4 days. The paint must be fully cured before the next phase.
Clear Vision Tip
Before mixing your resin, clean the dried painting with a drop of dish soap on a paper towel to remove silicone oil. If you skip this, the resin may separate and leave pits.
Step 3: The Glassy Finish
-
Clean the surface:
Once dried, gently wipe the surface with a damp cloth to remove any silicone oil residue, which can repel the resin. -
Mix the resin:
Measure equal parts of Resin A and Hardener B. Stir slowly and thoroughly for at least 3 minutes, scraping the sides of the cup to ensure a perfect chemical blend. -
Pour the topcoat:
Pour the clear resin into the center of the eye and use a clean gloved hand or spreader to guide it to the edges, allowing it to self-level. -
Remove resin bubbles:
Wait 10 minutes for bubbles to rise, then quickly sweep your torch over the surface to pop them. Cover with a box to prevent dust and let cure for 24-48 hours.
Level Up: Depth
Mix a tiny amount of interference blue powder into your clear resin coat. It will stay transparent but add a ghostly blue shimmer that shifts as you walk past the art.
Hang your cosmic eye where it catches the sunlight to show off that incredible glassy depth.
Overgrown Botanical Visions
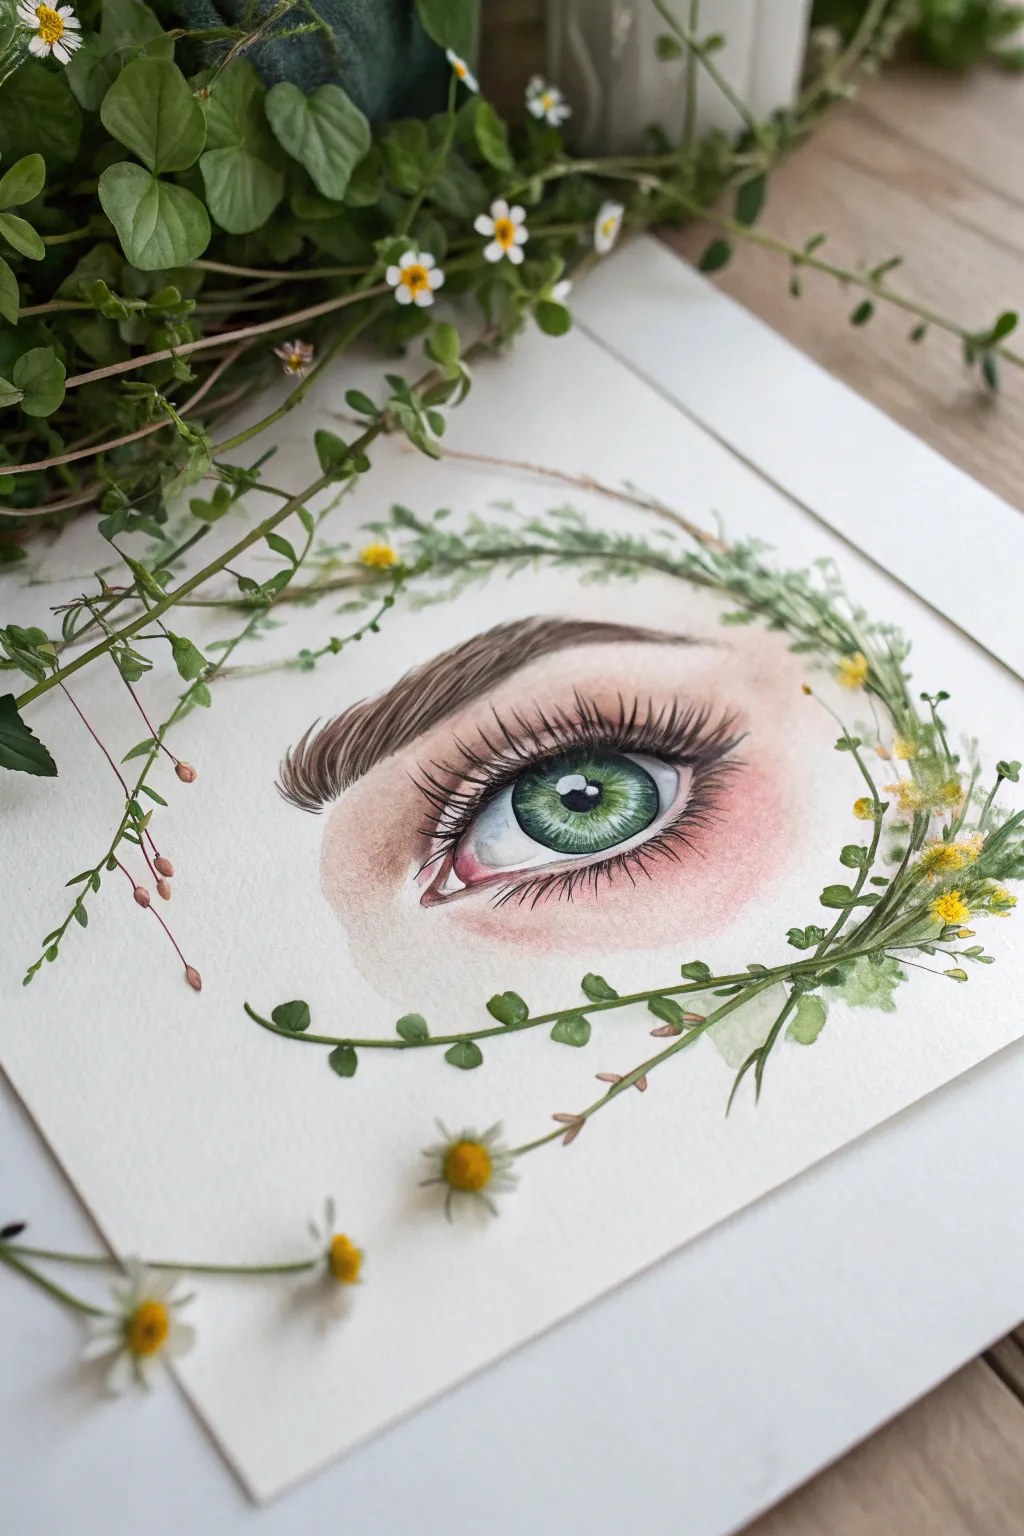
This project blends realistic portraiture with whimsical botanical illustration. You will create a striking green eye nestled within a delicate, painted wreath of vines and tiny wildflowers.
How-To Guide
Materials
- Hot press watercolor paper (smooth texture)
- Watercolor paints (skin tones, sap green, indigo, yellow ochre, burnt umber)
- Round watercolor brushes (size 4 for washes, size 000 for details)
- Colored pencils (dark brown, black, white)
- White gouache or white gel pen
- HB Pencil and kneadable eraser
- Paper towels and water cup
Step 1: Sketching and Skin Base
-
Outline the eye:
Lightly sketch the almond shape of the eye, the circular iris, the pupil, and the arched eyebrow using your HB pencil. Keep the lines very faint to avoid graphite muddying the paint later. -
Apply skin wash:
Mix a very watery pale peach or pink tone. Apply a soft wash around the eye area, softening the edges with clean water so they fade into the white paper. -
Deepen the shadows:
While the paper is slightly damp, drop a slightly darker pink-brown mix into the crease of the eyelid and the lower lash line to build form. -
Shade the sclera:
Paint the ‘white’ of the eye using a highly diluted mix of indigo and burnt umber (a cool grey). Focus the shadow under the upper lid and in the corners, leaving the center white.
Fixing “Dead” Eyes
If the eye looks flat or lifeless, the white highlight is likely not bright enough. Add a second layer of thick white gouache to the reflection for maximum contrast.
Step 2: Painting the Iris
-
Base iris color:
Fill the iris circle with a wash of sap green. While wet, drop a tiny touch of yellow ochre near the pupil center for warmth. -
Define the pupil:
Once dry, paint the pupil solid black or concentrated indigo. I like to leave a tiny speck of white paper unpainted here for the primary reflection, though we will enhance it later. -
Add iris texture:
Using your size 000 brush and a darker green mix, paint fine lines radiating from the pupil outward to mimic the complex fibers of the iris. -
The limbal ring:
Outline the outer edge of the iris with a dark green-grey to create the limbal ring, blending it slightly inward for a soft transition.
3D Mixed Media
Instead of painting the flowers, use clear craft glue to attach real pressed petals or tiny dried leaves to the wreath for a beautiful trompe-l’œil effect.
Step 3: Detailing Hair and Lashes
-
Eyebrow foundation:
Paint a faint watercolor wash in the shape of the brow using light brown. Let this dry completely before adding texture. -
Draw individual hairs:
Switch to sharp colored pencils. Draw fine, individual brow hairs, following the natural growth direction (upward near the nose, sweeping outward toward the temple). -
Create eyelashes:
Using a black or dark brown pencil (or a liner brush with thick paint), draw the upper lashes. Start the stroke at the lid line and flick your wrist quickly to create a tapered, natural tip. -
Lower lashes:
Add the lower lashes using a lighter touch; these should be shorter, thinner, and more spaced out than the upper lashes. -
Final highlights:
Use white gouache or a gel pen to place a crisp, bright highlight on the pupil and iris, and a small dot on the tear duct to make the eye look wet and alive.
Step 4: The Botanical Wreath
-
Draft the vines:
Lightly pencil a loose circle or oval framing the eye where your greenery will go. -
Paint main stems:
With a thin brush and varied green shades, paint delicate, waving lines along your guide to act as the main vines. Allow some stems to overlap the skin area slightly. -
Add leaves:
Press the belly of a round brush down and lift up to create simple tear-drop shaped leaves along the vines. Vary the greens—use some yellow-green and some blue-green for depth. -
Bloom the flowers:
Dab small clusters of yellow paint to create the tiny wildflowers. You can add tiny brown dots in their centers for detail.
Step back and verify your contrast, enjoying how the natural elements frame your realistic subject.
Wood Slice Canvases
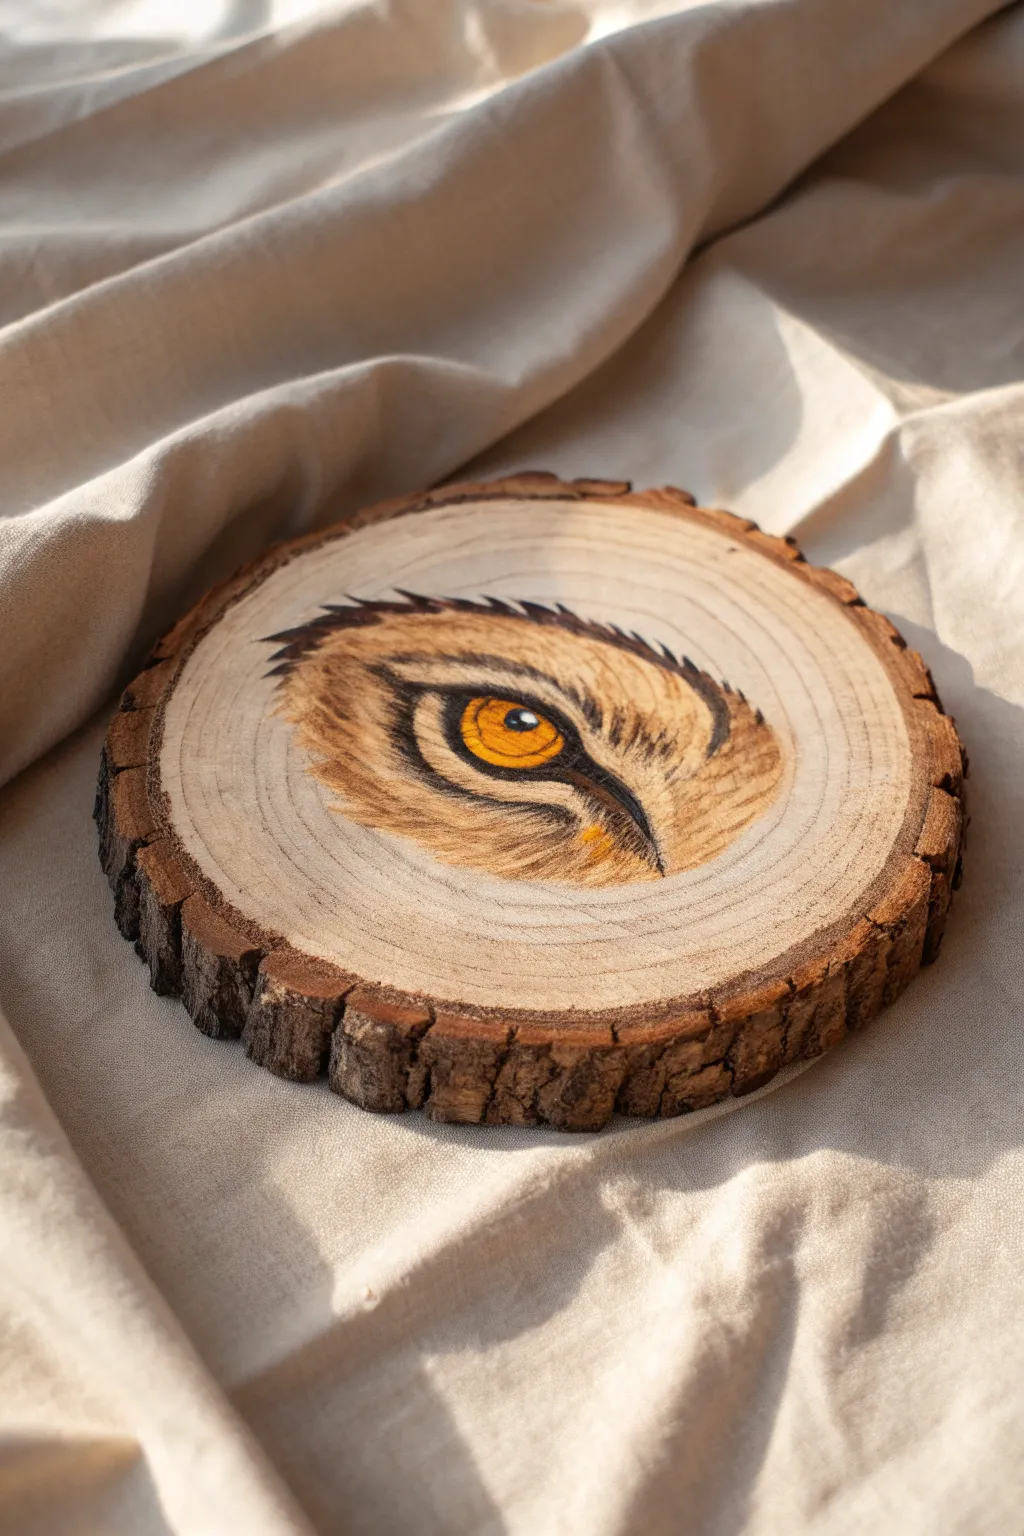
Transform a rustic slice of timber into a captivating piece of art by focusing on the intense realism of a single animal eye. The natural rings of the wood grain create a perfect organic backdrop, enhancing the texture of the painted fur and the piercing quality of the amber iris.
Step-by-Step Guide
Materials
- Basswood or birch wood slice (approx. 4-6 inches)
- Fine-grit sandpaper (220 grit)
- Acrylic paints (Yellow Ochre, Burnt Sienna, Mars Black, Titanium White, Raw Umber)
- Synthetic detail brushes (sizes 000, 0, and 2)
- HB Pencil and kneaded eraser
- Matte finish spray sealer
- Paper towels and water cup
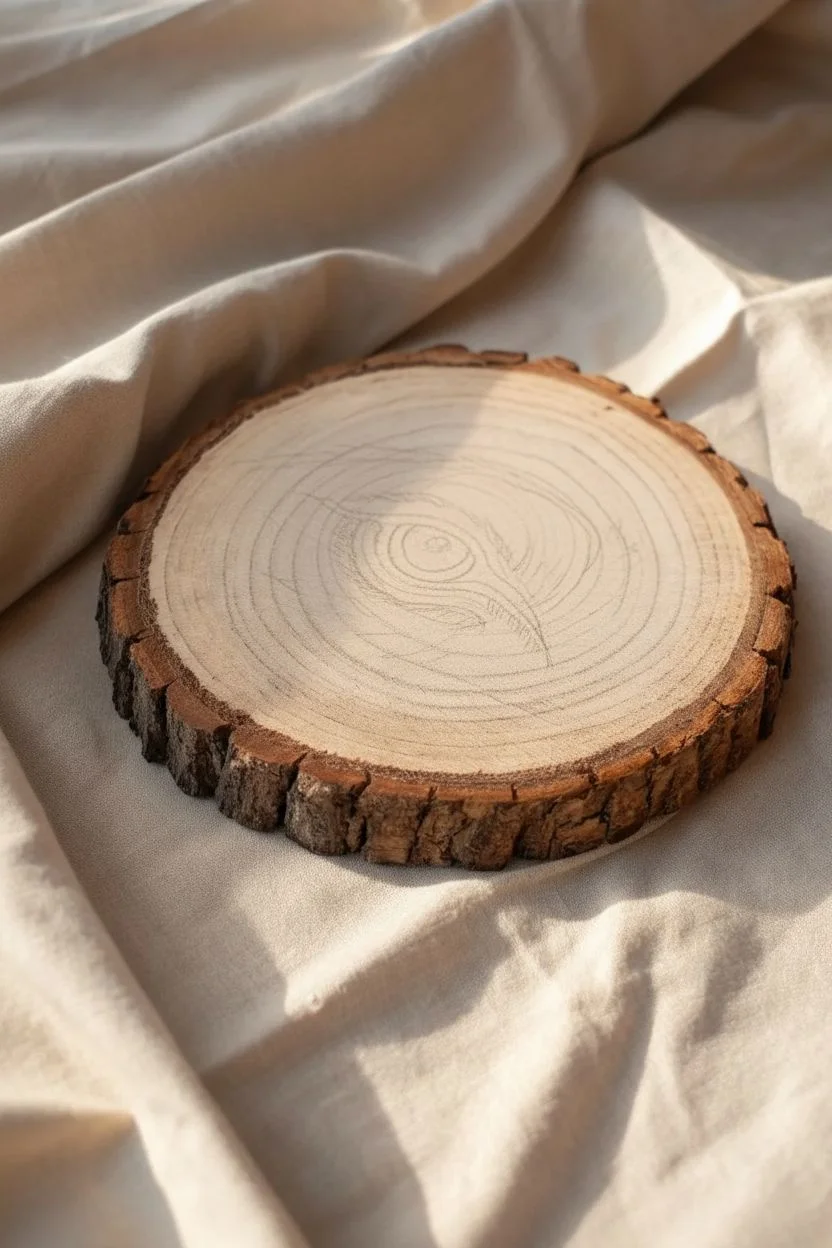
Step 1: Surface Prep & Sketching
-
Smooth the Canvas:
Begin by sanding the face of your wood slice with fine-grit sandpaper until it feels satin-smooth to the touch, ensuring the paint glides on effortlessly without snagging on splinters. -
Clear the Dust:
Wipe the surface thoroughly with a dry cloth or tack cloth to remove every particle of sawdust; even tiny dust specks can ruin the smoothness of the eye details later. -
Outline the Shape:
Lightly sketch the almond shape of the eye in the center of the wood slice, keeping your pencil lines faint so they won’t show through the yellow paint. -
Define the Pupil:
Draw the circular pupil in the center of the iris, and mark out the inner tear duct area and the general flow of the surrounding fur.
Step 2: Painting the Eye
-
Base the Iris:
Fill in the iris area with Yellow Ochre, applying two thin coats if necessary to get solid coverage over the wood grain. -
Adding Depth:
While the yellow is still slightly damp, blend a small amount of Burnt Sienna around the outer edges of the iris to create a shadowed, spherical effect. -
The Pupil:
Paint the pupil solid Mars Black, using your smallest brush to keep the edges crisp and perfectly round. -
Iris Details:
Using a 000 brush mixed with watered-down Raw Umber, paint tiny, hair-thin lines radiating from the pupil outward to mimic the muscle fibers of the iris. -
Rim the Eye:
Outline the entire eye shape with thick, dark black, paying special attention to the tear duct area which should be sharp and pointed.
Natural Texture
Don’t try to completely cover the wood texture on the outer edges. Allowing the grain to serve as the ‘skin’ tone creates a beautiful integration between art and canvas.
Step 3: Creating Texture
-
Fur Foundation:
Mix a wash of Raw Umber and water, then gently paint the area surrounding the eye where the fur begins; I like to keep this layer translucent so the wood grain still peeks through. -
Directional Strokes:
Using undiluted paint now, create short, flicking brushstrokes radiating away from the eye rim to simulate fur layers, following the pencil guides you sketched earlier. -
Dark Accents:
Add concentration of black and dark brown strokes along the upper eyelid area to create a ‘heavy brow’ look, which gives the eye an intense expression. -
Lighter Contrasts:
Mix Titanium White with a touch of Yellow Ochre and add highlight strokes in the fur below the eye and near the tear duct to add volume. -
Feather the Edges:
As you move further away from the eye, space out your brushstrokes and lift the pressure, allowing the painting to fade organically into the raw wood around the perimeter.
Stray Paint?
If acrylic paint accidentally lands on the bare wood area, try to wipe it immediately with a damp Q-tip. Sanding it off later can leave a visible light spot.
Step 4: The Spark of Life
-
The Catchlight:
This is crucial: place a sharp, pure Titanium White loose dot overlapping the pupil and the iris at the ’10 o’clock’ position to make the eye look wet and alive. -
Lower Highlight:
Add a faint, curved reflection on the opposite side of the iris (around 4 o’clock) using a very diluted white or pale yellow. -
Final Adjustments:
Step back and check contrast; if the fur looks too flat, deepen the shadows right next to the eyelid with your finest brush and black paint. -
Seal the Art:
Allow the painting to dry completely for at least 24 hours, then apply a matte spray sealer to protect the wood and paint from humidity.
Display your new wood slice art on a small easel or add a hook to watch over your room.
Double Exposure Landscapes

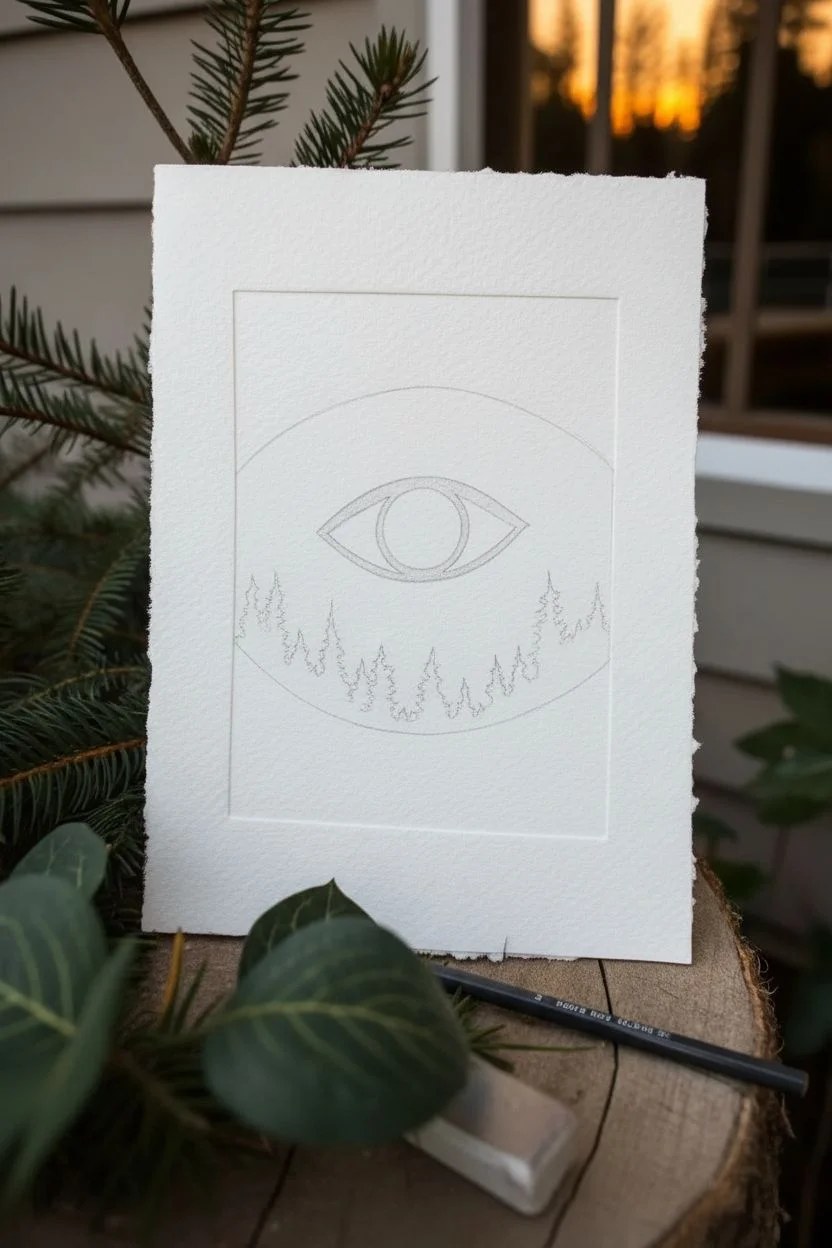
Capture the mystic beauty of nature with this surreal watercolor painting that merges a sunset landscape with a striking eye silhouette. This project plays with negative space and bold contrasts to create a window into a fiery forest soul.
Step-by-Step Tutorial
Materials
- Cold-press watercolor paper (300gsm)
- Watercolor paints (Violet, Magenta, Cadmium Orange, Lemon Yellow)
- Opaque black gouache or waterproof black ink
- Round watercolor brush (size 6)
- Fine detail brush (size 0 or 1)
- Pencil and kneaded eraser
- Masking fluid (optional)
- Ruler
Step 1: Sketching the Composition
-
Define the boundary:
Lightly sketch a large oval shape in the center of your paper to act as the vignette frame for your landscape. -
Draw the eye:
In the upper-middle section of the oval, sketch a wide, stylized almond shape for the eye. -
Place the iris:
Inside the eye, draw a perfect circle in the center. This will become the setting sun. -
Mark the treeline:
Sketch a rough, uneven line across the bottom third of the oval to indicate where the tops of the trees will sit.
Step 2: Painting the Sunset Sky
-
Protect the white:
If you have masking fluid, apply it carefully to the white ‘sclera’ areas of the eye (outside the iris but inside the almond shape). If not, just paint carefully around this area. -
Wet the sky:
Brush clean water onto the sky area—this is everything inside the main oval, excluding the eye shape and the bottom treeline area. -
Apply violet hues:
Load your round brush with deep violet and drop it into the very top curve of the oval, letting it bleed downwards. -
Blend the mid-tones:
While the violet is wet, introduce magenta just below it, blending the two colors softly to create a transition. -
Add warmth:
Near the bottom of the sky (just above where the trees will be), paint horizontal strokes of orange and yellow to mimic a glowing horizon. -
Paint the iris sun:
Switch to your smaller brush and paint the circular iris solid tangerine orange, perhaps lightening to yellow at the very center for a glow effect. -
Let it dry:
Wait for the paint to dry completely. I like to let this step sit for at least 20 minutes so the black ink next won’t bleed.
Crisp Lines Pro Tip
For the sharpest geometric shapes like the eye outline and iris circle, stabilize your painting hand by resting your wrist on a clean scrap of paper while you work.
Step 3: Silhouettes and Details
-
Outline the eye:
Using black gouache or ink and your detail brush, carefully paint a bold, consistent outline around the entire almond eye shape. -
Create the pupil tree:
Paint a single, tall pine tree silhouette directly in the center of the orange iris. The tip should just touch the top outline of the eye. -
Start the forest:
Begin painting the tree silhouettes along the bottom curve. Start with a solid black mass at the very bottom to anchor the image. -
Define tree shapes:
Work your way up from the solid black mass, using the tip of your detail brush to flick pine branches outward, creating pointy triangular tree tops. -
Vary the heights:
Make the trees on the far left and right taller, curving up to frame the eye, while keeping the trees in the middle slightly shorter. -
Layering density:
Ensure the black is fully opaque. If your watercolor dries greyish, apply a second layer or switch to ink for that deep, crisp silhouette look.
Level Up: Golden Hour
Swap the yellow watercolor in the iris/sun for a metallic gold watercolor paint. It will catch the light beautifully and give the ‘pupil’ a magical, glowing quality.
Step 4: Refining the edges
-
Remove masking:
If you used masking fluid, gently rub it away now to reveal the stark white paper of the eye. -
Clean up borders:
Erase any visible pencil lines around the main oval boundary for a clean, floating look. -
Optional deckle edge:
To match the reference photo’s rustic look, place a ruler against the paper edge and tear the paper upward against it to create a rough, deckled border.
Frame your mystical landscape and enjoy the conversation it sparks


Have a question or want to share your own experience? I'd love to hear from you in the comments below!