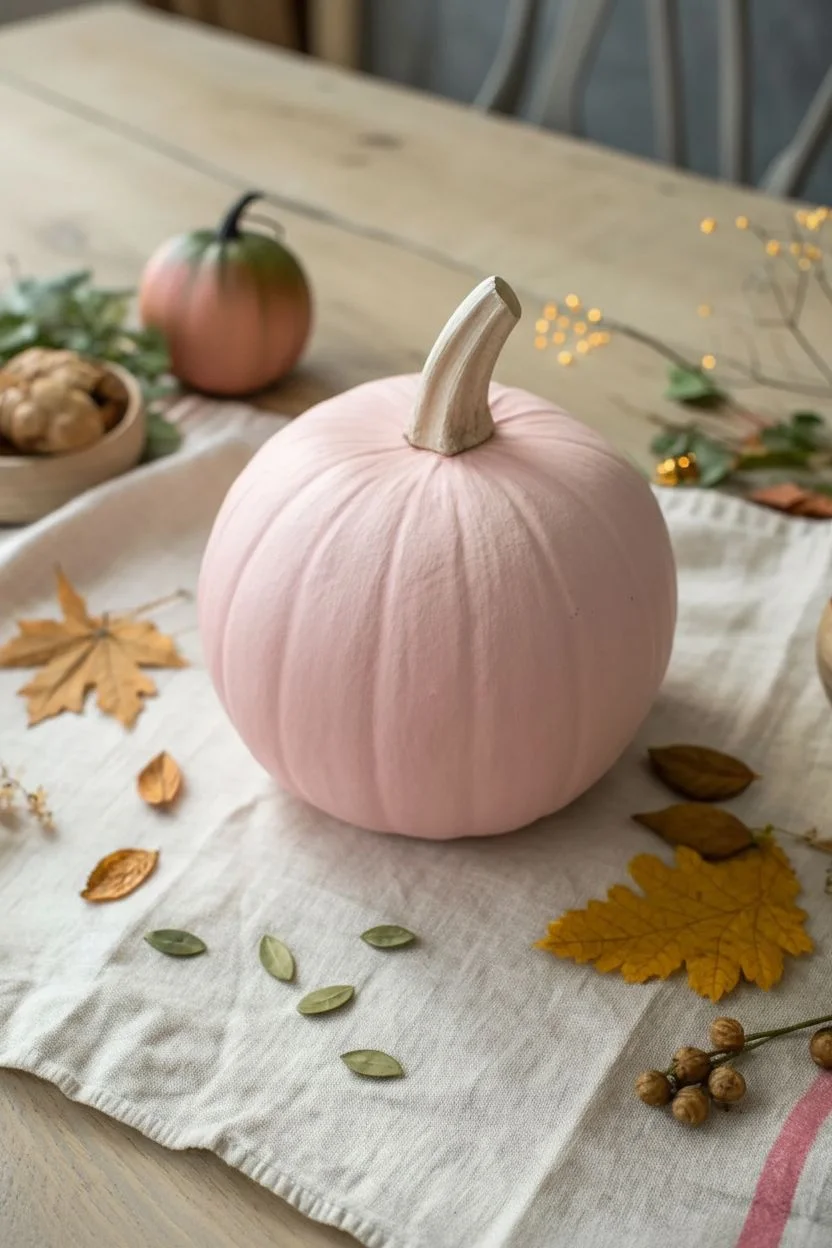
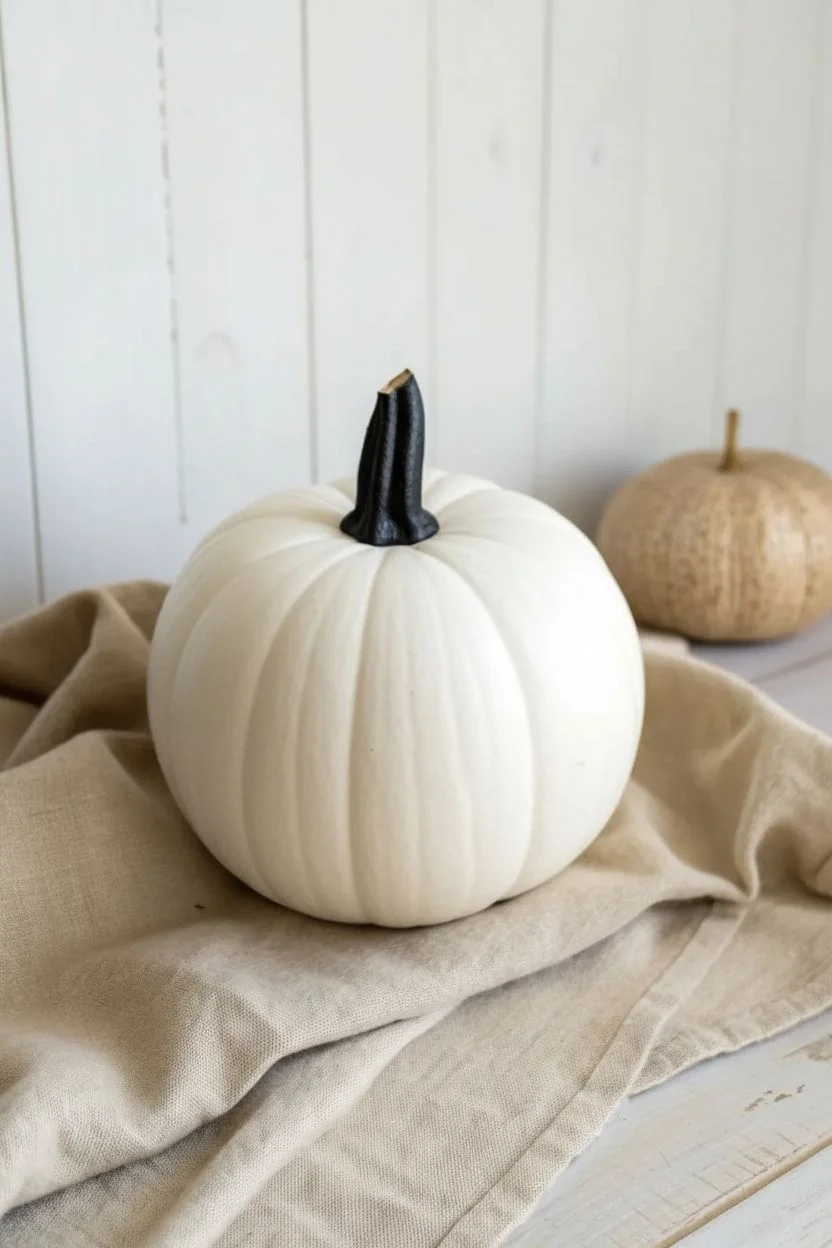
There is something incredibly charming about turning a round orange gourd into a whimsical barnyard character using just a bit of paint and imagination. Whether you want to craft a spotted cow pumpkin or a flock of cotton-covered sheep, these rustic projects are perfect for adding a touch of country warmth to your autumn porch.
The Classic Spotted Holstein
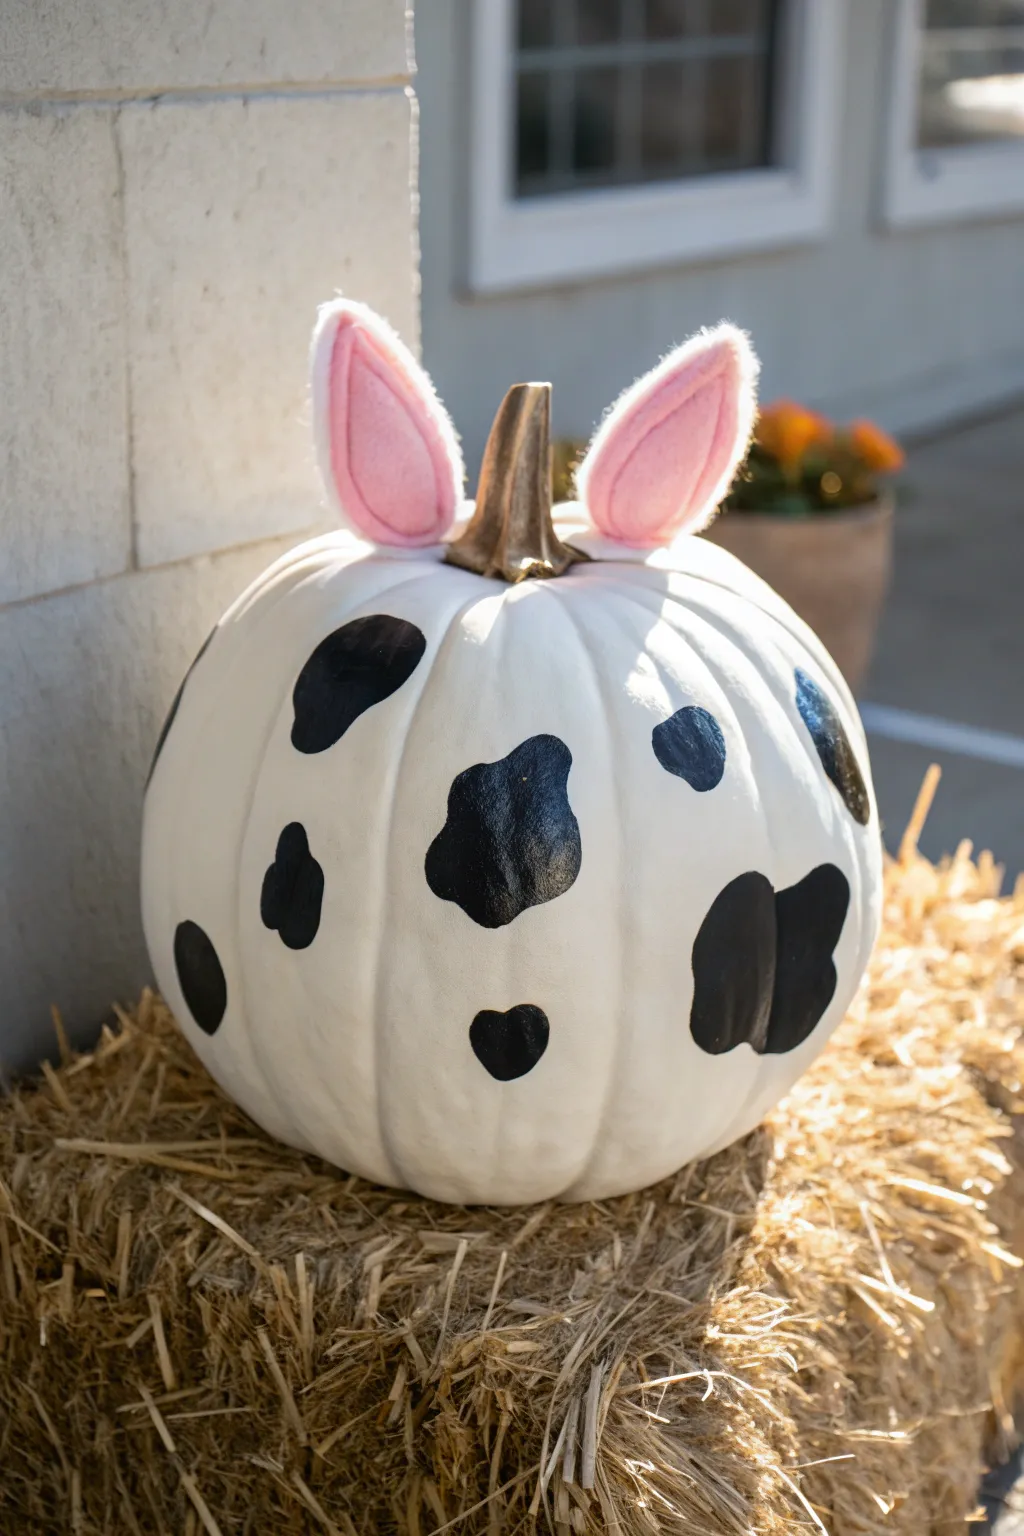
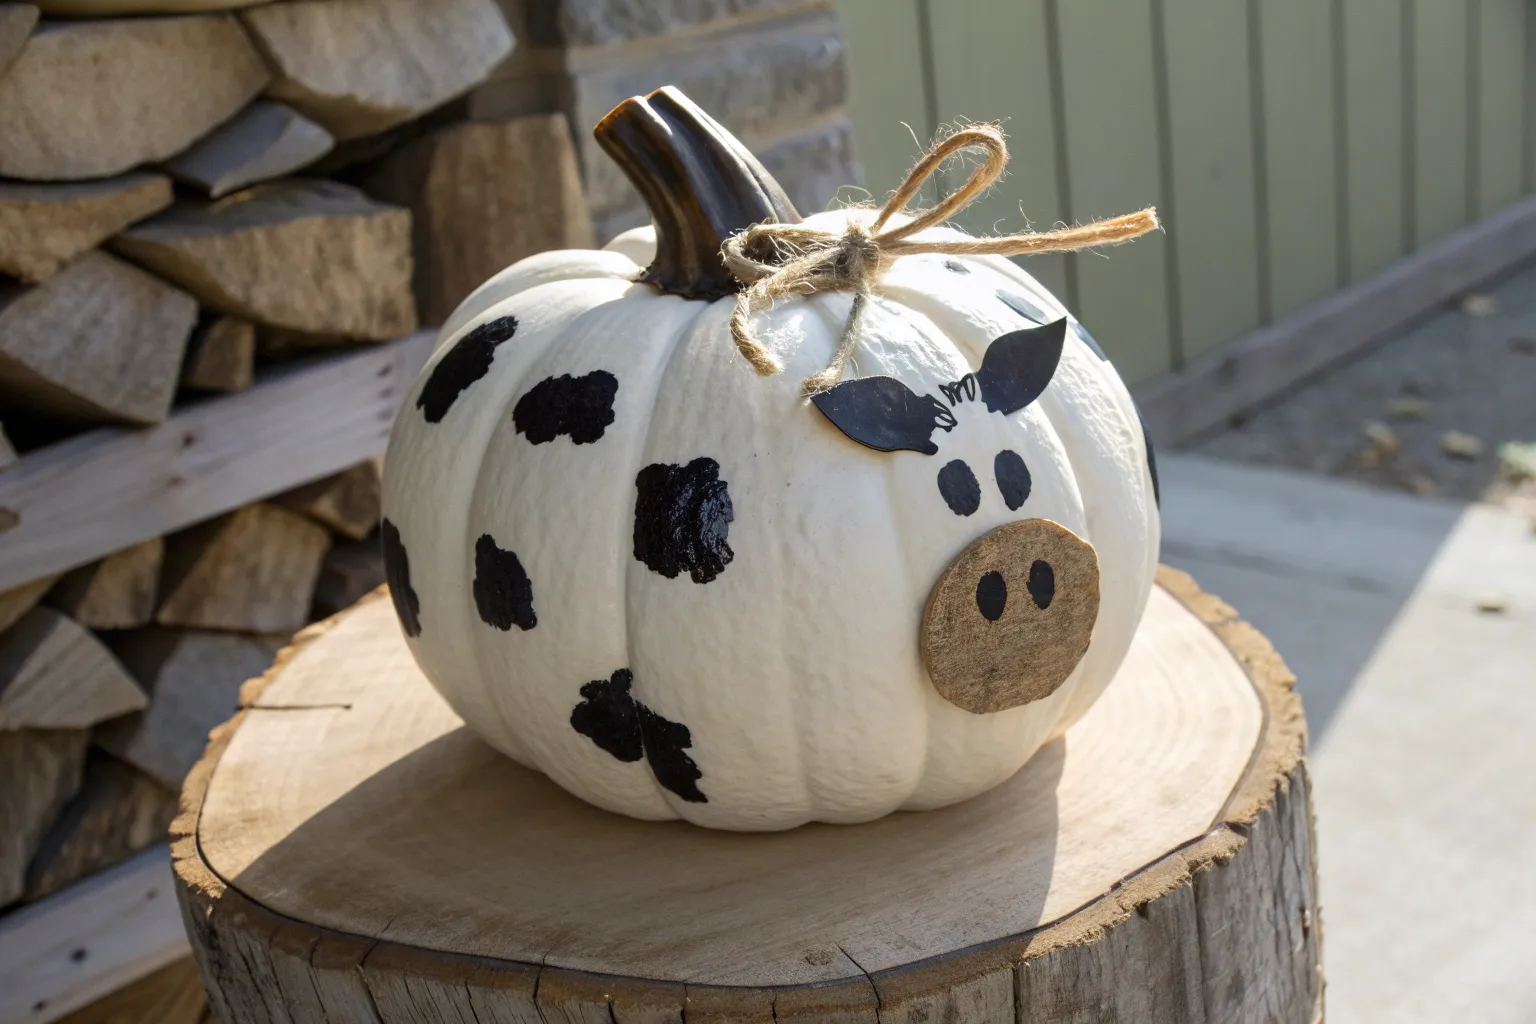
Transform a plain pumpkin into a charming barnyard friend with this delightful Holstein cow design. The crisp white background features playful organic black spots and a metallic gold stem, while soft pink felt ears add an adorable 3D finish.
Step-by-Step Guide
Materials
- White craft pumpkin (or real white pumpkin)
- Black acrylic paint
- Metallic gold acrylic paint
- Pink stiff felt sheet
- White stiff felt sheet
- Hot glue gun and glue sticks
- Medium round paintbrush
- Fabric scissors
- Pencil
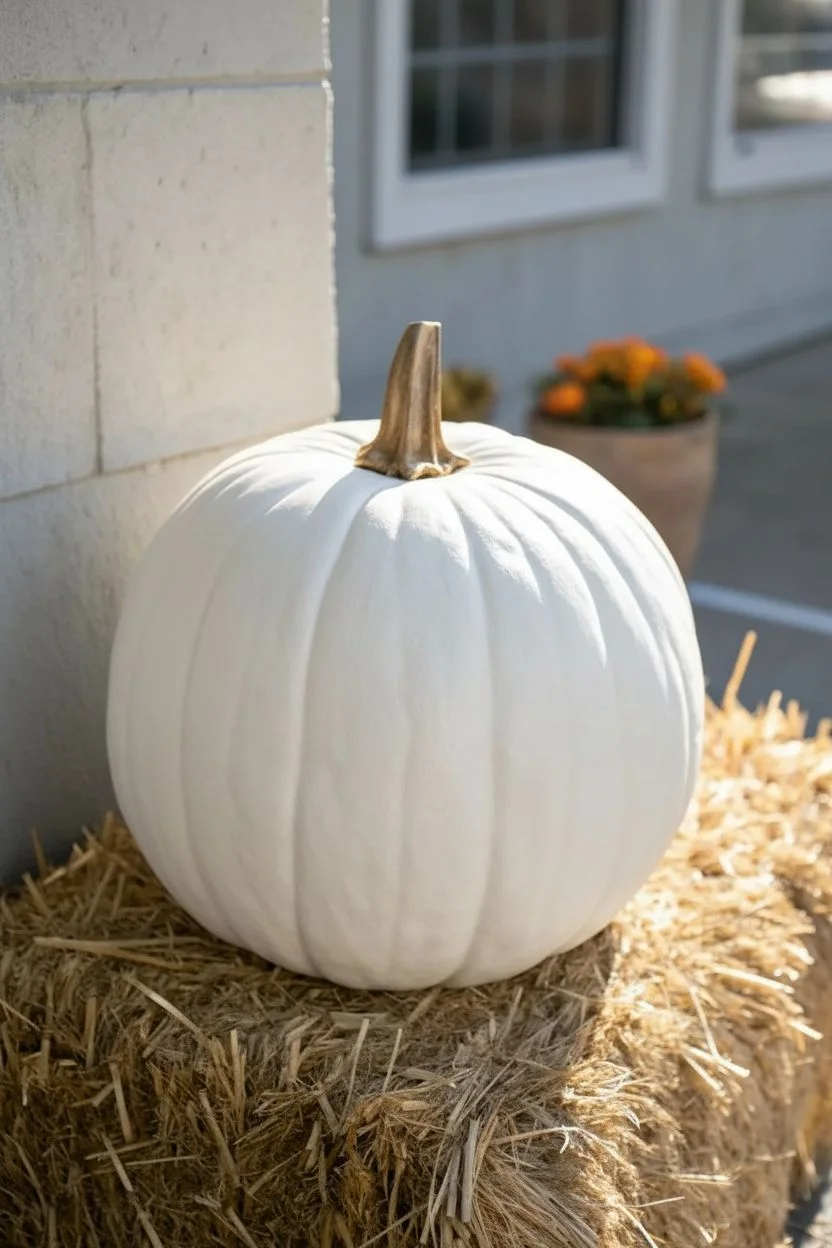
Step 1: Base Preparation
-
Clean the surface:
Wipe down your pumpkin with a damp cloth to remove any dust or oils. If you are using an orange pumpkin, paint the entire surface with two coats of white acrylic paint and let it dry completely. -
Gild the stem:
Using a small brush, coat the pumpkin stem with metallic gold or bronze acrylic paint. I find this adds a lovely elegant contrast to the rustic cow print. -
Allow to dry:
Let the white base (if painted) and the gold stem dry fully before moving on to the pattern to prevent smudging.
Spot Trouble?
If your black edges are too jagged, use a fine liner brush with a tiny bit of white paint to clean up and smooth out the perimeter of the spots.
Step 2: Painting the Spots
-
Sketch the pattern:
Lightly draw irregular blob shapes all around the pumpkin using a pencil. Make them vary in size to mimic a natural cow hide. -
Include a hidden detail:
Draw one small heart-shaped spot near the bottom center, just like the pumpkin in the image, for a sweet touch. -
Fill the large spots:
Dip your medium round brush into black acrylic paint and carefully fill in the larger outlined shapes first. -
Paint smaller accents:
Fill in the smaller spots and the heart shape. Use the tip of the brush to keep the edges smooth but organic. -
Apply a second coat:
Once the first layer of black paint is dry to the touch, apply a second coat if needed to ensure the spots are solid and opaque.
Level Up
Tie a rustic jute twine bow around the base of the gold stem or add a small cowbell for an extra dose of farmhouse character.
Step 3: Crafting the Ears
-
Cut the outer ears:
Cut two teardrop shapes from the white felt, approximately 3 inches tall. These will form the back of the ears. -
Cut the inner ears:
Cut two slightly smaller teardrop shapes from the pink felt to serve as the inner ear detail. -
Layer the felt:
Use a small amount of hot glue to attach the pink felt pieces directly onto the center of the white felt pieces. -
Shape the ears:
Pinch the bottom point of each ear assembly together to create a curve. Add a drop of hot glue inside the pinch to hold this cupped shape permanently. -
Attach to the pumpkin:
Apply a generous dab of hot glue to the bottom pinched edge of each ear. Press them firmly onto the top of the pumpkin, flanking the gold stem. -
Secure the hold:
Hold the ears in place for about 30 seconds until the glue cools and hardens, ensuring they stand upright without flopping.
Place your adorable cow pumpkin on a bale of hay to welcome guests with a smile


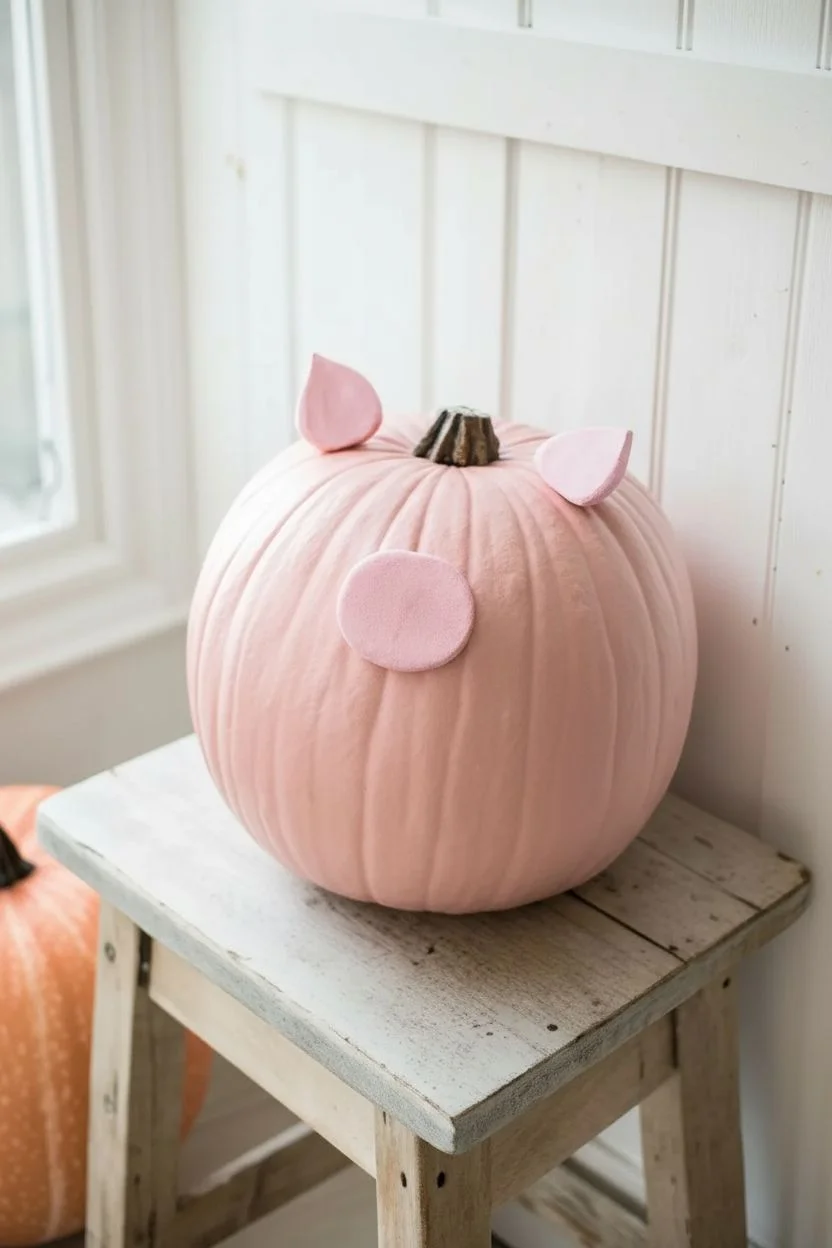
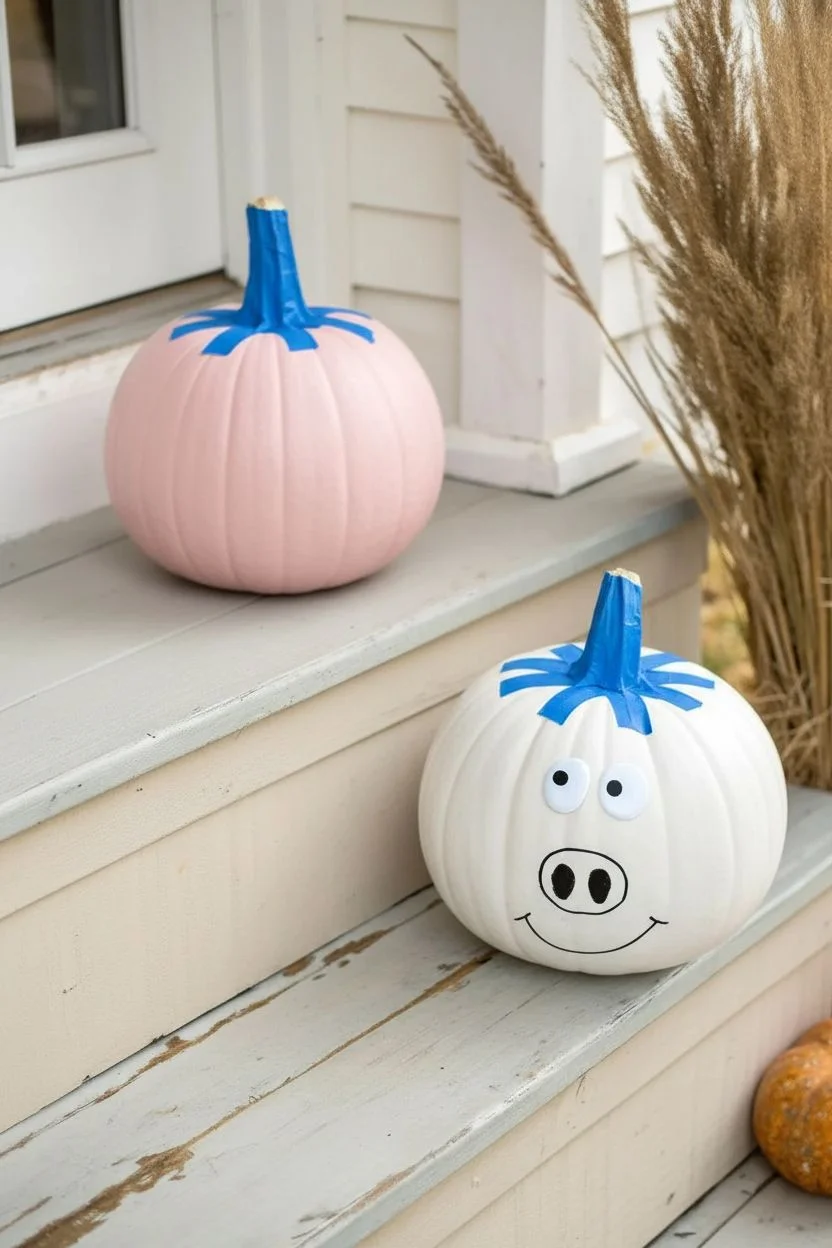
Pink Piglets on Their Side
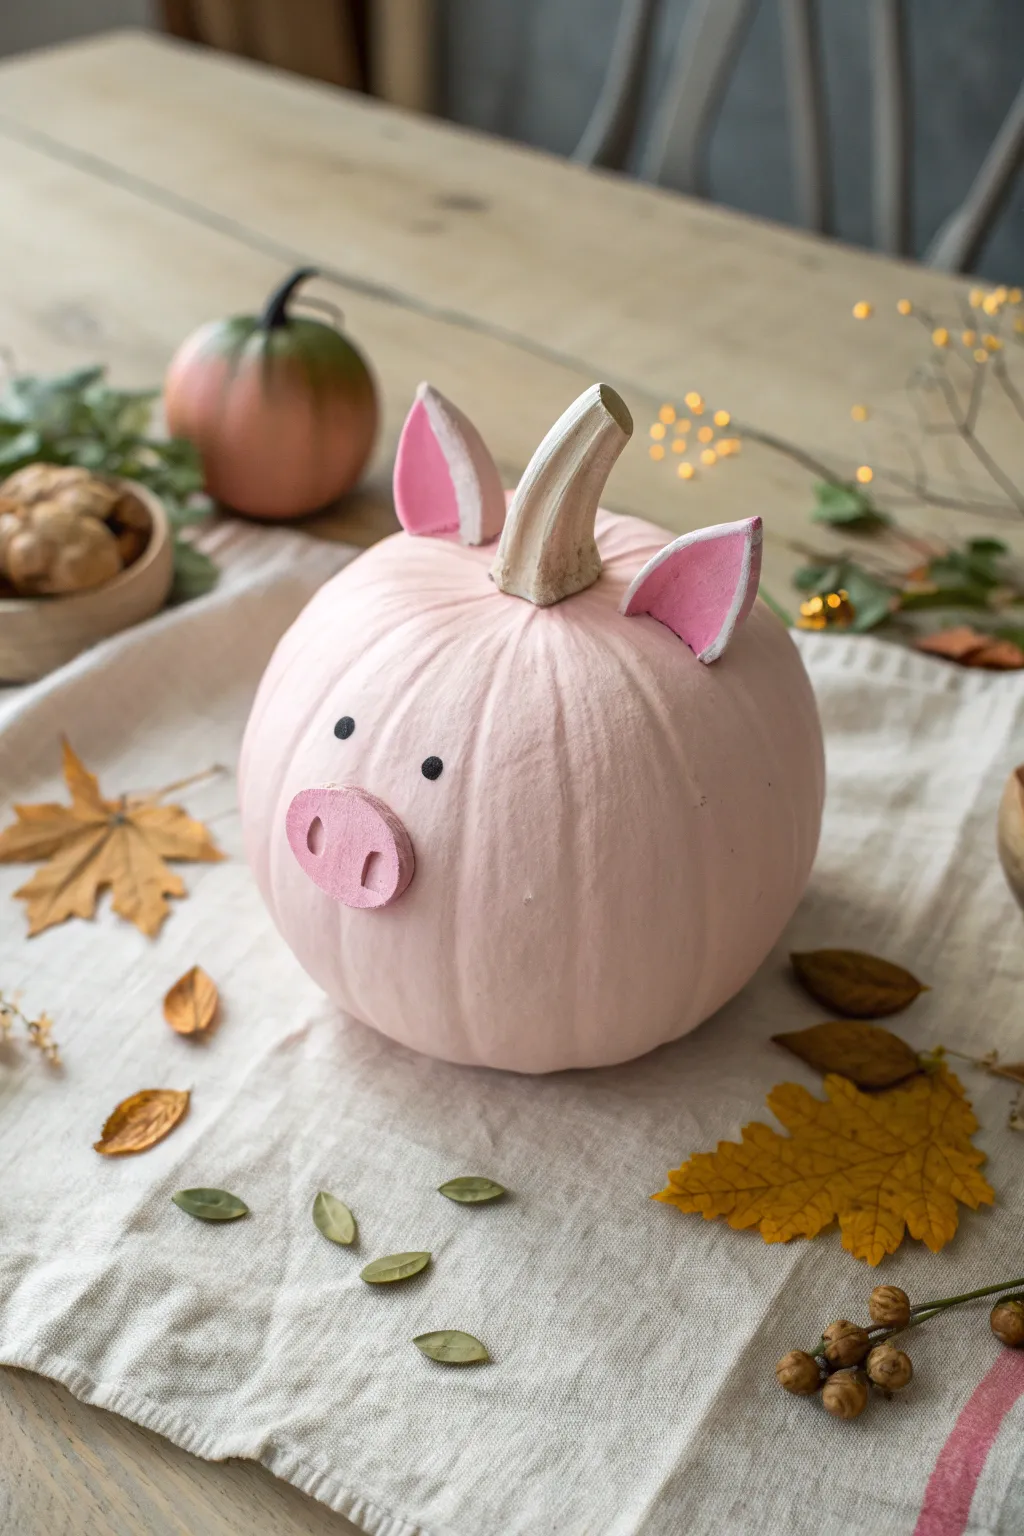
Transform a standard pumpkin into a farmyard favorite with soft pink pastels and simple craft foam details. This adorable piglet design uses a matte finish and minimalist features to create a modern, sweet decoration perfect for autumn.
Detailed Instructions
Materials
- Medium pumpkin (real or faux)
- White acrylic primer (optional)
- Pale pink acrylic paint
- Darker pink craft foam or felt
- Light pink craft foam or felt
- Black acrylic paint
- Foam paint brush
- Small liner brush or dotting tool
- Hot glue gun and glue sticks
- Scissors
- Pencil
- Painter’s tape
Step 1: Base Preparation
-
Clean surface:
Wipe down your pumpkin with a damp cloth to remove any dirt or oils, ensuring the paint adheres properly. -
Protect the stem:
Wrap a piece of painter’s tape around the base of the stem to keep it natural and paint-free. -
Prime the surface:
If you are using a bright orange pumpkin, apply a thin coat of white primer first to help the pastel pink pop. -
First coat:
Using a foam brush, apply a layer of pale pink acrylic paint over the entire body of the pumpkin. -
Drying time:
Allow the paint to feel dry to the touch, usually about 15 to 20 minutes. -
Opaque coverage:
Apply a second or third coat of pink until you achieve a solid, even matte color without streaks. -
Remove tape:
Carefully peel off the painter’s tape from the stem while the final coat is still slightly tacky to prevent peeling.
Step 2: Crafting Features
-
Sketch ears:
Draw two large triangles on the light pink craft foam for the outer ears. -
Inner ear details:
Sketch two slightly smaller triangles on the darker pink foam or felt to create the inner ear depth. -
Cut shapes:
Use scissors to cut out all four triangle shapes cleanly. -
Assemble ears:
Glue the dark pink triangles into the center of the light pink triangles using a small dot of hot glue. -
Create snout base:
Cut a horizontal oval shape from a thick piece of craft foam or a scrap of cardboard. -
Paint snout:
Paint this oval with a slightly darker shade of pink than the body to make it stand out. -
Add nostrils:
Using a small brush, paint two vertical dark pink or black lines on the snout oval.
Paint Pro Tip
To get that super matte, chalky finish seen in the photo, mix a tiny amount of baking soda into your acrylic paint before applying the final coat.
Step 3: Assembly & Finishing
-
Prepare glue gun:
Plug in your hot glue gun and let it heat up fully. -
Ear placement:
I like to fold the bottom edge of the foam ears back slightly to create a tab for easier gluing. -
Attach ears:
Glue the ears near the top of the pumpkin, close to the stem, angling them slightly outward. -
Attach snout:
Glue the painted snout to the front center of the pumpkin. -
Position eyes:
Visualize where the eyes should go, roughly halfway between the ears and the snout. -
Paint eyes:
Dip the handle end of a paintbrush into black paint and press it onto the pumpkin to create perfect round dot eyes.
Level Up
Don’t forget the back! Twist a pink chenille pipe cleaner around a marker to make a spiral, then hot glue it to the back for a curly pig tail.
Now you have a charming little piglet ready to greet guests throughout the harvest season.


Barnyard Totem Pole Stacking
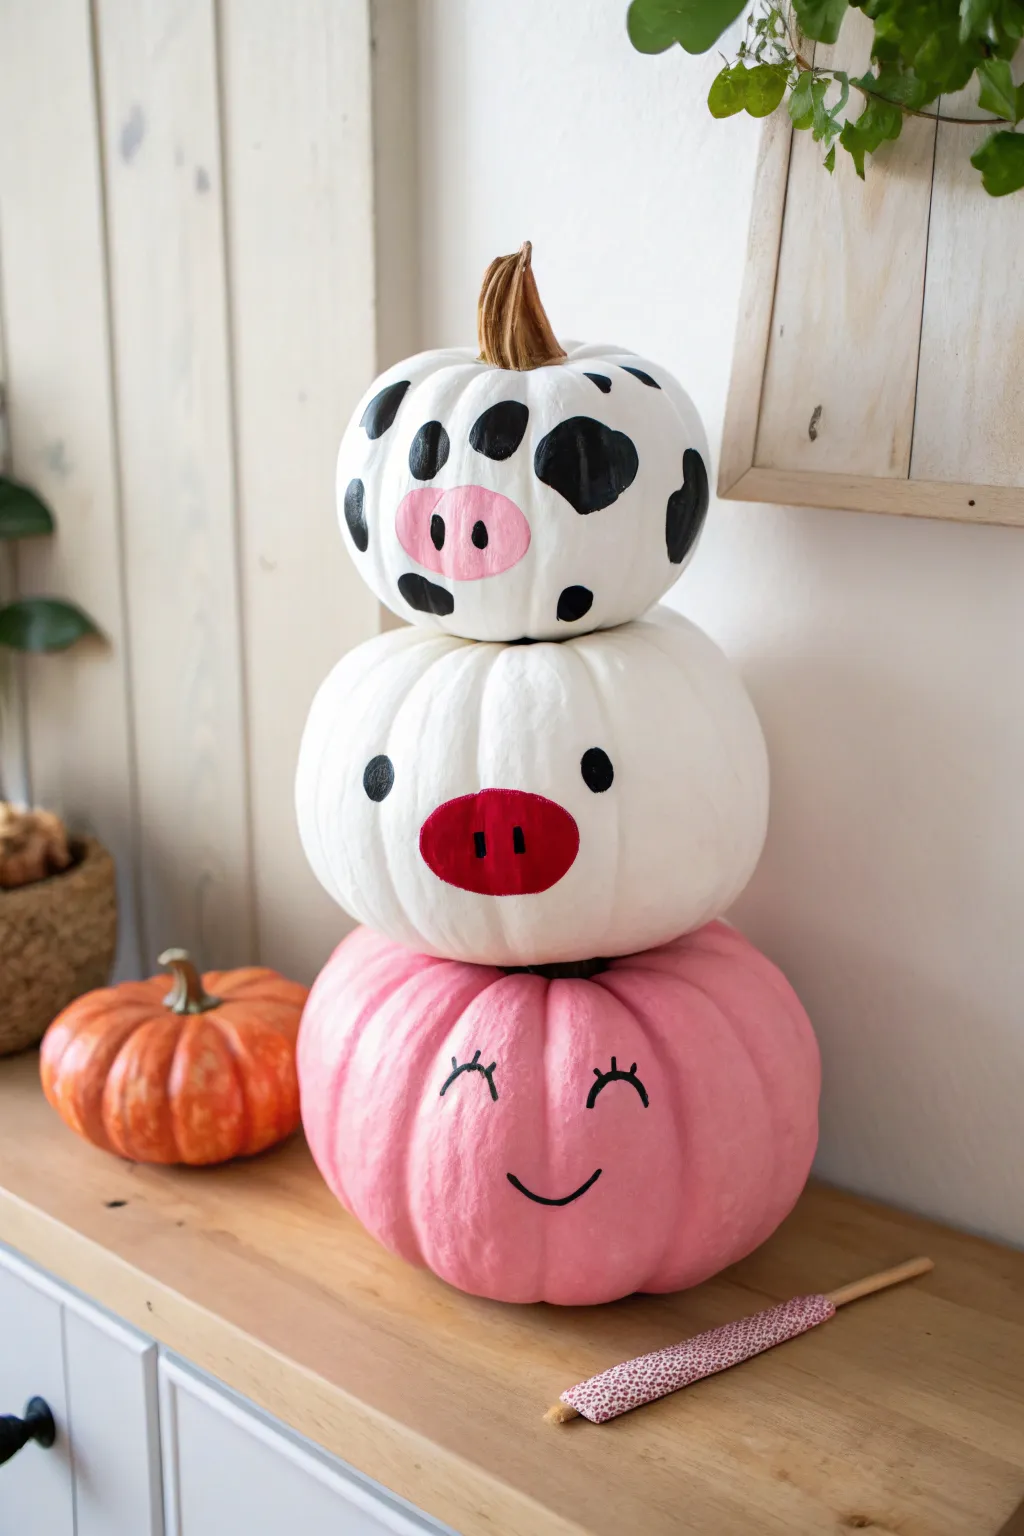
Bring rustic charm to your porch or mantel with this adorable trio of painted pumpkins stacked into a farm animal totem. This project features a cheerful pink pig base, a white piglet middle, and a spotted cow pattern on top for a whimsical finish.
How-To Guide
Materials
- 3 Faux pumpkins (Large, Medium, Small)
- Acrylic paint (White, Black, Candy Pink, Soft Pink, Red)
- Wide flat paintbrush
- Fine detail paintbrush
- Pencil
- Hot glue gun and glue sticks
Step 1: Setting the Base Colors
-
Prepare surfaces:
Wipe down your pumpkins with a damp cloth to remove any dust or oils that might prevent the paint from adhering properly. -
Coat the bottom pumpkin:
Using your wide flat brush, paint the largest pumpkin entirely with candy pink paint. You will likely need two coats for opaque coverage. -
Coat the upper pumpkins:
Paint the medium and small pumpkins with pure white acrylic paint. Apply multiple thin layers, allowing them to dry in between, until the finish is solid and streak-free. -
Let them cure:
Wait for all base coats to be completely dry to the touch before starting on the facial details.
Step 2: Painting the Cow Top
-
Block the snout:
On the smallest white pumpkin, paint a soft pink oval in the lower center to serve as the cow’s snout. -
Outline the spots:
Using a pencil, lightly sketch organic, wavy shapes around the rest of the white pumpkin to mimic cow spots. -
Fill the spots:
Use black paint to fill in your sketched spot outlines, being careful to keep the edges crisp against the white background. -
Add nostrils:
Once the pink snout is dry, use the handle end of a paintbrush or a dotting tool to stamp two black dots onto the pink oval.
Fixing the Wobble
If your stacked pumpkins won’t sit flush after removing the stems, carefully carve a small shallow hole in the bottom of the upper pumpkin for the lower pumpkin’s bump to nest into.
Step 3: The Middle White Piggy
-
Paint the nose:
On the medium white pumpkin, paint a bold red oval in the center. I prefer to make this slightly wider than the cow’s snout for variety. -
Detail the nose:
Once the red paint dries, paint two vertical black ovals inside the red area for the nostrils. -
Add eyes:
Dip a round brush or a large dotting tool in black paint and create two solid circle eyes spaced widely apart above the snout.
Level Up Your Cow
Paint the stem of the top pumpkin with metallic gold or bronze acrylic paint. This adds a chic farmhouse touch that contrasts beautifully with the black and white cow print.
Step 4: The Pink Base & Assembly
-
Sketch the face:
Lightly draw a simple happy face on the large pink pumpkin using a pencil first to ensure it’s centered. -
Line the eyes:
Using your finest detail brush and black paint, trace over your pencil lines to create two arched eyes with three small lashes on each. -
Paint the smile:
Paint a simple curved ‘U’ shape for the mouth below the eyes. -
Remove stems:
To ensure stable stacking, carefully pull out or cut off the stems from the large pink pumpkin and the medium white pumpkin. -
Assemble the totem:
Stack the pumpkins from largest to smallest. Apply a ring of hot glue between each layer to secure your barnyard stack permanently.
Place your charming animal stack in the entryway to greet guests with a farmhouse-style smile.


Felt Ear Attachments
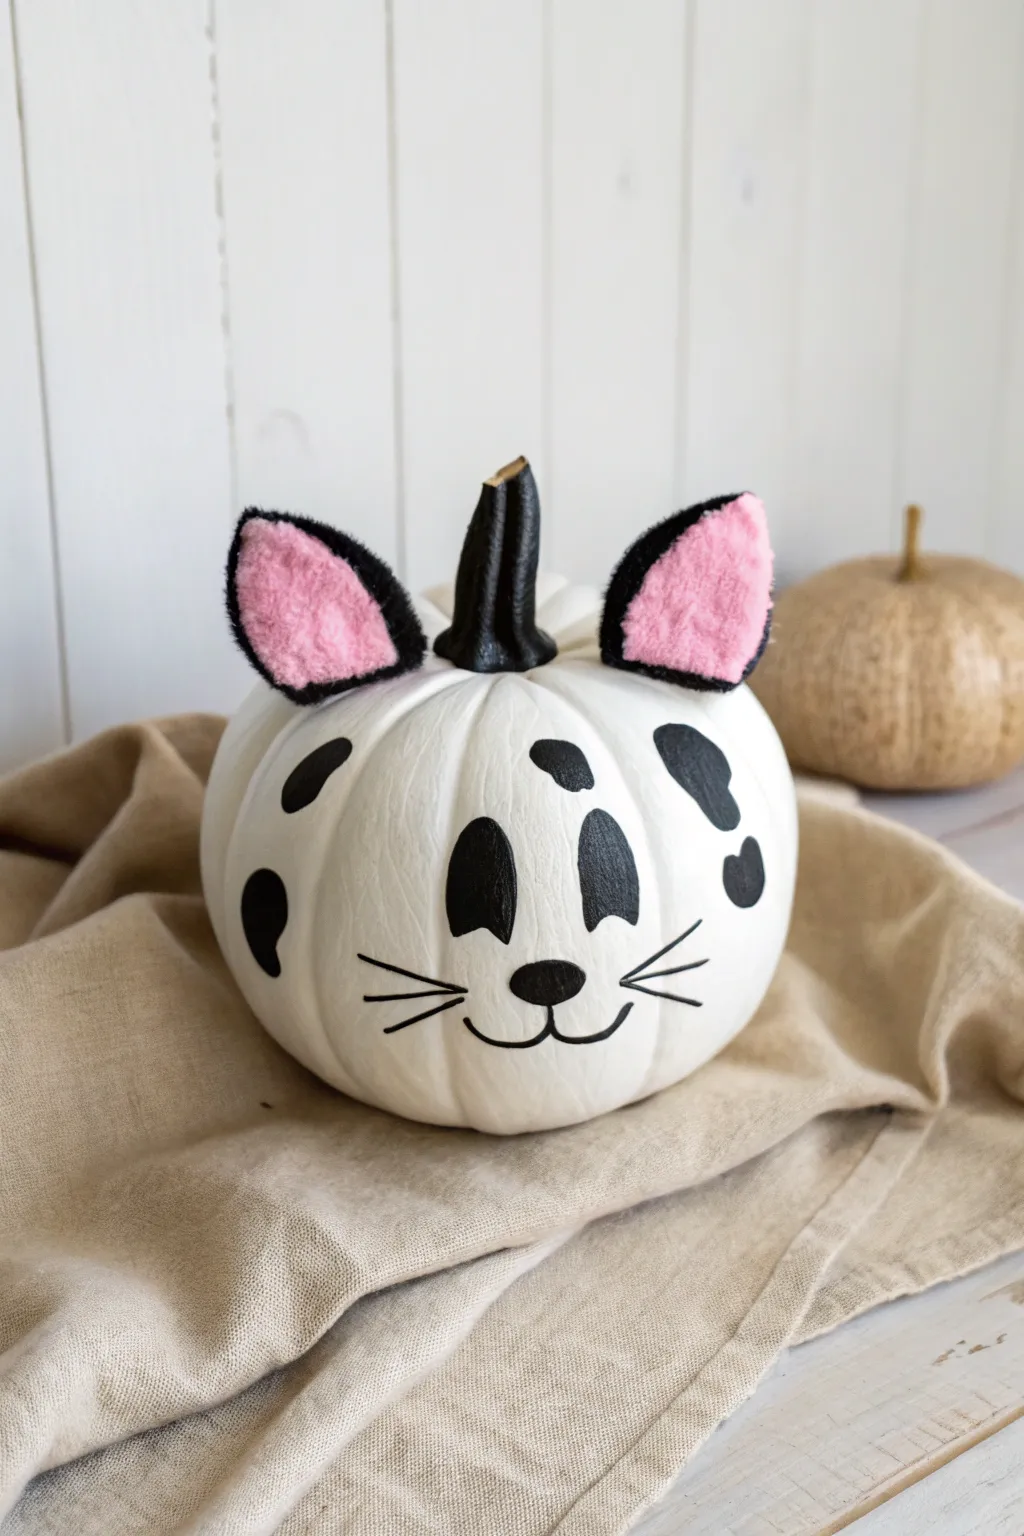
Transform a simple white gourd into a playful black-and-white spotted cat that fits perfectly into any farmhouse-themed display. This no-carve project combines smooth acrylic painting with textured felt accents for a charming, dimensional look.
Step-by-Step
Materials
- White craft pumpkin (medium size)
- Matte black acrylic paint
- Stiff black felt sheet
- Pink sherpa fabric or textured felt
- Hot glue gun and glue sticks
- Round paintbrush (size 4 or 6)
- Fine liner paintbrush (size 0 or 1)
- Pencil
- Scissors
Step 1: Base Prep
-
Clean surface:
Wipe down your white pumpkin with a damp cloth to remove any dust or oils, ensuring the paint adheres properly. -
Paint the stem:
Using your round brush and black acrylic paint, coat the entire stem of the pumpkin. I like to get into all the crevices of the stem first before smoothing out the surface. -
Dry the stem:
Allow the stem to dry completely before moving on to avoid smudging black paint onto the white skin.
Texture Tip
To exactly match the cozy look in the photo, ensure your pink fabric is ‘sherpa’ fleece or heavy wool felt rather than standard thin craft felt.
Step 2: Painting Features
-
Sketch the face:
Lightly sketch the facial features with a pencil. Draw two large, tall oval eyes, a rounded triangle nose, and the mouth anchor lines. -
Outline the spots:
Sketch a few organic, kidney-bean shaped spots on the upper sides and back of the pumpkin, leaving the face area clear. -
Fill the eyes:
Load your round brush with black paint and carefully fill in the eye outlines, keeping the edges smooth and crisp. -
Paint the nose:
Fill in the nose shape with solid black paint using the tip of your round brush. -
Detail the mouth:
Switch to your fine liner brush. Paint a vertical line down from the nose, curving outward to the left and right to create the smile. -
Add whiskers:
Using the liner brush, paint three thin, quick strokes extending horizontally from each cheek area. -
Fill the spots:
Switch back to the larger brush and fill in the irregular spots you sketched earlier on the sides of the pumpkin.
Clean Lines
If your hand shakes while painting the whiskers, dilute the black paint slightly with a drop of water. This helps the paint flow smoother for crisp lines.
Step 3: Felt Ears
-
Cut outer ears:
Cut two triangles out of the stiff black felt, each approximately 2.5 inches tall and 2 inches wide at the base. -
Round the tips:
Use scissors to slightly round off the top point and the bottom corners of the black triangles for a softer look. -
Cut inner ears:
Cut two slightly smaller triangles from the pink textured fabric, making them roughly half an inch smaller than the black pieces on all sides. -
Assemble ears:
Hot glue the pink triangles into the center of the black felt triangles. -
Shape the ears:
Place a small dot of glue at the bottom center of the ear and pinch the base slightly to give the ear a concave, realistic curve. -
Attach to pumpkin:
Apply a line of hot glue to the bottom edge of each ear. -
Final placement:
Press the ears firmly onto the top of the pumpkin, positioning them just behind the eyes and flanking the black stem.
Now you have a purr-fectly painted barn cat to add charm to your seasonal decor
BRUSH GUIDE
The Right Brush for Every Stroke
From clean lines to bold texture — master brush choice, stroke control, and essential techniques.
Explore the Full Guide
Baby Chicks Trio
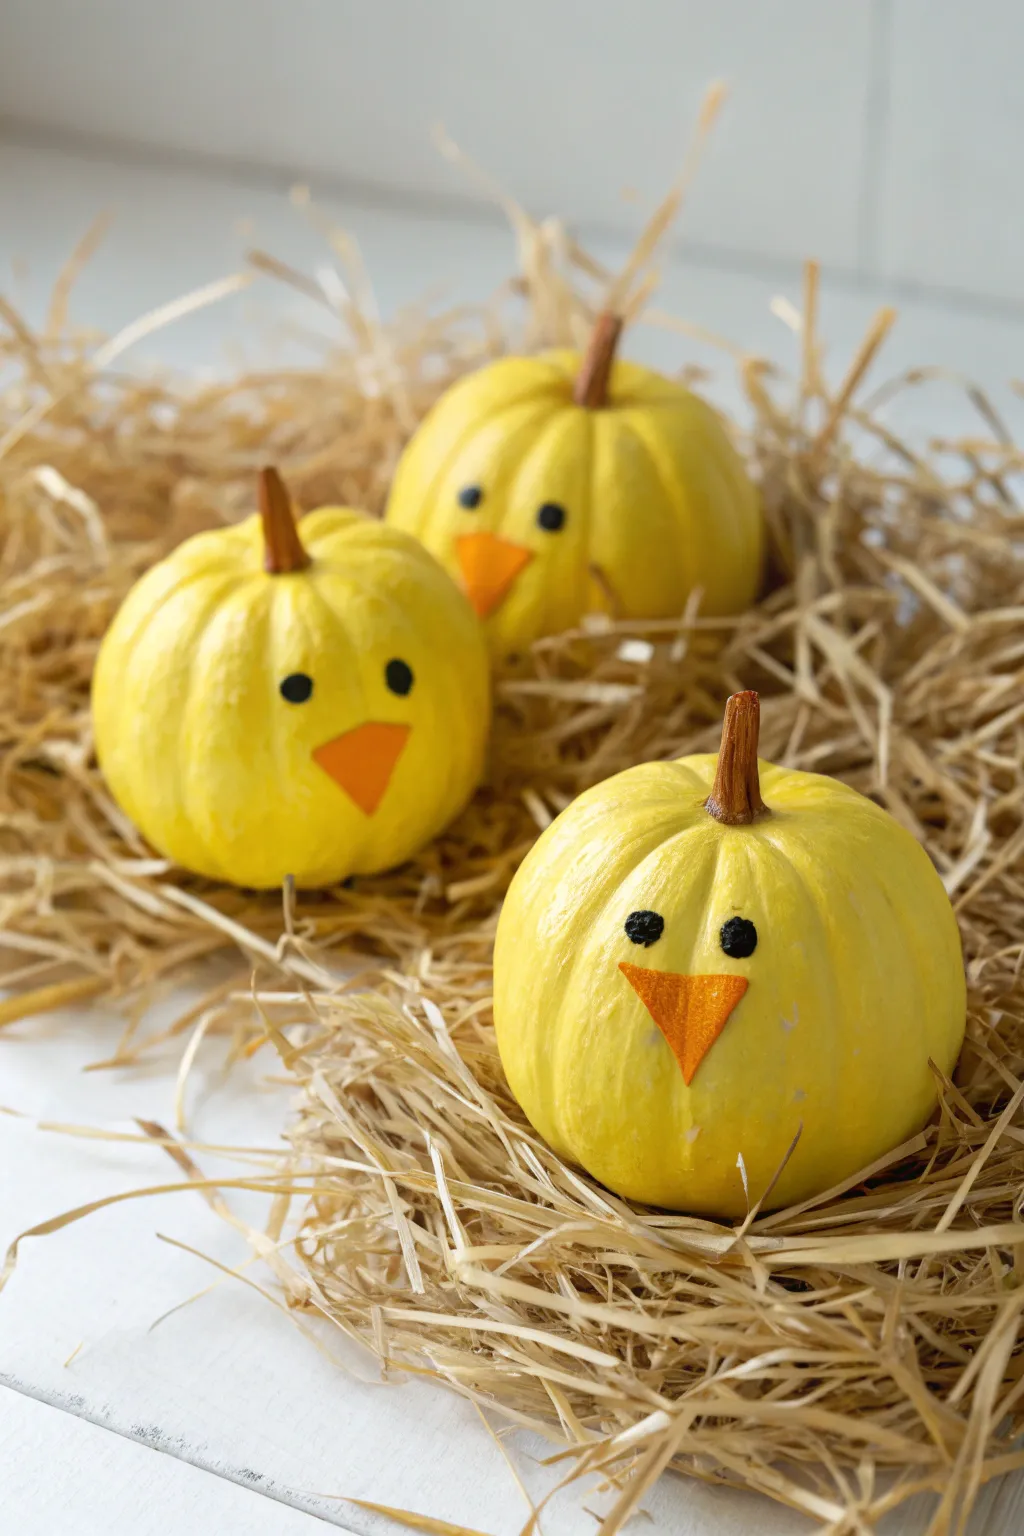

Transform a trio of mini pumpkins into adorable baby chicks perfect for a farm-themed display. These sunny yellow creations use simple shapes for a charming, minimalist look that brightens up any corner.
Step-by-Step Tutorial
Materials
- 3 mini pumpkins or gourds (white or orange)
- White surface cleaner
- Paper towels
- White acrylic primer (optional)
- Bright yellow acrylic paint
- Black acrylic paint
- Orange craft foam, felt, or cardstock
- Craft glue or low-temp hot glue gun
- Medium soft-bristle flat brush
- Small round detail brush
- Scissors
- Natural straw or hay for display
Step 1: Preparation and Base Coat
-
Clean surface:
Wipe down your mini pumpkins with a damp cloth and a little surface cleaner to remove any dirt or oily residue from the field. -
Dry thoroughly:
Dry them completely with a paper towel, as acrylic paint will not adhere well to a damp or waxy rind. -
Prime the surface:
If your pumpkins are dark orange or spotted, apply a base coat of white acrylic primer to help the yellow paint appear true to color later. -
First yellow coat:
Squeeze out a generous amount of bright yellow acrylic paint and apply the first layer using a medium flat brush, brushing vertically from the top down. -
Avoid the stem:
Work carefully around the stem base, keeping the stem natural brown to mimic the chick’s head feathers or crown. -
Dry and repeat:
Let the first coat dry completely; yellow pigment is notoriously translucent, so don’t worry if it looks streaky at first. -
Build opacity:
Apply a second and likely a third coat of yellow, allowing ample drying time between layers, until you achieve a solid, opaque lemon color. -
Paint the bottom:
Once the sides are dry to the touch, flip the pumpkins over to paint the bottom surface so no orange rind shows through.
Streaky Yellow?
Yellow paint is often sheer. Instead of applying thick globs, use multiple thin, even layers and let them dry fully in between to prevent lifting the wet paint underneath.
Step 2: Face and Features
-
Prep the beak material:
While the final coat of yellow paint cures, grab your orange craft foam or stiff felt. -
Cut beaks:
Cut out three small triangles, approximately half an inch tall and equally wide, to serve as the beaks. -
Position eyes:
Switch to a small round detail brush and dip the very tip into black acrylic paint. -
Paint first eye:
Press the brush gently onto the pumpkin surface to create a small, neat circular dot for the left eye, placing it somewhat wide on the ‘face’. -
Paint second eye:
Repeat for the right eye, checking for symmetry and keeping them level with one another. -
Attach the beak:
Place a small dot of craft glue on the back of an orange triangle cutout. -
Secure the beak:
Press the beak firmly onto the center of the pumpkin, positioned centered between and slightly below the eyes. -
Check adhesion:
Hold the beak in place for a few seconds to ensure the glue tacks so it doesn’t slide down the curved surface.
Feathery Texture
To add dimension, use a dry stencil brush to dab a slightly lighter shade of yellow over the body, creating a fuzzy, down-like texture before adding the face.
Step 3: Final Assembly
-
Repeat for trio:
Repeat the face application steps for the remaining two pumpkins to complete your little family. -
Prepare the nest:
Take a handful of natural straw or hay and arrange it loosely in a circular shape on your table or tray. -
Nestle the chicks:
Place the three finished pumpkins into the straw, tilting them slightly at different angles to give them personality.
Enjoy your flock of sunny pumpkin chicks as they bring a bright pop of color to your seasonal decor
The Muddy Pig Technique
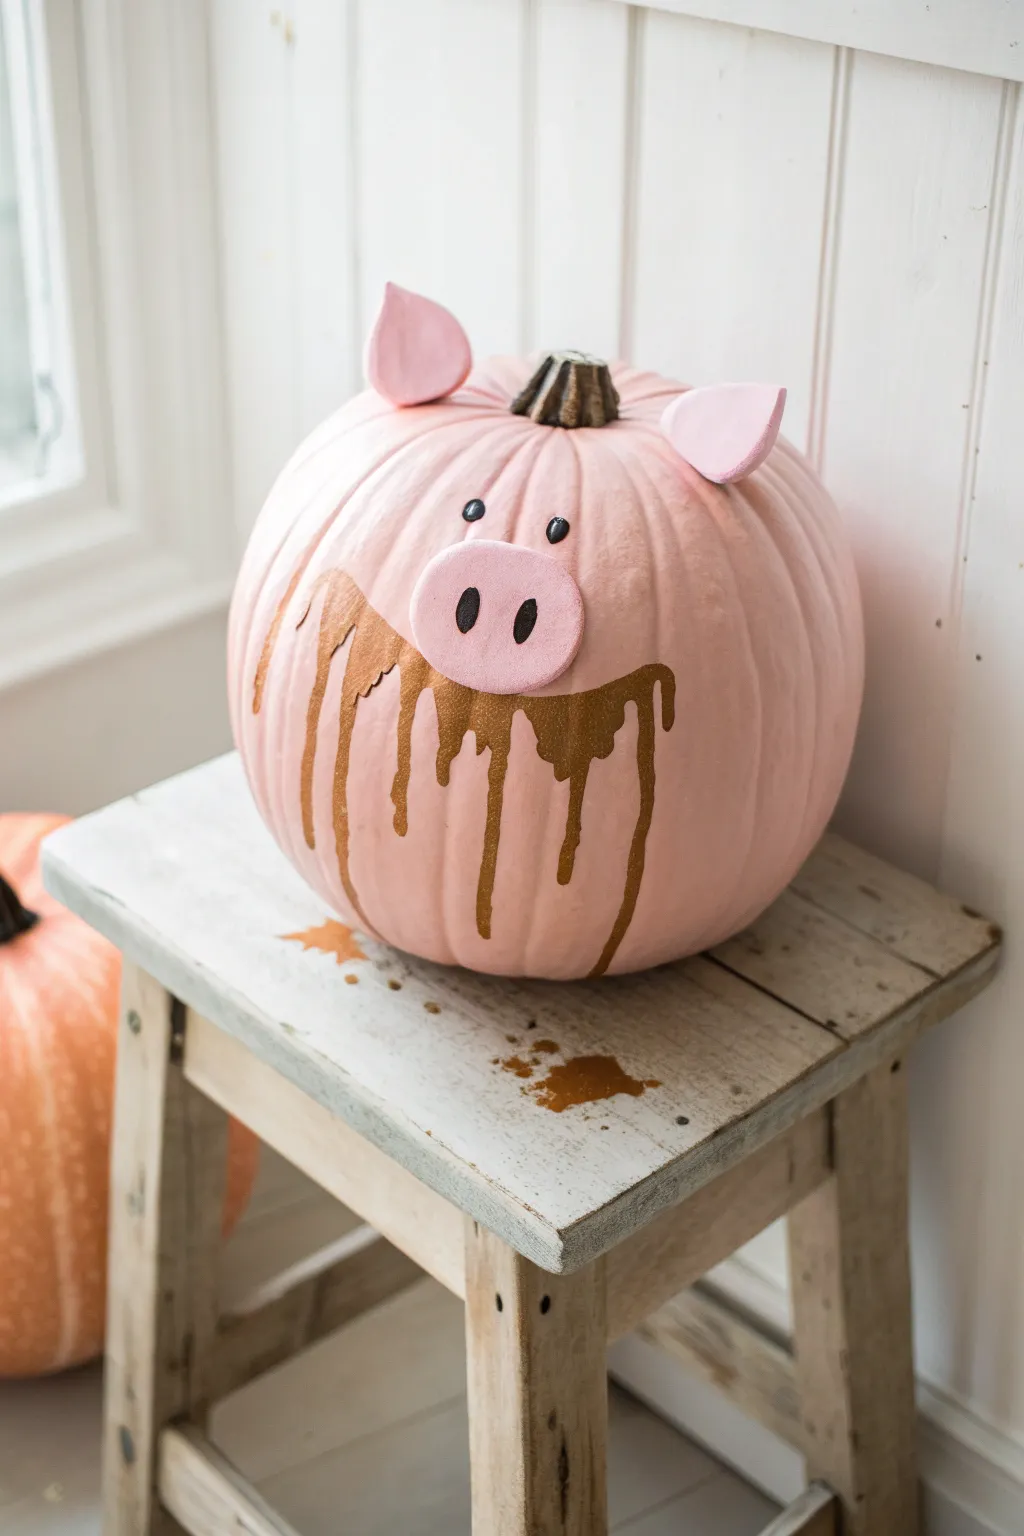
Transform a standard pumpkin into a playful barnyard friend with this messy-on-purpose project. You’ll combine simple craft foam additions with a satisfying drip-paint technique to create a pig that looks like it’s been rooting around in liquid gold mud.
How-To Guide
Materials
- Medium round pumpkin (real or faux)
- Matte pink acrylic paint
- Metallic bronze or dark gold acrylic paint
- Black and white acrylic paint
- Pink craft foam sheet (thick)
- Hot glue gun and glue sticks
- Sponge brush or large flat brush
- Small detail paintbrush
- Scissors
Step 1: The Pink Base
-
Clean surface:
Wipe your pumpkin down with a damp cloth to remove any dust or dirt, ensuring the paint adheres properly. -
Apply base coat:
Using a sponge brush, cover the entire pumpkin with matte pink paint. Don’t worry about the stem; you can leave it natural or paint it later. -
Apply second coat:
Let the first layer dry completely, then apply a second coat of pink to ensure full opacity so no orange shines through. -
Create features:
While the pumpkin dries, sketch two rounded triangles for ears and one wide oval for the snout onto your sheet of pink craft foam. -
Cut and color:
Cut out your foam shapes. I like to give the foam a quick coat of the same pink paint used on the pumpkin so everything matches perfectly.
Drips Not Running?
If your metallic paint is too thick to drip naturally, mix in a tiny drop of water or pouring medium until it flows like honey.
Step 2: Face Assembly
-
Attach the ears:
Apply a dab of hot glue to the bottom edge of each foam ear and press them onto the top shoulders of the pumpkin, slightly back from the face area. -
Shape the ears:
Gently fold the top tips of the foam ears forward or pinch the base slightly to give them a perky, three-dimensional look. -
Attach the snout:
Hot glue the oval foam piece directly to the center front of the pumpkin. -
Paint the nostrils:
Using a small detail brush and black paint, create two vertical oval shapes on the snout for the nostrils. -
Add the eyes:
Paint two small black circles just above the snout, spacing them widely for a cute, innocent expression. -
Add highlights:
Once the black paint is dry, use a toothpick or the very tip of your brush to add a tiny white dot to the top corner of each eye.
Step 3: The Muddy Splash
-
Prepare the mud:
Pour a generous amount of metallic bronze or gold paint onto a palette; ensure it is fluid enough to drip (add a drop of water if needed). -
Load the brush:
Fully saturate a medium round brush with the metallic paint so it is heavy and ready to drip. -
Create the mess:
Press the loaded brush firmly against the pumpkin’s surface, starting right under the snout and working outward across the ‘cheeks’. -
Encourage drips:
Apply extra paint to the top of the ‘mud’ line and let gravity pull thick ribbons of paint down the natural ridges of the pumpkin. -
Final dry:
Allow the project to sit undisturbed for several hours or overnight, as the thick drips of metallic paint will take much longer to dry than the base coat.
Curly Tail Addition
Twist a pink pipe cleaner into a tight corkscrew spiral and hot glue it to the back of the pumpkin to complete the piggy look from all angles.
Display your messy masterpiece on a sturdy stand and enjoy the farmhouse charm it brings to your decor

PENCIL GUIDE
Understanding Pencil Grades from H to B
From first sketch to finished drawing — learn pencil grades, line control, and shading techniques.
Explore the Full Guide
Red Bandana Accessories


Transform a plain white pumpkin into a chic farmhouse statement piece with this easy cow print design. Example photo features a sophisticated metallic gold stem and a classic red bandana base that brings the whole western look together.
Step-by-Step
Materials
- White faux craft pumpkin (medium to large)
- Black acrylic craft paint (matte)
- Metallic gold or bronze acrylic paint
- Medium flat paintbrush
- Small round detail brush
- Pencil (optional)
- Red paisley bandana
- Clear matte spray sealer
- Paper plate or palette
- Cup of water and paper towels
Step 1: Preparation & Base Work
-
Clean the surface:
Wipe down your pumpkin with a slightly damp cloth to remove any dust or oils from the faux skin. -
Refresh the white:
Even if your pumpkin is already white, I find that applying one thin coat of matte white acrylic paint gives the plastic surface a better ‘tooth’ for the black paint to stick to later. -
Base coat the stem:
Using your smaller brush, paint the entire stem with the metallic gold paint. -
Add stem dimension:
Once the initial gold layer is tacky but drying, dab a tiny bit more paint on the high points of the stem ridges to enhance the texture. -
Let it cure:
Allow the white base and gold stem to dry completely before starting the pattern to avoid smudges.
Fixing Streaky Paint
If the black paint looks transparent or streaky, avoid piling on thick wet blobs. Instead, apply multiple thin layers, allowing each to dry fully in between.
Step 2: Painting the Cow Print
-
Map your spots:
Visualize where your larger spots will go. You can lightly sketch the outlines with a pencil, but keep the lines very faint. -
Create organic shapes:
Using the round detail brush, paint the outline of your first spot. Remember that cow spots are irregular blobs, not perfect circles. -
Fill the shapes:
Switch to your flat brush to fill in the center of the spot with the black acrylic paint. -
Navigate the ridges:
When painting over the deep ribs of the pumpkin, dab the brush vertically into the crevice to ensure the black paint fully covers the groove. -
Vary the sizes:
Paint a few large, dominant spots first, scattered randomly around the pumpkin’s circumference. -
Add medium spots:
Fill in the gaps with medium-sized irregular shapes, ensuring you leave plenty of white space between them. -
Scatter small details:
Add tiny black dots or smaller blobs near the larger ones to make the pattern look natural and less uniform. -
Check density:
Step back and look at the pumpkin from a distance to ensure the balance of black and white looks pleasing. -
Apply a second coat:
Black acrylic paint can sometimes look streaky on the first pass. Once the first layer is dry, apply a second coat to the black spots for a solid, opaque finish. -
Clean up edges:
If any black paint went outside the lines, use a small brush with white paint to crisp up the edges once the black is fully dry. -
Seal the work:
Take the pumpkin to a ventilated area and apply a light coat of clear matte spray sealer to protect the paint from scratching.
Level Up: Western Tags
Add a piece of jute twine around the base of the gold stem and attach a small leather tag or a mini galvanized metal charm to enhance the rustic farm theme.
Step 3: Styling the Accessory
-
Prepare the bandana:
Lay your red paisley bandana flat on a table and fold it in half diagonally to create a triangle. -
Create the roll:
Starting from the long folded edge, loosely roll or scrunch the bandana until you have a long, rope-like shape. -
Form the nest:
Curve the rolled bandana into a loose circle or wreath shape on your display surface. -
Final placement:
Set your dry cow-print pumpkin directly into the center of the bandana nest, adjusting the fabric so the red peaks out visibly around the base.
Place your finished masterpiece on a window sill or mantle to bring a touch of playful country charm to your decor
Friendly Googly Eyes
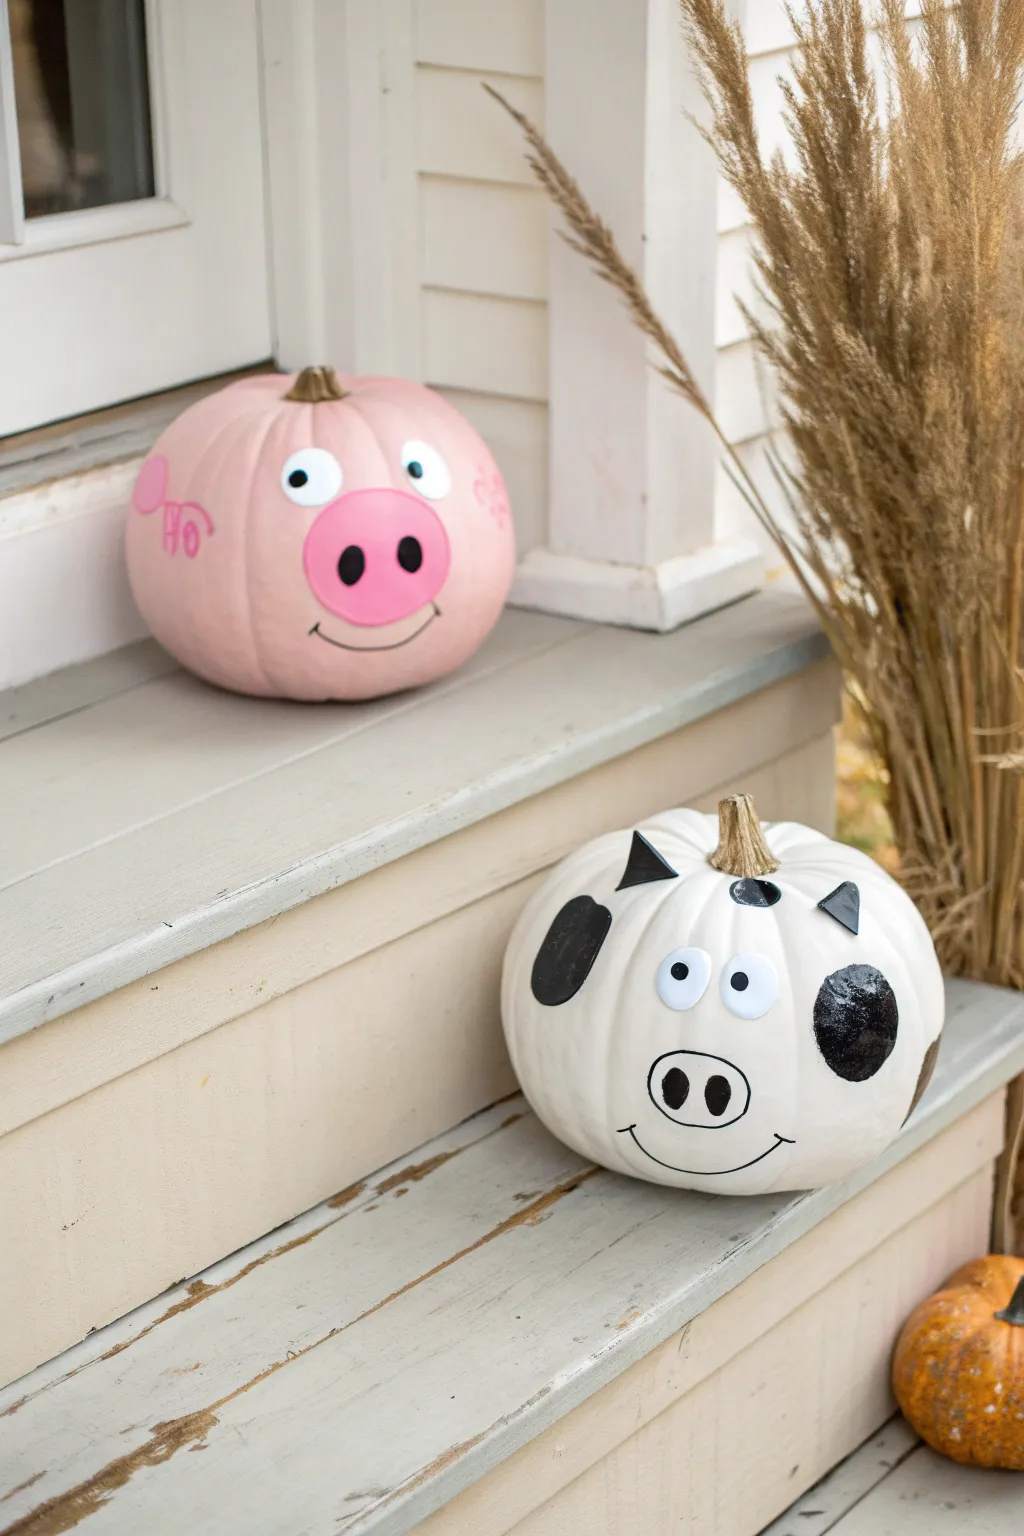
Transform your porch into a playful petting zoo with these adorable pig and cow painted pumpkins. Using oversized googly eyes and simple graphic shapes, this project turns ordinary gourds into characterful creations that are perfect for a family-friendly harvest display.
Detailed Instructions
Materials
- Two medium round pumpkins (one slightly taller for the cow)
- Acrylic craft paint: Light pink, hot pink, white, black
- Large foam paintbrush
- Small round detail brush
- Black paint pen (oil-based works best)
- Wooden craft oval or pink craft foam (for pig snout)
- Stiff black felt or craft foam (for cow ears)
- Large plastic googly eyes (approx. 1-2 inch diameter)
- Hot glue gun and glue sticks
- Painter’s tape
- Pencil
Step 1: Base Coats
-
Clean the surface:
Wipe down both pumpkins with a damp cloth to remove any field dirt or dust, ensuring the surface is completely dry before painting. -
Protect the stems:
Wrap a piece of painter’s tape around the base of each stem to keep them natural and paint-free. -
Paint the pig:
Using a foam brush, coat the squatter, rounder pumpkin with light pink acrylic paint. -
Paint the cow:
Apply white acrylic paint to the slightly taller pumpkin, covering the entire surface evenly. -
Apply second coats:
Acrylics can sometimes look streaky on pumpkin skin, so I always let the first layer dry completely and add a second coat for solid, vibrant color.
Smooth Operator
To avoid brush strokes on the pumpkin skin, use a cosmetic wedge sponge to dab the paint on rather than dragging a brush. It creates a seamless texture.
Step 2: The Pink Piggy
-
Prepare the snout:
Paint a wooden craft oval with hot pink paint to create a dimensional snout; alternatively, cut an oval shape from pink craft foam. -
Attach the snout:
Once the base coat is dry, use hot glue to secure the pink oval to the center of the pumpkin face. -
Add nostrils:
Using black paint or a thick marker, draw two large, vertical ovals inside the pink snout for the nostrils. -
The eyes:
Hot glue two large googly eyes just above the snout, spacing them slightly apart for a goofy, friendly look. -
Draw the smile:
Use a black paint pen to trace a wide, U-shaped smile directly under the snout, adding small tick marks at the ends for cheeks. -
Side details:
If you are feeling artistic, use a fine brush and hot pink paint to add a curly tail or the word ‘Oink’ to the side of the pumpkin.
Accessories Upgrade
Give your farm animals extra flair by hot gluing a curly pink pipe cleaner to the pig’s back for a 3D tail, or tying a checkered ribbon around the cow’s stem.
Step 3: The Spotted Cow
-
Sketch the spots:
Lightly draw irregular blob shapes around the sides and top of the white pumpkin using a pencil to map out the cow print pattern. -
Fill the spots:
Use black acrylic paint and a medium brush to fill in your pencil outlines; don’t worry about perfection, as organic shapes look more natural. -
Create the ears:
Cut two small triangles out of stiff black felt or craft foam to serve as the cow’s ears. -
Attach the ears:
Fold the bottom edge of the felt triangles slightly to create a tab and hot glue them near the top of the pumpkin, on either side of the stem. -
Draw the snout outline:
Since the cow doesn’t have a 3D snout, use a black paint pen to draw a large horizontal oval shape on the lower front of the face. -
Add facial features:
Draw two solid black circles inside the oval for nostrils and add a curved smile line underneath. -
Secure the eyes:
Finish the face by hot gluing your remaining pair of googly eyes right above the drawn snout.
Step 4: Finishing
-
Remove tape:
Carefully peel the painter’s tape off the stems to reveal the natural wood contrast against the paint. -
Seal (Optional):
If these will sit uncovered on a porch, give them a quick spray with a clear acrylic sealer to protect the paint from moisture.
Set your new barnyard friends on your steps to greet visitors with a smile this season


Mommy and Me Sets

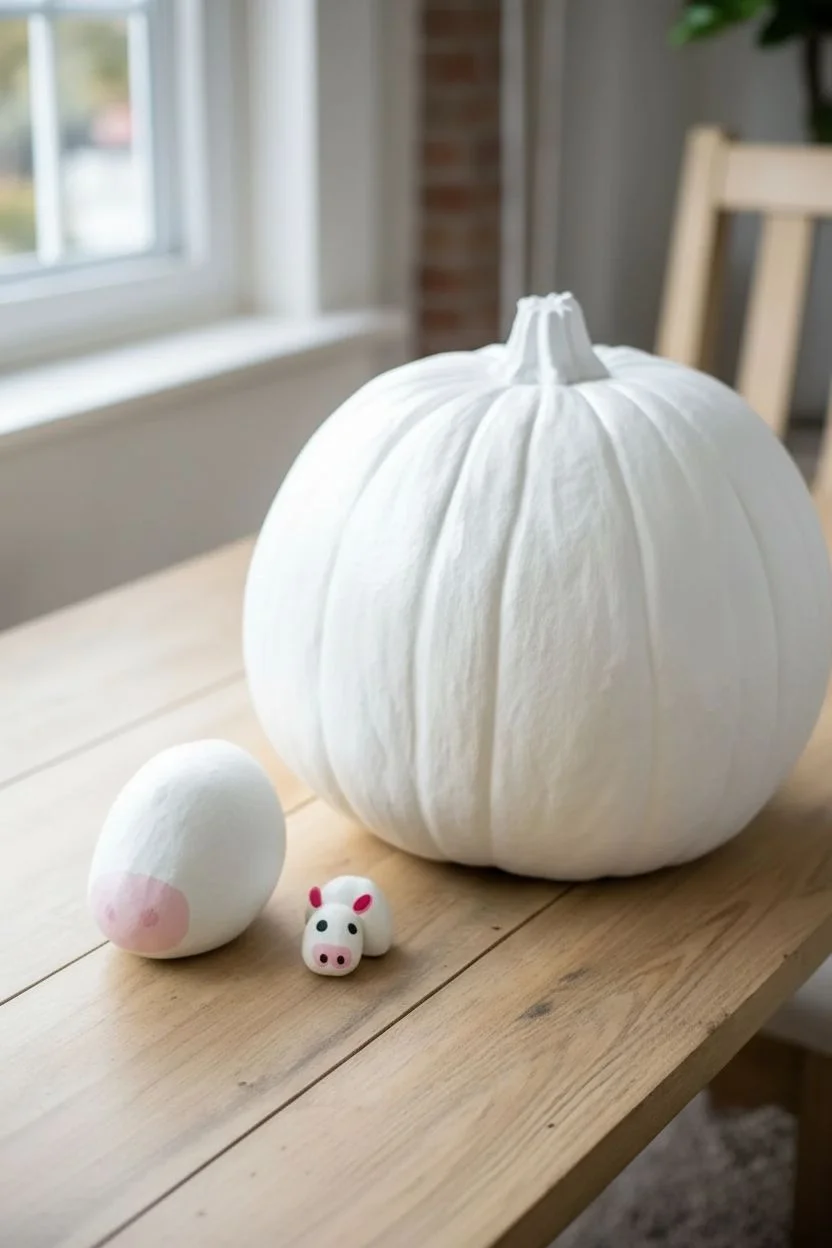
Turn a trio of pumpkins into a sweet bovine family that looks lovely on a farmhouse table or porch. By pairing a large white pumpkin with smaller egg-shaped gourds, you create a charming ‘Mommy and Me’ scene complete with spotted coats and pink snouts.
Step-by-Step Guide
Materials
- One large white pumpkin (real or faux)
- Two smaller egg-shaped gourds or mini pumpkins
- Acrylic craft paint: Black, White, Soft Pink
- Paintbrushes: wide foam brush, medium round brush, fine liner brush
- Pencil
- Thick white craft foam or stiff felt
- Hot glue gun and glue sticks
- Scissors
Step 1: Preparing the Canvases
-
Clean the surfaces:
Wipe down your large pumpkin and smaller gourds with a damp cloth to remove any dirt or oils, ensuring the paint adheres properly. -
Apply a white base coat:
Even if your pumpkins are naturally white, I recommend applying a smooth coat of white acrylic paint to all three pieces to create a uniform, bright canvas. -
Let it cure:
Allow the white base coat to dry completely before moving on to the colored details to prevent smearing.
Step 2: Painting the Mother Cow
-
Sketch the spots:
Using a pencil, lightly draw large, irregular amoeba-like shapes all over the large pumpkin to map out the cow spots. -
Outline in black:
Take your medium round brush loaded with black paint and carefully TRACE the pencil outlines you just created. -
Fill the spots:
Fill in the centers of your black textureless shapes, applying a second coat if necessary for opaque, solid coverage. -
Natural stem:
Leave the stem unpainted to maintain a rustic, natural element that contrasts nicely with the graphic black and white pattern.
Paint Slipping?
If the acrylic paint beads up on a real pumpkin’s waxy skin, wipe the surface with a cotton ball dipped in rubbing alcohol before painting to give it better ‘tooth’.
Step 3: Creating the Calves
-
Paint the snouts:
On the wider end of each smaller gourd, paint a large, horizontal oval shape using the soft pink paint to form the nose. -
Add nostrils:
Once the pink paint is dry, use a detail brush or the back end of a paintbrush to dab two large black ovals onto the pink area. -
Create the eyes:
Just above the snout, paint two widely spaced black circles for the eyes to give them a cute, innocent expression. -
Add body spots:
Paint a few black patches on the sides and back of the gourds so they match the mother pumpkin’s pattern.
Level Up
Make the set even sweeter by tying a small piece of burlap ribbon or a tiny cowbell around the stem of the mother pumpkin or gluing small bows near the ears of the calves.
Step 4: The Ears & Assembly
-
Cut ear shapes:
Cut two pairs of teardrop-shaped ears from your white craft foam—one pair slightly larger for the medium calf, and a tiny pair for the baby. -
Color the inner ear:
Paint the center of each foam ear with pink paint, leaving a small white border around the edges. -
Add the contrast rim:
Use a fine liner brush to paint a thin black rim around the very edge of the ears and add a small black patch at the tip for detail. -
Establish placement:
Hold the painted ears against the gourds to find the cutest placement—usually slightly high on the sides of the ‘head’. -
Glue the ears:
Apply a small bead of hot glue to the base of each ear and press them firmly onto the gourds. -
Final touch-ups:
Check your paint for any transparent spots and add a quick touch-up layer of black or white where needed.
Arranging your painted pumpkins together creates a heartwarming display that works beautifully for fall decor.
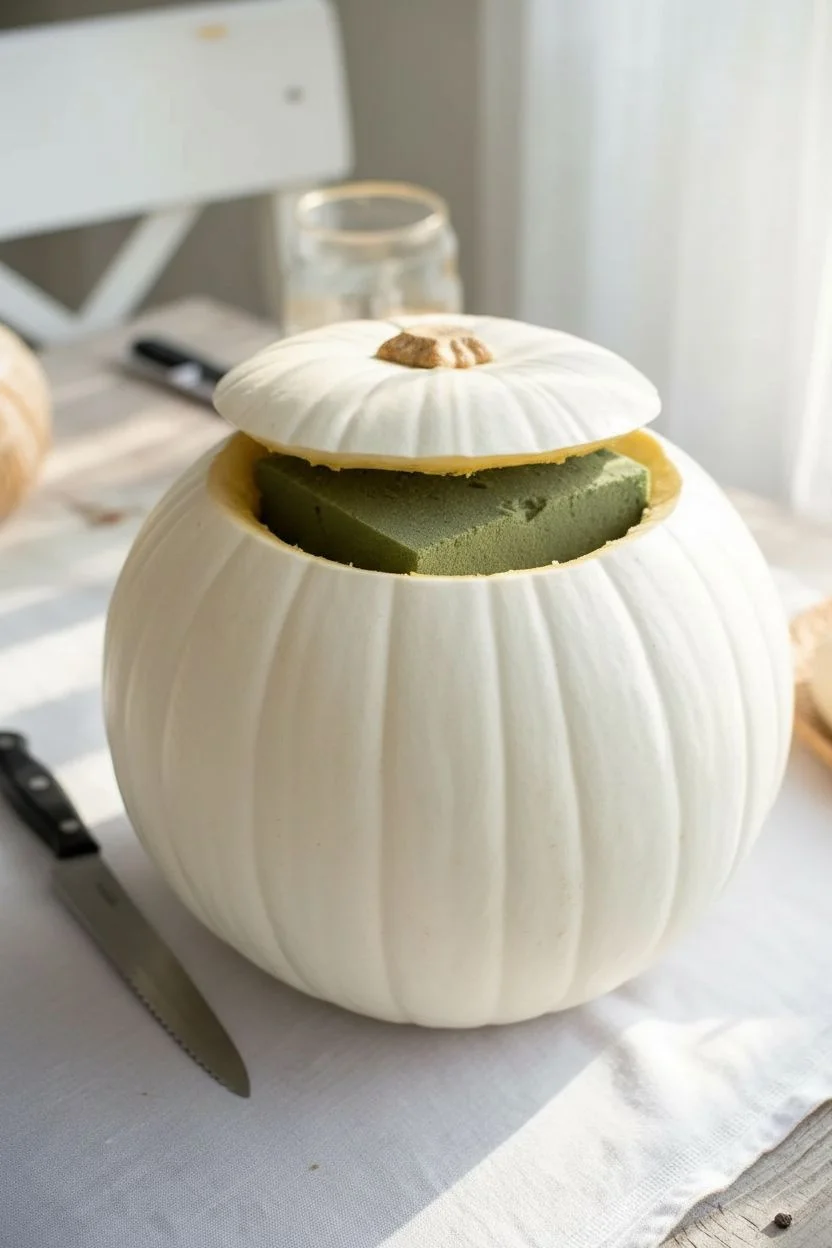
Boho Floral Cows
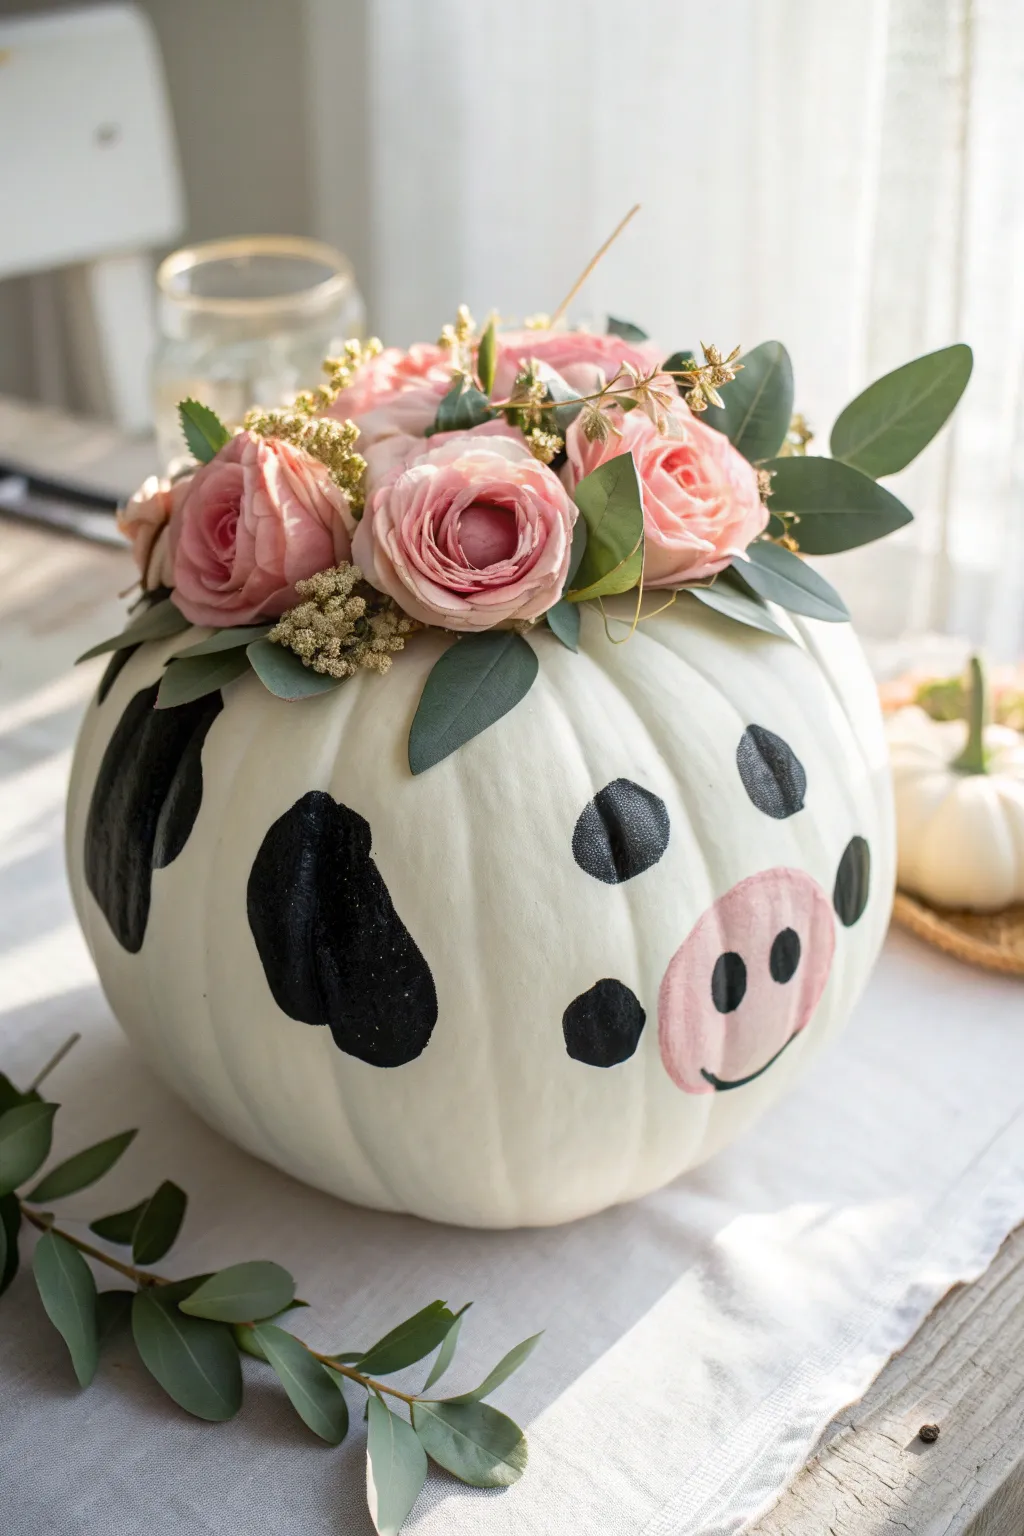
Blend rustic farmhouse charm with chic floral aesthetics in this adorable pumpkin project. By combining a classic black-and-white cow print with a crown of dusty pink roses, you will create a centerpiece that is both playful and elegant.
How-To Guide
Materials
- Large white pumpkin (faux or real)
- Acrylic paint (Black, Pale Pink)
- Paintbrushes (medium flat brush, small round brush, fine liner)
- Pencil
- Artificial flowers (dusty pink roses)
- Artificial greenery (seeded eucalyptus)
- Dried filler flowers
- Hot glue gun and glue sticks
- Serrated knife (if using faux pumpkin)
- Dry floral foam block
Step 1: Preparing the Base
-
Clean the surface:
Wipe down your white pumpkin with a damp cloth to remove any dust or oils that might prevent the paint from adhering properly. -
Create the opening:
If you are using a faux pumpkin, use a serrated knife to carefully carve out a circle around the stem, removing the top to create a bowl shape. -
Insert structure:
Cut a block of dry floral foam to fit snugly inside the cavity you just created. If it feels loose, secure it to the bottom with a dab of hot glue.
Natural Edges
When painting the black spots, don’t worry about making the edges perfectly smooth. A slightly wavy or bumpy edge mimics the natural texture of animal fur effectively.
Step 2: Painting the Features
-
Sketch the snout:
Using a pencil, lightly draw a large oval shape on the lower front of the pumpkin for the snout. -
Apply the pink base:
Fill in the snout oval with pale pink acrylic paint using a flat brush. I like to apply two thin coats rather than one thick one to ensure a smooth, opaque finish. -
Outline the spots:
While the pink dries, lightly sketch irregular organic shapes all around the rest of the pumpkin to represent the cow spots. -
Paint the cow print:
Fill in your sketched spots with black acrylic paint. Experiment with different sizes and shapes to make the pattern look natural. -
Add the eyes:
Paint two vertical black ovals just above the pink snout to create the eyes. Space them wide apart for a cute, innocent look. -
Detail the snout:
Once the pink paint is fully dry, paint two smaller black ovals inside the snout for nostrils. -
Create the smile:
Use a fine liner brush and black paint to draw a thin, curved line underneath the nostrils for a gentle smile.
Step 3: Arranging the Crown
-
Trim the stems:
Use wire cutters to trim your rose and greenery stems to about 3 or 4 inches long. -
Place the focal flowers:
Insert the largest dusty pink roses into the center of the floral foam, grouping them slightly for impact. -
Add greenery:
Tuck stems of seeded eucalyptus around the roses, allowing some leaves to drape over the edge of the pumpkin to soften the rim. -
Fill the gaps:
Insert small sprigs of dried filler flowers or smaller buds into any empty spaces to create a full, lush texture. -
Final touches:
Check the arrangement from all angles and use hot glue to secure any loose elements that aren’t firmly stuck in the foam.
Texture Twist
Instead of painting the black spots, try cutting shapes out of black velvet fabric or felt and gluing them on for a tactile, fuzzy finish that adds depth.
Place your charming bovine creation on a console table or entryway bench to welcome guests with a smile
The Barn Cat
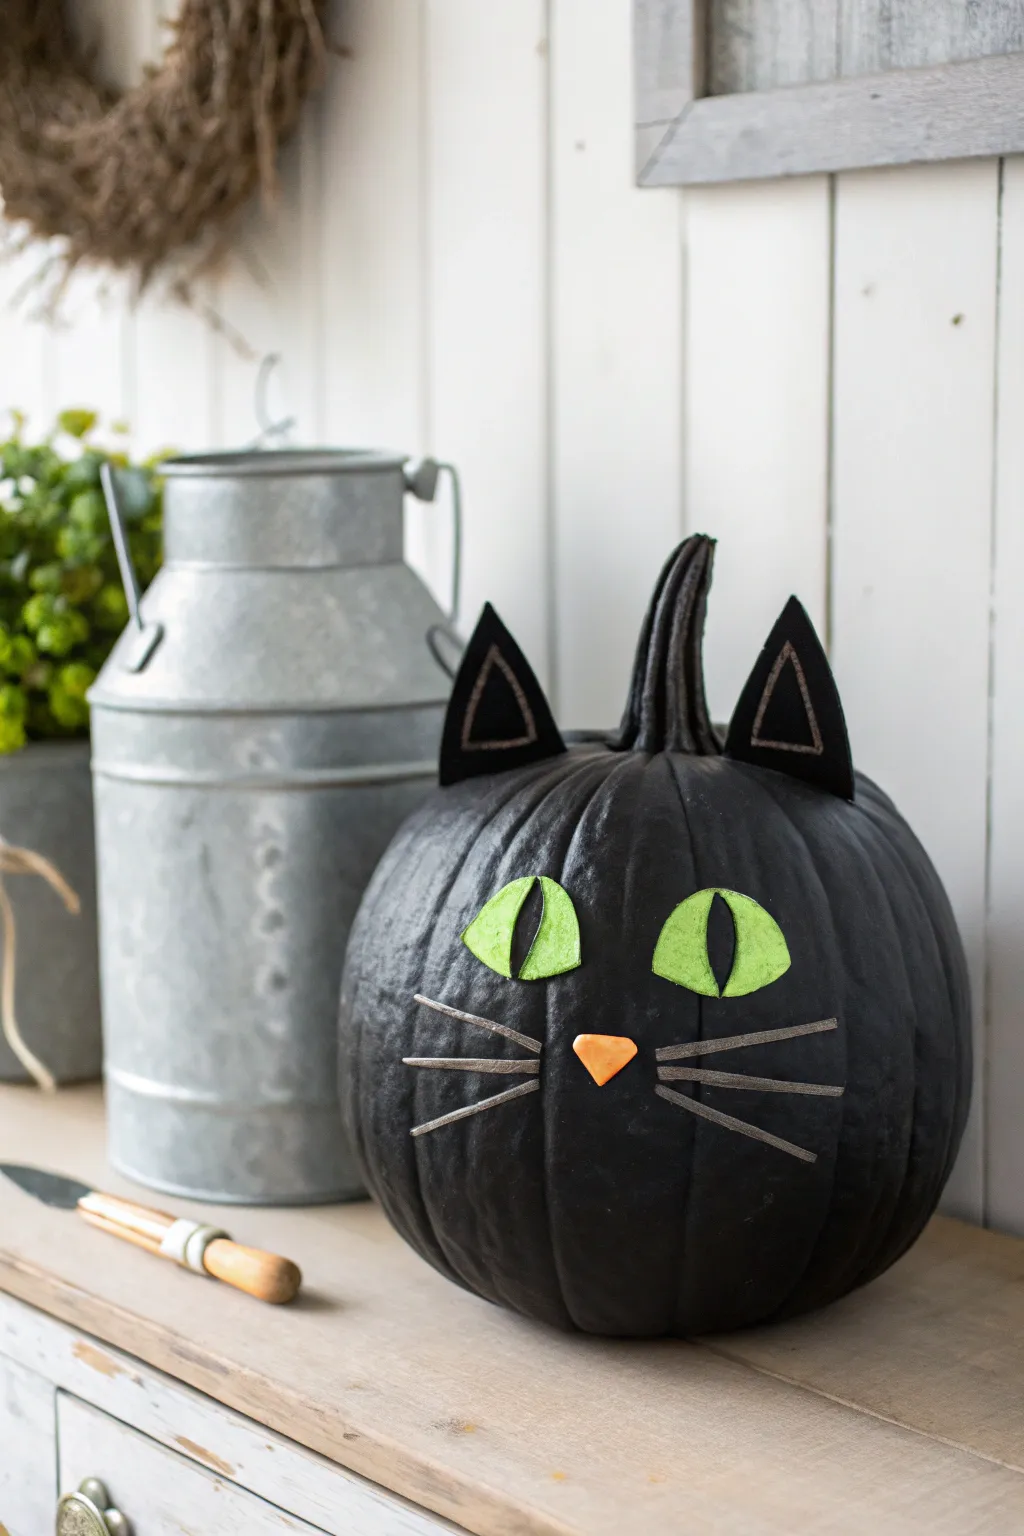
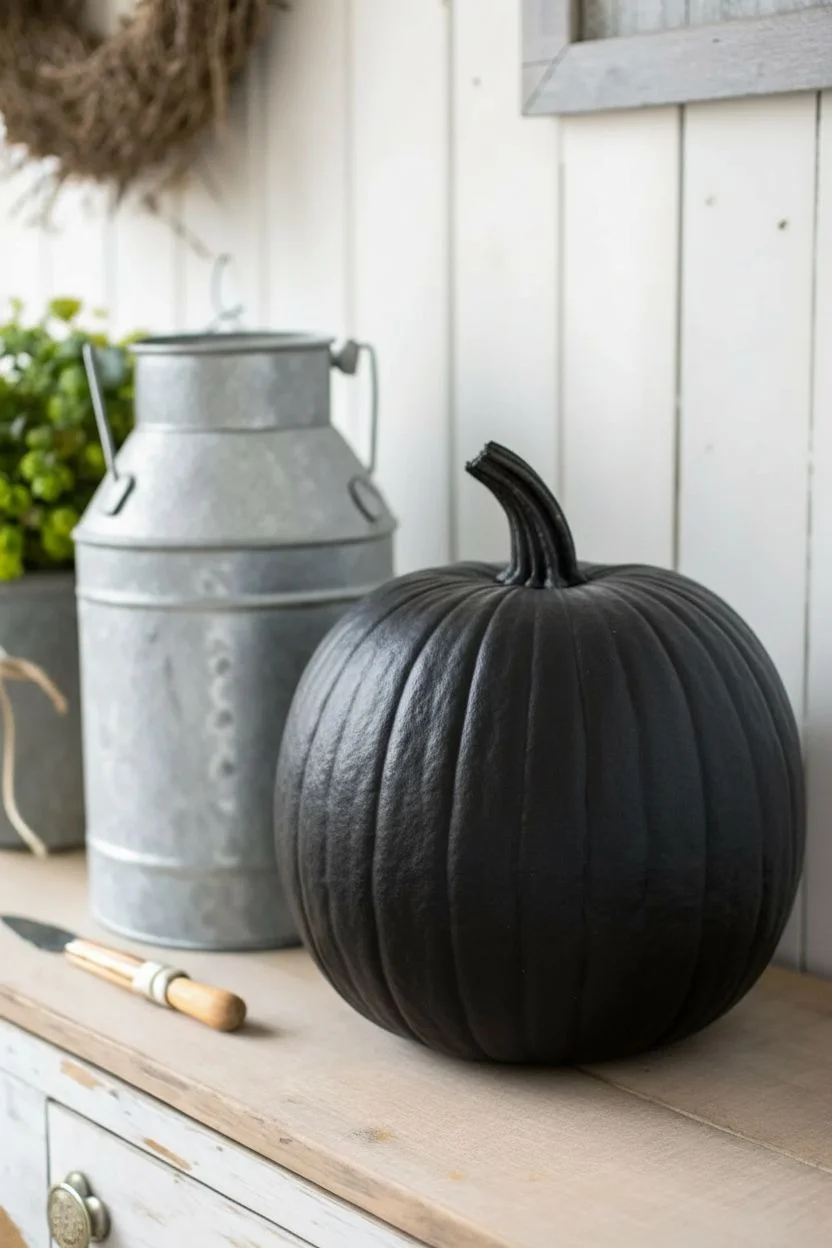
Transform a simple round pumpkin into a charming, spooky feline friend perfect for a farmhouse porch display. This no-carve project uses matte paint and felt accents to create an expressive cat face without the mess of removing pumpkin guts.
Detailed Instructions
Materials
- Medium round pumpkin (real or faux)
- Black matte acrylic paint
- Large sponge brush or flat paintbrush
- Stiff black felt sheet
- Lime green stiff felt or cardstock
- Small scrap of orange felt or foam
- Silver metallic paint pen or silver cardstock
- Hot glue gun and glue sticks
- Fabric scissors
- Pencil
Step 1: Creating the Base
-
Clean the surface:
Wipe down your pumpkin with a damp cloth to remove any dirt or oils, then dry it completely with a paper towel to ensure the paint adheres properly. -
Apply the first coat:
Using a sponge brush, apply a layer of black matte acrylic paint over the entire pumpkin. -
Don’t forget the stem:
Paint the stem black as well, working the bristles into the grooves to cover the natural brown color completely. -
Let it dry:
Allow the first coat to dry for at least 30 minutes; I find that rushing this step can cause the paint to lift when adding the second layer. -
Apply the second coat:
Add a second coat of black paint to ensure opaque coverage, hiding any orange spots showing through, and let it dry fully.
Stiffening Tip
If you only have soft felt, glue two layers together or coat the back with a layer of Mod Podge. This ensures the ears stand up straight rather than flopping over.
Step 2: Crafting the Ears
-
Cut the ear shapes:
Cut two equal-sized triangles out of the stiff black felt, roughly 3 inches tall depending on your pumpkin’s size. -
Add inner details:
Using the silver metallic paint pen, draw a smaller triangle inside each black felt ear to create depth and definition. -
Prepare for attachment:
Fold the bottom edge of each felt triangle backward about a quarter of an inch to create a small tab for gluing. -
Attach the ears:
Apply hot glue to the folded tabs and press the ears onto the top of the pumpkin, positioning them just behind the stem.
Level Up
Give your barn cat some extra personality by tying a rustic burlap ribbon around the bottom or draping a “collar” with a small metal bell around the pumpkin’s base.
Step 3: The Cat’s Face
-
Shape the eyes:
Draw two large almond or cat-eye shapes onto the lime green felt or cardstock using a pencil. -
Cut the eyes:
Carefully cut out the green eye shapes with sharp scissors to ensure smooth edges. -
Add pupils:
Paint a vertical black slit in the center of each green eye using the black acrylic paint and a small detail brush. -
Secure the eyes:
Once the pupils are dry, hot glue the green eyes onto the front of the pumpkin, spacing them evenly apart. -
Create the nose:
Cut a small, inverted triangle from the orange felt or foam scrap. -
Attach the nose:
Glue the orange nose in the center of the face, positioned slightly below the bottom inner corners of the eyes.
Step 4: Whiskers & Finishing Touches
-
Make the whiskers:
Cut six thin, long strips from silver cardstock or stiff grey felt to serve as the whiskers. -
Attach whiskers:
Apply a tiny dot of hot glue to the end of each strip and attach three whiskers on each side of the nose. -
Clean up:
Gently pull away any wispy hot glue strings that might be lingering around the facial features. -
Touch up paint:
If any glue shows or paint chipped during handling, dab a little extra black paint over the area for a seamless finish.
Place your finished feline on a hay bale or front step to welcome visitors with its glowing green stare.


Have a question or want to share your own experience? I'd love to hear from you in the comments below!