There is something delightfully refreshing about opening a sketchbook to capture the whimsy of Easter drawing ideas as the studio fills with warm spring light. From delicate floral patterns to playful characters, these prompts are designed to help you explore new techniques while celebrating the season of renewal.
Minimalist Fluffy Bunny Face
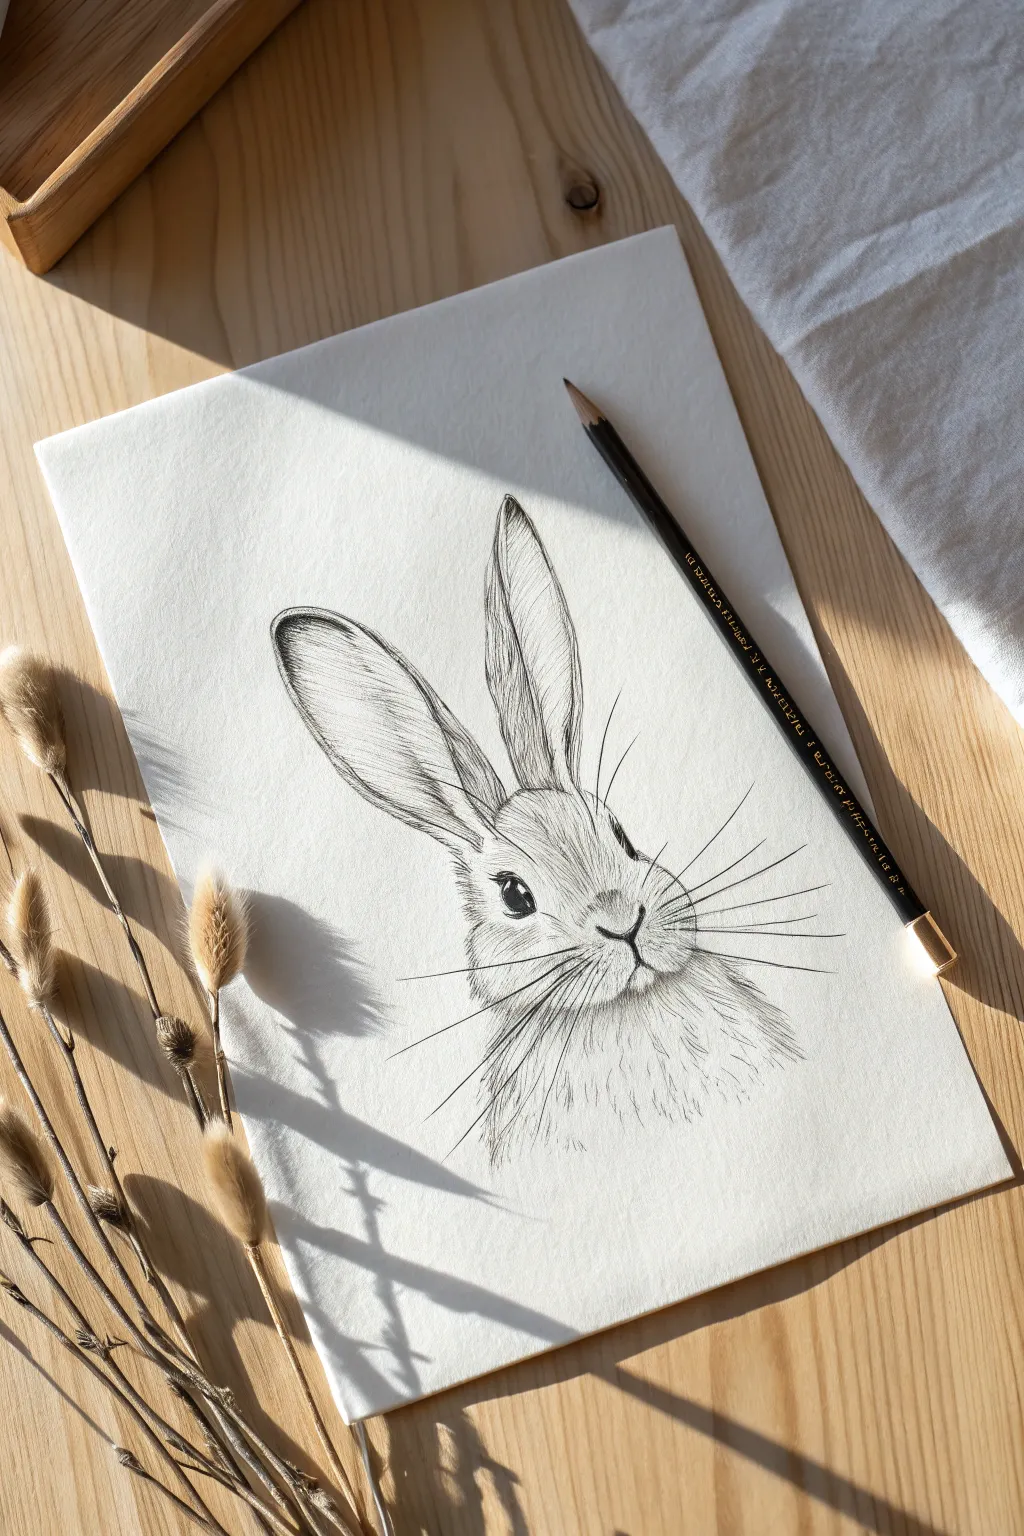
Capture the sweetness of spring with this elegant pencil drawing featuring a bunny with wonderfully expressive ears. By using simple hatching techniques and varying your pencil pressure, you’ll create soft fur textures and a lively gaze without needing complex shading.
How-To Guide
Materials
- Heavyweight drawing paper (medium tooth)
- HB graphite pencil (for initial sketching)
- 4B or 6B graphite pencil (for dark textures)
- Black colored pencil (optional, for deepest blacks)
- Kneaded eraser
- Precision pencil sharpener
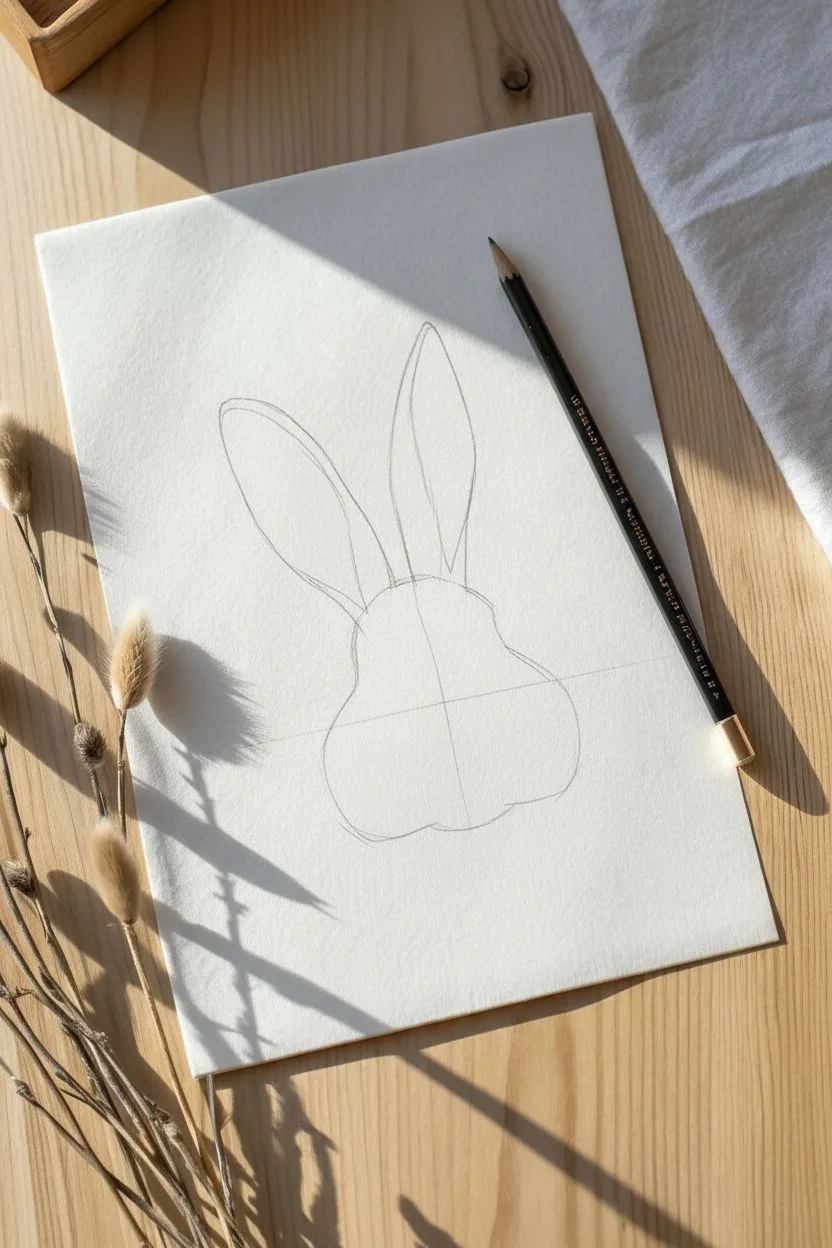
Step 1: Structuring the Shape
-
Base circle:
Begin with your HB pencil using very light pressure. Draw a medium-sized circle in the lower center of your paper to represent the bunny’s head. -
Snout definition:
Refine the circle into a slightly pear-like shape, making the top a bit narrower and allowing the bottom cheek area to bulge out slightly to the sides. -
Ear placement:
Sketch two long, tall leaf shapes extending from the top of the head. Position them slightly asymmetrical—perhaps one leaning just a bit more than the other—to give the bunny personality. -
Facial guidelines:
Lightly draw a vertical center line curving down the face, and a horizontal line crossing the lower third of the face where the eyes and nose will sit.
Step 2: Facial Features
-
The eye:
On the left side of the face, draw a large almond-shaped eye. Drawing in profile, you will only see one prominent eye. Include a small circular highlight near the top to imitate reflected light. -
Nose and mouth:
Place a small, soft ‘Y’ shape at the center line for the nose and mouth cleft. Keep this very small and delicate. -
Darkening graphical elements:
Switch to your 4B or 6B pencil. Fill in the pupil of the eye completely black, carefully avoiding the white highlight circle. This contrast brings the rabbit to life immediately. -
Nose definition:
Darken the nostrils and the split of the lip with confident, short strokes.
Keep it Sharp
For realistic fur texture, sharpen your pencil every few minutes. A dull tip creates blurry, smudge-like shading, while a razor-sharp point creates distinct, crisp hairs.
Step 3: Creating Texture
-
Ear interior shading:
Sharpen your darker pencil to a fine point. Inside the tall ears, draw long, sweeping lines that follow the curve of the ear from bottom to top, leaving gaps to show the ear’s depth. -
Ear rims:
Outline the outer edges of the ears with distinct, broken strokes rather than a solid continuous line. This mimics the texture of short fur along the ridges. -
Forehead fur:
Start adding short, ticking strokes between the ears and down the forehead. I find it helps to flick the pencil upward slightly at the end of each stroke to taper the hair. -
Cheek shaping:
Move down to the cheeks. Use longer, curved strokes here that fan outwards, creating the illusion of fluffy, puffy cheeks. -
Neck transitions:
Below the chin, allow your pencil strokes to become looser and longer, fading out toward the bottom of the page to suggest the neck fur dissolving into the white paper.
Soft Touch
To level up, take a cotton bud and smudge just a tiny bit of graphite inside the ear to create a soft gray shadow, then draw the sharp hair lines on top of it for depth.
Step 4: Details & Whiskers
-
Deepening contrast:
Go back to the eye area. Add a few tiny, dark lashes and deepen the shading in the tear duct area to anchor the eye. -
Whisker points:
Add small, faint dots on the muzzle pad where the whiskers will emerge. -
Long whiskers:
With a confident, quick hand, draw long whiskers extending outward from the muzzle. Vary the lengths, making some quite long and others shorter. -
Review and refine:
Erase any visible construction lines that distract from the fur. Add a few final dark strokes to the ear creases for volume.
Step back and admire the gentle expression of your sketched bunny.


Hatching Chick Surprise

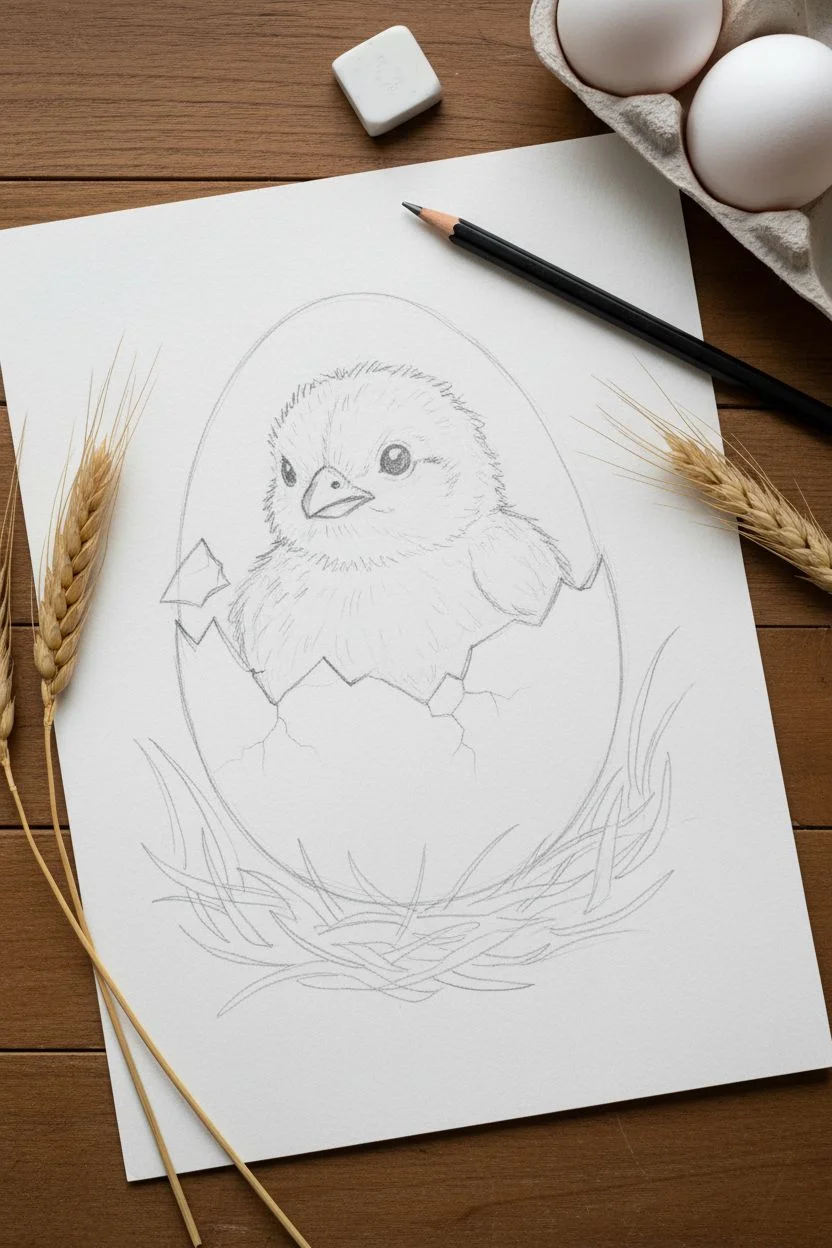
Capture the magic of new life with this delicate watercolor artwork featuring a fluffy chick emerging from its shell. The combination of soft paint washes and crisp pencil details creates a charming, textured illustration perfect for Easter cards.
Step-by-Step Tutorial
Materials
- Cold press watercolor paper (300 gsm)
- HB graphite pencil
- Kneaded eraser
- Watercolor paints (Yellow, Orange, Brown, Payne’s Grey/Black)
- Round watercolor brushes (size 2 and 4)
- Jar of clean water
- Paper towel
Step 1: Sketching the Outline
-
Draw the egg shape:
Start by lightly sketching a large, vertical oval in the center of your paper. Keep your pencil pressure very light so the graphite doesn’t show through the paint later. -
Add the opening:
About halfway down the egg, draw a zigzagged, uneven line across the width of the oval to represent the broken shell edge. -
Sketch the chick:
Inside the top half of the egg, outline the chick’s head and upper body. Use short, jagged pencil strokes to suggest fluffiness rather than a smooth, continuous line. -
Define the face:
Place a small triangle for the beak on the left side of the face. Add a small circle for the eye, drawing a tiny bubble inside it to serve as the highlight. -
Create shell fragments:
Draw a few jagged lines on the bottom half of the shell to look like cracks. You can also draw a small triangular shard of shell resting near the chick’s shoulder for realism. -
Outline the nest:
Sketch varying lengths of grass blades curving upward from the bottom of the egg, wrapping around the base to anchor the composition.
Step 2: Painting the Chick
-
Base yellow wash:
Load your size 4 brush with a diluted, bright yellow. Fill in the chick’s body, avoiding the eye and beak area. -
Add feathery texture:
While the base is still slightly damp, mix a more saturated yellow-orange. Using the tip of a smaller brush, dab small, flicking strokes into the wet paint to create a fluffy down texture. -
Define shadows:
Once the initial layer dries, take a darker golden tone and paint subtle shadows under the chin and where the wings meet the shell to add volume. -
Paint the beak:
Fill in the beak with a light orange-brown. I like to add a tiny touch of darker brown on the underside for dimension. -
Detail the eye:
Carefully paint the eye with black or dark grey, ensuring you leave that tiny white circle perfectly clean for the spark of life.
Eye Highlight Trick
If you accidentally paint over the tiny white highlight in the eye, don’t panic. Wait for the black paint to dry, then use a white gel pen or a dot of white gouache to restore the sparkle.
Step 3: Shell and Nest Details
-
Shadow the shell interior:
Mix a very watery grey. Paint the inside back wall of the shell (behind the chick) to show that the egg is hollow and the chick is coming out. -
Shade the egg exterior:
Clean your brush and use very pale grey water to add shading along the bottom and right curve of the eggshell, giving it a 3D rounded appearance. -
Paint the nest base:
Using a light brown or ochre, paint a broad, loose wash at the bottom where the straw sits. -
Define the straw:
Switch to a smaller brush with a darker brown. Paint individual blades of grass over the base wash, using quick, upward flicking motions that taper at the ends. -
Reinforce the cracks:
Use a very fine brush with diluted grey paint (or a sharp pencil) to gently trace over the cracked lines on the shell to make them distinct. -
Final touches:
Add a few final darker brown strokes to the deepest parts of the nest for contrast and let the entire piece dry completely.
Bleeding Colors?
If the yellow chick bleeds into the grey shell, you haven’t waited long enough between steps. Ensure the yellow is bone-dry before painting the adjacent grey areas.
Now you have a delightful little hatchling ready to bring spring cheer to your art collection.


Soft Spring Lamb
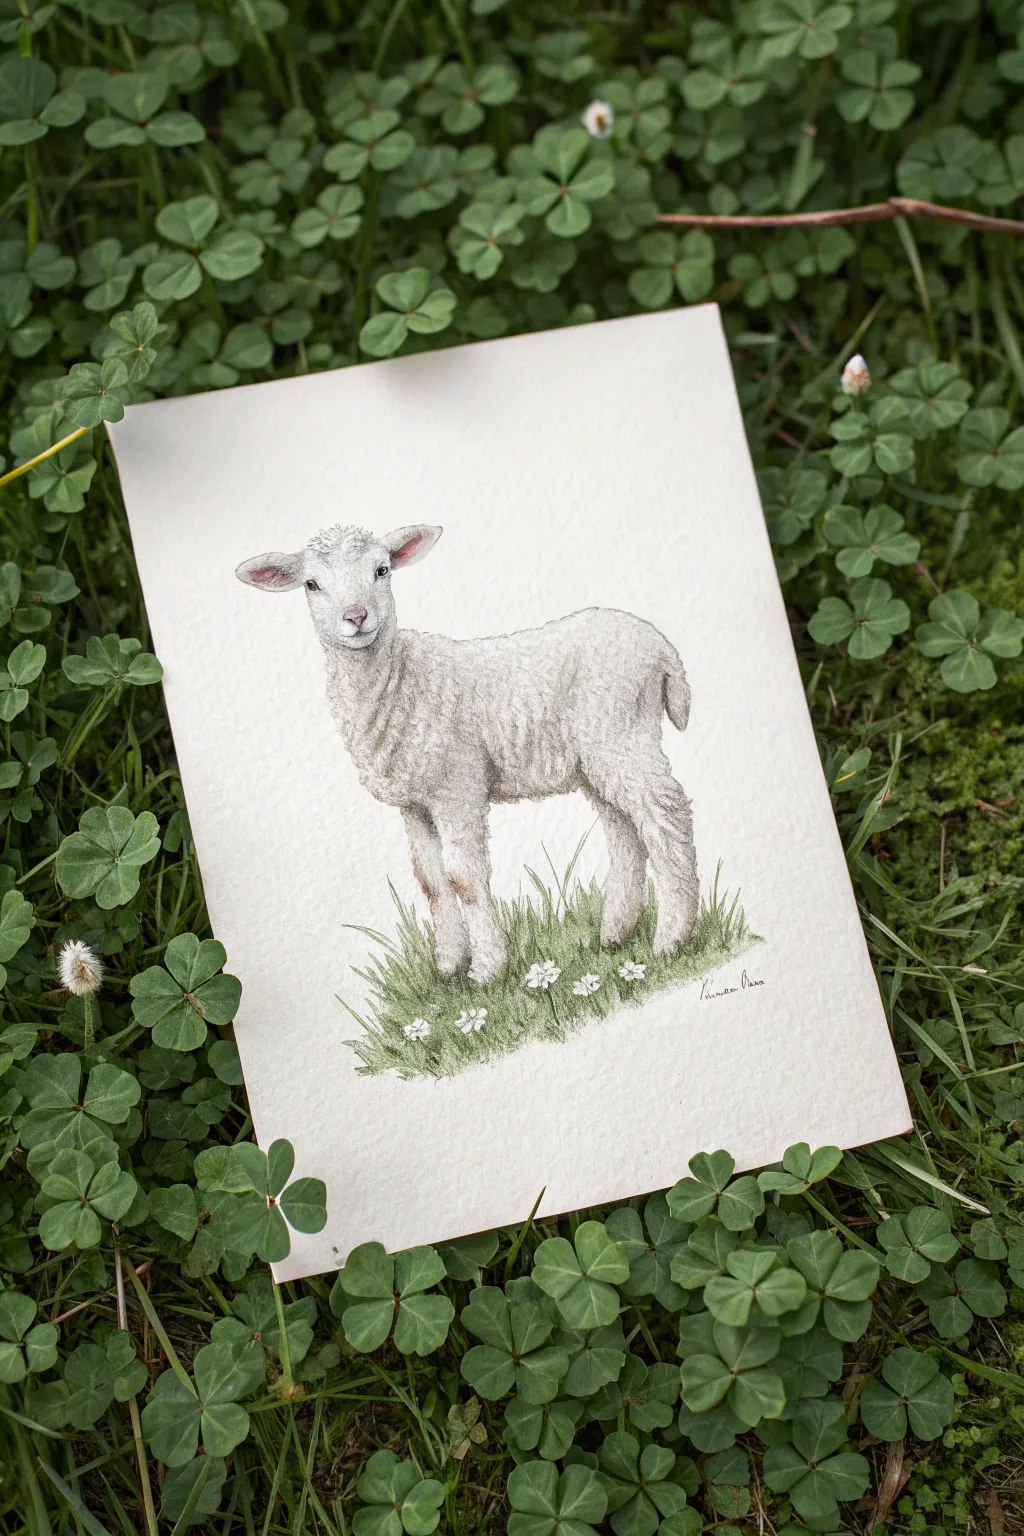
Capture the innocence of spring with this delicate study of a baby lamb standing in fresh grass. This project focuses on building realistic wool texture through patience and soft tonal layering rather than hard outlines.
How-To Guide
Materials
- Heavyweight drawing paper (Vellum surface)
- HB graphite pencil
- Kneaded eraser
- High-quality colored pencils (Warm Grey, Cool Grey, Black, Cream)
- Colored pencils (Blush Pink, Olive Green, Forest Green)
- Pencil sharpener
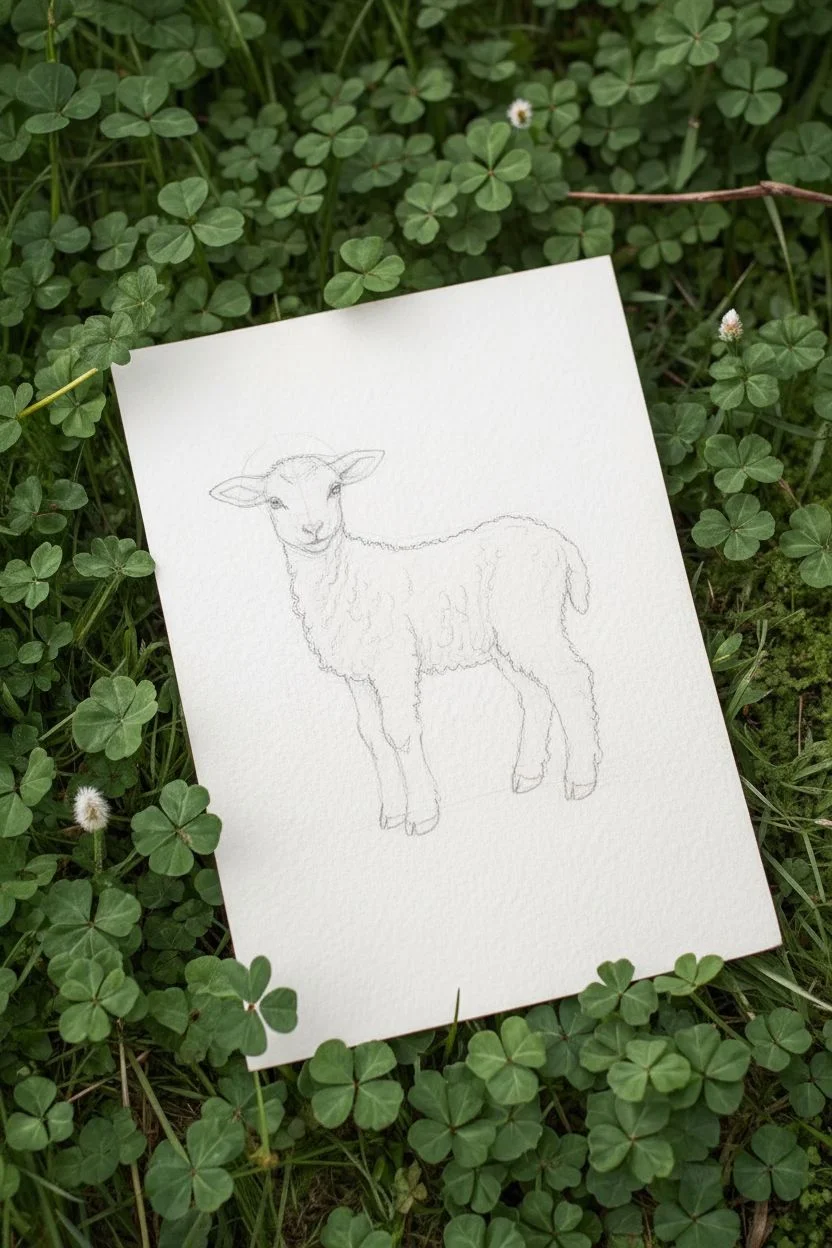
Step 1: Sketching the Form
-
Basic Shapes:
Start very lightly with your HB pencil. Draw a vertical oval for the chest and body, and a slightly smaller, more rounded shape closer to the top left for the head. -
Connecting Lines:
Connect the head to the body with a thick neck shape. Sketch the legs, noting that lamb knees are knobby and the legs taper significantly toward the hooves. -
Ears and Face:
Add two teardrop shapes extending horizontally from the head for ears. Mark the eye placement halfway down the face and a small Y-shape for the nose and mouth. -
Refining the Outline:
Go over your outline, but instead of a solid line, use a broken, squiggly line to indicate the fluffiness of the wool. Gently erase your heavy structural guidlines with the kneaded eraser until they are barely visible.
Fixing “Flat” Wool
If the wool looks too flat or wiry, you likely used lines that are too straight. Erase lightly to lift the pigment, then re-apply using only small, tight circular scribbles to mimic the texture of fleece.
Step 2: Detailed Features
-
The Eyes:
Using a sharp black pencil, outline the eye shape. Fill in the pupil black, but leave a tiny, crisp white circle for the catchlight to bring the lamb to life. -
Nose and Ears:
Layer a soft cream color over the muzzle. Use Blush Pink to lightly shade the nose and the inner parts of the ears, darkening the creases slightly for depth. -
Face Texture:
The hair on the face is shorter than the body. Use very short, fine, directional strokes with a Warm Grey pencil to map the fur growing outward from the nose.
Make It Pop
Use a white gel pen for the final eye highlight and to add tiny dots of ‘dew’ on the grass blades. This sharply contrasting bright white adds a professional, sparkling finish to the soft drawing.
Step 3: Creating the Wool
-
Initial Texture Layer:
For the body, swap straight strokes for tiny, circular motions (scumbling). Use a Cool Grey pencil lightly to create the appearance of curls on the neck and back. -
Building Volume:
Deepen the shadows where the legs meet the body and under the chin using a darker Warm Grey. I find that alternating between warm and cool greys creates a more realistic, natural whiteness. -
Leg Definition:
The legs have swirlier fur. Use curved strokes wrapping around the leg form to show roundness. Darken the hooves with dark grey, leaving a tiny sliver of light on the edge. -
Highlights:
Leave the top of the head and the back as pure white paper or use a white pencil to blend the grey edges, softening the transition into the highlights.
Step 4: The Grassy Base
-
Placing Flowers:
Before drawing grass, lightly circle a few spots near the hooves to reserve space for the white flowers. Do not color inside these shapes. -
Grass Strokes:
Using Olive Green, flick your pencil upward from the ground to create grass blades. Vary the length and direction, making sure some overlap the lamb’s hooves to ground the figure. -
Deepening Shadows:
Add Forest Green near the bottom of the clumps and directly under the hooves to create a cast shadow. This weight prevents the lamb from looking like it is floating. -
Flower Details:
Add a tiny dot of yellow to the center of your reserved white flower spots. Very lightly outline the petals with a pale grey to define them without making them look heavy.
Sign your artwork subtly near the grass to finish this soft, pastoral piece.


Bunny in a Storybook Jacket
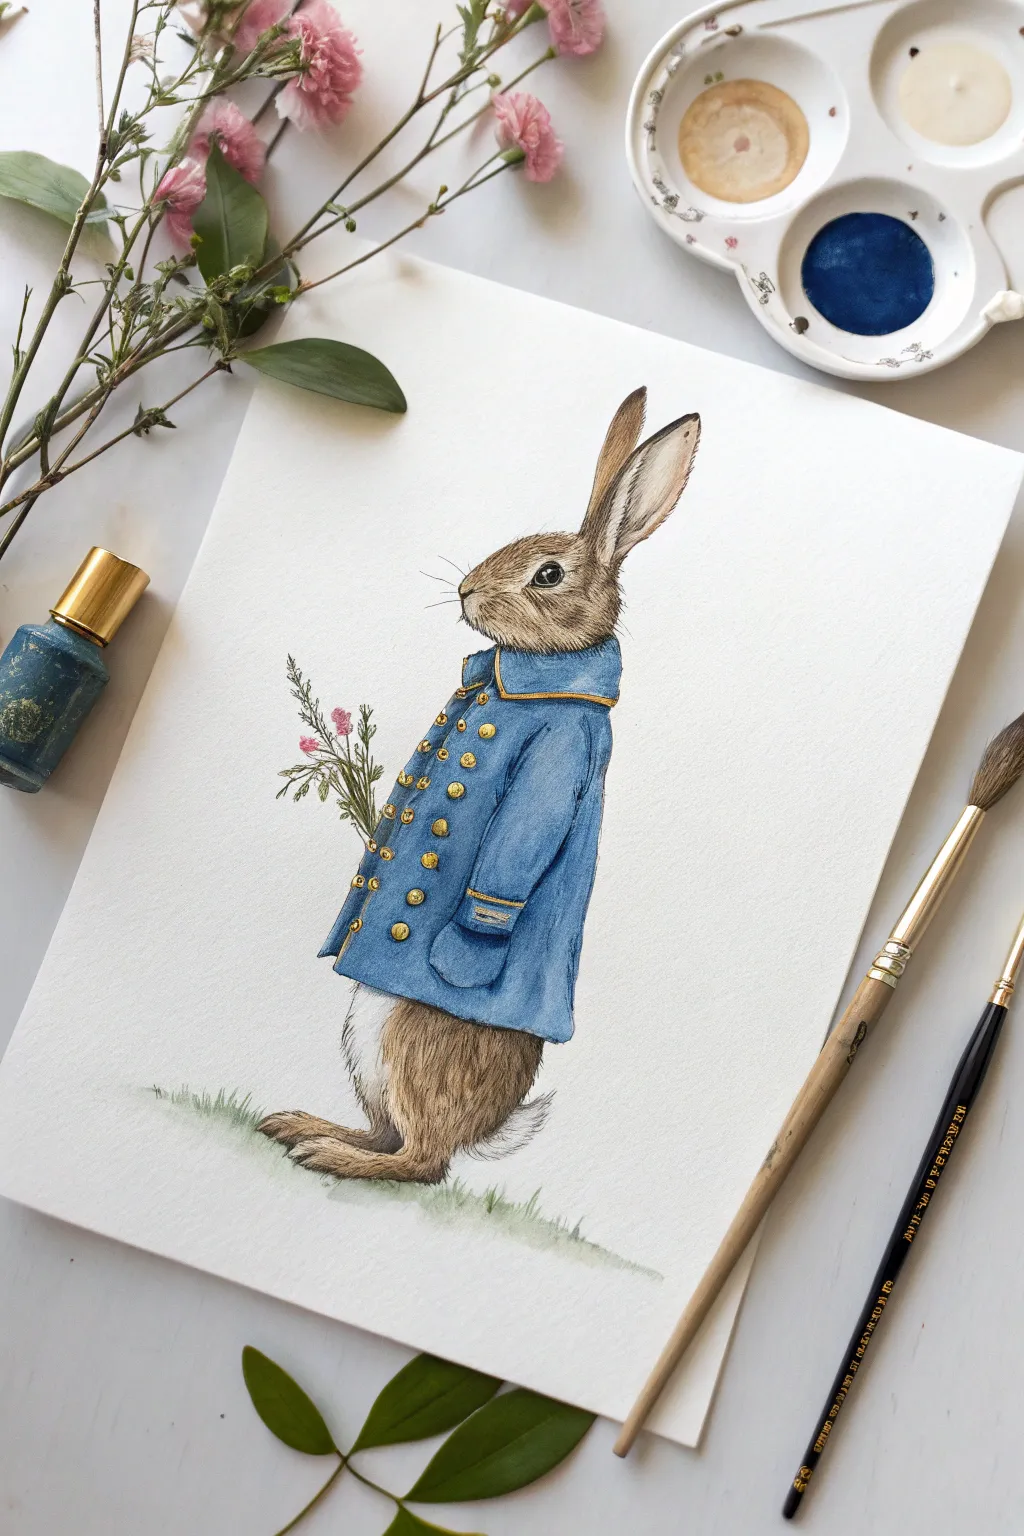
Capture the charm of classic children’s literature with this delicate watercolor and ink illustration. You will learn to layer soft fur textures against a crisp, structured jacket to bring this distinguished little character to life.
Step-by-Step
Materials
- Cold-press watercolor paper (300gsm)
- HB graphite pencil and kneaded eraser
- Watercolors (Yellow Ochre, Burnt Umber, Prussian Blue, Sap Green, Magenta)
- White opacity gouache (optional)
- Fine detail brushes (Size 0 and 2 round)
- Micron pen or fine liner (0.1mm, muted brown or black)
- Palette and water jars
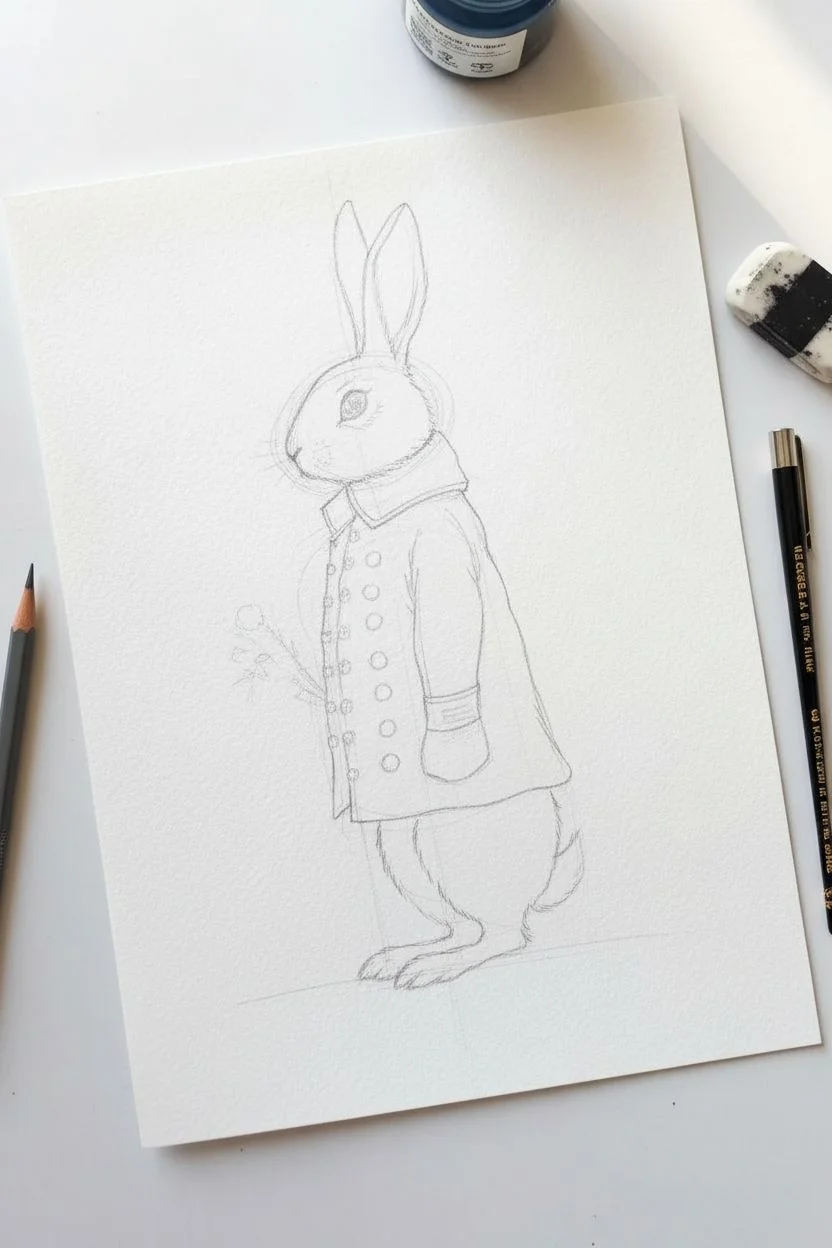
Step 1: Sketching the Character
-
Basic shapes:
Start by lightly sketching a tilted oval for the head and a larger, pear-shaped oval for the body standing upright. -
Ears and feet:
Add two long, upright ears with a slight curve to show alertness, and sketch large, elongated rabbit feet at the base to ground the figure. -
Clothing outline:
Draw the jacket over the torso, defining the high collar, the curve of the sleeve, and the front flap where the buttons will sit. -
Refining details:
Erase intersecting construction lines and sketch the tiny paw holding a bouquet, ensuring the pencil marks remain very light.
Step 2: Painting the Fur
-
Base wash:
Mix a diluted wash of Yellow Ochre and lightly fill in the head, ears, legs, and tail, leaving the belly area nearly white. -
Shadow mapping:
While the paper is still slightly damp, drop small amounts of Burnt Umber under the chin and along the back of the legs to create volume. -
Fur texture:
Once dry, use a size 0 brush with a thicker brown mix to paint tiny, flicking strokes in the direction of hair growth. -
The eye:
Paint the eye a solid dark brown or black, but be very careful to leave a tiny speck of white paper unpainted for the reflection. -
Ear details:
Add a touch of diluted pink to the inside of the ear, blending it softly into the brown fur shading.
Clean Edges
Keep your pencil sketch extremely faint using an HB pencil. Heavy graphite lines can smear when wet and muddy your delicate yellow and blue washes.
Step 3: The Blue Jacket
-
First coat:
Mix a vibrant Prussian Blue. Paint the entire jacket area, carefully working around the small circles you sketched for the brass buttons. -
Lifting highlights:
I like to use a clean, damp brush to lift a little pigment from the center of the sleeve and the chest while the paint is settling to simulate fabric sheen. -
Deepening shadows:
Mix a tiny bit of black or purple into your blue to create a darker indigo; paint this into the armpit creases and under the collar. -
Contrasting details:
Paint the collar and cuff edges with a steady hand, ensuring a crisp line where the fabric meets the fur. -
Brass buttons:
Fill the button circles with a thick mix of Yellow Ochre or Gold paint, adding a tiny brown crescent at the bottom of each for dimension.
Metallic Magic
Use a tiny dot of metallic gold watercolor or gouache for the brass buttons and cuff detailing to give the jacket a premium, storybook finish.
Step 4: Finishing Touches
-
Floral accent:
Use the tip of your smallest brush to dab pink/magenta dots for the flowers and draw thread-thin green lines for the stems. -
Grounding:
Sweep a very transparent green wash under the feet, flicking the brush upward at the edges to suggest grass blades. -
Whiskers:
Using your fine liner or a rigger brush with ink, draw long, confident sweeping lines for the whiskers appearing from the muzzle. -
Definition:
Add very selective ink outlines to the jacket collar and buttons to sharpen the illustration, but keep the fur edges soft.
Your distinguished bunny is now ready to hop straight into a storybook adventure.
BRUSH GUIDE
The Right Brush for Every Stroke
From clean lines to bold texture — master brush choice, stroke control, and essential techniques.
Explore the Full Guide
The Great Carrot Hug

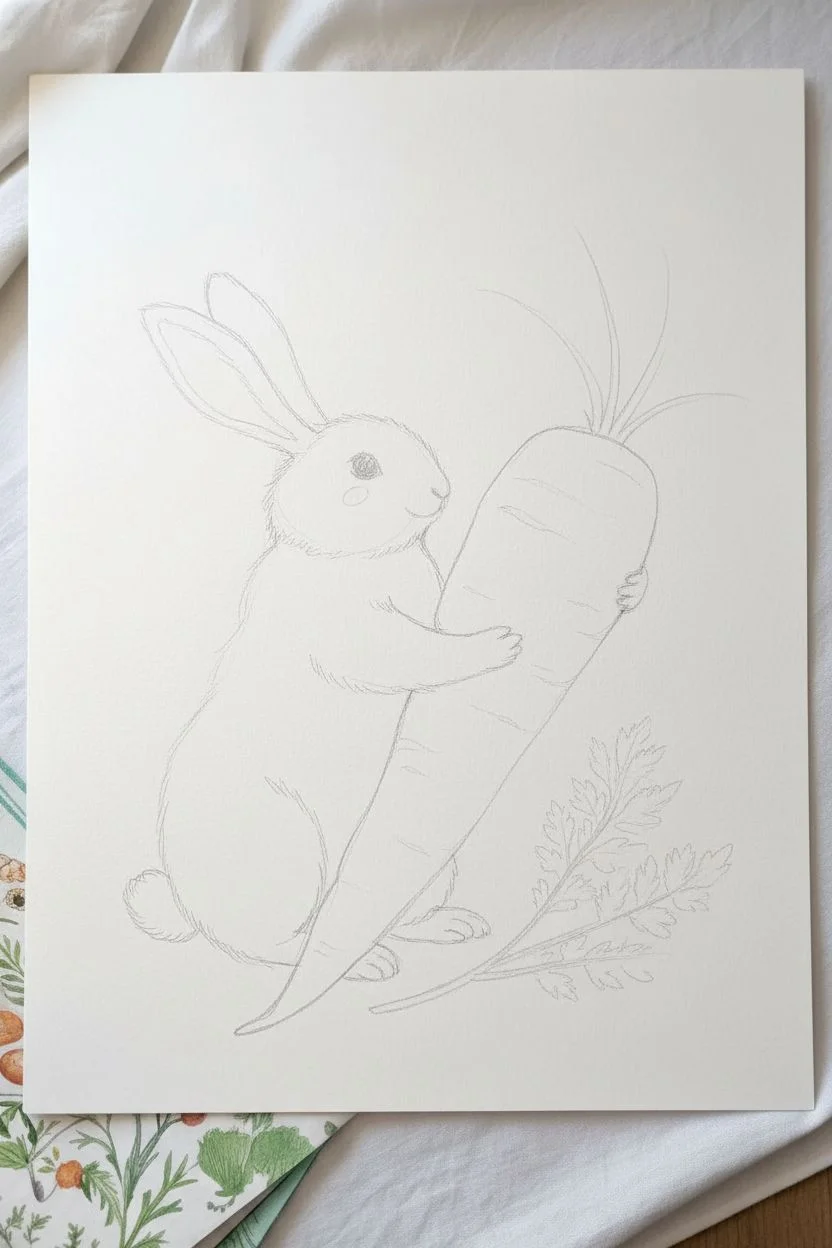
Capture the whimsy of spring with this illustration of a fluffy bunny hugging a prize-winning vegetable. By combining soft watercolor washes with precise colored pencil details, you will achieve a texture that looks realistic enough to touch.
Step-by-Step Tutorial
Materials
- Hot press watercolor paper (smooth texture)
- Watercolors: Yellow Ochre, Cadmium Orange, Burnt Umber, Sap Green, Alizarin Crimson, Lamp Black
- Colored pencils: Dark Brown, Terracotta, Dark Green, White
- Pointed round brushes (size 2 and 6)
- HB pencil and kneadable eraser
- White gel pen or fine white gouache
Step 1: Sketching the Scene
-
Outline the shapes:
Begin with a large, slanted oval for the carrot body. Sketch a smaller circle for the rabbit’s head and an oval for the body, positioning the rabbit so it leans against the vegetable. -
Refine the bunny:
Draw the long ears extending back, the paws gripping the carrot, and the fluffy tail. Mark the position of the eye, nose, and the line where the cheek changes color. -
Add foliage:
Sketch the carrot tops erupting from the top, using jagged, lively lines. Don’t forget to draw the separate sprig of greens lying on the ground to the right. -
Clean up:
Gently roll a kneadable eraser over your sketch. You want the graphite lines to be barely visible so they don’t show through the transparency of the lighter paint.
Pro Tip: Fur Direction
Always pay attention to the direction the fur grows. On the nose it spans outward, while on the back it flows toward the tail. Varying your stroke length creates realism.
Step 2: Base Watercolor Layers
-
Bunny base coat:
Mix a very watery wash of Yellow Ochre and a touch of Burnt Umber. Paint the entire rabbit, avoiding the eye and the inner ear. Keep the edges soft. -
Carrot coloring:
Load your size 6 brush with vibrant Cadmium Orange. Paint the carrot body, but leave irregular white strips toward the left side to simulate a shiny highlight. -
Greens and ears:
Apply a light wash of Sap Green to the leaves. For the inner ear and nose, use a diluted Alizarin Crimson to create a soft pink blush. -
Let it dry:
Ensure the paper is bone dry before moving to the next phase, otherwise your pencil lines will dig into the paper and tear the surface.
Level Up: Easter Frame
Use a fine liner to draw a delicate border around the artwork, entwining painted spring flowers like daisies or violets into the corners for a seasonal card look.
Step 3: Building Texture
-
Carrot ridges:
Using a more concentrated orange mixed with a drop of brown, paint horizontal, slightly curved lines across the carrot to create ridges and earthy texture. -
Deepening the greens:
Mix Sap Green with a little blue or black for a shadow green. Paint the veins and darker undersides of the leaves to give them volume. -
Fur texture foundation:
With a damp size 2 brush and light brown paint, add small flicking strokes under the chin, on the belly, and legs to suggest shadow and fur clusters.
Step 4: Detailed Refinement
-
Pencil fur details:
Take a sharp Dark Brown colored pencil. Draw short, quick strokes following the direction of hair growth. Focus on the face, ears, and back. -
Softening layer:
I like to layer a White colored pencil over the brown strokes on the chest and belly to blend them slightly and create that ultra-soft bunny look. -
Carrot definition:
Use a Terracotta or Rust colored pencil to deepen the shadows under the ridges of the carrot and around where the bunny’s paws grip it. -
Leaf precision:
Use the Dark Green pencil to outline the serrated edges of the carrot tops and define the thin stems connecting them. -
Facial features:
Paint the eye solid black, leaving a tiny pinprick of white paper. If you accidentally covered it, use opaque white paint later. -
Grounding shadows:
Mix a diluted watery grey/purple wash. Paint a soft shadow underneath the rabbit’s feet and the tip of the carrot so they don’t look like they are floating. -
Final highlights:
Use a white gel pen or fine brush with gouache to draw long, sweeping whiskers and add a crisp highlight to the eye.
Sign your name near the greens on the right and display your adorable springtime artwork
Digging Bunny Bum
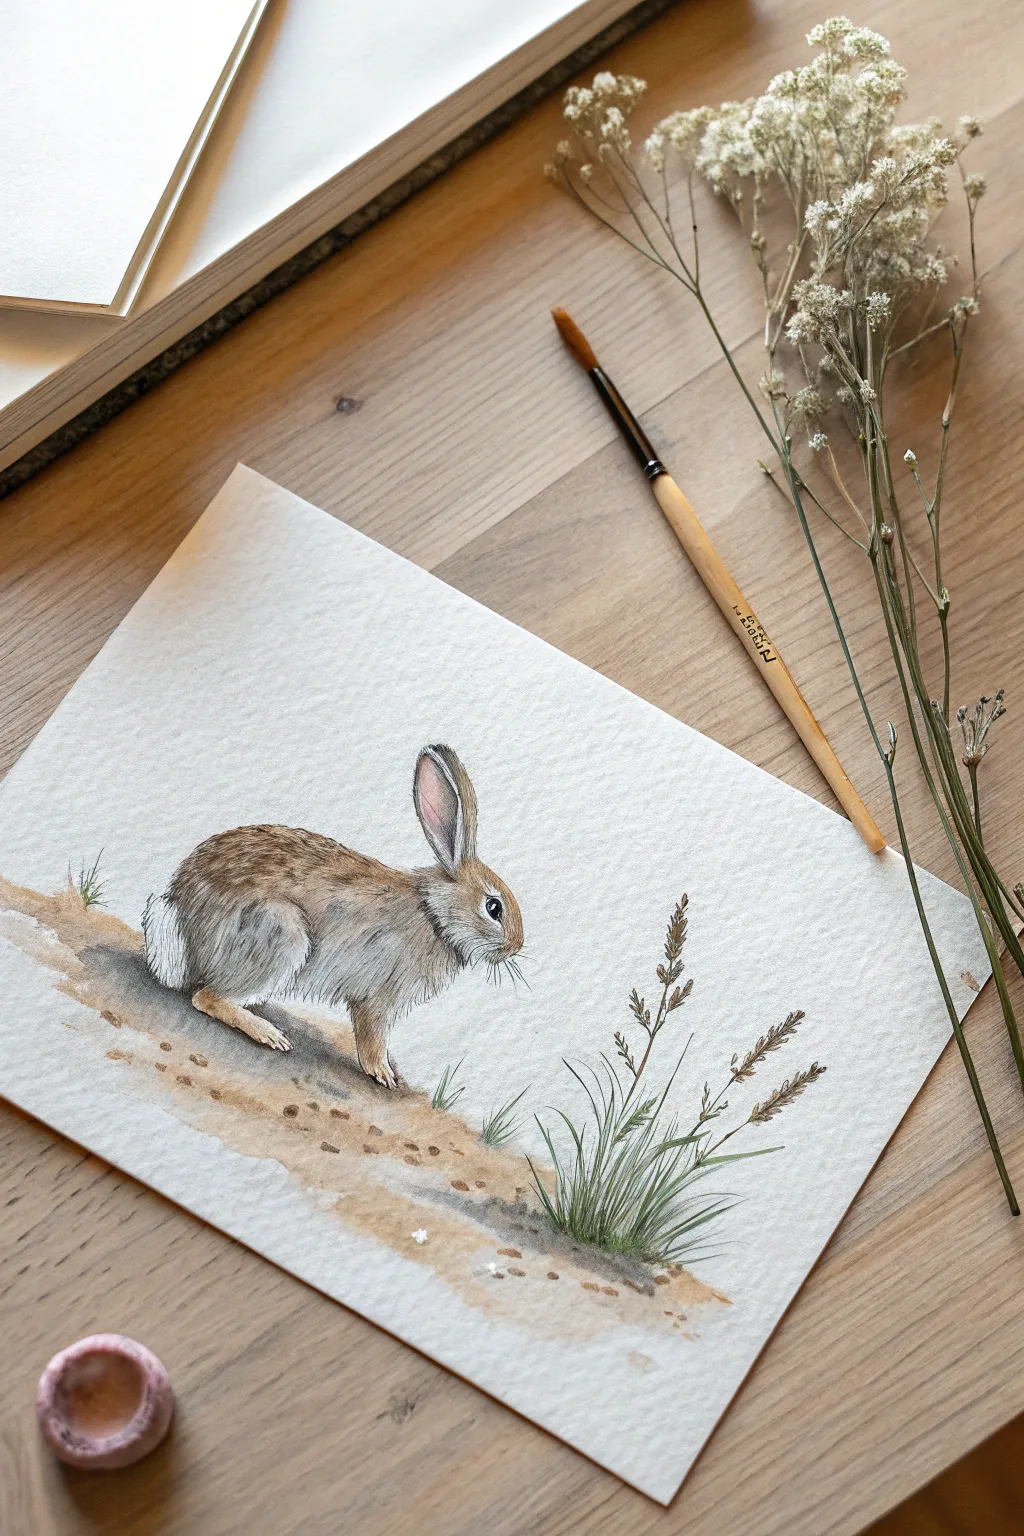
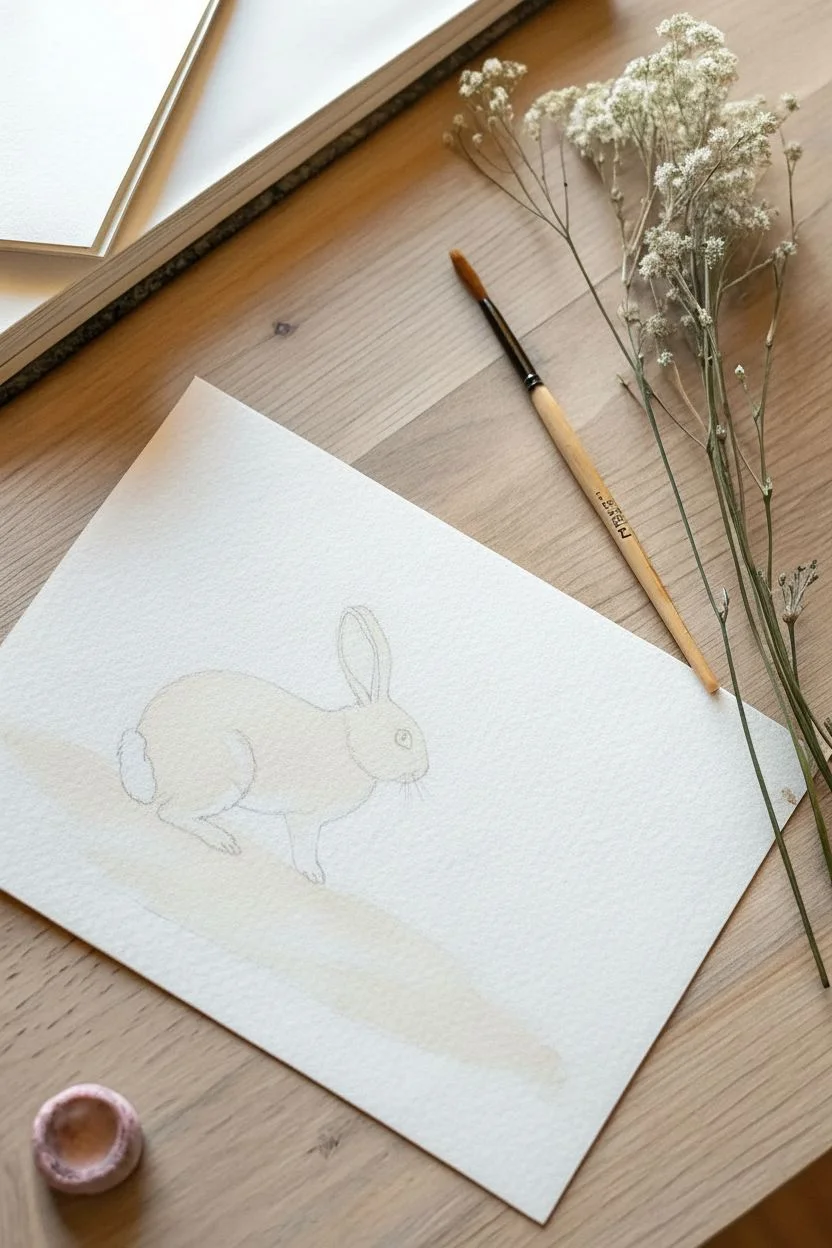
Capture the delicate details of nature with this realistic mixed-media style rabbit. By combining watercolor washes with precise fine-line work, you will create textured fur and a soft, earthy landscape.
Detailed Instructions
Materials
- Cold-press watercolor paper (300 gsm)
- Watercolors (Burnt Umber, Yellow Ochre, Paynes Grey, Sepia)
- Small round brush (size 4)
- Fine liner or detail brush (size 00 or 0)
- White gouache or white gel pen
- HB Pencil and kneaded eraser
- Paper towels
Step 1: Sketch and Base Washes
-
Light Outline:
Begin by sketching the rabbit’s basic shapes lightly with an HB pencil. Draw a large oval for the body and a smaller shape for the head, referencing the image for the erect ear and walking stance. -
Refine Shapes:
Refine the outline to connect the neck, define the paws, and mark the fluffy tail. Keep lines faint so they won’t show through the paint. -
Ground Layer:
Mix a watery wash of Yellow Ochre with a touch of Burnt Umber. Using the size 4 brush, paint a loose, horizontal strip beneath the rabbit to create the dirt path. -
Rabbit Base Coat:
Dilute a light brown mix heavily with water. Apply a very pale wash over the rabbit’s head and back, leaving the belly, chest, and tail completely unpainted white paper. -
Drying Time:
Allow these initial washes to dry completely. This is crucial for the texture steps that follow.
Fuzzy Solution
Is your fur looking like a blob? This happens if the base layer is damp. Ensure the paper is bone-dry before adding detail strokes so lines stay crisp.
Step 2: Fur Texture and Definition
-
Layering Fur:
Switch to your fine detail brush (size 0 or 00) and a slightly thicker mix of Burnt Umber. Start painting short, directional dashes along the back and flank to mimic fur. -
Adding Depth:
Pay attention to the direction the hair grows. I typically work from the neck downwards, curving the strokes around the thigh to show muscle volume. -
Greyscale Tones:
Mix a diluted Paynes Grey or cool brown. Add soft distinct fur strokes on the haunch and lower neck to indicate shadowed areas. -
Ear Details:
Paint the inside of the tall ear with a very pale, watery pink-brown. Once dry, outline the rim with darker brown fur strokes. -
The Eye:
Carefully paint the eye with dark Sepia or black. Leave a tiny speck of white paper (or add a dot of white gouache later) for the reflection highlight. -
Key Contrast:
Darken the area where the body meets the legs using Sepia. This contrast separates the limbs from the torso. -
White Highlights:
Use white gouache or a white gel pen to add sharp, short strokes over the transition areas between the brown fur and white belly for a realistic blend.
Pro Detail Tip
Vary your ‘fur’ colors. Don’t use just one brown; mix in ochres and greys on your palette to create a multi-tonal coat that looks deep and thick.
Step 3: Landscape and Finish
-
Grass Stalks:
Mix olive green with a bit of brown. Using the tip of your liner brush, flick upwards quickly to create thin, tapering grass blades on the right side. -
Seed Heads:
Add small, stippled dots in brown near the tops of the grass blades to represent dried seed heads or flowers. -
Texture on Path:
Drop small, concentrated dots of brown onto the ground wash to simulate pebbles and soil texture. -
Ground Shadows:
Paint a transparent grey wash directly underneath the rabbit’s paws and the grass clump to ground the subject. -
Whiskers:
With the finest point of your brush and very light pressure, pull out long, sweeping whiskers from the muzzle. -
Final Assessment:
Erase any remaining visible pencil marks around the edges once the paper is 100% dry.
Now you have a serene little nature study perfect for framing or an Easter card greeting.

PENCIL GUIDE
Understanding Pencil Grades from H to B
From first sketch to finished drawing — learn pencil grades, line control, and shading techniques.
Explore the Full Guide
Animals with Floral Crowns
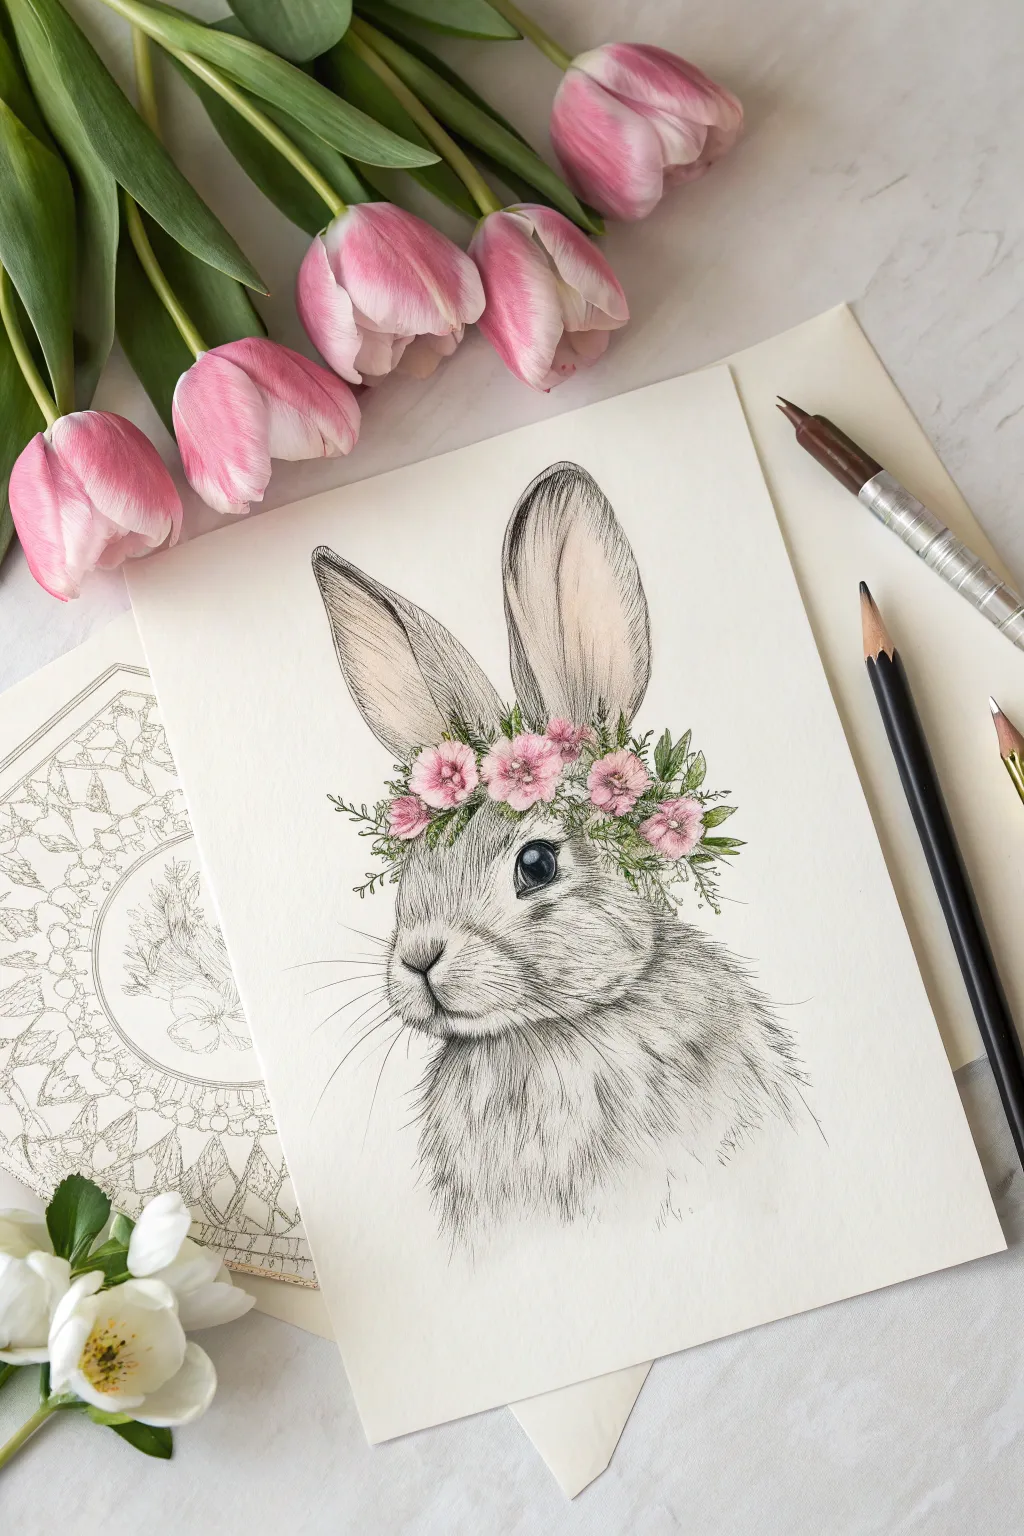
Capture the spirit of spring with this delicate ink and colored pencil illustration. You will combine precise hatching techniques with soft touches of color to create a portrait that feels both realistic and enchanting.
Step-by-Step
Materials
- Smooth heavyweight drawing paper or Bristol board
- HB Graphite pencil and kneaded eraser
- Black fine liner pens (sizes 0.05mm and 0.1mm)
- Colored pencils (Soft Pink, Rose, Olive Green, Cream)
- Pencil sharpener
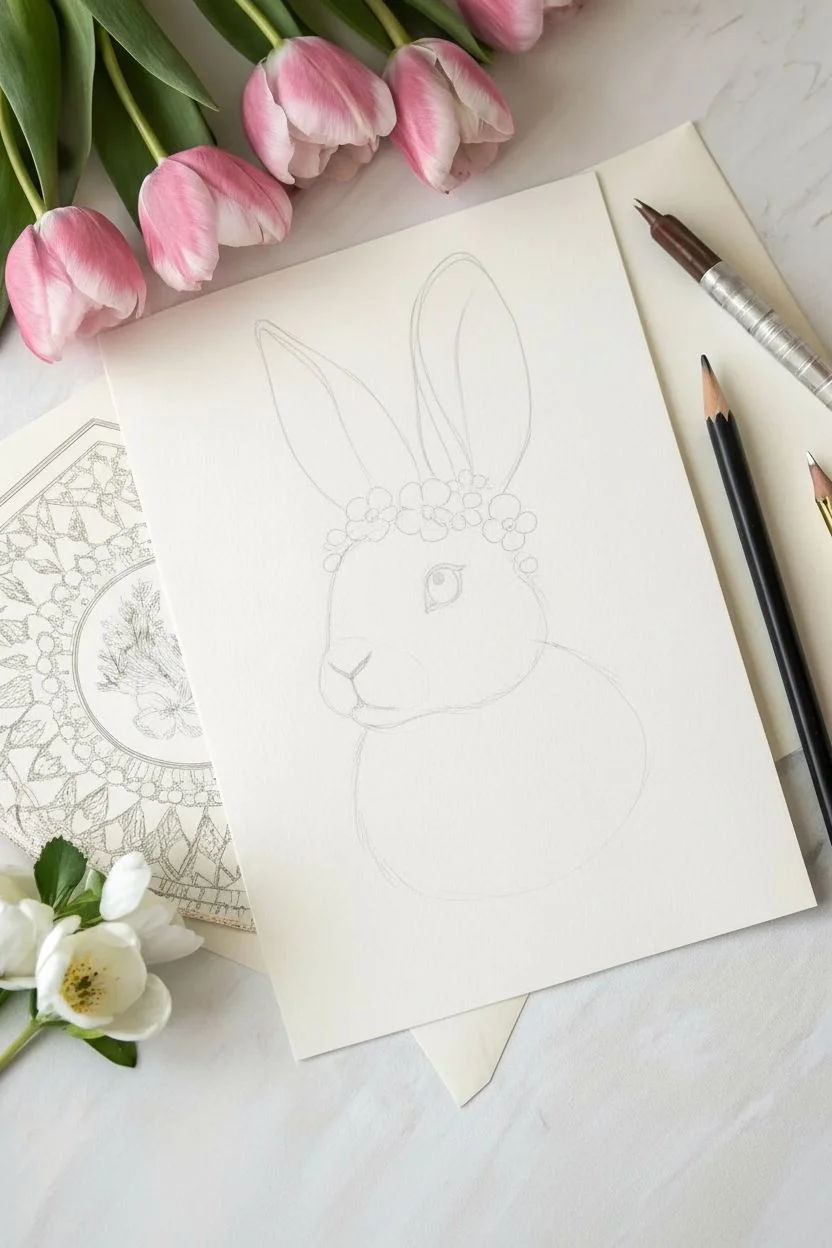
Step 1: Sketching the Composition
-
Outline the head shape:
Start by lightly sketching a tilted oval in the center of your page to represent the rabbit’s head, slightly wider at the bottom for the cheeks. -
Define the muzzle:
Add a smaller, protruding curve on the left side of the oval to mark the nose and mouth area, giving the bunny a 3/4 profile view. -
Add the ears:
Draw two long, tall leaf shapes extending from the top right of the head. Keep them upright but slightly curved for a natural alert look. -
Place the eye:
Sketch a large circle midway down the head, aligned with the top of the muzzle. Add a small circle inside near the top for the highlight. -
Sketch the crown:
Draw varying circle sizes in a band across the forehead, reaching from the left ear base to the right cheek, to map out the floral arrangement.
Step 2: Inking the Details
-
Ink the eye:
Using your 0.1mm pen, outline the eye and color the pupil distinctively dark black, being very careful to leave the small white highlight completely blank. -
Detail the nose:
Draw the Y-shape of the nose and mouth with delicate lines, keeping the strokes thin to maintain a soft expression. -
Create short fur texture:
Switch to the finer 0.05mm pen. Use short, quick hatching strokes radiating away from the nose and around the eye to simulate short velvet-like fur. -
Build cheek fluff:
As you move to the cheeks and neck, lengthen your pen strokes slightly. Layer these lines to create density and shadow where the jaw meets the neck. -
Refine the ears:
Outline the ears with broken, wispy lines rather than a solid contour. Use long vertical hatching lines inside the ears to suggest depth and shadow. -
Ink the chest:
Use your longest, loosest strokes for the chest area, mimicking the look of thicker, fluffier winter coat fur. -
Outline the flowers:
Go over your floral penciling with the 0.1mm pen. Use slightly wobbly, organic lines for the petals to keep them looking natural and soft. -
Add foliage:
Draw small sprigs of leaves and tiny buds poking out from between the flowers to flesh out the crown. -
Clean up:
Once the ink is entirely dry—I usually wait at least five minutes to be safe—gently erase all underlying pencil lines.
Stiff Fur?
If the fur looks too rigid, try ‘flicking’ your wrist at the end of each pen stroke. This tapers the line, making it thinner at the end, which mimics the natural taper of hair.
Step 3: Adding Soft Color
-
Base floral color:
Take a soft pink colored pencil and lightly fill in the flower petals, leaving the tips slightly lighter. -
Deepen the centers:
Use a rose or darker pink pencil to shade the centers of the flowers, blending outward to create dimension. -
Tint the leaves:
Apply the olive green pencil gently to the leaves and stems. Keep the pressure light to maintain the delicate aesthetic. -
Color the inner ears:
Lightly shade the inside of the tall ears with a mix of cream and very faint pink to differentiate the skin from the fur. -
Add final shadows:
Use a grey pencil to add very subtle shading under the chin and behind the flower crown to ground the drawing. -
Draw the whiskers:
Finish the piece by using the 0.1mm pen to draw long, confident sweeping lines for the whiskers extending from the muzzle.
Level Up
Add a touch of gold watercolor or a metallic gel pen to the very center of each flower. This tiny detail catches the light and adds a magical finish perfect for greeting cards.
Frame your beautiful bunny portrait or scan it to create lovely custom Easter cards for your friends
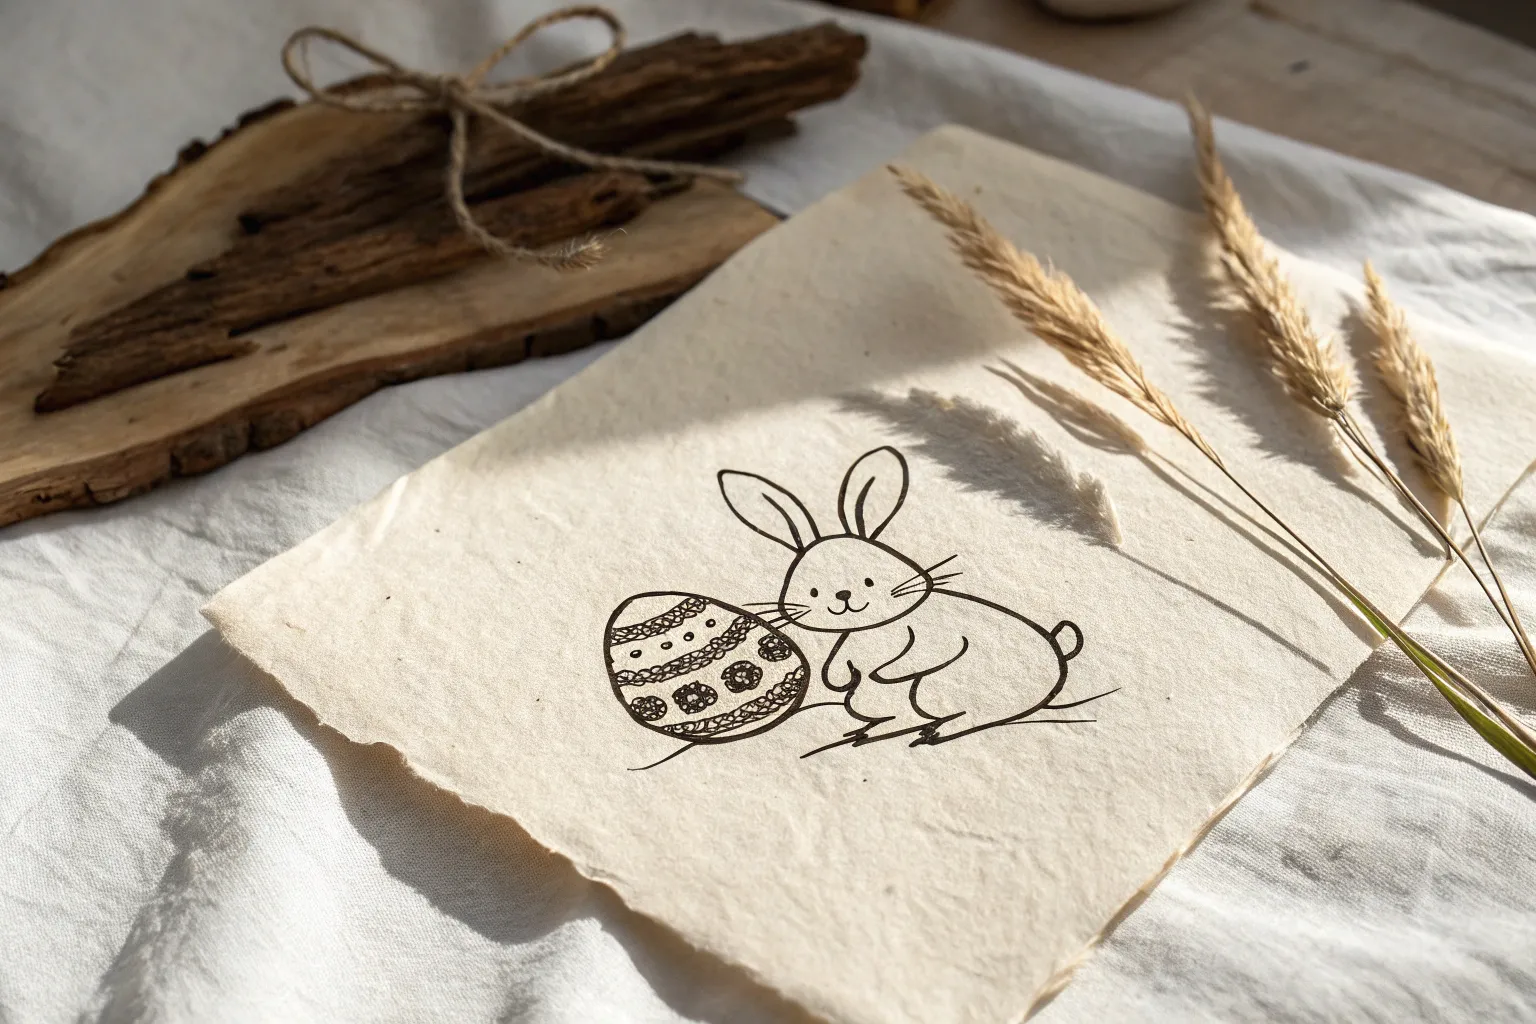
Folding Surprise Drawing
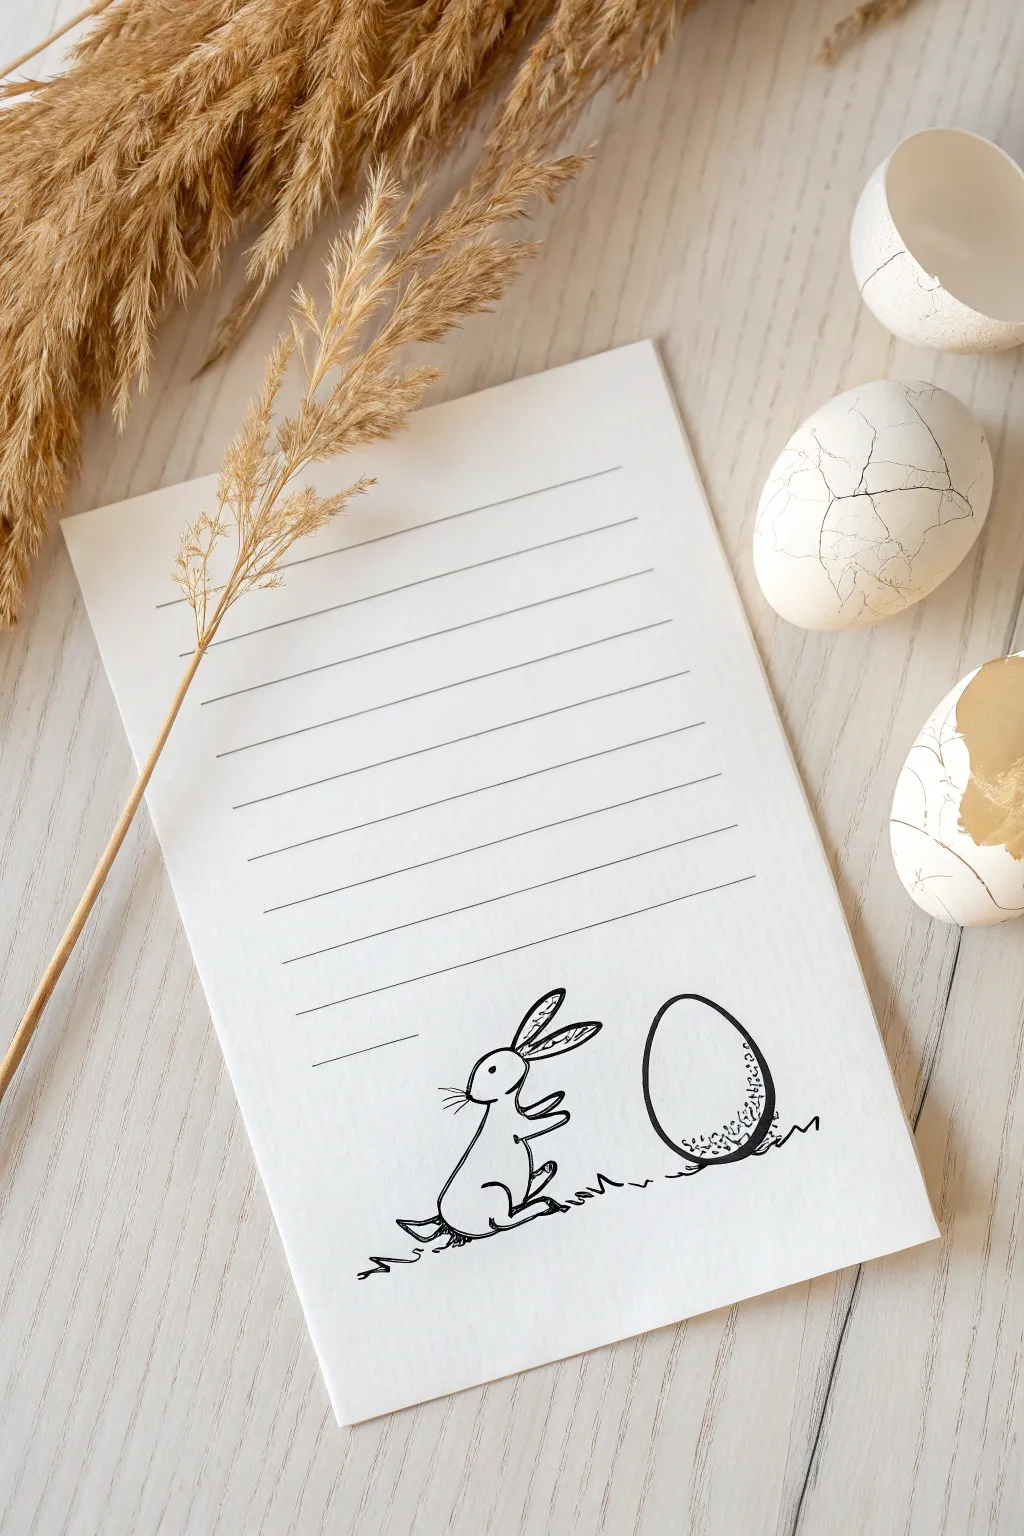
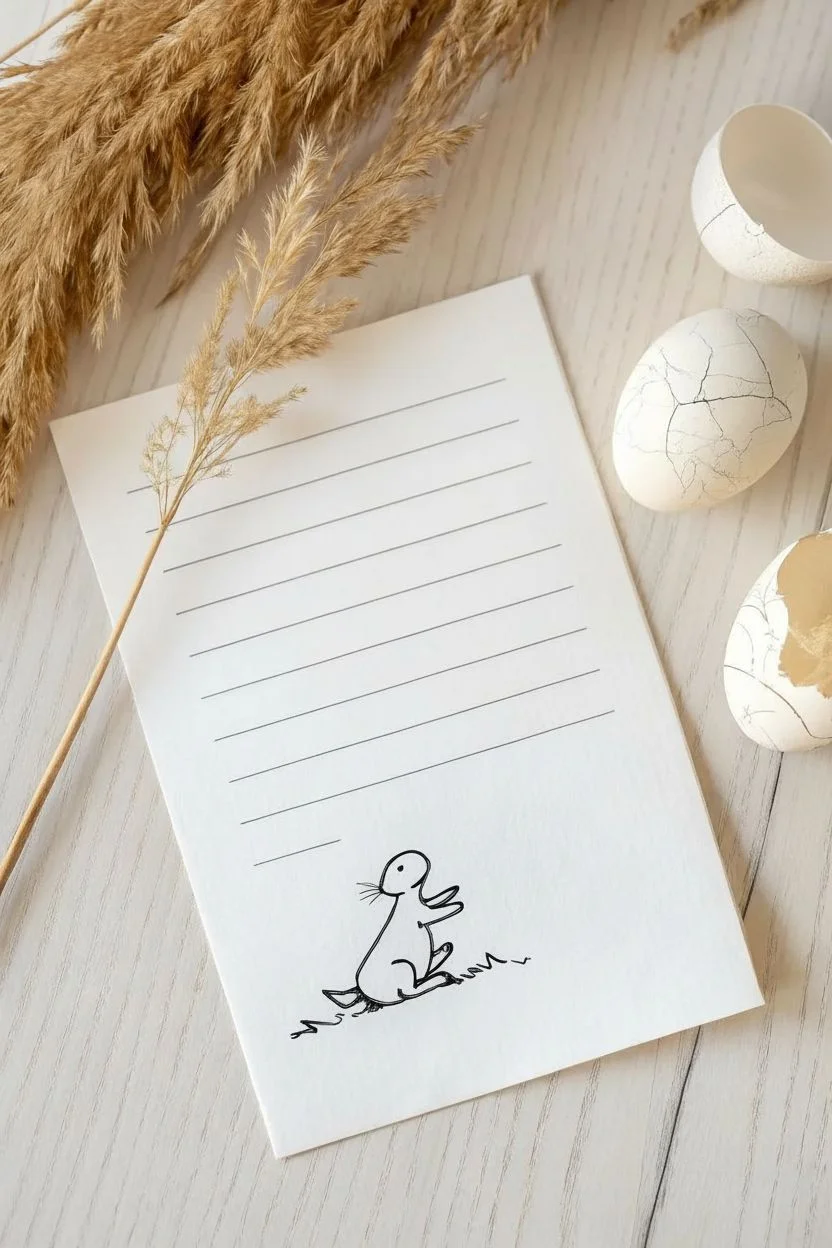
“t”: “Hand-Drawn Easter Bunny Stationery”,
“i”: “Transform a simple sheet of paper into charming custom stationery featuring a whimsical bunny sketch. This project combines precise ruled lines with a loose, playful doodle to create the perfect canvas for your holiday greetings.”,
“m”: [
“Heavyweight white paper or cardstock (A5 size)”,
“Black fine liner pen (0.3mm or 0.5mm)”,
“HB Pencil”,
“High-quality eraser”,
“Ruler”
],
“p”: [
{
“n”: “Layout & Structure”,
“s”: [
{
“t”: “Prepare the paper”,
“d”: “Start with your rectangular sheet of paper on a flat surface. If you are cutting it from a larger sheet, ensure edges are crisp and straight.”
},
{
“t”: “Mark text boundaries”,
“d”: “Measure about two inches down from the top edge and make a light pencil mark to indicate where your writing lines will begin.”
},
{
“t”: “Define the drawing space”,
“d”: “Leave a generous open space, approximately three inches high, at the bottom of the page for your illustration.”
},
{
“t”: “Draft the lines”,
“d”: “Using your ruler and pencil, lightly mark out 8 to 10 horizontal lines spaced about 1cm (0.4 inches) apart within the central writing area.”
},
{
“t”: “Ink the lines”,
“d”: “Switch to your black fine liner. Hold the ruler firm and draw over your pencil lines to create permanent, crisp writing guides. Stop before you reach the bottom drawing area.”
}
]
},
{
“n”: “Sketching the Characters”,
“s”: [
{
“t”: “Position the bunny”,
“d”: “With your pencil, lightly sketch a circle for the bunny’s head in the bottom left corner of the page.”
},
{
“t”: “Outline the body”,
“d”: “Draw a pear-shaped oval connected below the head, leaning slightly forward to give the bunny a seated posture.”
},
{
“t”: “Add the ears”,
“d”: “Sketch two long, slender ears extending from the top of the head. I like to bend the tip of the right ear downwards to add personality.”
},
{
“t”: “Sketch the egg”,
“d”: “To the right of the bunny, draw a large distinct oval shape. It should be roughly the same height as the bunny’s seated body.”
},
{
“t”: “Connect the scene”,
“d”: “Draw a faint, jagged horizontal line connecting the bunny’s feet to the egg to establish the ground.”
}
]
},
{
“n”: “Detailing & Inking”,
“s”: [
{
“t”: “Refine the face”,
“d”: “Pencil in a small nose, three long whiskers on the cheek, and an open oval shape for the eye.”
},
{
“t”: “Add limbs”,
“d”: “Sketch small front paws reaching out and a larger, folded rear leg to anchor the bunny’s pose.”
},
{
“t”: “Ink the bunny”,
“d”: “Go over your pencil sketch with the fine liner. Use quick, loose strokes for the fur to keep the drawing looking lively rather than stiff.”
},
{
“t”: “Ink the egg”,
“d”: “Trace the egg outline carefully. At the bottom right curve of the egg, add some stippling (small dots) or scribble texture to suggest shadow.”
},
{
“t”: “Finalize the ground”,
“d”: “Ink the jagged ground line, letting it extend slightly past the figures on both sides.”
},
{
“t”: “Shade the ears”,
“d”: “Add some light hatching lines inside the upright ear to create depth.”
},
{
“t”: “Clean up”,
“d”: “Allow the ink to dry completely for at least two minutes to avoid smudges.”
},
{
“t”: “Erase”,
“d”: “Gently embrace the page with your eraser to remove all underlying pencil marks, revealing your crisp, hand-drawn design.”
}
]
}
],
“boxes”: [
{
“title”: “Pro Tip”,
“content”: “Rotate your paper while inking the large curve of the egg. This helps your hand maintain a natural arc for a smoother, clearer line.”
},
{
“title”: “Level Up”,
“content”: “Use metallic gold watercolor to fill in the drawn egg or add cracks with a gold pen


The Puppy in Bunny Ears

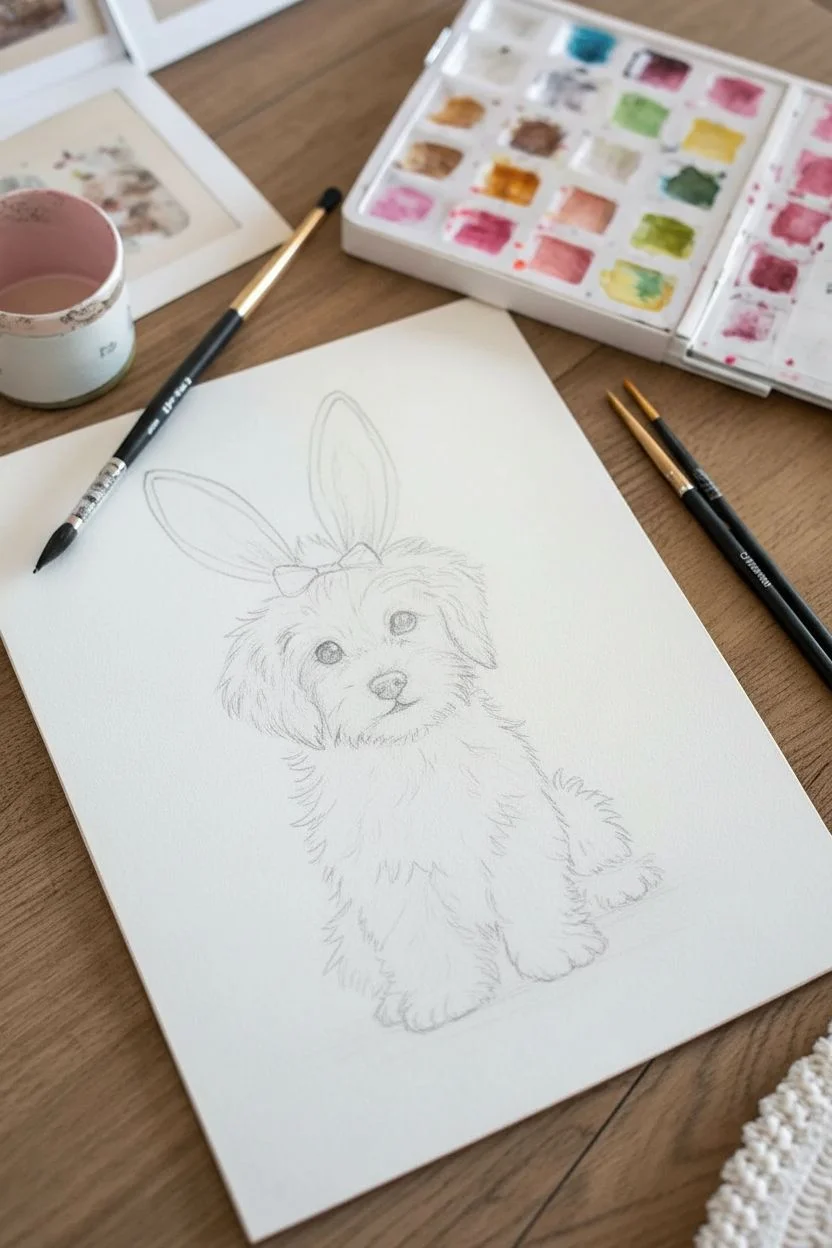
Capture the heartwarming spirit of spring with this watercolor portrait of a beige puppy donning playful pink ears. This tutorial focuses on building soft fur textures and mastering the wet-on-dry technique to create a soulful, realistic expression.
Step-by-Step Tutorial
Materials
- Cold press watercolor paper (300 gsm)
- Watercolor paints (Yellow Ochre, Burnt Umber, Sepia, Rose/Pink, Payne’s Grey)
- Round brushes (size 6 for washes, size 2 for details)
- Rigger brush or fine liner brush
- HB Pencil and kneaded eraser
- Two jars of water
- Paper towels
Step 1: Sketching the Composition
-
Outline the shapes:
Begin with a light HB pencil sketch, drawing a rounded oval for the puppy’s head and a pear shape for the seated body. -
Add the accessories:
Sketch the large, tall bunny ears extending from the top of the head, connecting them with a small bow shape at the crown. -
Map the features:
Lightly mark the placement of the eyes, nose, and muzzle, ensuring the eyes are level and spaced evenly. -
Indicate fur direction:
Use very faint, jagged pencil strokes to map out where the fur tufts on the cheeks and chest will flow.
Pro Tip: White Fur
To keep the chest looking fluffy and white, rely on ‘negative painting.’ Don’t paint the fur itself; paint the grey shadows between the tufts to make the white paper pop forward.
Step 2: Base Washes and Colors
-
Paint the first fur layer:
Mix a very watery wash of Yellow Ochre with a tiny touch of Burnt Umber. Apply this loosely over the puppy’s head and sides, leaving the chest and muzzle area paper-white. -
Wash the bunny ears:
While the fur layer dries, mix a soft Rose or Pink. Fill in the bunny ear shapes with a clean, even wash. -
Create an ear gradient:
Before the pink paint dries completely, drop a slightly more saturated pink mix into the bottom of the ears to create a subtle ombre effect. -
Detail the bow:
Paint the small bow connecting the ears using a concentrated pink mix, adding a small shadow stroke under the knot for dimension.
Level Up: Glossy Eyes
If you accidentally painted over the eye highlight, wait for the paint to fully dry, then use a white gel pen or a dot of white gouache to add the spark back in.
Step 3: Building Texture and Depth
-
Layering the head fur:
Using a size 6 brush and a mix of Burnt Umber, paint short, flicking strokes on the forehead and ears to simulate hair growth patterns. -
Define the chest fluff:
Instead of painting the white chest fur directly, paint the subtle shadows around the clumps using a very pale grey violet mix to suggest volume. -
Darken the ear shadows:
Add Sepia to your brown mix and paint the deeper shadows where the puppy’s natural ears fold downwards under the pink headband. -
Texture the body:
Use a ‘dry brush’ technique with light brown paint on the body and paws, dragging the brush lightly so the texture of the paper creates a scruffy look. -
Deepen the paws:
Paint vertical shadow lines between the toes and underneath the paws to ground the puppy.
Step 4: Features and Finishing Touches
-
Paint the eyes:
Switch to a size 2 brush and Payne’s Grey. Carefully fill in the iris and pupil, leaving a tiny, crisp white circle unpainted for the reflection. -
Add the nose:
Paint the nose with a dark grey mix, stippling the texture slightly and darkening the nostrils the most. -
Refine the muzzle:
Use a very pale grey wash to define the shadow under the nose and the separation of the mouth. -
Intensify contrasts:
I like to go back in with my darkest Sepia tone and add final deep contrast points just above the eyes and under the ear flaps. -
Ground the subject:
Wet the paper directly underneath the puppy and drop in a horizontal wash of dilute Payne’s Grey for a soft cast shadow. -
Final whiskers:
Using a rigger brush or a very sharp colored pencil, pull out a few fine whiskers from the muzzle area.
Allow your painting to dry completely before erasing any visible pencil lines, revealing a sweet Easter portrait ready to be framed.
Stacked Totem of Chicks
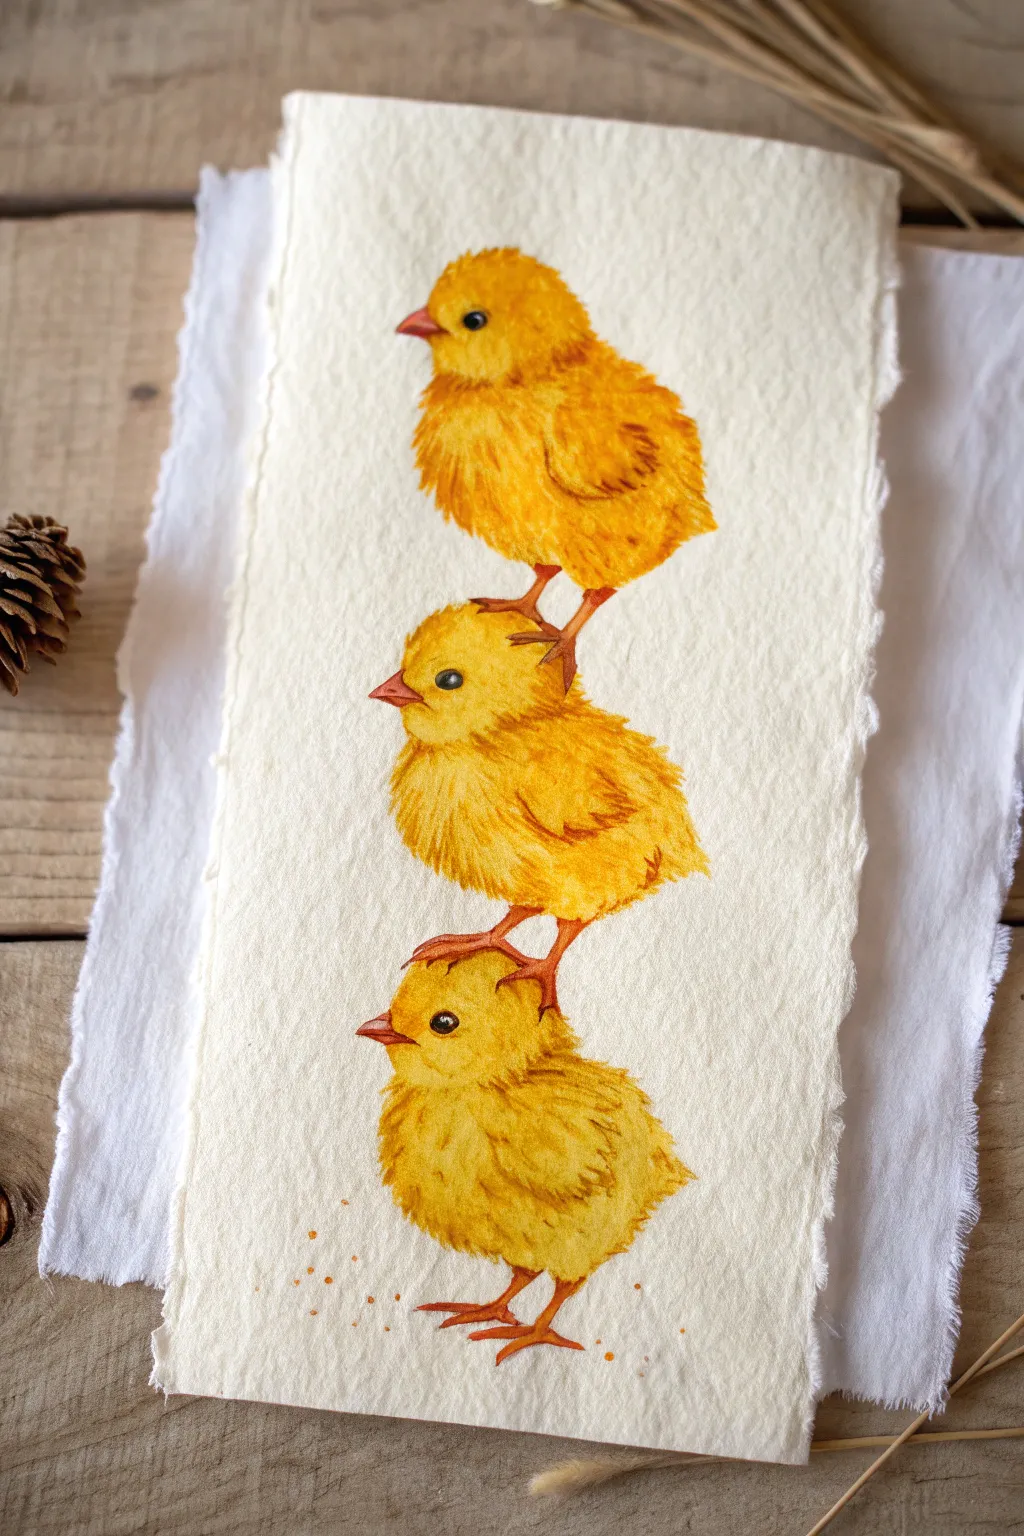
Capture the whimsy of Easter with this adorable vertical composition featuring a trio of balancing baby chicks. The project uses textured watercolor paper and warm, golden hues to create a soft, feathery look that feels traditional yet playful.
Detailed Instructions
Materials
- Heavyweight cold-press watercolor paper (deckle edge recommended)
- Watercolors: Cadmium Yellow, Yellow Ochre, Burnt Sienna, Cadmium Red
- Small round brushes (size 2 and 4)
- Detail brush (size 0 or 00)
- HB pencil and kneaded eraser
- White gel pen (optional)
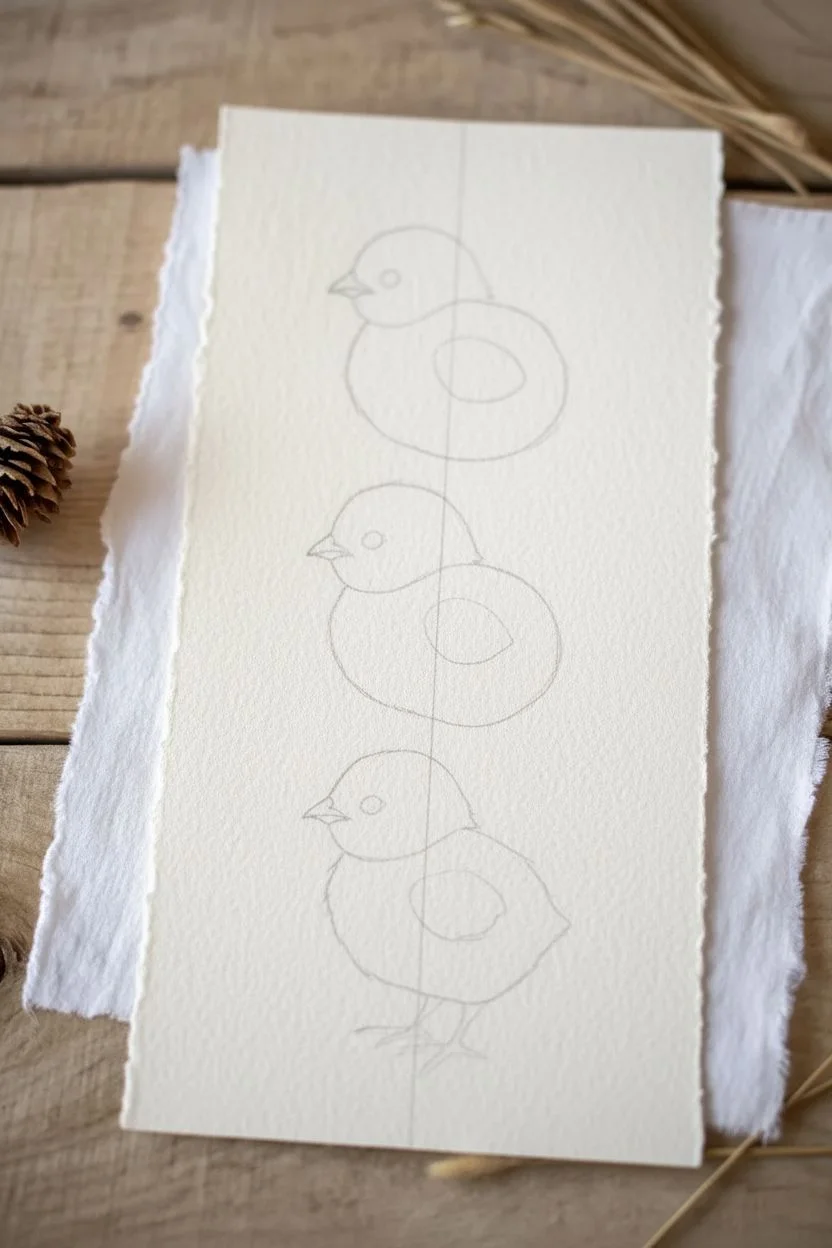
Step 1: Sketching the Stack
-
Establish the vertical line:
Lightly draw a central vertical line down your paper to ensure your chicks align perfectly without leaning. -
Block in the shapes:
Sketch three vertically stacked circles for heads and slightly larger ovals for bodies. The bottom chick should be slightly larger to support the ‘weight’ visually. -
Connect the trio:
Refine the outlines, allowing the feet of the top chicks to rest directly on the head curves of the chick beneath them. -
Add facial details:
Sketch small triangular beaks pointing left and small circles for eyes. Keep the pencil lines very faint so they don’t show through the yellow paint later.
Make it Fluffy
Paper texture does the work! Use ‘rough’ or ‘cold-press’ paper. The bumps in the paper naturally break up brushstrokes, making the color look like textured down feathers without extra effort.
Step 2: Base Washes
-
Mix your base yellow:
Prepare a watery mix of Cadmium Yellow. Check the intensity on a scrap piece of paper; it should be bright but transparent. -
First layer application:
Paint the body of the top chick. Use jagged, flicking brushstrokes along the outer edges to imitate fluffy down feathers rather than a smooth line. -
Continue the wash:
Repeat this process for the middle and bottom chicks. I prefer to leave a tiny sliver of unpainted white space between them initially to prevent the wet paint from merging into one big blob. -
Soften the edges:
While the paint is still damp, drop in tiny touches of clear water on the center of the bodies to push the pigment toward the edges, creating a subtle glowing effect.
Level Up: Deckle Edge
To exactly match the reference photo’s rustic look, tear the edges of your watercolor paper against a ruler instead of cutting it with scissors. This creates a soft ‘deckle’ edge.
Step 3: Texturing and Depth
-
Mix shadow tone:
Create a warmer shade by mixing more Cadmium Yellow with a touch of Yellow Ochre or Burnt Sienna. -
Layering feathers:
Using a size 2 brush, add this darker yellow in small, short strokes to suggest wings and thigh fluff. This ‘wet-on-dry’ technique builds texture. -
Deepening shadows:
Apply the shadow mix specifically under the wings, under the chins, and where the feet of the upper chicks cast a shadow on the heads below. -
Painting the legs:
Mix a reddish-orange using Cadmium Red and Yellow. Carefully paint the thin legs and toes with your smallest brush. -
Coloring the beaks:
Use the same orange mix (perhaps with a tiny bit more red) to fill in the beaks, leaving a microscopic line of white on top for a highlight.
Step 4: Final Details
-
The eyes:
Mix a dense black or dark grey. Carefully paint the eyes, ensuring you leave a tiny white spec unpainted for the ‘catchlight’ to bring them to life. -
Defining the contact points:
Use a darker brown-orange mix to outline the toes slightly where they grip the chick below, adding weight to the stack. -
Enhancing the fluff:
With a nearly dry brush and your darkest ochre mix, add a few stray ‘hairs’ or feather wisps sticking out from the outlines to break up any perfect curves. -
Grounding the image:
Paint the feet of the bottom chick and dab a few random specks of orange and brown near the toes to represent scattered birdseed.
Now you have a charming, rustic piece of Easter art ready to frame or turn into a heartfelt card.
Whimsical Easter Gnome

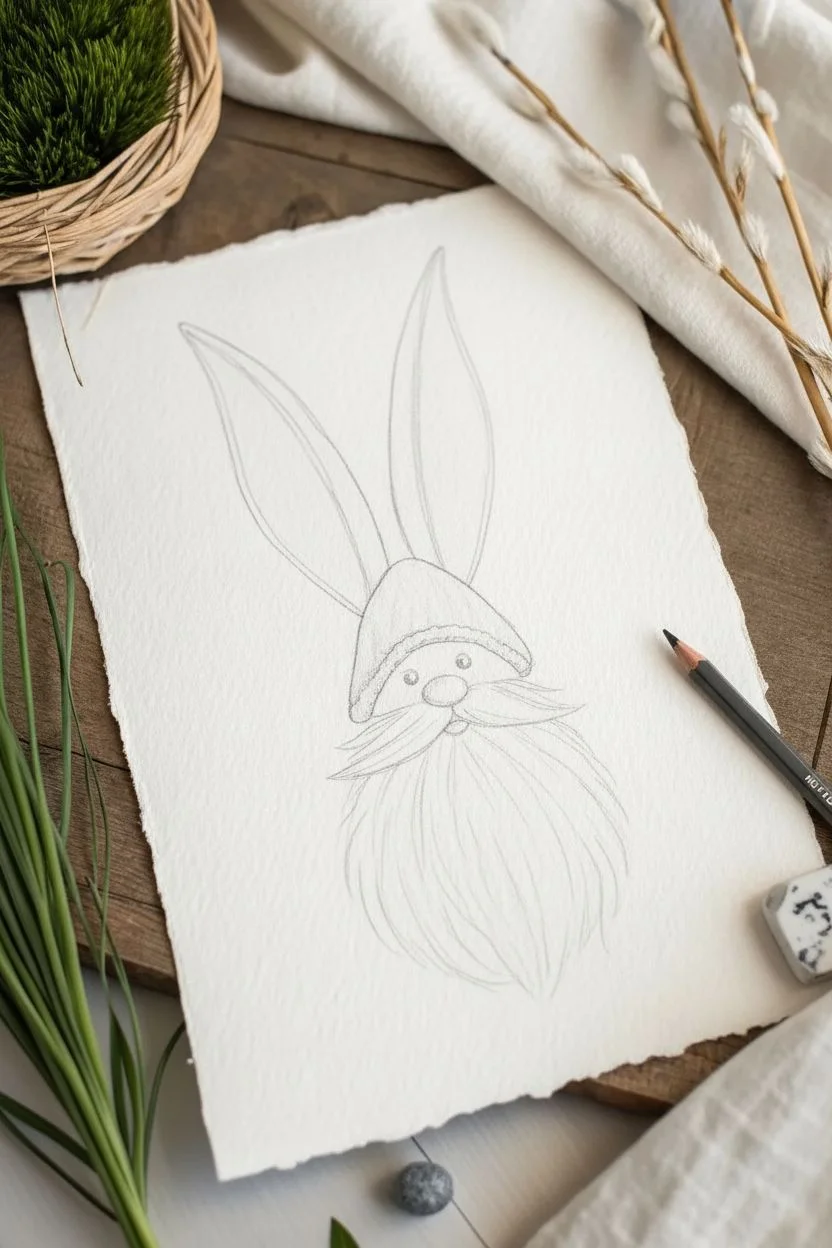
Combine the magic of Easter with rustic charm in this delightful watercolor painting. You will use soft washes and precise layering to create a fuzzy bunny-eared gnome featuring a textured hat and flowing beard.
How-To Guide
Materials
- Cold-press watercolor paper (300 gsm)
- HB pencil and kneaded eraser
- Watercolors (Ochre, Burnt Sienna, Rose, Payne’s Grey, Black)
- Round brushes (sizing 2 and 6)
- White opacity marker or gouache
- Optional: Gray and Brown colored pencils
Step 1: Sketching the Shapes
-
Outline the head:
Begin by lightly drawing a small oval for the nose in the center of your page. -
Add the hat:
Sketch a beanie shape resting directly on top of the nose, curving it slightly around the sides of the head. -
Draw the ears:
Extend two tall, tapered rabbit ears upward from behind the hat, keeping them narrow at the base and wider in the middle. -
Flowing beard:
Sketch the beard shape flowing downward from the nose, creating a teardrop silhouette that widens at the cheeks and tapers at the bottom. -
Refine features:
Add two small circles for eyes just under the hat brim and define the mustache swooping out from under the nose.
Edge Effect
To get the fuzzy texture on the ears, paint the outer edge with plain water first, then drop pigment into it. The color will bloom softly outward.
Step 2: Painting Base Layers
-
Inner ear wash:
Mix a very watery, pale rose color and paint the inner shape of the ears, leaving the outer edges unpainted. -
Outer ear definition:
While the pink is still slightly damp, carefully paint the outer rim of the ears with a pale ochre or beige to create a soft bleed. -
Hat base:
Paint the hat with a wash of Burnt Sienna or warm brown, keeping the color uneven to suggest texture. -
Skin tone:
Color the nose and the small visible area of the face with a mix of diluted pink and orange for a peach tone.
Muddy Beard?
If the beard looks too dark, you’ve over-painted. The beard should be 80% white paper. Only paint the shadows, not the hair itself.
Step 3: Adding Texture and Depth
-
Hat texture:
Once the hat is dry, use a smaller brush with a darker brown to dab small stippling marks or cross-hatching to mimic knitted wool. -
Shadowing the hat:
Add a darker line of brown right where the hat meets the brim, and under the brim where it meets the forehead. -
Beard shadows:
The beard relies on the white paper. Mix a very pale, watery grey and paint thin strokes *between* the clumps of hair to define them. -
Mustache definition:
Use the same pale grey to outline the bottom of the mustache, separating it from the main beard. -
Eye details:
Carefully paint the eye circles with solid black using your smallest brush.
Step 4: Finishing Touches
-
Deepening contrast:
I like to go back in with a grey colored pencil (or fine brush) to add thin, crisp lines that simulate individual hair strands in the beard. -
Facial highlights:
Add a tiny white dot to each black eye using white gouache or a gel pen to bring the character to life. -
Nose Highlight:
Lift a tiny bit of pigment from the top of the nose with a clean damp brush, or add a subtle white highlight. -
Rim shading:
Add a final, very thin shadow under the nose and mustache to make the features pop forward. -
Deckled edges:
If your paper isn’t pre-cut, gently tear the edges of the sheet against a ruler to create the vintage, deckled look shown in the reference.
Now your charming gnome is ready to frame or turn into a unique Easter card.
Sweet Easter Cupcake
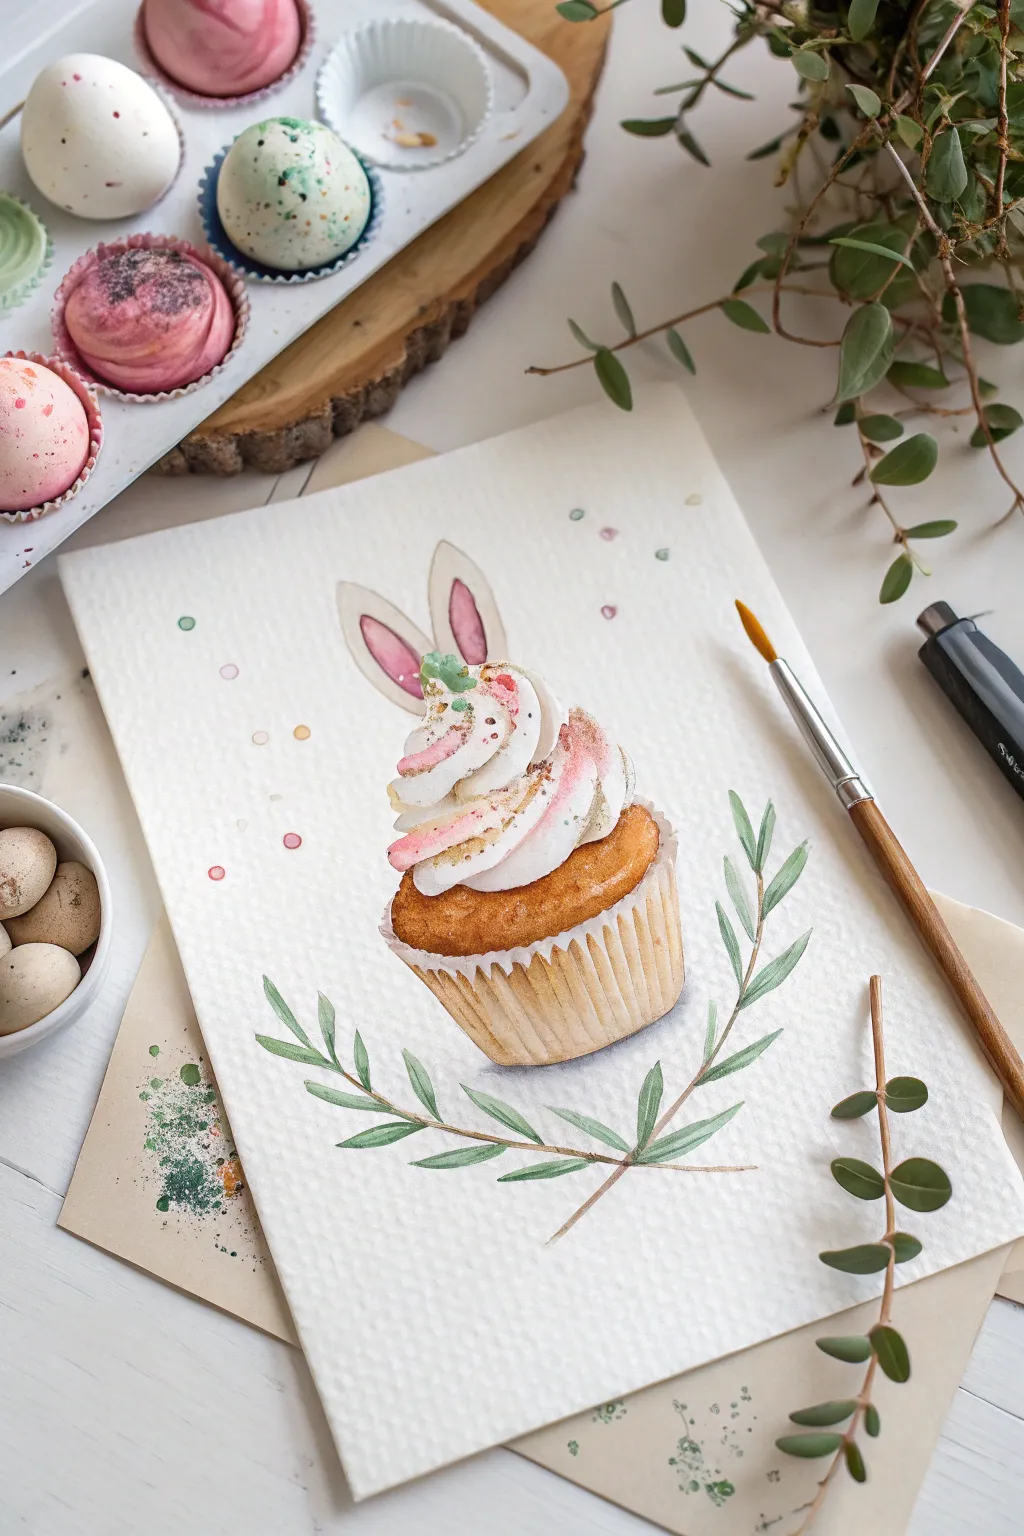
This charming watercolor illustration combines the warmth of a fresh pastry with playful Easter motifs. You will build up layers of transparent color to achieve that fluffy frosting and golden-baked effect.
Step-by-Step
Materials
- Cold press watercolor paper (300 gsm)
- Round watercolor brushes (size 6 and size 2)
- Watercolor paints (Yellow Ochre, Burnt Sienna, Alizarin Crimson, Sap Green, Shadow Violet)
- HB Pencil and kneaded eraser
- White gouache or white gel pen
- Water jar and paper towels
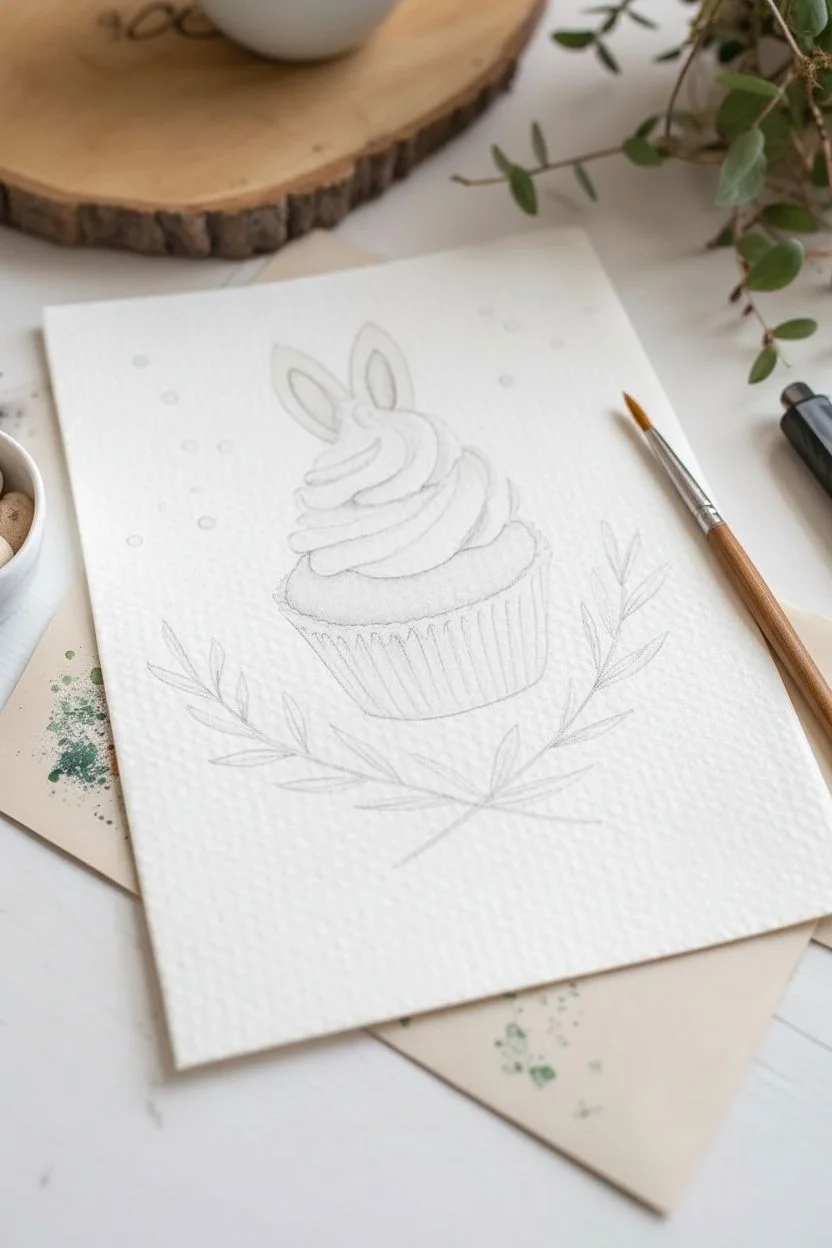
Step 1: Sketching the Composition
-
Outline the wrapper:
Start by lightly sketching a trapezoid shape for the cupcake wrapper. Curve the bottom line slightly downward to give the object volume. -
Add the cake and frosting:
Draw the muffin top peeking over the wrapper rim, then stack three to four distinct swirls of frosting on top, tapering to a peak. -
Ears and foliage:
Sketch two bunny ears emerging from behind the top frosting swirl. Finally, draw two curved branches crossing at the bottom to frame the cupcake. -
Lighten the lines:
Roll your kneaded eraser over the entire sketch. You want the graphite to be barely visible so it doesn’t dirty the watercolor.
Fixing Hard Edges
If your frosting shadows look too harsh or striped, scrub them gently with a clean, damp stiff brush to reactivate the paint and soften the edges into the white paper.
Step 2: Painting the Base Layers
-
Wrapper wash:
Mix a very watery Yellow Ochre. Paint the entire wrapper area with this pale wash and let it dry completely. -
Golden cake:
Paint the exposed muffin top with a mix of Burnt Sienna and Ochre. Keep the edges slightly uneven to suggest a crumb texture. -
Bunny ears:
Paint the outer shape of the ears with a very pale grey or cream. While wet, drop a touch of diluted Alizarin Crimson into the center of the ears and let it bleed softly. -
Leafy greens:
Using your smaller brush, paint the stems and delicate leaves with Sap Green. Vary the pressure to create tapered leaf shapes.
Pro Tip: Salt Texture
While the golden-brown cake part is still wet, sprinkle a tiny pinch of table salt on it. Let it dry completely and brush it off to create a realistic baked-good texture.
Step 3: Adding Volume and Frosting
-
Wrapper folds:
Mix a slightly darker brown-beige. Paint vertical stripes on the dry wrapper to represent the accordion folds. -
Softening the folds:
Immediately after painting a wrapper stripe, run a clean, damp brush along one edge of the line to fade it out, creating a rounded shadow effect. -
Shadowing the cake:
Add a second, darker layer of brown just under the frosting rim to show where the icing casts a shadow on the cake. -
Defining the frosting:
Frosting is white, so we paint the shadows, not the light. Use a very watery violet-grey to paint tiny shadows where the swirls overlap. -
Pink swirls:
I like to wet a strip of the frosting with clean water first, then touch it with pink paint so the color flows naturally along the curve of the swirl.
Step 4: Texture and Final Details
-
Deepen the foliage:
Go back to your leaves and add a second layer of darker green to just half of some leaves to create dimension. -
Wrapper contrast:
Mix a dark Sepia or Burnt Umber and paint very thin lines in the deepest crevices of the wrapper folds for high contrast. -
Cocoa sprinkles:
Load a small brush with dark brown paint. Tap the brush handle against your finger to splatter tiny specks onto the frosting, mimicking cocoa powder or sprinkles. -
Background confetti:
Paint small, spontaneous circles floating around the cupcake in soft pastels (pink, green, and ochre) to create a festive atmosphere. -
Highlights:
Use white gouache or a gel pen to add sharp highlights to the top of the frosting swirls and the brightest part of the wrapper.
Frame this sweet artwork for a kitchen corner or digitize it for handmade Easter cards.


Have a question or want to share your own experience? I'd love to hear from you in the comments below!