
Working on a mini canvas is one of my favorite ways to break through creative blocks because the small scale demands simplicity and bold choices. Whether you are using acrylic paints or experimenting with mixed media, these tiny surfaces allow you to finish a complete, satisfying artwork in a single sitting.
Classic Sunset Gradient
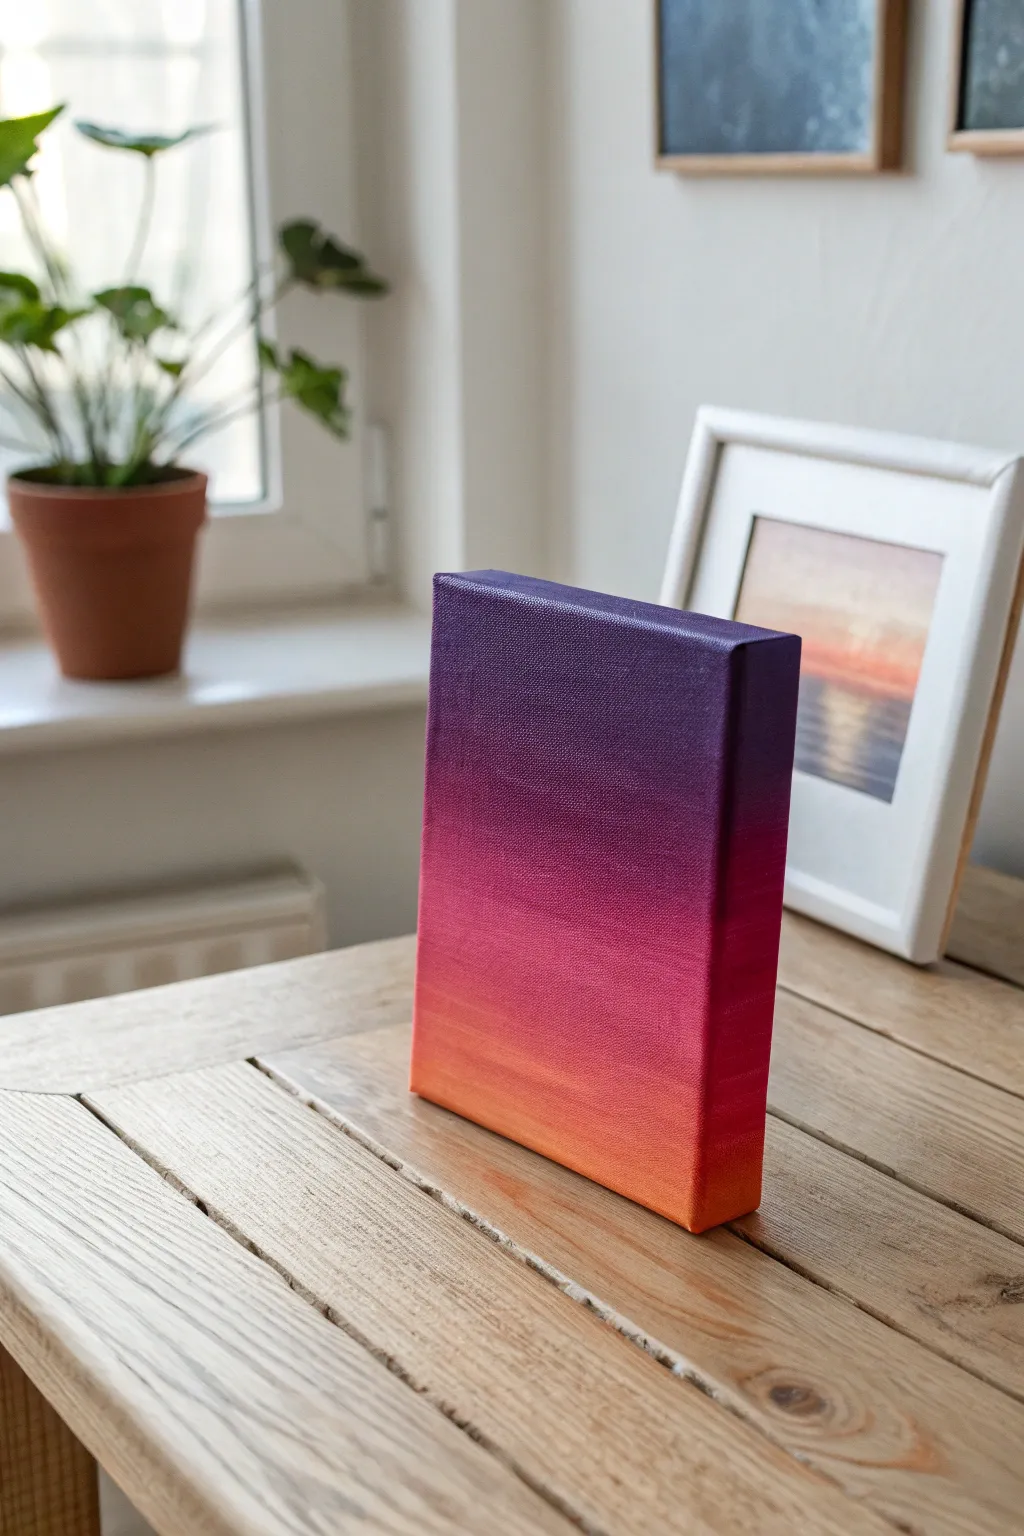
Capture the serene beauty of twilight on a small scale with this seamless gradient project. This tutorial guides you through blending acrylics to create a glowing transition from deep violet to warm orange that looks professional and modern.
Step-by-Step Tutorial
Materials
- Mini deep-edge stretched canvas
- Acrylic paints (Deep Violet, Magenta, Cadmium Orange)
- Flat synthetic paintbrush (approx. 3/4 inch)
- Soft blending brush (optional)
- Palette or mixing plate
- Paper towels
- Cup of water
- Acrylic retarder (optional)
Step 1: Preparation & Blocking
-
Workspace Setup:
Protect your table and place the mini canvas on a slight riser, like a jar or block, so you can easily paint the bottom edges without sticking to the surface. -
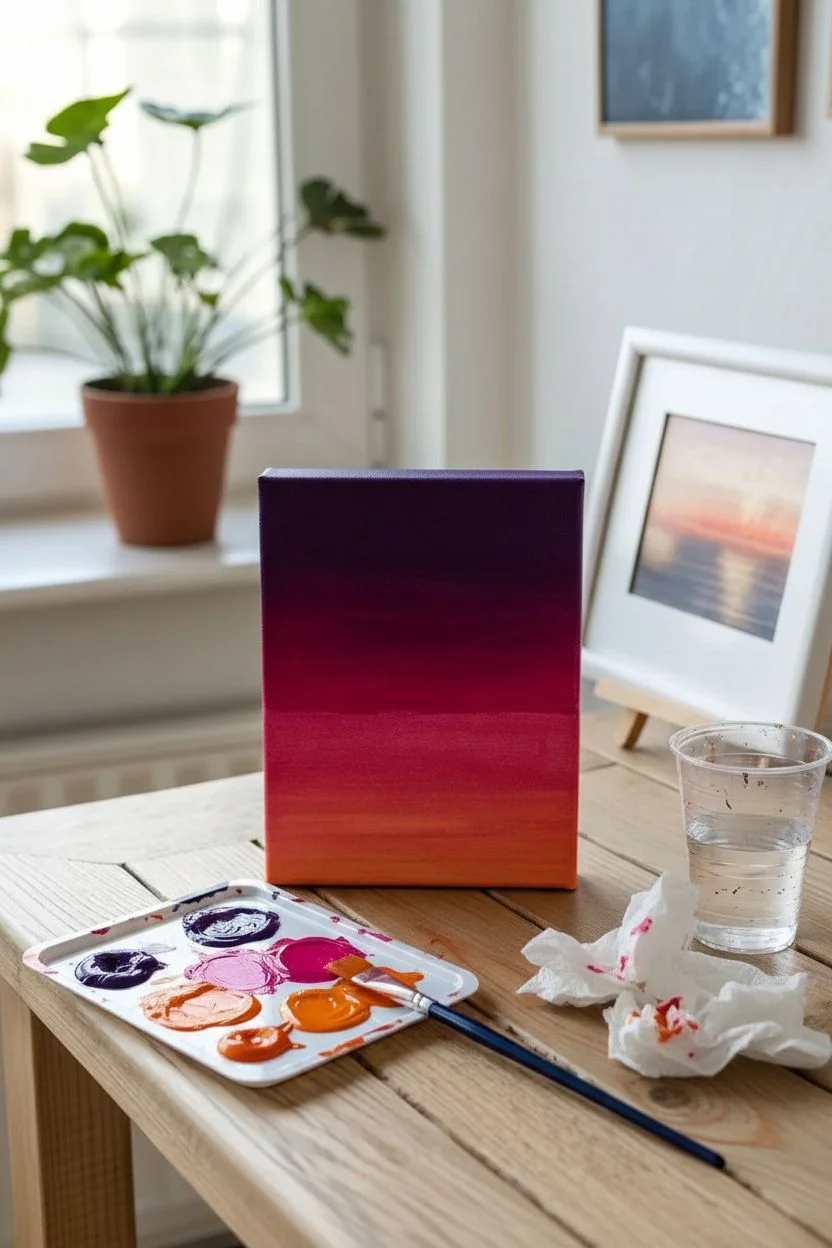
Palette Prep:
Squeeze out generous dollops of Deep Violet, Magenta, and Cadmium Orange onto your palette. -
Top Section:
Load your flat brush with Deep Violet and paint the top horizontal third of the canvas surface. -
Edge Coverage:
Immediately paint the top edge of the canvas and the upper third of the left and right sides to ensure the color wraps around. -
Middle Section:
Wipe your brush on a paper towel to remove the bulk of the purple. Load it with Magenta and paint the middle third. -
Overlap:
Ensure the Magenta touches and slightly overlaps the wet purple edge above it, but don’t blend just yet. -
Bottom Section:
Wipe the brush again. Load it with Cadmium Orange and paint the final bottom third, covering the bottom edge and remaining side areas.
Step 2: The Blending Process
-
Clean Brush:
Wash your brush thoroughly and dry it well on a paper towel. A dry or slightly damp brush is best for controlling the gradient. -
First Transition:
Start at the boundary where the orange meets the magenta. Use light, horizontal back-and-forth strokes to feather the colors together. -
Clean Often:
Wipe your brush frequently as you work to avoid pulling too much strong orange pigment up into the pink zone. -
Second Transition:
Move up to the line between the magenta and deep violet. Blend horizontally, allowing the dark purple to soften into the pink. -
Side Edges:
Don’t forget to blend the paint on the sides of the canvas using the same technique so the gradient flows seamlessly around the corners. -
Smoothing:
I like to take a clean, soft dry brush and very lightly sweep it across the entire wet surface from side to side to eliminate brush marks. -
Assessment:
Check your gradient. If the paint dries too fast and creates hard lines, simply apply a little fresh paint over the transition area and blend again.
Fixing Muddy Colors
If the blending area turns gray or brown, you likely over-mixed. Stop and let it dry fully. Then, apply fresh layers of the two original colors and blend them quickly with fewer strokes.
Step 3: Finishing Touches
-
Drying:
Let the first layer dry completely. Acrylics can look streaky when semi-dry, so patience is key here. -
Second Coat:
Canvas texture often requires two coats for rich opacity. Repeat the blocking and blending process a second time for vibrant, solid color. -
Final Dry:
Allow the canvas to cure for at least 24 hours before handling extensively. -
Varnish:
Apply a coat of satin or gloss varnish to unified the sheen and protect those lovely blended transitions.
Keep It Wet
Acrylics dry fast! Mix a drop of ‘slow drying medium’ into your paint or mist the canvas lightly with water to keep the paint workable longer for smoother blends.
Place your finished gradient piece on a shelf or desk for a daily dose of calming color

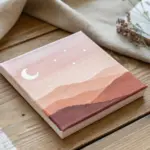
Dreamy Pink Clouds
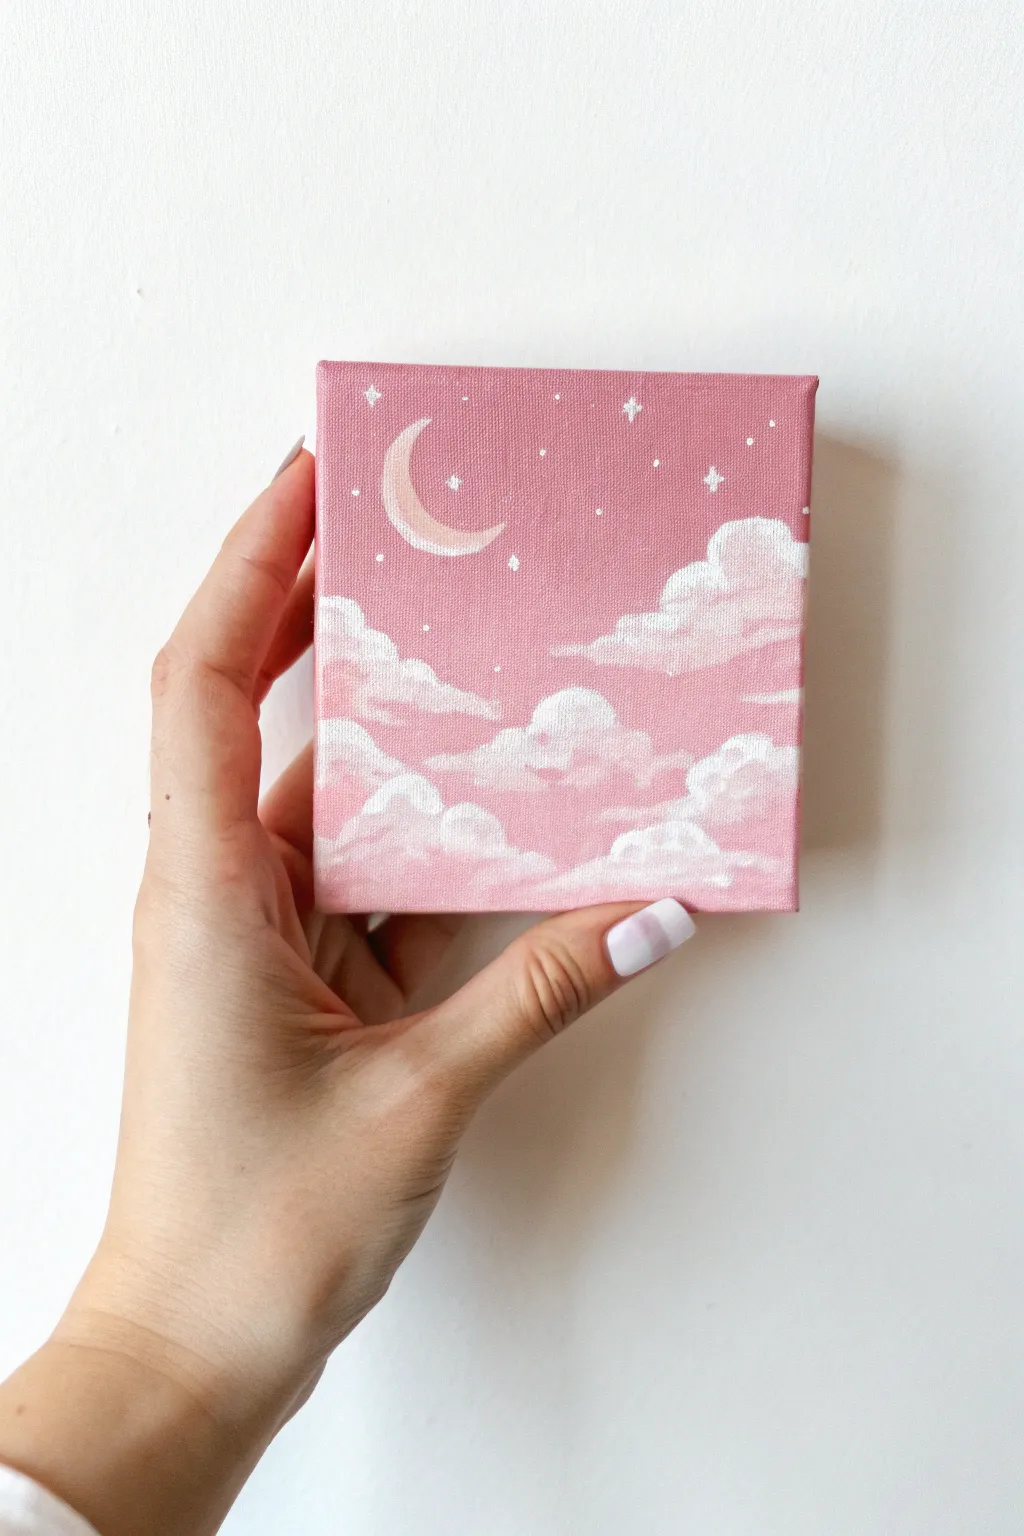
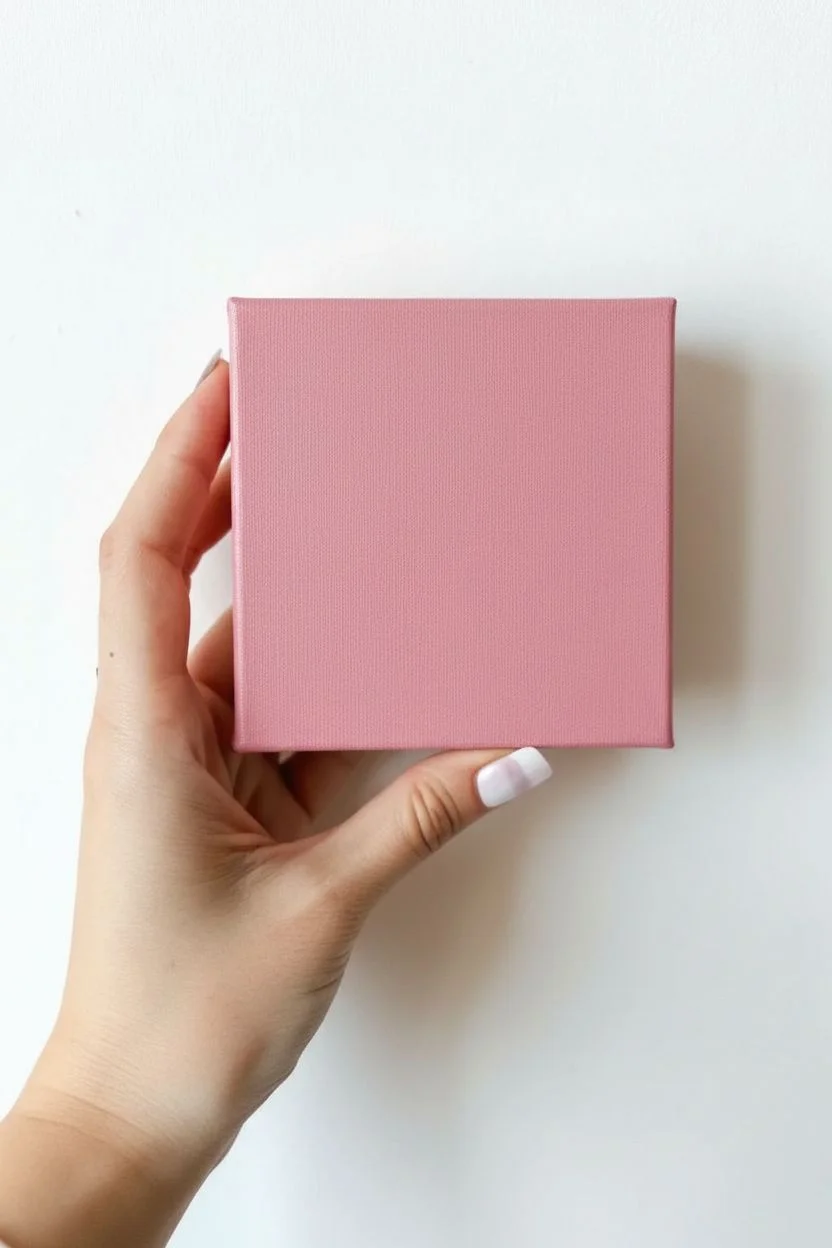
Capture the magic of a soft, aesthetic evening with this pint-sized painting project. The monochromatic pink palette combined with fluffy cloud textures makes for a calming piece of desk decor.
How-To Guide
Materials
- Mini stretched canvas (4×4 or similar square)
- Acrylic paint: Titanium White, Crimson or Primary Red, Burnt Sienna
- Flat shader brush (size 6 or 8)
- Small round brush or filbert brush (size 2 or 4)
- Fine liner brush (size 0 or 00)
- Mixing palette
- Cup of water and paper towels
Step 1: Setting the Scene
-
Mix the base color:
Start by creating your main sky color. Mix a large amount of white with a touch of red to get a bubblegum pink, then add a tiny dot of Burnt Sienna to tone it down to a dusty, vintage rose shade. -
Apply the background:
Using your flat shader brush, apply an even coat of your pink mixture across the entire front of the canvas. -
Don’t forget the edges:
Paint the sides (and top/bottom) of the canvas with the same pink. This ‘gallery wrap’ style makes the mini canvas look finished without needing a frame. -
Let it dry completely:
Allow the pink base coat to dry fully. If the canvas texture is still showing through too much, apply a second coat for a smoother, opaque matte finish.
Cloud Fluff Trick
Use a ‘scumbling’ motion—small circular scrubbing movements—with a relatively dry brush to create the wispy, cotton-like texture of the clouds rather than using long smooth strokes.
Step 2: Building fluffy clouds
-
Prepare cloud colors:
Squeeze out fresh Titanium White. You will also use a little of your leftover background pink to blend soft transitions. -
Map the cloud shapes:
Switch to a small round or filbert brush. Using a mix of 80% white and 20% pink, lightly sketch the loose, irregular shapes of the clouds near the bottom right and left edges. -
Block in the cloud bodies:
Fill in the mapped shapes with this soft light pink mixture. Don’t worry about being neat; a slightly messy texture helps create the illusion of fluffiness. -
Add pure white highlights:
While the paint is still tacky, load your brush with pure Titanium White. Dab this onto the very top curves of the clouds to make them pop forward. -
Blend the bottoms:
Wipe your brush clean. Gently drag the paint at the bottom of the clouds downward into the background pink to make the base of the clouds look misty and transparent. -
Create layering:
I like to repeat the highlighting process on the smaller, lower clouds to ensure they don’t look flat. Add a second layer of white to the top ridges if the background pink is showing through too much. -
Soften the edges:
Use a dry, clean brush to very lightly tap over any harsh lines within the cloud body to blur the transition between the bright white tops and the misty bottoms.
Step 3: Celestial details
-
Outline the crescent:
Switch to your fine liner brush. thinning a bit of white paint with a drop of water so it flows smoothly. Sketch a ‘C’ shape in the upper left quadrant. -
Fill the moon:
Fill in the crescent moon shape carefully. For a softer look like the reference creates, you can mix a tiny speck of pink into the white so the moon isn’t visually jarring. -
Paint the main stars:
Using the tip of your liner brush, paint a few four-pointed stars (cross shapes) scattered in the open pink space. Keep the lines very thin. -
Add distant stardust:
Dip the handle end of a paintbrush (or a toothpick) into white paint and gently dot the canvas to create tiny, perfectly round distant stars. -
Final drying time:
Let all the details dry completely before handling or displaying your mini masterpiece.
Troubleshooting: Chunky Lines
If your stars or moon look too thick, your paint is likely too heavy. Add a tiny drop of water to the white paint on your palette until it has an inky consistency, which allows for finer lines.
Place your tiny canvas on a mini easel or a shelf to add a touch of pink serenity to your space


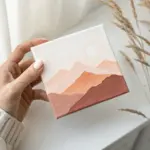

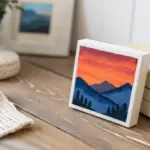
Mountain Ridge Silhouette
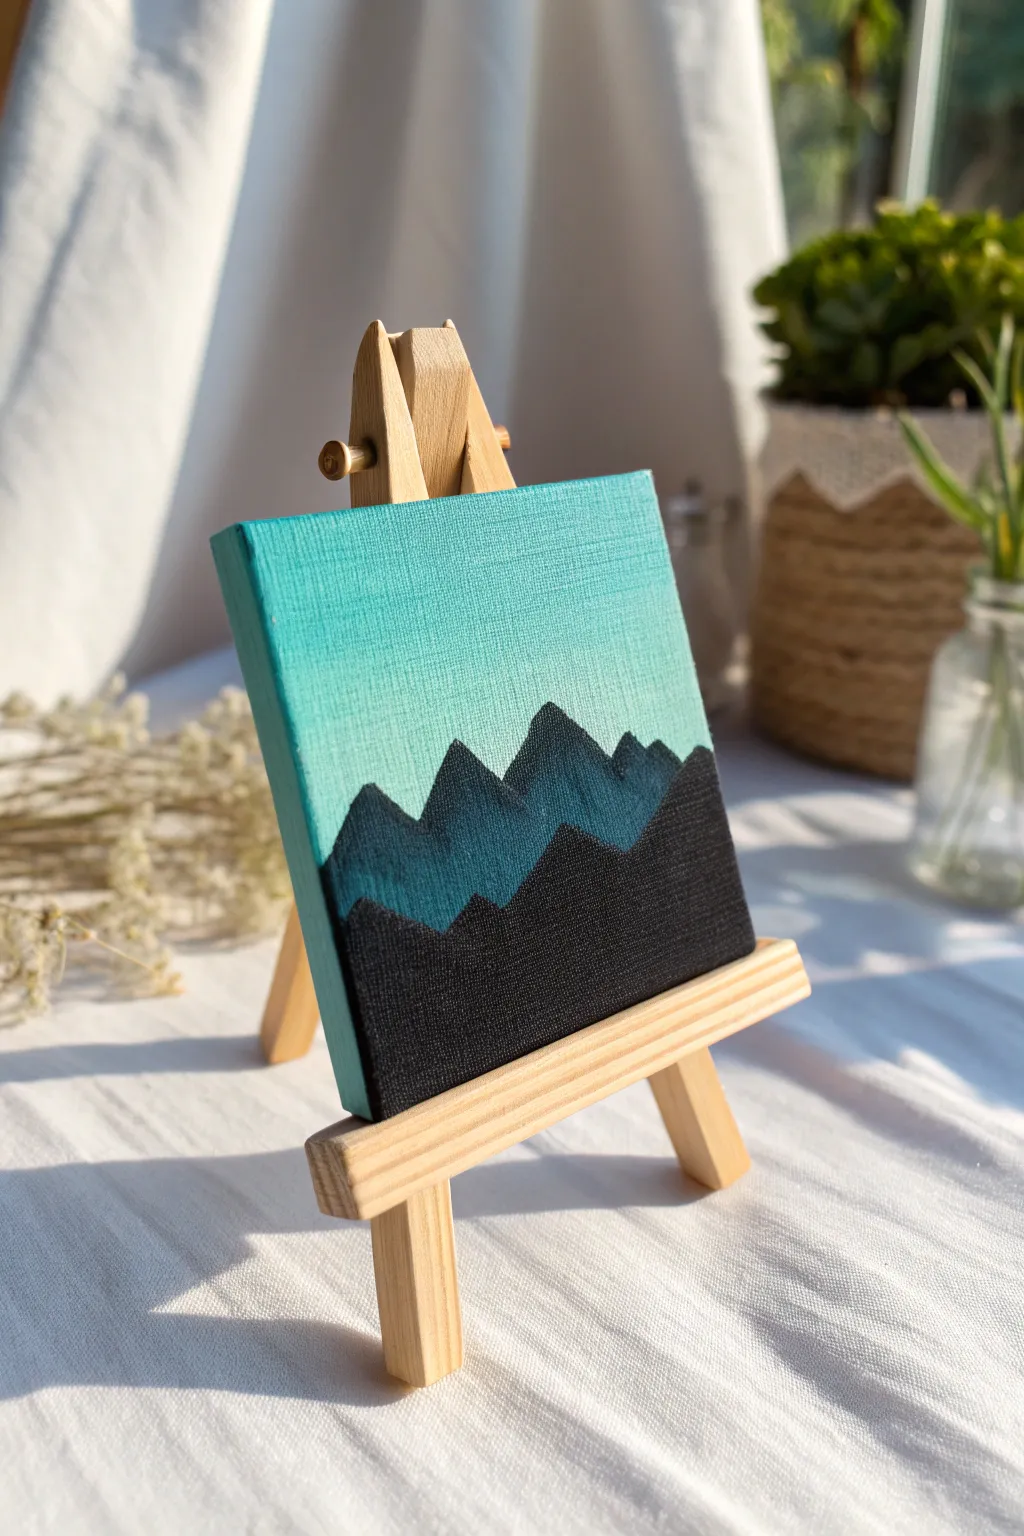
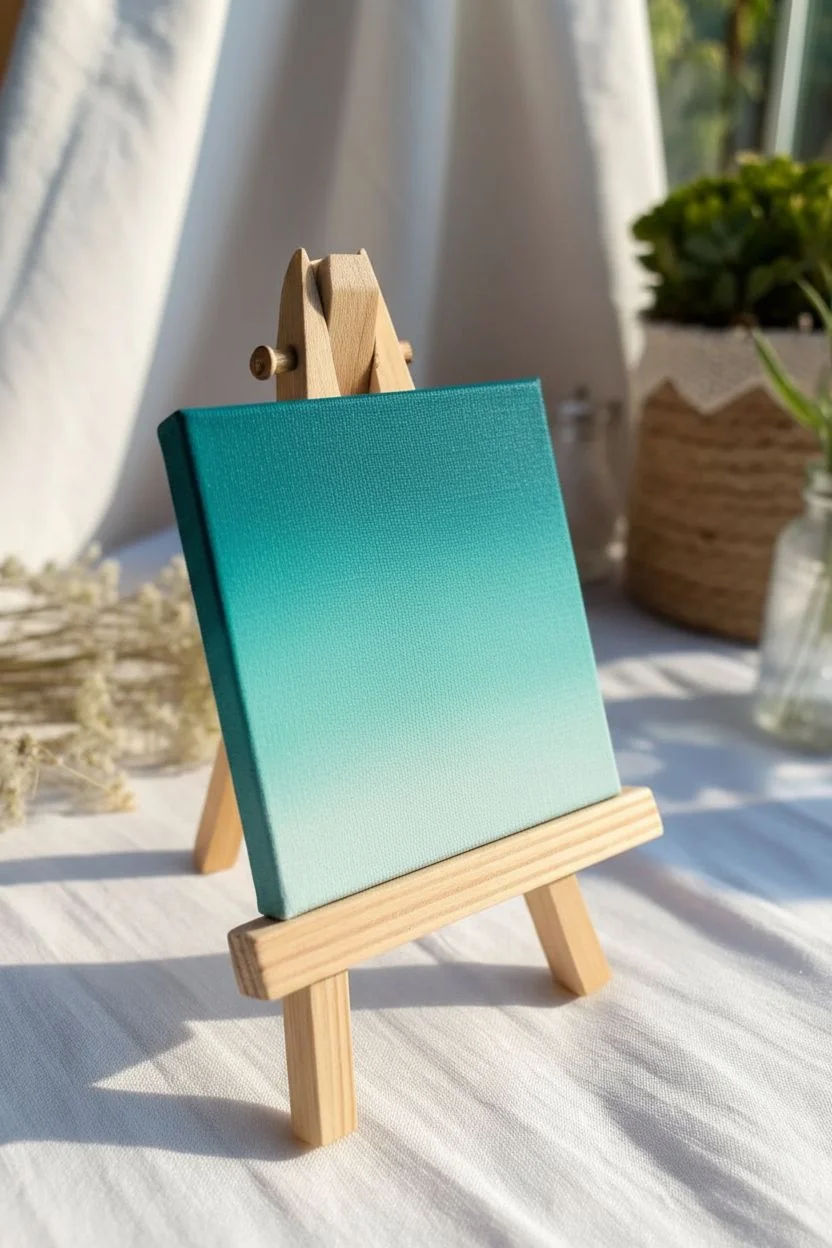
This minimalist landscape captures the serene beauty of mountain silhouettes against a vibrant teal sky. It is a perfect beginner project that uses simple layering to create depth on a miniature scale.
Step-by-Step
Materials
- Mini square canvas (e.g., 3×3 or 4×4 inch)
- Acrylic paints: Titanium White, Teal (or Turquoise), Carbon Black
- Small flat synthetic brush
- Small round detail brush (size 0 or 1)
- Clean water and paper towels
- Pencil for sketching
- Mini wooden easel for display
Step 1: Setting the Atmosphere
-
Prime the surface:
Start by applying a thin, even coat of Titanium White over the entire canvas to prime the surface and ensure the subsequent colors pop. -
Apply the top color:
Load your flat brush with pure Teal paint and cover the top third of the canvas using smooth horizontal strokes. -
Paint the edges:
Don’t forget to wrap the Teal paint around the top edge and the upper side edges of the canvas for a professional finish. -
Create the gradient:
Without cleaning your brush, dip just the corner into a little White paint to lighten the tone. -
Blend the sky:
Paint the middle section of the sky, blending upward into the pure Teal while the paint is still wet to create a soft, seamless transition. -
Soften the horizon:
Add a bit more white to your mix and paint downward towards the middle of the canvas, creating a subtle fade as if the sky is lightening near the horizon. -
Dry completely:
Allow the sky layer to dry fully before moving on; I usually give it about 15 minutes to ensure my pencil lines won’t carve into wet paint.
Step 2: Building the Ridge
-
Sketch the mountains:
Using a pencil with a light touch, draw a jagged line across the middle of the canvas for the first mountain range, varying the peak heights. -
Mix the shadow color:
Create a deep ‘Petrol Blue’ by mixing a generous amount of Teal with a very small drop of Black on your palette. -
Outline the peaks:
Switch to your small round detail brush to carefully paint the sharp outline of this middle mountain range using the Petrol Blue mix. -
Fill the shape:
Use the flat brush to fill in the body of these mountains, bringing the color down past where you plan to put the final foreground layer. -
Wrap the sides:
Continue this dark teal color onto the sides of the canvas, matching the level of the mountain range on the front. -
Let it set:
Wait for this layer to dry until it has a matte finish so the next layer doesn’t blend into it.
Steady Hand Hack
To get super sharp mountain peaks, rest your pinky finger on the dry wooden easel or the side of the canvas to stabilize your hand while painting details.
Step 3: The Foreground Silhouette
-
Sketch the foreground:
Lightly draw a second, lower mountain range, positioning its peaks in the ‘valleys’ of the range behind it for better visual balance. -
Outline in black:
Load your detail brush with pure Carbon Black and carefully trace the sharp peaks of this final foreground layer. -
Fill the bottom:
Fill in the rest of the bottom section with solid black, ensuring opaque coverage. -
Check the opacity:
If the black looks streaky or gray in spots, let it dry and add a second thin coat for a bold silhouette. -
Finish the edges:
Paint the bottom edge and the lower corners of the canvas sides in black to complete the wrapped-canvas look. -
Final touches:
Use the detail brush to touch up any peaks that need to be sharper, then place the canvas on the mini easel to dry.
Patchy Paint?
If your dark colors look transparent or streaky, avoid overworking the wet paint. Let the first layer dry completely, then apply a second coat for full coverage.
Display your miniature masterpiece on its easel to add a splash of modern color to any desk or shelf


Whale Tail Vignette
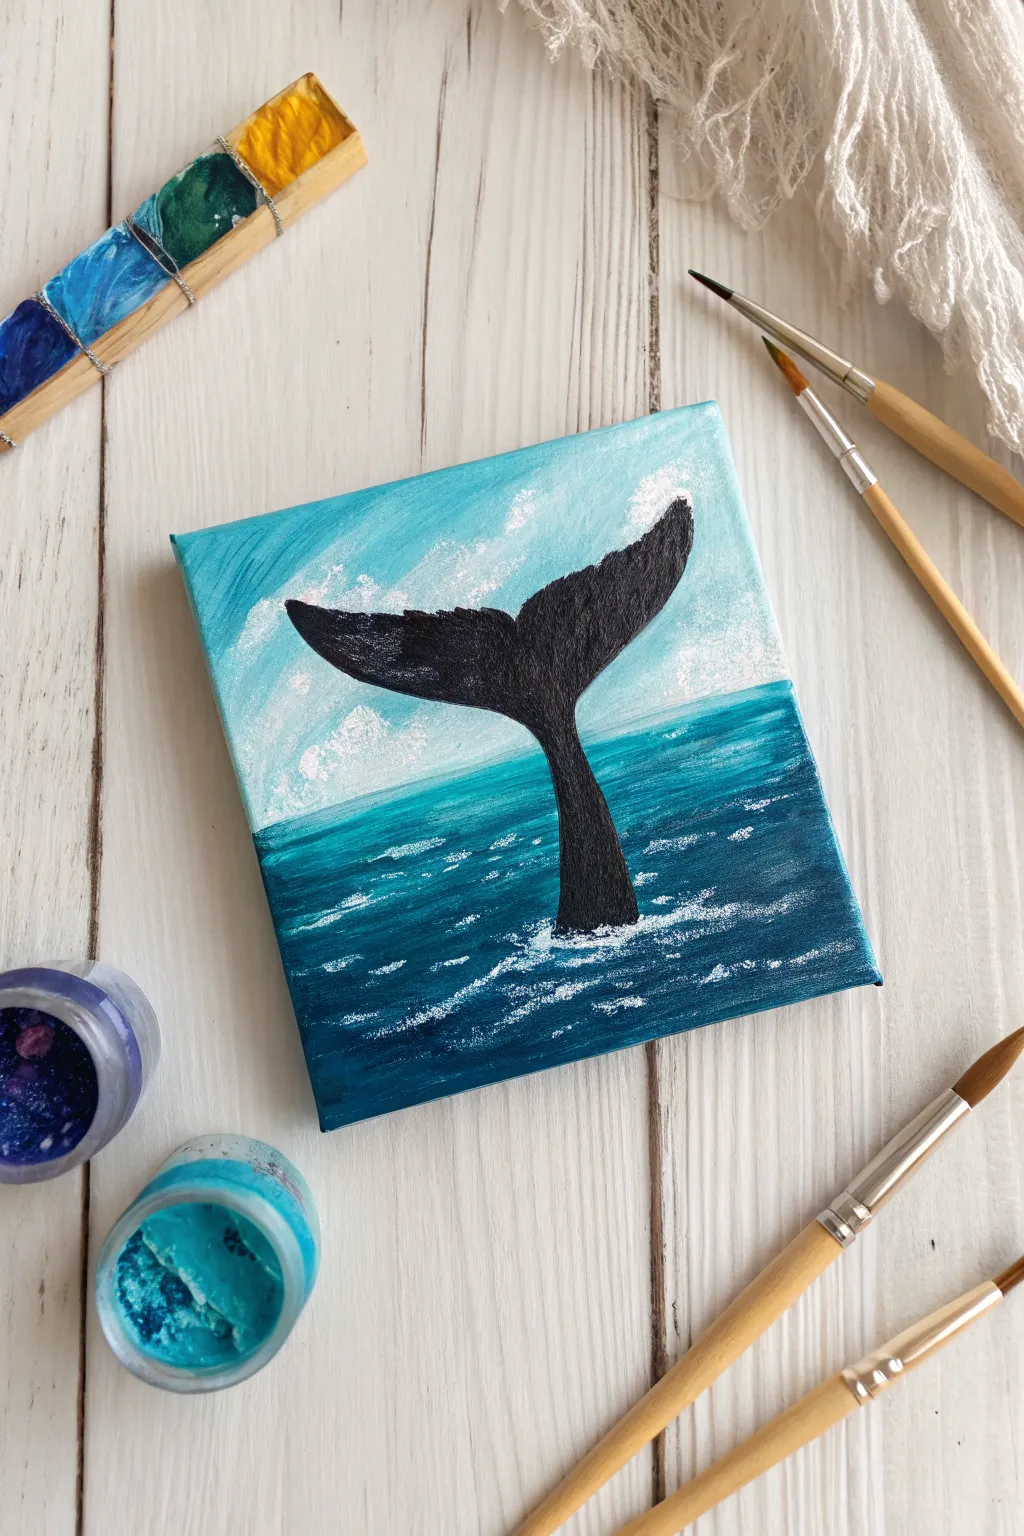
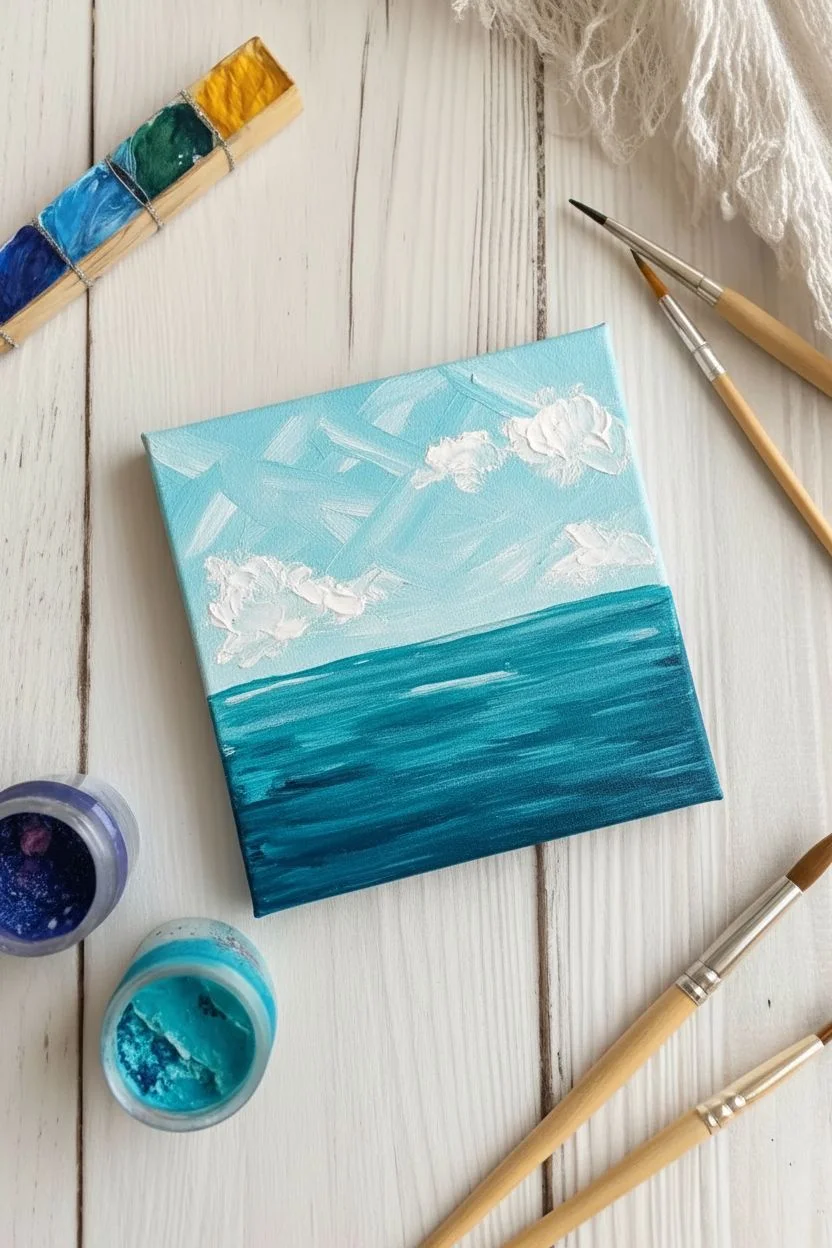
Capture the beauty of the ocean with this dynamic mini canvas painting featuring a whale tail silhouette diving into deep teal waters. This high-contrast project focuses on texture and movement to bring a simple composition to life.
Detailed Instructions
Materials
- Mini canvas (4×4 or 6×6 inch)
- Acrylic paints: Titanium White, Phthalo Blue, Turquoise, Black
- Small flat brush
- Fine liner brush
- Old scruffy brush or fan brush
- Palette and water cup
- Paper towels
Step 1: Painting the Sky and Horizon
-
Mix the sky color:
Start by mixing a large amount of white with a tiny dot of turquoise to create a very pale, icy blue. -
Apply the base:
Using your flat brush, paint the upper 60% of the canvas with this pale blue mixture using diagonal or crisscross strokes. -
Add cloud texture:
While the blue is still slightly wet, pick up pure white on your brush. Dab it randomly across the sky area to create fluffy, textured clouds. -
Soft blending:
Wipe your brush on a paper towel and gently blend the white patches into the blue background to soften the edges. -
Define the horizon:
Mix a deeper ocean color using Phthalo Blue and a touch of Turquoise. Draw a straight horizontal line across the canvas where the sky meets the intended water level.
Step 2: Creating the Ocean Deep
-
Fill the water:
Fill the bottom section of the canvas with your ocean mix, painting in long, horizontal strokes to mimic the flow of water. -
Add depth:
Mix a small amount of black into your blue creates a navy tone. Paint this near the bottom corners and edges for a vignette effect. -
Create waves:
Dip your clean flat brush into lighter turquoise. Add horizontal highlights across the middle of the water to create the look of rolling waves. -
Intensify contrast:
I like to go back with pure white and add very thin, broken horizontal lines on the water surface to show light reflecting off the waves. -
Dry time:
Allow the background to dry completely before moving on to the silhouette. This prevents the black paint from muddying your beautiful blues.
Tail Trouble?
If your whale tail looks lopsided, don’t panic. Whales move organically! Simply widen the thinner side slightly, or add more white splash effects to cover any uneven areas at the base.
Step 3: The Whale Silhouette
-
Outline the stem:
Using a fine liner brush and black paint, draw a vertical line rising from the center of the water, widening slightly as it goes up. -
Shape the flukes:
From the top of the stem, paint two curved lines extending outward and upward, resembling a wide letter ‘Y’. -
Refine the edges:
Connect the tips of the ‘Y’ back toward the center with a scalloped or wavy line to form the trailing edge of the tail. -
Fill it in:
Fill the entire tail shape with solid black paint. Apply a second coat if your background color shows through. -
Check symmetry:
Step back to look at the shape. It doesn’t need to be perfectly symmetrical, as the whale could be turning, but ensure both flukes look balanced.
Foamy Textures
For the best sea foam, use a brush with stiff, dry bristles. Dab straight up and down without sliding the brush. This leaves raised peaks of paint that mimic real churning water.
Step 4: Splashes and Foam
-
Prepare the foam paint:
Load an old, scruffy brush or a stiff bristle brush with thick Titanium White paint. Do not add water. -
Create the impact zone:
Dab the brush vertically at the base of the tail where it meets the water. Use a stippling motion to create a rough, splashy texture. -
Spread the ripples:
Continue dabbing white paint horizontally outward from the base to show the water displacement ripples. -
Add spray details:
Use your fine liner brush to add tiny white dots floating just above the splash zone to represent water droplets flying in the air. -
Final highlights:
Add a few tiny touches of white texture on the black tail itself if you want it to look wet, though a solid silhouette works beautifully too.
Display this serene seascape on a miniature easel to bring a splash of ocean magic to your desk or shelf
BRUSH GUIDE
The Right Brush for Every Stroke
From clean lines to bold texture — master brush choice, stroke control, and essential techniques.
Explore the Full Guide
Minimalist Sailboat
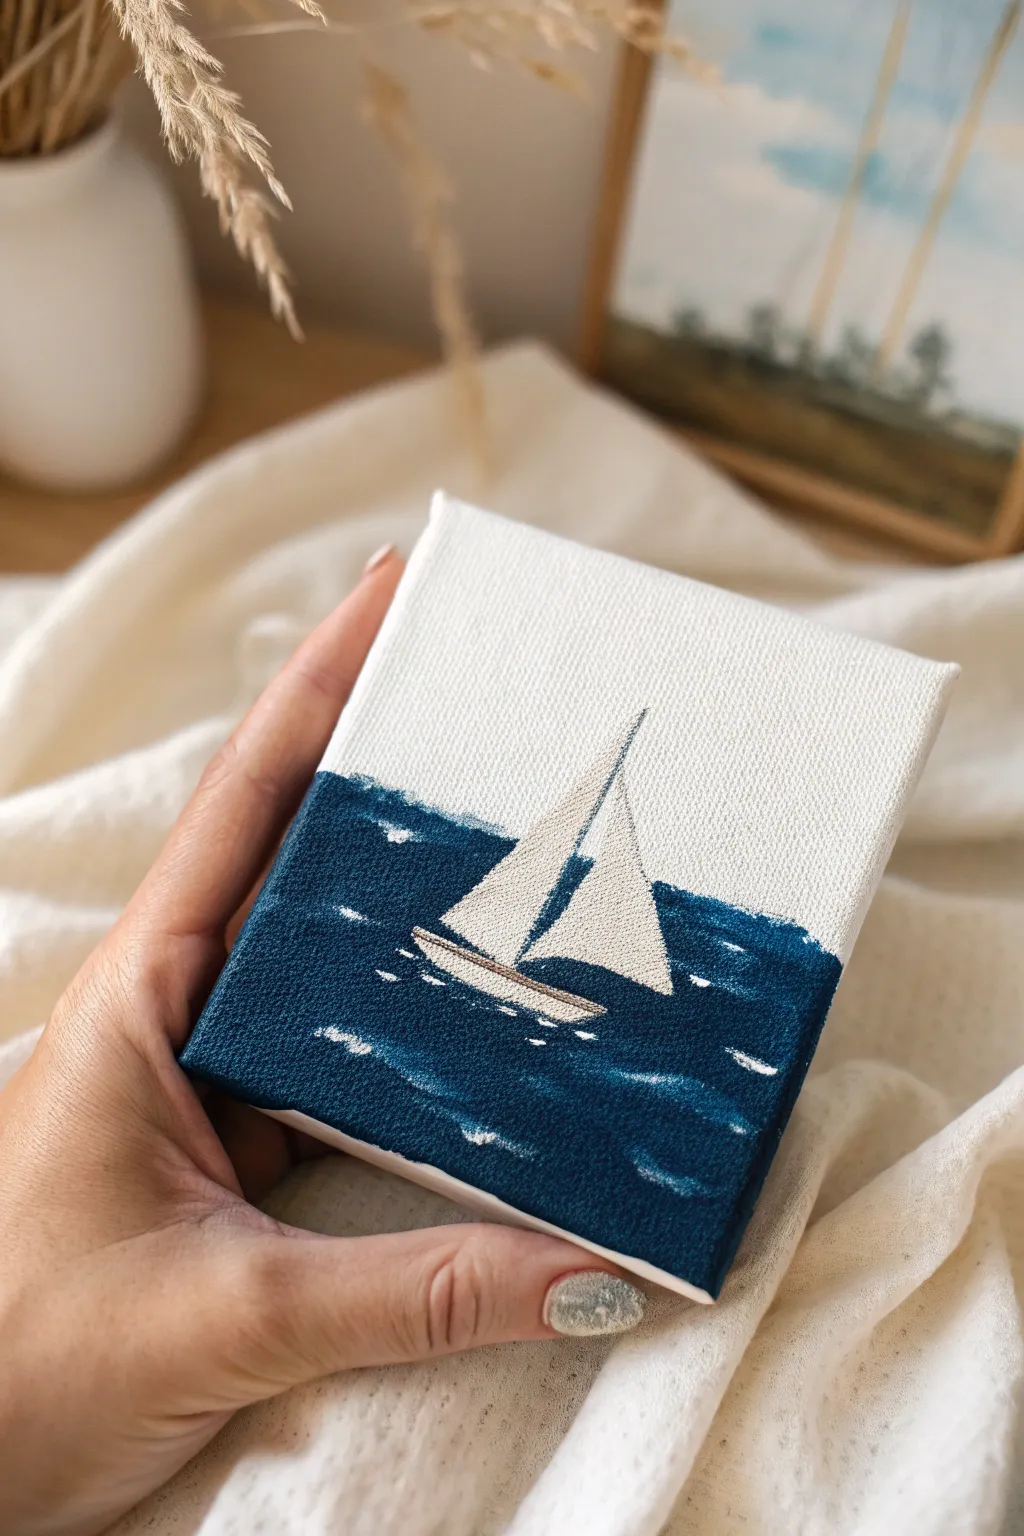
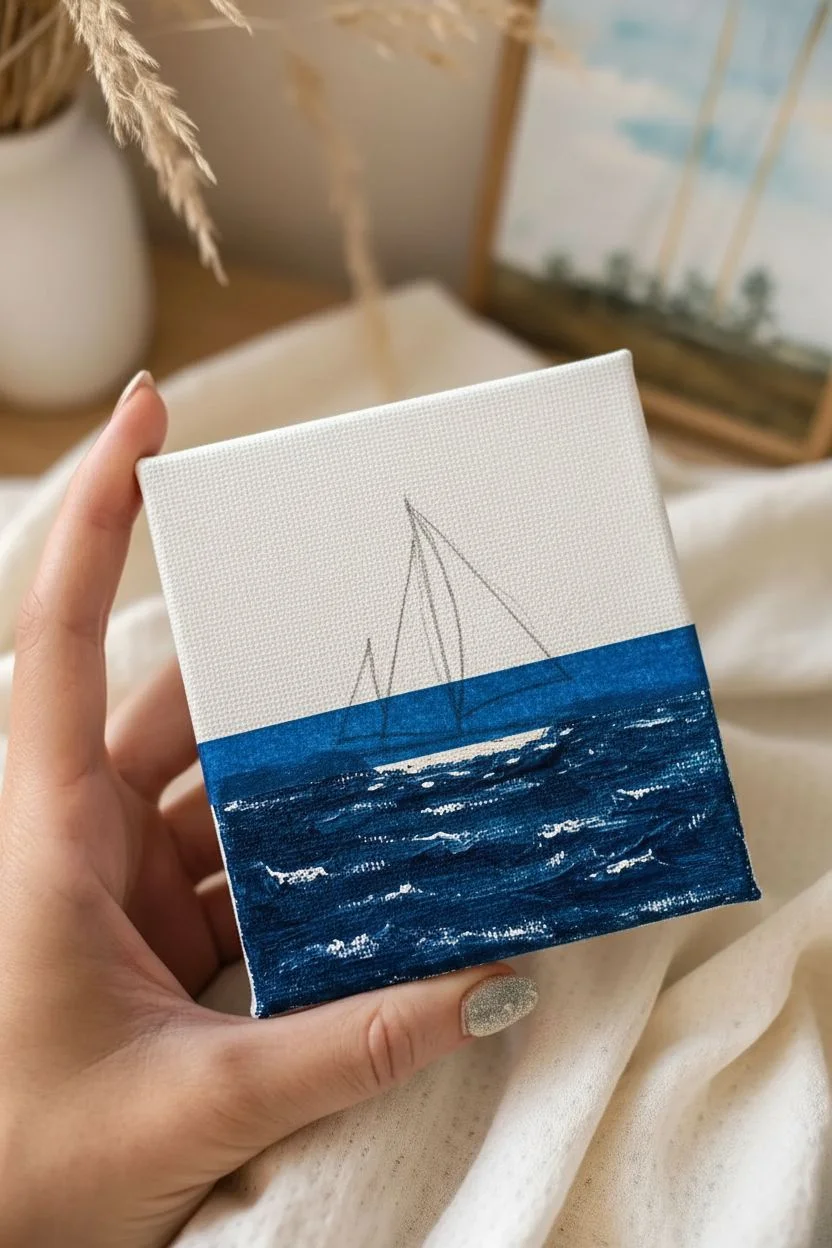
Capture the essence of a breezy day at sea with this tactile mini canvas project. We use heavy-body acrylics and specific brush strokes to mimic the look of woven embroidery, contrasting the raw white canvas against a deep, churned blue ocean.
How-To Guide
Materials
- Mini canvas (4×4 or 3×3 inch)
- Heavy body acrylic paints (Navy Blue, Titanium White, Beige/Unbleached Titanium, Burnt Umber)
- Painter’s tape or masking tape
- Small flat shader brush
- Detail liner brush (size 0 or 00)
- Pencil
- Palette knife (optional)
Step 1: Setting the Horizon
-
Prepare the canvas:
Ensure your mini canvas is clean and free of dust. Since the top half remains visible, it needs to be pristine. -
Tape the water line:
Place a strip of painter’s tape horizontally across the canvas, positioning it slightly below the vertical center point. -
Seal the edge:
Run your fingernail firmly along the edge of the tape to prevent paint from bleeding underneath. -
Sketch the subject:
Lightly sketch the triangular outline of the sails and the curved hull of the boat directly onto the canvas, centered above and on the tape line.
Uneven Horizon?
If paint bled under your tape, wait for it to fully dry. Then, use a small flat brush with white gesso or acrylic to carefully paint over the mistake and straighten the line.
Step 2: The Deep Blue Sea
-
Mix the ocean color:
Create a deep, rich navy blue. If your blue is too bright, mix in a tiny touch of Burnt Umber to deepen it without turning it black. -
Apply the base layer:
Using the flat shader brush, fill in the area below the tape with your blue mix. -
Create texture:
Instead of smoothing the paint out, use a stippling motion (tapping the brush tip up and down) to create a rough, choppy surface that mimics water texture. -
Wrap the edges:
The beauty of gallery-wrapped canvases is in the sides. Continue the blue paint and texture around the bottom and side edges of the canvas. -
reveal the horizon:
Carefully peel back the masking tape while the paint is still slightly tacky to reveal a crisp, straight horizon line.
Step 3: The Faux-Thread Sails
-
Prepare thick paint:
Squeeze out a dollop of Beige tones. Do not add water; we need the body of the paint to create physical ridges. -
Switch brushes:
Pick up your detail liner brush. This tool gives us the fine control needed for the faux-stitched look. -
Paint the main sail:
Starting from the bottom of the large triangle, paint horizontal lines stacked very closely together. Leave tiny, microscopic gaps to mimic rows of thread. -
Paint the jib (small sail):
Repeat this horizontal line technique for the smaller front sail, ensuring the angle of the sail tapers correctly toward the top. -
Add the hull:
Mix a light brown using Beige and a dot of Burnt Umber. Paint the hull using the same horizontal, thick strokes to maintain the texture theme. -
Define the mast:
With steady hands, paint a very thin, single vertical line in dark grey or thin black for the mast between the two sails.
Pro Tip: Impasto Gel
To really exaggerate the ’embroidery’ look of the sails, mix your acrylic paint with Gloss Gel Medium. This thickens the paint, holding the brush ridges perfectly.
Step 4: Highlights and Motion
-
Mix the sea foam:
Take pure Titanium White. It should be opaque enough to stand out against the dark blue. -
Add water movement:
Using the very tip of your detail brush, add short, broken horizontal white lines on the blue water, concentrating them near the boat’s hull. -
Create waves:
Add a few scattered white strokes lower in the water to suggest distant whitecaps or light reflecting on the waves. -
Add sail shadow:
I like to mix a tiny bit of darker beige and add a thin line along the inner vertical edge of the sails to give them 3D volume. -
Final dry:
Let the canvas sit flat to dry completely. Because the paint is applied thickly for texture, this may take a few hours.
Now you have a serene, nautical piece of art that looks deceptively complex and beautifully textured.
Single Tulip Bloom
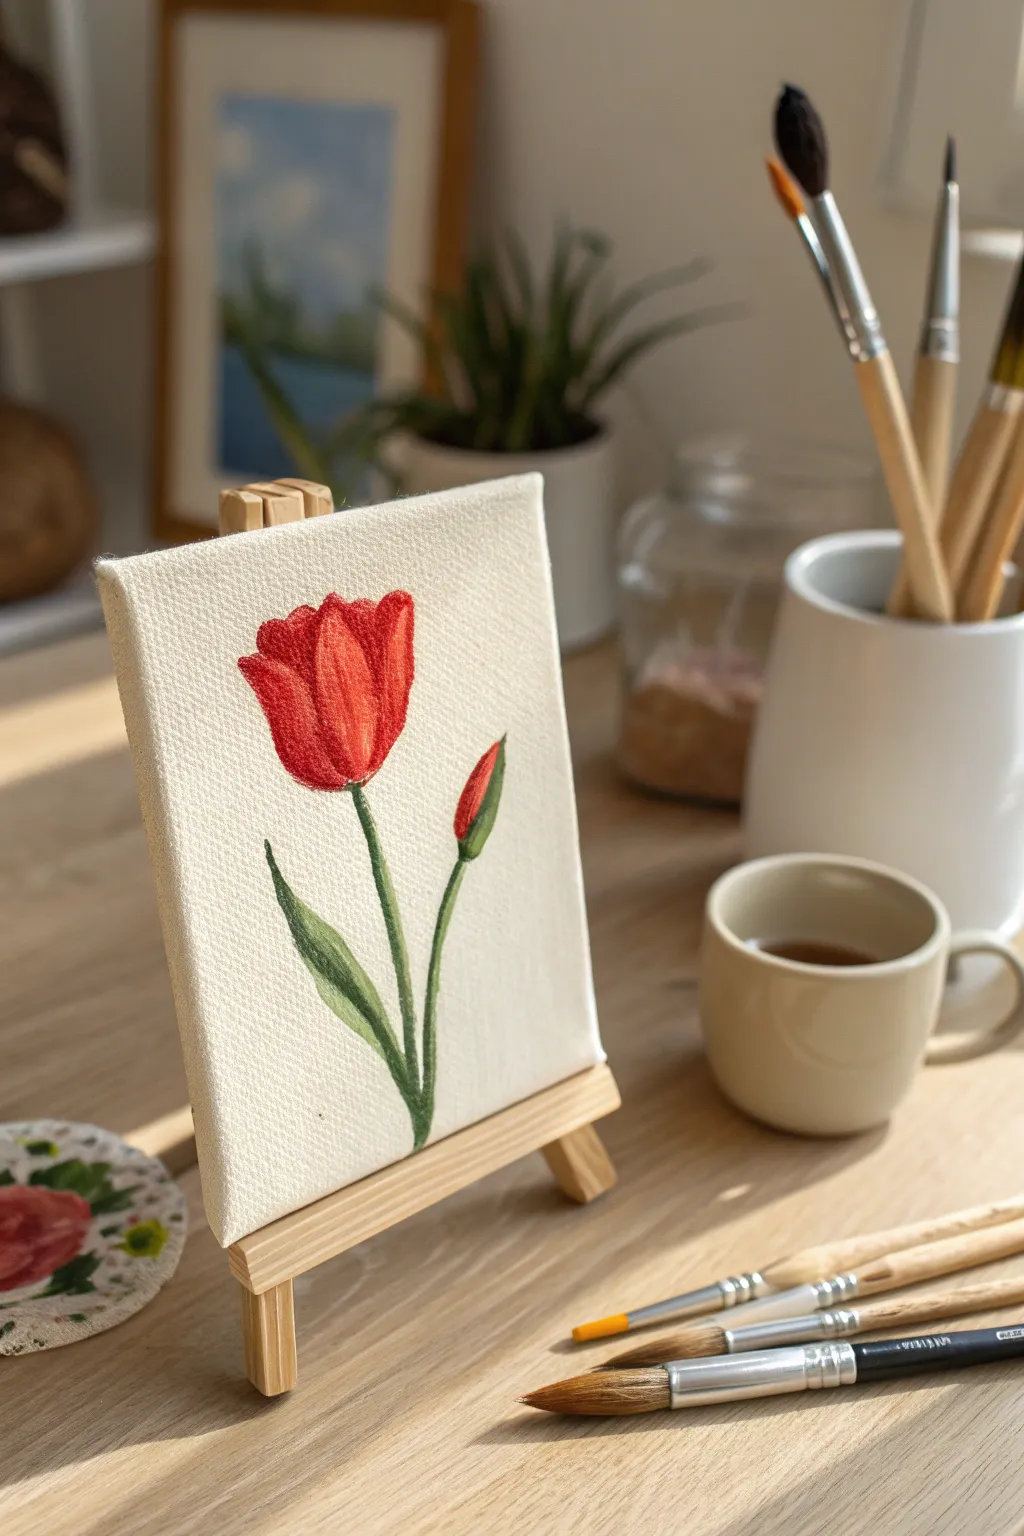
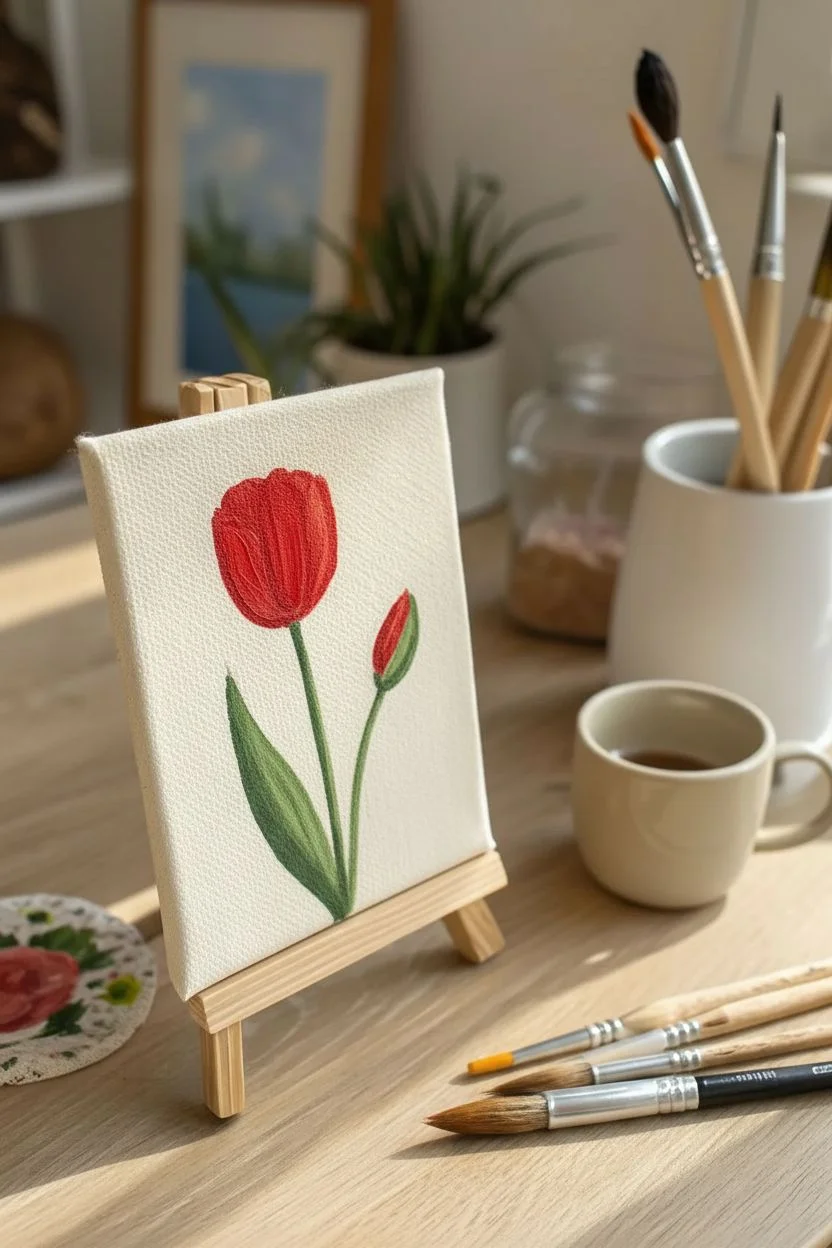
Capture the elegance of spring with this charming mini canvas featuring a bold red tulip against a natural background. This project celebrates simplicity, letting the texture of the canvas complement the vibrant red and green hues of the flower.
Step-by-Step Guide
Materials
- Mini canvas (approx. 4×6 inch) with easel
- Acrylic paints: Cadmium Red, Alizarin Crimson, Sap Green, Hooker’s Green, Lemon Yellow, Titanium White
- Small flat shader brush (size 4)
- Small round brush (size 2)
- Fine liner brush (size 0 or 00)
- HB Pencil and eraser
- Palette and water cup
- Paper towels
Step 1: Sketching and Base Coats
-
Sketch the flower head:
Using an HB pencil, lightly draw a deep U-shape slightly left of center for the main tulip bloom. Add curved lines at the top to indicate overlapping petals. -
Add the stems:
Draw a gently curving line downwards from the bloom for the main stem. Add a second, shorter stem branching off to the right for the bud. -
Outline the leaves:
Sketch a long, lance-shaped leaf curving upward along the left side of the main stem. Draw a small tear-drop shape for the closed bud on the right stem. -
Prepare the red paint:
Squeeze out Cadmium Red onto your palette. If the paint feels too thick, dip your brush in water to thin it slightly for better flow. -
Paint the bloom base:
Use the small flat brush to fill in the main tulip head with the bright red. Keep your strokes vertical to mimic the texture of petals. -
Paint the bud:
Use the round brush to carefully fill in the red tip of the small bud on the right. -
Mix the base green:
Mix Sap Green with a tiny touch of Lemon Yellow to create a fresh, spring green color. -
Paint the stems:
Switch to your round brush. Paint the main stem and the smaller bud stem with steady, smooth strokes. -
Fill the leaves:
Fill in the large leaf shape and the small green enclosure (sepal) at the base of the red bud. Allow these base layers to dry completely.
Canvas Texture Issues?
If the canvas weave makes straight execution difficult, thin your paint slightly with water or a flow medium to help the liner brush glide smoothly.
Step 2: Shading and Details
-
Mix shadow color:
Combine Alizarin Crimson with the original red to create a deeper, cooler red tone for shading. -
Define petals:
With the round brush, paint this darker red between the petals to separate them, and along the bottom curve of the flower cup. -
Blend the red shadows:
While the paint is still slightly wet, gently blend the dark edges into the bright red using soft vertical strokes. -
Add highlights:
Mix Cadmium Red with a little Yellow and White. Use the tip of the brush to apply this lighter color to the top edges of the petals where the light hits. -
Enhance the bud:
Add a small dab of the shadow red to the bottom of the bud and a tiny highlight to the tip. -
Deepen the greens:
I like to switch to the fine liner brush here for precision. Use Hooker’s Green (or dark green) to paint a thin shadow line down the right side of the stem. -
Shade the leaf:
Apply the dark green to the base of the leaf and the area where the leaf tucks behind the stem. -
Create leaf highlights:
Mix Lemon Yellow with a little White and a dot of green. Paint this highlight along the upper left ridge of the leaf to give it form. -
Refine edges:
Check the edges where the red meets the canvas. If they look rough, smooth them out with a liner brush and fresh paint. -
Final assessment:
Step back and look at the contrast. If the leaves look flat, add a bit more dark green to the deepest shadows for extra pop.
Pro Tip: Background
Leave the background unpainted within the negative space! The raw canvas creates a warm, natural contrast against the vivid red and green acrylics.
Place your mini masterpiece on its easel to enjoy a permanent touch of spring on your desk

PENCIL GUIDE
Understanding Pencil Grades from H to B
From first sketch to finished drawing — learn pencil grades, line control, and shading techniques.
Explore the Full Guide
Snowy Tree Line
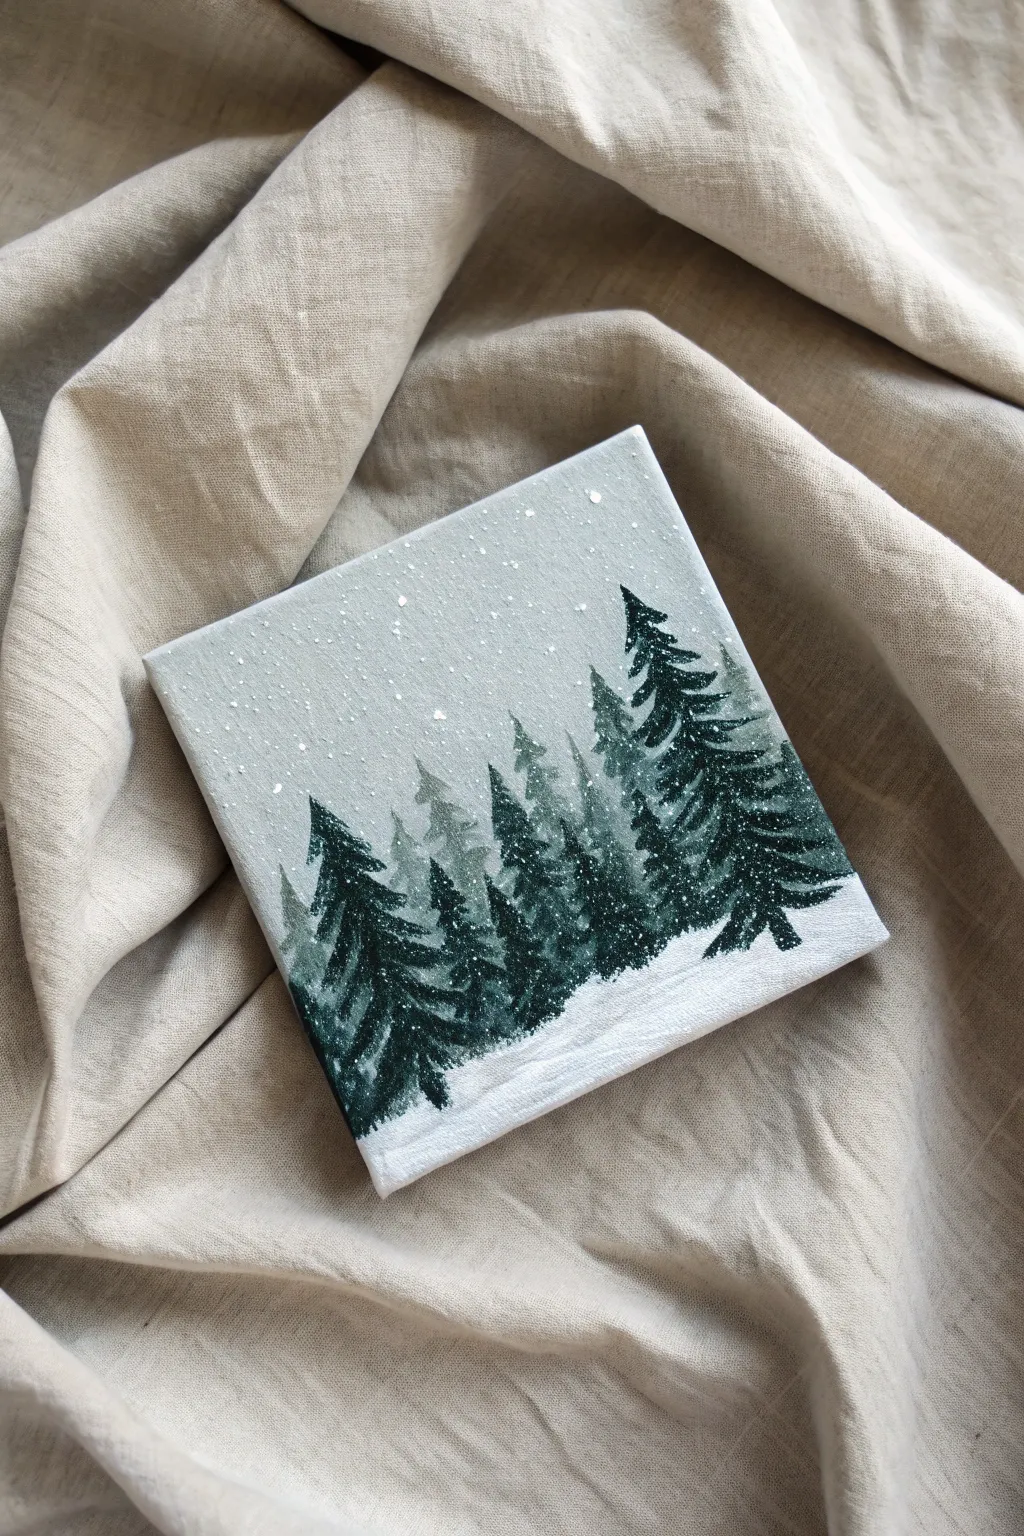

Capture the serene silence of a forest in winter on a tiny canvas. This project uses atmospheric perspective to create amazing depth, turning simple greens and greys into a dimensional woodland scene.
Step-by-Step
Materials
- Mini stretched canvas (4×4 or 5×5 inch)
- Acrylic paints: Titanium White, Mars Black, Phthalo Green (or Hunter Green), Ultramarine Blue
- Small flat brush (size 4 or 6)
- Small angled shader or round brush (size 0 or 1)
- Old toothbrush or stiff bristle brush
- Palette and water cup
- Paper towel
Step 1: Setting the Atmosphere
-
Mix the sky color:
Start by mixing a large amount of Titanium White with a tiny speck of Mars Black and a hint of Ultramarine Blue to create a pale, cool grey-blue. -
Paint the background:
Cover the upper three-quarters of the canvas with this pale grey mix, using horizontal strokes for a smooth finish. -
Soften the horizon:
While the paint is still wet, add a touch more white to the bottom of the sky area to create a hazy transition where the trees will sit. -
Let it dry:
Allow the background to dry completely; acrylics usually dry darker, so check if the color remains the cool mist you want.
Snow Control
If your paint splatter blobs are too big, let them dry, then paint over them with the background grey. Try testing the splatter action on scrap paper first.
Step 2: Building the Distant Forest
-
Mix the ‘ghost’ color:
Create a hazy green by mixing your sky grey color with a small amount of green; these trees need to look faded and far away. -
Paint distant trunks:
Using your smallest brush, paint faint vertical lines of varying heights to establish where the background trees will stand. -
Form the branches:
Using the tip of the brush, tap gently in a zig-zag pattern starting narrow at the top and widening as you go down to form faint pine shapes. -
Group them naturally:
Place these lighter trees close together, letting them overlap slightly to create a dense forest wall effect. -
Dry break:
Wait for this layer to be dry to the touch so your foreground colors don’t muddy the background.
Pro Tip
Keep the background trees consistently paler and blue-toned. This ‘atmospheric perspective’ is the secret technique that makes the small canvas look 3D.
Step 3: Painting the Foreground
-
Mix deep hunter green:
Combine your green with a touch of black and a tiny bit of blue to create a rich, deep forest green that contrasts sharply with the background. -
Place the hero trees:
Identify where you want your prominent foreground trees; paint their central vertical trunks over the faded background layer. -
Create texture:
Load your small angled brush or flat brush with the dark paint and use a decisive dabbing motion to create the heavy pine boughs. -
Shape the silhouette:
I like to leave small gaps between the branches on these foreground trees so the lighter background peeks through, adding realism. -
Vary the heights:
Ensure the tops of your dark trees don’t all align perfectly; give them different heights to keep the composition organic.
Step 4: Snow and Details
-
Paint the snow base:
Use pure Titanium White to paint the bottom quarter of the canvas, covering the fabric texture thoroughly. -
Blend the tree line:
Where the dark trees meet the white snow, use a clean brush to gently pull a little white paint up slightly over the trunks, burying them in drifts. -
Highlight the boughs:
Mix white with a tiny touch of the sky grey, then dab this lightly onto the tops of the dark green branches to look like settled heavy snow. -
Prepare splatter paint:
Dilute a small dollop of white paint with water until it reaches an ink-like consistency. -
Create the blizzard:
Dip an old toothbrush or stiff brush into the diluted white, hold it over the canvas, and flick the bristles to spray fine snow dots over the sky and trees.
Now you have a frosty winter window you can keep on your desk no matter the season
Potted Cactus
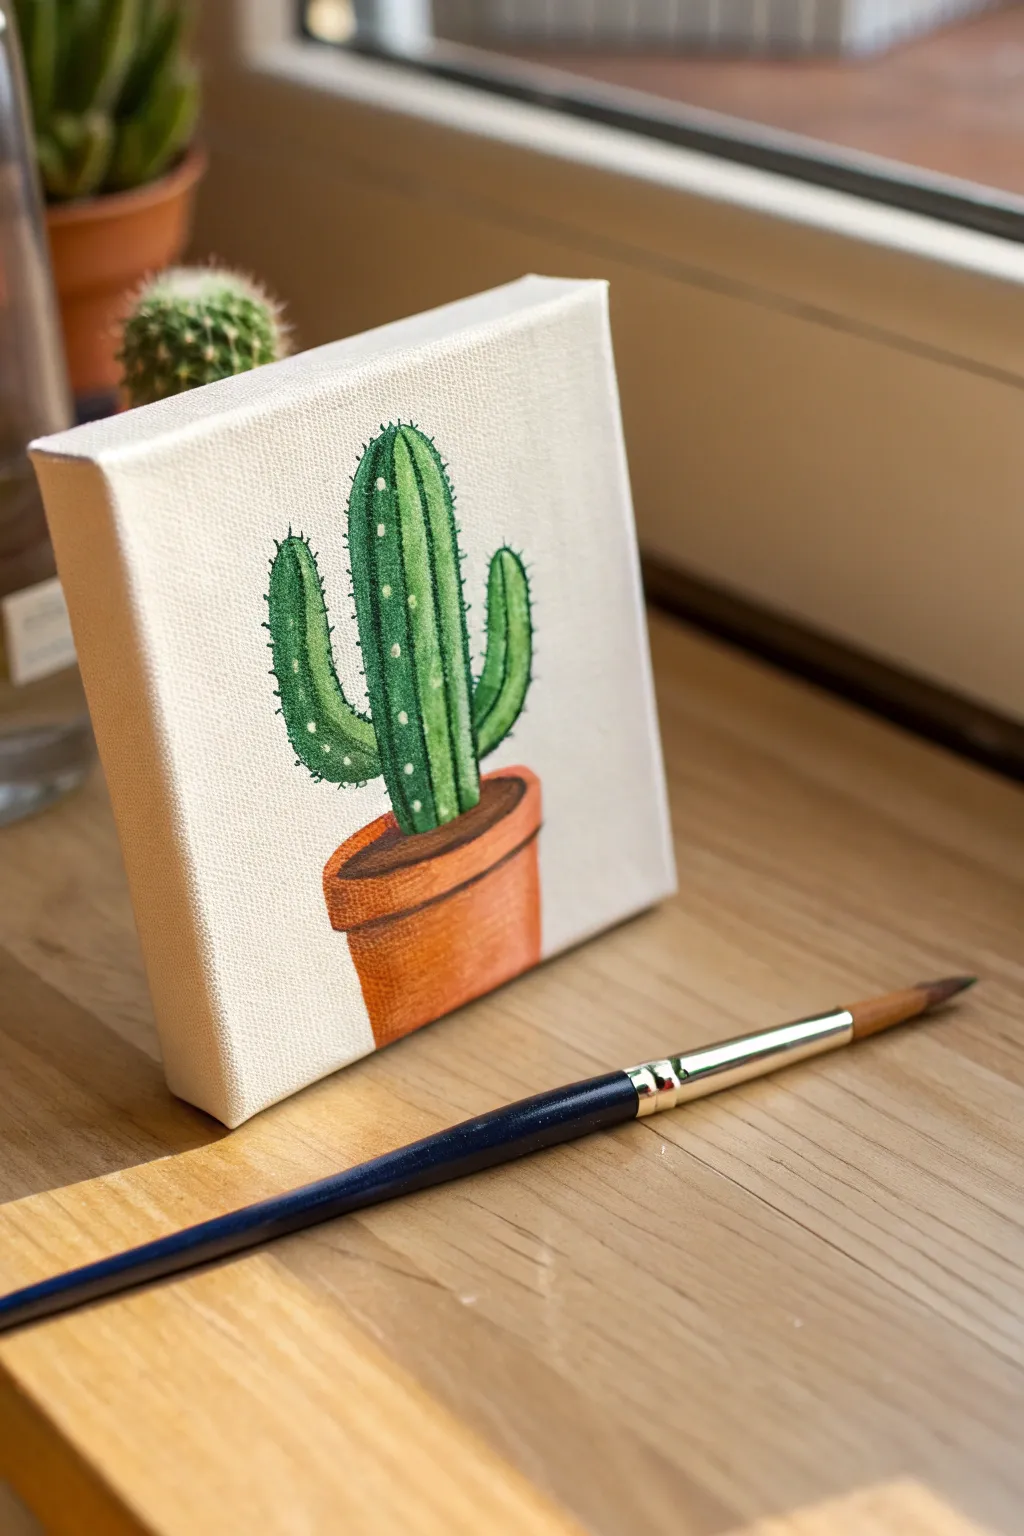
This miniature masterpiece captures the simple beauty of a desert succulent on a small scale. The finished piece features a classic three-armed cactus sitting snugly in a terracotta pot, perfect for adding a touch of greenery to small spaces without the need for water.
Step-by-Step Guide
Materials
- Mini canvas (4×4 inch or similar)
- Acrylic paints (primary yellow, sap green, dark green, burnt sienna, burnt umber, titanium white)
- Small flat brush (size 4)
- Fine detail brush (size 00 or 0)
- Pencil and eraser
- Palette and water cup
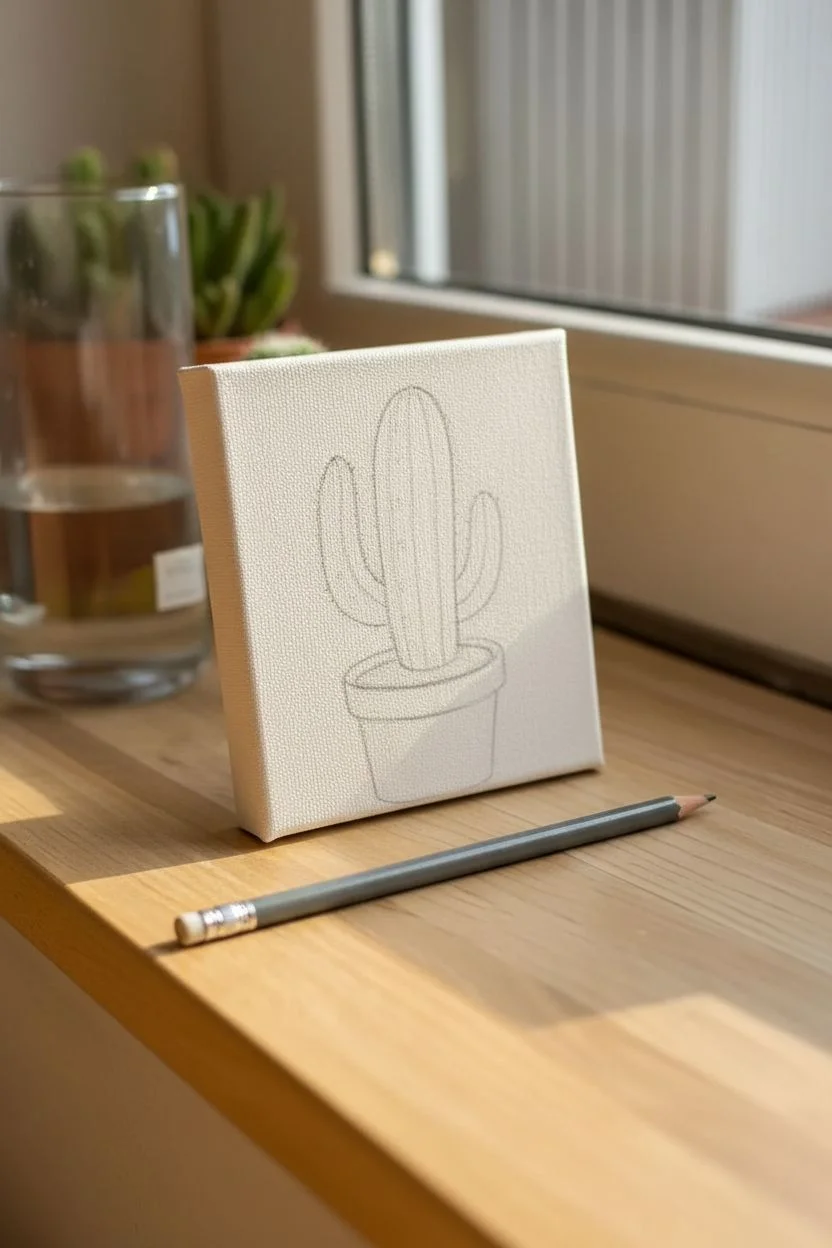
Step 1: Sketching the Outline
-
Position the pot:
Start by lightly sketching a slightly tapered cylinder at the bottom center of the canvas to form the pot slightly below the halfway mark. -
Add the rim:
Draw a thin oval or rectangle along the top edge of your pot shape to create the rim. -
Draft the cactus body:
Sketch a central, tall oval shape rising from the soil line inside the pot mostly reaching the top of the canvas. -
Attach the arms:
Add two smaller arms branching off the main stem—I like to place one lower on the left and one slightly higher on the right for balance.
Steady Hand Trick
Rest your pinky finger on the dry edge of the canvas or table to stabilize your hand while painting the tiny white spines.
Step 2: Painting the Pot
-
Mix the terracotta color:
Create a clay color by mixing Burnt Sienna with a tiny touch of Yellow and White to brighten it. -
Base coat the pot:
Use the flat brush to fill in the main body of the pot and the outer rim with your terracotta mix. -
Add shadows:
While the paint is still slightly wet, blend a small amount of Burnt Umber along the left edge and directly under the rim to create a 3D rounded effect. -
Paint the soil:
Fill the oval opening at the top of the pot with dark Burnt Umber to represent the soil.
Step 3: Greening the Cactus
-
Base green layer:
Mix Sap Green with a little Yellow for a vibrant mid-tone and paint the entire cactus shape. -
Define the ridges:
Switch to your fine brush and mix a Dark Green. Paint thin vertical lines down the length of the main stem and arms to simulate the cactus ribs. -
Shadow the edges:
Apply thin strokes of the Dark Green along the outer edges of the cactus and where the arms attach to the stem to add depth. -
Add highlights:
Mix a light lime green using White and Yellow with a dot of Green. Paint vertical streaks down the center of each section (between your dark lines) to make the cactus look round and plump.
Make it Bloom
Add a pop of color by painting a small pink or yellow flower on the very top of the tallest cactus arm.
Step 4: Details & Finish
-
Paint the spines:
Load the very tip of your detail brush with pure Titanium White. -
Dot the details:
Gently dab rows of tiny vertical dots or short dashes along the highlighted ridges of the cactus to create the look of needles. -
Clean up:
If any paint went outside the lines, use White paint to carefully tidy up the background around the cactus for a crisp edge. -
Final rim adjustment:
Add a thin line of highlighted terracotta (your pot color plus extra white) to the top edge of the pot rim to catch the light.
Display your maintenance-free plant on a desk or shelf for an instant dash of nature


Cherry Blossom Branch
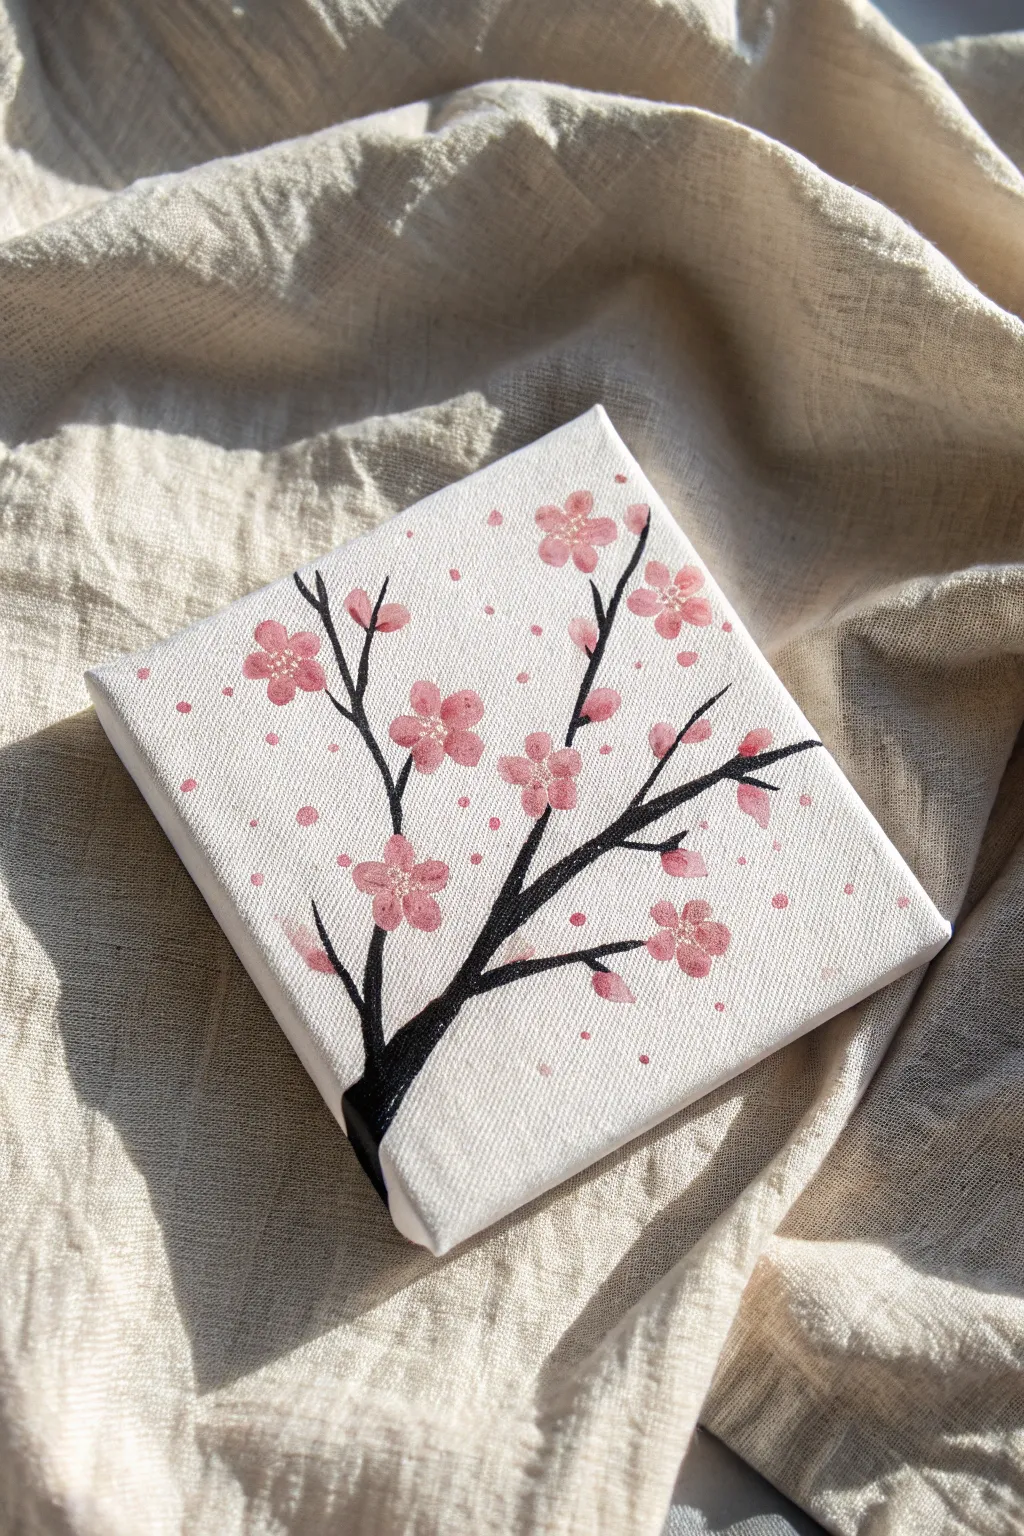
Capture the delicate beauty of cherry blossoms on a tiny scale with this elegant project. The stark contrast of the dark branch against the soft pink petals creates a striking look that fits perfectly in small spaces.
How-To Guide
Materials
- Mini stretched canvas (4×4 inch)
- Acrylic paints: Titanium White, Mars Black, Primary Red
- Detail liner brush (size 00 or 0)
- Small round brush (size 2)
- Palette and water cup
- Paper towel
Step 1: Setting the Stage
-
Prime the Surface:
Start by applying a thin, even coat of Titanium White over the entire canvas face. -
Smooth Finish:
While I usually like texture, for this piece I brush back and forth slightly to ensure the white background is relatively smooth. -
Dry Time:
Allow this white base layer to dry completely before touching it with dark paint.
Inky Lines
For the crispest branches, dilute your black paint to the consistency of heavy cream. This allows the liner brush to drag long, smooth lines without breaking.
Step 2: Painting the Branch
-
Prepare Black Paint:
Squeeze out a small amount of Mars Black. If the paint feels thick, mix in a tiny droplet of water to improve the flow. -
Start the Trunk:
Using the round brush, paint the base of the trunk starting at the bottom left center, angling it slightly toward the right. -
Extend the Main Line:
Switch to your liner brush. Pull the main branch diagonally upward across the canvas, stopping before you hit the top right corner. -
Branch Off:
Create 3 to 4 secondary branches coming off the main trunk. Vary their angles so they look organic rather than symmetrical. -
Tapering Twigs:
Add smaller twigs at the ends of the branches. Release pressure as you pull the brush away to create a sharp, tapered point. -
Critical Dry Step:
Let the black paint dry 100%. This is vital so the dark pigment doesn’t bleed into your delicate pinks later.
Muddy Pink?
If your pink petals are turning gray, the black branch underneath wasn’t fully dry. Stop immediately, let it dry, and apply a second coat of pink to cover the gray.
Step 3: Flowering the Tree
-
Mix Blossom Pink:
Mix a large amount of White with a tiny dot of Red to create a very pale, pastel pink. -
Petal Formation:
Load the small round brush. Create a flower by pressing the brush tip down five times in a circle, having the points meet in the center. -
Placement Strategy:
Clump groups of 2 or 3 flowers on the main branch tips. -
Add Buds:
Using the same pale pink, paint small ovals attached directly to the thin twigs to represent unopened buds. -
Falling Petals:
Paint a few single petals floating in the empty white space to create a sense of movement.
Step 4: Details & Atmosphere
-
Deepen the Centers:
Mix a slightly darker shade of pink by adding a bit more Red to your previous mix. -
Add Dimension:
Dab a small dot of this darker pink into the absolute center of each open flower. -
Accentuate Buds:
Add a tiny stroke of the darker pink to the bottom of the flower buds for shadow. -
Pollen Dots:
Using the very tip of your liner brush and pure White paint, place three tiny dots in the center of the dark pink flower centers. -
Atmospheric Speckles:
Dip the handle end of a brush into the dark pink paint and gently dot the background area randomly to simulate floating pollen or magic. -
Final Inspection:
Check that your floating petals look balanced and add one or two more speckles if the composition feels empty.
Display your mini masterpiece on a small easel to bring a permanent breath of spring into your room
Cozy Campsite Night
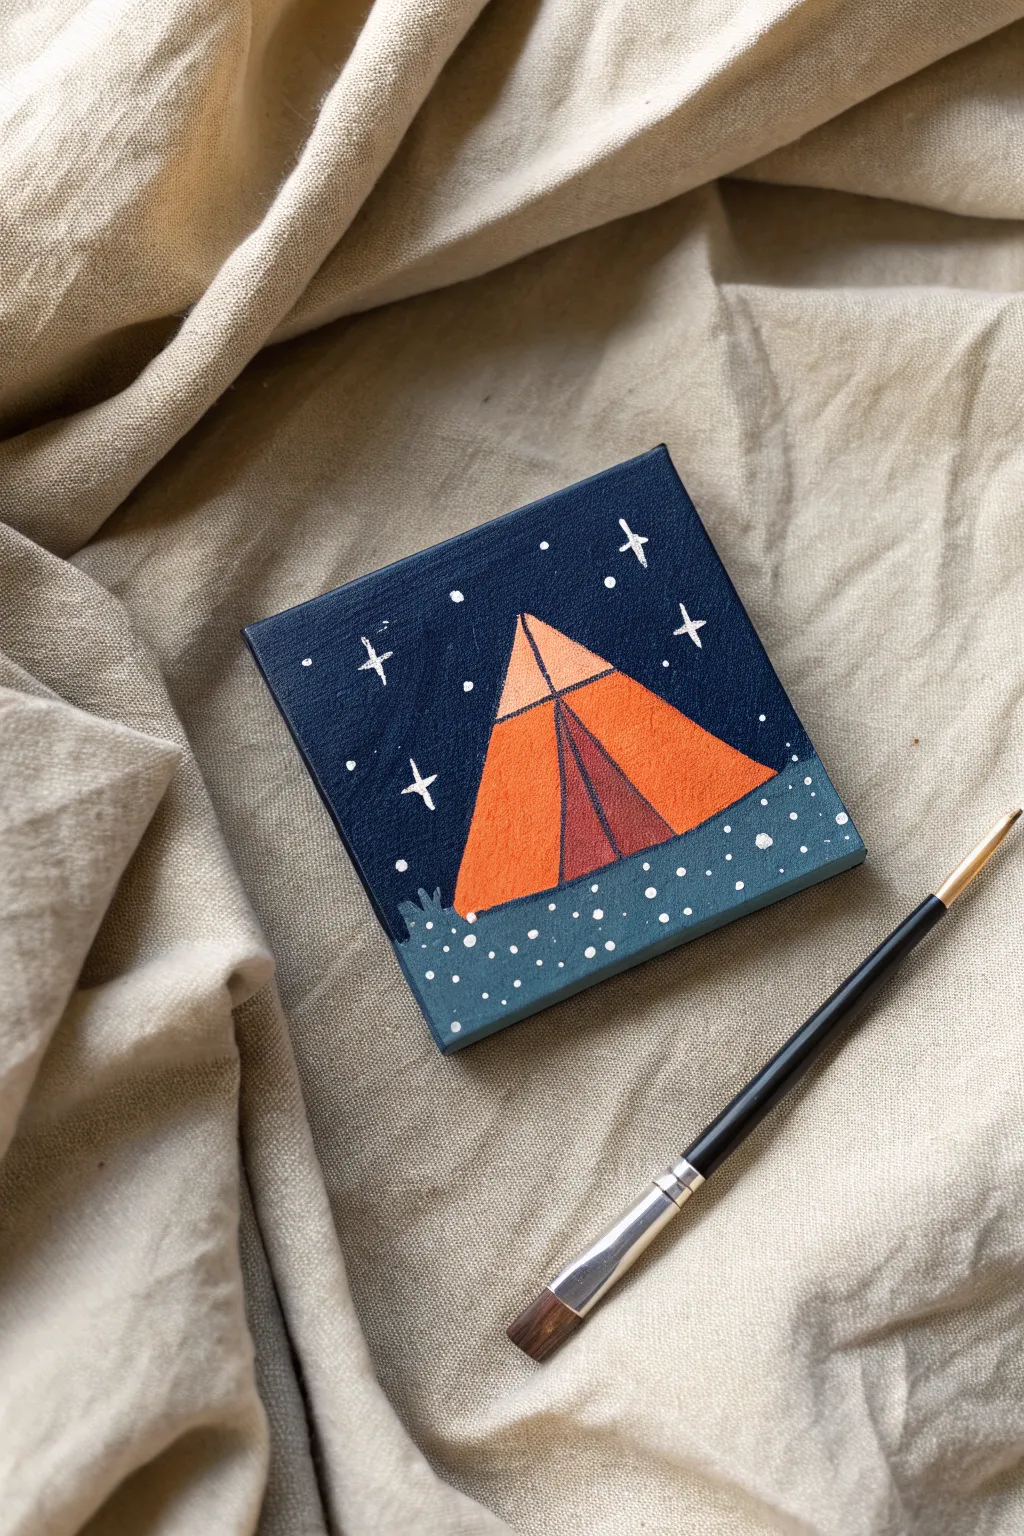
Capture the serenity of sleeping under the stars with this geometric mini painting. Using bold, flat colors and simple shapes, you’ll create a cozy scene that perfectly fits on a tiny 4-inch canvas.
Step-by-Step Guide
Materials
- Mini stretched canvas (4×4 or 6×6 inches)
- Acrylic paints: Navy blue, dull teal, bright orange, light peach, russet brown, white
- Small flat brush (size 4 or 6)
- Fine detail liner brush (size 0 or 00)
- Pencil and eraser
- Palette and water cup
Step 1: Setting the Scene
-
Mix the sky color:
Start by mixing a deep navy blue on your palette. If your blue is too bright, add a tiny touch of black or dark purple to deepen it for a night sky effect. -
Paint the background:
Use your flat brush to paint the upper three-quarters of the canvas with the navy mixture. Painting the sides of the canvas now gives it a finished, gallery-wrapped look. -
Create the ground:
Mix a dull teal or grey-blue shade. Paint the remaining bottom quarter of the canvas, slightly curving the meeting line between the ground and sky to create a gentle hill. -
Let it dry completely:
Allow the background layers to fully dry before moving on. I like to use a hairdryer on a low setting if I’m feeling impatient.
Opacity Issues?
If the orange paint looks streaky over the dark background, apply a layer of white paint inside your tent sketch first. Let it dry, then paint the orange over it for vibrant coverage.
Step 2: Constructing the Tent
-
Sketch the outline:
Using a pencil, lightly draw a large triangle in the center of the canvas. The base should sit comfortably on the teal ground. -
Add internal lines:
Draw a vertical line down the center of the triangle. Near the top, add a horizontal line crossing the center to define the tent’s peak. -
Paint the main sides:
Use the bright orange paint to fill in the two large bottom sections of the triangle, avoiding the central triangular slit where the opening will be. -
Highlight the peak:
Switch to a light peach or pale orange color. Paint the top triangle section above the horizontal line you drew earlier to suggest light hitting the roof. -
Create the opening:
Mix a russet or reddish-brown shade. Paint the narrow, central triangle slice that runs from the peach peak down to the ground to represent the tent flaps. -
Clean up edges:
Use your liner brush with the appropriate colors to sharpen the straight edges of your tent if they got a bit wobbly. -
Add the center pole:
With the liner brush and the russet brown paint, carefully trace the vertical center line to define the separation between the tent flaps.
Step 3: Starry Night Details
-
Paint the large stars:
Load your fine liner brush with pure white paint. Paint 4-5 evenly spaced ‘plus signs’ or crosses in the navy sky area. -
Add distant stars:
Using the very tip of the brush or a toothpick, dot varying sizes of white specks throughout the rest of the sky. -
Texture the ground:
Continue using the white paint to add small dots across the teal ground area. This mimics dew, snow, or reflective pebbles. -
Add grass tufts:
Mix a slightly darker shade of teal. Paint a few tiny, jagged strokes at the bottom left corner near the tent to suggest wild grass. -
Final touches:
Check the sides of your canvas again. If the tent design wraps around or if you need to touch up the background colors on the edges, do so now.
Make It Shimmer
Use metallic silver or gold paint for the stars and the ground speckles to make the artwork sparkle when it catches the light.
Place your finished mini masterpiece on a small easel or shelf to add a touch of adventure to your room
Twilight Powerlines
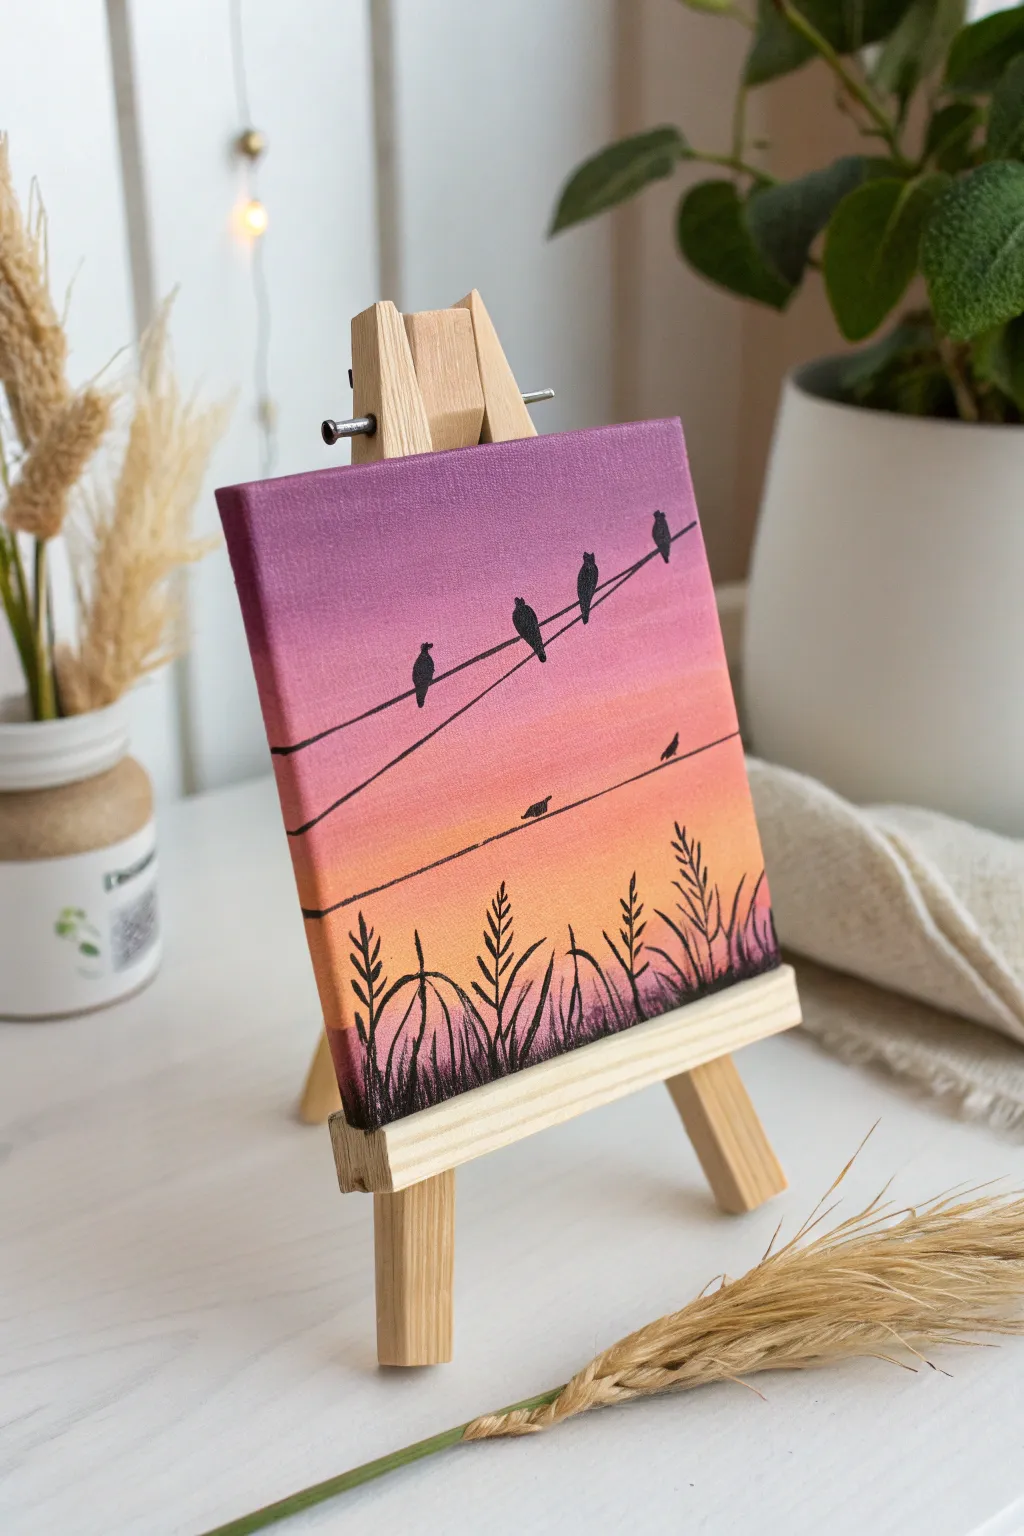
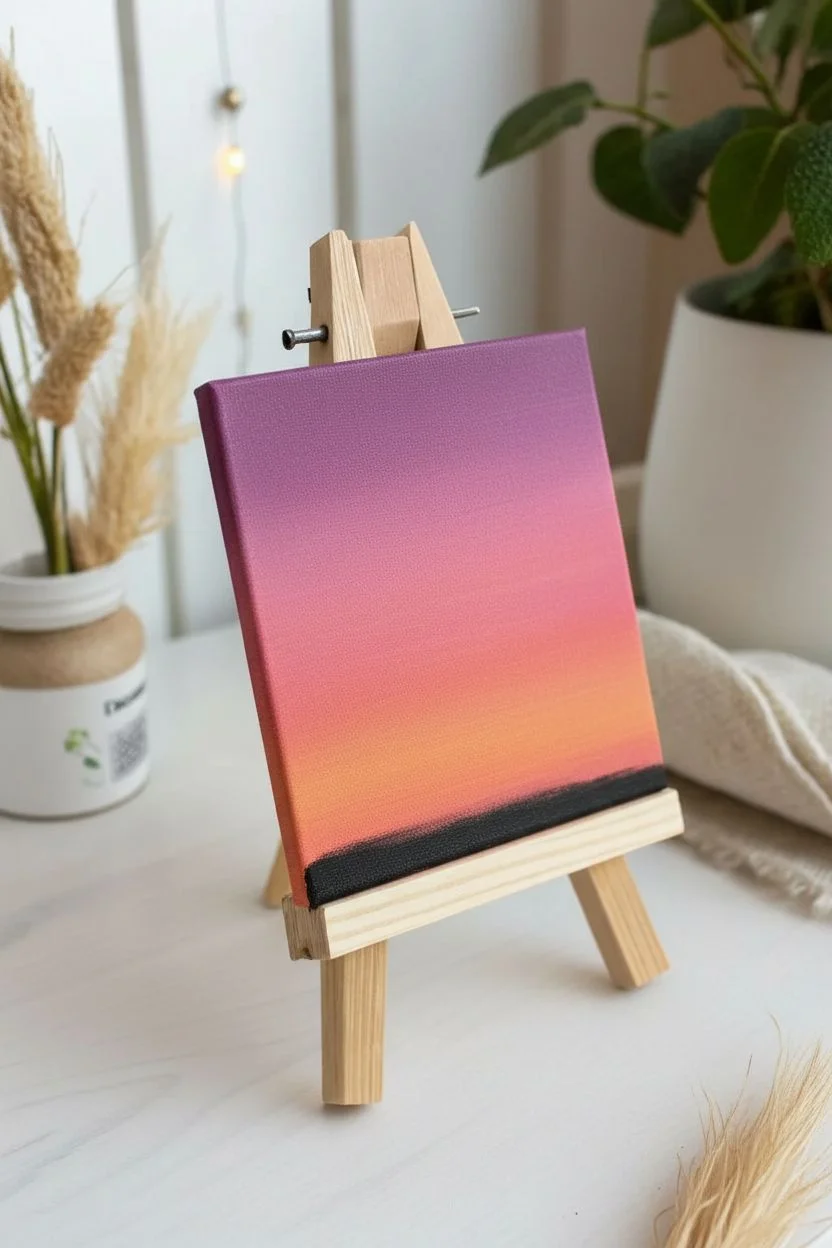
Capture the serene beauty of dusk on a miniature scale with this lovely gradient sky painting. This project combines smooth blending techniques with crisp silhouette work to create a peaceful scene that fits perfectly on a desk easel.
Step-by-Step Tutorial
Materials
- Mini stretched canvas (4×4 inch)
- Acrylic paints: Violet, Magenta, Orange, Black, White
- Small flat shader brush
- Detail liner brush (size 0 or 00)
- Palette and water cup
- Paper towels
Step 1: Painting the Gradient Sky
-
Prepare the Colors:
Squeeze violet, magenta, and orange acrylic paints onto your palette, keeping white handy to lighten colors if needed. -
Apply the Violet:
Using the flat shader brush, paint a horizontal band of violet across the top third of the canvas. -
Add the Magenta:
Without washing the brush fully, pick up magenta and paint the middle section, slightly overlapping the bottom edge of the violet. -
Finish with Orange:
Clean the brush and apply orange to the bottom third, blending it upwards into the magenta line. -
Blend the Transitions:
While the paint is still wet, use long horizontal strokes back and forth where the colors meet to create a soft, seamless fade. -
Paint the Edges:
Don’t forget to wrap the gradient colors around the sides of the canvas for a professional, gallery-style finish. -
Let it Dry:
Allow the background to dry completely; I like to speed this up with a hair dryer on a cool setting if I’m impatient.
Silky Smooth Lines
If your brush drags or skips while painting wires, your paint is too thick. Add water drop by drop until it flows like ink from a quill.
Step 2: Adding the Wires
-
Mix Inky Black:
Mix a small drop of water into your black paint until it reaches an ink-like consistency, which helps create smooth, long lines. -
Paint the Top Wire:
Using the detail liner brush, draw a fine line stretching across the upper sky, letting it dip slightly in the middle to simulate gravity. -
Add Lower Wires:
Paint two more wires below the first one, varying the angle and curve slightly so they don’t look too rigid or parallel. -
Steady Your Hand:
To keep shaky hands at bay, rest your pinky finger on a dry part of the canvas or the table while pulling the lines.
Starry Night Upgrade
Before painting the black silhouettes, flick a toothbrush loaded with thinned white paint over the purple section to create tiny distant stars.
Step 3: Silhouettes and Details
-
Paint Bird Bodies:
Dab small, oval shapes onto the wires using the tip of your liner brush to represent the birds’ bodies. -
Add Heads and Beaks:
Place a tiny dot on top of each oval for a head, and add incredibly small flicks for beaks or tail feathers. -
Vary the Poses:
Paint some birds facing left and others right, and group a few together while leaving others solitary for a natural look. -
Start the Grass:
At the very bottom, use short upward flicks with the liner brush to create uneven blades of grass rising from the edge. -
Add Seed Heads:
Detail the taller grass blades with small dashes or ‘V’ shapes on the sides to mimic wheat or weed textures. -
Ground the Scene:
Fill in the solid black strip along the absolute bottom edge to anchor the grass and hide any remaining canvas. -
Final Touches:
Check for any transparent spots in your black silhouettes and apply a second coat if necessary for a solid, opaque look.
Now you have a tranquil sunset scene to brighten up any small corner of your home.
Glowing Street Lamp
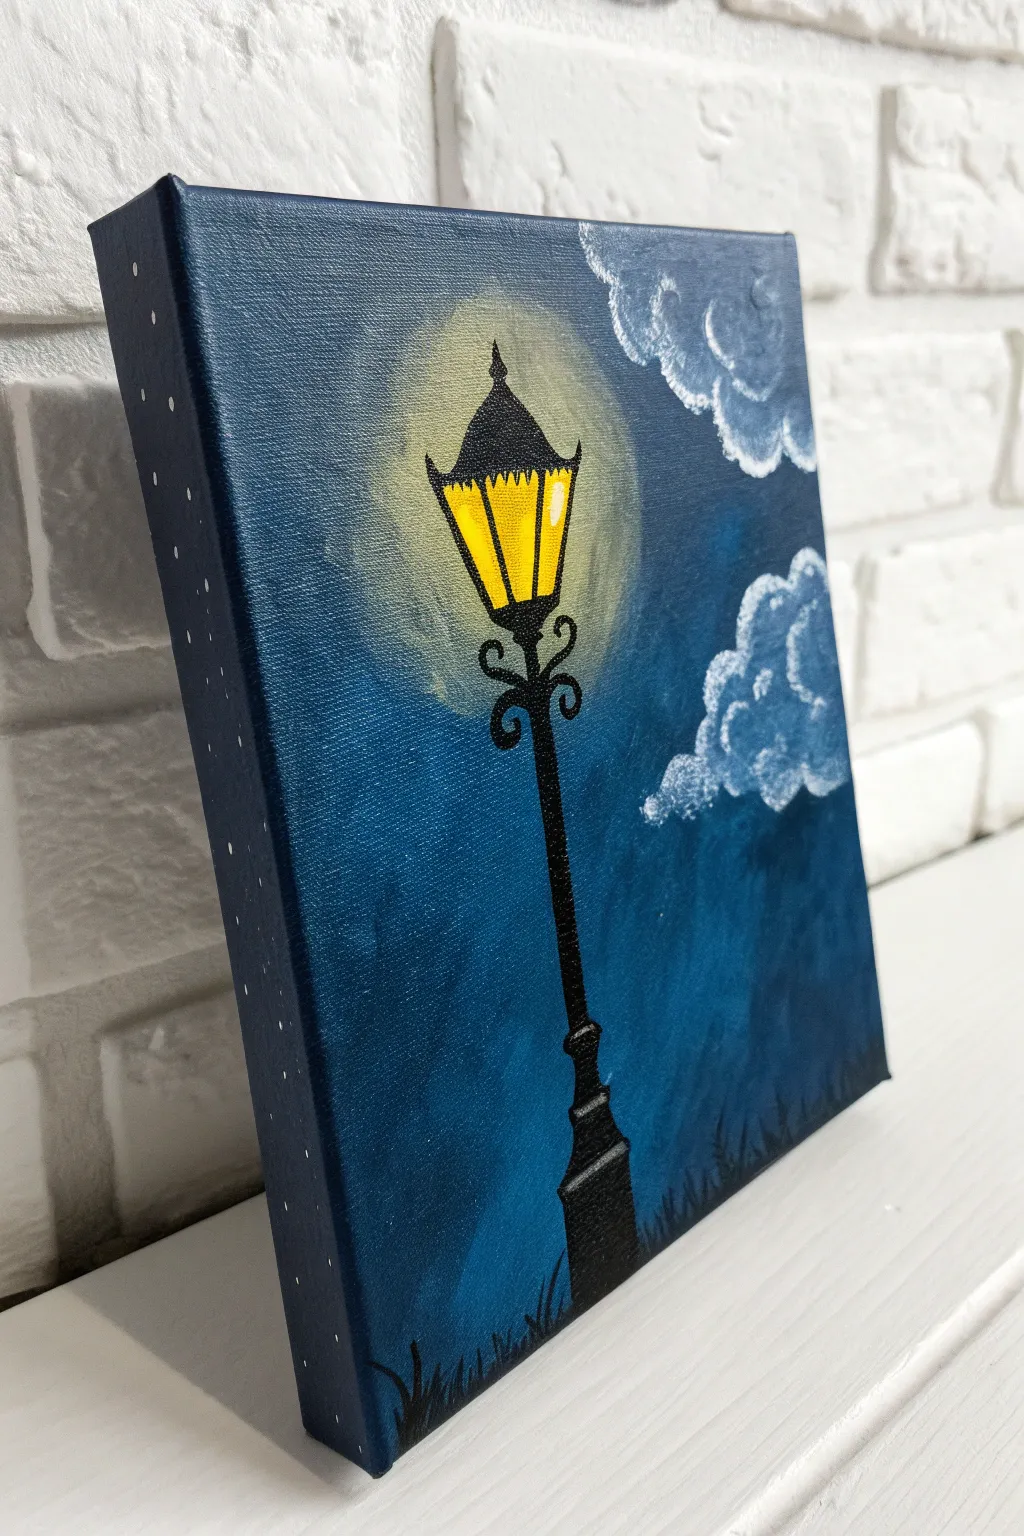

Capture the magic of a quiet evening walk with this charming mini canvas project. Using simple blending techniques and high-contrast silhouettes, you will create a glowing Victorian-style street lamp set against a moody, cloudy night sky.
Step-by-Step Guide
Materials
- Mini stretched canvas (4×4 or 5×7 inch)
- Acrylic paints: Phthalo Blue, Mars Black, Titanium White, Cadmium Yellow
- Flat shader brush (size 6 or 8)
- Small round brush (size 2)
- Fine liner brush (size 0 or 00)
- Palette and water cup
- Paper towels
Step 1: Setting the Atmosphere
-
Create the glow:
Start by mixing Titanium White with a very small touch of Cadmium Yellow to make a pale cream color. Paint a rough, soft circle in the upper-middle of your canvas where the light will originate. -
Build the sky gradient:
Surround the glowing center with Phthalo Blue. While the paint is still wet, blend the blue into the outer edges of the cream circle to create a soft, diffusing halo effect. -
Deepen the night:
Mix a little Mars Black into your Phthalo Blue to create a deep navy. Paint the corners and the bottom third of the canvas with this darker mix, blending it upwards into the lighter blue. -
Paint the canvas edges:
Don’t forget the sides of your mini canvas. Paint the top, left, and right edges with the deep navy mix to continue the scene, avoiding the white canvas look on the gallery profile.
Glow Like a Pro
To make the lamp look incredibly bright, ensure the yellow paint is fully opaque. If the blue shows through, apply a second coat of yellow before adding the black outlines.
Step 2: Clouds and Light
-
Form the clouds:
Using a small round brush with Titanium White, dab cloud shapes onto the upper right corner. Use a dry-brush technique—wiping most paint off first—to make them look fluffy and semi-transparent. -
Highlight the clouds:
Add touches of pure white to the top edges of the cloud puffs where the moonlight would hit them, leaving the bottoms slightly shadowy and blue. -
Paint the glass panes:
Once the background is completely dry, use your small round brush to paint a trapezoid shape (wider at the top, narrower at the bottom) in the center of the glow. Use bright Cadmium Yellow. -
Add glass reflections:
Mix a tiny bit of orange into your yellow and paint lines near the edges of the trapezoid for depth. Add a stark white streak on the right side of the yellow shape to simulate a reflection on the glass.
Step 3: The Silhouette
-
Outline the lamp head:
Switch to your fine liner brush and slightly watered-down Mars Black paint. Carefully outline the yellow trapezoid shape, then paint a horizontal line across the top and bottom of the yellow glass. -
Add the roof:
Paint the triangular ‘hat’ or roof of the lamp above the glass. Add a small decorative spike (finial) at the very top point. -
Create vertical bars:
Draw two thin vertical black lines dividing the yellow glass area to create the look of separate window panes. -
Paint the main post:
Starting from the bottom center of the lamp head, paint a straight vertical line all the way down to the bottom of the canvas. I like to stabilize my hand with my pinky finger to keep this line straight. -
Add scrollwork details:
Just below the lamp head, paint decorative S-curves or curlicues on either side of the post using the very tip of your liner brush. -
Thicken the base:
Widen the black post near the bottom of the canvas to create a sturdy base or pedestal for the street lamp.
Steady Hands
If you struggle painting the long straight line for the lamp post, place a strip of masking tape down the center as a guide, or use a clean ruler to support your painting hand.
Step 4: Finishing Touches
-
Plant the grass:
Use the liner brush to flick short, quick black strokes upward from the bottom edge of the canvas to create silhouetted blades of grass. -
Paint the side stars:
Diagonally across the deep blue painted sides of the canvas (primarily the left edge), use the tip of a handle or a toothpick to perfect small white dots representing stars.
Display your finished mini-masterpiece on a shelf or desk where its warm glow can add a touch of cozy tranquility
Heart-Flame Candle

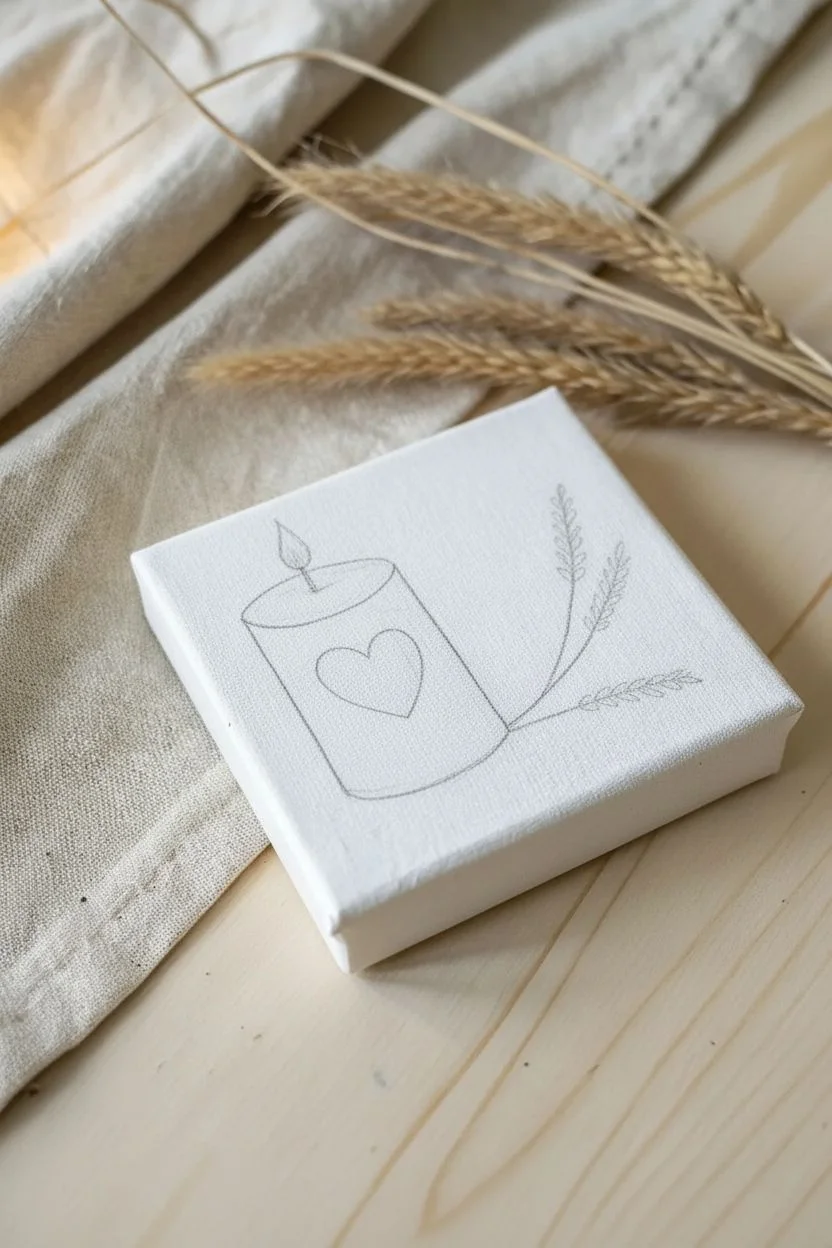
Capture the warmth of a rustic farmhouse aesthetic with this charming mini canvas project. Using soft washes of acrylics and delicate line work, you will create a sweet candle motif that radiates coziness.
Step-by-Step Tutorial
Materials
- Mini square canvas (e.g., 4×4 inches)
- Acrylic paints (peach/salmon, bright red, yellow, orange, white, burnt sienna, black)
- Small flat brush
- Fine detail brush (size 0 or 00)
- HB Pencil
- Eraser
- Palette and water water cup
Step 1: Sketching the Composition
-
Draw the candle sides:
Start by lightly drawing two vertical parallel lines in the lower left quadrant of the canvas to determine the width of your candle. -
Form the cylinder:
Connect the bottom of the lines with a slight downward curve, and connect the top with a flattened oval shape to create the 3D cylinder effect. -
Add the wick and flame:
Draw a short, straight line upwards from the center of the oval for the wick, then sketch a teardrop shape around it for the flame. -
Sketch the heart:
Place a simple heart shape right in the center of the candle body. Keep it proportionate so it has breathing room on all sides. -
Position the wheat:
Lightly trace three curved lines extending from behind the right side of the candle, fanning out slightly towards the top right corner.
Step 2: Painting the Candle
-
Mix the candle color:
Combine a touch of orange with plenty of white and a tiny dot of pink to create a soft salmon or peach shade. -
Apply the base wash:
Using a slightly damp flat brush, paint the body of the candle around the heart. I like to keep the paint thin here to let the canvas texture show through. -
Paint the top surface:
Mix a very pale grey or off-white and paint the top oval of the candle, denoting the wax surface. -
Fill the heart:
Switch to a small round brush and fill in the heart with bright opaque red paint. -
Refine the heart:
If the red looks streaky, allow the first layer to dry completely and add a second coat for a bold, solid pop of color.
Pro Texture Tip
To mimic the crayon-like texture seen in the photo, wipe most of the paint off your brush onto a paper towel before painting the candle body (dry brushing).
Step 3: Adding the Flame
-
Paint the flame base:
Fill the teardrop flame shape with a bright lemon yellow. -
Add flame dimension:
While the yellow is still wet, touch a tiny bit of orange to the very bottom or tip of the flame to give it a glowing gradient. -
Define the wick:
Use your finest detail brush and black paint to carefully draw the thin line for the wick connecting the wax to the flame.
Troubleshooting Lines
If you struggle to paint thin lines for the wheat or outlines, use fine-tip waterproof ink pens or colored pencils after the base paint is 100% dry.
Step 4: Wheat & Final Details
-
Mix the wheat color:
Create a sandy beige color by mixing white with a little burnt sienna or light brown. -
Paint the stems:
Using the very tip of your detail brush, paint over the three curved pencil lines you sketched earlier to create the wheat stems. -
Add the grains:
Paint small, V-shaped dashes or little distinct dabs along the top third of each stem to represent the wheat grains. -
Outline the rim:
Mix a watered-down black or dark grey and outline the top oval of the candle with a very thin line to separate the top from the side. -
Clean uph:
Once dry, gently erase any remaining visible pencil marks from the sketching phase to finish your piece.
Display your charming mini canvas on a small easel or shelf to add a touch of warmth to your decor.
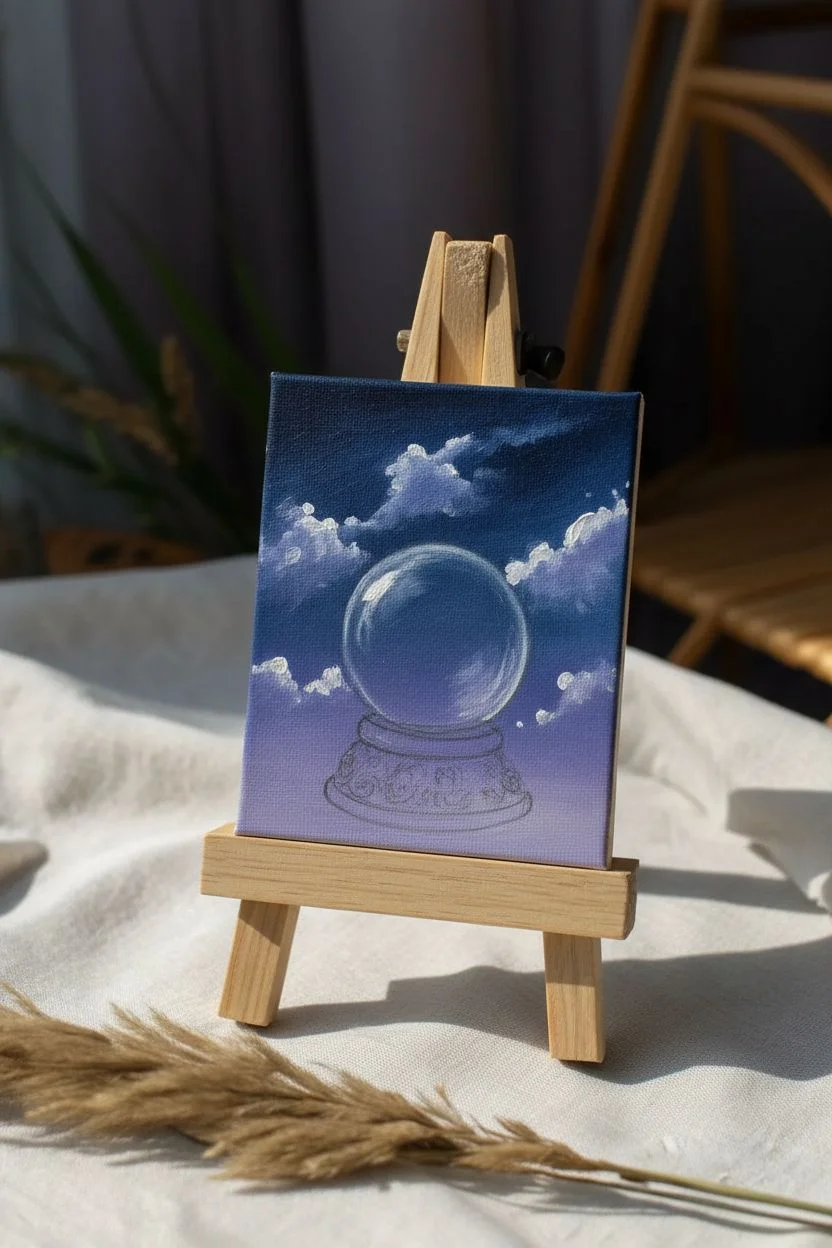
Crystal Ball Magic
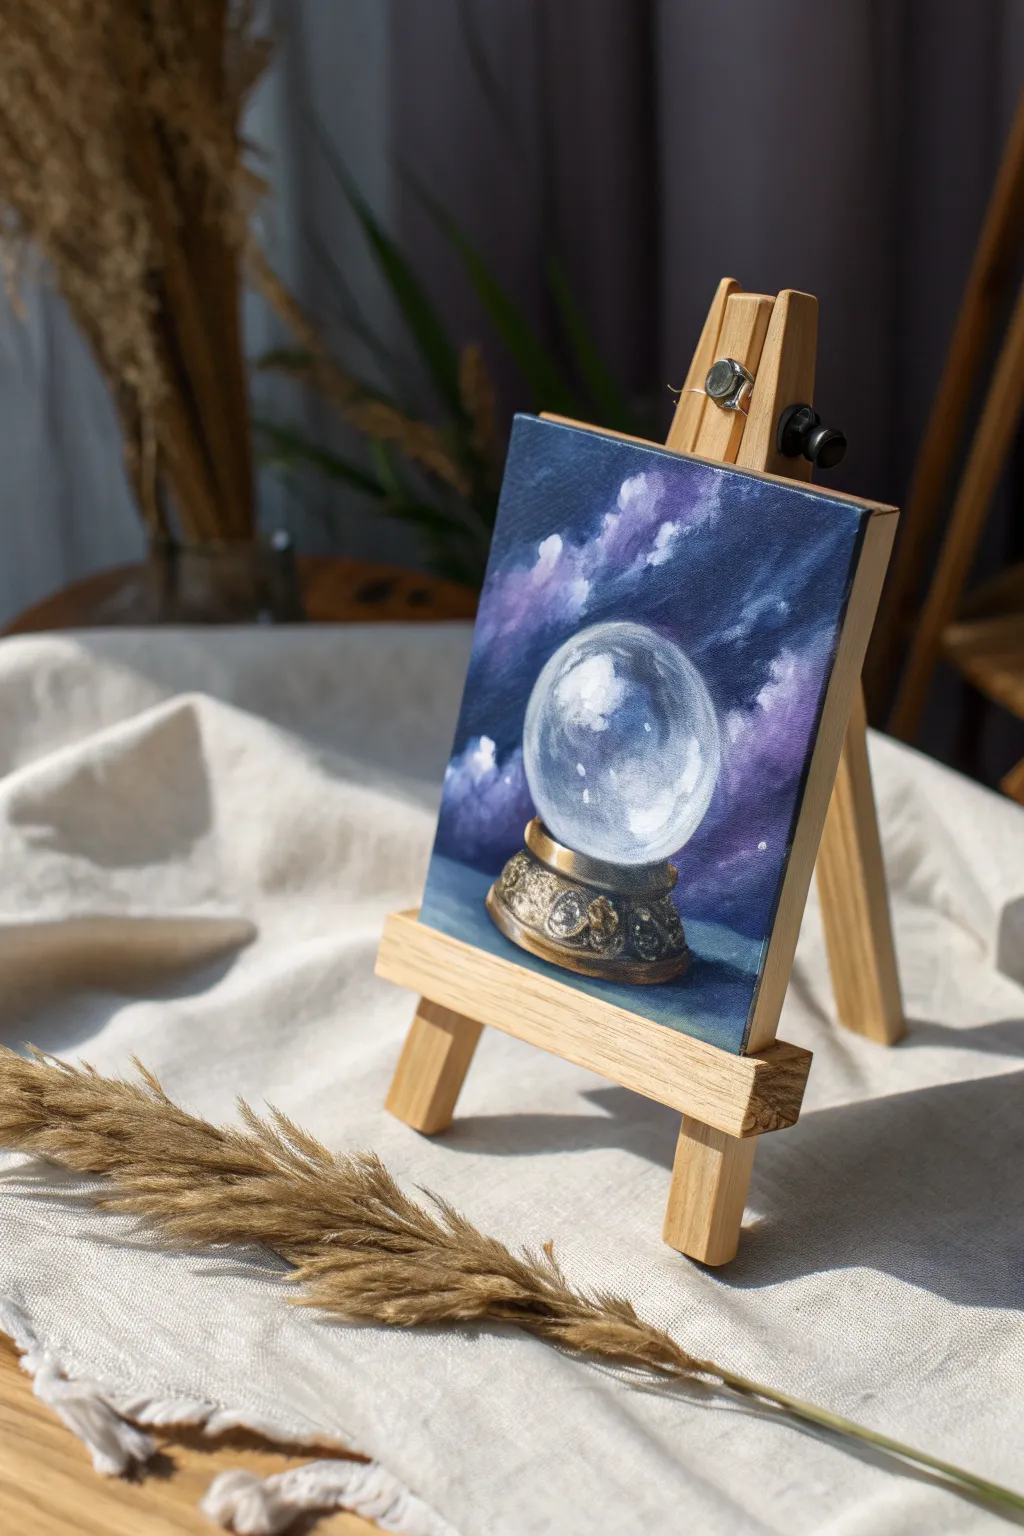
Capture a touch of magic on a miniature canvas with this moody, glowing crystal ball painting. You will learn to paint realistic glass effects and intricate gold details against a dramatic cloudy night sky.
Step-by-Step Guide
Materials
- Mini canvas (4×4 or 5×5 inch)
- Acrylic paints: Prussian Blue, Dioxazine Purple, Titanium White, Mars Black, Yellow Ochre, Burnt Umber
- Small flat brush (size 4 or 6)
- Small round detail brush (size 0 or 1)
- Circle template or small bottle cap
- Pencil
- Palette and water cup
Step 1: Setting the Scene
-
Sketch the layout:
Place your bottle cap or circle template in the center of the canvas slightly below the middle line. Trace a circle lightly with a pencil. -
Draw the base:
Sketch the ornate stand underneath the circle. Draw a ring directly under the ball, followed by a wider, curved dome shape for the foot of the stand. -
Block in the sky:
Mix Prussian Blue with a touch of Mars Black. Using the flat brush, paint the top corners of the canvas, brushing inwards. -
Create the horizon:
Gradually mix in Dioxazine Purple and a little White to your blue mix as you move down the canvas, creating a lighter, hazy purple horizon line just behind the crystal ball. -
Add cloud texture:
Load a dirty brush with Titanium White and a tiny dot of purple. Dab irregular, fluffy cloud shapes into the wet sky background to create a soft, stormy atmosphere.
Flat Looking Glass?
To make the ball look round, ensure your highest contrast is within the sphere. The highlights should be the brightest white, and the edges distinct.
Step 2: The Golden Stand
-
Base coat the gold:
Fill in the entire stand shape with Burnt Umber. Let this dry completely to establish a solid shadow layer. -
Add metallic mid-tones:
Paint the raised areas of the stand with Yellow Ochre, leaving the Burnt Umber visible in the recessed carvings and edges. -
Create shine:
Mix Titanium White with Yellow Ochre. Using the detail brush, paint small dashes and curves on the ridges of the stand to simulate light catching the metal. -
Deepen shadows:
I like to wash a very thin, watery layer of Mars Black over the bottom edges of the stand to ground it and make the gold pop.
Magical Glow
Mix a glaze medium with a tiny drop of neon blue or purple paint. Glaze this over the center of the crystal ball to give it a supernatural inner light.
Step 3: The Crystal Sphere
-
Fill the glass:
Paint the inside of the circle with a lighter version of your background sky color (Blue + White). The inside of a glass ball usually looks lighter than the background. -
Invert the image:
Paint a distorted, upside-down version of the clouds inside the top half of the ball. This refraction effect sells the realism. -
Reflect the base:
Paint a curved, upward-smiling shape of Yellow Ochre at the very bottom inside the ball to show the reflection of the gold stand. -
Define the volume:
Paint a very thin, translucent shadow curve on the right side of the ball using watered-down Prussian Blue. -
Add the rim light:
On the upper left edge of the circle, paint a thin, crisp line of pure Titanium White to show the glass edge catching the light. -
Create the main reflection:
Paint a distorted window shape (a curved rectangle) in pure Titanium White on the upper left side of the sphere. -
Final sparkles:
Add a few tiny white dots on the right side of the glass and on the brightest points of the gold stand for extra shine. -
Ground the object:
Paint a dark shadow under the stand on the table surface, blending it out softly to the right.
Place your mini masterpiece on its easel and enjoy the mystical atmosphere you have created.
Graphic Strawberry
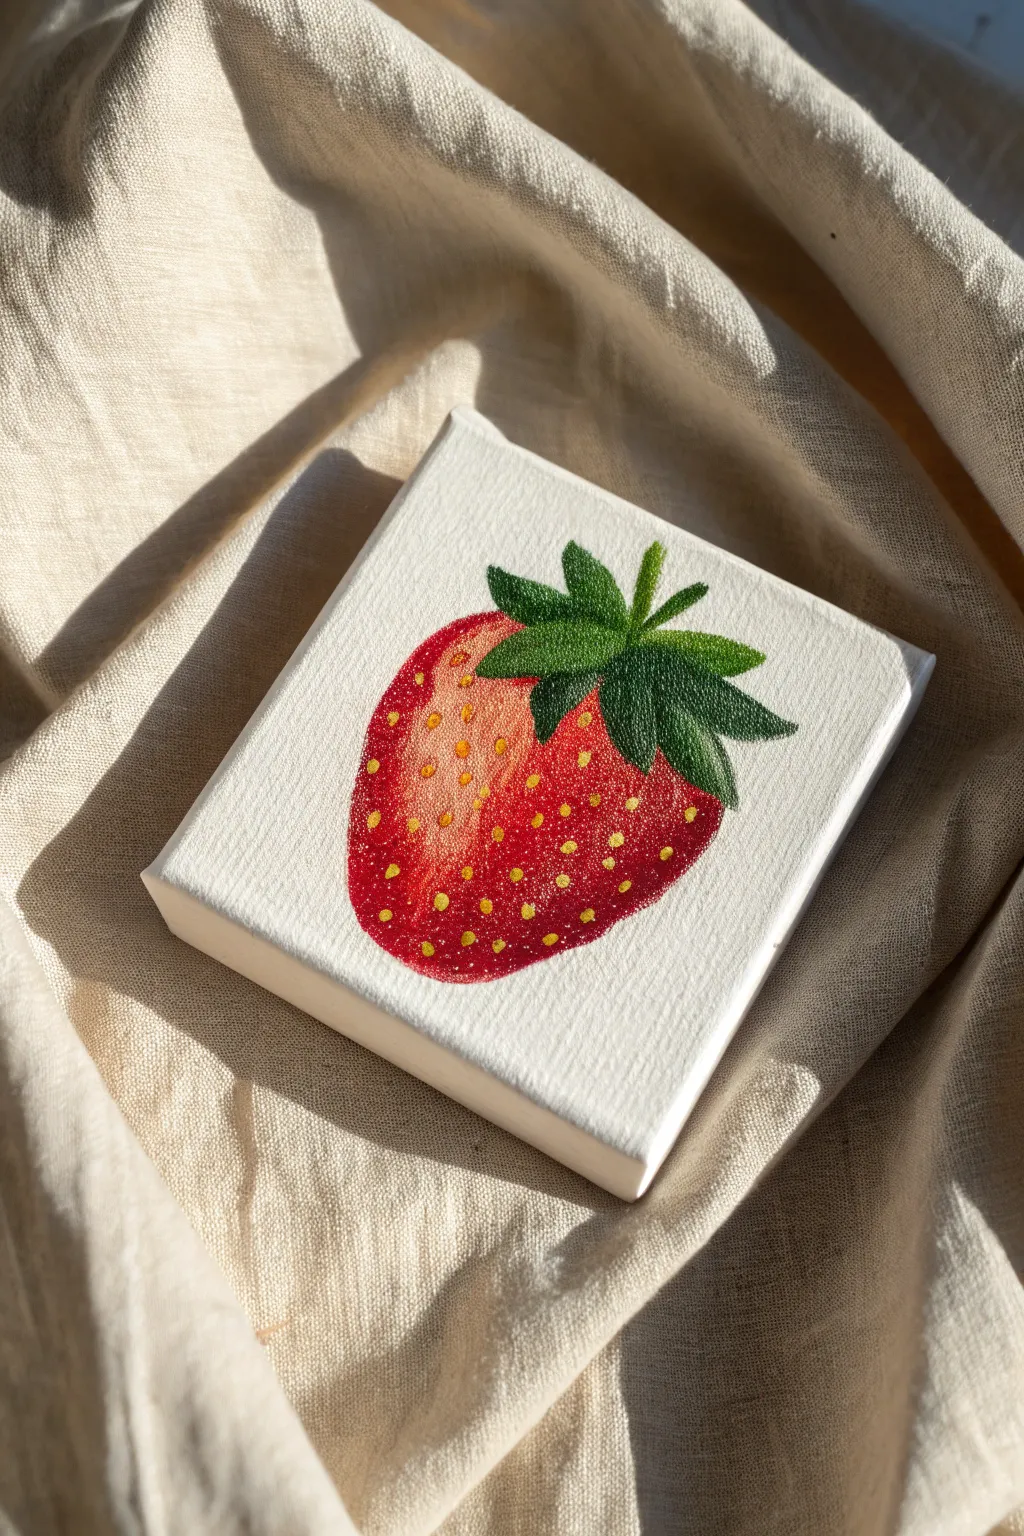
This charming mini canvas project captures the vibrant freshness of a single strawberry with a clean, graphic style. By focusing on smooth gradients and precise detailing, you will create a small piece of art that looks professionally polished and juicy.
Step-by-Step
Materials
- Mini canvas (4×4 or 6×6 inch)
- Acrylic paints (Cadmium Red, Alizarin Crimson, Sap Green, Dark Green, Yellow Ochre, Titanium White)
- Small flat brush
- Fine liner brush (size 0 or 00)
- Pencil and eraser
- Palette and water cup
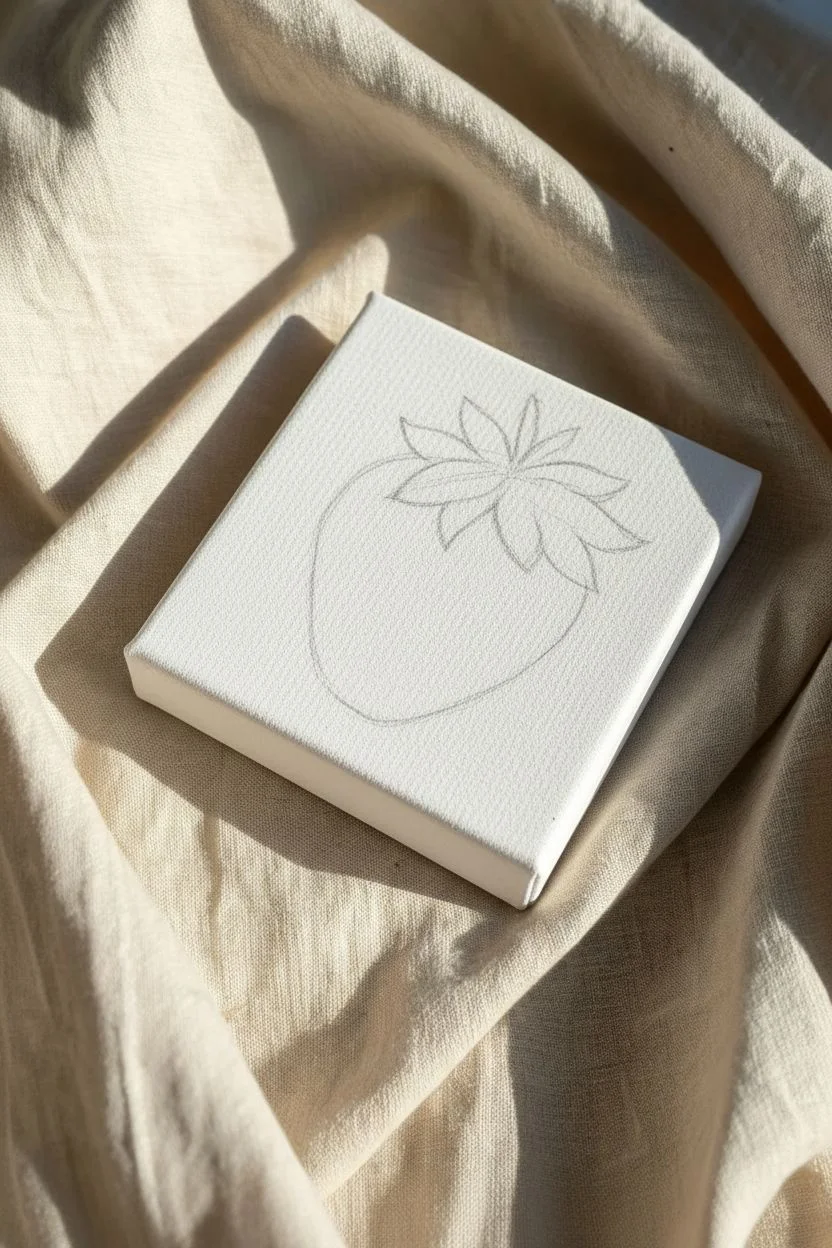
Step 1: Sketching the Shape
-
Outline the berry:
Start by lightly sketching a rounded, heart-like shape with a flattened top in the center of your canvas. Keep the lines faint so they don’t show through the paint later. -
Add the crown:
Draw the leafy calyx on top. Sketch about five or six jagged, star-like leaves that fan out from the center, with some overlapping the top of the red fruit.
Seed Precision
If you struggle to make tiny, consistent dots with a brush, try using a toothpick or the rounded end of a paintbrush handle dipped in paint to stamp the seeds perfectly.
Step 2: Painting the Fruit
-
Mix the base red:
On your palette, prepare a bright red using Cadmium Red. I like to add a tiny drop of water to improve the flow on the canvas texture. -
Apply the first coat:
Fill in the contour of the strawberry, carefully working around the sketched leaves. Establish a solid, opaque layer. -
Create the shadow:
While the red is still wet, mix a small amount of Alizarin Crimson (or a dark red) and blend it along the bottom right curve of the berry to create a shadow side. -
Add the highlight:
Mix a touch of yellow or white into your original red to create a lighter coral tone. Gently blend this into the upper left area of the berry to suggest a light source. -
Let it dry:
Allow the red layer to dry completely before moving on to prevent muddying the green colors next.
Avoiding Muddy Colors
Red and green are complementary colors, meaning they turn brown when mixed wet-on-wet. Ensure your red berry layer is 100% bone dry before letting green paint touch it.
Step 3: Leafy Details
-
Base the greens:
Using your small round brush and Sap Green, fill in the leaf shapes you sketched earlier. -
Deepen the contrast:
Take your Dark Green paint and apply it to the center point where the leaves meet and along the underside of the leaves where they cast a shadow on the fruit. -
Highlight the tips:
Mix a little yellow with your Sap Green to make a lime shade. lightly brush this onto the very tips and upper edges of the leaves for dimension. -
Refine the edges:
Use your fine liner brush to sharpen the points of the leaves, giving them that crisp, prickly look strawberries have.
Step 4: Seeds and Finish
-
Prepare the seed color:
Mix Yellow Ochre with a tiny pinprick of Titanium White. The white helps the yellow stand out opaquely against the dark red background. -
Map the seeds:
Visualize curved lines wrapping around the berry. This helps you place the seeds in a pattern that emphasizes the roundness of the fruit rather than looking flat. -
Paint the seeds:
Using the very tip of your finest brush, dab small, tear-drop shaped dots across the red surface following your visualized grid. -
Add seed depth:
For extra realism, you can add a microscopic dot of dark red directly above each yellow seed to make it look like it’s sitting in a small indentation. -
Clean the background:
Take some pure Titanium White and carefully paint around the outside of the strawberry to clean up any stray brushstrokes and make the image pop.
Display your vibrant little artwork in the kitchen or on a miniature easel to add a splash of sweetness to your room
Soft Peach Study
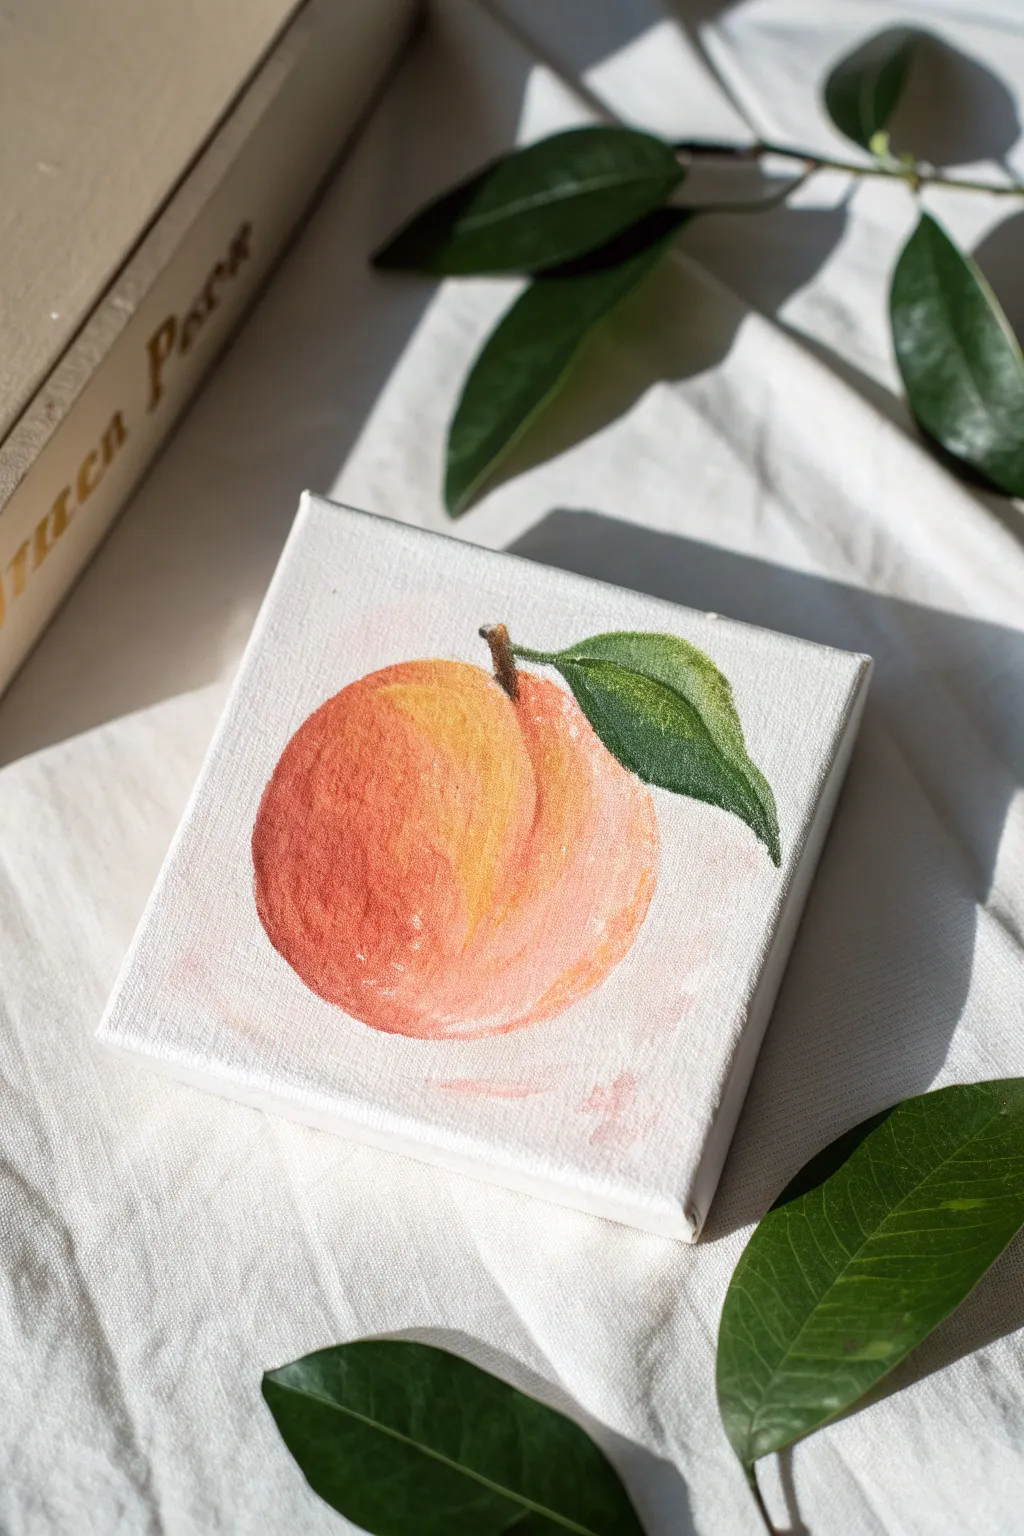
Capture the soft warmth of summer with this delicate fruit study on a miniature canvas. This project focuses on wet-on-wet blending techniques to replicate the dusty, fuzzy texture of peach skin.
How-To Guide
Materials
- Mini canvas (4×4 inch or similar)
- Acrylic paints (Cadmium Red, Cadmium Yellow, Titanium White, Burnt Umber, Sap Green)
- Small flat synthetic brush
- Small round detail brush
- Pencil and eraser
- Palette and water cup
- Paper towels
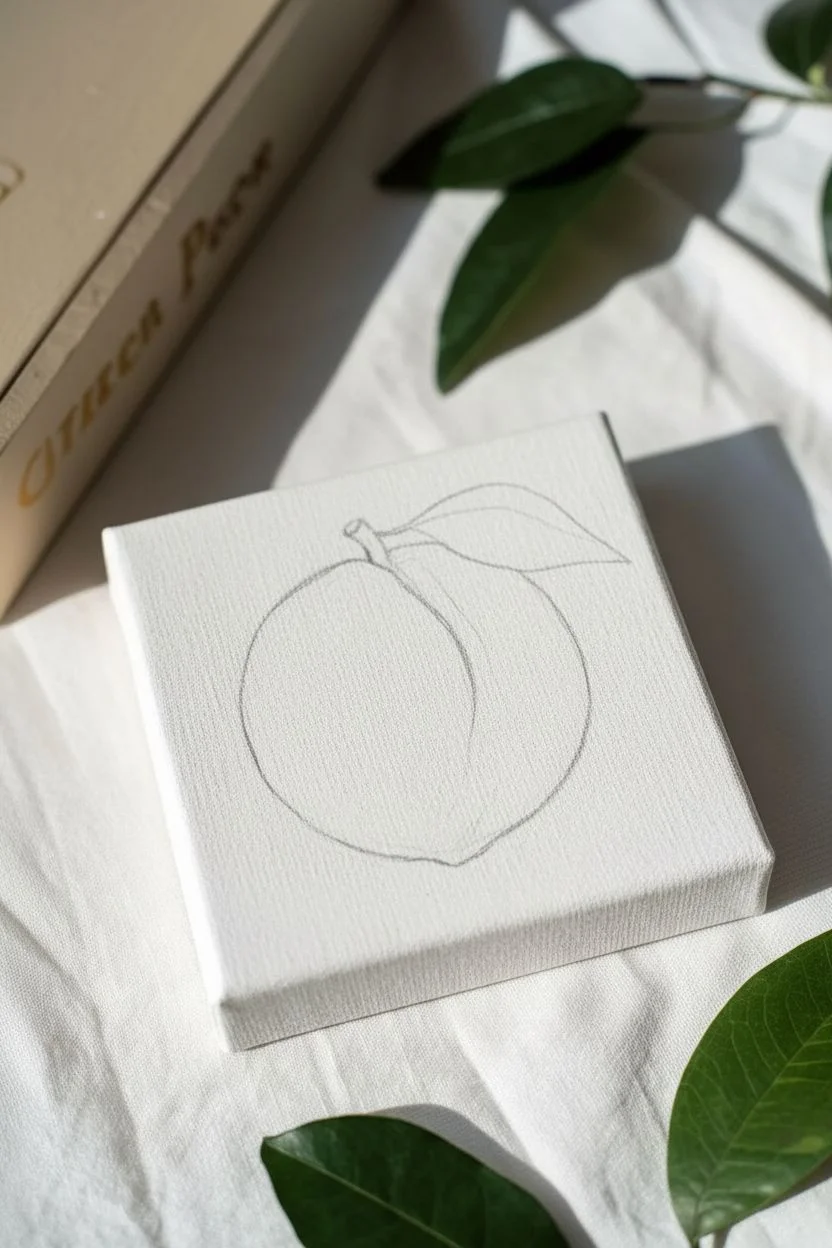
Step 1: Sketching the Composition
-
Outline the fruit:
Begin by lightly sketching a circle in the center of your canvas using a pencil. -
Define the shape:
Slightly flatten the top of the circle and draw a curved line dipping down from the top center to create the peach’s characteristic cleft. -
Add the greenery:
Sketch a small stem emerging from the cleft, and a single leaf extending to the right side.
Step 2: Painting the Peach Body
-
Mix the shadow tone:
On your palette, mix a reddish-orange hue using Cadmium Red with a touch of Yellow. You want a deep warm color for the shadowed side. -
Apply the shadow:
Using the flat brush, paint the left side and bottom curve of the peach with this reddish mixture. -
Mix the mid-tone:
Add more yellow and a tiny dot of white to your mixture to create a soft apricot orange. -
Fill the center:
Paint the middle section of the peach, slightly overlapping the red edge while the paint is still wet to encourage blending. -
Create the highlight:
Mix a pale creamy yellow using mostly Titanium White with a drop of Cadmium Yellow and a speck of red. -
Apply the highlight:
Paint the upper right section of the peach with this pale color, bringing it right up to the cleft line. -
Blend the gradients:
I like to wipe my brush clean and lightly drag it back and forth over the seams where the colors meet to create a smooth, fuzzy gradient. -
Enhance the form:
Use a little of the original reddish-orange to darken the crease line of the cleft, giving the fruit dimension.
Pro Tip: Fuzzy Texture
To get realistic peach skin, avoid harsh lines. Use a dry, clean soft brush to lightly tap over the transition areas while the paint is wet to blur the colors.
Step 3: Stem and Leaf Details
-
Paint the stem:
Using the round detail brush and Burnt Umber, carefully paint the small stem emerging from the center dip. -
Base the leaf:
Mix Sap Green with a tiny touch of Burnt Umber to get a natural dark green and fill in the leaf shape. -
Add leaf highlights:
While the green is still tacky, mix a little yellow into your green and paint the upper curve of the leaf to show light reflection. -
Detail the veins:
Wait for the leaf to dry significantly, then use your smallest brush to paint a faint center vein using a lighter green mix.
Troubleshooting: Muddy Colors
If your orange and green mix by accident where the leaf meets the fruit, paint over the mistake with opaque white first, let it dry, and then re-apply the correct color.
Step 4: Background and Final Touches
-
Mix the background wash:
Prepare a very pale color by mixing a large amount of White with the tiniest speck of your red-orange mix and a lot of water. -
Apply the background:
Roughly paint the background around the fruit, leaving the brushstrokes somewhat visible and loose for an artistic feel. -
Soften edges:
Where the background meets the peach, gently feather the paint so the outline isn’t razor-sharp; this helps the peach look soft rather than plastic. -
Refine texture:
If the peach looks too smooth, dry-brush a tiny bit of Titanium White on the roundest part of the cheek for a final texture pop.
Place your mini masterpiece on a small easel or shelf to add a touch of orchard sweetness to your room
Rubber Duck Portrait
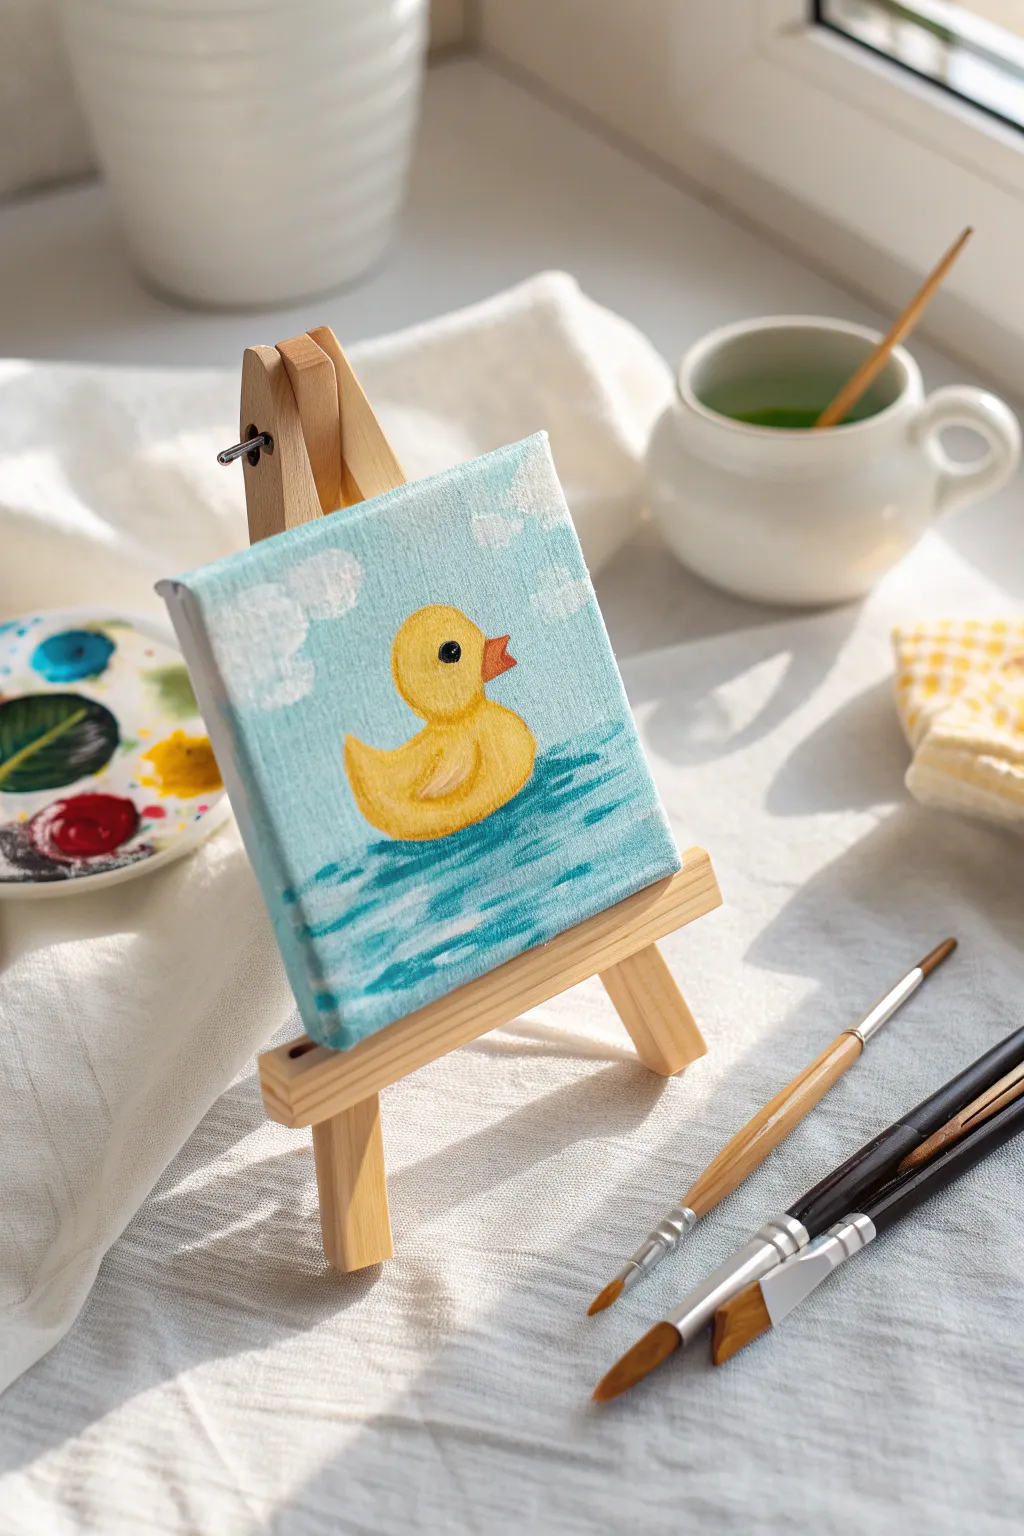
Capture the nostalgic charm of bath time with this cheerful acrylic painting on a miniature canvas. The bright yellow subject popping against a textured blue sky and water makes for an adorable desk accessory or gift.
Step-by-Step
Materials
- Mini stretched canvas (3×3 or 4×4 inch)
- Acrylic paints: Titanium White, Primary Yellow, Cadmium Orange, Sky Blue, Navy Blue, Mars Black
- Small flat synthetic brush (size 4 or 6)
- Fine detail liner brush (size 00 or 0)
- HB pencil
- Palette and water cup
- Paper towels
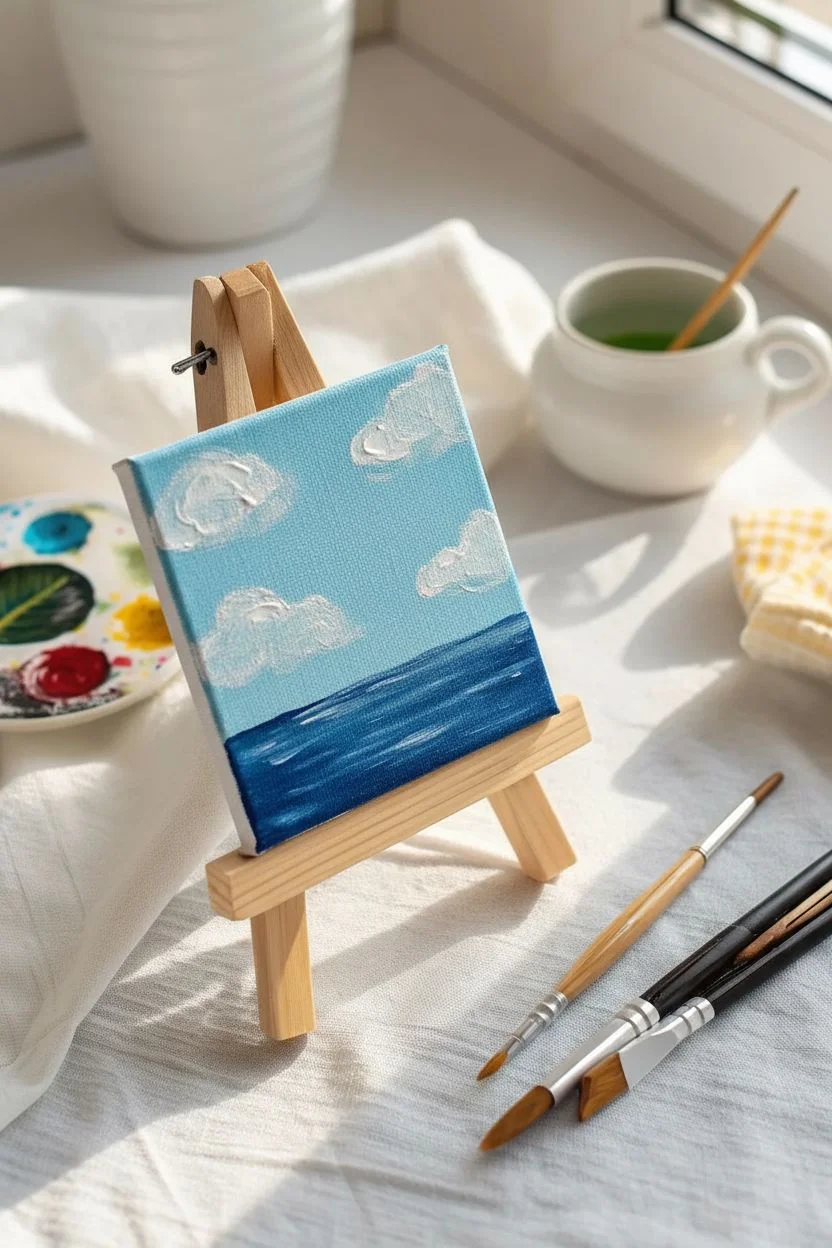
Step 1: Setting the Scene
-
Mix the sky color:
Start by mixing a generous amount of Sky Blue with a touch of Titanium White on your palette to create a soft, airy blue hue. -
Paint the upper gradient:
Using the small flat brush, paint the top two-thirds of the canvas with your sky mixture. Use horizontal strokes to keep the texture smooth. -
Create the waterline:
Without cleaning your brush thoroughly, pick up a tiny bit of Navy Blue to darken your sky mix. Paint the bottom third of the canvas to establish the water base, creating a subtle horizon line. -
Add cloud textures:
Wipe your flat brush clean. Dip just the corner into Titanium White and gently dab irregular, fluffy shapes into the sky area. Keep the edges soft and blended. -
Dry the background:
Allow the background layer to dry completely to the touch. This usually takes about 10–15 minutes for acrylics on a small surface.
Step 2: The Duck Shape
-
Sketch the outline:
Lightly draw the rubber duck shape with an HB pencil. Start with a circle for the head, a larger oval for the body, and a small triangle for the tail. -
Prime the subject:
Because yellow is naturally transparent, fill in your duck sketch with a solid coat of Titanium White first. I find this creates a perfect bright base. -
Apply the yellow base:
Once the white primer is dry, paint over the entire body (except the beak) with Primary Yellow. You may need two coats for full opacity. -
Paint the beak:
Switch to your fine detail brush. Fill in the beak area with Cadmium Orange, ensuring the shape has a slight upward curve for a smile. -
Define the wing:
Mix a tiny bit of White into your Primary Yellow. Paint a small, curved tear-drop shape on the side of the body to suggest a wing.
Transparency Trouble?
If your yellow paint looks streaky or greenish against the blue background, let it dry and apply another coat of pure white first. The yellow will pop much better over a white base.
Step 3: Details and Water Effects
-
Add subtle shading:
Mix a very small amount of Orange into your Yellow. Glaze this warmer color along the bottom of the duck and under the chin to give the form volume. -
Paint the eye:
Using the very tip of your detail brush and Mars Black, paint a small round dot for the eye. Place it relatively high on the head. -
Add the sparkle:
Wait for the black paint to dry, then use a clean toothpick or the tip of your smallest brush to add a tiny spec of Titanium White to the eye as a highlight. -
Deepen the water ripples:
Mix Navy Blue with a little Sky Blue. Using the edge of your flat brush, paint thin, horizontal zigzag lines beneath the duck to create movement. -
Add water highlights:
Clean the brush and pick up some pure Sky Blue. Add lighter streaks in between the dark ripples to simulate sunlight hitting the water surface. -
Final reflection:
Mix a watery glaze of Primary Yellow and stroke it gently directly under the duck into the blue water to show a slight reflection.
Level Up
Make the scene magical by creating tiny bubbles floating from the beak using thin rings of white paint mixed with a glazing medium for translucency.
Now your tiny canvas is ready to bring a splash of joy to any small space it occupies.
Peeking Frog
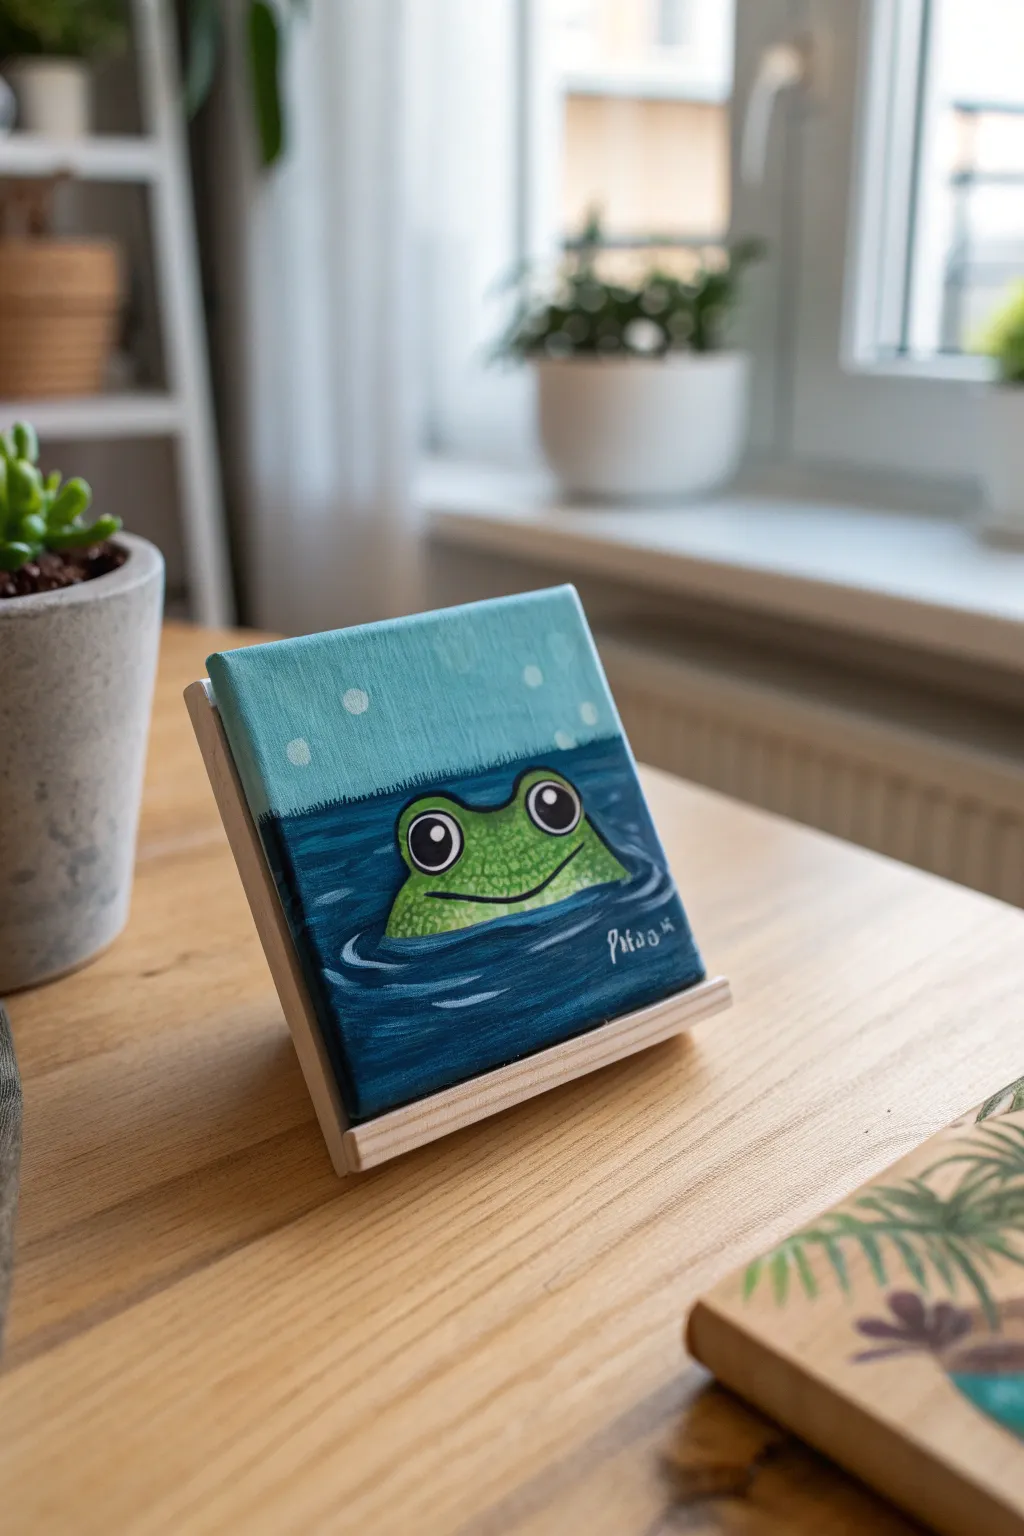
This adorable project captures a curious frog emerging from the water on a tiny scale, perfect for beginner painters. Using simple shapes and layering, you will create a vibrant scene that looks charming displayed on a miniature easel.
Detailed Instructions
Materials
- Mini canvas (3×3 or 4×4 inch)
- Acrylic paints (Titanium White, Mars Black, Phthalo Blue, Bright Green, Yellow)
- Small flat synthetic brush
- Fine detail liner brush (size 0 or 00)
- Pencil and eraser
- Palette and water cup
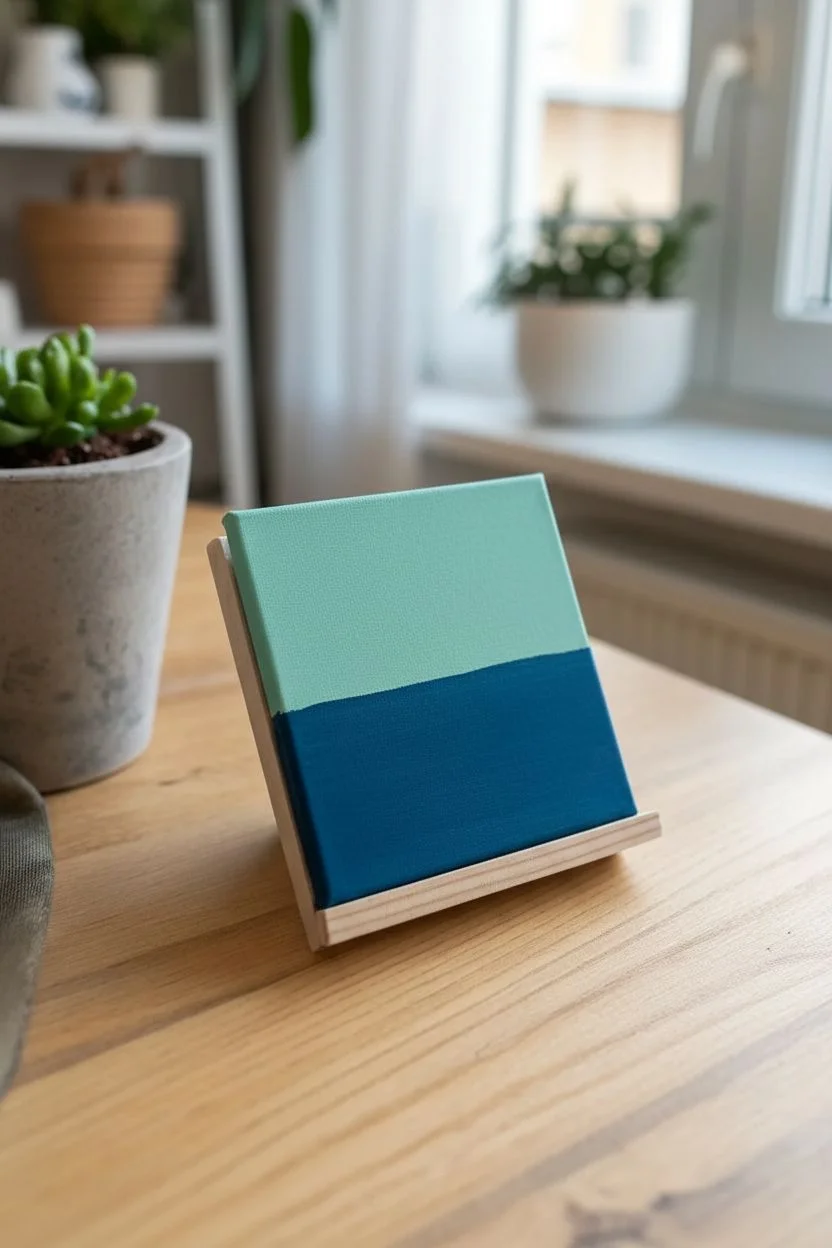
Step 1: Setting the Scene
-
Establish the horizon:
Use a pencil to lightly draw a straight horizontal line across the canvas, positioning it about two-thirds of the way down from the top edge. -
Mix the sky color:
Combine a large amount of Titanium White with a tiny dot of Phthalo Blue and a speck of Yellow to create a soft, minty aqua color. -
Paint the background:
Using the small flat brush, fill the area above your pencil line with the aqua mix, ensuring you paint the top and side edges of the canvas for a finished look. -
Mix the water color:
On your palette, mix Phthalo Blue with a very small touch of Black to create a deep, rich ocean blue. -
Paint the water:
Fill the bottom third of the canvas with the dark blue, carefully cutting in against the horizon line so the two colors meet cleanly. -
Let it dry:
Allow the background layers to dry completely before starting the frog to prevent the green paint from becoming muddy.
Clean Lines
If your hand shakes while painting the tiny mouth or pupils, rest your pinky finger on a dry part of the canvas or the table to anchor your hand for better stability.
Step 2: Painting the Frog
-
Sketch the outline:
Lightly sketch a mound shape rising from the water line, adding two distinct semicircles on top for the eye sockets. -
Base coat the frog:
Mix Bright Green with a little Yellow for a lime hue and fill in the frog shape using a small brush. -
Add skin texture:
Mix a slightly darker shade of green and use the tip of your brush to tap small dots (stippling) over the dried lime base to give the skin a bumpy texture. -
Paint the eye whites:
Use the liner brush and Titanium White to paint two large circles within the eye bumps you sketched earlier. -
Add pupils:
Once the white is dry, paint large black circles inside the eyes, leaving a thick white rim around the edges. -
Create the smile:
With the finest liner brush and black paint thinned slightly with water, draw a wide, gentle curve for the mouth.
Make it Yours
Customize the scene by adding a tiny pink lotus flower floating next to the frog or painting a small fly buzzing in the sky area.
Step 3: Water and Highlights
-
Shadow the water:
Mix a dark navy (Blue + Black) and paint a thin shadow line in the water right where the frog’s body meets the surface. -
Paint water ripples:
Mix White with a little Blue to make a light blue. Paint curved lines rippling outward from the frog’s body to show movement. -
Add sharp highlights:
I like to use pure Titanium White on the very tops of the ripples to make the water look wet and reflective. -
Create background bokeh:
Dip the handle end of a brush into light aqua or white paint and stamp a few random dots in the sky area to create a dreamy background effect. -
Sparkle the eyes:
Add a tiny dot of white paint to the upper right corner of each black pupil to bring the frog to life. -
Sign your work:
Use a contrasting color like white or light grey to add your signature or initials in the bottom corner.
Place your finished mini canvas on its easel and enjoy the cheerful vibe it brings to your desk
Blue Butterfly
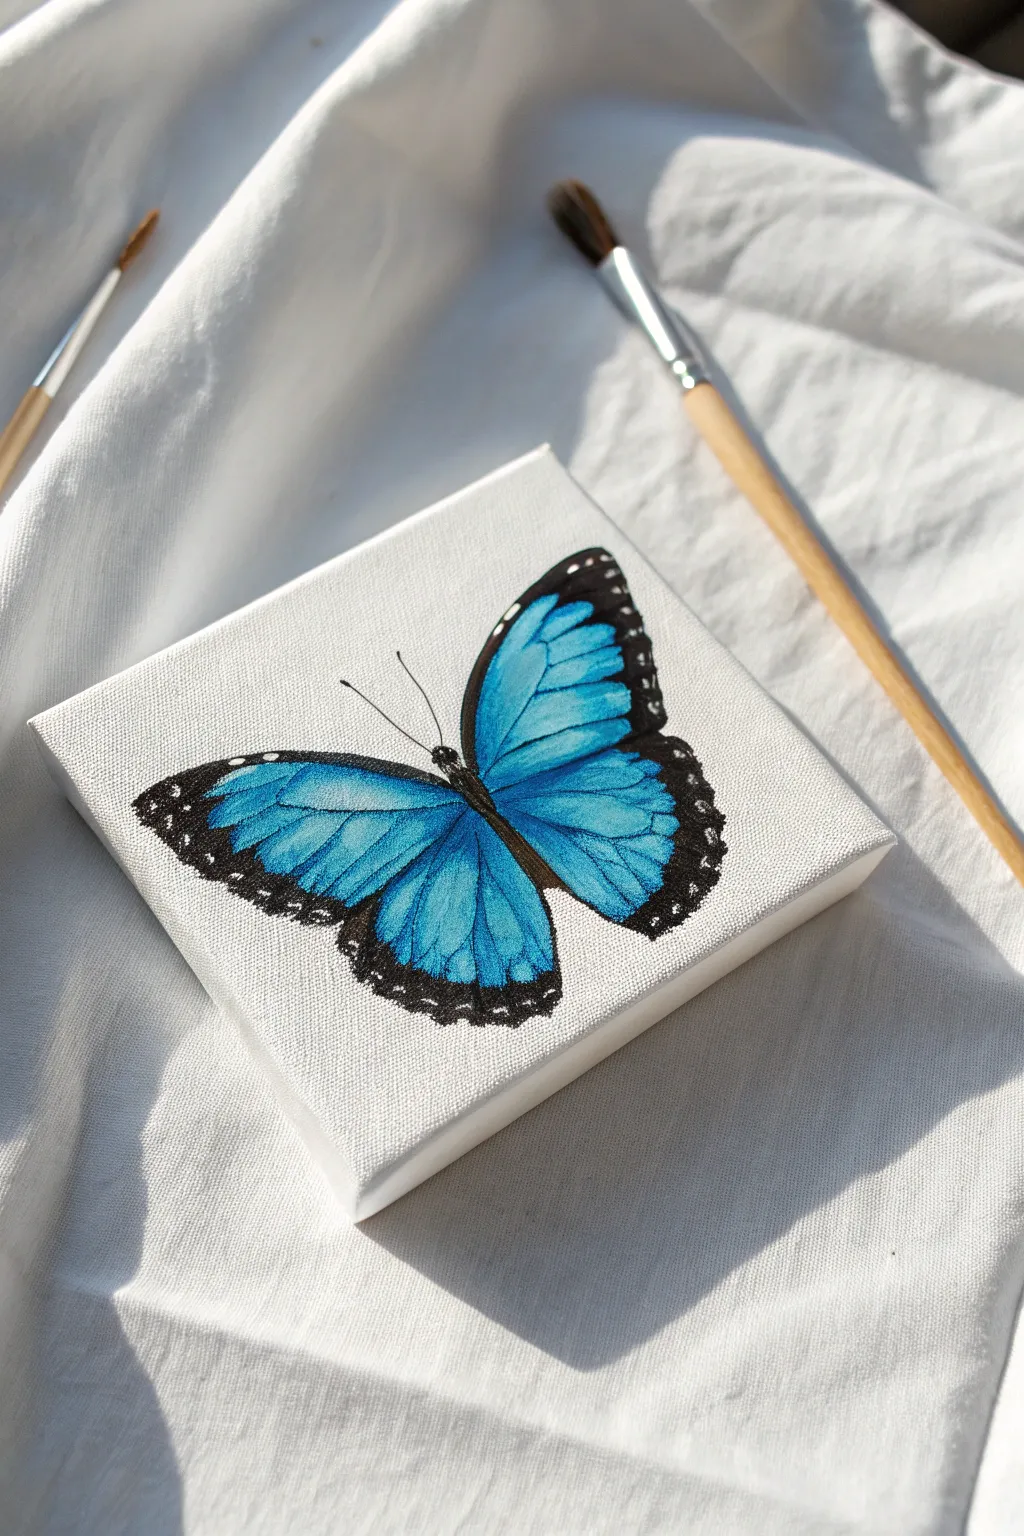
Capture the iridescent beauty of a Blue Morpho butterfly on a tiny canvas. This project focuses on blending vibrant blues with crisp black details to create a striking, realistic miniature painting.
Step-by-Step Guide
Materials
- Mini canvas (4×4 inches)
- Acrylic paints: Titanium White, Mars Black, Primary Blue, Phthalo Blue
- Small flat shader brush
- Fine liner brush (size 00 or 0)
- HB Pencil and eraser
- Palette and water cup
- Paper towels
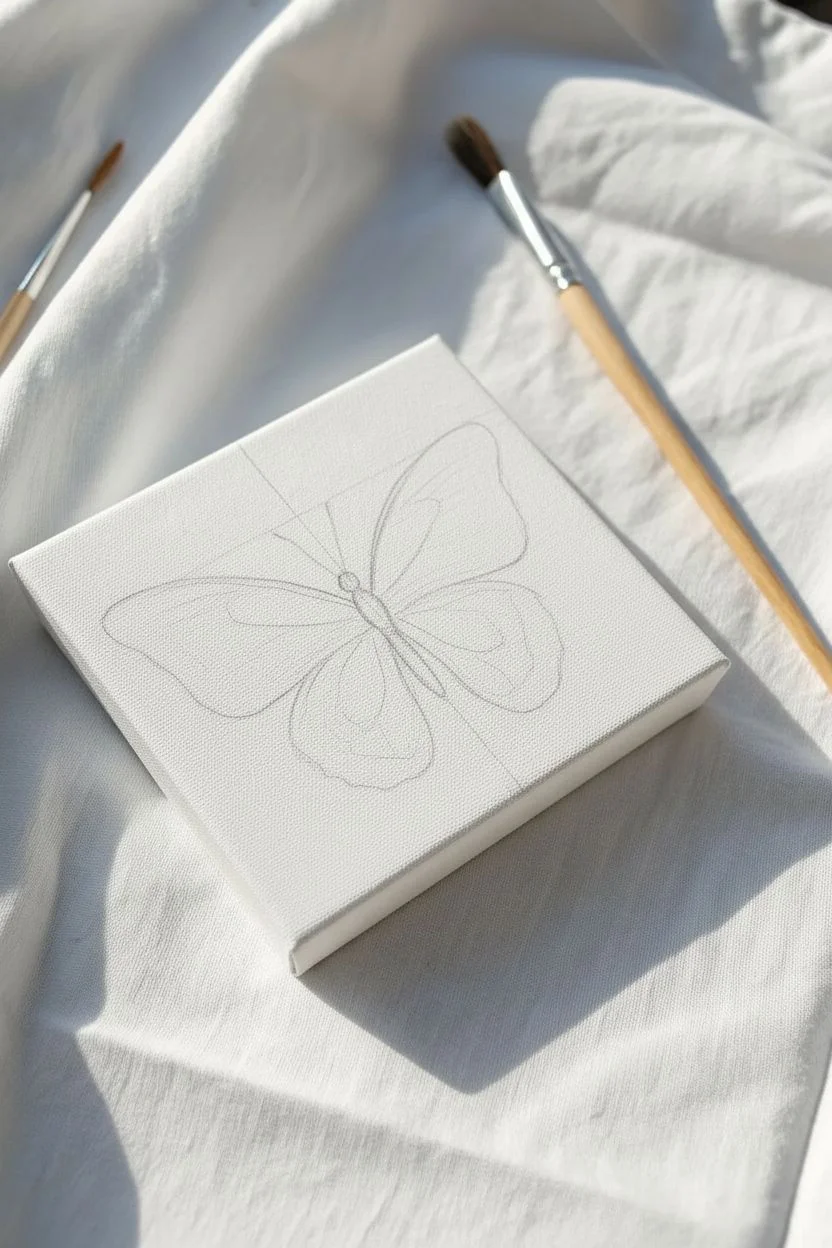
Step 1: Sketching the Shape
-
Center layout:
Lightly draw a diagonal line across the center of the canvas to establish the angle of the butterfly’s body. -
Body outline:
Sketch a slender oval for the thorax and a longer, thin shape for the abdomen along the guide line. -
Forewings:
Draw the two large upper wings, arching them broadly towards the top corners of the canvas. -
Hindwings:
Sketch the lower wings as teardrop shapes that tuck slightly underneath the upper wings. -
Verify symmetry:
Take a moment to step back and check that the left and right wings are roughly symmetrical before painting.
Step 2: The Blue Gradient
-
Mixing light blue:
Combine Titanium White with a small amount of Primary Blue to create a bright, opaque sky blue. -
Base coat:
Fill in the wing shapes with this light blue, stopping about a quarter-inch from the outer edges. -
Adding depth:
While the paint is still slightly wet, apply Phthalo Blue (or a deep blue) near the butterfly’s body. -
Blending:
Use a damp brush to gently blend the dark blue outwards into the light blue to create a soft gradient. -
Drying time:
Allow this layer to dry completely; I like to apply a second coat of the light blue if the canvas texture is still showing through.
Unsteady Hand?
Rest your pinky finger on a dry, unpainted corner of the canvas to stabilize your hand while painting the fine veins.
Step 3: Defining Details
-
Black borders:
Using your fine liner brush and Mars Black, carefully paint the thick borders along the outer edges of the wings. -
Scalloped edges:
Create small scalloped bumps along the bottom edge of the hindwings for a natural silhouette. -
Filling the body:
paint the central body black, ensuring a crisp separation from the blue wings. -
Vein preparatory:
Thin a small amount of black paint with a drop of water to make it ink-like for smoother lines. -
Painting veins:
With the liner brush, drag fine lines from the body outwards to meet the black border, curving them slightly with the wing shape. -
Antennae:
Paint two very thin, curved lines extending from the head for the antennae.
Make It Shimmer
Mix a drop of iridescent medium into your blue paint or use a metallic blue acrylic to mimic the natural shimmer of butterfly wings.
Step 4: Highlights & Finish
-
Wing spots:
Dip the tip of a toothpick or the handle of a brush into Titanium White paint. -
Applied texture:
Dot tiny white spots along the black outer margins of the wings, varying the spacing for a less rigid look. -
Final sheen:
Add a few faint, dry-brushed white streaks on the upper blue sections to suggest light hitting the wings. -
Cleanup:
Use white paint to touch up the background around the butterfly if you made any smudges.
Enjoy the vibrant splash of color this tiny piece brings to your space
Wavy Checkered Pattern
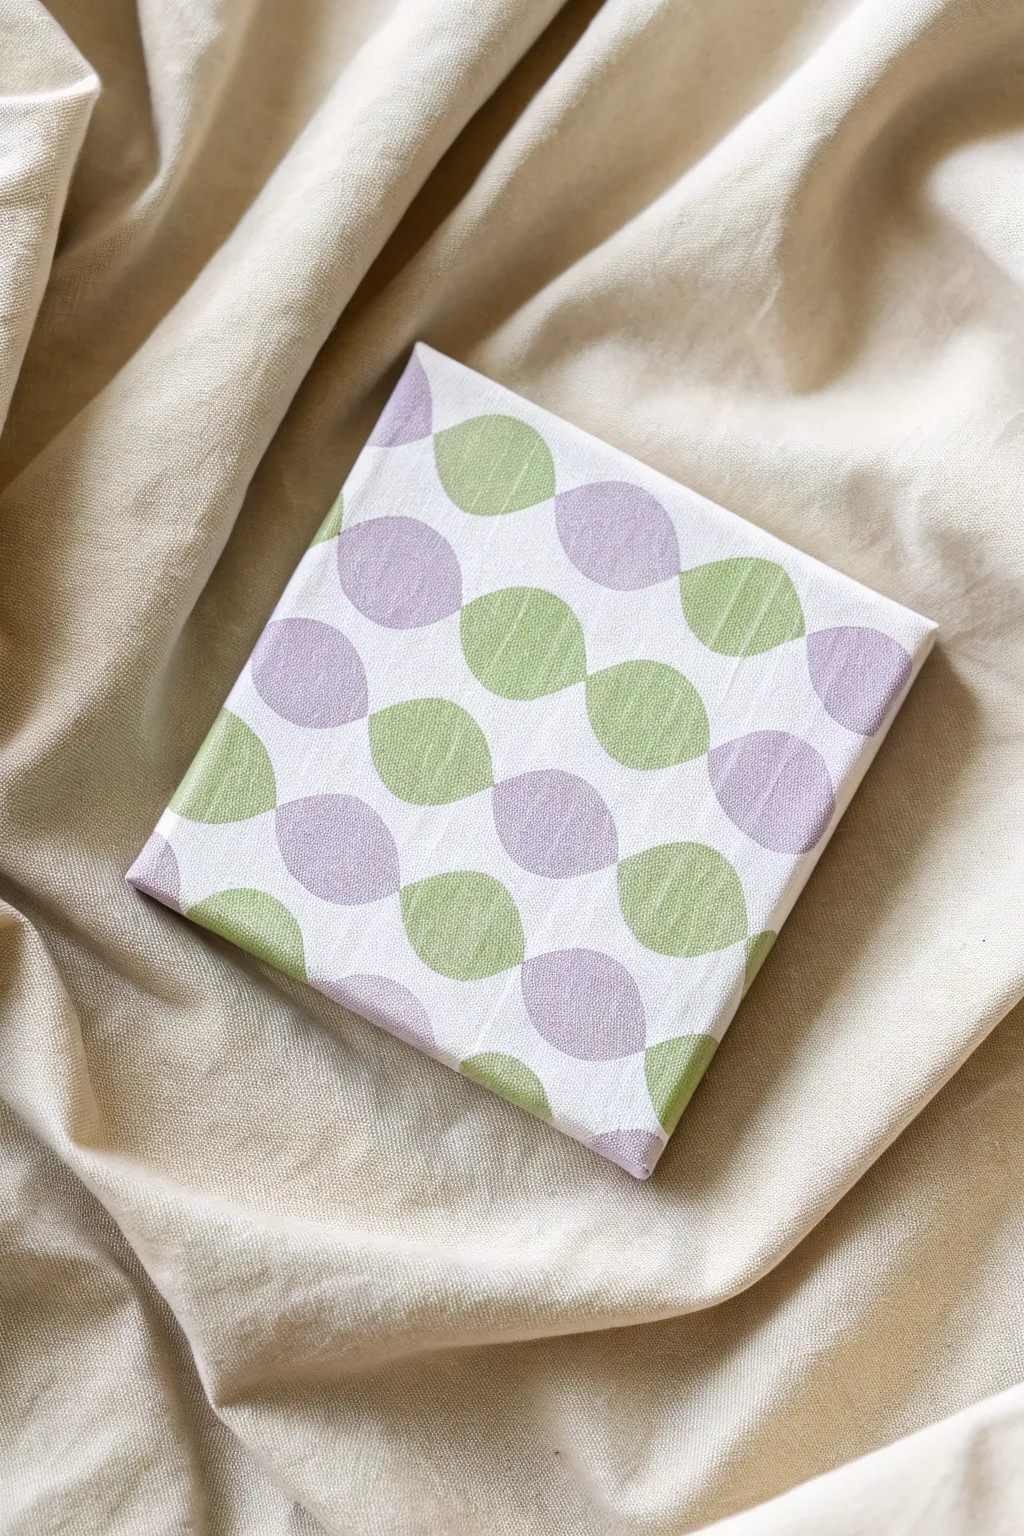
This project transforms a simple mini canvas into a soothing piece of geometric art using soft, alternating pastels. The result mimics a classic mid-century fabric print, bringing a clean and modern aesthetic to any small space.
Detailed Instructions
Materials
- Mini canvas (4×4 or 6×6 inch)
- Acrylic paint: Titanium White
- Acrylic paint: Pastel Lavender
- Acrylic paint: Sage or Lime Green
- Small flat shader brush (size 4 or 6)
- Fine liner brush
- Cardstock or thick paper
- Pencil
- Scissors
- Ruler
Step 1: Preparing the Base
-
Prime the surface:
Apply a base coat of Titanium White over the entire canvas, ensuring you cover the sides as well. -
Ensure opacity:
Once the first layer is dry, I find applying a second coat of white really helps create a bright, solid background for the colors to pop against. -
Smooth it out:
Check for any brush ridges or lumps while the white paint is wet and smooth them out gently for a flat finish. -
Let it cure:
Allow the base to dry completely before moving on to the sketching phase to avoid smudging.
Step 2: Creating the Grid
-
Make a template:
Draw small eye-shaped oval (like a football) on a piece of cardstock. -
Refine the shape:
Cut out your oval template carefully with scissors. This will ensure every shape on your canvas is uniform. -
Mark the center:
Using your ruler, lightly mark the vertical center of the canvas with a pencil. -
Trace the first column:
Place your template on the center line and trace around it. Move the template down so the tips just barely touch, and trace the next one. -
Fill the canvas:
Continue tracing columns to the left and right of the center. Position these ovals so they nestle between the curves of the first column. -
Wrap the pattern:
Don’t stop at the edge—trace partial ovals wrapping around the sides of the canvas for a professional gallery-wrapped look.
Clean Curves
Use a small flat shader brush slightly narrower than the widest part of your oval. This allows you to paint the curve in one or two smooth swoops rather than many choppy strokes.
Step 3: Painting the Pattern
-
Mix the green:
Prepare your sage green paint. If the body of the paint is too thick, thin it very slightly with water for smoother lines. -
Paint green ovals:
Identify a diagonal visual line and paint every alternating oval green. Using a flat brush helps get into the pointed corners easily. -
Complete green rows:
Continue filling in the green shapes across the canvas, maintaining the checkerboard-style alternating pattern. -
Dry break:
Let the green sections dry to the touch to prevent accidental smearing while you work on the next color. -
Mix the lavender:
Prepare your pastel purple shade on the palette. -
Fill the gaps:
Paint the remaining ovals purple. The tips of the purple ovals should touch the tips of other purple ovals vertically. -
Second pass:
Pastels can sometimes be transparent, so go back over each oval with a second layer of color for a rich, matte finish. -
Tidy the edges:
Use a fine liner brush and white paint to clean up the spaces between the ovals if any color spilled over the lines. -
Final smooth:
Check the painted sides of the canvas and touch up any areas where the pattern wraps around to ensure continuity.
Wobbly Lines?
If your oval shapes look uneven after painting, don’t stress. Wait for the color to dry completely, then use your white background paint and a liner brush to carve back into the shape.
Place your finished geometric mini canvas on a shelf or desk for a lovely touch of modern calm.
Galaxy Star Field

Capture the infinite beauty of the cosmos on a tiny scale with this mesmerizing galaxy painting. Using simple sponging techniques and strategic splashes, you will transform a small black square into a vibrant nebula filled with twinkling starlight.
How-To Guide
Materials
- Mini stretched canvas (4×4 or 6×6 inches)
- Acrylic paints: Carbon Black, Phthalo Blue (or Prussian Blue), Dioxazine Purple, Titanium White
- Small kitchen sponge or stencil sponge
- Old toothbrush (for splattering)
- Fine detail brush (size 00 or 0)
- Flat base coat brush
- Paper plate or palette
- Water cup and paper towels
Step 1: Setting the Void
-
Prepare the canvas:
Ensure your mini canvas is clean and dust-free. If the canvas texture is very rough, you can apply a layer of gesso, but for a galaxy, the texture often adds depth. -
Mix the base color:
On your palette, mix a large amount of Carbon Black with a touch of Phthalo Blue. You want a color that looks black at first glance but has a deep, cold undertone. -
Apply the background:
Paint the entire surface of the canvas with this dark mixture. Don’t forget to paint the sides of the canvas as well so it looks finished from every angle. -
Dry completely:
Allow this base layer to dry thoroughly. It must be matte and dry to the touch before you start adding the nebula clouds, or the colors will turn muddy.
Sponge Technique
Tear a piece off a kitchen sponge rather than cutting it. The ragged, uneven torn surface creates a much more organic, cloud-like texture for the nebula.
Step 2: Forming the Nebula
-
Sponge on the blue:
Dampen a small piece of sponge and squeeze out almost all the water. Dip it into pure Phthalo Blue and dab off the excess. Gently sponge a diagonal cloud shape across the center of the canvas. -
Add purple depth:
While the blue is still slightly tacky, take a clean corner of the sponge with Dioxazine Purple. Dab this alongside the blue, blending slightly where they meet to create a seamless transition. -
Layering lightness:
Mix a little Titanium White into your blue to create a light icy blue. Sponge this sparingly into the center of your blue patches. This creates the illusion of a glowing gas cloud. -
Highlight the core:
Using a very small amount of nearly pure white on the sponge, tap the very center of the lightest blue areas. I like to keep this minimal to prevent the galaxy from looking too washed out. -
Soften the edges:
If any sponge marks look too hard or circular, use a slightly damp, clean brush to gently feather the edges of the paint into the black background.
Step 3: Stardust & Details
-
Prepare the stars:
Dilute a dime-sized amount of Titanium White paint with water until it reaches an ink-like consistency. It should drip easily from a brush. -
Splatter the background:
Dip an old toothbrush into the watered-down white. Hold it over the canvas and run your thumb across the bristles to flick a fine mist of ‘stars’ onto the dark areas. -
Add distant stars:
Take your fine detail brush and dip it into the undiluted white paint. Touches the tip gently to the canvas to create distinct, slightly larger round stars scattered randomly. -
Create the twinkle stars:
Choose a few of the larger dots to turn into twinkling stars. Paint a thin vertical line through the dot, followed by a shorter horizontal line, creating a cross shape. -
Refine the points:
Using the very tip of the brush, pull the ends of the cross lines outward so they taper into sharp points, making them look like shining celestial bodies. -
Paint the shooting star:
Pick a spot in the upper right quadrant. Paint a small solid circle, then quickly drag your brush away from it to create a fading tail line. -
Final drying:
Let the white paint dry completely. Since the dots are thicker paint, they may take a little longer to set than the background layers. -
Varnish and protect:
Apply a coat of gloss varnish once the painting is fully cured. The gloss finish will deepen the blacks and make the colors pop significantly.
Cosmic Glow Up
Mix a tiny amount of glow-in-the-dark acrylic medium with your white paint for the stars to make your galaxy truly shine when the lights go out.
Now you have a stunning window into deep space held right in the palm of your hand


Have a question or want to share your own experience? I'd love to hear from you in the comments below!