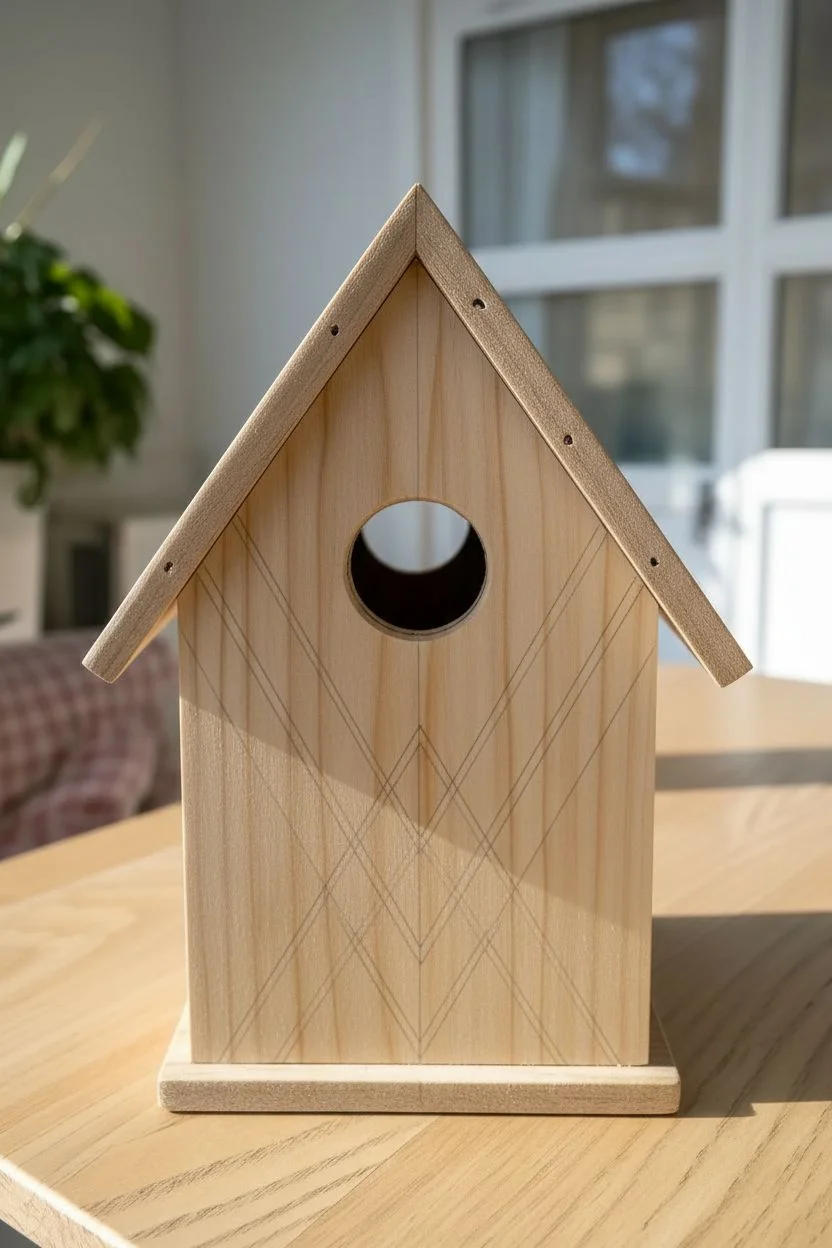
Painting a birdhouse is a rewarding way to add garden art to your outdoor space while creating a cozy sanctuary for local wildlife. Whether you prefer whimsical designs or natural camouflage, transforming a plain wooden box allows you to explore endless creative techniques.
Blooming Wildflower Garden
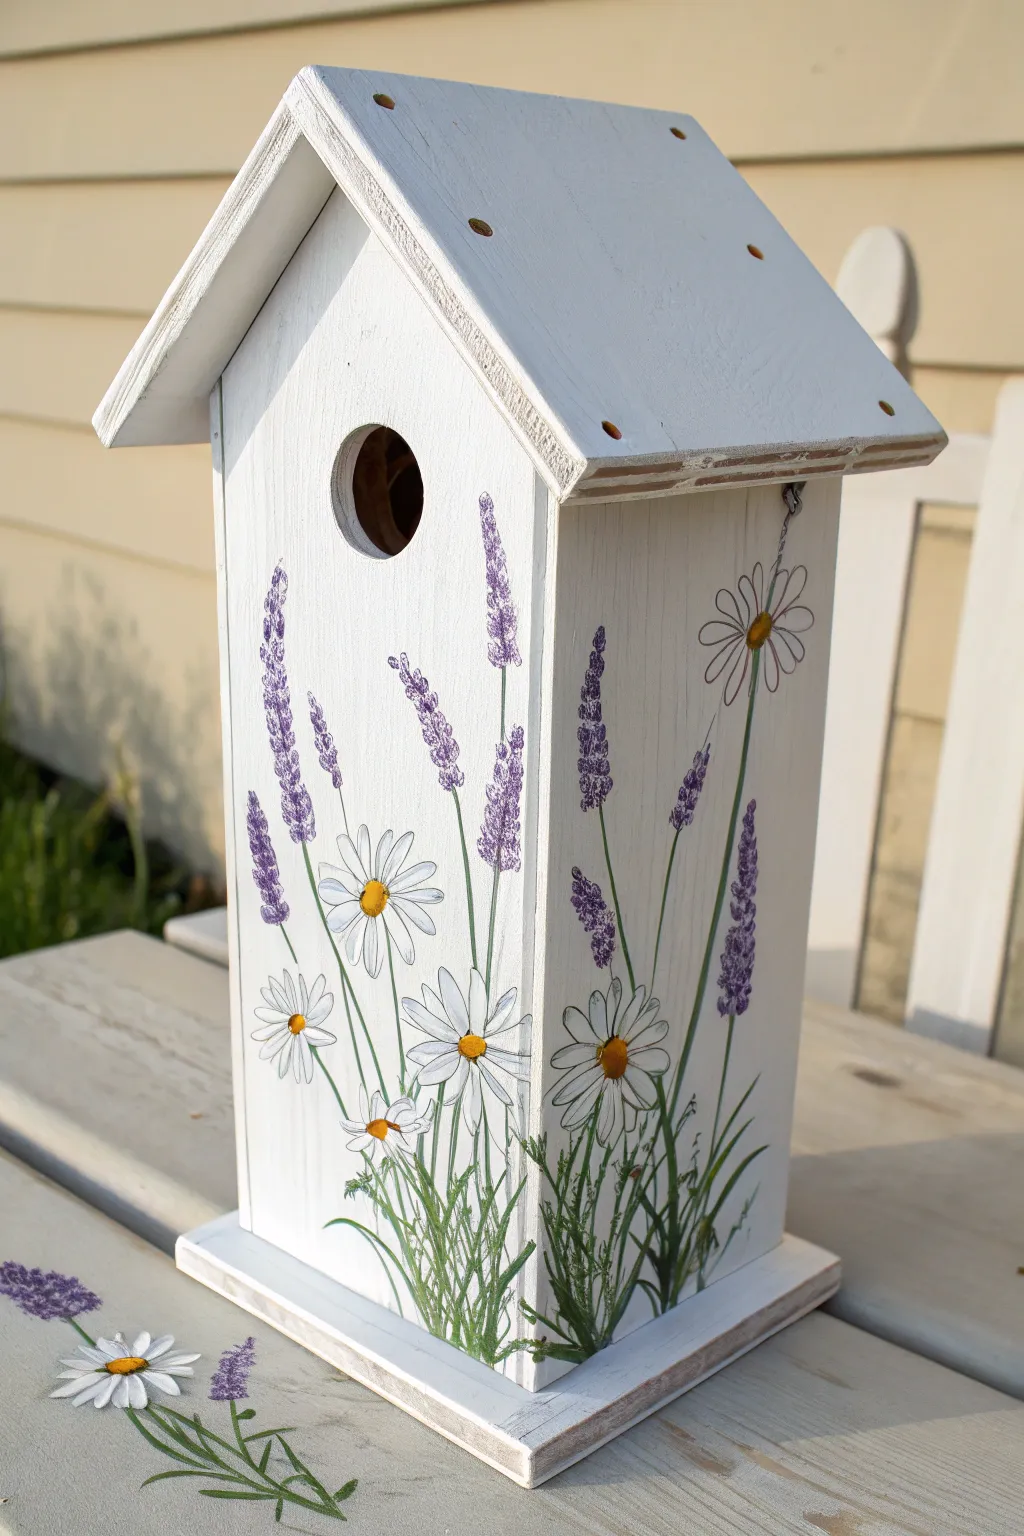
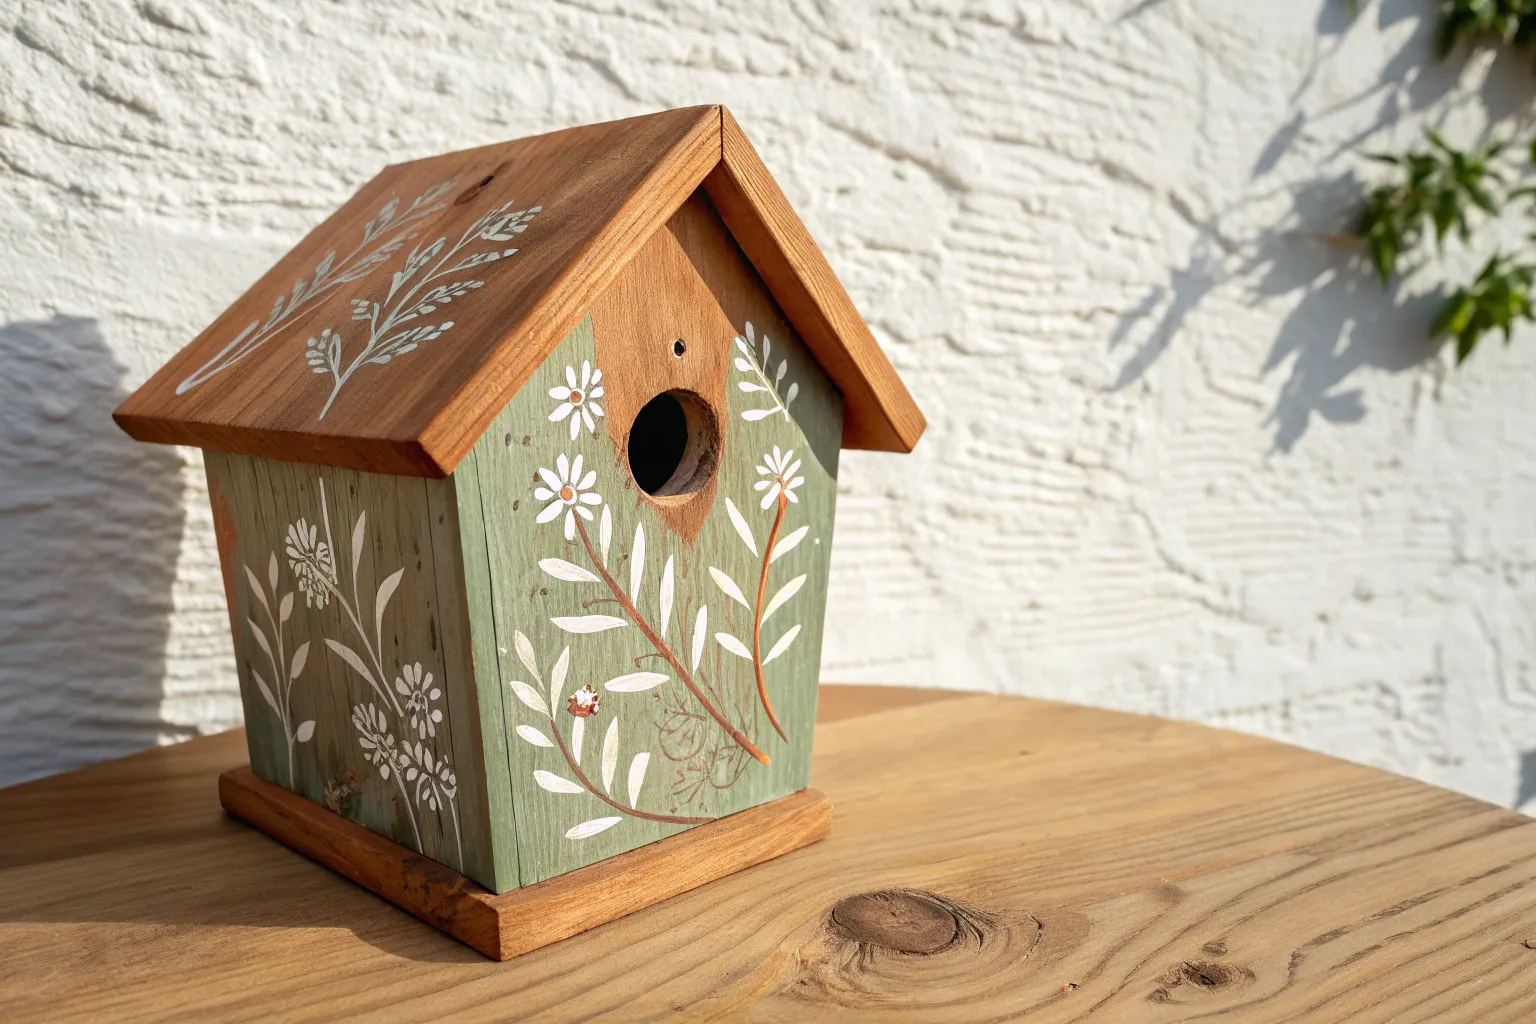
Transform a plain wooden birdhouse into a serene garden accent with this delicate floral design. Contrast crisp white siding with climbing lavender stems and cheerful daisies for a look that feels fresh and inviting.
Step-by-Step Tutorial
Materials
- Unfinished wooden birdhouse
- Sandpaper (medium and fine grit)
- White acrylic paint (exterior grade)
- Acrylic paints: Sap Green, Dark Purple, Lavender, Yellow Ochre, Burnt Sienna, Light Grey
- Flat shader brush (1-inch)
- Round detail brushes (sizes 0 and 2)
- Fine liner brush
- Clear exterior matte varnish
- Pencil
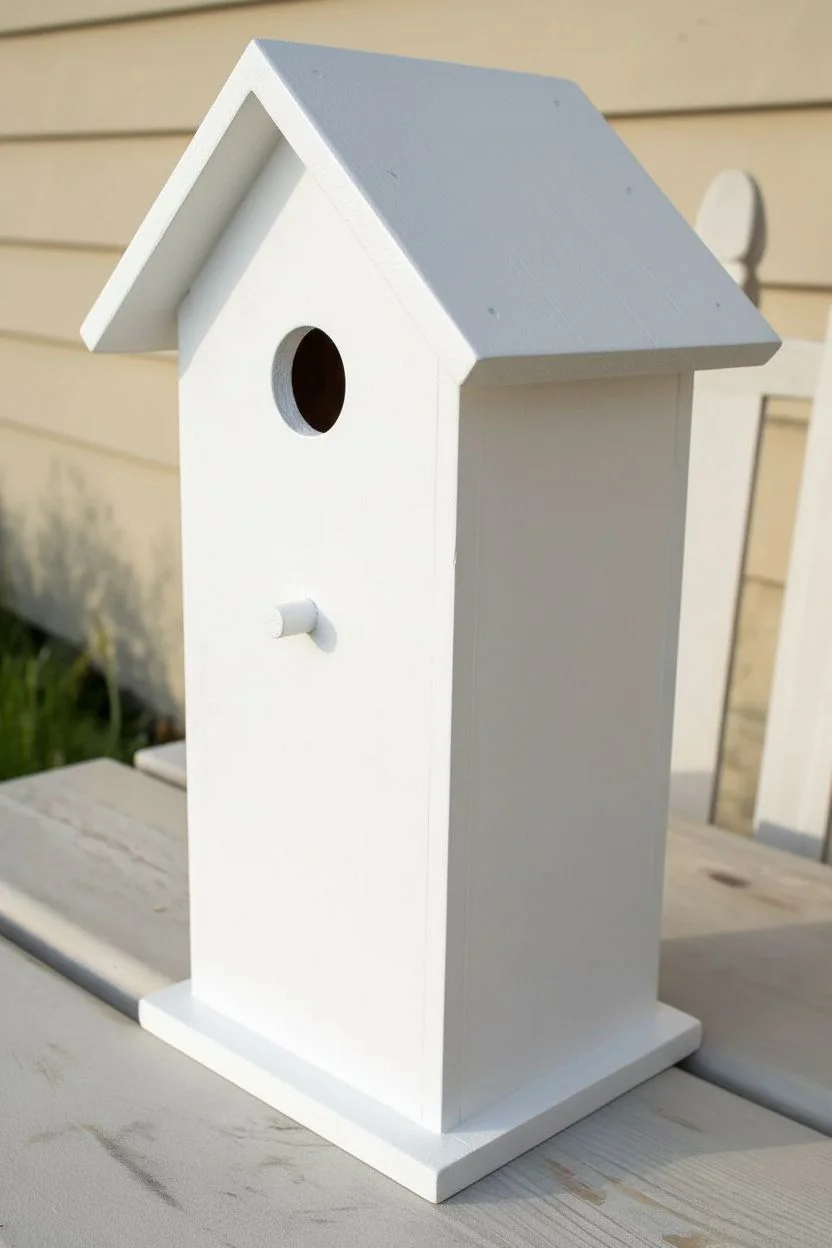
Step 1: Preparation & Base Coat
-
Smooth the surface:
Begin by sanding the entire birdhouse, paying special attention to the edges of the roof and the entry hole to ensure there are no splinters. -
Clean the dust:
Wipe the wood down with a damp tack cloth or paper towel to remove all sanding dust, ensuring a smooth canvas for painting. -
Apply the first coat:
Using your flat shader brush, apply a layer of white acrylic paint to the entire house, including the roof and base. -
Build opacity:
Let the first coat dry completely, then apply a second (and third if necessary) coat of white until the wood grain is mostly covered and the finish is opaque.
Texture Trick
Bundle three toothpicks together with tape and dip the ends into your purple paints. Tap this tool onto the stems to create perfect, tiny clusters of lavender buds instantly.
Step 2: Planning the Garden
-
Sketch the layout:
Lightly sketch the flower placement with a pencil. Draw long, curved lines for stems rising from the base, wrapping slightly around the corners for a natural look. -
Mix your greens:
On your palette, mix Sap Green with a tiny drop of white to soften it. I find this helps the stems stand out against the bright white background without looking too harsh. -
Paint the stems:
Using a size 2 round brush, paint over your pencil lines with smooth, upward strokes. Vary the height of the stems, making some tall enough to reach the roofline. -
Add grassy details:
Switch to a finer brush and flick short, quick strokes of green at the very bottom of the house to create a bed of grass anchoring the stems.
Garden Guest
Add a touch of life by painting a tiny bumblebee hovering near the lavender or a small ladybug crawling on a grass blade near the base.
Step 3: Painting the Blooms
-
Start the daisies:
For the daisy centers, paint small oval shapes using Yellow Ochre near the tops of the shorter stems. -
Outline the petals:
Since the background is white, use your fine liner brush with watery Light Grey paint to delicately outline the petal shapes radiating from the yellow centers. -
Detail the daisies:
Add defined lines inside the petals with the grey paint to show creases. Dab a little Burnt Sienna on the bottom edge of the yellow centers for shadow. -
Base the lavender:
Dip a size 0 brush into Dark Purple. Create the lavender shape by dabbing small dots in a cone shape at the top of the tall green stems. -
Highlight the lavender:
Without cleaning your brush fully, dip into the lighter Lavender paint and stipple dots over the dark purple, focusing on the tips to add dimension. -
Add leaves:
Go back to your green mix and paint small, narrow leaves growing out from the lavender stems.
Step 4: Protection
-
Refine the edges:
Check your work for any pencil marks that are still visible and gently erase them once the paint is bone dry. -
Seal the artwork:
Apply two coats of clear exterior matte varnish to the entire birdhouse to protect your artwork from the elements.
Now your birdhouse is ready to bring a permanent splash of spring to your backyard!


Classic Rustic Red Barn
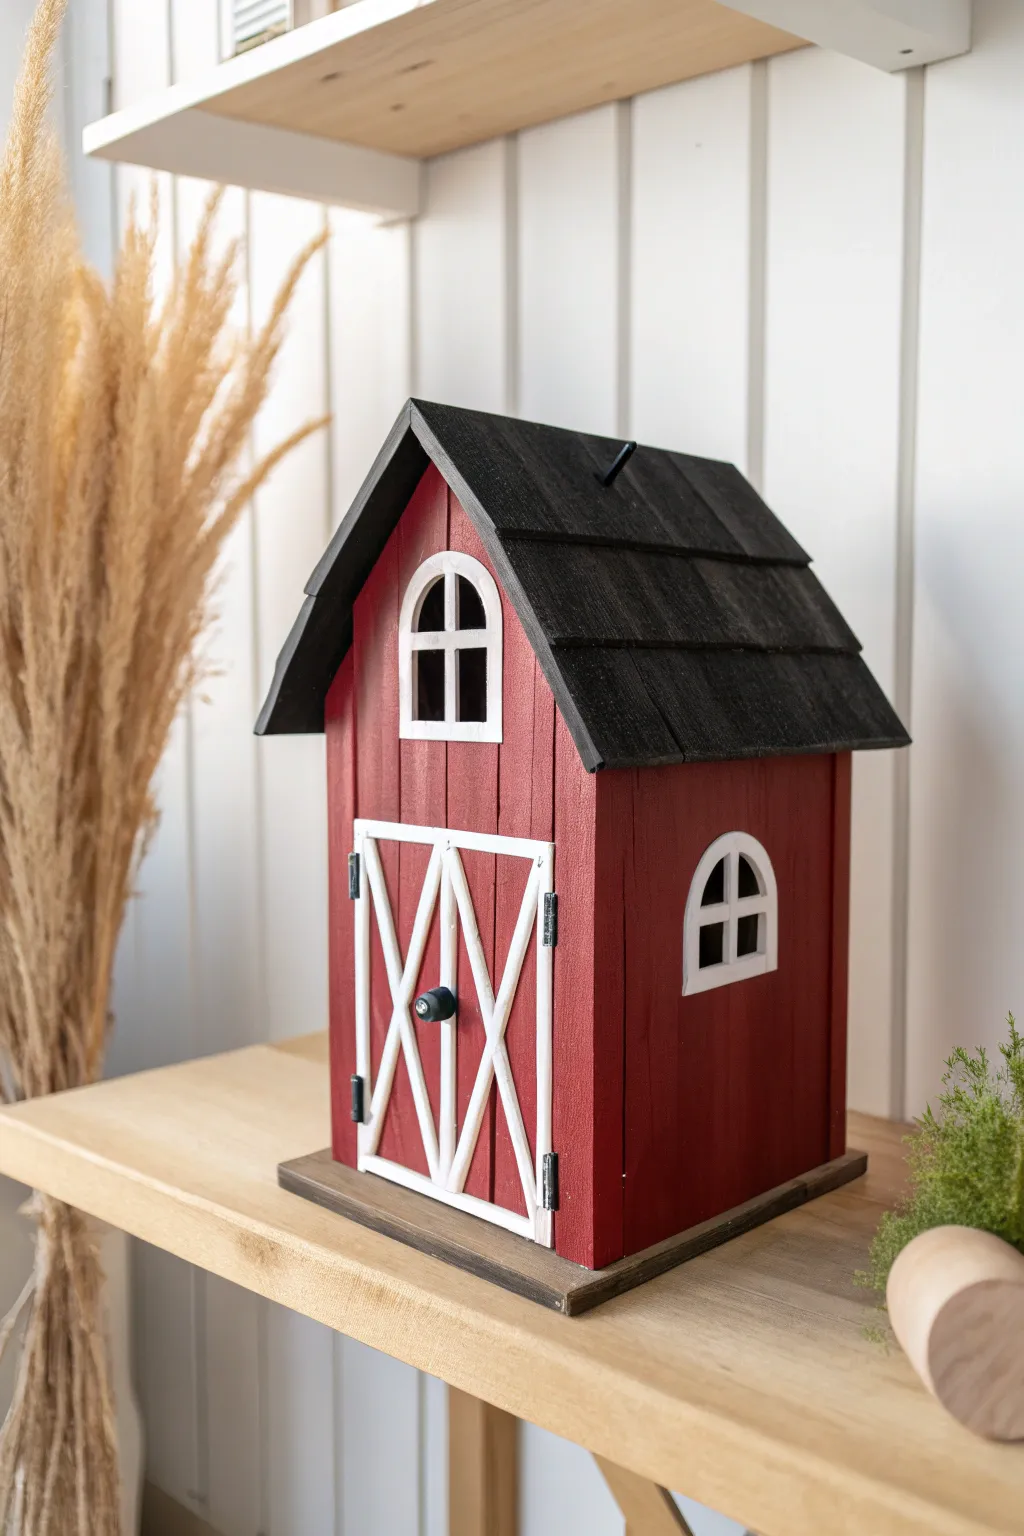
Bring a touch of classic farmhouse charm to your decor with this rustic red barn birdhouse. The iconic color scheme and crisp white trim make this a timeless project that looks wonderful on a shelf or tucked into a garden nook.
Step-by-Step Tutorial
Materials
- Unfinished wooden birdhouse (barn style with vertical siding)
- Acrylic paint: Barn Red
- Acrylic paint: Titanium White
- Acrylic paint: Lamp Black or Charcoal
- Small wood bead or split pea (for door knob)
- Sandpaper (220 grit)
- Tack cloth
- Flat shader brush (size 6 or 8)
- Small angled brush (size 1/4 inch)
- Fine liner brush (size 0 or 1)
- Wood glue
- Outdoor craft sealer spray (matte finish)
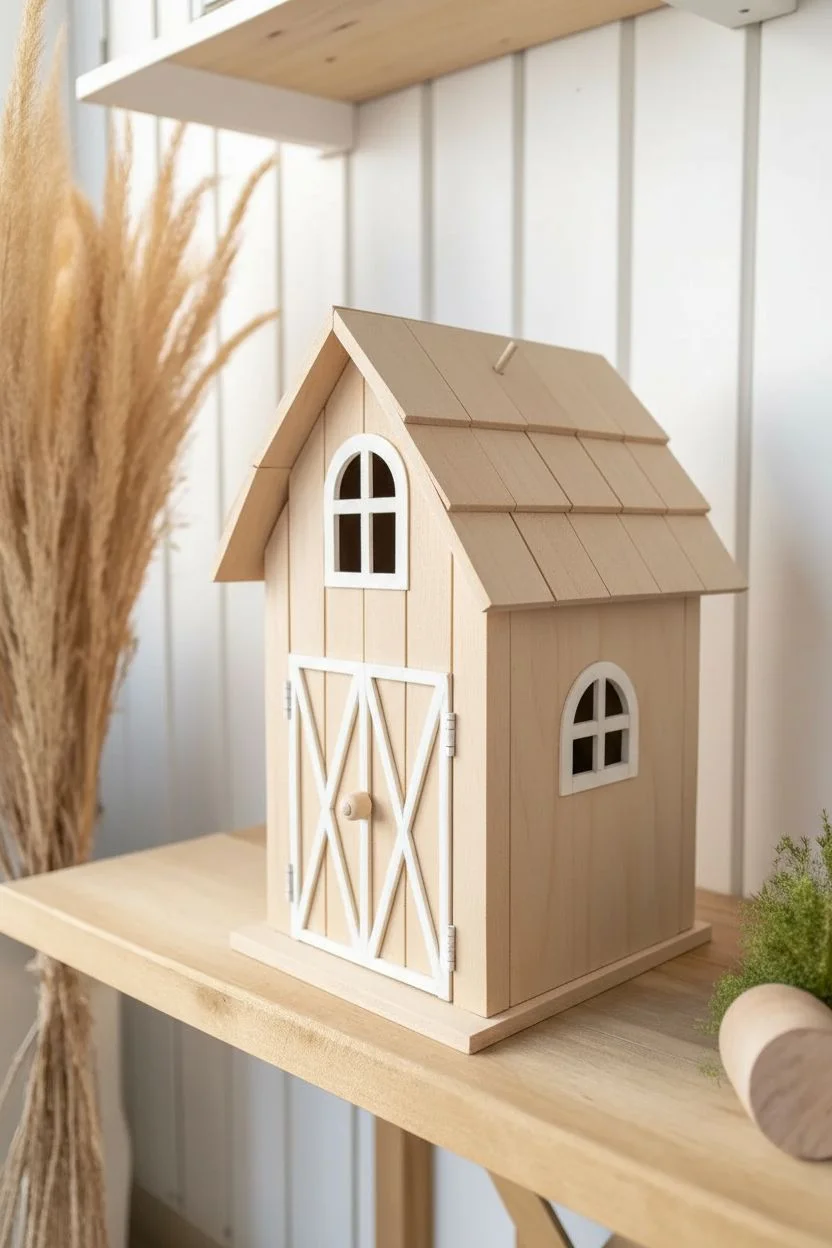
Step 1: Preparation
-
Smooth the surface:
Begin by lightly sanding the entire birdhouse with 220-grit sandpaper to remove any rough splinters or fuzz from the manufacturing process. -
Clean the dust:
Wipe the entire piece down thoroughly with a tack cloth or damp paper towel to ensure the wood is free of dust, which guarantees a smooth paint finish. -
Check the hardware:
If your birdhouse has removable hardware or cords, take them off now to make painting easier; if not, wrap them carefully with painter’s tape.
Clean Lines Hack
Issues with shaky hands on the trim? Paint the white trim parts first before doing the red walls. It is often easier to ‘cut in’ the red paint around the raised trim than to paint the narrow trim last.
Step 2: The Barn Walls
-
Base coat red:
Using the flat shader brush, apply the Barn Red paint to the main body of the house, avoiding the roof and the raised window/door trim if possible. -
Fill the grooves:
Since this style features vertical siding, turn your brush vertically to push paint deep into the grooves so no raw wood shows through. -
Door background:
Paint the flat recessed panels behind the farmhouse ‘X’ door design in the same red, as these areas represent the background of the door structure. -
Second coat:
Allow the first layer to dry completely, then apply a second coat of red for a rich, opaque finish that hides the wood grain.
Step 3: The Roof
-
Painting shingles:
Switch to a clean flat brush and apply Lamp Black paint to the roof shingles, working with the grain of the wood. -
Edge coverage:
Be sure to paint the underside of the roof overhang and the edges of the shingles to give the project a finished, professional look from all angles. -
Touch-ups:
If any black paint migrates onto the red walls under the eaves, wait for it to dry and touch it up with your red paint and a small brush.
Level Up: Authentic Aging
To give the barn a weathered history, lightly sand the black roof edges and the corners of the red walls after painting. This reveals a bit of raw wood for a charming, rustic antique effect.
Step 4: Trim and Details
-
White trim base:
Using the small angled brush, paint the arched window frames and the rectangular door frame with Titanium White. -
Defining the door:
Paint the diagonal ‘X’ braces on the door white. I find that bracing my pinky finger against the dry wall of the house helps steady my hand for these straight lines. -
Brightening the white:
White paint over raw wood or red often needs two or three thin coats to look crisp and bright, so be patient and let each layer dry. -
Window depth:
Use the fine liner brush and black paint to fill in the ‘window panes’ inside the white arches, creating the illusion of a dark interior. -
Adding hardware details:
Dip the very tip of your liner brush into black paint and create small faux hinges on the sides of the white door frame. -
The doorknob:
Paint a small wood bead black; once dry, use a tiny dot of wood glue to attach it to the center of the door overlap.
Step 5: Protection
-
Final inspection:
Look over the piece for any skipped spots in the siding grooves or messy edges and fix them with the appropriate color. -
Sealing:
Once the paint has cured for 24 hours, take the birdhouse to a well-ventilated area and spray it with a clear matte sealer to protect the vibrant colors from fading.
Place your completed barn on a mantle or hang it outdoors to enjoy a pop of classic country color all year round.


Modern Geometric Color-Blocking
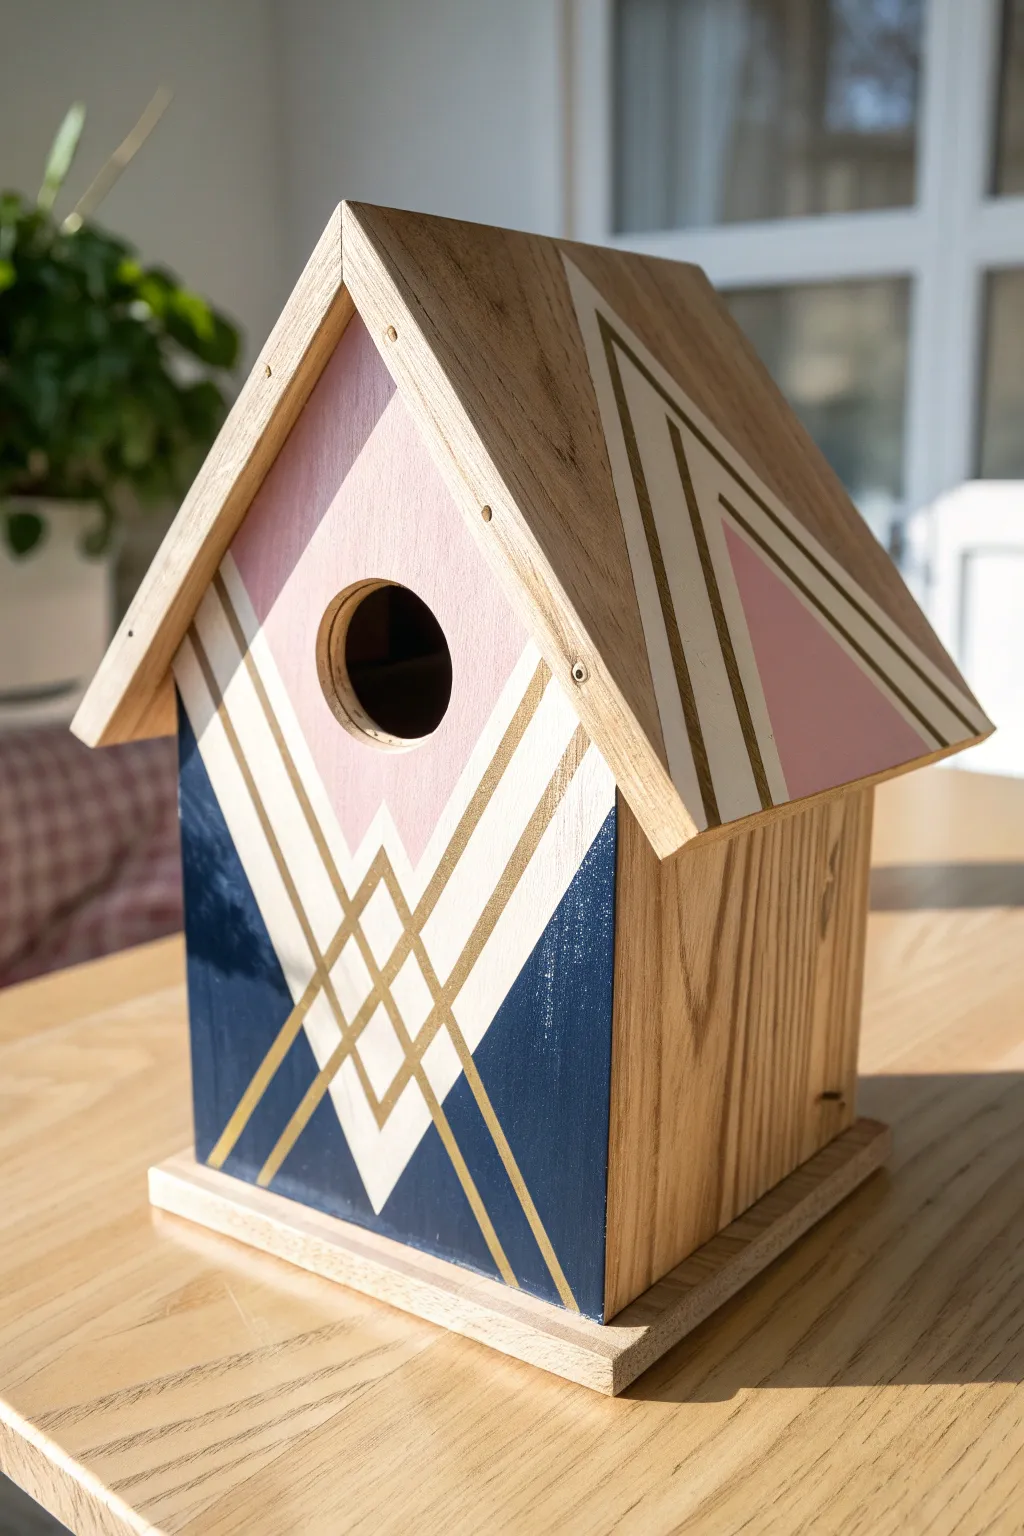
Transform a plain wooden birdhouse into a piece of modern garden art with this sophisticated color-blocking project. Featuring a trendy palette of navy, blush pink, and cream accented with metallic gold lines, this design relies on crisp geometric angles to make a statement.
Step-by-Step Guide
Materials
- Unfinished wooden birdhouse
- Acrylic craft or outdoor paints (Navy, Blush Pink, Cream)
- Gold metallic paint pen (medium tip)
- Painter’s tape (high quality)
- Fine-grit sandpaper (220 grit)
- Ruler and pencil
- Small flat paintbrushes
- Clear outdoor sealer or varnish
Step 1: Preparation & Mapping
-
Smooth the surface:
Begin by lightly sanding the entire birdhouse, paying special attention to the front face and roof edges where you will be painting. Wipe away all dust with a tack cloth or slightly damp rag. -
Find the center:
Using your ruler, lightly mark a vertical center line down the front of the birdhouse, starting from the peak of the roof down to the base. -
Sketch the primary diamond:
Measure about halfway down the front face. Draw a `V` shape starting from the outer edges angling down to the center line to form the bottom of the pink diamond area surrounding the entry hole. -
Sketch the lower chevron:
Draw a second, larger `V` shape parallel to the first one, leaving about a 1-inch gap. This gap will eventually be your white/cream stripe.
Step 2: Color Blocking
-
Tape the top section:
Apply painter’s tape along the pencil lines of your top diamond shape. Press the edges down firmly to ensure a tight seal. -
Paint the pink zone:
Fill the top diamond section (around the hole) with blush pink paint. I like to brush away from the tape edge rather than into it to minimize bleeding. -
Tape the bottom navy section:
Once the pink is touch-dry, tape off the angular sections at the very bottom corners of the house, following your sketched lines for the lower large `V`. -
Paint the navy zones:
Apply navy blue paint to these bottom outer triangles. Depending on the opacity of your darker paint, you may need a second coat for full coverage. -
Tape the chevron stripes:
After the blue is fully dry, carefully tape off the remaining central `V` band that sits between the pink and blue sections. -
Paint the cream stripes:
Paint this remaining chevron shape with your cream or off-white paint. Apply two thin coats rather than one thick one to avoid ridges. -
Add roof details:
While the front dries, tape off a geometric triangle on the front right slope of the roof and paint it to match the front patterns inside (cream border, pink interior) for continuity. -
Remove tape:
Carefully peel away all painter’s tape at a 45-degree angle. Don’t worry about tiny gaps between colors; the gold lines will cover them.
Crisp Line Hack
To prevent paint bleeding under tape, apply a very thin layer of your base color (or clear matte medium) over the tape edge first to seal it.
Step 3: Gilded Details & Finish
-
Draw the borders:
Shake your gold paint pen well. Using a ruler as a guide to keep your hand steady, draw thick gold lines over the seams where the colors meet. -
Add the white accent lines:
Draw an additional gold line down the center of the cream chevron, and two diagonal lines within the bottom point of the chevron to create a small diamond grid pattern. -
Detail the roof:
Continue your gold lines up onto the roof to outline the painted geometric section you created earlier. -
Extend the angles:
For a dynamic look, extend the outer gold lines all the way down to the base of the wood, even past the paint, so the gold streaks sit against the bare wood at the bottom. -
Seal the project:
Once the gold ink is completely cured (give it at least an hour), apply a coat of clear outdoor varnish to protect the wood and paint from the elements.
Uneven Gold Lines?
If the paint pen slips or creates a wobble, don’t wipe it! Let it dry completely, then touch up the adjacent paint color carefully with a small brush.
Hang this gem in a sheltered spot and enjoy the sophisticated pop of color it brings to your outdoor space


Enchanted Fairy Stone Cottage
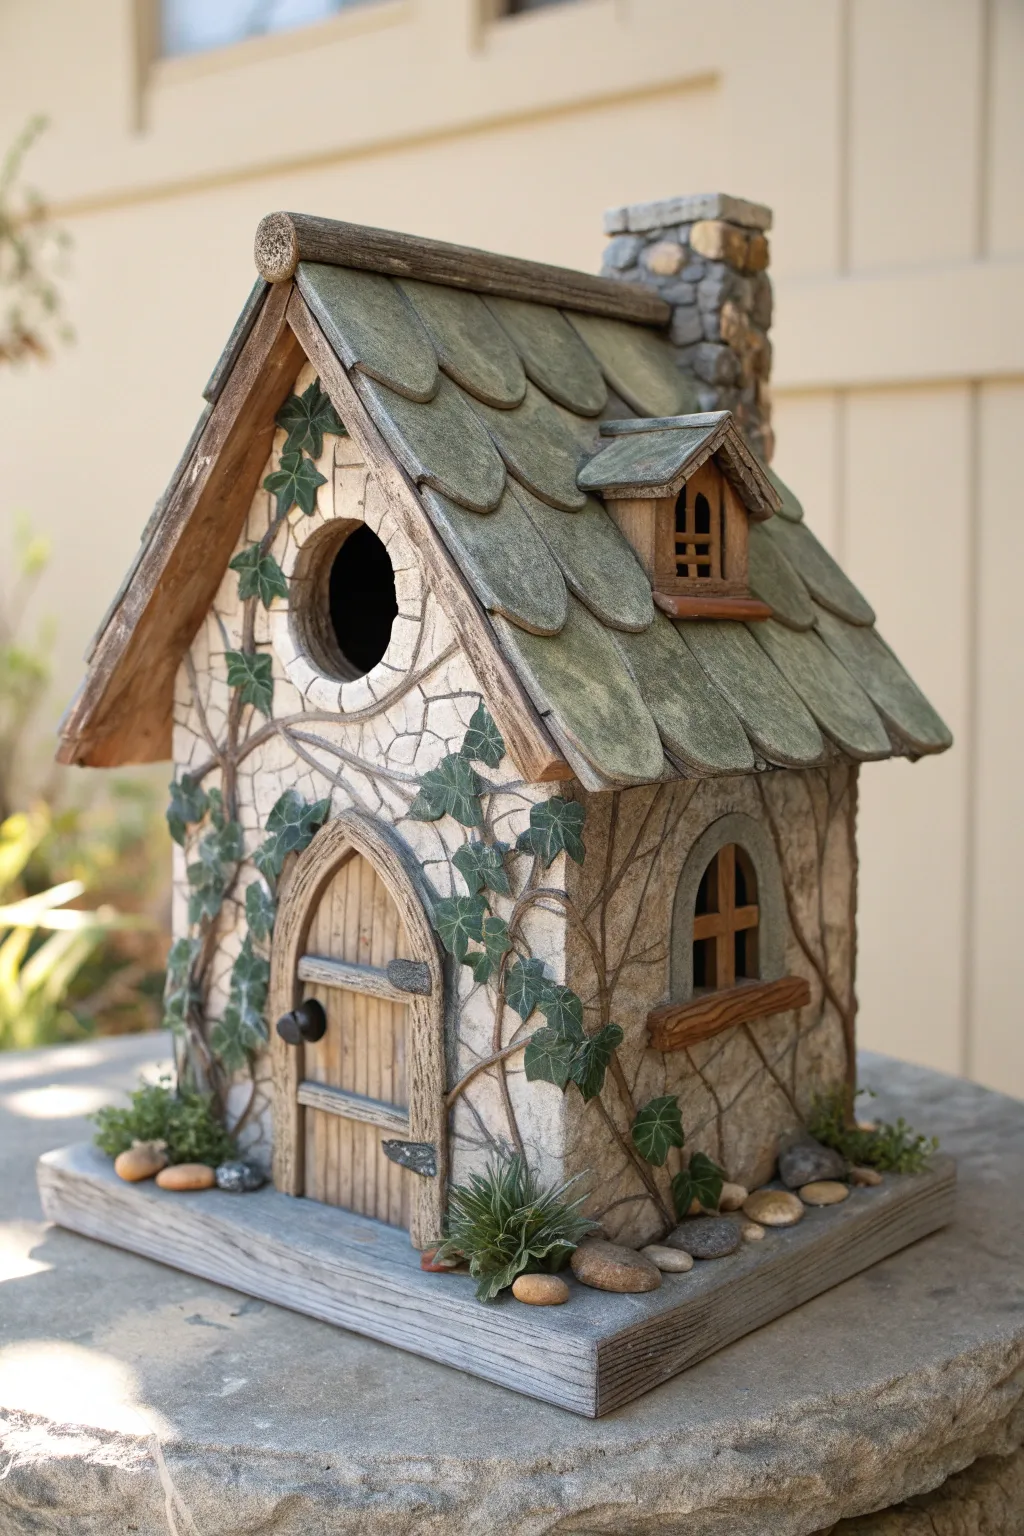
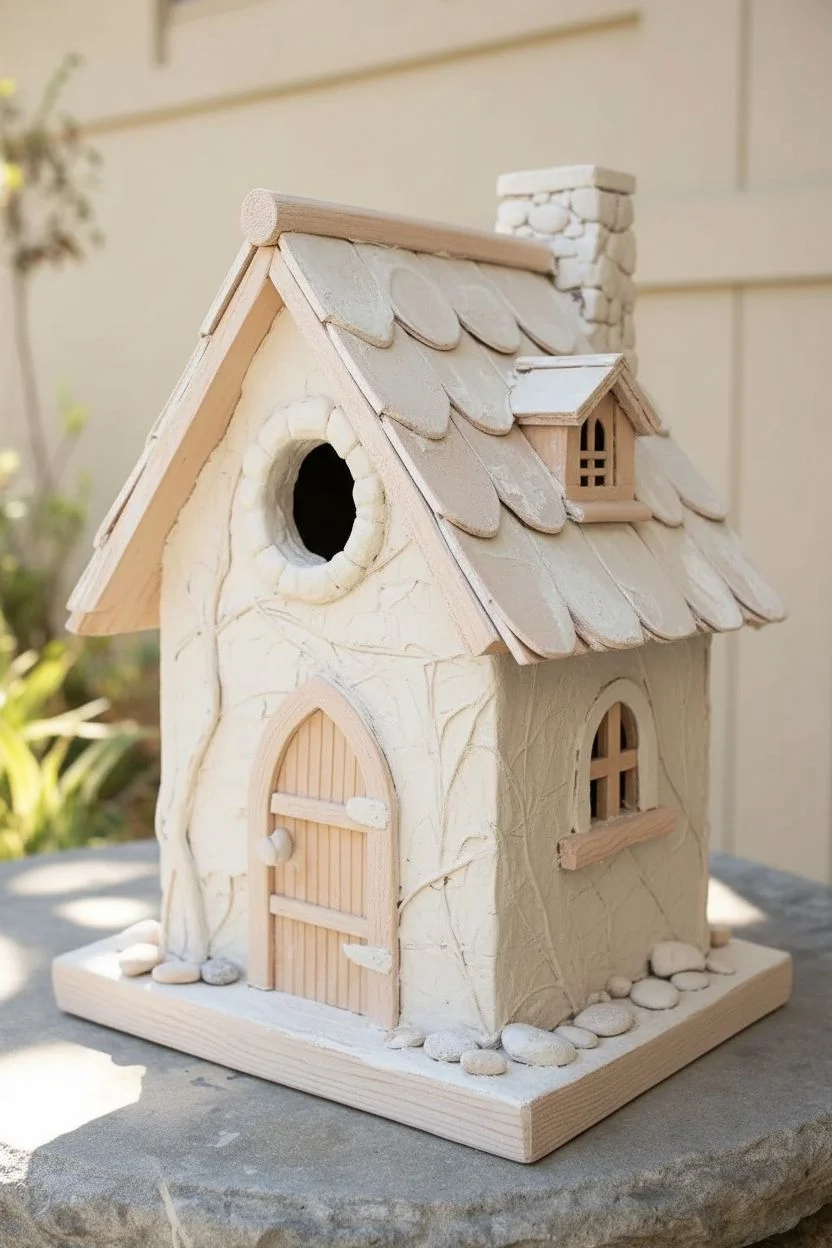
Transform a simple wooden birdhouse into a magical storybook cottage straight out of a fairy tale. By using texture mediums and strategic layering, you will create the illusion of aged stone walls, a mossy slate roof, and creeping vines.
Detailed Instructions
Materials
- Unfinished wooden birdhouse with steep roof
- Modeling paste or texture paste
- Acrylic paints (antique white, dark brown, olive green, sage green, charcoal, earthy metallic)
- Popsicle sticks or thin balsa wood
- Palette knife and toothpicks
- Assorted paintbrushes (flat shader, liner, old scruffy brush)
- Miniature ivy leaves (paper or silk) or green cardstock
- Small pebbles and faux succulents
- Wood glue or tacky glue
- Matte spray sealer
Step 1: Texturing the Structure
-
Prep the surface:
Lightly sand your wooden birdhouse to remove rough splinters and wipe it clean with a damp cloth to ensure the texture paste adheres well. -
Create the stone walls:
Use a palette knife to spread a roughly 1/8-inch layer of modeling paste over the exterior walls, avoiding the door area and windows. -
Carve the cracks:
While the paste is still wet, use a toothpick or clay tool to lightly score random jagged lines and cobweb shapes to mimic cracked stucco. -
Sculpt the entryway:
Add a thicker ring of paste around the main bird entrance hole; use your tool to press indentations into this ring to make it look like individual stones. -
Chimney textures:
Apply paste to the chimney and press small real pebbles into it, or carve brick shapes into the wet paste if you don’t have stones handy. -
Roof shingles:
Cut rounded ‘scale’ shapes from thin balsa wood or cardboard (or use pre-cut wood shingles) and glue them onto the roof in overlapping rows, starting from the bottom edge. -
Construct the door:
Cut popsicle sticks into vertical planks and trim the tops to form an arch shape; glue these onto the house front to create a 3D door.
Pro Tip: Depth & Dimension
For the most realistic looking stone walls, apply your dark wash in sections. Don’t let it dry completely before wiping back, or the walls will look dirty rather than aged.
Step 2: Painting the Cottage
-
Base coat the walls:
Once the texture paste is completely dry and hard, paint the walls with an antique white or cream acrylic paint, ensuring you get into the crevices. -
Base coat the roof:
Paint the roof shingles with a deep olive green to simulate aged mossy slate. -
Detail the woodwork:
Paint the door, window frames, and any exposed wood beams with a dark chocolate brown. -
Stone accents:
Paint the stones around the entrance hole and the chimney ‘stones’ in varied shades of gray and beige.
Step 3: Aging and Weathering
-
Apply an antiquing wash:
Mix a small drop of dark brown paint with water to create a thin wash. Brush this over the white walls, letting it pool in the cracks you carved. -
Wipe back:
Immediately use a damp cloth to wipe the wash off the raised surfaces, leaving the dark color only in the cracks and recesses for an aged look. -
Dry brush the roof:
Dip a dry, stiff brush into sage green or a lighter mossy color, dab off the excess, and lightly brush over the edges of the shingles to highlight the texture. -
Door hardware:
Use a fine brush and charcoal or metallic paint to draw faux iron hinges and a handle on the wooden door.
Troubleshooting: Paste Adhesion
If your modeling paste peels off the wood as it dries, first apply a coat of primer or gesso to the bare wood. This provides a ‘tooth’ for the heavy texture paste to grab onto.
Step 4: Fairy Garden Details
-
Paint the vines:
Using thin brown paint and a liner brush, paint twisting, organic lines winding up the walls and around the windows to represent vine stems. -
Add leaves:
Glue tiny individual paper leaves or silk ivy tips along the painted stems. I find using tweezers helps place these precisely. -
Decorate the base:
Paint the wooden base a weathered gray, then glue down larger river stones and clusters of faux rounded succulents around the corners. -
Seal:
Finish with a coat of matte spray sealer to protect your paint job and prevent the texture from chipping outdoors.
Now you have a whimsical centerpiece ready to welcome enchanted visitors to your garden.
BRUSH GUIDE
The Right Brush for Every Stroke
From clean lines to bold texture — master brush choice, stroke control, and essential techniques.
Explore the Full Guide
Juicy Summer Watermelon Slice
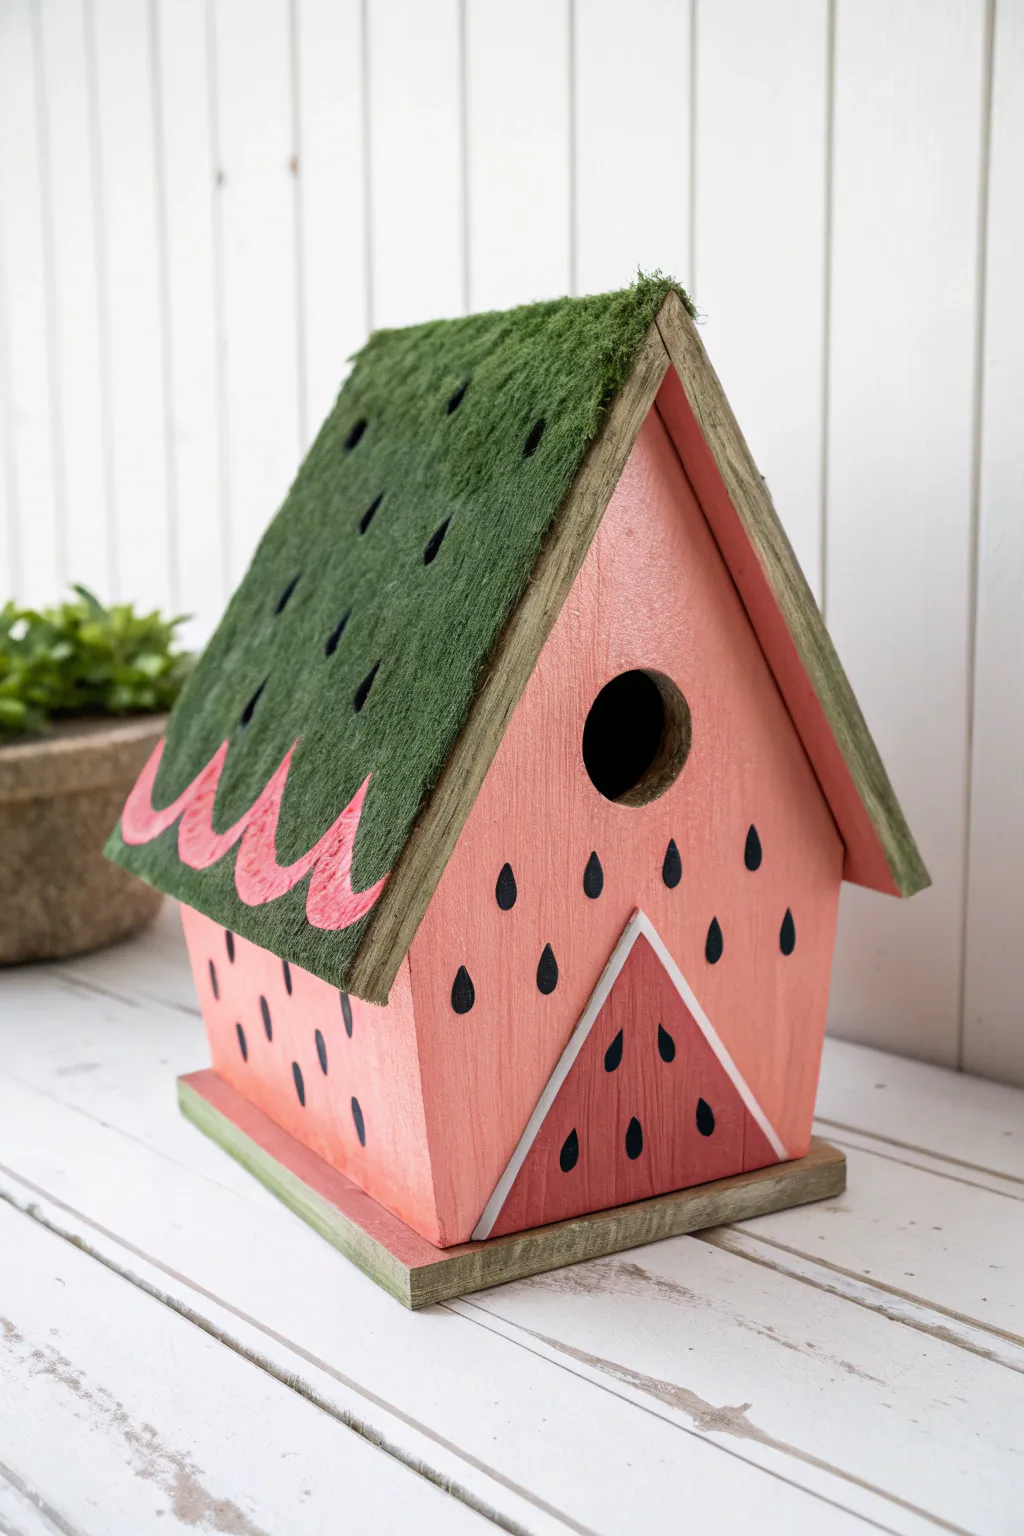
Transform a plain wooden birdhouse into a refreshing slice of summer with this vibrant watermelon design. This project combines bold colors with playful details like seed-shaped splashes and a textured rind roof for a whimsical garden accent.
Step-by-Step Guide
Materials
- Unfinished wood birdhouse
- Acrylic craft paints: Coral Pink, Forest Green, Lime Green, White, Black
- Flat shader brush (medium)
- Fine detail brush (round)
- Textured sponge or stiff-bristled brush
- Pencil
- Ruler
- Outdoor spray sealant (clear, matte or satin)
Step 1: Preparation & Base Colors
-
Smooth the surface:
Start by giving your birdhouse a quick sanding with fine-grit sandpaper to remove any splinters or rough patches. -
Clean it up:
Wipe the wood down with a tacky cloth or damp rag to ensure no dust remains, which helps the paint stick better. -
Mix your melon shade:
Create a custom juicy pink by mixing Coral Pink with a tiny drop of White. I like to test a dab on the bottom to ensure it’s bright enough. -
Paint the walls:
Coat the front, back, and sides of the house with your pink mixture. Avoid the roof and the bottom platform for now. -
Apply a second coat:
Watermelon colors should be rich, so apply a second coat of pink once the first is dry to get solid, opaque coverage.
Texture Pro Tip
For a truly 3D roof like the one in the photo, mix your green paint with a little baking soda or sand before applying. It creates a gritty, organic texture that looks fantastic when dry.
Step 2: The Rind & Roof Detail
-
Base the roof:
Paint the entire roof area with your Forest Green paint. Don’t worry about being perfectly smooth; a little texture works well here. -
Add rind texture:
To mimic the texture seen in the photo, take a dry sponge or stiff brush, dip it in the green paint, and dab repeatedly over the roof to build up a stippled surface. -
Create the scalloped edge:
Using your pink paint and a smaller brush, carefully paint a scalloped (wavy) design along the very bottom edge of the roof pieces, overlapping the green slightly. -
Paint the platform:
Use the Lime Green paint to coat the base platform of the birdhouse, representing the lighter inner rind of the melon.
Troubleshooting Lines
If your white triangle lines look shaky, wait for the paint to dry fully. Then, use pieces of painter’s tape to mark off clean edges and apply a fresh layer of white for a crisp look.
Step 3: Geometric Details & Seeds
-
Outline the slice:
On the front of the house, use a ruler and pencil to lightly draw a triangle shape starting from the bottom corners meeting near the center. -
Paint the pith:
Using a steady hand and a small flat brush, paint thick White lines over your pencil markings to create the white ‘pith’ separation. -
Start the seeds:
Dip your fine detail brush into Black paint. Practice painting a teardrop shape on a scrap paper first—press down for the round bottom and lift up for the point. -
Seed the walls:
Paint random black teardrops all over the pink walls. Keep the pointed ends facing upward. -
Seed the roof:
Add painted ‘seeds’ to the green roof as well. These simulate the darker stripes or spots often found on watermelon rinds. -
Detail the slice:
Don’t forget to add a few smaller seeds inside the pink triangle section on the front to complete the ‘slice’ look.
Step 4: Finishing Touches
-
Check for gaps:
Inspect the corners and under the eaves. Use your small brush to touch up any bare wood spots with the appropriate color. -
Let it cure:
Allow the birdhouse to dry completely for at least 24 hours to ensure the paint has hardened. -
Seal for protection:
Spray the entire project with several light coats of outdoor clear sealer to protect your artwork from the elements.
Now you have a refreshing splash of color ready to brighten up your porch or garden tree.
Retro ‘Glamping’ Trailer
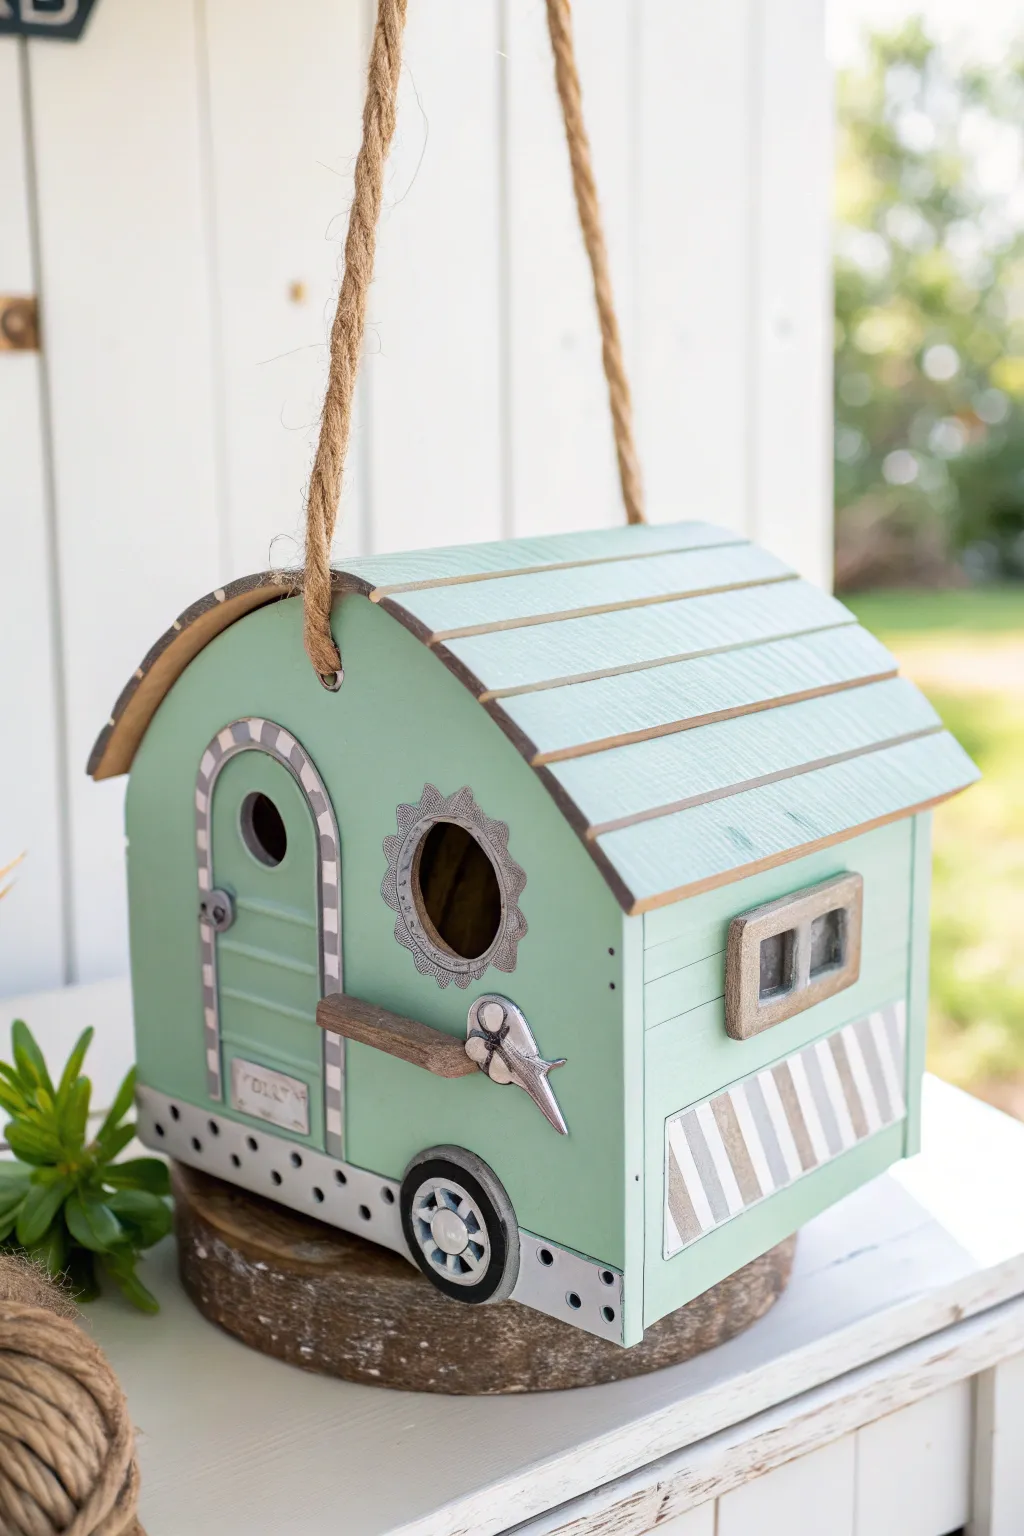
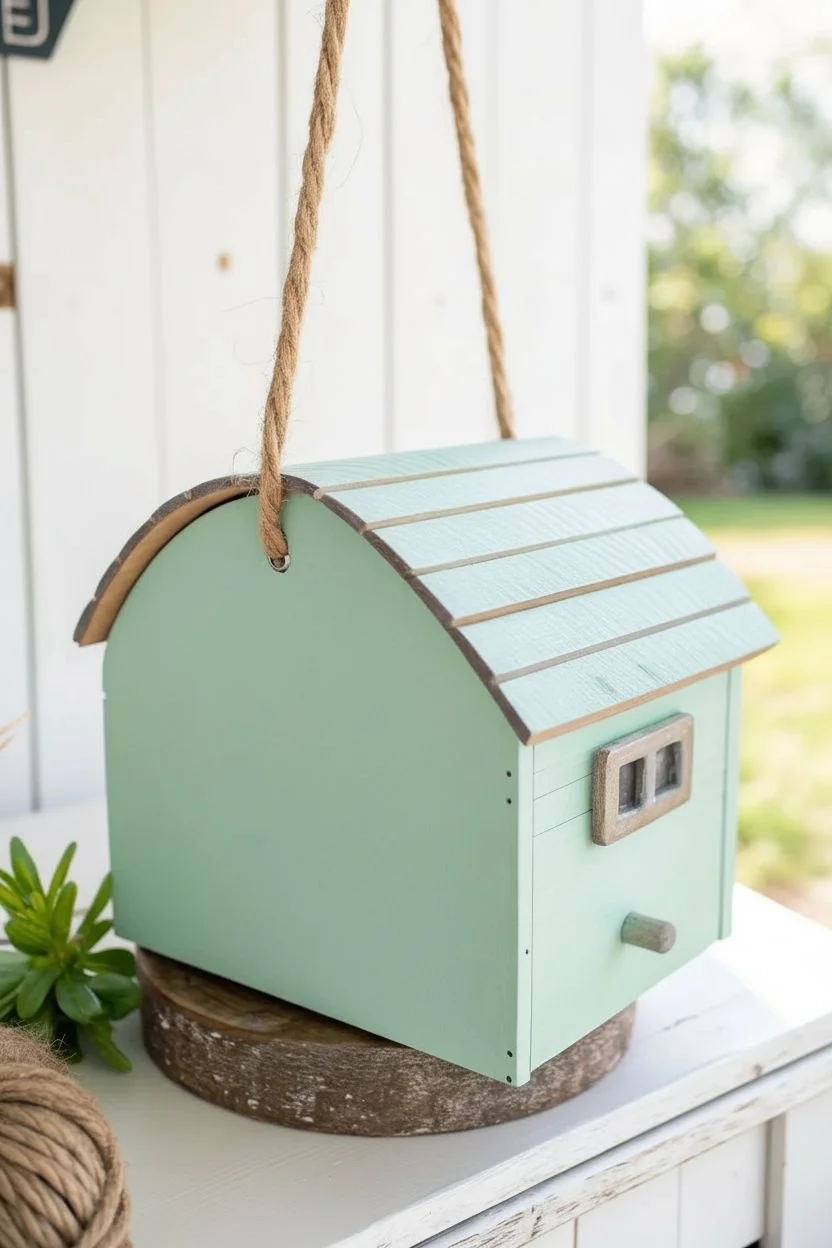
Transform a plain wooden birdhouse blank into a charming retro camper straight out of the 1950s. This project combines classic mint green hues with metallic accents and clever painting techniques to distinguish the ‘metal’ parts from the body.
Step-by-Step
Materials
- Camper-shaped wooden birdhouse blank
- Acrylic paints: Mint green, Metallic Silver, Dark Grey, White, Black, Burnt Umber
- Small flat paintbrush
- Fine liner detail brush
- Dotting tool (or toothpick)
- Small wooden bead (for door handle)
- Small metal charm or flower button (optional)
- Strong craft glue (e.g., E6000)
- Jute rope
- Sanding sponge
Step 1: Preparation and Body Color
-
Smooth the surface:
Begin by lightly sanding the entire wooden birdhouse with a sanding sponge to remove any splinters or rough patches. Wipe away the dust with a damp cloth or tack cloth. -
Apply the base coat:
Using a flat brush, paint the entire body and roof of the camper with Mint Green acrylic paint. Brush with the grain of the wood for a smooth finish. -
Build opacity:
Allow the first layer to dry completely to the touch. Apply a second coat of Mint Green to ensure solid coverage so no raw wood shows through. -
Define the roof planks:
If your birdhouse has grooved lines on the roof, run a very watered-down wash of Dark Grey or Burnt Umber into the grooves to create shadow and depth. -
Distress the edges:
For that vintage, well-traveled look, lightly dry-brush a small amount of Burnt Umber paint along the very edges of the roofline and corners.
Perfect Rivets Pro-Tip
To get uniform dots for the metal kickplate rivets, dip the handle end of a paintbrush into the paint and press straight down. It works much better than bristles!
Step 2: Painting the Architectural Details
-
Create the kickplate:
Using painters tape or a steady hand, paint a strip along the bottom half-inch of the walls extending to the wheels using Metallic Silver paint. -
Add the rivets:
Once the silver strip is dry, dip a dotting tool or the wrong end of a paintbrush into Dark Grey paint. Dot a row of ‘rivets’ along the top and bottom edge of the silver kickplate. -
Paint the wheel:
Paint the tire section Black using a steady hand to keep the circle round. Paint the inner hubcap area Metallic Silver, adding spokes or details with a fine liner brush if desired. -
Outline the door:
Paint an arched door shape in the same color as the body (or slightly lighter). Paint a thick border around the arch in Dark Grey to serve as the door frame. -
Detail the door frame:
Using a fine liner brush and White paint, add small horizontal stripes across the Dark Grey door frame to create a checkered or striped molding effect.
Step 3: Windows and Finishing Touches
-
Frame the side window:
Paint the raised rectangular window frame on the side with a mix of Metallic Silver and a touch of Burnt Umber to look like aged pewter. -
Darken the window panes:
Fill in the window pane areas with Black or very Dark Grey paint to simulate depth and glass shadow. -
Create the entry decal:
Paint a scalloped or flower-shaped design around the main bird entry hole using Metallic Silver. I like to outline this with a thin Grey line to make it pop. -
Add decorative stripes:
On the side panel above the kickplate, paint diagonal stripes inside a rectangular block using White or Beige paint to mimic a retro decal. -
Attach 3D hardware:
Glue a small wooden bead onto the door to act as a handle. Paint it silver if you prefer a metal look versus a wooden knob. -
Add charm details:
Glue a small metal charm, flower button, or propeller shape near the perch for extra whimsy. -
Install the hanger:
Thread a length of sturdy jute rope through the holes in the roof and knot securely on the inside to hang your masterpiece.
Level Up: License Plate
Cut a tiny rectangle of cardstock or balsa wood, paint it white, and use a fine-tip permanent marker to write a custom license plate name like ‘NEST-1’ on the back.
Now your vintage camper is ready to welcome feathered guests in retro style.

PENCIL GUIDE
Understanding Pencil Grades from H to B
From first sketch to finished drawing — learn pencil grades, line control, and shading techniques.
Explore the Full Guide
Meditative Mandala Dot Art
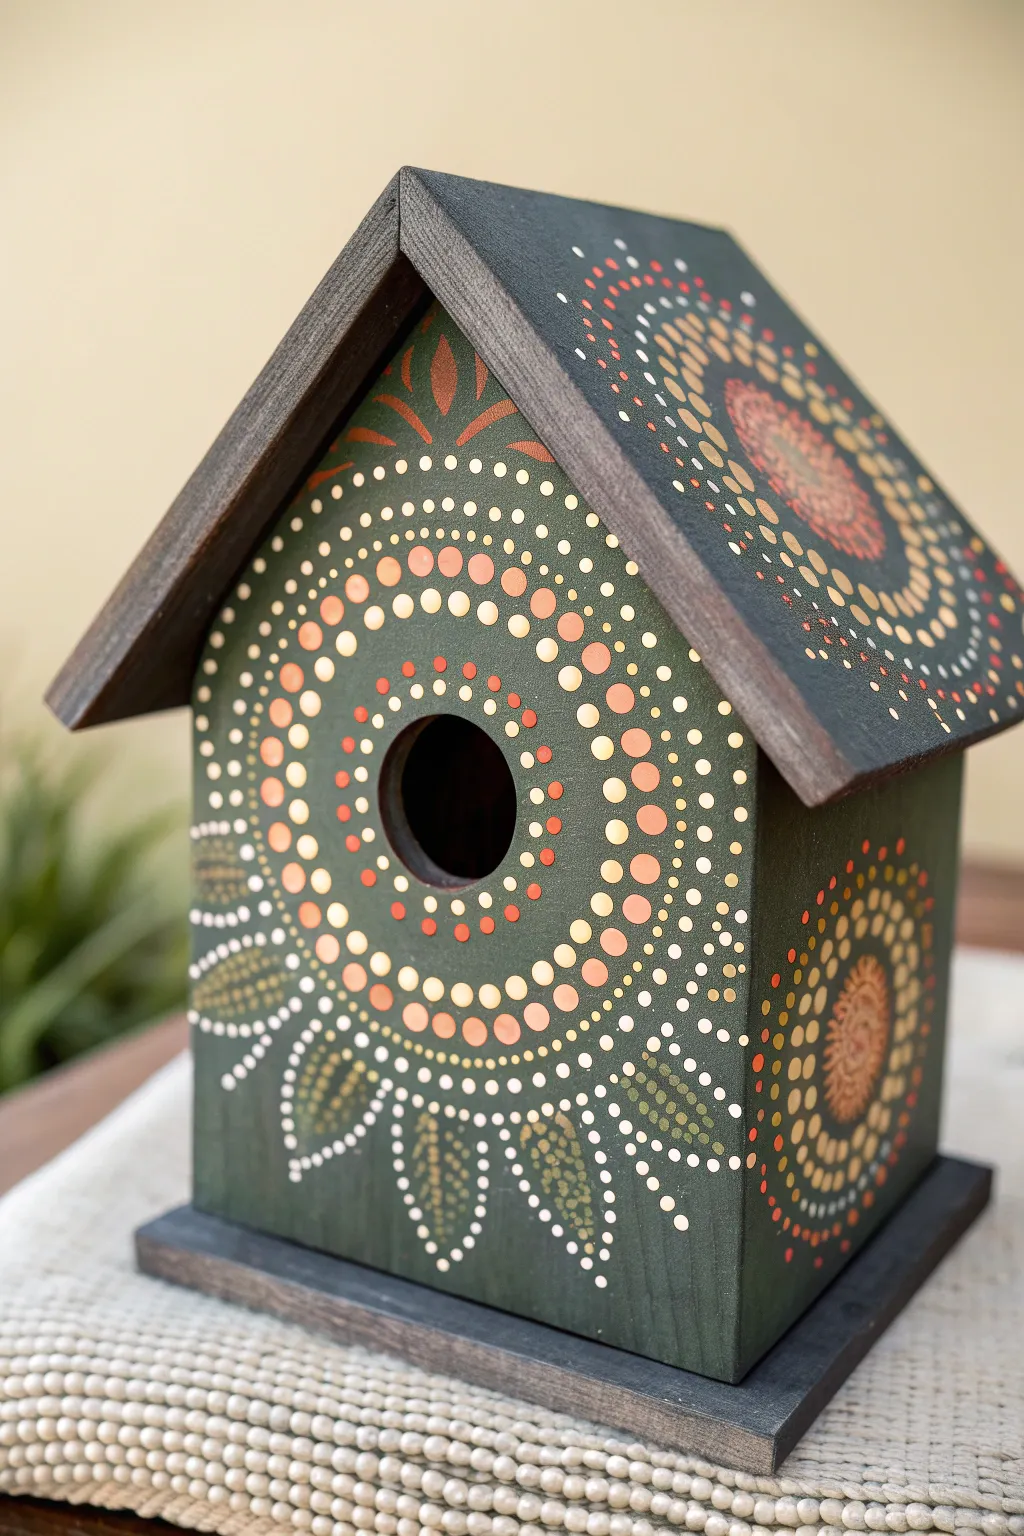
Transform a simple wooden birdhouse into a captivating piece of garden art using standard dotting tools. This project features a rich forest green base adorned with concentric mandala patterns in warm terracotta, peach, and cream tones.
Detailed Instructions
Materials
- Unfinished wooden birdhouse
- Acrylic paints (forest green, dark charcoal or walnut stain, white, cream, peach, terracotta, sage green)
- Set of acrylic rods or dotting tools (various diameters)
- Fine detail paintbrush
- White chalk pencil and compass
- Sandpaper (fine grit)
- Outdoor clear spray sealer (matte or satin finish)
Step 1: Preparation & Base Coat
-
Prepare the surface:
Lightly sand the entire birdhouse to remove any rough splinters. Wipe it down with a damp cloth to ensure a dust-free surface for the paint. -
Darken the trim:
Paint the edges of the roof and the base platform with the dark charcoal paint or walnut stain. This frames the artwork beautifully. -
Apply the background color:
Coat the main body, roof panels, and the underside of the clean surfaces with the forest green acrylic. I prefer to apply two thin coats rather than one thick one for the smoothest finish. -
Dry time:
Allow the green base coat to dry completely before attempting any dot work.
Troubleshooting: Peaky Dots
If your dots have sharp points on top (like Hershey’s Kisses), your paint is too thick. Mix in a drop of pouring medium or water to get a consistency like warm honey.
Step 2: The Central Mandala
-
Map the guidelines:
Using a white chalk pencil and a compass, draw light concentric circles radiating outward from the bird hole. These lines will help keep your dot rings perfectly round. -
Inner ring:
Dip a medium-small tool into terracotta paint. Place dots evenly spaced around the immediate perimeter of the bird hole. -
Second ring:
Switch to a slightly larger tool and peach paint. Place a dot in the spaces between the terracotta dots of the previous row (brick-laying pattern). -
Third ring:
Use a medium tool with white or cream paint to create the next row. Try to keep the spacing consistent as the circle diameter grows. -
Expanding the gradient:
Continue adding rings, alternating between large peach dots, small white filler dots, and larger terracotta accents. Use the chalk lines to ensure you stay centered. -
Larger outer dots:
As you reach the outer edges of the circle, use your largest dotting tool with cream or sage green paint to create the bold border dots.
Step 3: Roof & Details
-
Roof burst design:
On the roof panel, draw a half-circle guideline starting from the bottom edge. Create a ‘fan’ or sunburst pattern using the same color palette, starting with a dense collection of dots at the center of the burst and radiating outward. -
Walking the dots:
For the rays on the roof, place a large dot, then use the residual paint on the tool to make a line of progressively smaller dots trailing away from it. -
Side embellishments:
Repeat a smaller, full circular mandala on the side walls of the birdhouse, keeping the design low and centered. -
Leaf motifs:
On the front corners below the main mandala, lightly sketch a simple leaf shape. Outline it with small white dots using a fine tool. -
filling the leaves:
Fill the interior of the leaf outlines with closely packed sage green dots to create texture and contrast against the dark background. -
Top flourish:
In the triangle space above the bird hole, use a fine detail brush to paint a stylized floral or leaf motif in a muted copper or dark orange tone.
Pro Tip: Symmetry Hack
Use a segmented stencil or a protractor to mark 8 or 16 radial lines lightly in chalk before starting. This ensures your mandala spacing stays even all the way around.
Step 4: Finishing
-
Clean up:
Once the paint is rock hard and dry, gently wipe away any visible chalk guidelines with a damp cotton swab. -
Seal the work:
Take the birdhouse outside and apply a few light coats of clear spray sealer to protect your detailed work from the elements.
Place your finished masterpiece in a sheltered spot in the garden to attract feathered friends.
Holiday Gingerbread House
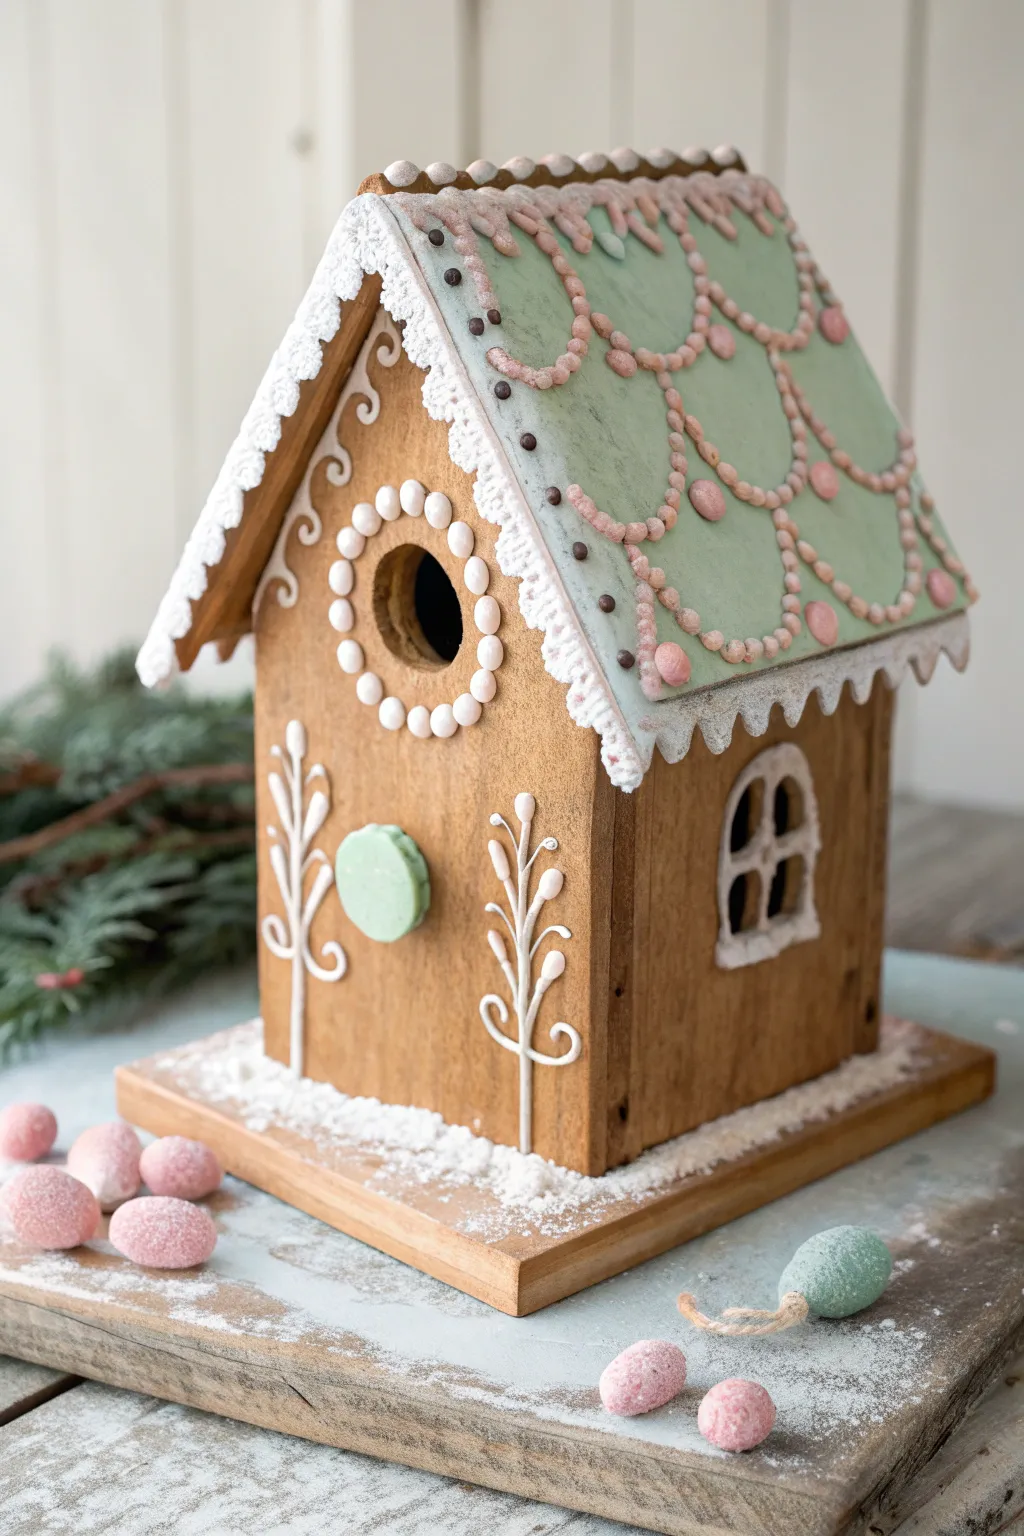
Transform a plain wooden birdhouse into a whimsical holiday decoration that looks good enough to eat. By using dimensional paints and a soft pastel palette, you will mimic the texture of gingerbread and royal icing for a centerpiece that lasts year after year.
Step-by-Step Tutorial
Materials
- Unfinished wooden birdhouse with a pitched roof
- Acrylic paints: warm golden brown, mint green, pastel pink, titanium white
- Dimensional fabric paint (white and pink) or heavy body acrylics in applicator bottles
- Texture paste or ‘snow’ medium
- Round wooden disc (approx. 1 inch)
- Small oval wooden beads or clay (for eggs)
- Sandpaper (220 grit)
- Flat shader brushes and fine liner brushes
- Clear glitter (optional)
Step 1: The Cookie Base
-
Prepare the surface:
Begin by lightly sanding the entire wooden birdhouse with 220-grit sandpaper to remove any rough splinters. Wipe away the dust with a tack cloth or slightly damp paper towel. -
Mix the gingerbread shade:
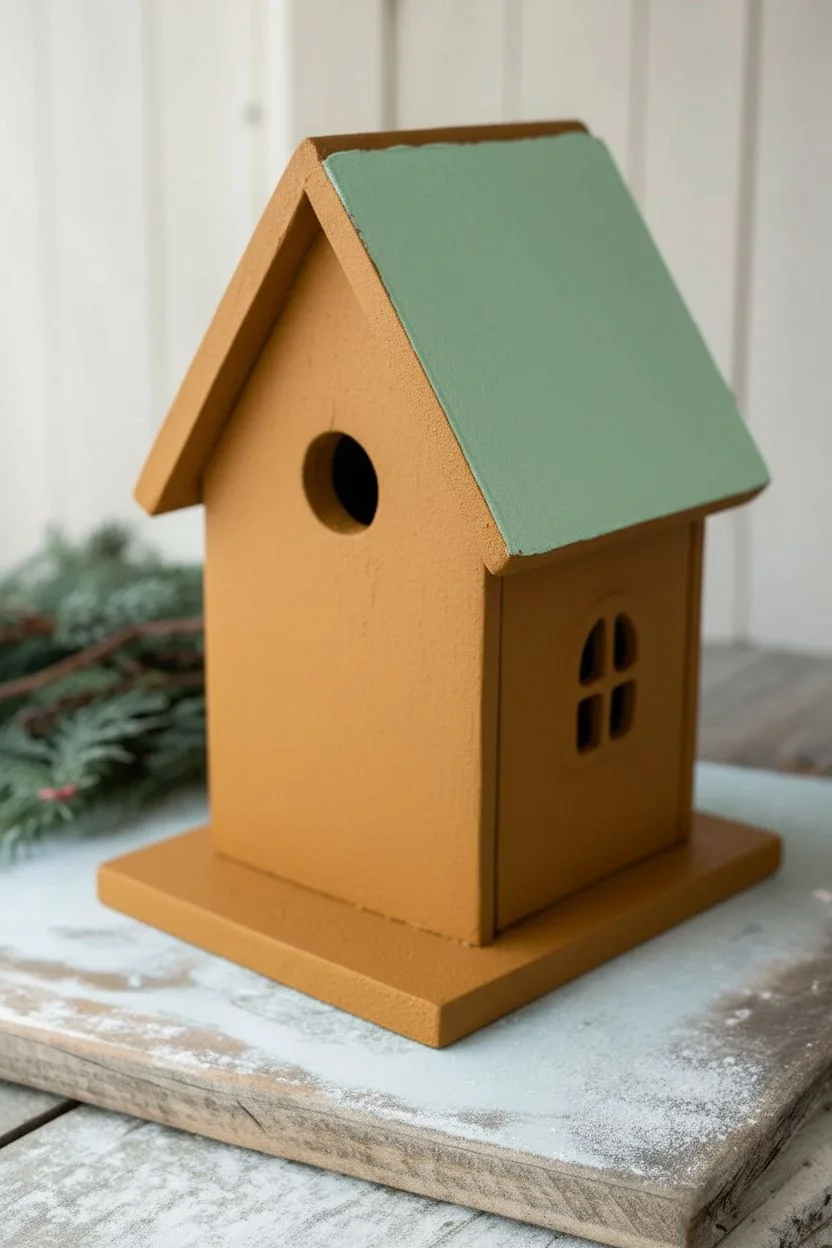
To get that perfect baked-good color, mix a warm golden brown acrylic paint with a tiny drop of orange and white. Aim for the color of fully baked gingerbread cookies. -
Paint the walls:
Apply the brown mixture to the four walls of the birdhouse, using smooth vertical strokes to resemble wood grain or smooth dough. Avoid painting the roof for now. -
Apply a second coat:
Once the first layer is dry to the touch, apply a second coat of brown paint to ensure opaque, rich coverage. Let this dry completely before handling. -
Paint the roof:
Use a soft mint green acrylic paint for the roof. Apply two coats, allowing drying time in between, to create a smooth, fondant-like finish.
Step 2: Royal Icing Details
-
Create the roof snow:
Using a palette knife or a stiff brush, apply white texture paste or thick white paint along the very top ridge of the roof. Drag it down slightly to mimic heavy, melting snow. -
Frost the eaves:
Dab white paint or texture paste along the front jagged edge of the roof overhang to create a ‘dripping icing’ effect. I like to dust this wet paint with clear glitter for a sugary sparkle. -
Pipe the roof scalloping:
Using pink dimensional paint (or heavy body acrylic in a fine-tip bottle), squeeze small dots in a scalloped ‘U’ pattern across the mint green roof. Create multiple rows that overlap slightly like fish scales. -
Add connecting pearls:
Where the pink scallops meet or intersect, squeeze a slightly larger drop of pink or light coral paint to create a decorative pearl accent. -
Pipe the entry trim:
Switch to white dimensional paint. Squeeze a ring of small, even dots around the circular bird entrance to mimic piped royal icing pearls.
Fixing Wobbly Lines
If your piped icing lines look shaky, don’t panic. Quickly wipe the wet paint away with a damp Q-tip/cotton bud, let the spot dry for a minute, and try again.
Step 3: Finishing Decorations
-
Prepare the medallion:
Paint the small round wooden disc with a pale pistachio or mint green. Let it dry, then glue it to the front of the house, to the left of the centerline. -
Paint the floral vines:
Using a fine liner brush and white white, paint delicate vertical stems rising from the bottom of the front wall. Add teardrop shapes for leaves to mimic embroidery or piped icing. -
Add side windows:
On the side wall, use the white dimensional paint or a thick brush to paint an arched window frame. Add a cross in the center to create window panes. -
Frost the base:
Apply a generous layer of white texture paste or ‘snow’ medium to the wooden base of the birdhouse, stippling it with a brush to look like fluffy ground snow. -
Create the candy eggs:
Paint your oval wooden beads or clay shapes in soft pastel pinks and greens. Coat them with a layer of clear glue and dip in fine white glitter for a ‘sugar-coated’ look. -
Final assembly:
Once the base snow is tacky but not fully dry, press the painted eggs into the ‘snow’ scattered around the birdhouse. Allow the entire project to cure overnight.
Pro Tip: Sugary Texture
For a realistic cookie texture, mix a pinch of baking soda into your brown paint before applying it. This gives the ‘dough’ a slightly grainy, baked appearance.
Display your sweet architectural masterpiece on a mantel or shelf to add a touch of fairy-tale charm to your holiday decor


Golden Honeycomb & Bees
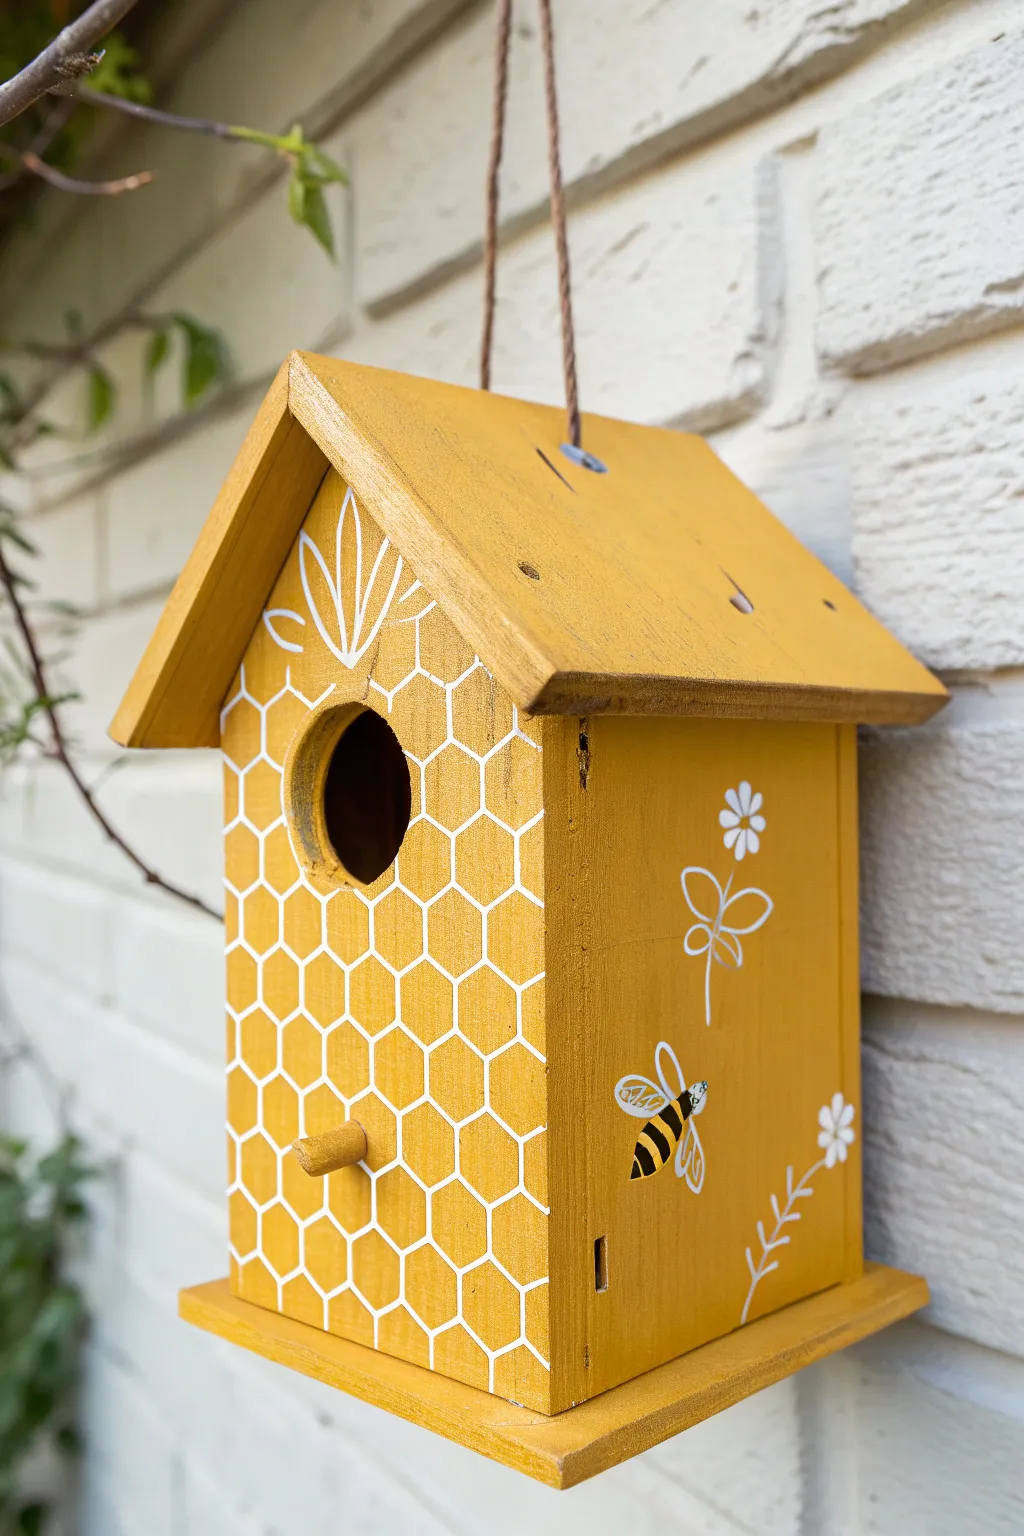
This cheerful birdhouse brings a buzz of excitement to any garden with its warm mustard tone and crisp geometric details. The combination of precise honeycomb patterns and whimsical hand-painted bees creates a modern yet nature-inspired look.
Step-by-Step Tutorial
Materials
- Unfinished wooden birdhouse
- Sandpaper (medium and fine grit)
- Acrylic paint: Mustard Yellow, Black, White
- Fine-tip white paint pen (oil-based works best)
- Fine-tip black paint pen or liner brush
- Flat paintbrush (1 inch)
- Pencil and eraser
- Hexagon stencil or ruler
- Outdoor spray sealer (matte or satin)
- Jute twine for hanging
Step 1: Preparation & Base Coat
-
Smooth the surface:
Remove any existing string or hardware from the birdhouse. Use medium-grit sandpaper to smooth out rough edges, especially around the entry hole and roofline. -
Apply the first coat:
Using a flat brush, paint the entire exterior (walls, roof, and perch) with mustard yellow acrylic paint. Don’t forget the bottom base. -
Paint the details:
Use a smaller brush to carefully paint the inside edges of the entry hole so no raw wood shows through. -
Second layer:
Allow the first coat to dry to the touch, roughly 20 minutes. Apply a second coat of yellow for a solid, opaque color. I usually let this layer cure for an hour to ensure a hard surface for drawing.
Stencil Secret
Can’t freehand hexagons? Buy a cheap plastic honeycomb stencil at a craft store. Tape it down and trace inside the shapes with your paint pen for perfect spacing.
Step 2: Drafting the Design
-
Plan the honeycomb:
On the front panel, lightly sketch a honeycomb pattern using a pencil. Start by centering a hexagon around the birdhouse opening or just below it to keep the symmetry balanced. -
Extend the grid:
Continue tracing hexagons outwards until you reach the edges of the front wall. Use a stencil or a cut-out paper hexagon to keep your shapes uniform. -
Sketch floral accents:
Above the hole on the ‘gables’, lightly sketch a stylized three-leaf plant motif. On the side walls, sketch a few tall, simple stem flowers.
Step 3: Line Work & Bees
-
Trace the honeycomb:
Shake your white paint pen well. Carefully trace over your pencil lines on the front panel to create the crisp white honeycomb grid. -
Draw the front foliage:
Use the white paint pen to outline the leaf design you sketched above the entry hole. -
Create side flowers:
Move to the side panel and draw the stems and flower petals with the white paint pen. Keep the lines clean and simple. -
Paint the bee body:
On the side panel among the flowers, paint a small oval using your yellow paint (or leave the background color showing if you prefer) and outline the head area in black. -
Add bee details:
Once the body is dry, use a fine-tip black pen or brush to add the iconic stripes and the bee’s face. -
Finish the wings:
Draw the bee’s wings using the white paint pen, filling them in slightly or leaving them as open outlines for an airy look.
Clean Up Edges
If you make a mistake with the paint pen or a line gets wobbly, wait for it to dry completely. Then, touch it up with a tiny bit of the yellow base paint to ‘erase’ the error.
Step 4: Finishing Touches
-
Erase guidelines:
Once you are absolutely certain the ink is dry (give it plenty of time), gently erase any visible pencil marks. -
Seal the wood:
Take the birdhouse to a well-ventilated area and apply two thin coats of clear outdoor spray sealer to protect your art from the elements. -
Attach the hanger:
Cut a length of jute twine. Thread it through the holes in the roof or attach eye hooks if your house doesn’t have holes. -
Secure the rope:
Tie sturdy knots on the inside or twist the rope securely so it can support the weight of the house.
Hang your new golden creation in a sheltered spot and wait for your feathered neighbors to move in
Mediterranean Faux Mosaic
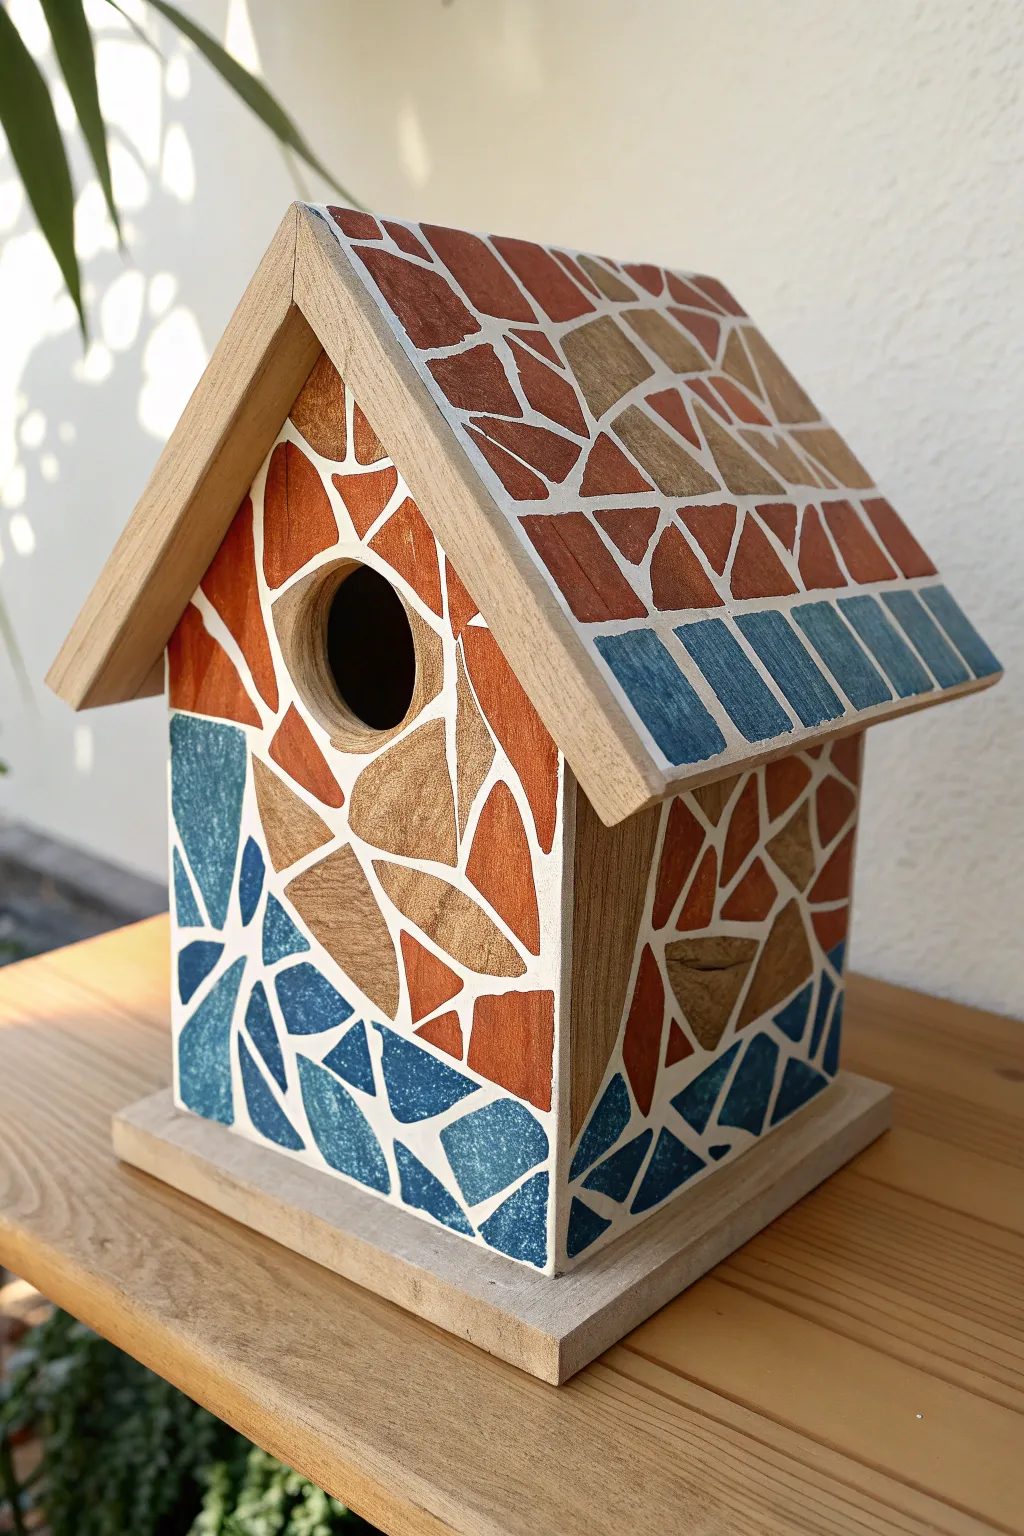
Transform a plain wooden birdhouse into a sun-soaked Mediterranean villa using simple painting techniques. By strategically leaving gaps of white base coat exposed, you’ll create a convincing illusion of broken ceramic tiles without glue or grout.
Detailed Instructions
Materials
- Unfinished wooden birdhouse
- Acrylic paint (White, Teal Blue, Terracotta, Golden Tan)
- White primer or gesso
- Paintbrushes (1-inch flat, fine detail round, and small flat shader)
- Pencil and eraser
- Fine-grit sandpaper
- Outdoor spray sealer (matte or satin)
- White paint marker (optional)
Step 1: Preparation & Base Coat
-
Smooth the Surface:
Begin by sanding the entire birdhouse with fine-grit sandpaper to remove any splinters or rough patches. Wipe away the dust with a barely damp cloth. -
Prime the Wood:
Apply a coat of white primer or gesso to the entire structure, inside the entry hole and out. This ensures your colors pop later. -
Applying the ‘Grout’:
Paint two solid coats of white acrylic paint over the dried primer. It is crucial to get an opaque, bright white finish here, as this layer will actually serve as your grout lines later on. -
Light Sanding:
Once the white base is bone dry, give it one last very light sanding. This creates a smooth surface that makes painting precise geometric shapes much easier.
Step 2: Mapping the Design
-
Sketch the Zones:
Using a pencil very lightly, mark out your color zones. The reference design features teal blue concentrated at the base, shifting to golden tan and terracotta near the roofline. -
Draw the Roof Pattern:
Sketch a row of rectangles along the bottom edge of the roof for a border. Above that, draw irregular triangles and polygons to mimic broken roof tiles. -
Draw the Wall Mosaic:
Sketch irregular geometric shapes (like shards of glass) on the walls. Leave about an 1/8th inch gap between every single shape—these gaps will stay white. -
Check the Spacing:
Stand back and look at your pencil lines. Ensure the ‘grout’ spaces are roughly consistent in width so the effect looks cohesive.
Grout Line Troubleshooting
Shaky hand? Instead of trying to paint around the white lines with a brush, you can use thin pinstripe tape (masking tape) to lay out the grid first, paint over it, and peel it off.
Step 3: Painting the Tiles
-
Start with Teal:
Load a small flat brush with teal paint. Fill in the ‘shards’ at the bottom third of the birdhouse and the rectangular border you sketched on the roof edge. -
Paint the Terracotta:
Switch to your terracotta orange. Paint the majority of the roof shapes and mix them into the upper section of the walls. -
Add Golden Accents:
Fill the remaining shapes on the walls and roof with the golden tan color. I find it helpful to mix a tiny dot of white into this color to make it look like sun-drenched stone. -
Create Texture:
Don’t worry if the paint isn’t perfectly flat; slightly uneven brushstrokes actually add to the textured, ceramic look of the faux tiles. -
Clean Up Edges:
Use your smallest brush to tidy up the geometric shapes. Sharp corners make the mosaic effect much more convincing than rounded blobs.
Pro Tip: Color Harmony
To make the birdhouse look cohesive, mix a tiny bit of the golden tan into both the teal and terracotta paints. This subtle warmth ties the palette together beautifully.
Step 4: Finishing Touches
-
Refine the Grout:
If you accidentally painted over some of your white gaps, use a white paint pen or a fine liner brush with white paint to re-establish the grid lines. -
Erase Pencil Marks:
Once the paint is absolutely cured (wait a few hours), gently erase any visible pencil lines from the white grout areas. -
Paint the Perch:
Paint the little wooden perch (if your model has one) in a coordinating color or leave it natural wood if it matches the aesthetic. -
Seal the Project:
Take the birdhouse to a well-ventilated area and apply 2-3 coats of outdoor spray sealer to protect the wood from moisture and UV rays.
Hang your new masterpiece in a shady spot and wait for your feathered tenants to arrive
Celestial Galaxy Night Sky
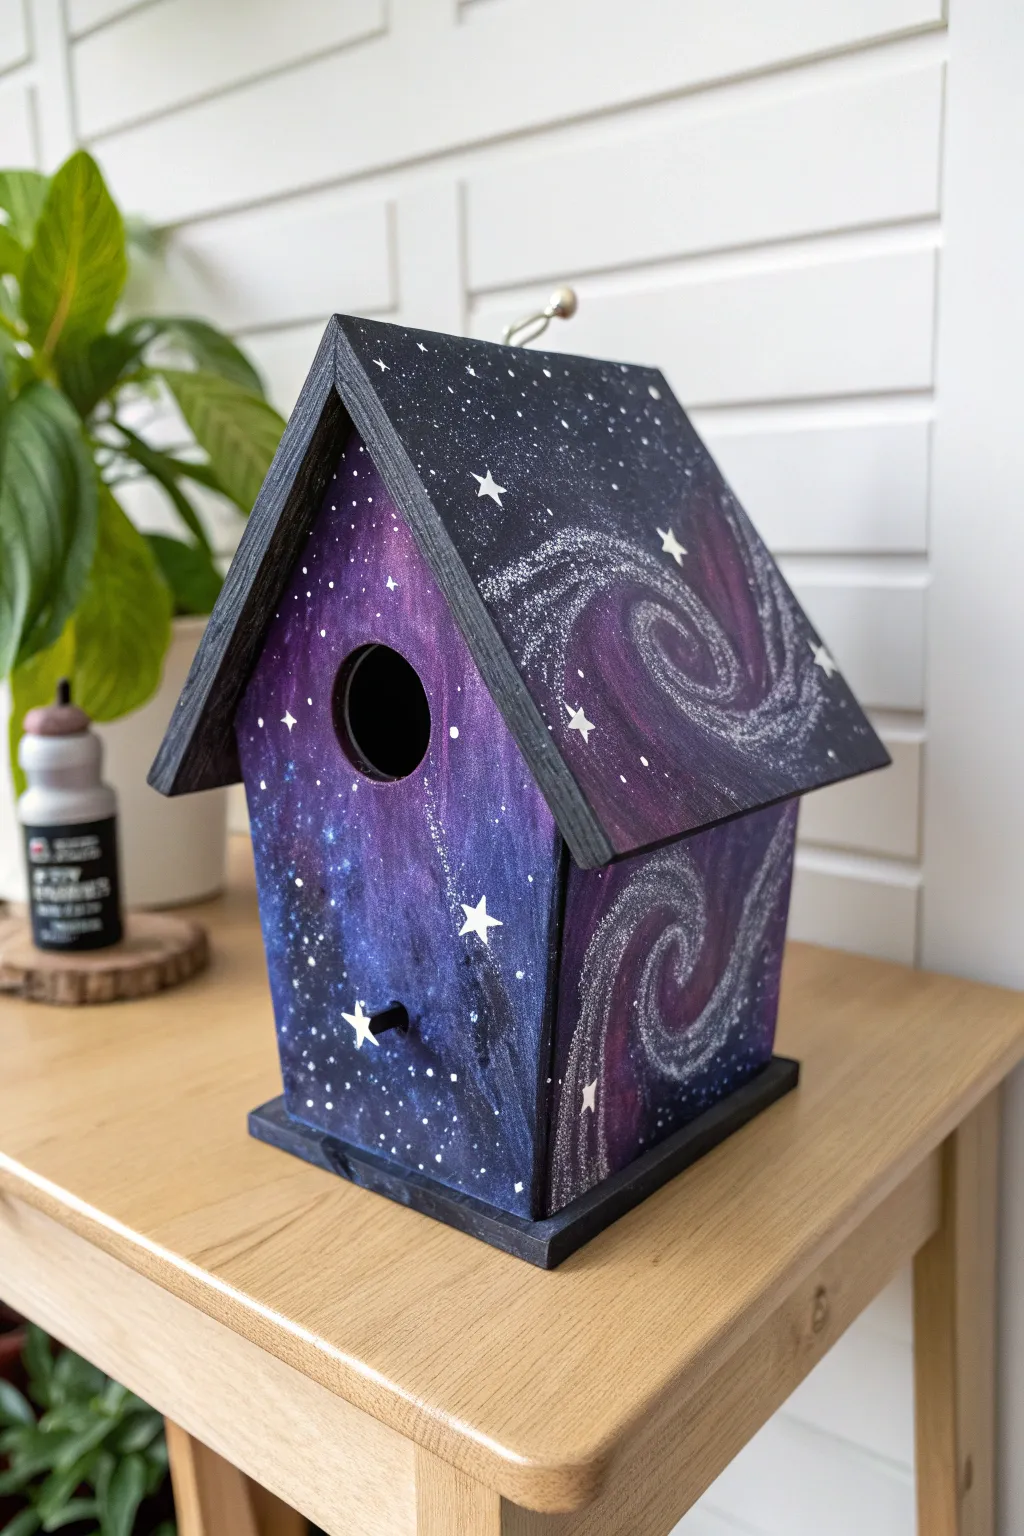
Transform a plain wooden birdhouse into a mesmerizing slice of the night sky using simple blending techniques. This project features swirling spiral galaxies, vibrant nebula clouds, and bright contrasting stars against a deep space background.
How-To Guide
Materials
- Unfinished wooden birdhouse
- Fine-grit sandpaper
- Acrylic paints: Carbon Black, Titanium White, Violet, Magenta, Phthalo Blue
- Flat shader brush (3/4 inch)
- Stiff bristle brush or stencil brush
- Fine detail liner brush (size 00 or 0)
- Makeup sponge or sea sponge
- Spray sealant or outdoor varnish
Step 1: Preparation and Base Coat
-
Smooth the Surface:
Lightly sand the entire wooden birdhouse with fine-grit sandpaper to remove any rough splinters, focusing on the roof edges and the entrance hole. -
Clean the Dust:
Wipe the wood down thoroughly with a tack cloth or slightly damp paper towel to ensure a clean painting surface. -
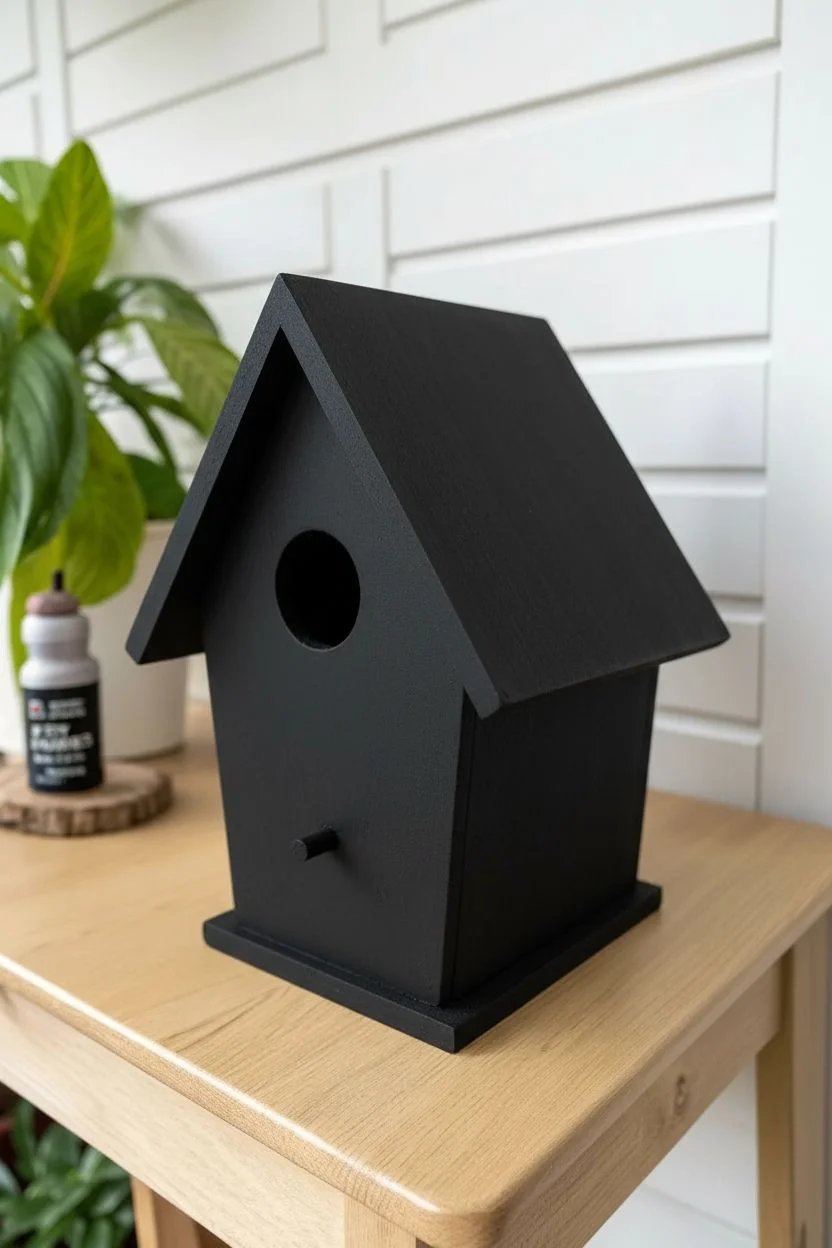
Paint the Void:
Using your large flat brush, apply a solid coat of Carbon Black paint to the entire exterior, including the underside of the roof overhangs. -
Detail the Entrance:
Don’t forget to push your brush just inside the birdhouse entrance hole to paint the inner rim black, hiding the raw wood color. -
Second Coat:
Let the first layer dry completely; if the wood grain is still showing through, apply a second coat of black for a true deep-space look.
Blurring Lines
If your nebula clouds look too harsh or stamped on, use a clean, slightly damp sponge to dab the edges while the paint is wet to soften the transition into the black.
Step 2: Painting the Galaxy
-
Start the Nebula:
Dip a sponge or stiff brush into Violet paint and blot most of it off on a paper towel until almost dry. -
Cloud Placement:
Gently dab irregular cloud shapes onto the roof and sides; I like to keep these somewhat random rather than perfectly round. -
Add Depth:
While the violet is tacky, sponge small amounts of Phthalo Blue near the edges of your purple clouds to create a color shift. -
Highlighting:
Dab highlights of Magenta into the center of the purple patches to create a glowing core effect. -
Create the Spiral:
To recreate the distinctive swirl shown on the roof, use a stiff brush with a tiny amount of Titanium White to maximize the ‘dry brush’ texture. -
Forming the Arms:
Starting from a center point in your purple nebula, drag the brush in a curved motion outward to create the milky spiral arms, keeping the pressure very light.
Step 3: Stars and Details
-
Tiny Distant Stars:
Load a toothbrush or stiff brush with watered-down white paint and flick the bristles to splatter tiny mist-like stars across the dark areas. -
Feature Stars:
Using your fine detail liner brush and pure Titanium White, paint larger 5-point stars scattered sparingly across the design. -
Brighten the Spiral:
Add extra white dots along the path of your white spiral galaxy to make it look like a dense cluster of stars. -
The Perch:
Paint the small wooden dowel or perch below the hole black, or add a tiny white star on the tip for a whimsical detail. -
Touch Ups:
If any stars look too messy, you can tidy up their edges with a little black paint on your smallest brush. -
Seal the Artwork:
Once fully dry, apply two coats of outdoor-rated varnish to protect your galaxy from the elements.
Sparkle Effect
Mix a small amount of holographic glitter medium into your final coat of clear varnish. It adds a subtle shimmer that changes as you view the nebula angles.
Hang your cosmic masterpiece in a sunny spot and enjoy the stellar view


Have a question or want to share your own experience? I'd love to hear from you in the comments below!