There is something so grounding about setting up a fresh canvas and mixing deep winter blues and sparkling golds while the snow falls outside. Whether you are planning a paint and sip night with friends or just need a quiet creative escape, this collection blends nostalgic holiday charm with approachable techniques for every skill level.
The Classic Vintage Red Truck
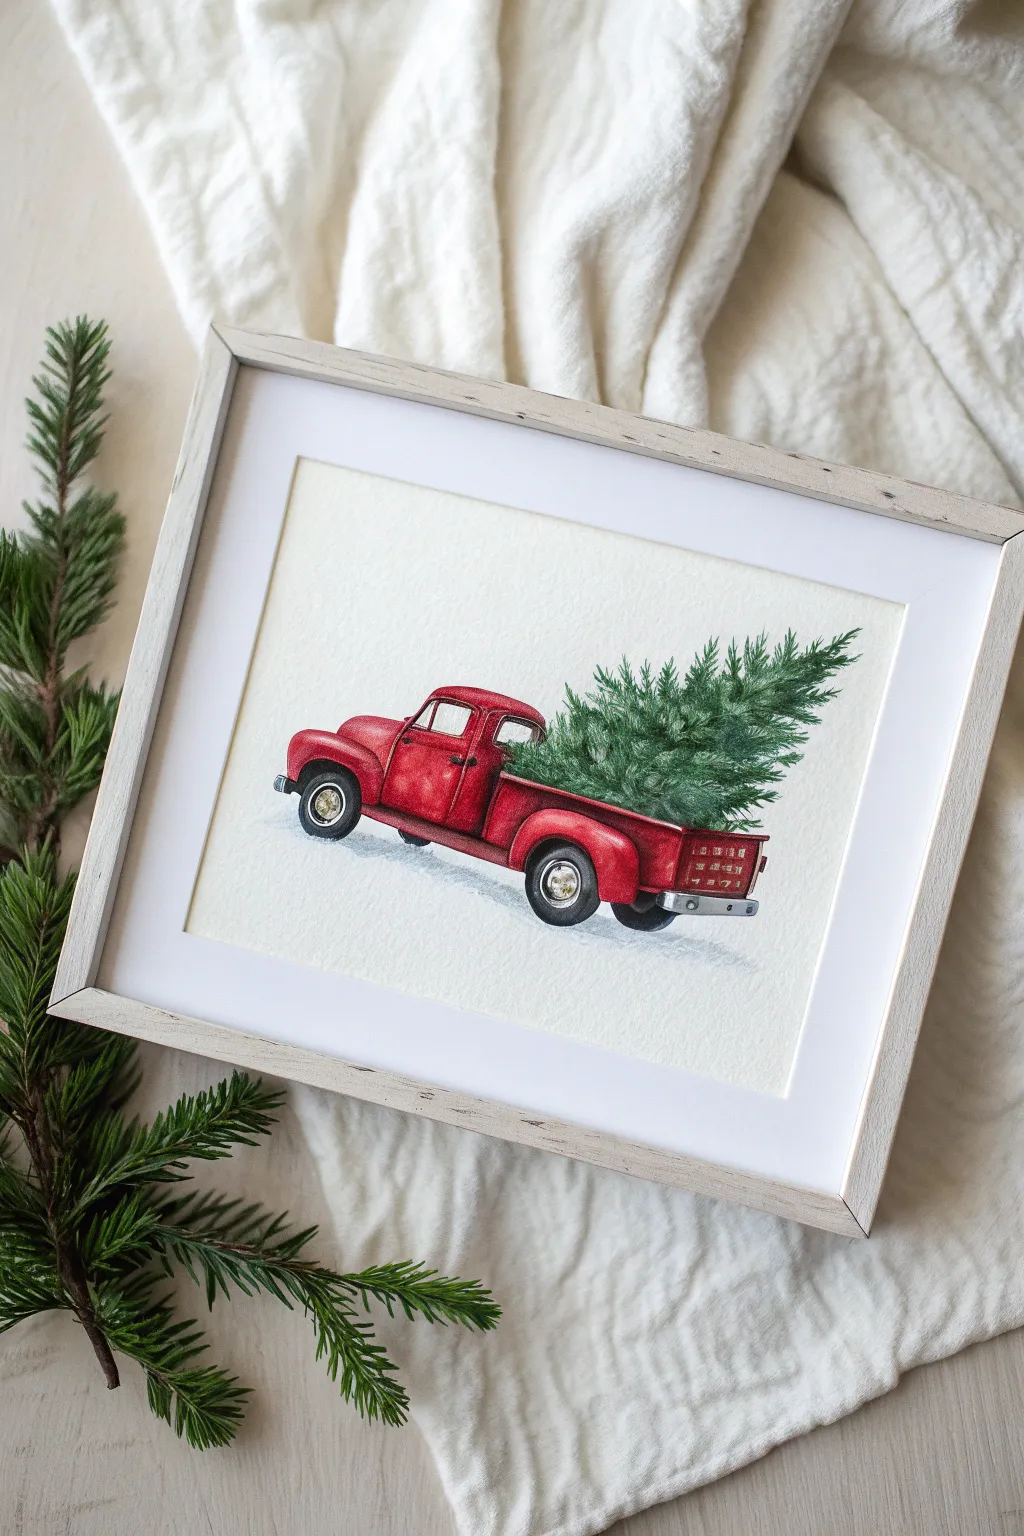
Capture the nostalgia of the season by painting this classic red pickup truck hauling a fresh evergreen. This watercolor tutorial focuses on layering vibrant reds and creating textured pine needles for a timeless farmhouse look.
Step-by-Step Guide
Materials
- Cold press watercolor paper (140 lb/300 gsm)
- Watercolor paints (Cadmium Red, Alizarin Crimson, Sap Green, Payne’s Gray, Burnt Umber)
- Round brushes (sizes 2, 6, and 8)
- HB Pencil and kneaded eraser
- Liquid masking fluid
- White gouache or white gel pen
- Two jars of water and a palette
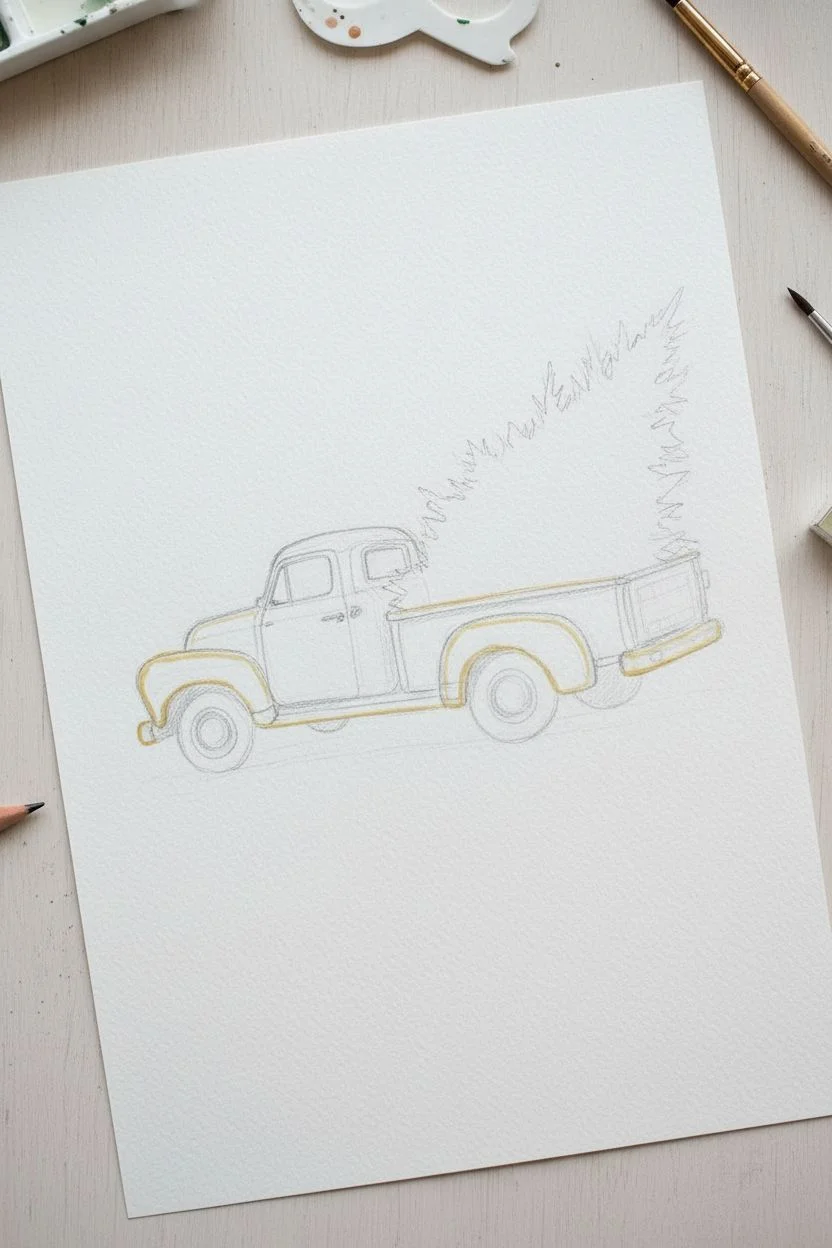
Step 1: Sketching and Masking
-
Outline the truck:
Lightly sketch the pickup truck profile using an HB pencil, focusing on the rounded fenders and the separation between the cab and the bed. -
Add the tree:
Sketch a rough, jagged triangular shape sitting in the truck bed to represent the Christmas tree. -
Refine small details:
Draw the smaller elements like the hubcaps, bumpers, door handle, and the taillights. -
Clean the sketch:
Roll a kneaded eraser over the entire paper to lift excess graphite, leaving only faint guide lines. -
Apply masking fluid:
Paint liquid masking fluid over the bumpers, door handle, hubcaps, and a few sleek lines on the fenders for highlights; let it dry intimately.
Needle Knowledge
Use a rigger brush or a very fine round brush (size 0-1) for the pine needles. Quick, confident flicks of the wrist create tapered tips that look much more realistic than slowly drawn lines.
Step 2: Painting the Truck Body
-
Base red layer:
Mix a watery wash of Cadmium Red and apply it to the main body of the truck, avoiding the window and tires. -
Add shadows:
While the red is still damp, drop in Alizarin Crimson along the bottom of the fenders and under the door frame to create rounded volume. -
Deepen contrast:
Mix a tiny bit of Burnt Umber into your red to paint the darkest crevices between the cab and the truck bed. -
Paint the taillights:
Use a concentrated, thick dab of pure red for the taillights so they stand out against the slightly lighter body. -
Let it dry:
Allow the red sections to dry completely before touching nearby areas to prevent bleeding.
Step 3: The Evergreen and Details
-
Base tree color:
Apply a light wash of Sap Green to the tree shape using a stippling (dotting) motion. -
Texture the needles:
While the base is damp, use a smaller size 2 brush with a darker green mix to flick short strokes outward at the edges for pine needles. -
Add depth to the tree:
Drop very dark green-blue paint into the center/bottom areas of the tree to simulate dense branches. -
Paint the tires:
Fill in the tires with Payne’s Gray, being careful to keep the masked hubcaps clean. -
Windows and shadows:
Paint the window glass with a very diluted blue-gray wash, leaving a small patch of dry white paper for reflection.
Bleed Patrol
If red paint accidentally touches the wet green tree, don’t wipe it! Wait for it to dry completely, then gently lift the unwanted color with a damp, clean stiff brush and a paper towel.
Step 4: Final Touches
-
Remove masking:
Rub your finger gently over the dried masking fluid to peel it off, revealing pristine white paper underneath. -
Chrome details:
Lightly wash over the now-white bumper and hubcaps with diluted gray to make them look metallic, keeping the brightest spots white. -
Ground shadow:
Add a wash of pale blue mixed with gray under the truck to ground it in a snowy scene. -
Final highlights:
For extra sparkle, I like to use a touch of white gouache to sharpen the highlights on the fenders and top of the cab.
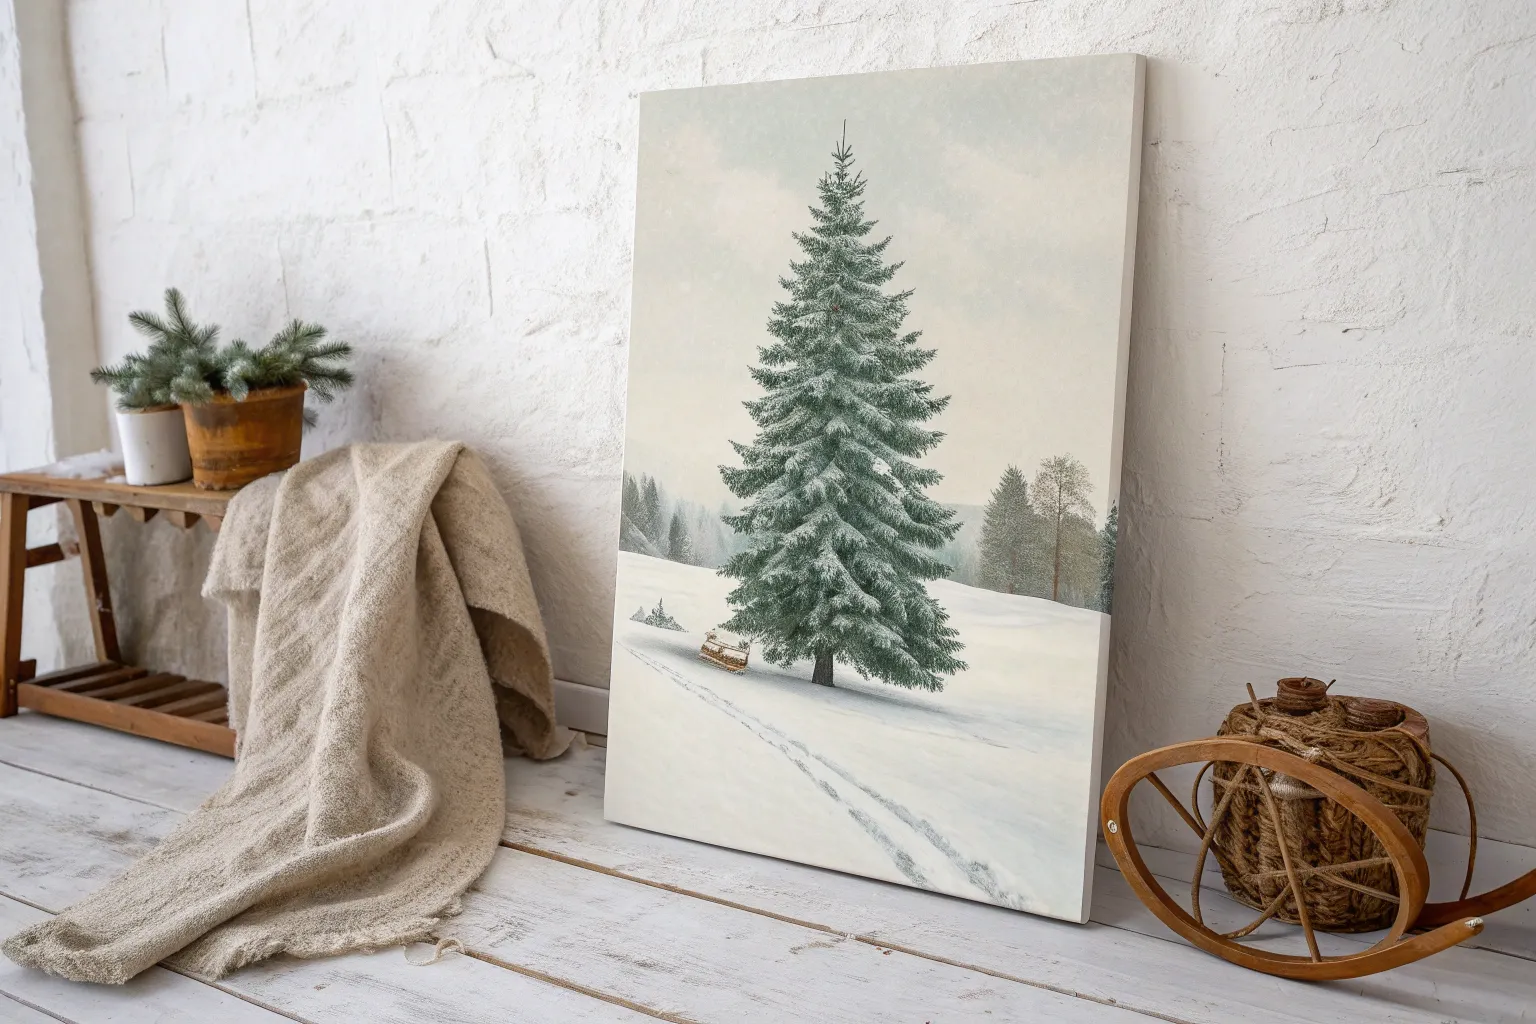
Frame your festive masterpiece in rustic wood for the perfect farmhouse holiday decor.


Snow-Laden Fir Forest
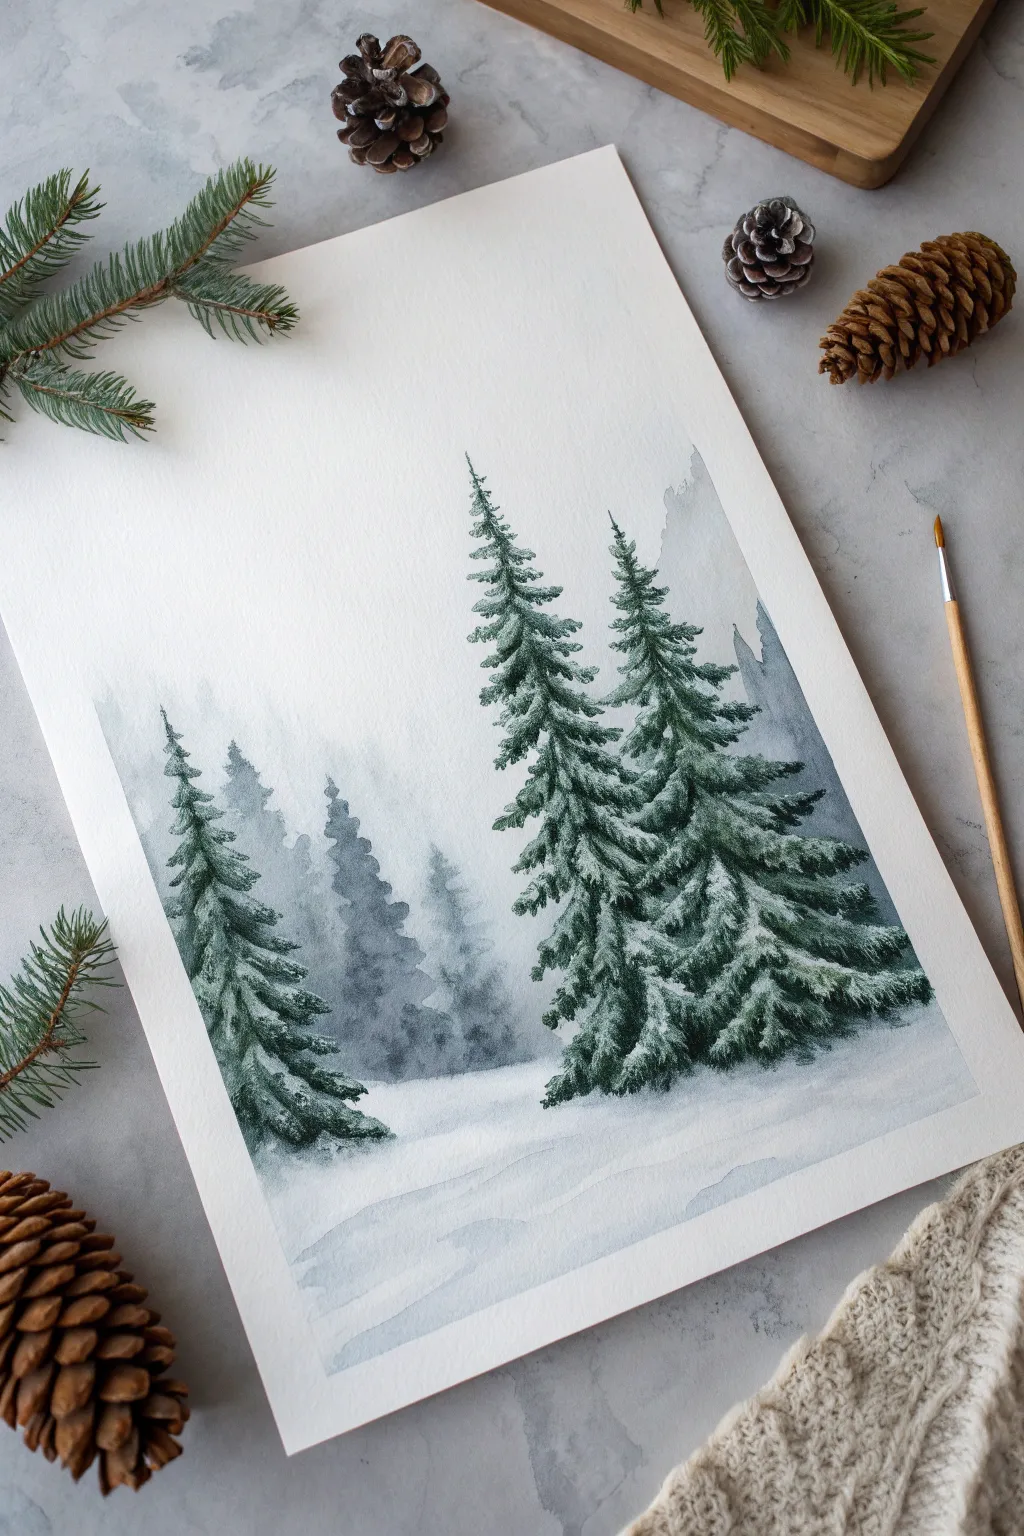
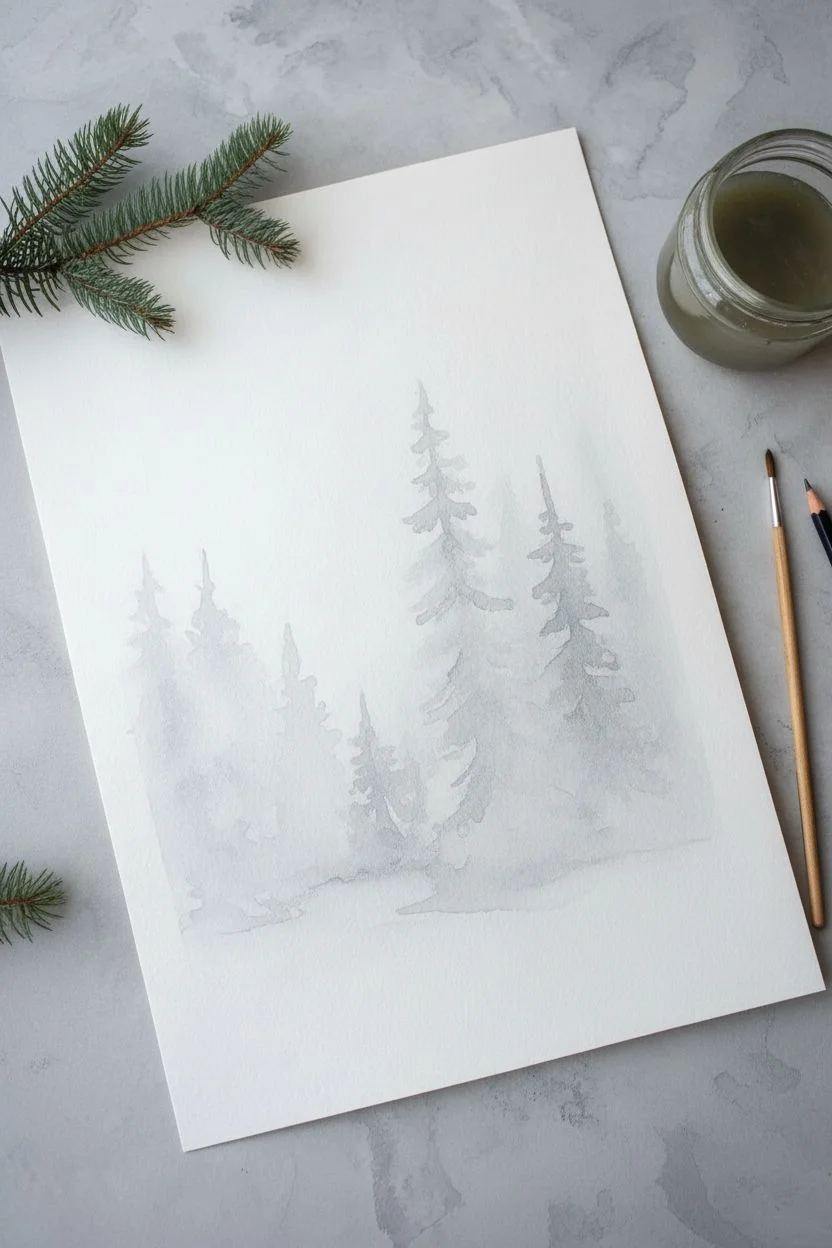
Capture the serene silence of a snow-laden forest with this atmospheric watercolor tutorial. You will use a combination of wet-on-wet techniques for the misty background and opaque gouache to create the crisp, heavy snow on the foreground pines.
Step-by-Step
Materials
- Cold press watercolor paper (140lb/300gsm)
- Watercolor paints (Payne’s Grey, Indigo, Sap Green, Hooker’s Green Dark)
- White Gouache or bleed-proof white ink
- Round brushes (sizes 2, 6, and 8)
- Clean water (two jars)
- Paper towels
- Pencil and kneaded eraser
Step 1: Sketching and Atmosphere
-
Map the composition:
Lightly sketch the position of your trees using a hard pencil. Place two large trees in the right foreground and a smaller companion on the left, leaving the center relatively open for depth. -
Prepare the background wash:
Mix a very watery puddle of Payne’s Grey diluted with plenty of water to achieve a pale, ghostly grey-blue tone. -
Paint the distant mist:
Using your size 8 brush, wet the middle section of the paper where the background trees will sit. While the paper is damp, paint simple, silhouette tree shapes. The wet paper will blur the edges, creating a distant, foggy effect. -
Ground the horizon:
While the background is still damp, darken the bottom of these ‘ghost’ trees slightly to suggest a forest floor obscured by mist. Let this layer dry completely.
Muddy Snow?
If your white gouache is turning light green, your pine trees weren’t fully dry. Stop immediately from adding snow, let the artwork dry bone-dry (or use a hair dryer), and then continue.
Step 2: The Foreground Pines
-
Mix the tree color:
Create a deep, rich forest green by mixing Hooker’s Green Dark with a touch of Indigo. It needs to be pigmented enough to stand out against the white paper. -
Start the left tree:
Using a size 6 brush, start at the top of the smaller left tree. Use a dabbing motion to create the texture of needles, widening your strokes as you move down the trunk. -
Paint the main trees:
Move to the large tree pair on the right. Paint the dark green branches, but here is the trick: leave intentional gaps between the boughs where the snow will eventually sit. -
Deepen the shadows:
While the green paint is still slightly wet, drop a thicker mix of Indigo into the center of the tree (near the imagined trunk) to create core shadows and volume. -
Feather the edges:
Switch to a smaller size 2 brush to flick out delicate needle details at the tips of the branches, ensuring the trees don’t look like solid triangles.
Step 3: Winter Ground and Shadows
-
Create snow drifts:
Dilute your Indigo paint until it is a very pale wash. On the clean white foreground, paint soft, horizontal undulating lines to represent the shadows of snow drifts. -
Soften the shadows:
I like to take a clean, slightly damp brush and run it along the top edge of these shadow lines to soften them, making the snow look rolling and soft rather than jagged. -
Cast shadows:
Add slightly darker blue-grey shadows directly underneath the base of the foreground trees to anchor them to the ground.
Pro Tip: Cool Shadows
Mix a tiny dot of violet into your shadow color for the snow on the ground. This subtle warmth makes the white of the paper look even brighter and colder by comparison.
Step 4: Adding the Heavy Snow
-
Prepare the gouache:
Squeeze out some white gouache. You want a creamy consistency—thick enough to be opaque, but fluid enough to flow off the brush. -
Cap the branches:
Using a clean size 6 brush, paint thick layers of white on top of your dried green branches. Follow the shape of the boughs, letting the white paint ‘sit’ heavily on the green. -
Texture the snow:
Don’t paint smooth lines; dab the brush to mimic the fluffy texture of fresh powder. Allow some of the dark green to peek through from underneath. -
Frost the details:
With your smallest brush, add fine lines of snow to the delicate tips of the branches you painted earlier. -
Final assessment:
Step back and check the contrast between the misty background and the crisp foreground. If the ground looks too empty, add a few very faint blue washes to connect the trees.
Once the gouache dries matte, you’ll have a peaceful, frosty landscape perfect for the season.


Moonlit Silhouette Night

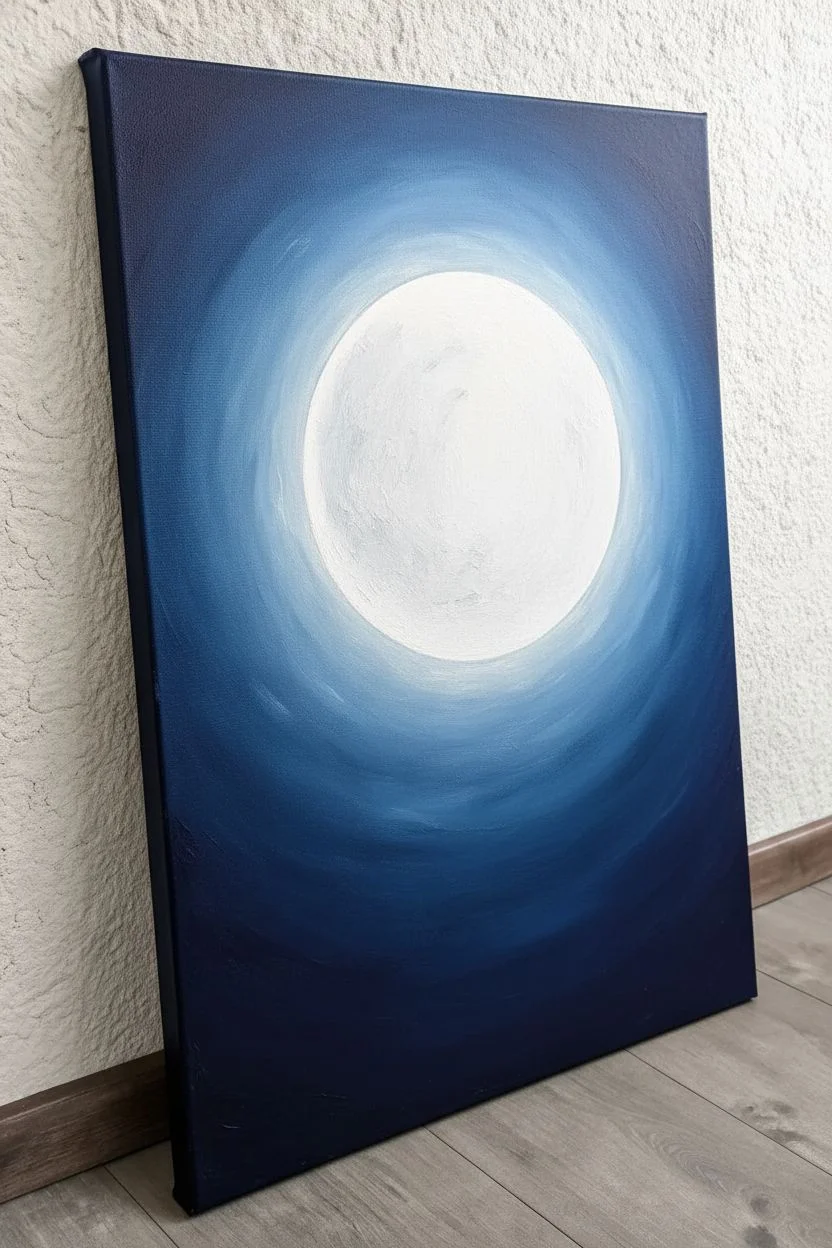
Capture the stillness of a crisp winter night with this high-contrast acrylic painting. Using simple blending techniques and bold silhouettes, you will create a glowing moon that perfectly frames a delicate winter scene.
Step-by-Step Tutorial
Materials
- Stretched canvas (16×20 inches recommended)
- Acrylic paints: Titanium White, Phthalo Blue, Mars Black
- Large flat brush or wash brush
- Medium round brush
- Fine detail liner brush (size 0 or 00)
- Old toothbrush (for the stars)
- White or light gray chalk
- Palette and water cup
Step 1: Setting the Atmosphere
-
Create the center glow:
Start by mixing a large amount of Titanium White with a tiny speck of Phthalo Blue. Paint a rough circle in the upper middle area of your canvas where the moon will eventually sit. -
Blend outward:
Without cleaning your brush, pick up a bit more blue. Work in circular motions around your bright center, blending the color outward so it gets slightly darker as it expands. -
Deepen the night sky:
Gradually add more blue and a touch of Mars Black to your brush as you reach the edges and corners of the canvas. The goal is a smooth gradient from a bright center to a deep, midnight navy border. -
Create wispy texture:
While the paint is still wet, use a clean, dry brush to lightly sweep over the transition areas in a circular motion. This softens any harsh lines and creates a hazy, atmospheric glow. -
Paint the moon:
Once the background is dry to the touch, load a round brush with pure Titanium White. Paint a clean, solid circle in the center of your lightest area to define the moon. -
Add lunar details:
Mix a very pale gray. Wipe most of the paint off your brush and gently dce or ‘scumble’ a few textured spots inside the moon to suggest craters, keeping it subtle.
Uneven Moon?
If you struggle to paint a perfect freehand circle, find a jar lid or bowl roughly the size you want. Wait for the sky to dry fully, trace the object with chalk, and fill it in.
Step 2: A Starry Backdrop
-
Prepare the stars:
Thin down a small amount of white paint with water until it reaches an ink-like consistency. -
Splatter texture:
Dip an old toothbrush into the thinned white paint. Point the bristles toward the canvas and run your thumb over them to spray a fine mist of stars across the sky. -
Highlight specific stars:
Use your fine liner brush to add a few larger, distinct stars. I like to paint a few small distinct crosses or diamonds to make some stars appear to twinkle.
Make it Sparkle
Mix a pinch of fine silver glitter or iridescent medium into the white paint used for the snow on the hill (step 11). It will catch the light and make the snow look frosty.
Step 3: The Winter Landscape
-
Sketch the layout:
Wait for the sky to effectively dry. Use a piece of chalk to lightly sketch the sloping hill at the bottom, the placement of the deer, and the main tree trunk on the left. -
Paint the ground:
Mix Mars Black with a tiny touch of blue. Fill in the hill area at the bottom, using smooth strokes that follow the slope of the land. -
Add snow texture:
While the black is still slightly tacky, use a dirty brush with a little white on it to stipple (tap repeatedly) along the top edge of the hill. This blends slightly with the black to create a shadowy snow effect. -
Create distant pines:
Using a small flat brush or fan brush turned vertically, tap in some jagged triangular shapes on the right side of the hill to represent distant pine trees.
Step 4: Refining the Silhouette
-
detail the deer:
Using your medium round brush and pure Mars Black, carefully paint the deer’s body. Switch to the liner brush to delicately paint the legs and the antlers. -
Anchor the big tree:
On the left side, paint the thick trunk of the main tree. Ensure the base looks wide and rooted, tapering as it goes up. -
Extend the branches:
Use the liner brush to pull branches outward. Paint quickly and loosely to keep them looking organic rather than stiff. Let the branches reach across the glowing moon. -
Add fine twigs:
Fill the empty spaces between main branches with tiny, hair-thin twigs using the very tip of your liner brush. The more fine details you add here, the more realistic the silhouette will look. -
Final clean up:
Paint the outer edges of the canvas black to give the piece a finished, framed appearance without needing an actual frame.
Step back and admire how the dark silhouettes pop against that magical glowing sky you created.


Dreamy Bokeh String Lights
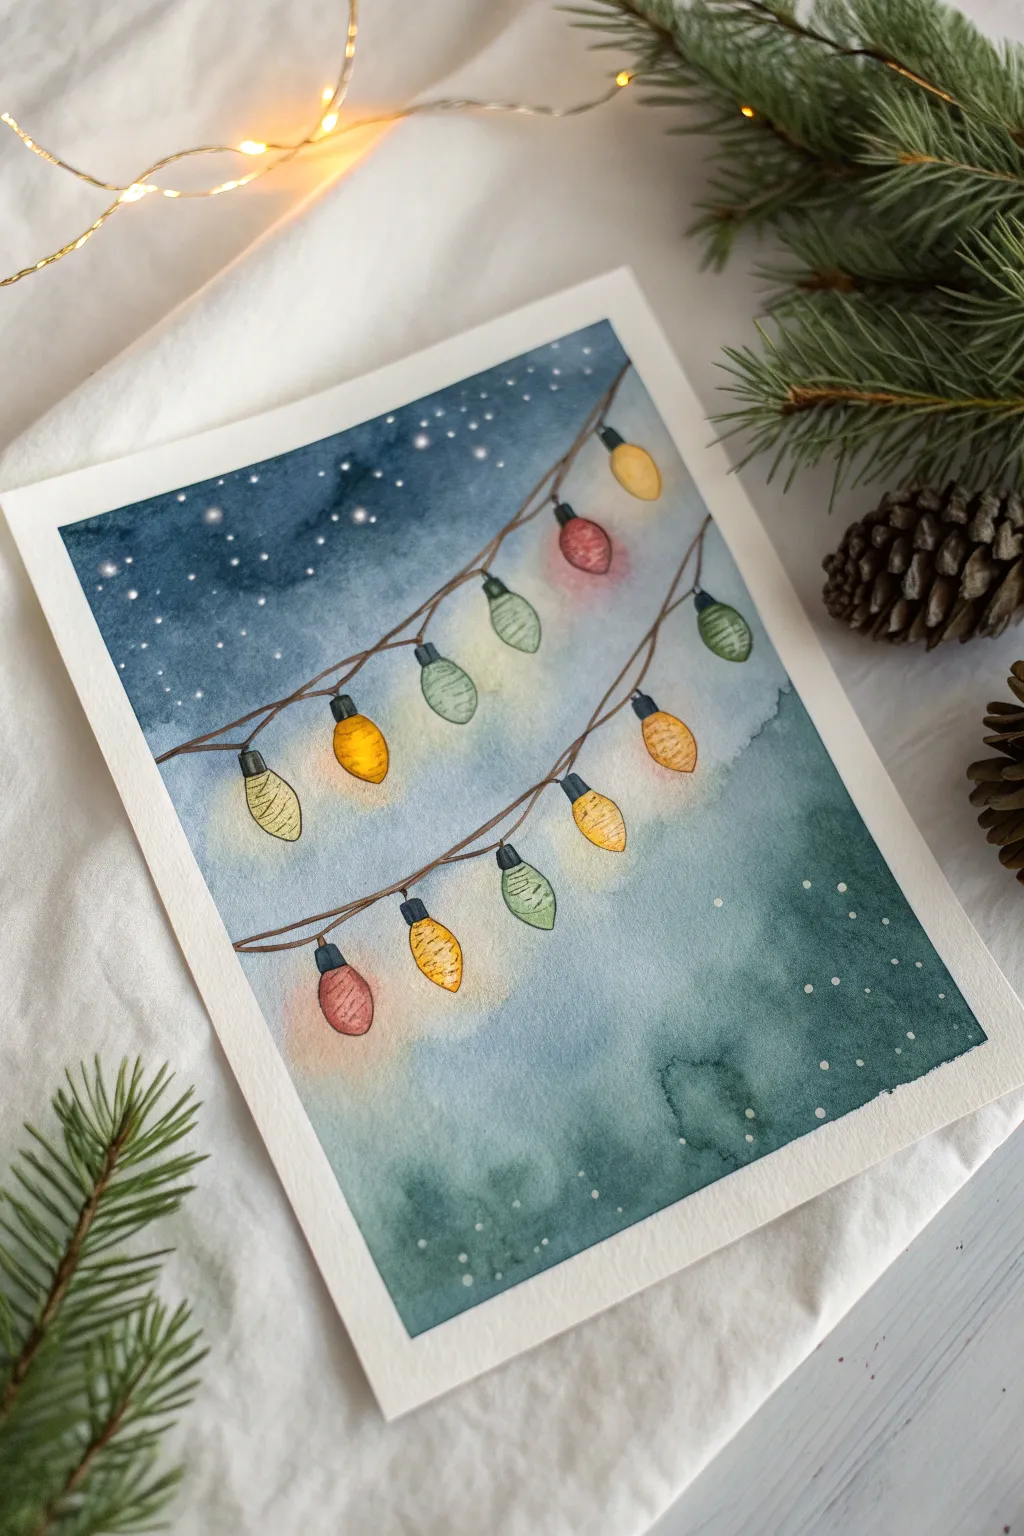
Capture the magic of the holidays with this charming watercolor illustration that balances a moody, atmospheric background with bright, cheerful bulbs. You will use a combination of wet-on-wet blending and precise ink detailing to achieve this cozy, illustrative look.
How-To Guide
Materials
- Cold press watercolor paper (140lb/300gsm)
- Watercolor paints (Indigo, Teal, Payne’s Grey, plus brights like Red, Yellow, Green)
- Masking fluid
- Old synthetic brush (for sticking masking fluid)
- Round watercolor brush (size 6 or 8)
- Fine liner pen (waterproof, black, size 01 or 03)
- White gouache or white ink
- Masking tape
- Pencil and eraser
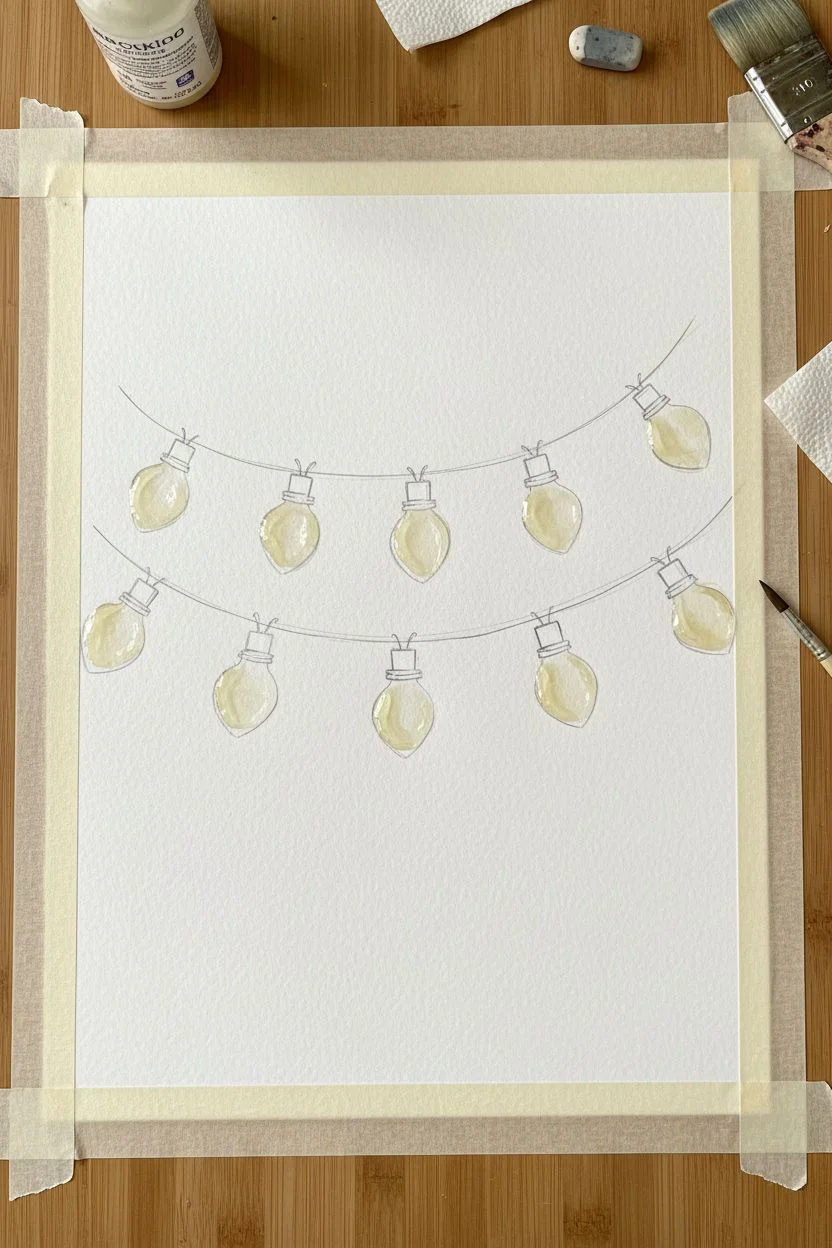
Step 1: Sketch and Reserving Light
-
Preparation:
Tape your watercolor paper down to a board on all four sides. This creates a clean white border and prevents the paper from buckling when we add water. -
Sketching the strands:
Using a light pencil, draw two swooping, curved lines across the paper to represent the wires. Keep the lines natural and relaxed, letting them dip in the middle. -
Adding the bulbs:
Sketch teardrop-shaped bulbs hanging from the wires at slightly irregular intervals. Add a small rectangle at the top of each teardrop for the socket. -
Applying masking fluid:
Carefully carefully paint masking fluid over the entire shape of every bulb and socket. This preserves the white paper so your lights will be bright later. -
Drying time:
Allow the masking fluid to dry completely. It should feel transparent or rubbery to the touch before you proceed.
Brush Saver Tip
Before dipping your brush into masking fluid, rub the bristles against a wet bar of soap. The soap coats the hairs and prevents the rubbery fluid from ruining your brush permanently.
Step 2: The Atmospheric Background
-
Wet-on-wet technique:
With a clean brush, apply a coat of clean water over the entire paper, going right over the masked bulbs. -
Painting the night sky:
Load your brush with Indigo or a deep Navy blue. Apply this concentrated color to the top third of the paper, letting it bleed downwards. -
Creating the gradient:
Rinse your brush slightly and pick up a Teal or muted turquoise color. Blend this into the lower two-thirds of the painting, allowing it to mix softly with the navy from above. -
Creating texture:
To achieve the dreamy texture seen in the photo, dab a little extra water into the drying paint in the lower corners. This creates soft ‘blooms’ or cauliflower effects. -
The Reveal:
Wait for the paper to be bone dry. Use your finger or a rubber cement pickup to gently rub away the masking fluid, revealing crisp white bulb shapes.
Step 3: Bringing the Lights to Life
-
Coloring the bulbs:
Paint the glass portion of each bulb with bright, translucent colors—alternating between warm yellows, ruby reds, and forest greens. Keep the washing watery for transparency. -
Adding dimension:
While the bulb paint is still damp, dab a slightly darker, more concentrated version of the same color along the bottom curve of the bulb to create a shadow. -
Painting the hardware:
Use a mix of brown and black to paint the sockets (the rectangular tops) and carefully trace over the wire lines connecting them. -
Creating the glow:
Once the bulbs are dry, take a clean, slightly damp brush and gently soften the paint at the very center of the yellow bulbs, lifting a tiny bit of pigment to make them look lit from within.
Level Up: Metallic Touch
For an extra festive sparkle, trace the filament wire inside the bulbs using metallic gold watercolor or a gold gel pen after the paint has fully dried.
Step 4: Final Details
-
Inking the outlines:
Using your waterproof fine liner, draw loose outlines around the bulbs, sockets, and wires. Add little scribbles on the sockets to mimic screw threads. -
Adding snow:
Dilute a small amount of white gouache with water. Tap your brush handle against another brush over the painting to splatter fine white dots for a snowy effect. -
Starry details:
I like to use a small detail brush or a white gel pen to add a few larger, intentional stars in the dark blue upper section.
Peel off your masking tape to reveal the crisp white border and enjoy your cozy winter scene!
BRUSH GUIDE
The Right Brush for Every Stroke
From clean lines to bold texture — master brush choice, stroke control, and essential techniques.
Explore the Full Guide
Cozy Winter Cabin
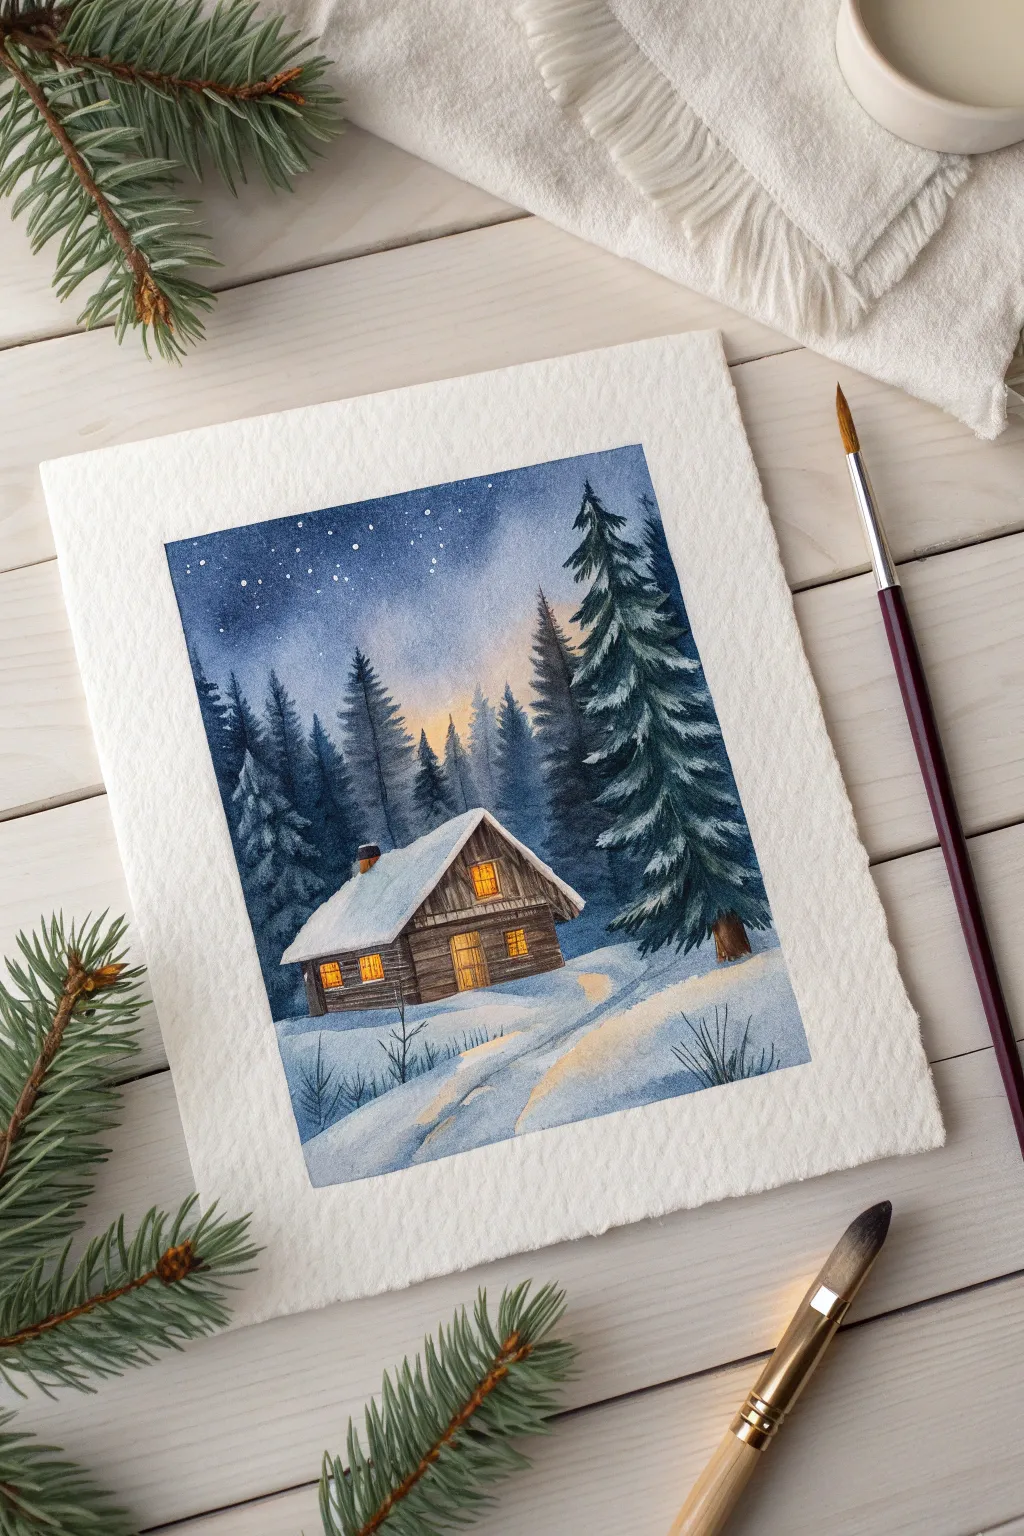
Capture the serenity of a winter evening with this atmospheric watercolor painting. You will learn to create a glowing gradient sky, textured pine trees, and a cozy cabin nestled in the snow.
How-To Guide
Materials
- Cold-pressed watercolor paper (140lb/300gsm)
- Watercolor paints (Indigo, Payne’s Gray, Burnt Umber, Yellow Ochre, Cadmium Orange, Sap Green)
- White Gouache or opaque white watercolor
- Round brushes (sizes 8 and 4)
- Fine liner or detail brush
- Pencil and kneaded eraser
- Two jars of water
- Painters tape or masking tape
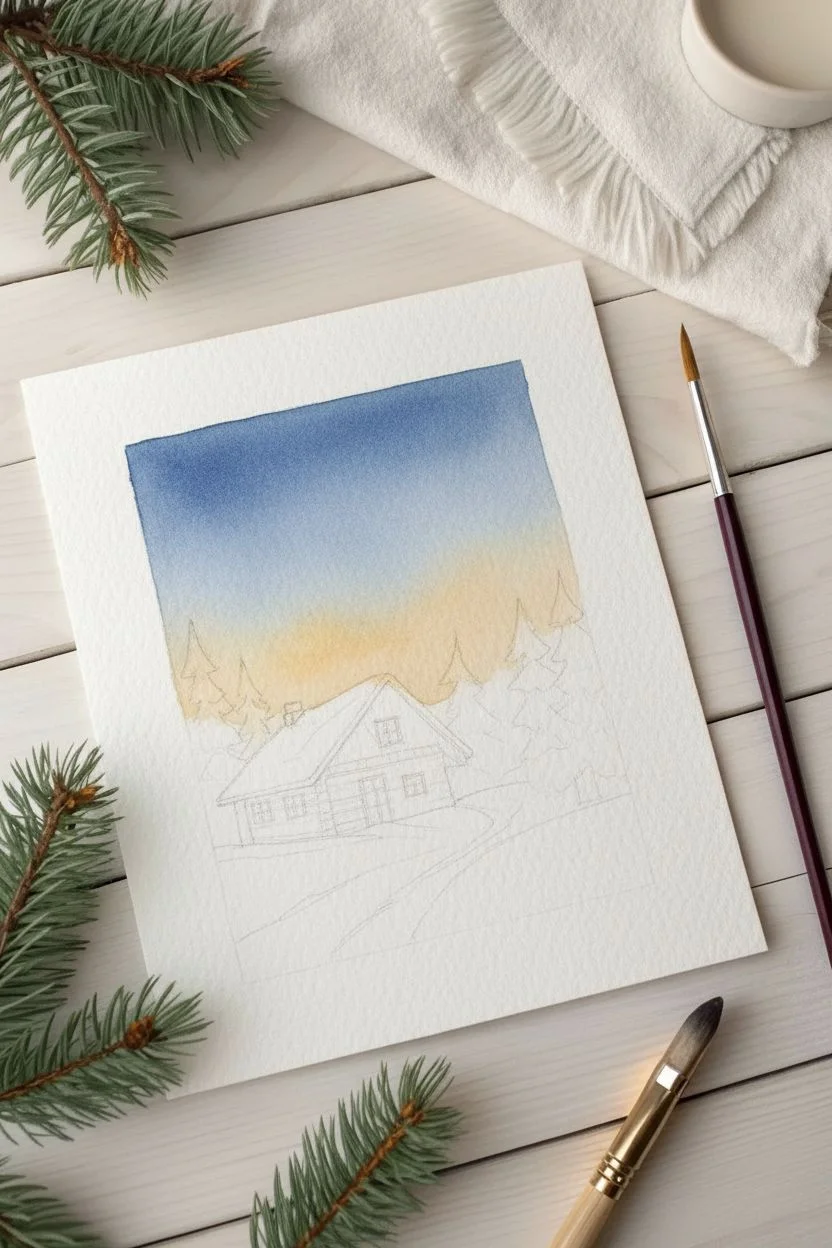
Step 1: The Evening Sky
-
Sketch the scene:
Lightly sketch the outlines of the cabin, the horizon line, the path, and the rough shapes of the large foreground trees with a pencil. Keep lines faint so they don’t show through the paint. -
Wet the sky:
Using your large round brush and clean water, dampen the sky area above the tree line. The paper should be glistering but not swimming in puddles. -
Paint the gradient:
Load your brush with Indigo or deep blue. Apply it to the very top edge of the paper, letting it flow downward. Rinse your brush slightly and blend the color down so it fades into a lighter blue. -
Add the sunset glow:
While the paper is still damp near the horizon (just above the cabin roof), drop in a small amount of watered-down Yellow Ochre or muted Orange. Let it blend softly upwards into the blue to create a twilight haze.
Muddy colors?
Wait for the yellow window light to be 100% dry before painting the brown frames. If wet, they will bleed into a muddy mess.
Step 2: Forest Layers
-
Paint distant trees:
Mix a watery blue-grey color. Paint simple, vertical jagged shapes for the distant trees behind the cabin. Since they are far away, they should lack detail and look faint to suggest atmospheric perspective. -
Deepen the mid-ground:
Mix a darker Payne’s Gray with a touch of Green. Paint a second layer of trees slightly in front of the distant ones, making them a bit sharper and darker to create depth. -
Define the large pine:
For the large tree on the right, mix a dense concentration of Indigo and Sap Green. Use the tip of your brush to dab outward from a central trunk line, creating heavy, drooping branches. -
Layer the branches:
Continue building the pine tree shape, leaving gaps between the dark branches where clumps of snow will sit later. Do the same for the smaller evergreens on the left side.
Step 3: The Cozy Cabin
-
Warm the windows:
Paint the window squares with bright Yellow Ochre mixed with a tiny dot of Orange. This creates the inviting candlelight effect. -
Paint the logs:
Using a smaller brush and Burnt Umber, paint the wooden walls of the cabin. carefully go around the yellow windows. I find distinct horizontal strokes help mimic the texture of logs. -
Add architectural shadows:
Mix a dark brown or sepia. Paint a thin shadow line just under the snow-covered roof overhang and down the corners of the cabin to modify the form. -
Detail the frame:
Once the yellow window paint is bone dry, use your finest liner brush and thick dark brown paint to draw the window panes and the door frame.
Make it shimmer
Mix a tiny pinch of iridescent medium or silver watercolor into your snow shadow color for a glistening frost effect.
Step 4: Winter Atmosphere
-
Shadow the snow:
Mix a very diluted Indigo or Cool Blue. Paint sweeping, curved shadows on the white ground to define the snowbanks and the path leading to the door. Keep the edges soft by blurring them with a damp brush. -
Roof shadows:
Add a faint blue shadow on the side of the snowy roof that is facing away from the light source to give it dimension. -
Snow on trees:
Using straight White Gouache (opaque white), paint heavy clumps of snow sitting on top of the dark pine branches you painted earlier. This high contrast brings the tree to life. -
Starry night:
Cover the cabin area with a piece of scrap paper to protect it. Load a brush with watery White Gouache and tap it against another brush handle to splatter fine white dots across the blue sky for stars.
Peel off your tape to reveal the crisp edges of your tranquil winter hideaway.
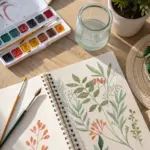
Botanical Mistletoe and Holly
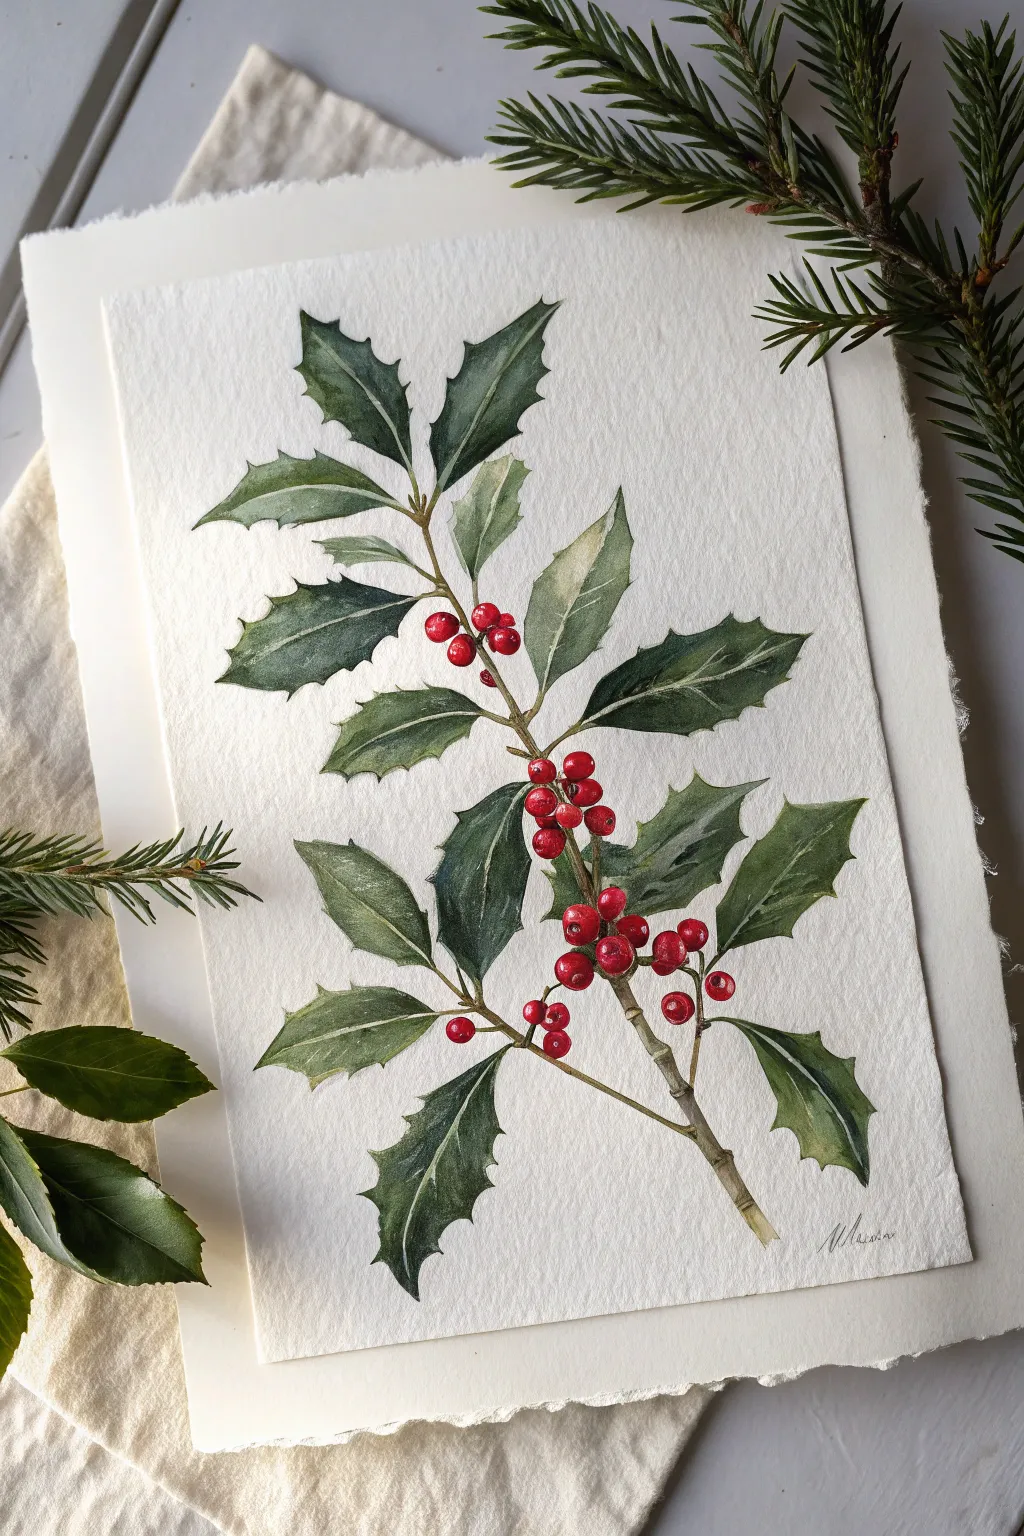
Capture the timeless beauty of winter flora with this detailed botanical study. You will focus on creating dimension through layering, contrasting the glossy, spiky deep green leaves against clusters of vibrant, plump red berries.
Detailed Instructions
Materials
- Cold press watercolor paper (140lb/300gsm)
- Watercolor paints (Sap Green, Hooker’s Green, Deep Green, Cadmium Red, Alizarin Crimson, Burnt Umber)
- Round watercolor brushes (sizes 2, 4, and 6)
- HB pencil and kneaded eraser
- Two jars of water
- Paper towel
- Ceramic or plastic palette
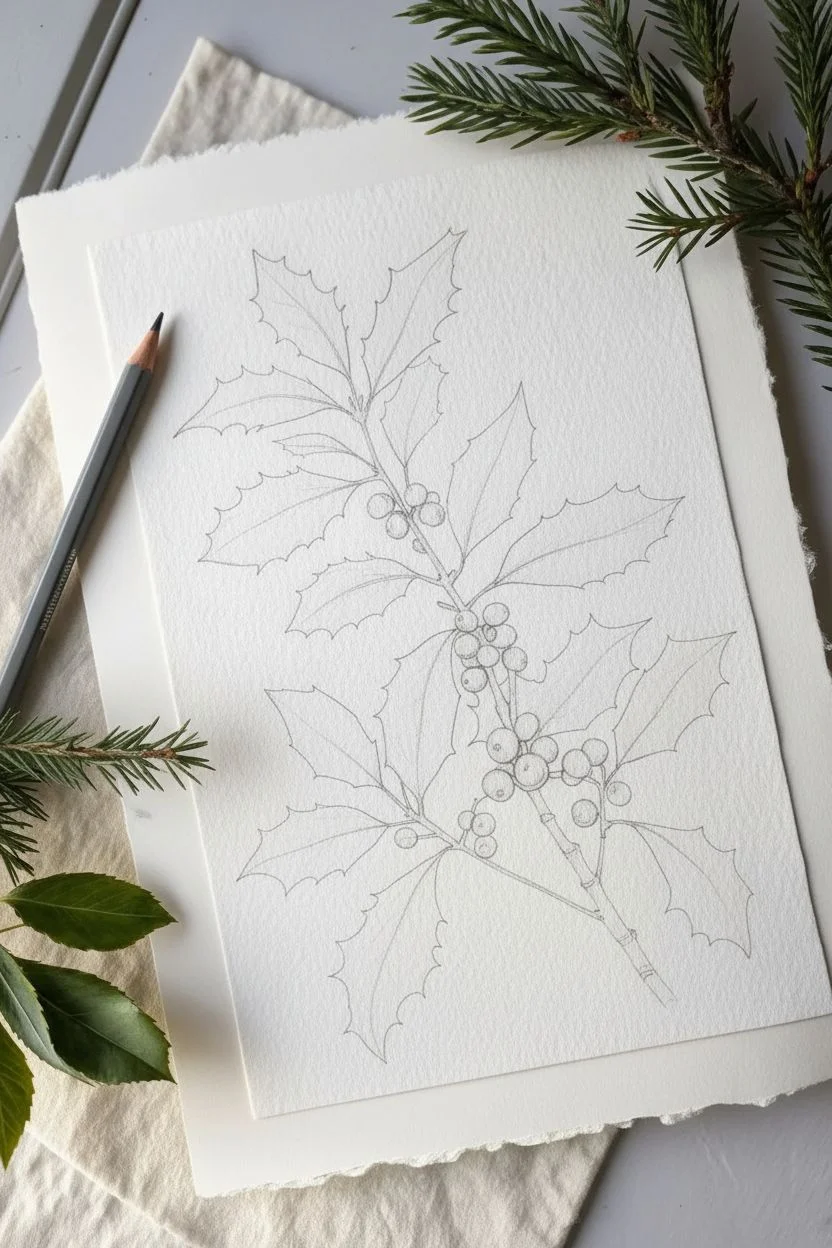
Step 1: Sketching the Composition
-
Draft the stem:
Start by lightly drawing the main branch diagonally across your paper, adding smaller offshoot twigs that alternate sides. -
Outline the leaves:
Sketch the leaves attached to the stems. Holly leaves have undulated, spiky margins, so draw sharp points connected by curved lines. -
Add center lines:
Draw the central vein down the middle of each leaf, following the curvature of the leaf’s spine. -
Place the berries:
Sketch small clusters of circles where the leaf stems meet the main branch. Draw them overlapping slightly for a natural look. -
Lighten the preparatory sketch:
Gently roll your kneaded eraser over the entire drawing to lift excess graphite, leaving only faint guidelines.
Highlight Pro Tip
If you accidentally paint over your berry highlights, wait for the paint to dry completely, then use a white gel pen or a dot of opaque white gouache to restore the shine.
Step 2: Painting the Foliage
-
Initial leaf wash:
Mix a watery wash of Sap Green. Paint all the leaves with a flat, pale layer to establish the base undertone and let this dry completely. -
Define the veins:
Mix a medium-strength Hooker’s Green. Paint one half of a leaf, carefully stopping just short of the center line to leave a thin strip of the pale base layer visible as the vein. -
Softening edges:
While the green is still wet on the paper, dip your brush in water and soften the outer edge towards the leaf points to create volume. -
Deepening shadows:
I like to drop a tiny amount of darker pigment (like Perylene Green) into the wet paint right next to the vein and near the shadows where leaves overlap. -
Repeat for all leaves:
Work your way through the branch, painting section by section. Treat the undersides of any curled leaves with a paler, cooler green mix. -
Glazing for depth:
Once the leaves are bone dry, apply a final glaze of deep green on the most shadowed leaves to push them into the background.
Level Up: Texture
Use a ‘dry brush’ technique on the leaves. Wipe most paint off your brush and lightly drag it over the dried green areas to create faint scratches that mimic the tough texture of holly.
Step 3: Berries and Branch
-
Base red layer:
Load a size 4 brush with bright Cadmium Red. Paint each berry, but leave a tiny, unpainted white speck on the upper left of each sphere for the highlight. -
Rounding the form:
While the red is damp, touch a darker red (like Alizarin Crimson) to the bottom right curve of the berry to create a shadow side. -
Painting the wood:
Mix Burnt Umber with a touch of green to create a natural bark color. Paint the main stem and the small connectors holding the berries. -
Texturing the stem:
Add small horizontal lines or darker brown patches along the stem to suggest a woody texture. -
Berry details:
Use your smallest brush (size 2) and dark brown paint to add a tiny dot on the center or side of each berry, representing the stigma remnant. -
Cast shadows:
Mix a dark grey-green. Paint subtle, thin shadows under the berries where they rest against the leaves or stem to anchor them.
Step back and admire your crisp, festive botanicals suitable for framing or holiday cards

PENCIL GUIDE
Understanding Pencil Grades from H to B
From first sketch to finished drawing — learn pencil grades, line control, and shading techniques.
Explore the Full Guide
Whimsical Snowman Gazing Up
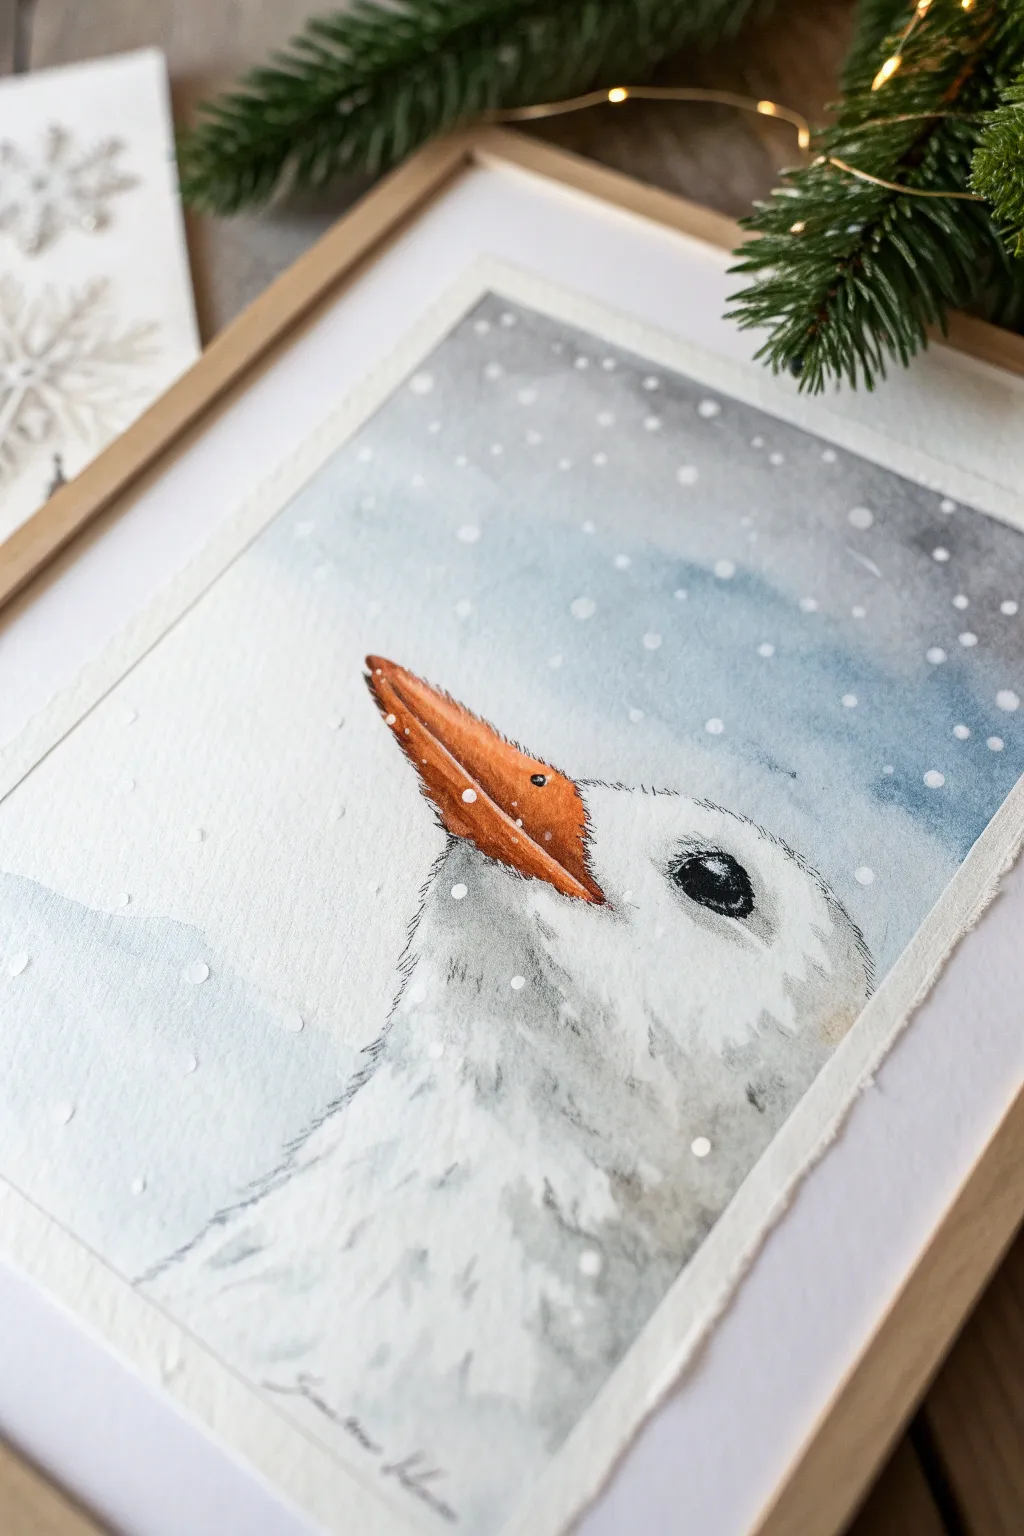
Capture the quiet wonder of the first snowfall with this serene watercolor painting of a white bird gazing skyward. The soft, feathery textures and cool winter palette create a peaceful holiday art piece perfect for framing or gifting.
How-To Guide
Materials
- Cold press watercolor paper (300 gsm)
- Watercolor paints (Payne’s Gray, Burnt Sienna, Cadmium Orange, Lamp Black)
- White opacity gouache or white acrylic ink
- Round watercolor brushes (size 6 and size 2)
- Pencil and kneaded eraser
- Masking tape and support board
- Paper towels
- Two jars of water
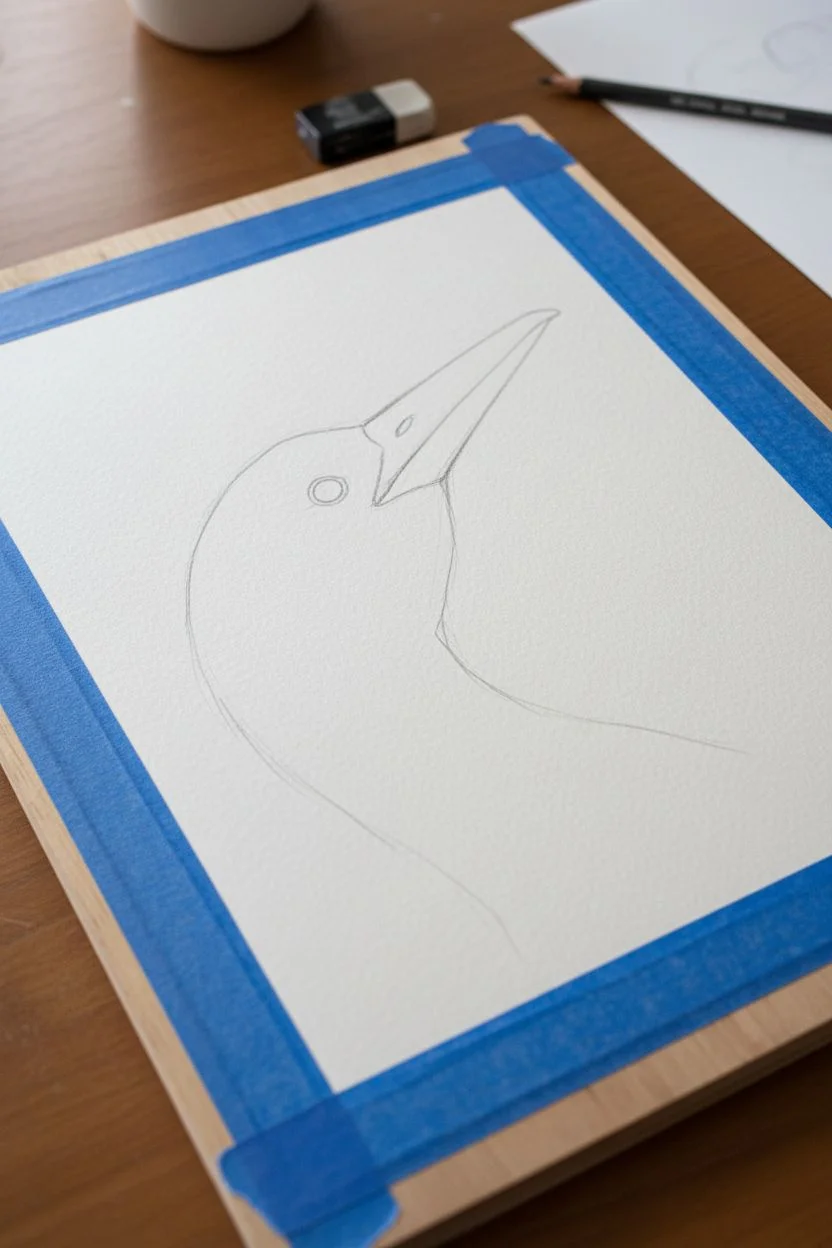
Step 1: Sketching the Subject
-
Secure the paper:
Tape your watercolor paper down to a board on all four sides. This ensures a clean white border and prevents the paper from buckling when wet. -
Outline the head:
Using a light hand, sketch a large, gentle curve starting from the bottom left, sweeping up to the right to form the bird’s head and neck. -
Position the beak:
Draw the beak jutting upward at a 45-degree angle. It should look somewhat triangular but with a rounded tip, reminiscent of a carrot shape. -
Place the eye:
Sketch a small oval for the eye, aligning it horizontally with the base of the beak but set slightly back on the head.
Step 2: Painting the Features
-
Base coat for the beak:
Mix a bright orange with a touch of water. Paint the entire beak area, keeping the edges crisp. -
Add beak details:
While the orange is slightly damp, drop in a mix of Burnt Sienna near the bottom edge and the nostril slit to create volume and shadow. -
Texturize the beak:
Once the beak is dry, use your size 2 brush with pure Burnt Sienna to paint faint, thin lines along the length of the beak to mimic organic texture. -
Paint the eye:
Fill in the eye carefully with Lamp Black paint. I find it helpful to leave a tiny speck of white paper unpainted for the highlight, but you can add it later with white paint if you forget.
Fixing “Hard” Edges
If your feather shadows dry with a hard line, scrub the edge gently with a clean, wet brush and blot with a paper towel to soften the look back to fluffy down.
Step 3: Creating Feathers
-
Mix a shadow color:
Create a very dilute wash of Payne’s Gray. It should look like faint dirty water on your palette—less is more here. -
Define the form:
Apply this pale wash to the shadowed side of the neck and under the chin. Remember, we are painting a white bird, so we are only painting the shadows, not the feathers themselves. -
Create texture:
While the shadow wash is wet, create small, jagged strokes at the transition to the white area to suggest fluffiness. -
Softening edges:
Use a clean, damp brush to soften the outer edges of the shadows, blending them gently into the white of the paper.
Make It Sparkle
Mix a pinch of iridescent silver watercolor medium or very fine glitter into your white gouache for the snowflakes to make the artwork shimmer under Christmas lights.
Step 4: Atmospheric Background
-
Wet the sky:
With clean water, paint the background area around the bird. careful not to let the water touch the bird’s outline yet. -
Drop in color:
Load your large brush with a watery mix of Payne’s Gray and a touch of blue. Touch it to the wet paper at the top and let the color flow downward. -
Define the silhouette:
Carefully bring the background paint right up to the edge of the bird’s head. The contrast between the dark paint and dry white paper will define the bird’s shape. -
Fade out:
As you move down the paper, add more water to your brush so the background color fades to white near the bottom. -
Dry partially:
Let the painting sit until the shine disappears from the paper but it still feels cool to the touch.
Step 5: Snowy Finish
-
Mix the snow:
Prepare white gouache or acrylic ink on your palette. It should have the consistency of heavy cream to ensure it’s opaque against the dark background. -
Paint large flakes:
Using the tip of your small brush, deliberately place round dots of white on the background and a few overlapping the bird’s feathers. -
Splatter effect:
Load a brush with watery white paint and tap the handle against your finger over the paper to create a spray of fine snowflakes. -
Final reveal:
Wait for everything to be bone dry before slowly peeling off the masking tape at a 45-degree angle.
Frame this gentle winter scene in a light wood frame to let the delicate details shine.
Golden Reindeer Profile
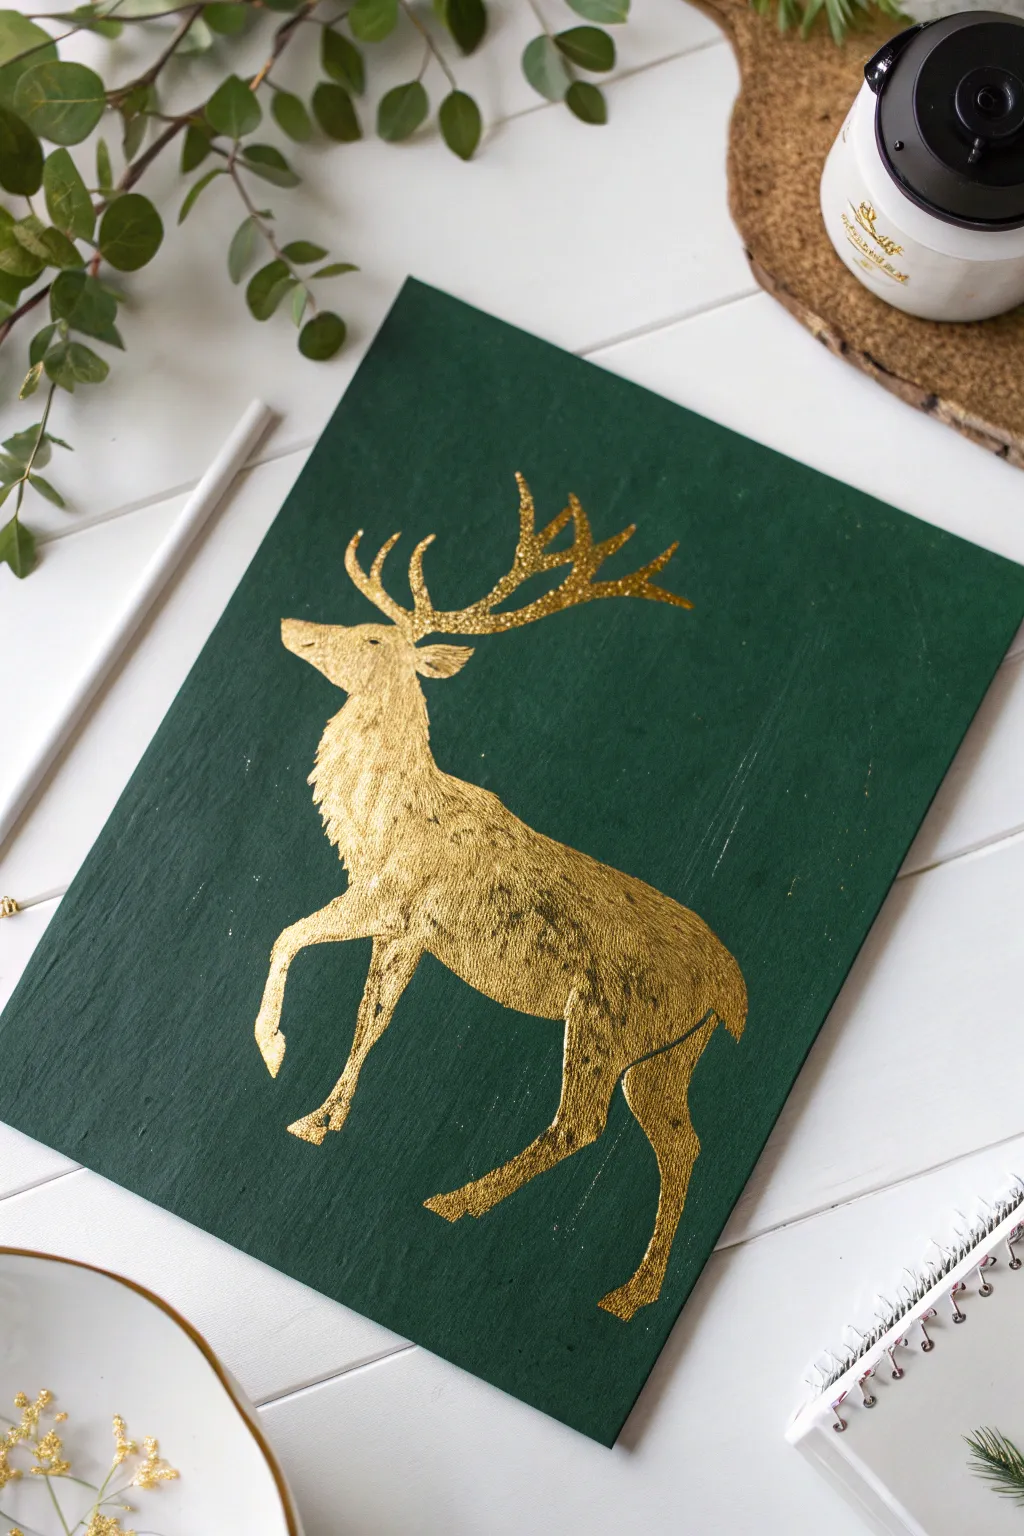
Create a striking piece of holiday decor that balances rustic charm with modern elegance. This project uses deep emerald green as a dramatic backdrop for a textured, metallic gold silhouette of a majestic stag.
Step-by-Step Tutorial
Materials
- Rectangular wood panel or flat canvas board
- Dark forest green acrylic paint
- Liquid gold leaf or high-pigment metallic gold acrylic
- Printed reindeer silhouette template
- Graphite transfer paper (carbon paper)
- Wide flat synthetic brush
- Fine liner brush (size 0 or 1)
- Small round brush (size 2 or 3)
- Painter’s tape
- Pencil
Step 1: Setting the Scene
-
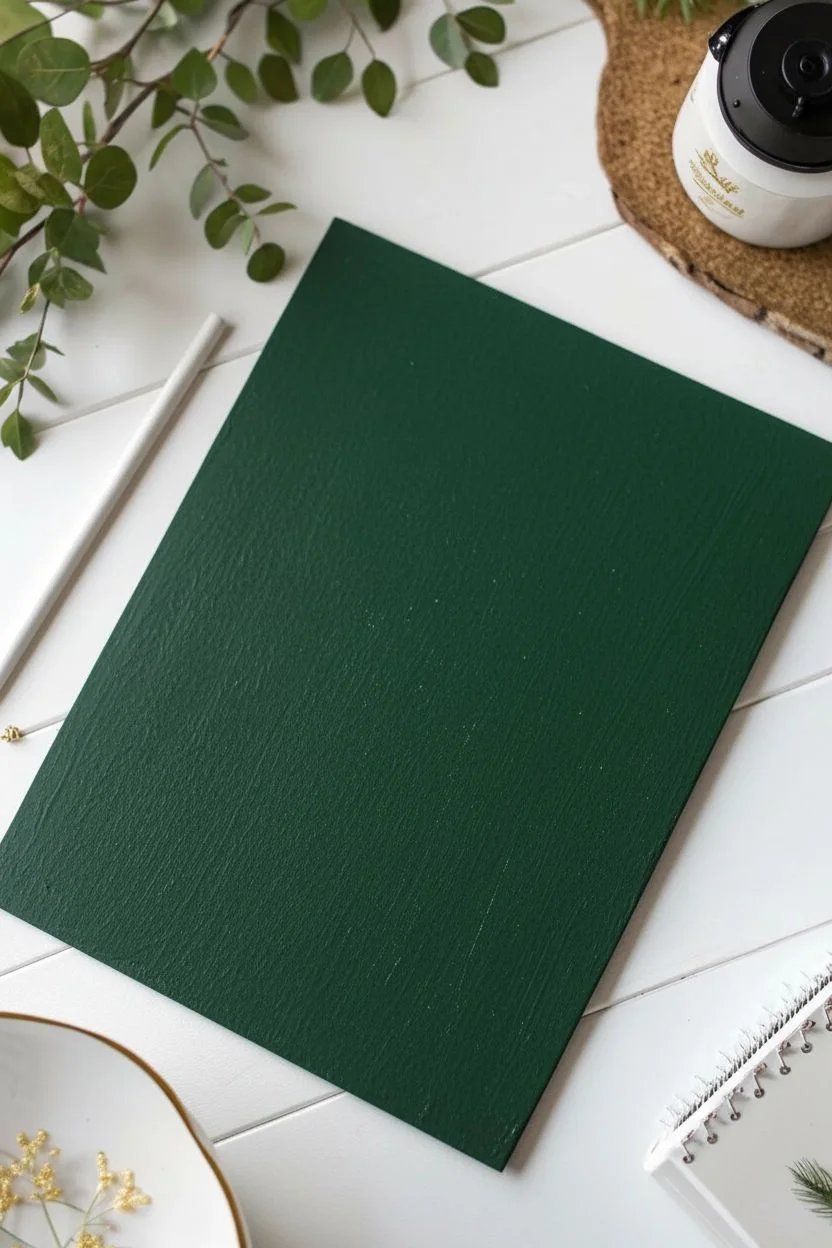
Prepare the surface:
If using a wood panel, lightly sand the surface to ensure it is smooth. Wipe away any dust with a damp cloth or tack cloth. -
Base coat application:
Load your wide flat brush with the dark forest green acrylic paint. Apply the paint in long, vertical strokes running from the top to the bottom of the board. -
Build opacity:
Allow the first layer to dry until touch-dry. Apply a second coat using the same vertical striation technique; visible brushstrokes add to the rustic, hand-painted aesthetic shown in the photo. -
Full cure:
Let the green background dry completely. This is crucial because moist paint will ruin the transfer process in the next phase.
Clean Edges
If your transfer lines are hard to see on the dark green, rub white chalk on the back of your printout instead of using carbon paper for a high-contrast white outline.
Step 2: Transferring the Silhouette
-
Position the design:
Center your printed reindeer template on the dried board. Use a small piece of painter’s tape at the top to secure it like a hinge. -
Insert transfer paper:
Slide a sheet of graphite transfer paper, dark side down, between the template and the painted board. -
Trace the outline:
Use a pencil to firmly trace the exterior outline of the reindeer. Don’t worry about shading; just get a clean perimeter line. -
Reveal the guide:
Lift the paper to check your transfer. You should see a faint, silvery-grey outline of the stag against the dark green background.
Step 3: Applying the Gold
-
Prep the gold:
Shake your liquid gold leaf or metallic paint vigorously. Metallic pigments settle quickly, so you need them well-mixed for maximum shine. -
Outline the difficult parts:
Dip your fine liner brush into the gold. carefully paint the thin, intricate lines of the antlers first, as these require steady hand control. -
Define the face:
Continue with the liner brush to outline the nose, jaw, and ears. Keep the paint fluid to avoid choppy edges. -
Switch brushes:
Switch to the small round brush (size 2 or 3) for the larger body sections. This holds more paint. -
Create texture:
Instead of painting a solid flat block of color, use short, flicking strokes. I find this mimics the texture of fur and gives the gold more visual interest. -
Fill the body:
Working from the neck down to the legs, fill in the silhouette. Maintain the directional strokes to follow the anatomy of the deer. -
Detail the legs:
Switch back to the fine liner brush to taper the legs down to the hooves. The legs should look delicate, not blocky. -
Review density:
Check your work in good light. If the green shows through too much in certain areas, dab a little extra gold to build rich opacity. -
Clean up:
If you strayed outside the lines slightly, wait for the gold to dry fully, then use a tiny brush with the green background color to ‘erase’ the mistake.
Level Up: Texture
Don’t aim for a perfectly smooth gold finish. Leaving slight ridges in the metallic paint catches the light better and mimics the animal’s fur coat.
Display your shimmering artwork on a mantel or shelf to add a regal forest touch to your holiday setup.


Santa’s Sleigh Against the Moon
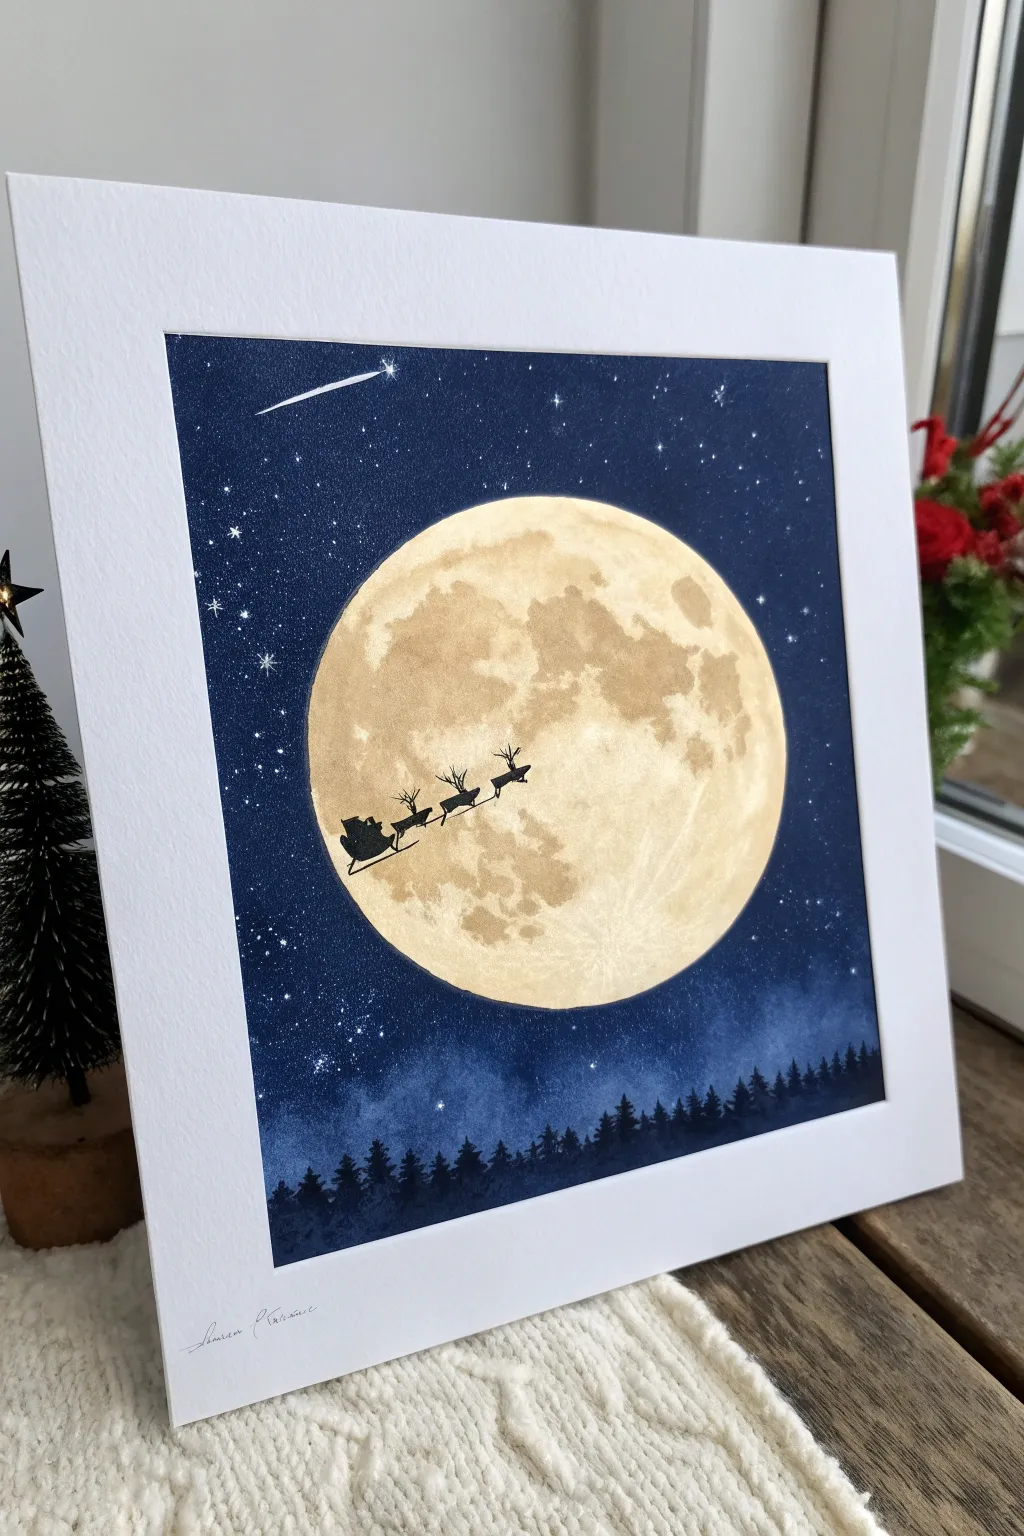
Capture the magic of Christmas Eve with this high-contrast watercolor project featuring a glowing moon and crisp silhouettes. This piece allows you to practice masking techniques to create distinct edges between the bright lunar surface and the deep winter sky.
Detailed Instructions
Materials
- Cold-press watercolor paper (300 gsm)
- Masking fluid
- Old brush (for masking fluid)
- Watercolors: Indigo, Payne’s Grey, Yellow Ochre, Burnt Umber
- White gouache or white gel pen
- Black gouache or waterproof black fine-liner pen
- Round brushes (size 8 and 2)
- Circular object to trace (bowl or compass)
- Toothbrush
- Painter’s tape
Step 1: Structuring the Scene
-
Secure the paper:
Tape your watercolor paper down to a board on all four sides to prevent buckling and create a clean white border. -
Outline the moon:
Place a circular object, like a small cereal bowl or compass, in the center of the paper and lightly trace a circle with a pencil. -
Apply masking fluid:
Using an old brush or a silicone tool, fill in the entire moon circle with masking fluid. This protects the paper so we can paint the dark sky freely. -
Let it cure:
Allow the masking fluid to dry completely. It should feel tacky but solid, with no wet pockets.
Bleeding Edges?
If blue paint seeped under your mask, don’t panic. Use a stiff, damp brush to scrub the error gently, or simply widen the moon’s shape slightly with white gouache to cover the mistake.
Step 2: The Midnight Sky
-
Wet the background:
Brush clean water over the entire paper surface around the masked moon, ensuring an even sheen. -
Apply base color:
Load a large round brush with Indigo or Prussian Blue and wash it over the wet paper, letting the color flow. -
Deepen the night:
While the paper is still wet, drop in Payne’s Grey or a touch of black at the edges and top corners to create a vignette effect. -
Create stars:
Mix a creamy consistency of white gouache. I like to load an old toothbrush and flick the bristles with my thumb to splatter fine stars across the wet sky. -
Add the shooting star:
With a fine brush and white gouache, paint a thin diagonal line in the upper left corner, lifting pressure at the end for a tapering tail. -
Wait and reveal:
Let the sky paint dry completely. Once bone dry to the touch, gently rub off the masking fluid to reveal the stark white circle.
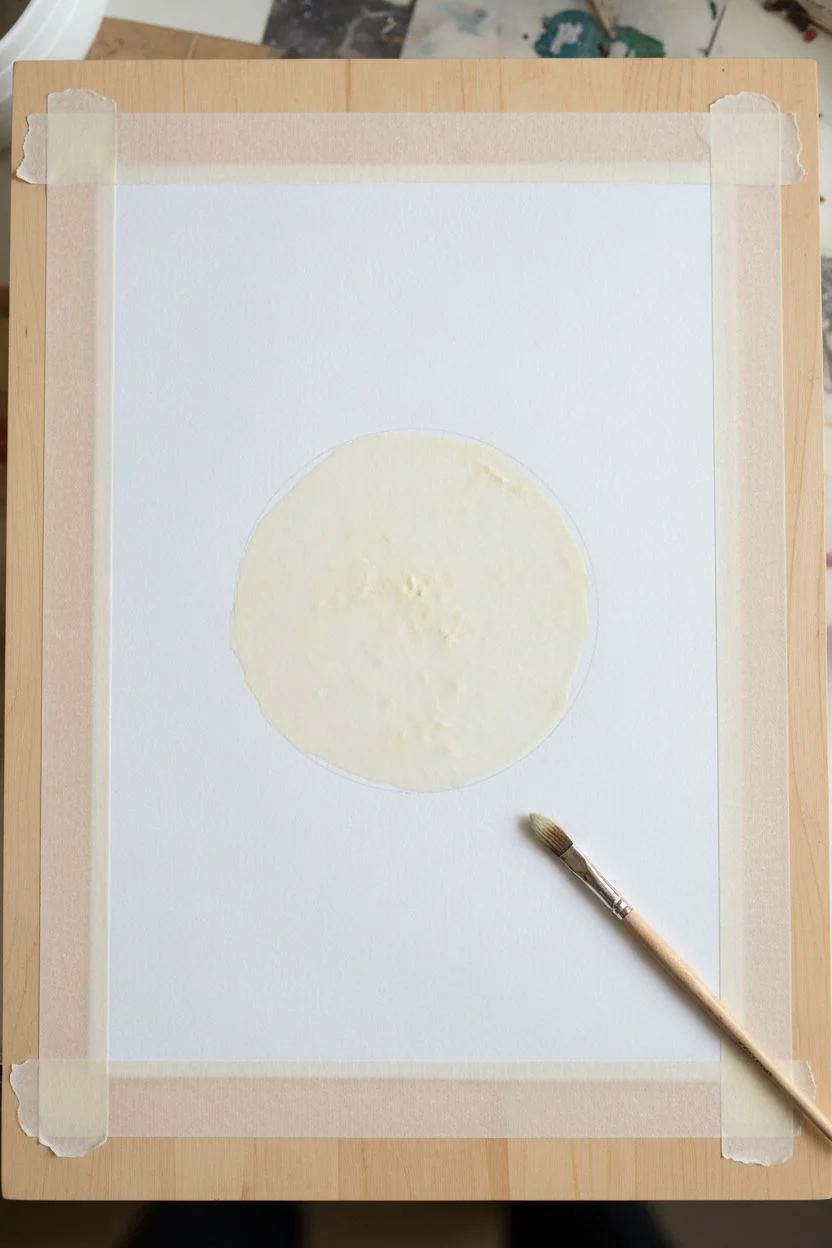
Step 3: Painting the Moon
-
Wet the moon:
Carefully wet the white moon circle with clean water, staying strictly inside the lines. -
Add lunar glow:
Drop in a very diluted wash of Yellow Ochre or Naples Yellow, leaving some areas almost white for highlights. -
Create craters:
While the yellow is still damp, dab in small, irregular spots of Burnt Umber or Sepia. Let these colors bloom slightly to create natural-looking texture. -
Refine texture:
If the moon looks too flat, dab a thirstry, dry brush onto the wet paint to lift color out, creating crater rims.
Level Up
Mix a tiny amount of iridescent medum or gold mica powder into your yellow moon paint. This adds a subtle, magical shimmer to the moonlight that changes as you walk past the frame.
Step 4: Silhouettes & Details
-
Paint the forest base:
Using black gouache and a medium brush, paint a solid uneven strip along the bottom of the paper for the forest floor. -
Add distinct trees:
Switch to a smaller brush or fine-liner. Draw vertical lines up from the base and add jagged, downward-sloping branches to create pine trees of varying heights. -
Sketch the flight path:
Lightly visualize where Santa needs to be centered on the moon. You can make tiny pencil dots as guides for the reindeer positions. -
Draw the reindeer:
Using a black fine-liner pen is easiest here. Draw distinct stags with antlers, connecting them with thin lines for reins. -
Draw the sleigh:
Finish the silhouette chain with the sleigh shape at the back, ensuring it looks distinct against the bright moon crater. -
Final touches:
Add a tiny glint to the shooting star with a gel pen if needed, and remove the tape to reveal your crisp border.
Now you have a stunning, high-contrast winter scene perfect for framing or gifting.
Abstract Winter Solstice
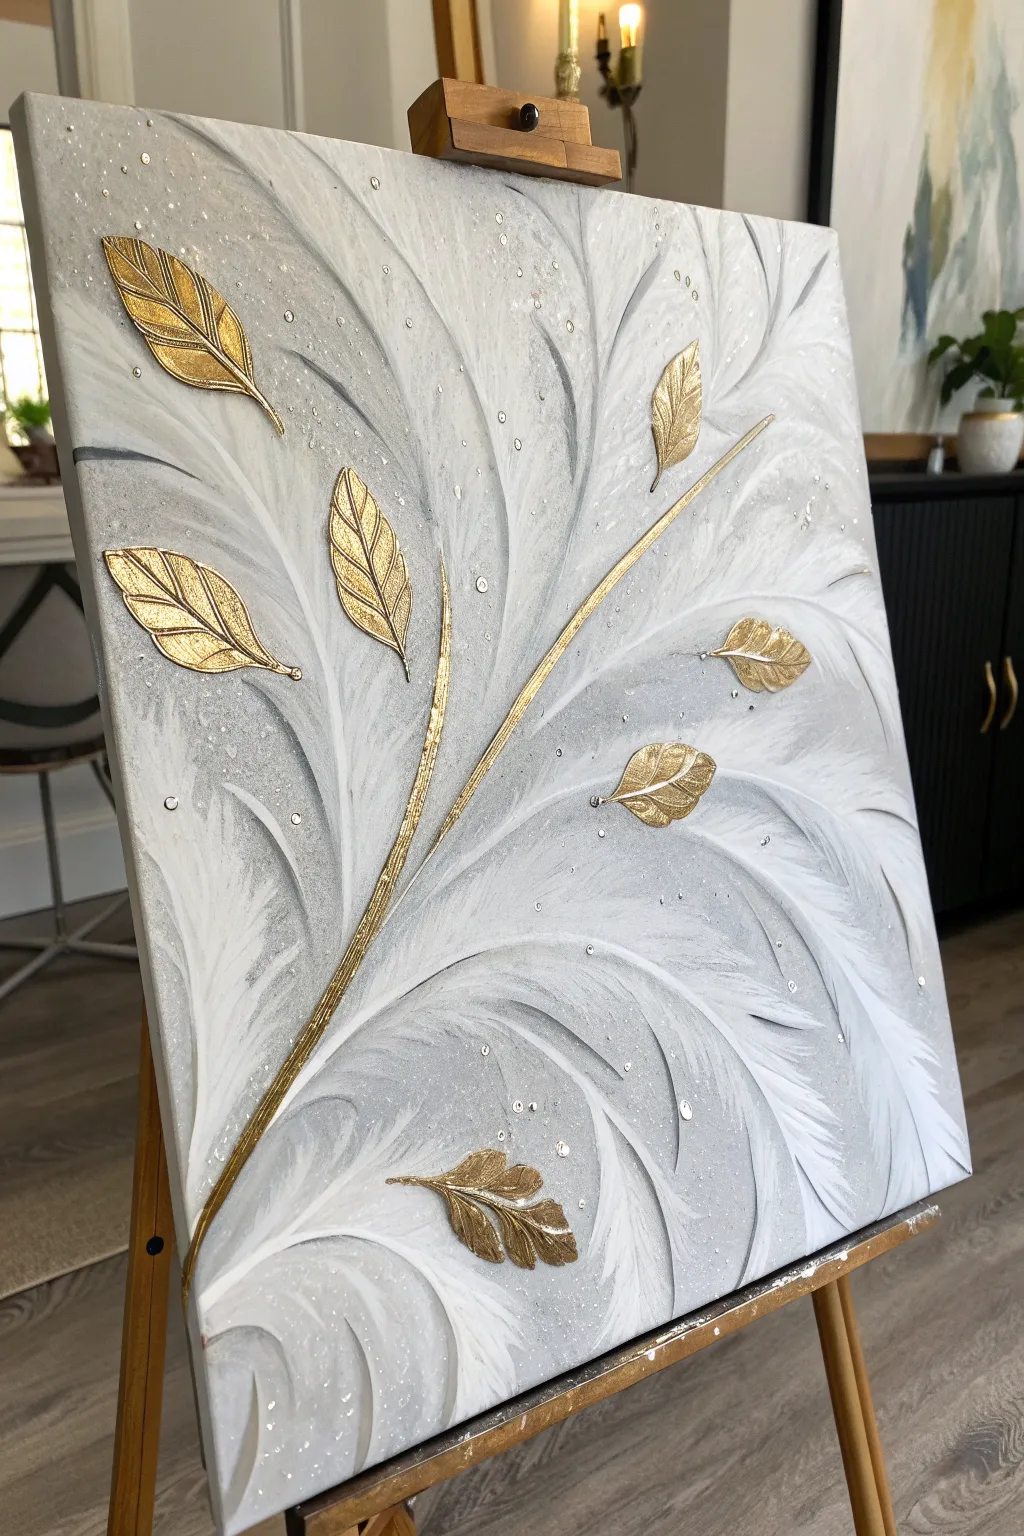
Capture the ethereal beauty of winter with this textured abstract piece featuring sweeping dimensional feathers and striking gold accents. This project combines modeling paste sculpting with metallic finishes to create a sophisticated holiday focal point.
How-To Guide
Materials
- Stretched canvas (16×20 or similar)
- White modeling paste or heavy structural gel
- Palette knives (large trowel and small diamond shape)
- Acrylic paint (Titanium White, Light Grey)
- Liquid gold leaf or high-gloss metallic gold paint
- Fine loose glitter (silver or iridescent)
- Small rhinestones or clear flat-back crystals
- Craft glue or gem adhesive
- Small detail paintbrush
- Fan brush
Step 1: Sculpting the Foundation
-
Canvas Prep:
Lay your canvas on a flat, protected surface and ensure it is free of dust or lint. -
Base Whiteners:
Apply a thin, even coat of Titanium White acrylic paint over the entire canvas to prime the surface and let it dry to the touch. -
Paste Application:
Scoop a generous amount of modeling paste onto your large palette knife. -
Creating the Swoops:
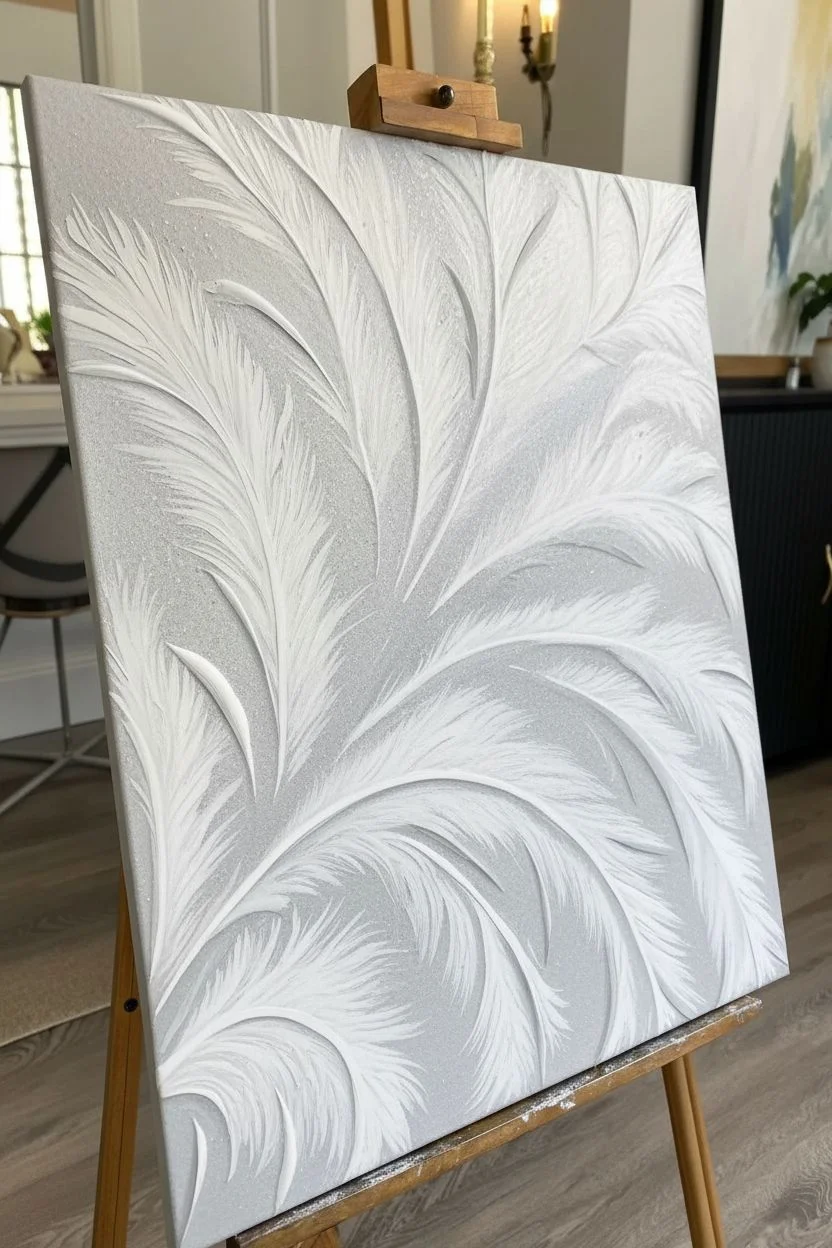
Apply the paste in long, sweeping, curved motions starting from the bottom corners and reaching upward to mimic the shape of large plumes or feathers. -
Texturizing:
While the paste is wet, use the edge of the palette knife or a coarse stiff brush to drag lines through the shapes, creating the fibrous texture of feather vanes. -
Adding Grit:
Sprinkle a pinch of fine glitter directly onto the wet paste texture to embed a base level of shimmer, then allow this layer to dry completely (usually 12-24 hours depending on thickness).
Step 2: Adding Golden Dimensions
-
Stem Structure:
Once the background is hard, mix a fresh batch of modeling paste and use a small palette knife to create a thin, raised line diagonally across the canvas for the main branch. -
Leaf Placement:
Apply small, almond-shaped dollops of paste branching off the stem where you want your gold leaves to sit. -
Sculpting Leaves:
Use the tip of a small knife to flatten the dollops into leaf shapes, tapering the points. -
Vein Detailing:
I like to use a toothpick or the very tip of the knife to gently carve a center line and veins into each wet leaf leaf. -
Final Cure:
Allow these new raised details to dry completely until they are solid to the touch.
Clean Sweeps
Wipe your palette knife with a damp paper towel after every few strokes. This prevents dried clumps of paste from ruining the smooth flow of your feather textures.
Step 3: Painting and Embellishing
-
Shadowing:
Dilute a small amount of Light Grey paint with water to create a glaze. -
Depth Definition:
Paint this grey glaze into the deep crevices between the white feather shapes to add visual depth, wiping away excess from the high points. -
Highlighting:
Dry brush pure Titanium White heavily over the raised textures of the feathers to make the pattern pop against the grey shadows. -
Gilding the Stem:
Using a small detail brush and your metallic gold, carefully paint the raised branch line, ensuring clean edges. -
Gilding the Leaves:
Paint the sculpted leaves gold, working the metallic paint int the carved veins to accentuate the texture. -
Second Coat:
Apply a second coat of gold to the leaves and stem for a rich, opaque metallic shine. -
Crystal Placement:
Apply tiny dots of gem adhesive sporadically around the feathers, following the upward movement of the design. -
Setting the Sparkle:
Place rhinestones or crystals onto the glue dots using tweezers to simulate frozen water droplets or floating ice.
Winter Magic
Mix a tiny drop of iridescent medium into your white paint for the top coat. This gives the curved feather shapes a pearl-like sheen that shifts in the light.
Hang your textured masterpiece near a light source to watch the gold and crystals catch the holiday glow


Have a question or want to share your own experience? I'd love to hear from you in the comments below!