Transforming plain wax into miniature works of art is one of my absolute favorite low-stakes creative projects. There is something so satisfying about holding a smooth taper candle and adding personality with just a few strokes of acrylic paint.
Climbing Botanical Vines
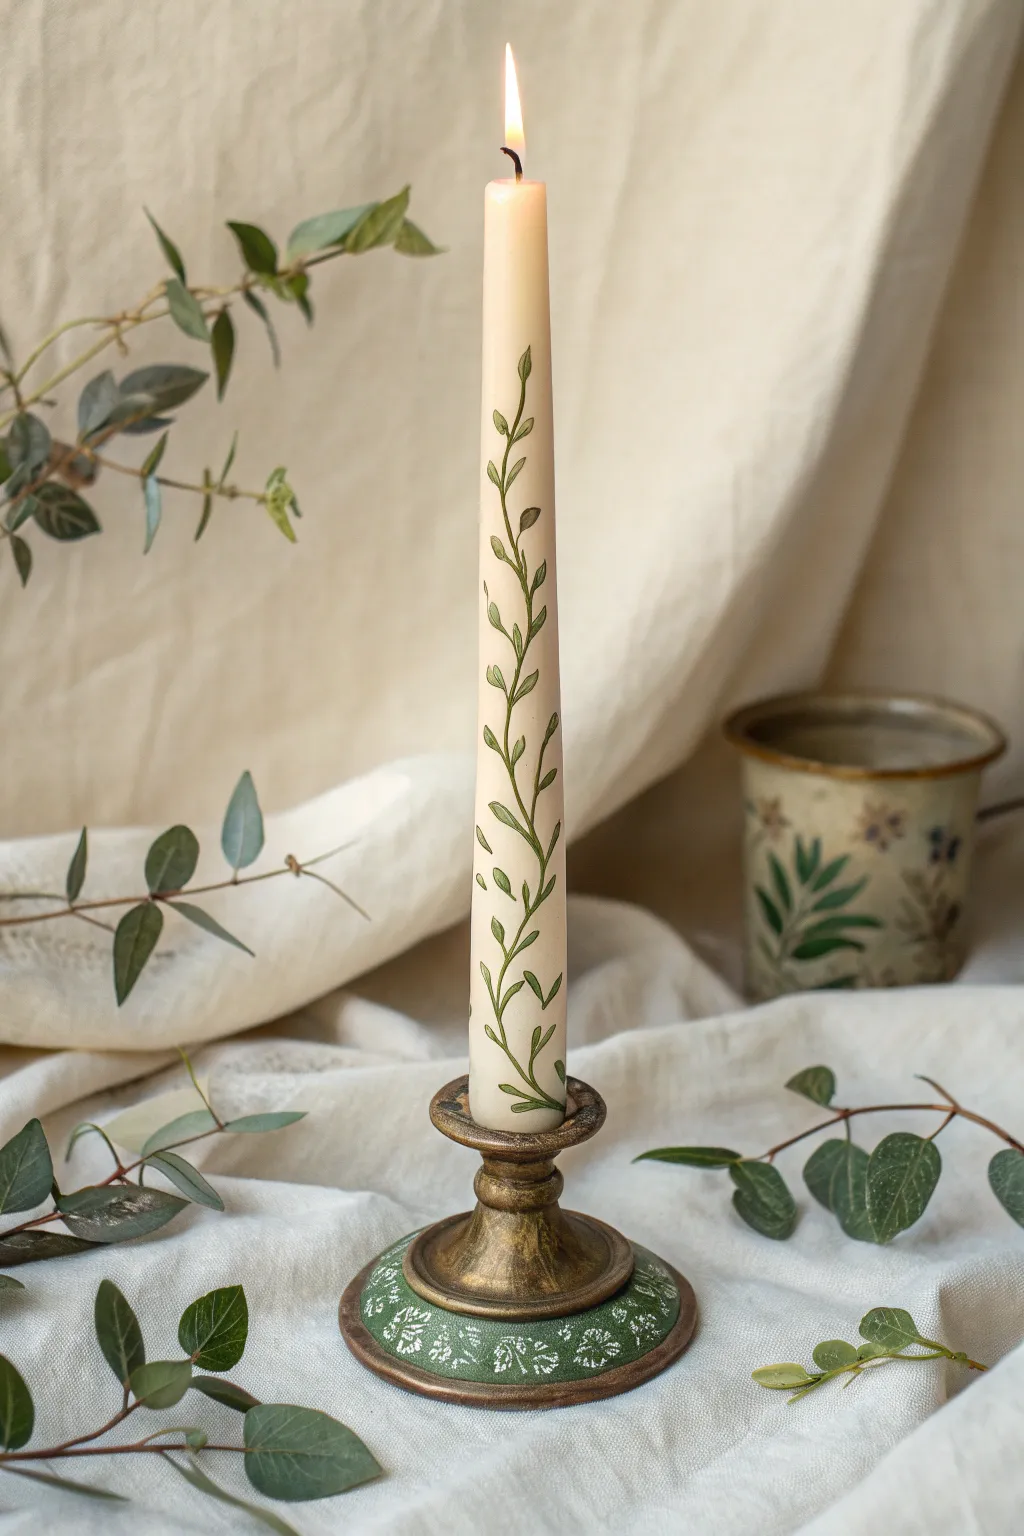
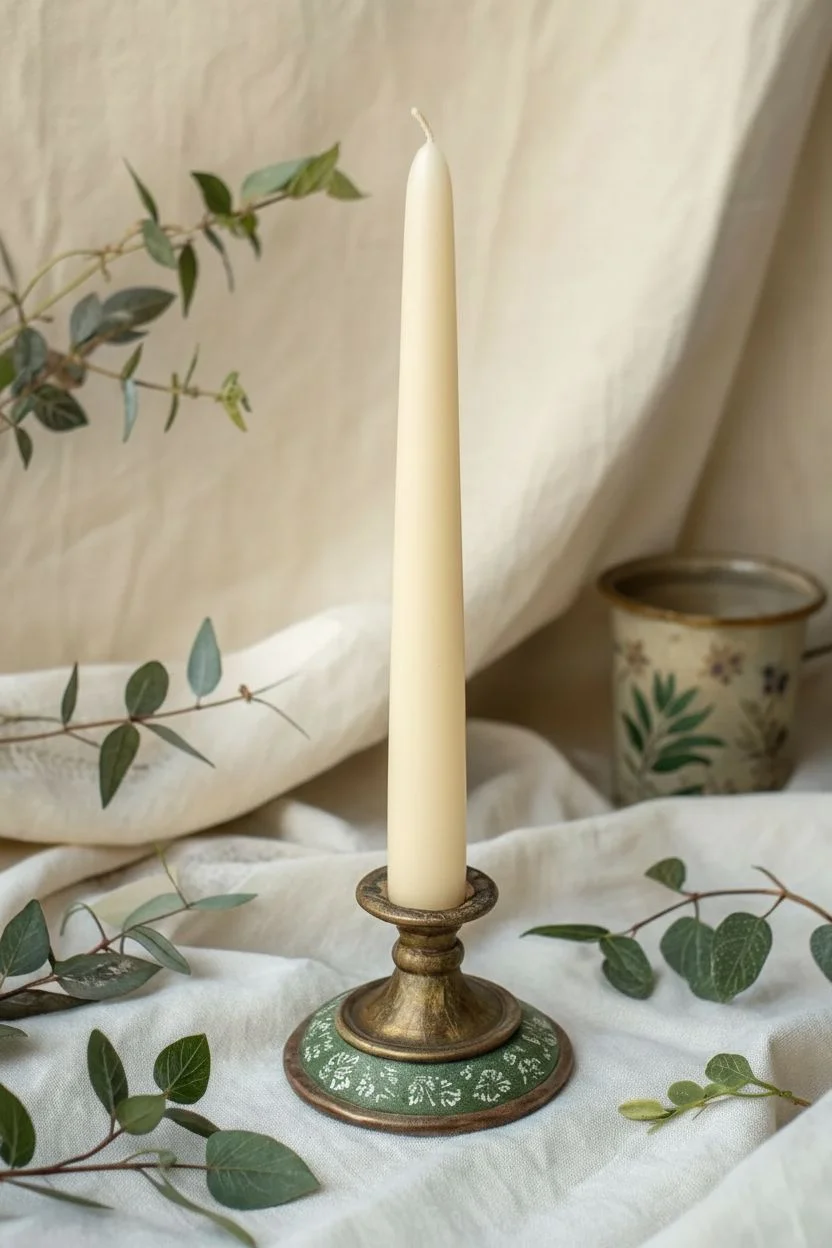
Transform a plain taper into an elegant botanical statement piece with this delicate painting project. Using simple brushstrokes, you’ll wind a trail of greenery up the wax to create a nature-inspired accent perfect for any table setting.
Detailed Instructions
Materials
- Smooth ivory or beige taper candle
- Rubbing alcohol
- Cotton pads
- Acrylic paint (Deep olive green, Sap green)
- Candle painting medium (or textile medium)
- Fine liner brush (size 00 or 0)
- Palette or small dish
- Paper towel
- Toothpicks
Step 1: Preparation & Mixing
-
Clean the surface:
Wipe the entire candle down thoroughly with a cotton pad soaked in rubbing alcohol. This removes invisible oils and release agents from the manufacturing process that prevent paint from sticking. -
Prepare the paint mix:
Squeeze a dime-sized amount of deep olive green acrylic onto your palette. Mix it with an equal amount of candle painting medium (or textile medium) to improve adhesion and prevent the paint from cracking as the candle burns. -
Check consistency:
Add a tiny drop of water if the paint feels too thick. You want an inky consistency that flows smoothly from the brush without running or dripping. -
Load the brush:
Dip your fine liner brush into the mixture and roll the tip on the palette to create a sharp point. You don’t want a glob of paint on the ferrule, just the bristles.
Slippery Surface?
If paint beads up and refuses to stick, wipe the area with alcohol again. You can also mix a tiny dot of dish soap into your paint to break the surface tension.
Step 2: Drafting the Vine
-
Anchor your hand:
Hold the candle securely by the base with your non-painting hand. I like to rest my painting wrist on the table surface to keep my hand steady while working on a curved object. -
Start the stem:
Begin about an inch from the bottom of the candle. Touch the brush tip lightly to the wax and pull upward in a gentle curve. -
Create the spiral:
Paint a thin, continuous line that spirals up the candle. Don’t try to paint the whole spiral in one go; do short segments about 2-3 inches long. -
Rotate and continue:
Rotate the candle slowly as you extend the line upward. Keep the spacing of your spiral loops fairly loose and organic rather than perfectly geometric. -
Taper the top:
As you reach the top third of the candle, allow your line to become slightly thinner and fainter, as if the vine is new growth. -
Let the stem set:
Allow the main stem line to dry for about 10 minutes before adding leaves so you don’t accidentally smudge your work while handling it.
Add Dimension
Mix a lighter sage green and add a single, thin highlight stroke to the upper edge of each leaf. This gives the vine volume and a sun-kissed appearance.
Step 3: Adding Foliage
-
Painting the first leaf:
Start back at the bottom of the vine. Place the tip of your brush against the stem, press down slightly to widen the bristles, and lift as you pull away to create a teardrop leaf shape. -
Vary the direction:
Ensure the leaves are pointing generally upward, following the direction of the vine’s growth. -
Alternate placement:
Paint leaves on alternating sides of the vine stem—left, then right, then left—spacing them out so they don’t look crowded. -
Navigate the curve:
As you move up the spiral, remember to rotate the candle. Paint the leaves that fall on the ‘front’ facing side, then turn slightly to reach the next section. -
Add detail stems:
If a leaf looks like it’s floating, use the very tip of your brush to paint a hair-thin connection back to the main vine. -
Fixing mistakes:
If you smudge a leaf or dislike a shape, quickly use a damp toothpick to gently scrape or wipe the wet paint off the wax without ruining the base. -
Final cure:
Let the candle stand upright in a holder to dry completely for at least 24 hours before handling or wrapping it.
Place your finished candle in a vintage holder to enjoy the warm, organic charm without even lighting the wick


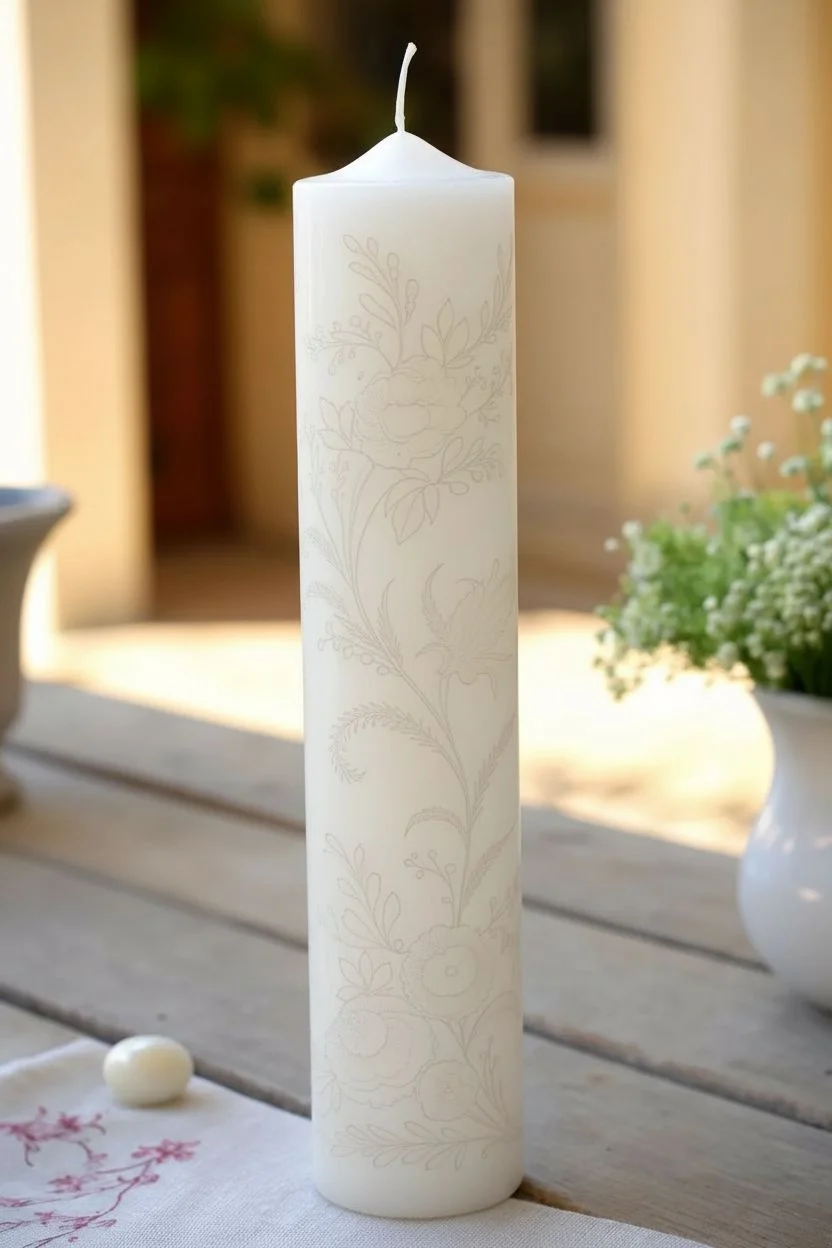
Romantic Mini Roses
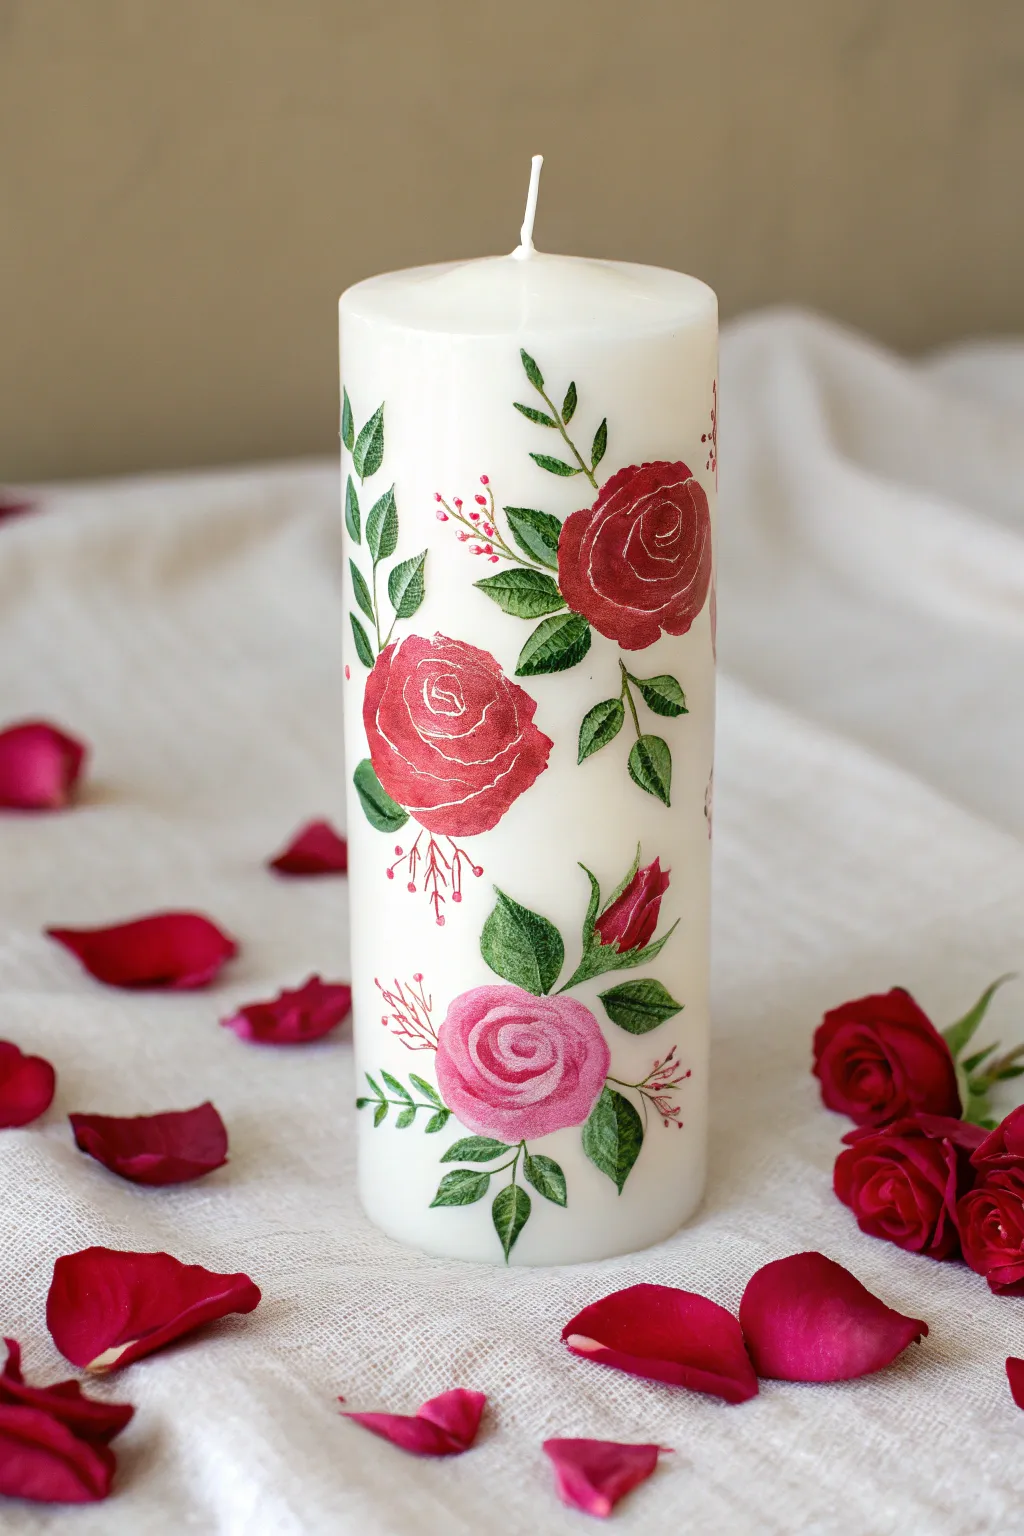
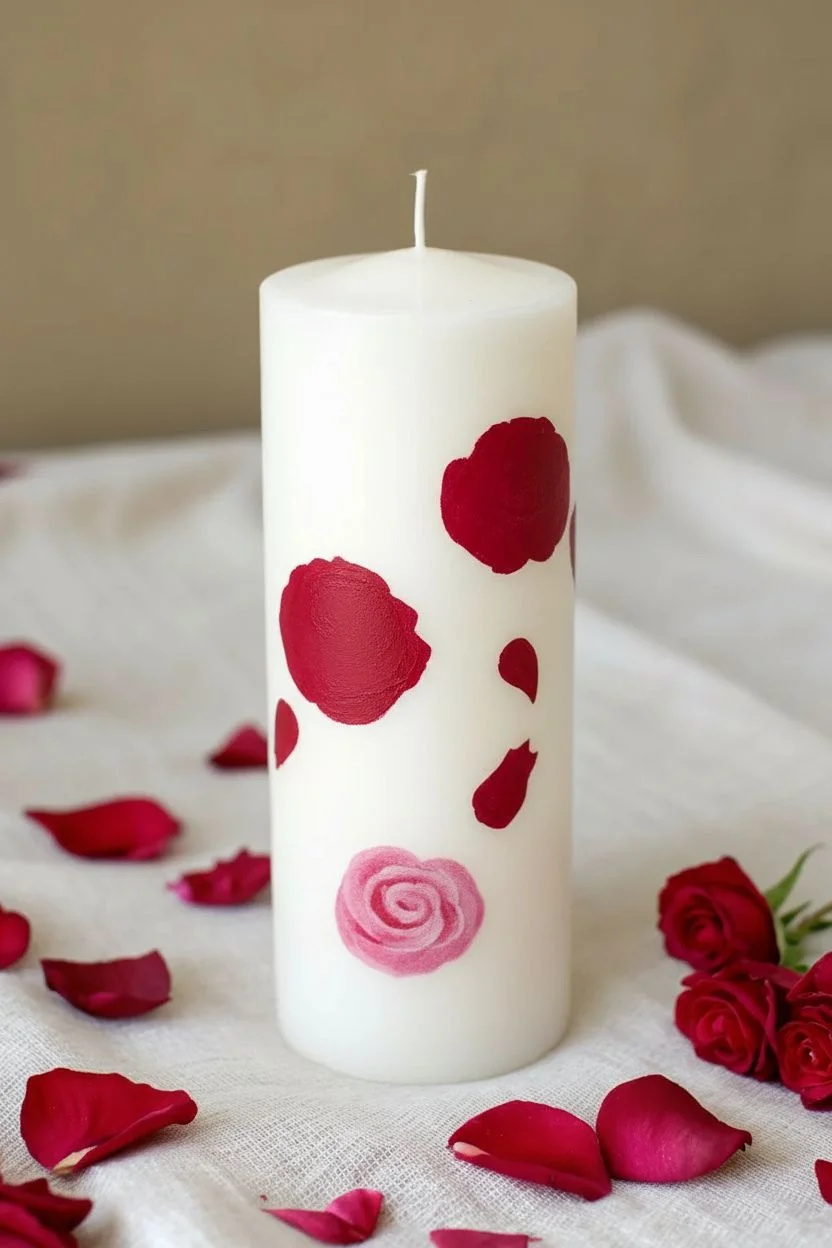
Transform a plain white pillar candle into a romantic centerpiece featuring charming, illustrative rose vines. This project mimics the delicate look of botanical drawings by combining bold color blocks with fine, sketchy white highlights.
Step-by-Step Tutorial
Materials
- White pillar candle (smooth surface)
- Acrylic paints: Crimson Red, Rose Pink, Sap Green, Forest Green, Titanium White
- Candle painting medium (or textile medium)
- Rubbing alcohol and cotton pads
- Round synthetic brush (size 2)
- Fine liner brush (size 00 or 000)
- Palette
- Paper towels
Step 1: Preparation & Base Layers
-
Clean the surface:
Wipe the entire surface of the candle with rubbing alcohol on a cotton pad to remove oils and fingerprints, ensuring the paint sticks properly. -
Mix your medium:
On your palette, mix your acrylic colors with candle painting medium according to the bottle instructions (usually a 1:1 ratio). This prevents the paint from peeling later. -
Placement guide:
Visualize a diagonal ‘S’ curve running down the candle side; this is where your floral vine will flow. -
Block in red roses:
Using the size 2 round brush and Crimson Red, paint two rough, rounded shapes for the main red roses—one higher up near the right, and one slightly lower on the left. -
Add the pink bloom:
Paint a similar rounded shape near the bottom of your composition using the Rose Pink mixture. -
Create rosebuds:
Add small, teardrop shapes in red near the main flowers to represent tight rosebuds waiting to open.
Adhesion Secret
Using a dedicated candle painting medium is key. If you can’t find it, textile medium (for fabric painting) is a great substitute that helps the paint grip the wax.
Step 2: Foliage & Stems
-
Connect with stems:
Switch to your fine liner brush and the Sap Green mix. Paint thin, curving lines connecting your flowers and buds to create the main vine structure. -
Paint leaf bases:
Using the round brush, paint pointed oval leaf shapes extending from the stems. Vary the angles to make them look natural. -
Leaf shading:
While the green is still slightly wet, I like to touch a bit of Forest Green to the base of each leaf to add depth and dimension. -
Add filler sprigs:
Paint very delicate, thin branching lines sticking out from the main vine using distinct, light strokes.
Scented Style
Apply a coat of clear candle varnish over the dried painting. While wet, sprinkle a tiny pinch of cosmetic-grade glitter on the roses for a morning-dew effect.
Step 3: Detailed Line Work
-
Define red petals:
Once the red base is dry, use the liner brush and Titanium White to paint thin, sketchy contour lines on the red roses. Draw loose spirals in the center and curved lines for outer petals. -
Highlight the pink rose:
Repeat the contouring process on the pink rose using a mix of White and a tiny drop of Pink, creating a soft, lighter swirl pattern. -
Detail the leaves:
Use the liner brush with Forest Green to paint a central vein and small side veins on each leaf for a crisp, botanical look. -
Highlight leaves:
Wash your liner brush and add very subtle white highlights to the tips of a few leaves to mimic light catching the foliage. -
Create berries:
Dip the tip of your brush handle or a dotting tool into the Red paint and place tiny dots at the ends of your thin filler sprigs. -
Let it cure:
Allow the candle to dry completely for at least 24 hours before handling it or moving it to its display location.
Place your beautiful hand-painted candle on a vintage tray or lace cloth to enjoy its romantic charm


Zesty Lemon Patterns
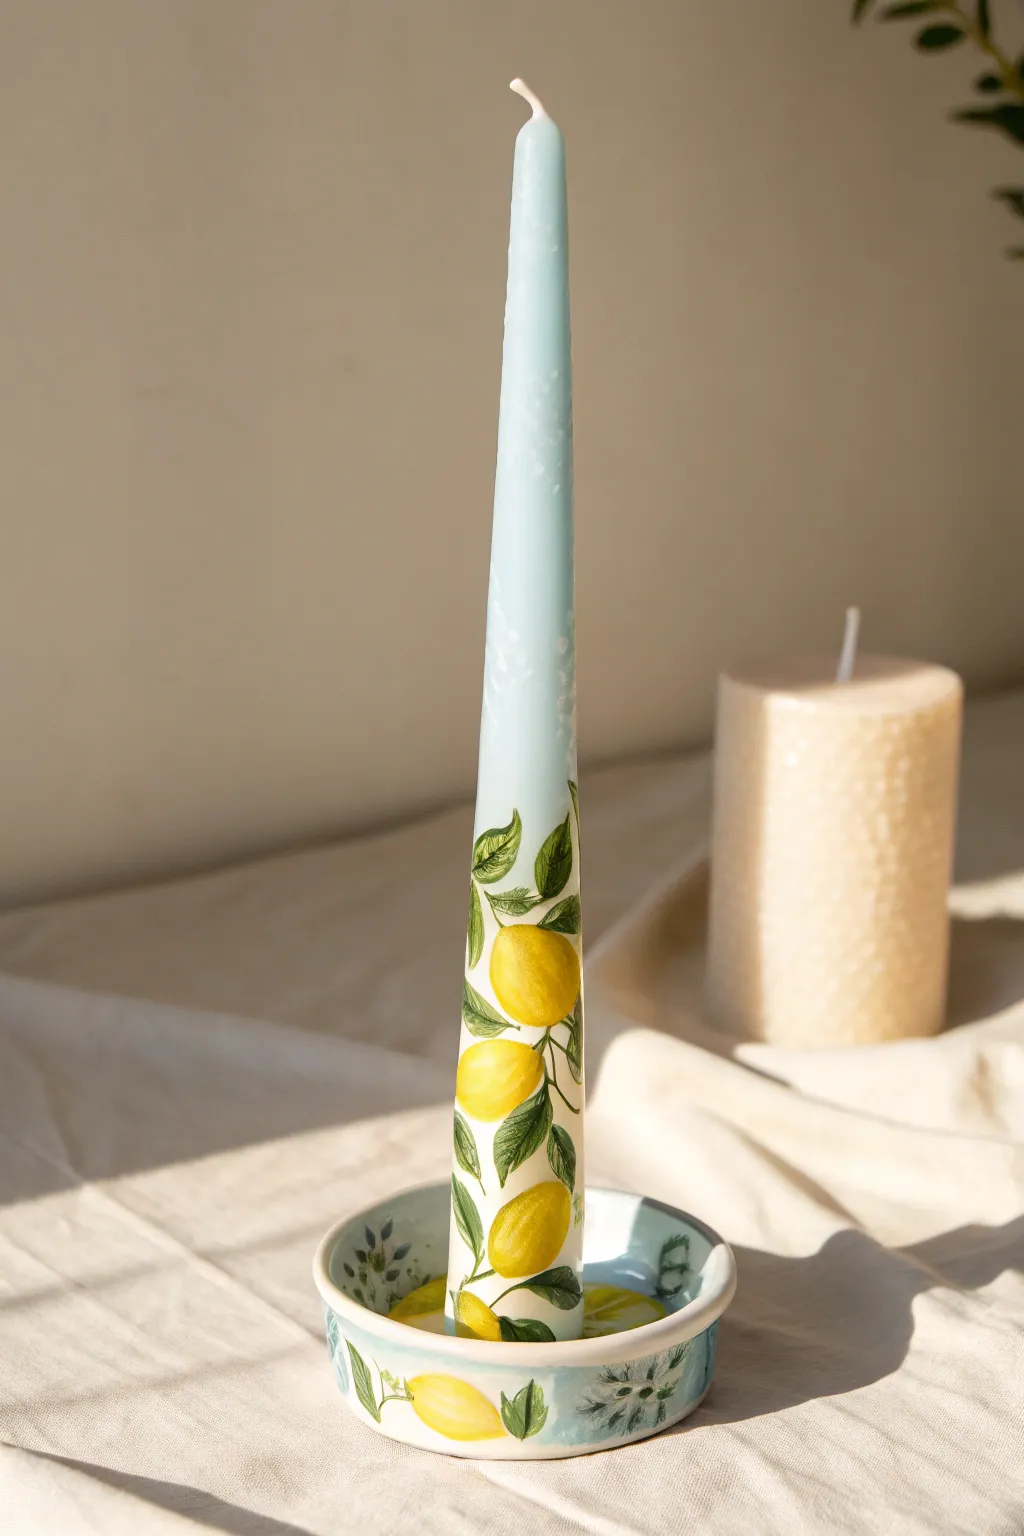
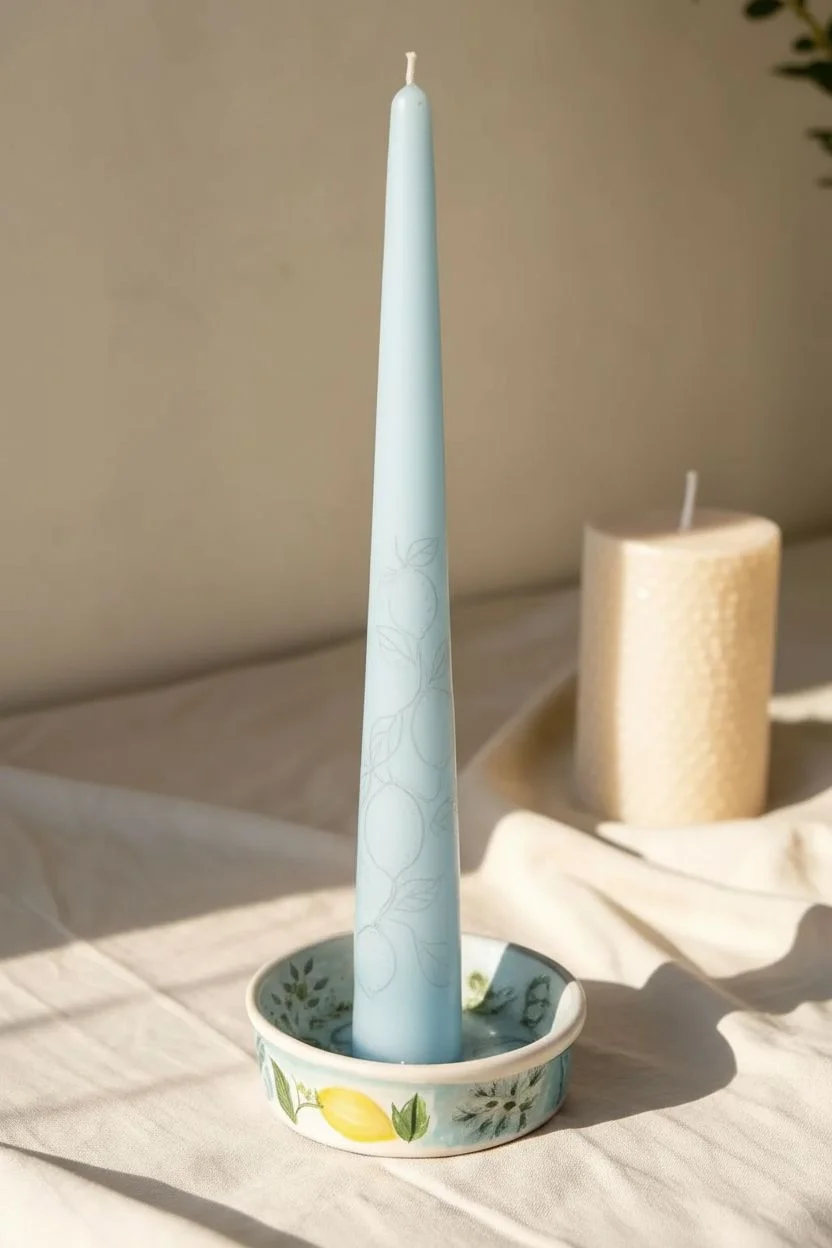
Transform a simple powder blue taper candle into a slice of Italian summer with this detailed painting project. The contrast of bright yellow citrus against the soft blue wax creates a sophisticated, artisanal look that doubles as gorgeous table decor.
Detailed Instructions
Materials
- Powder blue taper candle (unscented)
- Acrylic paints (Cadmium Yellow, Sap Green, Dark Green, Titanium White, Burnt Umber)
- Textile medium or Candle Painting Medium
- Rubbing alcohol
- Lint-free paper towel
- Small round brush (size 0 or 1)
- Fine liner brush (size 00)
- Palette
Step 1: Preparation & Layout
-
Clean the surface:
Before starting, wipe the entire candle down with rubbing alcohol on a paper towel. This removes any manufacturing oils or dust that would prevent the paint from adhering properly. -
Mix your medium:
On your palette, mix your acrylic paints with the textile or candle medium according to the bottle instructions (usually a 1:1 or 2:1 ratio). This ensures the paint binds to the wax and won’t flake off later. -
Plan the composition:
Visualize a climbing vine structure. You want the design to be dense and heavy at the base, gradually thinning out as it climbs halfway up the candle, eventually fading into empty space.
Slippery Surface?
If paint beads up on the wax, surface oils are likely the culprit. Wipe the spot again with rubbing alcohol and ensure your brush isn’t too wet with water.
Step 2: Painting the Fruit
-
Paint base lemon shapes:
Using the small round brush and yellow paint, create oval shapes for the lemons. Vary their angles—some tilting left, some right, and some overlapping. -
Concentrate at the bottom:
Cluster the majority of your lemon shapes near the bottom two inches of the candle to anchor the design. -
Add floating lemons:
As you move upward, space the lemons further apart, painting them slightly smaller to create perspective and flow. -
Apply a second coat:
Yellow acrylic is notoriously transparent. Let the first layer dry for about 10 minutes, then apply a second coat to ensure vibrant, solid coverage. -
Create dimension:
Mix a tiny dot of brown into your yellow to create a mustard shade. Paint this along the bottom curve of each lemon to create a shadow, giving the fruit a rounded 3D effect.
Complete the Set
To faithfully recreate the photo, purchase a plain ceramic candle holder and paint a matching wreath of lemons inside the bowl using ceramic or multi-surface paints.
Step 3: Adding Greenery
-
Connect with stems:
Using the fine liner brush and a mix of brown and green, paint thin, winding stems connecting your lemons. I find it helpful to wiggle the brush slightly to create organic, woody lines. -
Paint leaf outlines:
With your sap green (lighter green), paint almond-shaped outlines attached to the stems. Place them in pairs or tuck them behind the lemons. -
Fill the leaves:
Fill in the leaf shapes with the sap green. Don’t worry about perfect smoothness; slight brush strokes add texture to the foliage. -
Add dark veins:
Once the green base is dry, use your liner brush and the dark green paint to draw a central vein down the middle of each leaf. -
Add side veins:
Feather tiny, delicate lines outward from the central vein using the dark green to finish the leaf detailing.
Step 4: Highlights & Finishing
-
Highlight the lemons:
Mix white with a drop of yellow. Paint a small, curved comma shape on the upper curve of each lemon to mimic light hitting the rind. -
Add texture spots:
Use the very tip of your brush to stipple tiny dots of the highlight color on the lemon skin. This mimics the porous texture of citrus zest. -
Paint fading details:
Near the top of your design (mid-candle), add a few pale, almost translucent white dabs or tiny leaves to suggest the pattern is fading softly into the blue background. -
Cure the paint:
Let the candle stand upright to dry completely for at least 24 hours before handling or placing it in a holder.
Light your beautiful new creation and enjoy the warmth of a Mediterranean orchard right on your table.


Lavender Fields Stippling
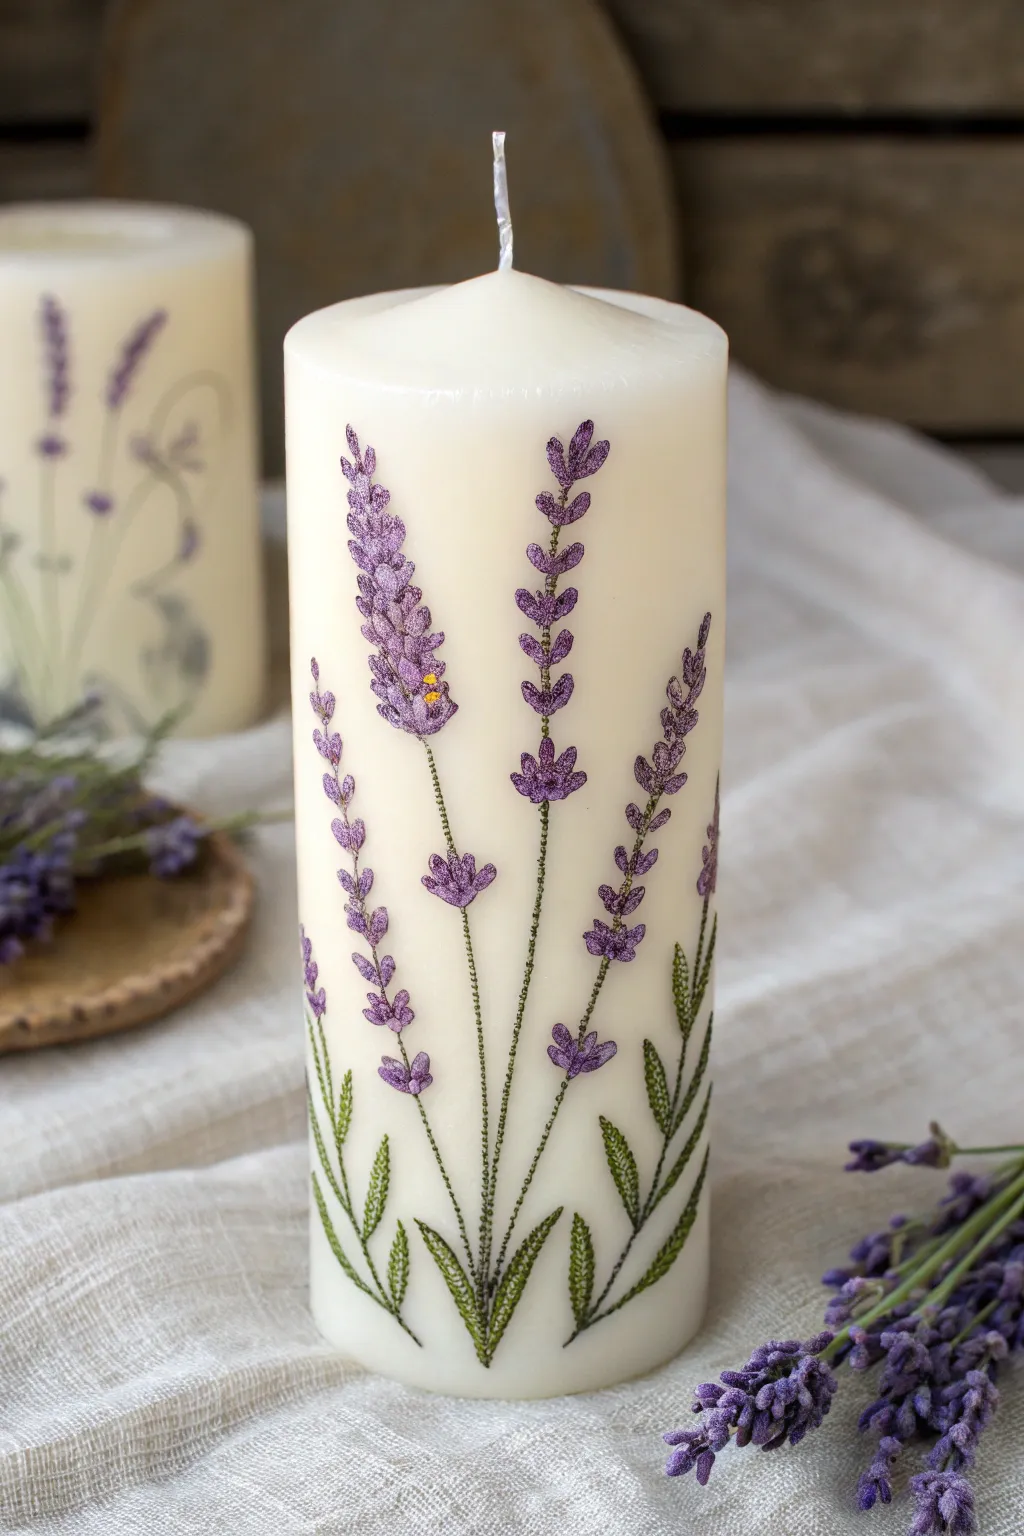
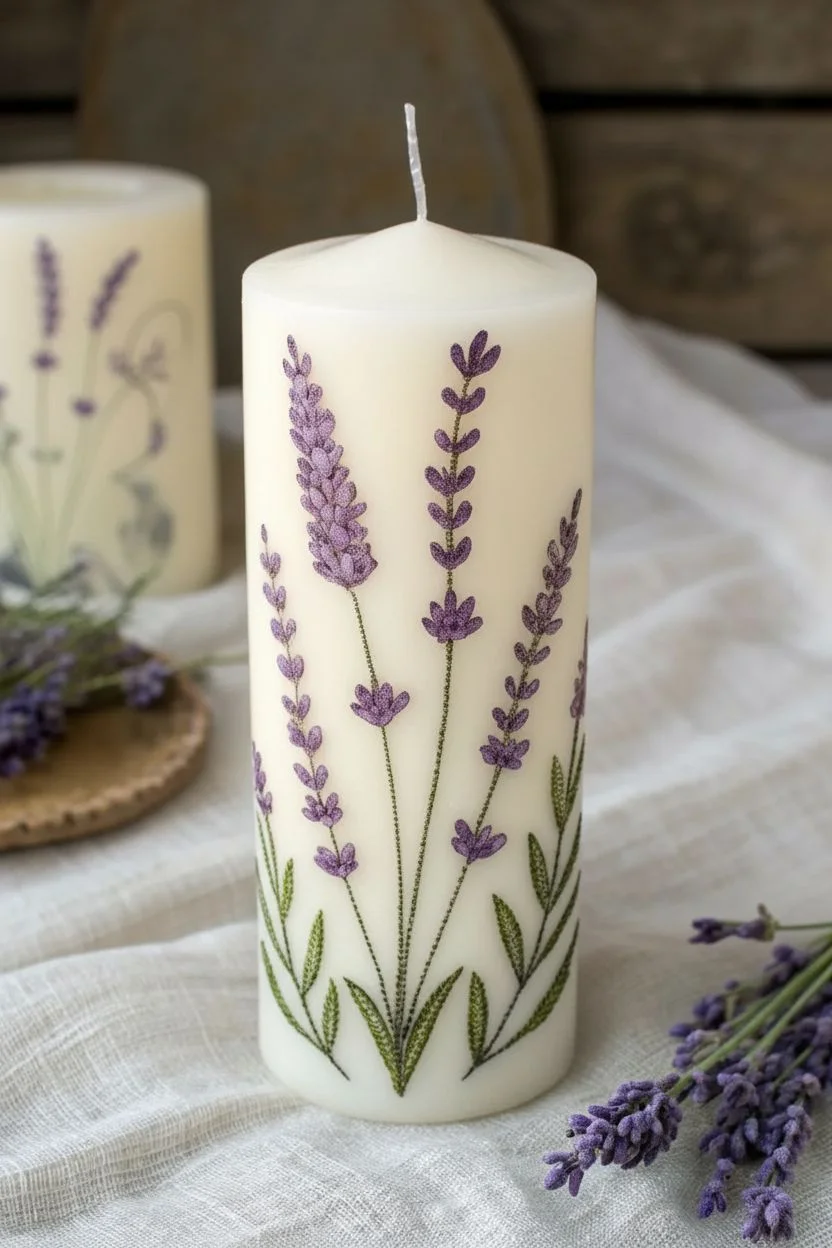
Transform a plain pillar candle into a botanical masterpiece that mimics the delicate texture of hand-embroidery. Using a specialized stippling and dashing technique, you will build up layers of paint to create a dimensional, stitched effect without a single thread.
Step-by-Step
Materials
- White or ivory pillar candle
- Multi-surface acrylic paints (Deep Olive, Moss Green, Eggplant, Lilac, Goldenrod)
- Textile medium or thickened gel medium
- Detail brush (size 00 or 0 liner)
- Small flat brush
- Rubbing alcohol
- Cotton pads
- Palette
- Toothpick (optional)
Step 1: Preparation & Layout
-
Clean the surface:
Wipe the entire surface of the candle with a cotton pad soaked in rubbing alcohol to remove dust and oily residues, which ensures the paint adheres properly. -
Plan the composition:
Visualize three to five main stalks of varying heights rising from the bottom; you can lightly scratch a guide line into the wax with a toothpick if you need a reference, but keep it faint. -
Prepare the medium:
Mix your acrylic paints with a small amount of textile or gel medium on your palette; this thickens the paint to create the raised, embossed texture that mimics thread.
Paint Beading Up?
If the paint refuses to stick and beads up on the wax, the surface is too oily. Wipe specifically that spot with alcohol again and let it dry. Mixing a drop of dish soap into your paint can also help adhesion.
Step 2: Stitching the Greenery
-
Mix leaf colors:
Create a custom green by mixing Deep Olive with a touch of Moss Green to get a natural, herbal tone. -
Paint the main stems:
Using the tip of your liner brush, paint the central stalks using tiny, vertical dashed lines rather than long smooth strokes to simulate a running stitch. -
Branch out:
Add smaller, curved branches extending from the main stalks, keeping the lines broken and dashed to maintain the embroidery illusion. -
Outline the leaves:
At the base of the stems, paint the outer shape of the long, slender leaves using the dark green mix. -
Fill with texture:
Fill in the leaves using diagonal hash marks that meet in the center, mimicking the look of a satin stitch or a leaf vein pattern. -
Add highlights:
I like to mix a little white into the Moss Green and dab tiny highlights on the upper edges of the leaves for dimension. -
Dry the base layer:
Allow the green sections to dry completely to the touch before starting the flowers to prevent muddying the colors.
Level Up: Scented Art
Since painting the wax seals in some scent, enhance the experience by rubbing a drop of high-quality lavender essential oil into the unpainted bottom of the candle before gifting or displaying.
Step 3: Stippling the Blooms
-
Create the dark base:
Load your liner brush with the Eggplant (dark purple) paint and begin stippling small dots in a cone shape at the top of a stem. -
Build the shape:
Cluster the dots tightly near the stem and space them out slightly as you move outward, creating the tapered look of a lavender bud. -
Add side clusters:
Repeat this pointillism process for the smaller flower clusters further down the stems, leaving gaps between them as real lavender grows. -
Layer lighter tones:
Dip your brush into the Lilac paint and apply a second layer of dots directly over the dark purple, ensuring the dark background still peeks through for depth. -
Create ‘stitch’ direction:
Instead of perfect circles, try to make your dots slightly elongated and angled upward, simulating tiny loops of thread. -
Add pollen details:
Using a microscopic amount of Goldenrod yellow, place two or three tiny specks within the lilac clusters to represent the flower’s center. -
Final touches:
Step back and look for balance; add a few stray purple dots falling near the base of the candle for a whimsical, loose effect. -
Cure the paint:
Let the candle sit undisturbed for at least 24 hours to allow the paint and medium to cure and harden fully onto the wax.
Enjoy the calming atmosphere your hand-painted garden brings to the room.
BRUSH GUIDE
The Right Brush for Every Stroke
From clean lines to bold texture — master brush choice, stroke control, and essential techniques.
Explore the Full Guide
Sweet Cherry Motifs
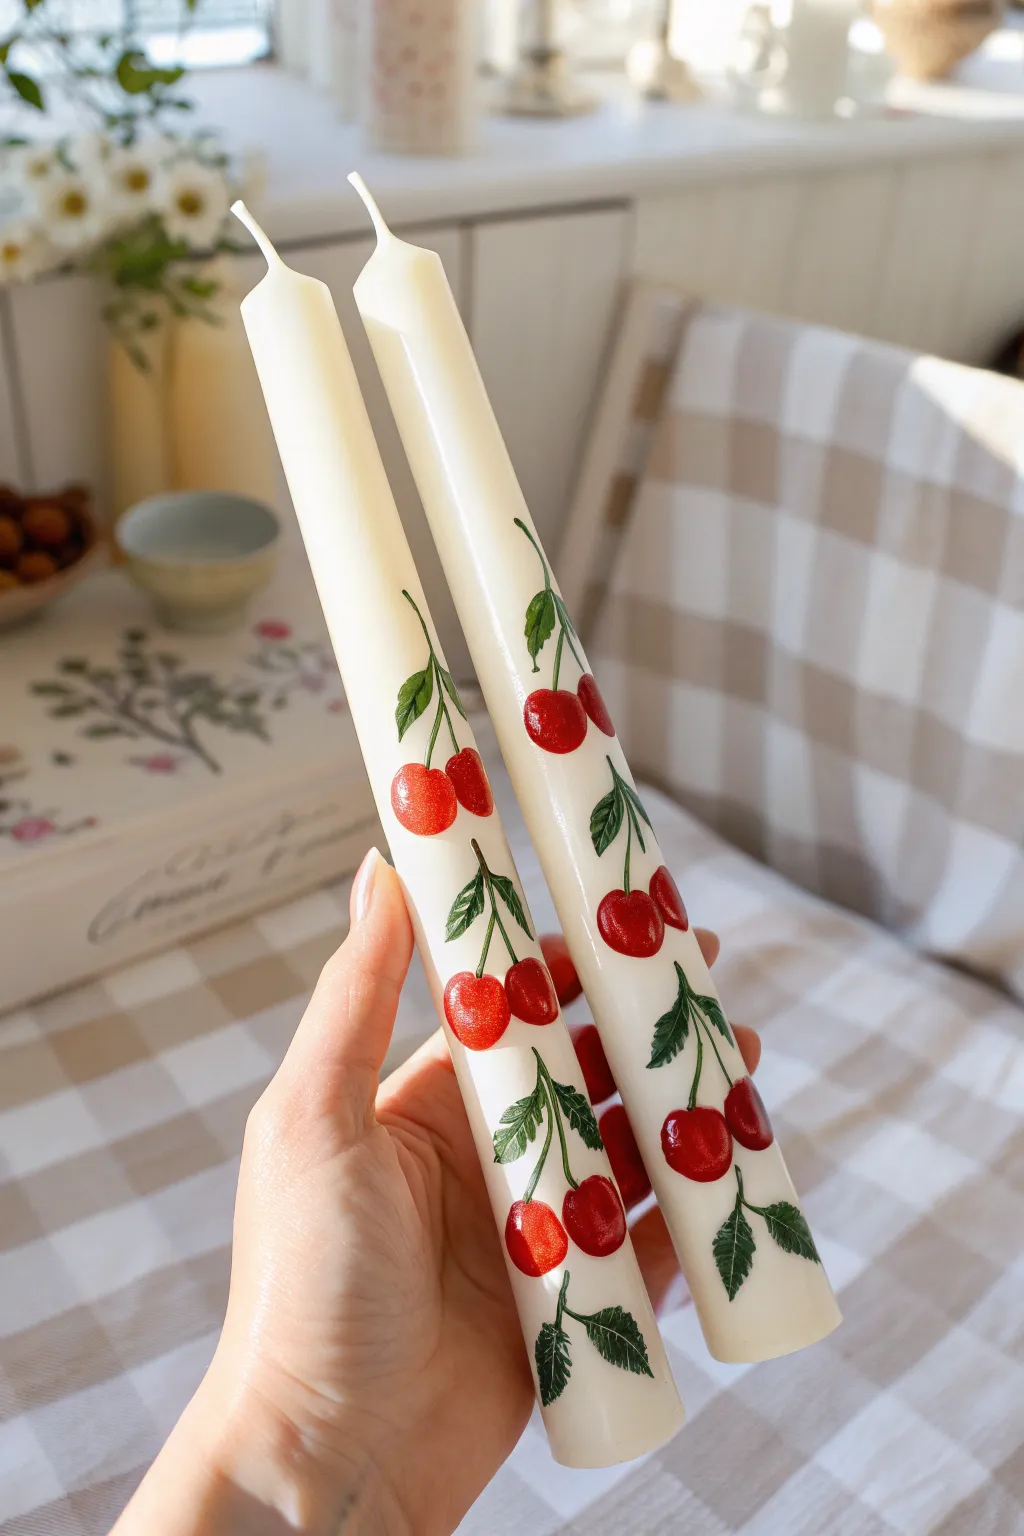
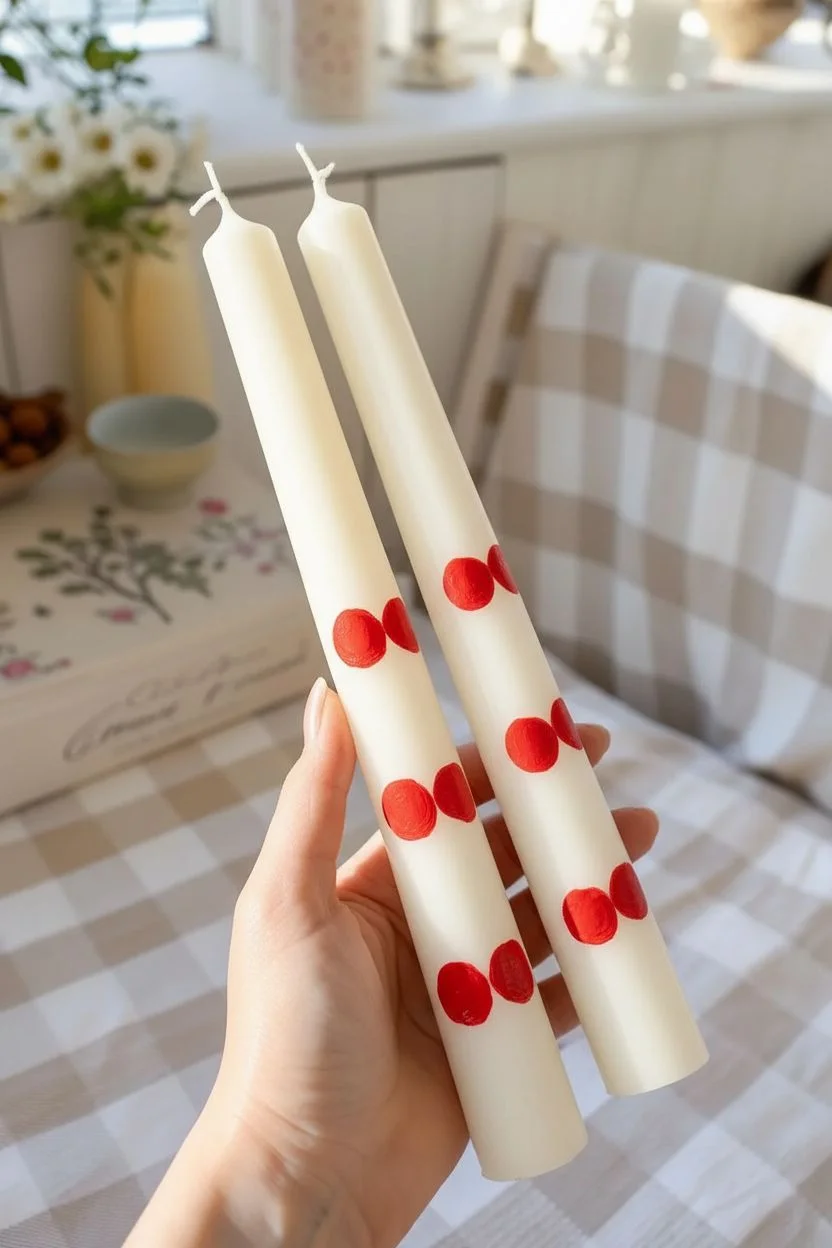
Transform plain dinner candles into a charming centerpiece with this sweet, hand-painted cherry motif. The design features juicy red fruit and detailed green leaves cascading down the wax for a fresh, whimsical look ideal for bright table settings.
Step-by-Step Tutorial
Materials
- Cream or white taper candles
- Rubbing alcohol
- Cotton pads
- Acrylic paints (Bright Red, Deep Red, Sap Green, Dark Green, White)
- Textile medium or Candle painting medium
- Round brush (size 2)
- Fine liner brush (size 0 or 00)
- Palette
- Paper towels
Step 1: Preparation and Base
-
Clean surface:
Dampen a cotton pad with rubbing alcohol and thoroughly wipe down the entire surface of the candles to remove manufacturing oils and fingerprints. -
Mix base color:
Squeeze a coin-sized amount of Bright Red acrylic paint onto your palette and mix it with an equal amount of textile or candle painting medium to improve adhesion. -
Start the pattern:
Using your size 2 round brush, paint two small circles near the top of the candle to form your first pair of cherries. -
Continue placement:
Work your way down the candle, painting pairs of red circles spaced about two inches apart. -
Vary alignment:
I like to stagger the position of the cherries slightly—some more to the left, some to the right—so the pattern feels organic rather than rigid. -
Build opacity:
Acrylics can be translucent on wax, so allow the red circles to dry for ten minutes before applying a second coat for a rich, solid color.
Step 2: Stems and Foliage
-
Mix stem color:
Clean your brush and mix Sap Green paint with your medium on the palette. -
Draw stems:
Switch to your fine liner brush. Start from the top center of a cherry and pull a thin, curved line upward. -
Connect pairs:
Draw a second stem from the partner cherry, angling it to meet the first stem at a central point above the fruit, creating an upside-down ‘V’ shape. -
Paint leaves:
At the junction where the stems meet, paint a small almond-shaped leaf, pressing the brush down at the base and lifting as you pull outward to create a point. -
Add variety:
For visual interest, paint two leaves on some bunches and just a single leaf on others. -
Refine edges:
Use the very tip of your liner brush to feather the edges of the green leaves slightly, giving them a jagged, natural texture.
Paint Slipping?
If your paint beads up on the wax surface, the candle is likely too oily. Wipe it again with alcohol, or try mixing a tiny drop of liquid dish soap into your acrylic paint to break the surface tension.
Step 3: Highlights and Details
-
Add depth:
Mix a small amount of Deep Red (or add a speck of black to your red) and paint a subtle crescent on the bottom curve of each cherry to suggest roundness. -
Detail leaves:
Load your liner brush with Dark Green paint and carefully draw a thin vein down the center of each leaf. -
Leaf texture:
Add tiny, diagonal lines branching off the center vein to enhance the realistic look of the foliage. -
Create shine:
Clean your liner brush thoroughly and dip it into pure White paint. -
Apply highlights:
Add a small, crisp white dot or curved dash to the upper side of each cherry, opposite your shadow area, to give them a glossy, juicy appearance. -
Final dry:
Stand the candles in holders and let them cure undisturbed for at least 24 hours to ensure the paint hardens completely.
Level Up: High Gloss
To make the cherries look freshly washed and hyper-realistic, apply a dot of clear gloss varnish or glossy Mod Podge specifically over the red fruit parts after the paint is fully dry.
With your new taper candles complete, your dining table is ready for a cheerful and stylish gathering.
Funky Checkerboard

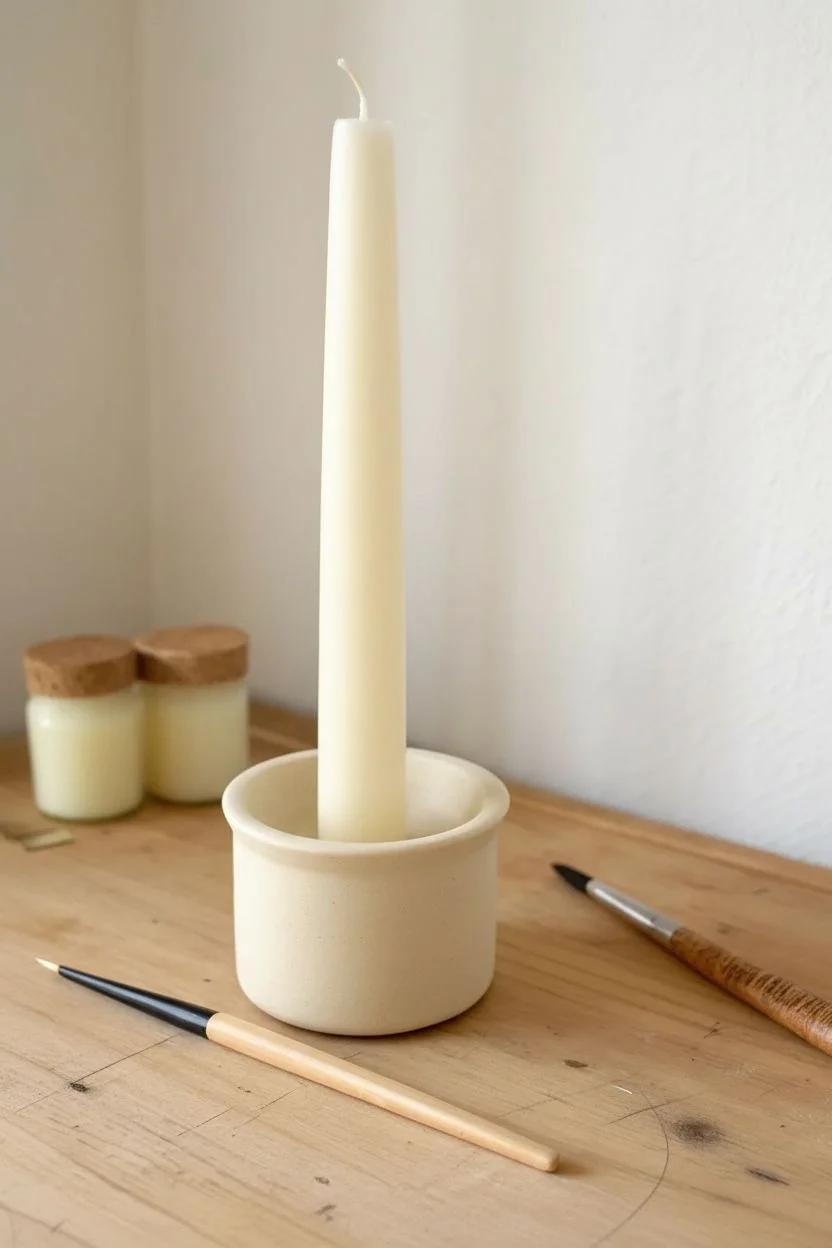
Transform a plain ivory taper and a simple ceramic holder into a modern art statement piece with this high-contrast painting tutorial. The harlequin diamond pattern adds a playful yet sophisticated touch to your decor, requiring only a steady hand and a bit of patience.
Detailed Instructions
Materials
- Smooth ivory taper candle
- Ceramic or matte glazed candle holder
- Black acrylic paint (non-toxic)
- Candle painting medium (mixing medium)
- Rubbing alcohol
- Cotton pads
- Small round paintbrush (size 2 or 4)
- Palette or small dish
- Paper towel
Step 1: Preparing the Canvas
-
Clean the wax:
Dip a cotton pad in rubbing alcohol and vigorously wipe down the entire surface of the taper candle to remove invisible manufacturing oils. -
Dry the surface:
Allow the candle to air dry for a minute or use a clean paper towel to ensure no moisture remains. -
Mix your medium:
On your palette, mix equal parts black acrylic paint and candle painting medium; this helps the paint adhere to the wax and burn safely. -
Load the brush:
Saturate your small round brush with the black mixture, twirling the tip against the palette to keep a sharp point.
Step 2: Painting the Candle Pattern
-
Start the first diamond:
Beginning about an inch from the top wick, paint a small diamond shape, ensuring the top and bottom points are vertically aligned. -
Create a vertical chain:
Paint a second diamond directly below the first so their tips just barely touch, continuing this chain all the way down to the base of the candle. -
Start the second column:
Rotate the candle slightly to begin the next vertical row; position these black diamonds so their widest points align with the narrow tips of the previous row’s diamonds. -
Mind the gap:
Leave unpainted diamond shapes of negative space between your black columns, creating that classic harlequin checkerboard look. -
Fill the shapes:
Go back and fill in the black diamonds with a second coat if the opacity looks streaky, though a little brush texture adds handmade charm. -
Continue rotation:
Repeat this alternating pattern around the entire circumference of the candle. -
Refine the edges:
I find it helpful to use a damp toothpick to gently scrape away any paint that strayed outside the intended diamond lines while it is still tacky.
Slippery Surface?
If the paint beads up on the wax immediately, the surface is still too oily. Wipe that section again with rubbing alcohol and let it dry completely before attempting another stroke.
Step 3: Styling the Holder
-
Clean the ceramic:
Wipe down your candle holder with a damp cloth to remove dust and let it dry completely. -
Paint the bottom triangles:
Along the main band of the holder, paint a series of black triangles with their flat bases resting on the bottom edge and points facing up. -
Paint the top inverted triangles:
Paint a corresponding row of inverted triangles hanging from the top rim, positioning their points to meet the points of the bottom triangles. -
Create the X effect:
Looking at the negative space, adjust your painted triangles so the beige unpainted areas form diamond or rhombus shapes between the black paint. -
Thicken the lines:
Go over your black geometric shapes one last time to ensure the color is solid and bold against the lighter ceramic. -
Final assembly:
Allow both the candle and the holder to dry for at least 24 hours before inserting the candle for display.
Mix It Up
To create a more tactile finish on the ceramic holder, mix a teaspoon of baking soda into your acrylic paint. This creates a terracotta-like texture that contrasts beautifully with the smooth wax.
Now you have a stunning, cohesive decor set that looks lovely even before you light the wick

PENCIL GUIDE
Understanding Pencil Grades from H to B
From first sketch to finished drawing — learn pencil grades, line control, and shading techniques.
Explore the Full Guide
Whimsical Mushrooms
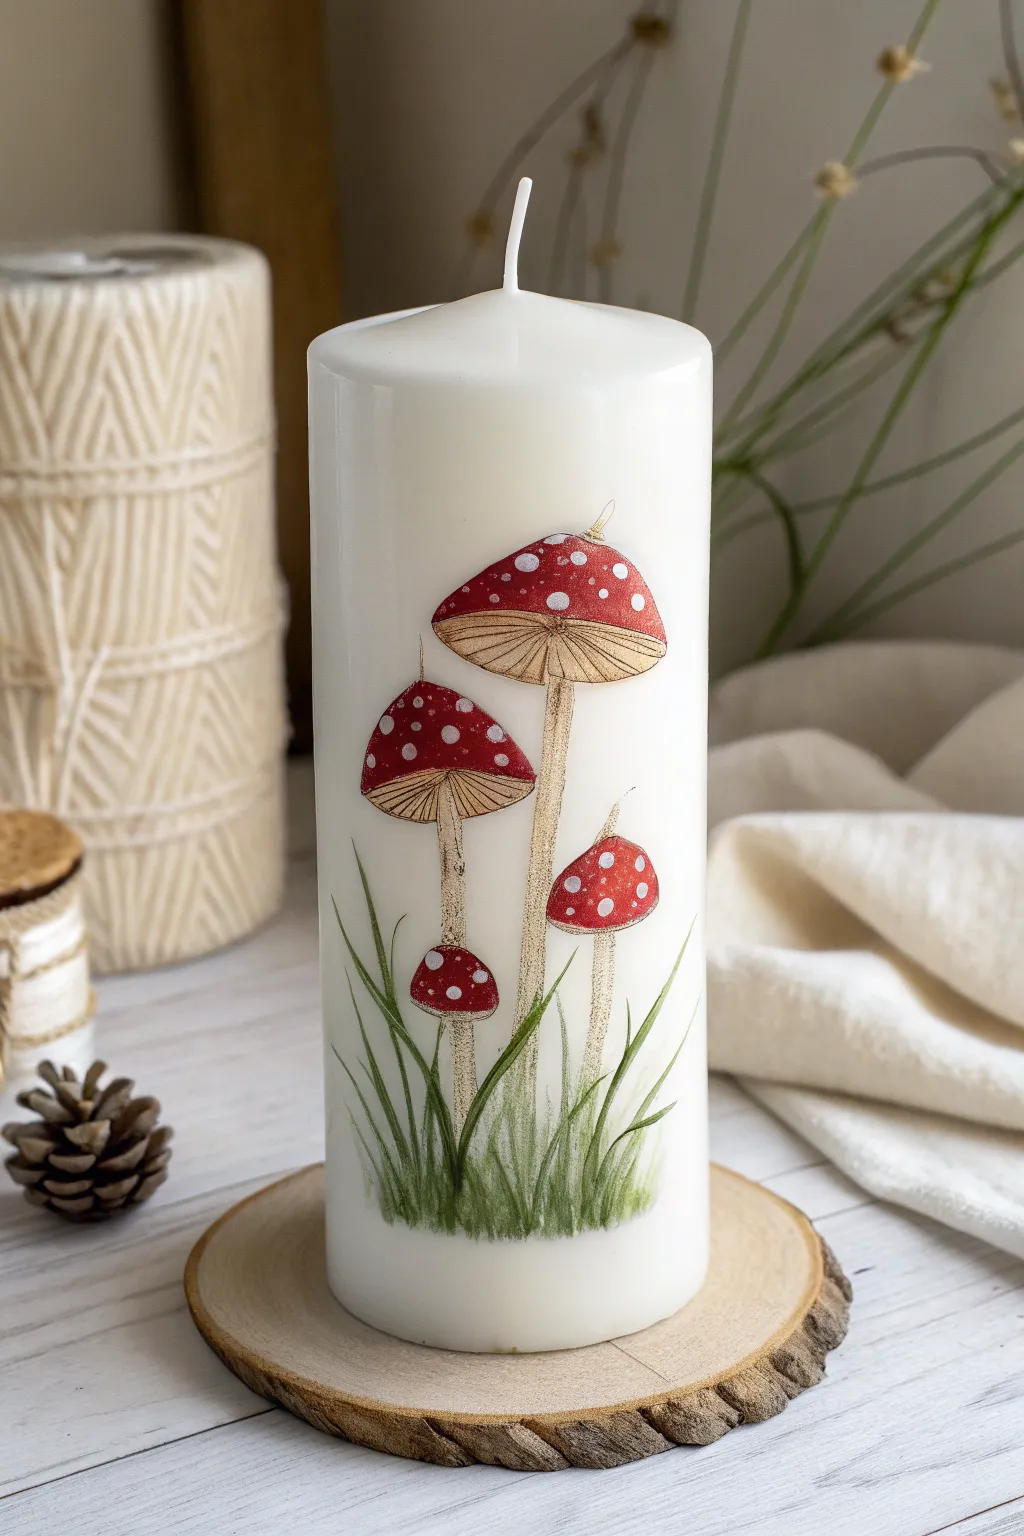

Bring a touch of enchanted forest charm to your decor with this hand-painted pillar candle. This project creates a delightful cottagecore aesthetic featuring vibrant fly agaric mushrooms rising from a bed of wispy grass.
Step-by-Step Tutorial
Materials
- White pillar candle (smooth surface)
- Rubbing alcohol and cotton pad
- Acrylic paints (Red, White, Beige, Dark Brown, Forest Green, Lime Green)
- Textile medium or Candle Painting Medium
- Detail brushes (sizes 0 and 00)
- Small flat brush
- Palette or mixing plate
- Paper towels
Step 1: Surface Prep & Outlining
-
Clean the surface:
Wipe the area of the candle you plan to paint with rubbing alcohol to remove any dust or manufacturing oils, ensuring the paint adheres properly. -
Prepare the paint mix:
Mix your acrylic paints with textile medium or candle painting medium simply according to the bottle’s instructions; this gives the paint flexibility so it won’t flake off the wax. -
Map the stems:
Using the beige mixture and a liner brush, paint thin vertical lines to mark the stems for four mushrooms—two tall ones in the center and two shorter ones on the sides. -
Sketch the cap shapes:
At the top of the tall stems, outline wide, triangular cap shapes, and for the short stems, draw rounded, dome-like shapes to represent younger mushrooms.
Step 2: Base Colors
-
Fill the stems:
Using a small flat brush, fill in the stems with your beige paint, widening them slightly at the base where they will meet the grass. -
Paint the caps:
Fill in the cap shapes with a bright red mixture, being careful to keep the edges crisp and smooth. -
Dry and opaque:
Allow the first layer to dry completely; since candle surfaces are slippery, I usually apply a second coat of red here to ensure solid, bold coverage. -
Paint the under-caps:
For the two taller mushrooms that are open, paint a shallow flattened oval shape underneath the red cap using a light tan color to serve as the background for the gills.
Paint Persistence
Don’t skip the mixing medium! Plain acrylic paint will eventually peel off wax surfaces. A textile or candle medium acts as a flexible binder.
Step 3: Fine Details
-
Add the gills:
Mix a small amount of dark brown into your beige to create a shadow tone, and use your finest brush to paint very thin, straight lines radiating from the stem to the edge of the cap. -
Define the annulus:
Paint a small, ragged ring or “skirt” around the upper third of the taller stems using the shadow tone to create the mushroom’s ring structure. -
Shade the stems:
Add a very sheer wash of the shadow brown texture along the right side of each stem to give them a cylindrical, 3D appearance. -
Apply the spots:
Dip the tip of a brush handle or a dotting tool into pure white paint and gently stamp irregular dots onto the red caps, varying the sizes for a natural look. -
Highlight the spots:
Once the white dots are tacky, dab a tiny bit of extra white in the center of the larger dots to make them look slightly raised.
Beading Paint?
If your paint separates or beads up on the wax, the surface is too oily. Wipe it again with rubbing alcohol and apply the first coat of paint “dry” (very little water).
Step 4: The Grassy Base
-
Base grass layer:
Load a liner brush with the forest green mixture and paint upward flicking strokes starting from the very bottom of the candle, overlapping the base of the mushroom stems. -
Add dimension:
Mix lime green with a touch of white and add fresh, lighter grass blades over the dark green ones, varying the height and angle to create wild, natural movement. -
Blend the bottom:
Use a damp brush to slightly feather the paint at the very bottom edge of the grass so it fades softly into the white wax rather than stopping abruptly. -
Final cure:
Let the candle sit undisturbed for at least 24 hours to allow the painting medium to fully cure and bond with the wax surface.
Now you have a stunning piece of illuminated art perfect for a cozy evening atmosphere
Blue Pottery Porcelain Style
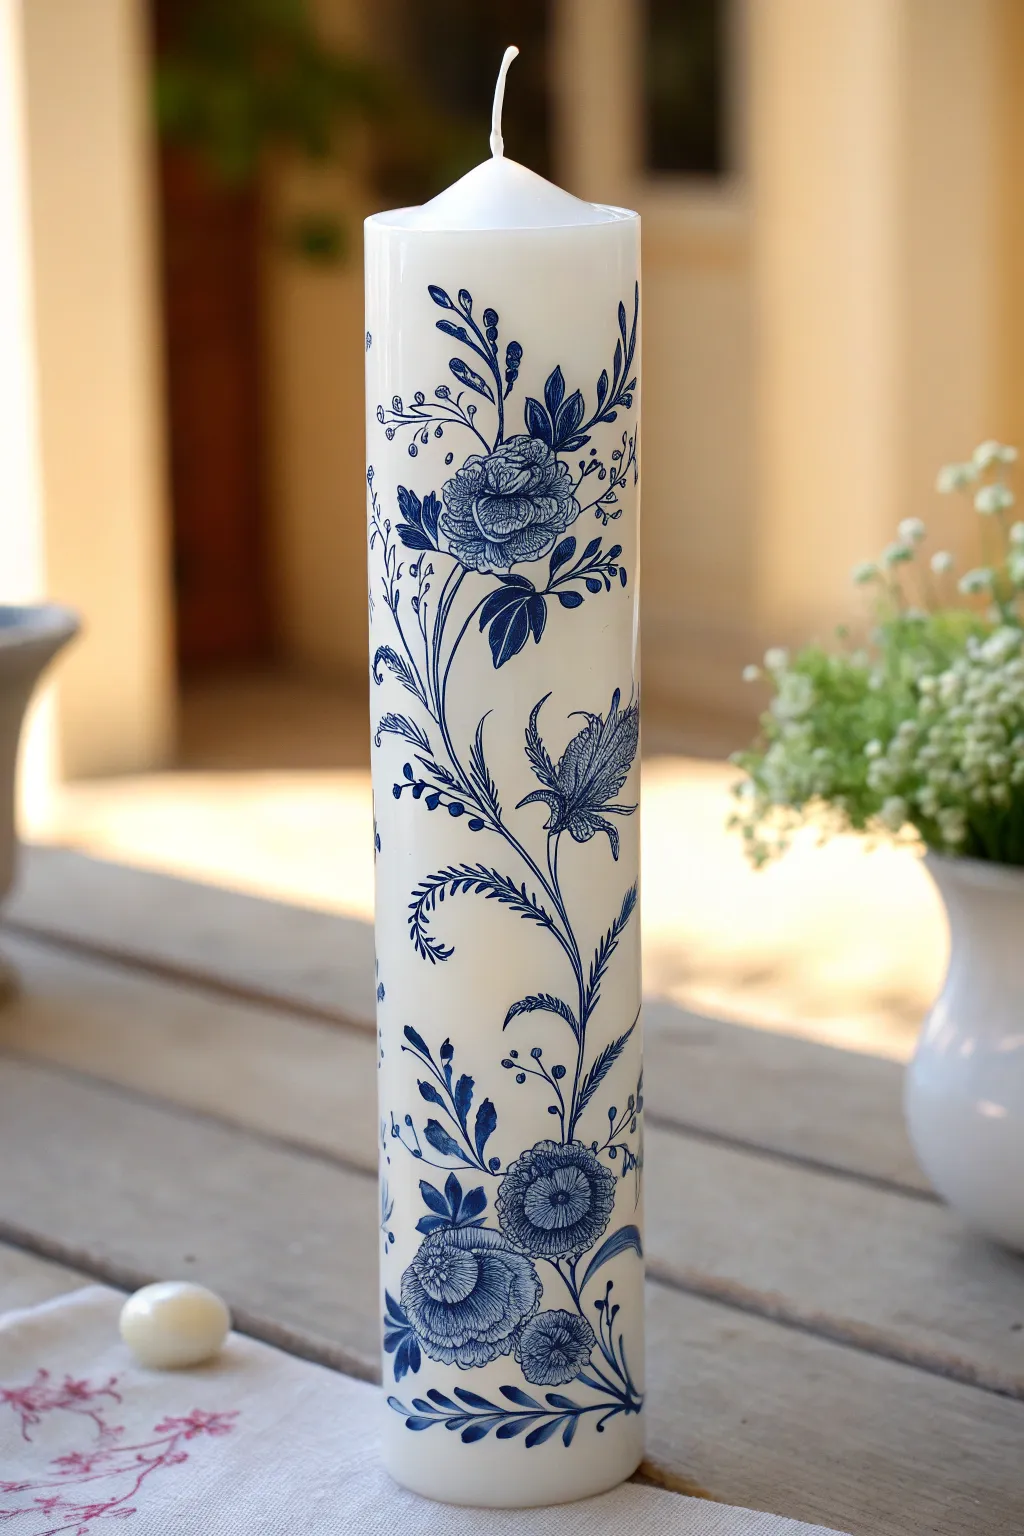
Transform a plain white pillar candle into a piece of classic decor inspired by Delft Blue pottery. Using fine brushwork and deep cobalt tones, you will recreate the intricate floral motifs and cross-hatching typical of vintage porcelain designs.
Detailed Instructions
Materials
- Large white pillar candle
- Rubbing alcohol
- Cotton pads
- Acrylic paint (Cobalt Blue or Phthalo Blue)
- Candle painting medium
- Fine detail brushes (size 000 and 0)
- Round brush (size 1)
- Tracing paper and pencil
- Stylus or ballpoint pen
- Palette
- Cotton swabs
Step 1: Preparation
-
Clean surface:
Wipe the entire surface of the candle with rubbing alcohol and a cotton pad to remove any oils or dust that might repel the paint. -
Mix your medium:
On your palette, mix your blue acrylic paint with the candle painting medium according to the bottle’s instructions (usually a 1:1 ratio). This ensures the paint adheres to the wax and burns safely. -
Plan the flow:
Cut a piece of tracing paper to the height of your candle. Sketch out a flowing, S-shaped vine design with a pencil to serve as your guide. -
Transfer the guide:
Wrap your sketch around the candle. Firmly trace over your pencil lines with a stylus or ballpoint pen to leave a faint indented guideline on the wax surface.
Step 2: Painting the Structure
-
Paint the main stem:
Load your size 1 round brush with the paint mixture. Starting from the bottom, follow your indented guide to paint the main winding stem that travels up the candle. -
Add branch offshoots:
Using the same brush, paint smaller stems branching off the main line where you plan to place your flowers and leaves. -
Outline the top rose:
Switch to a size 0 brush. I like to start the top rose by painting a tight, spiral-like center, then expanding outward with C-shaped strokes to form the petals. -
Create the lower blooms:
Near the base, outline the rounded shapes of the bottom flowers, keeping the edges slightly scalloped to mimic the reference.
Clean Lines Hack
Keep your brush perpendicular to the candle surface when painting fine lines. This prevents the belly of the brush from squishing down and making thick, unwanted strokes.
Step 3: Detailing the Flora
-
Shade with hatching:
This style imitates engraving, so avoid solid coloring. Instead, use your size 000 brush to paint tiny, parallel hatch marks inside the flower petals to create depth and shadow. -
Paint the leaves:
Paint the leaves attached to the stems. Make them slightly serrated or jagged on the edges rather than perfectly smooth for a realistic botanical look. -
Detail the leaf veins:
Once the leaf outlines are dry, use the very tip of your finest brush to draw a center vein and delicate side veins in each leaf. -
Add filler elements:
Look for empty spaces in your composition and fill them with tiny sprigs, buds on thin stems, or small fern-like fronds. -
Refine the lines:
Go back over any main lines that look too faint. The beauty of this style lies in the contrast between the white wax and the crisp blue lines.
Paint Beading Up?
If the paint separates on the wax, surface tension is too high. Add a tiny drop of dish soap to your paint mix, or wipe the candle area with alcohol again.
Step 4: Finishing Touches
-
Clean up edges:
If you made any stray marks, dip a cotton swab in a little water or rubbing alcohol and carefully wipe them away before the paint fully cures. -
Add final accents:
Place a few tiny dots around the flower centers or at the tips of the smallest branches to add texture and whimsy. -
Cure the paint:
Allow the candle to sit undisturbed for at least 24 hours. This lets the medium bind completely to the wax so the design stays put.
Now you have a stunning, hand-painted centerpiece that brings a touch of elegant antiquity to any room.


Abstract Organic Blobs


Transform a plain white pillar candle into a sophisticated piece of decor using intentional, textured brushwork. The beauty of this project lies in the visible bristles and thick paint application, creating abstract organic shapes that resemble rust-colored flowers and forest-green foliage.
Step-by-Step
Materials
- White pillar candle (unscented works best)
- Acrylic paints (burnt orange, rust red, forest green)
- Textile medium or candle painting medium
- Rubbing alcohol
- Cotton pads
- Flat shader brushes (size 6 and 8)
- Palette or paper plate
- Paper towels
Step 1: Preparation
-
Clean the surface:
Wipe the entire exterior of the candle with a cotton pad soaked in rubbing alcohol to remove any oils or dust that might prevent adhesion. -
Mix the medium:
On your palette, mix your acrylic paints with the textile or candle medium according to the bottle instructions (usually a 2:1 ratio of paint to medium). -
Prepare the orange:
Squeeze out the burnt orange and a small touch of rust red next to it, blending them only slightly so you get color variation in a single dip.
Paint sliding off?
If the paint beads up, the wax is too oily or polished. Buff the painting area lightly with fine-grit sandpaper to give the paint more ‘tooth’ to grab onto.
Step 2: Painting the Blooms
-
Load the brush appropriately:
Dip a size 8 flat brush into the orange mix. Do not overload it to the point of dripping, but ensure there is a thick amount of heavy body paint on the bristles. -
Create the first stroke:
Place the flat edge of the brush against the candle. Press firmly and pull the brush upward in a slight ‘C’ curve. -
Form the shape:
Repeat this motion right next to the first stroke, slightly overlapping, to create a rounded, cupped shape roughly the size of a apricot. -
Add texture:
If the paint looks too smooth, drag the dry bristles over the wet paint gently to create the vertical ridges and striations seen in the example. -
Layer depth:
While the orange is still tacky, pick up a tiny amount of the darker red on the corner of your brush and swipe it along the bottom curve of the blob for dimension. -
Repeat the pattern:
Create 3 to 5 of these orange shapes scattered around the candle. I like to vary the height and orientation slightly to keep it looking organic.
Make it shimmer
Once the matte paint is fully dry, dry brush a tiny amount of metallic gold acrylic over the textured ridges of the leaves for a holiday-ready look.
Step 3: Adding Foliage
-
Switch colors:
Clean your brush thoroughly or switch to a fresh size 6 flat brush for the greenery. -
Load the green:
Generously load the brush with the forest green mixture, ensuring the paint is thick enough to hold texture. -
Start the leaf stroke:
Position the brush near an orange bloom. Press the full width of the flat brush against the wax to start the base of the leaf. -
Taper the leaf:
Drag the brush upward or downward while slowly rotating the handle, twisting the brush so it lifts off the candle on the chisel edge, creating a sharp point. -
Create directional contrast:
Paint some leaves pointing up towards the wick and others drooping downwards to fill the negative space. -
Enhance the veins:
Use the brush tip to scratch gently through the wet green paint if needed, emphasizing the feather-like texture of the leaves. -
Fill gaps:
Step back and look at the composition. Add smaller, partial green strokes in any large empty white spaces, keeping the layout balanced but asymmetrical.
Step 4: Finishing Touches
-
Clean edges:
If any paint smudged where it shouldn’t have, use a damp cotton swab to wipe it away immediately before it sets. -
Dry time:
Allow the candle to dry undisturbed for at least 24 hours. The medium needs time to cure to the wax properly. -
Burn safety check:
Ensure no paint is on the wick or the very top edge of the candle where the flame will sit directly.
Light your candle and enjoy the warm glow illuminating your hand-painted textures
Cow Print CRAZE
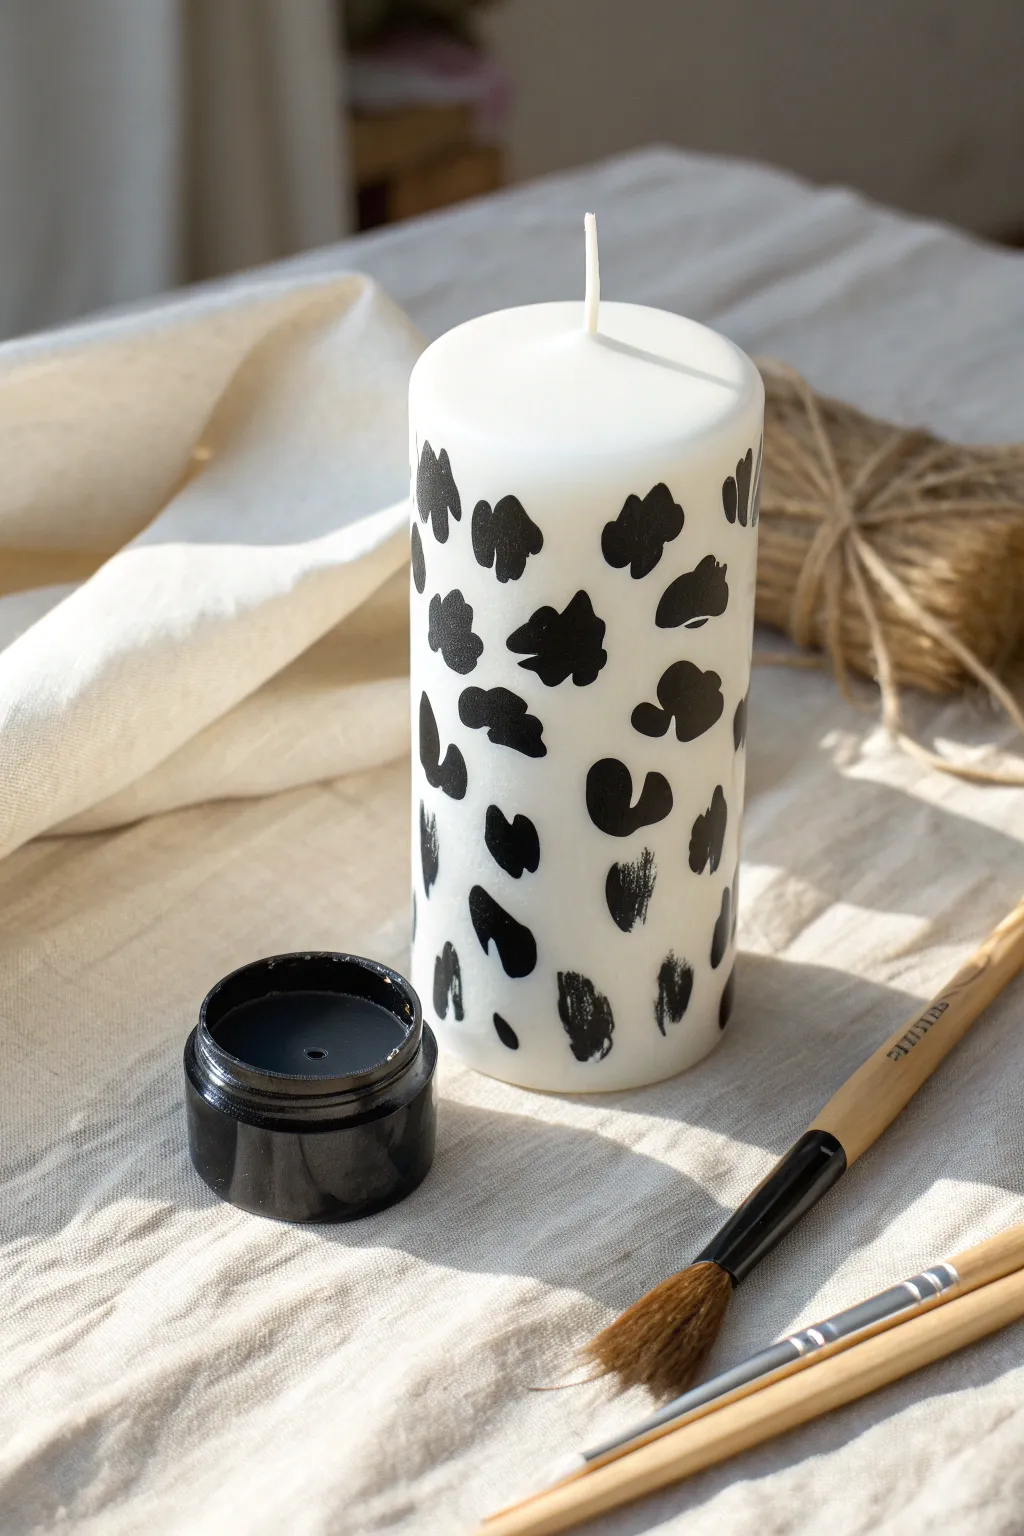
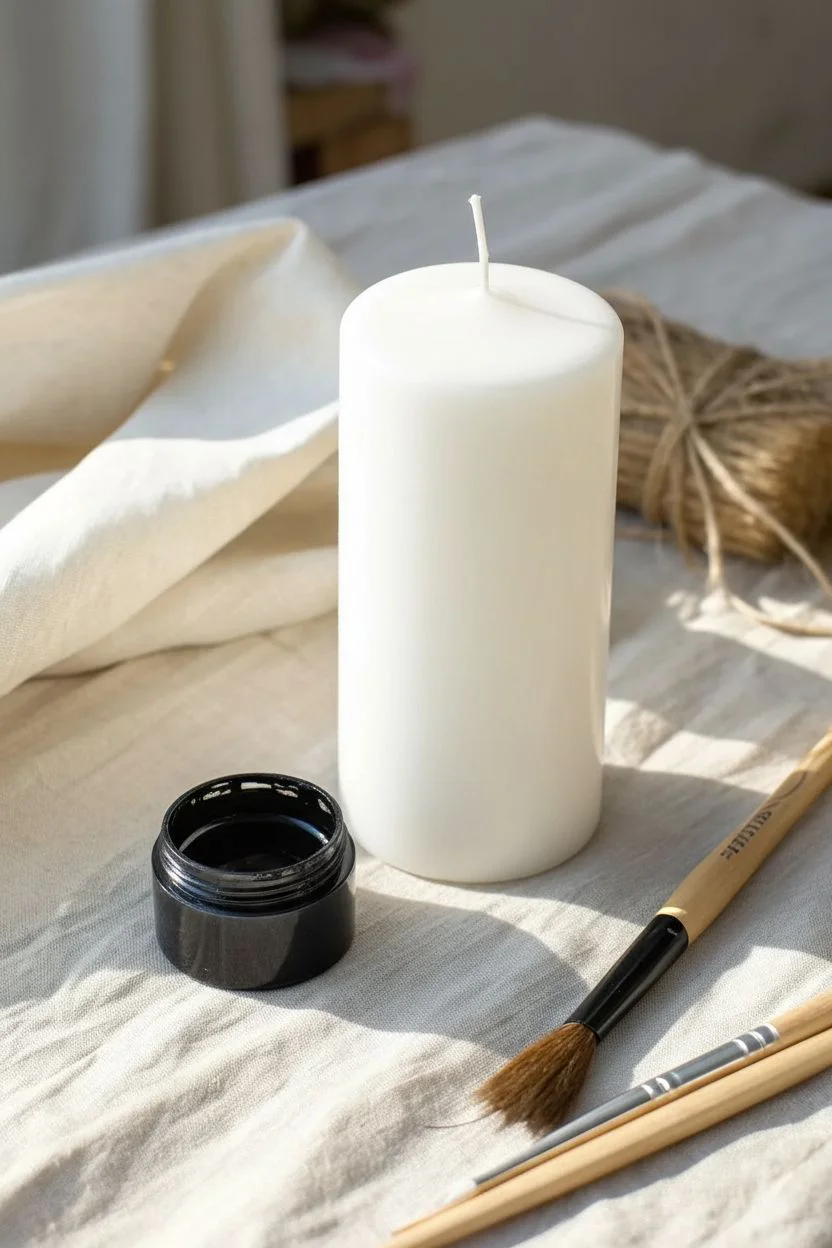
Transform a plain white pillar candle into a trendy statement piece with this simple cow print design. The bold black-and-white pattern brings a playful yet modern aesthetic to any room, and the organic shapes make it perfect for freehand painting.
Detailed Instructions
Materials
- White pillar candle (unscented works best)
- Black candle painting medium (or acrylic paint mixed with textile medium)
- Small flat shader brush or filbert brush
- Rubbing alcohol
- Cotton pads or lint-free cloth
- Palette or small dish
Step 1: Preparation
-
Clean the Surface:
Begin by wetting a cotton pad or lint-free cloth with a small amount of rubbing alcohol. -
Wipe Down:
Thoroughly wipe the entire surface of the white pillar candle to remove manufacturer oils, dust, and fingerprints. -
Dry Time:
Allow the candle to air dry for a few minutes; a clean, dry surface is crucial for the paint to adhere to the wax. -
Prepare Paint:
Open your jar of specific candle paint or mix a dollop of black acrylic with a textile medium on your palette. -
Select Brush:
Choose a small flat brush with a rounded tip (filbert), as the curved bristles help create softer, natural-looking edges.
Slippery Surface
Paint often slides on wax. Instead of long strokes, try a dabbing or stippling motion to build up opaque color without lifting the layer underneath.
Step 2: Painting the Pattern
-
Load Brush:
Dip your brush into the black paint, loading enough product to cover the wax without dripping. -
First Spot:
Press the brush gently onto the wax near the top rim and wiggle it slightly to form an irregular, organic blob. -
Vary Sizes:
Create the next spot nearby, but change the size; cow print looks best when large patches are mixed with smaller dots. -
Shape Edges:
Avoid perfect circles to keep the look authentic; I like to flick the brush slightly at the edges to mimic uneven animal hide. -
Spacing:
Leave generous amounts of white space between the black spots to let the pattern breathe. -
Rotation:
Carefully rotate the candle as you work, holding it by the top wick area or the very bottom base to avoid smudging wet paint. -
Wrap Around:
Paint some spots that appear to wrap around the curvature of the candle rather than sitting flat on the ‘front’ view. -
Fill Gaps:
Scan for large empty white areas and fill them with smaller accent dots to balance the overall composition.
Step 3: Finishing Touches
-
Check Opacity:
inspect your black spots for translucency; wax can be slippery, so you may need to dab on a second layer. -
Smooth Ridges:
Use the edge of your brush to gently smooth out any thick ridges of paint before they dry completely. -
Curing:
Set the candle aside in a dust-free area and let it dry for at least 24 hours. -
Hands Off:
Resist the urge to touch the spots during this time, as paint on wax stays tacky much longer than on paper. -
Final Polish:
Once fully cured, you can gently buff the unpainted white sections with a soft cloth to restore the wax’s sheen.
Make It Pop
Switch up the palette by using pastel pink or baby blue paint instead of black for a dreamy, soft-aesthetic version of the classic cow print.
Display your chic new candle on a stack of books or a decorative tray to add a dash of whimsy to your decor
Gold Celestial Moons
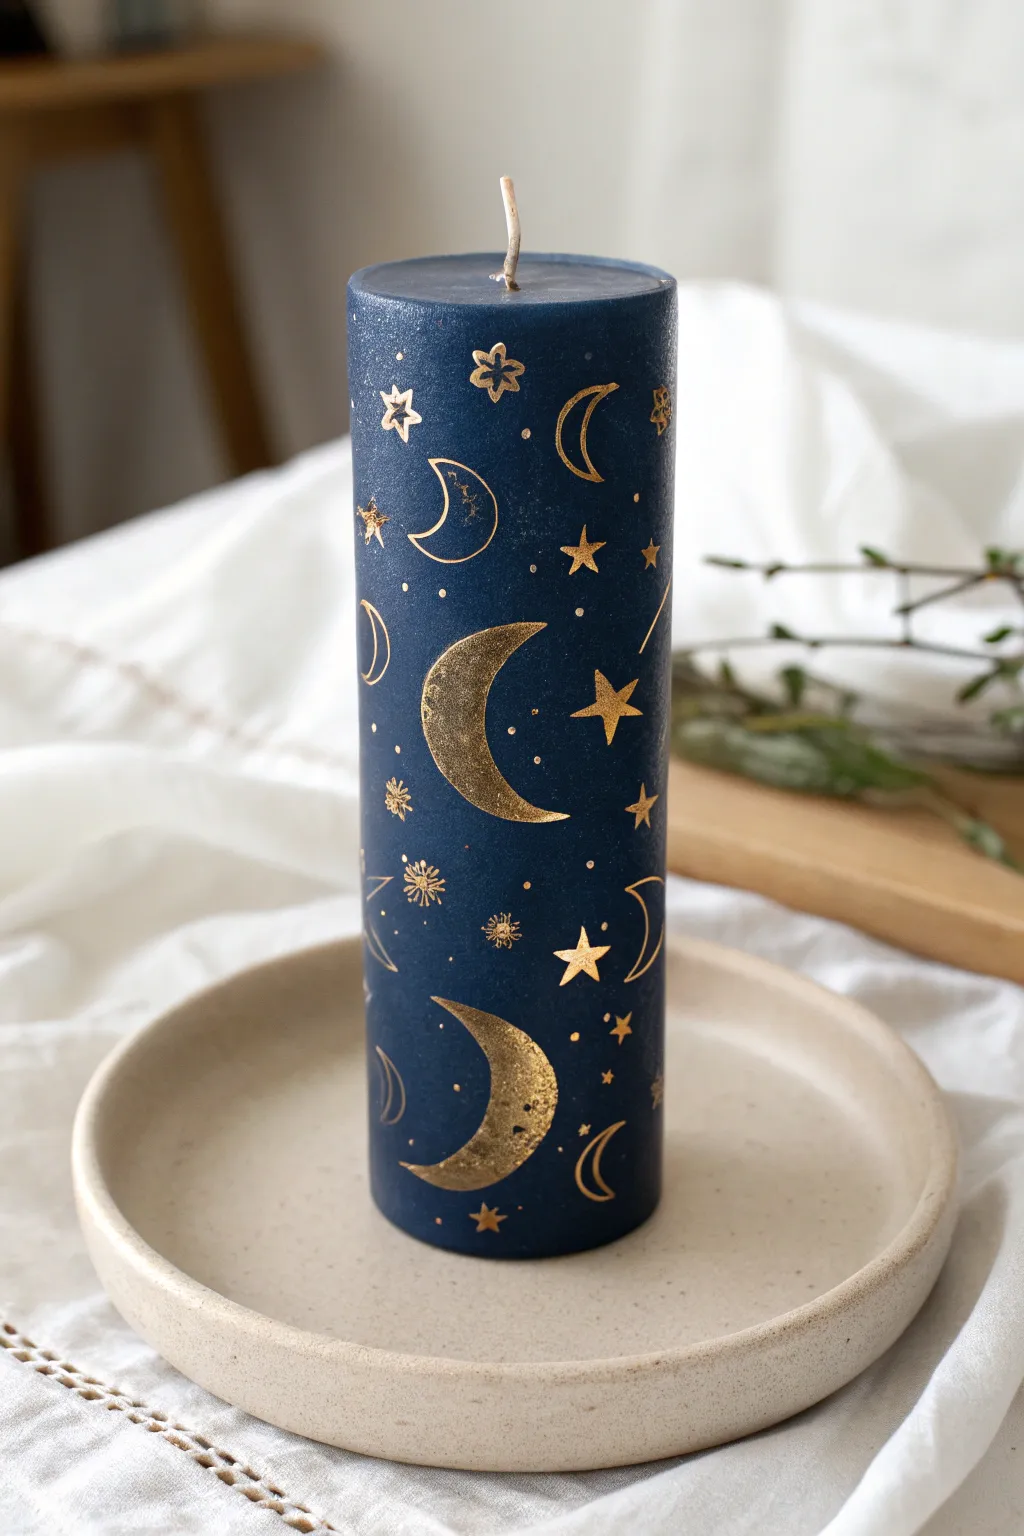
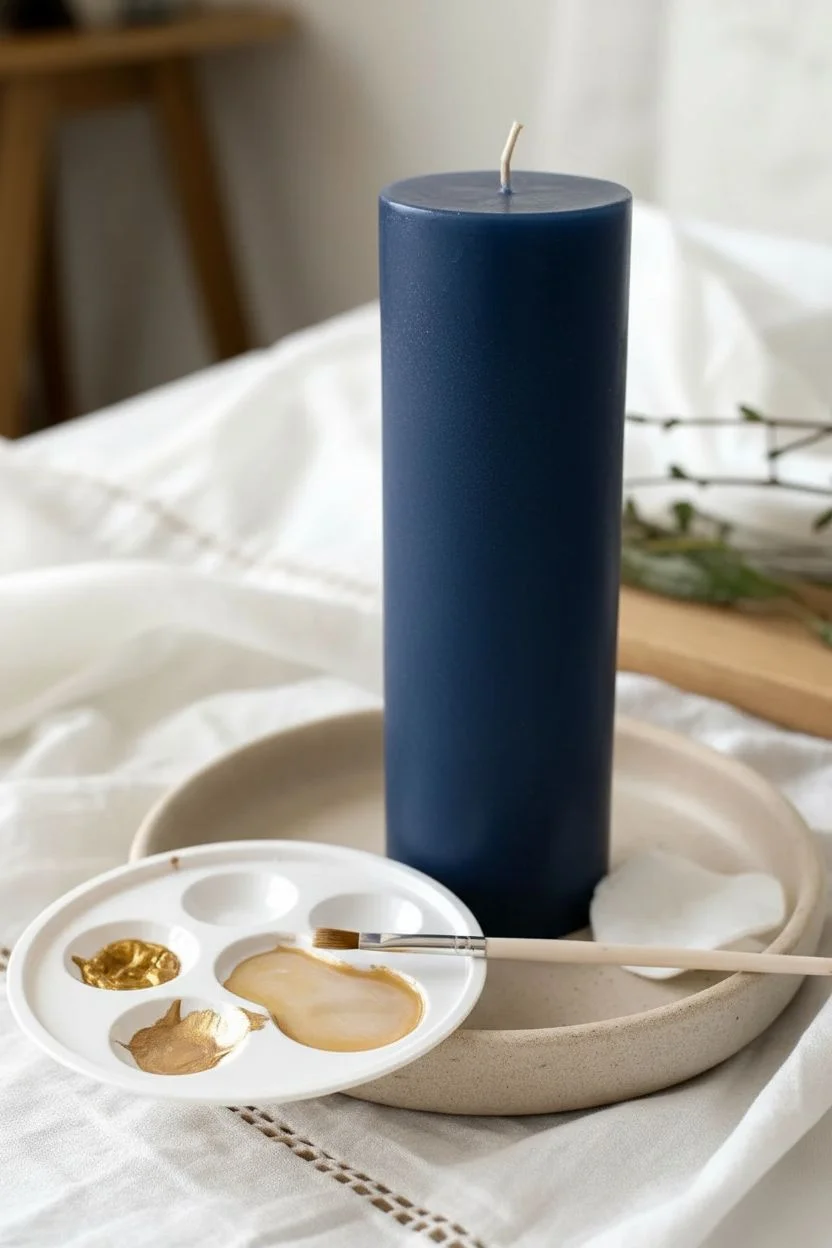
Transform a simple navy pillar candle into a piece of mystical decor with this celestial design. The striking contrast between deep blue wax and shimmering metallic gold creates a dreamy aesthetic perfect for cozy evenings.
Step-by-Step Guide
Materials
- Navy blue smooth pillar candle
- Metallic bright gold acrylic paint
- Candle painting medium (or textile medium)
- Rubbing alcohol and cotton pads
- Small flat synthetic brush (size 2 or 4)
- Fine detail liner brush (size 00)
- Small piece of kitchen sponge or cosmetic wedge
- Paint palette
Step 1: Surface Preparation
-
Clean the canvas:
Wipe the entire surface of the navy candle with a cotton pad soaked in rubbing alcohol to remove any manufacturing oils or fingerprints. -
Mix the medium:
On your palette, mix equal parts metallic gold paint and candle painting medium. This ensures the paint adheres to the wax and burns safely.
Pro Tip
Prepare your paint mixture freshly in small batches. Acrylics mixed with medium can thicken quickly, and a fresh flow helps keep your fine lines crisp.
Step 2: Painting the Moons
-
Establish the focal points:
Using the small flat brush, paint three to four large crescent moon shapes randomly around the candle, spacing them out vertically and horizontally. -
Create texture:
Before the large moon paint dries completely, dab the center of the crescents gently with a small piece of sponge to create the cratered, stippled texture seen in the image. -
Add outline moons:
Switch to your fine liner brush and paint delicate outlines of crescent moons in the empty spaces between the filled ones. -
Vary the sizes:
I like to ensure some outline moons are smaller than the solid ones to create a sense of depth and variety.
Step 3: Adding the Stars
-
Paint solid stars:
With the liner brush, paint classic five-point stars scattered throughout the design. Start with an inverted ‘V’ and cross it. -
Refine the points:
Go back over the solid stars to sharpen the tips, ensuring they look distinct against the dark background. -
Create skeletal stars:
Draw a few open five-point stars using very thin lines, leaving the inside of the shape unpainted. -
Add starbursts:
Paint simple eight-point bursts by drawing a small cross and adding a smaller ‘x’ through the center. -
Insert flower stars:
Paint a few small flower-like stars by creating a central dot and six small radiated loops around it.
Level Up
For a mystical 3D effect, press small flakes of real gold leaf onto the large moons while the paint is still tacky, then brush away the excess.
Step 4: Stardust and Details
-
Fill the void:
Dip the very tip of your liner brush or a toothpick into the gold paint mixture. -
Create constellations:
Dot the empty navy spaces with tiny specks of gold to represent distant stars and galaxy dust. -
Review the rotation:
Slowly turn the candle to identify any large blank patches that need an extra small star or moon outline. -
Dry time:
Allow the paint to set for at least one hour before handling. -
Final cure:
Let the candle cure for a full 24 hours before lighting it to ensure the paint and medium have fully bonded to the wax.
Now you have a stunning custom candle that captures the magic of a starry night sky.
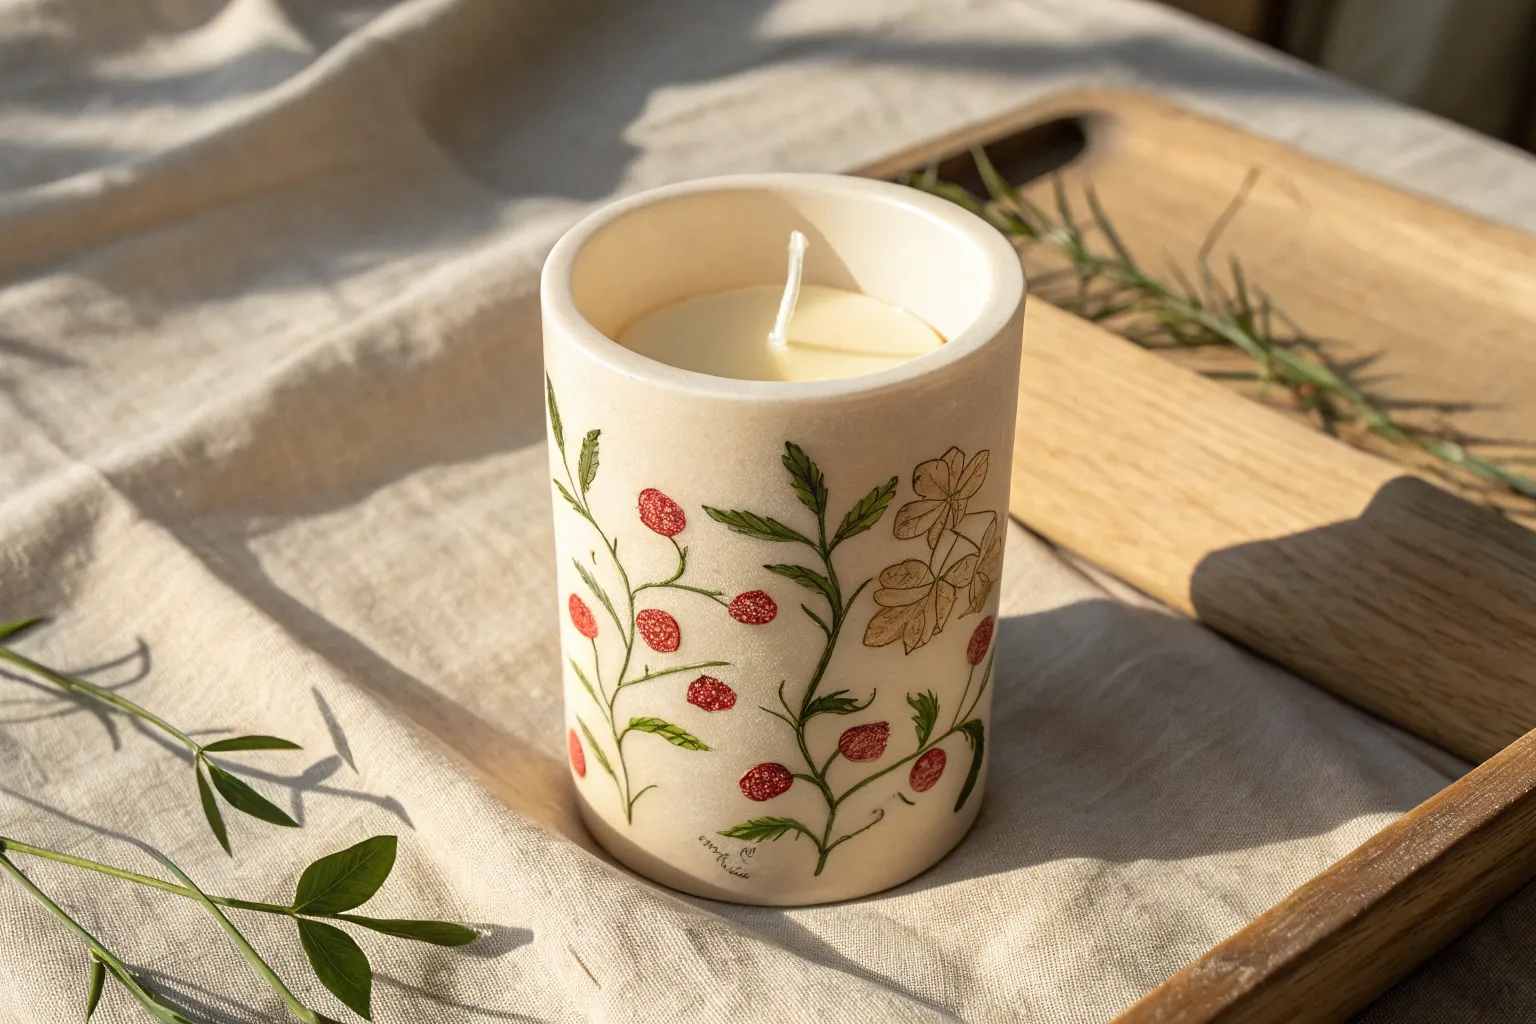
Juicy Strawberry Season
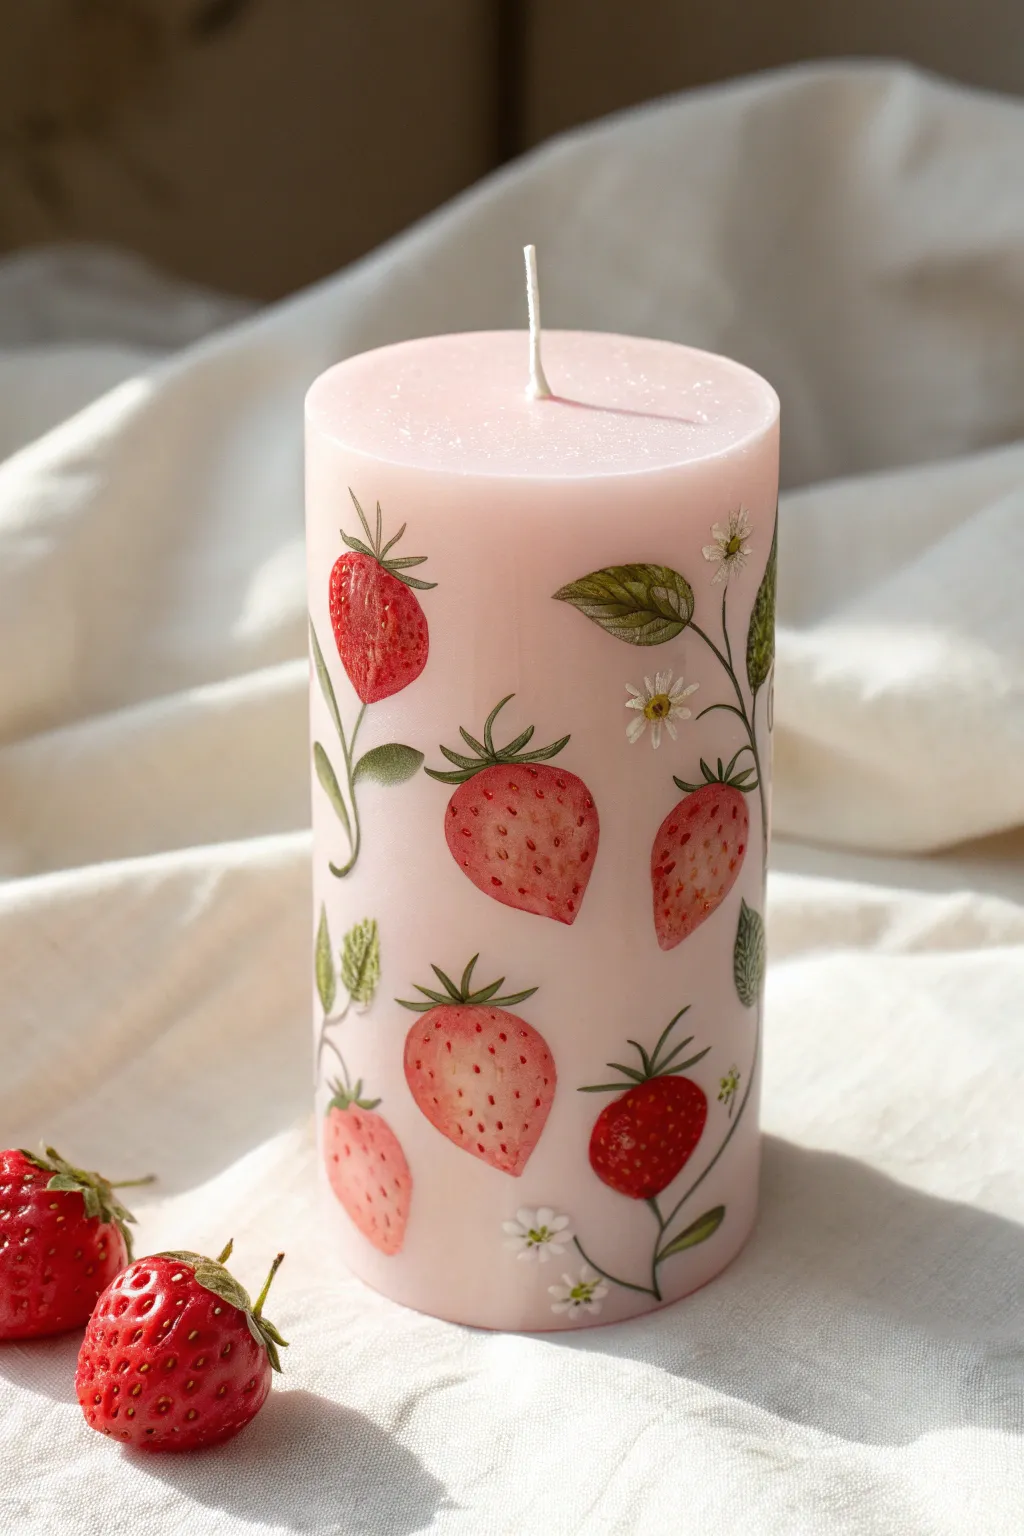
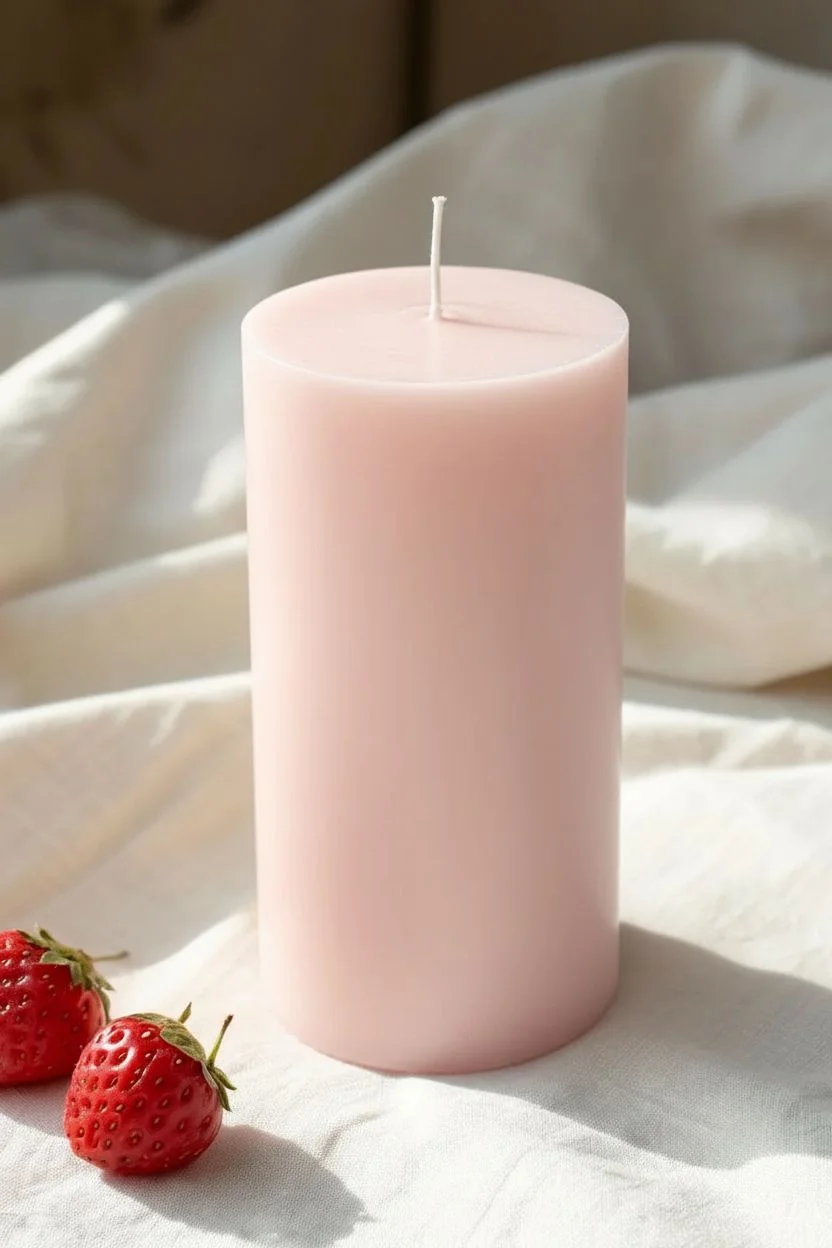
Transform a simple pink pillar candle into a botanical delight featuring juicy strawberries and delicate wildflowers. This project uses acrylics mixed with a special medium to ensure the design adheres smoothly to the wax surface for a long-lasting finish.
Step-by-Step
Materials
- Large pale pink pillar candle
- Acrylic paints (Red, Pink, Sap Green, Dark Green, White, Yellow, Brown)
- Candle painting medium or textile medium
- Rubbing alcohol and cotton pads
- Fine synthetic paintbrushes (Round sizes 0, 2, and 4)
- Palette or mixing plate
- Paper towels
Step 1: Preparation and Planning
-
Clean the surface:
Wipe the entire surface of the candle with a cotton pad soaked in rubbing alcohol. This removes manufacturing oils and fingerprints that prevent paint from sticking. -
Mix your medium:
On your palette, mix your acrylic paints with the candle painting medium according to the bottle instructions (usually a 1:1 ratio). This step is crucial so the paint doesn’t flake off the wax. -
Plan the composition:
Visualize a flowing S-curve pattern for your vines. You can lightly scratch the main stems’ path into the wax with a toothpick to guide you, but keep the marks faint.
Paint sliding off?
If the paint beads up, the wax is too oily. Wipe the area with alcohol again. For stubborn wax, lightly buff the spot with fine-grit sandpaper to create tooth.
Step 2: Painting the Fruit
-
Base shape:
Using a size 4 brush and your mixed red paint, create soft, rounded teardrop shapes for the strawberries scattered around the candle. -
Vary the ripeness:
Mix a little white into your red to make pink, or use a separate pink shade. Paint a few ‘unripe’ berries to add variety and realism to the composition. -
Create dimension:
While the paint is still slightly wet, add a tiny touch of darker red to one side of the berry and a lighter pink to the center to create a round volume. -
Drying time:
Allow the berry shapes to dry completely before moving on. I like to work on opposite sides of the candle to avoid smudging wet paint with my hand.
Make it Juicy
Once the paint is fully dry, apply a dot of glossy varnish or clear nail polish strictly over the strawberries. This makes the fruit look wet and freshly picked.
Step 3: Adding Greenery
-
Paint the sepals:
Using the size 2 brush and sap green, paint the leafy ‘hats’ sitting on top of each strawberry. Use quick, flicking strokes to make the tips pointy. -
Connect the vines:
Mix a medium green shade and paint thin, winding stems connecting your berries. Let them meander naturally up and around the pillar. -
Add leaves:
Paint broad, almond-shaped leaves branching off the main stems. Vary the green tones, making some leaves darker than others for depth. -
Leaf detailing:
Once the green leaves are dry, switch to your smallest size 0 brush. Use a darker green to paint thin central veins on the leaves.
Step 4: Fine Details
-
Strawberry seeds:
Mix a warm brown or deep red. Using the very tip of your size 0 brush, gently dot tiny seeds over the surface of the strawberries. -
Seed placement:
Try to arrange the seeds in diagonal rows that curve slightly with the shape of the fruit to enhance the 3D effect. -
Tiny blossoms:
clean your size 2 brush and dip it in white paint. Press the brush down gently five times in a circle to create small daisy-like flowers filling the gaps. -
Flower centers:
Add a tiny dot of yellow mixed with a speck of brown to the center of each white flower for a realistic pollen look. -
Highlighting:
Add extremely subtle white highlights to the top curves of the strawberries and the glossiest parts of the leaves to make them pop. -
Final cure:
Let the candle sit undisturbed for at least 24 hours to allow the paint and medium to fully cure and bond to the wax.
Now you have a charming, customized piece of decor that looks garden-fresh and ready to light up your space.
Leopard Print Glam
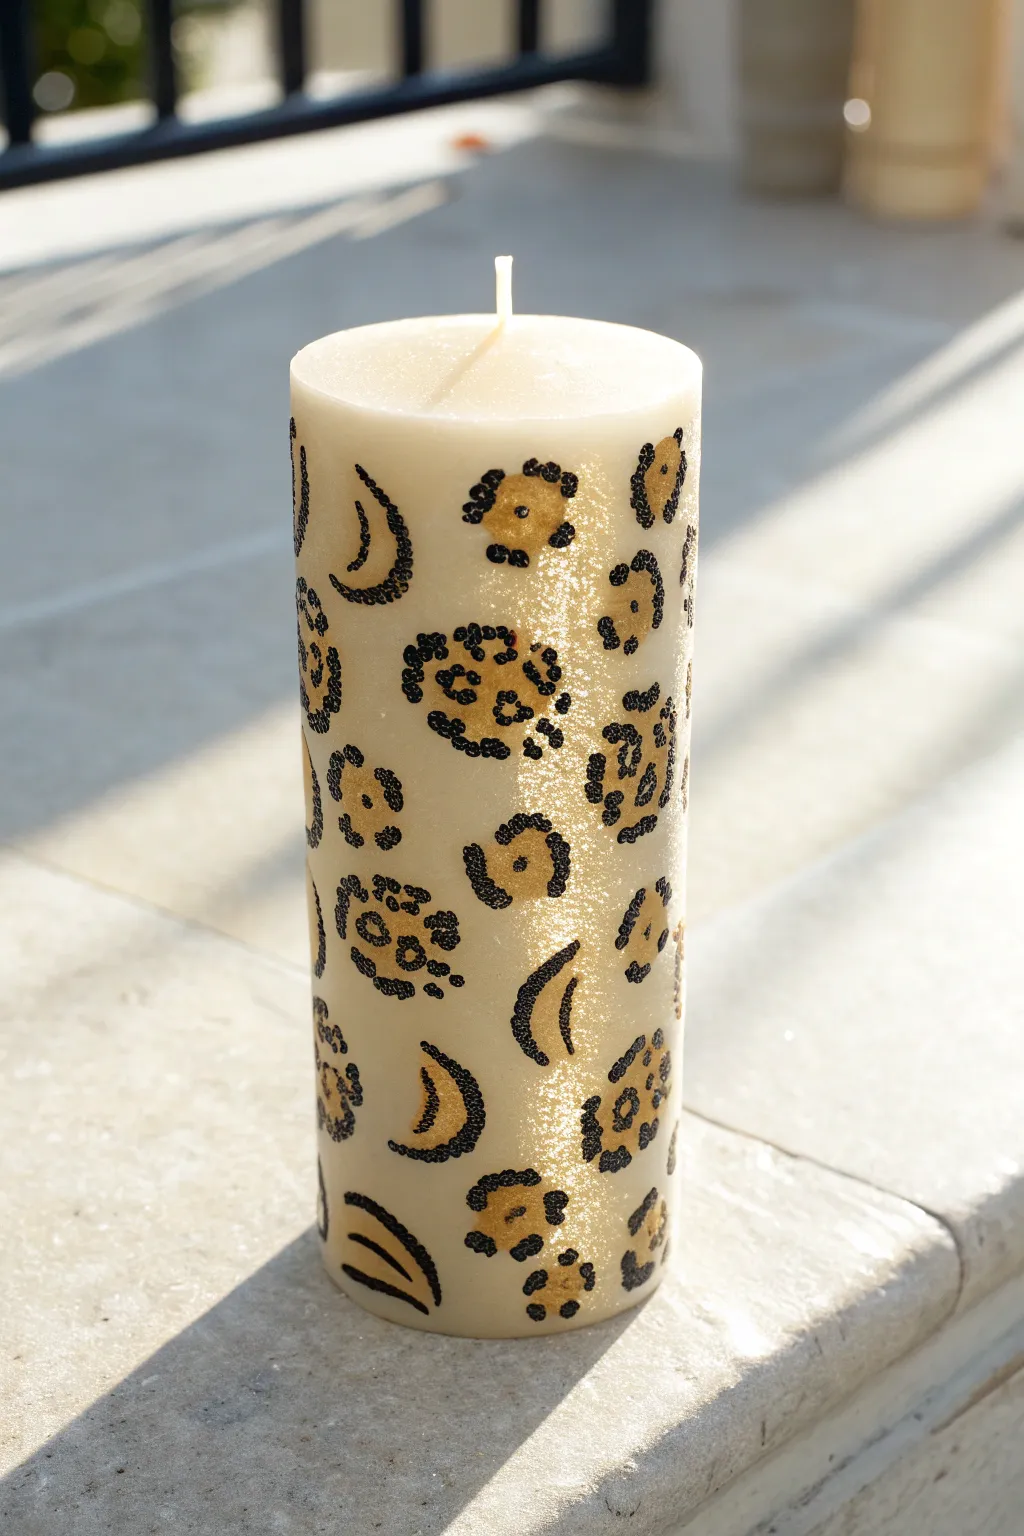
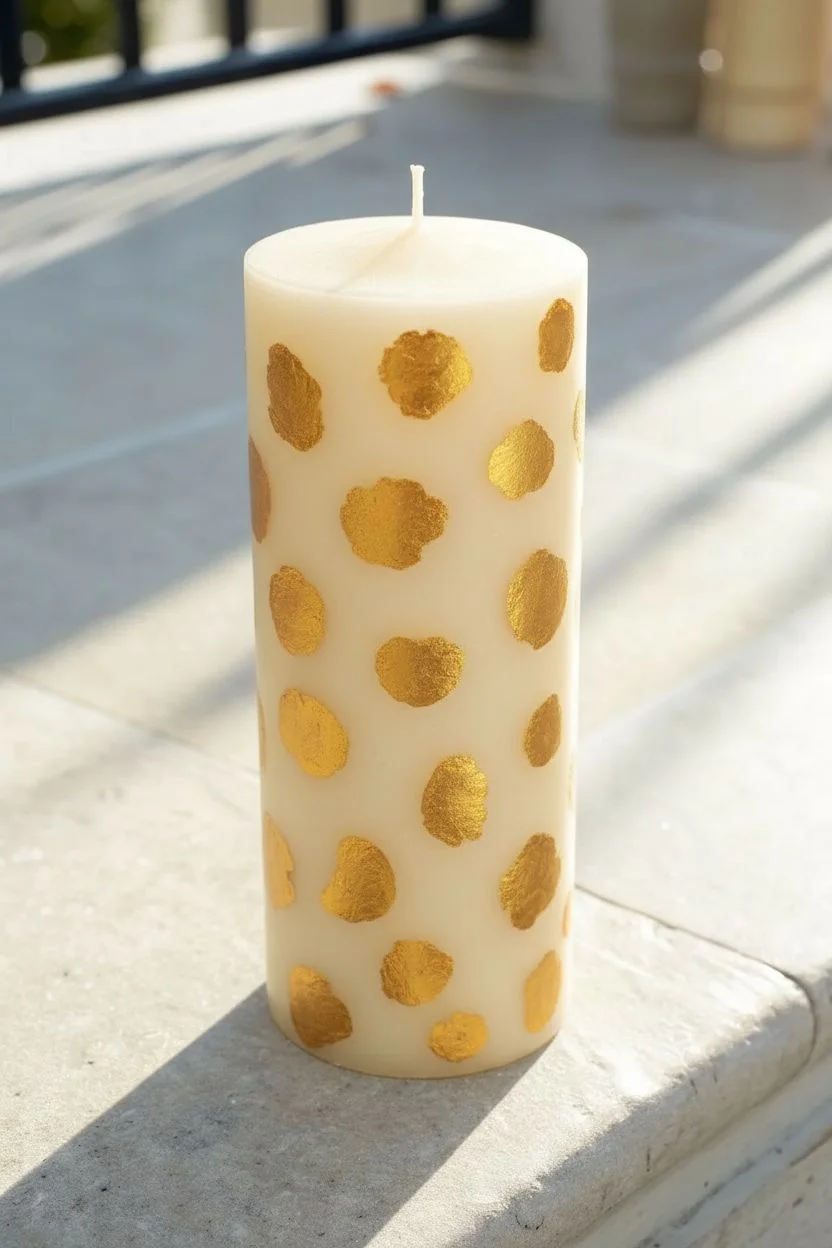
Transform a plain pillar candle into a chic statement piece using a simple stippling technique. The combination of metallic gold centers and textured black dot outlines creates a glamorous, tactile finish that mimics the luxury of animal print.
Step-by-Step Guide
Materials
- Large ivory or cream pillar candle
- Acrylic paint (Metallic Gold)
- Acrylic paint (Black)
- Candle painting medium or textile medium
- Rubbing alcohol and cotton pad
- Small flat paintbrush
- Fine detail brush (size 00) or dotting tool
- Palette or paper plate
Step 1: Preparation and Base
-
Clean the surface:
Before laying down any paint, wipe the entire surface of the candle with rubbing alcohol on a cotton pad. This removes invisible oils from your hands that can prevent paint adhesion. -
Prepare the gold mixture:
On your palette, mix equal parts heavy body metallic gold acrylic paint with your candle painting medium. The medium is essential to ensure the paint clings to the wax without flaking off later. -
Paint the abstract centers:
Using the small flat brush, dab irregular, organic shapes of gold onto the candle. Think of these as uneven blobs rather than perfect circles. -
Vary the sizing:
Make some gold spots larger and some smaller to create a natural, non-repetitive pattern. I find that varying the size keeps the design from looking too uniform or manufactured. -
Space them out:
Leave varying amounts of cream wax showing between your gold shapes. You need enough negative space to add the black detailing later without the design becoming muddy. -
Let the gold set:
Allow the gold paint to dry to the touch, which usually takes about 20 to 30 minutes depending on how thick you applied it.
Build Texture
To get the raised, beaded look shown in the image, do not add water to your black paint. Use heavy body acrylics and dab them on thickly so the dots retain 3D volume.
Step 2: Stippling the Rosettes
-
Prepare the black paint:
Mix a small amount of black acrylic with the medium. Keep this mixture relatively thick; we want the black dots to have a slight raised texture. -
Load the detail brush:
Dip just the very tip of your fine detail brush into the black paint. You want a decent amount of paint on the tip to create a bead. -
Begin the outline:
Choose a gold spot to start with. Instead of dragging a line, gently press the tip of the brush down to create a single dot on the edge of the gold. -
Form the brackets:
Continue adding dots side-by-side to create a stippled line that curves around the gold spot. Aim for ‘C’ shapes or brackets, rather than fully encircling the gold. -
Leave small gaps:
Leopard print is open and airy. I usually place two or three separate bracket shapes around one gold center, leaving gaps where the gold touches the cream background. -
Vary dot density:
For a more artistic look, vary the pressure slightly so some black dots are tiny and others are bolder. This mimics the texture seen in the reference photo. -
Repeat the process:
Work your way around the candle, stippling outlines for all your gold spots. Rotate the candle frequently to ensure you don’t smudge wet paint with your hand.
Step 3: Filling and Finishing
-
Identify empty voids:
Step back and look for large patches of creamy white space where there are no gold spots. -
Add standalone spots:
In these empty gaps, paint small clusters of black dots or independent crescent shapes without gold centers. This adds depth to the pattern. -
Touch up edges:
Check the design from all angles. If a spot looks too heavy on one side, balance it with a few extra stippled dots on the opposite side. -
Correct mistakes:
If you misplace a dot, quickly wipe it away with a damp Q-tip before it sets, or wait for it to dry and gently scrape it off with a fingernail. -
Allow to cure:
Let the candle sit undisturbed for at least 24 hours. Even though it feels dry, the paint needs time to bond fully with the wax surface.
Level Up
While the gold paint is still wet, sprinkle a tiny pinch of ultra-fine cosmetic glitter onto the centers for a candle that sparkles beautifully even when unlit.
Place your finished candle on a mantle or tray to enjoy your chic, hand-painted accent piece.


Have a question or want to share your own experience? I'd love to hear from you in the comments below!