There is something so magical about taking a bucket of beach finds and transforming them into vibrant little masterpieces with just a bit of color. Whether you are looking for a relaxing afternoon project or unique coastal decor, these simple techniques show just how versatile seashell art can be.
Rainbow Ridge Stripes
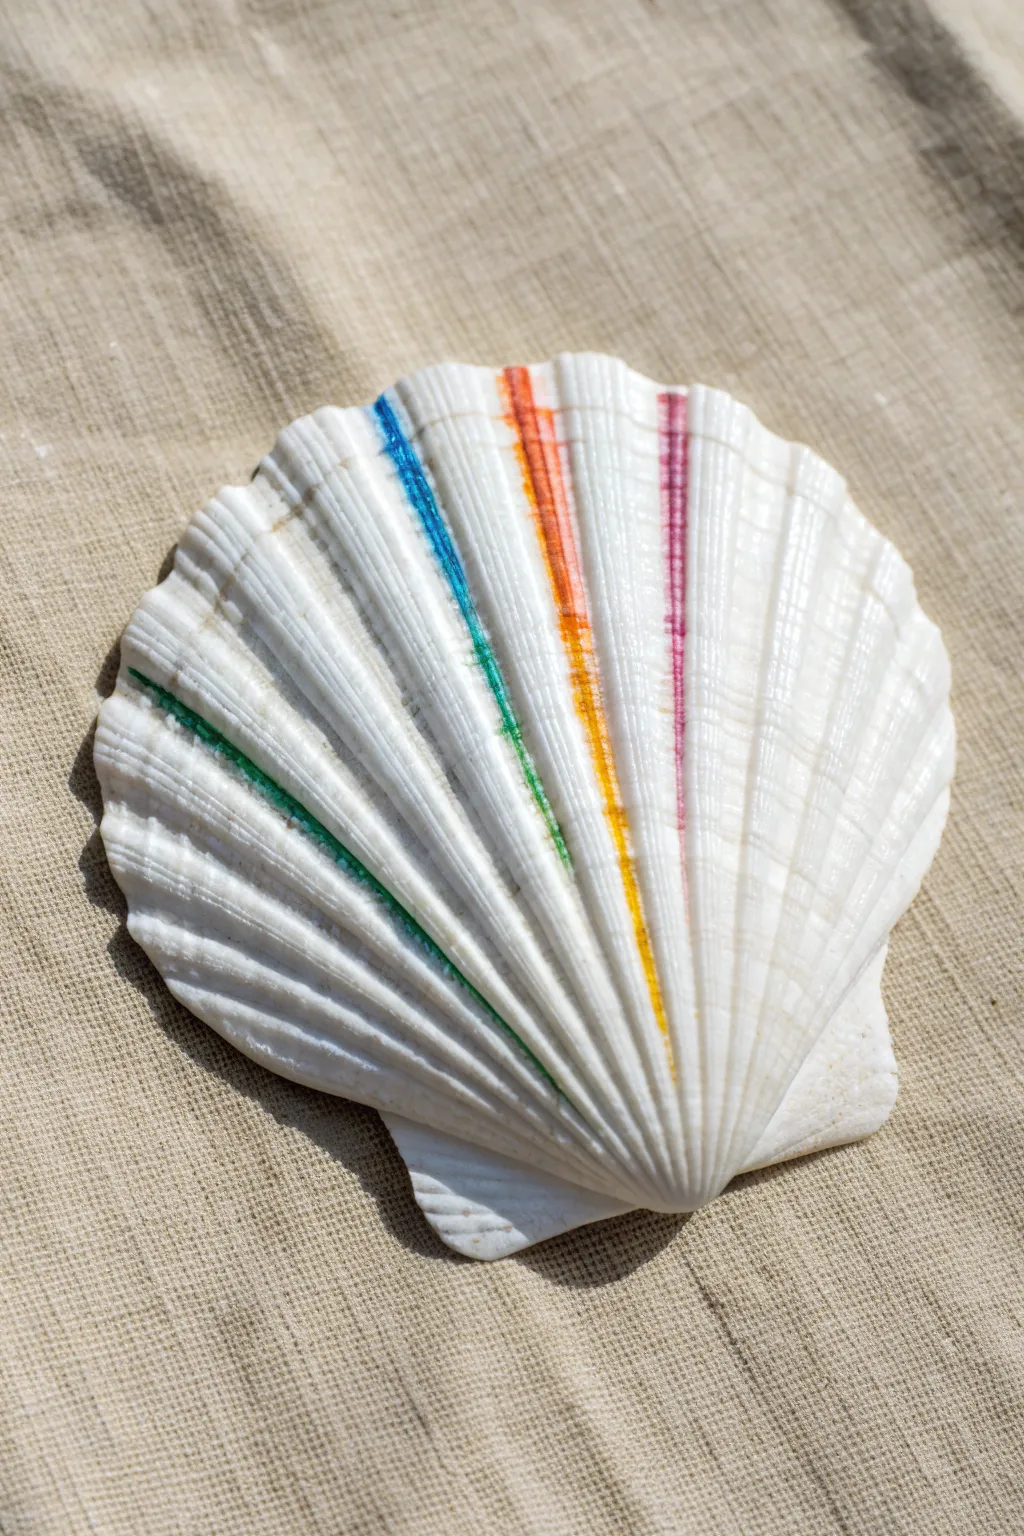
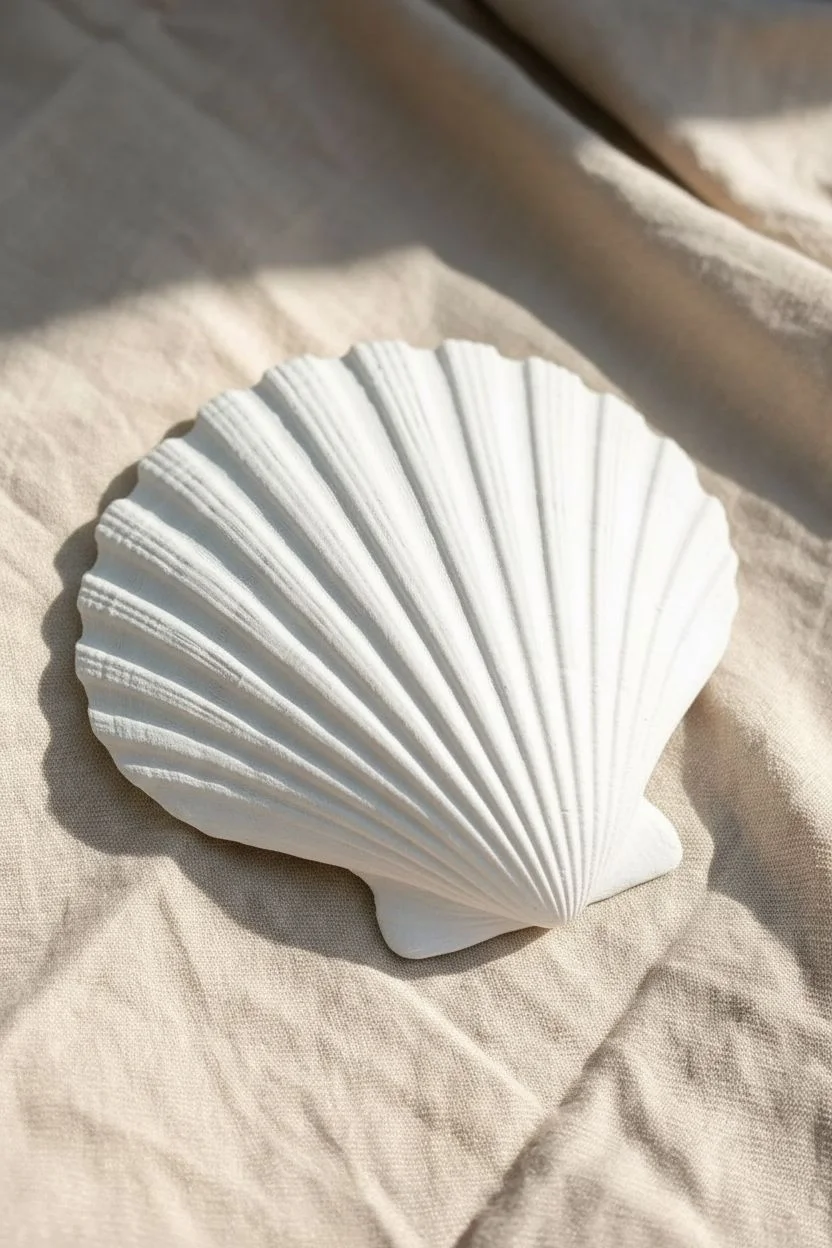
This minimalist painting project uses the natural architecture of a scallop shell to guide your brushstrokes, creating a clean and modern look. The pop of bright colors against the stark white calcium surface makes for an eye-catching piece of coastal decor.
Step-by-Step Tutorial
Materials
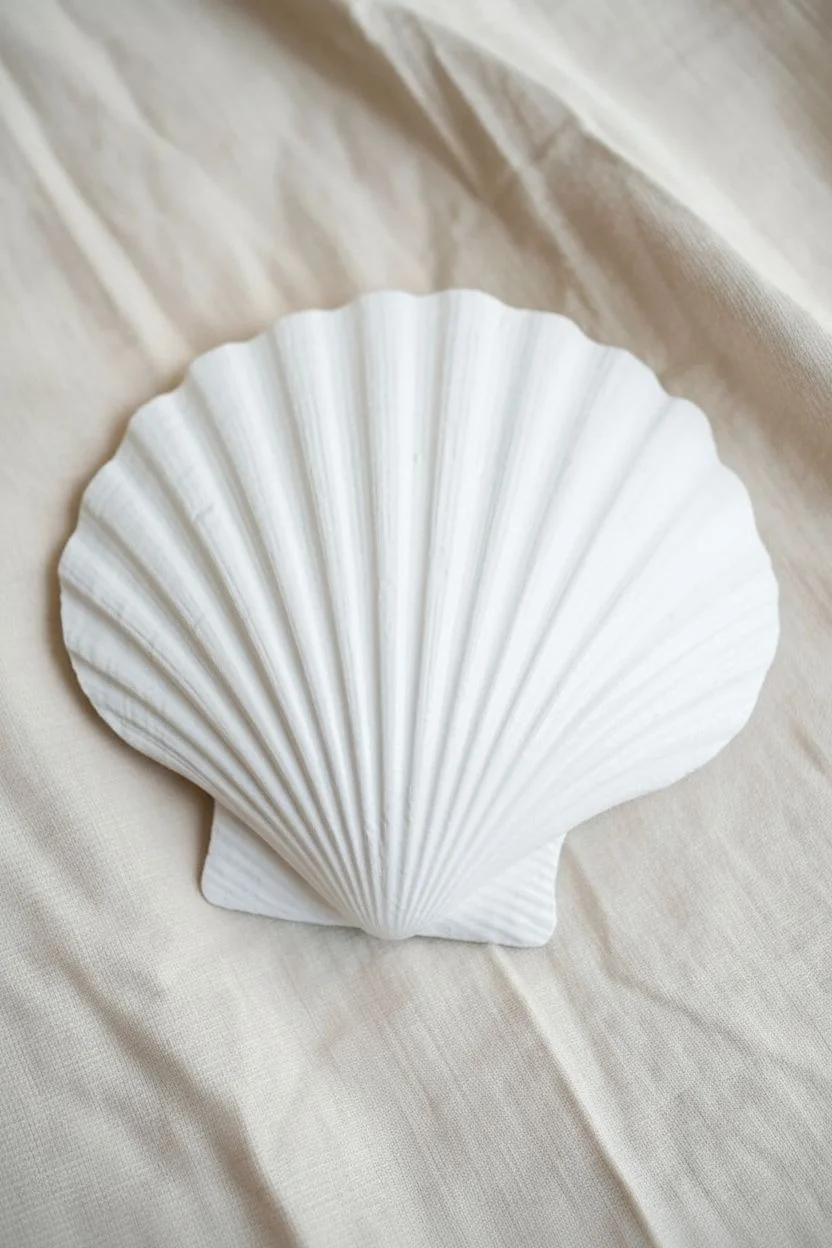
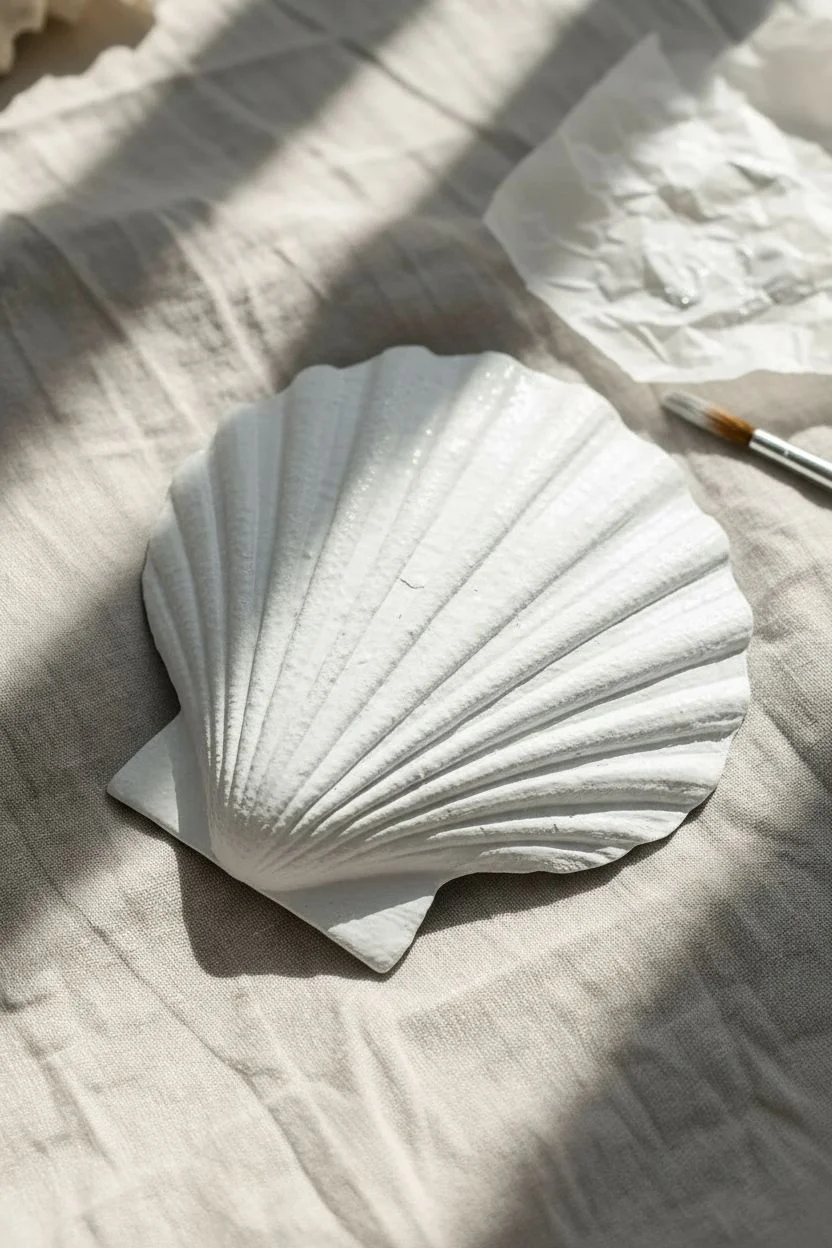
- Large white scallop shell (clean and dry)
- Fine-tip acrylic paint pens (Green, Blue, Orange, Magenta)
- Alternative: Size 0 liner brush and acrylic paints
- Paper towels
- Cotton swabs
- Clear spray sealant (gloss or matte)
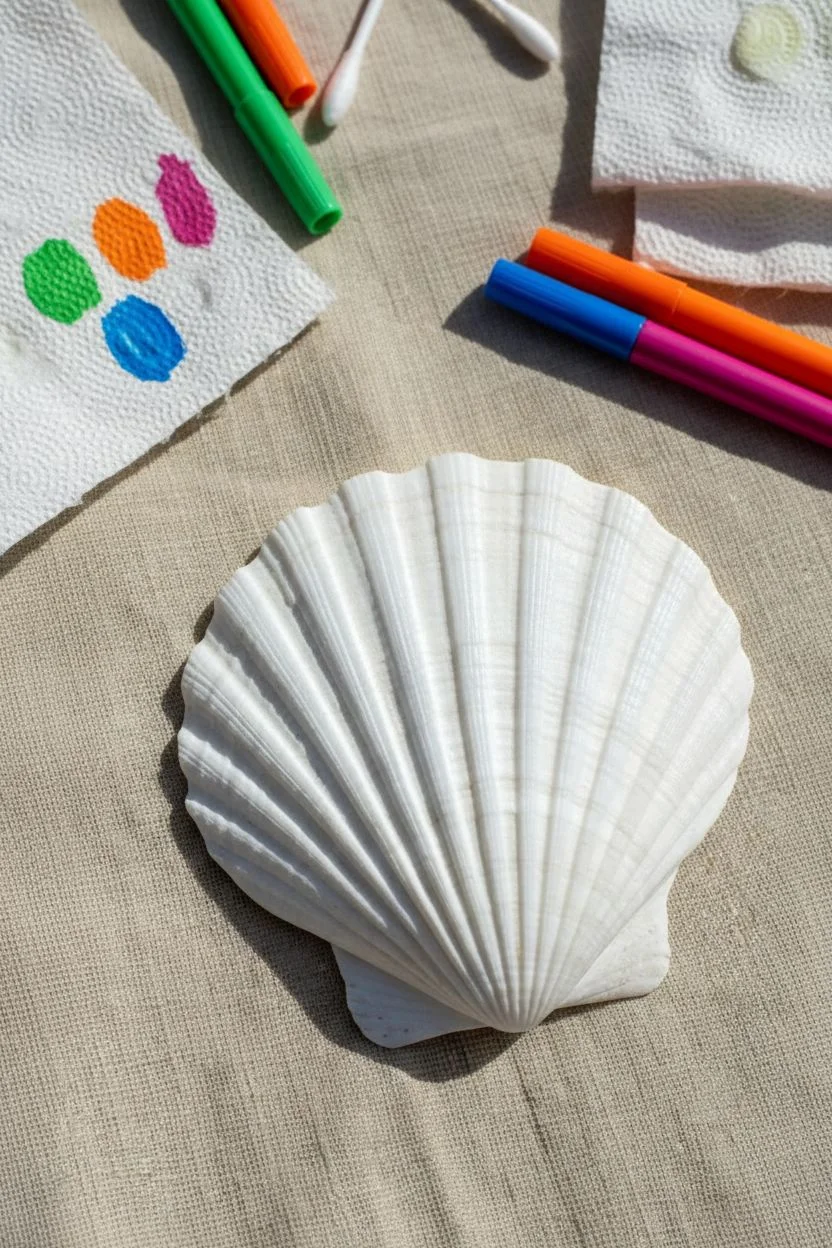
Step 1: Preparation & Planning
-
Clean surface:
Ensure your scallop shell is thoroughly washed with soapy water to remove any sand or salt, then let it dry completely in the sun. -
Examine texture:
Run your finger over the shell to identify the raised ridges versus the dipped valleys, as you will be following these natural lines. -
Map the spacing:
Visualize where your four stripes will go, planning to leave roughly three or four bare white ridges between each colored stripe for a balanced look. -
Prime the pens:
If using paint pens, shake them well and press the nibs on a scrap paper towel until the flow is smooth and consistent.
Step 2: Painting the Ridges
-
Start with green:
Locate a ridge on the far left side of the shell fan to begin your first stripe. -
Anchor your hand:
I find that resting the heel of my hand on the table helps steady the marker tip as I prepare to draw. -
Draw the line:
Place the tip near the hinge (the bottom point) of the shell and slowly drag it upward along the ridge crest toward the outer edge. -
Refine the edge:
Go over the green line a second time to ensure the color is solid and fills the top of the ridge evenly. -
Measure the gap:
Count three to four ridges to the right of your green line to create a negative space buffer. -
Apply the blue:
Using the blue marker, trace the next selected ridge from the base to the top, letting the brush naturally follow the widening fan shape. -
Check groove depths:
Allow the paint to settle slightly into the grooves on either side of the ridge for a dimensional look, but keep the center brightest. -
Create the orange stripe:
Skip another set of white ridges and apply the bright orange stripe, applying slightly more pressure near the wide top edge for a bolder finish. -
Add the magenta:
Finish with the magenta or pink stripe on the far right side, maintaining the symmetrical spacing pattern. -
Touch ups:
Inspect all four lines for any patchy areas and dab in extra pigment where needed to make the colors pop.
Wobbly Lines?
Don’t worry if your hand shakes. Use a white paint pen or a small brush with white acrylic to paint over mistakes and ‘erase’ them back to the background color.
Step 3: Finishing
-
Clean edges:
If any paint strayed into the white valleys where you didn’t want it, use a damp cotton swab to quickly wipe it away. -
Dry time:
Let the shell sit flat undisturbed for about 20 minutes to ensure the acrylic is fully cured. -
Seal the work:
Lightly mist the shell with a clear spray sealant to protect the paint from chipping and give the shell a wet, polished look.
Make It Sparkle
For a magical touch, trace over your colored lines with a clear glitter gel pen after the paint dries. It adds a subtle shimmer that catches the light beautifully.
Place your colorful finished shell on a bookshelf or window sill to catch the light and enjoy your handiwork


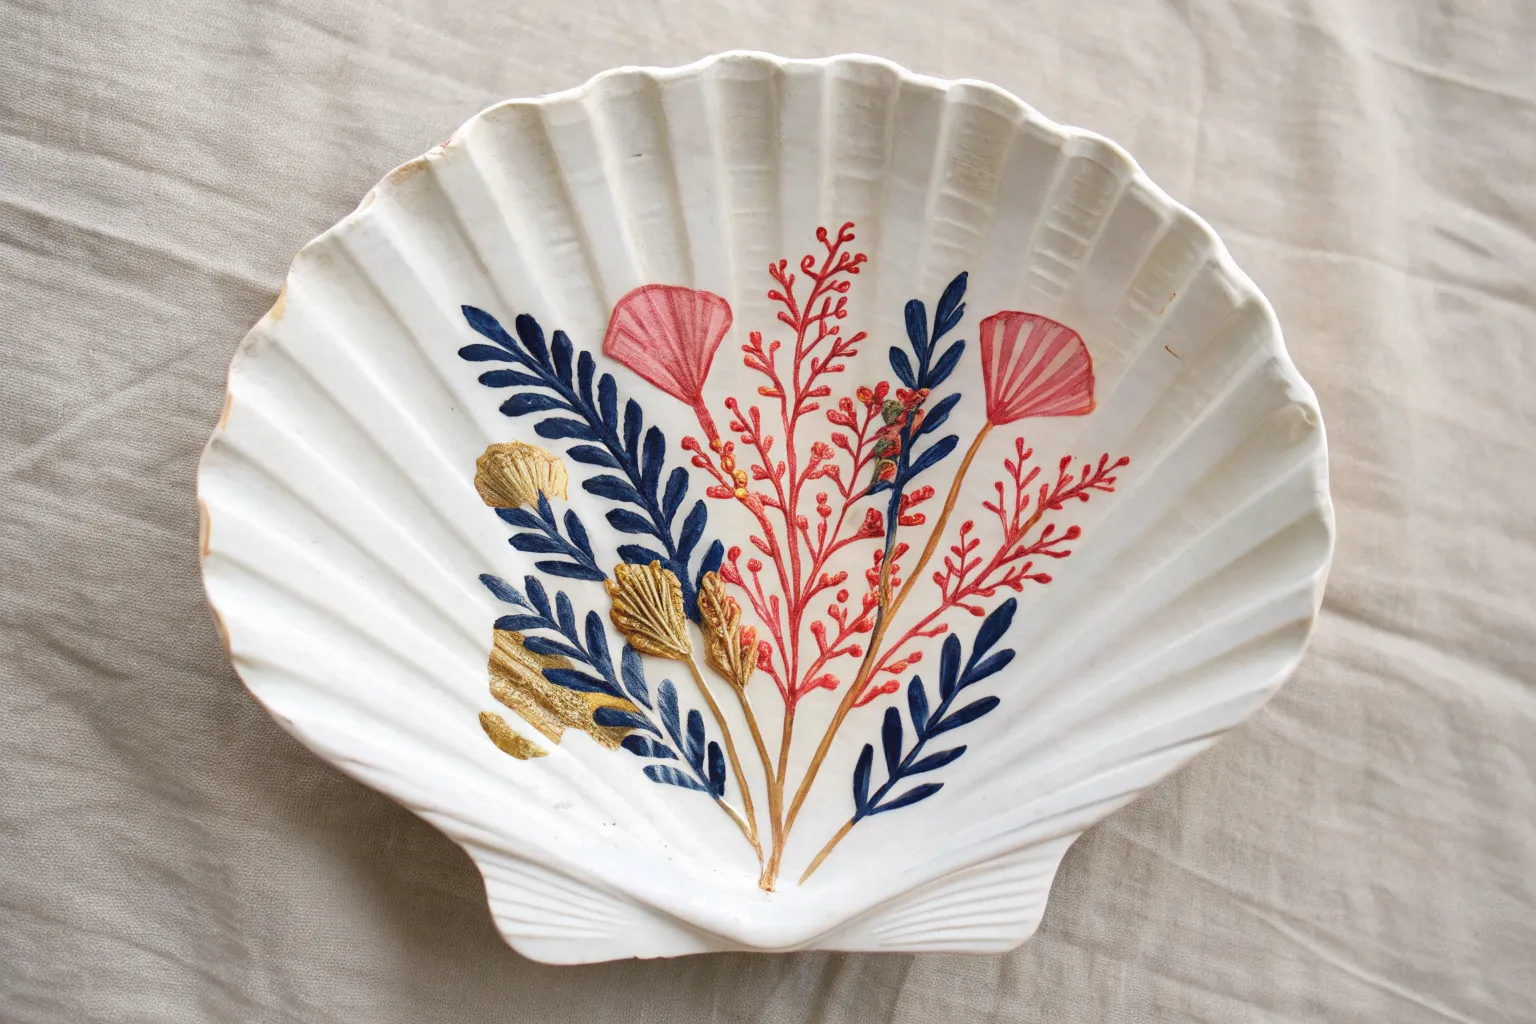
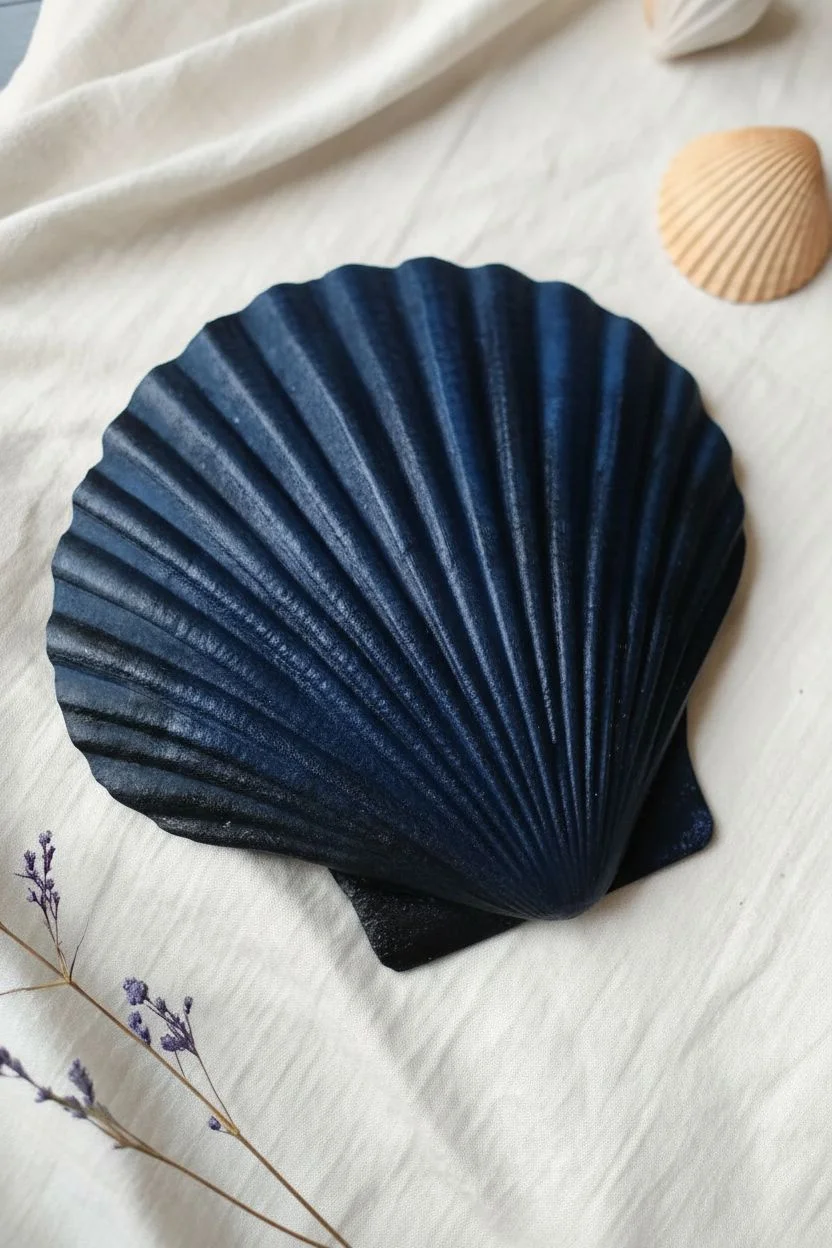
Classic Blue Chinoiserie
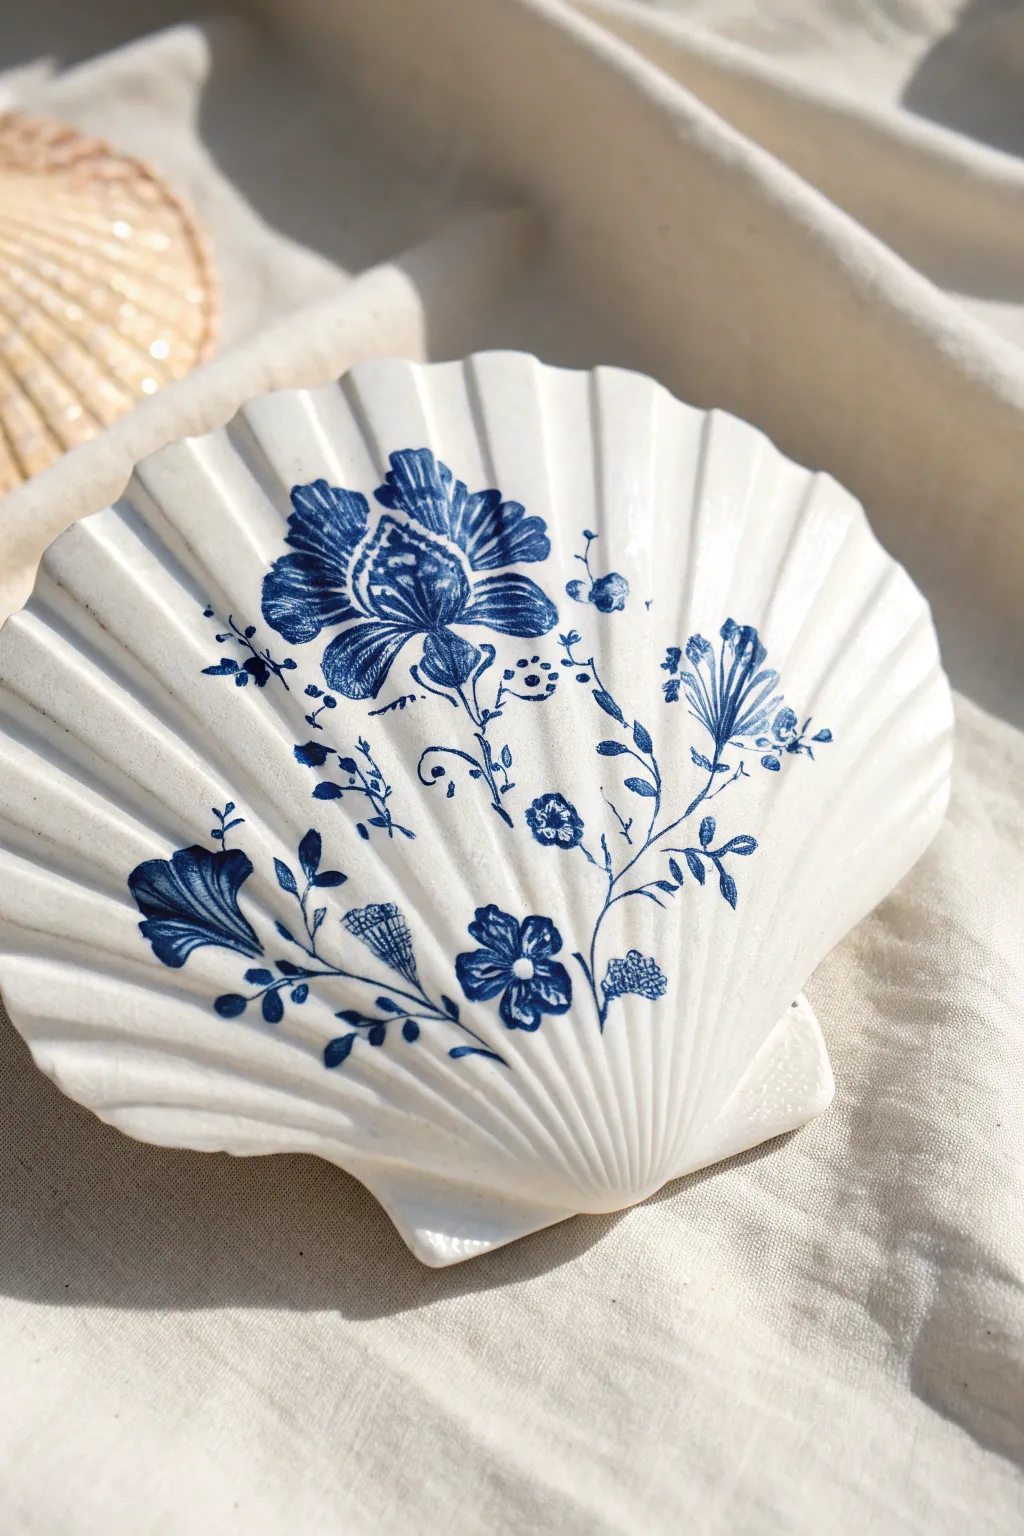
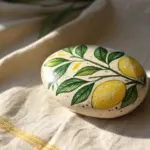
Transform a natural shell into a piece of faux antique china with this elegant blue and white design. The finished piece mimics the delicate look of Chinoiserie or Delftware, making it a sophisticated addition to any coastal vignette.
Step-by-Step Guide
Materials
- Large white scallop shell (4-6 inches wide)
- Titanium White acrylic paint
- Ultramarine Blue or Phthalo Blue acrylic paint
- Small flat brush
- Fine script liner brush (size 0 or 00)
- Small round brush (size 1)
- Pencil
- Acrylic flow improver or water
- High-gloss spray varnish
- Palette or paper plate
Step 1: Preparing the Canvas
-
Clean the surface:
Wash your scallop shell thoroughly with warm soapy water to remove any sand or salt residue, then let it dry completely. -
Apply base coat:
Paint the entire surface of the shell with Titanium White using your flat brush. -
Smooth coverage:
I prefer to apply two thin coats rather than one thick one to ensure the natural ridges don’t get clogged with paint globs. -
Let it cure:
Allow the white base to dry fully until it is smooth to the touch.
Ridge Rider
If your brush skips over the shell’s deep ridges leaving gaps, thin your paint slightly more with water. A fluid consistency helps the pigment sink into the grooves for a continuous line.
Step 2: Drafting the Design
-
Sketch the composition:
Using a pencil with a very light hand, sketch the rough placement of your flowers directly onto the white paint. -
Position the main bloom:
Place the largest flower slightly off-center to the left, allowing room for vines to extend outward. -
Map the stems:
Draw faint guiding lines for the stems curbing towards the right and bottom left edges.
Step 3: Painting the Motifs
-
Mix your blue:
Squeeze a small amount of dark blue paint onto your palette and mix in a drop of flow improver or water until it has an inky consistency. -
Start with the center:
Using the round brush, paint the solid center shape of the main large flower. -
Add petals:
Paint the petal outlines radiating from the center, following the curves of your pencil sketch. -
Create shading lines:
Switch to your fine script liner brush to paint delicate hatched lines inside the petals, mimicking the look of engraved pottery. -
Paint secondary flowers:
Move to the right side and paint the fan-shaped flower, using quick, upward strokes for the petals. -
Add the bottom bloom:
Paint the trumpet-shaped flower near the bottom left, ensuring the opening faces the shell’s edge. -
Connect with vines:
Use the liner brush to drag thin, confident lines connecting all blooms, allowing the brush to naturally bump over the shell ridges. -
Add leaves:
Paint small, simple leaf shapes along the vine stems. -
Detailing:
Add tiny dots and floating buds around the main arrangement to fill empty white space. -
Refine edges:
If any lines look messy, use a small brush with white paint to crisp up the edges once the blue is dry.
Gilded Edge
For an extra touch of luxury, paint the very rim of the scallop shell with liquid gold leaf or a metallic gold paint pen to mimic the expensive trim found on fine bone china plates.
Step 4: Finishing Touches
-
Dry completely:
Wait at least 20 minutes for the blue paint to dry fully. -
Seal the work:
Spray the shell with a high-gloss varnish to give it that shiny, glass-like porcelain finish.
Place your beautiful faux-porcelain shell on a stand or use it as a trinket dish to admire your handiwork


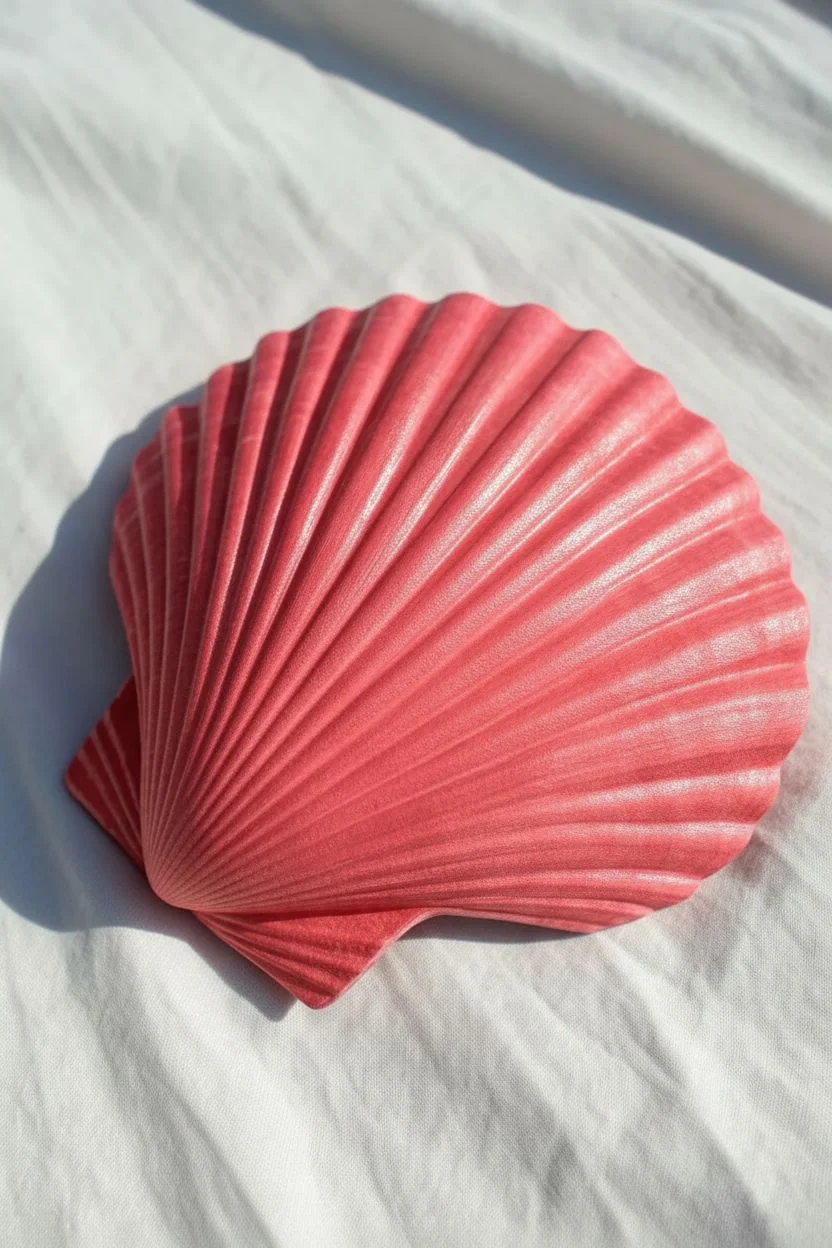
Ombré Sunset Wash
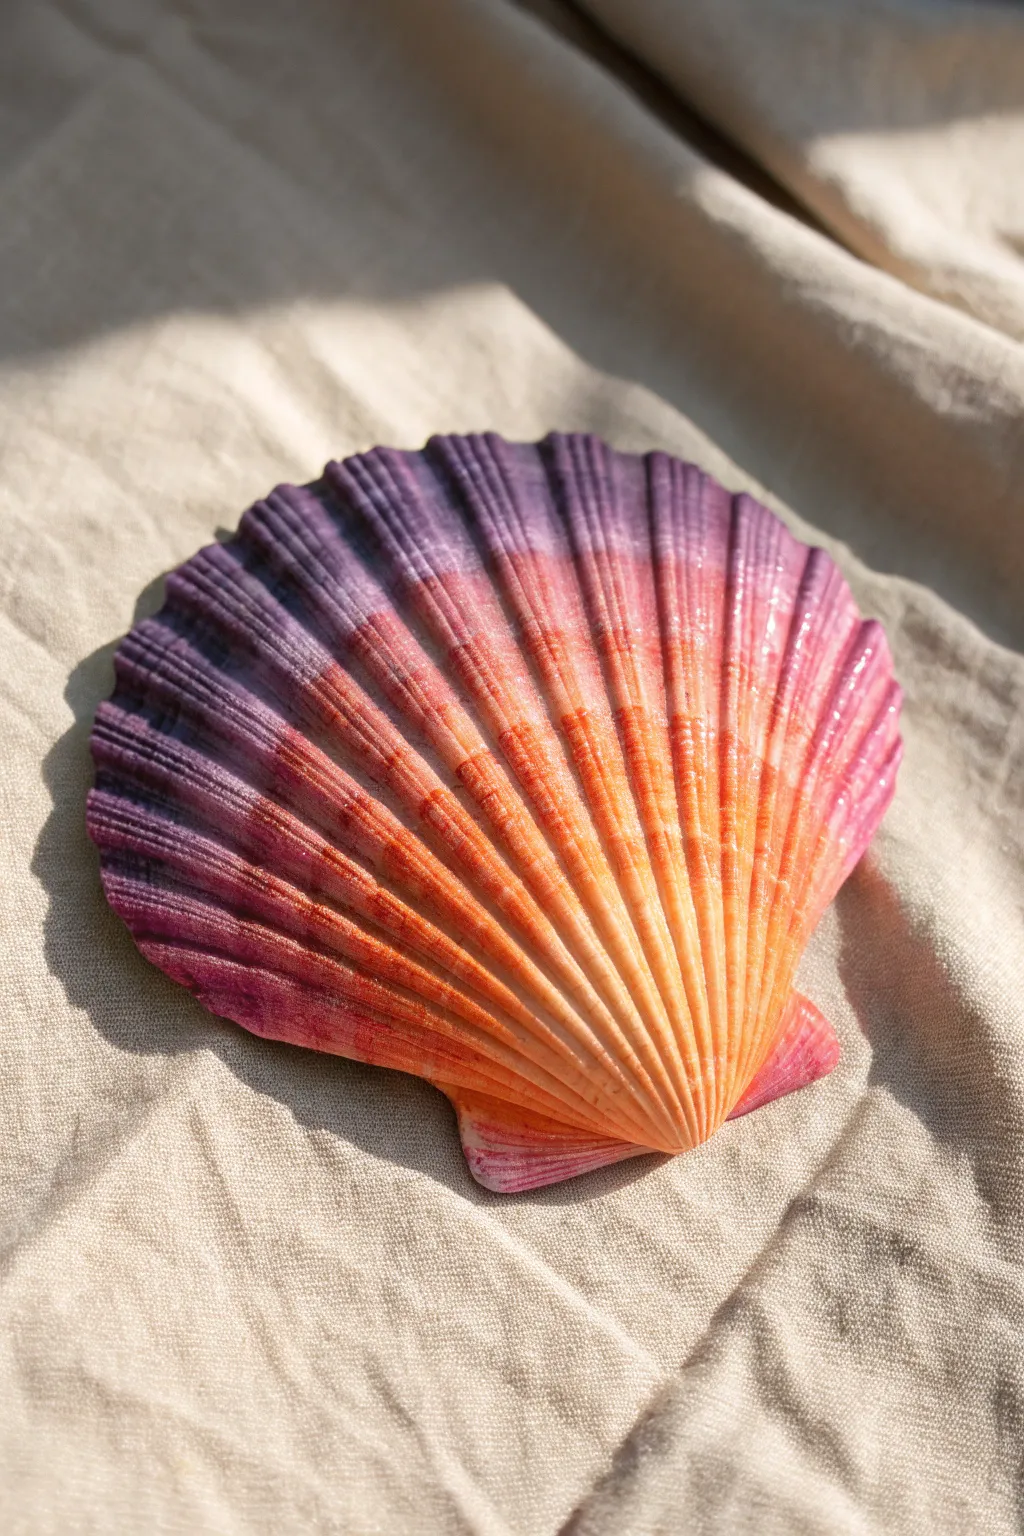
Capture the fleeing colors of dusk on a natural canvas with this beautiful ombré scallop shell project. By thinning acrylic paints into a translucent wash, you can highlight the shell’s natural ridges while creating a vibrant seamless transition from deep violet to warm peach.
How-To Guide
Materials
- Large white scallop shell
- Acrylic paints (Deep Violet, Magenta, Bright Orange, Warm White)
- White Gesso or primer
- Soft flat synthetic brush (size 6 or 8)
- Water cup
- Paper towels
- Palette or paper plate
- Gloss acrylic sealer (spray or brush-on)
Step 1: Preparation & Base
-
Clean the canvas:
Scrub your scallop shell gently with warm soapy water to remove any sand or salt residue, ensuring the surface is perfectly clean. -
Dry completely:
Pat the shell dry with a paper towel and let it air dry for a few minutes so no moisture remains in the crevices. -
Prime the surface:
Apply a thin, even coat of white Gesso or white acrylic paint over the entire surface of the shell. -
Let primer set:
Allow the base coat to dry completely; this white background ensures your sunset colors will appear bright and true rather than muddy.
Trouble Blending?
If acrylics dry too fast to blend smoothly, lightly mist the shell with water or mix a ‘slow-dry medium’ into your paints to keep them workable longer.
Step 2: Creating the Ombré Wash
-
Prepare the palette:
Dispense a dime-sized amount of violet, magenta, orange, and white paint onto your palette, keeping them spaced apart. -
Creat the wash consistency:
Mix a few drops of water into each paint color until they reach the consistency of heavy cream; you want them fluid but not messy. -
Apply the violet band:
Load your brush with the thinned violet paint and cover the top outer rim of the shell roughly one-third of the way down. -
Feather the edge:
While the violet is still wet, gently pull the paint downward in short strokes so the bottom edge is uneven and ready for blending. -
Add the magenta layer:
Rinse your brush quickly, blot it, load it with magenta, and paint the middle section of the shell right below the violet. -
Blend the first transition:
Where the violet and magenta meet, lightly sweep your brush back and forth horizontally to blur the line, letting the colors merge naturally. -
Apply the orange tone:
Clean your brush again, pick up the orange paint, and apply it below the pink section, leaving just the very bottom hinge area bare. -
Smooth the second transition:
Use a damp, clean brush to gently rub the border where the pink meets the orange, softening any harsh lines. -
Highlight the hinge:
Mix a tiny dot of orange into your white paint to make a pale peach, then paint the very bottom hinge area of the shell. -
Final blend:
Use your brush to pull this pale peach color slightly upward into the orange to complete the smooth gradient effect.
Level Up: Gilded Edge
Once the sunset colors are dry, use a fine detail brush to apply a thin line of metallic gold paint along the very top rim of the shell for an elegant finish.
Step 3: Sealing & Finish
-
Check for pooling:
Look closely at the shell’s ridges; if paint has pooled too thickly in the deep grooves, use a dry brush to gently lift the excess out. -
Dry time:
Allow the shell to dry completely, which should take about 15 to 20 minutes since the layers are thin. -
Apply sealer:
Coat the dry shell with a gloss varnish or spray sealer to protect the paint and give it that wet, freshly-washed beach look. -
Final cure:
Let the sealer cure according to the bottle instructions before handling or displaying your artwork.
Now you have a stunning piece of coastal decor that holds the warmth of a summer evening forever.


Metallic Gold Rims
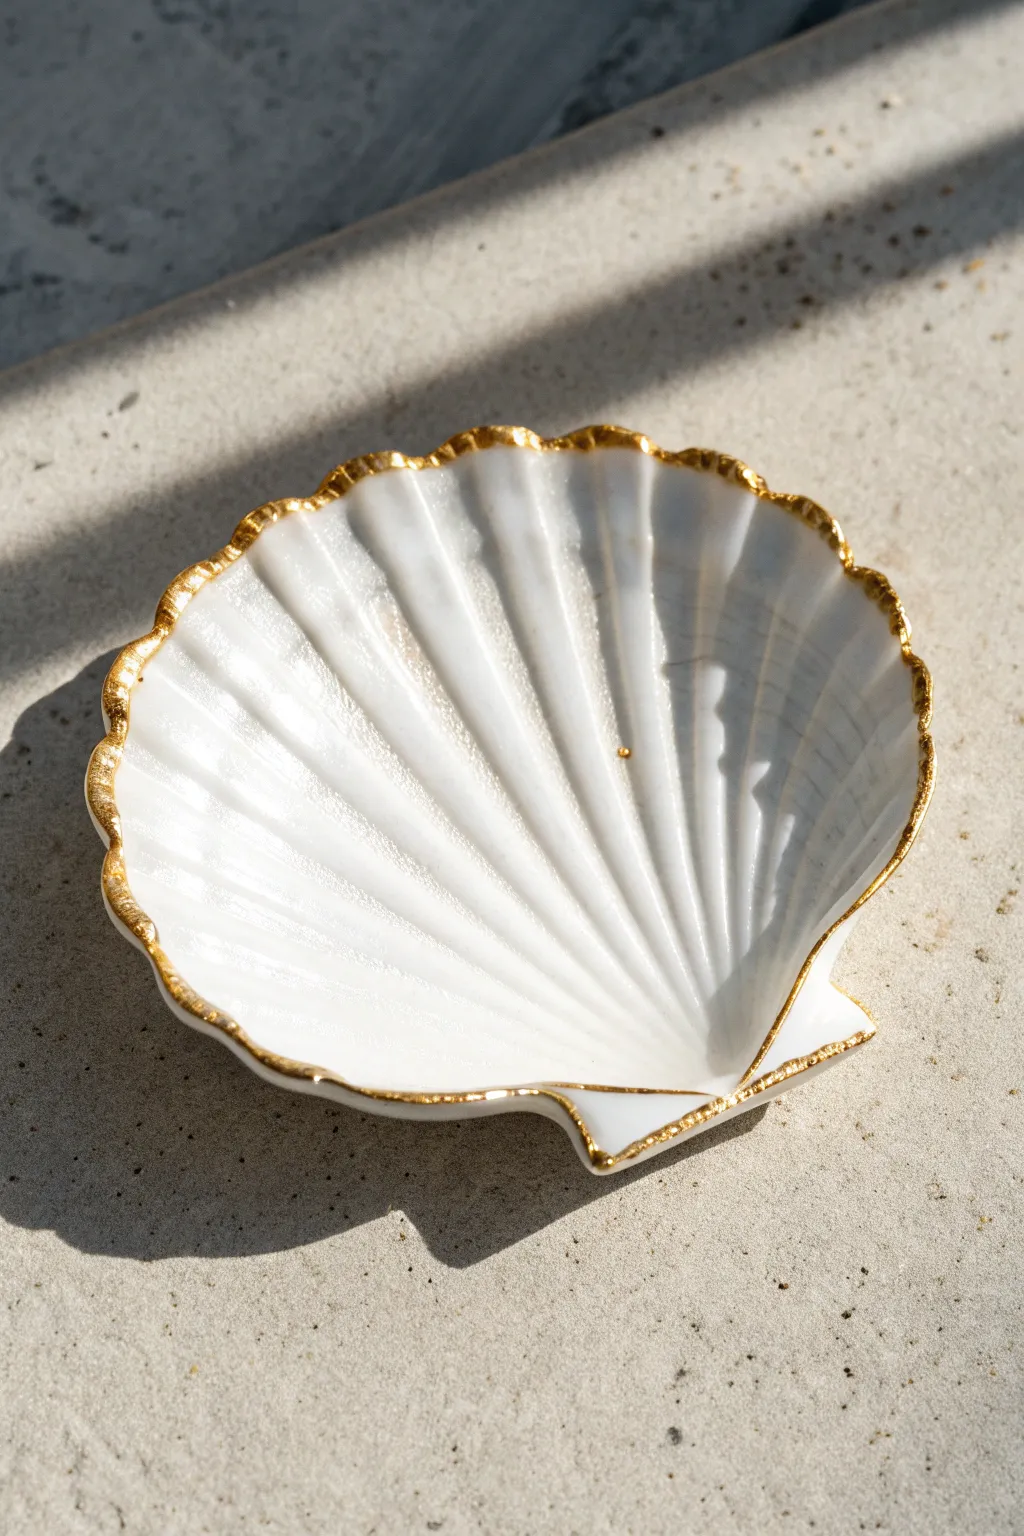
Transform a simple beach find into high-end decor with this elegant gilded edge technique. The sharp contrast between the bright natural white of the shell and the rich metallic gold creates a stunning trinket dish or vanity accent.
Step-by-Step Tutorial
Materials
- Large white scallop shells
- Liquid Leaf (Classic Gold) or high-gloss metallic enamel
- Fine-point round paintbrush
- Small flat paintbrush
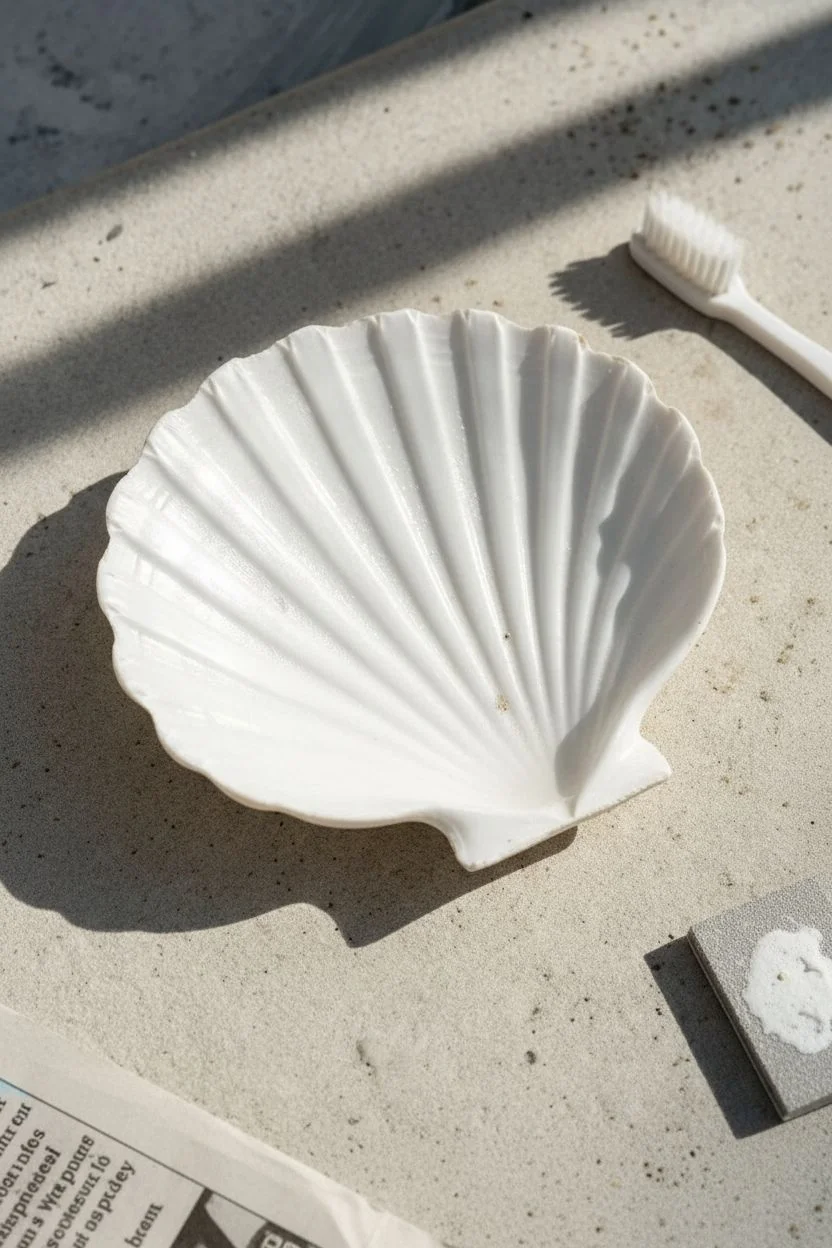
- Mild dish soap and old toothbrush
- Fine-grit sandpaper
- Clear gloss spray sealant
- Newspaper or drop cloth
Step 1: Preparation
-
Clean the shells:
Begin by rinsing your scallop shells under warm running water to remove any loose sand or salt residue. -
Scrub the grooves:
Use mild dish soap and an old toothbrush to gently scrub the ridged surface, ensuring the white is as bright as possible. -
Dry thoroughly:
Allow the shells to dry completely in the sun or on a clean towel for at least an hour; moisture under the paint will ruin the finish. -
Smooth the edges:
Run your finger along the rim to find any sharp chips, and gently sand them down with fine-grit sandpaper to create a smooth surface for the gold. -
Workspace setup:
Lay down newspaper or a drop cloth in a well-ventilated area, as metallic paints like liquid leaf can have strong fumes.
Ragged Lines?
If your edge looks messy, wait until the paint is semi-dry and use a wooden toothpick to gently scrape and reshape the line for a crisp finish.
Step 2: Gilding the Rim
-
Prepare the paint:
Shake your bottle of Liquid Leaf or metallic enamel vigorously to ensure the metallic pigments are fully suspended and mixed. -
Load the brush:
Dip a fine-point round brush into the paint, loading it moderately so it doesn’t drip but holds enough for a smooth stroke. -
Paint the crest:
Hold the shell steadily in one hand and carefully paint the very top crest of the rim, following the natural wave of the scallop. -
Extend inward:
Widen the line by bringing the gold partially onto the inner face of the shell, approximately 1/8th of an inch deep. -
Extend outward:
I like to wrap the color around to the back of the rim as well so the finish looks complete from every angle. -
Refine the ridges:
Use the fine tip of your brush to press paint into the small divots where the shell’s ridges meet the edge. -
Detail the ears:
Pay special attention to the flat ‘wings’ or ears at the base of the shell, painting these straight edges with a steady hand. -
Check opacity:
If using acrylics, let the first layer dry and apply a second coat; liquid leaf usually covers in one go.
Pearl Finish
Before gilding the rim, brush the white interior of the shell with a pearlescent glaze medium. This adds a subtle, high-end shimmer.
Step 3: Finishing Touches
-
Clean up edges:
Inspect the inner white area for any gold splashes and gently scrape them off with a fingernail or toothpick while the paint is tacky. -
Initial cure:
Set the painted shell on a clean sheet of paper and let it sit undisturbed for at least an hour to let the solvents evaporate. -
Apply sealant:
Take the shells outside and lightly mist them with a clear gloss spray sealant to prevent the brassy metals from tarnishing over time. -
Final dry:
Allow the sealant to cure overnight before placing any jewelry or soap inside your new dish.
Now you have a sophisticated piece of coastal decor that looks lovely on any bedside table
BRUSH GUIDE
The Right Brush for Every Stroke
From clean lines to bold texture — master brush choice, stroke control, and essential techniques.
Explore the Full Guide
Polka Dot Patterns
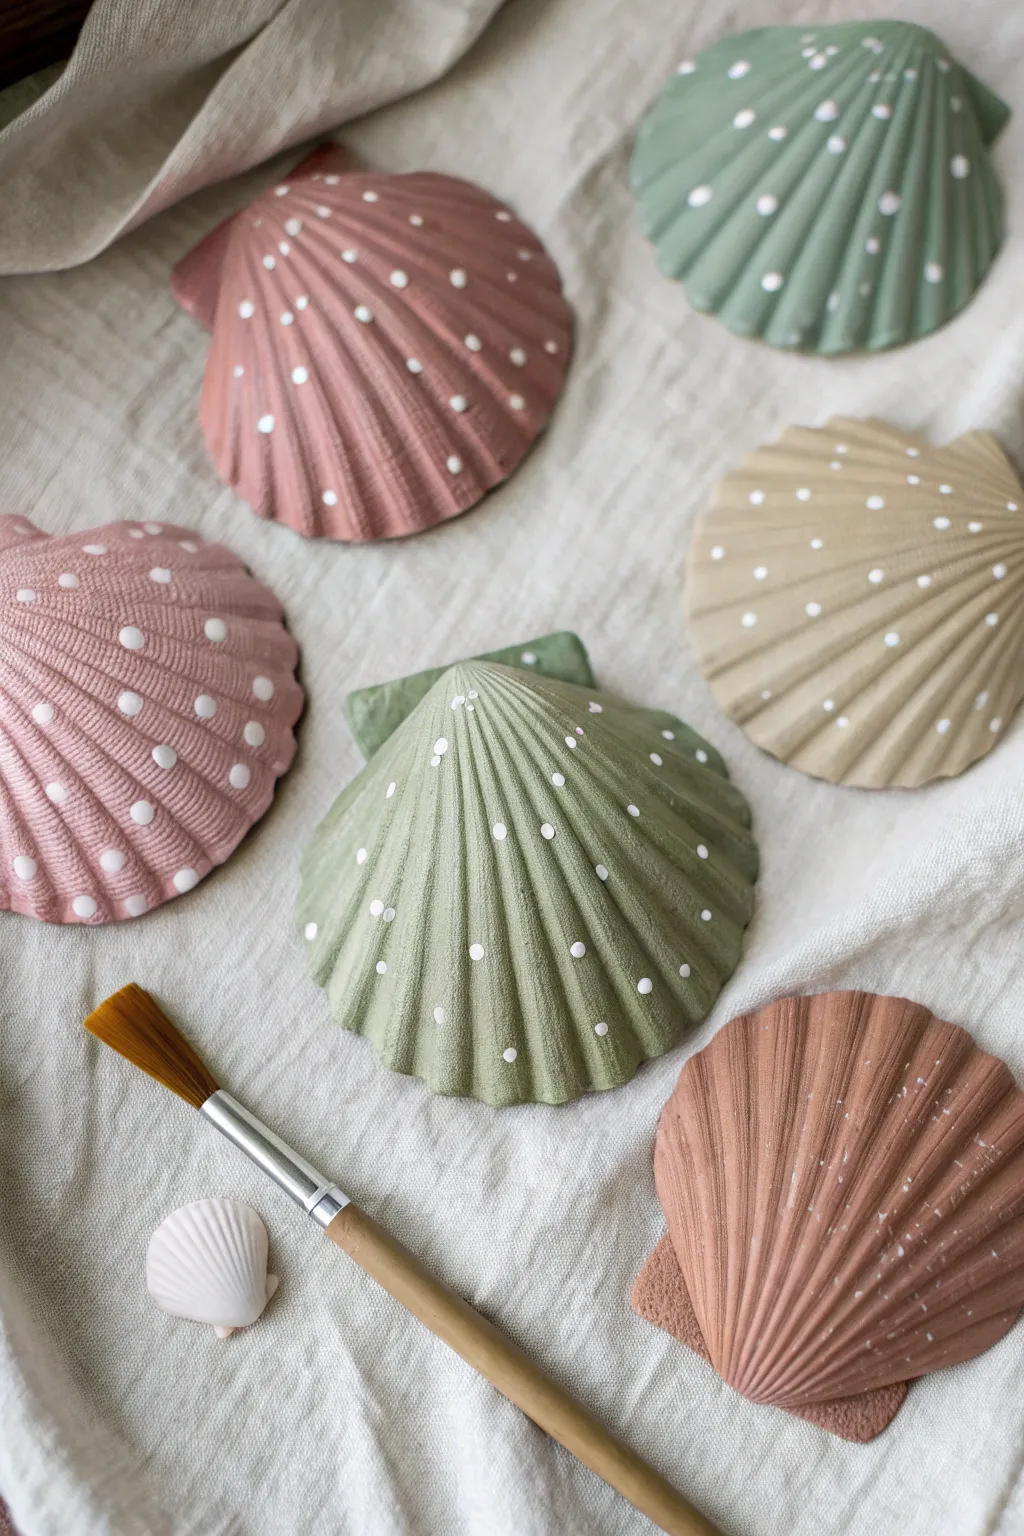
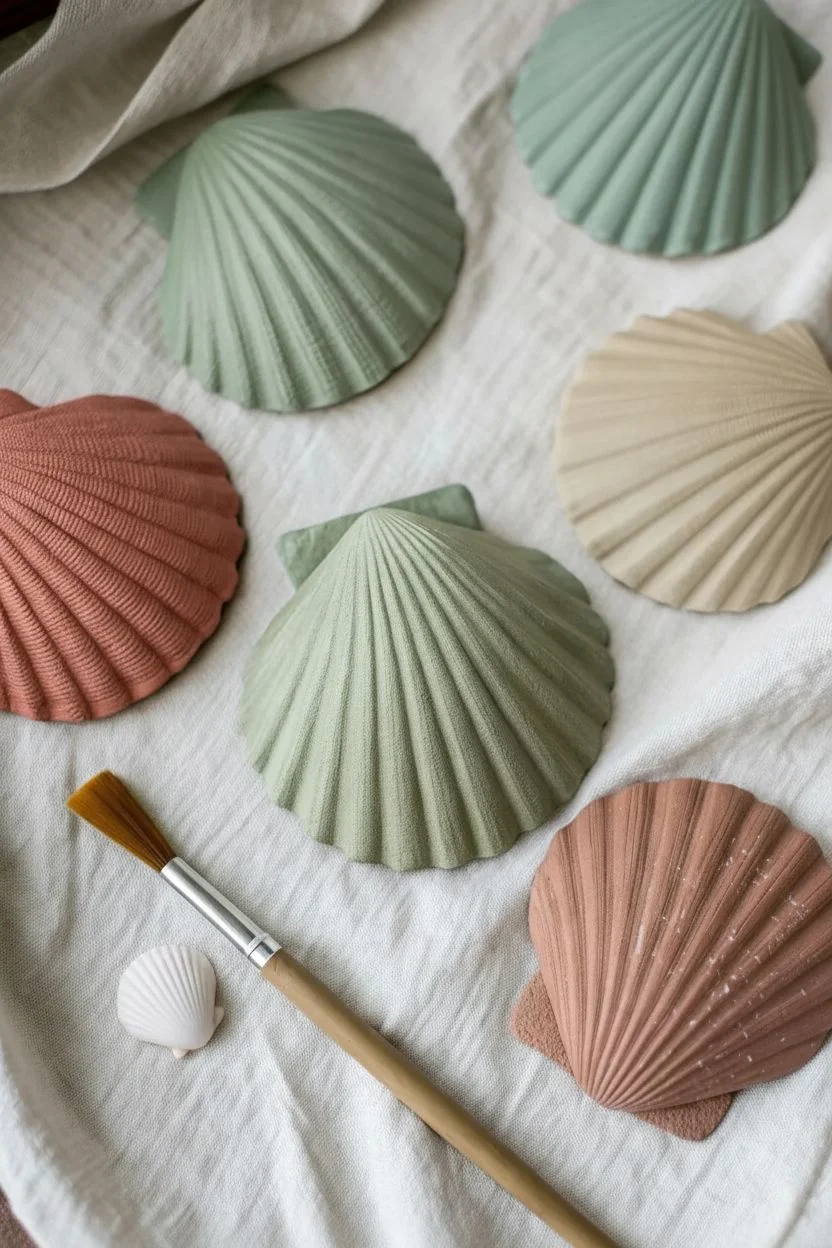
Transform ordinary seashells into modern boho décor pieces with this simple painting project. Using dusty pastel tones and a matte finish, these shells look less like beach finds and more like high-end ceramic art.
Step-by-Step Guide
Materials
- Large, clean scallop shells (3-4 inches wide)
- Matte acrylic craft paints or chalk paint (Sage Green, Dusty Rose, Sand/Beige, Terracotta)
- White acrylic paint
- Soft flat brush (size 6 or 8)
- Small round detail brush or dotting tool
- Palette or paper plate
- Water cup and paper towels
- Matte spray varnish (optional)
Step 1: Preparing the Base
-
Clean the surface:
Ensure your shells are free of sand and salt by washing them in warm soapy water and letting them dry completely before painting. -
Select your palette:
Pour a small amount of your matte base colors—Sage Green, Dusty Rose, Sand, and Terracotta—onto your palette. -
Apply the first coat:
Using the soft flat brush, paint the entire front surface of your first shell in Dusty Rose. Brush in the direction of the ridges. -
Paint the remaining shells:
Rinse your brush thoroughly and paint the other shells in your remaining colors: one Sage, one Sand, and one Terracotta. -
Allow to dry:
Let the shells sit for about 15 to 20 minutes until the paint is dry to the touch. -
Add a second coat:
To achieve the opaque, plaster-like look seen in the photo, apply a second coat of paint to each shell ensuring no natural shell color shows through. -
Smooth the ridges:
As you paint the second layer, watch for paint pooling in the deep grooves of the shell and brush it out gently for a smooth finish. -
Dry completely:
Let the base coats cure fully for at least 30 minutes. If the paint feels cool to the touch, it needs more time.
Step 2: Dotting Details
-
Prepare the details:
Pour a dime-sized amount of white acrylic paint onto your palette. -
Test your dotting tool:
I prefer to practice a few dots on a piece of scrap paper first to ensure the consistency of the paint isn’t too runny. -
Start on the Sage shell:
Dip your dotting tool or small brush tip into the white paint and place dots following the raised ridges of the shell. -
Create spacing:
Space the dots out about half an inch apart, letting them get naturally smaller as the ridges narrow toward the hinge. -
Pattern the Pink shell:
For the Dusty Rose shell, try alternating the placement so the dots sit in the grooves rather than on the ridges for variety. -
Detail the Sand shell:
On the beige shell, apply slightly larger dots along the spine of every other ridge to keep the collection looking organic and not too uniform. -
Leave a solid contrast:
Leave the Terracotta/Rust colored shell solid without dots to anchor the visual composition, as shown in the example image. -
Clean up imperfections:
If a dot smears, wait for it to dry, paint over it with the base color, and re-dot it. -
Final dry:
Allow the white details to dry completely, preferably overnight. -
Seal (optional):
To protect the finish without adding shine, lightly mist the shells with a matte spray varnish.
Perfect Dot Hack
Don’t have a dotting tool? Dip the handle end of a paintbrush into the paint and press straight down. It makes crisper circles than a brush tip!
Level Up: Faux Ceramic
Mix a pinch of baking soda into your acrylic paint before applying the base coat. This creates a gritty, matte texture that looks like pottery.
Arrange your beautiful new shells on a tray or shelf to add a touch of coastal calm to your room
Silhouette Palm Trees
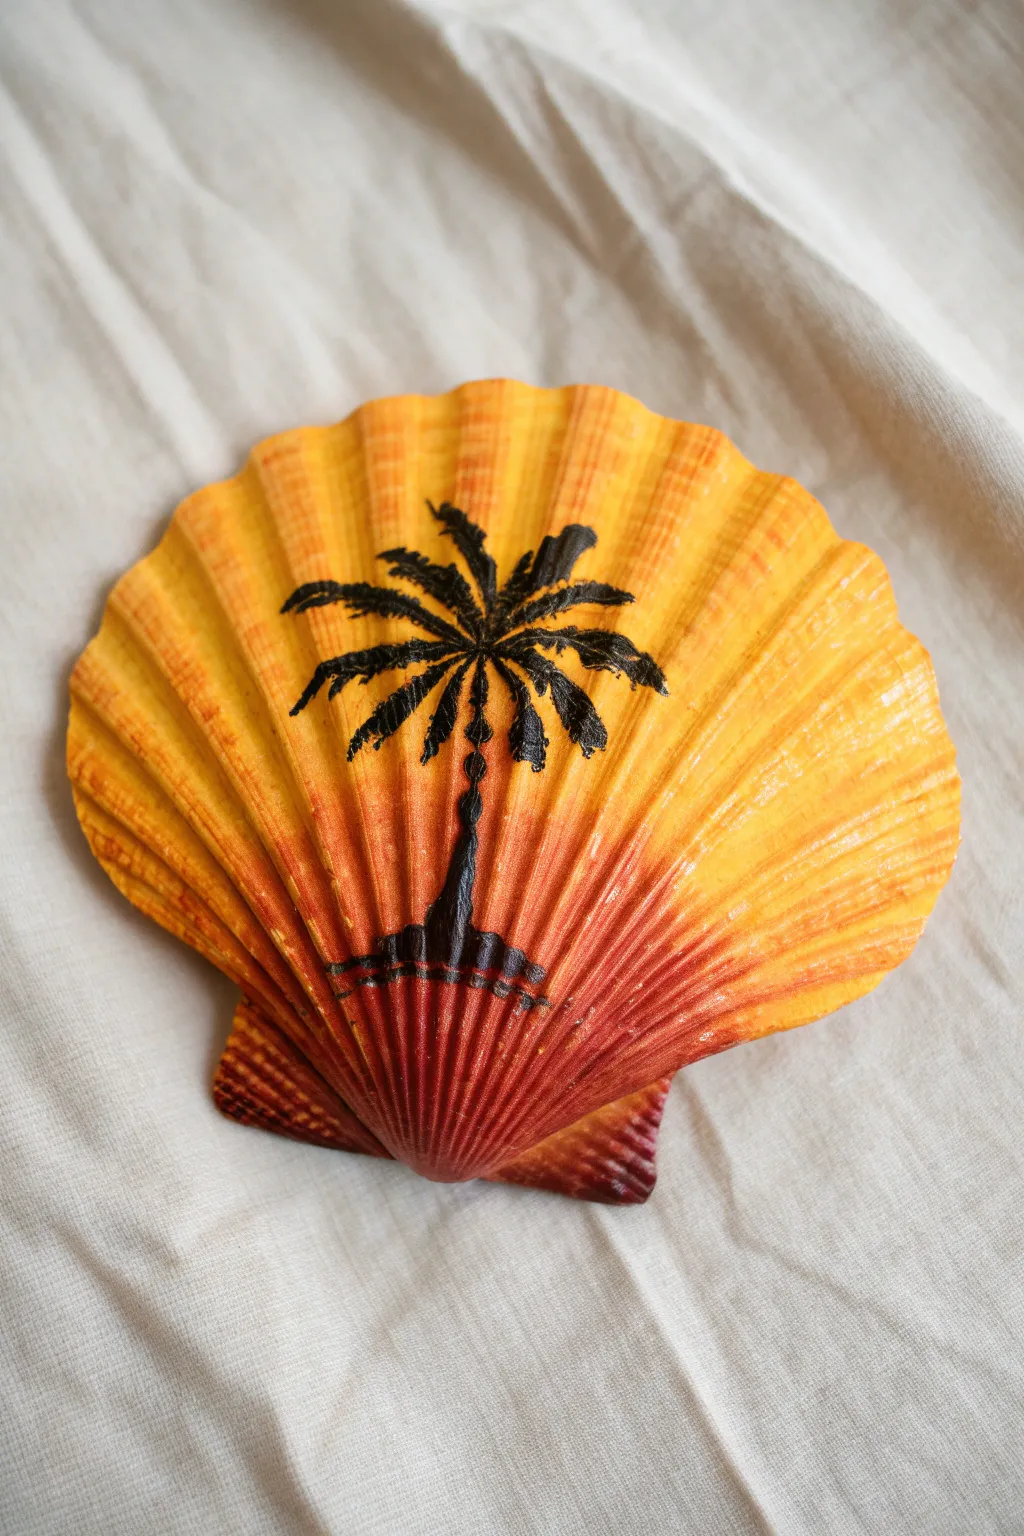
Capture the warmth of a tropical evening by painting a fiery gradient on a textured scallop shell. This project uses simple blending techniques to create a vibrant backdrop for a classic palm tree silhouette.
Step-by-Step Tutorial
Materials
- Large scallop seashell
- Acrylic paints (White, Deep Red, Orange, Yellow, Black)
- Flat shader brush (size 6 or 8)
- Fine liner brush (size 0 or 00)
- Water cup and palette
- Paper towels
- Matte or sealant spray (optional)
Step 1: Preparing the Canvas
-
Clean the shell:
Wash your scallop shell thoroughly with soap and water to remove any sand or salt residue. Let it dry completely. -
Apply base coat:
Using the flat brush, paint the entire surface of the shell with white acrylic paint. This creates a neutral base that will make your sunset colors pop. -
Dry the base:
Allow the white layer to dry fully. If the shell’s natural pattern still shows through, apply a second thin coat of white.
Step 2: Painting the Gradient
-
Start with the dark base:
Load your flat brush with deep red or maroon paint. Apply this color to the bottom third of the shell, near the hinge, painting vertically along the ridges. -
Add the middle tone:
Rinse your brush and pick up bright orange paint. Apply this to the middle section of the shell, slightly overlapping the top edge of the red section. -
Blend the warm tones:
While the paint is still wet, gently stroke the brush back and forth where the red and orange meet to create a soft, blurred transition. -
Apply the highlight:
Clean the brush again and load it with bright yellow paint. Cover the remaining top third of the shell, brushing all the way to the scalloped edge. -
Finalize the gradient:
Blend the yellow down into the orange section using long, light vertical strokes. Aim for a smooth fade from dark red to sunny yellow. -
Check groove coverage:
Inspect the deep grooves of the shell. I usually do a quick pass here to ensure the gradient colors have reached deep into the texture and aren’t leaving white gaps. -
Allow to cure:
Let the gradient background dry completely before moving on. The paint must be dry to the touch to prevent the black silhouette from bleeding.
Ridges & Valleys
Thin your black paint slightly with a drop of water. This improves the flow from your liner brush, helping you paint crisp, continuous lines over the shell’s bumpy ridges without the brush dragging.
Step 3: Detailing the Palm Tree
-
Paint the ground line:
Switch to your fine liner brush and black paint. Draw a small, slightly curved horizontal line near the bottom of the red section to represent the ground or water horizon. -
Form the trunk:
Starting from the center of your ground line, paint a vertical line upward. Make it slightly thicker at the base and thinner at the top, adding small bumps for texture. -
Position the crown:
At the top of the trunk, paint a small dot to mark the center where the palm fronds will emerge. -
Sketch the spines:
Paint 5 to 7 curved lines radiating outward from the center dot, looking like the spokes of an umbrella. Let some curve upwards and others droop down. -
Add the leaves:
Using just the tip of the liner brush, paint tiny, short strokes coming off each spine. Flick the brush gently to give the leaves a feathery, tropical look. -
Thicken the canopy:
Go back over the center of the tree and add a few more dense black strokes to connect the fronds, making the tree look lush and full. -
Add reflection:
Paint a few broken horizontal dashes just below the ground line to suggest a reflection in the water. -
Protect the art:
Once the black paint is fully dry, you may seal the shell with a clear spray varnish to protect against chipping.
Oops! Smudged Tree?
If you make a mistake on the silhouette, don’t wipe it. Let the black paint dry completely, then use a small brush to paint over the error with the underlying background color (orange or yellow) to ‘erase’ it.
Display your tropical masterpiece on a small easel or grouped in a bowl to bring summer vibes into your home year-round

PENCIL GUIDE
Understanding Pencil Grades from H to B
From first sketch to finished drawing — learn pencil grades, line control, and shading techniques.
Explore the Full Guide
Tropical Fish Faces
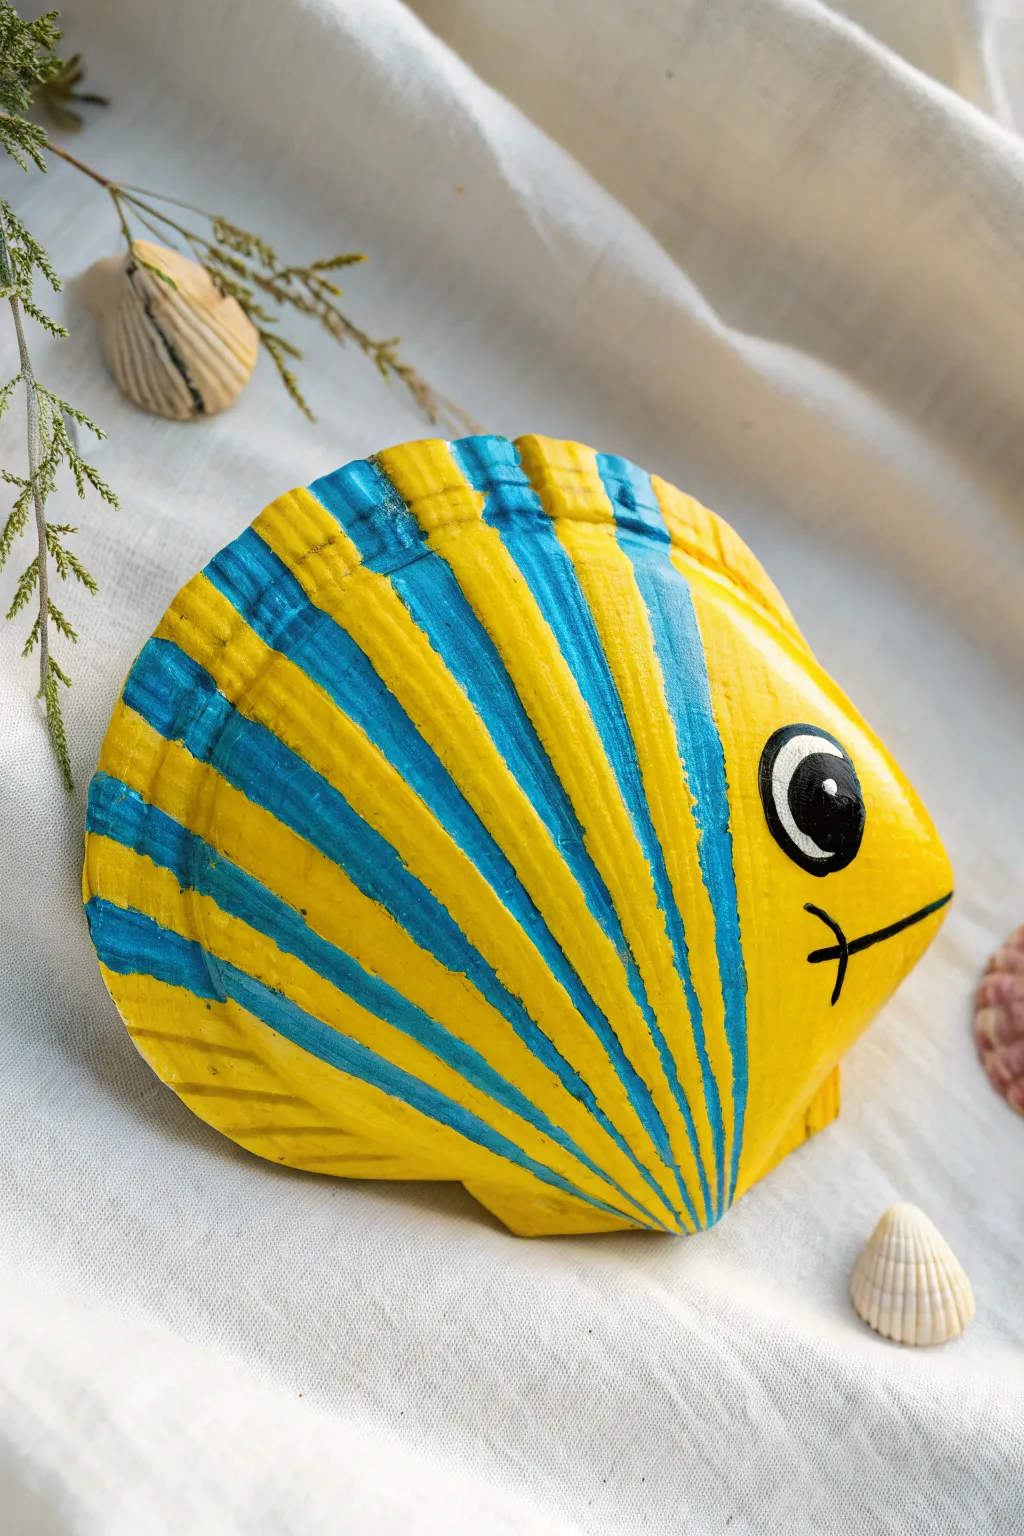
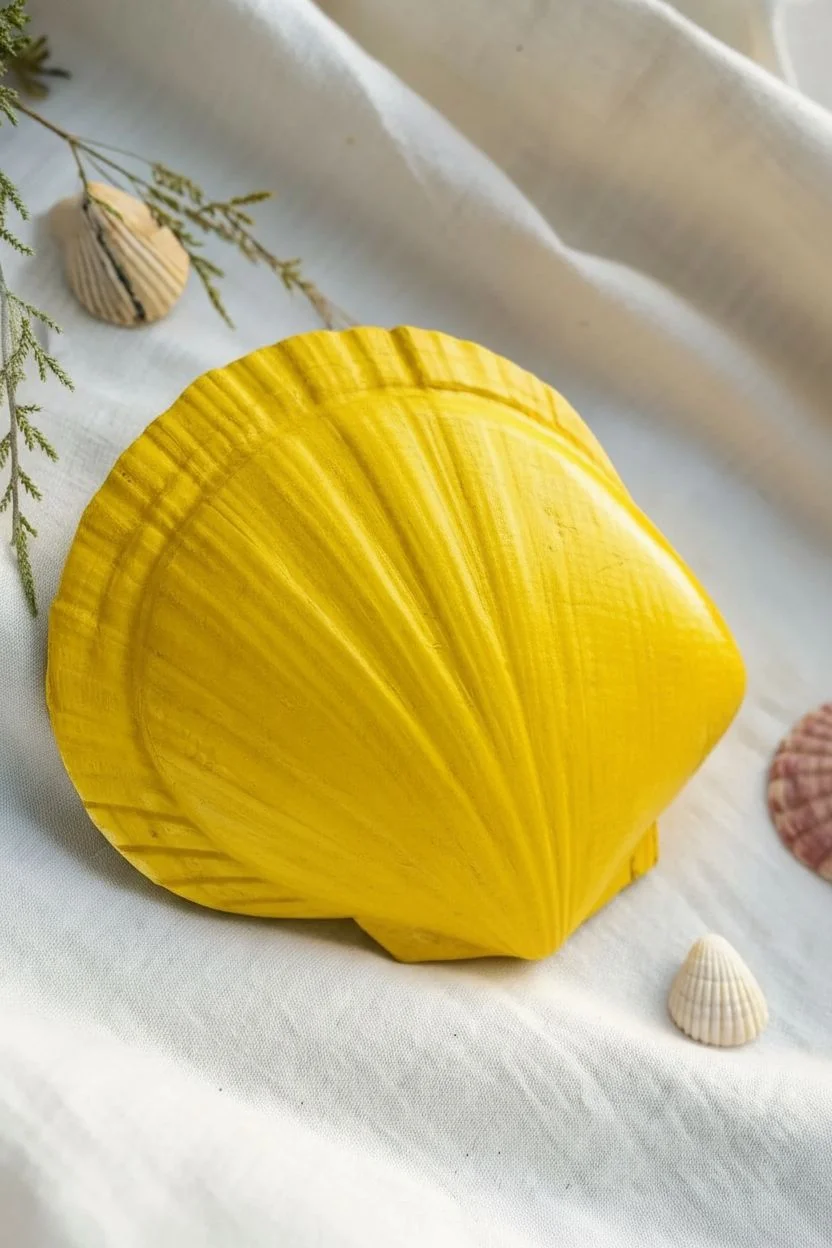
Transform a fan-shaped scallop shell into a vibrant tropical friend by using the shell’s natural ridges as guide lines. This project uses bright contrasting colors to create a cheerful fish that looks like it just swam out of a cartoon reef.
Step-by-Step Tutorial
Materials
- Large scallop shell (cleaned and dried)
- Acrylic paint: Bright Yellow, Turquoise Blue, Titanium White, Black
- Flat shader brush (size 4 or 6)
- Fine liner brush (size 0 or 00)
- Glossy sealant or Mod Podge
- Palette and water cup
Step 1: Prepping the Canvas
-
Clean the surface:
Ensure your scallop shell is free of sand and completely dry before starting. -
Prime with white:
paint the entire outer surface of the shell with Titanium White; this step is crucial because yellow paint is naturally transparent and needs a bright undercoat to pop. -
Apply the base color:
Once the white primer is dry, use your flat brush to cover the entire shell in Bright Yellow. -
Second coat:
Let the first yellow layer dry to the touch, then add a second coat to ensure solid, opaque coverage without streaks. -
Dry completely:
Allow the yellow base to dry completely before moving on to the stripes to prevent muddy colors.
Ridge Running
Thin your blue paint slightly with a drop of water. This helps the brush glide smoothly into the deep crevices of the shell ridges.
Step 2: Painting the Stripes
-
Load the blue:
Load a small flat brush or a thick round brush with Turquoise Blue paint. -
Identify the pattern:
Observe the natural fan-shaped ridges of the shell; you will be painting blue stripes that follow these radiating lines. -
Start the stripes:
Begin painting blue lines from the top edge of the shell down towards the hinge, following the natural grooves. -
Alternating colors:
Paint a blue stripe, then skip a space to leave a yellow stripe, continuing this pattern across the back two-thirds of the shell. -
Leave the face clear:
Stop painting stripes about one inch from the right side of the shell to create a solid yellow area for the fish’s face. -
Clean up edges:
I prefer to use a damp clean brush to tidy up any blue paint that may have touched the face area while it’s still wet.
Level Up
Glue a strong magnet to the hollow back of the shell once dry to turn your tropical fish into adorable refrigerator art.
Step 3: Adding the Face
-
Outline the eye:
In the solid yellow face area, lightly paint a large white circle using a round brush. -
Dry the eye base:
Wait for the white circle to dry completely so the black details won’t bleed. -
Outline in black:
Using your fine liner brush and black paint, carefully trace the outer edge of the white circle. -
Add the pupil:
Paint a large black circle inside the white eye, leaving a thick white ring visible around it. -
The sparkle:
Dip the tip of a brush handle into white paint and dot it onto the black pupil to create a lively reflection. -
Paint the mouth:
Use the fine liner brush to paint a thin black line starting from the shell edge, curving slightly inward for the mouth. -
Add detail line:
paint a small perpendicular hatch mark across the mouth line to give the fish a bit of character.
Step 4: Finishing Touches
-
Check for gaps:
Look over the blue stripes and dab a little extra paint if the shell’s texture caused any skip marks. -
Seal it:
Once all paint is 100% dry, apply a coat of glossy sealer or Mod Podge to protect the paint and give the fish a wet, aquatic shine.
Place your finished fish on a shelf or arrange a whole school of them for a permanent slice of summer
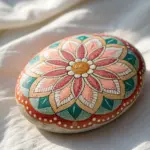
Mandala Dot Art
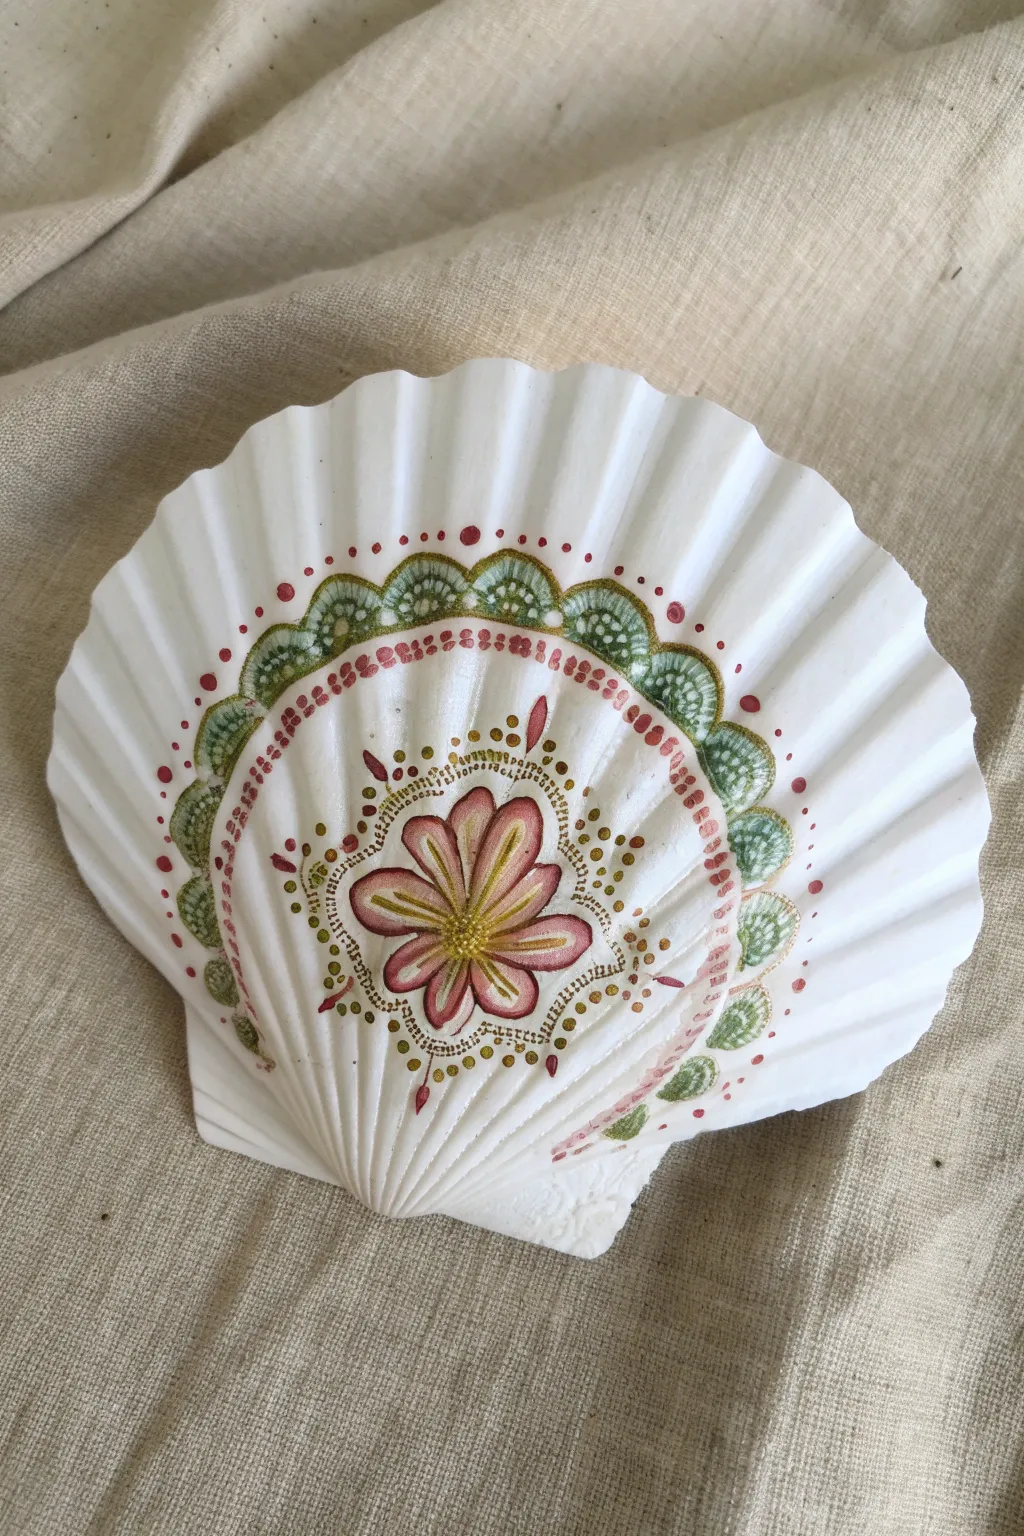
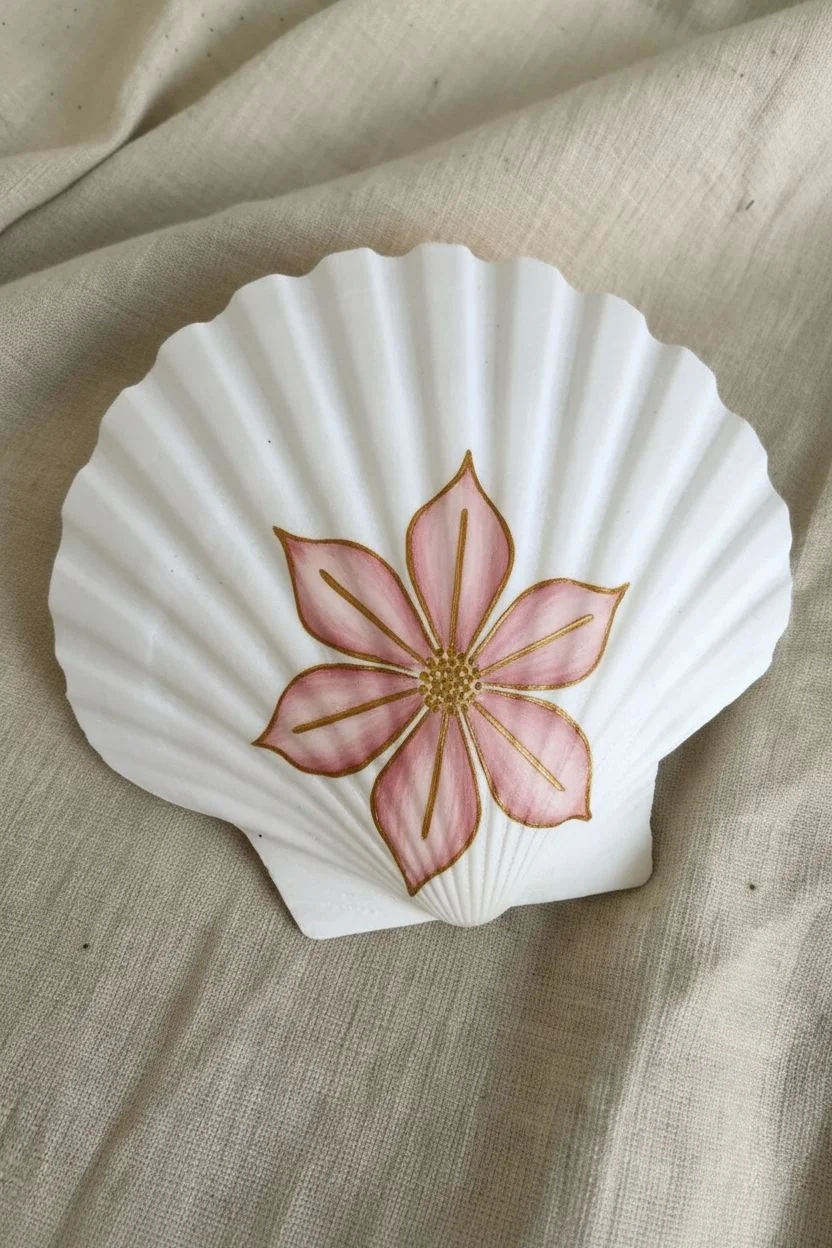
Transform a simple white scallop shell into a bohemian masterpiece with this delicate floral mandala design. By combining fine brush strokes with precise dotting techniques in earthy pinks and greens, you will create a piece that highlights the shell’s natural symmetry.
How-To Guide
Materials
- Large white scallop shell (3-4 inches wide)
- Acrylic paints (Dusty Rose, Olive Green, Ochre/Gold, White)
- Fine detail brush (size 0 or 00)
- Set of dotting tools (or toothpicks and brush ends)
- Palette or wax paper
- Cotton swabs
- Water cup
Step 1: Painting the Central Bloom
-
Prepare the surface:
Ensure your shell is completely clean and dry. I prefer using a matte white shell for this design, as it allows the colors to pop without priming. -
Block in the petals:
Load a fine brush with dusty rose paint. Paint six varying teardrop shapes radiating from the lower-middle center of the shell to form a flower. -
Refine the shape:
Go over your petals again to make them opaque. Keep the petals slightly separated; they shouldn’t touch at the base. -
Add the flower center:
Mix a warm ochre or gold tone. Dip a medium-sized dotting tool into the paint and place a cluster of dots in the very center of your flower. -
Outline the petals:
Using your finest brush and the ochre paint, carefully trace the outer edge of each pink petal with a very thin line. -
Add vein details:
Paint a single, straight line down the center of each petal using the same ochre color to create depth.
Troubleshooting: Peaks on Dots
Do your dots look like chocolate kisses with sharp peaks? Your paint is too thick. Mix in a drop of water or pouring medium to achieve a heavy cream consistency.
Step 2: Creating the Inner Mandala
-
Dot the perimeter:
Using a small dotting tool and ochre paint, place tiny dots closely together, outlining the entire floral shape you just painted. -
Create the starburst:
Add a second row of slightly spaced ochre dots that extend outward from the tips of the petals, creating a subtle starburst effect. -
Paint the pink arch:
Switch back to your dusty rose paint. Using a medium dotting tool, create a curved row of dots that forms an arch over the top of the flower design, leaving about half an inch of space from the flower. -
Connect the design:
Add tiny gold filler dots between the flower and the pink arch to bridge the empty space.
Pro Tip: Ride the Ridge
Use the shell’s natural vertical ridges as a grid. Aligning your main petals and border arches with these grooves keeps the mandala symmetrical without measuring.
Step 3: The Green Lace Boarder
-
Mark the green arches:
Mix an olive green shade. Use your brush to paint semi-circle outlines (scallops) above the pink dotted arch. Try to align the peak of each green arch with the shell’s natural ridges. -
Fill with texture:
Inside each green arch, use a mix of white and pale green to add a honeycomb or mesh pattern using tiny dots. -
Detail the green arches:
Use a small dotting tool and the original olive green to dot along the top curve of each painted green arch for a lace-like finish. -
Add separation dots:
Place a single, slightly larger olive green dot between each arch at the bottom where they meet.
Step 4: Outer Rim & Finish
-
Add rim accents:
Using dusty rose, place single, medium-sized dots along the upper outer ridges of the shell, spaced evenly outside the green border. -
Incorporate micro-details:
Look for any large gaps in your design. Fill them with extremely small dots of ochre or white using the very tip of a toothpick. -
Clean up edges:
If any paint went astray, use a damp cotton swab to wipe it away before it cures. -
Dry completely:
Let the shell sit undisturbed for at least an hour to ensure the raised dots are fully hardened.
Display your beautiful painted shell on a small stand or use it as a unique jewelry dish


Summer Strawberry Texture
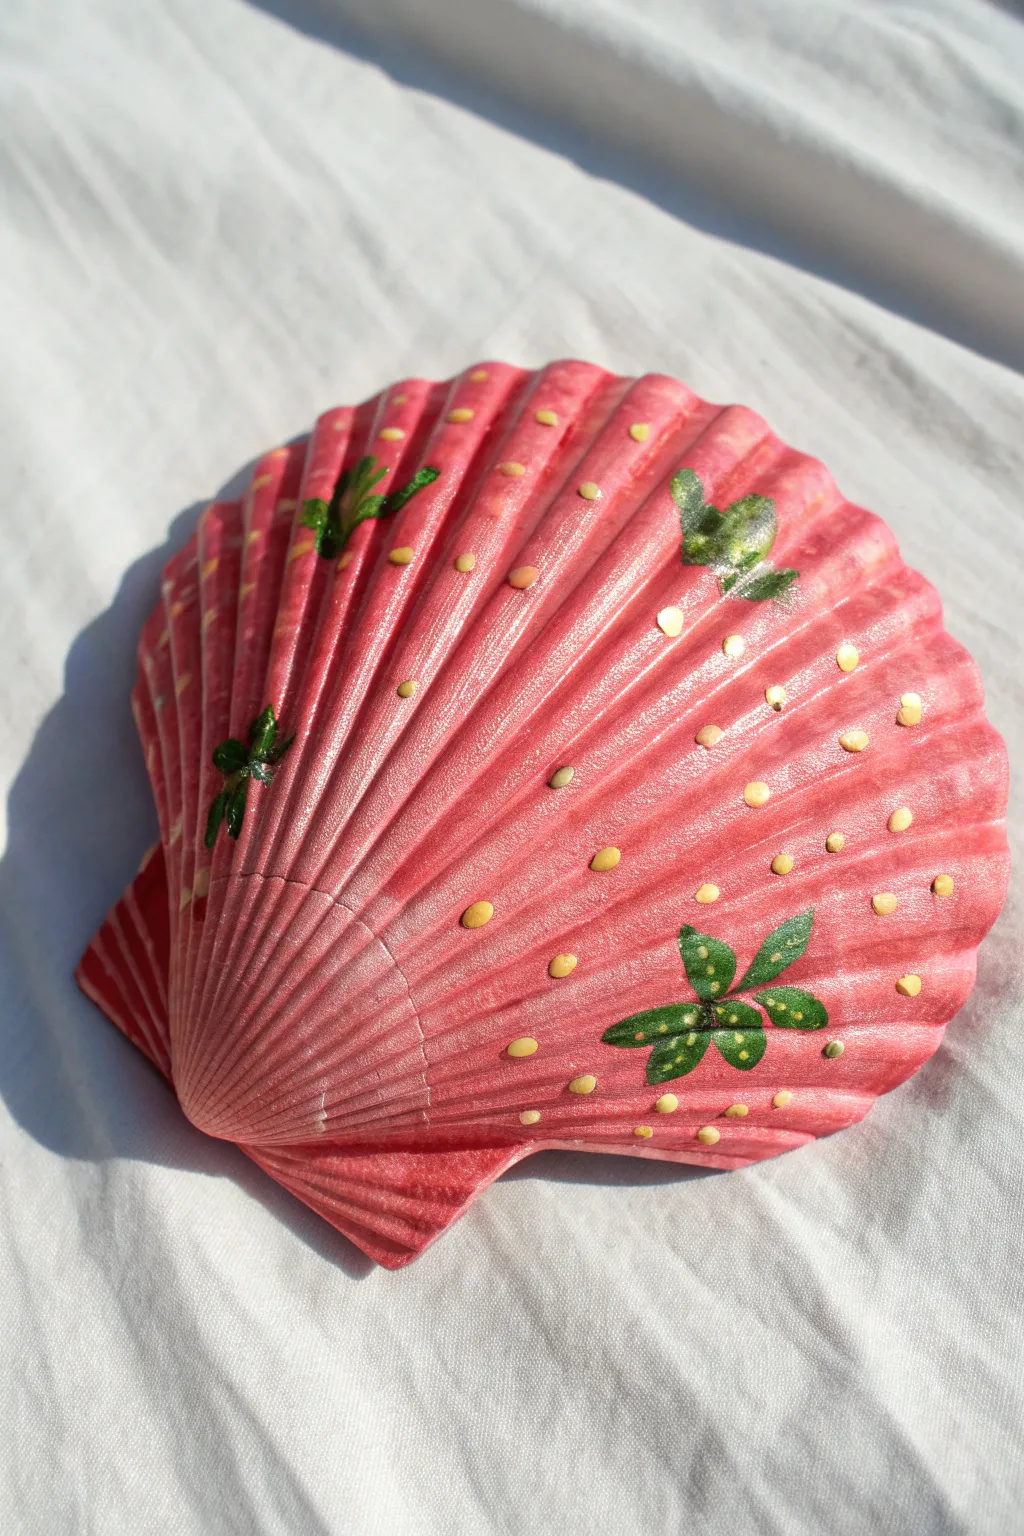
Transform a plain scallop shell into a juicy piece of summer decor with this berry-inspired painting technique. The natural ridges of the shell perfectly mimic the texture of a real strawberry, making the final result incredibly lifelike and fun.
Step-by-Step Guide
Materials
- Large scallop shell (cleaned and dried)
- Acrylic craft paint (watermelon pink, butter yellow, forest green, lime green)
- Wide flat paintbrush
- Fine detail brush (size 0 or 00)
- Glossy clear varnish or sealant
- Palette or paper plate
- Water cup and paper towels
Step 1: Creating the Berry Base
-
Prepare the workspace:
Lay down newspaper or a protective sheet on your table and set out your clean, dry scallop shell. -
Mix your base color:
Squeeze a generous amount of watermelon pink acrylic paint onto your palette. -
Apply the first coat:
Using the wide flat brush, paint the entire convex (outer) side of the shell with long, smooth strokes following the ridges. -
Allow to dry:
Let the first layer dry completely; acrylics usually take about 15-20 minutes depending on humidity. -
Add a second coat:
Apply a second layer of pink to ensure the color is opaque and vibrant, covering any natural shell patterns.
Paint sliding off?
Scallop shells can be slick. If the paint isn’t sticking, apply a thin coat of white gesso or matte primer first to give the acrylics something to grip onto.
Step 2: Planting the Seeds
-
Prepare the seed color:
Dispense a small dime-sized amount of butter yellow paint onto your palette. -
Switch tools:
Pick up your fine detail brush, dipping just the very tip into the yellow paint so you don’t overload it. -
Paint the first seeds:
Gently press the tip of the brush onto the pink surface to create small, oval-shaped seeds. -
Vary the placement:
Scatter the seeds randomly across the shell, placing some inside the grooves and some on top of the ridges for a natural look. -
Fill the surface:
Continue dappling yellow seeds until the whole pink surface has an evenly spaced, speckled texture.
Step 3: Painting the Foliage
-
Load the green paint:
Clean your detail brush thoroughly and load it with forest green paint. -
Outline leaf clusters:
Paint three small, star-like leaf clusters at random spots on the shell—I like to place one near the edge and two near the center. -
Fill in the leaves:
Carefully fill in the outlines of your leaf clusters with the dark green paint. -
Add highlights:
While the dark green is still slightly tacky or just dry, dip your brush into lime green paint. -
Detail the veins:
Paint thin, gentle strokes inside the dark green leaves to mimic veins and light reflection.
Make it functional
Turn this into a trinket dish! Paint the underside of the shell a solid gold or white, flip it over, and use the concave side to hold rings or earrings.
Step 4: Sealing the Sweetness
-
Dry completely:
Allow all paint layers to dry fully, ideally for at least an hour to prevent smudging. -
Apply varnish:
Brush on a coat of glossy clear varnish to give the strawberry a wet, juicy appearance and protect the paint.
Display your fruity creation on a sunlit shelf for a permanent splash of summer vibes.
Glitter Dipped Treasures
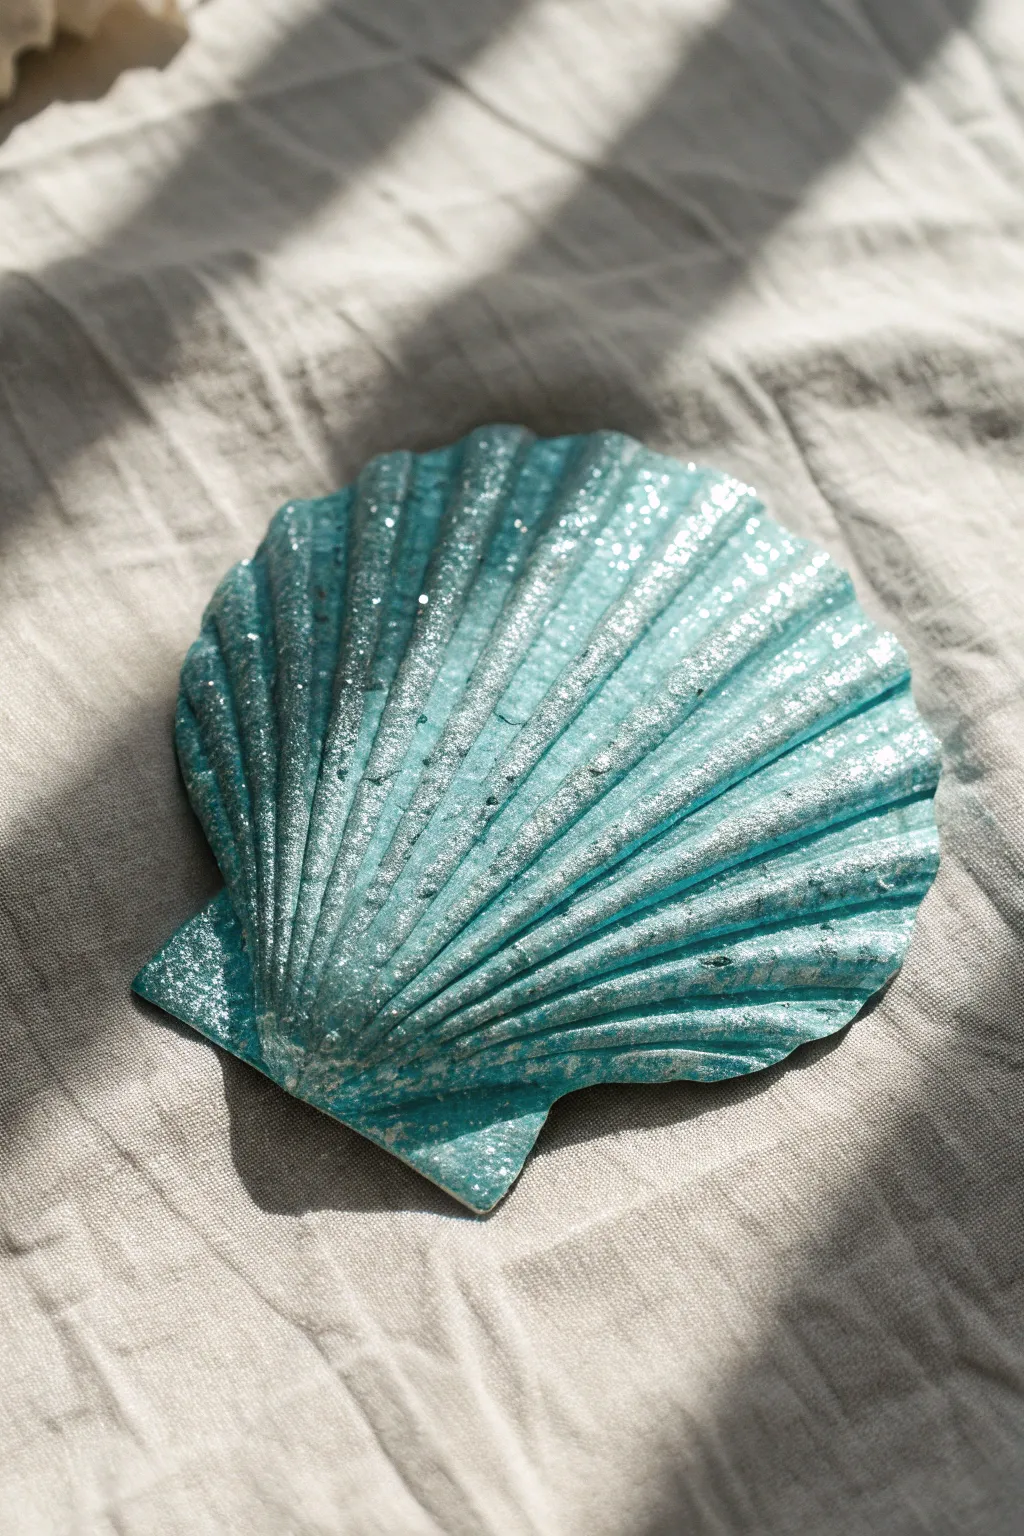
Capture the sparkling essence of the ocean with this vibrant, glitter-infused seashell project. By layering metallic paints with fine shimmer, you will create a luxurious decorative piece perfect for holding jewelry or styling a coffee table.
How-To Guide
Materials
- Large scallop shell (cleaned and dried)
- White acrylic paint (primer)
- Metallic turquoise or teal acrylic paint
- Fine iridescent or turquoise glitter
- Gloss Mod Podge or distinct clear acrylic glaze
- Soft synthetic flat brush
- Small foam brush
- Wax paper or parchment paper
- Paper plate or palette
- Clear spray sealer (gloss finish)
Step 1: Preparation and Priming
-
Clean surface:
Gently scrub your scallop shell with mild soap and warm water to remove any sand or salt residue. -
Dry thoroughly:
Pat the shell dry with a towel and let it air dry completely for about 30 minutes to ensure no moisture is trapped. -
Protect workspace:
Lay down a sheet of wax paper or parchment paper to protect your table and prevent the painted shell from sticking. -
Apply base coat:
Using the flat brush, cover the entire front surface of the shell with a thin layer of plain white acrylic paint. -
Allow to set:
Let this white primer layer dry completely; this step is crucial as it makes the translucent turquoise pop later.
Sticky Situation?
If your shell sticks to the paper while drying, gently wiggle it free every 10 minutes during the drying process to prevent adhesion.
Step 2: Applying Color
-
Prepare metallic paint:
Squeeze a generous amount of metallic turquoise paint onto your palette. -
First color pass:
Paint the shell with vertical strokes, following the natural ridges from the hinge to the outer edge. -
Check the grooves:
Use the tip of your brush to ensure paint gets deep into the crevices of the scalloped texture. -
Dry time:
Allow the first coat of turquoise to dry for roughly 15 to 20 minutes until it is dry to the touch. -
Second color pass:
Apply a second coat of the metallic paint to ensure full, opaque coverage and a rich color depth.
Step 3: Glitter Glazing
-
Create glitter mix:
In a clean spot on your palette, mix a dollop of Gloss Mod Podge with a teaspoon of fine glitter. -
Adjust consistency:
Stir well until the glitter is evenly suspended in the gloss medium; it should look like a thick, sparkly gel. -
Apply glaze:
I like to use a foam brush here to dab and sweep the glitter mixture over the dried turquoise paint. -
Even distribution:
Work quickly to spread the glaze evenly, ensuring the glitter doesn’t clump in the valleys of the shell. -
Extra sparkle:
While the glaze is still wet, lightly pinch a tiny amount of dry glitter and dust it over the highest ridges for dimension. -
Shake off:
Gently tap the shell against the table to knock off any loose excess glitter. -
Curing:
Let the shell sit undisturbed for at least one hour so the milky gloss medium dries perfectly clear. -
Final seal:
Take the shell to a well-ventilated area and give it a light coat of clear spray sealer to lock the glitter in place.
Gilded Edge
For a more upscale look, paint the very outer rim of the shell with liquid gold leaf or metallic gold paint after the glitter layer dries.
Place your shimmering treasure in a sunny spot and enjoy the coastal vibes it brings to your room
Galaxy Night Sky

Transform a simple beach treasure into a window to the cosmos with this mesmerizing painting technique. By layering deep blues and creating a speckled star field, you will capture the magic of the night sky on the unique texture of a scallop shell.
Step-by-Step Tutorial
Materials
- Large scallop shell (clean and dry)
- Acrylic paints: Navy Blue, Black, Violet, Titanium White, Metallic Silver
- Flat shader brush (size 6 or 8)
- Small piece of kitchen sponge or makeup wedge
- Old toothbrush
- Fine detail liner brush (size 00 or 000)
- Gloss or satin varnish
- Paper towel and water cup
Step 1: Setting the Background
-
Prepare the surface:
Ensure your shell is completely clean and free of sand or salt residue. If the shell is very smooth, you can lightly buff it with fine-grit sandpaper to help the paint adhere. -
Apply the base color:
Using the flat shader brush, coat the entire front surface of the shell with navy blue acrylic paint. -
Cover the grooves:
Work the bristles into the deep vertical grooves of the scallop shell to ensure no white shell shows through. -
Deepen the edges:
While the navy paint is still slightly wet, mix a small drop of black into your navy blue. Paint this darker shade along the outer rim and the very bottom hinge area to create depth. -
Let it dry:
Allow this base layer to dry completely to the touch before moving on to the nebula effects.
Pro Tip: Splatter Control
To prevent a mess, place your shell inside a cardboard box before using the toothbrush splatter technique. This keeps the specks on your art and off your table.
Step 2: Creating the Nebula
-
Prepare the sponge:
Dampen your small piece of sponge/makeup wedge and squeeze out almost all the water. -
Load the violet paint:
Dip the sponge into violet acrylic paint, then dab the excess off onto a paper towel until the texture looks soft and misty, not gloppy. -
Create the galaxy cloud:
Gently dab the sponge diagonally across the center of the shell. I like to twist my wrist slightly while dabbing to keep the shape organic and random. -
Soften the blend:
As the paint on the sponge runs out, move toward the edges of the violet area to fade it seamlessly into the dark navy background. -
Add dimension:
Once the first layer is dry, dab a very small amount of white mixed with violet into the absolute center of the nebula to make it glow.
Level Up: Hidden Constellations
Before painting random stars, look up a real constellation like The Big Dipper or Cassiopeia. Arrange your larger hand-painted stars to match the pattern for a hidden meaningful detail.
Step 3: The Starry Field
-
Mix the star paint:
On your palette, mix Titanium White paint with a few drops of water until it reaches the consistency of heavy cream or ink. -
Test your splatter:
Dip the bristles of an old toothbrush into the thinned white paint. Test the splatter on a piece of scrap paper first by running your thumb over the bristles. -
Create distant stars:
Hold the toothbrush about 6 inches above the shell and flick the bristles to create a spray of fine white ducts across the dark surface. -
Paint prominent stars:
Switch to your fine detail liner brush throughout the galaxy. Dip it in pure un-thinned white paint and dab irregular dots where you want brighter stars. -
Detail the cross stars:
Select 3 to 5 larger dots to turn into twinkling stars. Using the very tip of the liner brush, drag paint outward from the center dot: up, down, left, and right to form a cross. -
Add metallic shine:
Once the white cross stars are dry, add a tiny dot of metallic silver to the very center of them for extra sparkle. -
Seal the artwork:
Allow the paint to cure fully, then apply a coat of gloss or satin varnish to protect the paint and make the dark colors look richer.
Display your galactic shell on a stand or use it as a stunning jewelry dish to hold your rings
Abstract Color Splatter
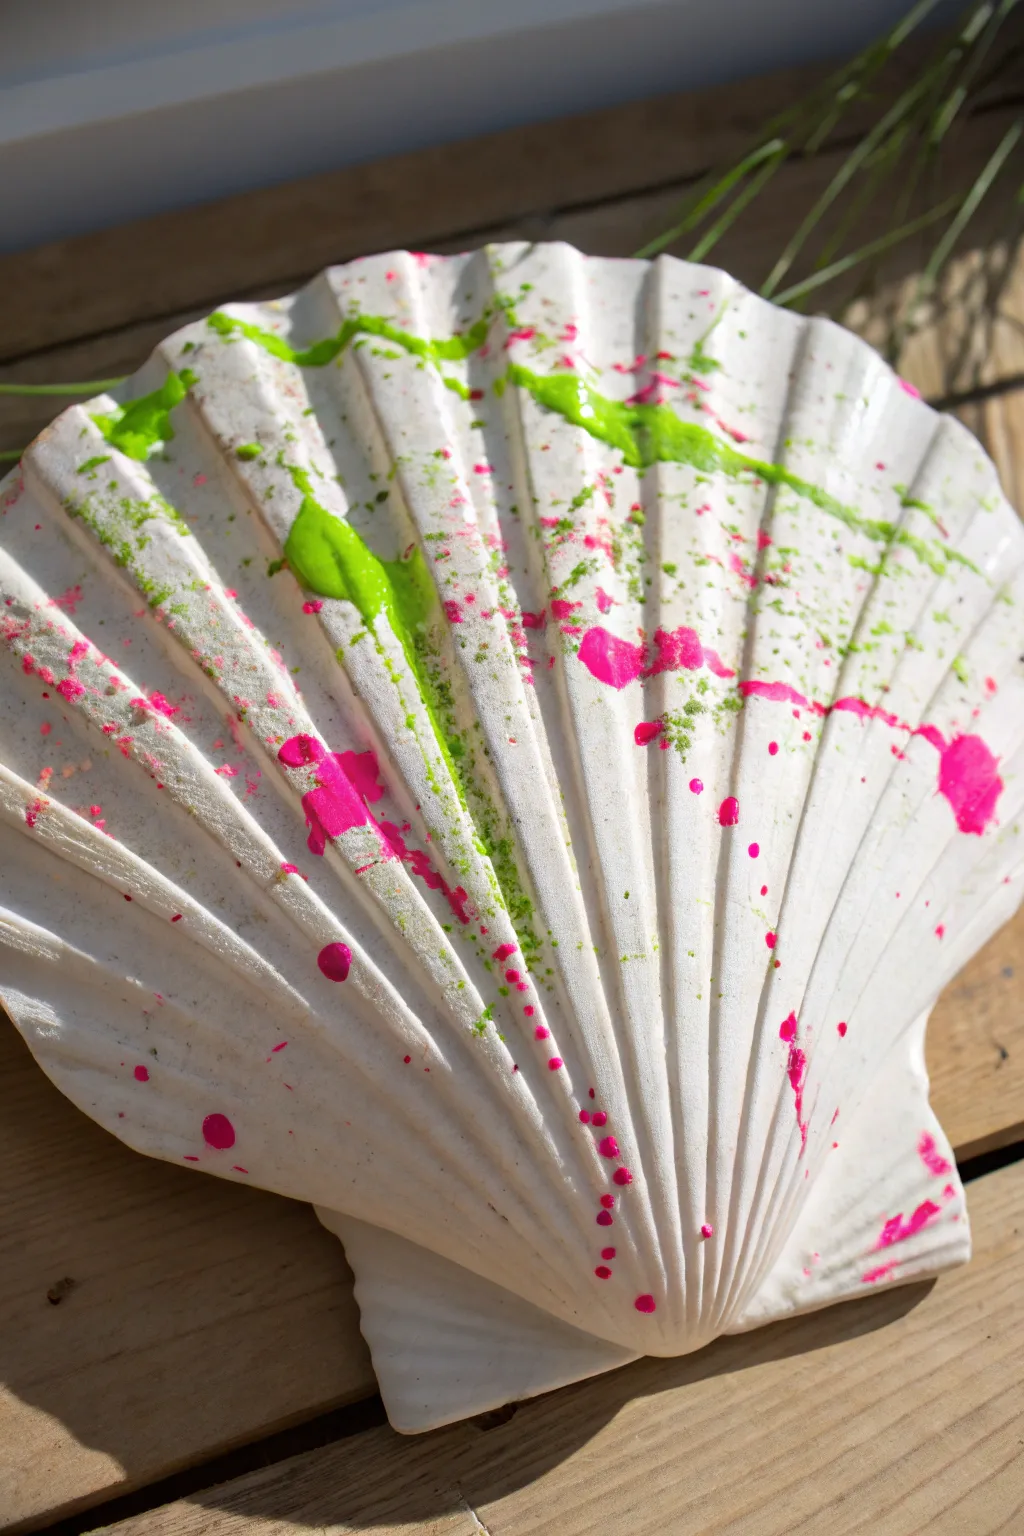
Transform a simple seashell into a vibrant piece of modern art with this high-energy abstract design. By layering electric lime and hot pink splatters over a pristine white base, you capture a fun, retro-pop aesthetic that brightens up any room.
Step-by-Step
Materials
- Large scallop shell (real or plaster)
- White acrylic paint or gesso
- Neon lime green acrylic paint
- Neon hot pink acrylic paint
- Stiff-bristled paintbrush or old toothbrush
- Second paintbrush (for mixing)
- Small cup of water
- Palette or paper plate
- Cardboard box (shallow)
- Clear acrylic sealer spray (optional)
Step 1: Preparation
-
Clean the surface:
Wash your large scallop shell thoroughly with mild soap and water to remove any sand, salt, or dust. -
Dry completely:
Pat the shell dry with a paper towel and let it air dry for about 15 minutes to ensure no moisture remains in the grooves. -
Create a blank canvas:
Paint the entire surface of the shell with a solid coat of white acrylic paint or gesso. -
Enhance the brightness:
I usually apply a second coat of white once the first is dry; a stark white background is essential for making neon colors truly pop. -
Set up the zone:
Place your dried, white shell inside a shallow cardboard box to contain the paint splatter mess that is about to happen.
Step 2: Applying Lime Green
-
Prepare the green paint:
Squeeze a dime-sized amount of neon lime green paint onto your palette. -
Dilute the pigment:
Mix in a few drops of water until the paint reaches a thin, ink-like consistency that runs easily. -
Load the tool:
Dip your stiff-bristled brush or an old toothbrush into the thinned green paint. -
Create fine mist:
Hold the brush over the shell and run your thumb briskly across the bristles to flick a fine mist of green across the ridges. -
Add larger drips:
Dip the brush again and tap the handle against your finger over specific spots to create larger, more distinct green droplets. -
Let it set:
Allow the green layer to dry for about 10 minutes so the colors remain distinct and don’t muddy together.
Splatter Zone Pro Tip
To get directional stripes of splatter like in the photo, move your hand swiftly in a diagonal line across the shell while flicking the bristles, rather than holding your hand stationary.
Step 3: Adding Hot Pink Accents
-
Mix the pink:
Prepare the neon hot pink paint on your palette, diluting it with water just as you did with the green. -
Strategize the placement:
Aim for the diagonal voids where there is less green paint to create a balanced composition. -
Splatter the pink:
Flick the bristles to create a scattering of pink speckles across the shell surface. -
Create focal points:
Load a regular paintbrush with undiluted pink paint and let a few heavy drops fall onto the shell for bold, opaque splashes. -
Check the balance:
Step back and look at the whole shell, adding tiny flicks of pink to any areas that feel too white.
Level Up
Turn this art piece into a functional jewelry dish by gluing a small wooden bead or felt pads to the bottom of the shell to stabilize it so it sits flat on a table.
Step 4: Finishing Touches
-
Dry thoroughly:
Leave the shell in a safe place to dry completely, which may take an hour depending on how thick the larger drops are. -
Protect the art:
Spray the surface with a clear acrylic sealer to give it a glossy finish and protect the neon pigments from fading over time.
Now you have a striking, modern accent piece that brings a splash of summer color to your space
Mermaid Scale Shimmer
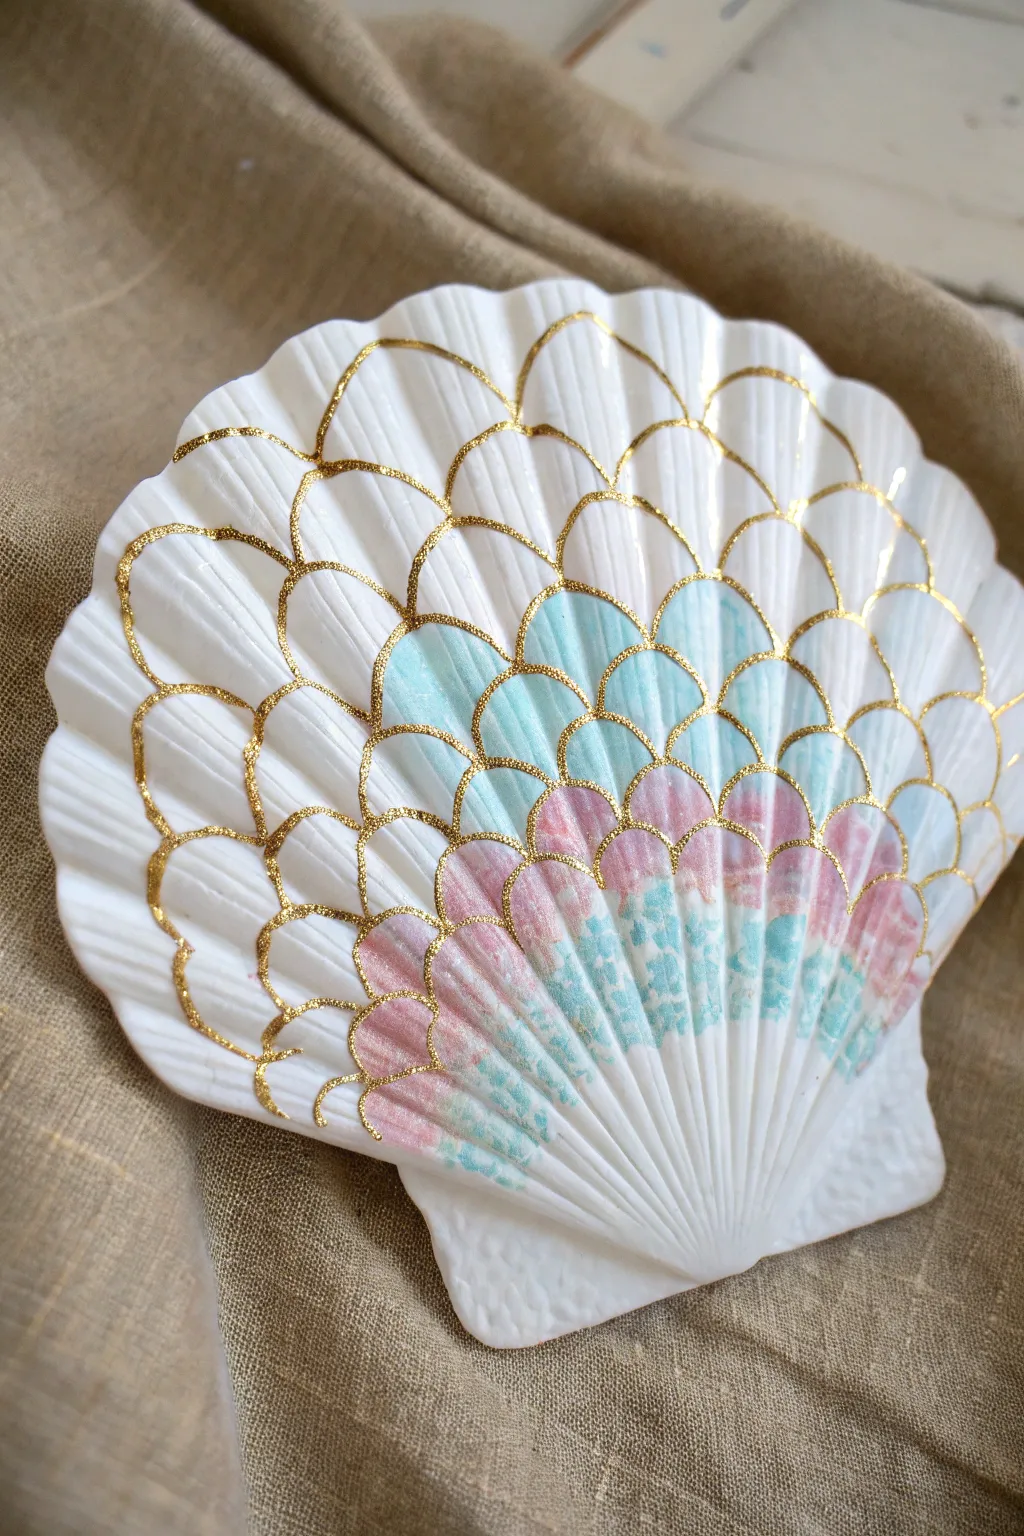
Transform a simple scallop shell into a treasure from under the sea with this delicate mermaid scale design. The combination of stippled pastel hues and crisp gold lines creates a sophisticated, ethereal textural effect perfect for jewelry dishes.
Step-by-Step Tutorial
Materials
- Large white scallop shell (real or ceramic)
- White gesso or primer
- Acrylic paints: Teal, pastel pink, soft blue, white
- Metallic gold acrylic paint or dimensional gold liner
- Fine detail brush (size 0 or 1)
- Small stiff-bristled brush or mini sponge applicator
- Light pencil (HB)
- Gloss varnish
Step 1: Preparation & Sketching
-
Clean surface:
Ensure your shell is completely clean and dry. If using a raw shell, scrub it gently with soapy water and let it dry overnight. -
Prime the base:
Apply a thin layer of white gesso or white acrylic paint to the inside of the shell. This provides a bright, even canvas that makes the pastel colors pop. -
Establish the center:
Once the base is dry, use a pencil to lightly mark a center vertical line radiating from the hinge to the outer edge to help guide your pattern. -
Sketch the first row:
Starting at the very bottom hinge area, draw small U-shapes connected side-by-side to form the first row of scales. -
Build the pattern:
Draw the second row of scales, positioning the bottom of each ‘U’ in the valley between the two scales below it (brick-lay pattern). -
Expand the scales:
Continue drawing rows of scales up toward the outer rim. I find it helpful to make the scales slightly larger as they move outward to match the fanning shape of the shell.
Dabbing Technique
To get the airy, speckled look shown in the photo, never drag your brush. Only use vertical dabbing motions with a ‘dry brush’ that has very little paint on it.
Step 2: Color Application
-
Mix your colors:
Prepare your teal, pink, and blue paints. Mix each with a tiny bit of white so they have a soft, chalky pastel finish. -
Stipple the pinks:
Dip a dry, stiff brush or sponge into the pink paint. Dab off excess paint onto a paper towel until the brush is almost dry. -
Apply texture:
Gently stipple the pink color into the lower central scales. Do not fill them solid; use a dabbing motion to create a speckled, sandy texture. -
Add teal tones:
Switch to a clean brush and repeat the dry-brush stippling process with the teal paint, focusing on the middle rows of the scale pattern. -
Blend the transition:
Where the pink and teal meet, lightly dab the colors over each other to create a soft, seamless gradient rather than a hard line. -
Fade to white:
Leave the uppermost rows of scales mostly white, or stipple very faintly with the soft blue to suggest a fade into the shell’s natural color.
Make it Sparkle
Before the final varnish dries, sprinkle a pinch of ultrafine iridescent glitter over the teal and pink sections to mimic the shimmer of sunlight on ocean water.
Step 3: Gilding & Finishing
-
Load the liner:
Using your finest detail brush, pick up the metallic gold acrylic paint. Ensure the paint consistency is fluid enough to glide but thick enough to be opaque. -
Trace the pattern:
Carefully paint over your pencil lines with the gold. Use confident, sweeping curves to create the defined scale outlines. -
Refine the edges:
Go back and slightly thicken the junction points where the scales meet to give the pattern a more organic, hand-drawn look. -
Dry thoroughly:
Allow the gold lines to dry completely. Metallic paints can sometimes take a little longer to set than standard acrylics. -
Seal the piece:
Apply a coat of gloss varnish over the entire painted area to protect the design and give it a wet, ceramic-like sheen.
Display your shimmering mermaid shell on a vanity to hold rings or stand it up as a piece of coastal art
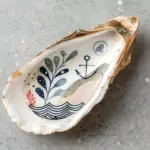
Interior Pearl Scenes
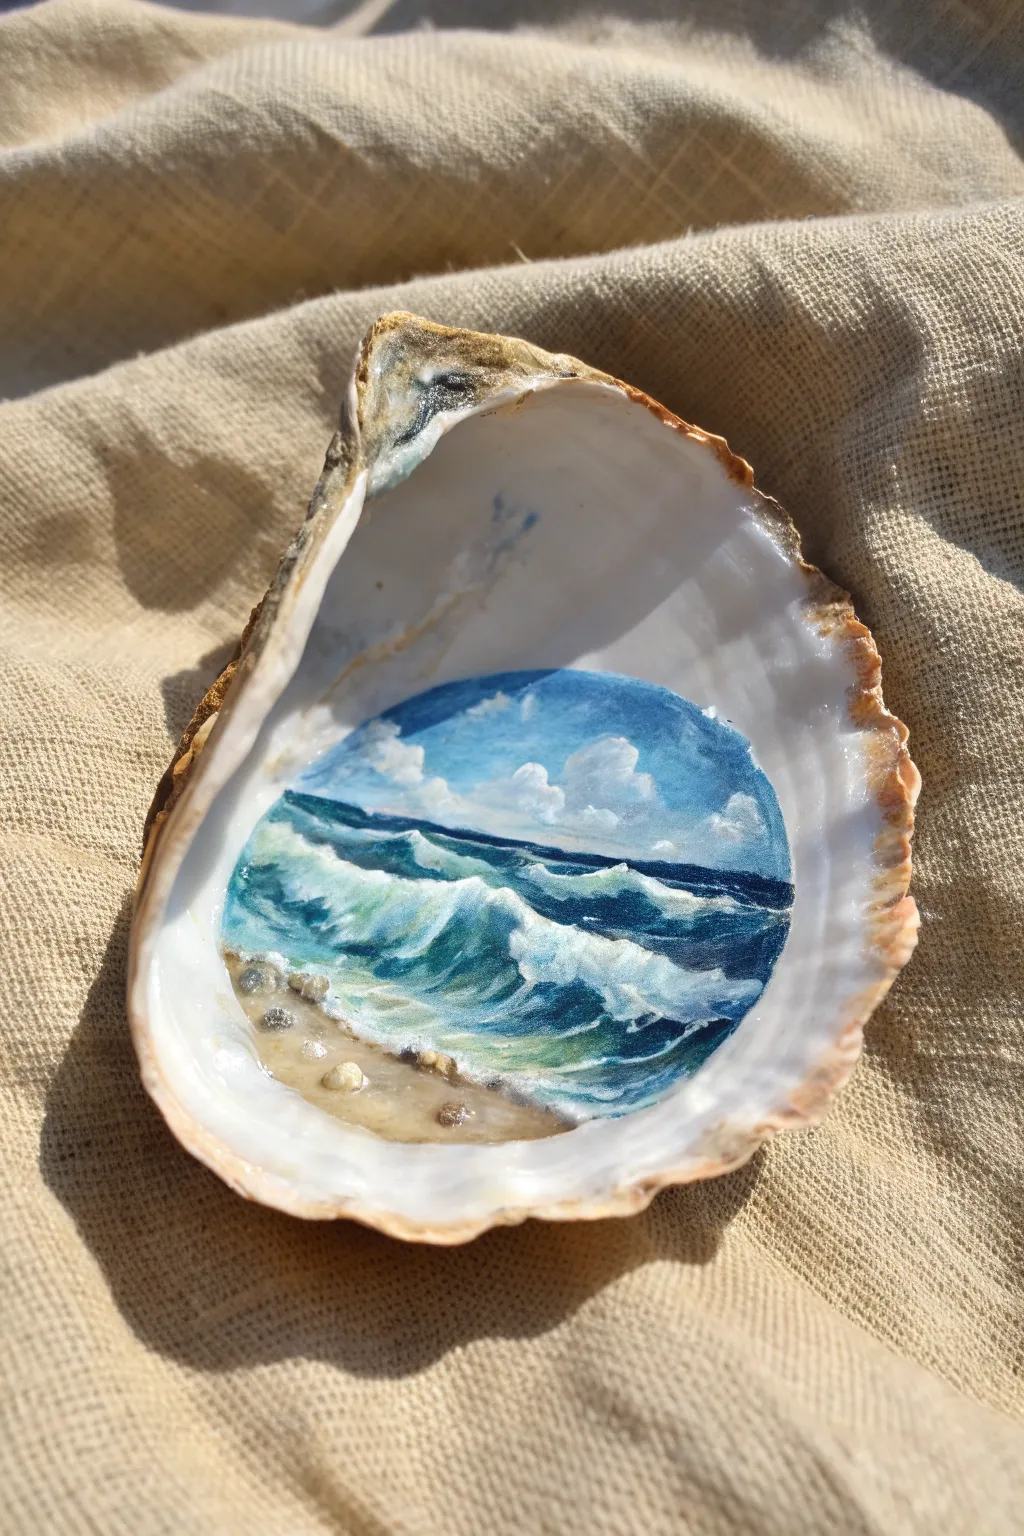
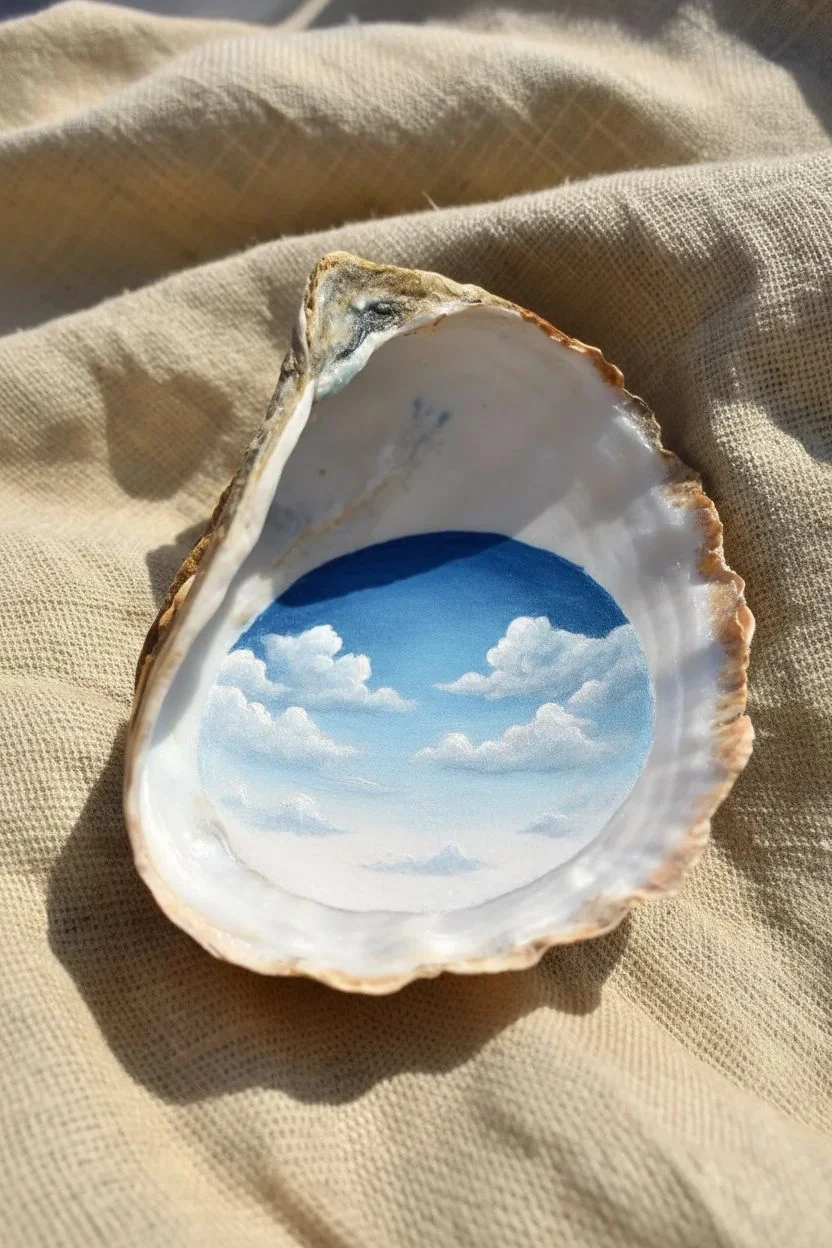
Transform a humble discarded oyster shell into a captivating miniature seascape that fits in the palm of your hand. This project utilizes the natural curvature of the shell to create depth, making the crashing waves feel as though they are physically rolling toward you.
How-To Guide
Materials
- Large oyster shell, thoroughly cleaned and dried
- Gesso or white acrylic primer
- Acrylic paints (Titanium White, Ultramarine Blue, Phthalo Turquoise, Burnt Umber, Yellow Ochre)
- Small flat shader brush (size 2 or 4)
- Fine detail liner brush (size 00 or 000)
- Palette for mixing paint
- Cup of water and paper towels
- High-gloss varnish
Step 1: Preparation and Sky
-
Surface Prep:
Scrub the interior of the shell with soap and water to remove any debris or salt, then let it dry funtly. If the nacre is very slick, lightly sand it with fine-grit sandpaper to give the paint some tooth. -
Prime the Surface:
Apply a thin layer of white gesso or white acrylic paint to the center cup of the shell where you intend to paint the scene. This creates a bright base that helps the translucent ocean colors pop later. -
Sky Gradient:
Mix a small amount of Ultramarine Blue with Titanium White. Start painting the top third of the primed area, keeping the blue darker at the top edge. -
Softening the Horizon:
Gradually add more white to your brush as you move downward, blending the sky into a nearly pure white just above where your water line will be. This creates realistic atmospheric perspective. -
Fluffy Clouds:
Using a dry, small brush with a tiny amount of pure Titanium White, gently dab circular motions into the sky area to form soft, billowy cumulus clouds.
Paint sliding off?
painting on smooth shell nacre can be slippery. If paint lifts, let layers dry completely or apply a clear matte sealer first to create grip.
Step 2: Painting the Ocean
-
Horizon Line:
Mix a deep indigo using Ultramarine Blue and a touch of Burnt Umber. With your fine liner brush, paint a straight, crisp line across the middle of the shell to define the horizon. The darker color indicates deep water. -
Mid-Ocean Tones:
Below the deep horizon line, paint a band of Phthalo Turquoise mixed with a little white. This represents the ocean transitioning toward the shore. -
Wave Underpainting:
Using the dark indigo mix again, determine the shape of your main crashing wave. -
Forming the Wave:
Paint a dark shadow curve that swoops diagonally across the lower middle section; this shadow will serve as the heavy water underneath the white foam. -
Translucent Water:
On the face of the wave (just above the dark shadow you painted), blend pure Turquoise with a tiny bit of Yellow Ochre to create that greenish, light-filled ‘glassy’ look of water just before it breaks. -
Crashing Foam Base:
Load your brush with Titanium White. Stipple (dab repeatedly) paint along the top edge of your wave to create the rough texture of crashing foam.
Step 3: Foreground and Details
-
Rushing Water:
Drag your brush with thinned white paint from the base of the foam towards the bottom of the shell to mimic the streaks of white water rushing onto the beach. -
Sea Spray Details:
I particularly enjoy using the very tip of a liner brush to add tiny, stray dots of white above the wave crests, simulating droplets of sea spray catching the light. -
Sand Base:
Mix Yellow Ochre, Titanium White, and a tiny pinpoint of Burnt Umber to make a warm sand color. Fill in the remaining bottom curve of the shell. -
Wet Sand Effect:
Glaze a thin, watery layer of Burnt Umber over the sand right where it meets the water to make the sand look wet and compact. -
Painting Pebbles:
Dip a detail brush into grey or brown paint and dot small ovals onto the sand area to represent scattered pebbles. -
Pebble Highlights:
Once the pebble dots are dry, add a microscopic dot of white to the top of each one, and a dark shadow underneath them, to give them 3D volume. -
Final Seal:
Allow the painting to cure for 24 hours. Coat the painted area with a high-gloss varnish to protect the artwork and give the water a permanent ‘wet’ sheen.
Gilded Edge
For a luxurious finish, paint the raw, jagged rim of the oyster shell with liquid gold leaf or metallic gold acrylic. It frames the seascape beautifully.
Display your miniature ocean masterpiece on a small easel or use it as a stunning jewelry dish.
Negative Space Stripes
Transform a simple scallop shell into a modern decor piece using a clever masking technique that highlights its natural texture. The crisp white bands of negative space contrast beautifully with warm, earthy tones for a sophisticated beach-house look.
Step-by-Step Tutorial
Materials
- Large scallop shell (clean and dry)
- Titanium white acrylic paint
- Burnt sienna or terracotta acrylic paint
- Painter’s tape or washi tape
- Medium flat synthetic paintbrush
- Small detail brush
- Scissors
- Paper towels
- Water cup
Step 1: Preparing the Canvas
-
Clean the surface:
Scrub your scallop shell gently with warm soapy water to remove any sand or debris from the deep grooves. -
Dry thoroughy:
Pat the shell dry with a towel and let it air dry completely so moisture doesn’t trap under the paint. -
Apply base coat:
Paint the entire surface of the shell with titanium white acrylic paint to ensure a bright, uniform background. -
Let it cure:
Allow this white base layer to dry completely; if it feels cool to the touch, it needs more time.
Bleeding Paint?
Shell ridges make masking tricky. To get perfect lines, paint a thin layer of WHITE over the tape edges first. This seals gaps with the base color so the brown strip remains crisp.
Step 2: Masking the Design
-
Cut tape strips:
Cut two segments of painter’s tape long enough to span the width of your shell. -
Position first band:
Place the first strip of tape across the upper third of the shell, following the subtle curve of the fan shape if possible. -
Position second band:
Place the second strip near the bottom edge, leaving a wide exposed section in the middle of the shell. -
Seal the grooves:
Run your fingernail or a brush handle firmly along the tape edges, pressing it deep into the shell’s ridges to prevent leaks. -
Double-check edges:
Inspect the tape particularly in the valleys of the shell texture to ensure it has adhered well to the white paint.
Level It Up
Swap the terracotta paint for liquid gold leaf or metallic copper acrylic. The metallic sheen against the matte white shell creates a stunning high-end look.
Step 3: Adding Color
-
Load the brush:
Load your flat brush with the burnt sienna or terracotta paint, ensuring you have enough to cover the texture. -
Paint with the grain:
Apply the paint to the exposed areas of the shell, brushing vertically along the ridges rather than across them. -
Cover the middle:
Fill in the large central section between your tape bands, ensuring the paint gets into the textured grooves. -
Paint top and bottom:
Apply color to the exposed very top edge and the very bottom rim of the shell. -
Check opacity:
If the white shows through too much, I like to apply a second thin coat while the first is still slightly tacky.
Step 4: The Reveal
-
Timing is key:
Wait until the paint is dry to the touch but not fully cured (usually about 10-15 minutes). -
Peel carefully:
Slowly peel back the painter’s tape at a sharp angle to reveal the crisp white stripes beneath. -
Refine edges:
Dip your detail brush in a tiny bit of white paint to touch up any spots where the brown paint might have bled under the tape. -
Clean the grooves:
If paint leaked into a deep ridge, use a damp toothpick to gently scrape it away before it hardens. -
Final dry:
Let the finished piece sit for an hour to ensure the thickest parts of the paint in the grooves harden completely.
Display your striped shell on a stack of books or a tray to bring a relaxed seaside elegance to your room.
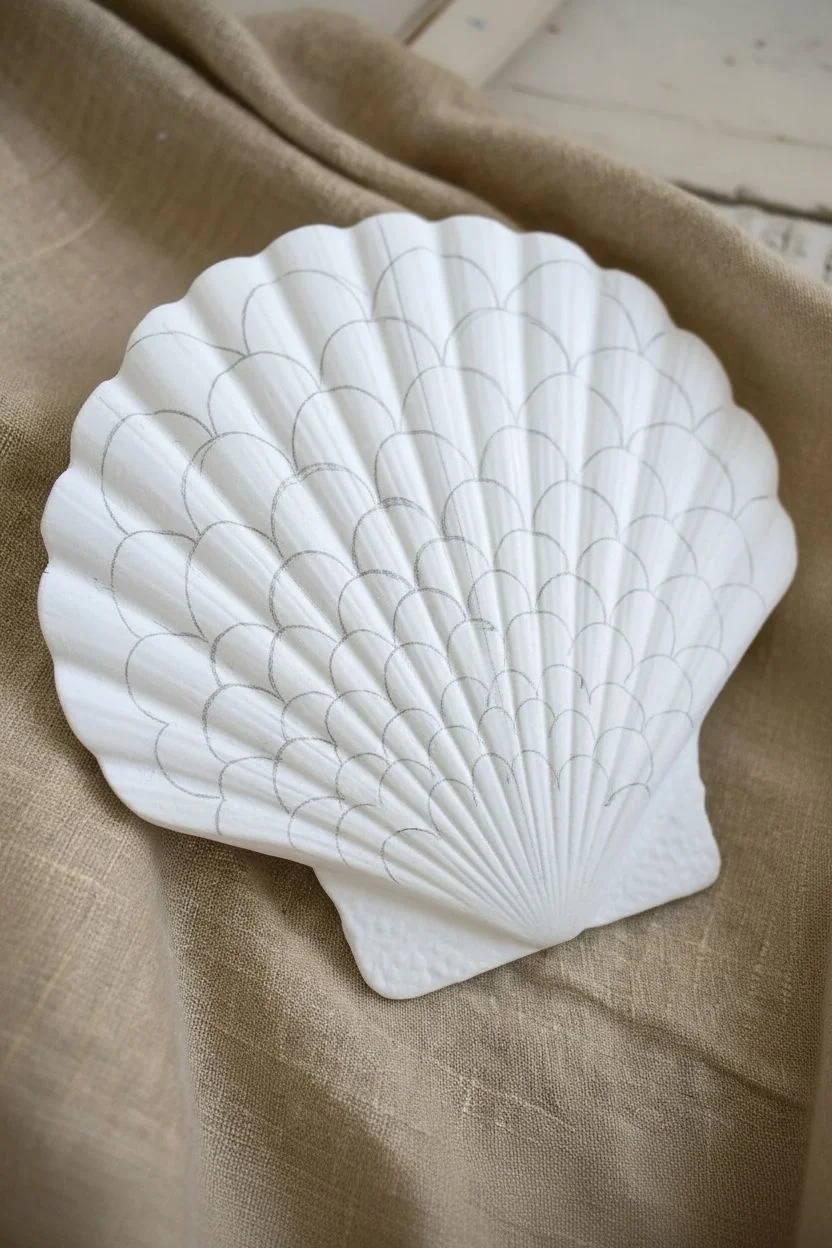
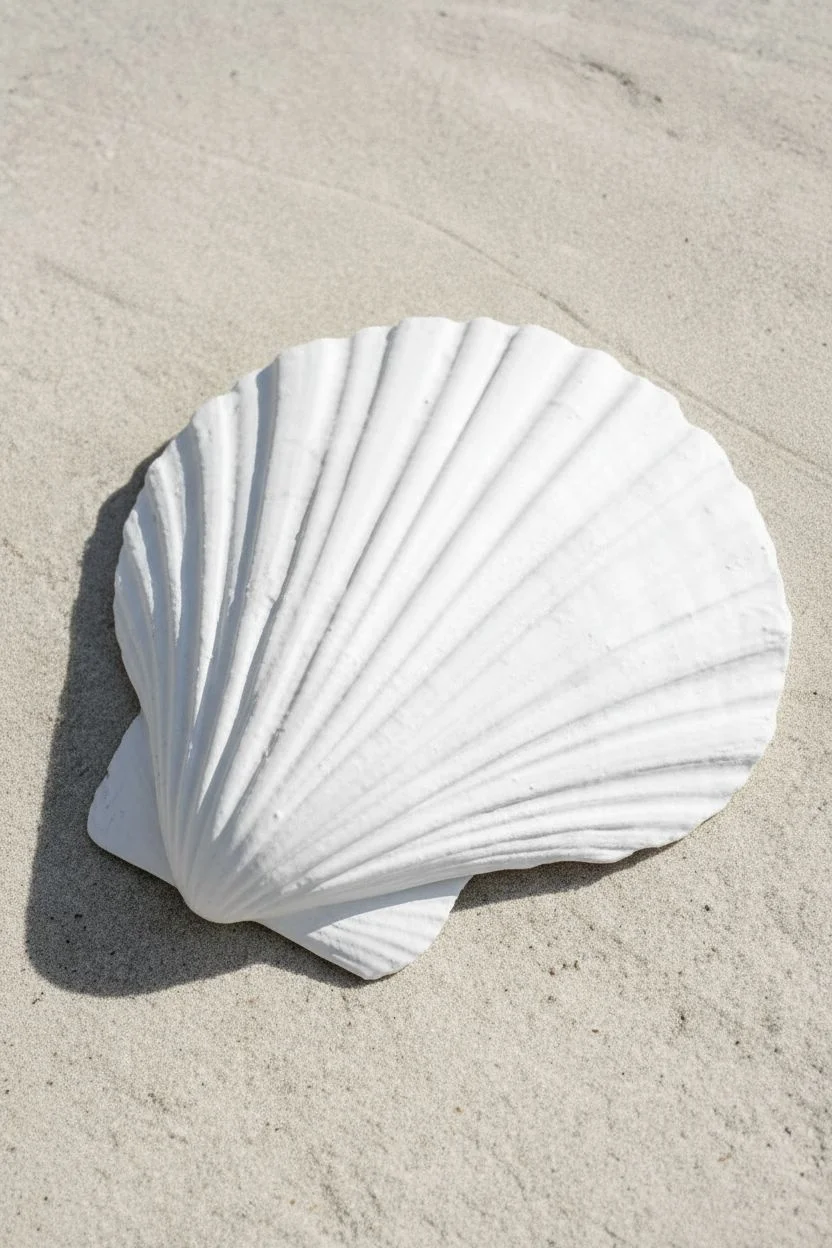
Zentangle Ink Doodles
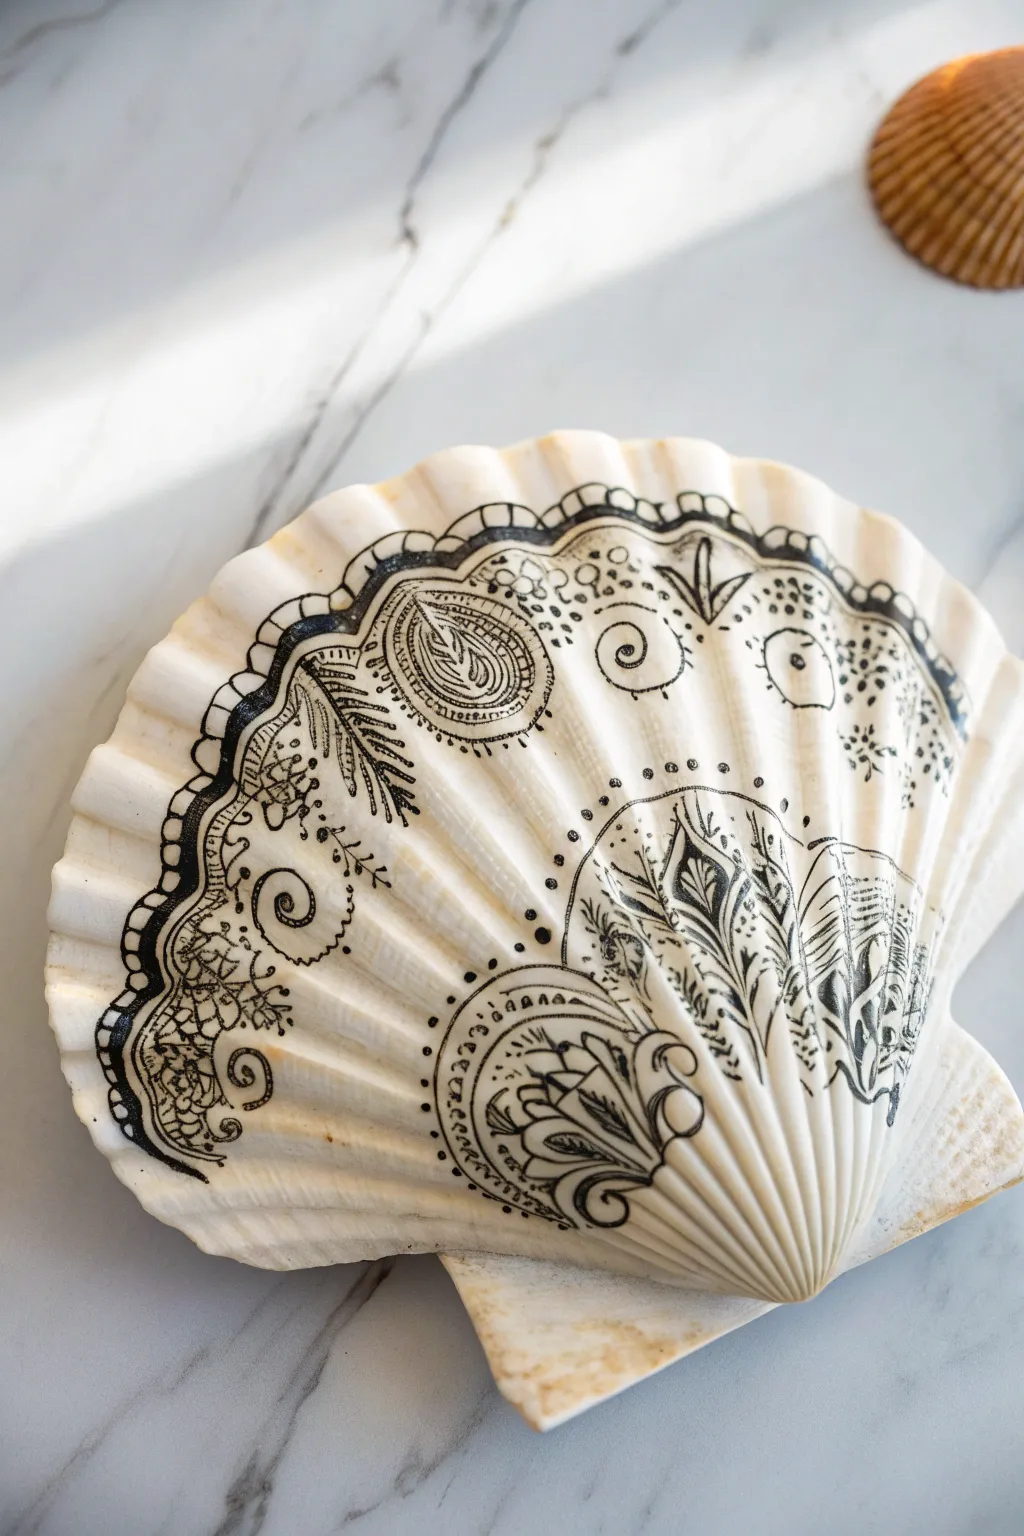
Transform a simple white scallop shell into a stunning display piece using meditative ink patterns. The high contrast of black ink against the natural ridges creates an elegant, bohemian look that is relaxing to create.
How-To Guide
Materials
- Large, clean white scallop shell (flat surface works best)
- Waterproof fine-tip drawing pens (sizes 01, 03, and 05)
- Pencil and eraser (optional for drafting)
- Matte clear acrylic sealer spray
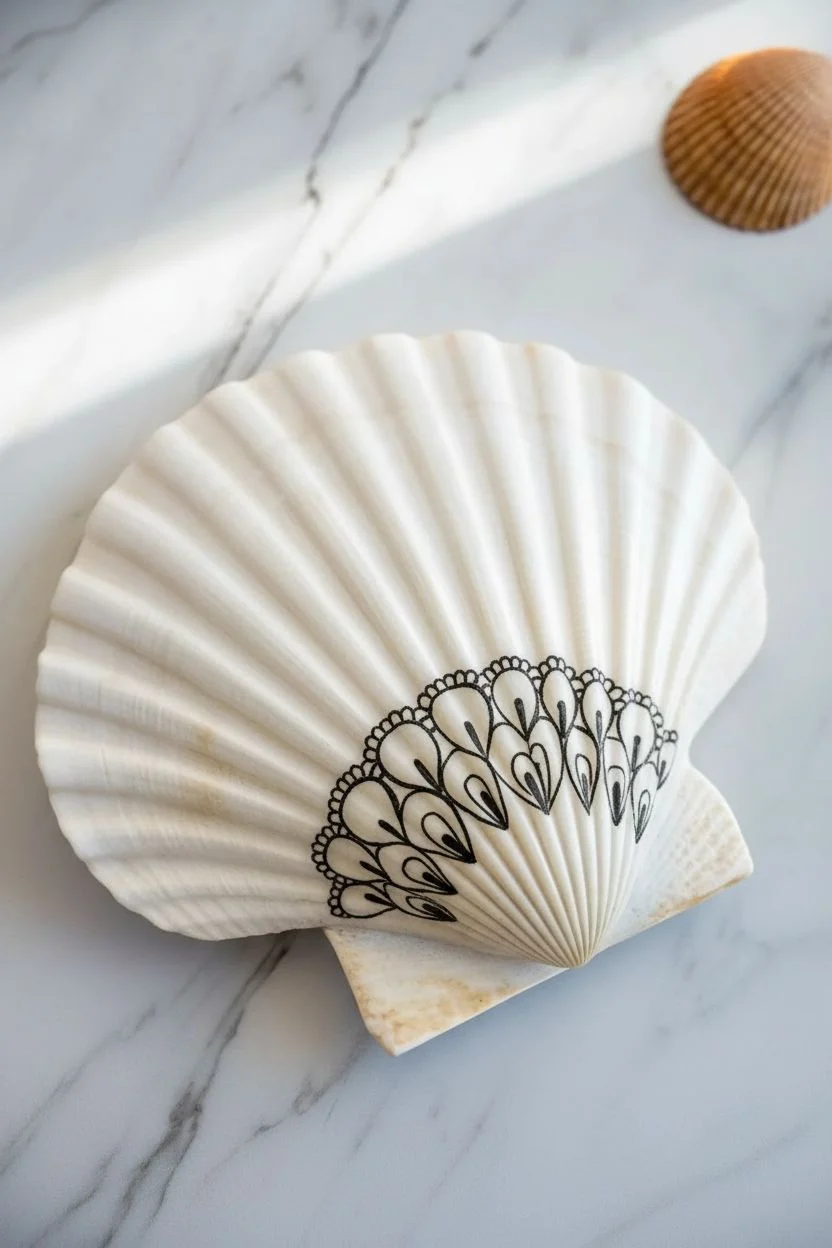
Step 1: Setting the Structure
-
Clean the surface:
Ensure your shell is completely clean and dry; any salt or sand residue will clog your expensive art pens. -
Orient the shell:
Place the shell with the fan edge facing up and the narrow hinge pointing down toward you. -
Draft the zones:
Mentally divide the shell into three curved bands radiating from the bottom: the hinge area, the middle band, and the outer rim. -
Create the base arc:
Using your medium-sized pen (03), draw a curved arch spanning the width of the shell just above the hinge point. -
Fill the hinge area:
Inside this bottom arch, draw upward-pointing petal shapes or “feathers” that follow the natural grooves of the shell.
Ink skipping?
Natural shells have bumpy ridges. If your pen skips, slow down and rotate the shell so you are always pulling the pen towards you, rather than pushing it over the bumps.
Step 2: Drawing the Core Motifs
-
Establish the focal point:
In the center of the middle band, draw a large teardrop or paisley shape with a double outline. -
Detail the center:
Fill the inside of your paisley shape with fine lines and a small centered circle. -
Add side circular elements:
To the right of the paisley, draw a bold spiral that curls inward. -
Incorporate botanicals:
To the left of the center, sketch a fern-like leaf or vine curving upward along the natural ridge. -
Define the upper boundary:
Draw a dotted line in an arch shape above these motifs to separate the middle band from the outer rim.
Go for Gold
Once the black ink is dry, use a metallic gold or silver paint pen to trace just the outermost rim of the shell for a luxurious, high-end finish.
Step 3: The Intricate Border
-
Outline the rim:
Draw a deeply scalloped (wavy) line about an inch below the top edge of the shell. -
Thicken the frame:
Go over this wavy line a second time to create a bold, thick border that stands out. -
Create the mesh pattern:
On the left side of this border, draw a crisscross grid pattern inside the waves to create a “lace” effect. -
Add floral accents:
On the right side of the border, draw simple flower petals or semi-circles inside the waves. -
Connect to the edge:
Draw faint vertical lines extending from the wavy border up to the actual edge of the shell.
Step 4: Shading and Finishing
-
Add weighted lines:
I like to go back and thicken the crevices where lines meet to add depth and contrast. -
Apply stippling:
Using your finest pen (01), add tiny dots around the paisley and spirals to create shadow effects. -
Check for balance:
Look for any large empty white spaces and fill them with small circles or simple dots. -
Let ink cure:
Allow the ink to dry for at least 15 minutes to prevent smudging. -
Seal the artwork:
Lightly mist the shell with a matte clear spray to protect your design from handling.
Place your finished Zentangle shell on a small stand or use it as a unique jewelry dish!


Have a question or want to share your own experience? I'd love to hear from you in the comments below!