Butterflies are my favorite excuse to play with color blending and mesmerizing wing patterns without getting stuck in perfectionism. Grab your brushes (or pencils) and try one of these butterfly painting ideas the next time you want something instantly uplifting on your canvas.
Blue Morpho Butterfly With Iridescent Blends
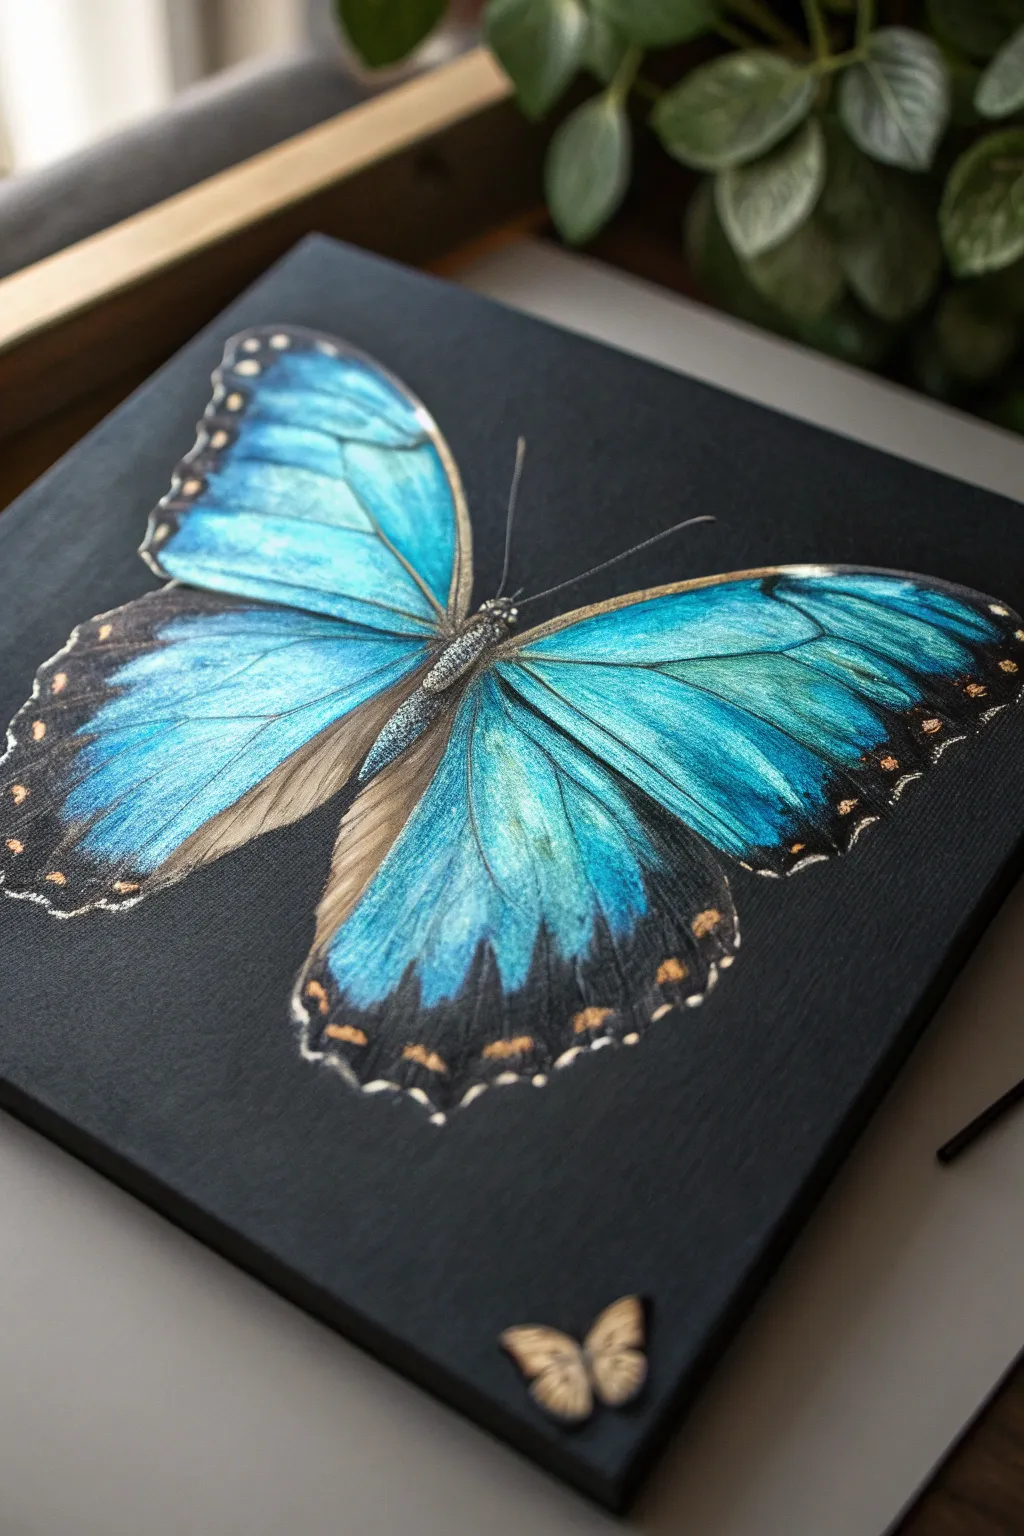
Capture the stunning luminosity of a Blue Morpho butterfly against a dramatic black background with this acrylic painting project. This piece uses careful blending of turquoise and deep blues, highlighted with metallic touches, to mimic the insect’s natural iridescence.
Step-by-Step Tutorial
Materials
- Square stretched canvas (approx. 12×12 inches)
- Black gesso or matte black acrylic paint
- White charcoal pencil or chalk
- Acrylic paints: Phthalo Blue, Turquoise, Titanium White, Carbon Black, Raw Umber
- Metallic Gold acrylic paint or paint pen
- Iridescent medium or glitter glaze (optional)
- Small flat brushes (size 2 and 4)
- Fine liner brush (size 0 or 00)
- Small wooden butterfly cutout (for embellishment)
- Strong craft glue
Step 1: Preparing the Base
-
Prime the Surface:
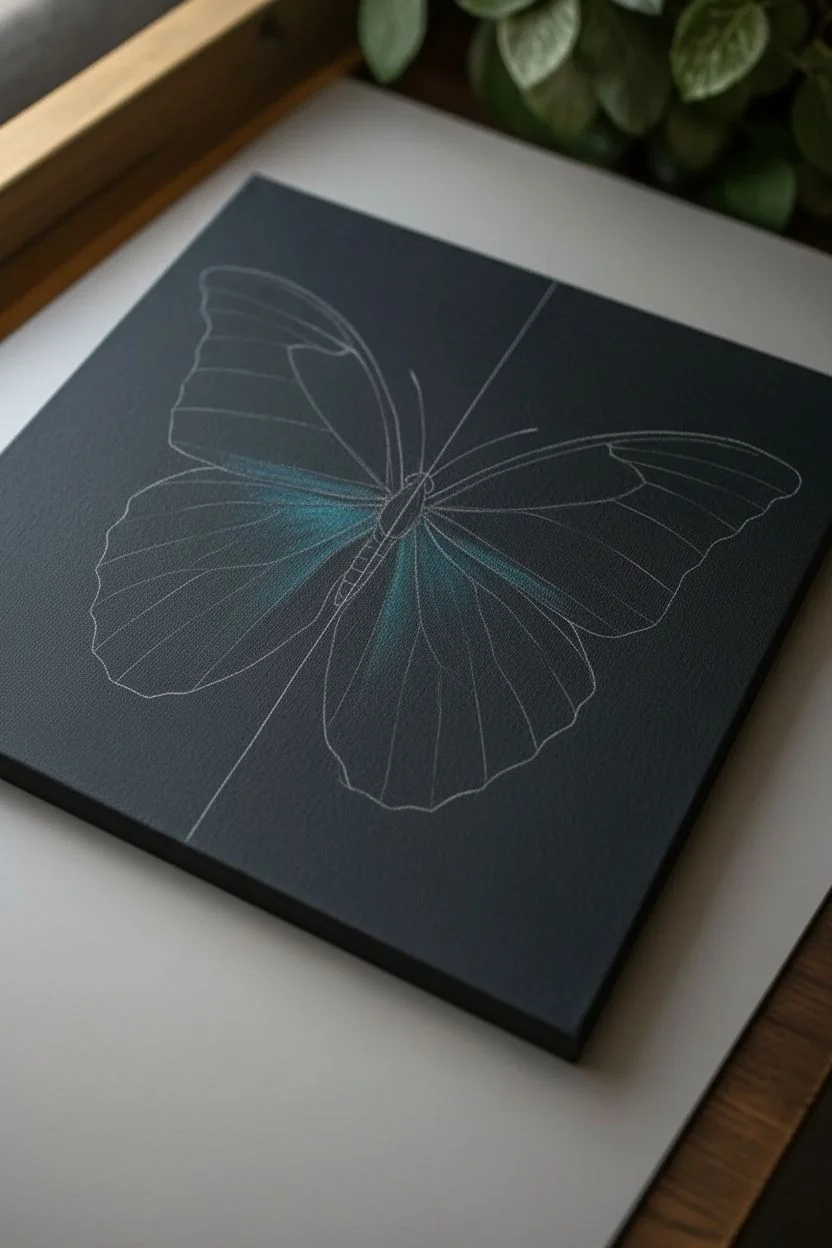
Begin by coating your entire canvas with black gesso or matte black acrylic paint. Apply two coats if necessary to ensure a solid, opaque background with no canvas weave showing through. Let this dry completely. -
Sketch the Outline:
Using a white charcoal pencil, lightly sketch the butterfly shape. Start with a central vertical line for the body, then draw the two large upper wings and the slightly smaller, rounded lower wings. Keep the lines faint so they don’t smear into your paint later. -
Map the Veins:
Lightly draw the main vein structures radiating from the body outward to the wing edges. These lines will serve as your guide for directional brushstrokes.
Fixing Muddy Colors
If your blues stop looking vibrant, let the paint dry completely. Then, apply a thin glaze of pure Phthalo Blue over the area to restore richness.
Step 2: Layering the Blues
-
Base Color Application:
Mix a mid-tone blue using Phthalo Blue and a touch of white. Apply this to the central areas of the wings, leaving the outer edges black for now. Use a flat brush and stroke outward from the body. -
Adding Turquoise Highlights:
While the base is still slightly tacky, blend in Turquoise paint near the center of the wings. This creates that characteristic Morpho glow. I like to use a dry brush technique here to feather the edges softly. -
Deepening the Shadows:
Mix a small amount of Carbon Black with Phthalo Blue to create a deep navy. Apply this near the butterfly’s body and slightly along the veins to create depth and separation between the wing sections. -
Brightest Highlights:
Mix Titanium White with a tiny dot of Turquoise. Using a smaller brush, add streaks of this highlight color in the center of the wing panels, following the direction of the veins. This creates the illusion of light hitting the iridescent scales. -
Brown Transition:
Mix Raw Umber with a little white to make a soft tan. Paint the area immediately adjacent to the body on the lower wings, blending it gently into the blue. This mimics the furry texture often found on the inner wing.
Step 3: Details & Definition
-
Painting the Body:
Use a fine brush to paint the thorax and abdomen with a mix of black and dark grey. Stipple the paint (tap straight down) to create a fuzzy texture rather than a smooth line. -
Defining the Veins:
With your liner brush and watered-down Carbon Black, carefully re-trace the veins over the blue paint. Keep these lines extremely thin and broken in places so they look organic. -
The Black Margins:
Paint the solid black irregular borders along the outer edges of all four wings. Allow this black edge to encroach onto the blue areas in jagged, scalloped shapes. -
Signature White Spots:
Dip a fine styling tool or the tip of a toothpick into Titanium White paint. Dot the white spots along the black marginal bands you just painted. Vary the size of the dots slightly for realism.
Realism Pro-Tip
For the most realistic wing veins, don’t paint solid lines. Use a liner brush to paint short, broken dashes that overlap slightly.
Step 4: Metallic Finishes
-
Gold Accents:
Using metallic gold paint or a gold pen, add tiny accents near the white spots on the wing edges. You can also add a faint gold glaze to the tan ‘furry’ sections near the body for extra warmth. -
The Antennae:
With the finest liner brush or a black pen, draw two delicate, curved antennae extending from the head. Keep the pressure light to ensure the lines taper off smoothly. -
Iridescent Glaze:
Once the blue paint is bone dry, apply a very thin wash of iridescent medium or a subtle glitter glaze over just the blue sections to enhance the shimmering effect. -
The 3D Embellishment:
Paint your small wooden butterfly cutout (or a heavy cardstock cutout) with metallic gold paint. Once dry, create a simple black pattern on it to match the main subject. -
Final Placement:
Glue the small gold butterfly to the bottom right corner of the canvas frame or surface as a signature seal on your artwork.
Step back and admire how the dark background makes those electric blue wings truly pop off the canvas


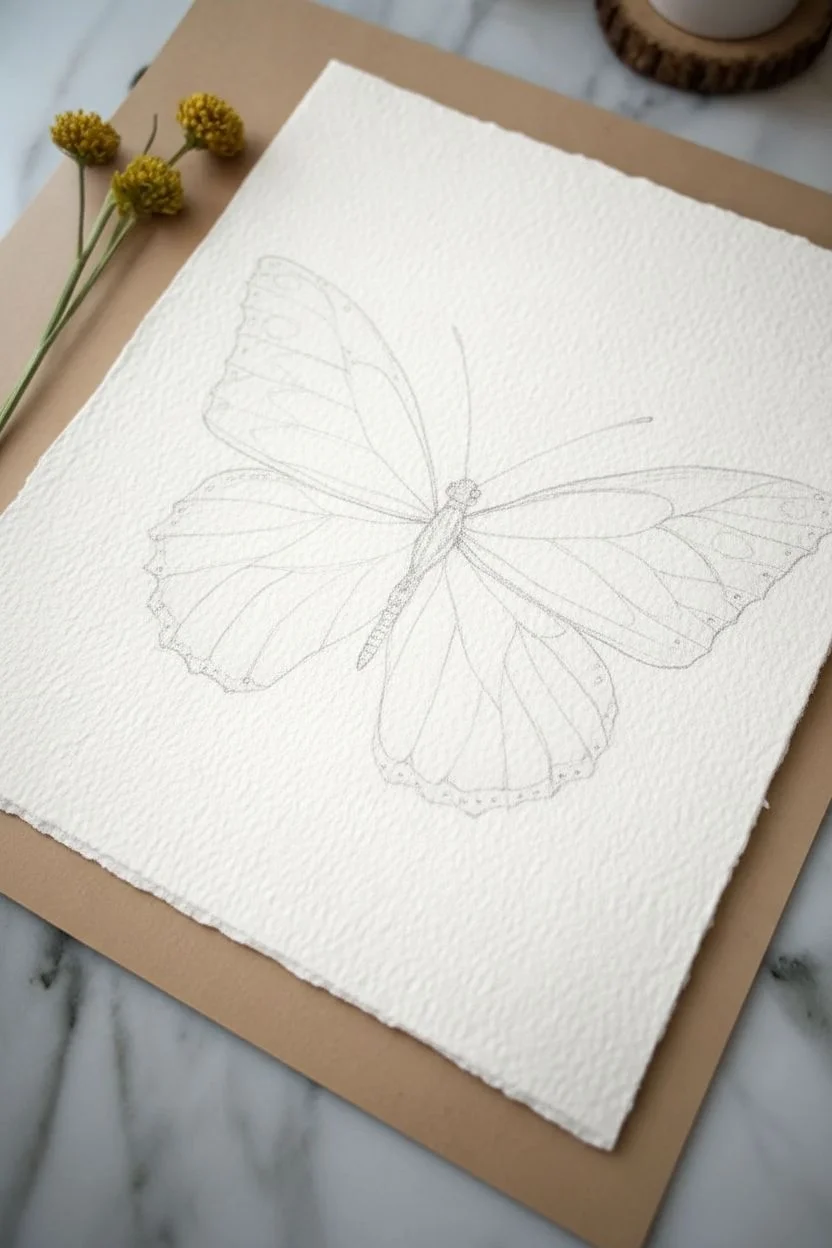
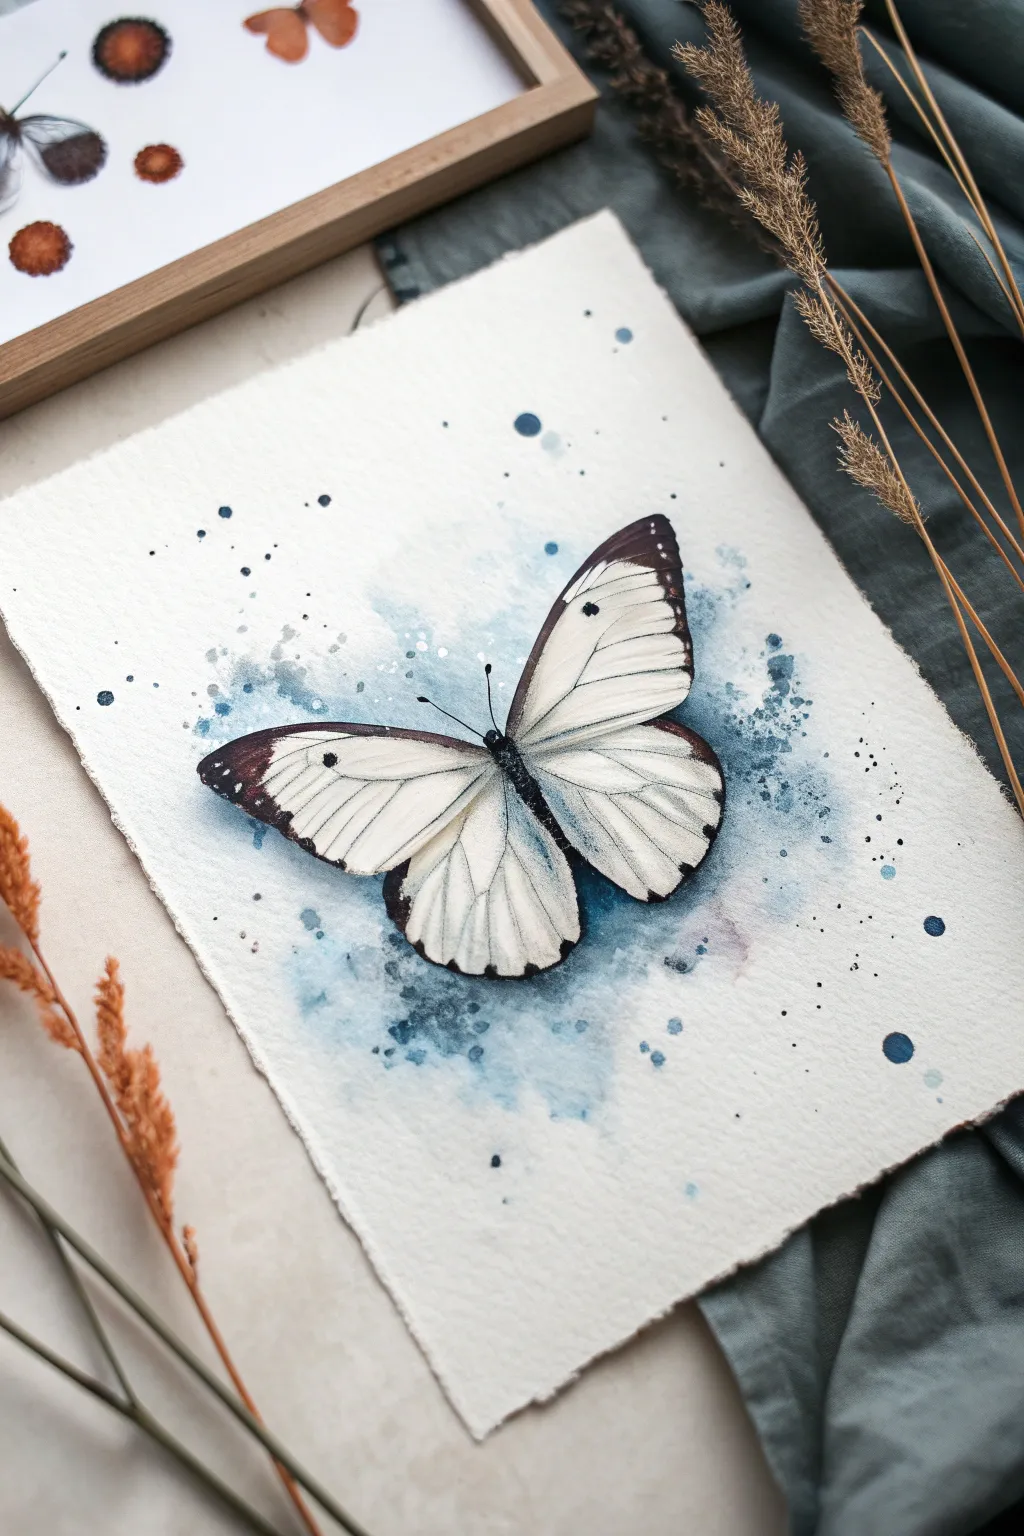
Watercolor Butterfly With Soft Wet-on-Wet Wings

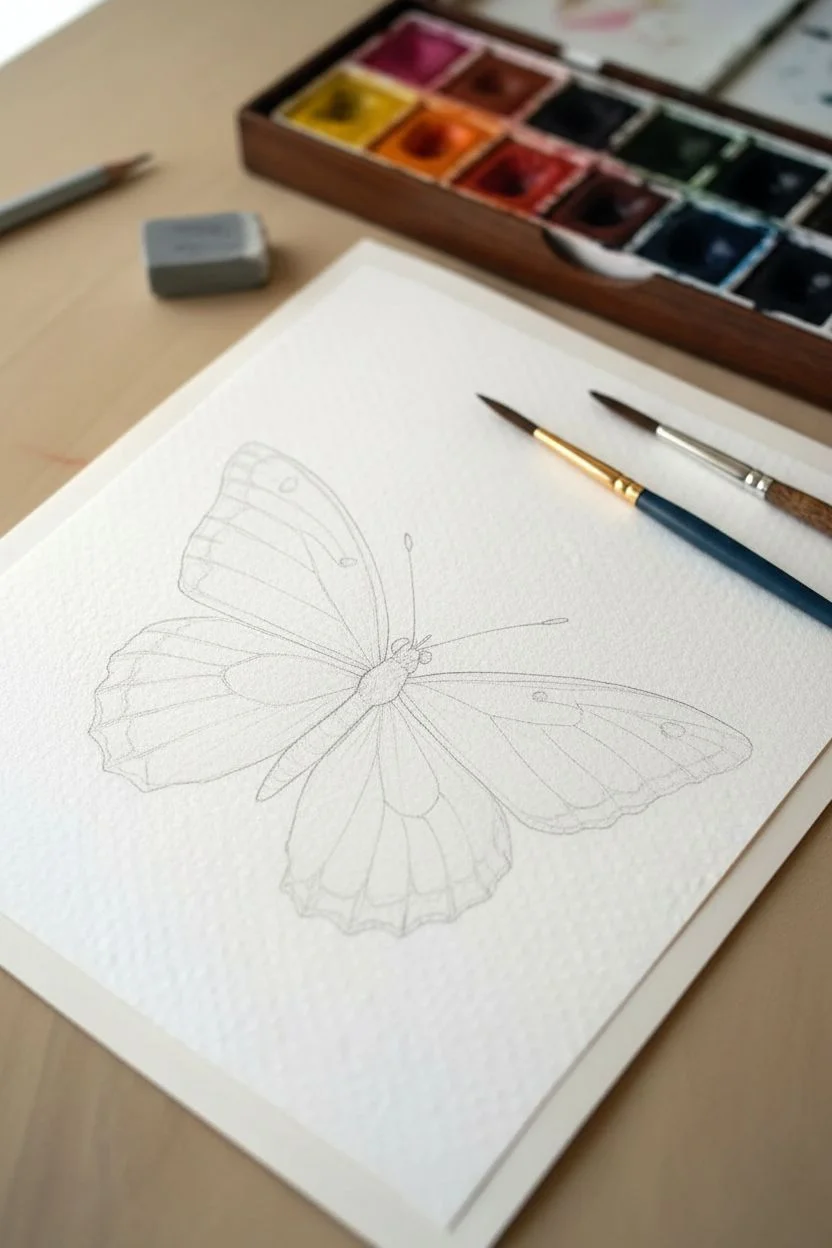
Capture the delicate beauty of a butterfly using soft washes and careful layering. This project combines dreamy, blended wing colors with crisp, detailed edges for a stunningly realistic effect.
Detailed Instructions
Materials
- Cold press watercolor paper (300 gsm)
- Round watercolor brushes (Size 4 for washes, Size 0 or 00 for details)
- Watercolor paints: Rose Madder or Alizarin Crimson
- Watercolor paints: Cobalt Blue or Ultramarine
- Watercolor paints: Payne’s Gray or Lamp Black
- Watercolor paints: Yellow Ochre or Gold (for the body)
- Clean water jar
- Palette for mixing
- Pencil (HB) and kneaded eraser
Step 1: Planning and Sketching
-
Outline the shape:
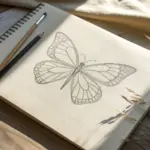
Begin by lightly drawing the butterfly’s structure on your watercolor paper. Start with the central body as a slender oval, then extend the four wing shapes outward. Keep the top wings larger and slightly more triangular, while the bottom wings should be rounded lobes. -
Refine the details:
Sketch in the vein patterns lightly inside the wings. You don’t need to draw every single line, but map out the major sections that radiate from the body to the wing edges. -
Lighten the guidelines:
Take your kneaded eraser and gently roll it over your sketch. You want the graphite lines to be barely visible—just enough to guide you but faint enough to disappear under the paint.
Control Your Bloom
If the paint spreads too fast during the wet-on-wet stage, your paper is too wet. Blot your brush on a paper towel before touching the paper to control the flow.
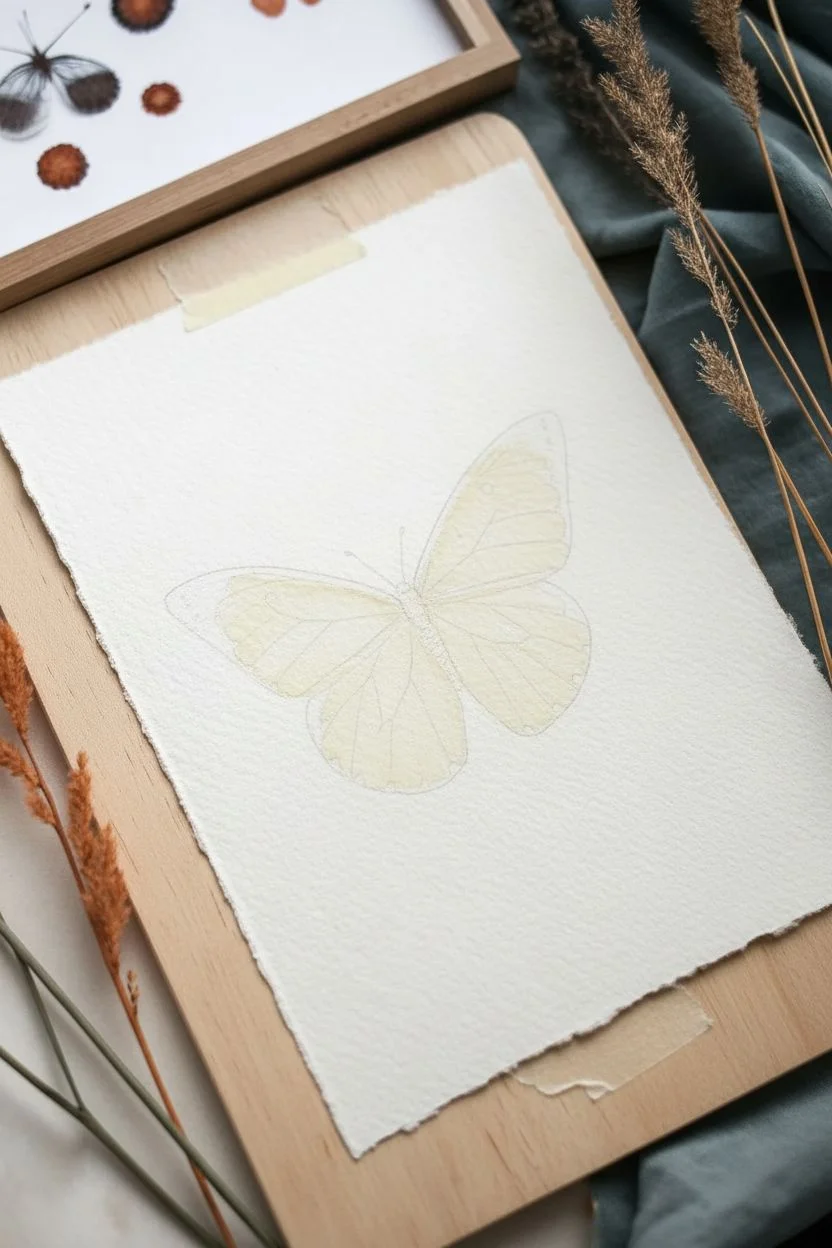
Step 2: Creating the Soft Gradient Wings
-
Pre-mix your palette:
Prepare watery puddles of your main colors: a soft pink (diluted Rose Madder), a gentle blue (diluted Cobalt), and a mix of the two to create a pale mauve. -
Wet the first wing:
Using your Size 4 brush and clean water, apply a glaze to just the upper left wing. The paper should be glisten evenly, but avoid creating a swimming pool of water. -
Drop in the pink:
While the wing is still wet, touch your brush loaded with the pink wash into the center and lower sections of that wet shape. Watch the pigment bloom and spread naturally. -
Add the blue accents:
Immediately drop the pale blue wash near the outer edges and the top curve of the wing. Allow it to touch the wet pink paint so they blend into a soft purple where they meet. -
Repeat for all wings:
Working one wing at a time to ensure the paper stays wet, repeat this process. Vary the intensity slightly; keep the centers warmer (pinks) and the edges cooler (blues). -
Let it dry completely:
This is crucial. Walk away and let the base layer bond with the paper until it is bone dry and warm to the touch. This prevents the next details from bleeding.
Add Some Shimmer
Mix a tiny pinch of metallic gold watercolor or mica powder into the body paint to give the butterfly a magical, iridescent thorax.
Step 3: The Body and Veins
-
Paint the body:
Mix a thicker consistency of Yellow Ochre with a tiny touch of brown or gold. Paint the thorax and abdomen with short, dabbing strokes to suggest a fuzzy texture. -
Add definition to the body:
While the body is damp, drop a tiny amount of Payne’s Gray on the shadowed side (usually the bottom or right side) to give it volume. -
Draft the veins:
Switch to your smallest detail brush (Size 0 or 00). Using a very dilute, watery grey mix, re-trace the vein lines you sketched earlier. Keep these lines incredibly thin and delicate.
Step 4: Defining Edges and Contrast
-
Deepen the wing borders:
Mix a stronger Payne’s Gray. Carefully paint the scalloped edges of the wings. I like to use the tip of the brush to create a broken, organic line rather than a perfect outline. -
Blend the borders inward:
Immediately after painting a small section of the dark border, rinse your brush and use damp (clean) bristles to pull that dark color slightly inward, fading it into the pink/blue wing color. -
Add the spots:
Place the distinctive dark circular spots on the wings using varied sizes. Add a few tiny dots near the outer margins for extra detail. -
Paint the antennae:
With a steady hand and your finest brush, pull two long, slender lines curving out from the head. Adding a tiny bulb at the end of each antenna gives a realistic finish. -
Final highlights:
If you lost any brightness, you can use a tiny amount of opaque white gouache to add a speck of highlight to the butterfly’s eyes or the very tip of the wings.
Step back and admire the delicate transition of colors you have captured in your painting


Butterfly in Flight Against a Gradient Sky
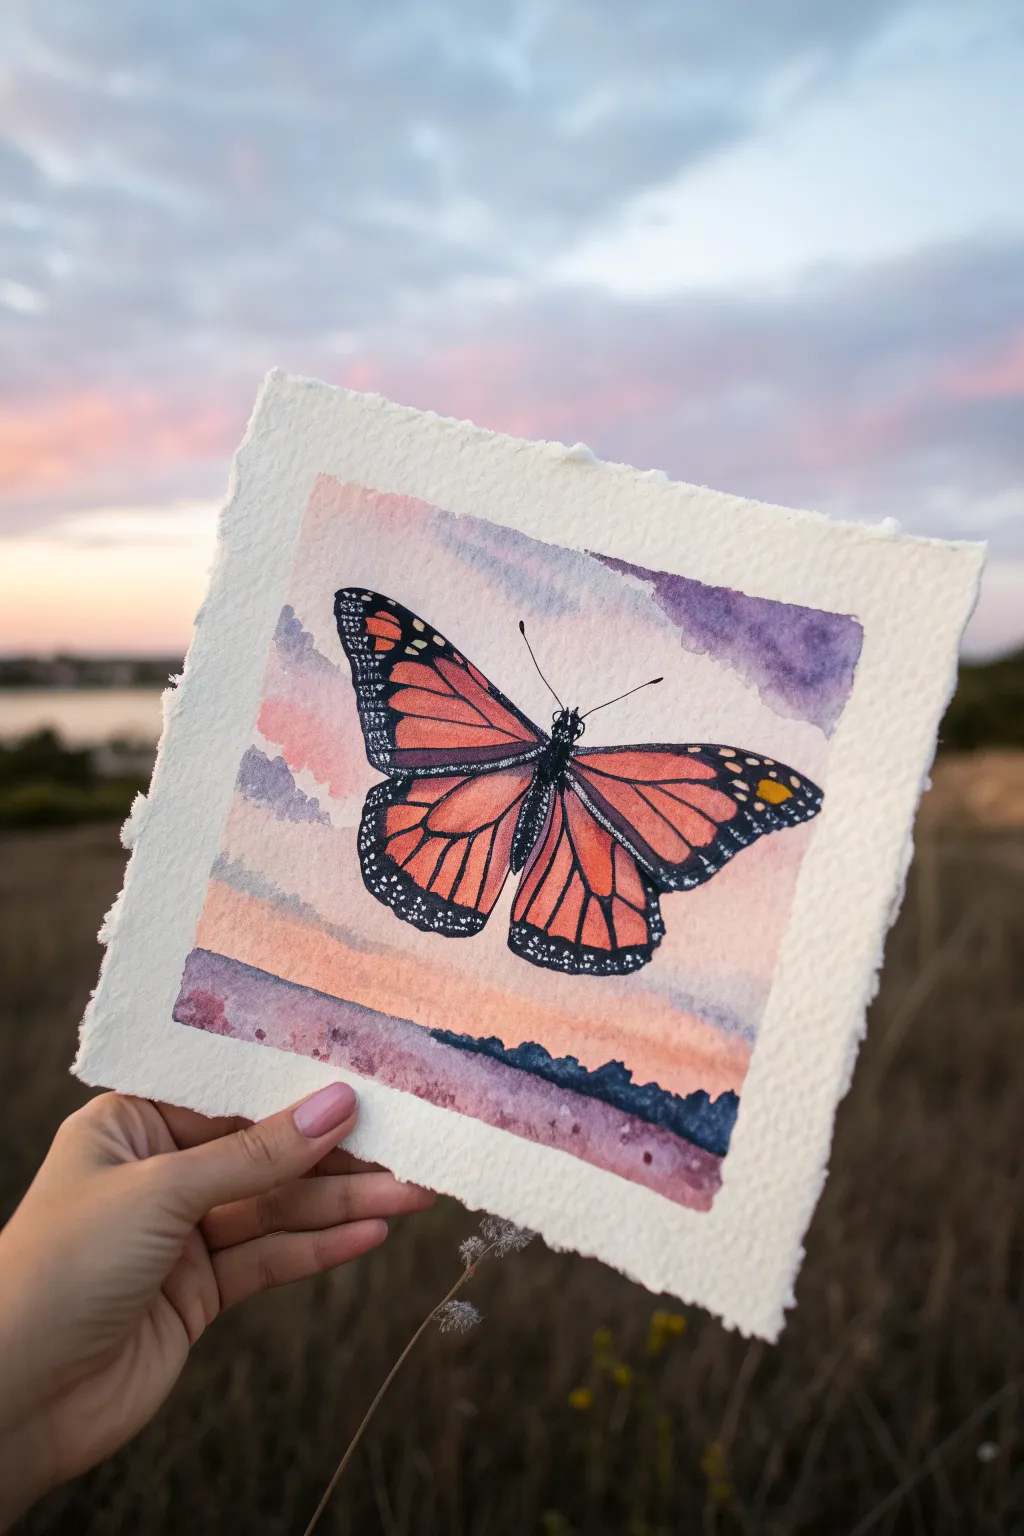

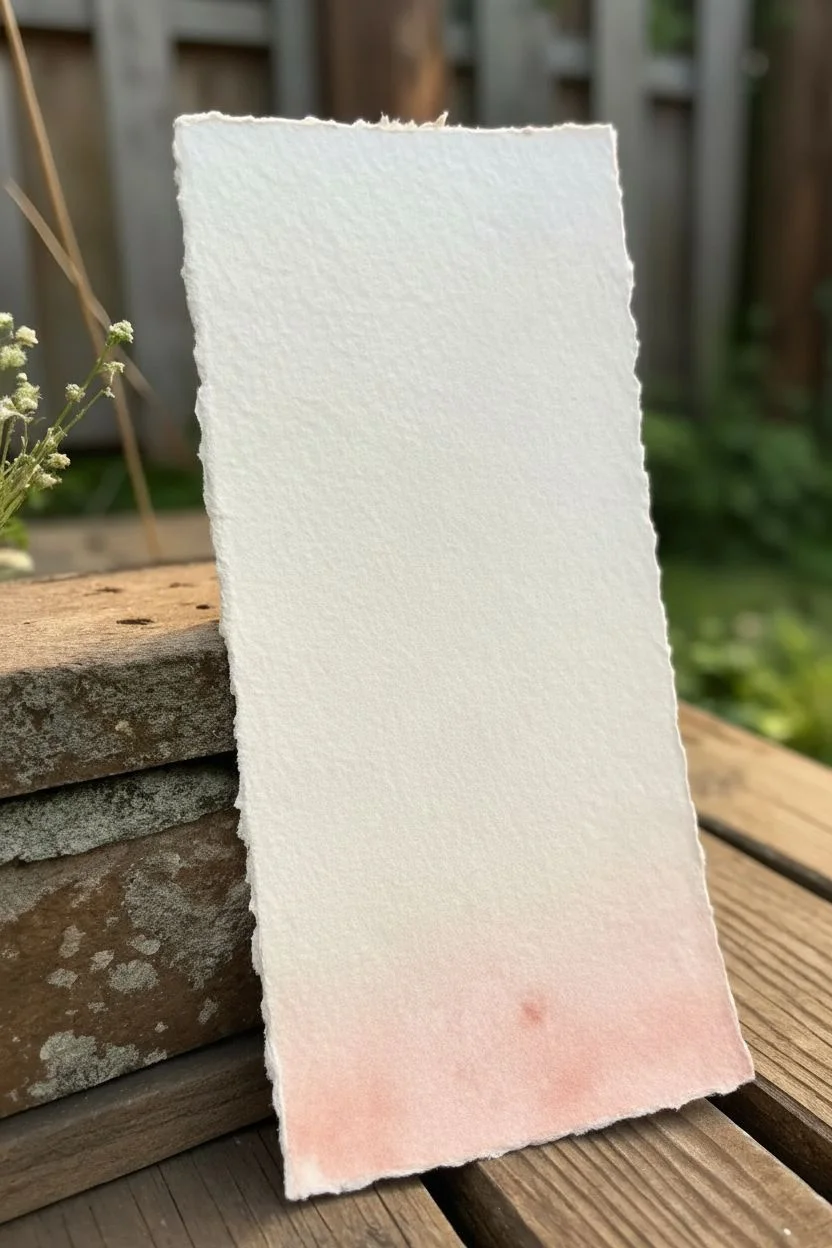
Capture the delicate beauty of a monarch butterfly soaring through a hazy evening sky using soft watercolor washes. This project combines a defined, high-contrast insect illustration with a loose, ethereal background on textured handmade paper.
How-To Guide
Materials
- Handmade cotton rag watercolor paper (deckle edge)
- Watercolor paints (Indigo, Alizarin Crimson, Cadmium Orange, Yellow Ochre, Burnt Umber)
- White gouache or white gel pen
- Round brushes (sizes 2, 4, and 00 for details)
- Pencil (HB or H)
- Masking fluid (optional)
- Two jars of water
- Paper towels
Step 1: Sketching & Preparation
-
Outline the butterfly:
Begin by lightly sketching the monarch butterfly in the center of your paper. Focus on the tilt of the wings to show flight; the left wing should appear slightly larger as it’s closer to the viewer. -
Map the vein structure:
Draw the intricate vein patterns inside the wings. Keep your pencil lines extremely faint so they won’t show through the translucent watercolor later. -
Define the horizon:
Sketch a very low, uneven horizon line near the bottom edge of the paper to ground the composition. -
Protect the subject (optional):
If you are less confident with brush control, apply a thin layer of masking fluid over the entire butterfly sketch. This allows you to paint the sky freely without worrying about ruining the insect’s shape.
Step 2: Painting the Sky Gradient
-
Wet the background:
Using clean water and a larger brush, gently wet the paper around the butterfly sketch (or over the masking fluid). Stop just short of the paper’s deckled edges to create a natural border. -
Apply the first wash:
Load a size 4 brush with a watery mix of Alizarin Crimson and a touch of Cadmium Orange. Sweep this soft pink-peach color horizontally across the middle and lower sections of the sky. -
Deepen the upper sky:
While the paper is still damp, mix Indigo with a bit of Alizarin Crimson to make a muted purple. Drop this color into the top corners and upper edge of the sky, letting it bleed naturally into the pink below. -
Add lower clouds:
Use the same purple mix, but slightly more diluted, to paint horizontal streaks near the bottom horizon line, mimicking distant low-hanging clouds. -
Dry completely:
Let the paper dry fully before proceeding. If you used masking fluid, gently rub it off with your finger or a rubber cement pickup once the paper is bone dry.
Deckle Edge Trick
To mimic handmade paper on a standard sheet, tear the edges against a ruler rather than cutting them. This creates a soft, fibrous ‘deckle’ look.
Step 3: The Monarch Butterfly
-
Base wing color:
Mix a vibrant Cadmium Orange. Paint the interior sections of the wings, carefully working around the vein lines if you can, though it’s okay to paint over them since the black will cover it. -
Add wing variations:
While the orange is wet, drop a tiny amount of Red or darker Orange near the butterfly’s body to create depth and curvature in the wings. -
Yellow accents:
Paint the small spot on the upper right forewing tip with Yellow Ochre or a bright yellow mix. -
Paint the veins and body:
Switch to your smallest brush (size 00 or 0). Mix a dense, opaque black using Indigo and Burnt Umber (or use pure Lamp Black). Carefully paint the butterfly’s body, antennae, and the thick vein lines. -
Fill the wing margins:
Fill in the outer edges of the wings with the same black mixture. Ensure the edges are crisp against the soft sky background. -
Add white spots:
Once the black is completely dry, use white gouache or a gel pen to dot the signature white speckles along the black margins of the wings and on the head.
Metallic Magic
Mix a tiny amount of iridescent gold medium into your orange paint for the wings. It will make the butterfly catch the light beautifully.
Step 4: Finishing Touches
-
Paint the landscape silhouette:
Mix a dark, cool purple-grey using Indigo and Alizarin Crimson. Paint the silhouette of the treeline or hills along the bottom horizon line you sketched earlier. -
Soften the landscape:
Before the landscape silhouette dries, I like to run a damp brush along the very bottom edge of the paper to blur the paint, making the ground feel like it’s fading out of focus.
Hold your finished piece up to the light to see the transparency of the wings against your painted sky


High-Contrast Veins and Highlights Practice Butterfly
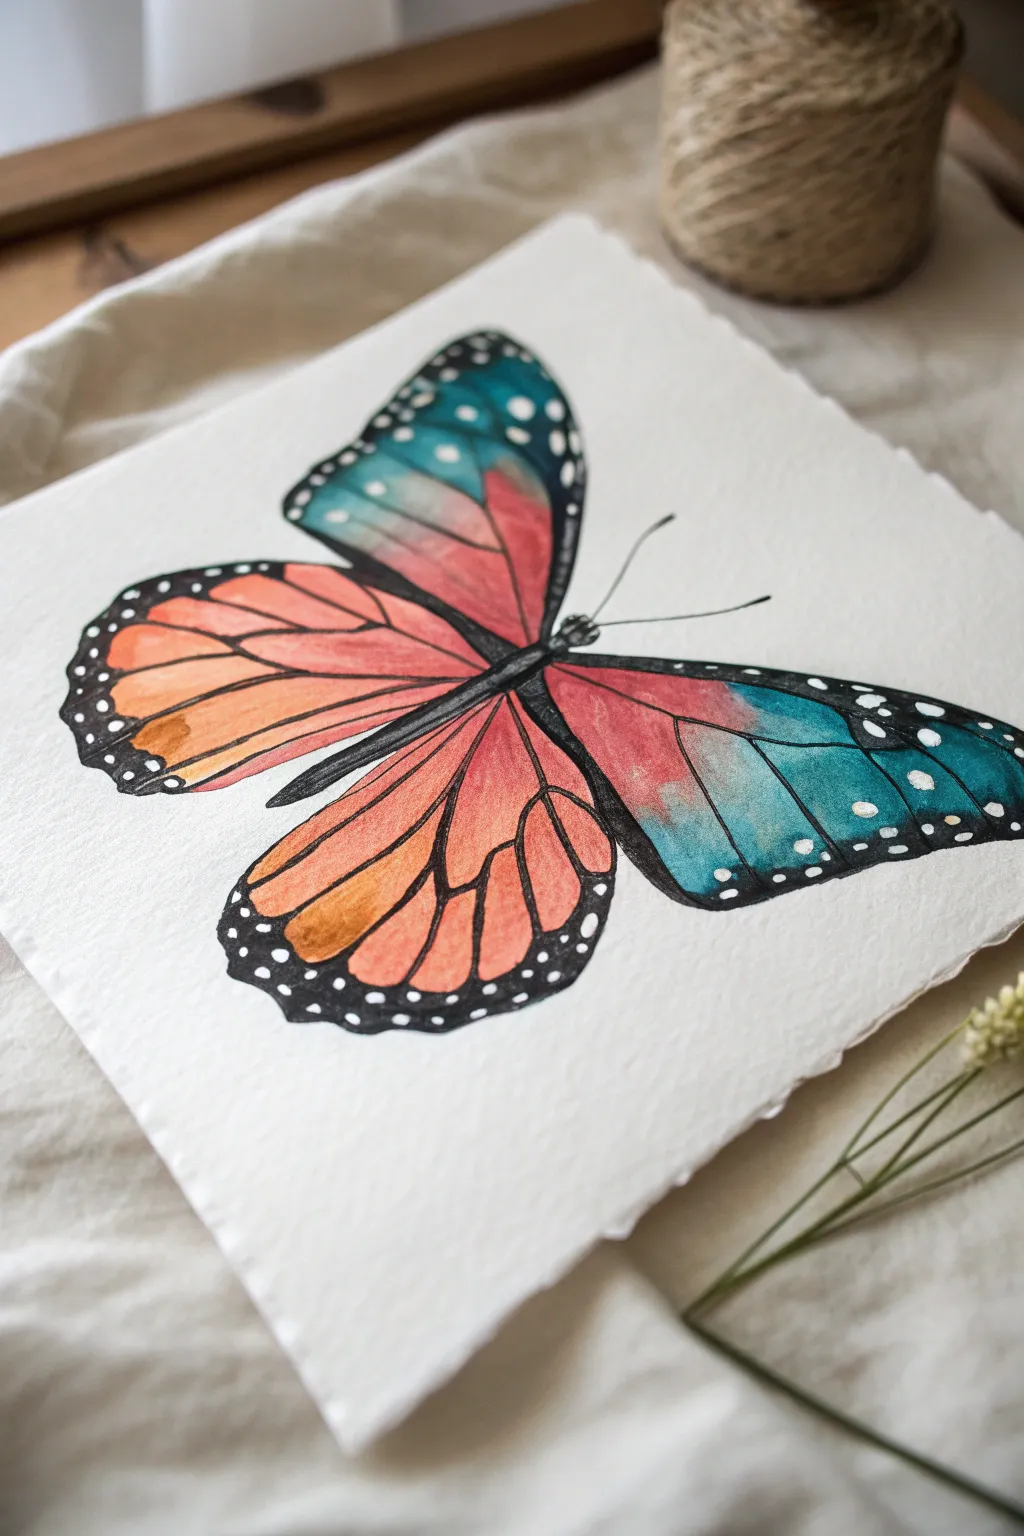

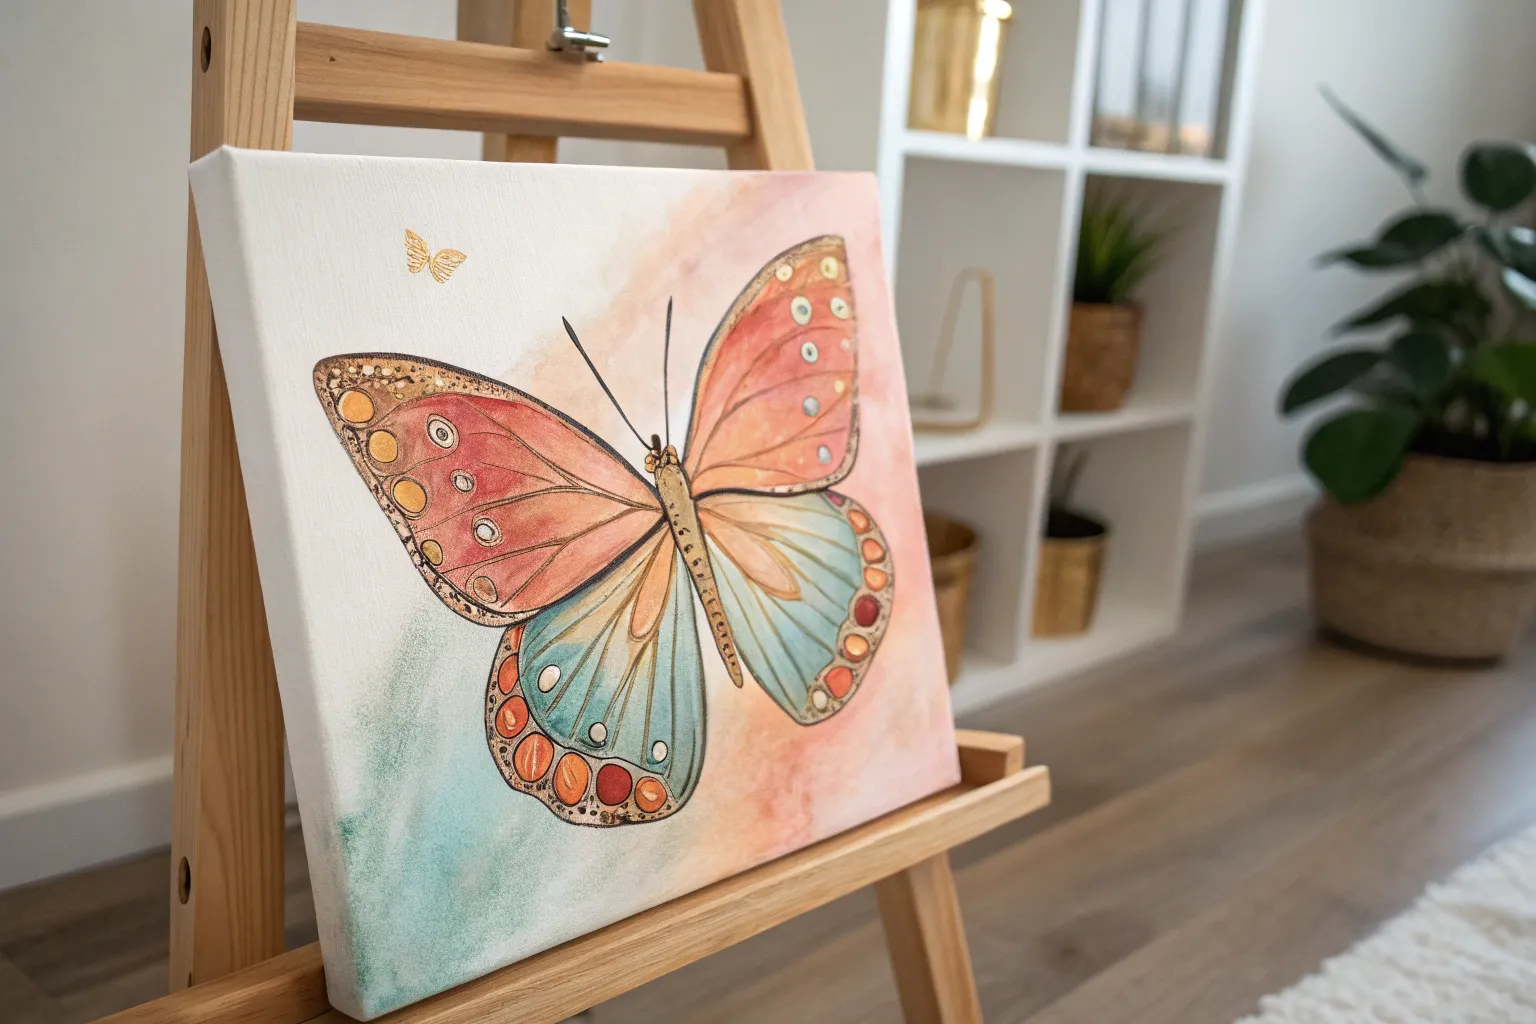
Capture the delicate beauty of a butterfly with this striking watercolor project that features a fantasy color palette. You’ll practice wet-on-wet blending between warm corals and cool teals, anchored by bold, high-contrast black veining.
How-To Guide
Materials
- Cold press watercolor paper (square format)
- Watercolor paints (coral/orange, teal/turquoise, black)
- Round watercolor brushes (size 4 and 0)
- Pencil and eraser
- Water cups and paper towels
- Fine liner pen (optional, for ultra-fine details)
- White gel pen or white gouache
Step 1: Drafting the Design
-
Establish the centerline:
Begin by lightly drawing a diagonal line across your paper to serve as the body’s axis. This slight tilt gives the butterfly a dynamic, natural look rather than a stiff, straight-on pose. -
Sketch the wings:
Draw the four wing sections. The top forewings should be longer and slightly pointed, while the bottom hindwings are more rounded. Keep your pencil marks very faint so they don’t show through the translucent watercolor later. -
Map the veins:
Lightly sketch the main vein structures radiating from the body to the wing edges. You don’t need every tiny vein yet, just the primary highways that divide the wing sections.
Muddy Colors?
If your coral and teal mix into a dull brown, let the first color dry slightly before adding the second. Alternatively, leave a tiny gap of white paper between them and bridge it with water.
Step 2: Applying the Gradient Base
-
Wet the left wings:
Using clean water, brush over the entire left side of the butterfly (both top and bottom wings). The paper should be glistening but not forming a puddle. -
Drop in warm tones:
Load your brush with a vibrant coral or orange. Touch it to the inner sections near the body and let the color bloom outward. I like to leave some areas slightly lighter to suggest transparency. -
Introduce the teal:
While the paper is still damp, apply teal paint to the outer tips of the top left wing. Let it bleed gently into the coral where they meet, creating a soft, muddy-free transition. -
Repeat for the right side:
Once the left side is damp-dry, repeat the process on the right wings. Here, reverse the dominance: use more teal on the outer edges and lower wing, blending back into the coral near the body. -
Dry completely:
Wait for the base layer to be bone dry. If the paper is cool to the touch, it’s still wet. This is crucial for crisp black lines later.
Step 3: Adding Contrast and Veiling
-
Paint the body:
Using a small round brush and concentrated black watercolor (or ink), paint the thorax and abdomen. Give the head a slightly fuzzy texture with tiny dabbed strokes. -
Outline the wings:
Carefully trace the outer edges of the wings with black. Create a scalloped edge, thickening the line significantly at the wing tips and corners. -
Draw the main veins:
Switch to your smallest brush (size 0) or a fine liner pen. Paint the veins radiating from the body. Press down for the clearer veins near the center and lift up for whisper-thin lines near the edges. -
Fill the margins:
Fill in the thickened black borders you created earlier. Ensure this black is opaque and solid to provide maximum contrast against the bright colors.
Metallic Magic
Swap the white gel pen for gold ink when adding the dots on the wing edges. The metallic sheen adds a luxurious, magical quality that catches the light beautifully.
Step 4: Final Details
-
Add antennae:
With a swift, confident motion, flick two thin lines out from the head for the antennae. Try not to overthink this stroke; speed helps keep the line smooth. -
Create the white spots:
Once the black borders are totally dry, use a white gel pen or a dot of white gouache to add the signature white spots along the dark wing edges. Variate the size—some distinct dots, some tiny specks. -
Clean up edges:
Erase any visible pencil marks that weren’t covered by paint, being careful not to rub over the painted areas.
Now you have a stunning, high-contrast butterfly ready to be framed or gifted.
BRUSH GUIDE
The Right Brush for Every Stroke
From clean lines to bold texture — master brush choice, stroke control, and essential techniques.
Explore the Full Guide
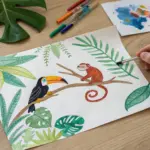
Butterfly and Wildflower Wreath Composition
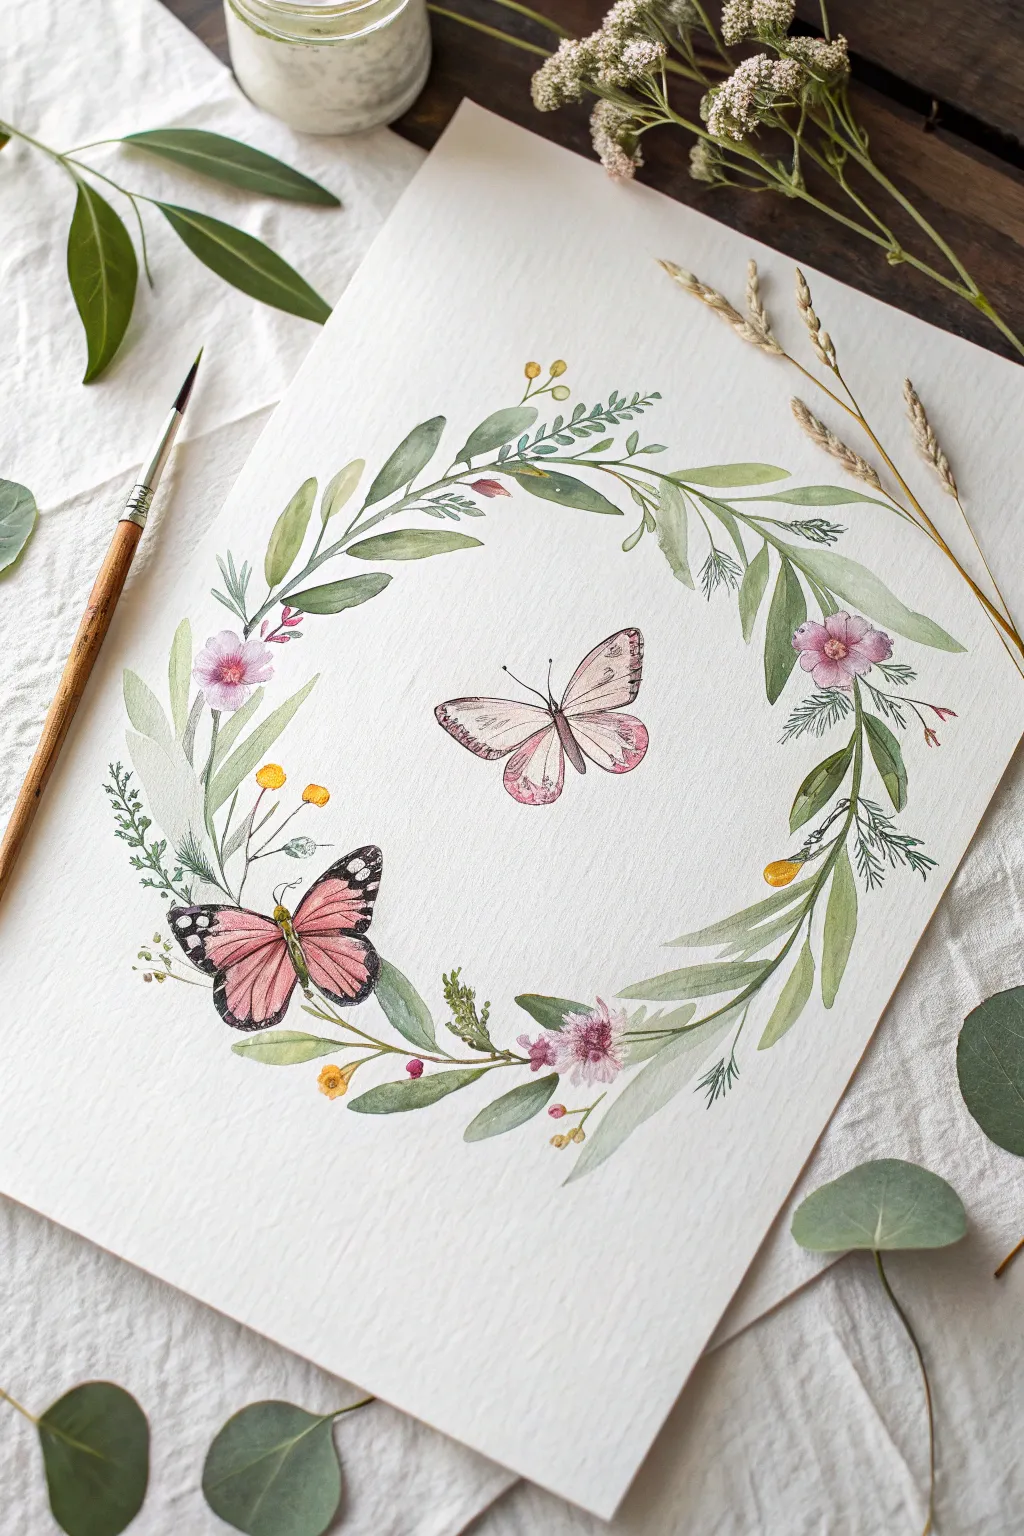
Capture the delicate beauty of a summer meadow with this watercolor painting, featuring a soft leafy wreath adorned with charming butterflies. The mix of muted greens, soft pinks, and intricate wildflower details creates a serene composition perfect for framing or greeting cards.
Step-by-Step
Materials
- Cold press watercolor paper (300 gsm)
- Round watercolor brushes (sizes 2, 4, and 6)
- Fine liner brush (size 0 or 00)
- Watercolor paints (Sap Green, Olive Green, Payne’s Grey, Alizarin Crimson, Yellow Ochre, Burnt Sienna)
- Pencil (HB or H) and kneaded eraser
- Clean water jars and paper towels
- Mixing palette
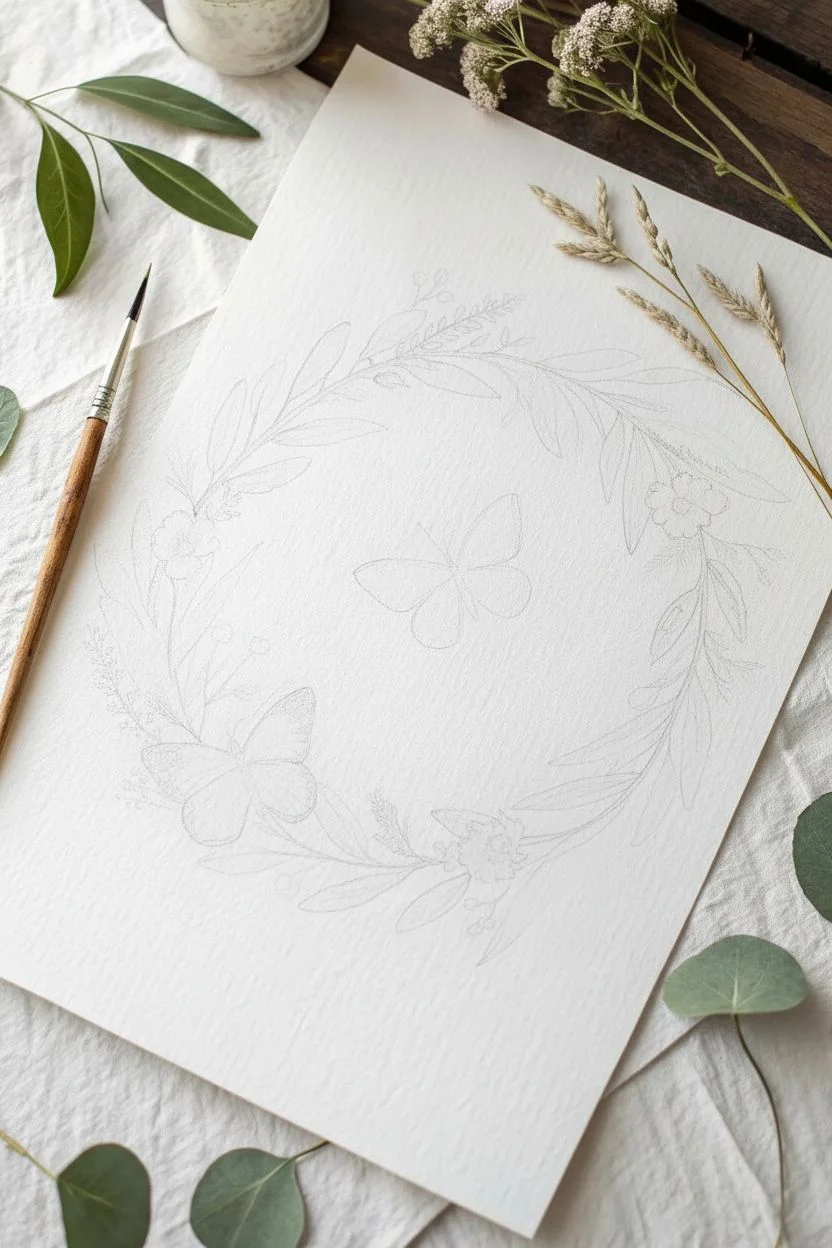
Step 1: Sketching the Wreath Layout
-
Draw the guide circle:
Start by lightly drawing a large circle in the center of your paper. You can trace a dinner plate or bowl to get a perfect shape, but ensure your pencil lines are very faint so they don’t show through the transparent watercolor later. -
Map out floral elements:
Sketch the overarching flow of the stems. Don’t simply draw a line on the circle; weave the stems in and out of the guideline to create natural movement. Mark small circles where the main pink flowers will go. -
Position the butterflies:
Place the central butterfly floating in the middle of the wreath. Sketch a second butterfly perched on the lower-left section of the foliage. Keep the wing shapes simple and symmetrical for now.
Wet-on-Wet Magic
For translucent, ethereal wings, dampen the paper inside the wing shape with clean water first. Touch wet paint to the edge and let it bleed inward naturally.
Step 2: Painting the Foliage Base
-
Mix your greens:
Prepare two main green puddles on your palette: a warm, yellowish green using Olive Green and a touch of Yellow Ochre, and a cooler, muted green using Sap Green mixed with a tiny bit of Payne’s Grey. -
Paint main leaves:
Using a size 4 or 6 brush, paint the larger elongated leaves along the main stems. Use the ‘press and lift’ technique: touch the tip to the paper, press down to widen the belly of the brush for the leaf body, and lift up to create a pointed tip. -
Vary tone and opacity:
While the paint is wet, drop hints of water into some leaves to create transparency, or add a touch of darker pigment to the base of others. I like to alternate between the warm and cool green mixes to keep the wreath looking organic. -
Add wispy sprigs:
Switch to a size 2 brush to add the delicate fern-like sprigs and thinner stems. Use a very watery mix of the cool green for these to make them look like they are receding into the background.
Add Subtle Shimmer
Mix a tiny amount of metallic gold watercolor or iridescent medium into your yellow ochre paint for the small buds to catch the light beautifully.
Step 3: Adding Floral Accents
-
Paint the pink wildflowers:
Dilute Alizarin Crimson to a soft wash. Paint the petals of the small pink flowers (top left, top right, and bottom center). Keep the edges soft and leave a tiny dot of white paper in the centers for highlights. -
Add yellow buds:
Using Yellow Ochre, paint small, round buds scattered through the foliage. Connect them to the main vine with thin green stems using your liner brush. -
Detail the flower centers:
Once the pink petals are dry, use a concentrated mix of crimson or purple to add tiny stamen lines and darker centers to give the flowers depth.
Step 4: Bringing the Butterflies to Life
-
Base layer for the central butterfly:
Paint the wings of the center butterfly with a very pale, watery wash of pink. Let the edges fade almost to white. While it’s damp, drop a tiny bit of darker pink near the body. -
Base layer for the perched butterfly:
The lower-left butterfly needs a bolder color. Use a stronger mix of Alizarin Crimson and Burnt Sienna for the wings. Paint carefully, avoiding the white spots on the wing tips if possible. -
Define the veins:
Switch to your size 0 or 00 liner brush. Mix a dark, nearly black color using Payne’s Grey and Burnt Sienna. Very carefully paint the delicate veins on both butterflies. Keep your hand steady and use only the very tip of the brush. -
Paint the butterfly bodies:
Using the same dark mixture, paint the slender bodies and antennae. Ensure the antennae curve naturally rather than sticking straight out.
Step 5: Final Details
-
Add texture to leaves:
Once the green leaves are completely dry, use the liner brush and a darker green mix to add thin central veins to just a few of the larger leaves. Don’t overdo this; less is more. -
Refine white spots:
If you accidentally painted over the white spots on the perched butterfly’s wings, use a tiny dot of white gouache or a white gel pen to bring them back. -
Review and erase:
Check the composition for balance. If there are any large gaps, add a small yellow bud or a tiny green sprig. Gently erase any visible pencil lines from your initial sketch.
Step back and admire the gentle harmony of your finished botanical composition
Butterfly Duo With Overlapping Transparent Wings
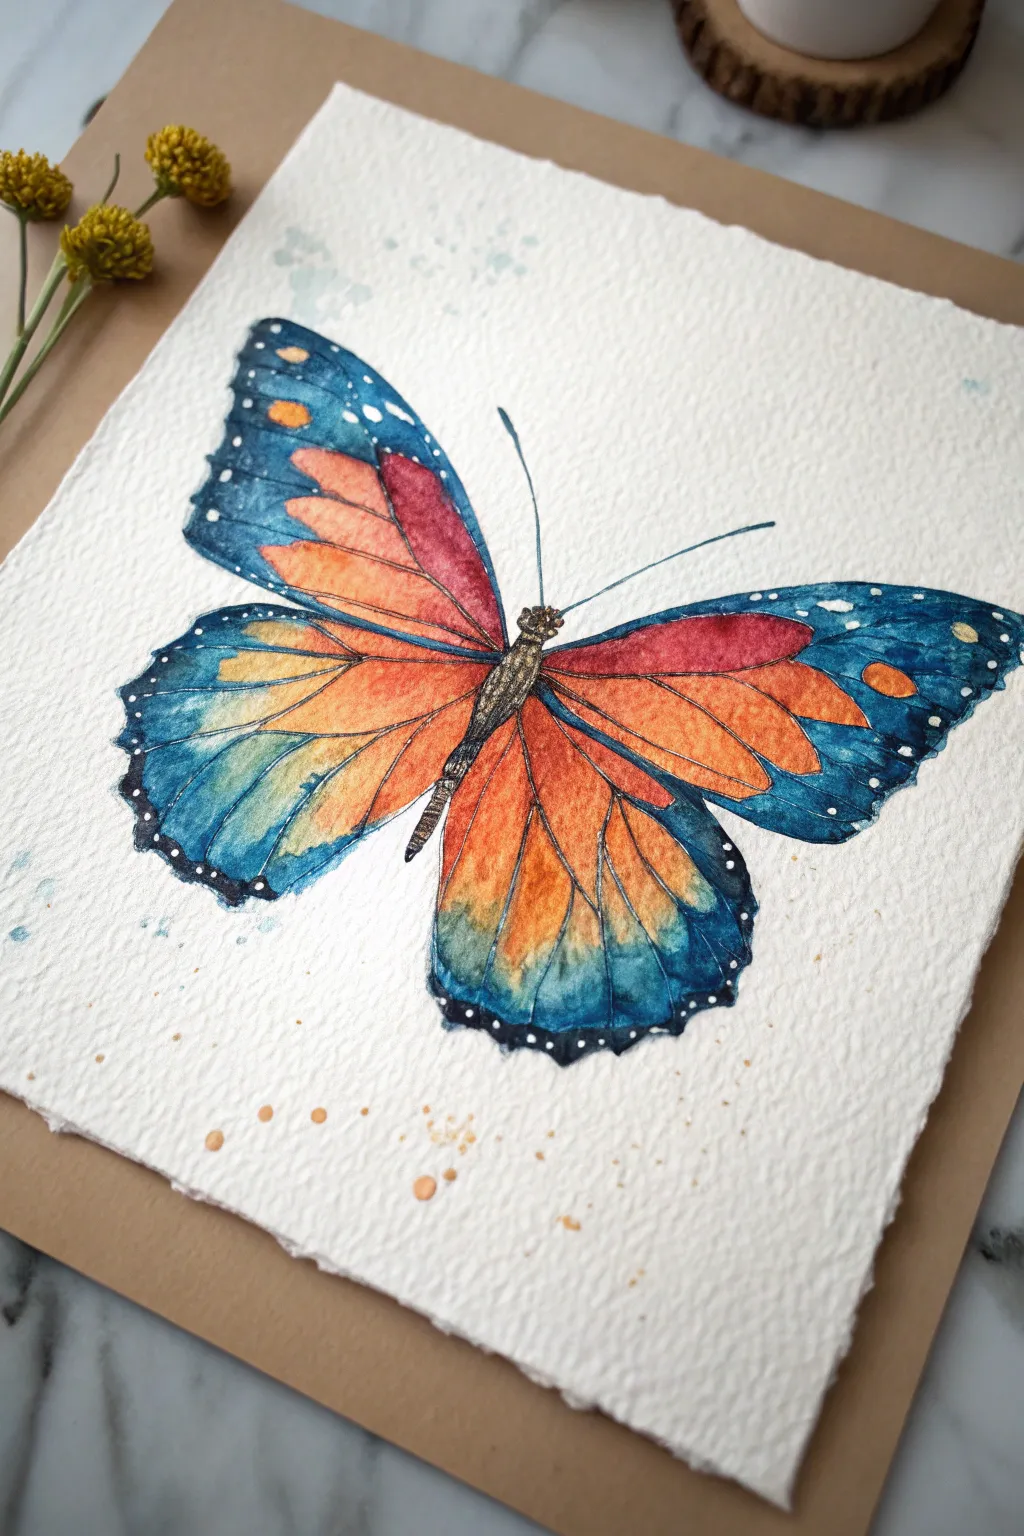
Capture the delicate beauty of a butterfly with this watercolor project, featuring rich blends of orange, red, and indigo. The textured paper adds a lovely organic feel, making the final piece look like a vintage scientific illustration come to life.
Step-by-Step Tutorial
Materials
- Cold press watercolor paper (deckle edge recommended, approx. 300 gsm)
- Watercolor paints (Cadmium Orange, Alizarin Crimson, Indigo, Burnt Umber)
- Round brushes (size 2 and size 6)
- Fine liner brush (size 0 or 00)
- White gouache or white gel pen
- Graphite pencil (HB or 2H)
- Kneaded eraser
- Mascing tape (optional)
- Water cups and paper towels
Step 1: Sketching the Outline
-
Prepare your paper:
Start with a high-quality, textured watercolor paper. If you have a sheet with deckle edges, let that natural texture shine by not taping down the edges, though you can tape the back to a board to prevent warping. -
Map the body:
Lightly sketch a slender, segmented body in the center of the page at a diagonal angle. Draw the thorax slightly thicker than the abdomen and add a small head at the top. -
Draft the wings:
Sketch the large forewings extending outward and upward, followed by the smaller, rounded hindwings below. The shape doesn’t need to be perfectly symmetrical; natural variation adds realism. -
Add vein details:
Very faintly draw the main veins radiating from the body to the wing edges. These will guide your color placement later, so keep the lines soft.
Wet-on-Wet Magic
To get that soft glow where orange meets blue, dampen the paper with clear water first. The pigments will swim together, creating seamless, dreamy transitions.
Step 2: Layering the Wing Colors
-
First wash of orange:
Dilute Cadmium Orange with plenty of water. Using your size 6 brush, apply a light wash to the inner sections of the wings closest to the body, leaving the outer edges untouched for now. -
Deepen with red:
While the orange is still slightly damp, drop In a mix of Alizarin Crimson and orange on the upper forewings. Let the colors bleed naturally into each other to create a gradient. -
Introduce the blue edges:
Mix a watery Indigo blue. Carefully paint the outer margins of the wings, flicking the brush inward slightly to blend toward the orange centers. Don’t worry if the colors touch and muddy slightly; it creates a natural transition. -
Saturate the colors:
Once the first layer is dry, go back in with more concentrated pigment. Enhance the deep orange in the center and darken the indigo edges to create high contrast. -
Create the veins:
Use your size 2 brush and a mix of Indigo and Burnt Umber to paint thin lines over your pencil sketch veins. Let the lines vary in thickness—thicker near the body, tapering off towards the edges.
Add Metallic Flair
Mix a small amount of gold watercolor or metallic ink into the vein lines or add tiny gold splatters near the wings for a shimmering, magical effect.
Step 3: Painting the Body and Details
-
Paint the thorax and abdomen:
Fill in the body shape using Burnt Umber. While wet, drop in a tiny bit of darker brown or black on the shadowed side of the body to give it roundness and dimension. -
Add texture to the body:
Once the body wash is dry, use the fine liner brush to add tiny, short strokes of dark brown to simulate fuzz or segments along the abdomen. -
Draw the antennae:
Using the fine liner brush and a dark grey-brown mix, paint two long, sweeping antennae extending from the head. Try to do this in one confident stroke for a smooth line.
Step 4: Final Touches
-
Deepen the wing margins:
Mix a very dark, almost black, Indigo. Carefully outline the scalloped edges of the wings and deepen the very tips of the forewings. -
Add white spots:
Using white gouache or a gel pen, add tiny dots along the dark outer edges of the wings. Vary the sizes—some tiny specks, some slightly larger oval shapes. -
Highlight the body:
Add a few microscopic dots of white on the head and thorax to simulate light catching the texture of the insect. -
Create background splatter:
Load a wet brush with diluted orange or blue paint. Tap the handle against your finger to flick subtle splatters around the butterfly, giving the piece a loose, artistic finish. -
Let it cure:
Allow the painting to dry completely before erasing any visible pencil lines, being careful not to rub over the painted areas.
Frame your beautiful butterfly in a floating glass frame to show off those stunning deckle edges

PENCIL GUIDE
Understanding Pencil Grades from H to B
From first sketch to finished drawing — learn pencil grades, line control, and shading techniques.
Explore the Full Guide
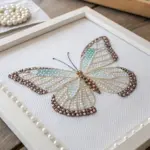
Negative Space Butterfly With Paint Splatter Background
Capture the delicate beauty of a white butterfly resting on an abstract, misty background with this watercolor project. The contrast between the precise, realistic insect and the loose, splattered blue surround creates a stunning focal point full of movement.
Step-by-Step Guide
Materials
- Cold press watercolor paper (300 gsm or heavier)
- Watercolor paints (Indigo, Payne’s Grey, Cerulean Blue, Burnt Umber)
- White Gouache (optional for highlights)
- Masking fluid
- Round brushes (Size 2, 6, and 10)
- Fine liner brush or rigger brush
- Pencil and eraser
- Palette for mixing
- Two jars of water
- Paper towels
- Clean toothbrush (for splatter)
Step 1: Preparation and Sketching
-
Prepare your paper:
Start by tearing the edges of your watercolor paper against a ruler to create that beautiful, organic deckled edge look seen in the reference. Tape the paper down to a board if it isn’t a block. -
Lightly sketch the outline:
Use a hard pencil (like an H or HB) to very faintly draw the outline of the butterfly. Focus on the four wing sections and the central body. Keep the lines light so they won’t show through the translucent wings later. -
Map the veins:
Draw the major vein structures inside the wings. These will serve as your guide for the detailed painting later. Don’t worry about every tiny vein, just the main architectural lines. -
Apply masking fluid:
Carefully apply masking fluid over the entire butterfly shape. This preserves the white paper for the insect while we go wild with the background. Allow it to dry completely.
Salt Texture Trick
While the blue background wash is still wet, sprinkle a pinch of table salt onto the pigment. As it dries, the salt pushes the pigment away, creating stunning crystalline stars.
Step 2: The Atmospheric Background
-
Wet the background:
Using your largest brush, wet the paper around the masked butterfly with clean water. Apply the water unevenly—some areas soaking wet, others just damp—to create varied texture. -
Drop in color:
Mix a watery wash of Indigo and Cerulean Blue. Drop this pigment into the wet areas around the wing edges. Let the paint bloom and spread outward naturally, concentrating the darkest pigment closest to the butterfly. -
Add splatter effects:
While the background is still damp, load a brush or toothbrush with darker indigo paint. Flick the bristles to create splatters. The wet paper will soften some dots, creating a ‘bokeh’ effect. -
Create distinct droplets:
Once the first layer is semi-dry, flick slightly thicker paint to create sharp, distinct droplets. This layering of soft and sharp splatters adds depth. Let the background dry completely before proceeding.
Step 3: Painting the Butterfly
-
Remove the mask:
Gently rub away the masking fluid to reveal the pristine white shape of the butterfly. -
Underpainting the wings:
Mix a very diluted, pale grey wash. Apply this to the shadowed areas of the wings, particularly near the body and where the wings overlap, to give them volume. Keep the majority of the wing paper-white. -
Painting the edges:
Switch to a size 2 brush and load it with concentrated Payne’s Grey or dark brown. Carefully paint the scalloped outer edges of the wings. Feather the paint slightly inward so it doesn’t look like a solid outline. -
Detailing the veins:
Using your fine liner or the tip of a small round brush, paint the veins. Use a mix of black and brown. Ensure your lines are broken and vary in thickness—thicker near the body, whisper-thin at the edges. -
Filling the body:
Paint the thorax and abdomen using a dark, almost black mixture. Use a stippling motion (small dots) to suggest a fuzzy texture rather than a solid smooth shape. -
Adding texture to the body:
While the body is still damp, lift out a tiny highlight on the thorax with a dry brush or tissue to make it look rounded. -
Defining the antennae:
With your finest brush or a micron pen, draw the two antennae with a confident, sweeping motion. Add small clubs at the ends.
Go Metallic
For a magical twist, mix metallic gold watercolor into your background splatter or trace a few of the wing veins with gold ink for shimmering details.
Step 4: Final Touches
-
Refining the contrast:
I like to go back in with my darkest indigo mix and deepen the shadow right underneath the wings. This ‘negative painting’ makes the white wings pop forward drastically. -
Adding highlights:
If you lost any brightness on the wings, use a touch of white Gouache to reclaim the highlights or add clean white spots on the black wing tips. -
Softening edges:
Check the transition between the butterfly and the background. If it looks too like a sticker, soften a few edges with a damp brush to integrate the subject into the atmosphere.
Step back and admire how the loose, abstract background perfectly frames the delicate precision of your painted butterfly
Vertical Butterfly Swarm Rising Composition
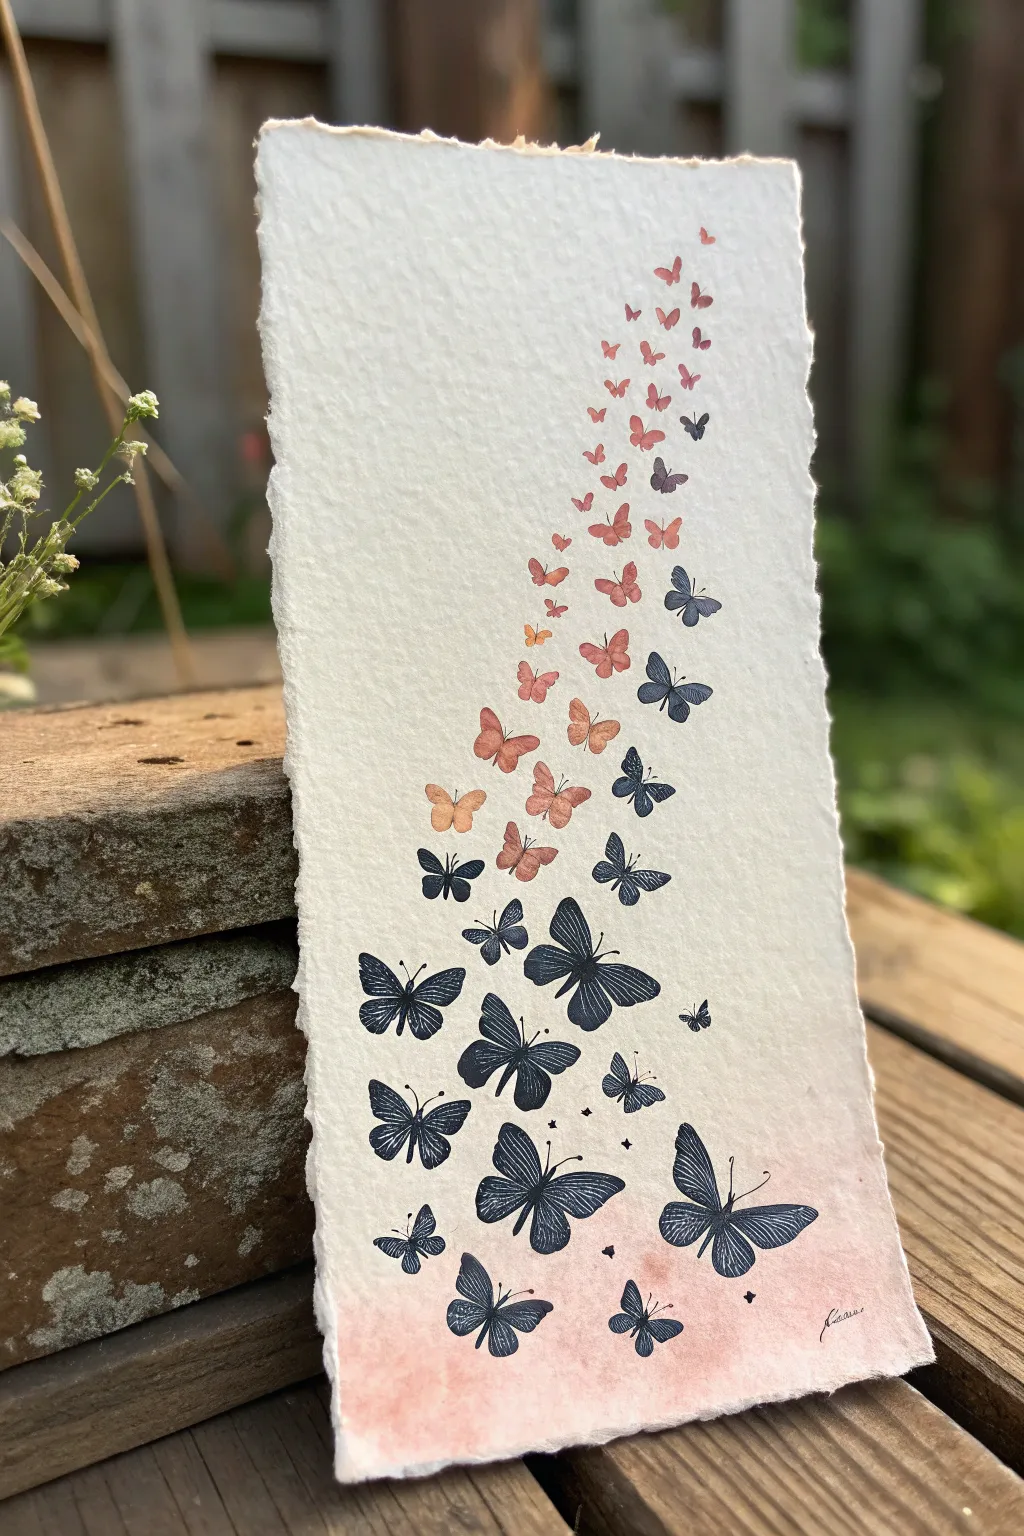
Capture the delicate movement of a rising butterfly swarm with this elegant mixed-media piece on handmade paper. This project combines a soft watercolor wash with precision stamping or hand-painting to create a dynamic vertical composition that draws the eye upward.
Detailed Instructions
Materials
- Heavyweight handmade cotton rag paper with deckle edges (approx. 4×8 inches)
- Black archival ink pad or fine tip black ink pen
- Watercolor paints (Peach, Coral, Warm Pink)
- Small butterfly rubber stamps (various sizes) or a stencil set
- Soft round watercolor brush (size 6 or 8)
- Clean water and paper towels
- Pencil for light sketching (optional)
- Scrap paper for testing
Step 1: Preparing the Base
-
Select your paper:
Choose a high-quality handmade paper with a rough, deckled edge. The texture adds significant character to the final piece, so don’t smooth it out. -
Mix the background wash:
Dilute a peach or soft coral watercolor paint with plenty of water. You want a very transparent, subtle hue rather than a bold block of color. -
Apply the gradient base:
Start at the very bottom edge of the paper. Gently brush the peach wash across the bottom, fading it upward. Stop about one-fifth of the way up the paper, letting the color disappear into the white of the page. -
Let it dry completely:
The paper must be bone dry before you add any ink, otherwise the ink lines will bleed and blur. Hand-made paper can be absorbent, so give it extra time.
Stamp Masking Trick
To make butterflies look like they are flying behind one another, stamp one on a sticky note loosely, cut it out, and place it over a stamped image on your paper before stamping the next one.
Step 2: Creating the Composition
-
Plan the flow:
Visualize a curved, S-shape or a towering cone shape for your swarm. The butterflies should start dense and large at the bottom and become smaller and sparser as they rise. -
Ink the largest stamps:
Using your largest butterfly stamp and black archival ink, press firmly onto a scrap paper first to ensure even coverage. This test stamp saves heartache later. -
Stamp the foundation:
Stamp 3-4 large black butterflies near the bottom, within the peach wash area. Angle them slightly differently so they aren’t all facing the exact same direction. -
Add floating butterflies:
Continue stamping black butterflies, moving upward. Switch to slightly smaller stamps or draw smaller ones if you are hand-painting. Keep them clustered but not overlapping.
Ink Blotches?
If a stamp leaves an unwanted smudge, turn it into a tiny distant butterfly or a sparkle star with a white gel pen. Mistakes are just unplanned details.
Step 3: Adding Color to the Swarm
-
Mix transition colors:
Creating the gradient effect on the butterflies themselves is the magic trick here. I like to prepare a palette with black, dark grey, muted pink, and pale coral. -
Stamp or paint the mid-section:
As you move up past the black butterflies, switch to a dark grey ink or paint. Place a few of these in the middle of the swarm to soften the transition. -
Transition to color:
Above the grey butterflies, start introducing muted coral or dusty pink butterflies. If using stamps, ink the stamp with a color pad instead of black. -
Create the peak:
For the very top of the swarm, use the smallest butterflies and the lightest pink or peach tone. These should look like they are fading into the distance. -
Scatter the stragglers:
Place tiny, single butterflies drifting away from the main group at the top right, breaking the uniformity for a natural look.
Step 4: Finishing Details
-
Add micro-details:
Using a very fine black pen (0.05 or 0.1 tip), draw tiny stars or dots in the empty spaces between the bottom black butterflies. This adds a bit of celestial magic. -
Check balance:
Step back and look at the flow. If there’s a gap that feels too empty, add a small dot or a tiny butterfly silhouette to bridge it. -
Sign your work:
Add your signature discreetly at the bottom right corner using the fine liner pen.
Frame this delicate vertical piece on a dark background to make the deckled edges and the rising swarm truly pop


Butterfly Mandala Pattern Fill
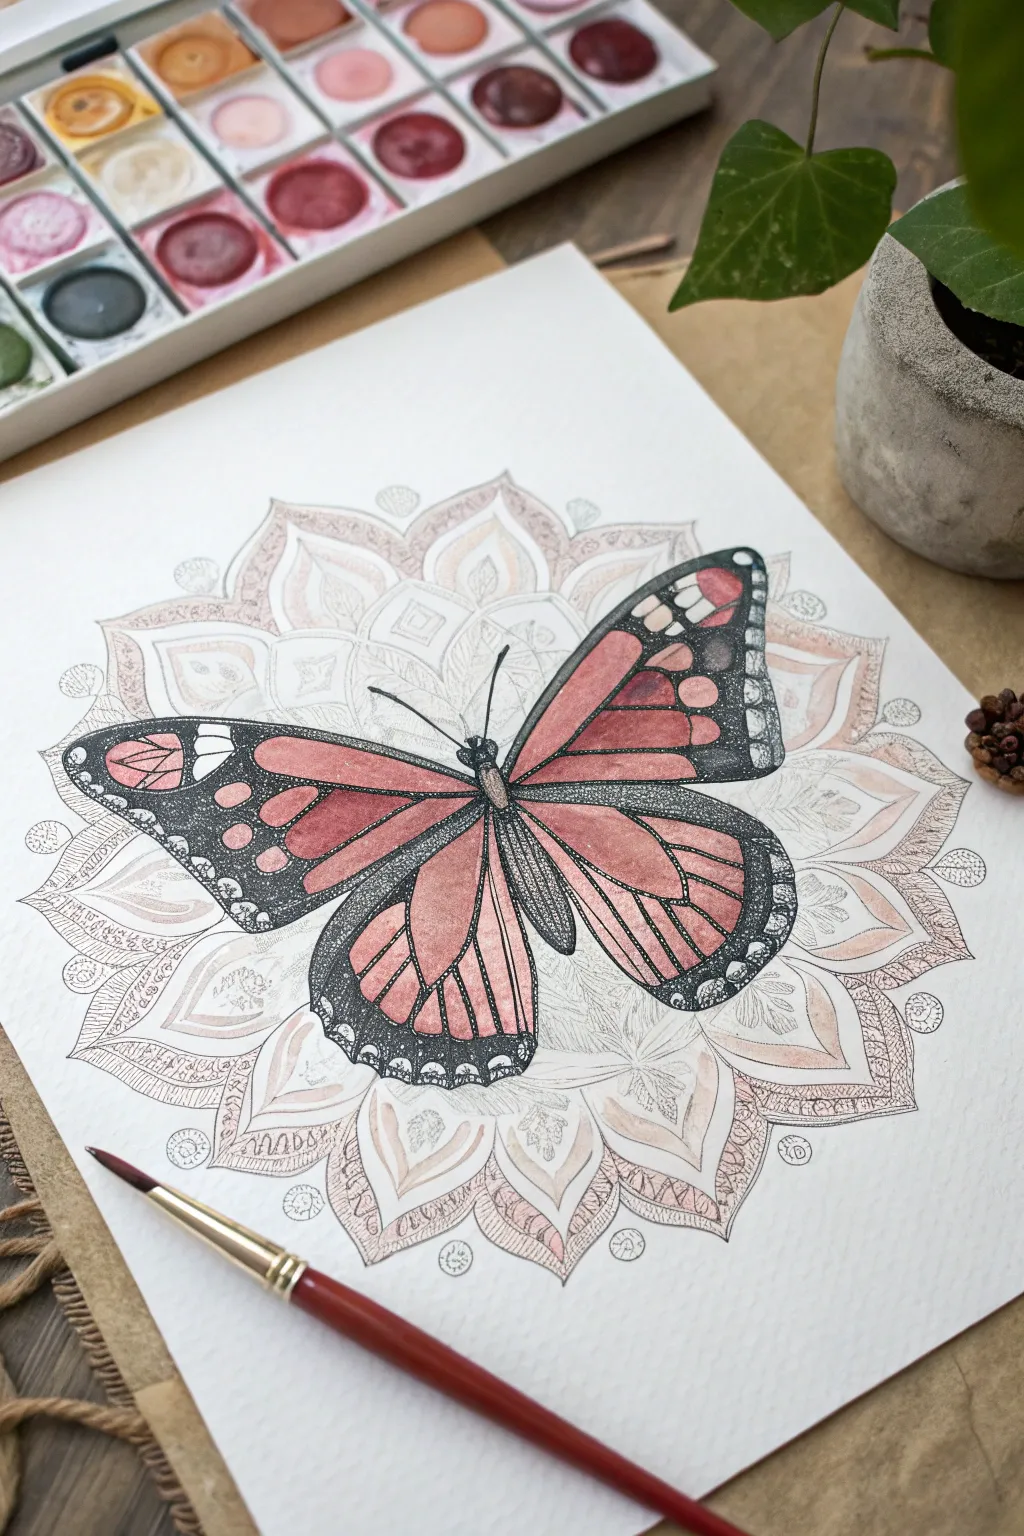
This stunning project combines the bold, graphic beauty of a monarch butterfly with the delicate, spiritual symmetry of a mandala. The resulting artwork plays with depth, making the vibrant butterfly appear to rest lightly upon a faded, ancient-looking geometric background.
Step-by-Step Guide
Materials
- Cold press watercolor paper (300 gsm)
- Watercolor paint set (focus on terracotta, burnt sienna, deep reds, and black)
- Fine liner pens (Black, sizes 0.1, 0.3, and 0.5)
- White gel pen or gouache for highlights
- Compass and ruler
- HB pencil and quality eraser
- Round watercolor brushes (Size 2 and 4)
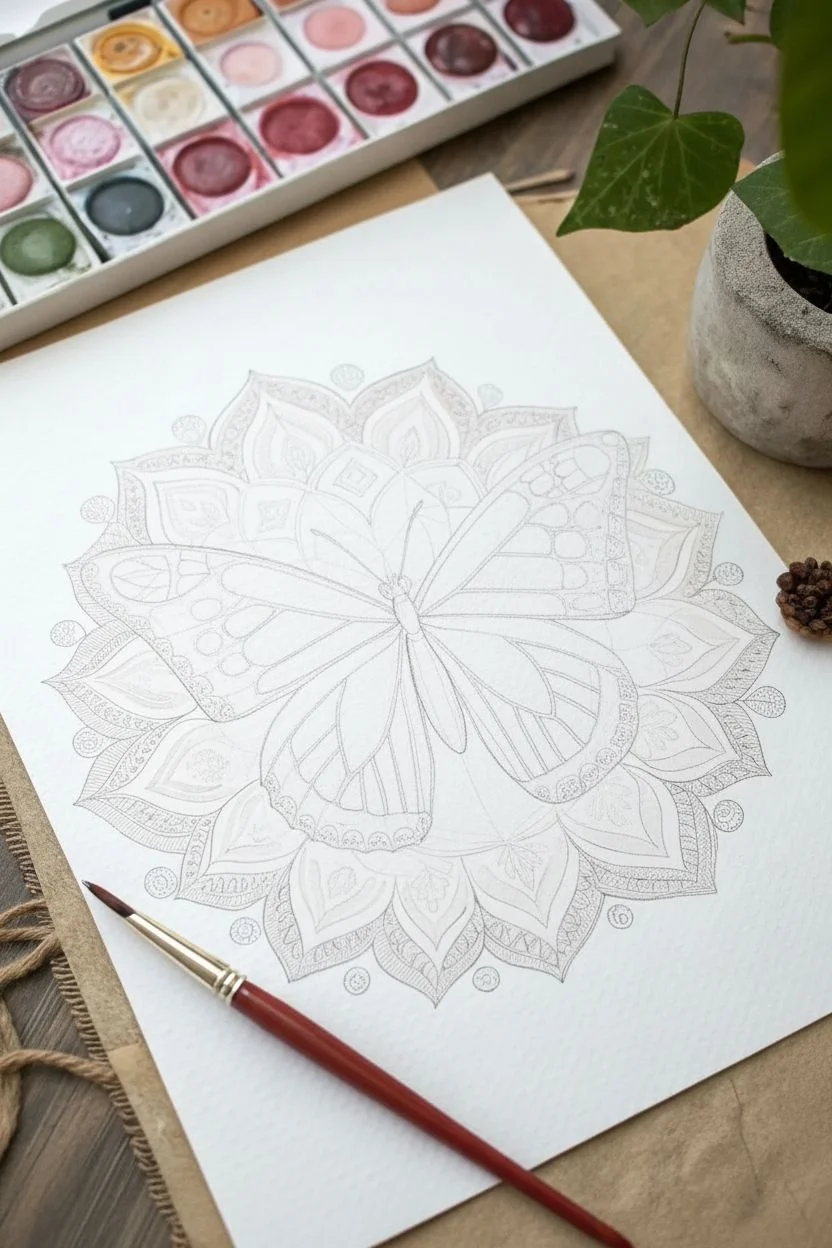
Step 1: Drafting the Mandala Base
-
Center Point:
Begin by finding the exact center of your watercolor paper. Mark it lightly with your pencil. Use your compass to draw four concentric circles radiating from this point, spacing them about an inch apart. -
Segmenting:
Using a protractor or just your ruler, lightly divide your circles into 8 or 16 equal pie-shaped segments. These guidelines will help keep your mandala petals symmetrical. -
Petal Shapes:
Sketch the flower-like petals within your circular guides. Start with small petals in the inner circle, expanding to larger, pointed lotus-style leaves on the outer rings. Keep your pencil pressure very light so graphite doesn’t smudge. -
The Butterfly Outline:
Sketch a large butterfly directly over the center of your mandala. Focus on getting the classic Monarch wing shape—broad upper wings and rounded lower wings. The butterfly should dominate the composition, covering the center of the mandala.
Step 2: Inking the Details
-
Mandala Stippling:
Switch to your 0.1 fine liner. Instead of solid lines, trace parts of your mandala petals using a stippling technique (tiny dots) or very broken, delicate lines. This pushes the mandala into the background visually. -
Butterfly Framework:
Use a thicker 0.3 or 0.5 pen to outline the butterfly. These lines should be bold and confident to bring the subject forward. Outline the distinct ‘veins’ and cells within the wings. -
Solid Blacks:
Fill in the margins of the butterfly wings with black ink or concentrated black watercolor. Leave small circles empty along the edges for the signature white spots of a Monarch.
Keep it clean
Place a scrap piece of paper under your hand while you draw or paint. This prevents oils from your skin transferring to the paper and stops you from smudging the fine pencil lines.
Step 3: Painting the Mandala
-
Mixing a Pale Wash:
Create a very dilute wash of a dusty rose or terracotta color. You want a ‘tea-stained’ look. Test the color on a scrap piece of paper; it should be barely visible. -
Applying the Wash:
Gently paint selected petals of the mandala. Don’t fill every section; leave some white paper showing to maintain an airy feel. I find that skipping every other petal creates a nice rhythm. -
Adding Texture:
While the mandala wash is still slightly damp, drop in tiny amounts of slightly darker pigment at the base of the petals to create a soft gradient.
Uneven Gradients?
If your watercolor dries with hard edges inside the wing cells, re-wet the area slightly with clean water and gently smooth the pigment out with a damp brush.
Step 4: Painting the Butterfly
-
Base Wing Color:
Mix a vibrant orange-red using vermilion and a touch of burnt sienna. Apply this to the inner cells of the wings. Work one cell at a time to control the flow. -
Creating Gradients:
While the orange paint is wet, drop a deeper red or brown into the corners of each wing cell (closest to the veins). Let the colors bleed naturally for a dimensional, velvety look. -
Body Details:
Paint the butterfly’s body with a mix of black and dark brown. Use your smallest brush to dab textures that mimic fuzzy thorax hairs. -
Define the Veins:
Once the paint is totally bone dry, go back over the black dividing veins with your pen if the paint clouded them. Sharp crisp lines are crucial here.
Step 5: Finishing Touches
-
White Highlights:
Using a white gel pen or a fine brush with white gouache, fill in the small spots along the black edges of the wings. Also, add tiny reflection lines to the body. -
Shadowing:
To make the butterfly ‘pop’ off the page, mix a very faint grey-purple wash. Paint a thin shadow under the bottom edges of the wings where they overlap the mandala. -
Final Ink Review:
Add tiny decorative dots or hatching to the mandala tips with your 0.1 pen to tie the background style to the detailed butterfly.
Now you have a piece where nature’s wild beauty meets organized geometric calm


Have a question or want to share your own experience? I'd love to hear from you in the comments below!