In my studio, I love turning smooth little stones into tiny Disney-inspired keepsakes—bold shapes, clean color blocks, and that animated charm. These rock painting ideas start super approachable and gradually build into more detailed, scene-style designs as you go.
Disney-Inspired Three-Circle Mouse-Ear Icon Rock
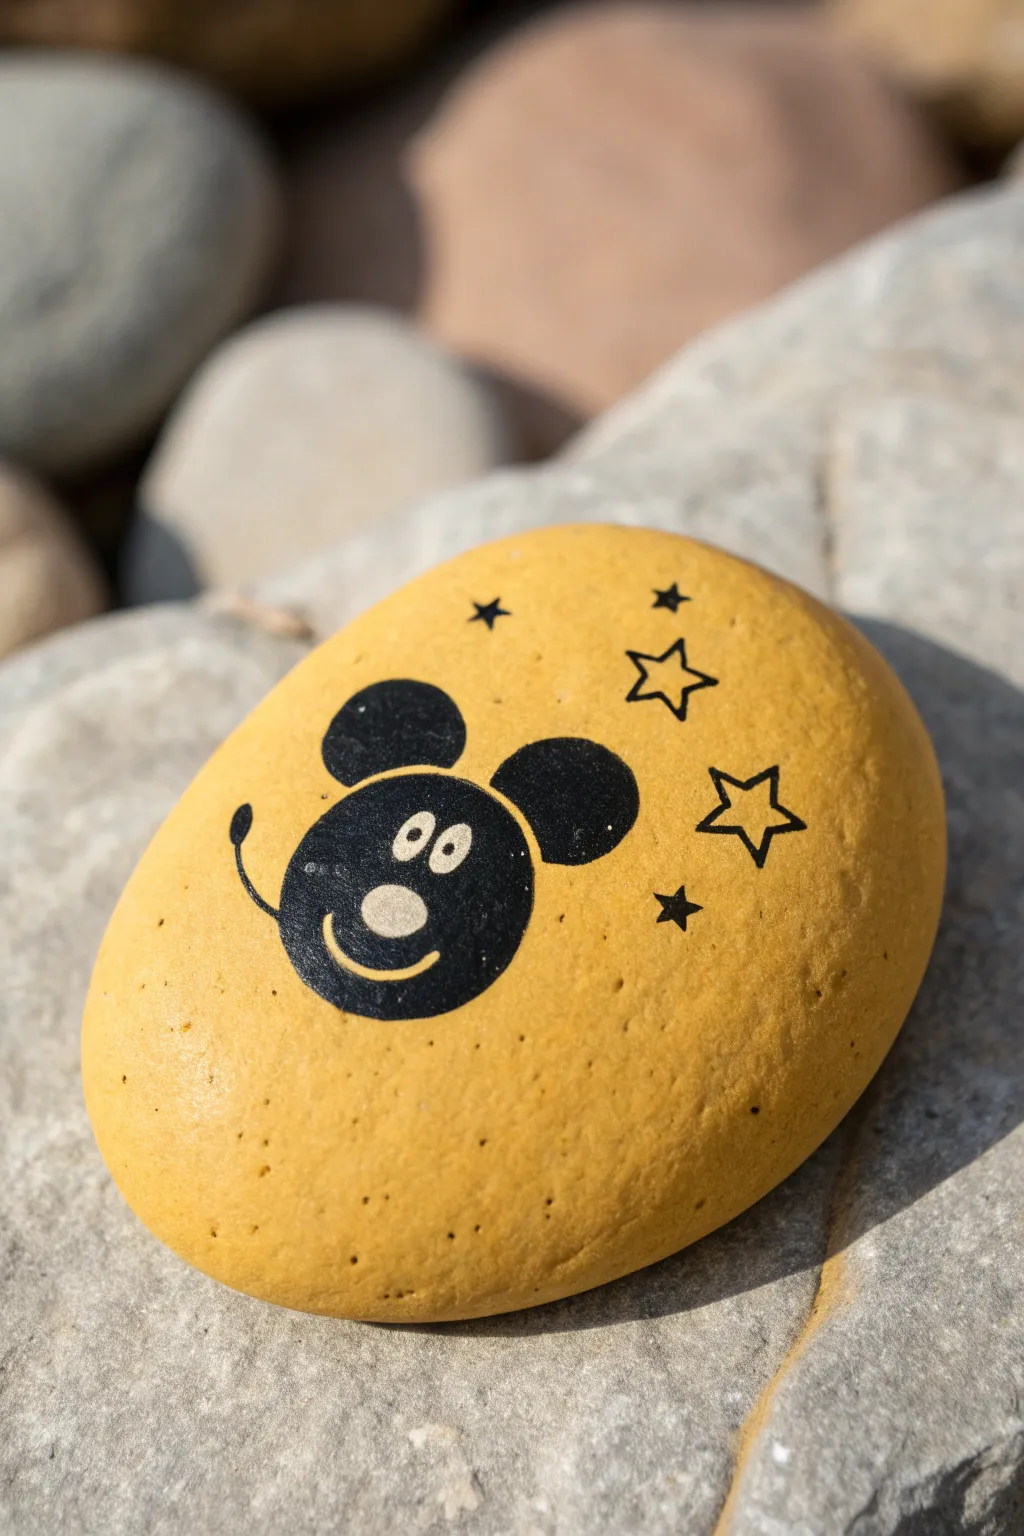
Bring a touch of classic animation charm to your garden or desk with this vibrant yellow rock featuring a beloved mouse icon. This simple yet striking design combines a bright, cheerful background with crisp black details for a truly magical finish.
Step-by-Step
Materials
- Smooth, oval river rock (medium size)
- Yellow acrylic paint (sunflower or bright yellow)
- Black fine-tip paint pen or permanent marker
- Pencil with eraser
- Carbon transfer paper (optional)
- Small round detail brush (size 0 or 00)
- Black acrylic paint
- Matte or satin clear sealant spray
- Flat paintbrush (for base coat)
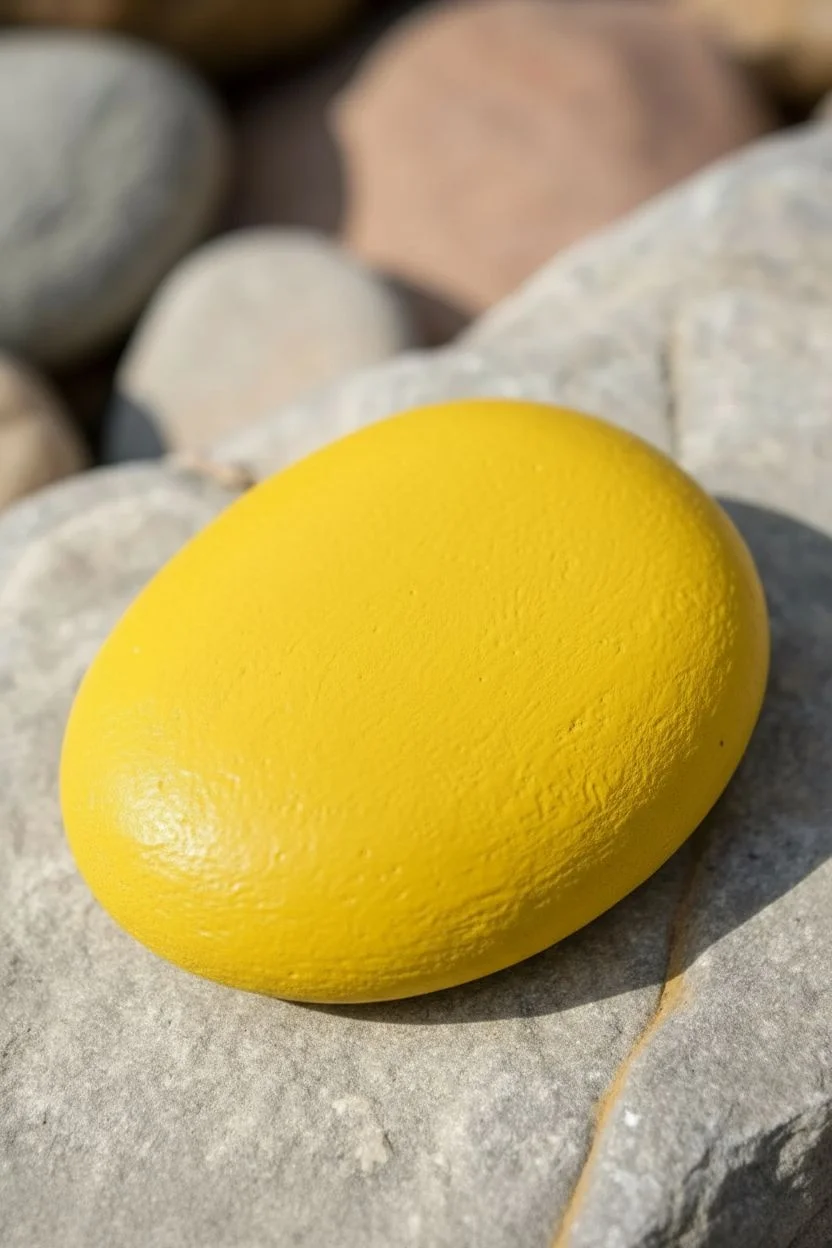
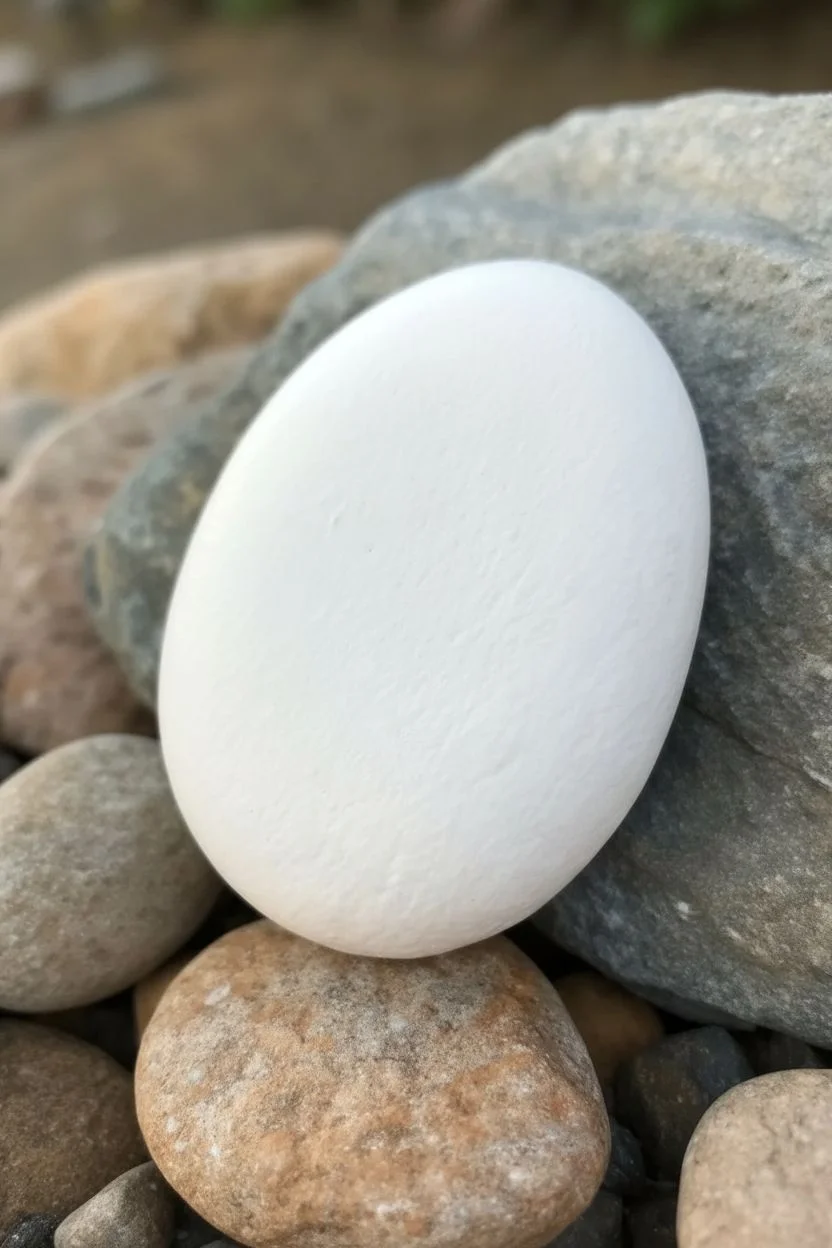
Step 1: Preparing the Canvas
-
Clean the stone:
Begin by thoroughly washing your rock with warm, soapy water to remove any dirt or oils that might prevent the paint from sticking. -
Dry completely:
Allow the rock to air dry completely in the sun, or speed up the process with a hairdryer if you are eager to start. -
Apply base coat:
Using your flat paintbrush, apply a generous layer of bright yellow acrylic paint to the top surface of the rock. -
Let it dry:
Wait for the first coat to dry fully; yellow pigment can be translucent, so this patience is key. -
Second coat application:
Add a second and possibly third coat of yellow until you have a solid, opaque color with no gray rock showing through.
Step 2: Drafting the Design
-
Center the head:
Lightly sketch a large circle in the lower-middle area of the rock using a pencil. -
Add the ears:
Draw two smaller circles on top of the main head circle, positioning them at the 10 o’clock and 2 o’clock positions to form the classic mouse silhouette. -
Sketch the face:
Inside the main circle, lightly draw two small ovals for eyes and a larger, lower oval for the nose area. -
Add the mouth and arm:
Sketch a simple curved line for the smile under the nose, and draw a thin, curved line extending from the left side of the head, ending in a small circle for a waving hand. -
Position the stars:
Draw outlines for three large stars to the right of the head and three smaller solid stars scattered around the top.
Uneven Yellow Coverage?
If the yellow looks streaky, don’t keep adding thick wet layers. Let it dry fully, then apply a thin coat of white paint first, followed by the yellow again.
Step 3: Painting the Details
-
Fill the silhouette:
Using black acrylic paint and a small round brush, carefully fill in the main head shape and ears, but work carefully around the facial features you sketched. -
Paint the eye details:
Instead of leaving the eyes raw yellow, stick to filling the black background around them so the yellow base coat acts as the eye color. -
Create the nose:
Paint the black ‘button’ nose, but leave a small oval of yellow space above it to define the snout area as seen in the reference. -
Draw the arm:
Switch to a black paint pen or fine liner to draw the thin, curved waving arm and small fist, as brush control can be tricky for such fine lines. -
Outline the stars:
Use the fine-tip pen to trace the outlines of the larger open stars on the right side of the rock. -
Fill small stars:
Use the pen or the very tip of your small brush to fill in the tiny solid black stars interspersed around the design. -
Refine edges:
Go back over the circular edges of the ears and head with your pen to smooth out any brushstrokes that look uneven.
Make It Sparkle
After the black paint dries, add a tiny dot of iridescent glitter glue to the center of each open star for a magical pixie-dust effect.
Step 4: Finishing Touches
-
Erase pencil marks:
Once you are absolutely certain the black paint is bone dry, gently erase any visible pencil sketch lines. -
Seal the artwork:
In a well-ventilated area, spray a coat of matte or satin sealant over the rock to protect the paint from chipping and weather damage.
Now you have a cheerful keepsake ready to hide in the park or display on your shelf


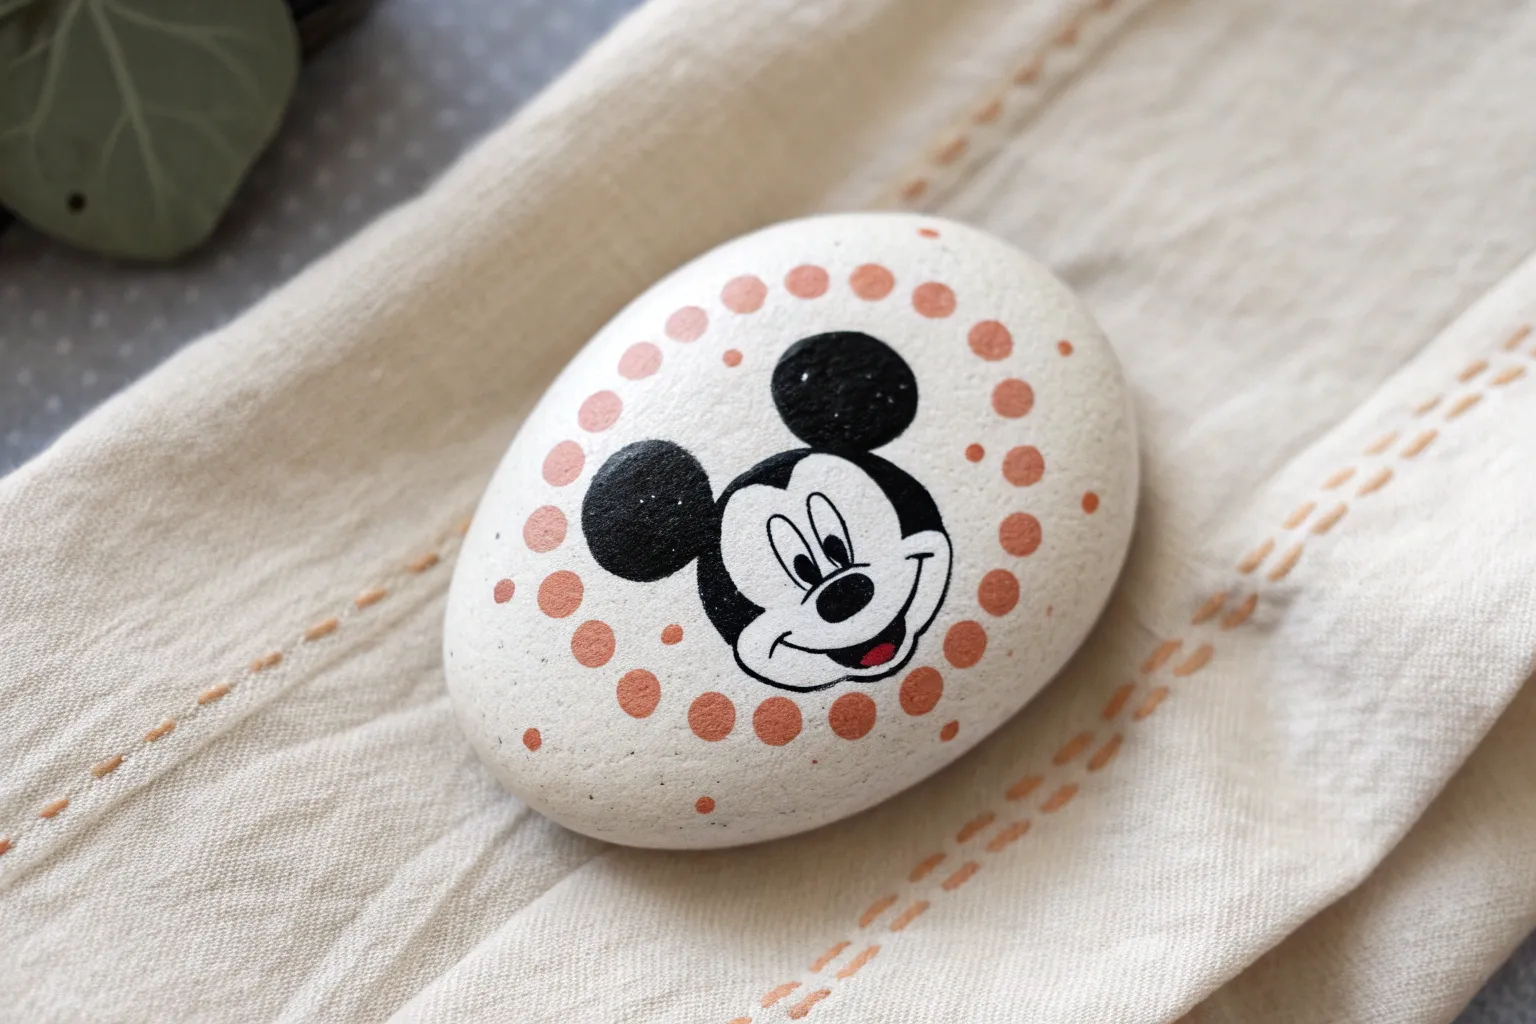
Disney-Inspired Polka-Dot Bow Character Rock

Transform a simple stone into this sweet, slumbering character featuring an iconic polka-dot bow. The minimalist design combines stark black lines with soft, creamy white for a look that is both modern and undeniably cute.
Step-by-Step Tutorial
Materials
- Smooth, oval-shaped river rock
- White acrylic paint (high opacity)
- Black acrylic paint or fine-tip black paint pen
- Pink acrylic paint (soft pastel shade)
- Dotting tools (various sizes) or toothpicks
- Fine detail brush (size 0 or 00)
- Water cup and paper towels
- Clear sealant (matte or gloss spray)
Step 1: Base Coating
-
Clean the stone:
Start by scrubbing your rock with soap and warm water to remove any dirt or oils. Let it dry completely in the sun or use a hairdryer to speed things up. -
Apply the base layer:
Paint the entire top surface of the rock with creamy white acrylic paint. You want a smooth, solid background, so apply thin, even strokes. -
Build opacity:
Once the first coat is dry to the touch, apply a second coat. If your rock works darkly against the white, a third coat might be necessary for full coverage. Let this base cure fully before moving on.
Step 2: Designing the Bow
-
Outline the bow shape:
Using a fine detail brush or a black paint pen, lightly sketch the outline of a large bow at the top of the rock. Draw two rounded triangles for the loops meeting at a central knot. -
Add the ribbons:
Extend two ribbon tails flowing downward from the central knot. Give them slightly jagged or V-shaped ends for a realistic fabric look. -
Fill with black:
Carefully fill in the entire bow shape with solid black paint. Creating a crisp edge here is key, so take your time near the outlines. -
Let the black dry:
Ensure the black paint is completely dry before adding details on top to prevent the colors from muddying. -
Dot the bow:
Dip a small dotting tool or the tip of a toothpick into white paint. Gently place tiny, evenly spaced polka dots all over the black bow area.
Uneven Dots?
If your dots differ in size, reload your tool with paint for every single dot. The amount of paint on the tip dictates the dot’s size.
Step 3: Painting the Face
-
Position the eyes:
Visualize the center of the face. Using your black paint pen or finest brush, draw two downward-curving arcs for the closed eyelids. -
Add eyelashes:
flick small, delicate lines downward from the eyelid arcs to create long, slumbering lashes. I find that starting from the outer corner and working inward helps keep them symmetrical. -
Draw the nose and mouth:
Place a tiny ‘v’ or heart shape just below the eyes for a nose. Below that, paint a simple, small upward curve for a sweet smile. -
Apply blushing cheeks:
Dip a small dotting tool into pastel pink paint. Add three tiny dots in a triangular cluster on each cheek area, just below the outer lashes. -
Add the decorative border:
Using white paint and a medium-sized dotting tool, create a pattern of polka dots starting from the bottom edge of the rock, fading upward toward the cheeks.
Steady Your Hand
For the fine eyelashes, rest your pinky finger on the dry part of the rock or the table surface to stabilize your hand while painting.
Finish your adorable creation by spraying it with a clear sealant to protect that sweet face from scratches and weather


Disney-Inspired Fairytale Castle Skyline Silhouette Rock
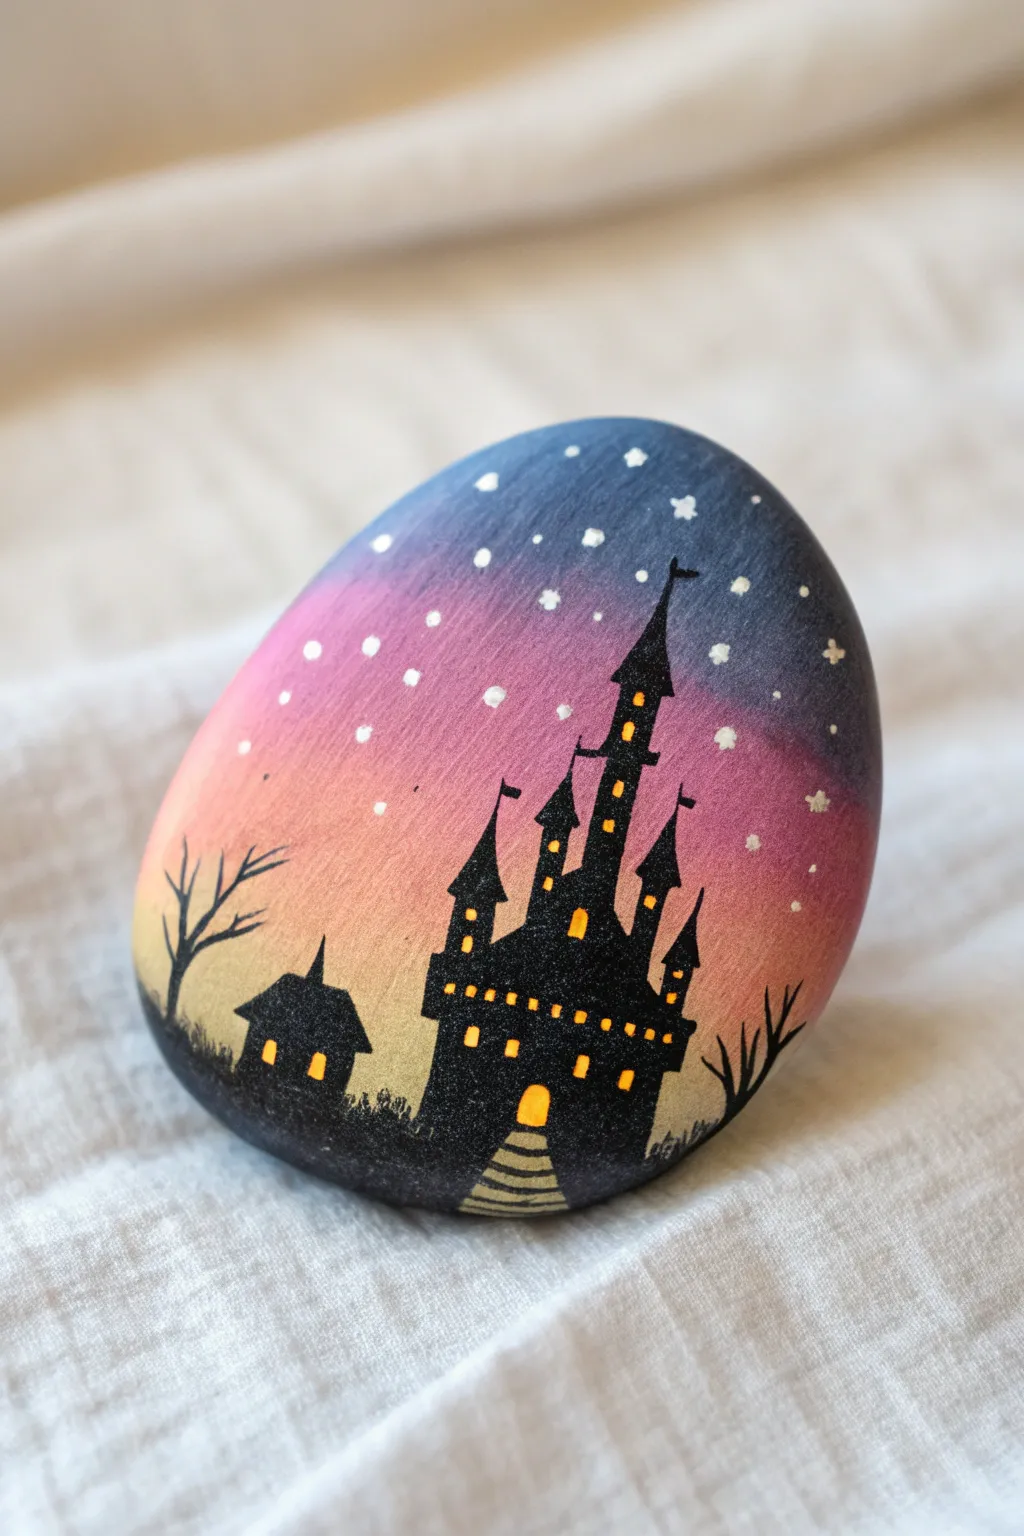
Create a magical twilight scene in the palm of your hand with this enchanting castle silhouette rock. The seamless blend of sunset colors provides a dreaming backdrop for the stark black castle towers and glowing windows.
How-To Guide
Materials
- Smooth, oval river rock (washed and dried)
- White acrylic paint (priming)
- Acrylic paints: Indigo, Violet, Magenta, Peach, Yellow, Black
- Posca paint pens (Black, Yellow, White) – optional but helpful for details
- Sponges (makeup wedges work perfectly)
- Detail brushes (fine liner size 00 or 0)
- Flat brush
- Water cup and paper towels
- Mod Podge or spray sealer
Step 1: Preparing the Canvas
-
Prime the Surface:
Start by painting the top surface of your clean rock with a layer of white acrylic paint. This creates a bright base that will make your sunset colors pop vividly instead of sinking into the dark stone. -
Let it Dry:
Allow the white base coat to dry completely. If the rock’s natural color still shows through, apply a second thin coat for opaque coverage.
Gradient Trouble?
If acrylics dry too fast while blending, mist your sponge very lightly with water. This keeps the paint workable longer for a smoother fade.
Step 2: Creating the Sunset Gradient
-
Apply the Base Colors:
Squeeze out small amounts of indigo, violet, magenta, and peach paint. Using a sponge, dab the indigo at the very top of the rock. -
Blend the Sky:
While the paint is wet, dab violet just below the indigo, blending the overlap gently with the sponge to create a transition. Continue this process moving downward with magenta, and finally peach at the bottom horizon. -
Smooth the Transition:
If the lines between colors look too harsh, lightly dab a clean, slightly damp sponge over the transition areas to soften the gradient. I like to keep the lightest peach area fairly broad to leave room for the castle silhouette. -
Dry Thoroughly:
This step is crucial—let the gradient background dry completely before starting any black paint work to prevent muddy smudges.
Pro Tip: Sharp Lines
For the castle silhouette, use a black Posca paint pen (extra fine 0.7mm tip) instead of a brush. It offers much better control for straight architecture lines.
Step 3: Painting the Silhouette
-
Outline the Horizon:
Using black acrylic paint and a brush (or a black paint pen), draw a slightly uneven, bumpy horizon line across the bottom peach section to represent distant ground. -
Draft the Large Tower:
Paint the central castle structure first. Draw a tall vertical rectangle that tapers slightly, topping it with a sharp triangle roof. This anchors your composition. -
Add Side Towers:
Add smaller, thinner towers of varying heights to the left and right of the main spire. Give them pointed roofs as well, varying the heights to create a whimsical skyline. -
Fill in the Shape:
Fill the entire castle shape with solid black paint. Ensure the edges are crisp and opaque. -
Paint the Cottage:
To the left of the castle, paint a small, simple house shape with a pointed roof to balance the composition. Connect it to the ground with black paint. -
Add Spooky Trees:
On the far left and right edges, use your finest brush or pen to draw bare, spindly tree branches reaching up from the ground. -
Texture the Ground:
Use tiny dabbing motions along the horizon line with your black brush to simulate grass textures.
Step 4: Magical Details
-
Add Glowing Windows:
Once the black paint is bone dry, use a yellow paint pen or a fine brush with yellow paint to add tiny squares and rectangles to the towers and the cottage. -
Paint the Entrance:
Create an arched doorway at the base of the main castle tower in yellow. Add a golden path radiating downward using horizontal dashes that get wider as they move away from the door. -
Add Stars:
Using a dotting tool or the tip of a toothpick dipped in white paint, place scattered dots across the upper dark sky. Vary the pressure to create different sized stars. -
Create Sparkles:
Select a few larger stars and draw tiny ‘x’ or cross shapes over them to make them twinkle. -
Add Flags:
Paint tiny black triangle flags facing the right on top of the tallest spires for a finishing royal touch. -
Seal the Rock:
Finish by applying a coat of clear sealant or Mod Podge to protect your artwork and give the sunset a beautiful sheen.
Place this little masterpiece on a shelf or in a garden to add a touch of fairytale wonder to your day


Disney-Inspired Sparkle-Trail Fairy Silhouette Rock
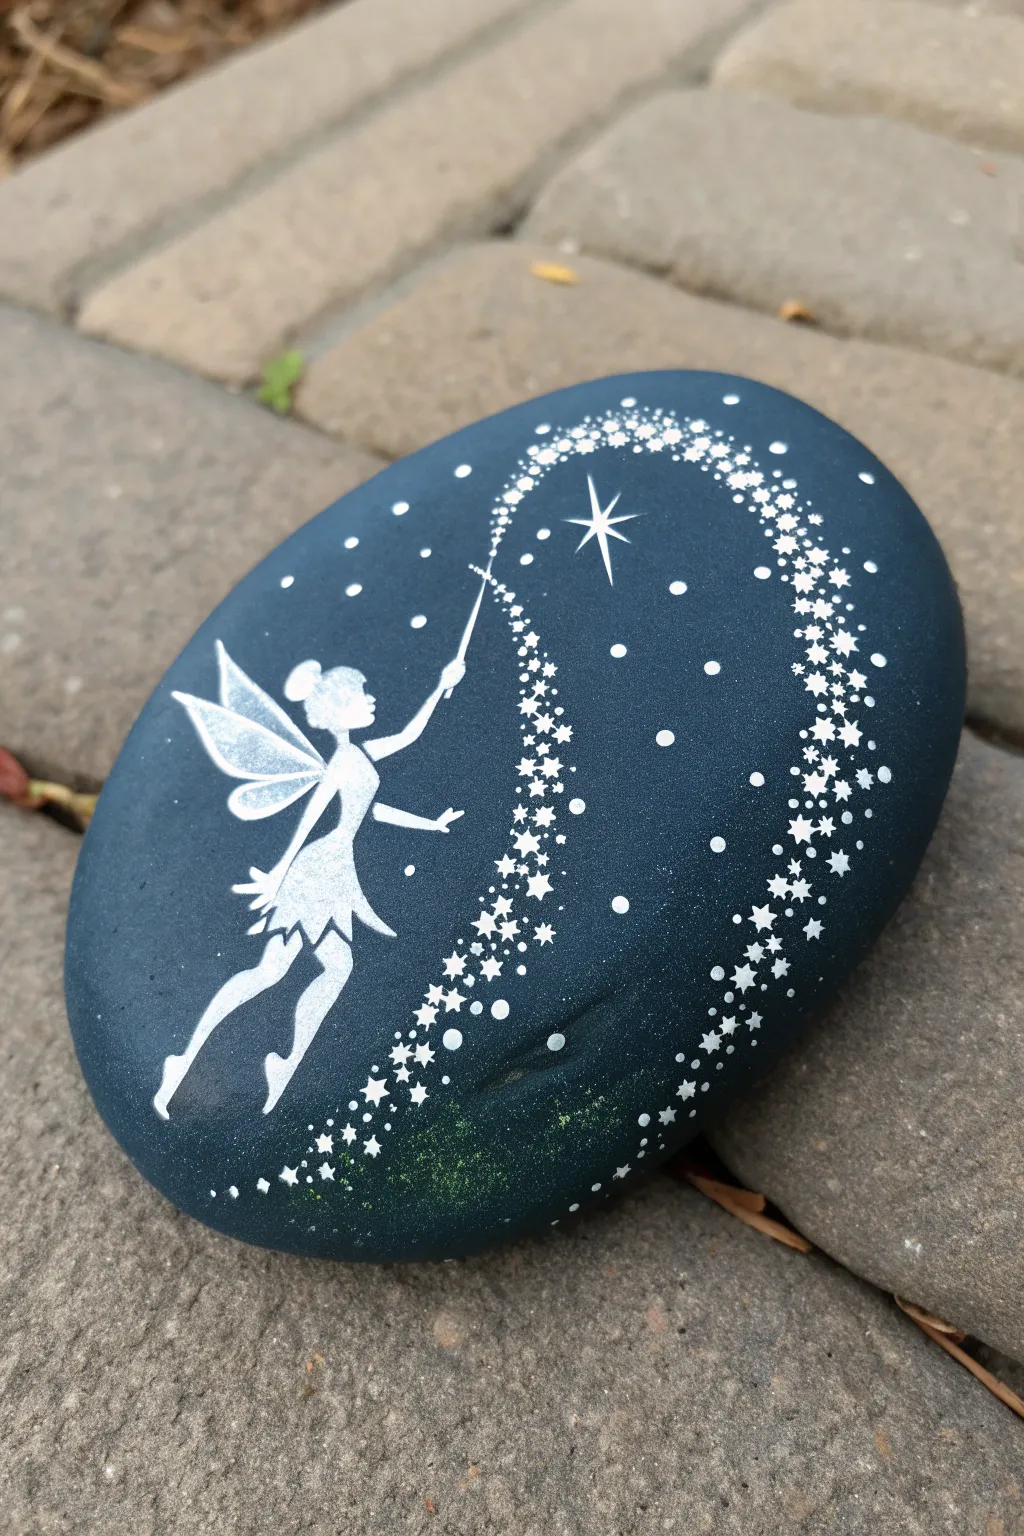
Capture the magic of Disney with this enchanting rock painting that features a classic fairy silhouette casting a brilliant spell. The stark contrast between the deep night-sky background and the crisp white design makes the magical trail of stars truly pop.
Detailed Instructions
Materials
- Smooth, oval-shaped river rock (approx. 4-5 inches wide)
- Deep midnight blue or matte black acrylic paint
- Titanium white acrylic paint
- Wide flat paintbrush (for base coat)
- Fine detail paintbrush (size 0 or 00)
- Very fine detail paintbrush (size 000 or liner brush)
- Dotting tools (various small sizes) or toothpicks
- White paint pen (extra fine tip) – optional but helpful
- Pencil or white chalk pencil
- Sealant (spray or brush-on varnish)
Step 1: Preparing the Night Sky
-
Clean the canvas:
Start by scrubbing your river rock with warm soapy water to remove any dirt or oils. Let it dry completely in the sun or with a cloth. -
Apply the base coat:
Using your wide flat brush, paint the entire top surface of the rock with deep midnight blue or matte black paint. This dark background is crucial for making the white fairy stand out. -
Ensure opacity:
Let the first layer dry for about 15-20 minutes. Apply a second coat if the rock’s natural color is showing through, ensuring a solid, opaque finish.
Wobbly Lines?
If your hand shakes while painting the tiny stars, brace your pinky finger against the dry part of the rock for stability. A white gel pen can also be easier to control than a brush.
Step 2: Sketching the Silhouette
-
Outline the fairy:
Once the background is bone dry, lightly sketch the fairy’s outline using a white chalk pencil. Place her on the left side of the rock, leaning slightly backward as if casting a spell upward. -
Refine the pose:
Focus on the key shapes: a small bun for the head, pointed wings, a short dress that flares out, and legs extended in mid-flight. Don’t worry about details yet; just get the proportions right. -
Map the magic trail:
Lightly draw a sweeping, curved line starting from where her wand will be, arching up and over to the right side of the rock, creating a large ‘C’ shape for the star trail.
Glow Up
Mix a tiny amount of glow-in-the-dark medium into your white paint for the stars. The fairy magic will disappear during the day and reappear when the lights go out!
Step 3: Painting the Fairy
-
Fill the silhouette:
Using the size 0 brush or a white paint pen, carefully fill in the fairy’s body with titanium white paint. Start from the center and work outward to the edges to keep lines crisp. -
Define the wings:
For the wings, you can use slightly thinned white paint to give them a translucent, gossamer look, or keep them solid white like the body. Ensure the tips are sharp and pointed. -
Sharpen the limbs:
Switch to your size 000 brush to paint the delicate arms, legs, and the tiny wand in her hand. The hand should be raised, extending the wand toward the beginning of your trail sketch. -
Add a second layer:
White paint on a dark background often needs a second pass. Once the first layer is dry, go over the silhouette again to make it bright and solid.
Step 4: Creating the Magic Trail
-
Paint the main stars:
Along the center of your sketched trail curve, paint several five-pointed stars using your finest brush. I prefer to paint a larger ‘North Star’ shape near the top of the arch as a focal point. -
Add medium stars:
Scatter smaller, simple cross-shaped stars or tiny five-pointed stars loosely along the path, concentrating them more heavily near the wand and the top of the curve. -
Begin dotting:
Dip a medium-sized dotting tool into white paint. Place dots randomly around the stars, keeping them mostly within the imaginary path of the swath. -
Add fine glitter dust:
Using a toothpick or the smallest dotting tool, fill in the gaps with tiny micro-dots. This creates the effect of ‘stardust’ and adds density to the magical trail. -
Scatter the edges:
Place a few stray dots and tiny stars outside the main boundary of the trail to make the magic look like it’s drifting into the night sky. -
Connect the wand:
Ensure there is a dense cluster of tiny dots and a thin line directly connecting the tip of the fairy’s wand to the start of the star trail.
Step 5: Finishing Touches
-
Clean up sketch lines:
If any chalk or pencil marks are still visible, gently wipe them away with a damp Q-tip or a soft eraser once the paint is fully cured. -
Seal the artwork:
To protect your rock from weather and chipping, apply a clear coat of spray sealant or brush-on varnish. A glossy finish mimics the shine of magic, while matte keeps it looking like chalk art.
Place this magical stone in your garden to add a touch of pixie dust to your flowerbeds
BRUSH GUIDE
The Right Brush for Every Stroke
From clean lines to bold texture — master brush choice, stroke control, and essential techniques.
Explore the Full Guide
Disney-Inspired Glass Slipper With Swirls Rock
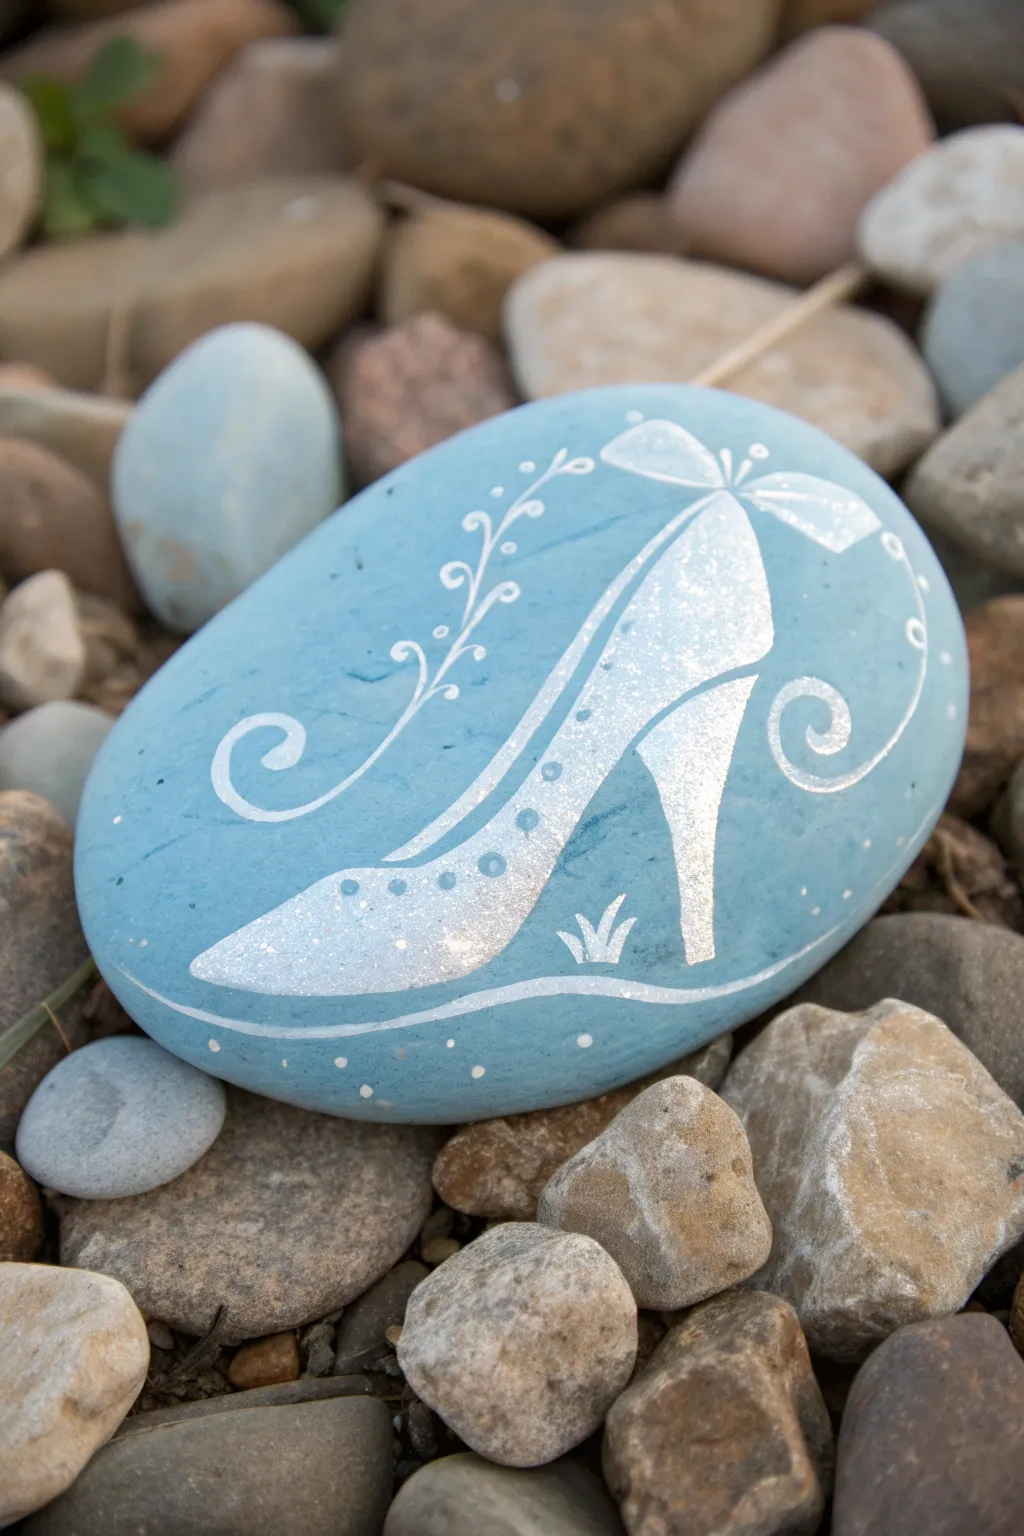
Transform a smooth river rock into a magical tribute to Cinderella with this elegant glass slipper design. The powder blue background perfectly offsets the shimmering silver glitter, creating a fairy-tale piece that sparkles just like the iconic shoe.
Step-by-Step
Materials
- Smooth, oval-shaped river rock (approximately palm-sized)
- Acrylic paint: Powder Blue (or light cyan), White
- Silver glitter paint or fine silver glitter glue
- Paintbrushes: Wide flat brush (for base coat), fine liner brush (for details)
- Pencil (white charcoal pencil preferred) or chalk
- Dotting tool or toothpick
- Spray sealer or varnish (gloss finish recommended)
Step 1: Preparing the Canvas
-
Clean and Dry:
Begin by thoroughly washing your rock with soap and warm water to remove any dirt or oils. Let it dry completely in the sun or use a hairdryer to speed things up. -
Base Coat Application:
Load your wide flat brush with powder blue acrylic paint. Apply a smooth, even coat over the entire top surface of the rock. You might need a second coat once the first is dry to ensure the natural rock color doesn’t peek through. -
Allow to Cure:
Let the blue base coat dry fully. If the paint is tacky, your pencil sketch in the next step might dig into the surface.
Step 2: Sketching the Slipper
-
Outline the Shape:
Using a white charcoal pencil or a light touch with a regular pencil, lightly sketch the outline of a high-heeled shoe. -
Add the Heel:
Draw a slender, tapering heel extending downwards from the back of the shoe shape. Make sure it looks balanced. -
Draw the Bow:
At the back of the shoe’s opening (the heel cup), sketch a simple two-loop bow shape.
Shaky Hands?
If painting fine swirls is difficult, use a silver or white fine-point paint pen instead of a brush. It offers much more control for detailed lines.
Step 3: Painting the Design
-
Fill the Slipper:
Using a small round brush or liner brush, fill in the slipper shape with white acrylic paint. This acts as a primer for the glitter and makes it pop. -
Outline in White:
Once the filled area is dry, go over the outline again with fresh white paint to make the edges crisp. Define the separate sections of the bow carefully. -
Add Silver Sparkle:
Apply a layer of silver glitter paint or glitter glue strictly over the white painted slipper area. I find dabbing it on rather than brushing helps build up a denser sparkle effect. -
Decorative Dots:
Dip a dotting tool or the non-brush end of your paintbrush into blue paint (the same shade as your background). Add a curved line of small dots running along the side of the slipper for texture.
Midnight Magic
Paint the background a dark midnight blue or purple instead of light blue. The silver slipper will pop dramatically against the darker night-sky tone.
Step 4: Magical Flourishes
-
Front Swirls:
Load your fine liner brush with white paint thinned slightly with water. Starting near the toe of the shoe, paint a delicate vine-like swirl curving upward and away. -
Back Swirls:
Create a matching swirl extending from the back of the heel, curling outward to frame the shoe. -
Tiny Leaves:
Along the main swirl lines, paint tiny, tear-drop shaped leaves or simple dashes to resemble a magical vine. -
Grounding Line:
Paint a thin, curved white line underneath the shoe to ground it, so it doesn’t look like it’s floating in space. -
Grass Tuft:
Add three small vertical strokes intersecting near the bottom center to create a tiny tuft of grass near the heel. -
Final Sparkles:
Using the tip of a toothpick and white paint, add tiny scattered dots around the background to represent magical dust or stars.
Step 5: Finishing Touches
-
Clean Up:
Check your design for any pencil marks that might still be visible. If the paint is fully dry, you may be able to gently erase them or touch them up with blue paint. -
Seal the Magic:
Once all paint and glitter are completely dry (give glitter extra time), spray the rock with a clear gloss sealer to protect it and enhance the shine.
Place this enchanting rock in your garden or gift it to someone who needs a little fairy godmother magic in their life
Disney-Inspired Pumpkin Carriage Night Scene Rock
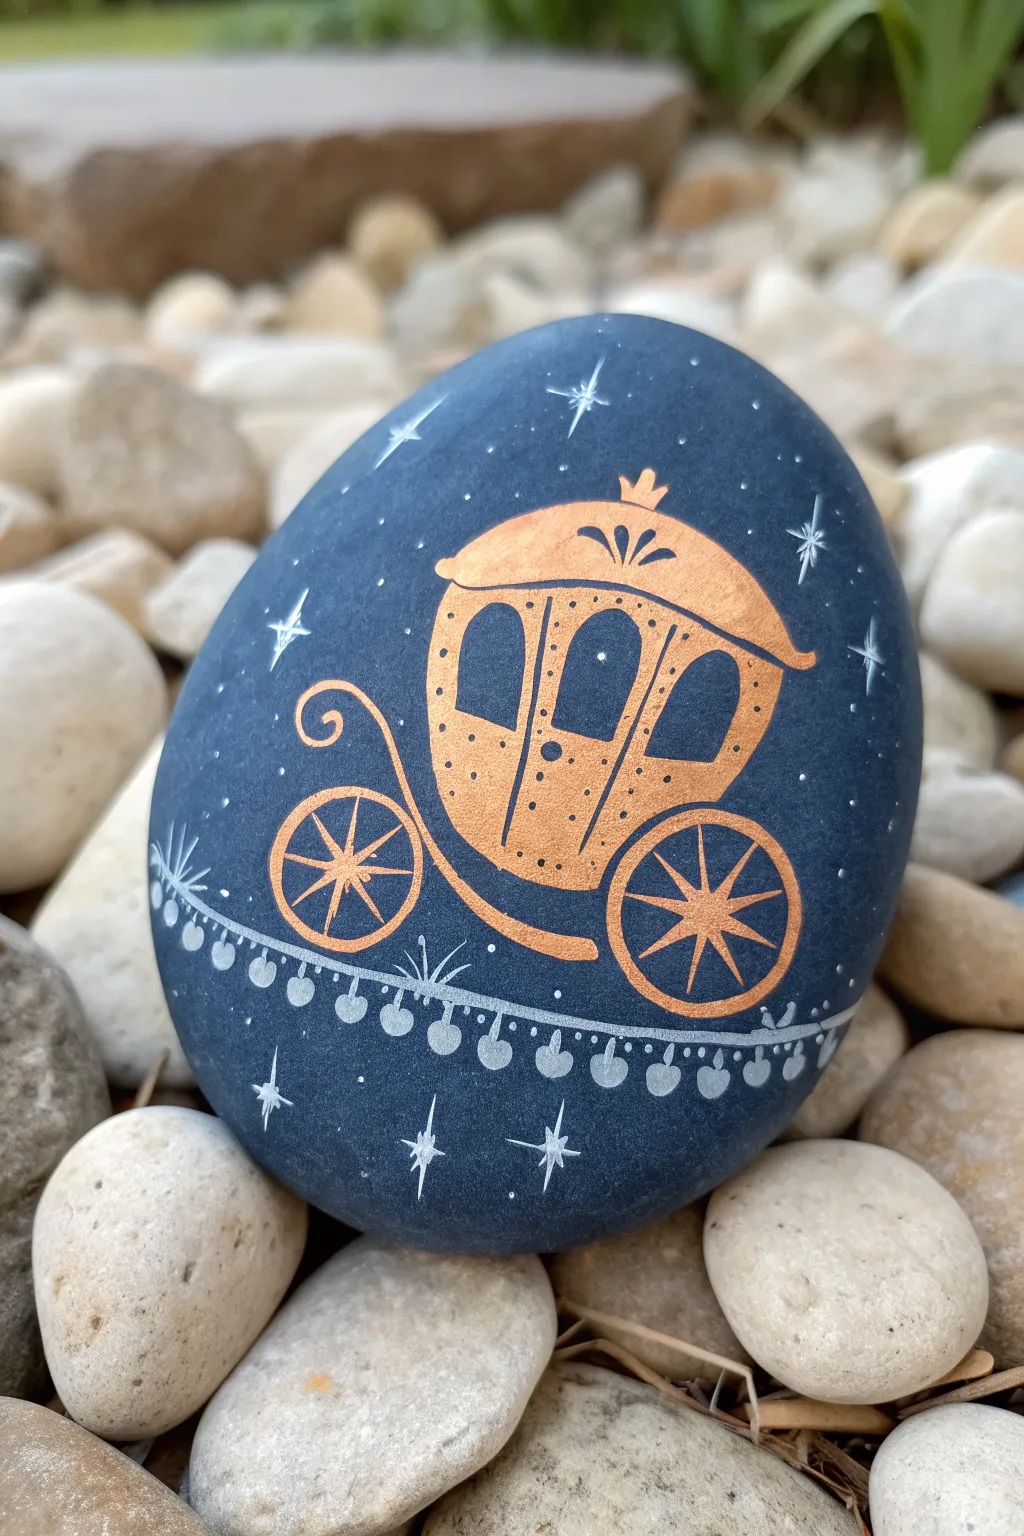
Capture the magic of a fairytale evening with this elegant rock painting design featuring Cinderella’s pumpkin carriage. The striking contrast between the matte midnight blue background and the metallic copper silhouette creates a sophisticated scene fit for royalty.
How-To Guide
Materials
- Smooth oval river rock
- Matte dark navy blue acrylic paint
- Metallic copper or bronze acrylic paint (or paint pen)
- White extra-fine tip paint pen (0.7mm or smaller)
- Wide flat paintbrush
- Fine detail paintbrush (size 0 or 00)
- Pencil for sketching
- Spray sealer or varnish (gloss or matte)
Step 1: Setting the Midnight Scene
-
Prep your canvas:
Begin by washing your rock with soap and water to remove any dirt or oils. Let it dry completely before you start painting. -
Base coat application:
Using a wide flat brush, coat the entire top surface of the rock with dark navy blue acrylic paint. You want a deep, velvety midnight sky look. -
Second layer:
Once the first coat is dry to the touch, apply a second coat of navy blue to ensure full opacity. Dark colors often need two layers to prevent streaks. -
Let it cure:
Allow the blue background to dry completely. I like to wait at least 30 minutes here, as drawing on tacky paint will ruin the metallic finish later.
Step 2: Sketching the Carriage
-
Outline the pumpkin shape:
Lightly sketch the carriage shape in pencil. Start with a large, slightly flattened oval in the center of the rock for the main cabin. -
Add the roof and wheels:
Draw the curved roof lid on top. Then, sketch two circles below the carriage for the wheels—make sure the rear wheel is slightly larger than the front one to mimic that classic fairytale style. -
Connect the curves:
Sketch the curved lines connecting the wheels to the carriage body and add the little stem detail on the very top.
Clean Lines Hack
If your hand is shaky on the wheels, use a circular stencil or trace a bottle cap with a pencil first to get effortless perfect circles.
Step 3: Painting the Metallic Magic
-
Fill the main body:
Using your metallic copper paint and a fine detail brush (or a copper paint pen for easier control), fill in the main pumpkin shape and the roof lid. -
Paint the wheels:
Trace the outer circles of your wheels with the copper. Then, carefully paint the spokes, creating a starburst pattern inside each wheel. -
Add the scrolling details:
Paint the elegant scrolls that connect the wheels Use a very light touch here to keep the lines fluid and delicate. -
Define the windows:
Once the copper is dry, go back in with your navy blue paint (or simply paint *around* these spots initially) to create three window openings on the carriage body. -
Add carriage details:
Using a very fine dark liner or the navy paint, add the vertical separation lines on the carriage door and the tiny dots that act as rivets or decorations along the seams.
Add Real Sparkle
Before the sealer dries, sprinkle just a pinch of ultra-fine champagne or silver glitter on the stars for a magical 3D effect.
Step 4: Sparkles and Finishing Touches
-
Draw the ground line:
Take your white extra-fine paint pen and draw a straight horizontal line beneath the wheels to ground the carriage. -
Add the decorative fringe:
Below your white line, draw tiny vertical ticks, and add small dots at the end of each tick to create a decorative, rug-like fringe or grass effect. -
Create the stars:
Scatter different sized stars across the blue sky. Draw simple crosses with elongated vertical lines to make them look like twinkling North stars. -
Add subtle stardust:
Dot tiny specks of white paint randomly around the carriage and larger stars to give the sky depth and texture. -
Highlight the carriage:
Add tiny white highlights to the top of the wheels and the curve of the roof to make the metal look shiny and reflective. -
Seal the magic:
Once absolutely everything is dry, finish with a clear spray sealer to protect your artwork from the elements.
Now you have a timeless piece of fairytale art that fits right in the palm of your hand

PENCIL GUIDE
Understanding Pencil Grades from H to B
From first sketch to finished drawing — learn pencil grades, line control, and shading techniques.
Explore the Full Guide
Disney-Inspired Lion Cub Face Rock
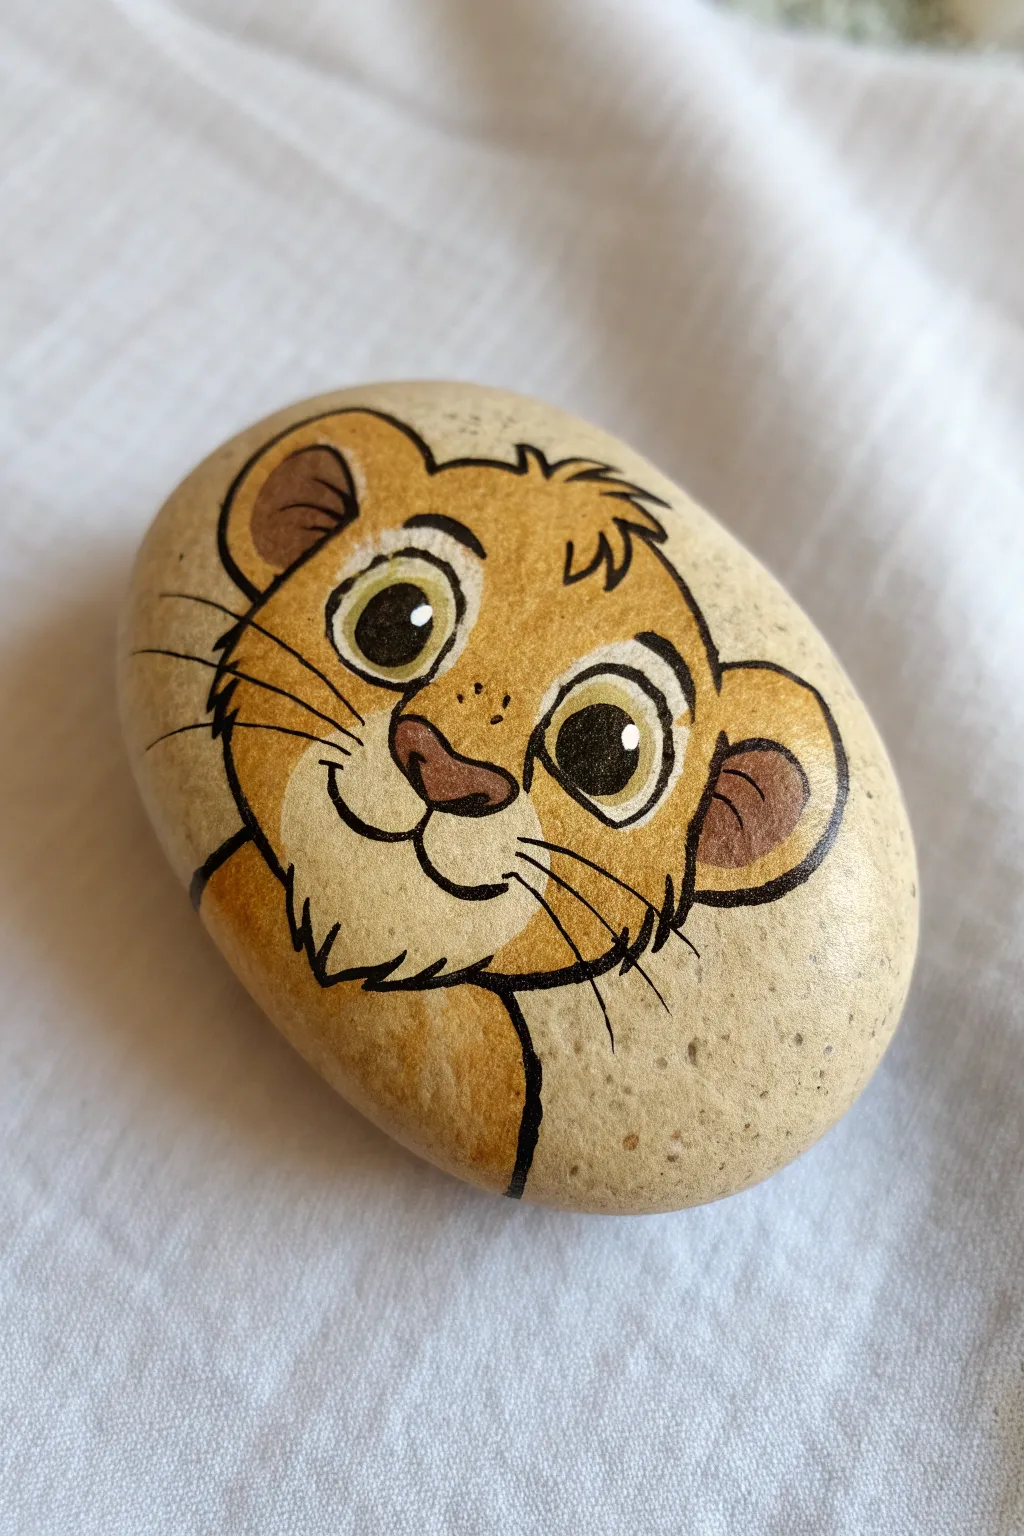
Bring the Pride Lands to your garden with this adorable hand-painted rock featuring a young lion cub’s expressive face. The natural tan color of the stone serves as a perfect backdrop, minimizing the amount of background painting needed for a clean, organic look.
Step-by-Step
Materials
- Smooth, oval river rock (light tan or beige color is ideal)
- Pencil and eraser
- Acrylic paints (golden yellow, cream/light beige, dark brown, reddish-brown, white, black, moss green)
- Fine liner brushes (sizes 0 and 00)
- Black Posca paint marker (extra fine tip) or micron pen
- Matte or glossy spray varnish
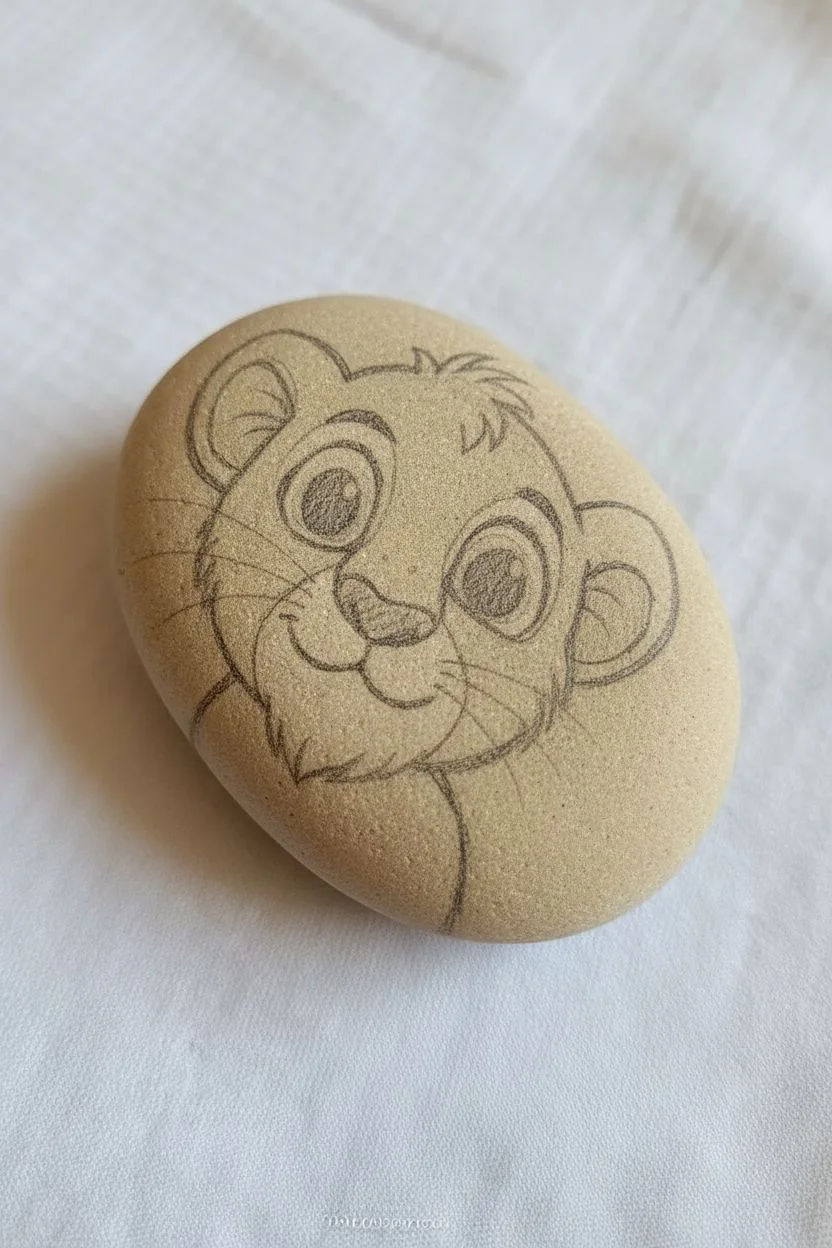
Step 1: Sketching the Cub
-
Clean your canvas:
Begin by scrubbing your rock with warm soapy water and letting it dry completely to ensure the paint adheres properly. -
Map the face shape:
Using a light pencil, sketch a large circle for the head slightly off-center on the rock. Add two smaller semi-circles on the sides for ears. -
Define the features:
Draw the heart-shaped nose area first to anchor the face. From there, sketch the large oval eyes, the muzzle area, and the chin fluff. -
Refine the details:
Lightly sketch the tuft of hair on top of the head and the inner ear shapes. Don’t press too hard with the pencil, as graphite can sometimes smudge into yellow paint.
Fixing Shaky Lines
If your black outline gets wobbly or too thick, wait for it to dry completely. Then, use the original fur color paint to carefully paint over the mistake and reshape the line from the outside.
Step 2: Blocking in Color
-
The golden coat:
Mix a golden yellow with a tiny drop of brown. Paint the main face area, the outer ears, and the neck/shoulder area. You may need two coats for opacity. -
Light accents:
Mix a cream color using white and a touch of your golden yellow. Paint the muzzle area (around the mouth and chin) and the circles around the eyes. -
Inner ears:
Fill in the inner ear shapes with a medium brown shade. This creates depth and distinguishes the ear structure. -
The nose:
Paint the nose with a reddish-brown or terracotta mix. It should be darker than the fur but warmer than the outlines. -
Eye whites:
Carefully paint the sclera (white part) of the eyes with pure white paint. Let this layer dry completely before moving on.
Make It Pop
Add a thin, white gel pen highlight along the top edge of the nose and the top of the ear tufts to simulate a light source hitting the character from above.
Step 3: Adding Life and Details
-
The irises:
Paint the irises with a muted moss green or yellow-green. Keep the shape round but slightly cut off by the upper eyelid. -
Pupils:
Using black paint and a very fine brush, add the large black pupils in the center of the green irises. -
Sparkle of life:
Dip the non-brush end of your paintbrush into white paint and dot a small highlight onto the upper right side of each pupil. This makes him look awake and alert. -
Shading the fur:
I like to take a slightly darker shade of the golden fur color and gently glaze the bottom of the cheeks and under the chin for subtle dimension.
Step 4: The Defining Lines
-
Main outlines:
Using your black paint marker or a liner brush with thinned black paint, trace over all your pencil lines. Start with the main face shape and ears. -
Facial features:
Outline the eyes, nose, and mouth. Make the lines slightly thicker on the upper eyelids to simulate lashes. -
Whisker spots:
Add three small dots on each side of the muzzle using the very tip of your marker. -
Whiskers:
With a quick, confident flick of the wrist, draw three to four long, thin whiskers extending from the muzzle spots. -
Fur texture:
Add small jagged lines at the chin and the top tuft to suggest fur texture rather than a smooth line. -
Sealing:
Once the black ink is fully dry (wait at least an hour to prevent smearing), spray the rock with a clear varnish to protect your artwork from the elements.
Place your little lion among some green plants to give him his very own jungle kingdom
Disney-Inspired Reef Fish Duo Story Stones
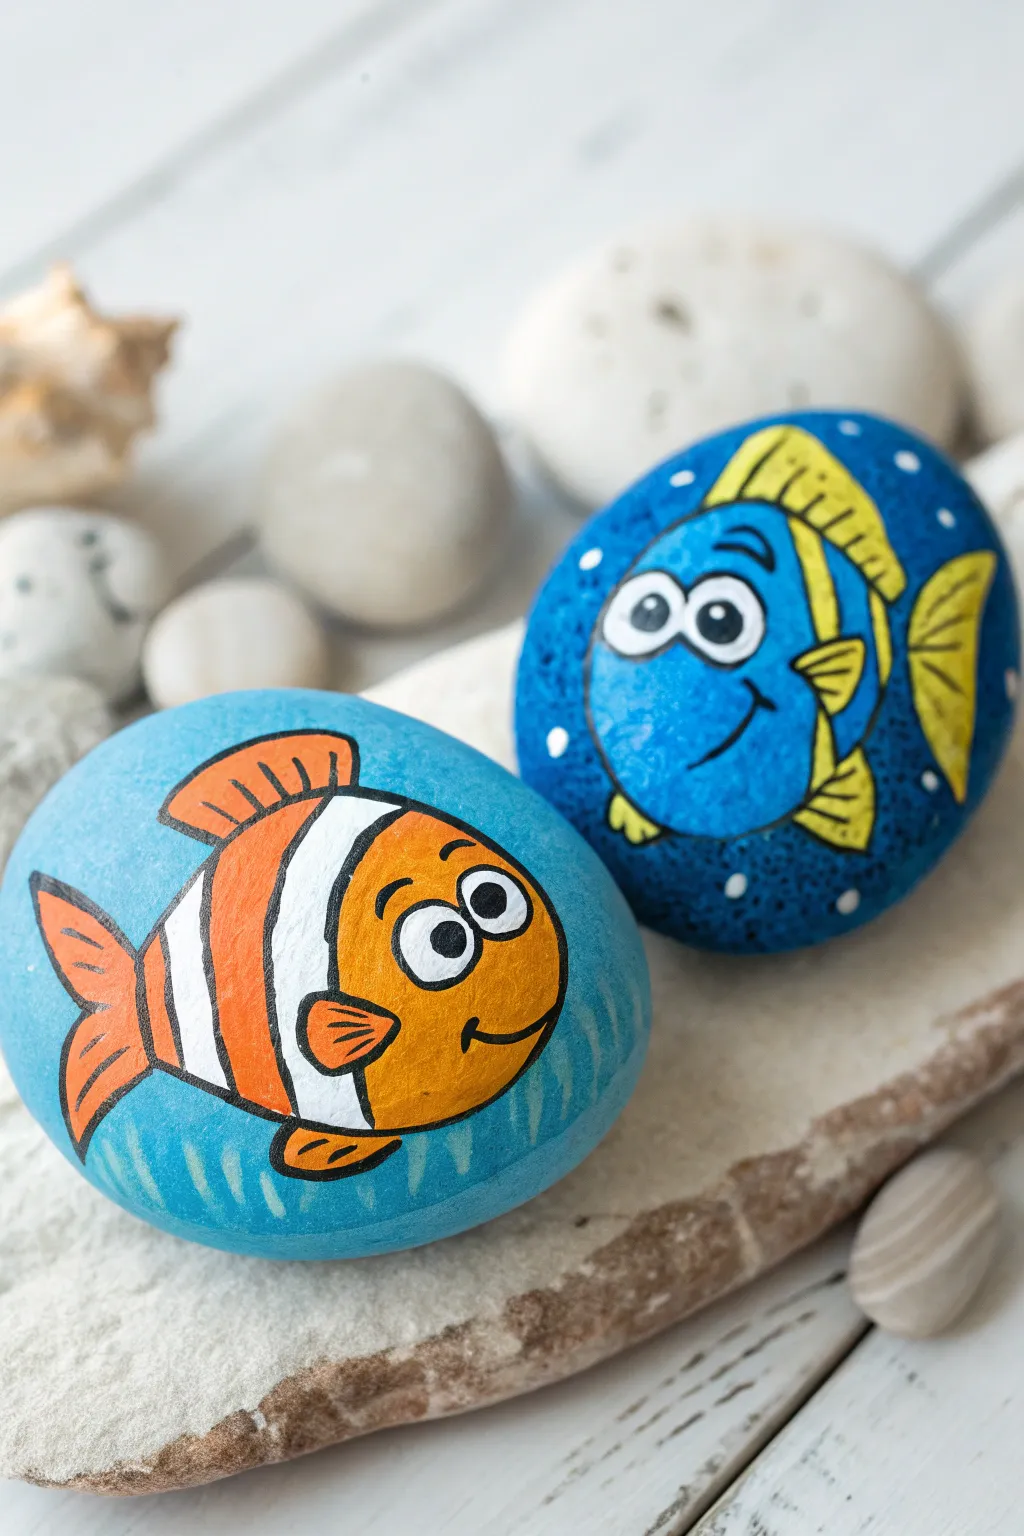
Bring the ocean to life with these vibrant, hand-painted stones featuring your favorite forgetful blue tang and adventurous clownfish. These cheerful characters are painted on smooth river rocks against deep blue backgrounds, perfect for hiding in parks or brightening up a garden planter.
How-To Guide
Materials
- Smooth, rounded river stones (palm-sized is ideal)
- Acrylic paints: Bright Orange, White, Black, Deep Blue (Cobalt), Light Blue (Sky), Yellow
- Poscas or acrylic paint pens (optional, for fine lines): Black (fine tip), White (extra fine tip)
- Paintbrushes: various sizes (flat shader for base, round #2 for details, liner brush)
- Pencil for sketching
- Gloss varnish or clear sealant spray
- Palette or paper plate
- Water cup and paper towels
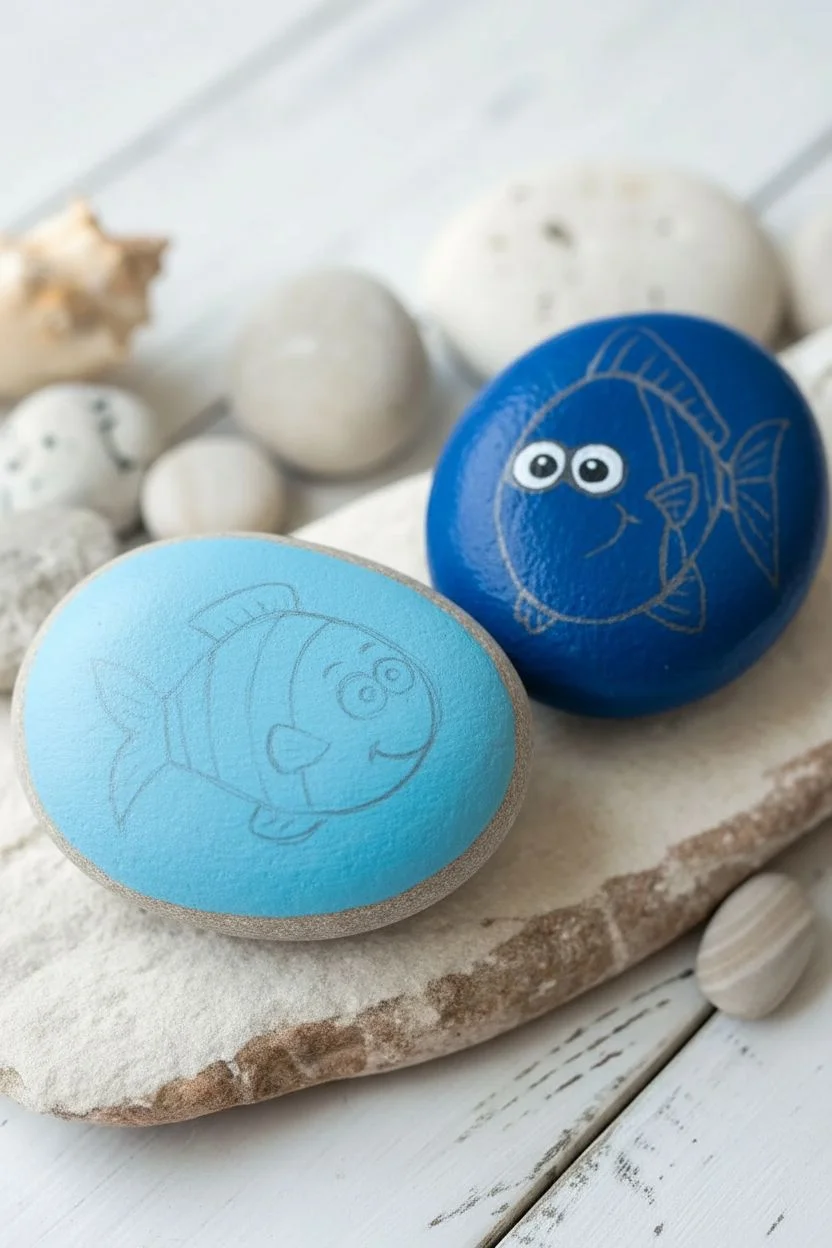
Step 1: Preparation & Base Coating
-
Clean Your Canvas:
Begin by washing your stones with soap and water to remove any dirt or oils. Let them dry completely, or speed up the process with a hairdryer if you’re eager to start. -
Apply the Base Colors:
For the clownfish stone, paint a large oval shape in a light sky blue to serve as the water background. For the blue tang stone, paint the entire rock face with a deep cobalt blue. Depending on your paint’s opacity, you might need two coats for solid coverage. -
Sketch the Outlines:
Once the base coats are bone dry, lightly sketch the fish shapes with a pencil. For the clownfish, draw a round body with a tail fin. For the blue tang, draw a taller oval shape with dorsal and pectoral fins.
Step 2: Painting the Clownfish
-
Block in the Orange:
Fill in the head, tail, and middle section of the clownfish with bright orange acrylic paint. Leave two curved vertical bands unpainted for the white stripes. -
Add the White Stripes:
Carefully paint the reserved bands with pure titanium white. Make sure the orange is dry first so the colors don’t smear together into a muddy peach. -
Facial Features:
Paint two large white circles for the eyes. Once dry, add smaller black pupils looking slightly upward and to the right for a playful expression. -
Black Outlining:
Using a fine liner brush or a black paint pen, outline the entire fish. Add thick black lines separating the white stripes from the orange body, and outline the fins to give them definition. -
Fin Details:
Add small lines inside the orange tail and side fin to suggest texture. -
Sea Grass Accents:
Mix a tiny bit of white into your main blue color to create a slightly lighter shade. Use short, upward strokes at the bottom of the stone to create subtle seagrass effects.
Fixing Shaky Lines
If your black outlines look wobbly, wait for them to dry fully. Then, take the original color (orange or blue) and carefully paint over the wobbly edge to ‘cut back’ and sharpen the line.
Step 3: Painting the Blue Tang
-
Create the Body Shape:
Since the background is already dark blue, mix a lighter, brighter blue (add white to your cobalt blue) and paint the main body shape of the fish so it stands out against the dark water. -
Yellow Accents:
Paint the dorsal fin (top), pectoral fin (side), and tail fin in a bright, sunny yellow. The yellow may need two coats to look vibrant over the blue background. -
Expressive Eyes:
Paint two large, connecting white ovals for the eyes. Add black pupils—I like to make one pupil slightly larger than the other to capture that goofy, lovable personality. -
Defining Lines:
Use your black paint pen or liner brush to outline the fish. Draw the curved line for the classic wide smile and add the distinguishing black markings on the side of the body. -
Fin Texture:
Add simple black lines across the yellow fins to show the ribs of the fins.
Level Up: Glow in the Dark
For a magical night-time effect, paint the white stripes of the clownfish or the bubbles with phosphorescent glow-in-the-dark acrylic paint. They will shine after charging in the sun!
Step 4: Highlights & Sealing
-
Eye Sparkles:
This is crucial for bringing them to life: dip the very tip of a brush handle or a toothpick into white paint and add a tiny white dot to the black pupil of each eye. This ‘catchlight’ makes them look wet and shiny. -
Bubble Details:
On the darker blue stone, use a dotting tool or brush handle to add small white dots around the fish to represent bubbles rising to the surface. -
Final Varnish:
Wait at least 24 hours for the paint to cure completely (or use a hairdryer on low heat). Apply a coat of glossy varnish or spray sealer to protect your artwork from the elements and give it that ‘underwater’ shine.
Enjoy finding the perfect spot for your colorful underwater friends to live


Disney-Inspired Mermaid Silhouette on Black Rock
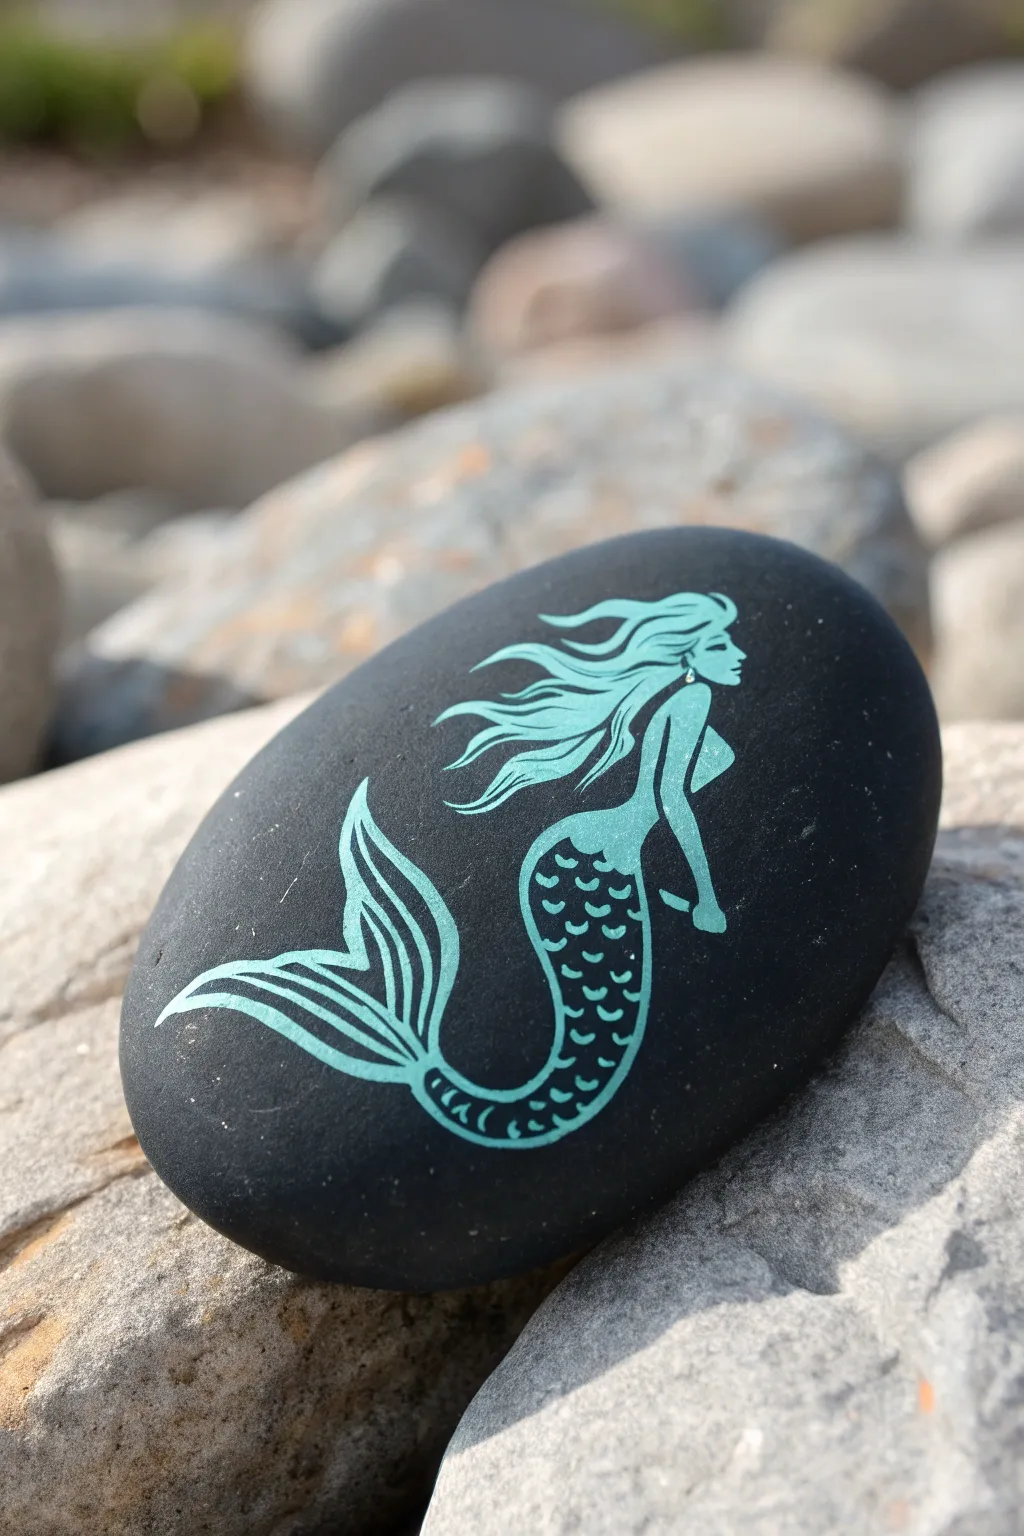
Capture the magic of the ocean with this elegant rock painting project featuring a striking teal mermaid silhouette against a matte black background. This high-contrast design creates a sophisticated look that pairs beautiful simplicity with intricate details in the tail and hair.
Step-by-Step
Materials
- Smooth, flat river rock (oval shape works best)
- Matte black acrylic paint
- Teal or seafoam green acrylic paint (opaque)
- White charcoal pencil or chalk
- Fine detail brush (size 00 or 000)
- Small flat brush
- Spray sealer (matte or satin finish)
- Graphite transfer paper (optional)
- Pencil (optional)
- Printed mermaid silhouette template
Step 1: Preparation & Base Coat
-
Clean the surface:
Before you begin, scrub the rock thoroughly with soap and water to remove any dirt or oils that might repel the paint. Let it dry completely in the sun or with a hairdryer. -
Apply the black base:
Using your flat brush, coat the entire top surface of the rock with matte black acrylic paint. I usually apply two thin coats rather than one thick one to ensure a smooth, streak-free fiinish. -
Full drying time:
Allow the black base coat to cure fully for at least 30 minutes. If the paint is tacky, your sketch lines or stencils will dig into it and ruin the texture.
Step 2: Sketching the Silhouette
-
Choose your method:
You can either sketch the mermaid freehand if you’re confident, use graphite transfer paper with a printed design, or create a simple stencil. For beginners, the transfer paper method yields the sharpest results. -
Position the design:
Place your printed mermaid template on the center of the rock. Tape it lightly on the edges if needed to keep it from shifting. -
Trace the outline:
Trace over the design lines with a pencil, pressing firmly enough to transfer the image onto the black paint. Focus on the main shapes: the flowing hair, the curved torso, and the sweeping tail. -
Refine with chalk:
Lift the paper and lightly go over faint lines with a white charcoal pencil or chalk. This makes the design visible against the dark background without leaving permanent marks.
Paint too thick?
If your fine lines are clumping, mix a tiny drop of water or flow medium into your teal paint. Inky consistency flows better for hair and scales.
Step 3: Painting the Mermaid
-
Outline the body:
Load your fine detail brush (size 00) with teal paint. Look for a consistency like heavy cream; if it’s too thick, add a drop of water. Carefully outline the torso, arms, and head. -
Fill the torso:
Fill in the upper body solid teal. This area needs to be opaque, so you might need a second layer once the first is dry. -
Detail the hair:
Paint the hair in wispy, flowing strokes. Start from the head and flick the brush outward to create tapered ends that look like they are floating underwater. -
Outline the tail:
Paint the long, curved outline of the tail, ending in the flukes. Keep your hand steady and rest your pinky finger on a dry spot of the rock for stability. -
Create the fluke lines:
Inside the tail fin, paint thin, curving lines that follow the shape of the flukes to suggest texture and movement.
Make it shimmer
Use metallic teal or mix a pinch of iridescent medium into your paint to give the mermaid a magical, shimmering tail that catches the light.
Step 4: Adding Scales & Details
-
Start the scales:
For the scales on the main tail section, paint small ‘U’ shapes or tiny crescent moons. Start near the waist and work your way down. -
Vary scale sizes:
Make the scales slightly larger near the top and smaller as the tail tapers down toward the fins. This adds realistic dimension to the silhouette. -
Face profile:
Very carefully refine the profile of the face. A sharp nose and chin are crucial for a recognizable silhouette. Use the very tip of your smallest brush. -
The bra detail:
Paint the small seashell bra shape on the torso. Leave a tiny hairline of black space between the arm and the body to distinguish the limbs.
Step 5: Finishing Touches
-
Cleanup:
Once the teal paint is completely dry, use a damp Q-tip or a soft brush with water to gently wipe away any remaining white chalk or charcoal guidelines. -
Check opacity:
Inspect your teal paint. If the black is showing through too much, carefully go over the solid areas (like the body and thick hair strands) with a second coat. -
Seal the artwork:
Take the rock outside and apply a coat of spray sealer. A matte finish keeps the elegant stone look, while a gloss finish will make it look wet like a real river rock.
Place this enchanting stone in your garden or on a bookshelf to bring a splash of mystical ocean vibes to your decor
Disney-Inspired Honey Pot and Bear Face Rock
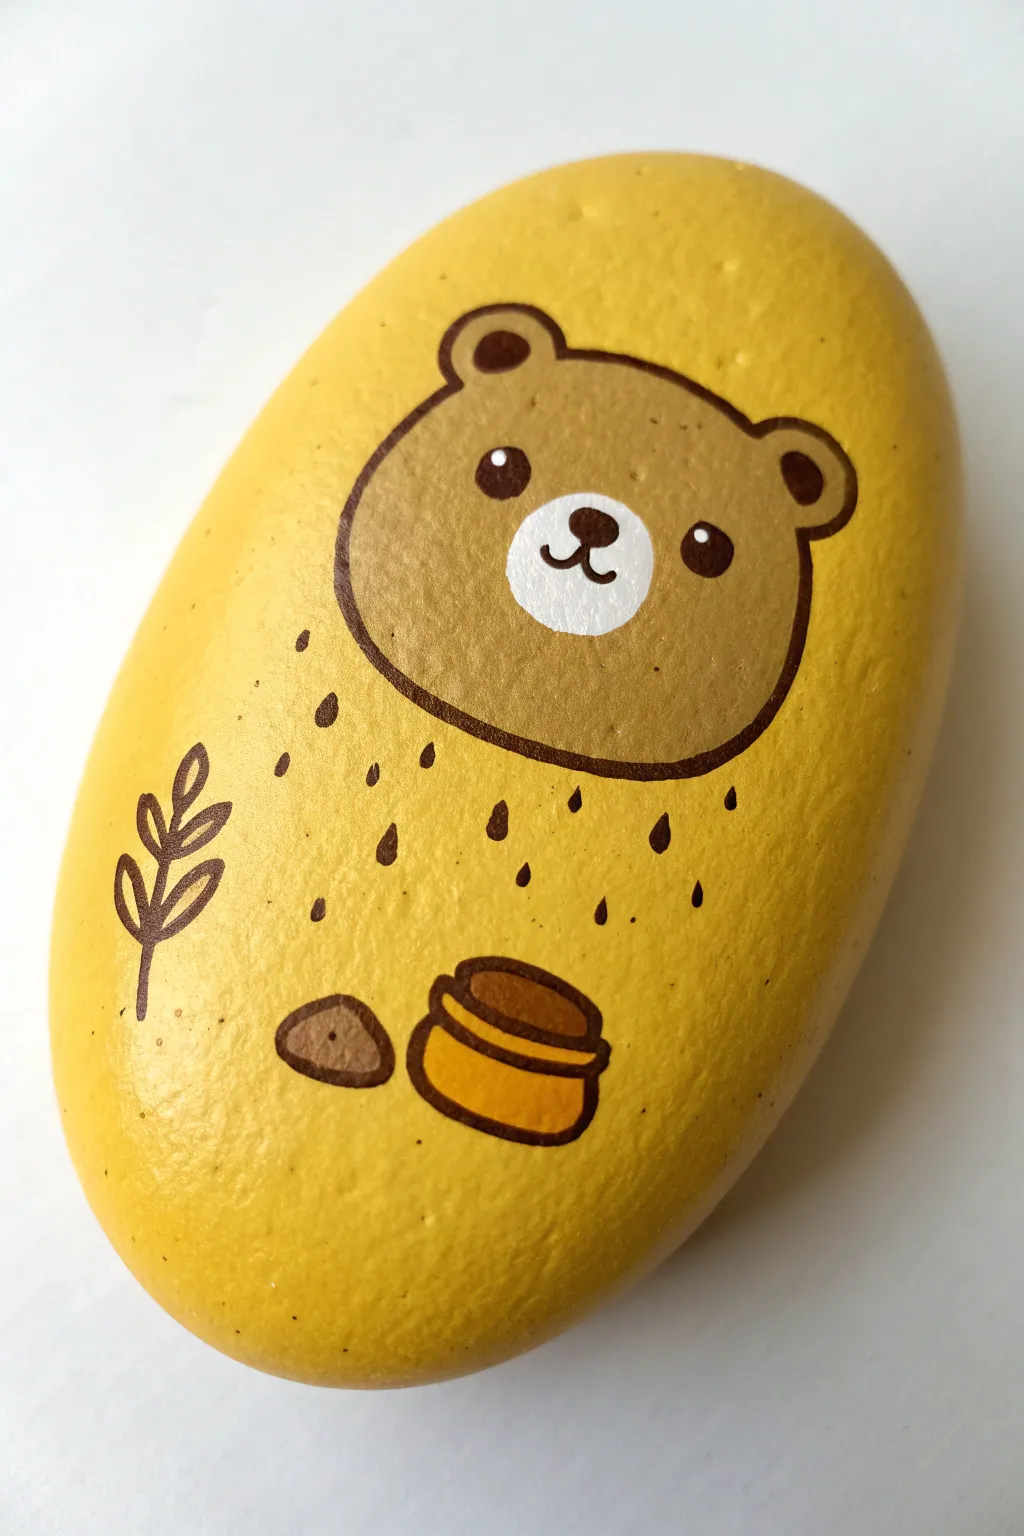
Transform a simple river stone into this adorable, golden-hued bear scene inspired by everyone’s favorite honey-loving cub. With its cheerful yellow background and simple cartoon lines, this painted rock brings a touch of whimsy to any garden or desk.
Step-by-Step Tutorial
Materials
- Smooth, oval river rock (about palm-sized)
- Yellow acrylic paint (bright sunshine shade)
- Light brown/tan acrylic paint
- Dark brown acrylic paint
- White acrylic paint
- Golden yellow or ochre acrylic paint
- Fine liner brush (size 00 or 0)
- Small flat brush (size 4 or 6)
- Pencil for sketching
- Gloss varnish or sealant (spray or brush-on)
- Palette or paper plate
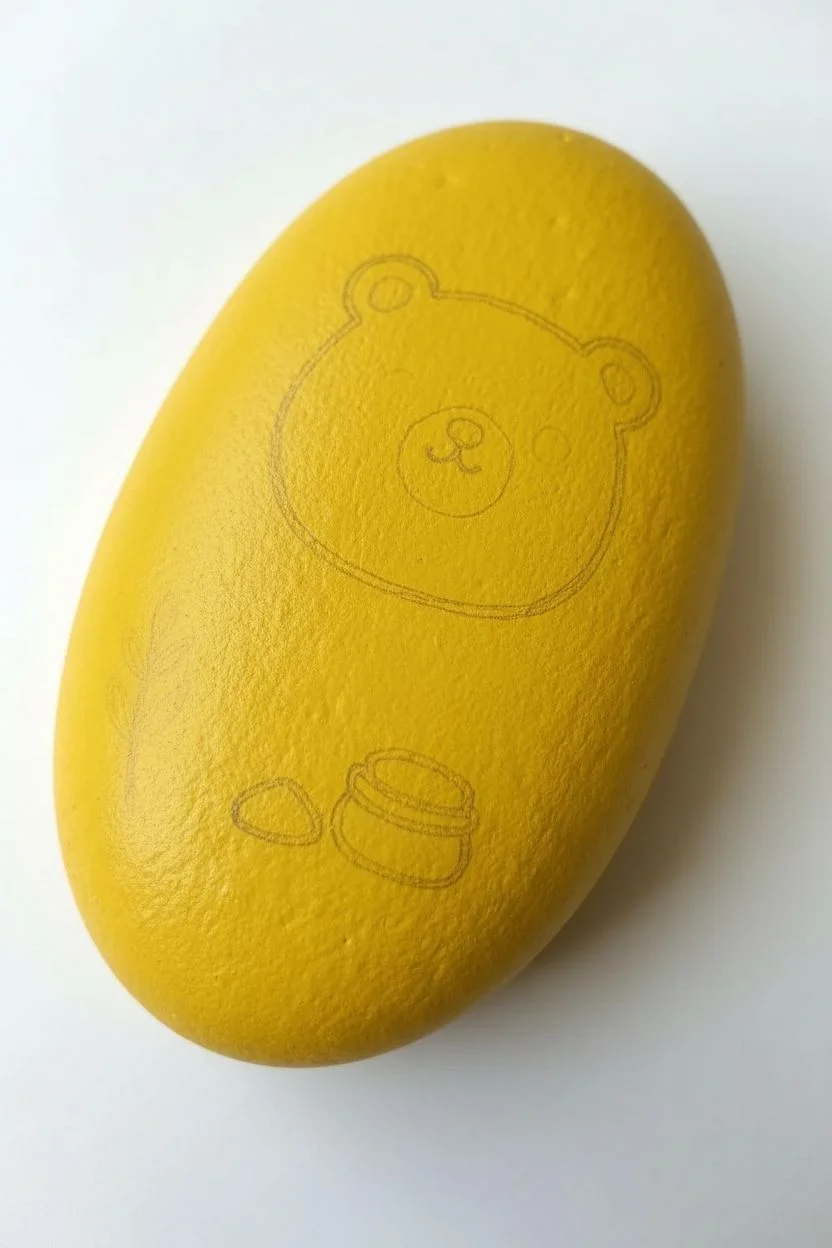
Step 1: Base and Sketch
-
Prepare the canvas:
Begin by washing your rock with soap and water to remove any dirt or oils. Let it dry completely before starting. -
Apply the base coat:
Using your flat brush, coat the entire top surface of the rock with bright yellow acrylic paint. You may need 2-3 coats to get a solid, opaque coverage. Let each layer dry fully before adding the next. -
Rough sketch:
Once the yellow base is bone dry, lightly sketch your design with a pencil. Draw a large oval shape near the top for the bear’s head and a small pot shape near the bottom. Don’t press too hard; you just need a guide.
Base Paint Trouble?
If your yellow base looks streaky, don’t rush. Apply thin coats and let them dry fully. Thick wet layers just push paint around.
Step 2: Painting the Main Elements
-
Paint the bear’s head:
Mix a soft, light brown or tan color. Use a small round brush to fill in the oval shape for the bear’s head. Add two small semi-circles on top for the ears. -
Add the honey pot:
For the honey pot at the bottom, use a golden yellow or ochre shade to paint the main body of the pot. Paint a small oval lid area on top in a slightly darker brown. -
Paint the snout area:
Moving back to the bear, paint a small white oval in the lower center of the face for the snout. This creates that classic cartoon bear expression. -
Add the pebble:
To the left of the honey pot, paint a small, rounded rock shape using a greyish-brown color. -
Wait for drying:
It is crucial to let these color blocks dry completely before moving on to the outline work to prevent smudging.
Steady Hand Trick
For those super fine outlines, rest your pinky finger on the dry part of the rock to stabilize your hand while painting.
Step 3: Detailing and Outlining
-
Outline the head:
Switch to your finest liner brush and dark brown paint. Carefully outline the bear’s head and ears. Keep your hand steady and the brush vertical for the thinnest line. -
Draw the facial features:
Using the dark brown paint, add two small circles for eyes. I like to place them wide apart for a cuter look. Paint a rounded triangle nose inside the white snout area and add a small ‘w’ shape for the mouth. -
Ear details:
Paint small dark brown semi-circles inside the ears to give them dimension. -
Eye highlights:
Dip the very tip of a toothpick or a detail brush into white paint and add a tiny dot to each eye. This ‘sparkle’ brings the character to life. -
Define the honey pot:
Outline the honey pot with your dark brown liner. Draw a rim around the top and a curved line for the lid to make it look 3D. -
Draw the leaf:
On the left side of the rock, paint a simple stem with leaves using the dark brown paint. Draw a vertical line and add small loops on either side. -
Add the rain texture:
Fill the empty yellow space between the bear and the pot with tiny teardrop shapes in dark brown. These represent rain or perhaps drops of honey, adding texture to the background.
Step 4: Finishing Touches
-
Clean up lines:
If any outlines look shaky, you can tidy them up by carefully painting over mistakes with the original background color once the dark paint is dry. -
Seal the rock:
Once you are certain the paint is 100% dry (give it a few hours just to be safe), apply a layer of gloss varnish. This protects your artwork from the elements and gives it a professional shine.
Now you have a charming little keepsake that captures the sweetness of classic storybook characters
Disney-Inspired Grinning Cat Stripe Rock
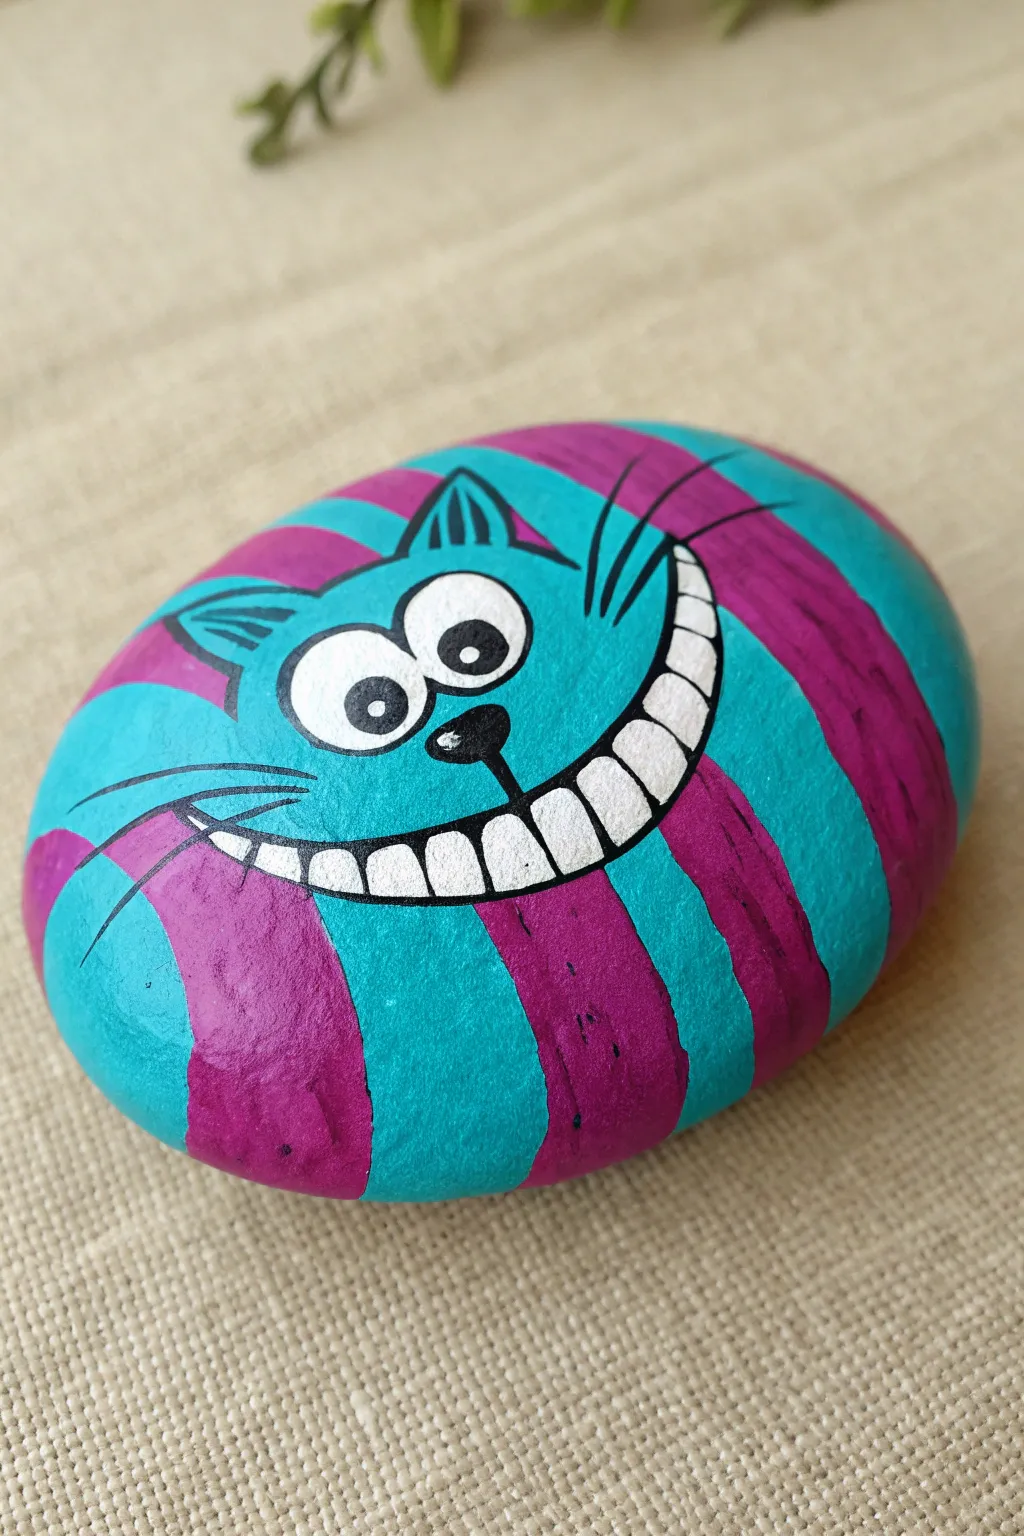
Capture the mischievous charm of Wonderland with this vibrant painted rock featuring everyone’s favorite grinning feline. The bold teal and purple stripes wrap around the stone, creating a seamless and whimsical design perfect for hiding in the garden or displaying on a shelf.
Detailed Instructions
Materials
- Smooth, oval-shaped river rock
- Teal acrylic paint (e.g., turquoise or aqua)
- Purple acrylic paint (e.g., magenta or violet)
- White acrylic paint
- Black acrylic paint or fine-point paint marker (Posca)
- Flat paintbrush (medium size)
- Detail liner brush (size 0 or 00)
- Pencil for sketching
- Clear varnish or sealant (glossy finish recommended)
Step 1: Base Prep & Sketching
-
Clean the rock:
Begin by washing your stone with warm soapy water and scrubbing away any dirt. Let it dry completely in the sun or use a hairdryer to speed it up. -
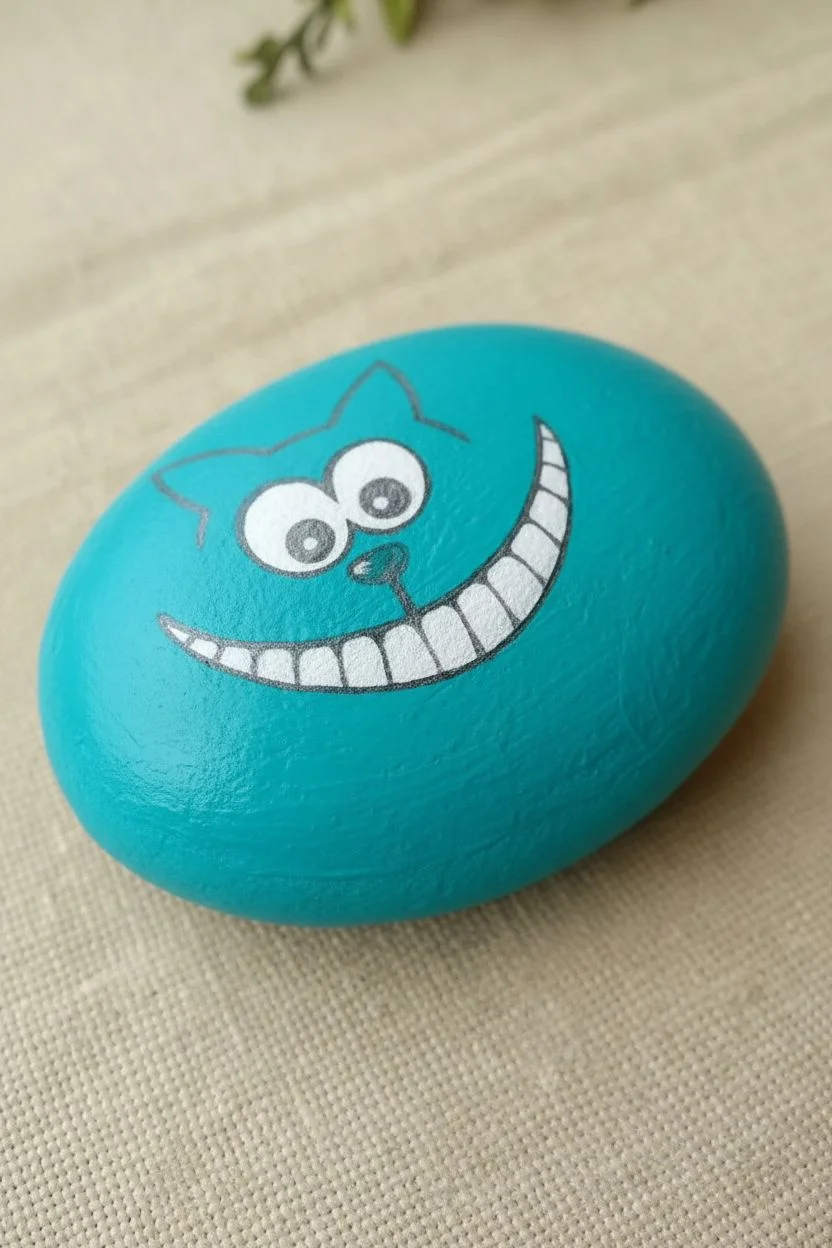
Establish the background:
While many painters start with white, for this vivid design, paint the entire rock with your teal (turquoise) acrylic paint. This acts as one of your two main stripe colors and ensures no bare stone shows through. -
Apply a second coat:
Once the first layer is dry, apply a second coat of teal to get a solid, opaque coverage. Let this dry thoroughly before sketching. -
Outline the face features:
Using a light pencil, sketch the main facial elements centered on the rock. Start with two large oval eyes, slightly touching or overlapping. Below that, draw a small triangular nose. -
Draft the smile:
Curve a large, exaggerated crescent moon shape under the nose for the mouth. This is the cat’s signature feature, so make it wide! Sketch vertical lines inside the crescent to mark where the teeth will be.
Paint Pen Precision
Using a fine-tip black Posca pen is much easier than a brush for the teeth and whiskers. Shake it well before use to ensure opaque lines.
Step 2: Painting the Stripes
-
Sketch the stripe guides:
Draw curved lines radiating outward from the face, wrapping around the sides of the rock. These will be your purple stripes. Leave gaps for the teal background you already painted. -
Fill the purple stripes:
Using a medium flat brush or a large round brush, carefully fill in the stripe sections with purple paint. I find it helpful to turn the rock in my hand as I paint to keep the curves smooth. -
Check opacity:
Purple pigment can sometimes be translucent. If the teal shows through too much, let the first purple layer dry and add a second coat for richness. -
Paint the eyes and teeth:
Switch to a smaller brush and white acrylic paint. Fill in the eyes and the entire crescent shape of the mouth. You will likely need two coats of white to cover the teal background completely.
Step 3: Details & Outlining
-
Outline the eyes:
Once the white paint is bone-dry, use a black paint pen or a very fine liner brush with thinned black paint to outline the eyes. Draw two small black circles inside for pupils. -
Define the nose and ears:
Paint the small triangular nose black. Sketch and paint two small triangles above the eyes for ears using the base colors, then outline them in black. -
Create the grin:
Outline the main mouth shape in black. Then, draw the curved vertical lines inside the white area to create individual teeth. Add a horizontal line through the middle of the teeth to separate upper and lower rows. -
Add whiskers:
With a quick, confident motion, draw three long, thin whiskers extending from each side of the face using your black liner or pen. -
Add texture marks:
For a little extra character, add a few tiny black hatch marks or dots randomly on the purple stripes to simulate fur texture. -
Seal the artwork:
Allow the rock to cure overnight. Finish by applying a glossy spray sealer or brush-on varnish to protect the paint and make the colors pop.
Fixing Wobbly Lines
If your black outline slips, don’t wipe it! Let it dry completely, then paint over the mistake with the original background color (teal or white) to erase it.
Place your finished Cheshire Cat rock in a flower pot or near a tree root where his grin can greet visitors
Disney-Inspired Space Ranger Helmet Badge Rock

Blast off to infinity and beyond with this cleverly designed rock painting project. By using simple geometric shapes and that iconic purple and green color palette, you’ll transform an ordinary stone into a tiny tribute to everyone’s favorite space ranger.
Detailed Instructions
Materials
- Smooth, egg-shaped rock (medium to large size)
- White acrylic paint (heavy body preferred)
- Lime green acrylic paint
- Purple acrylic paint
- Black acrylic paint
- Bright blue acrylic paint
- Orange acrylic paint
- Pencil for sketching
- Set of acrylic paint brushes (flat, filbert, and fine liner)
- Black paint pen or fine marker
- Clear spray sealer (gloss or matte)
Step 1: Base Prep
-
Clean surface:
Begin by scrubbing your rock with soapy water and letting it dry completely to ensure the paint adheres properly. -
Base coat:
Apply a coat of white acrylic paint over the entire rock. Use a wide flat brush for broad strokes. -
Second layer:
Once the first coat is dry, add a second or even third layer of white until the rock’s natural color is completely hidden and the surface looks opaque.
Wobbly Lines?
If painting straight lines on a curved rock is difficult, use thin strips of masking tape or washi tape to block off areas. Press edges down firmly to prevent leaks.
Step 2: Sketching the Design
-
Visor outline:
Using a pencil, lightly draw the large visor shape on the front. It should look like two wide, slanted trapezoids separated by a small gap. -
Side details:
Sketch a large circle on the right side for the helmet’s earpiece mechanism, leaving space inside for smaller details. -
Stripe placement:
Draw faint guidelines for the purple stripe running horizontally above the visor and along the bottom edge of the rock. -
Top stripe:
Mark out a wide vertical stripe running from the forehead area towards the back of the ‘helmet’ for the green section.
Step 3: Color Blocking
-
Lime green sections:
Using a small flat brush, paint the top vertical stripe and the curved section near the bottom right in lime green. You may need two coats for vibrancy. -
Main purple stripe:
Carefully paint the horizontal band above the visor with purple paint. Keep your edges crisp. -
Bottom purple accents:
Paint a thin purple stripe following the very bottom curve of the rock, connecting the design elements. -
Visor base:
Fill in the large visor shapes with solid black paint. Use a filbert brush to get smooth, rounded corners.
Glow in the Dark
Mix glow-in-the-dark medium into your lime green paint. When night falls, the green stripes on his helmet will actually glow like a real spacesuit!
Step 4: Adding Details
-
Earpiece outline:
Use a very fine liner brush with black paint (or a black paint pen) to outline the circle on the side, but don’t close the circle completely; leave gaps as shown in the photo. -
Earpiece vent:
Inside the side circle, draw a small oval and add three small horizontal black lines to create the vent look. -
Green dashes:
On the bottom right green section, paint two small purple rectangles or dashes to mimic the suit’s buttons. -
Helmet buttons:
Add two small dots next to the earpiece using the end of a paintbrush handle: one orange and one purple. -
Chin detail:
Paint a tiny green semi-circle at the very bottom center, outlined with a thin purple strip.
Step 5: Final Touches
-
Visor reflection:
Load a fine liner brush with bright blue paint. Paint a thin ‘X’ or cross shape on the black visor to simulate a glass reflection. -
Text (Optional):
If you have space, use a fine liner brush or green paint pen to write tiny letters like ‘BOU’ on the side green panel. -
Clean up:
check for any smudges or uneven lines. I usually keep a little white paint handy to touch up the background if any colors bled over. -
Sealing:
Once absolutely dry, spray the rock with a clear sealer to protect your space artwork from the elements.
Place your galactic creation in the garden and watch it defend your flower quadrant.
Disney-Inspired Cowboy Hat and Bandana Rock
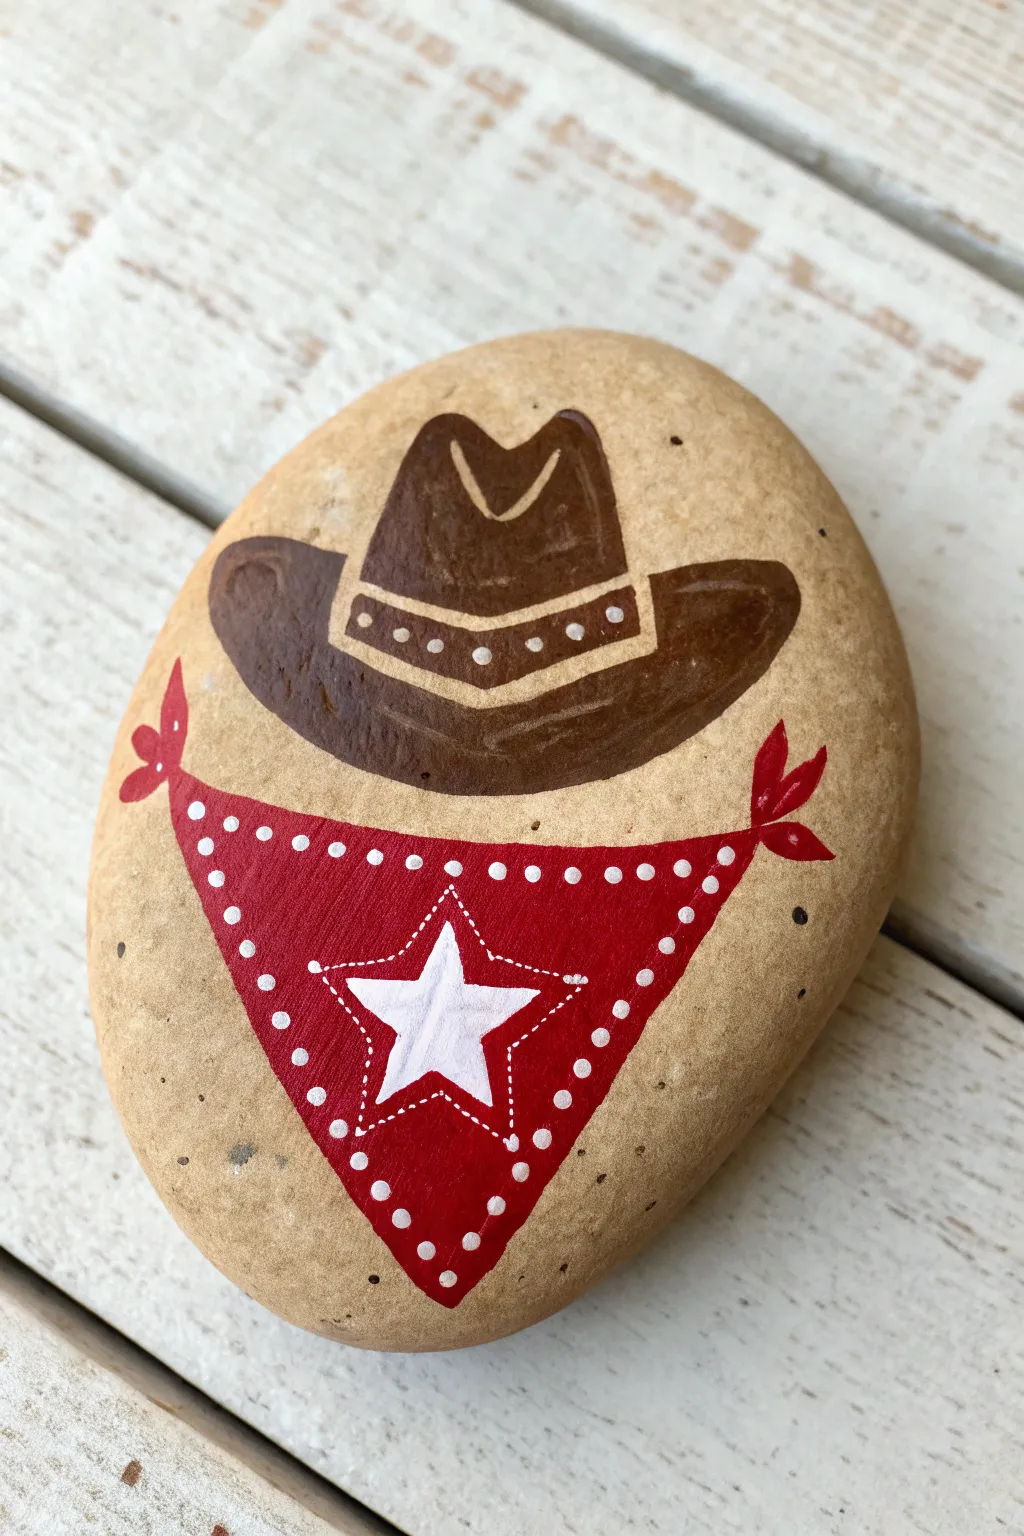
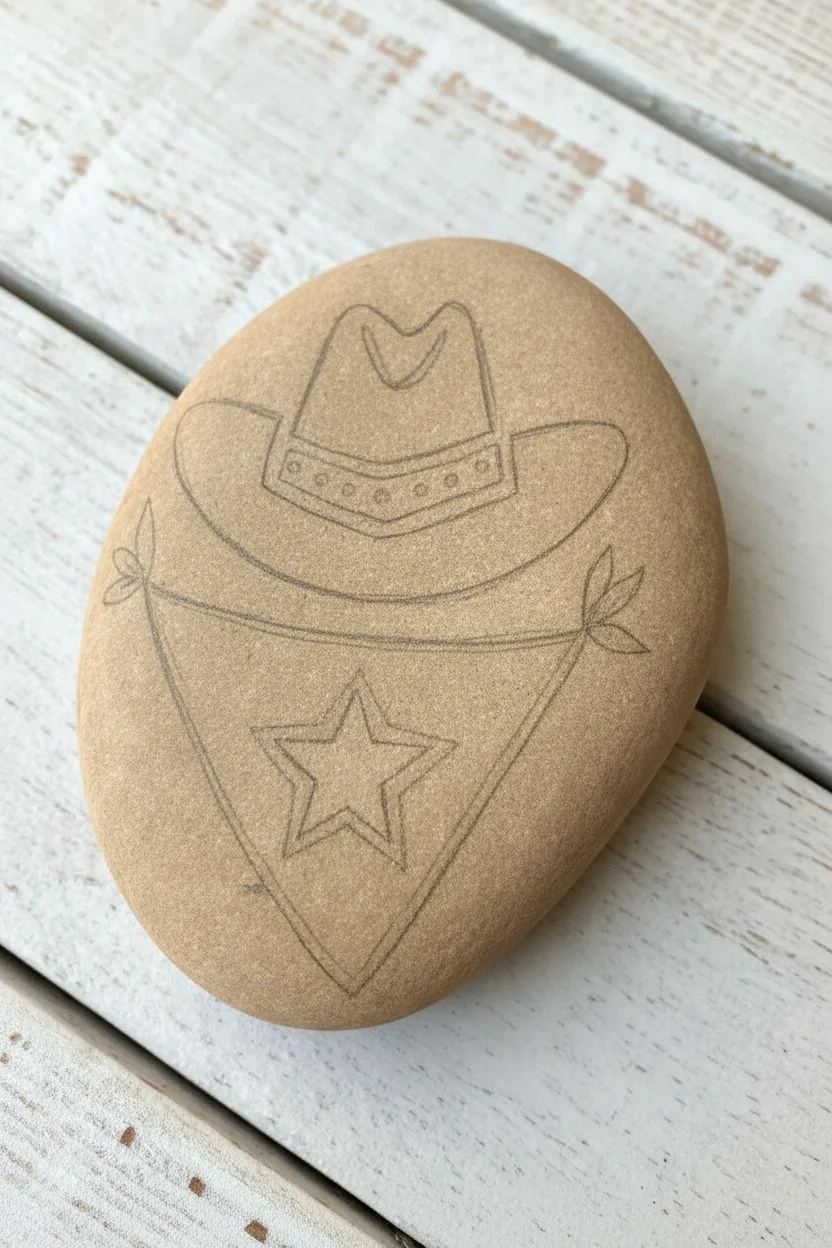
Channel your inner sheriff with this charming painted rock inspired by everyone’s favorite cowboy. This simple yet striking design features a classic brown Stetson and a bright red bandana, perfect for adding a touch of the frontier to your garden or desk.
Step-by-Step
Materials
- Smooth, oval-shaped river rock (tan or light brown base is ideal)
- Acrylic paints: Dark brown, golden-brown (or mix brown with yellow), bright red, white, black
- Fine detail brushes (size 0 or 00)
- Small flat brush (size 2 or 4)
- Pencil for sketching
- Dotting tool or toothpick
- Clear acrylic sealer (spray or brush-on)
- Palette or paper plate
Step 1: Sketching the Outline
-
Choose your canvas:
If your rock isn’t naturally tan like the one in the photo, give it a base coat of sandy beige acrylic paint and let it dry completely before starting. -
Place the hat:
Using a pencil, lightly sketch the cowboy hat near the top center of the rock. Draw a wide U-shape for the brim and a taller mound with a dip in the top for the crown. -
Add the bandana:
Below the hat, sketch a large inverted triangle shape for the bandana. Let the corners extend slightly outward to mimic the tied knot ends. -
Draw the star:
Right in the center of the bandana triangle, lightly pencil in a five-pointed star.
Uneven Dots?
If your painted dots look messy, let them dry fully, then gently scratch off the excess with a toothpick or paint over them with red to try again.
Step 2: Blocking in Colors
-
Paint the hat base:
Using your dark brown paint and a small flat brush, fill in the entire hat shape. Be careful to keep your edges neat. -
Define the hat band:
Before the brown is fully dry, or by mixing a slightly lighter shade, you can add subtle dimension, but the most important part is leaving space or painting a lighter brown strip where the hat band sits. -
Fill the bandana:
Switch to your bright red paint. Fill in the bandana area, carefully painting around the star shape you sketched earlier so it remains the background color for now. -
Paint the knot ends:
Don’t forget to paint the little red ties sticking out from the top corners of the bandana triangle. -
Second coats:
Allow the first layer of paint to dry. Red and dark brown can be translucent, so apply a second coat to ensure solid, opaque coverage.
Step 3: Adding Details
-
Paint the star:
Use white paint to fill in the star in the center of the bandana. This might need two coats to look crisp against the red surroundings. -
Hat band details:
Mix a tan or golden-brown color. Paint a curved band just above the brim of the hat. Add a V-shape highlight near the top of the crown to show the indentation. -
Stitching the hat:
Using your finest brush or the very tip of a toothpick, add tiny dots along the tan hat band to look like decorative stitching. -
Bandana border:
Dip a dotting tool or the non-brush end of a paintbrush into white paint. Create a row of evenly spaced dots along the entire perimeter of the red bandana. -
Outline the star:
With a super fine brush and white paint, create a dashed line mimicking stitching just outside the white star, sitting on the red paint. -
Bandana knots:
Add small detail lines in red on the knot ends to show the fabric bunching up.
Sheriff Badge Upgrade
Make the star yellow or gold with little ball tips on the points to turn the bandana design into a classic sheriff’s badge.
Step 4: Finishing Touches
-
Clean up:
Check your edges. If any paint went outside the lines, use a little of your base tan color to touch up the rock surface. -
Splatter effect:
For a rugged, western look, you can lightly flick a toothbrush with thinned brown paint over the background to create tiny speckles, though this is optional. -
Final drying:
Ensure all paint layers are completely dry. This is crucial before sealing to prevent smudging your crisp white dots. -
Seal the deal:
Apply a coat of clear acrylic sealer. A matte finish looks great for a natural stone look, or use gloss if you want the colors to really pop.
Place your finished western masterpiece in a sunny spot to enjoy
Disney-Inspired Superhero Mask Set Story Stones
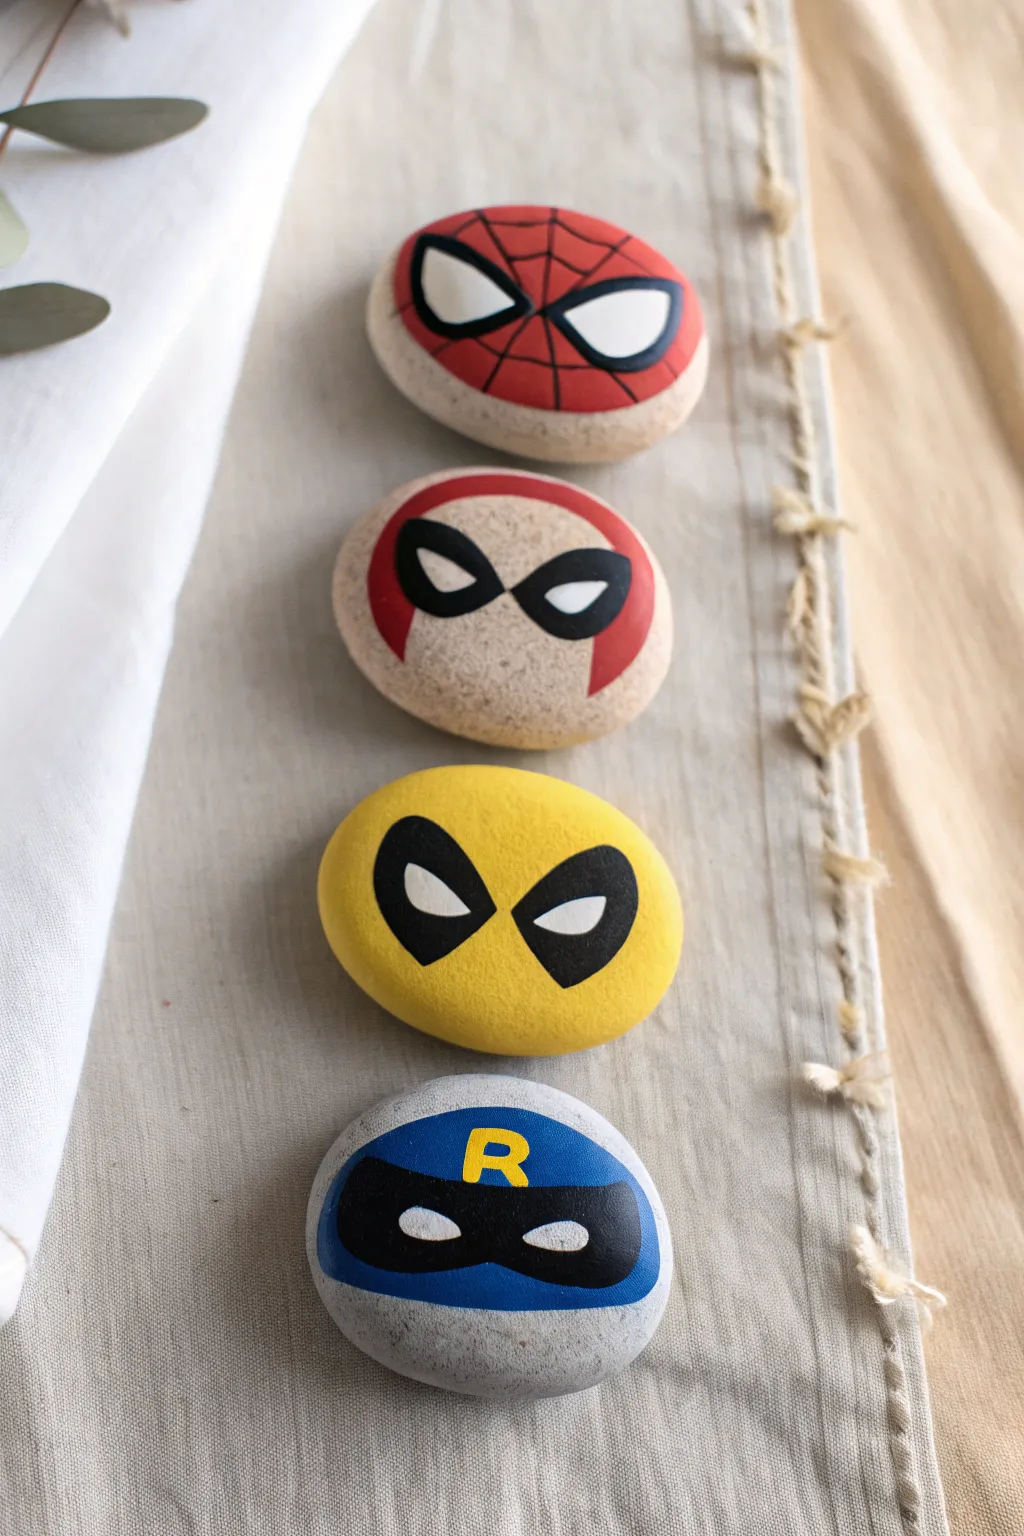
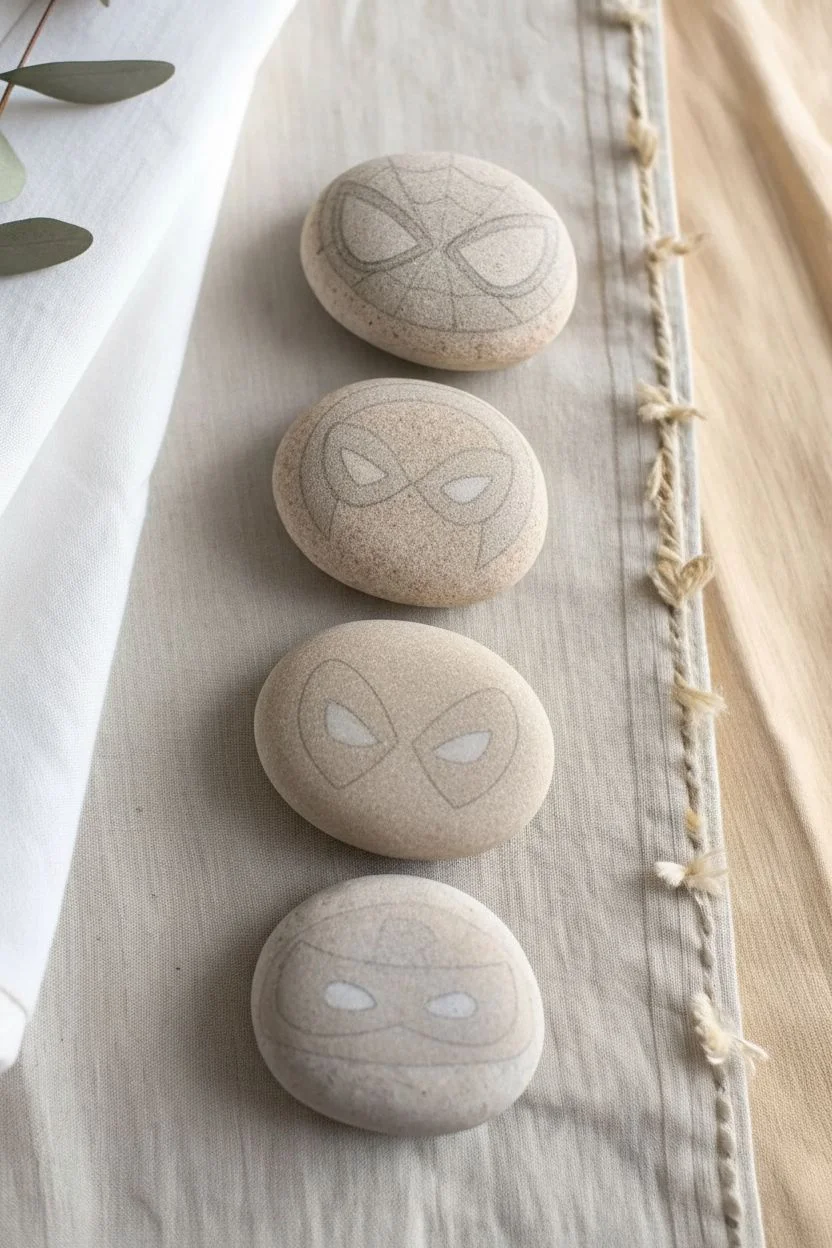
Assemble your own team of mighty heroes with this set of mask-themed story stones. Using smooth, round pebbles as your canvas, you can recreate the iconic masks of Spider-Man, Falcon, Deadpool, and Robin with precise lines and bold colors.
Detailed Instructions
Materials
- Smooth, round river rocks (roughly palm-sized)
- Acrylic paint (Red, Black, White, Yellow, Blue)
- Fine detail paintbrushes (size 0 and 00)
- Small flat brush (size 2 or 4)
- Pencil and eraser
- Posca paint pens (Black fine tip and extra fine tip)
- Mod Podge or spray sealer (matte or gloss)
- Water cup and palette
Step 1: Preparation & Sketching
-
Prepare your canvas:
Begin by washing your stones with soap and water to remove any dirt or oily residue. Let them dry completely, or speed up the process with a hair dryer. -
Sketch the Spider-Man mask:
On the first stone, lightly use a pencil to draw two large, teardrop-shaped eye lenses. Keep the rest of the stone surface free for the red base. -
Sketch the Falcon mask:
For the second stone, draw a curved ‘V’ shape coming down from the top edge, framing the eyes. Outline two tilted teardrop eye shapes in the center, leaving the bottom half of the stone blank. -
Sketch the Deadpool/Wolverine mask:
On the third stone, draw two large black patches that look like angled ovals, and place smaller white triangles inside them for the eyes. -
Sketch the Robin mask:
For the final stone, draw a wide, curved band across the middle for the mask. Add a smaller band on the forehead for the ‘R’ symbol area.
Clean Lines Pro-Tip
For the crispest lines on rough stones, use fine-tip acrylic paint pens (like Posca) instead of brushes for outlining. They offer way more control.
Step 2: Painting the Base Layers
-
Paint the Spider-Man red:
Using a small flat brush, fill the entire top surface of the first stone with bright red acrylic paint, carefully painting around the white eye shapes you sketched. -
Fill the Falcon accents:
Paint the curved ‘V’ shape on the second stone with a deep red. Leave the natural stone color visible for the face area. -
Apply the Yellow base:
Coat the entire surface of the third stone with a vibrant yellow. You may need two or three coats to get solid coverage, letting each layer dry in between. -
Block in Robin’s colors:
Paint the forehead area and the bottom chin area with a clear blue paint. Leave the central band empty for the black mask later. -
Paint the white eyes:
For all four stones, carefully fill in the eye lenses with white paint. This acts as a primer for the final look and ensures the eyes pop.
Step 3: Precision Details
-
Outline Spider-Man’s eyes:
Using a fine detail brush and black paint, create a thick, bold outline around the white eye lenses on the red stone. Make the outer corners sharp. -
Add Spider-Man’s webbing:
Switch to an extra-fine black paint pen or a size 00 brush. Draw a central point between the eyes, then radiate straight lines outward. Connect these with curved ‘web’ lines. -
Detail the Falcon mask:
Paint the eye patches black, ensuring the white lenses remain crisp. Use a fine brush to sharpen the red headpiece edges. -
Finish the Yellow mask:
Paint the large black patches around the white eyes on your yellow stone. Ensure the black shapes taper into sharp points towards the center of the ‘face’. -
Complete Robin’s domino mask:
Fill the central band on the blue stone with black paint. Leave the white eye slits visible. While the black dries, paint a small yellow ‘R’ on the forehead. -
Refine the white highlights:
Once all black paint is 100% dry, go back over the white eye lenses with a fresh coat of white to make them bright and opaque. -
Seal the artwork:
Allow the stones to cure overnight. Apply a layer of Mod Podge or spray varnish to protect the paint from chipping during play.
Level Up: Dual Sides
Don’t leave the back blank! Paint the superhero’s chest logo on the reverse side of the rock for a double-sided story stone experience.
Your miniature heroes are now ready for action-packed storytelling adventures
Disney-Inspired Emotion Face Collection Rocks

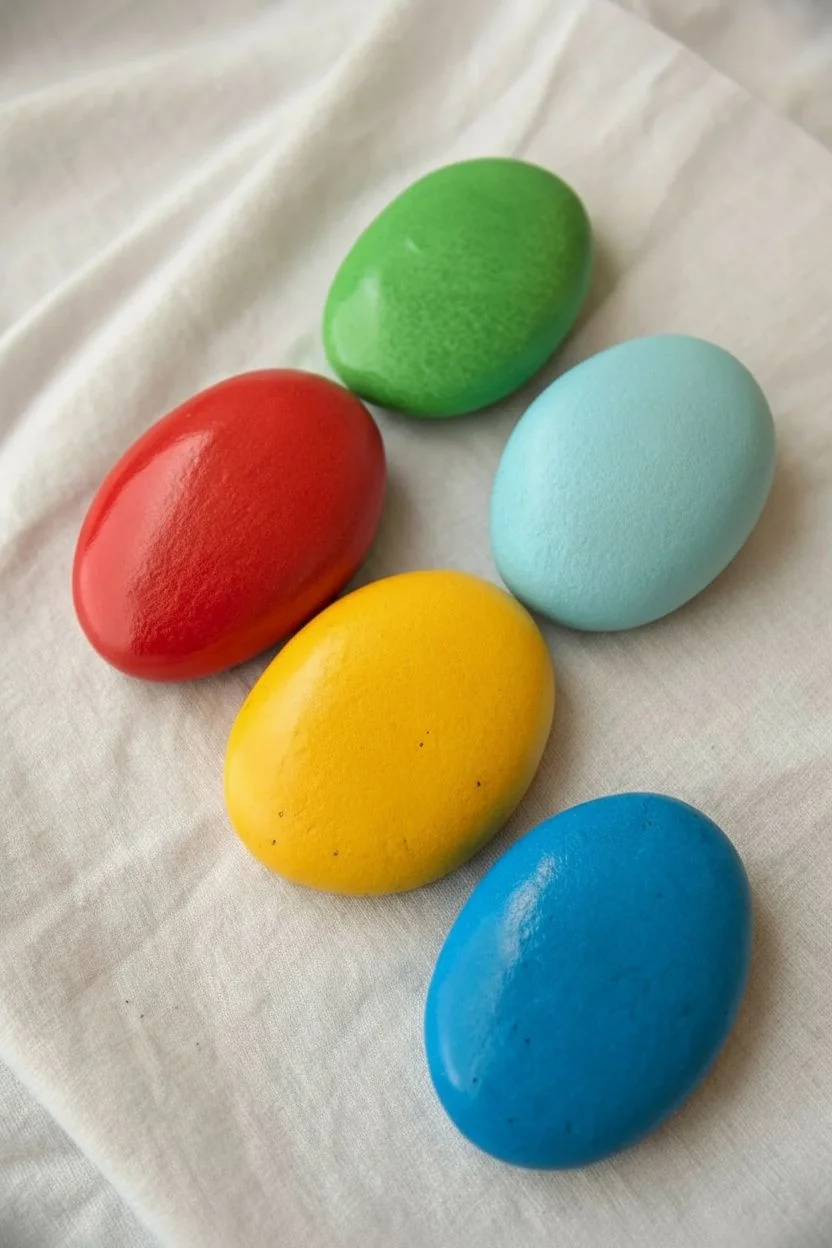
Capture the full spectrum of feelings with this fun and expressive rock painting project inspired by colorful characters. These vibrant stones make wonderful teaching tools for kids or quirky desk accessories to match your daily mood.
How-To Guide
Materials
- 5 rounded, smooth river rocks (palm-sized)
- Acrylic paints (Red, Bright Yellow, Leaf Green, Light Blue, Royal Blue)
- White acrylic paint (for eye highlights)
- Flat paintbrush (medium size)
- Fine detail paintbrush or black paint marker (0.7mm to 1mm tip)
- Spray sealer or varnish (matte or glossy)
- Cup of water
- Paper towels
- Pencil (optional)
Step 1: Base Coating
-
Prep the stones:
Begin by washing your rocks with warm, soapy water to remove any dirt or oil. Dry them thoroughly with a towel or let them air dry in the sun. -
Apply the first color:
Select your flattest, most oval-shaped stone for the red character. Paint the entire top surface with bright red acrylic paint. Use long, smooth strokes to minimize texture. -
Paint the remaining bases:
Repeat the base coating process for the other four stones using yellow, leaf green, light blue, and royal blue paints respectively. Aim for solid, opaque coverage. -
Apply a second coat:
Once the first layer is touch-dry (usually about 15-20 minutes), apply a second coat to each rock. This ensures the colors are vibrant and no stone grey shows through. -
Let them cure:
Allow all the rocks to dry completely for at least an hour. The surface must be perfectly dry before you start adding the facial details.
Step 2: Drawing the Faces
-
Pencil sketch:
Lightly sketch the facial expressions onto the painted rocks with a pencil. This helps you get the proportions right before committing with ink or paint. -
Outline the red face:
On the red rock, draw thick, slanted eyebrows that dip toward the center. Add half-circles for sleepy eyes and a wide, smirk-like curved mouth. -
Outline the green face:
For the green rock, draw two relaxed, half-lidded eyes with pupils looking sideways. Add a simple, small curved smile right in the center. -
Outline the yellow face:
On the yellow rock, draw wide, enthusiastic eyes. Create a large, open D-shaped mouth with a tongue inside to show excitement. -
Outline the light blue face:
Give the light blue rock a sad expression. Draw eyebrows slanting upwards in the middle, droopy eyes, and a distinct frown. -
Outline the dark blue face:
For the royal blue rock, sketch eyebrows that furrow deeply. Add eyes looking upward and a mouth that is a wavy or significantly frowned line.
Smoother Surfaces
If your rocks are pitted, prime them with a mix of white glue and white paint first to fill holes and create a smooth canvas.
Step 3: Inking and Details
-
Trace with black:
Using your fine detail brush and black paint, or a black paint marker, carefully trace over your pencil lines. I find paint markers offer steadier control for these crisp lines. -
Fill in the eyes:
Fill in the pupils or irises with solid black. For the yellow rock’s mouth, paint the back of the throat black, leaving the tongue area yellow. -
Refine the lines:
Go back over your outlines to thicken them slightly. The bold black lines give these rocks their distinct, cartoon-like appearance. -
Add white highlights:
Dip the very tip of a clean detail brush or use a toothpick into white paint. Add small white dots to the black part of the eyes on the darker blue rock to make it look alert. -
Add white to the yellow character:
Paint the whites of the eyes on the yellow rock to make the expression pop against the bright background. -
Final drying time:
Let the black details dry completely to avoid smearing. Paint pens usually dry fast, but give it 30 minutes to be safe.
Shaky Lines?
If your hand shakes while outlining, rest your wrist on a table or steady it with your pinky finger against the rock for support.
Step 4: Sealing
-
Apply sealer:
Take your rocks to a well-ventilated area. Spray a light, even coat of clear sealer over the dry rocks to protect the paint from chipping. -
Second coat of sealer:
Once the first coat is dry, apply a second coat for extra durability, especially if these will be placed outside or handled often.
Now you have a colorful cast of characters ready to brighten up your garden or keep you company on your desk
Disney-Inspired Tiny Dragon Sidekick Rock
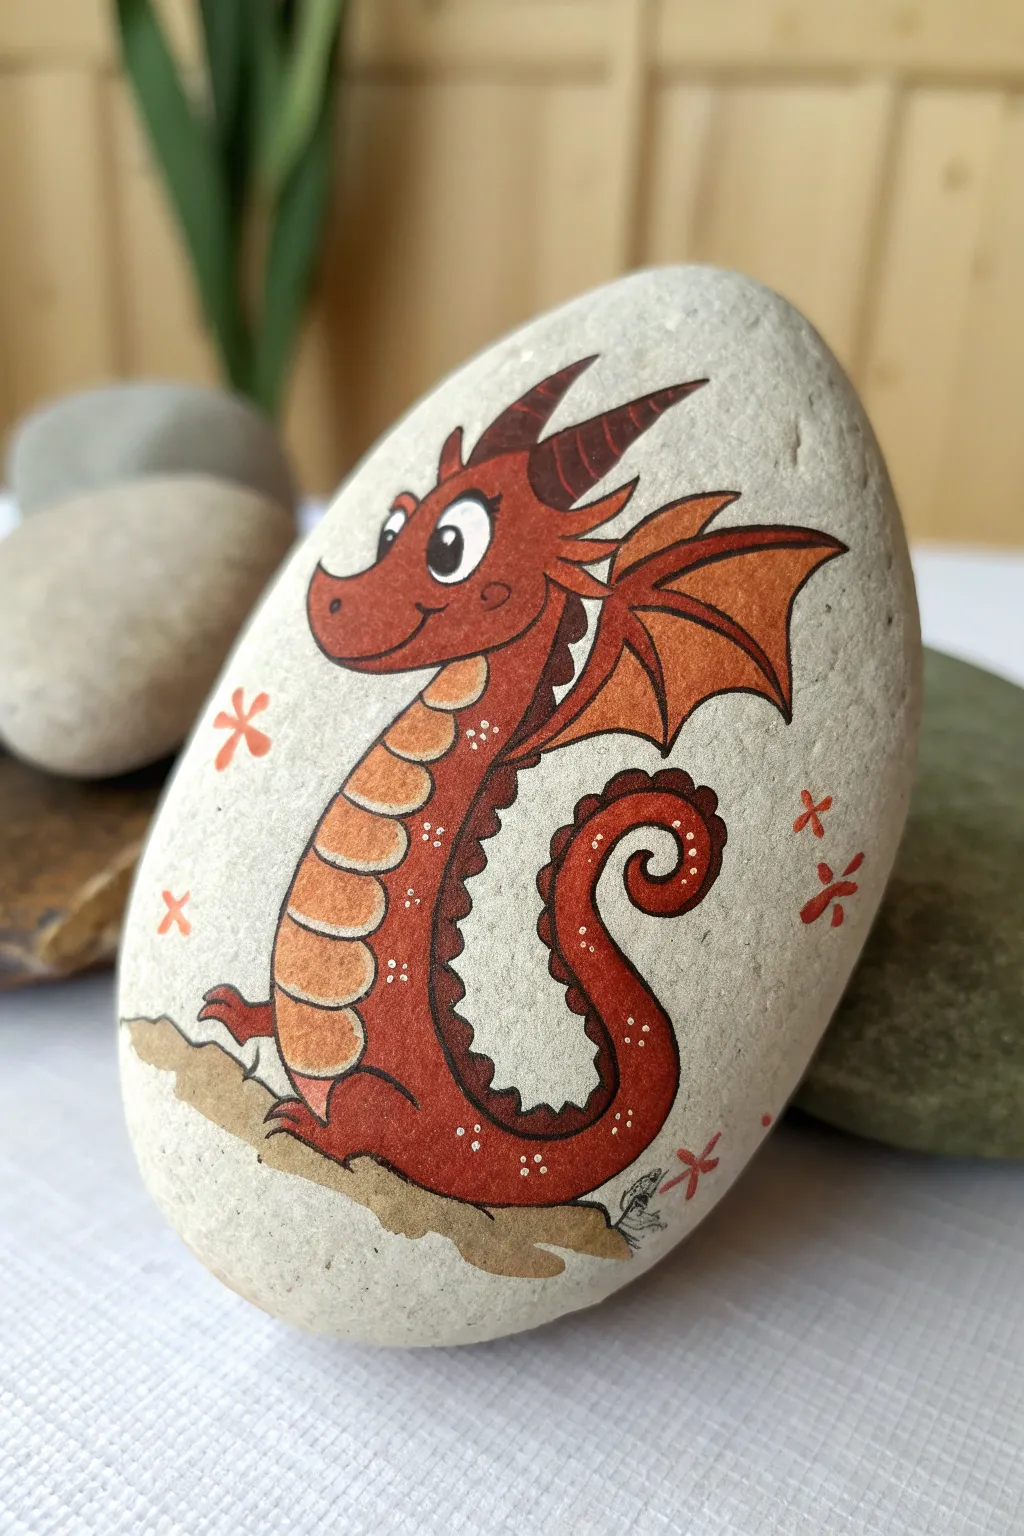
Capture the charm of a magical sidekick with this adorable hand-painted rock featuring a whimsical red dragon. Using fine liners and acrylics, you’ll create a smooth, illustrative character that looks ready to hatch right out of the stone.
Detailed Instructions
Materials
- Smooth, light-colored river stone (oval shape is best)
- Pencil and eraser
- Acrylic paints: brick red, bright orange, classic red, off-white/beige, dark brown
- Fine liner pens (black, water-resistant, ultra-fine tip 0.1mm to 0.5mm)
- White gel pen or fine white paint marker
- Small round paintbrushes (sizes 0 and 2)
- Matte or satin varnish/sealant
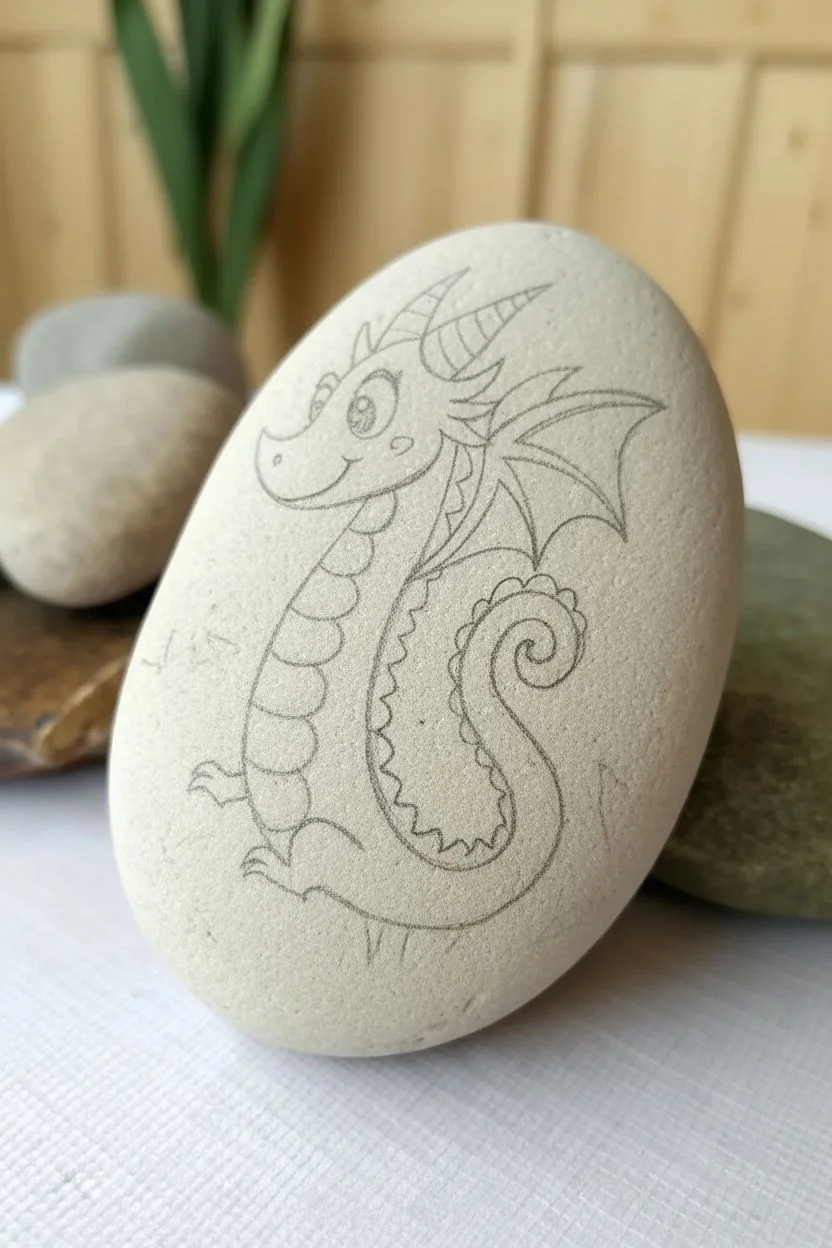
Step 1: Sketching the Character
-
Clean and prep:
Begin by washing your stone with soap and water to remove any dirt or oils. Let it dry completely before starting your artwork. -
Draft the head:
Using a pencil, lightly sketch a rounded shape for the head near the top third of the rock. Add a small snout protruding to the left side. -
Draw the body curve:
Sketch a swooping ‘S’ curve down from the head to form the neck and belly. Loop the tail upwards into a spiral to create that classic dragon curl. -
Add wings and limbs:
Draw a small, bat-like wing extending from the upper back. Keep the lines angular. Then, sketch tiny feet at the base of the body where the dragon meets the ground.
Ink Control Tip
If your fine liner skips over rough stone texture, try a ‘stippling’ motion (tiny dots) to connect lines rather than dragging the tip, which can damage the pen.
Step 2: Applying Base Colors
-
Paint the main body:
Mix a classic red with a tiny drop of brown to get a rusted red shade. Fill in the head, outer neck, and the main part of the tail. Avoid the belly area and the inner wing panels. -
Fill the belly scales:
Use a light orange or peach color to paint the segmented belly area that runs down the front of the dragon. -
Color the wings:
Paint the webbing of the wings with a slightly darker, burnt orange. Leave the bone structure of the wing unpainted for now or paint it the same red as the body. -
Create the ground:
Mix a watery beige or light brown wash. Paint a small patch of ground beneath the dragon’s feet so it isn’t floating in space. -
Let it dry:
Wait for all paint layers to be fully dry to the touch before moving to outlining. If the paint feels cool, it’s still wet.
Step 3: Detailing and Outlining
-
Outline the form:
Using your black fine liner, carefully trace over your pencil lines. Go slowly to verify your lines remain smooth and confident. -
Define the facial features:
Draw a large oval eye, leaving a white highlight inside, and fill the pupil with black. Add a small nostril and a curved smile line. -
Add markings:
Draw the segmentation lines across the orange belly. Outline the wing structure and add the spikes running down the dragon’s spine. -
Deepen the shading:
Take a slightly darker shade of red (or a watered-down brown) and carefully paint shadows on the underside of the tail curve and under the chin to add volume. -
Gradient effect:
On the belly scales, lightly glaze a darker orange at the bottom of each segment, fading up to the lighter orange. This gives the belly a rounded, 3D appearance.
Magic Smoke Effect
Add a tiny puff of grey or glittery smoke coming from the dragon’s snout to make it look like he just sneezed a little fireball.
Step 4: Final Flourishes
-
Highlight with white:
Use a white gel pen or paint marker to add tiny dots on the dragon’s back, cheek, and tail. These ‘sparkle’ dots give the character a magical texture. -
Add decorative elements:
Paint simple four-petaled flowers or ‘stars’ floating around the dragon in orange or red to fill the negative space. -
Refine the eye:
Double-check the white highlight in the eye. I like to make sure it’s crisp white to really bring the character to life. -
Seal the rock:
Once the ink and paint are fully cured (wait at least an hour), apply a clear varnish to protect your artwork from chipping.
Place your new fiery friend on your desk or in a planter for a daily dose of fantasy fun
Disney-Inspired Moonlit Hill Spooky-Whimsy Rock
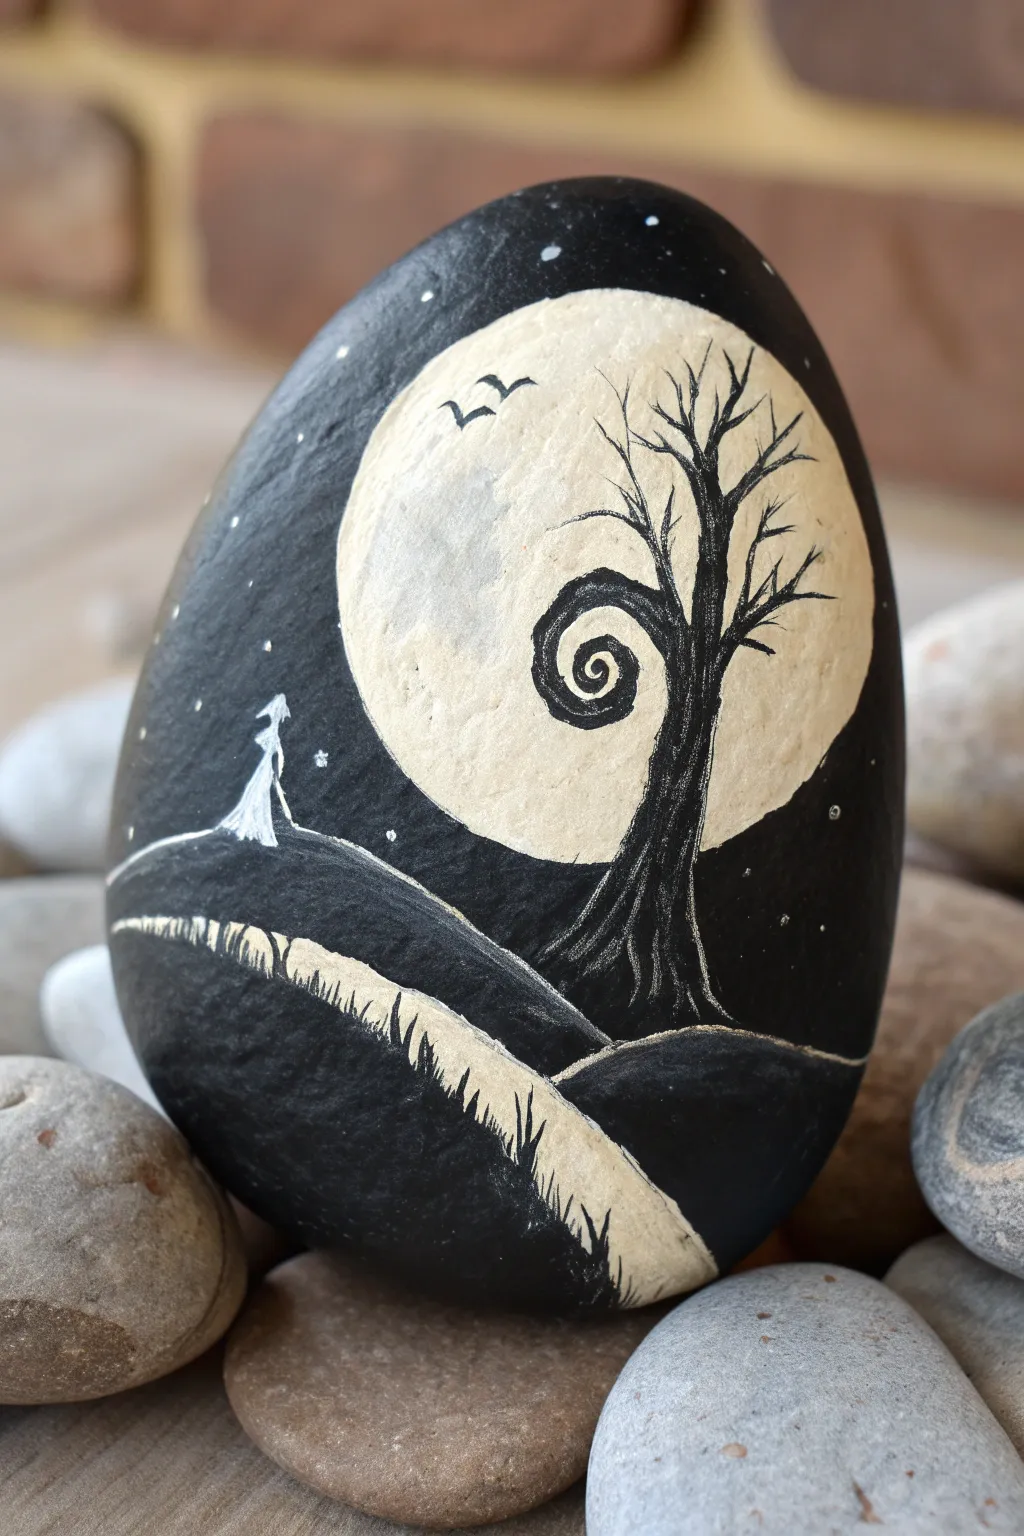
Capture the eerie romance of Halloweentown with this striking black-and-white silhouette rock painting. This design features the iconic curling hill and full moon, creating a recognizable tribute to The Nightmare Before Christmas that fits in the palm of your hand.
How-To Guide
Materials
- Smooth, egg-shaped river rock (cleaned and dried)
- Black acrylic paint (matte finish works best)
- White acrylic paint
- Cream or off-white acrylic paint
- Pencil (HB or lighter)
- Fine liner brush (size 00 or 000)
- Small flat brush
- Medium round brush
- White or silver paint pen (optional for stars)
- Matte or satin sealant spray
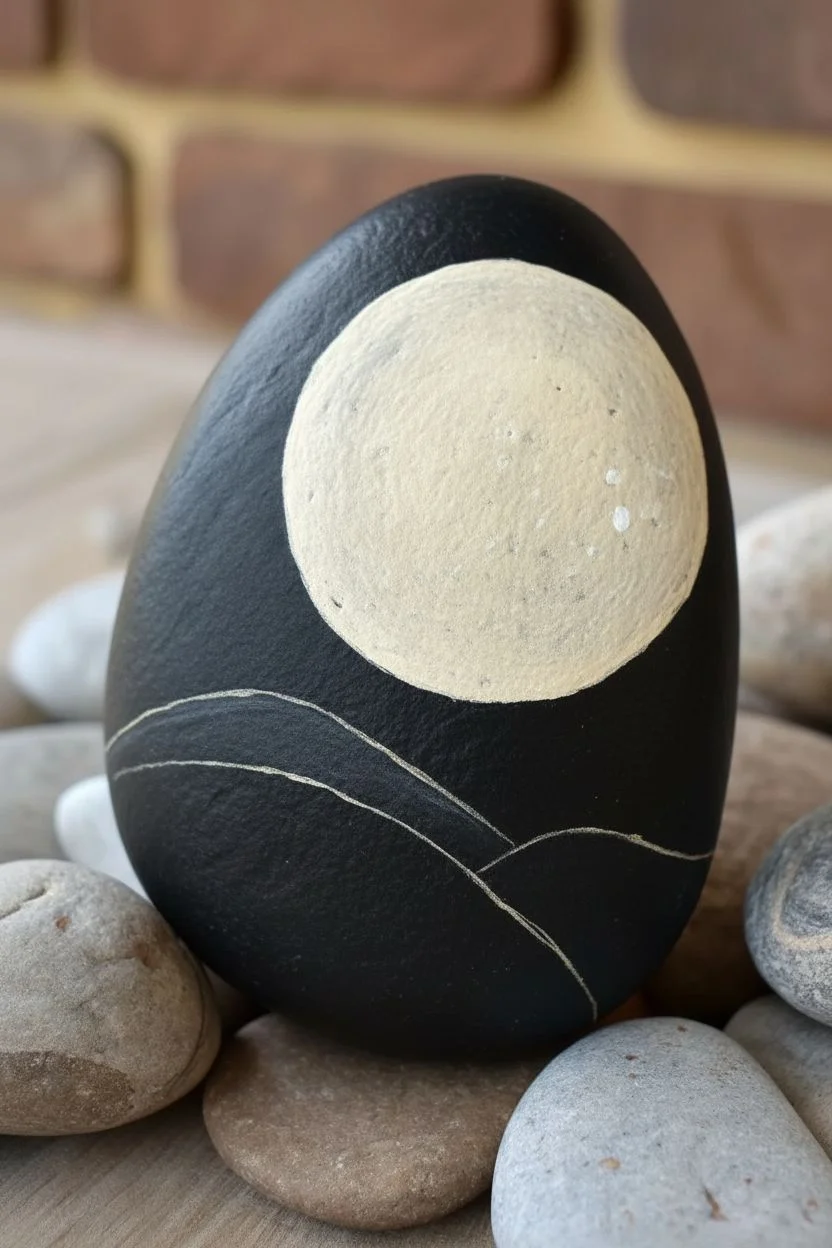
Step 1: Setting the Night Scene
-
Prepare the Base:
Begin by ensuring your rock is completely clean and dry. Using a medium round brush, coat the entire surface of the rock with black acrylic paint. You may need two coats to ensure a solid, opaque background without any streaks showing through. Let this dry completely. -
Map Out the Moon:
Once the black base is dry, lightly use a pencil to draw a large circle on the upper right side of the rock. This doesn’t need to be perfectly round—a slightly organic shape adds to the spooky vibe. Additionally, sketch the sloping line of the hill starting from the bottom left and curving upward. -
Paint the Moon:
Fill in your circle using cream or off-white acrylic paint and a small flat brush. Don’t worry about making it perfectly smooth; a little texture mimics the moon’s surface. You might need a second coat here to cover the black fully, but I like to leave it slightly semi-opaque in spots for dimension. -
Create the Moon’s Texture:
While the moon paint represents a bright glow, use a tiny bit of diluted white paint to gently sponge or dab subtle craters or highlights onto the cream surface. This adds depth so it isn’t just a flat circle.
Moon Texture Trick
Mix a tiny drop of grey into your cream paint and swirl it wet-on-wet while painting the moon. This creates natural-looking craters without needing advanced shading skills.
Step 2: Painting the Silhouette
-
Draft the Iconic Hill:
Using your fine liner brush and black paint, carefully paint the silhouette of the curling hill directly over the dried moon. The tip of the curl should spiral inward prominently. Start thick at the base and taper the line as it curls. -
Structure the Tree Trunk:
Extend the base of that curl downwards to form the tree trunk. The lines should look gnarled and textured, not straight. Pull vertical strokes downward from the curl into the black foreground to anchor the tree. -
Add Bare Branches:
With the finest point of your liner brush, pull thin, jagged branches extending from the trunk upwards and outwards. Since they are backlit by the moon, keep them sharp and black. Let some branches cross over the moon’s edge and others stay within it. -
Define the Hillside:
Paint the sloping hill in the foreground using black, merging it with the background. To separate the foreground hill from the background darkness, mix a tiny amount of grey or use a white paint pen to draw a very thin, distinct highlight line along the ridge of the hill. -
Add Grassy Texture:
From that highlight line on the ridge, use your liner brush to flick tiny, short strokes downward into the black area. This creates the illusion of grass catching the moonlight on the spooky hill.
Step 3: Tiny Details & Finishing Touches
-
Paint Jack Skellington:
On the far left side of the hill, paint a tiny silhouette of Jack. Use white paint for his shirtfront and head. His figure is very slender—essentially a thin vertical line with a small circle for a head and wispy lines for his long coattails blowing behind him. -
Add the Bats:
Paint two or three small ‘V’ or ‘M’ shapes near the top of the moon using black paint. These represent distant bats flying across the moonlight. -
create the Starry Sky:
Dip the tip of a toothpick or a very fine dotting tool into white paint. Dot tiny stars scattered through the black sky area surrounding the moon. Vary the pressure to create different sized stars. -
Seal the Artwork:
Allow the rock to dry for at least 24 hours to ensure all layers are set. Finish by spraying a light coat of matte or satin sealant to protect your design from chipping and weather.
Uneven Lines?
If your fine lines for the branches feel shaky or too thick, thin your black paint with a drop of water. Inky consistency flows smoother from liner brushes than thick paint.
Now you have a spooky little masterpiece ready to display on a shelf or hide in the garden for a neighbor to find


Have a question or want to share your own experience? I'd love to hear from you in the comments below!