If you’re in the mood to draw something festive, ornaments are basically the perfect playground: they’re simple shapes with endless ways to decorate them. I pulled together my favorite ornament drawing ideas—starting with classic looks and building up to the fun, unexpected twists.
Classic Round Ornament With Loop and Hanging String
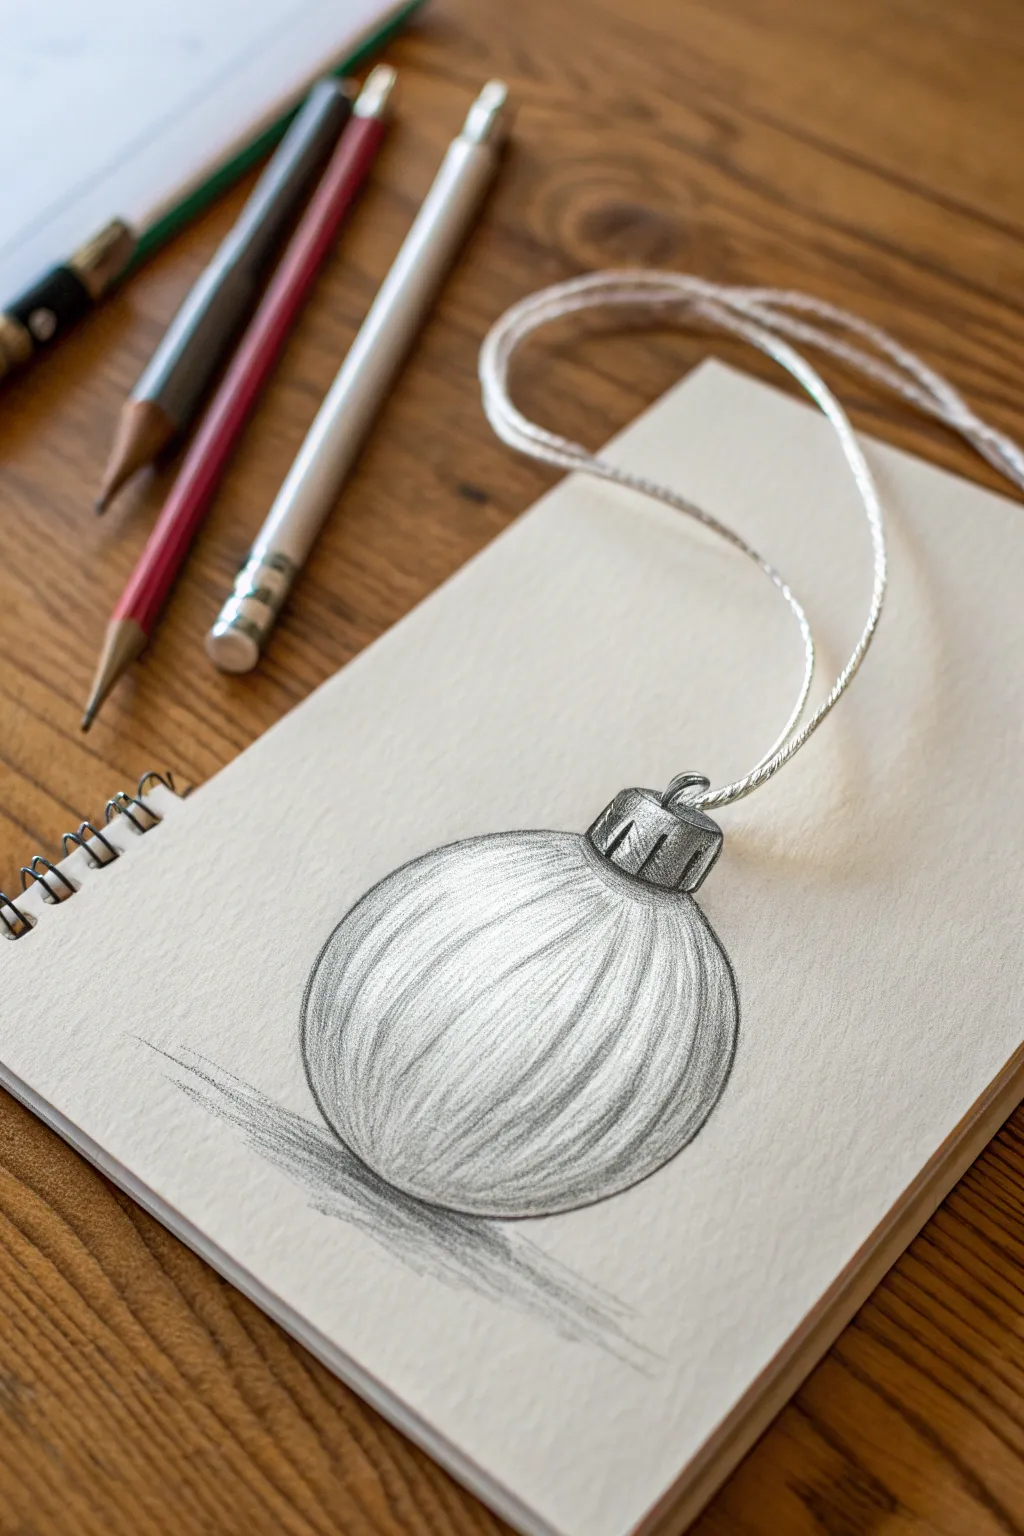
This charming project combines realistic pencil shading with a tactile twist to create a festive ornament that seems to pop off the page. The classic round bauble is rendered in soft graphite tones, while a real piece of string adds a playful, 3D mixed-media element.
Detailed Instructions
Materials
- Quality sketch paper or drawing pad
- HB pencil (for initial outlines)
- 2B and 4B pencils (for shading)
- White eraser or kneadable eraser
- Blending stump or tortillon (optional)
- Short length of white string or twine
- Clear drying craft glue
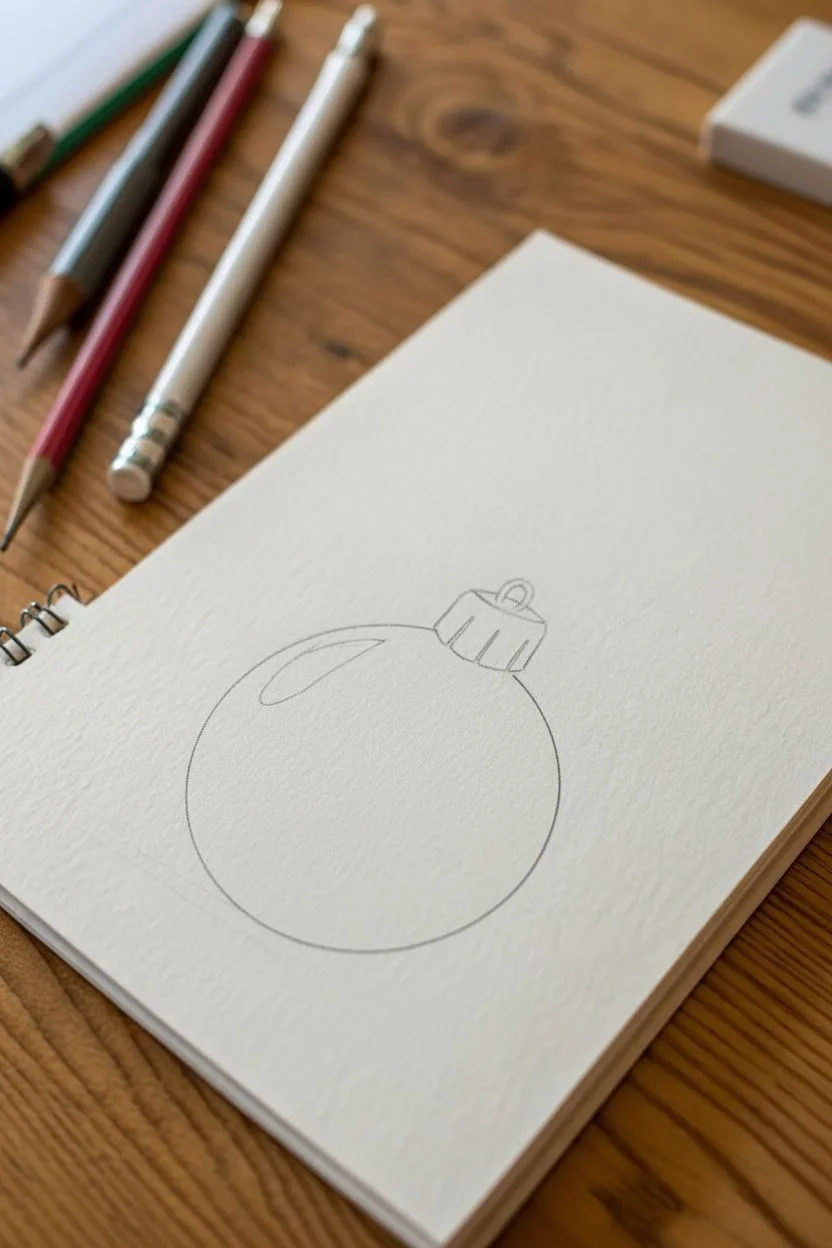
Step 1: Laying the Foundation
-
Draw the main circle:
Start by lightly sketching a perfect circle in the center of your page using your HB pencil. Don’t press too hard, as you want these lines to disappear into the shading later. -
Add the cap base:
At the very top of your circle, draw a small, slightly curved rectangle that sits like a crown. This will become the metal cap of the ornament. -
Sketch the cap details:
Refine the cap by angling the sides inward slightly and drawing a small loop at the very top center. Add vertical lines inside the cap to mimic the ridges found on real ornament hangers. -
Mark highlight zones:
Lightly outline a curved shape on the upper left side of the sphere. This area will remain the white of the paper to represent the strongest reflection of light.
Fixing Flatness
If your ornament looks flat, darken the edge furthest from the light source significantly. High contrast is the key to creating a spherical illusion
Step 2: Shading for Volume
-
Begin base shading:
Switch to a 2B pencil. Using the side of the lead, apply a light, even layer of graphite essentially everywhere except your highlight zone. -
Define the curvature:
Start darkening the side opposite your highlight (the bottom right). Use curved strokes that follow the round shape of the ball, wrapping around the form. -
Deepen the shadows:
Grab your 4B pencil to add deeper values. Focus on the bottom edge and the right side, pressing firmly to create a gradient from dark grey to the lighter middle tones. -
Render the metallic texture:
To make it look shiny, sharpen your pencil and draw distinct, vertical curved lines following the form of the ball. I prefer to leave distinct gaps between some strokes to simulate reflections. -
Detail the cap:
Shade the metal cap with high contrast. Make the ridges very dark and leave thin white strips between them to look like polished metal.
Step 3: Adding Depth and Finish
-
Cast a shadow:
beneath the ornament, sketch a horizontal shadow stretching to the left. Use horizontal back-and-forth strokes, making them darkest right underneath the ball to ground it. -
Blend for smoothness:
If you want a softer look, use a blending stump to gently smudge the graphite, smoothing the transition from the dark shadow to the bright highlight. -
Clean up edges:
Take your eraser and clean up any smudges outside the main circle to keep the silhouette crisp and sharp. -
Prepare the string:
Cut a piece of white string or twine, roughly 6-8 inches long. Tie one end into a small loop if desired, or leave it loose. -
Attach the string:
Place a tiny dot of clear glue right at the metal loop you drew on the cap. Press one end of your real string onto the glue dot. -
Arrange the curve:
Let the string fall naturally onto the paper in a loop shape, or arrange it artfully. You can glue it down completely or leave it loose for a removable effect.
Make it Sparkle
Use a white gel pen to add tiny, sharp dots of light on the darkest part of the metal cap or the shadow side for extra magical glint
Your finished piece now has a delightful blend of drawn artistry and real-world texture to display


Stripe and Polka Dot Pattern-Filled Ornament Designs
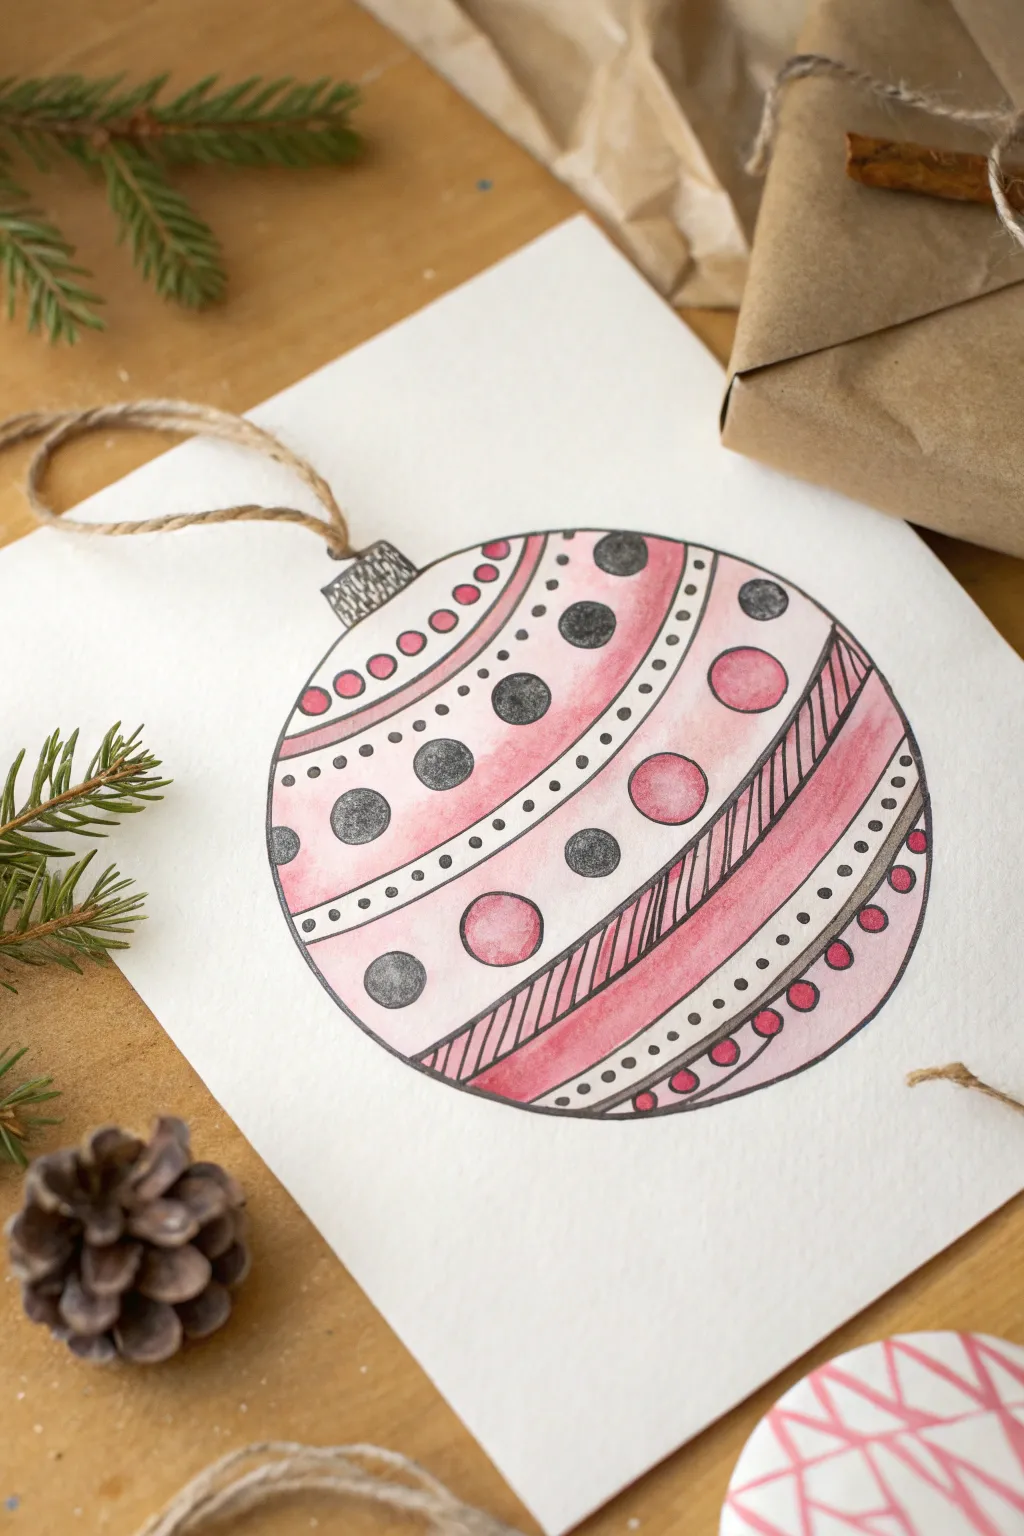
This charming holiday project combines simple geometric doodles with soft watercolor washes to create a modern, festive ornament illustration. The contrast between the organic, watery pinks and the crisp black ink lines gives it a delightful hand-drawn character.
Step-by-Step Guide
Materials
- High-quality watercolor paper (cold press recommended)
- Pencil and eraser
- Compass or circle template
- Fine liner pen (black, waterproof, size 03 or 05)
- Watercolor paints (shades of red and pink)
- Round watercolor brush (size 6 or 8)
- Jute twine or rustic string
- Craft glue
- Ruler
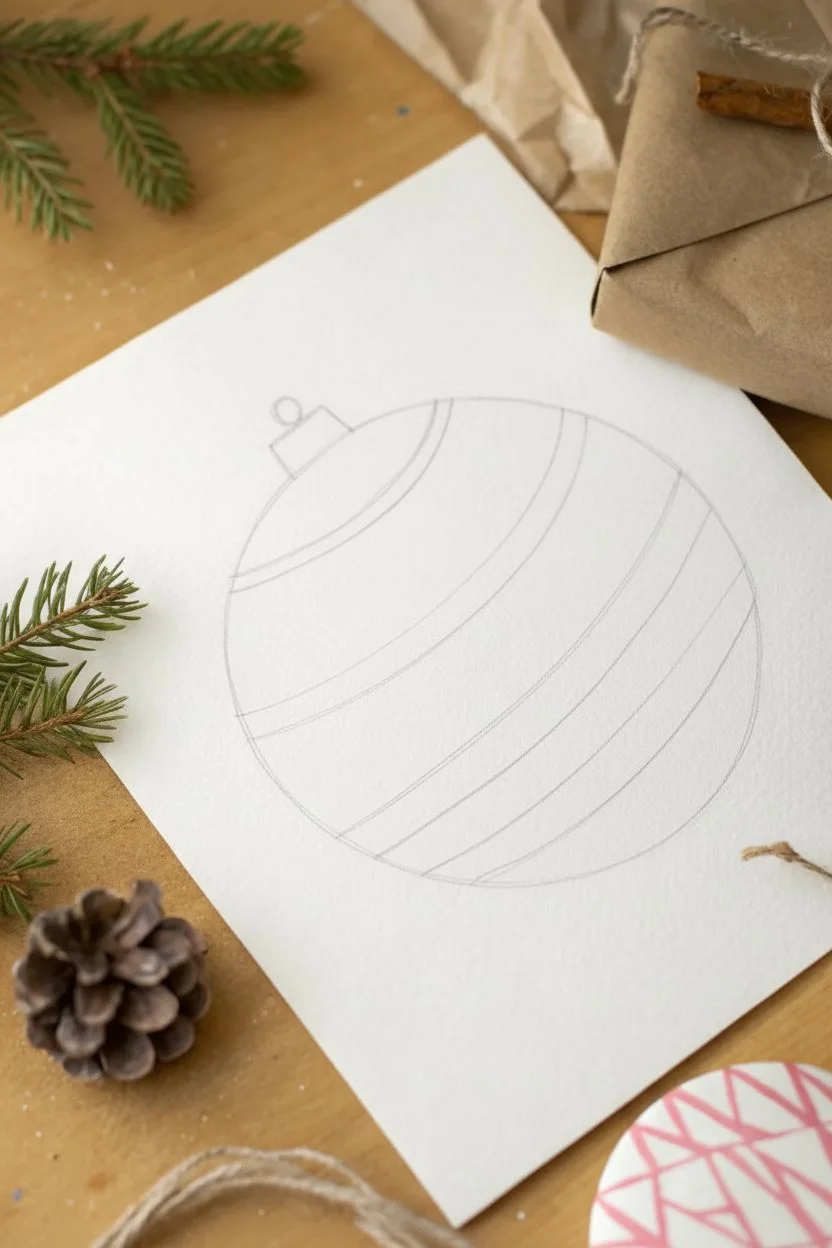
Step 1: Planning the Shape
-
Draw the main circle:
Start by using your compass or a circular object to lightly trace a perfect circle in the center of your watercolor paper. Keep the pencil pressure very light so it doesn’t show through later. -
Add the cap:
Sketch a small, rectangular cap shape at the very top of your circle. Add a tiny semi-circle loop on top of that rectangle where the string would thread through. -
Divide into sections:
Using your pencil, lightly draw curved lines across the ornament to divide it into five or six distinctive bands. These curves should follow the spherical form of the ornament, bowing downward slightly to create a 3D effect.
Step 2: Adding the Watercolor Base
-
Mix your colors:
Prepare a palette with a watery, diluted pink for the base layer. You want the color to be transparent and soft. -
Paint alternating bands:
Fill in specific bands of the ornament with your pink wash. I like to leave some bands white or extremely pale to create variety in the pattern later. -
Create a gradient:
While the paint is still wet, drop a slightly more saturated red or deep pink into the right side of the painted bands. This creates a subtle shadow and enhances the roundness of the bauble. -
Let it dry completely:
Allow the paper to dry fully before moving on to ink. If the paper is cool to the touch, it’s still damp. Using a marker too soon will cause the ink to bleed.
Smudge Prevention
Keep a piece of scrap paper under your drawing hand while inking. This protects the paper from oils on your skin and prevents you from accidentally smearing wet ink.
Step 3: Inking the Patterns
-
Outline the shape:
Once dry, use your waterproof fine liner to trace over the main pencil circle and the cap at the top. Use a confident, steady hand. -
Define the bands:
Ink the curved dividing lines you sketched earlier. You can double up some lines or make them thicker to separate the sections clearly. -
Draw large polka dots:
In the widest band, draw large circles. Fill every other circle with scribe marks or stippling to make them appear dark gray or black, leaving the alternate ones filled with the pink watercolor background. -
Create striped sections:
Choose a narrower band and fill it with diagonal hash marks. Keep the lines parallel but don’t worry about using a ruler; the hand-drawn look adds charm. -
Add decorative borders:
In the thin bands between patterns, add rows of tiny dots or small circles. Varying the size of these dots creates visual rhythm. -
Detail the cap:
Fill the rectangular cap at the top with a dense texture, like tiny vertical lines or a cross-hatch pattern, to make it look metallic.
Sparkle Upgrade
Once the paint is dry, use a metallic gold or silver gel pen to add highlights to the striped sections or the metal cap for a bit of festive shimmer.
Step 4: Finishing Touches
-
Add accent color:
If some areas look too plain, mix a slightly stronger red watercolor and carefully paint inside some of the smaller circles or stripe sections for a pop of contrast. -
Clean up sketch lines:
Wait for the ink and any new paint to be bone dry, then gently erase any remaining visible pencil marks to clean up the illustration. -
Prepare the twine:
Cut a small piece of jute twine, about 4 inches long. Fold it into a simple loop. -
Attach the hanger:
Apply a small dot of craft glue to the paper right above the drawn cap. Press the knotted end of your twine loop onto the glue so it looks like it’s threaded through the ornament.
Now you have a beautifully custom piece of holiday art ready to frame or turn into a greeting card


Plaid and Crosshatch Ornaments for Cozy Texture
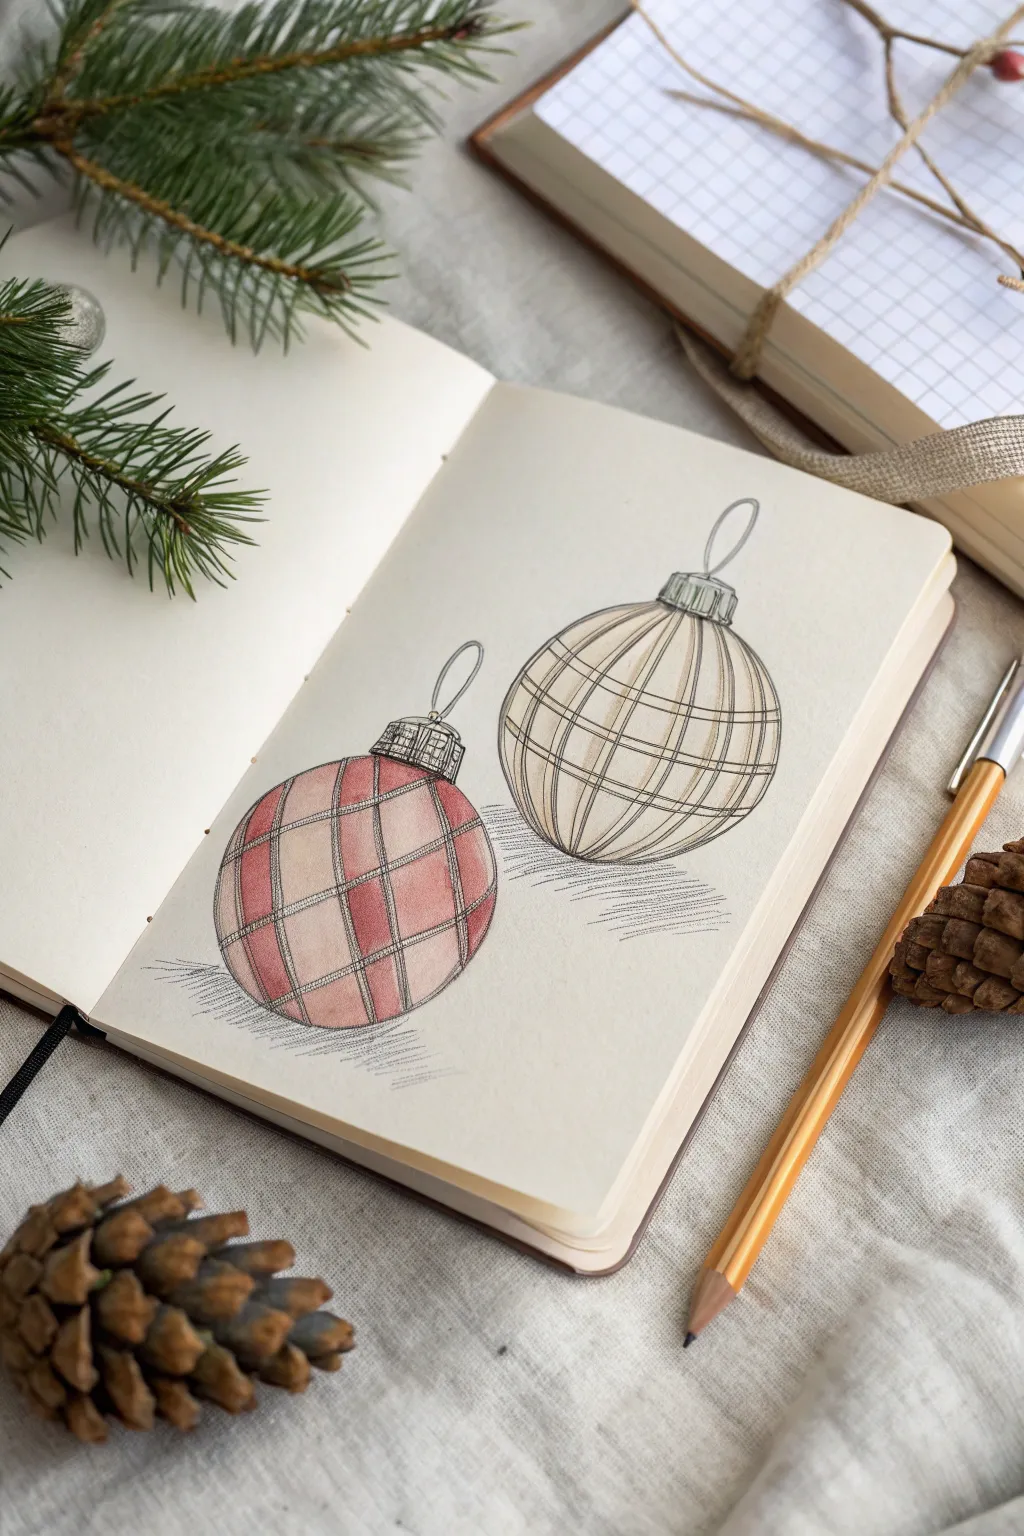
Capture the cozy warmth of winter textiles with this charming pencil drawing of plaid Christmas ornaments. Using a combination of soft coloring and precise linework, you’ll create a textured, three-dimensional look that pops off the page.
Step-by-Step
Materials
- Sketchbook or drawing paper (smooth finish)
- Graphite pencil (HB or 2B)
- Fine liner pen (black, 0.1mm or 0.3mm)
- Colored pencils (muted red/rose, beige/sand)
- Eraser
- Ruler (optional, freehand is preferred for a cozy look)
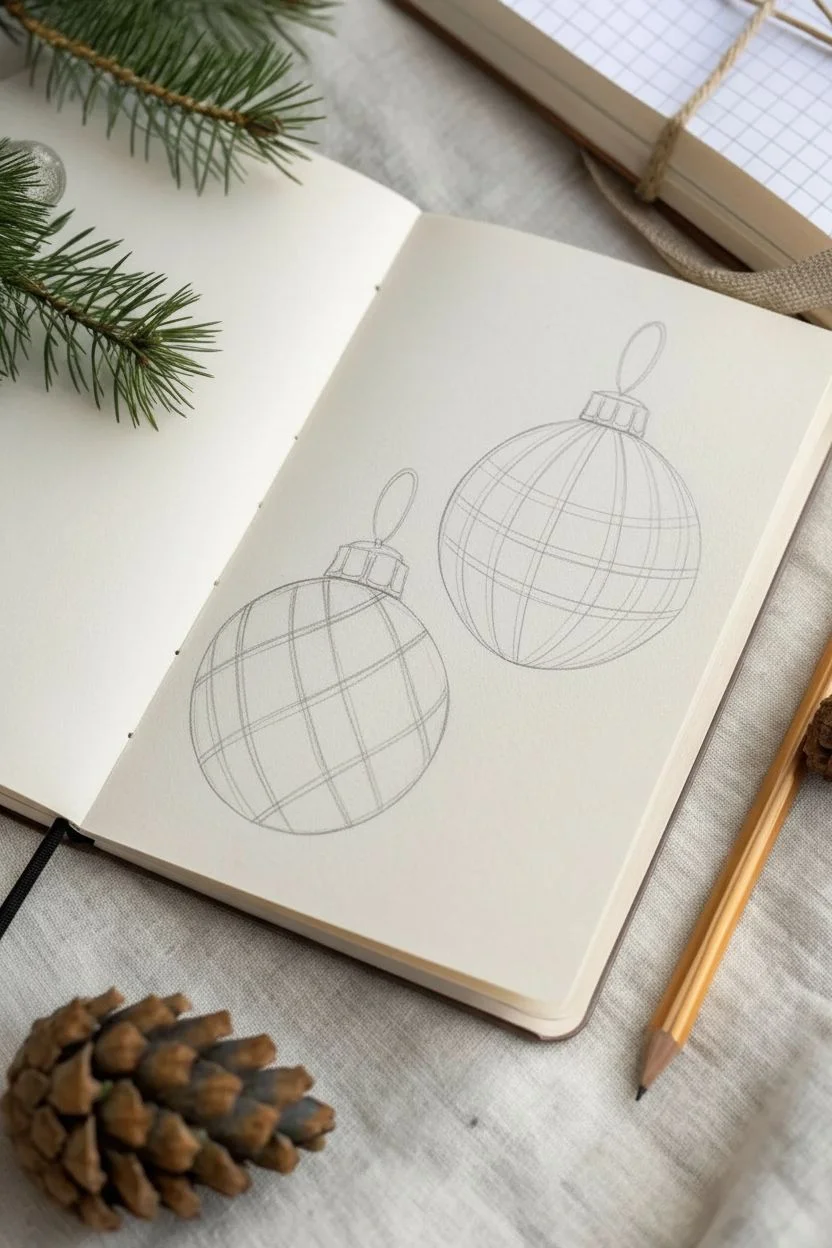
Step 1: Laying the Foundation
-
Draw the basic shapes:
Start by lightly sketching two circles on your page using your graphite pencil. Place one slightly lower than the other to create a pleasing composition. Don’t worry if they aren’t perfect circles; a slight irregularity adds character. -
Add the caps:
On top of each circle, draw a small rectangular shape for the ornament cap. Add a simple loop or hook coming out of the top of each cap. -
Map the curves:
To make the ornaments look spherical rather than flat, lightly sketch curved vertical longitude lines following the shape of the ball. These will guide your plaid pattern later. -
Add horizontal guides:
Sketch curved horizontal latitude lines around the ornaments. Think of these like the equator on a globe—curving downward slightly in the front to show volume.
Step 2: Adding Color and Texture
-
Base layer for the left ornament:
Take your muted red or rose-colored pencil. Identify the squares formed by your grid that you want to be darker. Gently shade certain vertical and horizontal bands to start building the plaid pattern. -
Deepening the plaid:
Where the vertical and horizontal red bands intersect, press slightly harder with your pencil to create a darker square. This mimics the way threads overlap in real fabric. -
Base layer for the right ornament:
Switch to your beige or sand-colored pencil for the second ornament. Apply the same technique, coloring broad bands vertically and horizontally, keeping the stroke pressure light. -
Creating highlights:
Leave the center-left area of both ornaments lighter or completely white. This uncolored space acts as a highlight, reinforcing the roundness of the object.
Curve Your Lines
The secret to 3D volume is never drawing straight grid lines. Always bow your vertical lines outward and dip your horizontal lines downward.
Step 3: Inking and Definition
-
Outline the silhouette:
Using your fine liner pen, carefully trace the outer edge of the ornaments. Use a deliberate hand, but don’t stress if the line wavers slightly. -
Detail the caps:
Ink the metal caps at the top. Add small vertical lines inside the rectangular cap shape to simulate the ribbed texture of the metal. -
Define the plaid grid:
Go over your initial pencil grid lines with the pen. Instead of rigid straight lines, let your hand follow the curve of the ornament naturally. I find loosely double-drawing some lines adds a nice sketched aesthetic. -
Crosshatching detail:
For extra texture, add very fine diagonal crosshatching within some of the colored bands. This makes the surface look more detailed and less like a simple coloring book fill. -
Add thin stripes:
Draw thin, double ink lines in the negative spaces (the white areas) between your colored bands to complete the complex plaid pattern.
Ink Smearing?
If you are erasing pencil lines and the ink smears, wait at least 5-10 minutes. Some fine liners take longer to dry on smooth sketchbook paper.
Step 4: Final Touches
-
Clean up:
Once the ink is completely dry, gently erase any visible graphite sketch lines that haven’t been covered. -
Grounding shadow:
Using your graphite pencil again, lightly sketch a horizontal shadow underneath each ornament. Use quick, horizontal back-and-forth strokes. -
Refine the shadow:
Darken the area of the shadow directly beneath the ornament where it touches the surface, fading it out as it moves away.
Now you have a pair of cozy, festive ornaments bringing warmth to your sketchbook pages


Mix-and-Match Ornament Pattern Grid (Like a Mini Menu)
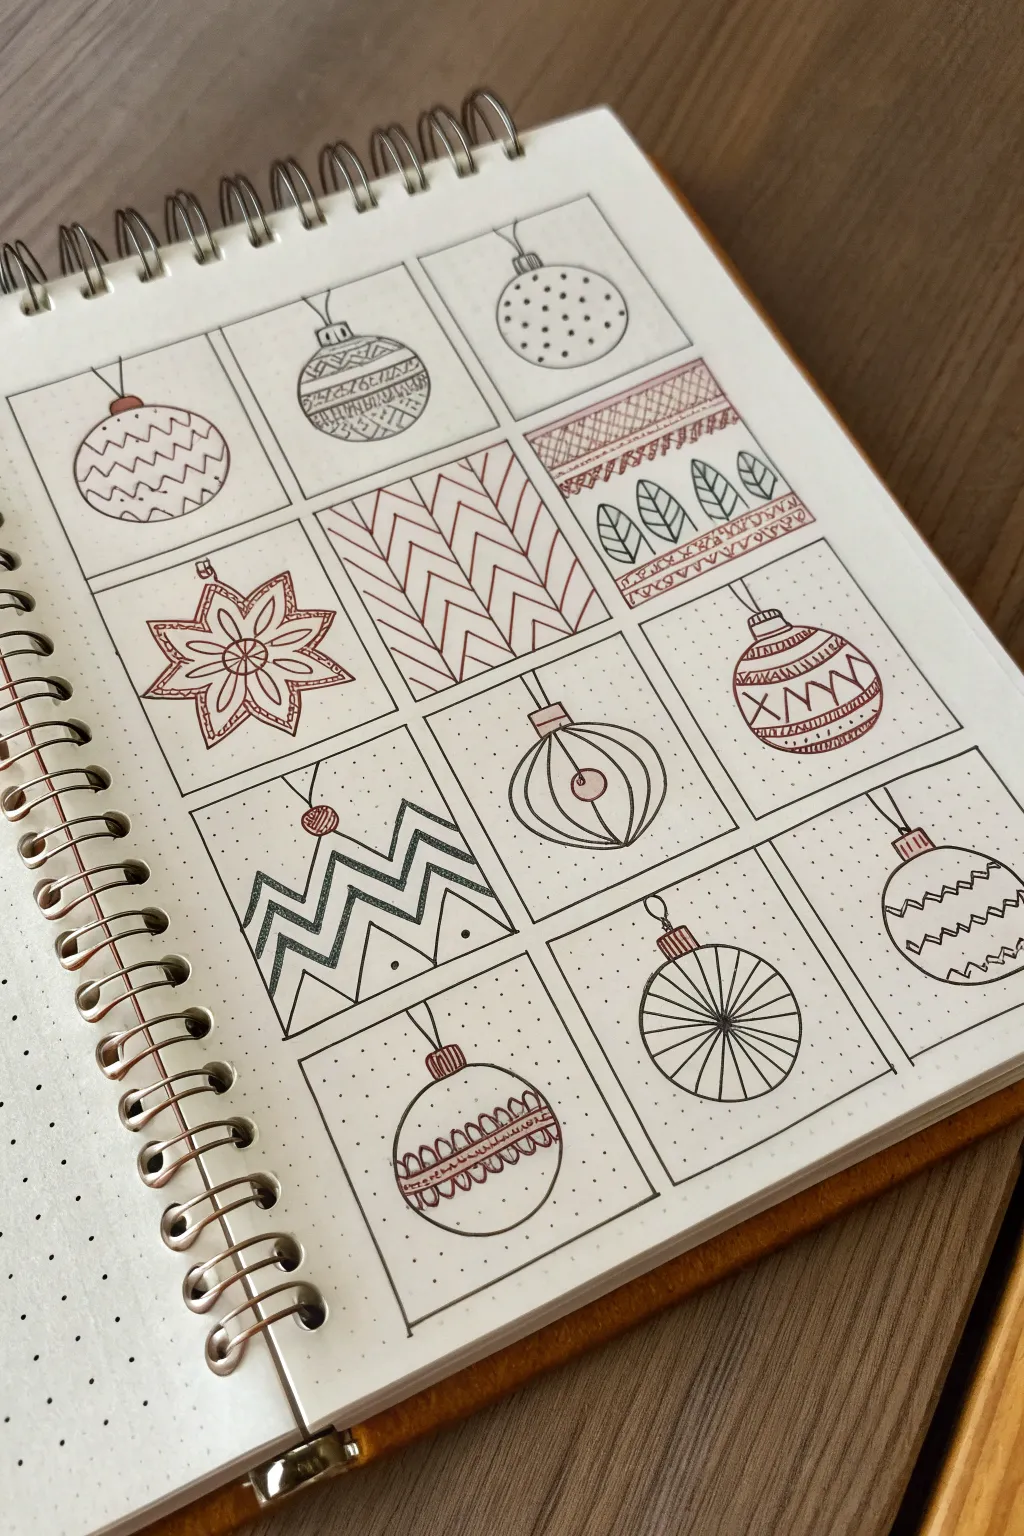
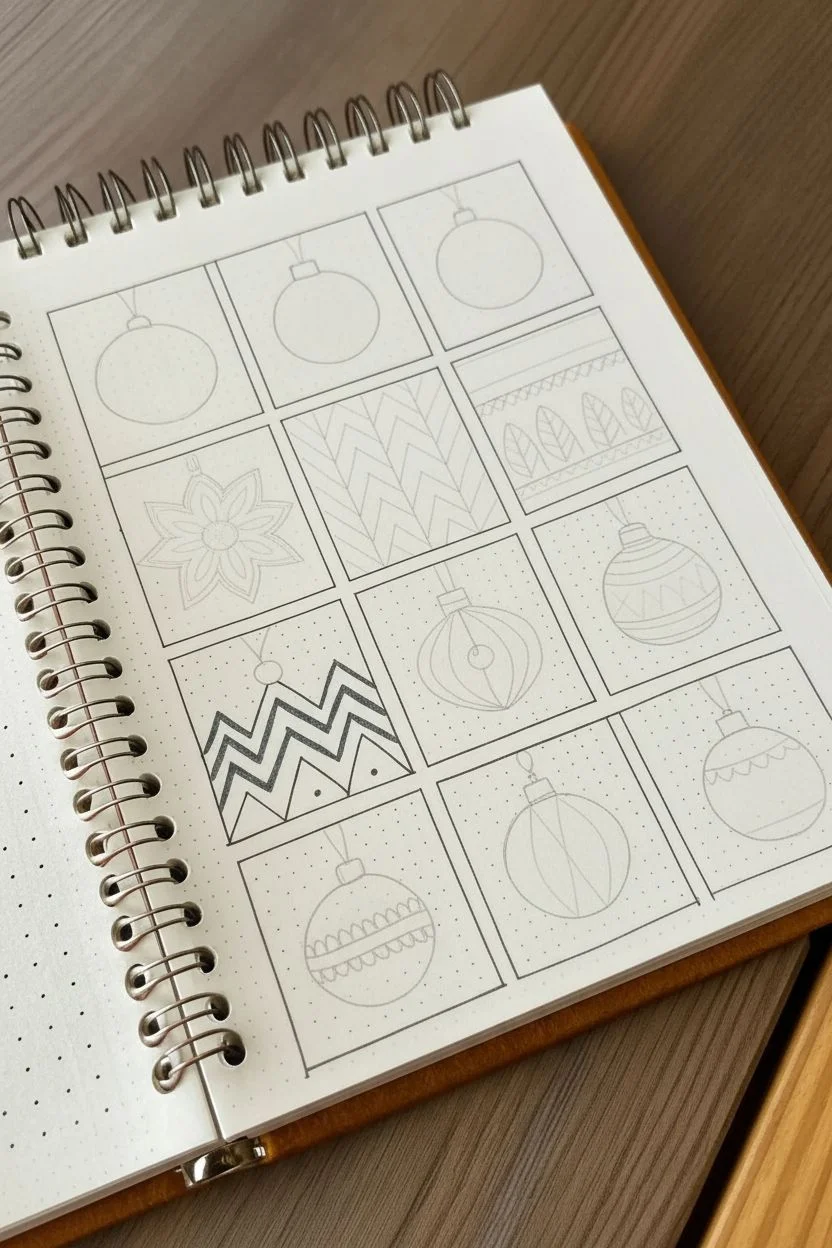
This project creates a satisfying and organized grid of ornament designs, acting like a visual menu for your holiday doodling. It uses a simple two-tone palette of black and burgundy to create a cohesive, minimalist look perfect for sketchbook spreads or bullet journals.
How-To Guide
Materials
- Dotted bullet journal or mixed media paper
- Pencil and eraser
- Ruler
- Fine nib black drawing pen (approx. 0.3mm or 0.5mm)
- Red or burgundy felt-tip marker or fineliner
Step 1: Setting the Structure
-
Map out the grid:
Using your pencil and ruler, lightly draw a 3×4 grid. If you are using dot grid paper, count the dots to ensure each square is equal in size, leaving a small gap or ‘gutter’ between each square for a neat appearance. -
Outline the boxes:
Go over your pencil grid lines with the black fine liner pen. Keep your hand steady and use the ruler again if you want crisp lines, or freehand it for a more organic, charming look. -
Sketch the base shapes:
Inside each square, lightly sketch circles in pencil for the round ornaments. For the varied shapes, sketch the outlines of the star, the elongated teardrop, and the large chevron pattern. -
Add caps and strings:
Draw small squares or rectangles at the top of your circles to represent the ornament caps. Add a simple loop or a straight line extending upwards to look like a string hanging from the top of the box frame.
Use dot grids wisely
If using dot grid paper, use the dots as anchors for your patterns. They help ensure your zig-zags are even and your circles are centered without measuring.
Step 2: Inking the Designs
-
Draw the zig-zag ornament:
In the top left box, ink a round ornament. Fill the center with horizontal zig-zag lines using your burgundy marker. -
Create the banded bauble:
For the top middle square, draw a round ornament with distinct horizontal bands. Fill the central band with tiny vertical hatches and the upper band with a burgundy wash. -
Stipple the spotted one:
In the top right, keep it simple. Draw a circle and fill it with small, evenly spaced black dots. -
Ink the poinsettia star:
On the second row, far left, ink the star shape. Draw a secondary, smaller star inside it and connect the points to the center to create petals or facets. -
Draw the geometric filler pattern:
For the middle square in the second row, skip the ornament shape. Instead, fill the entire box with a burgundy zig-zag or chevron pattern to break up the design repetition. -
Combine leaves and grids:
In the second row, right side, draw a rectangular section. Fill the top with a cross-hatch grid in burgundy and the bottom with simple leaf shapes in black. -
Create the mountain peaks:
Move to the third row, left side. Instead of a circle, draw a large zig-zag pattern that spans the width of the box. Use black ink to create texture within the peaks, making them look like stylized mountains. -
Design the lantern shape:
In the center of the third row, outline a teardrop or lantern shape. Draw vertical curved lines following the contour of the shape to give it volume. -
Detail the diagonal band:
For the third row, right side, draw a round ornament with a wide diagonal band across the middle. Fill this band with a loose cross-hatch pattern using the burgundy marker. -
Draw the striped sphere:
In the bottom row, middle box, draw a circle. Use a ruler to draw straight lines radiating from a central point to the edge, like pie slices. -
Add Scalloped Details:
For the final bottom-left ornament, draw a circle with a horizontal band. Inside the band, draw a row of small scallops or U-shapes.
Step 3: Final Touches
-
Add color accents:
Take your burgundy marker and carefully color in specific details, like the ornament caps, single stripes, or alternating sections of your patterns (like the ‘pie slices’ or the star center). -
Erase pencil guides:
Wait for the ink to comprise fully dry to avoid smudging. Gently erase all remaining pencil marks from your initial sketch.
Ink smearing?
Vertical lines on spherical shapes can look flat. Ensure you curve your internal lines (like on the lantern ornament) to mimic the 3D surface of a ball.
You now have a charming collection of ornament designs ready to inspire your holiday cards or gift tags
BRUSH GUIDE
The Right Brush for Every Stroke
From clean lines to bold texture — master brush choice, stroke control, and essential techniques.
Explore the Full Guide
Implied-Edge Ornament Drawing Using Pattern Only
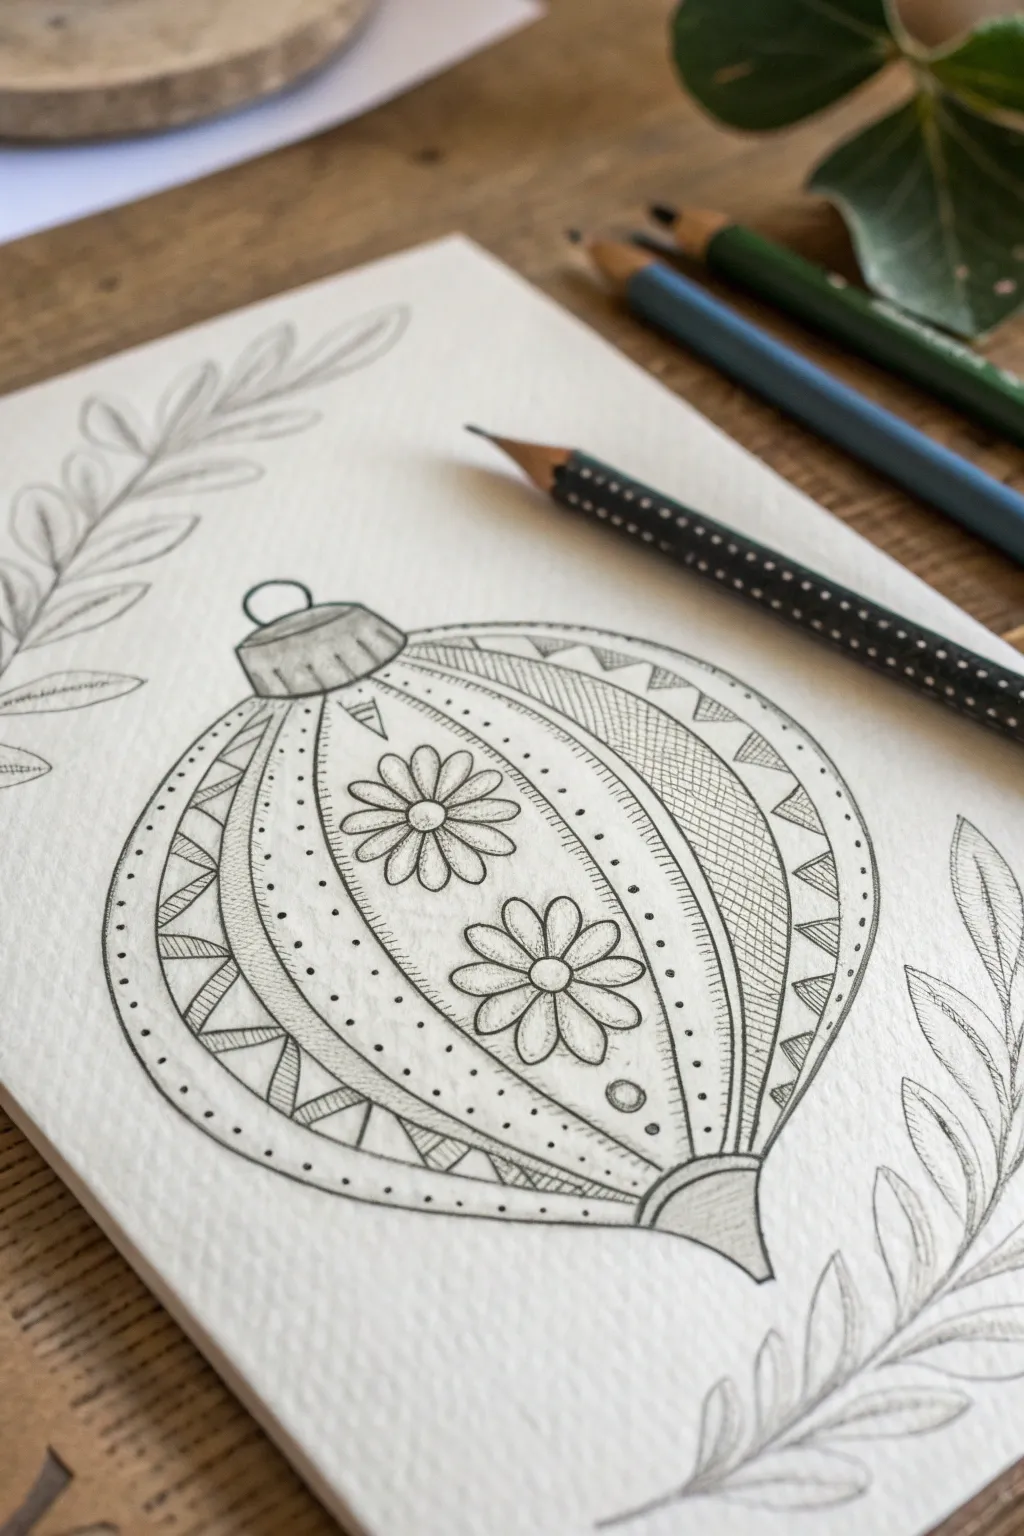
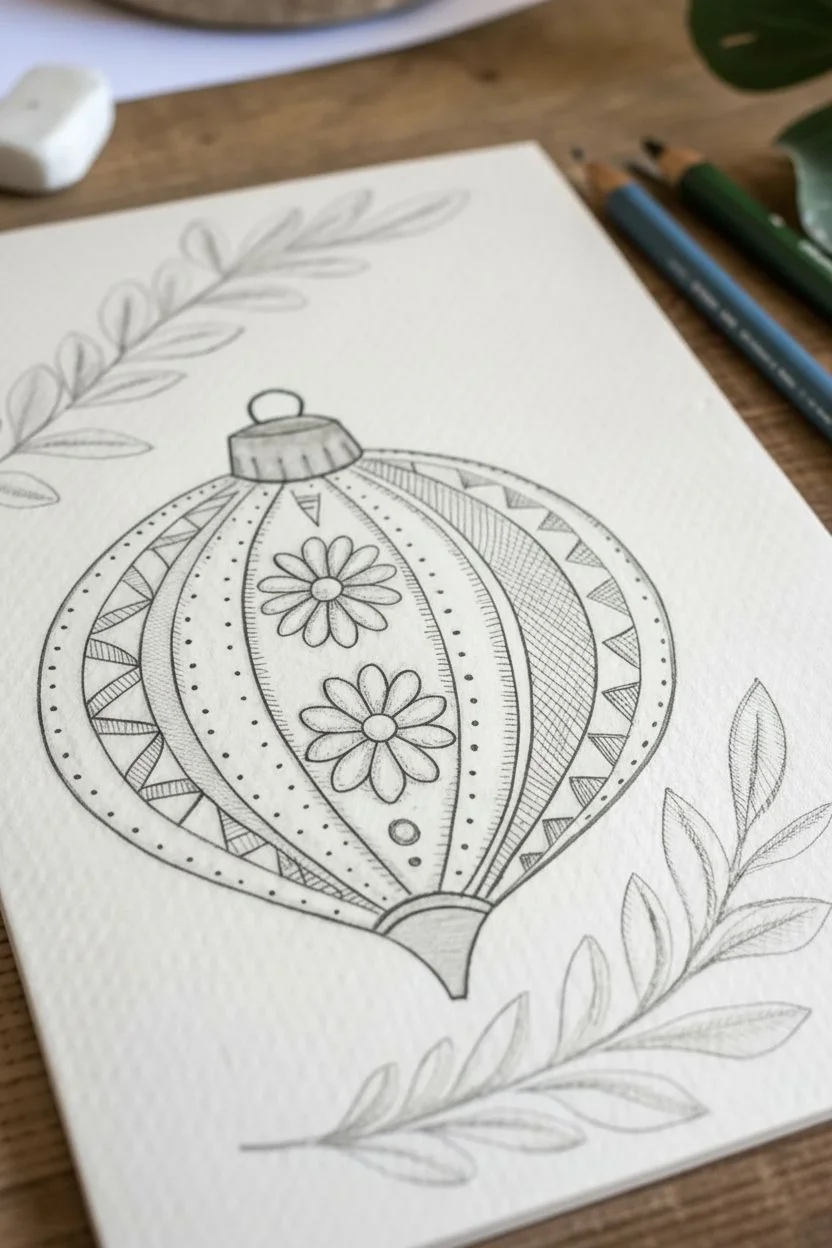
This elegant monochromatic drawing uses varied textures and precise line work to create a beautiful, teardrop-shaped ornament centerpiece. By focusing on repeating patterns like triangles and florals within segmented curves, you can build a rich, detailed design using only graphite.
Detailed Instructions
Materials
- Textured drawing paper or sketchpad (medium tooth)
- Graphite pencils (HB for sketching, 2B or 4B for shading)
- Fine-point mechanical pencil (optional for details)
- Eraser (kneaded eraser is essential for lifting highlights)
- Ruler (optional)
- Blending stump (tortillon)
Step 1: Drafting the Structure
-
Outline the main shape:
Begin by lightly sketching a large, rounded teardrop shape in the center of your page. The bottom should come to a gentle point, while the top remains circular. -
Add the cap and finial:
Draw a rectangular cap at the top of the circle with a small loop or ring above it. At the very bottom point, add a matching small, fluted finial to balance the design. -
Divide into segments:
Draw four curved vertical lines running from the top cap to the bottom finial. These lines should bow outward, following the contour of the ornament, creating five distinct vertical sections.
Smudged it?
If your hand drags graphite across the paper, place a clean scrap sheet under your drawing hand. Use a kneaded eraser to lift accidental smudges without damaging the paper tooth.
Step 2: Adding the Patterns
-
Establish the central floral motif:
In the wide, central segment, lightly sketch two large daisy-like flowers stacked vertically. Leave plenty of space between them for a clean look. -
Define the flower petals:
Go over your flower sketches with firmer lines, creating distinct, rounded petals and a defined circular center for each bloom. -
Create the zig-zag borders:
In the two outer segments (left and right edges of the ornament), draw a zig-zag line running from top to bottom. Fill one side of the triangles with horizontal hatching lines to create contrast. -
Fill the intermediate panels:
For the panels between the center and the outer edges, fill the space with closely spaced vertical lines. These mimic the texture of fabric or thread. -
Add dotted details:
Inside the main central panel, add rows of small dots along the vertical dividing lines. These act like a border for the floral section.
Add some sparkle
Once the pencil work is done, use a fine-tip gold or silver gel pen to trace over the ‘stitched’ lines or the dots for a sophisticated holiday shimmer.
Step 3: Embellishing and Shading
-
Add divider details:
Draw tiny hash marks or short perpendicular lines along the primary vertical curves to make them look like stitched seams. -
Detail the cap:
Add vertical shading lines to the top metal cap to give it a ribbed texture. Darken the base of the cap slightly to show dimension. -
Refine the triangles:
Go back to your zig-zag sections and ensure the hatched triangles are nice and dark compared to the empty white triangles next to them. -
Shade for volume:
Using the side of a softer pencil (like a 2B), gently shade the outer left and right edges of the entire ornament. This shadow implies roundness. -
Add final textures:
Draw a few tiny circles or ‘bubbles’ near the bottom of the central panel to fill empty space without cluttering it.
Step 4: Finishing Touches
-
Sketch the foliage:
Draw a long, curving stem starting from the bottom right corner, sweeping up the side. Add pairs of simple, pointed leaves along the stem. -
Repeat foliage on the left:
Add a smaller branch layout in the top left corner, ensuring the leaves point roughly towards the center of the composition. -
Vein the leaves:
Draw a central vein in each leaf, then add light diagonal hatching on just one side of the vein for a stylized, illustrative effect. -
Clean up:
Use your eraser to remove any stray sketch lines outside the main border. I find a kneaded eraser works best here to dab away graphite dust without smudging.
Now you have a beautifully intricate ornament illustration ready to be framed or used as a holiday card design
Two-Tone Ornaments With Bold Contrast and Simple Shapes
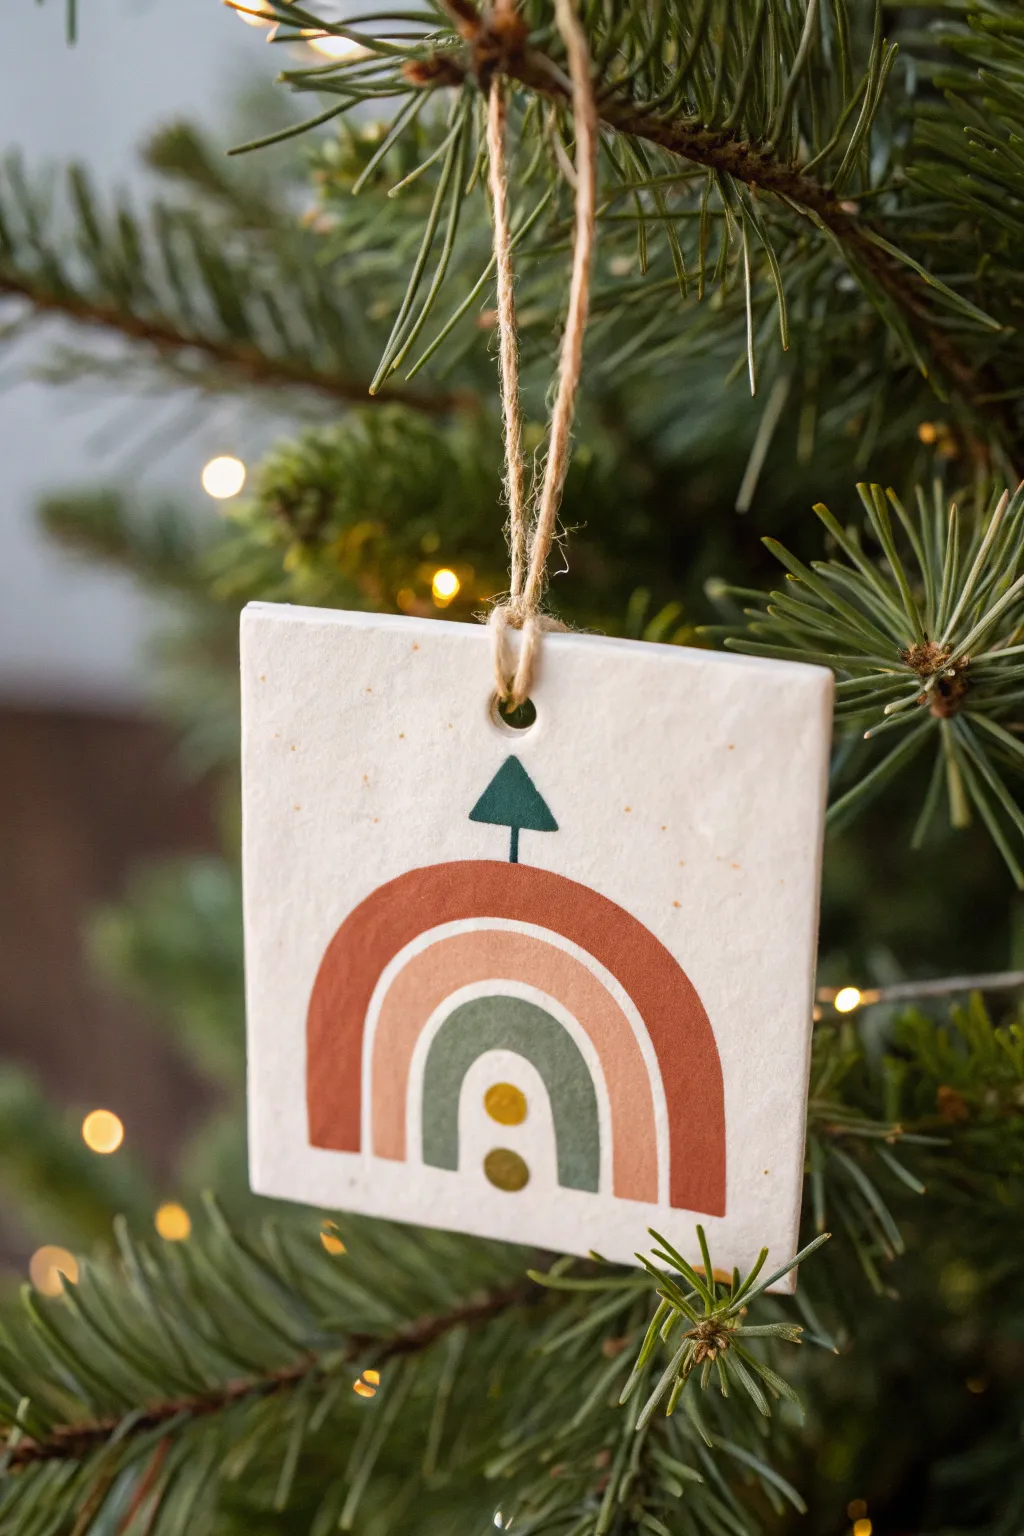
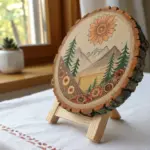
Bring earthy warmth to your holiday décor with this minimalist rainbow ornament featuring a charming abstract Christmas tree. The project combines muted, mid-century modern tones with simple geometric shapes for a distinctive, handmade look that feels both contemporary and cozy.
Step-by-Step Guide
Materials
- Square seed paper or white air-dry clay (rolled to 0.5cm thick)
- Acrylic paints (terracotta, peach/beige, sage green, dark forest green, mustard yellow)
- Fine detail paintbrush (size 0 or 00)
- Flat shader brush (size 2)
- Jute twine or hemp cord
- Pencil for sketching
- Hole punch or drinking straw (if using clay)
- Matte sealant or varnish (optional)
- Ruler
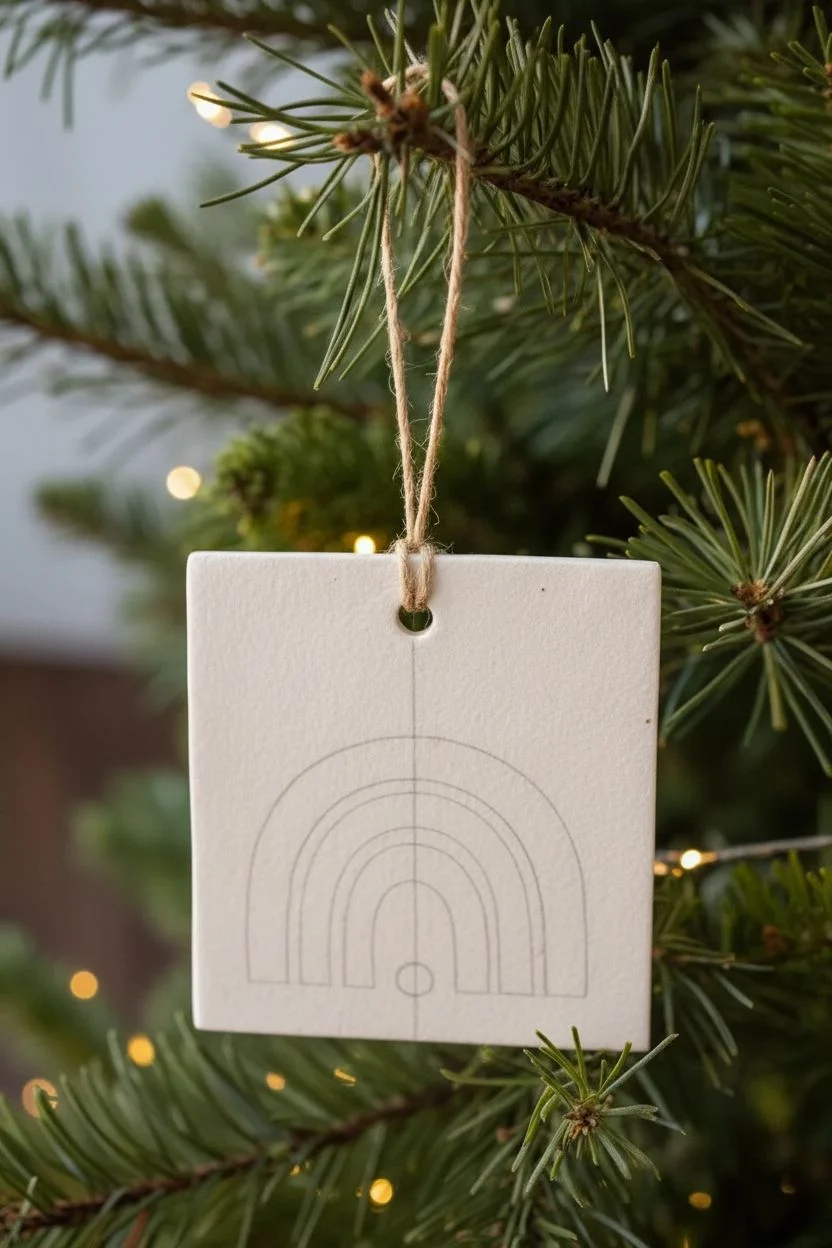
Step 1: Preparation
-
Prepare your base:
If you are using store-bought square seed paper cards, ensure the surface is clean. If using air-dry clay, roll it out to a uniform thickness, cut a 3×3 inch square, create a hole at the top using a straw, and let it cure fully before painting. -
Lightly sketch the design:
Using a pencil with a very light hand, mark the center vertical line of your square to help with symmetry. This will be the anchor for your rainbow arches and the tree stem. -
Mark the arches:
Sketch three concentric semi-circles for the rainbow. The outermost arch should span most of the width, while the inner arch should leave a small empty space in the very center.
Clean Lines Hack
Use a compass or trace round objects like coins and bottle caps to sketch perfectly symmetrical arches before you start painting.
Step 2: Painting the Rainbow
-
Paint the outer arch:
Load your flat shader brush with terracotta paint. Carefully follow your outer pencil line to create a thick, bold arch. I find it helps to rotate the ornament itself rather than your hand to get a smoother curve. -
Create the middle arch:
Mix a small amount of peach or beige paint. Apply this to the middle band, leaving a thin line of negative white space between it and the terracotta arch to keep the bands distinct. -
Add the inner arch:
Switch to sage green paint for the smallest, innermost arch. Keep this line as consistent in width as possible, maintaining that slight gap of white space from the peach band.
Add Subtle Texture
Mix a pinch of baking soda into your acrylic paint. It creates a matte, grainy texture that resembles ceramic pottery.
Step 3: Adding Details
-
Paint the central dots:
In the open space beneath the inner green arch, use the mustard yellow paint to place two vertical dots. Use the back end of your paintbrush handle dipped in paint to stamp perfect circles. -
Add the tree stem:
Using your fine detail brush and dark forest green paint, draw a very thin vertical line extending straight up from the top center of the terracotta arch. -
Paint the tree triangle:
At the top of that stem line, paint a small, solid triangle in the same dark forest green. The base of the triangle should hover just slightly above the main rainbow, creating a minimalist tree shape.
Step 4: Finishing
-
Let it dry completely:
Allow the paint to dry fully. If you used seed paper, avoid using heavy sealants that might damage the seeds. If using clay, you can apply a matte varnish now for protection. -
Prepare the hanger:
Cut a 6-inch length of jute twine or hemp cord. -
Thread and knot:
Fold the twine in half to create a loop. Push the folded end through the hole from front to back. -
Creating a lark’s head knot:
Pull the loose ends of the twine through the loop you just pushed through the hole and tighten it gently against the top of the ornament. -
Tie the top:
Finish by tying the two loose ends together in a simple overhand knot to close the hanging loop.
Hang your new ornament on a sturdy branch to showcase its modern charm nearby warm fairy lights

PENCIL GUIDE
Understanding Pencil Grades from H to B
From first sketch to finished drawing — learn pencil grades, line control, and shading techniques.
Explore the Full Guide
Ornament Garland Border for Cards and Journal Pages
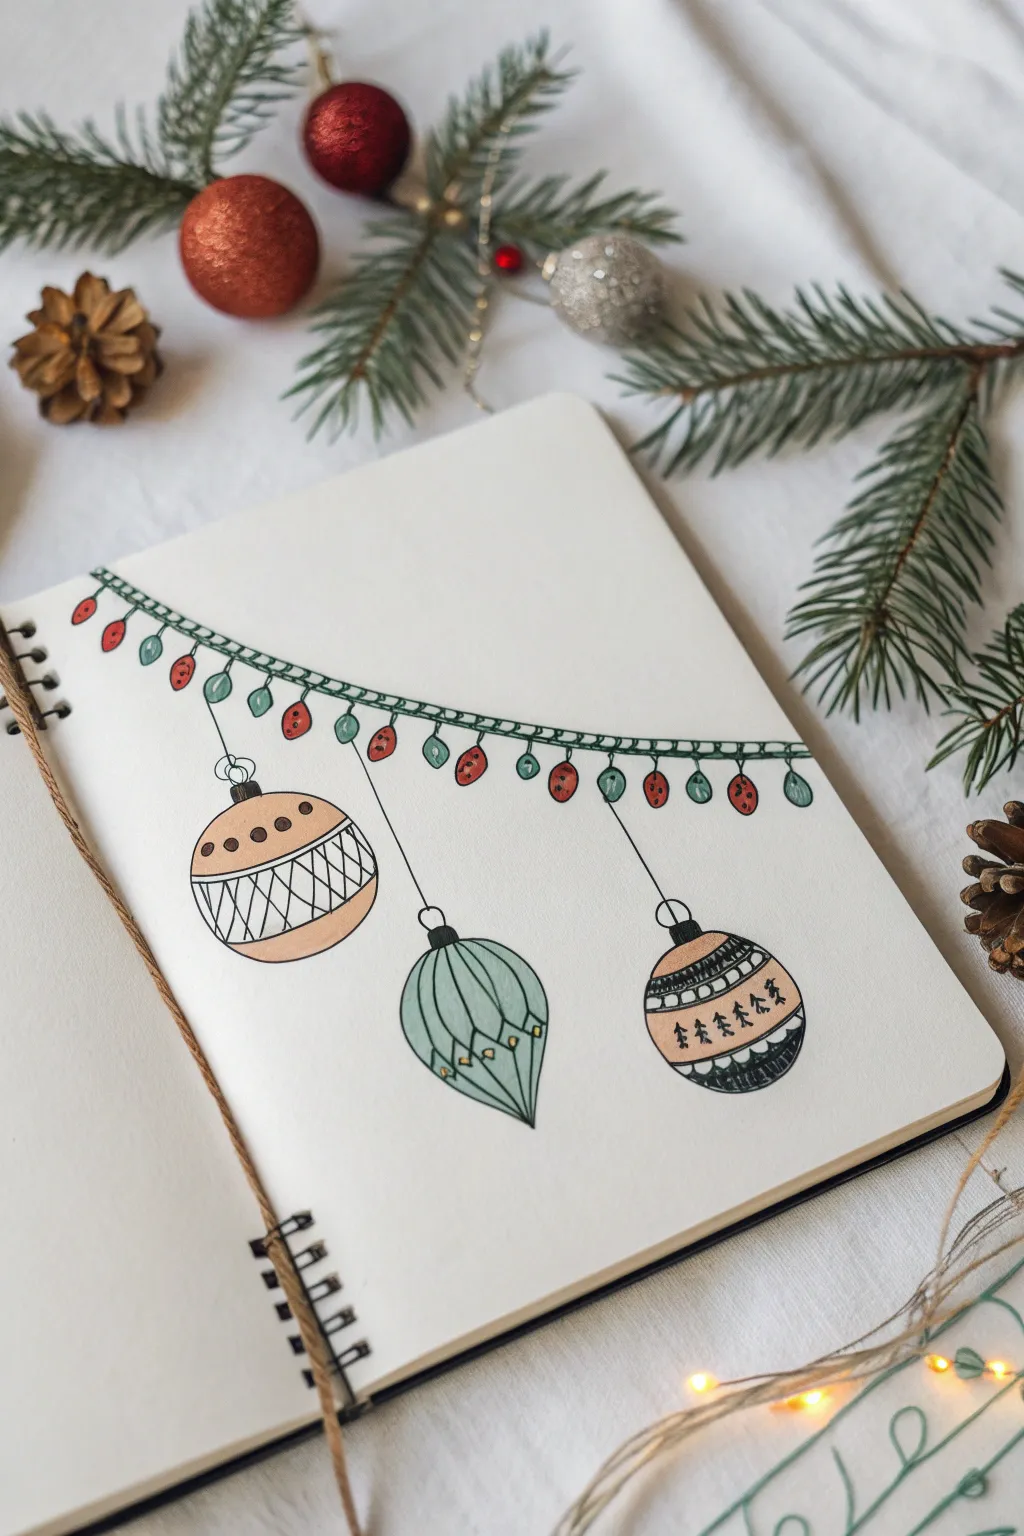

Add festive cheer to your journal or holiday cards with this delicate garland design. Featuring playful hanging baubles and string lights, this illustration captures the cozy spirit of the season with simple lines and soft colors.
Step-by-Step Guide
Materials
- Journal or sketchbook (smooth, thick paper preferred)
- Fine liner pen (0.3mm or 0.5mm, black)
- Pencil (HB) and eraser
- Colored pencils or markers (red, green, beige/peach, gold/light yellow)
- Ruler (optional, but helpful)
Step 1: Sketching the Framework
-
Draw the main curve:
Start by lightly sketching a gentle, downward-curving line across the top quarter of your page using your pencil. This will act as the wire for your garland. -
Position the hanging lines:
Decide where your three main ornaments will hang. Draw three vertical lines descending from the main curve—make the center one longer and the two side ones slightly shorter for visual balance. -
Outline the ornament shapes:
At the end of the left line, sketch a round circle. For the middle line, draw a teardrop or onion shape that tapers at the bottom. For the right line, sketch a slightly smaller circle. -
Add the light bulb placements:
Along the main curved wire, sketch small, evenly spaced ovals or teardrops hanging down. These will be your string lights. I usually aim for about 15-20 small lights across the span.
Pro Tip: Steady Lines
When drawing long strings or wires, lock your wrist and move your whole arm. This creates smoother, more confident lines than trying to move just your fingers.
Step 2: Inking the Details
-
Ink the main wire:
Switch to your fine liner pen. Trace over the main curved line. To give it the texture of twisted wire or garland, draw short, diagonal hatch marks along the entire length of the curve. -
Draw the string lights:
Ink the small light bulbs hanging from the wire. Make them distinct teardrop shapes. -
Fill the light cord details:
Connect each light bulb to the main wire with a tiny rectangle or square to represent the socket base. -
Ink the hanging strings:
Trace the three vertical strings holding the large ornaments. Keep your hand steady for a straight line, stopping just before you reach the ornament shape. -
Draw ornament caps:
At the bottom of each string, draw a small rectangular cap with a tiny loop on top connecting it to the string. Darken the top of the cap for depth. -
Outline the ornaments:
Carefully ink the outline of your three main ornaments—the round left one, the teardrop middle one, and the round right one.
Step 3: Decorating the Ornaments
-
Left ornament patterns:
Divide the left ornament into three horizontal sections. Draw small circles in the top section. In the middle band, draw a crisscross lattice pattern. Leave the bottom section smooth. -
Middle ornament texture:
For the teardrop ornament, draw vertical curved lines following the shape of the ornament to create ribs. Near the bottom, add a zig-zag line connecting these ribs. -
Right ornament motifs:
Segment the right ornament into bands. Fill the middle band with tiny, simple pine tree shapes. Add dashed lines to the bands above and below the trees for extra detail. -
Clean up:
Wait about five minutes to ensure the ink is completely dry, then gently erase all your pencil guides.
Level Up: Metallic Pop
Go over the ornament caps or the zig-zag details with a metallic gold or silver gel pen. It adds a surprising shimmer when the page catches the light.
Step 4: Adding Color
-
Color the string lights:
Using markers or colored pencils, alternate coloring the small light bulbs red and teal green. This classic combo instantly signals Christmas. -
Base tone for ornaments:
Color the top and bottom sections of the left ornament and the main body of the right ornament with a soft beige or peach tone. -
Coloring the center ornament:
Fill the middle teardrop ornament with a soft sage or mint green. Add tiny touches of gold or yellow to the zig-zag details near the bottom. -
Adding final accents:
Use a dark grey or black to fill in the bottom band of the right-hand ornament. You can also add tiny dots of yellow or gold to the patterns on the left ornament for a bit of sparkle.
You now have a beautiful festive border ready to frame your holiday memories
Faceted Geometric Ornament Drawing With Crisp Planes
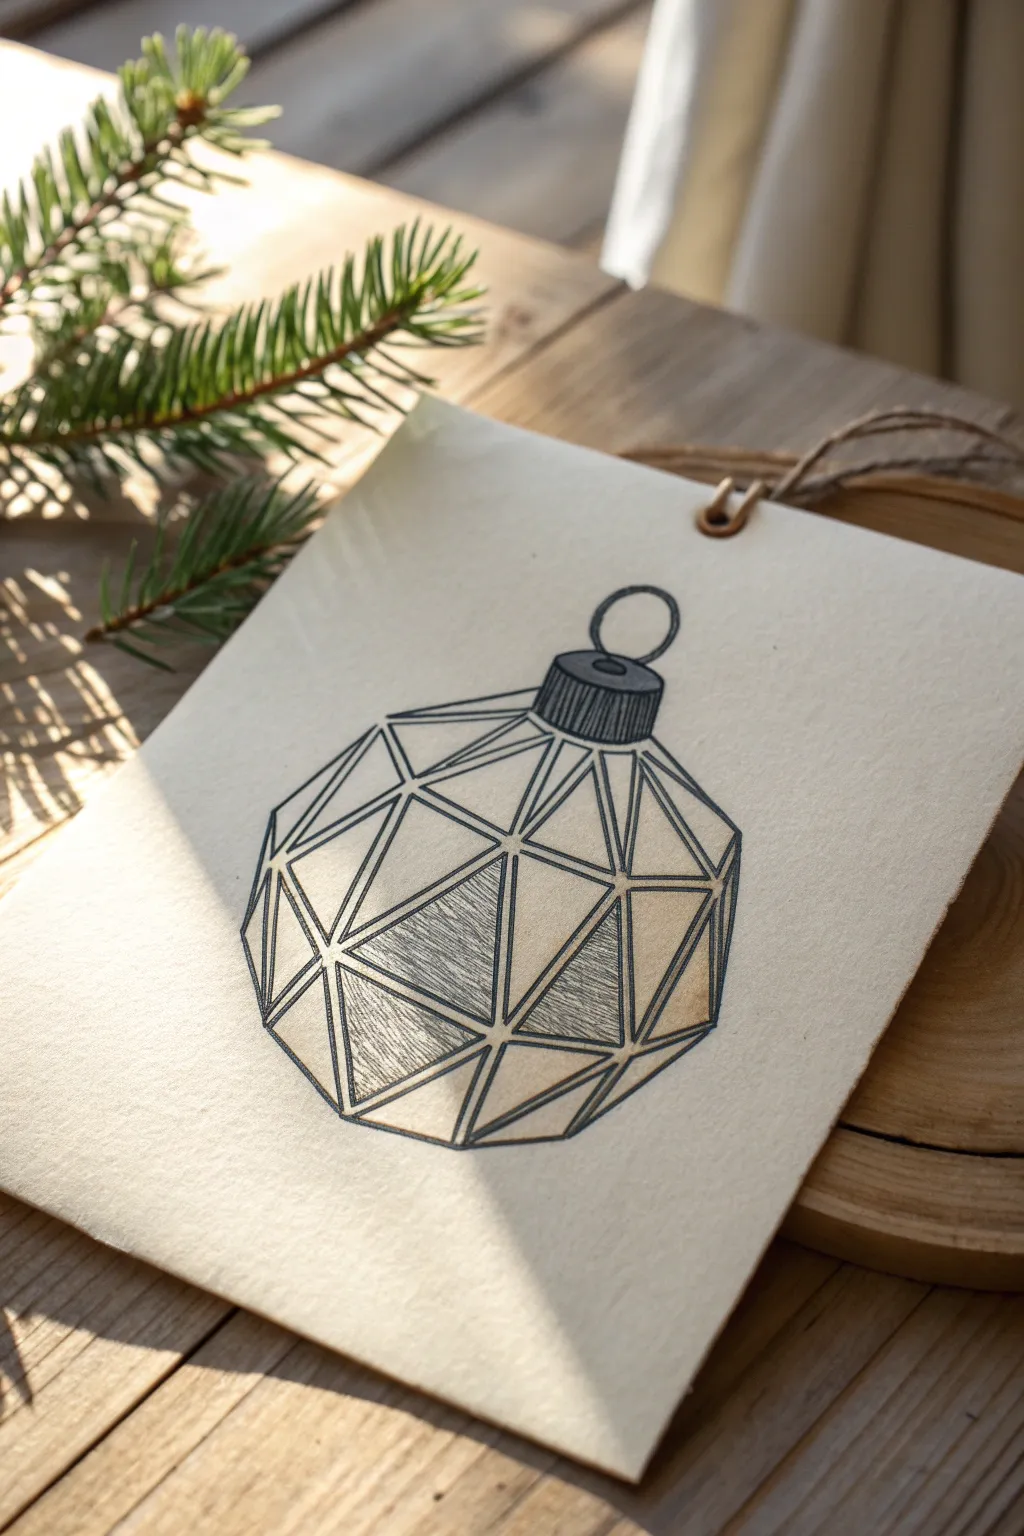
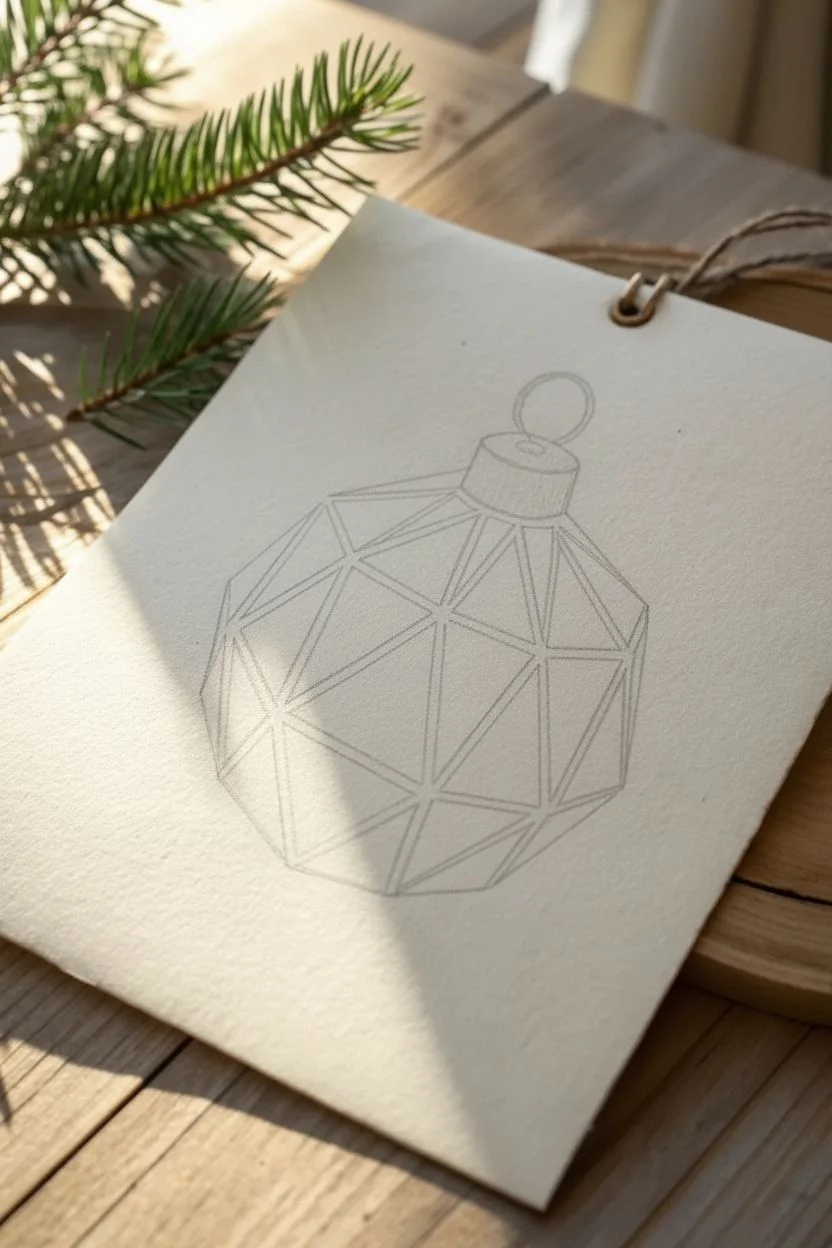
Capture the elegance of modern geometry with this faceted ornament design, perfect for holiday greeting cards or gift tags. The crisp, clean lines create a 3D effect that looks sophisticated yet is surprisingly simple to achieve with just a fine liner pen.
Step-by-Step Guide
Materials
- Cream colored cardstock or textured art paper
- Pencil (HB or H for light lines)
- Eraser (kneaded preferred)
- Ruler
- Fine liner pen (01 or 03 size, black)
- Circle template or compass (optional)
Step 1: Drafting the Design
-
Outline the base shape:
Start by drawing a faint circle in pencil. You can use a compass, trace a circular object, or freehand it if you feel confident. This acts as the boundary for your geometric form. -
Draw the geometric frame:
Visualize the circle as an octagon or decagon. Around the perimeter of your circle, draw straight lines connecting points to create a simplified, angular outline rather than a perfect curve. It helps to lightly mark 8 to 10 points on the circle first. -
Establish the focal point:
Draw a small horizontal pentagon or hexagon near the center, slightly offset towards the bottom left. This central ‘facet’ will anchor your perspective for the 3D effect. -
Connect the facets:
Using your ruler, draw straight lines radiating from the corners of your central shape out to the corners of your outer perimeter. This creates a web of triangles and quadrilaterals. -
Create the cap:
At the very top of your shape, sketch a small rectangle for the ornament cap. Top it with a simple loop for the hanger.
Uneven Lines?
If your hand shakes while drawing straight lines, try ‘ghosting’ the motion first—hover your pen over the paper and move your whole arm, not just your wrist.
Step 2: Inking and Definition
-
Trace the main lines:
Switch to your black fine liner pen. I find an 03 size works best for these outer lines to give them some weight. Carefully trace over your pencil structure. -
Avoid the ruler for inking:
Try inking freehand without the ruler now. Slightly imperfect lines add character and warmth to the drawing that a mechanically straight line might lack. -
Detail the cap:
Ink the rectangular cap at the top. Add tiny vertical lines close together inside the rectangle to simulate the texture of a metal crimped cap. -
Ink the hanger loop:
Draw the loop at the top with a double line to give it thickness, rather than a single wire strand. -
Double the internal lines:
To enhance the ‘leaded glass’ look, go back over your internal geometric lines and add a second, very thin line right next to the first one. This creates a small gap between facets.
Level Up: Gold Accents
Use a metallic gold gel pen or gold watercolor paint to fill in just one or two random facets. This adds a festive sparkle that catches the light beautifully.
Step 3: Shading and Finishing
-
Identify shadow areas:
Decide on a light source—in this example, it’s coming from the top left. Choose facets on the lower right and bottom to be your shadowed areas. -
Apply linear hatching:
Fill the chosen shadow facets with closely spaced, parallel fine lines. Keep the spacing consistent to create a uniform tone. -
Cross-hatching for depth:
For the darkest facets, add a second set of diagonal lines perpendicular to your first set. This makes those specific triangles recede further into the background. -
Erase pencil marks:
Wait until the ink is completely dry—give it a solid few minutes to prevent smudging. Gently run your kneaded eraser over the entire design to remove the graphite guidelines. -
Add highlights:
If you want extra dimension, leave the facets facing the light source completely white. This contrast maximizes the faceted, jewel-like appearance.
Now your modern geometric ornament is ready to adorn a holiday gift or hang on the wall


Cute Character Ornaments With Faces, Hats, and Accessories

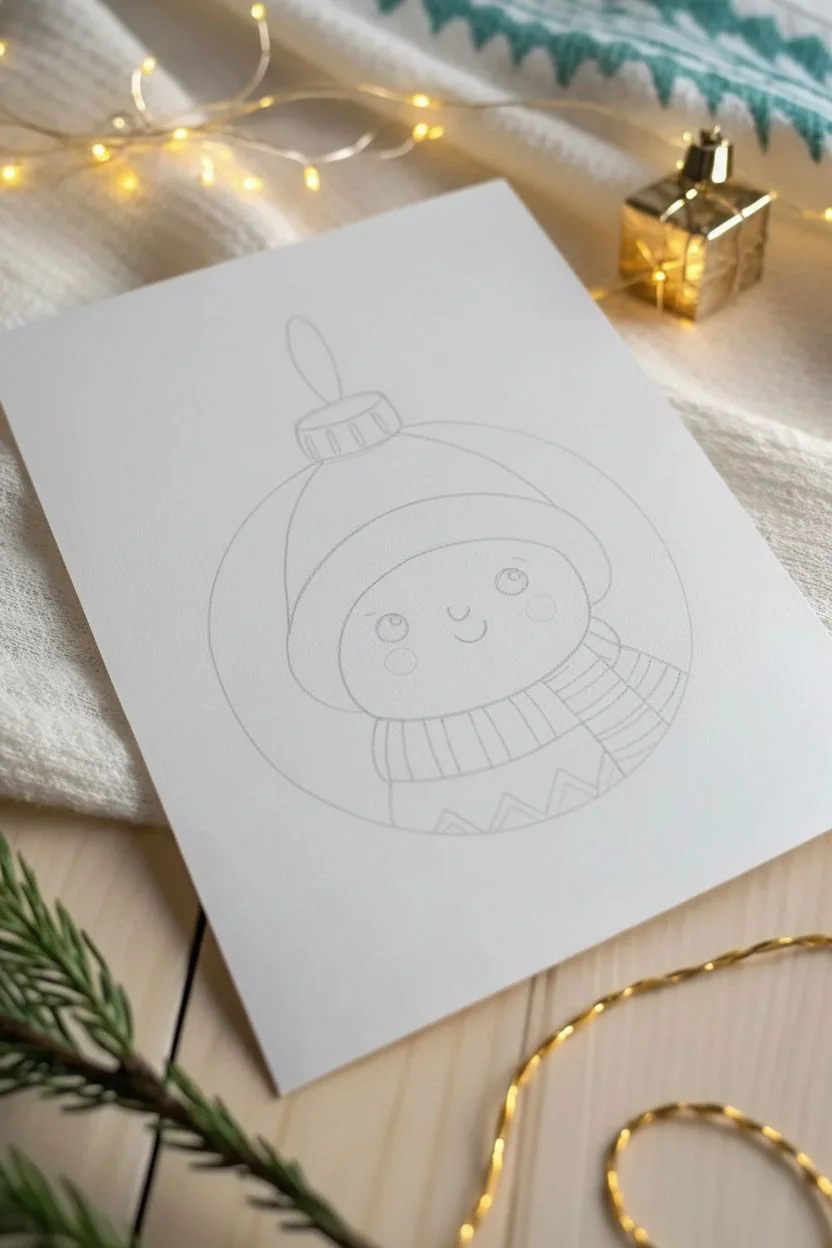
Capture the warmth of the season with this adorable drawing of a winter character tucked inside a classic round ornament. This project uses clean lines and distinctive coloring to create a charming, minimalist holiday card art inspired by Scandinavian design.
Step-by-Step Guide
Materials
- High-quality white cardstock or mixed media paper
- Pencil and eraser
- Compass or a circular object to trace (approx. 3-4 inches diameter)
- Fine liner pen (black, waterproof, size 0.3mm or 0.5mm)
- Markers (alcohol-based or water-based) in red, teal green, light peach/tan, and yellow-gold
- White gel pen (optional for highlights)
Step 1: Drafting the Basic Shape
-
Draw the main circle:
Start by lightly tracing a perfect circle in the center of your paper using a compass or by tracing a round object like a jar lid or masking tape roll. -
Add the ornament cap:
At the very top center of your circle, sketch a small, flattened rectangle for the ornament’s cap. Draw a simple loop coming out of it for the hanger string. -
Outline the hat:
Inside the circle, draw a curved line across the upper third to form the bottom of the hat’s cuff. Add a parallel curve above it for the top of the cuff, then draw the main dome of the hat reaching towards the ornament cap. -
Sketch the face shape:
Define the character’s face shape. The hat cuff covers the forehead, so just draw a U-shape extending down from the cuff, creating a smooth, rounded chin. -
Add the scarf:
Directly below the chin, draw two curved lines sweeping across the neck area to create a cozy scarf. Add vertical lines to indicate the hanging ends of the scarf on the right side. -
Detail the sweater:
In the remaining space at the bottom of the circle, sketch a simple geometric pattern for the sweater, like a zigzag line or small triangles.
Uneven Circle?
If drawing a perfect circle is tough, trace the *inside* of a tape roll for a guide. If inking goes wobbly, just make the outer line thicker to hide mistakes.
Step 2: Inking and Face Details
-
Ink the main outlines:
Take your black fine liner and carefully trace over your pencil lines. Use a steady hand to make the circle outline smooth and continuous. -
Draw the facial features:
In the center of the face, draw two small, solid black circles for widely spaced eyes. Add a tiny U-shape between them for a smiling mouth. -
Add decorative elements:
Draw vertical ribbing lines on the hat cuff and the ornament cap. Add small circles on the main part of the hat for a polka-dot pattern. -
Background snowflakes:
In the empty space inside the ornament (around the character’s head), draw simple stick-style snowflakes to fill the negative space. -
Erase pencil marks:
Once the ink is completely dry—I usually wait at least two minutes to be safe—gently erase all the underlying pencil sketches.
Make It Sparkle
Once the drawing is dry, add clear glitter glue over the red parts of the hat or the snowflakes for a textured, festive shimmer that catches the light.
Step 3: Coloring the Character
-
Color the hat cuff:
Use a teal or muted green marker to fill in the ribbed cuff of the hat. Work in smooth strokes to simulate the fabric texture. -
Fill the hat and scarf:
Switch to a warm red marker. Carefully color the main part of the hat (avoiding the white polka dots if you can, or color over them and fix later). Color the stripes of the scarf in red, leaving alternating white stripes. -
Add the rosy cheeks:
Take a pale pink or coral marker and dab two round distinct circles right under the eyes for that cute, frosty-cheek look. -
Color the sweater detail:
Use the red marker again to fill in the triangles or zigzags at the very bottom of the sweater pattern. -
Golden accents:
Color the ornament cap at the top with a yellow or gold marker to make it look metallic. -
Add subtle shading:
To give the character volume, use a very light grey or beige marker to add a shadow under the hat brim and along one side of the face.
Step 4: Final Touches
-
Highlighting:
If you colored over the hat dots, use a white gel pen to add them back in. Add a tiny white dot in each eye to bring the character to life. -
Snowflake colors:
Trace over your snowflake doodles with fine colored pens (red, green, and black) to integrate them with the color palette.
You now have a charming festive character ready to be cut out or used as the centerpiece for a holiday card
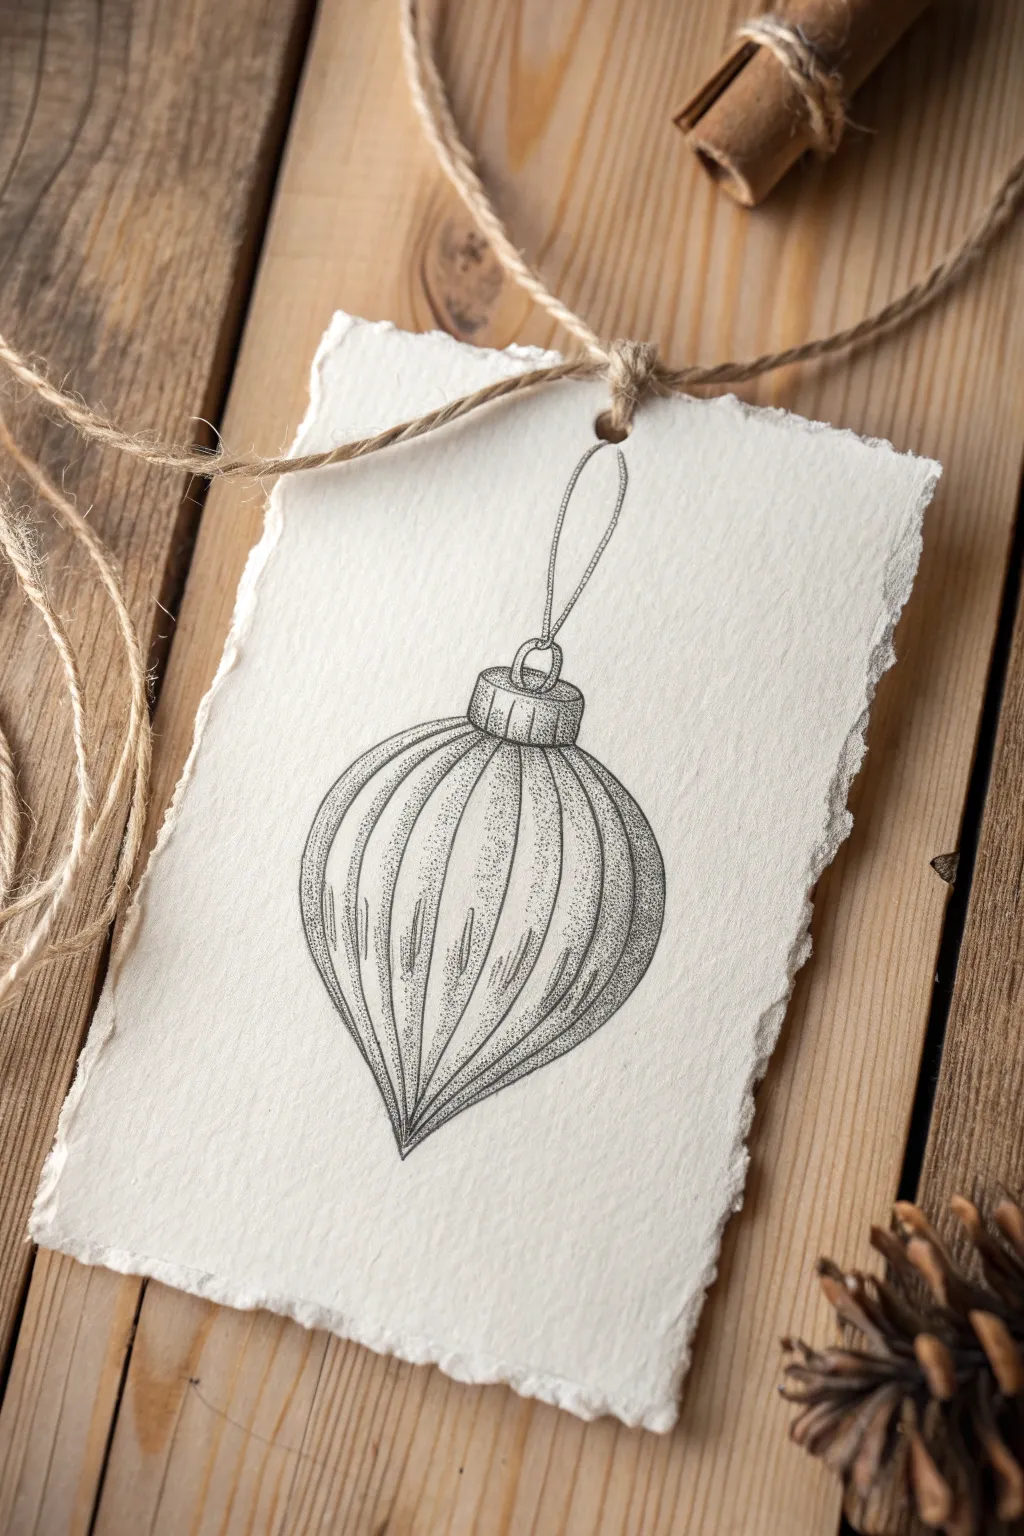
Rustic Woodgrain Ornament Sketches for a Handmade Feel

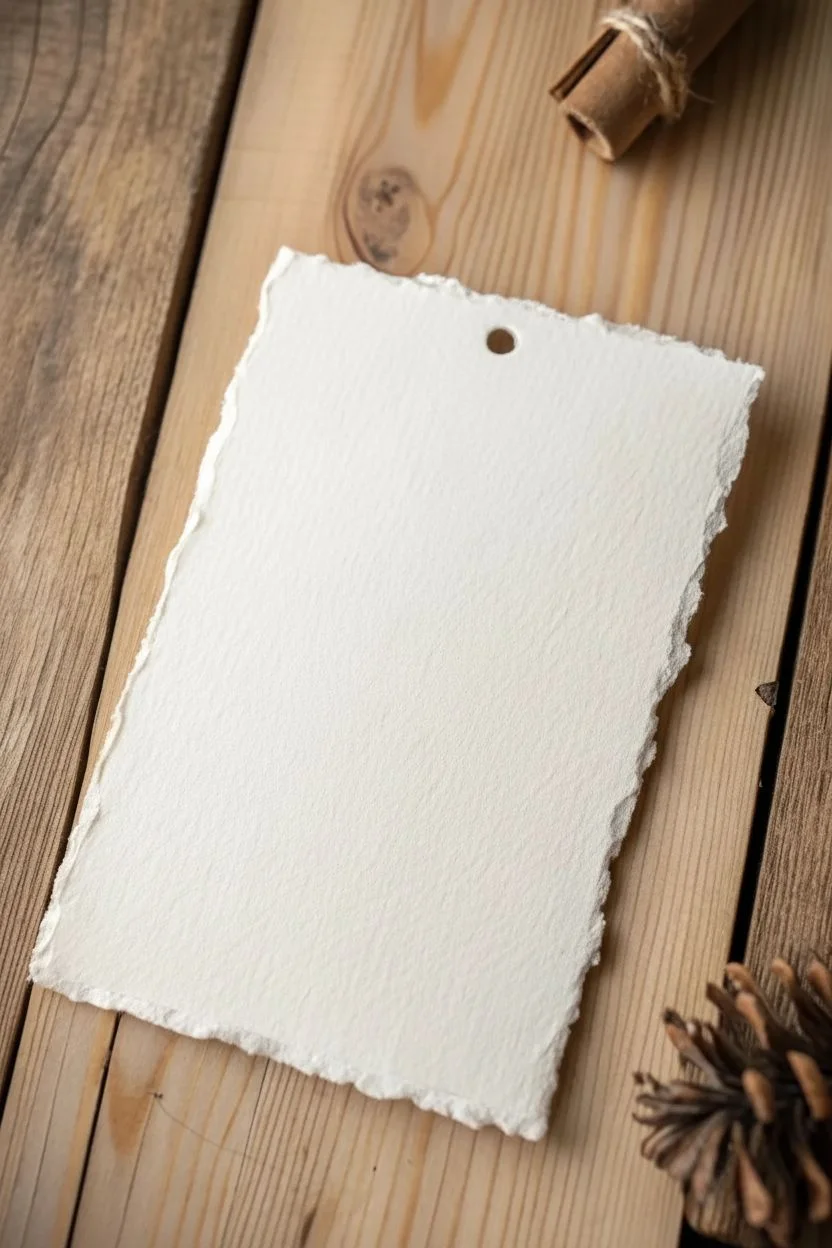
Capture the charm of an old-world Christmas with this delicate pen-and-ink illustration. Using fine stippling and textured paper, you’ll create a timeless piece of art perfect for holiday tags or greeting cards.
How-To Guide
Materials
- Heavyweight cold-press watercolor paper or handmade cotton paper
- Fine liner pens (sizes 005, 01, and 03, black ink)
- Graphite pencil (HB or 2H)
- Kneaded eraser
- Ruler
- Metal awl or thick needle
- Jute twine or rustic string
- Water for creating deckle edges (optional)
Step 1: Preparing the Paper
-
Size the Paper:
Cut or tear your handmade paper into a rectangle approximately 4×6 inches. If you are starting with a standard sheet, you can create the faux ‘deckle edge’ look by running a wet paintbrush along a ruler’s edge and carefully tearing the paper along the wet line. -
Punch the Hanging Hole:
Using a metal awl or a thick tapestry needle, pierce a small hole centered near the top edge of the paper. This will be used later for the decorative twine.
Step 2: Sketching the Outline
-
Basic Shapes:
Lightly sketch a teardrop shape with your HB pencil. This forms the main body of the bauble. Keep your lines very faint so they are easy to erase later. -
Adding the Cap:
Draw a small, slightly curved rectangle on top of the teardrop shape for the ornament cap. Add a small loop or ring on top of that rectangle. -
Defining the Curves:
Within the teardrop body, draw vertical curved lines that follow the contour of the shape. Imagine visualising the segments of a peeled orange or a pumpkin to get that ribbed, 3D effect. -
The String Loop:
Sketch a long, thin loop extending from the metal ring at the top. Make this look loose and natural rather than perfectly straight.
Ink Control
Keep your pen vertical. Angling the nib too much can flatten the tip and make inconsistent dots. Tap gently; don’t press hard.
Step 3: Inking and Detailing
-
Outline the Main Shape:
Take your 01 fine liner and carefully trace over your pencil lines for the ornament’s outer contour and the segmented curves. Break the lines slightly near the very bottom point to suggest light hitting the surface. -
Detailing the Cap:
Use the same 01 pen to outline the cap. Add tiny vertical hatches inside the cap rectangle to simulate the texture of crimped metal. -
The Thread:
Switch to your finest pen (005) to ink the string loop. Use a slightly shaky or broken line here to convey the texture of a thin thread rather than a stiff wire. -
Erasing Guides:
Wait at least five minutes for the ink to dry completely. Gently roll the kneaded eraser over the drawing to lift all graphite marks without damaging the paper surface.
Paper Bleeding?
If ink spreads or ‘feathers’ on handmade paper, use a finer nib and move faster. Avoid letting the pen tip rest in one spot.
Step 4: Shading with Stippling
-
Establishing Shadow Areas:
Identify the shadowed sides of the ornament segments. Generally, the edges of each ‘rib’ will be darker where they recede. -
Applying Base Stippling:
Using the 005 pen, begin placing tiny dots along the left and right edges of each vertical segment. Keep the center of each segment mostly white to serve as a highlight. -
Building Depth:
Increase the density of your dots near the very bottom of the ornament and along the outer edges. The closer the dots are to each other, the darker the shadow appears. -
Rounding the Form:
I usually add a very light scattering of dots just under the metal cap to show the gathered shadow there. Ensure the transition from the dense dots at the edges to the clear centers is gradual. -
Grounding the Image:
Add a few extremely faint dots on the paper background near the bottom tip of the ornament to give it a sense of place, though keep this minimal.
Step 5: Finishing Touches
-
Final Contrast Check:
Step back and look at your drawing. If the ornament feels flat, go back in with an 03 pen and darken just the very bottom tip and the deepest crevices between the segments. -
Adding Twine:
Cut a length of jute twine or rustic string. Thread it through the hole you punched in step one. -
Securing the Loop:
Tie a simple knot at the base of the hole, leaving the ends long and loose to mimic the rustic styling seen in the inspiration image.
Now you have a beautifully textured piece of art that brings a quiet, rustic elegance to your holiday decor


Have a question or want to share your own experience? I'd love to hear from you in the comments below!