Couples drawings are one of my favorite ways to practice gesture, storytelling, and that sweet little spark of connection on paper. Here are some go-to couple drawing ideas—starting with the classics you probably came for, then drifting into more playful, artsy twists.
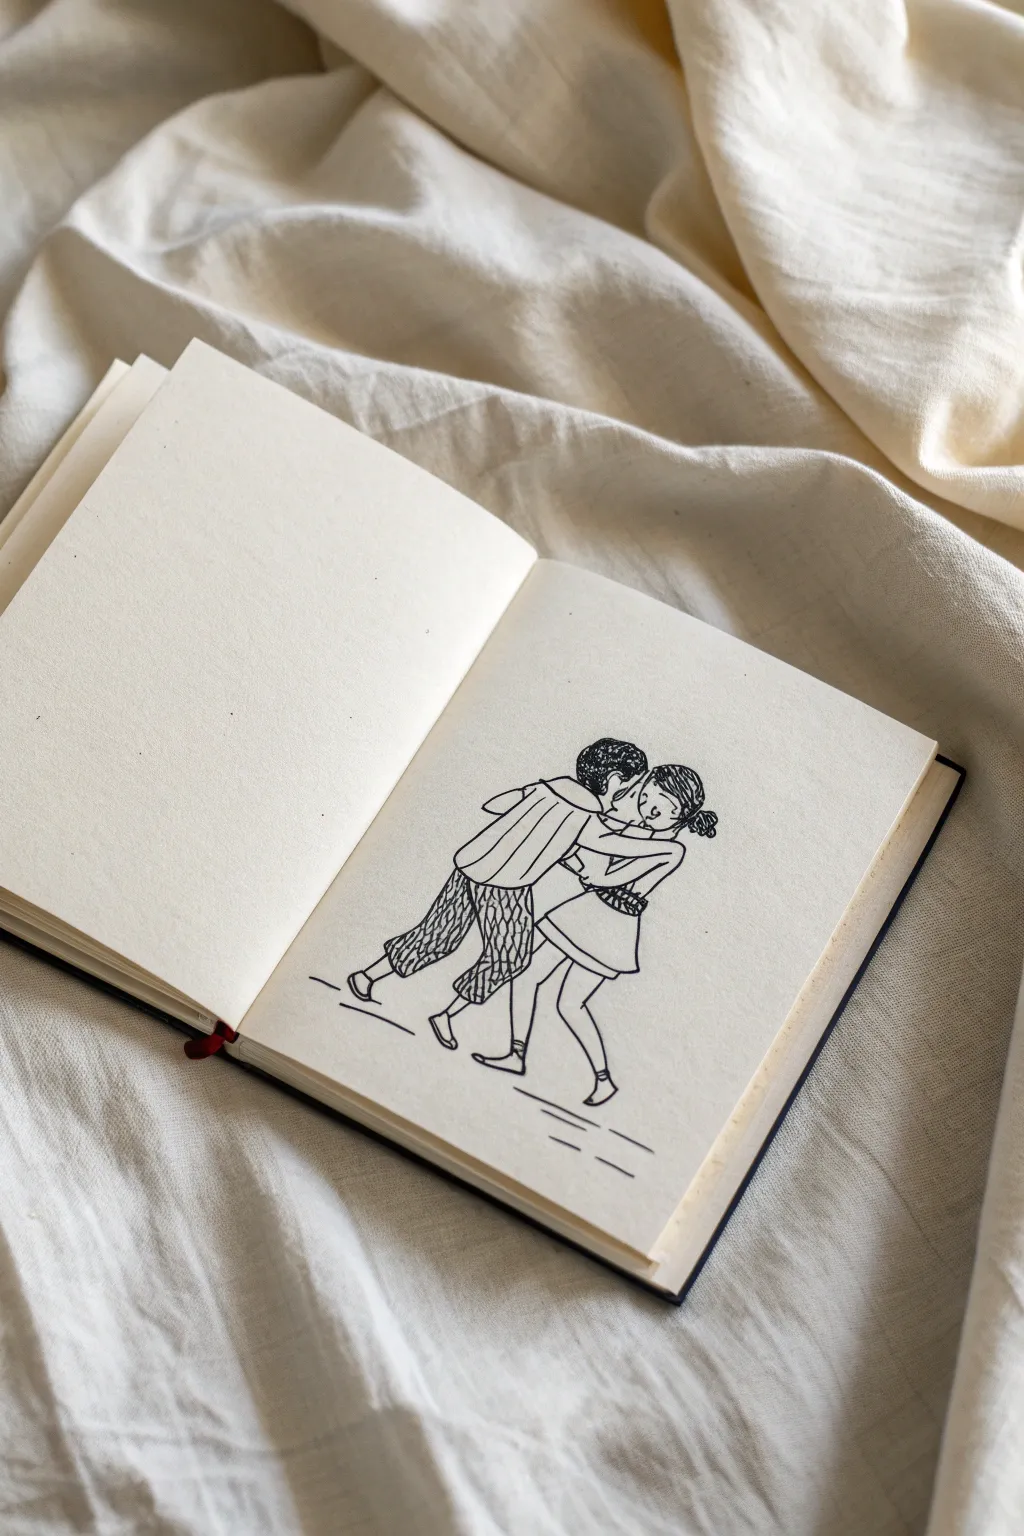
Classic Hug From the Side
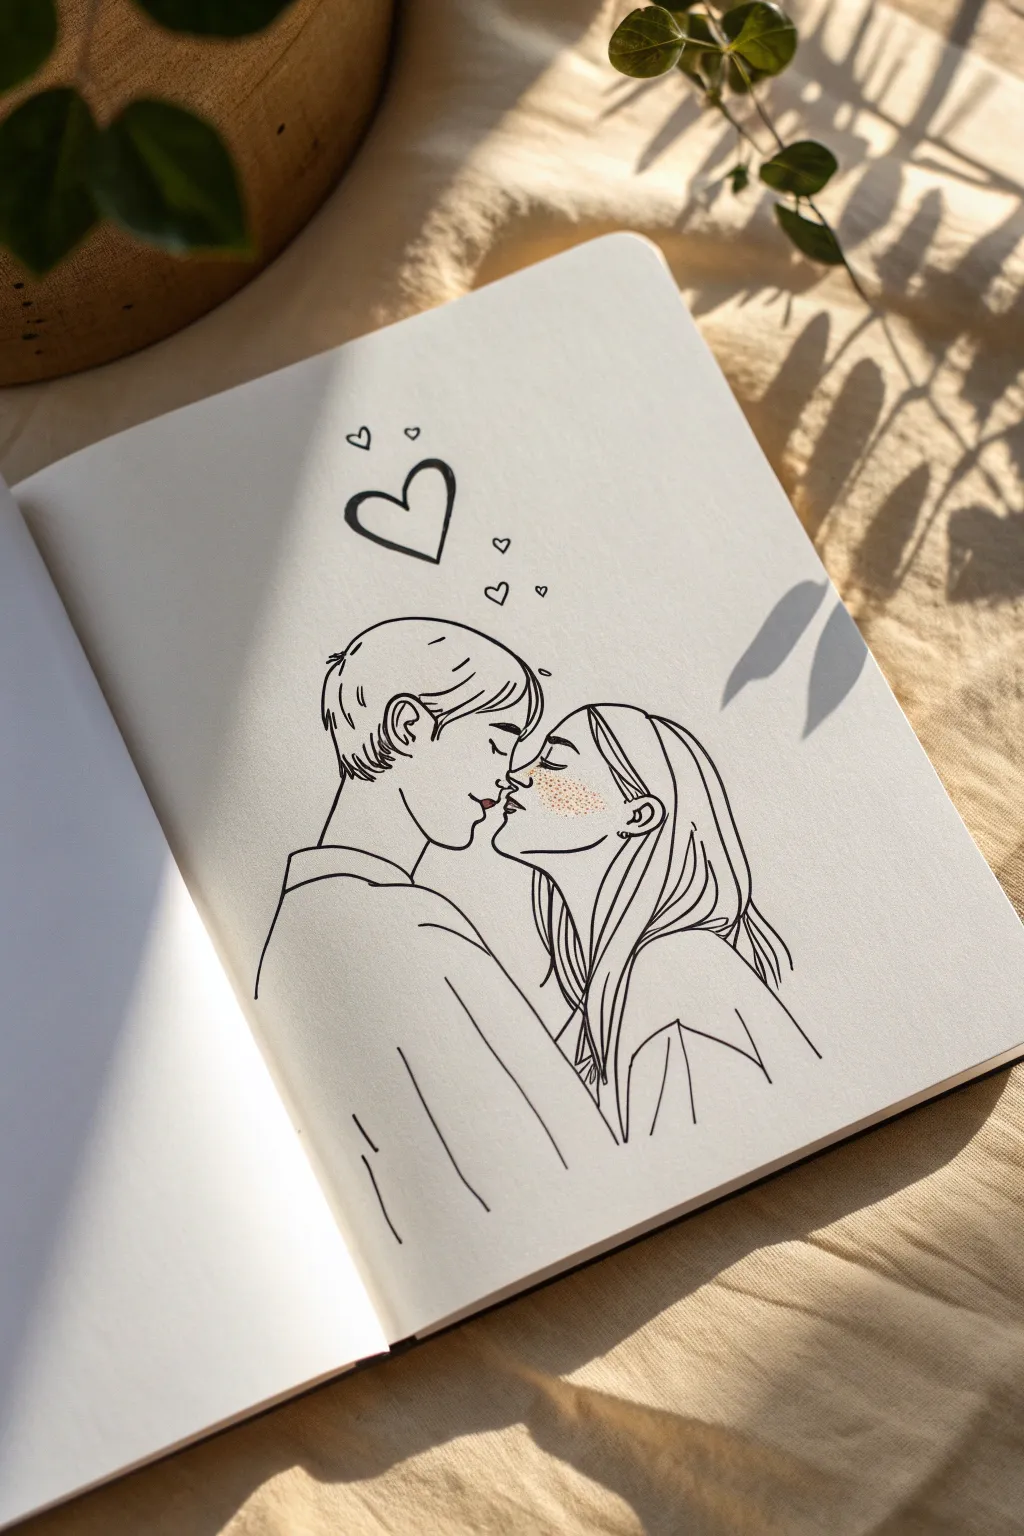
This tender line art piece captures a sweet moment of affection between a couple leaning in for a kiss. Using clean, minimalist ink lines and a delicate touch of stippling for freckles, this drawing relies on profile accuracy to convey emotion without needing heavy shading.
Step-by-Step Tutorial
Materials
- Sketchbook or quality drawing paper
- HB or 2B pencil for initial sketching
- Kneaded eraser
- Fine liner pen (0.3mm or 0.5mm, black)
- Thicker marker (0.8mm or 1.0mm) for the bold heart
- Optional: Red colored pencil or fine liner for lips
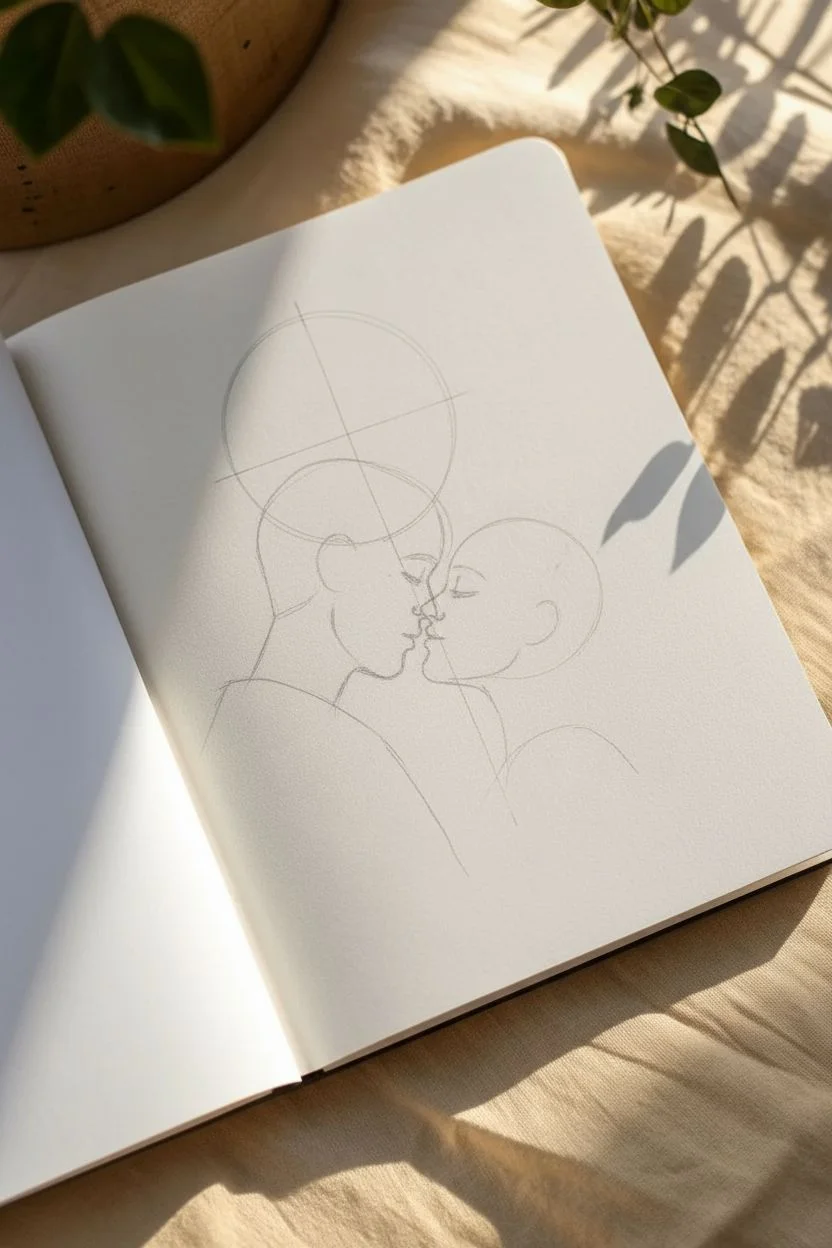
Step 1: Sketching the Foundations
-
Establish the head positions:
Start by lightly sketching two circles near the center of your page. The left circle (for the male) should be slightly higher than the right circle (for the female) to create natural spacing. -
Define the profile guidelines:
Draw vertical lines extending down from the front of each circle to mark where the faces will meet. Add horizontal guidelines to ensure the eyes and noses align comfortably. -
Draft the noses and foreheads:
Sketch the forehead slopes leading into the noses. Focus on the negative space between their faces; as they lean in, their noses should be overlapping or just barely touching. -
Position the lips and chin:
Below the noses, sketch the lips puckered outward. The male figure’s chin should be slightly more angular, while the female figure’s chin can be a softer curve leading into the jawline.
Step 2: Adding Details
-
Map out the hair shapes:
Sketch the general volume of the hair. For him, create a short, layered shape that covers the ears slightly. For her, sketch long, flowing lines that tuck behind her ear and drape over her shoulders. -
Draft the neck and shoulders:
Extend lines down for the necks. Since they are leaning, her neck will angle back slightly. Draw simple, sloping lines for their shoulders, indicating the clothing without excessive detail. -
Refine facial features:
Lightly pencil in the closed eyes. These should be simple, curved lines that angle downwards, mimicking the lash line. Add the ears; his is partially visible, while hers is tucked behind hair but visible near the jaw.
Reference Use
Take a photo of yourself and a partner (or use a stock photo) in this pose. Tracing the main contours from a photo first helps master tricky profile proportions.
Step 3: Inking the Drawing
-
Outline the faces:
Switch to your 0.3mm or 0.5mm fine liner. Carefully trace the profile lines of the faces first. Keep your hand steady to ensure the noses and lips look soft and connected. -
Inking the hair:
Use fluid, confident strokes for the hair. Don’t outline every single strand; instead, define the outer shape and add a few internal lines to suggest flow and direction. -
Define the eyes and lashes:
Ink the closed eye curves. For the female figure, I like to thicken the line slightly at the outer corner to suggest eyelashes. Add small eyebrows above the eyes with short, quick strokes. -
Draw the clothing:
Outline the shoulders and collars. Add a few vertical crease lines on his shirt and near her shoulder to give the fabric a sense of dimension and movement. -
Add the freckles:
Using the very tip of your fine liner, gently tap a cluster of small dots across the bridge of her nose and cheeks. Keep the spacing random for a natural stippled look. -
Ink the hearts:
Above their heads, draw three floating hearts. Use the thicker marker for the largest heart to make it pop, and the fine liner for the smaller, more distant hearts. -
Optional lip color:
If you wish, add a tiny amount of shading or a very subtle hatched line on the lips to differentiate them, but keep it minimal to maintain the clean aesthetic.
Wobbly Lines?
If your long hair lines are shaky, try drawing from your shoulder rather than your wrist. Faster, confident strokes often look smoother than slow, careful ones.
Step 4: Final Touches
-
Erase pencil marks:
Wait until the ink is completely dry (give it a few minutes to be safe). Gently rub a kneaded eraser over the entire drawing to lift all graphite guidelines. -
Evaluate line weights:
Check your drawing for any lines that need strengthening. Sometimes re-tracing the outer silhouette of the couple with a slightly thicker line helps separate them from the background.
Now you have a charming, minimalist keepsake that perfectly captures a quiet romantic moment


Couple From Behind Walking Together
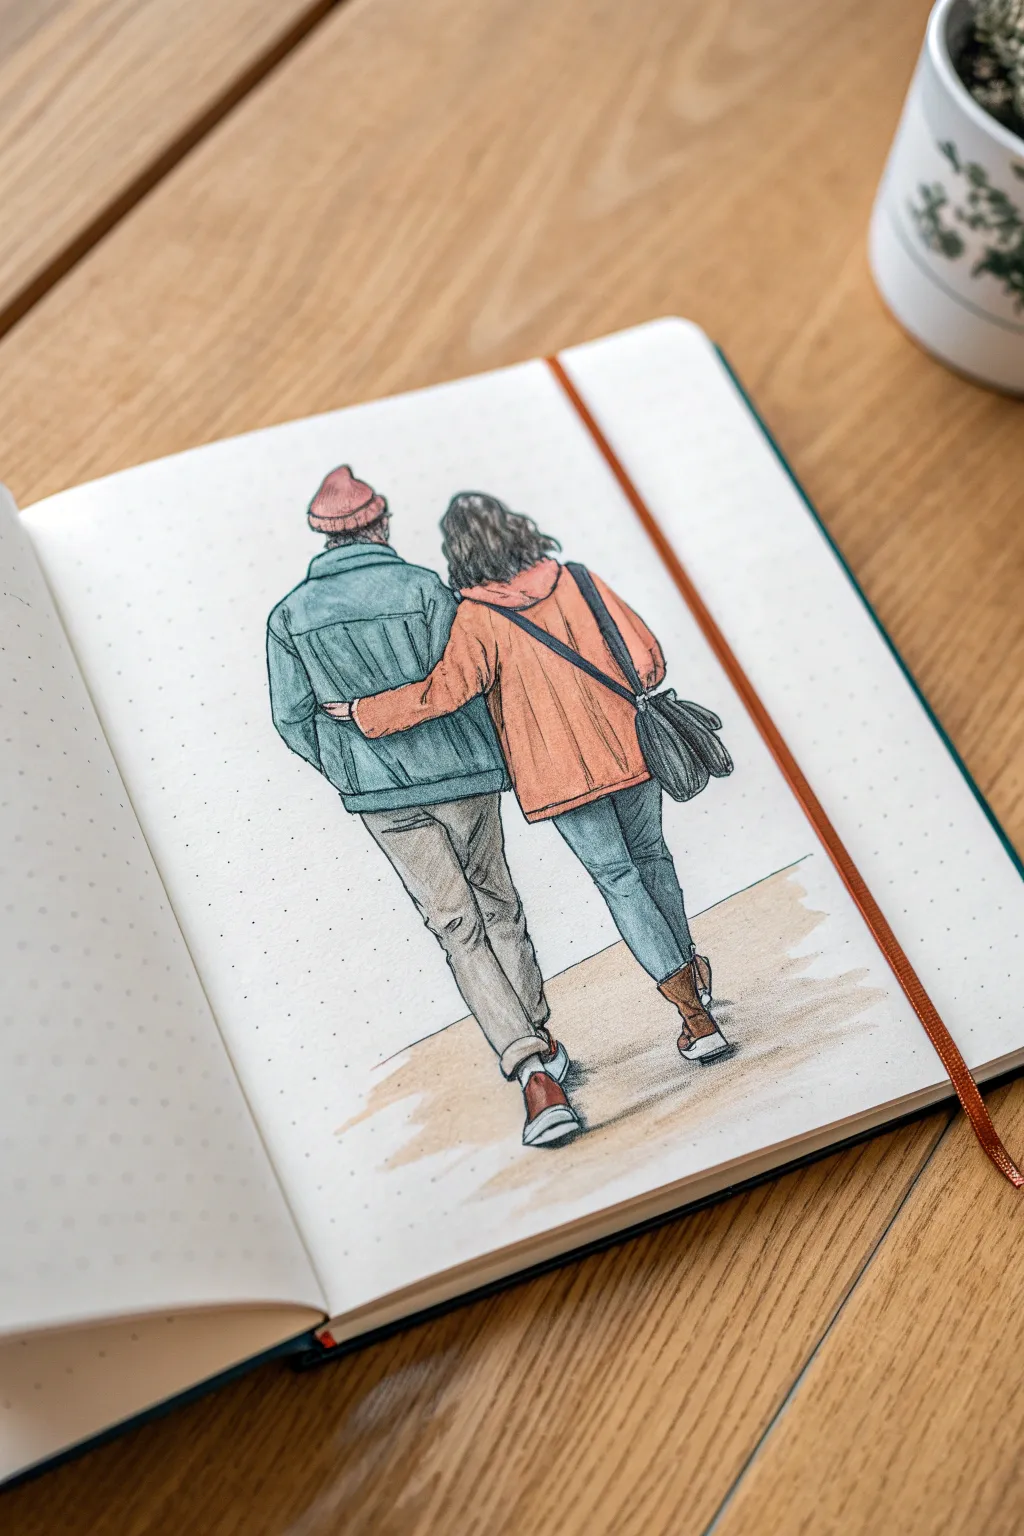
Capture the cozy intimacy of a simple walk together with this charming illustration of a couple seen from behind. Using simple lining techniques and soft marker shading on dotted notebook paper creates a warm, sketchbook-style aesthetic.
Step-by-Step Tutorial
Materials
- Dotted notebook or sketchbook
- HB pencil for sketching
- Eraser
- Fine liner pens (sizes 0.1 and 0.3, black)
- Alcohol-based markers or colored pencils (teal, salmon/terracotta, beige/khaki, blue denim, brown)
- White gel pen (optional for highlights)
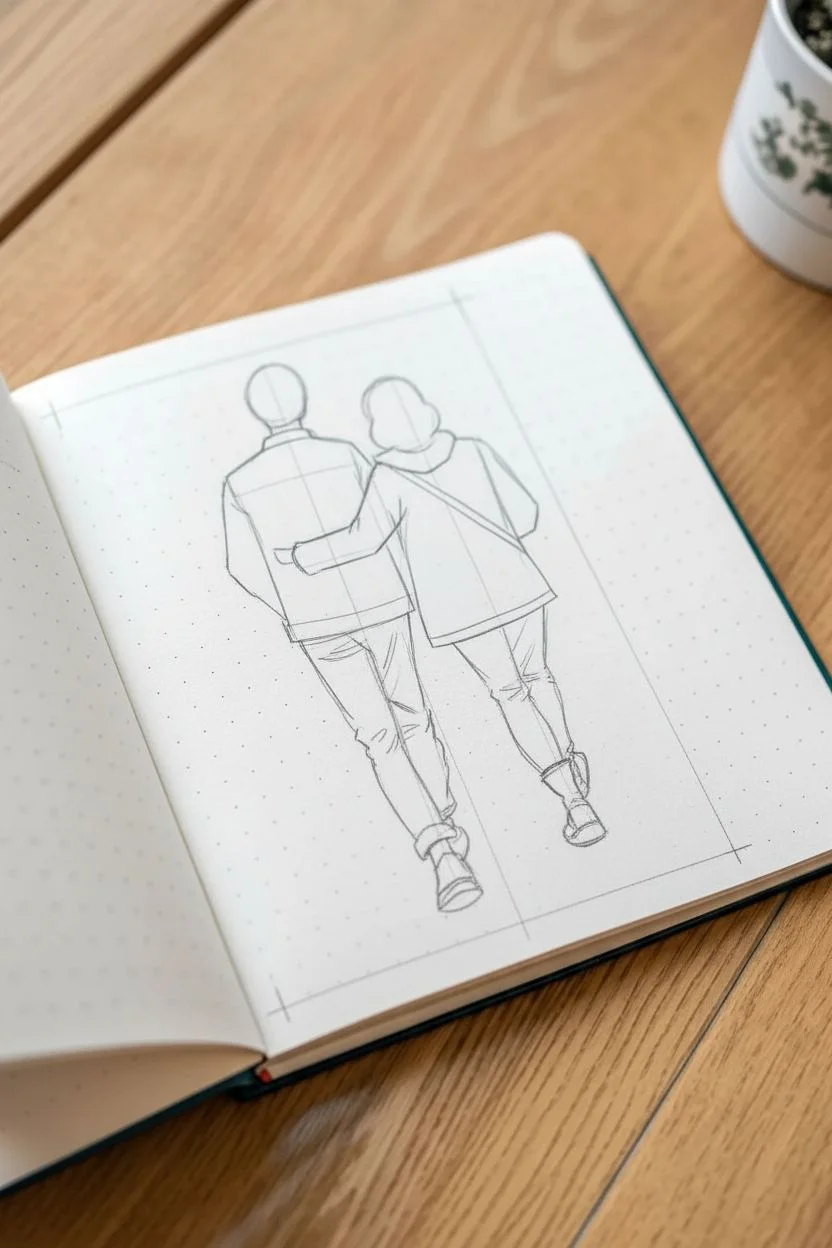
Step 1: Planning the Figures
-
Establish the height:
Begin lightly with your pencil. Mark the top of the heads and the bottom of the feet to ensure your couple fits comfortably on the page. The man on the left should be slightly taller than the woman on the right. -
Basic skeletons:
Draw simple vertical lines for spines and ovals for heads. Sketch a horizontal line for the shoulders, noting that the woman is leaning slightly into the man, so her shoulder line might dip towards him. -
Block in the shapes:
Flesh out the torsos using rectangular shapes. The man wears a boxy denim jacket, while the woman has a slightly looser, longer coat. Sketch cylinders for the legs, keeping the pose relaxed as if mid-stride.
Wrinkle Wizardry
Look at your own clothes in a mirror to see where folds happen. Usually,
Step 2: Refining the Sketch
-
Detailing the man:
Add the beanie hat on his head. Define the collar of his jacket and the horizontal seam across the back. Draw his left arm hanging down and his right arm tucked around the woman’s shoulder. -
Detailing the woman:
Sketch her wavy, shoulder-length hair. Draw her coat, ensuring the hood rests on her back. Extend her left arm to wrap around his waist. Add the strap of her bag going across her chest from right shoulder to left hip. -
Lower body details:
Refine the trousers. The man’s pants should have some wrinkles around the knees and ankles to show movement. The woman’s jeans are tighter; add the cuffs of her boots and the chunky bag hanging at her side. -
Add folds and creases:
Before inking, lightly mark where major fabric folds will go—like the armpits, elbows, and back of the knees. This adds realism to the clothing.
Make It Personal
Change the hair styles or outfit colors to match you and your partner! Add a specific logo to the bag or a pattern to the beanie for a custom touch.
Step 3: Inking the Lines
-
Outline the contours:
Take your 0.3 fine liner and carefully trace the main outer lines. Use confident, slightly broken strokes rather than one continuous rigid line to keep that sketchy feel. -
Texture the hair:
Switch to a finer 0.1 pen for the hair. Use quick, vertical strokes to suggest strands and volume without coloring it in completely yet. -
clothing details:
Use the 0.1 pen to add stitching details on the denim jacket and the seams of the woman’s coat. Add small hatch marks on the bag for texture. -
Ground shadows:
Sketch a few horizontal, scribbly lines under their feet to ground them, indicating a path or shadow. -
Erase pencil marks:
Wait a moment for the ink to fully dry, then gently erase all your underlying pencil sketches to clean up the page.
Step 4: Adding Color
-
Coloring the jackets:
Use a teal or muted green marker for the man’s jacket. Apply it evenly. For the woman’s coat, use a warm salmon or terracotta shade. I like to leave tiny slivers of white paper showing near seams for natural highlights. -
Pants and accessories:
Color the man’s trousers in a light beige or khaki. Use a denim blue for the woman’s jeans. Color the man’s beanie in a reddish-pink that complements the woman’s coat. -
Darker tones:
Fill in the hair with dark brown or black, leaving a few white streaks for shine. Color the bag and the man’s shoes dark grey or black. The woman’s boots can be a warm brown. -
Shading for depth:
Once the base layer is dry, go back over shadow areas with the same marker color to darken them. Focus on the area between the two figures, under the arms, and the back of the legs. -
Grounding the scene:
Use a very light beige or grey marker to add a wash of color on the ground beneath them, mimicking a sidewalk or path. Keep the edges ragged and uneven for an artistic finish.
Now you have a sweet, personalized keepsake of a shared moment captured in your journal


Dancing Together With Flowing Lines
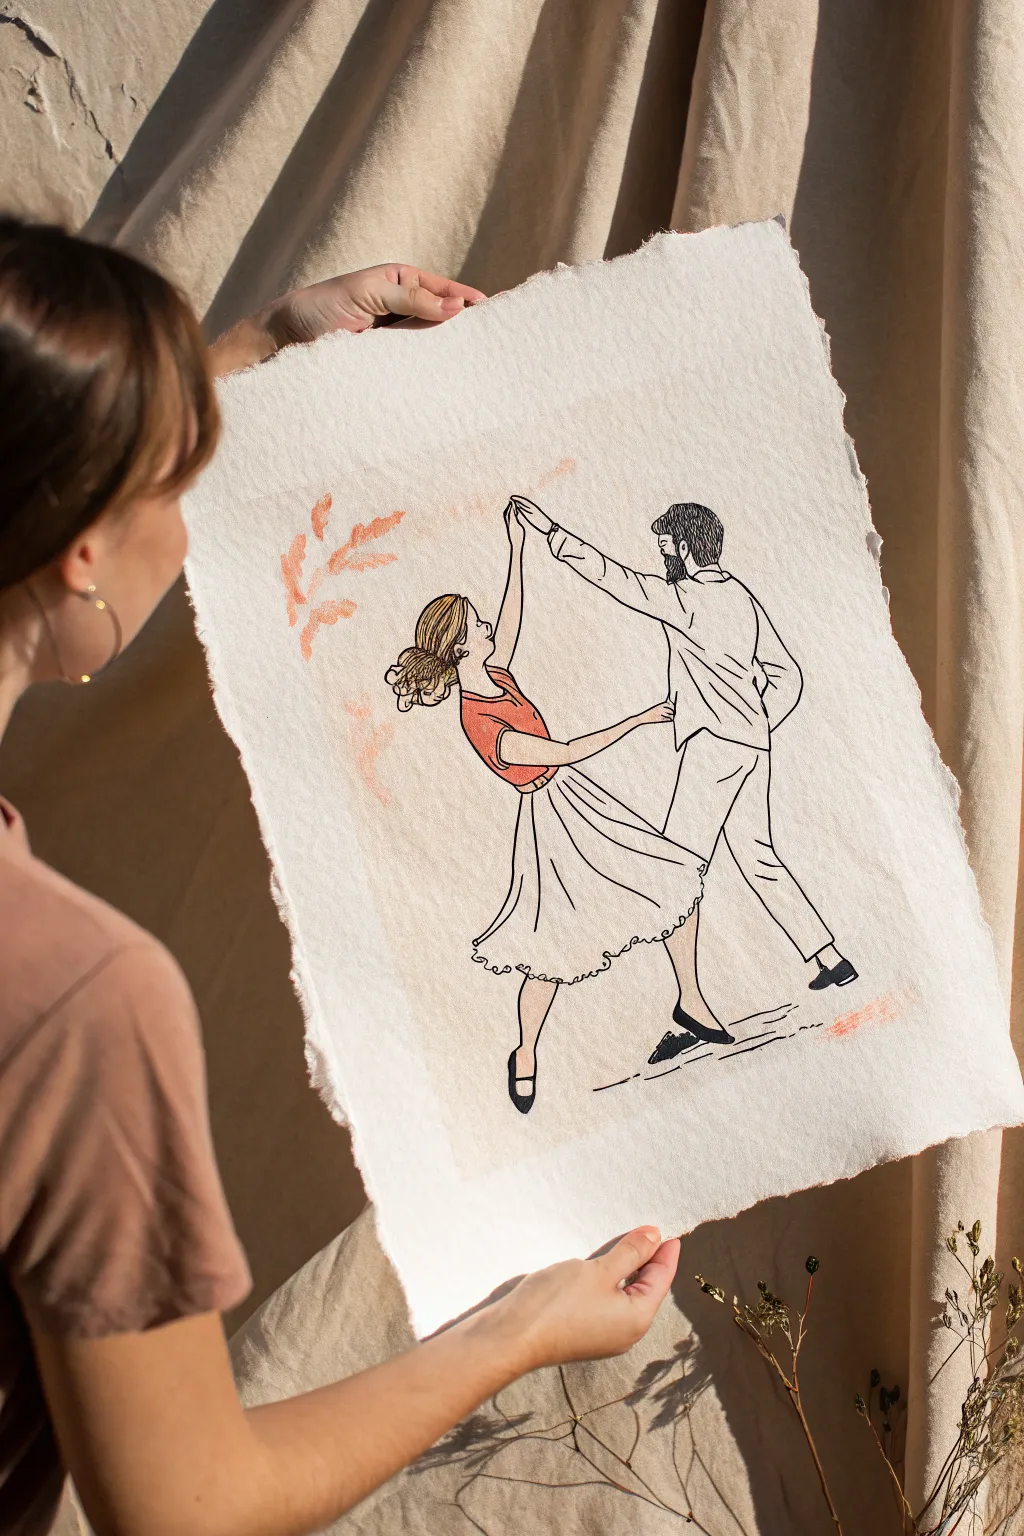
Capture the joy of movement with this minimalist line drawing featuring a dancing couple, rendered in crisp ink and soft watercolor accents. The project uses textured, handmade paper with beautiful deckled edges to give the finished piece a vintage, artisanal feel that perfectly complements the flowing lines.
How-To Guide
Materials
- Handmade cotton rag paper with deckled edges (A3 or similar size)
- Fine liner pens (Black, archival link, sizes 0.3mm and 0.5mm)
- Graphite pencil (HB or H)
- Kneaded eraser
- Watercolor paints (Terracotta/Burnt Sienna, Peach/Flesh tone)
- Soft round watercolor brush (Size 6 or 8)
- Reference photo of a dancing couple
- Masking tape (optional)
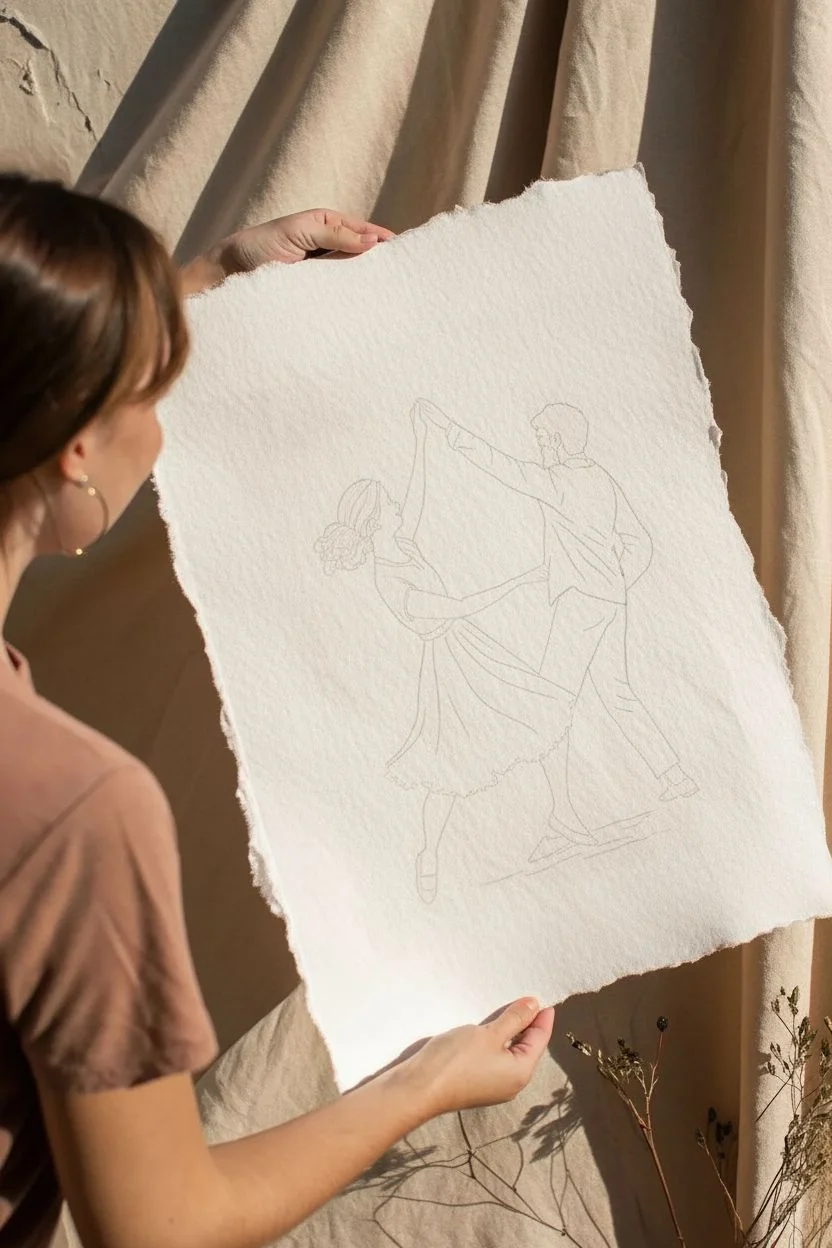
Step 1: Planning and Sketching
-
Prepare the surface:
Lay your handmade cotton rag paper on a clean, flat surface. Since this paper has a unique texture, I like to tape the corners very lightly just to keep it from shifting while I sketch, but be careful not to damage the delicate edges. -
Establish the pose skeleton:
Using your HB pencil, lightly sketch a stick-figure skeleton to capture the dynamic pose. Focus on the angle of the bodies leaning away from each other and the connection of their hands to establish the center of gravity. -
Draft the female figure:
Fleshing out the form on the left, draw the contours of her skirt, noting how it flares out to suggest spinning motion. Sketch her raised arm connecting to his, and her head tilted back slightly in joy. -
Draft the male figure:
Sketch the male partner on the right, focusing on the strong lines of his trousers and the extended arm. Ensure his feet are positioned to look grounded but light, suggesting a dance step. -
Refine clothing folds:
Go back over the clothes and add light lines to indicate folds in the fabric, particularly on the woman’s skirt and the man’s shirt sleeves. This adds volume and movement to the drawing. -
Detail the faces and hair:
Lightly pencil in the facial profiles and hair textures. The man has a beard and short hair, while the woman has an intricate updo—keep these details loose for now. -
Review and erase:
Take a step back to check proportions. Once satisfied, use the kneaded eraser to gently lift the darkest graphite lines, leaving only a faint guide for your ink.
Step 2: Inking the Lines
-
Outline the main figures:
Switch to your 0.5mm black fine liner. With confident, steady strokes, trace the main silhouettes of the couple. Try to keep the lines continuous rather than feathery for a clean look. -
Add hair details:
Use the finer 0.3mm pen to draw the individual strands of hair. For the woman’s bun, use curved strokes to show the volume; for the man’s beard, use short, dense hatching. -
Detail the clothing:
Use the 0.3mm pen to ink the folds in the clothing you sketched earlier. Keep these lines thinner than the main outline to suggest they are internal details. -
Create the skirt texture:
For the bottom hem of the dress, use a slightly wavy, scalloped line to imply a frilly or lace edge, adding character to the garment. -
Define the hands:
carefully ink the clasped hands and the man’s hand on her waist. Hands can be tricky, so take your time here to ensure the fingers look natural and elegant. -
Add shoes and ground:
Fill in the woman’s flats and the man’s shoes with solid black ink or dense hatching. Add a few quick, broken horizontal lines near their feet to create a shadow and ground them. -
Erase pencil marks:
Wait at least 10 minutes to ensure the ink is completely dry. Then, gently erase all remaining pencil guidelines with the kneaded eraser to clean up the drawing.
Rag Paper Tip
Cotton rag paper is very absorbent. When inking, move your pen slightly faster than usual to prevent the ink from bleeding or ‘spidering’ into the paper fibers.
Step 3: Adding Colored Accents
-
Paint the top:
Dilute your terracotta or burnt sienna watercolor to a semi-transparent wash. Carefully paint the woman’s top, staying within the lines but allowing the paper texture to show through. -
Add abstract leaves:
Using the same terracotta color, paint loose, free-floating leaf shapes to the left of the couple. These don’t need outlines; they act as a decorative, framing element. -
Create a subtle texture wash:
Mix a very watery, pale peach wash. Lightly brush this over the decorative leaf area and perhaps a tiny splash near the feet to tie the composition together. -
Touch up hair:
If desired, add a very transparent wash of brown or gold over the woman’s hair to distinguish it from the black-and-white figure. -
Final dry:
Let the paper dry completely flat. The cotton rag paper holds water well, but drying flat prevents any unwanted buckling.
Make It Personal
Customize the artwork by using colors that match the couple’s actual wedding outfits or a favorite date night memory for an extra sentimental touch.
Now you have a timeless, romantic piece of art ready to be framed or gifted


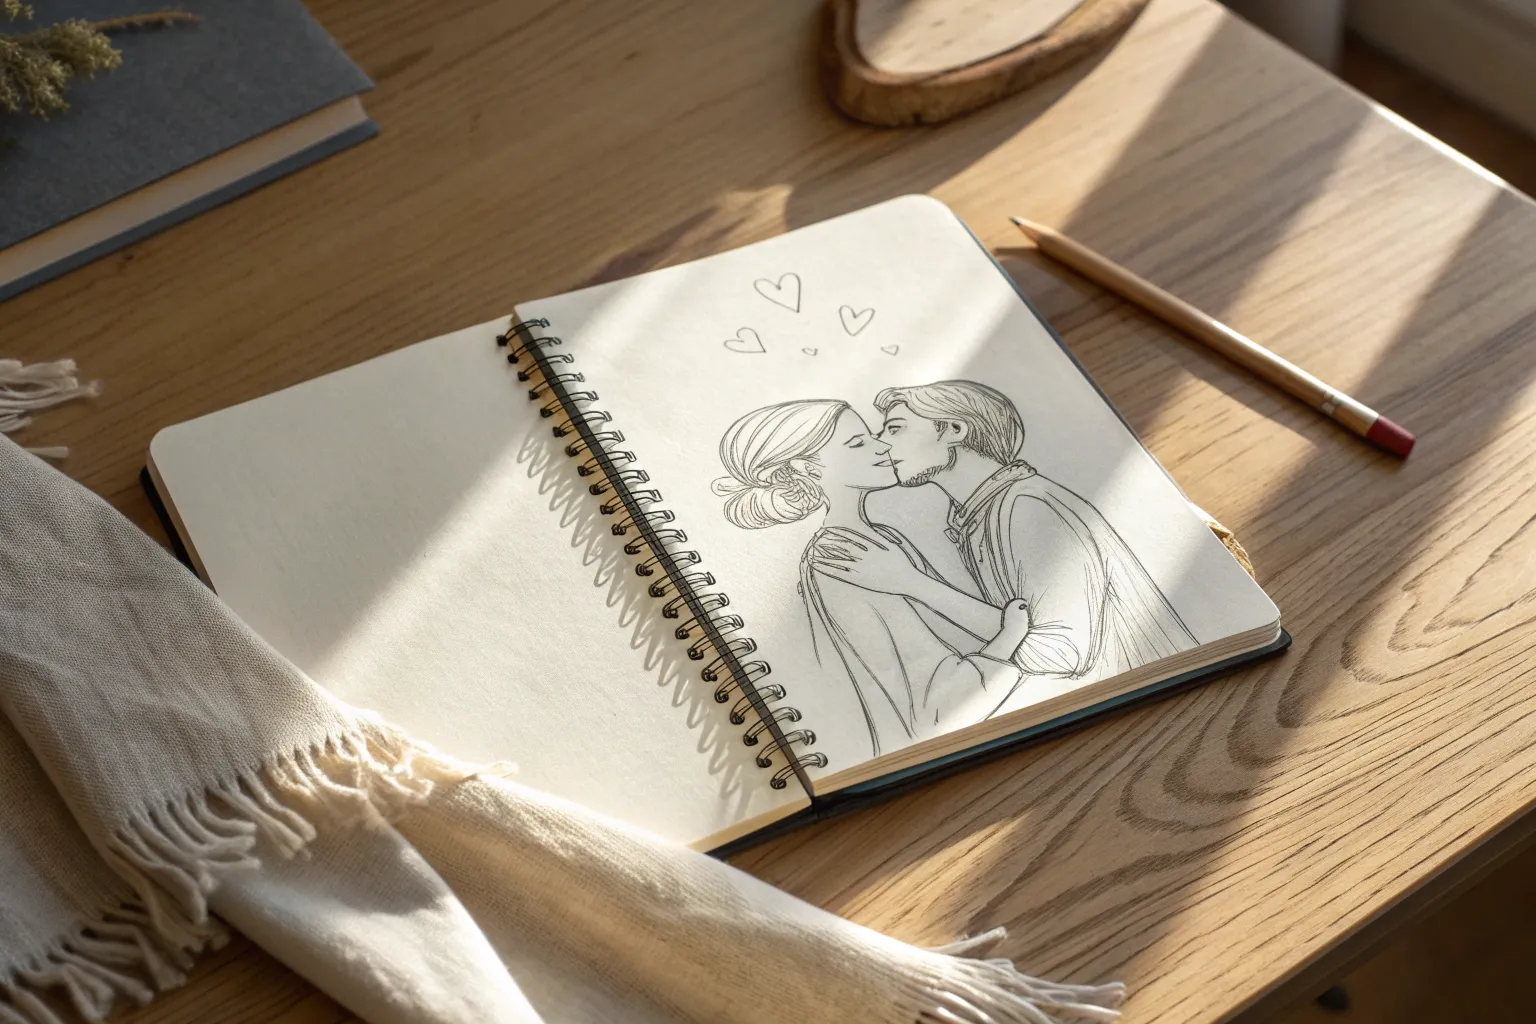
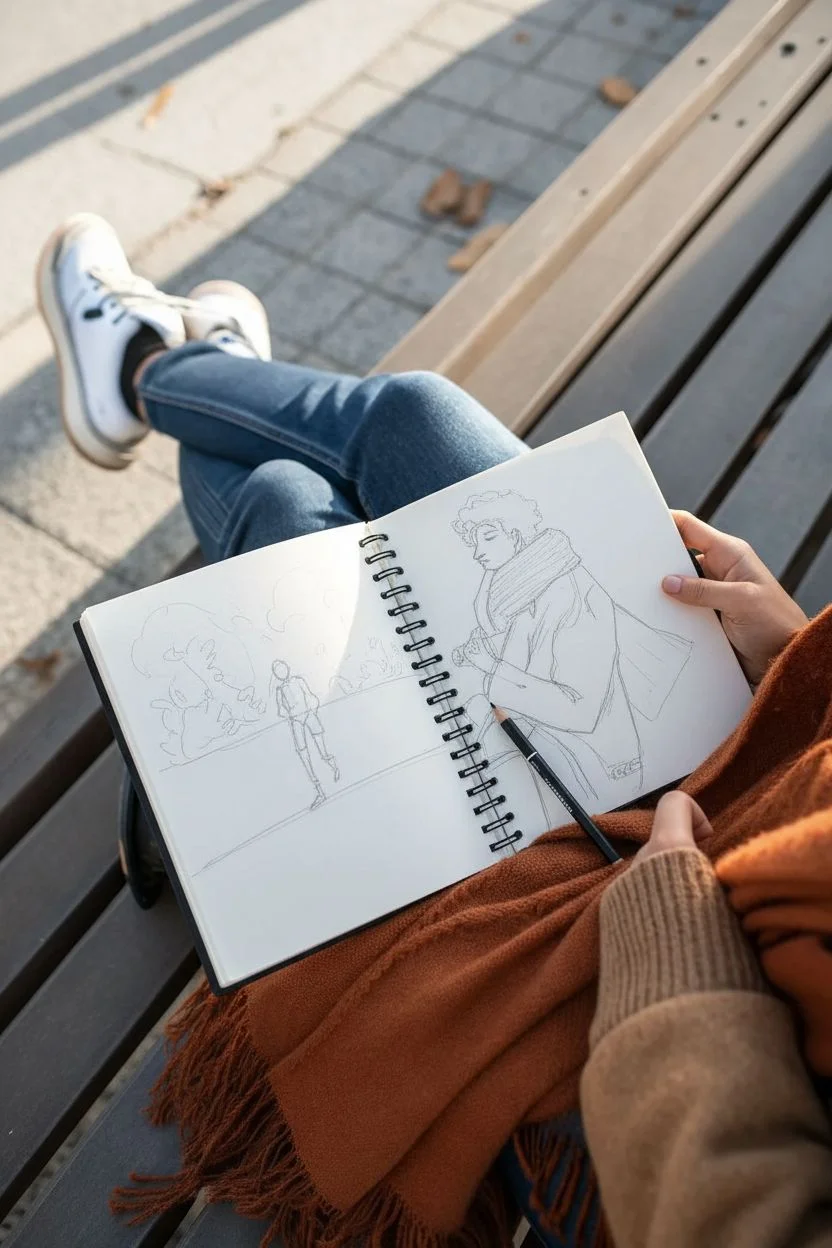
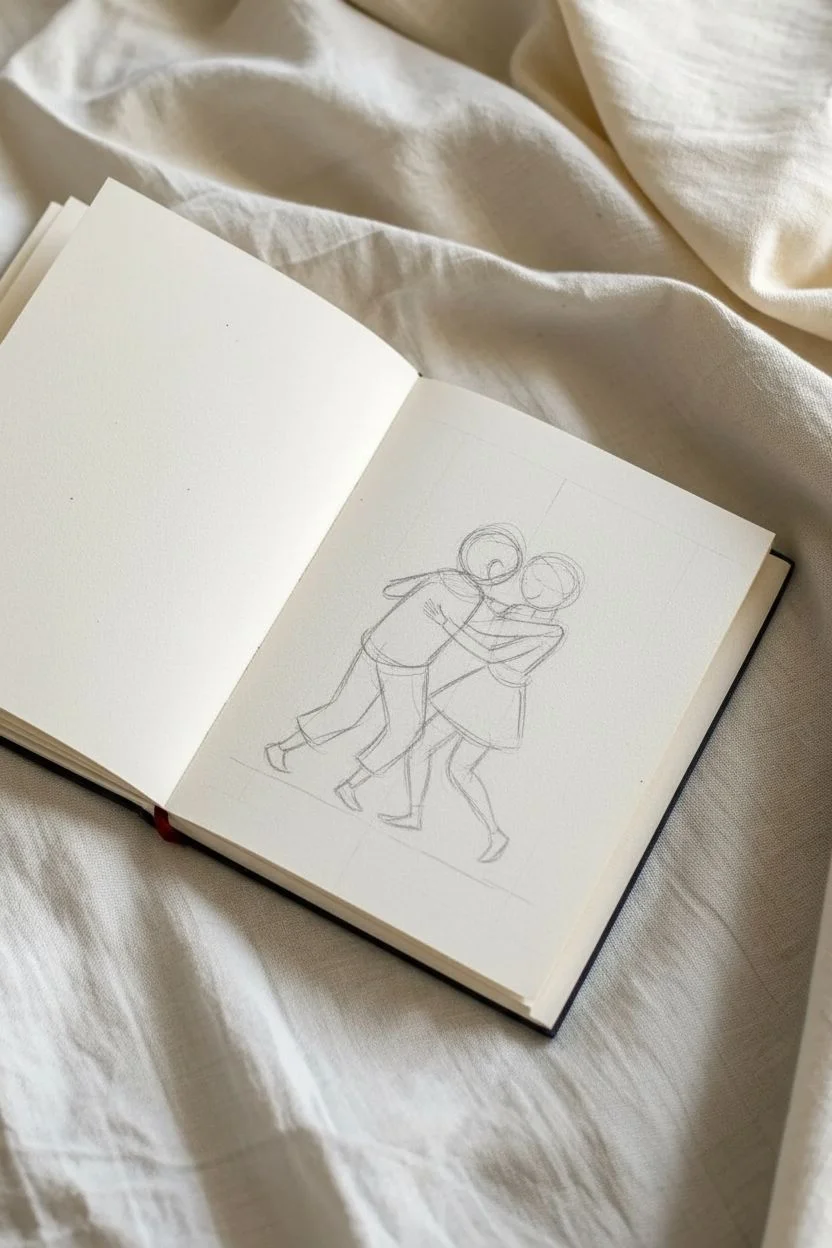
Sitting Shoulder-to-Shoulder on a Bench
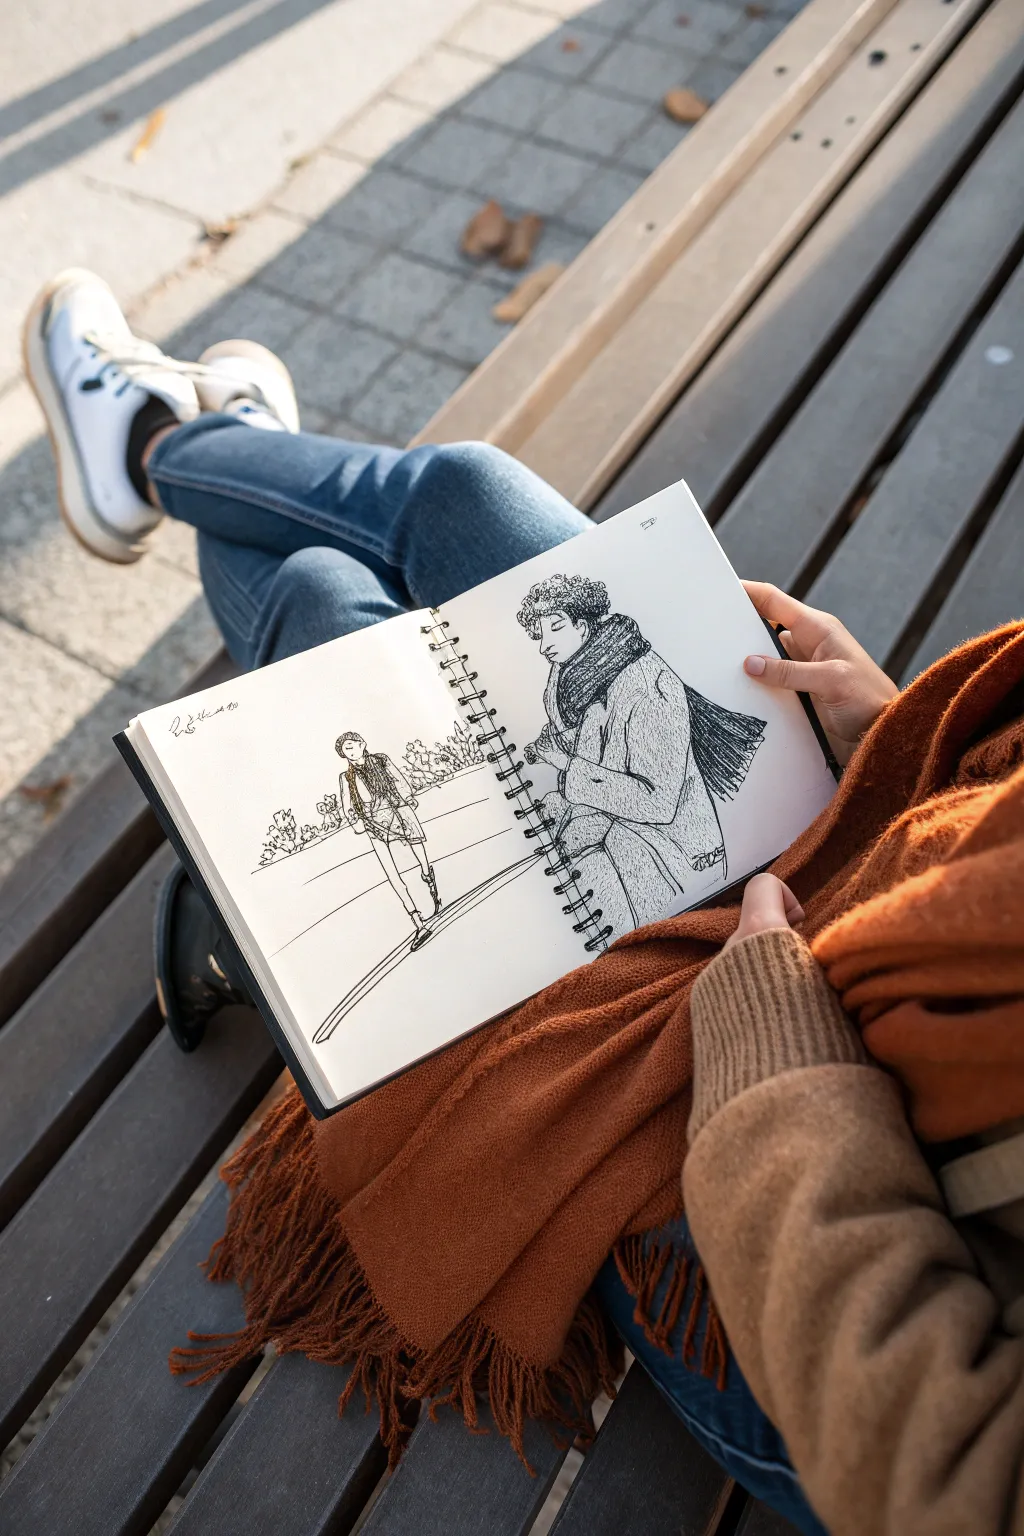
Capture the connection between two people by dividing their portraits across a sketchbook spread, playing with scale and distance. This pen-and-ink project contrasts a detailed, intimate close-up on one side with a distant, contextual figure on the other, creating a narrative that flows across the binding.
Step-by-Step Tutorial
Materials
- Spiral-bound sketchbook (A4 or similar size)
- Fine liner pens (0.1mm, 0.3mm, and 0.5mm)
- HB Graphite pencil
- Kneaded eraser
- Ruler (optional)
Step 1: Planning the Composition
-
Visualize the layout:
Visualize your double-page spread as two separate but related scenes. The right page will feature a large, waist-up portrait of your subject, while the left page will show the other person (or the same person) further away, creating a sense of depth and perspective. -
Sketch the right-side figure:
Using your HB pencil, lightly block out the main figure on the right page. Position their head near the top third of the page. Draw a loose oval for the head and swift, angular lines to indicate the shoulders and the bulk of the coat. -
Draft the scarf and details:
Add the large, chunky scarf wrapped around the neck. Focus on the volume it adds rather than individual threads for now. Sketch the profile or three-quarter view of the face, keeping the expression contemplative. -
Sketch the left-side scene:
On the left page, draw a horizontal line about one-third up from the bottom to represent a path or low wall. Sketch a much smaller figure walking along this line. The scale difference is key here—this figure should be significantly smaller to imply distance. -
Add background elements:
Lightly pencil in some distant foliage or bushes behind the small figure on the left to ground them in a setting. Keep these shapes organic and loose.
Fixing Smudges
If you smudge wet ink, turn it into a shadow or texture. Use a white gel pen to cover minor mistakes, then draw over it once dry.
Step 2: Inking the Close-Up Portrait
-
Outline the face:
Switch to a 0.3mm fine liner. carefully trace your pencil lines for the face profile on the right page. Use broken lines for the hair to suggest texture rather than a solid helmet shape. -
Define the scarf:
Outline the scarf folds with the 0.3mm pen. I find that using slightly wobbly lines here helps convey the softness of the fabric compared to the crisper lines of the face. -
Texturing the scarf:
Establish the scarf’s knit texture using hatch marks. Use short, repetitive vertical lines that follow the curve of the fabric folds. Switch to a 0.1mm pen for finer interior shadows within the folds. -
Draw the coat:
Outline the heavy winter coat with a 0.5mm pen to give it weight. Use long, confident strokes for the sleeves and lapels. Don’t worry if the lines aren’t perfectly straight; character is better than precision. -
Shade the coat:
Use cross-hatching to shade the side of the coat away from the light source. Keep the strokes diagonal and relatively loose to differentiate the smooth coat texture from the knit scarf. -
Detail the hair:
Go back to the hair with the 0.1mm pen. Add tight loops or small scribbles to create a curly or messy texture, concentrating the ink where the hair meets the neck or scarf for shadow.
Adding Context
Draw a faint horizon line that continues from the left page across to the right (behind the large figure) to physically link the two spaces.
Step 3: Inking the Distant Figure
-
Outline the small figure:
Move to the left page. Use the 0.1mm pen to outline the small walking figure. Because they are distant, keep details minimal—focus on the silhouette of the jacket, legs, and shoes. -
Add simple shading:
Apply very light vertical hatching to the small figure’s clothing. You want them to feel solid but not as heavy or dark as the foreground portrait. -
Draw the environment:
Ink the horizontal path lines with a steady hand. For the bushes in the background, use a ‘scumbling’ technique (light, controlled scribbling) with the 0.1mm pen to suggest leaves without drawing individual ones. -
Connect the pages:
Ensure the style of line work is consistent across both pages, even though the scale is different. This visual coherence ties the two separate drawings into one narrative. -
Final touches:
Wait for the ink to dry completely (at least 5-10 minutes to be safe). Gently erase all underlying pencil marks with the kneaded eraser. Add a small date or signature in the corner.
Close your sketchbook knowing you’ve preserved a beautiful moment of connection through contrasting perspectives
BRUSH GUIDE
The Right Brush for Every Stroke
From clean lines to bold texture — master brush choice, stroke control, and essential techniques.
Explore the Full Guide
Playful Lift or Piggyback Pose
Capture a moment of pure connection with this charming ink illustration of a playful couple. This minimalist line drawing relies on clean contours and simple hatching patterns to create movement and emotion on the page.
How-To Guide
Materials
- Fine-point archival ink pen (0.3mm or 0.5mm)
- Pencil (HB or 2B for sketching)
- Eraser
- Sketchbook with smooth, heavy paper
- Ruler (optional for ground lines)
Step 1: Setting the Composition
-
Rough placement:
Begin by lightly sketching two intersecting ovals in the center of your page to represent the torsos of the two figures. This ensures you have enough room for the legs and heads without running off the paper. -
Mapping the heads:
Draw the head of the taller figure slightly lower, tilted forward, and the head of the lifted figure slightly higher and tilted back. They should be close, suggesting intimacy. -
Establishing the embrace:
Sketch light stick-figure lines for the arms. The taller figure’s arms should wrap under the other’s arms, while the lifted figure’s arms reach up to clasp around the neck. -
Adding leg structure:
Draw the taller figure’s legs planted firmly, slightly spread for balance. Sketch the lifted figure’s legs dangling freely, with one knee slightly bent to imply a swinging motion.
Keep it Loose
Don’t connect every single line perfectly. Leaving small gaps in the outlines, especially around joints or hair, adds breath and movement to the sketch.
Step 2: Defining the Forms
-
Fleshing out figures:
Go over your stick frame to add volume to the limbs and define the clothing shapes. Give the taller figure a loose, untucked shirt and baggy pants. -
Refining the dress:
Sketch a simple A-line dress on the lifted figure. Let the hemline curve upward slightly to emphasize the lift. -
Detailing the faces:
Keep facial features minimal. Focus on the profiles: a nose, a closed eye, and a soft smile for the girl; the back of the head and ear for the boy. -
Hair textures:
Outline curly, textured hair for the boy and a pulled-back bun or ponytail for the girl. Don’t worry about individual strands yet, just the overall shape.
Step 3: Inking lines
-
Clean contours:
Switch to your fine-point pen. Start tracing the main outlines of the figures, using confident, continuous strokes rather than sketchy dashes. -
Clothing folds:
Add a few key creases where the fabric bunches—under the arms, at the waist where the bodies meet, and at the bend of the knees. -
Patterning the pants:
For the boy’s pants, create a texture using small, vertical hatching strokes. Keep the strokes somewhat loose to mimic a woven fabric texture. -
Waist detail:
Add a darker, denser pattern or sash detail around the girl’s waist to separate the bodice from the skirt. -
Inking the hair:
Fill in the boy’s hair with tight, scribbly loops to simulate curls. For the girl, use flowing lines that follow the direction of the hair being pulled back.
Add a Pop of Color
Use a single watercolor wash or a colored pencil to fill in just one element, like the dress or the boy’s shirt, to create a striking focal point.
Step 4: Finishing Touches
-
Grounding the scene:
Draw a few short, horizontal lines beneath the boy’s feet. I find this simple addition prevents the figures from looking like they are floating in empty space. -
Reviewing line weight:
Look over the drawing for areas that need emphasis. You might thicken the lines where shadows would naturally fall, like under the dress hem or between the two bodies. -
Erase pencil marks:
Wait until the ink is completely dry to avoid smudging, then gently erase all underlying pencil sketches to reveal the crisp black lines.
Now you have a timeless, hand-drawn keepsake celebrating a moment of joy
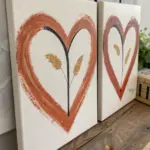
One-Line Continuous Couple Portrait
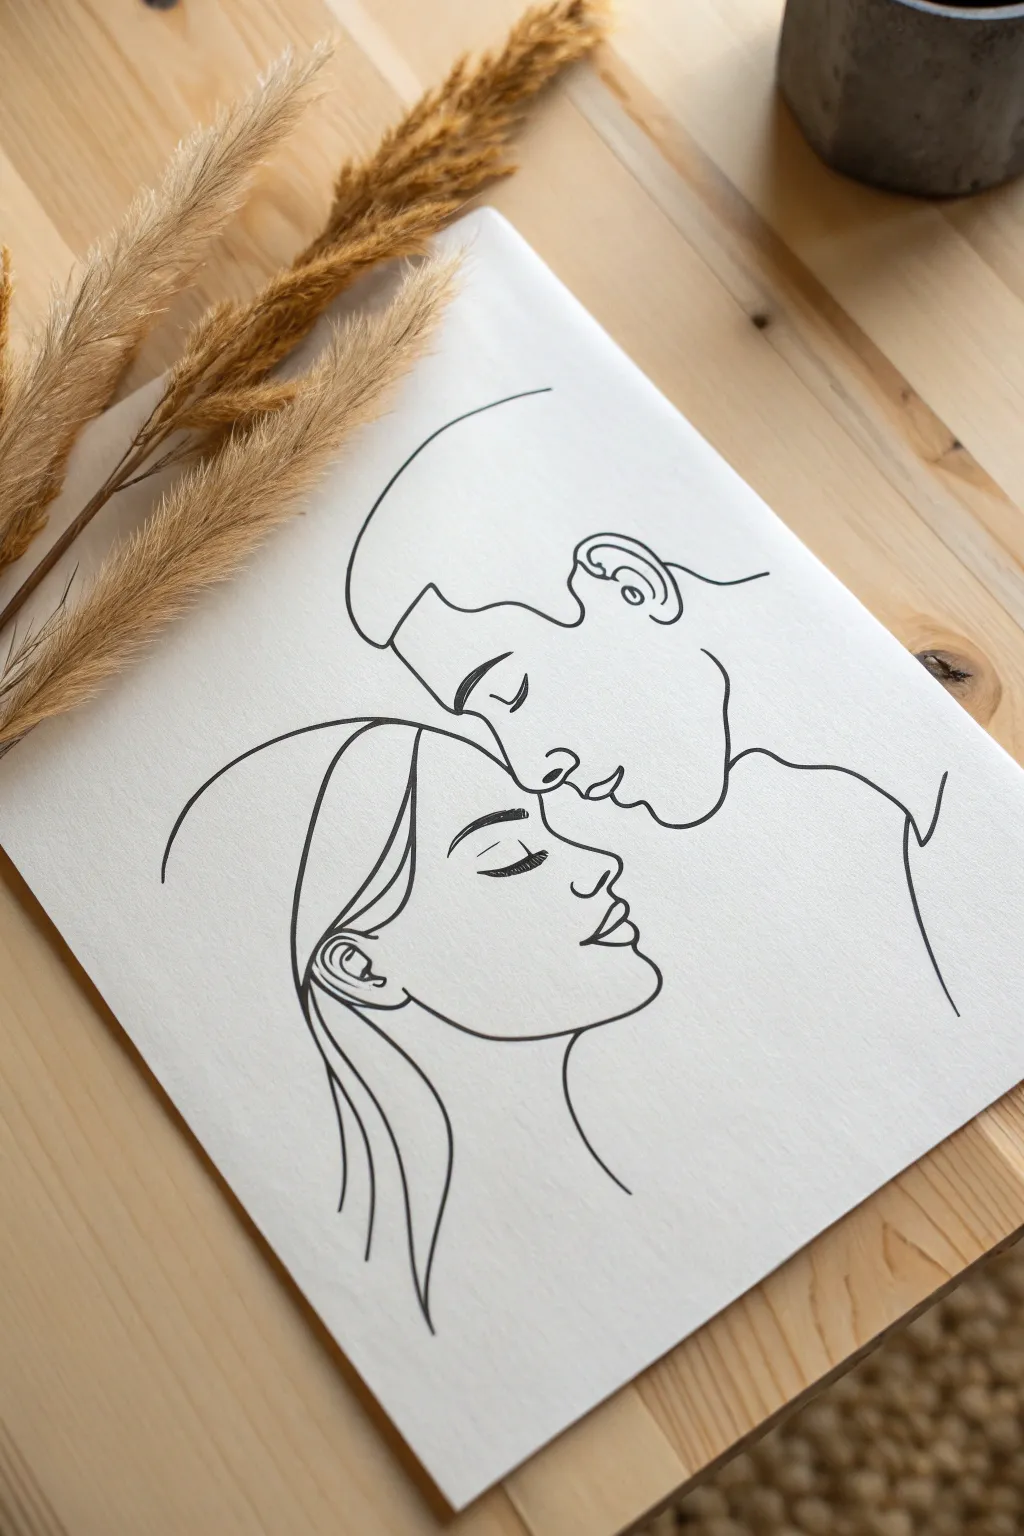
Capture the tender connection between two souls with this elegant one-line style portrait. The stark black ink against white textured paper creates a modern, sophisticated piece that feels both intimate and effortlessly chic.
Step-by-Step Guide
Materials
- Heavyweight watercolor paper or canvas panel (8×10 or similar)
- Black fineliner pens (0.5mm and 0.8mm)
- Pencil (HB or lighter)
- Soft eraser
- Tracing paper (optional)
- Ruler
- Masking tape
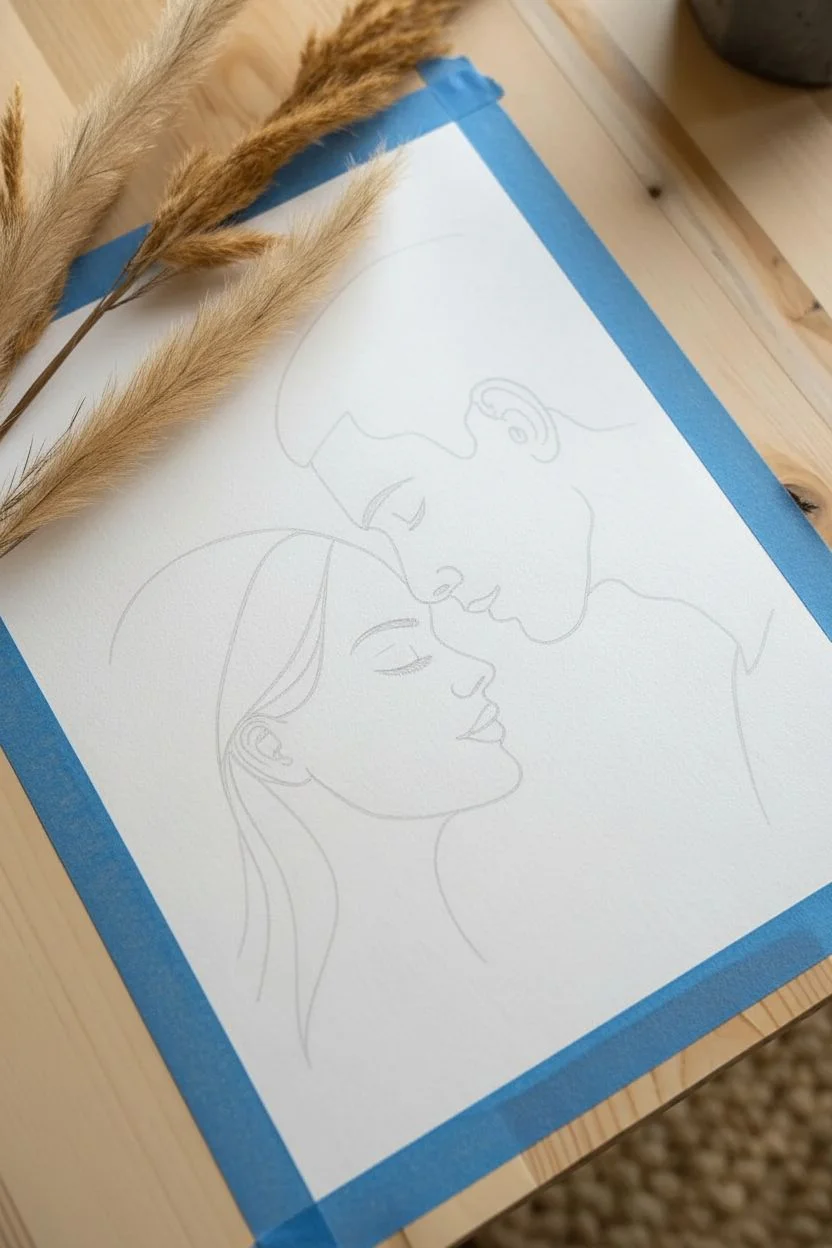
Step 1: Preparation & Sketching
-
Secure your surface:
Tape down the edges of your paper or canvas panel to your work surface. This prevents shifting and keeps your perspective aligned while you draw. -
Map out the composition:
Visualize where the two faces will meet. Using a very light pencil touch, draw two oval shapes in the center of the page to represent the heads. The upper head (male) should be slightly higher and to the right, leaning down. -
Draft the facial profiles:
Lightly sketch the profile lines. Focus on where the foreheads and noses interact. The key is the negative space between them—ensure the noses are close but distinct. -
Refine the male features:
Sketch the man’s brow, closing eye, and ear. Keep the lines simple; you don’t need excessive shading, just the essential curves that define his expression. -
Refine the female features:
Draft the woman’s closed eye with long lashes, her nose profile, and soft lips. I find it helpful to draw her hair outline loosely now to see how it frames her face. -
Connect the lines:
Look for opportunities to connect separate features into single, flowing paths. For instance, see if the line of the forehead can flow directly into the nose bridge without lifting your pencil.
Smooth Operator
Draw from your shoulder, not your wrist. Locking your wrist and moving your whole arm creates far smoother, more confident curves essential for this style.
Step 2: Inking the Lines
-
Test your pen flow:
On a scrap piece of paper, test your 0.5mm fineliner. You want a consistent, dark black line without any skipping or bleeding. -
Start with the woman’s hair:
Begin inking at the bottom left with the flowing strands of the woman’s hair. Use a confident, sweeping motion to create smooth curves rather than jagged strokes. -
Outline the woman’s profile:
Move up from the neck to the chin and lips. Keep your wrist loose. If you need to stop, try to lift the pen at a natural intersection or sharp corner to hide the break. -
Detail the woman’s eye:
Carefully ink the closed eyelid and lashes. These are delicate features, so use a lighter pressure here to keep the lines crisp and meaningful. -
Ink the man’s profile:
Switch to the upper figure. Trace the line of his forehead down to his nose. Pay special attention to the gap between their faces; keeping this clean is crucial for the intimacy of the piece. -
Define the man’s ear and hair:
Ink the intricate curves of the ear and the hairline. The sharp angle of the hairline contrasts nicely with the softer facial features. -
Complete the shoulders:
Draw the simple indication of the man’s shoulder and neck. Let the line trail off naturally at the edge or bottom of the composition to maintain that airy, open feel. -
Thicken select lines:
Switch to the 0.8mm pen. Go back over the main contour lines (like the outer hair and jawlines) to add subtle line weight variation, which adds depth to the simple drawing.
Digital Hybrid
Scan your line drawing and vectorize it in Illustrator. You can then print it large-scale or change the line color to gold foil for a luxury look.
Step 3: Finishing Touches
-
Let the ink cure:
Allow the ink to dry completely for at least 15 minutes. This is vital because erasing pencil marks over wet ink will smudge your crisp lines and ruin the effect. -
Erase guidelines:
Gently erase all visible pencil sketches. Hold the paper taut with one hand while erasing to prevent wrinkling the page. -
Final inspection:
Check for any gaps in your lines that look unintentional. You can use your thinner pen to carefully bridge any small breaks for a more continuous look. -
Styling the presentation:
To mimic the photo’s aesthetic, place your finished drawing on a clean wooden surface and arrange dried pampas grass or wheat stems diagonally across the top left corner for a warm, organic touch.
Now you have a timeless, romantic piece of art ready to frame or gift to someone special

PENCIL GUIDE
Understanding Pencil Grades from H to B
From first sketch to finished drawing — learn pencil grades, line control, and shading techniques.
Explore the Full Guide
Minimalist Blob Couple Cuddle

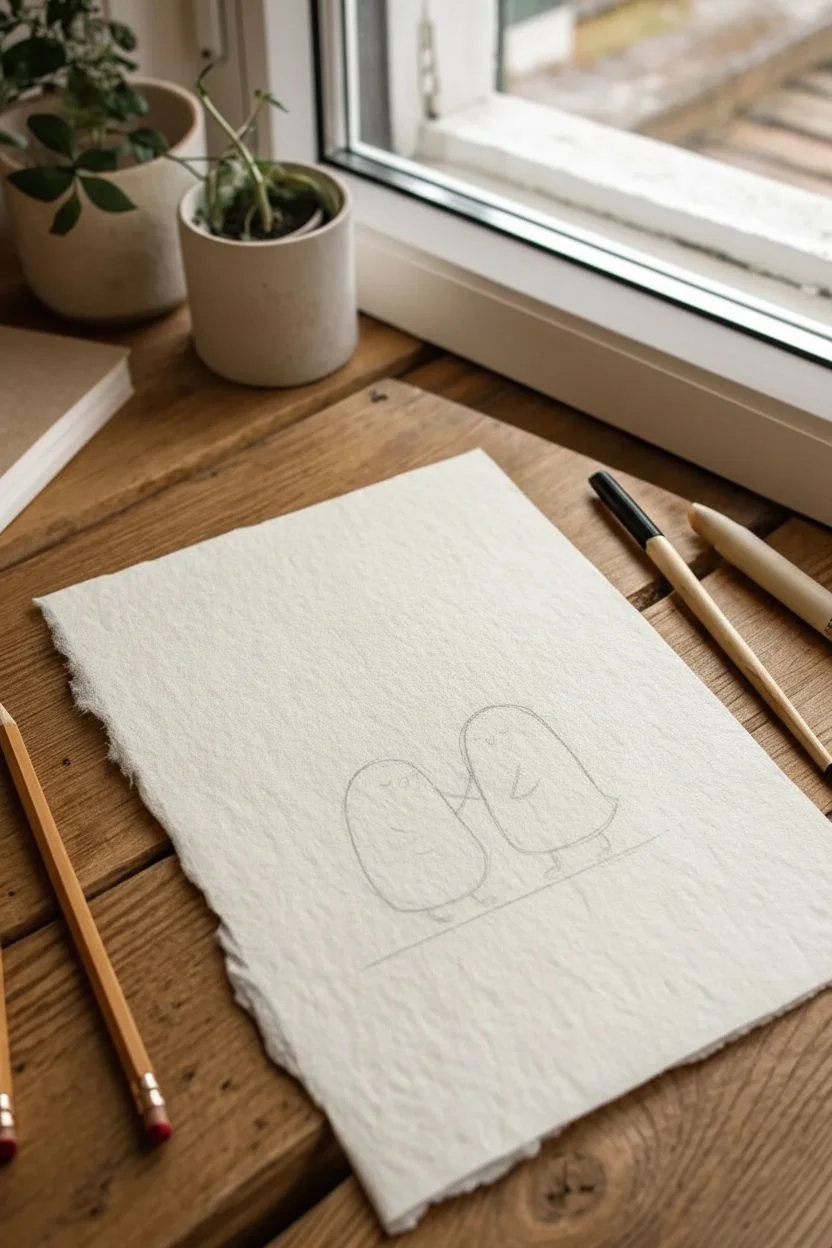
Capture a sweet moment with this charmingly simple line drawing of two round characters sharing a quiet connection. The uneven, textured edges of the paper add a handmade touch to this minimalist doodle.
Step-by-Step
Materials
- Heavyweight textured paper or watercolor paper (rough grain)
- Fine-tip black ink pen (archival quality)
- Pencil (HB or H)
- Soft eraser
- Ruler (optional)
- Pink or red colored pencil (soft core)
Step 1: Preparation & Setup
-
Prepare the rough edge paper:
If you don’t have handmade deckle-edge paper, you can fake the look. Take a standard sheet of heavy watercolor paper and carefully tear the edges by hand rather than cutting them. Pulling the paper towards you while holding a ruler down firmly can help guide a ‘controlled’ tear. -
Create a faint baseline:
Using your pencil, sketch a very light, straight horizontal line near the bottom third of the paper. This will serve as the ground for your characters so they don’t look like they are floating. -
Establish the positions:
Lightly mark two oval shapes resting on your baseline. The left oval should be slightly shorter and wider, while the right oval is a bit taller. Make sure they are leaning ever so slightly toward each other.
Embrace the Wobble
On heavily textured paper, your pen will naturally skip or bump. Don’t fight it! This adds character and warmth that a perfectly digital-looking line lacks.
Step 2: Drafting the Characters
-
Refine the left character:
Shape the left blob so it has a rounded bottom and a slightly flatter top. It should look like a soft gumdrop or a very round potato. -
Refine the right character:
Define the right character with a taller, smoother dome shape. The line facing the left character should be fairly straight to imply they are standing close together. -
Add tiny legs:
Draw two tiny vertical sticks at the bottom of each character for legs. Keep them very short and stick-like for that cute, clumsy aesthetic. -
Sketch the arms:
Add a small, curved line on the body of the left character, pointing inwards like a little flipper. On the right character, draw a similar curved line that slightly overlaps or touches the left character, suggesting a gentle hold or high-five. -
Place the facial features:
Draw tiny closed eyes near the top of the heads. Use small U-shapes or simple straight dashes. Place them high up on the ‘face’ to emphasize cuteness.
Step 3: Inking the Drawing
-
Outline the bodies:
Switch to your fine-tip black ink pen. Trace your pencil lines with a steady hand. Don’t worry if the line wavers slightly; that organic wobble matches the textured paper perfectly. -
Detail the expressions:
Inking the eyes requires a delicate touch. Just a quick tap or drag of the pen is often enough. Add tiny curves for smiles if desired, though the original drawing keeps mouths subtle or hidden. -
Add the ground shadow:
Beneath their feet, use rapid, horizontal hatching strokes to create a shadow. I like to keep these loose and sketchy rather than filling it in solid black. -
Erase guidelines:
Wait at least five minutes for the ink to dry completely. Gently erase your pencil baseline and sketch marks so only the crisp ink remains.
Ink Bleeding?
If your ink feathers into the paper fibers, switch to a finer nib size (like an 0.05) or use a pigment liner specifically designed for porous watercolor paper.
Step 4: Adding Heart Accents
-
Draw the main heart:
About an inch above the space between their heads, draw a medium-sized heart using your black pen. Keep the shape imperfect and hand-drawn. -
Add floating mini-hearts:
Draw two or three tiny hearts below the main one, cascading down toward the characters like bubbles. -
Color the big heart:
Take your pink or red colored pencil and gently shade inside the largest heart. Don’t press too hard; let the texture of the paper show through the color. -
Final touches:
Check your line weight. If the bottom of the characters feels too thin compared to the shadow, go over the bottom edge of their bodies one more time to thicken the line slightly.
This adorable little artwork is now ready to be framed or gifted as a sweet, handmade gesture.
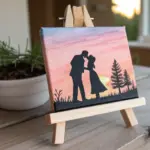
Couple in a Memory Frame (Polaroid-Style Scene)
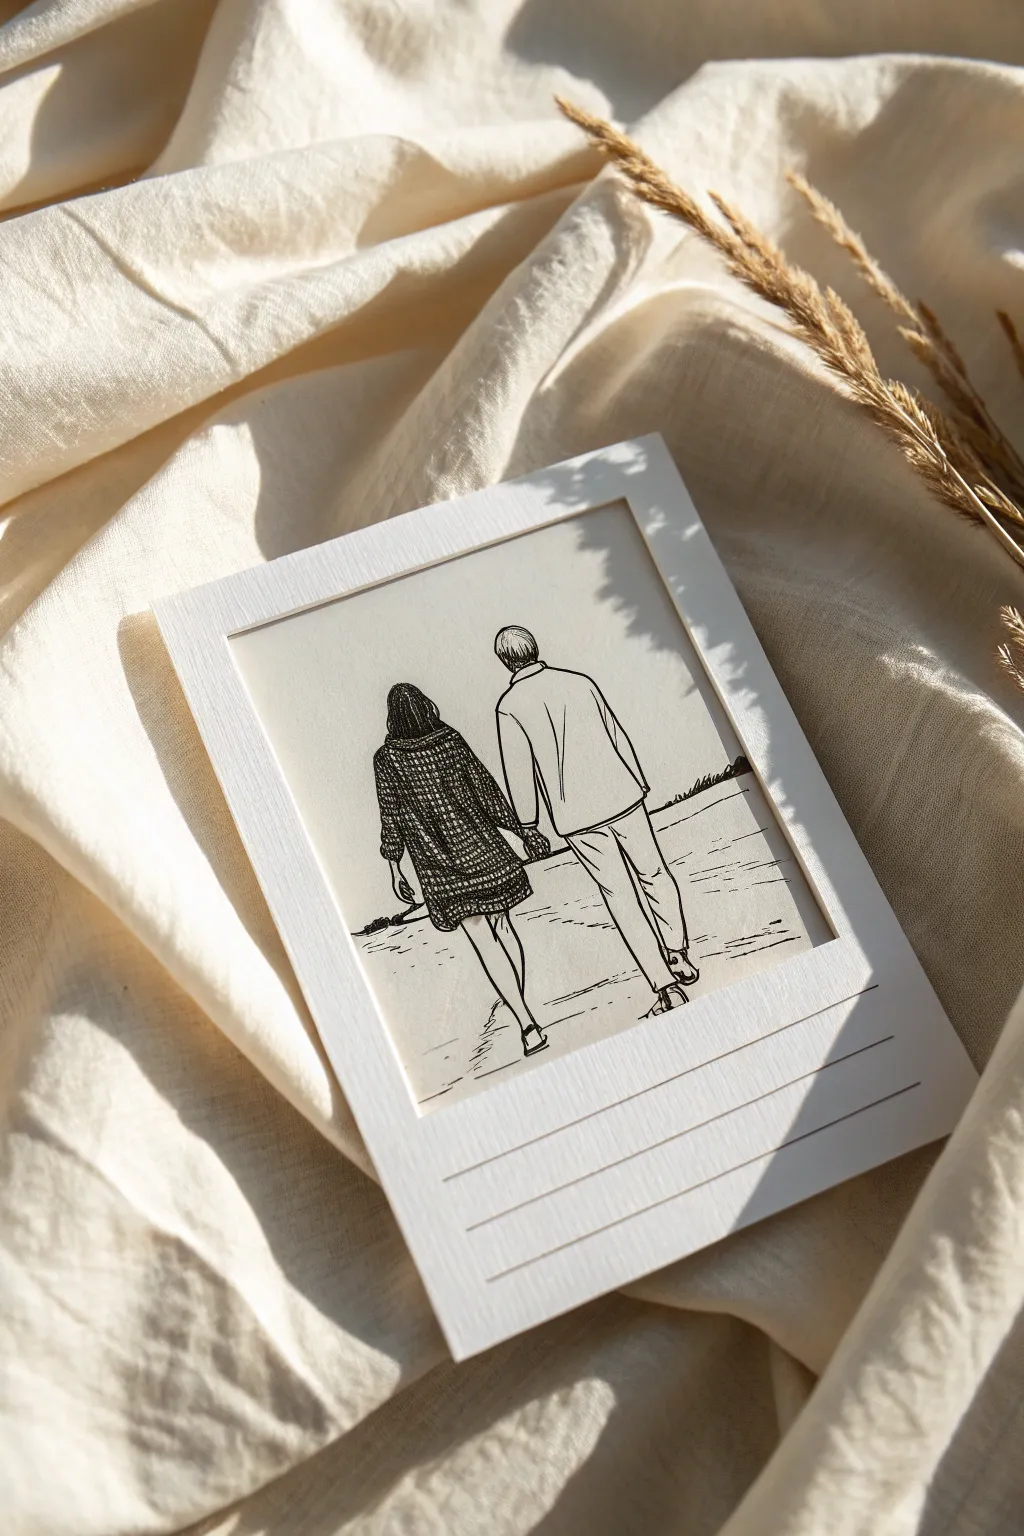
Recreate the charm of a vintage instant photo with this mixed-media project, combining a clean line drawing of a couple with a textured paper frame. The result is a minimalistic yet sentimental piece that perfectly captures the feeling of a cherished memory frozen in time.
Step-by-Step Tutorial
Materials
- Heavyweight textured paper (off-white or cream)
- White cardstock (for the frame)
- Fine liner or archival ink pen (0.1mm and 0.3mm)
- Pencil and eraser
- Ruler
- Craft knife and cutting mat
- Glue stick or double-sided tape
Step 1: Preparing the Canvas
-
Cut the base paper:
Cut your textured off-white paper into a rectangle slightly smaller than postcard size, around 3.5 x 4.2 inches, to serve as the ‘photo’ area. -
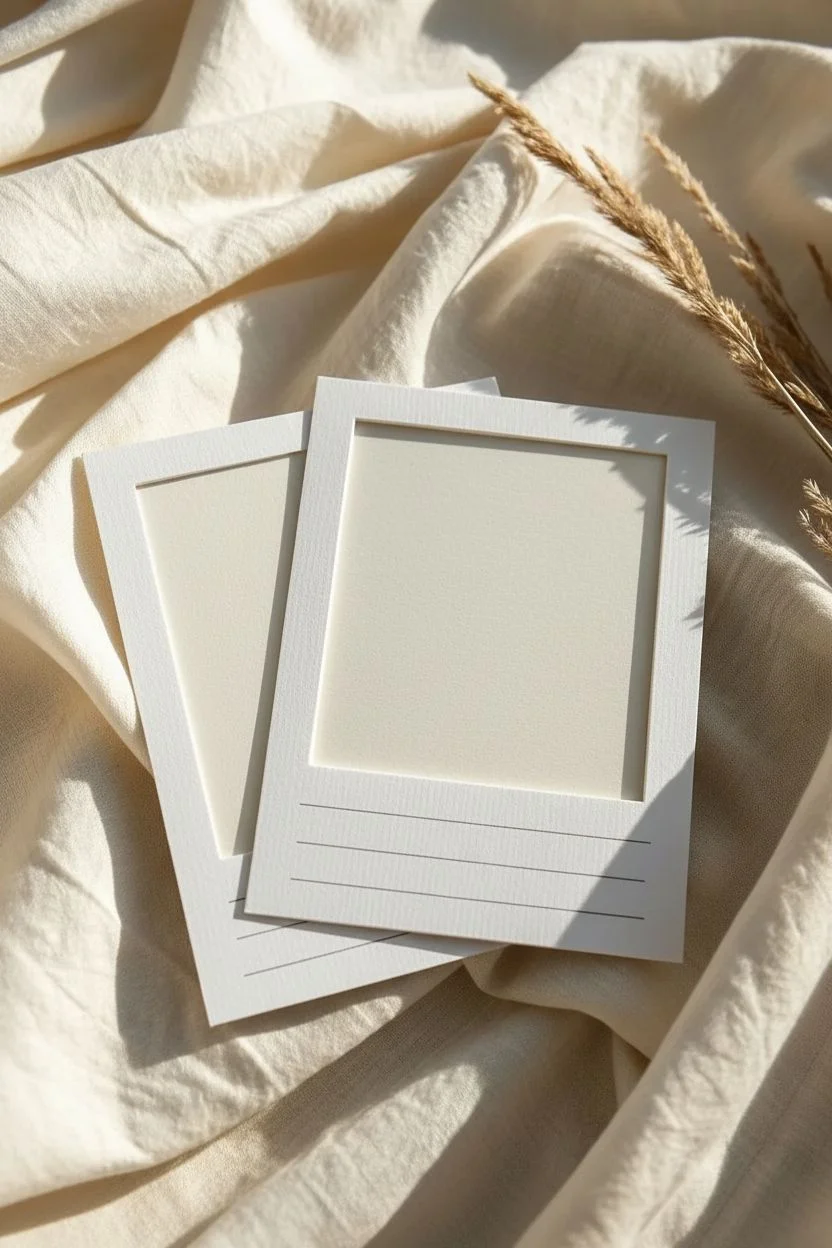
Create the Polaroid frame:
On white cardstock, measure and cut a classic Polaroid shape (approx. 3.5 x 4.2 inches outer dimension) with a square window cutout (approx. 3.1 x 3.1 inches), leaving the iconic thicker space at the bottom. -
Add texture lines:
Using a blunt tool or the back of a craft knife, gently score three horizontal lines across the bottom thick section of the frame to mimic the texture of instant film packaging.
Step 2: Sketching the Subject
-
Lightly outline figures:
Position your couple in the center of the textured paper. Lightly sketch the basic shapes of their backs, ensuring the male figure is slightly to the right and the female to the left. -
Detail the clothing:
Refine the male figure’s jacket with simple, straight lines to suggest a structured fit, and sketch his trousers with natural creases near the shoes. -
Add pattern basics:
For the female figure, sketch a loose-fitting dress or coat. Don’t worry about the pattern yet; just get the silhouette and folds correct. -
Establish the horizon:
Draw three faint horizontal lines behind the couple to suggest a beach or field landscape—one for the ground level, one for the water or mid-ground, and one for the distant horizon.
Clean Lines Only
If you smudge the ink while erasing, you can fix small errors with a white gel pen. It works like correction fluid but offers much finer control, blending right into the paper.
Step 3: Inking the Drawing
-
Outline the main figures:
Switch to your 0.3mm fine liner. Carefully trace the outlines of both figures, using confident strokes for the clothing folds and hair. -
Texture the dress:
Using a 0.1mm pen, cross-hatch the female figure’s dress to create a dark, woven texture. Keep the lines close together for a rich, dark tone that contrasts with the lighter male figure. -
Detail the hair:
Ink the hair with flowing, vertical strokes. Fill the female figure’s hair almost solidly black, leaving tiny gaps for highlights, while using lighter, separated lines for the male figure’s hair. -
Ground the scene:
Use broken, organic lines to ink the ground beneath their feet. Add small dashes to suggest sand or grass texture without overcrowding the white space. -
Ink the horizon:
Trace the background horizon lines with a very steady hand, keeping them thin to push them into the background. -
Add shadow accents:
Add small pools of solid black shadow under their shoes to firmly plant the figures on the ground.
Make it Personal
Write a tiny date or location on the bottom lines of the frame using a typewriter font or stamp set to enhance the vintage keepsake vibe.
Step 4: Final Assembly
-
Erase guidelines:
Wait for the ink to dry completely to avoid smudging, then gently erase all visible pencil marks. -
Attach the frame:
Apply a thin layer of glue to the back of your white cardstock frame and carefully press it over the drawing, aligning the window perfectly. -
Add a shadow effect:
I like to take a light grey marker or very soft pencil and add a subtle drop shadow to the right and bottom edges of the inner window to give the ‘photo’ some depth.
Now you have a timeless piece of art that looks like a treasured memory pulled straight from an old photo album


Have a question or want to share your own experience? I'd love to hear from you in the comments below!