
I love a good pumpkin painting contest because it’s all about big ideas, bold color, and that tiny bit of friendly bragging rights. These no-carve designs are made to read clearly from across the table, so your painted pumpkin actually stands out in the lineup.
Painted Jack-o’-Lantern Grin (No-Carve Classic)
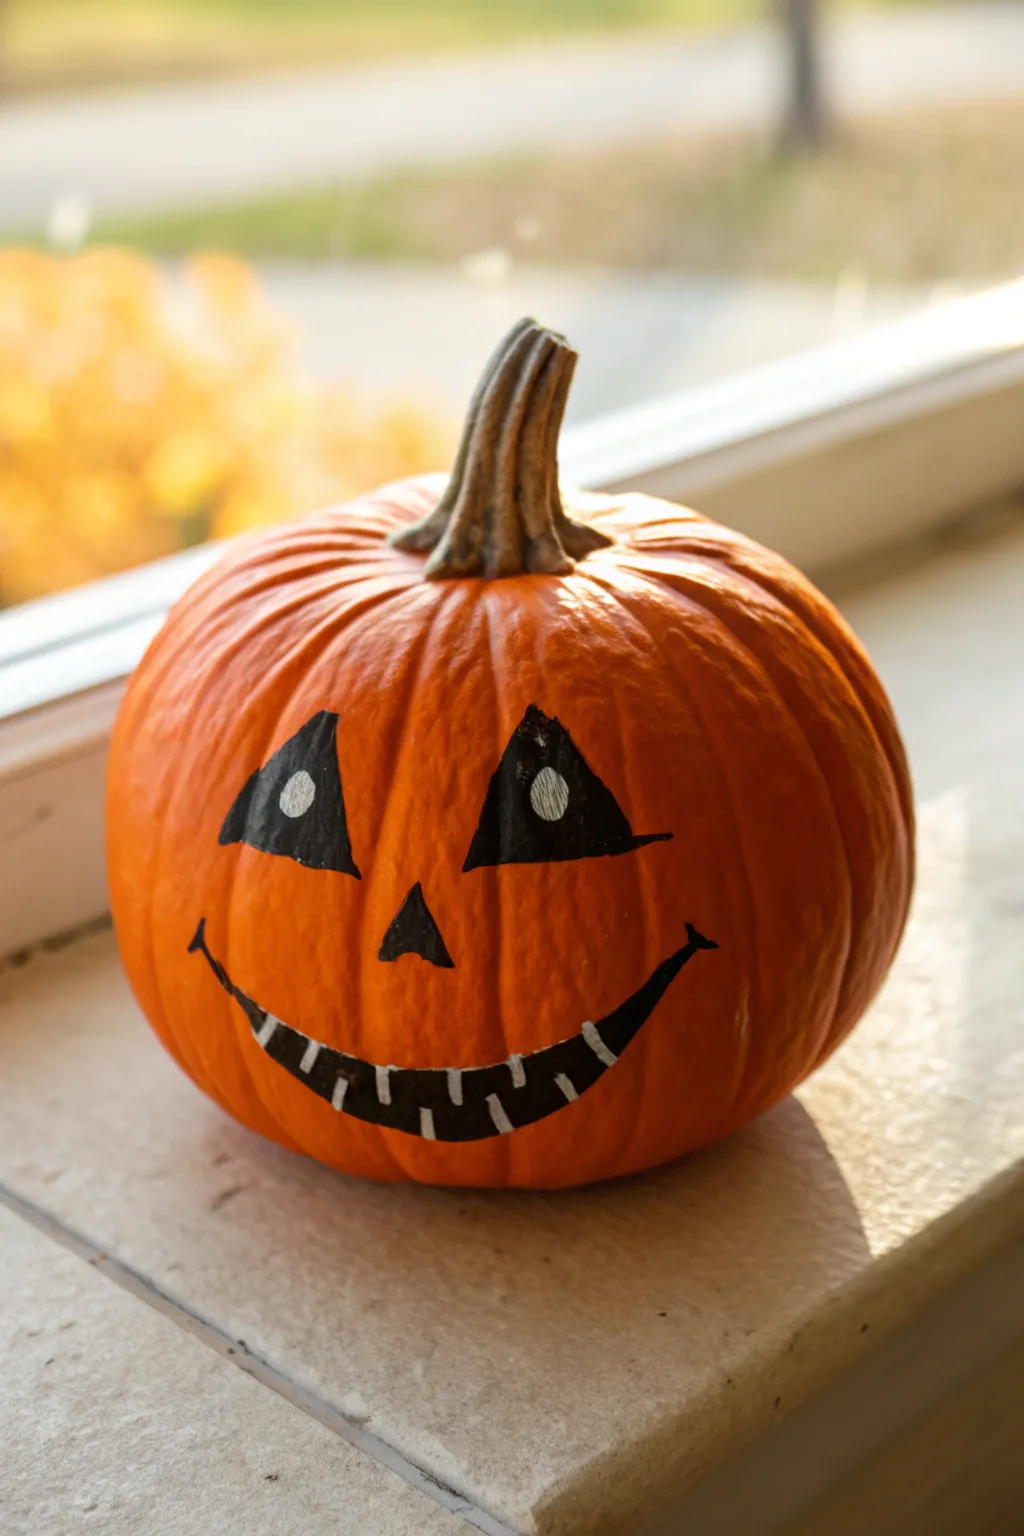
Skip the messy pumpkin guts this year and opt for this charmingly painted Jack-o’-Lantern design. With its classic triangle eyes and toothy grin, this project captures all the spirit of Halloween without picking up a single carving knife.
How-To Guide
Materials
- Small to medium round pumpkin
- Soft cloth or paper towel
- Mild dish soap and water
- Black acrylic paint
- White acrylic paint
- Small round paintbrush (size 2 or 4)
- Fine detail paintbrush (size 0 or 00)
- Pencil or fine-tip marker (light color)
- Paper plate or palette
- Cup of water for rinsing
Step 1: Preparation & Planning
-
Clean the surface:
Begin by thoroughly washing your pumpkin with a damp cloth and a drop of mild dish soap to remove any dirt or field residue. A clean surface ensures the paint adheres properly and doesn’t peel later. -
Dry completely:
Wipe the pumpkin down with a dry towel and let it sit for a few minutes until completely dry to the touch. -
Choose the best side:
Rotate your pumpkin to find the flattest, smoothest side without deep blemishes. This will be your ‘canvas’ for the face. -
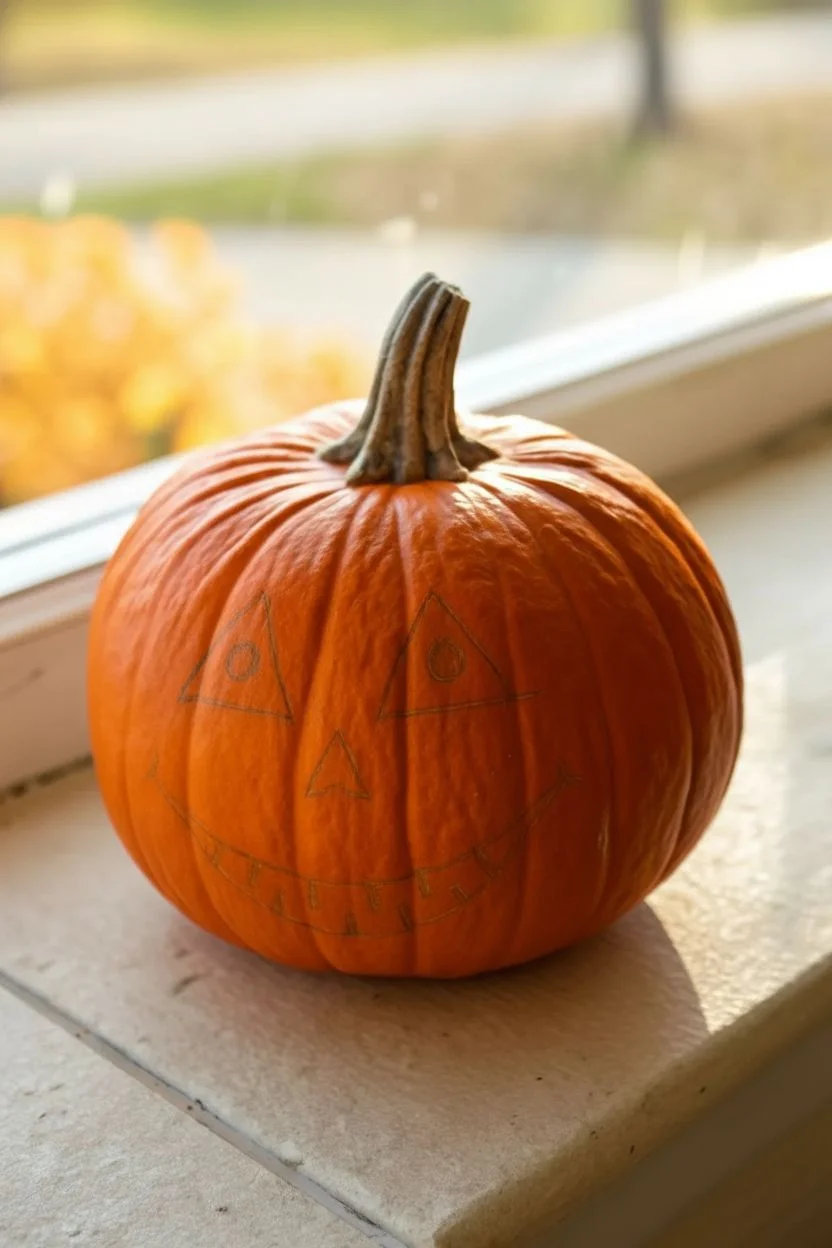
Sketch the eyes:
Using a pencil or a light-colored marker, lightly sketch two equilateral triangles for the eyes about a third of the way down from the stem. Angle them slightly inward to give the face character. -
Outline the nose:
Draw a smaller triangle right in the center of the face, slightly below the eyes. -
Draft the smile:
Sketch a wide, U-shaped curve that stretches past the width of the eyes. Add small tick marks at the corners of the mouth for a playful dimple effect.
Step 2: Painting the Features
-
Outline the eyes:
Load your small round brush with black acrylic paint. Carefully trace over your sketched lines for the left eye triangle. -
Fill in the eyes:
Using the same brush, fill in the triangle completely with black paint. Repeat this process for the right eye. -
Paint the nose:
Outline and fill in the small nose triangle with black paint, keeping your edges as sharp as possible. -
Create the mouth shape:
Switch to your fine detail brush for better control. Paint the main curved line of the smile, starting from the center and working outward to ensure symmetry. -
Thicken the smile:
Go back over the mouth line to thicken it slightly, making it roughly 1/4 inch wide so it stands out against the orange skin. -
Add the corners:
Paint the small upward ticks at the very ends of the smile to frame the expression. -
Initial drying time:
Let the black paint dry completely. This usually takes about 15-20 minutes depending on how thick your application was. I prefer to grab a coffee while waiting to ensure I don’t smudge anything.
Smooth Operator
If your pumpkin has very deep vertical ribs, try to position the eyes and nose within the wider valleys between the ribs rather than painting over the bumps.
Step 3: Adding Details
-
Paint the pupils:
Once the black is dry, dip the handle end of a paintbrush into white paint. Dot it onto the center of each black eye triangle to create perfect circular pupils. -
Draw the teeth lines:
Using the fine detail brush and white paint, draw vertical lines across the black mouth strip. Space them evenly to create the separation between teeth. -
Define the teeth:
Connect the vertical lines with small horizontal strokes at the top and bottom if you want squarely defined teeth, or leave them as simple vertical dashes for a stitched mouth look. -
Clean up edges:
If any white paint went outside the lines, use a clean, damp brush or a bit of black paint to touch up the edges once the white is dry. -
Final cure:
Allow the entire pumpkin to dry undisturbed for at least an hour before moving it to its display spot.
Glow Up
Use glow-in-the-dark acrylic paint for the white pupils and teeth. Your design will look classic by day and spooky by night.
Place your finished pumpkin on a sunny windowsill or porch to greet visitors with its timeless smile


Black Cat Pumpkin With Bright Green Eyes
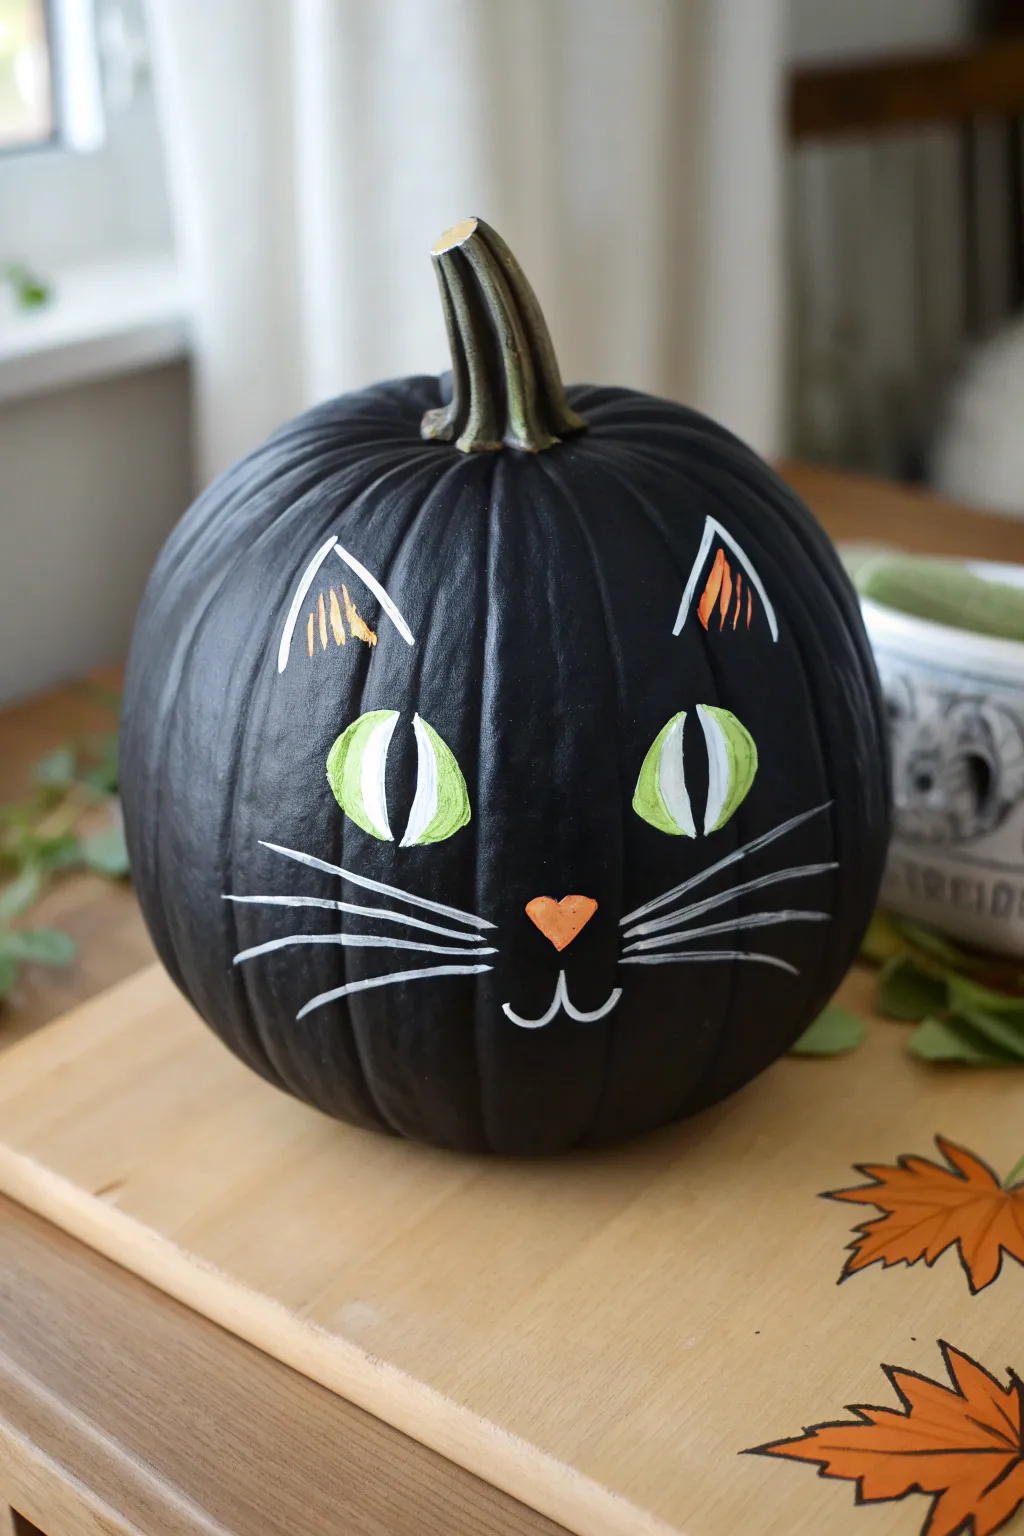
Transform a simple round gourd into a spooky yet adorable feline friend with this sleek black cat design. The striking contrast of matte black paint against bright green eyes and crisp white whiskers makes for a standout centerpiece on any porch.
Step-by-Step Guide
Materials
- Medium-sized round pumpkin (preferably with a clean, smooth surface)
- Matte black acrylic paint
- White acrylic paint
- Lime green acrylic paint
- Orange acrylic paint
- Large flat paintbrush or sponge brush
- Small round detail brush (size 2 or 4)
- Fine liner brush (size 0 or 00)
- Cup of water and paper towels
- Pencil or white chalk pencil
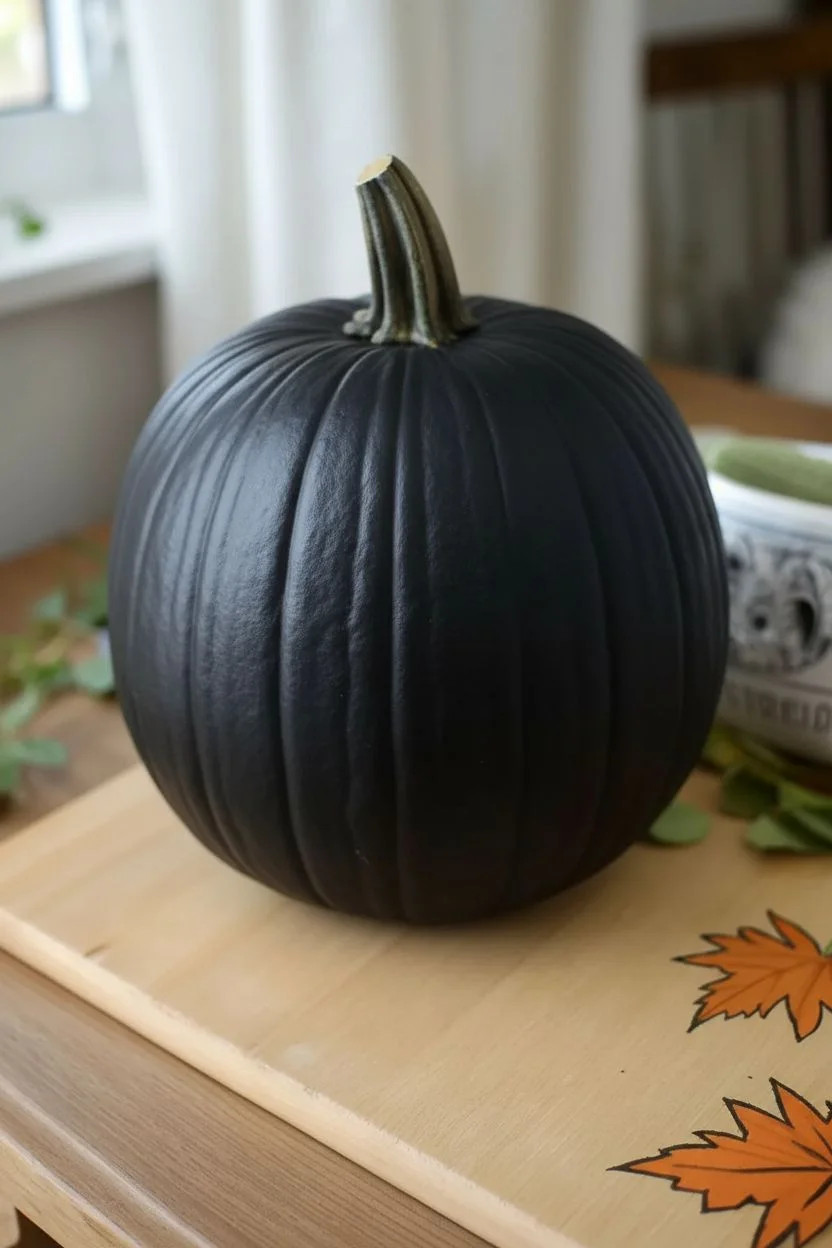
Step 1: Setting the Dark Canvas
-
Clean the surface:
Before you even open the paint, wipe down your pumpkin with a damp cloth to remove any dirt or field dust. Let it dry completely so the paint adheres properly. -
Apply the first black coat:
Using your large flat brush or sponge brush, cover the entire pumpkin in matte black acrylic paint. I recommend painting in vertical strokes following the pumpkin’s ribs for a smoother look. -
Paint the bottom carefully:
Wait until the sides are partially dry, then carefully tilt the pumpkin to paint the bottom curves, ensuring no orange skin is showing. -
Let it dry completely:
Allow this first layer to dry for at least 30 minutes. Acrylics dry fast, but thick layers on waxy pumpkin skin can take a moment. -
Apply a second coat:
For that deep, opaque midnight look, apply a second coat of black paint. This hides any streaky areas and solidifies the background color. -
Preserve the stem:
Notice how the stem in the image remains natural? paint carefully around the base of the stem, keeping the green-brown texture visible for a nice organic contrast.
Step 2: Sketching and Base Layers
-
Map out the face:
Once the black paint is bone dry, lightly sketch the facial features using a white chalk pencil or a regular pencil. Outline two large almond shapes for eyes, two triangles for ears near the top, and a small heart or triangle for the nose. -
Block in the eyes:
Using a small round brush, fill in the large almond eye shapes with lime green paint. You might need two layers here to make the green pop against the black background. -
Define the ears:
Use a thin brush and white paint to draw the triangular outlines of the ears. Make the lines slightly sketchy and loose rather than perfectly straight. -
A dash of orange:
Inside the white ear outlines and for the small nose, apply a coat of bright orange paint. This ties the design back to traditional Halloween colors.
Streaky Black Paint?
If the black paint separates on the pumpkin skin, try mixing a tiny drop of dish soap into your paint, or lightly buff the pumpkin with fine sandpaper first.
Step 3: Fine Details and Whiskers
-
Add the pupils:
Switch to your fine liner brush and black paint. Carefully paint a vertical slit pupil in the center of each green eye. -
Highlight the eyes:
To give the cat life, paint two curved white highlights on either side of the black pupil within the green area. This makes the eyes look glassy and round. -
Detail the ears:
Add a few scratchy, vertical orange lines inside the ear triangles to suggest fur texture. -
Paint the mouth:
Using white paint and your detail brush, draw a classic ‘W’ shape extending down from the orange nose to create the mouth. -
Start the whiskers:
Load your fine liner brush with slightly watered-down white paint. This helps the paint flow smoothly for long lines. -
Sweep the whiskers:
With a confident flick of the wrist, paint three long whiskers extending outward from each cheek area. Start firm near the nose and lift the brush as you move outward to taper the ends. -
Final touch-ups:
Look over your design. If any black background shows through the green eyes or orange nose, dab on a tiny bit more paint to make the colors solid.
Make it Glow
Use glow-in-the-dark acrylic paint for the green eyes and white whiskers. Your black cat will disappear at night, leaving only a floating ghostly face.
Place your sleek feline creation near your entryway to greet trick-or-treaters with a charming stare


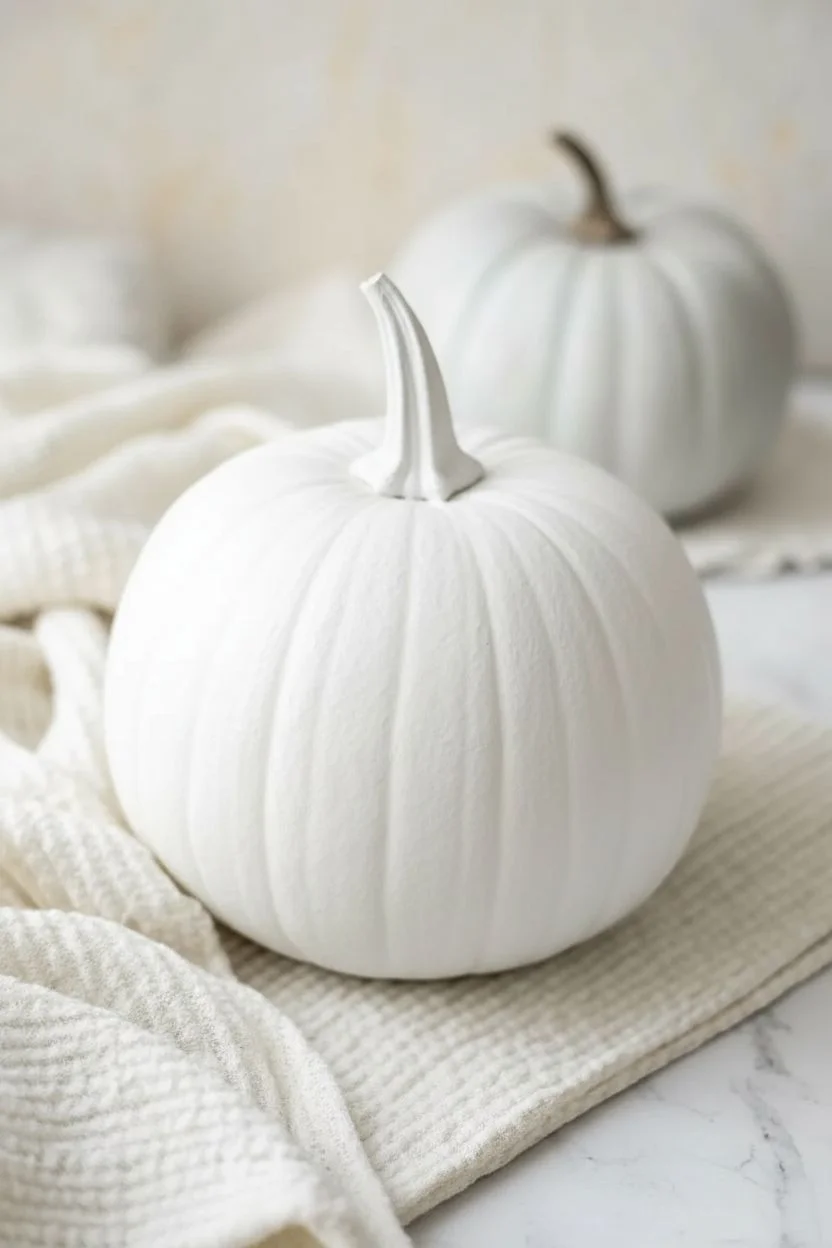
Friendly Ghost Pumpkin With Soft Shaded Edges
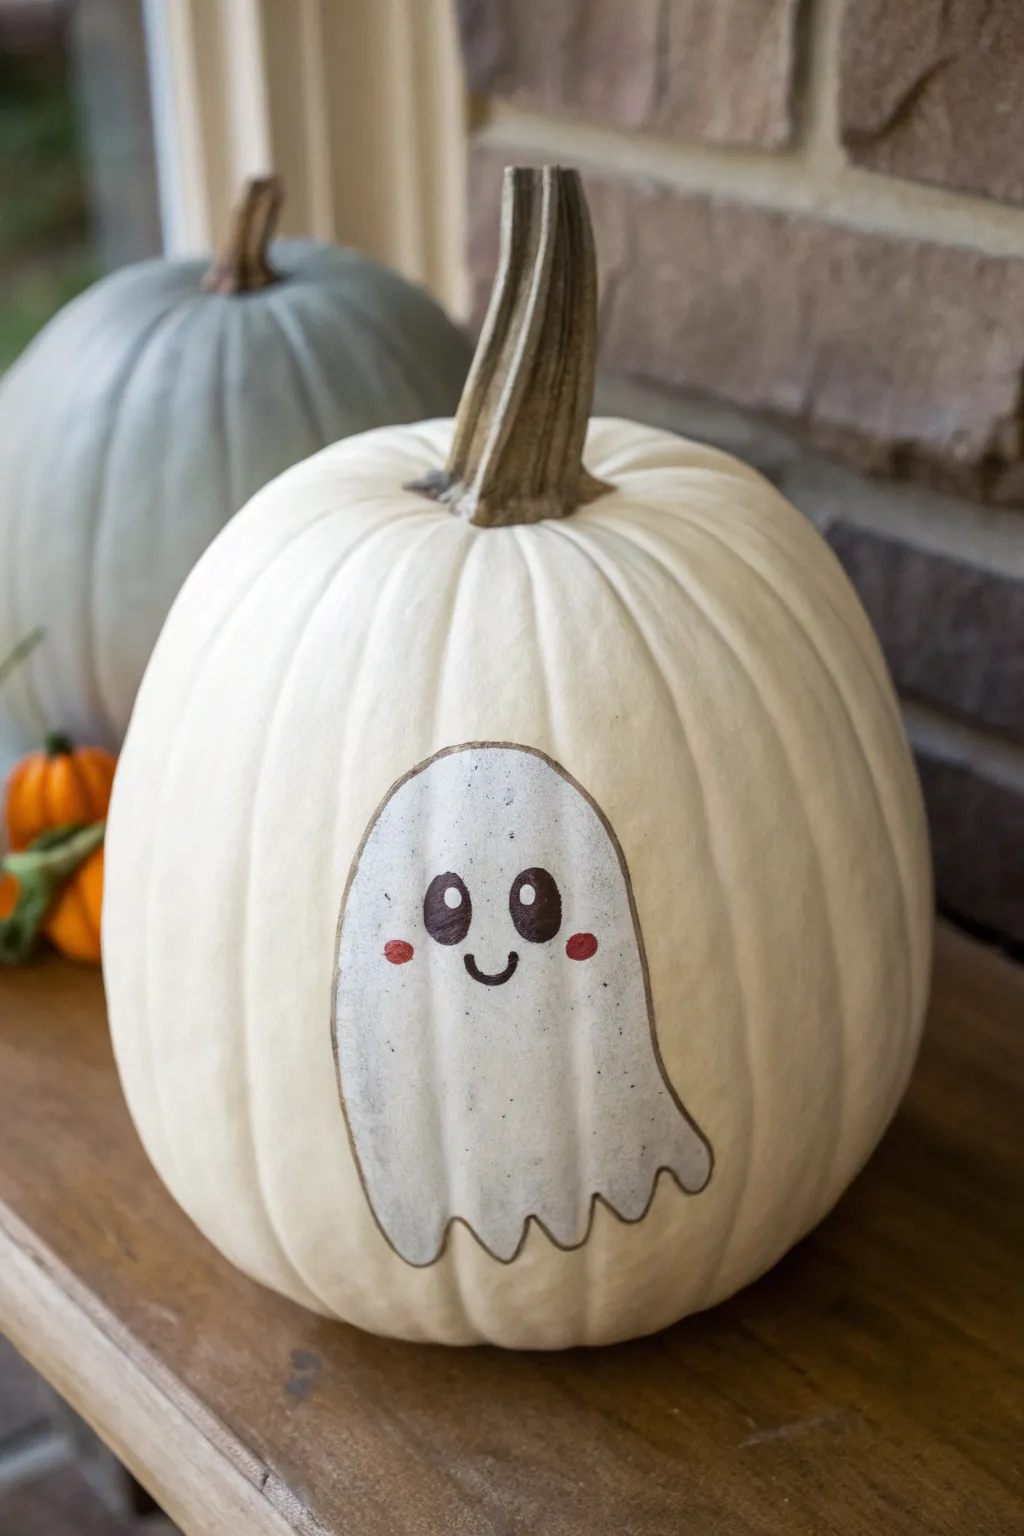
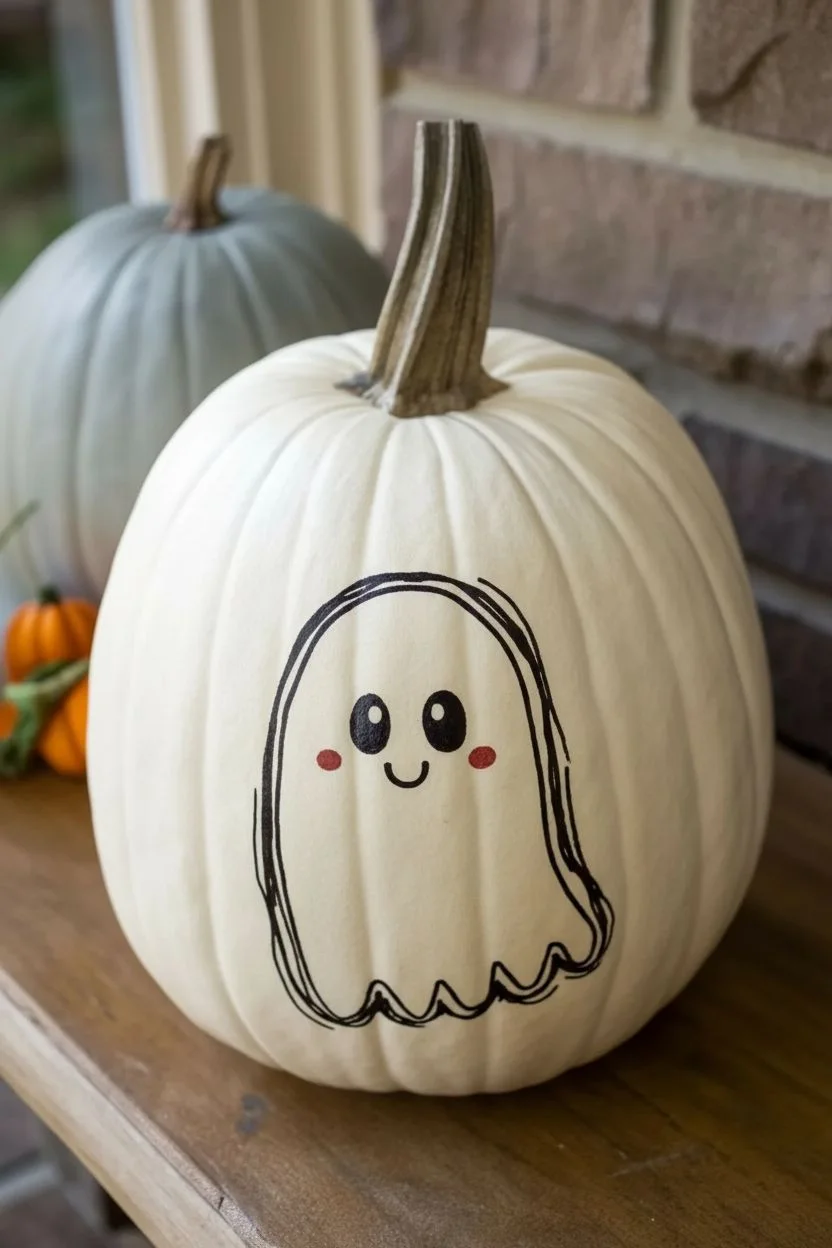
Transform a simple white pumpkin into a charming seasonal character with this gentle ghost design. The soft gray shading and minimalist features create a friendly, inviting look that is perfect for non-scary Halloween decor.
How-To Guide
Materials
- White pumpkin (real or faux)
- Pencil
- Eraser
- Fine tip black paint pen or permanent marker
- Black acrylic paint
- White acrylic paint
- Pink or coral acrylic paint
- Light gray acrylic paint (or white mixed with a tiny dot of black)
- Small round detail brush
- Small flat shader brush or stencil brush
- Container of water
- Paper towels
Step 1: Preparation and Outline
-
Clean surface:
Wipe down your white pumpkin with a damp paper towel to remove any dirt or oils. If using a real pumpkin, ensure it is completely dry before starting. -
Sketch the shape:
Using a light touch with your pencil, sketch a simple arch shape on the smoothest side of the pumpkin. Bring the lines down and create a wavy, scalloped bottom edge to represent the ghost’s tail. -
Add facial features:
Sketch two oval eyes near the top third of the ghost shape. Add a small ‘U’ shape between and slightly below them for the smile, and mark two small circles on the cheeks. -
Outline the body:
Take your fine tip black paint pen or a very thin brush with diluted black paint. Carefully trace over your pencil lines for the ghost’s outer body shape. Keep the line thin and delicate. -
Double the line:
To give the drawing a hand-illustrated feel, go over the outline a second time loosely, or thicken it very slightly in random areas for character.
Step 2: Painting the Ghost
-
Fill the eyes:
Load your small round brush with black acrylic paint. Carefully fill in the two oval eye shapes solid black. -
Paint the smile:
Use the very tip of your detail brush or the black paint pen to draw the small smile. -
Add highlights:
Once the black eye paint is dry to the touch, dip the back end of your brush handle into white paint. Dot a large highlight in the upper right corner of each eye. -
Second highlight:
Using a smaller tool, like a toothpick or a clean brush tip, add a tiny second white dot near the bottom left of the eyes for extra sparkle. -
Rosy cheeks:
Mix a soft pink or coral color. Using a small brush, paint two small circular cheeks on either side of the smile.
Smudge Control
Work from the top of the pumpkin down to avoid dragging your hand through wet paint. If you do smudge, wipe it immediately with a damp Q-tip.
Step 3: Shading and Depth
-
Mix shadow color:
Prepare a very light wash of gray paint. I like to keep this extremely transparent, almost like watercolor, so dilute your acrylic with a little water. -
Apply edge shading:
Dip a flat shader brush into the gray wash. Paint along the *inside* edge of your ghost outline. The goal is to create a shadow that makes the ghost look rounded. -
Feather the edges:
Before the gray paint dries, use a clean, slightly damp brush to blur the inner edge of the gray line, pulling the color gently toward the center of the ghost. -
Deepen creases:
Add a slightly darker gray tone just inside the bottom wavy lines to emphasize the folds of the sheet. -
Create texture:
If you want a rustic look, you can dry-brush a tiny amount of the gray vertically through the center of the ghost body to simulate fabric texture. -
Final touches:
Inspect your outlines. If the paint pen was covered by shading, re-trace the outer black line one last time to make the image pop.
Glow Up
Mix a tiny amount of glow-in-the-dark medium into your white paint for the eye highlights to make your ghost lightly luminescent at night.
Place your finished pumpkin on a porch or mantel for a delightfully spooky display


Witch Hat Pumpkin With Starry Night Background
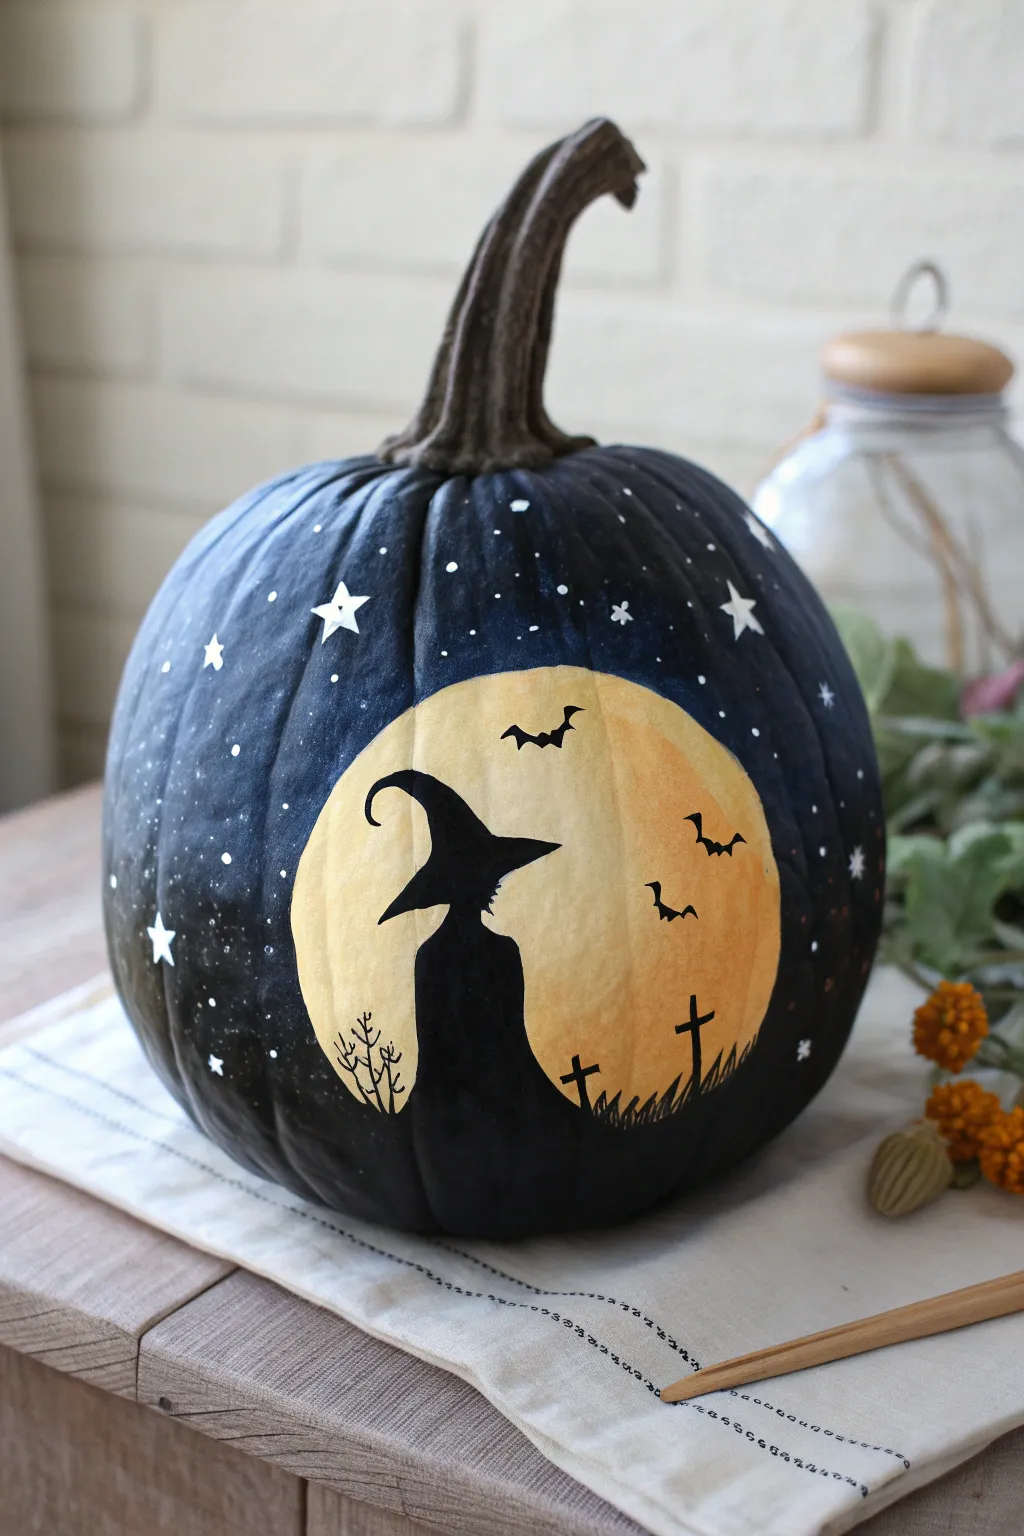
Transform a simple pumpkin into a spooky night scene with this enchanting painted design. Featuring a classic witch silhouette against a glowing moon and scattered stars, it combines elegance with just the right amount of Halloween fright.
Step-by-Step Guide
Materials
- Medium-sized pumpkin (real or faux)
- Black acrylic paint (matte finish)
- Yellow acrylic paint
- Cream or pale yellow acrylic paint
- White acrylic paint
- Large flat paintbrush
- Medium round paintbrush
- Fine detail paintbrush (liner brush)
- Paint palette or paper plate
- Pencil for sketching
- Cup of water and paper towels
Step 1: Setting the Scene
-
Clean surface:
Begin by wiping down your pumpkin with a damp cloth to remove any dirt or oils. If you are using a real pumpkin, ensure it is completely dry before applying any paint. -
Base coat:
Using your large flat brush, paint the entire pumpkin with matte black acrylic paint. I find that applying two thin coats rather than one thick coat prevents dripping and provides better coverage. Let this dry completely. -
Map the moon:
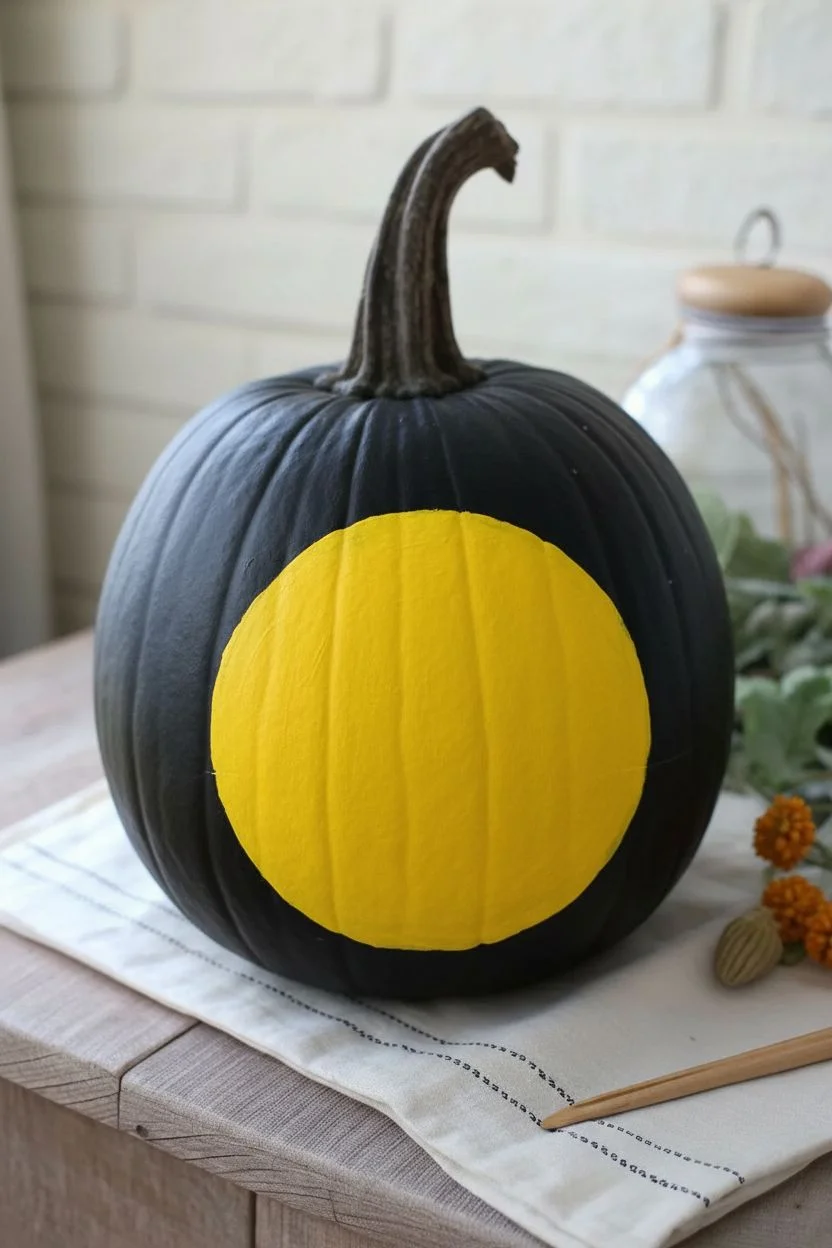
Once the black base is dry to the touch, lightly sketch a large circle in the center of the nicest side of your pumpkin using a pencil. This will be your moon. -
Moon base:
Fill in the circle with your yellow acrylic paint using a medium round brush. You may need a second coat to ensure the yellow pops against the dark background.
Circle Trick
Struggling to paint a perfect circle? Find a bowl or large jar lid that fits your pumpkin’s curve, hold it against the surface, and lightly trace around it with a pencil.
Step 2: Creating the Glow
-
Add texture:
While the yellow paint is still slightly tacky, mix a tiny bit of cream or pale yellow paint onto your brush. Dab this lightly around the center and edges of the moon to give it a textured, crater-like appearance. -
Feather the edges:
Carefully refine the edges of the moon circle. It doesn’t need to be geometrically perfect; a slightly organic edge adds to the spooky atmosphere.
Glow In The Dark
Mix glow-in-the-dark medium into your yellow moon paint and use glow paint for the stars. Your pumpkin will light up naturally when the porch lights go out.
Step 3: Painting the Silhouette
-
Sketch the witch:
With your pencil, lightly draw the outline of the witch inside the moon. Start with her pointed hat, curving the tip slightly, then draw her profile and cloak shape. -
Fill the silhouette:
Use your fine detail brush and black paint to carefully fill in the witch’s shape. Keep your hand steady, especially around the pointed hat and nose. -
Add ground elements:
At the bottom of the moon circle, paint a jagged, grassy horizon line in black to ground your scene. -
Spooky details:
Using the very tip of your detail brush, paint two cross-shaped tombstones rising from the grass on the right side. -
Dead trees:
On the left side of the silhouette, add a small, scraggly tree with thin, bare branches reaching up. -
Flying bats:
Paint three small ‘M’ shapes in the upper right quadrant of the moon to represent bats flying in the distance. Vary their sizes slightly to create depth.
Step 4: The Starry Sky
-
Large stars:
Dip a clean detail brush into white paint. Paint a few five-pointed stars scattered across the black upper section of the pumpkin. -
Tiny stars:
Dot tiny specks of white paint around the larger stars and down the sides of the pumpkin to create a distant galaxy effect. -
Final touches:
Check your black silhouette for any patchy areas and touch them up with a final layer of black paint if necessary. Ensure the distinction between the black figure and yellow moon is sharp. -
Stem work:
Leave the stem natural for a rustic look, or give it a light wash of brown paint if it looks too green or fresh. -
Protect your work:
Allow the entire pumpkin to dry for several hours. If you plan to display this outdoors, applying a spray sealer is a smart move to protect it from moisture.
Now you have a bewitching centerpiece ready to win any contest or greet trick-or-treaters
BRUSH GUIDE
The Right Brush for Every Stroke
From clean lines to bold texture — master brush choice, stroke control, and essential techniques.
Explore the Full Guide
Bat Swarm Pumpkin Using Bold Silhouettes
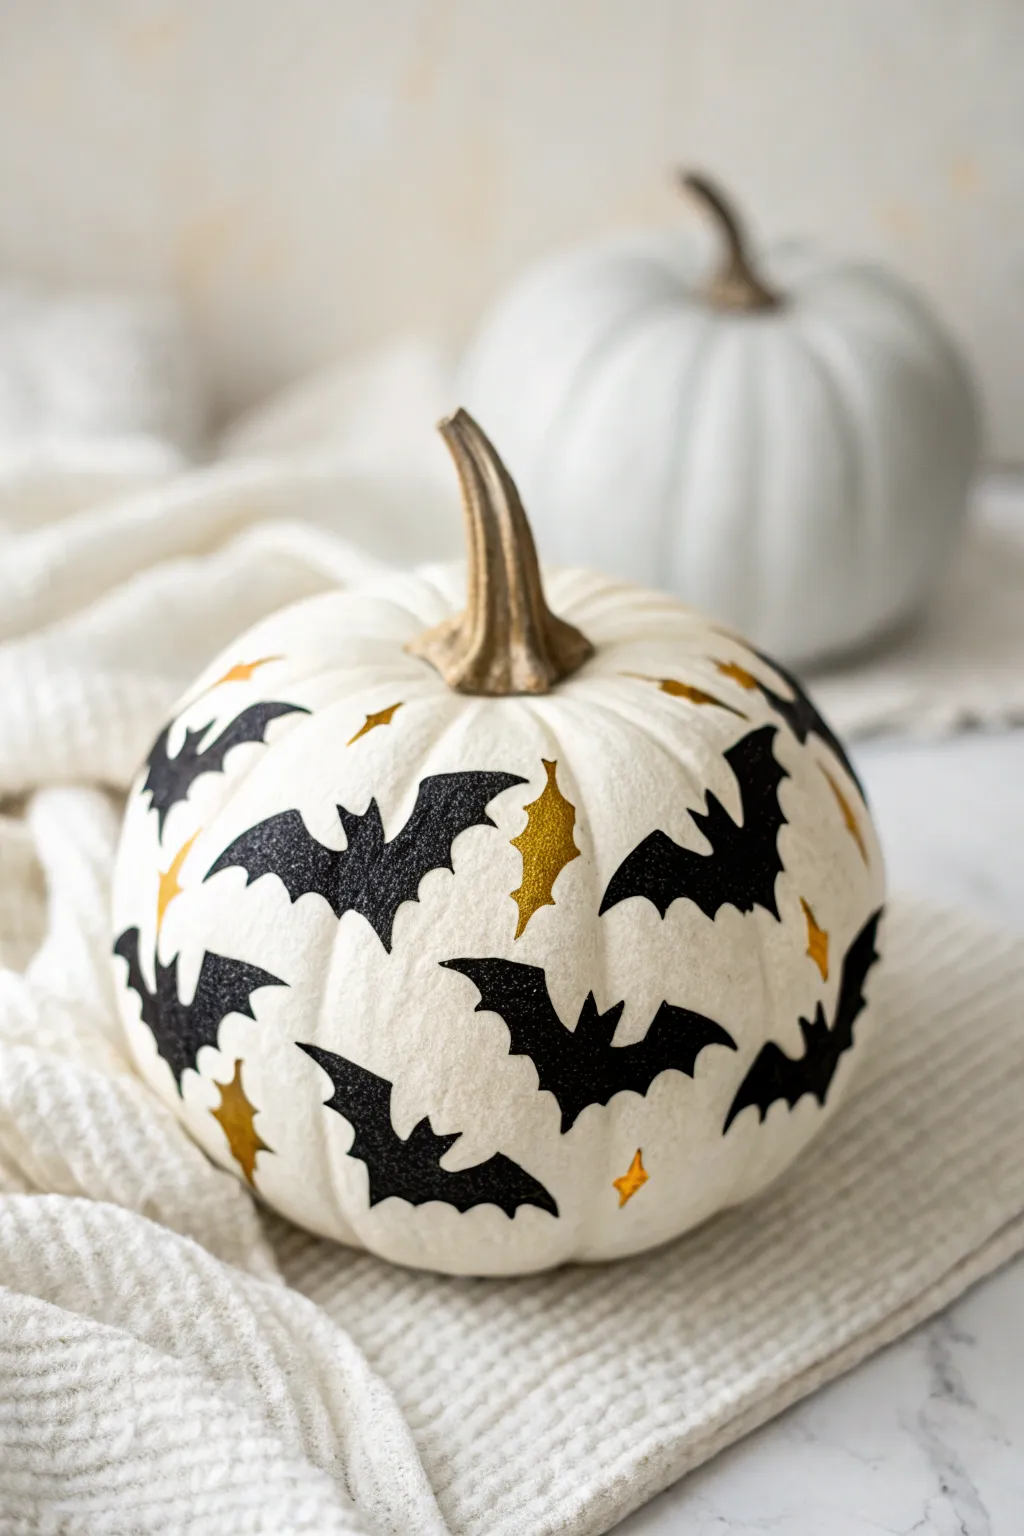
Transform a simple white pumpkin into a spooky-chic masterpiece with a flurry of jet-black bats and glittering gold accents. The high contrast of the dark silhouettes against the pale skin creates a striking, modern Halloween look that feels both elegant and eerie.
Step-by-Step Tutorial
Materials
- Medium-sized white pumpkin (real or faux)
- Black acrylic paint
- Gold acrylic paint or gold leaf pen
- Fine-grit sandpaper (optional)
- Small round paintbrushes (sizes 2 and 4)
- Fine liner brush (size 0 or 00)
- Pencil for sketching
- Paper bat templates or stencils (optional)
- Fine black glitter (optional)
- Mod Podge or clear sealant spray
- Palette or paper plate
- Water cup and paper towels
Step 1: Preparing the Canvas
-
Clean surface:
Begin by washing your pumpkin with a damp cloth and mild soap to remove any dirt or oils. Dry it thoroughly with a paper towel. -
Smooth imperfections:
If you are using a faux pumpkin with noticeable seams, use fine-grit sandpaper to gently smooth them down. Wipe away the dust afterward. -
Background coat (optional):
If your pumpkin isn’t a bright, crisp white, or if it has natural blemishes you want to hide, apply one to two coats of matte white acrylic paint over the entire surface. Let this dry completely before moving on.
Use a Stencil Trick
Struggling to draw freehand bats? Print a bat shape on cardstock, cut it out, and use it as a stencil to trace outlines. Use multiple sizes for variety.
Step 2: Planning the Layout
-
Envision the flight path:
Before you start drawing, decide on the flow of your bat swarm. Visualizing an ‘S’ curve wrapping around the pumpkin often creates dynamic movement. -
Sketch basic shapes:
Using a light pencil, sketch simple outline shapes for your bats directly onto the pumpkin skin. Vary the sizes significantly—some large, some medium, and tiny ones to fill gaps. -
Vary wingspans:
Ensure each bat looks unique by changing wing angles. Draw some with wings fully outstretched and others with wings angled sharply upward or downward, mimicking flight. -
Add accent placement:
Mark tiny diamond or star shapes in the empty spaces between the bats. These will become your gold accents later.
Make It 3D
Instead of painting all the bats, cut some out of black cardstock. Fold the wings up slightly and glue just the body to the pumpkin for a 3D flight effect.
Step 3: Painting the Silhouettes
-
Outline in black:
Load your fine liner brush with black acrylic paint. Carefully trace over your pencil lines for the bats to create crisp outer edges. -
Fill the bodies:
Switch to a slightly larger round brush (size 2 or 4) to fill in the bat shapes with solid black paint. Apply the paint smoothly to avoid visible brushstrokes. -
Sharpen the tips:
Go back in with your liner brush to refine the wing tips and ears. The sharper these points are, the more professional the silhouette will look. -
Add texture (optional):
If you want the glittery look seen in the photo, sprinkle fine black glitter onto the wet paint immediately after filling in each bat. I prefer doing one bat at a time so the paint doesn’t dry before the glitter sticks. -
Second coat:
If you aren’t using glitter and the first coat looks streaky, allow it to dry fully and then apply a second layer of black paint for opacity.
Step 4: Adding Golden Details
-
Paint gold stars:
Using a clean fine liner brush and metallic gold paint, fill in the small diamond or star shapes you sketched earlier. -
Create distinct shapes:
For the stars, paint a small vertical line crossed by a small horizontal line, tapering the ends to points. Some can just be simple four-point diamonds. -
Add gold bats:
To break up the black swarm, choose one or two small bat silhouettes and paint them entirely in gold instead of black. This adds a lovely pop of visual interest. -
Dry time:
Allow all paint to dry completely for at least an hour. Be patient to avoid smudging your crisp lines.
Step 5: Finishing Touches
-
Erase guidelines:
Once the paint is rock hard, gently erase any visible pencil marks remaining around the edges of your designs. -
Seal the work:
To protect your design, especially if the pumpkin will be outside, apply a layer of clear sealant spray or brush on a coat of Mod Podge. A matte finish looks best for this style. -
Stem detail:
Inspect the stem; if it looks messy with white paint, you can dry-brush a little brown or gold paint over it to give it an aged, realistic look.
Place your sleek bat-swarmed pumpkin on a porch or mantle to enjoy its modern and spooky charm
Spiderweb Corner Pumpkin With Pearly Highlights
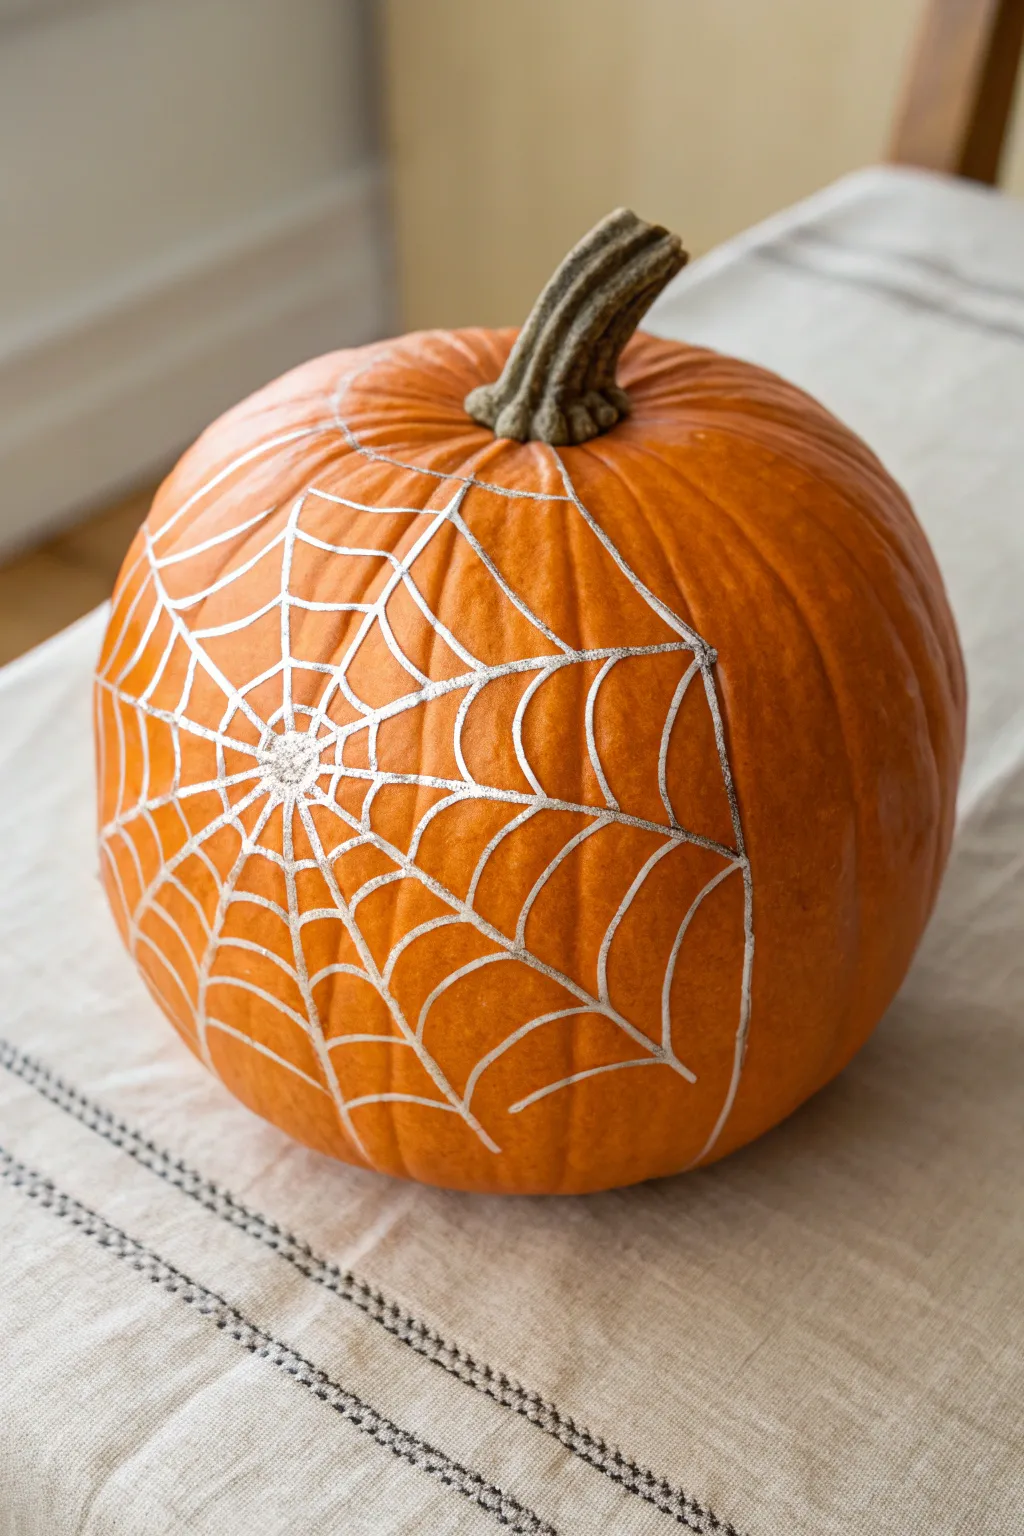
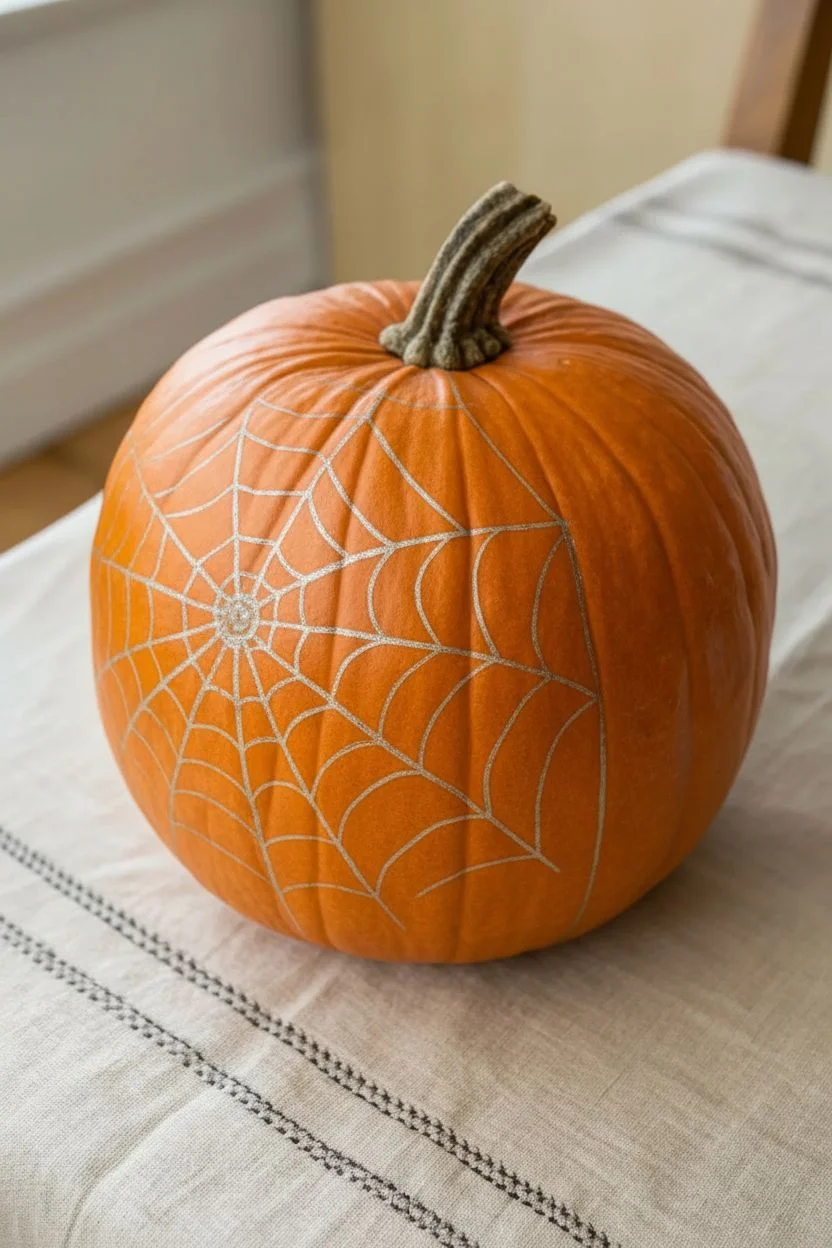
Transform a classic orange gourd into an elegant centerpiece with this metallic spiderweb design. The pearly silver lines pop beautifully against the pumpkin skin, creating a look that is spooky yet sophisticated.
Detailed Instructions
Materials
- Medium-sized orange pumpkin (real or faux)
- Silver metallic paint pen (medium or fine tip)
- White pencil or chalk (for sketching)
- Damp cloth or paper towel
- Rubbing alcohol
- Cotton rounds
- Clear matte acrylic sealer spray (optional)
Step 1: Preparation
-
Clean surface:
Begin by wiping down the entire surface of your pumpkin with a damp cloth to remove any dirt or garden debris. -
Degrease skin:
Take a cotton round soaked in rubbing alcohol and gently wipe the area where you plan to paint the web. This removes natural oils and ensures the paint pen adheres smoothly. -
Dry completely:
Let the pumpkin air dry for about 10 minutes. Painting on a damp surface will cause the ink to bleed or streak.
Step 2: Drafting the Design
-
Choose a focal point:
Decide where the center of your web will be. Instead of dead center, try placing it slightly off to the side, about halfway down the pumpkin, for a more dynamic look. -
Sketch anchor lines:
Using a white pencil or a piece of chalk, lightly draw 6 to 8 straight lines radiating outward from your chosen center point like slicing a pie. -
Check spacing:
Step back and look at your varied spacing. The lines don’t need to be perfectly symmetrical; natural spiderwebs are rarely perfect. -
Sketch curved connectors:
Starting near the center, lightly sketch scalloped or U-shaped lines connecting the straight anchor lines. Work your way outward in expanding concentric circles.
Ink Not Flowing?
Pumpkins are bumpy! If the pen skips, clean the tip on paper. Don’t press hard on the pumpkin itself or the tip may fray.
Step 3: Inking the Web
-
Prime the pen:
Shake your silver metallic paint pen vigorously. Press the tip down on a scrap piece of paper until the silver ink flows consistently. -
Trace anchor lines:
Begin tracing over your chalk anchor lines with the silver pen. Start from the center point and pull the pen outward toward the edges of the design. -
Create the center cluster:
At the very center where the lines meet, dab a small, solid circle of silver to anchor the web visually. -
Connect the inner rings:
Draw the smallest, innermost curved connecting lines first. Keep your hand steady and let the pen glide over the pumpkin’s bumps. -
Work outward:
Continue tracing the scalloped lines, moving ring by ring toward the outer edge of the web. -
Thicken slightly:
I find that going over the main anchor lines a second time helps them stand out against the curved connecting threads. -
Extend edges:
extending the very tips of the anchor lines past the last webbing ring to make the web look like it’s stretching across the surface.
Add Some Sparkle
While the silver paint is still wet, sprinkle ultra-fine iridescent glitter on the web for a magical morning-dew effect.
Step 4: Finishing Touches
-
Cleanup sketch marks:
Allow the silver ink to dry completely for at least 30 minutes. Once dry, gently wipe away any visible white pencil or chalk marks with a slightly damp cloth. -
Inspect the lines:
Check for any skipped spots where the pen might have jumped over a pumpkin ridge and fill them in carefully. -
Optional sealing:
If this pumpkin will live outside, spray a light coat of clear matte acrylic sealer over the painted area to protect the design from moisture.
Now your pumpkin is ready to add a touch of shimmering elegance to your porch or dining table

PENCIL GUIDE
Understanding Pencil Grades from H to B
From first sketch to finished drawing — learn pencil grades, line control, and shading techniques.
Explore the Full Guide
Haunted House Pumpkin With Full-Moon Backlight
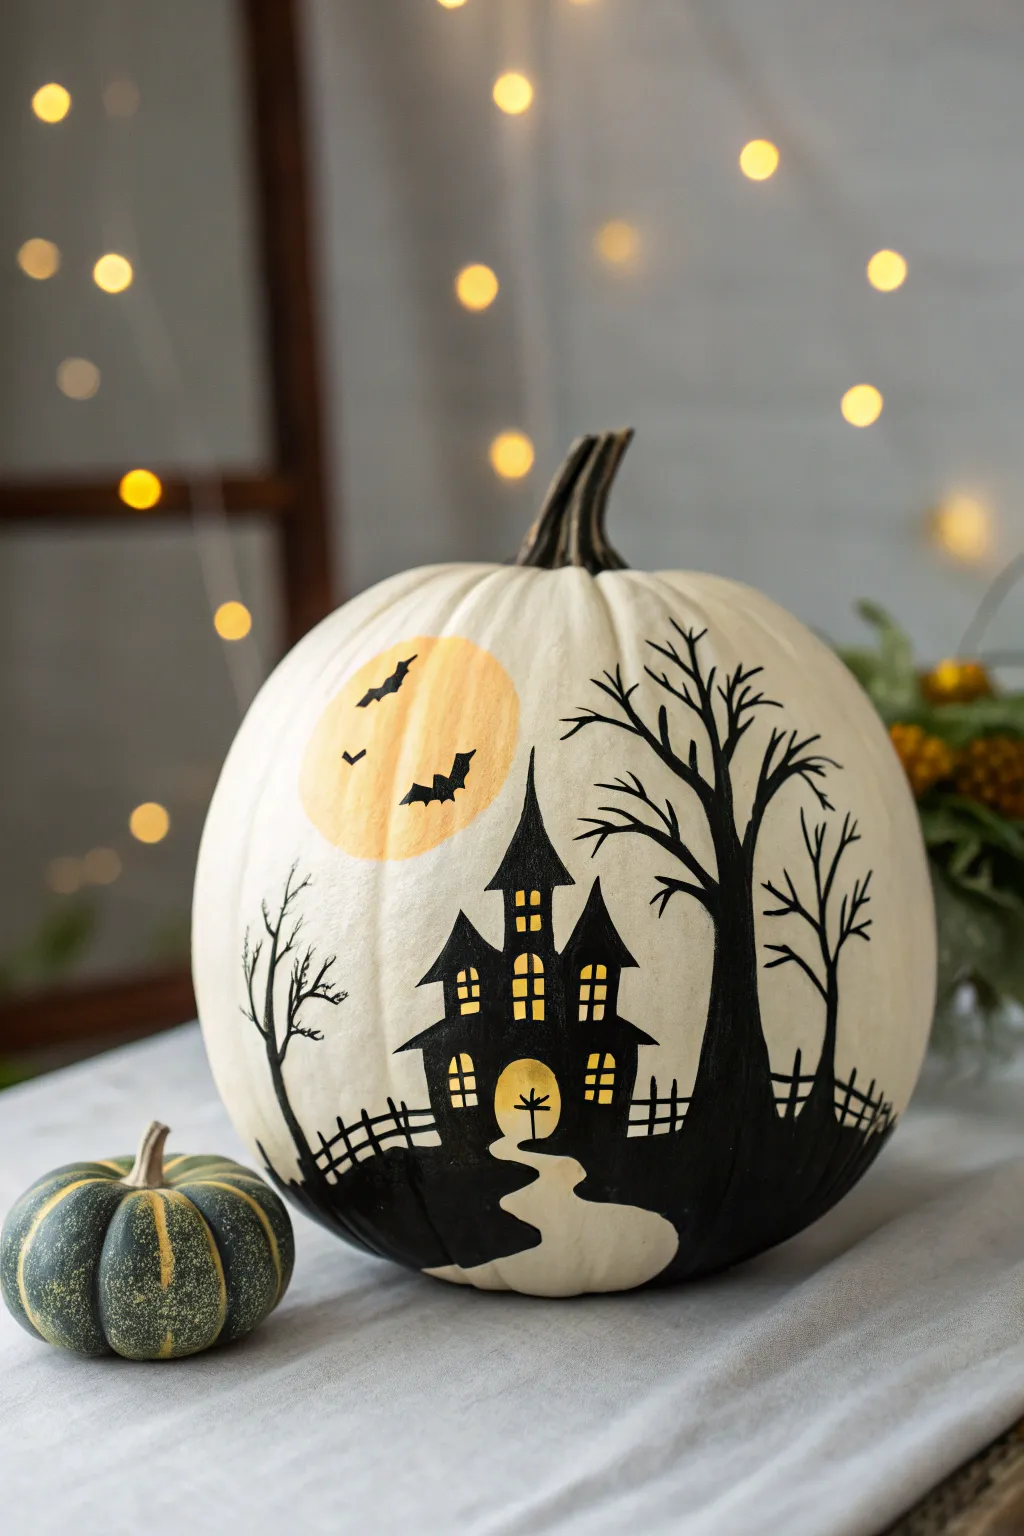
Transform a simple white pumpkin into a glowing Halloween scene with this striking high-contrast design. Using silhouette techniques and clever window lighting effects, you’ll create a haunted manor that looks ready for a spooky celebration.
Step-by-Step
Materials
- Large white artificial pumpkin (or a real pumpkin painted white)
- Black acrylic paint
- Golden yellow acrylic paint
- Light yellow acrylic paint
- Pencil
- Fine liner paintbrush (size 0 or 00)
- Small flat brush
- Medium round brush
- Black permanent marker (optional, for outlines)
- Palette or paper plate
- Cup of water and paper towels
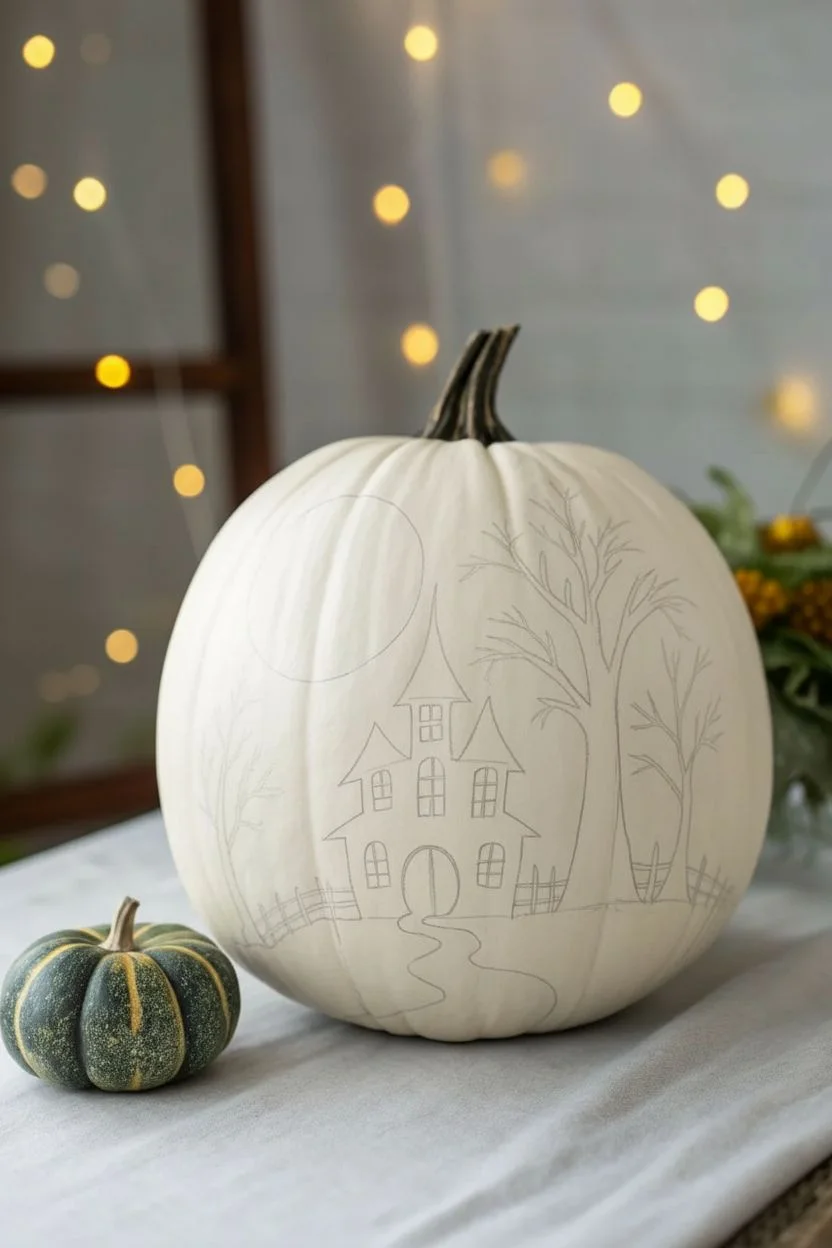
Step 1: Planning and Sketching
-
Prep the surface:
If you are using a real pumpkin, ensure it is thoroughly washed and dried. Apply two coats of white acrylic paint if it isn’t naturally white, letting it dry completely between layers. -
Sketch the moon placement:
Decide where your full moon will sit. Using a pencil, lightly draw a circle in the upper left quadrant of the pumpkin. It doesn’t need to be perfectly round; a slight organic shape adds character. -
Draft the house outline:
Lightly sketch the haunted house silhouette in the center. Start with the main tower, flank it with smaller turrets, and draw a winding path leading from the door to the bottom right. -
Add landscape elements:
Sketch a ground line that curves naturally around the base. Draw stick figures for the large gnarly tree on the right and the smaller dead tree on the left.
Tremendous Trees
To get sharp, pointy branches, dilute your black paint slightly with water. This helps the paint flow smoothly off the liner brush for crisp tips.
Step 2: Painting the Moonlight
-
Base coat the moon:
Mix a small amount of golden yellow with a touch of white. Paint the entire moon circle with your medium round brush. -
Add texture to the moon:
While the yellow is still slightly tacky, dab a tiny bit of darker golden yellow or very light orange in random spots to mimic craters and surface texture. -
Paint the window glow:
Using the same yellow mixture, carefully paint small squares where the windows will be on your house sketch. Don’t worry about messy edges; the black paint will cover them later. -
Illuminate the doorway:
Paint the arched doorway at the base of the house with the yellow paint mixture so it looks welcomingly spooky.
Step 3: Creating the Silhouette
-
Outline the house:
Once the yellow windows are bone dry, use your fine liner brush loaded with black paint (or a black marker) to outline the roof peaks and walls around the windows. -
Create window panes:
Carefully paint thin black crosses or lines over the dry yellow window squares to create the pane dividers. -
Fill the structure:
Switch to a small flat brush to fill in the solid black body of the house. Be careful not to paint over your yellow door or window lights. -
Paint the ground:
Fill in the rolling hill at the bottom with solid black. Leave the winding path negative space (white) so it stands out against the dark ground. -
Detail the main tree:
Using the fine liner brush, paint the large tree on the right. Start with a thick trunk and pull the brush upward and outward to create tapering, jagged branches. -
Add secondary trees:
Paint the smaller, spindlier tree on the left side. Use a light hand to keep the branches thin and eerie.
Fixing Smudges
Accidentally got black paint on the white pumpkin? Wait for it to dry completely, then carefully scrape it off gently with a craft knife or paint over it with white.
Step 4: Final Details
-
Paint the fence:
Add a small picket fence along the horizon line on both sides of the house. Use tiny vertical strokes connected by horizontal rails. -
Add bats:
Paint three small bat silhouettes flying across the moon. V-shapes with scalloped bottom edges work best for a classic look. -
Define the door:
Paint a very fine vertical line and a crossbar inside the yellow arched doorway to suggest a door frame or handle impact. -
Stem maintenance:
If your pumpkin stem looks messy from handling, give it a quick touch-up with brown or dark green paint to finish the look.
Place your masterpiece near a light source to let those yellow windows really shine
Candy Corn Ombre Pumpkin With Crisp Tape Lines
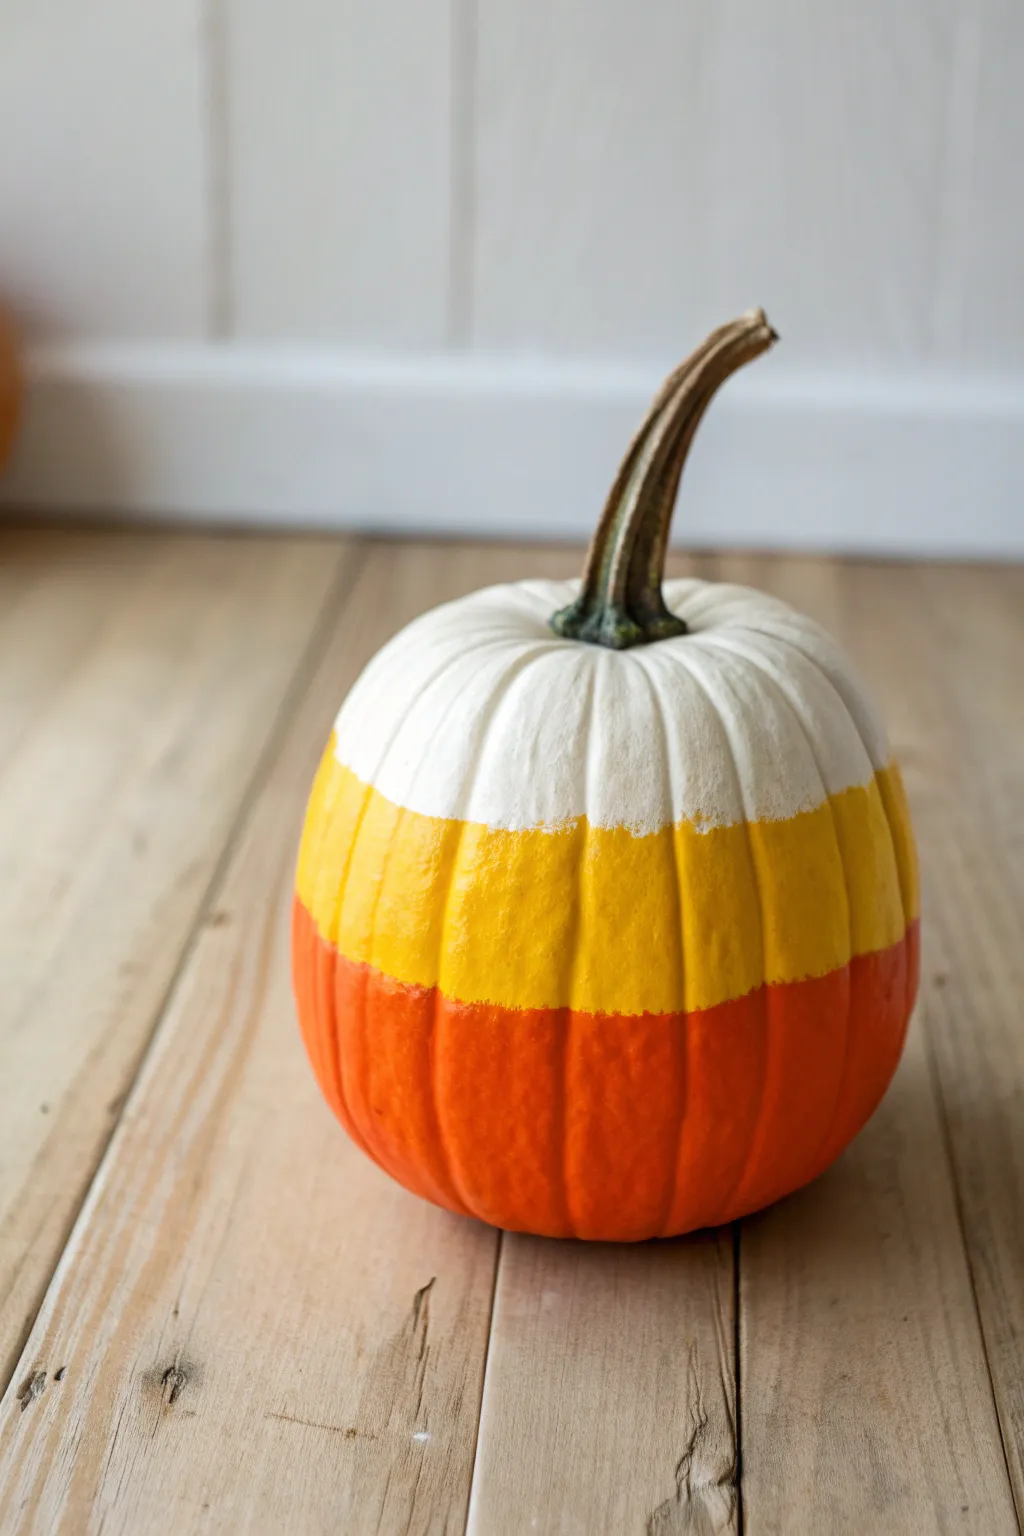
Transform a simple gourd into a giant piece of candy with this festive project. Using bands of white, yellow, and orange paint, you can create a playful ombre effect that mimics the classic Halloween treat.
Step-by-Step Guide
Materials
- Medium-sized pumpkin (real or faux)
- White acrylic paint
- Yellow acrylic paint
- Orange acrylic paint
- Medium flat paintbrush (1/2 inch to 1 inch)
- Painter’s tape or masking tape (optional)
- Palette or paper plate
- Paper towels
- Water cup
- Clear matte sealant spray (optional)
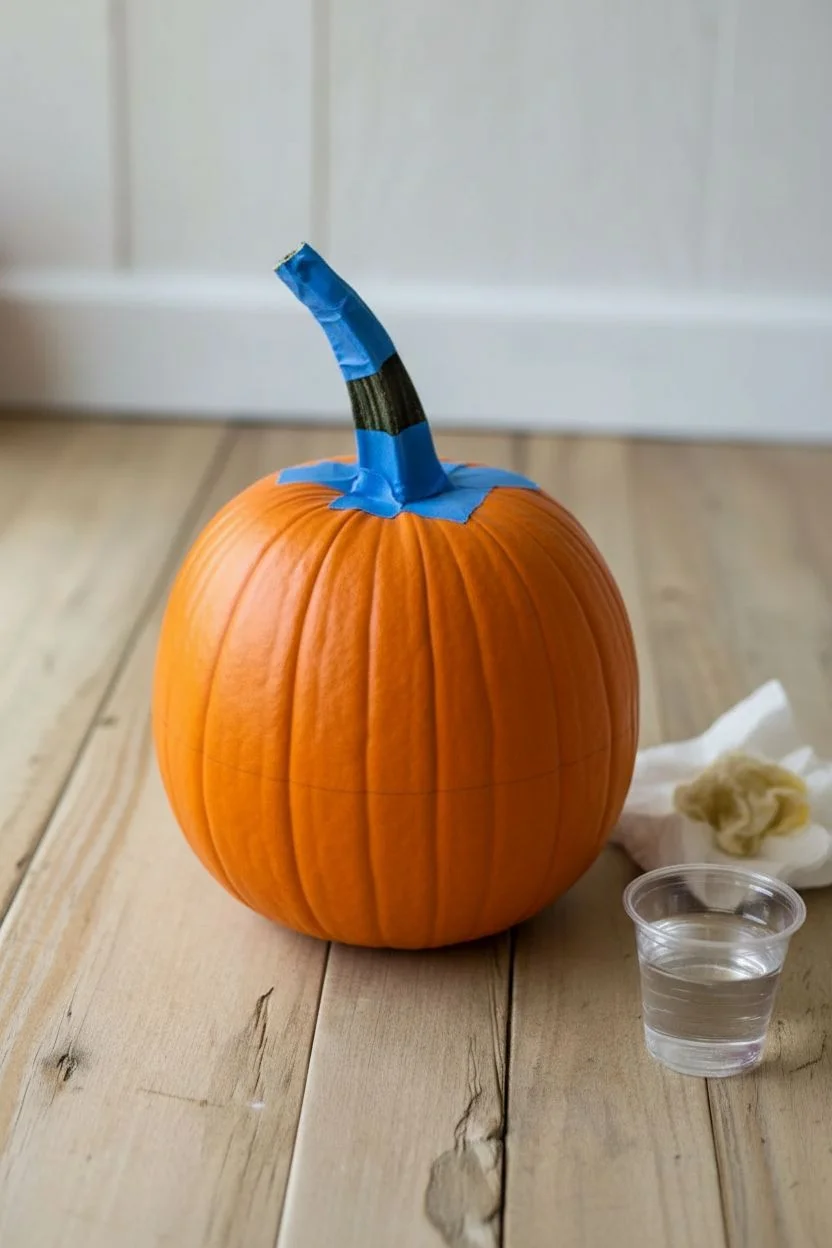
Step 1: Preparation and Planning
-
Clean surface:
Begin by wiping down your pumpkin with a damp cloth to remove any dirt or dust. If you are using a real pumpkin, ensure it is completely dry before you start painting. -
Protect the stem:
Wrap the stem carefully with painter’s tape if you want to keep it natural. Alternatively, you can just paint carefully around the base of the stem. -
Visualize thirds:
Mentally divide thePumpkin into three equal horizontal sections. You can lightly mark these sections with a pencil if you need a guide, but freehanding adds a nice organic touch.
Uneven Coverage?
If the paint separates on a faux pumpkin surface, try lightly sanding the plastic first or mixing a tiny drop of dish soap into your acrylic paint relative to the amount you are using.
Step 2: Painting the Layers
-
Start with white:
Squeeze a generous amount of white acrylic paint onto your palette. Using your flat brush, paint the top third of the pumpkin, starting right around the stem. -
Fill the ridges:
Make sure to push the bristles into the deep ridges of the pumpkin to get full coverage. The white layer might need to be a bit thicker to cover the natural orange skin. -
Create a jagged edge:
As you reach the bottom of the white section, don’t make a straight line. Instead, feather your brush strokes downward slightly to create a soft transition area for the next color. -
Apply the yellow:
Clean your brush thoroughly. Load it with bright yellow paint and begin filling in the middle third of the pumpkin. -
Blend the transition:
Where the yellow meets the white, lightly brush the wet yellow paint upward into the bottom of the white section. This creates that slightly messy, melted candy look rather than a sharp stripe. -
Paint around the circumference:
Continue painting the yellow band all the way around the pumpkin, keeping the layer consistent. -
Finish with orange:
Clean your brush again and switch to the orange paint. If your pumpkin is naturally orange, you might think you can skip this, but painting it ensures the colors have the same finish and texture. -
Paint the base:
Cover the bottom third of the pumpkin with the orange paint. I find it helpful to flip the pumpkin upside down (resting on its stem carefully) to get the very bottom. -
Blend the lower line:
Just as before, feather the orange paint slightly upward into the yellow section to soften the line between the two bright colors. -
Check for gaps:
Rotate the pumpkin and look for any spots where the natural skin is showing through, especially in the grooves. Touch up these areas with the appropriate color.
Step 3: Finishing Touches
-
Let it dry:
Allow the first coat to dry completely. Acrylics usually dry fast, about 15-20 minutes depending on humidity. -
Second coat:
Apply a second coat to each color band if the coverage looks streaky or thin. This makes the colors pop and look opaque like real candy. -
Remove tape:
If you taped the stem, peel the tape off gently. If you got any paint on the stem, wipe it off quickly with a damp paper towel. -
Seal (optional):
For longevity, especially if placing outdoors, give the pumpkin a light misting of clear matte sealant spray.
Add Sparkle
While the paint is still wet, sprinkle ultra-fine white glitter over the white top section, and orange glitter on the bottom to give it a sugared candy effect.
Place your sweet creation on the porch or a mantel for a seasonal touch that looks good enough to eat


Metallic Mandala Pumpkin for Instant Trophy Energy
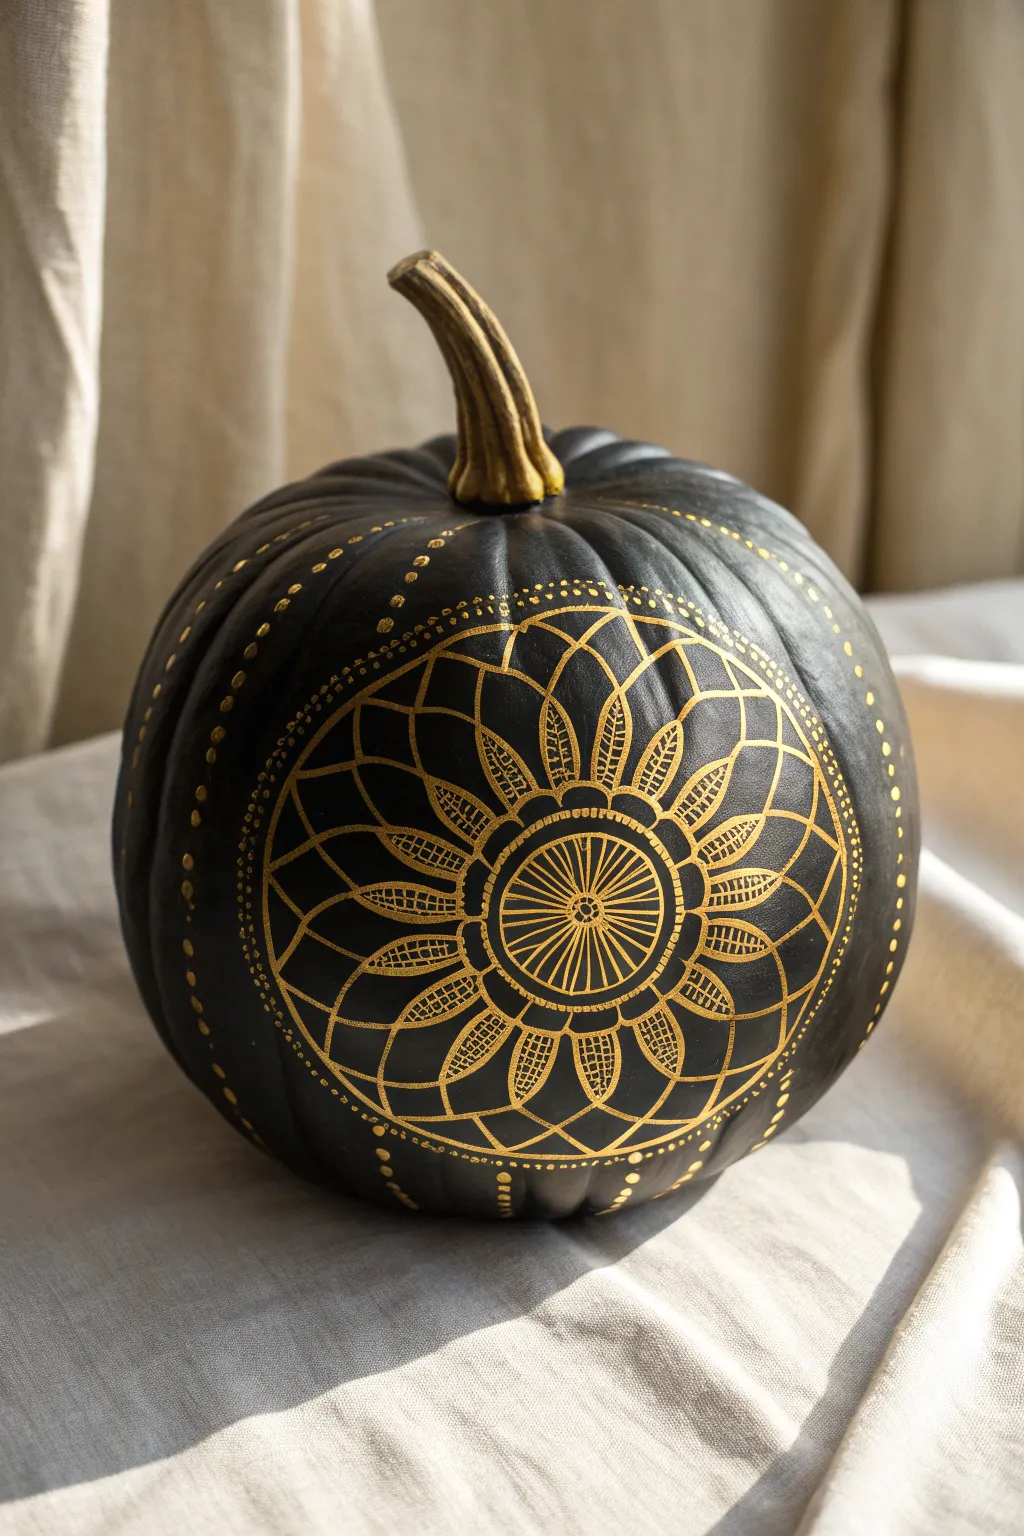
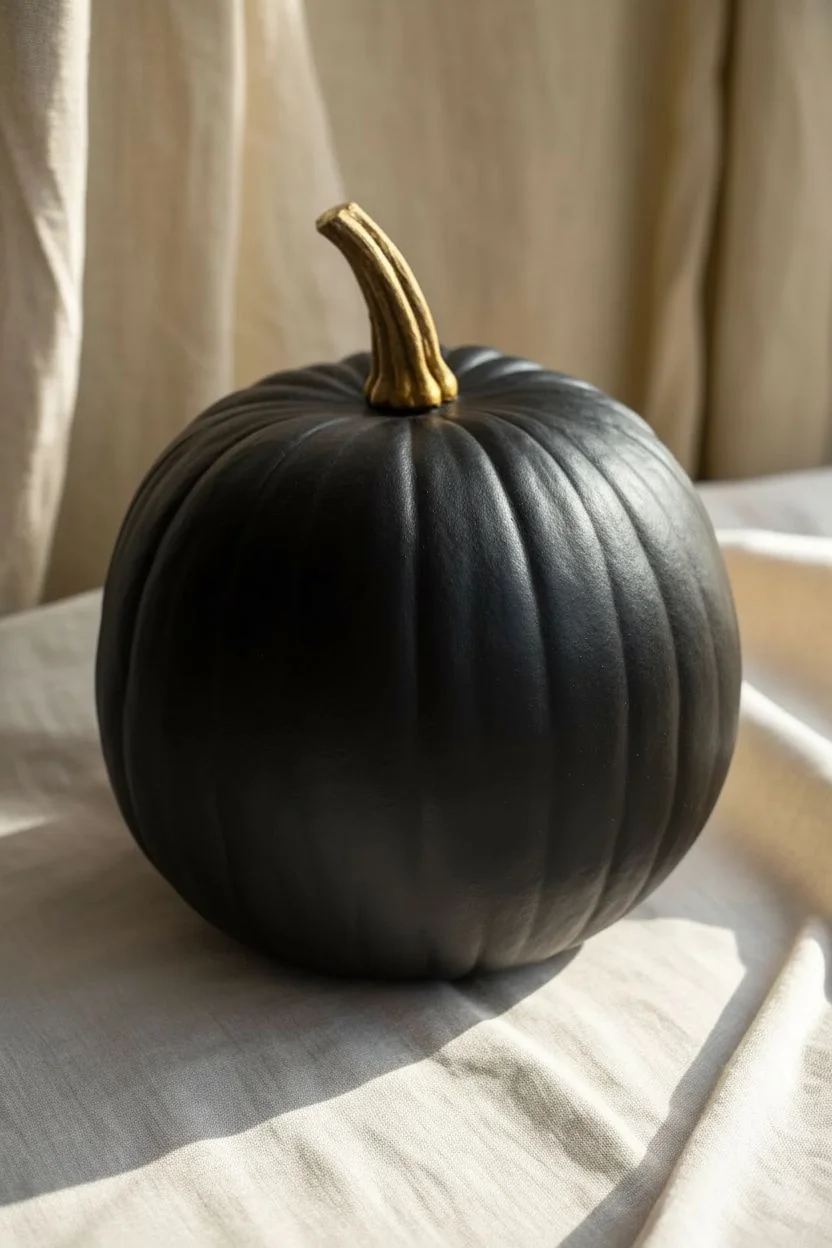
Transform a simple gourd into a sophisticated piece of art with this black and gold masterpiece. The sharp contrast between the matte black base and the metallic gold ink creates an intricate, jewelry-like effect that demands attention.
Step-by-Step
Materials
- Medium-sized faux or real pumpkin (smooth surface is best)
- Matte black spray paint (acrylic or chalkboard)
- Metallic gold paint marker (fine point)
- Metallic gold paint marker (medium point)
- Liquid gold leaf or metallic gold acrylic paint
- Soft detail paintbrush
- Pencil (white charcoal or chalk pencil)
- Flexible ruler or measuring tape
- Compass (optional but helpful)
- Q-tips (for cleanup)
- Matte clear sealant spray
Step 1: Base Preparation
-
Clean and Dry:
Start by thoroughly cleaning your pumpkin to remove any dirt or waxy residue. If using a real pumpkin, wash with a mild soap and water solution, then dry completely. For a faux pumpkin, a quick wipe with isopropyl alcohol ensures the paint adheres perfectly. -
Apply the Base Coat:
In a well-ventilated area, spray the entire pumpkin with matte black paint. Hold the can about 8-10 inches away and use sweeping motions to apply thin, even coats. Two or three light coats are better than one heavy one to avoid drips. -
Let it Cure:
Allow the black base coat to dry completely, preferably overnight. The surface needs to be rock-hard so your paint pens don’t scratch through the finish later. -
Gild the Stem:
Using a soft detail brush and liquid gold leaf (or metallic gold acrylic paint), carefully paint the entire stem. I find that getting into the crevices of the stem creates a rich, textured look. Let this dry fully before touching the pumpkin again.
Fixing Smudges
If you smudge the gold ink while it’s wet, quickly dampen a Q-tip with a tiny bit of rubbing alcohol and essentially ‘erase’ the error. Let the spot dry completely before redrawing.
Step 2: Drafting the Design
-
Find the Center:
Locate the ‘equator’ or the most bulbous part of the pumpkin’s face where you want the design to sit. Mark a tiny center dot with your white charcoal or chalk pencil. -
Draw Reference Circles:
Using a compass or by tracing circular objects (like jar lids or bowls), lightly sketch three concentric circles around your center point. These will serve as guidelines for the different layers of the mandala. -
Divide the Pie:
Lightly draw lines slicing through the center point to divide your circle into equal segments—aim for 12 or 16 sections to keep the symmetry manageable.
Add Dimension
For a 3D effect, glue small flat-back rhinestones or gold beads into the center of the medallion or at the tips of the outer petals using strong craft glue.
Step 3: Painting the Mandala
-
The Center Burst:
Switch to your fine-point gold paint marker. Start at the absolute center dot and draw a small circle. Radiate simple lines outward from this dot to fill the inner circle, creating a wheel-spoke effect. -
First Flower Layer:
Around the central wheel, draw small U-shaped petals connecting to the first guideline circle. Inside each petal, draw a slightly smaller U-shape and fill it with cross-hatching or tiny dots for texture. -
The Grid Web:
Move to the medium-point gold marker for bolder lines. Create a ‘web’ pattern by drawing arching lines that connect the petal tips of the previous layer to wider points on the next guideline circle. This creates those large, open diamond shapes seen in the reference. -
Detailing the Web:
Inside the lower triangular sections of your web (between the petals), draw tight grid lines or cross patterns with the fine-point marker. This contrast between open space and dense detail makes the design pop. -
Outer Petal Arches:
Draw the largest set of arches along the outermost guideline. Keep your hand steady but don’t worry about perfection; the curve of the pumpkin hides minor wobbles. -
Leaf Inserts:
Inside each large outer arch, distinctively draw a leaf shape. Fill one half of the leaf with solid gold or heavy stippling, and leave the other half open or lightly striped to create visual depth. -
Dotted Border:
Define the outer edge of your mandala by adding a series of dots. Start with large dots at the points of the arches, and decrease the dot size as you move down the curve between them.
Step 4: Finishing Touches
-
Vertical Accents:
Extend the design vertically by adding lines of dots that run up toward the stem and down toward the base, following the natural vertical ribs of the pumpkin. Space the dots widely for an elegant look. -
Clean Up Guidelines:
Once you are absolutely certain the gold ink is dry (give it at least an hour), use a slightly damp Q-tip or soft cloth to gently wipe away any visible white chalk guidelines. -
Seal (Optional):
To make your trophy pumpkin last through the season, give it a light misting of matte clear sealant. This protects the gold paint from oxidation and handling.
Now place your stunning creation on a mantle or tablescape and enjoy the sophisticated atmosphere it brings to the room
Watercolor Botanical Pumpkin With Loose Florals
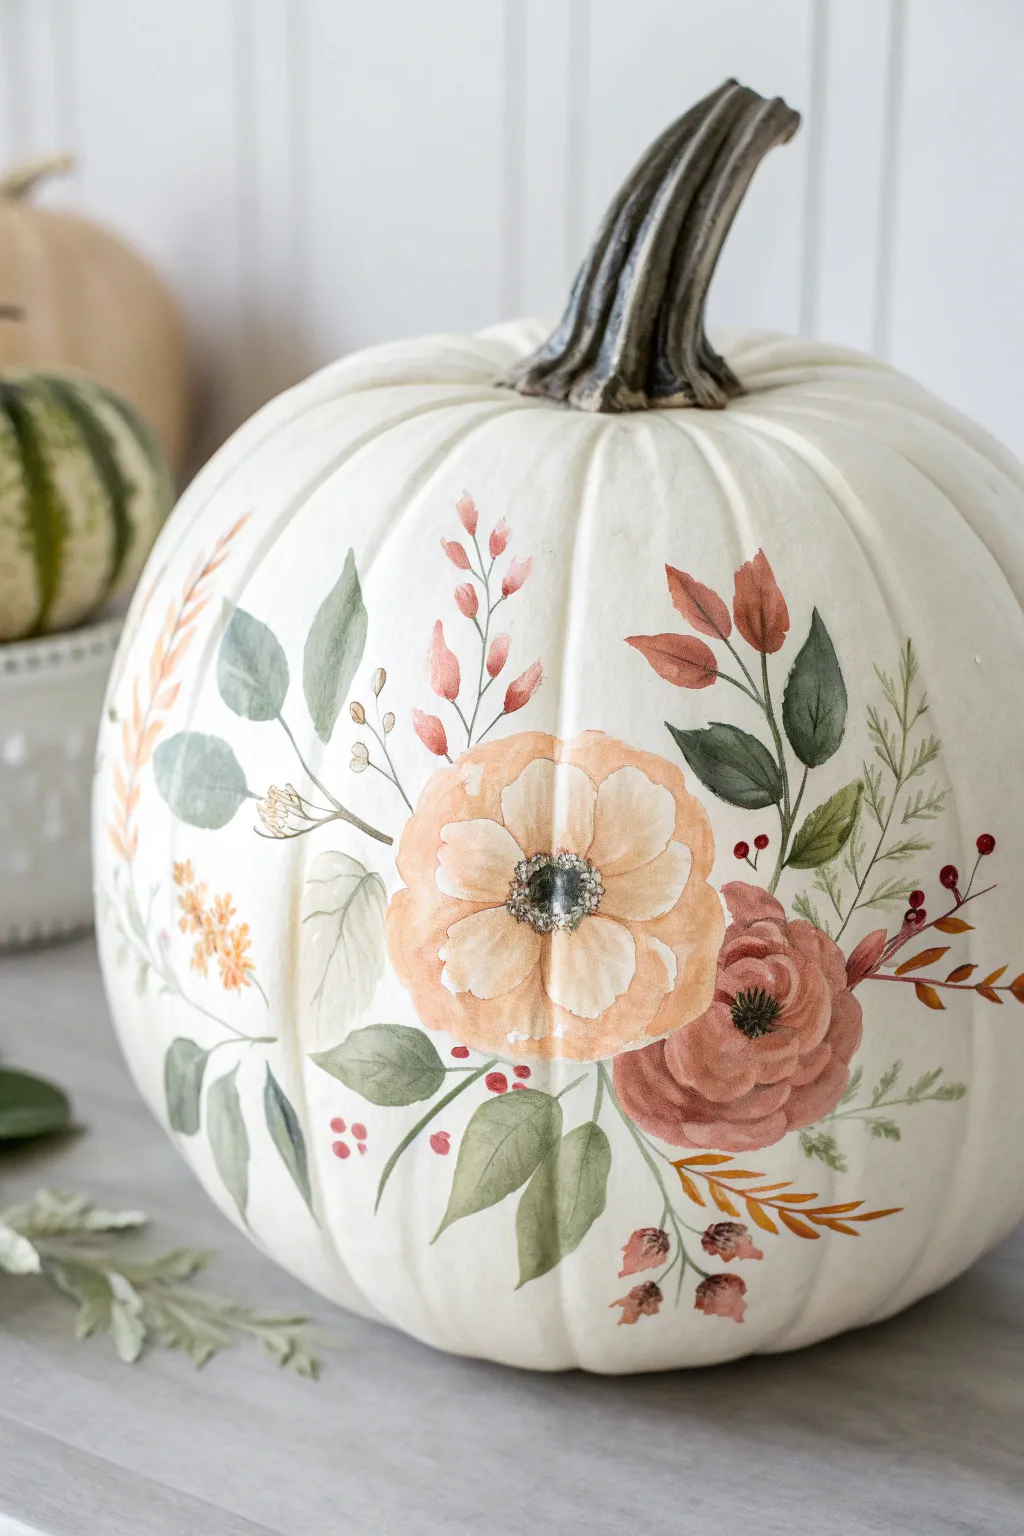
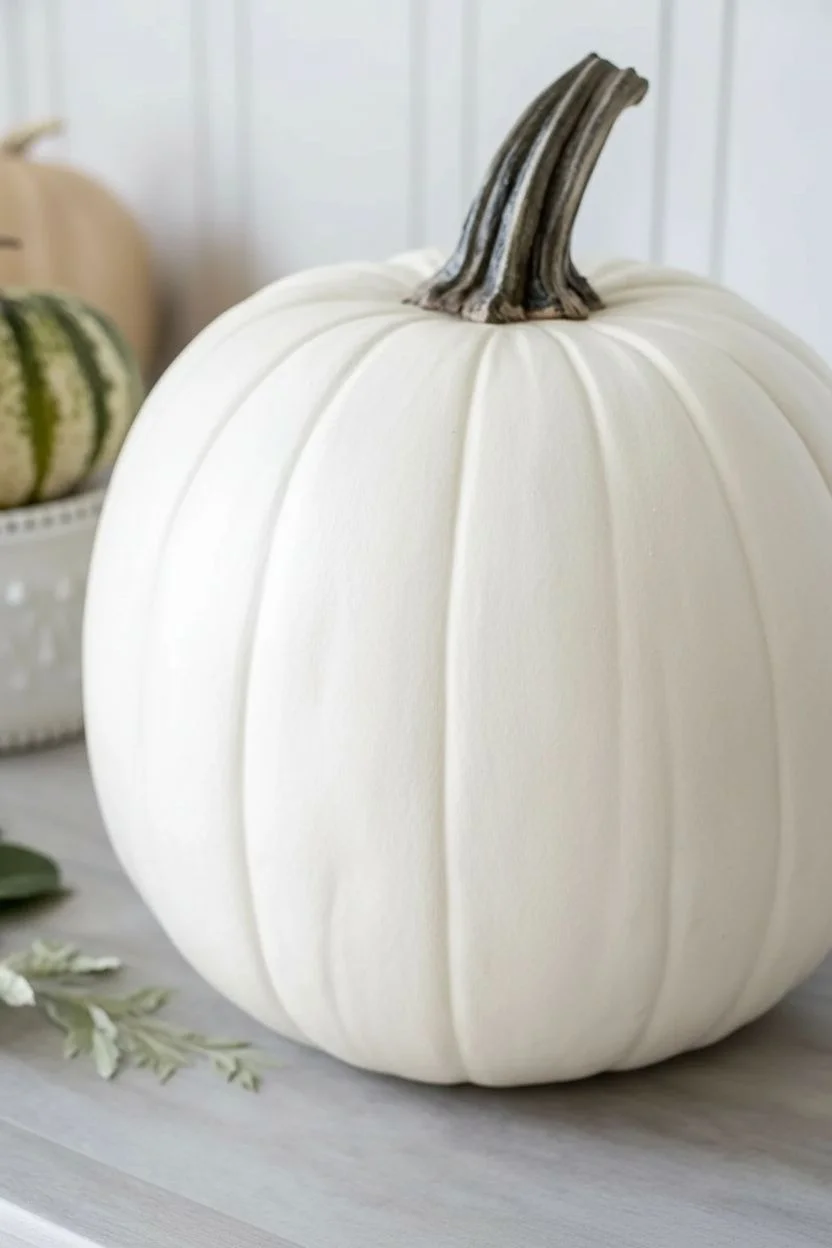
Transform a plain white pumpkin into an elegant autumn centerpiece using this blooming botanical technique. This project mimics the soft, transparent look of watercolor paintings directly on the pumpkin’s surface for a delicate and sophisticated finish.
Detailed Instructions
Materials
- Large white artificial pumpkin (smooth surface works best)
- Matte white acrylic paint (optional, for priming)
- Fluid acrylic paints or specialized multi-surface acrylics (Dusty Rose, Rust, Peach, Olive Green, Sage Green, Deep Brown)
- Watercolor medium or glazing medium
- Assorted round brushes (sizes 2, 4, and 6)
- Fine liner brush (size 0 or 00)
- Palette or small dishes for mixing
- Paper towels
- Clear matte spray sealer
Step 1: Surface Preparation
-
Clean the surface:
Wipe down your pumpkin with a damp cloth to remove any dust or oils. If you are using a real pumpkin, wash it with a mild bleach solution and dry completely. -
Prime for texture:
If your artificial pumpkin feels too slick or plastic-shiny, apply a thin base coat of matte white acrylic paint. This gives the surface a bit of ‘tooth’ for your floral painting to grip onto.
Paint Beading Up?
If acrylics slide off the pumpkin surface, mix a tiny drop of dish soap into your paint water. This breaks the surface tension and helps pigment adhere smoothly.
Step 2: Painting the Main Blooms
-
Mix your ‘watercolors’:
Since real watercolor won’t stick well to plastic or pumpkin skin, mix fluid acrylics with a glazing medium. Aim for a 1:1 ratio to make the paint translucent but durable. -
Map out the composition:
Visualize a curving vine shape across the front. Placing the largest flowers slightly off-center creates a more organic, natural look. -
Paint the peach anemone base:
Using a size 6 round brush loaded with diluted peach paint, create five loose, rounded petal shapes. Keep the edges soft and slightly uneven. -
Add petal definition:
While the peach paint is still tacky, drop a slightly darker shade of rust or orange near the center of the flower to create depth. -
Create the rose bloom:
Beside the peach flower, paint a circular rusty-red shape. Use C-curve strokes that overlap slightly, starting tight in the middle and getting larger as you move outward. -
Detail the flower centers:
Once the main petals feel dry to the touch, mix a dark brown-black. Use a size 2 brush to stipple a small, dark circle in the center of the peach flower. -
Add delicate stamens:
Using your fine liner brush and white or light yellow paint, add tiny dots around the dark center of the peach flower to mimic pollen stamens.
Step 3: Adding Foliage
-
Paint main leaves:
Mix a muted olive green with your glazing medium. Paint broad, almond-shaped leaves extending from the flowers using a size 4 brush. -
Vary the greenery:
Switch to a sage green tone. Paint lighter, more rounded eucalyptus-style leaves on thin floating stems. -
Layer in transparency:
I love to let some leaves overlap the petals slightly. Because of the glazing medium, the flower color will peek through the leaf, creating a beautiful watercolor effect. -
Add rust-colored branchlets:
Using the rust color, paint thin sprigs with small, oval-shaped leaves poking out from the arrangement to tie the color palette together. -
Create fern-like fronds:
With the liner brush and very diluted light green paint, add wispy, fern-like strokes at the edges of the bouquet for an airy feel. -
Insert berries:
Dip the back end of a small brush into red paint and dot small clusters of berries near the tips of your greenery stems.
Level Up: Gold Leaf
Apply tiny flakes of gold leaf to the flower centers or leaf tips while the sealer is tacky. This adds a glam shimmer that catches candlelight beautifully.
Step 4: Final Touches
-
Balance the stems:
Use a liner brush and diluted brown paint to connect any floating leaves or flowers to the main visual cluster. -
Review and refine:
Step back and look for any gaps. Add tiny filler leaves or small buds in pale yellow or orange to fill empty spaces. -
Highlight the stem:
Dry brush a little dark olive or brown paint onto the pumpkin’s actual stem to make it look realistic and weathered. -
Seal the artwork:
Allow the paint to cure for at least 24 hours. Lightly spray with a clear matte sealer to protect your delicate brushwork.
Place your masterpiece on a mantel or entryway table to enjoy these everlasting autumn blooms
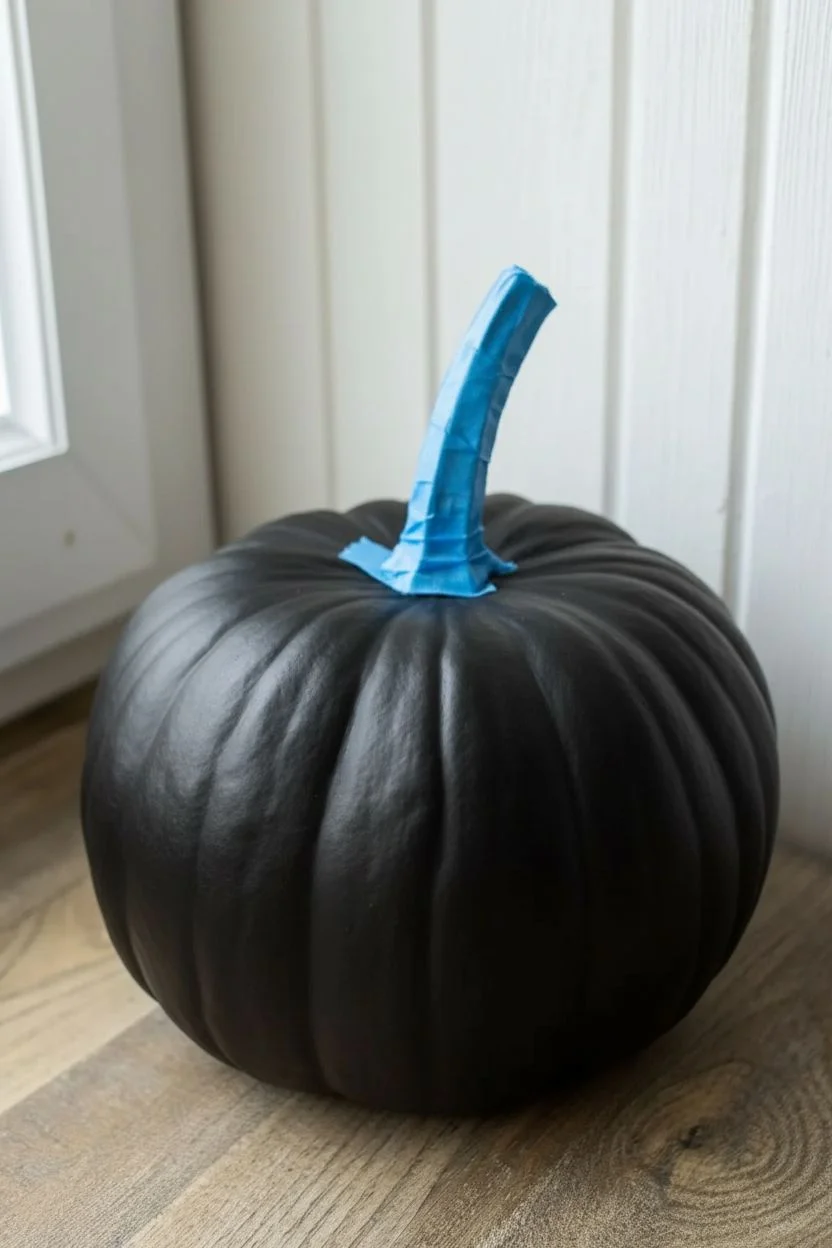
Night-Sky Galaxy Pumpkin With Splatter Stars
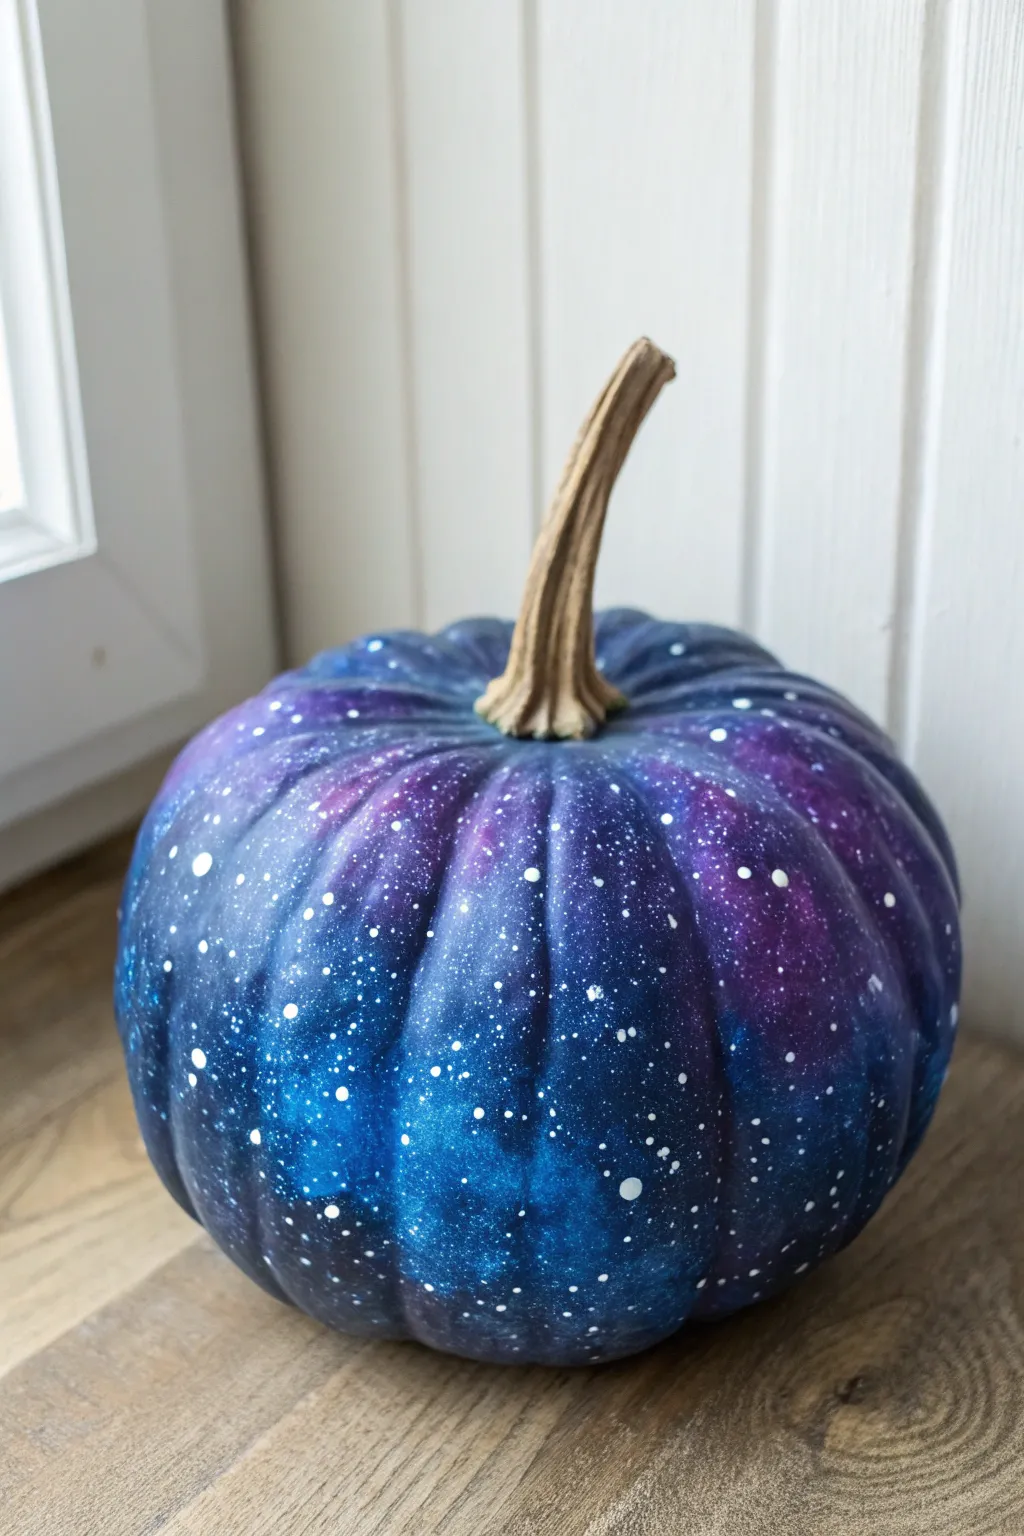
Transform an ordinary pumpkin into a piece of the cosmos with this stunning galaxy painting technique. By layering deep blues, vibrant purples, and starry specks, you will create a celestial centerpiece that feels infinitely deep and mysterious.
Step-by-Step Tutorial
Materials
- Medium-sized pumpkin (real or faux)
- Black or very dark navy acrylic paint (base coat)
- Deep violet acrylic paint
- Royal blue acrylic paint
- Teal or cyan acrylic paint
- White liquid acrylic paint
- Sponge applicators or dense kitchen sponge pieces
- Stiff-bristled toothbrush
- Medium flat paintbrush
- Painter’s tape
- Cup of water and paper towels
- Matte or glossy clear acrylic sealer spray
Step 1: Preparation and Base Coat
-
Clean surface:
Begin by wiping down your pumpkin with a damp cloth to remove any dirt or oils, ensuring the paint adheres properly. Dry it completely before starting. -
Protect the stem:
Wrap the stem carefully with painter’s tape to keep it natural and free of errant paint strokes. -
Apply base color:
Using your medium flat paintbrush, coat the entire pumpkin with black or dark navy paint. Make sure to get inside the crevices. -
Dry thoroughly:
Allow this base layer to dry completely. I prefer to wait about 20-30 minutes, as a tacky base can muddy the subsequent colors.
Sponge Technique
Don’t wipe or drag the sponge! Use an up-and-down dabbing motion. This stippling texture mimics gas clouds much better than brushstrokes.
Step 2: Creating the Nubula Effect
-
Start with purple:
Dip a sponge applicator into the deep violet paint. Dab off the excess onto a paper towel until the sponge is almost dry. -
Sponge placement:
Gently sponge the violet in random patches around the pumpkin. Focus on creating cloudy, irregular shapes rather than solid blocks of color. -
Layering blue:
While the purple is still slightly wet or just tacky, switch to a fresh sponge with royal blue paint. Dab this color near and slightly overlapping the purple areas to create depth. -
Adding highlights:
Load a sponge with a small amount of teal or cyan paint. Lightly dab this into the centers of your blue and purple clusters to create a ‘glowing’ nebula effect. -
Blending edges:
If the transitions look too harsh, go back with a sponge holding a tiny bit of the dark base color and lightly dab the edges of the colored patches to blend them back into the night sky. -
Assess and adjust:
Step back and look at your galaxy. Add more bright teal highlights if you want more contrast, or more dark blue if you want a moodier look.
Add Constellations
Use a silver or gold metallic paint pen to connect the larger star dots, drawing real constellations like the Big Dipper or imaginative zodiac signs.
Step 3: The Starfield and Finish
-
Prepare star paint:
Mix a small amount of white acrylic paint with a few drops of water. The consistency should be fluid, like thin cream, but not watery. -
Load the brush:
Dip the bristles of a stiff toothbrush into the thinned white paint. -
Test the splatter:
Test your splatter technique on a piece of scrap paper first. Run your thumb across the bristles to flick tiny droplets forward. -
Create the stars:
Hold the toothbrush near the pumpkin and flick the bristles to spray a fine mist of stars over the galaxy background. Vary the distance to get different sized specks. -
Add larger stars:
Dip the handle end of a paintbrush into un-thinned white paint and gently dot a few specific spots to create larger, brighter stars or distant planets. -
Remove tape:
Once you are satisfied with your starfield, carefully peel away the painter’s tape from the stem. -
Seal the work:
After the paint is fully dry (give it at least an hour), spray the pumpkin with a clear acrylic sealer to protect the finish and make the colors pop.
Place your finished galaxy pumpkin in a well-lit spot to let its cosmic colors shine
Glitter Gradient Pumpkin That Catches Every Light
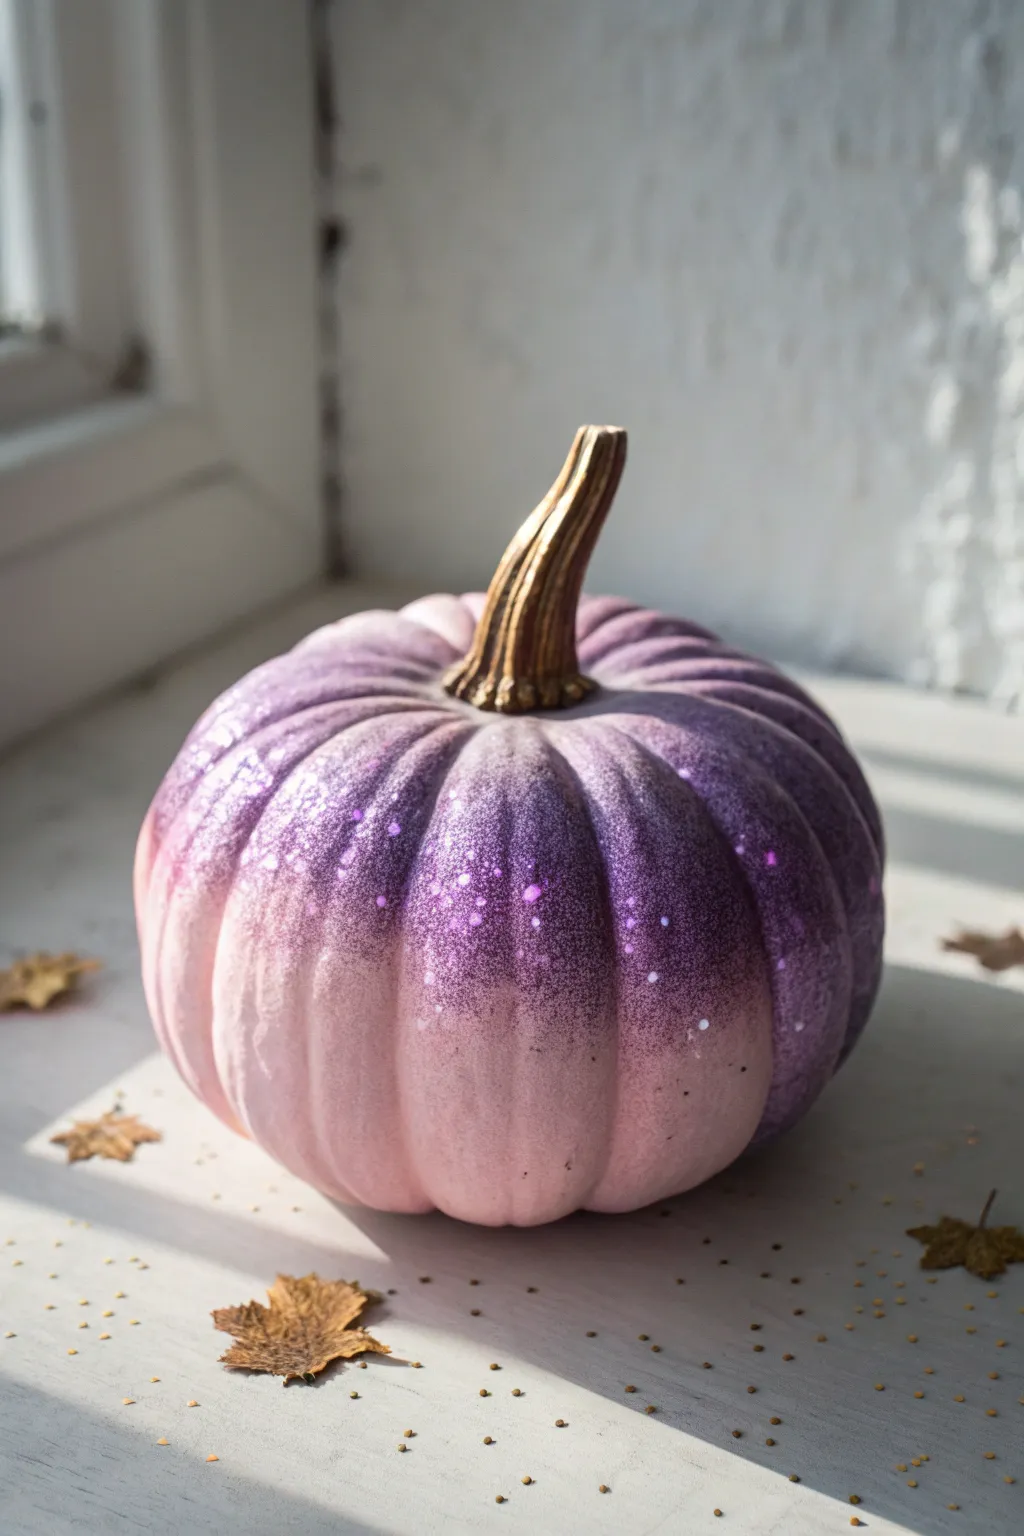
Transform a simple gourd into a sophisticated centerpiece with this stunning glitter gradient pumpkin. The soft fade from pastel pink to deep royal purple, capped with a gilded stem, creates a mesmerizing play of light perfect for elegant autumnal decor.
How-To Guide
Materials
- Faux or real pumpkin (medium size)
- White or cream acrylic paint (base coat)
- Light pink acrylic paint
- Deep purple acrylic paint
- Metallic gold acrylic paint
- Fine glitter (iridescent pink)
- Fine glitter (deep purple)
- Mod Podge or craft glue
- Foam brushes
- Small paintbrush (for stem)
- Paper plate or palette
- Clear spray sealant (glossy)
Step 1: Base Preparation
-
Clean surface:
Begin by wiping down your pumpkin with a damp cloth to remove any dust or oils. If using a real pumpkin, ensure it is completely dry before starting. -
Base coat application:
Apply a solid coat of white or cream acrylic paint over the entire pumpkin, excluding the stem. This neutral base ensures your gradient colors will pop vibrantly. Let this layer dry completely.
Step 2: Creating the Color Gradient
-
Painting the bottom:
Squeeze a generous amount of light pink paint onto your palette. Using a foam brush, paint the bottom third of the pumpkin, working the paint into the grooves. -
Mid-tone mixing:
While the bottom layer is still slightly wet, mix equal parts of your light pink and deep purple paint to create a mid-tone orchid shade. -
Blending the middle:
Apply this mid-tone mixture to the middle section of the pumpkin. Use light, feathery upward strokes where it meets the pink to blend the line, avoiding a harsh stripe. -
Top application:
Paint the top third of the pumpkin, right up to the base of the stem, with the deep purple paint. I like to bring this darker color down slightly into the grooves to accentuate the pumpkin’s shape. -
Final blending:
Use a clean, slightly damp foam brush to gently tap and drag the paint at the transition lines between the three colors, creating a seamless ombre effect. Allow the paint to dry fully before moving on.
Sticky Situation
Glitter clumping? Make sure your glue layer is extremely thin and even. Thick globs of glue will cause the glitter to pile up and look uneven.
Step 3: The Glitter Layer
-
Adhesive prep:
Pour a small amount of Mod Podge onto a clean plate. You’ll want to work in sections so the glue doesn’t dry before you add the sparkle. -
Top sparkle:
Brush a thin layer of glue over the dark purple top section. Generally, I prefer to sprinkle the deep purple glitter heavily near the stem and let it naturally thin out as it moves down. -
Lower sparkle:
Apply glue to the lighter mid-section and bottom. Sprinkle the iridescent pink glitter here, allowing it to overlap slightly with the purple glitter for a blended look. -
Spot checking:
Look for any bald spots where the glitter didn’t stick. Dab a tiny bit of glue on these areas and add a pinch of the appropriate glitter color. -
Drying time:
Let the glitter set for at least an hour. Once dry, hold the pumpkin upside down and give it a gentle shake to dislodge any loose particles.
Magic Dust
For a magical twist, mix a pinch of ‘chunky’ glitter into your fine glitter. The different sizes reflect light differently, adding depth.
Step 4: Finishing Touches
-
Gilding the stem:
Using a small detail brush, carefully paint the stem with metallic gold acrylic paint. You may need two coats to fully cover the natural color of the stem. -
Adding dimension:
For extra realism on the stem, mix a tiny drop of brown paint into your gold and paint thin lines in the stem’s crevices. -
Sealing:
Take the pumpkin to a well-ventilated area and spray it lightly with a clear glossy sealant. This will lock that messy glitter in place and give the finish a professional sheen.
Place your shimmering creation near a window or candle to watch it sparkle throughout the evening
Spa-Day Pumpkin Face Mask With Towel Wrap
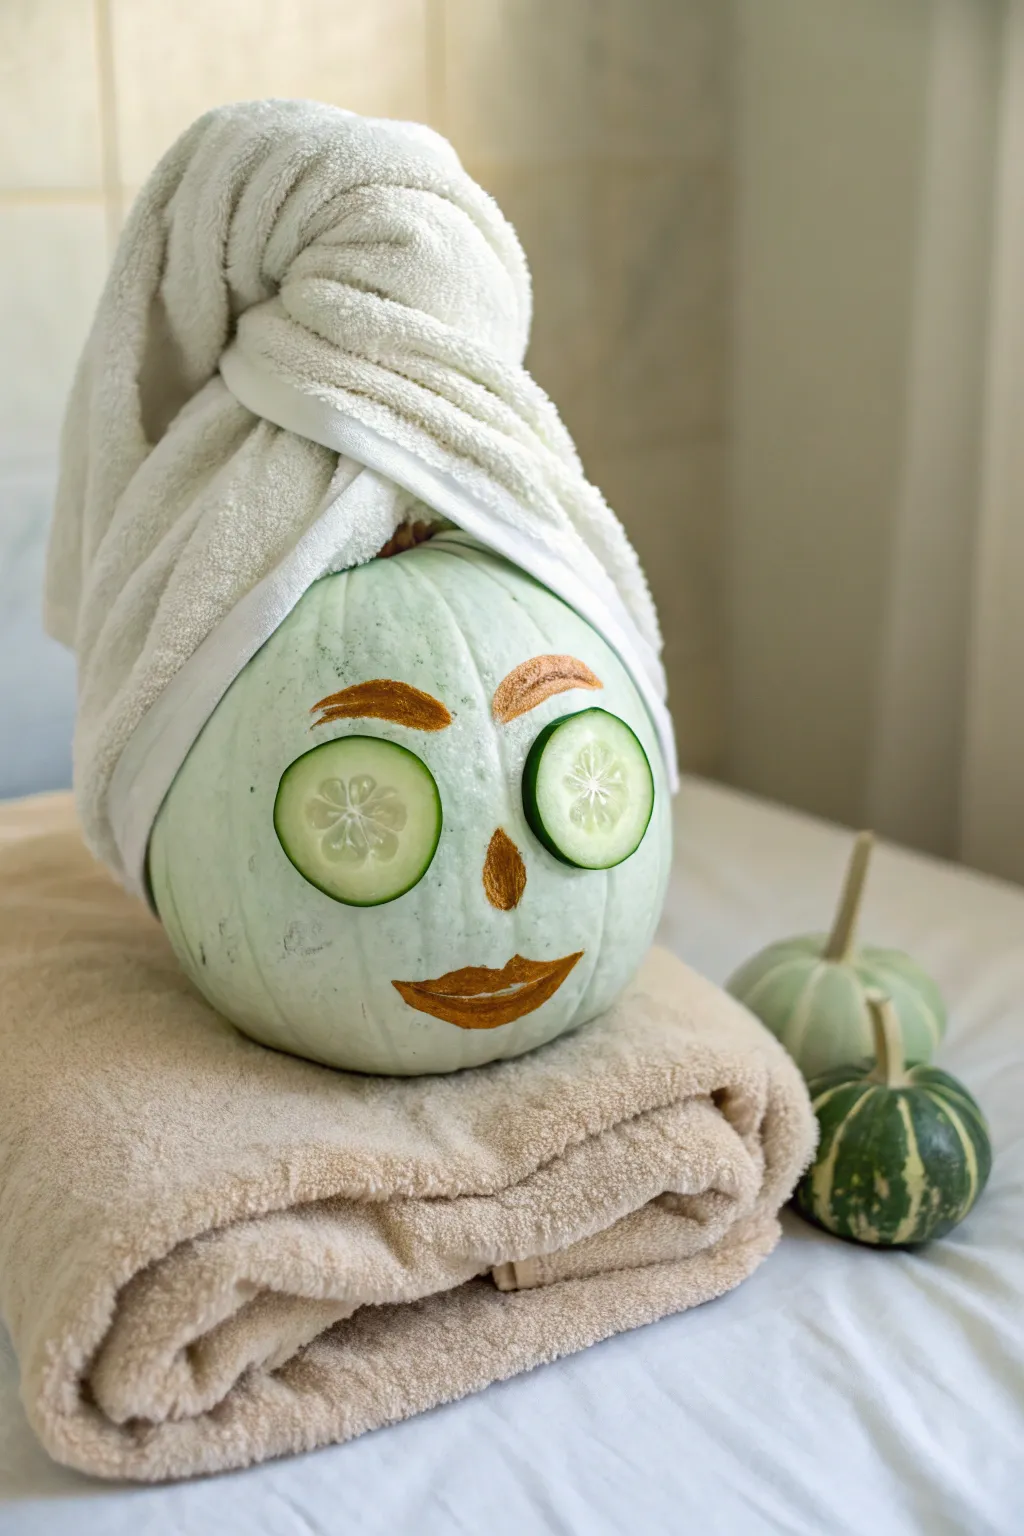
Transform a simple gourd into the ultimate symbol of relaxation with this clever and humorous spa-day design. Featuring a towel turban wrap and real cucumber slices, this pale pumpkin looks like it’s enjoying a luxurious facial treatment.
Step-by-Step
Materials
- Medium-sized pumpkin (preferably a ‘Jarrahdale’ or other blue-grey variety)
- White or cream bath towel (standard size)
- Fresh cucumber
- Metallic copper or bronze acrylic paint
- Small flat paintbrush
- Medium round paintbrush
- Safety pins or T-pins
- Knife and cutting board (for cucumber)
- Pencil (light sketching)
- Hot glue gun and glue sticks (optional but recommended for stability)
Step 1: Planning and Preparation
-
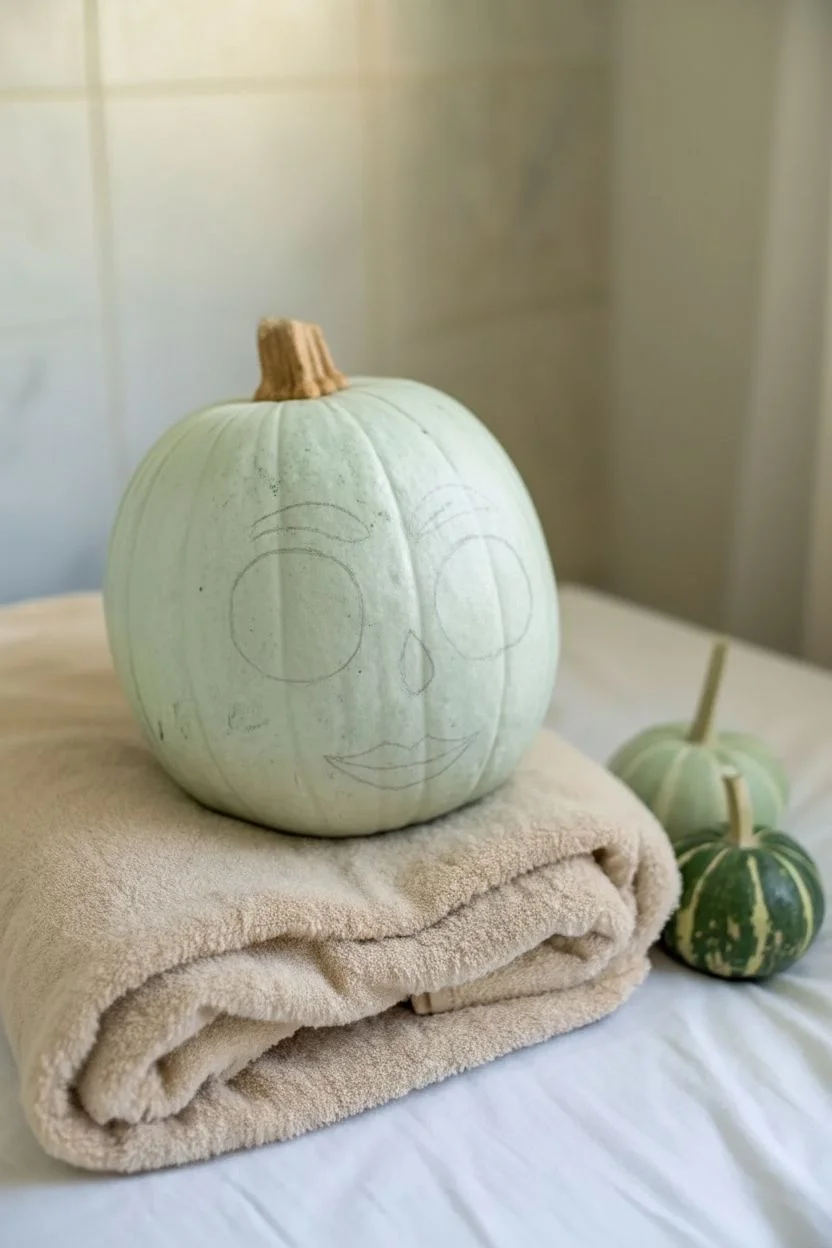
Select the right pumpkin:
Choose a pumpkin that naturally has a pale green or ghostly white hue, such as a Jarrahdale or White Ghost variety. This mimics the look of a clay face mask without needing a base coat of paint. -
Clean surface:
Wipe down the pumpkin’s surface with a damp cloth to remove any dirt or field debris. Dry it thoroughly so the paint adheres properly. -
Sketch the face:
Using a pencil, very lightly sketch where you want the eyebrows, nose, and mouth to sit. Leave plenty of room around the eye area for the large cucumber slices.
Step 2: Painting the Features
-
Outline the eyebrows:
Dip your medium round brush into the metallic copper paint. Follow your pencil sketch to paint two arched eyebrows, keeping the strokes fairly thick. -
Fill the brows:
Fill in the eyebrow shapes, ensuring the paint is opaque. You want them to look groomed but substantial. -
Create the nose:
Paint a small, rounded triangle or oval in the center of the face for the nose. I usually place this slightly lower than center to leave room for the cucumber eyes. -
Draft the lips:
Switch to your small flat brush for better control on the edges. Create a smiling mouth shape, accentuating the cupid’s bow on the top lip. -
Refine the mouth:
Fill in the lips completely with the copper paint. Check the edges and smooth out any bumpy lines for a clean, pampered look. -
Let it dry:
Allow the painted features to dry completely. Since acrylic dries quickly, this should only take about 15-20 minutes.
Cucumber Sliding Off?
Fresh vegetables are wet! Pat the back of the cucumber slice completely dry with a paper towel before applying hot glue, or use a toothpick inserted into the rind to skewer the slice in place.
Step 3: Creating the Turban
-
Position the towel:
Take a standard white bath towel and fold it lengthwise if it’s too bulky. Drape the center of the towel behind the pumpkin. -
Wrap the base:
Bring the two ends of the towel forward, crisscrossing them snugly over the top of the pumpkin, just above the painted eyebrows. -
Twist the towel:
Firmly twist the remaining lengths of the towel together to create a spiraled rope effect, mimicking a hair turban. -
Secure the twist:
Bring the twisted rope back over the top of the pumpkin’s head. Tuck the end of the towel into the back fold or secure it discreetly with safety pins. -
Stabilize the wrap:
If the towel feels slippery or loose, I often use a few T-pins hidden in the folds to anchor the fabric directly into the pumpkin rind.
Pro Tip: Eternal Spa Day
If you want this display to last all month without rotting fruit, print a high-resolution photo of a cucumber slice, glue it to cardboard, and attach that instead of the real veggie.
Step 4: Finishing Touches
-
Slice the cucumber:
Cut two thick slices from a fresh cucumber. Aim for slices about 1/4 inch thick so they are sturdy but not too heavy. -
Mount the cucumber eyes:
Apply a dab of hot glue to the back of each cucumber slice. Quickly press them onto the pumpkin face in the space between the eyebrows and nose. -
Hold in place:
Hold the cucumber slices firmly for a few seconds until the glue sets. The moisture in the cucumber can make adhesion tricky, so hold it longer than you think you need to. -
Final adjustment:
Adjust the towel folds slightly to frame the face perfectly and ensure the ‘hair’ looks voluminous and cozy.
Step back and enjoy the serene vibes your pampered pumpkin brings to the room
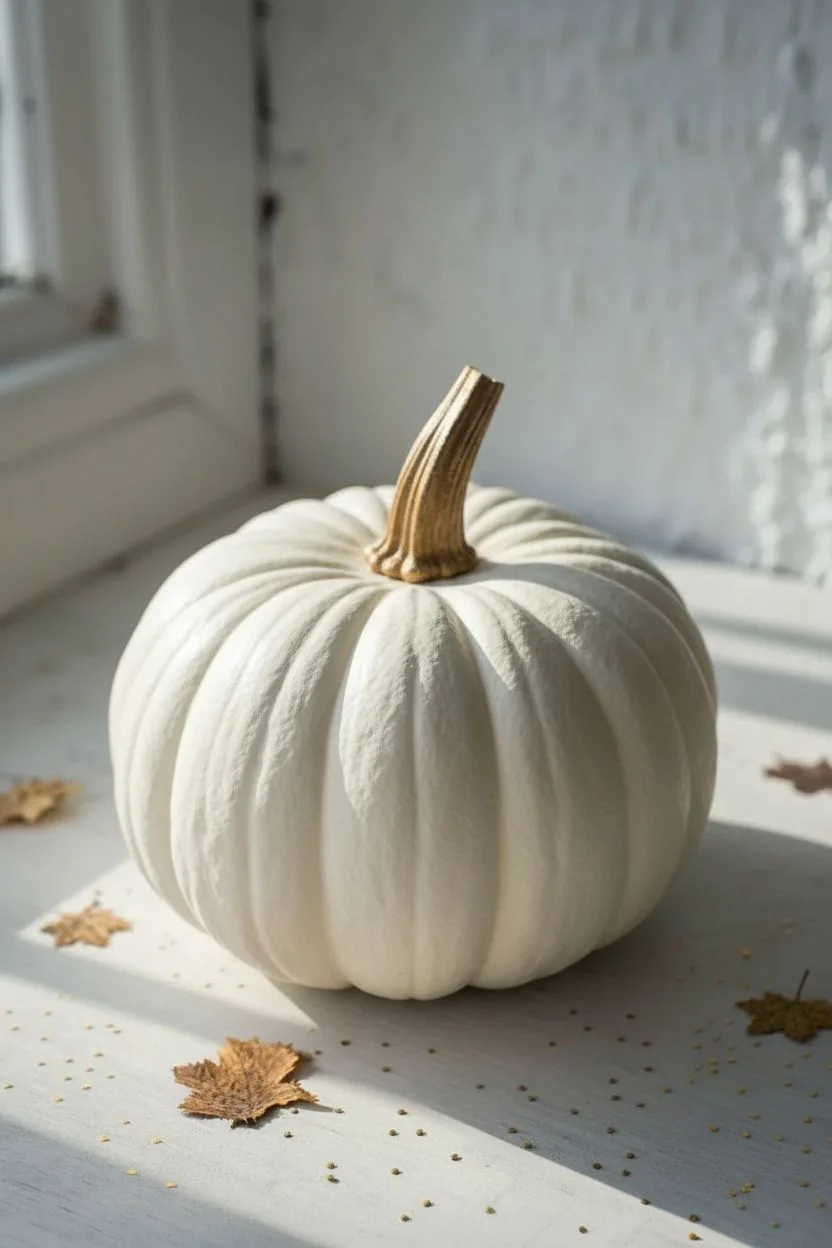
Three-Pumpkin Story Set for Maximum Table Impact
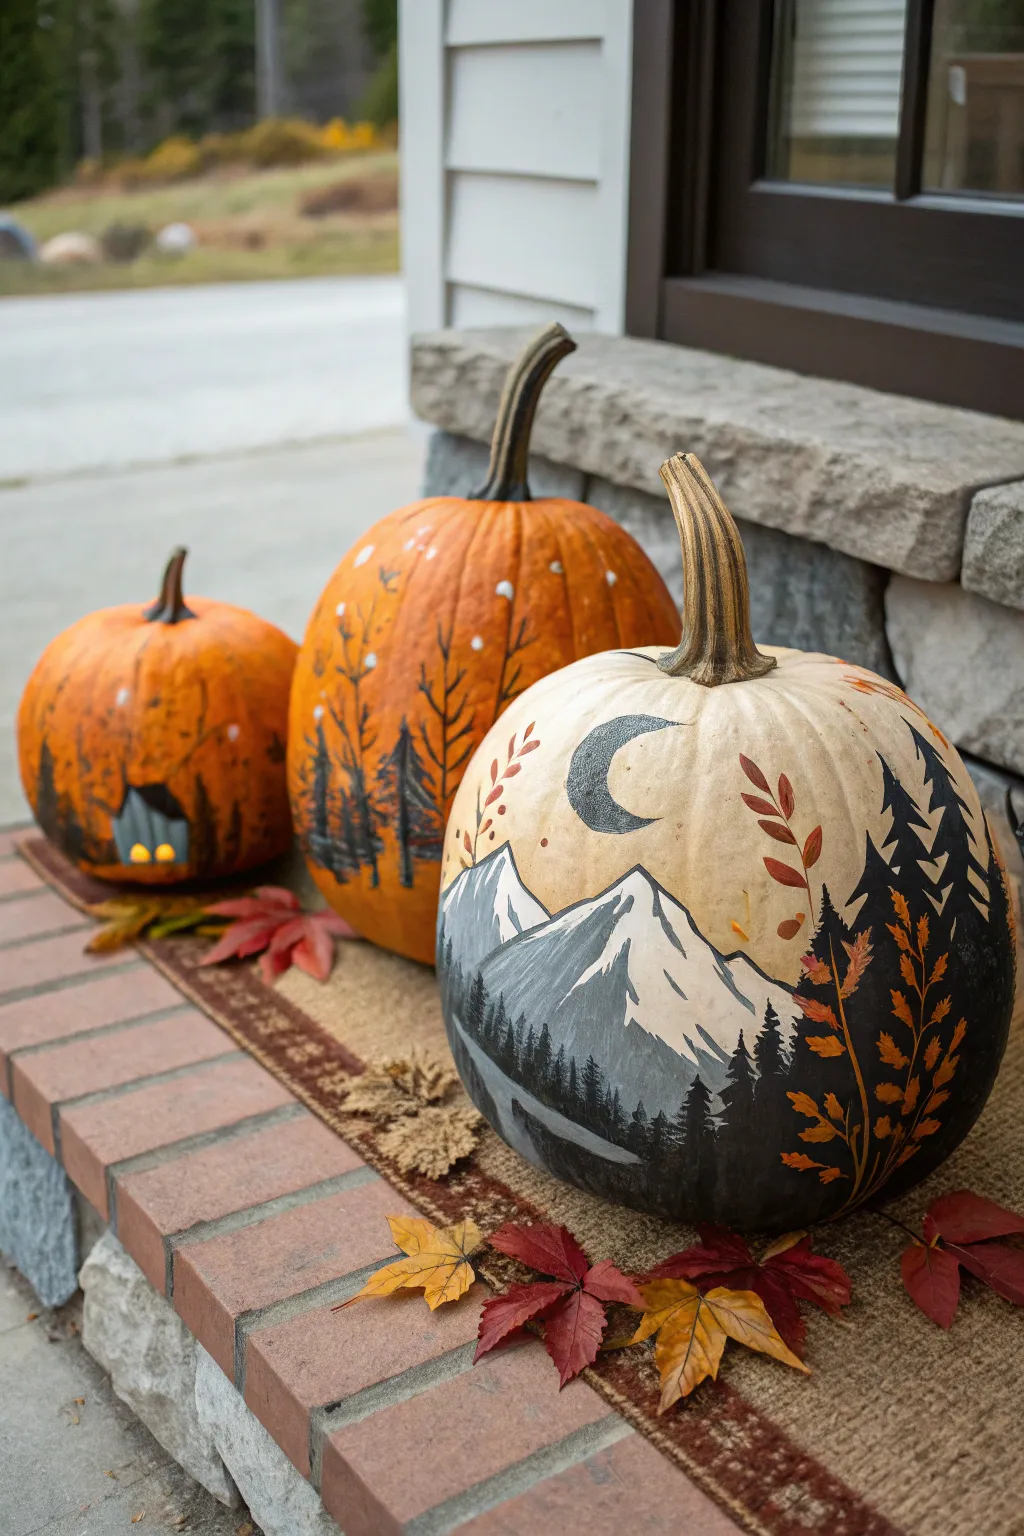
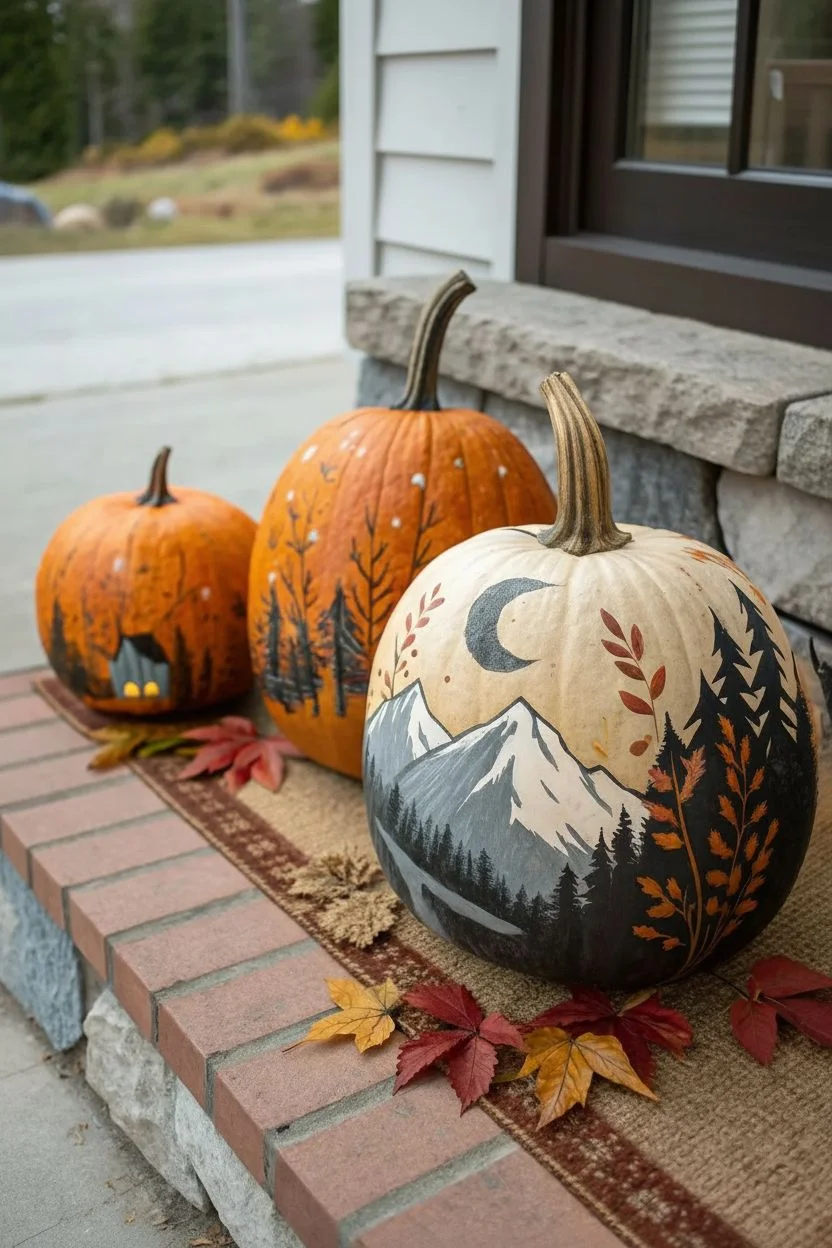
This narrative set utilizes three graduated pumpkins to tell a cohesive story of a cozy cabin nestled among trees, leading up to a majestic mountain view under the moon. By using a mix of orange and white pumpkins, you create a natural canvas that requires less base coating and allows the scene to flow beautifully from one gourd to the next.
How-To Guide
Materials
- One medium/large white pumpkin (for the mountain scene)
- Two orange pumpkins (one medium, one small)
- Acrylic craft paints (black, white, grey, burnt orange, brown, dark green)
- Assorted brushes (fine liner, small flat brush, medium synthetic filbert)
- Pencil or chalk for sketching
- Water cup and palette
- Matte spray sealer
Step 1: Planning the Tableau
-
Clean and Prep:
Begin by wiping down all three pumpkins with a damp cloth to remove any dirt or oils that might prevent the paint from adhering properly, then let them dry completely. -
Arrange the Composition:
Set your pumpkins side-by-side in their intended order: small orange on the left, medium orange in the center, and the large white pumpkin on the right. -
Drafting the Horizon:
Using chalk or a light pencil, lightly sketch a continuous horizon line that connects the visual flow—start low on the small pumpkin and rise slightly as you move to the large mountain features.
Brush Control Secret
To get those super-sharp pine tree tops and thin branches, water down your black acrylic paint slightly until it has an ink-like consistency.
Step 2: Painting the Backdrop (Left & Center)
-
Sketch the Cabin:
On the smallest pumpkin, sketch a simple A-frame cabin shape near the bottom center. -
Paint the Cabin:
Fill in the cabin shape with dark grey or blue-black paint. Add a tiny square of yellow for a glowing window, creating that cozy ‘lights on’ look. -
Creating Trees:
Mix a dark brown-black shade. Using a fine liner brush, paint thin, bare tree trunks rising from the bottom of the two orange pumpkins. -
Adding Branches:
Flick the brush upward and outward from the trunks to create delicate branches. I find that inconsistent, slightly shaky lines make the trees look more organic and old. -
Atmospheric Details:
Dip a stylus or the back of a paintbrush handle into white paint and dot tiny ‘stars’ or falling snow across the upper sections of the orange pumpkins.
Step 3: The Mountain Masterpiece (Right)
-
Outline the Peaks:
On the white pumpkin, paint large triangular mountain shapes using grey paint, letting the peaks reach about halfway up the pumpkin’s side. -
Highlighting Snow:
Once the grey is dry, use pure white paint on the right-hand slopes of the mountains to simulate moonlight hitting the snow. -
Adding Depth:
Use a darker charcoal grey on the left slopes for shadow, blending slightly where the light and dark meet for a jagged, rocky texture. -
Foreground Forest:
Paint a dense silhouette of pine trees along the bottom curve of the pumpkin using black paint to ground the mountain scene. -
Painting the Moon:
Above the mountain peaks, paint a crescent moon using black or dark grey, leaving the interior the natural color of the pumpkin or painting it a soft cream.
Covering Mistakes
Smudged a tree line? Don’t wipe it! Let the acrylic dry completely, then gently scrape the excess off with a craft knife or paint over it.
Step 4: Unifying the Scene
-
Branch Overlays:
On the right side of the white pumpkin, paint a large, detailed foreground branch silhouette climbing up the side. -
Leaf Accents:
Add stylized leaves to this branch using burnt orange and deep red paint to tie in the color of the neighboring orange pumpkins. -
Refining Silhouettes:
Go back to the center orange pumpkin and add simpler pine tree silhouettes near the base to visually connect it to the white pumpkin’s forest. -
Texture Check:
Take a step back and see if the ‘snow’ dots need to continue onto the white pumpkin for continuity; add a few subtle specks if needed. -
Sealing:
Once all paint requires is crisp and dry, apply a light coat of matte spray sealer to protect your artwork from moisture.
Arranging these on your porch with a few scattered real leaves creates an inviting, storybook entrance for your guests.
Alien Abduction Pumpkin Diorama With Spotlight Beam
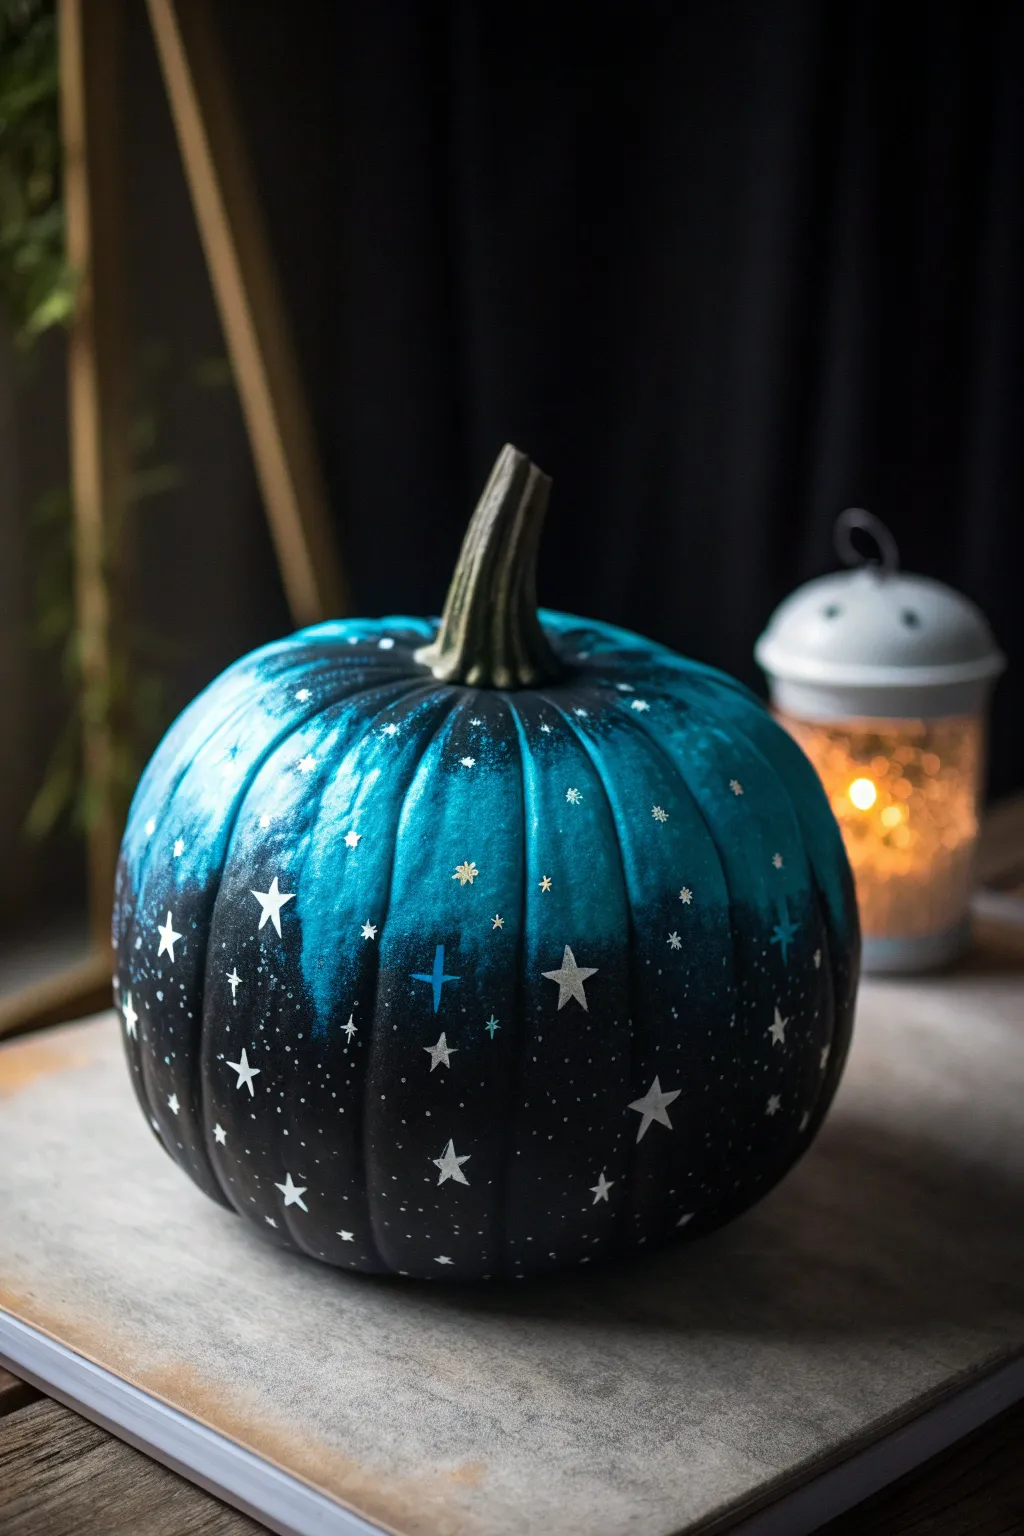
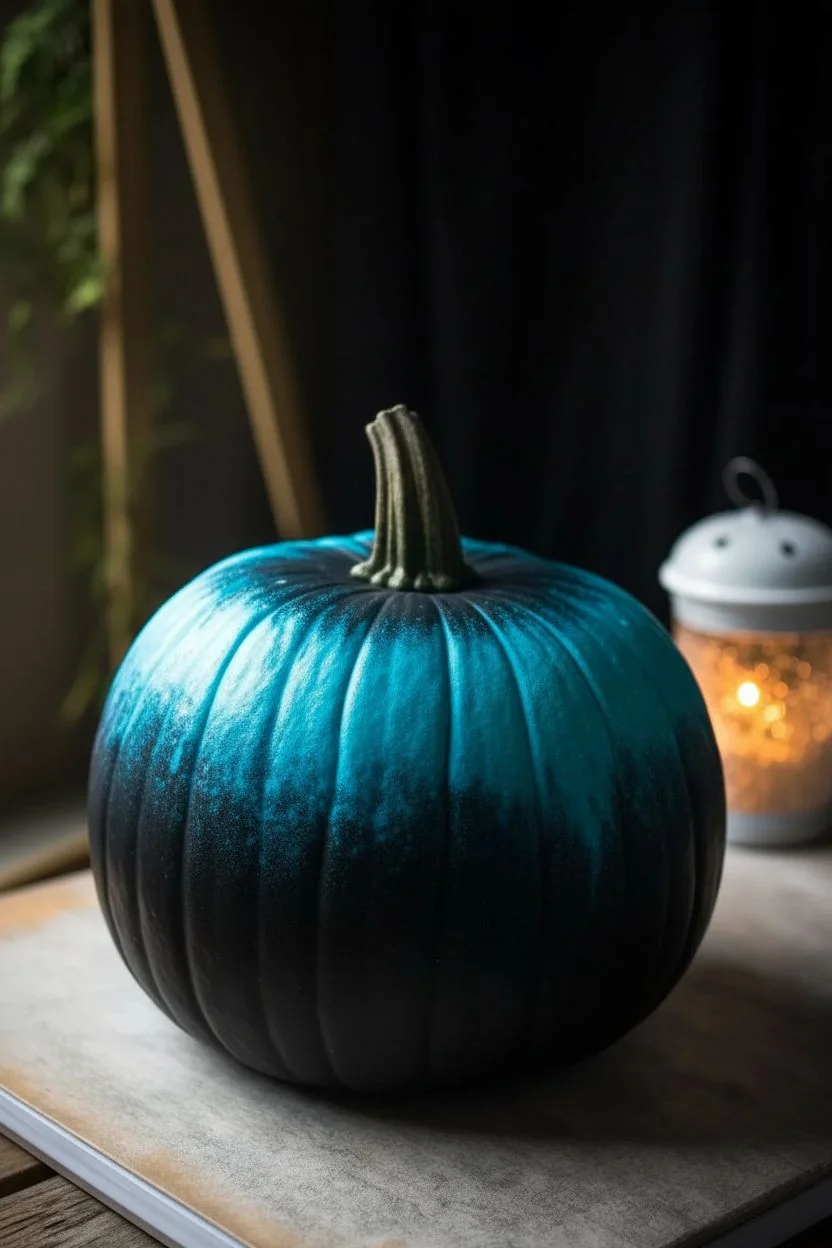
Transform an ordinary pumpkin into a mesmerizing window to the galaxy with this celestial painting technique. The design features a stunning gradient fade from deep space black to electric teal, scattered with shimmering stars that catch the candlelight.
Detailed Instructions
Materials
- Medium-sized faux or real pumpkin
- Acrylic paint (Black, Deep Teal, Metallic Silver, White)
- Small and medium flat paintbrushes
- Fine detail brush or dotting tool
- Makeup sponge or paint sponge
- Palette or paper plate
- Clear sealant spray (optional)
- Drop cloth or newspapers
Step 1: Setting the Base Gradient
-
Prepare your canvas:
Begin by cleaning your pumpkin thoroughly to remove any dirt or oils, ensuring a dry surface. If you are using a bright orange pumpkin, you might want to give it a quick base coat of primer or dark gray paint to help the final colors pop, though this is optional. -
Apply the midnight base:
Squeeze a generous amount of black acrylic paint onto your palette. Using a medium flat brush, paint the bottom two-thirds of the pumpkin in solid black, working your way up into the grooves. -
Add the teal horizon:
While the black paint is still slightly tacky, apply deep teal paint to the top third of the pumpkin, surrounding the stem but not painting the stem itself yet. -
Create the blend:
This is the crucial blending step. Take a slightly damp makeup sponge or paint sponge and dab it along the line where the black and teal meet. Use a stippling motion—tapping up and down—to blur the harsh line and create a seamless ombre transition from the dark bottom to the brighter top. -
Brighten the top:
I like to enhance the glow effect by mixing a tiny drop of white into your teal paint. Sponge this lighter teal just around the very top shoulders of the pumpkin to create a glowing highlight effect. -
Let it cure:
Allow the base coat to dry completely. This prevents your stars from turning muddy when applied later. A hair dryer on a cool setting can speed this up if you’re impatient.
Muddy Gradient?
If your sponge starts lifting paint instead of blending it, stop stippling. Let both colors dry completely, then apply a fresh, thin layer of both paints and try blending again very gently.
Step 2: Painting the Galaxy
-
Paint the major stars:
Using your finest detail brush and white acrylic paint, hand-paint several five-pointed stars scattered randomly around the pumpkin. Focus slightly more on the transition zone between black and teal. -
Add four-pointed flares:
To add variety, paint a few ‘north star’ shapes. Draw a simple cross with long vertical lines and shorter horizontal lines. Taper the ends of the lines to sharp points for a sparkling look. -
Incorporate blue stars:
Mix a small amount of light blue paint or use the teal from earlier. Paint a few specific stars (cross-shaped or standard) in this color to add depth and make the white stars stand out more. -
Create distant star dust:
Use a dotting tool or the wrong end of a paintbrush handle dipped in white paint. Dot the pumpkin generously to fill in the empty black spaces, varying your pressure to create different sized dots. -
Add micro-details:
For the tiniest distinct stars, use a toothpick dipped in silver or white paint. Ideally, place these in clusters or ‘constellations’ rather than spacing them all perfectly evenly. -
Highlight with metallics:
Take your silver metallic paint and carefully outline one or two of the larger white stars, or paint a few new solid silver stars. This adds a subtle shimmer that mimics real starlight.
Step 3: Finishing Touches
-
Detail the stem:
Using a small flat brush, paint the stem. A mix of dark green with dry-brushed metallic silver helps it match the cosmic theme without blending in too much. -
Review and refine:
Step back and look at your galaxy. If any area looks too empty, add a few more tiny white dots. If a star looks messy, carefully touch up the edges with black paint. -
Seal the artwork:
Once all paint requires is fully dry (give it at least an hour), spray the entire pumpkin with a clear acrylic sealer. A matte finish looks elegant, but a glossy finish makes the galaxy look wet and vibrant.
Level Up: 3D Elements
Before painting, glue small varying sizes of clear rhinestones onto the pumpkin shell. Paint over them or leave them clear to catch real light for a 3D star effect.
Your pumpkin is now a piece of painted stardust ready to light up the porch


Have a question or want to share your own experience? I'd love to hear from you in the comments below!