When I’m craving a fresh painting session, I almost always reach for a nature scene because it gives you instant mood, color, and story. Here are my go-to nature painting ideas—starting with the classics everyone loves, then drifting into some playful twists when you want a little wow-factor.
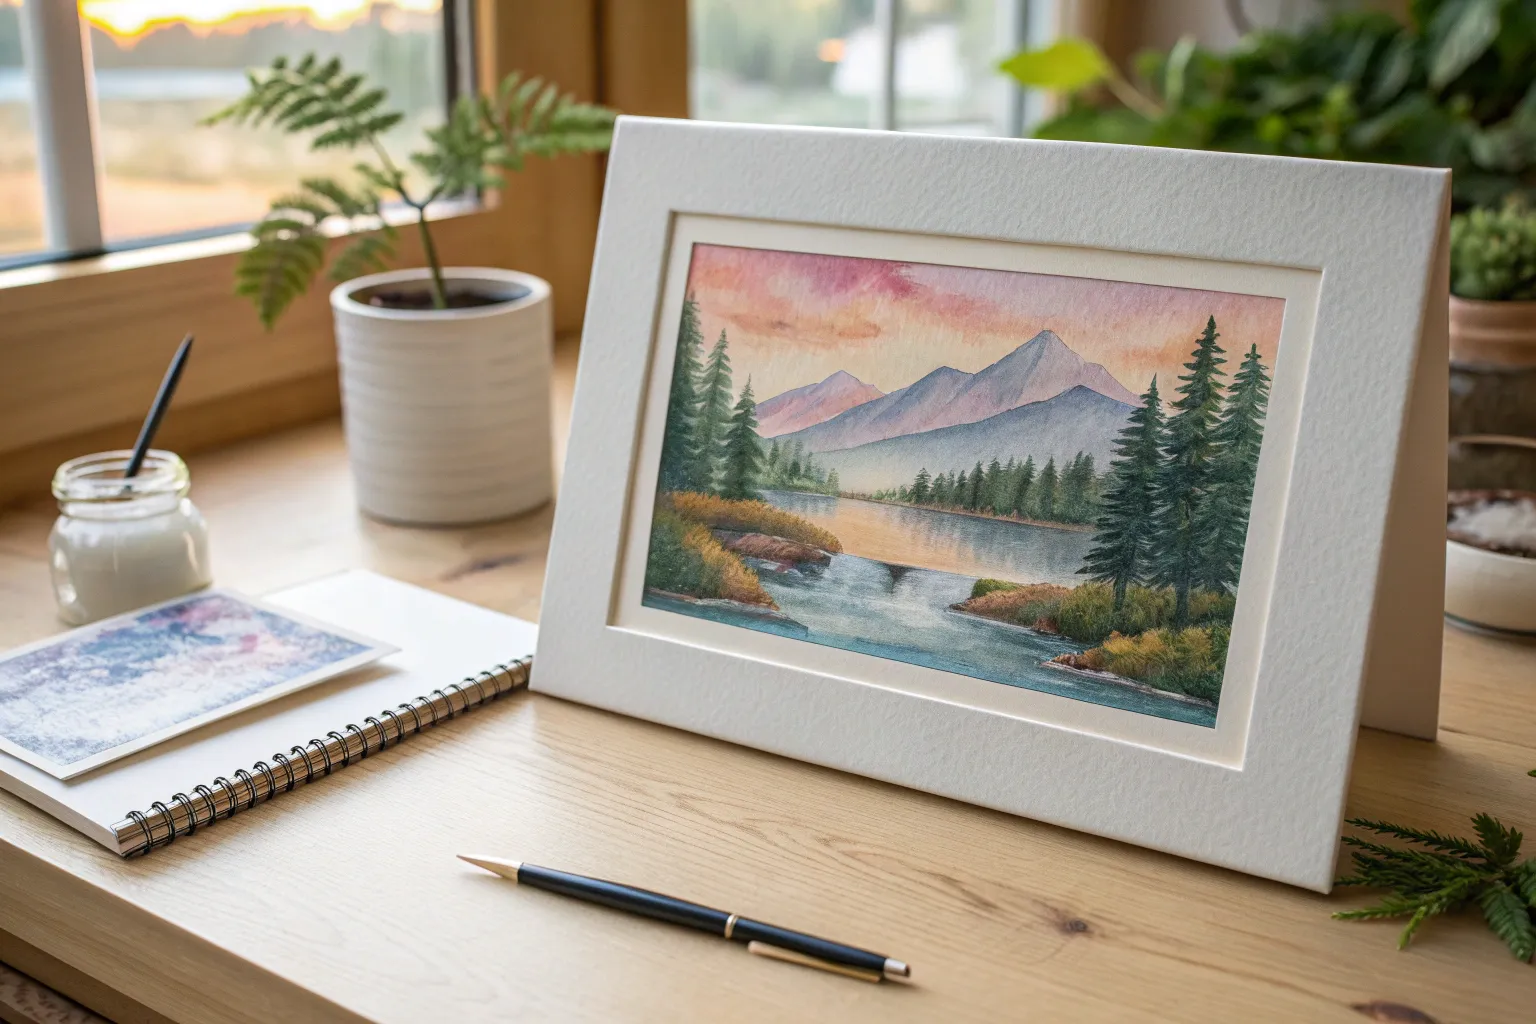
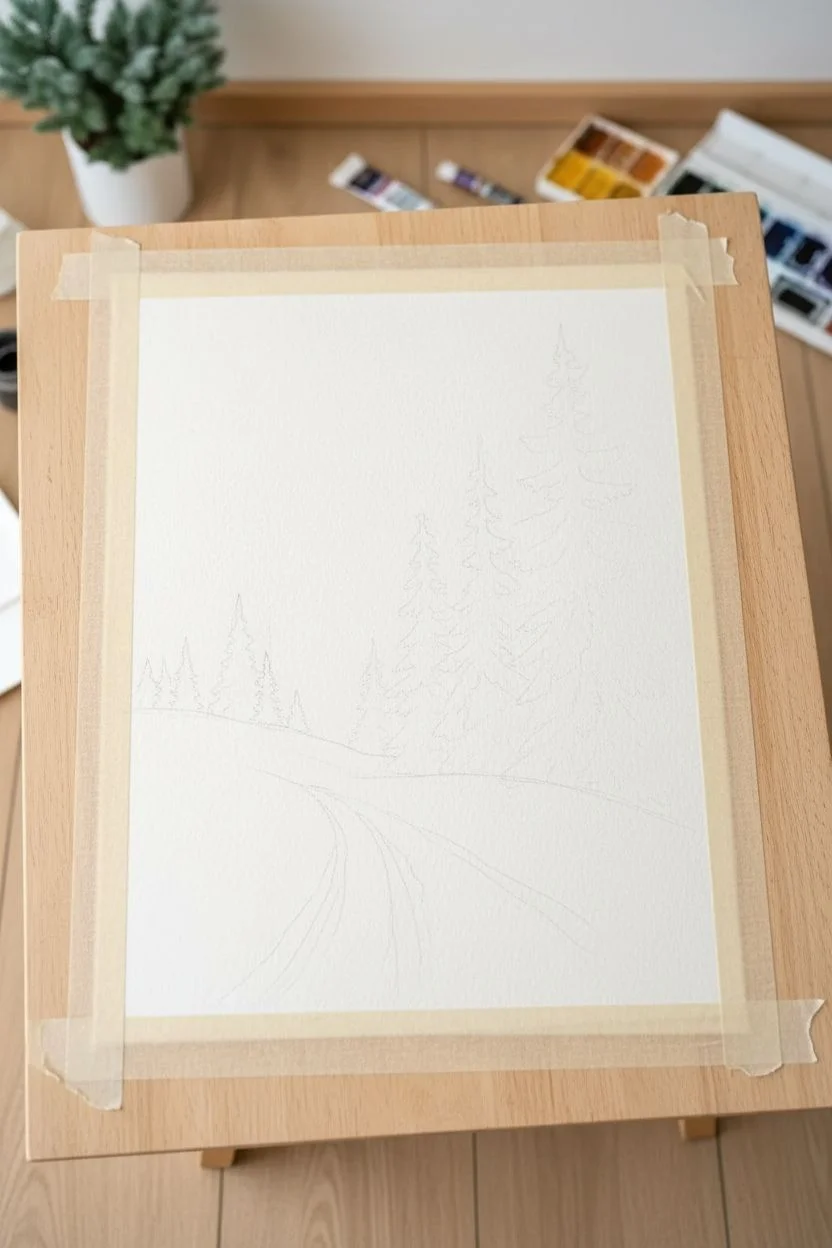
Pine Tree Silhouettes Against an Ombre Sky

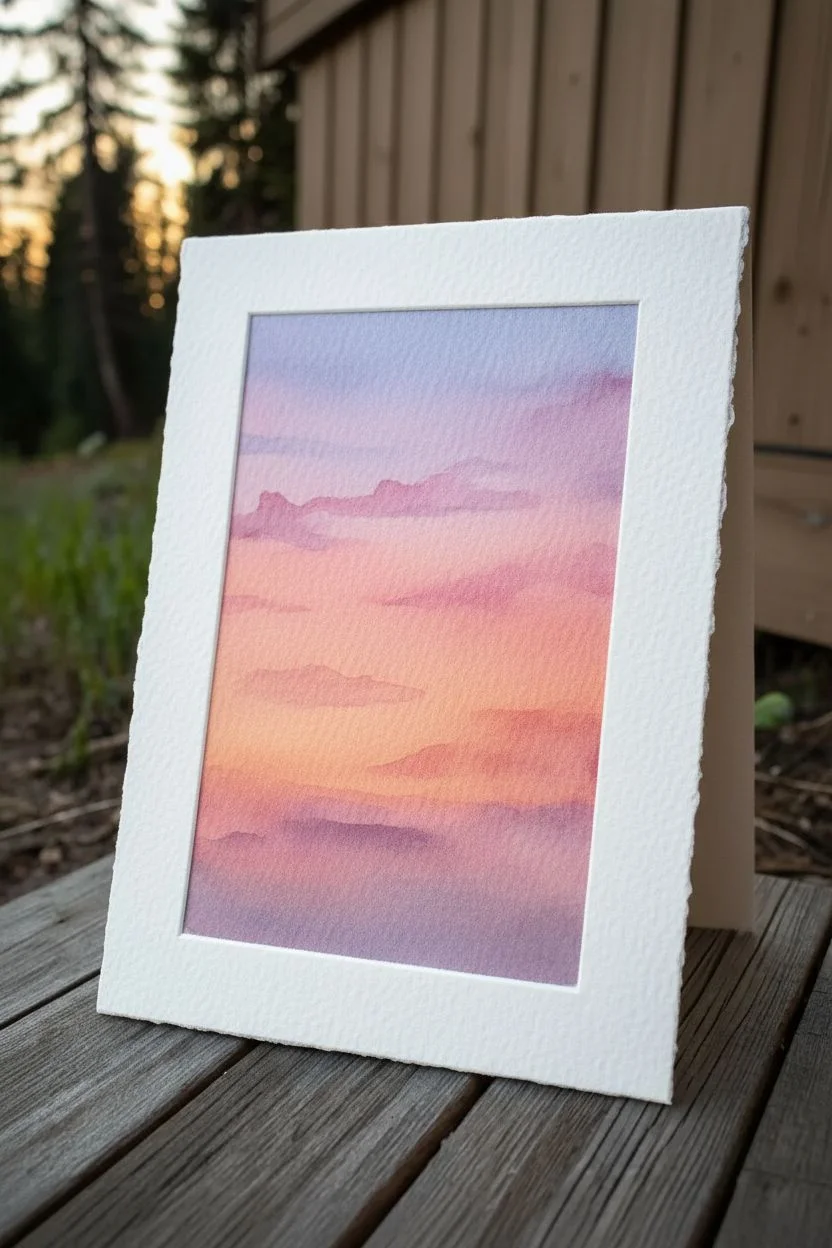
Capture the serene beauty of twilight in the mountains with this stunning watercolor card project. Using wet-on-wet blending for the sky and precise dry-brush strokes for the trees creates a striking contrast that fits perfectly on deckle-edged paper.
Step-by-Step Tutorial
Materials
- Deckle-edged watercolor greeting card (cold press)
- Watercolor paints (Indigo, Alizarin Crimson, Cadmium Yellow, Payne’s Gray, Black)
- Painter’s tape or masking tape
- Flat wash brush (3/4 inch)
- Round brush (size 4 or 6)
- Detail liner brush (size 0 or 00)
- Clean water jar
- Paper towels
- Pencil (optional)
Step 1: Setting the Sky
-
Prepare the card:
Begin by taping down your watercolor card to a hard board. Since this card has deckled edges that serve as a natural border, tape just inside or outside the edge depending on if you want a clean white border or a full bleed; for the look in the photo, tape off a clean rectangular border leaving the deckled edge exposed. -
Wet the paper:
Using your large flat brush, apply a clean coat of water to the entire sky area. You want the paper to be glistening and damp, but not holding puddles. -
Paint the upper sky:
Start at the very top with a watery mix of Indigo or a soft violet. Apply a horizontal stroke across the top third, letting the wet paper diffuse the bottom edge of the pigment. -
Add the middle transition:
Clean your brush and pick up a soft rose or Alizarin Crimson mix. Paint across the middle section, slightly overlapping the bottom of the violet area to encourage a soft purple blend where they meet. -
Warm up the horizon:
Load your brush with a warm yellow or peach tone. Paint the lower third of the sky, blending it upwards into the pink layer. The goal is a seamless ombre gradient from cool top to warm bottom. -
Create soft clouds:
While the sky is still damp (but not soaking), mix a slightly thicker purple-pink color. Using the tip of a round brush, gently dab in horizontal cloud shapes across the pink and yellow zones. Because the paper is wet, these will soften naturally. -
Dry completely:
This is crucial: allow the sky layer to dry 100%. If the paper is cool to the touch, it’s still wet. You can use a heat tool or hairdryer to speed this up.
Step 2: Painting the Foreground
-
Paint distant hills:
Mix a diluted wash of purple-gray. Paint a faint, rolling hill line just below the yellow horizon. This simulates atmospheric perspective, making these hills look further away. -
Establish the ground:
Mix a dark, muddy brown-black using burnt umber and Payne’s gray. With a round brush, paint the immediate foreground hill, sweeping the brush to suggest uneven terrain. -
Add texture to the ground:
While the foreground paint is wet, drop in hints of pure black or deep indigo to create shadows and depth in the earth. -
Start the main tree stem:
Switch to your detail liner brush or a fine tip round brush loaded with opaque black paint. Draw a thin, straight vertical line on the right side of the paper for the tallest pine tree trunk. -
Paint the pine branches:
Starting from the top of the tree, use a stippling or tapping motion to create branches. Keep the top branches very narrow and short. -
Build the tree volume:
As you move down the trunk, widen your strokes. I usually wiggle the brush tip back and forth to create that organic, needle-like texture, leaving small gaps to let the sunset peek through. -
Add supporting trees:
Repeat the tree painting process for the smaller trees on the left side and the medium tree in the center. Vary their heights to create a balanced composition. -
Fill the horizon line:
Using the very tip of your brush, paint tiny vertical lines along the distant ridge line to suggest a forest far in the distance. -
Refine the foreground:
If the foreground has dried too light, add a second glaze of dark paint. Use dry brush strokes (wiping most paint off the brush) to drag texture across the bottom, suggesting grass or dirt paths. -
Sign and unmask:
Once everything is bone dry, carefully peel away your tape at a 45-degree angle to reveal the crisp border. Add your signature in the bottom corner with a fine pen or brush.
Mastering the blend
Work quickly on the sky layer. If the paper starts to dry while you are blending, stop. Adding water to semi-dry paper creates ‘blooms’ or cauliflower marks.
Make it sparkle
Once the painting is dry, flick a toothbrush with white gouache or acrylic paint over the purple section of the sky to create the first visible evening stars.
This serene landscape makes a thoughtful handmade gift or a beautiful addition to your own desk display


Layered Mountain Ranges With Atmospheric Perspective
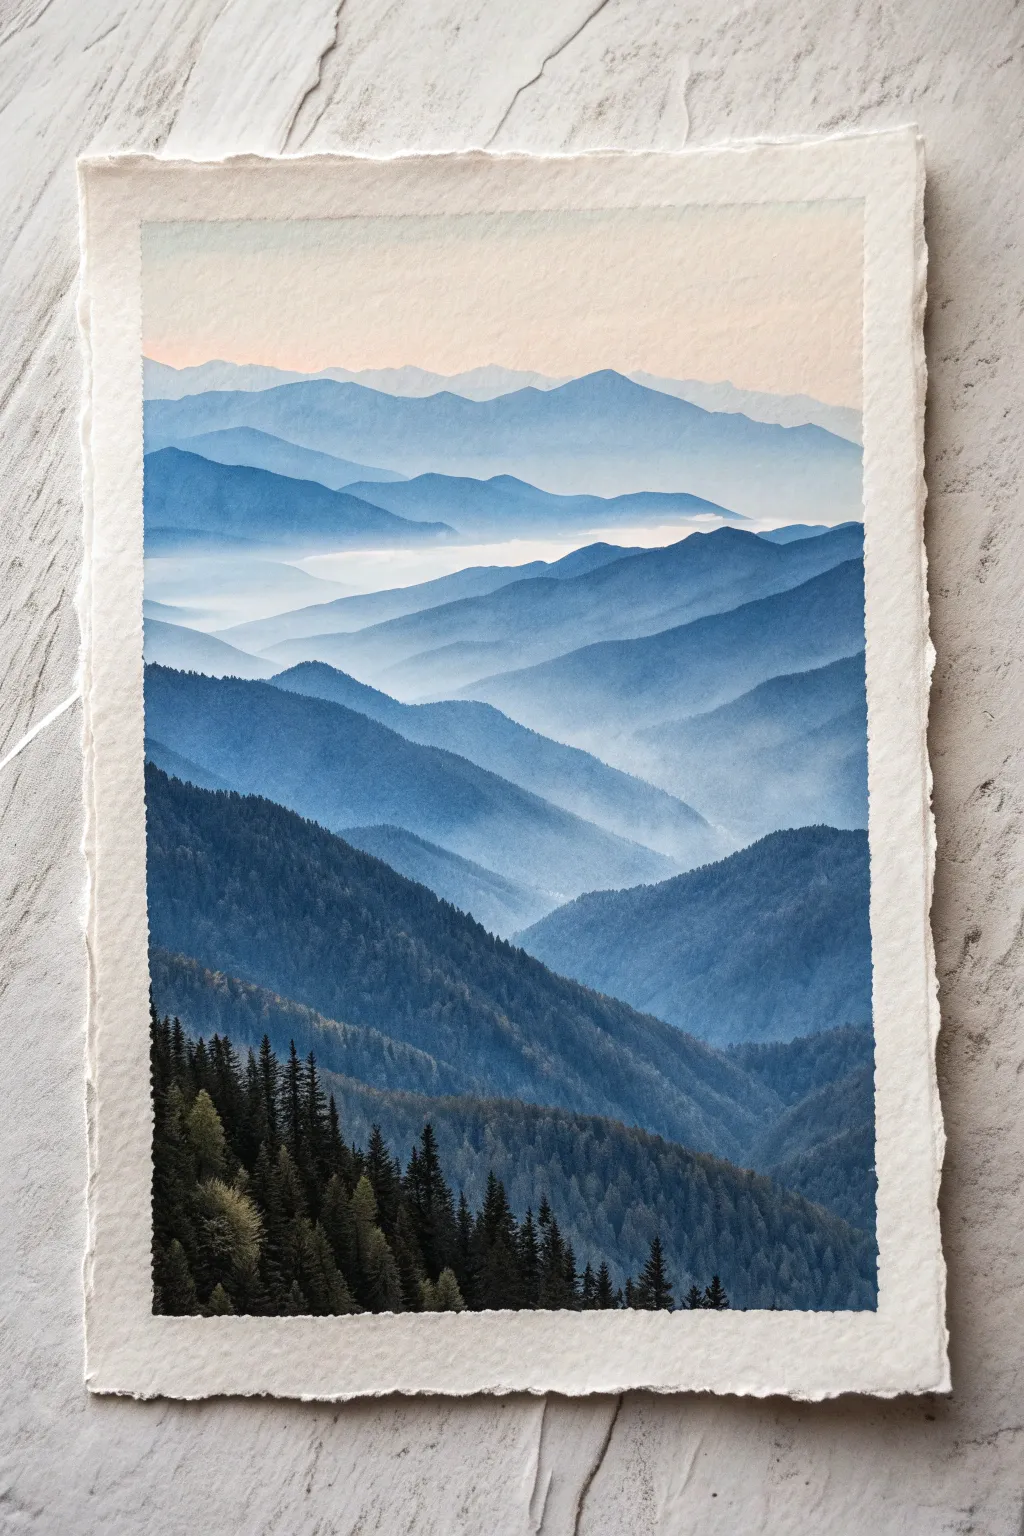
Capture the serene beauty of distant peaks fading into the horizon with this atmospheric watercolor study. By mastering the art of layering and value control, you’ll create a breathtaking illusion of depth where mountains seem to roll on forever.
How-To Guide
Materials
- Cold press watercolor paper (300 gsm or heavier)
- Watercolor paints: Indigo, Prussian Blue, Paynes Gray, Alizarin Crimson, Burnt Umber
- Large flat wash brush (1 inch)
- Round brush (size 6 or 8)
- Small liner or rigger brush (size 0 or 1)
- Masking tape
- Two jars of water
- Paper towels
- Pencil (HB or H)
- Mixing palette
Step 1: Preparation and Sky
-
Prepare your paper:
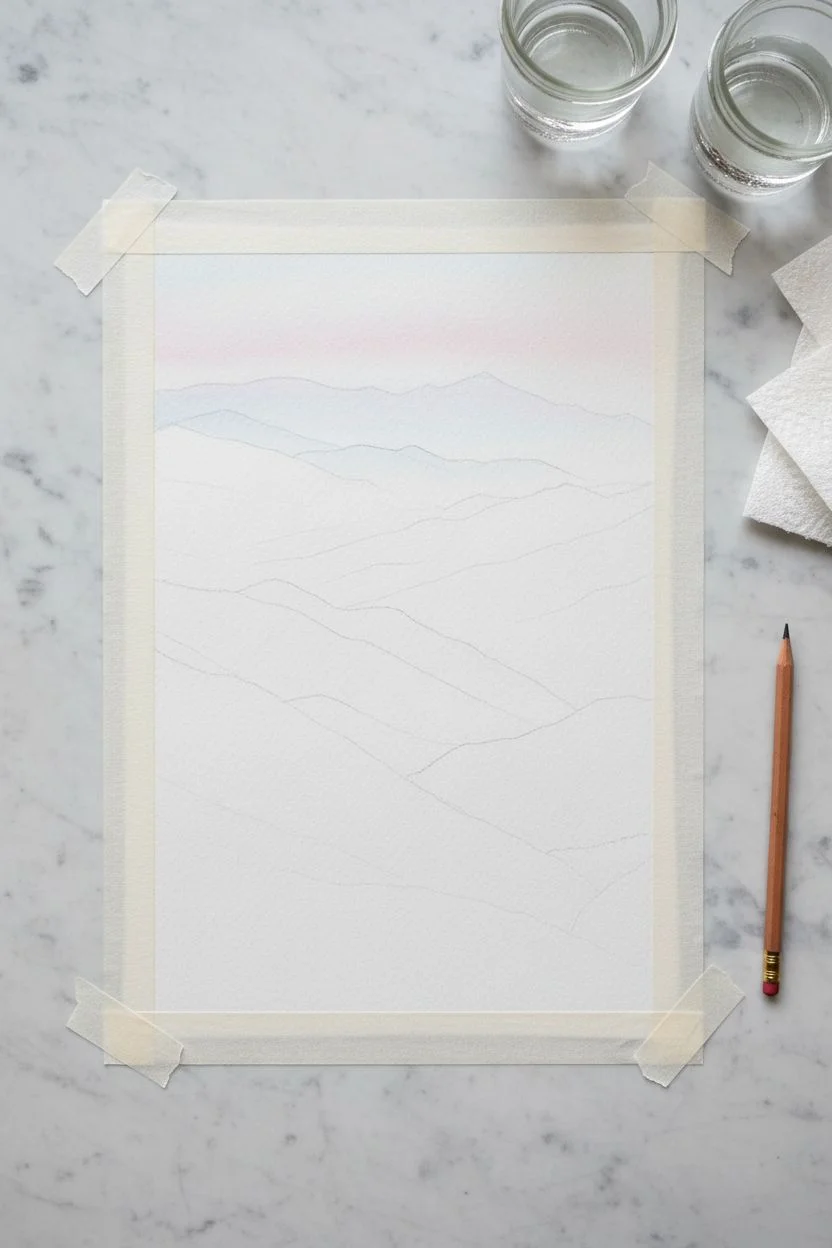
Begin by taping down your watercolor paper to a board to prevent buckling. If you want the rustic, deckled edge look shown in the reference, you can gently tear the edges of your paper against a ruler before starting, rather than taping over them. -
Sketch the ranges:
Using an HB pencil, very lightly sketch 5-6 wavy, overlapping lines across the paper. These will be your mountain ridges. Keep the lines irregular and natural; avoid perfect zig-zags. -
Mix the sky wash:
Create a very dilute wash of Alizarin Crimson with a touch of Indigo. You want a faint, barely-there pinkish-lavender hue for the sky. -
Paint a gradient sky:
Wet the sky area with clean water first. Apply your pale wash at the top and let it fade into white as it reaches the first mountain line. This wet-on-wet technique creates a soft, glowing horizon.
Hard Lines Appearing?
If your mist looks like a hard line, your paint dried too fast. Re-wet the area with clean water and scrub the edge gently with a damp brush to soften the transition back into the white paper.
Step 2: Painting the Distant Ranges
-
Mix the lightest blue:
Mix a very watery puddle of Indigo and Prussian Blue. It should be transparent tea consistency. This will be your furthest mountain range. -
Paint the first ridge:
Paint the most distant mountain shape. While the bottom edge is still wet, gently lift a little color or add clean water to fade it out at the base, creating a sense of mist. -
Dry completely:
Let this layer dry completely. This is crucial—painting over damp paper will cause ‘cauliflowers’ or muddy blending. -
Darken the mix slightly:
Add a bit more pigment to your blue mix. It should be just a shade darker than the previous layer. Paint the second mountain range, overlapping the first. -
Create the misty valley effect:
For the middle ground, where the white mist is prominent, paint the top ridge of the mountain but stop halfway down the shape. Rinse your brush and use clean water to drag that edge downwards, fading it into pure paper white.
Step 3: Building the Middle and Foreground
-
Intensify the blues:
As you move forward to the lower mountain ranges, add more Prussian Blue and a touch of Paynes Gray to your mix. The paint should be creamier now, less watery. -
Paint the large sloping hills:
Paint the large, sweeping hills in the mid-ground. Use the side of your round brush to create broad strokes. Allow the paint to settle into the paper’s texture, which adds a natural, rocky feel. -
Add subtle texture:
While the mid-ground layer is still slightly damp (not soaking), drop in tiny dots of stronger blue pigment here and there to suggest dense forests on the slopes. -
Mix the darkest value:
For the closest mountain range before the trees, mix a strong concentration of Indigo and Paynes Gray. It should be quite dark. -
Paint the foreground slope:
Fill in the bottom-most mountain shape with this dark mix. I like to leave a few tiny specs of white paper showing through to suggest light hitting the rough terrain.
Pro Tip: Value Check
Squint your eyes when looking at your painting. If the layers merge together, you need more contrast. The furthest mountains should be whisper-light, and the closest trees almost black.
Step 4: Adding the Evergreen Forest
-
Mix deep forest green:
Create a near-black green by mixing Paynes Gray, Indigo, and a little Burnt Umber. It should be thick, like heavy cream. -
Start the tree line:
Switch to your small rigger or liner brush. Starting at the bottom left corner, paint vertical lines of varying heights for the tree trunks. -
Detail the branches:
Using the tip of the brush, dab small, downward-sloping marks on either side of the trunks to create pine branches. Keep the tops pointy and let the bottoms be fuller. -
Vary the color:
To add dimension to the forest, mix a slightly lighter, warmer green (add a touch of yellow or ochre if you have it, or just water it down). Paint a few trees with this lighter shade amidst the dark ones. -
Fill the dense areas:
For the dense forest at the very bottom, simply stipple dark paint to fill the gaps between trees, ensuring the bottom corner feels heavy and grounded. -
Final assessment:
Step back and check your values. If the atmospheric perspective isn’t strong enough, you can gently glaze a very watery blue wash over the distant mountains to push them further back.
Once dry, frame or mount your painting to highlight those beautiful, rugged edges


Misty Forest Clearing With Soft Sunbeams
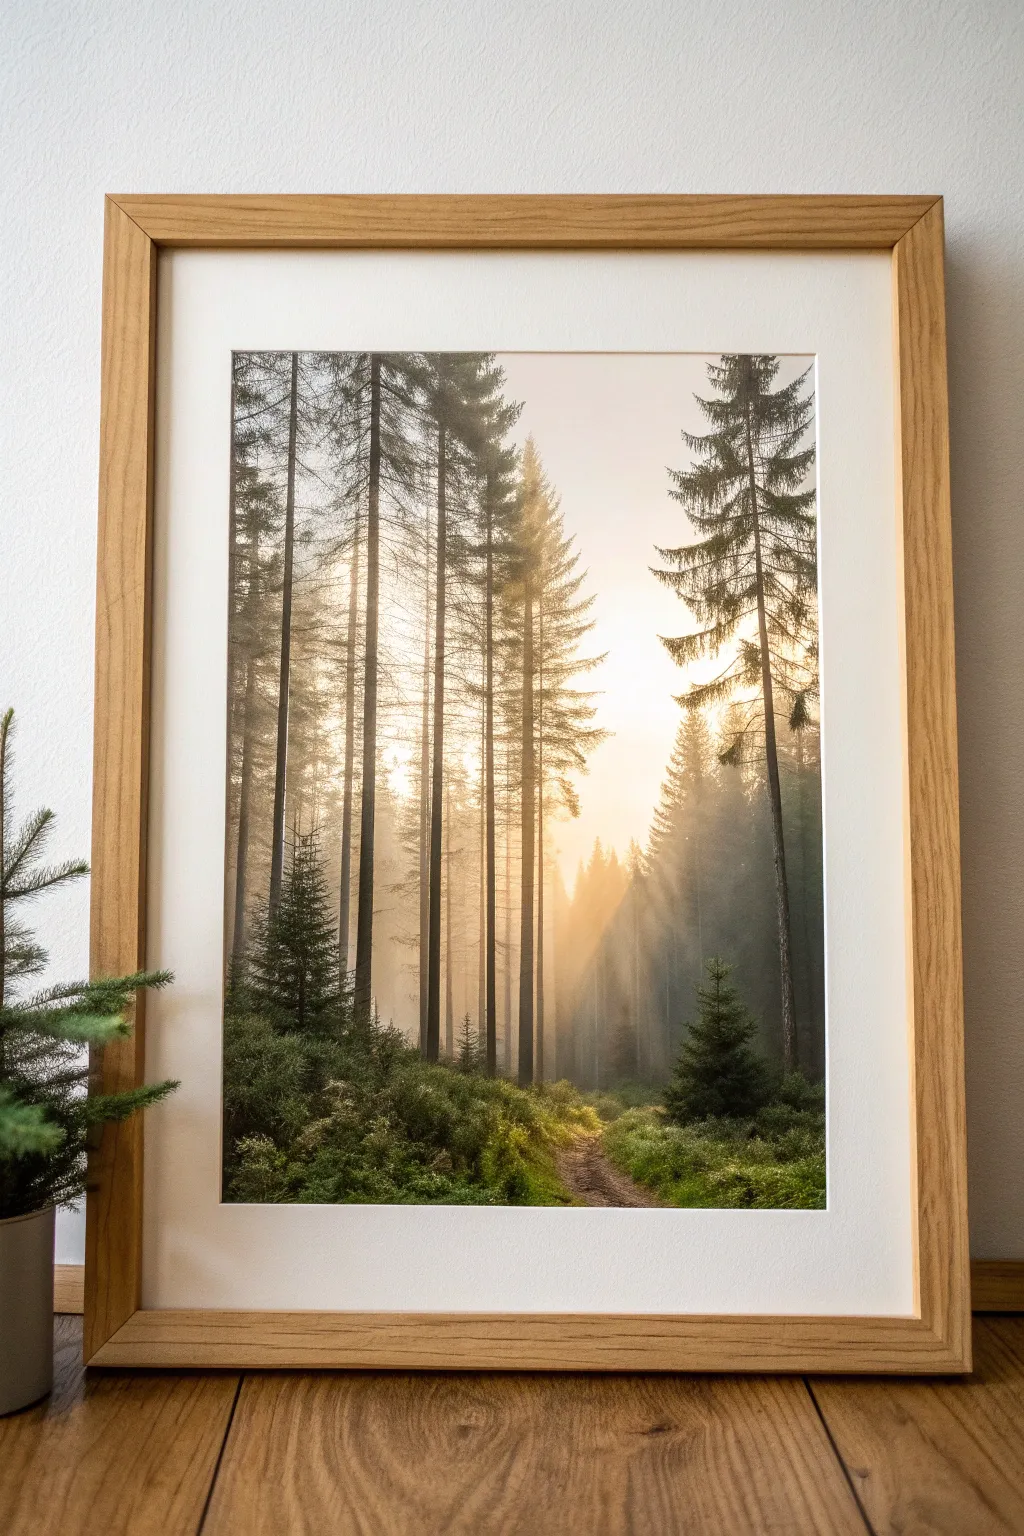
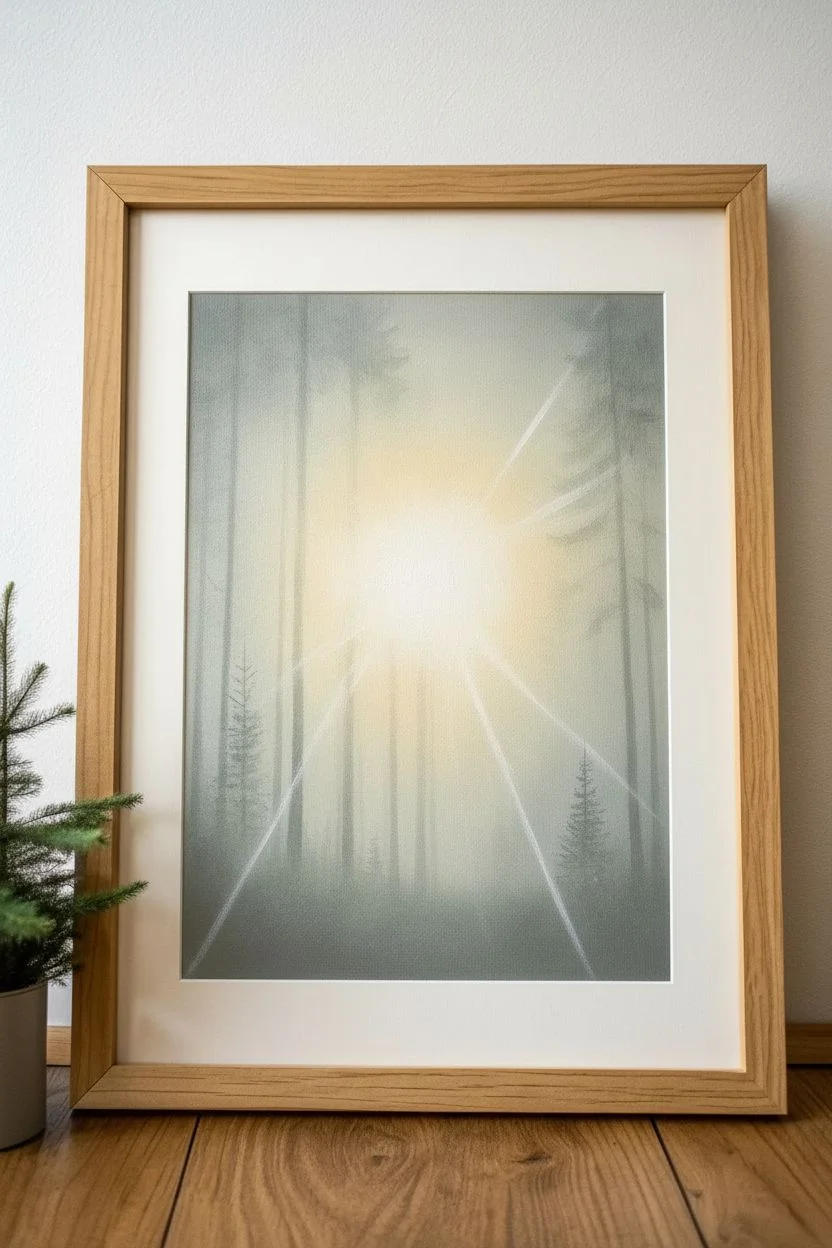
Capture the serene beauty of a misty woodland sunrise with this atmospheric painting project. You will learn to layer soft light and shadow to create depth, transforming a blank canvas into a peaceful forest path bathed in golden sunbeams.
Detailed Instructions
Materials
- High-quality watercolor paper or primed canvas (16×20 inches recommended)
- Acrylic paints (Titanium White, Mars Black, Burnt Umber, Sap Green, Payne’s Grey, Yellow Ochre, Cadmium Yellow)
- Set of soft synthetic brushes (large flat wash, medium filbert, fine liner)
- Glazing medium or water for thinning
- Paper towels and water cup
- Palette for mixing
- Masking tape
Step 1: Setting the Atmosphere
-
Prepare the misty background:
Start by mixing Titanium White with a tiny touch of Yellow Ochre and a drop of Payne’s Grey. You want a very pale, warm off-white color. Apply this to the center of your canvas using a large flat brush, blending outwards. -
Create the soft gradient:
While the paint is still wet, introduce a slightly darker, cool grey mix (White + Payne’s Grey) to the top corners and the bottom edge. Blend this into the warm center to establish the foggy atmosphere. -
Paint the distant trees:
Mix a very faint, watery grey-green using Sap Green, White, and Payne’s Grey. Using a medium filbert brush, gently suggest vertical shapes in the background. These should be barely visible, disappearing into the mist. -
Add first sunbeams:
Clean your brush thoroughly. Use a very thinned wash of White and Yellow Ochre. Start from the center light source and pull diagonal strokes downward through the distant trees to create faint rays of light.
Muddy colors?
If your mist looks dirty, clean your water jar immediately. Even a drop of black in the water can ruin the purity of your white and yellow light mixes.
Step 2: Building the Forest
-
Paint mid-ground trees:
Mix a darker value of grey-green. Paint a few slender tree trunks that are slightly more defined than the background, but still hazy. Focus on the left side and the right edge of the composition. -
Establish the main tree trunks:
For the prominent foreground trees, mix Burnt Umber with Mars Black. Use a smaller flat brush to paint tall, straight vertical lines. Vary the thickness slightly to make them look organic. -
Texture the bark:
Once the dark trunks are dry, take a little bit of the background mist color and dry-brush it onto the left side of the trunks. This creates the illusion of backlight hitting the bark. -
Add branches:
Switch to your fine liner brush. Using the dark trunk color, paint thin, horizontal branches extending from the main trunks. Remember that pine branches often droop slightly before curving up.
Step 3: The Path and Foliage
-
Lay out the path:
Mix Burnt Umber with White and a touch of Yellow Ochre. Paint a winding path starting wide at the bottom center and narrowing as it disappears into the mist. -
Create shadows on the path:
Add horizontal streaks of darker brown across the path to suggest uneven terrain and shadows cast by the grass. -
Paint the undergrowth base:
Use Sap Green mixed with a little Black to block in the dark grassy areas on either side of the path. Use a stippling motion with an old brush to create texture. -
Highlight the greenery:
Mix Sap Green with Cadmium Yellow. Lightly dab this color onto the tops of the texture you just created, focusing on areas where the sunbeams would hit the grass. -
Plant foreground saplings:
Paint small, triangle-shaped pine trees in the foreground using the dark green mix. Use the corner of a flat brush or a fan brush to tap in the needles.
Golden Hour Glow
For a warmer sunset vibe instead of morning mist, swap the pale yellows for soft oranges and pinks in the initial background wash.
Step 4: Final Lighting Effects
-
Enhance the sunbeams:
I find this step crucial for the ‘glow’ effect. Mix a transparent glaze of White and Cadmium Yellow. Carefully paint distinct rays coming from the center light source, overlapping some of the darker trees. -
Soften the edges:
If any sunbeams look too sharp, use a clean, damp brush to gently feather the edges before the paint dries. -
Add final highlights:
Use pure White to add tiny sparkles of light on the edges of the foreground pine needles and the brightest part of the path. -
Frame your work:
Once completely dry, place your painting in a light wood frame with a wide white mat to complement the airy feel of the forest scene.
Step back and soak in the tranquil atmosphere you’ve created with just paint and a brush


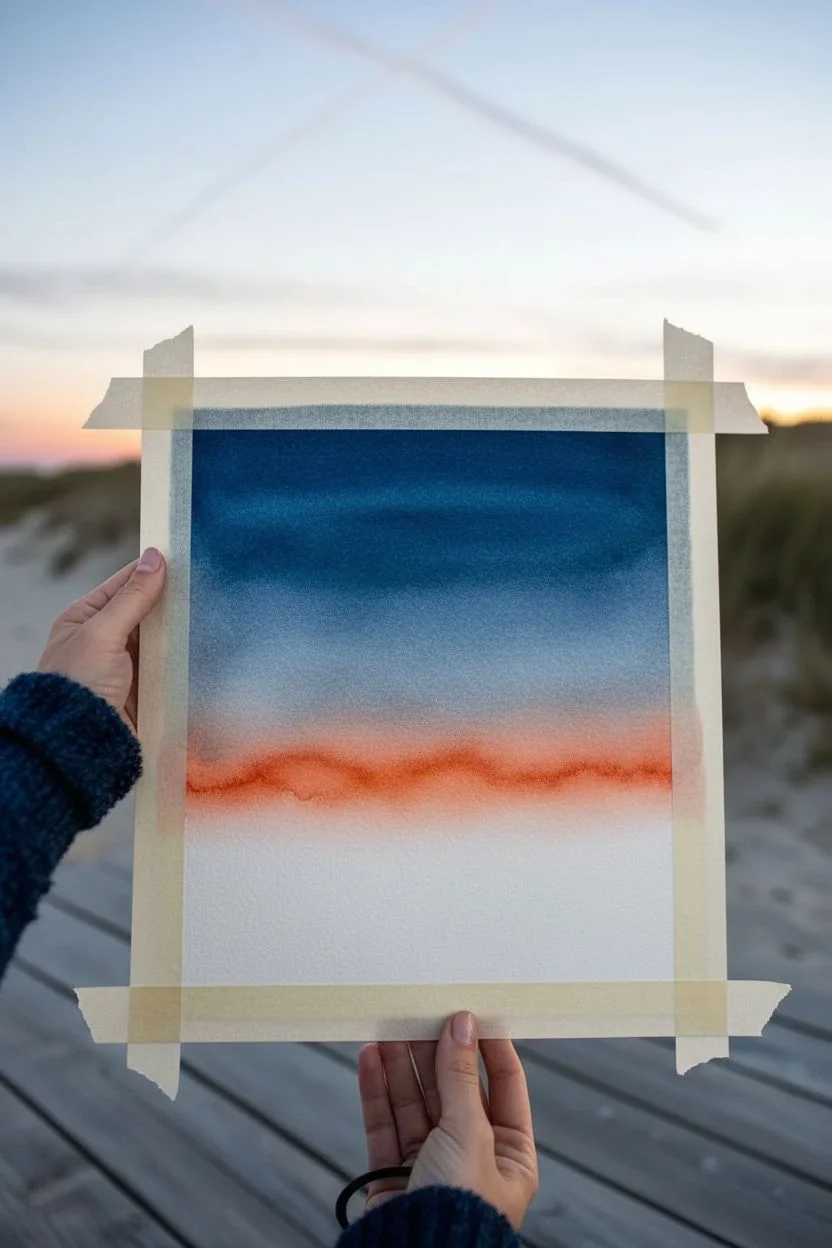
Ocean Waves Rolling Under a Warm Horizon
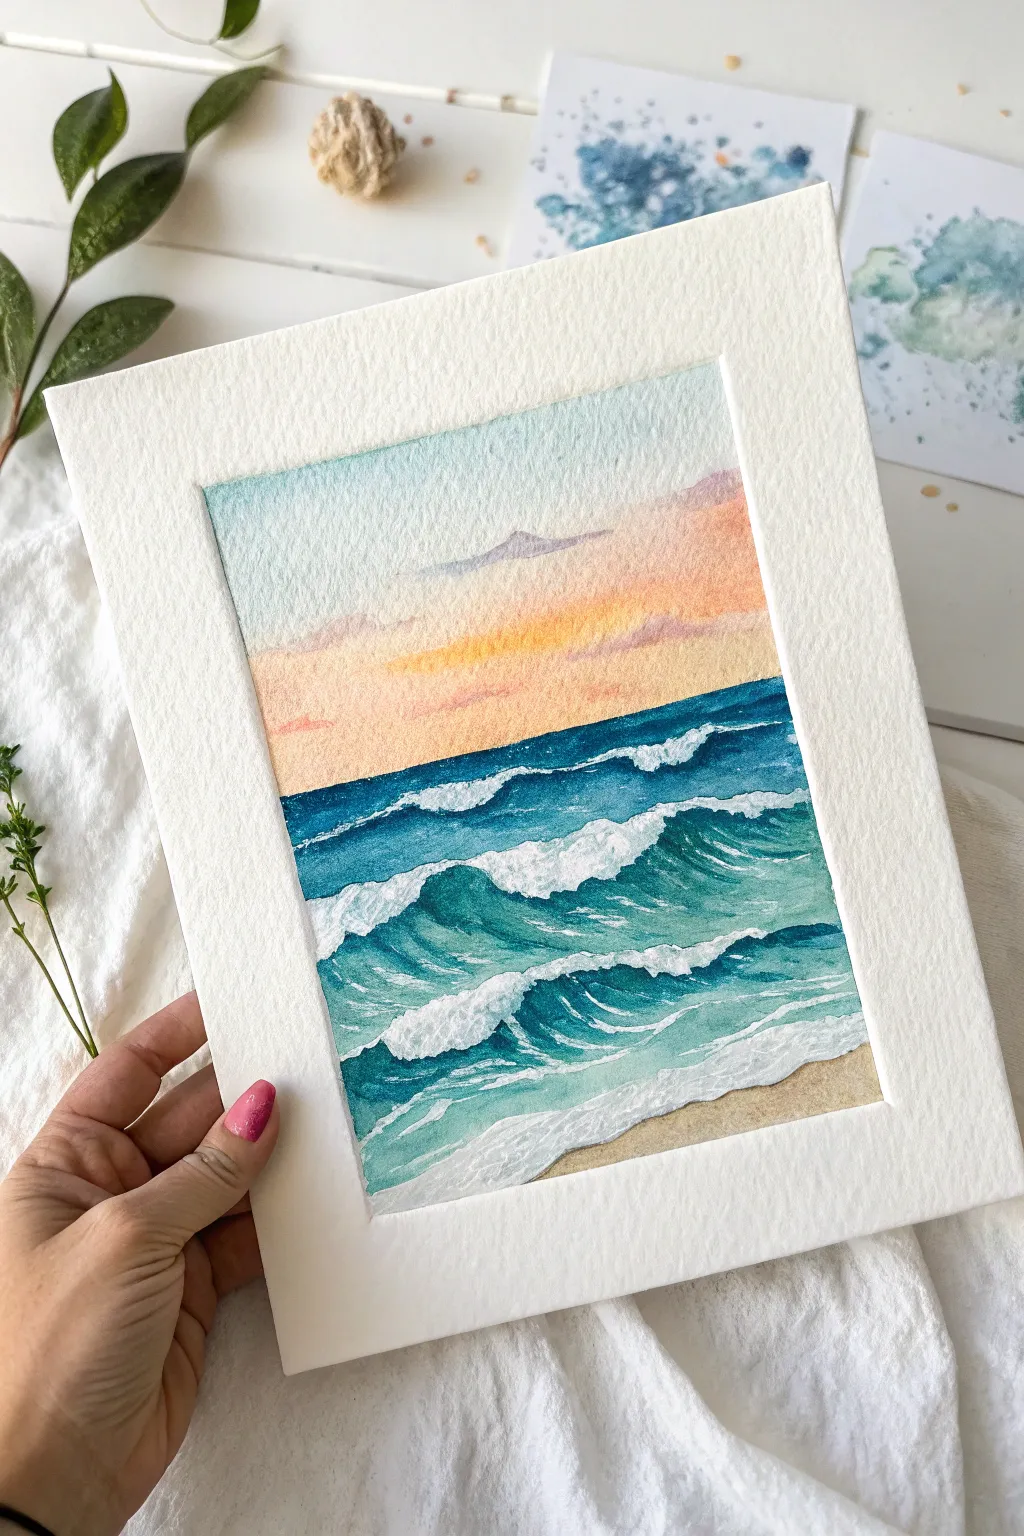
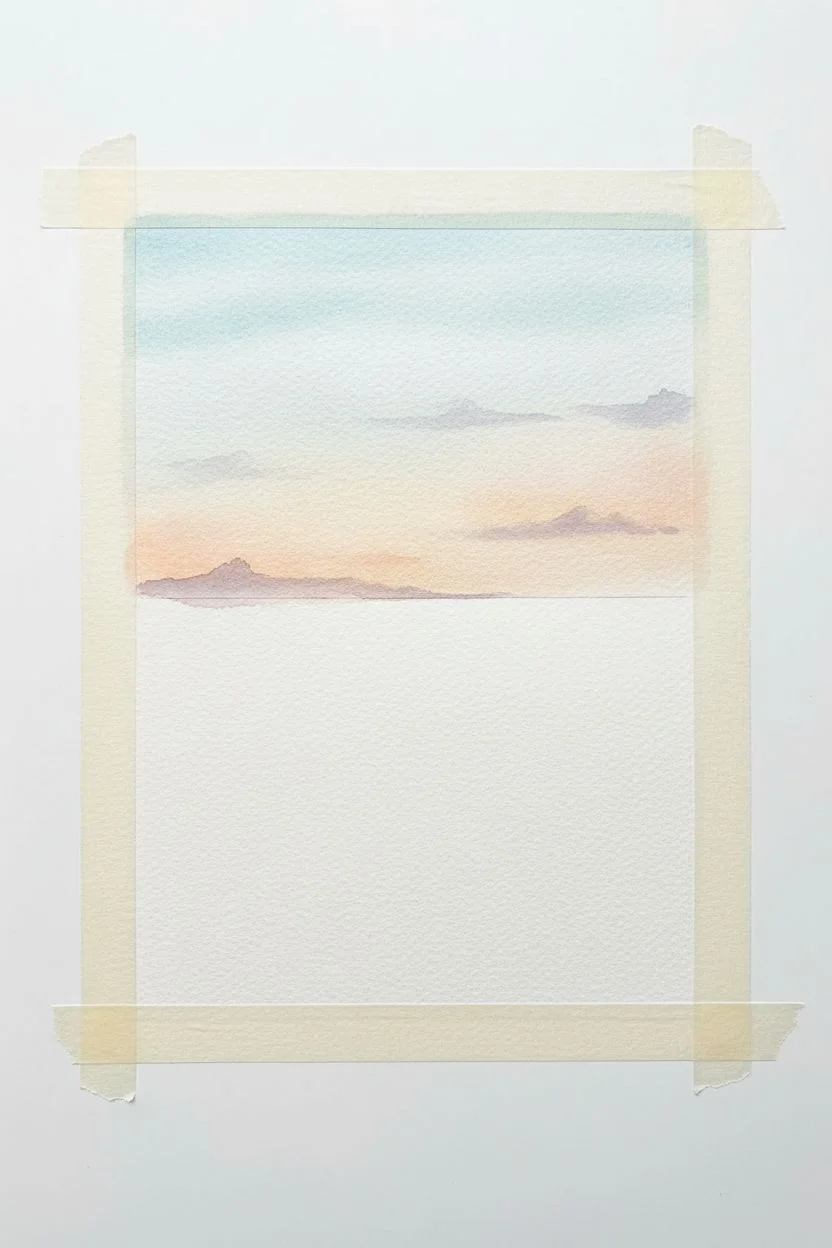
Capture the serene beauty of the coast with this vibrant watercolor landscape featuring crashing waves beneath a soft, gradient sky. The contrast between the warm peach horizon and the cool teal waters creates a captivating and peaceful scene perfect for framing.
How-To Guide
Materials
- Cold press watercolor paper (140lb/300gsm)
- Watercolor paints (Cerulean Blue, Prussian Blue, Viridian Green, Yellow Ochre, Rose Madder, Naples Yellow)
- White gouache or opaque white ink
- Round watercolor brushes (Size 4, 8, and a fine detail brush)
- Masking tape
- Jar of clean water
- Paper towels
- Palette for mixing
Step 1: Preparation & Sky
-
Tape the borders:
Begin by securing your paper to a flat surface using masking tape. Create a clean, straight rectangle in the center of your page to frame the artwork as shown in the photo. -
Map the horizon:
Lightly sketch a horizontal line about one-third of the way from the top of your taped area. This will separate the sky from the ocean. -
Wet the sky area:
Using a clean, damp brush, wet the paper above the horizon line. You want a sheen on the paper, but no puddles. -
Paint the upper sky:
Drop in a very diluted wash of sky blue at the top edge, fading it out as you move downward toward the middle of the sky section. -
Add warm tones:
While the paper is still damp, introduce a soft peach or rose color just above the horizon line. Blend this upward into a pale yellow, ensuring a smooth transition into the blue. -
Create distant clouds:
Mix a faint purple-grey tone. While the sky is still slightly damp but not soaking, gently dab in soft, elongated cloud shapes near the horizon and transition zone.
Clean White Foam
Don’t overwork the white gouache. Lay it down thickly for the brightest highlights and leave it alone. Mixing it too much with the underlying color will turn it muddy.
Step 2: The Deep Ocean
-
Establish the horizon line:
Once the sky involves is completely dry, mix a dark, rich blue (Prussian Blue mixed with a touch of green). Carefully paint a straight, crisp line across the horizon. -
Paint the deep water:
Continue bringing this dark blue wash down for about an inch. To suggest distance, make this the darkest and flattest part of the water. -
Form the first wave:
Leaves a jagged, irregular strip of unpainted white paper below the dark blue band. This negative space will become the sea foam on the distant wave crests. -
Add shadows under the crests:
Immediately below the white gap, paint a band of deep teal (Viridian mixed with Cerulean). Soften the bottom edge of this band with water so it fades into a lighter turquoise.
Step 3: Foreground Waves & Details
-
Draft the main wave:
pencil in the shape of the large central crashing wave. It should curve dramatically like a ‘C’ shape. -
Paint the wave body:
Fill the body of the wave with a gradient. Start with a deep teal under the curl and fade it to translucent turquoise as the water thins out. -
Sand and shoreline:
Mix a watery wash of Yellow Ochre and a touch of brown. Paint the bottom right corner to create the wet sand, fading it out as it meets the water area. -
Detailing the foam:
Using white gouache and a fine brush, paint crisp white edges along the top of your waves. Add texture by dabbing the brush to simulate splashing foam. -
Adding sea spray:
Dilute a tiny amount of white gouache. Flick the bristles of your brush or tap the handle to create tiny splatter dots around the crashing areas for a spray effect. -
Highlighting the surf:
Paint sweeping, curved white lines in the shallow foreground water to show foam patterns rushing onto the sand. -
Final touches:
Evaluate your contrast. If the shadows under the white foam look too light, glaze over them with a thin layer of dark blue to make the white ‘pop’. -
Reveal the border:
Wait until the painting is 100% dry. This is crucial! Peel the tape away slowly at a severe angle away from the painting to reveal crisp, clean edges.
Add Sparkle
For a magical touch, mix a tiny pinch of iridescent medium into your final white gouache highlights to make the sun-drenched foam shimmer in the light.
Enjoy the calming atmosphere of your new seascape as you display it in a simple frame
BRUSH GUIDE
The Right Brush for Every Stroke
From clean lines to bold texture — master brush choice, stroke control, and essential techniques.
Explore the Full Guide
Wildflower Meadow With a Dreamy Sky
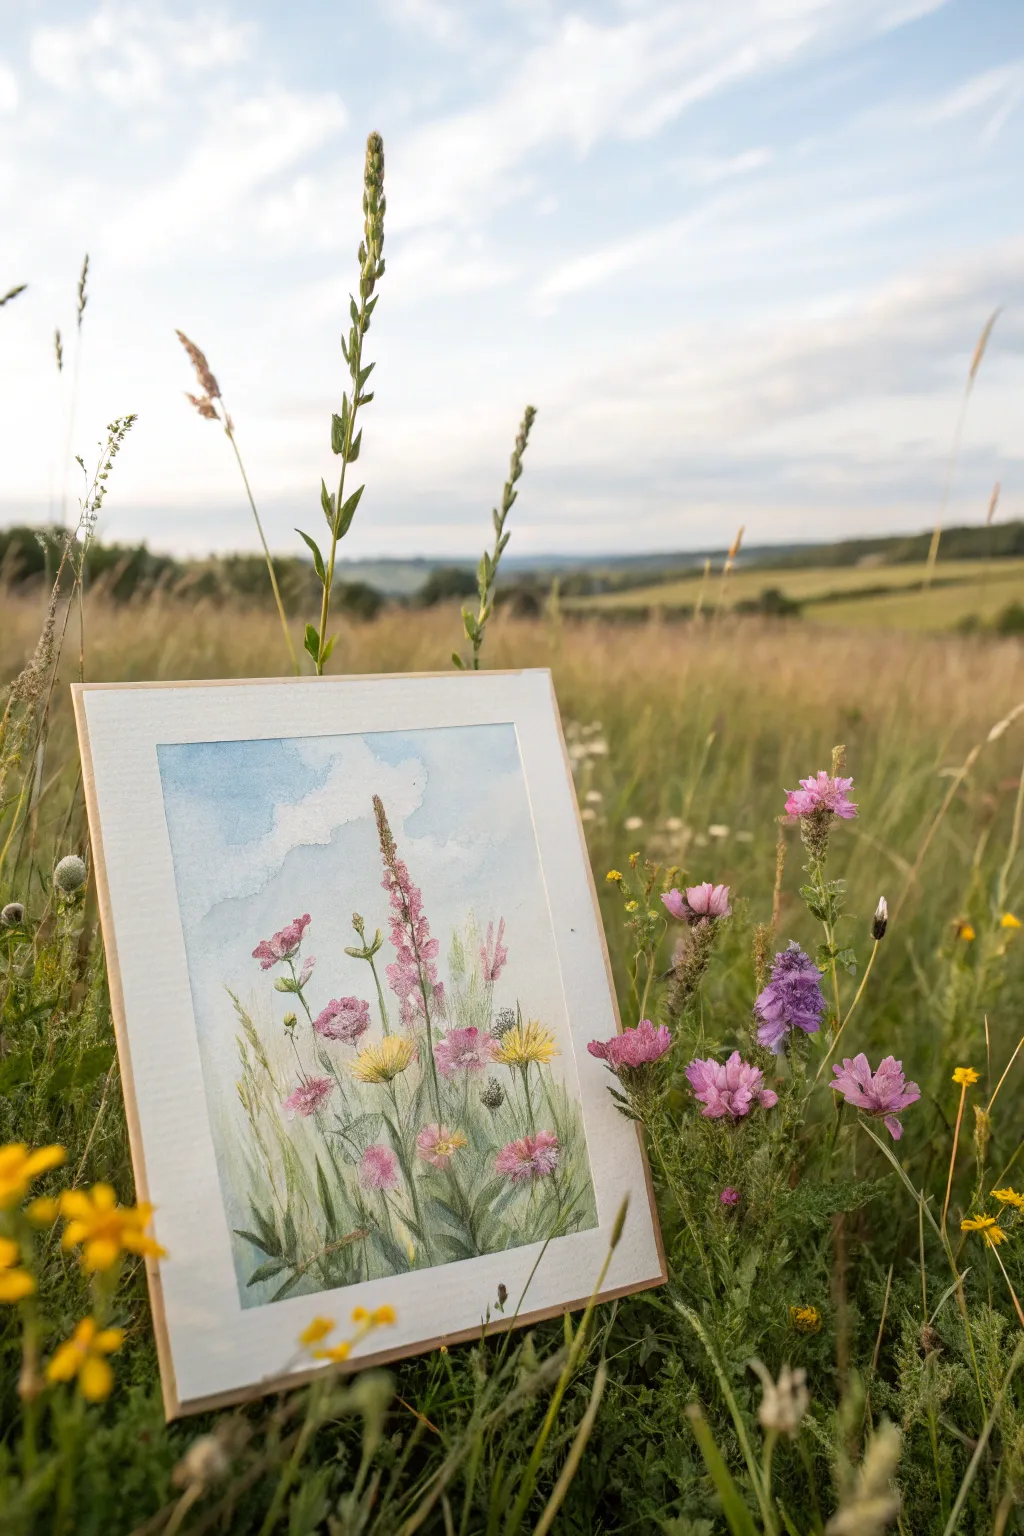
Capture the delicate beauty of a summer field with this airy watercolor tutorial, featuring soft pink blossoms and yellow accents dancing against a gentle blue sky. This project focuses on loose, expressive strokes to create depth and movement within the tall grasses.
Step-by-Step Guide
Materials
- Cold press watercolor paper (approx. A4 or 9×12 inches)
- Watercolor paints (Cerulean Blue, Sap Green, Olive Green, Rose Madder or Quinacridone Rose, Lemon Yellow, Burnt Umber)
- Round brushes (flats/rounds): Size 8 for washes, Size 4 and Size 0 for details
- Masking tape or gummed tape
- Drawing board or hard surface
- Jar of clean water
- Paper towels
- Pencil (HB or 2B) and kneaded eraser
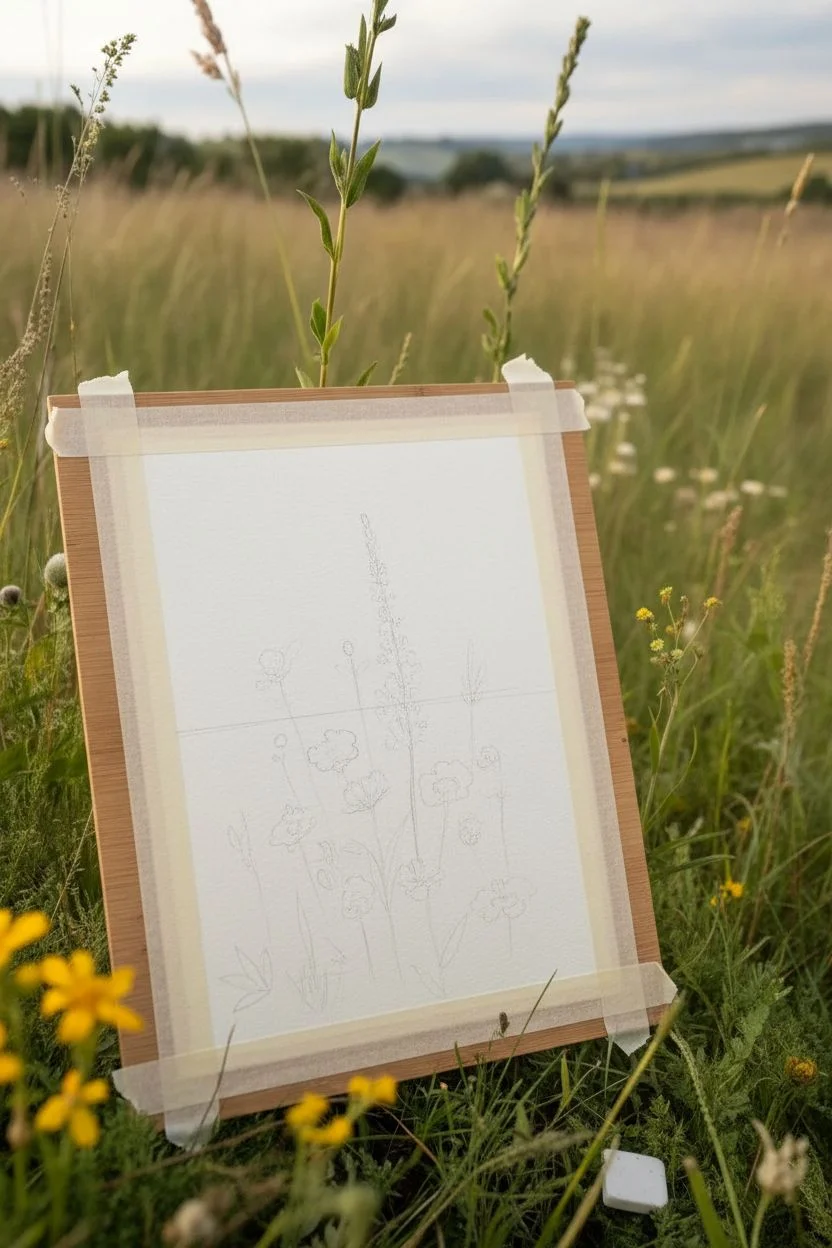
Step 1: Preparation and Sketching
-
Secure Your Paper:
Begin by taping your watercolor paper down to a sturdy board on all four sides. This prevents the paper from buckling when we add the wet sky wash and creates that crisp, professional white border seen in the example. -
Light Sketching:
Using an HB pencil, very lightly sketch the main composition. Mark the horizon line roughly one-third from the bottom, creating a gentle slope. Sketch the vertical axis lines for the tallest flower stalks, specifically the prominent central pink spire. -
Map the Blooms:
Add loose circles and ovals to indicate where the main flower heads will sit. Don’t worry about petals yet; just plan the spacing so your meadow doesn’t look too crowded or too empty.
Step 2: Painting the Sky and Background
-
Wet-on-Wet Sky:
Brush clean water over the sky area, stopping just short of your tallest flower sketches. While the paper is glistening, drop in a diluted wash of Cerulean Blue. Leave irregular white gaps to suggest soft, drifting clouds. -
Softening Edges:
If the edges of your clouds look too hard, rinse your brush and run a damp, clean brush along the blue edge to soften it into the white paper. -
Distant Hills:
While the bottom of the sky is still slightly damp (but not soaking), mix a very pale blue-grey. Paint the distant hill line across the background. The dampness will help push it into the distance, making it look hazy and far away. -
Initial Green Wash:
Mix a light wash of Sap Green with plenty of water. Paint the lower third of the paper loosely, allowing some vertical strokes to move upward, creating a base for the grass. Let the entire paper dry completely before moving on.
Muddy Greens?
If your greens look dull, avoid mixing more than 3 colors. Instead of black, mix red into green to darken it naturally. Let layers dry fully before painting over them so colors don’t bleed into mud.
Step 3: Floral Layers
-
The Focal Spire:
Mix Rose Madder with a touch of purple. Using your Size 4 brush, paint the tall central flower spike. Use small, dabbing motions to create individual florets, making them smaller at the top and larger toward the base. -
Pink Companions:
Use a slightly more watery pink mix to paint the surrounding smaller pink flowers (like the Knautia or Scabiosa types seen on the left and right). Keep the edges loose and organic. -
Yellow Accents:
Take your Lemon Yellow and paint the round, dandelion-like flower heads. Since watercolor is transparent, try to place these where the green background wash is lightest to keep the yellow bright. -
Adding Stems:
Switch to a liner brush or the tip of your Size 0 brush. with a mix of Sap Green and a tiny bit of Burnt Umber, draw thin, wavering lines connecting your floating flower heads to the ground. Vary the pressure to make the stems look natural. -
Layering Grasses:
I find it helpful to vary my greens here. Mix Olive Green for variety and flick your brush upward from the bottom of the page to create blades of grass. Some should cross over each other.
Pro Tip: Scratching Out
While the green grass wash is still wet, use the sharp edge of a credit card or a palette knife to scrape thin lines upward. This pushes pigment aside to create bright, highlighted distinct grass blades.
Step 4: Details and Definition
-
Darkening the Depths:
To give the meadow volume, mix a darker green (Sap Green + heavy Burnt Umber or a touch of blue). Paint into the negative spaces between the stems at the very bottom of the painting to create deep shadows. -
Flower Centers:
Once the flower heads are dry, add tiny dots of dark brown or deep purple to the centers of the yellow and pink flowers to give them dimension. -
Dry Brush Texture:
Load a brush with concentrated paint, blot it on a paper towel until it’s almost dry, and lightly drag it over the grassy areas. This creates a textured ‘seed head’ effect for the wild grasses. -
The Final Spatters:
Protect the sky area with a piece of scrap paper. Load a brush with watery paint (pink or green) and tap it against your finger to splatter tiny droplets into the meadow area, mimicking pollen and wild scruffiness.
Step 5: Finishing Touches
-
Review and Refine:
Step back and look at your composition. Add a few more dark grass blades in the foreground if it feels too light, or lift out some color with a damp brush if an area feels too heavy. -
The Reveal:
Wait until the painting is bone dry—if the paper is cold to the touch, it’s still wet. Carefully peel away the masking tape at a 45-degree angle to reveal your crisp white border.
Now you have a serene slice of nature ready to frame and bring a bit of the countryside indoors
Moonlit Lake With a Silver Reflection Path
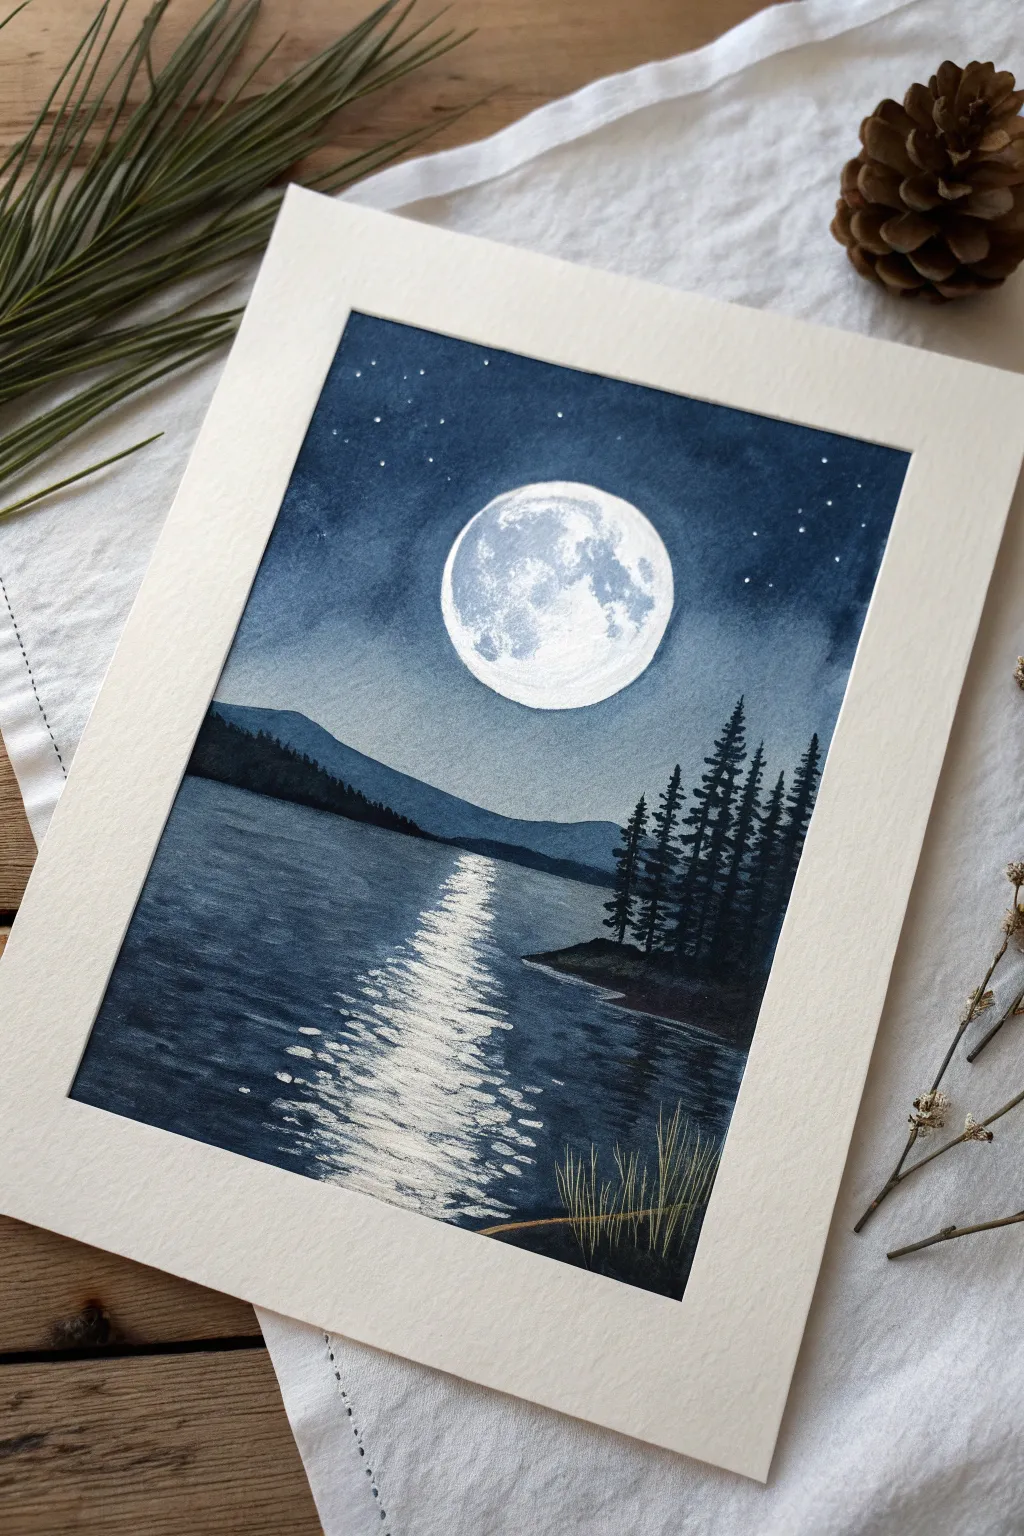
This serene painting captures the luminous magic of a full moon reflecting over calm waters, using deep indigo hues to create a striking night scene. The high-contrast composition, featuring silhouetted pines and a shimmering path of light, makes for a dramatic yet peaceful piece of wall art.
Step-by-Step Tutorial
Materials
- Cold Press Watercolor Paper (140lb/300gsm)
- Painter’s Tape and Drawing Board
- Watercolor Paints (Indigo, Prussian Blue, Payne’s Grey, Black)
- White Gouache or White Gel Pen
- Round Brushes (Size 8 for washes, Size 2 for details)
- Flat Brush (1/2 inch) for large washes
- Palette for mixing
- Pencil and Eraser
- Two cups of water
- Paper towels
Step 1: Sketching and Sky Wash
-
Preparation:
Begin by taping your watercolor paper securely to a board on all four sides. This creates that crisp white border seen in the final piece and prevents the paper from buckling under heavy washes. -
Light Sketching:
Use a pencil to very faintly sketch the position of the moon in the upper center. Draw a light horizon line about one-third of the way up from the bottom, and outline the shape of the mountain range and the right-side bank. -
Masking the Moon:
To keep the moon perfectly bright, you can carefully paint around it, or apply masking fluid if you have it. For this tutorial, we will carefully paint around the circle to leave the paper white. -
Sky Gradient:
Mix a deep, rich wash of Indigo and Prussian Blue. Start painting from the top edge of the paper, applying the darkest pigment at the top corners. -
Fading the Sky:
As you work your way down toward the mountains, maintain a wet edge but add a tiny amount of water to your brush to slightly lighten the blue. Carefully paint around your moon circle. -
Creating the Glow:
Around the moon and just above the mountain line, dilute the paint significantly so the blue is very pale, suggesting the atmospheric glow of the moonlight.
Step 2: Mountains and Water Base
-
Painting the Mountains:
Once the sky is dry, mix a medium-tone blue-grey using Indigo and a touch of Payne’s Grey. Paint the distant mountain range; layers further back should be lighter, while the closer hills are slightly darker. -
Water Base Layer:
For the lake, use a Flat Brush to apply horizontal strokes of deep blue. Leave a distinct, rough vertical gap of white paper directly underneath the moon—this reserved space is crucial for the reflection later. -
Darkening the Water:
While the water layer is still damp, drop deeper Indigo or Payne’s Grey into the corners and edges of the lake to create depth, keeping the center area lighter.
Mastering the Reflection
Don’t paint the reflection column solid white. Use ‘dry brush’ horizontal strokes to skip over the paper’s texture, creating natural sparkle.
Step 3: Details and Reflections
-
Adding Silhouette Trees:
Switch to your smallest round brush (size 2) and mix a very thick, almost black paint (Indigo mixed with Black). On the right bank, paint vertical lines for tree trunks. -
Tree Foliage:
Stipple the brush in a zig-zag motion down the trunks to create pine branches. Make the trees varied in height, with the tallest ones reaching up into the sky. -
Painting the Bank:
Fill in the landmass beneath the trees with solid dark paint, extending it slightly into the water to ground the scene. -
Water Ripples:
Using the dark blue mix, paint thin, horizontal lines cutting into the white reflection path you saved earlier. These lines should be irregular to mimic rippling water. -
Moon Texture:
In the white moon circle, use a very watery pale grey wash to dab in ‘craters’ and texture. Don’t fill it completely; leave plenty of bright white paper showing. -
Highlighting the Reflection:
I like to take white gouache or a gel pen here to add crisp, bright highlights to the center of the water reflection. This makes the moonlight look intensified. -
Adding Stars:
Dip a brush or toothbrush in white gouache and gently tap it to splatter tiny stars into the dark upper sky. You can add a few specific dots with a gel pen for brighter stars. -
Final Touches:
Add faint suggestions of dried grass or reeds in the bottom right corner using a fine brush and a mix of yellow-ochre and white gouache for contrast against the dark water. -
The Reveal:
Wait until the painting is completely bone-dry. Carefully peel off the painter’s tape at a 45-degree angle to reveal the clean, professional border.
Tape Tearing Paper?
If your tape rips the paper upon removal, try heating it briefly with a hair dryer first to soften the adhesive, and always pull away slowly.
Frame this piece behind glass to preserve the delicate gouache highlights and enjoy your tranquil night scene

PENCIL GUIDE
Understanding Pencil Grades from H to B
From first sketch to finished drawing — learn pencil grades, line control, and shading techniques.
Explore the Full Guide
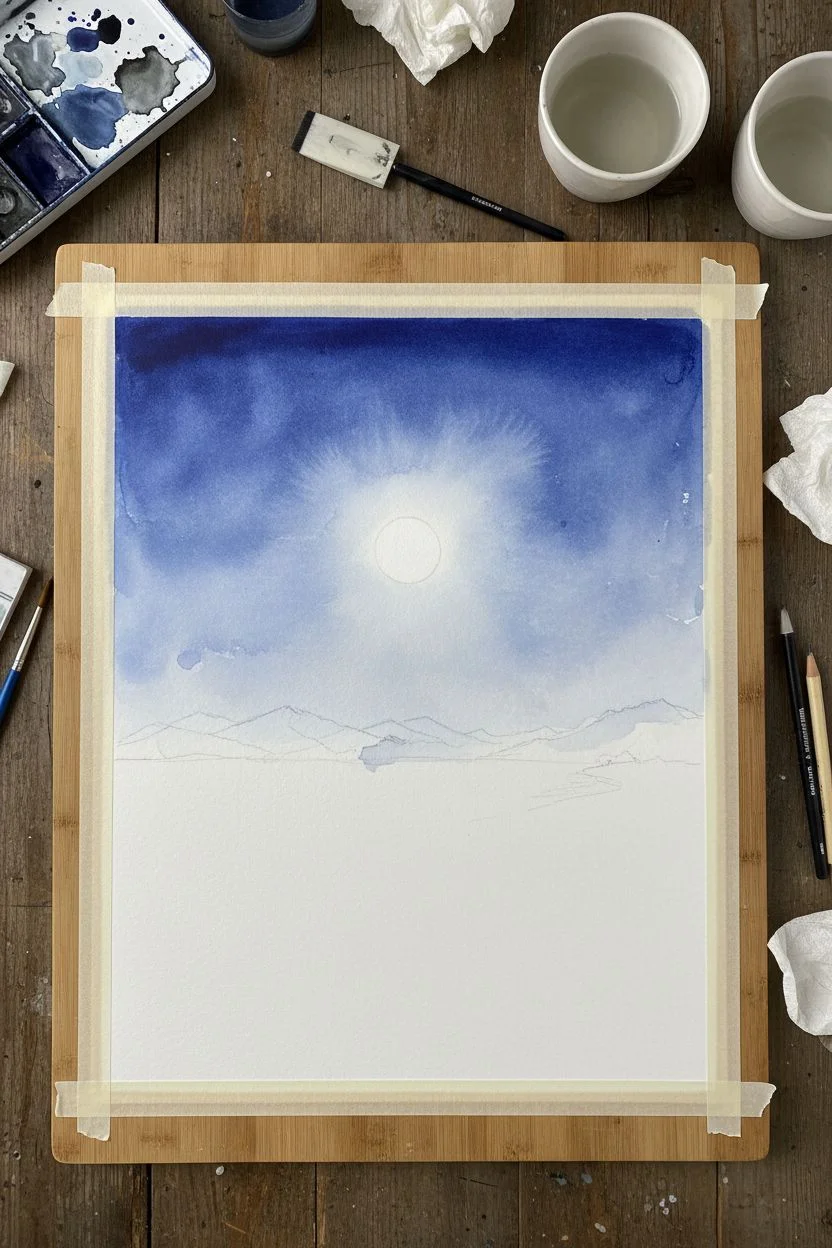
Cloud Study Sky Over Distant Hills
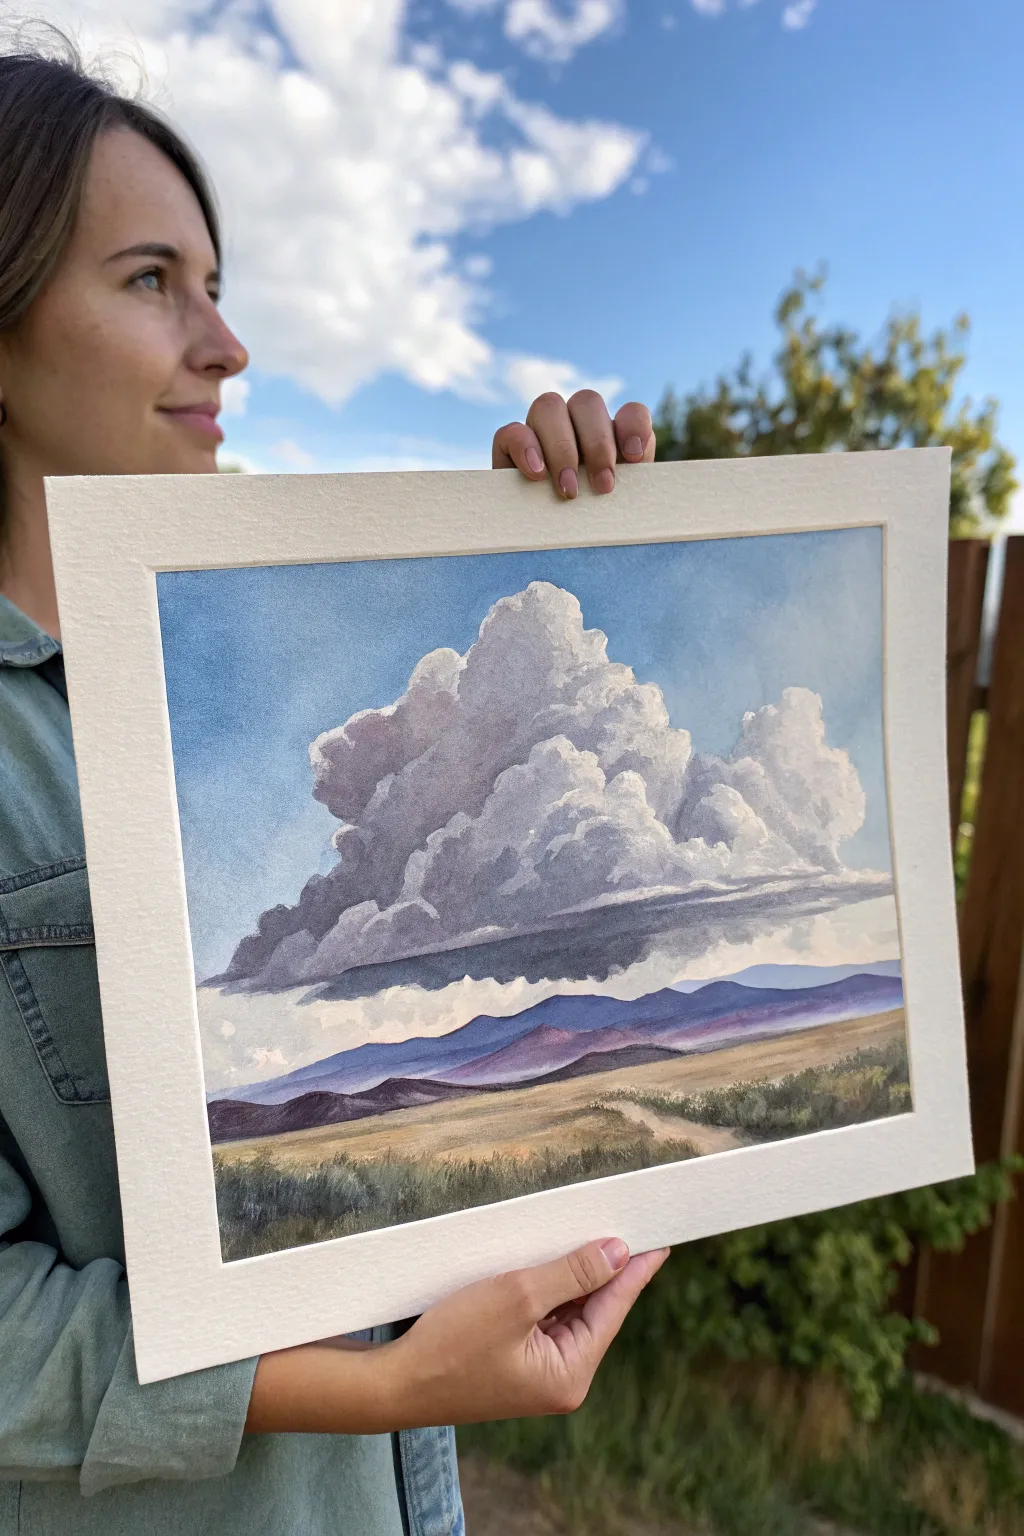
Capture the dramatic beauty of a summer storm brewing over a distant landscape with this detailed watercolor study. By focusing on light, shadow, and soft gradients, you will bring a towering cumulus cloud to life against soft, rolling hills.
Step-by-Step Guide
Materials
- Cold press watercolor paper (140lb/300gsm)
- Watercolor paints (Ultramarine Blue, Burnt Sienna, Alizarin Crimson, Yellow Ochre, Payne’s Gray)
- Round brushes (sizes 4, 8, and 12)
- Flat wash brush (1 inch)
- Masking tape
- Drawing board
- Pencil (HB)
- Two jars of water
- Paper towels
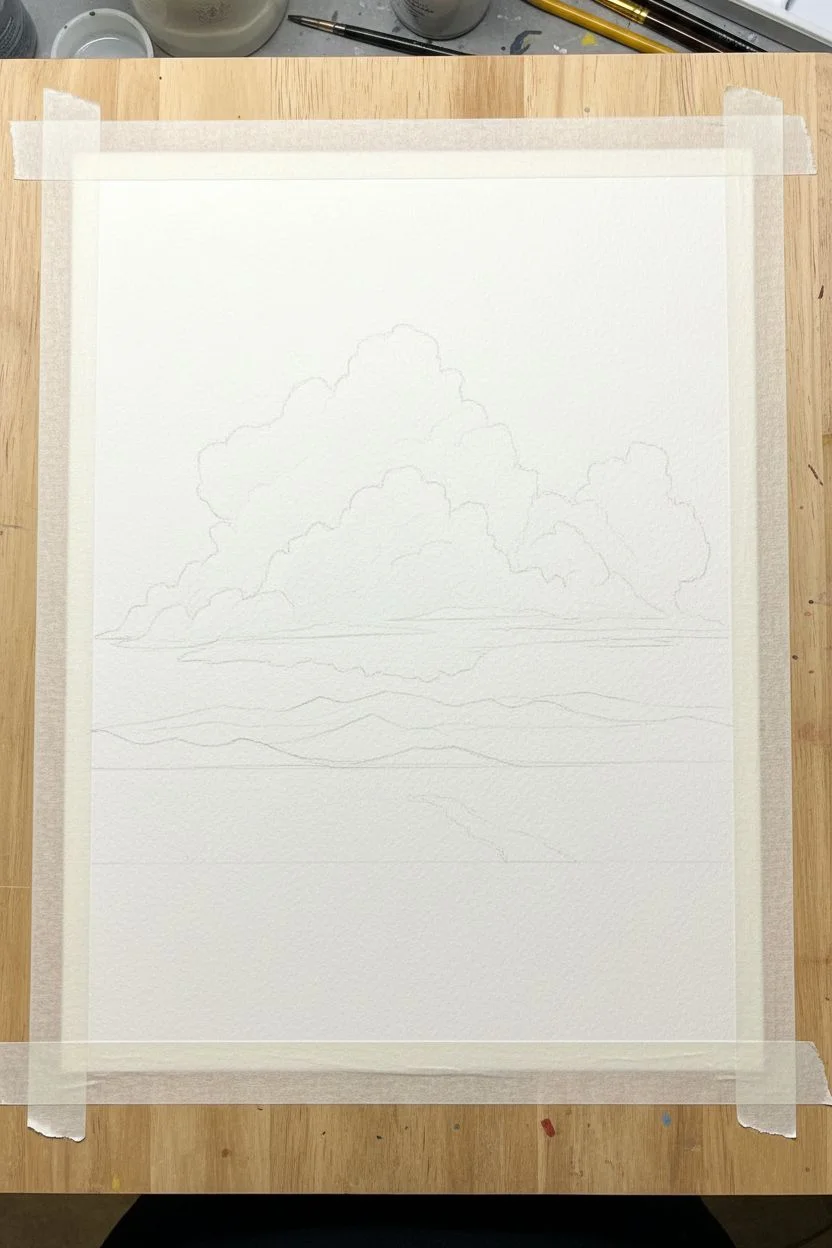
Step 1: Preparation and Sketching
-
Secure the paper:
Tape your watercolor paper down to a board on all four sides. This prevents buckling when you apply wet washes and creates that crisp, professional white border seen in the final piece. -
Establish the horizon:
Using your HB pencil, lightly sketch a low horizon line about one-quarter of the way up from the bottom of the paper. Keep it slightly uneven to represent natural terrain. -
Outline the cloud structure:
Lightly map out the large central cloud formation. Focus on the cauliflower-like bumps at the top and the flatter, darker base. Don’t press too hard; you want these lines to disappear under the paint. -
Sketch the distant hills:
Draw three distinct layers of hills below the cloud base. The furthest hills should be simple shapes, while the foreground plain can remain largely empty for now.
Step 2: Painting the Sky and Clouds
-
Wet the sky area:
With a clean 1-inch flat brush, wet the sky area around your pencil outline of the cloud. Be careful not to wet the inside of the white cloud top, as this must remain the dry white of the paper. -
Apply the blue gradient:
Mix a watery wash of Ultramarine Blue with a touch of Payne’s Gray. Paint the sky wet-in-wet, making the blue darker at the top corners and fading it out as you approach the horizon. -
Define cloud edges:
While the sky is still damp but not soaking, use a size 8 round brush to carefully paint up to the edges of your cloud sketch. This negative painting technique defines the bright white tops of the cumulus. -
Shadowing the cloud body:
Mix a soft gray-violet using Ultramarine Blue and a tiny bit of Alizarin Crimson or Burnt Sienna. Paint the shadowed areas within the cloud, leaving the bubbled tops pure white to catch the ‘sunlight.’ -
Deepen the cloud base:
As you move toward the bottom of the cloud, darken your gray mixture with a little more Payne’s Gray. Create a flat, dark underbelly for the cloud to give it weight and volume. -
Soften internal edges:
Use a clean, damp brush to gently soften the transition between the white cloud tops and the gray shadows, making the form look billowy rather than sharp.
Cloud Edge Magic
For fluffier clouds, soften only the bottom edges of the shadows inside the cloud while keeping the top outer edges crisp against the blue sky.
Step 3: The Landscape Layers
-
Paint the furthest mountains:
Mix a watery purple using Ultramarine Blue and Alizarin Crimson. Paint the most distant mountain range. This atmospheric perspective pushes them into the background. -
Add middle-ground hills:
Once the first layer is dry, mix a slightly darker, warmer violet hue. Paint the second row of hills, overlapping the first layer to create depth. -
Create the foreground plain:
Mix Yellow Ochre with a touch of Burnt Sienna. With a large round brush, apply horizontal strokes across the foreground field, leaving a small negative space for a winding path if desired. -
Add texture to the field:
While the yellow wash is still damp, drop in touches of green and brown near the bottom edge to suggest grasses and scrub brush closer to the viewer.
Make It Stormy
Want more drama? glaze a vertical, streaky wash of diluted gray beneath the dark cloud base to simulate distant falling rain curtains.
Step 4: Final Details
-
Define the path:
If you left space for the path, lightly glaze it with a very pale brown. If you painted over it, you can lift out some color with a damp stiff brush to reveal a lighter trail. -
Enhance foreground vegetation:
Using a size 4 brush and a mixture of green and burnt sienna, paint small, vertical flicking strokes in the immediate foreground to resemble tall grasses and bushes. -
Final contrast check:
Assess the dark underside of the cloud. If it dried too light, glaze another layer of cool gray over it to ensure the cloud looks heavy and rain-laden. -
Remove tape:
Wait until the painting is completely bone-dry. Carefully peel the tape away at a 45-degree angle to reveal your crisp white borders.
Enjoy the deep atmospheric perspective you’ve created in this serene yet powerful skyscape.
Framed Vista With Overhanging Branches
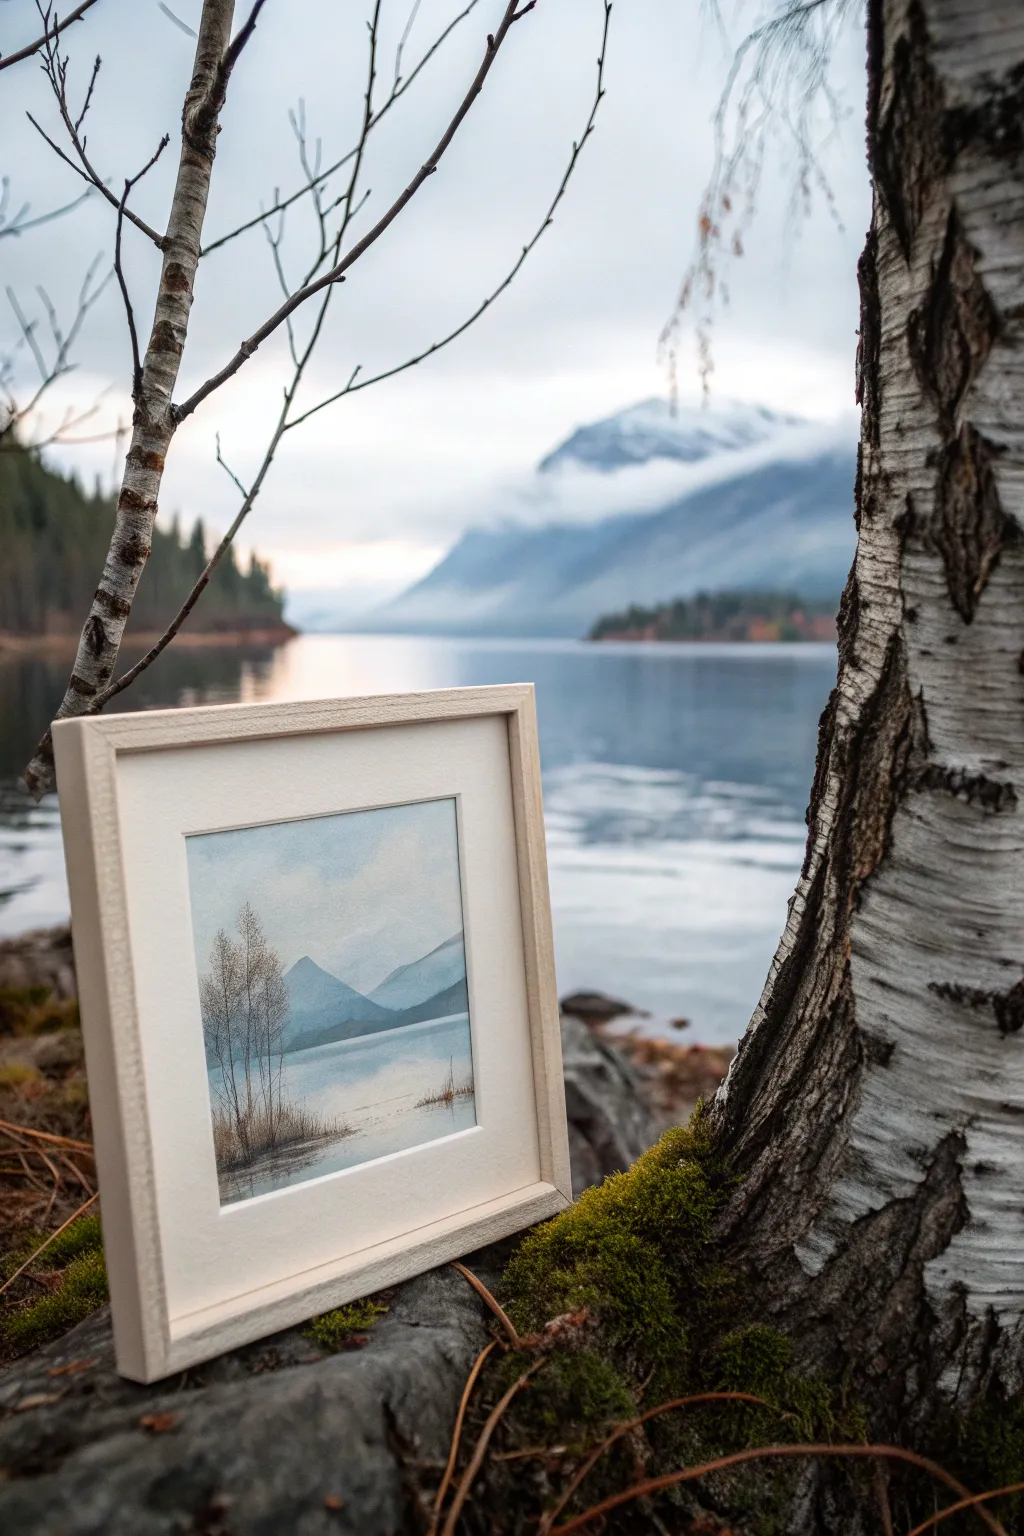
Capture the serene beauty of a foggy mountain lake with this soft and atmospheric watercolor painting. The gentle gradients and minimalist trees create a tranquil mood perfect for preserving a quiet moment in nature.
Step-by-Step
Materials
- Cold press watercolor paper (140lb/300gsm)
- Watercolor paints (Ultramarine Blue, Payne’s Grey, Burnt Umber, Alizarin Crimson)
- Masking tape
- Plywood board or hard surface
- Flat wash brush (1-inch)
- Round brushes (sizes 4 and 8)
- Small rigger or liner brush
- Two jars of water
- Paper towels
- Cream or off-white mat board and light wood frame
Step 1: Preparation and Sky
-
Secure the paper:
Begin by taping down all four edges of your watercolor paper onto your board using masking tape. This prevents the paper from buckling when wet and creates a clean, professional border. -
Pre-wet the sky area:
Dip your large flat brush in clean water and evenly wet the top two-thirds of the paper. You want a sheen, but not puddles. -
Mix the sky wash:
Create a very dilute wash of Ultramarine Blue with a touch of Payne’s Grey. The color should be extremely pale. -
Paint the background sky:
Apply the pale blue mix to the wet paper, starting at the top and letting it fade out as you reach the horizon line. Keep it uneven to suggest shifting clouds.
Step 2: Mountains and Water
-
Form the distant mountains:
While the sky is still slightly damp but not soaking, mix a slightly stronger blue-grey. Paint the silhouette of distant mountains, allowing the soft paper to blur the edges slightly for that misty look. -
Add the mid-ground mountain:
Once the first layer is dry, mix a darker, more pigmented blue-grey. Paint a second mountain range slightly lower and overlapping the first, creating depth through value difference. -
Establish the water:
Using your flat brush, drag horizontal strokes of very pale blue across the bottom third of the paper. Leave some white paper showing to represent light reflecting off the water. -
Paint water reflections:
While the water area is damp, drop in faint vertical streaks of the mountain color directly below the mountain shapes. Soften these with a clean, damp brush.
Muddy Colors?
If your mountains look muddy, you likely overworked the wet paper. Lay the pigment down once and let it settle; don’t scrub back into drying paint.
Step 3: Foreground Details
-
Create the shoreline:
Mix Burnt Umber with a little Payne’s Grey to get a dark, earthy tone. With a size 8 round brush, paint a narrow, uneven strip of land on the bottom left, jutting slightly into the water. -
Texture the ground:
Dab a few spots of concentrated brown mix into the wet bank to create the look of soil and small rocks. Let this section dry completely. -
Paint the main tree trunks:
Switch to a liner or rigger brush. Load it with a dark grey-brown mixture. Paint thin, slightly wavering lines extending upward from the bank to represent the main trunks of the birch-like trees. -
Add delicate branches:
Using only the very tip of the liner brush, add fine branches growing from the trunks. I find that holding the brush loosely helps create natural, organic branch shapes. -
Suggest foliage:
Mix a very dilute, warm grey tone. Gently stipple a few patches around the upper branches to suggest sparse, dried leaves or fine twigs without painting individual leaves. -
Add grassy details:
Use the liner brush with the dark brown mix to flick upward strokes from the shoreline, creating tall grasses and reeds at the water’s edge. -
Final touches:
Evaluate your painting. If the water looks too flat, add a few extremely thin, horizontal lines of darker blue to suggest ripples, but keep them minimal.
Enhance the Mist
To add more fog, gently lift pigment from the base of the mountains with a clean, damp paper towel while the paint is still wet.
Step 4: Sizing and Framing
-
Remove tape:
Wait until the paper is bone dry. Peel the masking tape away slowly at a 45-degree angle to reveal your crisp white borders. -
Mount and Frame:
Center your painting behind a cream-colored mat board. Place it into a light wood frame to complement the natural tones of the landscape.
Place your framed artwork on a shelf or desk where you can enjoy your personal window into a calm wilderness


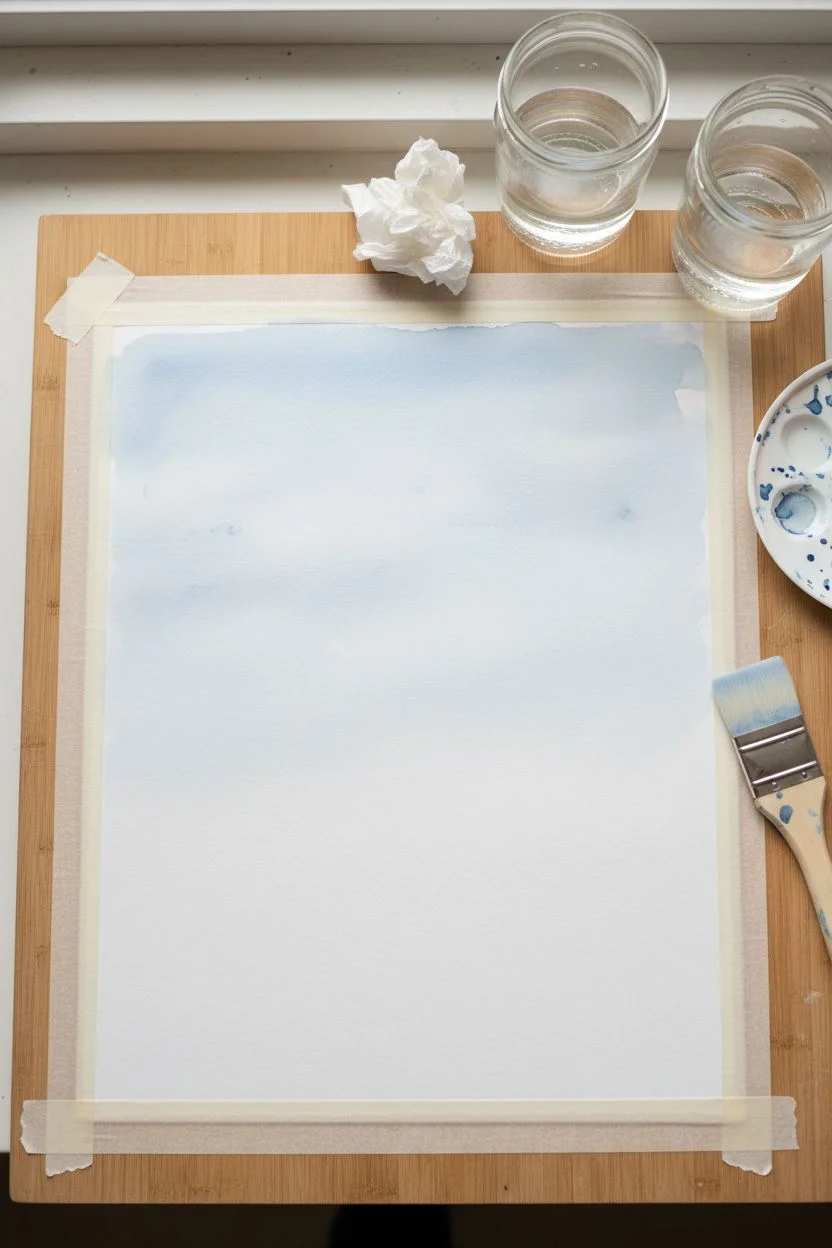
Cherry Blossom Pop Against a Blue Mountain Backdrop
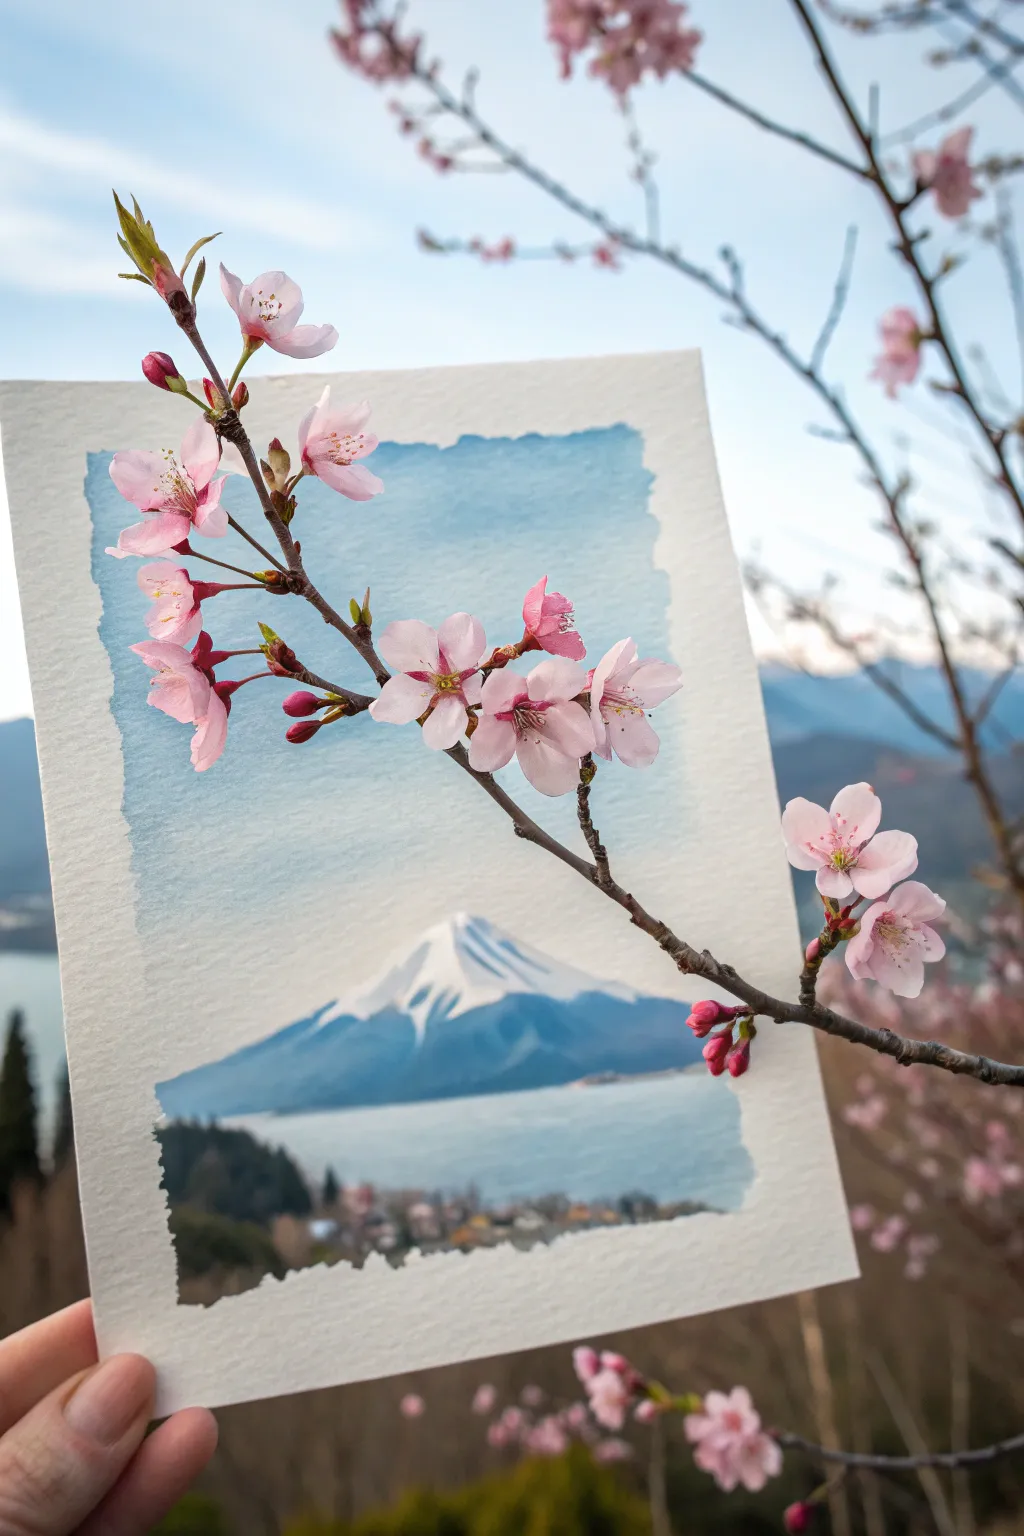
Blend the beauty of watercolor landscapes with the tactile charm of real botanicals in this unique mixed-media project. By aligning a real cherry blossom branch with your painted scene of Mount Fuji, you create a seamless illusion where art and nature meet.
Step-by-Step Tutorial
Materials
- Cold press watercolor paper (300 gsm)
- Watercolor paints (Cerulean Blue, Prussian Blue, Payne’s Gray, Sap Green, Burnt Sienna, Alizarin Crimson)
- Round watercolor brushes (size 4 and 8)
- Masking tape or washi tape
- Pencil (HB or H)
- Kneaded eraser
- Clean water jar and paper towels
- A small flowering branch (cherry blossom, plum, or similar)
Step 1: Setting the Scene
-
Prepare the paper border:
Begin by taping off your watercolor paper to create a crisp, rectangular boundary. For the jagged edge look shown in the inspiration photo, you can carefully tear the paper edges against a ruler before painting, or simply paint loosely without tape for a vignetted effect. -
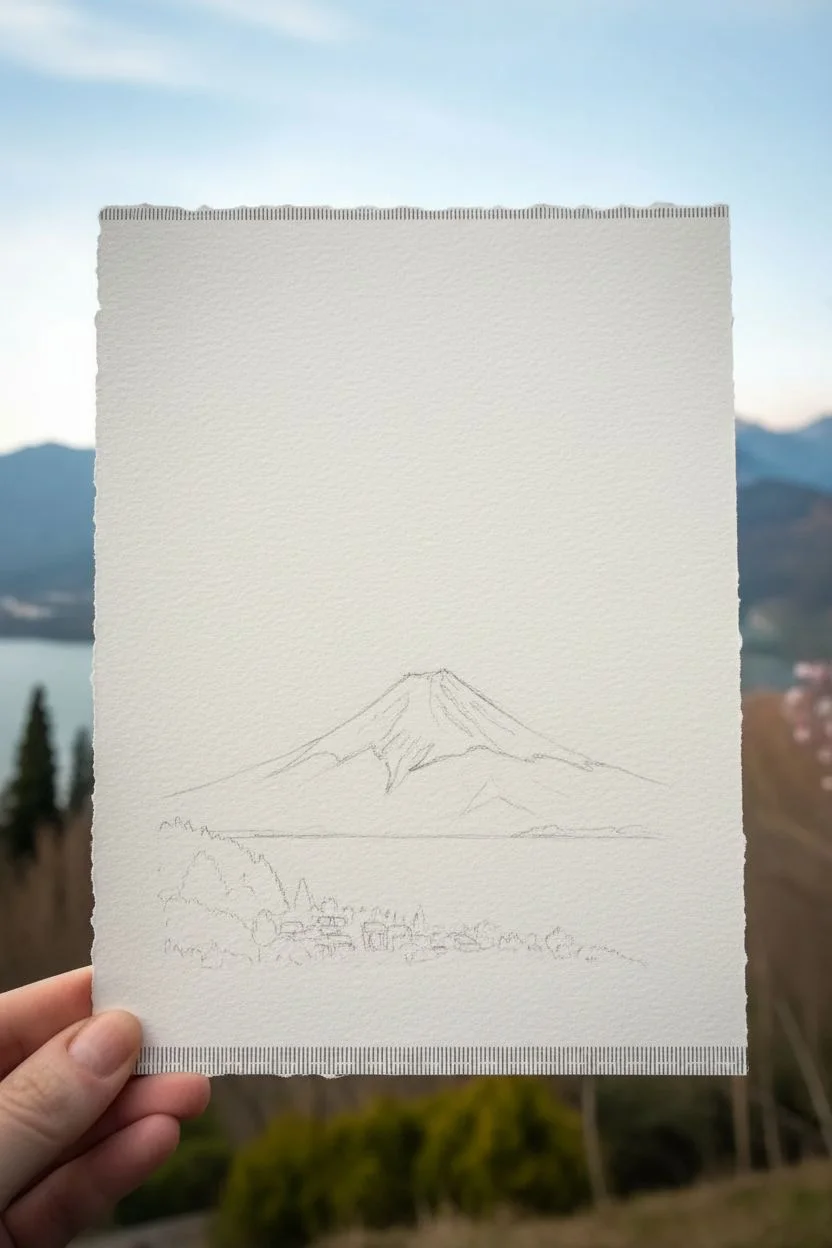
Sketch the mountain:
Lightly sketch the iconic triangular silhouette of Mount Fuji about one-third of the way up the paper. Keep the peak slightly flattened and add the jagged snow line that defines the summit. -
Outline the foreground:
Below the mountain, sketch a horizontal line for the distant lake shore. Add rough shapes for the foreground trees and the small village buildings at the bottom edge.
Step 2: Painting the Sky and Mountain
-
Wash the sky:
Wet the sky area with clean water first. Load your size 8 brush with a very diluted Cerulean Blue and sweep it across the top, fading it out to almost clear water as you approach the mountain peak to create atmospheric perspective. -
Paint the mountain base:
Mix Prussian Blue with a touch of Payne’s Gray for a cool, deep blue. Paint the body of the mountain below the snow line. I like to keep the paint slightly uneven here to suggest the texture of rock and distance. -
Define the snow cap:
Leave the paper white for the snow cap. However, use a very pale, watery blue-gray to add subtle shadows on the right side of the peak, giving the mountain three-dimensional form. -
Create the lake:
For the water, use a horizontal stroke of watered-down Prussian Blue. Leave a few thin slivers of dry white paper showing through to represent light reflecting on the ripples.
Natural Texture
Use cold press paper with a rough texture. When dragging your brush across for the lake, the paint will catch the ‘peaks’ and miss the ‘valleys,’ creating instant water sparkles.
Step 3: Filling the Foreground
-
Block in the tree line:
Mix Sap Green with a little Payne’s Gray to get a dark, forest color. Using the tip of your size 4 brush, tap in vertical shapes on the left side and along the bottom to suggest pine trees. -
Add village details:
With tiny touches of Burnt Sienna and diluted Alizarin Crimson, dot in the roofs of the small buildings near the water’s edge. Keep these very loose and abstract; they don’t need distinct windows or doors. -
Darken the shadows:
Once the green layer is dry, come back with a darker mix (add more blue or black to your green) and paint the shadowed sides of the trees to add depth to the forest.
Interactive Art
Cut a small slit in the paper where the painted branch begins. You can physically thread the real stem through the paper instead of just holding it behind for a 3D effect.
Step 4: The Floral illusion
-
Plan the branch placement:
Hold your real cherry blossom branch over the painting to see where it naturally falls. Lightly mark where the main stem should cross into the painted area. -
Paint the branch connection:
Using a fine brush and a mix of Burnt Sienna and Payne’s Gray, paint a branch extending from the edge of the paper inward. Try to match the thickness and direction of your real branch. -
Add painted blossoms:
Mix a soft, translucent pink using Alizarin Crimson and plenty of water. Paint delicate five-petaled flowers along your painted branch. Vary the color intensity, making the centers slightly darker for realism. -
Connect the stamens:
Use a relatively dry brush with dark pink or magenta to flick tiny lines radiating from the center of each flower. Add tiny yellow or white dots at the ends for the pollen. -
The final alignment:
Once the paint is fully dry, hold the card up again. Adjust your position until the real branch and the painted branch look like one continuous limb reaching toward the mountain.
Now you have a breathtaking miniature landscape that changes with the season depending on the flower you hold it against
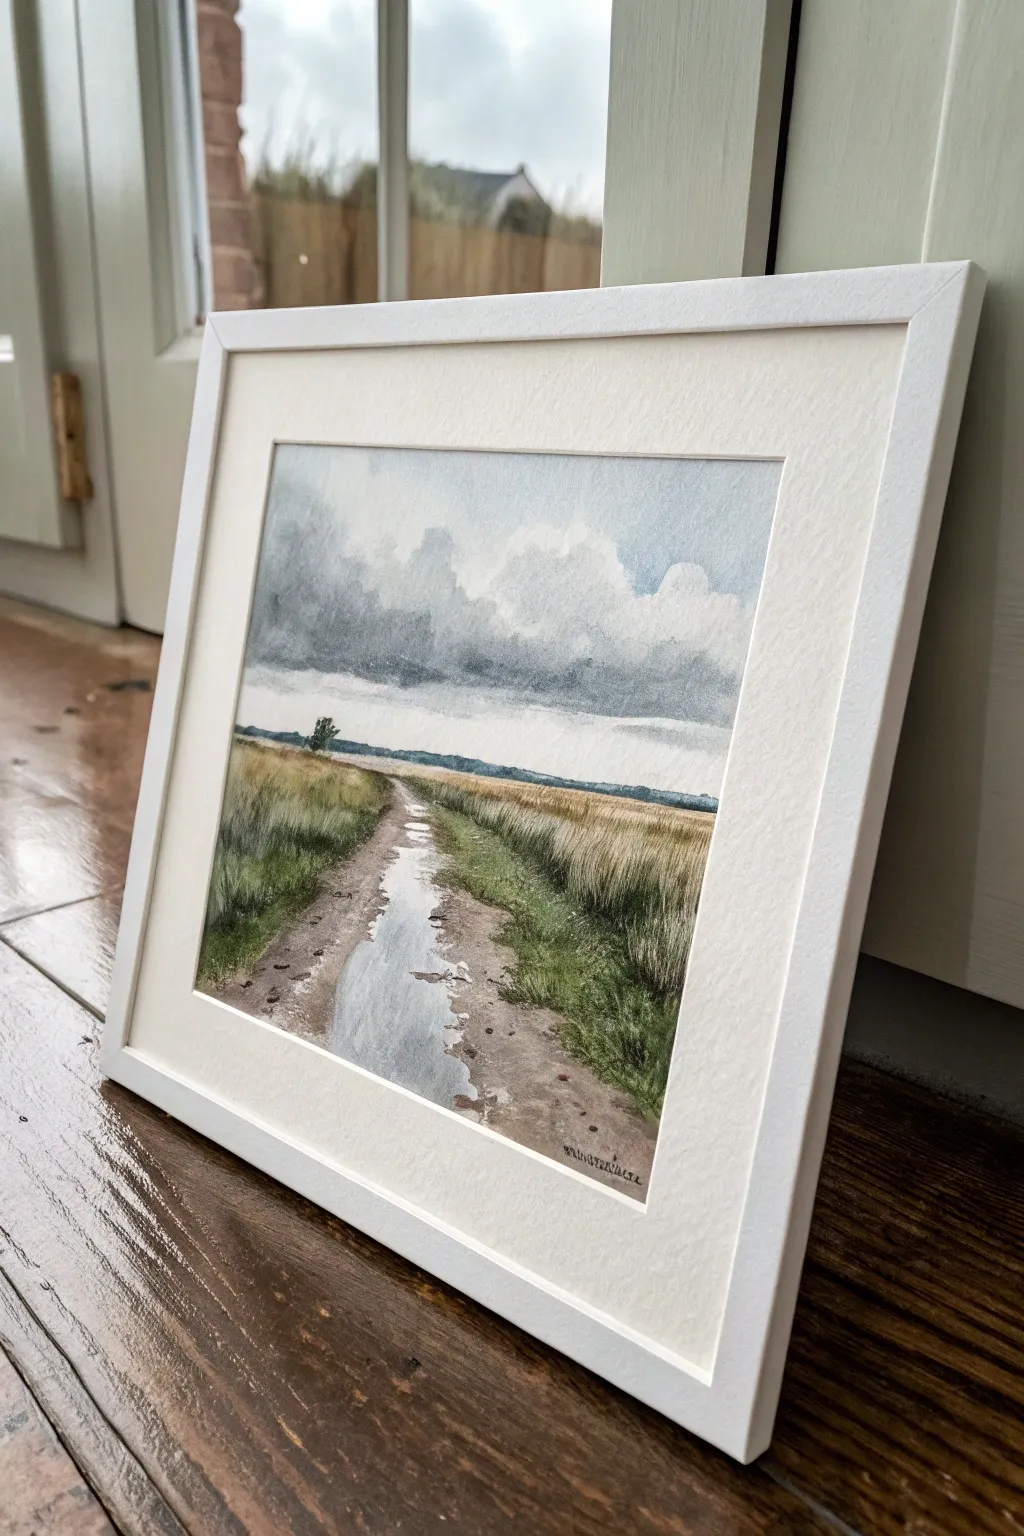
Rainy Day Landscape With Puddles and Reflections
Capture the moody beauty of a rainy afternoon with this atmospheric watercolor landscape. This project focuses on mastering wet-in-wet skies and the delicate reflections found in muddy puddles along a country track.
Step-by-Step
Materials
- Cold Press watercolor paper (140lb/300gsm)
- Watercolor paints (Payne’s Grey, Burnt Umber, Yellow Ochre, Sap Green, Ultramarine Blue, Alizarin Crimson)
- Masking fluid (optional)
- Large wash brush
- Medium round brush (size 8 or 10)
- Small detail brush (size 2 or 4)
- Palette for mixing
- Two jars of water
- Paper towels
- Pencil (HB) and eraser
Step 1: Preparation and Sketching
-
Plan the composition:
Begin by lightly sketching the horizon line just below the halfway point of your paper. Draw the perspective lines of the dirt path, making it wide at the bottom and narrowing as it leads toward the horizon. -
Map out the puddles:
Inside the path outline, sketch irregular, elongated shapes for the puddles. These should follow the perspective of the road, becoming smaller and narrower as they recede into the distance. -
Add landmarks:
Sketch a faint line of distant trees on the horizon and perhaps a solitary tree silhouette on the left side to anchor the composition. Keep pencil marks light so they don’t show through the final wash. -
Protect highlights (optional):
If you want to ensure the brightest highlights on the water remain pristine, apply a tiny amount of masking fluid to the edges of the puddles. Let this dry completely before painting.
Muddy mess?
If your path colors are bleeding into your puddles, ensure the ‘dirt’ paint is fully dry before painting the water, or leave a tiny hairline gap of dry paper between them.
Step 2: The Dramatic Sky
-
Pre-wet the sky area:
Using your large wash brush and clean water, dampen the entire sky area down to the horizon line. The paper should be glistening but not forming pools. -
Paint the heavy clouds:
Mix a moody grey using Payne’s Grey and a touch of Ultramarine Blue. Drop this color into the wet paper near the top, allowing it to bloom downwards to create heavy rain clouds. -
Soften the edges:
While the paint is still wet, lift out pigment with a clean, damp brush or paper towel to create soft white cloud tops. Leave the area just above the horizon lighter to suggest distance and light breaking through. -
Suggest rain:
For distant rain streaks, you can lightly drag a semi-dry brush with diluted grey vertically from the dark clouds towards the horizon. Let the sky dry completely before moving on.
Step 3: Fields and Horizon
-
Paint the distant tree line:
Mix a cool, muted green using Sap Green and a little Payne’s Grey. With your medium round brush, paint the distant line of trees along the horizon. Since the sky is dry, this edge will be crisp. -
Wash in the fields:
For the fields on either side of the path, apply a wash of Yellow Ochre mixed with a tiny bit of Burnt Umber. While wet, drop in hints of Sap Green near the bottom foreground to show closer, greener grass. -
Add texture to the grass:
Once the base wash is damp (not soaking), use a drier brush with concentrated green and brown mix to flick upward strokes, simulating tall grasses growing alongside the path.
Pro Tip: Scratching Out
While the grass paint is still damp, use the sharp edge of an old credit card or a palette knife to scratch thin lines into the paper. This creates realistic light-colored grass blades.
Step 4: The Path and Puddles
-
Base layer for the path:
Mix a watery Burnt Umber with a touch of Payne’s Grey for a muddy earth tone. Paint the dirt sections of the path, carefully painting around the puddle shapes you sketched earlier. -
Deepen the mud:
I like to drop darker, thicker brown pigment into the wet path wash near the foreground corners and along the edges of the puddles to create depth and shadow. -
Paint the puddle water:
The water in the puddles reflects the sky. Use a very pale, diluted version of your sky color (bluish-grey). Fill in the puddle shapes, keeping the value lighter than the surrounding mud. -
Add reflections:
While the puddle paint is still damp, drop in a slightly darker grey to mirror the dark clouds above. If there are grasses near the edge, paint a small, blurry reflection of them into the water.
Step 5: Refining Details
-
Texture the road:
Once the path is dry, use a dry brush technique with dark brown to scuff over the dirt areas. This creates the texture of rough gravel and tire tracks. -
Define the grass edges:
Use your small detail brush to paint individual blades of grass overlapping the edges of the path. Use a mix of dark green and brown to anchor the foreground. -
Darken the horizon accents:
Revisit that solitary tree on the horizon or the distant tree line. Add a second layer of darker pigment to create a strong silhouette against the bright lower sky. -
Final highlights:
If you masked any areas, rub the masking fluid away gently. If not, you can use a touch of white gouache to add sparkles or bright edges to the puddles where the light hits the water.
Frame your piece with a wide white mat to emphasize the subtle, moody tones of your rainy day walk
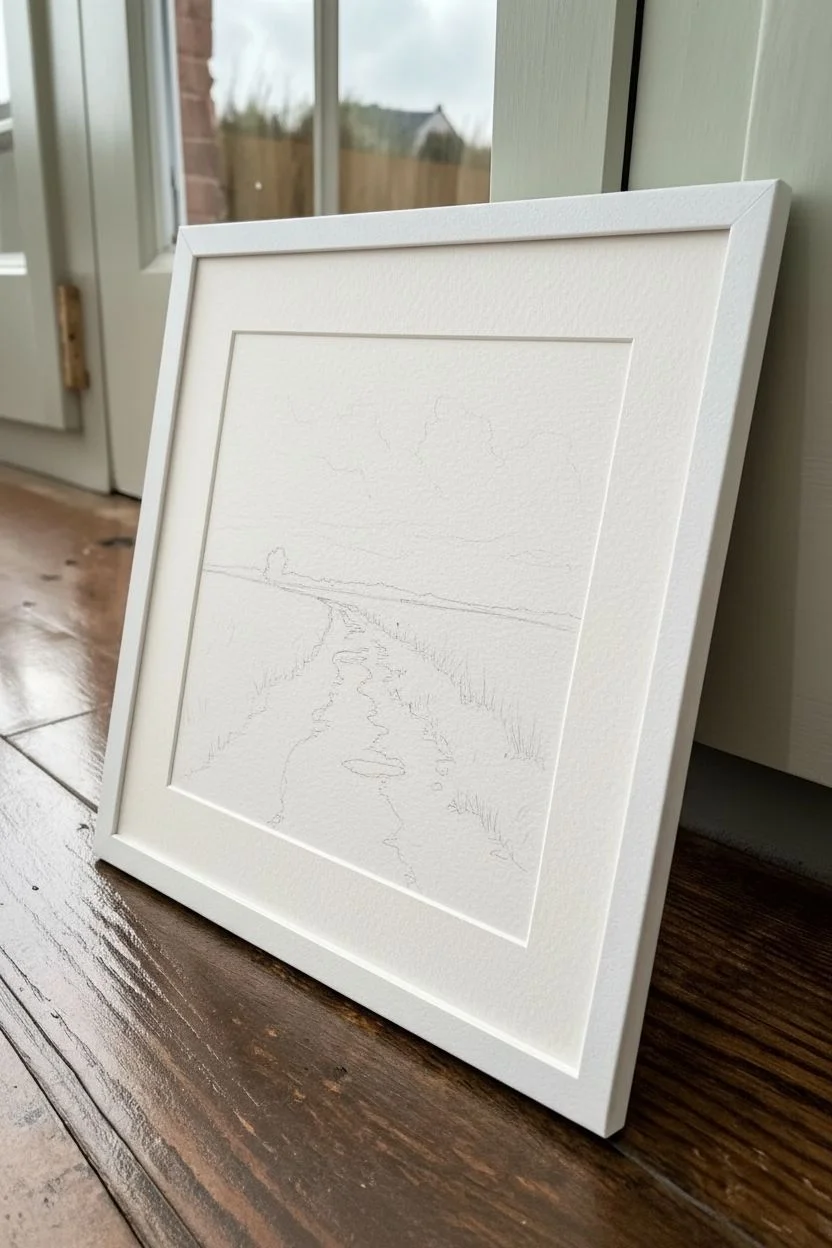
Desert Sunset With Layered Mesas and Long Shadows
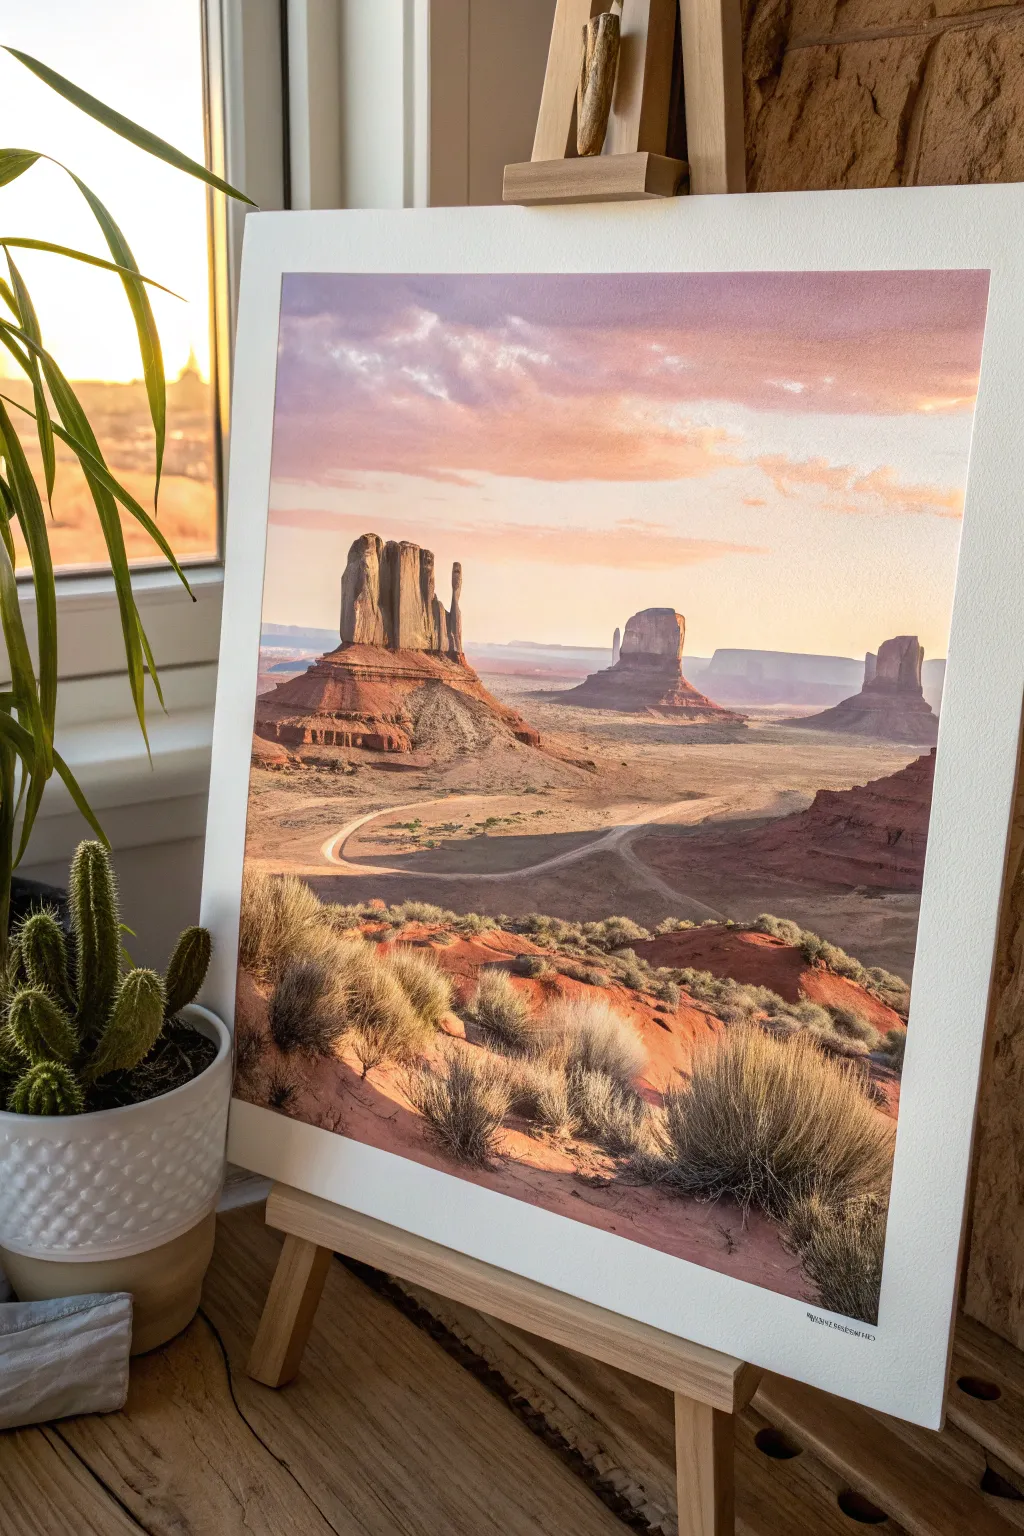
Capture the majestic stillness of the American Southwest with this breathtaking landscape painting. By layering soft sunset hues and building up dusty textures, you’ll recreate the iconic mesas and sweeping shadows of a desert evening.
Step-by-Step Tutorial
Materials
- Heavyweight watercolor paper (300gsm cold press recommended)
- Paints: Ultramarine Blue, Alizarin Crimson, Burnt Sienna, Yellow Ochre, Cadmium Orange, Titanium White
- Flat wash brush (1 inch)
- Round brushes (sizes 4, 8, and 12)
- Rigger or liner brush for fine details
- Masking fluid (optional)
- Pencil and kneaded eraser
- Salt (optional for texture)
- Two water containers
- Paper towels
Step 1: Preparation and Sky
-
Sketch the Composition:
Begin by lightly sketching the horizon line just below the middle of the paper. Outline the distinct shapes of the three main mesas: the large, prominent one on the left (West Mitten Butte) and the two smaller ones receding into the distance. -
Map the Foreground:
Lightly trace the winding S-curve of the dirt road leading from the foreground towards the central mesa. Mark general areas for the foreground scrub brush clumps, keeping lines faint so they don’t show through later. -
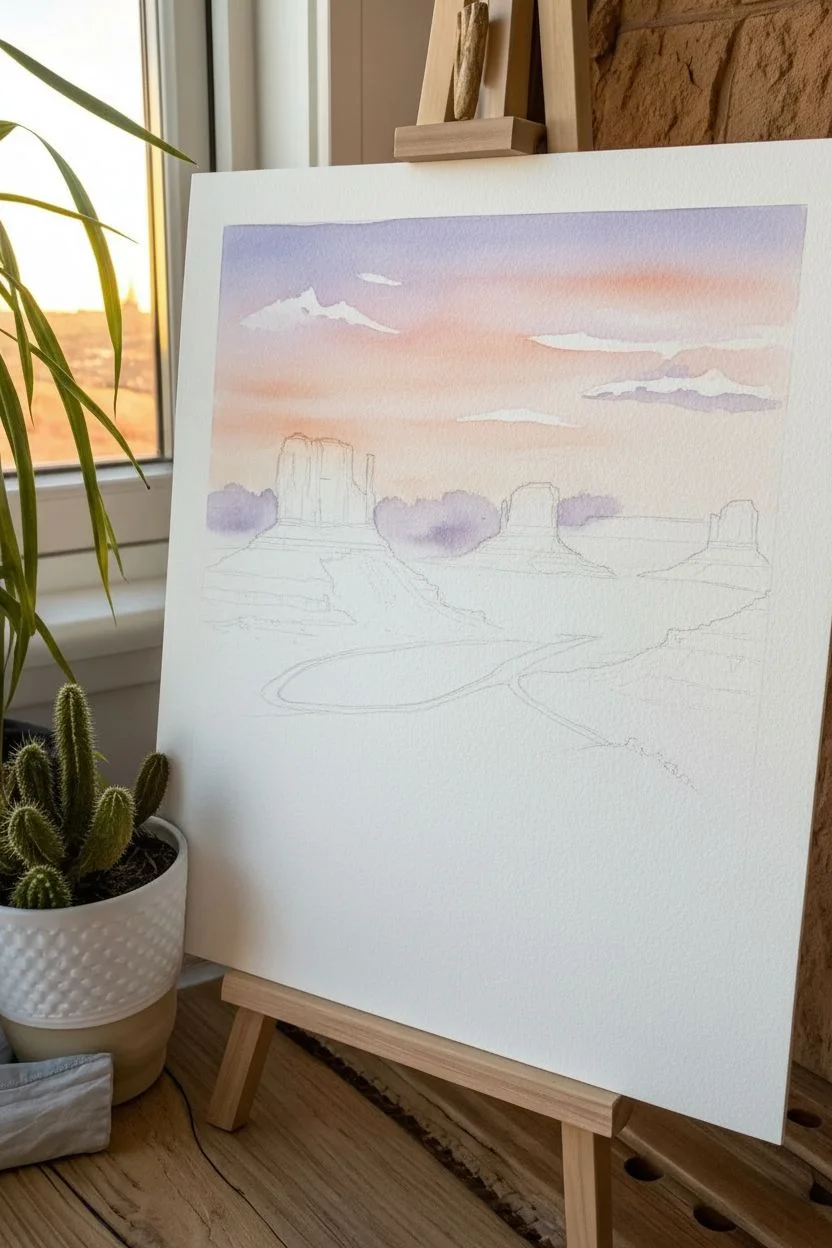
Prepare the Sky Wash:
Mix a watery wash of Cadmium Orange and a touch of Alizarin Crimson for the lower sky. Separately, mix a soft violet using Ultramarine Blue and a hint of crimson for the upper sky. -
Paint the Gradient:
With a large flat brush, wet the entire sky area with clean water. Apply the violet mix at the top and the orange mix near the horizon, letting them blend naturally in the middle to create a soft transition. -
Add Wispy Clouds:
While the sky is still damp, lift out pigment using a thirsty, clean brush or a twisted paper towel to create soft white cloud shapes. You can dab in a slightly darker purple-grey to shadow the clouds’ bottoms for volume.
Muddy colors?
If your purples or oranges look dull, clean your water jar immediately. Desert sunsets rely on vibrant, transparent layers. Let layers dry completely to avoid dragging up underlying paint.
Step 2: Mesas and Middle Ground
-
Base Layer for Mesas:
Once the sky is bone dry, mix a warm, reddish-brown using Burnt Sienna and a touch of Alizarin Crimson. Paint the silhouettes of the mesas with a round brush (size 8), keeping the wash relatively flat for now. -
Paint the Distant Ground:
Mix a pale, dusty beige using Yellow Ochre and a lot of water. Sweep this horizontally across the flat terrain between the mesas, allowing the color to fade as it gets closer to the horizon to simulate atmospheric perspective. -
Define Mesa Shadows:
Mix a stronger, cooler shadow color using Burnt Sienna and Ultramarine Blue. Apply this to the right sides of the mesas (assuming the light comes from the left) to give them 3D form. Don’t forget the long cast shadows stretching across the ground. -
Add Rock Texture:
Using a drier brush and the shadow mixture, scumble (drag the brush lightly) over the lit sides of the mesas to create the appearance of rough, weathered strata and vertical cracks. -
Paint the Winding Road:
Use a pale creamy mix (White + Yellow Ochre) to paint the winding road. Ensure the road is wider in the foreground and tapers to a thin line in the distance.
Step 3: Foreground Detail
-
Build the Foreground Earth:
For the closest section of ground, mix a rich terracotta color using Burnt Sienna and Cadmium Orange. Apply this in the bottom right and left corners, leaving space for the scrub brush. -
Create Texture:
While the foreground wash is damp, you can sprinkle a tiny pinch of salt or spatter clean water droplets to create a sandy, uneven texture. -
Paint Scrub Brush Bases:
Mix a dark, muddy green-brown. Using a size 4 round brush, dab in the shadows and bases of the foreground bushes. I find varying the pressure creates more natural, irregular shapes. -
Enhance the Vegetation:
Switch to a lighter, warmer ochre-green mix. Paint quick, upward flicking strokes on top of the dark bases to simulate dried grasses catching the evening light. -
Refine Shadows:
Add deep, cool shadows underneath the scrub brushes using a mix of Blue and Burnt Umber to ground them to the earth. -
Final Highlights:
Use a liner brush and opaque Titanium White (or white gouache) mixed with a tiny bit of Yellow Ochre to add the final bright highlights on the rims of the mesas and the tips of the foreground grass.
Framing Tip
Leave a 1/2 inch border of white paper around the edges. This natural ‘mat’ brightens the colors and gives the finished piece a polished, gallery-ready look even before framing.
Step back and admire how the warm light transforms the rugged landscape into something peaceful and timeless
Snowy Pines With Blue Shadows in the Snow
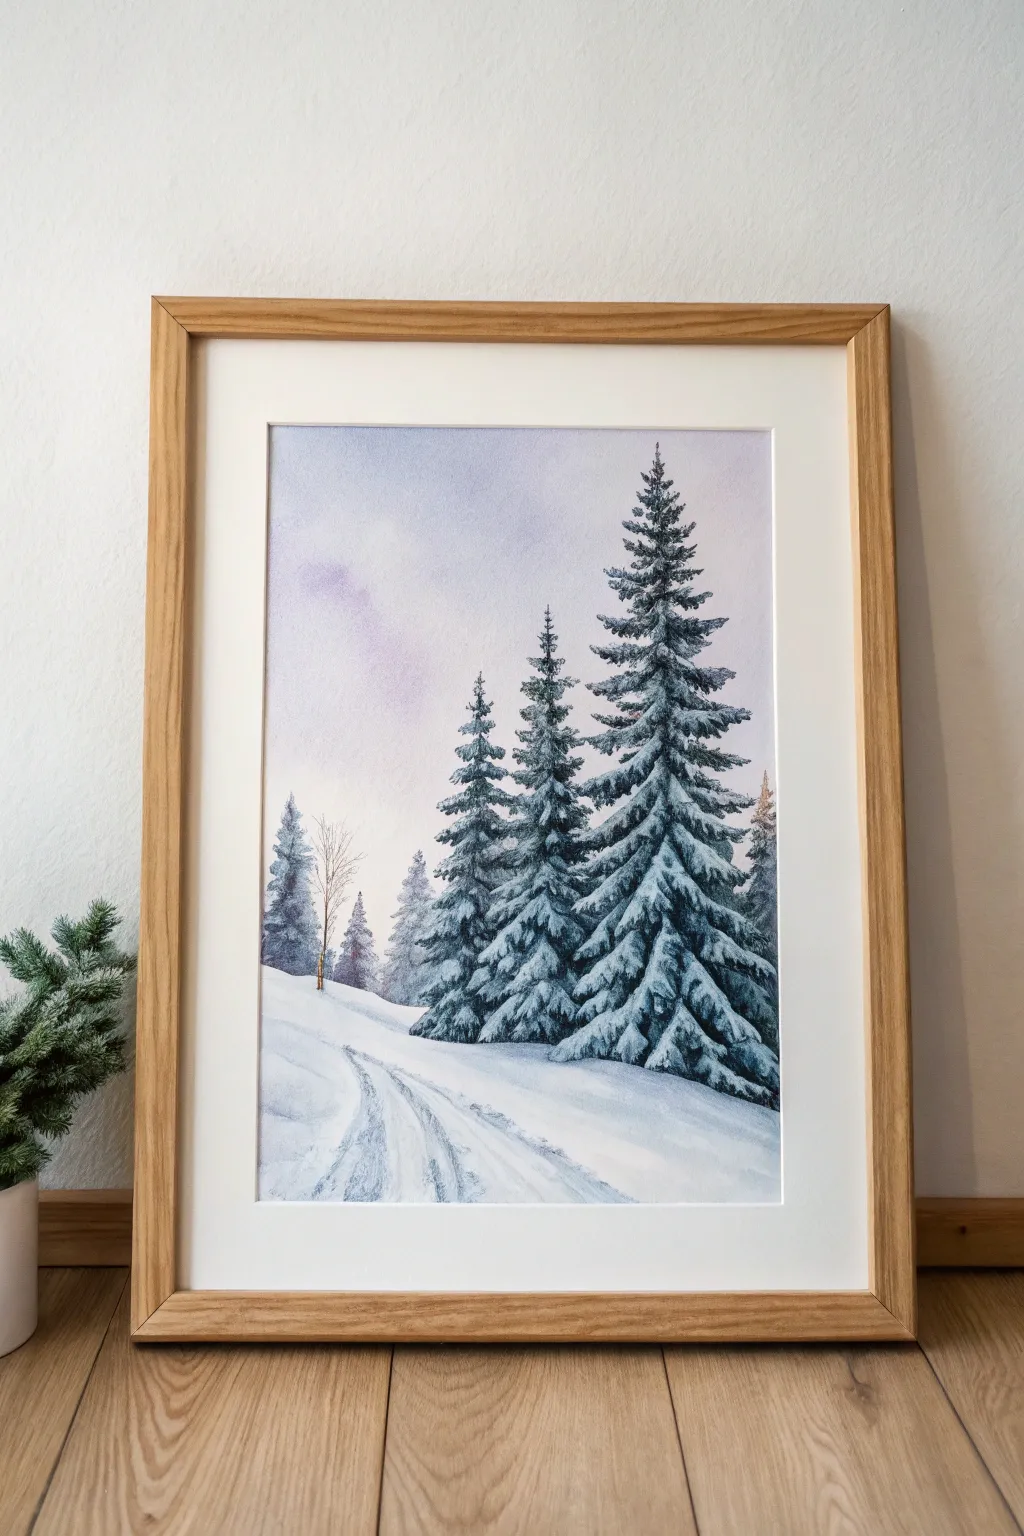
Capture the serene silence of a winter forest with this delicate watercolor painting featuring snowy evergreens and soft, trailing tracks. The cool blue shadows contrast beautifully with the warm, misty purple sky to create a scene that feels frozen in time yet full of life.
Step-by-Step
Materials
- Cold press watercolor paper (300 gsm)
- Watercolor paints (Ultramarine Blue, Burnt Umber, Payne’s Grey, Alizarin Crimson, Sap Green)
- Round brushes (sizes 2, 6, and 10)
- Masking fluid (optional, but helpful for snow)
- Old toothbrush (for spattering)
- Two jars of water
- Paper towels
- Painter’s tape
- Pencil (HB)
- Wooden frame with mat board
Step 1: Preparation and Sketching
-
Secure the paper:
Tape your watercolor paper down to a board on all four sides. This creates a crisp border and prevents the paper from buckling when we apply wet washes. -
Sketch the composition:
Lightly sketch the horizon line, sloping gently downward from left to right. Draw simple vertical lines to mark the trunks of the three main pine trees on the right and the smaller distant trees on the left. -
Map the path:
Pencil in two curving lines to guide where the snowy tracks will lead into the distance. Keep these lines very faint so they disappear under the paint later.
Step 2: Painting the Atmosphere
-
Wet the sky area:
Using your largest round brush, apply clean water to the entire sky area, stopping just above the snowy ground line. The paper should be glistening but not forming puddles. -
Drop in sky colors:
While the paper is wet, touch in a very dilute mix of Alizarin Crimson and a tiny bit of Ultramarine Blue to create a soft lavender glow in the upper left. Let the color diffuse naturally. -
Cool the horizon:
Near the bottom of the sky, blend in a very pale wash of Payne’s Grey to suggest distant mist. Let this layer dry completely before moving on. -
Paint distant trees:
Mix a watery grey-blue using Payne’s Grey. Paint the silhouettes of the distant background trees on the left. Soften their edges with a clean, damp brush to make them look like they are receding into the fog.
Muddy Shadows?
If your snow shadows look grey or muddy, clean your palette and water. Use pure Ultramarine Blue diluted heavily. Snow shadows reflect the sky, so they need to stay cool and clean.
Step 3: The Main Pines
-
Mix the pine green:
Create a deep, cold green by mixing Sap Green with Payne’s Grey and a touch of Ultramarine Blue. We want a dark value to contrast with the white paper. -
Start the tallest tree:
Using a size 6 brush, start at the top of the largest tree. Use the tip of the brush to tap in small, irregular shapes for the upper branches, leaving plenty of white paper showing for the snow. -
Build the branches downward:
As you move down the tree, make the branches wider and heavier. Paint the *undersides* of the boughs, imagining the snow is sitting on top. The paint acts as the shadow of the green needles beneath the snow. -
Add the companion trees:
Repeat this process for the two slightly smaller trees to the left of the main one. Vary your green mixture slightly—add a bit more blue to the one furthest back to push it into the distance. -
Define snowy clumps:
Switch to a smaller size 2 brush. Darken the green mix significantly and paint tight, crisp shadow lines right underneath the ‘white’ snow shapes on the branches to give them volume.
Level Up: Salt Texture
Sprinkle table salt onto the wet sky wash or the shadowy foreground while the paint is still damp. Once dry, brush it off to create beautiful, crystalline frost textures.
Step 4: Shadows and Snow
-
Mix the shadow color:
Create a beautiful, transparent blue-violet using Ultramarine Blue and a tiny touch of Alizarin Crimson. This is for the shadows on the snow. -
Form the tree shadows:
Paint soft, diagonal shadows on the white branches of the trees, primarily on the right side if we imagine the light source is coming from the upper left. Keep these very subtle. -
Paint the track shadows:
Using the same blue-violet mix, paint the shadows inside the wheel tracks. Use a dry-brush, sweeping motion to mimic the texture of rough snow. -
Add ground contours:
Add broad, watery swoops of the blue shadow color across the foreground to suggest undulations and shallow drifts in the snow. -
Adding texture:
I like to take an old toothbrush with slightly thicker white gouache or acrylic (if you have it) and flick tiny specks over the trees for a falling snow effect.
Step 5: Finishing Touches
-
Final tiny details:
Use a rigger brush or your finest tip with Burnt Umber to add a tiny, leafless sapling near the distant tree line for scale and interest. -
Remove tape:
Wait until the painting is 100% bone dry. Peel the tape away slowly at a 45-degree angle to reveal your crisp white border. -
Frame your work:
Place the artwork behind a white mat and a light wood frame to complement the natural, wintry tones of the piece.
Now step back and admire the calm, frosty atmosphere you have created on paper.
Night Sky Starscape Over a Calm Meadow
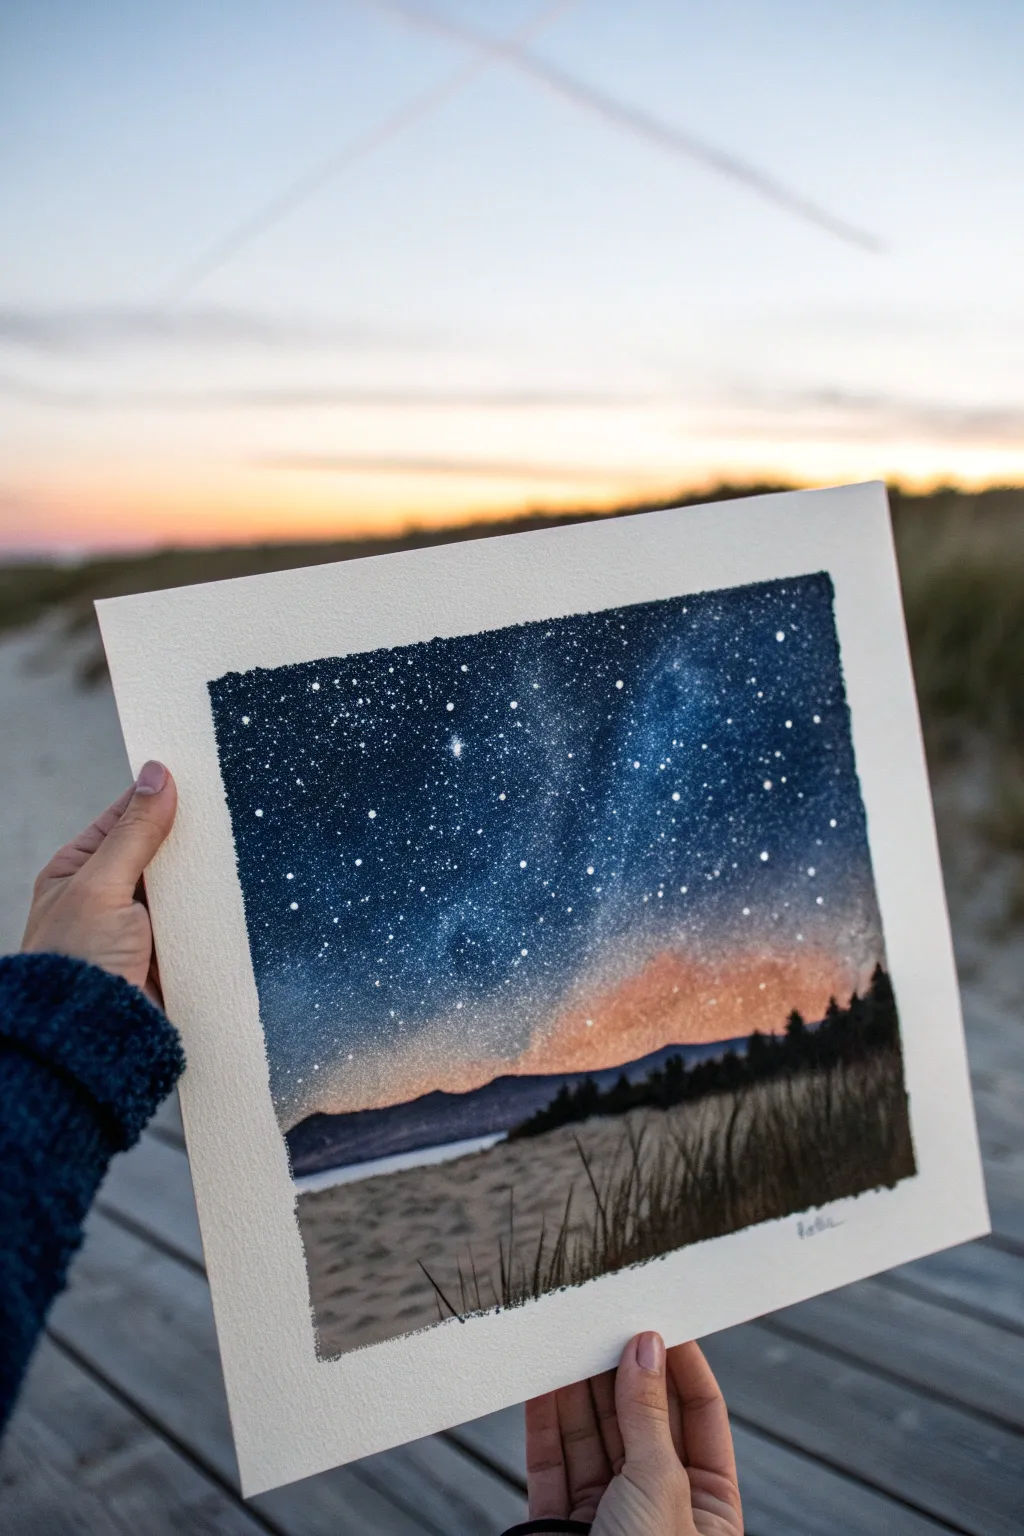
Capture the magic of a starry night meeting the last warm glow of sunset in this atmospheric watercolor painting. This project focuses on building deep, dark values for the sky while preserving the luminosity of the horizon and stars.
Step-by-Step Tutorial
Materials
- Cold press watercolor paper (140lb/300gsm)
- Masking tape
- Watercolors (Indigo, Prussian Blue, Black, Alizarin Crimson, Cadmium Orange, Burnt Sienna)
- White gouache or white ink
- Large flat brush or wash brush
- Medium round brush (size 6 or 8)
- Small detail brush (size 0 or 1)
- Old toothbrush (for splatter)
- Paper towels
- Clean water
Step 1: Preparation and Base Layer
-
Tape the edges:
Secure your watercolor paper to a board using masking tape on all four sides. This creates the crisp white border seen in the example and prevents the paper from buckling when wet. -
Wet the sky area:
Using your large flat brush and clean water, thoroughly wet the upper 80% of the paper where the sky will be. Leave the bottom area dry for the foreground dunes. -
Paint the horizon glow:
While the paper is wet, drop in a mix of Cadmium Orange and a touch of Alizarin Crimson just above where your mountains will sit. Let the color bleed upwards slightly, keeping it soft. -
Begin the blue gradient:
Above the orange glow, introduce a light wash of Prussian Blue. Blend it gently downwards so it meets the orange without turning muddy—work quickly while the paper is still damp.
Starry Depth Pro Tip
For a more realistic galaxy, layer your splatters. Do one faint layer of stars before the sky is totally dry for a distant blurry look, then a second crisp layer after it dries.
Step 2: Deepening the Sky
-
Build darker values:
Start adding Indigo and Prussian Blue to the upper sky. Use a higher concentration of pigment and less water to get that deep, rich night sky color. -
Create the Milky Way:
As you paint the dark blue, leave a diagonal band slightly lighter or lift some pigment out with a thirsty, clean brush to suggest the Milky Way galaxy spanning across the frame. -
Intensify darkness:
Mix Indigo with a tiny bit of Black or heavy Paynes Gray. Apply this to the top corners and edges to create a vignette effect, framing the lighter central galaxy area. -
Smooth the transition:
Ensure the transition from the dark darks at the top to the warm orange horizon is seamless. Clean your brush often to avoid dragging dark blue into your pristine orange glow. -
Let it dry completely:
This is crucial. The paper must be bone dry before adding stars, or they will blur into fuzzy blobs rather than crisp points of light.
Step 3: Stars and Landscape
-
Splatter the stars:
Dilute white gouache with a little water until it has a creamy consistency. Dip an old toothbrush into it and run your thumb across the bristles to flick tiny specks onto the sky area. -
Protect the ground:
You might want to cover the bottom unpainted area with a scrap piece of paper while splattering to keep the foreground clean. -
Add prominent stars:
Use your smallest detail brush and pure white gouache to manually dot in a few larger, brighter stars to create variety in the constellations. -
Paint the distant mountains:
Mix a dark purple-grey using Indigo and Alizarin Crimson. Paint the silhouette of the distant mountains right over the blended horizon line. The shape should be low and rolling. -
Paint the foreground dunes:
For the sandy ground, use a very watery wash of Burnt Sienna or weak brown. Keep it textured and uneven to mimic sand; don’t make it a flat block of color. -
Add the tree line:
Using a strong black or deep sepia mix, dab in the silhouette of trees on the right side. Use the tip of the brush to create jagged tops that look like pines. -
Detail the grass:
With a rigger brush or your fine detail brush, flick quick, upward strokes using dark brown or black paint to create tall grasses in the immediate foreground. -
Vary the grass:
Make some grass blades overlap the sand and even reach up into the dark tree line area. Vary the pressure to make the lines taper naturally at the tips. -
Reveal the border:
Once the painting is 100% dry, slowly peel away the masking tape at a 45-degree angle to reveal your crisp, professional edges.
Muddy Horizon?
If your blue sky mixes with the orange sunset and turns greenish-brown, let the orange layer dry completely first. Then re-wet the paper above it to add the blue.
Enjoy the peaceful atmosphere of your new Twilight Starscape painting
Stained-Glass Style Landscape With Bold Outlines
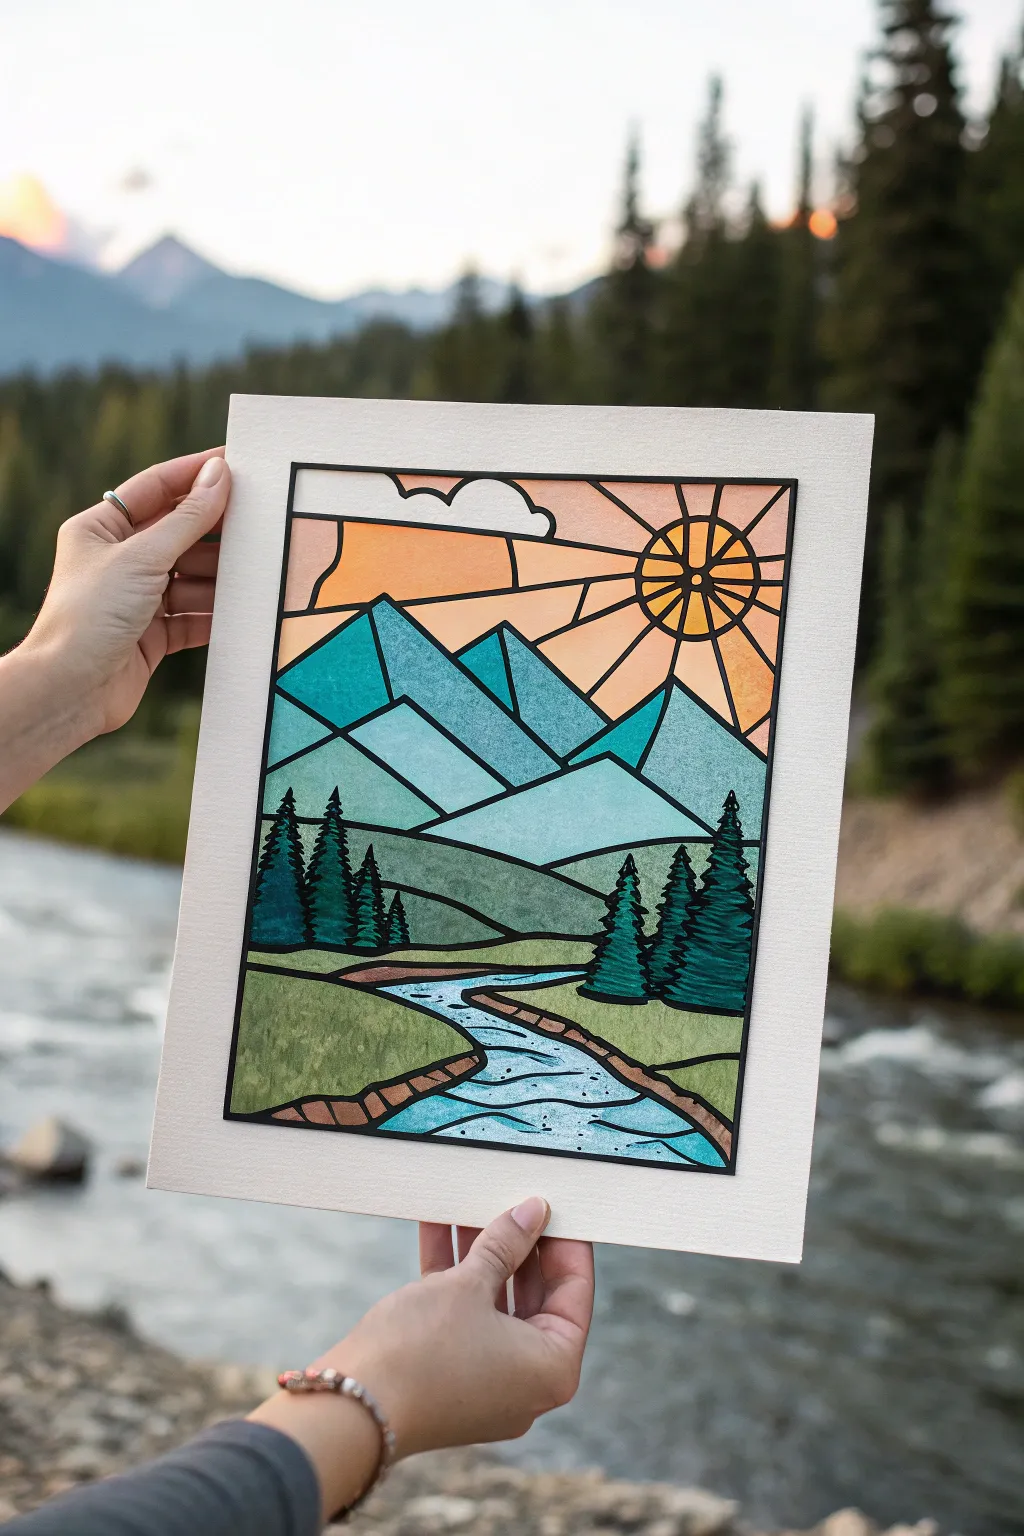
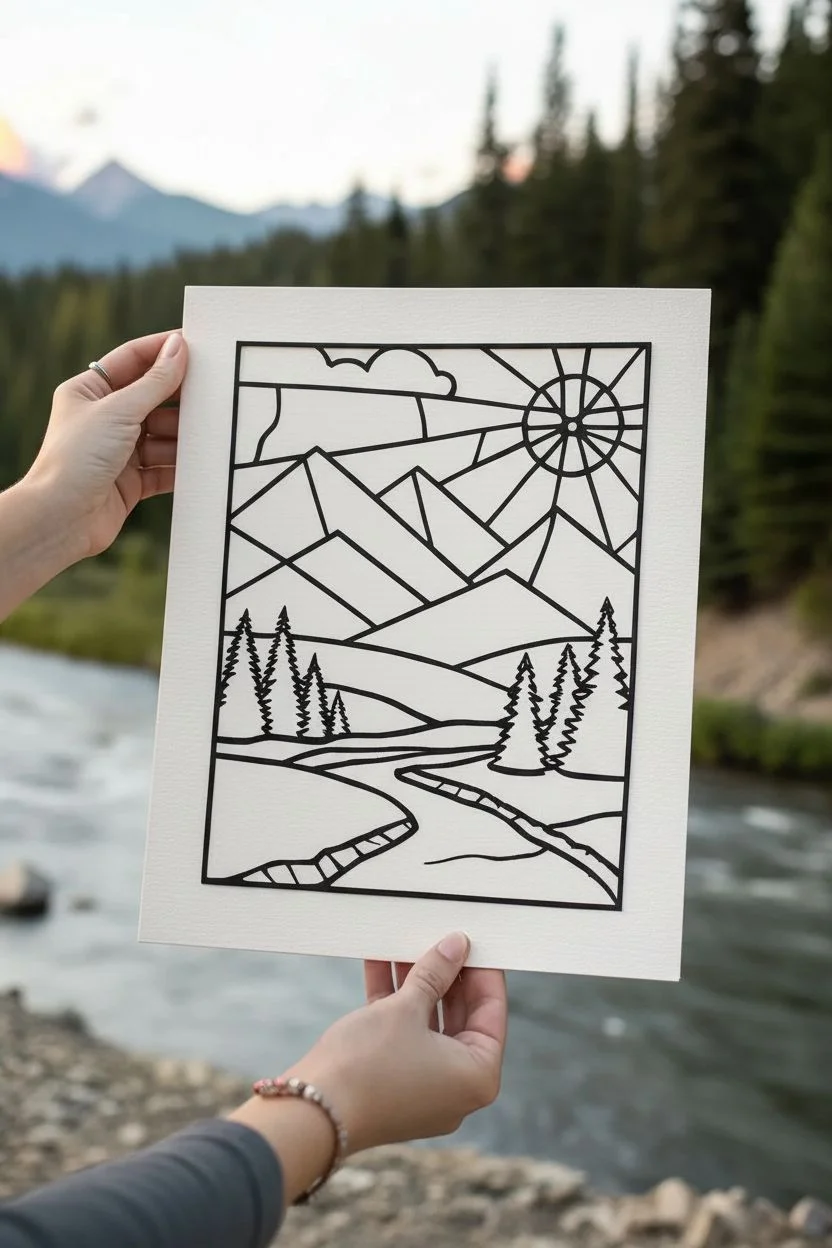
Capture the geometric beauty of stained glass without cutting a single shard. using bold black linework and vibrant watercolors to create a structured yet serene landscape. The result is a crisp, dimensional piece that glows with color.
Step-by-Step Guide
Materials
- Heavyweight watercolor paper or mixed media cardstock
- Black cardstock (for the outline overlay)
- Precision craft knife (X-Acto)
- Cutting mat
- Spray adhesive or fine-tip glue pen
- Watercolors (pan or tube)
- Small round watercolor brush (size 2 or 4)
- Pencil and eraser
- Ruler
- Reference photo of mountains
Step 1: Designing the Grid
-
Draft the frame:
Start by drawing a rectangular border on your black cardstock. Leave about a half-inch margin to create a sturdy outer frame for your artwork. -
Sketch the major shapes:
Inside the frame, lightly sketch your scene using simple geometric forms. Break the mountains into triangles and the river into winding ribbon segments. -
Add the sunburst:
Position a circle in the upper right corner for the sun. Use a ruler to draw straight rays extending outward, dividing the sky into distinct sections. -
Create the outlines:
Thicken your sketch lines. You need to create double lines for every single shape, ensuring they connect to the main frame or each other so the entire grid remains one connected piece. -
Detail the trees:
For the pine trees, draw jagged, stylized chevron shapes. Keep them connected to the ‘ground’ line so they don’t fall out when cutting.
Keep it Sharp
Change your blade frequently when cutting cardstock. A dull blade will drag and fray the paper corners, ruining the crisp ‘lead came’ look of the faux stained glass.
Step 2: Cutting the Outline
-
Prepare for cutting:
Place your black cardstock on a self-healing cutting mat. Ensure you have a fresh, sharp blade in your craft knife for clean edges. -
Remove negative space:
Carefully cut out the inner spaces between your grid lines. Always cut towards yourself and rotate the paper, not your hand, for difficult angles. -
Clean up edges:
Once all holes are cut, lift the paper gently. If any corners stick, don’t tear them; use the knife to snip the remaining fiber. -
Mount the outline:
Flip your delicate black skeleton face down. Apply a light, even coat of spray adhesive or dots of glue, then press it firmly onto your white watercolor paper.
Add Glossy Depth
Once the paint is fully dry, cover the colored sections (avoiding the black lines) with a layer of clear dimensional glaze or Mod Podge for a shiny, glass-like finish.
Step 3: Adding the Color
-
Plan the palette:
Select colors that mimic nature but with a vibrant punch. I like to lay out teal blues for the mountains and warm oranges for the sunset. -
Paint the sky:
Start with the sun segments. Use a wet-on-dry technique to fill the spaces between the black lines, blending yellow into soft orange as you move away from the center. -
Fill the mountains:
Paint the mountain facets in varying shades of blue and teal. Use lighter, watered-down washes for ‘sun-hit’ sides and deeper saturation for shadowed sides to create depth. -
Define the river:
Use a bright cyan or light blue for the water. Leave tiny slivers of white paper showing near the black lines to mimic the reflection of glass/water. -
Paint the foliage:
Fill the tree shapes with a deep forest green. For the grassy banks, use an olive or mossy green, adding slight texture by dabbing the brush rather than sweeping. -
Add finishing details:
Once the main colors are dry, you can add tiny lines or dots within the colored sections using a fine liner pen to suggest current in the water or texture on the rocks.
Frame your piece with a wide mat to let the bold colors and intricate lines take center stage in your home.
Mini Nature “Window” Paintings in a Grid
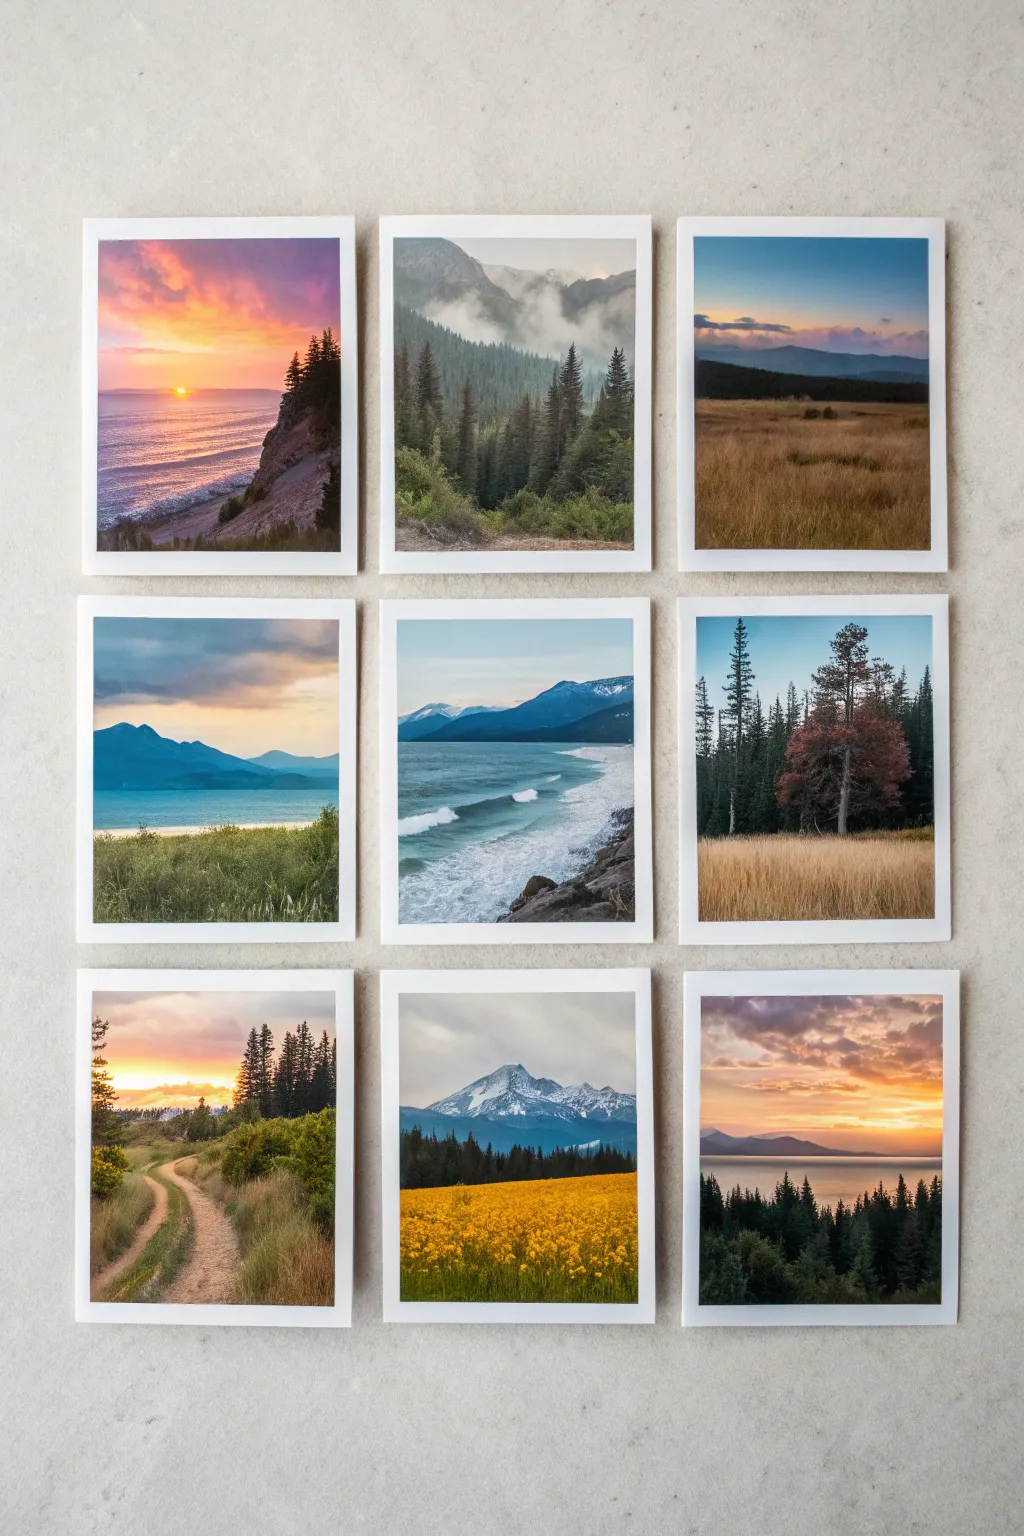
Capture the vast beauty of nature in bite-sized format with this stunning grid of nine miniature landscapes. This project combines various terrains—from misty mountains to golden sunsets—into a cohesive gallery wall display that feels like looking through multiple windows at once.
Detailed Instructions
Materials
- 9 sheets of square watercolor paper (approx. 4×4 inches) or a single large sheet to cut later
- Painter’s tape or masking tape
- Watercolor or gouache paints
- Set of small brushes (rounds #0, #2, #4 and a small flat brush)
- Pencil and eraser
- White gel pen (optional for highlights)
- Mixing palette
- Two jars of water
- Paper towels
- Mounting board or heavy cardstock (light gray or off-white)
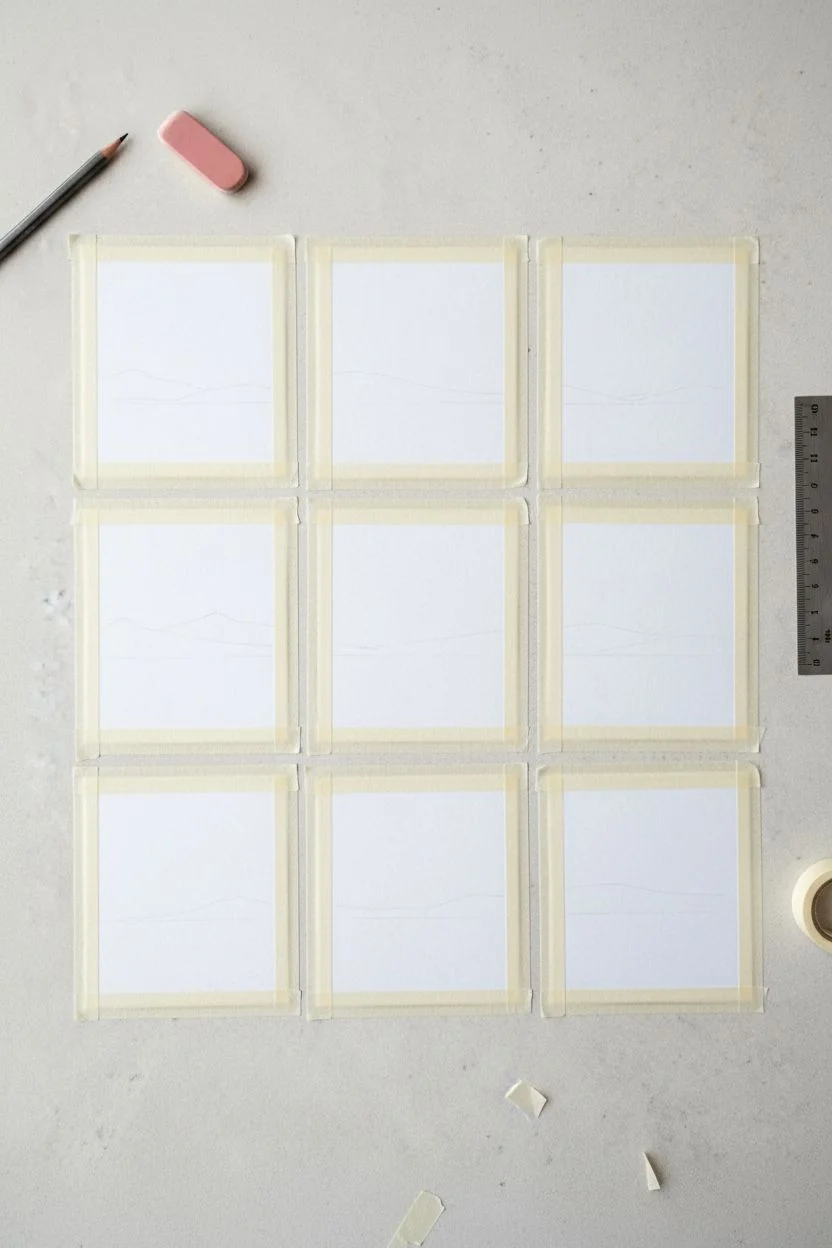
Step 1: Preparation & Planning
-
Prep the paper:
If you aren’t using pre-cut squares, measure and cut your watercolor paper into nine identical squares. I find 4×4 inches works perfectly for maintaining detail without becoming overwhelming. -
Create the borders:
Tape down all four sides of each square onto your work surface using painter’s tape. This secures the paper and creates that crisp, clean white collection border seen in the final piece. -
Sketch the horizons:
Lightly sketch the horizon lines for all nine scenes. vary the height—place some low for big skies (like the sunsets) and some high for foreground detail (like the flower field). -
Plan the color palette:
Group your scenes mentally. Notice the image has three distinct moods: warm sunsets (purples/oranges), cool misty mountains (greens/greys), and bright daylight scenes (blues/yellows). Plan to paint similar colored scenes together to save mixing time.
Step 2: Painting the Skies & Backgrounds
-
Wet-on-wet skies:
Start with the sunset panels (top left, bottom right). Wet the sky area with clean water, then drop in gradients of yellow, orange, and purple, letting them bleed together naturally. -
Clear blue days:
For the coastal and mountain day scenes, paint a gradient from deep azure at the top fading to nearly white at the horizon line. -
Misty atmosphere:
For the misty forest scene (top middle), use a very diluted wash of grey-green. While it’s still damp, dab in slightly darker pigment to suggest distant, fog-shrouded trees. -
Drying time:
Allow all the sky layers to dry completely. If the paper feels cold to the touch, it is still wet.
Uneven Watercolors?
If you get ‘blooms’ where water pushes pigment away, don’t panic. In landscapes, these often look like organic clouds or textured rocks. Embrace the happy accident.
Step 3: Middle Ground & Mountains
-
Layering mountains:
Mix a blue-grey shade for distant mountains. Paint the silhouettes against the dry skies. Remember, objects further away should be lighter and cooler in tone. -
Adding texture to peaks:
For snowy peaks (bottom middle), leave the white of the paper showing or lift paint with a thirst brush. Add shadows on one side of the peaks for dimension. -
Water reflections:
For the coastal scenes (middle left, middle center), mirror the sky colors into the water area, adding horizontal strokes of darker blue to create ripples and movement.
Level Up: Gallery Depth
Instead of gluing flat, use foam mounting tape to lift the squares off the backing board. This creates drop shadows and gives the grid a professional 3D shadow-box effect.
Step 4: Foreground Details
-
Deep greens:
Mix a dark, rich evergreen color using sap green and a touch of burnt umber. Use your smallest round brush to paint the distinct pine trees in the foregrounds. -
painting grasses:
For the golden fields (middle right, bottom middle), use ochre and burnt sienna. Use quick, upward flicking motions with a dry brush to simulate individual stalks of grass. -
Flower fields:
In the bottom center panel, stipple intense yellow dots over a green base to create the dense field of wildflowers. -
Crashing waves:
Use opaque white gouache or a gel pen to add the foamy crests of waves in the center panel where the ocean meets the shore. -
Final trees:
Add the sharpest, darkest details now, like the silhouette of the tree line against the sunset in the bottom right panel.
Step 5: Assembly
-
The reveal:
Wait until the paint is bone dry, then carefully peel away the tape at a 45-degree angle to reveal your crisp borders. -
Arrange the grid:
Lay out your nine paintings on the mounting board. Use a ruler to ensure equal spacing between each square—about half an inch usually looks best. -
Mounting:
Secure each painting to the backing board using double-sided tape or adhesive mounting squares.
Step back and enjoy the view of your diverse miniature world that brings the outdoors in


Have a question or want to share your own experience? I'd love to hear from you in the comments below!