
If you’ve got a few smooth stones and a little paint, your garden can turn into a tiny outdoor gallery. I love how rock painting adds color, personality, and even practical garden decor right where your plants live.
Classic Ladybug Rocks for Flower Beds
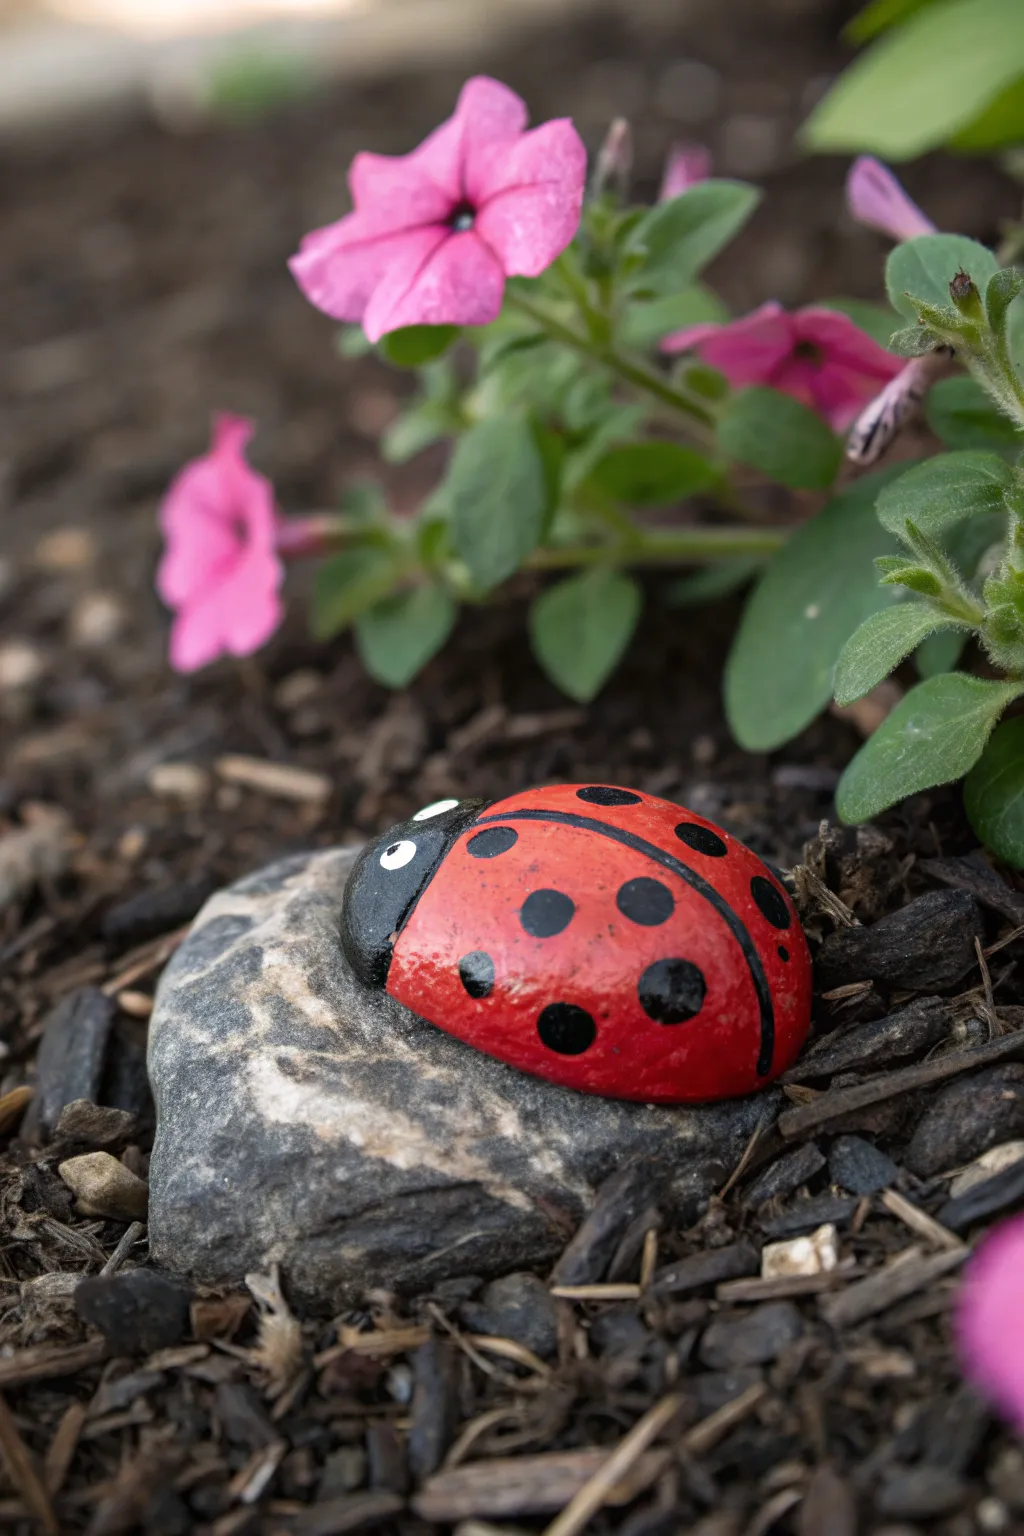
Bring a touch of playful charm to your flower beds with this classic painted ladybug rock. The bright red shell and bold black spots create a delightful contrast against the natural earth tones of your garden soil.
How-To Guide
Materials
- Smooth, oval-shaped river rock (approximately 3-4 inches)
- Acrylic outdoor craft paint (Bright Red, Black, White)
- Wide flat paintbrush
- Medium round paintbrush
- Small fine detail brush or toothpick
- Clear outdoor sealer (spray or brush-on)
- Water cup for rinsing
- Paper towels
- Pencil (optional)
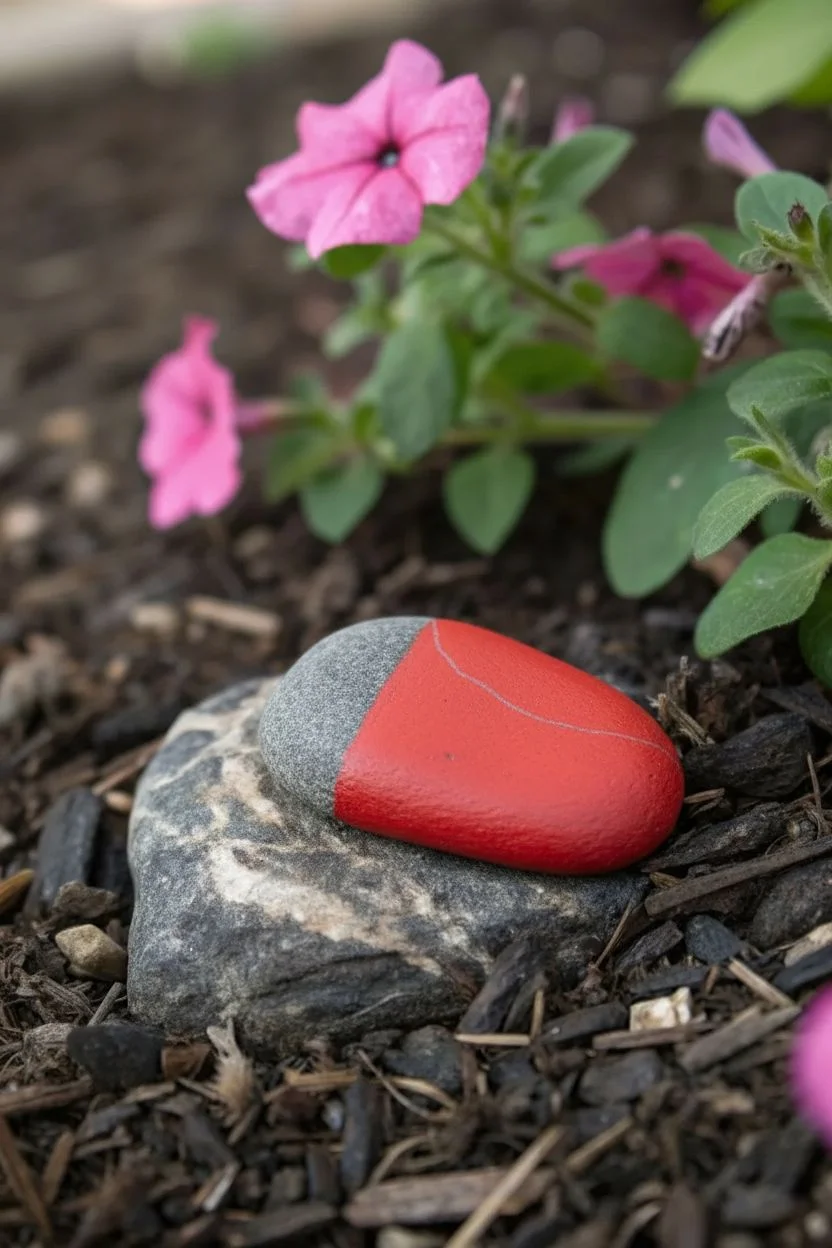
Step 1: Base Coat & Layout
-
Clean the stone:
Before starting, scrub your rock thoroughly with warm soapy water to remove any dirt or grit. Let it dry completely in the sun so the paint adheres properly. -
Review the shape:
Hold your rock and decide which end will be the face. A slightly narrower end usually works best for the head, while the wider end mimics the body. -
Sketch the division:
If you are nervous about freehanding, use a pencil to lightly mark a curved line about one-quarter of the way down the rock. This line separates the black head from the red wings. -
Paint the red body:
Using your wide flat brush, paint the larger bottom section of the rock with bright red acrylic paint. Start from your pencil line and cover the entire back. -
Apply a second coat:
Wait for the first layer to dry (about 15 minutes). Apply a second or even third coat of red to ensure the color is vibrant and opaque, with no rock showing through.
Dotting Tool Hack
Don’t have dotting tools? Use the flat head of a nail, a pencil eraser, or the handle end of different sized paintbrushes to get perfect circles every time.
Step 2: Adding the Details
-
Paint the head:
Switch to your medium round brush and black paint. Carefully fill in the front section of the rock to create the ladybug’s face, making sure the line where it meets the red is clean and curved. -
Create the center line:
Using a finer brush with black paint, draw a straight line down the center of the red back, starting from the head and going all the way to the tail end. -
Outline the wings:
Using the same fine brush, carefully outline the bottom rim of the red section with a thin black line, bordering the entire painted area. -
Add large spots:
Dip the handle end of a paintbrush into the black paint to use as a stamp. Press it firmly onto the red wings to create perfectly round, large polka dots. -
Add medium spots:
Use a slightly smaller brush handle or a cotton swab to add smaller black dots interspersed among the larger ones for a varied, natural look. -
Let the black dry:
Allow the black paint to dry completely. This is crucial because wet black paint smears easily into the lighter colors we are about to add.
Step 3: Bringing it to Life
-
Paint the eyes:
Load a small round brush with white paint. Paint two oval shapes on the black head section. I like to space them slightly apart to give the ladybug a cute, wide-eyed expression. -
Add pupils:
Once the white ovals are dry, use the tip of a fine brush or a toothpick to place a small black dot inside each white oval. -
Highlight the eyes:
For extra sparkle, add a tiny pinprick of white paint inside the black pupil dots. This ‘catchlight’ makes the character look alive. -
Highlight the shell:
Mix a tiny amount of white into your red paint to make a soft pink/red. Add very subtle, curved highlight lines near the top of the red dome to simulate a shiny shell. -
Seal the rock:
Take the rock outside or to a well-ventilated area. Apply a clear outdoor sealer over the entire top surface to protect your artwork from rain and sun fading. -
Final curing:
Let the sealer cure for at least 24 hours before placing your new friend on a large base rock in your garden bed.
Make it a Family
Create a whole bug family by finding rocks of diminishing sizes. Paint them identical to this one and line them up behind the ‘mama’ bug on a garden log.
Nestle your colorful creation among some greenery and enjoy the pop of color it adds to your yard


Busy Bee Rocks to Tuck Among Herbs
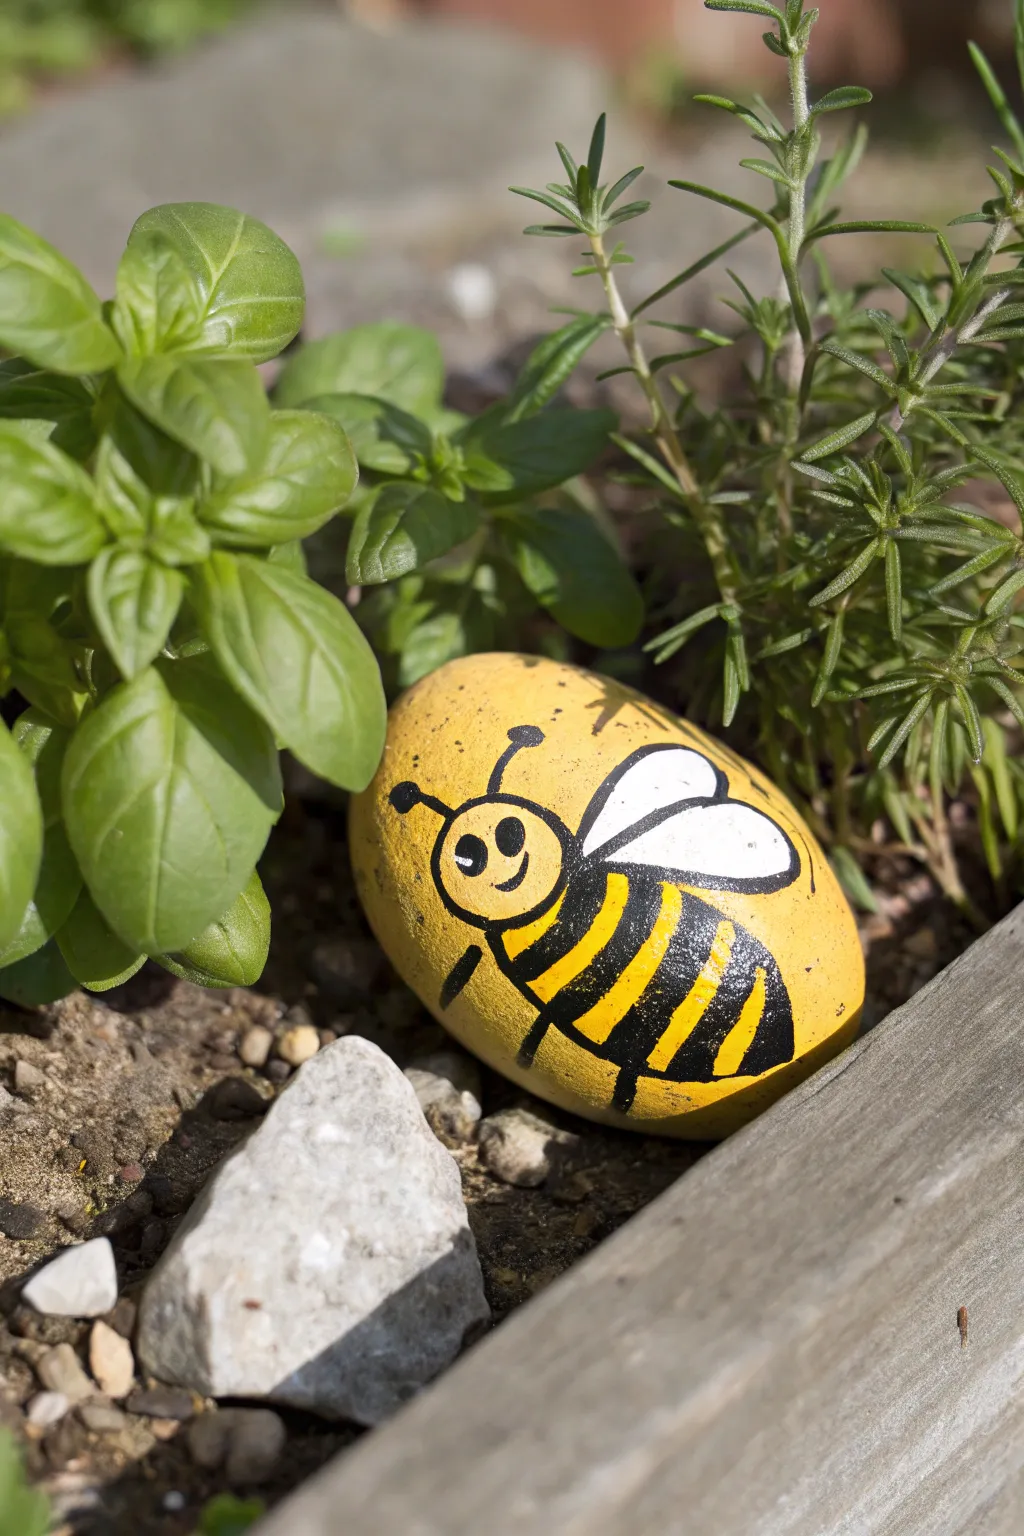
Brighten up your herb garden with this cheerful, hand-painted bumblebee stone. Its sunny yellow base and simple cartoon style make it a perfect beginner-friendly project that looks delightful nestled among green basil leaves.
Detailed Instructions
Materials
- Smooth, oval river rock (palm-sized)
- Acrylic paint (Bright Yellow, Black, White)
- Flat paintbrush (medium size)
- Fine detail paintbrush (round size 0 or 1)
- Pencil
- Outdoor acrylic sealer or varnish spray
- Cup of water
- Palette or paper plate
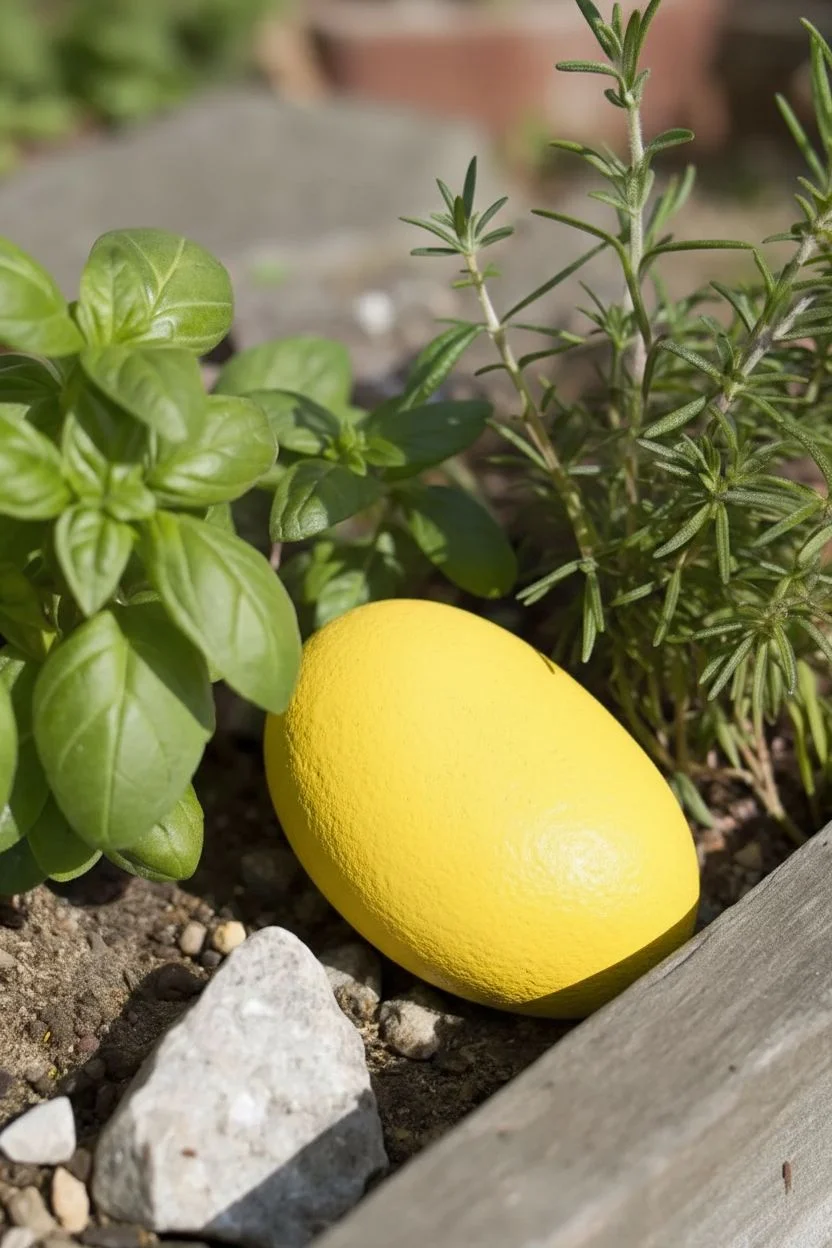
Step 1: Base Preparation
-
Clean the stone:
Before you begin, scrub your rock with mild soap and water to remove any garden dirt or dust. Let it dry completely in the sun or use a hairdryer to speed things up. -
Apply the base coat:
Using your medium flat brush, paint the entire top surface of the rock with bright yellow acrylic paint. You don’t need to paint the very bottom that touches the soil. -
Add a second coat:
Yellow paint can sometimes be translucent. Once the first layer is dry to the touch, apply a second coat to ensure a solid, opaque background color. -
Let it cure:
Allow the yellow base to dry thoroughly. If the paint is still tacky, your pencil sketch in the next step might drag through it.
Smooth Moves
Choose the smoothest rock possible. Pits and bumps make painting straight lines for the antennae and legs much harder.
Step 2: Outlining the Bee
-
Sketch the body:
Lightly draw a large oval shape for the bee’s body using a pencil. Tilt the oval slightly so the bee looks like it is flying upward. -
Draw the head:
Sketch a circle for the head overlapping the front (left side) of the body oval slightly. -
Add the wings:
Draw two teardrop shapes coming off the top back of the bee for the wings, making sure the front wing is slightly larger than the back one. -
Sketch the legs and antennae:
Add two small lines for antennae on top of the head and three small lines on the bottom for legs.
Step 3: Painting the Details
-
Fill in the wings:
Use a smaller brush and white paint to fill in the two wing shapes. You may need two coats here to cover the yellow background. -
Outline the body:
Switch to your fine detail brush and black paint. Carefully trace over your pencil outline for the entire body and head. -
Add the stripes:
Paint two thick, black curved stripes across the bee’s body. These should contour with the shape of the oval to make the bee look round. -
Paint the stinger:
At the very back of the body, paint the tip black to create the stinger area. -
Define the wings:
Once the white paint is dry, use the fine brush with black paint to outline the wings. -
Add the wing detail:
Paint a single curved line inside each wing to suggest dividing veins. -
Paint the face:
Using the tip of your fine brush, paint two small black dots for eyes and a small curved smile. I find adding a tiny white dot inside the black eyes later makes them pop. -
Add appendages:
Go over your pencil lines for the antennae (adding little dots at the tips) and the legs with black paint.
Shaky Hands?
If using a brush for the fine black outlines feels too difficult, use a black acrylic paint pen or permanent marker instead.
Step 4: Finishing Touches
-
Clean up edges:
If you made any smudges, wait for them to dry and touch them up with a little bit of your yellow base color. -
Dry completely:
Let the rock sit for at least 24 hours to ensure all paint layers are fully cured before sealing. -
Seal the artwork:
Take the rock outside and spray it with a clear acrylic sealer. This is crucial to protect your bee from rain and sun damage.
Place your buzzing creation near some flowers and enjoy the instant charm it adds to your garden path


Butterfly Wing Rocks for Pollinator Corners
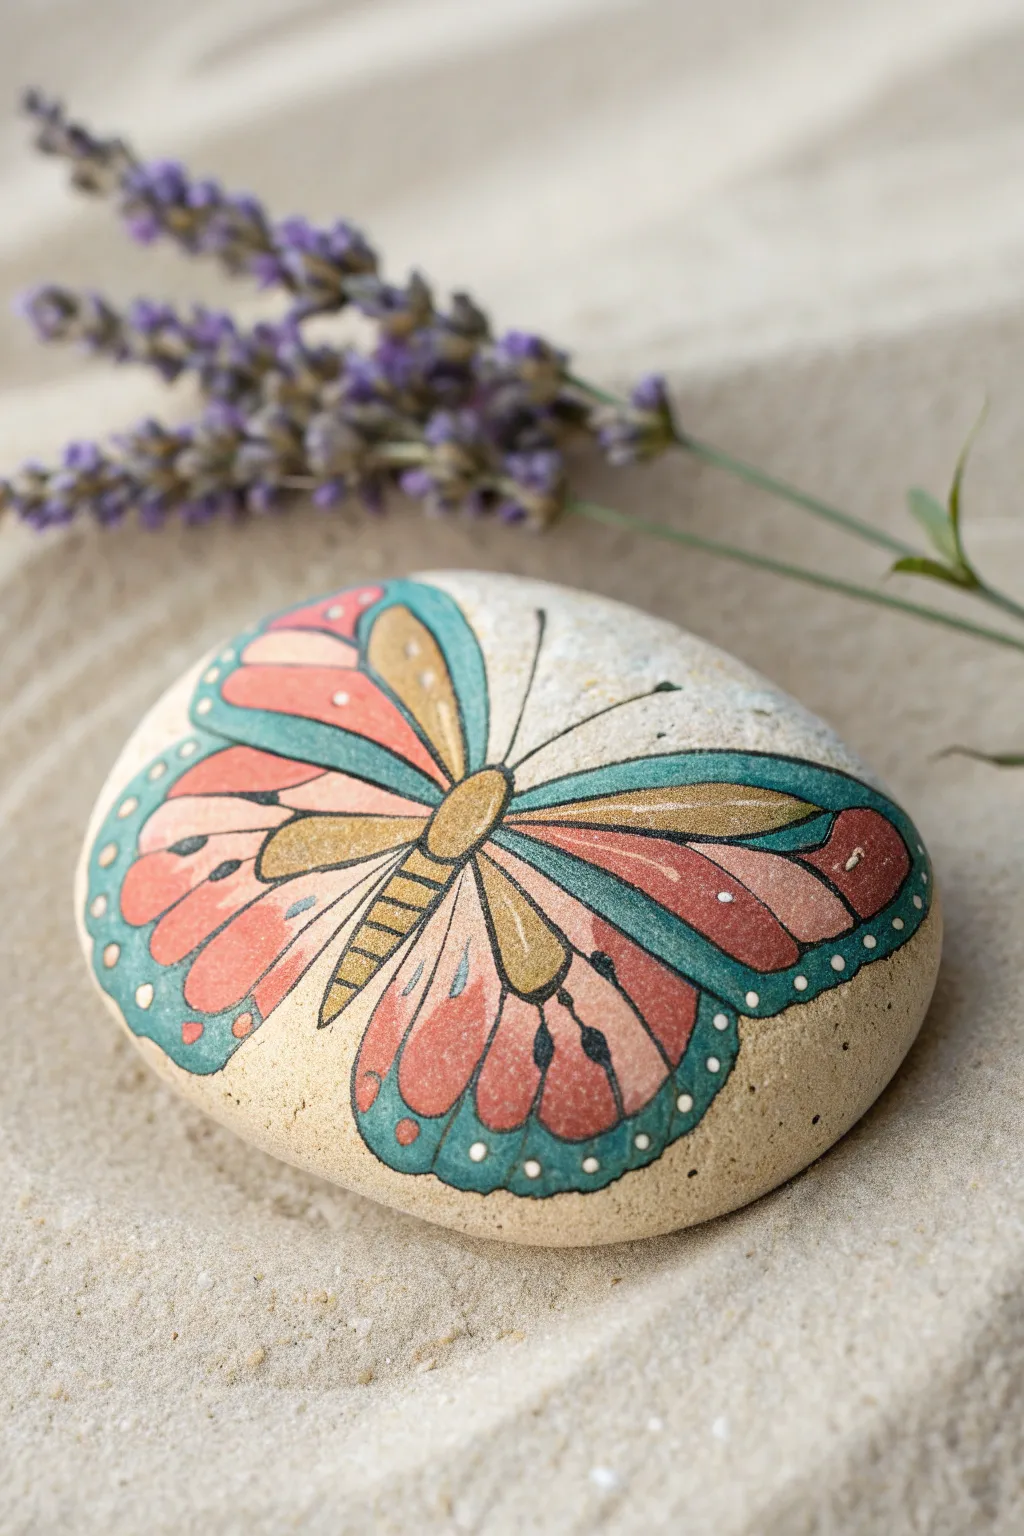
Transform a smooth garden pebble into a delicate piece of art with this butterfly design featuring a soft, muted palette of corals, teals, and golds. The style mimics vintage botanical illustrations with its precise black lining and decorative dot details, making it a perfect accent for a pollinator garden.
Step-by-Step Guide
Materials
- Smooth, flat-topped river rock or garden stone (palm-sized)
- Acrylic paints (matte finish): Coral/salmon pink, teal/turquoise, mustard yellow/gold, black, white
- Fine detail paintbrush (size 0 or 00)
- Small round paintbrush (size 2)
- Pencil and eraser
- Palette or small plate for mixing
- Clear acrylic sealer (spray or brush-on, matte or satin)
- Water cup and paper towels
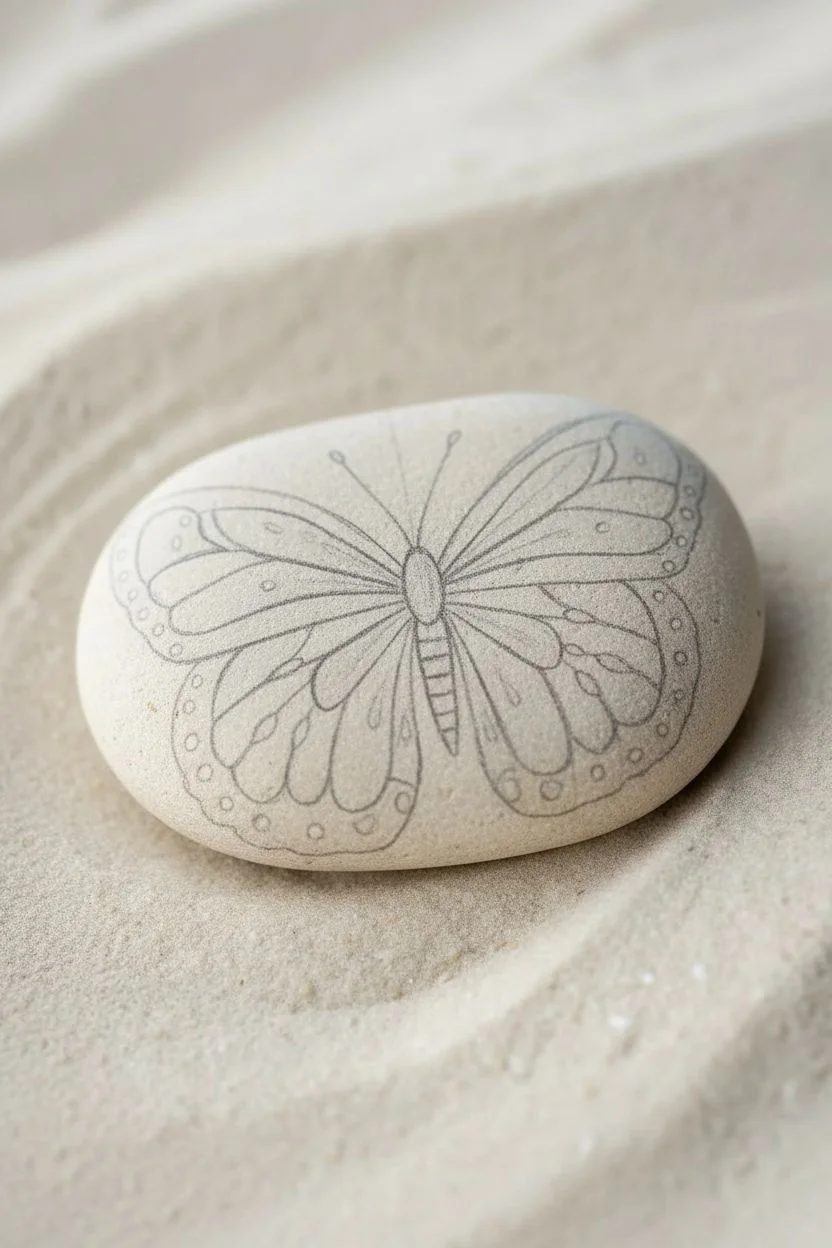
Step 1: Sketching the Foundations
-
Prepare the Surface:
Ensure your rock is clean and completely dry. If the natural stone color is too dark or uneven, you can paint a base layer of cream or off-white acrylic over the top surface to make the butterfly colors pop, though leaving the natural stone texture often looks best. -
Draft the Body:
Using a pencil, lightly sketch a long, slender segmented body down the center of the stone. Include a small oval for the head and a longer, tapered shape for the abdomen. -
Outline the Wings:
Sketch two large upper wings that gently curve outward and upward. Below these, draw two slightly smaller lower wings that round downward. Aim for symmetry, but don’t worry if it’s not perfectly mirrored—nature rarely is. -
Add Wing Segments:
Divide the wings into sections. Draw elongated teardrop shapes inside the upper wings and smaller subdivisions in the lower wings to guide your color placement later.
Steady Hands
For the steadiest black outlines, dilute your black acrylic paint with a tiny drop of water until it has an ink-like consistency. Rest your pinky finger on the plain stone surface for balance.
Step 2: Blocking in Color
-
Paint the Upper Wings:
Load your small round brush with the coral or salmon pink paint. Fill in the main central sections of the upper wings. You may need two thin coats for full opacity. -
Add Teal Accents:
Using the teal paint, fill in the outer borders of the upper wings and the scalloped edges of the lower wings. Keep the edges relatively clean, but remember the black outline will tidy things up later. -
Paint the Lower Wings:
Fill the inner sections of the lower wings with the coral paint, blending it slightly creating a soft transition if you have a darker shade of red, or just keeping it solid. -
Gold Details:
Use the mustard yellow or gold paint to fill in the butterfly’s body segments. I also like to add slithers of gold near the body on both the upper and lower wings to create contrast. -
Dry Completely:
Let all the colored sections dry thoroughly before moving on. Check for any patchy areas and apply a second coat if the stone’s texture is showing through too much.
Metallic Magic
Swap the mustard yellow paint for actual metallic gold heavily pigmented paint. When the sun hits the stone in your garden, the butterfly’s body will shimmer like a real insect.
Step 3: Lining and Details
-
Outline the Body:
Switch to your finest detail brush (size 00) and black paint (slightly watered down for flow). Carefully outline the segmented body and the head. -
Define the Wings:
Trace over your pencil lines to create the thick black framework of the wings. Vary your line weight slightly—thicker on the outer edges, thinner for interior veins. -
Add Antennae:
Paint two very fine, curbing lines extending from the head for the antennae. Keep your hand steady and lift the brush at the end of the stroke for a tapered look. -
Decorative Dots:
Dip the non-brush end (the handle) of a paintbrush or a dotting tool into white paint. Gently press dots along the teal border of the wings. Space them evenly for a professional look. -
Final White Accents:
Add tiny white specks or highlights inside the coral sections of the wings to give them texture and life. -
Black Tear Drops:
Add small black teardrop shapes or dashes within the lower wing sections to mimic the patterns found on real butterfly wings.
Step 4: Finishing Touches
-
Erase Stray Marks:
Once the paint is absolutely bone dry, gently erase any visible pencil sketch lines that weren’t covered by paint. -
Seal the Stone:
Apply a coat of clear acrylic sealer. A matte spray works best to maintain that natural, stone-like aesthetic while protecting your artwork from garden weather.
Place your finished stone near a lavender bush or flower pot to surprise visitors with a permanent splash of color


Herb Name Marker Rocks With Painted Sprigs
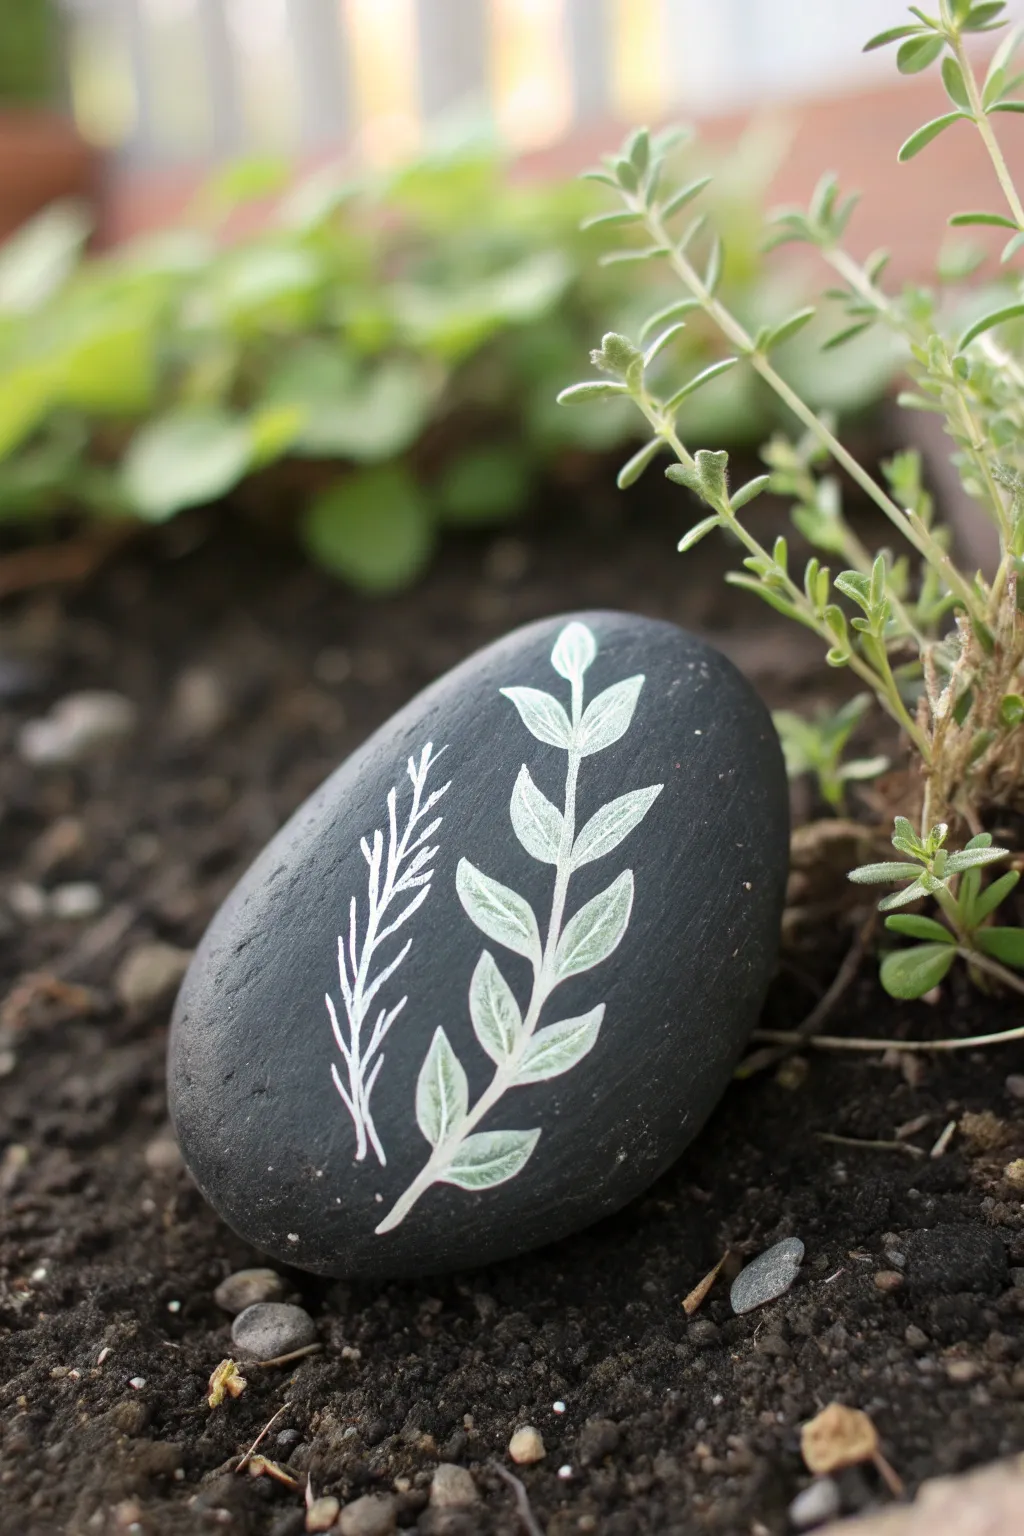
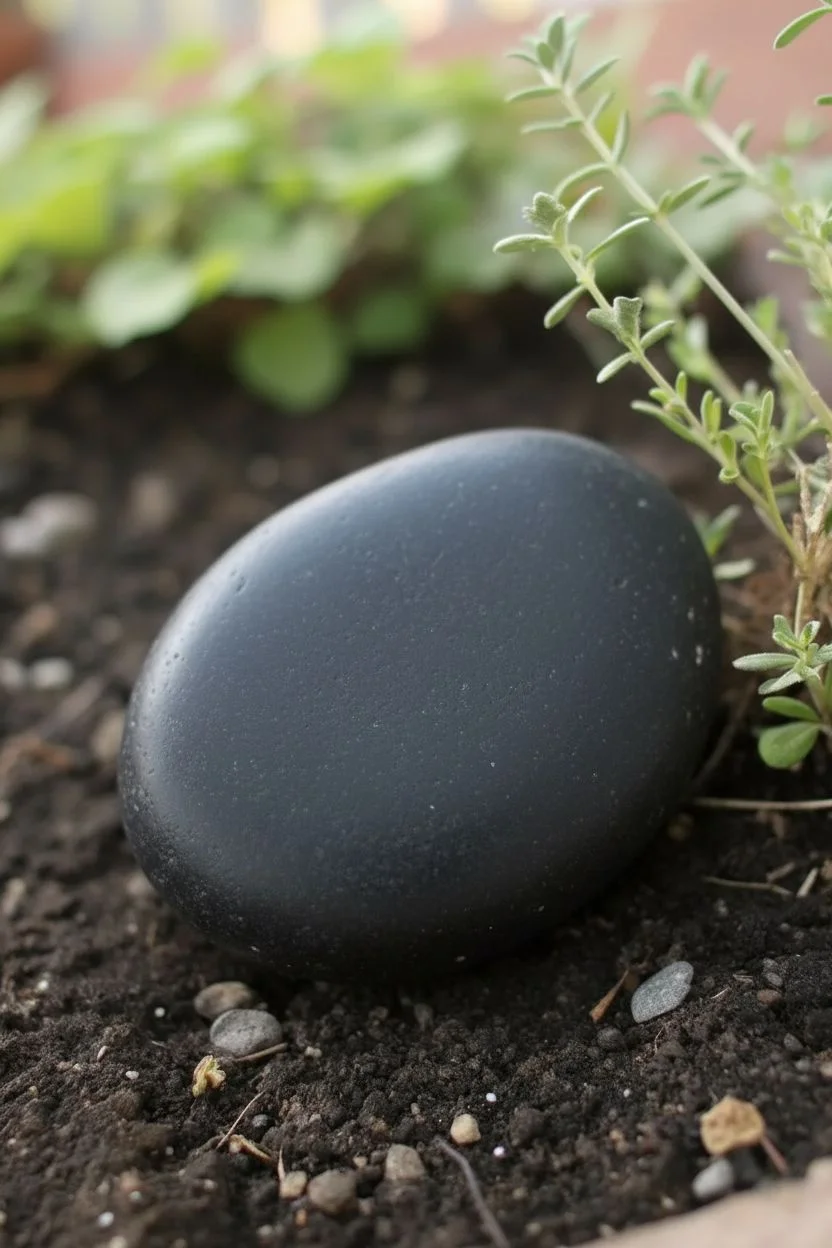
Bring gentle organization to your planting beds with these elegant markers that let the plants themselves do the talking. Using a smooth, dark stone as your canvas, simple white and sage green botanical sprigs pop beautifully against the natural backdrop.
How-To Guide
Materials
- Smooth, dark river rock (black or dark grey)
- White acrylic paint or paint pen (extra fine tip)
- Sage green acrylic paint
- Fine detail paintbrush (size 0 or 00)
- Clear outdoor sealant spray (matte or satin finish)
- Pencil (optional)
- Soap and water
Step 1: Preparation
-
Select your stone:
Choose a rock that is naturally dark and very smooth. The painted design relies on the contrast between the white paint and the dark surface, so a darker grey or black stone works best. -
Clean the surface:
Wash your stone thoroughly with warm soapy water to remove any garden dirt, moss, or oils. Let it dry completely in the sun; any trapped moisture will prevent the paint from adhering properly.
Step 2: Painting the Rosemary Sprig
-
Draw the main stem:
Using your white paint pen or a liner brush loaded with thinned white acrylic, draw a single, slightly curved vertical line on the left side of the rock. Let it waver naturally rather than making it perfectly straight. -
Add first needles:
Starting from the bottom of the stem, paint short, thin strokes angled upward. These should look like needles branching off the main stem. -
Build density:
Continue moving up the stem, adding pairs of needles. Make the strokes slightly shorter as you reach the tip of the sprig to mimic natural growth. -
Refine the shape:
Go back and add a few overlapping needles here and there to give the sprig a bit more dimension, but keep this design delicate and purely white.
Uneven Lines?
If your brush drags or skips on the rock surface, the paint is too thick. Dilute it with a tiny drop of water until it has the consistency of ink.
Step 3: Painting the Sage Sprig
-
Outline the stem:
To the right of your rosemary, paint a second curved stem using white paint. This one should be slightly thicker and taller than the first. -
Outline the leaves:
Using the white paint, outline pairs of opposite leaves travelling up the stem. These leaf shapes should be elongated ovals with pointed tips. -
Add the terminal leaf:
Paint a single, smaller leaf at the very top of the steam to complete the silhouette. -
Let the outlines dry:
Allow the white outlines to dry completely. This acts as a barrier and makes the green pop against the dark rock. -
Mix your green:
If your green paint is too bright, mix in a tiny drop of white to soften it into a sage or herbal tone. -
Fill the leaves:
Carefully paint inside the white leaf outlines with your green paint. It’s okay if you leave a little gap between the green fill and the white outline; that negative space adds style. -
Add central veins:
Once the green is dry, use your finest white tool to paint a very delicate vein line down the center of each leaf.
Add Variety
Don’t stop at two sprigs! Try painting lavender with tiny purple dots or basil with large, rounded bold leaves to create a full herb garden set.
Step 4: Finishing Touches
-
Clean up edges:
If any lines look messy, you can carefully scratch away dried acrylic with a toothpick or cover mistakes with a tiny dot of black paint if you have one that matches the rock. -
Initial drying:
Let the rock sit undisturbed for at least 24 hours to ensure the paint has fully cured. -
Seal the artwork:
Apply two light coats of clear outdoor sealant spray. This is crucial for protecting your art from rain and sprinklers.
Your garden now has a permanent, weatherproof marker that is as lovely as the herbs it identifies
BRUSH GUIDE
The Right Brush for Every Stroke
From clean lines to bold texture — master brush choice, stroke control, and essential techniques.
Explore the Full Guide
Veggie Patch Marker Rocks (Carrots, Tomatoes, Squash)
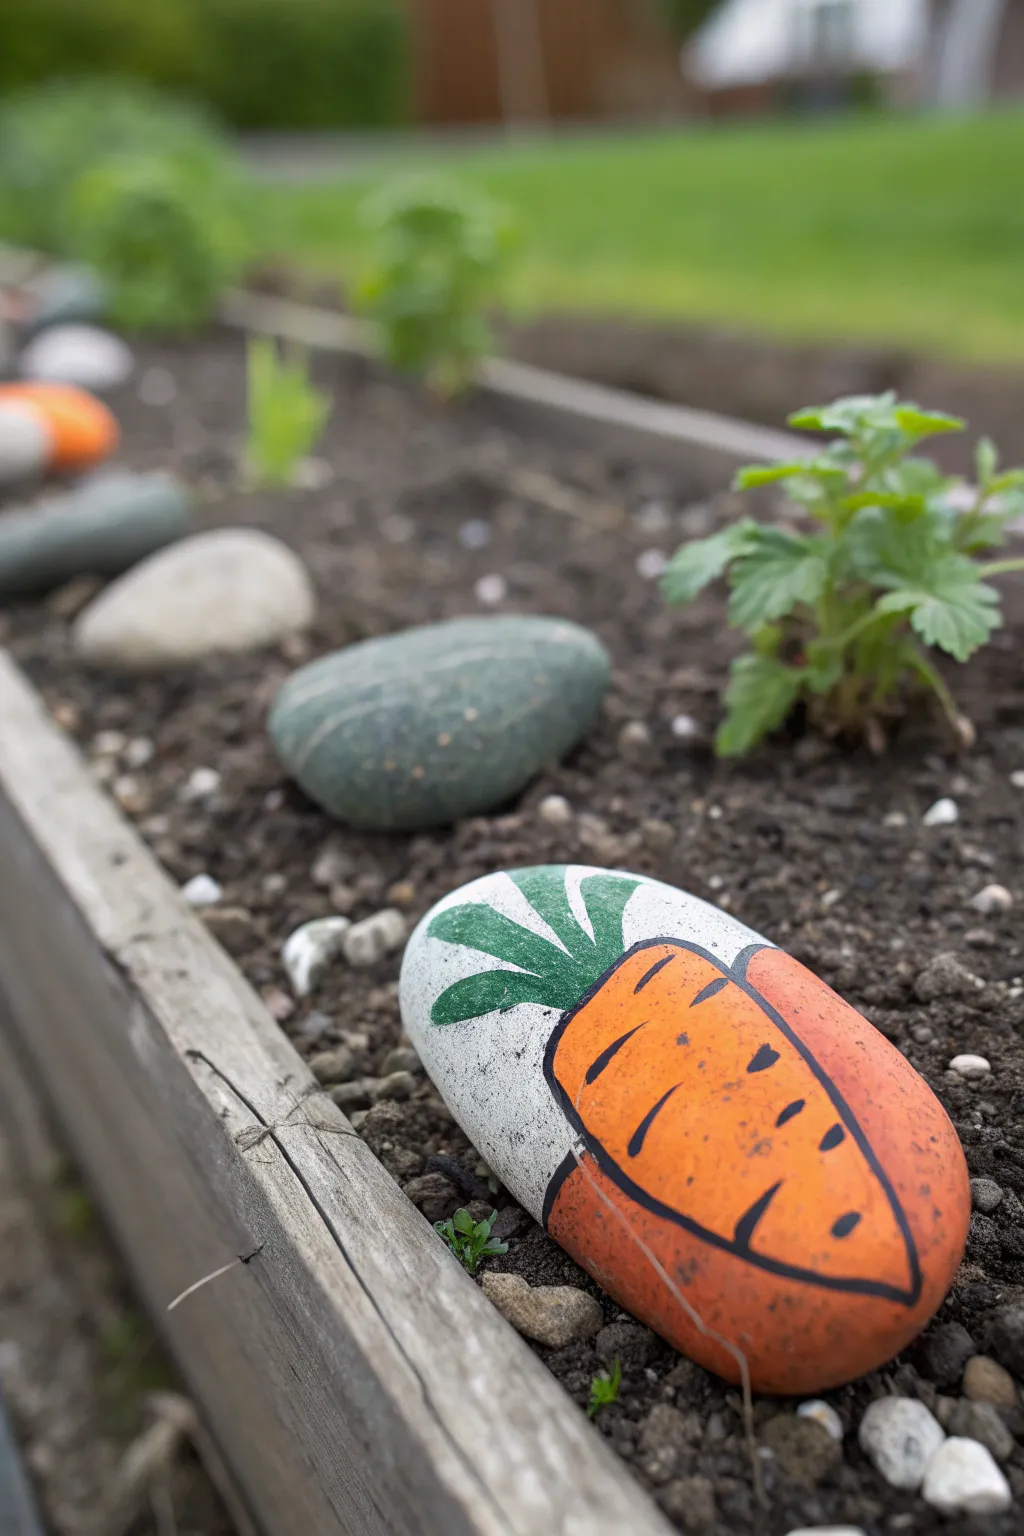
Brighten up your vegetable patch with this charming painted stone that doubles as a durable plant marker. With its clean white background and bold illustrative style, this carrot design pops against dark garden soil, making it easy to spot where your seeds are sown.
Detailed Instructions
Materials
- Smooth, oval river rock (approx. 3-4 inches long)
- Dish soap and scrub brush
- Gesso or white acrylic primer
- Acrylic paints: Orange, White, Green, Black
- Fine detail brush (size 0 or 1)
- Medium flat brush (size 4 or 6)
- Pencil for sketching
- Water cup and paper towels
- Outdoor clear varnish or sealant (spray preferred)
Step 1: Preparation & Base Coat
-
Cleaning:
Begin by thoroughly scrubbing your rock with warm water and a drop of dish soap to remove any dirt or grease. Rinse well and let it dry completely in the sun. -
Priming:
Apply a thin layer of gesso or white acrylic primer to the top surface of the rock. This helps the colors appear more vibrant later. -
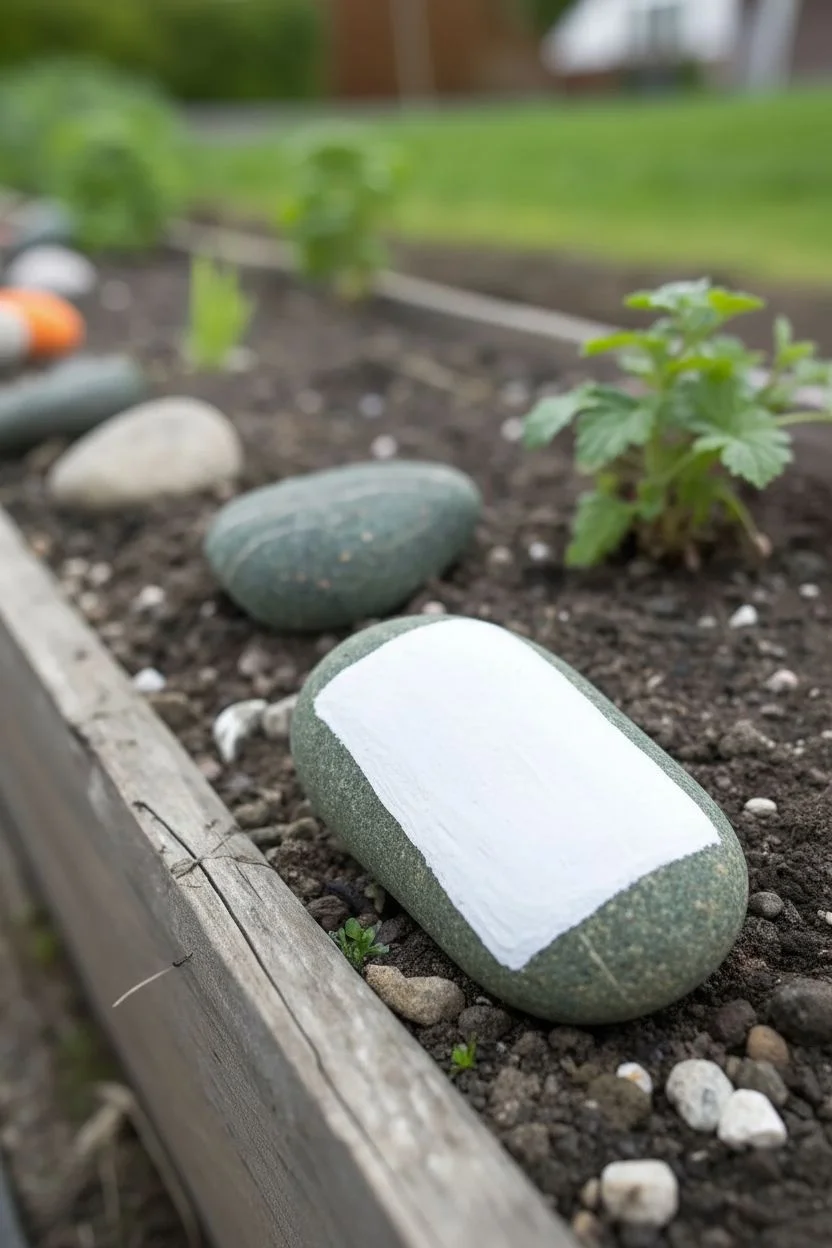
The Canvas Layer:
Using your medium flat brush, paint a solid oval shape of white acrylic paint onto the center of the rockface. You don’t need to cover the entire stone; leaving the natural rock exposed around the edges creates a nice frame. -
Second Coat:
Once the first layer is dry to the touch, apply a second coat of white to ensure full opacity so no grey rock shows through your ‘canvas’ area.
Paint Consistency Tip
If your black paint drags or skips while outlining, mix in one drop of water. Ink-like consistency gives smoother, continuous lines on textured rock surfaces.
Step 2: Sketching & Blocking Color
-
Pencil Outline:
Lightly sketch a thick, triangular carrot shape that dominates the white oval. Add three distinct leafy tufts emerging from the top of the carrot. -
Orange Base:
Load your medium brush with bright orange paint. Fill in the main body of the carrot, being careful to stay within your pencil lines. -
Green Tops:
Switch to a smaller brush and paint the three leafy tufts with a deep green shade. If the green looks too translucent against the white, wait for it to dry and add a second layer. -
Drying Time:
Allow these base colors to dry completely. Acrylics dry fast, but if the paint is still tacky, the black outline we add next might bleed.
Step 3: Details & Outlining
-
Beginning the Outline:
Using your finest detail brush and black paint (slightly thinned with water helps flow), start outlining the orange carrot shape. Keep your hand steady and use the very tip of the bristles. -
Leaf Definition:
Continue the black outline around the green leafy tops. Instead of one big blob, make sure you define the separation between the three individual leaves. -
Adding Texture lines:
To give the carrot that classic cartoon look, paint short, horizontal curved dashes across the orange body. Vary their lengths—some short, some longer—to create visual interest. -
The Right Edge:
Extend the orange paint slightly past the black outline on the right side if you want to mimic the reference image’s loose, illustrative style, or keep it tidy within the lines depending on your preference. -
Clean Up:
If you made any smudges on the white background, simply use a clean brush with a bit of white paint to touch up the negative space around the vegetable.
Make a Full Set
Don’t stop at carrots! Use the same white-oval technique to paint red tomatoes, green zucchini, or purple beets to color-code your entire veggie patch.
Step 4: Finishing Touches
-
Final Inspection:
Check your marker for any spots that need a colour boost. I like to sometimes add a tiny dot of white inside the orange area as a highlight to make it look 3D. -
Sealing:
Once the artwork is bone dry (give it at least an hour), take the rock outside and spray it with a clear, UV-resistant outdoor sealer. -
Second Seal:
Apply a second light coat of sealer to ensure waterproof protection against rain and sprinklers. -
Placement:
Nestle the rock into the soil at the head of your carrot row once the varnish has cured completely.
Your garden will look organized and cheerful all season long with these custom markers
Strawberry and Berry Rocks for Garden Borders
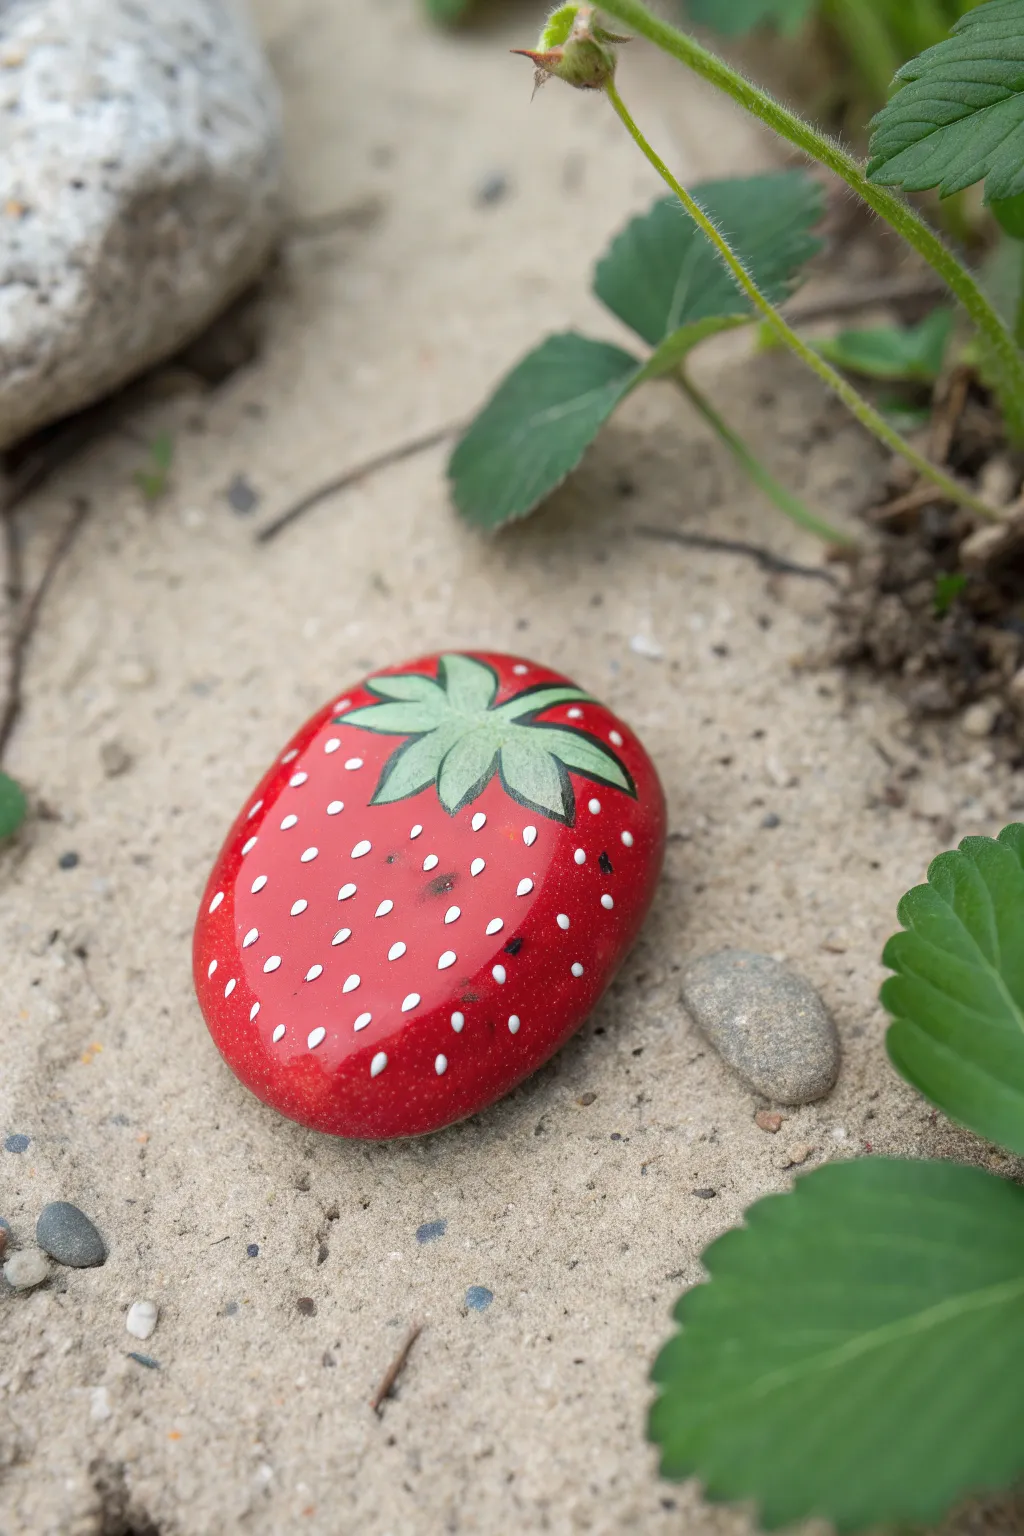
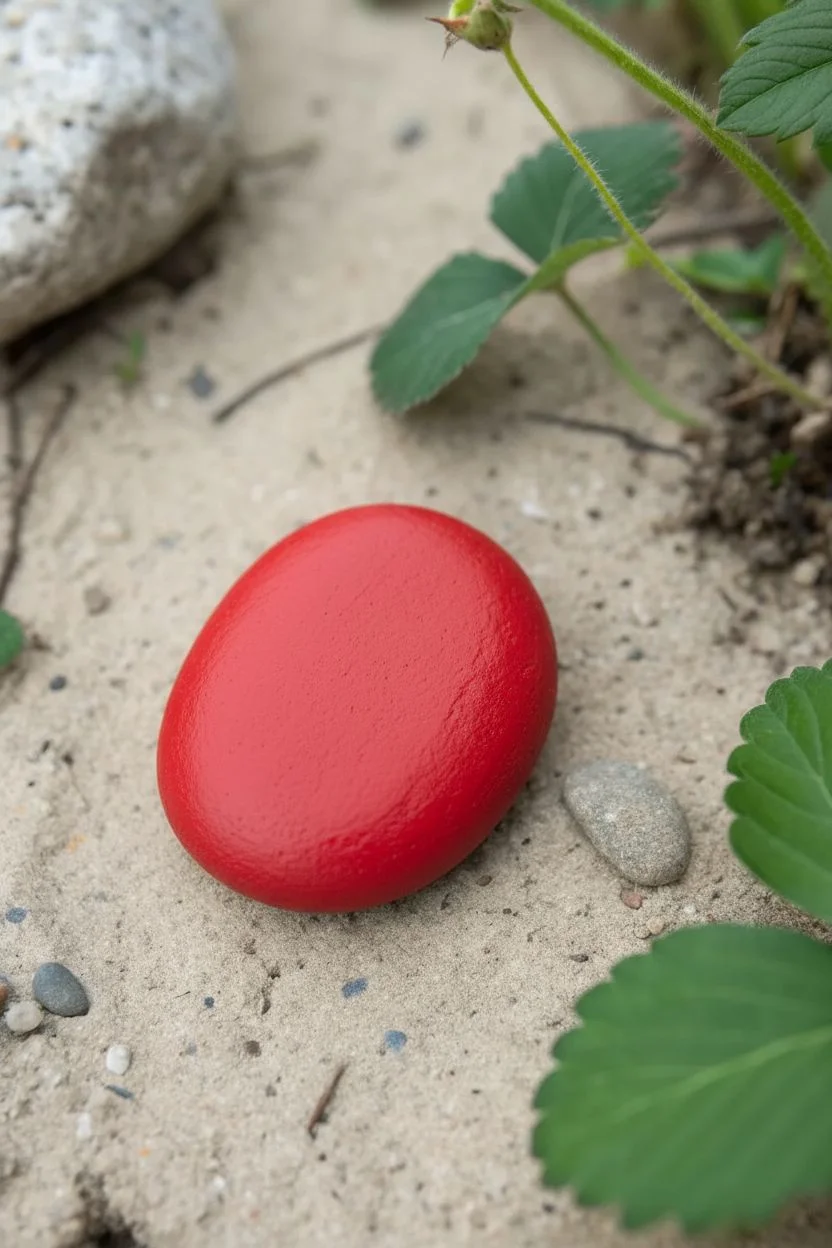
Transform a simple garden stone into a vibrant, juicy-looking strawberry that birds won’t try to steal. This rock painting project uses clever shading and highlighting to create a surprisingly realistic fruit for your garden borders.
How-To Guide
Materials
- Smooth, oval-shaped river rock (roughly strawberry-sized)
- Red acrylic paint (bright scarlet)
- Dark red or maroon acrylic paint
- Light green acrylic paint (leafy tone)
- Dark green acrylic paint (forest tone)
- White acrylic paint or a fine-point white paint pen
- Black acrylic paint (very small amount)
- Small flat paintbrush
- Fine detail paintbrush (size 0 or 00)
- Clear outdoor sealant spray (gloss finish)
Step 1: Base and Shape
-
Clean Your Canvas:
Begin by scrubbing your rock with warm, soapy water to remove any garden dirt or dust. Let it dry completely in the sun so the paint adheres properly. -
Priming (Optional):
If your rock is very dark, apply a thin coat of white paint first to make the red pop. If it’s a light-colored river stone, you can skip straight to the color. -
Apply the Red Base:
Paint the entire top surface of the rock with your bright scarlet red acrylic paint. Use smooth strokes to cover the texture. -
Second Coat:
Allow the first layer to dry for about 15 minutes, then apply a second coat of red to ensure opaque, solid coverage.
Paint Slipping?
If acrylic paint slides off the rock, the surface is too smooth. Sand the rock lightly with sandpaper to create ‘tooth’ for grip.
Step 2: Adding the Foliage
-
Outline the Leaves:
Using your smaller brush and light green paint, sketch a star-like shape at the ‘top’ (flatter end) of the strawberry rock. These triangles will be your sepals. -
Fill the Leaves:
Fill in the green star shape completely. Don’t worry about perfect edges yet; organic variations look more natural. -
Leaf Texture:
Mix a tiny drop of dark green with your light green. I like to paint a central vein line down the middle of each leaf point for depth. -
Leaf Outlining:
With the fine detail brush and dark green (or black mixed with green), very thinly outline the leaves to separate them visually from the red fruit.
Color Depth
Mix a tiny drop of gold into your white seed paint. Real strawberry seeds are often yellowish-brown rather than stark white.
Step 3: Seeds and Details
-
Planning the Seeds:
To make the strawberry look convincing, visualize a grid pattern across the red surface. The seed placement should be somewhat regular but not robotic. -
Create Seed Pits:
Mix a small amount of dark red or maroon. Using the tip of your fine brush, paint tiny, elongated teardrop shapes where each seed will go. This creates the shadow of the seed indentation. -
Adding the Seeds:
Once the dark pits are dry, take your white paint (or a white paint pen) and place a smaller teardrop shape inside each dark spot. -
Highlighting the Fruit:
To give the berry a plump appearance, dry brush a very small amount of lighter red or pink on the highest curved part of the rock. -
Leaf Highlights:
Add tiny dashes of white or very pale yellow to the tips of the green leaves to simulate sunlight hitting the foliage.
Step 4: Finishing Up
-
Final Cleanup:
Check your edges. If any red got messy near the bottom of the rock, touch it up now. -
Protecting Your Work:
Because these rocks live in the garden, durability is key. Spray the rock with a clear, UV-resistant gloss sealant. -
Second Seal:
Apply a second light coat of sealant once the first is dry. The gloss finish mimics the natural shine of fresh fruit skin. -
Garden Placement:
Place your creation in the dirt near real plants, half-buried slightly to complete the illusion.
It is so satisfying to tuck these bright faux berries among your greenery for a pop of color that lasts all year

PENCIL GUIDE
Understanding Pencil Grades from H to B
From first sketch to finished drawing — learn pencil grades, line control, and shading techniques.
Explore the Full Guide
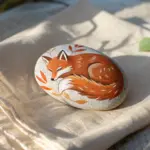
Sunflower and Daisy Bouquet Rocks for Pots
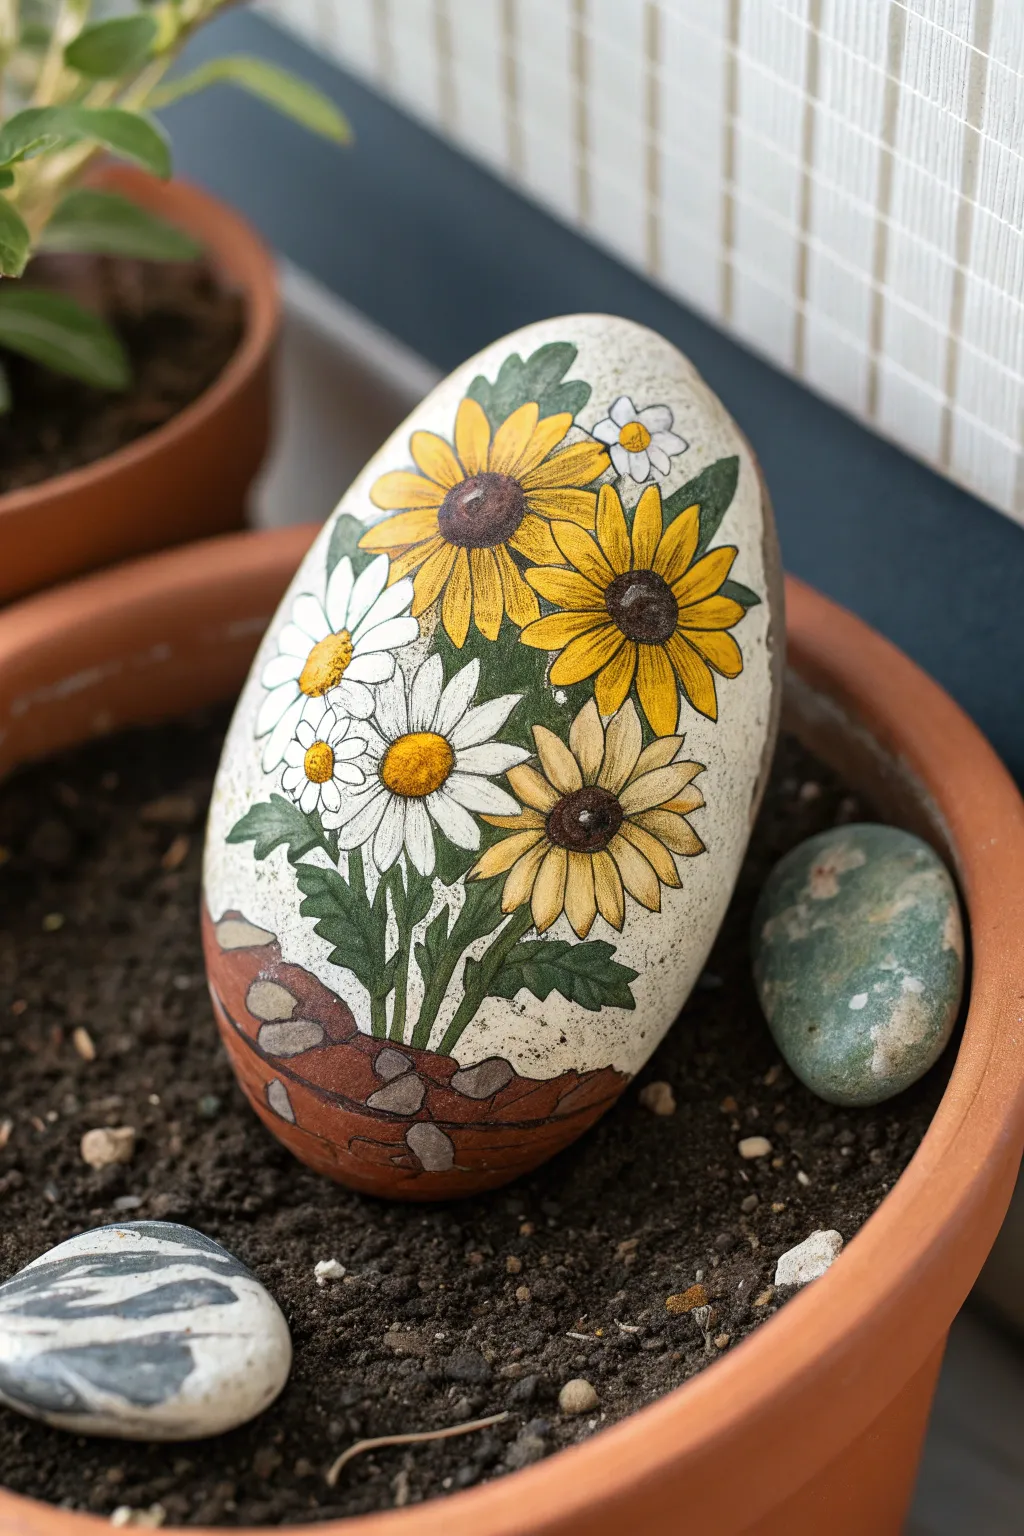
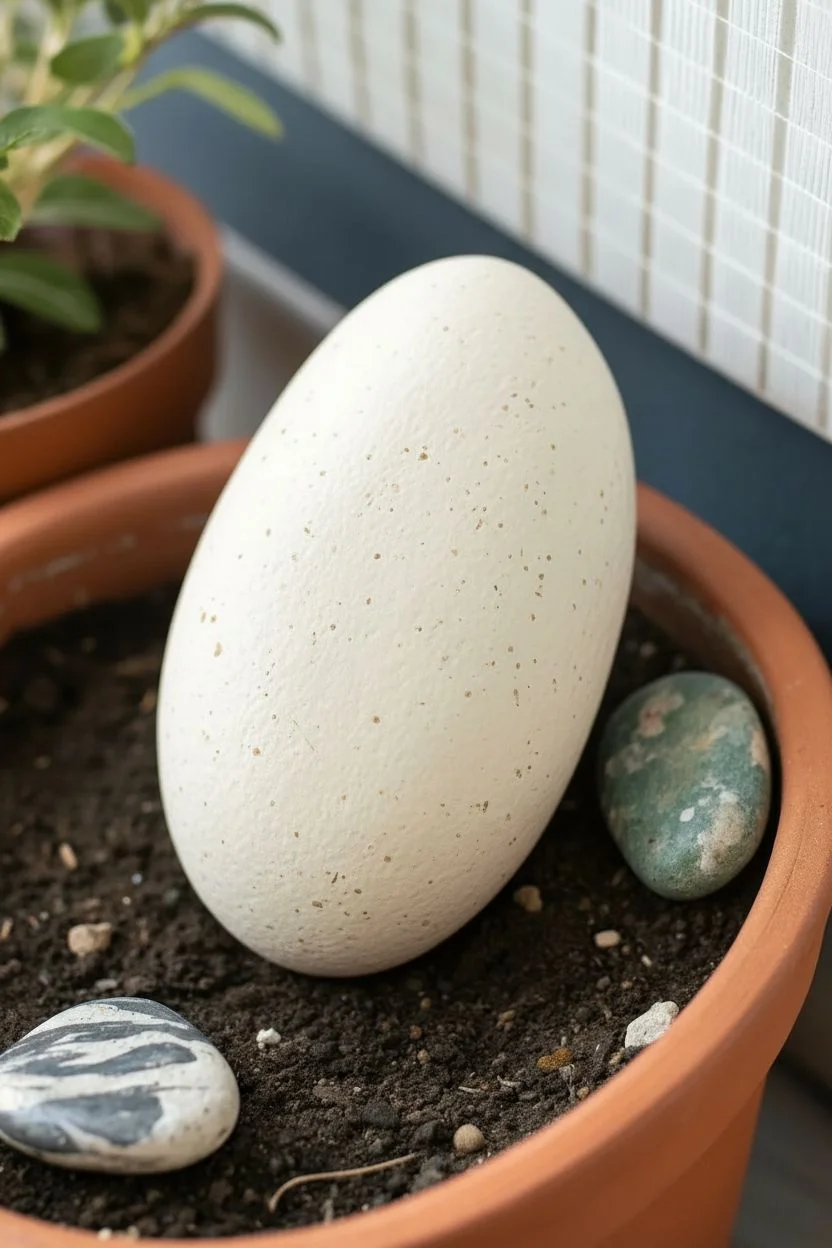
Bring a permanent burst of sunshine to your garden pots with this charming painted stone featuring cheerful sunflowers and daisies bursting from a faux planter base. The speckled cream background gives it a natural, organic feel that nestles perfectly among real greenery.
Step-by-Step Guide
Materials
- Large, smooth, egg-shaped river rock
- Acrylic paints (Titanium White, Cream/Off-White, Cadmium Yellow, Yellow Ochre, Burnt Sienna, Burnt Umber, Forest Green, Sap Green, Terra Cotta)
- Black fine-liner paint pen or permanent marker (0.5mm)
- Wide flat brush
- Medium round brush (size 4 or 6)
- Fine detail brush (size 0 or 00)
- Old toothbrush (for splattering)
- Matte or satin clear sealant spray
- Pencil and eraser
Step 1: Base Preparation
-
Clean and Dry:
Scrub your rock thoroughly with soap and water to remove any dirt or oils, then let it dry completely in the sun. -
Apply Base Coat:
Using your wide flat brush, paint the entire rock with a cream or off-white acrylic paint. You may need two to three coats to get solid, opaque coverage. -
Add Speckles:
Once dry, dip an old toothbrush into watered-down brown or grey paint. Run your thumb across the bristles to flick tiny speckles onto the rock, simulating an eggshell or natural ceramic texture.
Smear Prevention
Paint pens can smear if sealed too soon! Let your black outlines cure overnight before spraying, or apply the first coat of sealant very lightly.
Step 2: Sketching and Blocking
-
Outline the Pot:
Lightly sketch a curved line near the bottom third of the rock to define the rim of the ‘pot’ where the flowers will sit. -
Draft the Flowers:
Sketch three large circles for sunflowers near the top and right, and three smaller circles for daisies on the left. Don’t worry about petals yet, just place the centers to balance the composition. -
Block in the Pot:
Paint the area below your curved line with terra cotta paint. This will be the flower pot base. -
Add Stone Details:
While the pot area is drying, paint irregular grey shapes along the top rim of the terra cotta section to look like stones or mulch sitting in the planter.
3D Effect
Glue small ladybug cabochons onto a leaf or petal after sealing to add a cute, tactile 3D element to your garden rock.
Step 3: Painting the Florals
-
Sunflower Petals:
Using Cadmium Yellow mixed with a touch of Yellow Ochre, paint long, teardrop-shaped petals radiating from your sketched sunflower centers. Make them slightly overlap for a lush look. -
Daisy Petals:
Switch to Titanium White and your medium round brush to paint the daisy petals. These should be thinner and more numerous than the sunflower petals. -
Lower Flower Variation:
For the lowest flower on the right, mix Yellow Ochre with a dot of white to create a muted, straw-yellow color, distinguishing it from the brighter sunflowers above. -
Flower Centers:
Paint the centers of the sunflowers with Burnt Umber. For the daisies, use a bright yellow center, perhaps dabbed with a little texture. -
Center Detailing:
Once the centers are dry, stipple (dot) a lighter brown or tan color on top of the dark sunflower centers to give them a fuzzy, seeded texture.
Step 4: Leaves and Stems
-
Paint Stems:
Using a fine liner brush and Sap Green, draw stems connecting your flower heads down into the ‘pot’ base. -
Add Greenery:
Fill in the empty spaces between stems with leafy shapes using Forest Green. Vary the sizes, making some leaves broad and others slender. -
Highlight Leaves:
Mix a little white into your green and add thin veins or highlights to the leaves to create dimension.
Step 5: Defining and Finishing
-
Outline Work:
This step brings it all together. Use your black fine-liner pen to carefully outline each petal, leaf, and stem. Keep your hand steady but allow for lively, organic lines. -
Detail Petals:
Add small lines inside the petals, radiating from the center outward, to suggest ridges and texture. -
Define the Pot:
Outline the grey stones in the pot and add a few horizontal curved lines across the terra cotta base to suggest the rim and structure of the planter. -
Seal the Rock:
Ensure the ink is 100% dry to avoid smearing. Take the rock outside and spray it with a clear acrylic sealant to protect your artwork from the elements.
Now your everlasting bouquet is ready to brighten up any corner of the garden, rain or shine
Mushroom and Toadstool Rocks for Shady Spots
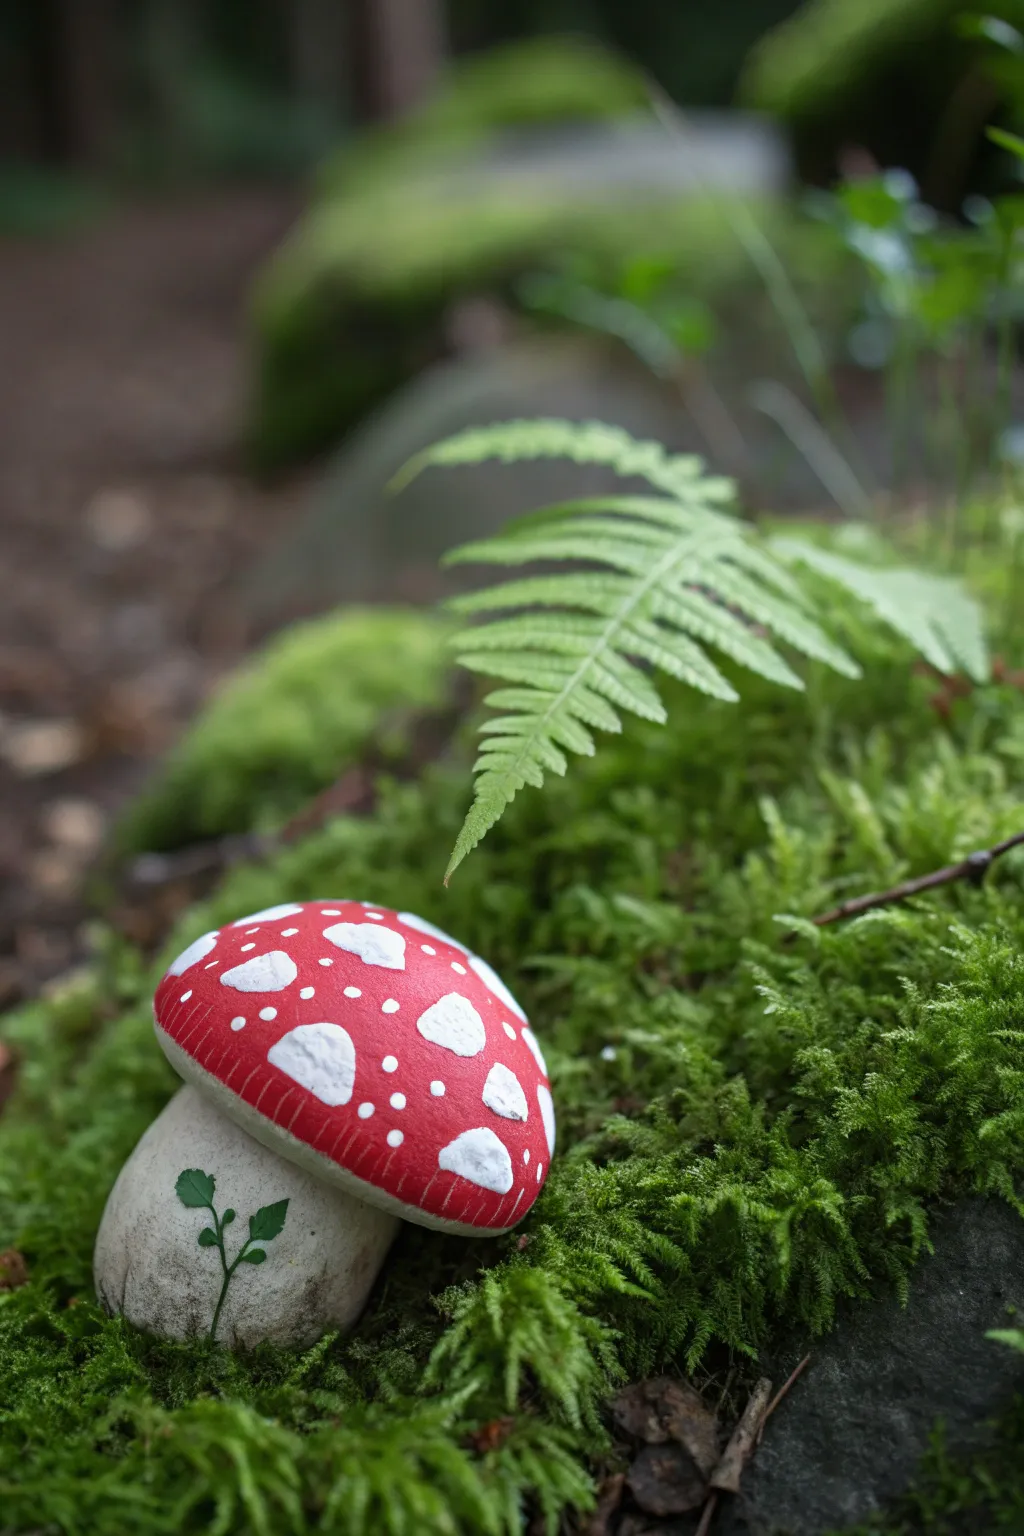
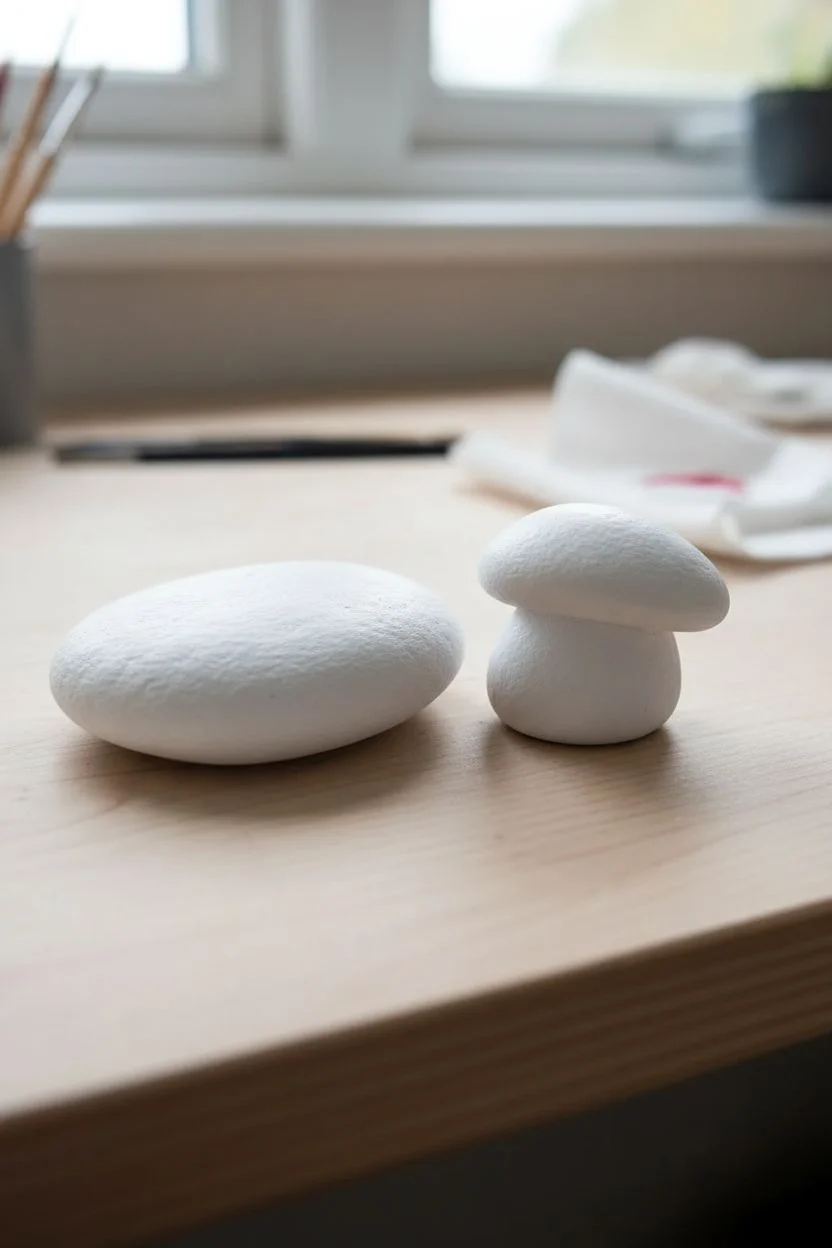
Transform two simple stones into a charming fairytale toadstool that looks right at home nestled in the moss. This clever stacked design uses separate rocks for the stem and cap, creating a 3D effect that adds depth and delight to any shady garden corner.
Step-by-Step Tutorial
Materials
- One smooth, round flat stone (for the cap)
- One oblong, sturdy stone (for the stem)
- Outdoor acrylic craft paint (Red, Bright White, Cream/Off-White, Forest Green)
- Medium flat brush
- Small round detail brush
- Fine liner brush
- Waterproof construction adhesive or strong outdoor glue
- Clear spray sealer (matte or satin finish)
- Pencil
Step 1: Preparing the Stones
-
Select your shape:
Hunt for two specific rocks: a flatter, rounded one that mimics a mushroom cap and a thicker, cylindrical one that can stand upright as the stem. Test their balance by stacking them before painting. -
Clean surface:
Scrub both rocks thoroughly with soapy water and a stiff brush to remove all dirt and moss, then let them dry completely in the sun. -
Prime the base:
Paint a base coat of white acrylic paint on both rocks to ensure your colors pop. This step is especially important for the red cap to look vibrant.
Natural Texture Trick
Don’t aim for perfect smoothness on the stem. If the rock has pits or bumps, let the paint settle into them naturally creates a believable organic mushroom texture.
Step 2: Painting the Cap
-
Base color application:
Using your medium flat brush, paint the top surface of the cap stone in a bold, classic red. You may need two coats for full opacity. -
Underside detailing:
Paint the underside of the cap stone with a cream or off-white color. If you’re feeling detailed, add very faint grey lines radiating from the center to mimic mushroom gills. -
Adding the texture:
Once the red paint is dry to the touch, mix a tiny drop of white into your red paint to create a lighter shade. Use a dry brush technique to lightly feather tiny vertical strokes near the rim, adding texture and highlighting the curve. -
Creating the spots:
Dip a small round brush into bright white paint. Press and swirl gently to create irregular, organic-looking spots on the red cap. Vary the sizes—some large, some tiny—so it looks natural rather than polka-dotted. -
Highlighting the spots:
I like to dab a second coat of white on the center of the larger spots once the first layer dries to make them really stand out against the red.
Step 3: Painting the Stem
-
Stem base coat:
Paint the entire stem rock in a creamy off-white shade. You want it to look earthy, not stark white like paper. -
Texture sponging:
Lightly sponge a very diluted light grey or tan near the bottom of the stem to make it look like it has been in the dirt. -
Sketch the sprout:
With a pencil, lightly draw a tiny little seedling growing up the side of the stem. Just a simple curved line and three or four small leaves will do. -
Painting the sprout:
Use your fine liner brush and forest green paint to trace over your pencil lines. Keep your hand steady and the paint fluid for crisp lines. -
Leaf details:
Fill in the small leaves carefully. If you want extra realism, add a tiny highlight of lime green to the tips of the leaves.
Uneven Stacking?
If the cap rock wobbles on the stem, use a small dab of epoxy putty between the stones. It fills gaps better than liquid glue and creates a stable, custom fit.
Step 4: Assembly and Finish
-
Dry check:
Ensure all paint is completely bone dry before moving on to assembly. -
Sealing:
Spray both rocks separately with a clear matte or satin sealer. This protects your artwork from rain and UV rays. -
Applying adhesive:
Apply a generous dollop of waterproof construction adhesive to the top of the stem rock. -
Final stack:
Press the cap rock firmly onto the stem. Wipe away any excess glue that squeezes out immediately. -
Curing time:
Let the mushroom cure undisturbed for at least 24 hours (or per your glue’s instructions) before placing it in the garden.
Nestle your new stone fungi among ferns or low-growing ground cover for a sweet garden surprise


Caterpillar Rock Train Along Path Edges
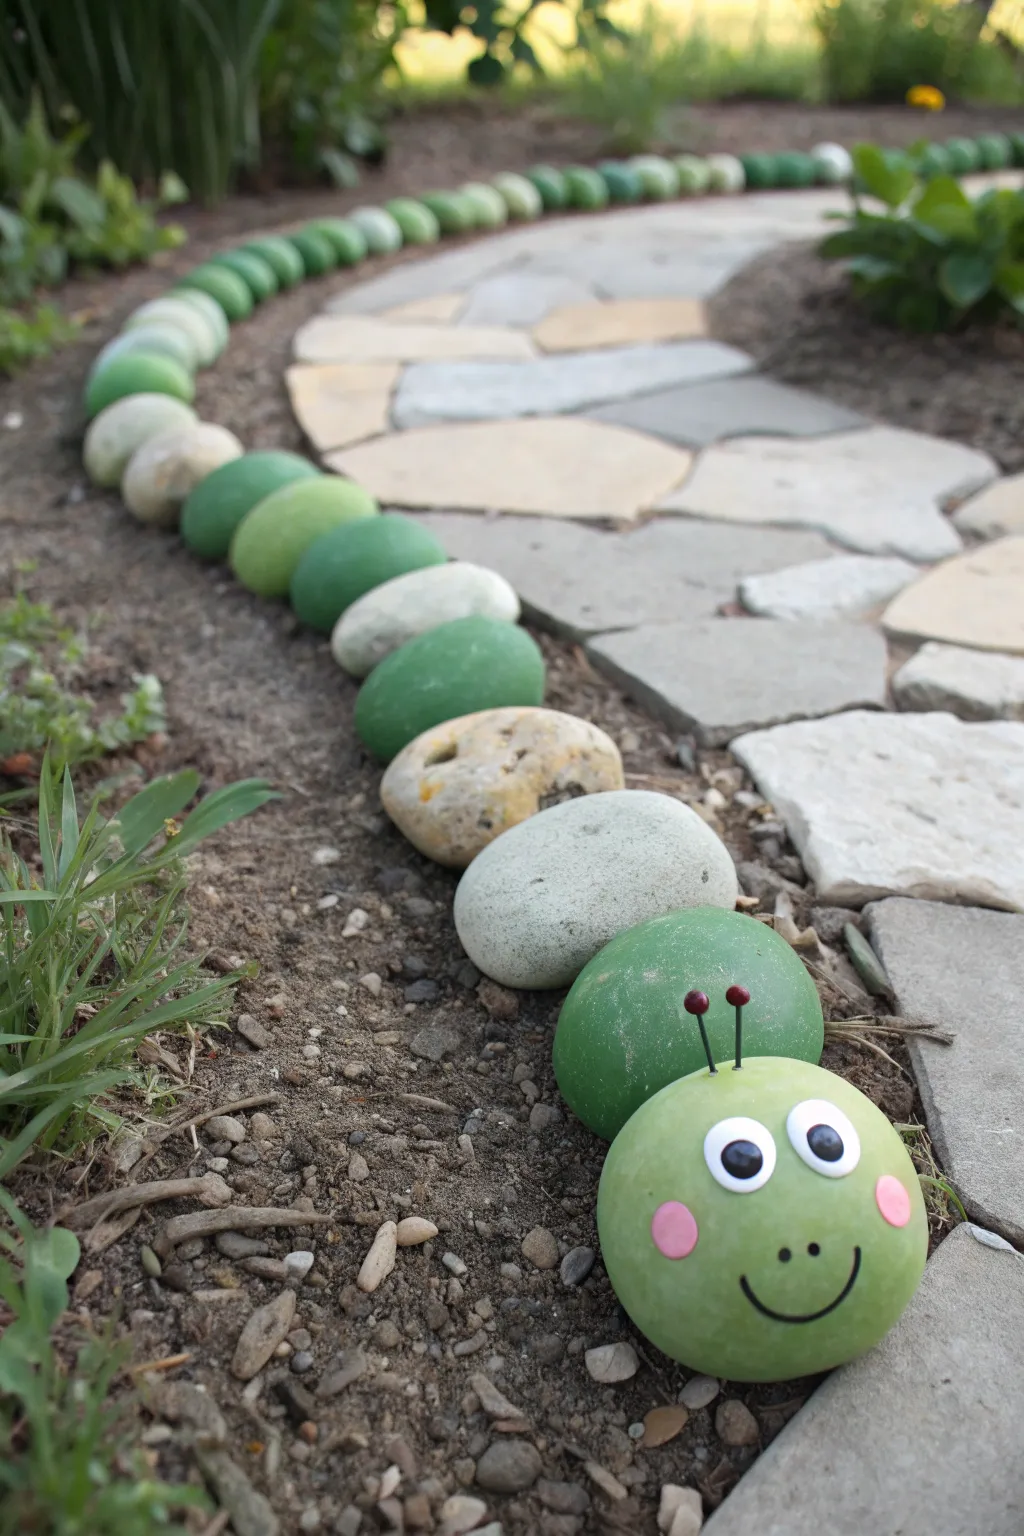

Transform a simple garden path edge into a delightful creature using nothing more than gathered stones and a splash of paint. This project creates a charming, winding caterpillar that adds character and a pop of green to your flower beds.
How-To Guide
Materials
- One large, round, smooth river rock (for the head)
- Collection of oval or round rocks in varying sizes (20-30+ depending on length)
- Outdoor acrylic craft paint (lime green, forest green, light pink, black)
- Spray sealer or outdoor varnish (matte or satin)
- Large googly eyes (adhesive or glue-on)
- Strong outdoor craft glue (e.g., E6000)
- Two dark red or black beads on wire, or pre-made craft antennae
- Paintbrushes (flat brush for coverage, fine liner brush for details)
- Trowel or small shovel (optional, for leveling)
Step 1: Preparation & Planning
-
Collect your stones:
Gather a significant number of smooth, rounded stones. You will need one special ‘head’ stone that is slightly larger and rounder than the rest. For the body, look for oval shapes that nestle well together. -
Clean the surface:
Scrub all stones thoroughly with soap and water to remove dirt, moss, and garden grit. Allow them to dry completely in the sun, as paint won’t adhere well to damp or dirty surfaces. -
Plan your layout:
Before painting, test the arrangement along your garden border. Place the largest stone at the front and trail the smaller stones behind it to ensure you have enough rocks to cover the desired distance.
Paint Peeling?
If paint peels after rain, the rock wasn’t clean enough. Scrub with a wire brush and vinegar, rinse well, dry fully, and primes before repainting.
Step 2: Painting the Body Segments
-
Select stones to paint:
You don’t need to paint every single stone. Select about half or two-thirds of your body stones to be painted green. The alternating natural and painted look adds organic texture. -
Apply base coats:
Paint the selected body stones in varied shades. Use lime green for some and forest green for others to create depth. I find applying two thin coats works better than one thick glob. -
Paint the head:
Take your primary ‘head’ stone and coat it entirely in a bright, cheerful lime green. This needs to be the most vibrant part of the caterpillar, so give it an extra coat if necessary for full opacity. -
Allow tailored drying:
Let all the painted rocks dry completely. If you are painting the undersides (which helps prevent moisture seepage), flip them over and paint the bottoms once the tops are dry to the touch.
Step 3: Creating the Face
-
Add rosy cheeks:
Dip a small round brush or a foam pouncer into light pink paint. Dab two soft circles on the lower sides of the head stone to create blushing cheeks. -
Paint the smile:
Using a fine liner brush and black acrylic paint, carefully draw a simple, U-shaped smile between the cheeks. -
Add the nose:
Place two tiny black dots just above the smile for nostrils. -
Prepare the eyes:
Check the positioning of your large googly eyes. They should sit fairly high on the face. Mark the spot lightly with a pencil if needed. -
Attach the eyes:
Apply a dab of strong outdoor craft glue to the back of the googly eyes and press them firmly onto the painted stone. Hold for a moment to ensure they grip. -
Create antennae:
Take two small pieces of wire with beads on the end (or pre-made craft antennae). If using bare wire, paint the tips red for a cute detail. -
Attach antennae:
Glue the antennae to the top or back of the head stone. If the stone is heavy enough, you can simply tuck the wire underneath it when placing it in the garden, or glue it directly to the stone surface.
Glow in the Dark
Mix glow powder into your green paint or use a glow-in-the-dark topcoat. Your caterpillar will serve as a magical path guide at night.
Step 4: Assembly & Installation
-
Seal the artwork:
Before putting them outside, spray all painted stones (especially the face) with a clear outdoor sealer. This protects the paint from rain and UV fading. -
Prepare the ground:
Clear a narrow strip of soil along your path edge. Use a trowel to make the ground relatively flat so the rocks don’t wobble. -
Position the head:
Place the head stone first at the start of your border. Nest it slightly into the dirt for stability. -
Lay the body:
Begin placing the body stones behind the head. Alternate between your painted green stones and the unpainted natural stones. -
Create the curve:
Don’t place them in a straight line; follow the natural curve of your garden bed or path. Overlap them slightly or snug them tight against each other to mimic a segmented body.
Enjoy watching your friendly stone guardian brighten up your walkway throughout the seasons
Frog and Toad Rocks Near Ponds and Birdbaths
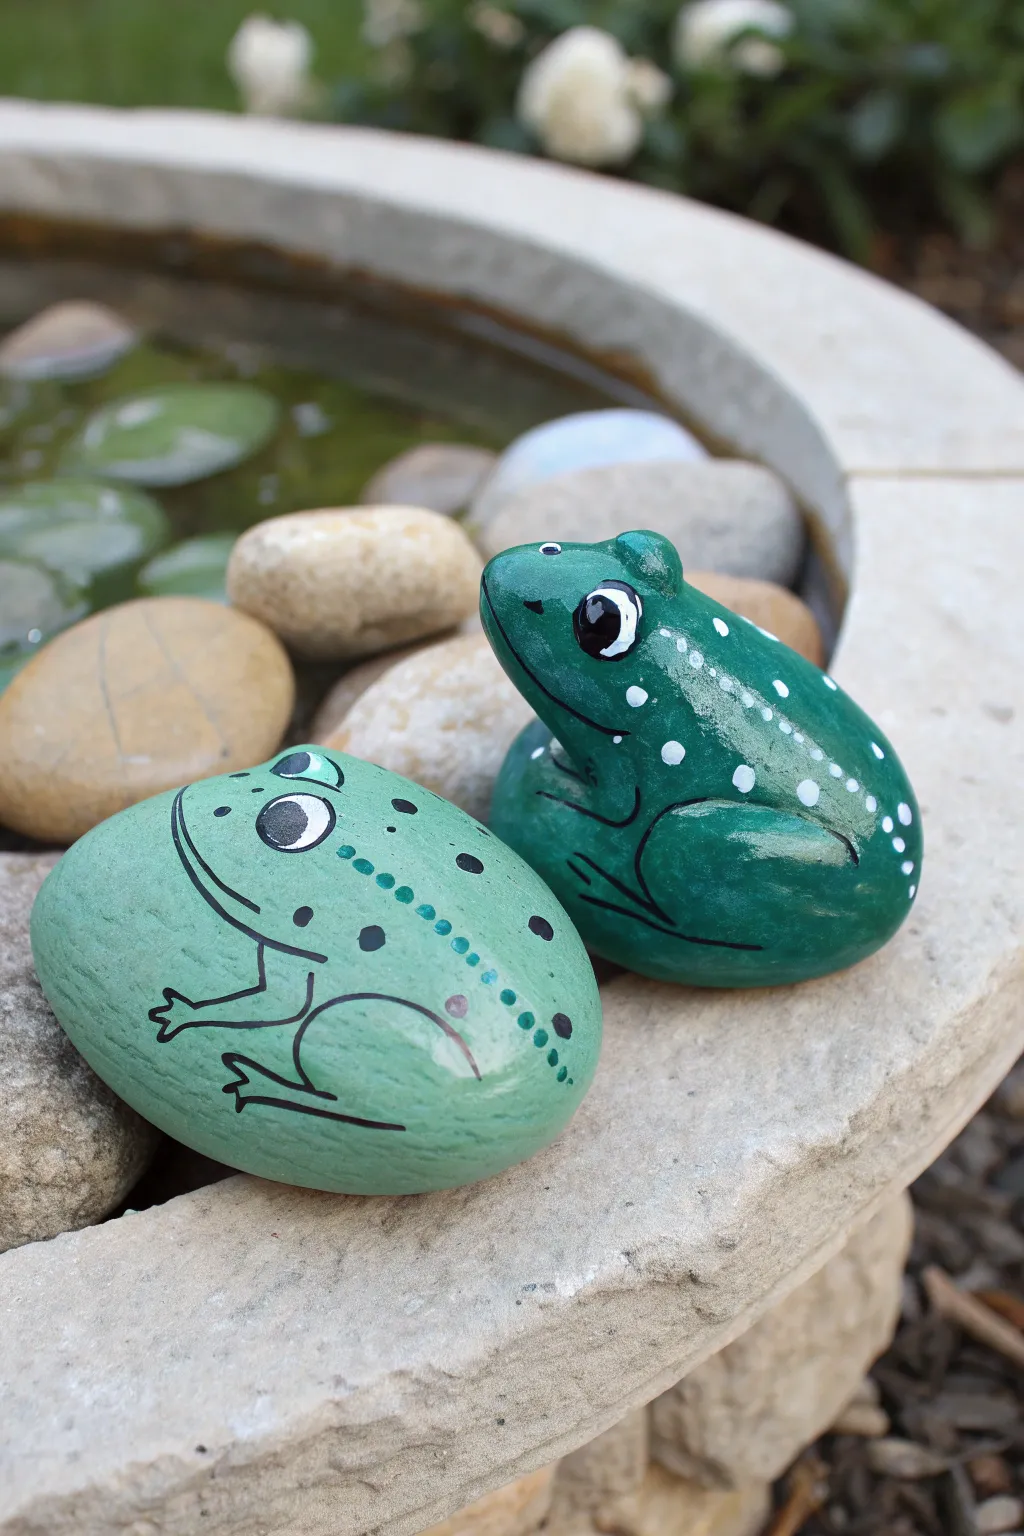
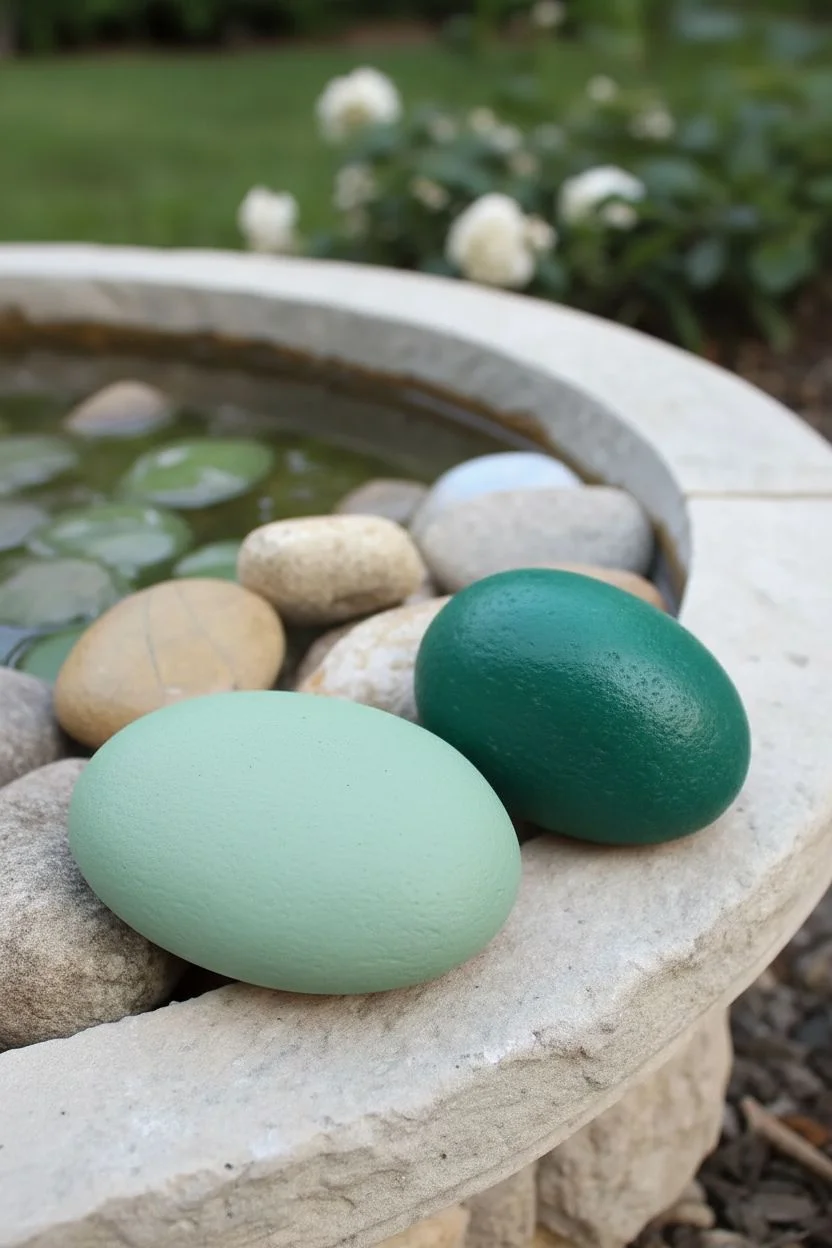
Bring your garden water features to life with this charming pair of amphibian rock art friends. One rock depicts a lighter green frog resting flat, while the other features a darker, seated frog with raised eyes, perfect for nesting near ponds or birdbaths.
Step-by-Step
Materials
- Two smooth river rocks (one flat oval, one slightly taller/rounder)
- Acrylic craft paints (light sage green, deep forest green, white, black, dark teal)
- Medium flat paintbrush
- Fine detail liner brush (size 0 or 00)
- Small dotting tool or toothpick
- Outdoor sealant spray (gloss or matte)
- Water cup and paper towels
Step 1: Base Coating
-
Clean and Prep:
Scrub your chosen rocks with soap and water to remove any dirt or oils that might repel paint. Let them dry completely, preferably in the sun. -
Base Color – The Flat Frog:
For the flatter oval rock, mix a light sage green using green and a touch of white. Paint the entire top surface. You may need two coats for full opacity. -
Base Color – The Seated Frog:
Paint the taller, rounder rock with a deep forest green. Ensure you get into any crevices if the rock texture is rough. -
Drying Time:
Allow both rocks to dry fully. If the paint feels cool to the touch, it still holds moisture, so give it a few extra minutes.
Wobbly Lines?
If your black outlines are too thick, switch to a permanent marker pen for better control, then seal carefully so the ink doesn’t run.
Step 2: Detailing the Light Frog
-
Outline the Shape:
Using your fine liner brush and black paint reduced with a drop of water, draw a simple outline of a frog profile. Start with a curve for the back and a rounded nose. -
Adding Legs:
Paint a bent back leg shape near the rear of the rock and a simple, three-toed front foot extending forward. -
The Eye:
Draw a large circle near the top front of the head. Fill it with white paint, let it dry, then add a large black pupil looking slightly backward. -
Spotted Pattern:
Dip a dotting tool or the back of a paintbrush into dark teal or dark green paint. Dot a line of spots running from behind the eye down the center of the back. -
Extra Spots:
Add a few scattered, larger spots on the sides using black paint for contrast.
Project Level Up
Glue a small, flat pebble underneath the front of the darker frog to tilt it upward, making it look like it’s about to hop into the water.
Step 3: Detailing the Dark Frog
-
Mouth and Jaw:
Take your liner brush with black paint. Draw a long, slightly curved line for the mouth that extends halfway down the side of the rock. -
Defining the Eyes:
Instead of a flat circle, paint a prominent, bulging eye shape on the upper curve of the rock. Outline it in black, fill with white, and add a large black pupil. -
Leg Contours:
Paint a large, curved line on the side to suggest the haunch of the back leg. Add faint black lines for the toes tucked beneath. -
Creating Texture:
Using white paint and your liner brush or a toothpick, add tiny speckles along the frog’s back to mimic moist skin. -
Highlighting:
I like to add a small white ‘glint’ dot inside the black pupil of the eye to make the frog look alive and alert.
Step 4: Finishing Touches
-
Clean Up Lines:
If any lines are shaky, use your base color paint to carefully tidy up the edges of your black outlines. -
Final Seal:
Once absolutely dry (give it at least an hour), spray the rocks with a clear outdoor sealant to protect them from rain and sun damage.
Place your new amphibian friends near a water feature and enjoy their quiet company
Bird and Feather Rocks to Scatter Under Feeders
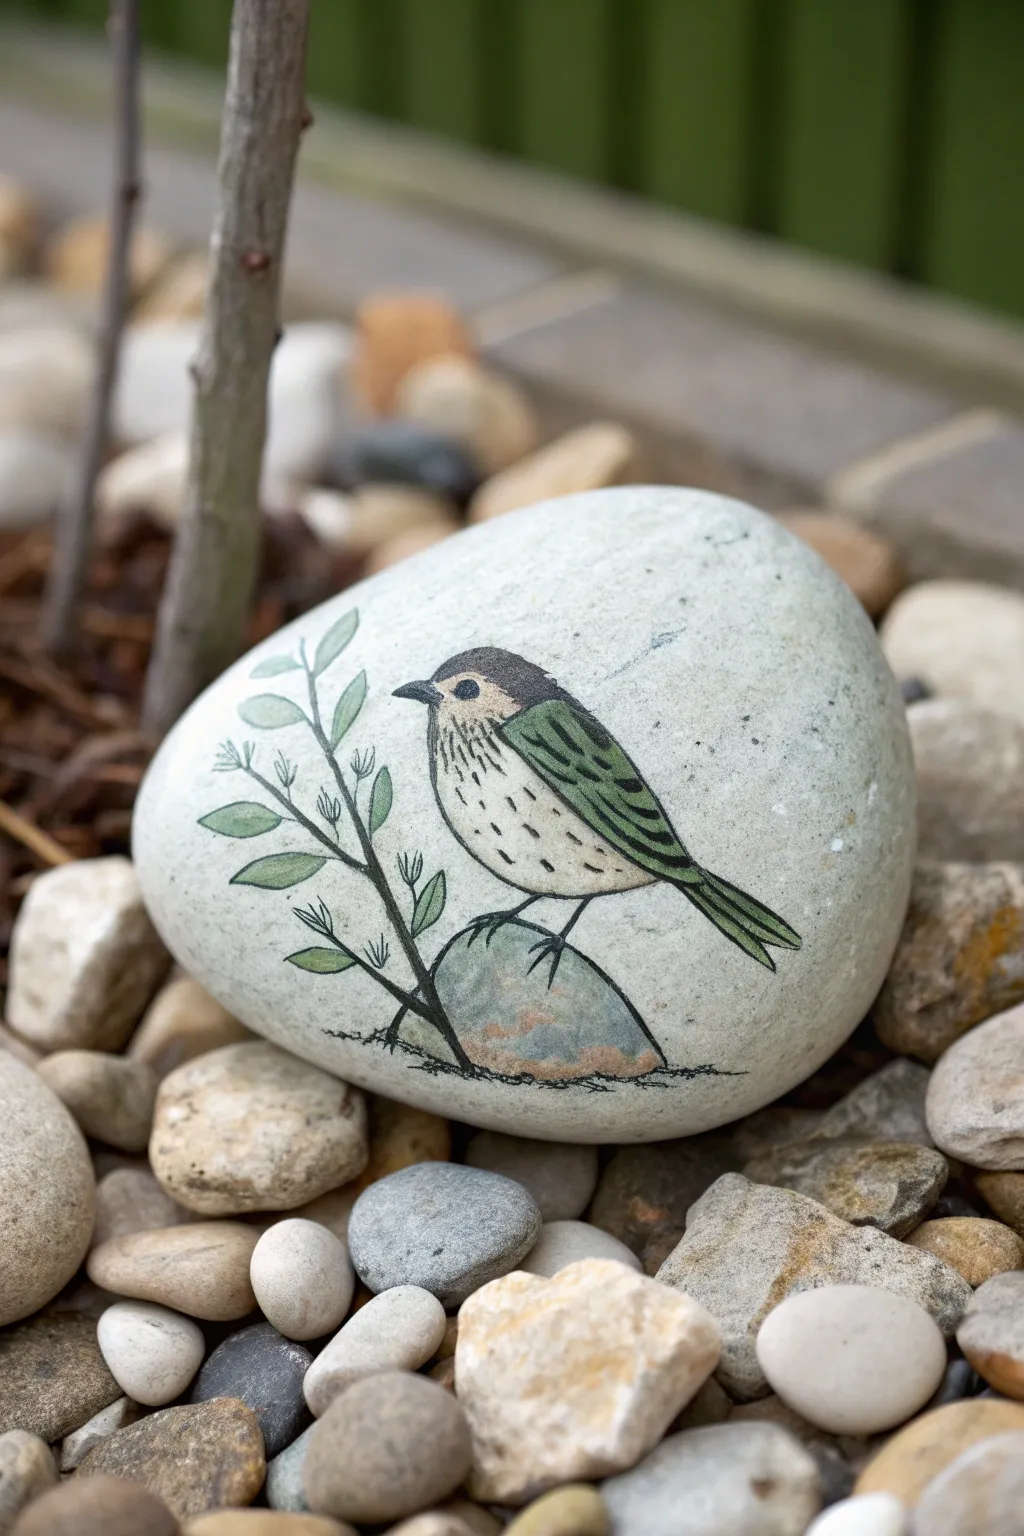
This charming, naturally-inspired rock painting features a small, perching songbird resting on a stone of its own. The design uses delicate black linework and soft, translucent washes of color to create a serene, illustrative look that blends beautifully into garden pathways.
Step-by-Step Tutorial
Materials
- Large, smooth white river stone (flat surface preferred)
- Pencil (HB or lighter)
- Fine-point black permanent marker or liner pen (01 or 03 size)
- Acrylic paints: Olive green, deep forest green, buff or beige, grey, slate blue, black, white
- Small round detail brush (size 1 or 2)
- Very fine liner brush (size 00)
- Water container and palette
- Paper towel
- Outdoor UV-resistant varnish (spray or brush-on)
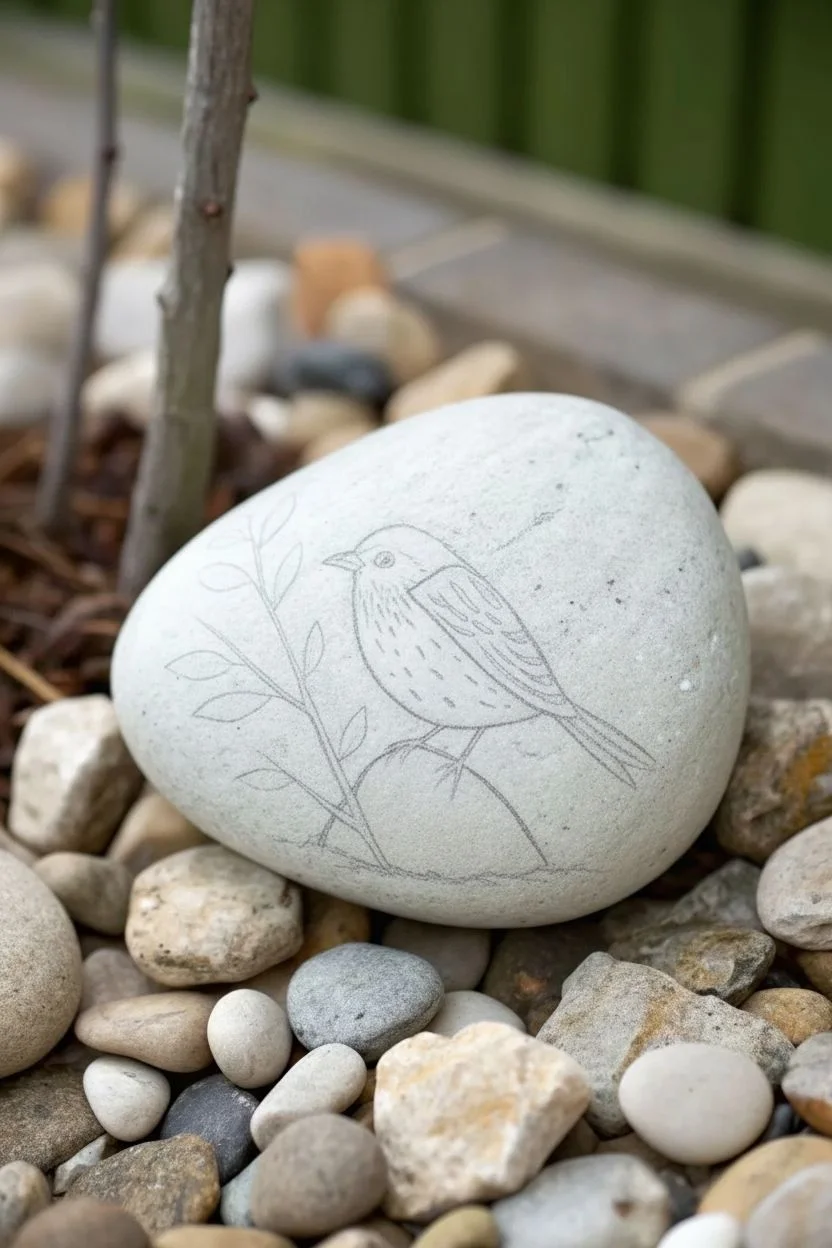
Step 1: Sketching the Composition
-
Clean the stone:
Before starting, ensure your rock is scrubbed clean of any dirt or garden residue and completely dry. A smooth surface is key for the fine ink lines you will be drawing. -
Draft the bird’s shape:
Using a light pencil, lightly sketch a teardrop shape for the bird’s body, tilted slightly upward. Add a small circle for the head on the upper left side of the teardrop. -
Add the perch:
Draw an oval shape directly beneath the bird’s belly to represent the rock it is standing on. The bird’s feet will eventually connect these two shapes. -
Sketch the foliage:
Draw a curving line extending from behind the rock up the left side of the stone. Add small, paired leaf shapes along this stem to create the branch detail.
Step 2: Applying the Ink Outline
-
Outline the bird:
Trace over your pencil lines with the fine-point black marker. Define the beak, the round eye, and the wing shape that tucks against the bird’s side. -
Detail the feathers:
Add small, dashed lines on the bird’s chest to suggest fluffy texture. Draw straighter lines on the wing to indicate flight feathers. -
Ink the surroundings:
Trace the rock perch and the leafy branch. Make the branch slightly thicker at the bottom and taper it as it goes up. I suggest adding a few tiny grass scribbles at the base of the rock for grounding. -
Erase guidelines:
Wait at least 15 minutes to ensure the ink is absolutely dry, then gently erase visible pencil marks.
Ink Bleed Prevention
If your marker bleeds when painting over it, try sealing the ink drawing with a light coat of spray matte sealer before you start painting.
Step 3: Adding Color Washes
-
Paint the breast:
Dilute the buff or beige acrylic paint with a little water to create a semi-transparent wash. Apply this to the bird’s chest and belly area. -
Color the wings:
Mix olive green with a touch of forest green. Paint the wing area carefully, staying within the ink lines. -
Detail the head cap:
Use a dark grey or soft black to paint the top of the head (the cap), avoiding the eye area. -
Paint the leaves:
Using a light leafy green, fill in the leaves on the branch. If you want depth, add a tiny dot of darker green at the base of each leaf while the paint is still wet. -
Color the rock perch:
Mix slate blue with a little grey and water to create a stony wash. Fill in the rock shape beneath the bird.
Make a Flock
Create a whole set using different local bird species like cardinals or robins. Place them throughout your garden beds for a hidden scavenger hunt.
Step 4: Final Details and Protection
-
Add white highlights:
Once dry, use your finest brush or a white paint pen to add a tiny ‘sparkle’ dot in the bird’s eye and thin highlight lines on the wing feathers. -
Enhance shading:
If desired, adding a very faint wash of brown at the bottom of the rock perch creates a shadow effect, grounding the composition. -
Dry completely:
Allow the paint to cure for at least an hour. Acrylics dry fast, but thicker layers need time. -
Seal the artwork:
Apply two coats of UV-resistant varnish. This is crucial for garden rocks to prevent fading from the sun and rain damage.
Place your little stone bird near a real feeder and see if it attracts any feathered friends
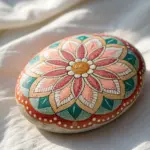
Mandala Dot Rocks as Mini Stepping Stones
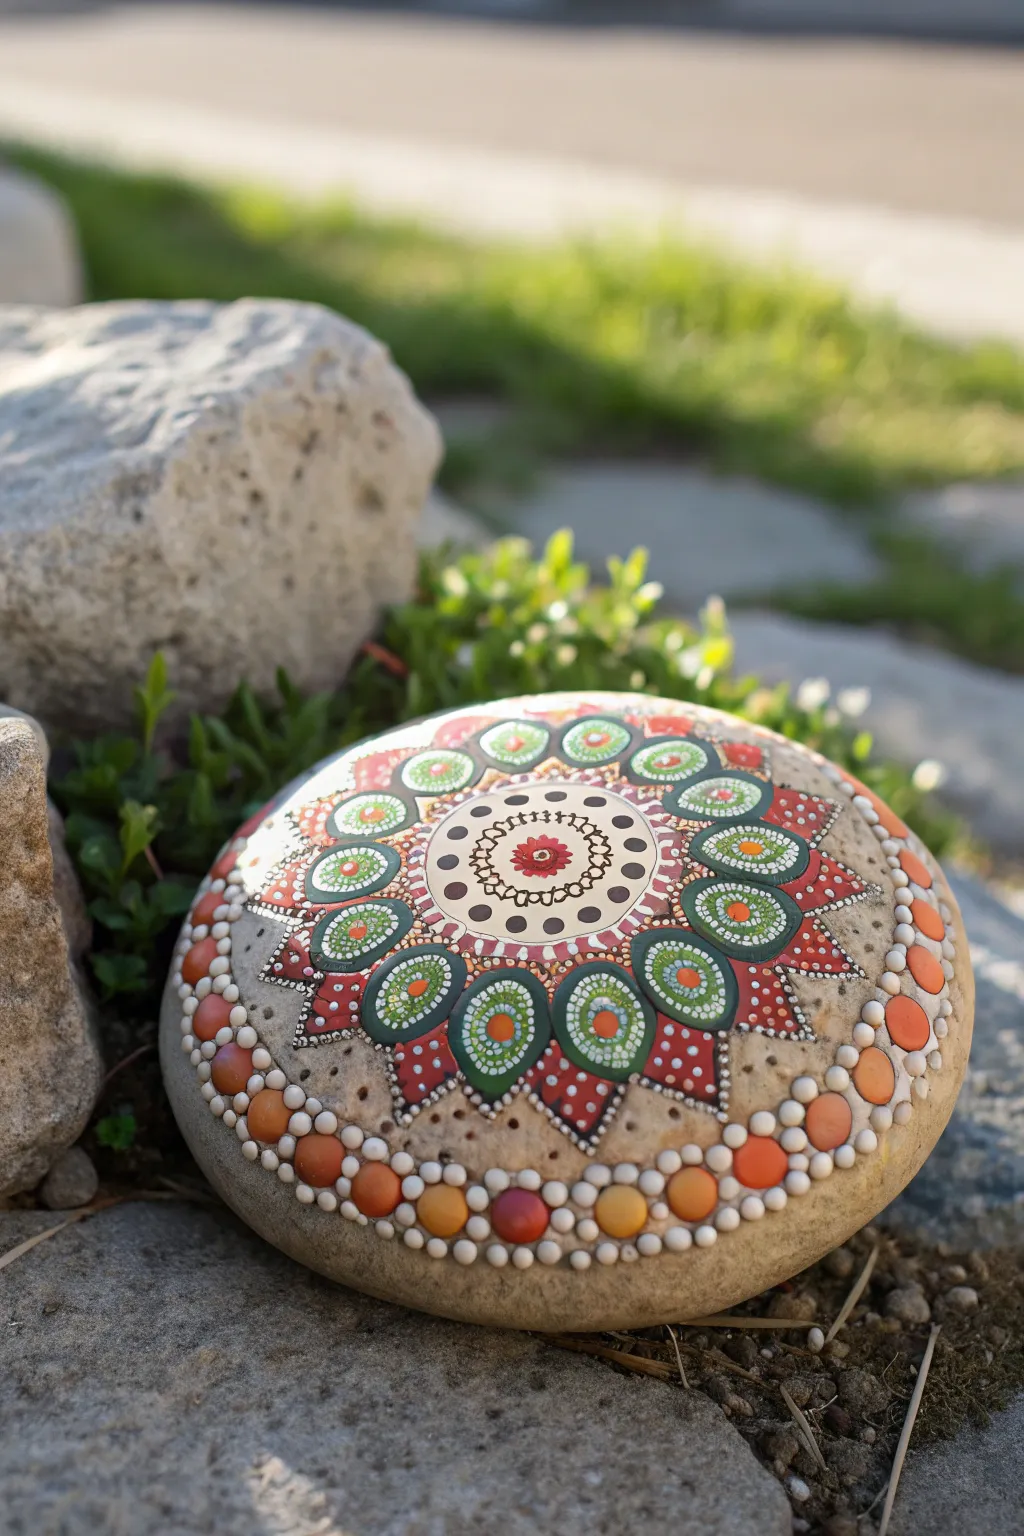
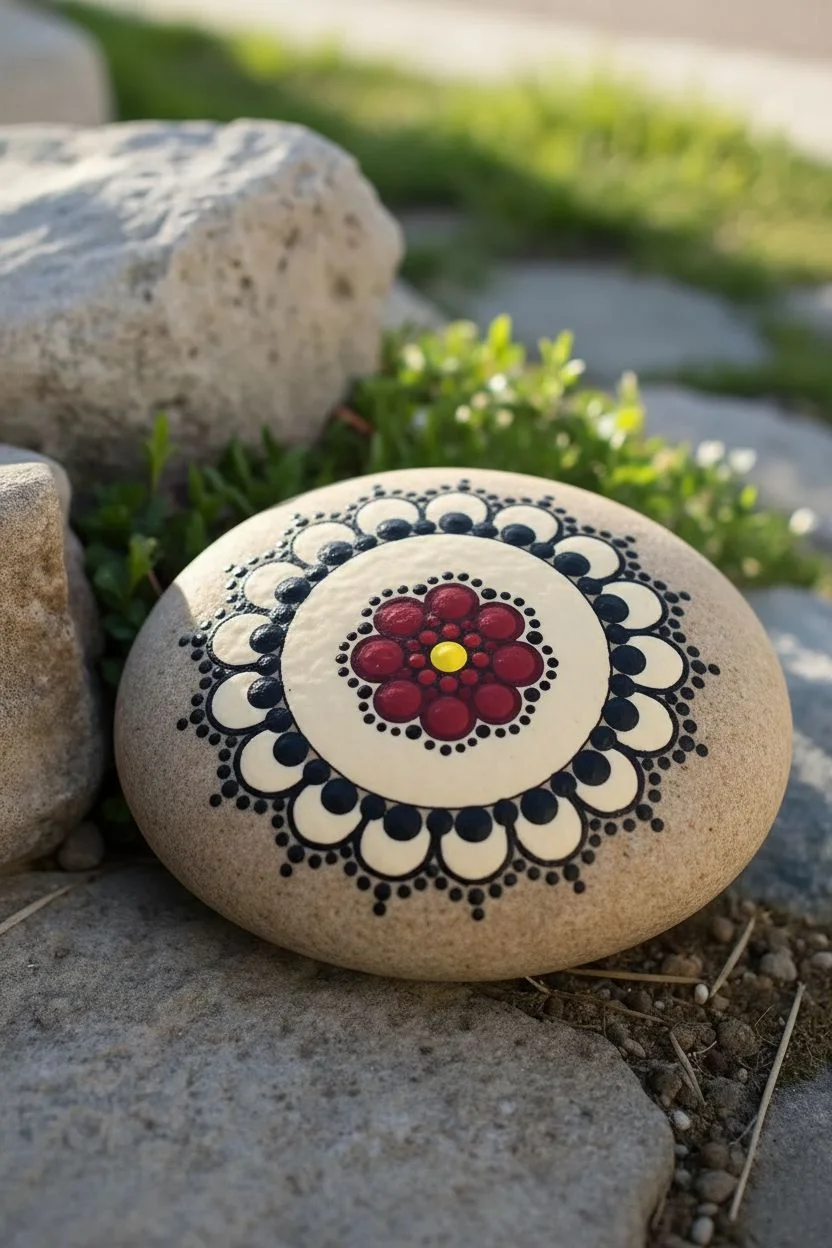
Brighten your garden path with this radiant mandala design featuring radiating layers of olive green, terra cotta red, and crisp white dots. The intricate patterns expand from a central blossom, creating a mesmerizing, earthy focal point that looks beautiful nestled among greenery.
How-To Guide
Materials
- Large, smooth, round river rock (approx. 6-8 inches diameter)
- Small round sponge applicator or large dotting tool
- Set of dotting tools (various sizes)
- Fine liner brush
- Acrylic paints: Cream/Off-white, Deep Red/Terra Cotta, Olive Green, Sage Green, Golden Yellow, Black
- Matte or satin outdoor varnish
- Warm soapy water and cloth (for cleaning rock)
- Pencil and compass (optional for guidelines)
Step 1: Preparation and Center
-
Clean and Prep:
Begin by scrubbing your rock thoroughly with warm soapy water to remove any dirt or oils. Let it dry completely in the sun before starting. -
Base Circle:
Using a large round sponge applicator or your largest dotting tool, create a perfect circle in the very center using cream-colored paint. This serves as the foundation for your central motif. -
Central Blossom:
Once the cream circle is dry, paint a small, deep red flower shape in the middle. Add a tiny yellow dot in the flower’s center for detail. -
Inner Pattern:
Using a fine liner brush and black paint, carefully draw a scalloped ring around your central red flower. Finish this inner section by placing small black dots around the scallops, creating a delicate lace-like effect.
Paint Consistency Pro Tip
For perfectly round, raised dots, your paint should be the consistency of heavy cream. If it forms peaks, it’s too thick; if it runs, it’s too thin.
Step 2: Radiating Petals
-
First Petal Ring Outline:
Ideally using a medium-sized dotting tool, paint a ring of olive green ovals or ‘petals’ surrounding the central cream circle. There should be about 10-12 petals. -
Petal Details:
Inside each olive green oval, add a smaller circle of sage green, and then a tiny dot of orange or yellow in the very center to create depth. -
Red Framing:
Using your deep red paint, create triangular shapes between the green petals, pointing outward. This creates a starburst effect. -
White Dot Accents:
Outline these red triangles with tiny cream or white dots. This high-contrast step is crucial for defining the separation between the red and green sections. -
Outer Green Ring:
Paint a larger ring of green petal shapes directly above the red triangles. These should be slightly larger than your first green ring. -
Layering the Outer Green:
Just like the inner ring, layer these green shapes. I find waiting for the base coat to dry completely prevents the colors from muddying. Add a sage circle, then a smaller white dot inside.
Step 3: Border and Finishing
-
Border Prep:
Moving towards the edge of the stone, visualize where your final border will sit. You can lightly verify spacing with a pencil if needed. -
Large Dot Border:
Create the main border using alternating large dots of golden yellow and terra cotta orange. These should wrap around the curvature of the stone. -
Inner Border Detail:
Place a smaller white dot between each of the large colored border dots, slightly closer to the center of the design. -
Outer Border Detail:
Add a second row of even smaller white dots on the very outside edge, nestled between the large colored dots to frame the entire piece. -
Sealing:
Allow the paint to cure for at least 24 hours. Once fully hard, apply two to three coats of outdoor-grade varnish to protect your work from rain and UV rays.
Fixing Smudges
Don’t panic if a dot smudges! wait for it to dry completely, pick it off gently with a craft knife or paint over it with the base color, then re-dot.
Place your finished mandala stone in a sunny spot to enjoy the intricate patterns all season long
Glow-in-the-Dark Constellation Rocks for Night Gardens
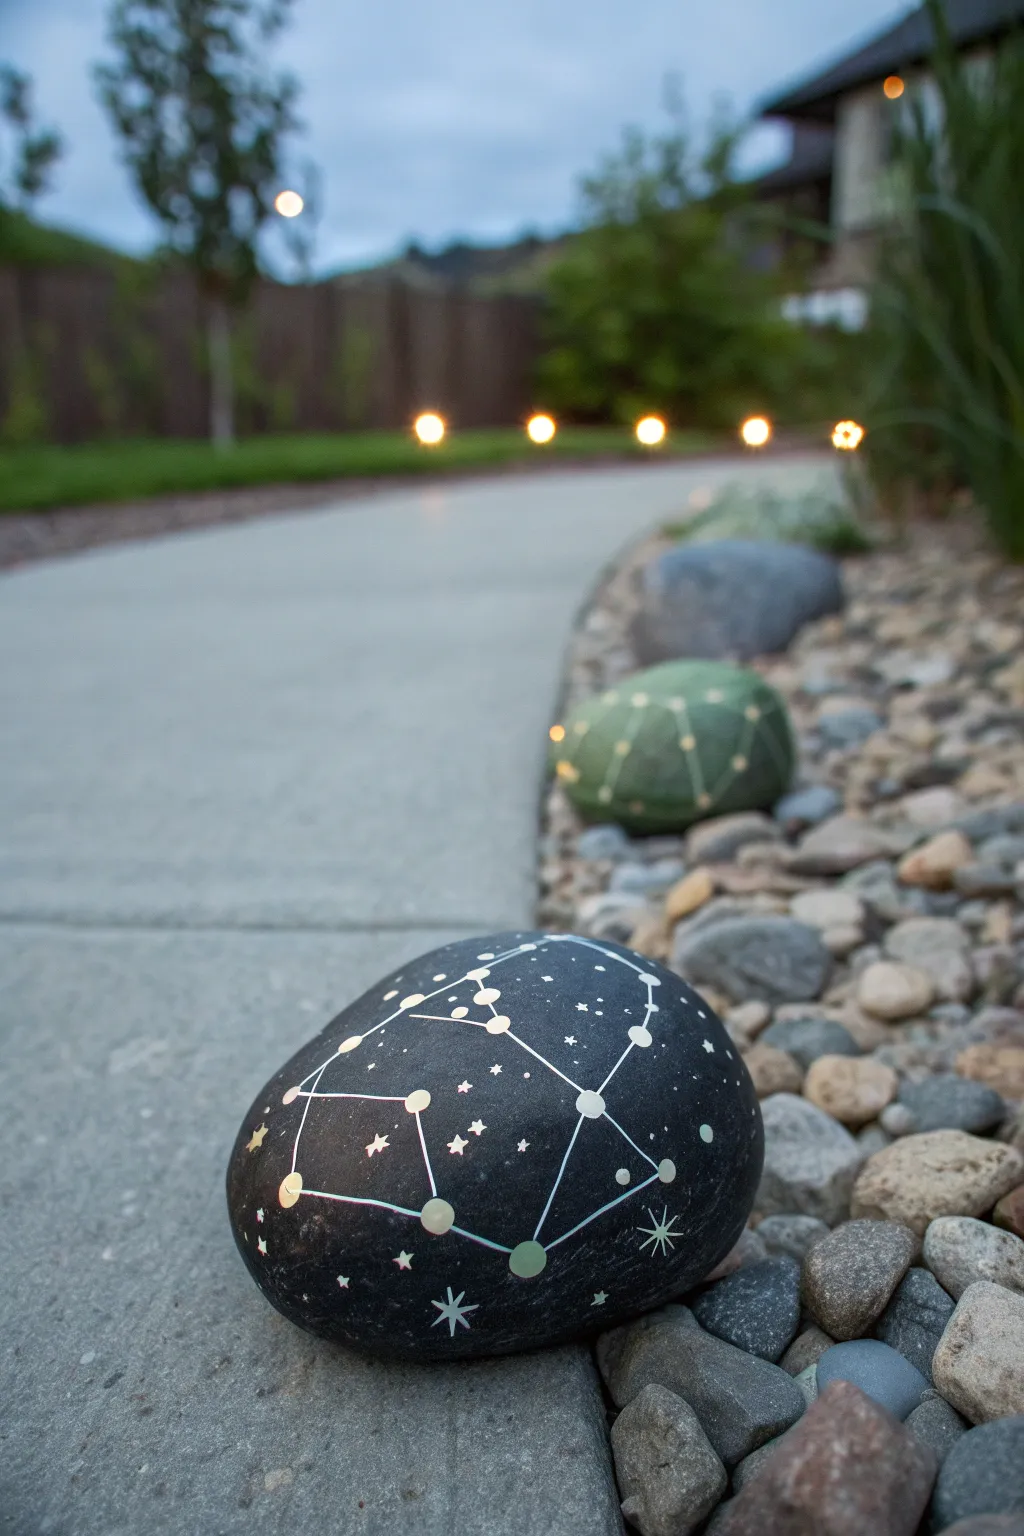
Transform ordinary garden stones into a celestial map that lights up your pathway after dusk. These elegantly simple rocks featuring constellations use glow-in-the-dark paint to create a magical, subtle ambiance in your flower beds.
Step-by-Step Guide
Materials
- Smooth river rocks (flat surfaces work best)
- Black or very dark navy outdoor acrylic paint
- Glow-in-the-dark acrylic paint (phosphorescent)
- White acrylic paint (for base dots)
- Fine detail paintbrushes (size 00 or 000)
- White or metallic silver paint pen (fine tip)
- Spray sealant (outdoor, clear matte or satin finish)
- Pencil and eraser
- Soap and water
Step 1: Preparation and Base Coat
-
Clean the canvas:
Before you begin, scrub your chosen rocks thoroughly with soap and warm water to remove any dirt or oily residue. Let them dry completely in the sun, as trapped moisture can cause the paint to peel later. -
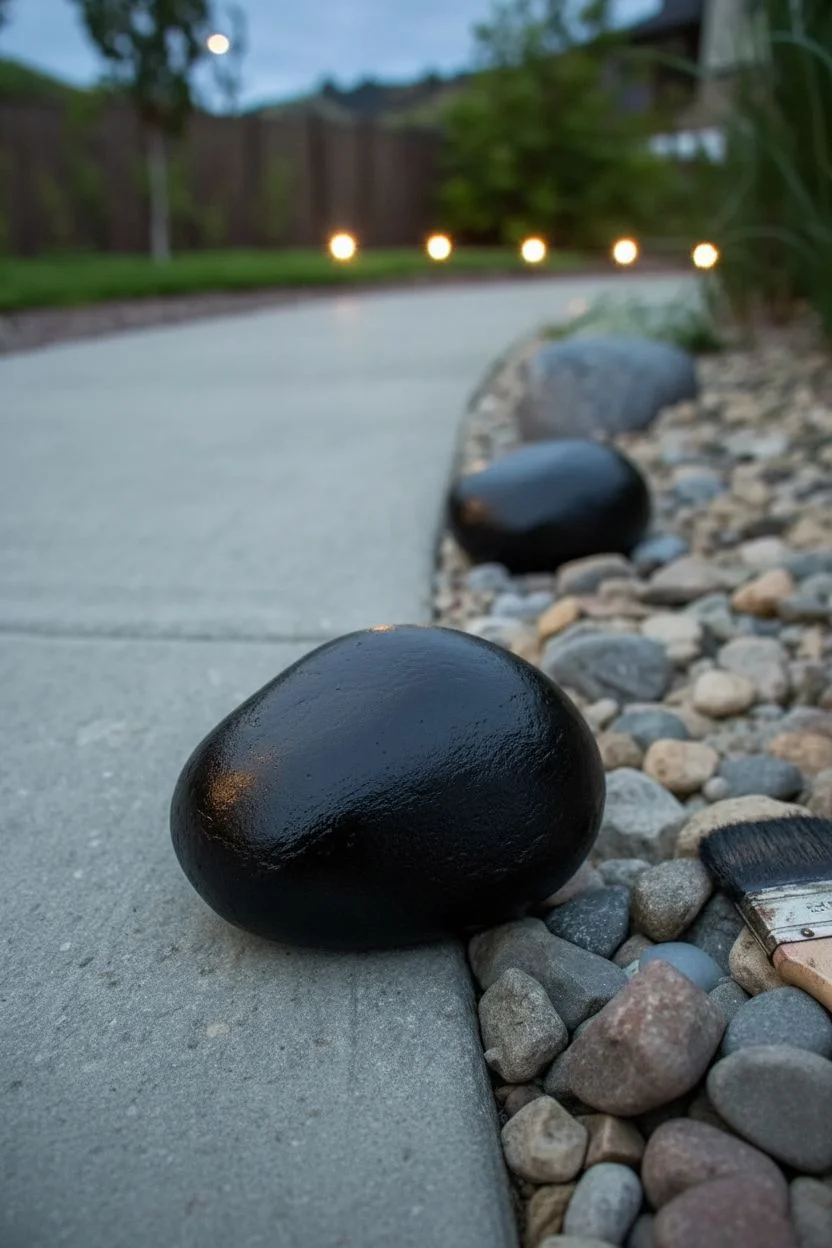
Apply the dark background:
Paint the entire top surface of the rock with your black or dark navy acrylic paint. This dark base is essential for making the glowing elements pop. -
Add a second coat:
Once the first layer is dry to the touch, apply a second coat to ensure fully opaque coverage. I find cross-hatching the brush strokes helps hide any rock texture. -
Full drying time:
Allow the base coat to cure fully, preferably for at least an hour, before attempting to sketch on top.
Glow Troubleshooting
If the glow is too dim, you likely need a thicker application. Don’t brush the glow paint flat; dab it on creating a small dome directly over the white base dots.
Step 2: Mapping the Stars
-
Choose your constellation:
Look up a reference image of your favorite constellation, such as the Big Dipper, Cassiopeia, or Orion. -
Sketch the layout:
Lightly mark the position of the main stars using a pencil directly onto the black paint. Don’t worry about the lines yet, just place the dots where the major stars belong. -
Create the white base stars:
Dip the handle end of a paintbrush into white acrylic paint and dot it over your pencil marks. Variation is key here; make some dots slightly larger for brighter stars and smaller for fainter ones. -
Add tiny background stars:
Using a very fine brush or the tip of a toothpick, add tiny speckles of white stars in the empty negative space to simulate a distant galaxy. -
Paint starbursts:
For the largest ‘stars’ in your constellation, use a fine brush to carefully pull small lines outward from the center dot to create a cross or starburst shape.
Step 3: Adding the Glow
-
Connect the dots:
Using a white or silver paint pen, draw straight lines connecting your main star dots to form the constellation shape. Use a ruler if your hand feels shaky. -
Apply the glow medium:
Once the white base dots are dry, load a clean brush with glow-in-the-dark paint. Dab a generous amount directly over the white star dots. The white base helps reflect the glow outward. -
Layer the glow:
Let the first layer of glow paint dry clear, then add a second or even third layer. The thicker the application on the stars, the brighter the luminescence will be at night. -
Trace the lines:
Carefully trace over your connecting lines with a thin layer of glow paint if you want the structure to be visible at night, though leaving them just silver creates a nice contrast.
Zodiac Level Up
Personalize your garden by painting a rock for every family member’s zodiac sign. Arrange them in birth order along the path for a hidden family tree.
Step 4: Sealing and Placement
-
Seal the artwork:
Take the rocks outside or to a well-ventilated area and spray them with a clear outdoor sealant. This protects the paint from rain and UV fading. -
Let it cure:
Allow the sealant to cure for 24 hours before exposing the rock to heavy moisture. -
Charge the glow:
Place your finished rocks in a part of the garden that receives direct sunlight during the day. They need to absorb UV light to glow effectively at night.
Enjoy watching your garden path gently illuminate as the sun goes down
Mosaic-Style Tile Pattern Rocks for Patio Gardens
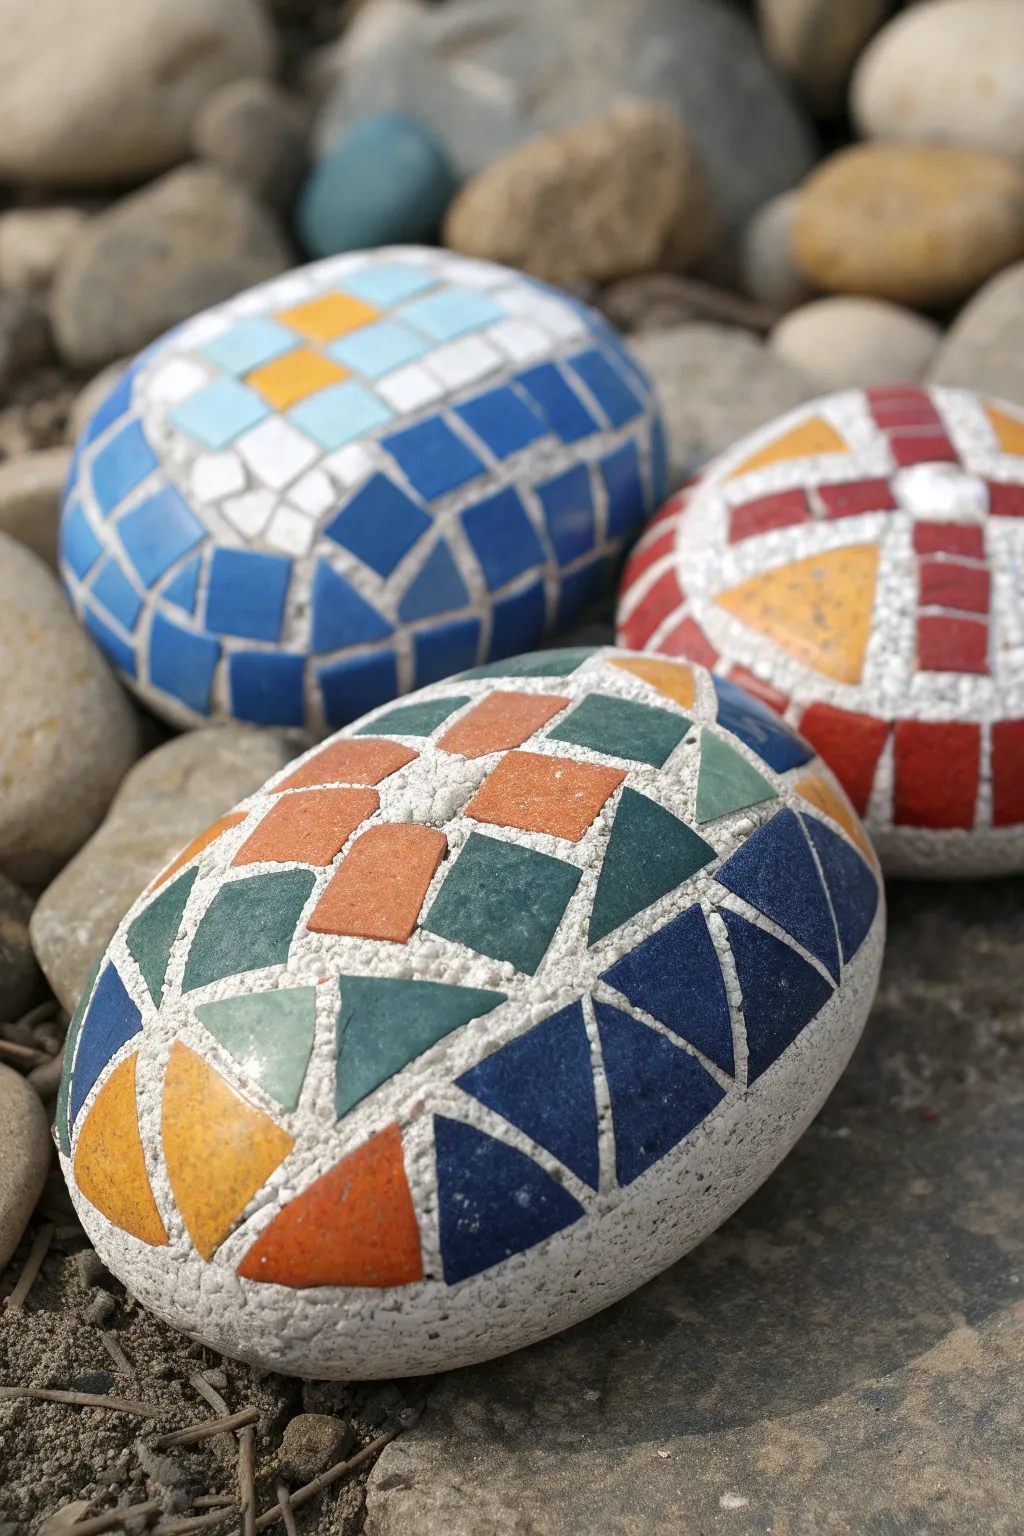
Bring the timeless elegance of Greek and Roman floors to your garden path with these clever faux-mosaic rocks. Using carefully painted geometric shapes and a textured grout effect, you can transform ordinary smooth river stones into deceptively intricate-looking art pieces.
How-To Guide
Materials
- Large, smooth river rocks (flat and oval shapes work best)
- Acrylic craft paints (white, terracotta orange, navy blue, forest green, yellow ochre, sky blue, beige)
- White or light grey texture paste (or very thick heavy body acrylic)
- Fine detail paintbrush (size 0 or 00)
- Medium flat paintbrush
- Pencil
- Matte or satin outdoor varnish/sealer
- Palette for mixing
Step 1: Preparation and Base
-
Clean the canvas:
Begin by scrubbing your collected river rocks with warm soapy water to remove any dirt or moss. Rinse them thoroughly and let them dry completely in the sun so the paint adheres properly. -
Prime the surface:
Apply a base coat of white or very light grey paint over the entire top surface of the rock. This acts as your ‘grout’ color and ensures the colored tiles will pop vibrantly later. -
Sketch the grid:
Once the base is dry, lightly use a pencil to map out your mosaic design. For the foreground stone style, draw a central focal point and radiate geometric lines outward. -
Refine the shapes:
Within your grid, sketch individual tile shapes—squares, triangles, and wedges. Leave a small gap (about 1/8th inch) between every shape to simulate the grout lines.
Step 2: Painting the Tiles
-
Mix your palette:
Prepare your acrylic colors. For an authentic look, I like to mix a tiny touch of brown or grey into primary colors to mute them slightly, making them look like natural ceramic or stone tiles. -
Start the center:
Using your fine detail brush, begin filling in the central tiles. For the multicolored stone in the photo, alternate between terracotta orange and forest green for the diamond shapes in the middle. -
Work outward:
Move to the next ring of shapes. Paint the triangular sections pointing outward using navy blue, keeping your edges as crisp and straight as possible. -
Add contrasting zones:
Fill in the larger side triangles with yellow ochre or a lighter orange. Consistency is key here; try to keep the paint layer flat and opaque. -
Second coats:
Acrylics often dry darker or translucent. Apply a second coat to any tiles that look streaky, ensuring the color is solid and mimics the opacity of real ceramic. -
Create variation:
To simulate the natural variation of real stone tiles, you can lightly stipple a slightly lighter shade onto the center of a few random tiles before the paint fully dries.
Uneven Grids?
Don’t stress about perfect symmetry. Real ancient mosaics often have irregular tiles. If a gap is too wide, just add a tiny triangular ‘shard’ tile to fill the space.
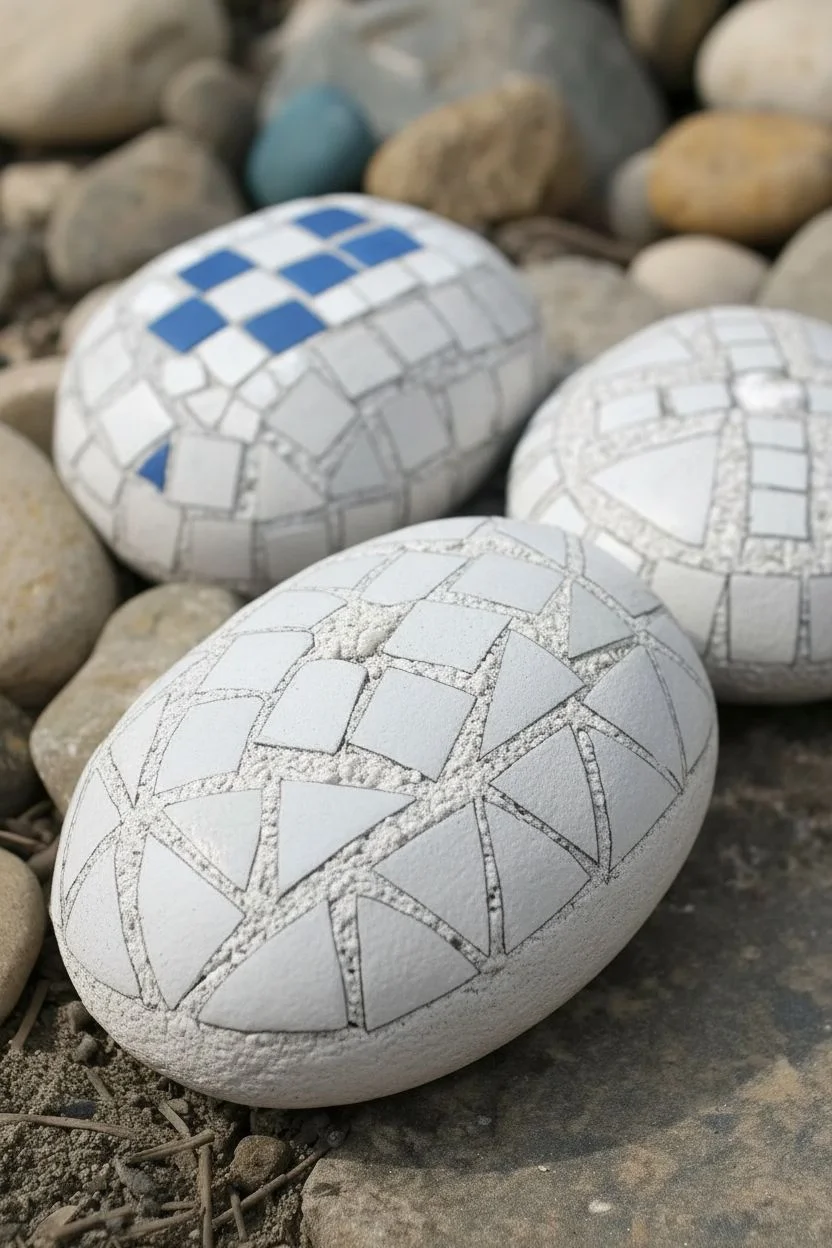
Step 3: The Faux Grout Effect
-
Prepare the paste:
This is the secret ingredient. Take your texture paste or heavy body white paint. If it’s too stark white, mix in a drop of beige or grey to make it look like old cement. -
Apply the texture:
Carefully dab this thick paste into the gaps you left between the colored tiles. You don’t need to be neat; a slightly rough, raised texture looks more realistic. -
Build the height:
Ensure the ‘grout’ distinctively separates each tile. You want the grout lines to feel slightly sandy and raised, or at least flush with the thick paint of the tiles. -
Clean the edges:
If any texture paste accidentally smudged onto a colored tile, wipe it away immediately with a damp brush or cotton swab before it hardens.
Texture Trick
If you don’t have texture paste, mix a teaspoon of baking soda into your white acrylic paint. It creates a gritty, cement-like finish perfect for the grout lines.
Step 4: Finishing Touches
-
Final curing:
Allow the stone to sit undisturbed for at least 24 hours. The texture paste needs significantly more time to cure than standard acrylic paint. -
Seal for outdoors:
Apply two to three thin coats of outdoor-rated varnish. A matte finish is usually best to maintain the ‘stone’ look, but satin can add a nice ceramic sheen.
Place these gems among your patio plants to add a touch of handcrafted history to your outdoor space


Have a question or want to share your own experience? I'd love to hear from you in the comments below!