
If you’re in the mood to draw something with instant energy, basketball is pure visual fun—bold shapes, great textures, and tons of motion. Here are my favorite basketball drawing ideas to spark your next page, from super simple studies to big wow-factor concepts.
Simple Hoop, Backboard, and Net Outline
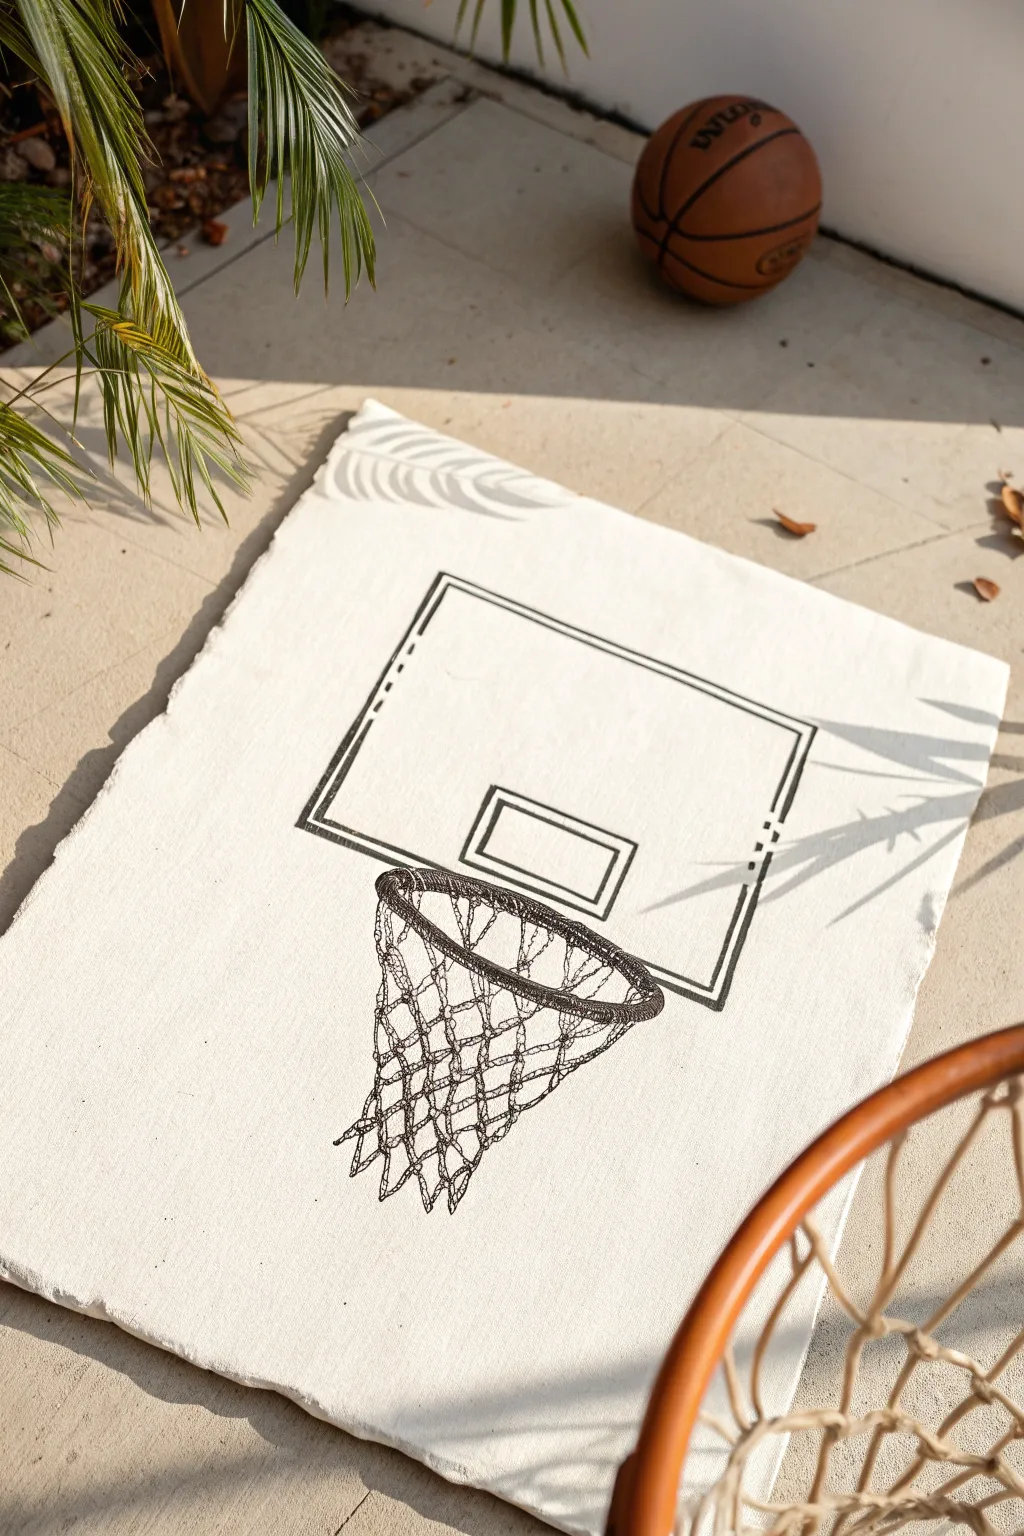
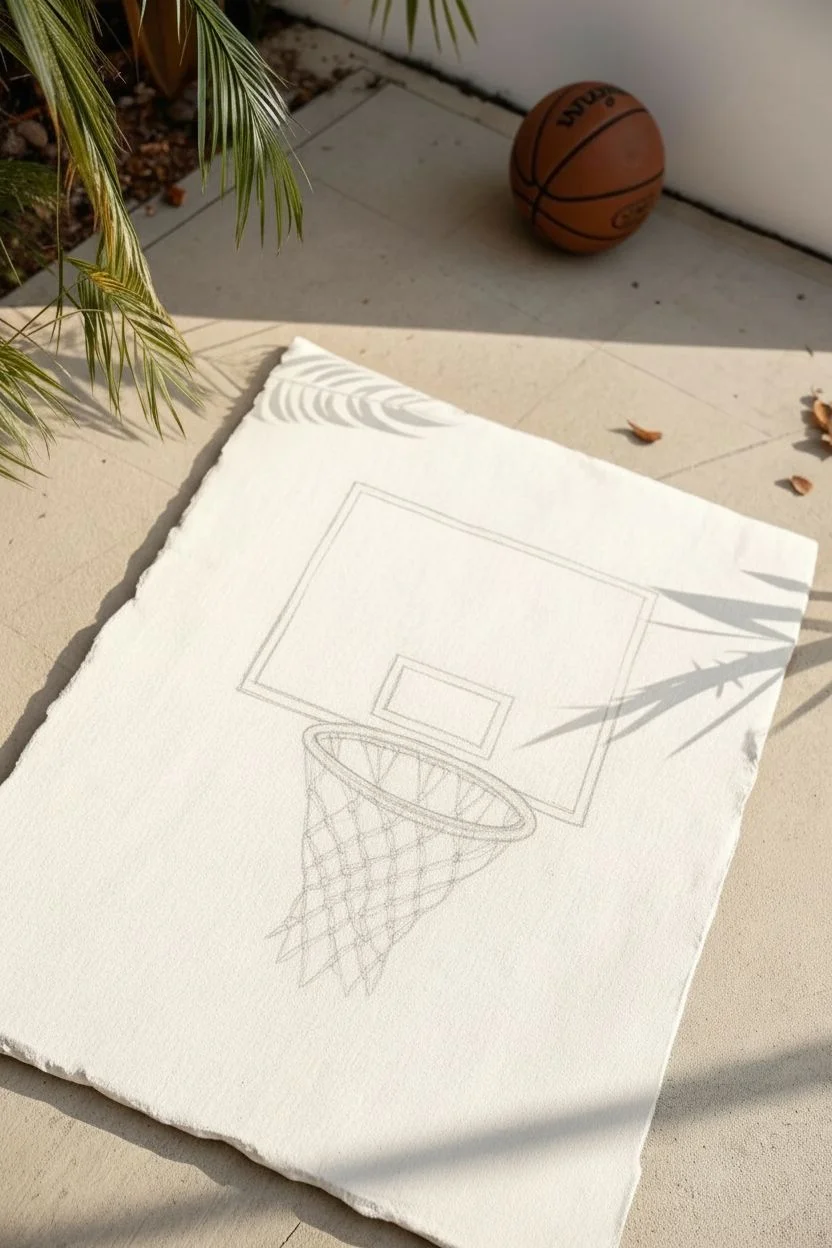
Capture the essence of the game with this minimalist line art drawing on textured paper. The sketchy, overlapping lines give the hoop and net a dynamic, hand-drawn feel that looks effortlessly cool.
Step-by-Step Guide
Materials
- Heavyweight, rough-texture watercolor paper or handmade deckled-edge paper
- Pencil (HB or 2B) for initial sketching
- Kneaded eraser
- Fine liner pens (sizes 03 and 05) with black archival ink
- Ruler or straight edge
- Reference photo of a basketball hoop (optional)
Step 1: Drafting the Structure
-
Paper selection:
Begin by selecting a piece of paper with significant tooth or texture. The rough surface is crucial for achieving that broken-line aesthetic shown in the example. -
Large rectangle:
Using your pencil and ruler, lightly draw a large rectangle for the outer backboard. Center it horizontally on your paper, leaving plenty of white space around the edges. -
Inner square target:
Inside the main rectangle, draw the smaller ‘shooter’s square’ just above where the rim will attach. Keep your pencil pressure very light so these lines are easy to adjust. -
Rim placement:
Sketch an oval shape centered at the bottom of the shooter’s square. This represents the basketball rim seen from a slight angle below. -
Rim thickness:
Draw a second, slightly smaller oval inside the first one to give the metal rim some thickness. Connect them with small vertical lines if you want to imply depth, but keep it simple for now.
Step 2: Inking the Backboard
-
Choose your pen:
Switch to your 05 fine liner. This slightly thicker nib works perfectly for the sturdy backboard lines. -
Double-line technique:
Trace over your pencil lines for the outer rectangle. Instead of one perfect continuous line, start and stop frequently. Draw a second line right next to the first in some areas to create a sketchy, architectural look. -
The shooter’s square:
Ink the inner small rectangle using the same broken-line technique. Allow the lines to overlap slightly at the corners rather than meeting perfectly. -
Erase guidelines:
Once the ink on the backboard is completely dry, gently run your kneaded eraser over the area to remove the graphite, leaving only the crisp black ink.
Bleeding Ink?
If ink bleeds on the textured paper, switch to a pigment-based liner rather than water-based. Move the pen faster across the surface to prevent pooling.
Step 3: Detailing the Net
-
Darkening the rim:
Use the 05 pen to ink the rim. Use short, scratching motions to fill it in darker, suggesting heavy metal mesh or iron, rather than a solid black block. -
Net structure diagram:
Switch to the finer 03 pen. Lightly pencil in a ‘v’ shape of guide lines hanging down from the rim to define the general shape of the net. -
Diamond pattern:
Start drawing the net mesh. Begin with a row of diamond shapes attached directly to the rim. Don’t worry about perfect symmetry; the wobbly nature adds character. -
Descending rows:
Continue adding rows of diamonds below the first, making them slightly narrower as they go down to simulate the net bunching together. -
Knot details:
Where the lines of the net intersect, add small, dark scribbles or distinct knots. This emphasizes the texture of the nylon. -
Loose ends:
At the very bottom of the net, leave the lines hanging slightly open or curved outward, suggesting the movement of the fabric. -
Texture enhancement:
I like to go back over the net lines with very faint, quick scratches to make the string look frayed and fibrous. -
Final clean up:
do a final pass with the eraser to remove any remaining pencil marks inside the complex net structure.
Pro Tip: Rustic Edges
If you can’t find deckled paper, tear regular watercolor paper against a ruler edge. Dampen the fold with a wet brush before tearing for a fuzzy, fibrous edge.
Hang your finished drawing unframed or in a floating frame to show off those beautiful rough paper edges


Spinning Basketball on a Finger

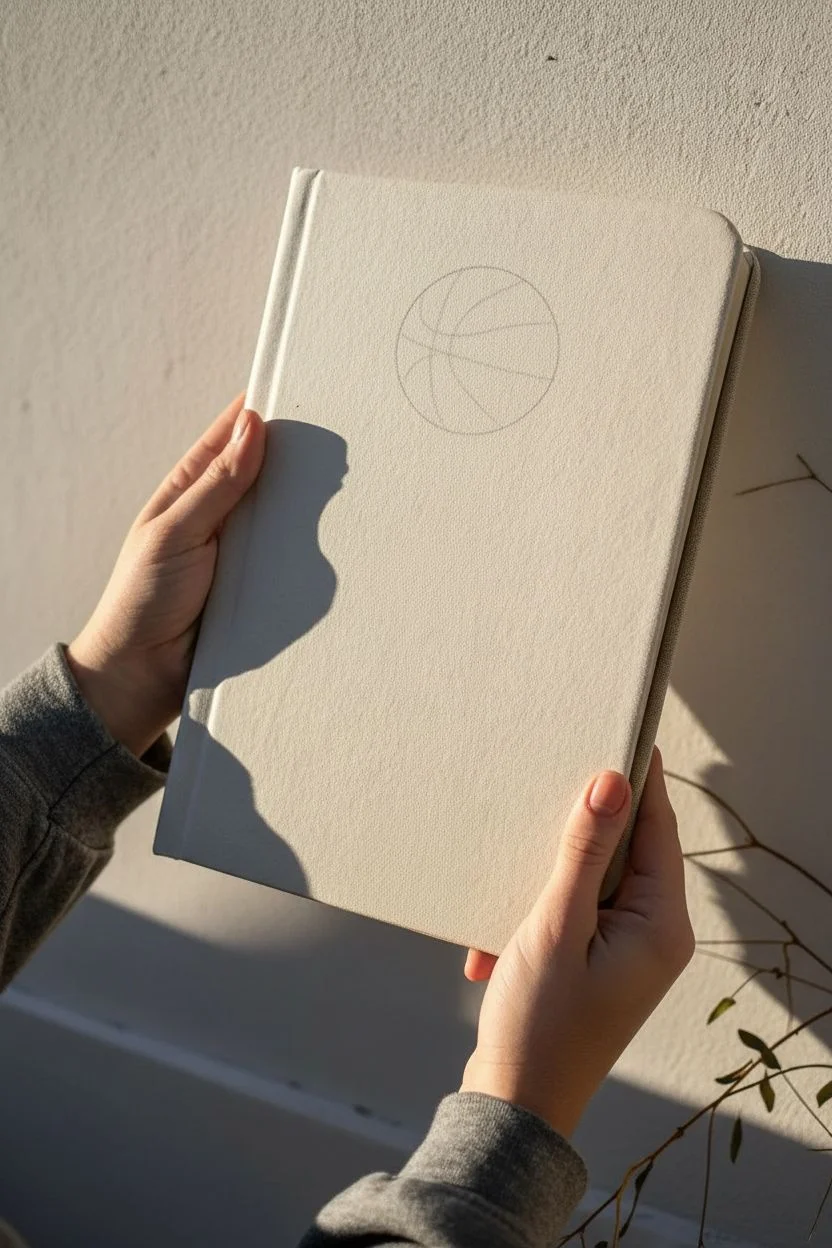
Customize a plain fabric-bound notebook with this playful, minimalist line art design featuring a spinning basketball. The contrast between the stark black ink lines and the solitary pop of orange paint creates a striking, modern aesthetic perfect for sports fans.
Step-by-Step Guide
Materials
- Fabric-bound sketchbook or journal (light beige/cream)
- Black fabric marker or fine-tip permanent marker (0.5mm)
- Pencil (HB or H)
- Eraser
- Orange acrylic paint
- Small round paintbrush (size 2 or 4)
- Ruler (optional)
- Compass or circular object for tracing
Step 1: Planning the Layout
-
Position the notebook:
Place your sketchbook flat on a stable surface. Ensure the cover is clean and free of lint before starting your design. -
Mark the center:
Lightly visualize where the finger needs to be to support the ball. The basketball should sit roughly in the top third of the cover, centered horizontally. -
Draft the basketball shape:
Using a compass or a small round object (like a glass or jar lid), lightly trace a perfect circle in pencil near the top center of the cover.
Step 2: Drawing the Hand
-
Sketch the index finger:
Starting directly under the center of your circle, sketch a long, straight index finger pointing upwards. The tip should just barely touch the bottom curve of the ball. -
Form the hand silhouette:
Draw the rest of the hand below the index finger. Sketch the thumb tucked in and the other three fingers curled down into the palm. Keep the lines somewhat angular for that illustrative style seen in the reference. -
Add the wrist and sleeve:
Extend two lines down from the hand to form the wrist. At the bottom, sketch a simple cuff shape to represent a shirt sleeve, adding a grid pattern to suggest flannel or ribbing. -
Detail the fingers:
Go back into your pencil sketch and add fingernail details and the small creases at the knuckles.
Fabric Texture Tip
If the fabric cover is rough, pull the fabric taut with your free hand while drawing to prevent the marker nib from skipping or snagging.
Step 3: Adding Color
-
Prep your paint:
Squeeze a small amount of orange acrylic paint onto a palette. You want a consistency that isn’t too watery, so it doesn’t bleed into the fabric cover. -
Fill the basketball:
Carefully paint inside your penciled circle. Use a small round brush to keep the edges crisp. I find it helps to outline the circle with paint first, then fill in the center. -
Let it dry:
Allow the paint to dry completely. This is crucial—if the paint is wet, your ink lines in the next step will smudge.
Level Up: Texture
Instead of flat orange paint, stipple the paint on with a stiff brush to mimic the pebbled texture of a real basketball.
Step 4: Inking the Design
-
Outline the hand:
Using your black fabric marker or permanent fine liner, carefully trace over your pencil lines for the hand and sleeve. Use confident, continuous strokes where possible. -
Ink the sleeve details:
Draw the grid pattern on the sleeve cuff. Don’t worry if the lines aren’t perfectly straight; the hand-drawn look adds character. -
Outline the ball:
Once the orange paint is dry, outline the circle with your black marker. The ink usually sits nicely on top of dried acrylic. -
Draw the ball seams:
Add the basketball’s signature curved lines. Draw a horizontal curve across the middle, a vertical line intersecting it, and two curved lines on the sides to create that spherical 3D look.
Step 5: Finishing Touches
-
Let ink set:
Give the ink at least 10-15 minutes to fully set into the fabric texture. -
Erase guidelines:
Gently erase any visible pencil marks. Be very light with the eraser to avoid scuffing the fabric or lifting the dried paint.
Now you have a custom, artistic journal ready for tracking stats or sketching plays


Jump Shot Silhouette and Arc Trail

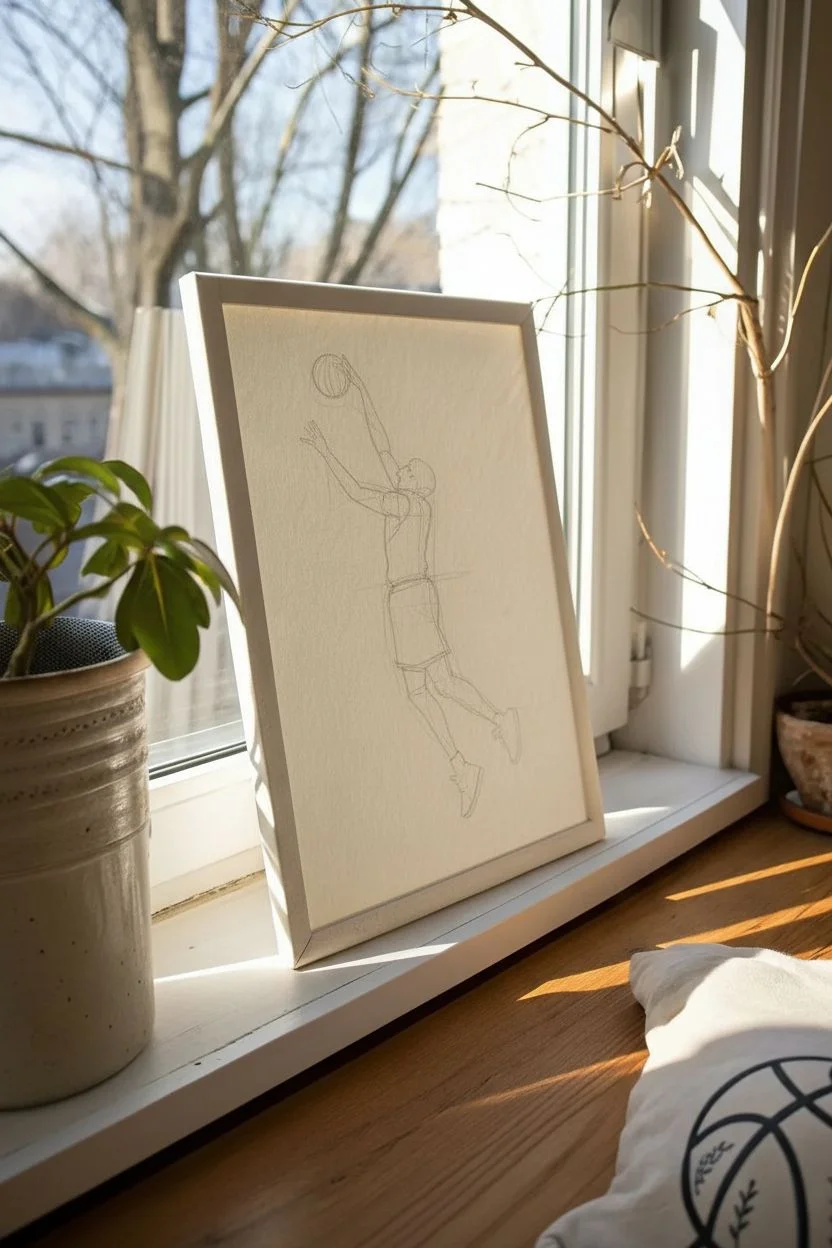
Capture the dynamic energy of basketball with this minimalist, high-contrast silhouette art piece. Using a stippling or heavy texture technique on warm-toned paper creates a sophisticated, gallery-ready look that focuses purely on form and motion.
Detailed Instructions
Materials
- Heavyweight cream or off-white drawing paper (approx. 11×14 inches)
- Fine-point black pigment liner pens (0.1mm and 0.5mm)
- Thicker black master marker or brush pen
- Pencil (HB or 2B)
- Eraser (kneaded preferred)
- Ruler
- Tracing paper (optional)
- Reference photo of a basketball jump shot
- Simple white wooden frame
Step 1: Preparation and Outline
-
Select your reference:
Find a clear photo of a basketball player in mid-air. You want a pose with distinct limbs where the ball is clearly separated from the head for the best silhouette readability. -
Scale your image:
If you aren’t confident drawing freehand, print your reference photo to the desired size of your final art. This ensures your proportions are accurate for that athletic look. -
Transfer the outline:
Lightly sketch the outline of the player onto your cream paper. If using a printed reference, use a lightbox or a sunny window to trace the contour very faintly with your pencil. -
Refine the edges:
Go over your pencil sketch to clean up the lines. Pay special attention to the fingers on the shooting hand and the laces on the shoes, as these small details sell the silhouette effect. -
Mark shadow zones:
Even though this is a silhouette, I like to lightly mark where the clothing folds would naturally sit. This guides your texture density later.
Ink Saturation Tip
Work in layers for the black fill. Doing one heavy pass can warp the paper; two lighter passes creates a deeper, flatter black.
Step 2: Inking the Texture
-
Outline in ink:
Using your 0.5mm pen, carefully go over the final pencil outline. Keep your hand steady to create a crisp, continuous edge. -
Establish the base fill:
Instead of coloring it in solid black immediately, use your thicker marker to fill the center of the body, staying about 2mm away from the edges. -
Create the textured edge:
Switch to the 0.1mm pen for the edges. Use a stippling technique (thousands of tiny dots) or a tight cross-hatch pattern to blend the solid black center out to the outline. This gives the drawing that grainy, vintage print look. -
Detailing the ball:
For the basketball, leave very thin negative space lines (the color of the paper) to represent the ribs of the ball. Fill the rest with solid black. -
Texturing the jersey:
To make the figure look less like a paper cutout and more like art, use the 0.5mm pen to add subtle white noise or ‘static’ patterns within the black fill, particularly near the waist and shorts. -
Shoes and socks:
Define the shoes carefully. You can leave tiny slivers of paper un-inked to suggest shoelaces or soles, which adds dimension to the feet.
Step 3: Finishing and Framing
-
Let the ink cure:
Allow the drawing to sit for at least 30 minutes. The heavy black areas need time to fully dry to prevent smudging. -
Erase pencil guides:
Gently roll your kneaded eraser over the entire image to lift any remaining graphite lines without damaging the paper surface. -
Inspect contrast:
Step back and look at your work. If the black looks patchy or grey in spots, go back in with your thick marker to deepen the saturation. -
Prepare the frame:
Clean the glass of your white wooden frame thoroughly on both sides to remove dust and fingerprints. -
Mount artwork:
Center your artwork in the frame. If your paper is smaller than the frame, use a white mat board to float the image in the center. -
Secure the back:
Close up the frame backing, ensuring the artwork hasn’t shifted. Place it near a window or light source to let the stark contrast shine.
Add an Arc Trail
Use a straightedge to draw a dashed or dotted line from the ball to the frame edge to simulate the trajectory of the shot.
Now you have a striking piece of sports art that perfectly balances motion and stillness


Dunk Pose With Foreshortened Basketball
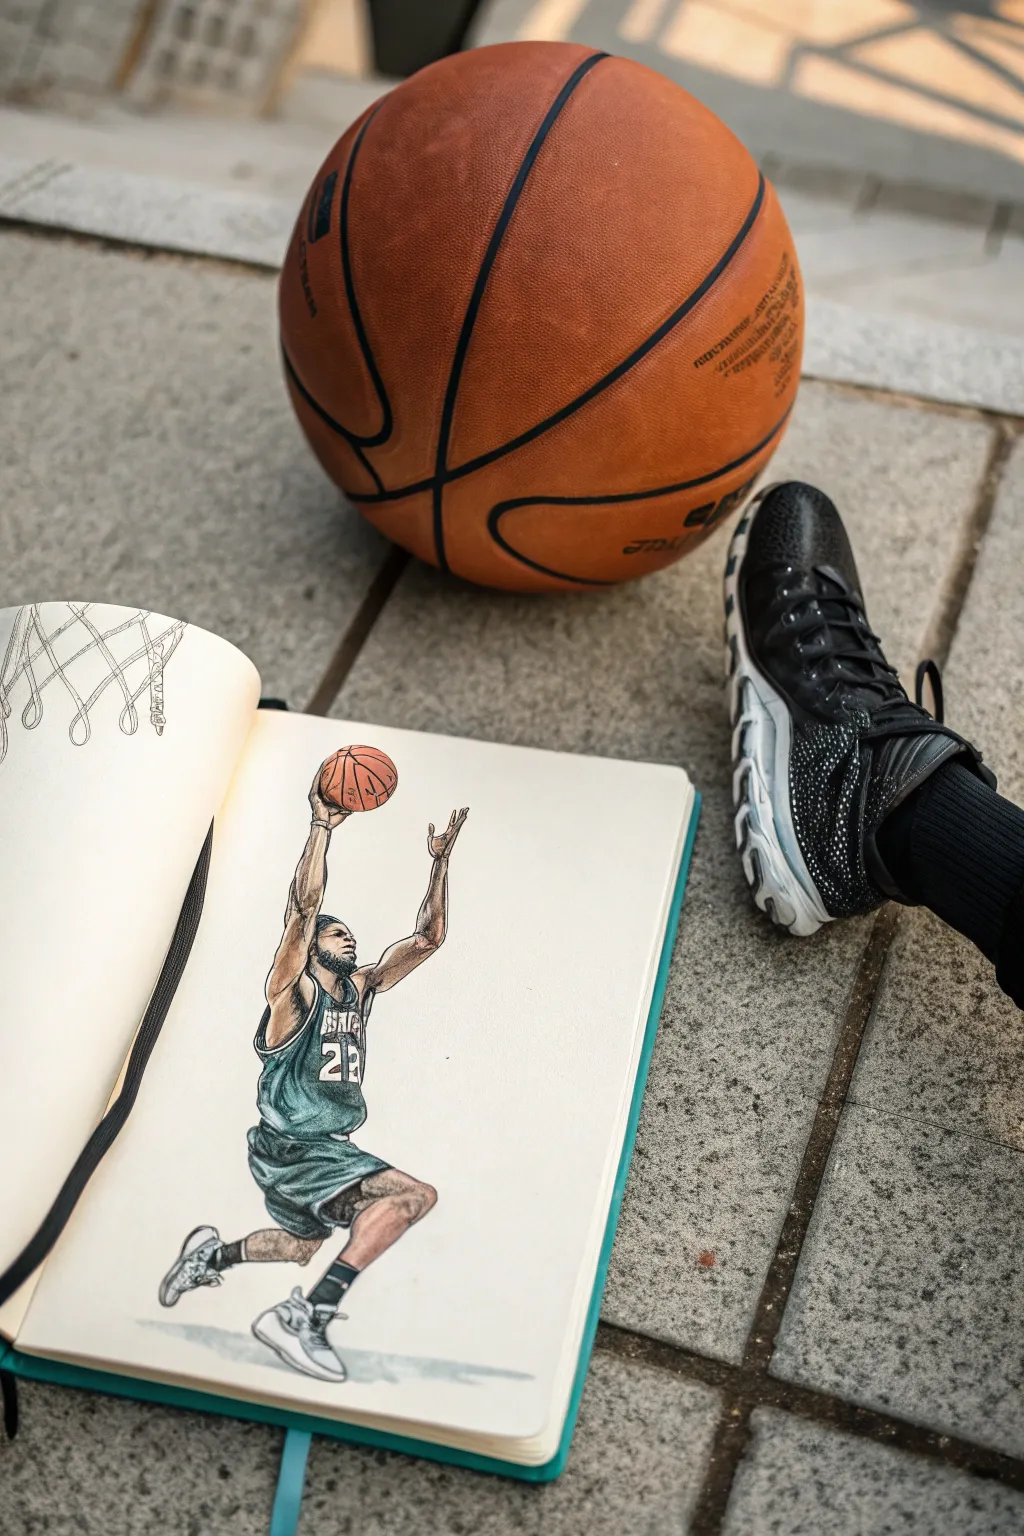
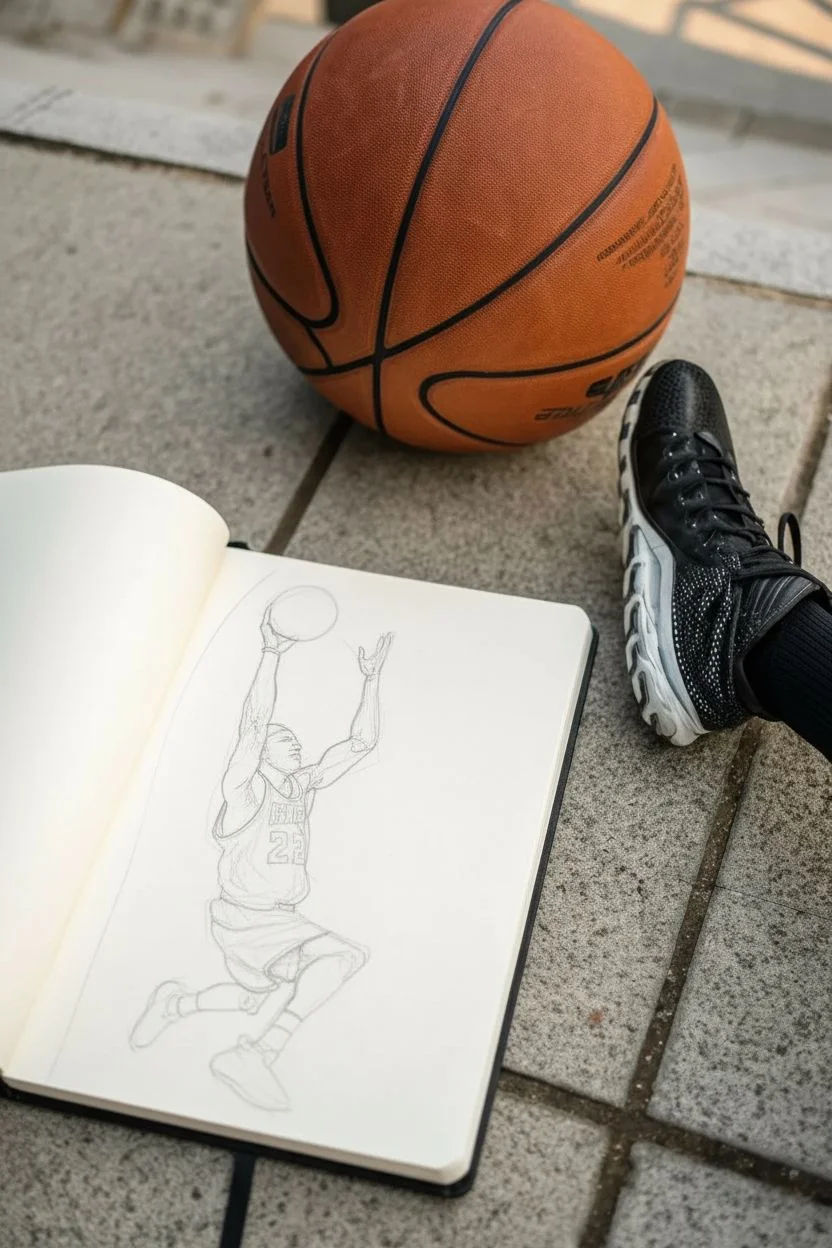
Capture the dynamic energy of basketball with this vibrant sketch featuring a player mid-air, poised for a powerful shot. Using a mix of fine liners and colored markers on smooth paper, this project focuses on capturing movement and form.
Step-by-Step Guide
Materials
- Sketchbook with smooth heavyweight paper
- HB or 2B graphite pencil
- Kneaded eraser
- Fine liner pens (0.1mm, 0.3mm, 0.5mm – black)
- Alcohol-based markers (Skin tones, cool greys, dark green, black)
- White gel pen for highlights
Step 1: Laying the Groundwork
-
Establish the Action Line:
Start by drawing a faint, sweeping curve with your graphite pencil. This line of action should represent the spine and the general flow of the jump, extending from the feet up through the torso to the extended arm holding the ball. -
Block in Basic Shapes:
Using simple geometric shapes, map out the body structure. Draw an oval for the torso, circles for the joints (shoulders, elbows, knees), and cylinders for the limbs. Keep your pencil pressure very light so these lines can be erased later. -
Position the Limbs:
Refine the pose by angling the legs to show the jump’s momentum. One leg should be bent back, the other slightly extended. Ensure both arms are reaching upward, with the right hand cupping a circle for the basketball. -
Define the Features:
Begin adding more specific anatomical details. Sketch the contours of the muscles in the arms and legs, paying attention to the calf and bicep shapes that flex during a jump. -
Draft the Clothing:
Draw the loose-fitting jersey and shorts over the body frame. Add wrinkles and folds around the waist and armpits to suggest movement and fabric texture. Don’t forget the number ’22’ on the chest.
Step 2: Inking the Outline
-
Outline the Figure:
Switch to a 0.3mm fine liner. Carefully go over your pencil lines, defining the final outline of the player. Use varied line weight—thicker lines on the shadowed side of limbs can add depth. -
Detail the Face and Hands:
Use a finer 0.1mm pen for delicate areas like the facial features, fingers, and the net mesh (if you included the hoop sketch on the opposite page). Capture the determination in the expression. -
Add Texture to Clothing:
With the 0.1mm pen, add small hatching lines within the folds of the jersey and shorts to indicate shadows before coloring. Outline the sneakers with precision. -
Erase Guidelines:
Once the ink is completely dry—give it a few minutes to be safe—gently erase all the underlying pencil sketches with your kneaded eraser. This leaves a clean, crisp drawing ready for color.
Wonky Proportions?
If limbs look off, check your negative space. Look at the shapes created *between* the arms and body, not just the body itself. Measure head heights to keep scale consistent.
Step 3: Bringing it to Life with Color
-
Base Skin Tones:
Select a mid-tone skin marker. Fill in the arms, legs, and face evenly. I find circular motions help prevent streakiness with alcohol markers. -
Shading the Skin:
Layer a slightly darker skin tone or a warm grey marker over areas in shadow: under the chin, the undersides of the arms, and the back of the calves. This gives the muscles volume. -
Color the Uniform:
Use a deep green marker to fill in the jersey and shorts. Work quickly to keep the color saturation consistent. Leave the number ’22’ and trim details white or fill them with a contrasting color if desired. -
Deepen Fabric Shadows:
Go over the green areas again with the same marker or a cool grey to create shadows in the folds you inked earlier. This enhances the three-dimensional look of the clothing. -
Color the Accessories:
Fill in the basketball with a warm orange-brown marker. Use cool greys for the socks and sneakers, adding darker grey or black for the soles and accents. -
Ground the Figure:
Add a light wash of cool grey beneath the player’s feet to create a subtle shadow. This ‘grounding’ shadow connects the figure to the imaginary floor, emphasizing the height of the jump. -
Final Highlights:
Use a white gel pen to add small highlights. touches on the shoulders, knees, and the curve of the basketball can simulate sweat or shiny surfaces, making the drawing pop.
Dynamic Backgrounds
Instead of white space, use markers to create motion lines or ‘speed streaks’ behind the player. This amplifies the feeling of upward velocity and impact.
Now you have a dynamic basketball action shot preserved in your sketchbook.

PENCIL GUIDE
Understanding Pencil Grades from H to B
From first sketch to finished drawing — learn pencil grades, line control, and shading techniques.
Explore the Full Guide
Layup at the Backboard Corner
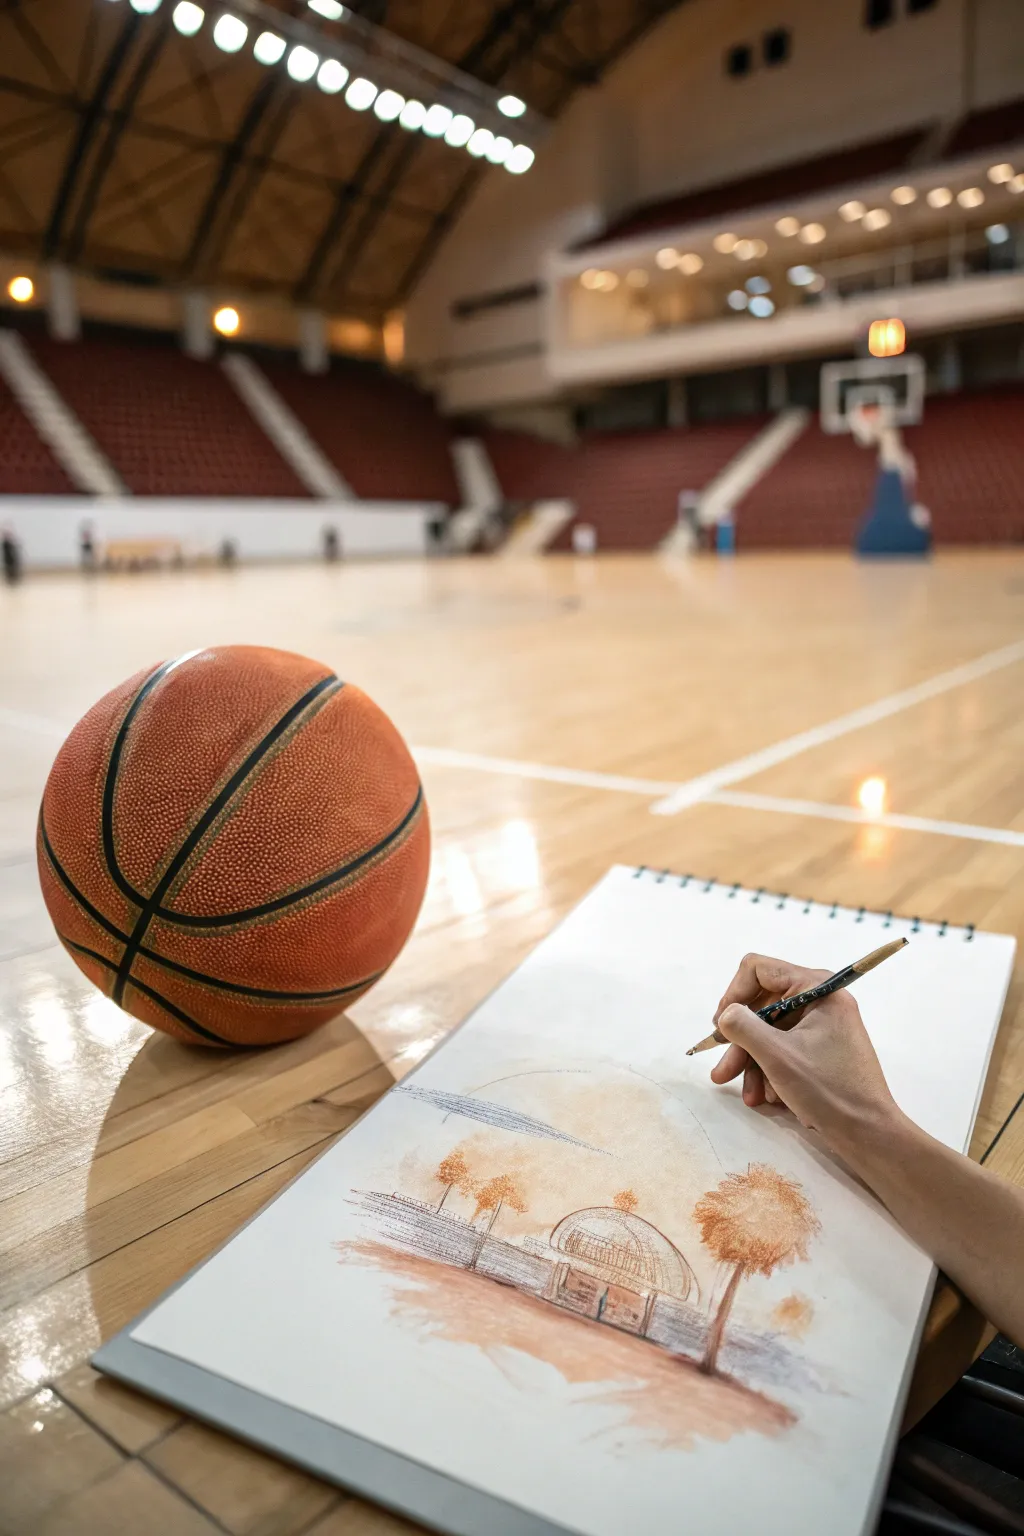
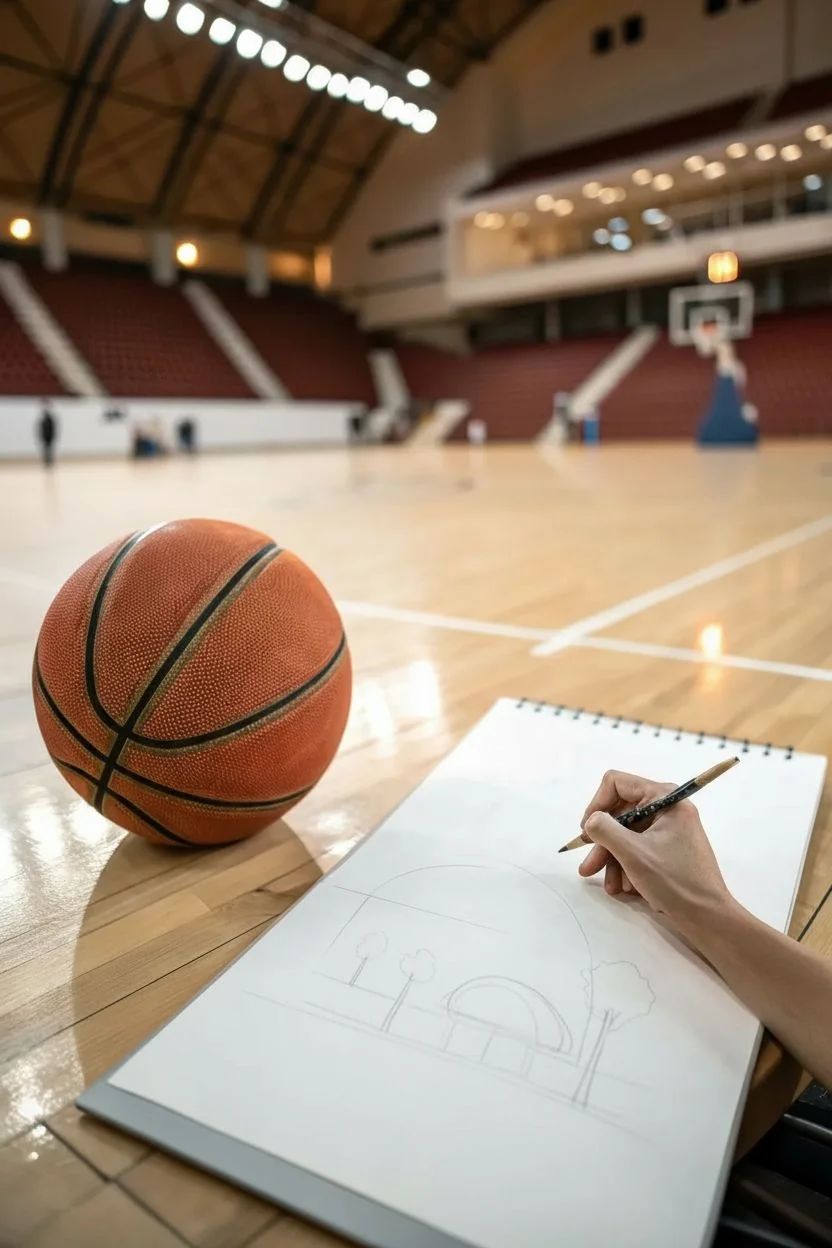
Capture the nostalgic essence of an outdoor court with this warm, sepia-toned mixed media sketch. Using a combination of graphite and earthy colored pencils, you will create a soft focus scene that highlights the structure of the backboard against natural elements.
Step-by-Step Tutorial
Materials
- Spiral-bound sketchbook (heavyweight drawing paper)
- Graphite pencils (HB and 2B)
- Sepia or Terra Cotta colored pencil
- Burnt Sienna colored pencil
- Soft charcoal pencil (black)
- Blending stump
- Kneaded eraser
Step 1: Setting the Composition
-
Establish the horizon:
Begin by lightly sketching a horizontal line about one-third of the way up the page using an HB pencil. This separates the court surface from the background sky and trees. -
Map the main structure:
To the right of the center, sketch the basic geometric shape of the backboard support. It resembles a curved dome or arched structure in this stylization, rooted firmly into the ground. -
Position the trees:
Place two vertical lines to indicate tree trunks—one flanking the right side of the structure and another smaller one on the left to create depth. -
Draft the court lines:
Draw faint diagonal lines leading from the bottom corners toward the center horizon line to suggest the perspective of the basketball court floor or fencing.
Muddy colors?
If graphite and colored pencil look messy when mixed, apply fixative spray between layers to keep colors distinct and crisp.
Step 2: Building Tone and Texture
-
Initial shading layer:
Switch to your Sepia or Terra Cotta colored pencil. Apply a very light wash of color to the ground area, using the side of the pencil lead to create a grainy, textured surface effect. -
Define the structure:
Using the same colored pencil, darken the lines of the central arched structure. Add vertical hatching lines inside the arch to suggest a fence or net texture. -
Foliage foundation:
Use the Burnt Sienna pencil to scumble (draw small, scribbly circles) loosely at the tops of your tree trunks. Keep the edges soft and uneven to mimic leaves catching the light. -
Add atmospheric depth:
Lightly smudge some of the graphite and colored pencil strokes on the left side of the page with a blending stump. I find this creates a nice sense of motion or distance. -
Strengthen the shadows:
Take the charcoal pencil and add deep accents to the base of the trees and the bottom of the central structure where the shadows would be darkest.
Step 3: Refining Details
-
Detail the trees:
Go back over the tree foliage with the Sepia pencil, pressing harder in the center of the tree crowns to give them volume. Leave the outer edges wispy. -
Create the horizon haze:
Lightly shade the area just above the horizon line with graphite, barely touching the paper. This separates the distant background from the foreground elements. -
Architectural accents:
Sharpen your 2B graphite pencil and clearly define the edges of the backboard frame or the domed structure. Add small rectangular details to suggest bricks or metal supports. -
Texture the court:
Add horizontal strokes across the foreground using a mix of Burnt Sienna and graphite. These should be rough and quick to imply a paved or dirt surface. -
Final blending:
Use your finger or a clean tissue to gently rub the large areas of color, softening the transition between the warm earth tones and the grey graphite. -
Clean up highlights:
Use a kneaded eraser to lift pigment away from the top of the dome structure and the upper edges of the trees, simulating sunlight hitting the scene.
Add a dynamic element
Sketch a silhouette of a basketball mid-air near the hoop to add action and an immediate focal point to the quiet scene.
Your sketchbook now holds a beautifully stylized memory of a sunny day at the court
Jersey and Basketball Number Design
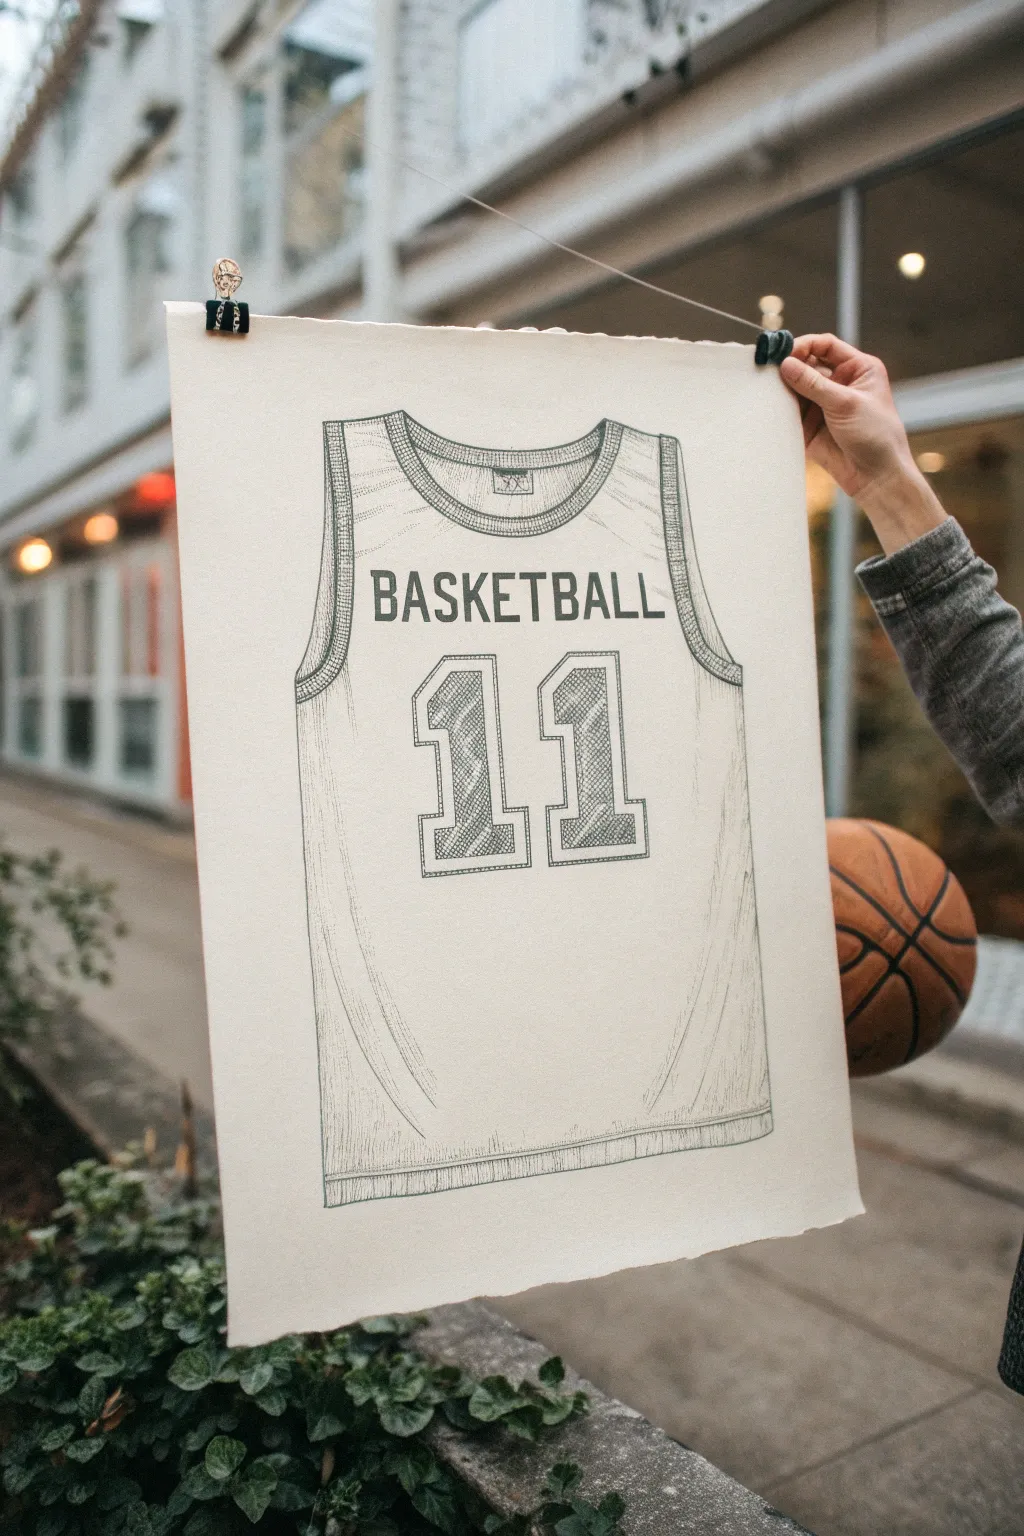
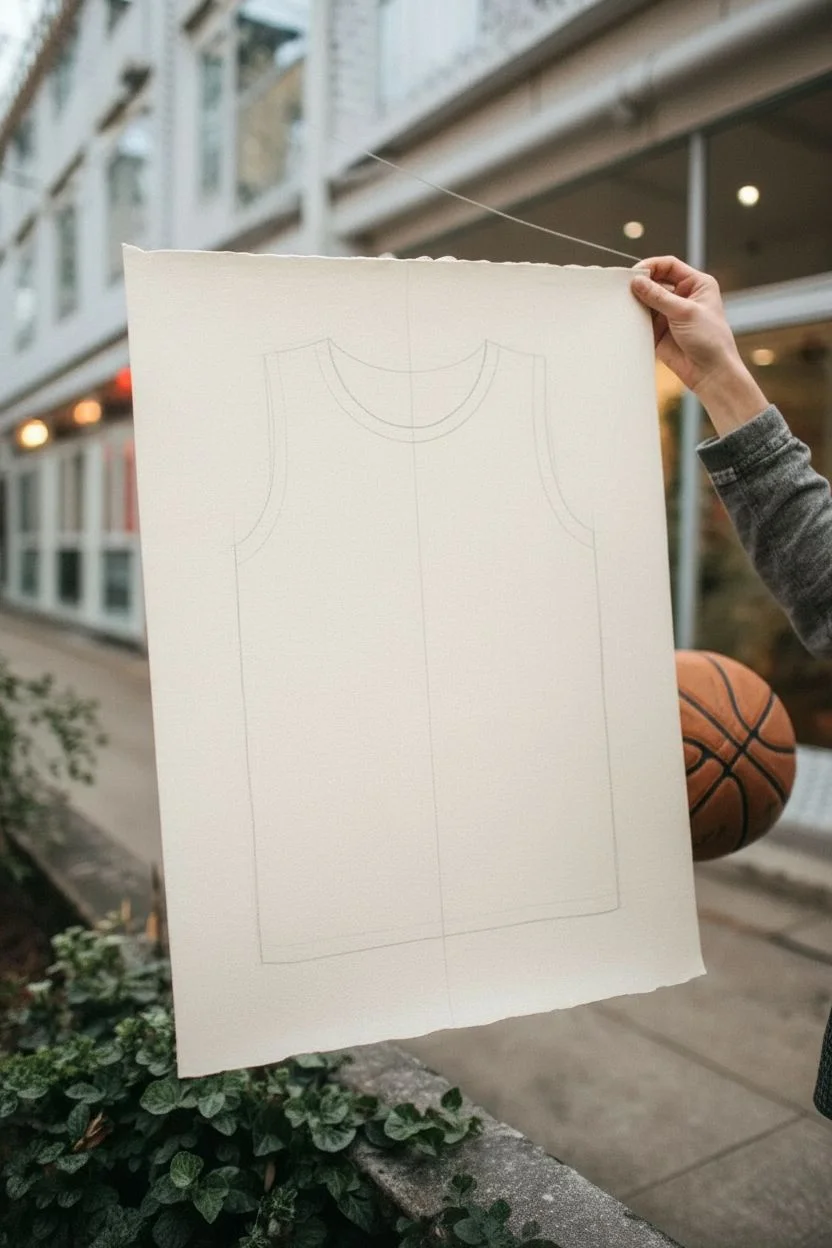
This tutorial guides you through creating a detailed, illustrative drawing of a basketball uniform on textured paper. The focus is on capturing the folds of the fabric and the structured typography of the team name and number.
Step-by-Step Guide
Materials
- High-quality textured paper (e.g., watercolor or mixed media paper, visible tooth)
- H lead pencil for initial construction lines
- HB or B graphite pencil/fine liner pen for detailing
- Ruler
- Eraser (kneaded eraser preferred)
- Clean flat surface or drawing board
Step 1: Establishing the Structure
-
Lay out the paper:
Begin with a rectangular sheet of nice, thick paper. The project looks best on paper with a deckled edge or rough texture. -
Draw the center line:
Using your ruler and H pencil, draw a faint vertical line down the direct center of the paper to ensure symmetry. -
Outline the torso block:
Sketch a large rectangle that will serve as the body of the jersey, leaving generous borders on all sides. -
Shape the armholes:
Carve out deep U-shapes on the top left and right corners of your rectangle to create the sleeveless armholes. -
Define the neckline:
Connect the top points of the shoulders with a gentle curve for the back of the neck and a deeper scoop for the front collar.
Text Not Centered?
If your lettering looks off-center, write the middle letter first directly on your centerline, then work outward to the left and right.
Step 2: Designing the Jersey Details
-
Add the trim:
Draw parallel lines following the curves of the neckline and armholes to create the ribbing or trim detail. -
Add texture to the trim:
Sketch small, vertical hatch marks inside the ribbon borders you just created to simulate the knit texture of the fabric. -
Create the bottom hem:
Draw a horizontal band across the very bottom of the jersey, matching the style of the collar trim. -
Sketch fabric folds:
Add subtle curved lines originating from the armpits and extending down the sides. I usually keep these light to suggest draping. -
Draw the tag:
Sketch a small rectangle inside the back collar area for the size tag.
Step 3: Typography and Numbering
-
Mark text guidelines:
Use your ruler to draw faint horizontal guidelines across the upper chest where the team name will sit. -
Letter the team name:
Block in the word ‘BASKETBALL’ using a tall, sans-serif font. Ensure the spacing is centered around your vertical axis line. -
Outline the numbers:
Below the text, draw a large outline for the number ’11’. These should be blocky, collegiate-style digits with serifs. -
Add the inner stroke to numbers:
Draw a smaller ’11’ inside the larger outline to create a double-border effect. -
Shade the numbers:
Fill the inner part of the numbers with diagonal cross-hatching to make them stand out against the white jersey.
Clean Graphite Lines
Place a scrap piece of paper under your drawing hand as you shade. This prevents hand oils from smudging your crisp pencil work.
Step 4: Refining and Finish
-
Darken the main lines:
Switch to your darker pencil or fine liner. Go over the main outline of the jersey, making the lines confident and crisp. -
Add side seam shading:
Use vertical hatching lines along the extreme left and right sides of the torso to give the drawing volume and roundness. -
Detail the hem:
Add vertical hatching to the bottom hem band to match the collar and armhole trim. -
Erase guidelines:
Gently remove your center line and text guidelines with a kneaded eraser, being careful not to smudge your shading. -
Final assessment:
Check the symmetry and contrast. If the number feels too light, add another layer of cross-hatching to deepen the value.
Now you have a timeless piece of sports art ready to be displayed
BRUSH GUIDE
The Right Brush for Every Stroke
From clean lines to bold texture — master brush choice, stroke control, and essential techniques.
Explore the Full Guide
Basketball on Fire With Bold Flame Shapes

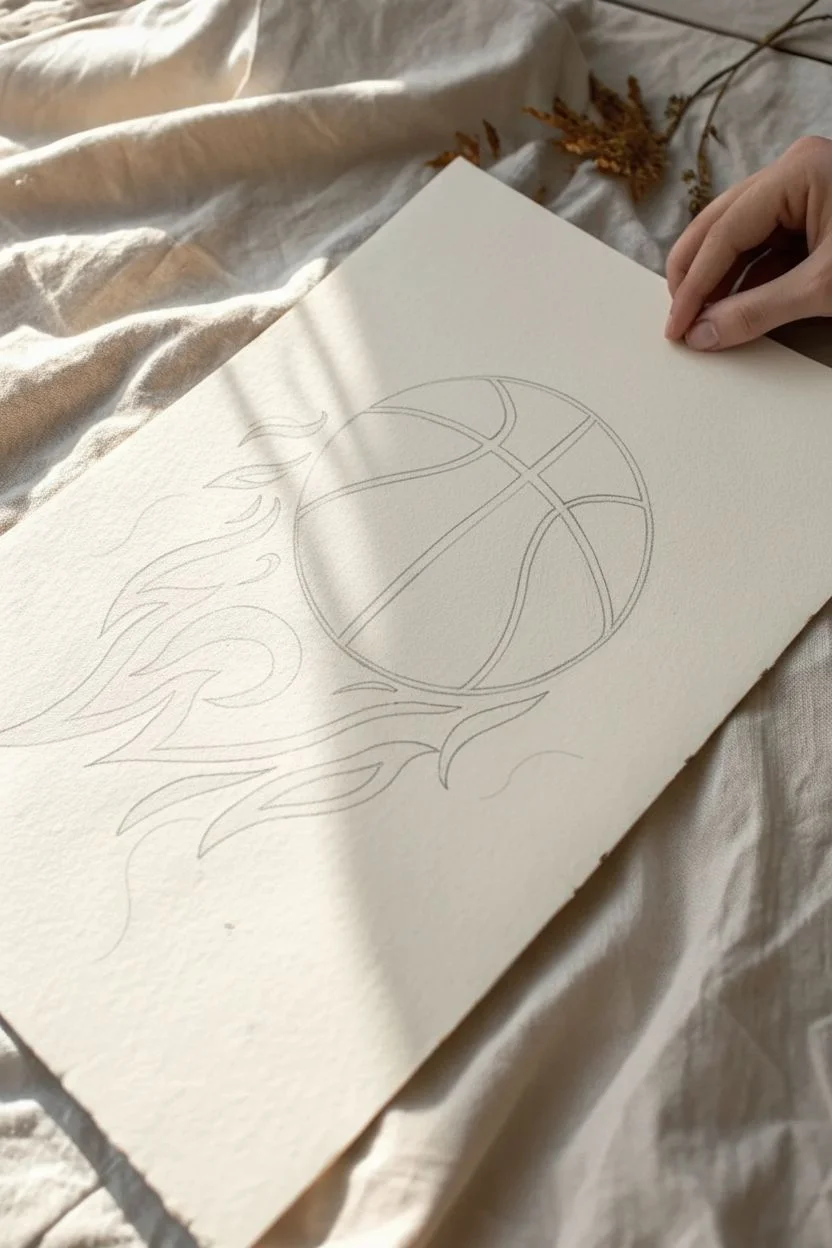
Capture the energy of the game with this dynamic drawing featuring a classic basketball leaving a trail of stylized flames. The textured paper and warm pencil strokes give this piece a nostalgic, kinetic feel perfect for sports fans.
Step-by-Step Tutorial
Materials
- Textured heavy-weight drawing paper or mixed media paper (cream or off-white)
- Black fine liner pen (0.5mm)
- Black marker or brush pen (medium tip)
- Colored pencils (Warm brown, Orange, light yellow, burnt sienna)
- Compass or round object for tracing
- Pencil and eraser for sketching
Step 1: Setting the Stage
-
Positioning the ball:
Start by identifying where your basketball will live on the page. Since the flames trail behind it, position your circle slightly to the right of the center. Use a compass or trace a round object like a jar lid to get a perfect circle. -
Skeleton lines:
Lightly sketch the internal lines of the basketball. Draw one curved vertical line following the sphere’s contour, then a horizontal one intersecting it. Add the classic curved ribs on either side to define the ball’s segments. -
Mapping the fire:
Sketch the flames trailing to the left. Don’t worry about perfect realism here; use long, flowing S-curves to create stylized, tribal-tattoo-inspired shapes. Let the flames taper off into sharp points.
Uneven Shading?
If the pencil layers look scratchy, use a white colored pencil or a dedicated colorless blender pencil to burnish drawing. This pushes pigment into the paper tooth for a smoother look.
Step 2: Inking the Outline
-
Pen work begins:
Take your black fine liner and carefully trace over your graphite circle. Keep your hand steady to maintain that crisp, geometric shape. -
Defining segments:
Switch to a slightly thicker black marker or go over your lines twice to thicken the internal ribs of the basketball. These black lines need to be bold enough to stand out against the coloring later. -
Erase guidelines:
Once the ink is completely dry—give it a good minute so it doesn’t smudge—take your eraser and gently remove all the underlying pencil sketches, leaving just your clean black outlines.
Make It Glossy
Leave a tiny, pure white circle or oval uncolored on the upper left side of the basketball. This ‘highlight’ instantly makes the object look spherical and shiny.
Step 3: Coloring the Ball
-
Base layer:
Using a light brown or tan colored pencil, lightly shade the entire surface of the basketball. Use the side of the pencil lead to catch the texture of the paper, avoiding hard distinct strokes. -
Adding dimension:
Switch to a warmer, burnt sienna or reddish-brown pencil. Shade the edges of the ball more heavily to create a sense of roundness, leaving the center slightly lighter. -
Texture details:
I find that adding tiny, quick directional hatch marks with a sharp brown pencil mimics the pebbled leather texture of a real basketball effectively.
Step 4: Igniting the Flames
-
Yellow core:
Start coloring the flames closest to the ball with a bright yellow or pale orange pencil. This represents the hottest part of the fire. -
Orange transition:
Blend a vibrant orange pencil into the yellow sections, moving outward toward the tips of the flames. Overlap the colors gentle to create a smooth gradient. -
Burnt tips:
Use a dark red or brownish-red pencil for the very tips and edges of the flames. Outline the flame shapes with this darker color to make them pop against the paper. -
Defining flame edges:
Go back with your dark red pencil and thicken the outer edges of the flame shapes, similar to how you outlined the basketball ribs, but slightly softer. This gives the fire a graphical, illustrative style.
Step 5: Final Touches
-
Motion lines:
Add a few very thin, wispy curved lines floating around the flames using a fine-point brown pen or sharpened pencil. These ‘action lines’ help sell the idea of movement. -
Clean up:
Check for any stray pencil marks or smudges and gently lift them with a kneaded eraser. If any black lines look faded after coloring, carefully re-ink them for maximum contrast.
Now you have a dynamic piece of sports art ready to display on your wall


Have a question or want to share your own experience? I'd love to hear from you in the comments below!