
When I’m craving something sweet to paint, I always come back to love-themed images because they’re instantly meaningful and honestly just fun to make. These ideas are beginner-friendly but still look like you really *meant it*—perfect for a cozy solo session or a laid-back couple paint night.
Interlocking Hearts With a Soft Gradient Background
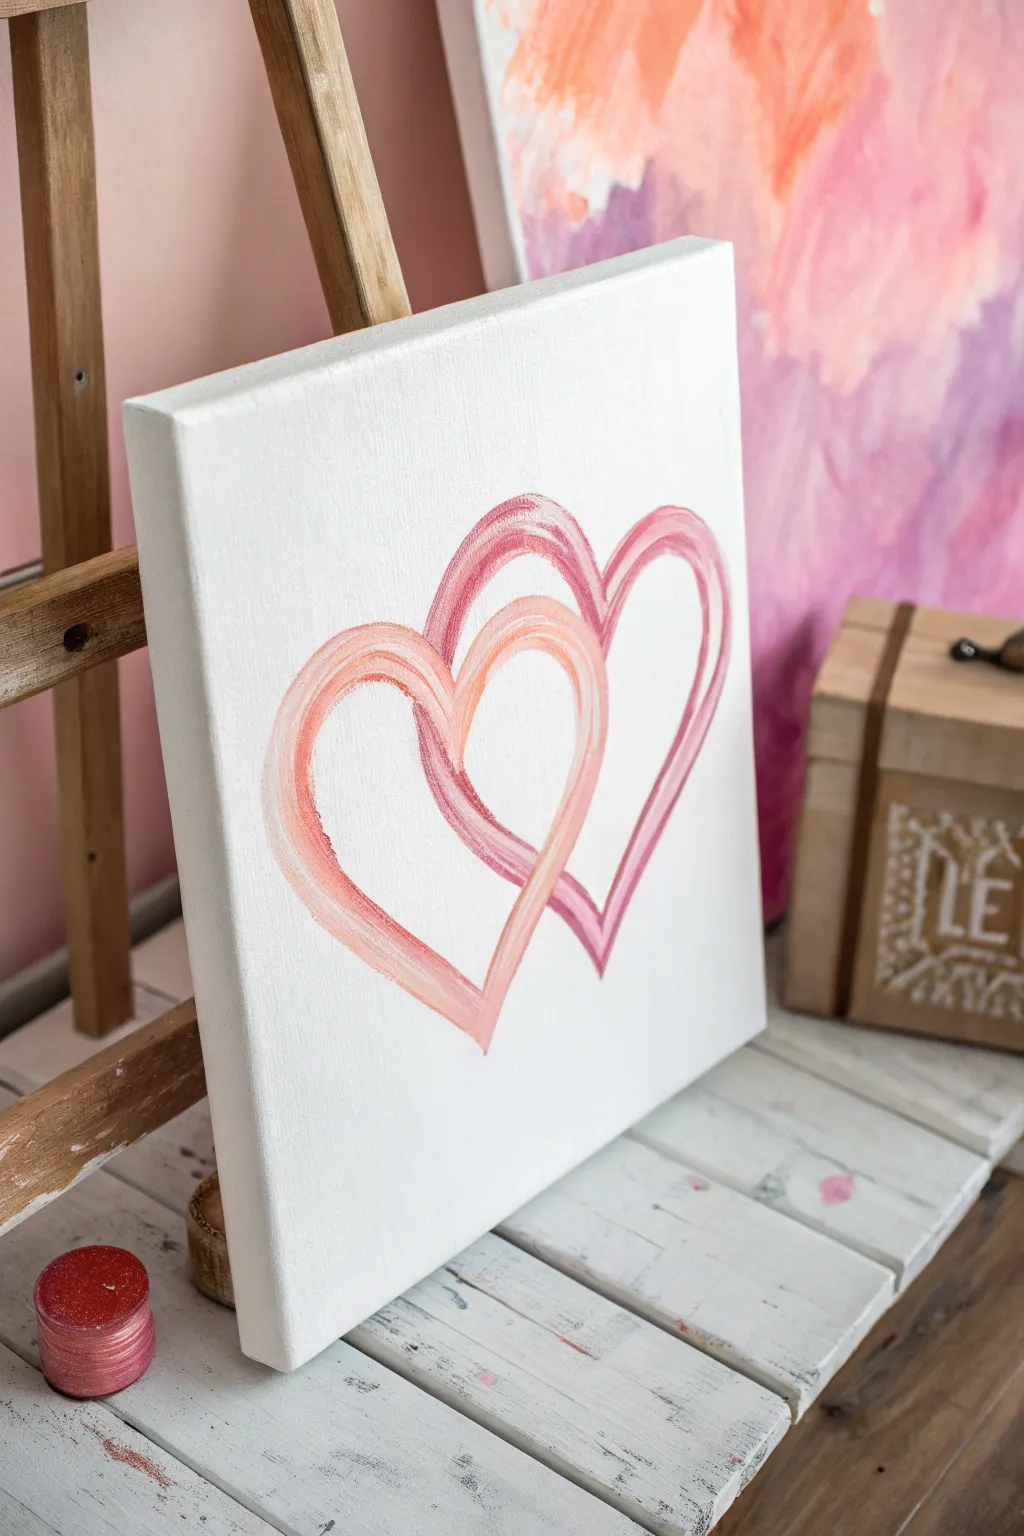

Celebrate connection with this simple yet elegant canvas featuring two linked hearts. Using broad, textured brushstrokes in peach and rose hues creates a modern, painterly feel that looks effortless and romantic.
How-To Guide
Materials
- Square stretched canvas (e.g., 10×10 or 12×12 inches)
- Acrylic paints: Titanium White, Rose Pink, Peach or Light Coral
- Flat shader brush (medium size, around 1/2 inch)
- Round brush (small, for touch-ups)
- Pencil
- Paper plate or palette
- Cup of water
- Paper towels
Step 1: Drafting the Design
-
Prepare the canvas:
Ensure your stretched canvas is clean and dust-free. If it isn’t pre-primed, apply a coat of gesso and let it dry completely. For this minimalist look, a crisp white background is essential to make the colors pop. -
Lightly sketch the first heart:
Using a pencil with a very light touch, draw the outline of the first heart on the left side of the canvas. Angle it slightly to the right. Keep the shape loose and organic rather than perfectly symmetrical. -
Sketch the interlocking heart:
Draw the second heart slightly higher and to the right of the first, overlapping the right ‘lobe’ of the first heart. This overlap is crucial for the linking effect. -
Define the connection points:
Visualize where the hearts weave over and under each other. Lightly mark which lines will be on top (the dominant line) and which will be tucked underneath to guide your painting later. -
Erase excess lines:
Use a soft eraser to gently remove any heavy sketch lines. You want the guide to be barely visible so the graphite doesn’t smudge into your light paint colors.
Visible Pencil Marks?
If pencil lines show through your light paint, don’t scrub. Once the paint is 100% dry, gently run a clean white eraser over the painted area to lift the graphite without damaging the acrylic.
Step 2: Painting the Base Strokes
-
Load your brush for the peach heart:
Squeeze out Peach/Coral and a little Titanium White on your palette. Don’t fully mix them; leave the colors slightly separated so your brush picks up streaks of both variations. -
Paint the left curve:
Using the flat brush, start at the top center of the left heart (the peach one). Pull the brush smoothly up and around the curve down to the bottom point in one continuous motion if possible. If you need to stop, lift the brush gently to feather the edge. -
Paint the right curve:
Reload the brush and paint the right side of the peach heart. When you reach the area where it intersects the second heart, stop your stroke or lift pressure significantly if it’s meant to go ‘under’ the pink heart. -
Create the brush texture:
Don’t overwork the paint. The beauty of this piece lies in the visible bristles and slight transparency. If the paint looks streaky, leave it; that adds to the artistic charm. -
Prepare the pink palette:
Clean your brush thoroughly. Prepare your Rose Pink paint, adding a touch of white or water to soften it if the pigment is too heavy. -
Paint the right heart:
Follow the same technique for the second heart using the pink tone. Paint the curves boldly, paying close attention to the intersection points.
Pro Tip: Fluid Strokes
Mix a tiny drop of water or glazing medium into your paint. This improves flow, allowing you to create those long, continuous swooping curves without the brush ‘stuttering’ on the canvas.
Step 3: Creating the Interlock
-
Detail the ‘over’ crossover:
Where the pink heart crosses *over* the peach heart, apply a slightly thicker, more opaque layer of pink. This ensures the peach color below is fully covered, creating the illusion of depth. -
Detail the ‘under’ crossover:
Where the pink heart goes *under*, neatly stop the pink paint right at the edge of the peach line. You can use your small round brush here for a cleaner edge. -
Add subtle highlights:
Mix a very pale tint of each color (mostly white with a dot of pigment). Add a quick, light highlight streak on the upper curves of both hearts to give them dimension. -
Review the shape:
Step back and look at the composition. If any curves look too jagged, use a damp brush to gently smooth the outer edges, but try to maintain that hand-painted texture. -
Final drying time:
Allow the painting to dry flat for at least an hour. Because the paint is applied somewhat conceptually and thinly in places, it shouldn’t take long to set.
Hang this sweet dual-toned artwork in a bedroom or living space for a subtle daily reminder of love


Romantic Sunset Couple Silhouette Holding Hands
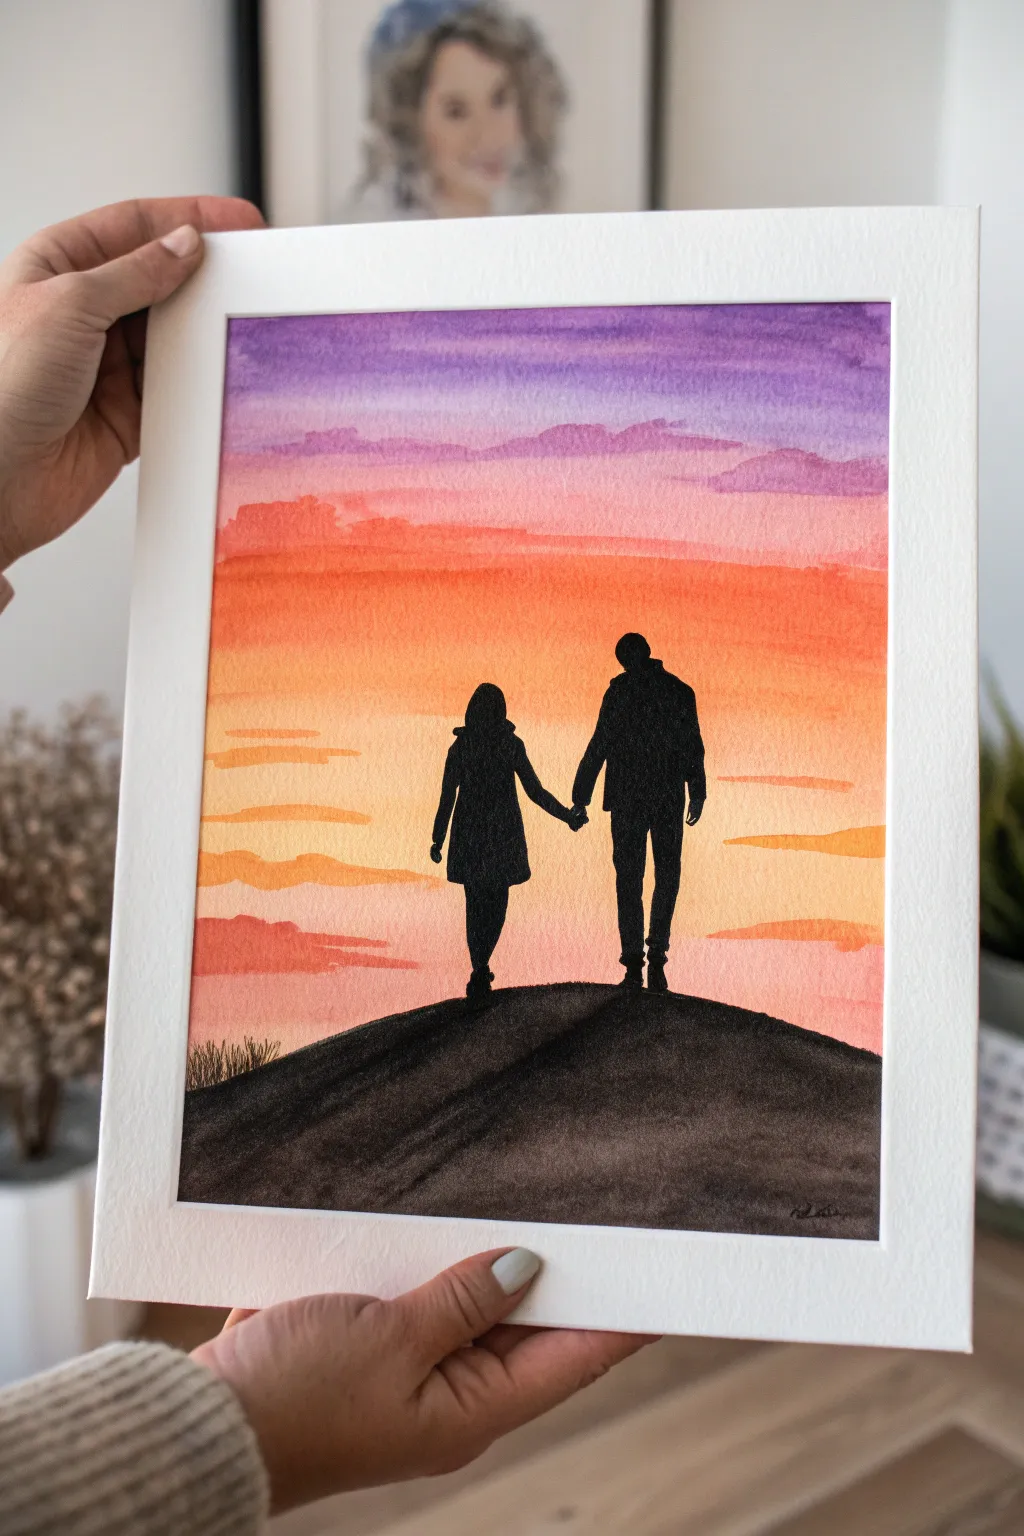
Capture the magic of a quiet evening walk with this vibrant watercolor project that places a striking black silhouette against a blazing sky. The beautiful gradient background transitions from deep purple to warm orange, creating a dramatic backdrop for a couple holding hands on a hilltop.
Step-by-Step Tutorial
Materials
- Cold press watercolor paper (A4 or similar size)
- Watercolor paints (Purple, Magenta/Pink, Orange, warm Yellow)
- Black ink or black gouache paint
- Flat wash brush (large)
- Round brush (size 6 or 8)
- Fine liner brush (size 0 or 1)
- Masking tape
- Drawing board or hard surface
- Pencil and eraser
- Water cups and paper towels
Step 1: Setting the Scene
-
Prep the paper:
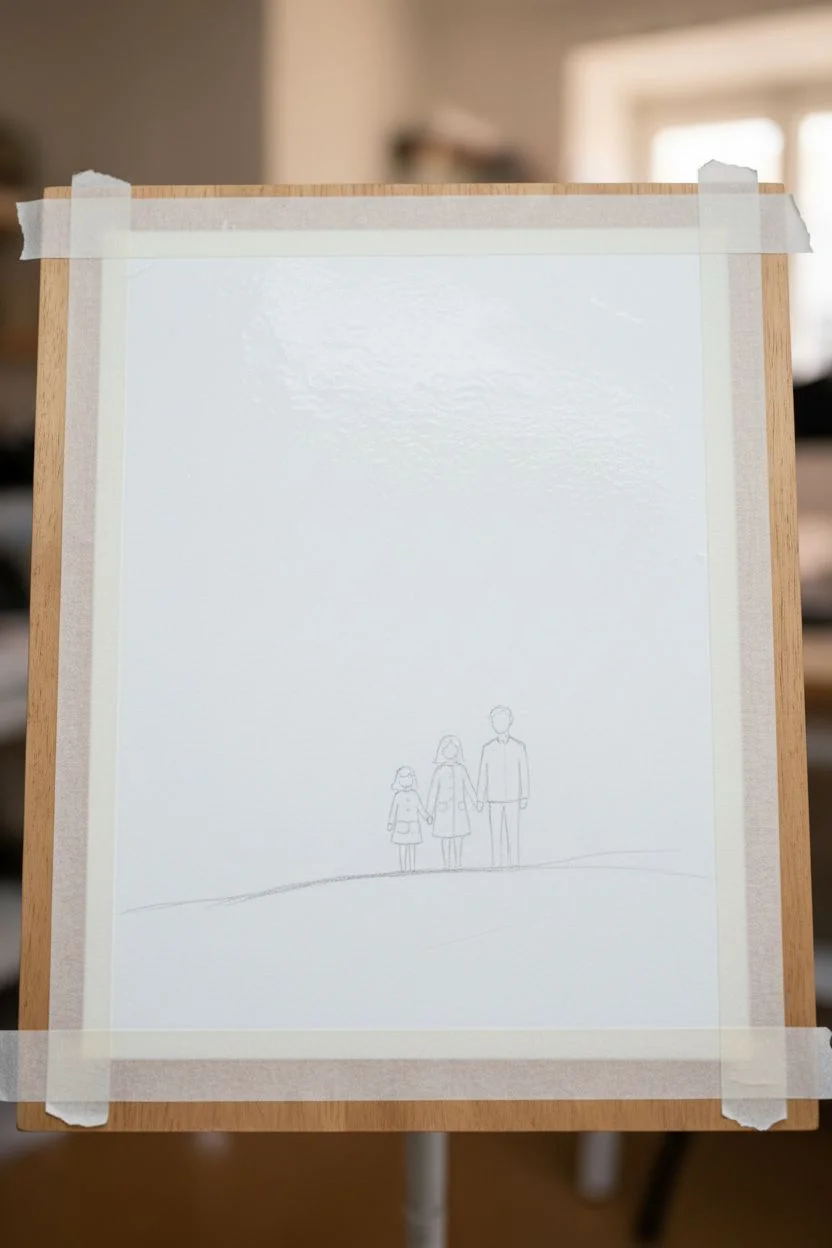
Secure your watercolor paper to a board using masking tape on all four sides. This creates that crisp white border seen in the final piece and prevents the paper from buckling when wet. -
Sketch the outline:
Lightly sketch the curved hilltop at the bottom third of the paper. Then, gently draw the outlines of the two figures—a slight female figure in a coat and a taller male one—holding hands. Keep pencil pressure very light so lines don’t show through later. -
Wet the sky:
Using your large flat brush and clean water, wet the entire sky area above the hill line. The paper should be glistering with a sheen but not holding puddles.
Use Gouache for Black
For the silhouette, standard watercolor can look pale when dry. Use black gouache or India ink instead—it dries perfectly matte and opaque, blocking out the bright sunset colors completely.
Step 2: Painting the Sunset Gradient
-
Apply the purple:
Load your flat brush with deep purple paint. Apply horizontal strokes across the very top of the paper, letting the wet surface soften the edges as the color moves downward. -
Introduce pink tones:
Clean your brush quickly and pick up a vibrant magenta or pink. Paint a strip below the purple, allowing the two colors to bleed into each other slightly for a seamless transition. -
Add the orange glow:
Switch to orange paint. Apply broad horizontal strokes below the pink section, filling the middle area of the sky. The wet-on-wet technique will help these warm tones merge naturally. -
Finish the horizon:
As you near the hill line, mix a touch of warm yellow into your orange to create the lightest part of the sunset. Paint right down to your pencil line, even overlapping slightly into the hill area since the black will cover it. -
Add cloud details:
While the sky is still damp but not soaking, mix a slightly more saturated purple-pink. Use a round brush to dab in horizontal, irregular shapes in the upper sky to suggest soft clouds. Let the background dry completely before proceeding.
Step 3: Creating the Silhouettes
-
Paint the hill base:
Using black gouache or heavy black watercolor, fill in the large hill shape at the bottom. Use curved, sweeping strokes to give the ground texture and rotundity. -
Outline the figures:
Switch to a smaller round brush (size 6) loaded with thick black paint. Carefully fill in the main bodies of the figures, ensuring the coats look opaque against the bright background. I find it helpful to start in the center of the body and push paint toward the edges. -
Detail the edges:
Use your fine liner brush (size 0 or 1) to refine the edges of the silhouette. Pay close attention to the distinct shape of the joined hands, the heads, and the legs. -
Add subtle texture:
While the black hill is drying, you can drag a slightly dry brush across the slope to create faint streaks, suggesting grass or direction in the terrain. -
Dry and reveal:
Wait until the black paint is bone dry. If it’s even slightly wet, it might smudge. Once safe, peel off the masking tape slowly at a 45-degree angle to reveal your clean white frame.
Date Night Variation
Customize the silhouette to match you and a partner! Adjust the heights, add a pet dog sitting nearby, or include props like a bicycle leaning against the hill for a personal touch.
Frame this romantic piece behind glass to protect the delicate watercolor surface and display it where the sunset colors can shine


Lovebirds on a Branch at Dusk
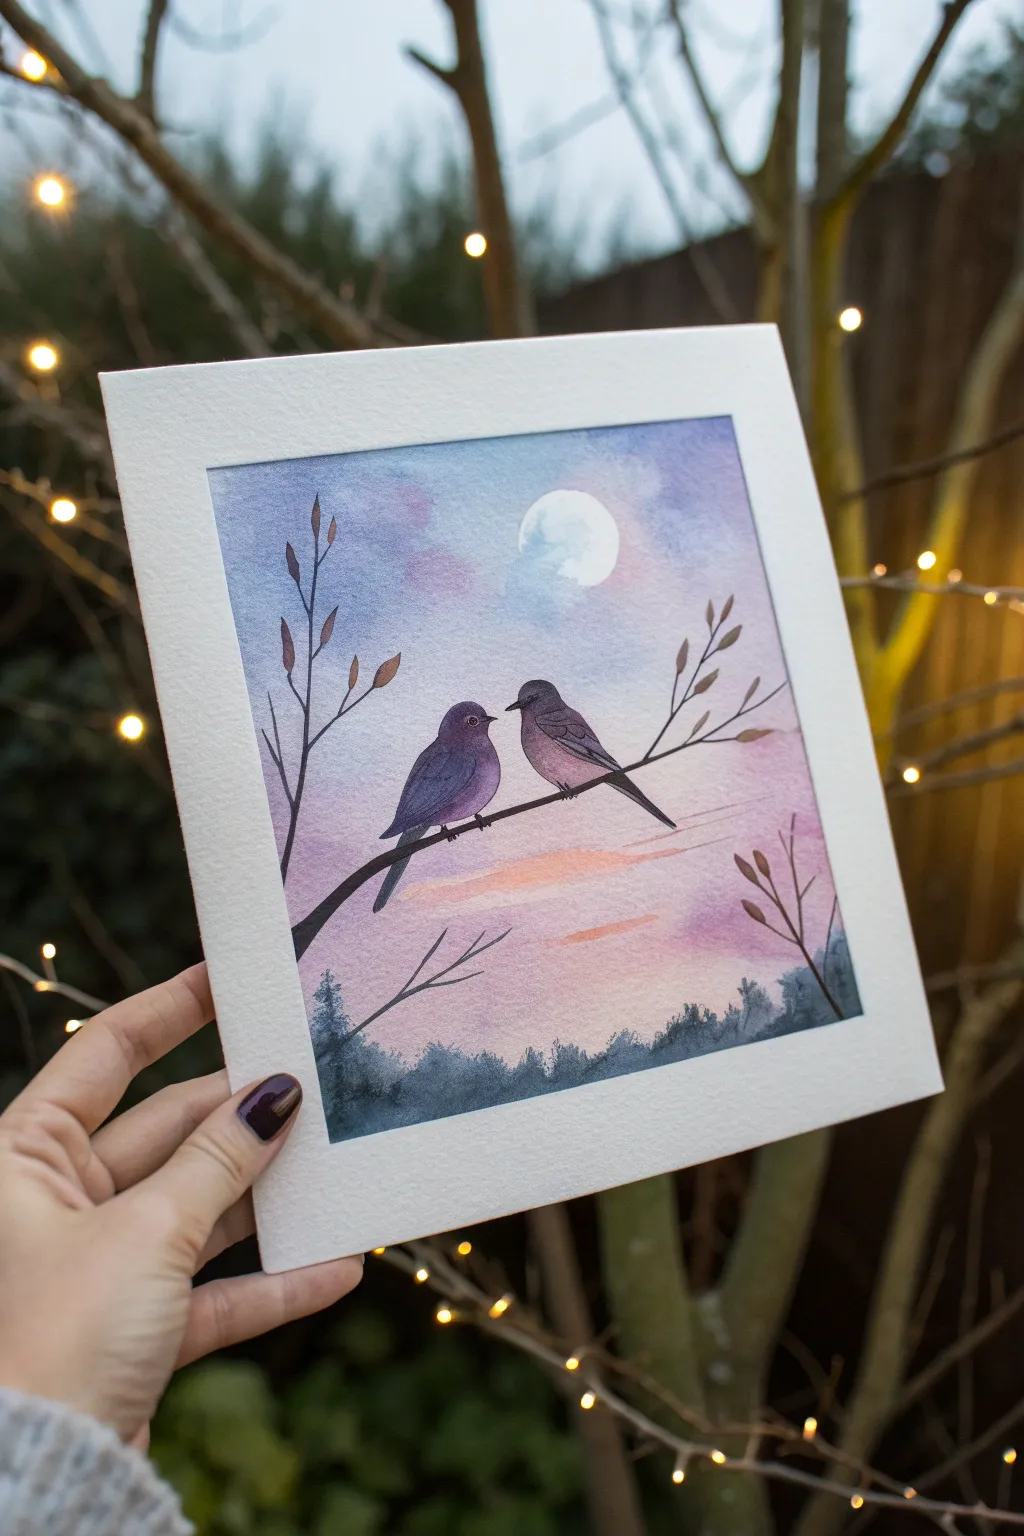
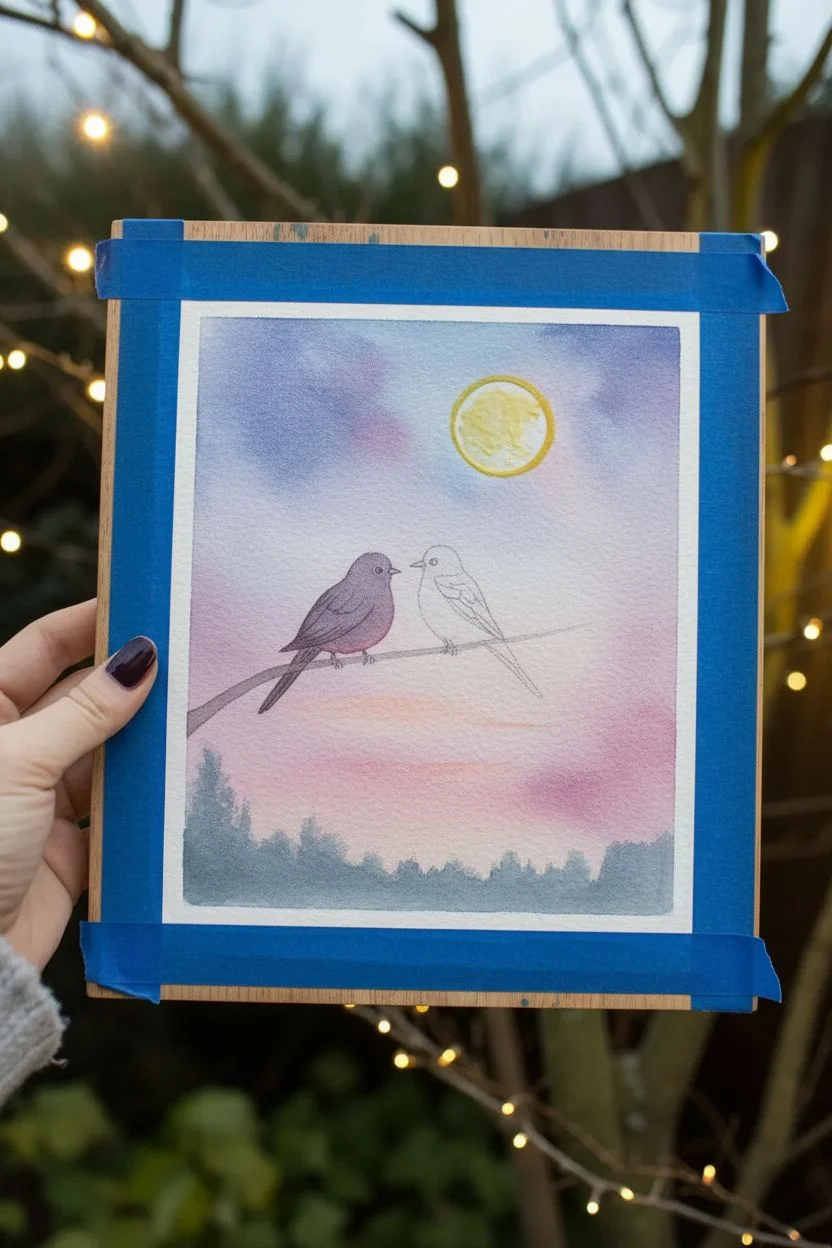
Capture the tender moment of two birds perched silhouetted against a dreamy, cotton-candy sky in this watercolor project. The soft gradients of purple and pink create a romantic dusk atmosphere perfect for beginners and seasoned painters alike.
Step-by-Step Guide
Materials
- Cold press watercolor paper (300gsm)
- Watercolor paints: indigo, violet, rose madder, yellow ochre, Payne’s gray
- Masking fluid (optional)
- White gouache or white gel pen
- Round brushes: sizes 2, 6, and a finer detail brush
- Pencil and eraser
- Painter’s tape
- Clean water and paper towels
Step 1: Sketching and Sky
-
Tape the edges:
Secure your watercolor paper to a board using painter’s tape. Create a clean border by pressing the tape firmly to prevent paint bleeding underneath. -
Light sketch:
Using a pencil, very lightly sketch the placement of the moon in the upper center. Then, draw a simple line for the main branch stretching diagonally across the page. Outline the basic shapes of the two birds sitting close together. -
Mask the moon:
Apply a thin layer of masking fluid over the moon circle to keep it pristine white while you paint the sky. If you don’t have masking fluid, you’ll need to carefully paint around this circle. -
Wet the paper:
With your larger brush (size 6), cover the entire sky area with clean water. I like to let it soak for a few seconds until the paper has a satin sheen—not a puddle. -
Apply the purple gradient:
Load your brush with a watery violet or purple mix. dab it into the upper corners and around the moon area, letting the wet-on-wet technique diffuse the color softly. -
Add pink warmth:
While the paper is still damp, introduce rose madder or a soft pink into the lower middle section and near the horizon line to create sunset clouds. -
Deepen the sky:
Add a touch of indigo to your purple mix and darken the top corners further to create the feeling of approaching night. Let the colors blend naturally. -
Paint the horizon clouds:
Near the bottom third, paint horizontal streaks of diluted orange or yellow ochre mixed with pink to mimic the last light of the sun fading behind clouds.
Step 2: Landscape and Birds
-
Dry partially:
Wait until the sky is damp but not soaking wet. The shine should be mostly gone. -
Create the treeline:
Mix a dark blue-grey using indigo and Payne’s gray. Paint a jagged, loose horizon line at the very bottom to represent distant trees. Since the paper is slightly damp, the top edge of these trees will blur slightly, creating atmospheric depth. -
Dry completely:
Allow the entire painting to dry fully. You can use a hairdryer on a low setting to speed this up. Remove the masking fluid from the moon by gently rubbing it away. -
Paint the moon texture:
Using very diluted blue-grey paint, dab a few craters and shadows onto the white moon to give it dimension, leaving parts of it bright white. -
Paint the birds:
Switch to your size 2 brush. Mix a dense, creamy consistency of violet and Payne’s gray. Fill in the bird silhouettes carefully. Leave a tiny speck of white paper for the eye, or paint it solid and add a white dot later. -
Add bird details:
While the birds are drying, you can add slight wing definitions with a darker concentration of the same color, especially on the bird to the right. -
Draw the branch:
Using the detail brush and a dark brown-black mix (burnt umber and indigo), paint the main branch under the birds. Let your hand shake slightly to give the wood a natural, organic texture. -
Add twigs and buds:
Extend smaller twigs upwards and downwards from the main branch. Paint small, teardrop-shaped buds at the tips of these twigs using a warm brown or copper tone. -
Final highlights:
Once everything is bone dry, use white gouache or a gel pen to add the catchlight in the birds’ eyes and perhaps a tiny highlight on the beaks or the tops of the buds. -
Reveal:
Carefully peel off the painter’s tape at a 45-degree angle to reveal your crisp white border.
Clean Edges
Does your tape tear the paper? Heat the tape with a hairdryer for a few seconds before peeling. This softens the adhesive and saves your artwork.
Sparkle Effect
Mix a tiny amount of iridescent medium into your moon paint or the bird feathers to give the piece a subtle, magical shimmer when it catches the light.
Frame your twilight masterpiece in a square mat to emphasize the intimate connection between the two birds


Couple Under One Umbrella in the Rain
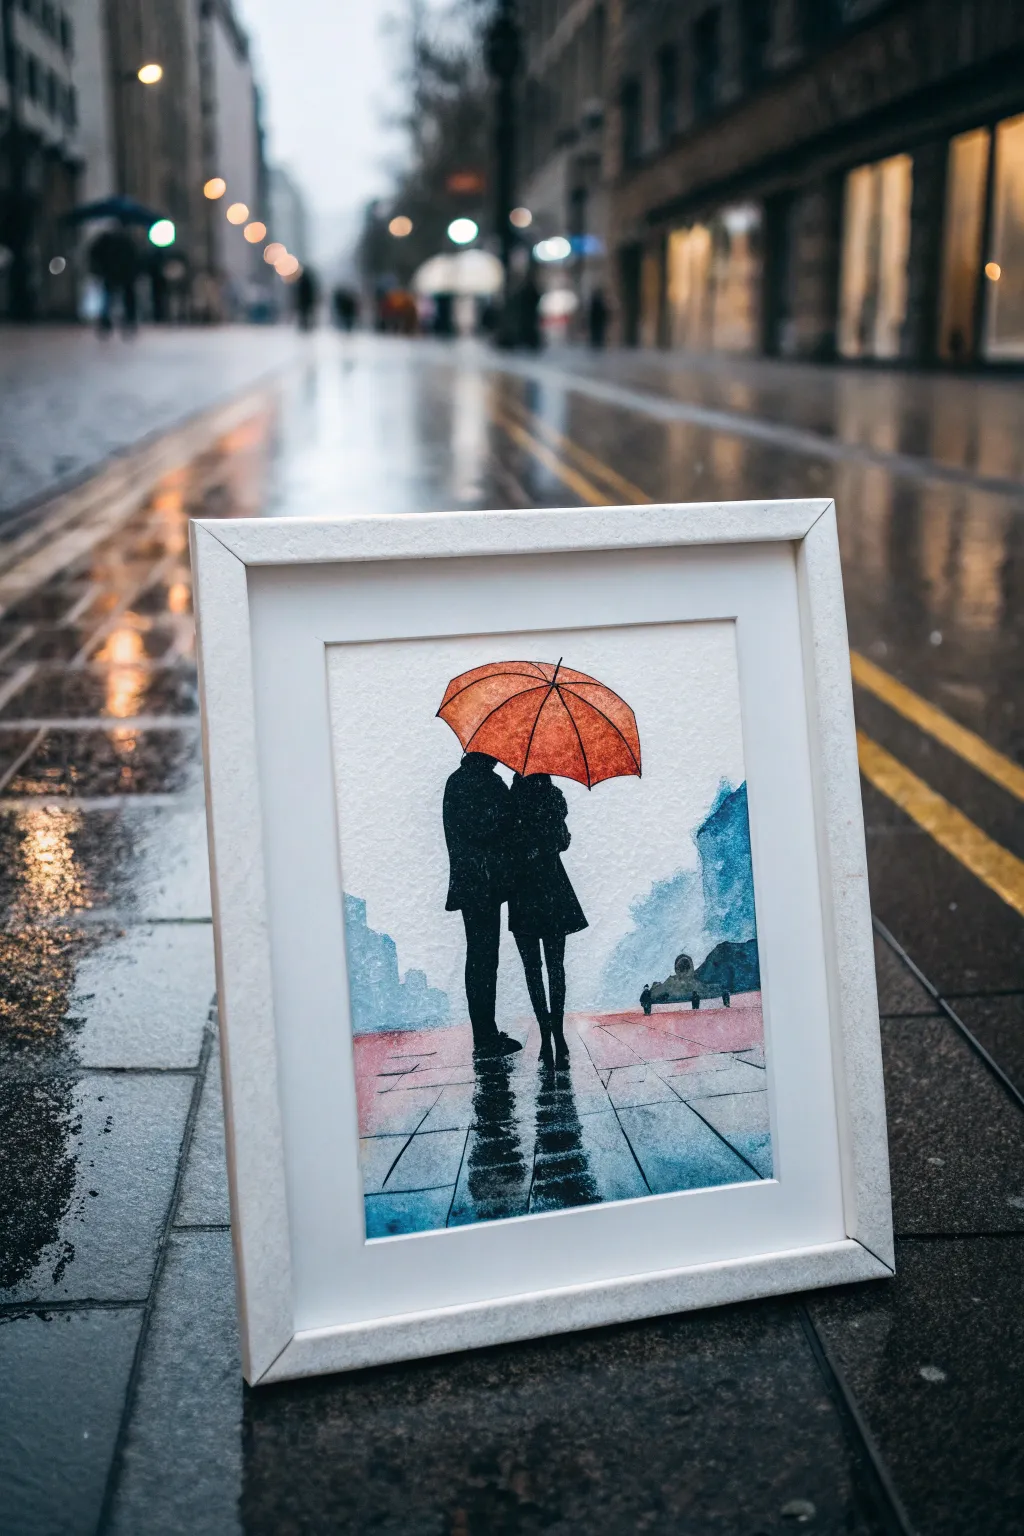
Capture the cozy feeling of a rainy day stroll with this evocative watercolor piece. By combining wet-on-wet background techniques with crisp black silhouettes, you’ll create a striking contrast that emphasizes the glowing orange umbrella.
Step-by-Step
Materials
- Cold press watercolor paper (300 gsm)
- Watercolor paints (Indigo, Payne’s Grey, Cadmium Orange, Burnt Sienna, Teal/Turquoise)
- Black waterproof ink or gouache
- Flat wash brush (1 inch)
- Round brushes (size 4 and 8)
- Small detail brush (size 0 or 1)
- Masking fluid (optional)
- Pencil and eraser
- Jar of clean water
- Paper towels
- White mat and frame
Step 1: Sketching and Preparation
-
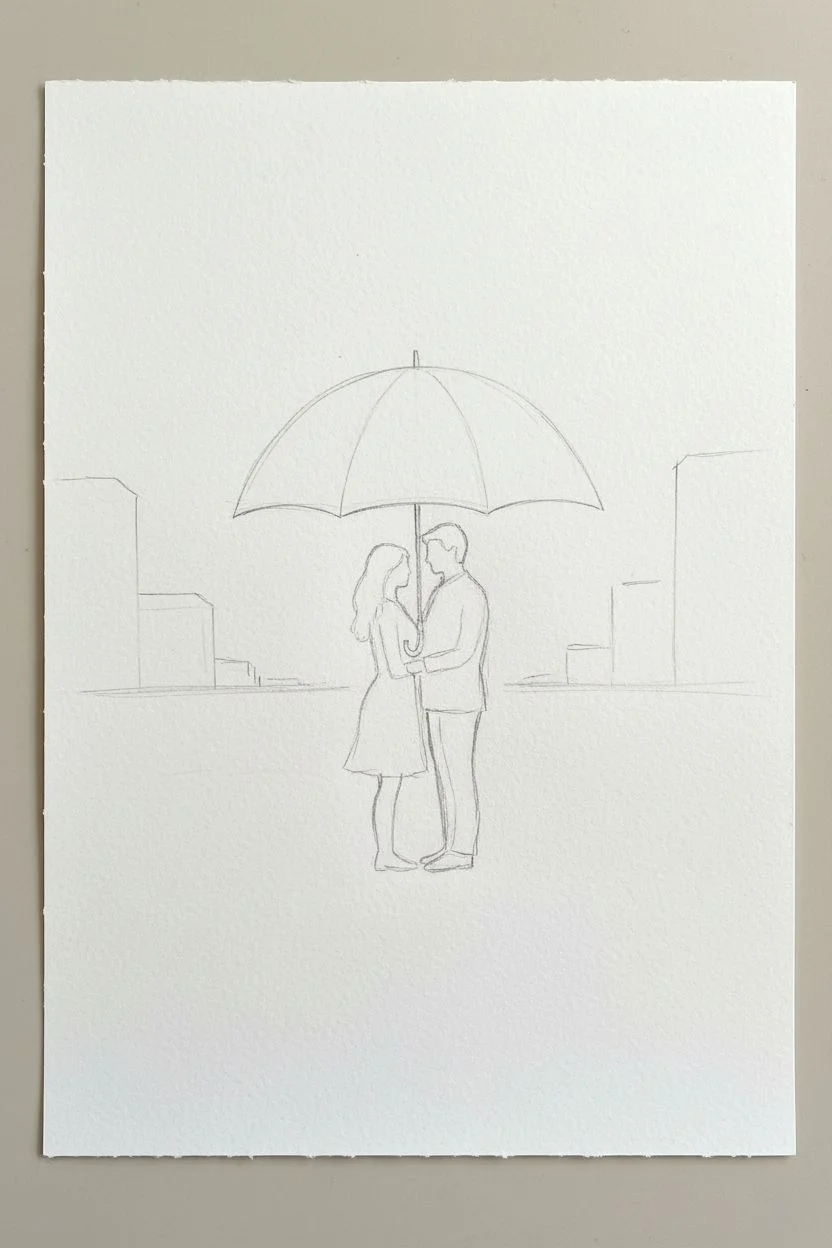
Outline the Composition:
Begin by lightly sketching the central elements on your watercolor paper. Draw the dome shape of the umbrella first, positioning it slightly above the center. Simple shapes are best here. -
Add the Couple:
Lightly sketch the outlines of the two figures underneath the umbrella. Focus on their overall shape rather than details, as these will be filled in with solid black later. Draw their legs extending down into what will be the wet pavement. -
Suggest the Background:
Very faintly indicate the horizon line and vague rectangles for distant buildings. These shouldn’t be precise; they act as a guide for your background wash. -
Protect the Highlights (Optional):
If you want to keep the area around the umbrella or specific reflections pristine, apply a thin layer of masking fluid. I sometimes skip this and just paint carefully, but it offers nice peace of mind.
Bleeding Lines?
If your black silhouette bleeds into the background, the paper wasn’t fully dry. Let it dry completely, then use white gouache to tidy the edges before reapplying black.
Step 2: The Atmospheric Background
-
Wet the Paper:
Using your large flat brush, apply clean water to the entire background area, avoiding the couple and the umbrella. The paper should be glistening but not forming puddles. -
Apply Cool Tones:
Load a round brush with a mix of Teal and Indigo. Drop this color into the wet areas representing the sky and distant buildings. Let the paint bloom and spread naturally to create a foggy, out-of-focus effect. -
Create Depth:
While the paper is still damp, add slightly concentrated Payne’s Grey to the building shapes on the right and left edges. This wet-on-wet technique keeps the edges soft. -
Paint the Pavement:
Wash a lighter, watered-down version of your blue-grey mix across the bottom third of the paper. Use horizontal strokes to suggest the flat surface of the street. -
Add Reflection Base:
While the pavement wash is wet, drop in vertical streaks of darker blue and grey directly below where the couple is standing to start forming the reflections. -
Let it Dry:
Allow this layer to dry completely. If the paper is cold to the touch, it’s still wet. Using a hair dryer on a low setting can speed this up.
Make it Sparkle
Use a white gel pen to add tiny dots of ‘rain’ or highlights on the umbrella’s top curve and the wet pavement tiles for extra realism.
Step 3: The Focal Point
-
Paint the Umbrella:
Mix a vibrant Cadmium Orange with a touch of Burnt Sienna. Paint the segments of the umbrella using a size 4 round brush. Create slight variations in tone between the segments to show the ribs of the umbrella. -
Fill the Couple:
Using black waterproof ink or concentrated gouache, carefully fill in the silhouettes of the couple. Use your steady hand and the size 4 brush for the main bodies. -
Refine the Edges:
Switch to your smallest detail brush to sharpen the edges of the coats and the couple’s legs. Precise edges here are crucial to make the figures pop against the blurry background. -
Add the Umbrella Pole:
With the detail brush and black ink, draw the thin line of the umbrella shaft and the small ferrule at the very top tip.
Step 4: Reflections and Details
-
Deepen the Reflections:
Once the silhouette is dry, use watered-down black watercolor (not ink) to paint the shadow reflections on the wet pavement. Use zigzag motion with your brush to mimic ripples in the water. -
Add Ground Texture:
Use a ruler and a dilute grey mix to paint very faint perspective lines on the ground, suggesting pavement tiles. Keep these lines broken and subtle. -
Redden the Pavement:
To tie the image together, glaze a very watery wash of faint red or orange over parts of the pavement, suggesting the reflection of the umbrella or streetlights on the wet stone. -
Final Contrast Check:
Evaluate your painting. If the background dried too light, you can add a second glaze of blue to the corners to frame the couple better. -
Frame It:
Once fully dry, place your artwork behind a clean white mat and frame it to give it that professional gallery look shown in the inspiration photo.
Hang your finished piece in an entryway or living room to add a touch of romance and atmosphere to your home
BRUSH GUIDE
The Right Brush for Every Stroke
From clean lines to bold texture — master brush choice, stroke control, and essential techniques.
Explore the Full Guide
Moonlit Dance Silhouettes With a Giant Moon
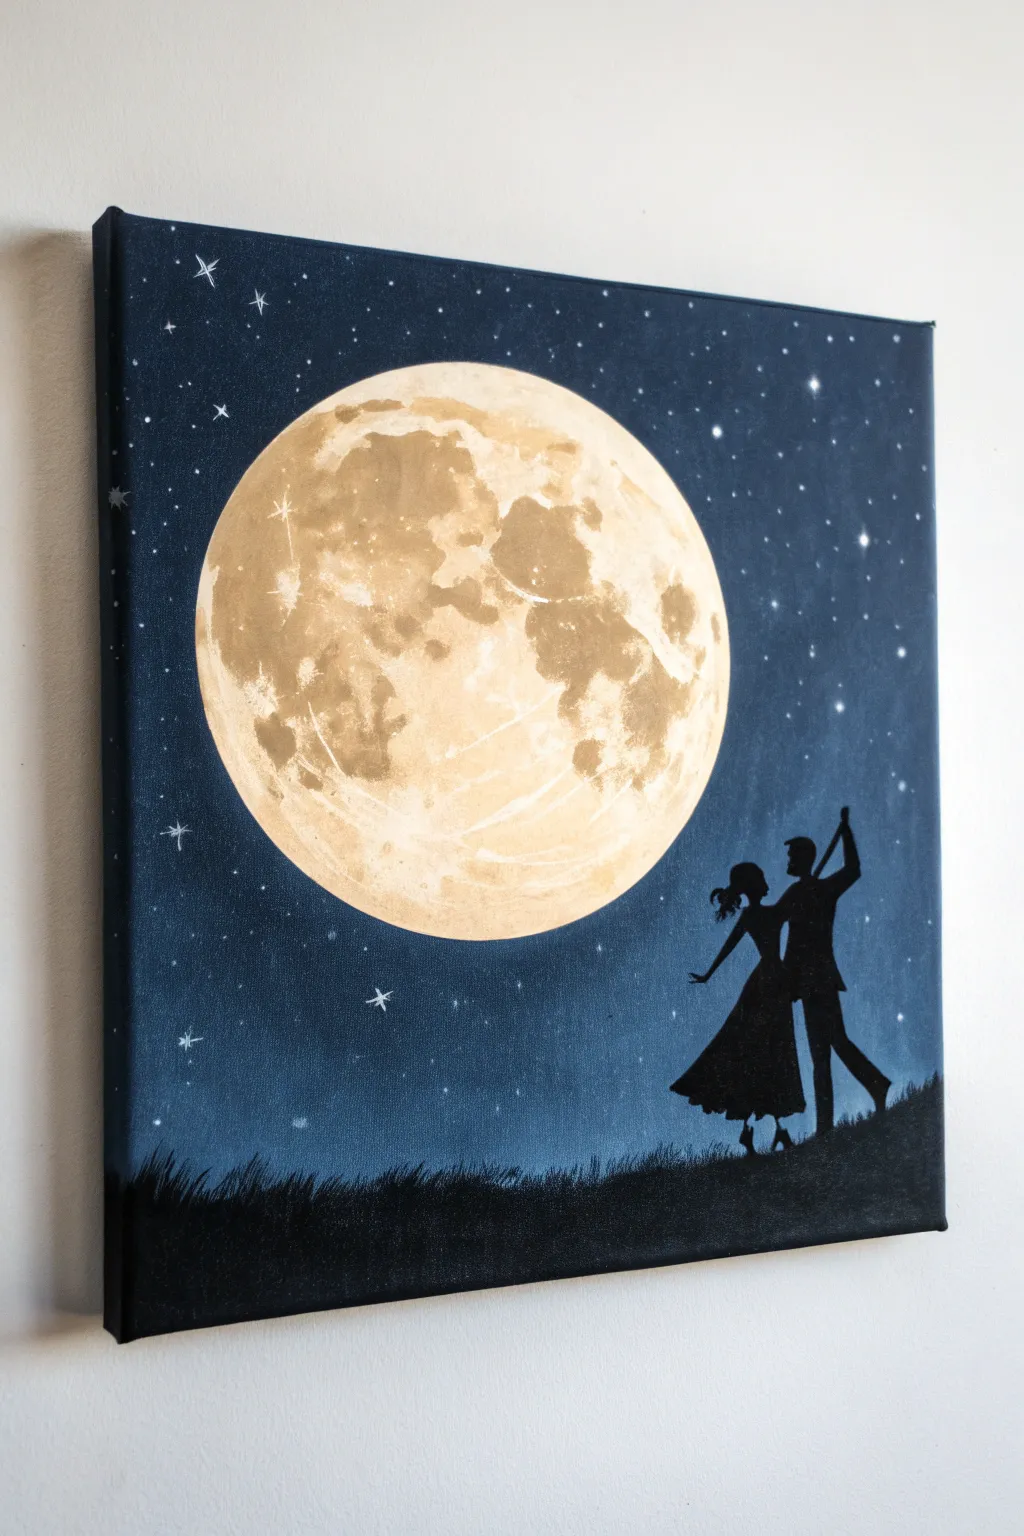
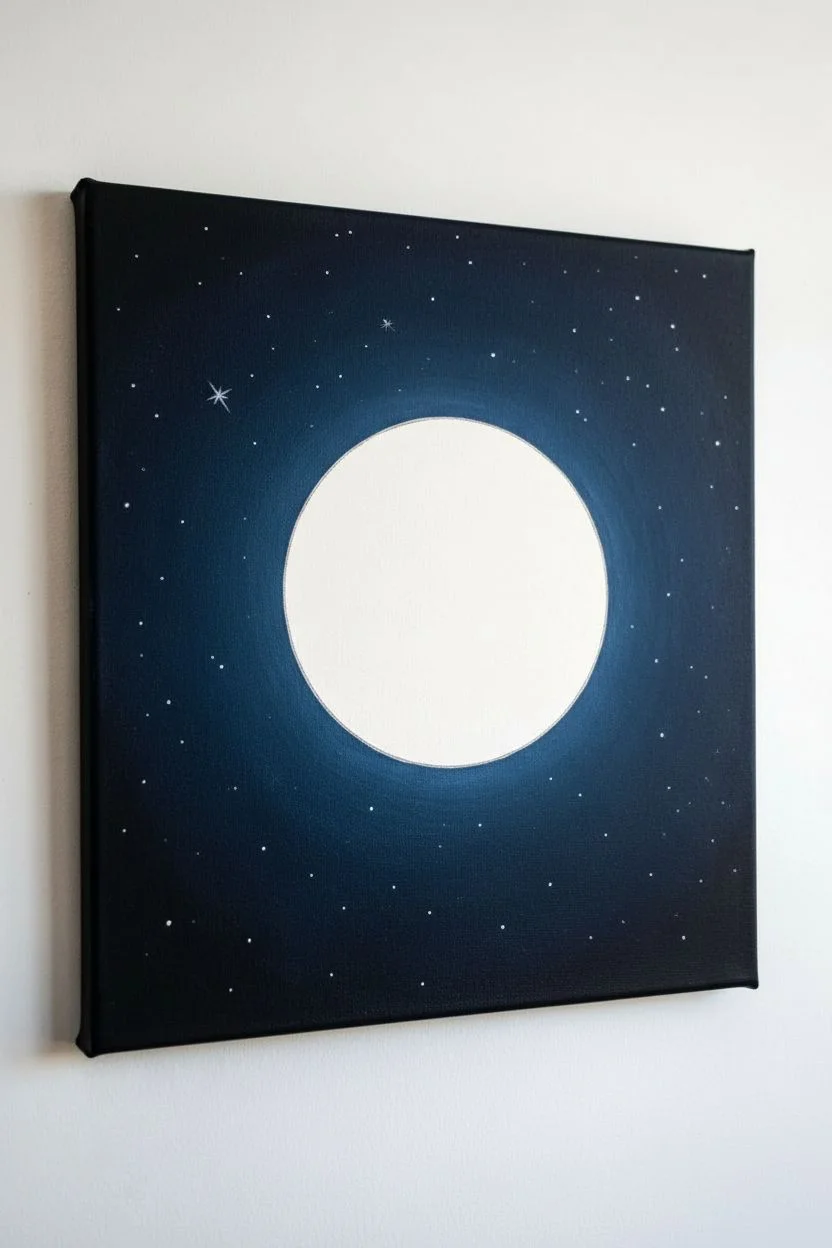
Capture the magic of a perfect evening with this romantic acrylic painting featuring a couple silhouetted against a luminous, oversized moon. The high-contrast design pairs deep midnight blues with warm lunar golds for a striking piece of wall art.
Step-by-Step Tutorial
Materials
- Square stretched canvas (e.g., 12×12 or 16×16 inches)
- Acrylic paints: Carbon Black, Titanium White, Phthalo Blue (or Navy), Burnt Umber, Yellow Ochre or Gold Metallic
- Large flat brush (1 inch)
- Medium round brush
- Small liner brush (for stars)
- Circular stencil, plate, or compass (for the moon outline)
- Pencil
- Palette and water cup
- Paper towels
Step 1: Setting the Night Sky
-
Trace the moon:
Begin by placing your circular stencil or plate firmly in the upper-center of the canvas. Use a pencil to lightly trace a perfect circle outline; this reserves the bright space for later. -
Mix the background base:
On your palette, mix a large amount of Phthalo Blue with a touch of Cardon Black to create a deep, rich midnight blue. It should look almost black but clearly blue under light. -
Paint the background:
Using the large flat brush, paint the entire area outside the moon circle. I usually start carefully cutting in around the pencil line first, then fill in the rest of the canvas with smooth, horizontal strokes. -
Add subtle gradients:
While the blue paint is still wet, you can blend in a tiny bit more black at the very top corners to create a vignette effect, deepening the night sky. -
Paint the edges:
Don’t forget to extend your dark blue paint onto the sides of the canvas for a finished, professional gallery-wrapped look. -
Create the stars:
Once the blue background is fully dry, load a small liner brush with thinned Titanium White paint. Dot tiny stars randomly across the dark sky. -
Add starbursts:
Select a few specific spots to paint larger stars with cross-shapes or four-pointed flares to add sparkle and variety to the galaxy.
Moon Glow Tip
For extra luminosity, dry-brush a very faint, translucent ring of white or pale yellow onto the blue sky immediately surrounding the moon.
Step 2: Painting the Luminous Moon
-
Fill the moon base:
Mix Titanium White with a very small dot of Yellow Ochre to create a pale cream color. Fill in the entire moon circle with this solid base tone. -
Mix texture colors:
Prepare two new mixtures: a slightly darker beige (White + more Yellow Ochre) and a soft grey-brown (White + touch of Burnt Umber). -
Sponge or dab textures:
Using a crumpled paper towel or an old, dry scruffy brush, dab the darker beige color onto the moon to create the look of craters. Focus on random blotches rather than a uniform pattern. -
Add deep craters:
Layer the grey-brown mixture sparingly over the beige areas to add depth to the lunar surface. Keep the center slightly lighter to make the moon appear spherical. -
Highlight the rim:
With clean white paint, gently brush the very outer edge of the moon circle in a few spots to make it look like it’s glowing against the dark sky.
Uneven Moon Edge?
If the moon outline gets messy, wait for it to dry completely. Then, use the dark background color to carefully cut back in and reshape the circle.
Step 3: Adding the Silhouette
-
Draft the foreground:
Using your pencil lightly, sketch the uneven hill line at the bottom and the dancing couple. Make sure their feet are grounded on the hill, not floating. -
Paint the ground:
Load your medium brush with pure Carbon Black. Paint the rolling hill at the bottom, ensuring it covers the entire width of the canvas. -
Fill the figures:
Switch to your small round brush to fill in the couple’s silhouette with black paint. Take your time with the edges to keep them crisp. -
Refine the pose:
Pay attention to small details like the angle of the arms and the flowing dress shape, which conveys movement. A tiny brush helps get the sharp points of the fingers right. -
Add grass texture:
Along the top edge of the black hill, use a dry brush or the tip of a small brush to flick tiny, upward strokes. This creates the look of grass blades silhouetted against the sky. -
Final touches:
Check your blacks for opacity. If the canvas shows through, apply a second coat of black to the silhouette for a solid, shadow-like appearance.
Now step back and admire the timeless romance of your moonlit masterpiece
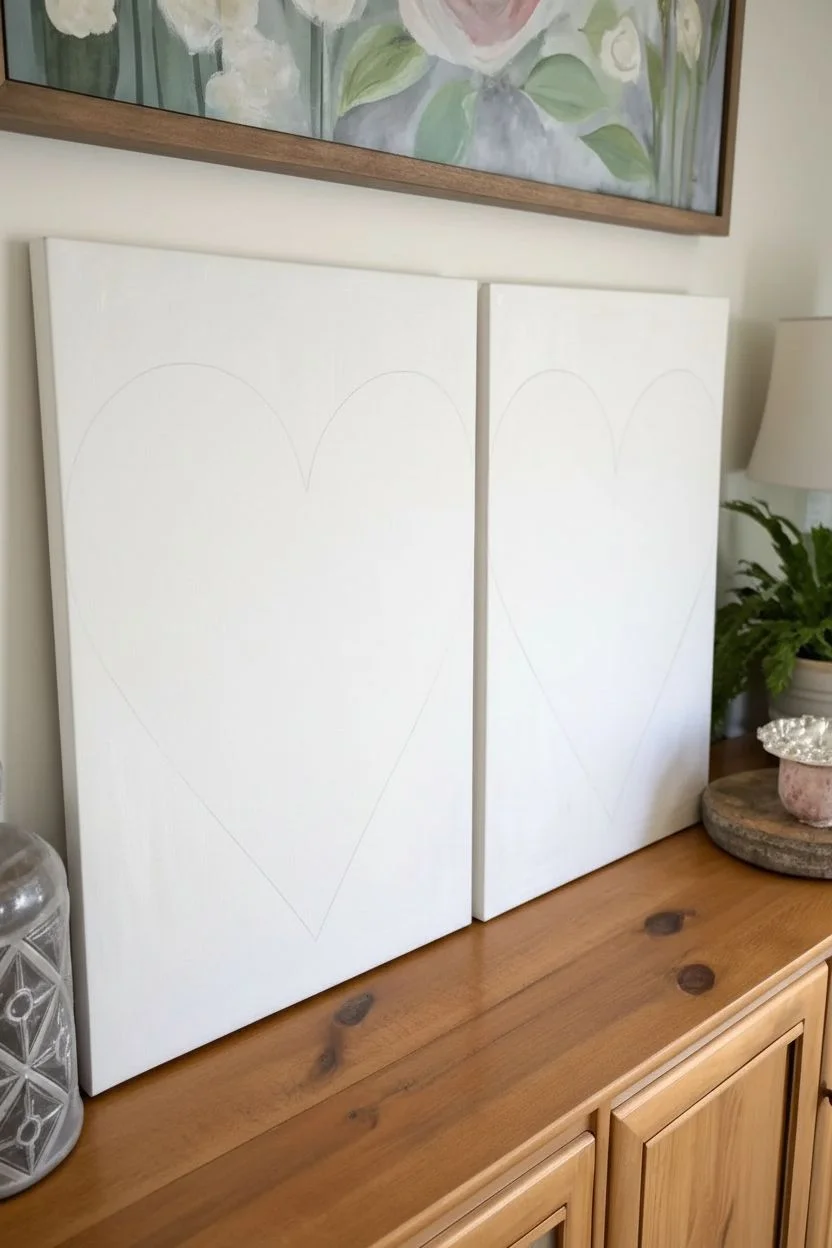
Split-Canvas Diptych Heart That Becomes One
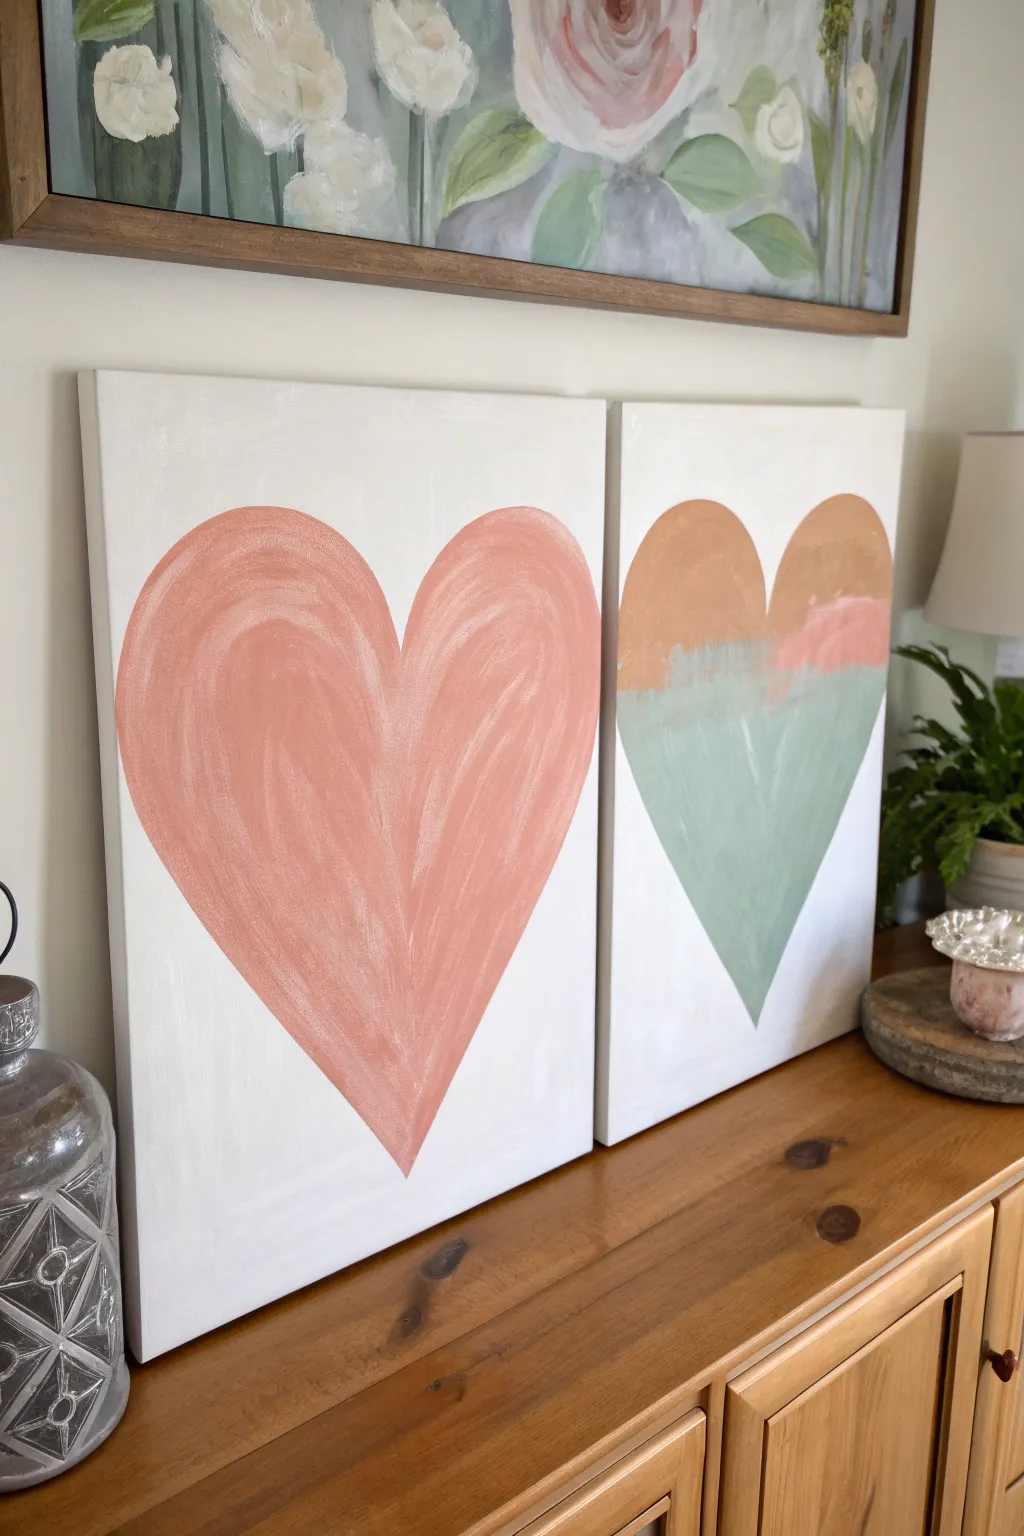
This charming project creates a unified statement across two separate canvases, symbolizing two halves becoming a whole. With soft texture and a soothing color palette of blush pink, terracotta, and sage green, it brings a gentle, romantic touch to any mantle or wall.
Step-by-Step
Materials
- Two 16×20 inch stretched canvases (or similar rectangular size)
- Acrylic paints: white, blush pink, terracotta/burnt sienna, sage green
- Large flat paintbrush (2-3 inch width)
- Medium round brush
- Pencil
- Large sheet of paper or cardboard (for template)
- Scissors
- Masking tape or painter’s tape
- Paper plate or palette
- Water cup and paper towels
Step 1: Preparation and Sketching
-
Prepare the workspace:
Lay down drop cloths or newspaper to protect your surface. Set your two canvases side-by-side on a flat surface, touching each other vertically, exactly how they will hang. -
Create a heart template:
Cut a piece of paper (or tape several together) to match the total width of both canvases combined. Draw a large, symmetrical heart shape that spans across this paper. -
Refine the shape:
Make sure the heart is wide enough so that the outer curves fill most of the canvas width, while the bottom point centers perfectly between the two sheets. -
Cut out the template:
Cut out your paper heart. Cut it vertically down the center line so you have a left half and a right half. -
Trace the design:
Place the left paper heart on the left canvas and the right paper heart on the right canvas. Lightly trace the outline onto the canvas with a pencil.
Step 2: Painting the Left Heart
-
Mix the blush color:
On your palette, mix a generous amount of blush pink with a touch of terracotta and plenty of white titanium to create a soft, warm coral-pink tone. -
Apply the base coat:
Using your large flat brush, fill in the entire heart shape on the left canvas. Don’t worry about perfect smoothness; texture is part of the charm here. -
Add texture strokes:
While the paint is still wet, dip your brush into a slightly lighter version of your pink mix (add more white). Sweep the brush in long, curved strokes following the shape of the heart to create dimension. -
Soften the edges:
If the pencil lines are still visible, carefully paint over them. I like to keep the brush fairly dry here to keep the edges soft rather than sharp and geometric. -
Let it dry:
Allow the left canvas to dry completely before moving it, as you’ll want to reference its color for the next step.
Keeping the Curve
When applying the visible brushstrokes inside the heart, always follow the curve of the outline. Curved strokes make the heart look rounded and puffy; straight strokes make it look flat.
Step 3: Painting the Right Heart
-
Mark the horizon line:
On the right canvas, decide where the color split will happen. Use a pencil to lightly mark a horizontal line across the heart shape, slightly above the center point. -
Mix the top color:
Mix a terracotta shade that is slightly darker and earthier than the left heart. It should relate to the first canvas but stand out as distinct. -
Paint the upper section:
Fill in the top curves of the right heart with this terracotta mix. Let your brushstrokes remain loose and painterly. -
Mix the bottom color:
Clean your brush thoroughly. Mix a muted sage green using green, a touch of yellow ochre if you have it, and white to soften it. -
Paint the lower section:
Fill in the bottom point of the heart with the sage green mix, bringing the paint up to meet the terracotta section. -
Blend the transition:
Where the green meets the terracotta, don’t create a hard line. Instead, use a dry brush to lightly feathered the green up into the terracotta and vice versa, creating a dreamy, hazy horizon. -
Add highlight accents:
Take a tiny bit of the pink mixture from the left canvas and dab a few opaque strokes right at the transition line on the right canvas to visually connect the two pieces.
Muddy Middle?
If blending the green and terracotta creates an ugly brown color, stop blending while wet. Let the bottom layer dry, then dry-brush the second color on top for a cleaner transition.
Step 4: Finishing Touches
-
Paint the background:
Using clean white paint (or an off-white cream), carefully paint the negative space around both hearts. This cleans up any messy edges and makes the shapes pop. -
Check the edges:
Paint the sides of the canvas (the depth part) white as well for a finished gallery look. -
Final cure:
Let both canvases dry undisturbed for at least 24 hours before hanging or displaying on a shelf.
Step back and admire how the two distinct canvases interact to form a single symbol of affection

PENCIL GUIDE
Understanding Pencil Grades from H to B
From first sketch to finished drawing — learn pencil grades, line control, and shading techniques.
Explore the Full Guide
Hidden Heart Negative Space in a Floral Wreath
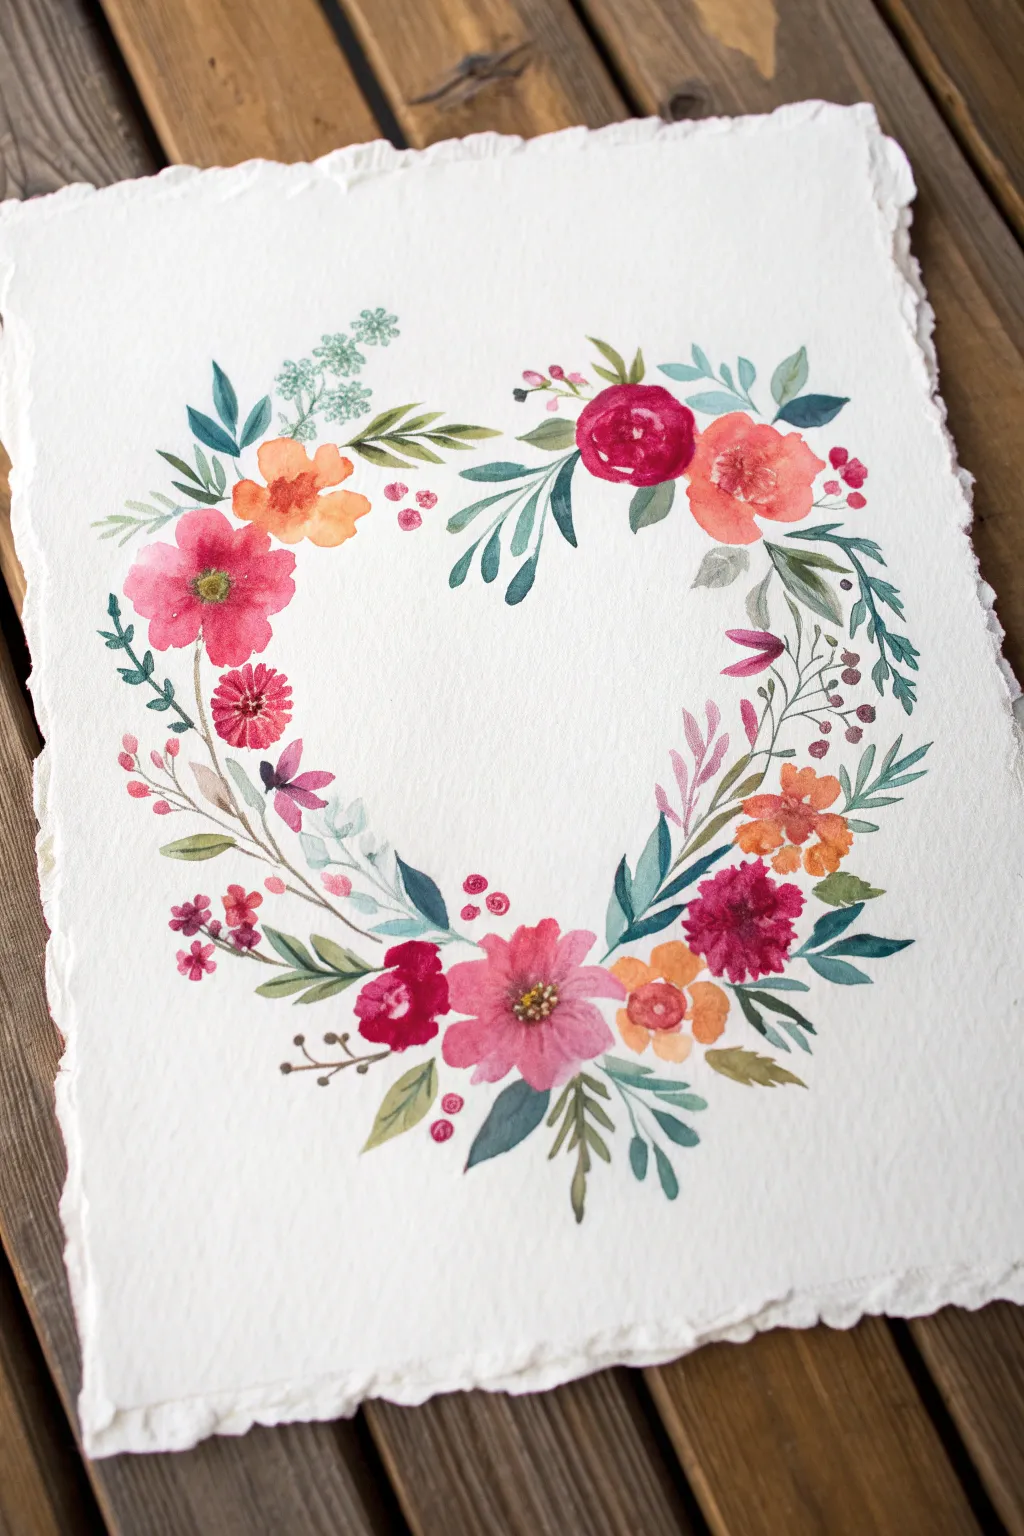
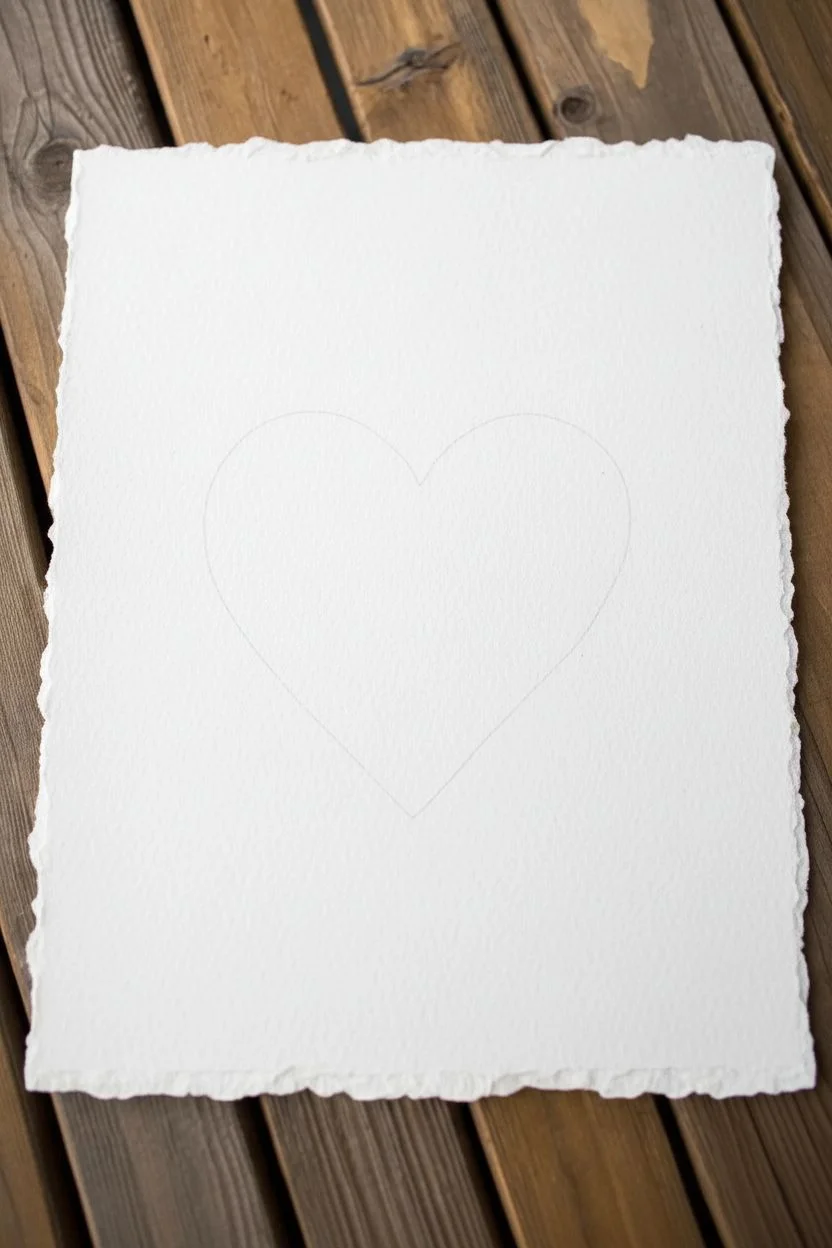
Capture the delicate beauty of wildflowers with this romantic watercolor project, where vibrant blooms frame a pristine white heart in the center. The soft, deckle-edged paper adds an organic, vintage feel that perfectly complements the loose, painterly style of the wreath.
Step-by-Step Guide
Materials
- Cold press or rough watercolor paper (cotton rag with deckle edge recommended)
- Watercolor paints (shades of pink, red, coral, green, teal)
- Round watercolor brushes (sizes 2, 4, and 6)
- HB pencil
- Kneaded eraser
- Paper towel
- Two jars of water
- Scrap paper for testing colors
Step 1: Planning the Shape
-
Cut your paper:
If you aren’t using pre-cut deckle-edged paper, gently tear your watercolor paper to size using a ruler as a guide to create that soft, fibrous edge. -
Sketch the heart:
Lightly draw a heart in the center of your paper using an HB pencil. This line will act as the inner boundary for your flowers, so keep it faint; you want the paint to touch this line but not cross it. -
Soften the guide:
Roll your kneaded eraser gently over the pencil line to lift up most of the graphite. You should be left with a ghost of a line that is barely visible, just enough to guide your brush placements.
Defining the Edge
To make the heart shape pop, ensure your leaves and petals physically touch or slightly overlap your pencil guide. The sharper the inner edge, the clearer the heart will appear.
Step 2: Painting the Anchor Blooms
-
Start with the focal flowers:
Mix a vibrant crimson red. Paint a loose rose shape near the top right curve of the heart, ensuring the inner petals touch your pencil guide. -
Add a coral companion:
While the red rose is drying, mix a soft coral orange. Paint a second open flower next to the red one, slightly lower down the right side. -
Balance the left side:
Create a punchy pink-red mix. On the upper left curve of the heart, paint a five-petaled flower facing inward. Leave the center empty for now. -
Place the bottom anchors:
Down at the bottom point of the heart, paint a cluster of smaller blooms. Use a deep magenta for a small anemone-style flower and a soft pink for a larger, multi-petaled bloom right at the tip. -
Wait for layers:
Let these main anchor flowers dry completely. If you paint adjacent wet areas too soon, the colors will bleed uncontrollably.
Step 3: Filling the Wreath
-
Add secondary flowers:
Using a smaller brush (size 4), fill in the gaps with smaller flowers. Paint a bright orange cosmos on the upper left and a small cluster of violet-red buds near the bottom left. -
Detail the centers:
Once your main flowers are dry, go back in with a size 2 brush. Add yellow or brown stamen dots to the centers of the open flowers to give them depth. -
Paint large leaves:
Mix a deep blue-green teal shade. Paint long, flowing leaves that curve around the heart shape, tucking them behind the main flowers. -
Add varied foliage:
Switch to a lighter olive green. Paint smaller, fern-like leaves extending outward from the wreath to create an organic, wild look. -
Create airy textures:
I like to use a very watery pale teal to dab in some soft, nebulous leaves or ‘filler’ sprigs in the background. This adds volume without heaviness.
Mending a Broken Heart
Accidentally painted inside the heart? Don’t panic. Use a wet, clean brush to gently scrub and lift the paint while it’s damp, then dab with a paper towel.
Step 4: Refining the Negative Space
-
Check the edge:
Look closely at your heart shape. Are there any large white gaps along the pencil line? If so, fill them with tiny berries, buds, or small leaves to define the edge clearly. -
Add berries:
Using a concentrated red or burgundy, dot in small berries on thin stems. Let these weave through the greenery. -
Connect the elements:
Use a liner brush or the tip of your size 2 brush to paint thin brown or green stems connecting floating flowers to the main wreath structure. -
Final touches:
Step back and assess the composition. Add a few more stray leaves pointing outward to break up any rigid circular shapes, keeping the inner heart line clean.
Allow your painting to dry fully before erasing any remaining pencil marks to reveal your perfectly formed floral heart
Starry Sky Where the Constellations Form a Heart
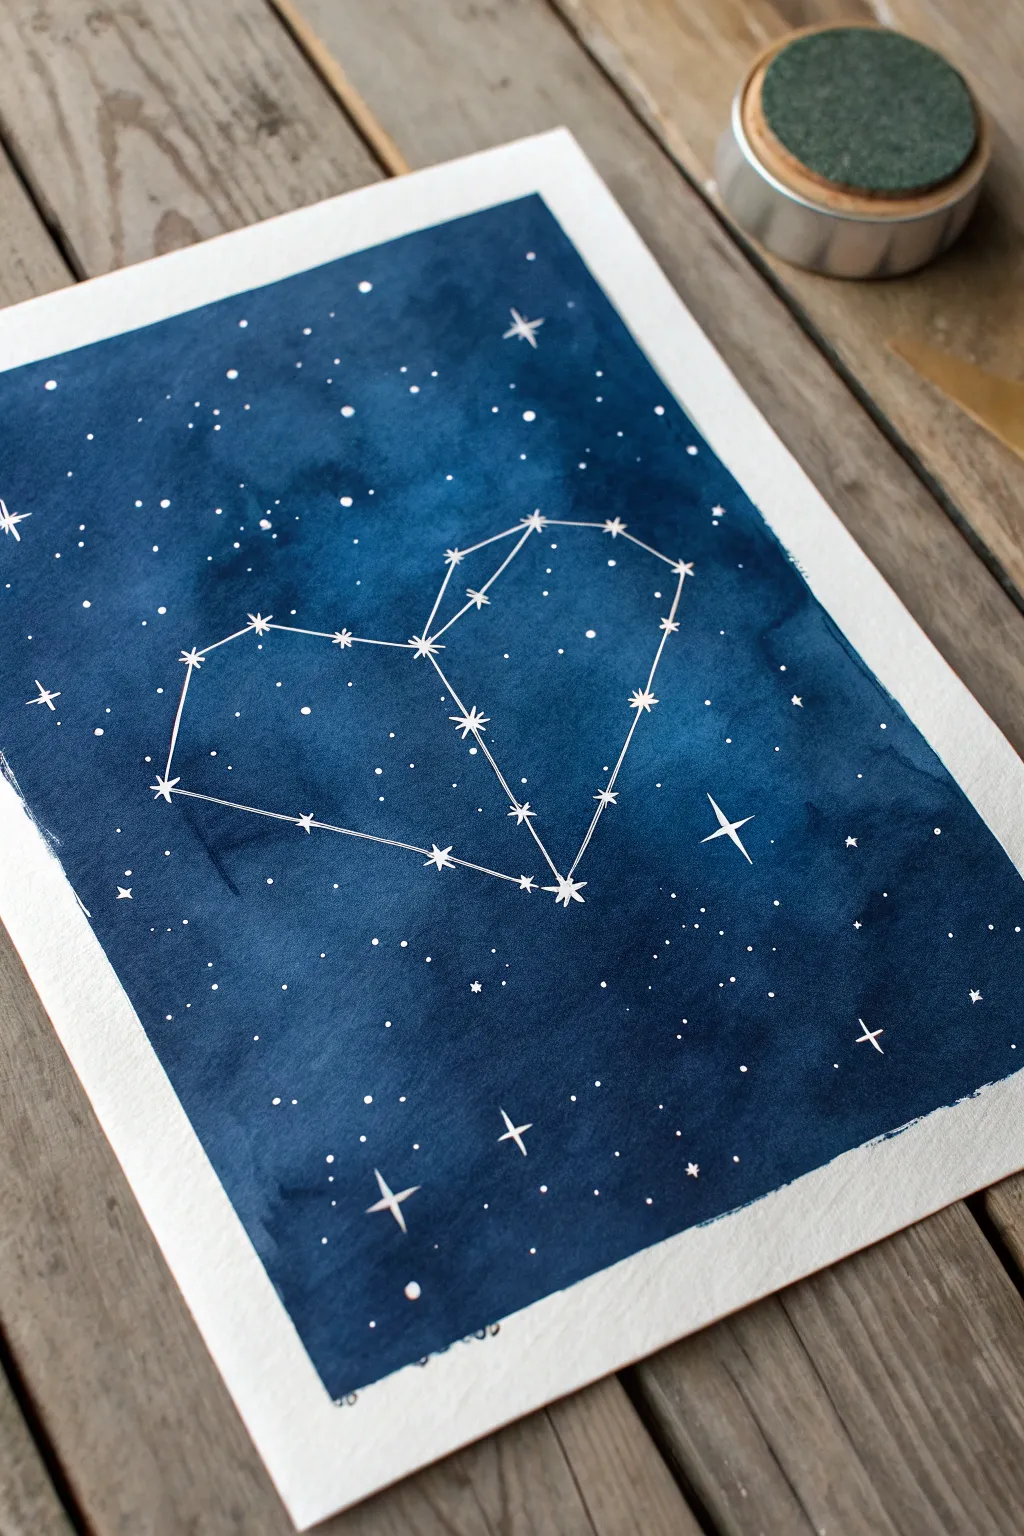
Capture the romance of the cosmos with this stunning watercolor project that turns a starry night into a symbol of love. Using deep indigo hues and delicate white ink, you’ll create a celestial heart constellation that glows against a moody, infinite backdrop.
Step-by-Step Guide
Materials
- Cold press watercolor paper (300 gsm or heavier)
- Painter’s tape or masking tape
- Watercolor paints (Indigo, Prussian Blue, or Payne’s Gray)
- Large flat brush or wash brush
- Round watercolor brush (size 6 or 8)
- White gel pen or opaque white ink with a fine liner brush
- Ruler
- Pencil
- Paper towel
- Jar of clean water
- Drawing board or hard surface
Step 1: Preparing the Sky
-
Secure the paper:
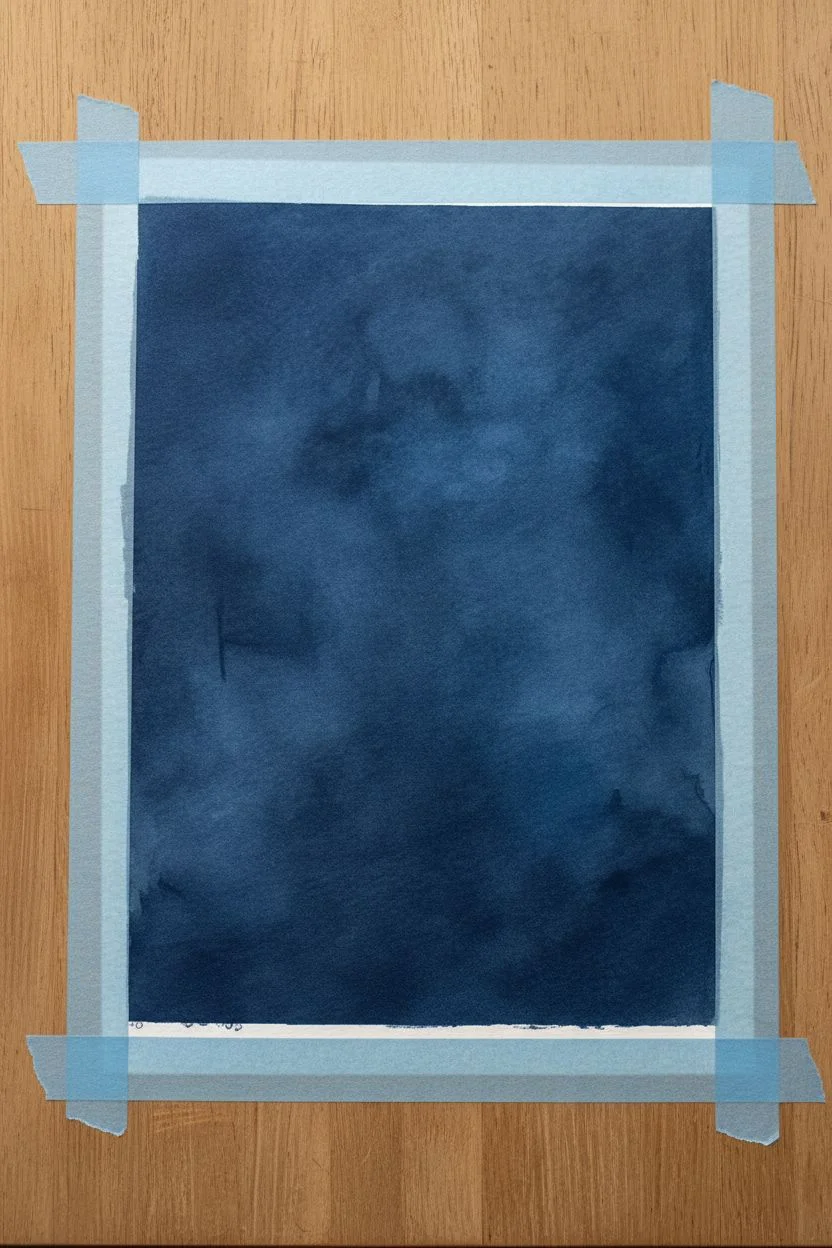
Begin by taping your watercolor paper down to a drawing board or hard surface using painter’s tape. Ensure you cover about a quarter-inch of the paper’s edge on all four sides to create that crisp white border later. -
Wet on wet base:
Using your large brush, apply a clean coat of water across the entire area inside the tape. The paper should be glisten with moisture but not have standing puddles. -
Mix your midnight blue:
Prepare a generous amount of your deep blue paint. I like to mix Indigo with a touch of Payne’s Gray to get that really deep, almost black-blue tone. -
First wash:
While the paper is still wet, drop in your blue paint starting from the corners and working inward. Let the water carry the pigment to create soft, natural transitions. -
Deepening the color:
While the first layer is still damp, add more concentrated pigment to random areas to create the cloudy, nebula-like texture seen in the reference. Leave some areas slightly lighter to suggest depth. -
Dry completely:
Let this background layer dry fully. The paper must be bone-dry before moving on, or your constellation lines will bleed. You can use a hairdryer on a low setting to speed this up.
Starry precision
Use a white gel pen for the constellation lines but opaque white gouache for the splatters. The gouache sits on top of the dark watercolor better for tiny details.
Step 2: Mapping the Constellation
-
Light pencil sketch:
Using a ruler and a very light hand with your pencil, gently mark the points of your heart shape. Don’t draw the connecting lines yet; just place small dots where the ‘stars’ will be. -
Symmetry check:
Step back to ensure your heart shape looks balanced. The charm of this piece relies on the geometric structure of the constellation. -
Drawing the stars:
Take your white gel pen or white ink. At each pencil mark, draw a small star. You can vary them by making some simple dots and others typical four-point twinkling stars. -
Connecting the dots:
Use your ruler and the white pen to draw straight, thin lines connecting your star points. The lines should look crisp against the dark wash, mimicking a star chart.
Bleeding edges?
If paint leaked under the tape, wait for it to dry completely, then gently cover the mistake with a small amount of white gouache or heavy white acrylic.
Step 3: Adding Celestial Details
-
Scattered stardust:
Randomly dot white ink around the rest of the blue background. Vary the pressure to create stars of different sizes. -
Major stars:
Select a few spots outside the heart to draw larger, brighter stars. A classic four-pointed star shape works beautifully here to break up the field of dots. -
Splatter technique:
For a natural galaxy look, load a brush with slightly watered-down white gouache or ink. Tap the handle against another brush or your finger to mist tiny white speckles over the paper. -
Refining the heart:
Go back to your main constellation. If the white ink faded slightly as it dried, retrace the lines and star points to ensure they pop brilliantly against the dark blue.
Step 4: The Final Reveal
-
Check for dryness:
Wait until all your white ink and splatters are totally dry. Smudging white ink on a dark background is difficult to fix. -
Remove the tape:
Peel the painter’s tape away slowly at a 45-degree angle, pulling away from the painting. This reveals the clean, sharp edge that frames your night sky.
Hang this celestial piece on your wall or gift it to someone who truly lights up your universe


Abstract “Map of Our Love” With Topographic Heart Lines
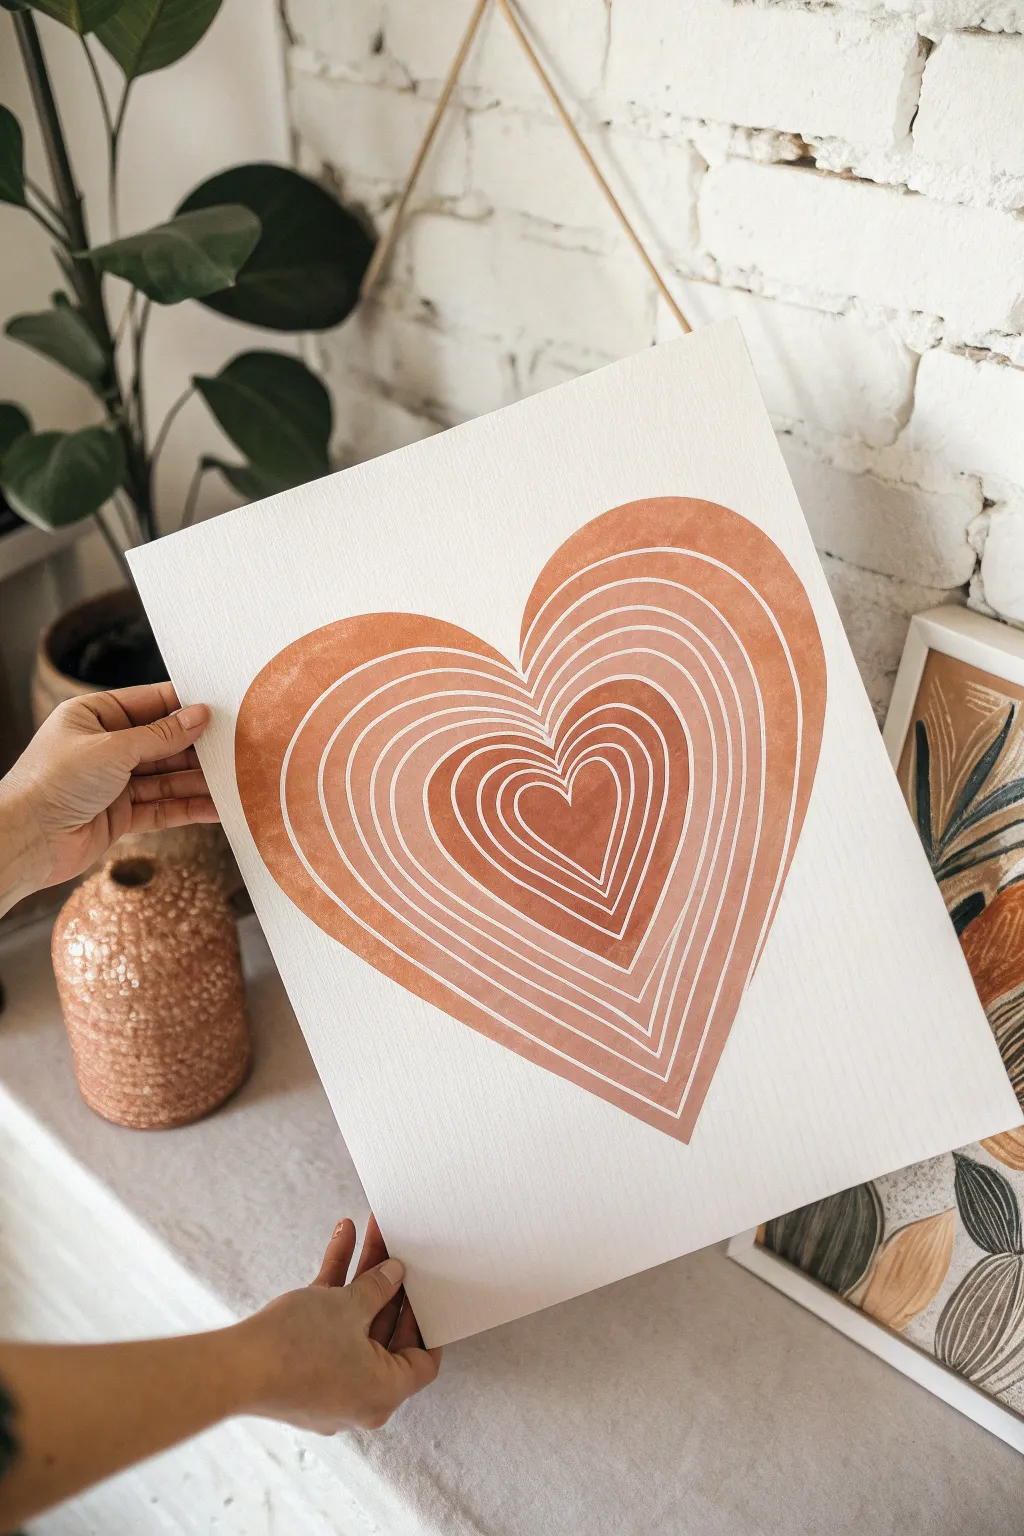
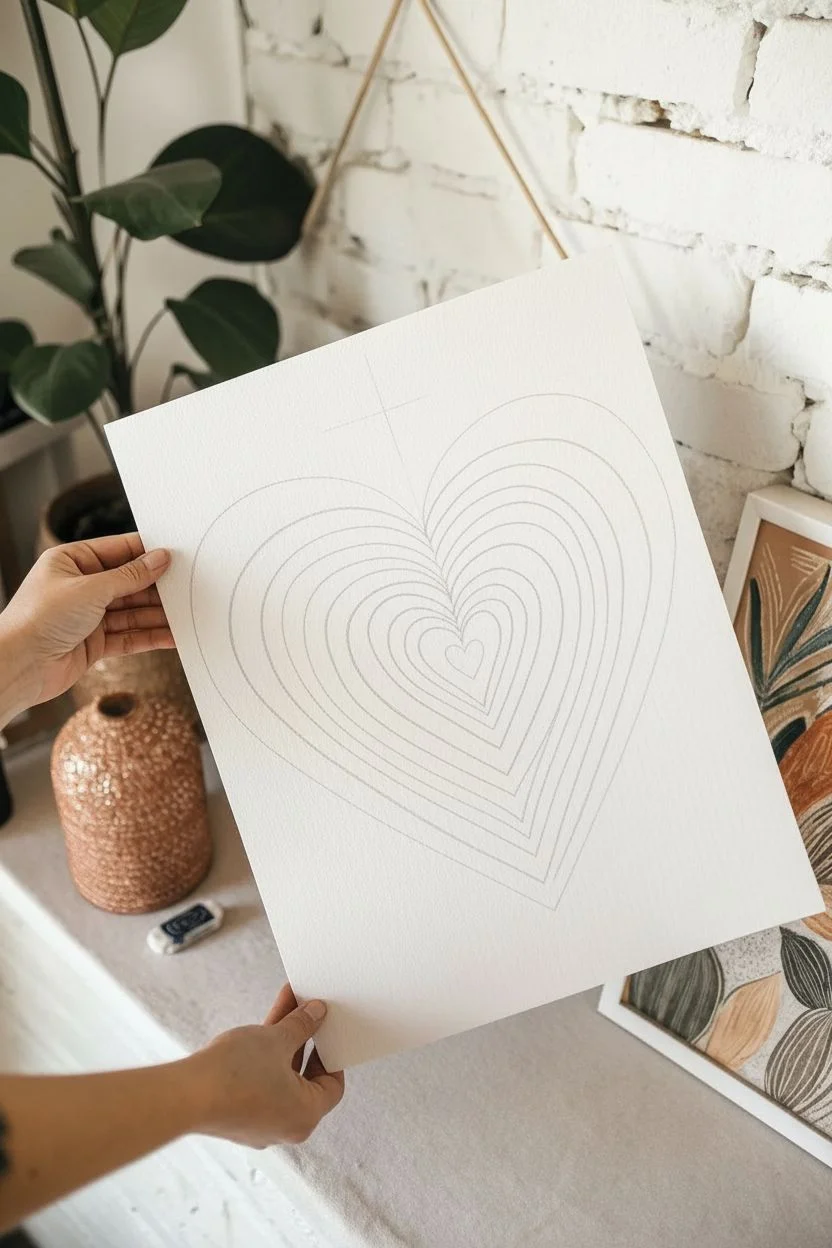
This modern, minimalist piece transforms the classic heart shape into a sophisticated design reminiscent of topographic maps or echoing ripples. Using warm terracotta tones and crisp negative space, you’ll create a soothing artwork perfect for neutral or boho-inspired spaces.
Step-by-Step Tutorial
Materials
- Heavyweight watercolor paper or canvas panel (11×14 inches)
- Acrylic paints (burnt sienna, unbleached titanium, red oxide, white)
- Pencil (HB or lighter)
- Fine liner brush (size 0 or 1)
- Small flat brush (size 4 or 6)
- Palette or mixing plate
- Eraser
- Ruler (optional)
- Container of water
- Paper towels
Step 1: Planning the Layout
-
Mark the center:
Find the approximate center of your paper or canvas and mark it lightly with a pencil. This will be where the smallest, central heart sits. -
Draw the central heart:
Sketch a very small heart in the center, about 1-2 inches wide. Keep the shape symmetrical and simple. -
Sketch the expanding rings:
Lightly draw larger heart shapes around the central one. Space them out roughly 0.5 to 0.75 inches apart. They don’t need to be mathematically perfect; a little organic wobble adds character. -
Create the topographic effect:
As your hearts get larger, you can slightly alter the curve at the top or the point at the bottom to make them look like expanding ripples rather than exact copies. -
Extend to the edges:
Continue drawing these concentric lines until the outer heart shape fills most of the canvas, leaving a comfortable white border of about 2 inches around the final shape.
Step 2: Mixing the Terracotta Palette
-
Create the base color:
Mix burnt sienna with a touch of red oxide. This gives you that deep, rich rust color seen on the outermost rings. -
Prepare gradient shades:
On your palette, create 3 or 4 distinct puddles of paint. Start with your base mix in the first one. -
Lighten the tones:
Add unbleached titanium or white to the subsequent puddles. Each new mix should be slightly lighter and softer than the last, creating a gradient from dark rust to soft peach. -
Test your colors:
Swipe a test line of each color on a scrap piece of paper. Ensure there is enough contrast between them so the rings will look distinct.
Wobbly Lines?
If your white gaps look uneven, use a white gel pen or white acrylic paint on a super-fine brush to tidy up the edges after the colors dry.
Step 3: Painting the Layers
-
Paint the center heart:
Start with the very center heart using your darkest or mid-tone shade—I usually prefer the mid-tone here for balance. Use the small flat brush to fill it in completely. -
Begin the first ring:
Switch to your fine liner brush. Carefully outline the inside of the next heart ring, leaving a consistent 2-3mm gap of white paper between this new paint and the center heart. -
Fill the ring:
Once the edge is defined, use the flat brush to fill in the rest of that specific band. Use a color slightly lighter or darker than the center to establish your pattern. -
Alternate colors:
Work your way outward, ring by ring. You can create a classic ombre effect (light to dark) or alternate shades randomly for a more organic, textured look. -
Mind the gap:
The most crucial step is maintaining that thin, unpainted white line between every colored section. This negative space is what creates the ‘topographic’ line effect. -
Steady your hand:
If your hand feels shaky on the larger outer curves, rest your pinky finger on a dry part of the canvas for stability while you paint the edges. -
Add texture (optional):
For a rustic look like the photo, don’t make the paint perfectly opaque. Let some brushstrokes show, or add a tiny drop of water to create a washed, watercolor-like transparency. -
Clean uph:
Once the paint is fully dry (give it at least 30 minutes), gently erase any visible pencil marks that might be showing in the white gaps.
Make It Personal
Hide a secret message or a significant date in the white negative space lines using very faint pencil or white ink for a hidden detail.
Frame your new abstract heart in a light wood or white frame to complement the warm, earthy tones you created
Secret Love Message Revealed With Tape-Resist Lettering
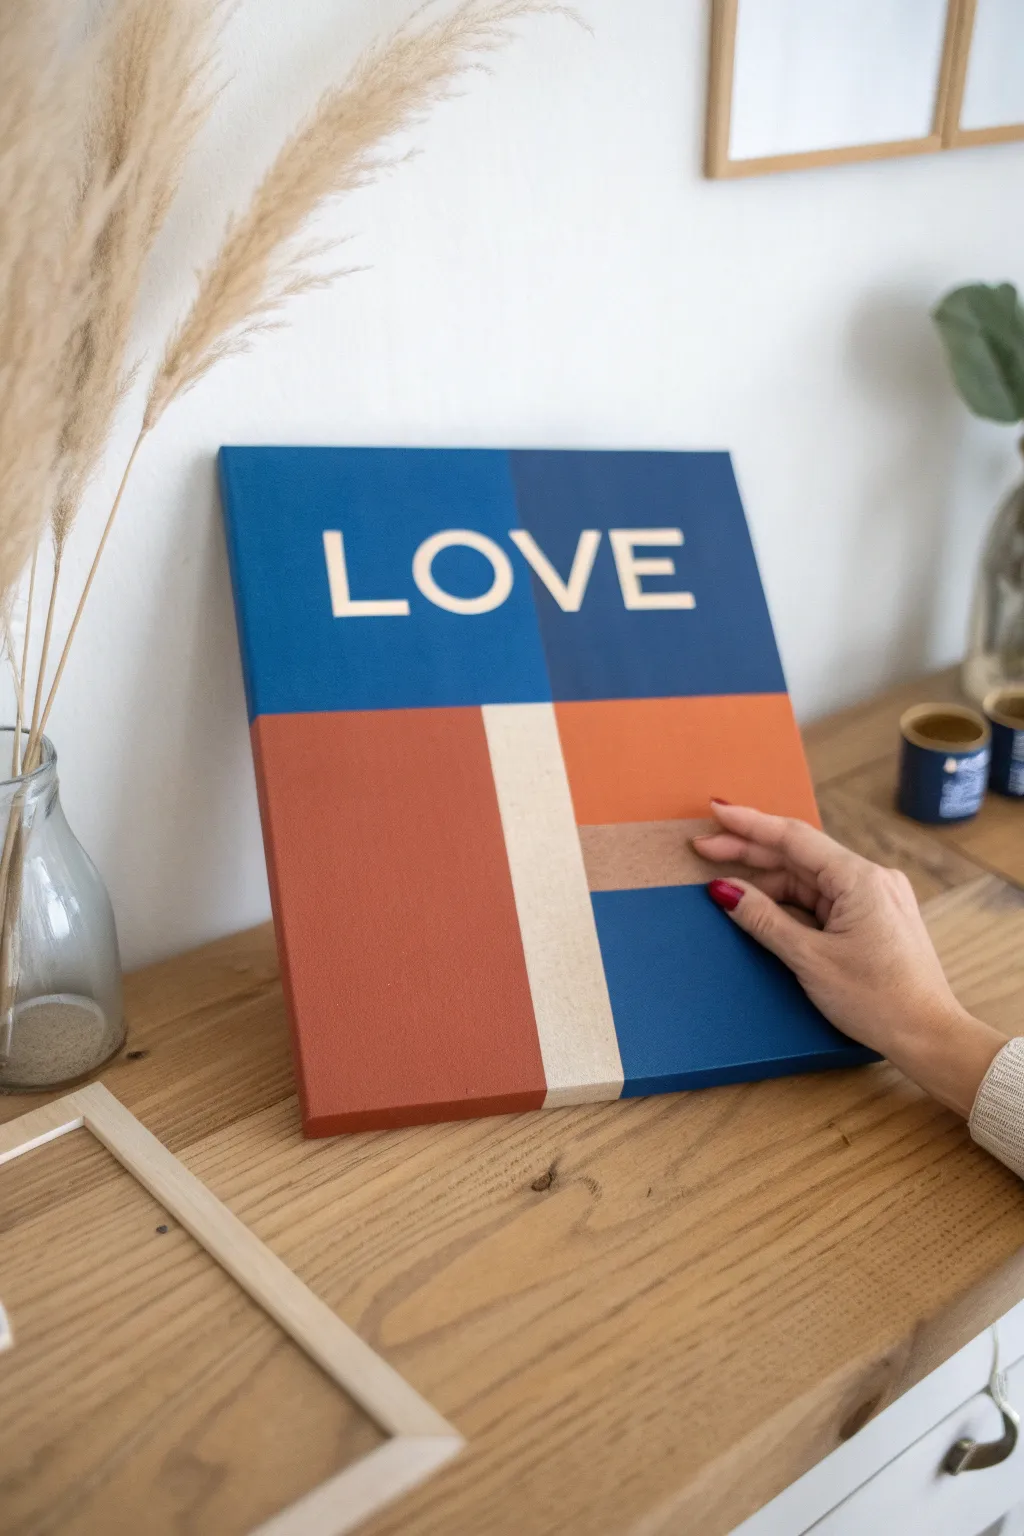
Create a bold statement piece with this color-blocked canvas that reveals a hidden message through negative space. By using artist’s tape to mask off letters and geometric shapes, you achieve crisp, clean lines and a professional graphic look with minimal painting experience required.
How-To Guide
Materials
- Square stretched canvas (12×12 or similar)
- Acrylic paints (Navy Blue, Cobalt Blue, Burnt Orange/Terracotta, Cream/Beige)
- Painter’s tape or masking tape (various widths)
- Adhesive vinyl letters or stencil film (for the word ‘LOVE’)
- Flat synthetic paintbrushes (medium and large sizes)
- Ruler or straight edge
- Pencil
- Burnishing tool or credit card
- Matte finish varnish (optional)
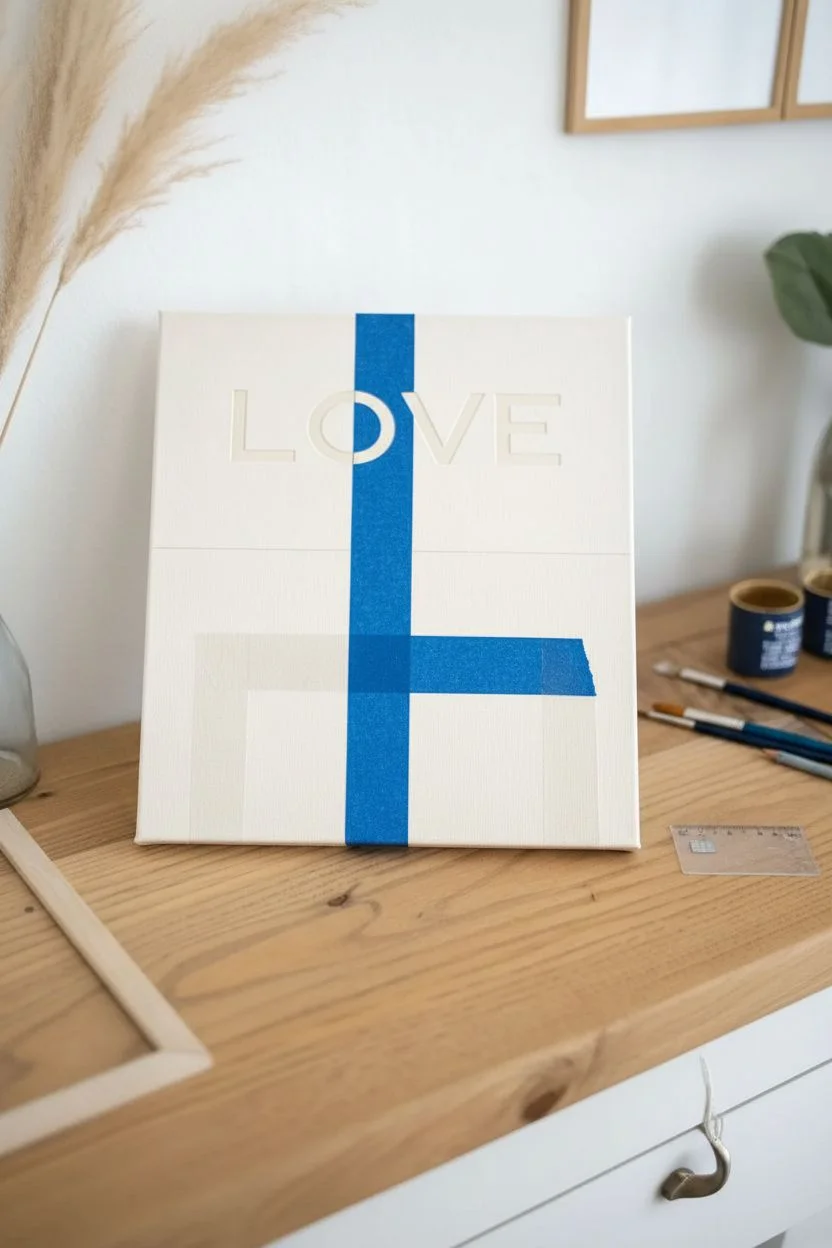
Step 1: Preparation & Masking
-
Prime the Surface:
Begin with a clean canvas. If your canvas isn’t pre-primed, apply a coat of white gesso and let it dry completely. This ensures the raw canvas texture shows through the letters cleanly later. -
Plan the Layout:
Lightly mark a horizontal line across the center of the canvas with a pencil and ruler to divide the top and bottom sections. This will guide your composition. -
Apply the Letters:
Position your adhesive vinyl letters to spell ‘LOVE’ in the center of the top half. I prefer to measure from the sides to ensure the word is perfectly centered. -
Secure the Edges:
Press the letters down firmly. Use a burnishing tool or a credit card to rub over the edges of the stickers; this is crucial to prevent paint from seeping underneath and ruining the crisp edge. -
Tape the Vertical Line:
Place a vertical strip of painter’s tape down the center of the top half, running right through the middle of the word ‘LOVE’. This creates the split-color background effect. -
Block the Lower Geometry:
For the bottom half, use your tape to mark off vertical sections. Create a wide section for the cream stripe and block off the remaining areas where the orange and blue will go.
Step 2: Painting & Revealing
-
Seal the Tape:
Paint a very thin layer of white paint or matte medium over the edges of your tape and letters. This little trick seals the gaps so any bleeding paint will be clear/white, keeping your colored lines razor-sharp. -
Paint the Top Left:
Using the Cobalt Blue acrylic, paint the upper left quadrant, covering the first two letters (‘LO’) and stopping at the center tape line. -
Paint the Top Right:
Switch to your Navy Blue paint for the upper right quadrant. Paint over the remaining letters (‘VE’). Ensure the paint overlaps the tape but doesn’t cross into the other color zones. -
Apply the Burnt Orange:
Paint the large geometric block in the lower left section with your Burnt Orange or Terracotta shade. You may need two coats for full opacity depending on the pigment quality. -
Add the Accent Stripe:
Paint the vertical stripe in the lower center with the Cream/Beige acrylic. Keep your brush strokes vertical to match the shape. -
Fill Remaining Blocks:
Fill in the remaining bottom right sections with the Burnt Orange and Navy Blue as shown in the design, using tape to separate the colors if necessary. -
Let it Set Briefly:
Allow the paint to dry until it is tacky but not fully hardened. Removing tape too late can sometimes pull up dry paint chips. -
The Grand Reveal:
Carefully peel away the tape strips first, pulling at a 45-degree angle away from the painted edge. Then, very gently use the tip of a craft knife or tweezers to lift the edge of the vinyl letters and peel them off. -
Touch Ups:
inspect your edges. If there are any jagged spots or small bleeds, use a tiny liner brush and a bit of white paint (or the background color) to clean them up.
Bleed-Proof Lines
Before applying color, paint over tape edges with the wider background color (or white). This seals the tape so crisp lines are guaranteed.
Add Metallic Flair
Swap the cream stripe for gold leaf or metallic copper paint to add a luxurious, shimmering texture to the composition.
Once fully dry, you have a striking piece of modern art ready to hang or lean on a shelf


Have a question or want to share your own experience? I'd love to hear from you in the comments below!