If you’ve ever stared at a flat wall and thought, “This needs a little more magic,” textured wall paint is the fun, hands-on fix. I love how a touch of texture turns a plain wall into a feature wall that shifts with the light and feels totally custom.
Classic Knockdown Texture for Soft, Modern Depth

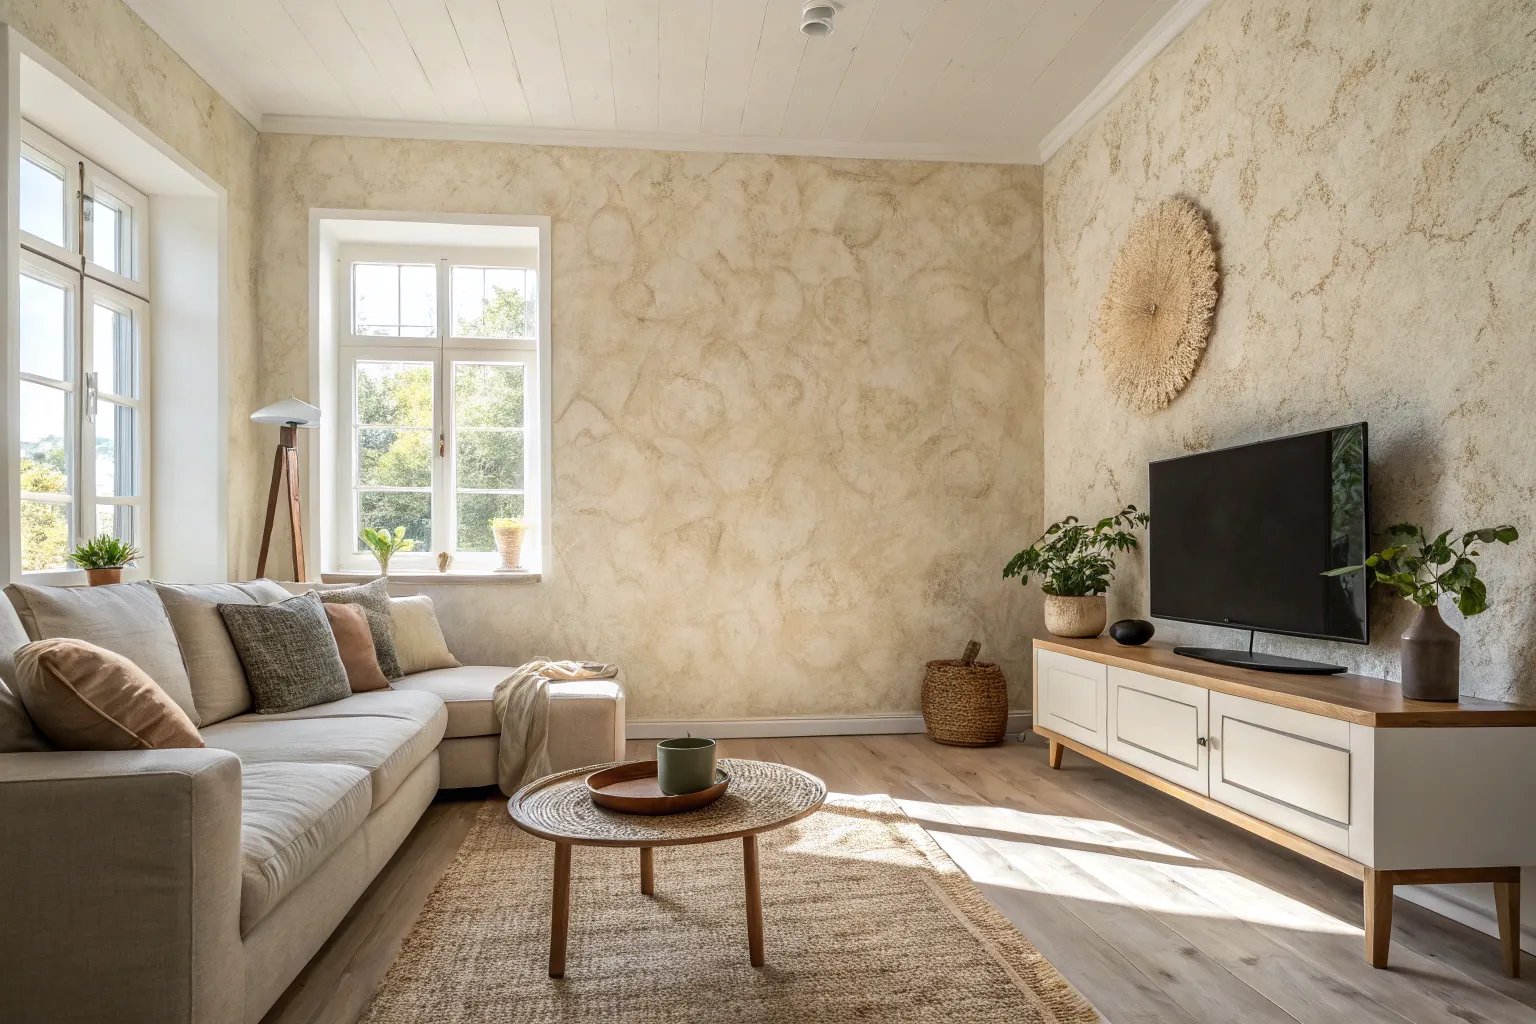
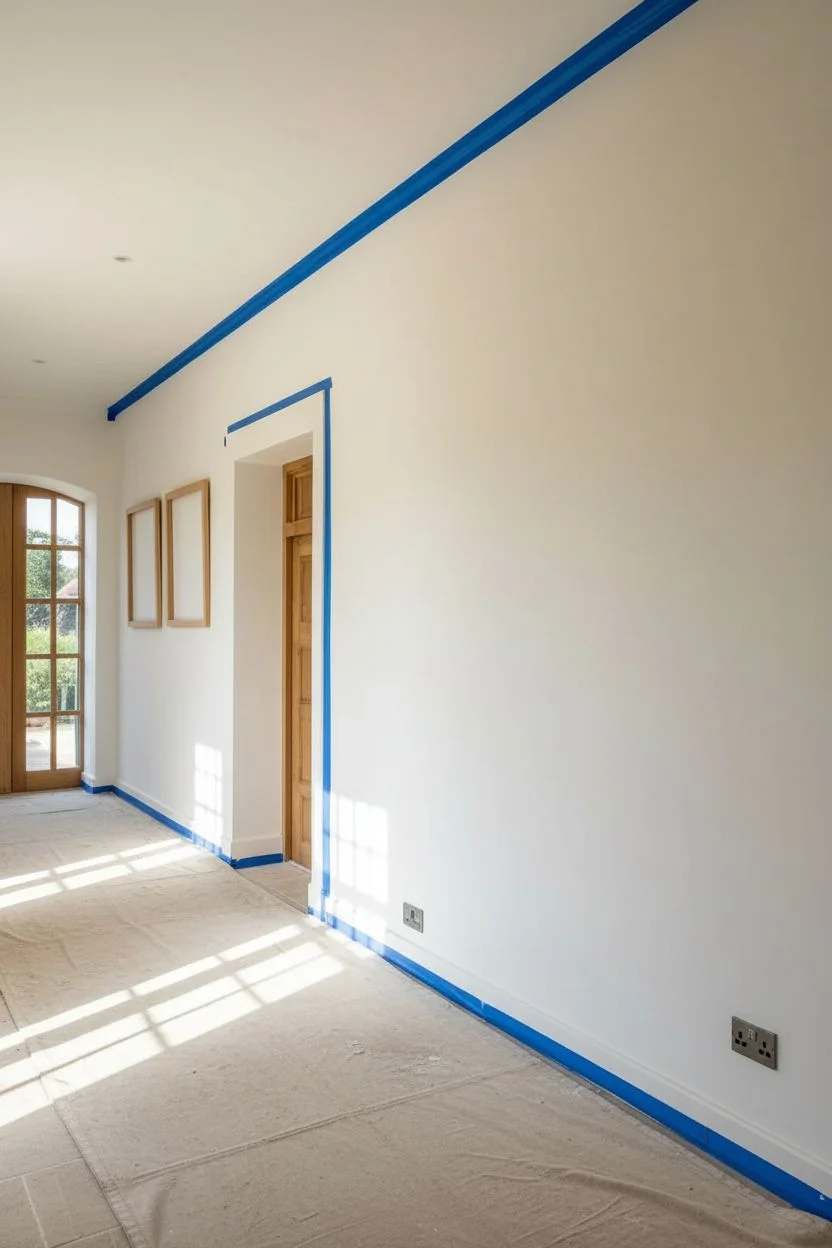
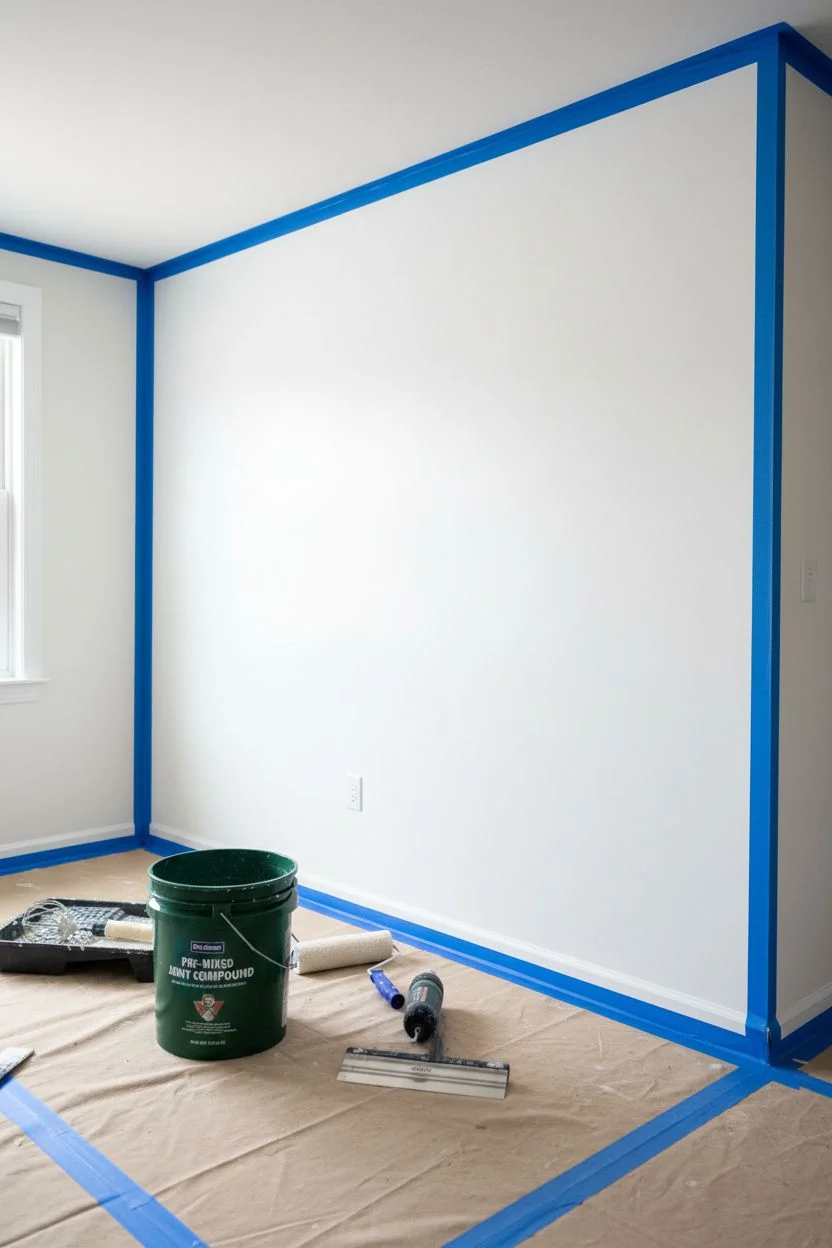
This project achieves a sophisticated, velvety wall texture that adds incredible depth without feeling heavy or dated. By opting for a subtle knockdown technique in earthy taupe tones, you create a surface that catches the light beautifully, mimicking the look of aged plaster or stone.
Step-by-Step
Materials
- Joint compound (pre-mixed or powder)
- Water (for thinning)
- Clean 5-gallon bucket
- Heavy-duty drill with mixing paddle attachment
- High-quality interior paint (Taupe/Beige, matte or eggshell)
- Interior primer (tinted or white)
- Texture spray gun and hopper (rental recommended)
- Knockdown knife (12-inch or wider, flexible metal or plastic)
- Painter’s tape
- Drop cloths and plastic sheeting
- Rag or sponge (for edge cleanup)
- Sandpaper (120-grit)
Step 1: Preparation and Priming
-
Protect the perimeter:
Begin by removing all furniture from the area or pushing it to the center of the room. Cover the floors completely with drop cloths and use plastic sheeting to mask off windows, doors, and trim. Tape everything down securely with painter’s tape; overspray can travel surprisingly far. -
Clean the surface:
Wipe down the wall to remove any dust or grease. If there are previous holes or cracks, patch and sand them smooth now to ensure an even base for your texture. -
Apply the primer:
Roll on a coat of high-quality interior primer. This seals the drywall and ensures the joint compound adheres properly without drying too fast. Let the primer dry completely according to the manufacturer’s instructions.
Step 2: Mixing the Mud
-
Prepare the compound:
Pour your joint compound into a clean 5-gallon bucket. If you’re using powder, follow the mixing ratio on the bag; if pre-mixed, you will still need to thin it. -
Thin to pancake batter consistency:
Add water slowly while mixing with your drill paddle. You are aiming for the consistency of pancake batter—it should be fluid enough to spray but thick enough to hold a shape when it hits the wall. I always test the consistency by lifting the paddle; the mud should run off in a steady stream, not a glob. -
Eliminate lumps:
Mix thoroughly until the compound is perfectly smooth. Any small lumps can clog the hopper gun, so take your time here.
Timing is Everything
Work in pairs if possible. One person sprays the texture while the other follows slightly behind to knock it down. This ensures the mud doesn’t dry out before you can flatten it.
Step 3: Application
-
Set up the hopper gun:
Fill the hopper about halfway with your thinned mud. Test the spray pattern on a scrap piece of cardboard or plastic first. You want a medium splatter pattern, not a fine mist or giant blobs. -
Adjust air pressure:
If using a pneumatic gun, adjust your compressor to around 30-40 psi. This usually provides enough force to fling the mud without atomizing it too much. -
Spray the wall:
Working in sections of about 3×3 feet, spray the wall with a sweeping motion. Aim for about 60-70% coverage, leaving some of the primed wall visible underneath. This negative space is crucial for the depth of the final look. -
Let it firm up:
Wait about 10 to 15 minutes. The mud needs to lose its wet sheen and become slightly tacky. If you knock it down too soon, it will smear; too late, and it won’t flatten.
Level Up: Color Wash
For more dimension, apply a diluted darker wash over the dried paint, then wipe it off immediately with a rag. The dark pigment settles in the low spots, mimicking aged plaster.
Step 4: The Knockdown
-
Position the knife:
Hold your wide knockdown knife almost parallel to the wall surface. The angle should be very shallow to avoid scraping the mud off. -
Drag across the surface:
Gently glide the knife straight down or horizontally across the splatter bumps. Use a light touch—you are just flattening the peaks, creating wide, irregular plateaus. -
Keep the blade clean:
Wipe the blade off with a damp rag frequently. Accumulated mud on the knife creates drag marks and ruins the smooth, organic effect you’re after. -
Overlap sections:
Move to the next sprayed section, overlapping slightly with the previous one to blend the texture seamlessly. Continue until the entire wall is textured. -
Full dry time:
Allow the texture to dry for at least 24 hours. Thicker areas may need slightly longer.
Step 5: Finishing Touches
-
Prime the texture:
Once fully dry, apply another coat of primer over the texture. The fresh compound is very porous and will drink up paint if not sealed first. -
Base coat application:
Roll on your chosen taupe or beige paint using a thick-nap roller (1/2 inch or 3/4 inch) to get into all the nooks and crannies. -
Enhance the depth (optional):
For the specific look in the photo, mixing a slightly lighter shade of the same color with glaze and gently rag-rolling over the high points creates that mottled, sun-baked aesthetic. -
Remove tape and clean:
Carefully score the edge of the painter’s tape with a utility knife before peeling it off to prevent tearing the new texture. Clean up your drop cloths and tools immediately.
Now step back and enjoy the warm, organic atmosphere your new wall brings to the room


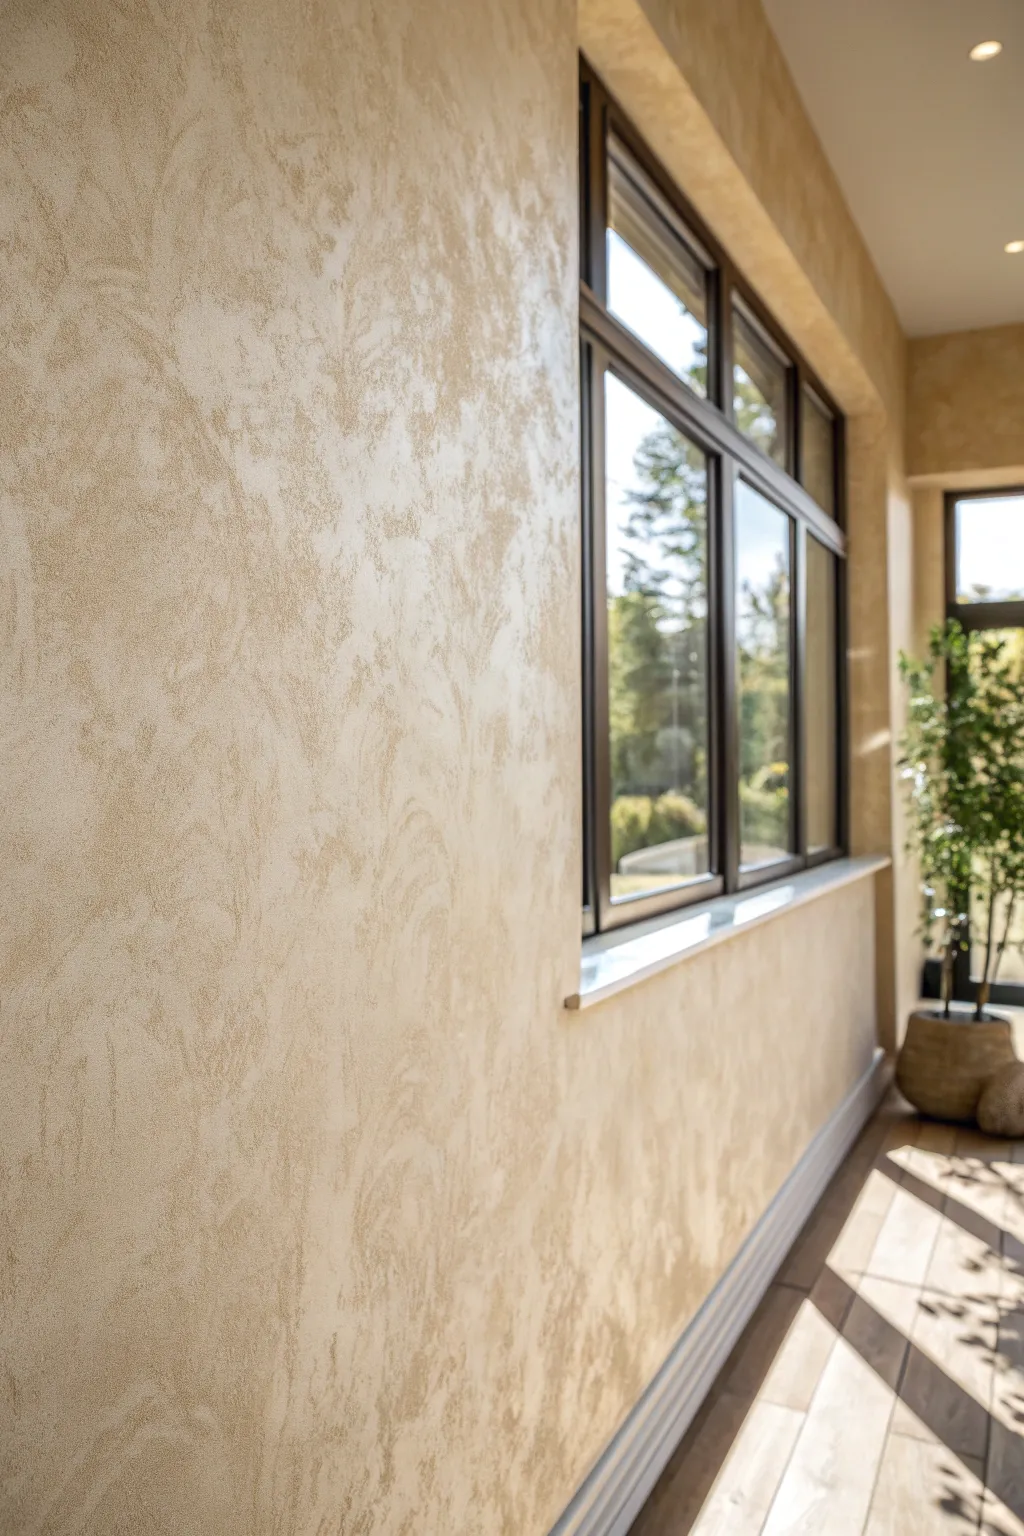
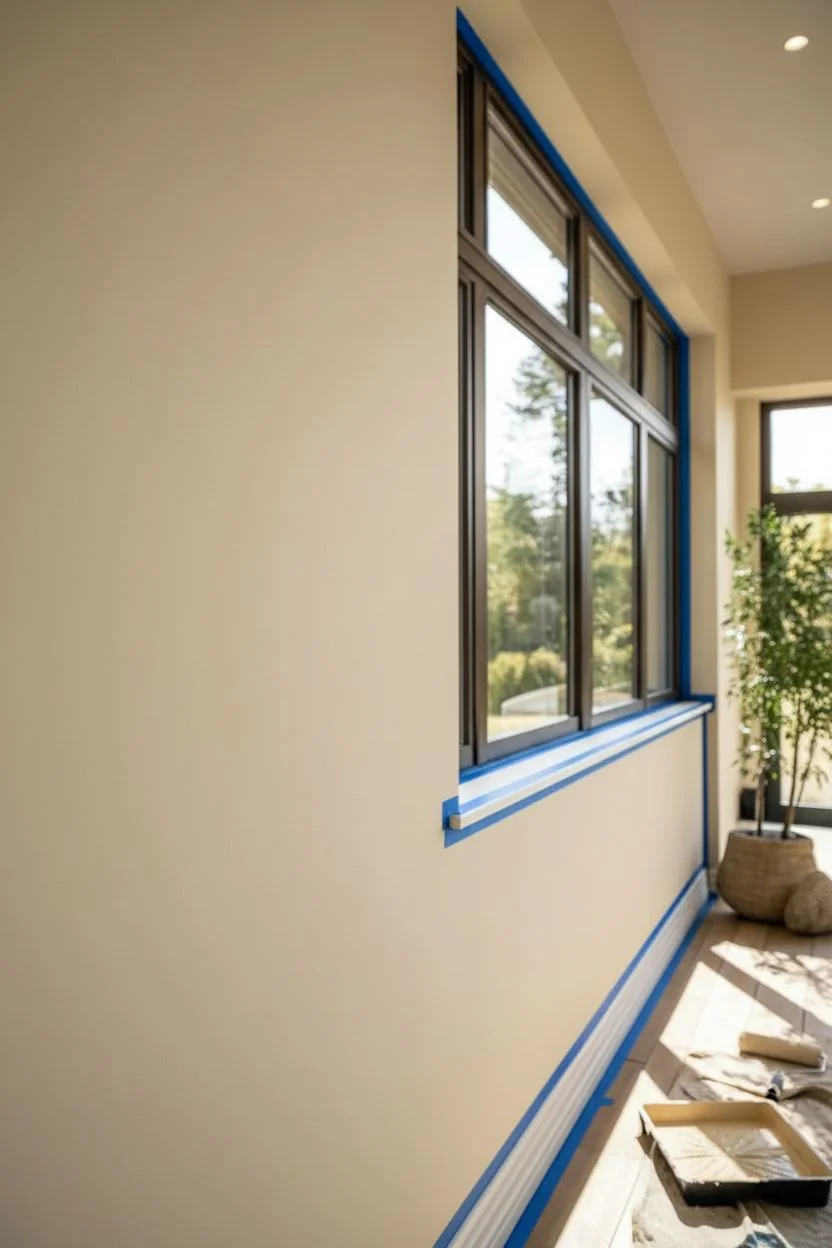
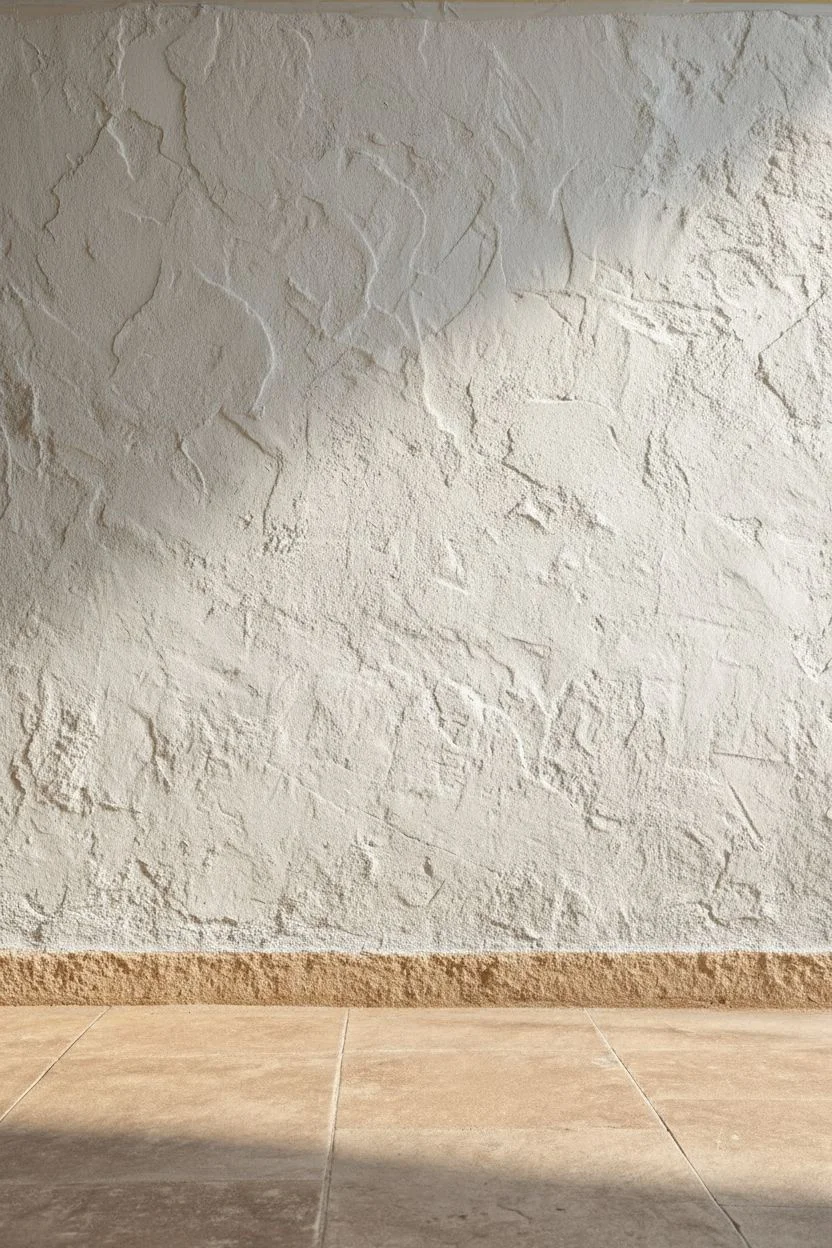
Smooth Stucco-Inspired Finish With Subtle Movement
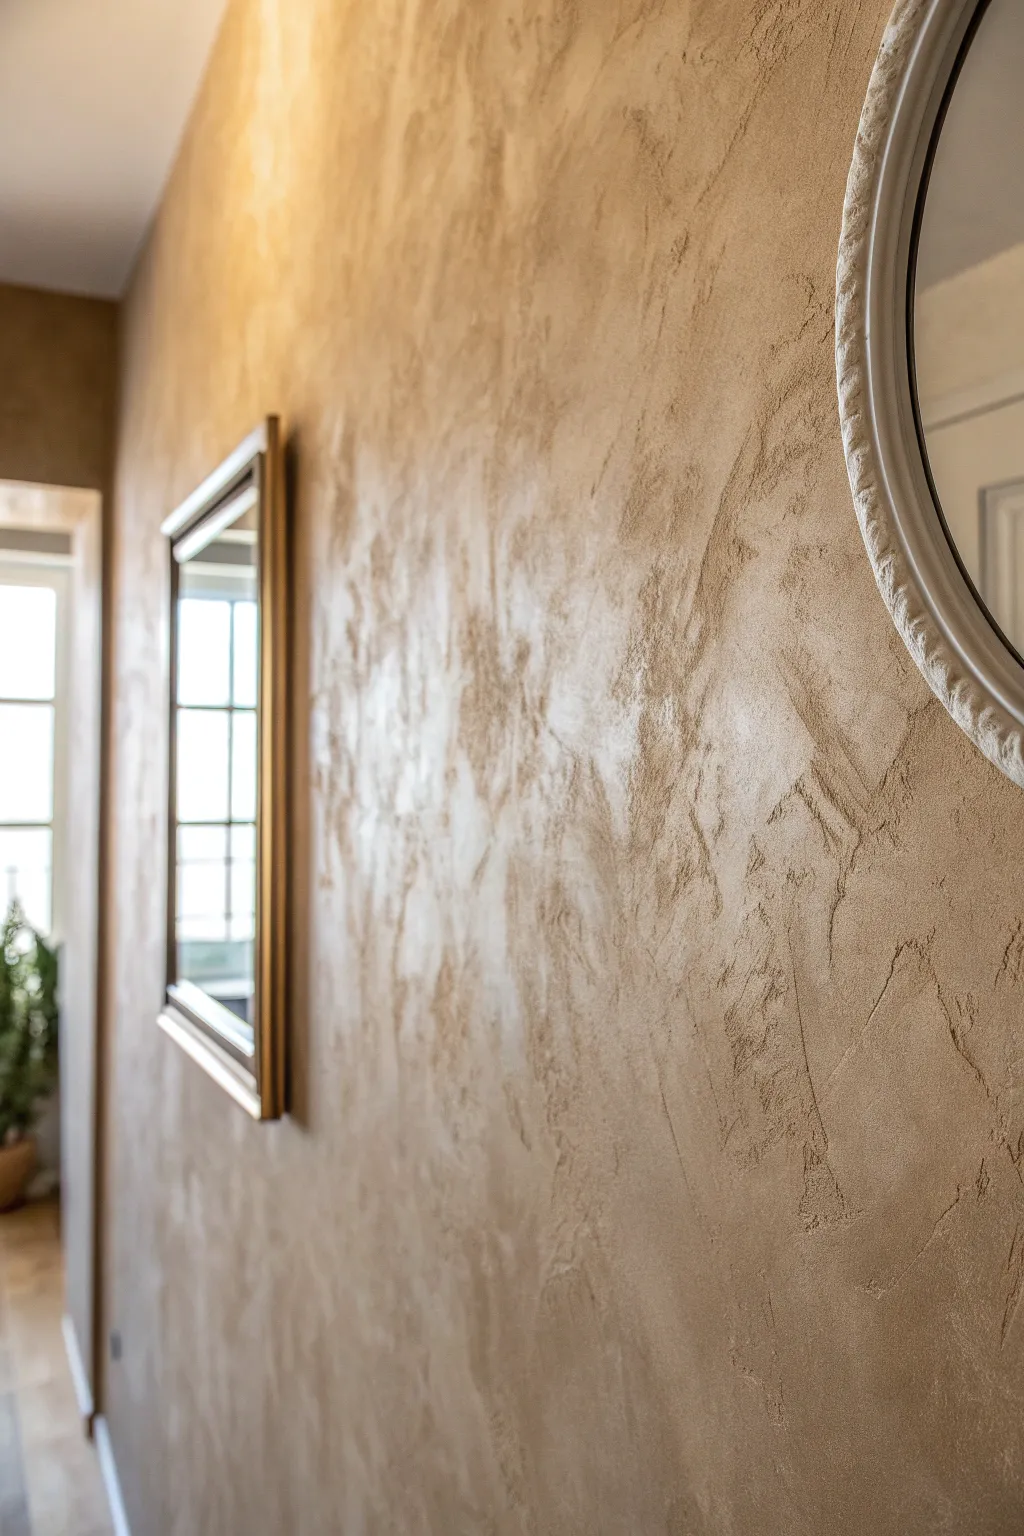
Bring the warmth and character of an Italian villa into your hallway with this highly textured, sun-baked finish. This technique uses a heavy-body compound to create deep reliefs and peaks, finished with a warm yellow glaze to mimic aged plaster.
Step-by-Step Guide
Materials
- Joint compound or texture medium
- Wide drywall knife (6-8 inch)
- Trowel
- High-quality latex primer
- Flat latex paint (warm ochre/yellow)
- Glazing liquid
- Paint roller and tray
- Clean rags or sponge
- Painters tape
- Drop cloths
- Sandpaper (100-grit)
Step 1: Preparation & Base Coat
-
Prepare the space:
Clear the hallway of furniture and art. Remove outlet covers and switch plates. Carefully tape off baseboards, door frames, and ceiling edges with painter’s tape to protect them from the heavy texture you’ll be applying. -
Protect the floor:
Lay down heavy-duty drop cloths. This project involves dropping blobs of compound, so canvas cloths are better than plastic here as they stay in place and absorb spills. -
Apply primer:
Roll a coat of high-quality stain-blocking primer over the entire wall. This ensures the heavy texture adheres properly to the drywall without peeling later. Let it dry completely according to the can’s instructions.
Fixing Cracks
If thick compound cracks while drying, worry not! This adds to the rustic look. If a crack is too big, simply fill it with a little more compound on your finger and re-paint the spot.
Step 2: Creating the Texture
-
Prepare the compound:
Open your bucket of joint compound. It should be thick, like peanut butter. Do not thin it down with water; you need the body to hold those distinct ridges and peaks visible in the photo. -
Load the hawk:
If you have a mortar hawk, pile a generous amount of compound onto it. If not, you can work directly from the bucket or a mud pan. -
Apply the first patch:
Using your trowel or wide drywall knife, scoop up a large dollop of compound and slap it onto the wall. Don’t smooth it out flat like you would when taping drywall. -
Create the movement:
Spread the compound using sweeping, irregular, crisscross motions. I like to keep my wrist flexible here to avoid creating uniform patterns. Leave ridges, valleys, and thick spots intentionally. -
Work in sections:
Tackle a 3×3 foot area at a time. Keep the wet edge active so you can blend the perimeter of the new section into the previous one without creating a distinct seam line. -
Add character:
Go back over the wet compound with the flat side of the trowel. Press it gently into the surface and pull straight off to create little peaks, then lightly knock them down with a sideways sweep. -
Check the variation:
Step back frequently to view the wall from an angle. You want significant topography—areas of low smoothness contrasting with high, rough ridges. -
Let it cure:
Allow the texture to dry for at least 24 hours. Thicker areas may take up to 48 hours. The compound will turn white when fully dry.
Level Up: Color Wash
Instead of a single glaze color, mix two slightly different glaze shades (one warm, one cool) and apply them simultaneously for a complex, dimensional ‘old world’ patina.
Step 3: Painting & Glazing
-
Knock down burrs:
Once bone dry, take a sanding pole or a block with 100-grit paper and very lightly skim the surface. You aren’t sanding it smooth; you’re just knocking off sharp, jagged points that could snag clothing. -
Dust the wall:
Vacuum the wall or wipe it down with a tack cloth to remove the fine dust created by sanding. -
Apply base color:
Roll on your base coat of warm ochre or yellow flat paint. Use a thick nap roller (3/4 inch or higher) to really get the paint into all the deep crevices and pits of the texture. -
Touch up missed spots:
Inspect the wall for white pinholes where the roller missed. Use a cheap chip brush to dab paint into these deep recesses. -
Mix the glaze:
Mix one part of your paint color with four parts glaze liquid. You can add a drop of darker brown paint if you want a more aged, antique look. -
Apply the wash:
Working in small sections again, brush or rag the glaze mixture onto the wall. -
Wipe back:
Immediately wipe the surface with a damp rag. The glaze will stay darker in the deep crevices and wipe off the high points, accentuating the texture you worked so hard to create.
Step back and admire how the sunlight catches the ridges of your new rustic masterpiece


Venetian Plaster-Style Trowel Marks for a Polished Look
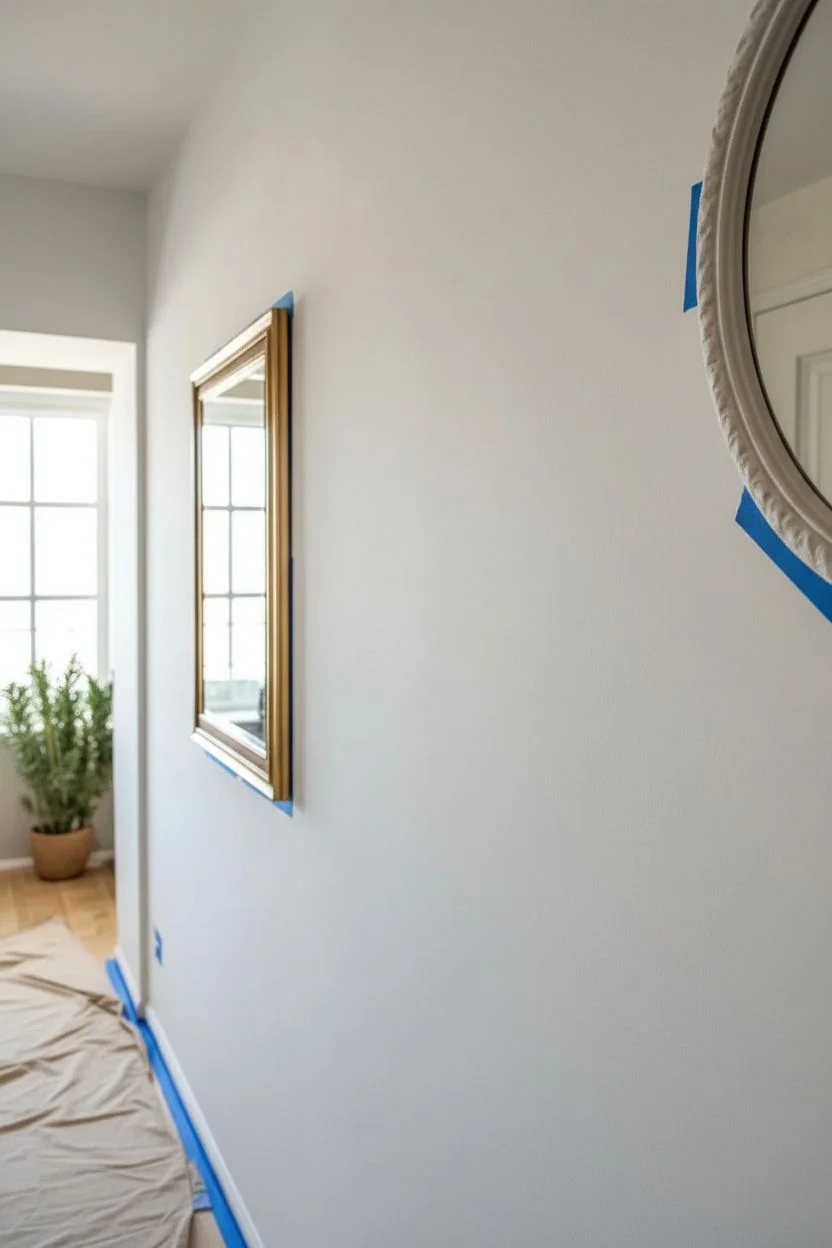
Transform flat, boring drywall into a surface rich with old-world charm using this achievable texturing technique. By layering joint compound and paint, you can mimic the depth and movement of authentic Venetian plaster without the specialized materials.
How-To Guide
Materials
- Pre-mixed joint compound (lightweight or all-purpose)
- Wide drywall trowel or steel taping knife (6-10 inch)
- Hawk (optional, for holding mud)
- Painter’s tape
- Drop cloths
- Primer (high-quality PVA primer)
- Latex paint (satin or eggshell finish) in a warm beige or taupe
- Glaze medium
- Rag or sponge (optional for washing finish)
- Sandpaper (220 grit)
- Paint roller and tray
Step 1: Preparation & Priming
-
Protect the area:
Begin by taping off all baseboards, ceiling edges, windows, and door frames with painter’s tape to ensure crisp lines later. Lay down drop cloths to catch any falling compound. -
Clean the surface:
Wipe down the existing wall to remove dust or grease, which ensures good adhesion for the upcoming layers. -
Prime the wall:
Roll on a coat of high-quality PVA primer. This seals the drywall and creates a consistent base, preventing the joint compound from drying too quickly.
Step 2: Creating the Texture
-
Load the trowel:
Scoop a generous amount of pre-mixed joint compound onto your hawk or directly onto a wide taping knife. I find working with a slightly thicker consistency helps maintain the peaks. -
Apply the first pass:
Apply the compound to the wall in random arching motions. Don’t try to be uniform; the beauty lies in the variation of thickness. -
Skip and drag:
Create the signature texture by using a ‘skip-trowel’ technique. Hold the blade at a shallow angle and drag it lightly so it skips over the surface, leaving small voids and raised areas. -
Cross-hatching strokes:
Change your wrist angle frequently. Apply strokes horizontally, vertically, and diagonally to avoid any recognizable pattern. -
Fill open spaces:
Move across the wall, filling in large gaps but intentionally leaving some lower spots untouched to create depth. -
Check for ridges:
Gently knock down any excessively sharp ridges with a clean trowel while the mud is still wet, creating a more polished ‘knockdown’ look. -
Let it cure:
Allow the joint compound to dry completely. This usually takes 24 hours, but thicker areas may need more time.
Clean Blades Only
Keep a bucket of water and a sponge nearby. Clean your trowel blade every few minutes to prevent dried bits of compound from dragging lines through your fresh texture.
Step 3: Finishing the Look
-
Light sanding:
Once dry, run a piece of 220-grit sandpaper lightly over the surface to remove sharp burrs. Don’t over-sand; you want to keep the texture. -
Dust off:
Vacuum the wall or wipe it with a microfiber cloth to remove all sanding dust before painting. -
Prime the texture:
Apply another coat of primer over the dried texture. Joint compound is very thirsty and will absorb your paint unevenly without this step. -
Mix your glaze:
Mix your chosen beige latex paint with a clear glazing medium in a 1:4 ratio (one part paint to four parts glaze). This increases transparency and working time. -
Apply the base color:
Roll on your solid base coat color (without glaze) and let it dry completely. -
Wash with color:
Dip a rag or sponge into your glaze mixture and wipe it onto the wall in circular motions, working in 3-foot sections. -
Buff and blend:
Immediately wipe over the wet glaze with a clean, damp cloth. The glaze will stay in the recesses of the texture while wiping off the high points, creating that dimensional, aged plaster look.
Add Subtle Shimmer
For a truly luxurious finish, mix a tiny amount of metallic pearl or gold paint into your final glaze coat to catch the light on the high points.
Step back and admire how the light plays across the rich, nuanced surface you have created


Limewash Wash for Cloudy, Old-World Texture
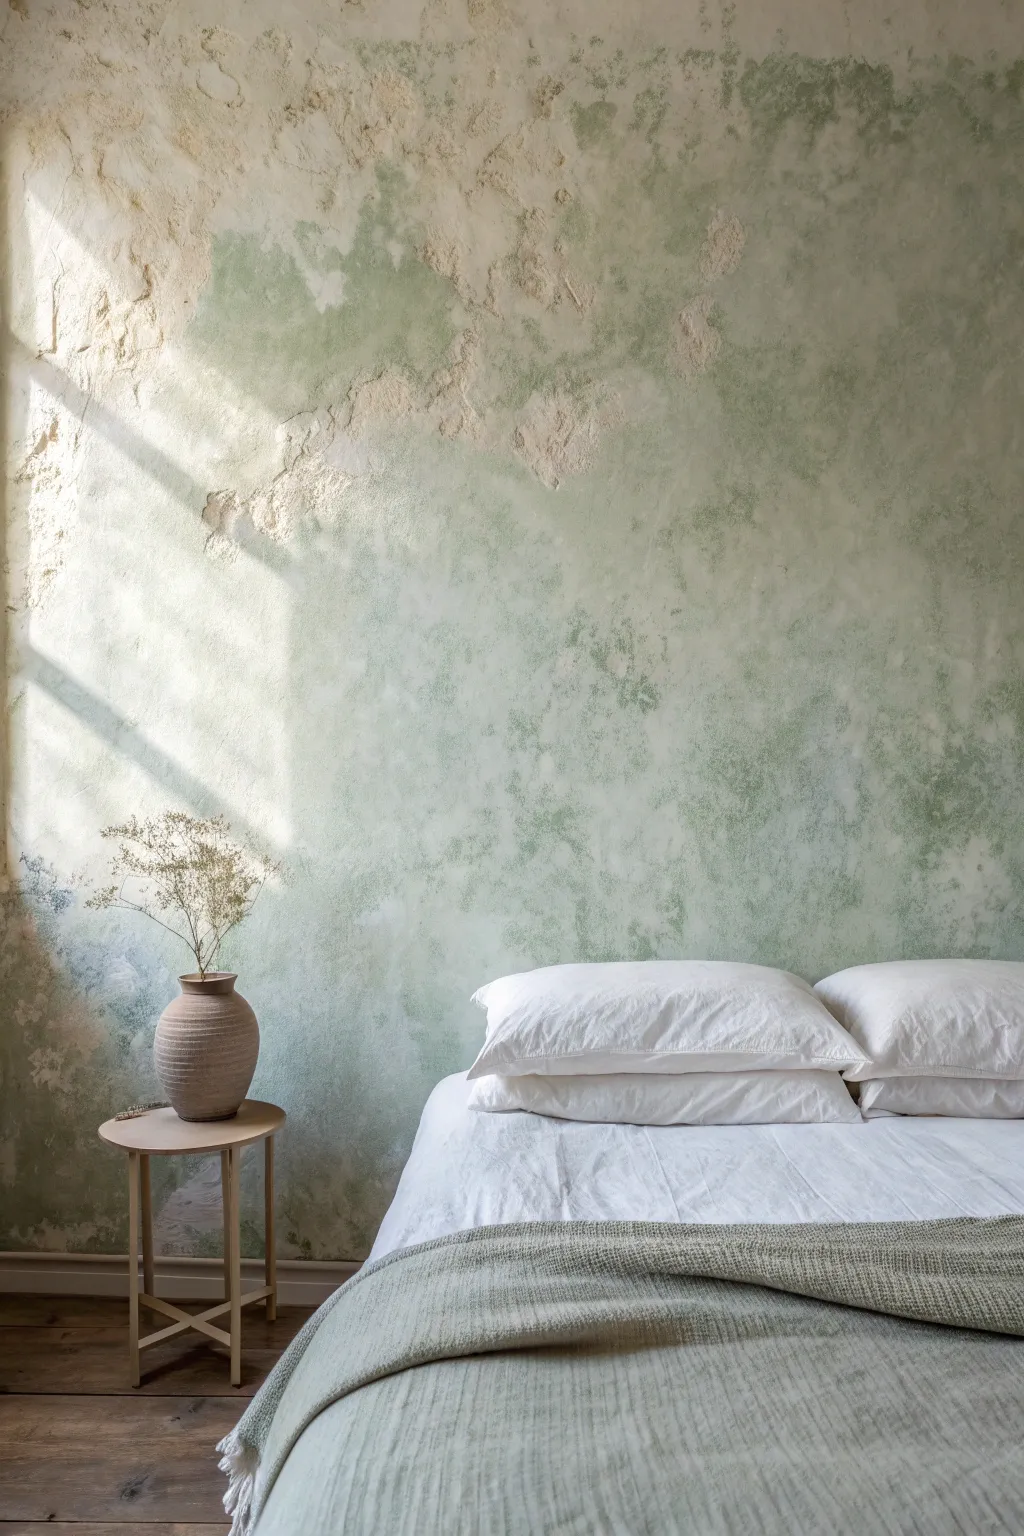
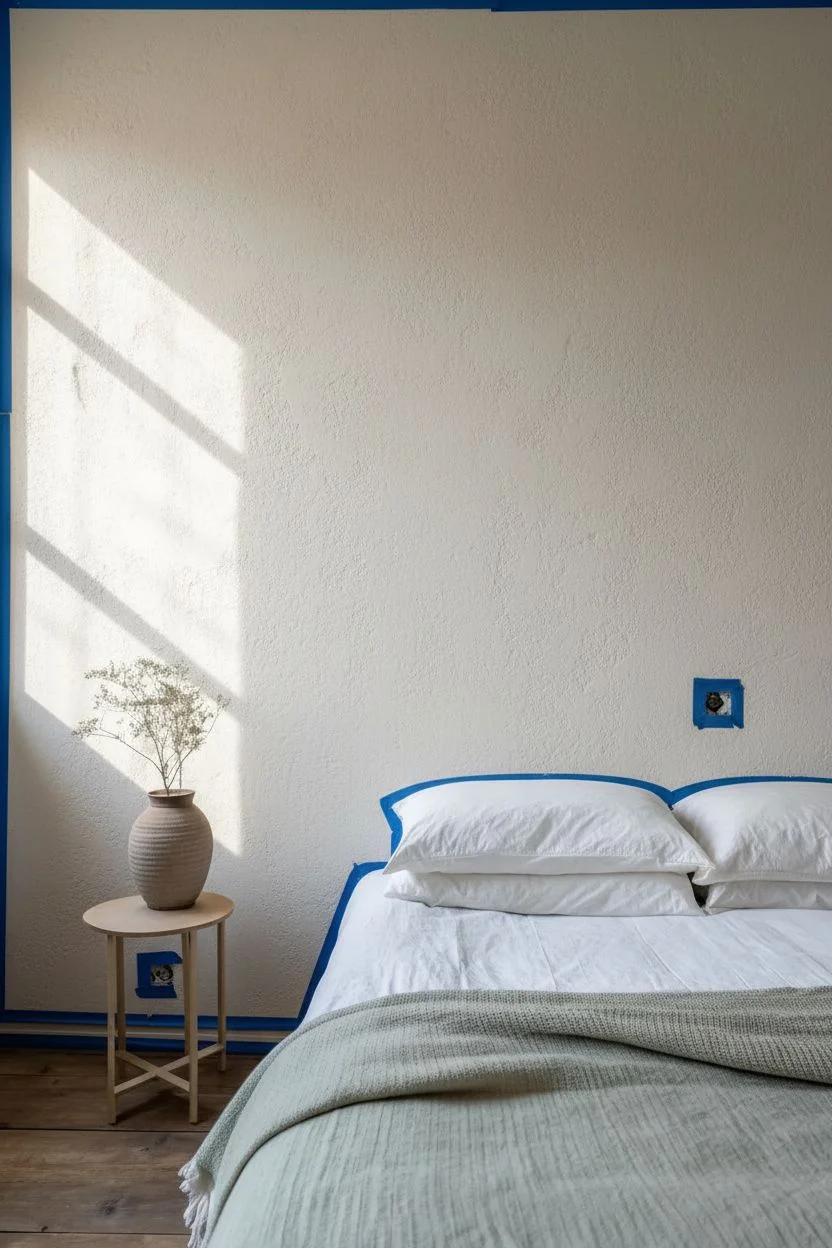
Bring the romance of an old Italian villa into your bedroom with this cloudy, textured limewash finish. By layering soft sage greens over a warm plaster base, you create a living surface that shifts beautifully with natural light.
Step-by-Step
Materials
- Limewash primer or acrylic primer (if painting over standard drywall)
- Block brush (large, 4-5 inch masonry brush)
- Small chip brush for edges
- Limewash paint: Base color (Warm Cream/Beige tone)
- Limewash paint: Accent color (Soft Sage/Moss Green tone)
- Clean water for dilution
- Mixing buckets
- Painter’s tape
- Drop cloths
- Sponge or lint-free rag (optional for blending)
- Protective gloves and eyewear
Step 1: Preparation & Priming
-
Clear and Clean:
Remove all furniture, switch plates, and outlet covers from the wall you intend to transform. Wipe the surface down with a damp cloth to ensure it is free of dust and grease, which can interfere with the mineral bond. -
Tape Off:
Apply painter’s tape carefully along the baseboards, ceiling line, and adjoining walls. Limewash has a thinner consistency than latex paint and splashes easily, so be meticulous here. -
Apply Mineral Primer:
Since limewash binds best to porous surfaces, apply a specific limewash primer if you are working on standard drywall or previously painted latex walls. Use a roller for this step to create a gritty, receptive base layer. -
Let it Cure:
Allow the primer to dry consistently according to the manufacturer’s instructions, usually overnight. A uniform base is critical for the cloudy texture to develop correctly.
Wet-on-Wet Blending
To get the softest transitions between the cream and green, mist the wall lightly with water before applying the green topcoat. This helps the pigments bleed together.
Step 2: Base Layer Application
-
Dilute the Base Tone:
Pour your warm cream/beige limewash into a bucket. I often dilute the first coat slightly (about 10-15% water) to make it more workable and translucent. -
Begin Cross-Hatching:
Dip your large block brush into the cream paint. Starting from a top corner, apply the paint using random, X-shaped strokes (cross-hatching). Avoid long, straight lines. -
Maintain a Wet Edge:
Work in manageable sections (about 3×3 feet) to keep a wet edge. This prevents harsh lap lines from forming where sections meet. -
Cover the Wall:
Continue the X-pattern across the entire wall. Don’t worry if the coverage looks uneven or patchy at this stage; limewash dries much lighter and the variation is intentional. -
First Coat Dry Time:
Let this cream base layer dry for at least 3-4 hours. It will look significantly lighter once the moisture evaporates.
Step 3: Creating the Green Clouds
-
Prepare the Green Wash:
Mix your sage green limewash. For that ethereal, watercolor look seen in the photo, dilute this color more heavily than the base—perhaps 20-25% water. -
Apply Green Clouding:
Dip just the tips of your block brush into the green mixture. Apply it sporadically over the cream base in loose, organic patches, focusing on creating ‘clouds’ rather than full coverage. -
Feather the Edges:
While the green is still wet, use a clean, slightly damp brush or rag to feather the edges of the green patches out into the cream background. This creates that seamless, smoky transition. -
Leave Negative Space:
Resist the urge to cover the whole wall. Leave large areas of the cream base showing through, particularly near the top or wherever light hits naturally, to mimick sun-bleached plaster. -
Build Intensity:
If certain green areas feel too faint, wait for them to dry slightly and dab on a second, more concentrated layer of green to add depth and darkness. -
Scumble for Texture:
For areas that need more grit, use a ‘scumbling’ technique: drag a nearly dry brush with very little paint lightly over the surface to catch on the texture of the primer without filling in the valleys.
Add Faux Crackle
For true age, lightly drag a palette knife with joint compound in random spots before painting. The limewash will catch on these raised areas for extra texture.
Step 4: Finishing Touches
-
Assess from Afar:
Step back to the other side of the room. Look for areas that seem too heavy or too empty. Use a damp rag to lift paint if it’s too dark, or add a wash of diluted cream over green spots that feel too aggressive. -
Final Cure:
Allow the entire wall to cure for 24-48 hours. The colors will continue to chalk out and soften during this time. -
Remove Tape:
Carefully score the edge of the painter’s tape with a utility knife before peeling it off to ensure you don’t chip the hardened mineral finish. -
Optional Sealer:
For high-traffic areas, apply a breathable matte sealer. However, for a bedroom wall like this, leaving it unsealed preserves the velvety, matte light refraction best.
Enjoy the serene and timeless atmosphere your new textured wall brings to the room
BRUSH GUIDE
The Right Brush for Every Stroke
From clean lines to bold texture — master brush choice, stroke control, and essential techniques.
Explore the Full Guide
Cement-Effect Painted Wall for Industrial Vibes
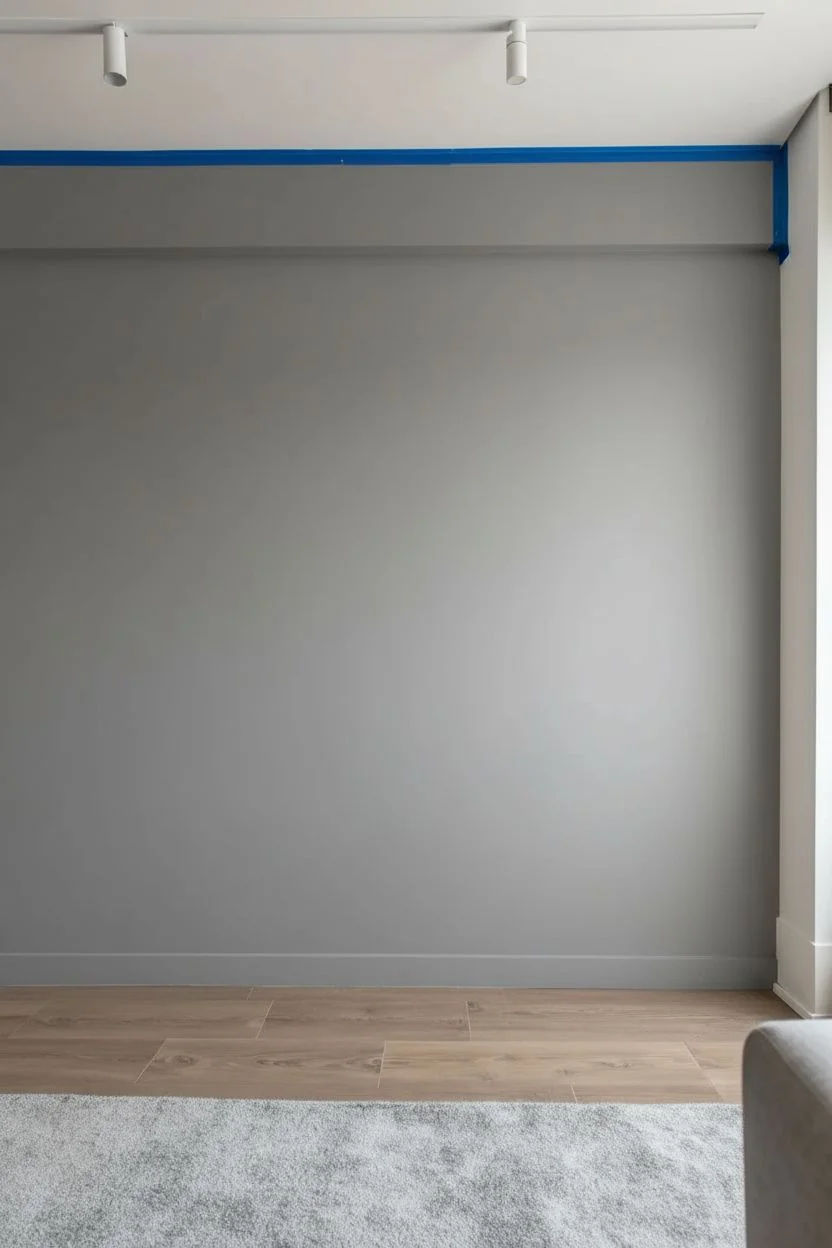
Transform a plain wall into a striking industrial feature with this faux-concrete finish. By layering glaze and paint with a trowel technique, you can achieve the depth and rugged sophistication of real cement without the heavy construction.
Detailed Instructions
Materials
- Grey base latex paint (darker shade)
- Black or dark charcoal latex paint (for mixing)
- Glazing liquid (clear)
- White latex paint (for highlights)
- 9-inch paint roller and tray
- Painter’s tape
- Drop cloths
- Large steel trowel or drywall knife
- Clean lint-free rags
- Sea sponge (large)
- Wide paintbrush (4-inch)
- Mixing bucket
Step 1: Preparation and Base Coat
-
Prep the space:
Start by clearing the wall area. Remove any floating shelves, TV mounts, or outlet covers. Lay down drop cloths to protect your floor and tape off the ceiling, baseboards, and adjacent walls with painter’s tape. -
Apply the base coat:
Using your roller, apply an even coat of the medium-grey latex paint across the entire wall. This will serve as the foundation color for your concrete look. -
Spot check coverage:
If the original wall color shows through significantly after the first coat dries, roll on a second coat. Let the base layer dry completely, ideally overnight, before starting the texture work.
Too Heavy-Handed?
If a section is too dark or the texture is too rough, let it dry, then dry-brush a little of your original base grey paint over it to knock back the intensity.
Step 2: Creating the Concrete Texture
-
Mix your glaze:
In the mixing bucket, combine 4 parts glazing liquid with 1 part of the darker charcoal paint. The glaze makes the paint translucent and extends the drying time, allowing you to manipulate it. -
Apply glaze in patches:
Dip a dampened sea sponge or large brush into the glaze mixture. Apply it to the wall in random, organic patches about 2-3 feet wide. Don’t try to cover the whole wall at once. -
Trowel technique:
While the glaze patch is still wet, take your clean steel trowel. Hold it at a low angle (about 30 degrees) and drag it across the glaze in sweeping, cross-hatch motions. This pushes the pigment around and creates those characteristic varying densities. -
Create voids and scrapes:
Occasionally press harder or skip the trowel slightly to leave thicker ridges or scrape down to the base coat. This unevenness mimics the imperfections of poured concrete. -
Blend the edges:
As you move to the next section, overlap your new wet glaze with the previous section. Use the trowel to blur the lines so you don’t end up with a grid pattern. -
Work across the wall:
Continue this sponge-and-trowel process across the entire surface. Step back occasionally to ensure the texture looks balanced and random.
Step 3: Adding Depth and Highlights
-
Mix a highlight wash:
Once the dark glaze layer is dry to the touch, mix a small amount of white paint with a large amount of water (about 1:4 ratio) to create a very thin whitewash. -
Rag application:
Dip a clean rag into the whitewash and wring it out until it’s barely damp. Gently dab and rub it onto random areas of the wall, focusing on the high points of the texture. -
Soften with the trowel:
Immediately go over these highlighted areas with a clean, dry trowel. Dragging the trowel over the whitewash will feather it out, creating the dusty, chalky look of cured cement. -
Add darker accents:
To enhance contrast, mix a tiny amount of black paint with glaze. Use a small artist brush to add faint, jagged veins or darker patches in corners, then immediately smear them with the trowel. -
Dry brush blending:
If any area looks too stark, take a dry, wide paintbrush and lightly whisk over the surface to soften transitions between the dark and light areas. -
Create faux imperfections:
For added realism, you can flick tiny droplets of the dark glaze mixture onto the wall using a stiff bristle brush, mimicking air pockets or aggregate in concrete.
Industrial Edge
Use a straightedge and a pencil to lightly draw horizontal lines every 2-3 feet across the wet glaze, mimicking the seams of concrete formwork boards.
Step 4: Final Touches
-
Remove tape:
Carefully peel off the painter’s tape while the final touches are still slightly tacky to prevent peeling dry paint films. -
Inspect and refine:
Examine the wall from different angles. If any spot looks too uniform, dab a little leftover glaze or whitewash to break it up. -
Seal (Optional):
If this wall is in a high-traffic area, apply a matte clear sealer with a roller to protect your faux finish without adding shine.
Enjoy the sleek, modern atmosphere your new industrial-style wall brings to the room
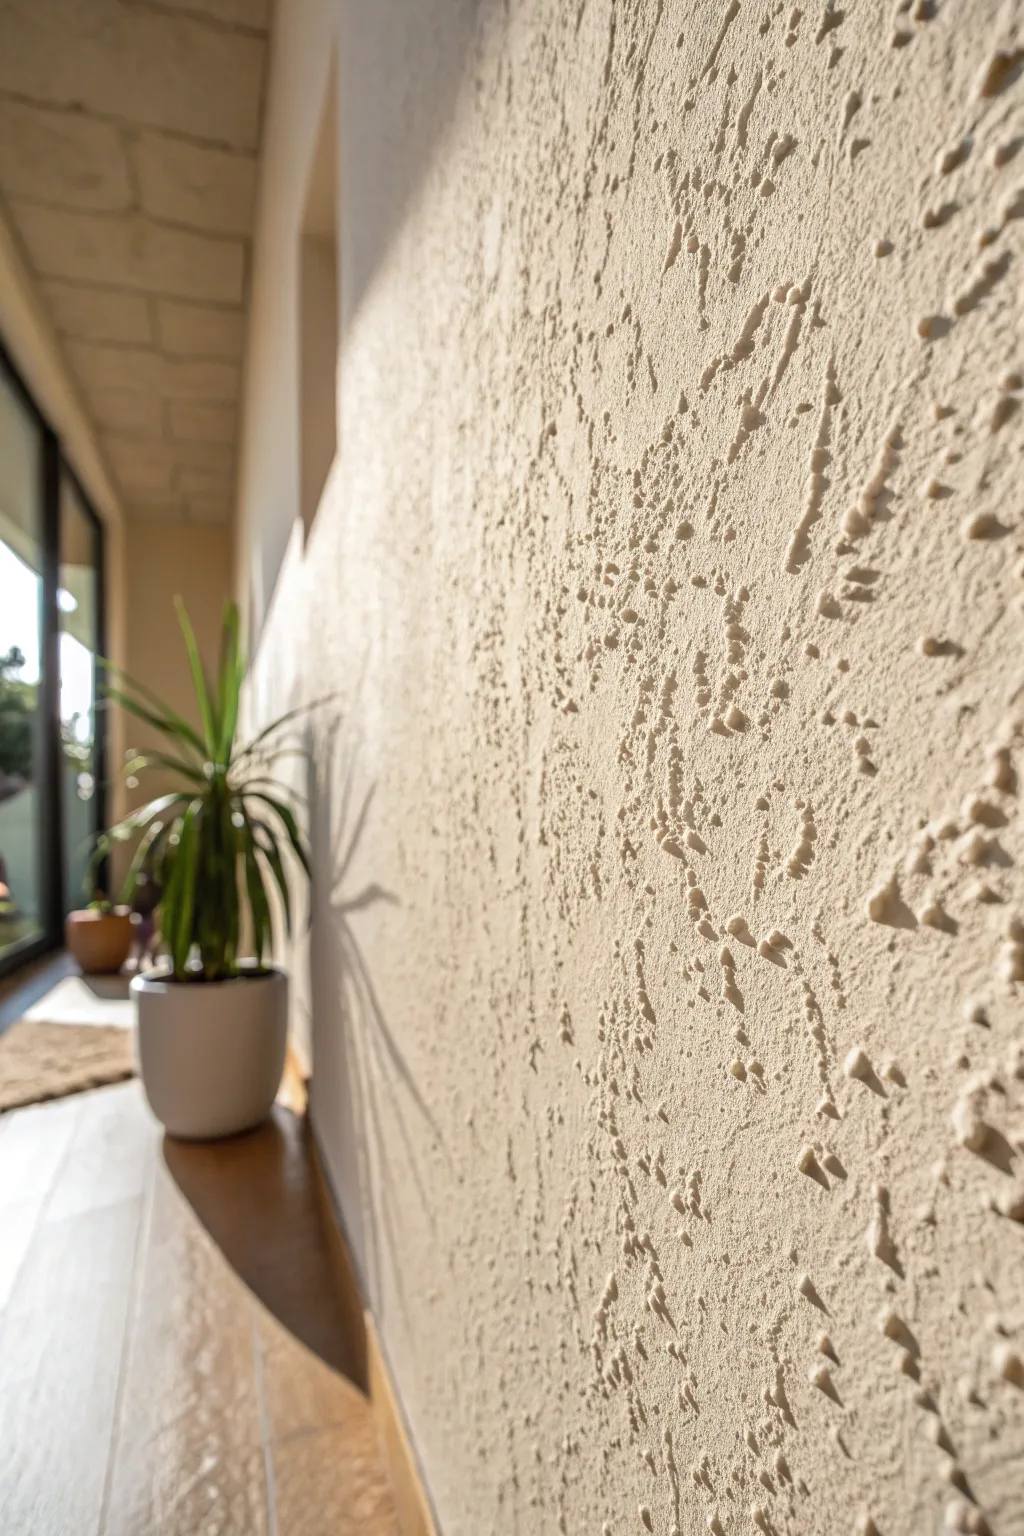
Sand-Infused Paint for Beachy, Gritty Texture
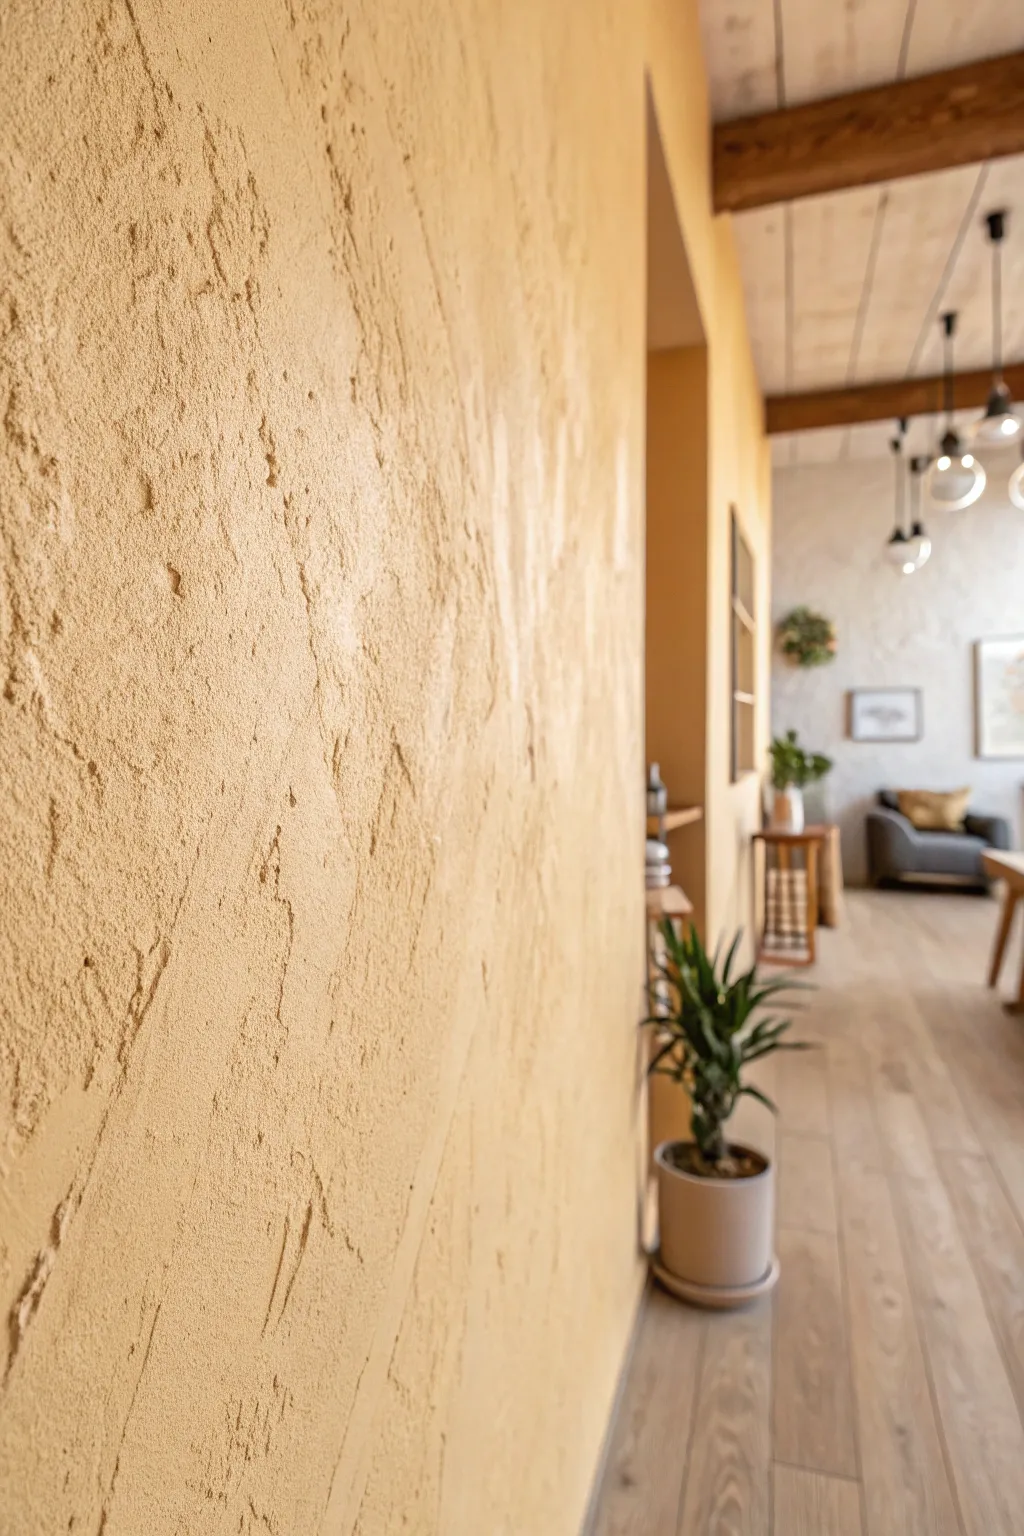

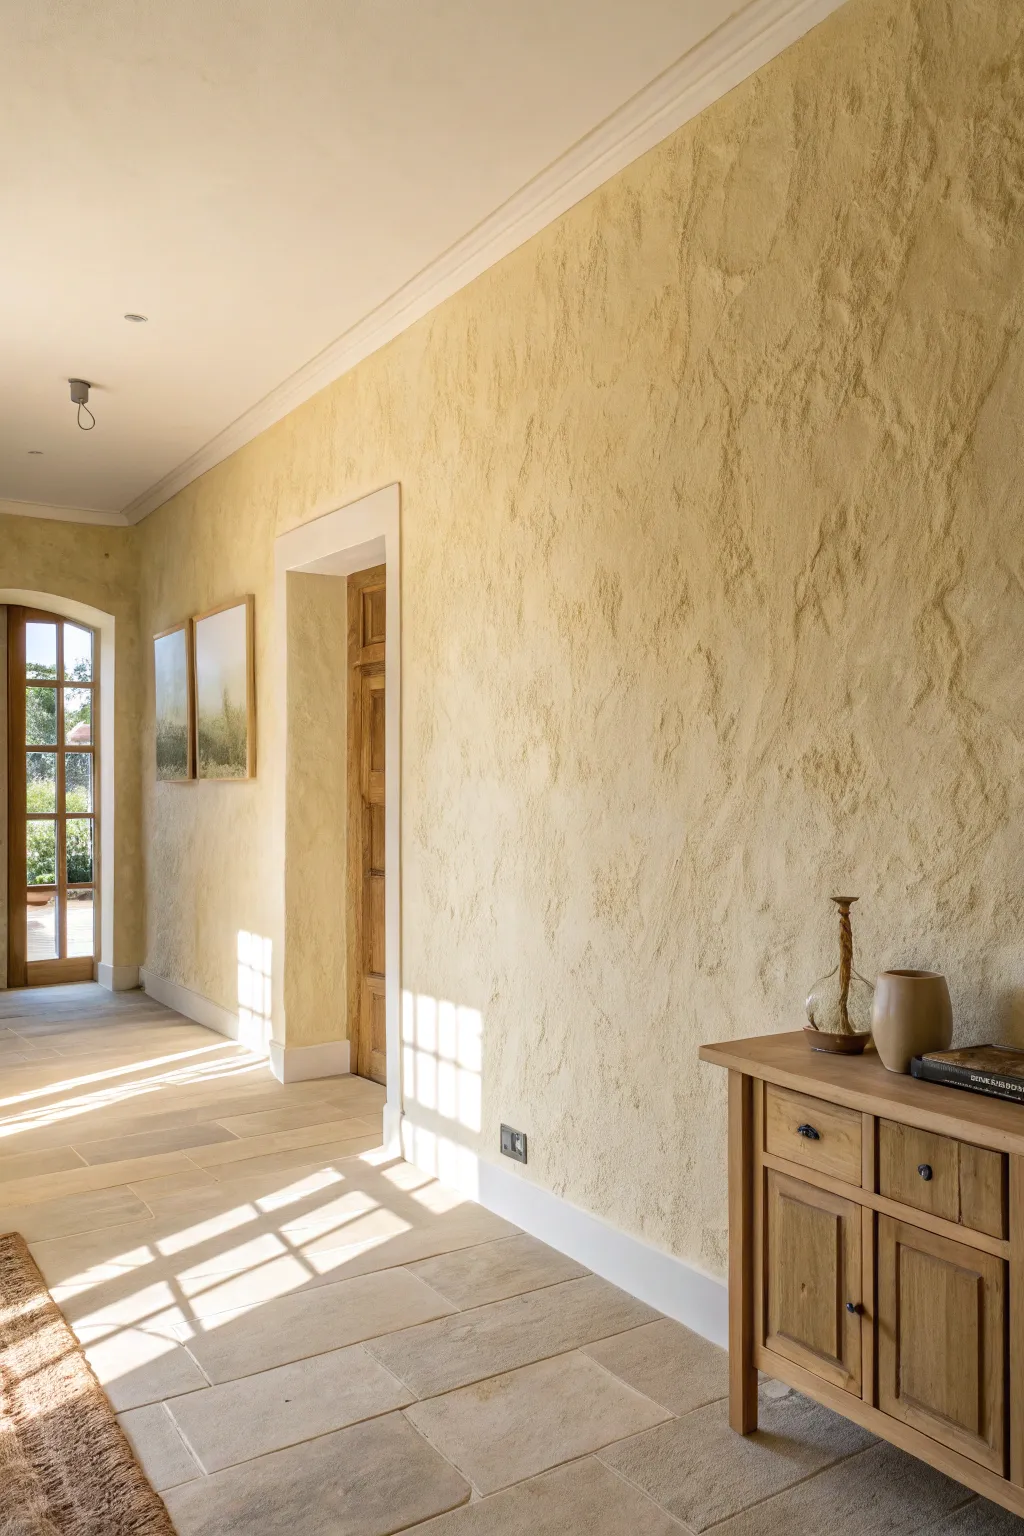
Bring the calming, tactile warmth of the desert right into your living room with this heavy-grit texture technique. This finish mimics the organic imperfections of sandstone and adobe, creating deep shadows and a dynamic surface that changes with the light.
Step-by-Step Tutorial
Materials
- Latex wall paint (warm beige or sandy yellow)
- Clean silica sand (fine to medium grain)
- Wide mixing paddle or drill attachment
- Large 5-gallon bucket
- Wide paintbrush (4-inch or larger)
- Masonry trowel or wide putty knife
- Painter’s tape
- Drop cloths
- Paint tray and roller (for base coat)
Step 1: Preparation & Base
-
Protect the perimeter:
Begin by taping off all baseboards, ceiling edges, and adjacent walls. Since this mixture is thicker and heavier than standard paint, wider tape is often safer. -
Lay the groundwork:
Cover your floors extensively with drop cloths. The sand additive creates significant splatter and fallout during application, so a few extra feet of coverage is worth the effort. -
Apply the primer coat:
Roll on a standard, flat coat of your chosen sandy beige color. This doesn’t need texture yet; it simply ensures that if you miss a spot with the grit layer, the wall color remains consistent. -
Let it dry completely:
Wait at least 4 hours for the base coat to fully cure. A dry surface is crucial for the heavy texture coat to adhere properly without pulling up the paint underneath.
Keep it Moving
Stir your paint bucket every 10 minutes during application. The heavy sand tends to sink to the bottom quickly, which will cause uneven texture coverage as you work.
Step 2: Mixing the Grit
-
Pour the paint:
Transfer your remaining paint into the large 5-gallon bucket. You need plenty of room for displacement once the sand is added. -
Add sand gradually:
Start by pouring a cup of silica sand into the paint. Stir thoroughly with the mixing paddle. I prefer to add the sand in small batches to avoid immediate clumping. -
Check consistency:
Continue adding sand until the paint resembles a thick, gritty batter. It should hold its shape slightly when lifted but still be spreadable. -
Test a patch:
Apply a small amount to a piece of cardboard. If the texture looks too subtle, add more sand. If it’s too difficult to spread, add a splash of water or more paint.
Desert Sunset Styling
Once dry, dry-brush a slightly lighter shade of beige over the highest ridges. This highlights the texture and makes the deep crevices pop, adding massive visual depth.
Step 3: Application & Texturing
-
Load the brush:
Dip your wide brush heavily into the bucket. You want to carry a significant amount of material to the wall, almost like you are scooping it rather than just dipping. -
Apply in cross-hatch strokes:
Slap the mixture onto the wall in random, X-shaped motions. Don’t worry about neatness; the goal is to get the material on the surface quickly and unevenly. -
Work in small sections:
Only tackle a 3-foot by 3-foot area at a time. The sand mixture dries faster than regular paint, and you need it wet for the manipulation phase. -
Create the ridges:
Once the section is covered, use your brush creates vertical, dragging motions. Imagine you are pulling the sand down the wall to create vertical drift lines. -
Knock down with a trowel:
For the specific look in the photo, take a clean masonry trowel and lightly drag it downward over the wet paint. This flattens the high peaks and emphasizes the gritty ‘stone’ look. -
Vary the pressure:
Press harder in some spots and lighter in others while troweling. This creates the natural, weathered variance where some areas look smooth and others rough. -
Blend the edges:
Leave the edges of your current section ragged and irregular. When you start the next section, overlap these wet edges to ensure no straight seams are visible. -
Review from a distance:
Step back every few minutes to look at the wall as a whole. Ensure the heavy texture is distributed somewhat evenly, even though the pattern itself is random. -
Final dry time:
Allow the wall to dry for at least 24 hours. The thick layers of sand and paint take significantly longer to cure than standard applications.
This textured surface transforms a flat room into an earthy sanctuary that feels grounded and organic

PENCIL GUIDE
Understanding Pencil Grades from H to B
From first sketch to finished drawing — learn pencil grades, line control, and shading techniques.
Explore the Full Guide
Sponge-Dabbed Glaze for a Velvety Mottled Finish
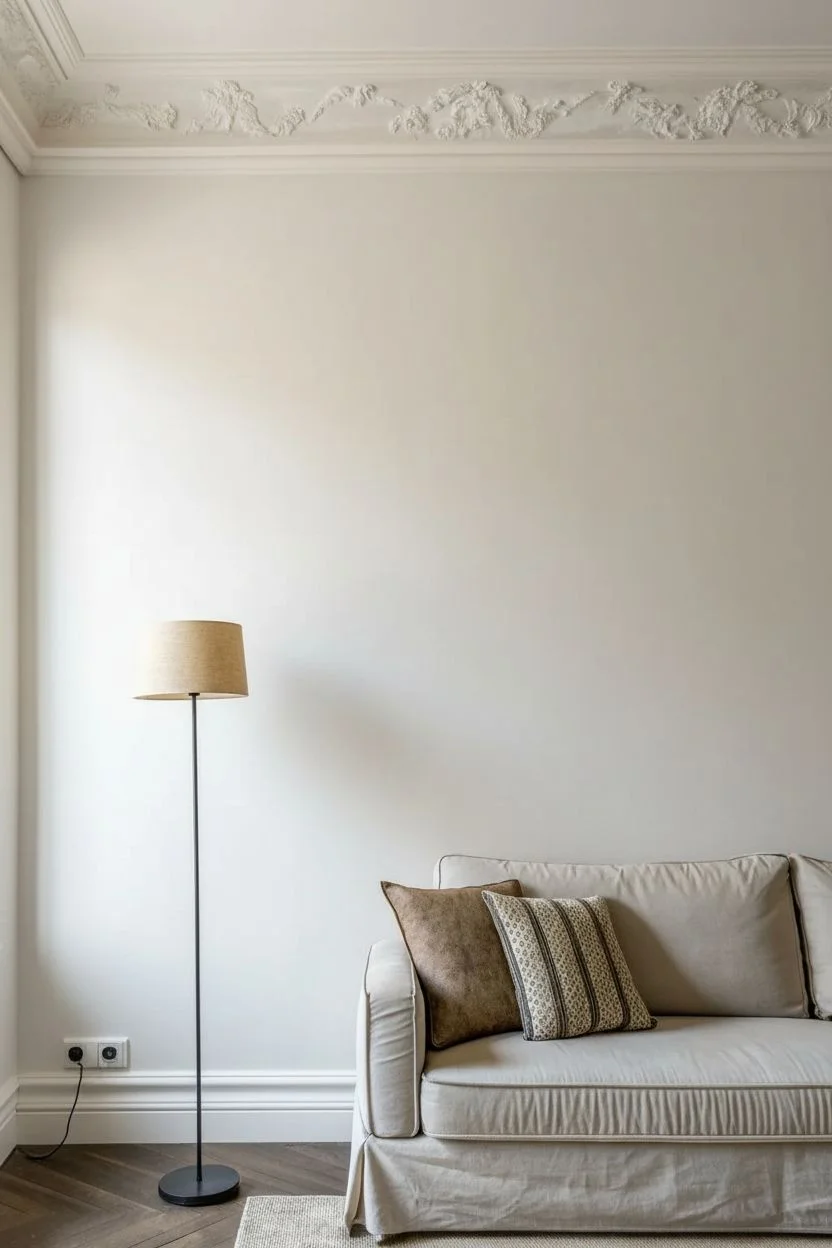
Transform plain drywall into a sophisticated, tactile surface that mimics the look and feel of crushed velvet or soft suede. This subtle, mottled effect adds incredible depth and warmth to a room without overwhelming the space with heavy texture.
Step-by-Step Guide
Materials
- High-quality latex primer
- Base coat paint (eggshell or satin finish, cream/beige)
- Glaze medium (latex or acrylic)
- Top coat paint (slightly darker than base, satin or semi-gloss)
- Natural sea sponge
- Lint-free cotton rags
- Painter’s tape
- Paint tray and liners
- roller and roller cover (3/8 inch nap)
- 2-inch angled sash brush
- Bucket for water
- Mixing stick
Step 1: Preparation and Base Coat
-
Prepare the workspace:
Begin by removing all furniture from the area or covering it with drop cloths. Clear the wall of any nails or hangings and patch any holes with spackling compound. -
Tape the edges:
Apply painter’s tape carefully along the ceiling line, baseboards, and window trim to ensure crisp, clean edges. Press the tape down firmly to prevent bleed-through. -
Clean the walls:
Wipe down the wall surface with a damp cloth to remove dust and grease, which allows the primer to adhere properly. Let the wall dry completely. -
Apply primer:
Roll on a coat of high-quality latex primer. This step is crucial for ensuring a uniform absorption rate for your glaze later on. -
Paint the base coat:
Using your roller, apply the base coat of cream or beige paint. I prefer using an eggshell finish here because it offers a smooth surface without being too slippery for the glaze. -
Edge the wall:
Use the angled sash brush to cut in around the corners and trim where the roller couldn’t reach, blending the wet edges into the rolled paint. -
Dry completely:
Allow the base coat to dry for at least 24 hours. The wall needs to be fully cured so the glaze work doesn’t lift previous layers.
Uneven Patches?
If you see distinct square shapes or ‘grid lines’ appearing, use a clean, dry softening brush or rag to feather the edges of your sections immediately while the glaze is wet.
Step 2: Glaze Mixing and Application
-
Prepare the sponge:
Soak your natural sea sponge in water until it creates a soft, pliable shape, then wring it out very thoroughly so it is damp but not dripping. -
Mix the glaze:
In a separate container, mix one part of your darker top coat paint with four parts glaze medium. Stir until the mixture is completely consistent. -
Test the mixture:
Dab a small amount of the glaze mixture onto a piece of cardboard or a hidden wall patch to ensure the transparency and color depth are to your liking. -
Load the sponge:
Dip the face of the sponge lightly into the glaze mixture. Blot the excess onto the ribbed part of a paint tray or a paper towel; you want the sponge coated, not soaked. -
Apply the first patch:
Starting in an upper corner, gently press the sponge against the wall. Rotate your wrist slightly with each dab to create a random, non-repeating pattern. -
Work in sections:
Continue sponging in roughly 3-foot by 3-foot sections. Keep the edges ragged and irregular so distinct lines don’t form between work areas. -
Soften the texture:
Before the glaze dries, take a clean, slightly damp lint-free rag and gently dab or “pounce” over the wet glaze. This softens the sponge marks and creates that velvety blur seen in the photo. -
Reload and rotate:
Reload your sponge with glaze as needed, always remembering to blot. Rotate the sponge in your hand frequently to use different textures of the sea sponge surface. -
Blend the sections:
Move to the next adjacent section, overlapping the wet edges of the previous patch. Blending while wet is the secret to a seamless finish. -
Check for heavy spots:
Step back occasionally to view the wall from a distance. If you spot an area that looks too heavy with paint, dab it with the clean rag to lift some pigment off. -
Finish the wall:
continue this process until the entire wall is covered. If you need to take a break, try to finish a full wall corner-to-corner first to avoid dry lines in the middle. -
Remove tape:
Carefully peel off the painter’s tape while the glaze is still slightly tacky to prevent peeling the dried paint film.
Add Metallic Shimmer
Mix a small amount of metallic pearl or gold paint into your glaze mixture. This adds a luxurious sheen that catches the sunlight and enhances the velvet effect.
Enjoy the warm, elegant texture you’ve brought to your living space with this simple yet impactful technique
Rag-Rolled Layers for Cozy, Handmade Texture
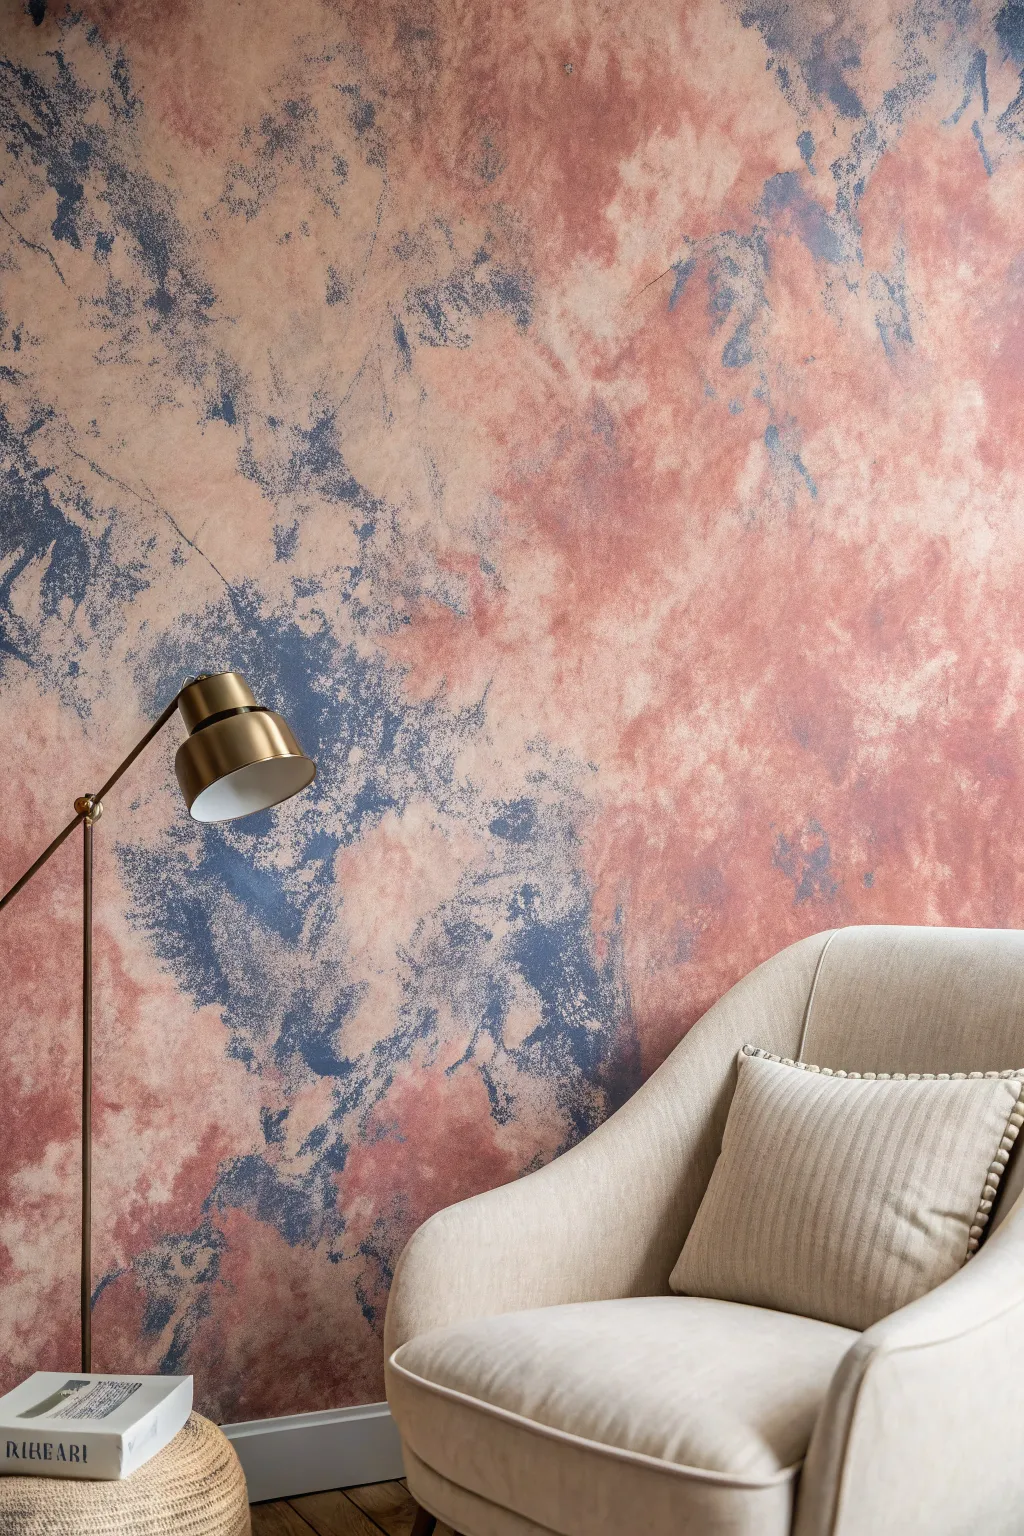
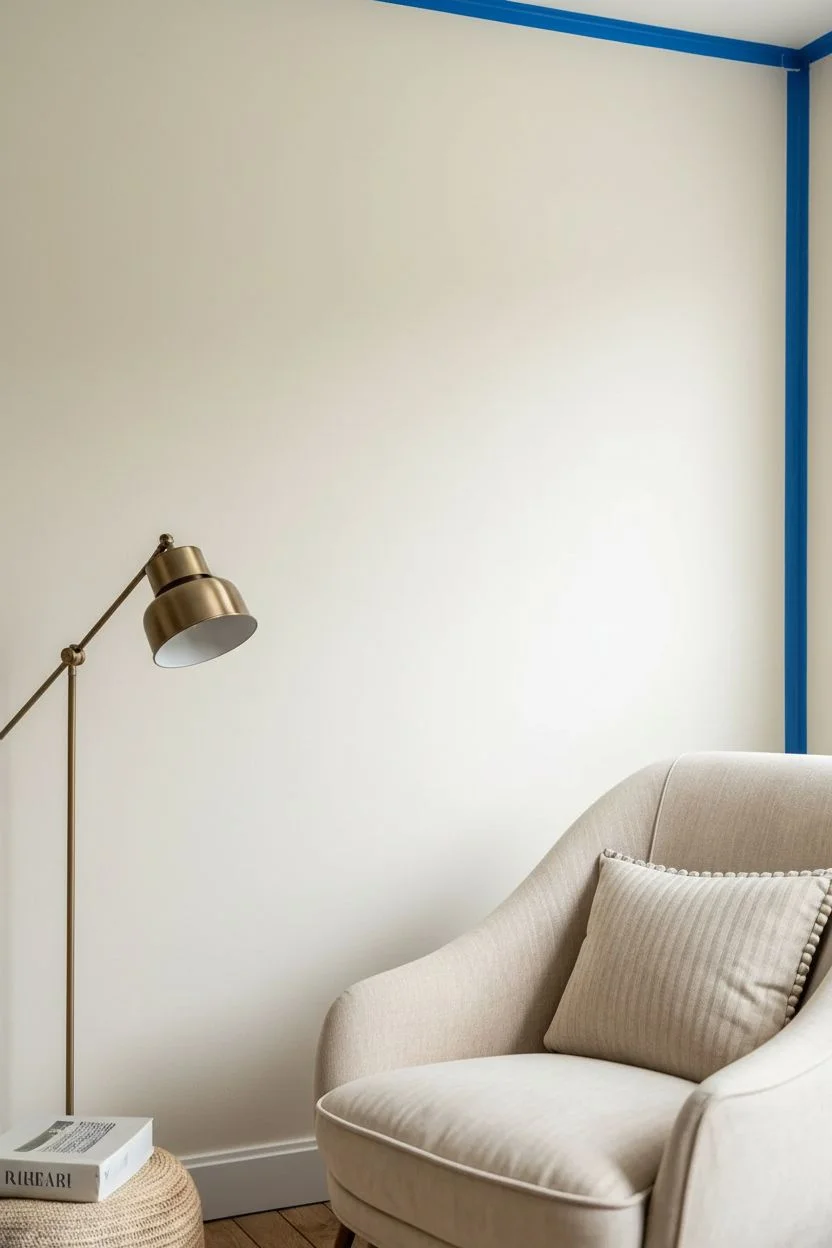
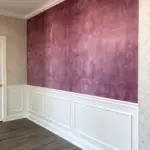
Transform a plain wall into a dreamy, cloud-like canvas using this rag-rolling technique that blends warmth and drama. The interplay of dusty peach and indigo creates a sophisticated, stone-inspired texture ideal for cozy reading nooks.
Step-by-Step Tutorial
Materials
- Latex wall paint (Base color: Soft Cream or Pale Beige)
- Latex glaze medium
- Latex wall paint (Accent 1: Terracotta or Dusty Pink)
- Latex wall paint (Accent 2: Indigo or Deep Denim Blue)
- Several lint-free cotton rags (t-shirt material works well)
- Painter’s tape
- Drop cloths
- Paint rollers and tray
- Two smaller mixing buckets
- Sea sponge (optional for blending)
- Stir sticks
Step 1: Preparation & Base Coat
-
Clear the area:
Remove furniture and cover floors with drop cloths to protect against any accidental splatter. -
Tape the edges:
Apply painter’s tape along the ceiling line, baseboards, and any adjacent walls you aren’t painting to ensure crisp edges. -
Apply the base color:
Roll on your base coat of soft cream or pale beige. Start cutting in the edges with a brush, then use a roller for the main surface. Let this dry completely, usually around 4 hours.
Step 2: Mixing the Glazes
-
Prepare the warm glaze:
In the first bucket, mix your Terracotta paint with the clear glaze medium. A 1:4 ratio (paint to glaze) usually works best for translucency, but test on a piece of cardboard first. -
Prepare the cool glaze:
In the second bucket, mix the Indigo paint with the glaze medium using the same 1:4 ratio. Stir thoroughly until the consistency is uniform. -
Prep the rag tools:
Soak two separate rags in water and wring them out completely so they are just damp. This prevents the cloth from absorbing too much expensive glaze.
Glaze Consistency Tip
Work with a partner if possible! One person can apply the warm glaze while the other follows with the cool tones. This ensures the first layer stays wet enough to blend properly.
Step 3: Rag Rolling Technique
-
Apply the warm layer first:
Dip a scrunched-up rag into the terracotta glaze mixture. Dab off excess on a paper towel or the tray’s ridge. -
Roll the warm glaze:
Press the rag onto the wall and roll your wrist in random directions. Aim for large, cloud-like patches rather than total coverage, leaving plenty of the cream base showing. -
Work in sections:
Cover roughly a 3×3 foot section at a time. Keep the edges of your sections wet and irregular to blend seamlessly into the next area. -
Introduce the cool tone:
While the terracotta glaze is still slightly tacky but not wet, take a fresh rag and dip it into the Indigo glaze mixture. -
Apply the indigo accents:
Roll the blue glaze into the open spaces left by the cream base, and slightly over the edges of the terracotta patches. Don’t press too hard; you want lighter, feathery touches for the dark color. -
Blotting heavily inked areas:
If a spot looks too heavy or solid, use a clean, dry rag to blot the wall immediately. This lifts the glaze and recovers some texture. -
Create veins:
For the subtle marble vein look seen in the image, twist a corner of the blue-soaked rag very tightly and gently drag it through the wet glaze in diagonal, jagged lines. -
Softening the blend:
Take a barely damp, clean sea sponge and lightly pounce over areas where the two colors meet. This softens hard lines and creates that dreamy, diffused transition.
Add Metallic Flair
Once the wall is fully dry, mix a tiny amount of metallic gold paint with glaze and use a fine artist brush to trace thin veins over the indigo sections for a luxe kintsugi effect.
Step 4: Refining & Finishing
-
Step back and assess:
Walk to the other side of the room to view the wall as a whole. Look for bald spots or areas that are too heavy with one color. -
Touch ups:
I usually go back in with a very small piece of rag to dab tiny amounts of indigo into areas that feel too warm, balancing the composition. -
Remove tape:
Carefully peel away the painter’s tape while the glaze is still slightly tacky to prevent peeling dry paint. -
Final cure:
Let the wall dry undisturbed for at least 24 hours. The glaze takes longer to cure than standard latex paint.
Enjoy the deep, cozy atmosphere your new textured wall brings to the room


Combed Striations for Clean, Linear Texture
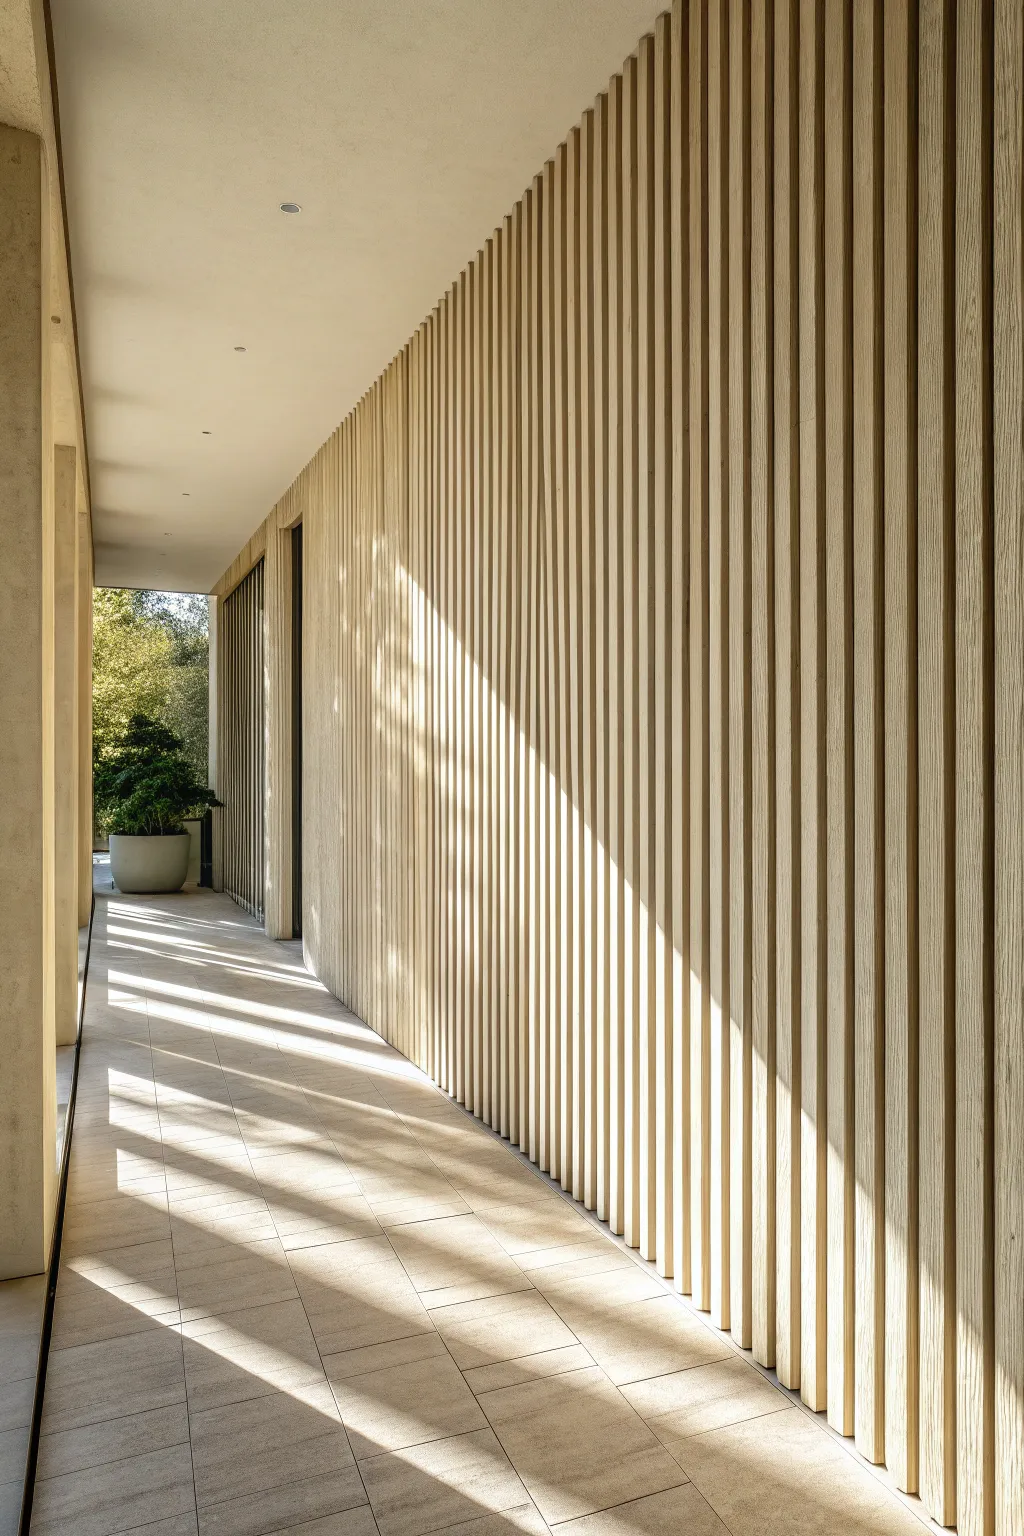
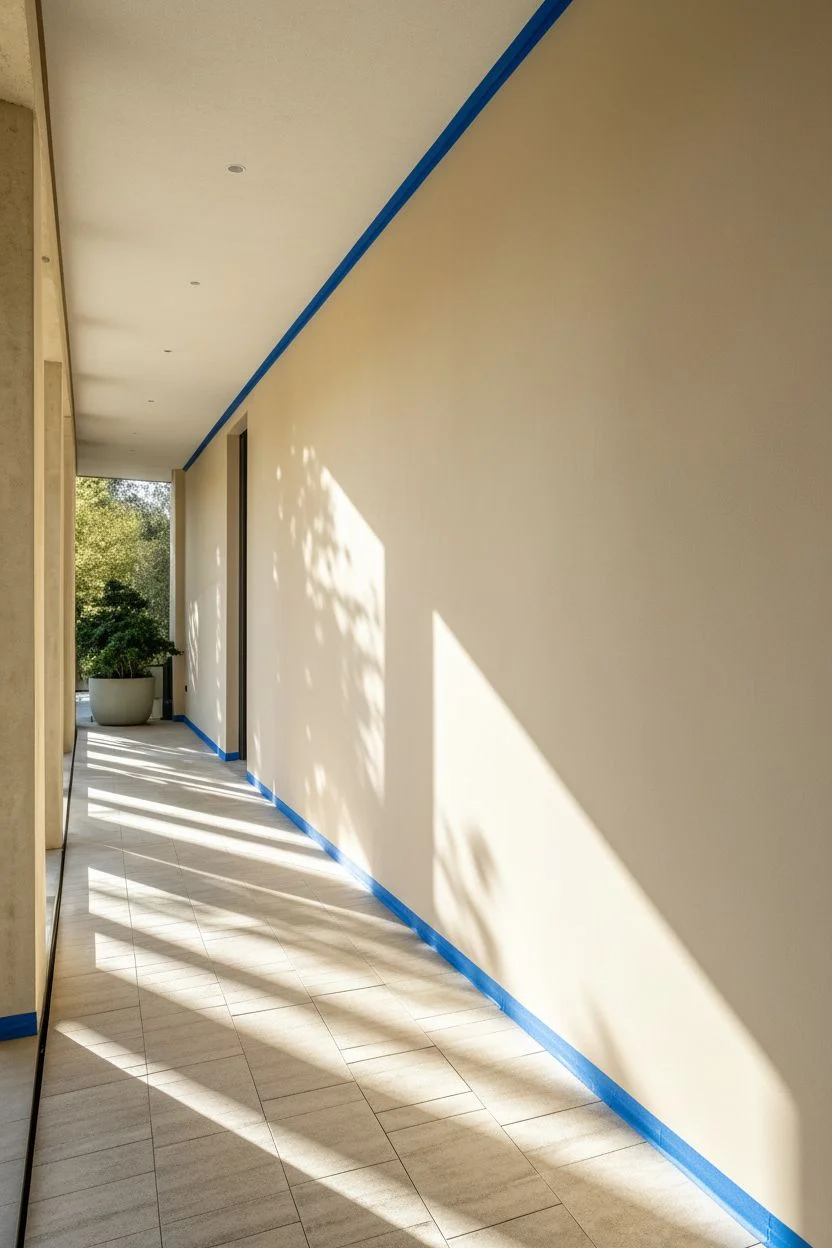
Recreate the sophisticated look of vertical wooden slatting using only plaster and a steady hand. This technique creates high-contrast relief lines that catch the light, transforming a plain corridor into a modern architectural statement without the cost of millwork.
Detailed Instructions
Materials
- High-viscosity texturing plaster or joint compound
- Tintable primer (warm beige/sand tone)
- White matte latex paint (or light cream)
- Wide-tooth tiling trowel or custom combing tool (square notch)
- 4-foot metal straightedge or level
- Painter’s tape (2-inch)
- Smoothing trowel
- Medium-grit sanding block
- Laser level (optional but recommended)
- Clear matte sealer
Step 1: Preparation & Layout
-
Clean and Prime:
Begin by cleaning your wall surface thoroughly to remove dust and grease. Apply a coat of high-quality primer tinted to a warm, sandy beige; this undercoat color will peek through the deep grooves later, adding depth akin to natural wood shadows. -
Establish Vertical Guides:
Set up a laser level to project a perfectly plumb vertical line at the start of your wall. If you don’t have a laser, use a plumb bob to mark a definitive guide line every 3 feet. -
Tape Boundaries:
Mask off the ceiling line, floor molding, and adjacent walls with wide painter’s tape. Press the edges firmly to prevent the heavy plaster from bleeding underneath.
Wobbly Lines?
If your hand shakes and a line goes crooked, don’t try to fix just that spot. Smooth the entire vertical section back to flat with a putty knife and re-comb immediately while wet.
Step 2: Applying the Texture
-
Mix the Plaster:
Prepare your texturing plaster. It needs to be thick enough to hold a sharp ridge without sagging—think peanut butter consistency. I like to mix in a small amount of the light cream paint to tint the plaster itself lightly. -
Apply First Section:
Working in vertical sections about 2 feet wide, apply the plaster using a smooth trowel. Aim for a consistent thickness of about 1/4 inch creating a flat, wet canvas. -
Set the Guide:
Before combing, lightly mist your metal straightedge with water so it glides easily. Position it vertically against the wall to act as a physical fence for your combing tool. -
Comb the Striations:
Press your square-notch trowel firmly into the wet plaster at the ceiling line. Drag it straight down the wall in one continuous, confident motion, using the straightedge to keep your hand steady. -
Clean and Repeat:
Wipe the excess plaster off your trowel immediately after every single pass. Clumps on the tool will ruin the clean lines of the next stroke. -
Overlap Carefully:
Move your straightedge over. When starting the next vertical pass, overlap the previous pass by one ‘tooth’ or ridge to ensure the spacing remains uniform across the entire wall. -
Check for Sagging:
Inspect the bottom of the wall. Gravity often pulls plaster down; create a crisp termination line by running a putty knife horizontally along the tape line at the floor.
Make it Metallic
Swap the matte paint for a metallic bronze or charcoal glaze. The linear texture mimics extruded metal panels, creating an ultra-modern industrial look perfect for commercial spaces.
Step 3: Refining & Finishing
-
Allow Long Dry Time:
This thick application needs significant drying time. Wait at least 24-48 hours until the plaster is bone dry and hard to the touch. -
Knock Down Burrs:
Inspect the ridges for any sharp, jagged bits created by the trowel dragging. Very gently run a medium-grit sanding block vertically down the ridges to soften distinct imperfections without flattening the texture. -
Clean the Grooves:
Use a dry bristle brush or a vacuum attachment to remove sanding dust from deep inside the grooves, ensuring the paint will adhere properly. -
Apply Top Coat:
Using a thick nap roller or a sprayer, apply your matte white or light cream paint. Ensure the paint gets into the recesses but doesn’t pool there. -
Enhance Contrast (Optional):
For extreme depth, you can dry-brush a slightly lighter highlight color just on the very tops of the ridges. -
Seal the Surface:
Finish with a clear matte sealer to protect the plaster ridges from chipping and to make the wall wipeable. -
Remove Tape:
Score the edge of the painter’s tape with a utility knife before peeling it away to ensure you don’t rip chunks of the dry plaster off the wall.
Step back and watch how the changing daylight moves across your wall, revealing the dramatic rhythm of your hand-crafted architecture
Troweled Swirls for a Soft, Sculpted Statement
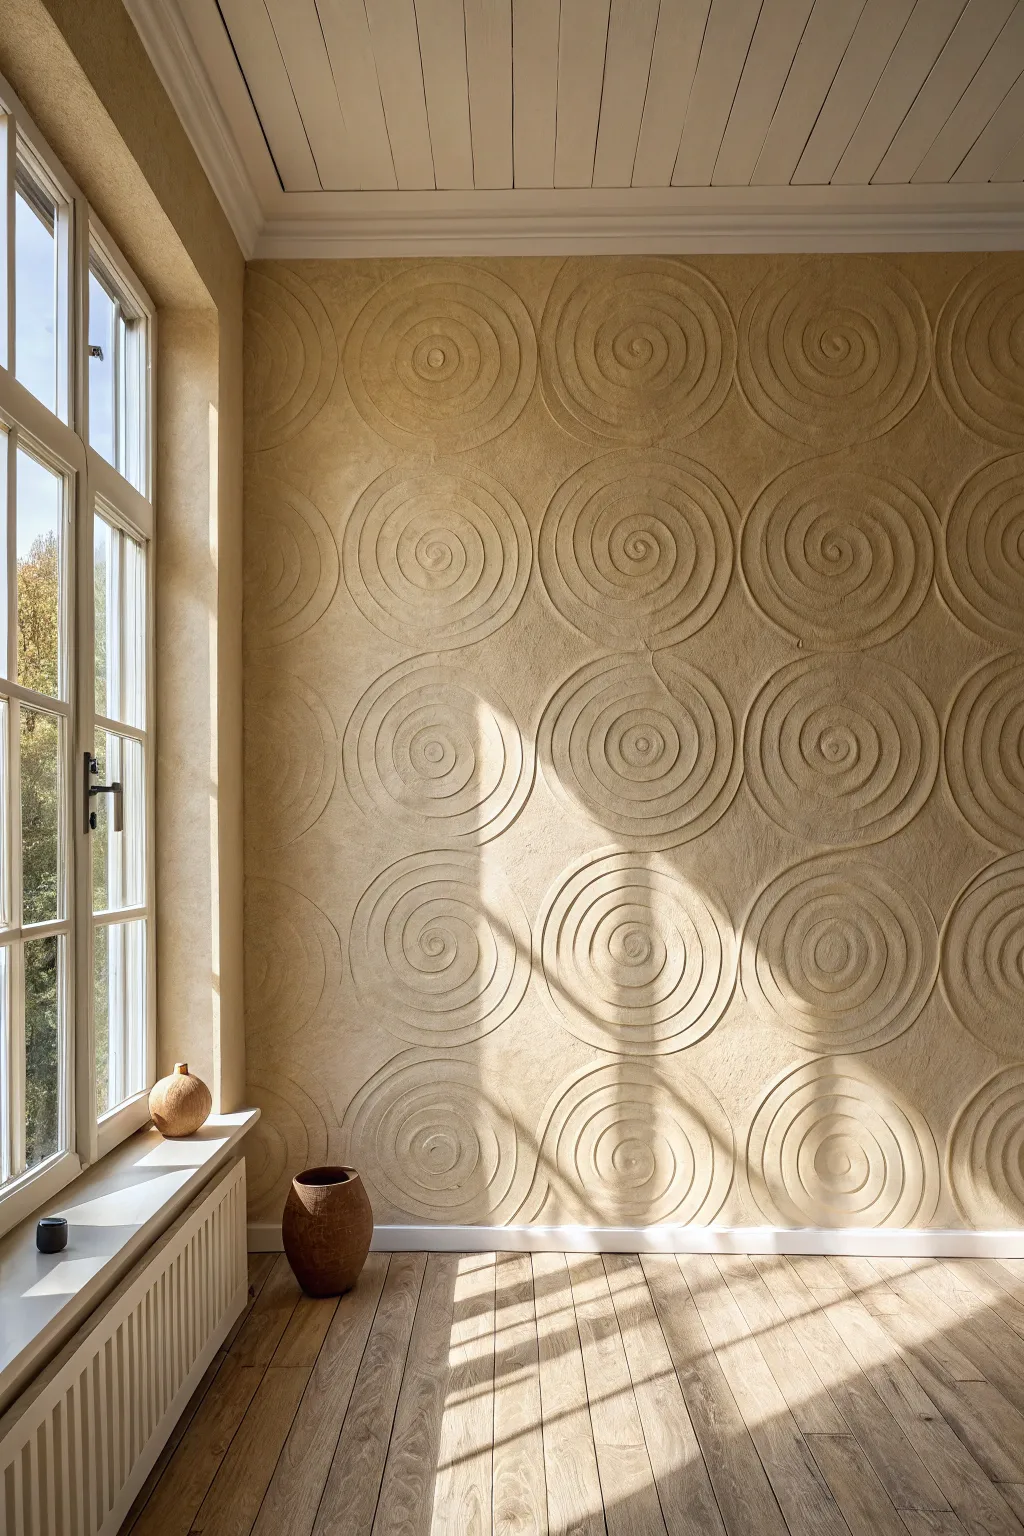
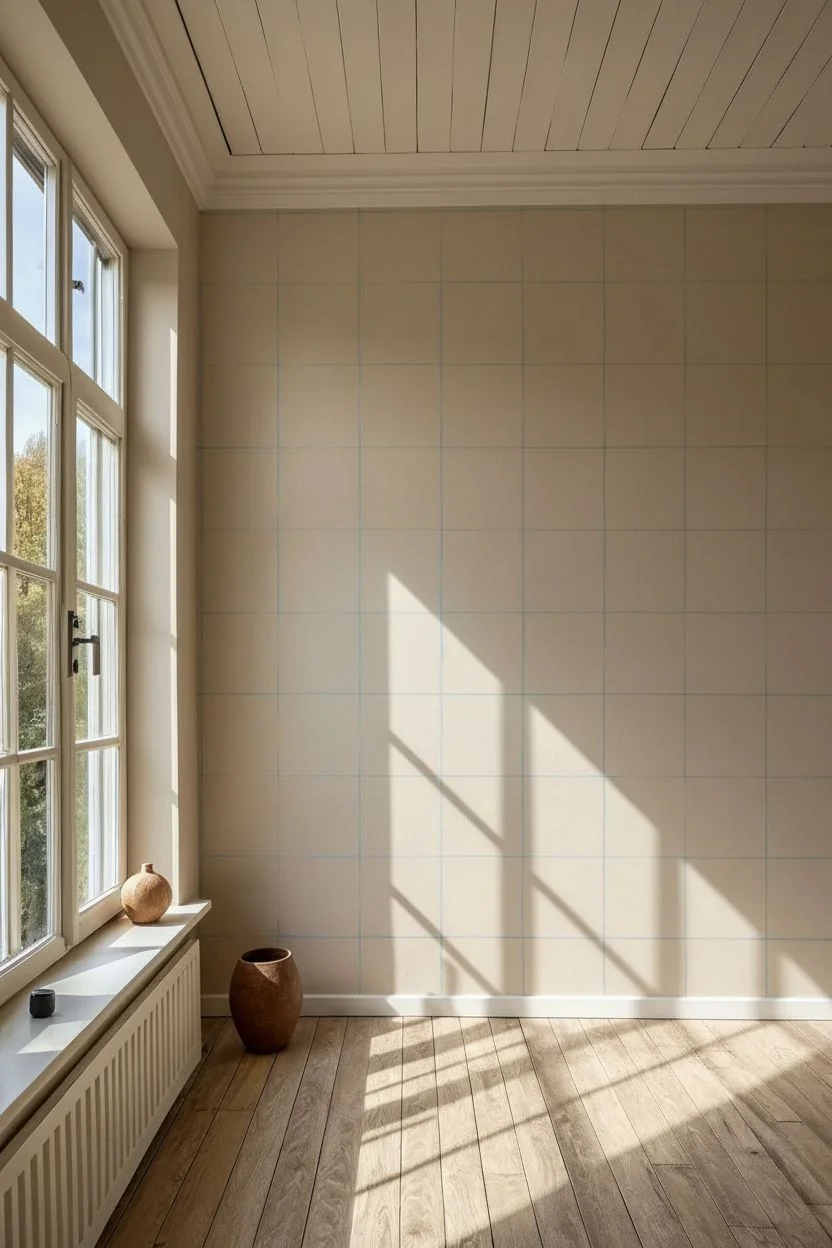
Transform a plain wall into a tactile masterpiece with this sophisticated yet earthy plaster technique. The repeating concentric spirals create a rhythmic, sculpted look that catches the light beautifully, evoking warmth and artisanal charm.
Step-by-Step Guide
Materials
- High-quality venetian plaster or texturing compound
- Paint primer suitable for textured surfaces
- Notched trowel (square notch, approximately 1/4 inch)
- Standard steel trowel or putty knife
- Flexible spiral texturing tool or homemade comb (stiff cardboard/plastic)
- Masking tape (painter’s tape)
- Drop cloths
- Sandpaper (medium grit)
- Level and chalk line
- Matte paint in a warm beige or sandstone hue (optional if plaster is untinted)
- Glaze (optional for depth)
Step 1: Preparation & Base Coat
-
Protect the area:
Begin by completely clearing the workspace. Lay down heavy-duty drop cloths to protect your flooring, as this process can get messy. Tape off the ceiling line, baseboards, and any adjacent window frames with painter’s tape to ensure crisp edges. -
Assess the surface:
Check your wall for any major imperfections. Patch holes and sand down bumps. The surface doesn’t need to be perfectly smooth, but major flaws will disrupt the spiral pattern later. -
Prime the wall:
Roll on a coat of high-quality primer designed for textured surfaces. This ensures the heavy plaster adheres properly and dries evenly across the wall. Let this dry completely according to manufacturer instructions. -
Plan the grid:
For a symmetrical look like the reference image, you need a guide. Use a level and a chalk line to lightly snap a grid onto the wall. The intersection points will be the centers of your spirals. I find spaces of about 18-24 inches work well for this scale.
Sticky Situation
If the plaster pulls away from the wall with your tool, the mix is likely too dry. Mist the wall section lightly with water before applying, or add a tiny amount of water to your bucket.
Step 2: Applying the Texture
-
Mix the medium:
Prepare your plaster or texturing compound. It should be the consistency of thick peanut butter—pliable enough to hold a shape but stiff enough not to sag. If you are tinting the plaster itself, mix the color thoroughly now. -
Apply the first section:
Work in manageable sections, perhaps a 4×4 foot area. Load your standard trowel and apply a generous, even layer of compound to the wall. You are aiming for a thickness of roughly 1/8 to 1/4 inch. -
Smooth the bed:
Quickly run over the applied compound with a wide putty knife to ensure the depth is relatively uniform before you start sculpting. Don’t worry about being perfect; texture is the goal. -
Create the spiral tool:
If you don’t have a specialized texturing comb, cut a series of notches into a piece of stiff plastic or dense cardboard. The teeth should be about 1/4 inch wide to create those distinct ridges seen in the photo. -
Sculpt the first swirl:
Place your notched tool at the center of one of your grid intersections. Press firmly into the wet compound and rotate your arm in a smooth, continuous spiral motion, expanding outward until the circles touch the edge of your imaginary grid square. -
Continue the pattern:
Move to the adjacent grid center and repeat the motion. The key is to keep the pressure consistent so the ridges are the same height. If lines overlap slightly, it adds to the organic, hand-troweled feel. -
Blend the transitions:
Where the outer rings of different spirals meet, you can leave them colliding for a sharp look, or gently soften the intersection with a wet finger or small brush to make the transition more fluid. -
Work across the wall:
Continue applying compound and swirling, moving section by section. Keep a wet rag handy to frequently clean your tool; built-up plaster will ruin the crispness of the ridges.
Metallic Magic
For a luxurious twist, dry-brush a metallic gold or bronze glaze lightly over the very tops of the spiral ridges. It will catch the sunlight and add a glamorous shimmer.
Step 3: Finishing Touches
-
Check for errors:
Before the wall dries completely, step back and look for any unintended blobs or areas where the pattern fell flat. You can carefully re-trowel small spots while the medium is still damp. -
Let it cure:
Allow the wall to dry fully. Depending on the thickness of your application and humidity, this could take 24 to 48 hours. The plaster will lighten as it dries. -
Knock down burrs:
Once dry, lightly run a wide trowel or very fine sanding block over the surface. You aren’t trying to flatten the spirals, just knocking off any sharp peaks or jagged crumbs that would be unpleasant to touch. -
Painting (if untinted):
If you used plain white compound, now is the time to paint. Use a thick nap roller or a sprayer to get paint into all the deep grooves of the swirls. A warm beige or sand color emphasizes the shadows. -
Apply a wash (optional):
To really make those swirls pop like the image, mix a slightly darker glaze and brush it over the wall, then wipe the high points with a rag. This leaves darkness in the valleys and highlights the ridges. -
Clean up:
Remove the masking tape slowly to avoid peeling any plaster near the edges. Clean up your drop cloths and re-install outlet covers.
Enjoy the way the changing angle of the sun slowly reveals different depths of your spiraled wall throughout the day
Stippled Peaks for a Playful, Dimensional Surface
Transform a plain wall into a tactile feature with this stippled peak effect, which catches sunlight to create dynamic shadows throughout the day. This technique uses joint compound or specialized texture paint to build a rugged, dimensional surface that feels both organic and modern.
How-To Guide
Materials
- Pre-mixed joint compound or texture paint
- High-quality primer
- Large stippling brush or stomp brush
- Paint roller and tray
- Painter’s tape
- Drop cloths
- Mixing drill with paddle attachment
- Wide putty knife or trowel
- Latex wall paint (eggshell or satin finish)
- Sanding sponge (optional)
Step 1: Preparation
-
Protect the area:
Begin by completely clearing the workspace. Lay down drop cloths to cover the flooring, taping them securely at the baseboards to prevent any compound from sliding underneath. -
Clean the surface:
Wipe down the wall with a damp cloth to remove dust and grease. A clean surface ensures the heavy texture material bonds properly without peeling later. -
Apply primer:
Roll on a coat of high-quality primer. This seals the drywall and provides a uniform base, which prevents the moisture from the joint compound from soaking in too quickly. -
Tape boundaries:
Use painter’s tape to mask off adjacent walls, ceilings, and trim. This texture can get messy, and crisp lines are essential for a professional look.
Lighting Matters
Install wall-grazing lighting or position floor lamps nearby. The steep angle of light intensifies the shadows, making the texture pop dramatically.
Step 2: Applying the Compound
-
Mix the compound:
Open your bucket of joint compound. If it feels too stiff, add a very small amount of water and mix with a drill paddle until it reaches a consistency similar to thick cake batter. -
Load the roller:
Pour a generous amount of compound into a paint tray. Load a heavy-nap roller thoroughly; you want it carrying much more material than you would for standard painting. -
Roll on a heavy layer:
Apply the compound to a small section of the wall, about 3 feet by 3 feet. Roll it on thickly—aim for a layer about 1/8 to 1/4 inch thick. Don’t worry about smoothness; thickness is key here. -
Maintain a wet edge:
Ensure you don’t let the edges of your working section dry out. Work quickly enough that you can blend the next section into this one seamlessly.
Step 3: Creating the Texture
-
Prepare the stomp brush:
Take your stippling or stomp brush. Some people like to dampen the bristles slightly to prevent the compound from sticking too aggressively, though a dry brush works for sharper peaks. -
Stomp the wall:
Press the brush firmly into the wet compound and pull it straight back out. The suction created will pull the mud outward, forming the jagged, raised peaks characteristic of this style. -
Rotate your wrist:
As you move across the section, rotate the brush slightly with each stamp. This randomization prevents a repetitive grid pattern and keeps the texture looking organic. -
Adjust peak height:
If the peaks are too aggressive or sharp for your liking, you can wait a few minutes for the mud to set slightly and then gently stamp over them again to knock them down, or leave them tall for maximum drama. -
Check consistency:
Step back frequently to ensure the density of the texture is consistent across the section. You don’t want bare spots next to heavy clumps. -
Continue working:
Repeat the rolling and stomping process across the rest of the wall. Always overlap wet edges slightly to hide the seams between sections.
Peaks Slumping?
If your peaks droop immediately after stomping, your compound mix is too thin. Add more dry powder or fresh thick compound to stiffen the mixture.
Step 4: Finishing Touches
-
Allow to dry:
Let the wall dry completely. Depending on humidity and thickness, this can take anywhere from 24 to 48 hours. The compound will turn from gray to white as it dries. -
Knock down sharpness (optional):
I prefer to lightly run a wide putty knife over the dried surface just to take the razor-sharp tips off the highest peaks. This makes the wall less abrasive to the touch. -
Seal with primer:
Once fully cured, apply another coat of primer over the texture. The dried compound is very porous and will suck up paint if not sealed first. -
Paint the wall:
Finally, roll on your topcoat paint using a thick-nap roller to get into all the crevices. An eggshell or satin finish works best to highlight the shadows without being overly shiny. -
Remove tape carefully:
Score the edge of the painter’s tape with a utility knife before peeling it off to prevent the thick texture from tearing away from the wall.
Enjoy the interplay of light and shadow on your new feature wall as the sun moves across the room.
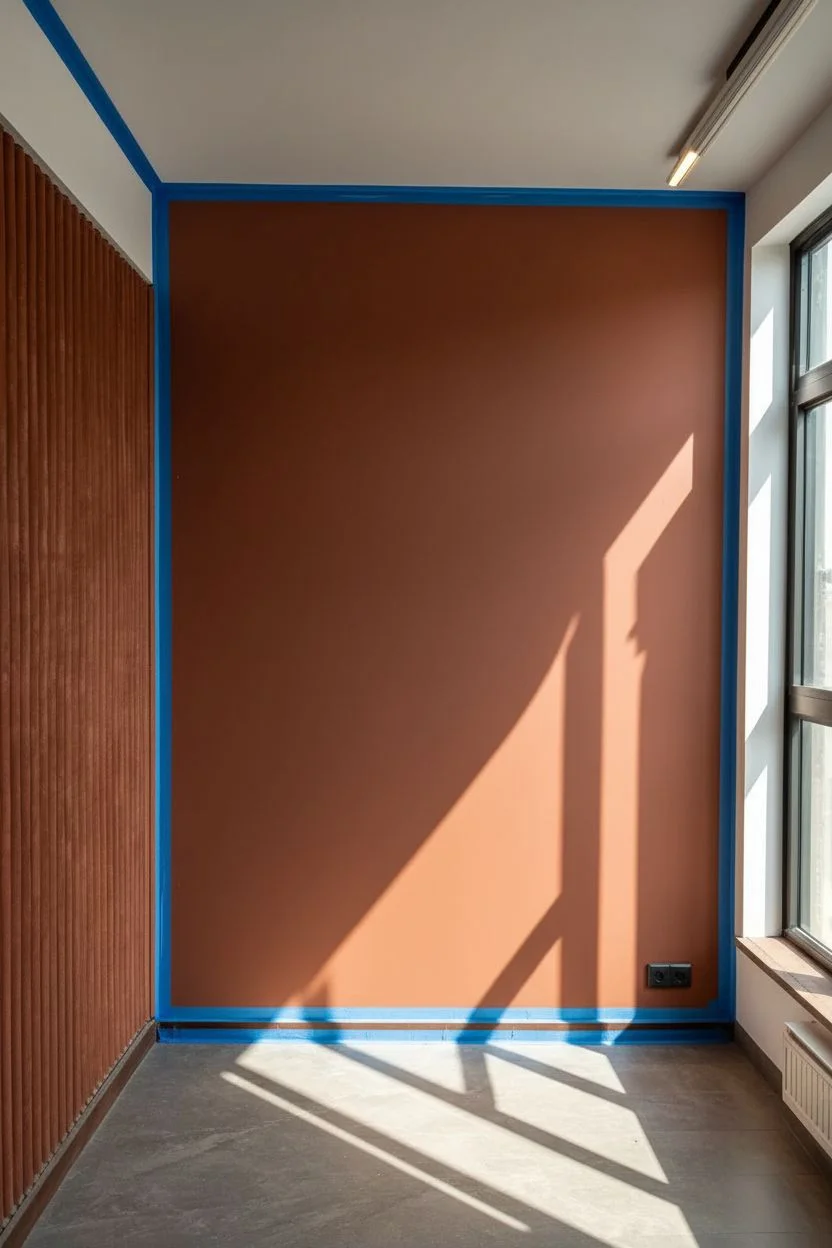
Raised Stencil Texture for Pattern You Can Feel
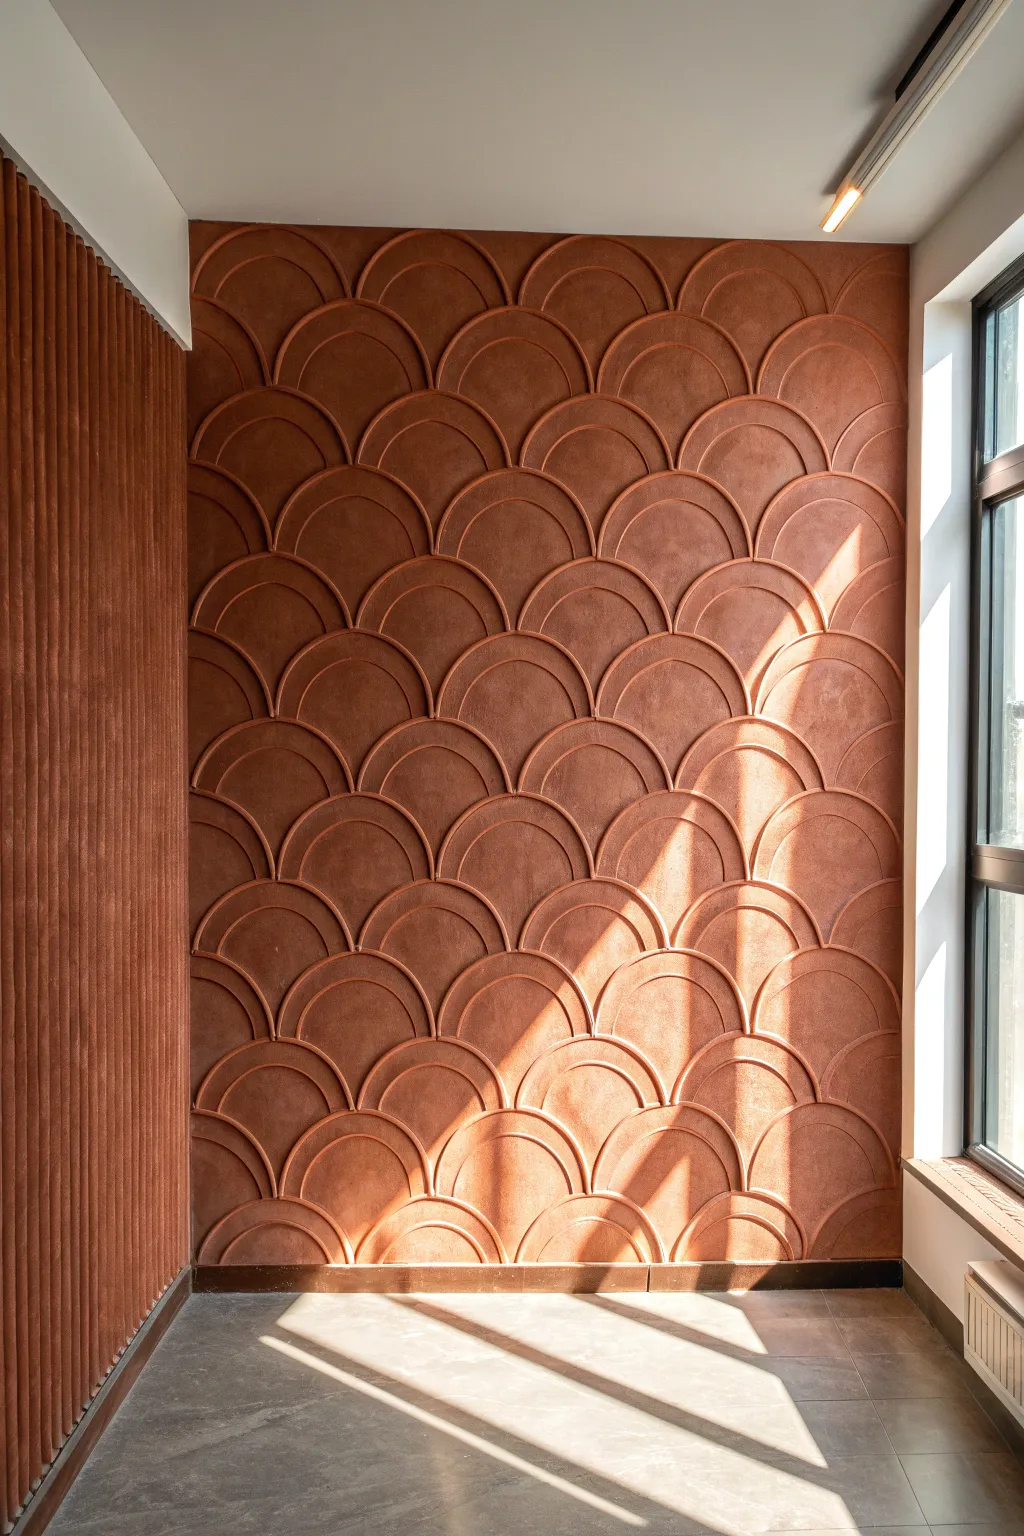
Transform a plain surface into a tactile masterpiece with this rich, relief-patterned wall technique. By combining warm earth tones with structural thickness, you create a cozy, Mediterranean-inspired scallop design that catches the light beautifully throughout the day.
Step-by-Step Tutorial
Materials
- Large-scale scallop/fish scale wall stencil (approx. 12-18 inch pattern)
- Textured wall paint or Venetian plaster (tinted to a deep rust/terracotta)
- Stucco mix or joint compound (optional, for extra thickness relative to paint)
- Large trowel
- Putty knife (4-6 inch)
- Painter’s tape
- Bubble level or laser level
- Spray adhesive (repositionable)
- Fine-grit sanding block
- Matte sealer (optional)
Step 1: Preparation
-
Clean and prep the surface:
Begin by thoroughly cleaning the wall to remove any dust or grease. If the existing wall has a high-gloss finish, scuff it lightly with sandpaper to ensure your base coat adheres properly. -
Protect the perimeter:
Use high-quality painter’s tape to mask off the ceiling line, baseboards, and adjacent walls. Pay special attention to corners, like where the featured wall meets the slatted paneling shown in the image. -
Apply the base color:
Roll on a flat coat of your terracotta-tinted paint. This ensures that any gaps in your stenciling will show the matching color rather than the white underlying wall. Let this dry completely.
Clean Stencil Hack
Keep a bucket of warm water and a scrub brush nearby. Clean the stencil every 3-4 uses to prevent drying paste from ruining the crisp lines of your next section.
Step 2: Creating the Texture
-
Mix your medium:
For that raised, stone-like look, normal paint is too thin. I like to mix joint compound with the paint until it’s a thick, peanut-butter consistency, or simply use pre-tinted Venetian plaster or modeling paste. -
Position the first stencil:
Start at the top center of the wall. Use a very light mist of spray adhesive on the back of the stencil to keep it flush against the wall. Check perfection with a level before pressing it securely. -
Load the trowel:
Scoop a generous amount of your textured mixture onto the trowel. Don’t worry about being too neat just yet; the goal is to get the material onto the stencil. -
Apply the mixture:
Swipe the mixture over the stencil using the trowel, holding it at a low angle. Apply enough pressure to fill the stencil voids completely, aiming for a thickness of about 1/16 to 1/8 of an inch. -
Smooth the surface:
Run cleanliness passes with your trowel or wide putty knife to level off the excess compound so it is flush with the stencil plastic.
Step 3: Repeating the Pattern
-
Remove the stencil:
This is the critical moment. Carefully peel the stencil straight back—not up or down—to avoid smudging the wet compound edges. Clean the stencil immediately if buildup occurs. -
Align the next section:
Most professional stencils have registration marks. Line these up over the pattern you just created to ensure the continuous flow of the scallops. Move horizontally first. -
Work in sections:
Continue applying texturing paste across the top row. Once the top row is complete, move down to the next row, using the dry edges of the previous work as your guide. -
Handle the edges:
When you reach corners or the floor, the stencil likely won’t fit perfectly. You may need to bend the flexible stencil into the corner or tape off the specific area and hand-trowel carefully. -
Let it cure:
Allow the entire wall to dry for at least 24 hours. The thick paste takes much longer to dry than standard paint.
Varied Depth
For a more rustic, handmade pottery look, vary the pressure on your trowel slightly. This creates subtle undulations in thickness that catch shadows differently.
Step 4: Finishing Touches
-
Knock down imperfections:
Once fully dry, inspect the wall for any sharp peaks or jagged edges created during the stencil removal. Gently run a fine-grit sanding block over these high spots to soften them. -
Clean up dust:
Wipe away the sanding dust with a dry microfiber cloth or a soft vacuum attachment. -
Seal the work (Optional):
If this wall is in a high-traffic area, apply a clear matte sealer using a roller. This protects the textured plaster from chipping and makes dusting easier later. -
Remove tape:
Carefully score the edge of the painter’s tape with a utility knife before pulling it off to prevent it from ripping your new textured finish.
Step back and watch how the changing daylight moves across the textured curves of your new feature wall
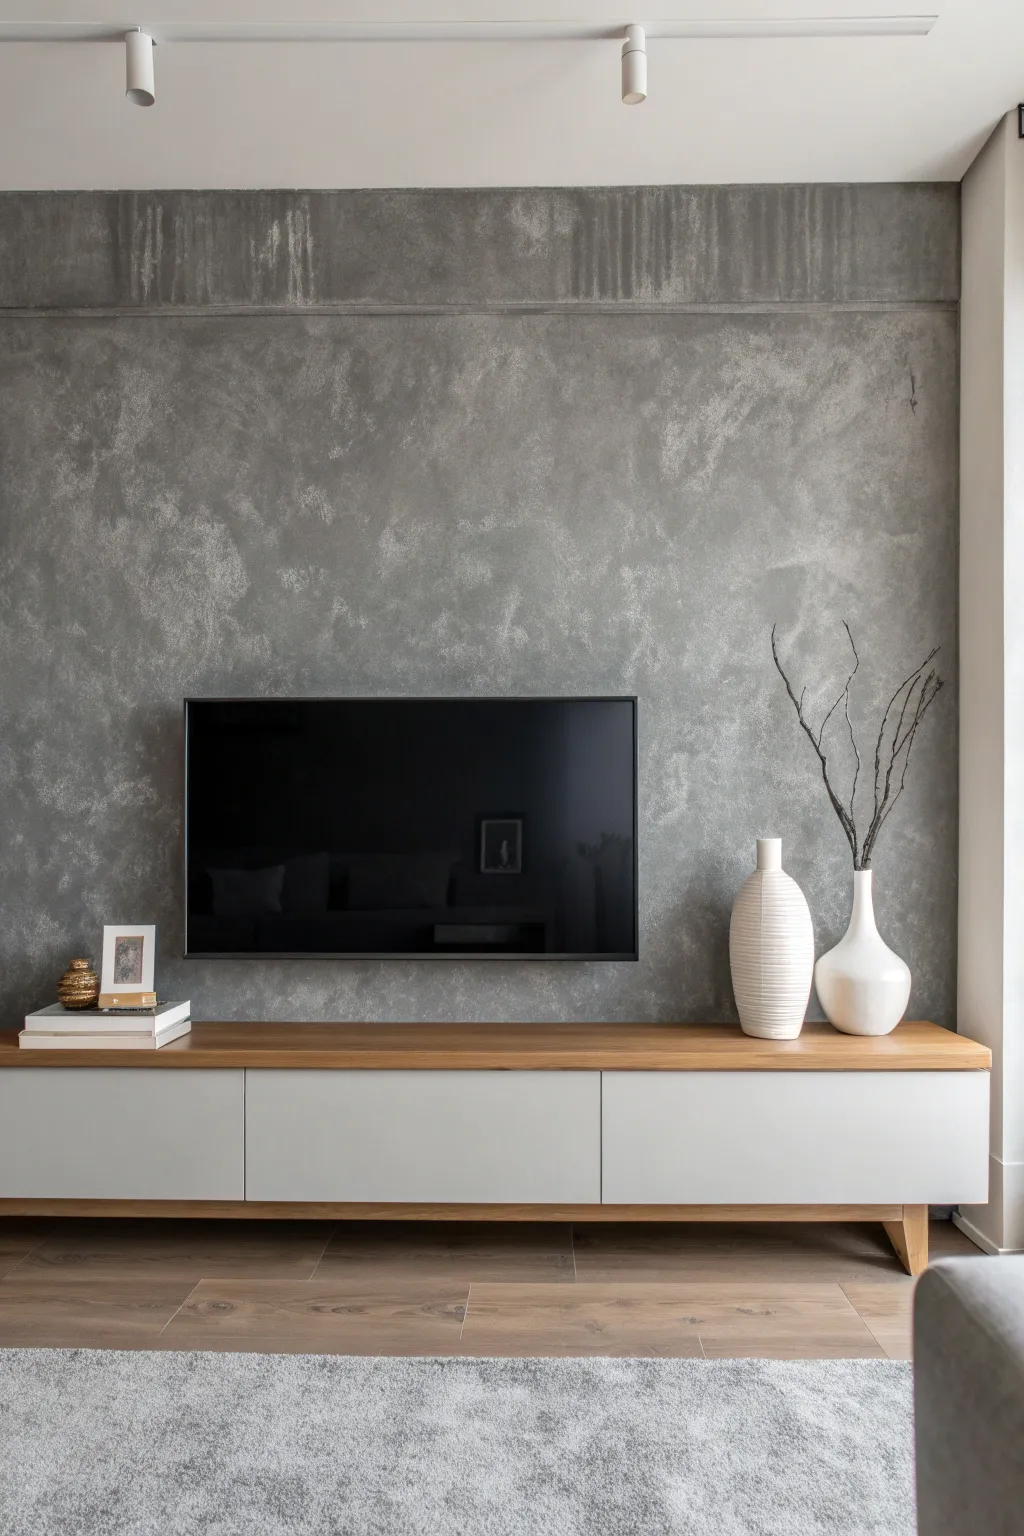
Metallic Skim Coat for Light-Catching Dimension

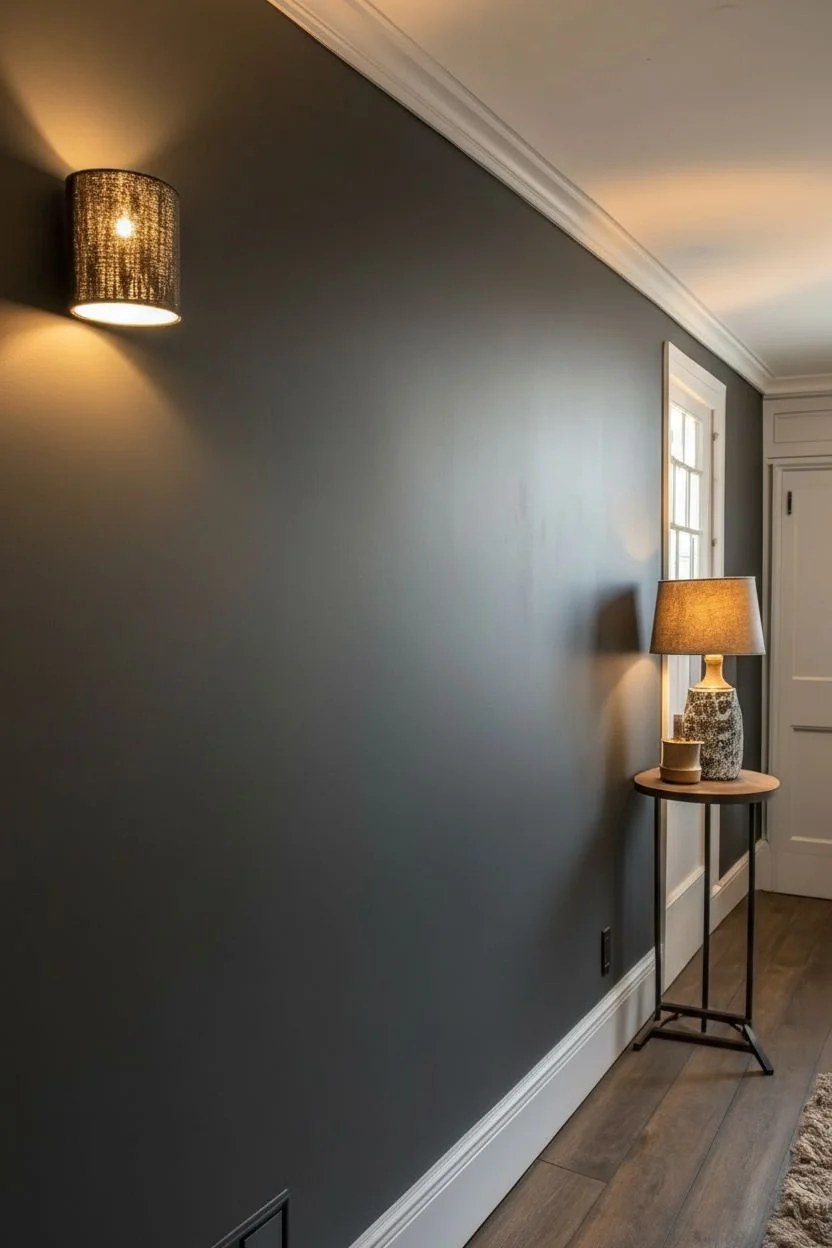
Transform a plain wall into a dramatic focal point with this dark, moody finish that mimics the look of raw slate or brushed metal. By layering texture and metallic glaze, you’ll create a surface that catches light beautifully, adding depth and dimension to any room.
How-To Guide
Materials
- Joint compound or drywall mud
- Tinted primer (dark gray or black)
- Black latex paint (eggshell or satin)
- Metallic glaze (silver or pewter)
- Wide drywall knife (6-10 inch)
- Trowel
- Painter’s tape
- Drop cloths
- Paint roller and tray
- Sanding sponge (medium grit)
- Mixing bucket with drill attachment (optional)
Step 1: Preparation and Base Coat
-
Prep the Area:
Begin by clearing furniture away from the wall and laying down drop cloths. Mask off baseboards, ceiling edges, and adjacent walls with painter’s tape to protect them from splatters. -
Clean the Surface:
Wipe down the wall to remove dust or grease. Ensure any existing holes or cracks are patched and sanded smooth before you start applying new layers. -
Apply Tinted Primer:
Roll on a coat of dark gray or black tinted primer. This dark base is crucial because it ensures no white wall will peek through the texture later, deepening the final effect. -
Let it Dry:
Allow the primer to dry completely according to the manufacturer’s instructions, usually about 2-4 hours.
Step 2: Building the Texture
-
Prepare the Compound:
Scoop your joint compound into a bucket. If you want the base texture to be dark throughout, mix in a small amount of black latex paint directly into the mud now, stirring until uniform. -
Apply the First Pass:
Load your trowel or wide drywall knife with a generous amount of compound. Apply it to the wall in random, crisscrossing strokes. Don’t aim for smooth; the goal is creating ridges. -
Create Ridges:
Using the edge of the trowel, lift away from the wall slightly as you sweep across, pulling the mud to create distinct high points and valleys. Vary the direction of your strokes—vertical, diagonal, and curved—to mimic natural stone. -
Work in Sections:
T tackle the wall in manageable 3×3 foot sections. This prevents the compound from drying out before you’ve achieved the desired texture. -
Knock Down (Optional):
If some peaks look too aggressive, wait about 15-20 minutes for the mud to set slightly, then gently glide a clean trowel over the surface to flatten just the highest tips. -
Full Cure:
Let the textured wall dry completely. Since the mud is thick, I recommend leaving it for at least 24 hours to ensure it is hard and ready for paint.
Don’t Overwork It
Resist the urge to smooth the texture too much. The rougher and more chaotic the mud application, the more dramatic the metallic highlights will look later.
Step 3: Painting and Glazing
-
Apply Base Color:
Once the texture is dry, use a thick-nap roller to apply your black latex paint. Press firmly to work the paint into all the crevices and valleys of the texture. -
Check for Gaps:
Inspect the wall from different angles. Use a brush to dab paint into any deep pockets the roller might have missed. Let this coat dry fully. -
Prepare the Glaze:
Pour a small amount of metallic glaze into a tray. If the glaze is very thick, thin it slightly with water or a glazing liquid to make it more translucent. -
Dry Brush Technique:
Dip just the tip of a wide, dry brush into the metallic glaze. Offload most of the paint onto cardboard or a rag until the brush is almost clean. -
Highlight the Texture:
Lightly drag the brush over the raised ridges of the wall. Keep the brush flat and use practically no pressure—you only want the metallic shimmer to catch the high points, leaving the valleys dark. -
Blend and Soften:
If you apply too much glaze in one spot, use a clean, damp rag to gently blot it before it dries. Continue this process until the entire wall has a uniform, shimmering dimension. -
Final Inspection:
Step back and view the wall with the lights on. Add tiny touches of glaze to any dull areas to ensure the light catches the texture evenly across the surface.
Bronze or Copper Twist
Swap the silver glaze for a copper or bronze metallic paint to give the wall a warmer, rusted industrial vibe instead of the cool slate look seen here.
Enjoy the sophisticated atmosphere your new feature wall brings to the space
Textured Ombre Wall for an Artsy Fade With Depth
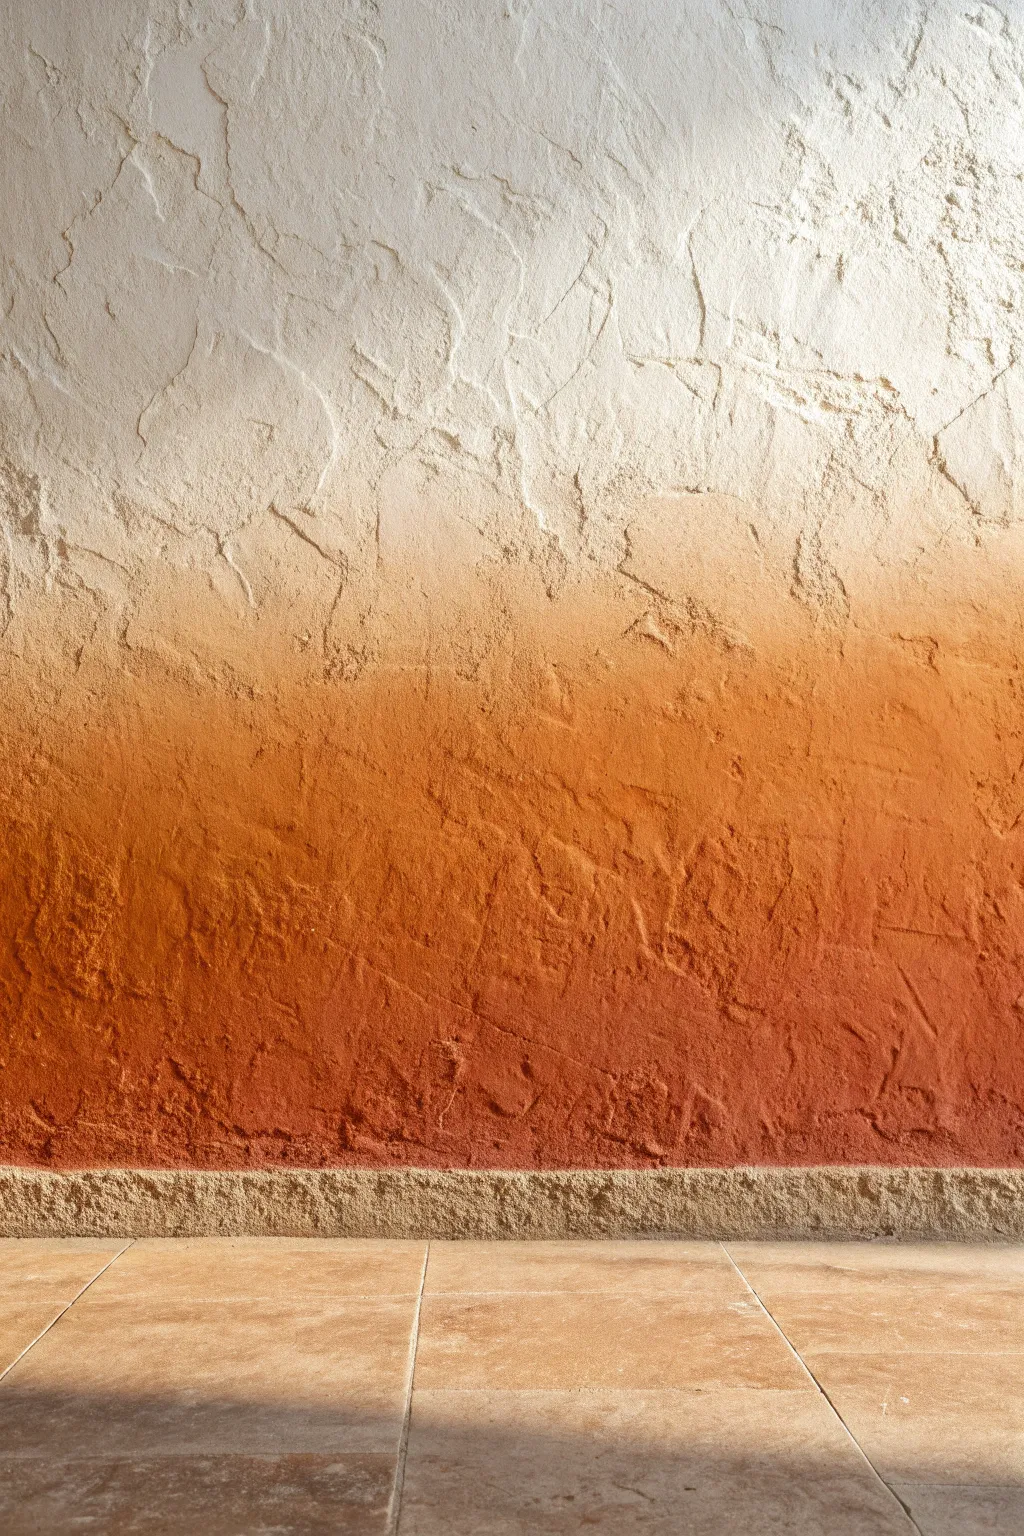
Transform a plain surface into a warm, Mediterranean-inspired feature with this textured ombré technique. By blending deep terracotta into creamy white using a specialized plaster application, you achieve an organic, aged look that adds instant depth and history to any room.
Detailed Instructions
Materials
- Joint compound or texture medium (pre-mixed)
- Latex paint (Deep Rust/Terracotta)
- Latex paint (Cream/Off-White)
- Large drywall trowel or Venetian plaster trowel
- 4-inch putty knife
- Large mixing bucket
- Paint tray and liners
- Wide paintbrush (chip brush style)
- Drop cloths and painter’s tape
- Spray bottle with water
- Sanding sponge (medium grit)
Step 1: Preparation and Base Texture
-
Protect the area:
Begin by thoroughly taping off your baseboards, ceiling line, and adjacent walls. Lay down heavy-duty drop cloths, as dropping texture paste is inevitable. -
Prime the wall:
Apply a coat of primer to your wall if it is currently painted with a glossy finish. This ensures the heavy texture mud adheres properly without sliding. -
Apply base texture:
Scoop a generous amount of plain joint compound onto your large trowel. Spread it onto the wall in random, sweeping arcs. Don’t aim for smoothness; the goal is to create peaks, valleys, and ridges. -
Refine the ridges:
Using the putty knife, press into the wet compound and pull away sharply to create lifted ‘stucco’ textures. Knock down any overly sharp points by lightly skimming the trowel over them. -
Let it cure:
Allow this base texture layer to dry completely, typically for 24 hours. It must be rock hard before you start painting.
Step 2: Creating the Color Gradient
-
Mix your colored glazes:
In separate containers, dilute your rust paint and cream paint with water (about a 70% paint to 30% water ratio). This thinner consistency helps the pigment settle into the texture. -
Establish the horizon line:
Visualize where you want the color shift to happen—usually about waist height. Lightly mark this mental line; it doesn’t need to be straight. -
Paint the bottom section:
Dip your wide brush into the rust paint mixture. Work form the bottom up, aggressively pushing the paint into all the crevices and texture pits. -
Paint the top section:
Using a clean brush, apply the cream paint mixture from the ceiling down, stopping about 12 inches above your rust section. -
Bridge the gap:
In the middle ‘transition zone,’ apply the cream paint, bringing it down to meet the wet rust paint. -
Blend the colors:
While both paints are still wet in the middle, use a damp, clean brush to cross-hatch back and forth. Drag some rust color up and some cream color down to create a soft fade. -
Mist and soften:
If the paint starts to dry too quickly while blending, mist the wall lightly with your spray bottle to reactivate the latex and extend your working time.
Uneven Blending?
If the gradient looks stripey, use a natural sea sponge. Dampen it and dab along the transition line while the paint is wet to break up hard edges and create an organic blur.
Step 3: Finishing Touches
-
Dry brush highlights:
Once the base coat is dry, dip the very tip of a dry brush into undiluted cream paint. Lightly skim it over the raised texture of the rust section to highlight the ridges. -
Check for holidays:
Inspect the wall for ‘holidays’ (missed spots) deep in the texture. Dab a small amount of watered-down paint into any glaring white spots in the dark section. -
Optional sanding:
I like to gently run a sanding sponge over the transition area if the brush strokes look too distinct. This distresses the finish and merges the layers further. -
Seal the surface:
For high-traffic areas, roll on a clear matte polycrylic sealer to protect the texture from chipping and make it wipeable. -
Clean up:
Remove the painter’s tape slowly at a 45-degree angle to ensure a crisp edge along the baseboards and ceiling.
Add Metallic Age
Mix a tiny amount of copper or bronze metallic glaze into your rust paint for the bottom third. It catches the light on the texture peaks and adds a luxurious glow.
Step back and enjoy the incredible warmth and sophisticated depth your new textured wall brings to the space
Sculpted Geometric Relief Using Paintable Compound
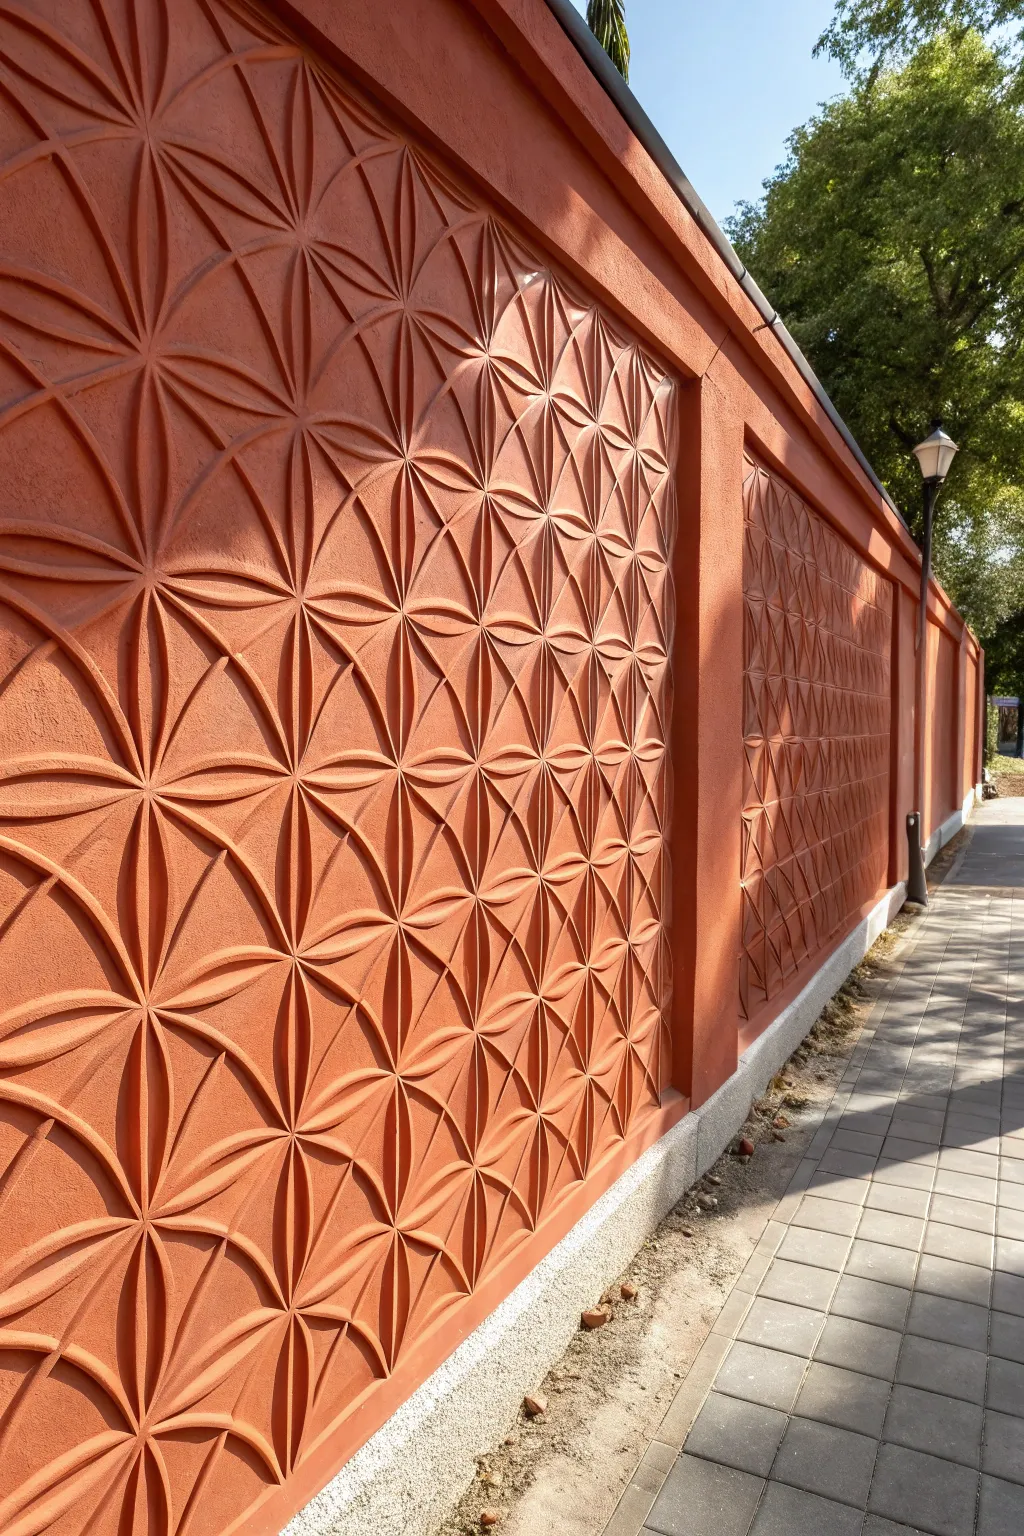

Transform a plain exterior or interior wall into a striking architectural feature with this deep-relief geometric pattern. Using a weather-resistant sculpting compound and a custom stencil technique, you can create a repeating flower-of-life design that mimics traditional carved terracotta.
How-To Guide
Materials
- High-density foam sheet or plywood (for making the stencil)
- Jigsaw or precision hot knife
- Construction adhesive or repositionable spray adhesive
- Exterior-grade heavy-texture compound or sand-finish stucco (pre-colored terracotta)
- Masonry primer (tinted terracotta)
- Wide finishing trowel (12-inch)
- Large damp sponge
- Sculpting loop tool or palette knife
- Masking tape
- Level and chalk line
- Drop cloths
- Measuring tape
Step 1: Design and Template Preparation
-
Choose your scale:
Determine the size of your geometric ‘flowers.’ For a large garden wall like the one shown, a diameter of 12-16 inches per circle works best to ensure the pattern is visible from a distance. -
Create the master stencil:
Draw the repeating geometric pattern onto a sheet of high-density foam or plywood. The pattern consists of overlapping circles where the center of each circle is on the circumference of six surrounding circles. -
Cut the positive shape:
Carefully cut out the ‘petals’ and interstitial spaces using a jigsaw or hot knife. You want a thick stencil (at least 1/2 inch) to create significant depth for the relief. -
Verify the repeat:
Before committing to the wall, test your stencil on a scrap board to ensure the pattern repeats seamlessly when shifted left, right, up, or down.
Clean Release Trick
Spray the edges of your stencil with a silicone lubricant or cooking spray before placing it on the wall. The sticky compound will release much cleaner, giving you sharper lines.
Step 2: Surface Preparation
-
Clean the substrate:
Pressure wash the wall to remove dirt, moss, or loose paint. Let it dry completely for at least 24 hours. -
Prime the surface:
Apply a coat of high-quality masonry primer. I recommend having this tinted to match your final stucco color so any holidays or missed spots blend in later. -
Establish guidelines:
Use a chalk line and level to snap a horizontal baseline and a vertical centerline. This grid is critical for keeping your geometric pattern perfectly upright.
Step 3: Sculpting the Relief
-
Position the stencil:
Align your stencil with the grid lines. Use a light spray of repositionable adhesive or strong tape to hold it firmly against the wall. -
Fill the stencil:
Load your wide finishing trowel with the heavy-texture compound. Press it firmly into the stencil openings, ensuring you fill them completely flush with the stencil face. -
Initial smoothing:
Screed off the excess compound so the surface is flat and even with the stencil thickness. -
Remove stencil carefully:
Pull the stencil straight out, perpendicular to the wall, to avoid smudging the defined edges. Clean the stencil immediately with water. -
Refine the edges:
While the compound is still damp but firming up, use a sculpting loop tool or a wet palette knife to sharpen the points of the petals and clean up any bleed-under. -
Repeat the process:
Move the stencil to the adjacent position, aligning it with the previously applied pattern. Continue this process across the entire wall section.
Slumping Issues?
If the relief sags after removing the stencil, your mix is too wet or applied too thick. Add a thickening agent or apply in two slightly thinner layers.
Step 4: Detailing and Finishing
-
Create the ‘spine’ details:
Once the main relief shapes are applied, use a smaller tool to hand-carve shallow grooves down the center of each petal if you want that specific ridged look shown in the inspiration photo. -
Texture blending:
Take a large damp sponge and gently stipple the surface of the relief. This knocks down unnatural trowel marks and gives it a unified, stone-like texture. -
Cure time:
Allow the relief work to cure based on the product instructions, usually 24 to 48 hours for thick applications. -
Final color coat (optional):
If your compound wasn’t pre-colored, or if you want a uniform finish, apply a final coat of high-quality exterior masonry paint in a matte terracotta shade using a thick-nap roller or sprayer.
With the texture dry and the sun hitting the wall, the shadows will bring your geometric masterpiece to life


Have a question or want to share your own experience? I'd love to hear from you in the comments below!