Pink pumpkins are my favorite way to flip fall decor into something softer, cuter, and way more you. If you’re craving pink pumpkin ideas that feel artsy (not fussy), this list is basically a little studio chat in article form.
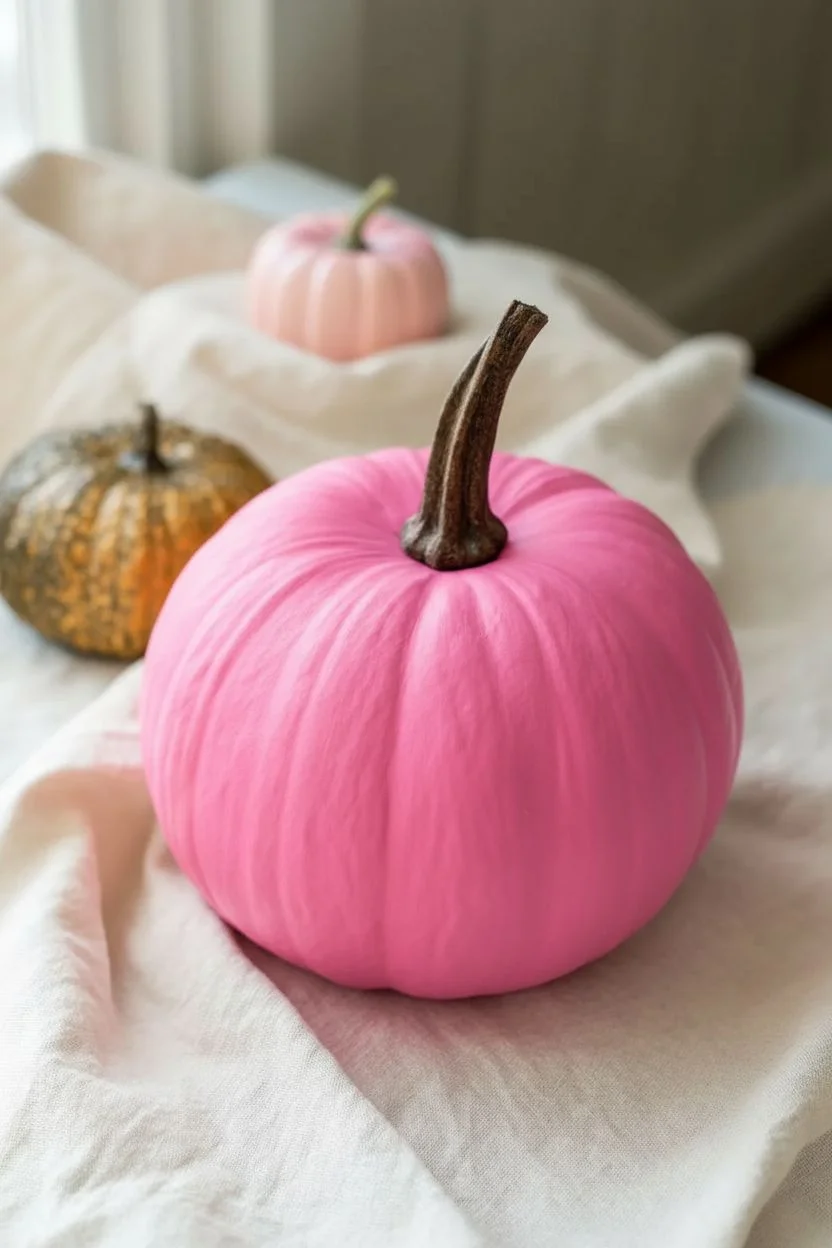
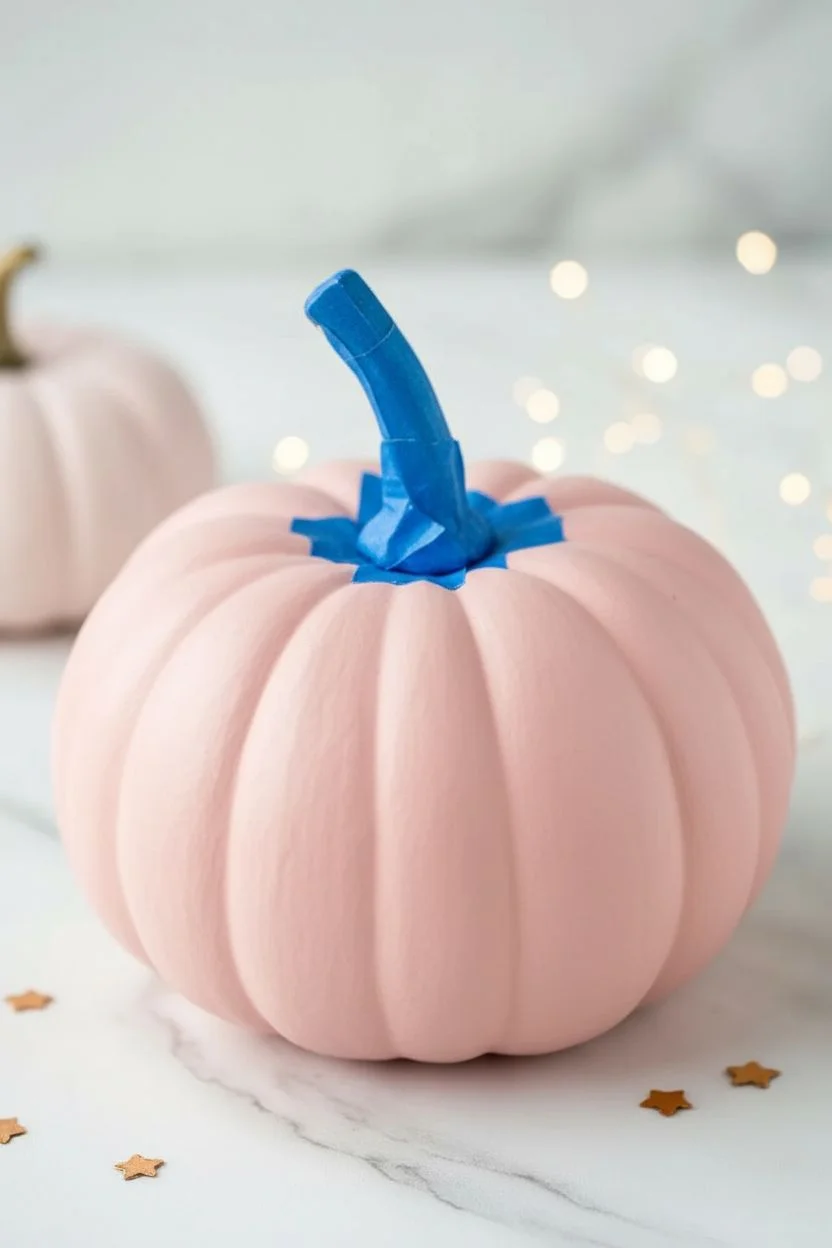
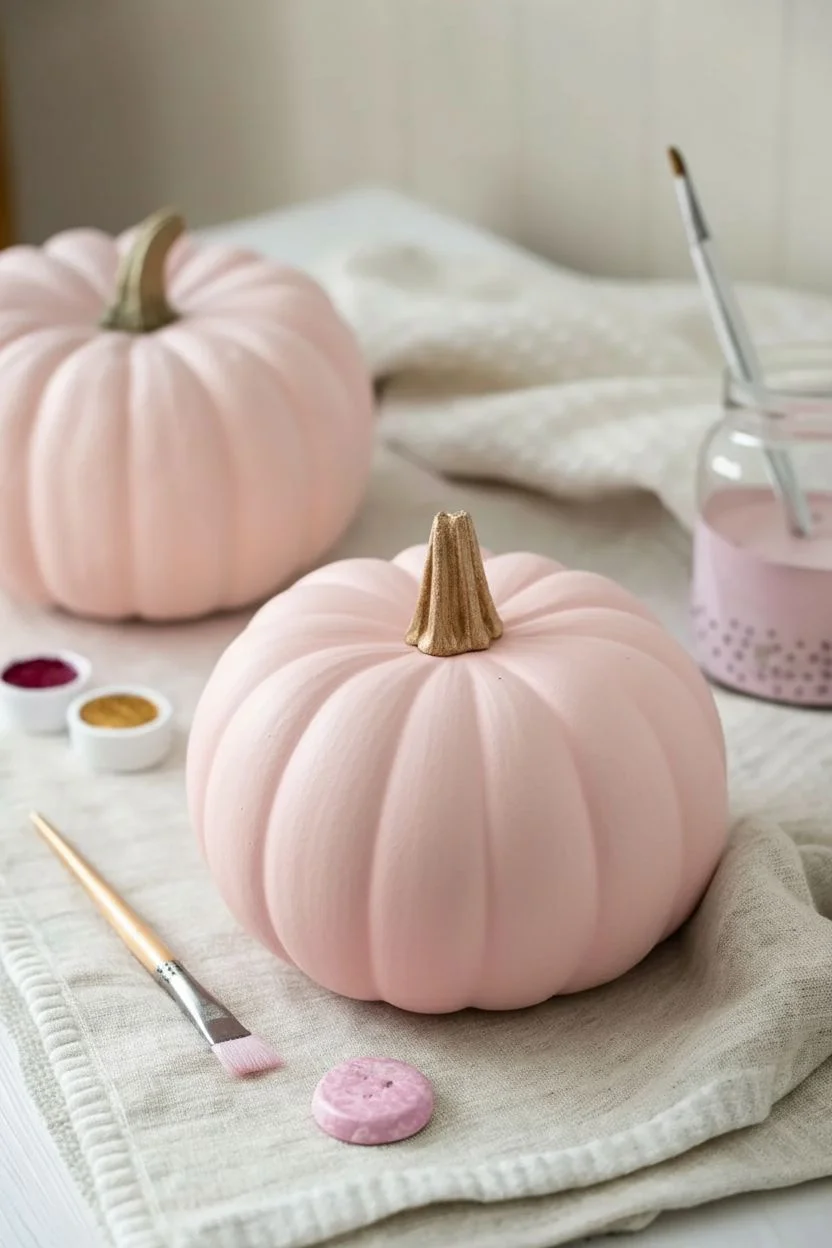
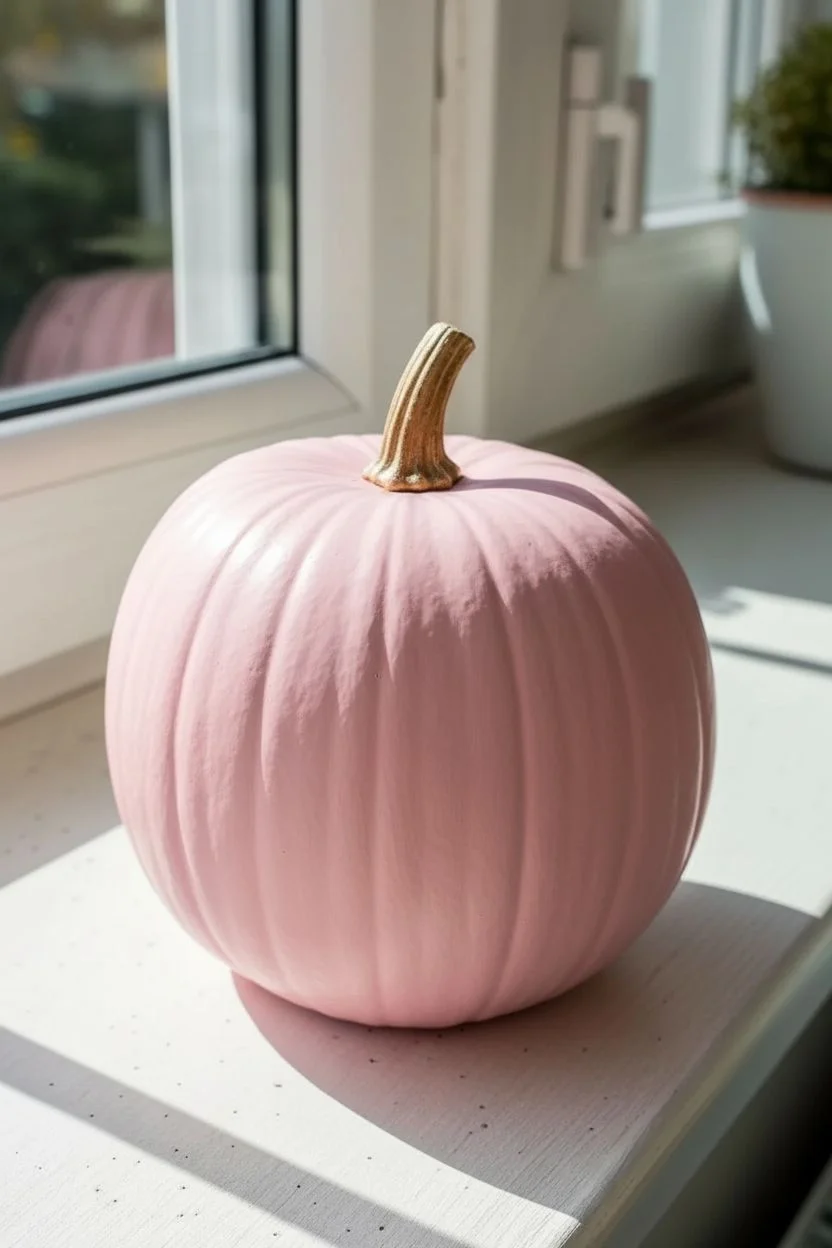
Classic Blush Pink Pumpkins With Gold Stems
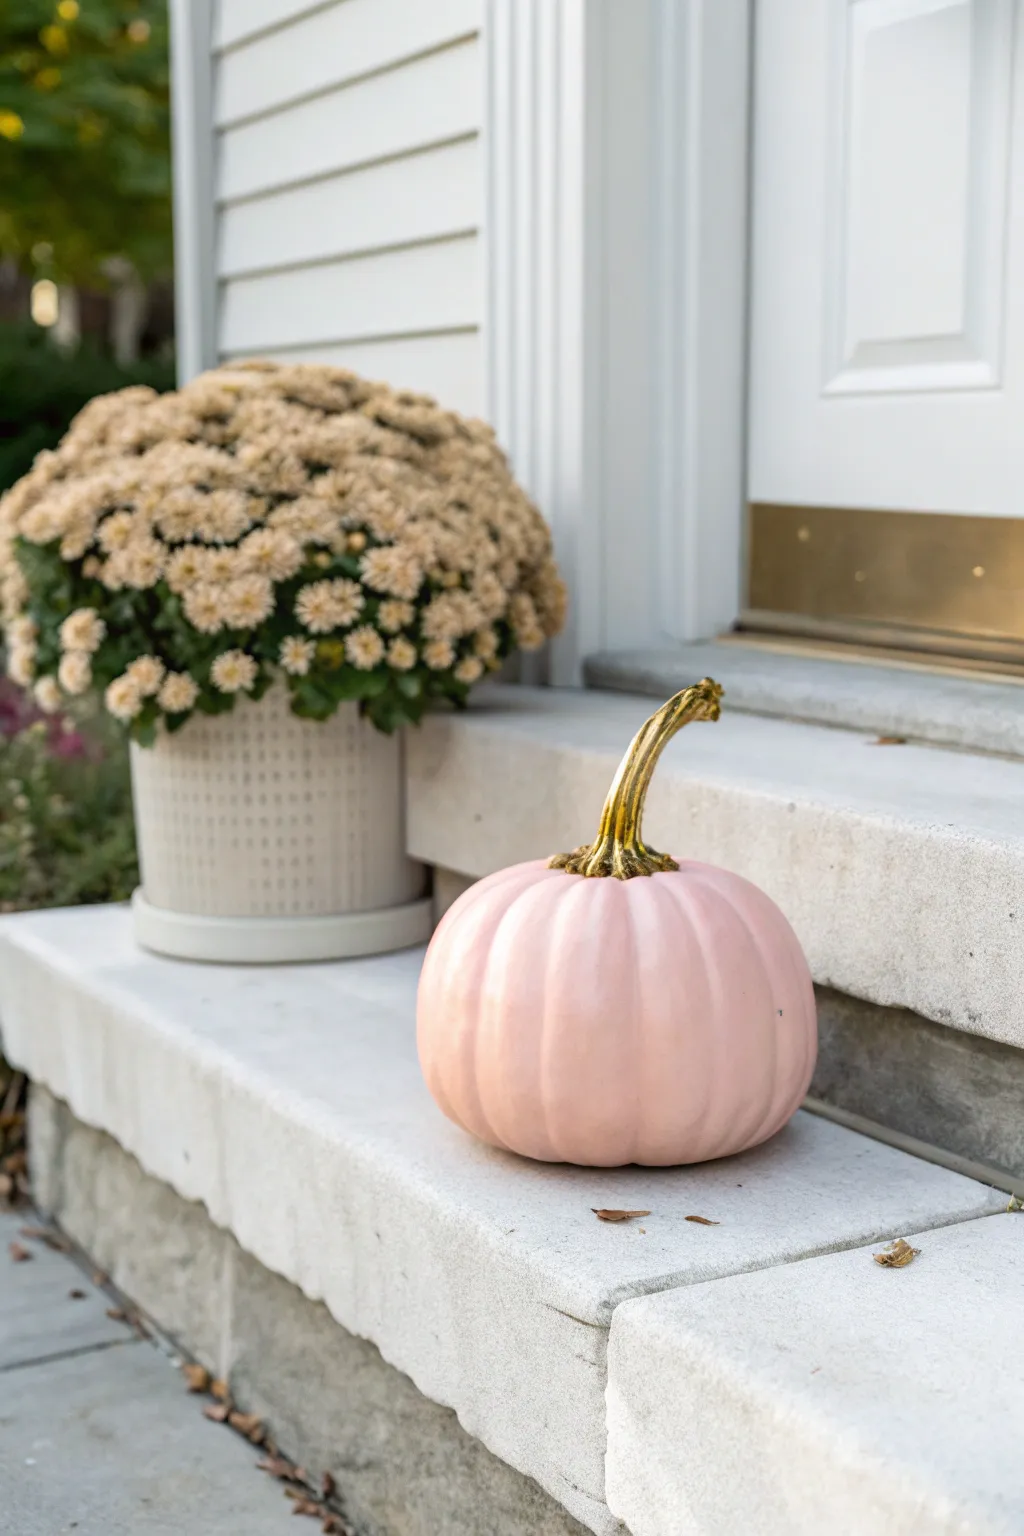
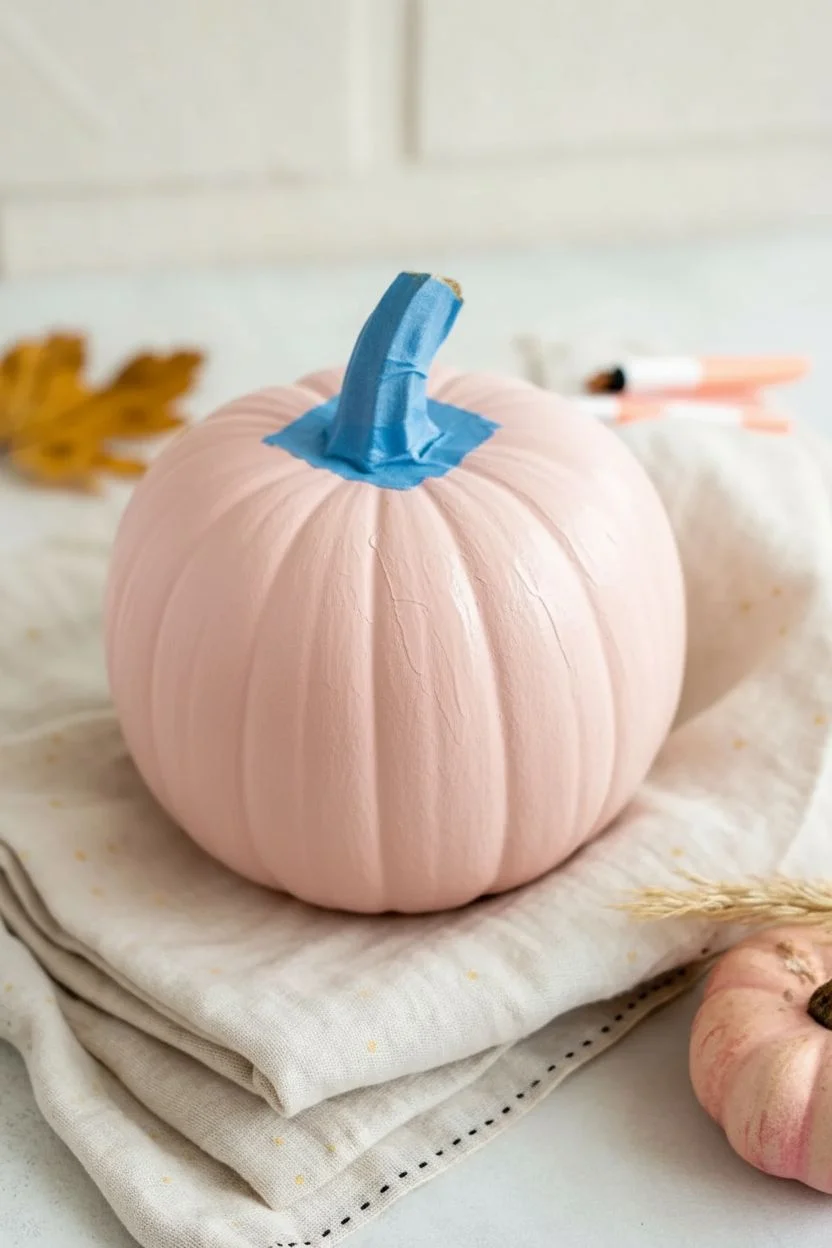
Transform a standard orange pumpkin into a sophisticated piece of porch décor with this elegant makeover. The soft blush pink body paired with a striking metallic gold stem creates a chic, modern look perfect for fall.
Step-by-Step
Materials
- Medium-sized pumpkin (real or faux)
- White primer spray paint
- Blush pink acrylic craft paint (matte or satin finish)
- Metallic gold liquid leaf or acrylic paint
- Glossy clear sealant spray (optional)
- Medium flat paintbrush
- Small detail paintbrush
- Painter’s tape
- Damp cloth
- Newspaper or drop cloth
Step 1: Preparation & Priming
-
Clean surface:
Begin by wiping down your pumpkin thoroughly with a damp cloth to remove any dirt or oils. -
Dry completely:
Let the pumpkin air dry fully before applying any paint to ensure proper adhesion. -
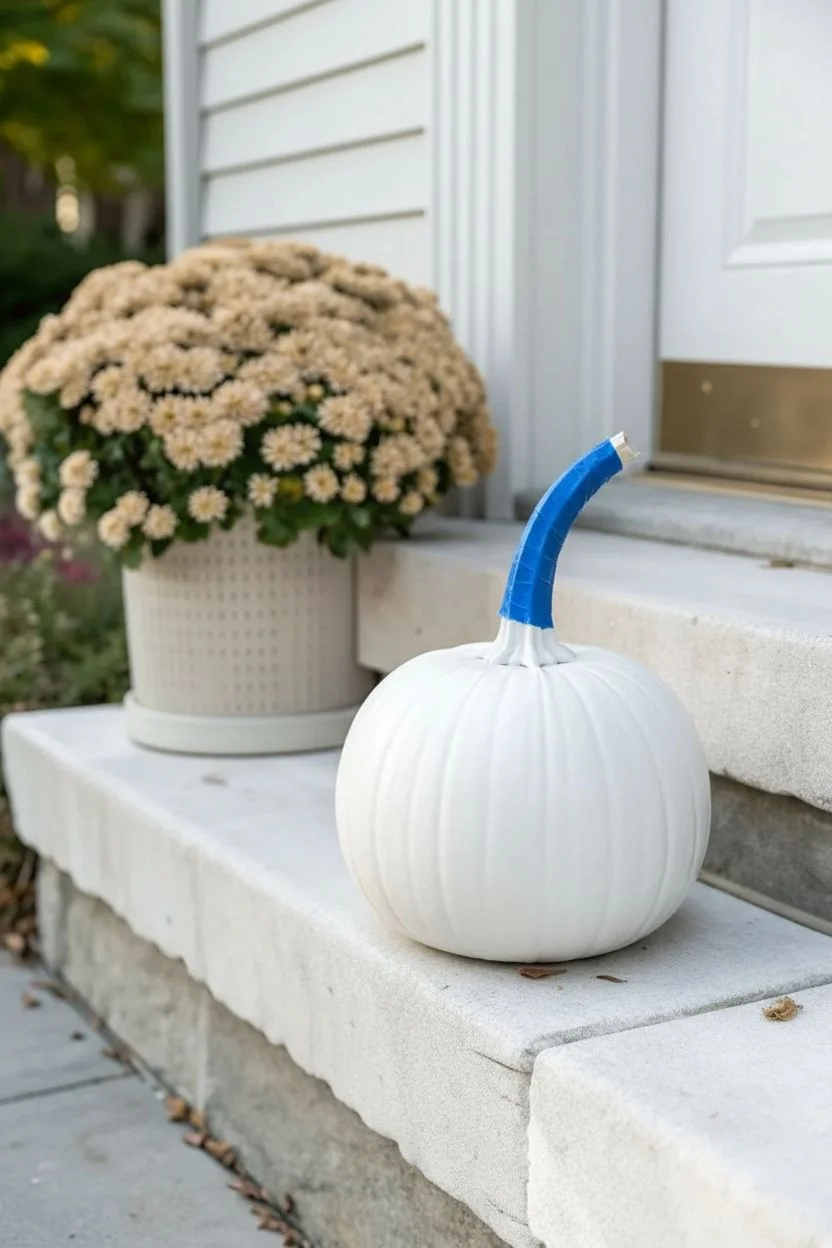
Protect the stem:
Wrap the entire stem carefully with painter’s tape to keep it free from the base coat sprays. -
Set up workspace:
Lay down newspaper or a drop cloth in a well-ventilated area to catch overspray. -
Apply primer:
Spray a light, even coat of white primer over the entire body of the pumpkin. This helps the pink color pop and cover the orange. -
Dry and repeat:
Allow the primer to dry for about 30 minutes. If the orange is still showing through, apply a second coat and let dry.
Step 2: Painting the Body
-
First pink coat:
Using a medium flat brush, apply your blush pink acrylic paint in vertical strokes, following the pumpkin’s natural ribs. -
Smooth the grooves:
Pay special attention to the deep grooves, ensuring paint gets into crevices without pooling. -
Allow to dry:
Let this first coat dry to the touch, which usually takes about an hour depending on humidity. -
Second coat:
Apply a second layer of pink paint for a solid, opaque finish. I like to lightly feather out brushstrokes to keep the finish smooth. -
Final dry time:
Let the pink paint cure completely, ideally for a few hours or overnight.
Liquid Gold Tip
For the brightest shine, use ‘liquid leaf’ instead of standard acrylic gold paint. It creates a stunning, believable metal finish.
Step 3: Gold Stem Detailing
-
Remove tape:
Carefully peel off the painter’s tape from the stem once the body is fully dry. -
Base of the stem:
Using a small detail brush, carefully paint the base of the stem where it meets the pumpkin with metallic gold paint. -
Create a clean line:
Take your time around the base to create a crisp line or a slightly organic edge where the gold meets the pink. -
Paint the stem length:
Brush the gold paint up the length of the stem, covering all nooks and crannies of the texture. -
Tip touch-up:
Don’t forget to dab gold paint expressly on the cut top or tip of the stem for a finished look. -
Double check coverage:
Inspect the stem from different angles and touch up any spots that look thin. -
Seal (optional):
If this pumpkin will live outside, mist the entire project with a clear sealant spray for weather protection.
Streaky Paint?
If brushstrokes are visible in the pink paint, try using a foam pouncer instead of a brush for the final coat to achieve an eggshell texture.
Now you have a stunning custom decoration ready to welcome guests perfectly.


Hot Pink Statement Pumpkin With High-Contrast Details
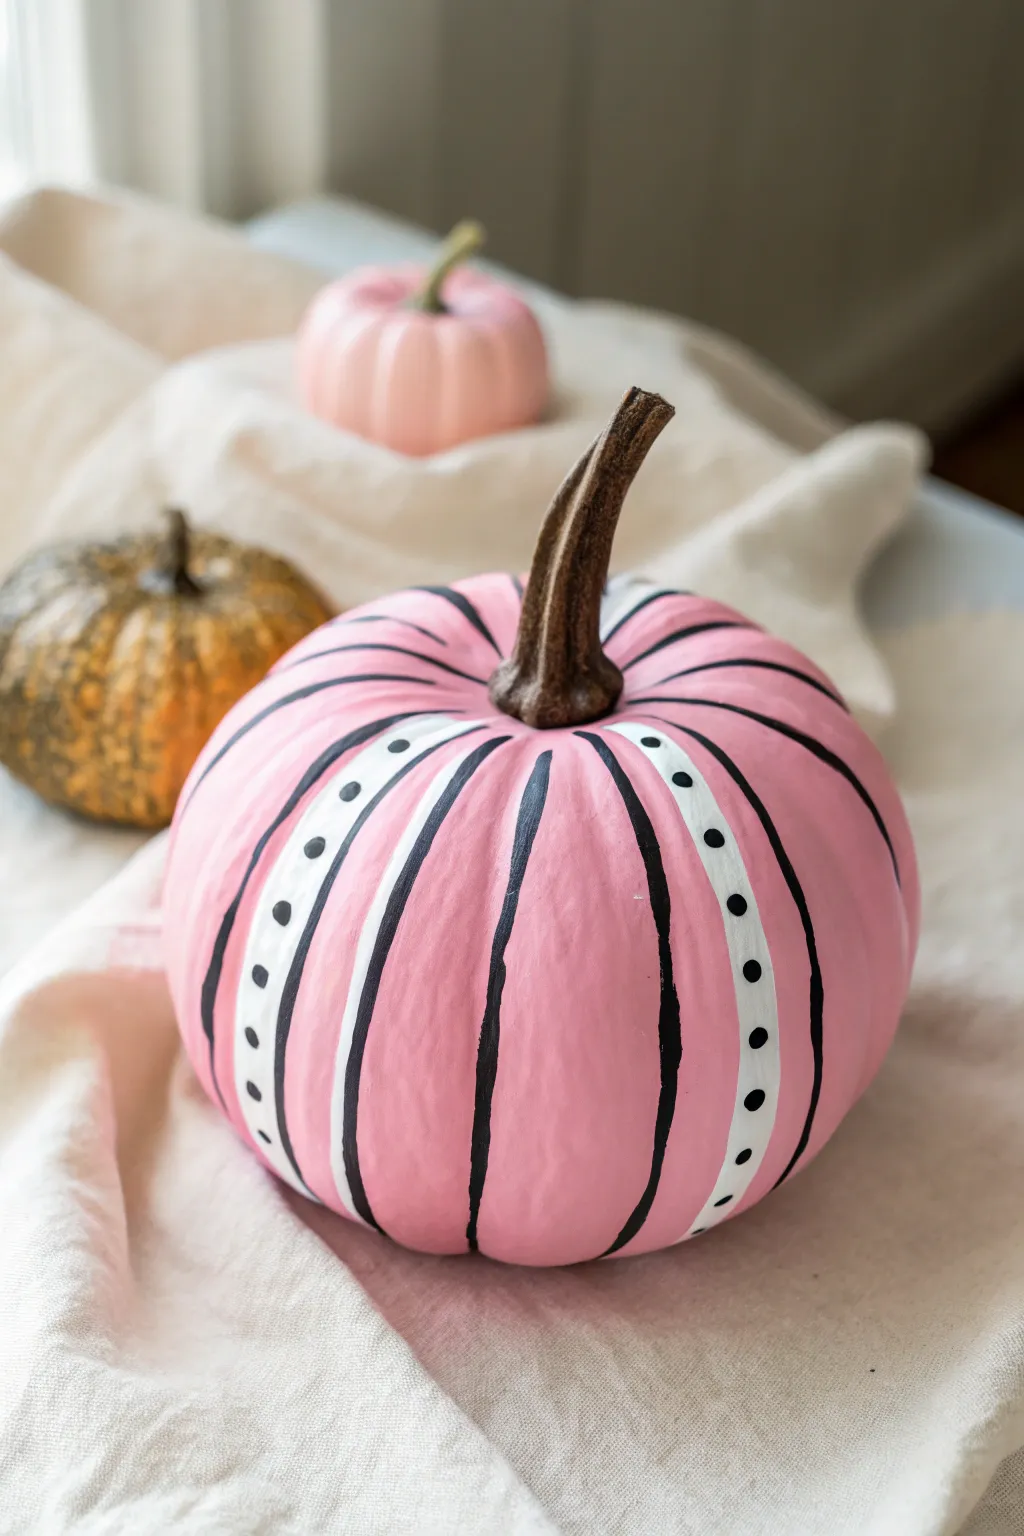
Bring a bold pop of color to your fall decor with this playful hot pink pumpkin, featuring high-contrast black and white details. The combination of painted segments, bold dividing lines, and charming polka dots creates a modern, artistic look that stands out amongst traditional orange gourds.
Detailed Instructions
Materials
- Medium-sized pumpkin (real or faux)
- Hot pink acrylic paint (matte finish)
- White acrylic paint
- Black acrylic paint
- Medium flat paintbrush (approx. 1/2 inch)
- Small round detail brush (size 2 or 4)
- Clean cloth or paper towel
- Palette or small dishes for paint
- Cup of water for rinsing
- Newspaper or drop cloth
Step 1: Base Coat & Preparation
-
Clean surface:
Begin by wiping down your pumpkin with a damp cloth to remove any dirt, dust, or oils. If you are using a real pumpkin, dry it thoroughly to ensure the paint adheres properly. -
Stem protection:
If you want to keep the stem natural, carefully tape around the base of the stem with painter’s tape, or simply be very mindful when painting near the top. -
First pink coat:
Squeeze your hot pink acrylic paint onto the palette. Using the medium flat brush, apply a generous first coat over the entire pumpkin surface. -
Let dry:
Allow the first layer of pink to dry completely to the touch, usually about 20-30 minutes depending on your paint thickness. -
Double check coverage:
Apply a second coat of pink paint to ensure an opaque, vibrant finish where no orange (or the original pumpkin color) shows through. Let this dry fully.
Uneven Dots?
If your paintbrush handle makes uneven dots, try using a Q-tip with the cotton pulled off or the head of a small nail for more precise circles.
Step 2: Adding the Stripes
-
Identify segments:
Look at the natural ridges and grooves of your pumpkin. You will be using these natural segments as guides for your design. -
Paint white sections:
Choose alternating ridges to paint white. I suggest skipping one or two pink ridges between each white stripe to keep the pink as the dominant color. Use your flat brush to paint a white stripe down the center of selected ridges. -
Refine white opacity:
White paint over pink can sometimes look streaky. Once the first white layer is dry, apply a second coat to make the white sections crisp and bright. -
Outline the grooves:
Switch to your small round detail brush and dip it into black acrylic paint. Carefully paint a thin line down the deepest part of every vertical groove on the pumpkin. -
Define the white stripes:
While you have the black paint and small brush, paint a thin outline along the left and right edges of your white stripes to separate them clearly from the pink background.
Use Nature’s Guide
Don’t stress about painting straight lines. Follow the pumpkin’s natural valleys for your black stripes; the organic curve makes the design look better.
Step 3: Polka Dots & Details
-
Prepare for dots:
Ensure your black outlines and white stripes are dry to avoid smudging your work as you handle the pumpkin. -
Start dotting:
Dip the handle end of a paintbrush or a small dotting tool into the black paint. This gives you a perfect circle every time without intricate brushwork. -
Apply dots vertically:
Press the paint-dipped handle onto the center of your white stripes. Start at the top near the stem and work your way down to the base. -
Keep consistent spacing:
Try to keep the space between each black dot relatively equal, roughly half an inch apart, though a little variation adds to the hand-painted charm. -
Clean edges:
Check the bottom of the pumpkin where the stripes end. If they look ragged, use a little pink paint to tidy up the bottom rim for a polished look. -
Touch up stems:
If any stray paint got onto the stem, you can gently wipe it off with a damp cloth or paint over it with a dark brown to blend it back in.
Place your new vibrant pumpkin on a mantle or table runner to instantly brighten your autumn display


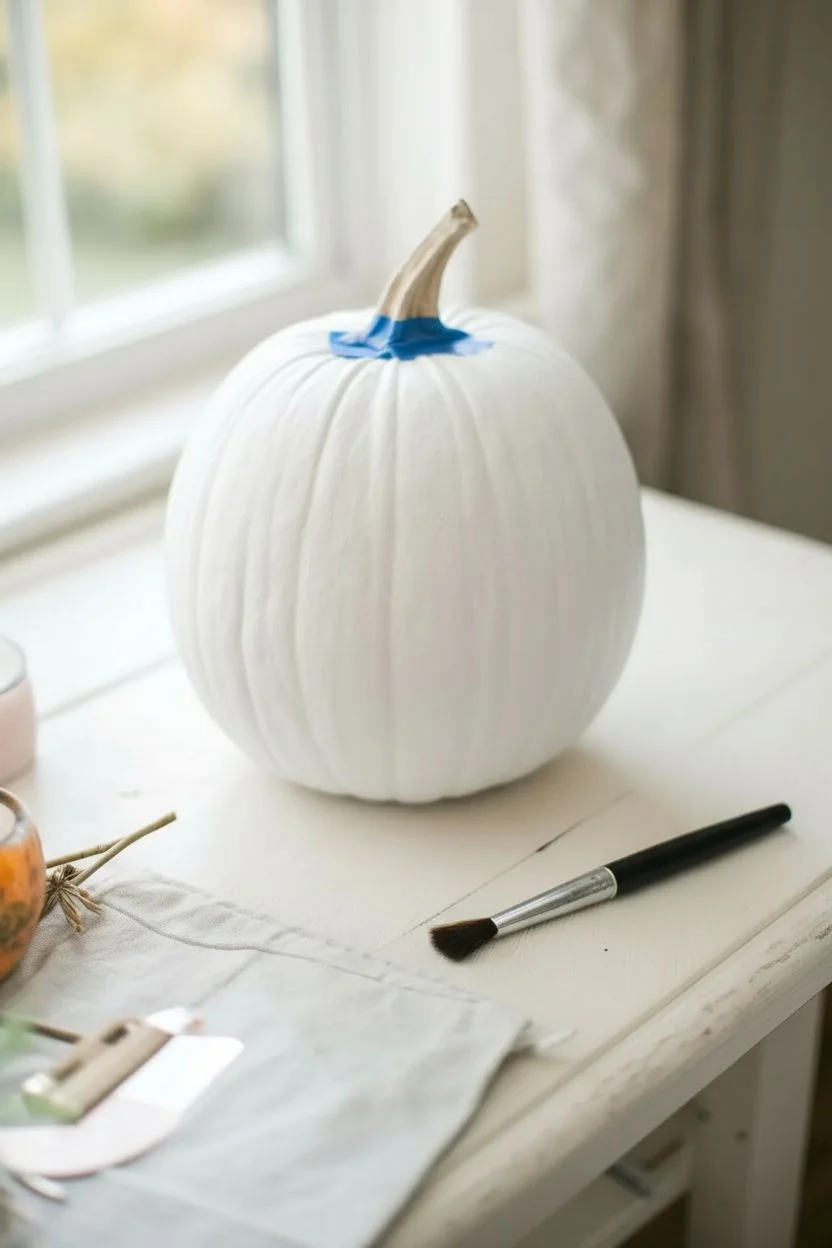
Ombre Pink Pumpkins From Pale Rose to Fuchsia
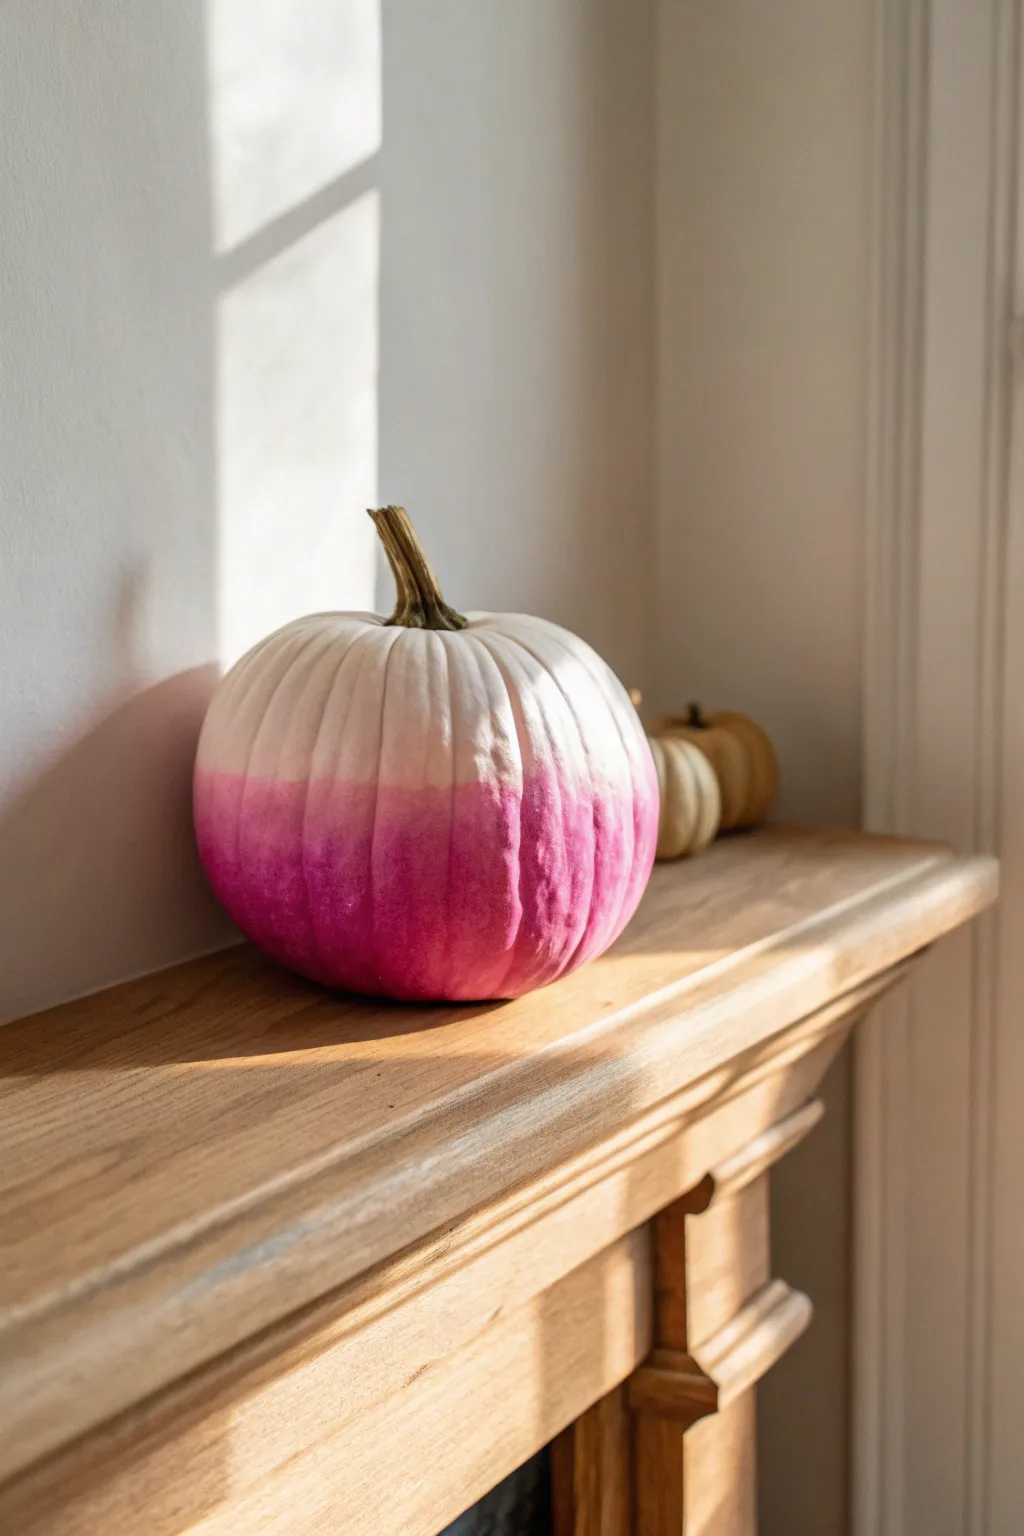
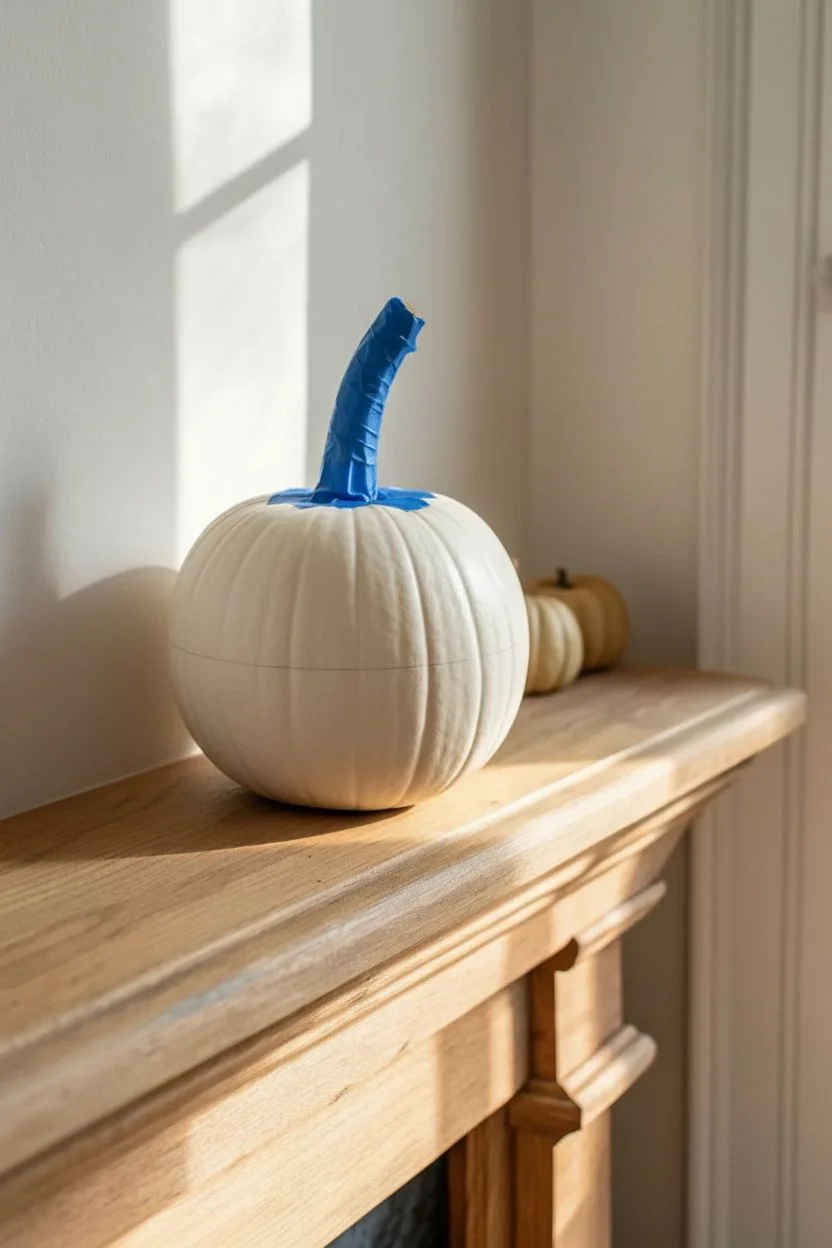
Transform a simple white pumpkin into a modern statement piece with this vibrant two-tone gradient. This project creates a striking contrast between the natural pale top and a bold, saturated fuchsia base that looks as if it has been gently dipped in dye.
How-To Guide
Materials
- White pumpkin (real or faux)
- Fuchsia or hot pink acrylic craft paint
- White or cream acrylic craft paint (matching the pumpkin skin)
- Wide foam brush
- Soft-bristle blending brush or makeup sponge
- Paper palette or paper plate
- Painter’s tape (optional)
- Damp cloth
- Clear matte sealant spray (optional)
Step 1: Preparation and Base Coat
-
Prepare your pumpkin:
Begin by thoroughly cleaning the pumpkin’s surface with a damp cloth to remove any dirt or oils. If you are using a real pumpkin, ensure it is completely dry before proceeding. -
Protect the stem:
Carefully wrap the stem with painter’s tape to keep it free from accidental paint splatters. I like to keep the stem natural for that lovely organic contrast. -
Establish the horizon line:
Visualise where you want the pink color to start fading. For this look, the transition happens just below the midpoint of the pumpkin. You can lightly mark this line with a pencil if you need a guide.
Step 2: Creating the Ombre Gradient
-
Apply the dark base:
Squeeze a generous amount of fuchsia paint onto your palette. Using the wide foam brush, paint the bottom third of the pumpkin with fully saturated pink paint. -
Paint the bottom surface:
Don’t forget to flip the pumpkin over carefully and paint the very bottom underside so no white shows when it’s sitting on a shelf. -
Start the mid-tone transition:
While the bottom layer is still wet, mix a small amount of white paint into your fuchsia on the palette to create a slightly lighter pink shade. -
Apply the mid-tone:
Apply this lighter mix just above your dark base coat, slightly overlapping the wet edge of the dark pink. Work in horizontal strokes around the circumference. -
Blend the boundary:
Use a soft-bristle blending brush or a makeup sponge to tap repeatedly along the line where the two pink shades meet. This stippling motion blurs the hard line into a soft gradient. -
Create the fade-out tone:
Mix significantly more white into your pink paint until you have a very pale, rose-blush color. -
Apply the lightest layer:
Paint a narrow band of this pale blush above your mid-tone pink, feathering the strokes upward toward the white top of the pumpkin. -
Dry brush the final edge:
Wipe most of the paint off your brush until it is almost dry. Gently feather the top edge of the pale pink upward into the white pumpkin skin. The goal is to make the color disappear seamlessly.
Paint drying too fast?
If the acrylics dry before you can blend them, mix in a tiny drop of retarder medium or keep a spray bottle of water handy to lightly mist the surface while working.
Step 3: Finishing Touches
-
Check the transition:
Step back and look at the pumpkin from a distance. If the line looks too harsh, take a slightly damp sponge and dab lightly at the transition line to soften it further. -
Touch up the base:
Add a second coat of the dark fuchsia to the very bottom section if the first coat looks streaky or translucent. Keep this layer strictly at the bottom to maintain the gradient. -
Let it dry completely:
Allow the pumpkin to sit undisturbed for at least an hour. Acrylic paint dries relatively quickly, but thick layers might take longer. -
Remove tape:
Once dry, gently peel away the painter’s tape from the stem. Reveal the clean, natural top. -
Seal to protect (optional):
If you plan to display this outdoors or keep it for future seasons, give the painted area a light misting of clear matte sealant spray.
Pro Tip: The Sponge Method
For the smoothest gradient, use a fresh makeup wedge sponge for the transition area. The tiny pores create a softer, airbrushed look compared to brush bristles.
Now you have a chic, modern centerpiece ready to brighten up your autumn mantelpiece


Pink Glitter Pumpkin for Easy Glam Shine
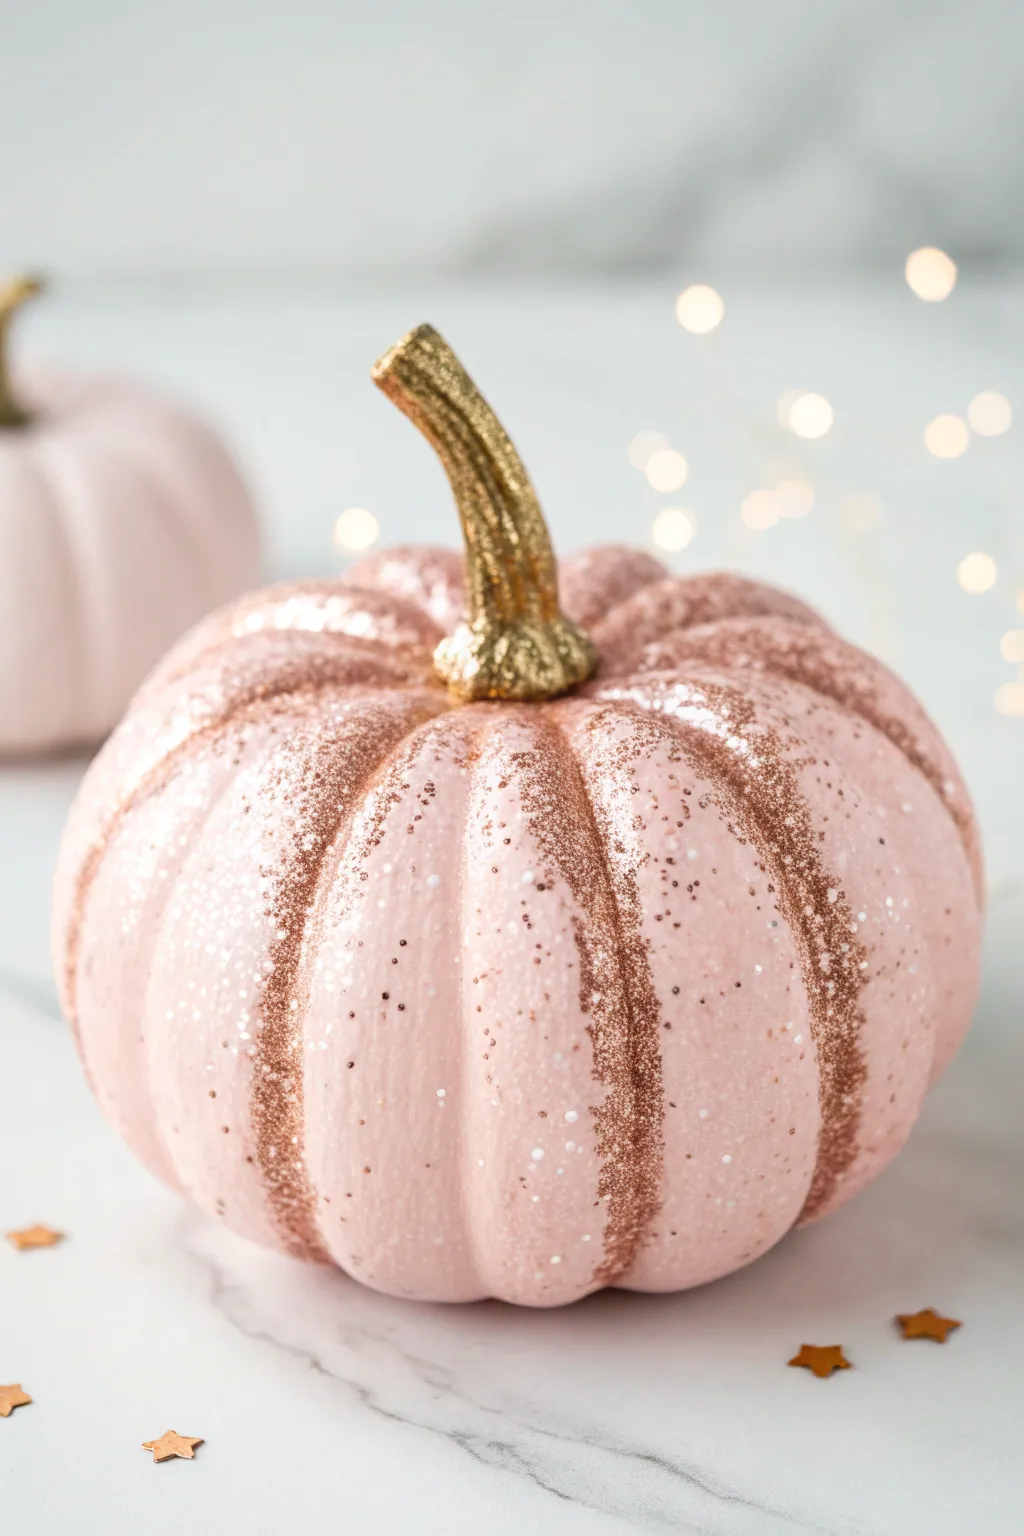
Transform a plain pumpkin into a sophisticated centerpiece with soft blush paint and strategic glitter placement. This project balances matte elegance with just the right amount of sparkle, featuring a dazzling gold-dipped stem and shimmering grooves.
Detailed Instructions
Materials
- Faux pumpkin (white or orange base)
- Blush pink acrylic craft paint (matte or satin)
- Metallic gold acrylic paint
- Mod Podge or white craft glue
- Fine rose gold or copper glitter
- Chunky iridescent glitter (optional)
- Fine gold glitter
- Medium flat paintbrush
- Small detail paintbrush
- Paper plate or palette
- Wax paper or drop cloth
- Clear spray sealant (optional)
- Disposable cup for glitter mixing
Step 1: Base Prep
-
Clean surface:
Begin by wiping down your pumpkin with a damp cloth to remove any dust or oils. If you are using a faux pumpkin with a glossy finish, you might want to lightly sand it first to help the paint adhere better. -
Protect your stem:
Since we’ll be giving the stem a special gold treatment later, wrap it carefully with painter’s tape to keep it clean while you paint the body. Alternatively, just paint carefully around the base. -
Base coat application:
Squeeze a generous amount of blush pink acrylic paint onto your palette. Using a medium flat brush, apply the first coat of paint in long, vertical strokes from the top indentation to the bottom. -
Dry and repeat:
Let the first coat dry completely, which usually takes about 20-30 minutes. Apply a second coat to ensure opaque, solid coverage. I find that three thin coats often look smoother than two thick ones.
Step 2: Gilded Stem
-
Paint the stem:
Once the body is dry, remove the tape from the stem. Paint the stem with a metallic gold acrylic paint. Don’t worry about brush strokes here; they’ll be covered soon. -
Apply glue:
While the gold paint is dry (or slightly tacky), brush a layer of Mod Podge or craft glue over the entire stem surface. -
Glitter the stem:
Working over a paper plate to catch excess, sprinkle fine gold glitter heavily onto the wet glue. Rotate the pumpkin to ensure every nook of the stem is covered. -
Tap off excess:
Give the stem a gentle tap to dislodge loose glitter particles. Set the pumpkin aside for a few minutes to let the stem set securely.
Glitter Everywhere?
If glitter sticks where you don’t want it, use a small piece of masking tape or a lint roller to lift stray sparkles off the dried paint without damaging the finish.
Step 3: Glitter Grooves
-
Mix your glitters:
In a disposable cup, create a custom glitter mix. Combine largely fine rose gold or copper glitter with a tiny pinch of chunky iridescent glitter for dimension. -
Apply glue to grooves:
This step requires a steady hand. Using a small detail brush, paint a heavy line of Mod Podge down the deepest part of one of the pumpkin’s vertical grooves. -
Feather the glue:
Quickly feather the glue outwards from the center of the groove. You want the glue to be concentrated in the crease but fade out slightly onto the ridges for a natural, dusted look. -
Sprinkle the groove:
Immediately sprinkle your rose gold glitter mix over the glue. Be generous, changing angles to coat the sides of the groove. -
Tap and repeat:
Tap the pumpkin to remove excess glitter onto your paper catch-sheet. Repeat the glue and glitter process for each vertical groove around the pumpkin. -
Add random sparkle:
To mimic the image’s scattered effect, dip a harsh bristled brush or an old toothbrush into your glue. Use your thumb to flick tiny speckles of glue onto the smooth, pink sections between the grooves. -
Dust the speckles:
Lightly dust these glue speckles with a pinch of fine white or iridescent glitter. This creates a magical, floating dust effect distinct from the heavy groove lines.
Ombré Effect
Make the glitter fade as it goes down! Apply more glitter near the stem and gradually use less as you move toward the base for a cascading sparkle look.
Step 4: Finishing
-
Final cure:
Allow the entire pumpkin to sit undisturbed for at least an hour or two so the glue can fully harden. -
Brush off stray glitter:
Take a clean, dry paintbrush and gently sweep over the pink sections to knock off any glitter that isn’t glued down. This cleans up the lines between groove and body. -
Seal it (optional):
If you plan to store this for next year, take the pumpkin outside and give it a quick misting with a clear acrylic sealer spray to lock the glitter in place.
Place your shimmering creation near fairy lights to watch the different glitter textures sparkle in the soft glow
BRUSH GUIDE
The Right Brush for Every Stroke
From clean lines to bold texture — master brush choice, stroke control, and essential techniques.
Explore the Full Guide
Pink Pumpkin With Hand-Lettered Fall Script
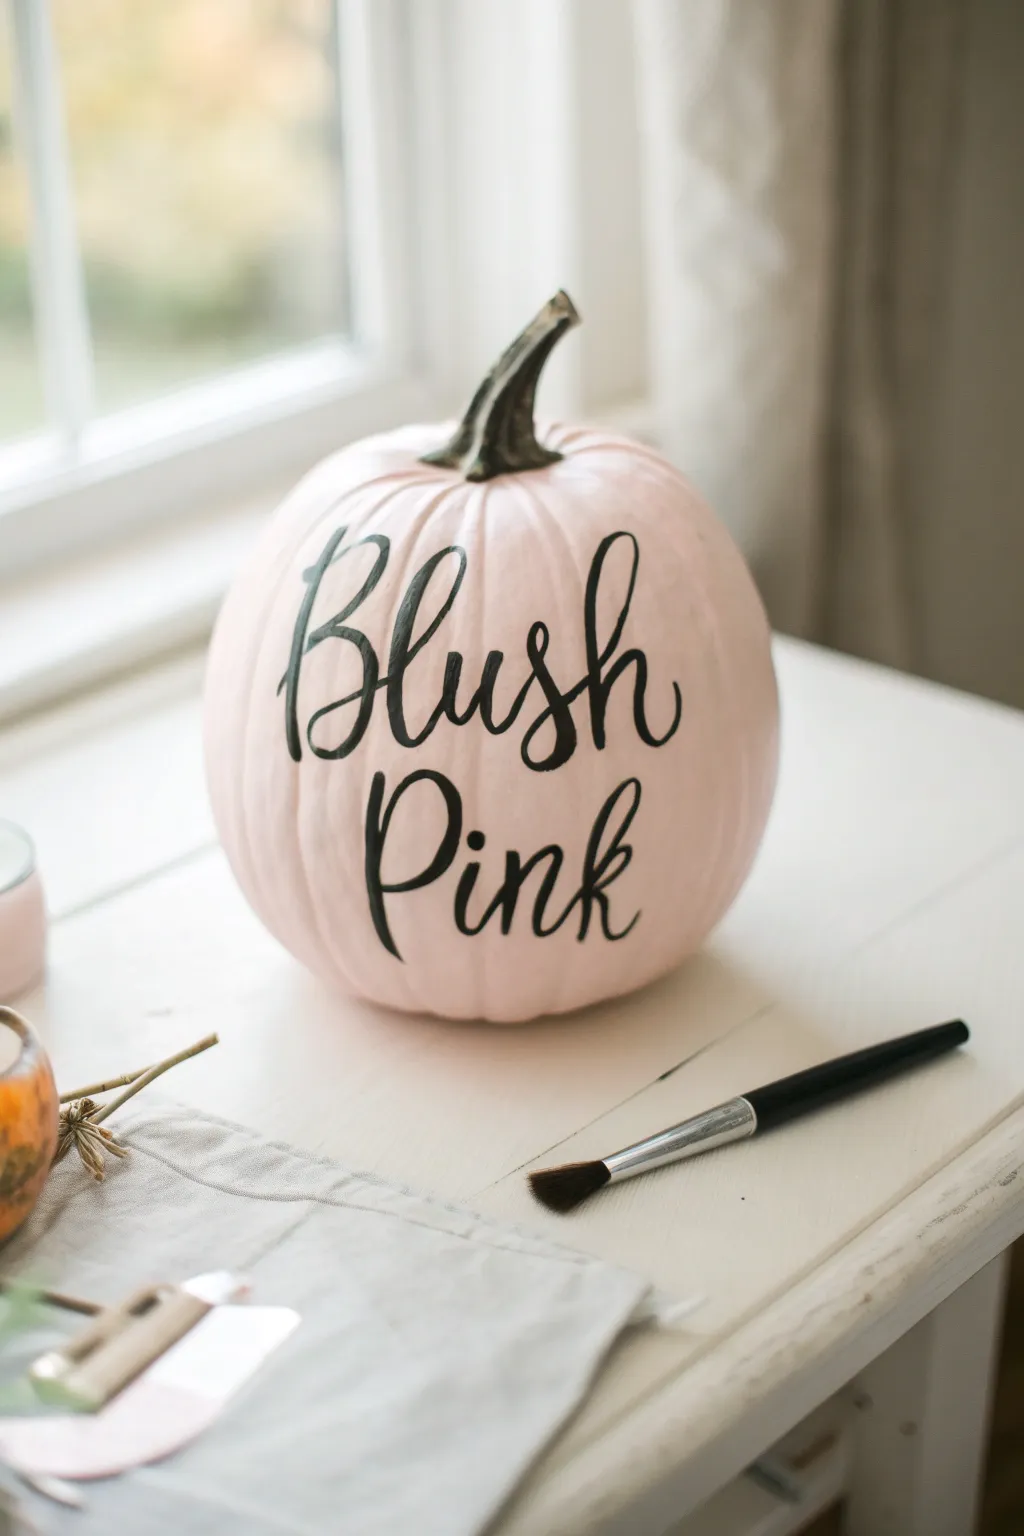
For a softer take on traditional autumn decor, this project transforms a standard pumpkin into a chic statement piece. The combination of creamy blush paint and bold, flowing script creates a sophisticated contrast perfect for bright, airy interiors.
Step-by-Step Tutorial
Materials
- Medium-sized pumpkin (real or faux)
- White chalk paint or acrylic primer
- Blush pink chalk paint or matte acrylic paint
- Black acrylic paint or paint pen
- Wide flat paintbrush (synthetic bristles)
- Fine liner brush or round brush (size 0 or 1)
- Pencil
- Paper towel
- Clean water cup
- Clear matte sealer spray (optional)
Step 1: Base Preparation
-
Clean surface:
Begin by thoroughly wiping down your pumpkin with a damp cloth to remove any dirt or oils. If using a real pumpkin, dry it completely before proceeding. -
Protect the stem:
Carefully wrap the stem with painter’s tape if you want to keep its natural color. I find it easier to just paint carefully around the base of the stem with a smaller brush later, but taping is safer. -
Prime the surface:
Apply a coat of white primer or white chalk paint to the entire surface of the pumpkin. This neutralizes the orange tone so your pink color will show up true and bright. -
First drying period:
Allow the primer layer to dry completely according to the manufacturer’s instructions, usually about 30-60 minutes.
Step 2: Applying Color
-
First pink coat:
Using your wide flat brush, apply the first layer of blush pink paint. Use long, vertical strokes starting from the top near the stem and pulling down to the base to follow the pumpkin’s natural curve. -
Watch for drips:
Check the grooves of the pumpkin where paint tends to pool and smooth them out immediately with your brush. -
Dry and repeat:
Let the first coat dry fully. Apply a second coat of pink to ensure full opacity and a rich, creamy finish. -
Detailing the top:
Switch to a smaller brush to carefully paint the area right up against the stem, ensuring a clean edge where the pink meets the stem.
Paint Consistency Trick
For the smoothest lettering, mix a tiny drop of water into your black acrylic paint. It should have an ‘inky’ flow that glides over the pumpkin bumps without skipping.
Step 3: Script Lettering
-
Sketch the layout:
Lightly sketch the words ‘Blush Pink’ onto the center of the pumpkin using a pencil. Arrange the words so ‘Blush’ sits slightly above ‘Pink’, utilizing the surface curve. -
Load the liner brush:
Dip your fine liner brush into black acrylic paint. You want the consistency to be like heavy cream—add a tiny drop of water if the paint is too thick to flow smoothly. -
Outline the script:
Trace over your pencil lines with thin, steady decorative strokes to establish the basic skeleton of the letters. -
Thicken downstrokes:
Go back over the letters and thicken only the downstrokes (anywhere your pen moved downward while writing). This creates that classic faux-calligraphy look. -
Refine edges:
Use the very tip of your brush to sharpen the ends of the letters and smooth out any shaky edges on your thickened lines. -
Add flourishes:
Extend the entry stroke on the ‘B’ and the exit stroke on the ‘k’ to add elegant curls that wrap slightly around the curve of the pumpkin. -
Erase guidelines:
Wait at least an hour for the black paint to cure fully, then very gently erase any visible pencil marks. -
Seal the work:
If you plan to place this pumpkin outdoors or want it to last for years, apply a light mist of clear matte sealer over the entire project.
Make It Glossy
Swap the matte sealer for a high-gloss lacquer spray at the end. The shiny finish makes the pumpkin look like custom ceramic decor.
Place your lovely new creation near a window to let the natural light highlight those soft pink tones
Polka Dot Pink Pumpkins in Chic Studio Colors
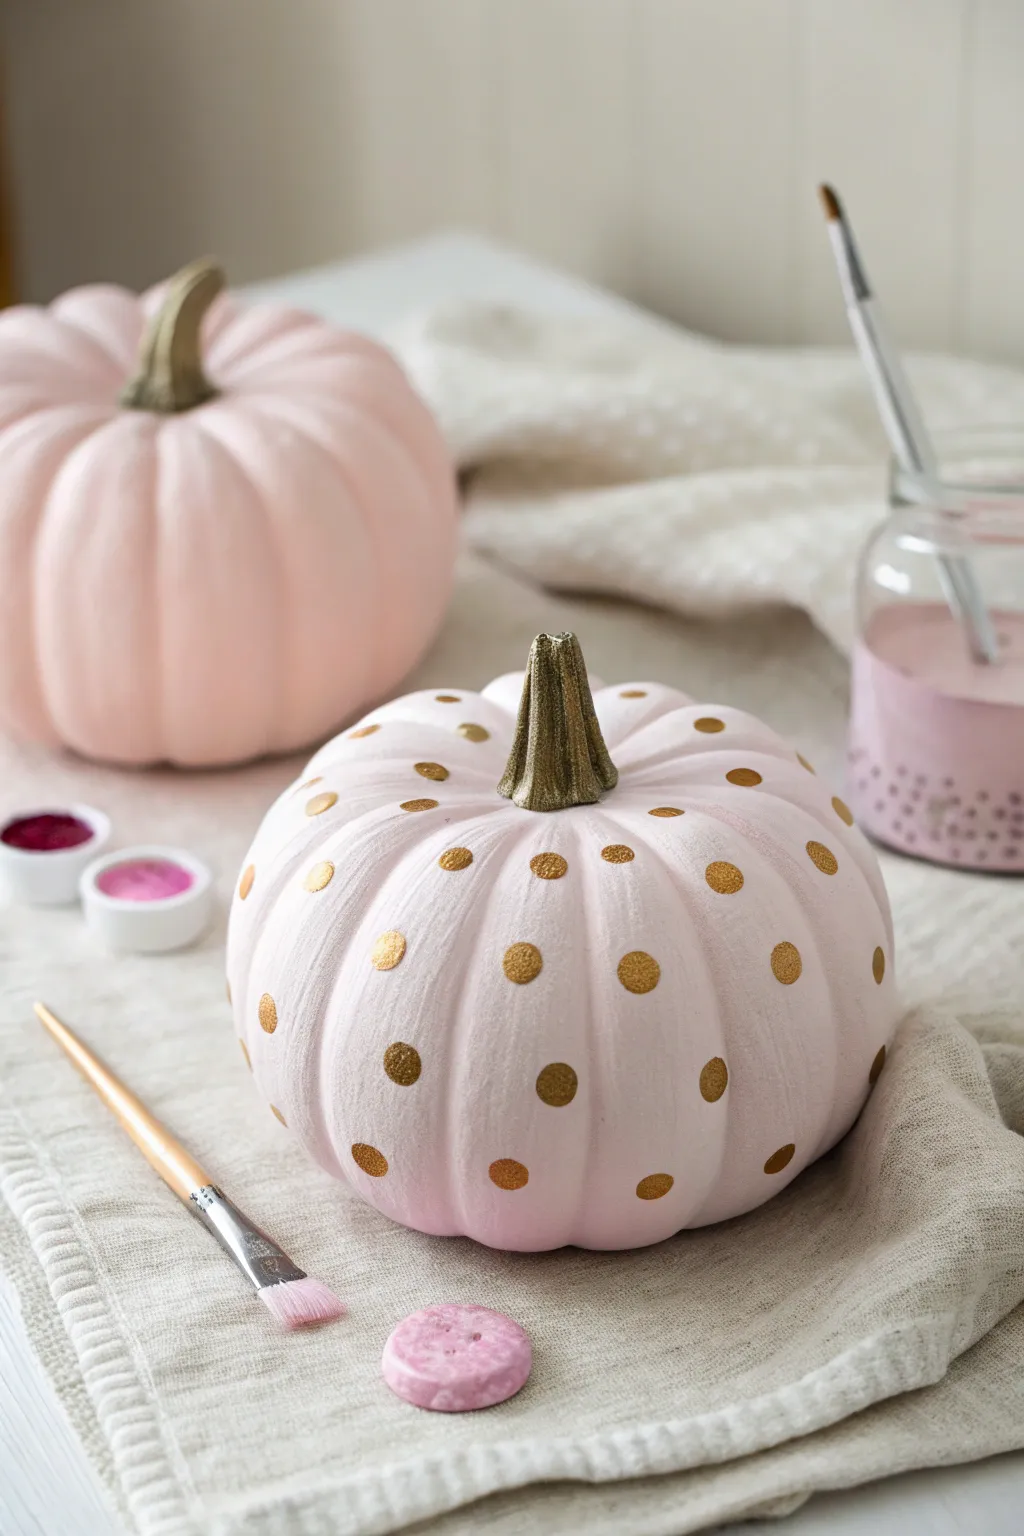
Transform ordinary faux pumpkins into elegant décor with this soft pink and gold color palette. The combination of a matte pastel base with shimmering metallic accents creates a sophisticated look perfect for a modern autumn display.
How-To Guide
Materials
- Faux pumpkins (smooth surface preferred)
- Pastel pink acrylic craft paint (matte finish)
- Metallic gold acrylic paint
- Wide flat paintbrush (approx. 1 inch)
- Small round sponge pouncers or dobbers (approx. 0.5 inch diameter)
- Small detail paintbrush
- Paper plate or paint palette
- Water cup and paper towels
- Clear matte sealer spray (optional)
Step 1: Base Coat Application
-
Clean the surface:
Before painting, wipe down your faux pumpkins with a damp cloth to remove any dust or oils that might prevent the paint from adhering properly, and let them dry completely. -
Prepare the pink paint:
Squeeze a generous amount of pastel pink acrylic paint onto your palette. If the paint feels too thick, mix in a tiny drop of water to help it glide more smoothly. -
Apply the first coat:
Using the wide flat brush, paint the entire body of the pumpkin. Use long, vertical strokes that follow the natural ridges of the pumpkin to minimize visible brushstrokes. -
Let it dry:
Allow the first coat to dry completely. This usually takes about 20-30 minutes depending on the brand of paint. Don’t rush this step, or the next layer will lift the first one. -
Apply subsequent coats:
Apply a second or third coat of pink paint until you have opaque, even coverage. I usually find that three thin coats look smoother than two thick ones.
Clean Circle Hack
Twist your wrist slightly when lifting the sponge pouncer off the pumpkin. This breaks the surface tension and prevents little spikes of paint from rising in the center of your dot.
Step 2: Gilded Details
-
Paint the stem:
Switch to your small detail brush and dip it into the metallic gold paint. Carefully paint the stem, getting into all the little crevices and textures. -
Refine the stem edge:
Be very precise where the stem meets the pink pumpkin body to create a crisp, clean line. You may need two coats of gold for a rich, solid metallic finish. -
Prepare the pouncers:
Pour a puddle of metallic gold paint onto your palette. Load your round sponge pouncer by dipping it straight down into the paint. -
Offload excess paint:
Dab the loaded pouncer onto a clean part of the paper plate once or twice. This removes excess globby paint and prevents the dots from sliding or dripping on the curved surface. -
Start the vertical rows:
Begin applying dots in vertical lines following the pumpkin’s ribs. Press the sponge straight down and lift straight up to keep the circle shape perfect. -
Space the dots:
Leave about an inch of space between each dot vertically. Using the pumpkin’s natural valleys as a guide helps keep your spacing consistent without measuring. -
Continue patterning:
Work your way around the pumpkin, alternating the placement of the dots on adjacent ribs (like a brick pattern) if you want a more organic feel, or keep them aligned for a structured look. -
Touch ups:
If any dots look uneven or transparent, wait for them to dry and carefully dab a second layer of gold paint over them with the same sponge.
Step 3: Finishing
-
Final drying time:
Set the pumpkin aside in a safe, dust-free area and let it cure for at least 24 hours to ensure the paint hardens fully. -
Seal the work (optional):
If you plan to store these for next year, lightly spray the finished pumpkin with a clear matte sealer to prevent chips and scratches.
Glamorous Gradations
For a luxe variation, change the dot sizes as you go down the pumpkin. Use tiny dots near the stem and switch to larger pouncers near the base for a ‘falling confetti’ effect.
Now you have a stunning set of custom studio-style pumpkins ready for your centerpiece

PENCIL GUIDE
Understanding Pencil Grades from H to B
From first sketch to finished drawing — learn pencil grades, line control, and shading techniques.
Explore the Full Guide
Pink Pumpkin With White Ghost Pattern
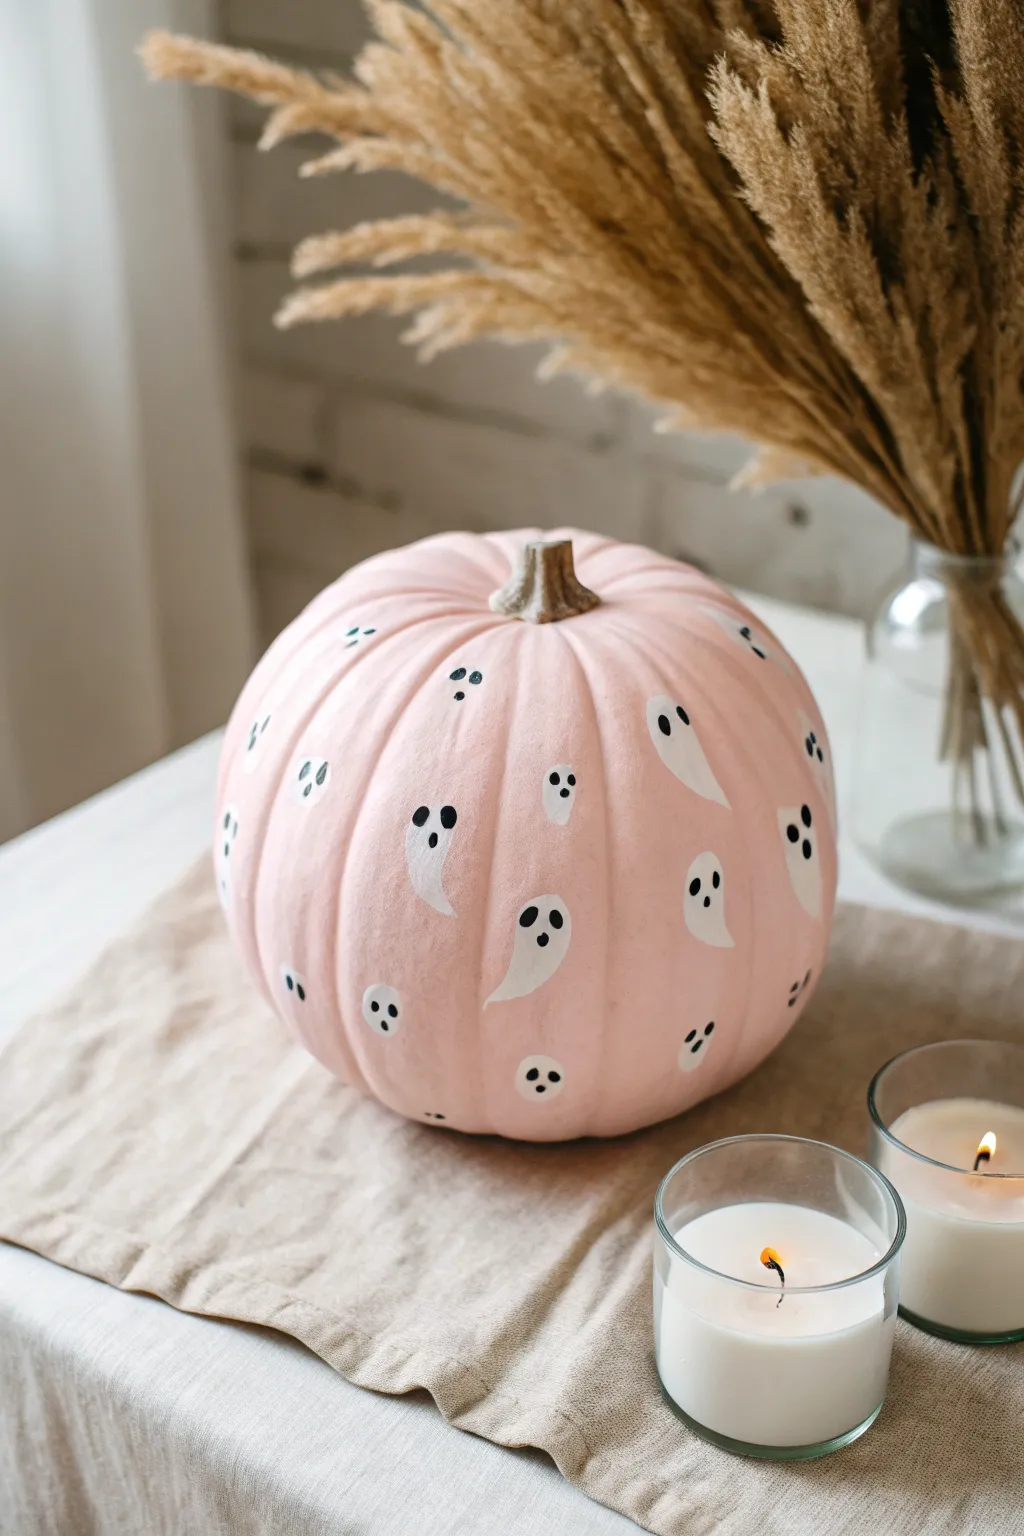

Give your Halloween decor a soft, pastel twist with this adorable pink pumpkin featuring a hand-painted cloud of wandering spirits. This project combines modern aesthetics with classic spooky motifs for a centerpiece that is more sweet than scary.
Step-by-Step Tutorial
Materials
- Faux craft pumpkin (white or cream)
- Pale blush pink acrylic paint (matte finish)
- White acrylic paint
- Black acrylic paint or black paint pen
- Medium flat paintbrush (for base coat)
- Small round detail brush (size 2 or 4)
- Fine liner brush or dotting tool
- Paper towels
- Water cup
- Palette or paper plate
- Clear matte sealer spray (optional)
Step 1: Base Coat Application
-
Clean surface:
Begin by wiping down your pumpkin with a slightly damp cloth to remove any dust or manufacturing oils. A clean surface ensures the pink paint adheres smoothly without streaking. -
Mix your pink:
If you don’t have the perfect shade of blush pink pre-mixed, create your own. Mix a large amount of white acrylic with just a tiny drop of red or magenta. Aim for a very pale, milky strawberry milk color. -
First coat:
Using the medium flat brush, apply the first layer of pink paint. Work in vertical strokes from the stem down to the base, following the natural ridges of the pumpkin. Don’t worry if it looks slightly patchy; this is normal. -
Dry time:
Allow the first coat to dry completely. This usually takes about 20-30 minutes. If you are impatient like me, a hair dryer on a cool setting speeds this up significantly. -
Second coat:
Apply a second layer of pink paint using the same vertical stroke technique. This should make the color opaque and solid. Check for any bald spots near the stem or bottom and touch them up. -
Stem maintenance:
While painting, be careful around the stem. If you accidentally get pink paint on a realistic-looking brown stem, quickly wipe it off with a damp paper towel before it sets.
Ghost opacity issues?
If your white paint looks streaky, use a ‘stippling’ motion (tapping the brush) rather than dragging it. This deposits more pigment for a solid white ghost.
Step 2: Painting the Ghost Pattern
-
Load the brush:
Squeeze a dollop of white acrylic paint onto your palette. Dip your small round detail brush into the paint, ensuring the bristles are coated but not dripping. -
Create the first shape:
Choose a spot just below the stem to start. Press the brush down gently to create the rounded head of the ghost, then drag the brush downward in a curved, comma-like motion to create the tail. -
Vary the tails:
As you paint more ghost shapes, vary the direction of the tails slightly. Curve some to the left and some to the right to give the pattern a sense of floating movement. -
Establish the pattern:
Continue painting white ghost silhouettes all over the pumpkin. Try to space them somewhat randomly but evenly, avoiding large empty gaps. Imagine a polka-dot pattern, but swap the dots for ghosts. -
Opacity check:
White paint over pink can sometimes look translucent. Once your first set of ghosts is dry, go back over them with a second coat of white to make them pop brightly against the pastel background. -
Let the ghosts cure:
Ensure the white paint is bone dry before proceeding to the details. Wet white paint will mix with the black details and turn gray, which we want to avoid.
Pro Tip: Face variety
Don’t make every face identical! Give one ghost winking eyes or a happy smile instead of a surprised ‘O’ mouth to create a hidden Easter egg in the pattern.
Step 3: Adding Faces and Finishing
-
Prepare the black paint:
You can use a fine liner brush with black acrylic paint, or for easier control, opt for a black paint pen. If using a brush, thin the black paint just slightly with water for smoother flow. -
Paint the mouths:
Start with the mouth. Place a small vertical oval or circle in the lower-middle part of the ghost’s head area. This ‘O’ shape gives them a surprised, spooky look. -
Add the eyes:
Add two smaller dots above the mouth for the eyes. Space them close together for a cute look, or wider apart for something goofier. Varying the face expressions slightly adds tons of character. -
Clean up edges:
Inspect your work. If any black paint smeared or if a ghost shape looks ragged, use a tiny bit of the original pink paint to ‘erase’ or reshape the edges once everything is dry. -
Optional sealing:
If you plan to keep this pumpkin for future Halloweens or place it outside (in a covered area), spray the entire pumpkin with a light coat of clear matte sealer to protect the artwork.
Now you have a charmingly customized pumpkin that perfectly bridges the gap between autumn vibes and spooky season fun
Pink Spiderweb Pumpkin That’s Spooky but Sweet
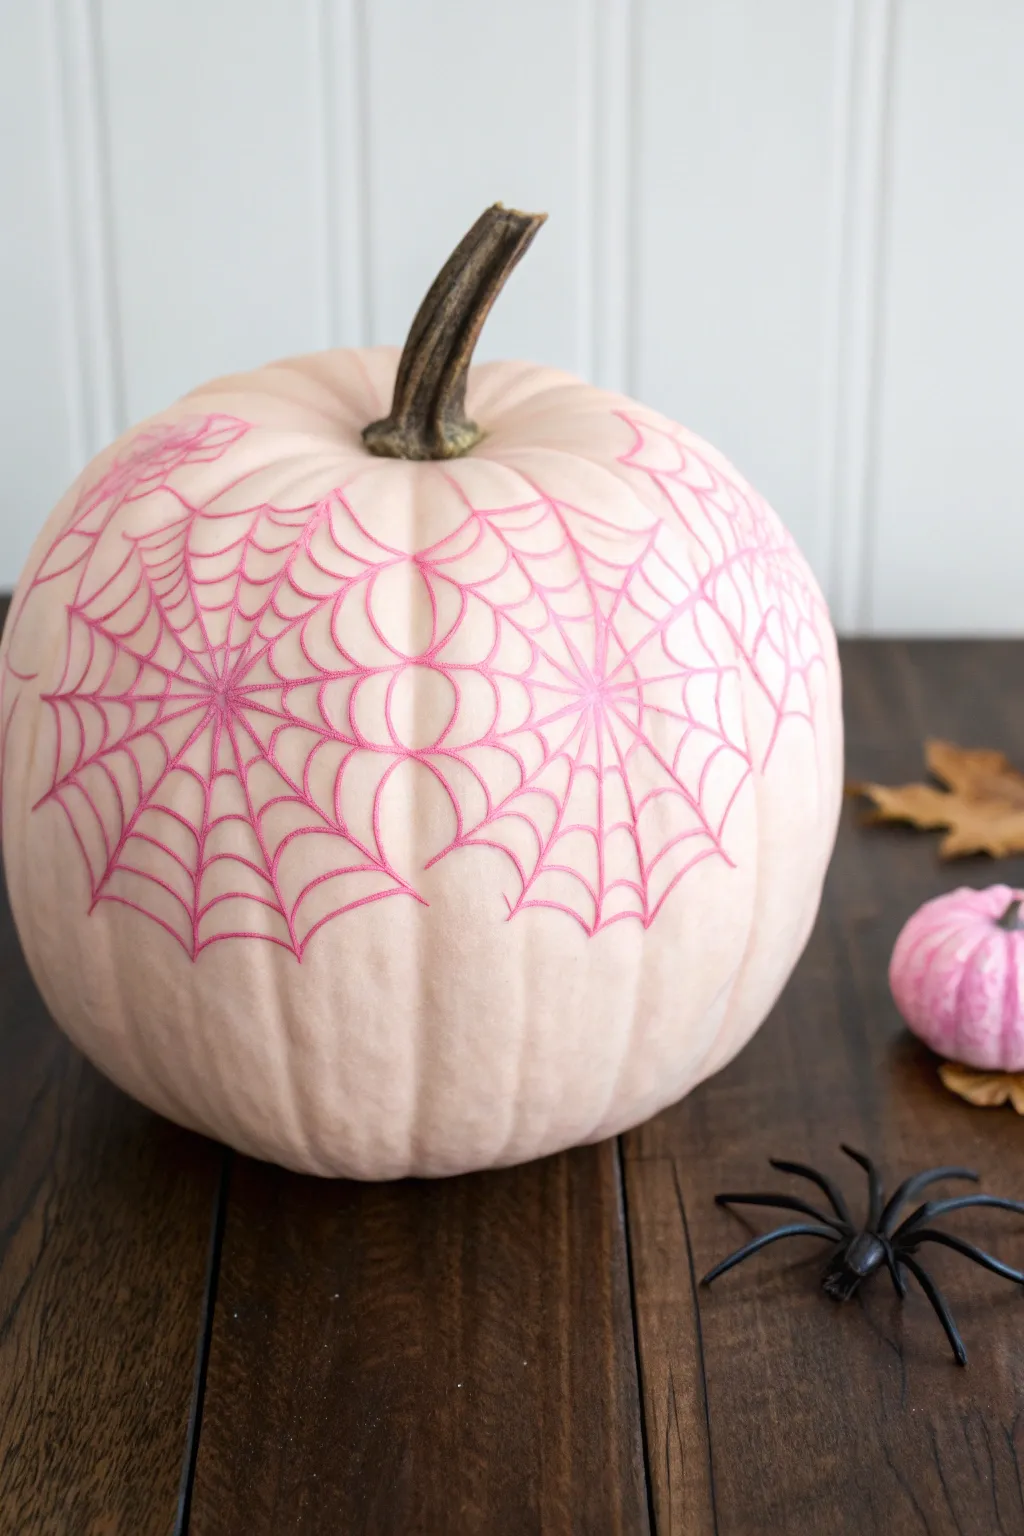
Transform a pale pumpkin into a chic Halloween centerpiece with delicate pink spiderwebs. This project balances spooky and sweet perfectly, featuring intricate pink line work against a soft, creamy background for a sophisticated seasonal look.
How-To Guide
Materials
- Faux pumpkin (cream or white)
- Pale pink craft paint (acrylic or chalk paint)
- Fine-point permanent marker or paint pen (dark pink/magenta)
- Pencil
- Eraser
- Paper towels
- Cotton swabs (for cleanup)
Step 1: Preparation and Planning
-
Clean surface:
Begin by wiping down your pumpkin with a damp paper towel to remove any dust or manufacturing residue, ensuring a clean surface for the paint or ink to adhere to. -
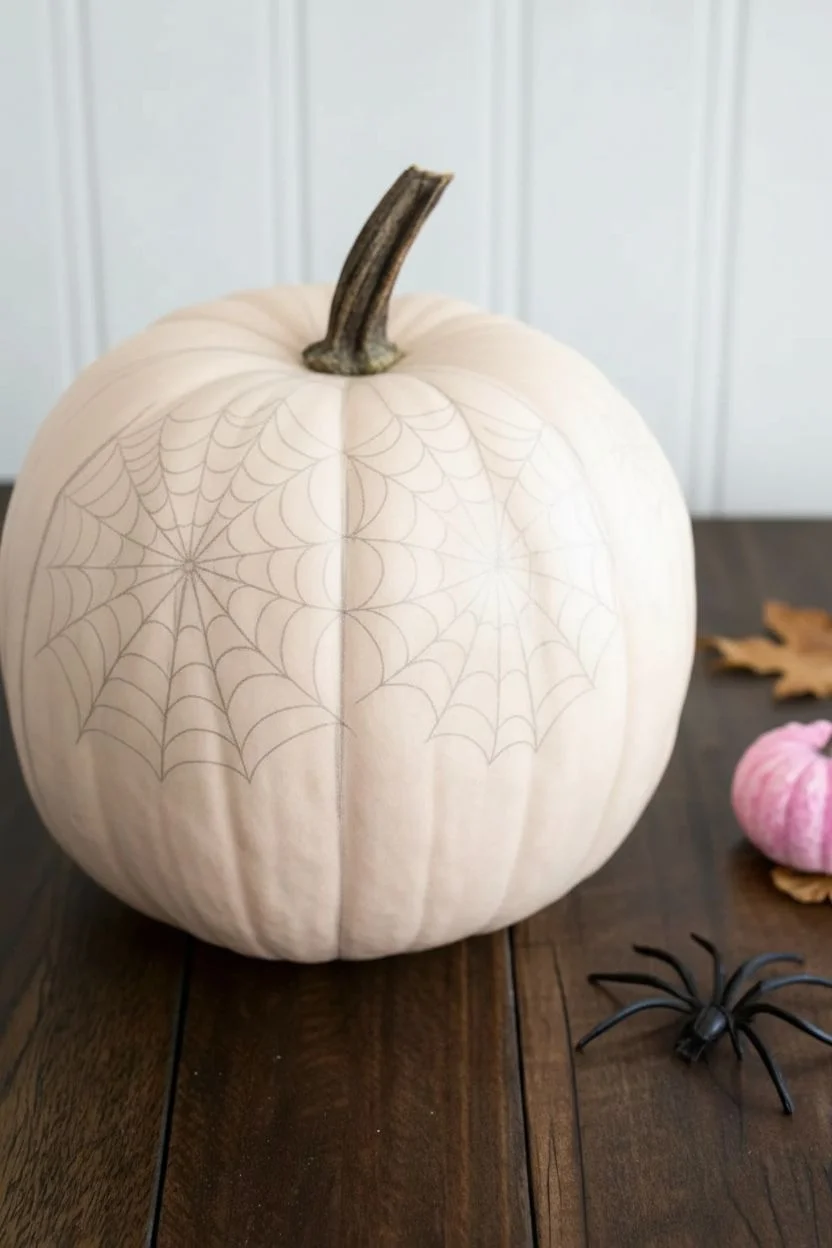
Establish center points:
Visualize where you want your spiderwebs to sit. Using a pencil, lightly mark a small dot to serve as the center hub for each main web; placing one high on the shoulder of the pumpkin creates a nice draping effect. -
Draw radial lines:
From your center dot, lightly sketch 6 to 8 straight lines radiating outward like spokes on a wheel. Extend them quite far down the pumpkin’s side for a dramatic look. -
Connect the spokes:
Starting near the center, draw curved, scallop-shaped lines connecting the spokes to create the classic web structure. Continue moving outward, making the scallops slightly larger as you go.
Steady Hand Trick
Rest your pinky finger on the pumpkin surface while drawing to stabilize your hand. This acts as a pivot point and helps you draw smoother curved lines.
Step 2: Creating the Web Design
-
Start the permanent linework:
Take your pink fine-point paint pen or permanent marker. Begin tracing over your pencil lines, starting with the central radial spokes first to establish the framework. -
Add inner details:
Carefully trace the curved connecting lines between the spokes. Work from the center outward to avoid smudging your fresh lines with your hand. -
Create overlapping webs:
To mimic the image, start a second web nearby. Draw its center point and radial lines so they intersect with the outer edges of your first web. -
Manage intersections:
Where the two webs meet, let the lines cross naturally or merge them to look like a single complex structure spun by multiple spiders. -
Vary line thickness:
For a more illustrated look, go back over the main radial lines a second time to make them slightly bolder than the delicate connecting threads. -
Let ink set:
Allow the ink or paint pen to dry completely for at least 15 minutes before touching the surface again to prevent smearing.
Step 3: Refining and Finishing
-
Erase guidelines:
Once you are absolutely certain the pink ink is dry, gently erase any visible pencil marks left underneath or around your design. -
Check for gaps:
Inspect your webs for any broken lines or faint areas. Fill these in carefully with the marker to ensure the design looks crisp and intentional. -
Add hanging threads:
Draw a few single, long lines extending downward from the bottom edges of the webs, as if the spider has dropped down a silk thread. -
Clean up edges:
If you made any small mistakes with the marker, a cotton swab dipped in a tiny bit of rubbing alcohol can often lift the pigment from a smooth faux pumpkin surface. -
Style the stem:
Inspect the stem area. If any web lines go right up to the top, ensure they tuck neatly under the base of the stem for a polished finish.
Add Some sparkle
While the ink is still wet on the main radial lines, sprinkle a pinch of extra-fine iridescent glitter over them. Blow away the excess for a magical glimmer.
Place your lovely webbed creation on a mantel or table for a decoration that is undeniably stylish


Winking Face Pink Pumpkin With Lashes
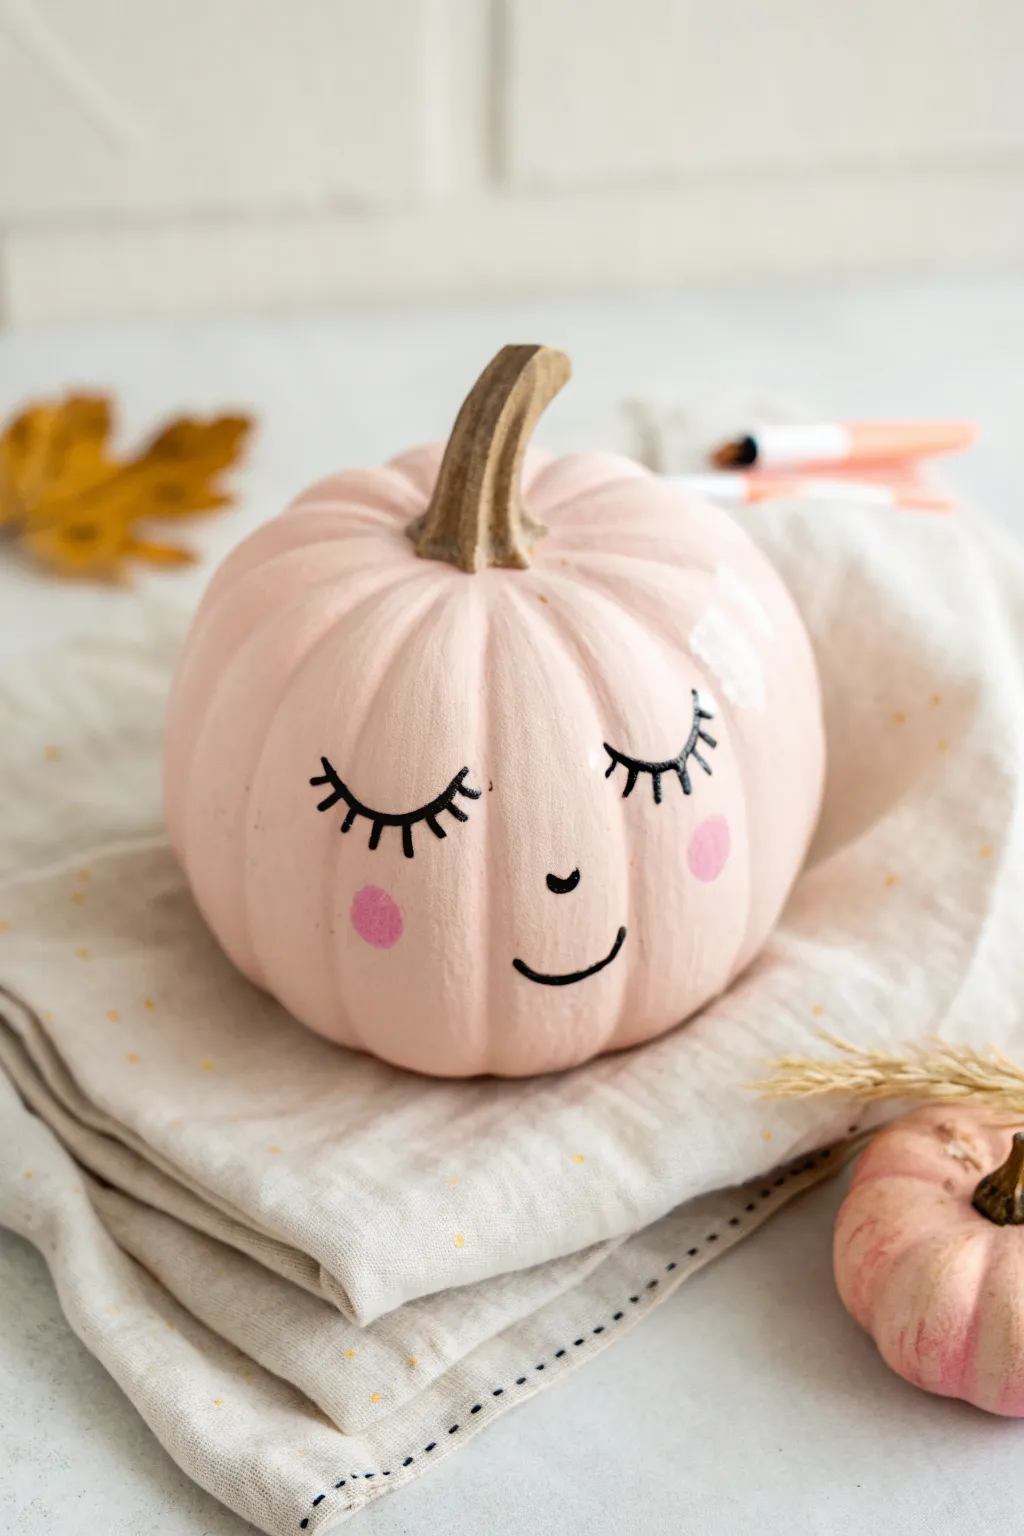
Transform a simple pumpkin into a cozy character with pastel hues and a peaceful, sleeping expression. This project uses soft pink matte paint and delicate black detailing to create a charming piece of autumn decor that feels both modern and whimsical.
Step-by-Step Tutorial
Materials
- Medium-sized pumpkin (real or faux)
- Light blush pink acrylic paint (chalk finish preferred)
- Medium flat paintbrush
- Small round detail brush (size 0 or 1)
- Black acrylic paint
- Bubblegum pink acrylic paint
- Pencil with eraser
- Clear matte sealer spray (optional)
- Paper towels
- Water cup
Step 1: Preparation & Base Coat
-
Clean surface:
Begin by wiping down your pumpkin with a damp cloth to remove any dirt or oils, especially if using a real pumpkin. Dry it completely. -
Protect the stem:
Use a small piece of painter’s tape to wrap the base of the stem. This keeps your brown stem clean while you paint the body. -
Apply first coat:
Using your medium flat brush, apply the light blush pink paint. Start from the top near the stem and pull the paint down into the grooves. -
Smooth coverage:
Don’t worry if the first coat looks streaky. Apply thin, even layers rather than one thick glob to prevent drips. -
Dry and repeat:
Let the first coat dry for about 20-30 minutes. I usually apply a second and sometimes third coat until the orange or white underneath is completely hidden.
Wobbly Lines?
If brushwork is tricky, swap the black paint for a fine-tip permanent marker or paint pen. It gives you much more control over the fine lashes.
Step 2: Drafting the Face
-
Sketch placement:
Once the pink base is bone dry, lightly sketch the face features with a pencil. Place the eyes about halfway down the pumpkin. -
Draw the lashes:
Draw two downward curves for closed eyes. Add 4-5 small tick marks extending off the bottom of each curve for the eyelashes. -
Add nose and mouth:
Sketch a tiny ‘u’ shape for the nose right between and slightly below the eyes. Draw a wider, gentle curve for a small smile below that. -
Mark the cheeks:
Lightly circle two spots outside the smile for the rosy cheeks. Getting the symmetry right with pencil first saves a lot of headache later.
Pro Tip: Chalk Paint
Use chalk-style paint for the base coat. Its thick, matte consistency covers orange pumpkins faster and dries to a velvety finish.
Step 3: Painting Details
-
Paint the cheeks:
Dip your medium brush or a round sponge dabber into the bubblegum pink paint. Fill in the circular cheek guides you drew. -
Soft edges:
If the cheek circles look too harsh, you can gently tap the edges with your finger while the paint is wet to soften the look. -
Outline the lashes:
Switch to your smallest detail brush and black paint. Carefully trace over your pencil lines for the eyelids. Keep a steady hand and use the very tip of the bristles. -
Refine the lashes:
Flick the brush outward gently to create the eyelashes. They should be thicker at the base where they meet the lid and taper off at the ends. -
Complete the features:
Trace the small nose and the smile line with the black paint. Keep the pressure light to maintain a delicate line weight. -
Highlight (optional):
If desired, add a tiny dot of white paint to the top of the pink cheeks for a shiny look, though the example keeps it matte. -
Clean up:
Use a damp Q-tip to erase any visible pencil marks that weren’t covered by paint once everything is fully dry. -
Remove tape:
Gently peel the painter’s tape off the stem. If any pink paint seeped through, touch up the stem with a bit of brown paint. -
Seal the work:
For longevity, especially if placing outdoors, give the entire pumpkin a light coat of clear matte sealer spray.
Now you have an adorable painted pumpkin ready to nap peacefully on your shelf intended for this fall season
Marble-Effect Pink Pumpkins for a Luxe Finish
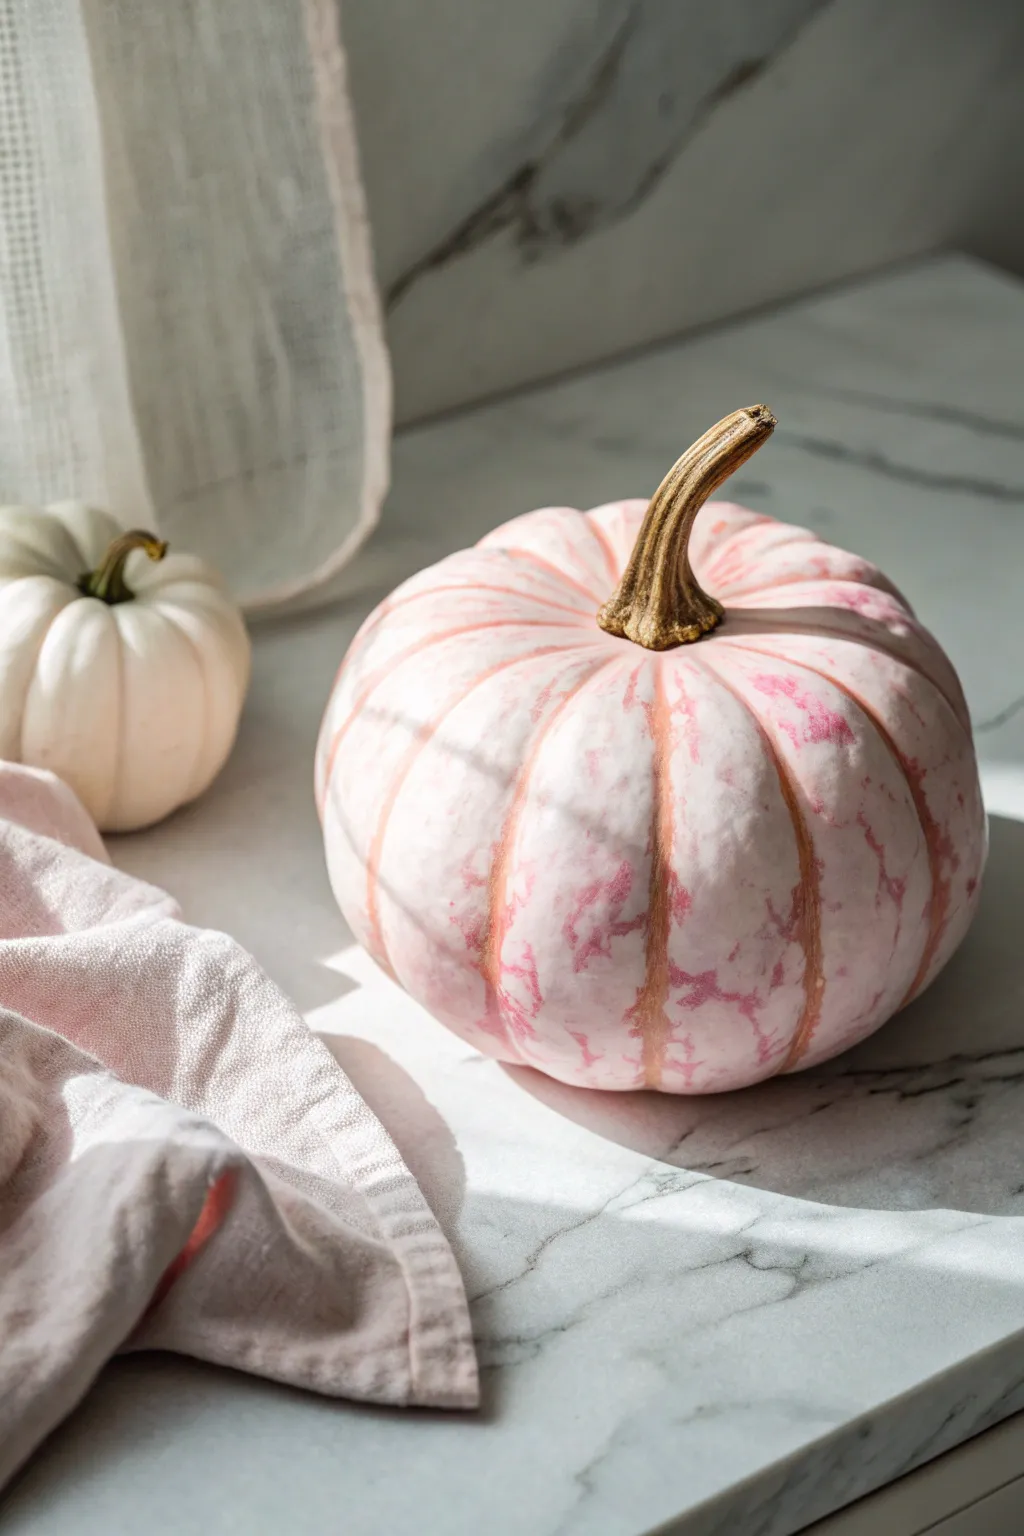
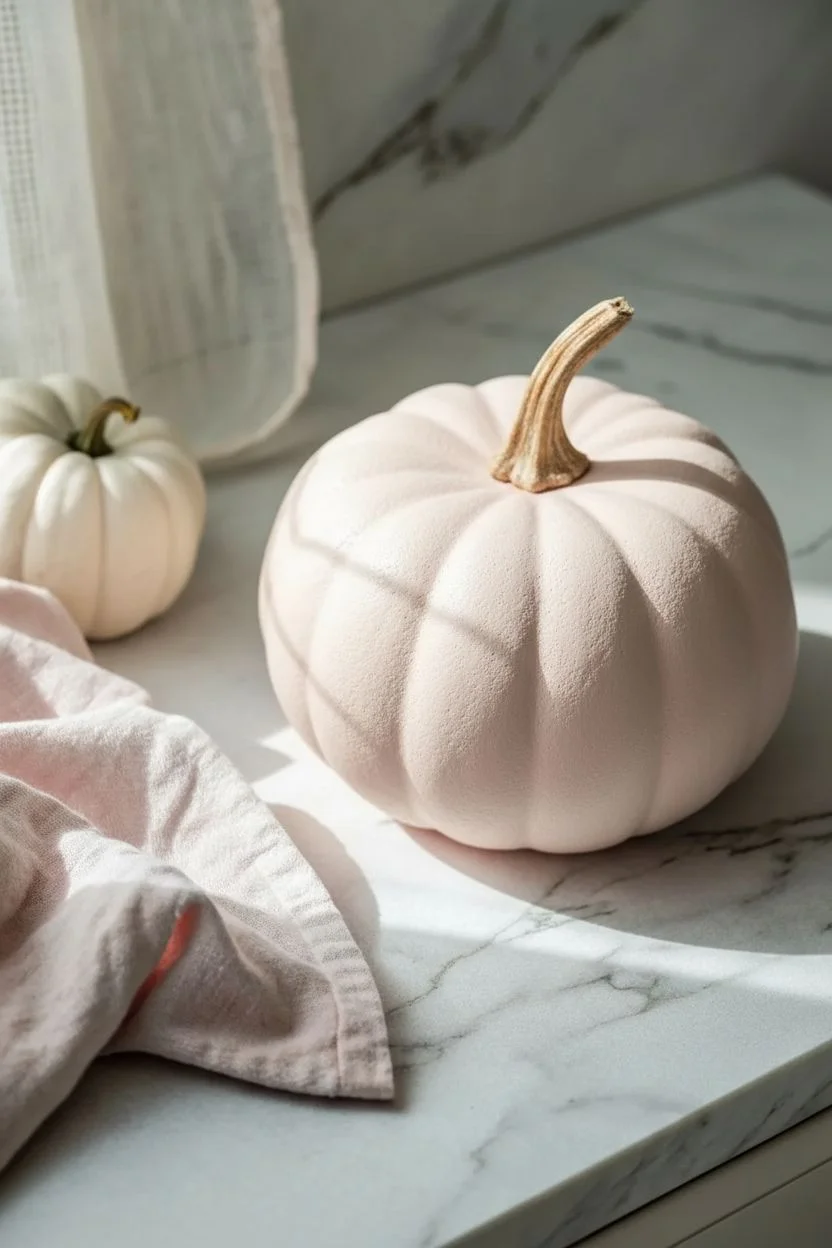
Transform a standard pumpkin into a sophisticated piece of décor with this subtle pink marbling technique. The finish mimics the organic veins of rose quartz or pink marble, creating a soft, luxurious look perfect for an upscale autumn display.
Detailed Instructions
Materials
- Faux pumpkin (white base)
- Pale pink acrylic paint (matte)
- Rose or magenta acrylic paint (for veining)
- Metallic copper or gold paint
- Glazing medium or water (for thinning)
- Sea sponge or crumpled plastic wrap
- Fine liner brush (size 0 or 00)
- Soft blending brush
- Clean rags or paper towels
- Matte or satin clear sealant spray
- Palette for mixing
Step 1: Preparation and Base Coat
-
Clean the surface:
Wipe down your faux pumpkin with a damp cloth to remove any dust or manufacturing residue. If the surface is very slick, a light scuffing with fine-grit sandpaper can help the paint adhere better. -
Mix the base color:
Combine white acrylic paint with a very small amount of pale pink. You want a barely-there blush tone that looks like white stone with a pink cast, rather than a solid bubblegum pink. -
Apply the first coat:
Brush the base mix over the entire pumpkin, including the bottom. Don’t worry about perfect coverage yet; streaks can actually add to the stone effect. -
Apply a second coat:
Once the first layer is dry to the touch, apply a second coat for opacity. Stippling (dabbing) the paint on with a sponge rather than brushing can create a nice, porous texture similar to real stone.
Feather Light Touch
For realistic veins, hold your brush at the very end of the handle. This reduces control and creates the naturally jittery, organic lines found in real marble.
Step 2: Creating the Marble Effect
-
Prepare the glaze:
Mix a darker rose or magenta paint with glazing medium (or water) in a 1:3 ratio. The mixture should be translucent and fluid, not thick. -
Initial sponging:
Dip a damp sea sponge lightly into the glaze mixture. Blot most of it off on a paper towel until almost dry. -
Dabbing texture:
Gently dab the sponge randomly across the pumpkin’s surface. Focus on the natural vertical ridges of the pumpkin to emphasize its shape, but keep it irregular. -
Softening the edges:
While the sponged paint is still wet, use a clean, dry blending brush or a soft rag to blur the edges. This creates those soft ‘clouds’ of color typical in marble.
Gilded Glamour
Instead of painted metallic veins, apply size adhesive to the vein lines and press real gold or copper leaf into the crevices for a high-end, textured shine.
Step 3: Detailing the Veins
-
Load the liner brush:
Using your fine liner brush and the undiluted rose or magenta paint, load the bristles with a small amount of pigment. -
Paint the veins:
With a shaky hand, drag the brush down the pumpkin’s vertical crevices. I like to twist the brush slightly as I pull to create random thick and thin lines. -
Feather the veins:
Before the vein lines dry completely, gently feather them out with a dry brush. You don’t want harsh stripes; you want them to look like mineral deposits within the stone. -
Add metallic accents:
For a touch of luxury, mix a tiny bit of copper paint into your rose veining color. Highlight just a few select veins with this metallic mix to catch the light. -
Enhance the stem:
Paint the stem with a mix of brown and gold. Dry brush a bit of the rose glaze near the base of the stem where it connects to the pumpkin to integrate it.
Step 4: Finishing Touches
-
Inspect and refine:
Step back and look at the pumpkin from a distance. If any areas look too plain, add faint sponging. If veins look too harsh, tap them with a clean damp sponge to fade them. -
Let it cure:
Allow the paint to dry completely, preferably overnight to ensure all layers are set. -
Seal the project:
Spray the pumpkin with a matte or satin clear sealant. This protects the finish and unifies the sheen, making it look more like polished stone.
Your beautiful faux-stone pumpkin is now ready to add a soft, romantic touch to your seasonal arrangement
Pearls and Soft Glam Pink Pumpkin Centerpiece
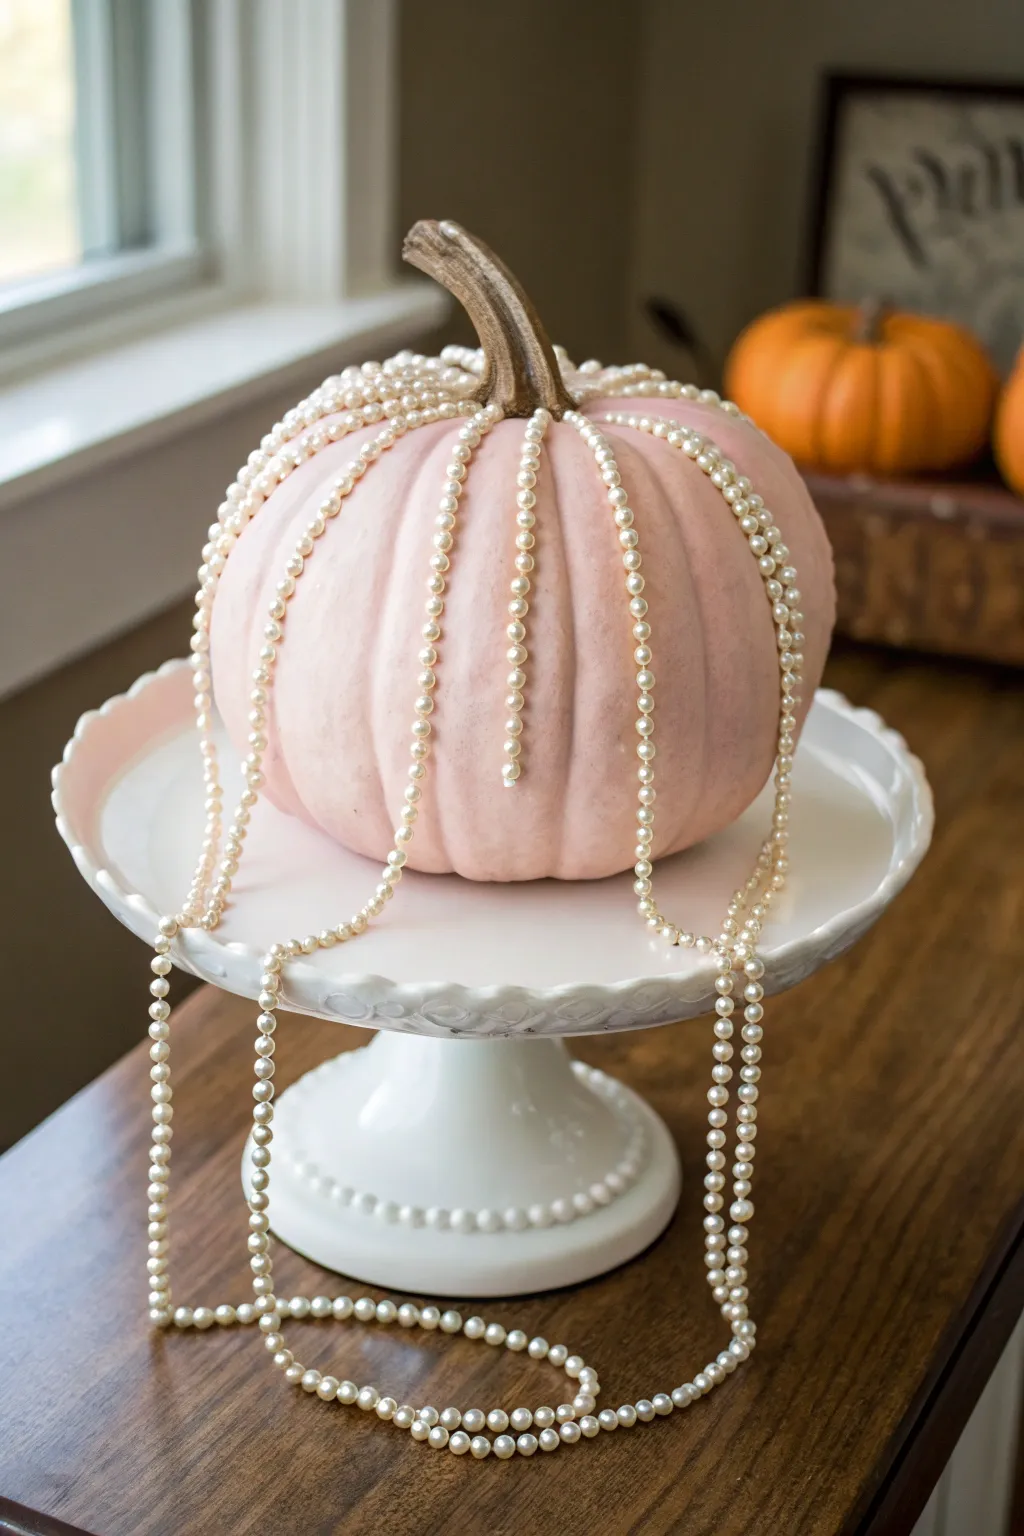
Elegance meets autumnal charm in this sophisticated twist on fall decor, featuring a soft blush pumpkin draped in strands of classic pearls. This centerpiece creates a romantic, vintage-inspired look perfect for showers, weddings, or a chic Thanksgiving table.
Step-by-Step
Materials
- Faux craft pumpkin (medium size)
- Matte pale pink spray paint (chalk finish recommended)
- White cake stand (pedestal style)
- Faux pearl strands (beaded garland or long necklace strands)
- Hot glue gun and clear glue sticks
- Painter’s tape or masking tape
- Drop cloth or newspaper
- Scissors
Step 1: Painting the Base
-
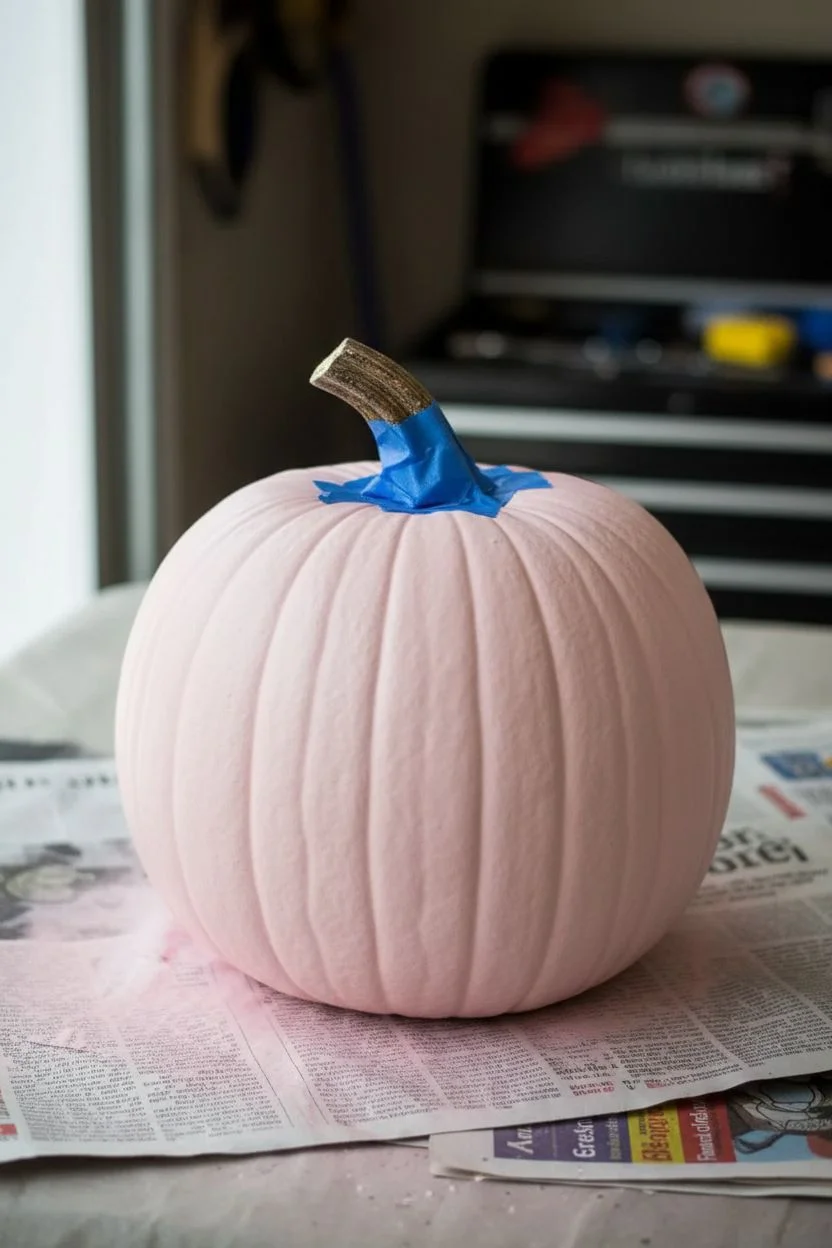
Prep your pumpkin:
Begin by wiping down your faux pumpkin with a slightly damp cloth to remove any dust or oils that might prevent paint adhesion. If you are using a real pumpkin, ensure it is thoroughly washed and completely dry. -
Protect the stem:
Carefully wrap the stem of the pumpkin with painter’s tape. You want to preserve that natural brown or realistic stem color to provide contrast against the pink body. -
Set up a paint station:
Lay down your drop cloth or newspaper in a well-ventilated area, preferably outdoors or in an open garage. -
Apply the first coat:
Holding the spray can about 8-10 inches away, apply a light, even coat of matte pale pink paint. Keep the can moving to avoid drips. -
Let it dry completely:
Allow the first coat to dry according to the manufacturer’s instructions, usually about 20-30 minutes for a touch-dry finish. -
Apply the second coat:
Spray a second layer to ensure full coverage, paying attention to the crevices and ribs of the pumpkin where the original orange might peek through. Let this cure fully, ideally overnight.
Step 2: Pearl Assembly
-
Prepare pearl strands:
Measure your pearl strings. You will need multiple strands of varying lengths. Cut or arrange them so they are long enough to drape from the stem all the way down to the table surface. -
Establish the anchor point:
Heat up your glue gun. Remove the painter’s tape from the stem carefully. -
Attach the first strand:
Place a small dab of hot glue right at the base of the stem. Press the end of a pearl strand into the glue and hold it for a few seconds until secure. -
Create the drape:
Allow the strand to fall naturally down the side of the pumpkin, following the vertical indentation (rib) of the pumpkin for a cleaner look. -
Attach opposing strands:
I find it balances the design best if you glue the next strand on the exact opposite side of the stem, rather than working in a circle. -
Fill in the gaps:
Continue gluing strands around the base of the stem, spacing them evenly. Aim to have a strand fall along every prominent rib of the pumpkin. -
Secure the bottom (optional):
If you want the pearls to stay tight against the pumpkin, you can add a tiny dot of glue at the bottom curve of the vegetable, but letting them hang freely creates better movement.
Sticky Situation?
If hot glue isn’t holding the pearls to the slick paint, lightly sand the spot near the stem with sandpaper to create a rougher surface for better grip.
Step 3: Styling the Centerpiece
-
Position the pedestal:
Place your white cake stand in the center of your table or display area. -
Place the pumpkin:
Set your pink pumpkin onto the center of the stand. -
Arrange the flow:
Gently pull the longer pearl strands so they drape off the cake stand and puddle onto the table surface. This pooling effect is key to the lavish look. -
Add accent strands:
For extra dimension, you can loosely loop a separate, unattached strand of pearls around the base of the cake stand to connect the elements visually.
Clean Lines
Use a clear matte sealer spray after painting but before gluing pearls. This prevents the paint from chipping when handling the pumpkin.
Step back and admire your beautifully tailored centerpiece that brings a soft, glamorous touch to the season
Tulle-Wrapped Pink Pumpkin for Romantic Texture
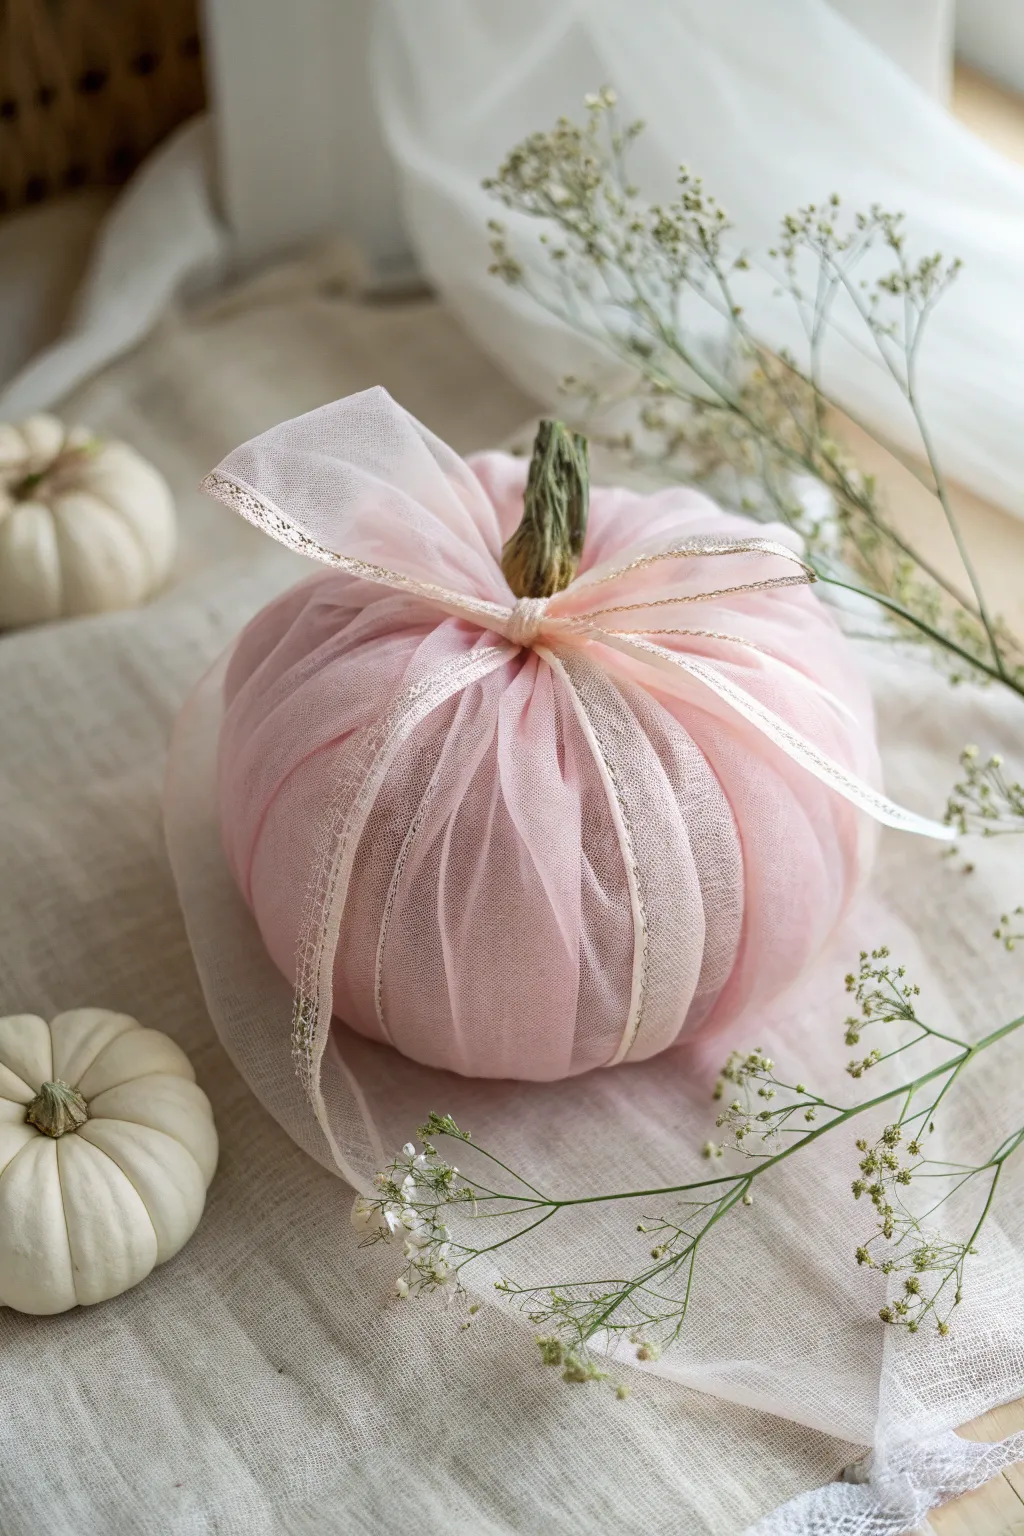
Transform a simple pumpkin into a soft, romantic centerpiece with delicate layers of sheer pink fabric. This no-sew project uses gathered tulle to create dreamy pleats that elevate your autumn decor with an elegant, fairy-tale touch.
Step-by-Step Tutorial
Materials
- Medium-sized faux pumpkin (white or cream works best)
- Soft pink tulle fabric (1-2 yards)
- Sheer pink ribbon with gold trim (approx. 1 inch wide)
- Sharp fabric scissors
- Hot glue gun and clear glue sticks
- Thin rubber band or floral wire
- Dried baby’s breath (optional styling element)
Step 1: Preparing the Base
-
Clean surface:
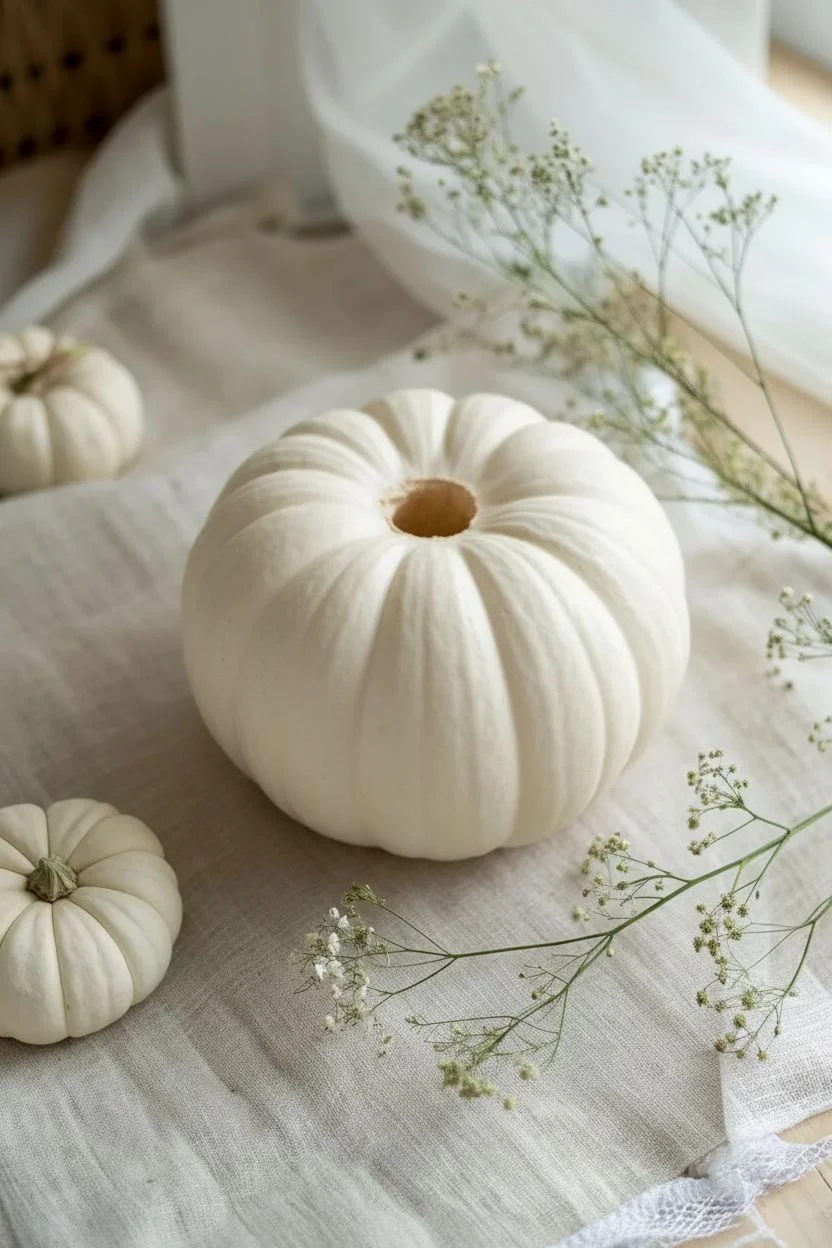
Begin by wiping down your faux pumpkin with a damp cloth to remove any dust or oils, ensuring the fabric will sit cleanly against the surface. -
Remove stem:
Carefully twist or pull out the faux stem if it is removable. If it’s glued tight, you can cut around it, but removing it makes wrapping much easier.
Loose Fabric?
If the tulle feels loose, gather it at the *bottom* of the pumpkin first with a small dab of glue before pulling it up to the stem.
Step 2: Wrapping the Tulle
-
Cut fabric square:
Lay your pink tulle flat on a table and cut a large square or circle. The diameter should be roughly three times the height of your pumpkin to allow for gathering. -
Initial placement:
Center your pumpkin in the middle of the tulle fabric sheet. -
First gather:
Pull up the four corners of the tulle square towards the center top of the pumpkin where the stem was. -
Create pleats:
Starting from one side, gently gather the excess fabric between the corners, pulling it taut against the pumpkin’s curves. -
Tighten fabric:
Continue working your way around, bunching the tulle tightly at the top center. Aim for evenly spaced folds that mimic the pumpkin’s natural ribs. -
Secure the top:
Once all fabric is gathered at the apex, use a thin rubber band to tightly bind the tulle bunch together right at the base of the stem hole. -
Trim excess:
Using sharp scissors, trim the excess tulle bunch above the rubber band, leaving just enough material to tuck into the hole or cover with the stem.
Add Sparkle
Spray a light mist of spray adhesive over the finished tulle and sprinkle ultra-fine iridescent glitter for a magical, frosted morning effect.
Step 3: Adding the Stem and Trim
-
Reattach stem:
Apply a generous dab of hot glue to the bottom of the original stem. Press it firmly back into its hole, covering the rubber band and the cut edges of the tulle. -
Cut ribbon:
Cut a length of the sheer pink and gold ribbon, approximately 24 inches long. -
Wrap the ribbon:
Place the center of the ribbon against the back of the stem. -
Create the knot:
Bring the ends forward and tie a simple overhand knot at the front base of the stem. -
Form the loops:
Tie a standard bow, but pull the loops large and loose. The tails should cascade down the sides of the pumpkin rather than hang straight. -
Adjust draping:
Gently manipulate the wire-edged ribbon or stiff tulle ribbon so the tails curve nicely around the pumpkin’s body.
Step 4: Styling
-
Fluff tulle:
Go around the pumpkin and gently tug at your tulle pleats to even them out, ensuring the pink color is distributed consistently. -
Secure ribbon tails:
If the ribbon tails are refusing to stay in place, use a tiny dot of hot glue to tack them inconspicuously to the tulle layer. -
Final touches:
Inspect the stem area for any visible glue strands and remove them for a clean finish.
Your elegant pumpkin is now ready to add a soft touch of romance to your autumn display
Decoupage Pink Pumpkin With Patterned Paper Collage
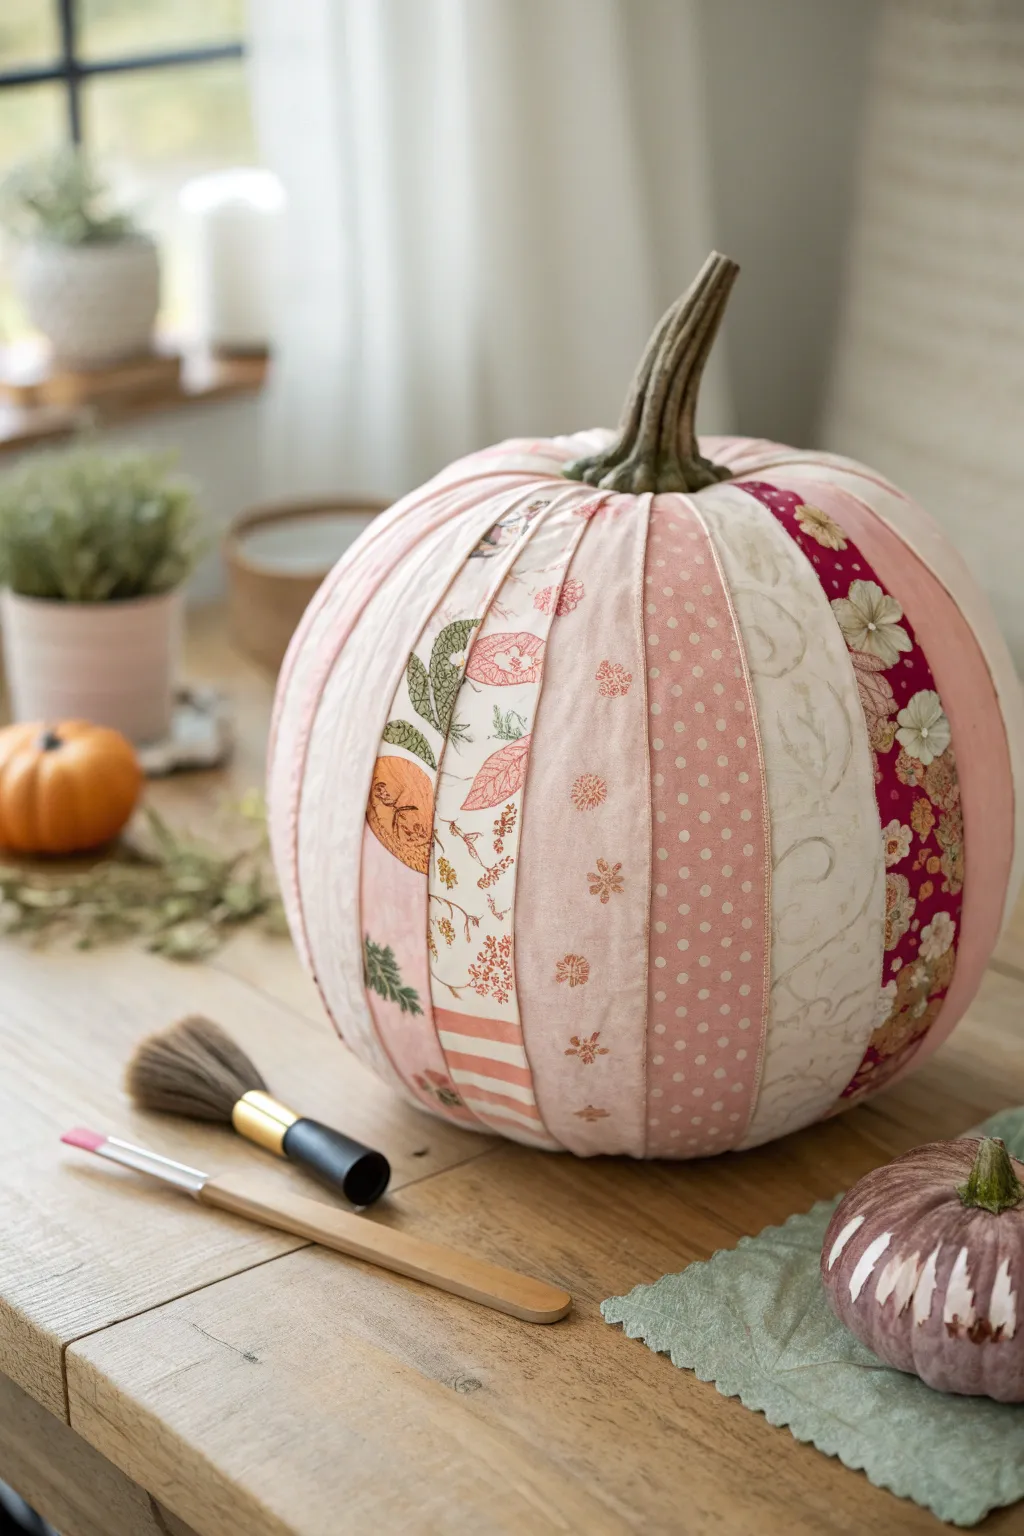

Transform a plain craft pumpkin into a charming centerpiece using soft pink patterned papers and decoupage techniques. This collage-style design mimics the cozy look of a fabric quilt, bringing a touch of vintage warmth to your autumn decor.
Step-by-Step Guide
Materials
- Faux pumpkin (medium or large)
- Assorted scrapbook paper or decoupage paper (pink florals, polka dots, cream patterns)
- Mod Podge (Matte finish)
- Flat paintbrush or foam brush
- Scissors
- Pencil
- Dark green acrylic paint (optional, for stem)
- Fine-grit sandpaper (optional)
Step 1: Preparing the Ribs
-
Establish your template:
If your faux pumpkin has defined ribs, perfect! If not, or if you want custom spacing, use a soft measuring tape to measure the curve from the stem to the base. Draw a elongated oval shape on a piece of scrap paper that matches this length and is about 1.5 to 2 inches wide at the center, tapering to points at both ends. -
Test the fit:
Cut out your template and hold it against the pumpkin. It should cover one ‘segment’ nicely. Adjust the width if necessary so the edges will just barely touch or slightly overlap when placed side-by-side. -
Trace onto patterned paper:
Select 4-6 different patterns of paper. I like to mix small florals, polka dots, and solid textured creams for variety. Trace your template onto the back of these papers. You will need enough strips to cover the entire pumpkin circumference. -
Cut the strips:
Carefully cut out all your paper strips. Don’t worry if edges aren’t laser-straight; a little handmade irregularity adds to the textile look we are aiming for. -
Create texture (optional):
To mimic the fabric look in the inspiration photo, gently crumple the paper strips into a ball and then smooth them back out. This breaks the paper fibers, making it pliable and giving it a softer, wrinkled texture.
Soften Up
To get the fabric-like look shown here, dampen your paper strips very slightly with a mist of water before gluing. It makes paper mold around curves like cloth.
Step 2: Applying the Collage
-
Apply base adhesive:
Working one section at a time, paint a layer of Mod Podge down the length of the pumpkin where your first strip will go. -
Place the first strip:
Lay a paper strip onto the wet adhesive, starting from the stem base and smoothing it down to the bottom. Use your fingers to gently press out air bubbles, molding the paper into any natural grooves. -
Seal the strip:
Immediately brush another thin layer of Mod Podge over the top of the paper strip to seal it. Brush in faint horizontal strokes if you want to enhance the ‘fabric’ illusion. -
Continue around the pumpkin:
Apply the next strip adjacent to the first. Rotate through your different patterns so no two identical designs are touching. It looks best if the edges slightly overlap, creating a seamless patchwork effect. -
Manage the curves:
As you work around the curves, the paper might bunch slightly. Since we want a textured look, simply press these wrinkles down flat with your brush. If a wrinkle is too large, make a tiny slit with scissors to relieve the tension and overlap the paper. -
Check for gaps:
Once the pumpkin is covered, inspect your work. If you see the original pumpkin color peeking through any gaps, cut thin slivers of matching patterned paper and patch them in.
Step 3: Finishing Touches
-
Dry thoroughly:
Let the pumpkin dry completely. This usually takes about 1-2 hours depending on humidity. -
Clean up the stem:
If you got any glue or paper on the stem, wipe it off now. If the stem looks too plastic, give it a quick coat of realistic dark green or brown acrylic paint to ground the pastel colors. -
Soften the edges:
For a vintage feel, lightly sand the raised ridges or paper overlaps with fine-grit sandpaper. This distressing makes the ‘collage’ look more integrated. -
Final seal:
Apply one final, even coat of Matte Mod Podge over the entire pumpkin to unify the sheen and protect your artwork.
Wrinkle Rescue
Large, ugly air bubble? Don’t panic. Prick it with a sewing needle to release the trapped air, then press the paper down firmly with your finger or brush handle.
Place your finished pumpkin on a rustic table or mantel for a soft, romantic take on fall decor
Strawberry-Inspired Pink Pumpkin With Seed Dots
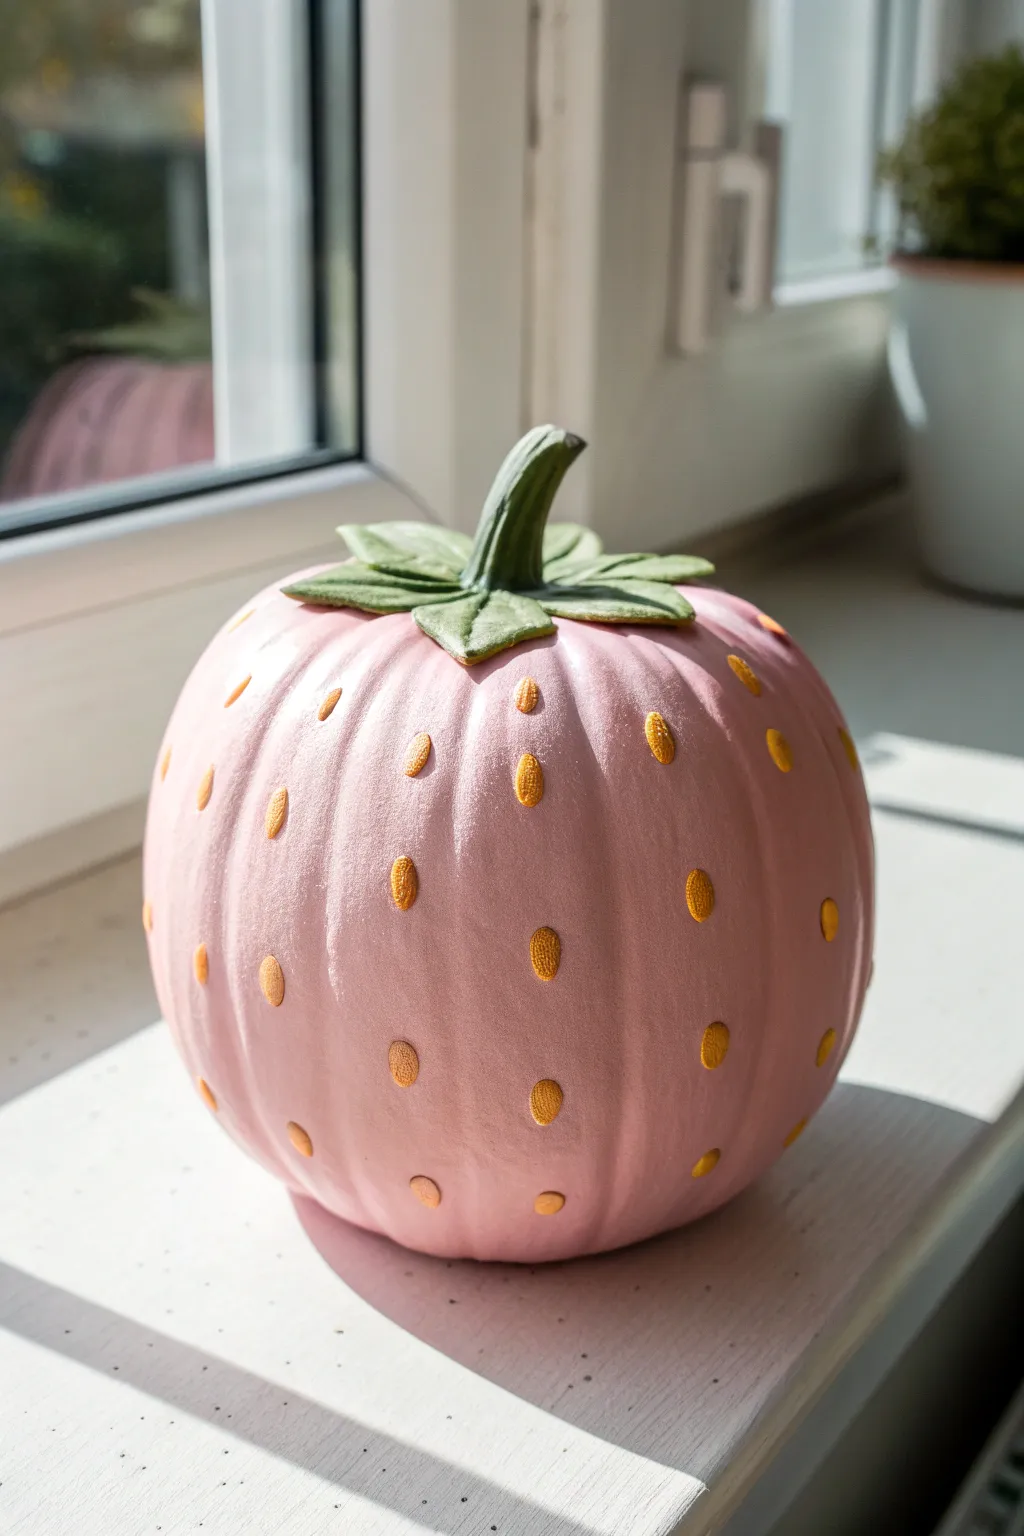
Transform a plain pumpkin into a delightful giant strawberry with this whimsical painting project. This design combines soft matte pink details with golden seed accents for a playful autumn decoration that looks good enough to eat.
Step-by-Step
Materials
- Medium-sized faux white pumpkin (for smoothest finish)
- Matte light pink acrylic paint (e.g., bubblegum or pastel pink)
- Forest green acrylic paint
- Leaf green acrylic paint
- Metallic gold or yellow ochre acrylic paint
- Wide flat synthetic paintbrush
- Small round detail brush (size 1 or 2)
- Pencil (optional)
- Air-dry clay or painter’s tape (for the leaves)
- Clear matte sealant spray
Step 1: Base Coat Preparation
-
Clean surface:
Begin by wiping down your pumpkin with a damp cloth to remove any dust or oils. If using a real pumpkin, ensure it is completely dry. -
Prime the pumpkin:
If your pumpkin is orange or dark, apply a coat of white primer or white acrylic paint first. This ensures the pastel pink color will pop rather than looking muddy. -
Apply base pink:
Using a wide flat brush, paint the entire body of the pumpkin in your chosen light pink shade. Use vertical strokes that follow the natural ridges of the pumpkin for a cleaner look. -
Let it dry:
Allow the first coat to dry effectively. I usually wait about 20 minutes before checking if a second coat is needed to achieve full, opaque coverage. -
Second coat:
Apply a second layer of pink paint if necessary to hide any streaks, ensuring the finish is smooth and even.
Seed Precision Tip
Instead of a brush, use a gold paint pen or even a puff paint applicator for the seeds. This gives you way more control over the teardrop shape.
Step 2: Creating the Strawberry Crown
-
Define the stem area:
Look at the existing stem. If it’s small, you can extend the ‘greenery’ by painting leaf shapes directly onto the top shoulders of the pumpkin. -
Sculpt leaves (Optional):
For the realistic 3D look shown in the image, roll out small pieces of air-dry clay into pointed oval shapes. Keep them thin and press them gently around the base of the existing stem to flare outward. -
Attach and dry:
Press the clay firmly to adhere it to the pumpkin surface while it is still wet. Let the clay harden completely according to the package instructions. -
Paint the stem base:
Paint the main stem using a dark forest green. Get into all the crevices and grooves of the stem structure. -
Paint the leaves:
Paint the clay leaves (or painted leaf shapes) with a lighter leaf green. Blending a little forest green near the center adds lovely depth. -
Add leaf highlights:
Dry brush a tiny amount of yellow or lighter green on the very tips/edges of the leaves to define their shape.
Fixing Wobbly Lines
If you smudge pink onto the green stem, don’t wipe it! Let it dry completely, then paint over the mistake with the correct color for a clean fix.
Step 3: Adding the Seeds
-
Plan seed placement:
Visualize a grid pattern. The seeds should be somewhat regular but not mathematically perfect. You can lightly mark spots with a pencil if you’re nervous about freehanding. -
Load the detail brush:
Dip your small round brush into metallic gold or yellow ochre paint. You want enough paint to create a slightly raised texture, but not so much that it drips. -
Paint the first seed:
Press the brush tip down gently and pull up quickly to create a teardrop or small oval shape. The ‘point’ of the tear should face upward. -
Work in diagonal rows:
Paint your seeds in diagonal lines wrapping around the pumpkin. This mimics the natural growth pattern of a real strawberry. -
Adjust spacing:
Keep the seeds about 1.5 to 2 inches apart. Gaps that are too small can make the design look cluttered. -
Check different angles:
Spin the pumpkin slowly to ensure you haven’t missed any large bald spots on the back or bottom curves. -
Add dimension:
Once the gold seeds are dry, add a tiny dot of lighter yellow or white to the top corner of each seed for a ‘highlight’ effect. -
Seal the project:
Finish by spraying the entire pumpkin with a clear matte sealant. This protects the paint from chipping and gives it a professional, unified finish.
Place your sweet strawberry creation on a windowsill or porch to enjoy a fresh twist on traditional fall decor
Candy-Themed Pink Pumpkin With Sweet Pastel Shapes
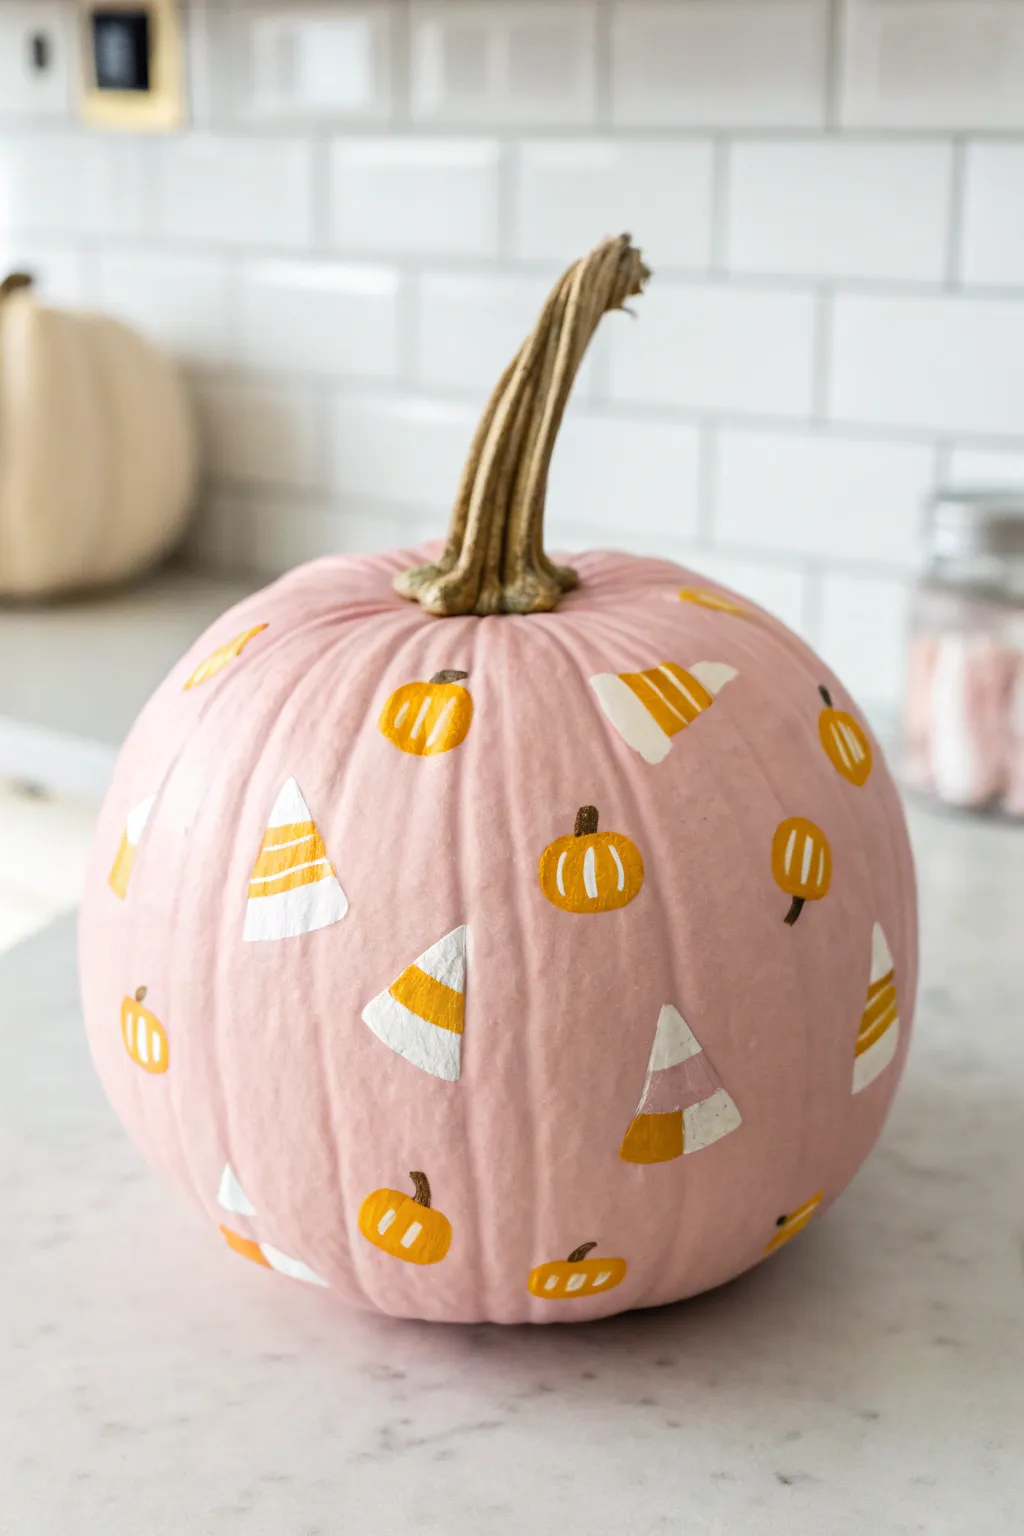

Transform a simple faux pumpkin into a sugary autumn delight by combining pastel pink with classic Halloween motifs. This playful design features hand-painted candy corns and mini pumpkins scattered across a soft pink base for a centerpiece that looks almost good enough to eat.
Step-by-Step Guide
Materials
- Faux craft pumpkin (white or cream base)
- Pastel pink acrylic craft paint
- Golden yellow or mustard acrylic paint
- Bright orange acrylic paint
- Clean white acrylic paint
- Brown acrylic paint
- Paintbrushes (medium flat brush for base, small round detail brush)
- Pencil (optional)
- Matte sealer spray (optional)
- Paper plate or palette
- Cup of water and paper towels
Step 1: Painting the Base
-
Clean surface:
Before dipping into your paint, wipe down the pumpkin surface with a slightly damp cloth to remove any dust or manufacturing residue. If it’s a shiny plastic pumpkin, a very light sanding with fine-grit sandpaper can help the paint grip better. -
First coat of pink:
Using your medium flat brush, apply the first layer of pastel pink paint. Stroke from top to bottom, following the natural vertical ridges of the pumpkin. Don’t worry if it looks streaky at first. -
Let it dry:
Allow the first coat to dry completely. This usually takes about 15-20 minutes for acrylics. If you rush this step, the next layer might lift the previous paint up. -
Apply second coat:
Add a second coat of pink to get that solid, opaque bubblegum look. Ensure you cover the bottom edges and the little crevices near the stem. -
Stem detail:
While you wait for the pink body to dry fully, you can touch up the stem. Leave it natural if you like the rustic look, or give it a light dry-brushing of gold or brown to add contrast against the bright pink.
Step 2: Adding the Motifs
-
Plan placement:
Visualize where your shapes will go. I prefer to work in a random scattering pattern rather than neat rows. You can lightly mark positions with a pencil if you feel nervous about freehanding. -
Paint triangle base:
Start with the candy corn shapes. Paint small, rounded triangles using white paint. These serve as the base for the candy corn. Scatter them around the pumpkin at different angles. -
Add candy corn layers:
Once the white triangle base is dry, paint the bottom third of the triangle with your golden yellow paint. Let that set for a moment. -
Candy corn middle:
Paint the middle section of the triangle with bright orange, leaving the very top tip white. You now have a classic candy corn look. -
Paint pumpkin shapes:
In the empty spaces between the candy corns, paint small orange ovals or rounded rectangles to serve as the mini pumpkins. Vary their sizes slightly for interest. -
Detail the ribs:
Take your smallest detail brush and dip it in white paint. Carefully add 2-3 vertical curved lines on each mini pumpkin to represent the ribs. -
Add stems:
Using the brown paint and the very tip of your detail brush, add a tiny stem to the top of each mini pumpkin. A simple little dash or slightly curved line works perfectly. -
Touch ups:
Look over the entire pumpkin. If the orange on the candy corn looks transparent, dab a little more paint on top. Clean up any fuzzy edges with your base pink color. -
Seal (Optional):
If you plan to keep this decoration for next year, give the entire pumpkin a light mist of matte sealer spray once all paint is 100% dry.
Clean Lines Hack
Use a white paint pen or fine-tip POSCA marker for the candy corn tips and pumpkin rib lines. It offers way more control than a brush for tiny details.
Level It Up
Mix glitter into your white paint for the tips of the candy corn to make them look sugar-coated and sparkly.
Place your adorable pink creation on the kitchen counter or mantel for a soft pop of festive color
Ice Cream Drip Pink Pumpkin With Sprinkle Details
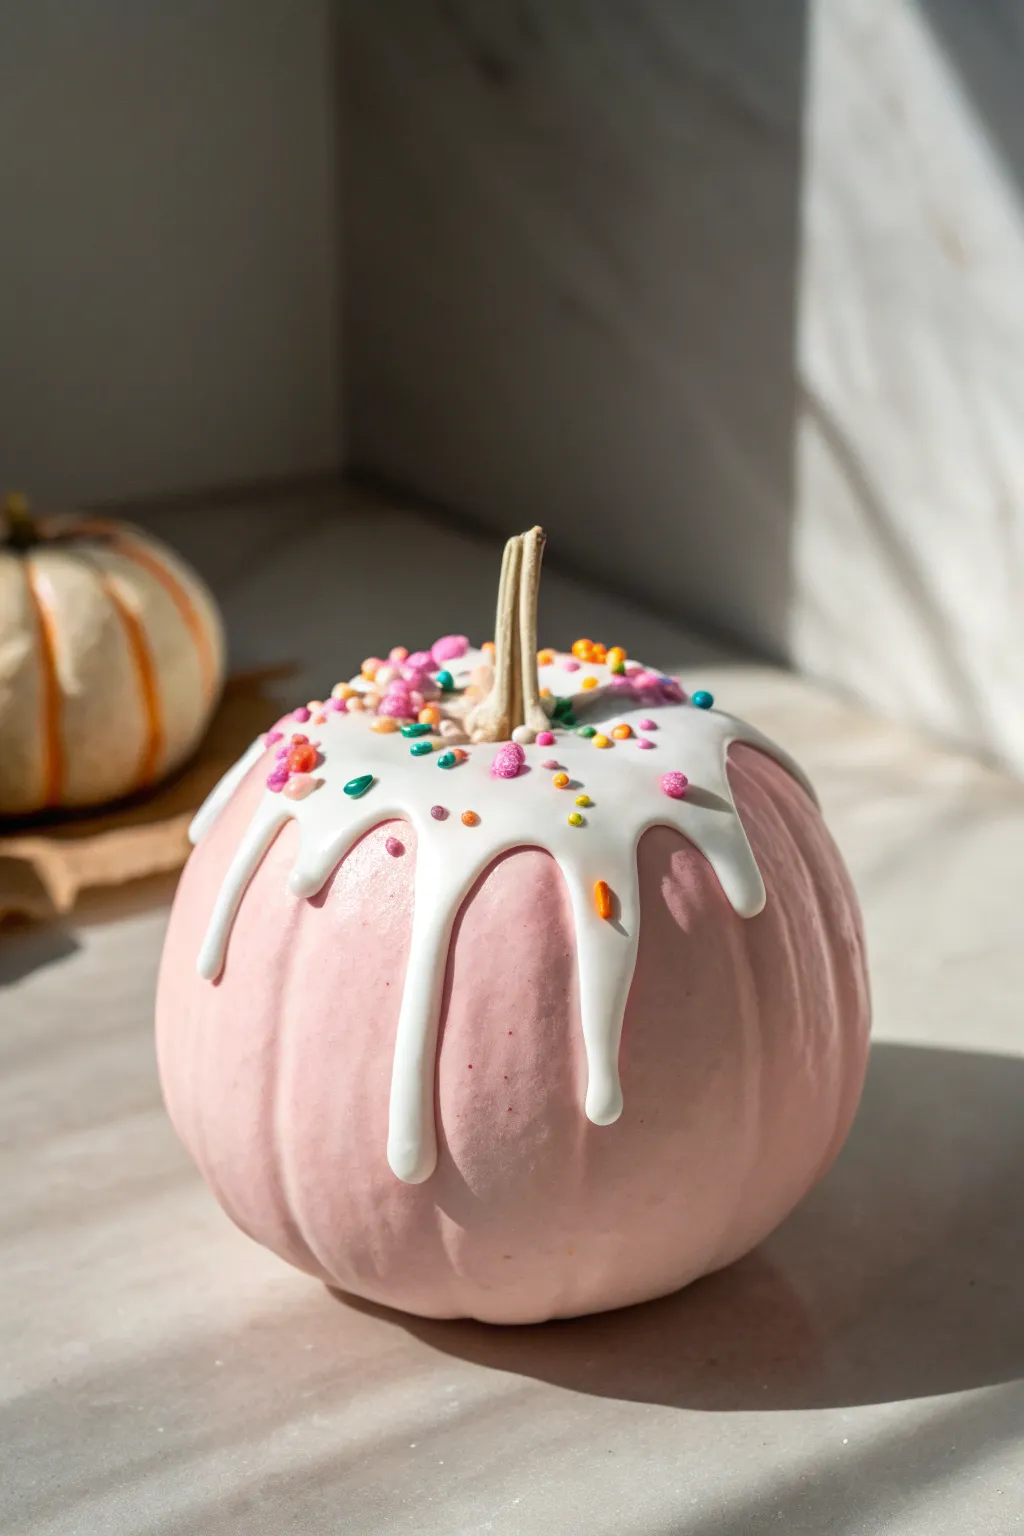
Transform a simple gourd into a sweet treat with this whimsical design that looks good enough to eat. By mimicking the glossy drip of melted ice cream and adding cheerful sprinkles, you’ll create a pastel centerpiece that’s perfect for a playful autumn display.
How-To Guide
Materials
- Small to medium craft pumpkin (or real pumpkin, cleaned and dried)
- Matte pale pink acrylic paint
- Glossy white puffy paint (3D fabric paint) or white acrylic paint mixed with pouring medium
- Real rainbow sprinkles (jimmies and nonpareils)
- Wide flat paintbrush
- Tape (painter’s or masking)
- Small paper cup or bowl (if mixing paint)
- Clear sealant spray (optional)
Step 1: Creating the Strawberry Base
-
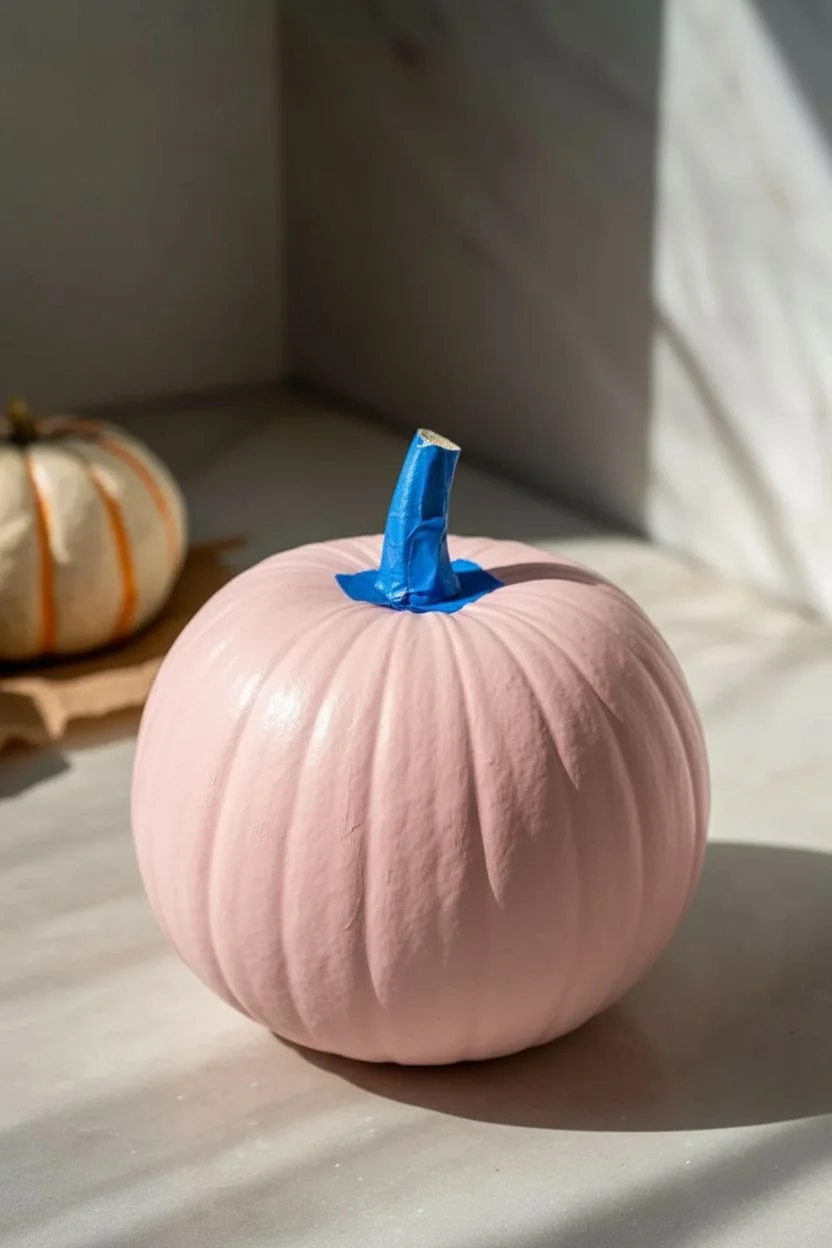
Prepare your pumpkin:
Start with a clean, dry pumpkin. If you are using a real pumpkin, ensure all dirt is wiped away. If using a craft pumpkin, remove any price stickers. Cover the stem tightly with painter’s tape to keep it natural and paint-free. -
First coat of pink:
Squeeze some matte pale pink acrylic paint onto a palette or paper plate. Using your wide flat brush, apply an even coat over the entire surface of the pumpkin, working in vertical strokes from top to bottom. -
Let it dry completely:
Allow the first coat to dry for about 20-30 minutes. The matte finish helps create that soft, ‘strawberry ice cream’ look, but it often needs two layers for full opacity. -
Second coat of pink:
Apply a second layer of pink paint to cover any streaks or orange spots showing through. Let this layer dry fully before moving on to the ‘icing’ step.
Drip Too Runny?
If your paint trails all the way to the bottom, it’s too thin. Catch the drip with a paper towel, wipe it back, and let your paint mixture sit for 10 minutes to thicken slightly before retrying.
Step 2: Adding the Drippy Icing
-
Prepare the white mixture:
For the most realistic effect, I recommend using white 3D fabric paint (puffy paint) directly from the bottle. Alternatively, mix white acrylic paint with a pouring medium until it has the consistency of warm honey. -
Start at the top:
Begin applying the white paint in a circle immediately around the base of the stem. You want a thick pool of paint here to serve as the source for your drips. -
Create the first drip:
Gently squeeze the bottle (or guide your poured paint) toward one of the pumpkin’s natural grooves. Let gravity help pull a thick bead of paint down the side. -
Vary the lengths:
Continue creating drips around the circumference. Make some drips long, reaching halfway down the pumpkin, and keep others short and stubby near the top for a natural, random look. -
Connect the drips:
Go back and fill in the spaces between the drips at the top shoulder of the pumpkin. You want a cohesive ‘cap’ of white that looks like a single scoop melting down. -
Thicken the edges:
If your drips look too flat, add a little extra paint right at the bottom tip of each drip. This creates a rounded, 3D droplet effect that mimics real icing.
Pro Tip: Realistic Drips
For ultra-realistic puffy icing, mix equal parts white school glue and shaving cream plus a drop of white paint. It dries foamy and matte like real frosting rather than glossy glaze.
Step 3: The Sprinkle Finish
-
Time carefully:
Do not let the white paint dry yet! You need the surface to be wet and tacky for the sprinkles to adhere properly. -
Select your sprinkles:
Pour a mix of rainbow jimmies (the long sticks) and nonpareils (the tiny balls) into your hand. A mixture of shapes adds the best texture. -
Drop from above:
Gently pinch a few sprinkles and drop them onto the wet white paint. Focus mainly on the top, flat area near the stem. -
decorate the drips:
Carefully place individual sprinkles on the vertical drips. Press them very lightly into the paint if needed to ensure they stick, but be careful not to smudge the drip shape. -
Catch stray sprinkles:
If any sprinkles land on the dry pink section, gently brush them away immediately before they get stuck in any tacky residue. -
Remove the tape:
Once you are satisfied with your sprinkle placement, carefully peel the painter’s tape off the stem to reveal the natural color underneath. -
Final cure:
Let the pumpkin sit undisturbed for at least 24 hours. Because the white paint is applied thickly to create the drip effect, it will take much longer to dry than a standard coat of paint.
Place your sweet creation on the mantel or porch for a distinctive pop of pastel color this season
Self-Care Spa Face Pink Pumpkin Character
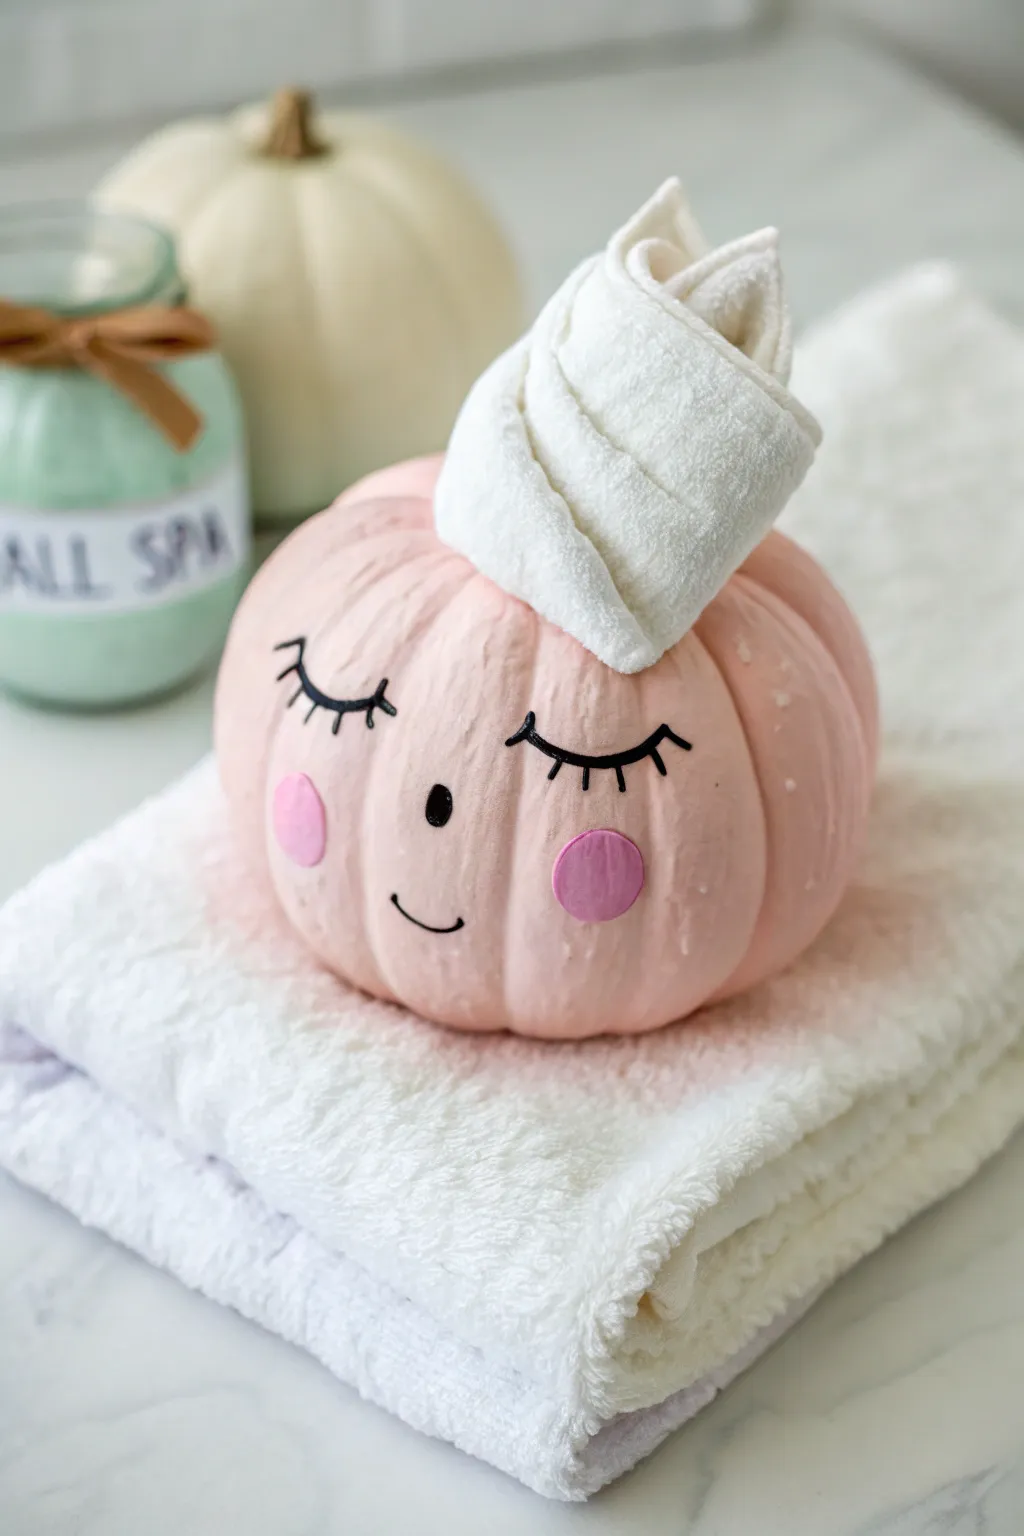
Transform a regular pumpkin into the ultimate symbol of relaxation with this adorable spa-themed character. With her serene expression and tiny towel wrap, this painted pumpkin brings a touch of self-care whimsy to your fall decor.
Step-by-Step Tutorial
Materials
- Small to medium foam or real pumpkin
- Blush pink acrylic craft paint
- Soft pink crafting felt
- White washcloth or scrap of terry cloth fabric
- Black acrylic paint or black paint marker
- Hot glue gun and glue sticks
- Scissors
- Paintbrushes (wide foam brush and fine detail brush)
- Small round sponge dauber (optional)
- Pencil
Step 1: Setting the Base
-
Clean surface:
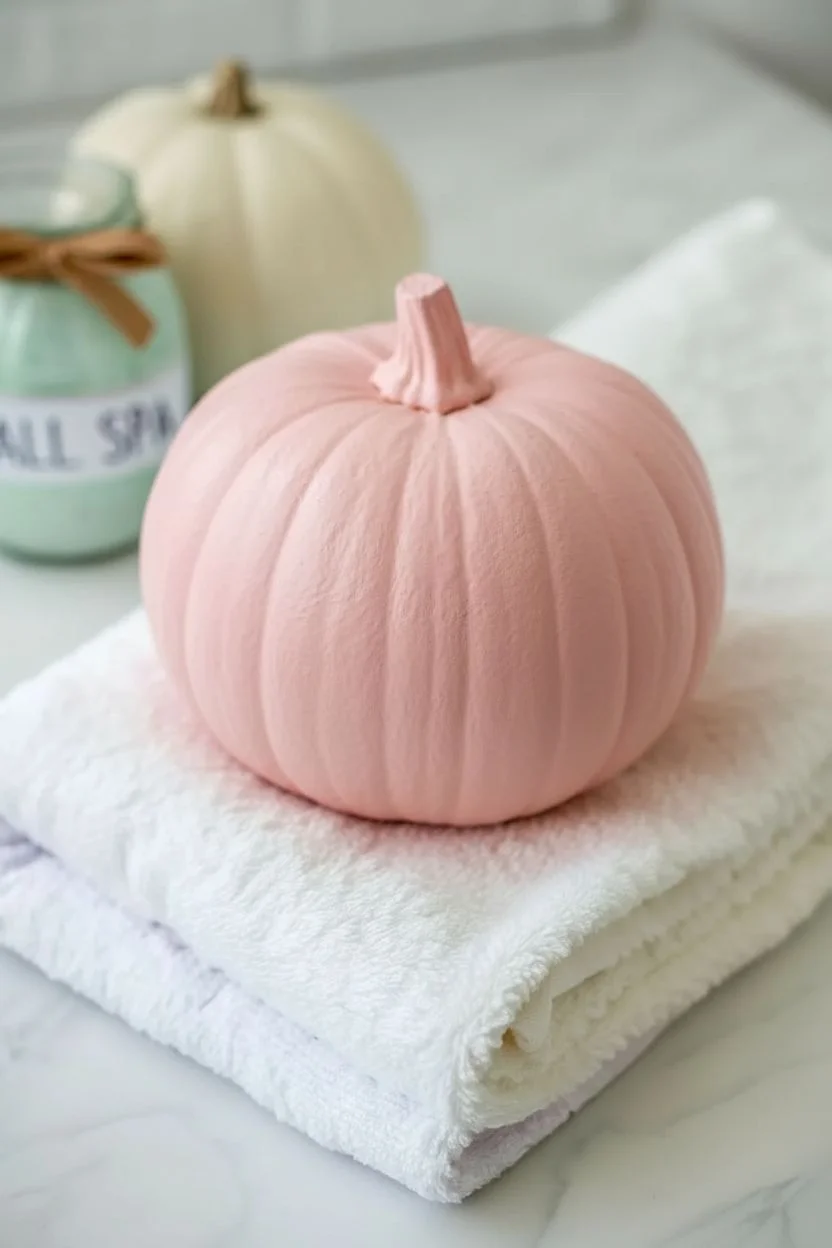
If using a real pumpkin, wash and dry it thoroughly to remove dirt. For a foam pumpkin, just give it a quick wipe with a damp cloth to ensure the paint adheres well. -
Apply base color:
Using a wide foam brush, paint the entire pumpkin with blush pink acrylic paint. Cover the stem as well, though it will mostly be hidden layer. -
Dry and repeat:
Let the first coat dry completely. Apply a second or third coat until you achieve a solid, opaque pink finish with no orange showing through.
Step 2: Creating the Face
-
Draft the features:
Once the pink paint is bone dry, lightly sketch the facial features with a pencil. Place the eyes about halfway down the pumpkin, curved downwards for a sleeping look. -
Paint the lashes:
Using a fine detail brush and black paint, or a black paint marker, carefully trace your pencil lines to create two curved eyelids. -
Add lash details:
Draw three small, flicked lines extending from the outer corner of each eyelid to create fluttering eyelashes. -
Nose and mouth:
Paint a small, vertical oval in the center for the nose. Below that, add a tiny, simple curved line for a subtle smile. -
Cut the cheeks:
Cut two small, perfect circles out of the soft pink felt. These should be slightly larger than a quarter. -
Appling cheeks:
Use a small dab of hot glue to secure the felt circles onto the pumpkin cheeks, placing them just below and outside the eyes.
Paint Smudges?
If you smudge the black paint, wipe it immediately with a damp Q-tip. If it dried, just dab a little pink base coat over the error to magic it away.
Step 3: The Spa Wrap
-
Prepare the fabric:
Cut your white washcloth or terry cloth into a long rectangular strip, roughly 3 inches wide and 10 inches long, depending on your pumpkin’s size. -
Fold the edge:
Fold one of the long edges under by about half an inch to create a clean, finished hem for the front of the head wrap. -
Start wrapping:
Place the center of the fabric strip against the back of the pumpkin’s stem area. Bring the two ends forward, wrapping them around the stem. -
Twist the top:
Twist the two ends of the fabric together at the front, creating that classic towel-turban look. Allow the twisted height to rise above the stem. -
Secure the shape:
Tuck the twisted ends back behind the main wrap or glue them securely in place so the turban holds its vertical shape. -
Final glue down:
Apply hot glue underneath the edge of the towel wrap where it meets the pumpkin to ensure it stays permanently attached and doesn’t slide off.
Accessories
Cut two cucumber slices out of green felt and glue them near the base for props, or place a real face mask sheet underneath the pumpkin for display.
Set your finished spa pumpkin on a stack of folded towels to complete the relaxing vignette
Pink Ribbon Pattern Pumpkin for a Meaningful Display
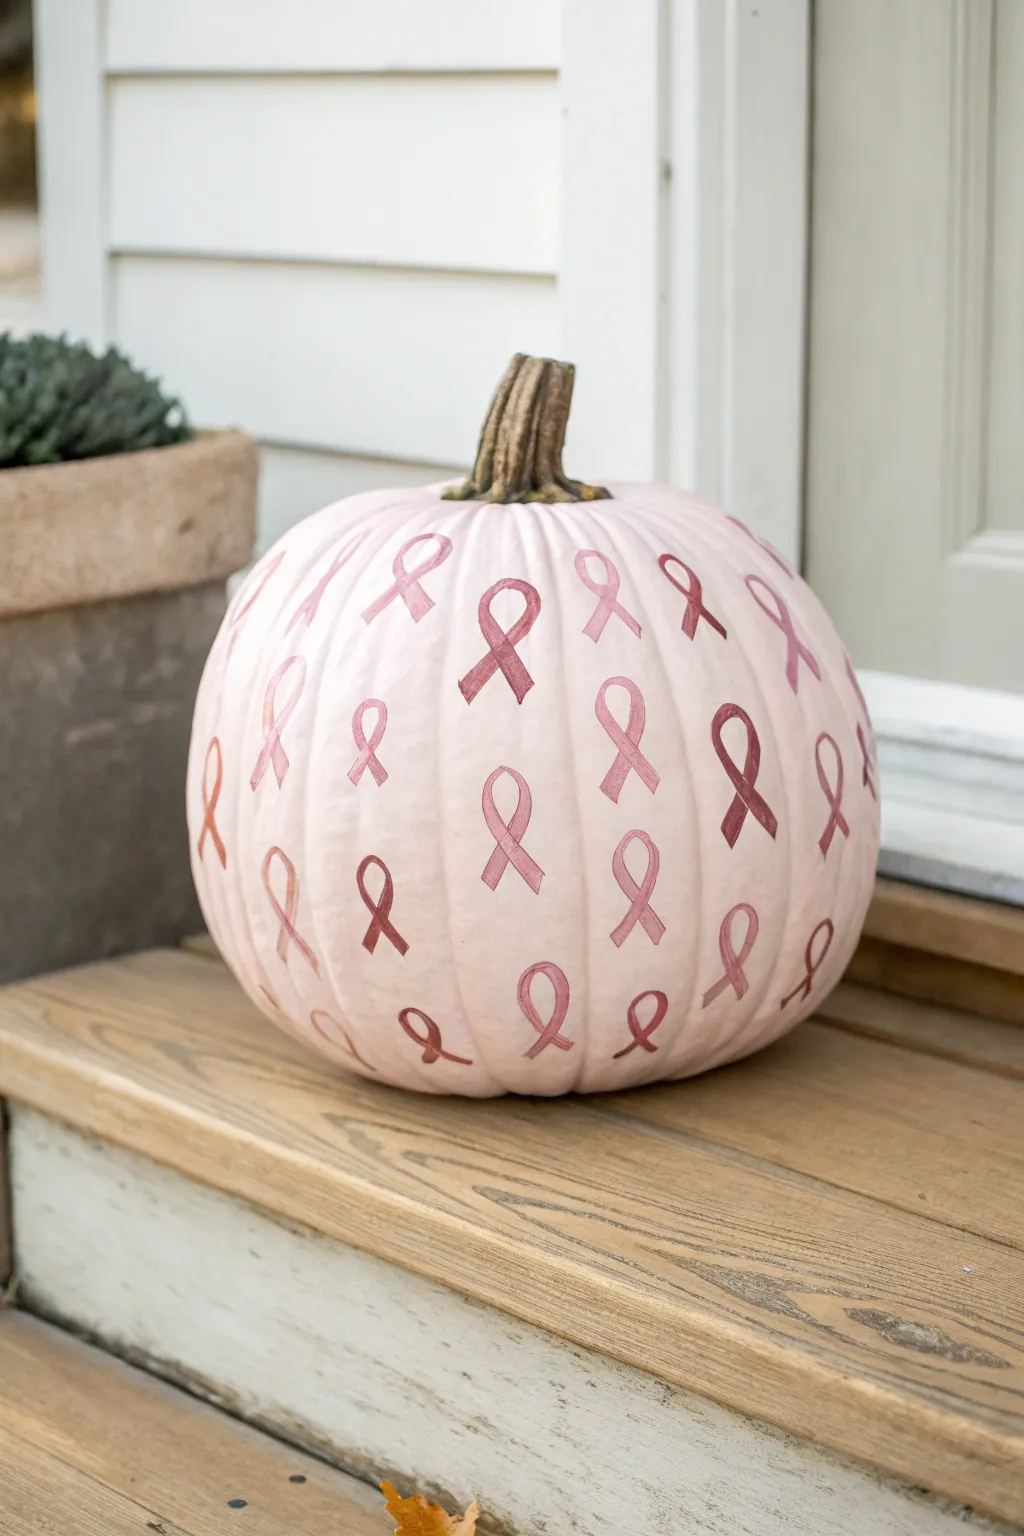
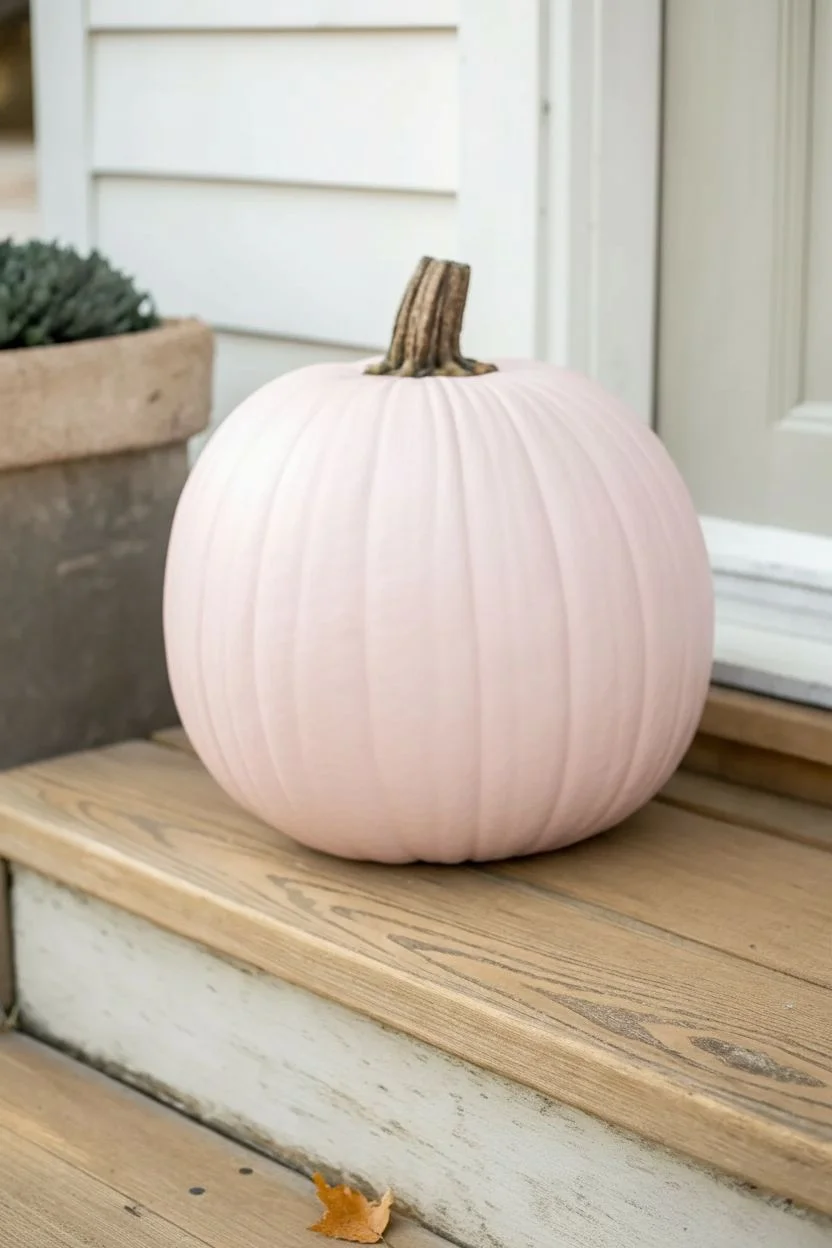
Transform a simple pumpkin into a beautiful symbol of hope and support with this delicate painted design. Featuring a soft blush base and a scatter of hand-painted awareness ribbons in varying shades of pink, this project creates a meaningful display for your porch or entryway.
Step-by-Step Guide
Materials
- Faux pumpkin (medium size, white or cream)
- Pale pink acrylic paint (matte or satin finish)
- Dark rose or maroon acrylic paint
- Medium pink acrylic paint
- Soft pink acrylic paint
- Small flat paint brush (1/4 inch wide)
- Medium foam brush
- Pencil
- Palette or paper plate
- Paper towels
- Matte spray sealer (optional)
Step 1: Preparing the Base
-
Clean the surface:
Before painting, wipe down your faux pumpkin with a slightly damp paper towel to remove any dust or manufacturing residue. If using a real pumpkin, wash and dry it thoroughly. -
Protect the stem:
If you want to keep the natural stem color, carefully tape it off with painter’s tape. I usually just paint carefully around the base of the stem to save time. -
Apply the base coat:
Using your foam brush, apply a layer of pale pink acrylic paint over the entire pumpkin. -
Let it dry:
Allow the first coat to dry completely for about 20-30 minutes. The surface should not feel tacky to the touch. -
Add a second coat:
Apply a second coat of the pale pink paint to ensure solid, opaque coverage, smoothing out any brushstrokes as you go. Let this dry fully before moving on.
Step 2: Painting the Ribbons
-
Practice your shape:
On a piece of scrap paper, practice drawing the ribbon loop shape. It looks like a lowercase cursive ‘l’ or a fish swimming upward. -
Sketch the layout:
Lightly sketch the ribbons onto the dried pumpkin using a pencil. Arrange them randomly, angling them in different directions to create a tumbling pattern rather than perfect rows. -
Mix your palette:
Squeeze dime-sized amounts of your dark rose, medium pink, and soft pink paints onto your palette. You want a clear variety of shades. -
Start with the darkest color:
Dip your flat brush into the dark rose/maroon paint. Following your pencil sketches, paint a selection of the ribbons scattered across the surface. -
Create the ribbon definition:
Use the flat edge of the brush to create the width of the ribbon in a single stroke if possible, turning the brush slightly as you round the loop. -
Add medium tones:
Rinse your brush thoroughly. Switch to the medium pink paint and fill in about a third of the remaining pencil sketches. -
Fill in lighter shades:
Using the soft pink paint, complete the remaining ribbons. The variation in color adds depth and visual interest to the pattern. -
Check for gaps:
Step back and look at the pumpkin from a distance. If any areas look too empty, pencil in a small partial ribbon near a groove or edge and paint it to balance the composition. -
Touch up edges:
Go back over any ribbons that look transparent or streaky with a second layer of paint to make the colors pop.
Fixing Wobbly Lines
If a ribbon curve gets messy, wait for it to dry completely. Then, use a small detail brush dipped in your base pale pink color to carefully ‘erase’ and reshape the edges.
Step 3: Finishing Touches
-
Clean up pencil lines:
Once the ribbon paint is bone dry, gently erase any visible pencil marks that weren’t covered by the paint. -
Seal the artwork:
If you plan to display this outdoors, spray the entire pumpkin with a clear matte sealer to protect the design from moisture. -
Display:
Place your finished pumpkin on your porch steps or entryway bench.
Add Subtle Sparkle
Mix a tiny amount of glitter medium into your darkest ribbon color before painting, or outline the dried ribbons with a metallic silver paint pen for a sophisticated shimmer.
This lovely hand-painted project serves as a gentle reminder of strength and solidarity during the autumn season
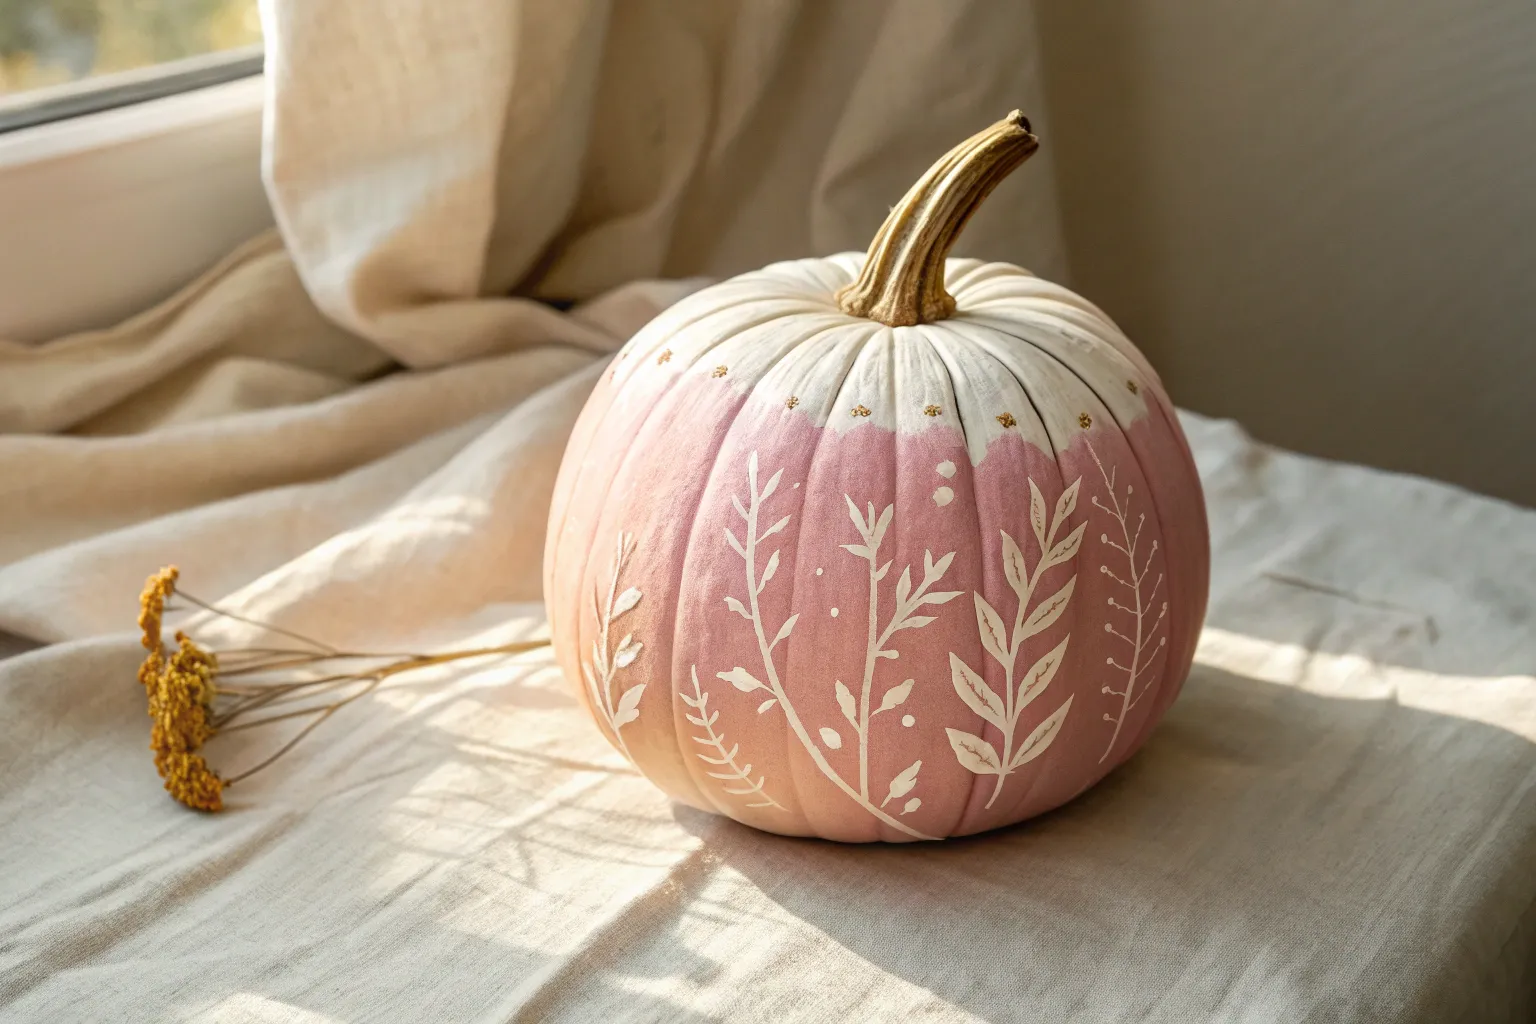
Negative-Space Line Art on a Pale Pink Pumpkin
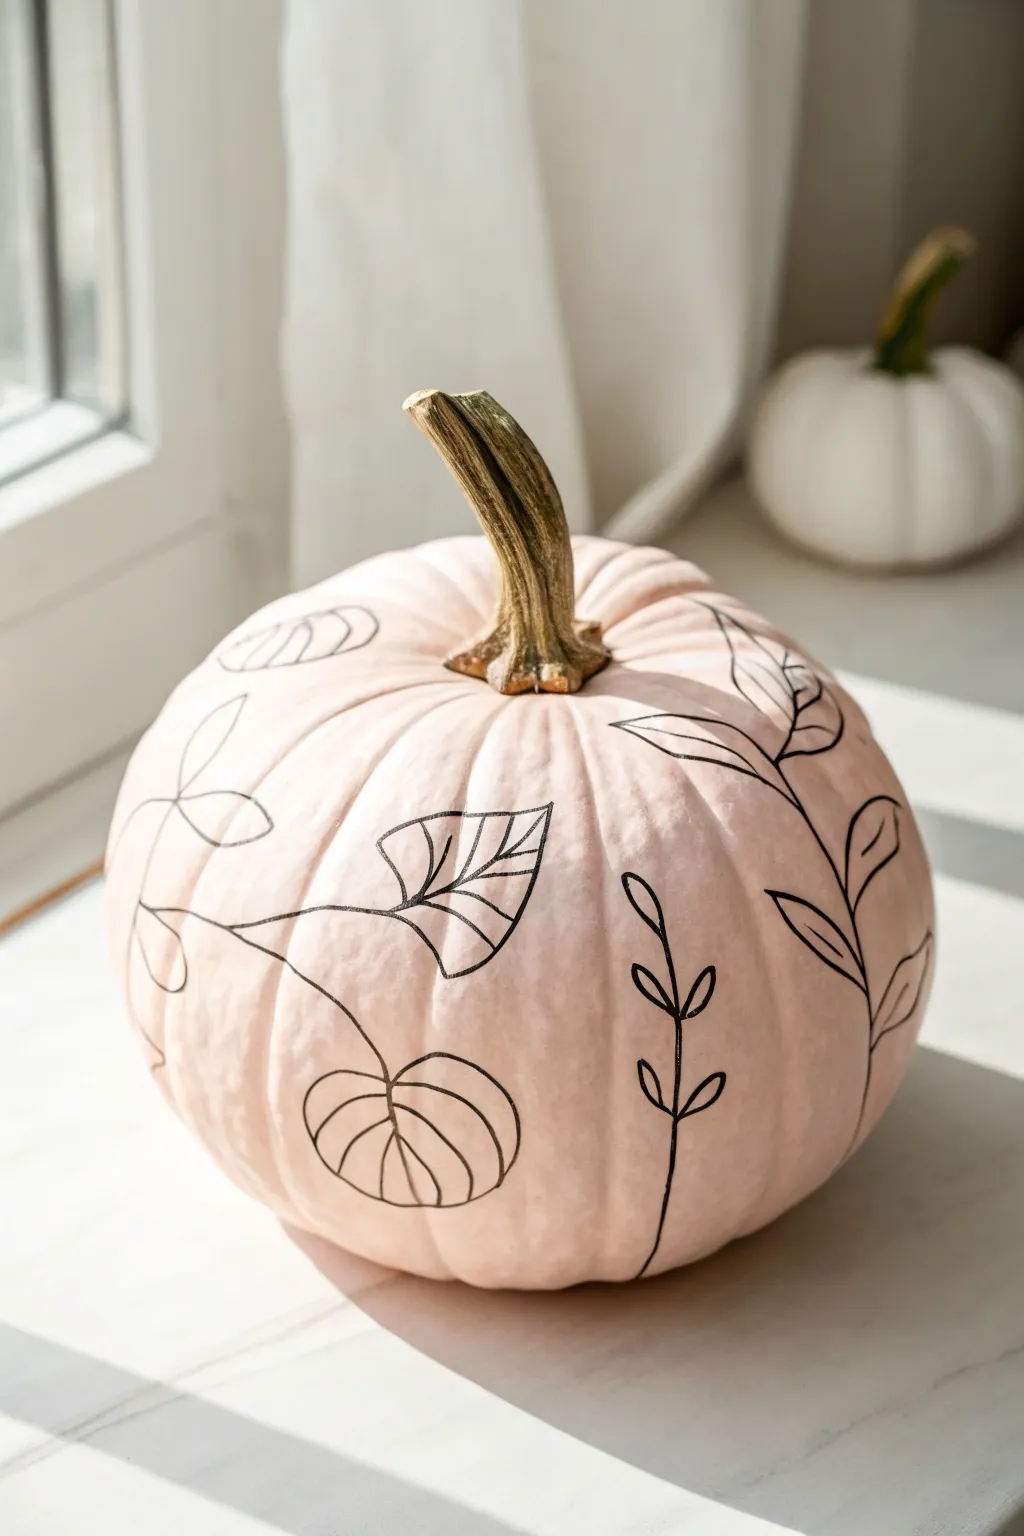
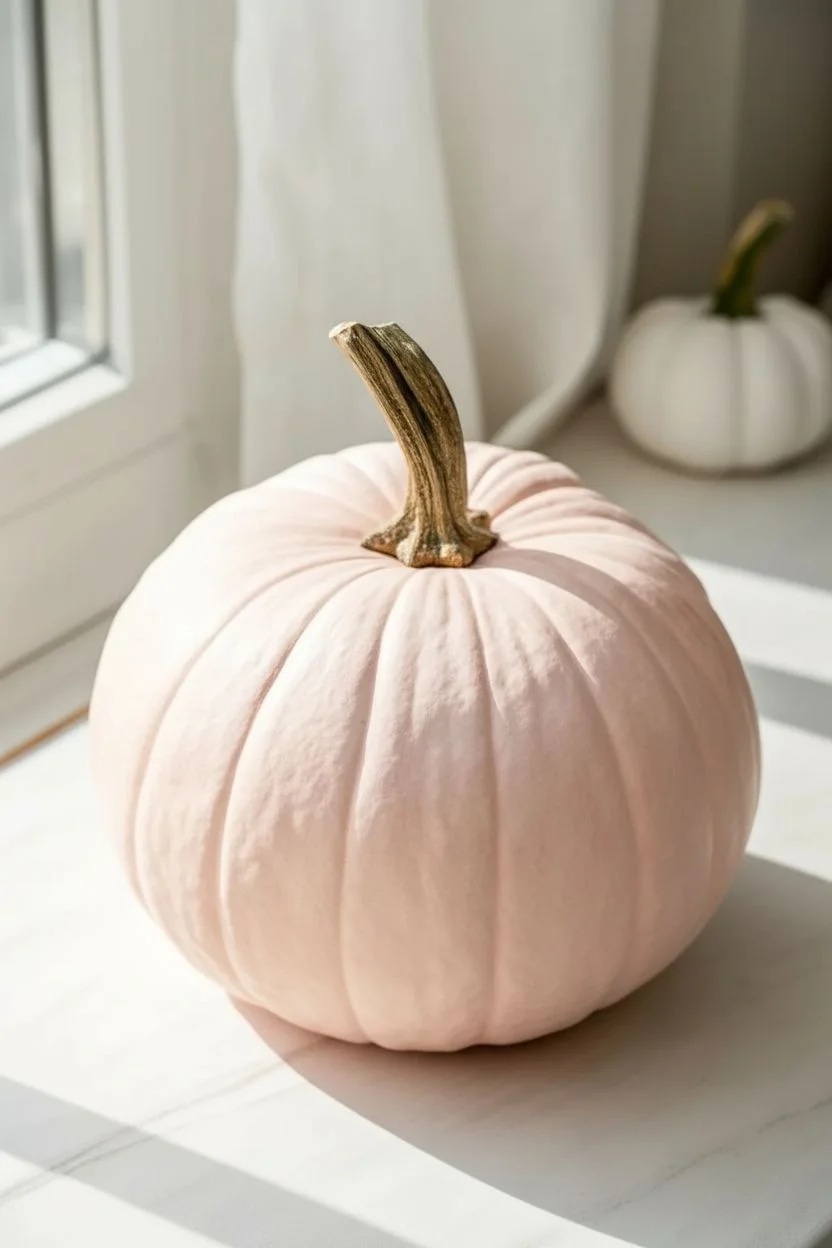
For a sophisticated twist on fall decor, this project treats a pale pink pumpkin as a canvas for delicate, illustrative line art. The contrast between the soft matte blush background and the crisp black botanical drawings creates a modern, airy aesthetic perfect for bright interiors.
Detailed Instructions
Materials
- Medium-sized faux pumpkin (or real pumpkin)
- Pale pink chalk paint or matte acrylic paint (e.g., ‘Ballet Slipper’ or ‘Blush’)
- Gold acrylic paint (metallic antique gold)
- Black oil-based paint marker (fine point)
- Black acrylic paint pen (medium point)
- Pencil (HB or lighter)
- White eraser
- Medium flat paintbrush
- Small detail paintbrush
- Matte spray sealer (clear)
Step 1: Preparing the Canvas
-
Clean the surface:
Whether using a real or faux pumpkin, wipe the surface down thoroughly with a damp cloth to remove any dust or oils. Let it dry completely. -
Mix your base color:
If you don’t have a premixed pale pink, mix white acrylic paint with a tiny drop of red and a touch of yellow ochre to warm it up. Aim for a very pastel, muted blush tone rather than a bright bubblegum pink. -
Apply the first coat:
Using your medium flat brush, apply a coat of the pink paint over the entire pumpkin body, stopping at the base of the stem. Use long, vertical strokes that follow the natural ribs of the pumpkin. -
Let it dry:
Allow the first coat to dry fully. Chalk paint dries quickly (about 30 minutes), but standard acrylics may need an hour. Don’t rush this, or the brush will drag the previous layer. -
Apply the second coat:
Add a second coat of pink paint to ensure solid, opaque coverage where no original orange or white shows through. -
Paint the stem:
While the body dries, carefully paint the stem with the metallic antique gold paint. I use a smaller brush here to get into the crevices near the base without messing up the pink.
Clean Lines Tip
Rest your pinky finger on the pumpkin surface while drawing to stabilize your hand. If the paint is fully dry, this won’t leave a mark and keeps lines steady.
Step 2: Sketching the Design
-
Plan your composition:
Visualize three main types of botanical elements: long trailing vines with small leaves, larger singular statement leaves, and rounder seed-pod shapes. -
Lightly sketch vines:
Using a pencil, very lightly draw sweeping, curved lines starting from the bottom third of the pumpkin and reaching upward. Let them meander across the ‘ribs’ naturally. -
Add leaf placements:
Sketch simple outlines for the leaves attached to your vines. Vary the sizes, keeping some clusters purely linear and others fuller. -
Check the balance:
Step back and look at the pumpkin. Make sure you have plenty of negative pink space remaining; the design should feel open and airy, not crowded.
Step 3: Inking the Botanicals
-
Trace main stems:
Shake your medium-point black paint pen well. confident, smooth strokes, trace over your main vine pencil lines. Try to do each section in one continuous motion to avoid shaky lines. -
Draw the ‘skeleton’ leaves:
Switch to the fine-point marker for intricate details. Draw the outlined leaves that have internal veins. These look like open shapes with a central line and diagonal veins branching off. -
Create the solid vines:
For the simpler vines (like the one on the right side of the image), draw a single stem line with small, football-shaped leaves attached directly to it usually in opposite pairs. -
Add the seed pods:
Draw the rounded, pumpkin-like pod shapes near the bottom. Outline the main shape, then add curved vertical lines inside to give them volume. -
Vary line weight:
Go back over certain intersections—where a leaf meets a stem—to thicken the line slightly. This subtle weight variation makes the drawing look more organic and professional. -
Erase guidelines:
Wait at least 2 hours for the ink to cure completely. Once you are certain it’s dry, gently erase any visible pencil marks with a white eraser. -
Seal the work:
To protect your intricate lines from scratching, take the pumpkin to a well-ventilated area and apply a light coat of clear matte spray sealer.
Level Up: Gilded Edges
For extra glamour, use a tiny brush to add a thin line of gold paint along just one side of the main black vine stems to create a shadow effect.
Place your creation near a window where the natural light can highlight the delicate contrast of your handiwork
Mixed-Media Pink Pumpkin With Raised Texture Paste
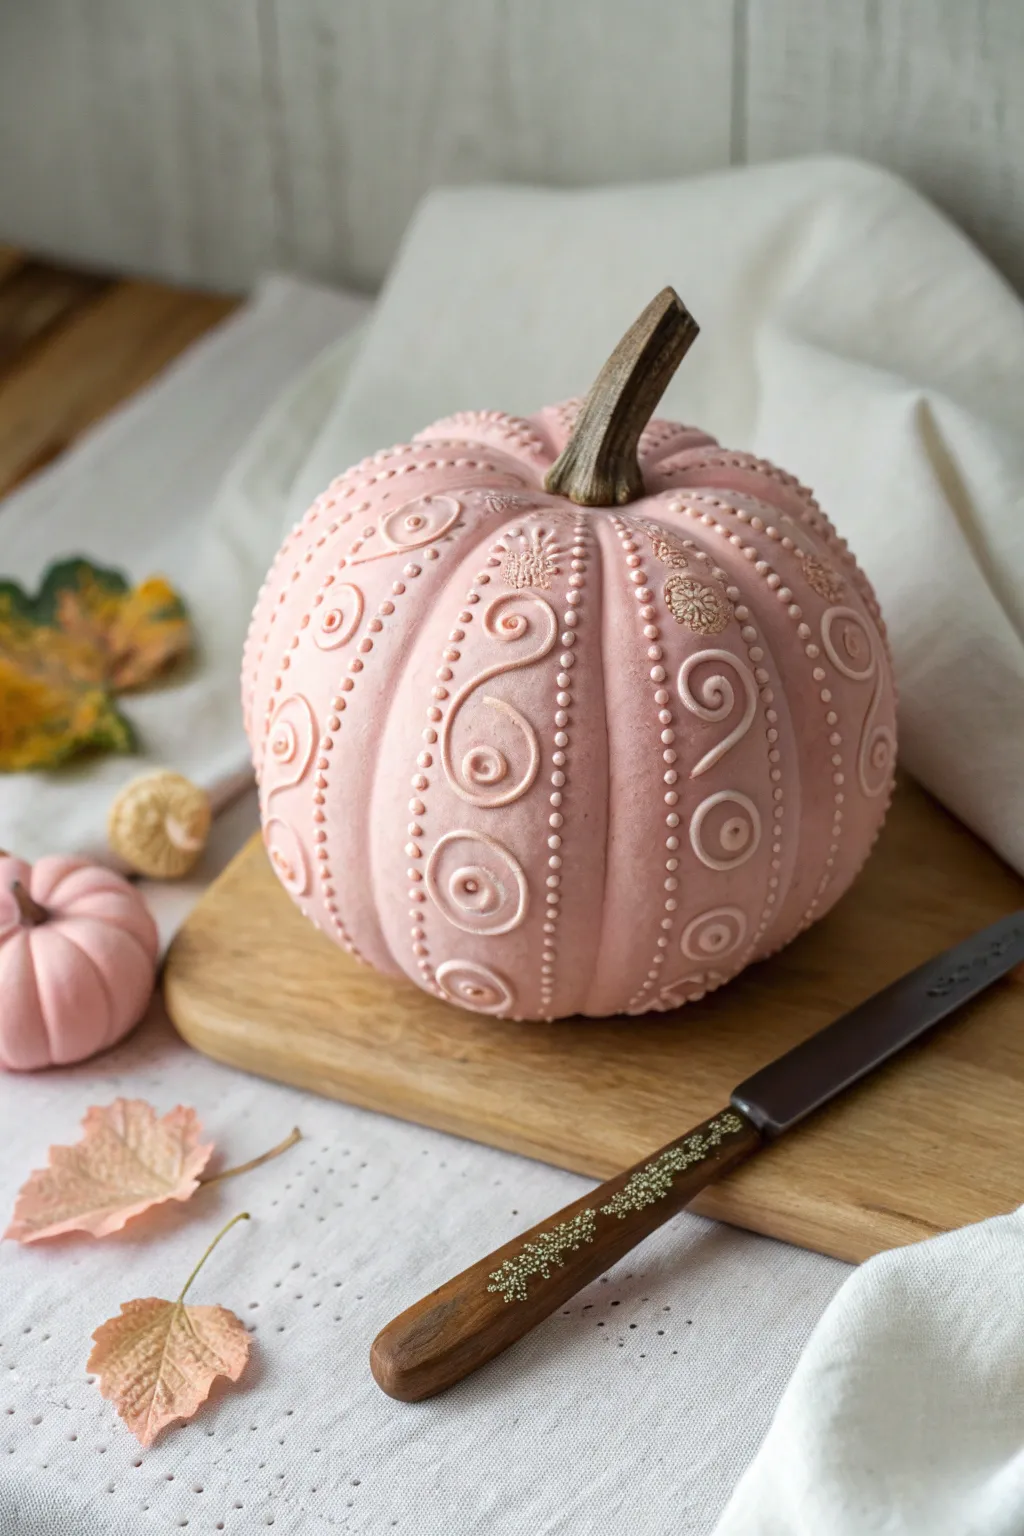
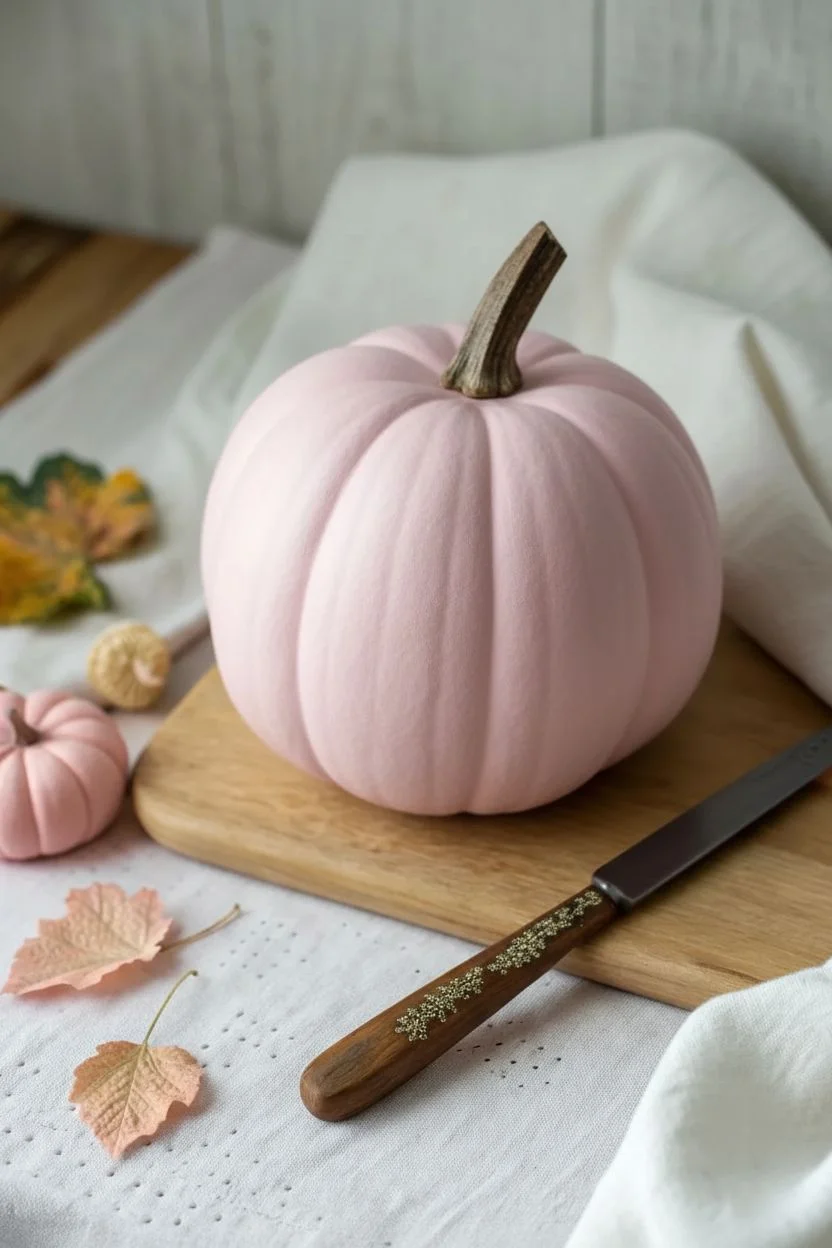
Transform a faux pumpkin into a delicate work of art with this raised texture technique that mimics intricate royal icing or henna designs. The soft matte pink finish combined with dimensional white piping creates a sophisticated, tactile centerpiece perfect for a shabby chic autumn display.
How-To Guide
Materials
- Medium-sized faux pumpkin (smooth surface works best)
- Matte pale pink spray paint (e.g., chalk finish)
- White or cream dimensional fabric paint (easy-squeeze bottle)
- Alternative: Texture paste and a piping bag with a fine round tip
- Pencil (light color) or chalk for sketching
- Paper towels
- Matte clear sealant spray (optional)
- Fine-grit sandpaper
Step 1: Preparation and Base Coat
-
Prep the Surface:
Wipe down your faux pumpkin with a damp cloth to remove any dust or oils. If the original surface is very shiny, lightly scuff it with fine-grit sandpaper to help the paint adhere better. -
Prime the Stem:
Mask off the stem with painter’s tape to keep it natural, or plan to paint around it carefully. If you want the stem pink too, skip the masking. -
Apply Base Color:
In a well-ventilated area, spray the pumpkin with matte pale pink paint. Hold the can 8-10 inches away and apply light, even coats to avoid drips. -
Build Coverage:
Allow the first coat to dry for about 20 minutes, then apply a second or third coat until you achieve a solid, opaque pink finish. Let this dry completely—I usually wait overnight to ensure the surface is hard enough to sketch on.
Uneven Piping Fix
If your dots look like Hershey’s Kisses with sharp peaks, dampen your finger slightly and gently tap the peak down after the paint has set for 5-10 minutes.
Step 2: Designing the Texture
-
Plan the Segments:
Identify the natural vertical ribs of the pumpkin. These indented lines will serve as the boundaries for your design sections. -
Sketch the Pattern:
Using a light pencil or chalk, very faintly sketch your main design elements. Focus on the center of each pumpkin rib for the largest motifs. -
Draft the Spirals:
Draw large S-curves and spiral shapes vertically along the bulging parts of the pumpkin. Alternate the direction of the spirals for visual interest. -
Mark the Dividers:
In the deep crevices between ribs, plan for rows of simple dots. This will frame each decorative panel remarkably well.
Step 3: Piping the Relief Art
-
Test Flow Rate:
Squeeze a small amount of your dimensional fabric paint onto a paper towel first. This clears any air bubbles and helps you get a feel for how much pressure is needed. -
Pipe the Dividers:
Start with the easiest part: the vertical lines of dots in the pumpkin’s crevices. Hold the bottle vertical and squeeze gently, lifting straight up to form clean peaks. Do this for every vertical groove. -
Create Central Spirals:
Moving to the main panels, pipe over your sketched swirls. Keep your hand steady and maintain even pressure to ensure the line thickness remains consistent. -
Add Concentric Circles:
Pipe small circles, then pipe a second, larger ring around them. Place these near the bottom or middle of the panels to anchor the design. -
Detail with Micro-Dots:
Enhance the swirls by adding tiny dots along their curves or clustering them in empty negative spaces. This mimics the look of jeweled henna. -
Partial Drying:
Work on opposite sides of the pumpkin first. This prevents your hand from accidentally smudging wet paint as you rotate the pumpkin. -
Add Floral Accents:
Near the top shoulder of the pumpkin, pipe small starbursts or flower shapes to fill the space where the ribs narrow toward the stem.
Gilded Glamour
Before the dimensional paint fully dries, lightly dust the wet raised areas with fine gold glitter or mica powder for a subtle, elegant shimmer.
Step 4: Finishing Touches
-
Clean Up Mistakes:
If a line goes rogue, use a toothpick to immediately lift the wet paint off. Wipe the spot gently with a damp Q-tip if a smudge remains. -
Final Cure:
Let the dimensional paint dry undisturbed for at least 24 hours. The lines will firm up and may shrink slightly, becoming very durable. -
Monochromatic Option:
If you want the texture to be the same pink as the pumpkin (rather than white contrast), give the entire finished piece a final light mist of the pink spray paint now. -
Seal (Optional):
To protect your handiwork, spray a very light coat of matte clear sealant over the entire pumpkin.
Place your textured pumpkin on a wooden board or tray to contrast with the rustic elements


Have a question or want to share your own experience? I'd love to hear from you in the comments below!